AW11Power build thread for my 88 SE
 04-17-2015, 05:38 PM
#41
Member
Thread Starter

Join Date: Mar 2015
Posts: 278
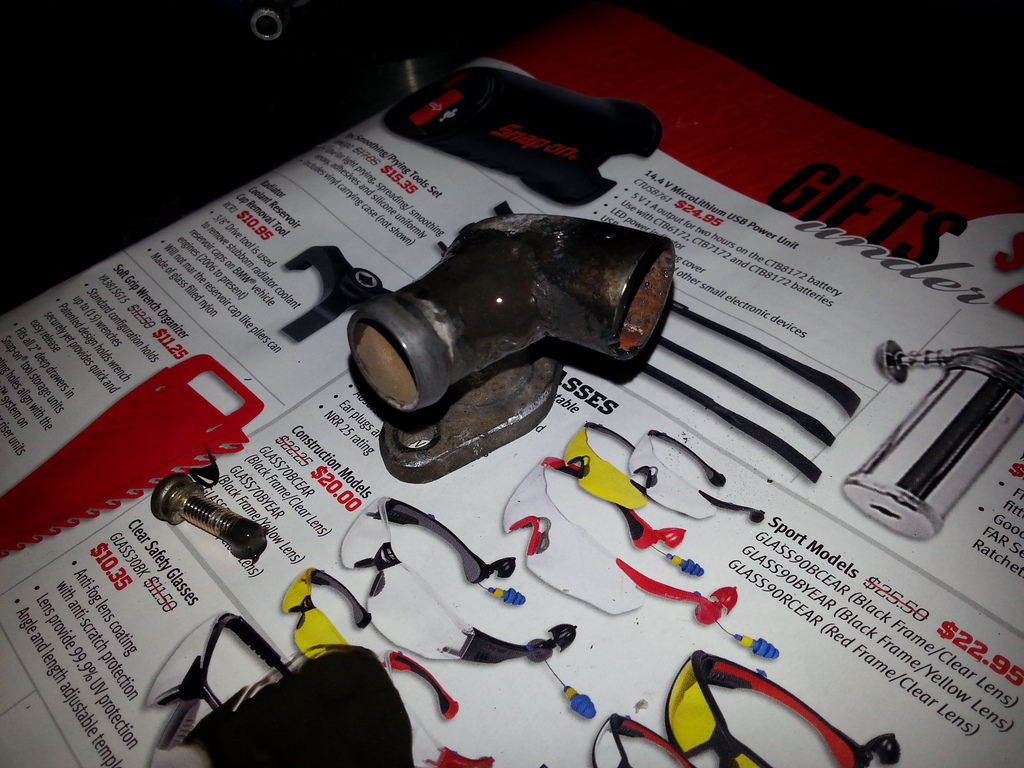
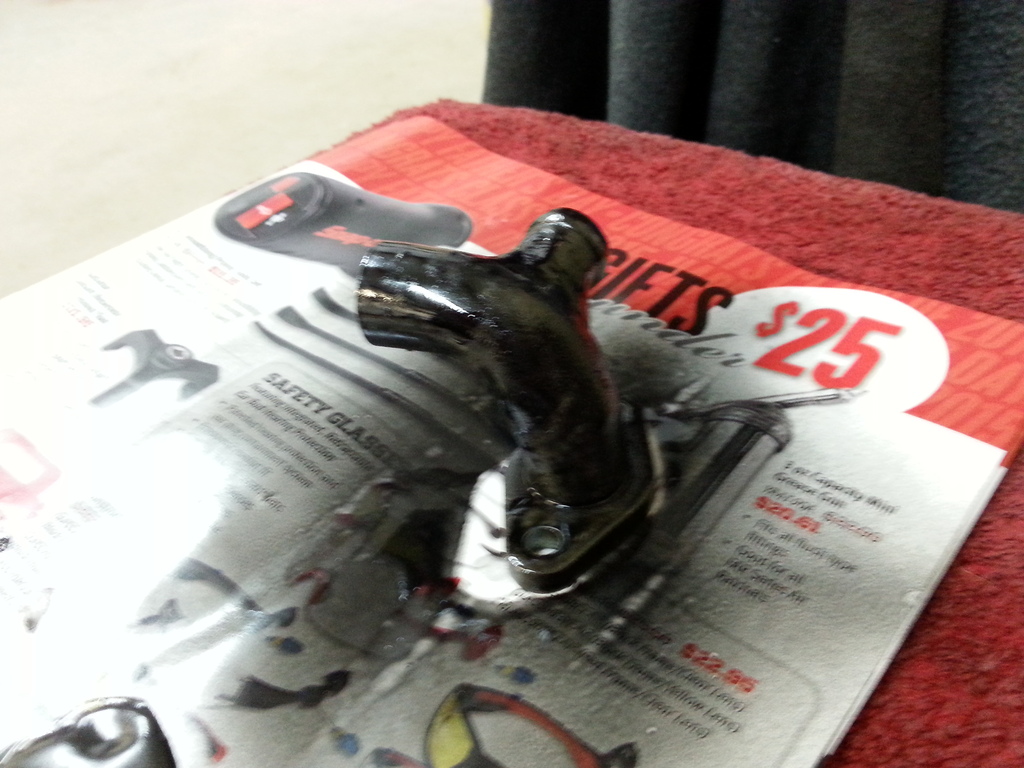
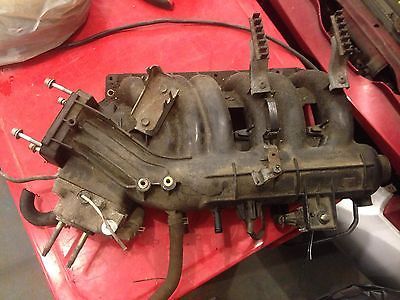
Ill be using a mercury villager lower intake as a donor since it has the hardware for a sidefeed fuel rail. This will require the use of RWD water outlets and some coolant line rerouting, Definately worth the benefits tho. Heres some shots of the donor manifold as I got it.
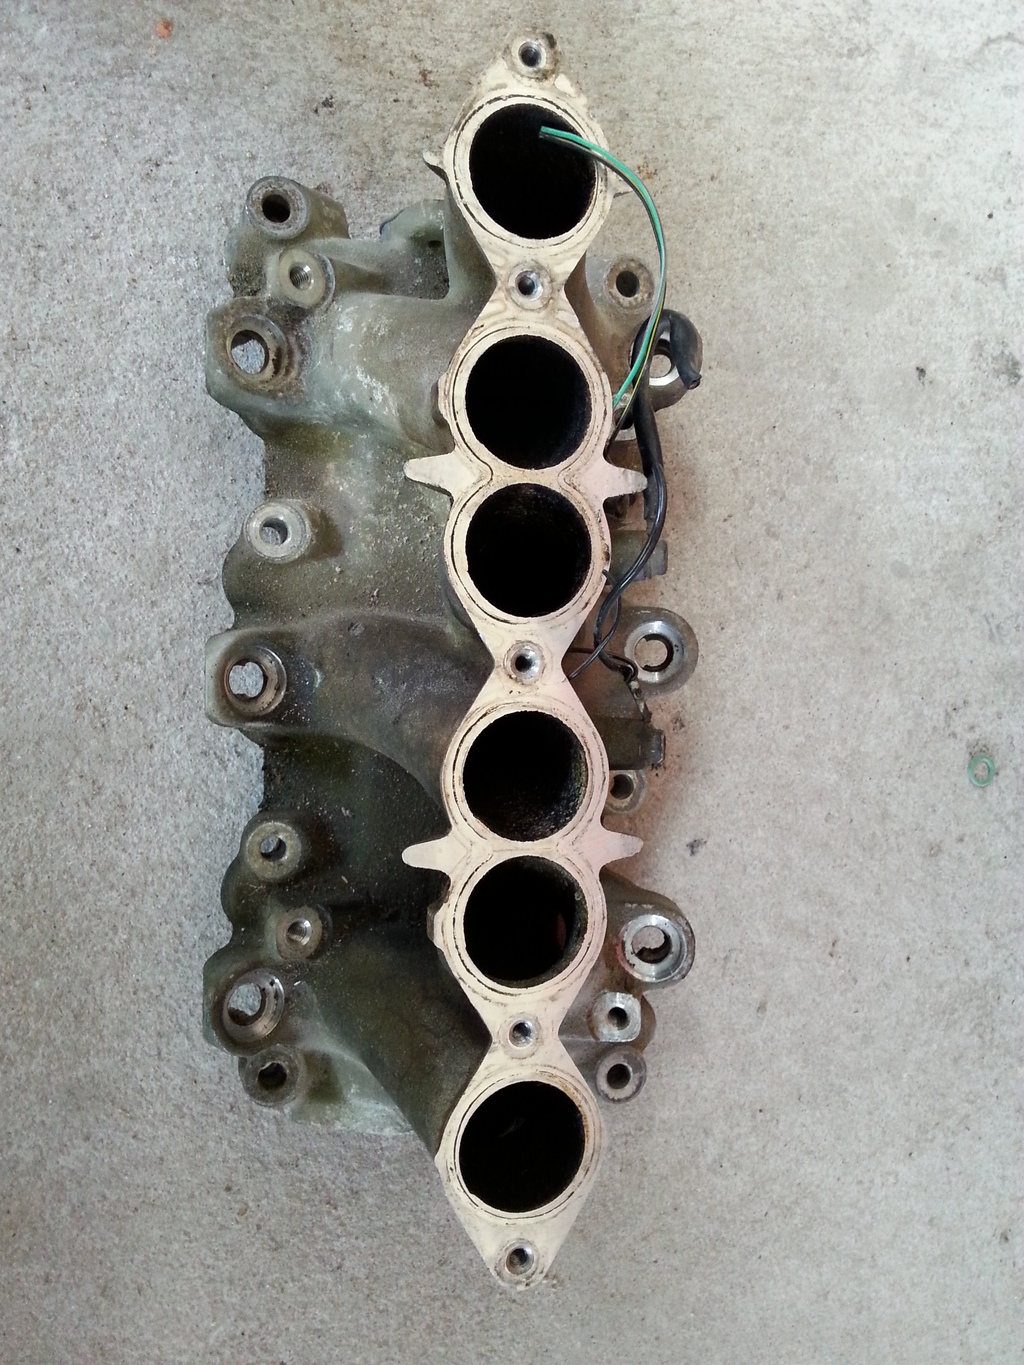
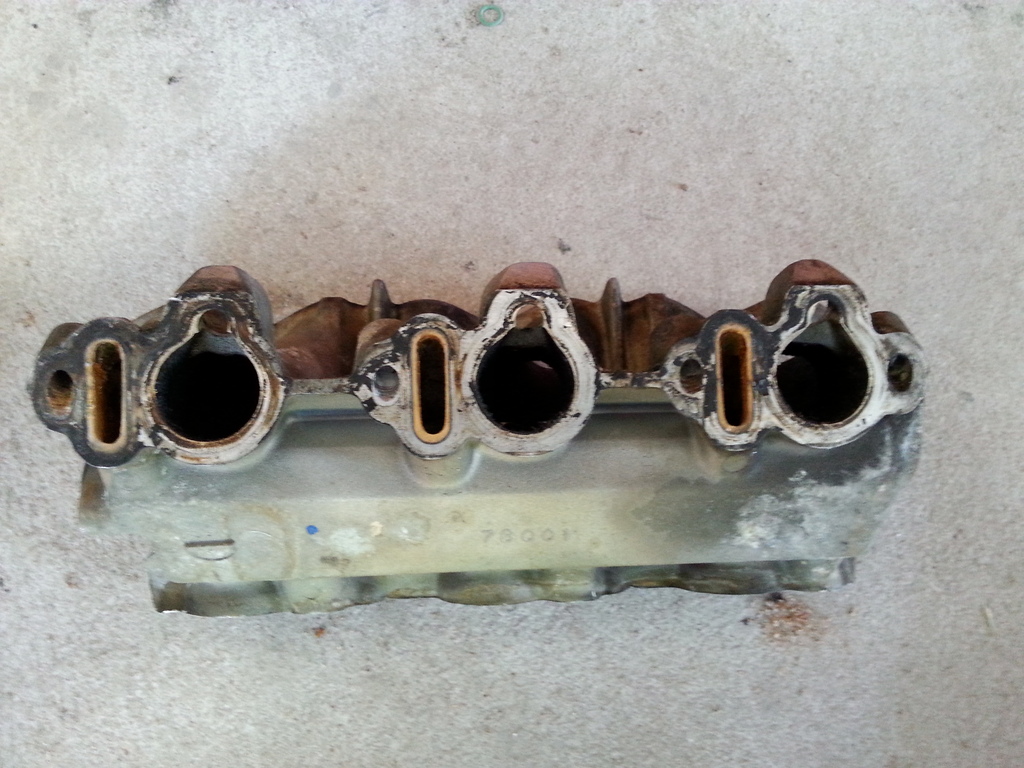
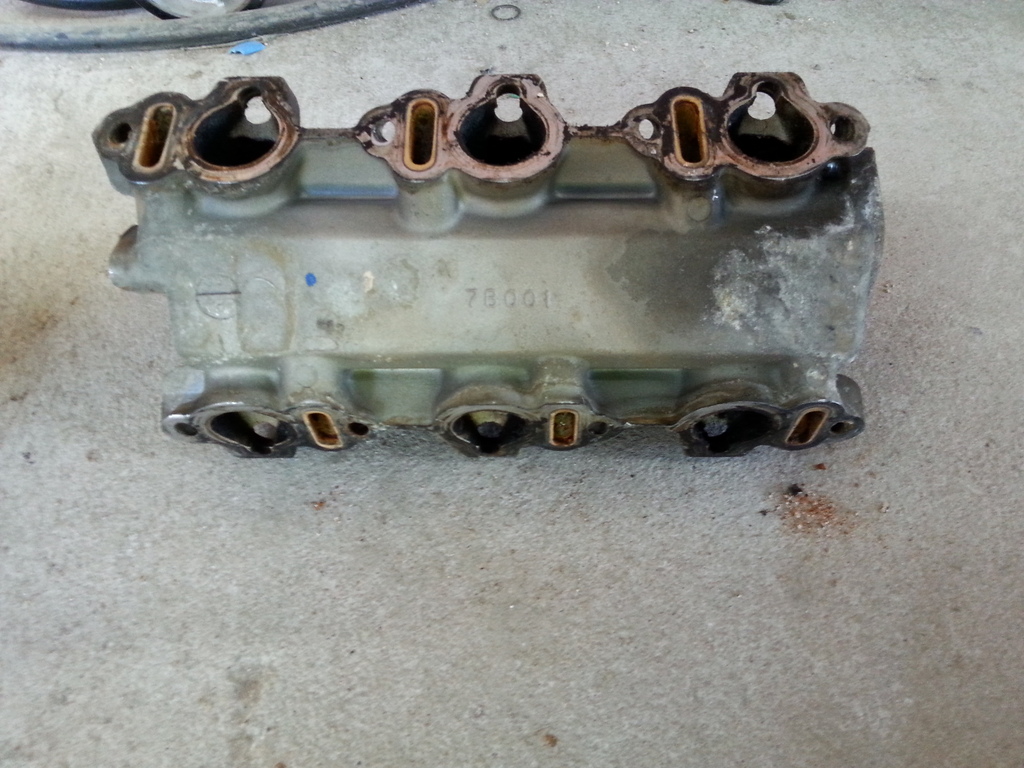
The ports are not only nasty, but full of casting.
Ill be doing a full port an polish on this, which will take quite some work, but I'm patient.
first thing is some smoothing in the ports to get all that casting out.
Ill keep yall posted.


The ports are not only nasty, but full of casting.

Ill be doing a full port an polish on this, which will take quite some work, but I'm patient.
first thing is some smoothing in the ports to get all that casting out.

Ill keep yall posted.


 04-21-2015, 12:21 PM
#44
Member

Join Date: Jul 2011
Location: Brooklyn, NY
Posts: 159
Again, great progress and I'm extremely grateful that youre documenting as you go along. Since for the last 4 years or so every thread with pics and documentation all have dead links. lol
Reading about your O2 sensor has striked a thought on my end. I did a short ram on my car back in Dec 2012. I deleted the AAV and EGR setup at the same time. And ever since then, the car smells like it dumps fuel when cold. And when its cold outside (under 40 degrees), the car would dump fuel at start up and wont idle on its own unless I give it some throttle for a little then it'll idle from there on. Even when the car is warm, it would still smell a little too rich. I rechecked all of my connections and plugs and havent found anything. I suspected a bad CHTS, but I couldnt confirm that.
Also, X2 on that input shaft bearing. When I bought my car, I was told there was a noise in the trans. It drove fine for the first few months of ownership. Then one day it locked out first gear. For an entire month I would drive starting off in second. Then one night, I miraciously got first gear back for the entire night. Then later on that same night, the transmission locked up on me. (fack)
I ended up buying a trans from an 86, bought a new input shaft bearing and had my cousin with his trans shop install it for me. Added a new clutch and some other odds and ends. lol
04-21-2015, 04:08 PM
#45
Senior Member

Join Date: Apr 2007
Location: Albuquerque, NM
Posts: 1,323
yea when input shaft bearings go they make lots of noise while in N then the plastic cover starts coming off bearing and jams up 1st gear forks.... big thing in these cars is keep a eye on gear lube and don't let it idle in N with the clutch engaged, the oil doesn't reach it unless the gears are turning....
04-27-2015, 11:18 AM
#46
Member

Join Date: Jan 2014
Location: Atlanta, GA
Posts: 102
Hi there fellas and kudos to AW11Power, you've encouraged me to try the throttle body, and SRI cold air intake you made. I have an 88 SE with about 100k, and I've made many of the repairs you did too. The only upgrade I've made is a 300zx ecu, and I just found a TB from a 90 Stanza, I took off the electrical module and the cable tensioner (I'm gonna need help putting that back together correctly). Lol.
Did you use a cut off tool to just slice that 1/2" rectangle and ports off? What type of disc did you use?
What type of pad on the grinding smooth part with the angle grinder and what is the cookie pad you used on the plenum cover? Thx.
I would also like to know your specs on the SRI you built. Where did find the adapter for the MAF?
Last edited by lowpost99; 04-27-2015 at 04:24 PM.
04-29-2015, 04:44 PM
#47
Member
Thread Starter
Join Date: Mar 2015
Posts: 278
Well first off, good look with the throttle spring...that parts is...um...fun. Yeah. Just be careful how you wind it back on and be sure it does'nt bind anywhere because it can cause it to hang at WOT after full application of the accelerator. Ask me how I know lol. kinda scary. Also, if yours is automatic make sure to swap over the extra bracket for the transmission TV cable...or it wont shift out of first.
04-29-2015, 04:47 PM
#48
Member
Thread Starter
Join Date: Mar 2015
Posts: 278
Cookie discs are mechanic slang. They are more commonly called surface prep discs. You can get em at carquest and the like. Not A-zone, gotta be a decent auto parts house that carries paint supplies usually. I did use a cut off tool to remove the water passages with a regular metal disc. Just have a steady hand and cleaned the cut with a "cookie disc". Then I used and steel wire brush made for aluminum to clean it and get that awesome shine.
04-29-2015, 04:56 PM
#49
Member
Thread Starter
Join Date: Mar 2015
Posts: 278
Oh, forgot. the intake is pretty much spec-less. Its all 3" and I pretty much had to fab all of it. Off the shelf stuff is a spectre 3" cone filter and a "universal" MAF adaptor plate that required redrilling and a lot of trimming. I suppose I could have just drilled it and called it a day, but I like details and wanted it to fit like an OE piece. Im sort of picky about that sort of thing.
Also, what kind of difference did you notice with the 300zx ECU? I really considered doing this but I plan on going turbo soon so I decided to hold off since Id end up having to buy a 300zx turbo ecu later and figuredit didnt make sense to buy 2 ECUs.
Also, what kind of difference did you notice with the 300zx ECU? I really considered doing this but I plan on going turbo soon so I decided to hold off since Id end up having to buy a 300zx turbo ecu later and figuredit didnt make sense to buy 2 ECUs.
04-29-2015, 06:09 PM
#50
Member
Join Date: Jan 2014
Location: Atlanta, GA
Posts: 102
Cookie discs are mechanic slang. They are more commonly called surface prep discs. You can get em at carquest and the like. Not A-zone, gotta be a decent auto parts house that carries paint supplies usually. I did use a cut off tool to remove the water passages with a regular metal disc. Just have a steady hand and cleaned the cut with a "cookie disc". Then I used and steel wire brush made for aluminum to clean it and get that awesome shine.

Oil pan, plenum, and the TB.


Last edited by lowpost99; 04-30-2015 at 05:20 PM.
05-01-2015, 05:48 AM
#51
Member
Join Date: Jan 2014
Location: Atlanta, GA
Posts: 102
Oh, forgot. the intake is pretty much spec-less. Its all 3" and I pretty much had to fab all of it. Off the shelf stuff is a spectre 3" cone filter and a "universal" MAF adaptor plate that required redrilling and a lot of trimming. I suppose I could have just drilled it and called it a day, but I like details and wanted it to fit like an OE piece. Im sort of picky about that sort of thing.
Also, what kind of difference did you notice with the 300zx ECU? I really considered doing this but I plan on going turbo soon so I decided to hold off since Id end up having to buy a 300zx turbo ecu later and figuredit didnt make sense to buy 2 ECUs.
Also, what kind of difference did you notice with the 300zx ECU? I really considered doing this but I plan on going turbo soon so I decided to hold off since Id end up having to buy a 300zx turbo ecu later and figuredit didnt make sense to buy 2 ECUs.
05-01-2015, 06:05 AM
#52
Member
Join Date: Jan 2014
Location: Atlanta, GA
Posts: 102
Reading about your O2 sensor has striked a thought on my end. I did a short ram on my car back in Dec 2012. I deleted the AAV and EGR setup at the same time. And ever since then, the car smells like it dumps fuel when cold. And when its cold outside (under 40 degrees), the car would dump fuel at start up and wont idle on its own unless I give it some throttle for a little then it'll idle from there on. Even when the car is warm, it would still smell a little too rich. I rechecked all of my connections and plugs and havent found anything. I suspected a bad CHTS, but I couldnt confirm thisl
He also said that my gains in hp would be lost in efficiency. He sounded convincing, and then I read your item. His examples were older and small block engines, not import tuners, so I'm wondering how much stock to take in this before I rip out my air intake and emissions stuff. (no more emissions testing for me). I'm guessing you guys already this and if true, there are some workarounds or improved methods.
05-01-2015, 06:38 PM
#53
Member
Thread Starter
Join Date: Mar 2015
Posts: 278
The problem you're having is BECAUSE you deleted the AAV(auxillary air valve). The ECM is programmed to expect the AAV to be open when the motor is cold. It DOES dump fuel on cold start to help the cold motor start, that valve is supposed to be open and bypass air around the throttle in order to provide sufficient air to burn the extra fuel. once the motor is warm a bi-metallic strip in the valve pulls it shut and the ECM sees coolant temp up and pulls back the fuel trims to normal levels. Thats why it smells rich when you cold start it.....
05-01-2015, 06:46 PM
#54
Member
Thread Starter
Join Date: Mar 2015
Posts: 278
Also, the coolant lines are not to cool anything, nor are they there "to make the air play nice by heating it. they are there to help the throttle retain heat after shut down to aid in preventing the throttle from freezing shut in colder climes. They harm performance a great deal. Also, They dont really do the job very well even when they are working.
The lesson here I think, is to always do your own research...Or ask a technician or an engineer as opposed to a parts salesman.
The lesson here I think, is to always do your own research...Or ask a technician or an engineer as opposed to a parts salesman.
05-04-2015, 04:22 PM
#55
Member
Thread Starter
Join Date: Mar 2015
Posts: 278
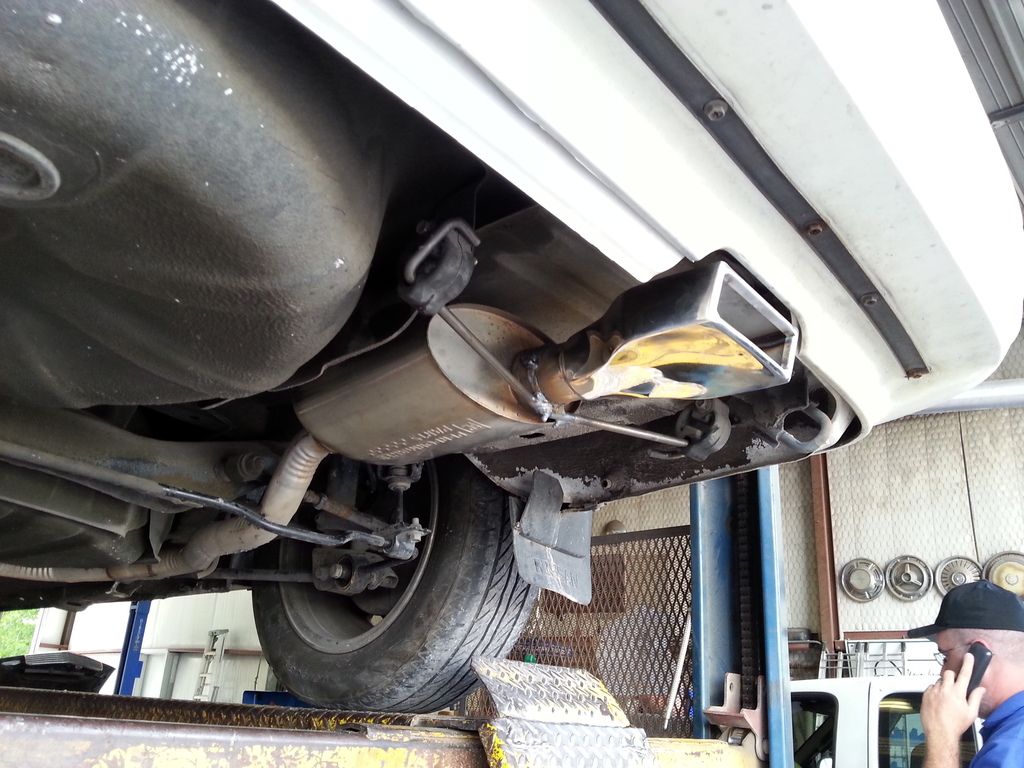
So quick update for today. Wanted to do a full exhaust system but didnt have enough time. I did however get to change the muffler and put a custom tip on the car.
Here's the old muffler
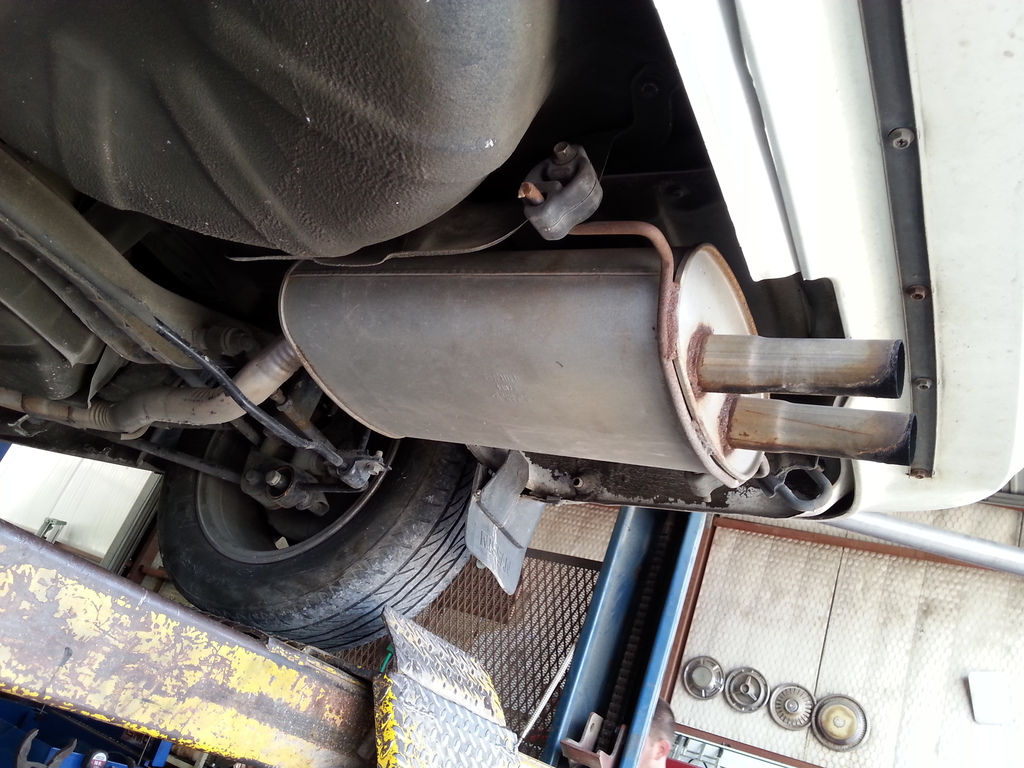
And this is the muffler I put on today. It's a GM Performance muffler off a camaro. Yeah, yeah I know...GM on a nissan. Whatever, it looks and sounds good and My boss got to me for free. Plus no one is gonna see it anyway.
Here's the old muffler


And this is the muffler I put on today. It's a GM Performance muffler off a camaro. Yeah, yeah I know...GM on a nissan. Whatever, it looks and sounds good and My boss got to me for free. Plus no one is gonna see it anyway.
 05-04-2015, 04:26 PM
#56
Member
Thread Starter
Join Date: Mar 2015
Posts: 278
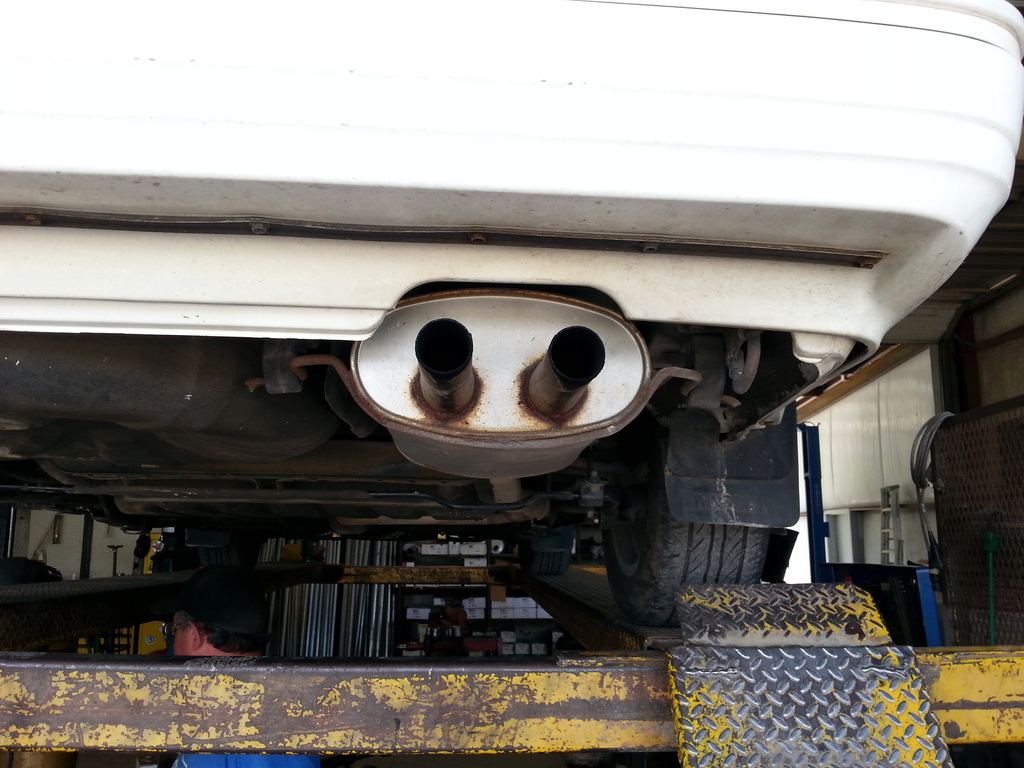
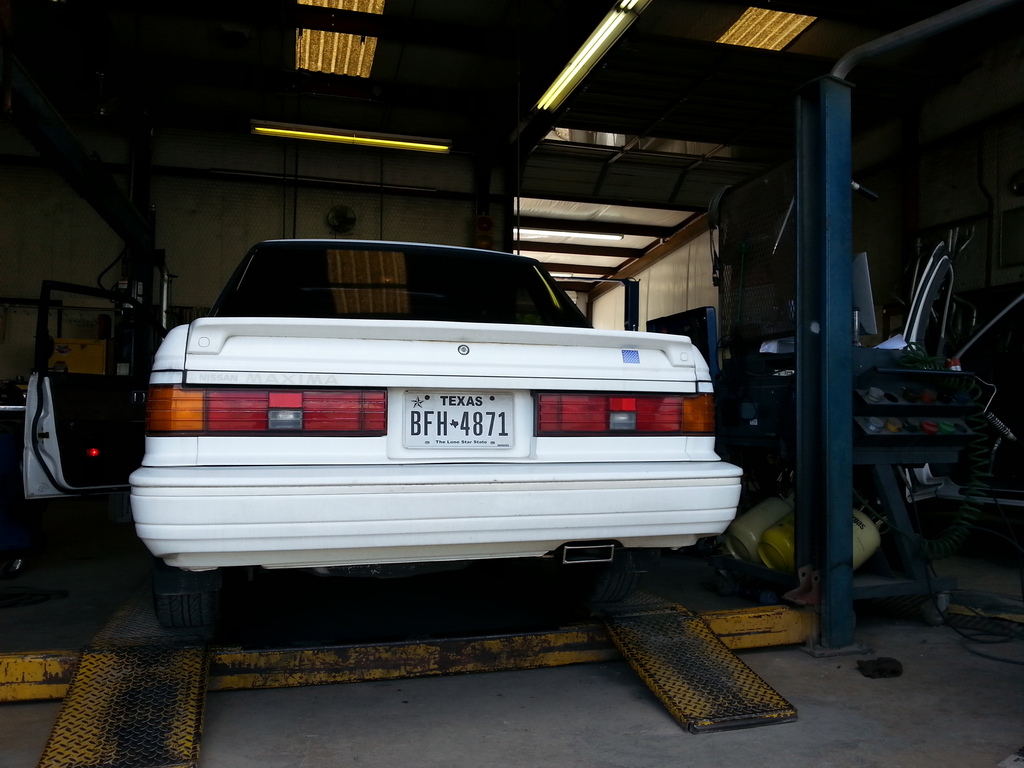
And.....mounted up with a tip
The tip looks wierd from the bottom but thats not an angle people see. I was mostly concerned with something that felt period specific for the car and that looked understated at first glance.
Im pretty happy with how it came out actually. This is the angle people see, I think it looks great. I did my best to get it flush with the skirt. It tucks nicely under the bumper.


 05-05-2015, 08:04 AM
#58
Member
Join Date: Jan 2014
Location: Atlanta, GA
Posts: 102
Also, the coolant lines are not to cool anything, nor are they there "to make the air play nice by heating it. they are there to help the throttle retain heat after shut down to aid in preventing the throttle from freezing shut in colder climes. They harm performance a great deal. Also, They dont really do the job very well even when they are working.
The lesson here I think, is to always do your own research...Or ask a technician or an engineer as opposed to a parts salesman.
The lesson here I think, is to always do your own research...Or ask a technician or an engineer as opposed to a parts salesman.
05-05-2015, 04:28 PM
#59
Member
Thread Starter
Join Date: Mar 2015
Posts: 278
Here's a clip of the sound. Not a great video, but I tried.
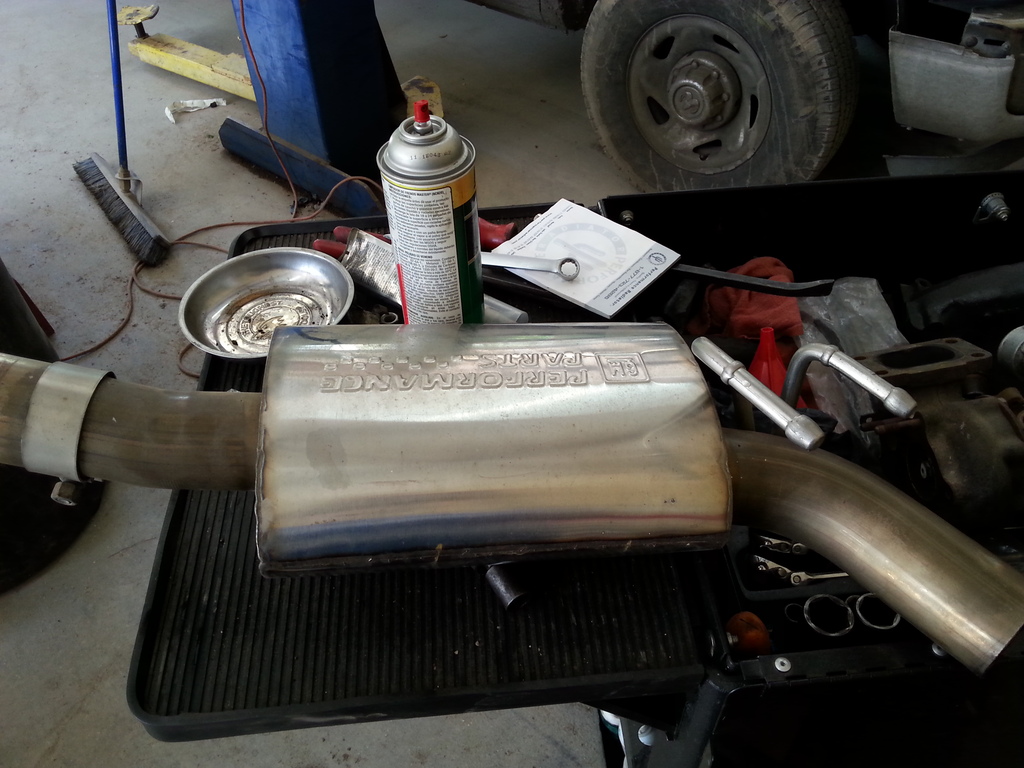
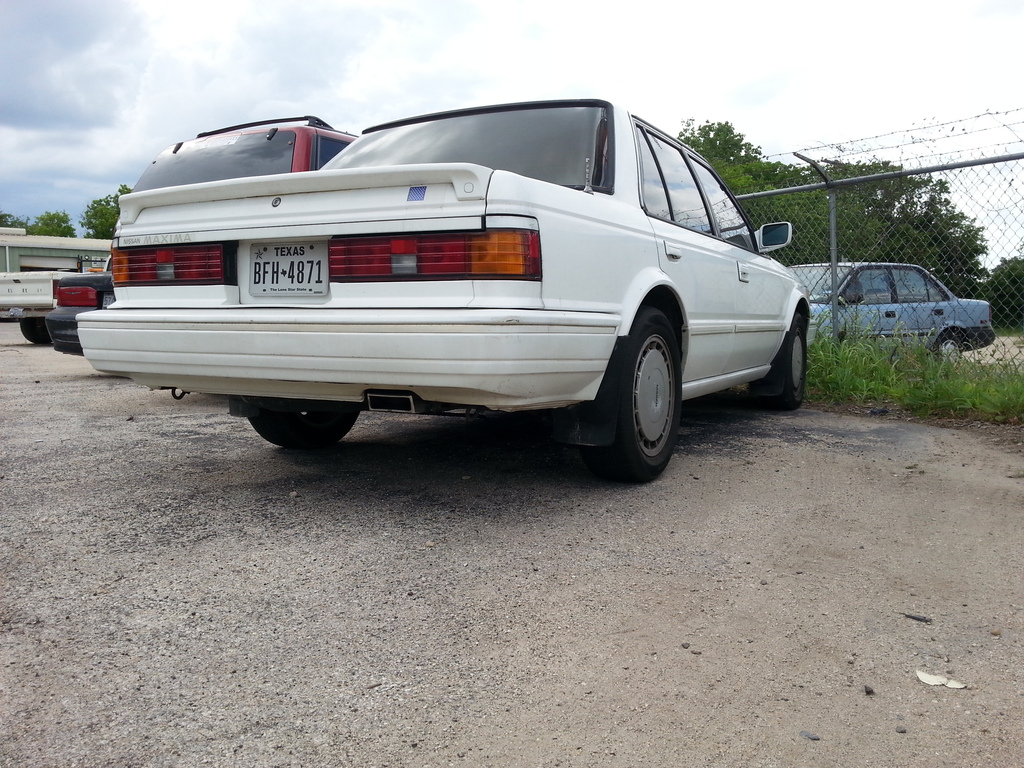
AND..............one more shot of the outlet because I really just like it that much
oh yeah, low post. Leave the AAV hooked up. The secondary air injection, decelleration lean out valve and EGR all could be disconnected without jacking up the mixture. *For "off road" purpose only of course.
AND..............one more shot of the outlet because I really just like it that much

oh yeah, low post. Leave the AAV hooked up. The secondary air injection, decelleration lean out valve and EGR all could be disconnected without jacking up the mixture. *For "off road" purpose only of course.
Last edited by aw11power; 05-05-2015 at 04:35 PM. Reason: fix broken link
05-05-2015, 04:41 PM
#60
Member
Thread Starter
Join Date: Mar 2015
Posts: 278
Pulled of my old square fog lights yesterday since the had a terrible beam pattern and sucked tons of energy. Havent yet wired them in, but I mounted a better set of driving lights I had. They are DOT/E code lights. I loved them on my galant and mazda prior, so I kept them. Nice beam pattern they are equipped with 4300K HIDs. Useful light in the right parts of the road without causing glare for others.


 05-06-2015, 04:28 PM
#62
Member
Thread Starter
Join Date: Mar 2015
Posts: 278

I had some time today to get the HIDs wired up. Good stuff. Also finally straightened out my steering wheel. The alignment is good as I set it some six months ago, but when I installed my new pedals for the 5 speed I accidentally stabbed my steering column about two teeth off. So, my steering wheel was off to the right and driving me crazy. I re-stabbed the column today and all is well.
05-07-2015, 06:00 PM
#63
Member
Thread Starter
Join Date: Mar 2015
Posts: 278
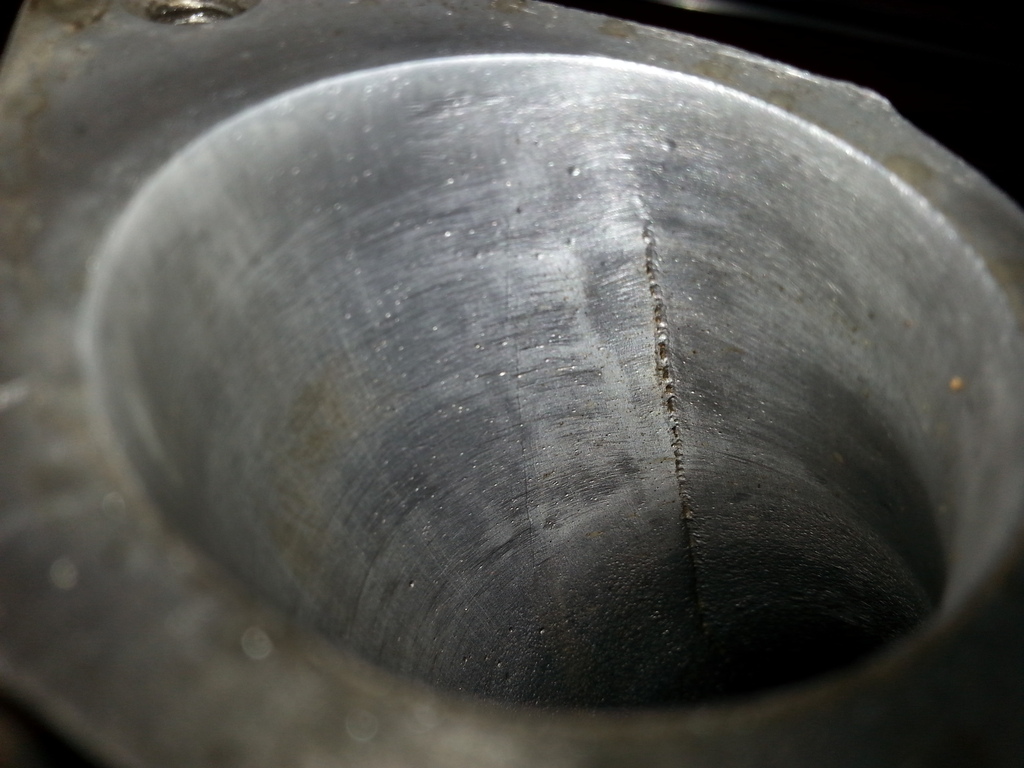
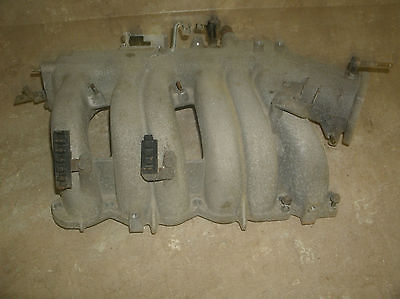
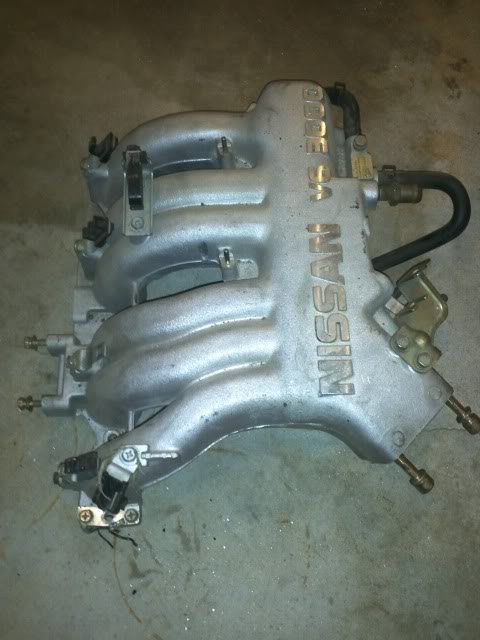
So today I.....finished my lower intake. Was going to start modding the coolant lines for the conversion and found that one of my 180cc injectors is no good. LAME. But I guess another junk yard trip isnt a bad thing, Im gonna need to pick up some 260 or 270cc injectors for the next phase of my project anyway...so, yeah. Well here's the finished lower intake.
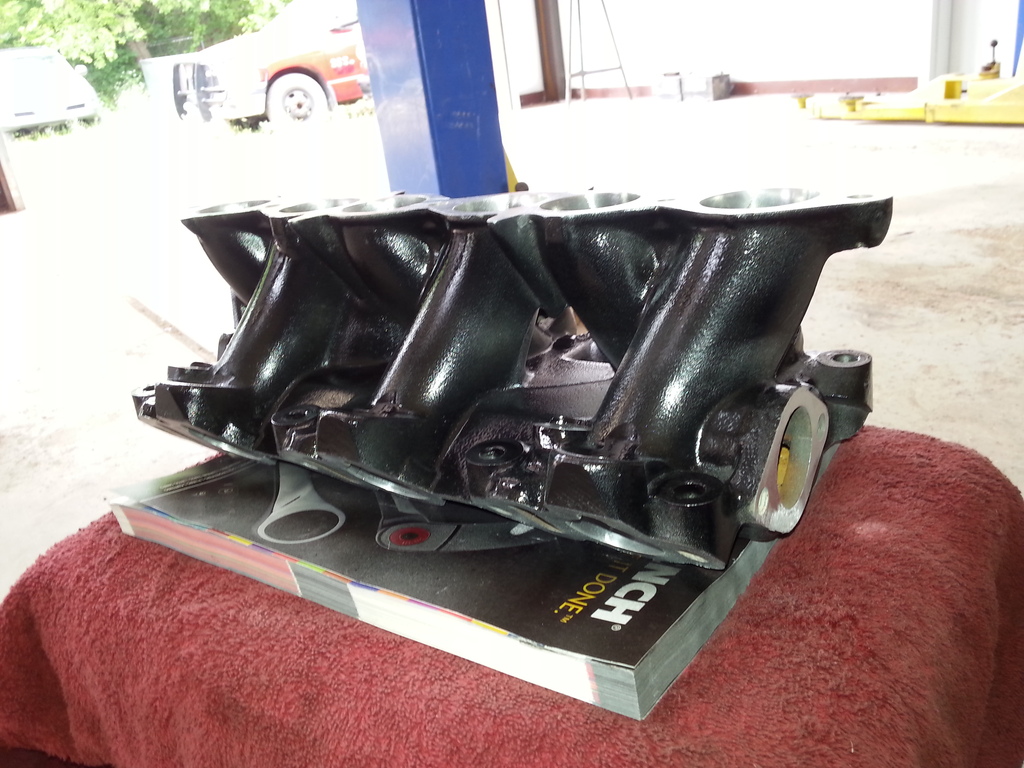
I almost painted it chrome silver to look new again, but changed my mind last minute after seeing some of Big E Dogs stuff yesterday.

I almost painted it chrome silver to look new again, but changed my mind last minute after seeing some of Big E Dogs stuff yesterday.
05-08-2015, 04:24 PM
#64
Member
Thread Starter
Join Date: Mar 2015
Posts: 278
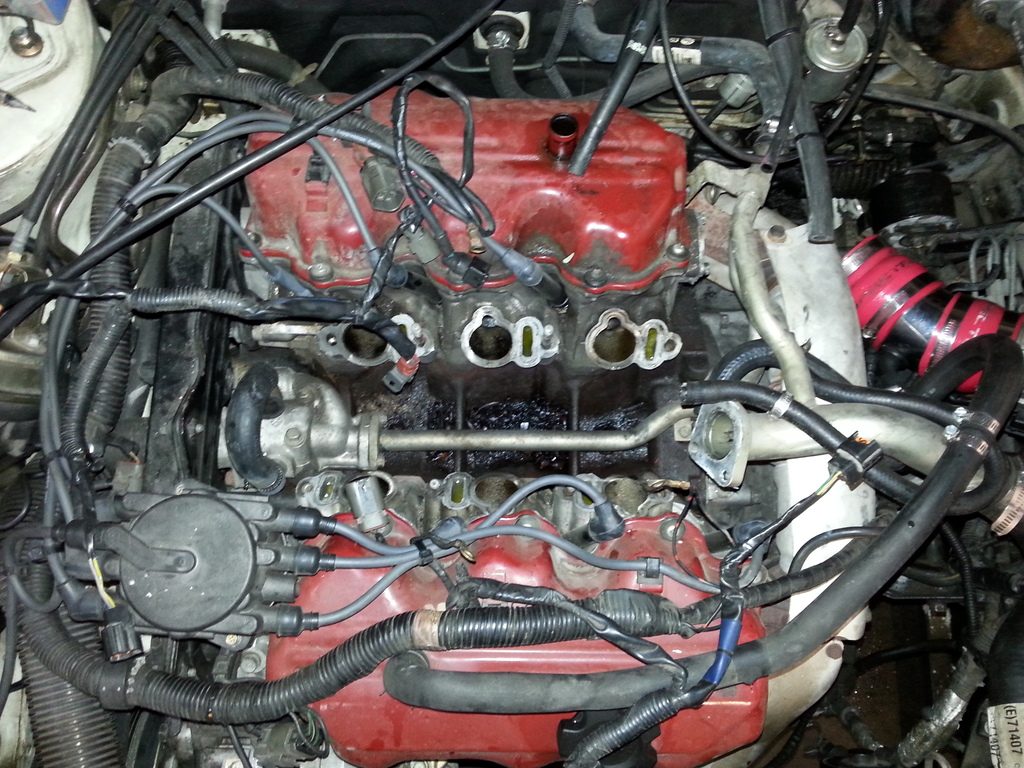
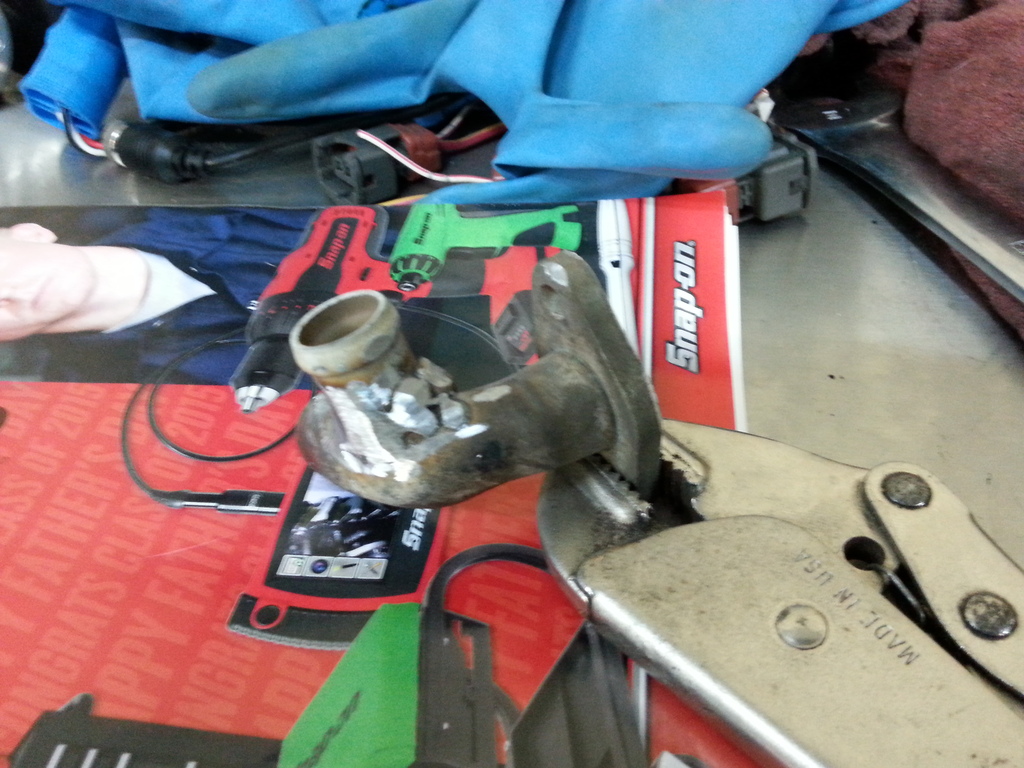
EGR delete
So I was tired of looking at this under my hood. Waste of space and 2 lbs lol. 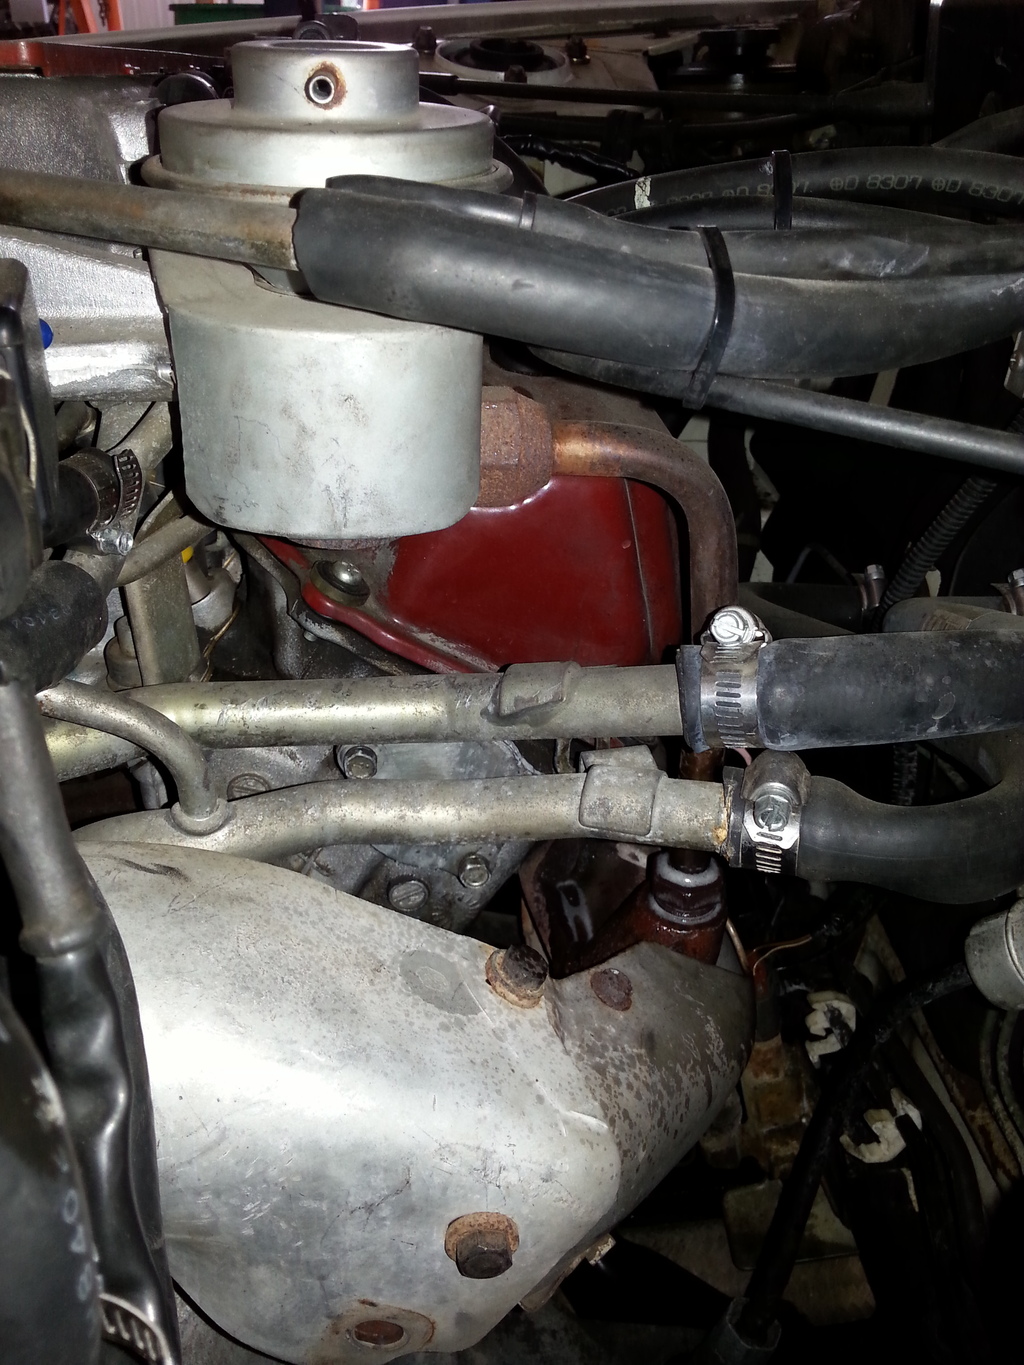
iI had been planning on ditching it for a awhile. So I removed all of it.had to cut the bung in the exhaust and weld it shut since it was seized in there.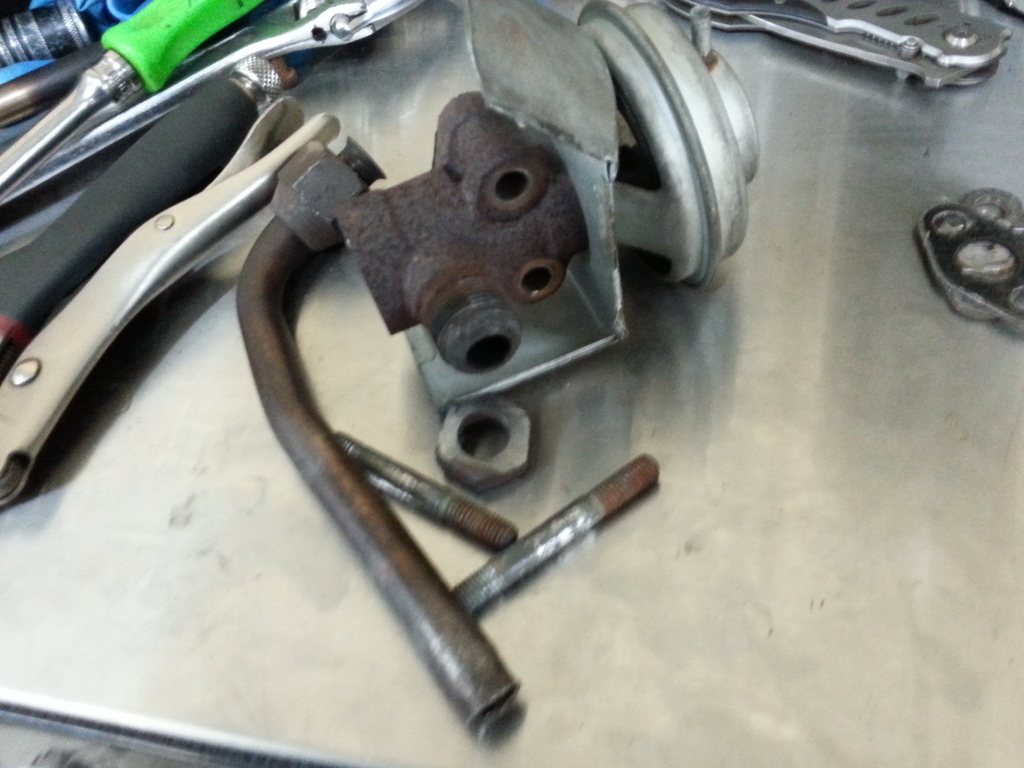
Heres what I scrounged up for the inlet in the manifold.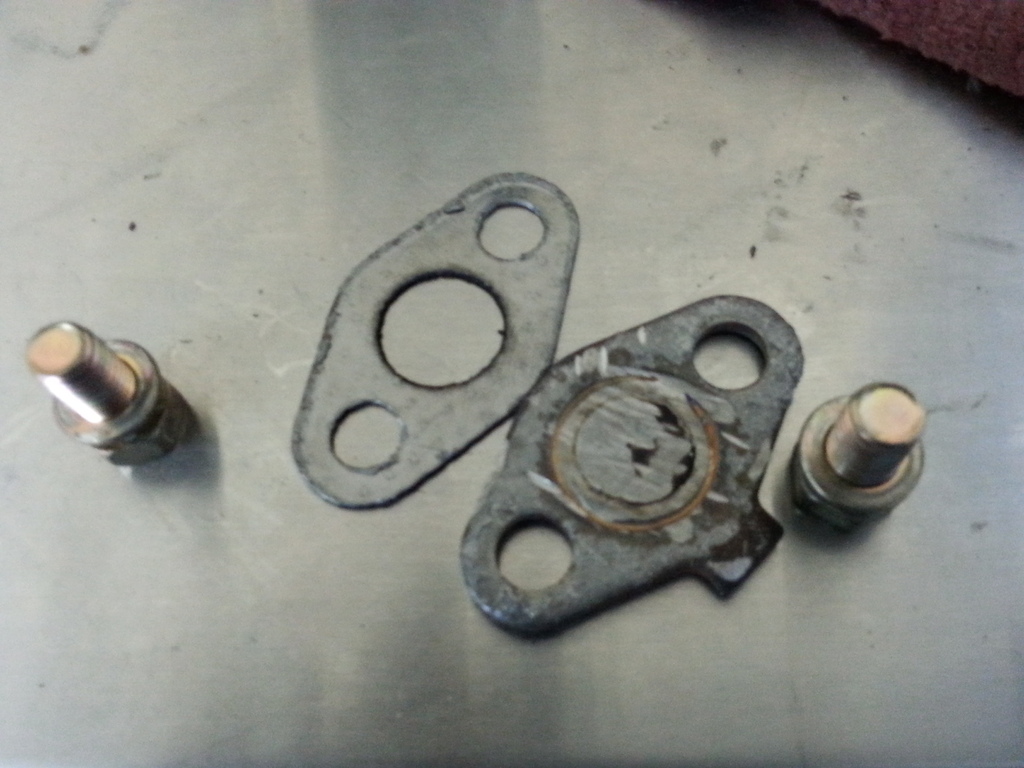
The finished product...
It also had the added benefit of removing that big tube taking up 1/4 of the throttle bore so its better for flow too.

iI had been planning on ditching it for a awhile. So I removed all of it.had to cut the bung in the exhaust and weld it shut since it was seized in there.

Heres what I scrounged up for the inlet in the manifold.

The finished product...


It also had the added benefit of removing that big tube taking up 1/4 of the throttle bore so its better for flow too.
Last edited by aw11power; 05-08-2015 at 04:26 PM. Reason: forgot something
05-09-2015, 06:33 PM
#65
Member
Join Date: Jul 2011
Location: Brooklyn, NY
Posts: 159
The problem you're having is BECAUSE you deleted the AAV(auxillary air valve). The ECM is programmed to expect the AAV to be open when the motor is cold. It DOES dump fuel on cold start to help the cold motor start, that valve is supposed to be open and bypass air around the throttle in order to provide sufficient air to burn the extra fuel. once the motor is warm a bi-metallic strip in the valve pulls it shut and the ECM sees coolant temp up and pulls back the fuel trims to normal levels. Thats why it smells rich when you cold start it.....
Everything is intact except for te secondary air valve, egr, and the cat. And yes I had to weld my egr opening shut too. It was seized. I had got a block off kit that was given to me from Acadiana Sports Car Orphanage.
I'll probably mess with the O2 sensor soon. And change the chts when I do a timing job. Turns out I won't be getting rid of my 88 as planned. My dad is going to use it to beat around with.
Great progress on your car man!
05-10-2015, 10:07 AM
#67
Member
Join Date: Jan 2014
Location: Atlanta, GA
Posts: 102
Happy Mothers Day! Hope you guys went the Kingsford route today....lol.
Hey guys, I dont need an emissions test this year....do I need the catalytic converter anymore?
Pros and cons? It just opens up more right?
Hey guys, I dont need an emissions test this year....do I need the catalytic converter anymore?
Pros and cons? It just opens up more right?
05-14-2015, 10:54 AM
#68

Here's the answer to more power! Port heads, 3 or 5 angle valve job, port match entire engine intake and exhaust tract, install JWT S1 cams, Ignition upgrade, drop crazy cross over exhaust design for 3rd Gen exhaust setup, free flow cat and catback.....also a 90lp/h Walbro fuel pump, an adjustable FPR....and maybe even have JWT reprogram your computer....that's what's up!!!
05-14-2015, 07:19 PM
#69
Member
Thread Starter
Join Date: Mar 2015
Posts: 278
Heck yeah! Those would make a great N/A motor! Im only doing a few of those things however as I have higher "aspirations" to make power. One could even say above atmospheric, if you clever ones know what I mean HaHa!
Anyone ready for some updates?!?!
Cuz here come the updates!!!!!
Anyone ready for some updates?!?!
Cuz here come the updates!!!!!
05-14-2015, 07:23 PM
#70
Member
Thread Starter
Join Date: Mar 2015
Posts: 278
Once again tearing my motor up...........
Installing my modified lower intake. Its a stock mercury villager lower intake with some changes made to fit a maxima. The Maxima has a 3 bolt flange for the upper radiator hose, where as the villager has 2 bolts. Interestingly the flange lines up perfectly and seals with two bolts. So I didnt have to modify that side. The other end of the manifold however is completely different since the villager uses coolant routing much more similar to the RWD 300.

Installing my modified lower intake. Its a stock mercury villager lower intake with some changes made to fit a maxima. The Maxima has a 3 bolt flange for the upper radiator hose, where as the villager has 2 bolts. Interestingly the flange lines up perfectly and seals with two bolts. So I didnt have to modify that side. The other end of the manifold however is completely different since the villager uses coolant routing much more similar to the RWD 300.
05-14-2015, 07:31 PM
#71
Member
Thread Starter
Join Date: Mar 2015
Posts: 278
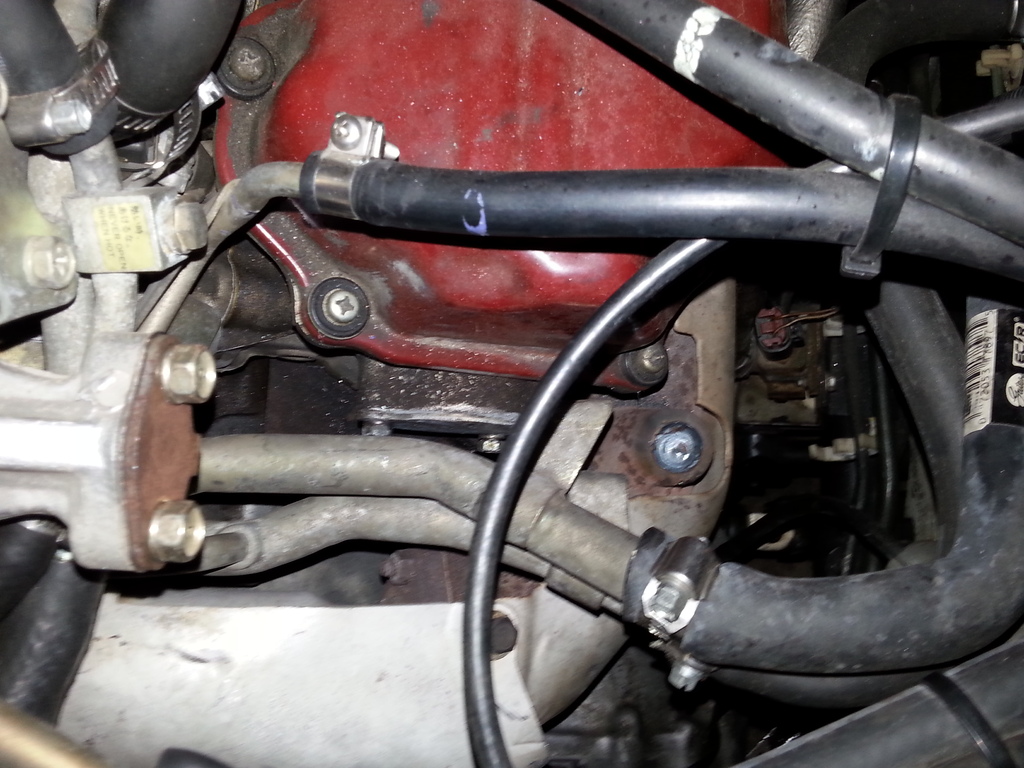
I had to cut a very small piece off the back of the timing cover to make the custom water outlet fit. I used the villager's old heater outlet flange and fabbed up a tee that would allow me to connect to the maxima's existing coolant lines without changes. That way if I had problems I could still theroratically turn back. The metal I had to work with was old....and two different thicknesses, making the welding process very difficult. Even with the voltage on the welder turned down to its lowest setting it still want to burn holes. I suppose thats part of the game when dealing with this sort of stuff.
Heres the piece I welded up,
and yes, I had to grind a lot off to get hoses to fit properly on it. The slag build up was because I had to fill in holes where I accidentilly overheated the thin metal during the welding process. After grinding down I smoothed it with JB weld to prevent moisture from getting into any little air pockets in my welds. Which left me with this ugly thing
Then I shot some cheap black on it as a sort of final seal.
Looks like crap, but it gets the job done and I made it with basically scrap soooo....Im cool with it.
Heres the piece I welded up,

and yes, I had to grind a lot off to get hoses to fit properly on it. The slag build up was because I had to fill in holes where I accidentilly overheated the thin metal during the welding process. After grinding down I smoothed it with JB weld to prevent moisture from getting into any little air pockets in my welds. Which left me with this ugly thing

Then I shot some cheap black on it as a sort of final seal.
Looks like crap, but it gets the job done and I made it with basically scrap soooo....Im cool with it.

Last edited by aw11power; 05-14-2015 at 07:32 PM. Reason: forgotten pic
 05-14-2015, 07:41 PM
#73
Member
Thread Starter
Join Date: Mar 2015
Posts: 278
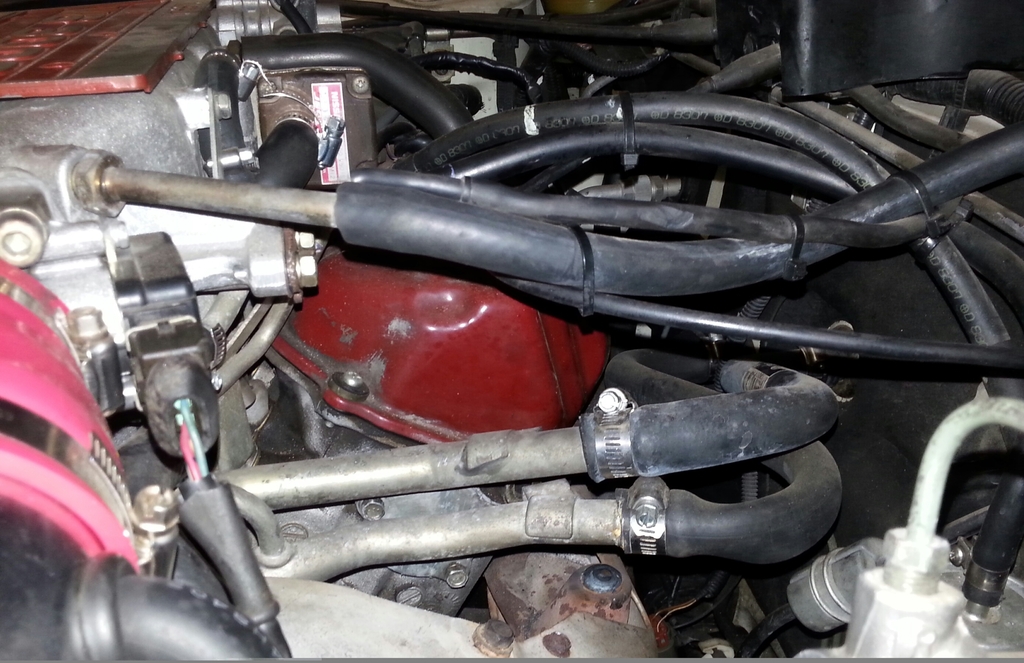
That leads to the whole point of what I was really doing here....Trying to modify the car to use modern side feed style injectors. They come in a much wider variety of CC sizes for future upgrades, have statistically higher reliability than duals feeds do and they are also much cheaper to replace if they do fail. Not to mention that this style is in great abundance at scrappers on several models. These are all pluses for me as my original dual feeds were bleeding down causing all kinds if problems.
Here is the port/polished intake mounted up with coolant lines installed and side feed rail/injectors mounted up.

After that it was time to replace all six if the original injector plugs. You know, the onse with those really frustrating little clips...yep. I soldered and heat wrapped all connections of course. The new style clips are "squeeze" type, much easier to remove if needed.

All of these components are from late 90s villager/quest. They new injectors are pink top, 180cc, 12.5 ohm injectors. So the ECM has no idea that anything is different. The car runs much better than it ever has since it came into my possesion. I no longer have to apply the accelerator on cold start and it has a noticable difference in pep. I know most of that being the new injectors working properly allowing the ECM to accurately control fuel trims, but given the amount of time I spent on the intake...I would like to think the port/polish helped a little with that pep too haha!
Here is the port/polished intake mounted up with coolant lines installed and side feed rail/injectors mounted up.

After that it was time to replace all six if the original injector plugs. You know, the onse with those really frustrating little clips...yep. I soldered and heat wrapped all connections of course. The new style clips are "squeeze" type, much easier to remove if needed.


All of these components are from late 90s villager/quest. They new injectors are pink top, 180cc, 12.5 ohm injectors. So the ECM has no idea that anything is different. The car runs much better than it ever has since it came into my possesion. I no longer have to apply the accelerator on cold start and it has a noticable difference in pep. I know most of that being the new injectors working properly allowing the ECM to accurately control fuel trims, but given the amount of time I spent on the intake...I would like to think the port/polish helped a little with that pep too haha!
Last edited by aw11power; 05-14-2015 at 07:46 PM. Reason: clarification
05-15-2015, 02:02 PM
#74
Hopefully you didn't smoothen the intake tact too much....but pay attention to your port alignment (port matching) it increases throttle response and torque directly....This is going too be a turbo'd Maxima?
05-15-2015, 07:25 PM
#75
Member
Thread Starter
Join Date: Mar 2015
Posts: 278
Nah, I didnt go too crazy on the smoothing. I left the factory curve to the runners and made sure not to flatten out those little humps that are there for velocity. I did match the OD to the gasket tho. I havent done the upper plenum since I will be using a different one. I've got three maybes that im considering. Pathfinder cast aluminum, villager cast aluminum(early model) or villager thermo-plastic(late model). Pathfinder has the longest runners(better for torque) but is very heavy so it will need to be braced and it puts the throttle very close to my cruise control unit...and I'm keeping my cruise control. Villager cast aluminum plenum has negligably shorter runners when compared to the pathfinder but is still worlds better than stock Max in the regard. It also puts the throttle much closer to the factory location which i prefer, but because of that additional turn I assume it would have more turbulence in a bad way. lastly it is just as heavy as the pathfinder plenum(like 12 lbs, both much heavier than stock and need to have a brace fabbed to support it from the rear). The final option, thermo-plastic villager has a much less harsh curve in placing the throttle so would have smoother air flow, is only about 3 lbs(much lighter than stock Max)and has equal length long runners. It being that much lighter would mean it wont need bracing. Thermo-plastic is a poor conductor of heat so in theory the intake charge wouldnt be heated as much by the lower intake. Also it does not have casting internally so wouldnt require clean up in that regard. It could just as easily be port match by simply using appropriate tools for the softer material. This material also has been proven capable of handling excessive amounts of boost. Cons...it doesnt look as cool LOL.
and yes, hell yes this is going to be a BOOSTED Maxima!
and yes, hell yes this is going to be a BOOSTED Maxima!
05-18-2015, 07:29 PM
#79
Member
Thread Starter
Join Date: Mar 2015
Posts: 278
These are the three possible intake choices....
First up is the early villager cast aluminum plenum,
Next potential plenum is the late model villager thermo-plastic plenum
This is the last option, pathfinder cast aluminum plenum. I already have one of these, but it needs a repair as one of the end bolt ears is broken, I would also need to be modified to move the throttle inlet.
All of these options would increase low end and midrange torque delivery. Also, they all have been flow bench tested at much higher CFM than the stock plenum. So there should be no reduction in top end power, in fact...there would increase top end flow.
Lets gets opinions on this please. Motor will eventually be boosted.
First up is the early villager cast aluminum plenum,

Next potential plenum is the late model villager thermo-plastic plenum

This is the last option, pathfinder cast aluminum plenum. I already have one of these, but it needs a repair as one of the end bolt ears is broken, I would also need to be modified to move the throttle inlet.

All of these options would increase low end and midrange torque delivery. Also, they all have been flow bench tested at much higher CFM than the stock plenum. So there should be no reduction in top end power, in fact...there would increase top end flow.
Lets gets opinions on this please. Motor will eventually be boosted.

