Turbo VG swapped stanza
 12-23-2016, 04:58 PM
#41
Member
Thread Starter

Join Date: Oct 2016
Posts: 284
between making christmas presents that i procrastinated on a little too long for (like every year) i realized that some old sawblades i had lying around were almost exactly the same thickness as the timing belt shim needed to be (about .050") so i figured i might as well knock it out and have the crank installed for tomorrow when i bring everything to the car.
i started by plunge cutting a disc out of the inside of the sawblade.

then i turned down the outer diameter to size.
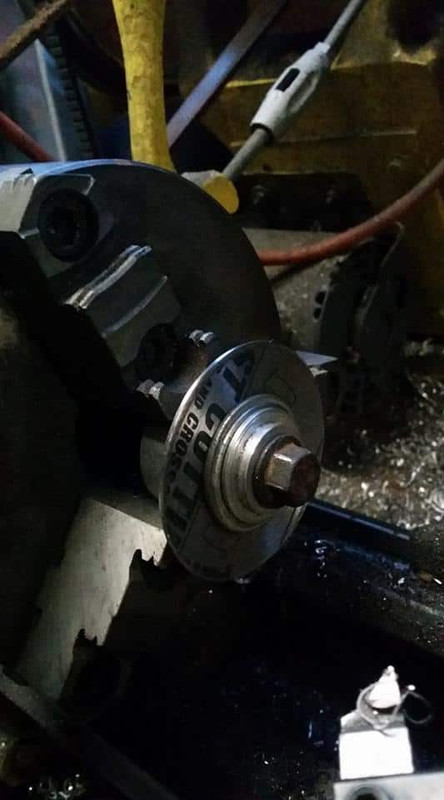
filed the edges until they were very smooth because i dont want my timing belt to get eaten up by this thing.
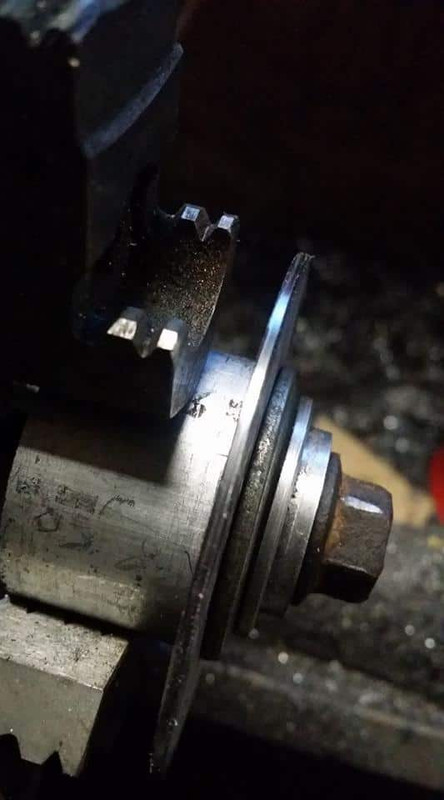
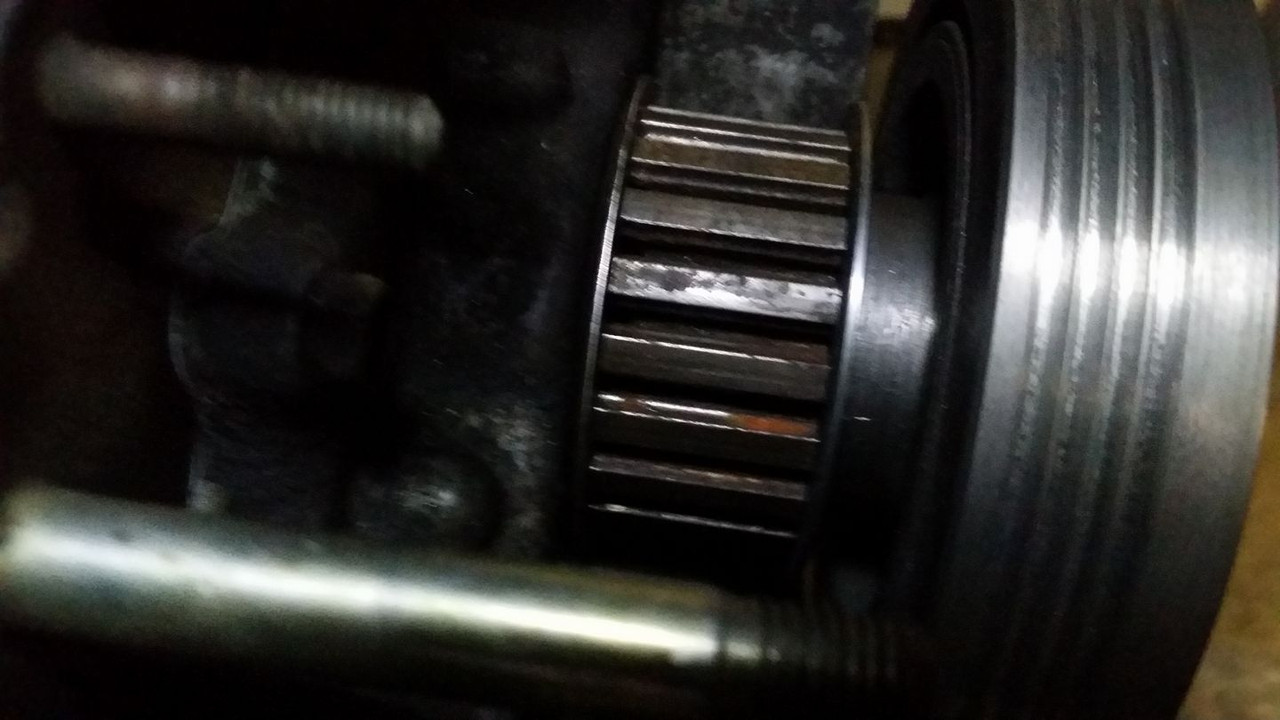
here it is compared to the front shim on my vg33 thats in my z31. i havent widened the hole yet here but you will notice the crank snout is significantly larger on that motor.


apparently you can punch out this rhombus shaped section of the blade for a different kind of saw... i didnt do that, i kinda just machined it, not realizing it would just pop out...
but when it did it actually created enough room for the key so i didnt even have to cut a new keyway.

since this shim does absolutely no load bearing and it will also be clamped between the crank pulley and timing gear the key is completely unimportant to this shim, the only reason there is a keyway in the shim is so the key can pass through it to retain the timing gear and crank pulley.
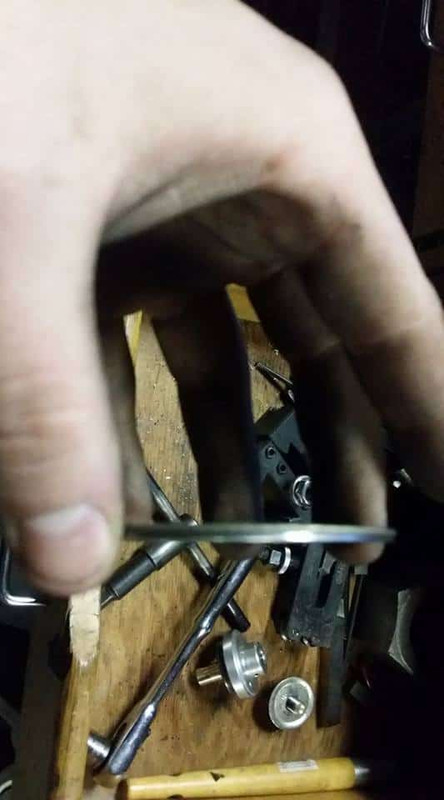
with this shim in my crank pulley and its ribs line up perfectly with everything else.
i started by plunge cutting a disc out of the inside of the sawblade.
then i turned down the outer diameter to size.
filed the edges until they were very smooth because i dont want my timing belt to get eaten up by this thing.
here it is compared to the front shim on my vg33 thats in my z31. i havent widened the hole yet here but you will notice the crank snout is significantly larger on that motor.
apparently you can punch out this rhombus shaped section of the blade for a different kind of saw... i didnt do that, i kinda just machined it, not realizing it would just pop out...
but when it did it actually created enough room for the key so i didnt even have to cut a new keyway.
since this shim does absolutely no load bearing and it will also be clamped between the crank pulley and timing gear the key is completely unimportant to this shim, the only reason there is a keyway in the shim is so the key can pass through it to retain the timing gear and crank pulley.
with this shim in my crank pulley and its ribs line up perfectly with everything else.
Last edited by Nate Boslet; 05-14-2018 at 04:58 PM.
 01-08-2017, 06:57 PM
#42
Member
Thread Starter
Join Date: Oct 2016
Posts: 284
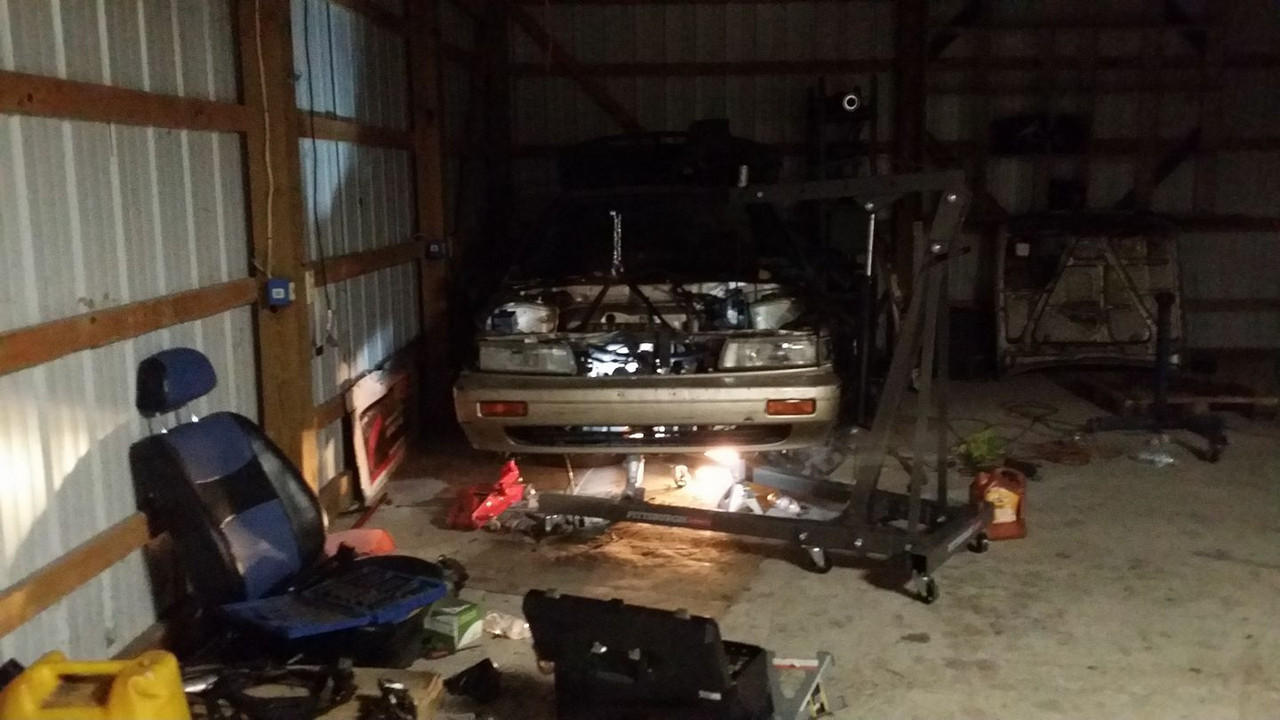
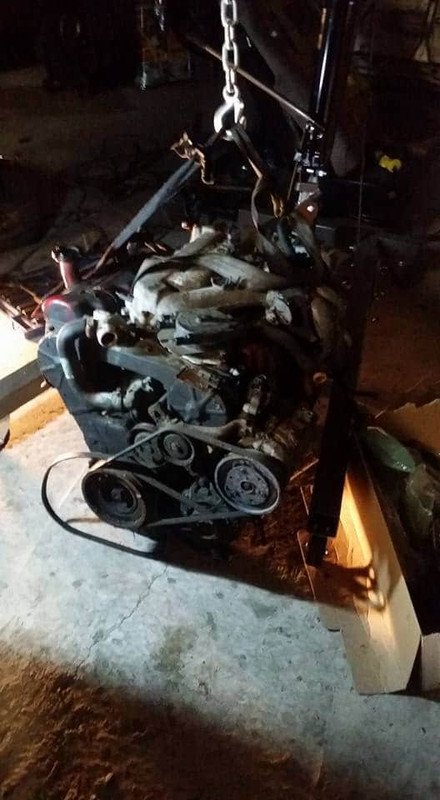
FINALLY. i got a hoist and all my **** to the garage.... the whole drive up to the door is straight ice and my buddies truck was only 2wd so we had to carry the engine up an ice covered hill 50 feet, shuffling carefully trying desperately not to fall and crush ourselves.... but we made it. the short block isnt that heavy at all (i say short block because there heads have nothing in them except the valves and the heads are only like 20lbs a piece or something) anyway, its about time i know.
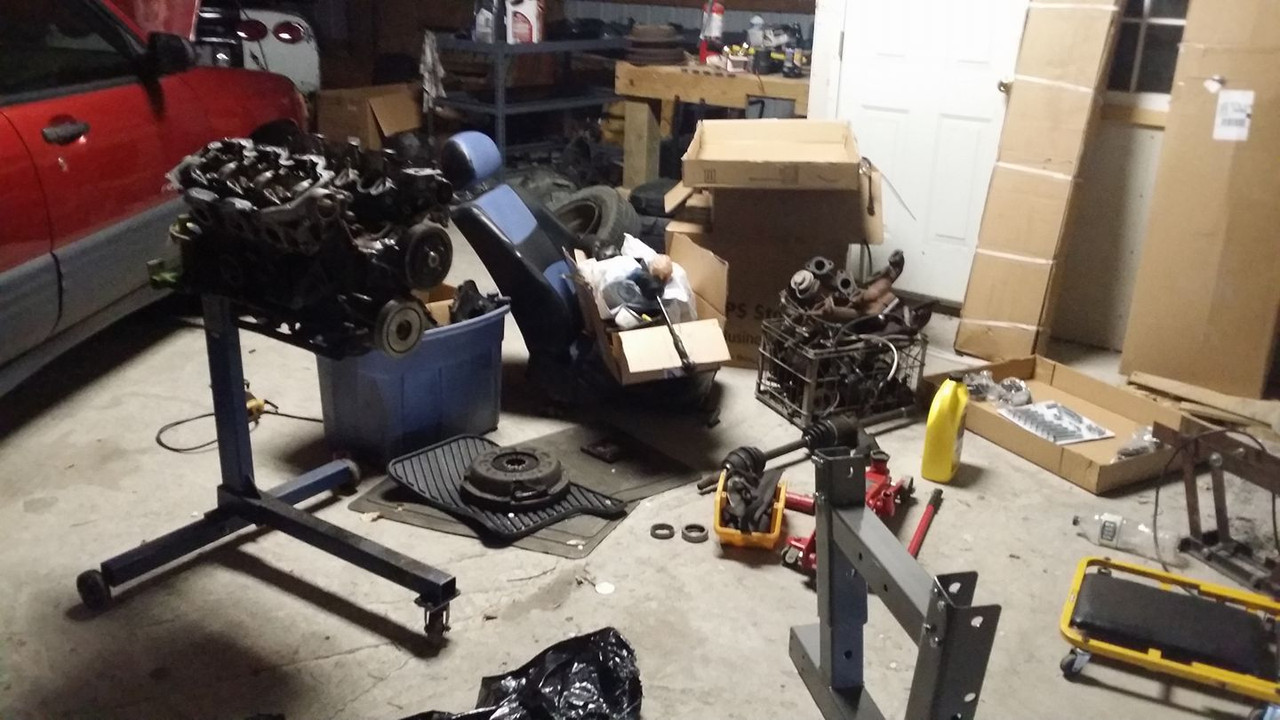
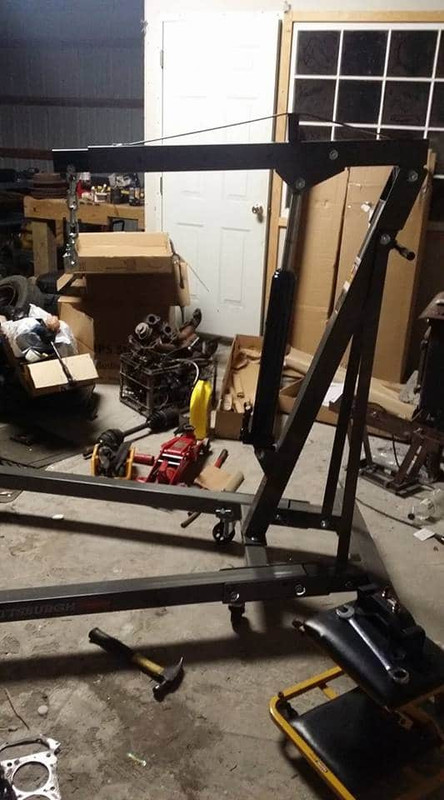
put the hoist together
its 10 degrees here right now. apparently that is somewhere near the freezing point of purple power because the fasteners i was cleaning in this jar stopped sloshing around after being in here overnight...

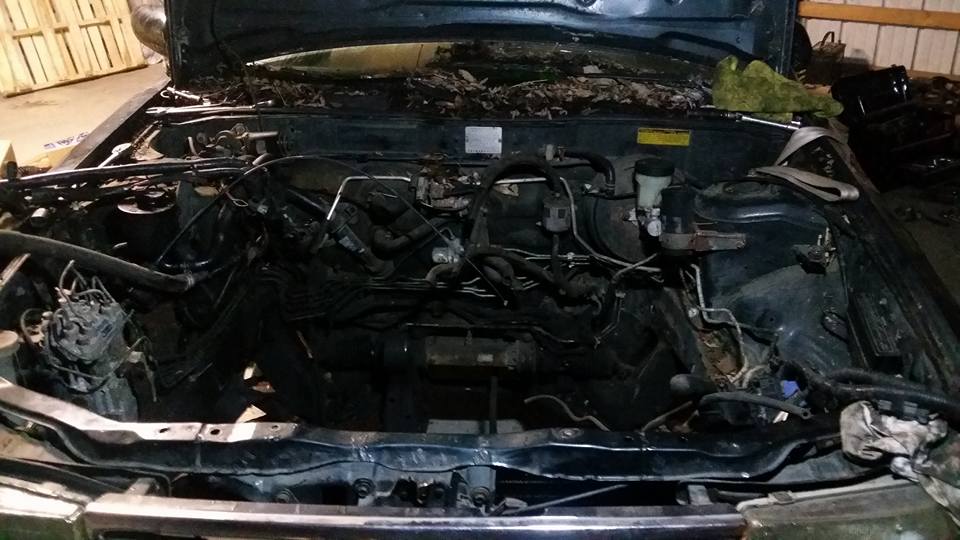
i wanted to get a decent idea of where im going to have clearance issues so i slapped the oil pan on.
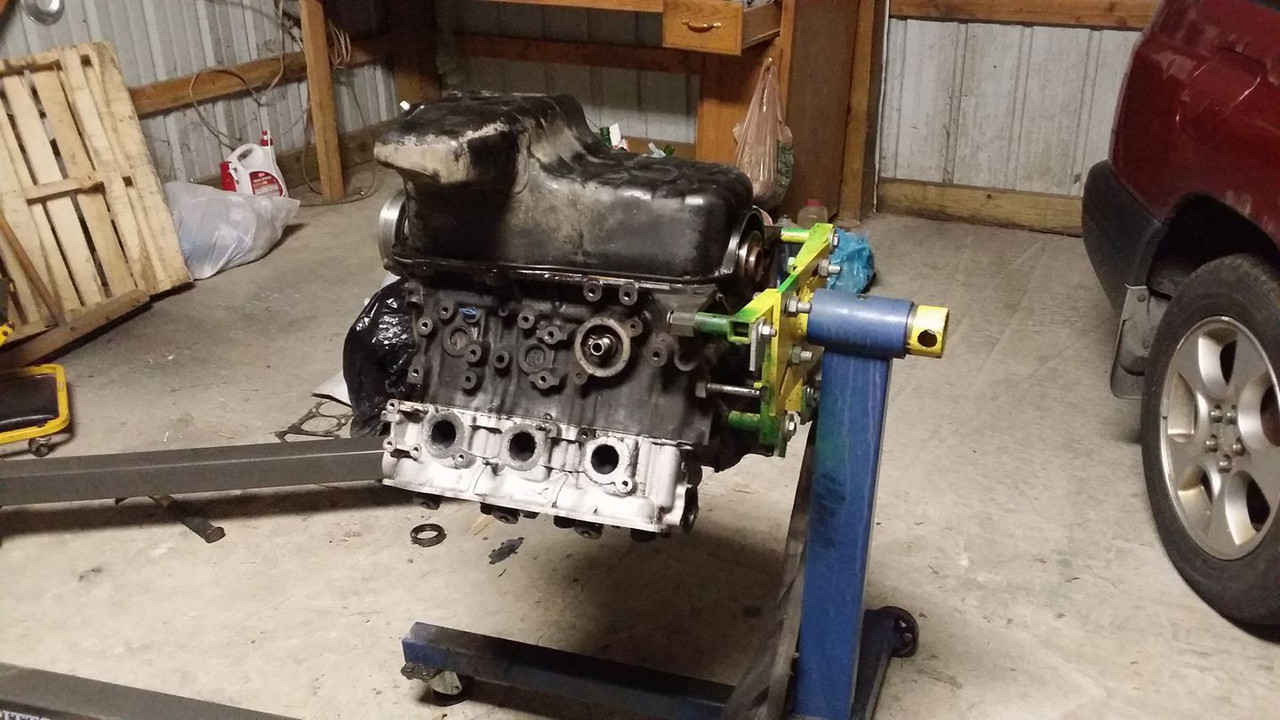
and the valve covers.
i used the hoist to move the KA out of the way with its starter hole lol
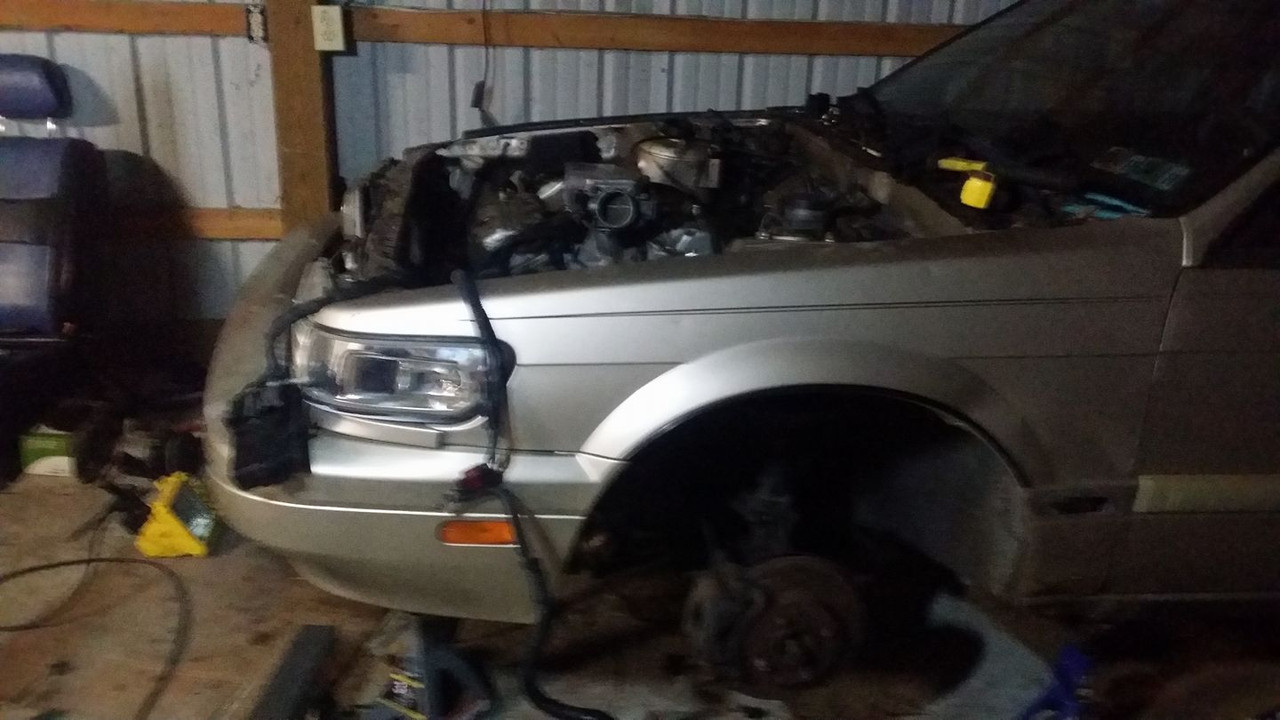
then i took the hood off by myself which went better than i expected. the panel bonder or whatever was on there held the hood onto the brackets just enough for me to pull the bolts off and then crack it loose once i was ready to pull it off the car.
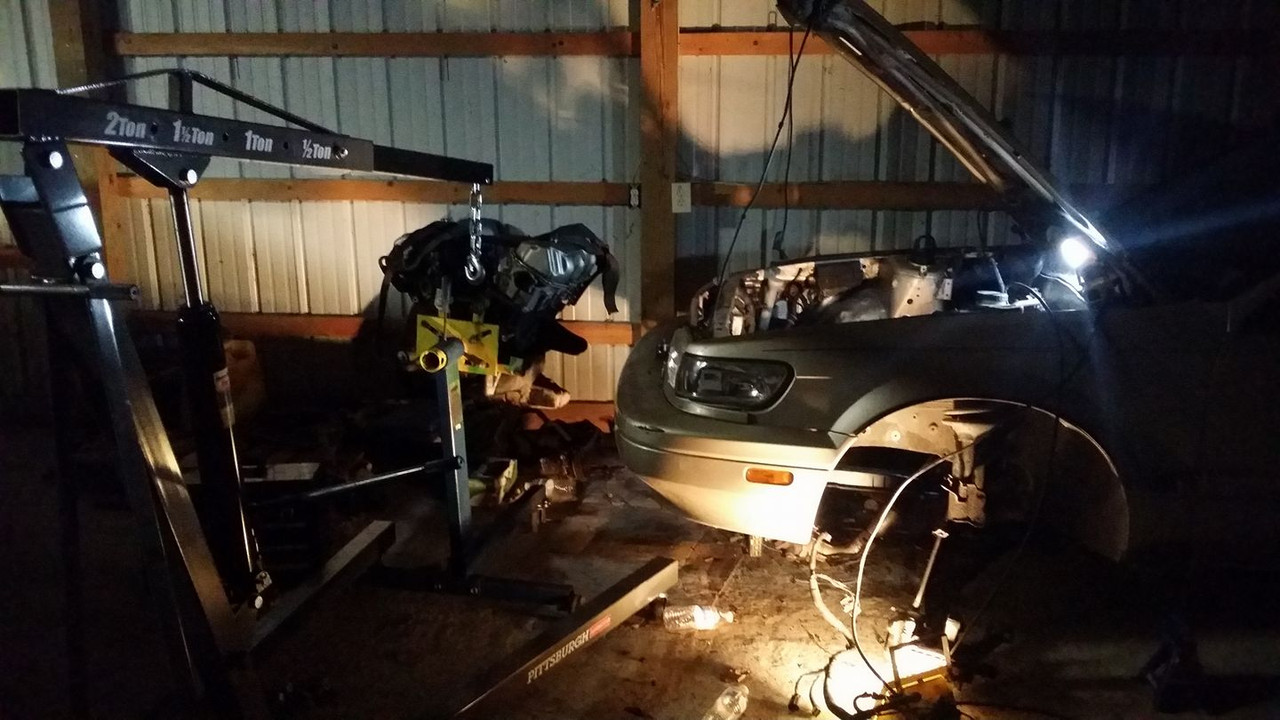
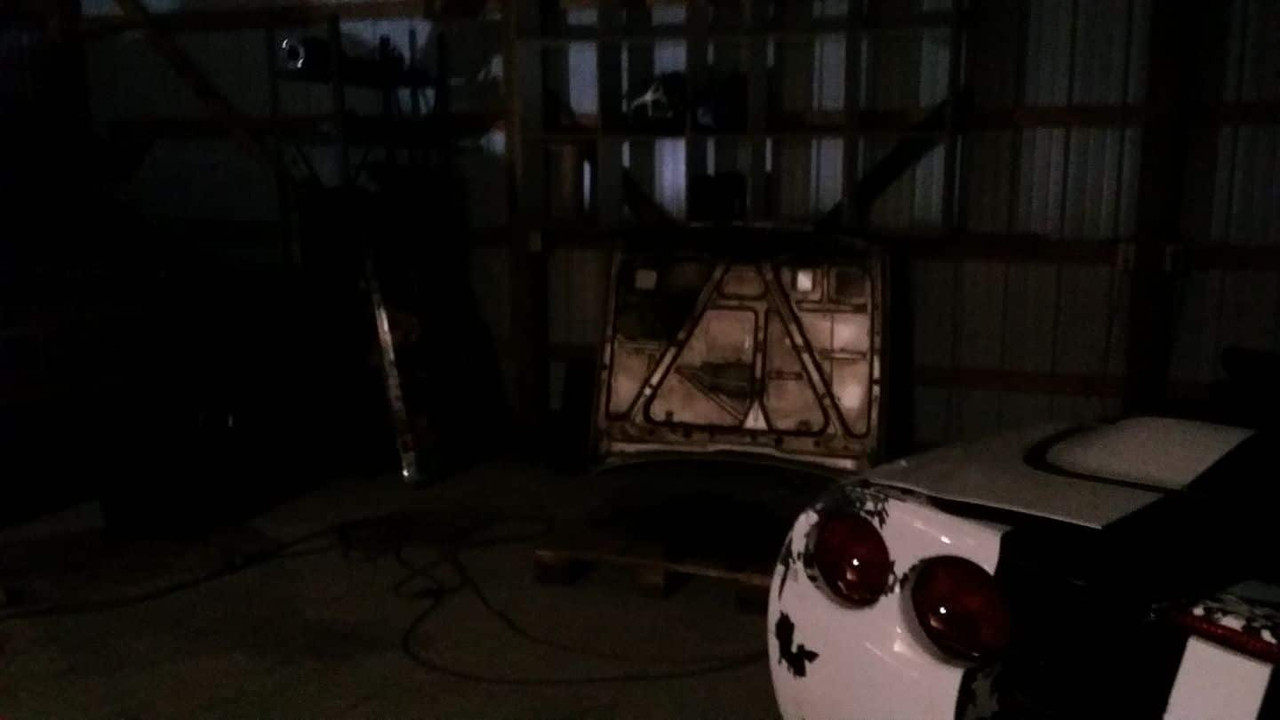

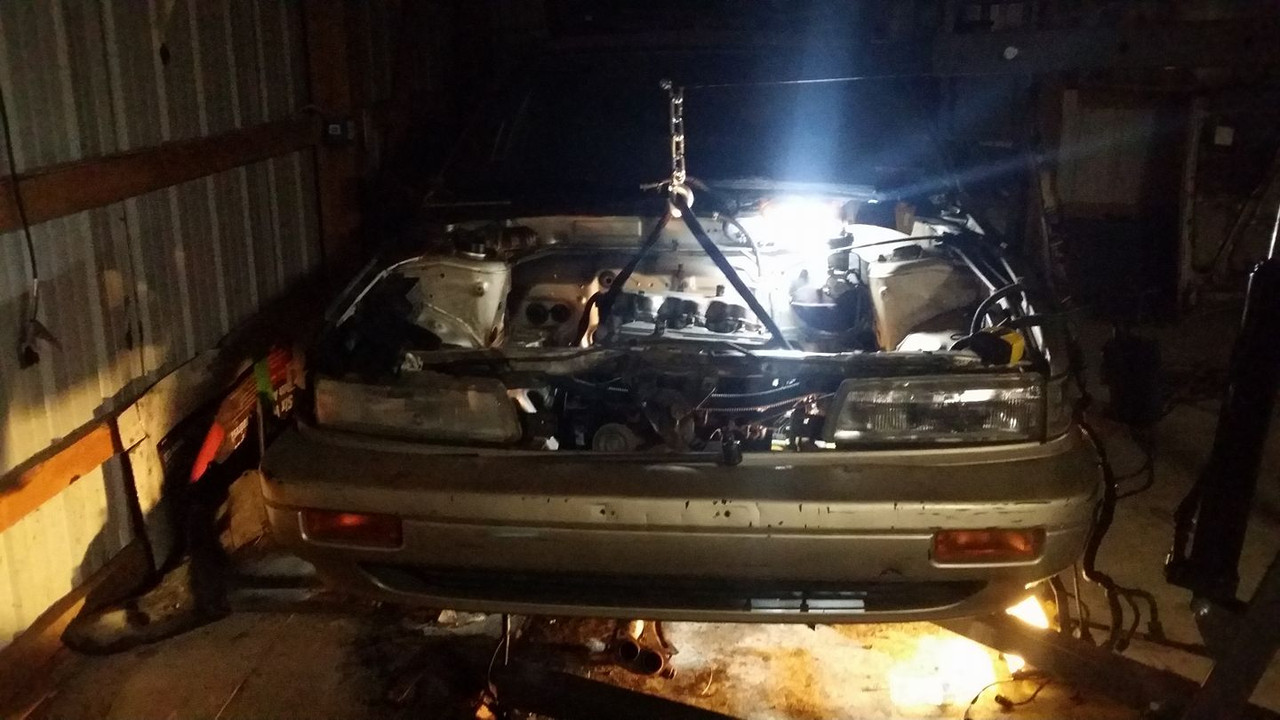
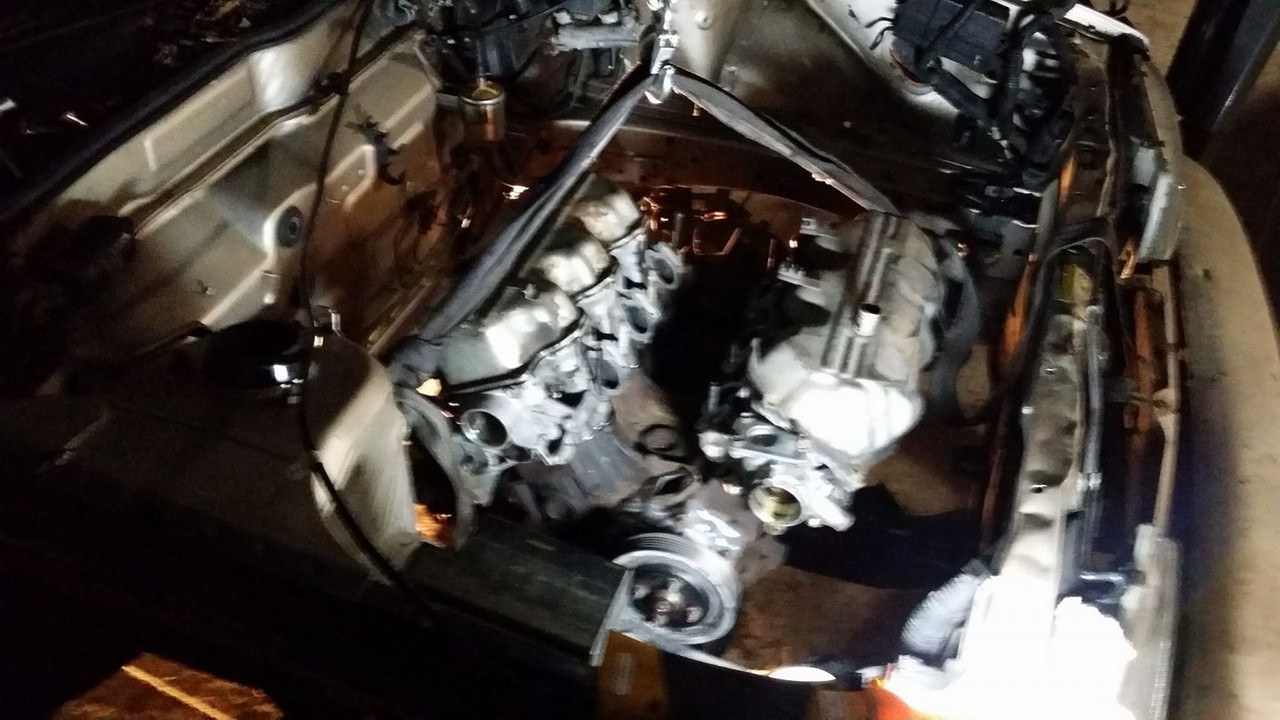
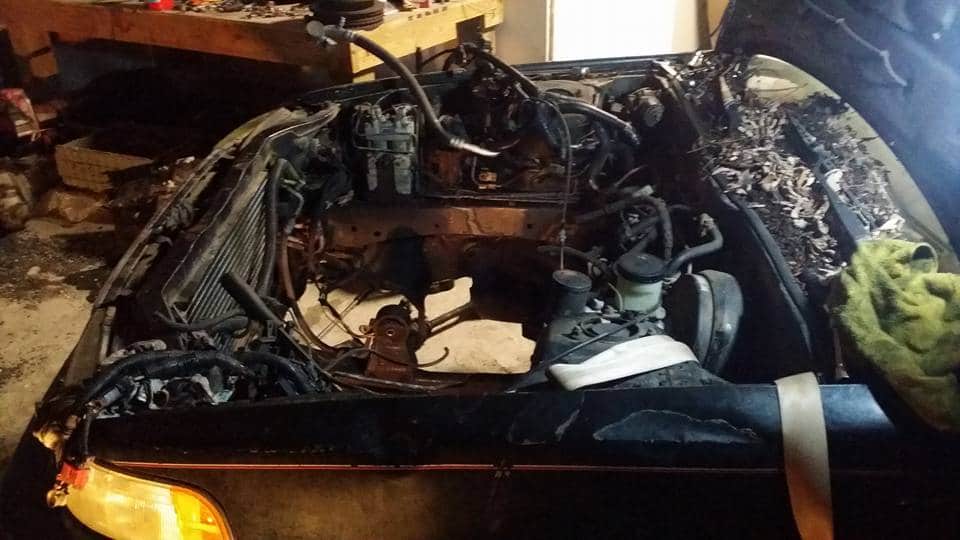
then theres this..... this is not what i was expecting lol

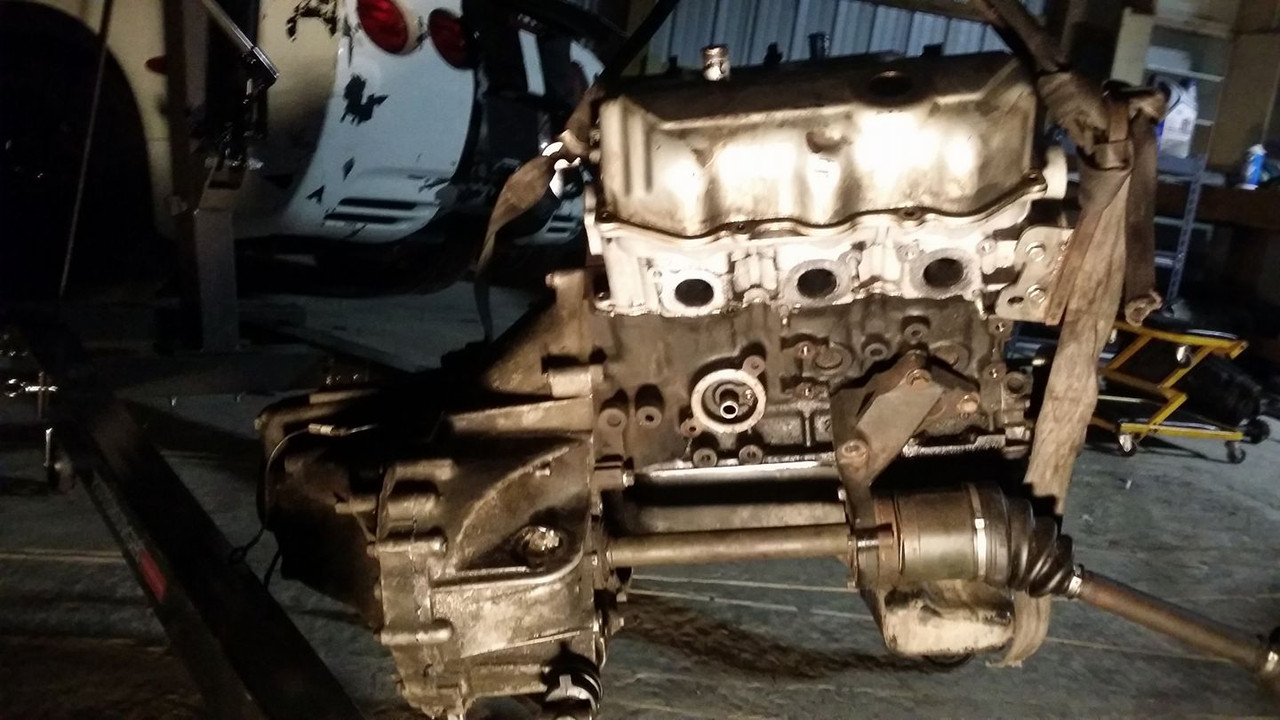
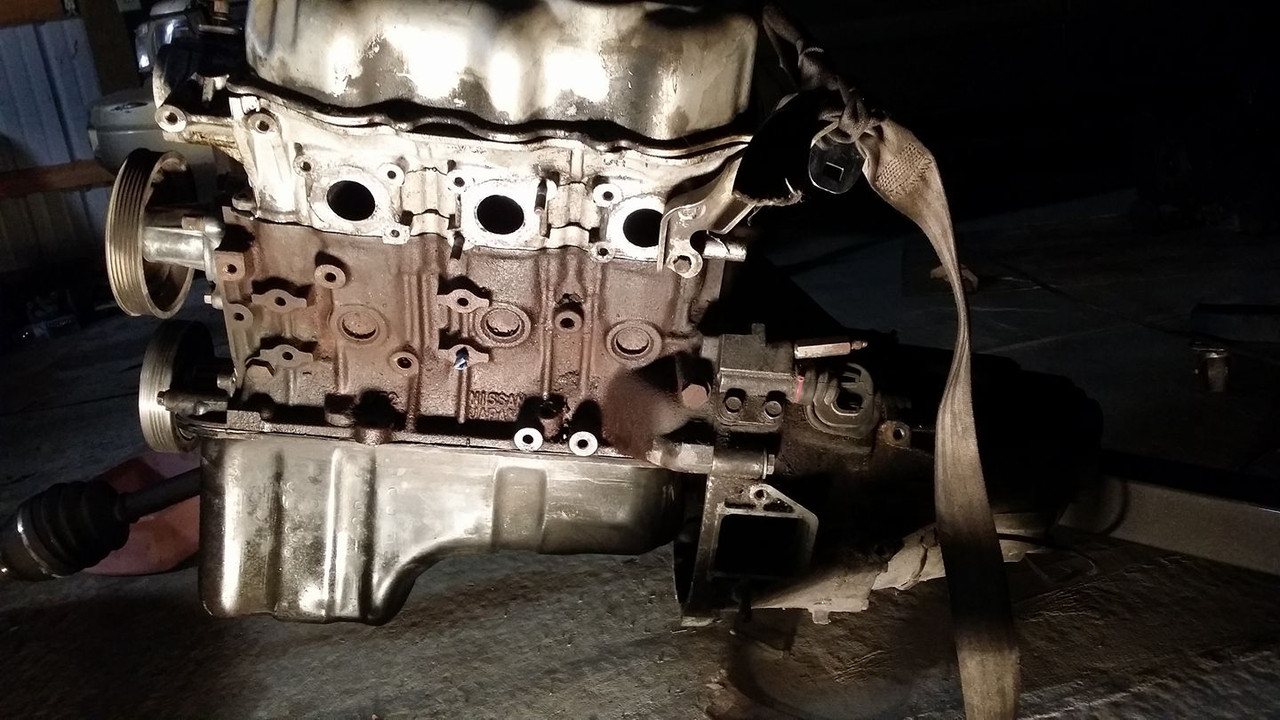
the motor is literally in the EXACT CENTER of the engine bay which since i need a transmission and axles and stuff in there is actually a bad thing..... it turns out the maxima crossmember is way off to the side whereas the stanza crossmember is right in the center. in order to fix this i plan on making plates for the front and back of the motor to move the mounting brackets as far back on the motor as they need to. ill bolt the trans on, put the axles in and hang the whole thing and level it for that so making new mounts shouldnt be too big of a deal. at least front to back looks like its right where i want it to be so thats good, my crossmember was made perfectly its just not in the right place lol i could have sworn the maxima crossmember was centered but apparently not, not that it would have mattered if i knew it wasnt before because the way the stanzas crossmember mounts to the car there is no way for me to move the crossmember over in the back (even if i could i dont want to have to deal with redoing the shifter linkage bracket and stuff) anyway now i get to fabricate some more stuff so yayyyy
put the hoist together
its 10 degrees here right now. apparently that is somewhere near the freezing point of purple power because the fasteners i was cleaning in this jar stopped sloshing around after being in here overnight...
i wanted to get a decent idea of where im going to have clearance issues so i slapped the oil pan on.
and the valve covers.
i used the hoist to move the KA out of the way with its starter hole lol
then i took the hood off by myself which went better than i expected. the panel bonder or whatever was on there held the hood onto the brackets just enough for me to pull the bolts off and then crack it loose once i was ready to pull it off the car.
then theres this..... this is not what i was expecting lol
the motor is literally in the EXACT CENTER of the engine bay which since i need a transmission and axles and stuff in there is actually a bad thing..... it turns out the maxima crossmember is way off to the side whereas the stanza crossmember is right in the center. in order to fix this i plan on making plates for the front and back of the motor to move the mounting brackets as far back on the motor as they need to. ill bolt the trans on, put the axles in and hang the whole thing and level it for that so making new mounts shouldnt be too big of a deal. at least front to back looks like its right where i want it to be so thats good, my crossmember was made perfectly its just not in the right place lol i could have sworn the maxima crossmember was centered but apparently not, not that it would have mattered if i knew it wasnt before because the way the stanzas crossmember mounts to the car there is no way for me to move the crossmember over in the back (even if i could i dont want to have to deal with redoing the shifter linkage bracket and stuff) anyway now i get to fabricate some more stuff so yayyyy
Last edited by Nate Boslet; 05-14-2018 at 04:59 PM.
 01-09-2017, 08:27 PM
#44
Member
Thread Starter
Join Date: Oct 2016
Posts: 284
whelp.... i was already planning on doing a filter relocation but now i have to make a mount and a blockoff plate at the same time.... im trying to figure out what feeds and methods of returns i have to choose from and which will work best/at all. my next question is has anyone relocated an oil filter without using the stock oil filter location?
the good thing is now i have an excuse to hang an oil cooler off the front bumper
the good thing is now i have an excuse to hang an oil cooler off the front bumper
01-10-2017, 07:51 PM
#45
Member
Thread Starter
Join Date: Oct 2016
Posts: 284
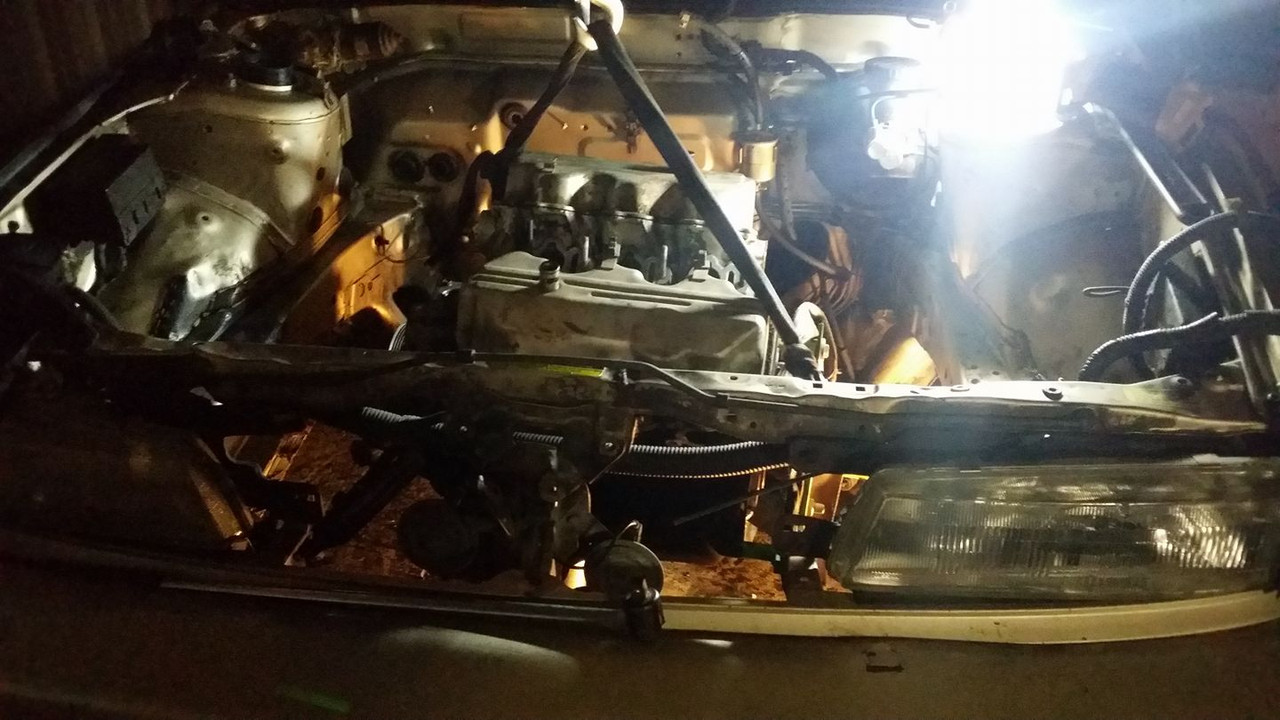
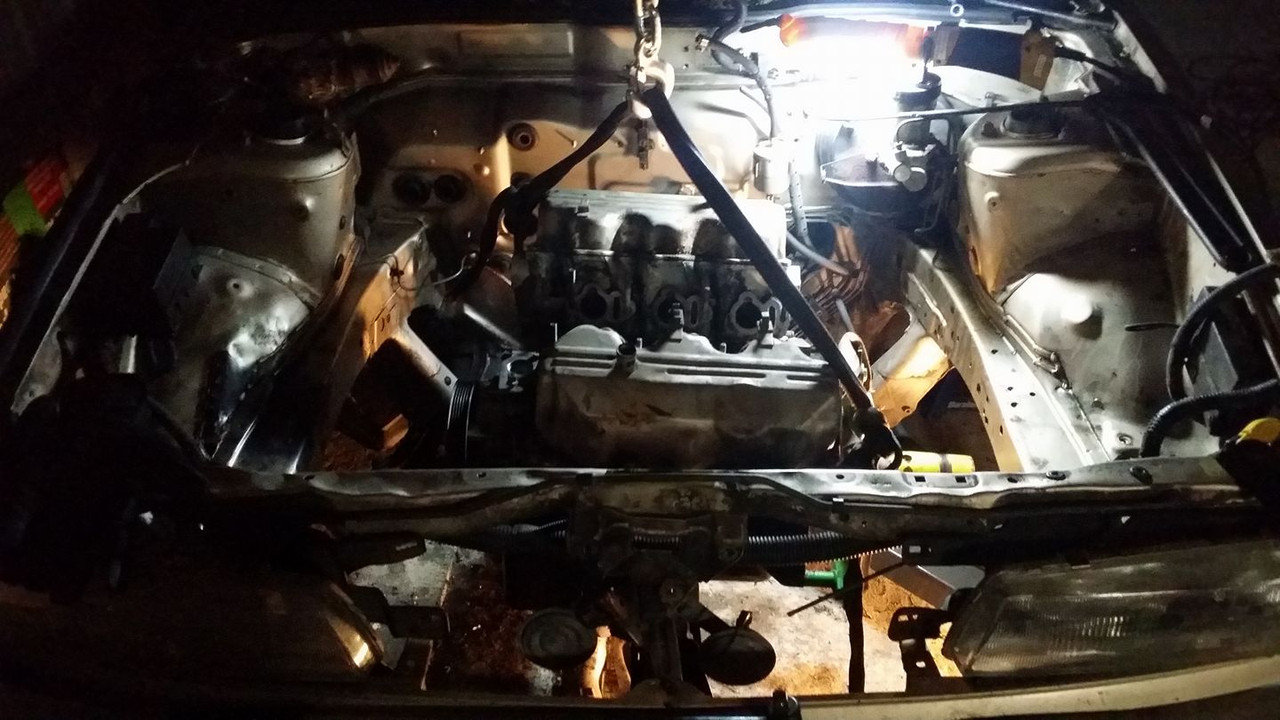
engine and trans are in the car, i havent gotten the car squared up so its just kinda plopped in there and roughly lined up to see what else i have to do to get it mounted up right.
i just bolted the engine and trans together with bolts i had lying around, only like 2 of them are actually long enough to get more than 3 threads out of.
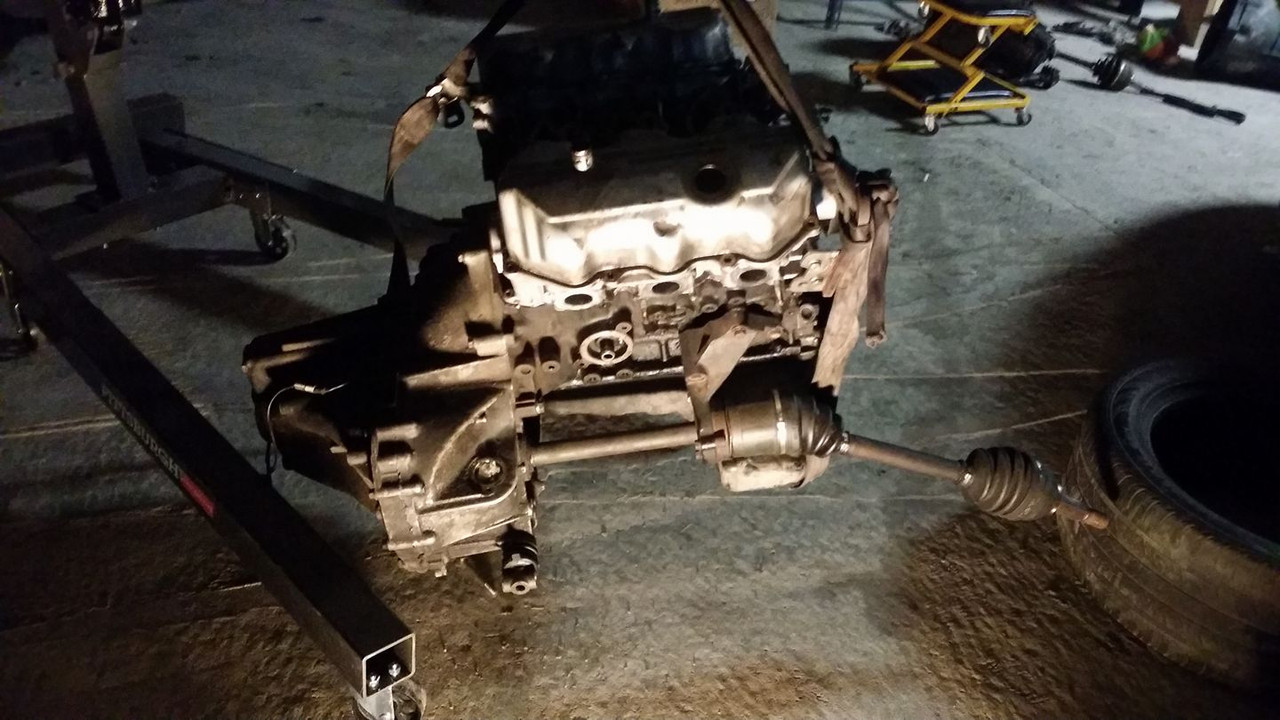
i managed to get the passenger side axle in and just threaded the nut on to keep it from slipping back out. the drivers side axle is damaged and probably wont be able to be used unfortunately so ill have to get a new one unless i can repair it.


i have to move the engine back a lot more but as far as space is concerned i dont immediately see any problem areas. im going to have to be very diliberate when i mount the engine but i dont think it will end up being too tight in there.
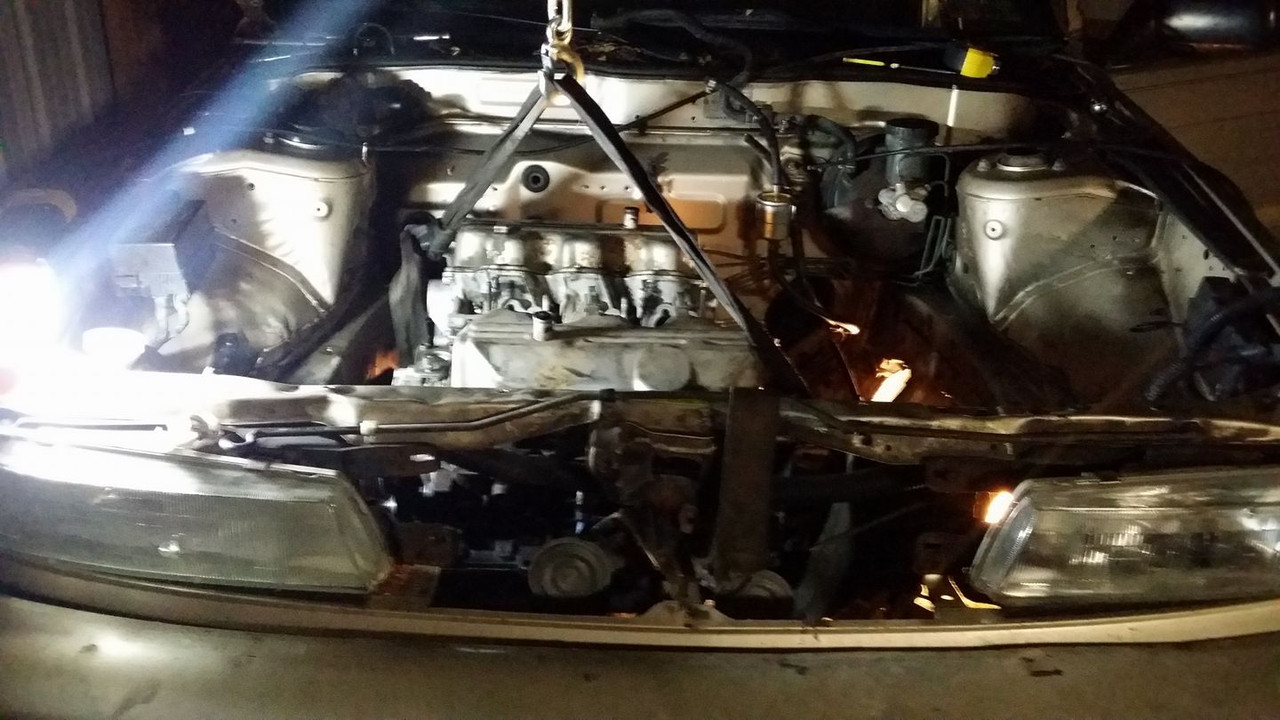

i will have to make some kind of modification to the shifter linkage, its just not long enough. right now the shifter is pulled back meaning the linkage is all the way forward and it doesnt even come close to where it will need to be when the engine is mounted even if i do move it a few inches back.

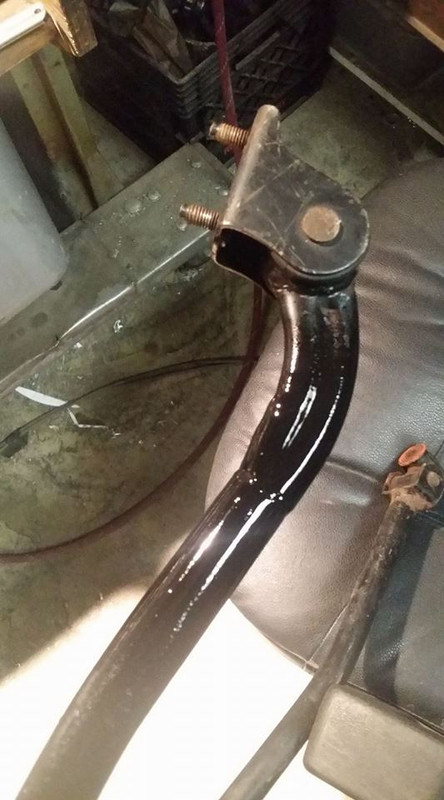
i was more concerned about the rear mount but of course my pictures of the front, that im not concerned about at all, are much better. the mount up here wil be much easier to make, i actually may even be able to use the z31 mounting bracket i have for it (the z31 engine mount is basically the same as the maxima front engine mount)
if anyone knows btw if there is a plate that goes between the engine and trans or one that just covers up the bottom of the trans opening i would really like to know that.
so tomorrow or whenever i get back to the garage ill actually remember to bring my angle gauge and square up the car and be on my way to locating the motor a little better.
i just bolted the engine and trans together with bolts i had lying around, only like 2 of them are actually long enough to get more than 3 threads out of.
i managed to get the passenger side axle in and just threaded the nut on to keep it from slipping back out. the drivers side axle is damaged and probably wont be able to be used unfortunately so ill have to get a new one unless i can repair it.
i have to move the engine back a lot more but as far as space is concerned i dont immediately see any problem areas. im going to have to be very diliberate when i mount the engine but i dont think it will end up being too tight in there.
i will have to make some kind of modification to the shifter linkage, its just not long enough. right now the shifter is pulled back meaning the linkage is all the way forward and it doesnt even come close to where it will need to be when the engine is mounted even if i do move it a few inches back.
i was more concerned about the rear mount but of course my pictures of the front, that im not concerned about at all, are much better. the mount up here wil be much easier to make, i actually may even be able to use the z31 mounting bracket i have for it (the z31 engine mount is basically the same as the maxima front engine mount)
if anyone knows btw if there is a plate that goes between the engine and trans or one that just covers up the bottom of the trans opening i would really like to know that.
so tomorrow or whenever i get back to the garage ill actually remember to bring my angle gauge and square up the car and be on my way to locating the motor a little better.
Last edited by Nate Boslet; 05-14-2018 at 05:00 PM.
01-15-2017, 07:02 PM
#46
Member
Thread Starter
Join Date: Oct 2016
Posts: 284
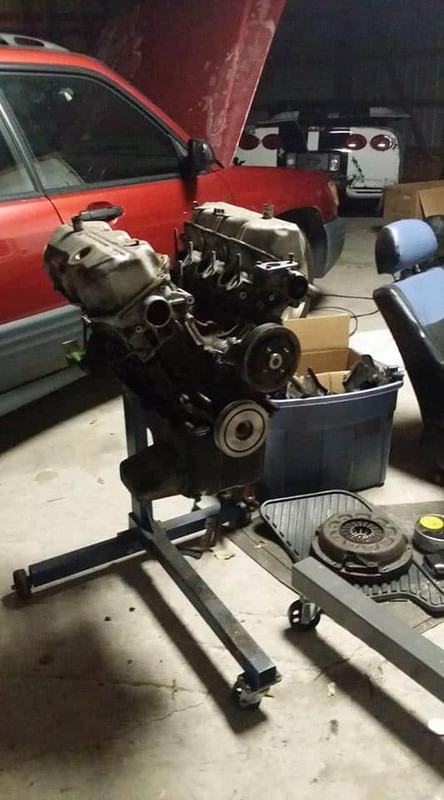
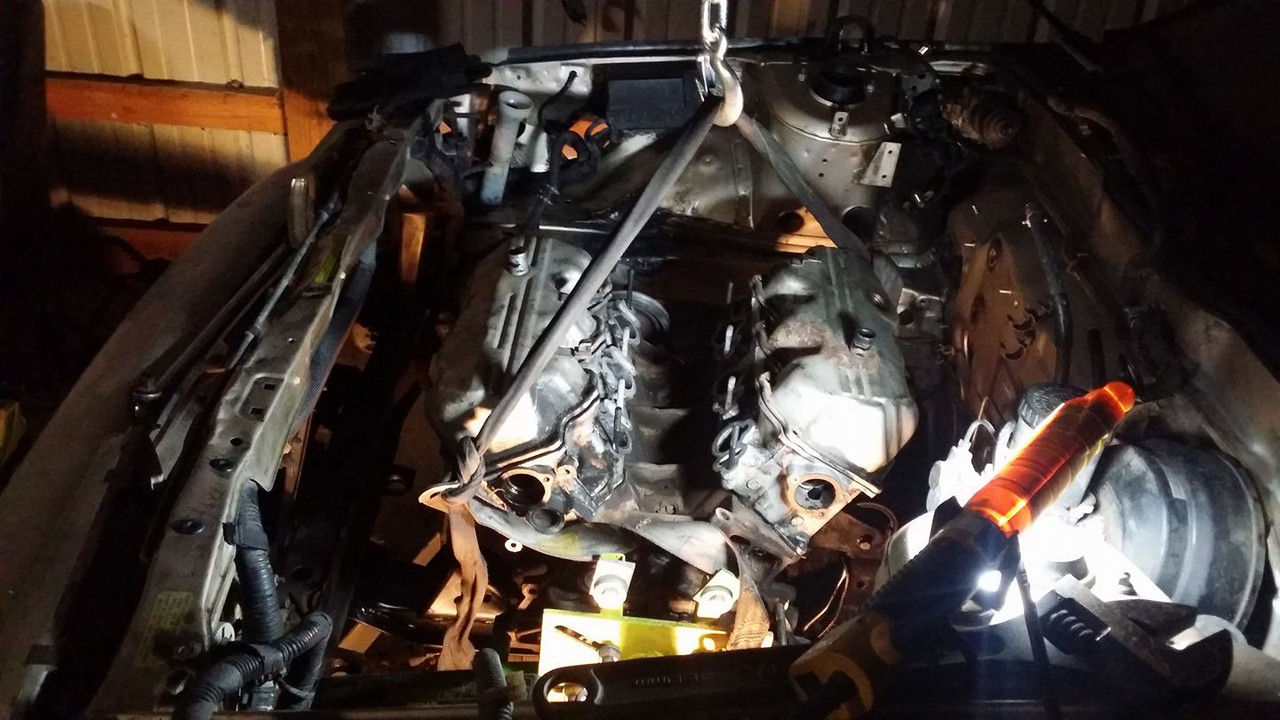
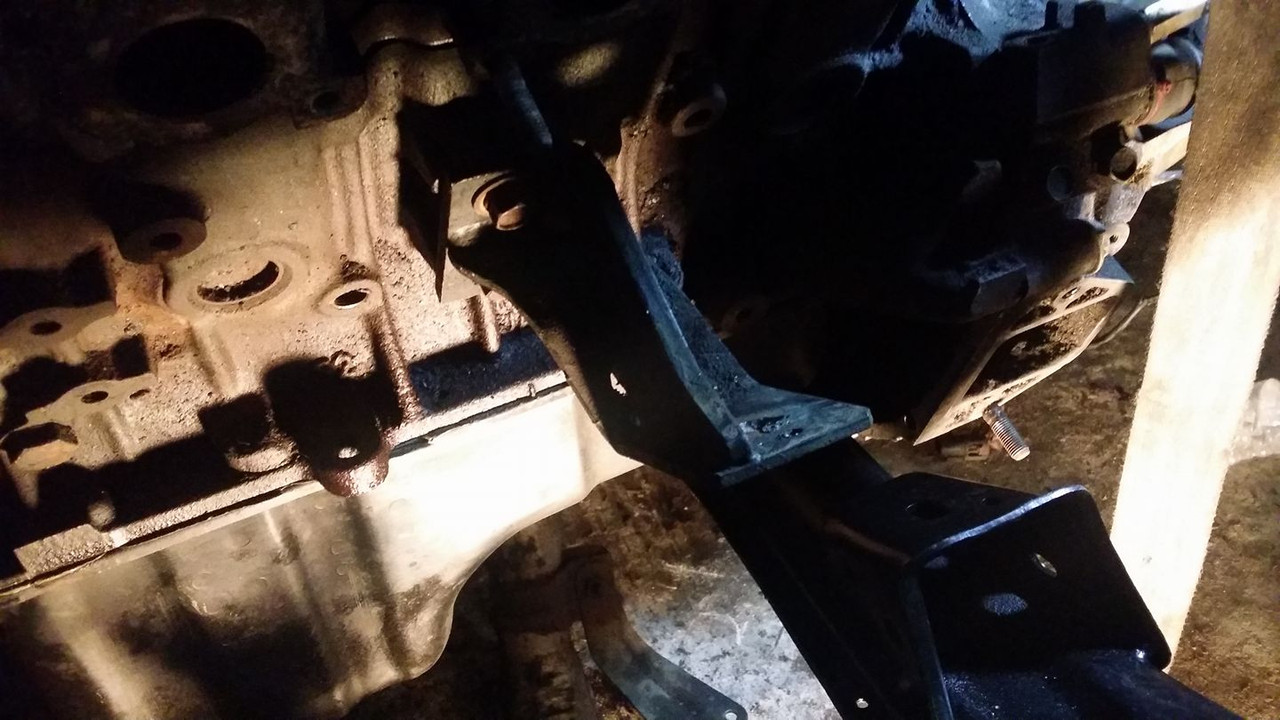
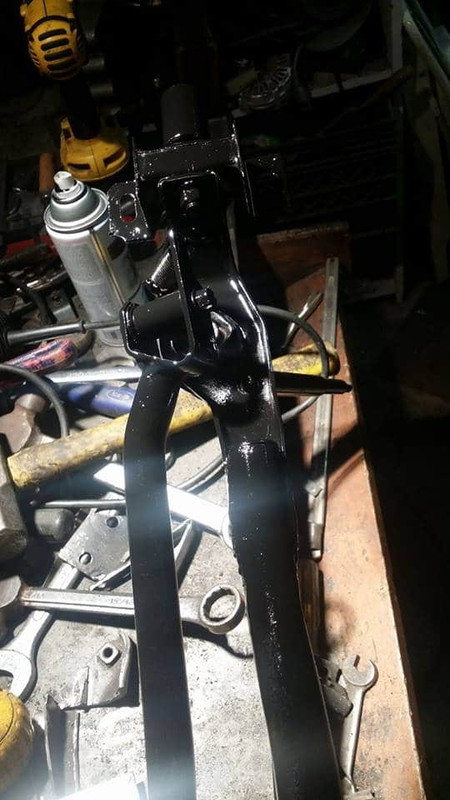
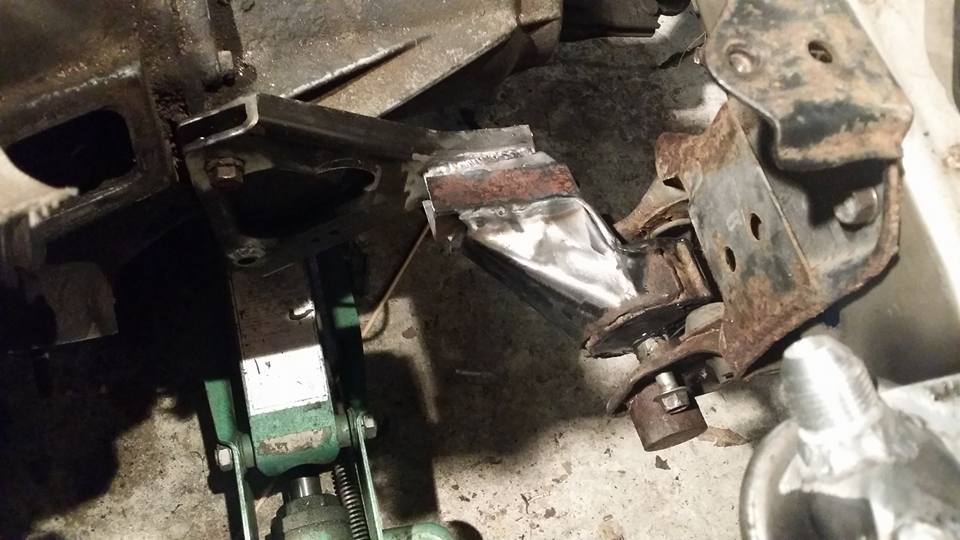
i kinda did the rear mount without much updates because i had to prototype it like 3 times before it was right so it was a lot of welding, fitting up, taking home, cutting, rewelding and refitting up but the motor is basically where it needs to be now.
as with any swap the first thing you gotta do to make custom mounts is take a **** ton of measurements and pictures, then go 20 minutes back home and make them completely off the car.
....at least thats what i did....

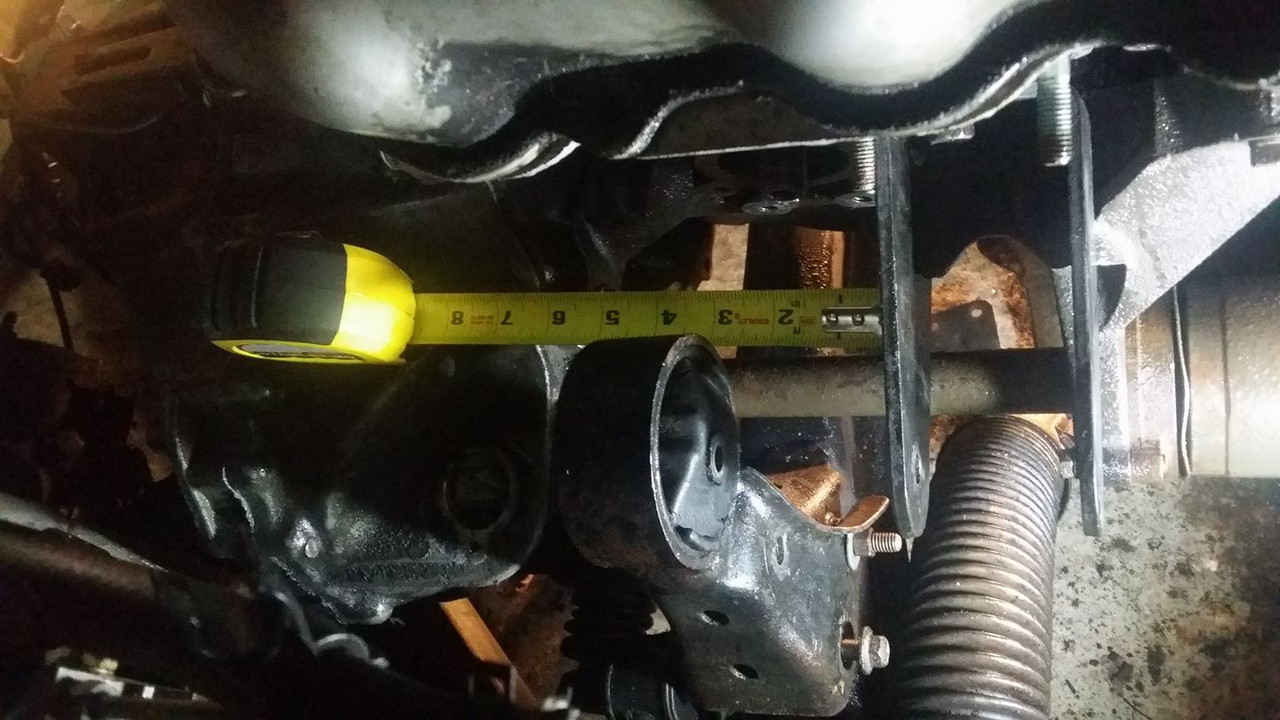
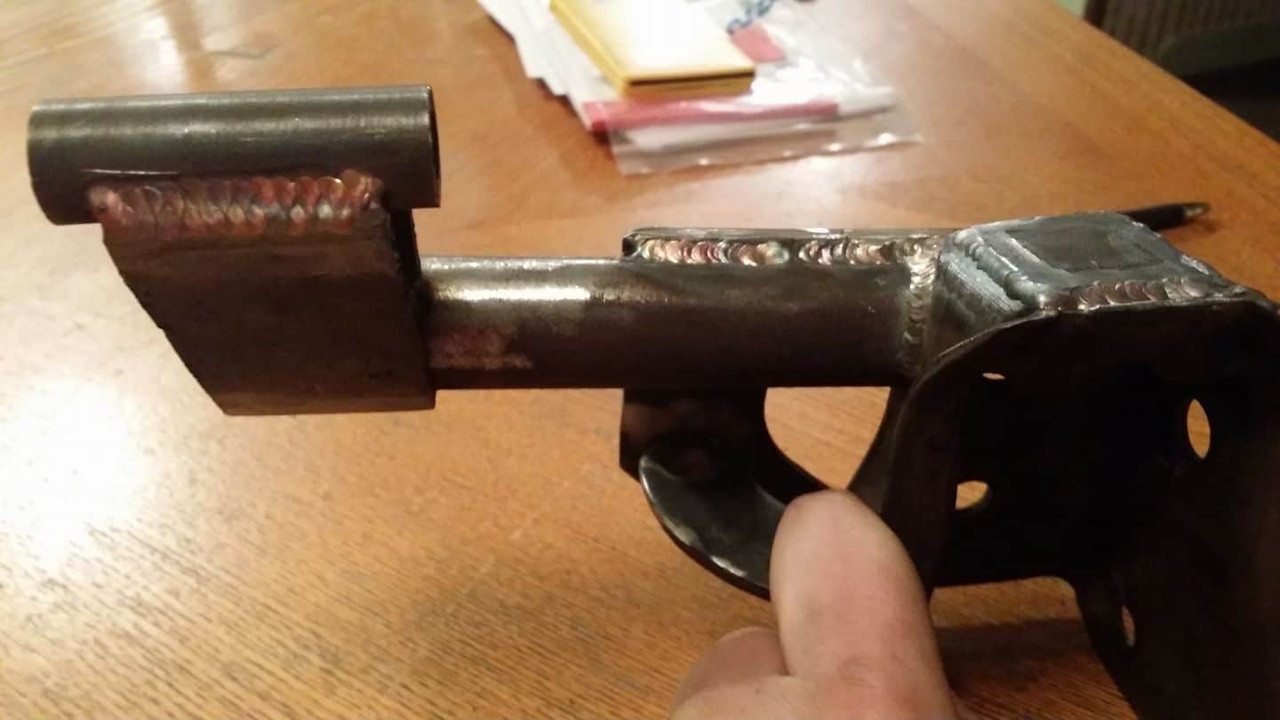
it aint pretty but it should work fine. this may end up just being a jig ill end up replacing with a rubberized or insulated mount if the solid one is too loud or rough but the stanza had a solid torque mount with the KA and that wasnt too bad so idfk.

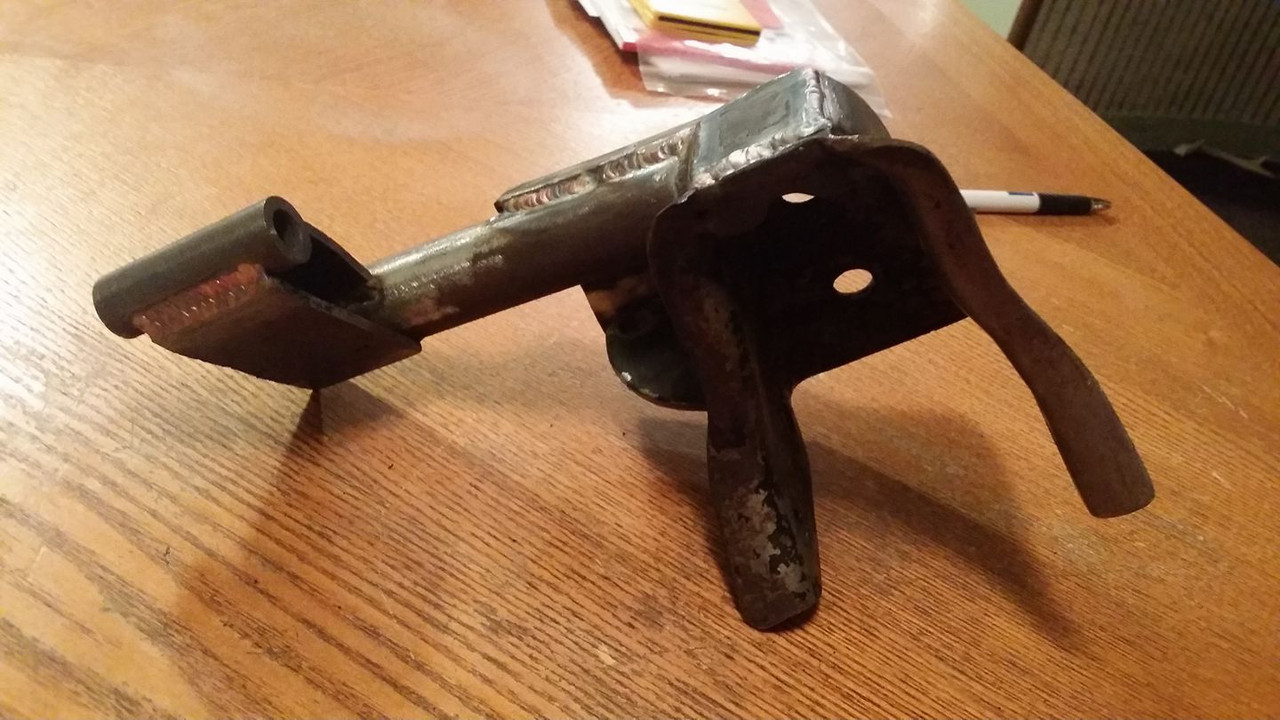
this is obviously pre-paint but i assume people want to see the welds. again, i didnt put any effort into making these welds pretty because they will be covered up and under the engine. this car just isnt worth doing stainless parts on lol
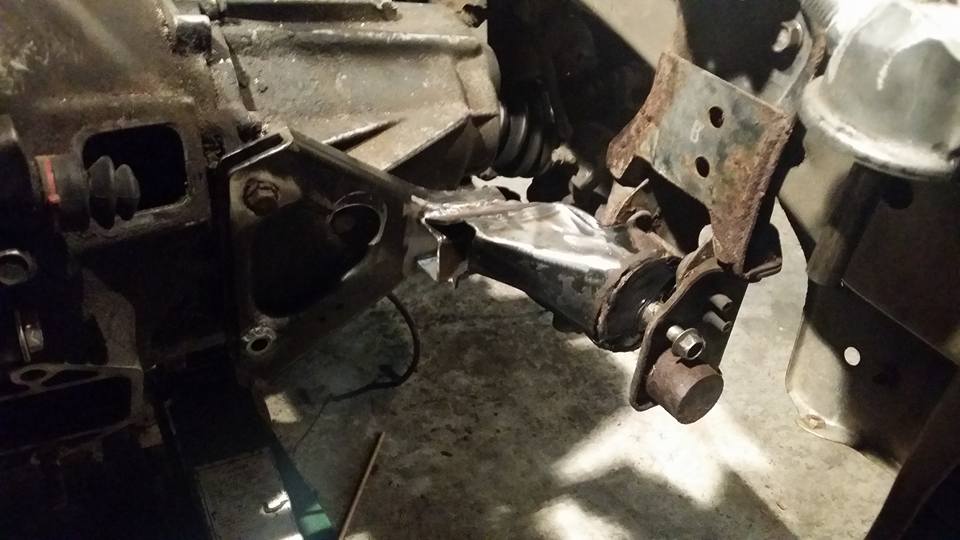
i threw the driver axle in (the passenger one has been in all week) to see where they line up and it looks like the motor is still pretty far forward or at least farther forward than i want it to be. its not all that clear from the garbage pictures i took but the axles are angled backward. im not sure if the axles are supposed to be slightly angled back or perfectly in line with the hubs. im assuming cv joints dont have the same restrictions that a universal joint does as far as angles go, so im not super worried about it but im gonna get them a little more straight if i can.
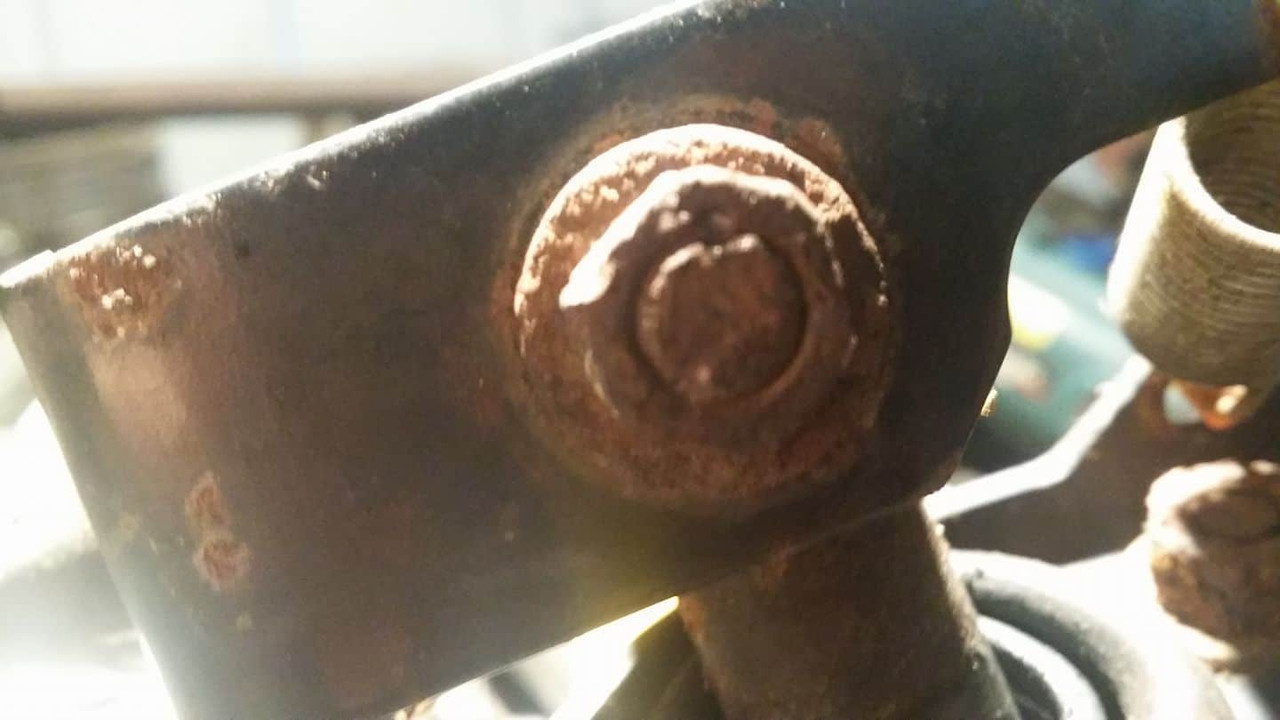
after i had the wood stove going and then sitting overnight the condensation got just about everything in the garage wet including the crank pulley and it rusted right up so i sanded that and slapped a coat of paint on it at home.
you can see the angle of the axles a little better (although for this pic i think the motor moved out of line a little so it might be worse here) and the rear mount i made in the car.
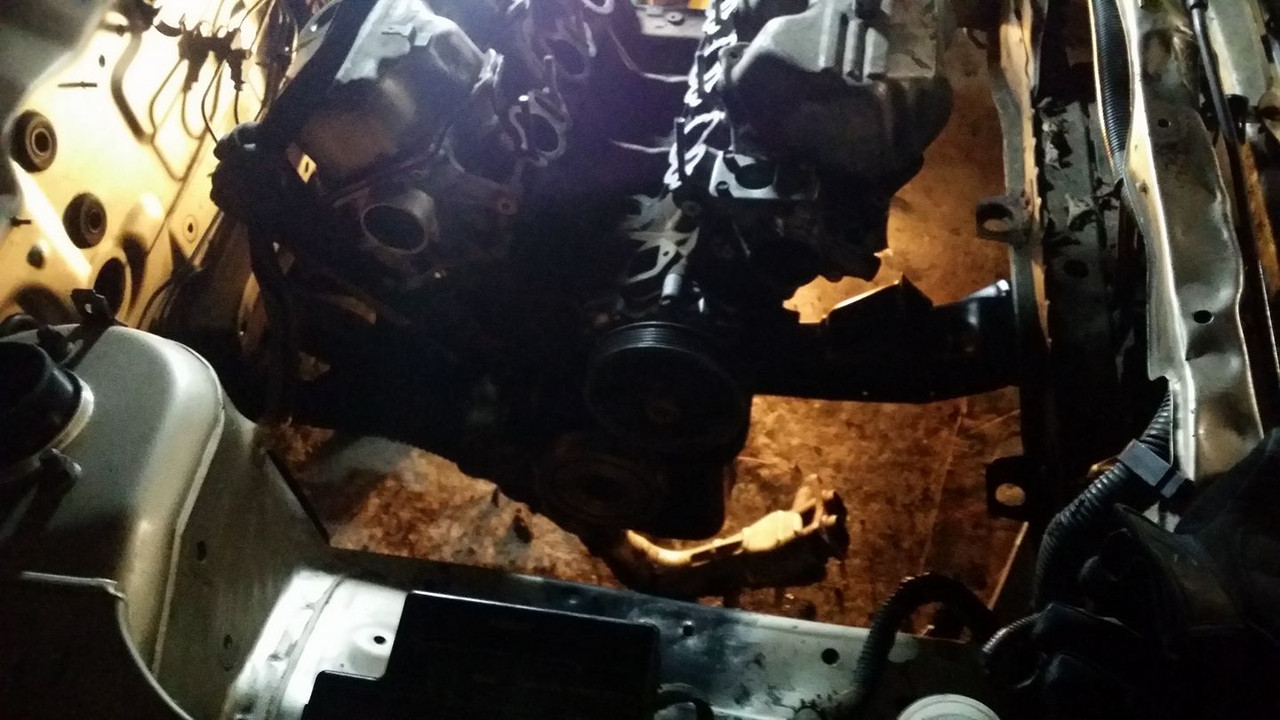
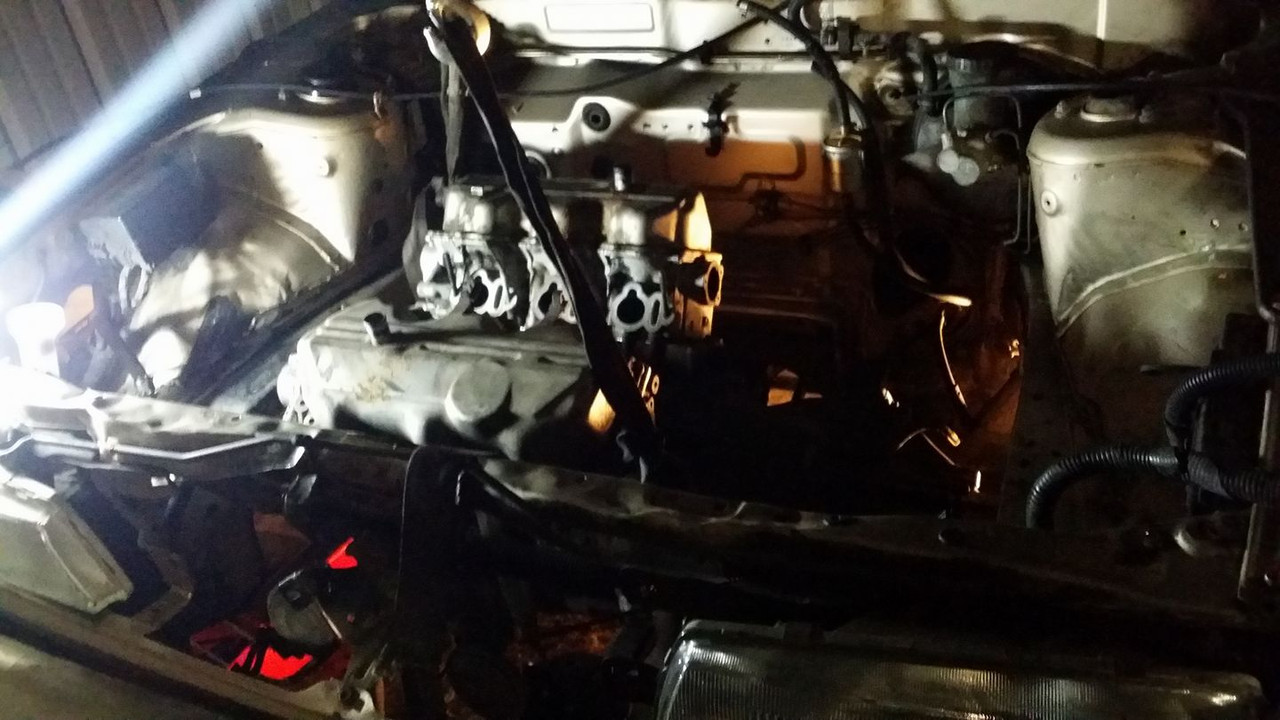
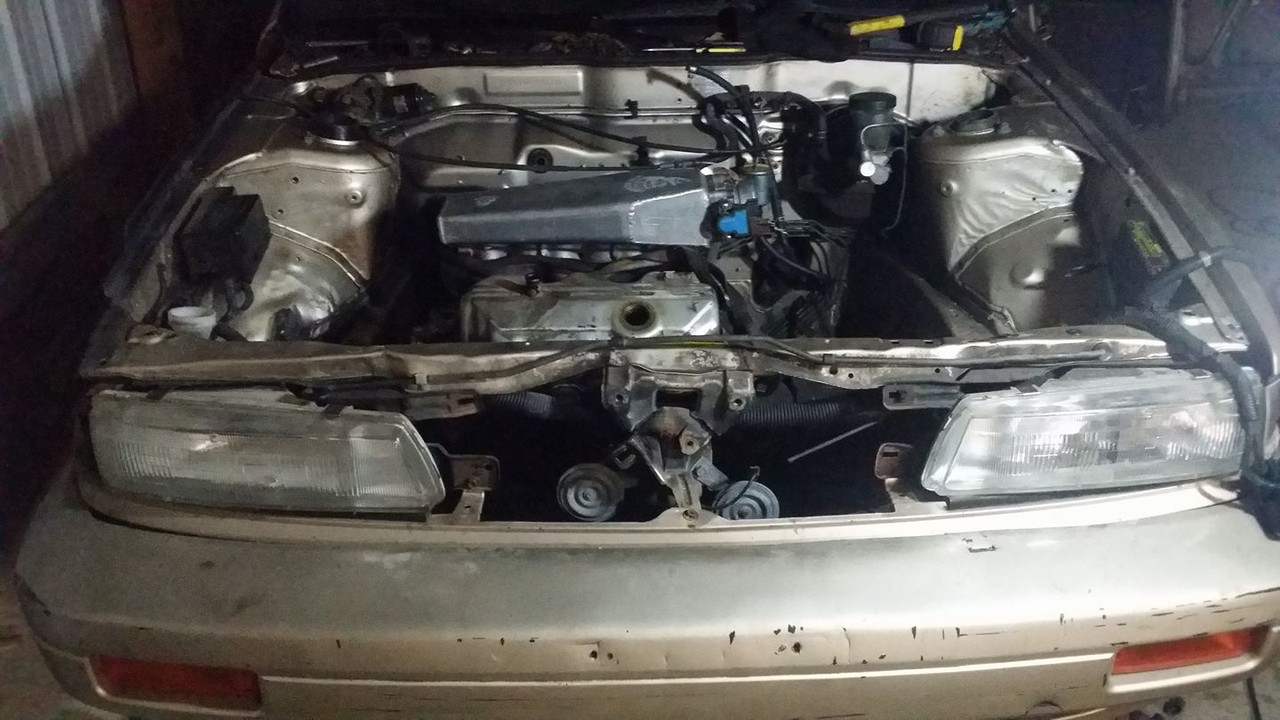
at some point all this space here will be occupied by a turbo. when that will be im not sure anyone knows lol

IT CLEARS THE HOOD!!!! its actually not even close, i will probably flip the intake to the other direction when i turbo the car, i really didnt expect to have all that room in front of the motor and i would like to go that way for the sake of intercooler pipe routing, just makes everything a lot easier.
and yes sometimes i work in my garage in my slip-on house shoes, they are a pragmatic solution for a ridiculous person like me.
now im moving on to the front mount which i plan on doing my best to basically break apart (grind out the welds and pull the two pieces apart) and bend so it points more toward that mount and then reassemble and weld it all up so that hopefully i end up with something i can use some kind of actual insulator since i plan on daily driving this car...
idk if i said this before in another post but it turns out i definitely dont HAVE to use an oil filter relocation kit anymore because of the mount solution i came up with. i now have PLENTY of room for an oil filter in the stock location. i would still like to use a relocation kit and a cooler, i will likely do one later when i have the extra scratch but for now i just wanna get all this stuff done and running right, i dont need any extra things breaking and giving me problems lol
next up like i said is the front mount and a complete overhaul of the shift linkages.
as with any swap the first thing you gotta do to make custom mounts is take a **** ton of measurements and pictures, then go 20 minutes back home and make them completely off the car.
....at least thats what i did....
it aint pretty but it should work fine. this may end up just being a jig ill end up replacing with a rubberized or insulated mount if the solid one is too loud or rough but the stanza had a solid torque mount with the KA and that wasnt too bad so idfk.
this is obviously pre-paint but i assume people want to see the welds. again, i didnt put any effort into making these welds pretty because they will be covered up and under the engine. this car just isnt worth doing stainless parts on lol
i threw the driver axle in (the passenger one has been in all week) to see where they line up and it looks like the motor is still pretty far forward or at least farther forward than i want it to be. its not all that clear from the garbage pictures i took but the axles are angled backward. im not sure if the axles are supposed to be slightly angled back or perfectly in line with the hubs. im assuming cv joints dont have the same restrictions that a universal joint does as far as angles go, so im not super worried about it but im gonna get them a little more straight if i can.
after i had the wood stove going and then sitting overnight the condensation got just about everything in the garage wet including the crank pulley and it rusted right up so i sanded that and slapped a coat of paint on it at home.
you can see the angle of the axles a little better (although for this pic i think the motor moved out of line a little so it might be worse here) and the rear mount i made in the car.
at some point all this space here will be occupied by a turbo. when that will be im not sure anyone knows lol
IT CLEARS THE HOOD!!!! its actually not even close, i will probably flip the intake to the other direction when i turbo the car, i really didnt expect to have all that room in front of the motor and i would like to go that way for the sake of intercooler pipe routing, just makes everything a lot easier.
and yes sometimes i work in my garage in my slip-on house shoes, they are a pragmatic solution for a ridiculous person like me.
now im moving on to the front mount which i plan on doing my best to basically break apart (grind out the welds and pull the two pieces apart) and bend so it points more toward that mount and then reassemble and weld it all up so that hopefully i end up with something i can use some kind of actual insulator since i plan on daily driving this car...
idk if i said this before in another post but it turns out i definitely dont HAVE to use an oil filter relocation kit anymore because of the mount solution i came up with. i now have PLENTY of room for an oil filter in the stock location. i would still like to use a relocation kit and a cooler, i will likely do one later when i have the extra scratch but for now i just wanna get all this stuff done and running right, i dont need any extra things breaking and giving me problems lol
next up like i said is the front mount and a complete overhaul of the shift linkages.
Last edited by Nate Boslet; 05-14-2018 at 05:01 PM.
01-15-2017, 08:13 PM
#47

I'm sure you've got your reasons for doing this, maybe already answered this question, but the Stanza body and interior is basically a slightly smaller and watered down Maxima. Add a VG, and it is a slightly smaller and watered down Maxima. Why not just buy a Maxima?
01-15-2017, 09:09 PM
#48
Member
Thread Starter
Join Date: Oct 2016
Posts: 284
unfortunately after sitting for so long the KA developed an issue that i was unsure how to fix and after tryng to diagnose it for a week just to see if i could at least drive it up into my garage i decided i was wasting my time. (to this day i have no idea why it wouldnt start, it got spark and fuel, i changed the plugs and sprayed about a can of starter fluid in it and all i got was a cough and it wasnt the distributor because that only goes in one way and the timing chain was fine, to be honest i dont really care whats wrong with it because its getting rebuilt anyway) i didnt want to put any money into the car because by the time i brought it to my garage to store it i already knew i wanted to swap it, so i pulled it all out, set it aside and in all likelihood that motor and transmission will go into some other car that it doesnt belong in.
i like the vg and as far as i know no one has ever done this swap before (i would be very interested to see anyone that has though, i am curious if someone did things like i did or some other way)
i could go on about the chassis dimensions and curb weights or suspension geometry or whatever else but none of that really has anything to do with this project. the main reason im doing this is because i want to.
maybe you didnt expect such a long response but i feel like the car deserves an explanation and i guess so does anyone who reads this thread lol
Last edited by Nate Boslet; 01-15-2017 at 09:15 PM.
01-16-2017, 05:09 PM
#49
Member
Thread Starter
Join Date: Oct 2016
Posts: 284
i took home my rear engine bracket along with the front bracket and shift linkages last night so i could do whatever i gotta do to get them all to work together. all i did to the rear bracket was drill a new hole so i dont think anyone is missing much not seeing a picture of that. im making the front mount by modifying what i think is a second gen front mount but ill post more on that later.
the main, primary, #1, absolute, major, top priority i had was fixing my shifter. after i did the 5 speed swap i noticed that sometimes the shifter was extremely tight when going from front to back and it made it really hard to shift with any kind of precision or confidence at all. i initially thought it was the ball and socket bracket needing to be greased but it turns out the lower mounts bolt was just too tight and super rusty so i broke out the vice grips and busted that ***** loose and the shifter was instantly a million times better.
once i had the bolt tensioned so that it was tight but not prohibiting movement i used a punch to dimple the bolt so the nut would never back out on its own.
next i needed to modify the length of this mounting linkage that im not entirely sure is necessary at all. i made a mark on where i needed the bracket to end while it was still on the car and chopped the end off first.
then i cut off about 5 and a half inches from the middle of the linkage.
i used a ball peen hammer to make the opening on the bracket side round and then ground the two sides flat and sanded off the paint with a flap disc. here is the fitup:
the new length after welding.
i know there are pinholes in the weld, fortunately this shifter linkage will not have to hold fluid pressure lol

threw some paint on to prevent rust
and wirebrushed all the rust off of the other parts and painted those too.

i believe the point of this rear bushing and the mounting linkage is to allow the shift linkage to sway left and right without needing the pivot point to be in line with the lower linkage and also to dampen any extra vibration or movement when shifting, i considered making all of this stuff solid with brass bushings or something but i dont think the geometry would work.
i may pull this all back out once i know it works and try something different (solid bushings, short shift mod) in the future but for now i dont want to make any extra problems for myself that i dont need so i think the shift linkages are done. next up is the front engine and trans mounts.
the main, primary, #1, absolute, major, top priority i had was fixing my shifter. after i did the 5 speed swap i noticed that sometimes the shifter was extremely tight when going from front to back and it made it really hard to shift with any kind of precision or confidence at all. i initially thought it was the ball and socket bracket needing to be greased but it turns out the lower mounts bolt was just too tight and super rusty so i broke out the vice grips and busted that ***** loose and the shifter was instantly a million times better.
once i had the bolt tensioned so that it was tight but not prohibiting movement i used a punch to dimple the bolt so the nut would never back out on its own.
next i needed to modify the length of this mounting linkage that im not entirely sure is necessary at all. i made a mark on where i needed the bracket to end while it was still on the car and chopped the end off first.
then i cut off about 5 and a half inches from the middle of the linkage.
i used a ball peen hammer to make the opening on the bracket side round and then ground the two sides flat and sanded off the paint with a flap disc. here is the fitup:
the new length after welding.
i know there are pinholes in the weld, fortunately this shifter linkage will not have to hold fluid pressure lol
threw some paint on to prevent rust
and wirebrushed all the rust off of the other parts and painted those too.
i believe the point of this rear bushing and the mounting linkage is to allow the shift linkage to sway left and right without needing the pivot point to be in line with the lower linkage and also to dampen any extra vibration or movement when shifting, i considered making all of this stuff solid with brass bushings or something but i dont think the geometry would work.
i may pull this all back out once i know it works and try something different (solid bushings, short shift mod) in the future but for now i dont want to make any extra problems for myself that i dont need so i think the shift linkages are done. next up is the front engine and trans mounts.
Last edited by Nate Boslet; 05-15-2018 at 03:26 PM.
01-18-2017, 07:32 PM
#50
Member
Thread Starter
Join Date: Oct 2016
Posts: 284
phone died at the garage but nothing happened worth taking pics of really, all the stuff i changed fits, the mounting bracket i made for the shift linkage fits etc.
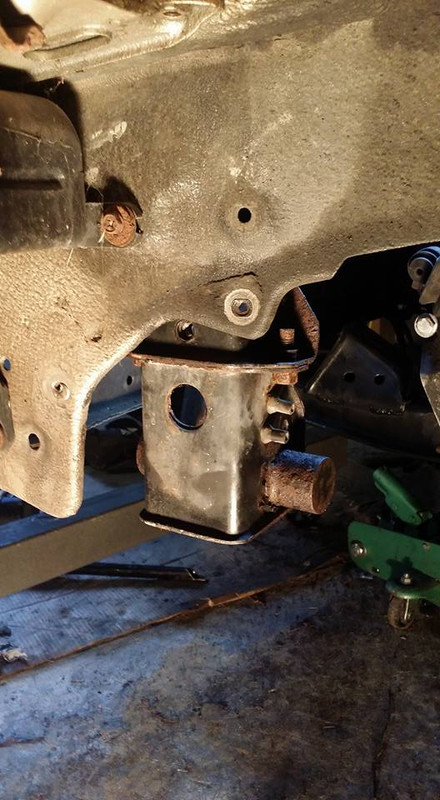
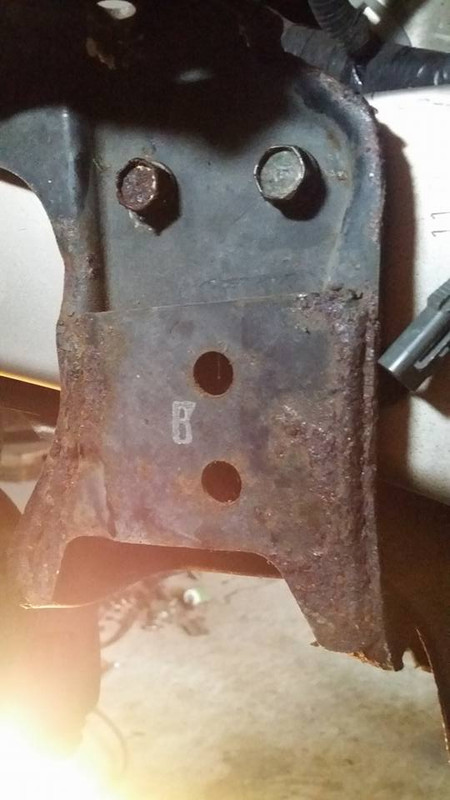
last night i marked the crossmember where the bolts for the shift linkage lined up and took a measurement to locate this plate.
theres no reason for me to leave this rear mount as removable because it will never need to be replaced so i welded it on so i could save the high grade long bolts i have so few of on other things if i need them.
i realized my rear mount was a bit too low which was tilting the engine backwards a little bit, i raised it 1 inch which puts it close enough that i can make any later adjustments (im almost positive there will be later adjustments) with the rear mounting bracket.
then i painted everything. ..finally.

this is the last time im gonna say "next is the front mount" because tomorrow im actually going to do it and hopefully after tomorrow or the day after that it will actually be done. i have a parts maxima i will be grabbing a whole bunch of **** from soon and hopefully ill have a trans mount i can use instead of having to make one.
last night i marked the crossmember where the bolts for the shift linkage lined up and took a measurement to locate this plate.
theres no reason for me to leave this rear mount as removable because it will never need to be replaced so i welded it on so i could save the high grade long bolts i have so few of on other things if i need them.
i realized my rear mount was a bit too low which was tilting the engine backwards a little bit, i raised it 1 inch which puts it close enough that i can make any later adjustments (im almost positive there will be later adjustments) with the rear mounting bracket.
then i painted everything. ..finally.
this is the last time im gonna say "next is the front mount" because tomorrow im actually going to do it and hopefully after tomorrow or the day after that it will actually be done. i have a parts maxima i will be grabbing a whole bunch of **** from soon and hopefully ill have a trans mount i can use instead of having to make one.
Last edited by Nate Boslet; 05-15-2018 at 03:27 PM.
01-20-2017, 04:09 PM
#51
i already had the stanza which has a lot of sentimental value, i paid 250 bucks for it when i first got it 5 years ago and i just cant help but squeeze every mile i can from a deal like that. i beat the **** out of this car and it never flinched, changed the oil 3 times maybe, which is all i ever changed no plugs, no wires, no starters, no distributers, no alternators, nothing. never even looked at the trans fluid, ran it with a scrap tire from my job at jack williams for 3 years, the other 3 were bald, it was parked under a tree before i bought it and i parked it under a different tree while i owned it, i took it on 2 hour drives one way almost every weekend, its been ridden hard and put away wet for years and every single time i put the key in the ignition it gave a half a crank before firing right up. every. single. time. the underside of the car tells the same story, for all the abuse the car has had you would think its been sitting in a garage most of its life (a garage in pennsylvania, there is rust) its just a great car and has a lot of life left in it.
unfortunately after sitting for so long the KA developed an issue that i was unsure how to fix and after tryng to diagnose it for a week just to see if i could at least drive it up into my garage i decided i was wasting my time. (to this day i have no idea why it wouldnt start, it got spark and fuel, i changed the plugs and sprayed about a can of starter fluid in it and all i got was a cough and it wasnt the distributor because that only goes in one way and the timing chain was fine, to be honest i dont really care whats wrong with it because its getting rebuilt anyway) i didnt want to put any money into the car because by the time i brought it to my garage to store it i already knew i wanted to swap it, so i pulled it all out, set it aside and in all likelihood that motor and transmission will go into some other car that it doesnt belong in.
i like the vg and as far as i know no one has ever done this swap before (i would be very interested to see anyone that has though, i am curious if someone did things like i did or some other way)
i could go on about the chassis dimensions and curb weights or suspension geometry or whatever else but none of that really has anything to do with this project. the main reason im doing this is because i want to.
maybe you didnt expect such a long response but i feel like the car deserves an explanation and i guess so does anyone who reads this thread lol
01-20-2017, 05:25 PM
#52
Member
Thread Starter
Join Date: Oct 2016
Posts: 284
I have a pipe dream that requires use of a U12, so I'm not dissing it or anything. I was just curious why you wouldn't just use a 3rd gen. But sentimental value explains it. I've kept my car through several incidents for the same reason (and a few others) that would result in most people sending it off to the junkyard.
01-20-2017, 06:28 PM
#53
Member
Thread Starter
Join Date: Oct 2016
Posts: 284
i had thought i was done with the shift linkages or at least would have had an idea of what to do with it last night but it turns out the sentra shift linkage uses a much smaller bracket than the maxima (about 1/4 of an inch or so smaller) so despite trying to bend it out to try to make it work i ended up just taking a measurement, bringing it home, and making a new bracket for it. i didnt take any pictures of the entire bracket making process i think its pretty obvious what i did. the hole is a little further forward, i did that because i know for a fact the trans is a little tiny bit further forward as well and there is plenty of adjustment available in the shifter mount. even if its completely off i can always just take a measurement and cut and weld the piece again so i wasnt trying to nail it or anything.

as you can see the spacing is pretty significant, since this is a relatively precise part that is integral to the operation of the car i made sure to take extra care when taking measurements and making the bends (which i did using my homemade brake, the roundness of the bend is intentional, the brake is designed to bend aluminum without work hardening the **** out of the corners so they are still ductile and very strong.)

i just chopped the tabs off and welded it directly to the front of the plate since i wanted more length anyway and welding in straight lines is easier than welding in a circle.
if this looks like it took me 15 minutes to make thats probably because it took me 10.
if people were actually ever going to see this on the car i would have clear coated the color changed parts but since its gonna be completely underneath the car covered in dirt its getting the same black as everything else.
black.
it actually looks almost exactly the same color as the oem(?) paint that was already on this part.
tomorrow ill throw the shift bracket in and see how it fits and then at some point in the near future im going to have basically an entire maxima engine with all kinds of goodies including the trans mount so i think before i finish the front engine mount i will do the trans mount so i can square everything up off the jackstands and install an actual rubber mount in the front instead of a solid aluminum one. so basically ill have an entire engine pulling walkthrough in one of my next posts lol
as you can see the spacing is pretty significant, since this is a relatively precise part that is integral to the operation of the car i made sure to take extra care when taking measurements and making the bends (which i did using my homemade brake, the roundness of the bend is intentional, the brake is designed to bend aluminum without work hardening the **** out of the corners so they are still ductile and very strong.)
i just chopped the tabs off and welded it directly to the front of the plate since i wanted more length anyway and welding in straight lines is easier than welding in a circle.
if this looks like it took me 15 minutes to make thats probably because it took me 10.
if people were actually ever going to see this on the car i would have clear coated the color changed parts but since its gonna be completely underneath the car covered in dirt its getting the same black as everything else.
black.
it actually looks almost exactly the same color as the oem(?) paint that was already on this part.
tomorrow ill throw the shift bracket in and see how it fits and then at some point in the near future im going to have basically an entire maxima engine with all kinds of goodies including the trans mount so i think before i finish the front engine mount i will do the trans mount so i can square everything up off the jackstands and install an actual rubber mount in the front instead of a solid aluminum one. so basically ill have an entire engine pulling walkthrough in one of my next posts lol
Last edited by Nate Boslet; 05-15-2018 at 03:28 PM.
01-24-2017, 05:57 PM
#54
Member
Thread Starter
Join Date: Oct 2016
Posts: 284
the shift linkage fits and shifts the car, its not perfect yet, ill dial it in once the trans and engine are in where i want them.
anyway after getting this into my garage completely uneventfully and in a safe and legal way without breaking or ****ing up anything in my whole garage at all....... i began stripping out what i want. i just happened to come across someone willing to give me whatever i want off this car for 100 bucks so now i have mostly everything i need. only problem is its an auto trans so i likely wont be able to use the trans mount and its a 3rd gen (i think?) so the engine mounts wont work either unfortunately...


so i might have to just buy a new trans mount or make one still or whatever but before i do that im gonna pull everything and see what i can use in the stanza and what i will have to stockpile or sell. if this trans mount will bolt to the trans i have ill happily use it but i think they are totally different, if anyone knows off hand i would appreciate the info.
anyway after getting this into my garage completely uneventfully and in a safe and legal way without breaking or ****ing up anything in my whole garage at all....... i began stripping out what i want. i just happened to come across someone willing to give me whatever i want off this car for 100 bucks so now i have mostly everything i need. only problem is its an auto trans so i likely wont be able to use the trans mount and its a 3rd gen (i think?) so the engine mounts wont work either unfortunately...
so i might have to just buy a new trans mount or make one still or whatever but before i do that im gonna pull everything and see what i can use in the stanza and what i will have to stockpile or sell. if this trans mount will bolt to the trans i have ill happily use it but i think they are totally different, if anyone knows off hand i would appreciate the info.
Last edited by Nate Boslet; 05-15-2018 at 03:28 PM.
01-24-2017, 06:27 PM
#55
Senior Member
iTrader: (1)

Join Date: Jan 2002
Location: Miami, FL. / Indianapolis, IN.
Posts: 2,610
the shift linkage fits and shifts the car, its not perfect yet, ill dial it in once the trans and engine are in where i want them.
anyway after getting this into my garage completely uneventfully and in a safe and legal way without breaking or ****ing up anything in my whole garage at all....... i began stripping out what i want. i just happened to come across someone willing to give me whatever i want off this car for 100 bucks so now i have mostly everything i need. only problem is its an auto trans so i likely wont be able to use the trans mount and its a 3rd gen (i think?) so the engine mounts wont work either unfortunately...


so i might have to just buy a new trans mount or make one still or whatever but before i do that im gonna pull everything and see what i can use in the stanza and what i will have to stockpile or sell. if this trans mount will bolt to the trans i have ill happily use it but i think they are totally different, if anyone knows off hand i would appreciate the info.
anyway after getting this into my garage completely uneventfully and in a safe and legal way without breaking or ****ing up anything in my whole garage at all....... i began stripping out what i want. i just happened to come across someone willing to give me whatever i want off this car for 100 bucks so now i have mostly everything i need. only problem is its an auto trans so i likely wont be able to use the trans mount and its a 3rd gen (i think?) so the engine mounts wont work either unfortunately...
so i might have to just buy a new trans mount or make one still or whatever but before i do that im gonna pull everything and see what i can use in the stanza and what i will have to stockpile or sell. if this trans mount will bolt to the trans i have ill happily use it but i think they are totally different, if anyone knows off hand i would appreciate the info.
IIRC the rear mount is the same between auto and manual except for the bracket. The front is different.
01-27-2017, 12:52 PM
#57
Member
Thread Starter
Join Date: Oct 2016
Posts: 284
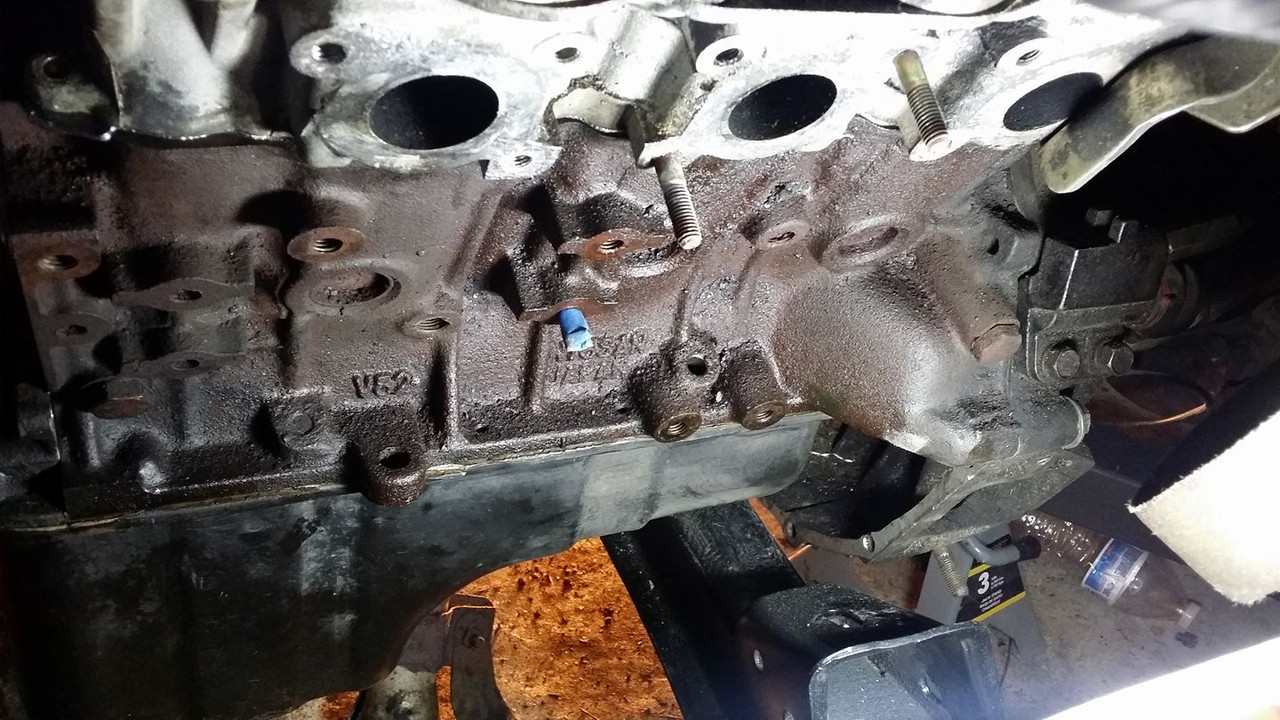
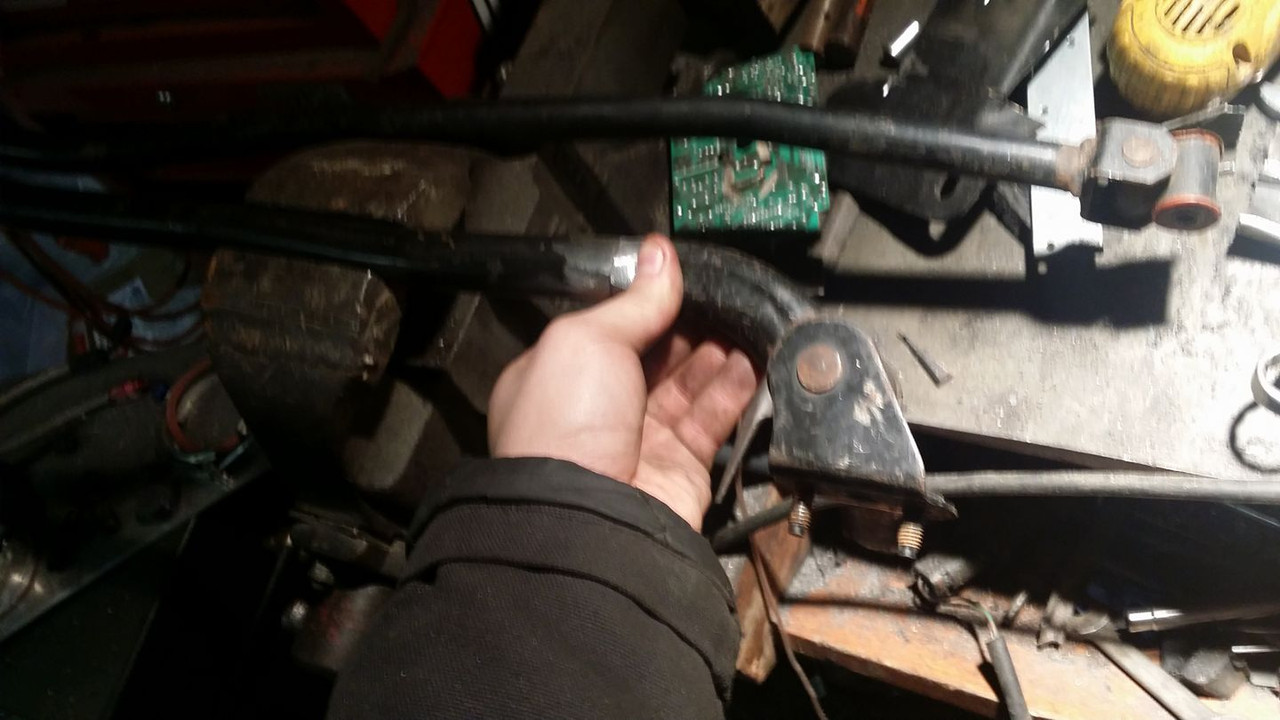
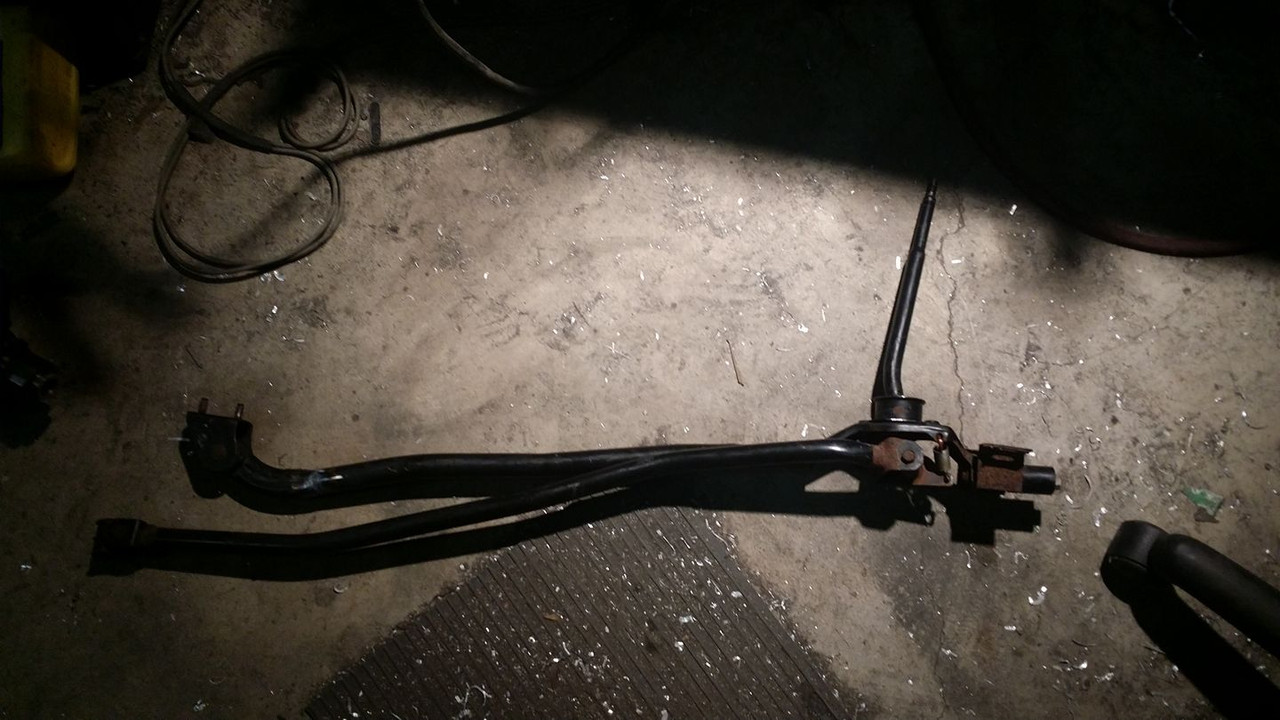
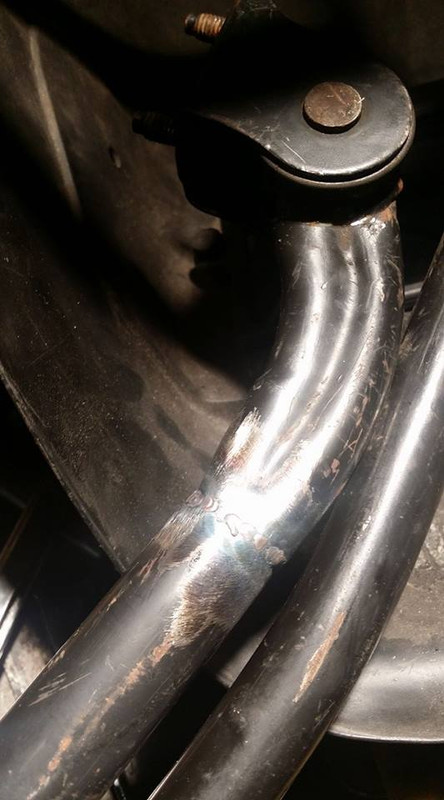
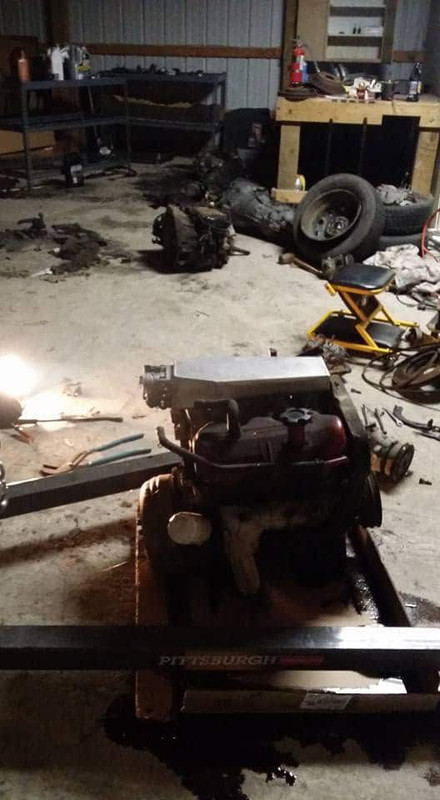
so after staying at my garage until 3am i got this pain in the *** motor pulled. seemed like i had to take every single thing anywhere near a mount or specifically the passenger axle apart entirely before i could get the thing out and its been sitting in basically a swamp for 10 years so most of the bolts were super rusty but fortunately they came out... i wanted to see if there was any way i could avoid having to get a maxima flywheel so the first two pics are to let me know what ill have to do in order for that to happen if its even possible for me to do. if not ill probably be asking someone on here for one so ill know in the next few posts but if anyone has one just lying around let me know.

i want to pull as much usable stuff from this car as possible so i have plenty of options for the stanza. im definitely going to use a lot of the water stuff like coolant pipes and hopefully the radiator which looks a lot thinner than the stanzas radiator so that may save me some space. for now im still stripping this thing out and then i just want to get it out of the garage so i have room to do all my other work.
next thing to do is get the transmission off and put it onto the engine stand so i can start stripping it down.
Last edited by Nate Boslet; 05-15-2018 at 03:29 PM.
 01-30-2017, 07:44 PM
#60
Member
Thread Starter
Join Date: Oct 2016
Posts: 284
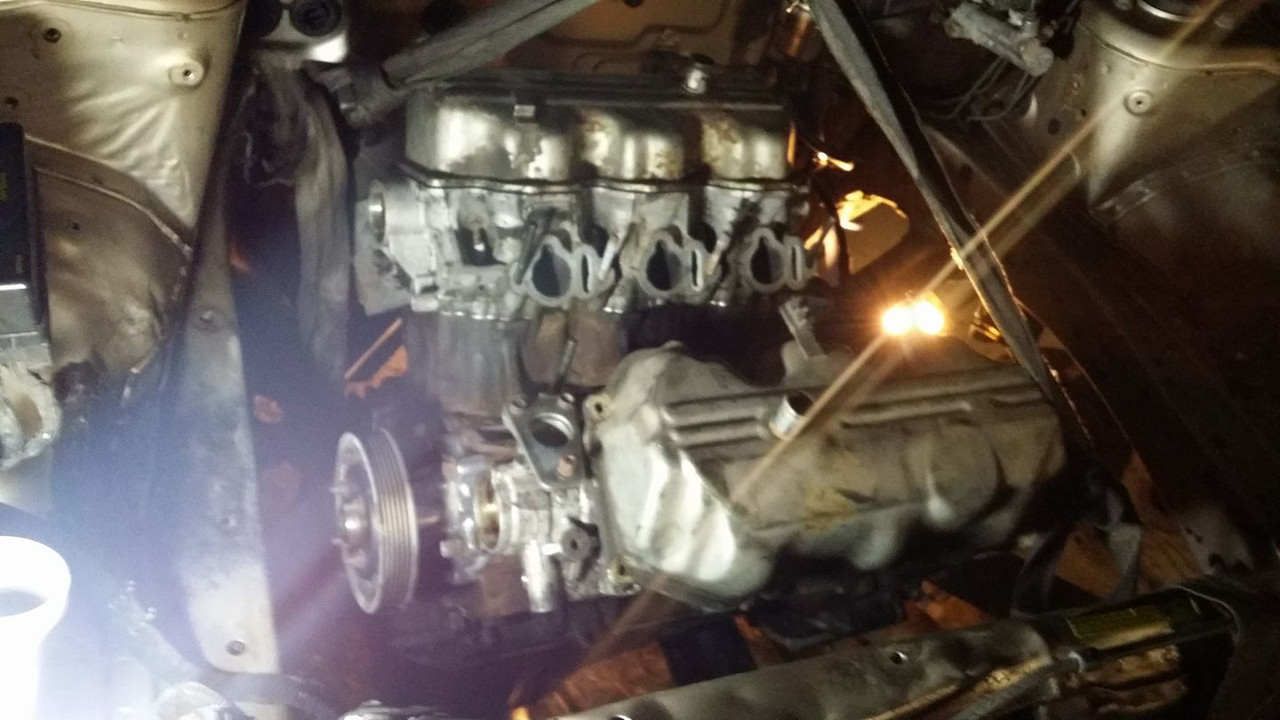
after cleaning out a few odds and ends from the maxima i had a friend use her truck to slowly roll the maxima down the hill out of my garage and now (as far as you know) it is gone. next i separated the engine and transmission and started to break down the motor to get a look at the parts i need from it.
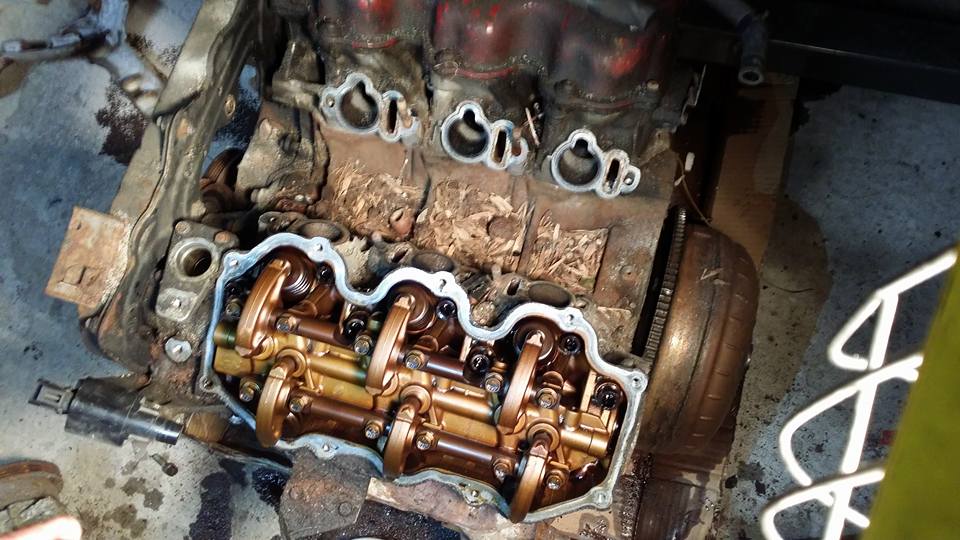
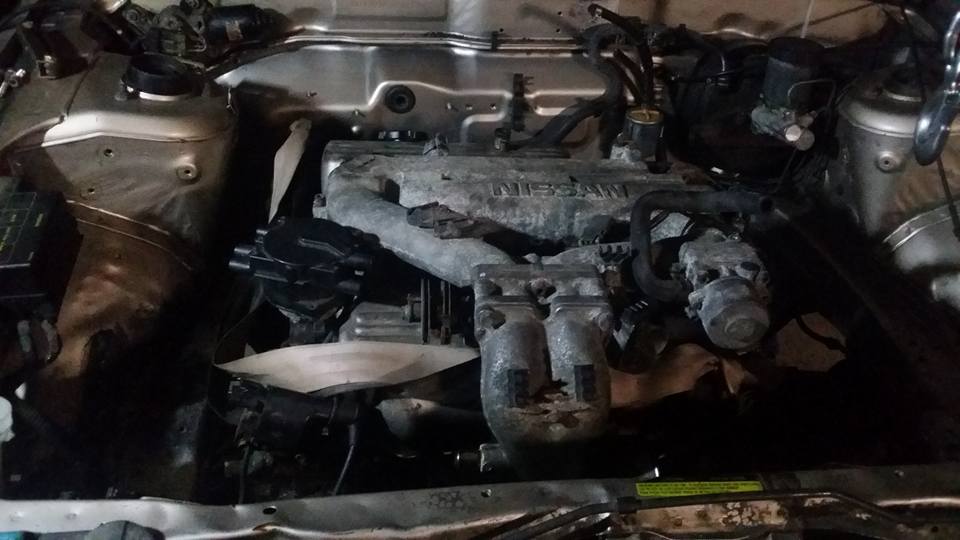
i wasnt expecting the heads to be this clean at all. looks like it was taken very well care of.
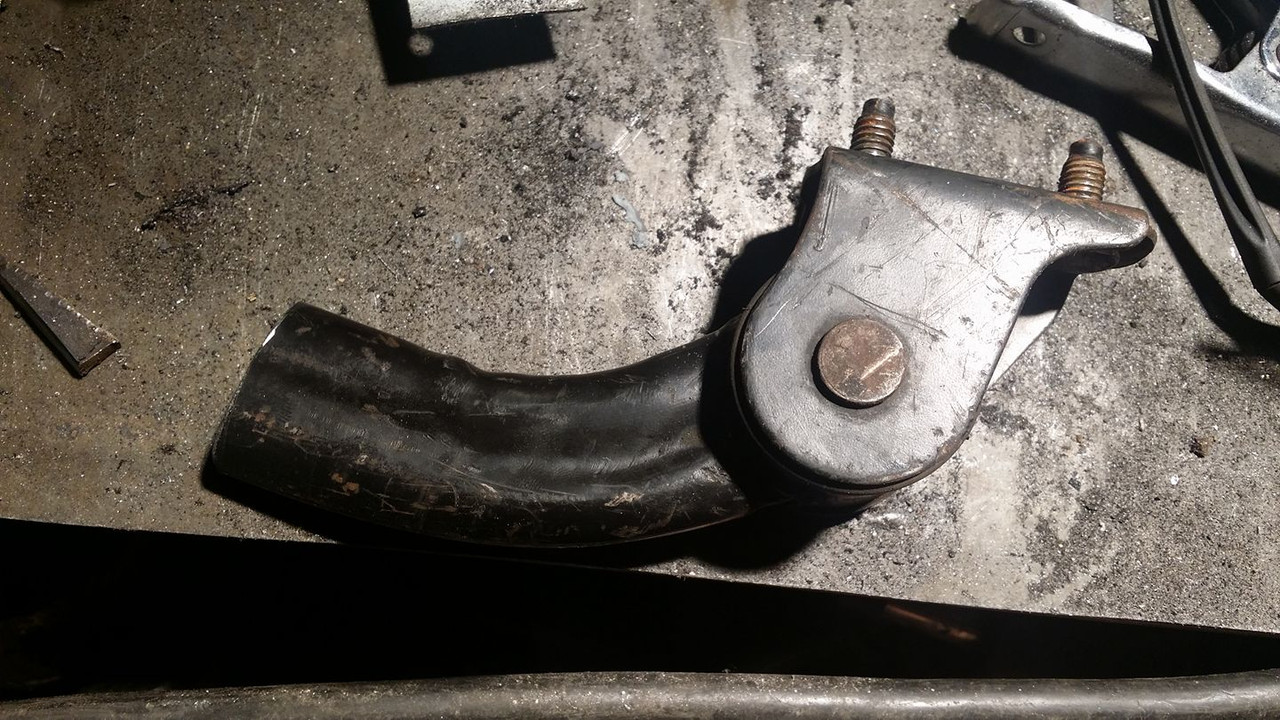
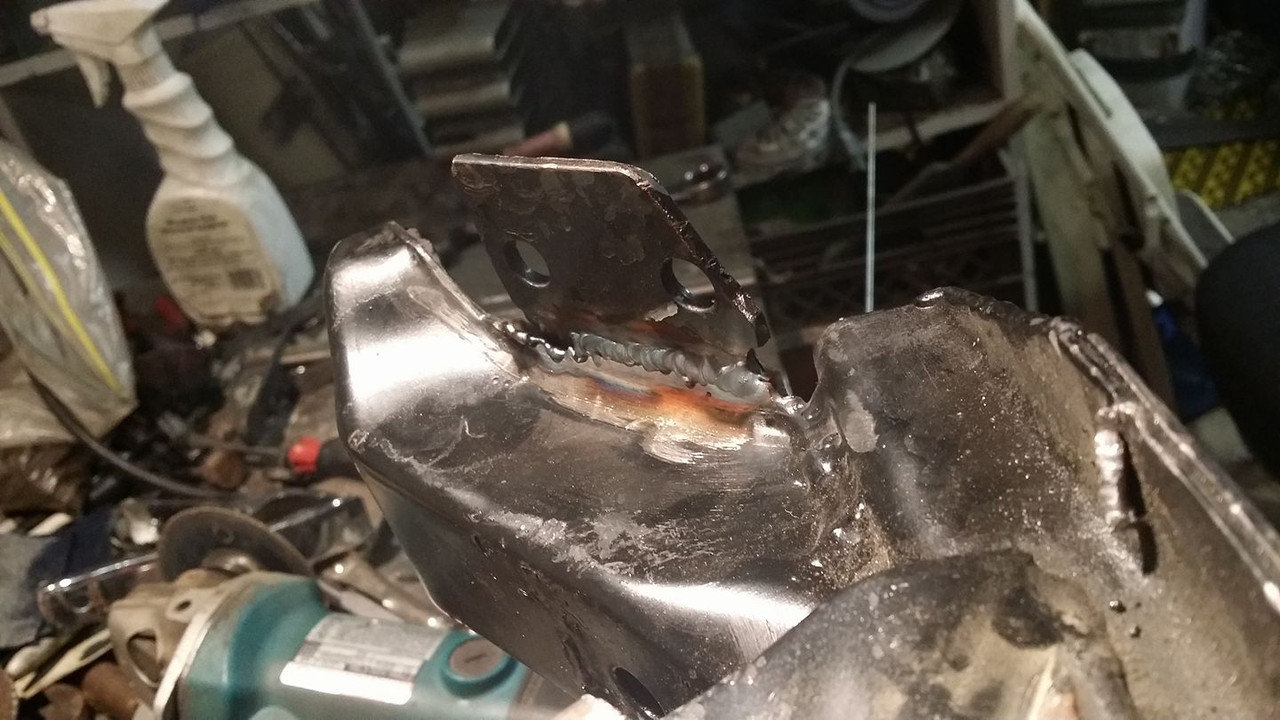
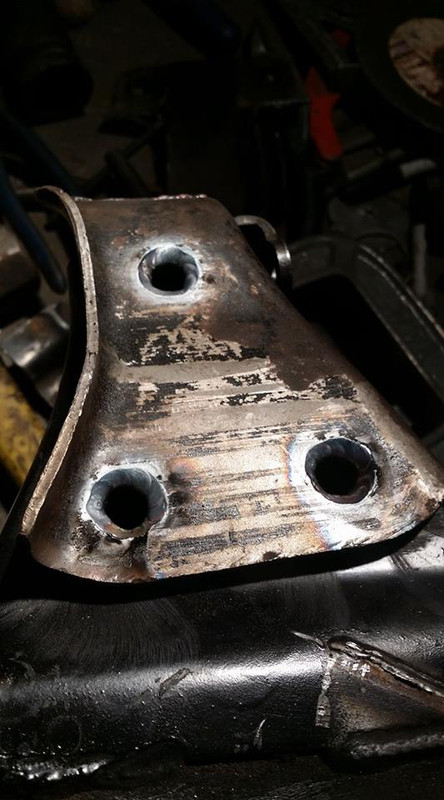
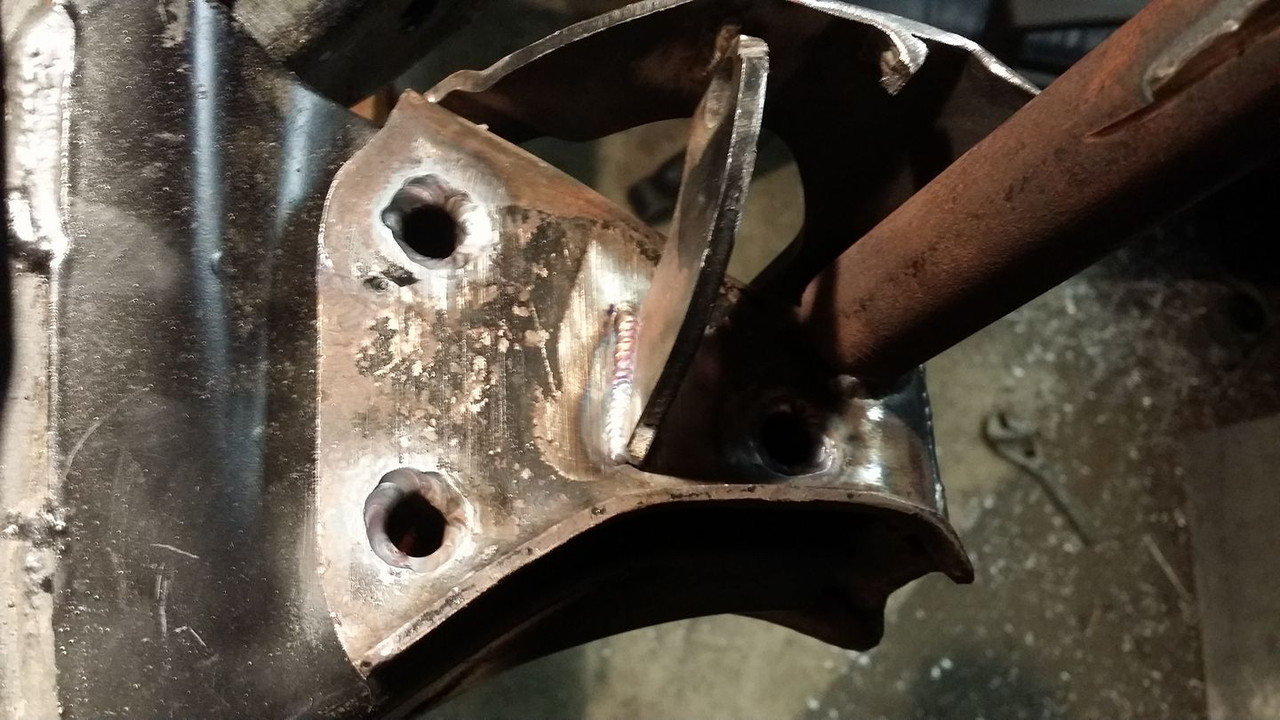
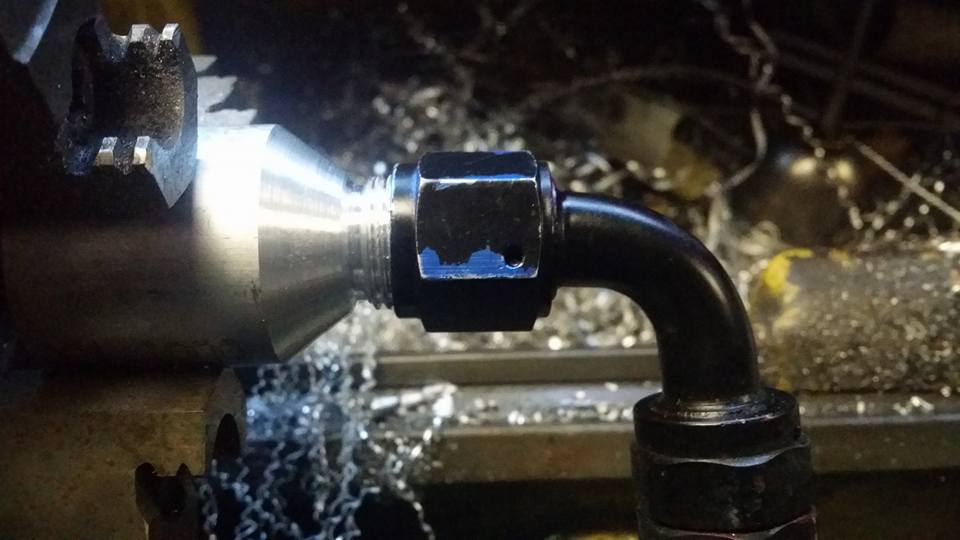
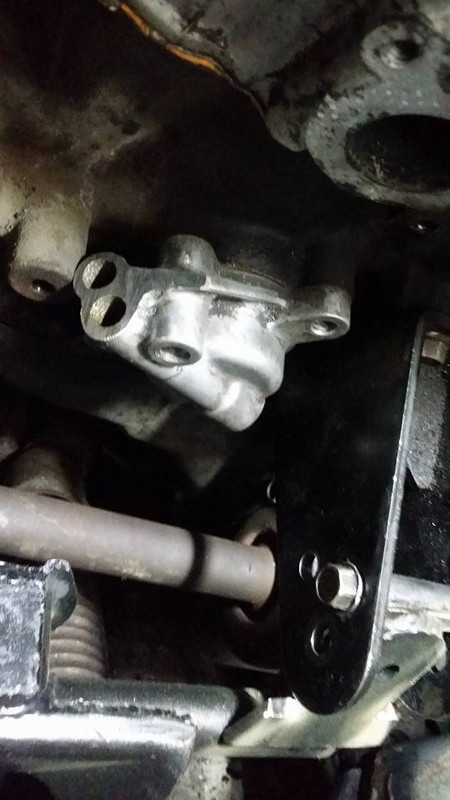
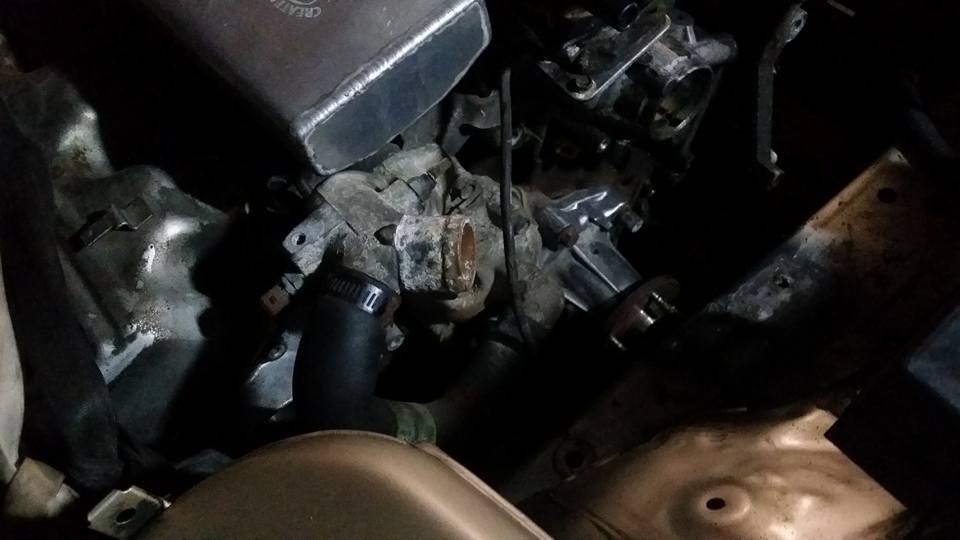
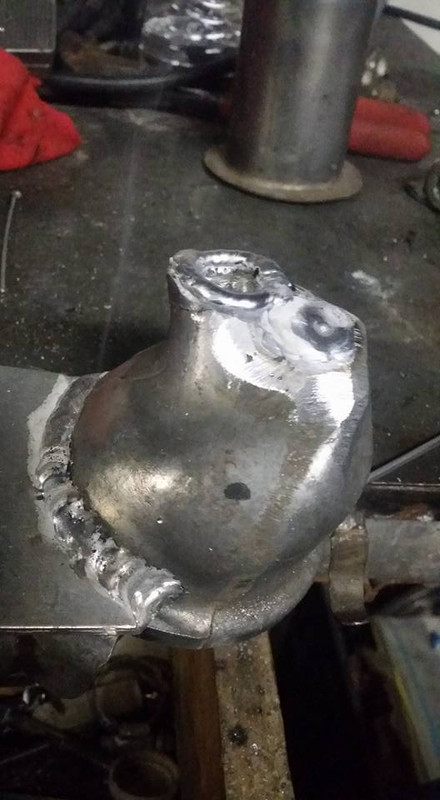
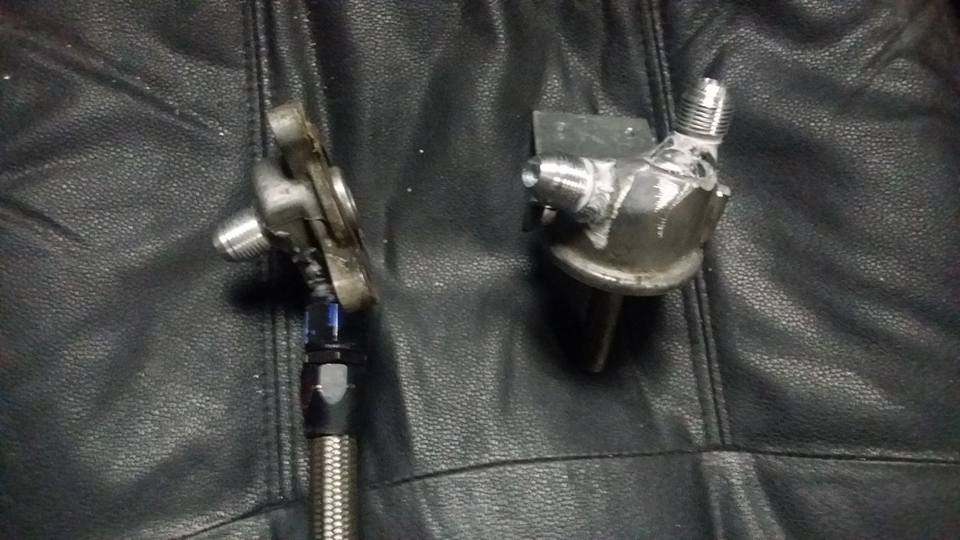
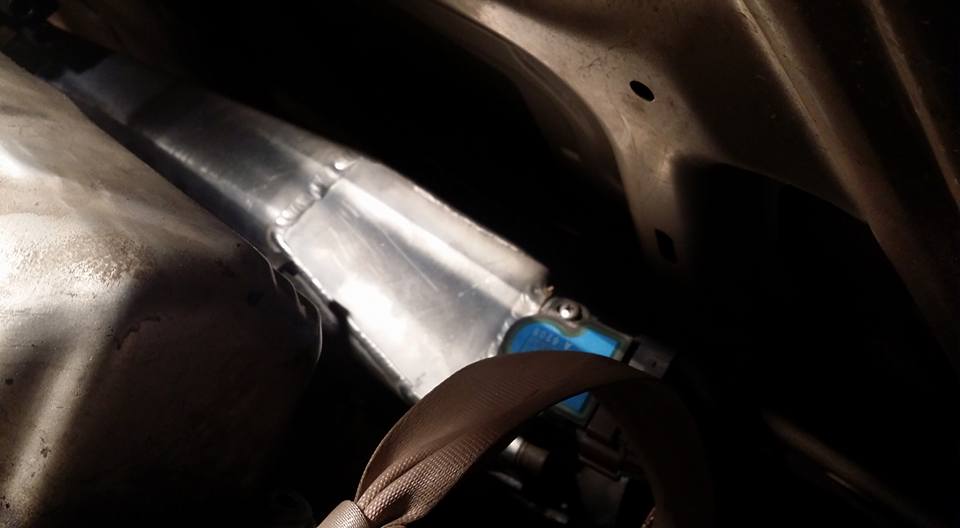
i noticed this oil filter housing bracket on the back of the motor (which i was hoping would be there after i did my research earlier when i thought i would need to relocate the oil filter)

so i chopped it in half.
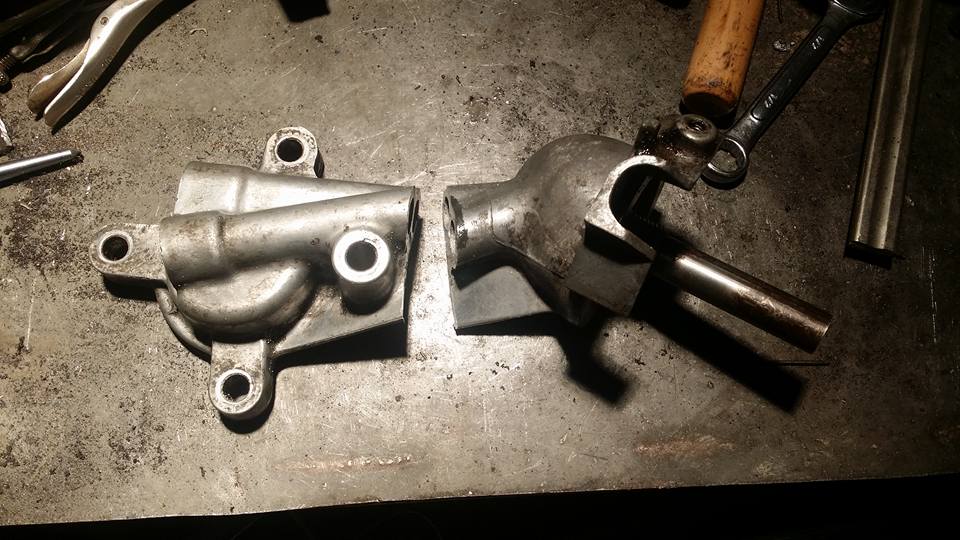
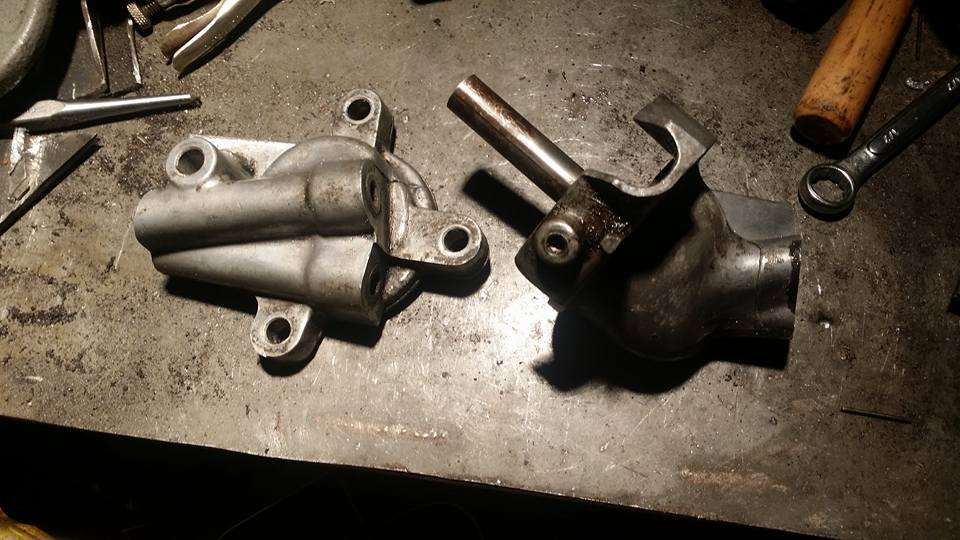
some of you may see where im going with this... first i have to see if i can actually turn AN bungs on my lathe. updates on that soon.

i wasnt expecting the heads to be this clean at all. looks like it was taken very well care of.
i noticed this oil filter housing bracket on the back of the motor (which i was hoping would be there after i did my research earlier when i thought i would need to relocate the oil filter)
so i chopped it in half.
some of you may see where im going with this... first i have to see if i can actually turn AN bungs on my lathe. updates on that soon.
Last edited by Nate Boslet; 05-15-2018 at 03:29 PM.
02-07-2017, 07:06 PM
#61
Member
Thread Starter
Join Date: Oct 2016
Posts: 284
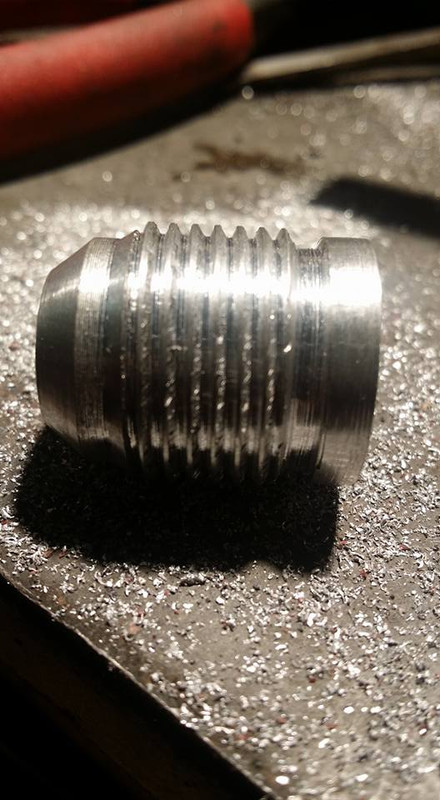
so i printed out a chart that shows the TPI of AN fittings and it turns out that i can turn AN threads on my lathe no problem. so thats what i started doing. im still waiting on some rodstock to show up to make the rest but i had a little scrap billet lying around just to see what i could do and for practice i did this one.


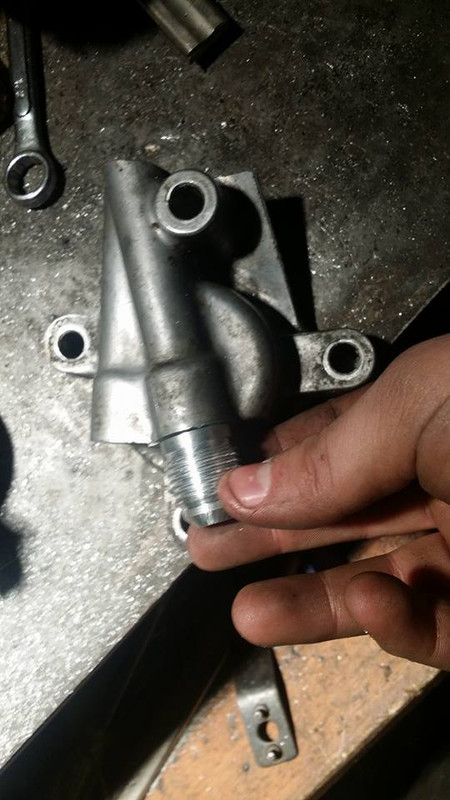
i gotta make sure this oil filter thing will actually bolt to my block and also that it can be flipped so im not 100% sure where im gonna put these fittings but i would rather flip it 180 so there is more room for each fitting and line. theres already holes in the back too they are just plugged with set screws.
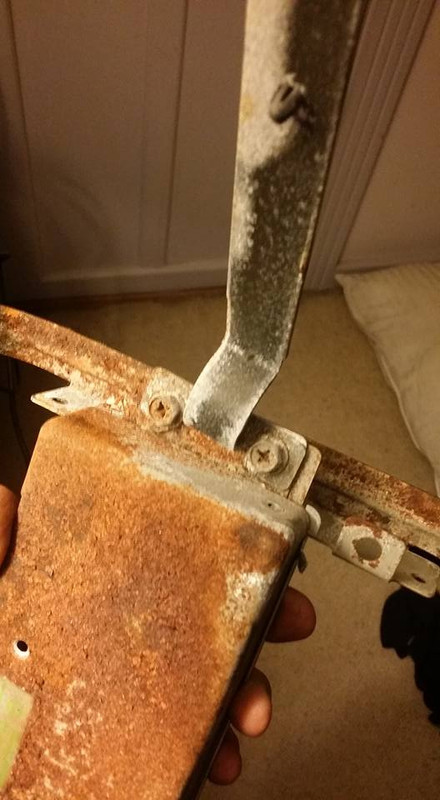
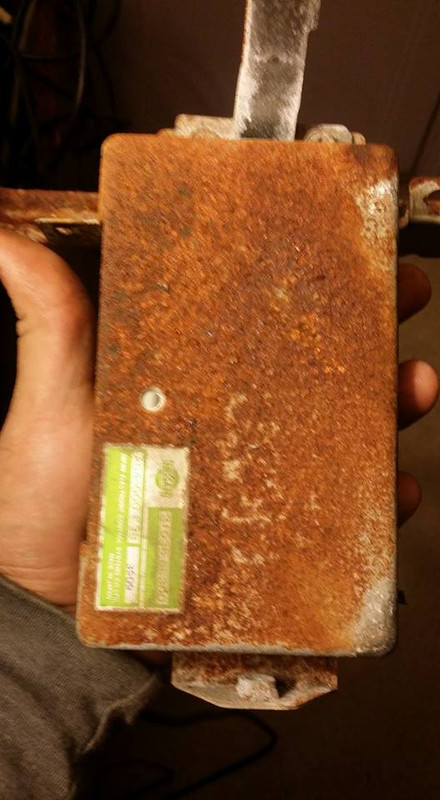
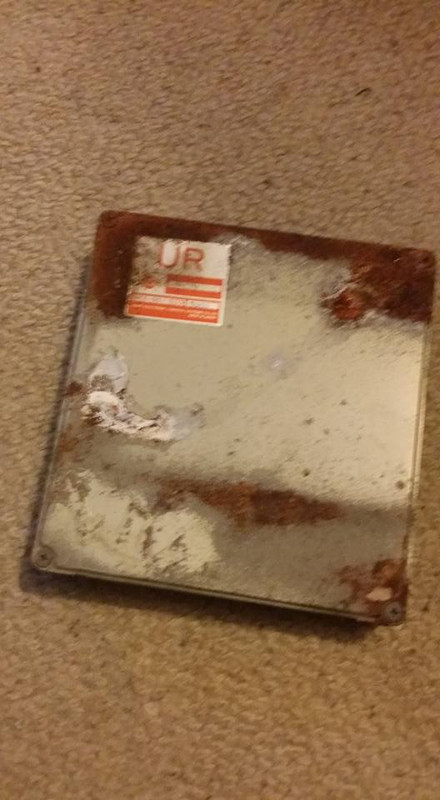
i have been busy with my business and getting a flip car so i havent gotten back to the stanza in a few days but i did bring home the ecu and what i think is the body computers for the stanza and maxima so i could switch out the shells with the internals because the maxima ones were rusted to ****. im not sure if ill actually be able to use the maxima bcu or if ill need to use the stanza one or if ill even have one at all but for now i just switched it out anyway because the plugs for it are on the engine harness so if i end up needing it i assume ill need the maxima one and it will take me 10 minutes to switch it back anyway so i dont really care. if anyone knows exactly what this box is and what it is for let me know lol
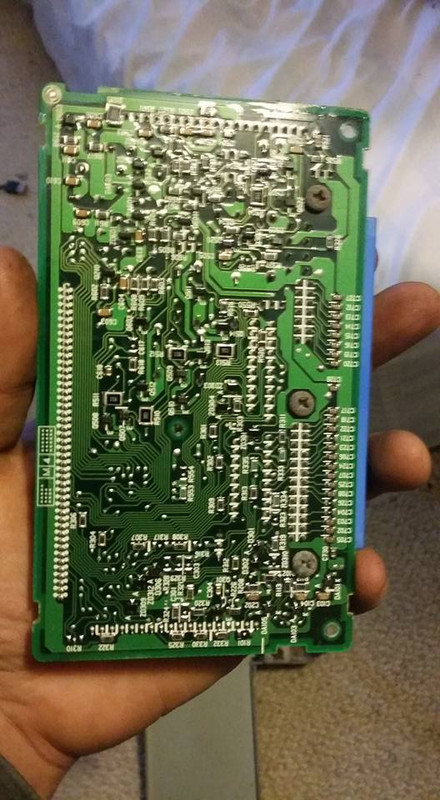
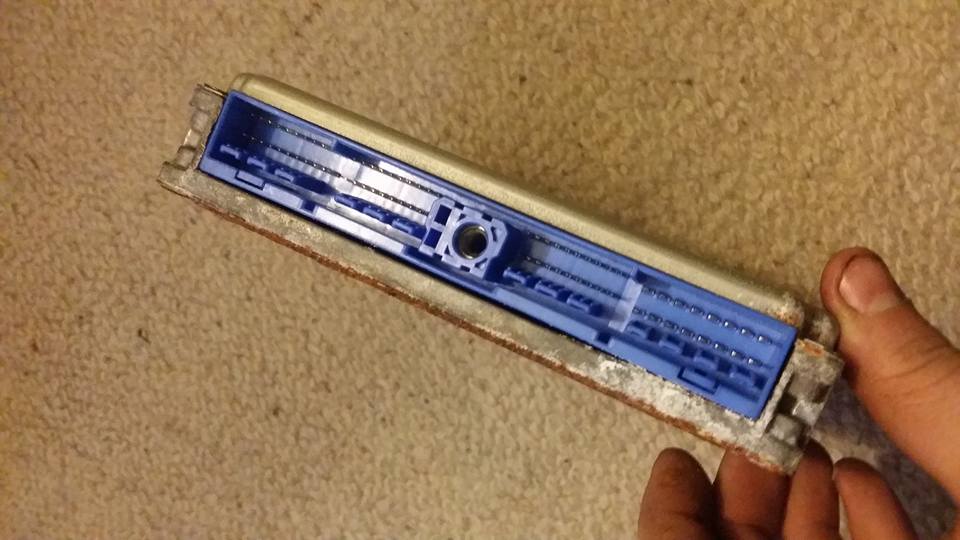
the internals look suprisingly ok considering how ****ed the outsides are, im honestly not sure if they are going to end up working anyway but if not i may attempt to rebuild them if i can figure out what parts on them are bad.
next i cracked open the crusty ecu.
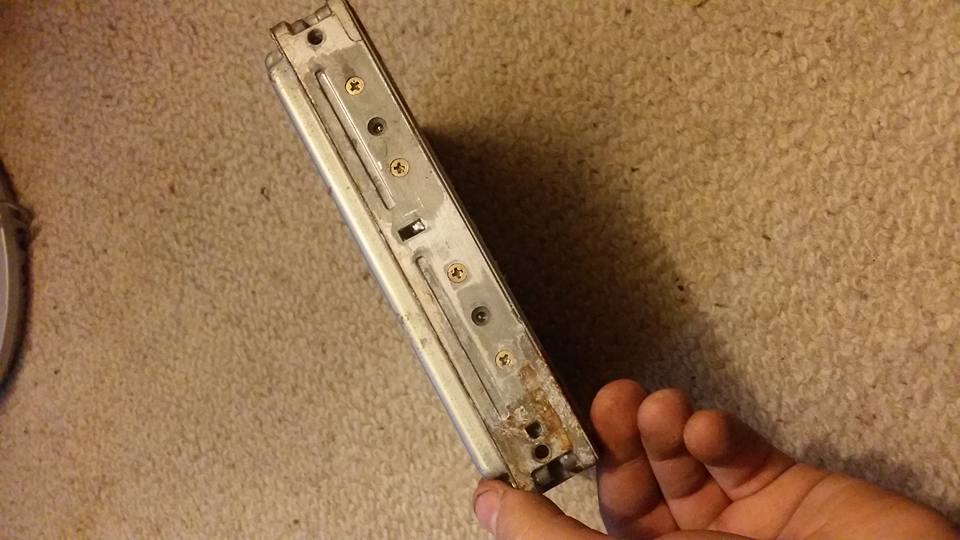
anyone who has ever done this before will know these ecu screws are basically welded in with loctite and oxidation and you have a better chance of taylor swift calling you on the phone to ask you about your d*ck than getting them all out without stripping or snapping any.

again, the insides look clean, if you accidentally look closer you will see some of the components look like they may have been screwed up a little but enough to break it? only one way to find out... actually theres probably several ways to find out but im only gonna use one.

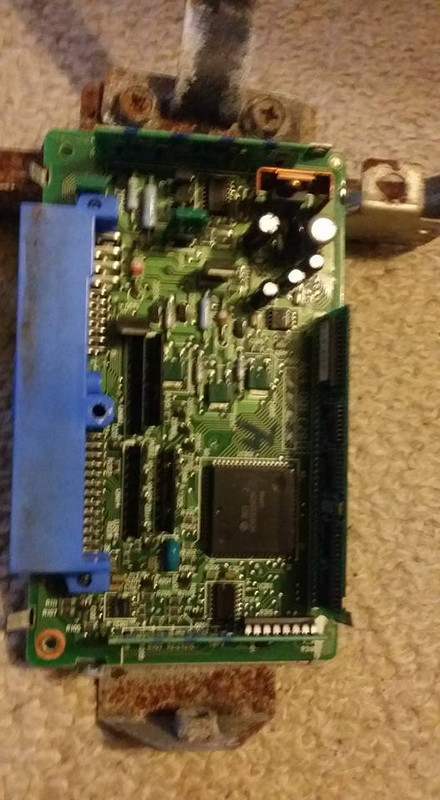
so after i got the maxima board out i took the stanza ecu apart. since the stanza hasnt been swimming in bong water and milk carton kid soup it looks like what i assume its supposed to look like, not a rusty piece of ****.
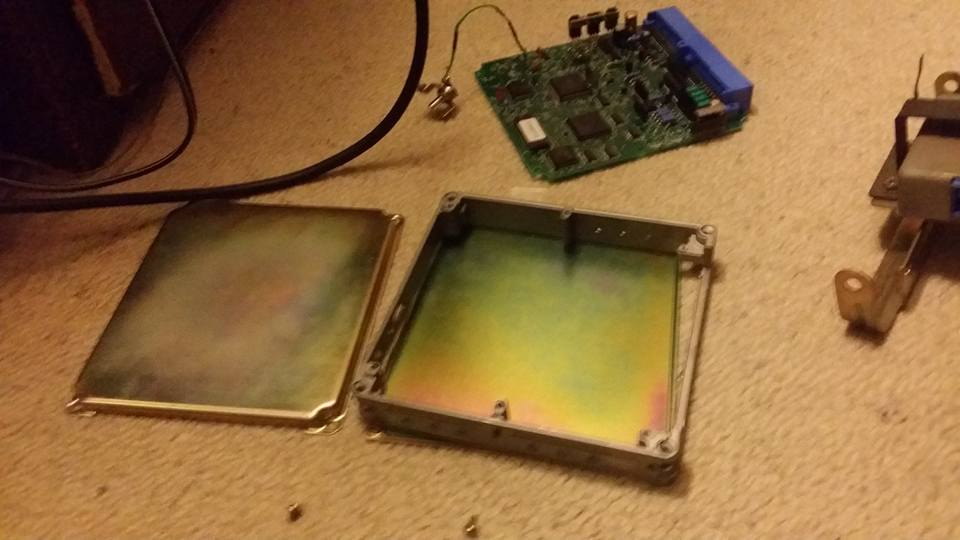
then i put all the parts i wanted to keep together into one big thingy and i was done.

i STILL have to get the engine and trans mounted up where i want them, i ran into a snag with the rear mount when i put it back in, the new hole i drilled might work but the bracket hits on the crossmember so i have to do some slimming and then ill bolt/weld in the trans mounts so i can definitively do the front engine mount and move onto something that i suck at even more..... wiring.
i gotta make sure this oil filter thing will actually bolt to my block and also that it can be flipped so im not 100% sure where im gonna put these fittings but i would rather flip it 180 so there is more room for each fitting and line. theres already holes in the back too they are just plugged with set screws.
i have been busy with my business and getting a flip car so i havent gotten back to the stanza in a few days but i did bring home the ecu and what i think is the body computers for the stanza and maxima so i could switch out the shells with the internals because the maxima ones were rusted to ****. im not sure if ill actually be able to use the maxima bcu or if ill need to use the stanza one or if ill even have one at all but for now i just switched it out anyway because the plugs for it are on the engine harness so if i end up needing it i assume ill need the maxima one and it will take me 10 minutes to switch it back anyway so i dont really care. if anyone knows exactly what this box is and what it is for let me know lol
the internals look suprisingly ok considering how ****ed the outsides are, im honestly not sure if they are going to end up working anyway but if not i may attempt to rebuild them if i can figure out what parts on them are bad.
next i cracked open the crusty ecu.
anyone who has ever done this before will know these ecu screws are basically welded in with loctite and oxidation and you have a better chance of taylor swift calling you on the phone to ask you about your d*ck than getting them all out without stripping or snapping any.
again, the insides look clean, if you accidentally look closer you will see some of the components look like they may have been screwed up a little but enough to break it? only one way to find out... actually theres probably several ways to find out but im only gonna use one.
so after i got the maxima board out i took the stanza ecu apart. since the stanza hasnt been swimming in bong water and milk carton kid soup it looks like what i assume its supposed to look like, not a rusty piece of ****.
then i put all the parts i wanted to keep together into one big thingy and i was done.
i STILL have to get the engine and trans mounted up where i want them, i ran into a snag with the rear mount when i put it back in, the new hole i drilled might work but the bracket hits on the crossmember so i have to do some slimming and then ill bolt/weld in the trans mounts so i can definitively do the front engine mount and move onto something that i suck at even more..... wiring.
Last edited by Nate Boslet; 05-15-2018 at 03:31 PM.
02-08-2017, 06:43 AM
#62

The box in your top pic. your inquiring about appears to be the transmission control module. If it was on top of the ecu in the same bracket then it would be the tcu for the tranny. Atleast that's the way it's set up in the max. If the rear subframe on the max is in better shape or descent condition you may want to keep it too. I know the 3rd Gen max rear subframe is the same as the stanza.
02-08-2017, 04:43 PM
#63
Member
Thread Starter
Join Date: Oct 2016
Posts: 284
The box in your top pic. your inquiring about appears to be the transmission control module. If it was on top of the ecu in the same bracket then it would be the tcu for the tranny. Atleast that's the way it's set up in the max. If the rear subframe on the max is in better shape or descent condition you may want to keep it too. I know the 3rd Gen max rear subframe is the same as the stanza.
oh yeah duh lol i forgot the stanza used to be an automatic so i didnt think that it had one but that explains that. thanks!
02-08-2017, 05:12 PM
#64
Member
Thread Starter
Join Date: Oct 2016
Posts: 284
after doin some junkyard huntin i still cant seem to find a manual maxima in my area. i just need the trans mounts and brackets and maybe a flywheel. in the meantime i cut away the parts on the rear motor mount that were hitting the bracket and bolted in this one trans mount bracket to see where it was at. i was really surprised that it bolts in, im not sure why it does or what it might have been for but the bolt holes are exactly right and even the body is cutout in the back for the crossbolt like it was on the maxima.
im assuming this bracket is nowhere near i want it to be but if someone could post pics of the manual trans mounts so i can get an idea of what ill have to do that would be awesome. im gonna search anyway on here but ive searched several times already and cant seem to find pics of them for some reason...

the body cutout thats the same on the maxima for the crossbolt in the back of the bracket which you have to remove or at least back out to reach the bolt thats going up into the frame (which there is also a bolt hole for on the car )
)
ill clean up the rust and paint this if i end up wanting to use it.
i have no idea what im gonna do about the rear trans mount because that doesnt bolt to the manual trans and i have no bolt holes on the frame so ill probably have to either make holes or weld a bracket right to the body. im not really worried about doing any welding or whatever because i plan on giving the bay at least on rattle can coat before everything goes in for good. so once i get either pics or mounts from a manual i will have a better idea of where i want this motor to sit (its still too high rn so i have to modify the rear bracket AGAIN, this will be the last time for sure tho...) and then i can bang out the other mounts and not need the hoist looming in my way all the time which would be rad.
im assuming this bracket is nowhere near i want it to be but if someone could post pics of the manual trans mounts so i can get an idea of what ill have to do that would be awesome. im gonna search anyway on here but ive searched several times already and cant seem to find pics of them for some reason...
the body cutout thats the same on the maxima for the crossbolt in the back of the bracket which you have to remove or at least back out to reach the bolt thats going up into the frame (which there is also a bolt hole for on the car
)ill clean up the rust and paint this if i end up wanting to use it.
i have no idea what im gonna do about the rear trans mount because that doesnt bolt to the manual trans and i have no bolt holes on the frame so ill probably have to either make holes or weld a bracket right to the body. im not really worried about doing any welding or whatever because i plan on giving the bay at least on rattle can coat before everything goes in for good. so once i get either pics or mounts from a manual i will have a better idea of where i want this motor to sit (its still too high rn so i have to modify the rear bracket AGAIN, this will be the last time for sure tho...) and then i can bang out the other mounts and not need the hoist looming in my way all the time which would be rad.
Last edited by Nate Boslet; 05-15-2018 at 03:31 PM.
02-12-2017, 04:32 AM
#65
Member
Thread Starter
Join Date: Oct 2016
Posts: 284
so after forgetting it the last like 3 or 4 times i went to the garage i finally remembered to bring my cut up oil bracket thing and my cooler to plot out where im gonna put it all. i have to chop off more of the longer parts so that when i flip it around it will clear the rear engine mounting bracket but it looks like this should still work on my block. hopefully 2 bolts will be enough to keep it from leaking....
i like this spot.
this is by no means the final location of my oil cooler, i do plan on hanging it off the bumper like a skrub douche but im probably going to wait till i have the lines made and decide how im going to rout those before i make up brackets to permanently mount it.
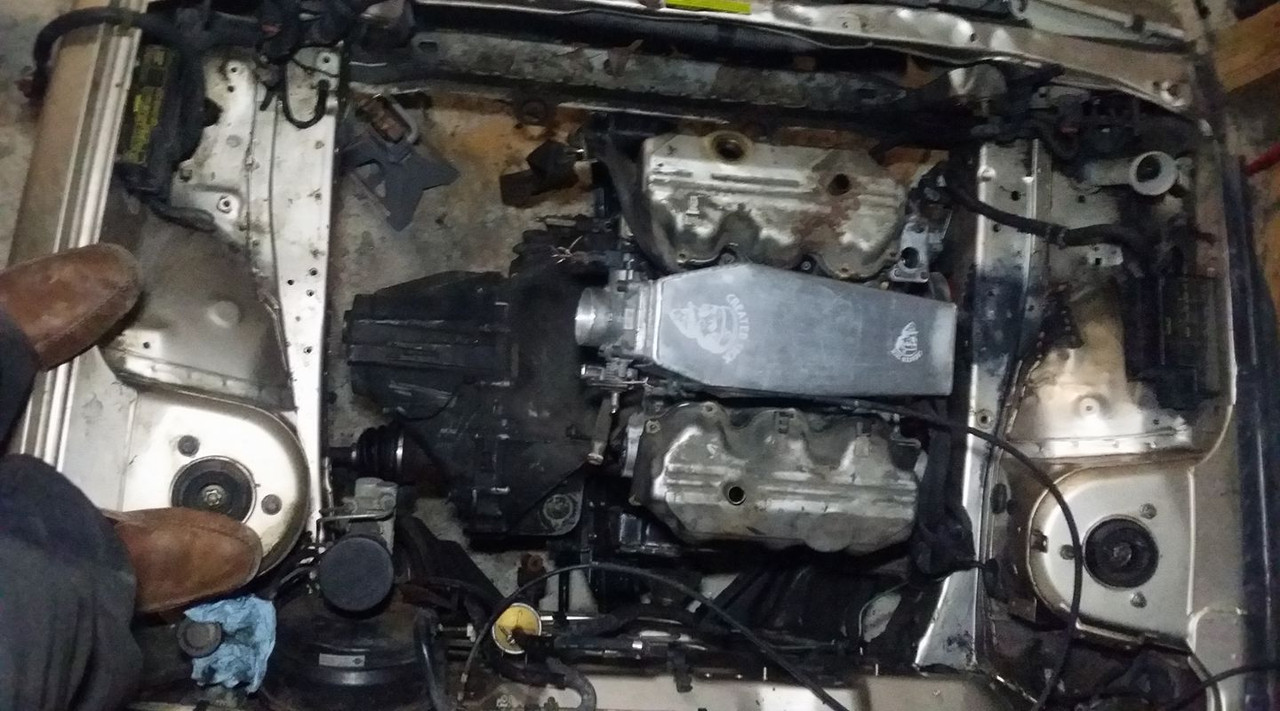
i slapped the maxima intake onto the motor real quick just to illustrate how much less space i have in here lol
something i wasnt expecting happened when i put on the maxima lower coolant pipe. my intake doesnt clear it on the bottom..... i might take a picture tomorrow but the bottom of my custom intake has these big bumps in the casting (not defects but maybe a bigger sprue or different mold type) and they prevent the intake from seating fully. the maxima one is much flatter on the bottom so ill just have to grind the bumps down to match.
other than that everything bolts right on and looks like its where i want it.

as this picture shows i have about 5 or 6 inches less bay width than the maxima and basically everything that is effected by will have to be modified to address that. i think im going to try to cut this coolant pipe and clock it further downward to help get it to line up better and get out of the way of my exhaust but im probably going to build the exhaust first so for now im just gonna cut it off.

i dont see any real reason for this to stick out this far either so i may shorten it or change the bend angle.

i gotta take that length out of the middle of this coolant hose. honestly i might just do what i did on my z and make hard pipes and replace the coolant hoses entirely but im trying to keep costs down and keep as much oem stuff as possible.
i decided to just buy a brand new transmission mount that will give me an idea of where i want to be. ill be bolting it to that mounting bracket that is bolted onto the car. im pretty sure its not going to be anywhere near fitting without being modified first but i guess we will see when it gets here. in the mean time i now have all kids of stuff to clean up and start modifying for my oil and coolant setups.
i like this spot.
this is by no means the final location of my oil cooler, i do plan on hanging it off the bumper like a skrub douche but im probably going to wait till i have the lines made and decide how im going to rout those before i make up brackets to permanently mount it.
i slapped the maxima intake onto the motor real quick just to illustrate how much less space i have in here lol
something i wasnt expecting happened when i put on the maxima lower coolant pipe. my intake doesnt clear it on the bottom..... i might take a picture tomorrow but the bottom of my custom intake has these big bumps in the casting (not defects but maybe a bigger sprue or different mold type) and they prevent the intake from seating fully. the maxima one is much flatter on the bottom so ill just have to grind the bumps down to match.
other than that everything bolts right on and looks like its where i want it.
as this picture shows i have about 5 or 6 inches less bay width than the maxima and basically everything that is effected by will have to be modified to address that. i think im going to try to cut this coolant pipe and clock it further downward to help get it to line up better and get out of the way of my exhaust but im probably going to build the exhaust first so for now im just gonna cut it off.
i dont see any real reason for this to stick out this far either so i may shorten it or change the bend angle.
i gotta take that length out of the middle of this coolant hose. honestly i might just do what i did on my z and make hard pipes and replace the coolant hoses entirely but im trying to keep costs down and keep as much oem stuff as possible.
i decided to just buy a brand new transmission mount that will give me an idea of where i want to be. ill be bolting it to that mounting bracket that is bolted onto the car. im pretty sure its not going to be anywhere near fitting without being modified first but i guess we will see when it gets here. in the mean time i now have all kids of stuff to clean up and start modifying for my oil and coolant setups.
Last edited by Nate Boslet; 05-15-2018 at 03:32 PM.
 02-12-2017, 06:28 PM
#67
Member
Thread Starter
Join Date: Oct 2016
Posts: 284
i was actually thinking about using a z32TT ecu if the plug is the same. i was wondering if i could get the boost profile close enough then i could get my afr's half decent without having to spend much on a standalone but ill probably end up just running MS1 or something. not sure and dont really wanna worry about it until i have to lol
02-13-2017, 12:43 AM
#68
did you fingure out the rear tran mount? iirc it is long,no pics though
it should be close if it was in place
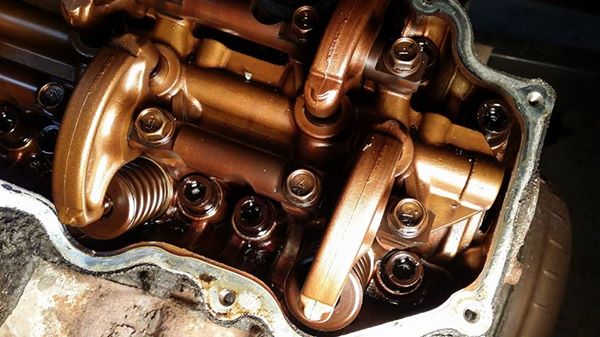
those gold valve covers,ive only seen those on pathfinder and v-6 d21 trucks
did i miss a part of the story?
02-13-2017, 09:57 PM
#69
Member
Thread Starter
Join Date: Oct 2016
Posts: 284
I was just trying to be funny although you will be lighter than a maxer
did you fingure out the rear tran mount? iirc it is long,no pics though
it should be close if it was in place
those gold valve covers,ive only seen those on pathfinder and v-6 d21 trucks
did i miss a part of the story?
did you fingure out the rear tran mount? iirc it is long,no pics though
it should be close if it was in place
those gold valve covers,ive only seen those on pathfinder and v-6 d21 trucks
did i miss a part of the story?
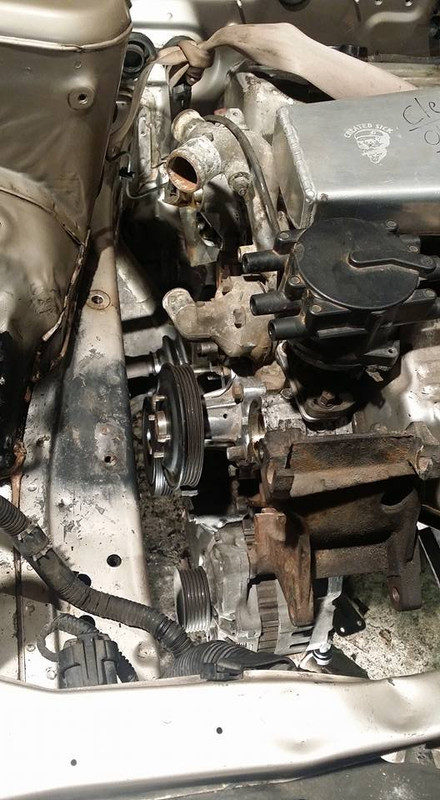
the motor with the gold valve covers is actually from a 1984 z31. i initially pulled it for mocking up custom parts i make like intakes and turbo relocation pipes but after i made jigs for all that stuff i figured id rather have it waste space in my stanza than in my workshed at home lol
02-16-2017, 03:05 PM
#70
the automatic is bigger, doesnt need to extend to the body mount
and the manual is smaller but uses the same car/body/mount point as the automatic so the 5sp one is like an arm
02-16-2017, 07:18 PM
#71
Member
Thread Starter
Join Date: Oct 2016
Posts: 284
do you happen to have a picture of the manual trans mounts? i just spent a week waiting around for this one to get here to find out it doesnt fit.

(the pen is for scale)
i believe my trans is from an 86 and i believe when i ordered this mount it was for a 91 so that is likely the issue but the 86 mount looks like its super short and wont even come close to reaching the mounting bracket. i need to see a picture of the front trans mount on the car all bolted up so i can get an idea how to move forward..
Last edited by Nate Boslet; 05-15-2018 at 03:32 PM.
02-16-2017, 07:46 PM
#72
Member
Thread Starter
Join Date: Oct 2016
Posts: 284
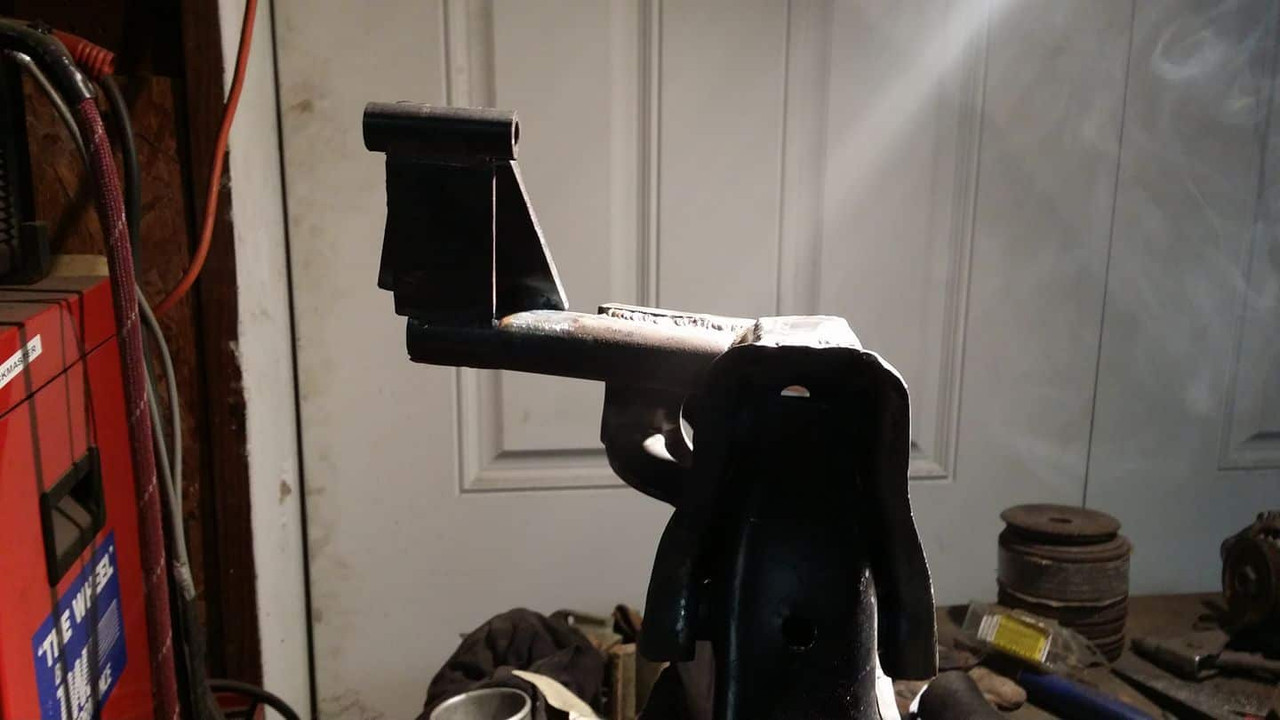
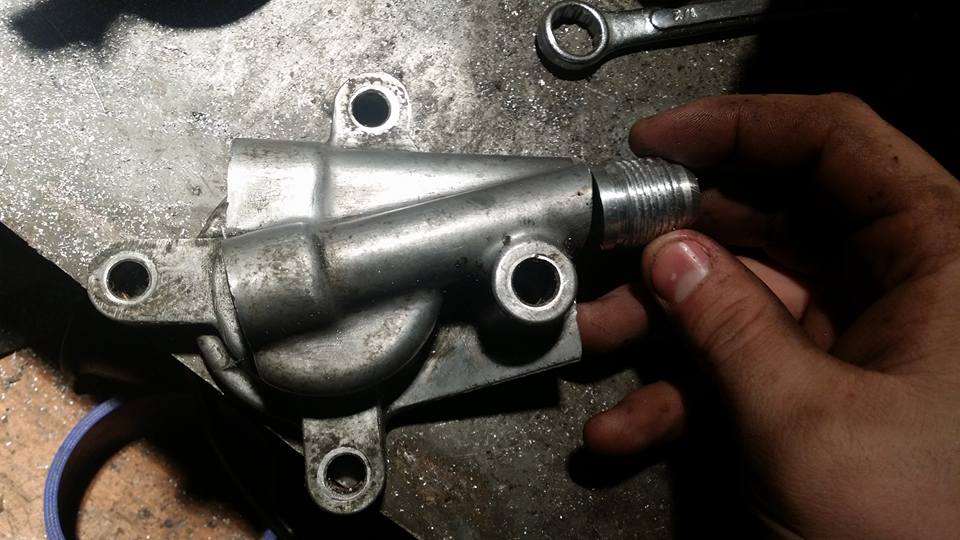
so besides that, the bracket i made for the oil filter housing fits the way i wanted to and looks like its going to work perfect. clears the radiator and everything.

im gonna machine the AN bungs and get those parts finished up, maybe order some lines and fittings. im gonna keep looking for pictures of the 2nd gen transmission mounts and probably just modify the **** out of this mount i got so it will work somehow. saturday i gotta move the vette and im gonna do some cleaning and rearranging to help with workflow and bring my mig machine to the garage so i can start tacking **** up and having it fit right the first time instead of running it back and forth to my shop at home 20 times. lights at the end of the tunnel i know it lol
im gonna machine the AN bungs and get those parts finished up, maybe order some lines and fittings. im gonna keep looking for pictures of the 2nd gen transmission mounts and probably just modify the **** out of this mount i got so it will work somehow. saturday i gotta move the vette and im gonna do some cleaning and rearranging to help with workflow and bring my mig machine to the garage so i can start tacking **** up and having it fit right the first time instead of running it back and forth to my shop at home 20 times. lights at the end of the tunnel i know it lol
Last edited by Nate Boslet; 05-15-2018 at 03:33 PM.
02-17-2017, 07:05 AM
#73
Just a suggestion Nate but have you tried putting a post in the 1st and 2nd Gen discussions to see if someone there has a pic of the 2nd Gen Trans mount your looking for? It may be slow in that section but if it's a 2nd Gen mount your looking for someone in the 2nd Gen area might be able to help?
02-17-2017, 09:11 AM
#74
Member
Thread Starter
Join Date: Oct 2016
Posts: 284
Just a suggestion Nate but have you tried putting a post in the 1st and 2nd Gen discussions to see if someone there has a pic of the 2nd Gen Trans mount your looking for? It may be slow in that section but if it's a 2nd Gen mount your looking for someone in the 2nd Gen area might be able to help?
02-17-2017, 08:24 PM
#75
Member
Thread Starter
Join Date: Oct 2016
Posts: 284
OIL STUFF IS DONE (i hope) (....besides fittings and lines)
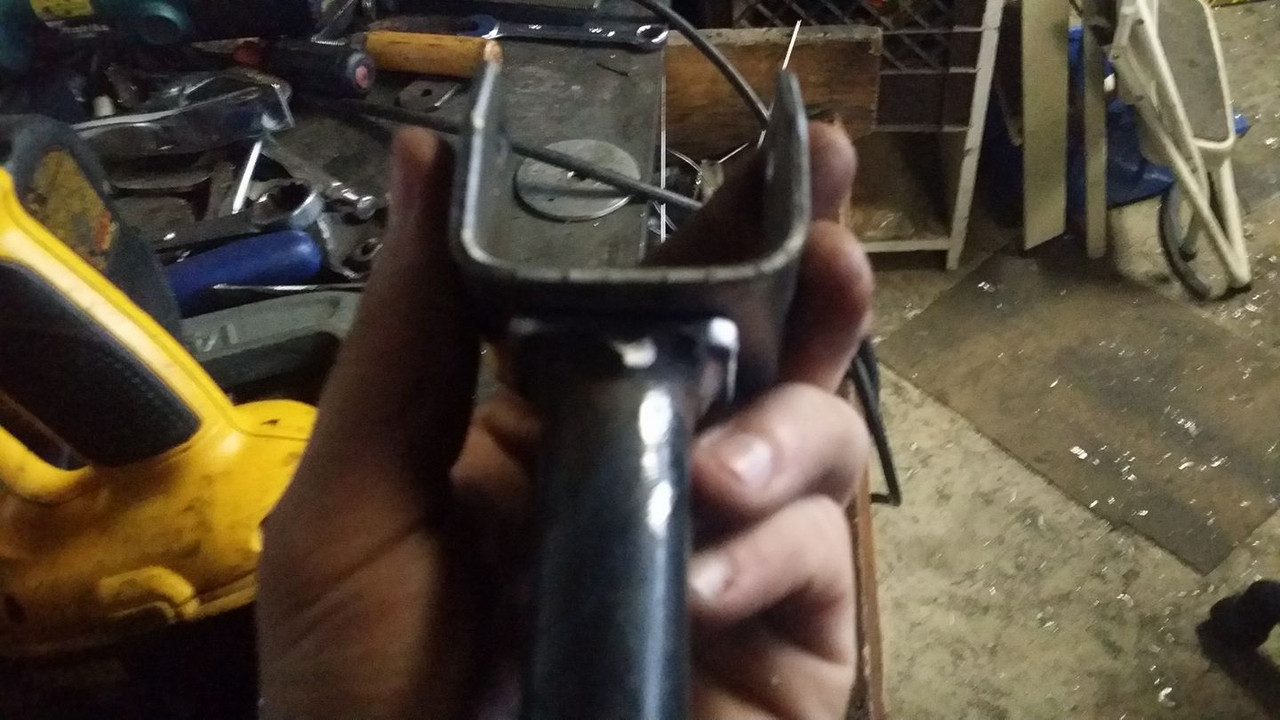
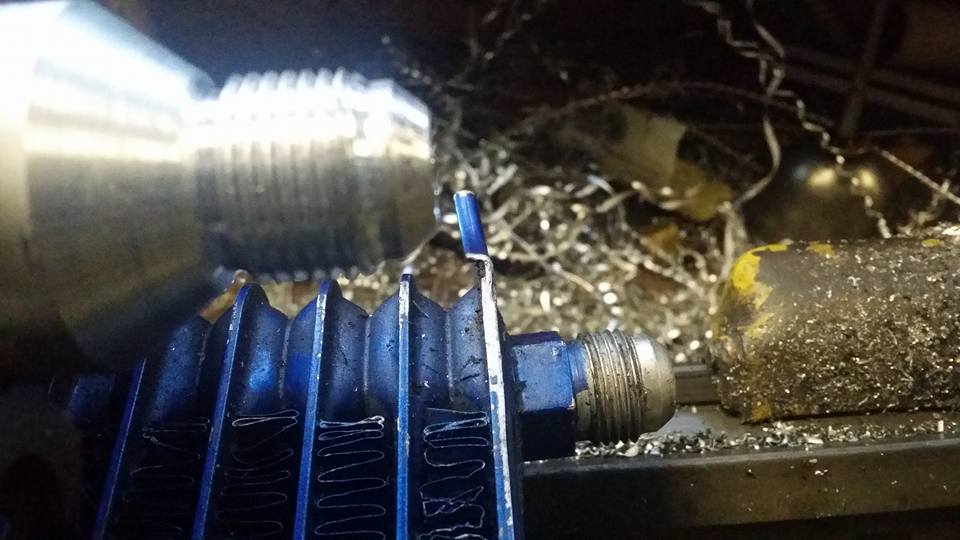
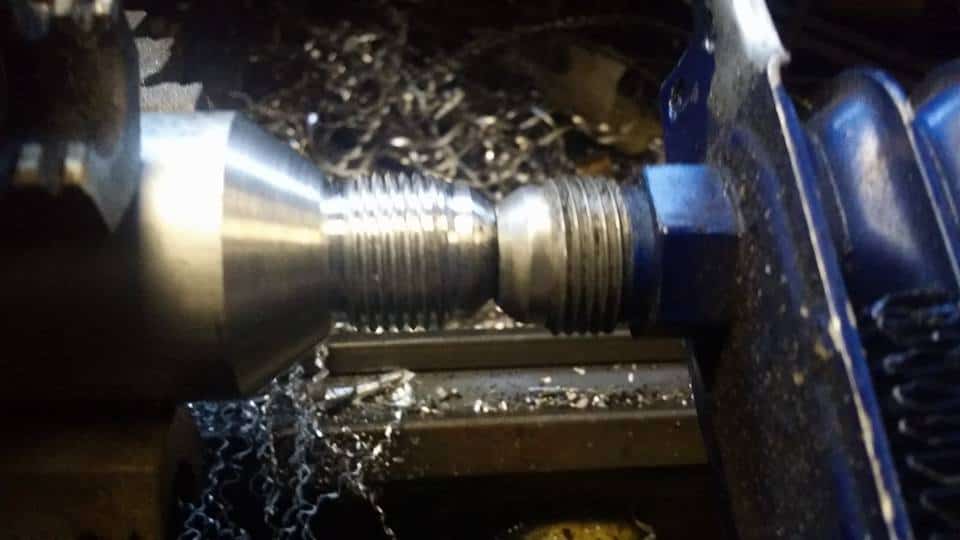
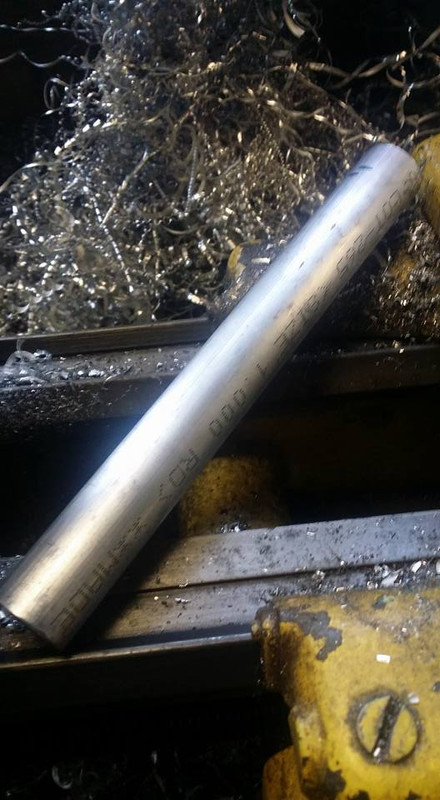
the bungs started life packed away inside of this round lathe stock i got on ebay.
after parting to length i drilled the center hole.
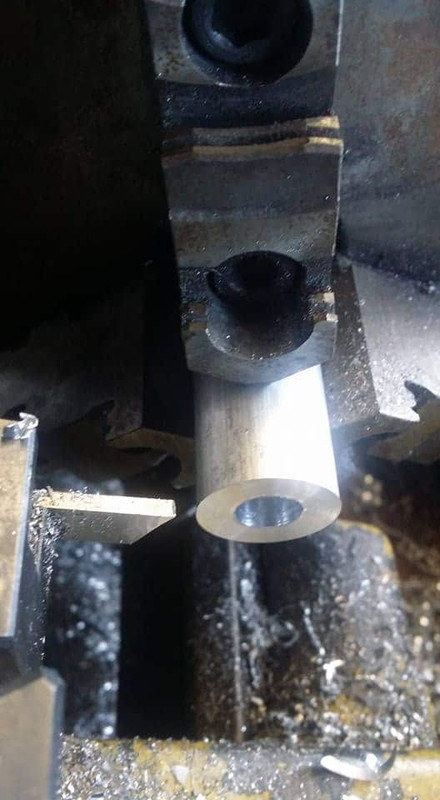
turned the profile then cut the relief and turned the threads.

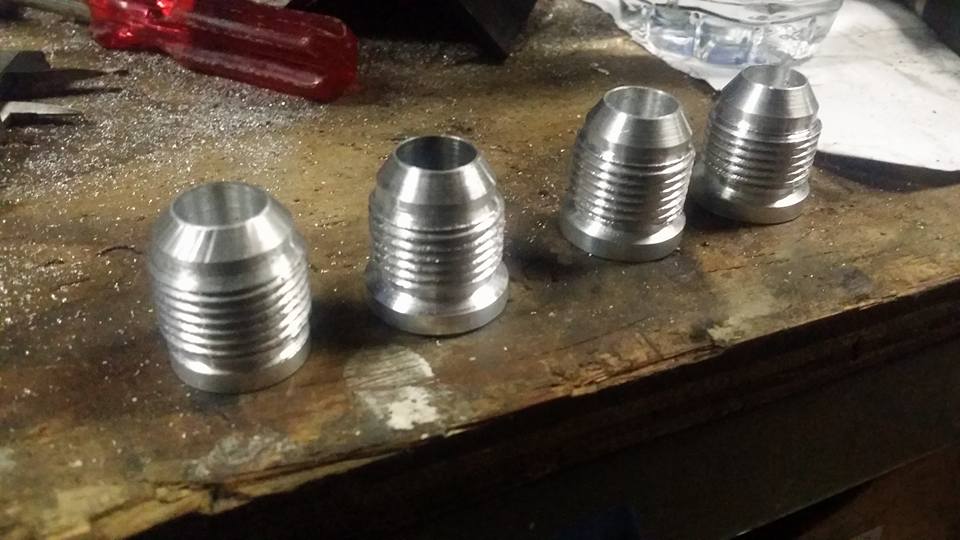
then after threading i parted them off. here is all 4 done.
in case none of you have ever had the absolute delight of welding oil soaked cast aluminum ill fill you in: its ****ing awful and no matter how much you grind and clean there will always be more garbage in the metal to **** up your puddle. it doesnt look that bad in these pics because by the time i ran a bead i had already pulled all the dirt out into my tungsten and contaminated the **** out of it lol

knowing that welding this stuff sucks i decided to build up weld material over top of it with clean filler so that when i went to weld the bungs to it i wouldnt be blowing out and having crazy arc wander the whole time. this worked really well on the filter housing part because i had plenty of room to do it.
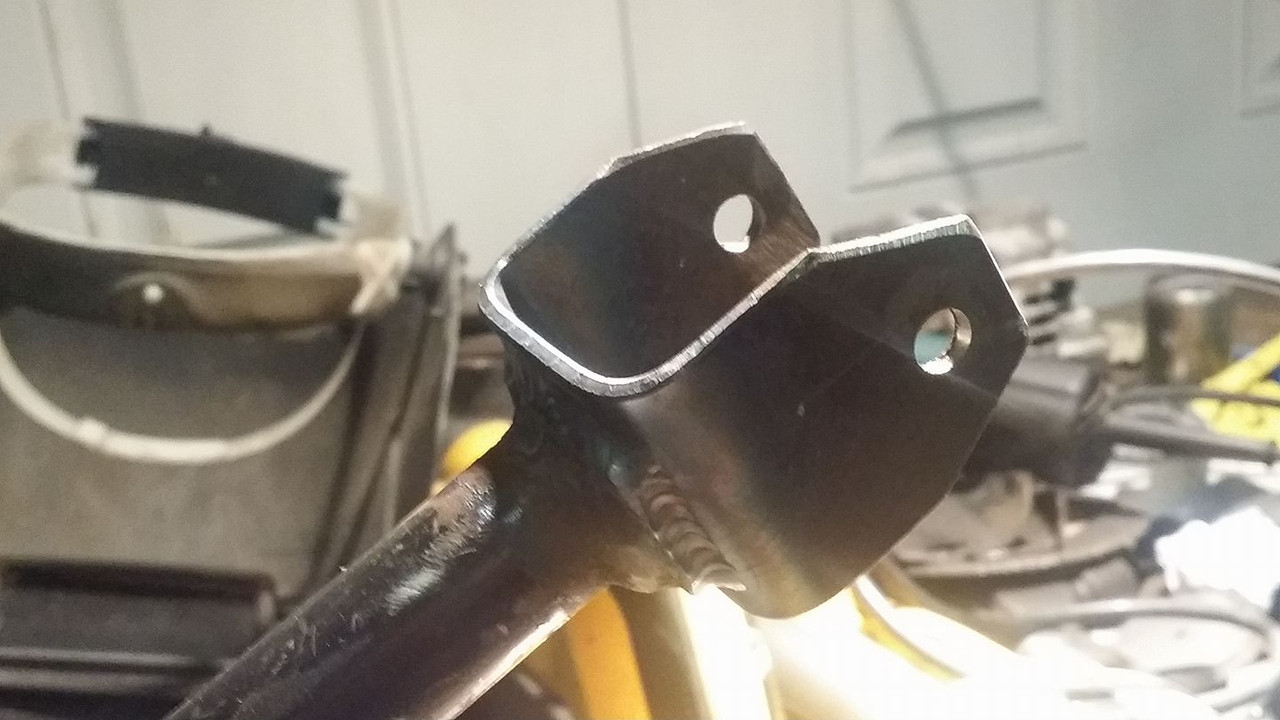
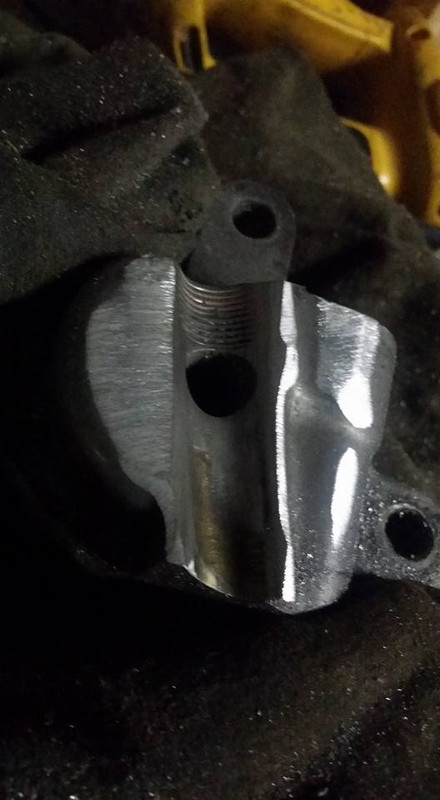
both fittings welded up. i plugged the one hole and drilled a new one in the housing so that line will point back toward the engine and the top one ill just use a 90 degree fitting so i can point it wherever it needs to go.

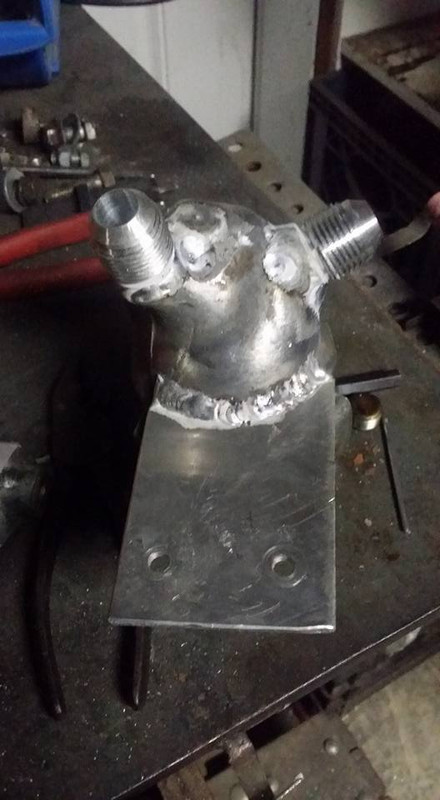
next i chopped off the top of this tube for the engine block adaptor thing. this area was probably the worst to try to get clean because its actually had pressurized oil in it for who knows how long and through how many heat cycles. it was like welding inside of a pool of oil...
but i burned all that junk out and got er dun anyway.

i threw one of the catch can lines from my z on them to show that the threads fit well and the fittings and lines will clear everything. i had to cut one of the ears off for clearance but it doesnt matter cause there are only 2 bolt holes on the block for this piece anyway.
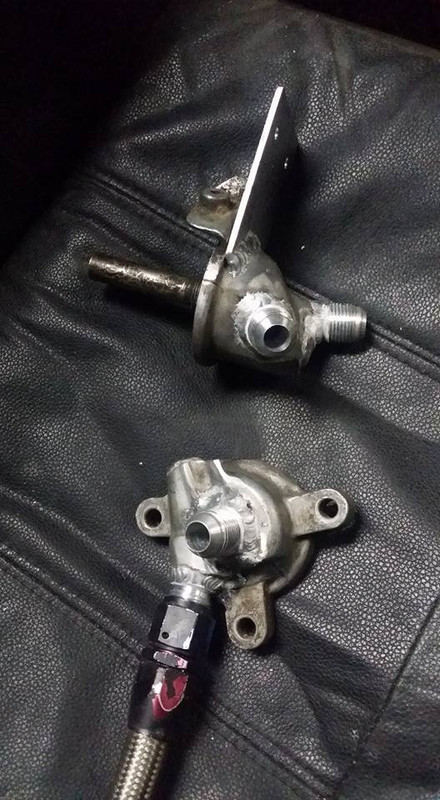
so ill get those fitted up on the car tomorrow at some point and hopefully in the mean time ill get some replies to the pics thread i started so i can get back to making the trans mount. if not ill wing it lol
the bungs started life packed away inside of this round lathe stock i got on ebay.
after parting to length i drilled the center hole.
turned the profile then cut the relief and turned the threads.
then after threading i parted them off. here is all 4 done.
in case none of you have ever had the absolute delight of welding oil soaked cast aluminum ill fill you in: its ****ing awful and no matter how much you grind and clean there will always be more garbage in the metal to **** up your puddle. it doesnt look that bad in these pics because by the time i ran a bead i had already pulled all the dirt out into my tungsten and contaminated the **** out of it lol
knowing that welding this stuff sucks i decided to build up weld material over top of it with clean filler so that when i went to weld the bungs to it i wouldnt be blowing out and having crazy arc wander the whole time. this worked really well on the filter housing part because i had plenty of room to do it.
both fittings welded up. i plugged the one hole and drilled a new one in the housing so that line will point back toward the engine and the top one ill just use a 90 degree fitting so i can point it wherever it needs to go.
next i chopped off the top of this tube for the engine block adaptor thing. this area was probably the worst to try to get clean because its actually had pressurized oil in it for who knows how long and through how many heat cycles. it was like welding inside of a pool of oil...
but i burned all that junk out and got er dun anyway.
i threw one of the catch can lines from my z on them to show that the threads fit well and the fittings and lines will clear everything. i had to cut one of the ears off for clearance but it doesnt matter cause there are only 2 bolt holes on the block for this piece anyway.
so ill get those fitted up on the car tomorrow at some point and hopefully in the mean time ill get some replies to the pics thread i started so i can get back to making the trans mount. if not ill wing it lol
Last edited by Nate Boslet; 05-18-2018 at 09:56 AM.
02-22-2017, 08:16 AM
#76
Hi Nate, I was just taking a look in the 1st-2nd gen discussions and noticed there is a thread by a member called starks2010 parting a 2nd Gen tranny. Maybe you could send him a pm and see if he has the mounts? Or pics atleast? Again just a suggestion. Quite the welding skills you have by the way. Im no welder but i know people that weld and apparently aluminum is a bugger to weld especially cast aluminum. Keep up the good work. Looking forward to a video of the stanzima getting turned over and hearing it run once everything is in place.
02-23-2017, 12:39 AM
#77
Member
Thread Starter
Join Date: Oct 2016
Posts: 284
Hi Nate, I was just taking a look in the 1st-2nd gen discussions and noticed there is a thread by a member called starks2010 parting a 2nd Gen tranny. Maybe you could send him a pm and see if he has the mounts? Or pics atleast? Again just a suggestion. Quite the welding skills you have by the way. Im no welder but i know people that weld and apparently aluminum is a bugger to weld especially cast aluminum. Keep up the good work. Looking forward to a video of the stanzima getting turned over and hearing it run once everything is in place.
02-28-2017, 10:36 PM
#78
Member
Thread Starter
Join Date: Oct 2016
Posts: 284
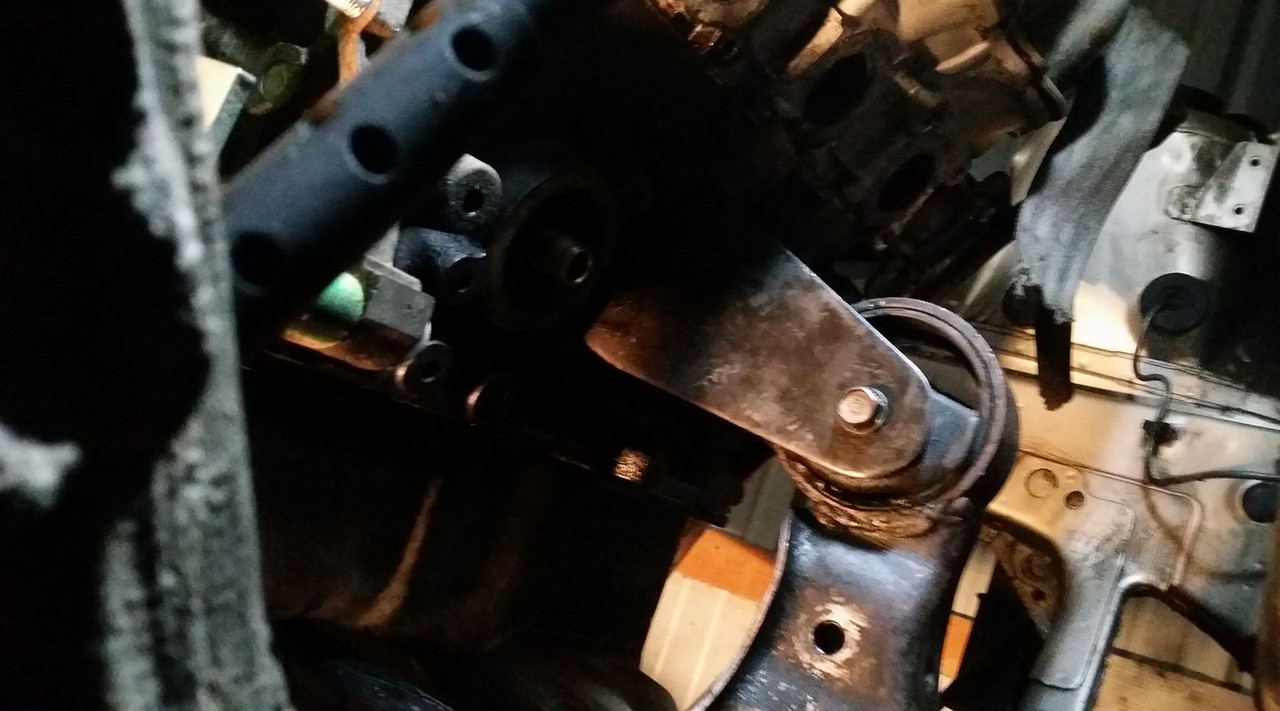
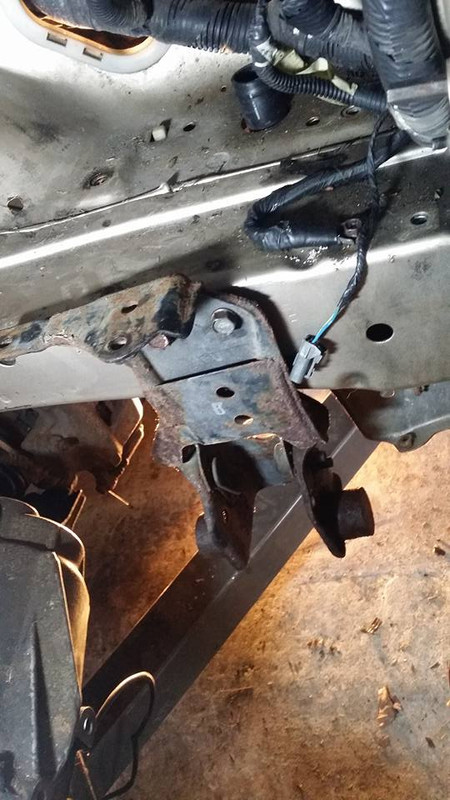
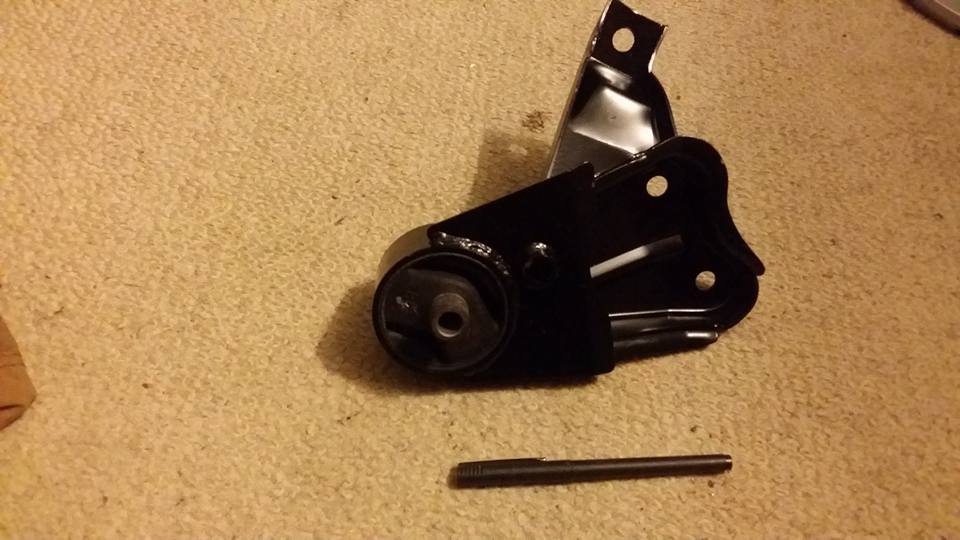
the trans mount is basically done, im gonna smooth out the corners and brace it up a little more then paint it. the motor is essentially where its going to stay besides the tilt toward the firewall its going to get when i shorten the rear mount which i took home with me tonight to do tomorrow.

the mount i used looked like it wasnt in that great of shape so i decided to use some window weld i had lying around to fill it up. if it does break later on ill just fill it with poly.
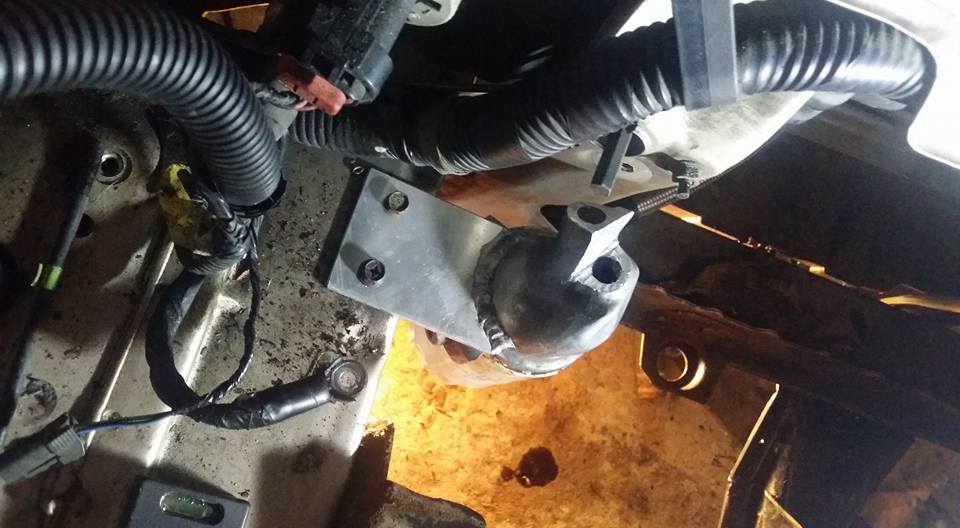
as this picture shows the rear needs to come down, i will probably add a half inch or so to the front mount as well to tilt the motor back so i have as much room in front of the motor as possible.
this mount bracket and mount are just to help line up the motor. the mount was actually a prototype for my z31, now i make billet aluminum ones lol but for the stanza im probably going to look for something a little softer because i already rattle my fillings out with the z, this car is supposed to be more of a daily...
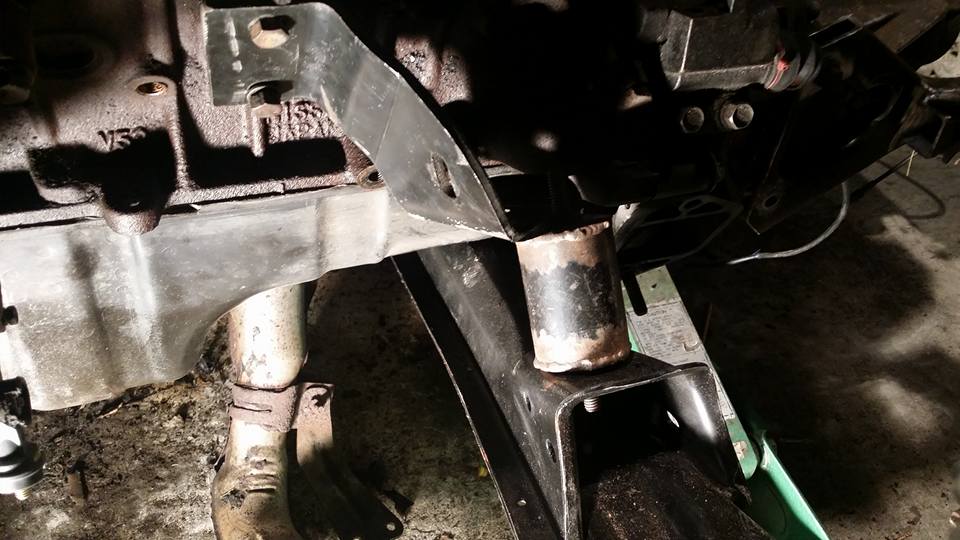
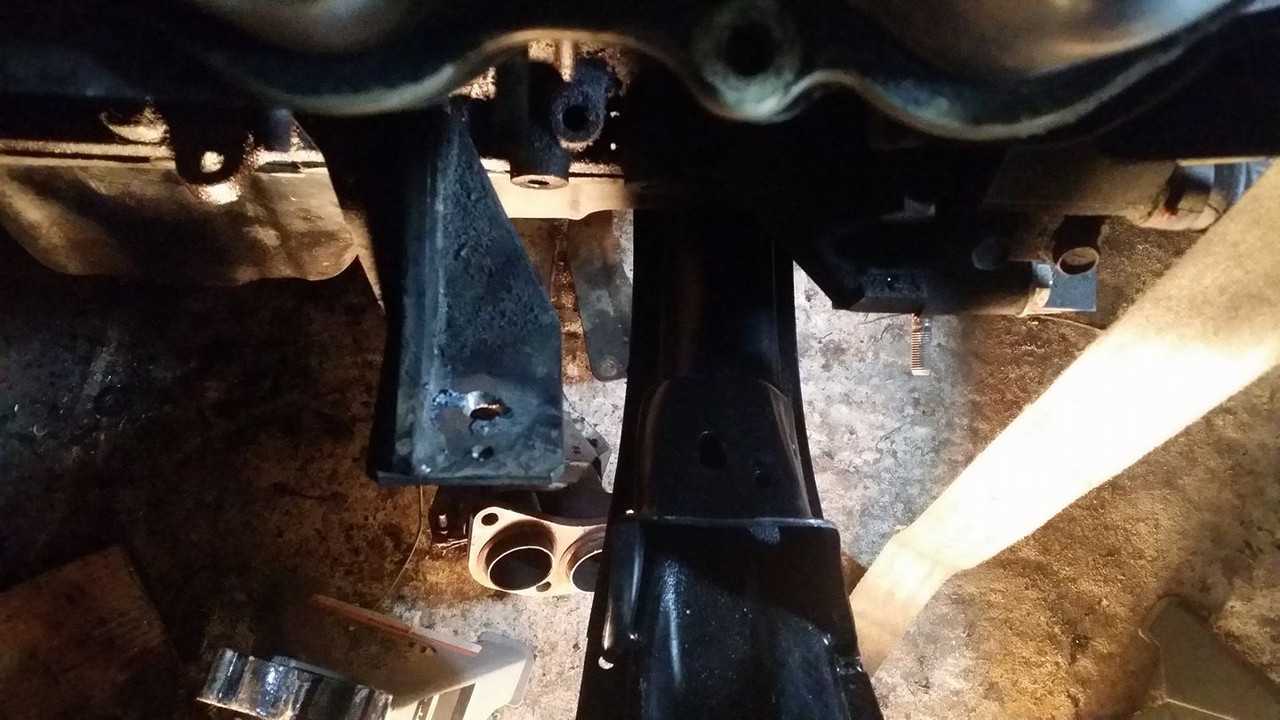
this kind of shows where the motor is now and why i want to tilt it back, i dont really need much room behind the motor but i have almost as much as in the front. hopefully the adjustments i make with the mounts will help with this because i cant move anything else any more rearward than i already have lol
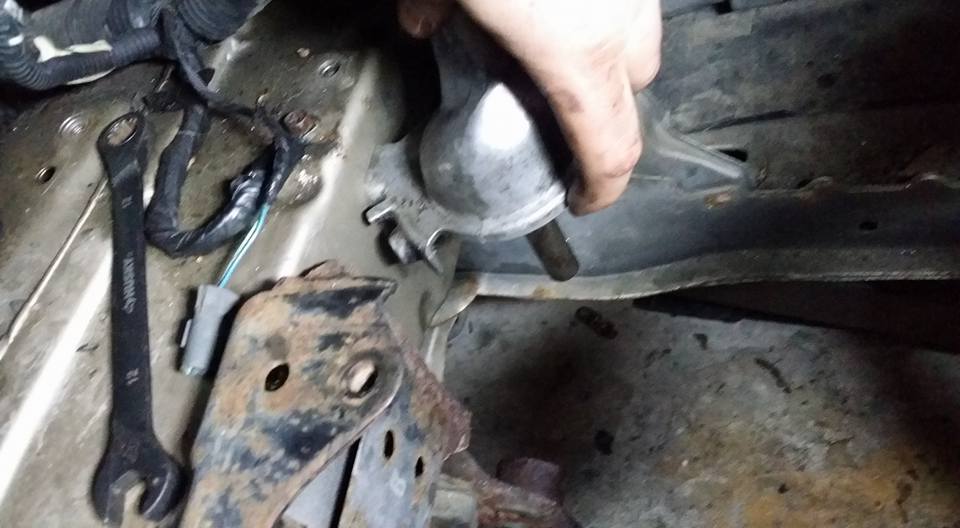
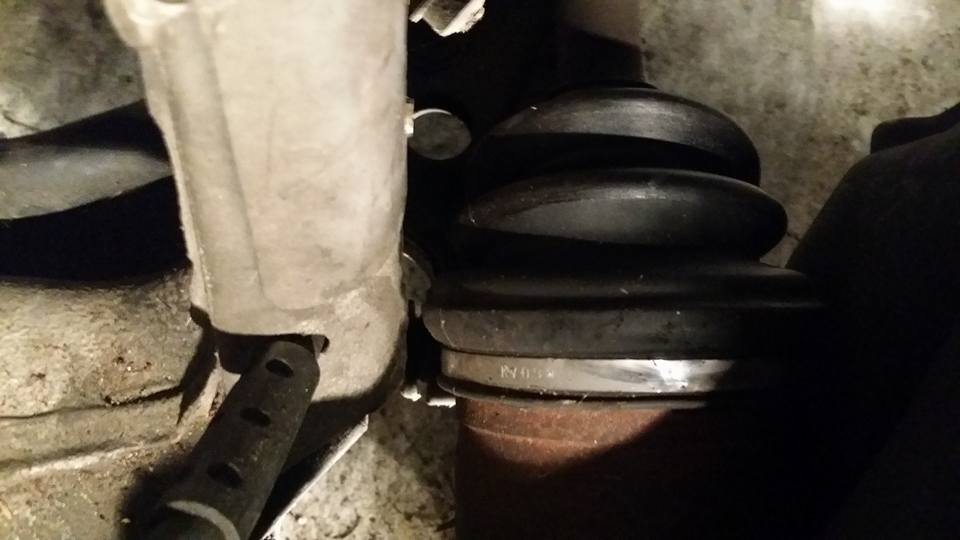
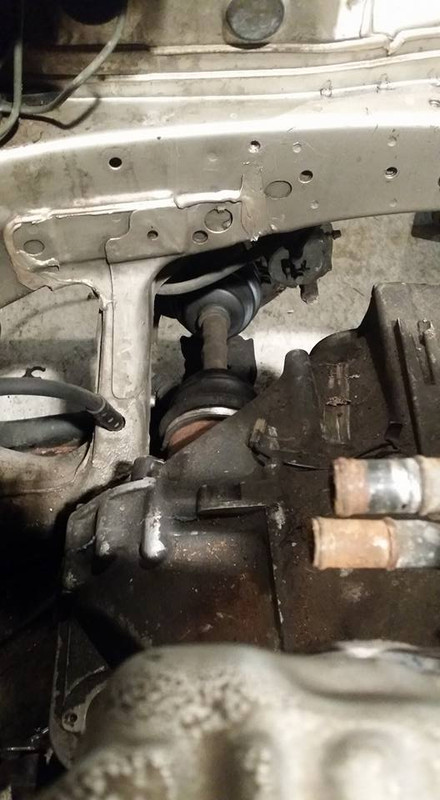
its not this axle that stops me from moving the mounts farther back....
its this one. i dont even like it being as close as it is right now, i never took pictures of where the axles were when the KA was in the car so im not sure how this compares but its a little close for my liking but its as good as its gonna get. if i have to ill notch that part of the body but for now i think it will be ok.
contrary to how this picture compares to the last one the motor is actually surprisingly square and level right now. im not sure why this axle is so much farther from that body feature if its the like this on the maxima i would be interested to know.

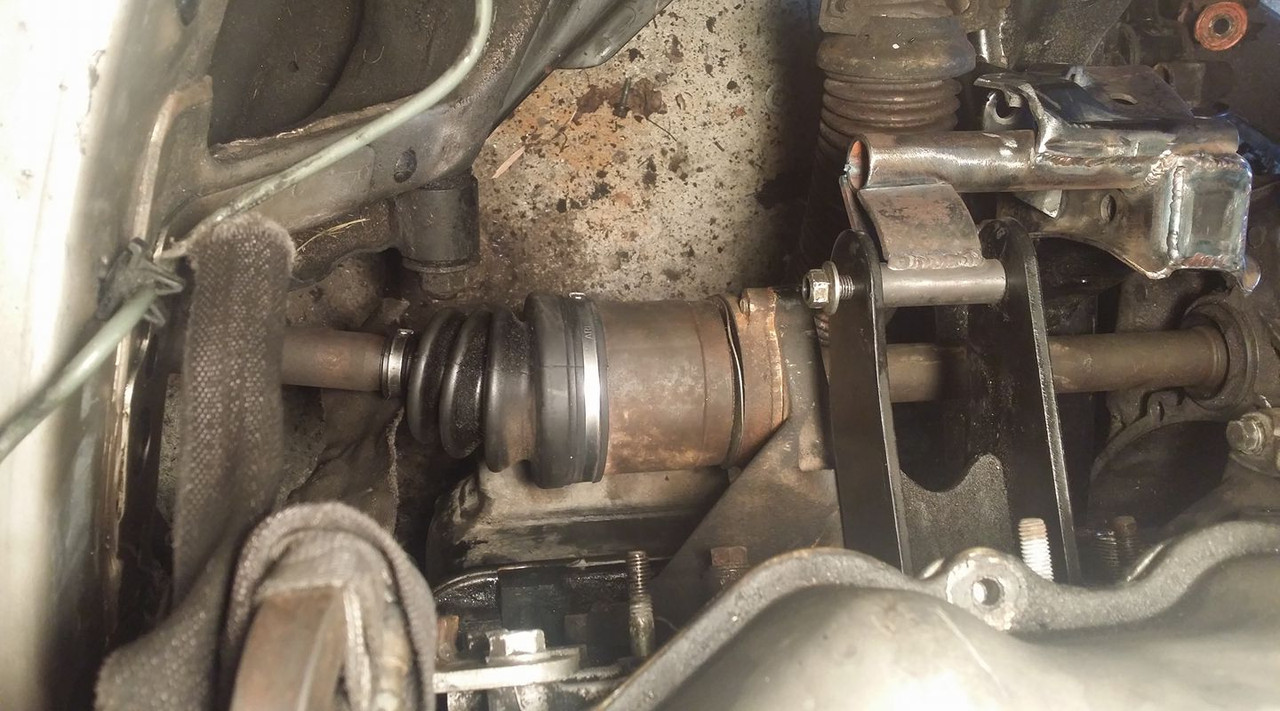
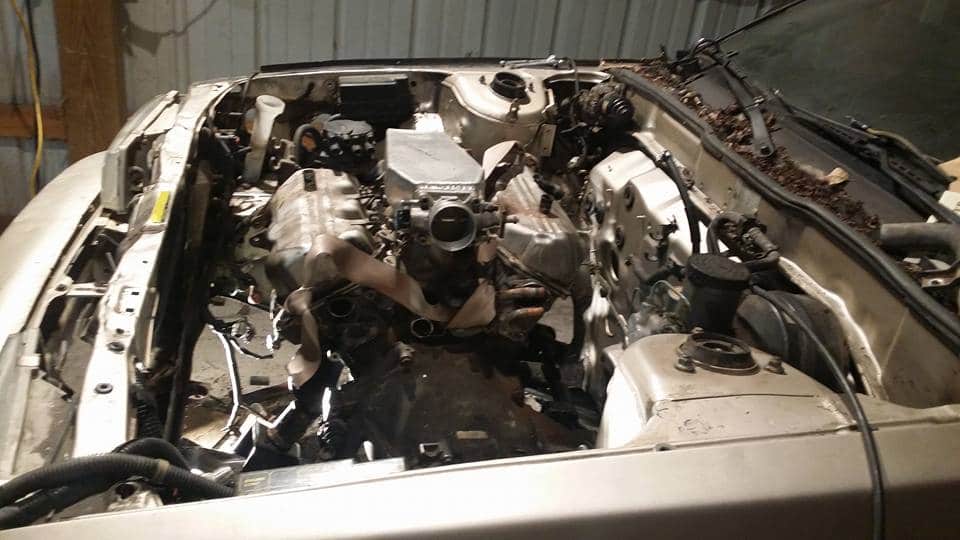
heres my clearance in the front of the motor. not great but its not too terrible either, ive seen worse. i am pulling the motor and trans back out to finish up the engine work and gasketting and stuff before final assembly anyway but i dont look forward to doing a water pump or timing belt when the time comes.
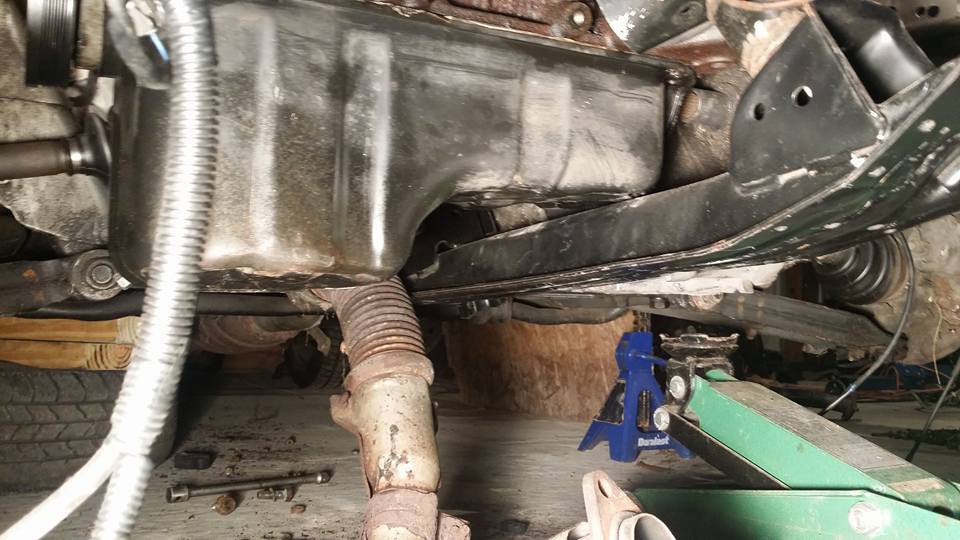
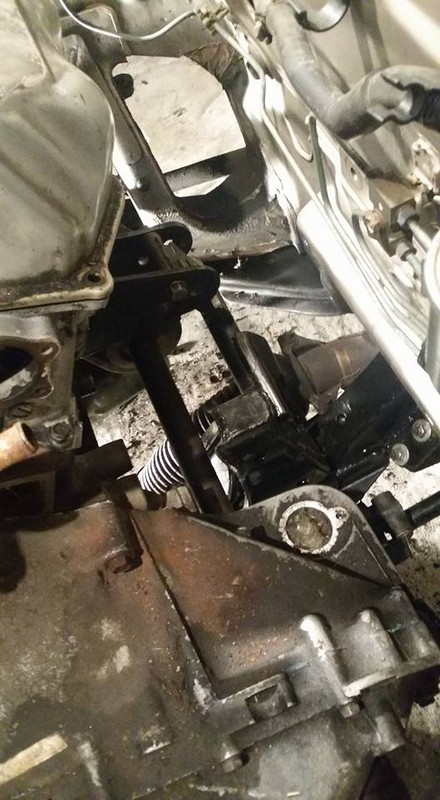
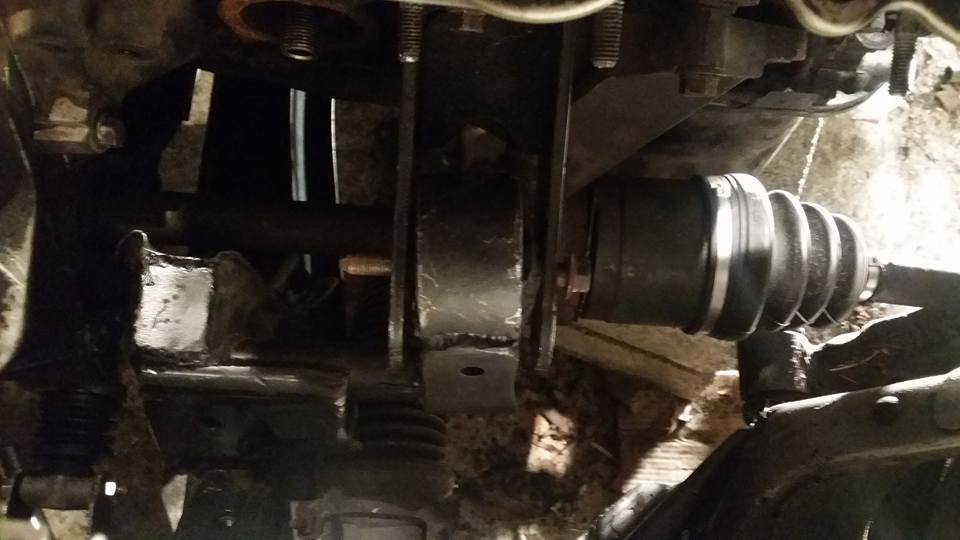
the oil pan looks super duper low but ill take pics when the wheels are back on and its on the ground cause im sure its only a half inch below the crossmember so it should be fine, if not ill modify it to be a little lower profile.
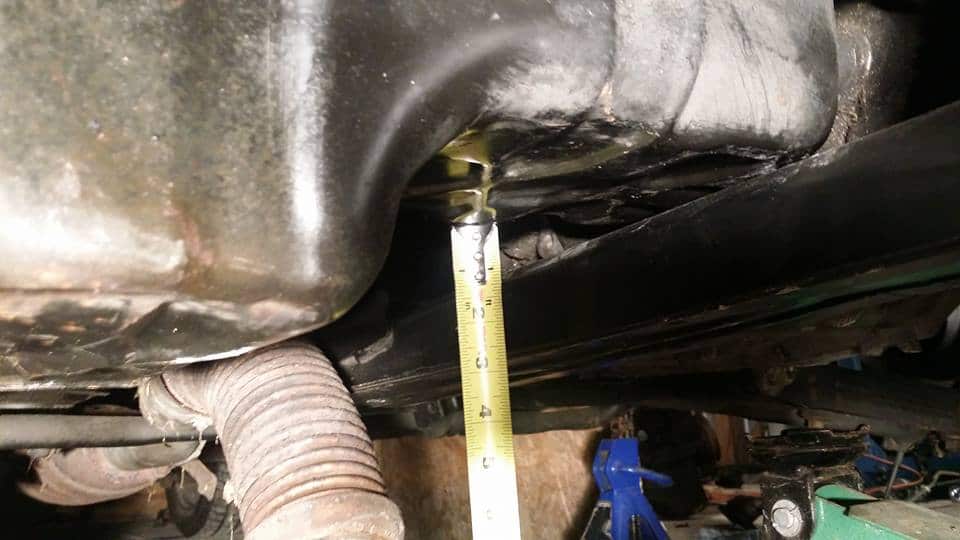
not quite an inch between the oil pan and crossmember in the rear, im gonna try to close that up a bit and raise it up in the front because the clearance in the front is more like a 1/4 inch.
i may have to notch out the crossmember slightly, not to clear the trans but the heads of the bolts that hold the cover onto the trans. other than that the trans has plenty of clearance here.

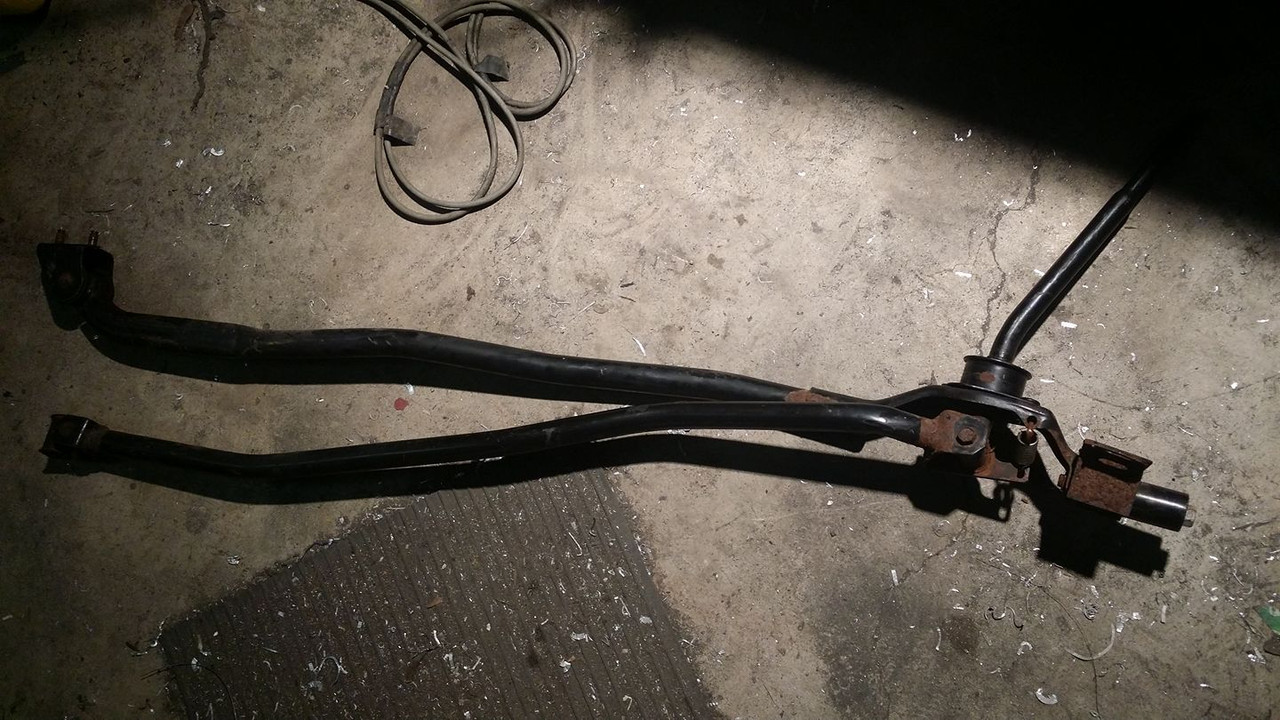
i brought home the crossmember and the shift linkages so i can replace the solid mount in the rear with a rubber one and shorten the shift linkage slightly and bend it out to the side so it lines up better with the transmission shift fork thingy. once i get that done ill move on to the front mount finally and then get started on the exhaust. im not sure when ill install the rear transmission mount since i can do a bunch of other stuff without it because nothing will move whether its in or out but ill be looking for a mount and the mounting bracket that fits this trans if anyone has one lying around. i really dont care if its in good shape or not since ill probably end up converting to poly down the line anyway.
BTW in case anyone is wondering why my pictures are way brighter i finally installed some new lights in my garage. i didnt even realize how dark it was in there until i compared this post to my other ones lol
the mount i used looked like it wasnt in that great of shape so i decided to use some window weld i had lying around to fill it up. if it does break later on ill just fill it with poly.
as this picture shows the rear needs to come down, i will probably add a half inch or so to the front mount as well to tilt the motor back so i have as much room in front of the motor as possible.
this mount bracket and mount are just to help line up the motor. the mount was actually a prototype for my z31, now i make billet aluminum ones lol but for the stanza im probably going to look for something a little softer because i already rattle my fillings out with the z, this car is supposed to be more of a daily...
this kind of shows where the motor is now and why i want to tilt it back, i dont really need much room behind the motor but i have almost as much as in the front. hopefully the adjustments i make with the mounts will help with this because i cant move anything else any more rearward than i already have lol
its not this axle that stops me from moving the mounts farther back....
its this one. i dont even like it being as close as it is right now, i never took pictures of where the axles were when the KA was in the car so im not sure how this compares but its a little close for my liking but its as good as its gonna get. if i have to ill notch that part of the body but for now i think it will be ok.
contrary to how this picture compares to the last one the motor is actually surprisingly square and level right now. im not sure why this axle is so much farther from that body feature if its the like this on the maxima i would be interested to know.
heres my clearance in the front of the motor. not great but its not too terrible either, ive seen worse. i am pulling the motor and trans back out to finish up the engine work and gasketting and stuff before final assembly anyway but i dont look forward to doing a water pump or timing belt when the time comes.
the oil pan looks super duper low but ill take pics when the wheels are back on and its on the ground cause im sure its only a half inch below the crossmember so it should be fine, if not ill modify it to be a little lower profile.
not quite an inch between the oil pan and crossmember in the rear, im gonna try to close that up a bit and raise it up in the front because the clearance in the front is more like a 1/4 inch.
i may have to notch out the crossmember slightly, not to clear the trans but the heads of the bolts that hold the cover onto the trans. other than that the trans has plenty of clearance here.
i brought home the crossmember and the shift linkages so i can replace the solid mount in the rear with a rubber one and shorten the shift linkage slightly and bend it out to the side so it lines up better with the transmission shift fork thingy. once i get that done ill move on to the front mount finally and then get started on the exhaust. im not sure when ill install the rear transmission mount since i can do a bunch of other stuff without it because nothing will move whether its in or out but ill be looking for a mount and the mounting bracket that fits this trans if anyone has one lying around. i really dont care if its in good shape or not since ill probably end up converting to poly down the line anyway.
BTW in case anyone is wondering why my pictures are way brighter i finally installed some new lights in my garage. i didnt even realize how dark it was in there until i compared this post to my other ones lol
Last edited by Nate Boslet; 05-18-2018 at 09:58 AM.
03-03-2017, 09:41 PM
#79
Member
Thread Starter
Join Date: Oct 2016
Posts: 284
THE CROSSMEMBER IS DONE. FINALLY.
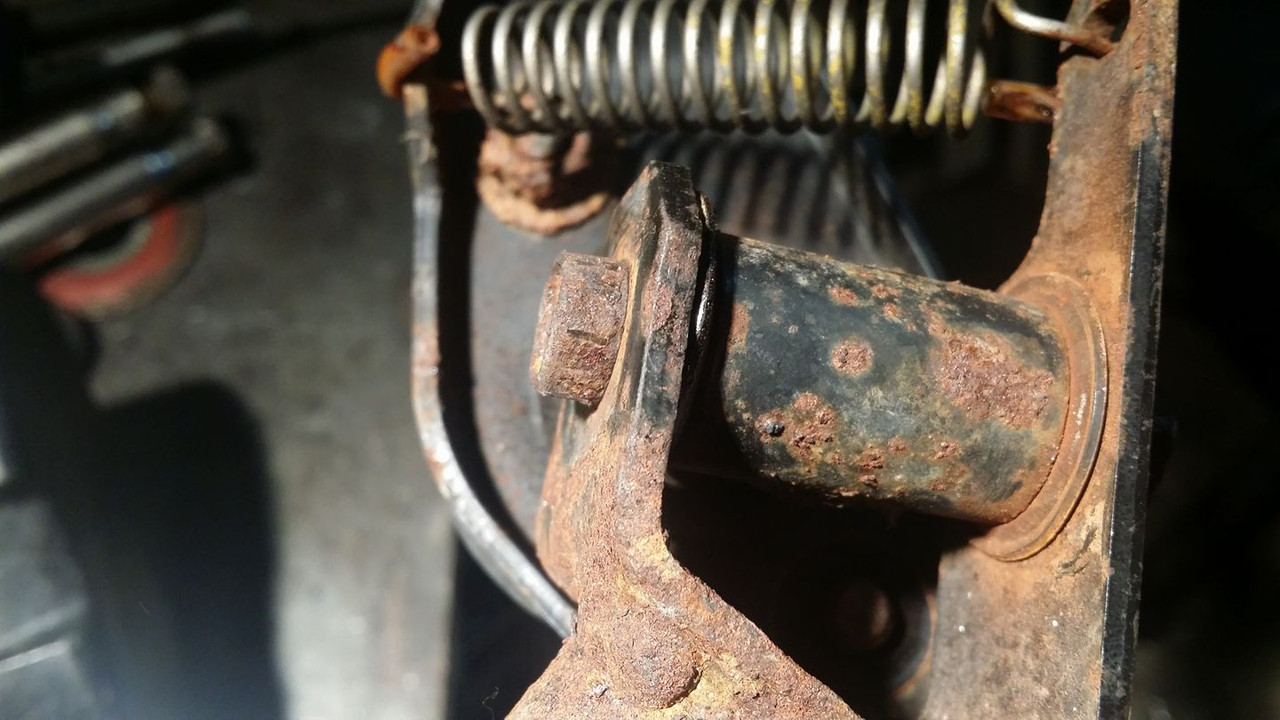
i used the rear mount from the automatic trans to replace the solid bar that i had been using before. the bolt holding it to the bracket was rust-welded together and since the mount is rubber i couldnt use heat so i drilled the head off the bolt and it came right out.

after cutting off the excess pieces and cleaning off all the rust i cut up the solid mount i was using to use as bracing.

then i threw some paint on it and took it over to the garage to see how it fit.

of course it fit perfectly..... i mean kinda

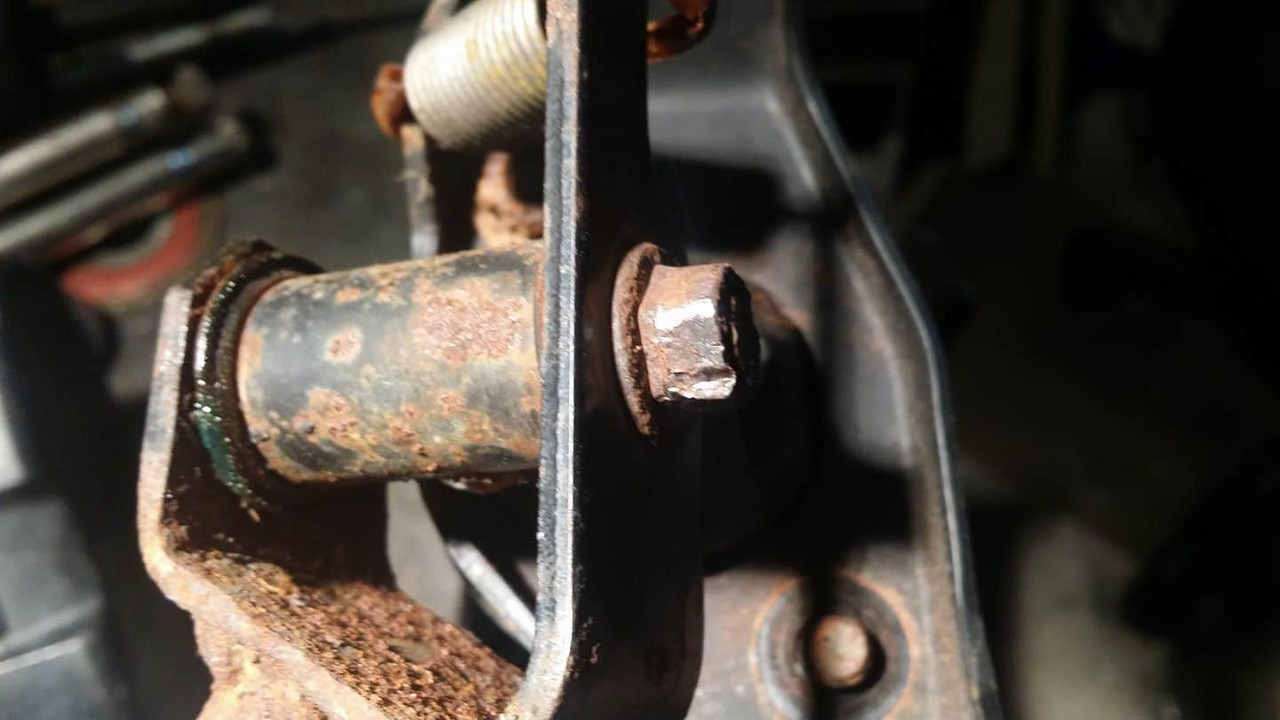
i brought it back and moved the mount over a 1/4 of an inch lol

with the mount moved over slightly the motor is officially where it is going to stay forever (besides being rocked rearward by the front mount and obviously as long as nothing forces me to move it again..)
im going to raise the front mount significantly higher than i originally expected to so the motor should be noticably farther back once i do that, its actually leaning a bit forward in this picture.

the axles are basically perfectly straight (or at least as straight as i could ever expect to get them)

this is the mount after the 1/4 inch correction. it still looks crooked because of the motor being tilted from the front mount, it should be much straighter once the front mount is where i want it.
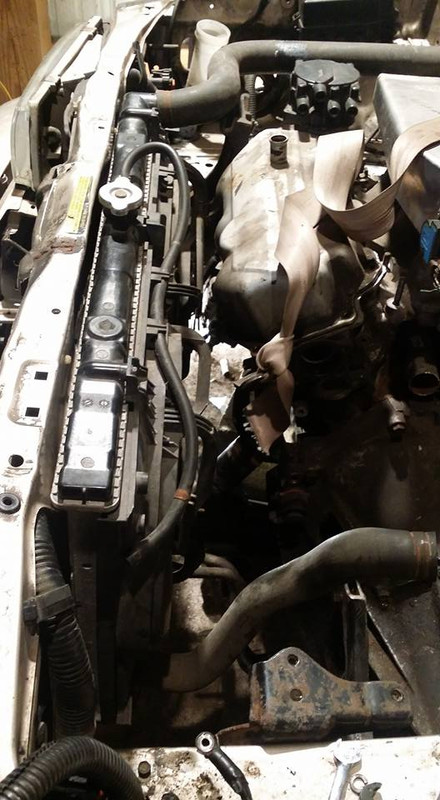
i threw the radiator in to see how much room i have, it looks like i have plenty of room but i hope ill get a bit more later.
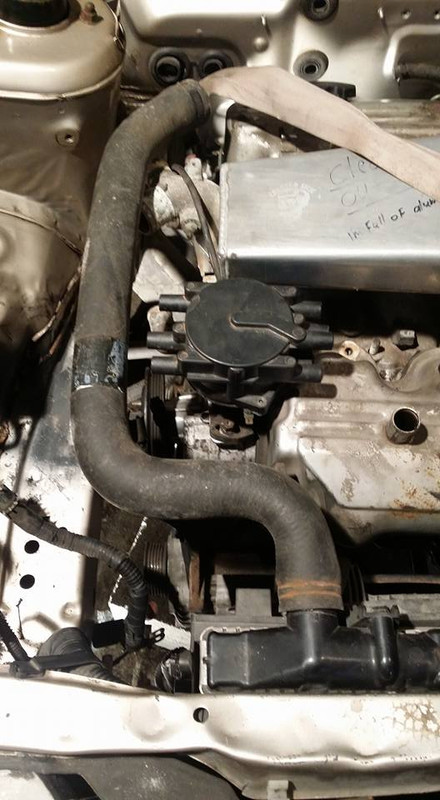
upper coolant hose, im pretty sure i posted about this already, i gotta take like 5-6 inches out of this hose. nbd.
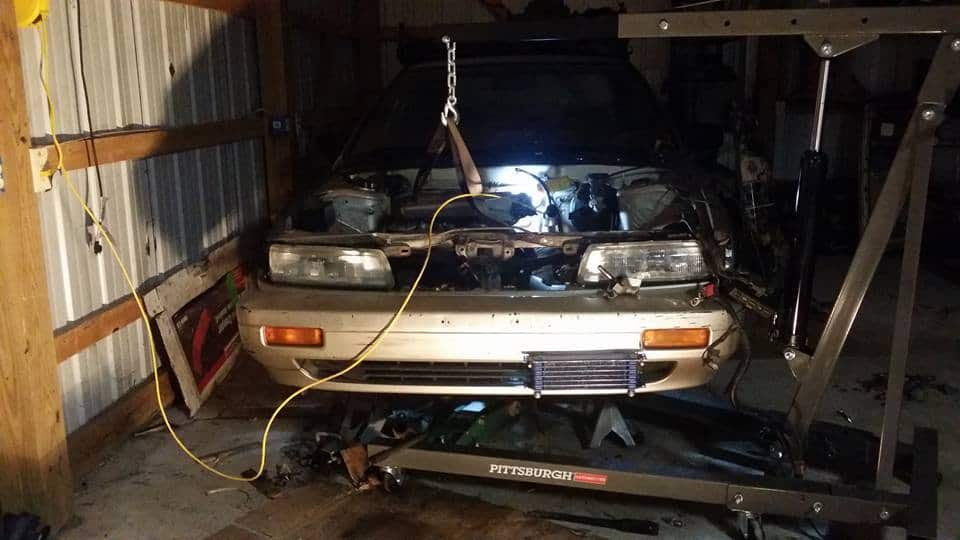
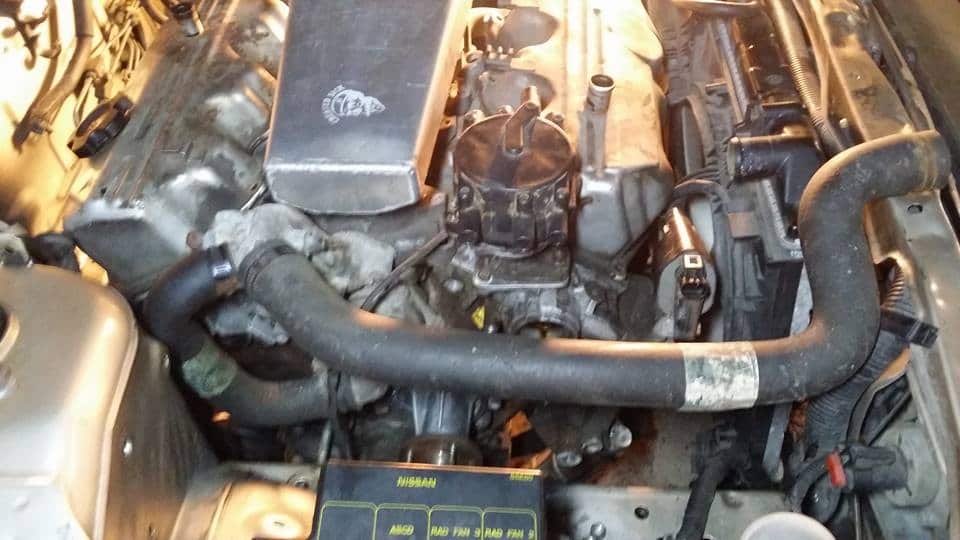
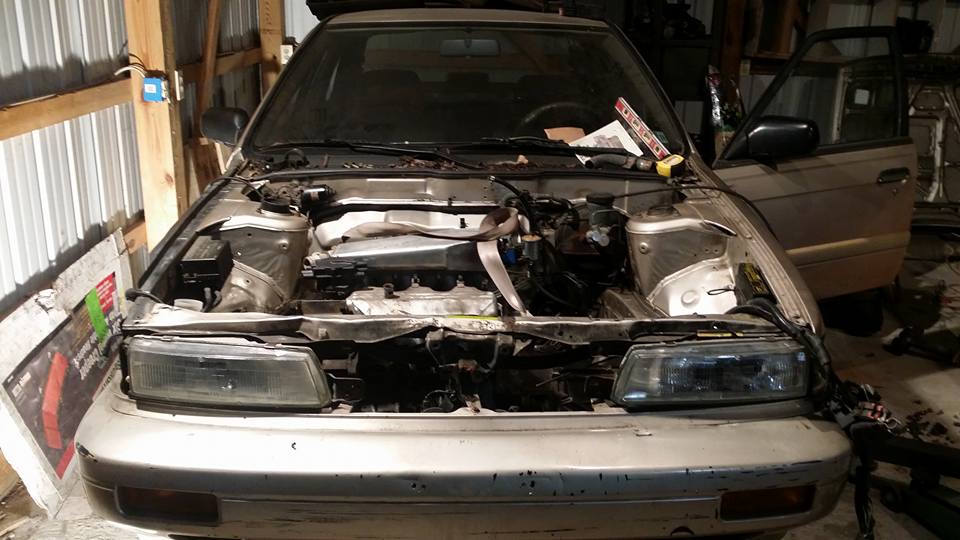
i slapped the hood back on to see where my hood clearance was at because i was kinda nervous it was going to be close. well i clearly have nothing to worry about because the top of the intake, which is the highest part in the engine bay, has like 2+ inches of clearance from the hood when its completely closed.
ive been thinking about doing aerocatch hood pins like i have on my z. the hoodpins i made out of bolts and washers never really worked very good for when i needed to open the hood but they did keep it closed and i want that trend to continue when the car is done..
i aslo want to fix this gross looking dent in my hood. i left the car with a "friend" for a while and he apparently smashed into it with something. i will probably just cut away the inner skin and hammer it out. i dont really mind dents but its just in a really ****ty spot. kinda like how like if the bad guy has a scar over his eye he is cool, this is more like if the bad guy had a hairlip.
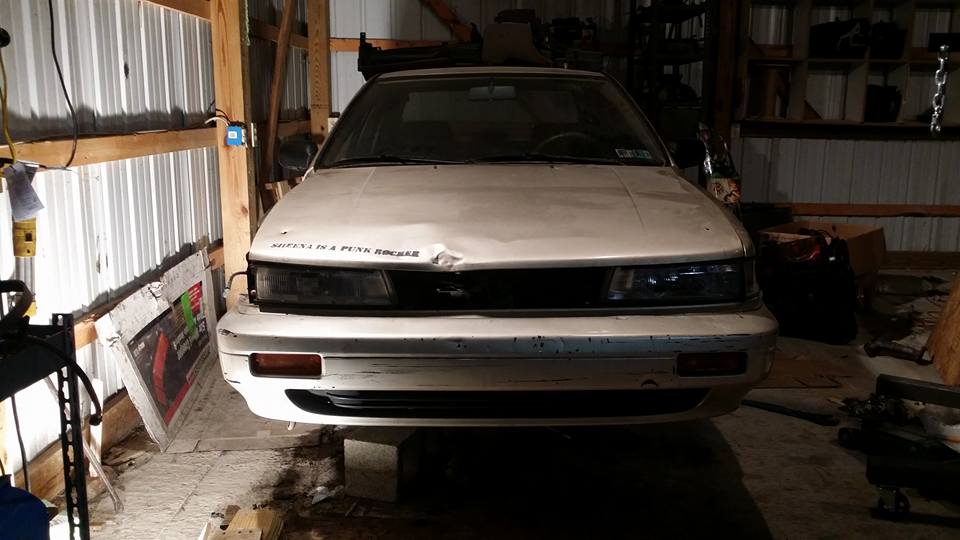
i was also looking at short shifters just for the **** of it and i realized the only difference between their shifters and mine (besides being painted blue) was that the little arm below the fulcrum was longer, which makes sense because all its doing is translating the movement at the top of the shifter by a smaller ratio.

i only added about a half inch to it because i only wanted to do this once and if it didnt work enough i could live with having a basically stock shifter but the throw is perfect, its about half of what the mile long stock throw was and basically turned my shift box into a square instead of a huge rectangle. i still need to dial in the length of the shift linkage, its a little long yet but im really happy with what ive done so far, cleaning, tightening and lubricating the moving parts of the shifter have made this thing shift better than it ever did with the other engine and trans.

i used the rear mount from the automatic trans to replace the solid bar that i had been using before. the bolt holding it to the bracket was rust-welded together and since the mount is rubber i couldnt use heat so i drilled the head off the bolt and it came right out.
after cutting off the excess pieces and cleaning off all the rust i cut up the solid mount i was using to use as bracing.
then i threw some paint on it and took it over to the garage to see how it fit.
of course it fit perfectly..... i mean kinda
i brought it back and moved the mount over a 1/4 of an inch lol
with the mount moved over slightly the motor is officially where it is going to stay forever (besides being rocked rearward by the front mount and obviously as long as nothing forces me to move it again..)
im going to raise the front mount significantly higher than i originally expected to so the motor should be noticably farther back once i do that, its actually leaning a bit forward in this picture.
the axles are basically perfectly straight (or at least as straight as i could ever expect to get them)
this is the mount after the 1/4 inch correction. it still looks crooked because of the motor being tilted from the front mount, it should be much straighter once the front mount is where i want it.
i threw the radiator in to see how much room i have, it looks like i have plenty of room but i hope ill get a bit more later.
upper coolant hose, im pretty sure i posted about this already, i gotta take like 5-6 inches out of this hose. nbd.
i slapped the hood back on to see where my hood clearance was at because i was kinda nervous it was going to be close. well i clearly have nothing to worry about because the top of the intake, which is the highest part in the engine bay, has like 2+ inches of clearance from the hood when its completely closed.
ive been thinking about doing aerocatch hood pins like i have on my z. the hoodpins i made out of bolts and washers never really worked very good for when i needed to open the hood but they did keep it closed and i want that trend to continue when the car is done..
i aslo want to fix this gross looking dent in my hood. i left the car with a "friend" for a while and he apparently smashed into it with something. i will probably just cut away the inner skin and hammer it out. i dont really mind dents but its just in a really ****ty spot. kinda like how like if the bad guy has a scar over his eye he is cool, this is more like if the bad guy had a hairlip.
i was also looking at short shifters just for the **** of it and i realized the only difference between their shifters and mine (besides being painted blue) was that the little arm below the fulcrum was longer, which makes sense because all its doing is translating the movement at the top of the shifter by a smaller ratio.
i only added about a half inch to it because i only wanted to do this once and if it didnt work enough i could live with having a basically stock shifter but the throw is perfect, its about half of what the mile long stock throw was and basically turned my shift box into a square instead of a huge rectangle. i still need to dial in the length of the shift linkage, its a little long yet but im really happy with what ive done so far, cleaning, tightening and lubricating the moving parts of the shifter have made this thing shift better than it ever did with the other engine and trans.
Last edited by Nate Boslet; 05-18-2018 at 09:59 AM.
03-03-2017, 09:56 PM
#80
Member
Thread Starter
Join Date: Oct 2016
Posts: 284
P.S. the rear mount is going to definitely be either replaced with poly or at the very least filled with window weld. the rubber mounts arent terrible or anything but i just dont want them to fail before i get a couple drives out of the car.