Broken control arm bolt
 11-28-2014, 02:10 PM
#1

Broken control arm bolt
I was removing the left control arm on my 1998 Maxima GLE (automatic) to replace the ball joint and bushings (with Moog and ES stuff) and one of the bolts broke. Has anyone else had this happen? The bolt was pretty badly crystallized inside which explains how a wimp like me could break it.
I am guessing my only real option now is to lower the K frame and drill out the bolt or get a machine shop to do it. Is there a good tutorial on Maxima.org or another source for lowering the K frame? It appears that the only other attachment point is the center support rail which I'll be taking out for other stuff anyway. Is there a source for the K frame bushings (assuming that is what they are called)? It would be a good idea to replace them anyway but I haven't been able to come up with a method from my searching.
Thanks in advance guys for any help you can offer.
 11-28-2014, 03:37 PM
#2
Senior Member

Join Date: Jan 2011
Location: Central AR
Posts: 3,041
Sorry to hear the bad news.
I'm collecting some posts and links below.
https://maxima.org/forums/4th-genera...ame-studs.html
https://maxima.org/forums/4th-genera...olt-stuck.html
Is this the item where the bolt stripped in the picture below?

I'm collecting some posts and links below.
https://maxima.org/forums/4th-genera...ame-studs.html
https://maxima.org/forums/4th-genera...olt-stuck.html
Is this the item where the bolt stripped in the picture below?
Last edited by CS_AR; 11-28-2014 at 04:08 PM.
11-28-2014, 06:12 PM
#3
Senior Member

Join Date: May 2012
Location: Long Island
Posts: 1,566
This might be a bit of a PITA because of logistics, but you could have it towed to a place that has an EDM (Electrical Discharge Machining) Tap Disintegrator. It will remove what's left of the bolt without hurting the threads. Can be around $100 per broken bolt, depending on where you live and go.
Clean all 6 holes with a tap and dare I say, use Anti-Seize compound on the way back in and be sure to Torque them in WELL!
Finding a place might be a pain, but if you can get it done close by, nothing will be anywhere as easy.
Good luck and please let us know how it goes!
Clean all 6 holes with a tap and dare I say, use Anti-Seize compound on the way back in and be sure to Torque them in WELL!
Finding a place might be a pain, but if you can get it done close by, nothing will be anywhere as easy.
Good luck and please let us know how it goes!
11-28-2014, 06:17 PM
#4
Senior Member
Join Date: May 2012
Location: Long Island
Posts: 1,566
Also, maybe you can put the other 5 bolts back in, buy and bring an extra and drive it to where they can do this. Have them EDM the old one out and then install the new bolt and when you get home, get it done!
I hope this helps.
I hope this helps.
11-29-2014, 04:22 AM
#5
This isn't very encouraging, guys!
It is the middle of the three bolts that hold the control arm (the light colored three bolt rod piece) to the K Frame that broke. If I am hearing you guys, the K Frame is never supposed come out of the car. It seems that, given that the bushing for the vertical rod is some sort of rubber or plastic and is cracking at the edges, that it is supposed to come out so the bushing could be replaced. If it is supposed to be permanent, wouldn't the factory have not put a nut at the end? BTW, I have to replace the rack at the same time so the other aspects of this job aren't an added burden. And thanks for the head's up about the EDM machine. Regardless what I do next, that sure sounds like a good solution for getting the old bolt out. There is a really good place in Denver called AAA Metric that sells just about any fastener you can imagine so getting the new bolt will not be a problem.
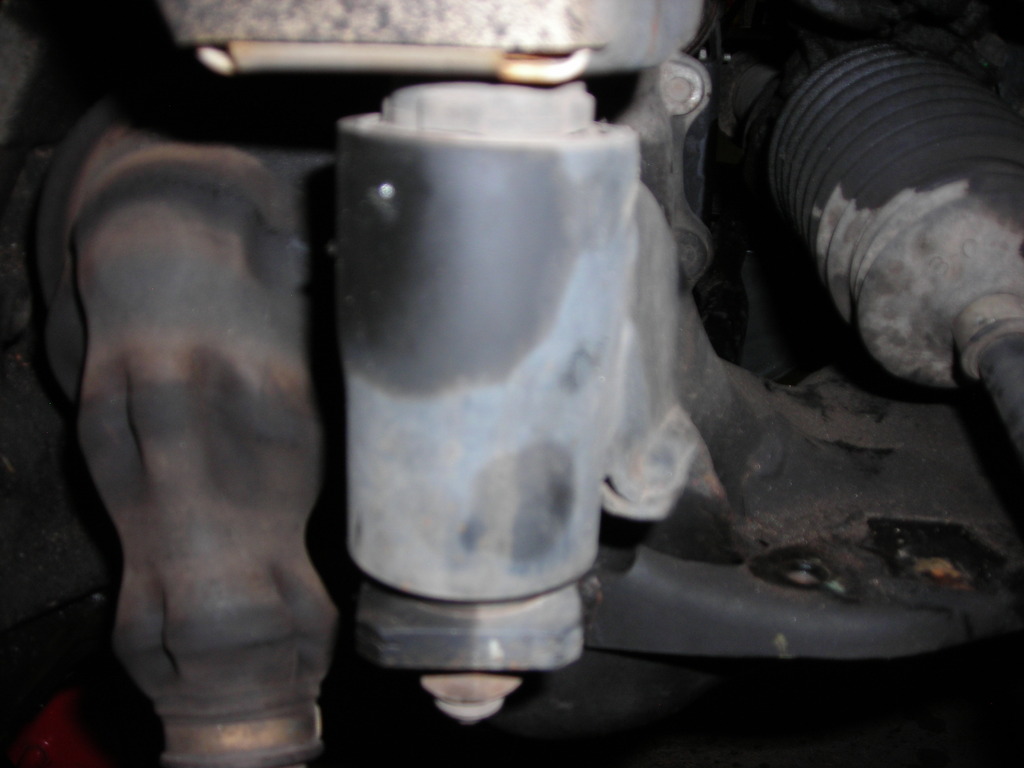

Last edited by rbuswell; 06-15-2015 at 08:12 AM. Reason: Added picture in place of attachment
11-29-2014, 05:21 AM
#7
That's helpful to know
11-29-2014, 05:44 AM
#8
Senior Member
Join Date: Jan 2011
Location: Central AR
Posts: 3,041
Let me look..
Meanwhile I see some for sale on eBay..
http://www.ebay.com/itm/like/221613362352?lpid=82
http://www.ebay.com/itm/1996-1999-99...-/251180009432
Meanwhile I see some for sale on eBay..
http://www.ebay.com/itm/like/221613362352?lpid=82
http://www.ebay.com/itm/1996-1999-99...-/251180009432
Last edited by CS_AR; 11-29-2014 at 06:51 AM.
11-29-2014, 06:51 AM
#9
Senior Member
Join Date: Jan 2011
Location: Central AR
Posts: 3,041
Last edited by CS_AR; 11-29-2014 at 06:55 AM.
11-29-2014, 08:48 AM
#10
 11-29-2014, 08:58 AM
#11
I joined
Hey, BTW, I wanted you guys to know how awesome your help has been. I realized that I was being a freeloader and went ahead and joined Maxima.org. I really appreciate your help and I hope to extend the favor back someday.

11-29-2014, 09:27 AM
#12
Senior Member
Join Date: Jan 2011
Location: Central AR
Posts: 3,041
Welcome aboard. I'm with you on trying to find some instructions. I'm coming up empty. We have some great members who I'm sure will stop by and offer their experience.
This one has my curiosity stirred up because I know I'll be facing this job at some point in the future for bushing replacement. I do see a lot of instructions for S14 (240SX) and other Nissans. I guess steps for many types of Nissan sub-frame removal can be applied to our cars.
How are you fixed for garage, jack stands, floor jack? One thing I have noticed from suspension instructions is there always seems to be a good floor jack and a couple of heavy jack stands in the picture. I keep jack stand(s) and floor jack(s) handy for when I get into some of the more challenging suspension projects.
Last edited by CS_AR; 11-29-2014 at 09:34 AM.
11-29-2014, 11:06 AM
#13
Senior Member
Join Date: May 2012
Location: Long Island
Posts: 1,566
So, let me ask a stupid question.....
Yes the three bolts from the (ready for this?) Link-Pin Bush need to come out to remove the LCA, but so do the other three. Six in total.
Were the other five all the same length? One of the six is supposed to be somewhat shorter. Could that one be the middle one on the (ready for this?) Link-Pin Bush? LOL I'm not sure which of the six is the short one. But you know. LOL
Also, can you reach around to the backside of the K Frame where the bolt would come out the back if it was long enough? Is there an opening, or is the back side where the bolts would come through closed off?
If it's threaded all the way through and what's left of the bolt is short of the end, can you get a teaspoon of a top penetrating lubricant in it. Gravity will feed it down. And you can focus a torch on the bolt itself to add some physical changes as well.
Buy a left handed drill bit made for Hardened metals smaller and able to stay centered and away from the threads, and as you drill into the bolt using a drill able to spin counter clockwise, it may heat up the bolt and along with the penetrating oil free it up before you get to an EZout. Or get you ready for using an EZout. And then do so.
Maybe you have a place nearby that sells: Moovit by Lloyds Labs in Canada. (There's an American brand using the same name and it's NOT the same) This is the best I've ever worked with. I buy it through Lee Valley, but Grainger might be able to source it as well.
But a higher success percentage is more likely with getting Moovit puddled on the back side of the bolt for a while and adding heat after.
I hope this helps! Best of luck and tenacity!
11-30-2014, 09:26 AM
#14
Answers
Welcome aboard. I'm with you on trying to find some instructions. I'm coming up empty. We have some great members who I'm sure will stop by and offer their experience.
This one has my curiosity stirred up because I know I'll be facing this job at some point in the future for bushing replacement. I do see a lot of instructions for S14 (240SX) and other Nissans. I guess steps for many types of Nissan sub-frame removal can be applied to our cars.
How are you fixed for garage, jack stands, floor jack? One thing I have noticed from suspension instructions is there always seems to be a good floor jack and a couple of heavy jack stands in the picture. I keep jack stand(s) and floor jack(s) handy for when I get into some of the more challenging suspension projects.
This one has my curiosity stirred up because I know I'll be facing this job at some point in the future for bushing replacement. I do see a lot of instructions for S14 (240SX) and other Nissans. I guess steps for many types of Nissan sub-frame removal can be applied to our cars.
How are you fixed for garage, jack stands, floor jack? One thing I have noticed from suspension instructions is there always seems to be a good floor jack and a couple of heavy jack stands in the picture. I keep jack stand(s) and floor jack(s) handy for when I get into some of the more challenging suspension projects.
I have a pretty nice garage for a hobbyist that includes a couple floor jacks and eight jack stands.
So, let me ask a stupid question.....
Yes the three bolts from the (ready for this?) Link-Pin Bush need to come out to remove the LCA, but so do the other three. Six in total.
Were the other five all the same length? One of the six is supposed to be somewhat shorter. Could that one be the middle one on the (ready for this?) Link-Pin Bush? LOL I'm not sure which of the six is the short one. But you know. LOL
Also, can you reach around to the backside of the K Frame where the bolt would come out the back if it was long enough? Is there an opening, or is the back side where the bolts would come through closed off?
If it's threaded all the way through and what's left of the bolt is short of the end, can you get a teaspoon of a top penetrating lubricant in it. Gravity will feed it down. And you can focus a torch on the bolt itself to add some physical changes as well.
Buy a left handed drill bit made for Hardened metals smaller and able to stay centered and away from the threads, and as you drill into the bolt using a drill able to spin counter clockwise, it may heat up the bolt and along with the penetrating oil free it up before you get to an EZout. Or get you ready for using an EZout. And then do so.
Maybe you have a place nearby that sells: Moovit by Lloyds Labs in Canada. (There's an American brand using the same name and it's NOT the same) This is the best I've ever worked with. I buy it through Lee Valley, but Grainger might be able to source it as well.
But a higher success percentage is more likely with getting Moovit puddled on the back side of the bolt for a while and adding heat after.
I hope this helps! Best of luck and tenacity!
Yes the three bolts from the (ready for this?) Link-Pin Bush need to come out to remove the LCA, but so do the other three. Six in total.
Were the other five all the same length? One of the six is supposed to be somewhat shorter. Could that one be the middle one on the (ready for this?) Link-Pin Bush? LOL I'm not sure which of the six is the short one. But you know. LOL
Also, can you reach around to the backside of the K Frame where the bolt would come out the back if it was long enough? Is there an opening, or is the back side where the bolts would come through closed off?
If it's threaded all the way through and what's left of the bolt is short of the end, can you get a teaspoon of a top penetrating lubricant in it. Gravity will feed it down. And you can focus a torch on the bolt itself to add some physical changes as well.
Buy a left handed drill bit made for Hardened metals smaller and able to stay centered and away from the threads, and as you drill into the bolt using a drill able to spin counter clockwise, it may heat up the bolt and along with the penetrating oil free it up before you get to an EZout. Or get you ready for using an EZout. And then do so.
Maybe you have a place nearby that sells: Moovit by Lloyds Labs in Canada. (There's an American brand using the same name and it's NOT the same) This is the best I've ever worked with. I buy it through Lee Valley, but Grainger might be able to source it as well.
But a higher success percentage is more likely with getting Moovit puddled on the back side of the bolt for a while and adding heat after.
I hope this helps! Best of luck and tenacity!
Unfortunately there is no access to the bolts from above. The top of the K Frame is closed off. The Linch-Pin bolts are all the same size and BIG. At least that's what came out of the other side. The three bolts holding the Compression Clamp (steel plate) on are smaller and there is one that is shorter so that is probably what you are remembering.
I tried to get a picture of the broken off bolt in the K Frame but the pic didn't show much. It is REALLY crystallized however. I am convinced that given how little it took to break it off, that bolt ain't gonna be turning anytime soon due to tremendous corrosion. I will keep your notes for removing frozen bolts and nuts in general though because I run into frozen stuff all the time and I know your suggestions will come in real handy. I still have to get the exhaust system down
.A machinist neighbor thinks I should go with very small incremental increase when drilling it out. To do that, I think I need to get the K Frame to a big drill press. I think I'd need to do it for contracting the EDM job too unless I want to pay way too much money. As we see above other used K Frames can be had for not that much money. That is why I feel so strongly about getting the K Frame off the car.
 12-01-2014, 06:23 AM
#16
Good advice
 Of course if the machine shop wants too much there is always the option to buy another one from the junk yard or eBay.
12-27-2014, 01:03 PM
Of course if the machine shop wants too much there is always the option to buy another one from the junk yard or eBay.
12-27-2014, 01:03 PM
#17
Lowering K-frame not hard to do
It turned out that I was sweating the small stuff. The two nuts holding the K-frame on loosened easily (I pre-soaked them with PB Blaster) and I used two floor jacks to lower it to the ground. If I wasn't doing it by myself I wouldn't have even needed to use jacks. It is fairly light given its size and how much work it does. It is actually a pretty impressive piece. The bushings/collars/whatever they're called look to be in pretty good shape although if I can source them, I would probably replace them just to play it safe.
Next up: drilling out the bolt.
Next up: drilling out the bolt.
12-27-2014, 11:39 PM
#19
anti-seize and proper torque will prevent the broken bolt scenario....too tight can cause fastener failure....plenty of PB blaster and good hammer and chisel can get the bolt loose enough to remove with a set of Vise Grip Pliers....Just be patient and PPE yourself!
12-27-2014, 11:52 PM
#20
I wish the picture was any good because the bolt actually sheared off below the surface of the K Frame about 3/8 inch and it is not flat. I have Scottish blood so I am notoriously cheap. I would much prefer to fix this myself but if the EDM solution will give me the right result I may have to part with the money. Of course if the machine shop wants too much there is always the option to buy another one from the junk yard or eBay.
Of course if the machine shop wants too much there is always the option to buy another one from the junk yard or eBay.
12-28-2014, 07:57 AM
#21
Thanks for all the input
Since I have the K-frame out, I now have the option of using my drill press. This will give me a more accurate drilling path and a little more power. I will use cutting oil throughout the process and I'll need a second set of hands to hold the other end of the K-frame. My plan is to use a small enough bit to get started but big enough that it won't break. I will give an Easy-Out a try when I get roughly halfway but I don't have much hope it will work. Then I will just work my way out with bigger sized drill bits. I hope to avoid the helio-coil option. In fact, if it gets that close it may be time to seek out an EDM provider since it may be cheaper than a helio-coil kit for that sized bolt.
12-28-2014, 03:53 PM
#22
Senior Member
Join Date: May 2012
Location: Long Island
Posts: 1,566
If you have the K Frame out, make a few calls to several places that can EDM out the last of it. If someone is slow, offer $50. No complications. Same sized bolt back in!
IMO, A No Brainer. Good Luck!
IMO, A No Brainer. Good Luck!
12-28-2014, 07:58 PM
#23
Member

Join Date: Sep 2013
Location: Canada
Posts: 112
Yep, the heli-coil kit ran me about $100 Canadian. Only one place in town had that size in stock.
I pulled a spare bolt from a Maxima at the junkyard so it was the factory thread pitch.. I believe it was M14 x 1.5.
I pulled a spare bolt from a Maxima at the junkyard so it was the factory thread pitch.. I believe it was M14 x 1.5.
03-24-2015, 03:09 PM
#24
Eureka
Sorry I have been so slow in replying. I got the bolt out about two weeks ago. I used a fairly small left-handed cobalt drill bit and only had to drill in a little ways ... I could actually see the bolt turn a little. I then took an EZ-Out and the bolt came right out. No thread damage or anything. I think this tells me that the bolt had been weakened somehow. The replacement bolt was available at the local Nissan dealer (special order) for about $6 and two business days delivery wait. The parts counter guy said that his store had never stocked or ordered that bolt before so it was pretty unusual. Thanks again for all your help.

 03-26-2015, 06:37 AM
#26
On to the next problem ...
Actually, I am replacing the bushings with Energy Suspension parts so buying new control arms wouldn't have helped me. There's nothing wrong with the factory arms other than I am running into problems getting the old bushings out. But that will be addressed in an new thread.
04-13-2015, 05:48 AM
#28
Nissan bolt best option
As for your stripped-out threads, my first recommendation would be to try a thread chaser to be sure the threads can't be salvaged. If they are toast, that would leave you with the Time-Cert type of solution. A machine shop can usually do it if you aren't up to the task yourself.
04-13-2015, 09:36 PM
#29
Member

Join Date: Sep 2012
Posts: 227
I took the bolt to a really good independent metric fastener supplier here in Denver and they didn't have anything that came close. The factory bolt has a couple different reliefs and other differences from a standard bolt. As I mentioned in my write-up, the factory bolt is readily available at a Nissan dealer and is not expensive. I would recommend against re-inventing the wheel given how easy the right bolt is to get.
As for your stripped-out threads, my first recommendation would be to try a thread chaser to be sure the threads can't be salvaged. If they are toast, that would leave you with the Time-Cert type of solution. A machine shop can usually do it if you aren't up to the task yourself.
As for your stripped-out threads, my first recommendation would be to try a thread chaser to be sure the threads can't be salvaged. If they are toast, that would leave you with the Time-Cert type of solution. A machine shop can usually do it if you aren't up to the task yourself.
04-14-2015, 09:34 AM
#30
K-frame
If the threads end up being bad and you found a K-Frame in a junked car -- that is, if that is where you found the replacement bolt -- you may want to just buy that K-Frame rather going to the extra effort to put in the Time-Cert in your existing K-Frame. Just a thought.

Thread
Thread Starter
Forum
Replies
Last Post