How to: Floor pan rust repair with lots of pics
 08-18-2014, 10:25 AM
#1
I'm nutty for Nissans

Thread Starter
iTrader: (46)
Join Date: Feb 2003
Location: Maine
Posts: 10,328
How to: Floor pan rust repair with lots of pics
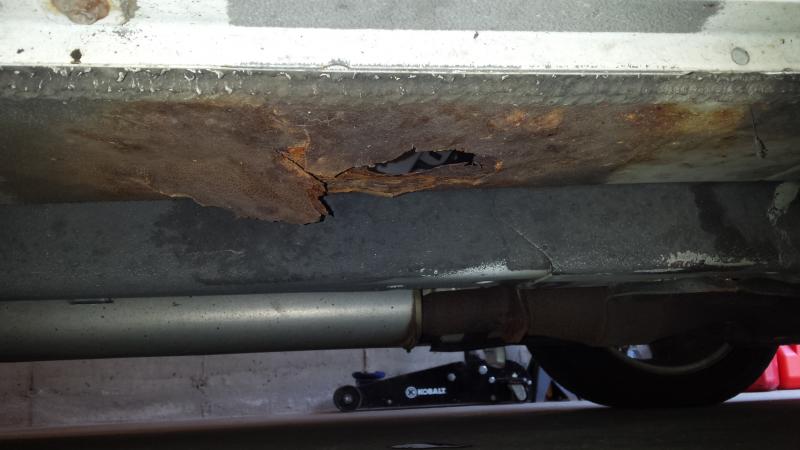
I've been working like crazy on my father's 07 SL. It's been neglected pretty good to say the least. I have already tackled this job on my 03 Altima, which suffers from the exact same problem.
If you have this problem, roll up you sleeves and get to work!
01 - Unbolt seat and lean it back. You don't need to remove it from the car.
02 - Disconnect battery. You'll have to unplug the wiring, including air bag, if you want to remove the carpet from the vehicle. Work smart, don't set off the air bag.
03 - Remove trim from around carpet. The panels pop off with no screws, just clips.
04 - Remove carpet. It's held in with clips on the sill and velcro around the edges. There are some push pins on the drivers side. You'll need to remove the HVAC drain tube from the ducting on the passenger side. Finally you're getting to the issue.
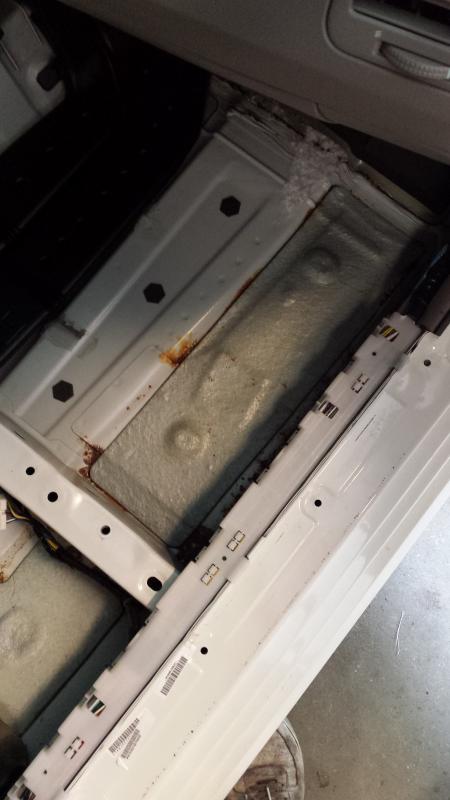
05 - Time to get dirty. Remove the sound deadening. A chisel and mallet work just fine. Some have been lucky and it peeled up in one piece.
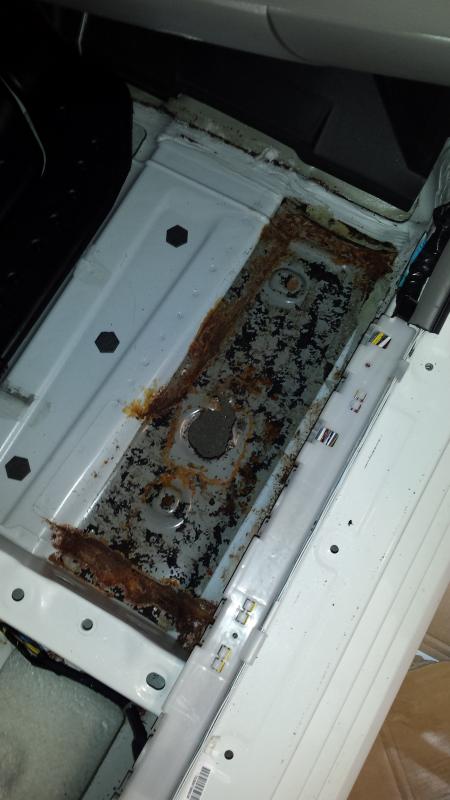
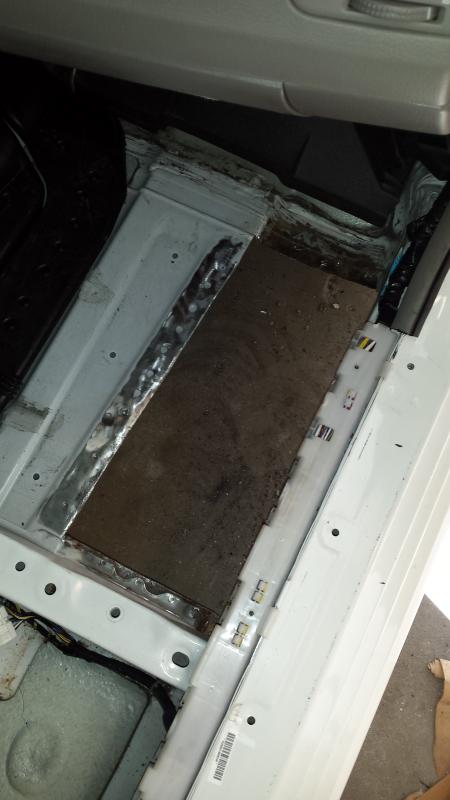
06 - Drill out any spot welds and remove the first layer of sheet metal. Hammer and chisel or air hammer if you choose. This is where all the water got trapped.
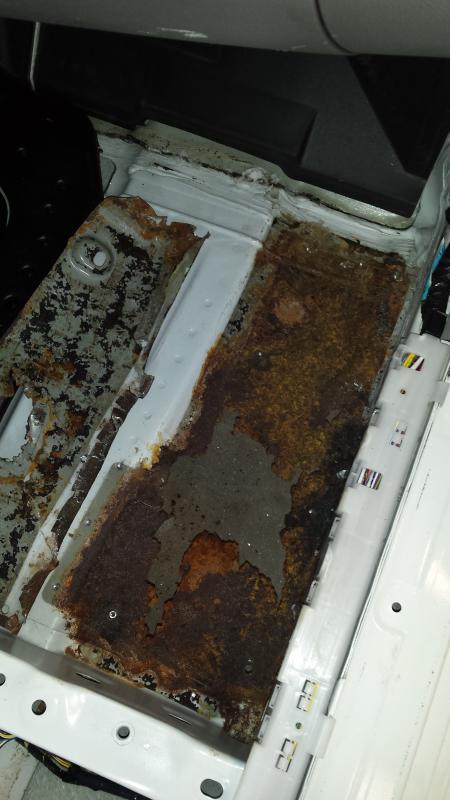
07 - Cut out the rusted floor pan. Get as much of the rust out as you can yet leave as much good metal as you can. I had to cut from the seat mounting area to the reinforced area of the foot well. About 18" long and 8" wide.
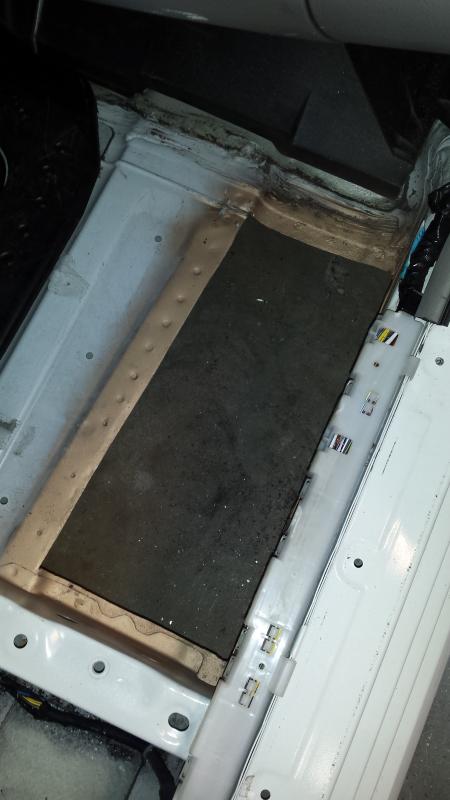
08 - Grind the metal the best you can. The cleaner the better, ask me how I know.
09 - Hit it with some rust treatment.
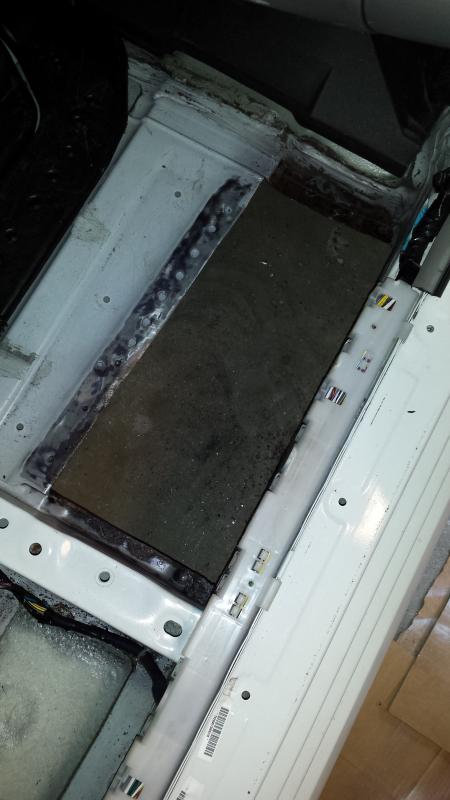
10 - Prime the bare metal. I am welding the new panel in; I used copper weld through primer. If you rivet or use panel adhesive the new panel in you can use the appropriate primer.
11 - Make a patch panel. I chose a piece of 12x24" mild steel. Unfortunately it's somewhat thin at 22 gauge. I had 16 gauge which would have been difficult to bend and shape. 18 gauge would have been closest to the original metal. Get creative if you don't have lots of shop tools. Clamps, wood, and a hammer will get you there.
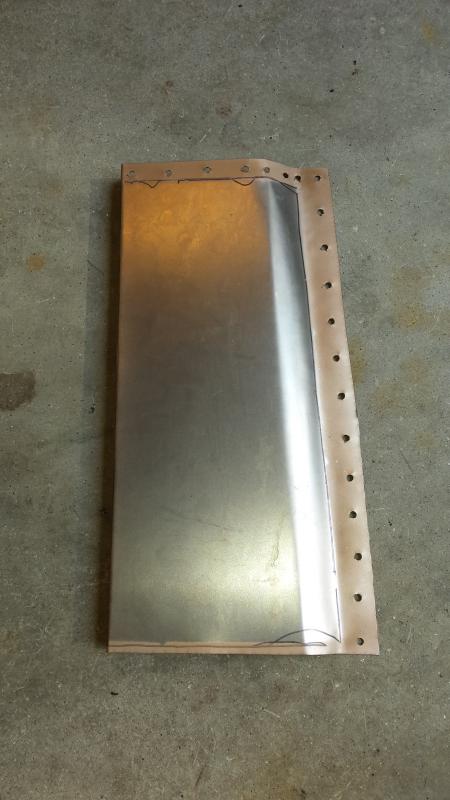
12 - Test fit. Bend, hammer, repeat.....
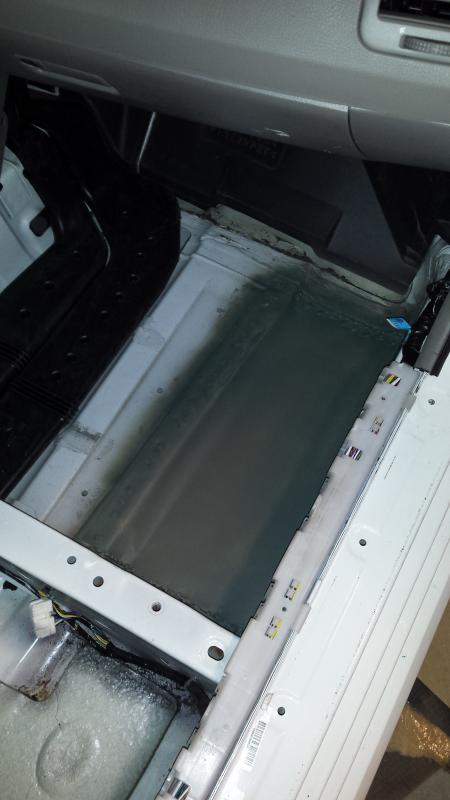
13 - Weld it in. Or rivet, screw, glue, whatever your method may be.
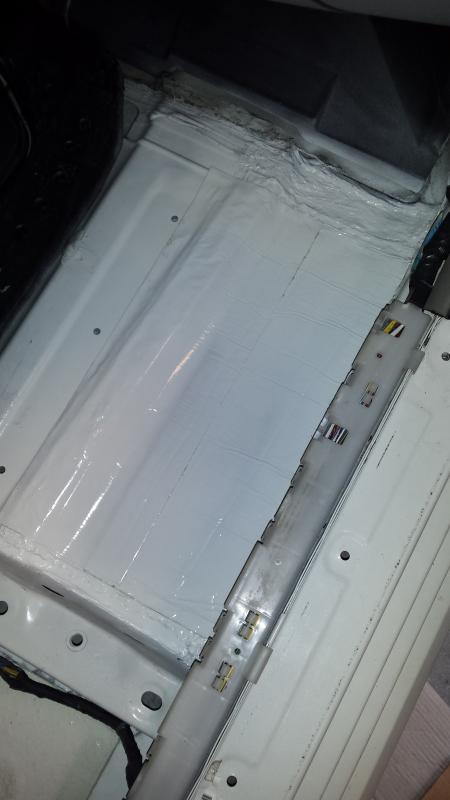
14 - Prime the bare metal, inside and out.
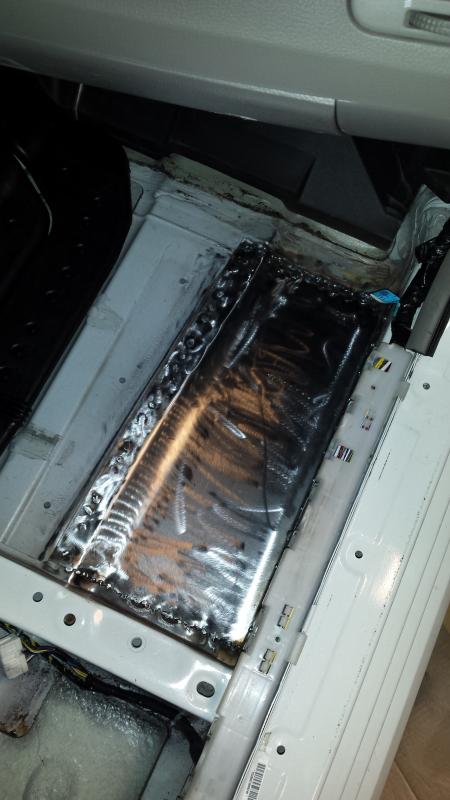
15 - Seam seal the edges, inside and out.
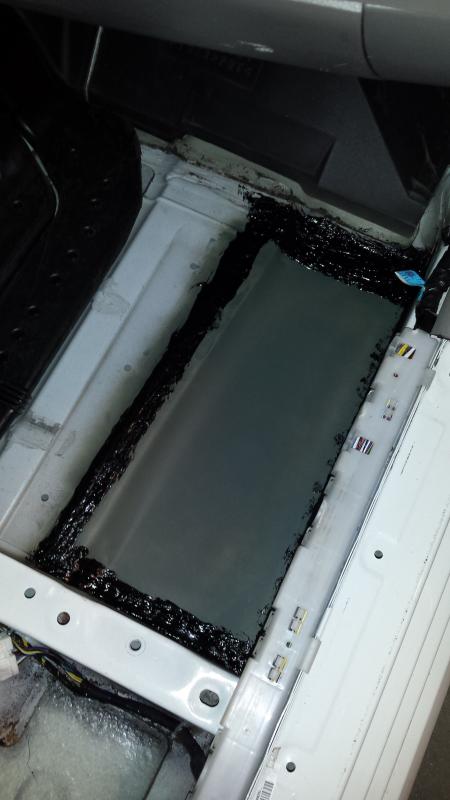
16 - Paint the area, inside and out.
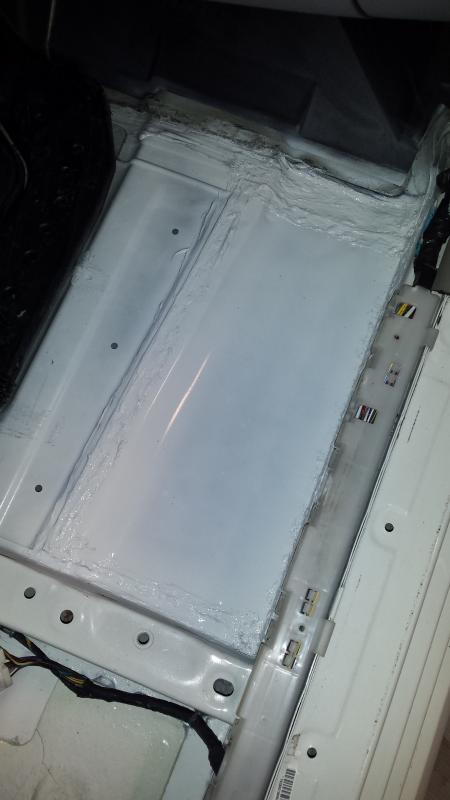
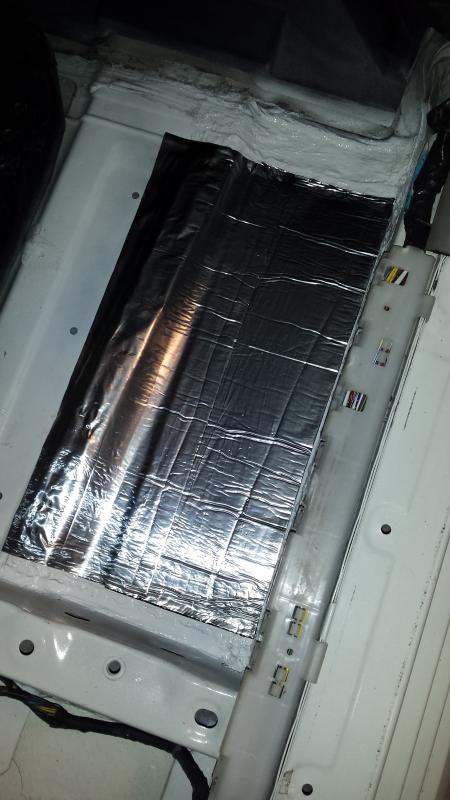
17 - Add some sort of sound deadener if you like. I used peal and seal type stuff on the inside. I under coated the under side like crazy.
18 - Paint over it again? Sure why not.
19 - Put the interior back together.
20 - Repeat on other side.

If you have this problem, roll up you sleeves and get to work!
01 - Unbolt seat and lean it back. You don't need to remove it from the car.
02 - Disconnect battery. You'll have to unplug the wiring, including air bag, if you want to remove the carpet from the vehicle. Work smart, don't set off the air bag.
03 - Remove trim from around carpet. The panels pop off with no screws, just clips.
04 - Remove carpet. It's held in with clips on the sill and velcro around the edges. There are some push pins on the drivers side. You'll need to remove the HVAC drain tube from the ducting on the passenger side. Finally you're getting to the issue.

05 - Time to get dirty. Remove the sound deadening. A chisel and mallet work just fine. Some have been lucky and it peeled up in one piece.

06 - Drill out any spot welds and remove the first layer of sheet metal. Hammer and chisel or air hammer if you choose. This is where all the water got trapped.

07 - Cut out the rusted floor pan. Get as much of the rust out as you can yet leave as much good metal as you can. I had to cut from the seat mounting area to the reinforced area of the foot well. About 18" long and 8" wide.

08 - Grind the metal the best you can. The cleaner the better, ask me how I know.
09 - Hit it with some rust treatment.

10 - Prime the bare metal. I am welding the new panel in; I used copper weld through primer. If you rivet or use panel adhesive the new panel in you can use the appropriate primer.

11 - Make a patch panel. I chose a piece of 12x24" mild steel. Unfortunately it's somewhat thin at 22 gauge. I had 16 gauge which would have been difficult to bend and shape. 18 gauge would have been closest to the original metal. Get creative if you don't have lots of shop tools. Clamps, wood, and a hammer will get you there.

12 - Test fit. Bend, hammer, repeat.....
13 - Weld it in. Or rivet, screw, glue, whatever your method may be.

14 - Prime the bare metal, inside and out.

15 - Seam seal the edges, inside and out.

16 - Paint the area, inside and out.

17 - Add some sort of sound deadener if you like. I used peal and seal type stuff on the inside. I under coated the under side like crazy.

18 - Paint over it again? Sure why not.

19 - Put the interior back together.
20 - Repeat on other side.


 09-07-2014, 06:01 AM
#4
Newbie - Just Registered

Join Date: Nov 2008
Location: central new york
Posts: 12
floorboards
Jsutter, Have you determined what exactly occurs to cause this problem? I just purchased a 2012 maxima and want to get ahead of it. My 2006 Altima has the same problem. I tried to cut out as much rust as possible but didn't have tools to totally remove.
09-07-2014, 10:24 AM
#5
I'm nutty for Nissans
Thread Starter
iTrader: (46)
Join Date: Feb 2003
Location: Maine
Posts: 10,328
There is a hole in the chassis, supposedly there from production, that is not sealed well from the factory. Water collects between the layers of metal and rots the floor from the inside out. The bottom of the car looks fine until its too late.
Best course of action would have been to seam seal the hole when the car was new.
I hope the 09+ Maxima does not suffer from this.
Best course of action would have been to seam seal the hole when the car was new.
I hope the 09+ Maxima does not suffer from this.
09-07-2014, 04:47 PM
#6
Newbie - Just Registered
Join Date: Nov 2008
Location: central new york
Posts: 12
Would you be talking about the plug looking things that are in the floor boards and pop out or loosen when rusted. Would be in the section you removed.
I sealed those on the 2012 Maxima and under coated the under body.
I sealed those on the 2012 Maxima and under coated the under body.
 11-19-2015, 05:38 PM
#8
Senior Member

Join Date: Jan 2004
Location: toronto
Posts: 371
know this is an old post (but niece just told me of rust on 2015 Altima .. not related) so checking this site .... check this post ... I got rid of my max coz of same issue - rust in floor wells and reason was from sunroof. further searching required even with the link.
possible multiple sources of water coming into the car!
https://maxima.org/forums/7th-genera...ml#post9051556
possible multiple sources of water coming into the car!
https://maxima.org/forums/7th-genera...ml#post9051556
12-28-2015, 12:16 PM
#9
Newbie - Just Registered

Join Date: Mar 2014
Location: Rhode Island
Posts: 12
Thank you for the guide! I printed out everything here, gonna do some work on my 04 Maxima SE 3.5L. Driver & Passenger rotted all the way, very sad. It escalated after the harsh winter last year in RI. My damage is similar to the car you fixed but worse, carpet is draping out of the hole. Tackling the issue this week! Again thank you, I'll post when the fix is complete will take pictures & track how it goes!
05-29-2017, 05:29 AM
#10
Junior Member

Join Date: Sep 2010
Location: Cleveland
Posts: 22
 Thanks for the detailed process, this will be my 4th of july week vacation project at my father-inlaws house for my 07 maxima. thank goodness he has a full shop with all the tools. Here is a link for floor pans anyone use these before? 20 gauge metal, reviews seem top be good. pans ar 34" long my rust damage is only about 14 x 11 was going to patch back about 18 inches. Any thoughts?
https://raybuck.com/product/2002-200...n-driver-side/
Fyi does anyone know how to disconnect the wiring harness for seats? I started a separate thread but really need an answer. It is not your standard easy disconnect plug. UGH Thanks Nissan
Last edited by mdb007; 07-02-2017 at 08:16 PM.
07-07-2017, 01:33 PM
#11
Junior Member
Join Date: Sep 2010
Location: Cleveland
Posts: 22
Well here is how my pans came out, great thanks to my father-inlaw. He did the sizing and cutting of the pans I got from raybuck. I did the cutting around old area, grinding spraying etc and left the hard part to him. Sad I only used about 1/3 of them but they fit like a glove, and $180 total for them still better than a shop charging $2-3000.
Passenger side was rotted a little past the passenger crossmember so he cut back further. I got a can of welding primer as suggested here and along with my father-inlaws suggestion for $6, 3M rubberized undercoating on sale for $18 at advance auto, tube of seam seal for $7 at another parts store, and. And found the dynamat on sale at amazon for $15 a roll. So for about 3 days on and off work over the holiday it turned out well and I should get another 2-3 years out of this easily. Oh and replacement pan had that drain hole but what is weird is the soundproofing covers it up as was the original I assume. I primed the hell out of it and hot bottom of pans good with the seam seal and 3m undercoat.
What really made easy though was the fact he had a lift so we could work from above and below easily. Good luck if you are doing this. Just labor intensive.
Last edited by mdb007; 07-07-2017 at 01:36 PM.
08-26-2017, 03:24 AM
#12
Newbie - Just Registered

Join Date: Jun 2016
Posts: 1
My root is on the passenger side and when I was pulling out the carpet, at the top there is a rubber tube going through the carpet, is that from the AC condenser??? so I am going to cut the carpet from the top to the tube in order to get the carpet passed the tube. All I wanted to do is pull the carpet on the passenger side back to the center console and that would give me enough room to work on the rooted area. Any Ideas, I just do not want to pull on the hose because I am not sure where it goes to??????????? It is a 2004 Nissan Maxima SE and I am a Disabled Veteran and I do not have a lot of funds to work with.
08-26-2017, 06:12 AM
#13
Junior Member
Join Date: Sep 2010
Location: Cleveland
Posts: 22
I am not sure about the hose. we did not see one when working on mine but I think your right it is tied into something for drainage. And I think someone else mentioned in another thread, what was Nissan thinking? I do remember I used to hear water sloshing from somewhere when braking or starting and knew that wasn't good. most likely it was in the floor pan area. My suggestion would be to drill a hole in your patch when it is done and put the hose so it is draining to bottom of vehicle. then use body caulk to seal it. good luck to you it's a labor intensive job.
11-07-2017, 05:31 PM
#14
Senior Member
Join Date: Jan 2004
Location: toronto
Posts: 371
rmoon3711: the tube you are referring to is most likely the tube from the sunroof that goes down the a-pillars and then to the floor panels where it is somehow supposed to drain outside. the rust on my car (both front sides) was due to this - water was not draining as it was clogged somewhere.


 08-19-2021, 09:40 AM
#17
So am I correct in reading this that originally there are two layers of sheet metal in this area, and you cut out the inner layer to get to the outer/under layer, but only weld in the outer layer back in?
I've got a similar problem in my 4th gen that I need to figure out how to tackle. The issue is complicated by the fact the my SFCs are blocking access to some of the area that will need to be welded back in place.

I suppose I could cut the SFCs off the car and weld them back on later, but I'd really prefer to not have to do that. Should I cut mine apart from the inside and weld in a patch from up there?
I've got a similar problem in my 4th gen that I need to figure out how to tackle. The issue is complicated by the fact the my SFCs are blocking access to some of the area that will need to be welded back in place.
I suppose I could cut the SFCs off the car and weld them back on later, but I'd really prefer to not have to do that. Should I cut mine apart from the inside and weld in a patch from up there?
08-19-2021, 10:23 AM
#18
I'm nutty for Nissans
Thread Starter
iTrader: (46)
Join Date: Feb 2003
Location: Maine
Posts: 10,328
The 4th and 6th gens are slightly different. 6th gens have a small piece of metal over the large hole which promotes rust.
You can do just about the whole job from inside. Pull your interior out and see exactly what you are working with.
You can do just about the whole job from inside. Pull your interior out and see exactly what you are working with.


Thread
Thread Starter
Forum
Replies
Last Post
kjlouis
4th Generation Maxima (1995-1999)
12
10-03-2015 05:29 AM
The Wizard
4th Generation Maxima (1995-1999)
24
10-01-2015 08:47 PM
sdotcarter
6th Generation Maxima (2004-2008)
2
09-02-2015 09:53 PM