My Massive I30 Revival and Build Thread
 11-18-2014, 05:00 PM
#241

I pulled my vacuum source from the other side of the manifold where the VIAS would be located. The stock 3.5 FPR doesn't have a vacuum nipple on it because it is supposed to run 51psi all the time, whereas the 3.0 FPRs switch between roughly 31psi and 42 psi depending on engine load.
The two hose barbs under the tb are for coolant.
The two hose barbs under the tb are for coolant.
 01-13-2015, 04:18 PM
#242

Well between one thing and another; I still don't have the AFPR on the car yet.
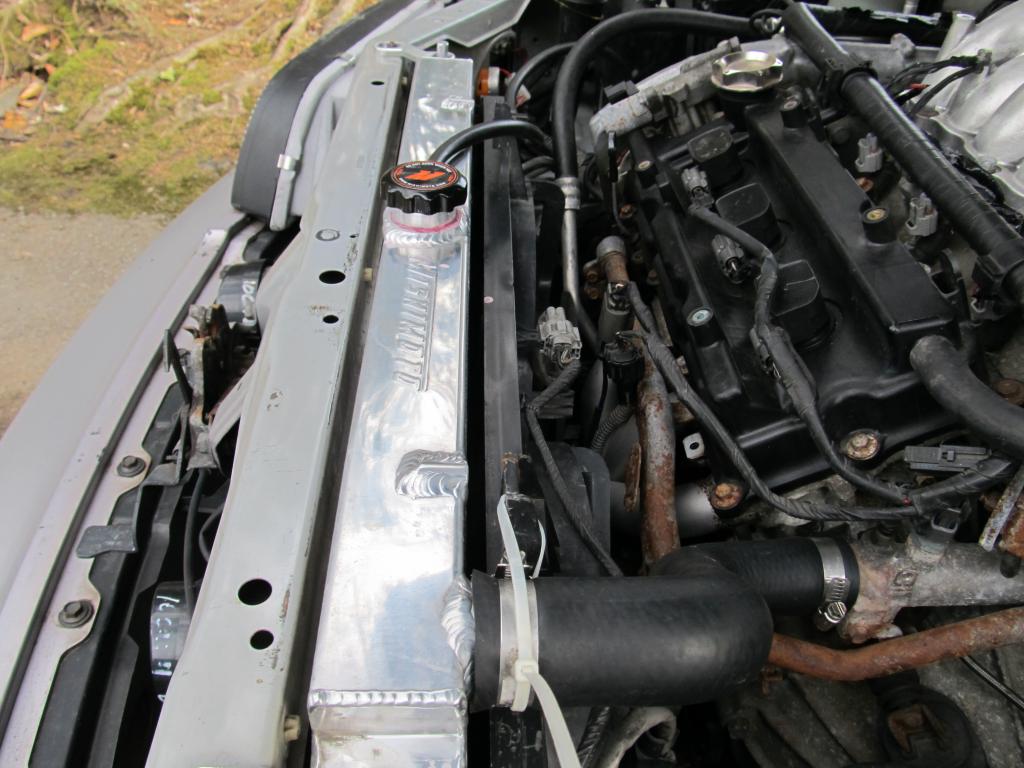
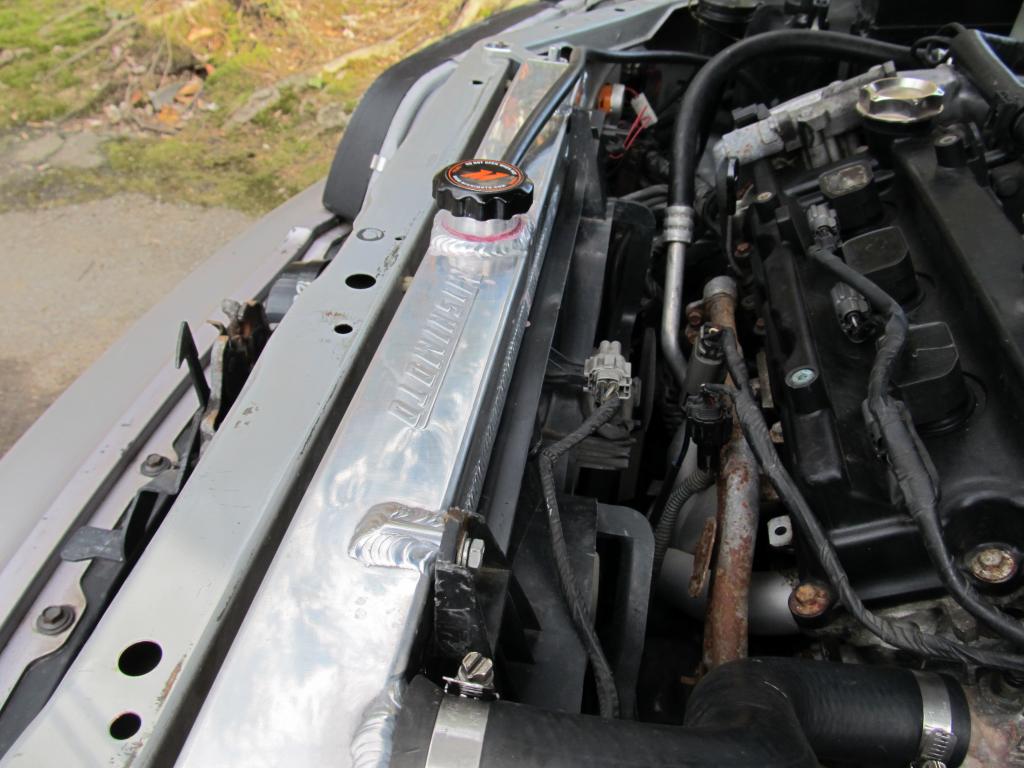
That gas leak turned out to be a rubber line on top of the tank that was brittle and burst from the force of hitting that speed bump at like 50 mph. Thankfully, it only cost $20 to fix. Driving the car around a few days later, I found the coolant overflow tank low, and eventually traced it to a leaky drain bolt/screw on the bottom of the stock radiator. I tightened up the bolt, but that only made the leak worse, so I decided to go with a new Mishimoto:
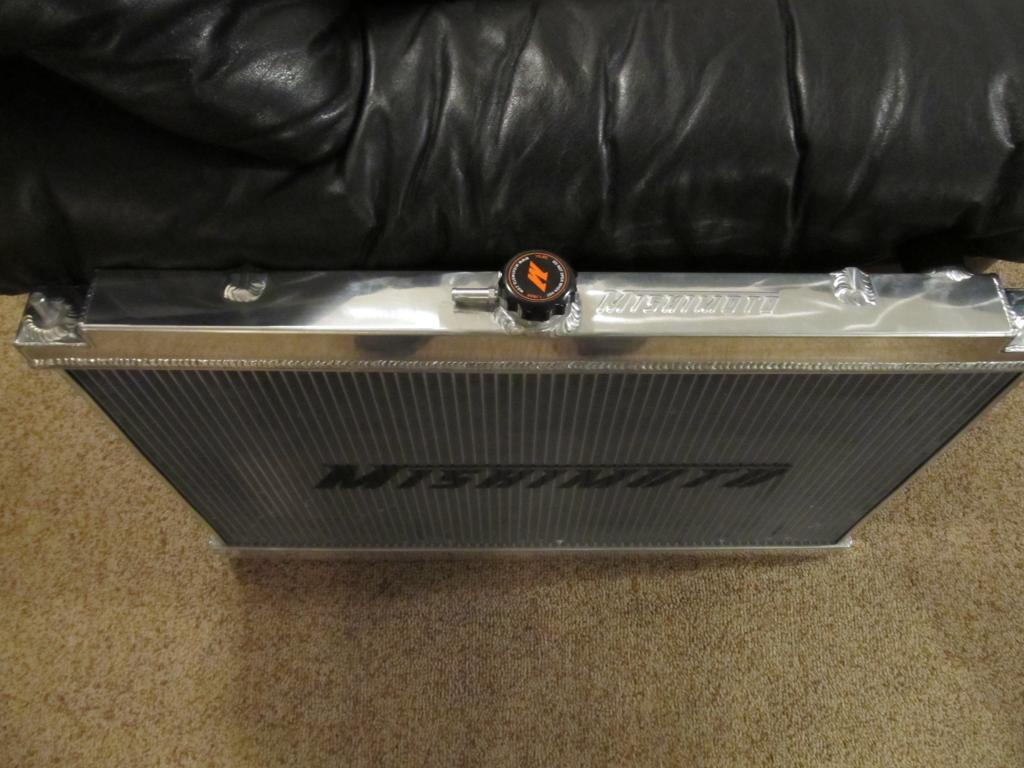
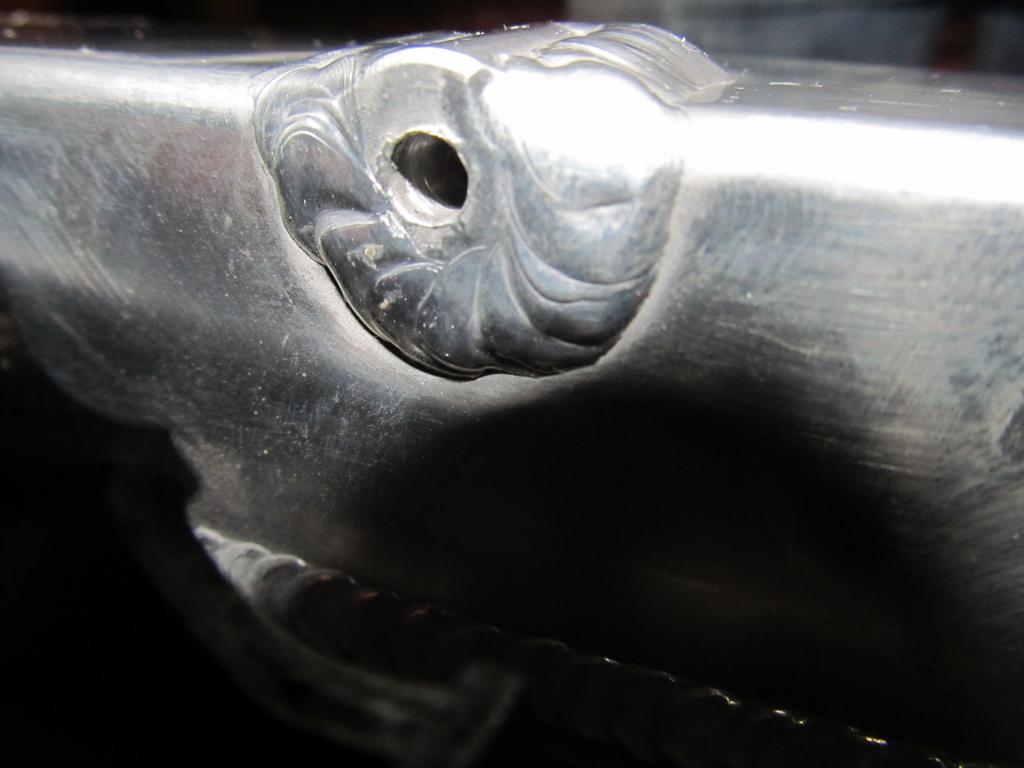
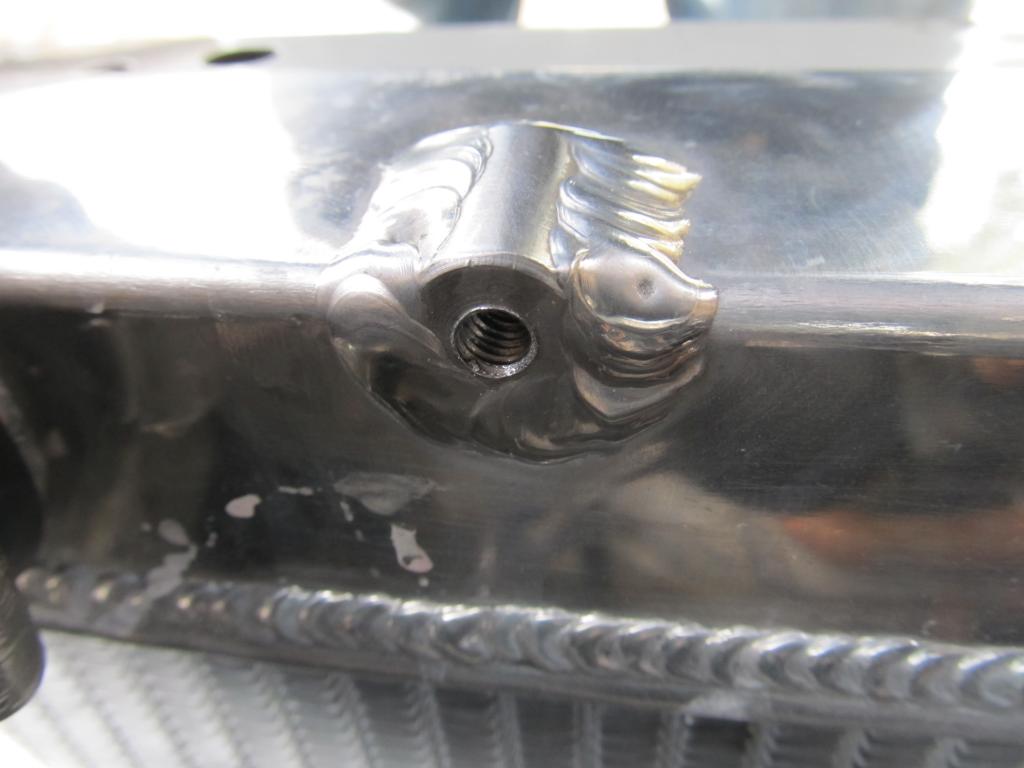
I got it installed, but couldn't find any bolts that would fit to secure the fan shroud. After further inspection, I determined the holes for those bolts weren't threaded:
So now I'm dealing with trying to get a replacement. On top of that, the coolant overflow tank is low again. I'm really hoping I don't have a blown head gasket, but this is just another indication that that might be a possibility. However, I also noticed some coolant around the radiator cap, so I'm hoping that that's where the coolant went. Unfortunately, the only cap that fits this radiator is the Mishimoto one that came with it. On my old Mishimoto radiator OEM caps worked just fine, so I'm not sure of what to make of that. Oh, and this cap is something like 19 psi, which is even higher than the Z32 cap I was using before. I hope it's safe to use.
I'm also still getting an 0505 code for the IACV. I'm currently hooked up to the stock 4th gen IACV, but I'm considering lengthening the wires to hook up to the Pathfinder IACV on the bottom of the PF TB.
I'm also talking with a shop about getting a Nistune ECU set up, but I need to get these other issues resolved before moving forward with that. Wish me luck!
That gas leak turned out to be a rubber line on top of the tank that was brittle and burst from the force of hitting that speed bump at like 50 mph. Thankfully, it only cost $20 to fix. Driving the car around a few days later, I found the coolant overflow tank low, and eventually traced it to a leaky drain bolt/screw on the bottom of the stock radiator. I tightened up the bolt, but that only made the leak worse, so I decided to go with a new Mishimoto:

I got it installed, but couldn't find any bolts that would fit to secure the fan shroud. After further inspection, I determined the holes for those bolts weren't threaded:

So now I'm dealing with trying to get a replacement. On top of that, the coolant overflow tank is low again. I'm really hoping I don't have a blown head gasket, but this is just another indication that that might be a possibility. However, I also noticed some coolant around the radiator cap, so I'm hoping that that's where the coolant went. Unfortunately, the only cap that fits this radiator is the Mishimoto one that came with it. On my old Mishimoto radiator OEM caps worked just fine, so I'm not sure of what to make of that. Oh, and this cap is something like 19 psi, which is even higher than the Z32 cap I was using before. I hope it's safe to use.
I'm also still getting an 0505 code for the IACV. I'm currently hooked up to the stock 4th gen IACV, but I'm considering lengthening the wires to hook up to the Pathfinder IACV on the bottom of the PF TB.
I'm also talking with a shop about getting a Nistune ECU set up, but I need to get these other issues resolved before moving forward with that. Wish me luck!
 01-14-2015, 09:49 AM
#244

Why not just tap those holes? Aluminum threads easy enough.
For the loss in coolant, check your heater core and TB line connections at the engine, those can seep and the trans burns it off without much of a trace.
For the loss in coolant, check your heater core and TB line connections at the engine, those can seep and the trans burns it off without much of a trace.
01-14-2015, 11:24 AM
#245
Thanks for the ideas, I'll check them out.
Apparently some people on NASIOC have been having problems with Mishimoto caps sealing recently, so it might be a trend. I just wish I could throw on one of my OEM caps.
 01-21-2015, 12:06 PM
#247
It's time to make some progress on this car!
With winter in full force here in DC, I needed a warm place to work on the car, and Josh (Irish) was nice enough to let me use his garage for the day, and our rally-x buddy turbojosh came to help out.
First order of business was replacing the rear IM elbow. When Tilley put this motor is Darius' old 97, he just bolted up the throttle cable bracket to the IM elbow. By the time it got to me, the bolts were loose and didn't seal properly. I considered throwing some JB Weld around them and calling it a day, but I didn't want to risk any dripping down into the intake, and I thought it would look pretty ghetto. That, and I like making life difficult.
I hadn't driven the car in about two weeks since the e-brake seized up during the last snow fall, which left me stranded a few blocks from my house. I eventually dragged the car back home, but it wasn't happy. How in the world are these 4th gen rear calipers so crappy? I swear, I have to replace these things every two years.
Anyways, I start the car up to drive to Josh's house, and the idle is all over the place, and my wideband is reading lean off the chart. Under load the car seems to run ok, but it struggled to idle. That should have tipped me off to the problem, but I was running on little sleep and just wasn't thinking clearly yet. The car limps into Josh's garage, and I popped the hood to find the culprit:
Somehow, one of the old throttle cable bracket bolts had popped out and was causing a massive vacuum leak. Duh.
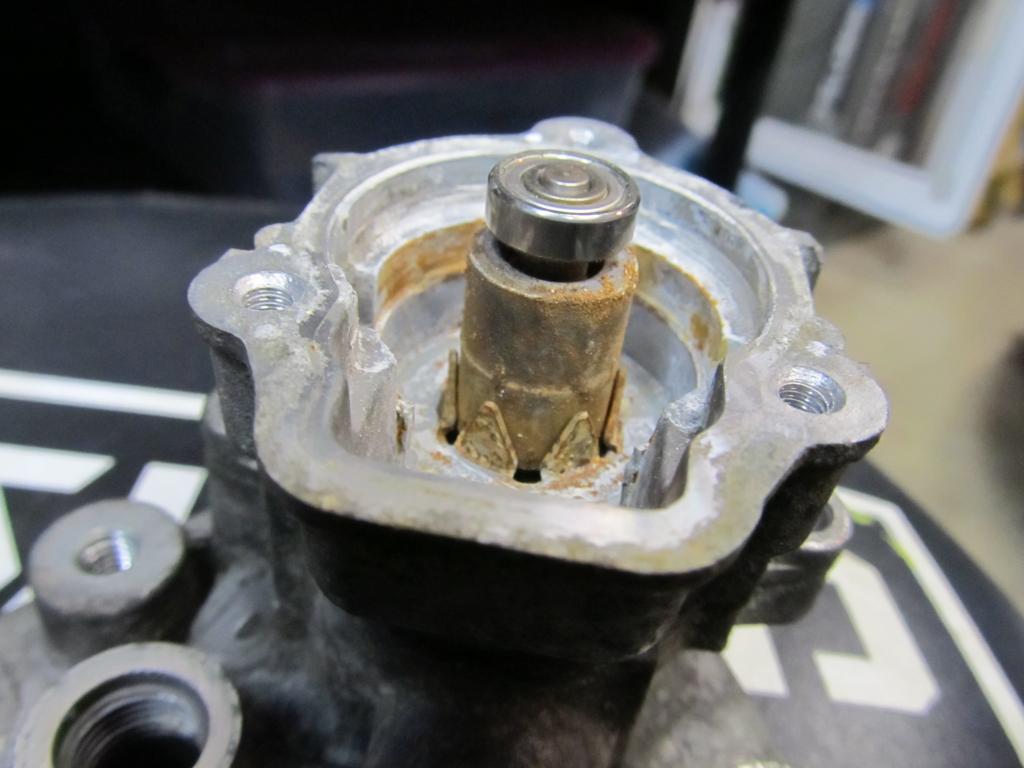
The car has been throwing a IACV code for a while, and wouldn't idle below 1200, so I wanted to work on that. I currently have the 4th gen IACV hooked up with the 3 plugs (2 small, 1 large), but I was considering extending the wires for the big plug and hooking it up to the PF IACV on the bottom of the TB. Turbojosh did some reading and figured that might not be the best idea, so we decided to just clean up my IACV and see what happened. It wasn't grimy like some of the ones in the how-tos, but it was nasty nonetheless.
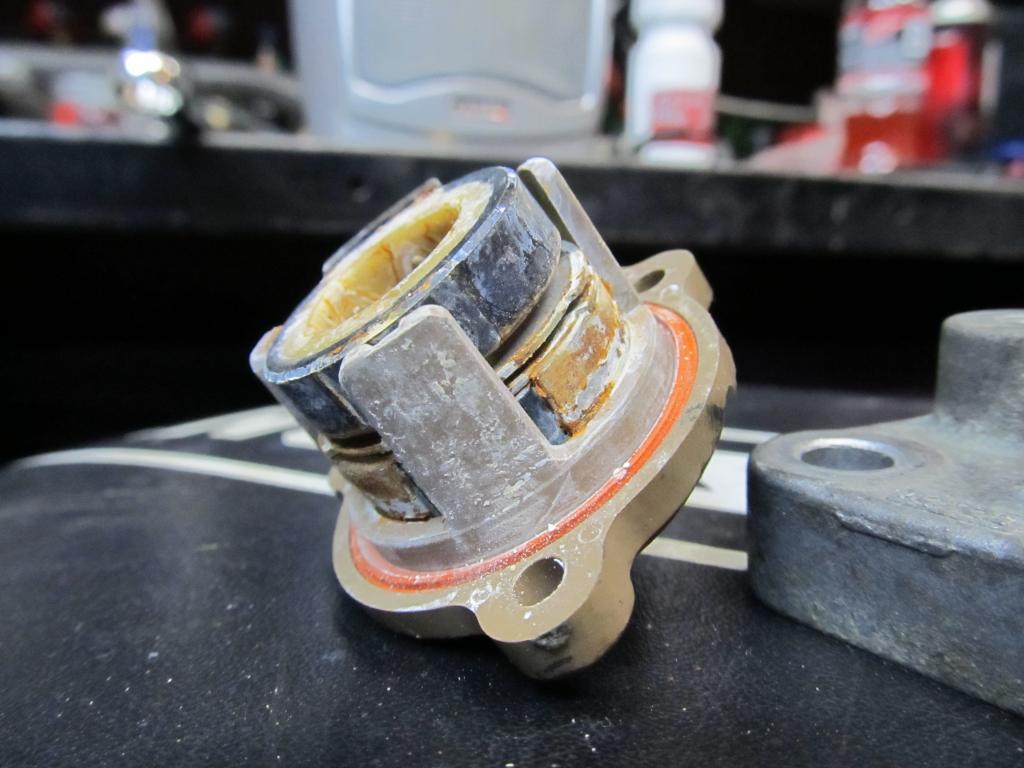
Next was the IM elbow. Upon removing the PF TB, I found Tilley had drilled the EGR into the elbow:
We didn't have anything to drill and tap with, so after an informative phone call to Aaron (aackshun) I just plugged up the EGR port with a bolt and let it hang by the exhaust manifold. No codes yet!
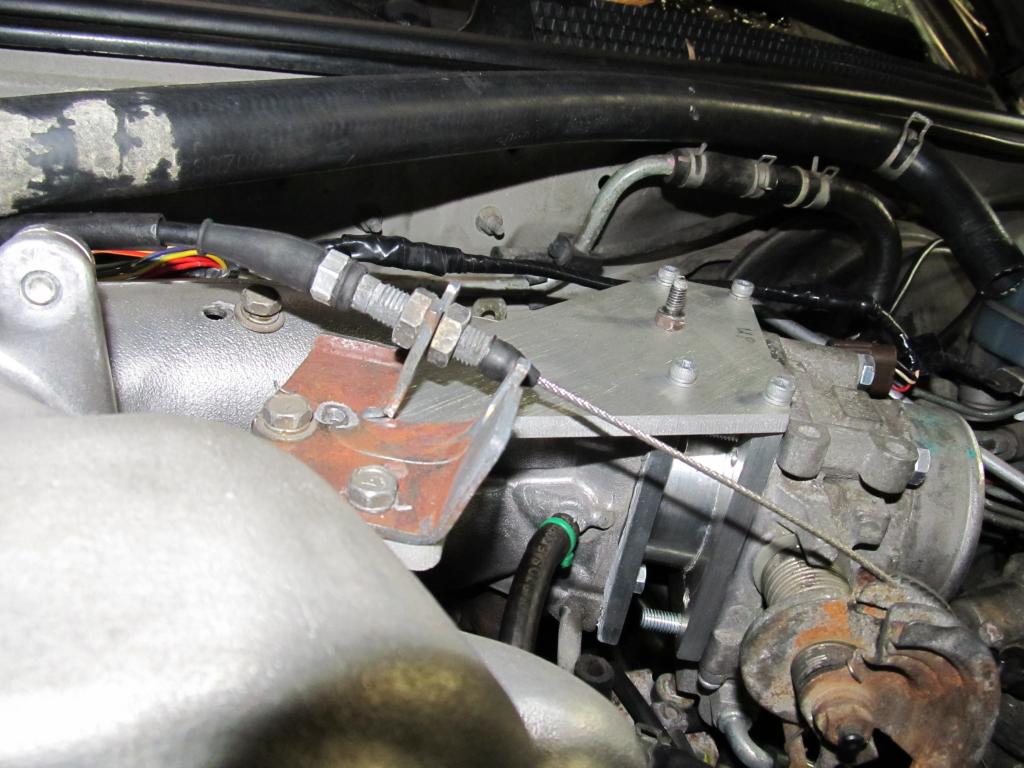
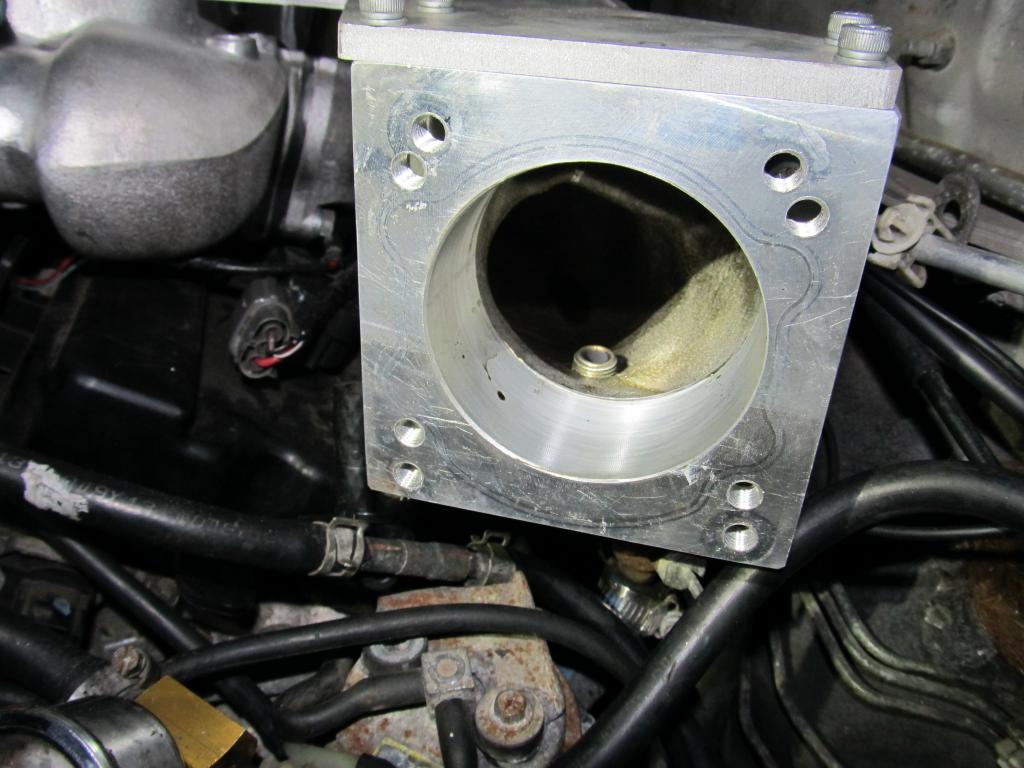
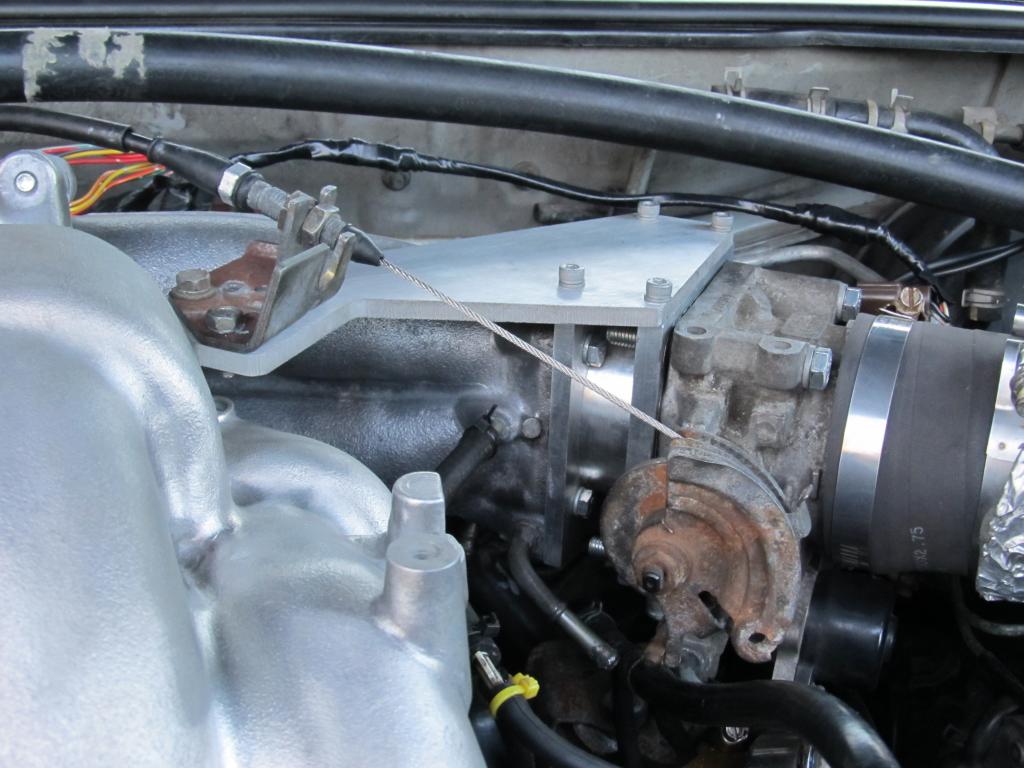
Oh, and since I didn't really post up any pics of the PF TB 3.5 IM adapter and throttle bracket relocation kit made by sicivic89, here they are! I think they look great and fitment is perfect, so thanks to him for that!
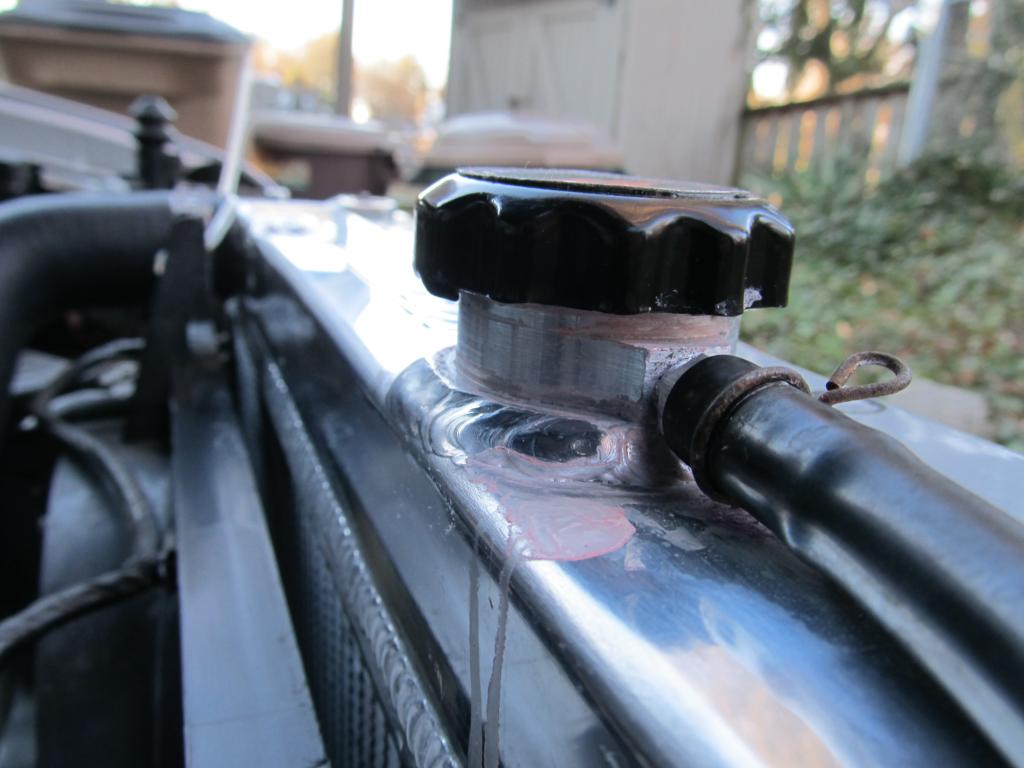
Remember that possible coolant leak? I cleaned it up a few days earlier, and it was back again by the time I got to Josh's house. Thanks for the all-around crappy product Mishimoto! If and when they send me a new rad/cap, I'll be replacing the cap with one from an STI, because I sure as hell don't trust their caps.
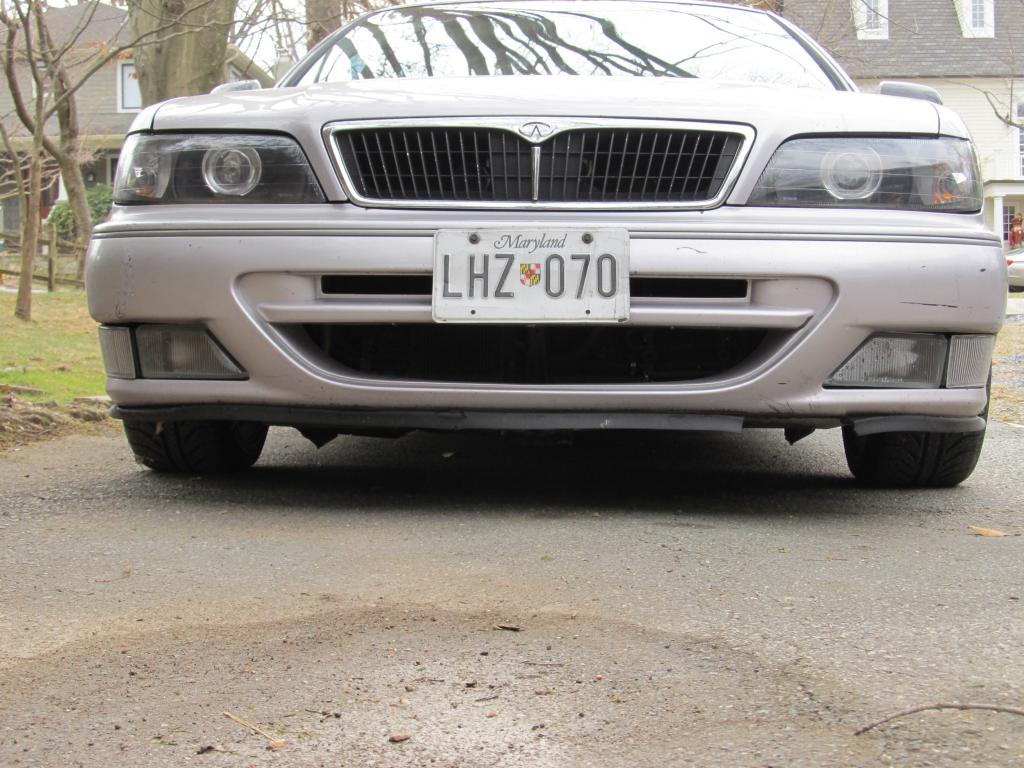
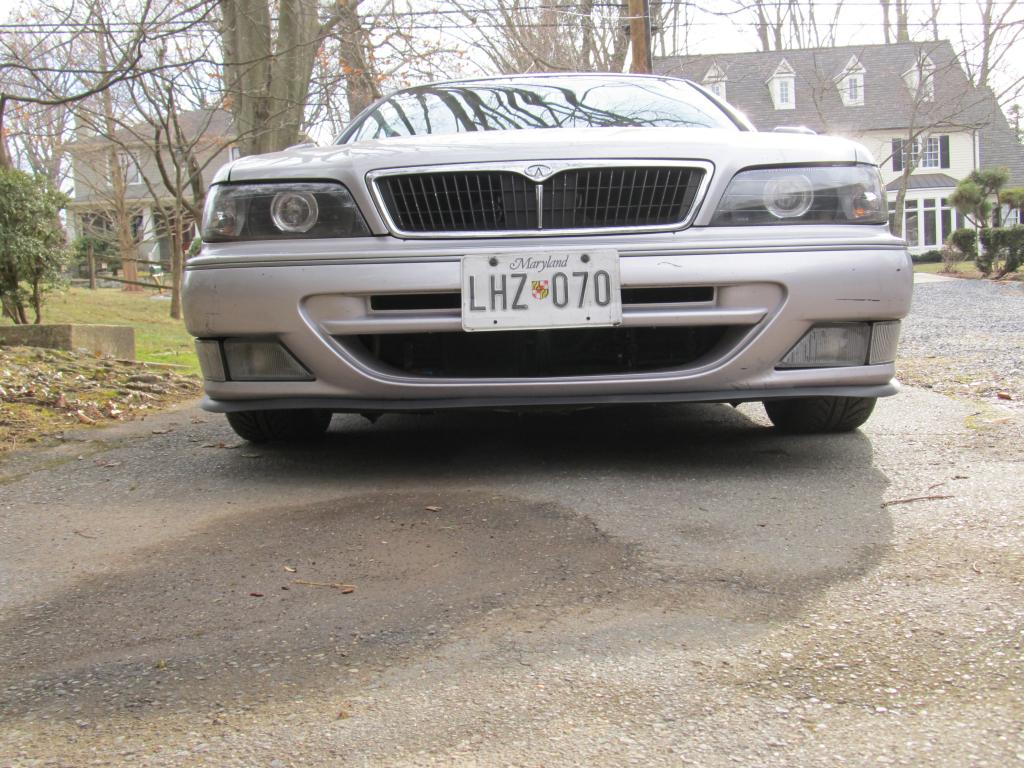
And here's how it currently sits:
So...after all that, and me playing with the IACV set screw the following day (maxed out to the low side), my idle now sits around 900. No codes so far either. I guess 900 is okay, but I would really prefer it to be back around 700. I tried lowering the TB stop screw, but it was seized, so I hit it with some PB Blaster, and will try again later. I've read conflicting reports about adjusting the stop screw on these cars. Keeping in mind that I have a PFTB, what do people think about messing with the stop screw? Should I chase vacuum leaks first? The idle changes when I remove the oil cap, so I'm pretty sure I don't have any bad vacuum leaks, but you never know.
Oh, and since I can't fix something without something else breaking, it kind of sounds like there's an exhaust leak coming from the front Cattman header, but I haven't looked very hard for that yet. It's always something.....
Oh yeah, and Nistune has been ordered
With winter in full force here in DC, I needed a warm place to work on the car, and Josh (Irish) was nice enough to let me use his garage for the day, and our rally-x buddy turbojosh came to help out.
First order of business was replacing the rear IM elbow. When Tilley put this motor is Darius' old 97, he just bolted up the throttle cable bracket to the IM elbow. By the time it got to me, the bolts were loose and didn't seal properly. I considered throwing some JB Weld around them and calling it a day, but I didn't want to risk any dripping down into the intake, and I thought it would look pretty ghetto. That, and I like making life difficult.
I hadn't driven the car in about two weeks since the e-brake seized up during the last snow fall, which left me stranded a few blocks from my house. I eventually dragged the car back home, but it wasn't happy. How in the world are these 4th gen rear calipers so crappy? I swear, I have to replace these things every two years.
Anyways, I start the car up to drive to Josh's house, and the idle is all over the place, and my wideband is reading lean off the chart. Under load the car seems to run ok, but it struggled to idle. That should have tipped me off to the problem, but I was running on little sleep and just wasn't thinking clearly yet. The car limps into Josh's garage, and I popped the hood to find the culprit:

Somehow, one of the old throttle cable bracket bolts had popped out and was causing a massive vacuum leak. Duh.
The car has been throwing a IACV code for a while, and wouldn't idle below 1200, so I wanted to work on that. I currently have the 4th gen IACV hooked up with the 3 plugs (2 small, 1 large), but I was considering extending the wires for the big plug and hooking it up to the PF IACV on the bottom of the TB. Turbojosh did some reading and figured that might not be the best idea, so we decided to just clean up my IACV and see what happened. It wasn't grimy like some of the ones in the how-tos, but it was nasty nonetheless.


Next was the IM elbow. Upon removing the PF TB, I found Tilley had drilled the EGR into the elbow:

We didn't have anything to drill and tap with, so after an informative phone call to Aaron (aackshun) I just plugged up the EGR port with a bolt and let it hang by the exhaust manifold. No codes yet!
Oh, and since I didn't really post up any pics of the PF TB 3.5 IM adapter and throttle bracket relocation kit made by sicivic89, here they are! I think they look great and fitment is perfect, so thanks to him for that!

Remember that possible coolant leak? I cleaned it up a few days earlier, and it was back again by the time I got to Josh's house. Thanks for the all-around crappy product Mishimoto! If and when they send me a new rad/cap, I'll be replacing the cap with one from an STI, because I sure as hell don't trust their caps.

And here's how it currently sits:

So...after all that, and me playing with the IACV set screw the following day (maxed out to the low side), my idle now sits around 900. No codes so far either. I guess 900 is okay, but I would really prefer it to be back around 700. I tried lowering the TB stop screw, but it was seized, so I hit it with some PB Blaster, and will try again later. I've read conflicting reports about adjusting the stop screw on these cars. Keeping in mind that I have a PFTB, what do people think about messing with the stop screw? Should I chase vacuum leaks first? The idle changes when I remove the oil cap, so I'm pretty sure I don't have any bad vacuum leaks, but you never know.
Oh, and since I can't fix something without something else breaking, it kind of sounds like there's an exhaust leak coming from the front Cattman header, but I haven't looked very hard for that yet. It's always something.....
Oh yeah, and Nistune has been ordered
Last edited by 95maxrider; 01-21-2015 at 12:10 PM.
01-21-2015, 07:02 PM
#248

Welcome to my world, every time something goes right something else goes wrong. Your car is officially a spoiled woman never satisfied always wants more attention and you WILL give it your attention OR ELSE. Be warned. From one battered man to another fore coming battered man.
01-23-2015, 10:59 AM
#250
So what do you guys think about adjusting the stop screw on the PF TB? I can always raise it back up if I don't like what it does, right?
01-25-2015, 12:25 PM
#251
**** this ****ing car. Seriously.
It's nice enough outside today to do some work, so I wanted to get the old Nismo AFPR in the car. We cut the ends off with a Dremel last week at Josh's house, but the slots weren't quite big enough for the bolts, so I had to open them up a bit more with my Dremel.
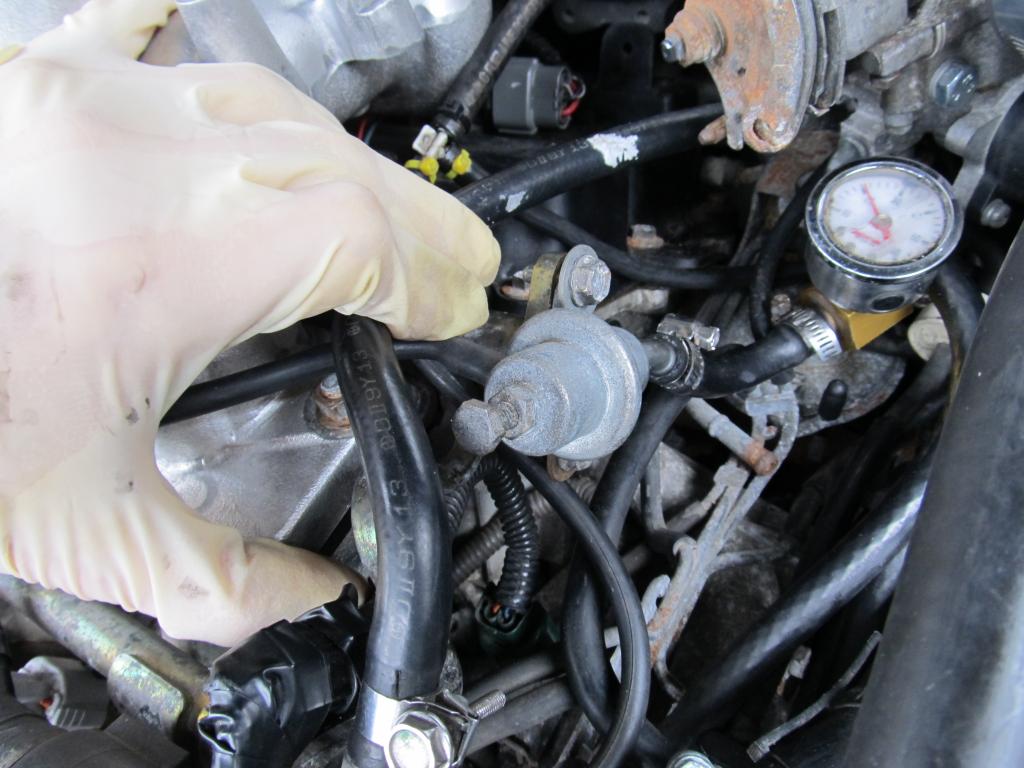
Out with the old, in with the new.
Installed with some washers:
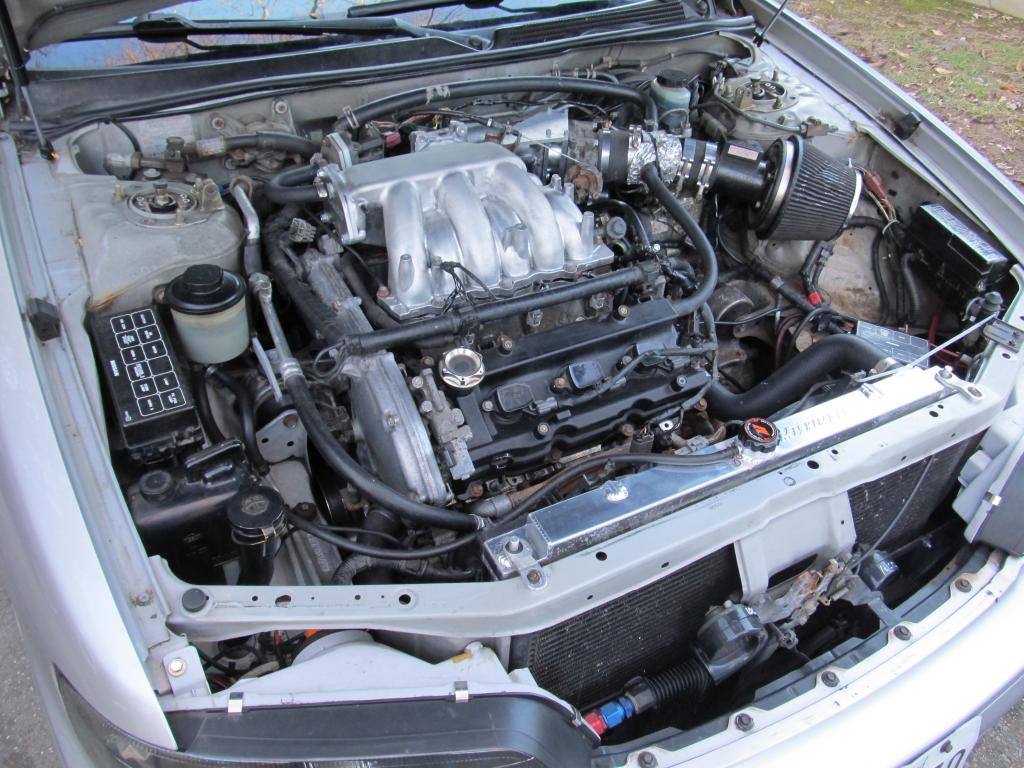
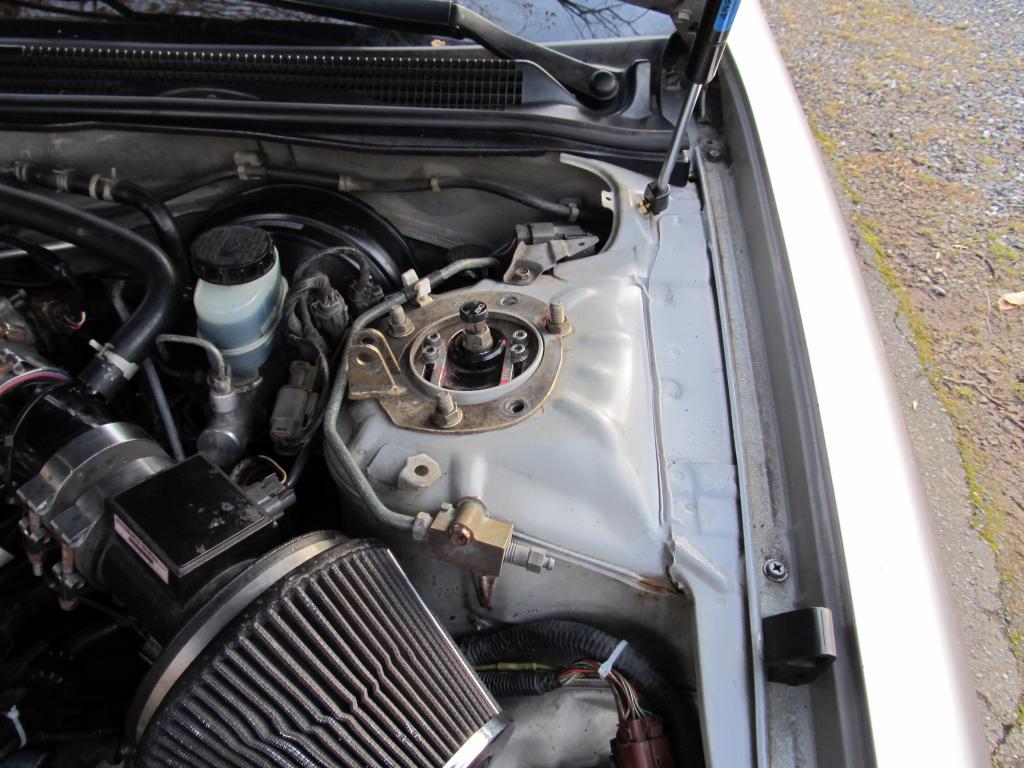
And here's where I'm pulling vacuum from. That's correct, right?
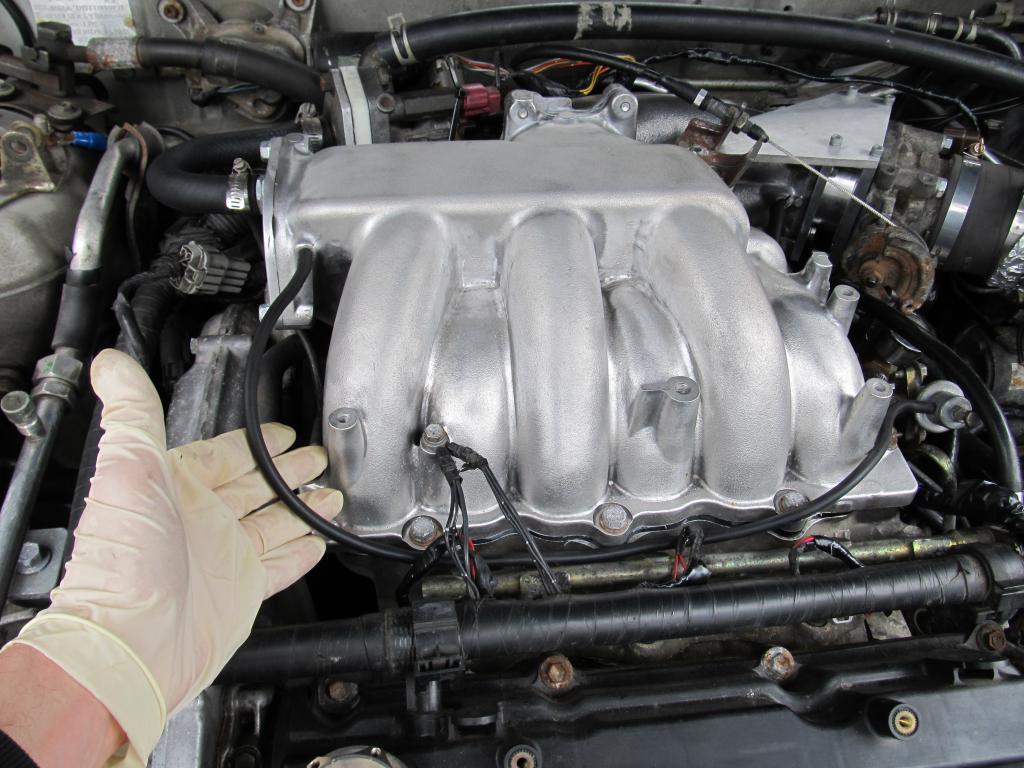
Well I got it all installed and went to start the car and.....nothing. WTF. I pulled it off and tried to blow some air through it, and nothing came through. I then blew through the stock one and air went through just fine. I then sprayed brake cleaner inside the AFPR to see if it would loosen anything up, but no dice. I guess this thing just died after sitting outside for a year. Freaking great, now I need a new AFPR.
I found mine for sale on Courtsey, but they want $285 for it! Amazon has it for $150, but there's a 3-6 week wait.
So I guess that means going with the junk on Ebay? I found a decent looking one for $70, but I just can't figure out how that's supposed to mount up to the stock location on the return line. Why do none of them have rubber o-rings to seal up to the stock flange? Am I supposed to leave the stock regulator in place and put the adjustable one down stream?
It's nice enough outside today to do some work, so I wanted to get the old Nismo AFPR in the car. We cut the ends off with a Dremel last week at Josh's house, but the slots weren't quite big enough for the bolts, so I had to open them up a bit more with my Dremel.

Out with the old, in with the new.

Installed with some washers:

And here's where I'm pulling vacuum from. That's correct, right?

Well I got it all installed and went to start the car and.....nothing. WTF. I pulled it off and tried to blow some air through it, and nothing came through. I then blew through the stock one and air went through just fine. I then sprayed brake cleaner inside the AFPR to see if it would loosen anything up, but no dice. I guess this thing just died after sitting outside for a year. Freaking great, now I need a new AFPR.
I found mine for sale on Courtsey, but they want $285 for it! Amazon has it for $150, but there's a 3-6 week wait.
So I guess that means going with the junk on Ebay? I found a decent looking one for $70, but I just can't figure out how that's supposed to mount up to the stock location on the return line. Why do none of them have rubber o-rings to seal up to the stock flange? Am I supposed to leave the stock regulator in place and put the adjustable one down stream?
 01-25-2015, 10:13 PM
#253
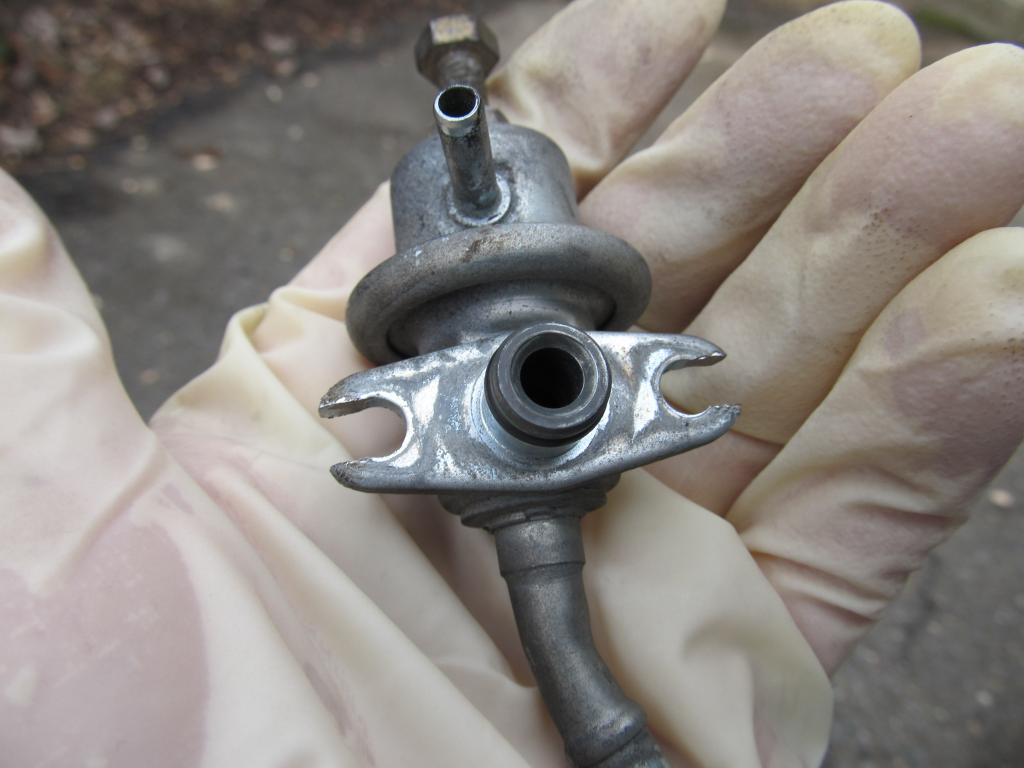
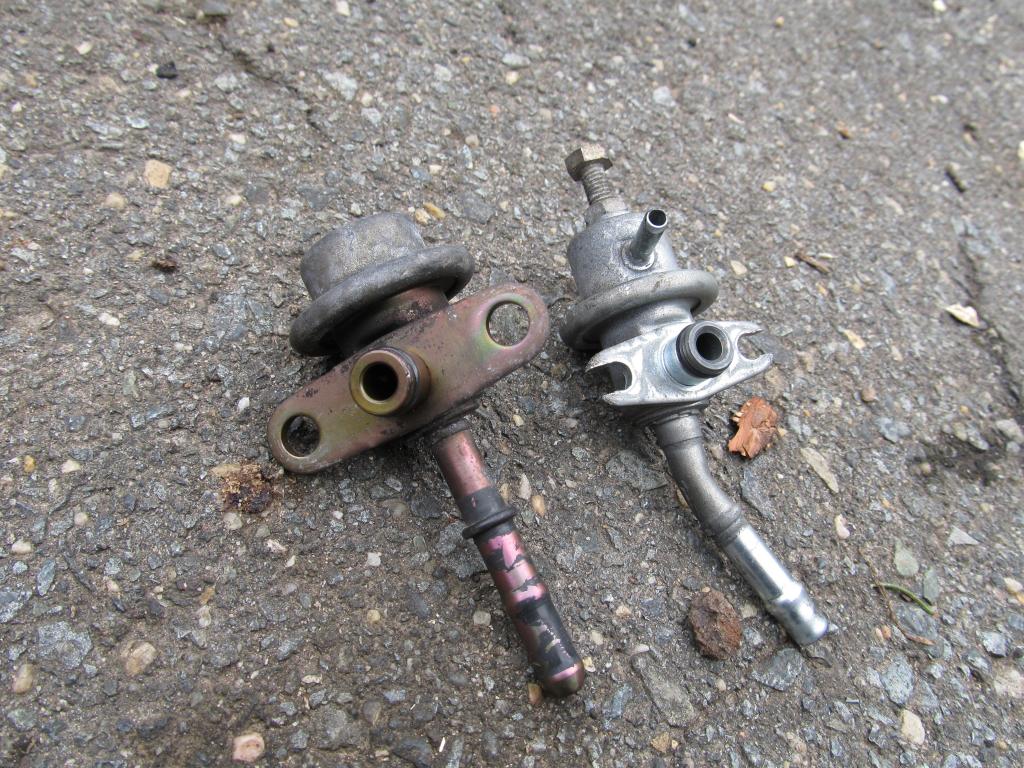
You sure you have the fuel lines connected in correct order? For that style FPR your fuel lines should look like the second style pictured:

From what I can see in the picture it looks like you have a fuel running into your FPR backwards. From the fuel filter it should run directly into the fuel rail with, thats where your fuel pressure gauge should be then the FPR comes on the other end for the return line. It regulates pressure by restricting the amount of fuel it allows out of the fuel rail. Swap lines and i bet it will fire up.
I had a rough time with understanding fuel flow and regulation when i was swapping, at least you don't have to deal with people calling you an idiot for not getting it at first like did *cough* Dave *sneeze* *cough* . Just remember from the fuel filter directly to the fuel rail with no restrictions tbh i would take the fuel dampers off. There should only be a restricted ie regulation when leaving the fuel line on the return line. You wanna pressurize your fuel rail not your fuel lines.
From what I can see in the picture it looks like you have a fuel running into your FPR backwards. From the fuel filter it should run directly into the fuel rail with, thats where your fuel pressure gauge should be then the FPR comes on the other end for the return line. It regulates pressure by restricting the amount of fuel it allows out of the fuel rail. Swap lines and i bet it will fire up.
I had a rough time with understanding fuel flow and regulation when i was swapping, at least you don't have to deal with people calling you an idiot for not getting it at first like did *cough* Dave *sneeze* *cough*
. Just remember from the fuel filter directly to the fuel rail with no restrictions tbh i would take the fuel dampers off. There should only be a restricted ie regulation when leaving the fuel line on the return line. You wanna pressurize your fuel rail not your fuel lines.
Last edited by Crusher103; 01-25-2015 at 10:17 PM.
01-27-2015, 11:57 AM
#254
You sure you have the fuel lines connected in correct order? For that style FPR your fuel lines should look like the second style pictured:
From what I can see in the picture it looks like you have a fuel running into your FPR backwards. From the fuel filter it should run directly into the fuel rail with, thats where your fuel pressure gauge should be then the FPR comes on the other end for the return line. It regulates pressure by restricting the amount of fuel it allows out of the fuel rail. Swap lines and i bet it will fire up.
I had a rough time with understanding fuel flow and regulation when i was swapping, at least you don't have to deal with people calling you an idiot for not getting it at first like did *cough* Dave *sneeze* *cough*. Just remember from the fuel filter directly to the fuel rail with no restrictions tbh i would take the fuel dampers off. There should only be a restricted ie regulation when leaving the fuel line on the return line. You wanna pressurize your fuel rail not your fuel lines.
From what I can see in the picture it looks like you have a fuel running into your FPR backwards. From the fuel filter it should run directly into the fuel rail with, thats where your fuel pressure gauge should be then the FPR comes on the other end for the return line. It regulates pressure by restricting the amount of fuel it allows out of the fuel rail. Swap lines and i bet it will fire up.
I had a rough time with understanding fuel flow and regulation when i was swapping, at least you don't have to deal with people calling you an idiot for not getting it at first like did *cough* Dave *sneeze* *cough*
. Just remember from the fuel filter directly to the fuel rail with no restrictions tbh i would take the fuel dampers off. There should only be a restricted ie regulation when leaving the fuel line on the return line. You wanna pressurize your fuel rail not your fuel lines.The car runs just fine when I took off the AFPR, so I'm guessing my lines are run correctly, but that doesn't mean I put the AFPR in the correct place. I just put it in the same place I had it on the DEK. You may remember that my lines were run backwards a few months ago, which was the last step I needed to fix to actually get the car to run. The inlet damper is the one on the front rail, right? I had the AFPR on the rail towards the back of the motor.
Even if I had it installed wrong, shouldn't I be able to blow through it like I can with the stock damper? And you would remove the front/inlet damper?
You rock!
01-28-2015, 12:08 PM
#255
I found a Nismo AFPR for $108!
02-07-2015, 11:31 AM
#256
Well I tried the Nismo AFPR on the return (in my case, front) fuel rail and the car still wouldn't start. Interestingly, the stock fuel damper on the front rail does have a vacuum line going to it, and I also couldn't blow through it like I could with the rear damper. Even so, the car started right back up when I put the stock one back on, so I can only assume the Nismo is dead, so I just ordered a new one. Wish me luck, I could use some!
02-09-2015, 03:48 PM
#257
Yesterday was nice out so I was able to get some work done!
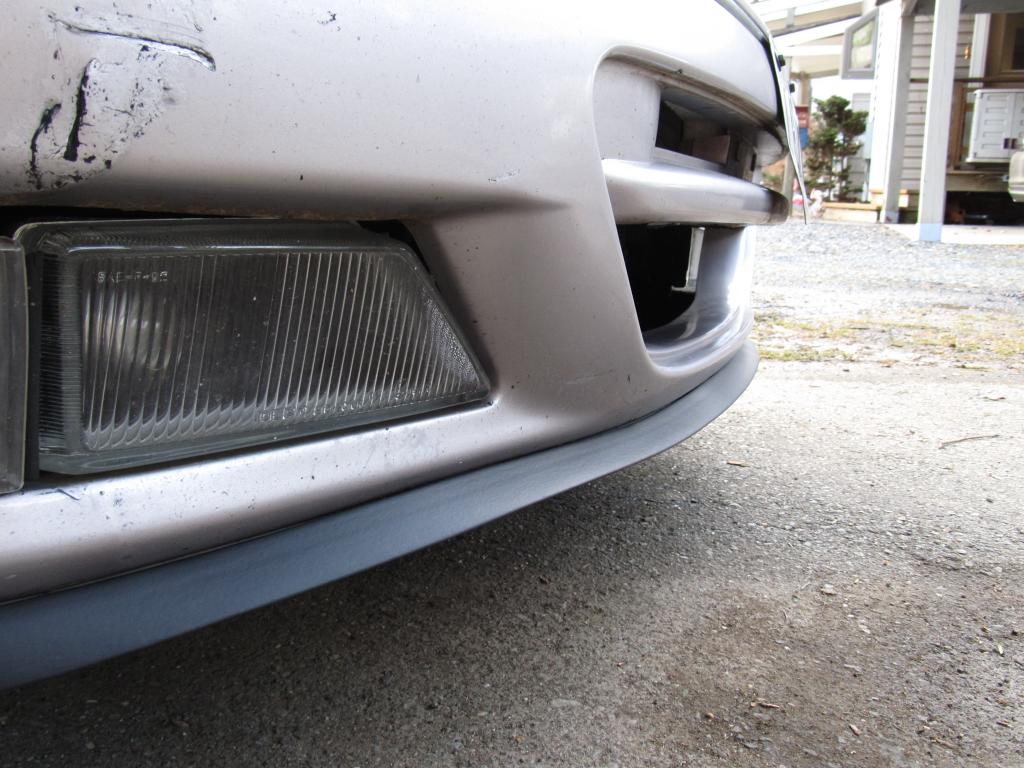
First up was the garage door lip (GDL). I ripped off a piece of my old one coming out of an extremely steep driveway over a year ago, but have had more important things to fix between now and then, so it got put on the back burner. Unfortunately, the automotive 3M double sided tape is literally impossible to remove, so I had to lay the new tape slightly above the old one so it wouldn't be visible. This is turn changed the angle that the GDL is attached, so now it's more of a "splitter" rather than a lip. Oh well, it looks better than it did before. I'm just not looking forward to replacing this one when it dies.
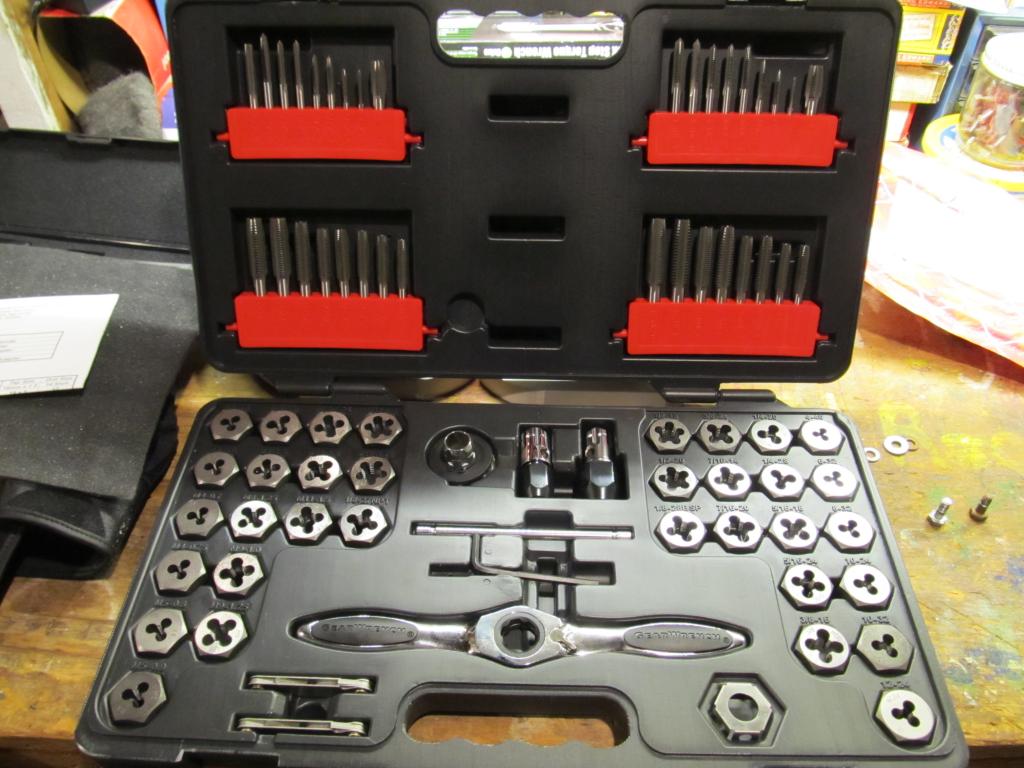
Next up was the unthreaded Mishimoto radiator fan shroud holes. Apparently, a new one is on the way to me, but I don't really want to drain the system again, so I wanted to try my hand at threading the holes. I broke down and ended up buying a nice Gear Wrench tap and die kit, and as luck would have it, I was able to thread the holes with no problems!
Before- Somehow the zip tie held up for a few weeks.
Unthreaded:
Threaded!
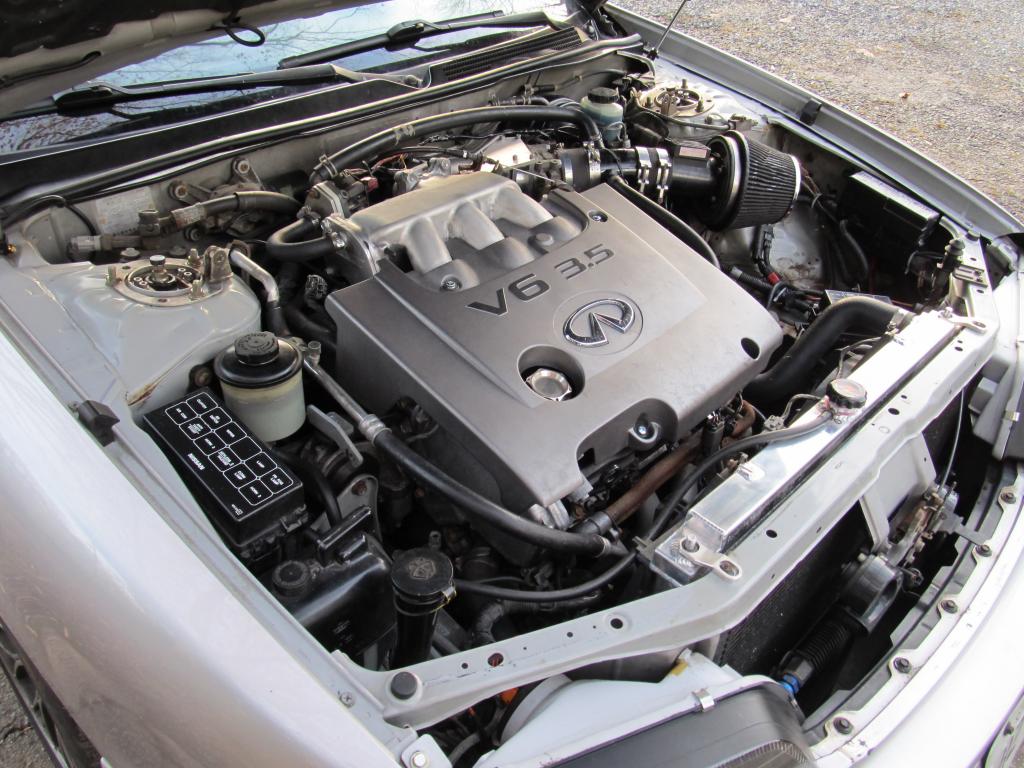
Installed properly!
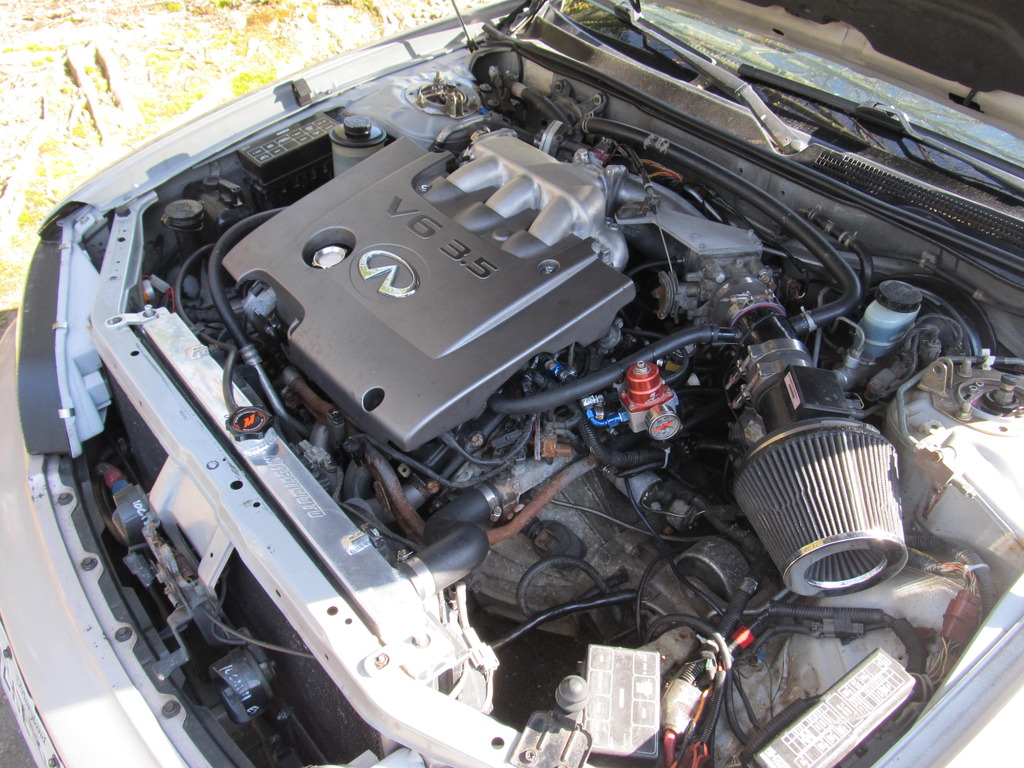
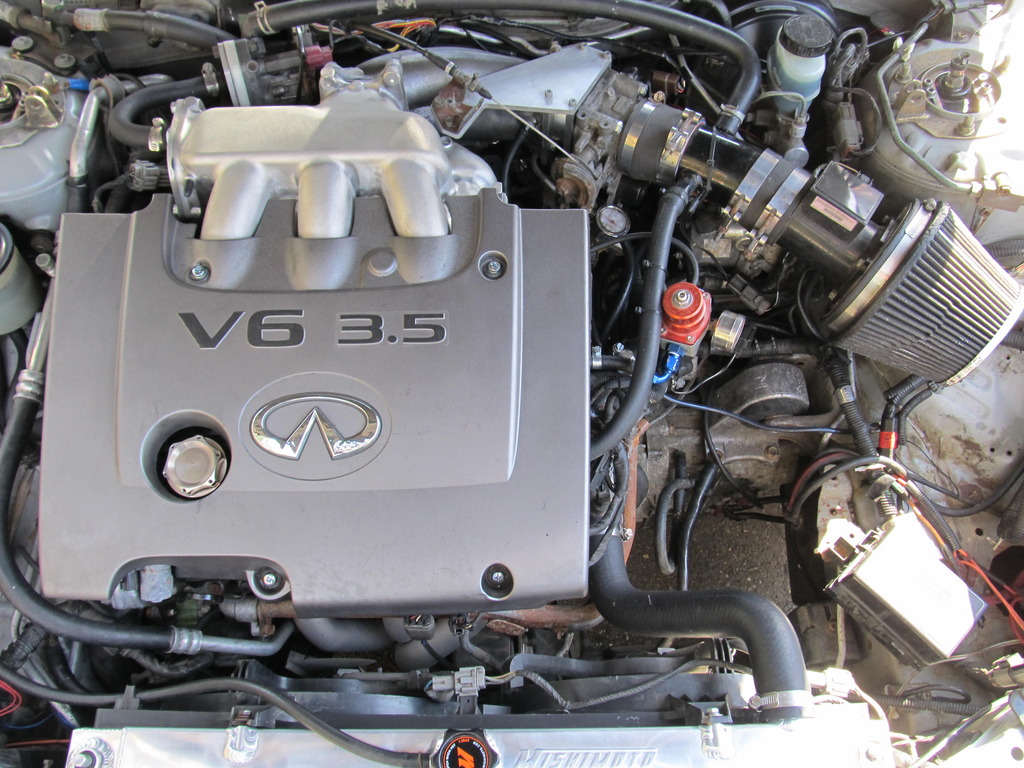
I then spent a lot of time with a toothbrush, paper towels and some Purple Power and went to town on the engine bay. Things have never looked this clean, I love it! Everybody needs to have a bottle of Purple Power lying around, it's a cut above Simple Green in my opinion.
That's it for now. I'm waiting for the AFPR to arrive, and I need to go do a smoke test to check for vacuum leaks, but after that I should be good to head up to JE Import Performance in Baltimore and get the Nistune ECU installed and tuned! 250 whp here I come!
First up was the garage door lip (GDL). I ripped off a piece of my old one coming out of an extremely steep driveway over a year ago, but have had more important things to fix between now and then, so it got put on the back burner. Unfortunately, the automotive 3M double sided tape is literally impossible to remove, so I had to lay the new tape slightly above the old one so it wouldn't be visible. This is turn changed the angle that the GDL is attached, so now it's more of a "splitter" rather than a lip. Oh well, it looks better than it did before. I'm just not looking forward to replacing this one when it dies.


Next up was the unthreaded Mishimoto radiator fan shroud holes. Apparently, a new one is on the way to me, but I don't really want to drain the system again, so I wanted to try my hand at threading the holes. I broke down and ended up buying a nice Gear Wrench tap and die kit, and as luck would have it, I was able to thread the holes with no problems!

Before- Somehow the zip tie held up for a few weeks.

Unthreaded:

Threaded!

Installed properly!

I then spent a lot of time with a toothbrush, paper towels and some Purple Power and went to town on the engine bay. Things have never looked this clean, I love it! Everybody needs to have a bottle of Purple Power lying around, it's a cut above Simple Green in my opinion.


That's it for now. I'm waiting for the AFPR to arrive, and I need to go do a smoke test to check for vacuum leaks, but after that I should be good to head up to JE Import Performance in Baltimore and get the Nistune ECU installed and tuned! 250 whp here I come!


 02-18-2015, 03:49 PM
#261
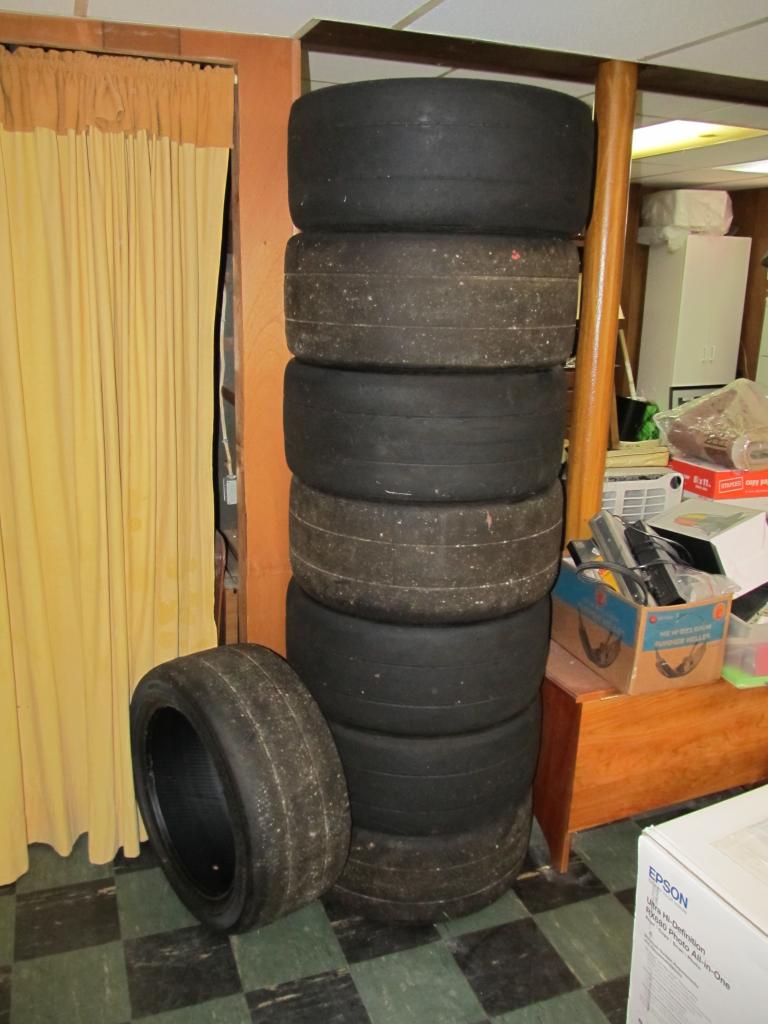
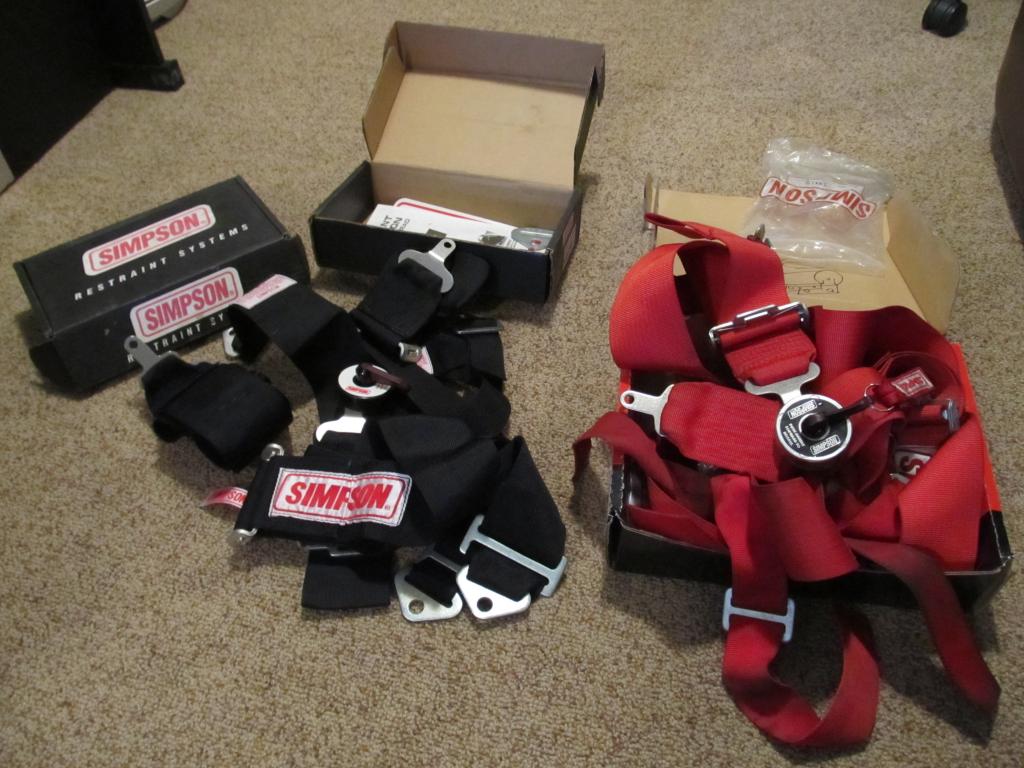
Well I got lucky browsing Craigslist last week and got the deal of the century. $2400 worth of Hoosier A6 245/40/17 rubber for $300, barely used. Also, a brand new (but expired....don't care) and a used 6 point harness for $50! I've got rubber for the next 4 years!


 02-26-2015, 12:23 PM
#263
Well I just can't catch a break. That nice, reasonably-priced NISMO AFPR I ordered apparently isn't available, so I back to either buying one for $200+ or something else on Ebay. What do you guys think I should do?
Here's a no-name for $70 that seems to get good enough reviews:
http://www.ebay.com/itm/NISSAN-SR20DET-ADJUSTABLE-FUEL-PRESSURE-REGULATOR-GAUGE-/260421374806?pt=Motors_Car_Truck_Parts_Accessories&hash=item3ca252d356&vxp=mtr
Sard for $125 (Genuine???)
http://www.ebay.com/itm/SARD-FPR-Adj...-/251782920077
Ugh.
03-21-2015, 10:36 AM
#267
Hey guys, I made the front page of NICO!
03-21-2015, 11:56 PM
#268
Senior Member

Join Date: Jan 2011
Location: Central AR
Posts: 3,041
Hey guys, I made the front page of NICO!
 04-05-2015, 06:12 PM
#270
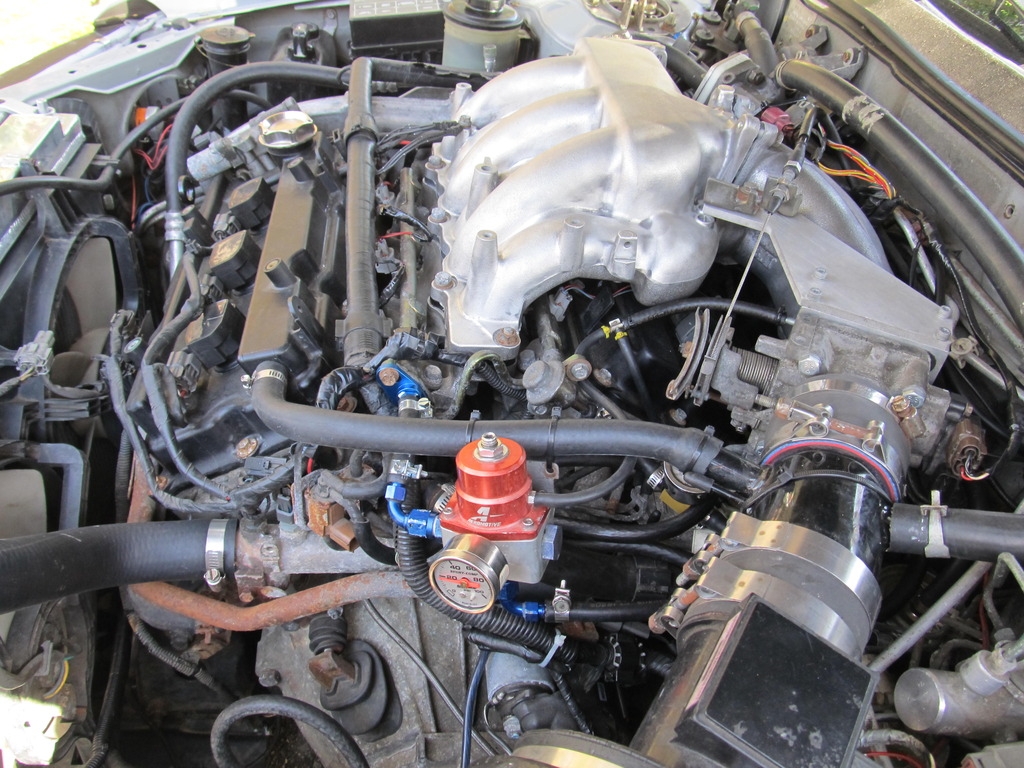
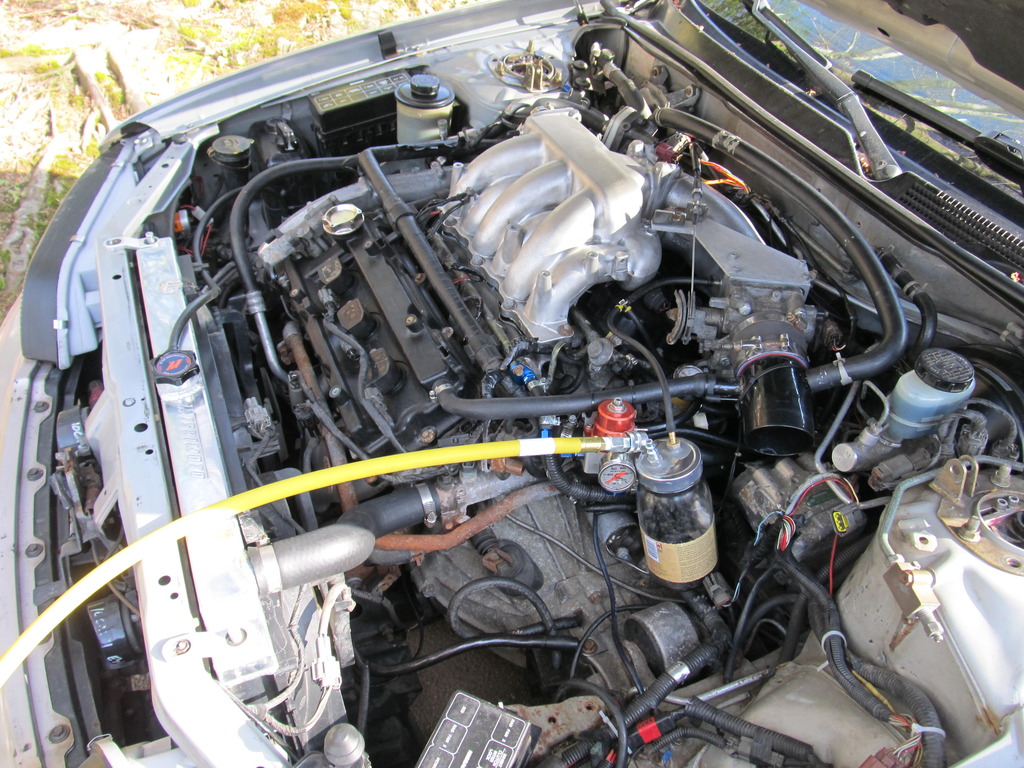
With my dyno date approaching quickly, I had to get some things fixed up. The priority was getting my new/used Aeromotive unit (thanks ChrisMan287!) to work and bump up my fuel pressure from 40 to 50. Thankfully it fired right up and my FP is sitting pretty. Big thanks to Crusher for helping me understand this stuff!
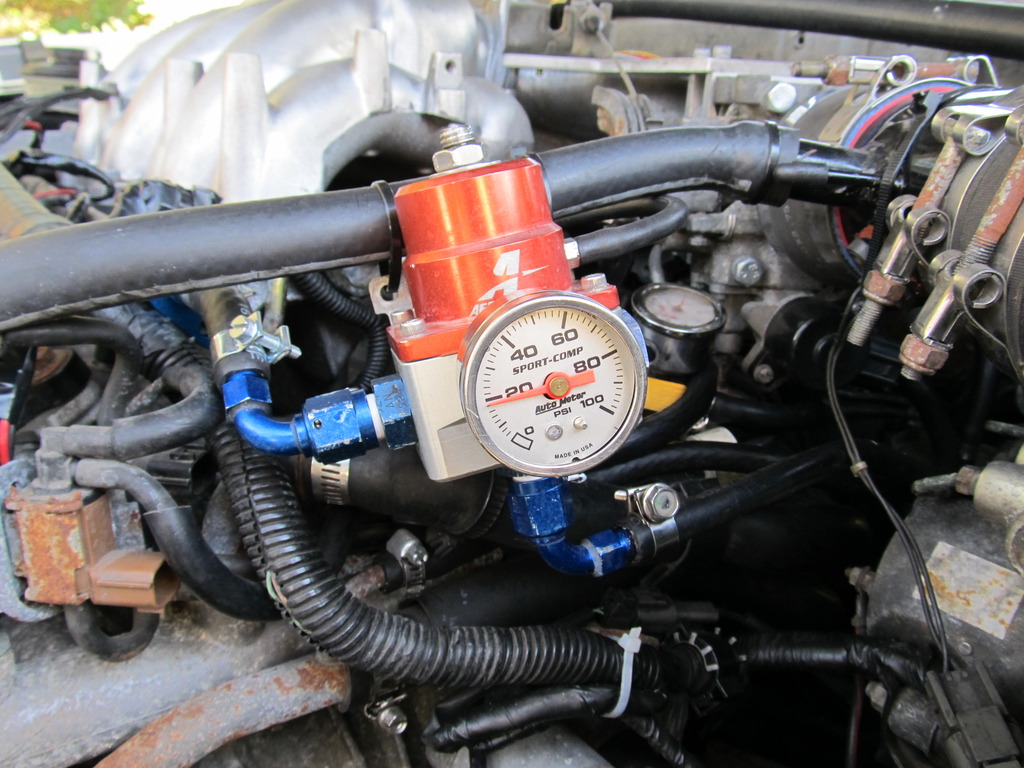
Yeah, I know the attachment of the unit leaves something to be desired, but this is good enough for right now.
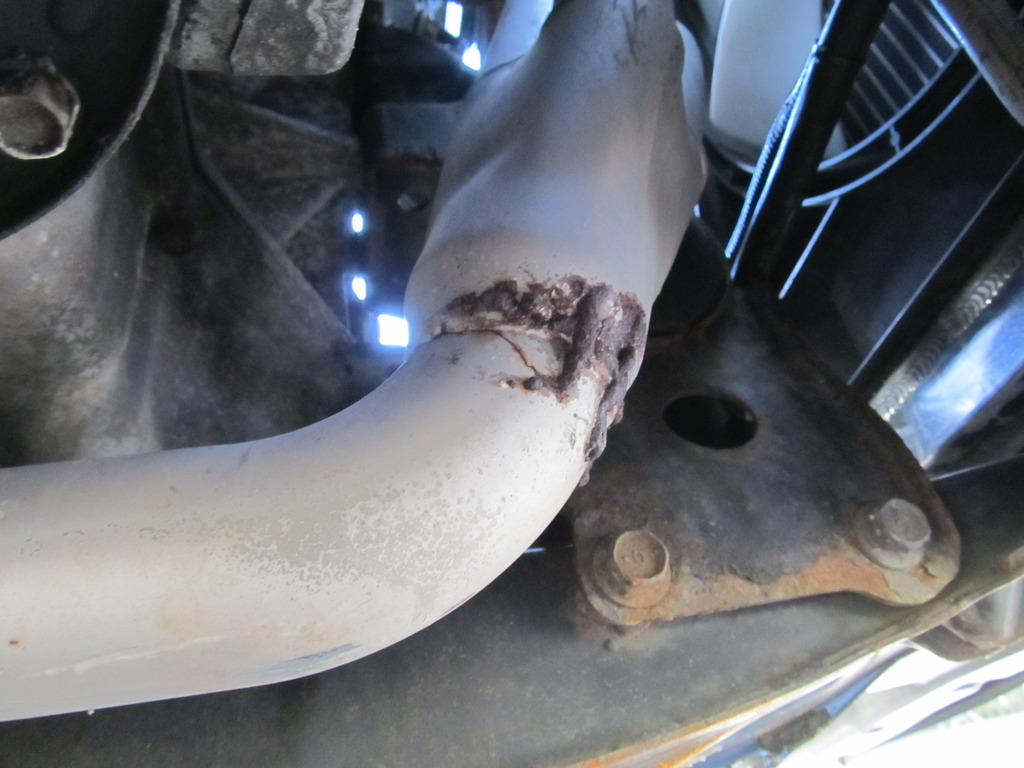
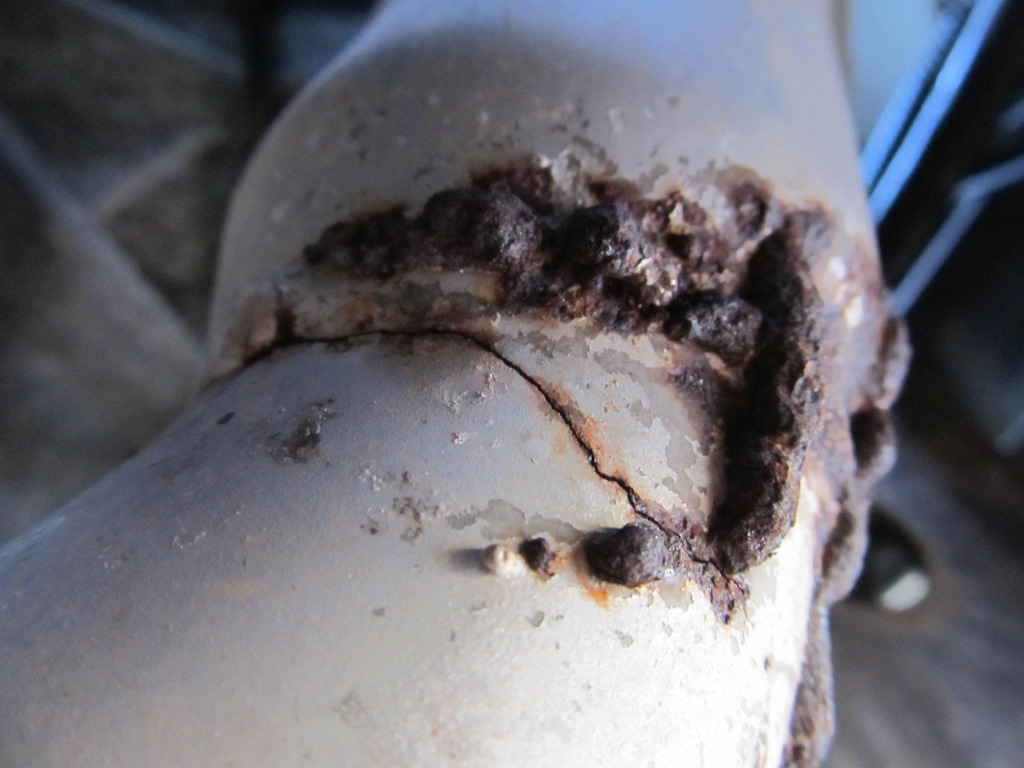
Next up was addressing the cracked Cattman head pipe. I'm guessing this happened right around the time I hit the nasty speed bump at like 40+ mph. I'll eventually take it off and get it welded up, but right now time is short and I think I have something that will buy me a few weeks, some Prematex muffler putty. The packet I used was already opened, so it's probably not as good as it would be when new.
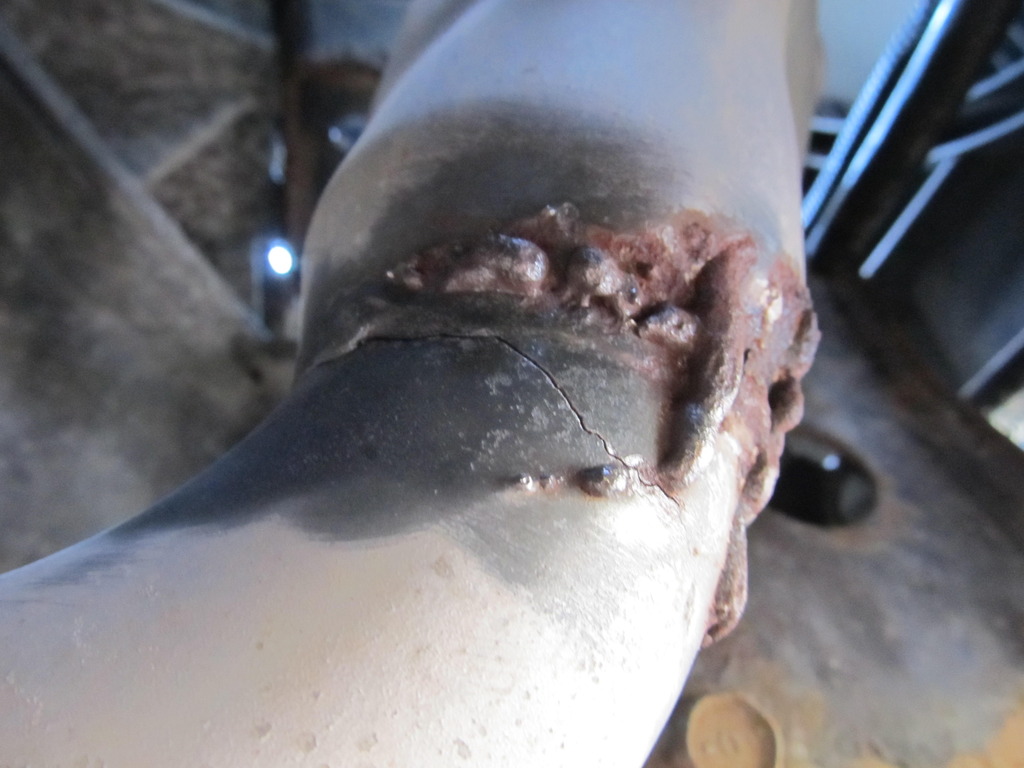
After the wire wheel
Gooped up
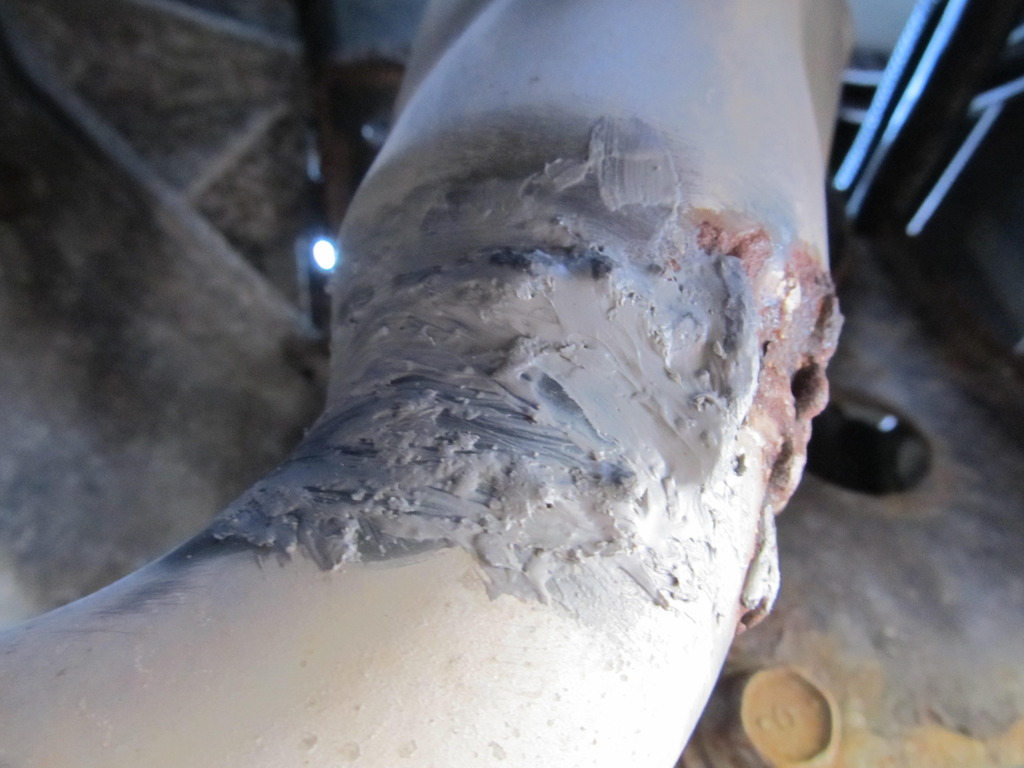
I'll probably put another layer of some different stuff on top tomorrow after this one cures and hope for the best.
Next up is to build a smoke/leak tester.....

Yeah, I know the attachment of the unit leaves something to be desired, but this is good enough for right now.


Next up was addressing the cracked Cattman head pipe. I'm guessing this happened right around the time I hit the nasty speed bump at like 40+ mph. I'll eventually take it off and get it welded up, but right now time is short and I think I have something that will buy me a few weeks, some Prematex muffler putty. The packet I used was already opened, so it's probably not as good as it would be when new.


After the wire wheel

Gooped up

I'll probably put another layer of some different stuff on top tomorrow after this one cures and hope for the best.
Next up is to build a smoke/leak tester.....
 04-06-2015, 12:28 PM
#272

 04-16-2015, 12:10 PM
#273
In preparation for the dyno day, I needed to make sure I didn't have any vacuum leaks. Rather than pay a shop $50 to do 5 minutes of work with a smoke machine/leak detector, I decided to build my own using the instructions I found on a BMW site.
First off, you need an air compressor with an adjustable pressure regulator to lower the PSI to about 5.
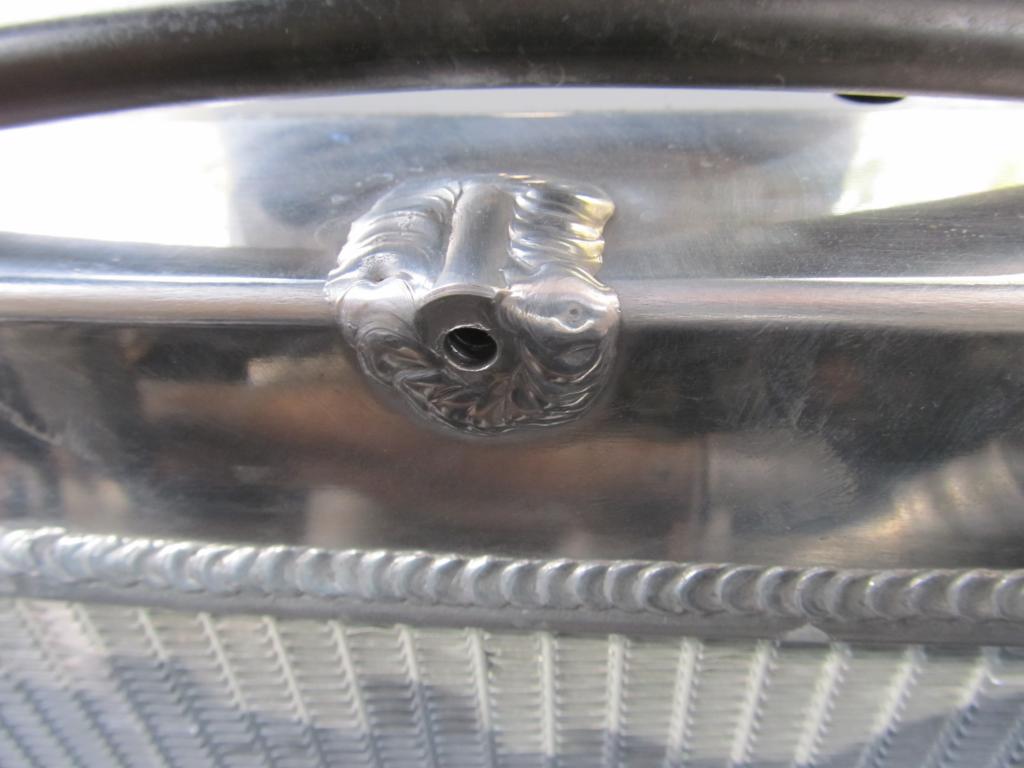
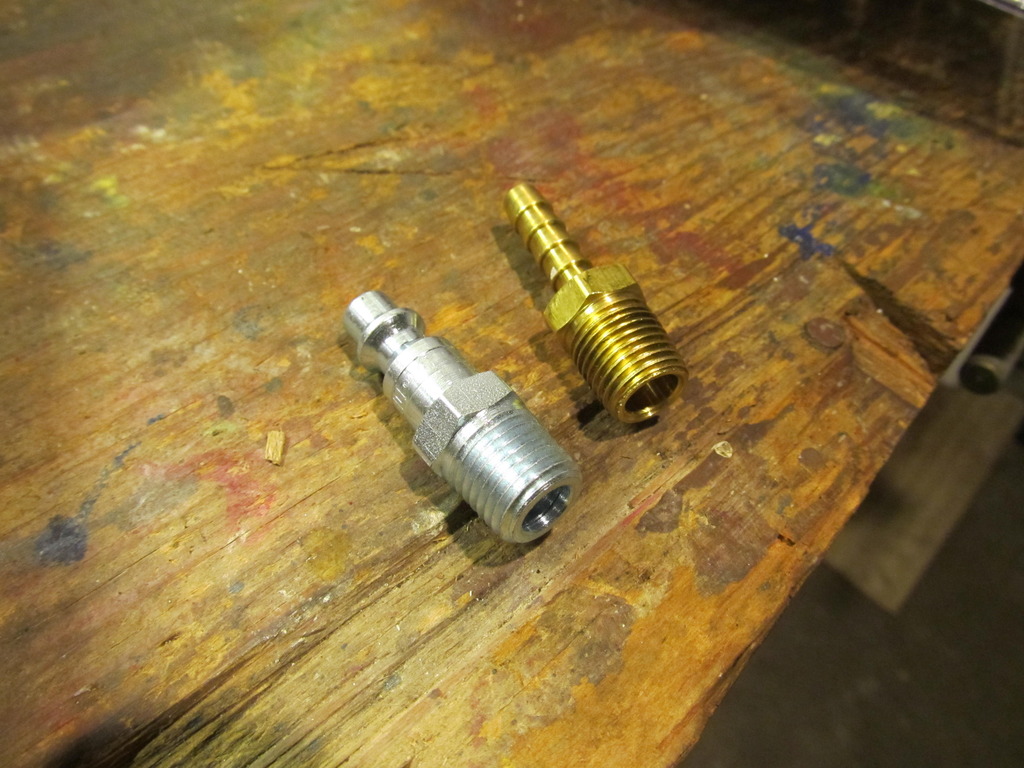
Second, you will need some fittings:
and . To drill holes big enough for them, I had to get .
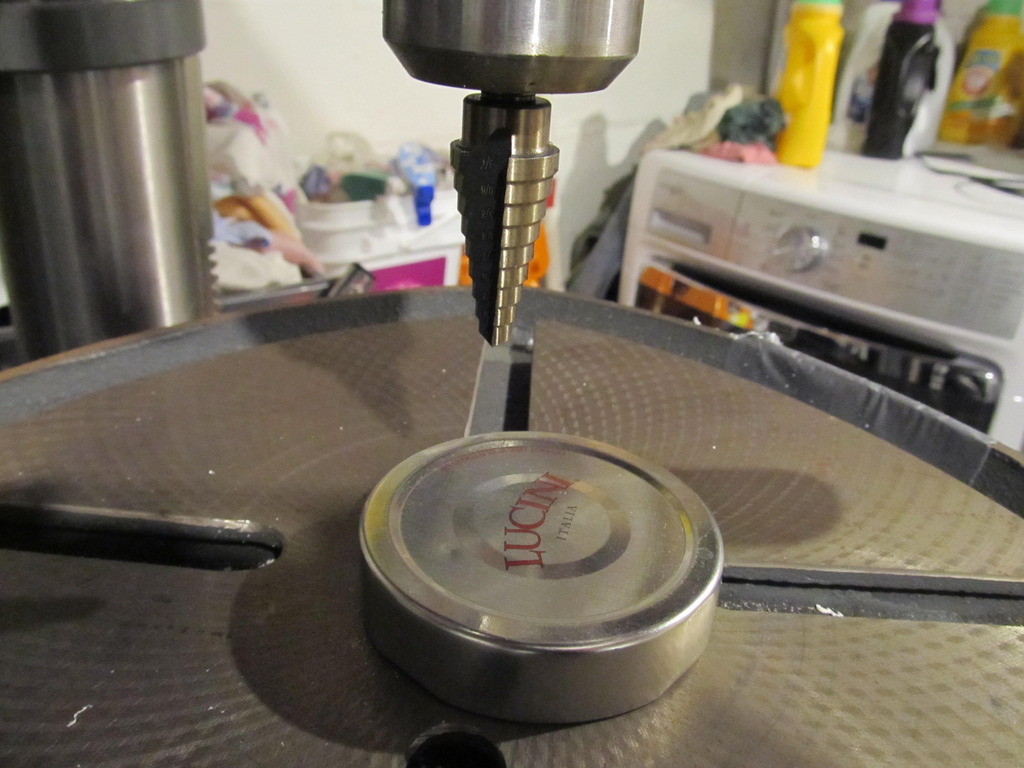
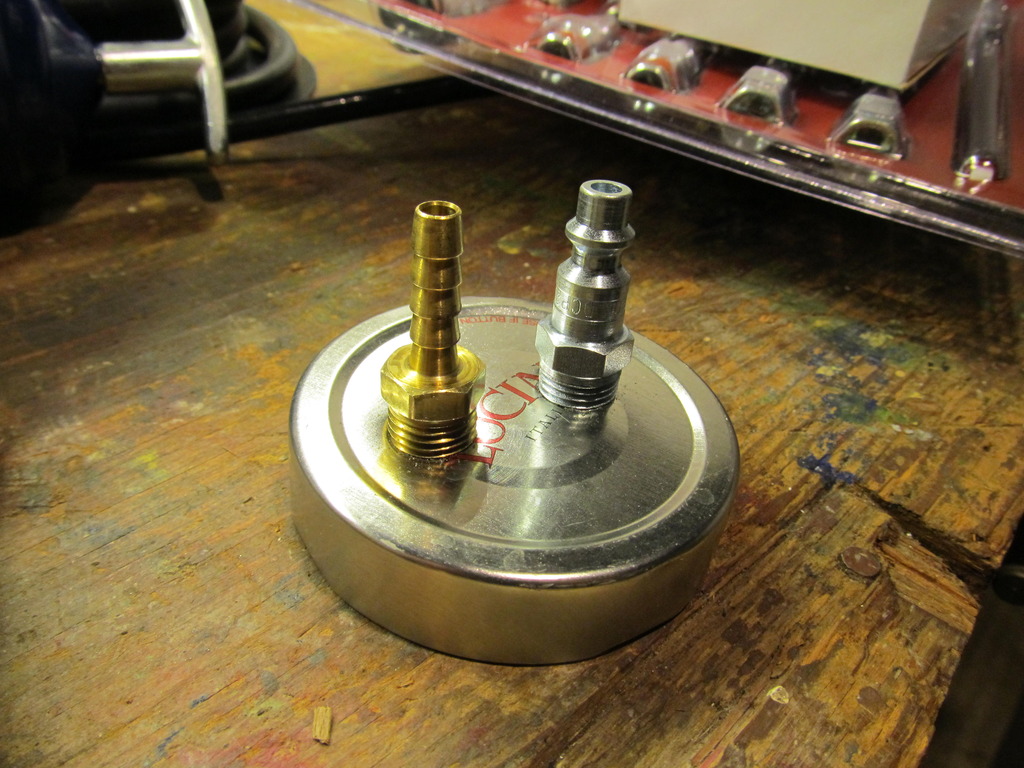
Then throw on some JB Weld to make a tight seal:
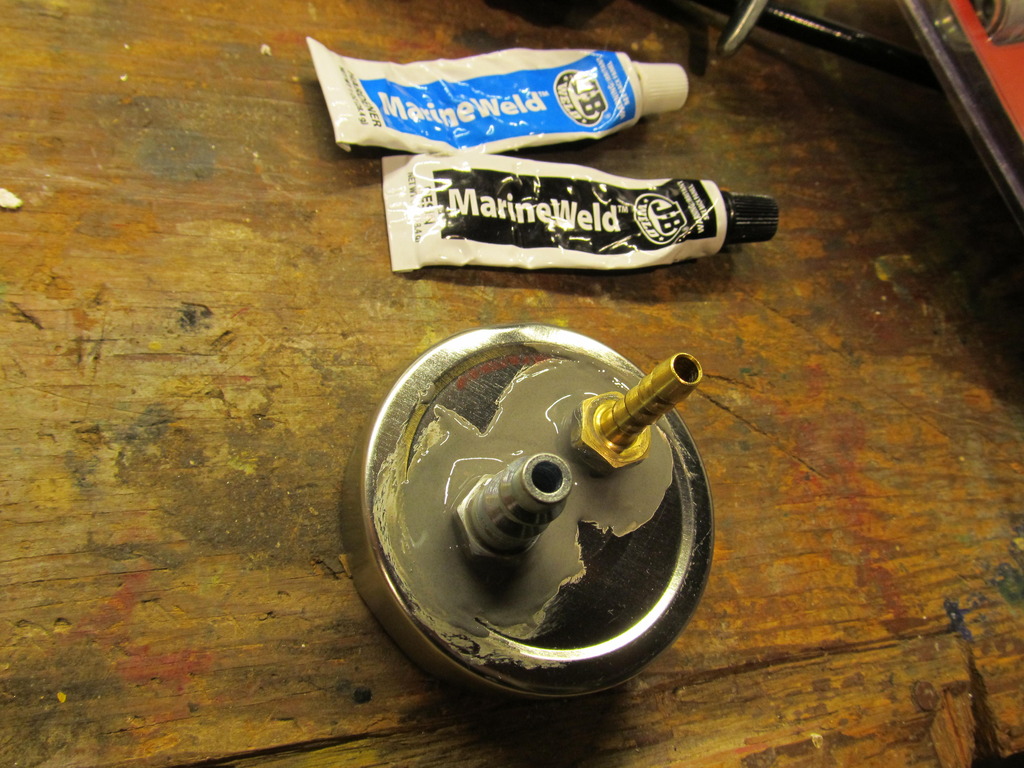
Burn up some paper or rags in the jar, let it burn for about 30 seconds, then blow it out and put the top on. Connect the line from the air compressor, connect the other line to a vacuum port, and start looking for leaks.
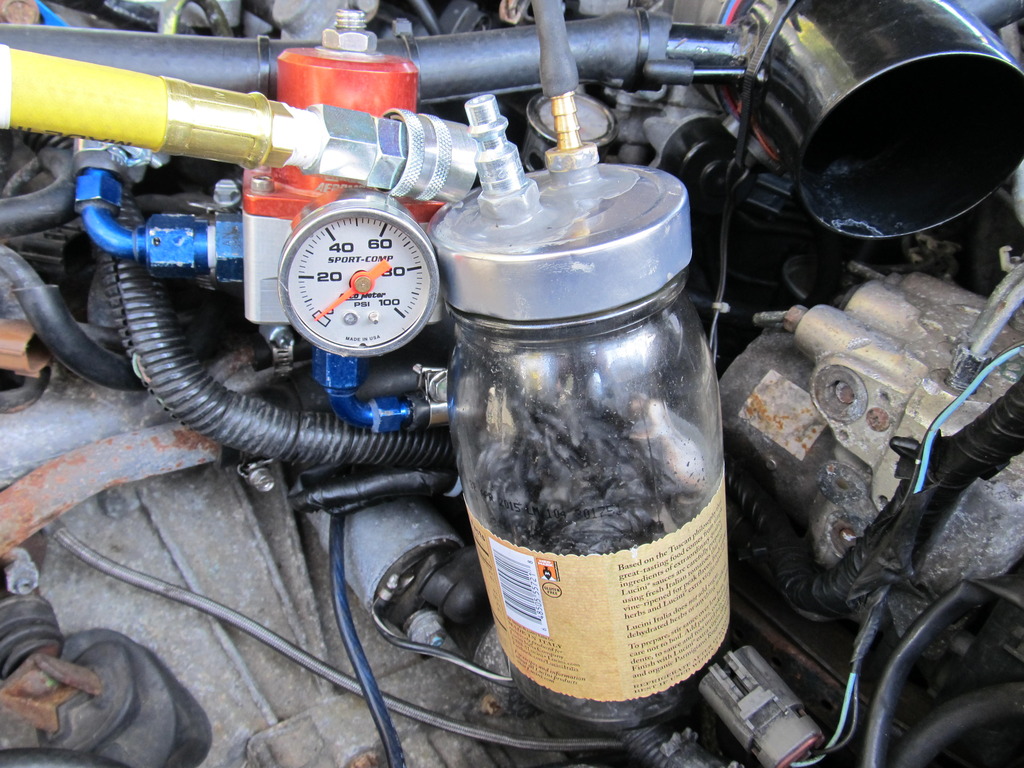
Thankfully, I couldn't find any leaks! Unfortunately, that goo that I used to seal up the crack on my header didn't work, and it's leaking again. But that's for another post...
First off, you need an air compressor with an adjustable pressure regulator to lower the PSI to about 5.
Second, you will need some fittings:
and . To drill holes big enough for them, I had to get .


Then throw on some JB Weld to make a tight seal:

Burn up some paper or rags in the jar, let it burn for about 30 seconds, then blow it out and put the top on. Connect the line from the air compressor, connect the other line to a vacuum port, and start looking for leaks.


Thankfully, I couldn't find any leaks! Unfortunately, that goo that I used to seal up the crack on my header didn't work, and it's leaking again. But that's for another post...


 It was probably one of the worst sounds i have ever heard.
