My Massive I30 Revival and Build Thread


 12-09-2015, 10:29 AM
#322
Member

Join Date: Feb 2008
Location: Pittsburgh
Posts: 104
Hey 95maxrider, I autoX a 1995 Maxima in Pittsburgh and am a big follower of your thread. Can you tell me more about your welded subframe connectors and point me to a thread in that direction? The more time I spend on my Maxima the less I'm interested in getting something newer. -paul
12-09-2015, 10:50 AM
#323

Hey 95maxrider, I autoX a 1995 Maxima in Pittsburgh and am a big follower of your thread. Can you tell me more about your welded subframe connectors and point me to a thread in that direction? The more time I spend on my Maxima the less I'm interested in getting something newer. -paul
12-09-2015, 12:17 PM
#324

Passing through.
If you have heard of a company called Ultra Racing they are Malaysian based company that makes stuff for the A32 and A33 chassis so they are worth taking a look at.
One of the issues I am going through is if i want to keep a 4th gen even as a DD. My turbo car is likely going nowhere but especially with the price of "newer" cars coming so far down. I've been shopping around and let say you are looking at 350Zs, they can be picked up now in decent shape for around $4,000, four thousand dollars. Seriously. To top it off even cars with in our class of cars or the sport compacts of the world they are becoming so fast. Laugh at that cobalt or neon if you want to, it will eat you for breakfast lunch and dinner if you are not paying attention. It is almost depressing. But i was looking at cars to purchase for a DD here is the list, mind you all of them are under 5k
R53 Mini Cooper S
E46 330i
350z&G35
RX8*
Thats just off the top of my head. Stock all of those cars would pretty much put a 4th gen so far in its place its not even funny. then the load of 80-90s japanese sports cars: MR2, 300zxs, RX7s, Celica All tracs, Supras. And then i saw this and almost **** myself:
https://raleigh.craigslist.org/ctd/5351531359.html
In case the link doesn't work that is a Mercedes E55 AMG for under $10,000. all of my mods add up to double the price of that car and i can't even compete with it.
Hey 95maxrider, I autoX a 1995 Maxima in Pittsburgh and am a big follower of your thread. Can you tell me more about your welded subframe connectors and point me to a thread in that direction? The more time I spend on my Maxima the less I'm interested in getting something newer. -paul
Hi Paul, the subframe connectors were made by Warpspeed 10+ years ago and I'm sure are no longer in production. I believe another company made their own version for a while, but again, I'm pretty sure they're also no longer available. They were the first thing I put on the car and despite them putting me in a stupid prepared class for SCCA, I will not remove them because of how much they improve the ride quality. It's the same reason why I had fender braces made. This platform really benefits from added rigidity, and I just love both of them. Since a 4th gen can't really be competitive in any SCCA class, prepared or not, I would recommend trying to find a used set or have some made if you're really keen on keeping the car. I know how you feel about not wanting to get a new car; after 12+ years of development, I really love everything about my car, and it makes me happy every time I drive it. I'm glad to hear there's someone else out there auto-xing a Maxima. You should come down to the DC region for an SCCA Solo event next year! Thanks for reading my thread, and good luck!
R53 Mini Cooper S
E46 330i
350z&G35
RX8*
Thats just off the top of my head. Stock all of those cars would pretty much put a 4th gen so far in its place its not even funny. then the load of 80-90s japanese sports cars: MR2, 300zxs, RX7s, Celica All tracs, Supras. And then i saw this and almost **** myself:
https://raleigh.craigslist.org/ctd/5351531359.html
In case the link doesn't work that is a Mercedes E55 AMG for under $10,000. all of my mods add up to double the price of that car and i can't even compete with it.
12-10-2015, 03:35 PM
#325

https://raleigh.craigslist.org/ctd/5351531359.html
In case the link doesn't work that is a Mercedes E55 AMG for under $10,000. all of my mods add up to double the price of that car and i can't even compete with it.
In case the link doesn't work that is a Mercedes E55 AMG for under $10,000. all of my mods add up to double the price of that car and i can't even compete with it.
Like basic chit, control arms, brake rotors, etc. That wallet will be hurtin quick!
Boss just has to replace teh Rotors on his S63
 lets just say he coulda brought a 4th gen.
And the mods....
Nice fckn car tho, motor and tranny is solid from what I've seen.
12-10-2015, 04:03 PM
#326
Maintenance is a b*tch tho....
Like basic chit, control arms, brake rotors, etc. That wallet will be hurtin quick!
Boss just has to replace teh Rotors on his S63 lets just say he coulda brought a 4th gen.
And the mods....
Nice fckn car tho, motor and tranny is solid from what I've seen.
Like basic chit, control arms, brake rotors, etc. That wallet will be hurtin quick!
Boss just has to replace teh Rotors on his S63
lets just say he coulda brought a 4th gen.And the mods....
Nice fckn car tho, motor and tranny is solid from what I've seen.
 12-11-2015, 06:44 AM
#327
You buy that car, you better have your own set of tools to maintain it. And if he took an S63 even to an indy to have brakes done, LOL keep the astroglide ready. Our 545i, this is a 2004 car not even an M if i took it to our indy he charges $1200 for brakes, one thousand two hundred dollars, yea i did the **** myself for $200. Better be ready to **** up dem manicured nails or have a huge bank account for das auto.
I'm just talking about the parts, not P&L. He found rotors w/ 2k miles on em and still had to drop a 4th gen on em

But I digress.
95max, what is your rear brake setup? Your thread is too epic.
12-21-2015, 06:16 PM
#328
 12-21-2015, 06:54 PM
#329

 01-26-2016, 07:32 AM
#330
========================================
I put together a full mod list last year when I was writing my little article for NICO, and I don't think I ever posted it up in here. So here's a quick reference of every mod on the car:
Engine/Trans
-2002/03 Maxima 3.5 motor, no SS IM mod
-K&N filter, velocity stack
-2001/02 Pathfinder 70mm TB, custom adapter and throttle cable bracket from sicivic89
-NWP thermal intake manifold spacers
-NWP Block off plate
-Nistune ECU, 7k RPM rev-limit
-Cattman headers
-Resonated test pipe
-2.5” Budget resonated b-pipe
-2004 G35 sedan muffler
-Aeromotive AFPR, fuel pressure gauge
-Quaife differential in rebuilt/refreshed transmission
-2000/01 DEK Maxima clutch and flywheel
-97-99 Maxima shifter with 1” cut out
-Sola Luna weighted metal shift ****
-Custom aluminum radiator brackets
-Put down 210 whp on old DEK motor
-Put down about 237/247 on the 3.5
Suspension
-BC Racing coilovers 9k front, 8k rear and valved to match dampers
-2.5* camber front (maxed out camber bolts), custom 4.7* caster (up from 2.2* stock, drilled new holes in front strut towers, rotated coilovers 90*), 0.1* toe out
-Corner balanced, 60.0% F, 40.0% R, 50/50 left to right
-3130 lbs w/full tank of gas, empty trunk, full interior
-2J Racing converted to panhard rod rear suspension from a Scott-Russel linkage
-Progress RSB at max stiff
-Energy Suspension poly bushings for sway bar frame mounts, sway bar end links, control arms, cross member and F&R motor mounts
-Poly side/trans mounts
-Delrin front subframe bushings/collars
-Super Pro poly rear trailing arm bushings
Brakes
-Wilwood 4 piston front calipers with 12.9” 2-piece rotors w/Wilwood Polymatrix E pads
-Fastbrakes rear 12.3” BBK with stock calipers and redrilled Accord rotors, old Carbotech AX-6 pads
-Track pads are Carbotech XP-8
-SS lines
-ATE racing fluid
Chassis-
-Warpspeed Stage 1+2 Subframe connectors (welded)
-Custom fender braces, welded to chassis
-Stillen RSTB (front won't fit over 3.5 IM)
-No sunroof (stock)
-97-99 Maxima SE steering rack, B15 SE-R rack coming soon
-NWP engine torque link
-Aluminum steering column bushing
-Relocated battery to trunk, 0-gauge wire
-95 Maxima aluminum front bumper support (-30 lbs)
-Rolled front fenders, rolled and slightly pulled rear fenders
Cooling
-Mishimoto radiator w/19 psi cap, Toyota red coolant
-Racer Parts Wholesale 24 row oil cooler with -10 AN lines
-Derale power steering cooler
Other Fluids
-Mobil 1 Synthetic 5w-30
-Amsoil MT fluid
Exterior
-The Retrofit Source FX-R projectors w/ 4.3k HID bulbs in Cefiro headlights
-TRS Blazer fog light projectors, 3k HID bulbs, independent fog light rewire mod
-All front lighting housings blacked out
-1998/99 I30 tail lights (heated up with heat gun, pressed center section together to fix common leak issue)
-35% tint
-I30t spoiler
-Painted grille black
-Black OEM mirrors
-Removed three bars front lower front grille, filled, sanded, painted
-Garage door front lip
-All chrome window trim blacked out
-All original paint (except spoiler and some touch up work on bumpers)
-Nissan Murano windshield washer nozzles
-350Z horns
Interior
-Recaro Speed seat w/gray alcantara center section, CG Locks
-Gunmetal aluminum dash trim, matching aluminum lower door panels
-Stock light gray leather (less than 5% of A32s)
-Sparco steering wheel
-350Z aluminum pedals, dead pedal
-Custom gray alcantara door panels
-Matching gray alcantara shift boots w/black stitching by Redline Goods
-Redline Goods black leather arm rest with some extra foam cushion inside
-Techtom MDM-100 (Set to display speed and water temp since the smaller steering wheel cuts off view of 20-120 mph)
-95/96 Maxima SE gauge cluster, gunmetal aluminum gauge rings
-Innovate Motorsports LC-2 Wideband O2 Sensor
-Innovate Motorsports MTX-D Oil Pressure & Oil Temperature Gauge
-99 I30 Limited aluminum door scuff plates
-All interior lights are white LEDs (Gauge cluster, door switches, HVAC display, dome lights, door light, etc.)
-97-99 Maxima flip-over cup holder in center console
-Fuzzy pillars (stock)
-Replaced cracking chrome interior door handles
Stereo
-Premier DEH-490IB head unit (4V pre-out)
-Focal P165V15 6.5” front speakers
-Hertz DCX 165 2-way rear speakers
-Subaru Audio PVC custom speaker adapters
-12” JL W6 subwoofer, Sonic Electronix 1.15 sealed box
-Boston Acoustics GT2 (125w RMS x 2 for fronts)
-Alpine MRP-M500 (500w x 1 for sub)
-Clifford RS3.5 alarm with remote start
-MDF trunk floor with bracket to hold sub box in place
-“Big 3” 0-gauge wire upgrade
-12g speaker wire
-E-Dead sound deadening in the trunk, front doors and rear deck
-Frost King insulation in the front doors and other areas
-E-Dead sound deadening on front fender liners
Wheels/tires
-17x8 Enkei RPM2 with 245/45/17 Michelin Pilot Super Sports
-17x8.5 Enkei RPF1 with 245/40/17 Hoosier A6
-ARP extended wheel studs
-2J Racing 10mm front, 15mm rear wheel spacers
Maintenance
-Replaced windshield
-Replaced radiator core support
-Touch up paint to bumpers
-DS front door hinges replaced due to door sagging
01-26-2016, 07:37 AM
#331
So my E28 rally-x car got smashed by an 18 wheeler a few months ago, and I replaced it with an E36 M3 
08-19-2016, 09:48 PM
#332

Wow great thread first time seeing it
Doing something different but still a lot of work.
https://maxima.org/forums/5th-genera...-clean-up.html
Doing something different but still a lot of work.
https://maxima.org/forums/5th-genera...-clean-up.html
Last edited by krismax; 08-19-2016 at 09:51 PM.
08-20-2016, 05:39 AM
#333
Wow great thread first time seeing it
Doing something different but still a lot of work.
https://maxima.org/forums/5th-genera...-clean-up.html
Doing something different but still a lot of work.
https://maxima.org/forums/5th-genera...-clean-up.html
02-06-2017, 05:11 PM
#334
Thanks! I've barely driven the car at all over the last year due to lots of oil and trans fluid leaks, but once the M3 makes it through a few races without breaking I'll be bringing the I30 into the garage to do the rear main seal, upper and lower oil pan gaskets, and reseal the transmission case. Hopefully I'll be able to do that within the next month and I can finally start driving this thing again! I'm getting a little tired of the 3rd gen with no stereo and no AC.....

 02-14-2017, 12:28 PM
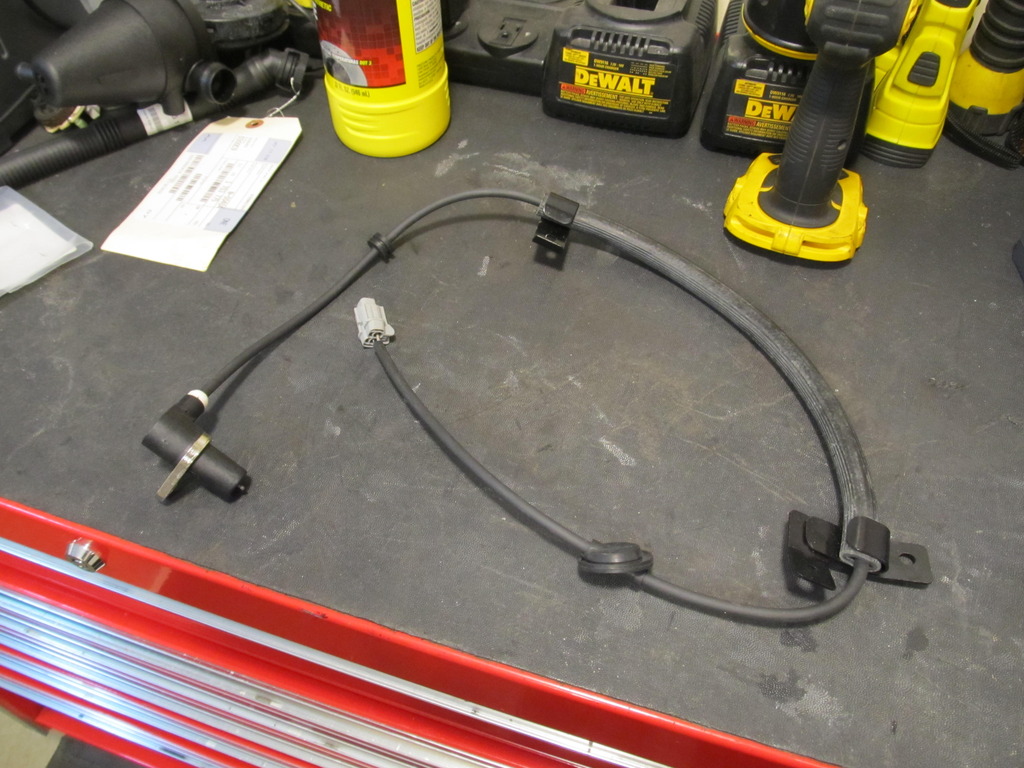
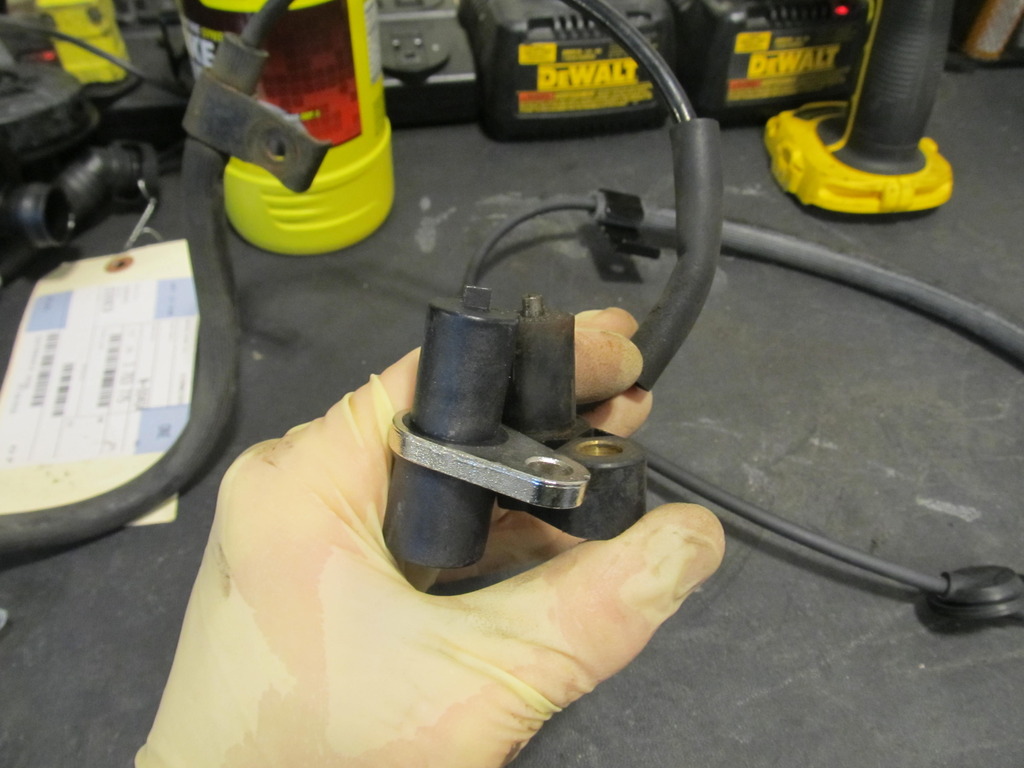
#337
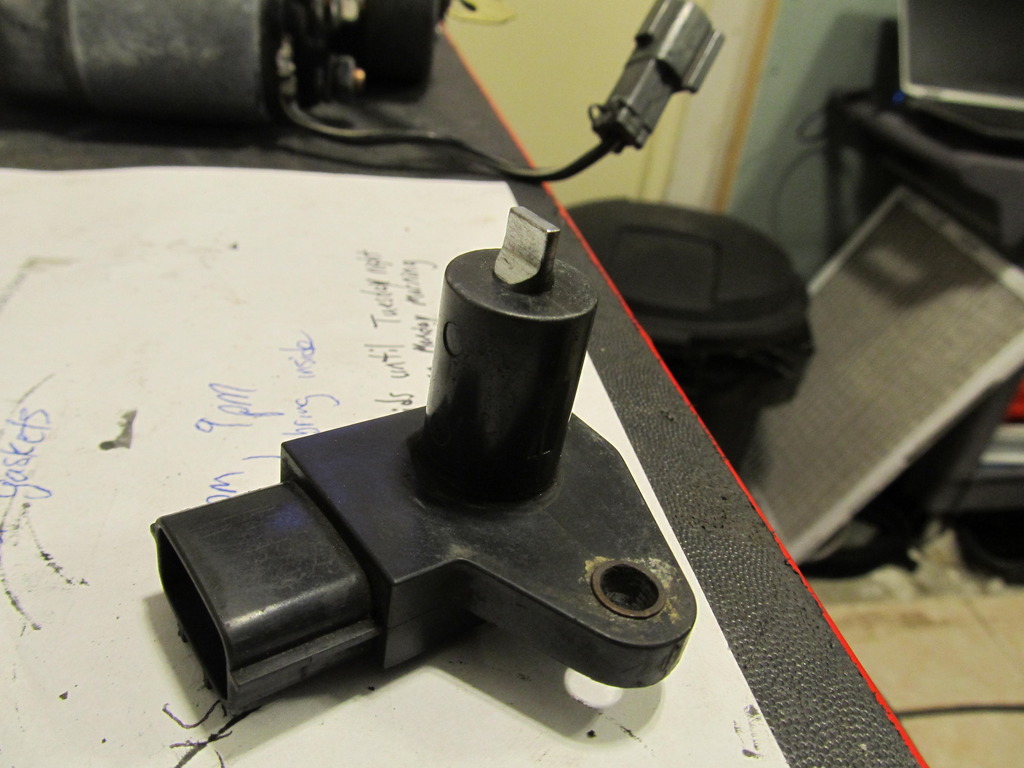
Nothing big to report yet, but I'm getting ready for the big tear down. Maybe this weekend! In the mean time, I installed a brand new $13 ABS sensor that replaced when I was working on my PS axle some two years ago. It certainly looks different than OEM, but it seems to work just fine! Normally I would have bought it from RockAuto or something, but they wanted $100+. I found this one, and plenty of others, on Ebay for less than $15! Score!
I also sucked out the fluid from the clutch reservoir and put in fresh stuff. A full flush is coming later when I have someone to help!
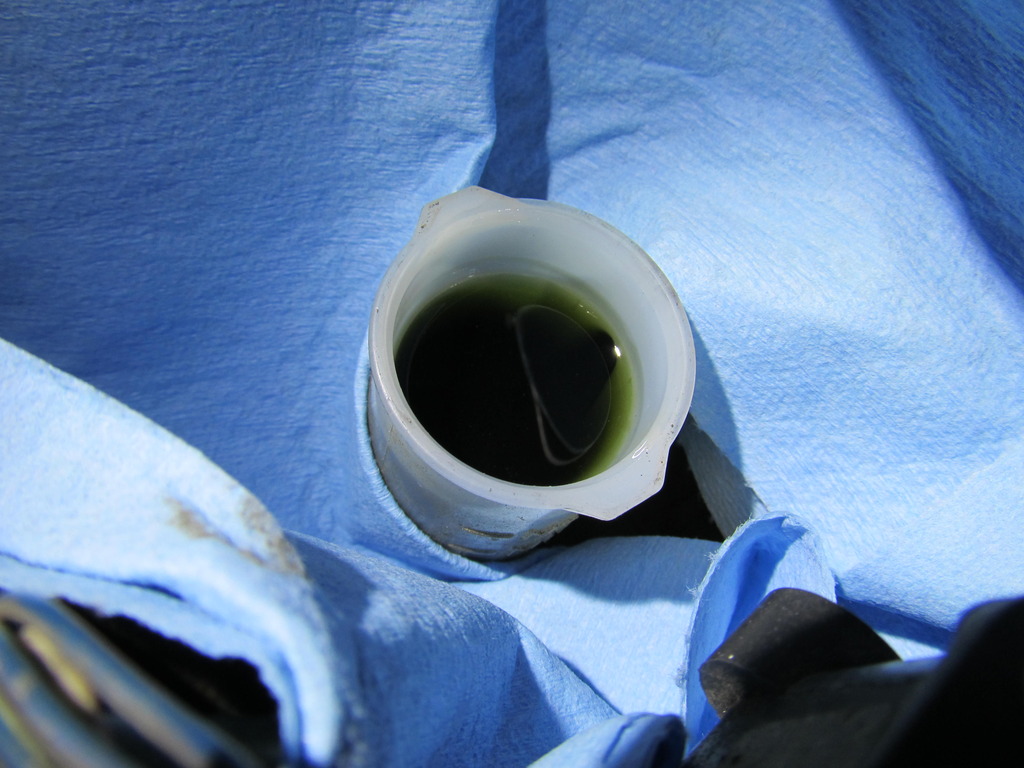
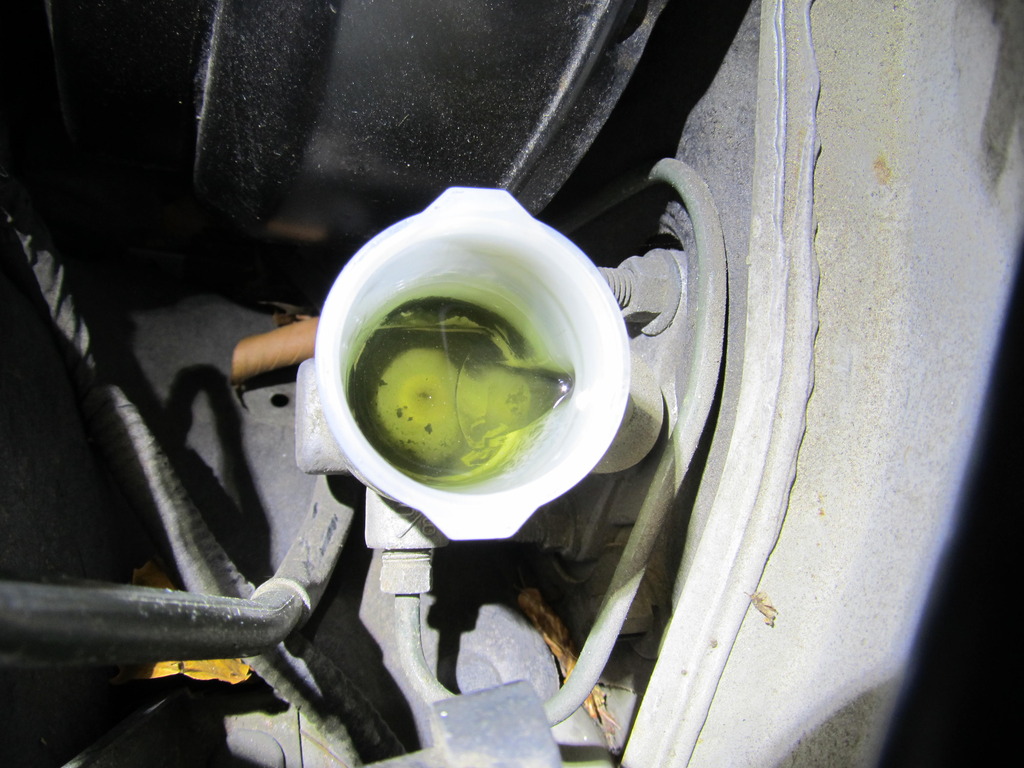


I also sucked out the fluid from the clutch reservoir and put in fresh stuff. A full flush is coming later when I have someone to help!

 02-27-2017, 12:30 PM
#338
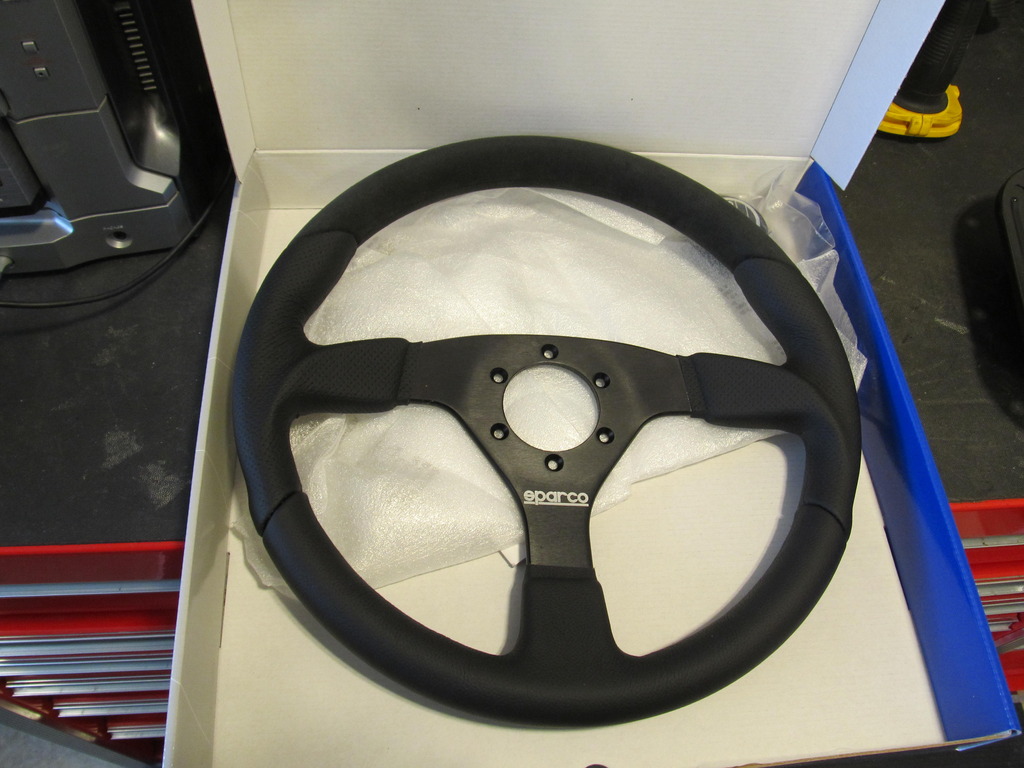
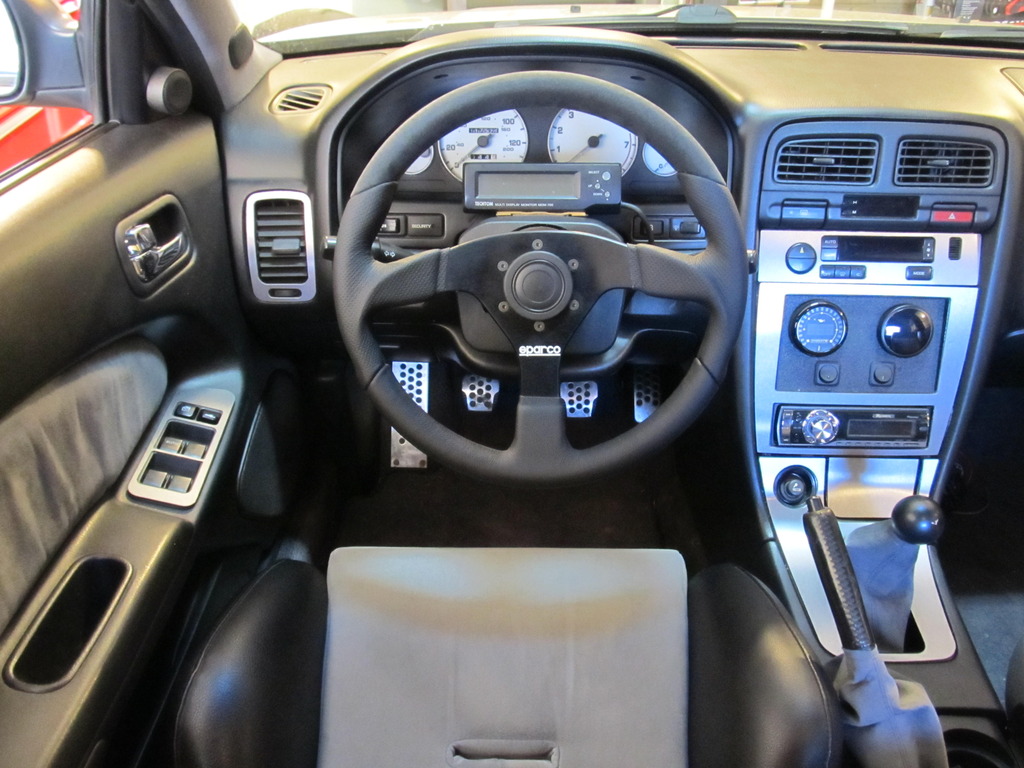
The I30 is finally under the knife and things are going well enough! Before I get into the heavy stuff, let's start with a small project: installing a new steering wheel. The old Sparco now lives in the M3, and since I loved the design so much, I wanted to get the same thing for the I30 again. The wheel is the Sparco L505. They must have revised it a tad, as the old center section was silver, and the new one is black. Still though, same great shape and thickness, and new alcantara sure is smooth!
Much more later


Much more later

 03-13-2017, 07:04 AM
#341
Okay, before I clog up the thread with tons of pictures, I need some help with one more item!
My new needed new crossmember bushings, so I picked up an ES set. My two rear bolts that attach the crossmember to the body are larger than stock (17mm is stock- one is 19mm the other is 24mm) because the threads got really chewed up at one point and needed to be re-threaded, but I can't see how that would matter. My problem is that when I go to tighten the bolts, the lower/outer bushing ring squishes out around the washer for each bolt.
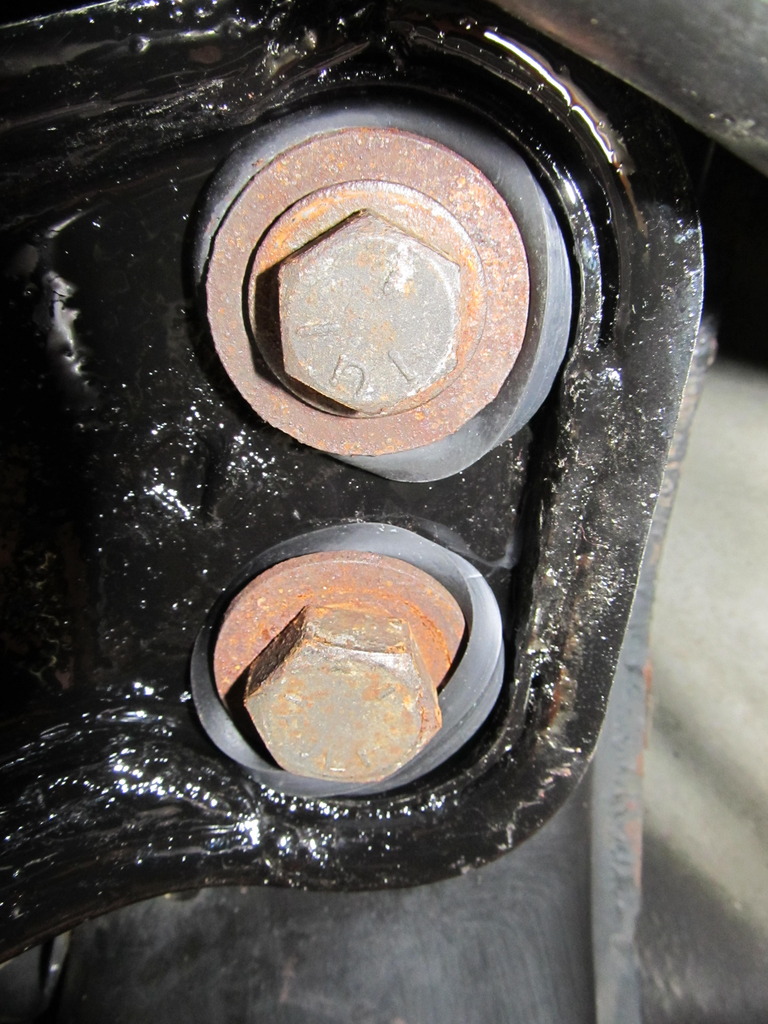
I assembled everything in the correct order, and am nowhere near over-torquing the bolts. Why do these outer bushings keep squishing out around the washer? Anyone have any tips for me?
 03-20-2017, 07:58 AM
#343
Nope, turns out the bolts need to be OEM-style with a large shoulder. My bolts, that are fully threaded, just keep tightening without ever being able to get torqued, which is why they are squishing the bushings out. After over an hour spent at Fastenall, I think I might have a solution. We shall see soon when the parts arrive!
03-31-2017, 12:30 PM
#344
As you can probably tell from the lack of posts in this thread, my attention has been elsewhere for the past year or so. By the end of the 2015 racing season, the car was leaking a good amount of oil and trans fluid, and my E28 rally-x car had just gotten totaled by an 18 wheeler. At the same time, I bought a house with my wife, and was on the hunt for a replacement rally-x car. Within the same month, I also picked up the 3rd gen as a DD/beater. It was a very busy time, and the I30 got pushed to the back burner while we got settled at the house, I got the 3rd gen reliable enough to DD, and I had to find and build a new rally-x car. The rally-x car (E36 M3/4/5) turned out to be an unmitigated disaster, as it turned out the car had been in a bad accident, and the frame was very bent. Then I had to cut out and replace the rear shock towers as one side cracked when a spring perch failed. Then I switched career paths and started training in my new field. Then the head gasket blew on the M3!
This whole time I had been hankering to get the I30 back on the road, but knowing what was involved in replacing the rear main seal (RMS), I knew I needed a few weeks to do everything I wanted to do, which meant the other cars needed to be in good enough shape for the I30 to take over the garage for a while. Finally, after earning my first certification, it was time. In its year of not really being driven, the I30 took up the hobby of rusting, which slowed down the project considerably. Being borderline OCD, I needed to fix everything I came across, and since most of the front end comes apart to do the RMS properly, there was a lot for me to fix. Let�s get started!
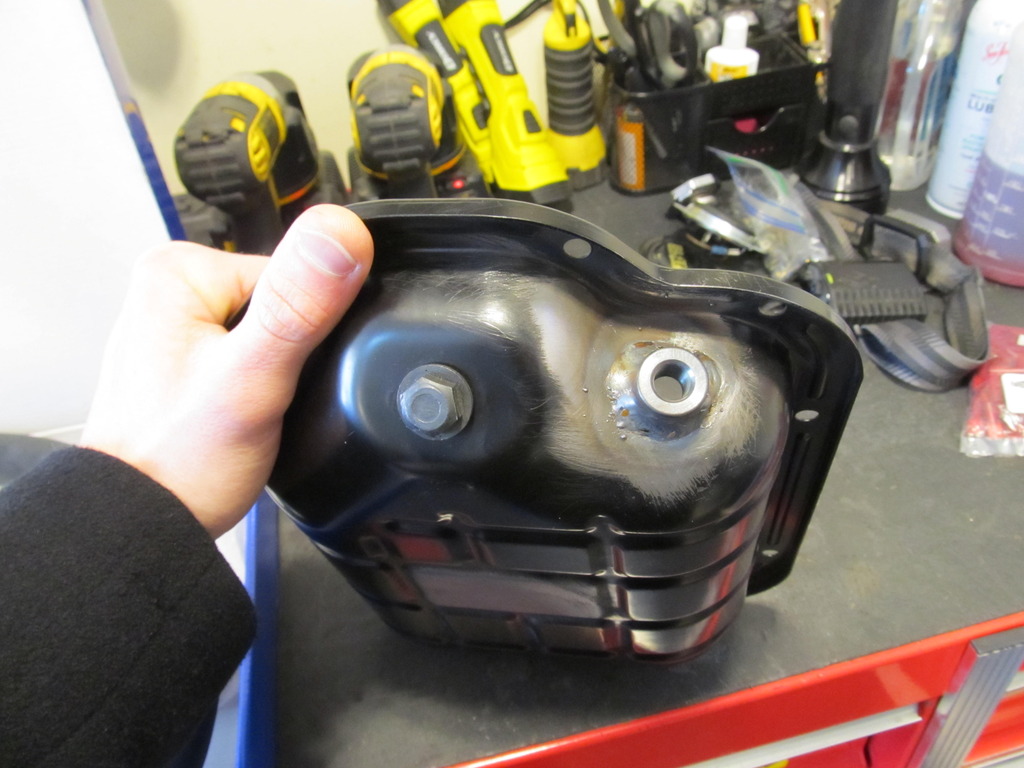
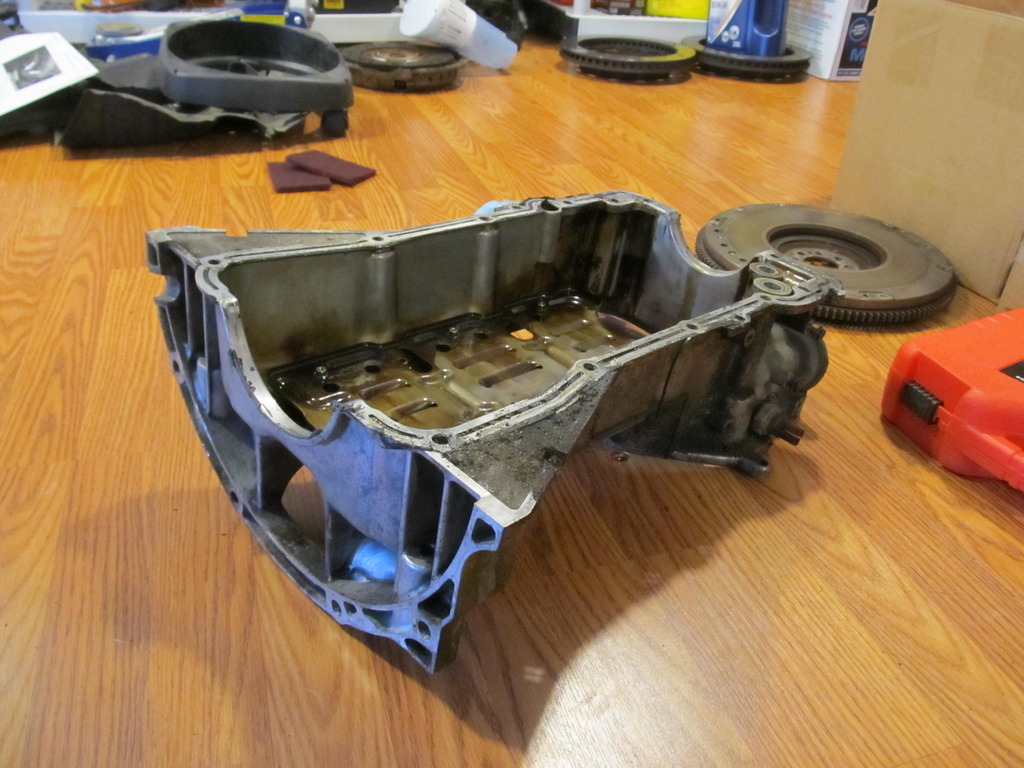
A few years ago I installed an Innovate Motorsports dual oil temp/pressure gauge. The pressure sensor went in nicely to my oil cooler adapter, but I didn�t have any way to mount up the temp sensor. Given the condition of the oil pan on the car, I decided to just buy a new pan off Ebay for $20 and have my buddy Brian weld on the bung for the temp sensor.
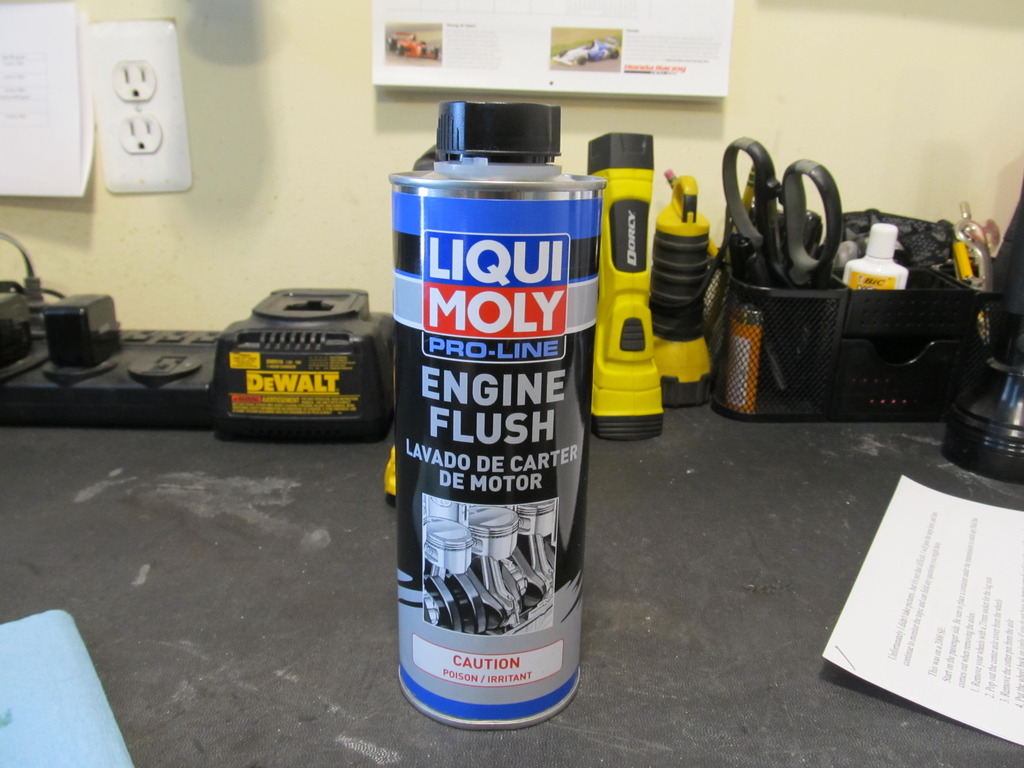
Next, I drove the car around for 30 minutes to circulate the oil that I had put in back in December. Back in December, I noticed that the engine was making more clattering noises than usual, so I checked the oil. When I pulled the fill cap, there was �milkshake� residue on it, so I figured I should change the oil. When I drained the oil it was nice and black, so the milkshake on the cap was just water residue from not driving the car and getting it up to temp for a year. After putting in new oil the clattering noises went away. Anyways, back to February. I figured I should get that new oil moving around and have it pick up some sediment before draining it, plus hot oil drains better. After the drive, I poured in a product I started using- Liqui Moly Engine Flush. You pour it in and let the car idle for ten minutes, then drain the oil out. It�s supposed to help clean up oil passages and such, and since the car had been sitting for so long, I figured it couldn�t hurt. Sure enough, the oil came out pretty damn black for having some 30 miles on it!
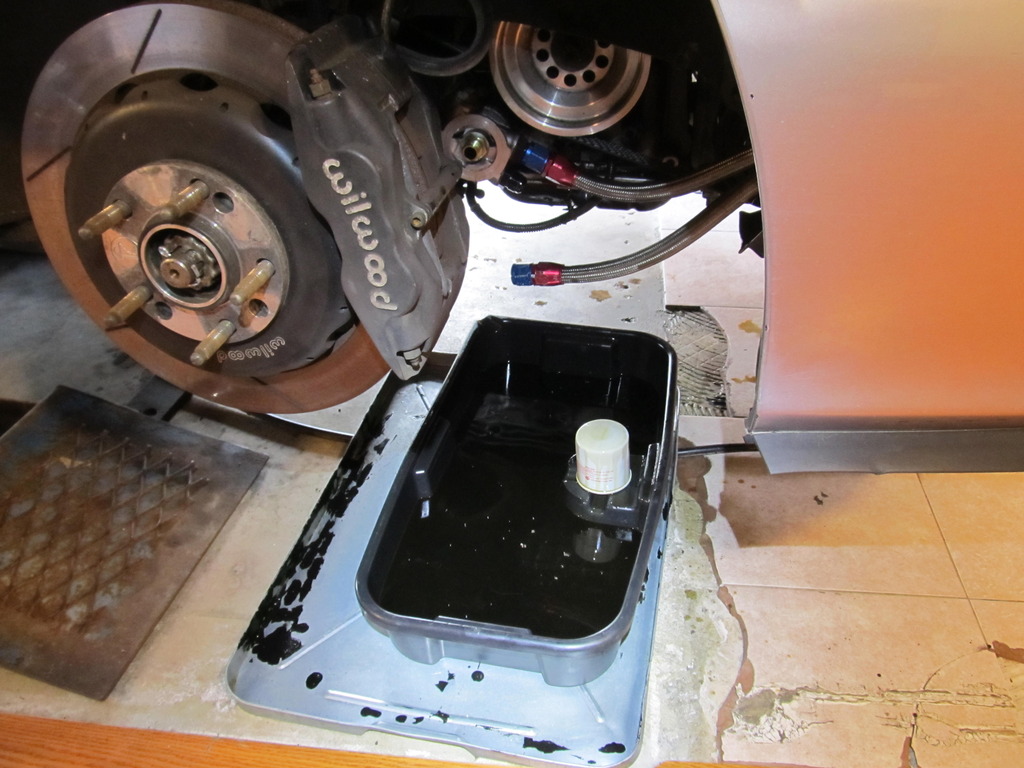
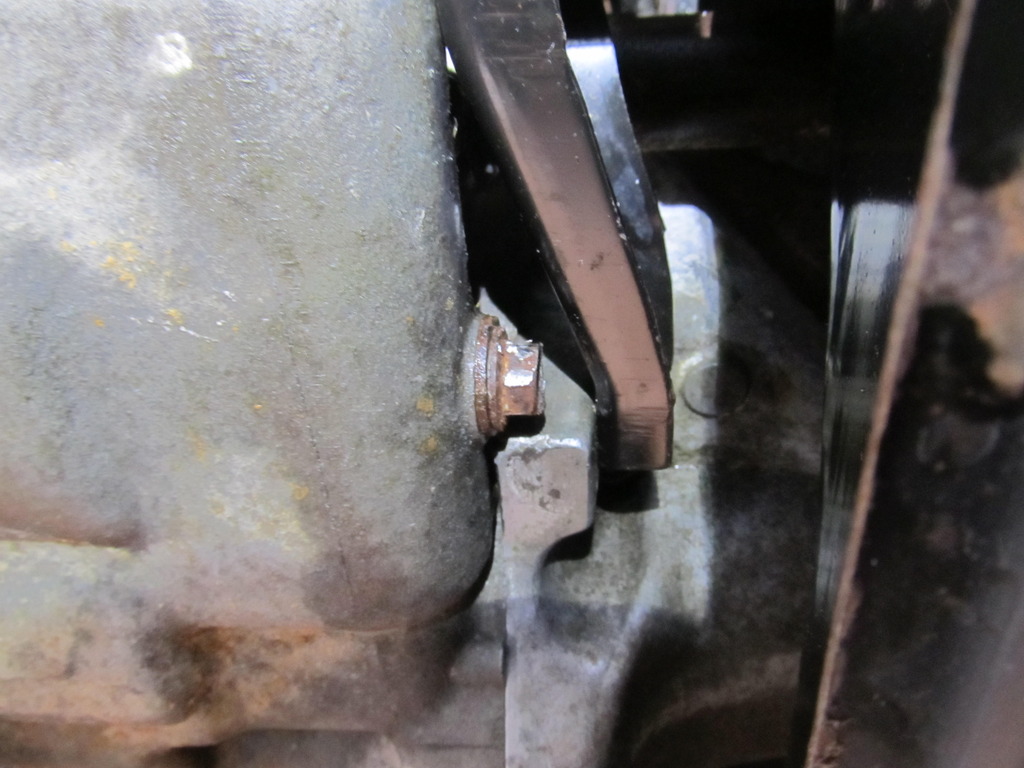
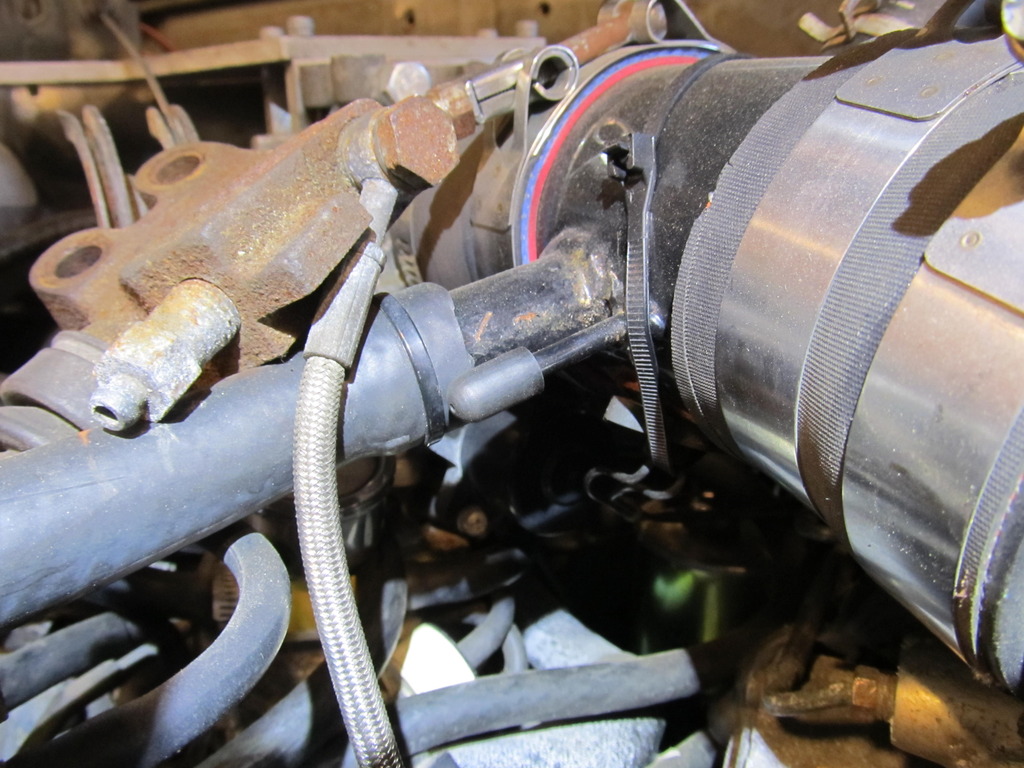
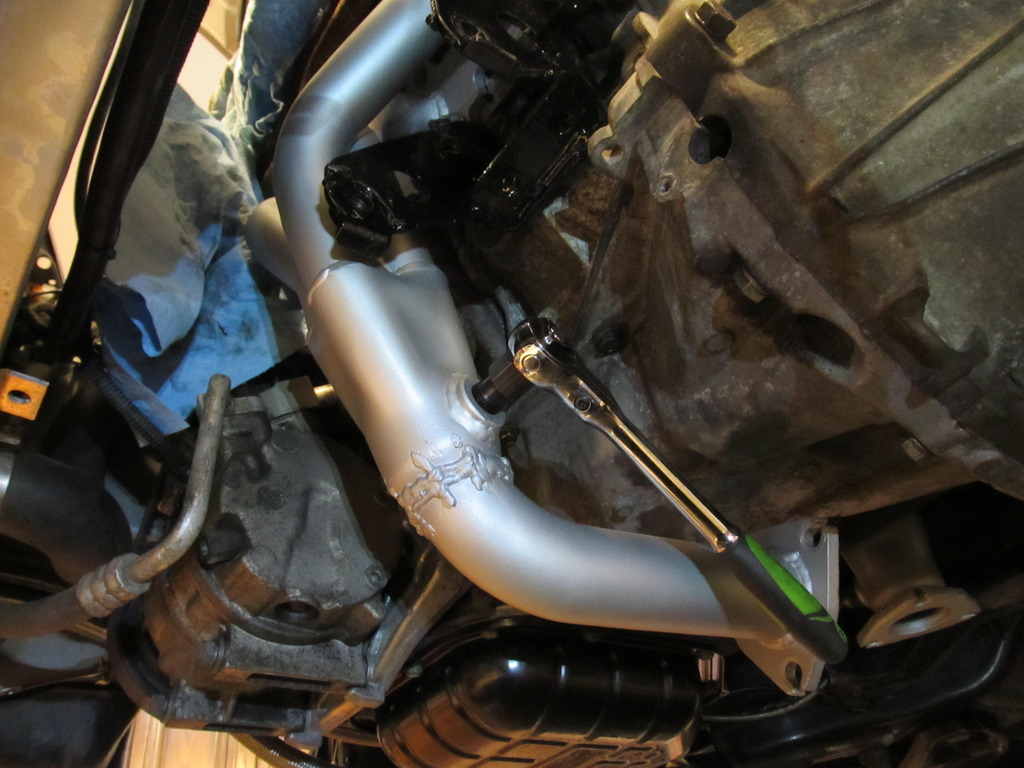
Then it was time to drain the trans. Little did I know that the shop who installed my axle seal when I was crunched for time overtightened the drain plug, and it started rounding off when I tried to loosen it! I don�t know about you guys, but I can only get wrenches on the drain plug, and no sockets.
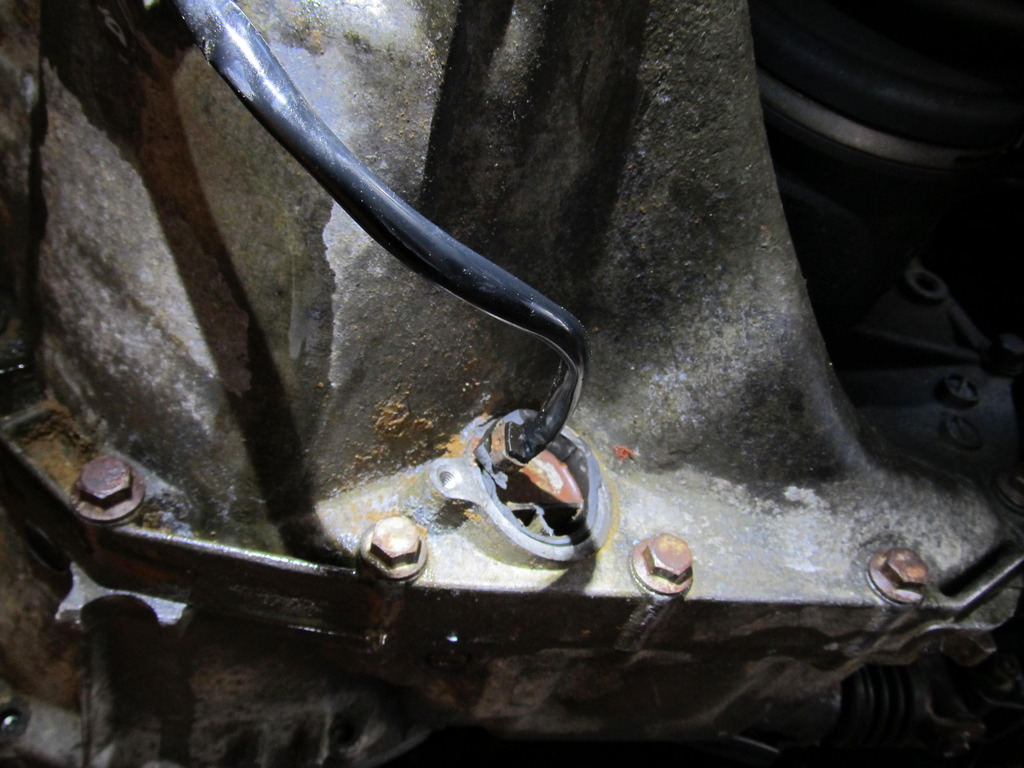
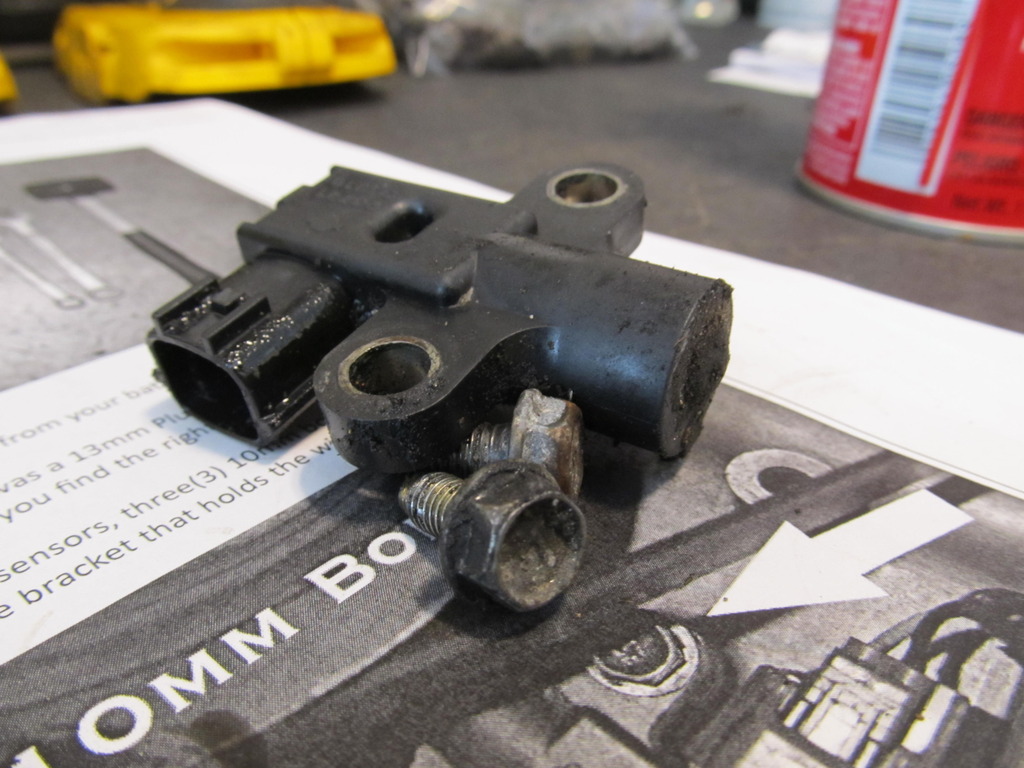
After fighting it for over an hour, I decided to try the reverse sensor over on the driver�s side. I got the bolt out, and got the sensor so wiggle back and forth, but apparently that wasn�t enough, because as soon as I started to pry it out the lip cracked. Then more of it cracked. Pretty soon there was nothing to pry against, and it too was stuck in the trans. I suppose I could have just smashed it with a hammer to drain the fluid since I couldn�t reuse it, but I decided to press on and just let the fluid drain when I pulled the axles.
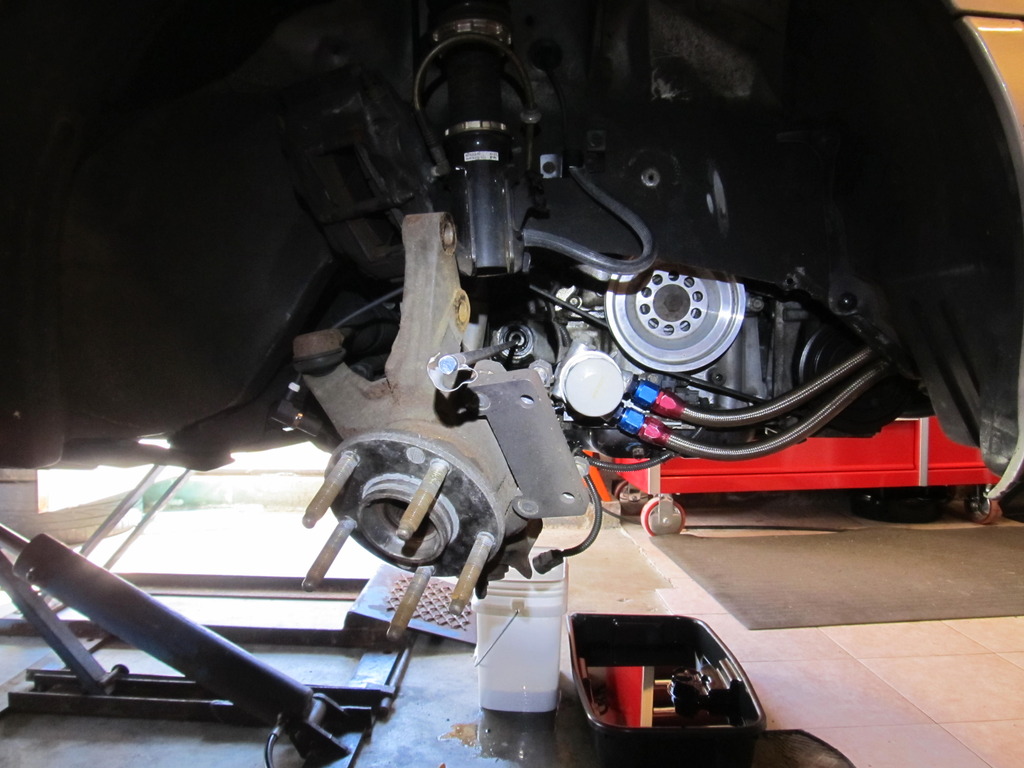
So what do you think happened when I tried to pull the DS axle? That�s right, nothing! That sonofabeetch was in there good, and no amount of prying against the trans was able to get that circlip to pop. I proceeded to fight the axle for an hour or two, because how freaking hard can it be to pull an axle? I figured I was just stupid, but apparently it�s not too uncommon. I eventually gave up and pulled the PS axle, which was nice and easy. One of the how-tos from here mentioned using a long screw driver from the PS axle hole to tap the DS axle out, but my 2� long screw driver just wasn�t long enough. The next morning I went to Home Depot and bought a 4� long 3/8� metal rod, came home, put it up against the DS axle through the PS axle hole, gave it a whack with my rubber mallet, and out came the DS axle. Huzzah, finally!
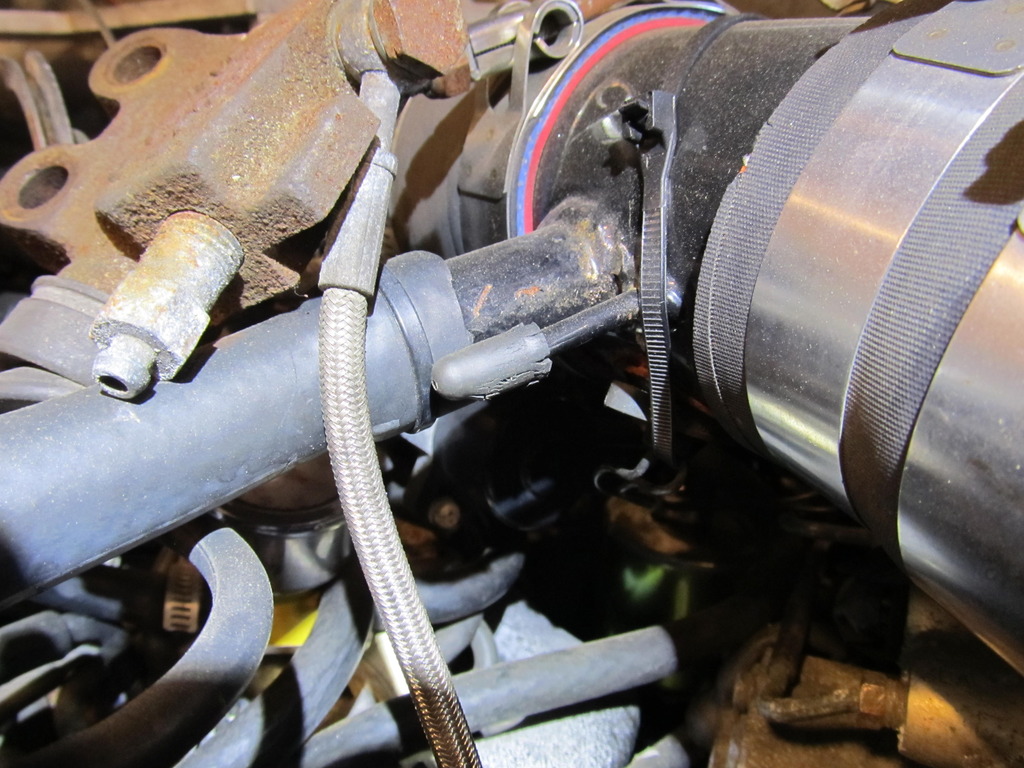
While I was taking some things apart I noticed that three of my vacuum caps had started to rot and crack, so I threw some new ones on. I hate vacuum leaks!
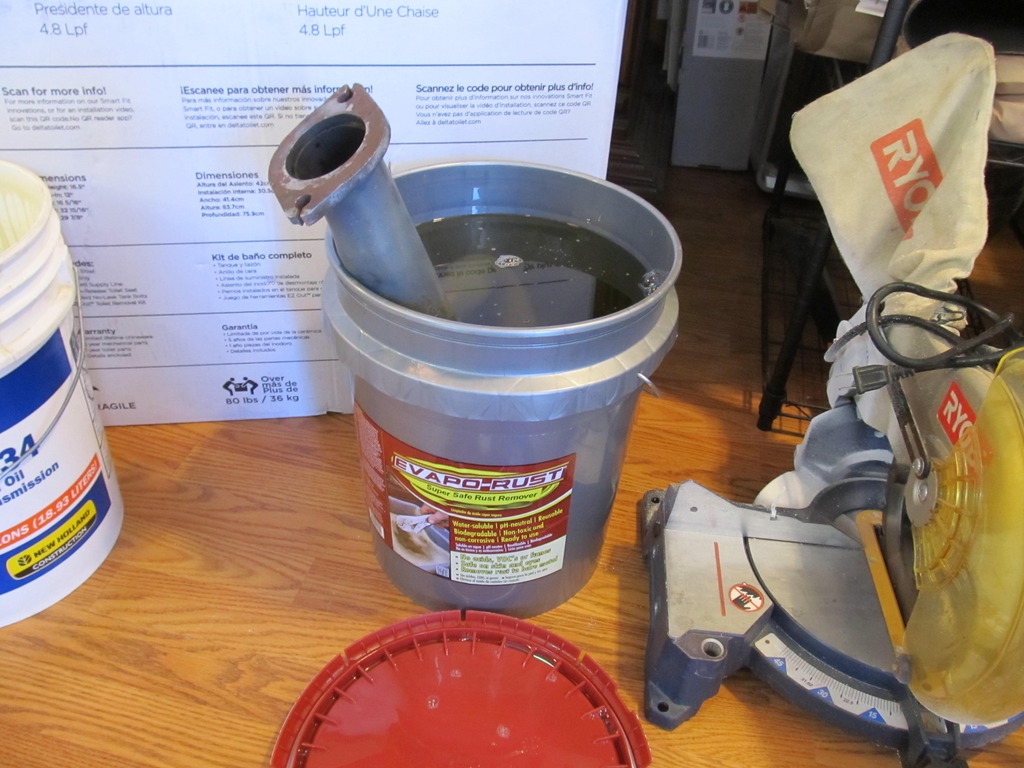
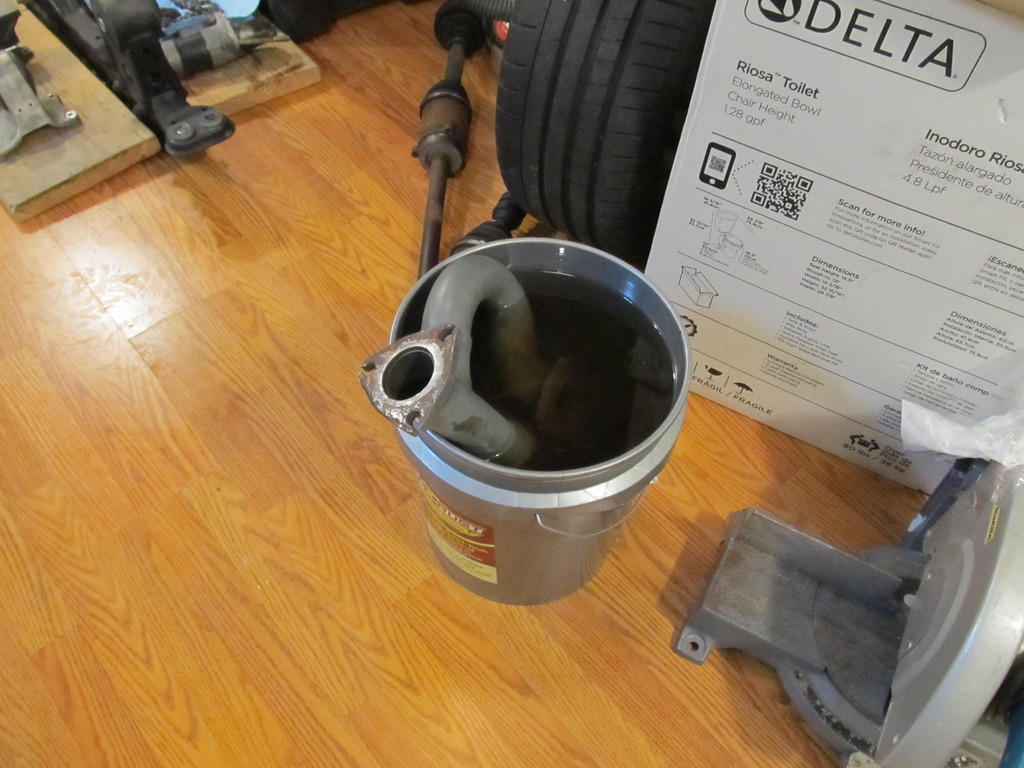
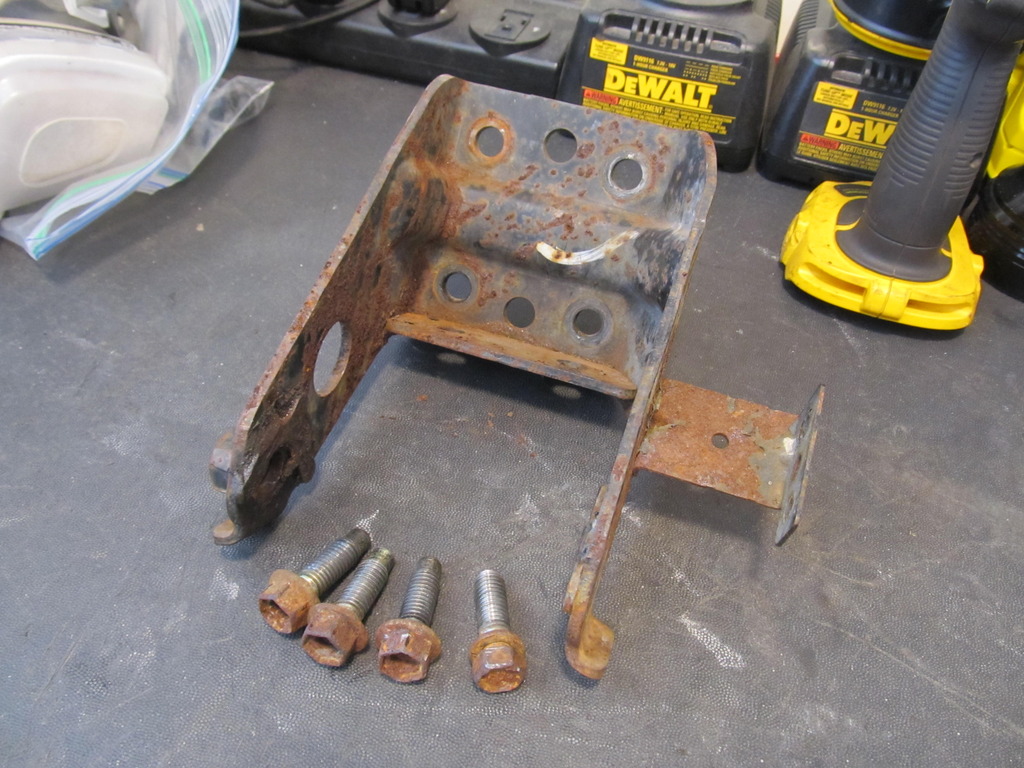
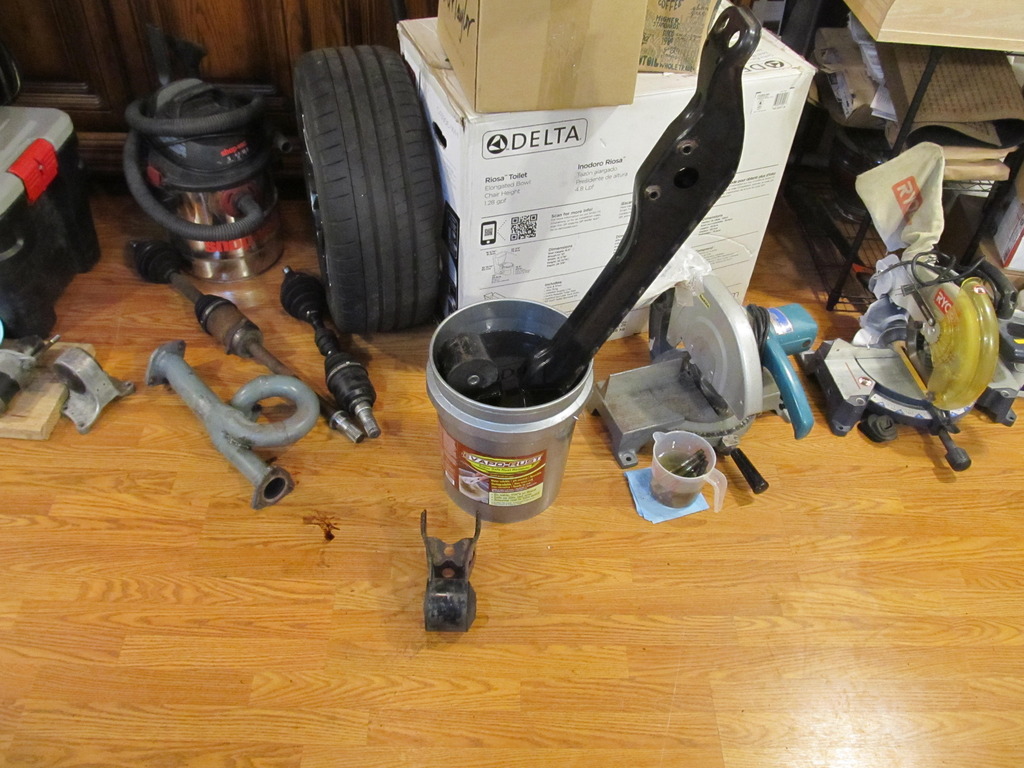
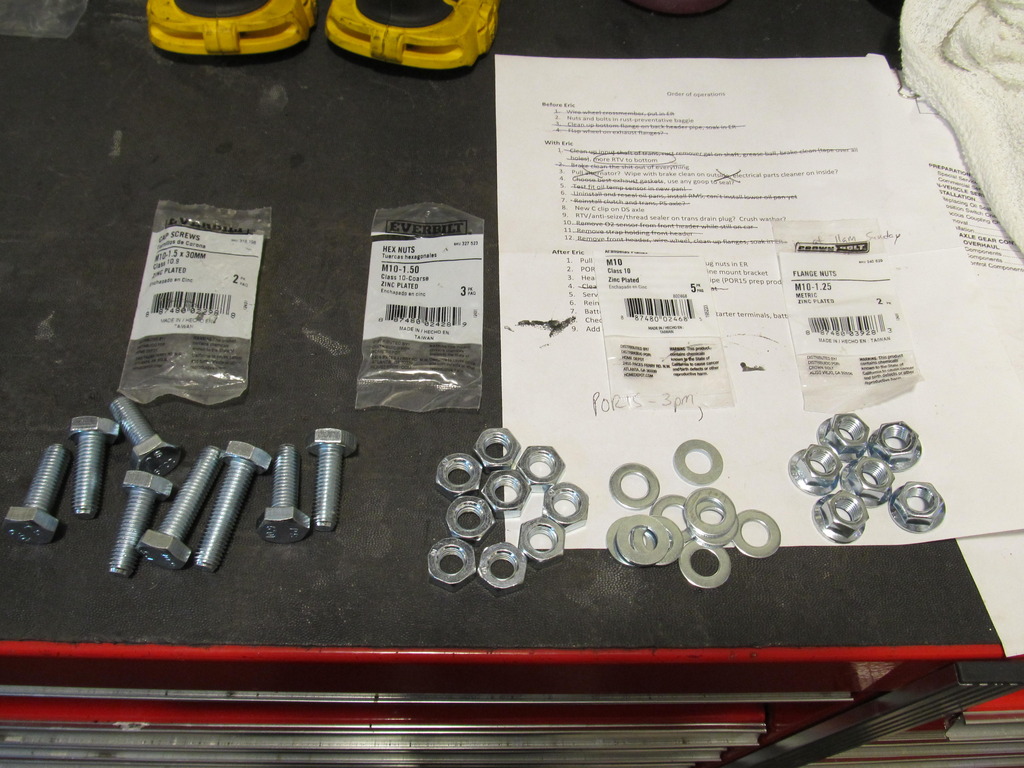
Remember how I said I was going to fix everything I got my hands on during this project? In that vein, I bought a 5 gallon bucket of Evapo Rust for about $85 so I could soak large parts and get rid of rust permanently. This stuff is awesome! I used it on some parts from the E28 and after a day or so rust really just disappears from parts. It wasn�t cheap, but it�s reusable, so I should be able to get plenty of use out of it. First up was assorted hardware:
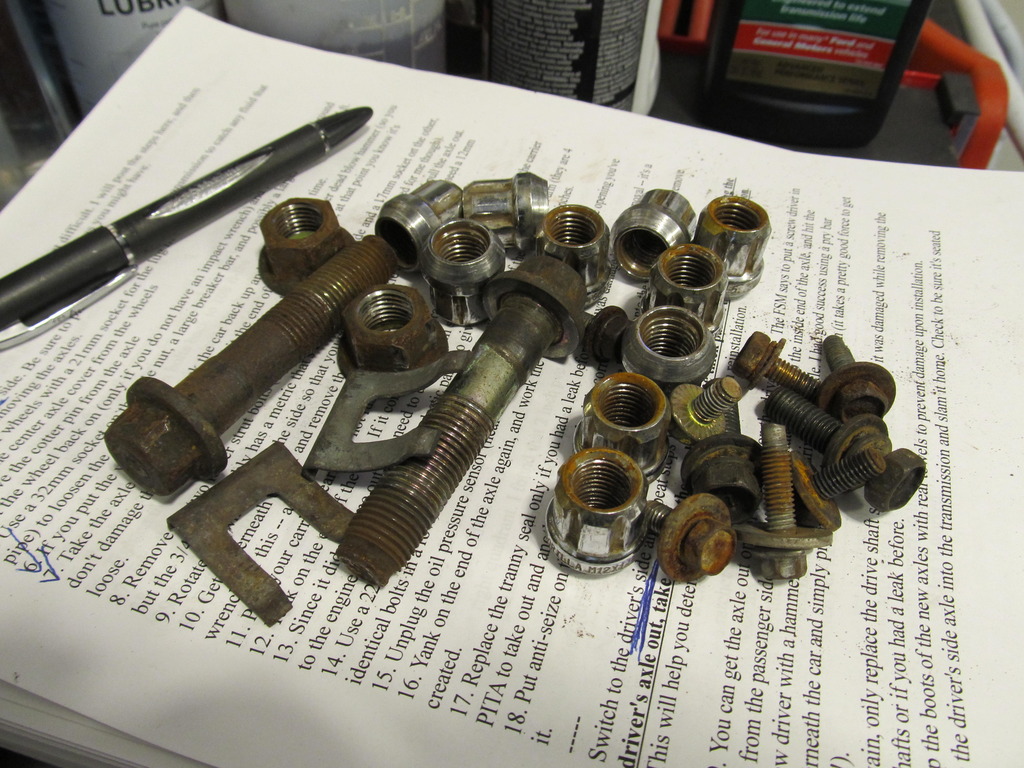
And then after soaking for a day or two�
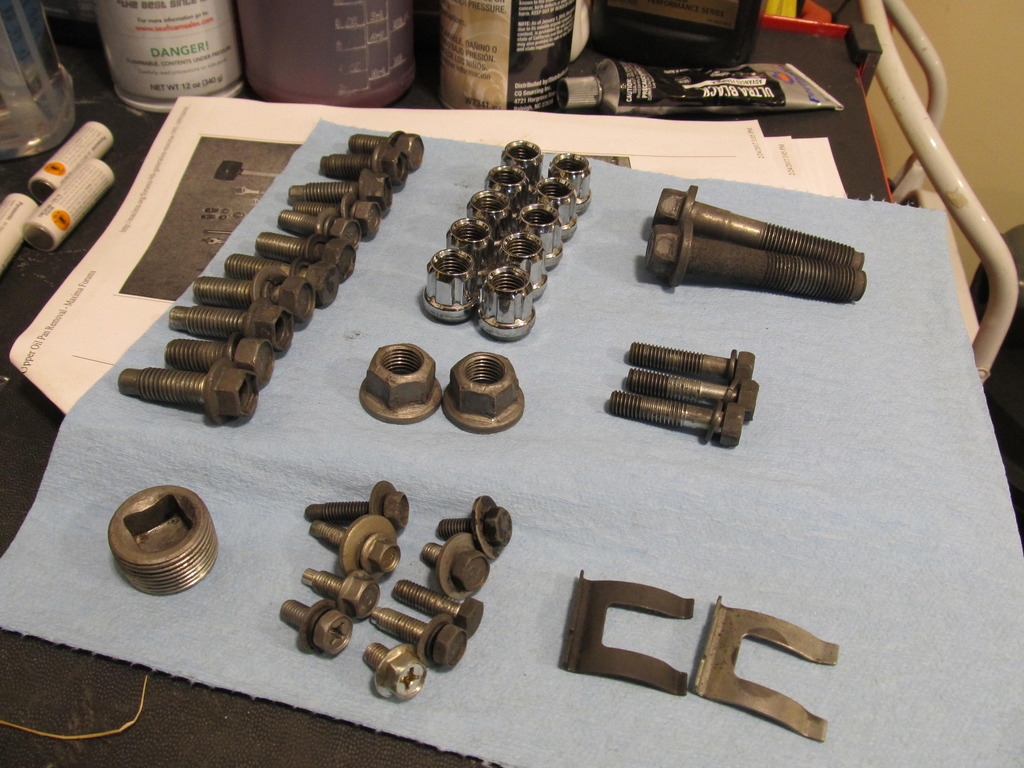
Awesome! I did half of the carrier bearing bracket at a time to see the change:
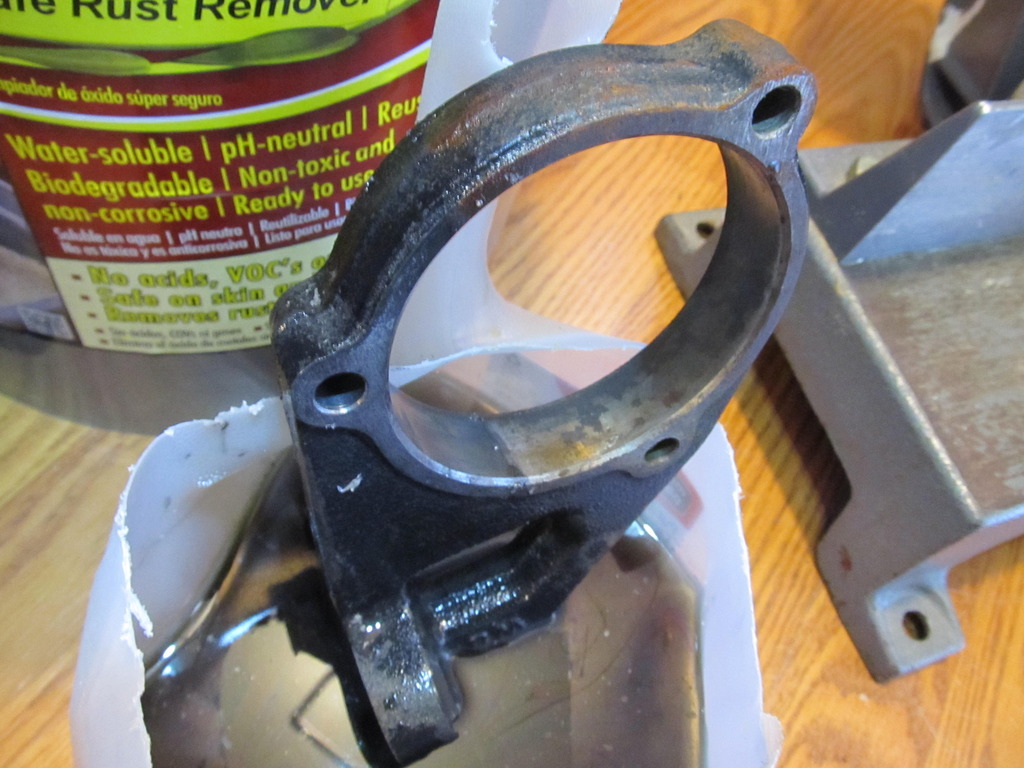
All done!
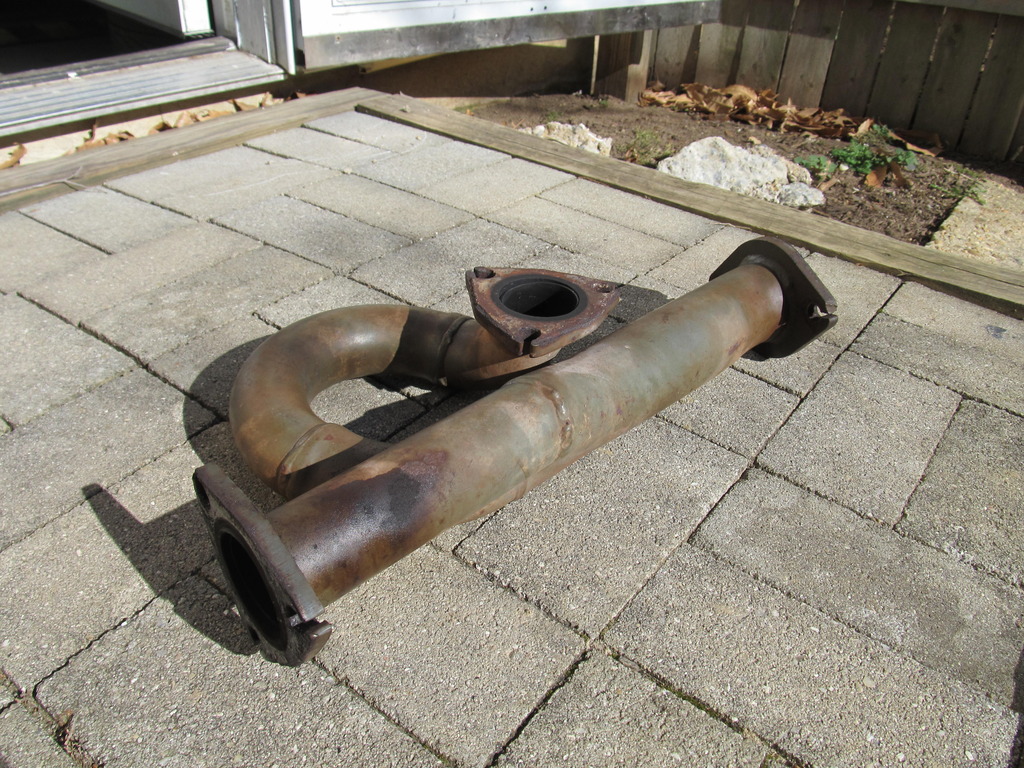
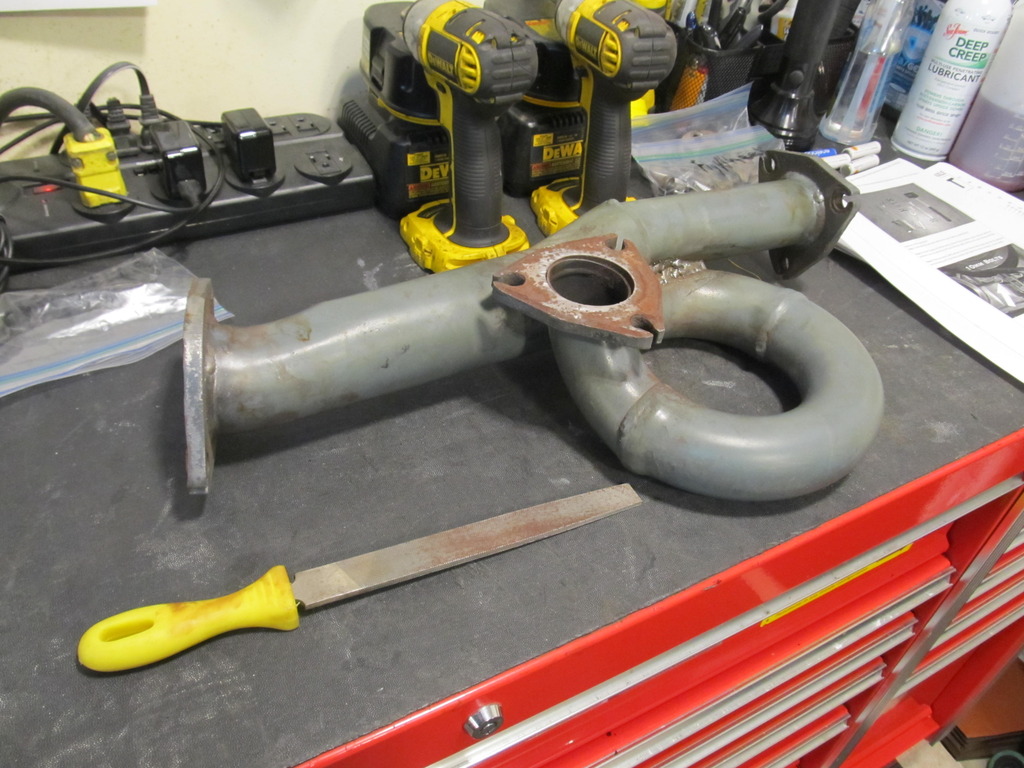
Anyways, back to work! My next great struggle was with the Cattman header y-pipe. It didn�t help that the hardware was old and rusty, but it wasn�t cross-threaded. No matter what combination of sockets and wrenches I tried, I just could not get the nuts to break loose! I let them soak in PB Blaster�.didn�t matter. There just wasn�t enough room in there for me to get leverage enough to break them loose. I eventually decided that I needed a 17mm stubby wrench, and of course my set for some reason skips from 15mm to 18mm. Great. So I ordered a cheap set off Amazon and waited for it to arrive since no local stores had a stubby 17mm. The set arrived, and it was exactly what I needed to get the nuts off. Finally, I could continue with the disassembly! But first, more cleaning and rust repair!
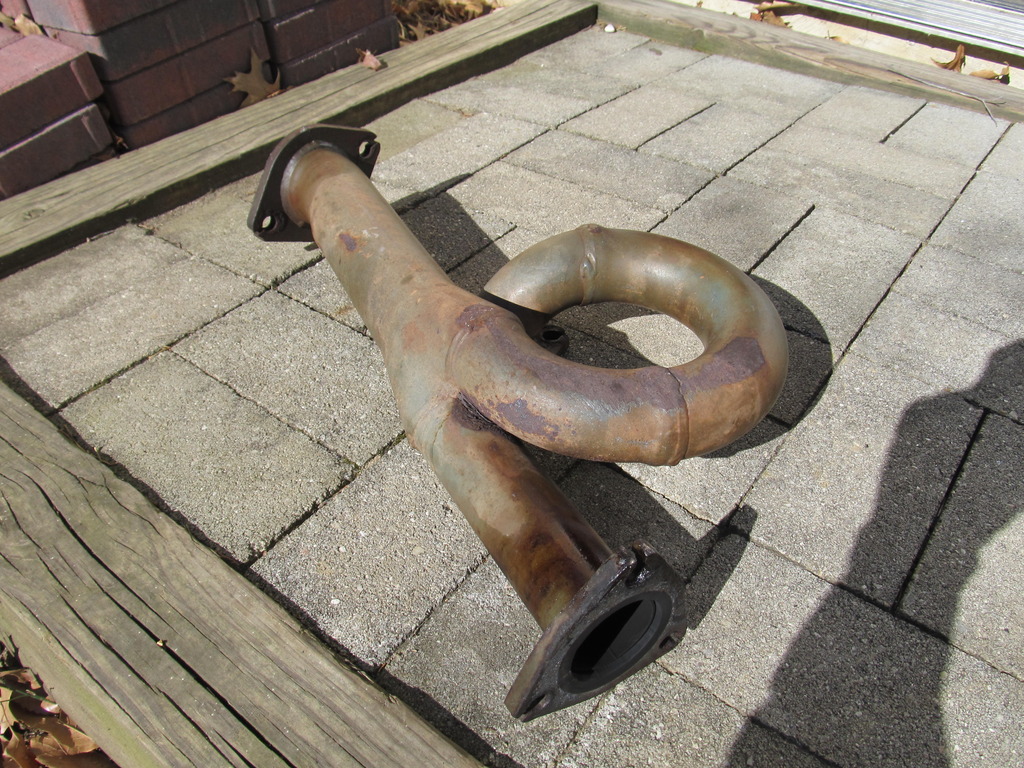
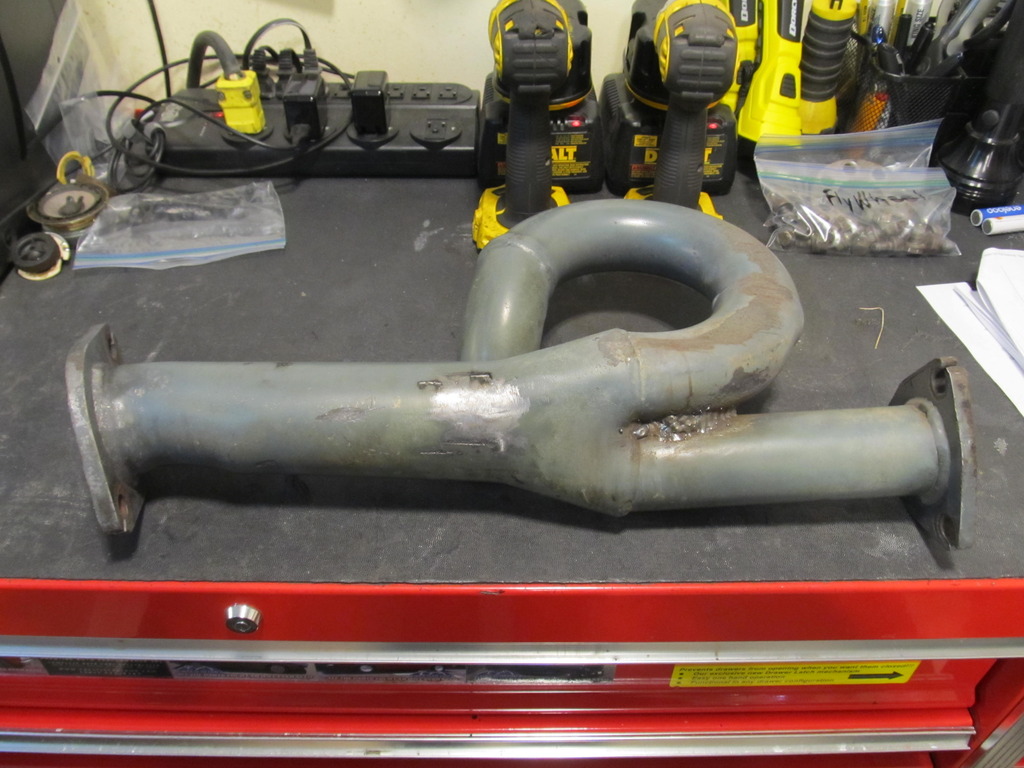
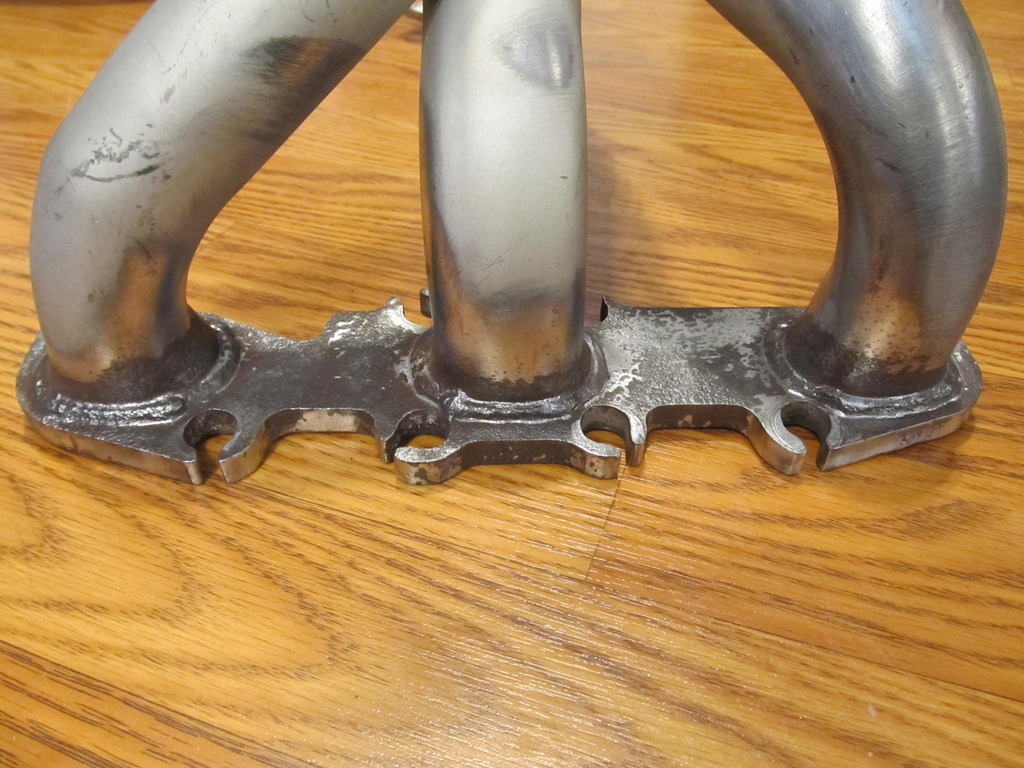
I knew going into this project that I wanted to repaint the headers with the silver header paint. When I originally installed them, I didn�t paint the y-pipe, just the manifolds. Well, that meant I had my work cut out for me with the y-pipe. Now that it was finally off I could get busy with the wire wheels. These headers are almost 15 years old, and have spent much of their life getting old dripped onto them. Needless to say, they were kinda nasty.
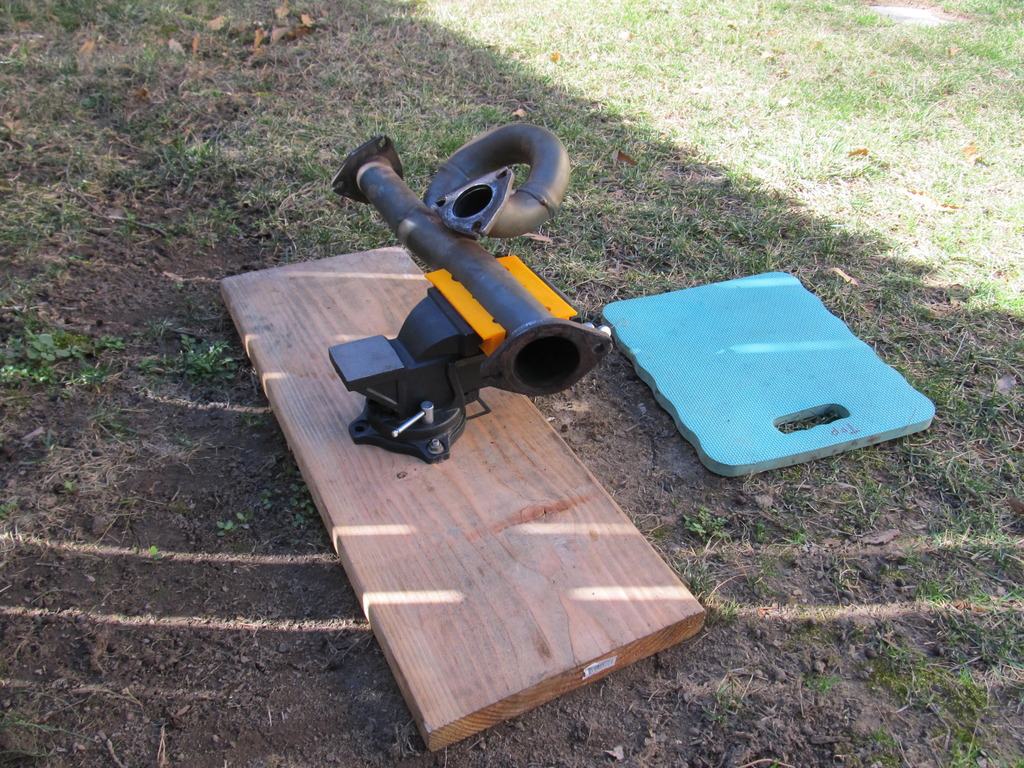
I quickly realized that trying to wire wheel things while holding them was not the right way to do things, so I fashioned a mount for my vice:
Many hours later�.
This whole time I had been hankering to get the I30 back on the road, but knowing what was involved in replacing the rear main seal (RMS), I knew I needed a few weeks to do everything I wanted to do, which meant the other cars needed to be in good enough shape for the I30 to take over the garage for a while. Finally, after earning my first certification, it was time. In its year of not really being driven, the I30 took up the hobby of rusting, which slowed down the project considerably. Being borderline OCD, I needed to fix everything I came across, and since most of the front end comes apart to do the RMS properly, there was a lot for me to fix. Let�s get started!
A few years ago I installed an Innovate Motorsports dual oil temp/pressure gauge. The pressure sensor went in nicely to my oil cooler adapter, but I didn�t have any way to mount up the temp sensor. Given the condition of the oil pan on the car, I decided to just buy a new pan off Ebay for $20 and have my buddy Brian weld on the bung for the temp sensor.

Next, I drove the car around for 30 minutes to circulate the oil that I had put in back in December. Back in December, I noticed that the engine was making more clattering noises than usual, so I checked the oil. When I pulled the fill cap, there was �milkshake� residue on it, so I figured I should change the oil. When I drained the oil it was nice and black, so the milkshake on the cap was just water residue from not driving the car and getting it up to temp for a year. After putting in new oil the clattering noises went away. Anyways, back to February. I figured I should get that new oil moving around and have it pick up some sediment before draining it, plus hot oil drains better. After the drive, I poured in a product I started using- Liqui Moly Engine Flush. You pour it in and let the car idle for ten minutes, then drain the oil out. It�s supposed to help clean up oil passages and such, and since the car had been sitting for so long, I figured it couldn�t hurt. Sure enough, the oil came out pretty damn black for having some 30 miles on it!


Then it was time to drain the trans. Little did I know that the shop who installed my axle seal when I was crunched for time overtightened the drain plug, and it started rounding off when I tried to loosen it! I don�t know about you guys, but I can only get wrenches on the drain plug, and no sockets.

After fighting it for over an hour, I decided to try the reverse sensor over on the driver�s side. I got the bolt out, and got the sensor so wiggle back and forth, but apparently that wasn�t enough, because as soon as I started to pry it out the lip cracked. Then more of it cracked. Pretty soon there was nothing to pry against, and it too was stuck in the trans. I suppose I could have just smashed it with a hammer to drain the fluid since I couldn�t reuse it, but I decided to press on and just let the fluid drain when I pulled the axles.

So what do you think happened when I tried to pull the DS axle? That�s right, nothing! That sonofabeetch was in there good, and no amount of prying against the trans was able to get that circlip to pop. I proceeded to fight the axle for an hour or two, because how freaking hard can it be to pull an axle? I figured I was just stupid, but apparently it�s not too uncommon. I eventually gave up and pulled the PS axle, which was nice and easy. One of the how-tos from here mentioned using a long screw driver from the PS axle hole to tap the DS axle out, but my 2� long screw driver just wasn�t long enough. The next morning I went to Home Depot and bought a 4� long 3/8� metal rod, came home, put it up against the DS axle through the PS axle hole, gave it a whack with my rubber mallet, and out came the DS axle. Huzzah, finally!

While I was taking some things apart I noticed that three of my vacuum caps had started to rot and crack, so I threw some new ones on. I hate vacuum leaks!


Remember how I said I was going to fix everything I got my hands on during this project? In that vein, I bought a 5 gallon bucket of Evapo Rust for about $85 so I could soak large parts and get rid of rust permanently. This stuff is awesome! I used it on some parts from the E28 and after a day or so rust really just disappears from parts. It wasn�t cheap, but it�s reusable, so I should be able to get plenty of use out of it. First up was assorted hardware:

And then after soaking for a day or two�

Awesome! I did half of the carrier bearing bracket at a time to see the change:


All done!


Anyways, back to work! My next great struggle was with the Cattman header y-pipe. It didn�t help that the hardware was old and rusty, but it wasn�t cross-threaded. No matter what combination of sockets and wrenches I tried, I just could not get the nuts to break loose! I let them soak in PB Blaster�.didn�t matter. There just wasn�t enough room in there for me to get leverage enough to break them loose. I eventually decided that I needed a 17mm stubby wrench, and of course my set for some reason skips from 15mm to 18mm. Great. So I ordered a cheap set off Amazon and waited for it to arrive since no local stores had a stubby 17mm. The set arrived, and it was exactly what I needed to get the nuts off. Finally, I could continue with the disassembly! But first, more cleaning and rust repair!
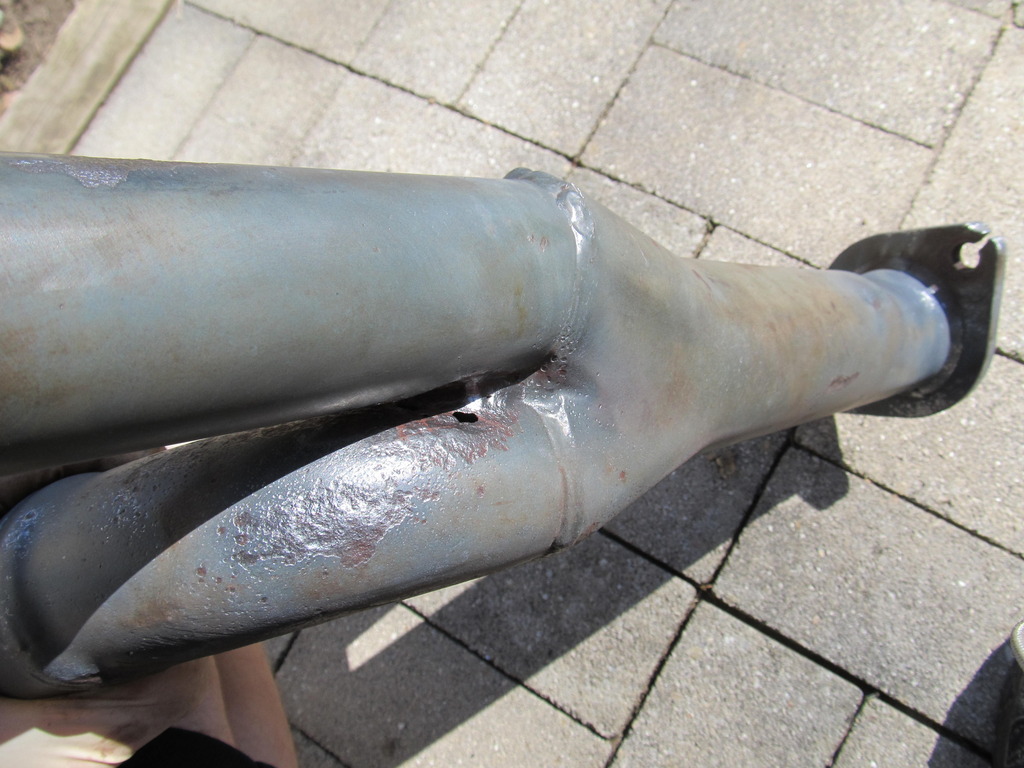
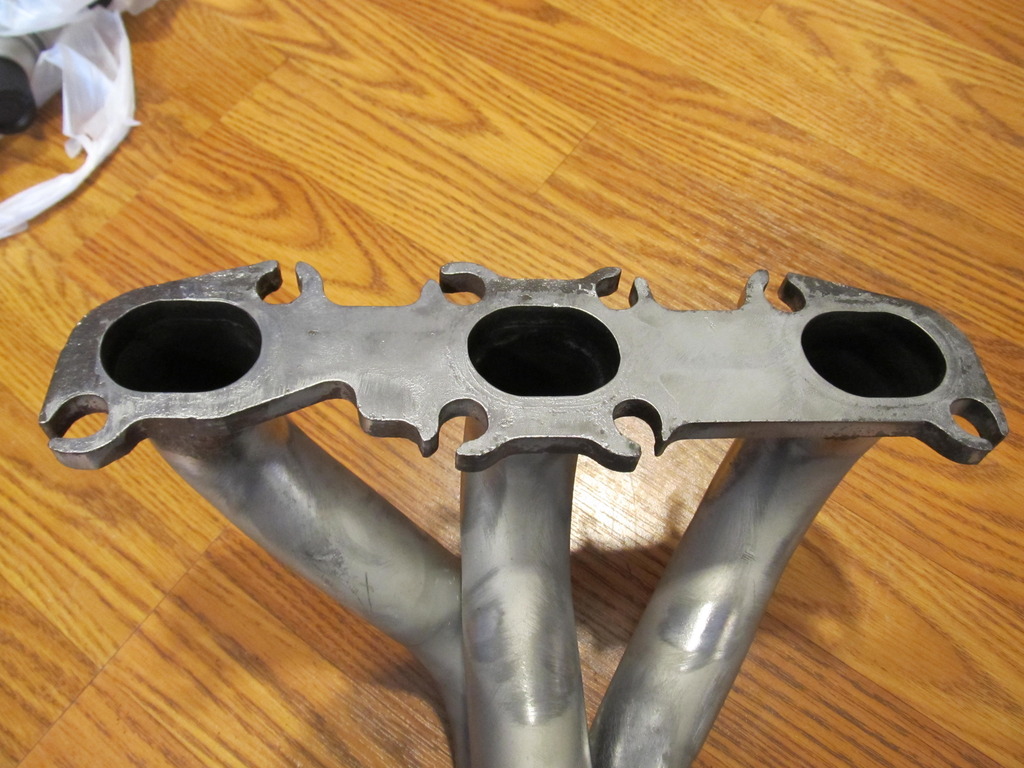
I knew going into this project that I wanted to repaint the headers with the silver header paint. When I originally installed them, I didn�t paint the y-pipe, just the manifolds. Well, that meant I had my work cut out for me with the y-pipe. Now that it was finally off I could get busy with the wire wheels. These headers are almost 15 years old, and have spent much of their life getting old dripped onto them. Needless to say, they were kinda nasty.


I quickly realized that trying to wire wheel things while holding them was not the right way to do things, so I fashioned a mount for my vice:

Many hours later�.

 03-31-2017, 12:31 PM
#345
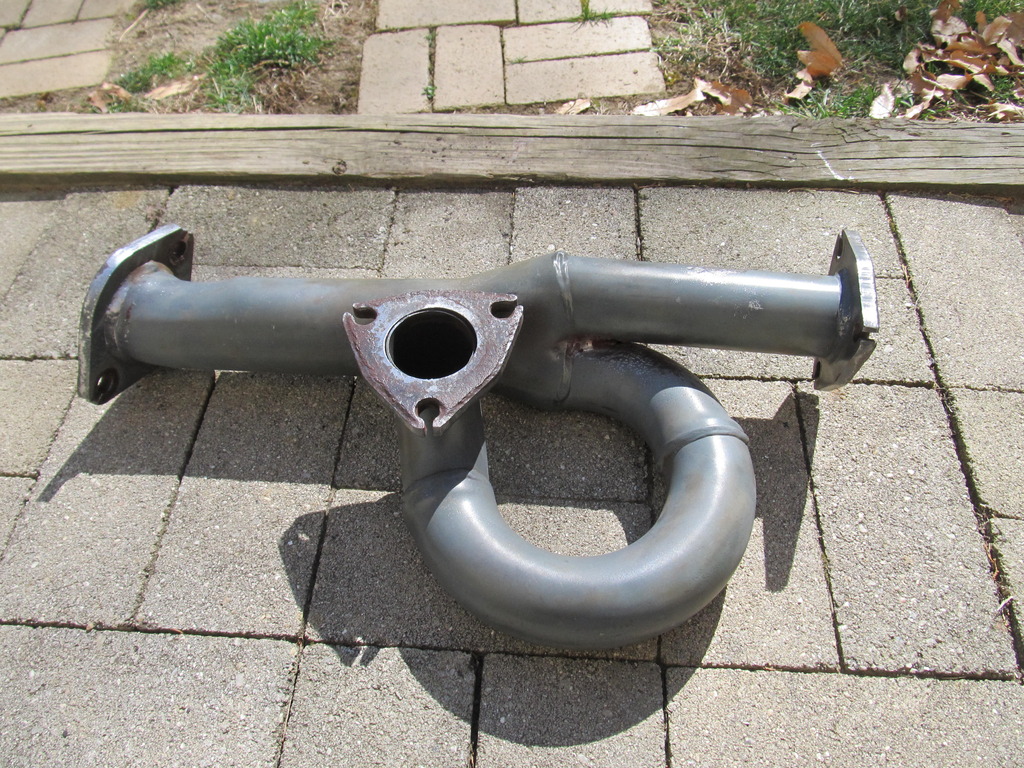
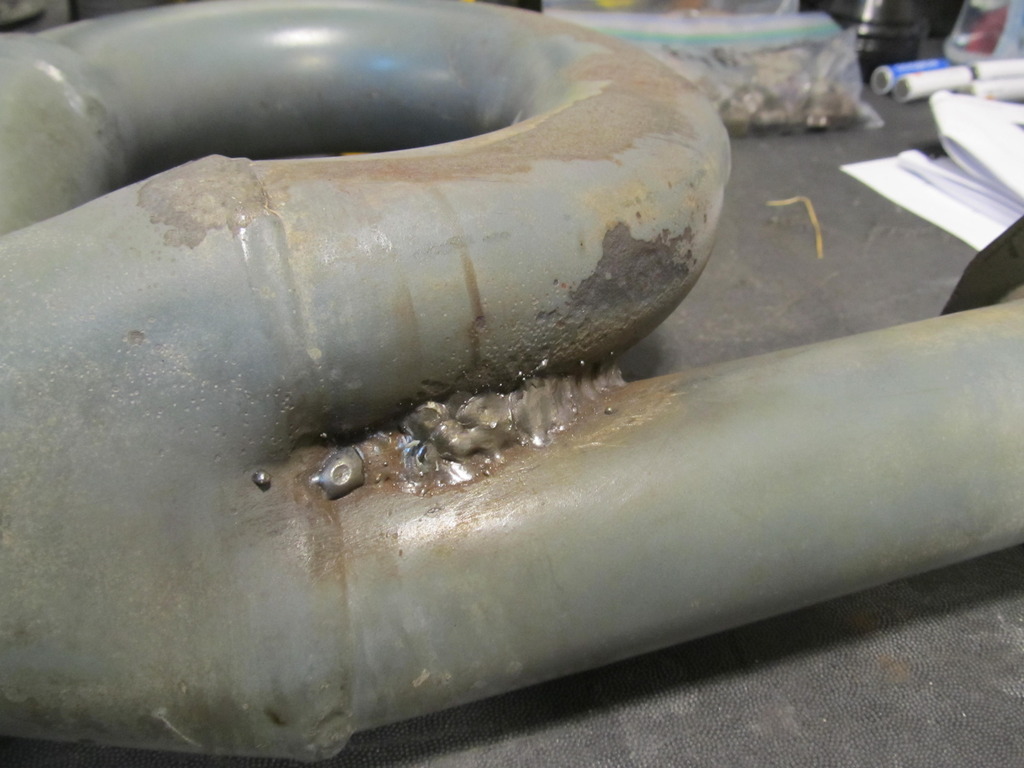
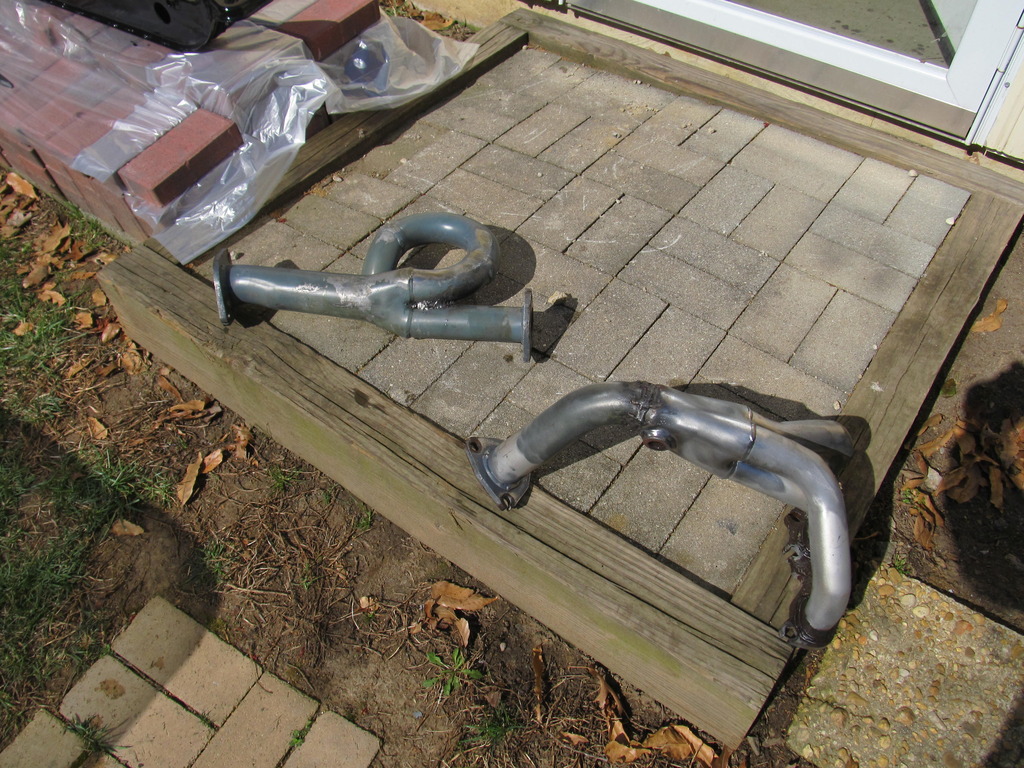
Hey, that actually looks kinda good!
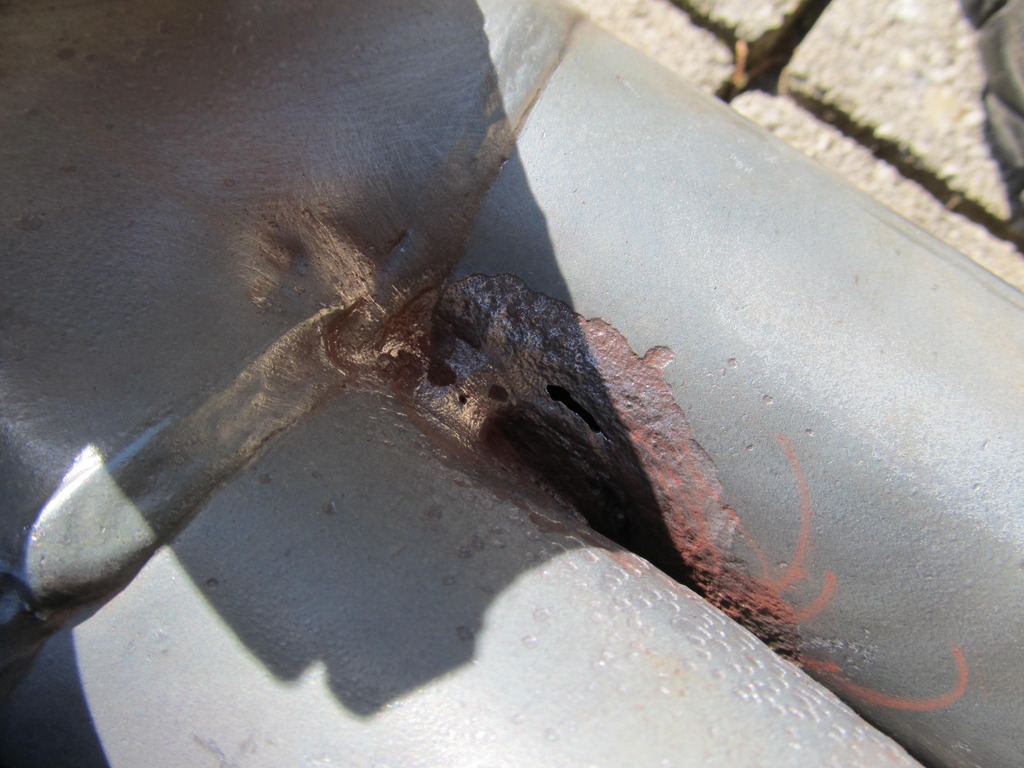
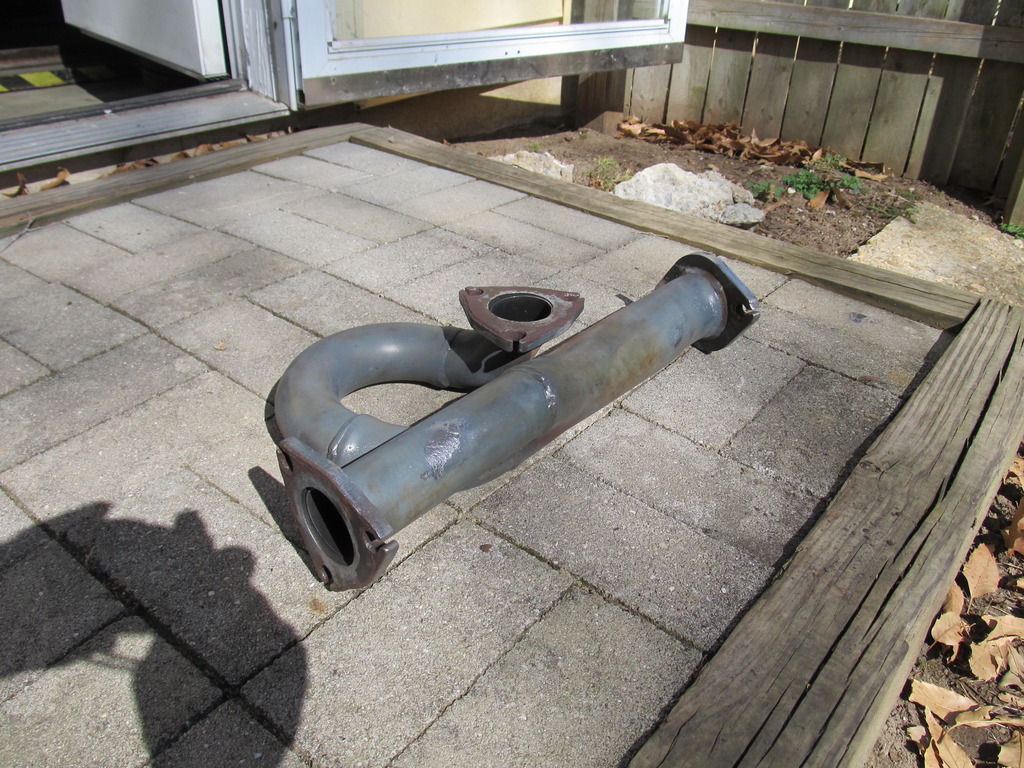
Oops, spoke too soon! Looks like I’ll need to get those holes welded up. But first, more Evapo Rust!
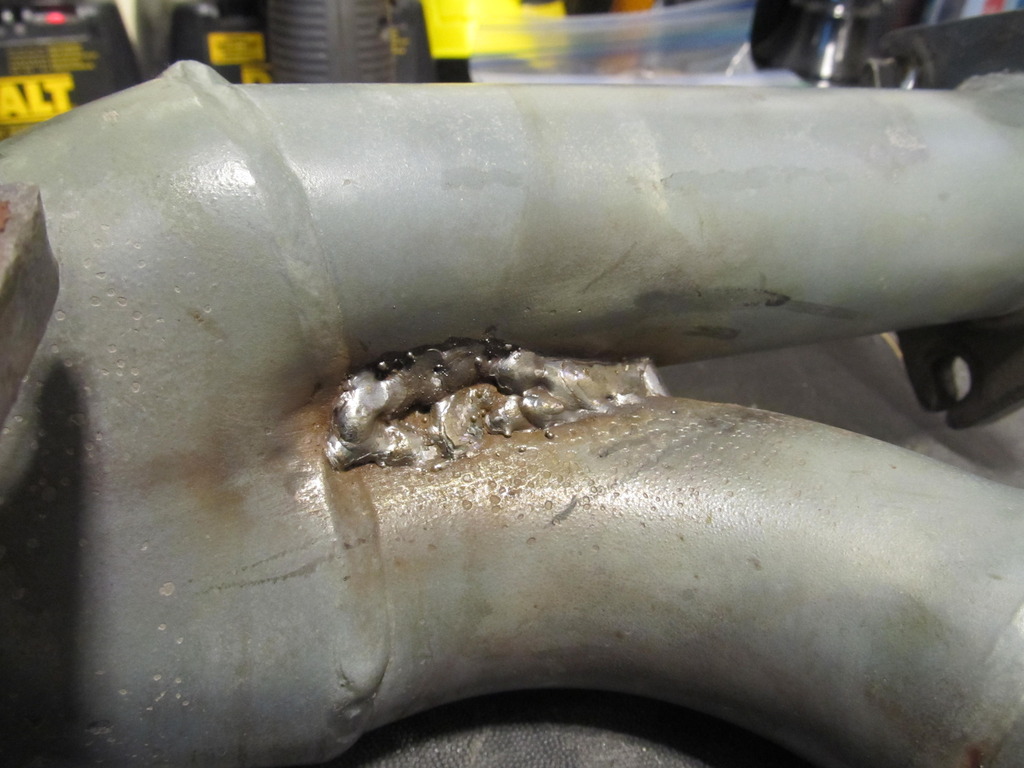
Then, some welding thanks to my buddy Brian:
And since I had the time, more Evapo Rust!
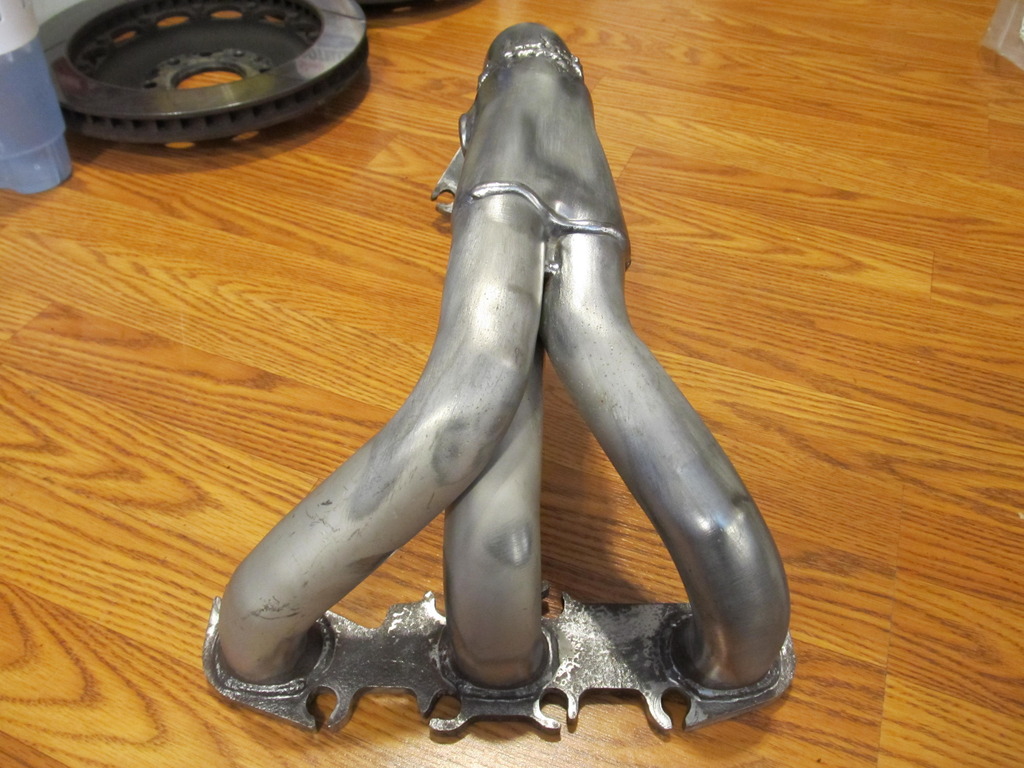
Cleaned up and prepped for header paint:
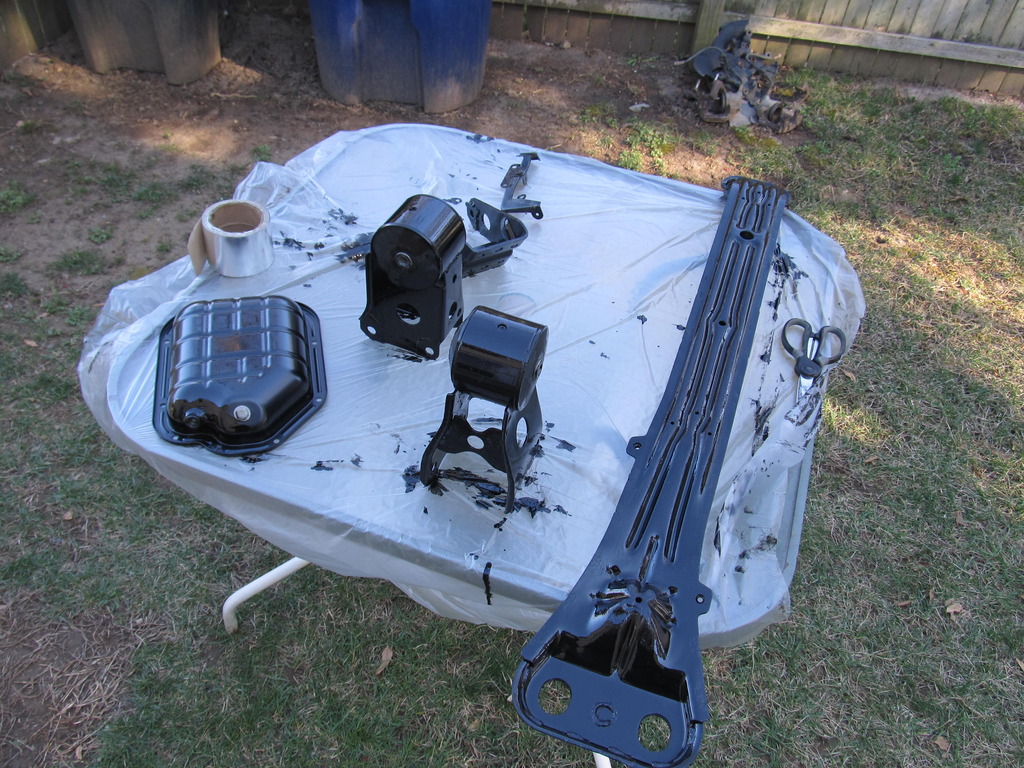
Painting….
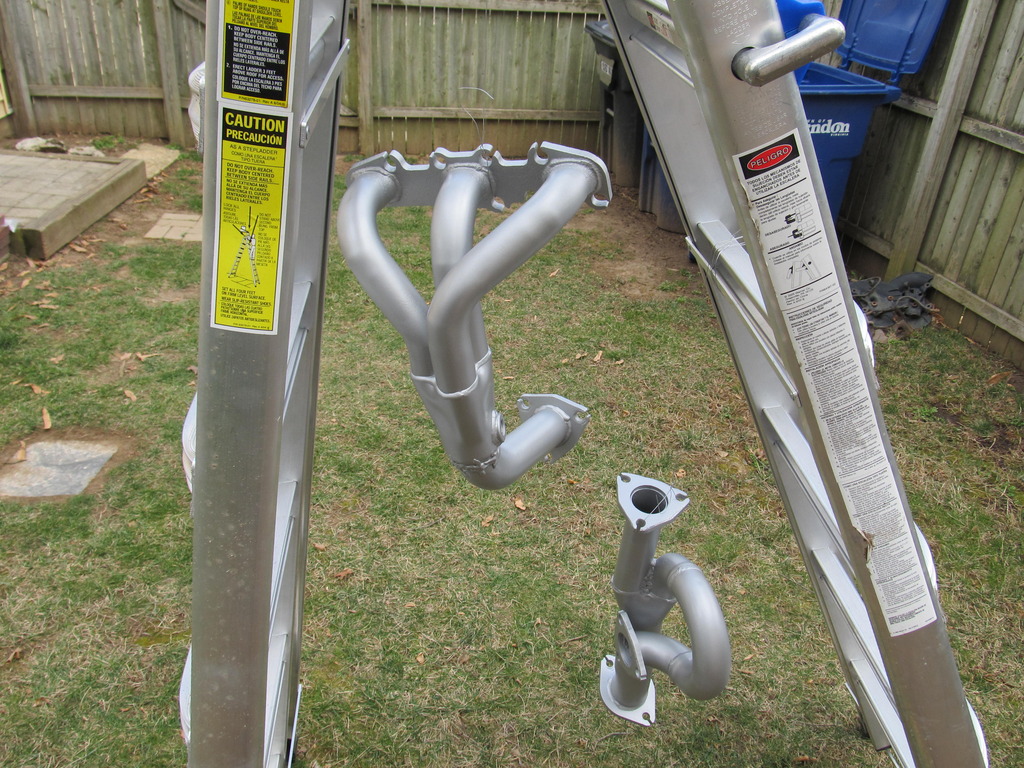
I was too lazy to remove the rear header, so I just cleaned it up on the car, hung up some plastic sheeting, and painted the bottom section:
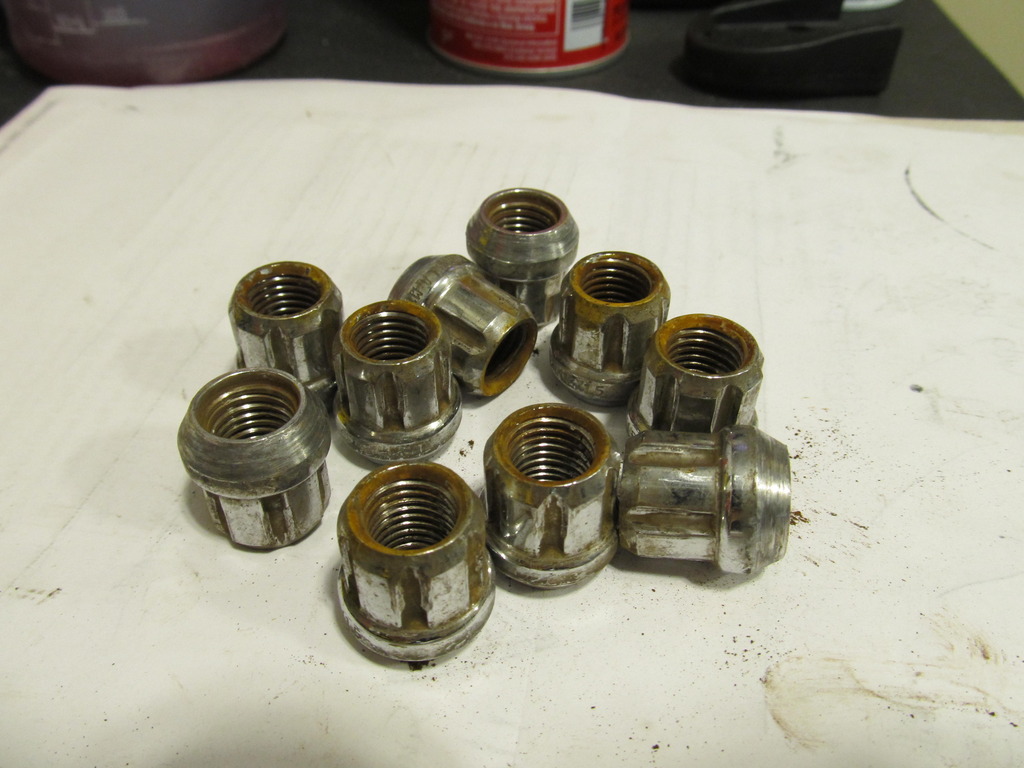
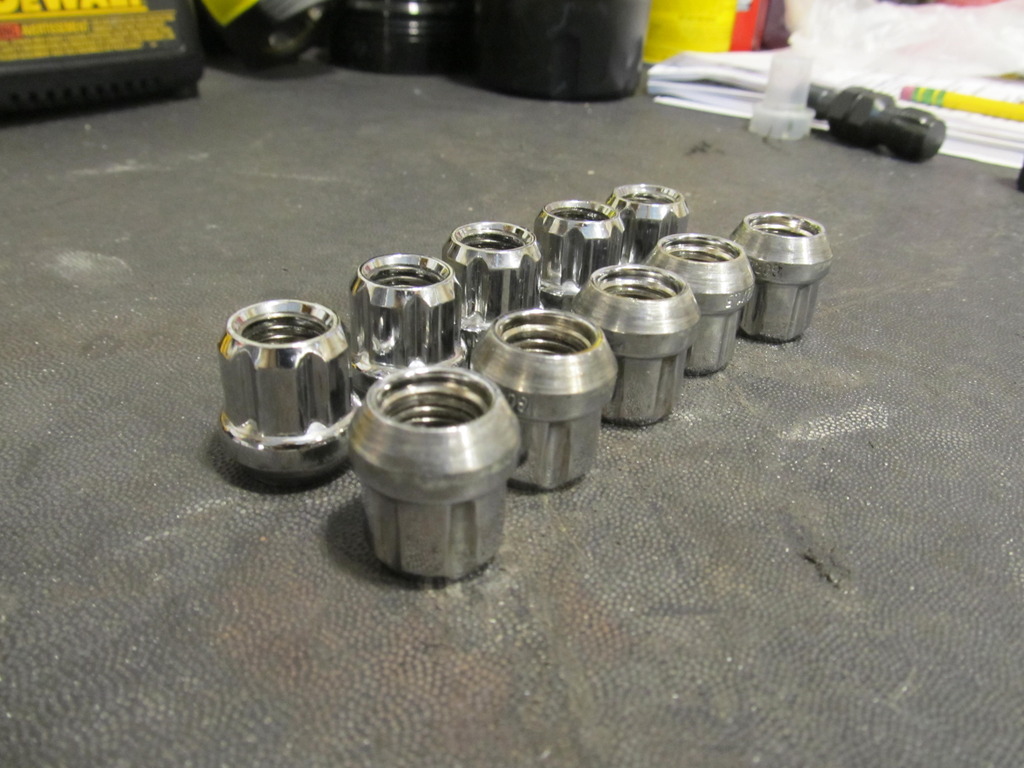
Sitting around for a year really did a number on my ARP wheel studs and Gorilla lugs. Wire wheel to the rescue!


Oops, spoke too soon! Looks like I’ll need to get those holes welded up. But first, more Evapo Rust!

Then, some welding thanks to my buddy Brian:


And since I had the time, more Evapo Rust!


Cleaned up and prepped for header paint:

Painting….

I was too lazy to remove the rear header, so I just cleaned it up on the car, hung up some plastic sheeting, and painted the bottom section:


Sitting around for a year really did a number on my ARP wheel studs and Gorilla lugs. Wire wheel to the rescue!


 03-31-2017, 12:32 PM
#346
Evapo Rust to the rescue!
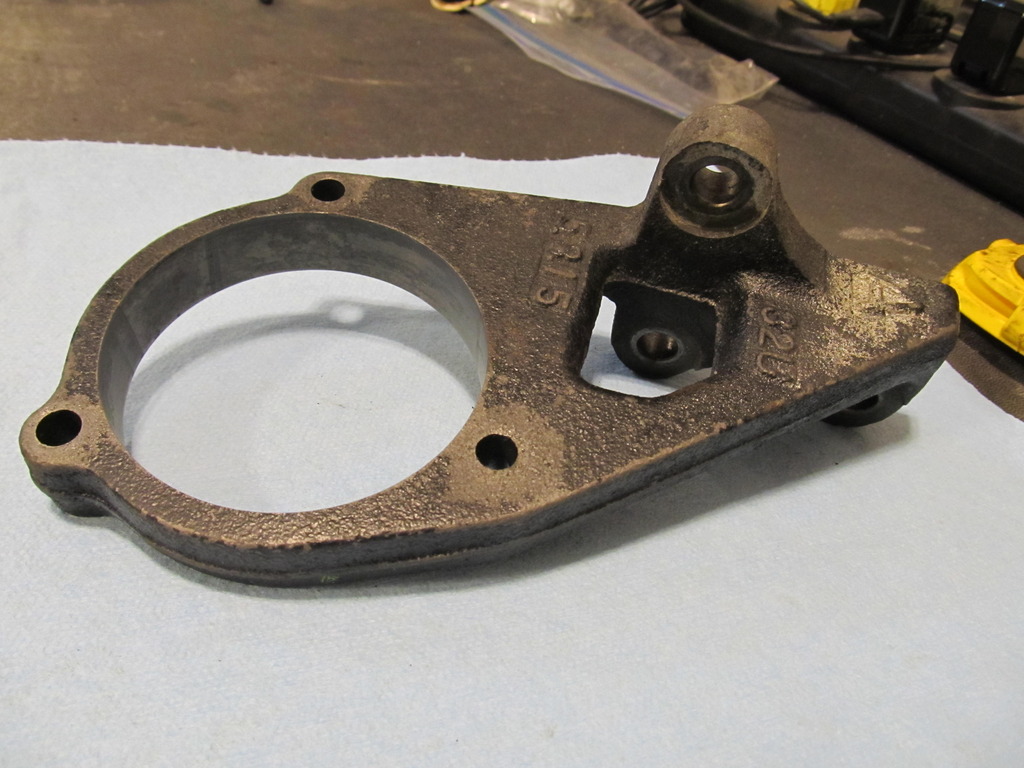
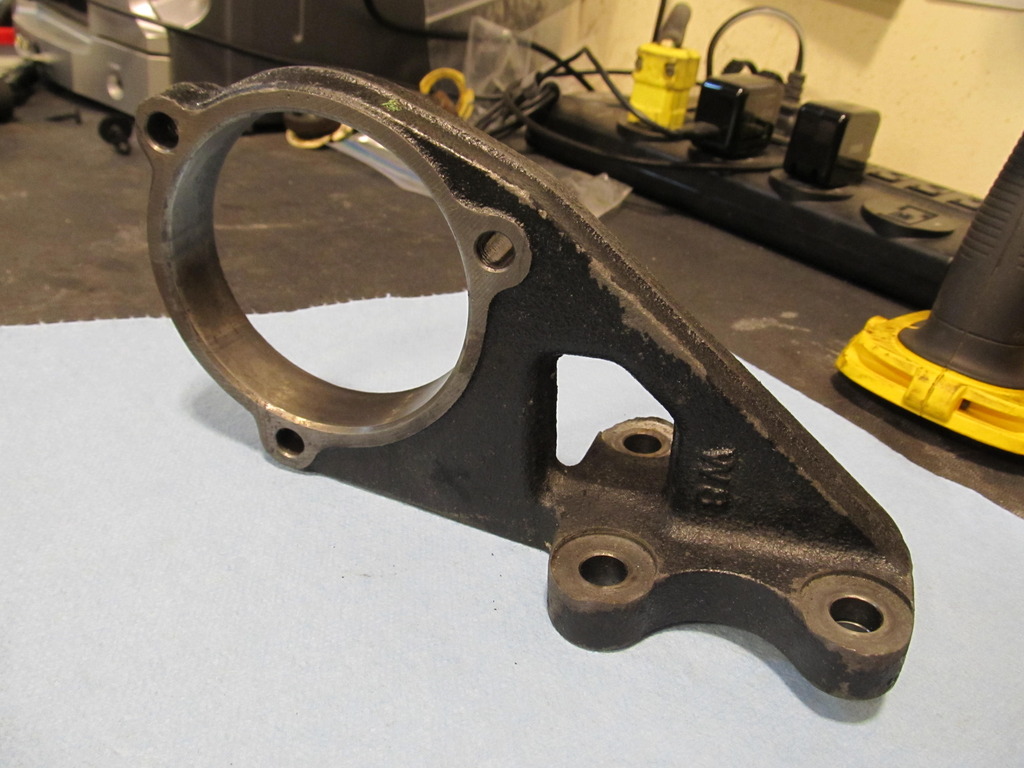
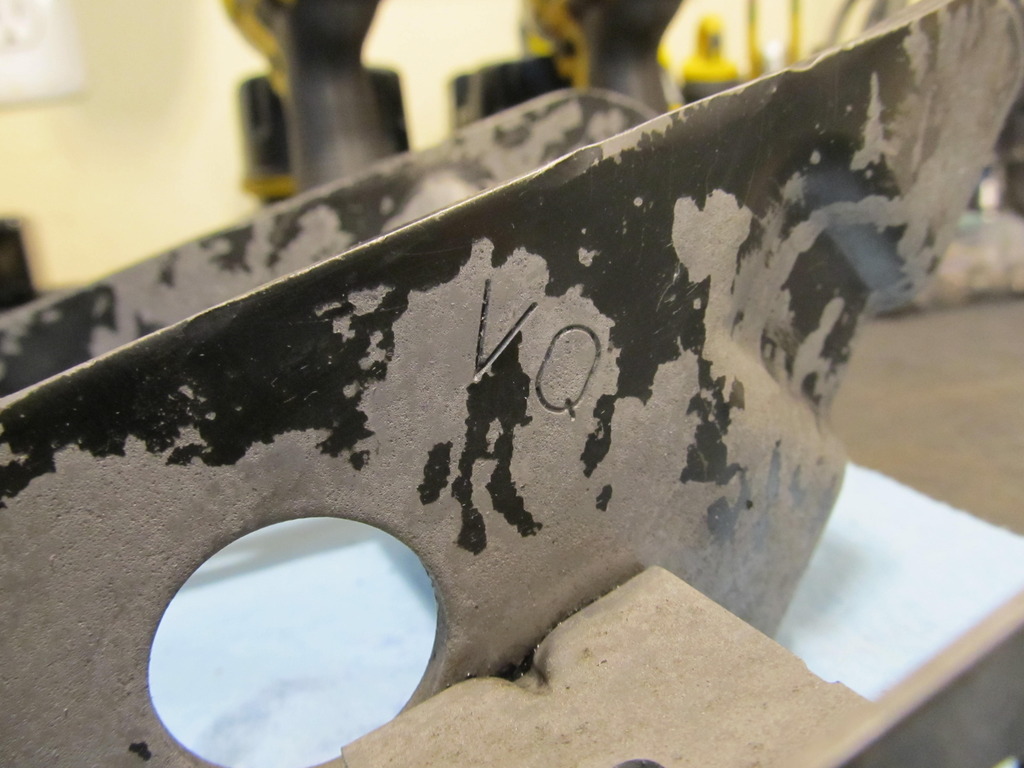
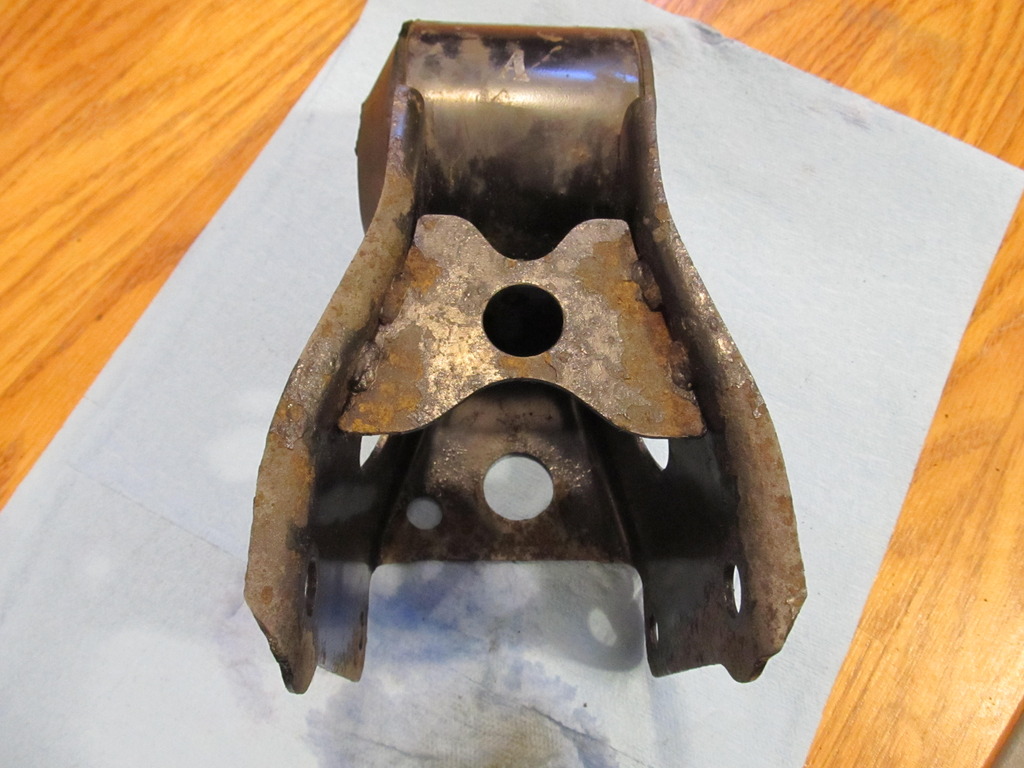
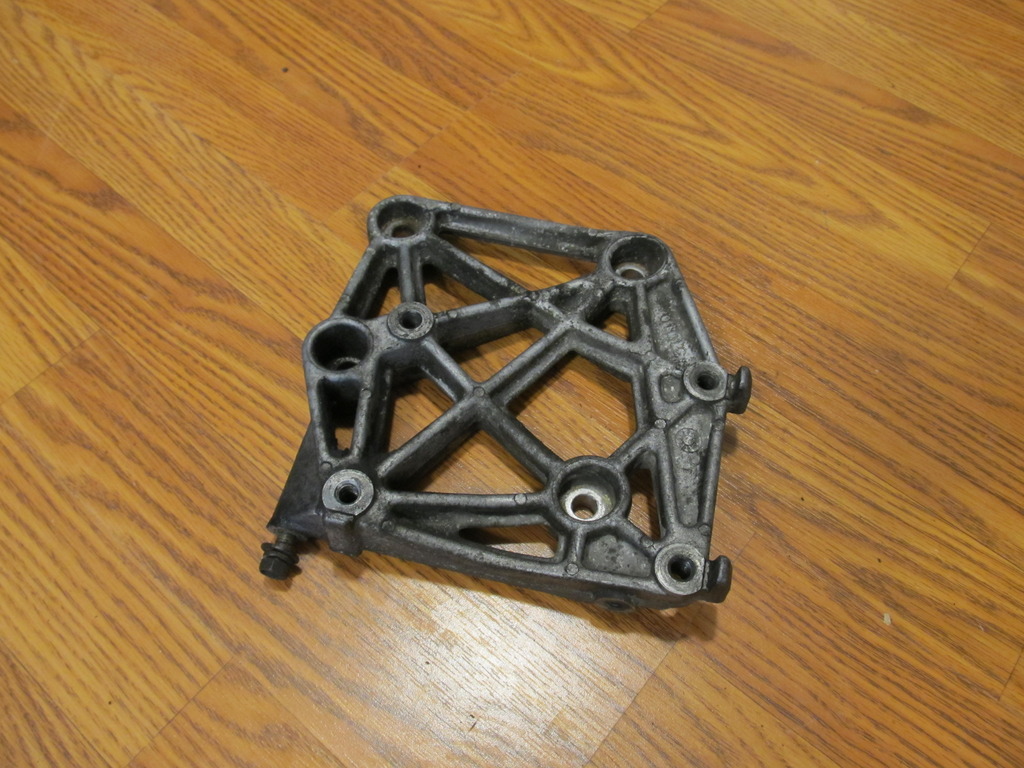
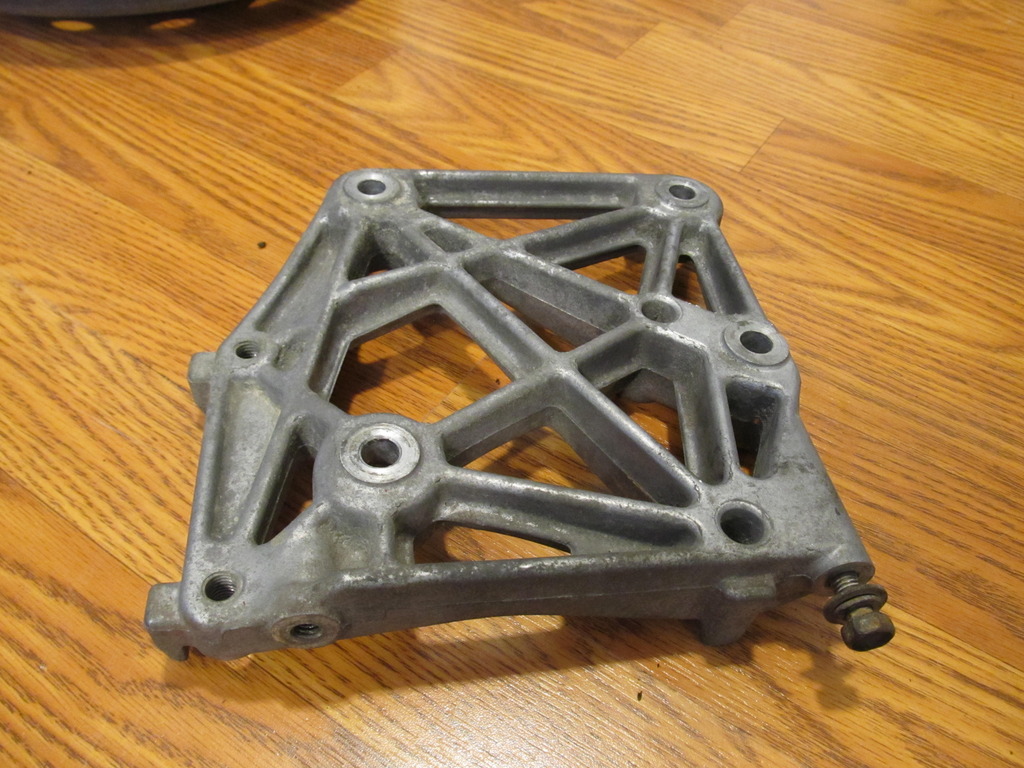
The front motor mount bracket was also looking pretty nasty�.
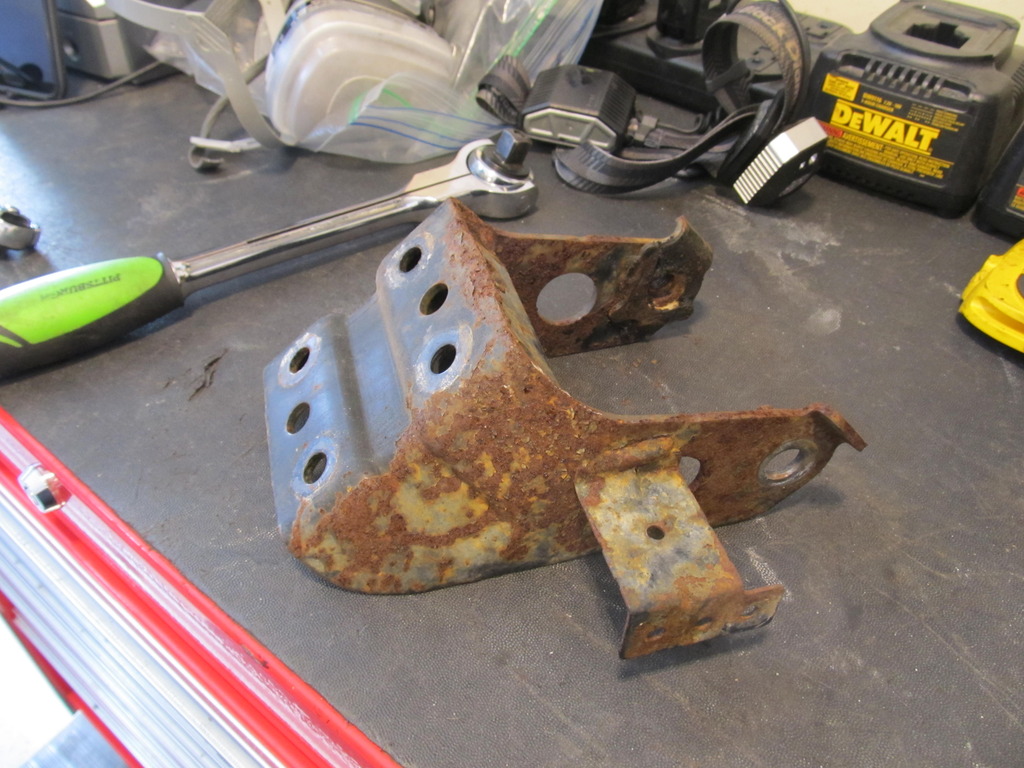
More wire wheel!
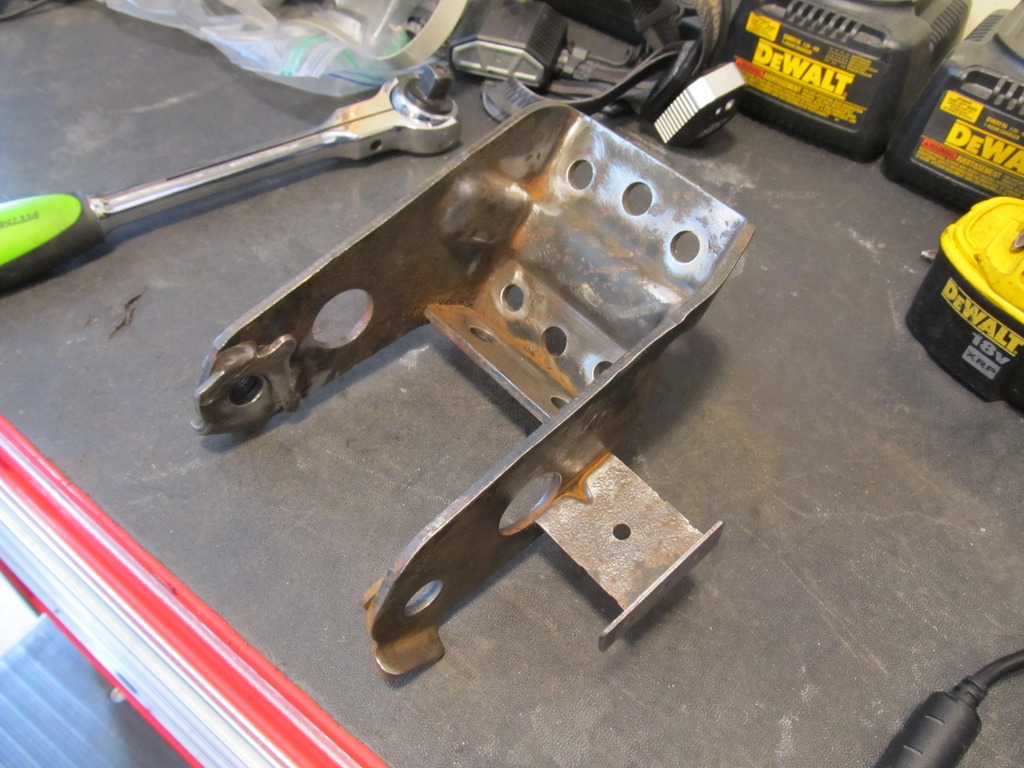
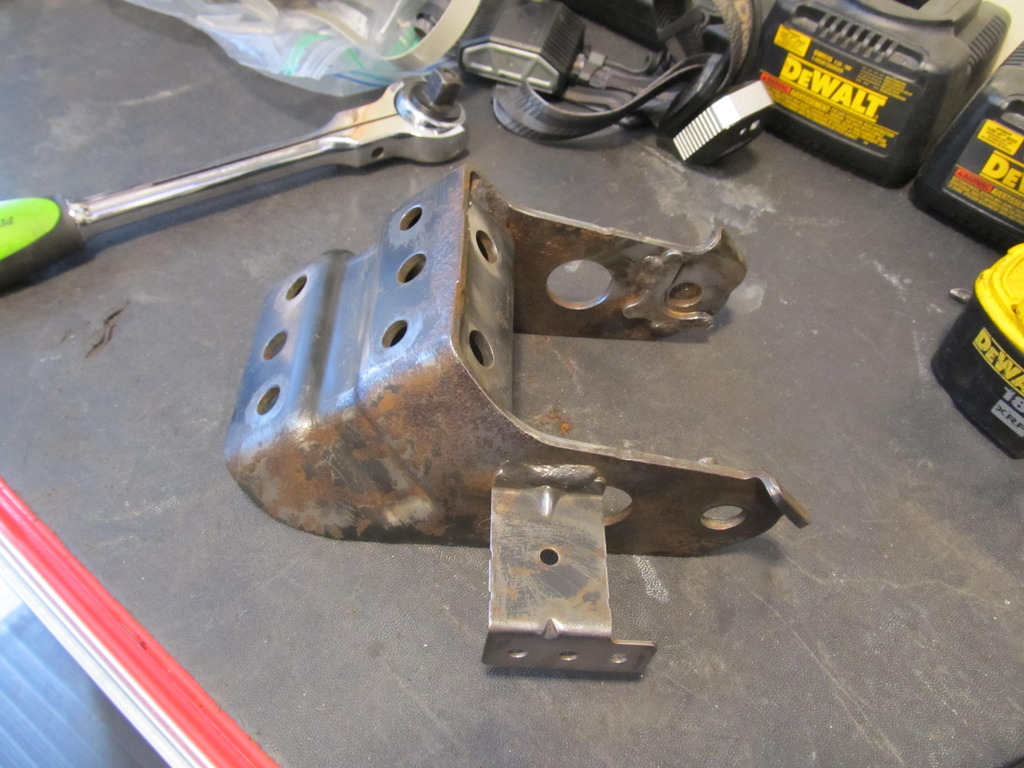
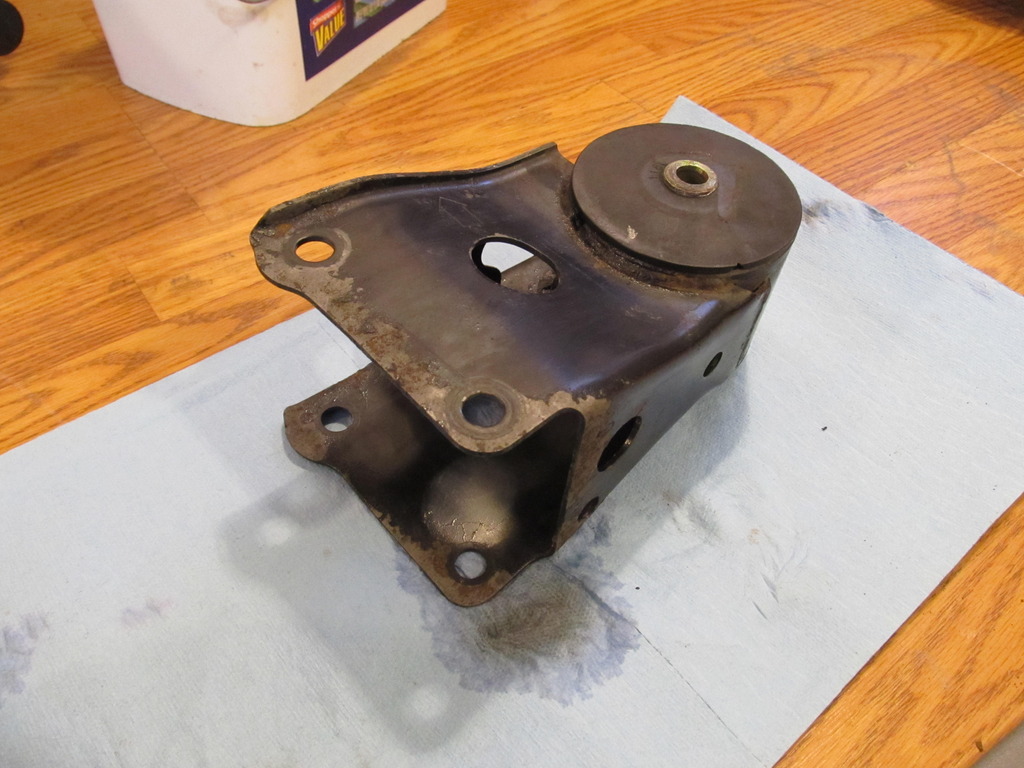
More Evapo Rust!
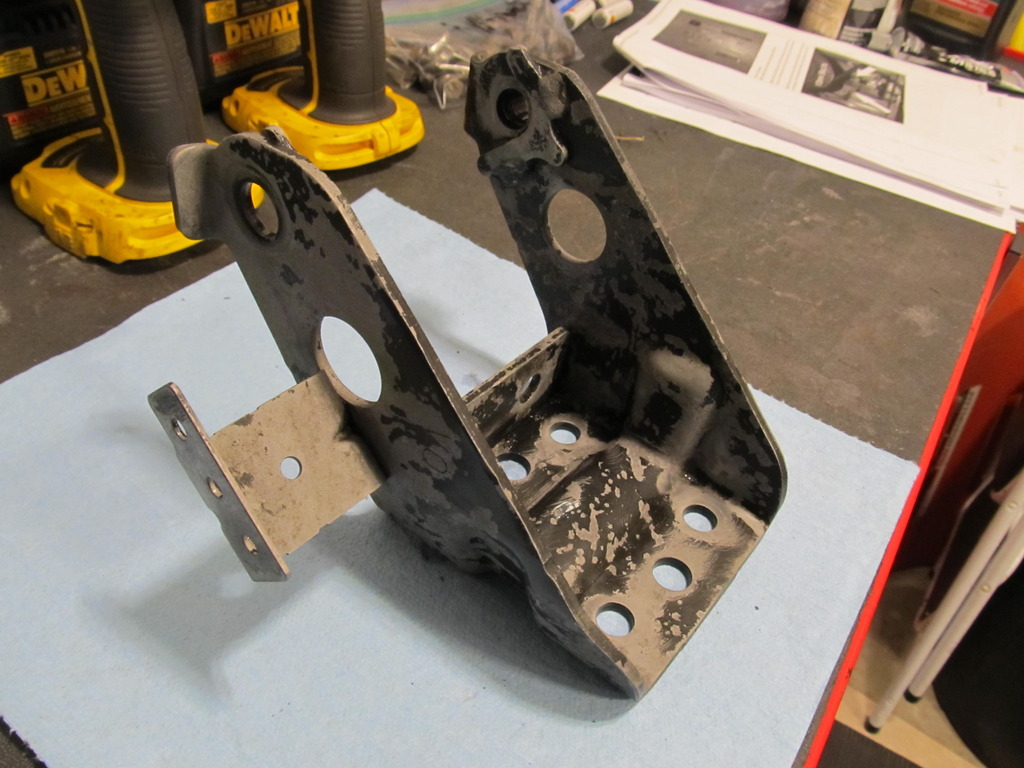
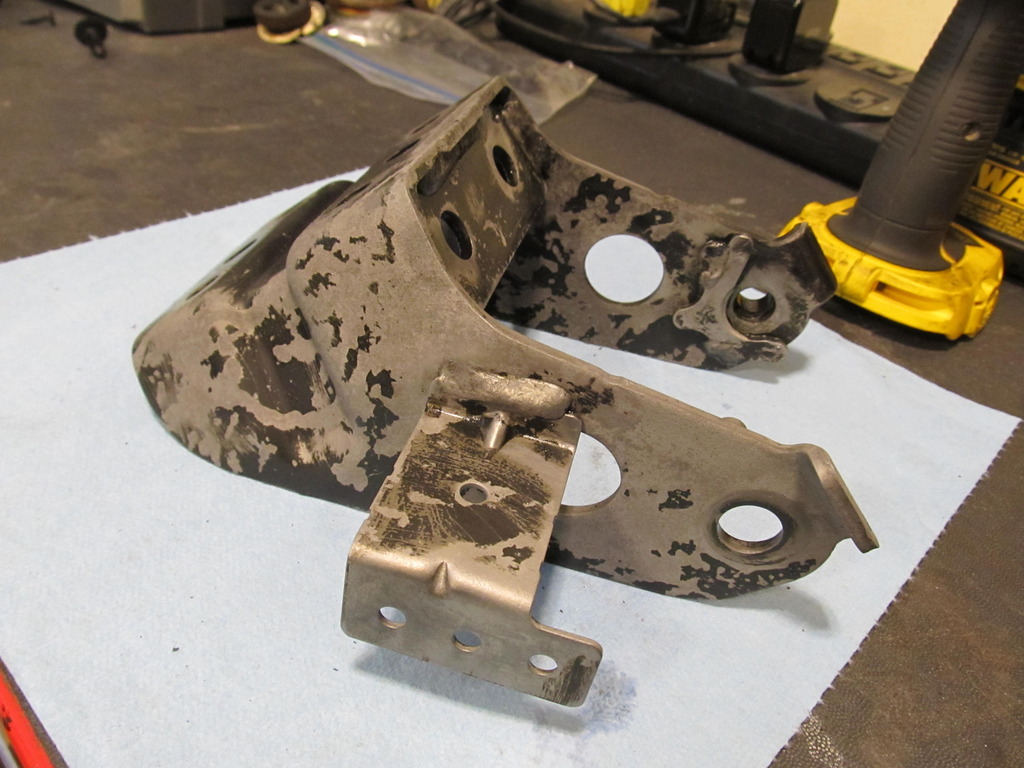
VQ Power!


The front motor mount bracket was also looking pretty nasty�.


More wire wheel!


More Evapo Rust!


VQ Power!

Last edited by 95maxrider; 03-31-2017 at 12:41 PM.
03-31-2017, 12:33 PM
#347
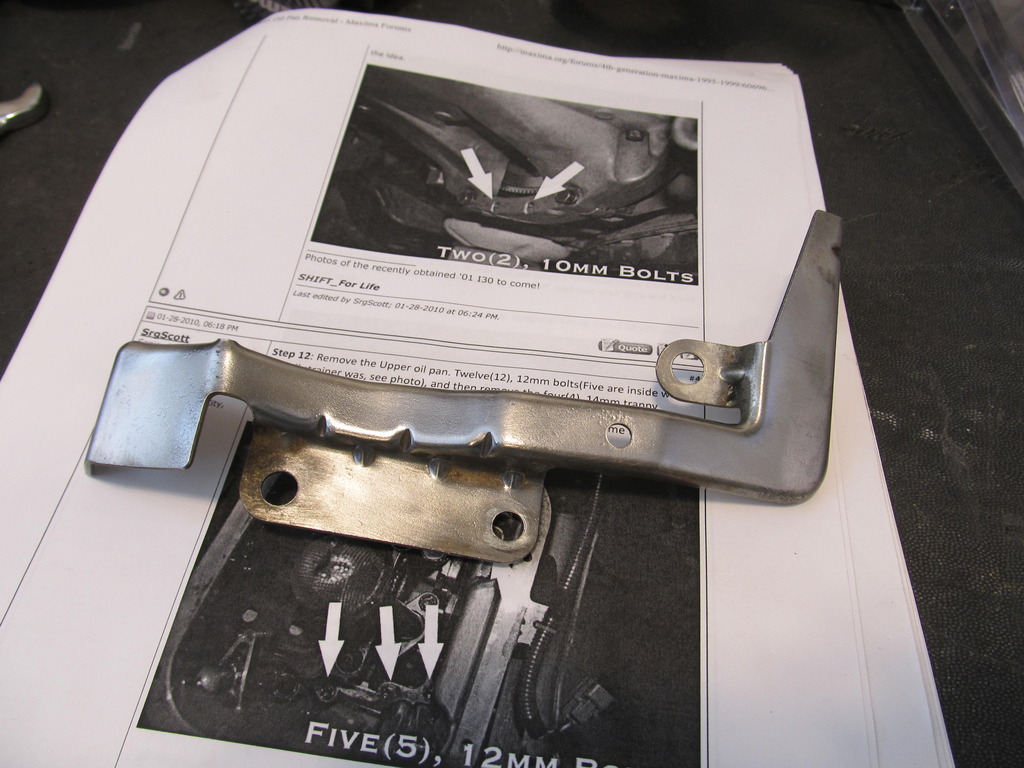
The little bracket that holds the front crank sensor and oil pressure sensor wires was filthy and rusty, so that also got the full treatment:
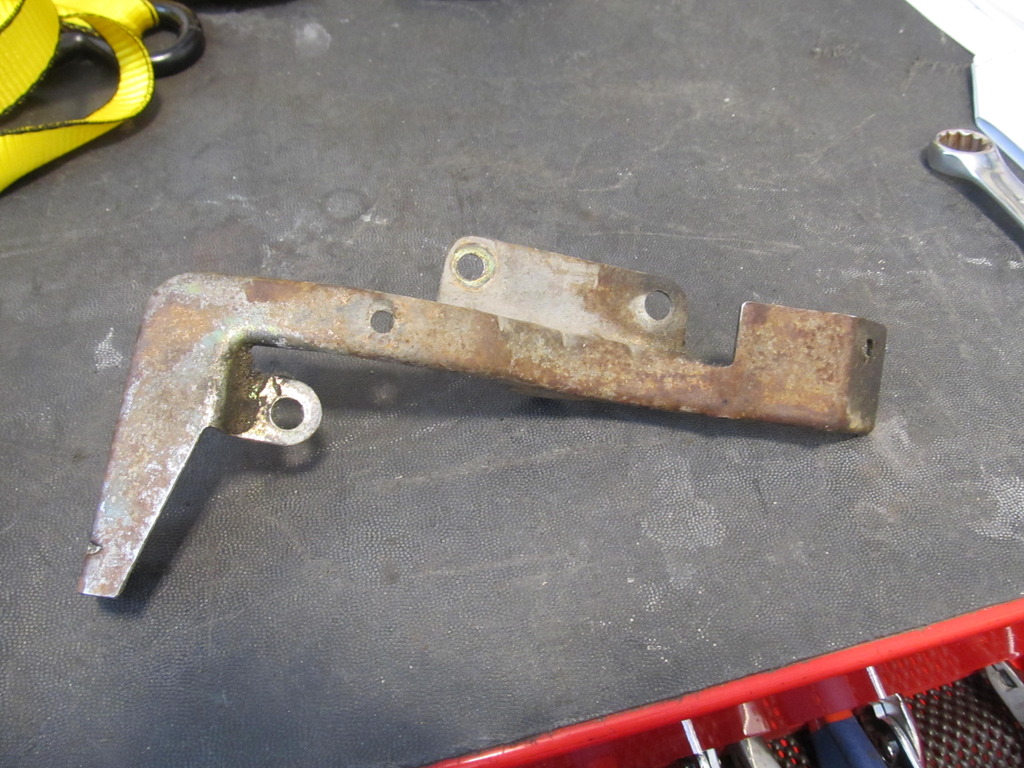
After wire wheeling...
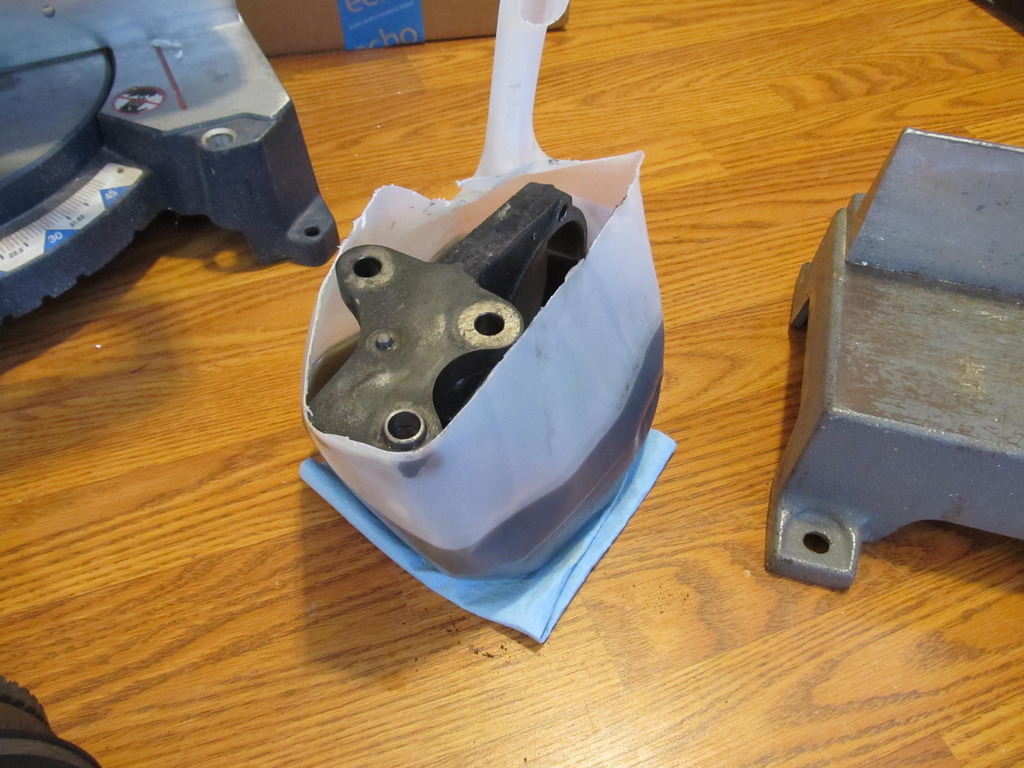
The motor mounts were also in need of some help:
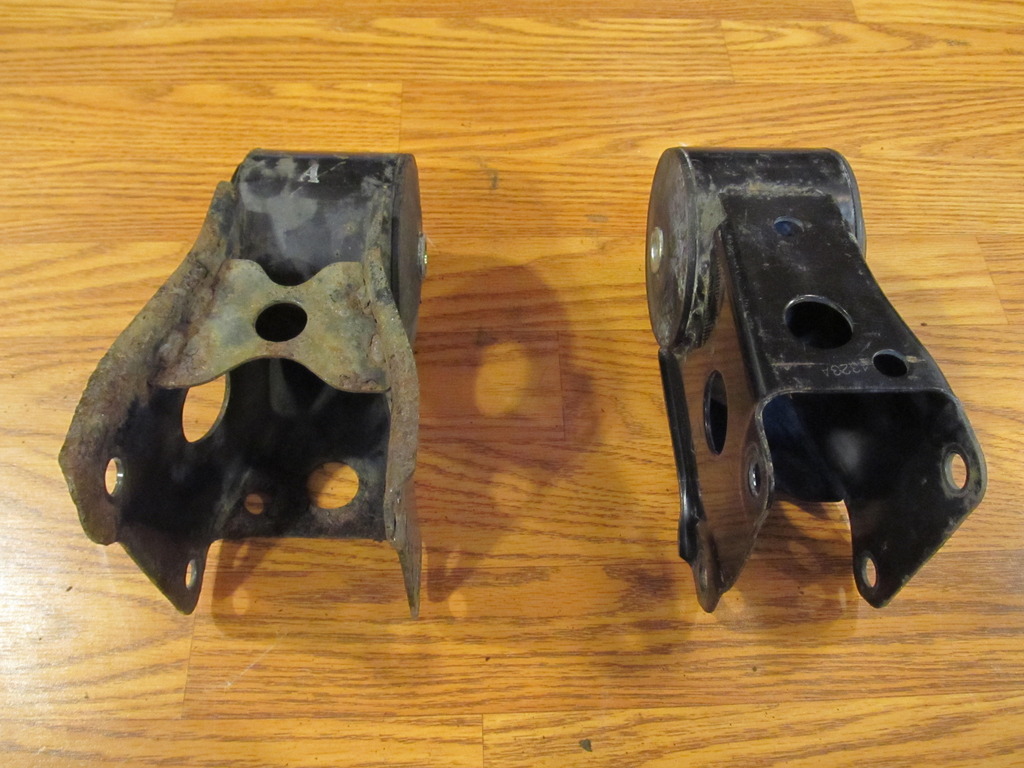
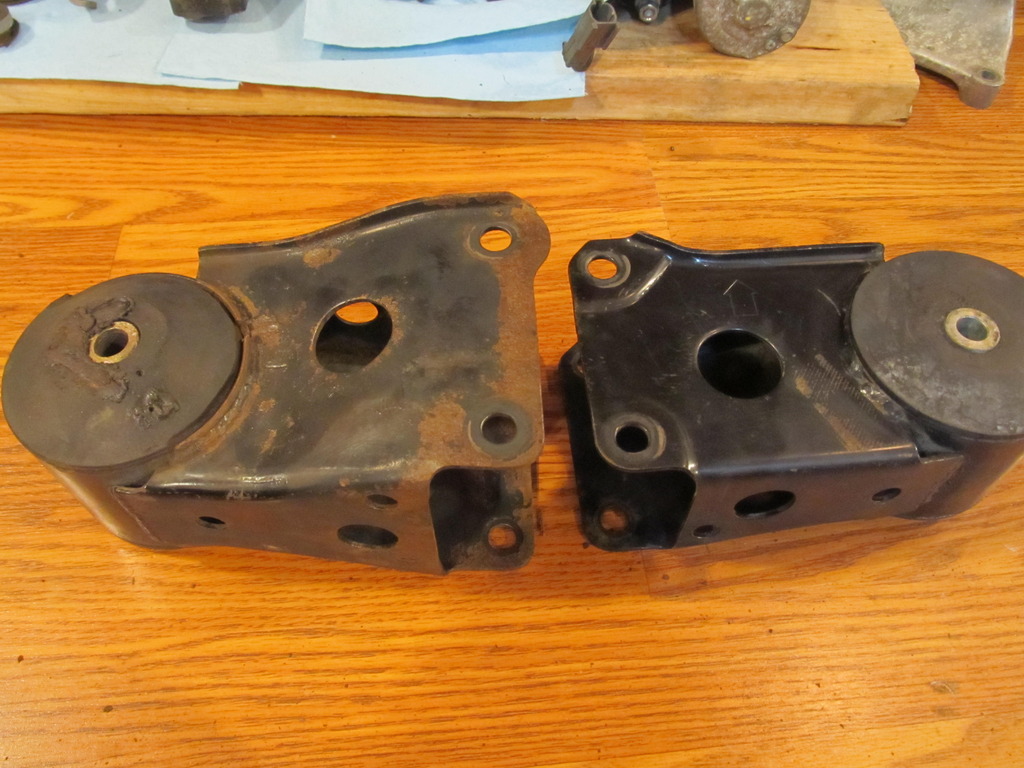
After soaking in Evapo Rust:
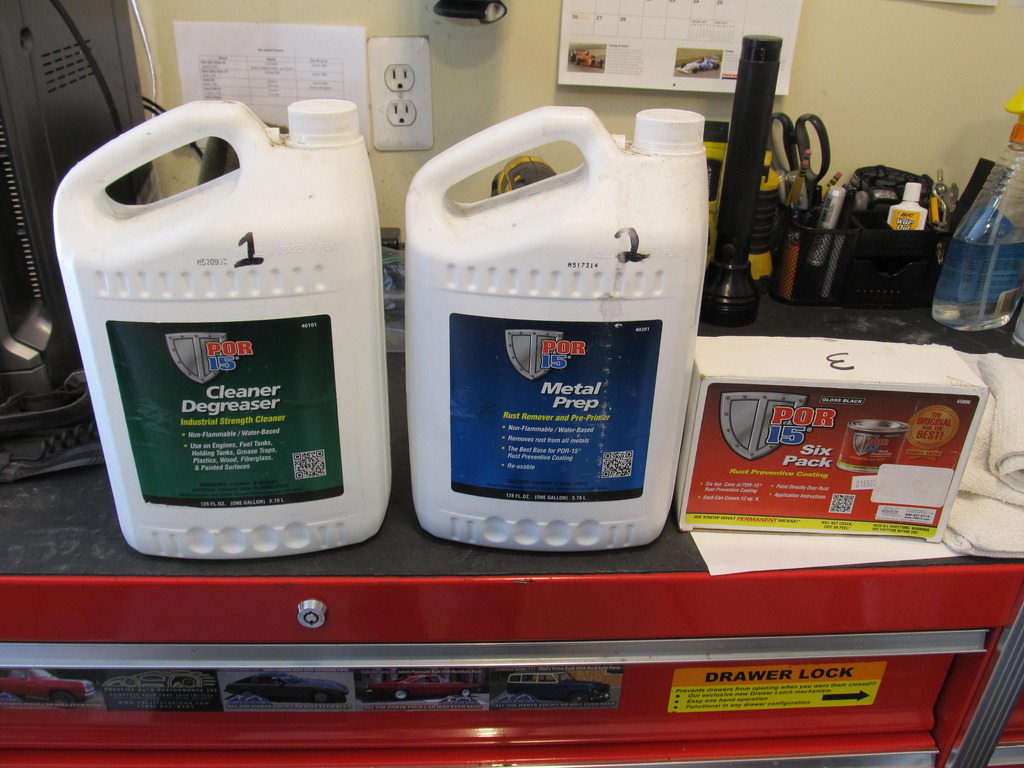
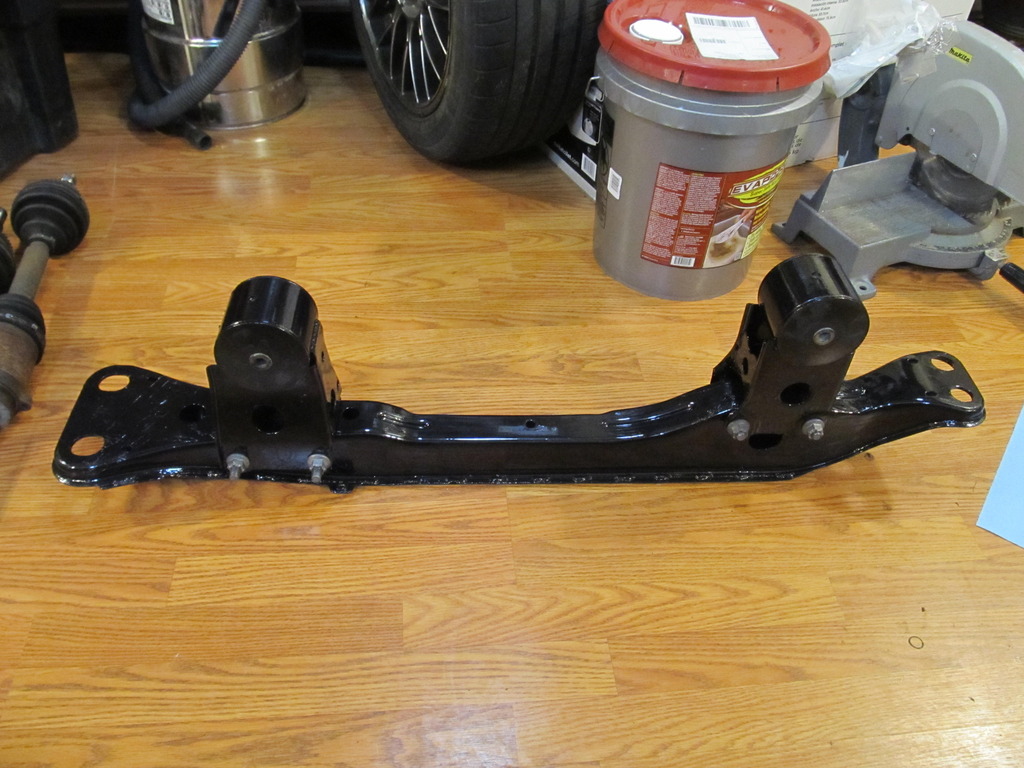
The crossmember also got the full treatment. Brake cleaner, wire wheel, Evapo Rust, and POR15:
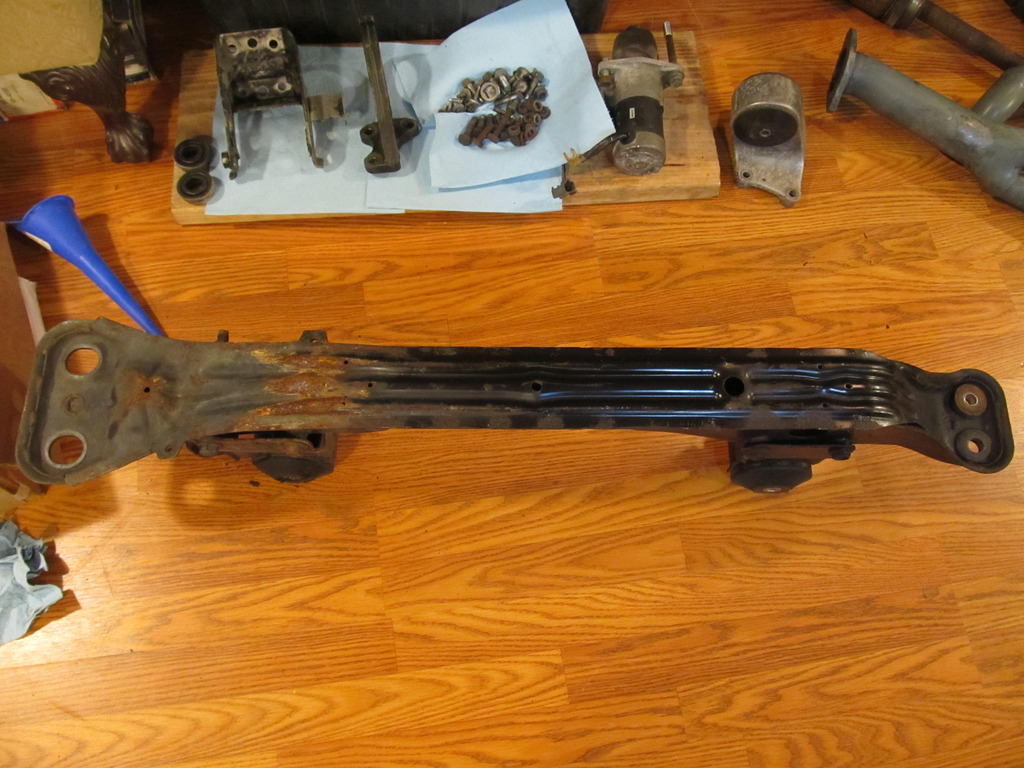
Finally, time to apply a few coats of POR15! But that means doing quite a bit of prep work....
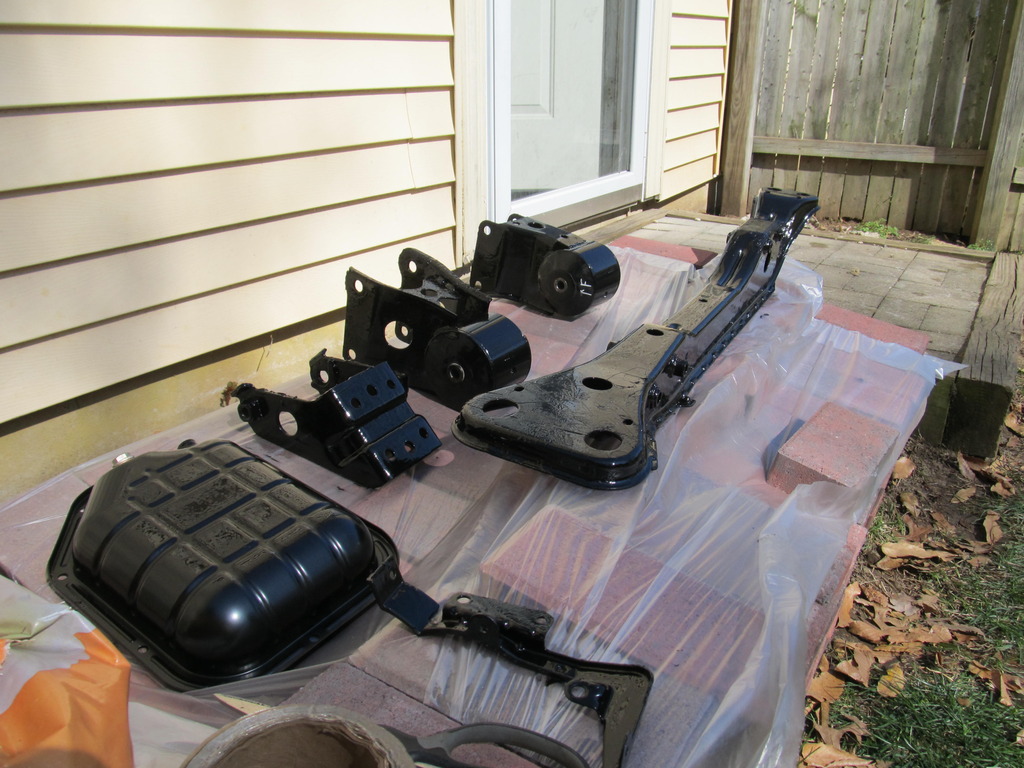
So much better!
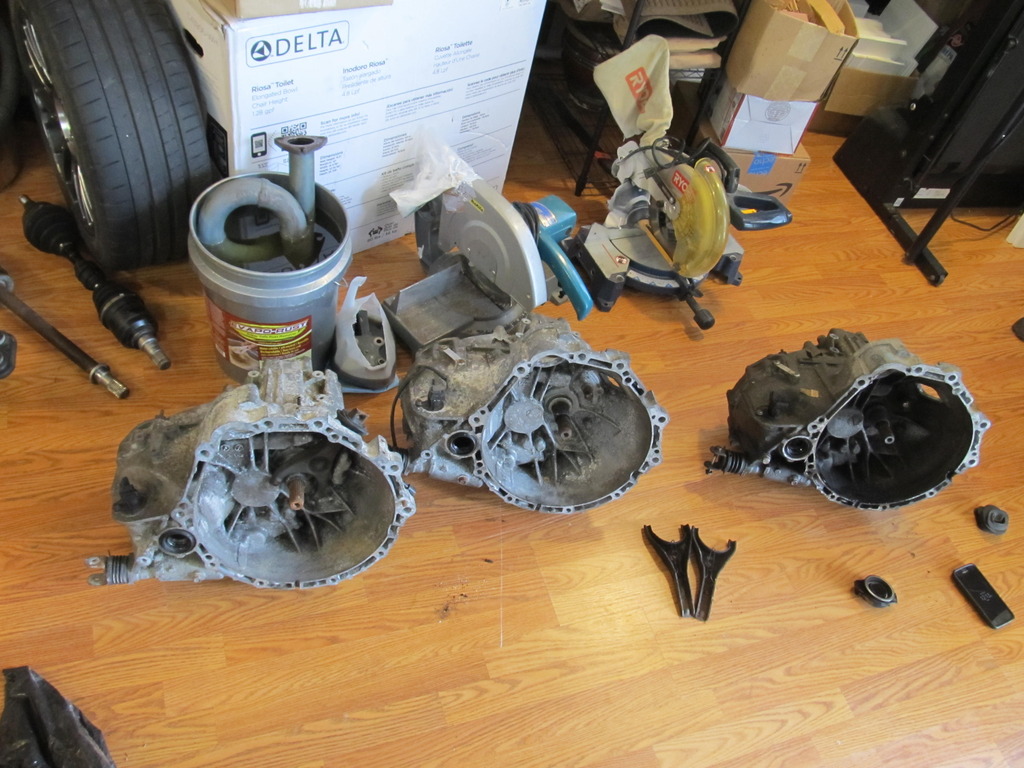
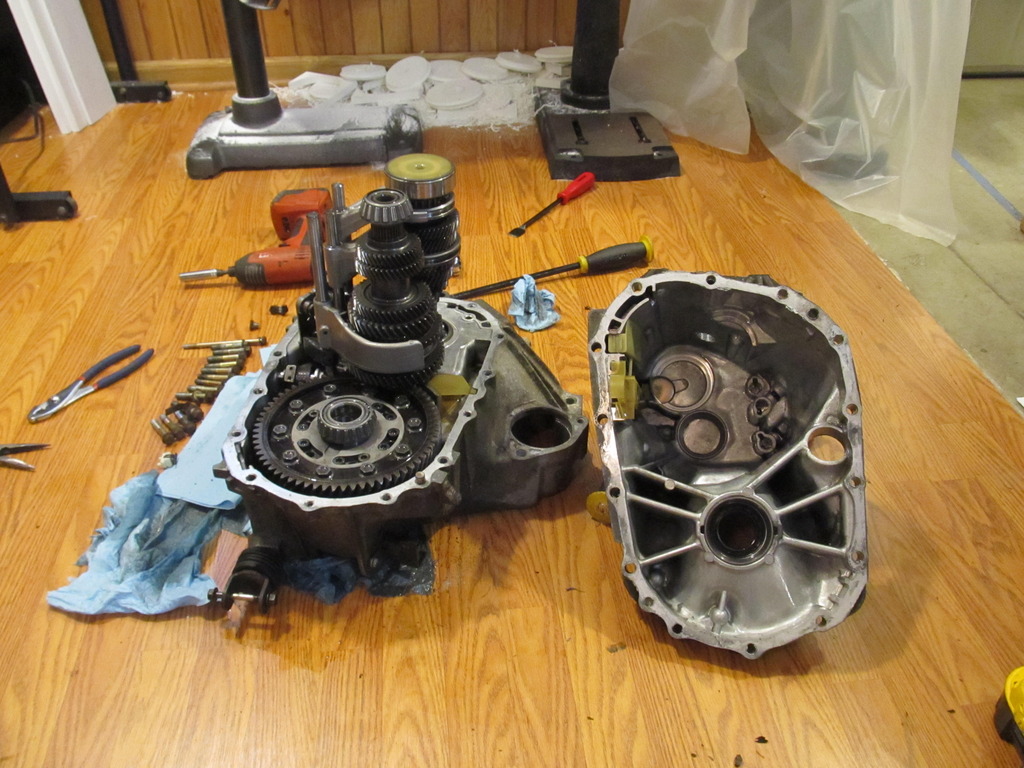
Oh look, my little family of transmissions!
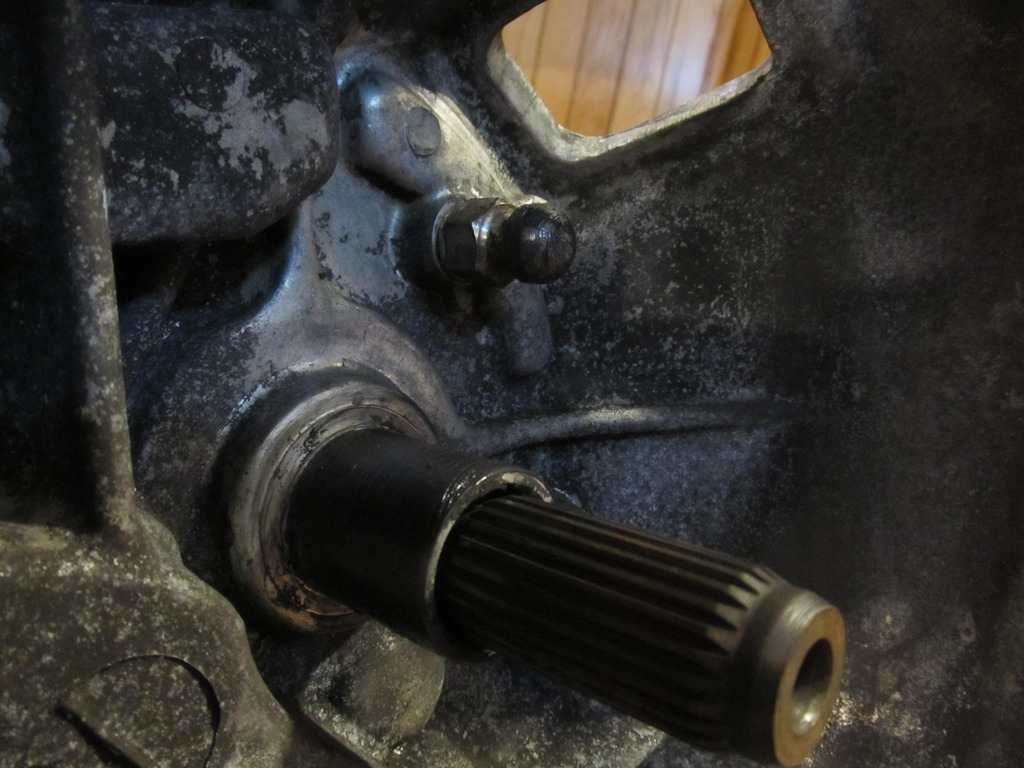
This is what a properly installed axle seal should look like, nice and flush with the face of the trans.
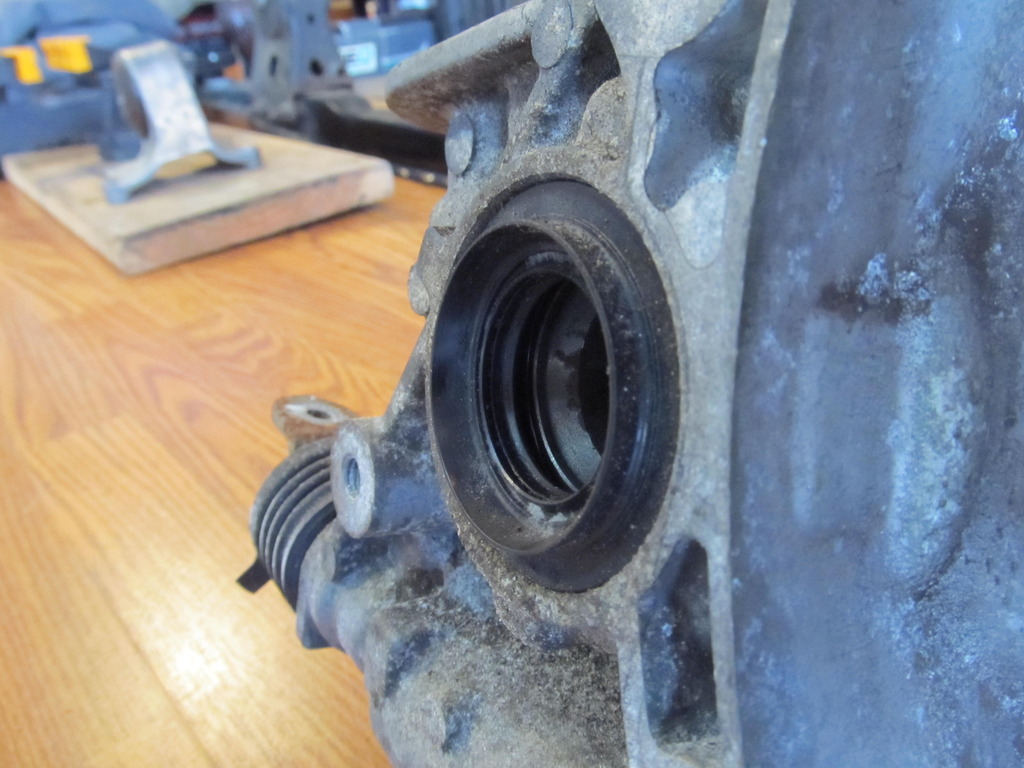
And this is what the bozo at that shop did (same guy who over-tightened my trans drain plug):
No wonder why it leaked so badly. Damn!
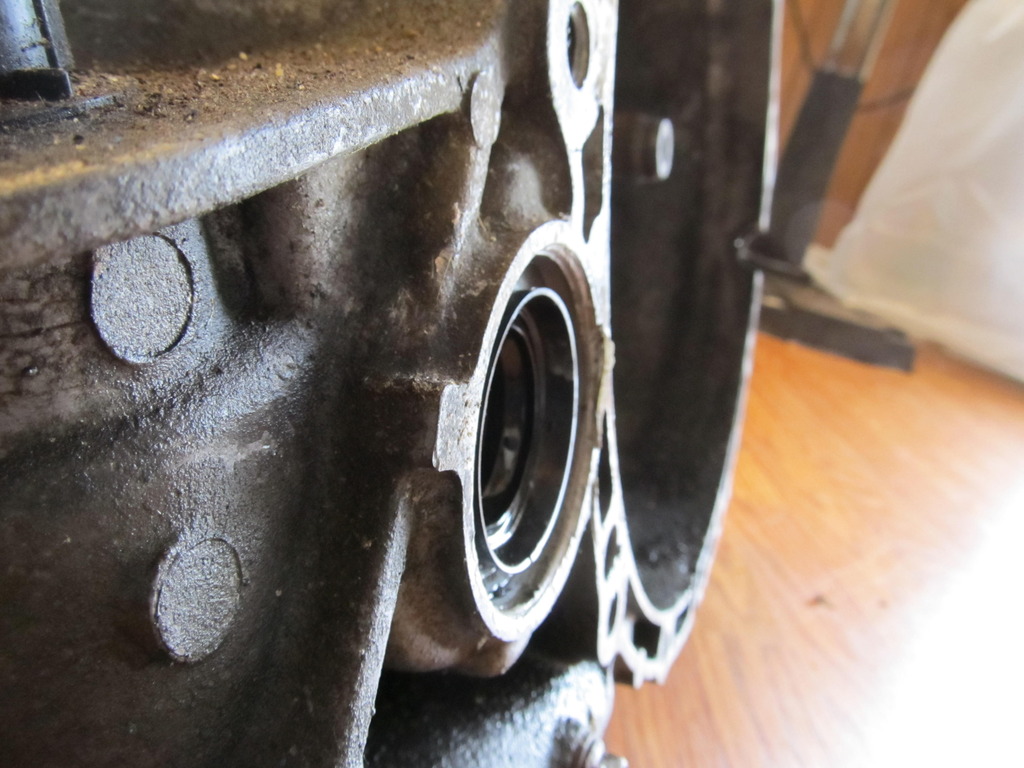
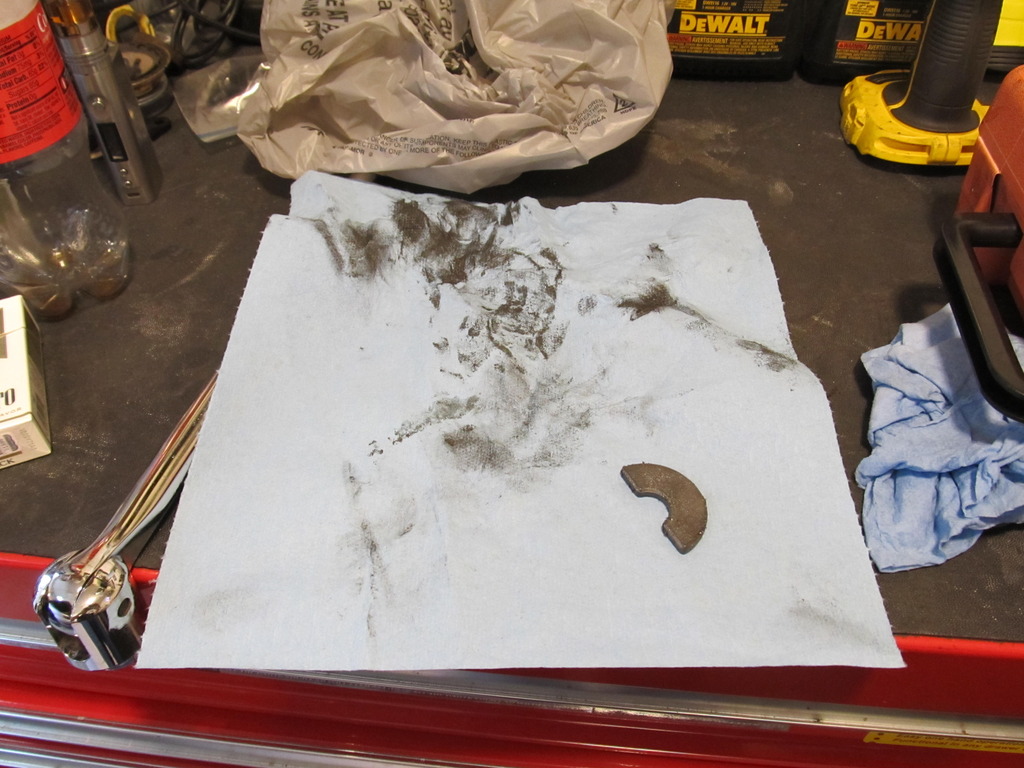
I wasn�t sure if the case was leaking, so in the interest of going overboard, I decided to reseal the case. First up, clean off the magnet:
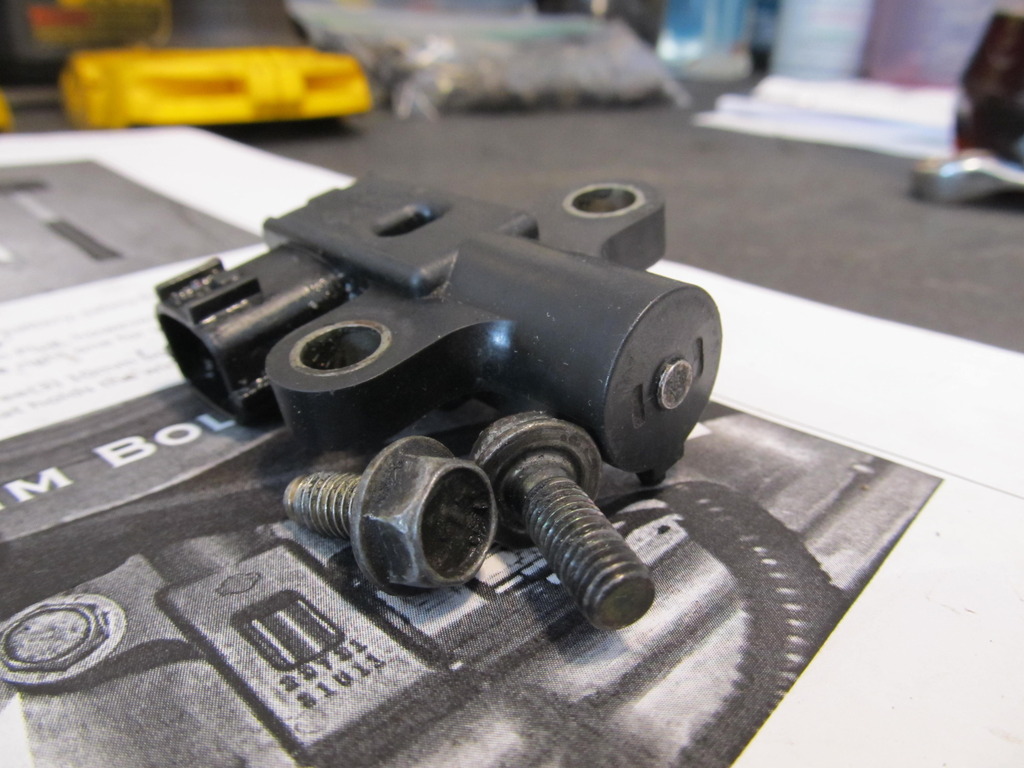
Get the new reverse sensor ready�

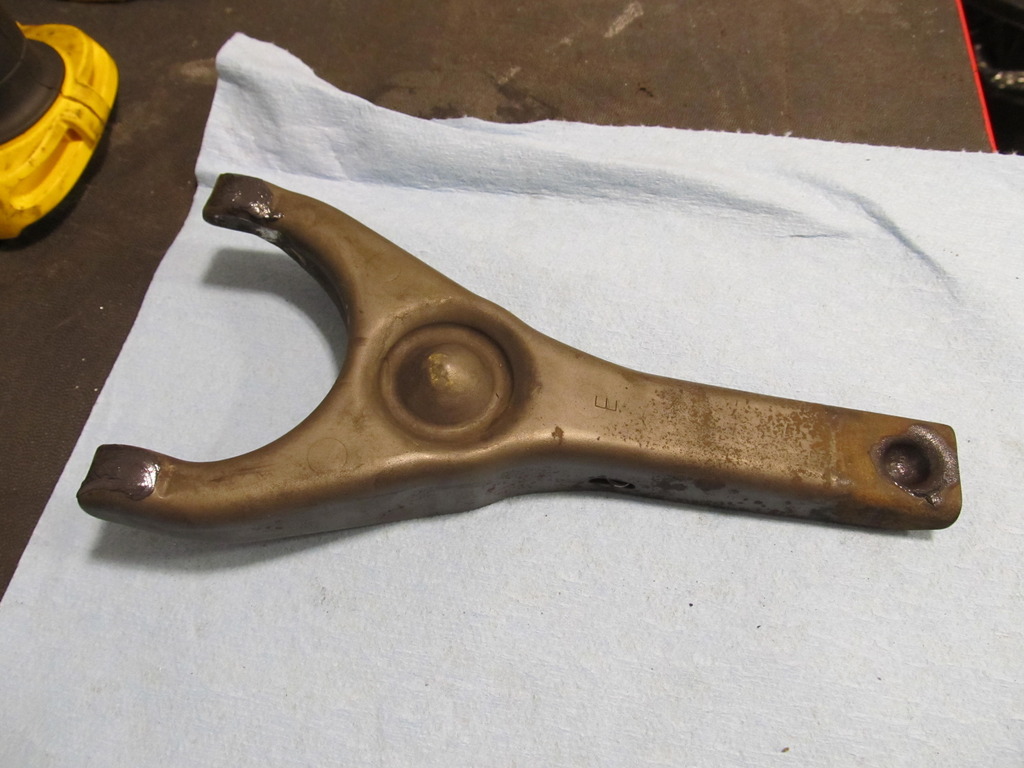
Clean up the clutch fork�
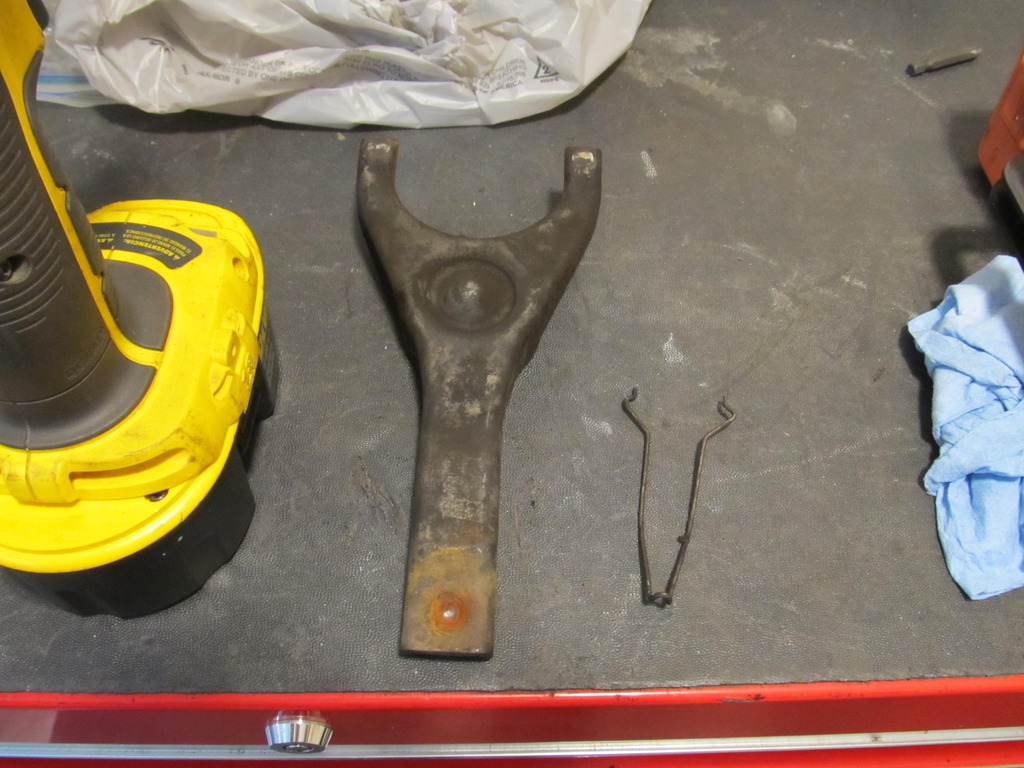
Lube it�

After wire wheeling...

The motor mounts were also in need of some help:


After soaking in Evapo Rust:


The crossmember also got the full treatment. Brake cleaner, wire wheel, Evapo Rust, and POR15:


Finally, time to apply a few coats of POR15! But that means doing quite a bit of prep work....


So much better!

Oh look, my little family of transmissions!

This is what a properly installed axle seal should look like, nice and flush with the face of the trans.

And this is what the bozo at that shop did (same guy who over-tightened my trans drain plug):

No wonder why it leaked so badly. Damn!
I wasn�t sure if the case was leaking, so in the interest of going overboard, I decided to reseal the case. First up, clean off the magnet:

Get the new reverse sensor ready�

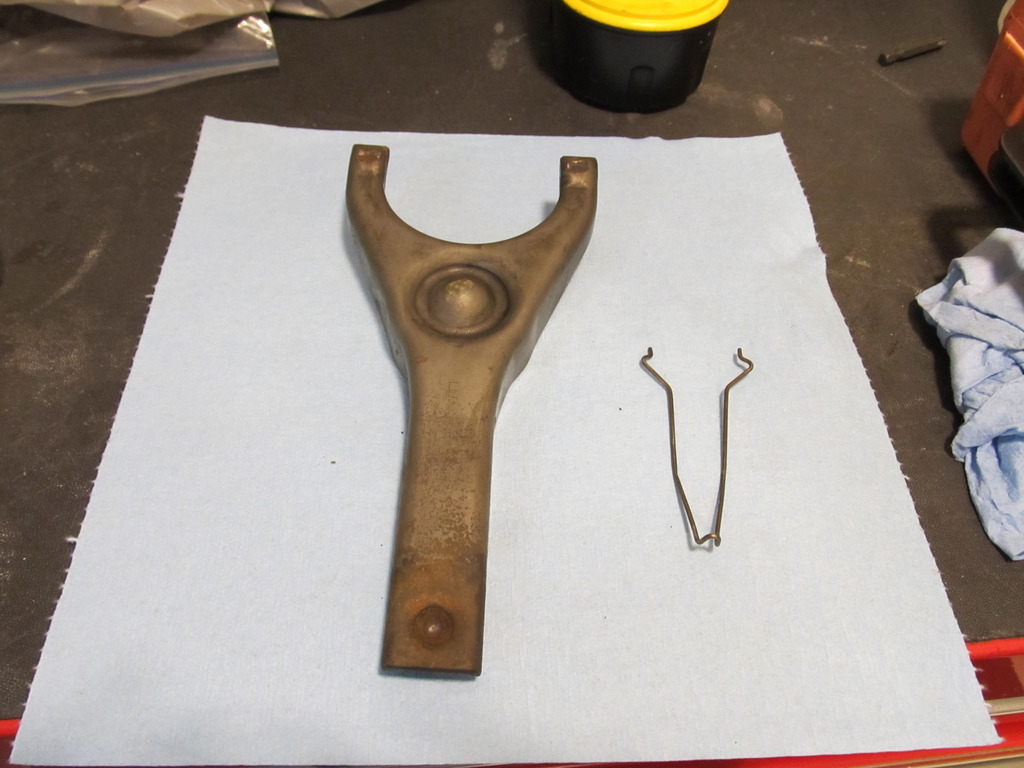
Clean up the clutch fork�


Lube it�

Last edited by 95maxrider; 04-01-2017 at 05:48 PM.
03-31-2017, 12:33 PM
#348
Wire brush the splines and lube the ball:
Admire the Quaife:
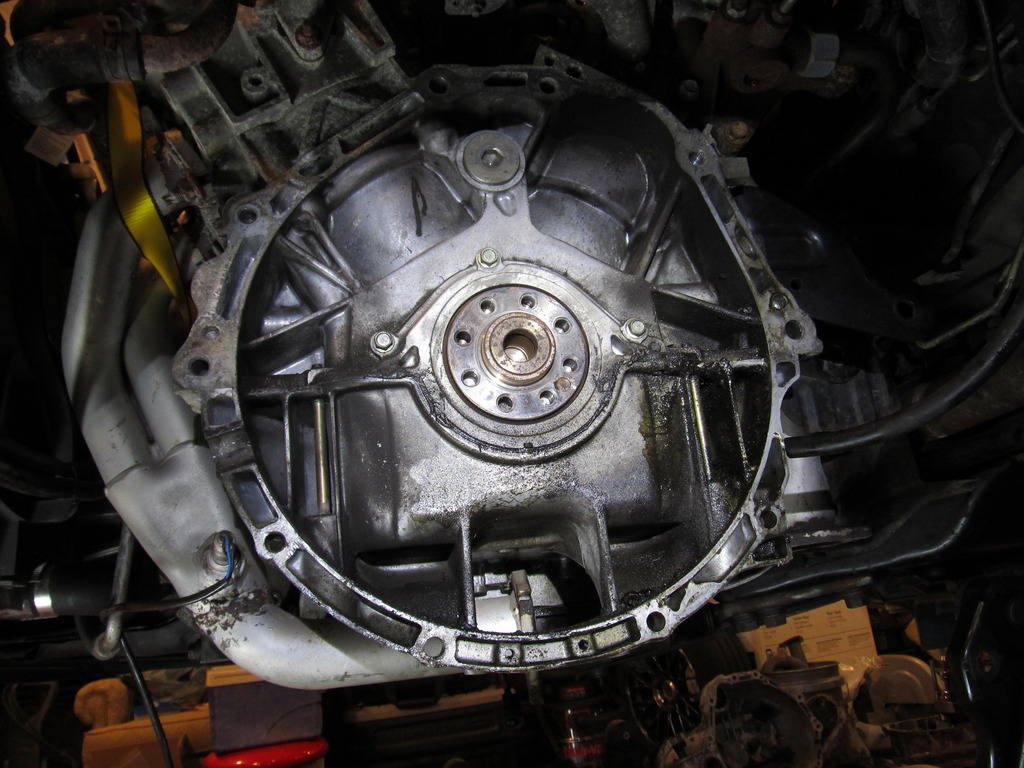
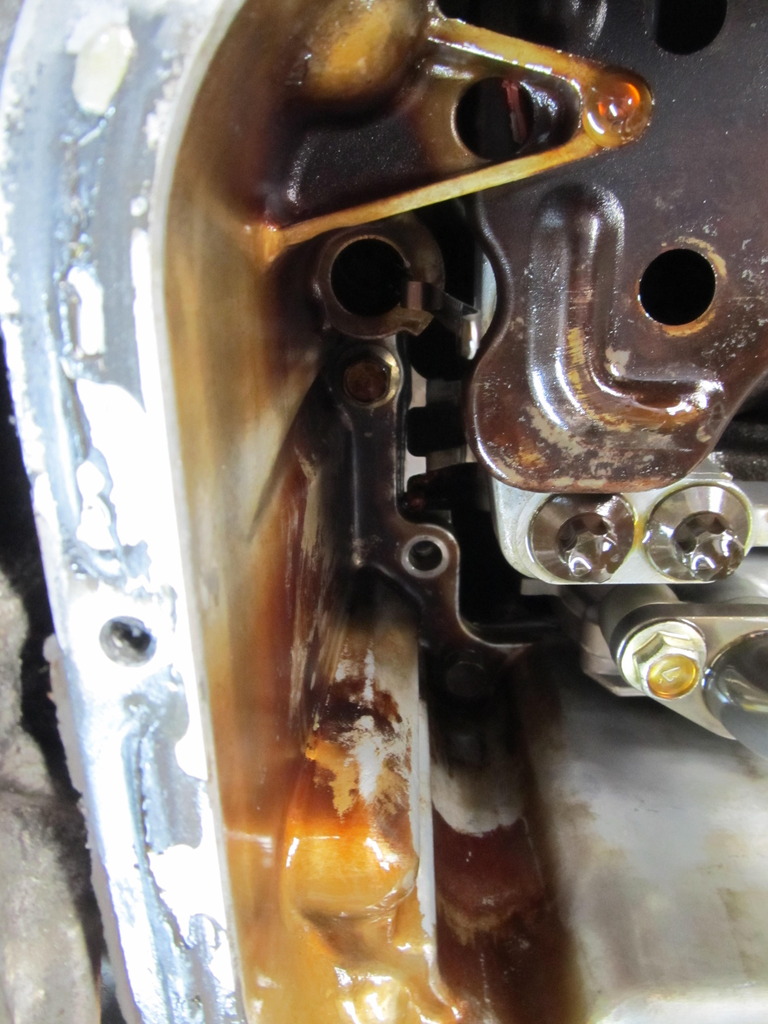
Only to discover that the RMS wasn�t leaking, it was the upper oil pan! Same difference I guess�.
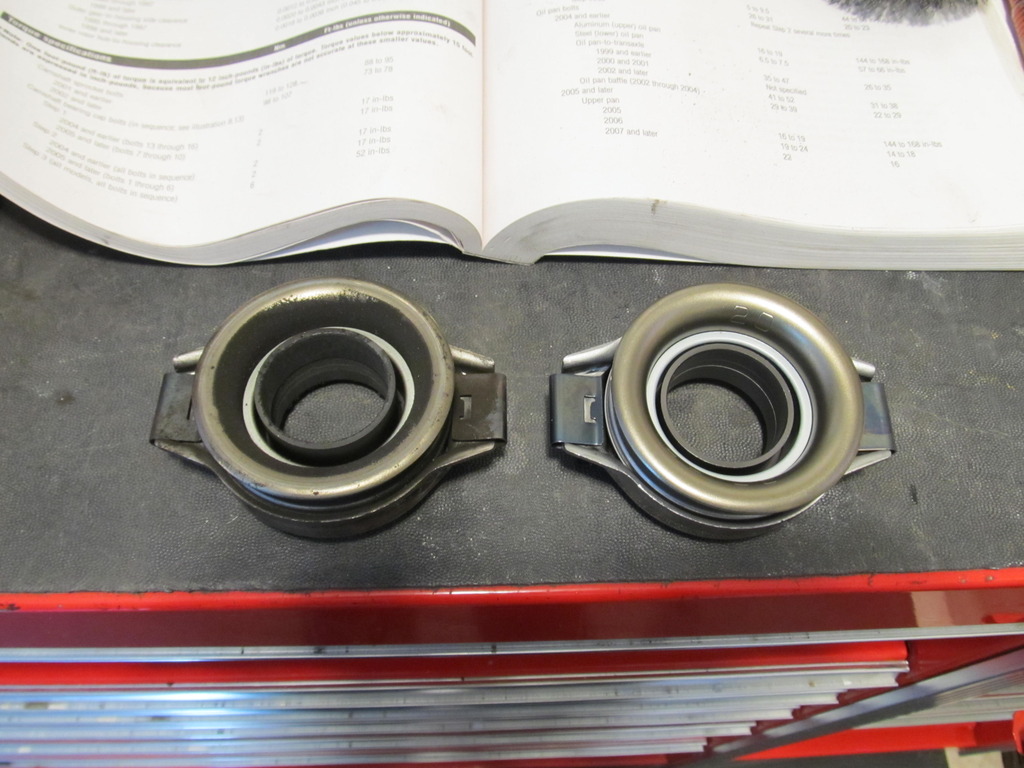
I�m running a 2000-2001 clutch in my car, which seems to hold 250 wtq just fine. The TOB probably has less than 10k on it, but I figured it couldn�t hurt to put a new OEM one in. Apparently the TOB is the same for all 95-01 cars.
So I�m guessing someone had already done the upper oil pan on this car, because when I got off the lower I noticed there was a bolt missing holding the upper pan on! I wonder if that contributed to the leak�.
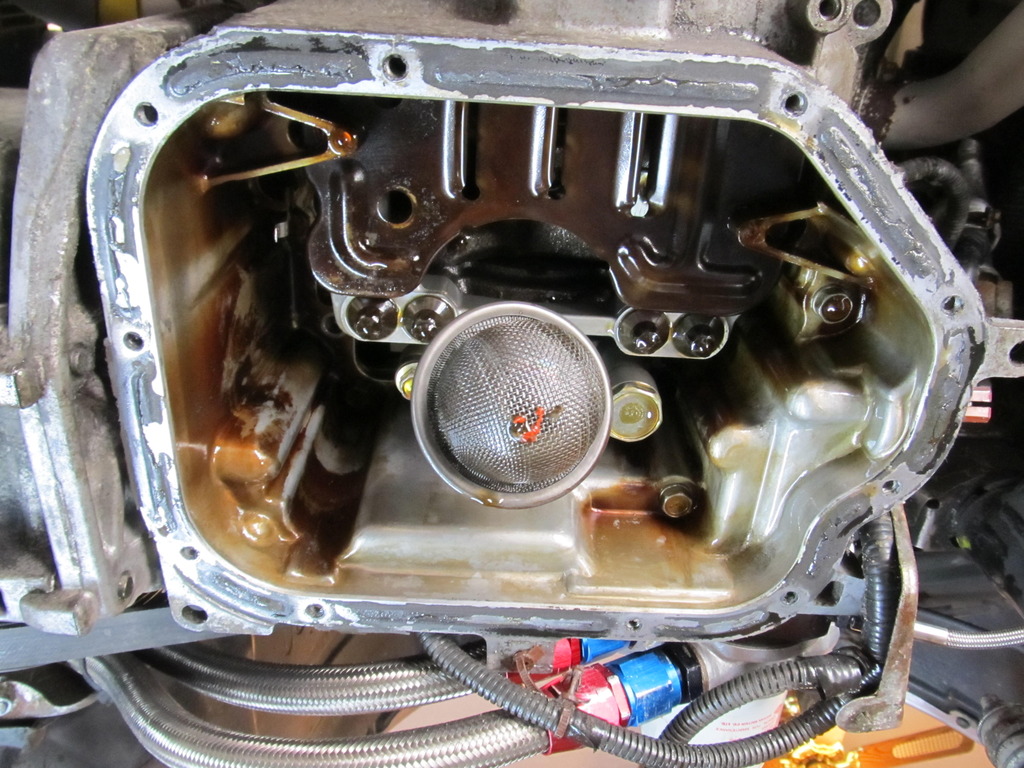
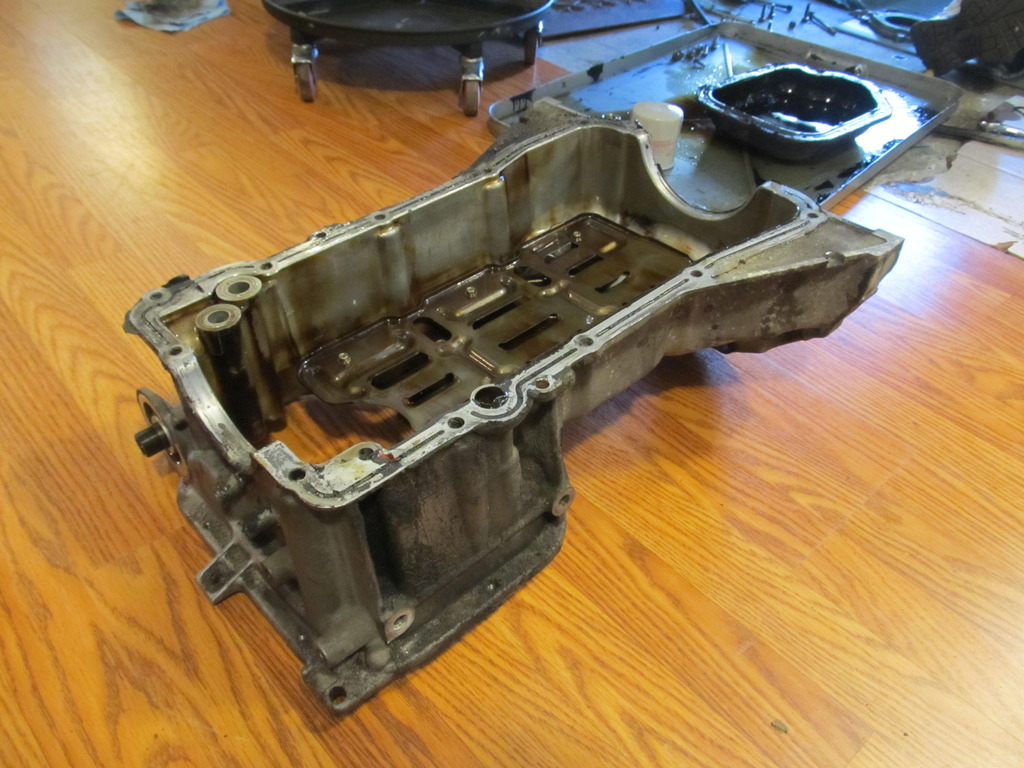
I used up a few cans of brake clean on the upper oil pan. That crap was caked on! Here are some before pics:
New OEM RMS plus plenty of the black oil-resistant RTV! I also used up quite a bit of brake clean getting this area cleaned up.
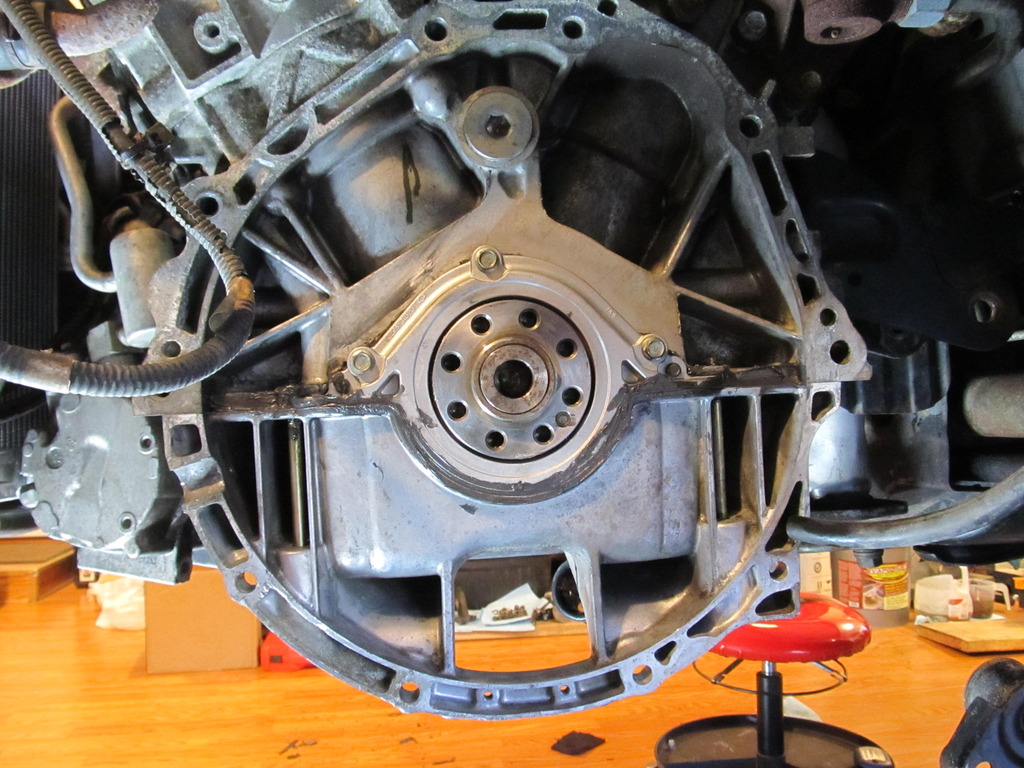
Gotta clean up the crank sensors!
I bought a little cylinder hone to clean out the ABS sensor holes. Luckily, both of mine came out without any trouble, but I wanted to make sure they stay that way in the future!
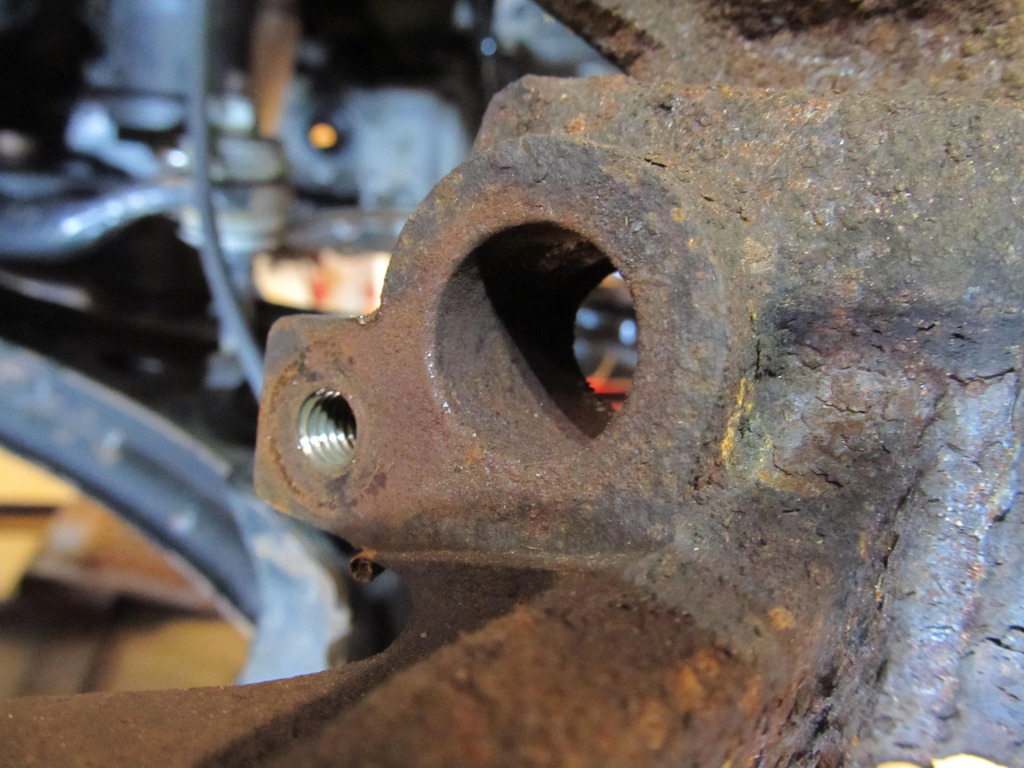
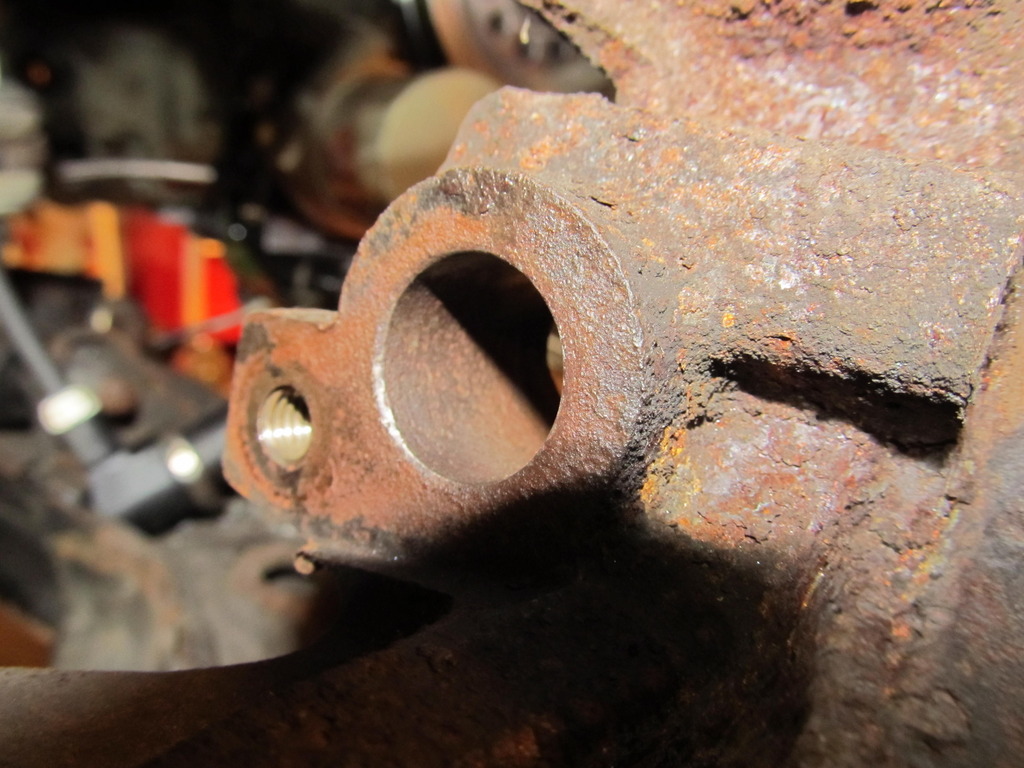
When I reinstalled the ABS sensors I coated them in high temp anti seize. They should be good for a long time now.
I spent a lot of time during this project just cleaning up oil and gunk. It was everywhere, and I was not okay with that. I�ll just say that I�m very happy I have Purple Power. These aren�t the greatest pics, but you get the idea. Before:
After:
Oh, and when I removed the AC compressor I found that its bracket holding it to the block was also missing a bolt. Naturally, when I went to install a new bolt, there was so much crap in the threads I couldn�t get it started, so I broke out my tap and die kit to chase the threads. Well, as luck would of course have it, that hole was blocked by the alternator, so I had to remove the alternator. Down the rabbit�s hole I go! Apparently my alternator has some weird little bracket holding it to the engine, but it needs two 1/4� C-shaped washers to get it to line up right with the pullies.


Admire the Quaife:

Only to discover that the RMS wasn�t leaking, it was the upper oil pan! Same difference I guess�.

I�m running a 2000-2001 clutch in my car, which seems to hold 250 wtq just fine. The TOB probably has less than 10k on it, but I figured it couldn�t hurt to put a new OEM one in. Apparently the TOB is the same for all 95-01 cars.

So I�m guessing someone had already done the upper oil pan on this car, because when I got off the lower I noticed there was a bolt missing holding the upper pan on! I wonder if that contributed to the leak�.


I used up a few cans of brake clean on the upper oil pan. That crap was caked on! Here are some before pics:


New OEM RMS plus plenty of the black oil-resistant RTV! I also used up quite a bit of brake clean getting this area cleaned up.

Gotta clean up the crank sensors!


I bought a little cylinder hone to clean out the ABS sensor holes. Luckily, both of mine came out without any trouble, but I wanted to make sure they stay that way in the future!


When I reinstalled the ABS sensors I coated them in high temp anti seize. They should be good for a long time now.
I spent a lot of time during this project just cleaning up oil and gunk. It was everywhere, and I was not okay with that. I�ll just say that I�m very happy I have Purple Power. These aren�t the greatest pics, but you get the idea. Before:


After:


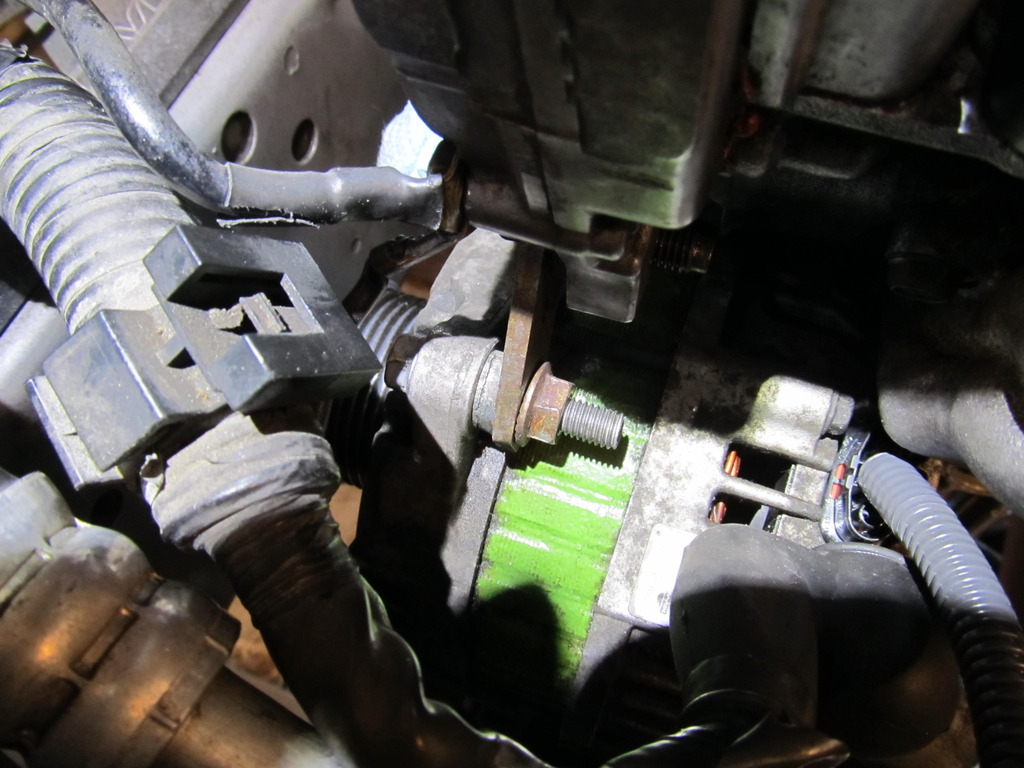
Oh, and when I removed the AC compressor I found that its bracket holding it to the block was also missing a bolt. Naturally, when I went to install a new bolt, there was so much crap in the threads I couldn�t get it started, so I broke out my tap and die kit to chase the threads. Well, as luck would of course have it, that hole was blocked by the alternator, so I had to remove the alternator. Down the rabbit�s hole I go! Apparently my alternator has some weird little bracket holding it to the engine, but it needs two 1/4� C-shaped washers to get it to line up right with the pullies.

Last edited by 95maxrider; 04-01-2017 at 05:52 PM.
03-31-2017, 12:33 PM
#349
I couldn�t see the washers clearly, and when I dropped the alternator, one fell out, and I couldn�t figure out where it was supposed to go. Due to the tight space, I couldn�t really get a good pic of the problem. But this was the washer in question:

The AC compressor bracket also got cleaned up. I love Scotch Brite pads!
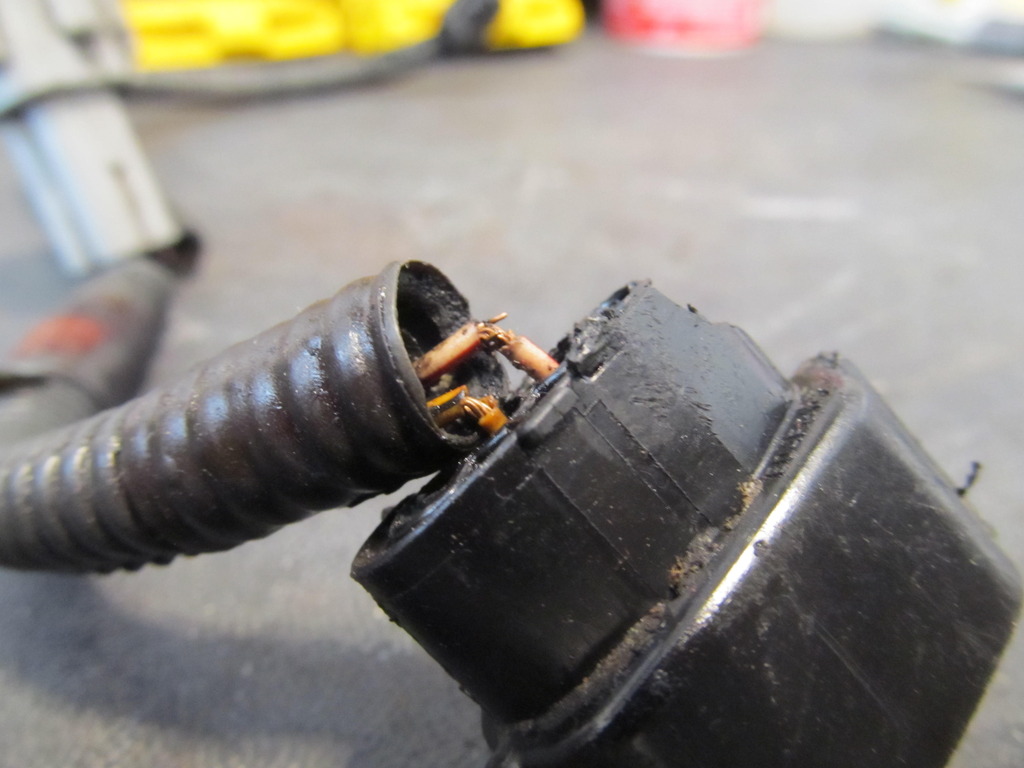
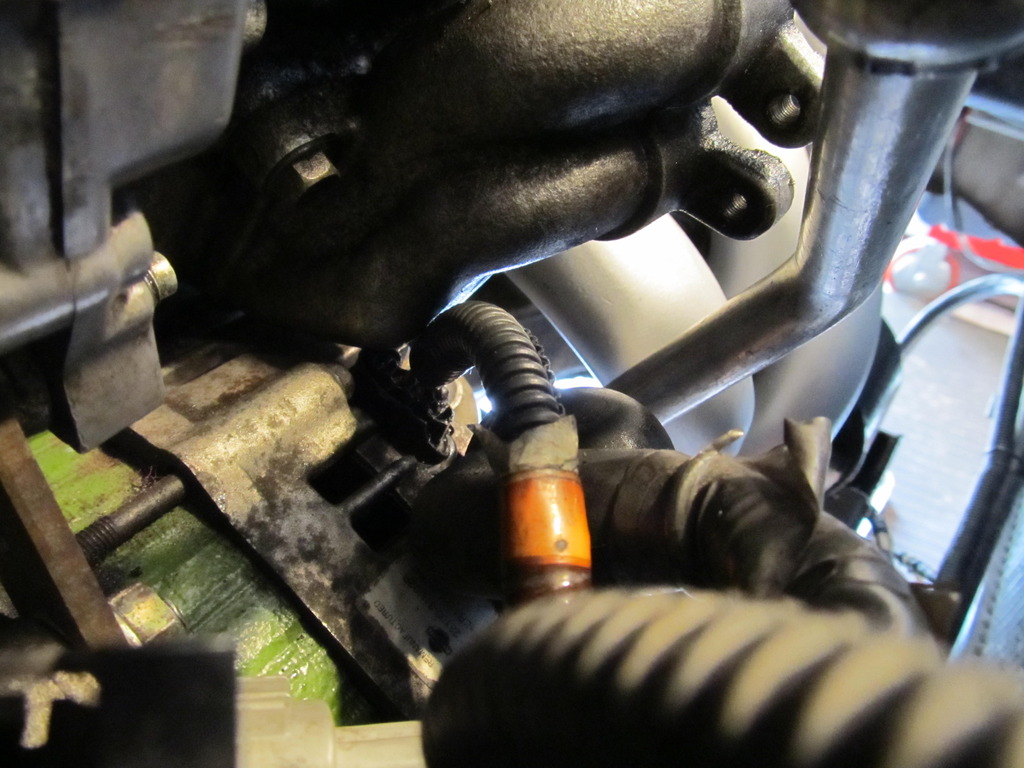
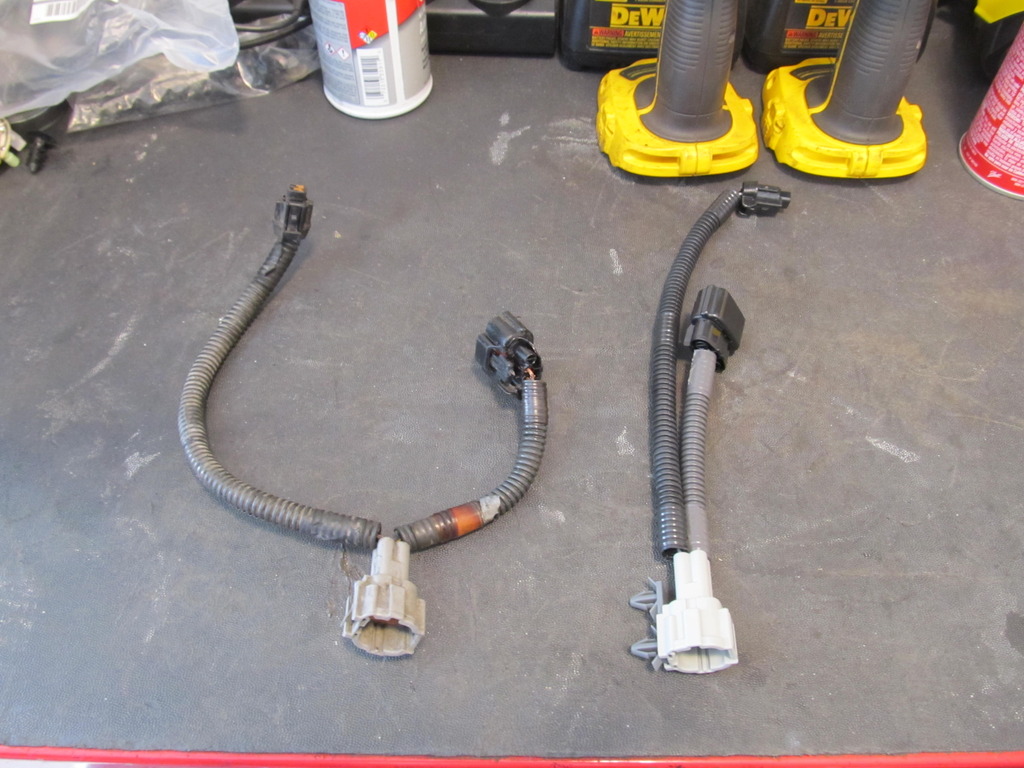
I of course had to clean up the alternator of all the oil and gunk now that it was off the car, which gave me time to notice that the wiring harness had seen better days:
Hmm, I think I�ll replace that. Anyways, I chased the thread for the AC compressor bracket, reinstalled the alternator, and then finally the AC compressor. I placed the order for the alternator wiring harness and some other parts from Courtesy (best prices ever!!!) and waited.
The new harness arrived, but I quickly realized I needed about another millimeter of clearance under the coolant tubes to get the old harness off, so I had to drop the AC and everything again. Crap!!
At least the harness looks nice and purdy.
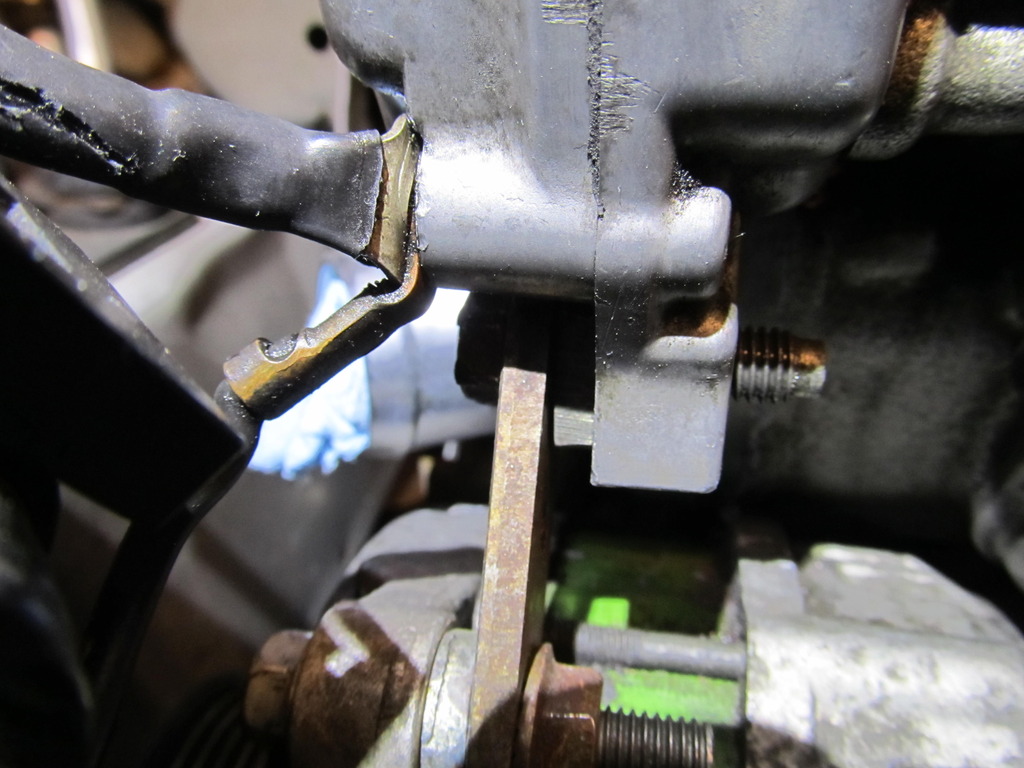
As I began reassembling everything, I noticed a gap between the alternator bracket and the engine, so I figured this is where the C-shaped washer should go. Only problem was that when I put the washer in, there weren�t enough threads at the end of the bolt to get the nut on, so I went searching for a longer bolt. Success!
Installed, hopefully properly.
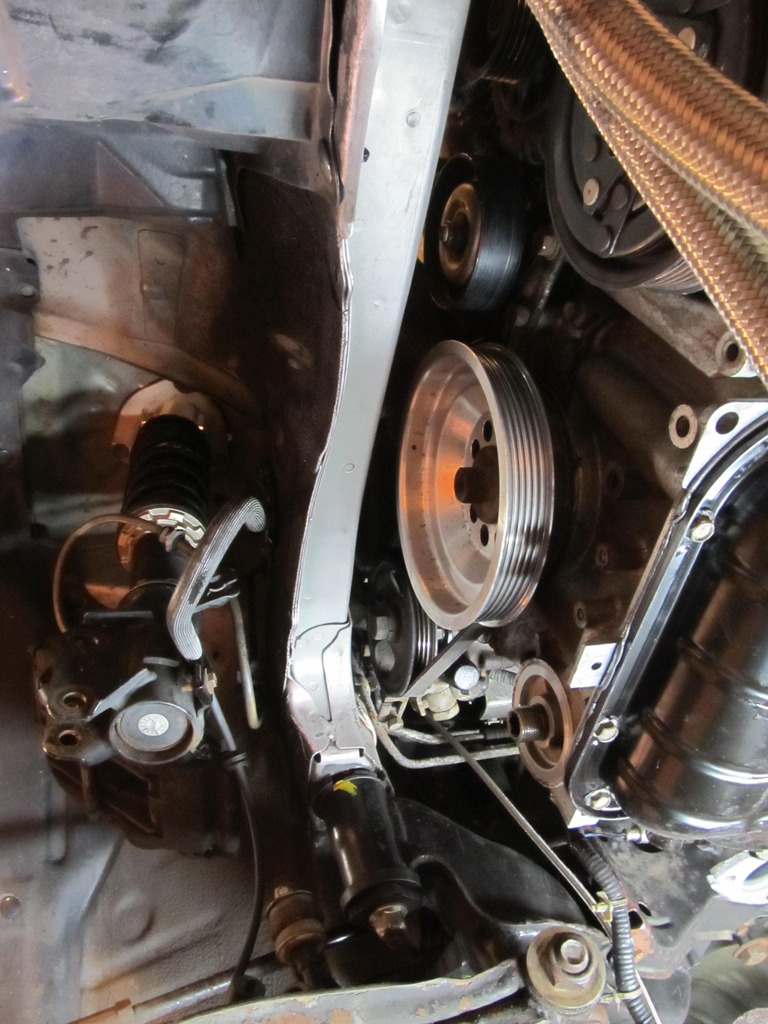
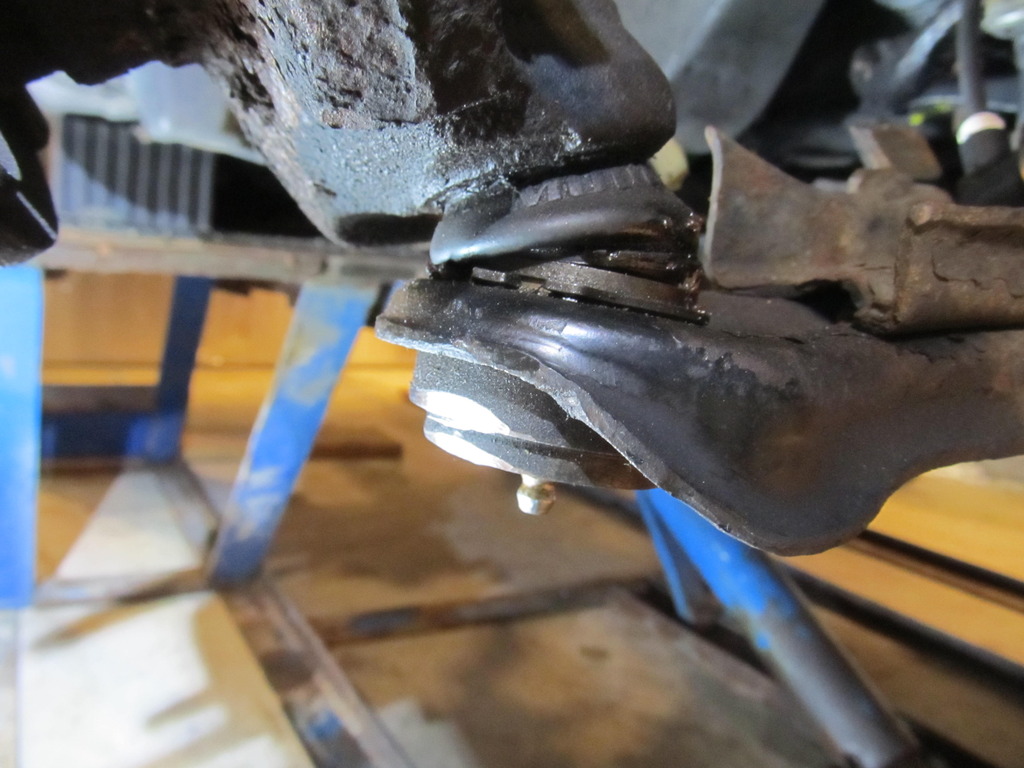
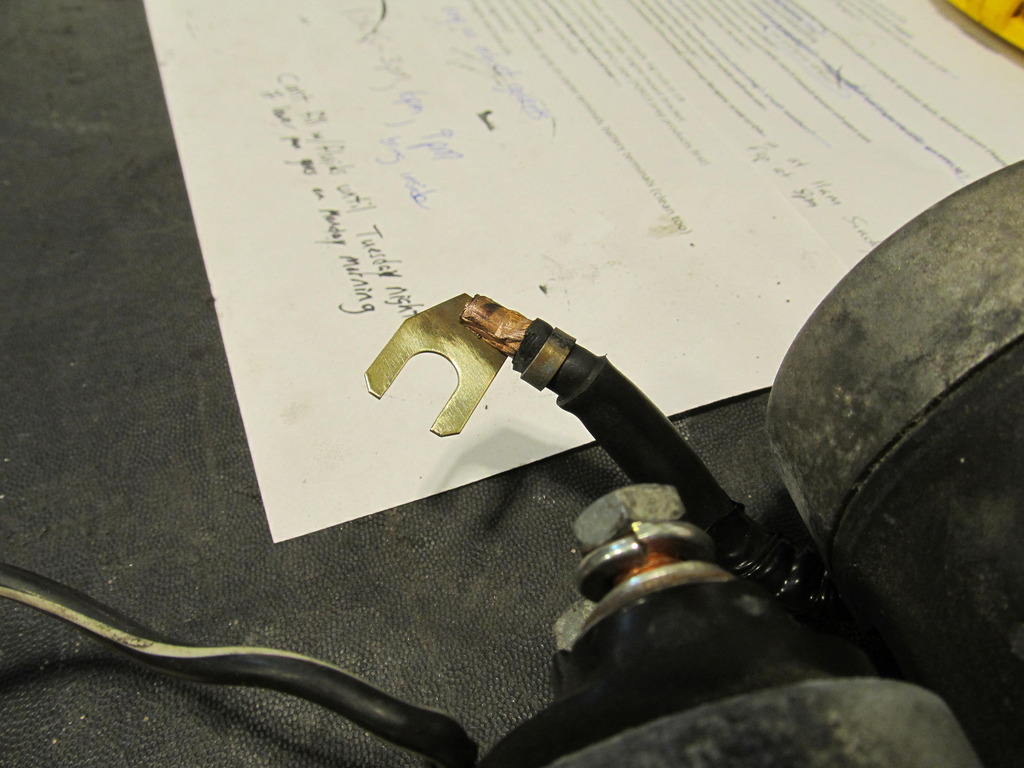
I also took my dremel to the PS Moog ball joint because when I auto-x it rubs against my brake rotor during hard left hand turns. The rotor had already done a fair amount of grinding:
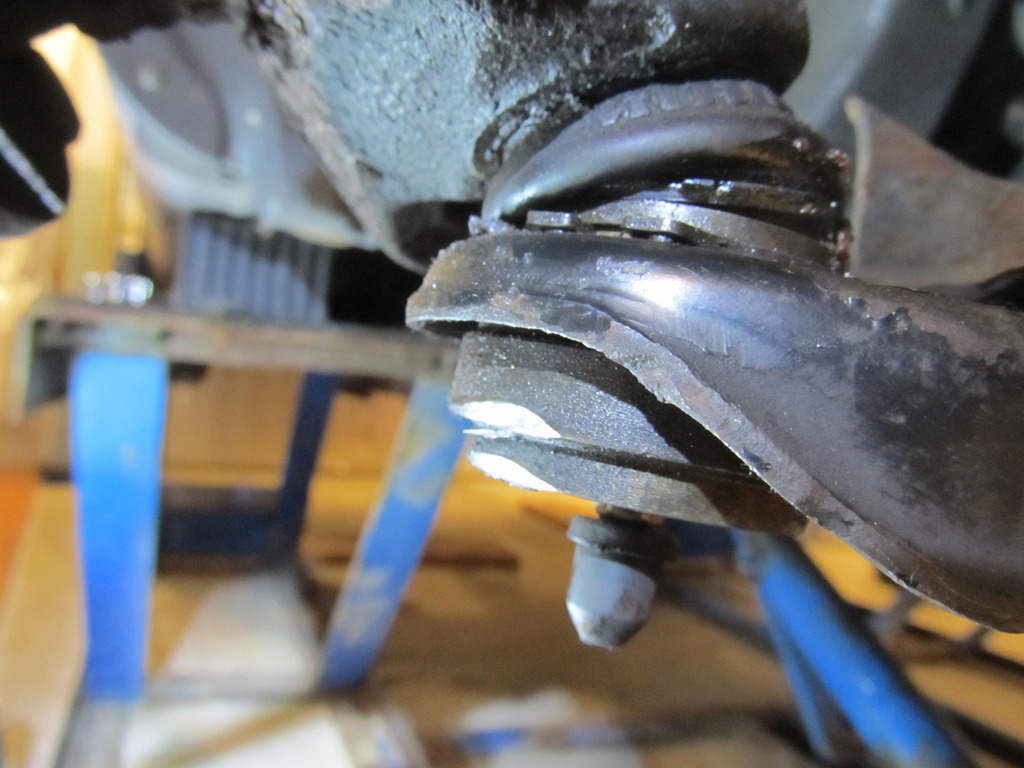
But I smoothed it out and took some more off to be safe. The noise it makes when it rubs the rotor is not pleasant!
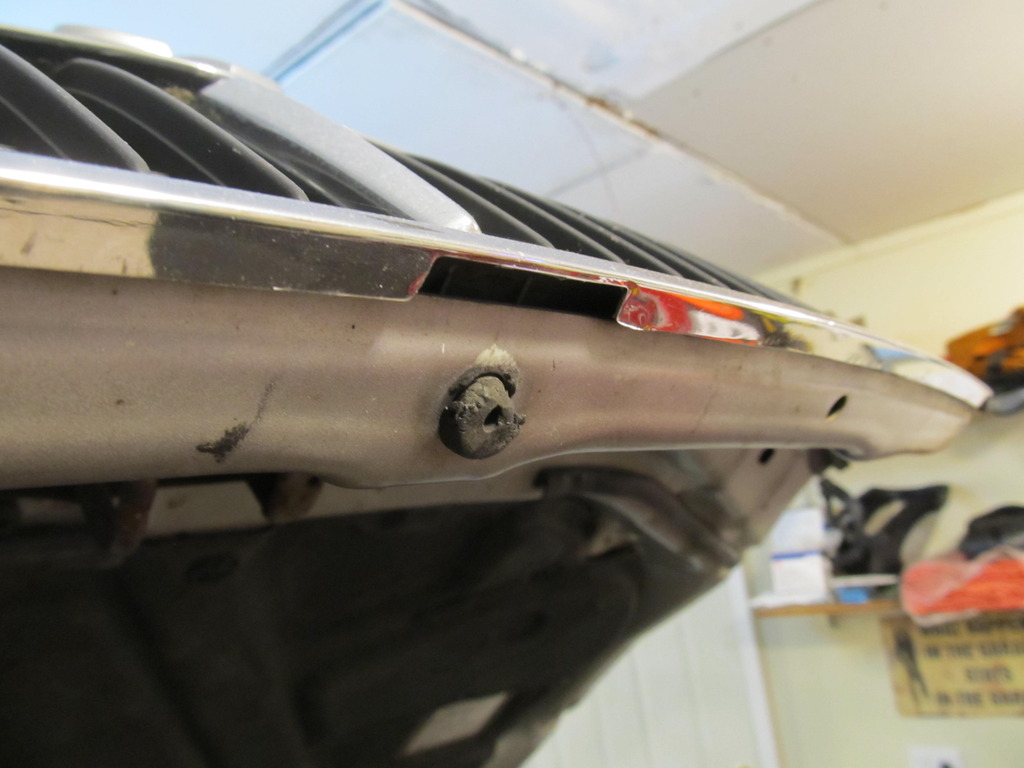
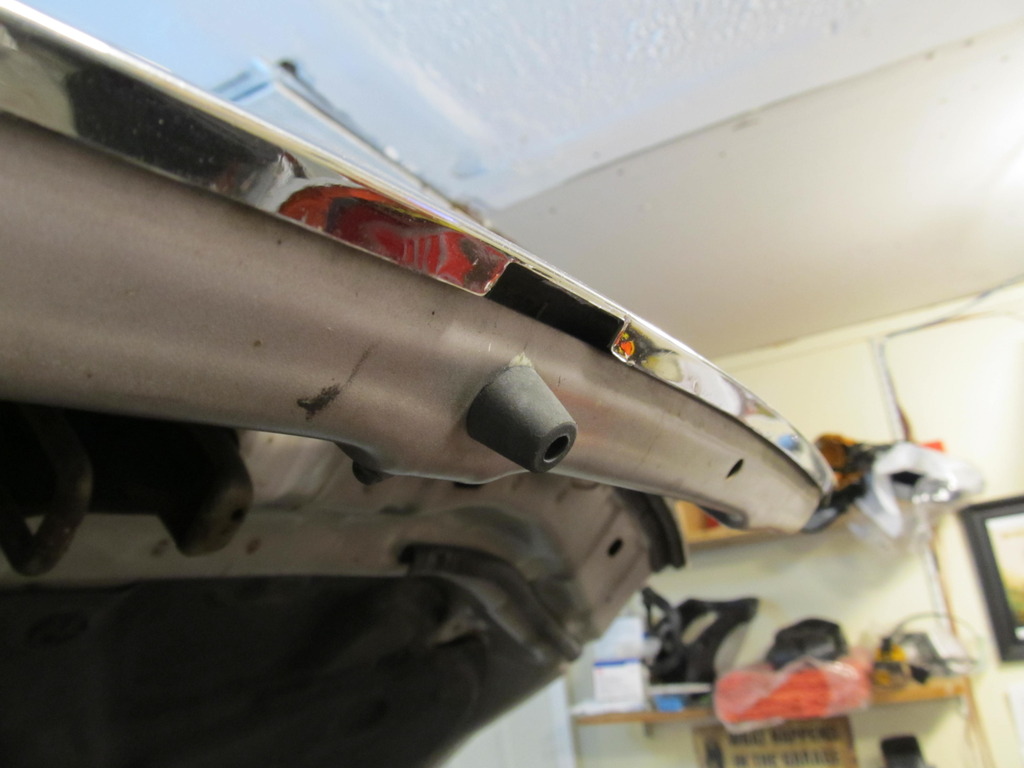
I also replaced the rubber hood bushing since mine was toast:
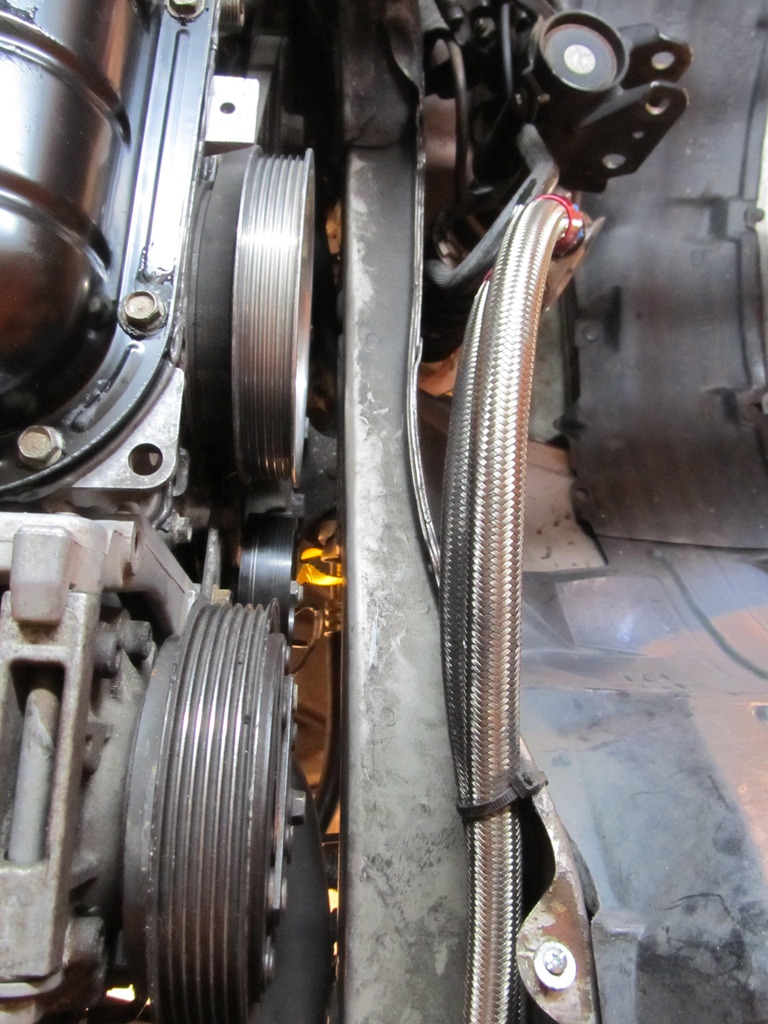
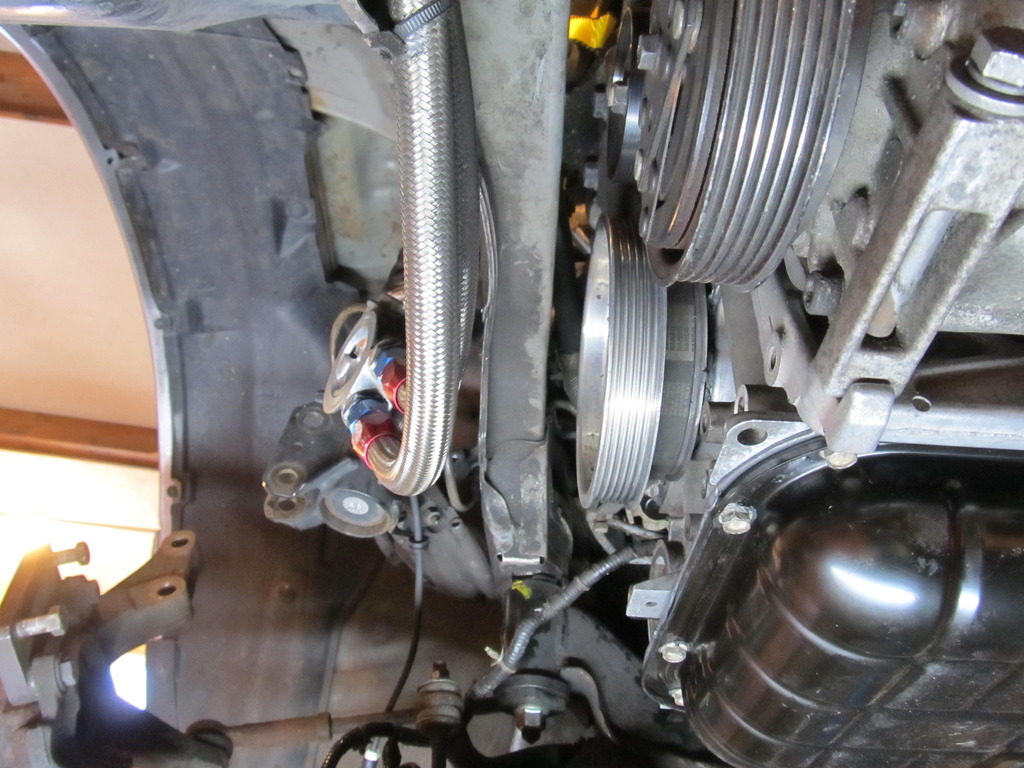
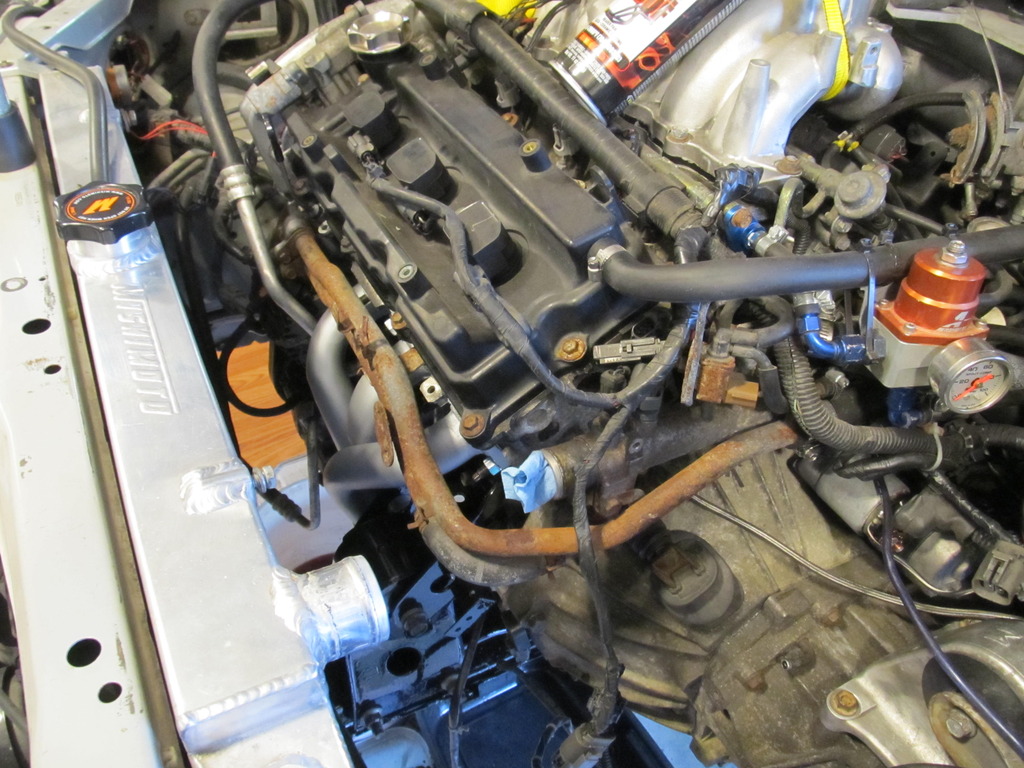
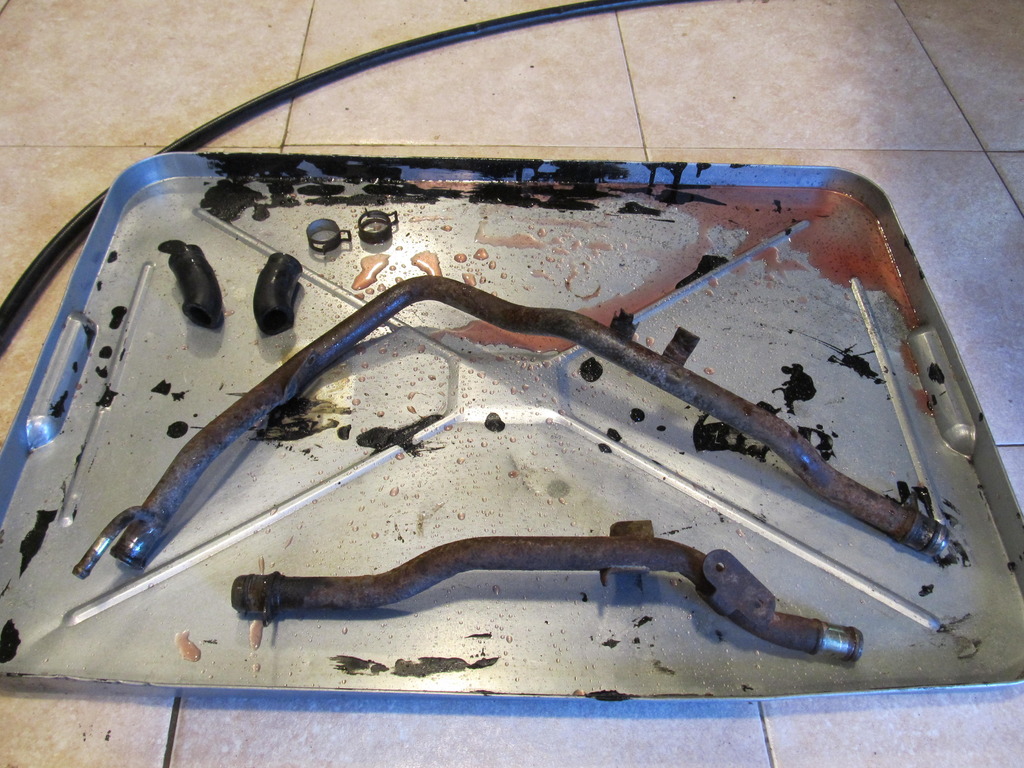
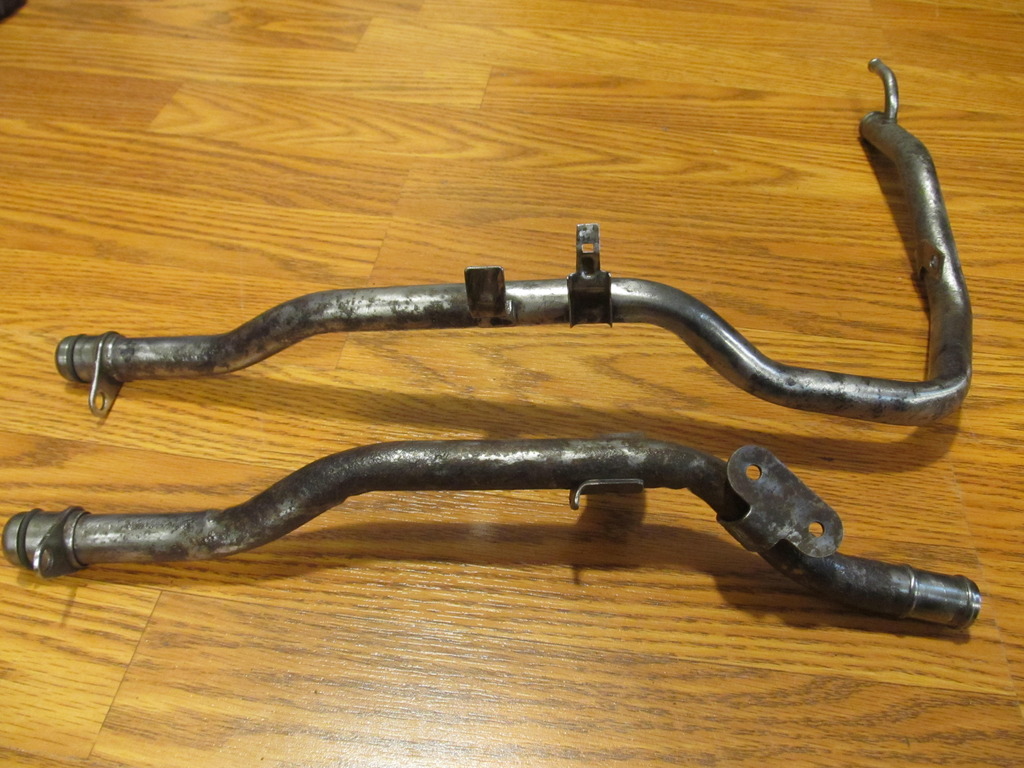
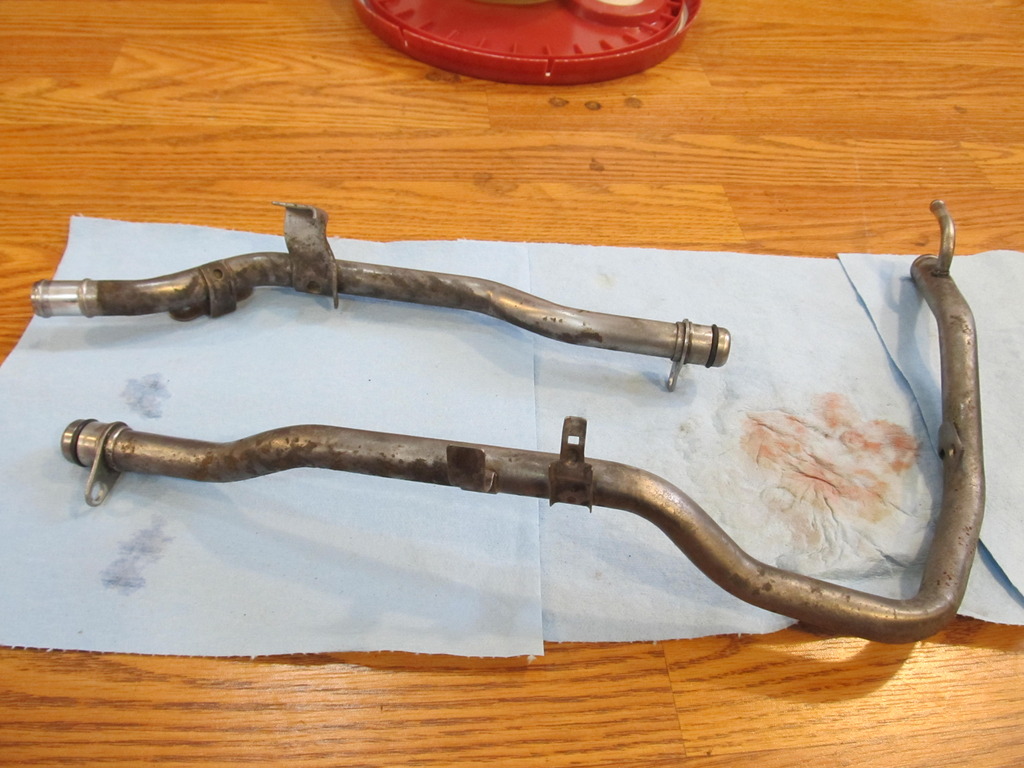
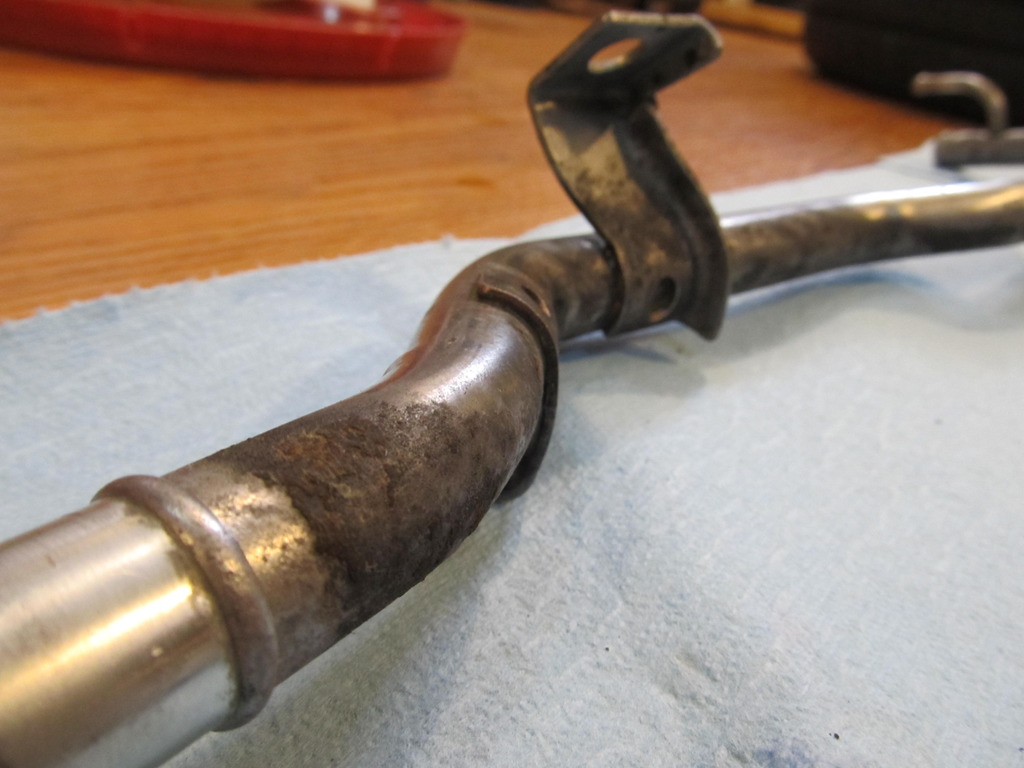
I had seem a few drops of coolant under my car over the last year but could never find the source of the leak. I decided to do a minor overhaul of the cooling system, because why not? First up were the nasty coolant pipes that run along the front of the motor. They were simply too ugly to be sitting on top of my freshly painted headers, so off they came for the familiar treatment.

After much wire wheeling�

The AC compressor bracket also got cleaned up. I love Scotch Brite pads!


I of course had to clean up the alternator of all the oil and gunk now that it was off the car, which gave me time to notice that the wiring harness had seen better days:

Hmm, I think I�ll replace that. Anyways, I chased the thread for the AC compressor bracket, reinstalled the alternator, and then finally the AC compressor. I placed the order for the alternator wiring harness and some other parts from Courtesy (best prices ever!!!) and waited.
The new harness arrived, but I quickly realized I needed about another millimeter of clearance under the coolant tubes to get the old harness off, so I had to drop the AC and everything again. Crap!!

At least the harness looks nice and purdy.

As I began reassembling everything, I noticed a gap between the alternator bracket and the engine, so I figured this is where the C-shaped washer should go. Only problem was that when I put the washer in, there weren�t enough threads at the end of the bolt to get the nut on, so I went searching for a longer bolt. Success!

Installed, hopefully properly.


I also took my dremel to the PS Moog ball joint because when I auto-x it rubs against my brake rotor during hard left hand turns. The rotor had already done a fair amount of grinding:

But I smoothed it out and took some more off to be safe. The noise it makes when it rubs the rotor is not pleasant!

I also replaced the rubber hood bushing since mine was toast:


I had seem a few drops of coolant under my car over the last year but could never find the source of the leak. I decided to do a minor overhaul of the cooling system, because why not? First up were the nasty coolant pipes that run along the front of the motor. They were simply too ugly to be sitting on top of my freshly painted headers, so off they came for the familiar treatment.


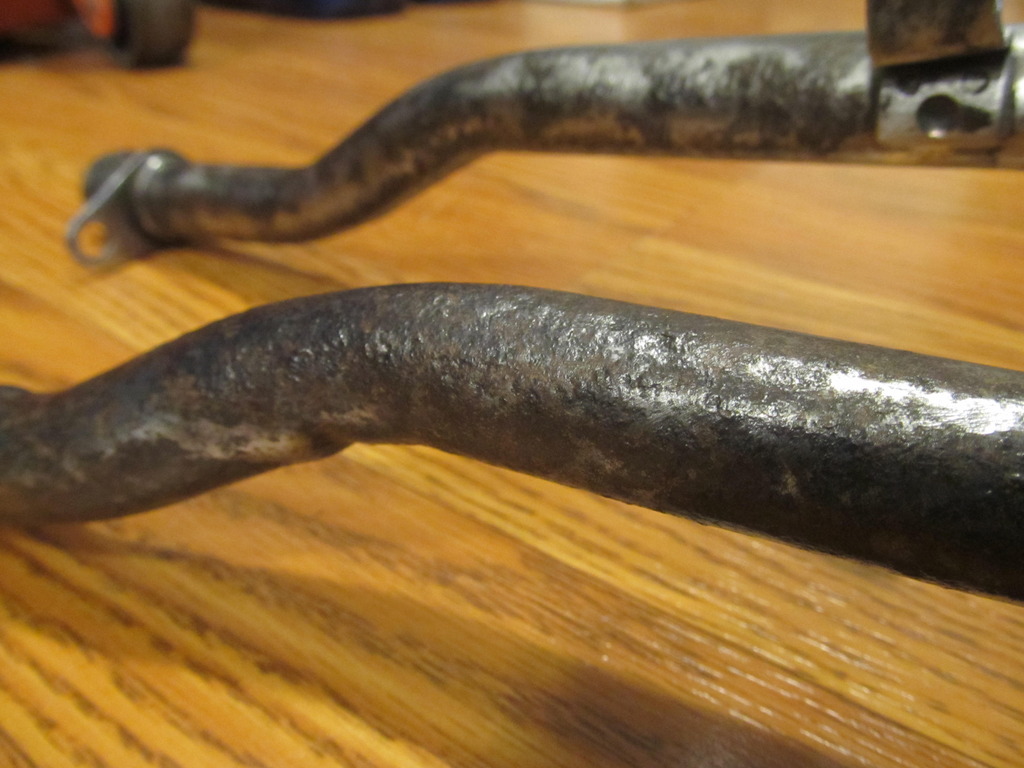
After much wire wheeling�


Last edited by 95maxrider; 04-01-2017 at 04:24 PM.
03-31-2017, 12:33 PM
#350
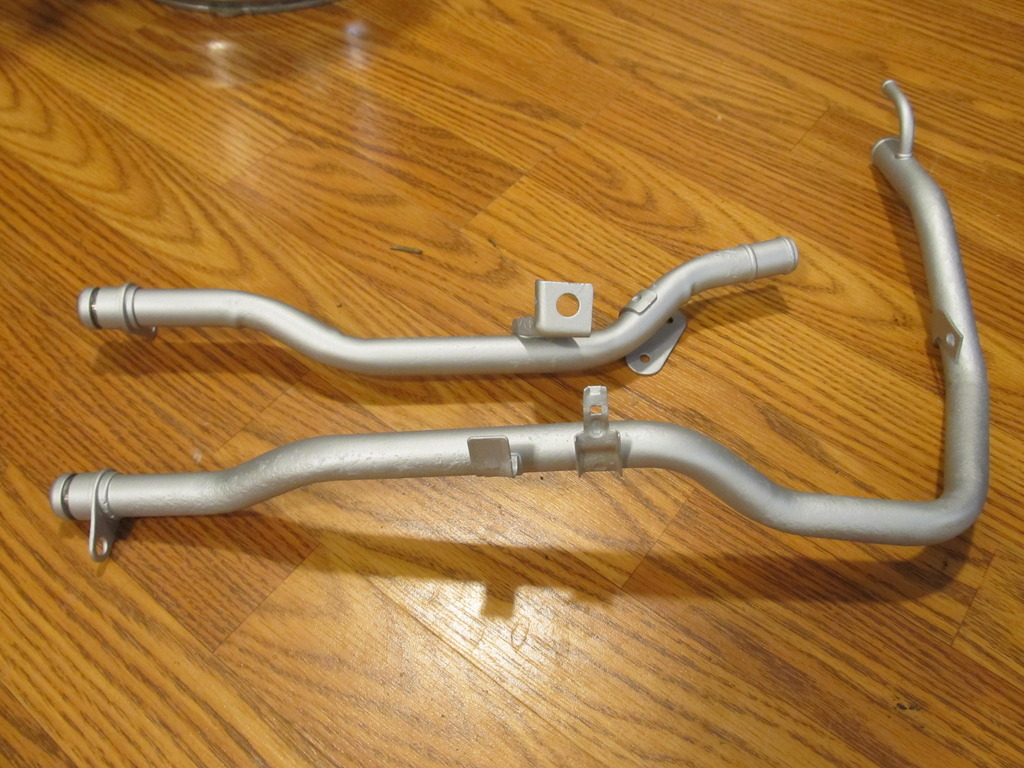
And Evapo Rust:
The pipes also got the header paint treatment even though they don�t get that hot�
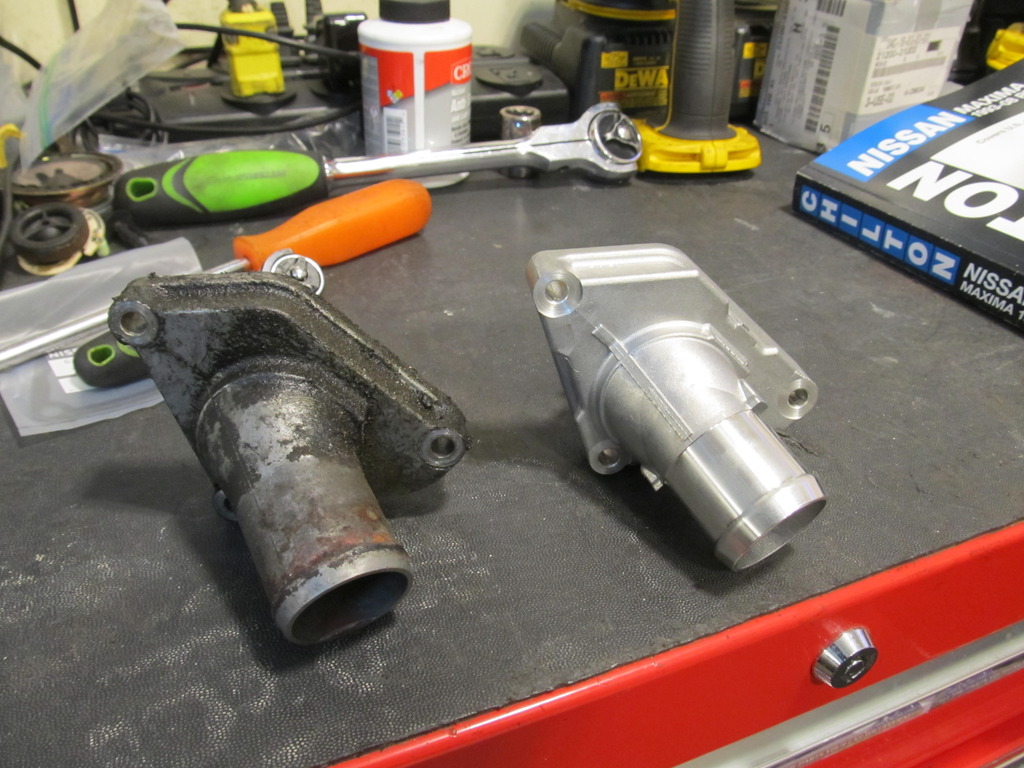
I figured I would throw in a new thermostat since they�re so cheap. I bought pretty much all parts for this job from Courtesy, and their prices are fantastic! The old thermostat was caked in crap and didn�t look so hot.
I didn�t realize that part of the 3.5 swap involved installing the 3.0 thermostat on the 3.5, so the 3.5 thermostat I ordered did not work.

But the 3.0 one sure did!
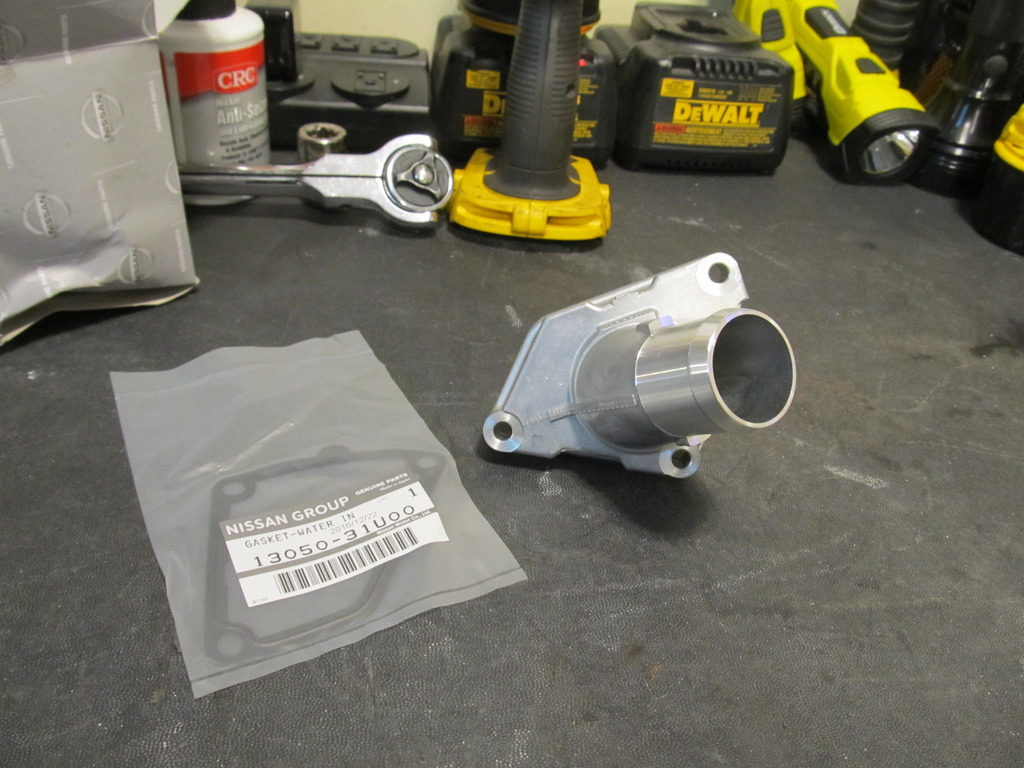
Gotta clean up the filthy mating surface...
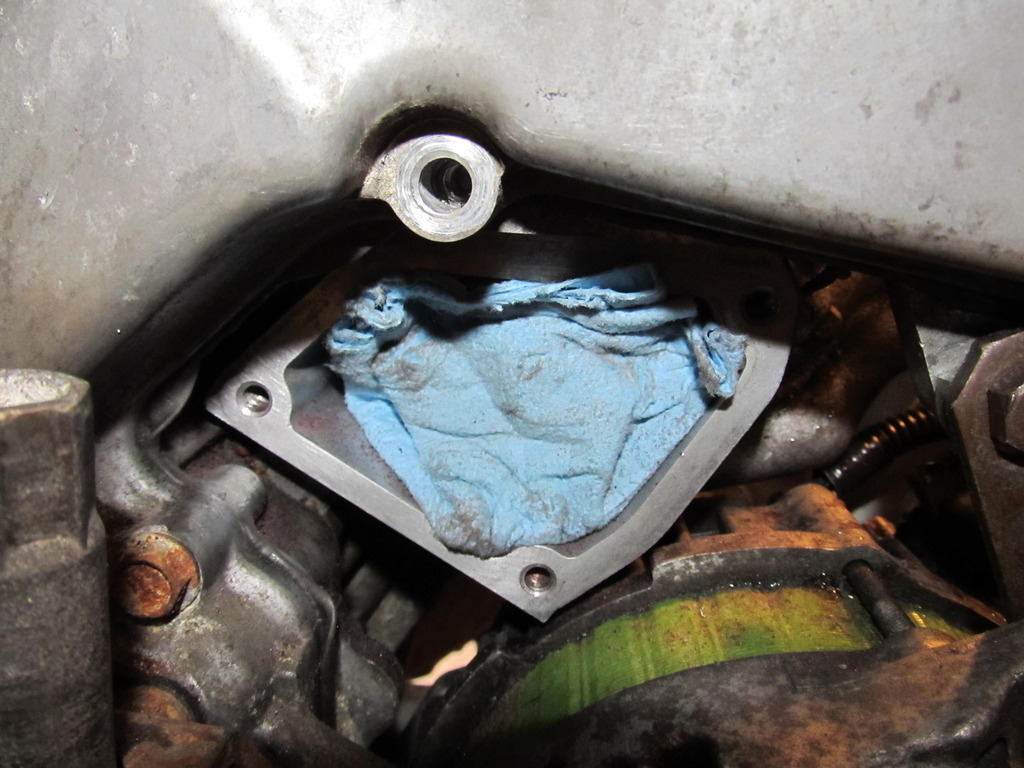
I must say that getting the thermostat in was more difficult than I anticipated. I put RTV on both sides of the gasket, and with clearance as tight as it is down there, I struggled for a while to get it all to line up, but I eventually got it in! Not to mention that coolant keep dripping out, which was going to keep the RTV from getting a good seal, so I had to let it sit overnight until the coolant stopped coming out before doing the install.
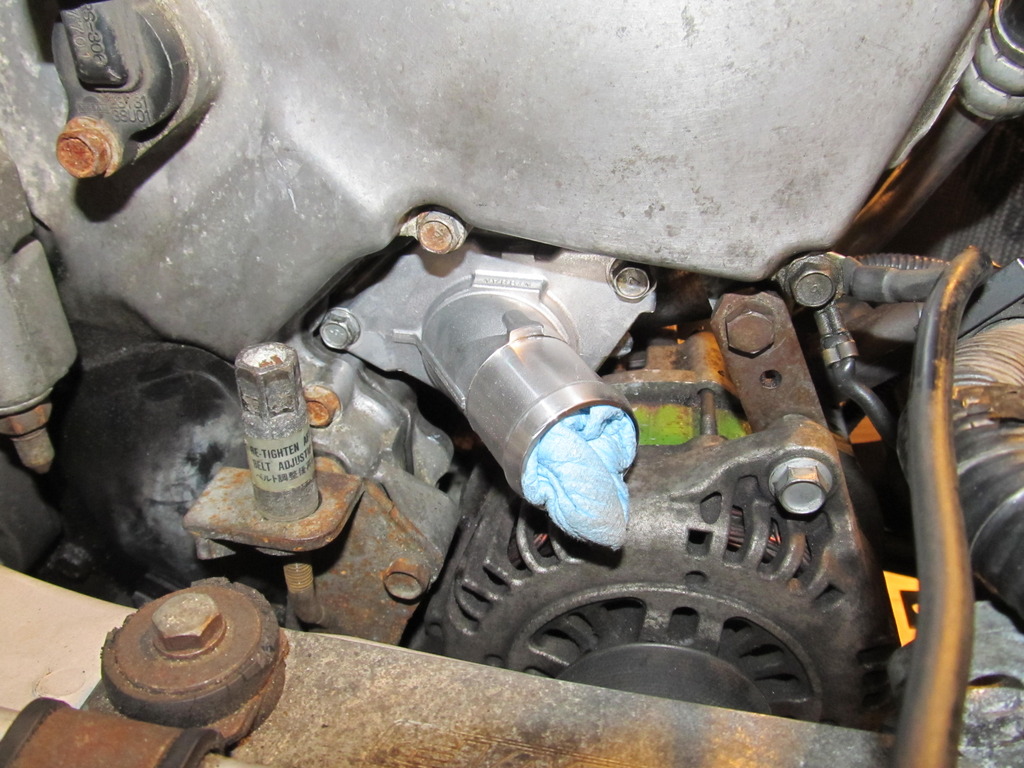
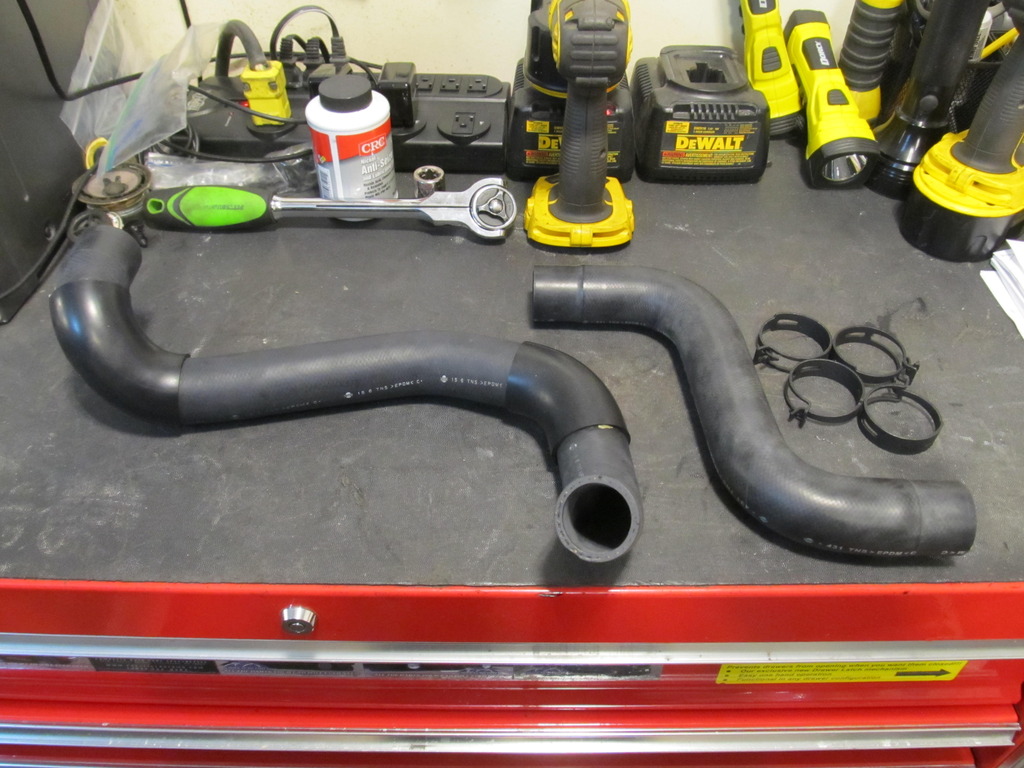
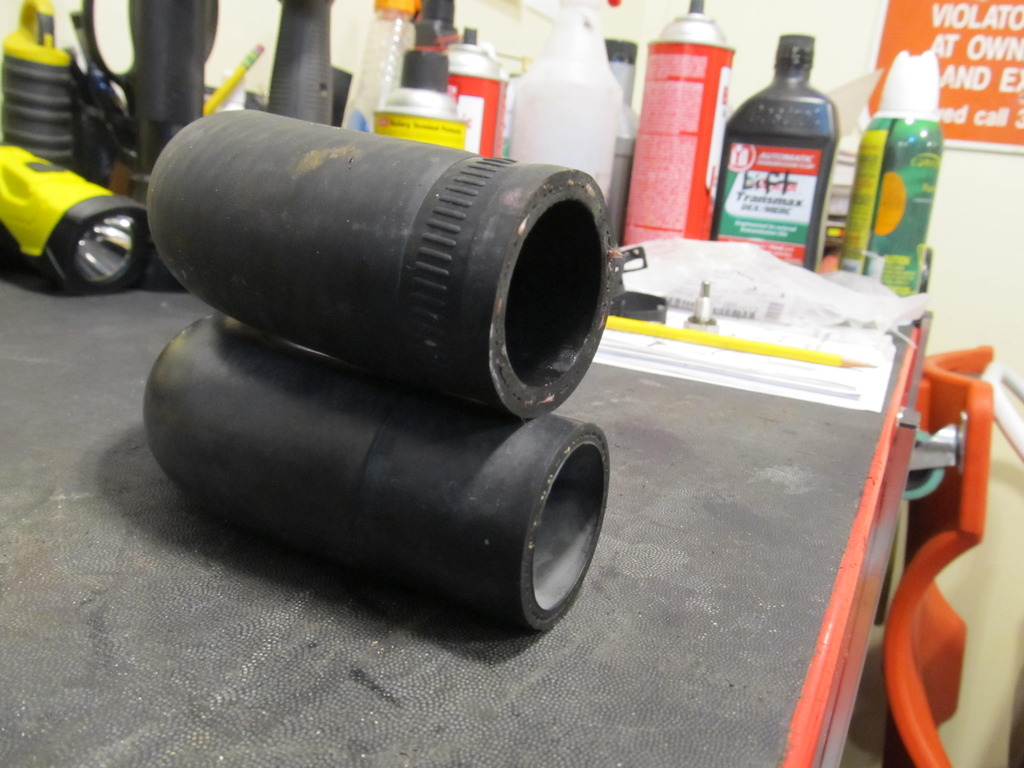
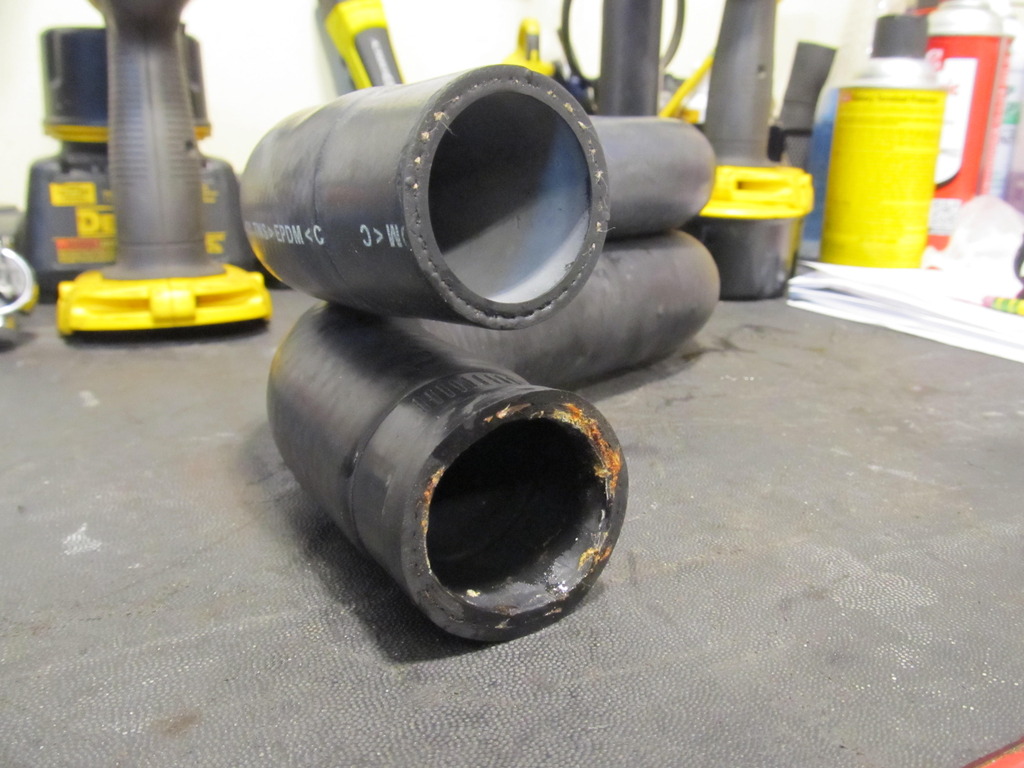
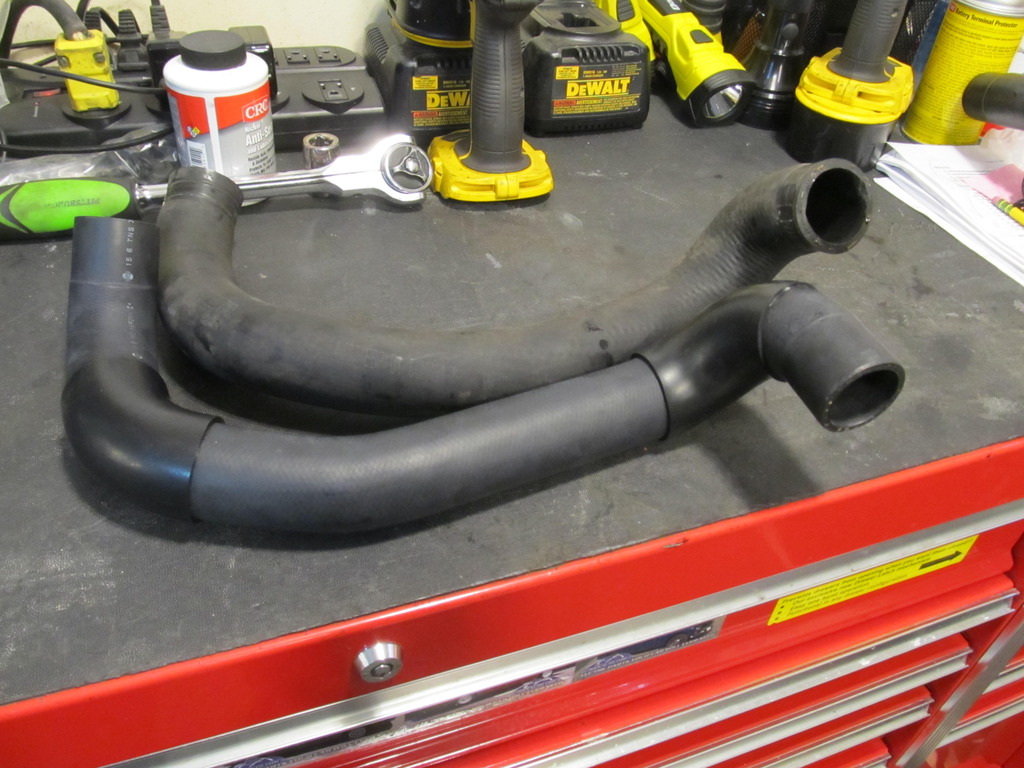
I also got new OEM hoses and clamps. They looks much nicer than what was on the car!
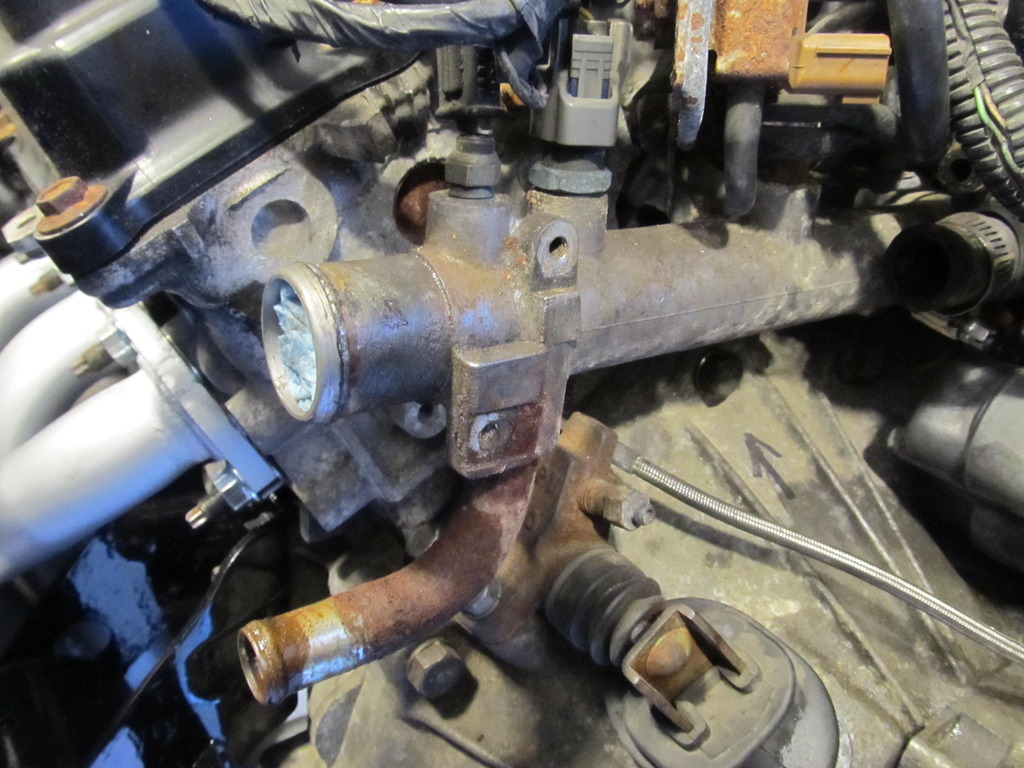
While I was in there, I couldn�t help but clean up this coolant tube�
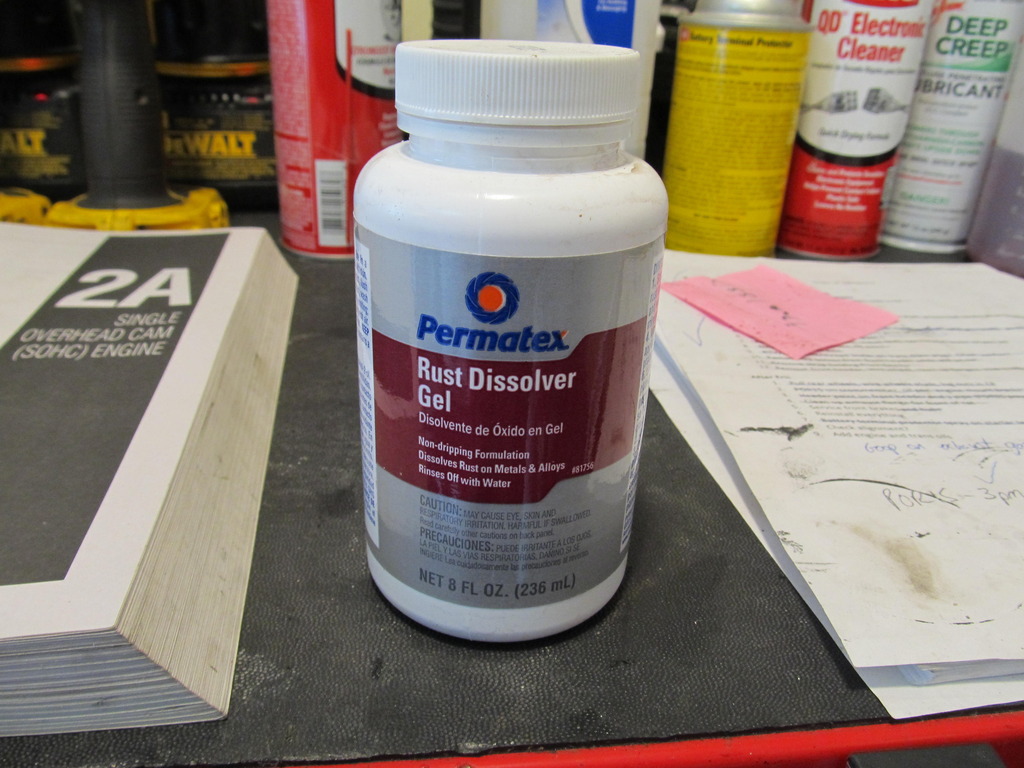
After some more wire wheeling and this cool gel rust remover:
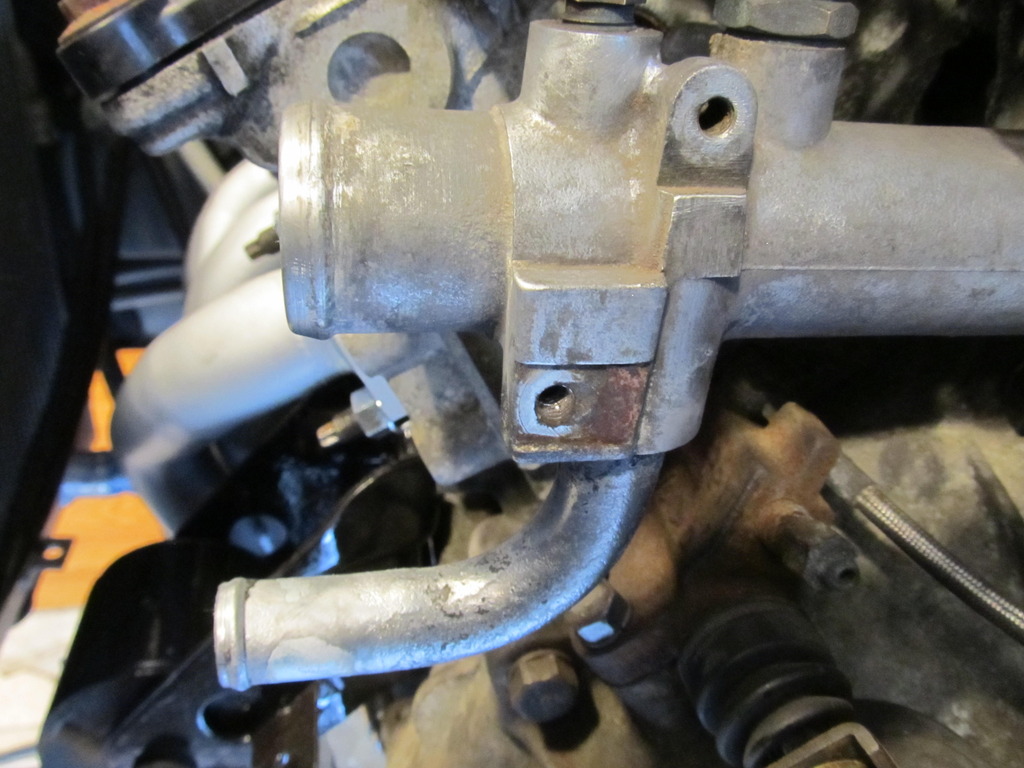
It looked acceptable:
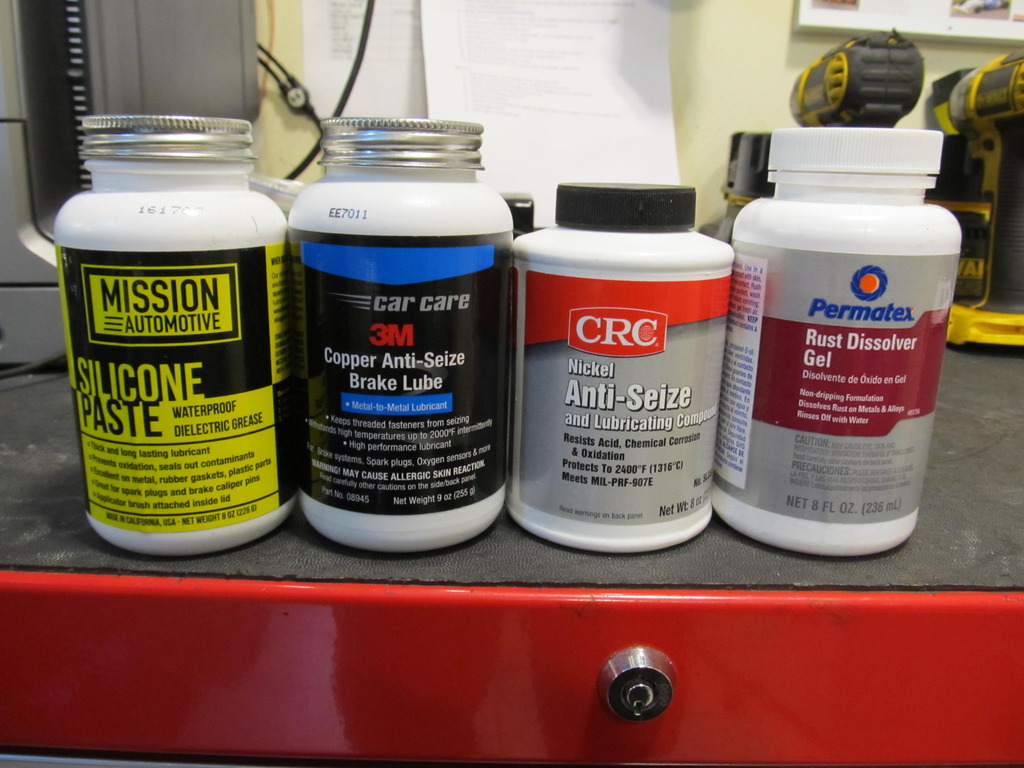
Picked up some new products that get great reviews. I didn't know there were so many different types of anti-seize!
Then it was on to install a new front valve cover gasket since mine was leaking. The bolts were looking pretty cruddy, so you know what that means!
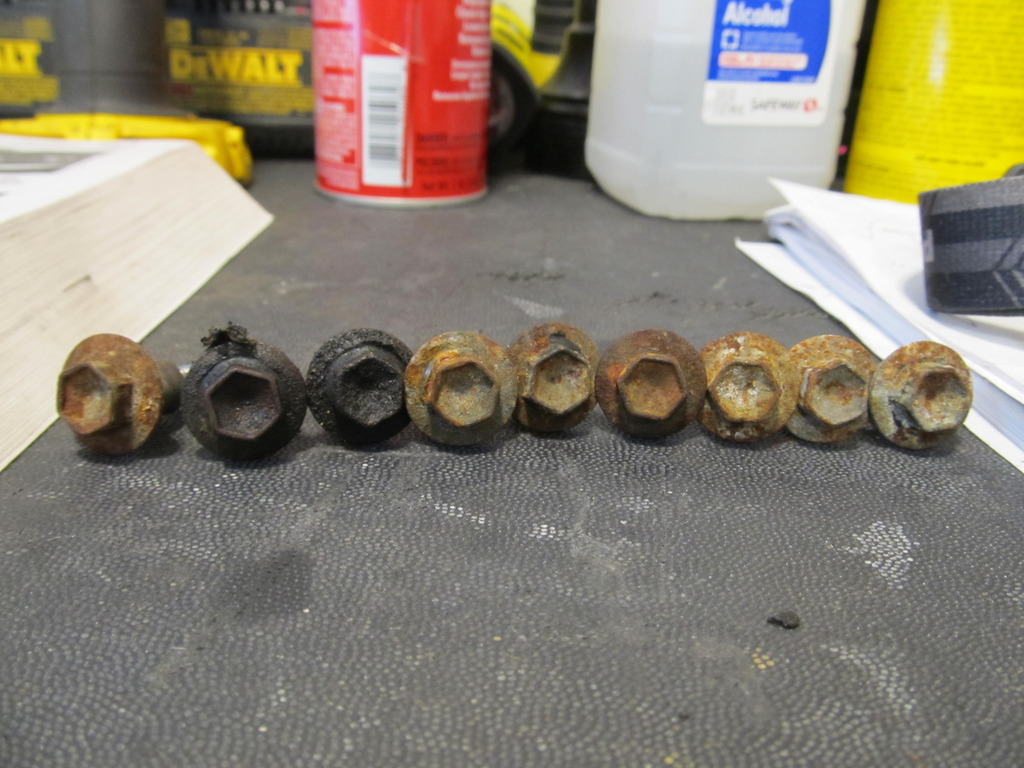
Wire wheel!
Put some RTV between the VC and the new OEM gasket...


The pipes also got the header paint treatment even though they don�t get that hot�

I figured I would throw in a new thermostat since they�re so cheap. I bought pretty much all parts for this job from Courtesy, and their prices are fantastic! The old thermostat was caked in crap and didn�t look so hot.

I didn�t realize that part of the 3.5 swap involved installing the 3.0 thermostat on the 3.5, so the 3.5 thermostat I ordered did not work.

But the 3.0 one sure did!


Gotta clean up the filthy mating surface...

I must say that getting the thermostat in was more difficult than I anticipated. I put RTV on both sides of the gasket, and with clearance as tight as it is down there, I struggled for a while to get it all to line up, but I eventually got it in! Not to mention that coolant keep dripping out, which was going to keep the RTV from getting a good seal, so I had to let it sit overnight until the coolant stopped coming out before doing the install.

I also got new OEM hoses and clamps. They looks much nicer than what was on the car!


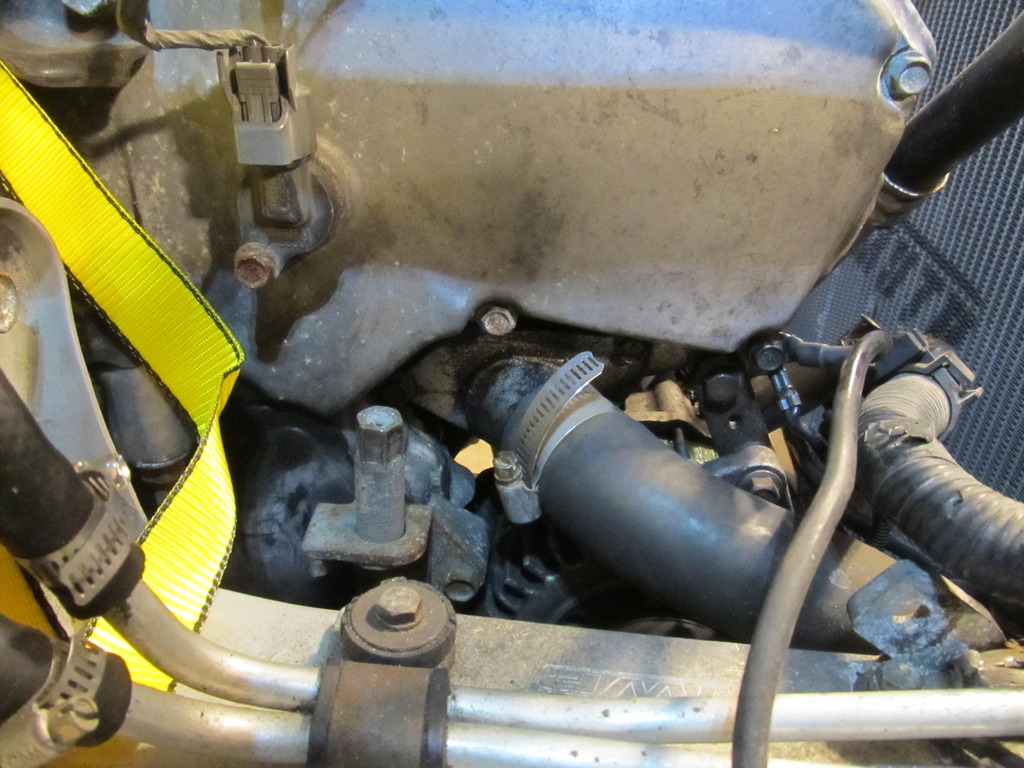
While I was in there, I couldn�t help but clean up this coolant tube�

After some more wire wheeling and this cool gel rust remover:

It looked acceptable:

Picked up some new products that get great reviews. I didn't know there were so many different types of anti-seize!

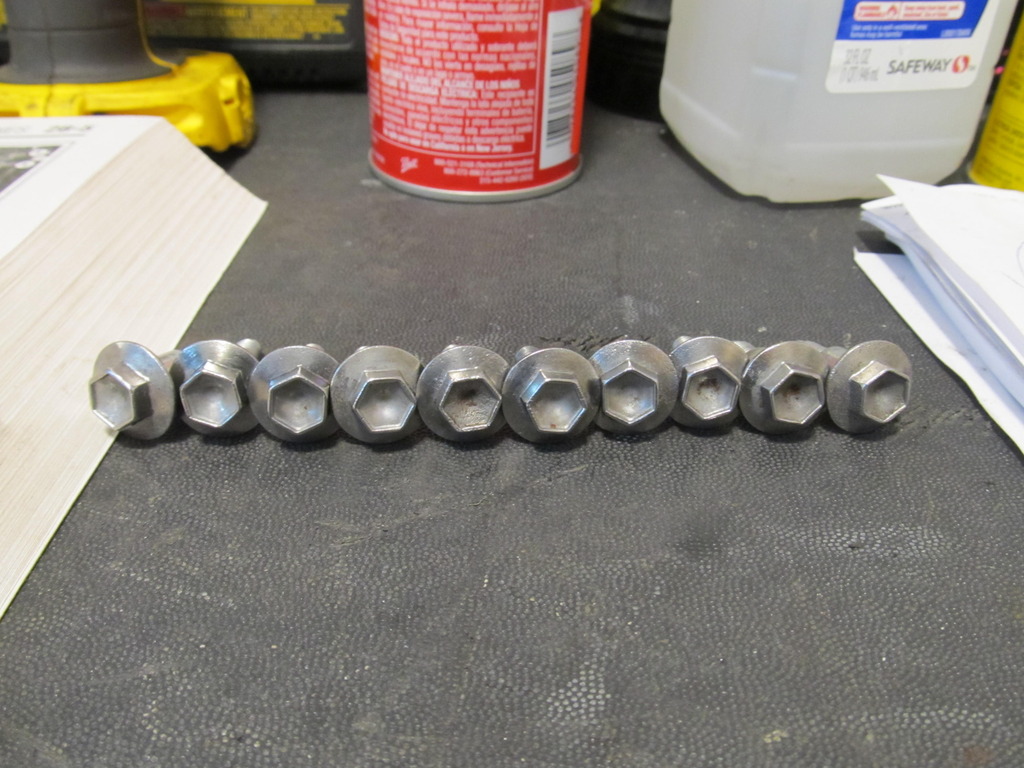
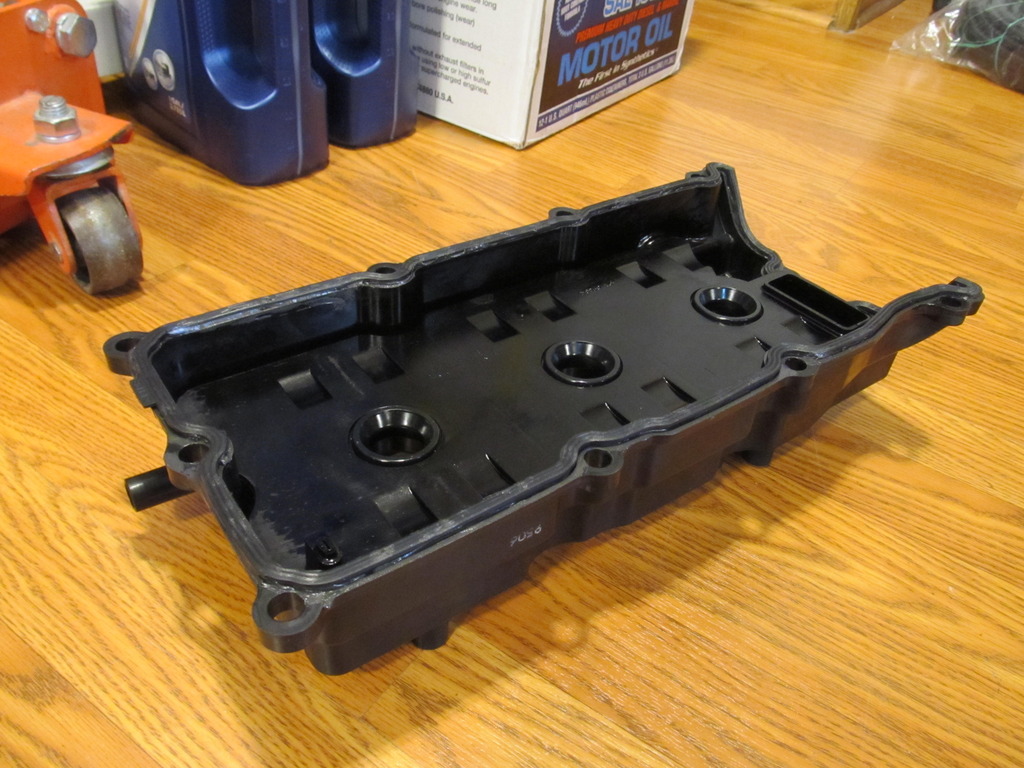
Then it was on to install a new front valve cover gasket since mine was leaking. The bolts were looking pretty cruddy, so you know what that means!

Wire wheel!

Put some RTV between the VC and the new OEM gasket...

Last edited by 95maxrider; 04-01-2017 at 05:36 PM.
03-31-2017, 12:34 PM
#351


The paint had started coming off my coolant overflow tank and my windshield wiper fluid neck, so they got fresh coats of paint too!


I ran into a problem when I tried to install my new ES poly crossmember bushings. The old ones were beat up, but I didn�t think much of it when I pulled them off the car:


When I went to torque them down, the bushings just squished out around the washer:
WTF, why is it doing that? The washer is big enough�.

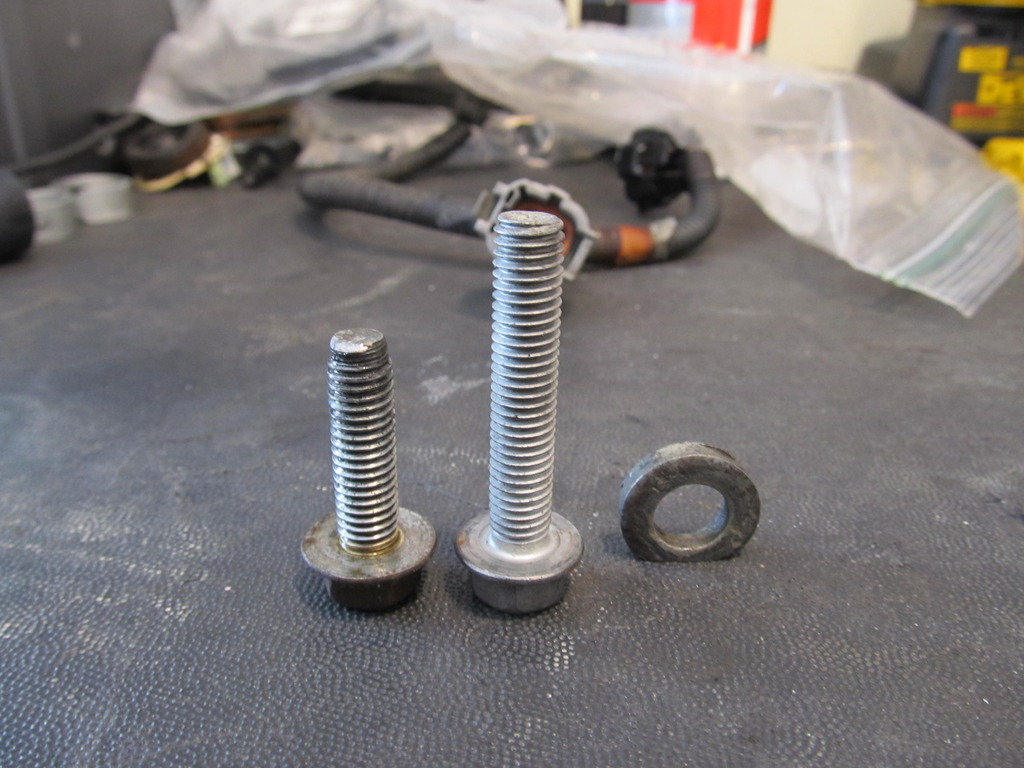
Turns out the problems stems from the fact that many years ago, one of my old mechanics had to rethread both rear crossmember bolt holes because I guess the bolts had seized up and the threads were ruined. For some reason, he rethreaded them to SAE and to two different sizes. The only problem is that these bolts need shoulders on them to get an accurate torque reading, and the bolts he used didn�t have a proper shoulder on them, so they just kept tightening and tightening, which squished the bushings out around the washers. Well, finding bolts that large, with a proper shoulder on them turned out to be incredibly difficult. I eventually found a Fastenal store with two competent employees who were able to get me squared away. The only potential problem was the length of the shoulder didn�t match up exactly with OEM, but I figured I could fix that. I ordered two new ones from the local dealership so I had the correct dimensions. So here�s what I was dealing with.
OEM on the left, my old ones in the center, and the new ones from Fastenal on the right:

They were allen head instead of hex, but beggars can�t be choosers.

On the smaller bolt, adding two washers gave me the exact shoulder height needed to match the stock bolts. For the larger bolt, two washers were 1mm too tall, and were also too large in outer diameter and hit the crossmember. I tried the Dremel�.


But that was going to take forever. Time to bring out the angle grinder!

Good enough! Then I put a flap wheel on the grinder to take about 1mm of thickness from one of the washers so the shoulder height would match the OEM bolts:


In and torqued to spec. Hooray! I really didn�t want to have to weld the holes shut and redrill/tap them from scratch, because that would have sucked. And the hole for the larger bolt was too big to Helicoil, so I was very relieved to have this work!
Back to the exhaust. I had a hell of a time getting the O2 sensor out of the front header. Even with the yellow torch it barely came out. The threads on the sensor were pretty gnarly, and I noticed that one of the wires had frayed, so I decided to buy a new sensor for $50. To make sure it went in smoothly, I also bought a tap to make the threads new again, and boy am I glad I did.

Last edited by 95maxrider; 04-01-2017 at 05:34 PM.
03-31-2017, 12:34 PM
#352
I�ve rethreaded quite a lot during this build and when I built my M3, but this was on another level completely. It must have been the hard metal in the bung, but it was hard just getting the tap started. I had to remove the crossmember again just so I could get enough room to really get a good grip on it all. It took ten minutes just to get it started, since it kept trying to go in crooked. Once it was started, I could only go something like 1/4� turn at a time before I had to back it out and start over. For a while I wasn�t sure if I was using the right thread pitch, but it was. Some 20 minutes later, after using all my strength, I got the bung fully rethreaded.
But it was all worth it when I threaded in the new sensor�.so smooth! I barely had to use a wrench to tighten it up.
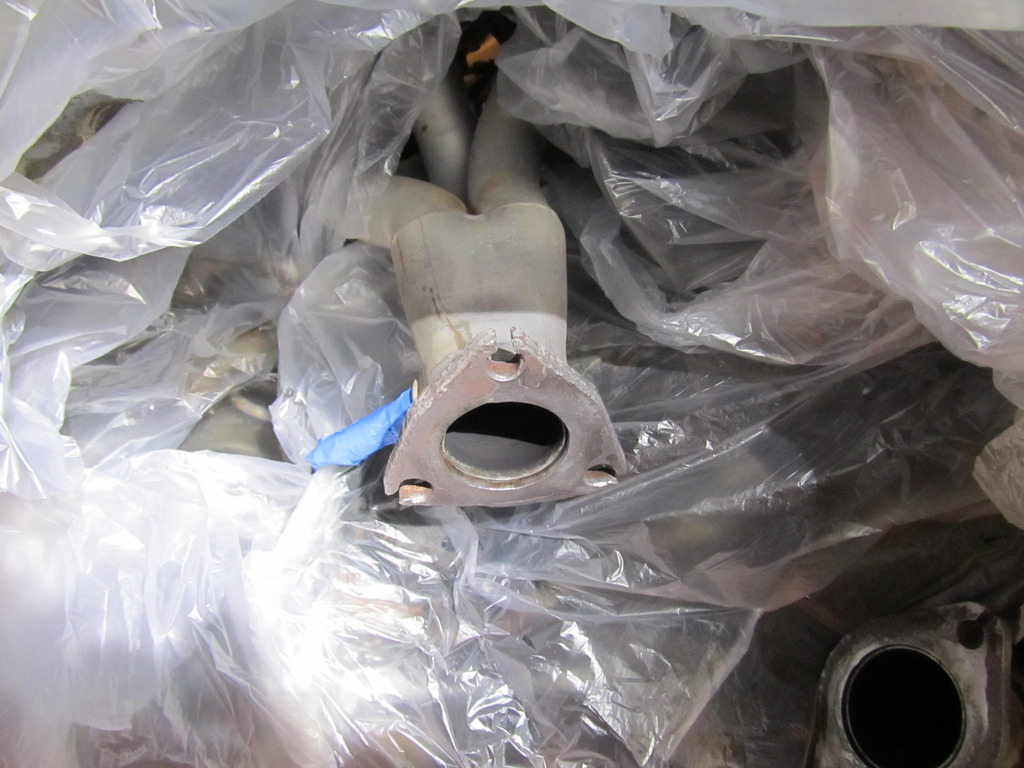
After dealing with the cluster that was my exhaust hardware during disassembly, I figured I should spring for new hardware to make it easier on myself the next time around. It all got coated in my high temp anti seize before going back on the car.
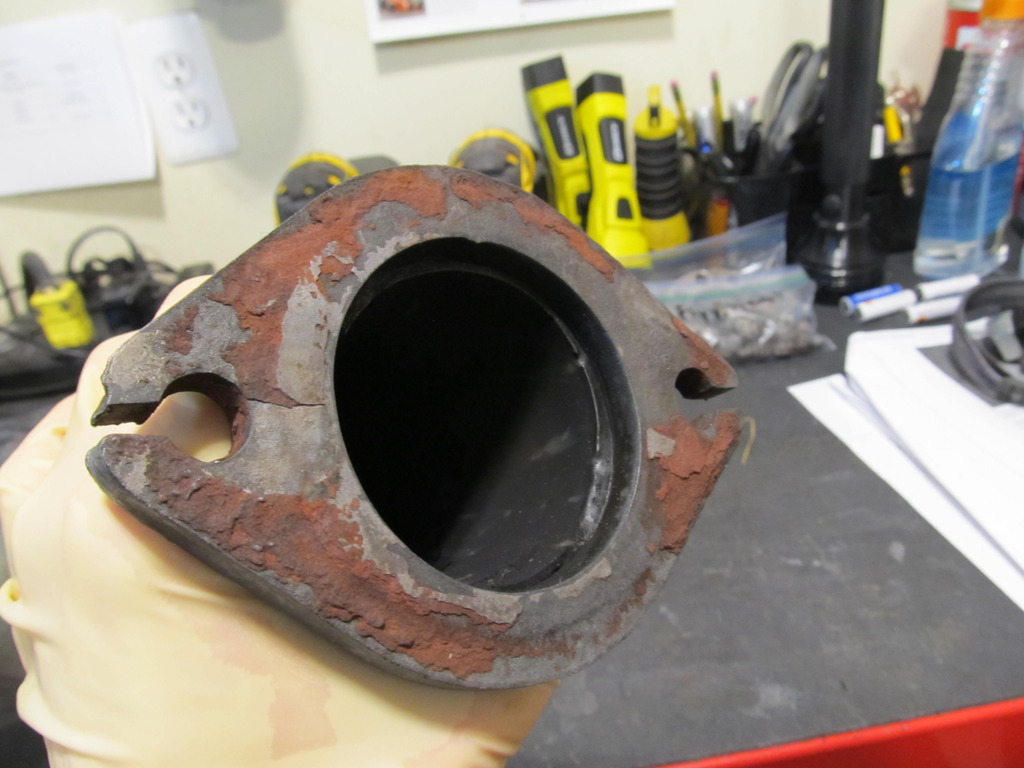
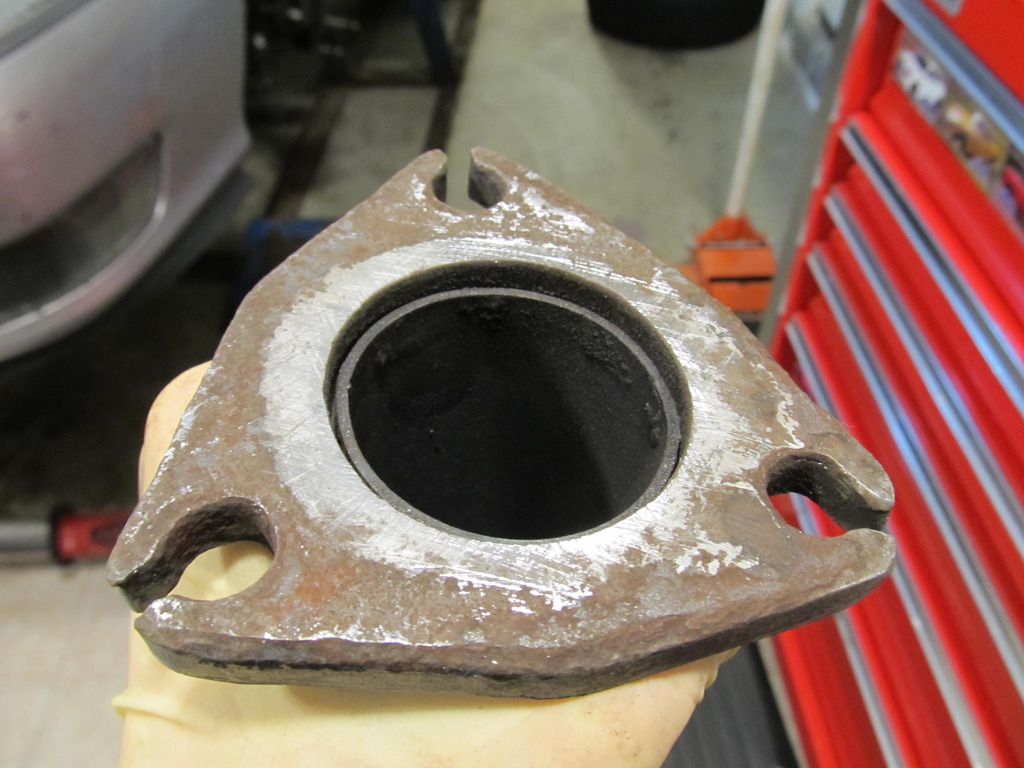
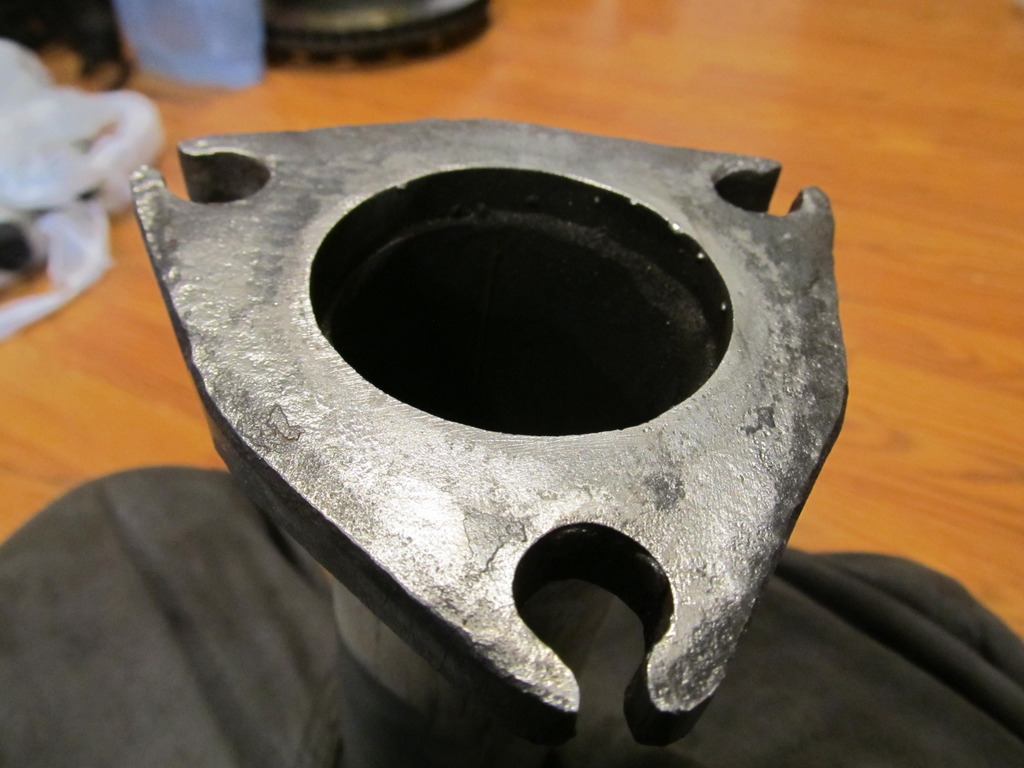
All of the exhaust flanges were rusted up and had bits of gaskets embedded in them, so I spent way too much time wire wheeling, chiseling, and filing them until they were acceptably smooth. I hate exhaust leaks! I believe by the time I took this pic I had already wire wheeled them and let them soak in Evapo Rust.
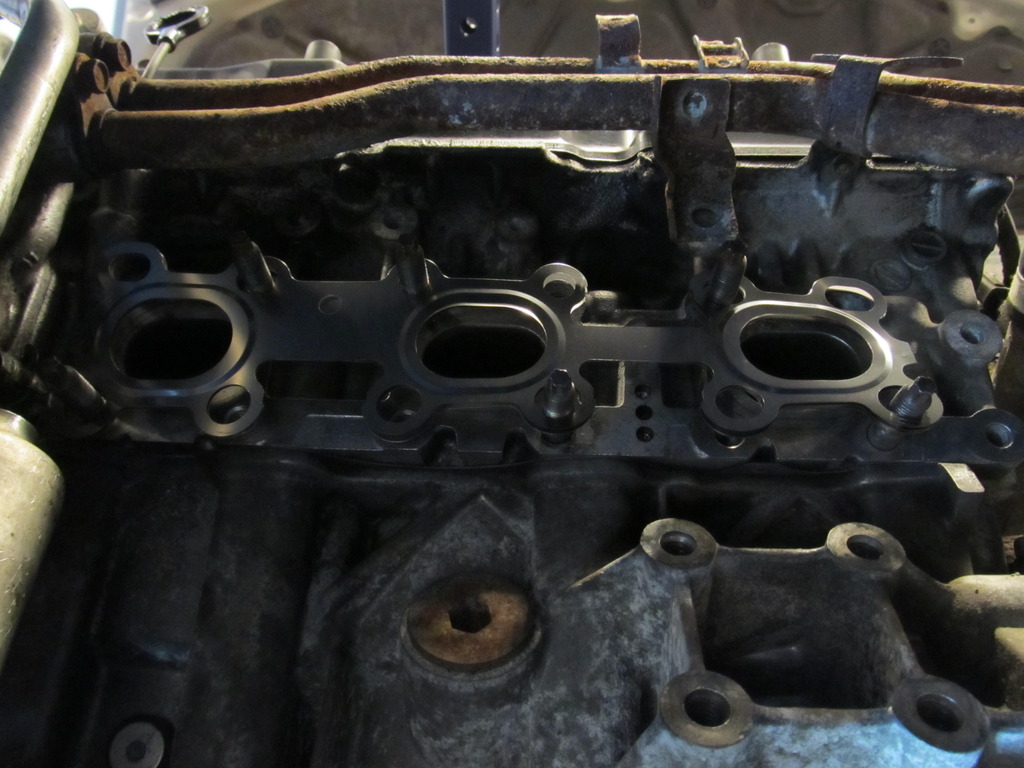
I also wire wheeled the crap out of the head before installing a new OEM gasket:
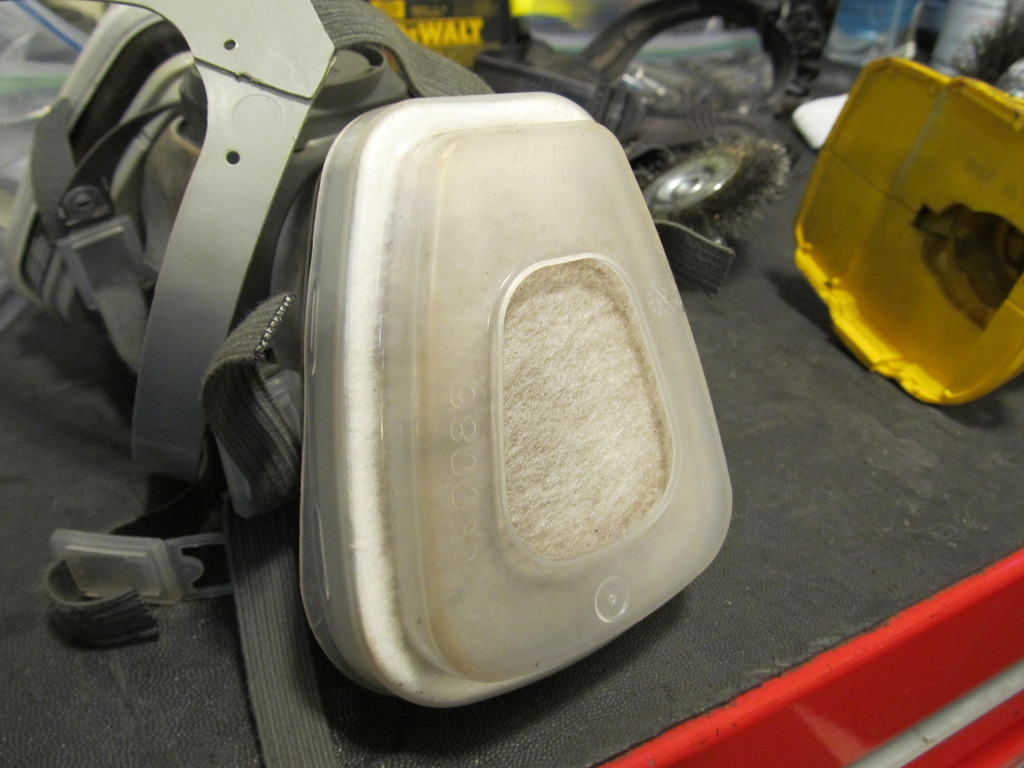
Don't forget to wear a respirator!
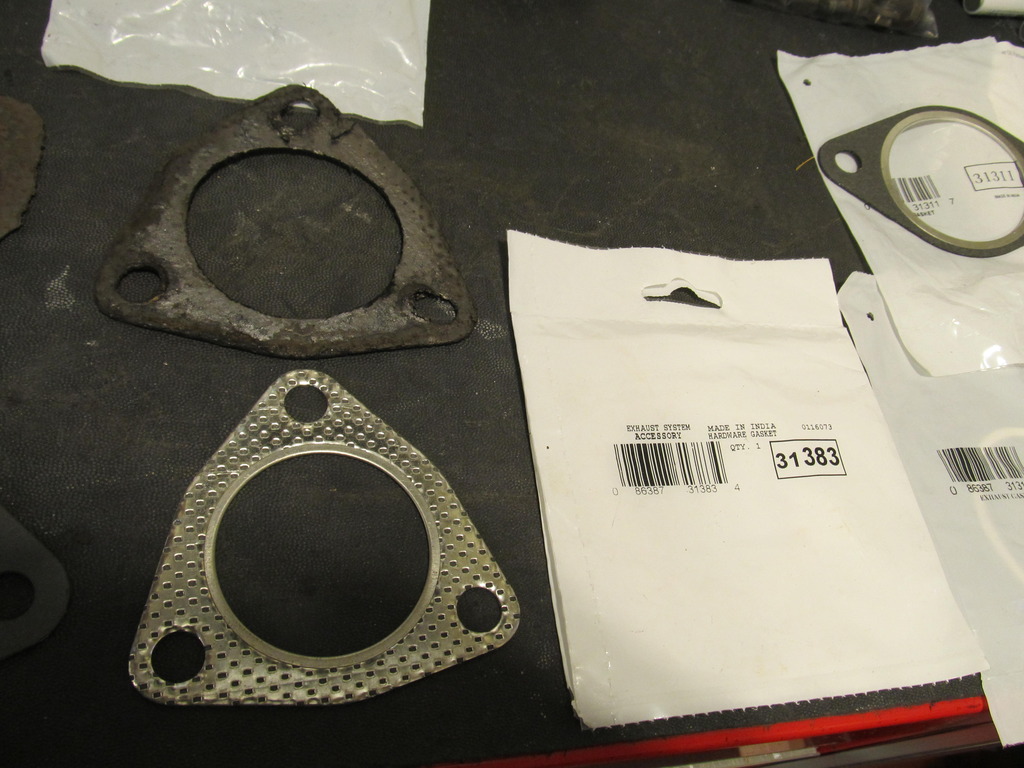
I also spent about an hour at Autzone digging through their boxes of exhaust gaskets trying to find two that fit the y-pipe where it connects to the manifolds. I used a stock Maxima gasket between the y-pipe and cat. I have no idea what these are off of, but they are a damn near perfect fit and they�re the good metal material!
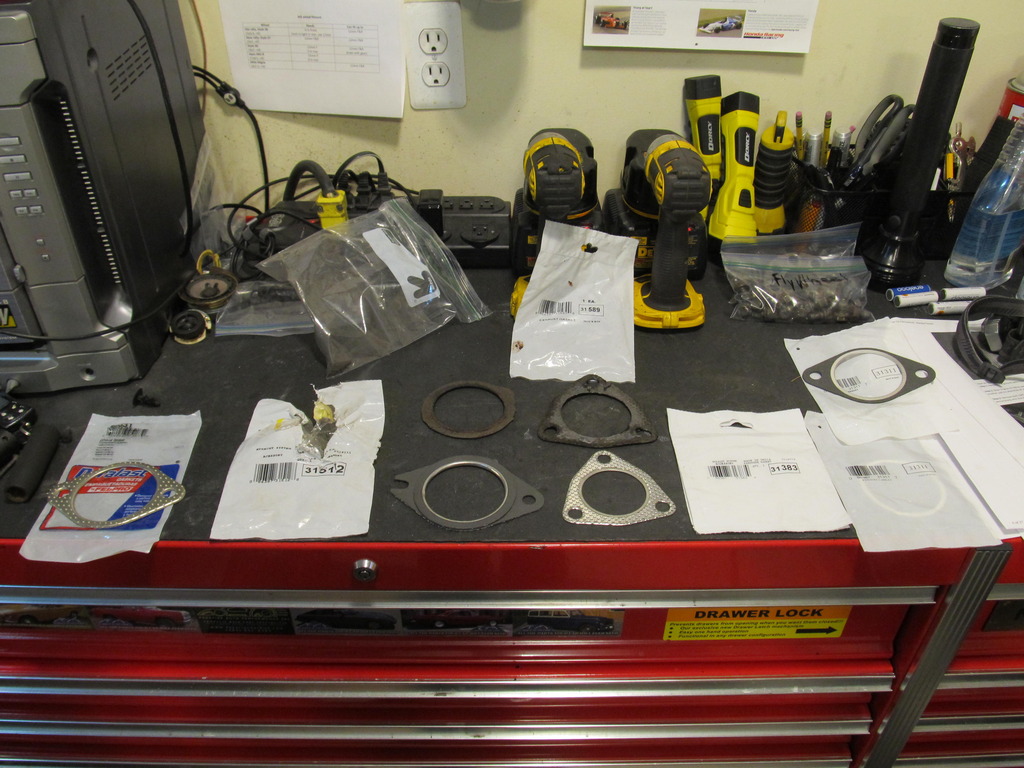
These are for the y-pipe where it connects to the manifolds:
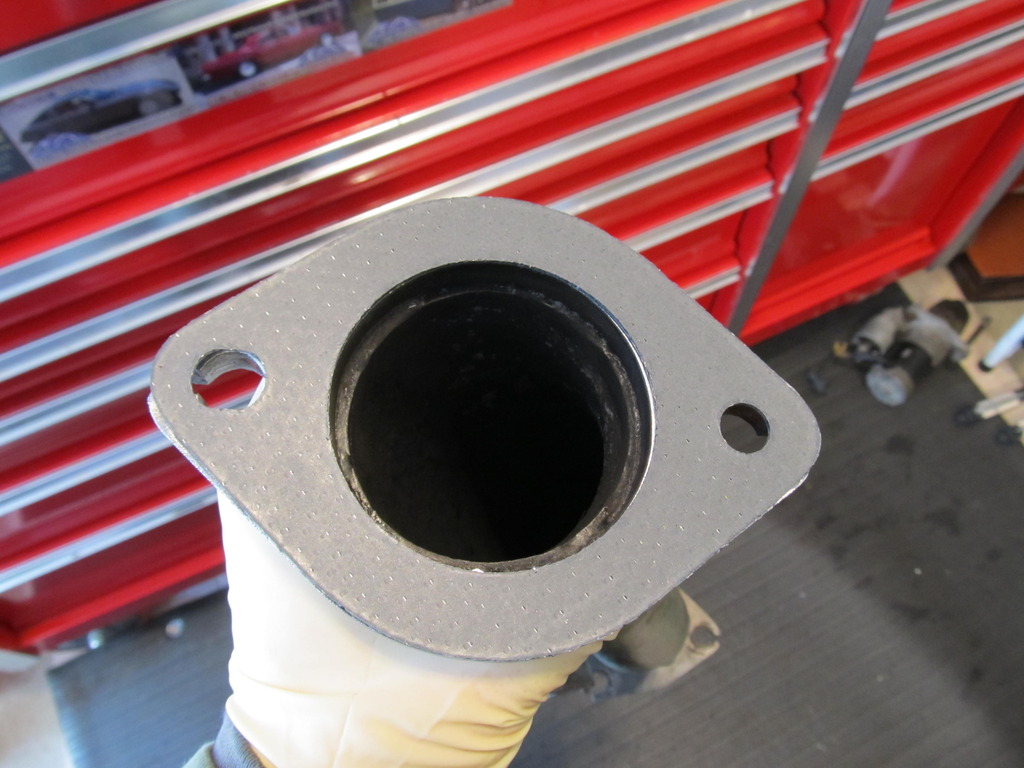
I had to hog out the holes just a tad to allow the bolts to pass through easily:

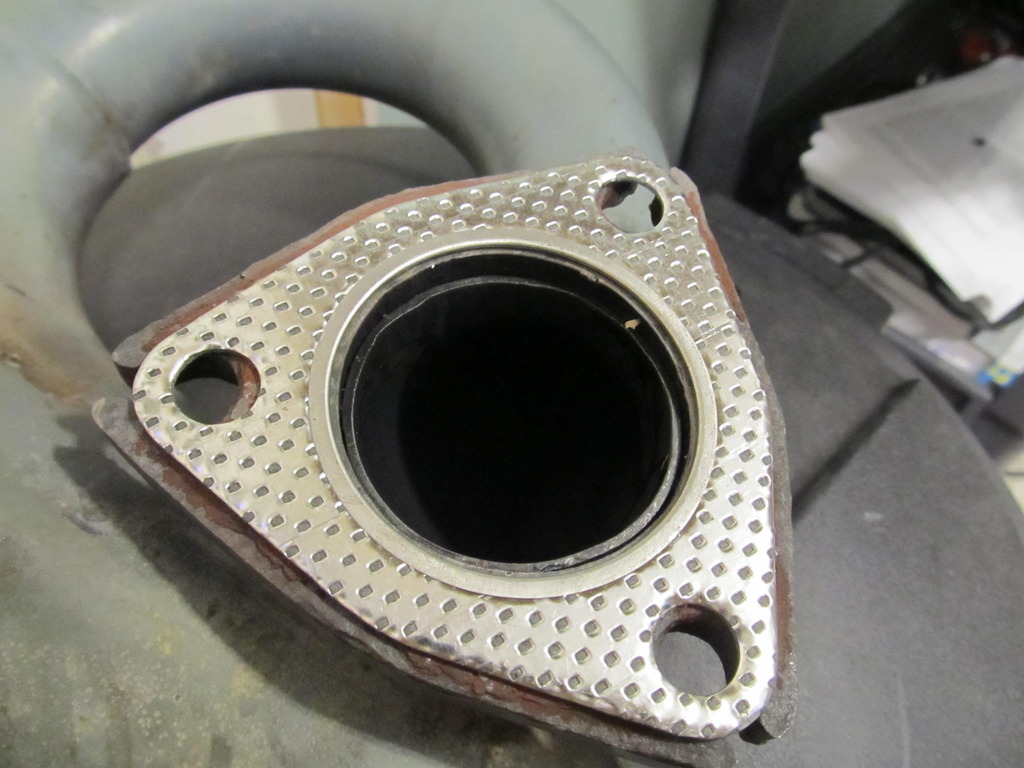
And the normal gasket for the front of the cat:
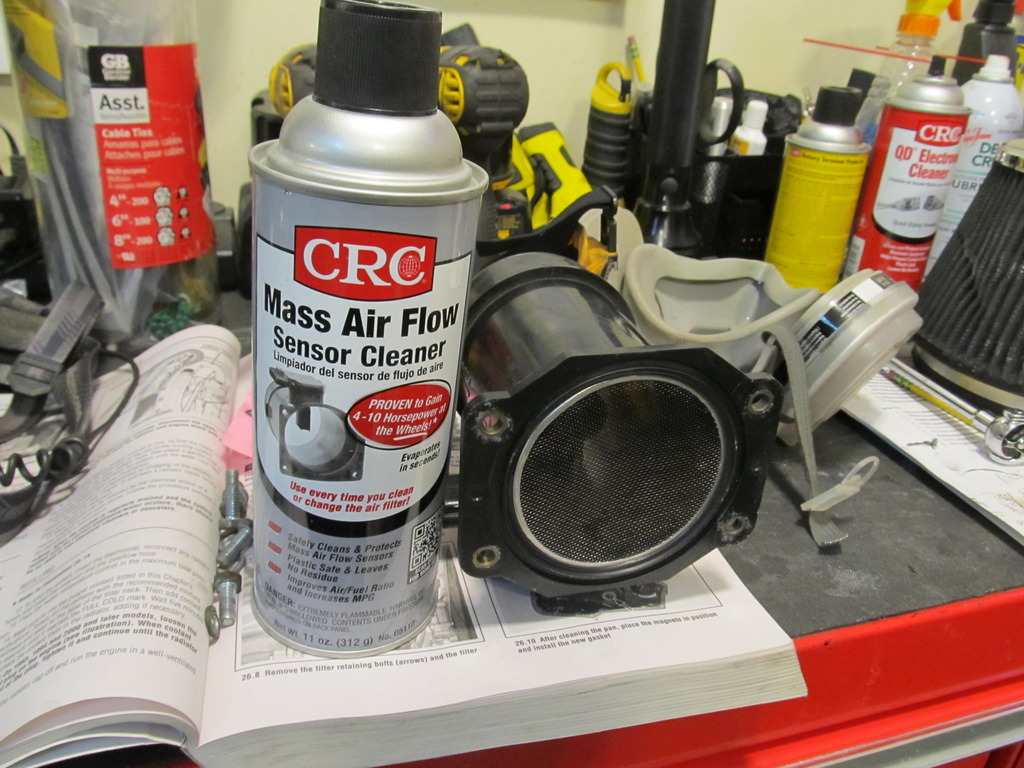
I also gave the MAF a little cleaning�
I gave all my ground points and anything that touched them a good cleaning with wire brushes, and for the starter and alternator I applied some battery terminal protector spray to prevent corrosion:

But it was all worth it when I threaded in the new sensor�.so smooth! I barely had to use a wrench to tighten it up.
After dealing with the cluster that was my exhaust hardware during disassembly, I figured I should spring for new hardware to make it easier on myself the next time around. It all got coated in my high temp anti seize before going back on the car.

All of the exhaust flanges were rusted up and had bits of gaskets embedded in them, so I spent way too much time wire wheeling, chiseling, and filing them until they were acceptably smooth. I hate exhaust leaks! I believe by the time I took this pic I had already wire wheeled them and let them soak in Evapo Rust.


I also wire wheeled the crap out of the head before installing a new OEM gasket:

Don't forget to wear a respirator!

I also spent about an hour at Autzone digging through their boxes of exhaust gaskets trying to find two that fit the y-pipe where it connects to the manifolds. I used a stock Maxima gasket between the y-pipe and cat. I have no idea what these are off of, but they are a damn near perfect fit and they�re the good metal material!


These are for the y-pipe where it connects to the manifolds:

I had to hog out the holes just a tad to allow the bolts to pass through easily:

And the normal gasket for the front of the cat:

I also gave the MAF a little cleaning�

I gave all my ground points and anything that touched them a good cleaning with wire brushes, and for the starter and alternator I applied some battery terminal protector spray to prevent corrosion:

Last edited by 95maxrider; 04-01-2017 at 06:03 PM.
03-31-2017, 12:34 PM
#353


And cleaned the oil out of many electrical connectors...

I installed a new circlip for the DS axle just to be safe....

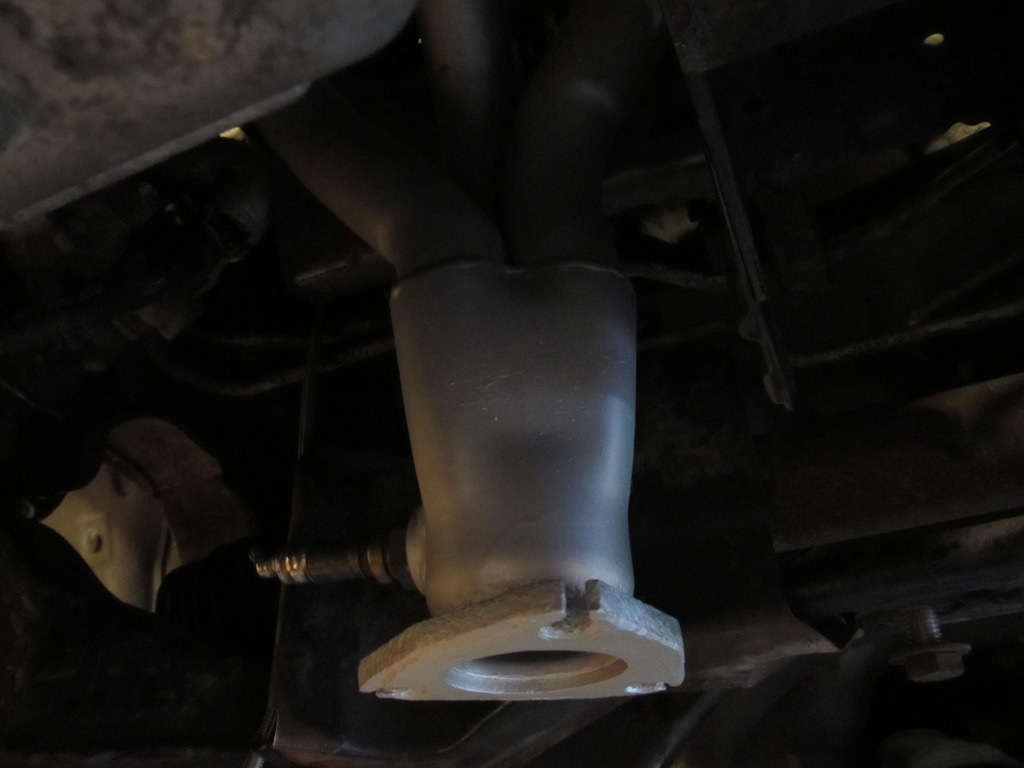
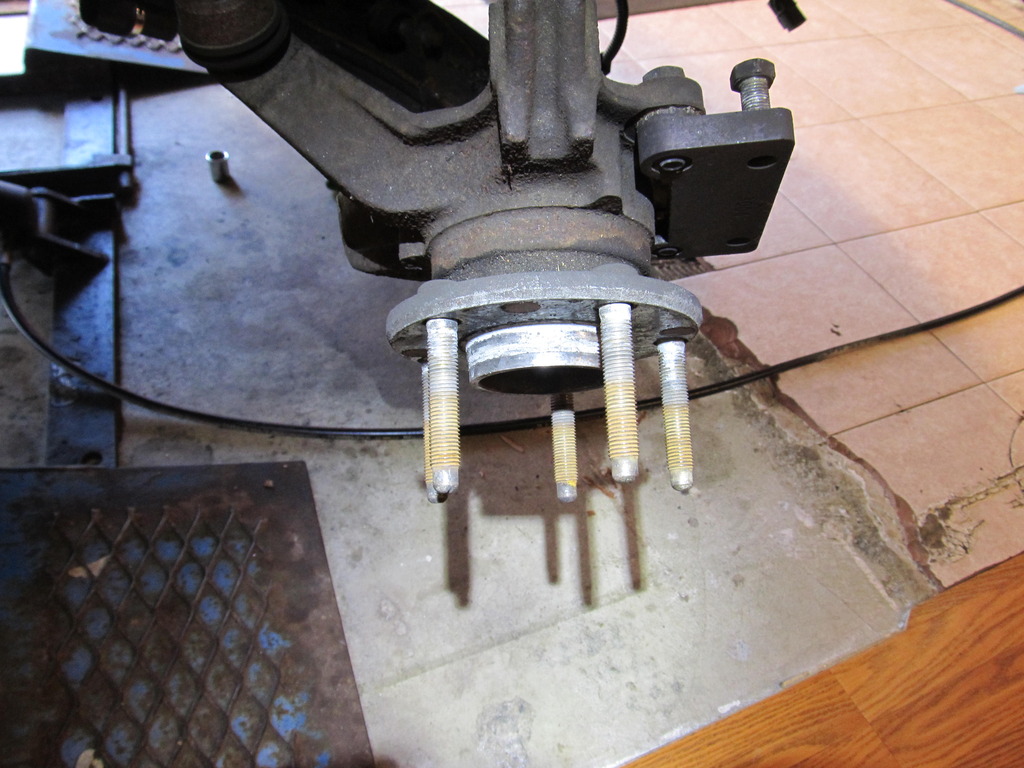
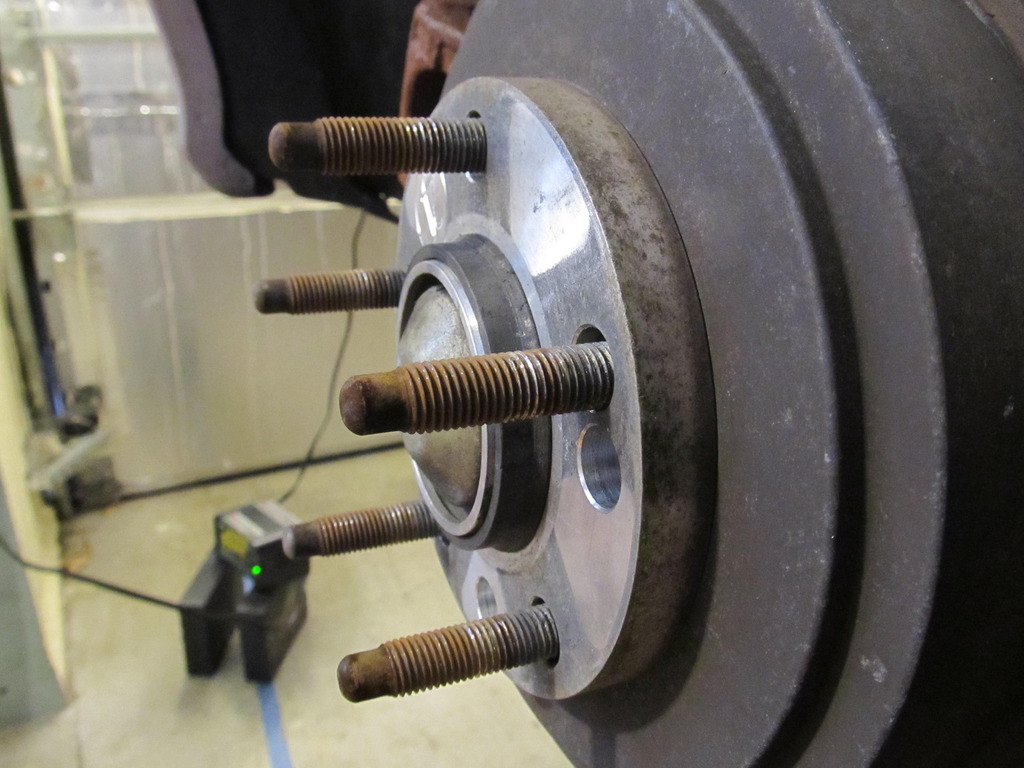
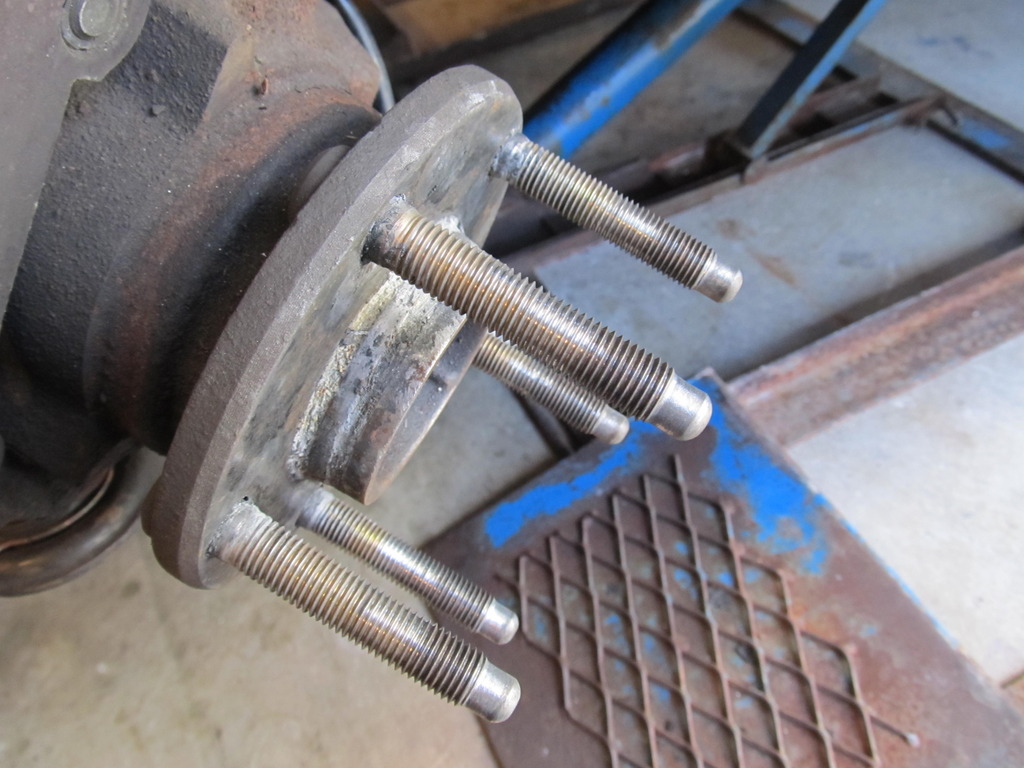
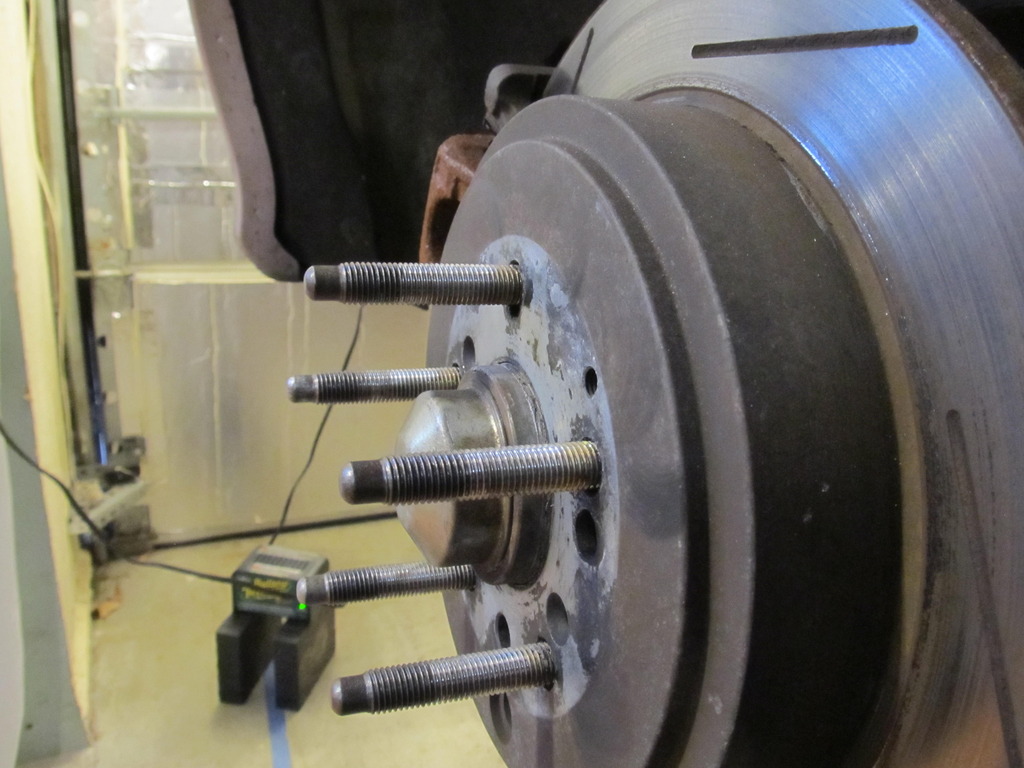
I also cleaned up the front hubs while I had the brakes off....


More high temp anti-seize!

While I was trying to remove a coolant hose with a screwdriver, I slipped and poked a hole into one of my radiator coolant tubes. Crap!!! I decided to just mush up some Quik Steel, stuff it in the hole, and hope for the best. So far, the fix has held!

But before I started the car I let my pressure tester sit on it for a while, and sure enough, no leaks!

Holy crap, the car actually went back together without any missing pieces. This is a miracle!


Last edited by 95maxrider; 04-01-2017 at 04:35 PM.
03-31-2017, 12:34 PM
#354


I still need to reinstall all the plastic covers, but I wanted to wait until I was sure there were no fluid leaks.
Have I mentioned how incredibly lucky I am to now have a lift in my garage? This makes my life a million times easier and I am so thankful I was able to get it for so cheap ($500!!!). This is truly a game changer.

I would like to end with this. I know you see it.

Last edited by 95maxrider; 04-01-2017 at 04:30 PM.


 04-07-2017, 05:21 AM
#360