Something I'm thinking about doing...
 10-10-2015, 01:27 PM
#1681
LandShark has Cosworth

Thread Starter
iTrader: (12)
Join Date: Jan 2004
Location: Topeka, KS
Posts: 4,327
That's too bad on the older valve covers. I was thinking about removing the bracket and closing the holes in the valve cover off with some plastic and JB Weld. For a little less hassle, you can get 07+ altima valve covers as they will only have one opening in the valve covers for the intake cam sensor.

 10-10-2015, 06:41 PM
#1683
LandShark has Cosworth
Thread Starter
iTrader: (12)
Join Date: Jan 2004
Location: Topeka, KS
Posts: 4,327
 Huummmm... actually, I could wire a superbright LED with resistor across the (+) and Signal lines of the sensor (or Signal and Ground) so it flashed every time the intake cam rotated. Now that would be elegant! .. and useful for the new 36-1 crank sensor as well.. Blinky lights everywhere - I like it. I already have two pairs of blue/red LEDs across both pairs of nitrous solenoids, mounted just under the left-side lip of the raised hood, next to a nitrous gauge. Lots of blinky (intensity varies with throttle) going on there when spraying...
Elegant - and useful as well....

EDIT: Since I don't have any HR head covers, I ordered both 2010 Altima valve covers ($31.21 ea) and gaskets ($6.75 ea) from Courtesy Nissan. These prices were better than eBay. New parts = more elegant.
I don't want to pay over $60 for an OEM cam sensor - I have several earlier Hall cam sensors, and some industrial sensors as well, so I think I can find a solution after the engine is running.
Last edited by grey99max; 10-11-2015 at 12:38 PM. Reason: elegant
10-11-2015, 10:43 AM
#1684
LandShark has Cosworth
Thread Starter
iTrader: (12)
Join Date: Jan 2004
Location: Topeka, KS
Posts: 4,327
sucking air...
Since the stroker will add 16.3% more volume of air into each cylinder, and that air will have to flow thru a MAF, TB, and upper and lower intake manifolds, there will be even more restriction in the intake path. "sucking harder thru the same straw". I'm going to need everything for initial startup and until I get the Megasquirt connected and running - then just the manifolds and TB are needed.
For the moment, take nitrous out of the plan. I have a 2010 Maxima LIM machined to connect to the intake ports and support fuel rails for injectors, and a 2010 Maxima UIM and much-modded Pathy TB to suck air thru an OEM MAF. The upper manifold has several internal restrictions between the TB and LIM. What if I can eliminate the UIM and instead breathe thru a (larger->90mm) TB and the huge ports in the LIM?
I bought another 2010 Max LIM to look at, and maybe use to mock up alternate designs. Disregarding hood clearance for now, what if (be afraid!) I cut some aluminum plate the width of the entire top of the LIM and say 12" long, then drill for the studs on the LIM and cut out matching holes for the six intake ports? Then slice a 90* section out of 4" aluminum pipe and weld that to the back edge of the manni-plate, curve facing forward. Cut out five curved dividers and weld them to the base and curved section as port dividers, cut three more pieces of AL plate to enclose the sides and cover the top, with all three meeting to the TB plate already welded to the base plate. Poof - instant low-restriction intake manifold. Might need a vacuum pump for the brake master cylinder, but I could scavenge the crankcase at the same time.
Of course this would fit on any VQ35DE - would still need an aftermarket ECU.
<a href="http://s48.photobucket.com/user/hwb123/media/10_OCT_2015/DSCN3787_zpsiou7syo6.jpg.html" target="_blank"><img src="http://i48.photobucket.com/albums/f216/hwb123/10_OCT_2015/DSCN3787_zpsiou7syo6.jpg" border="0" alt=" photo DSCN3787_zpsiou7syo6.jpg"/></a>
Last edited by grey99max; 10-11-2015 at 05:10 PM.
10-12-2015, 07:43 PM
#1685
LandShark has Cosworth
Thread Starter
iTrader: (12)
Join Date: Jan 2004
Location: Topeka, KS
Posts: 4,327
JWTs C11 and RZ1 cams..
The C11 and RZ1 cams are not similar specs, with different durations and lifts. The C11 has 311* duration and
13.8mm lift, and the RZ1 is shown as 300* and 11.5mm lift. I understand that combination is intended to work with HR heads, and the cams will require large clearance cuts in the head to clear the lobes. I'm shipping my washed HR heads to JWT along with some 3.0 timing parts to get the cams mated up to the heads, with appropriate cam timing set for me.
This should be ... interesting....
http://www.jimwolftechnology.com/wol...RC11_RZ1EX.pdf
Last edited by grey99max; 10-12-2015 at 08:03 PM.
10-14-2015, 08:02 AM
#1686
LandShark has Cosworth
Thread Starter
iTrader: (12)
Join Date: Jan 2004
Location: Topeka, KS
Posts: 4,327
A look at the last engine's cam timing
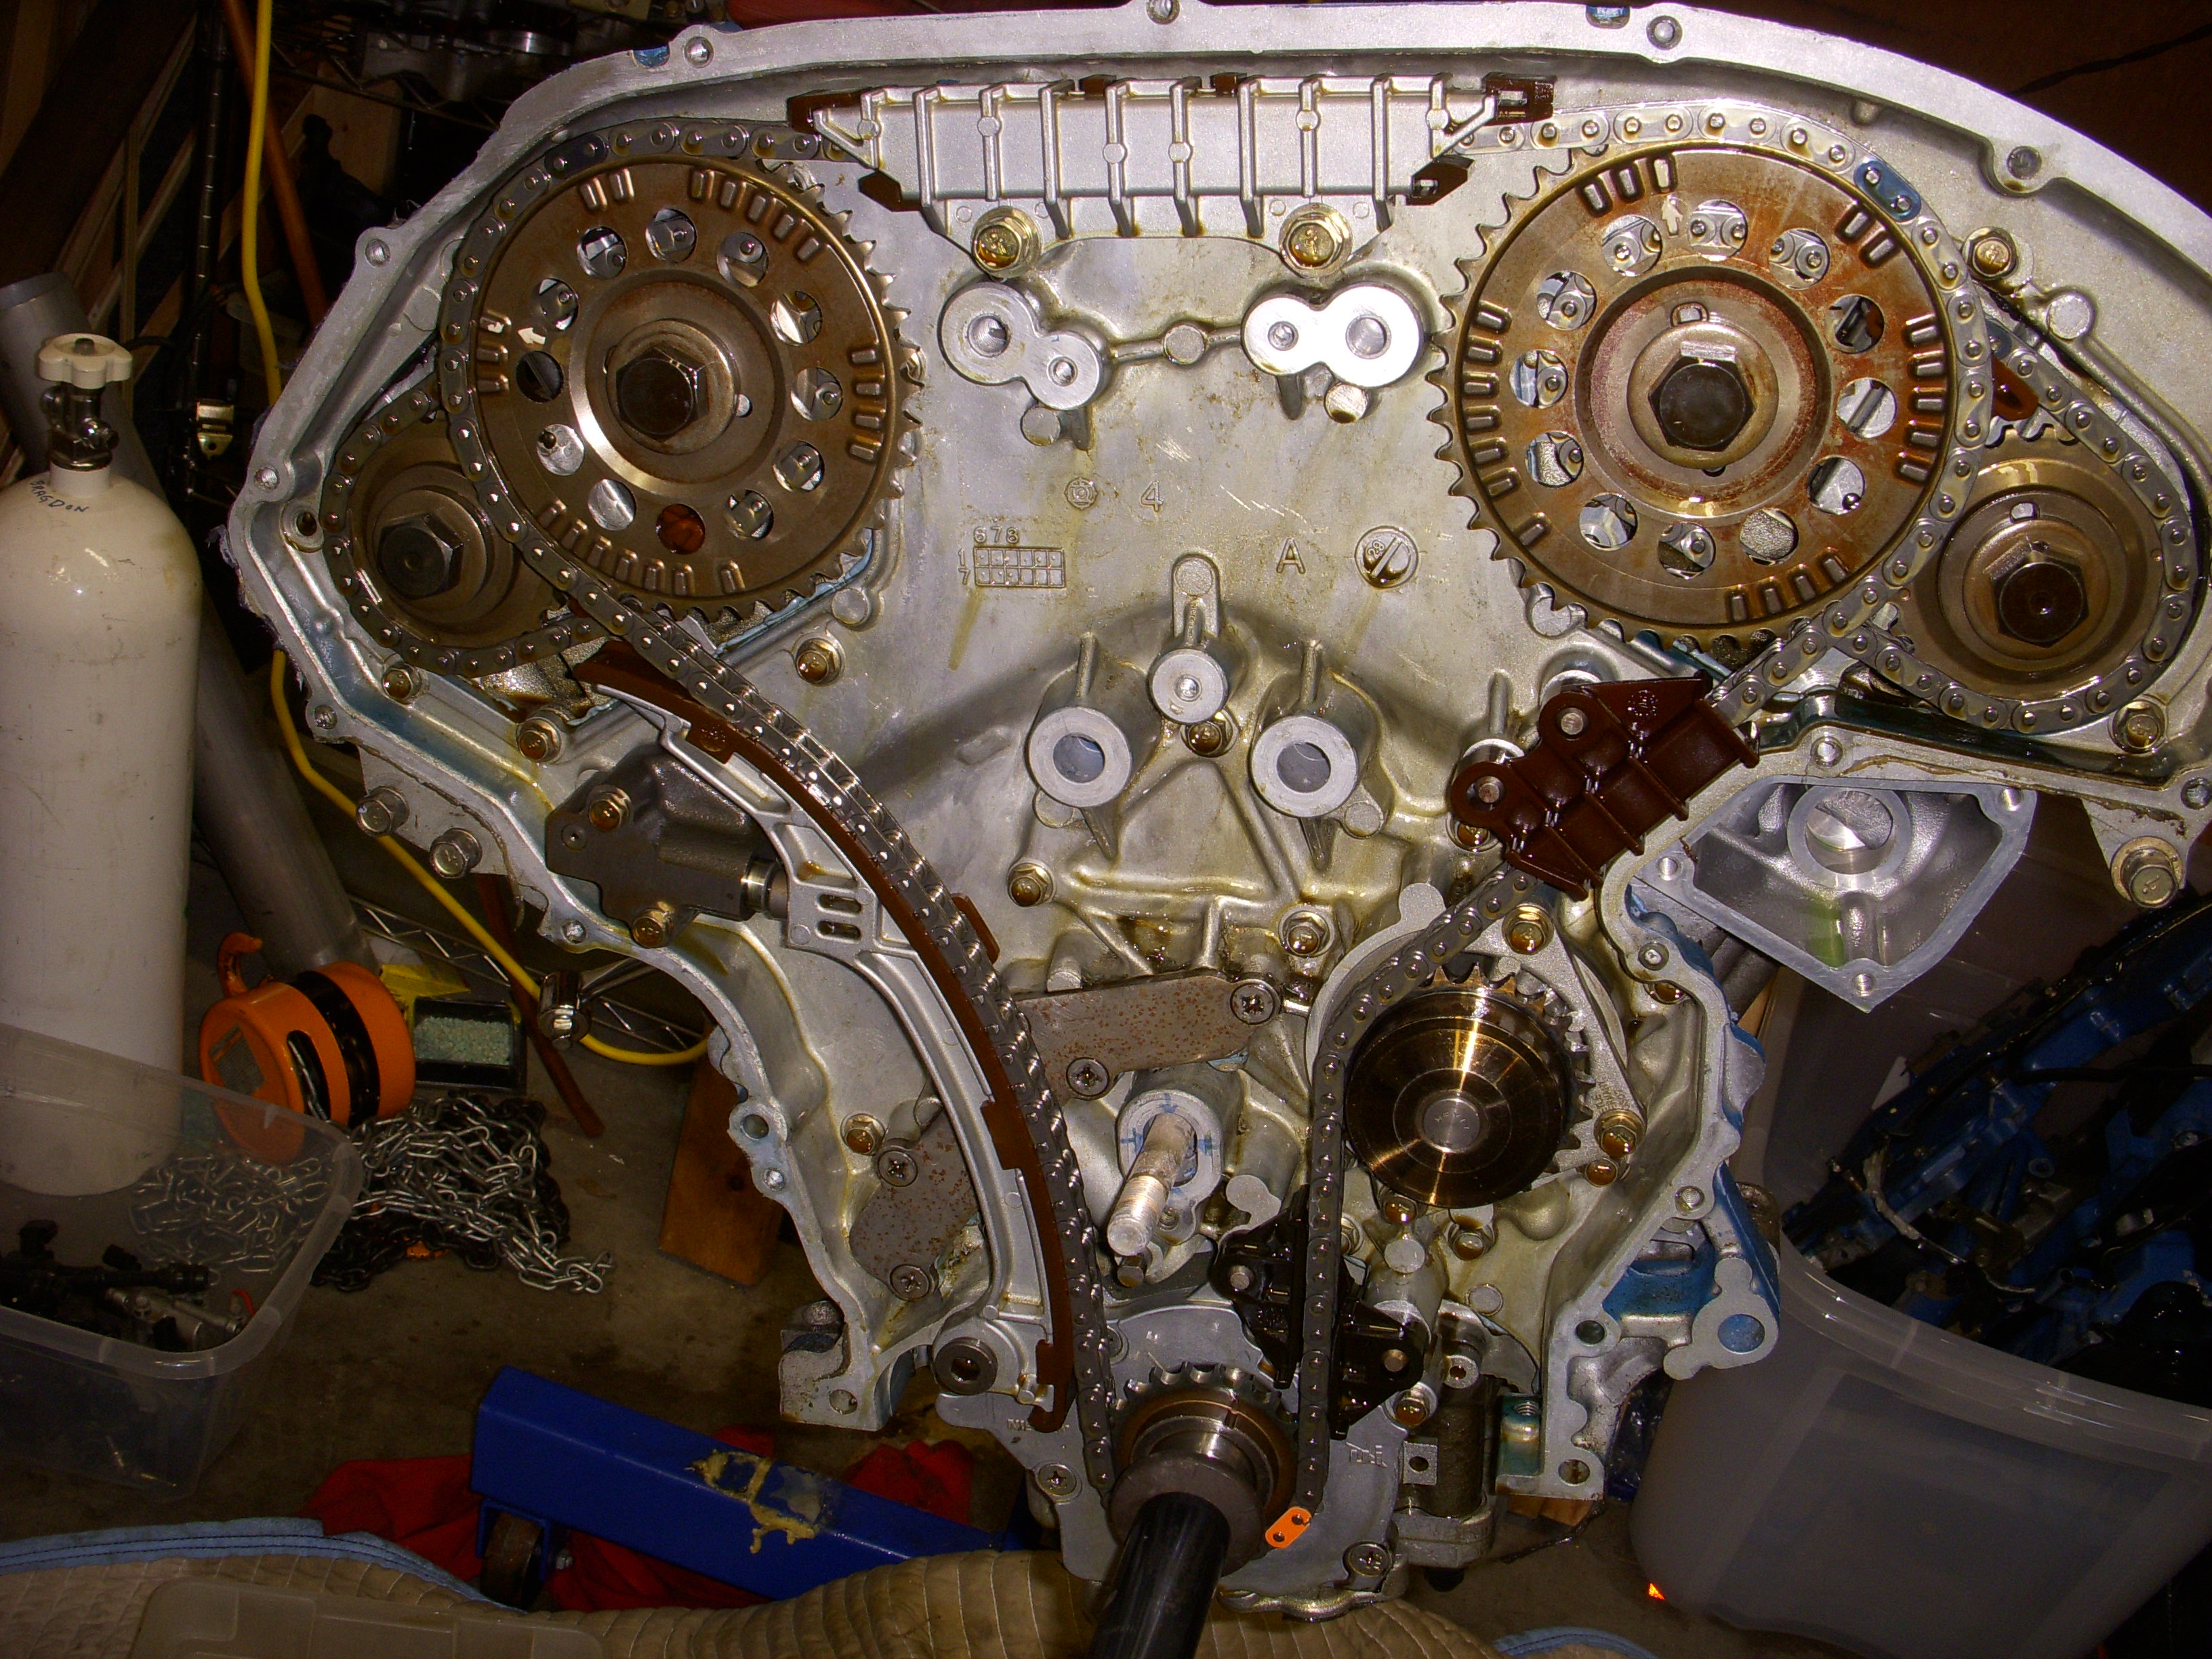
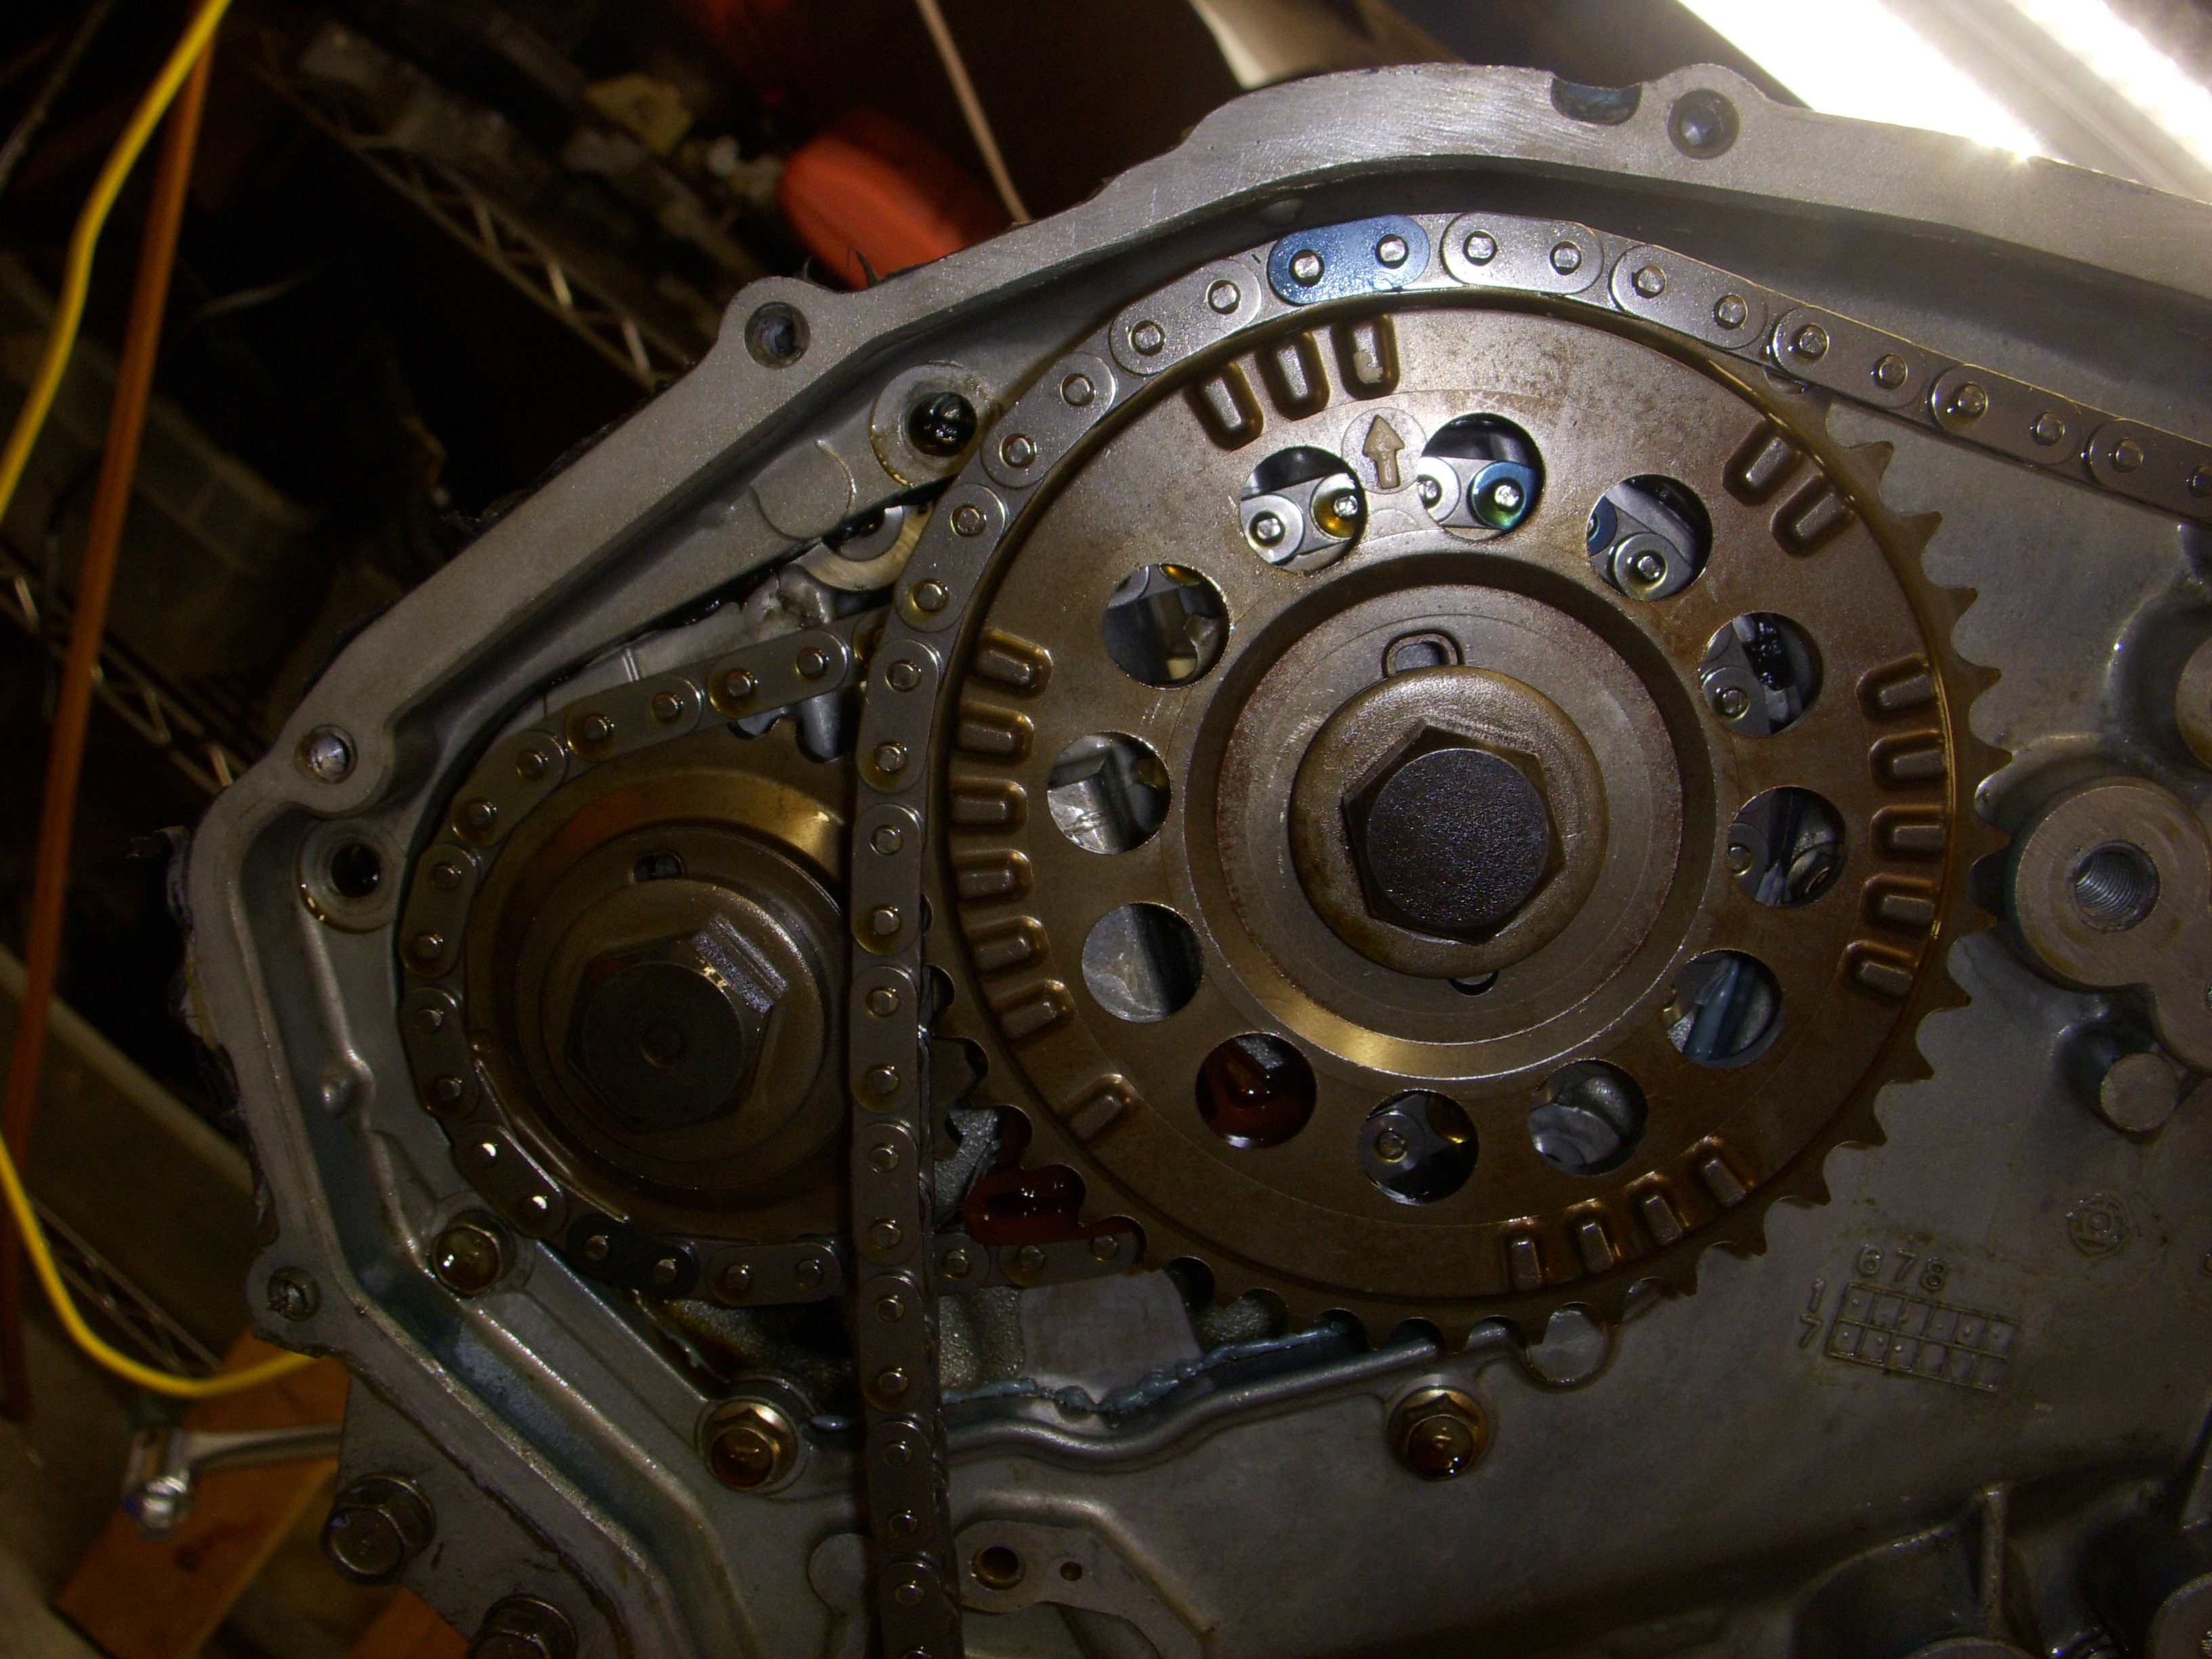
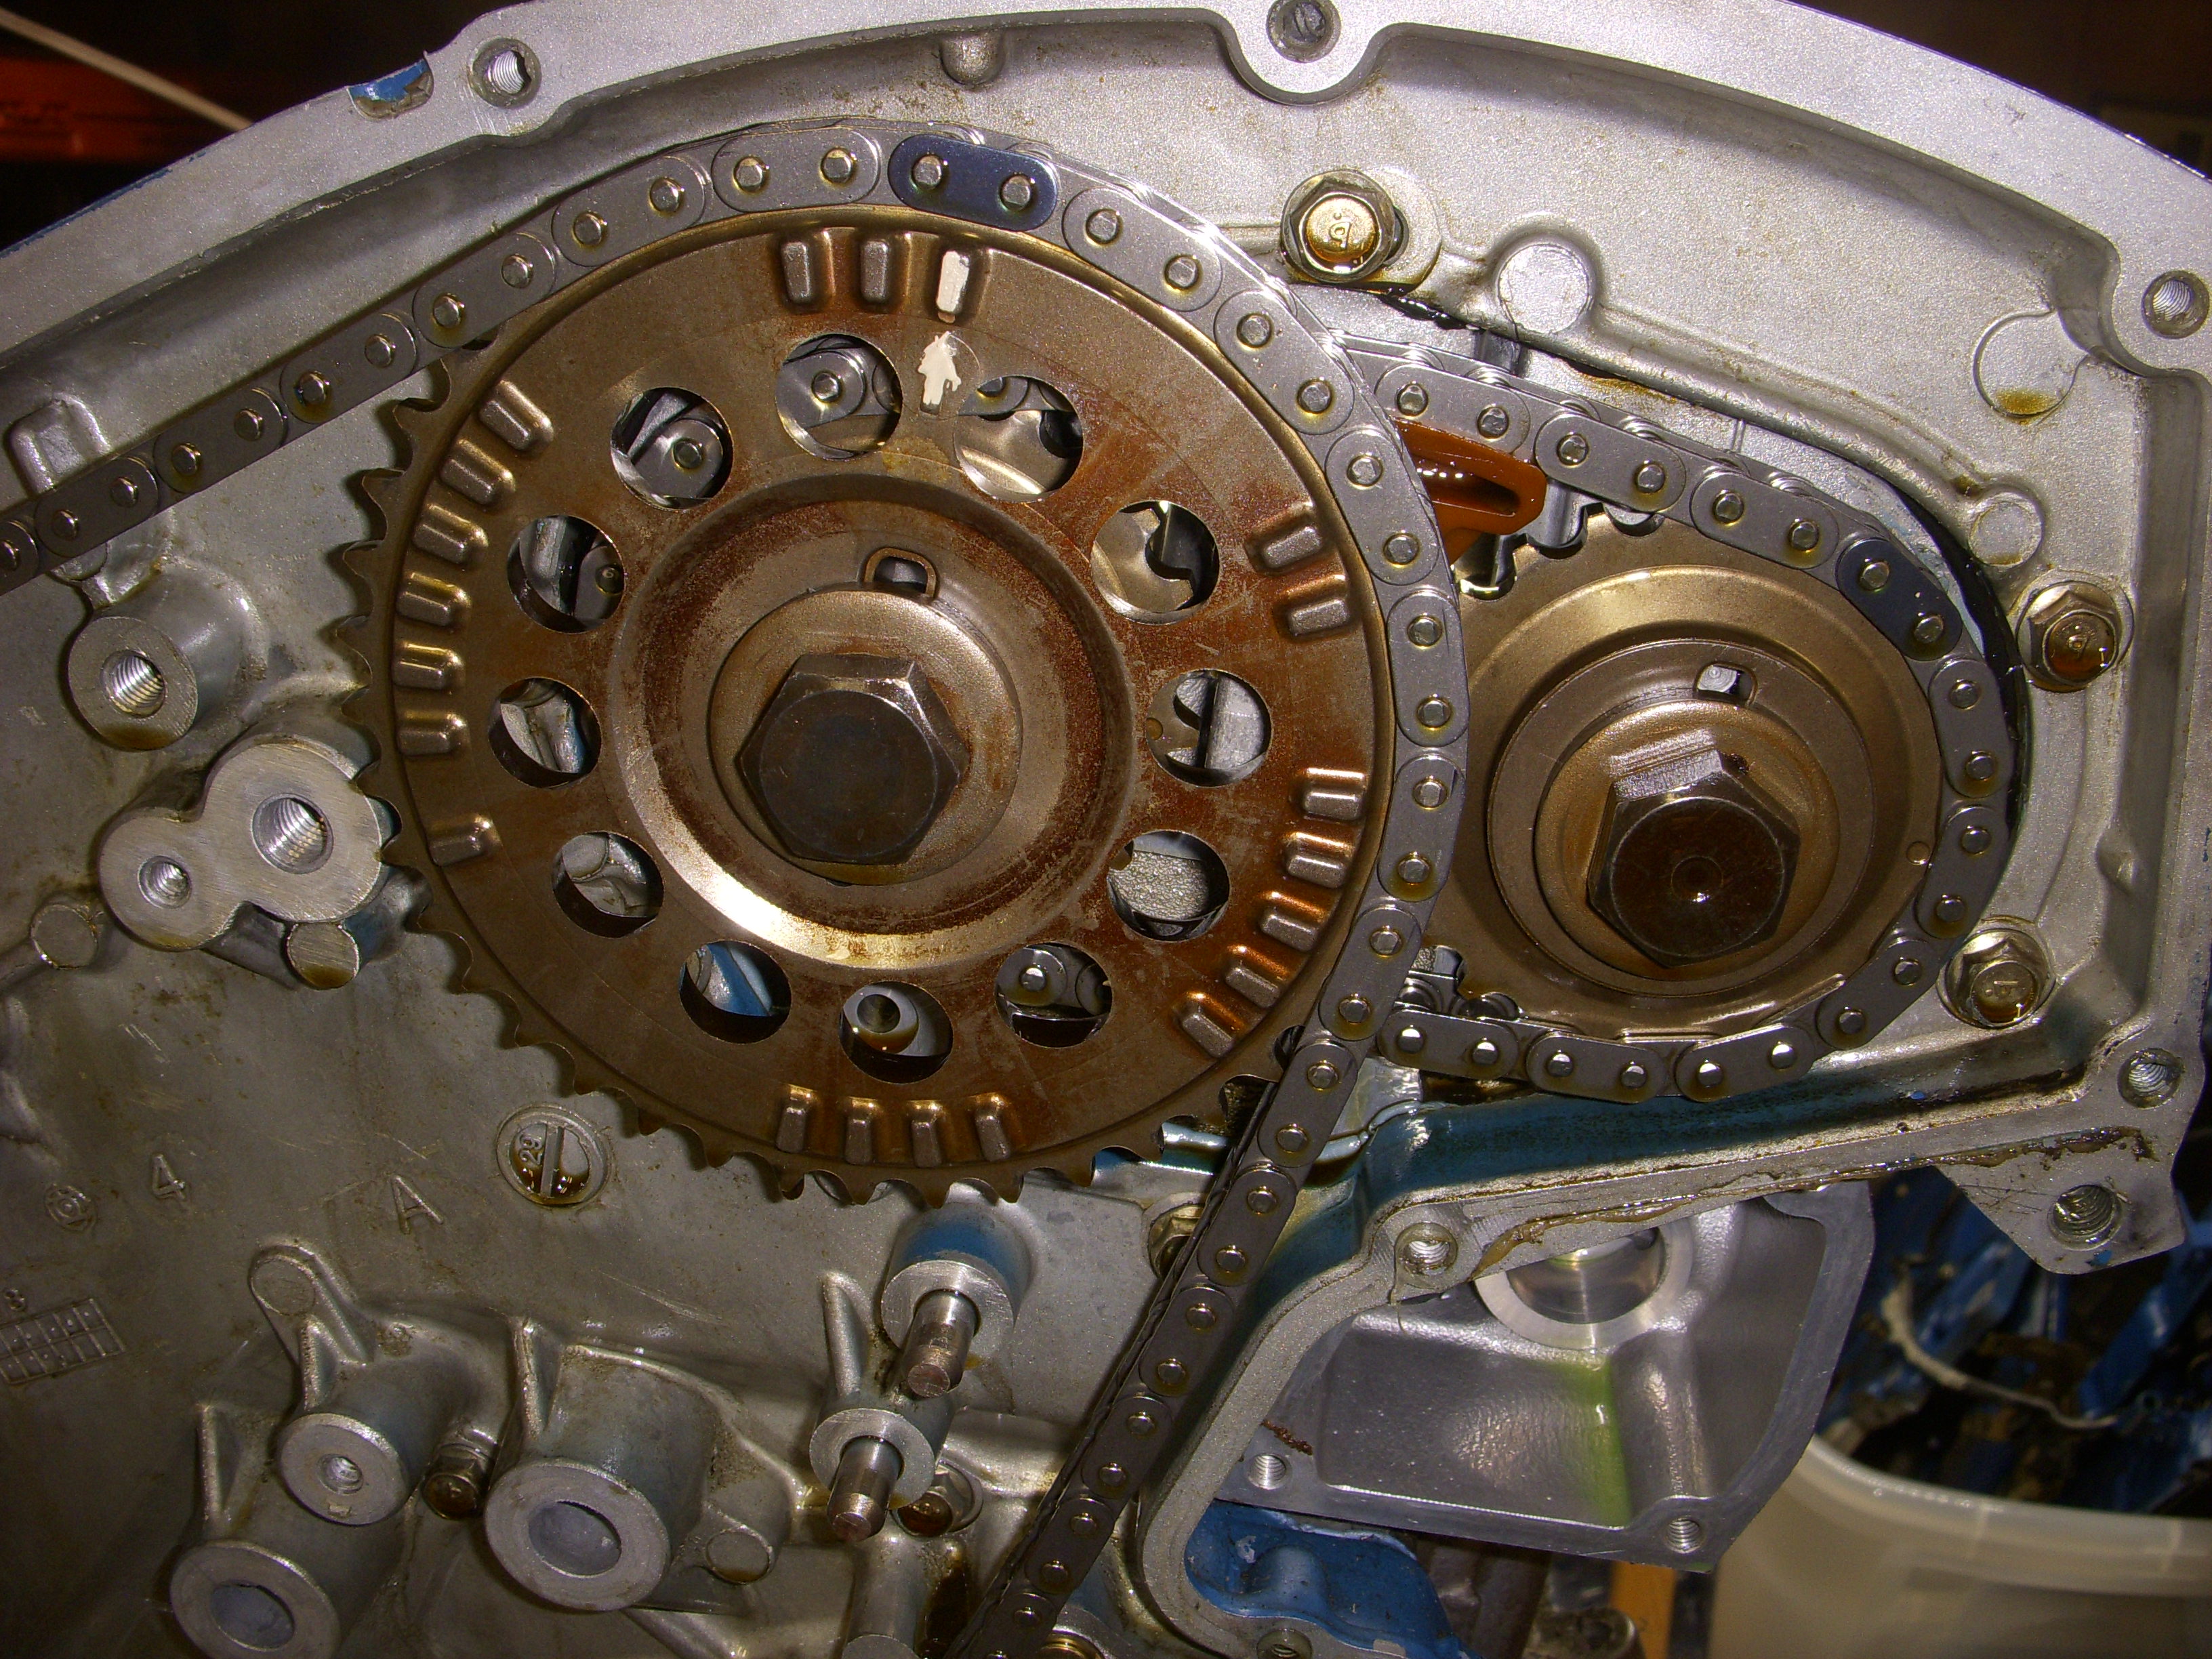
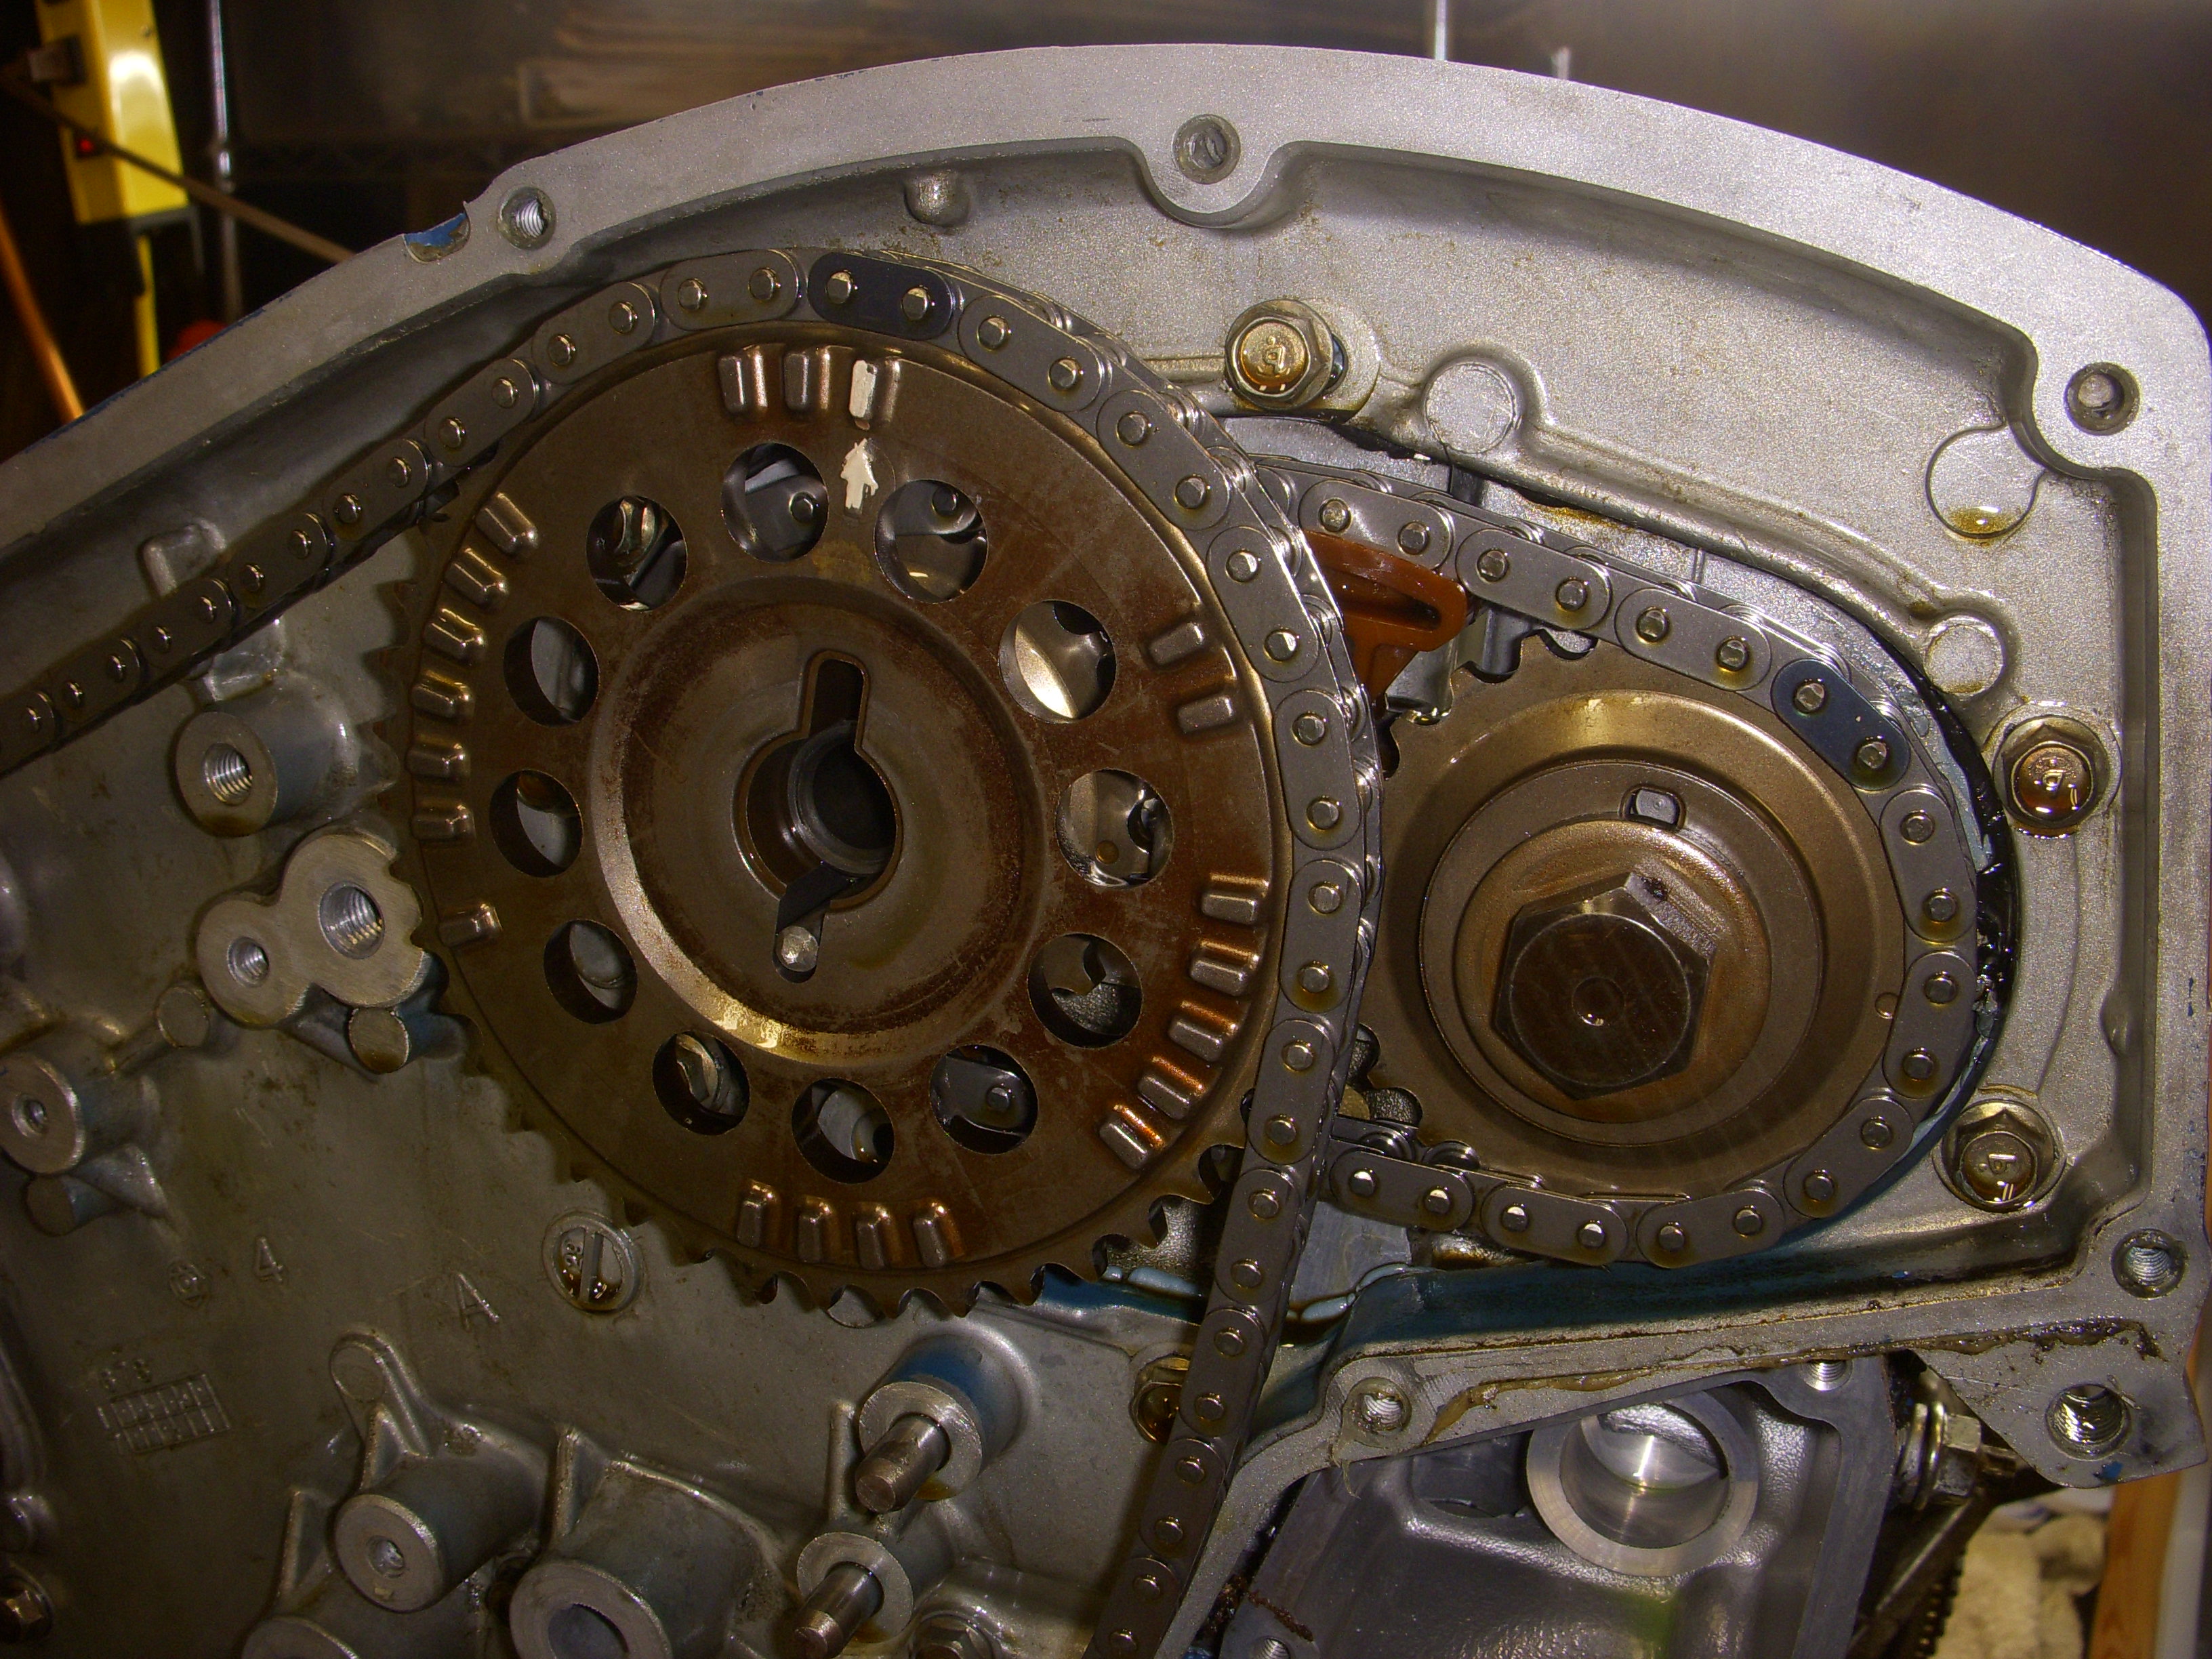
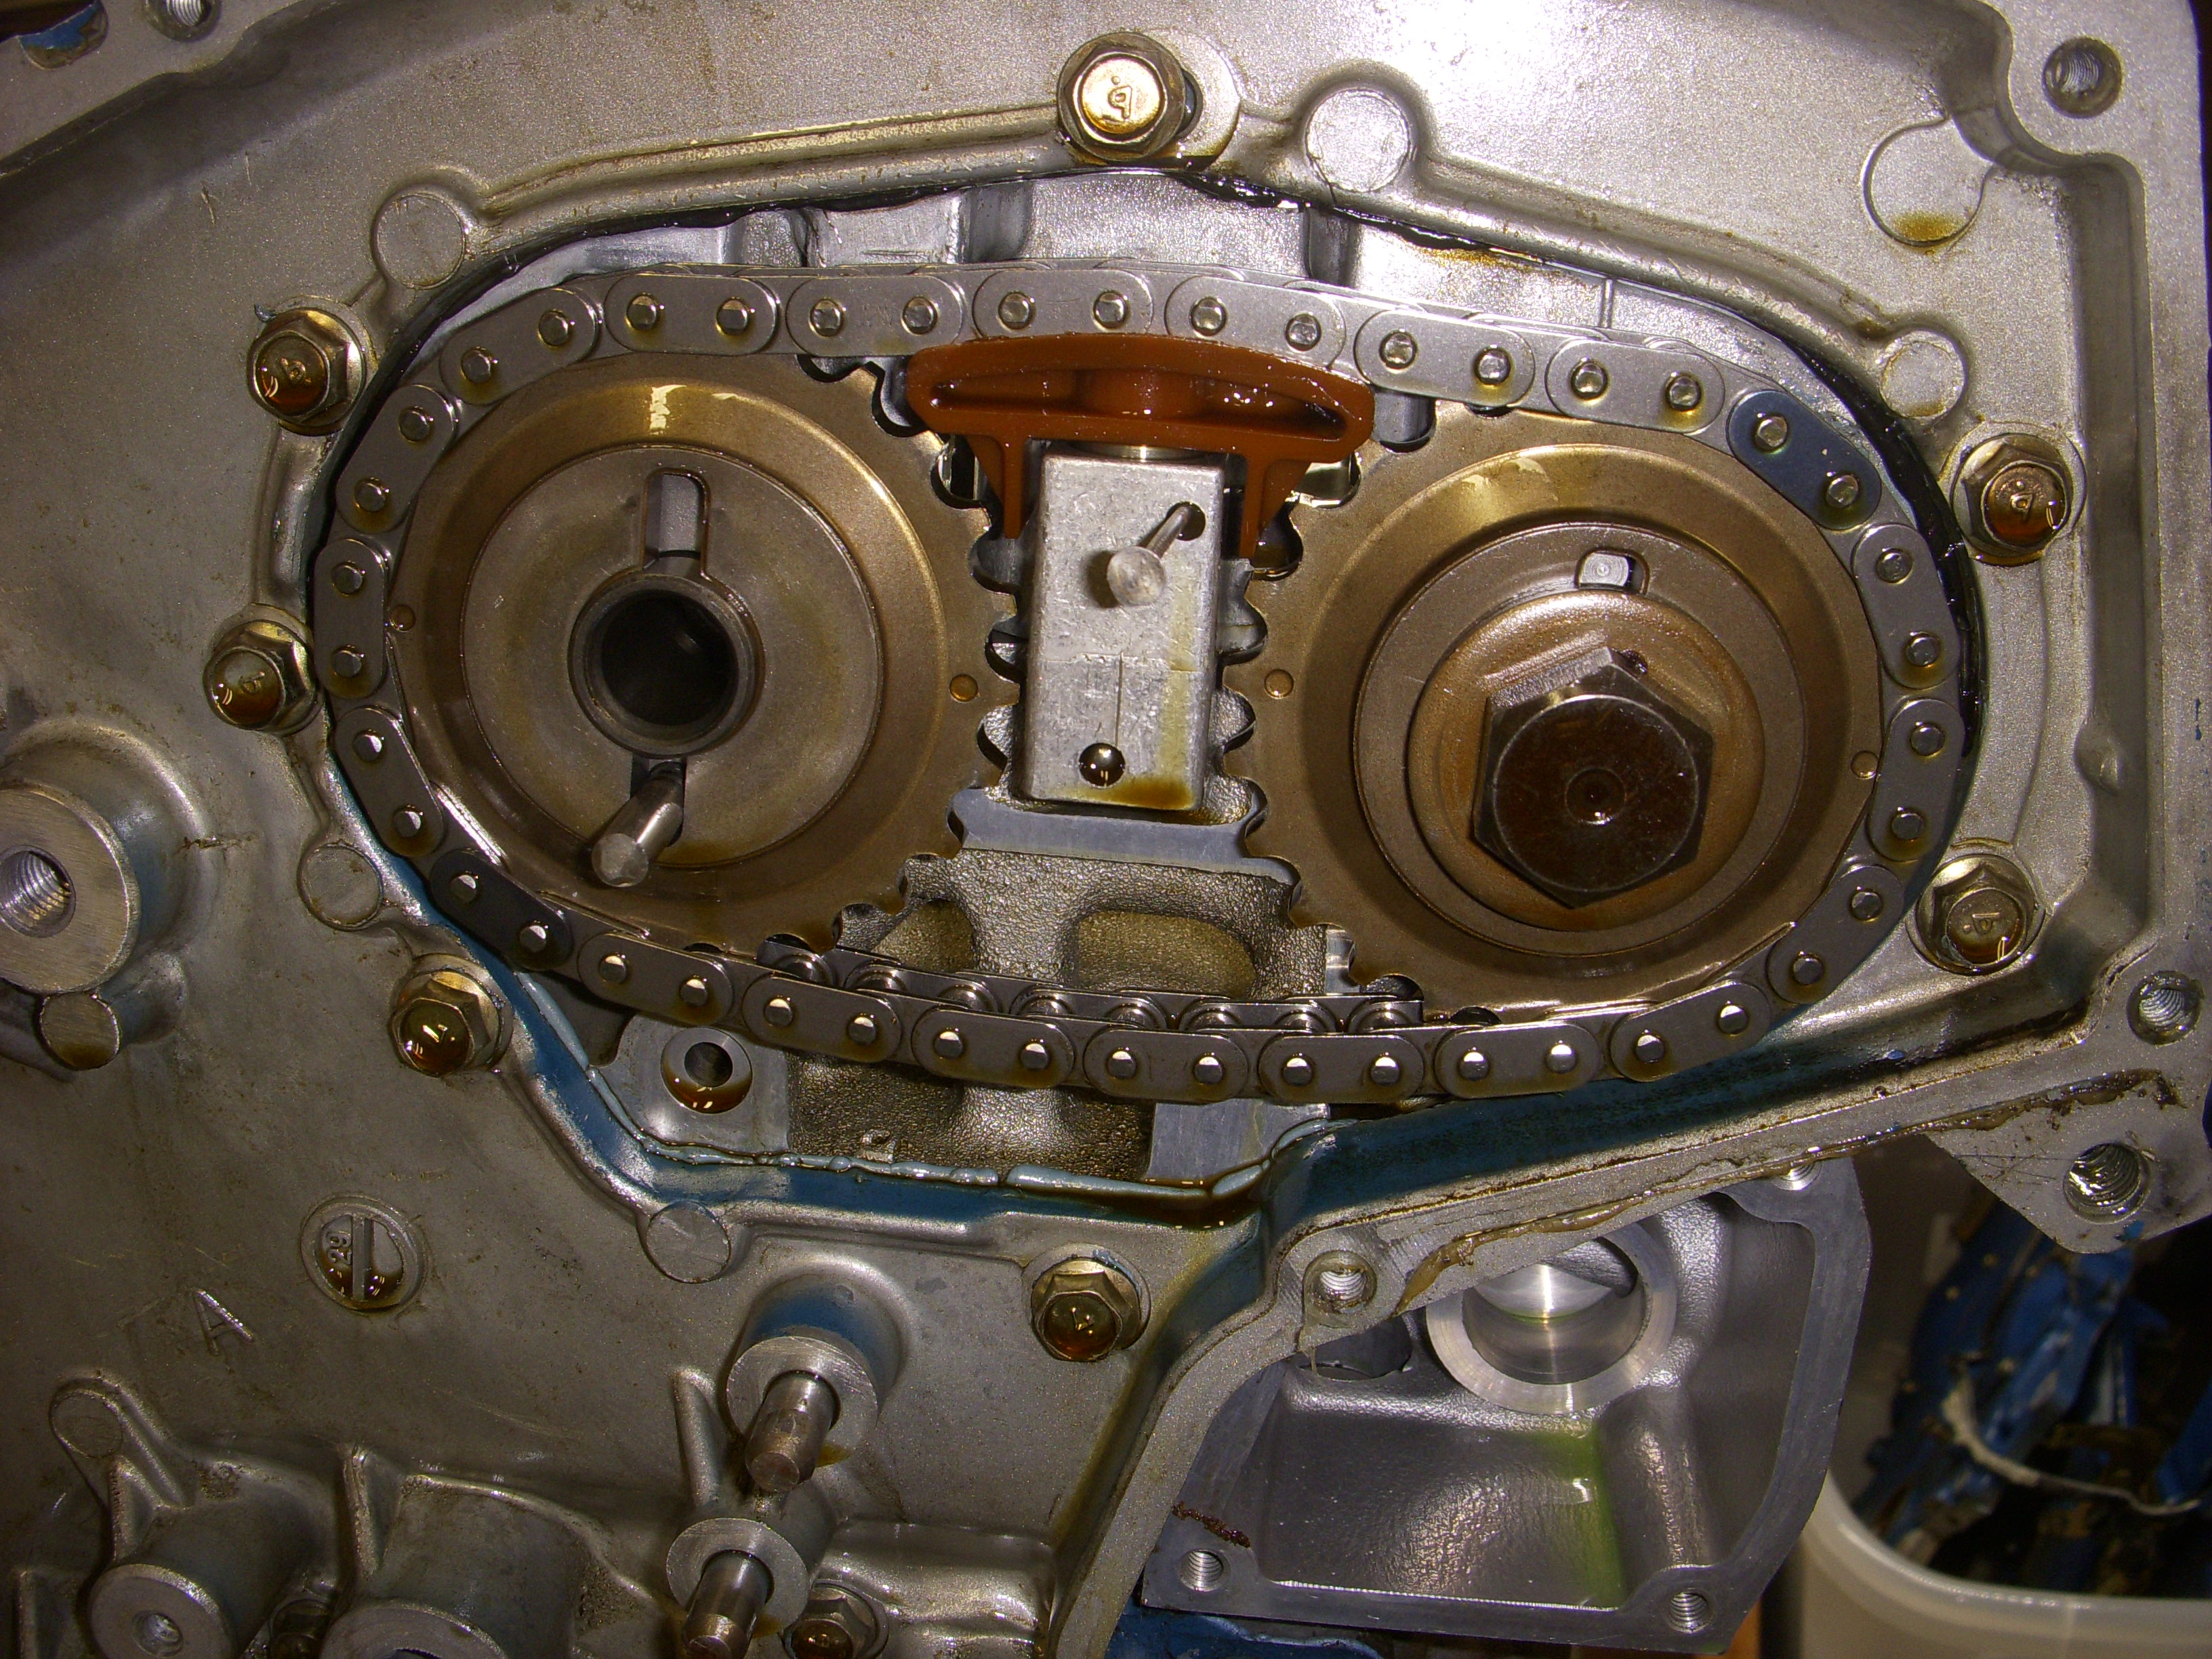
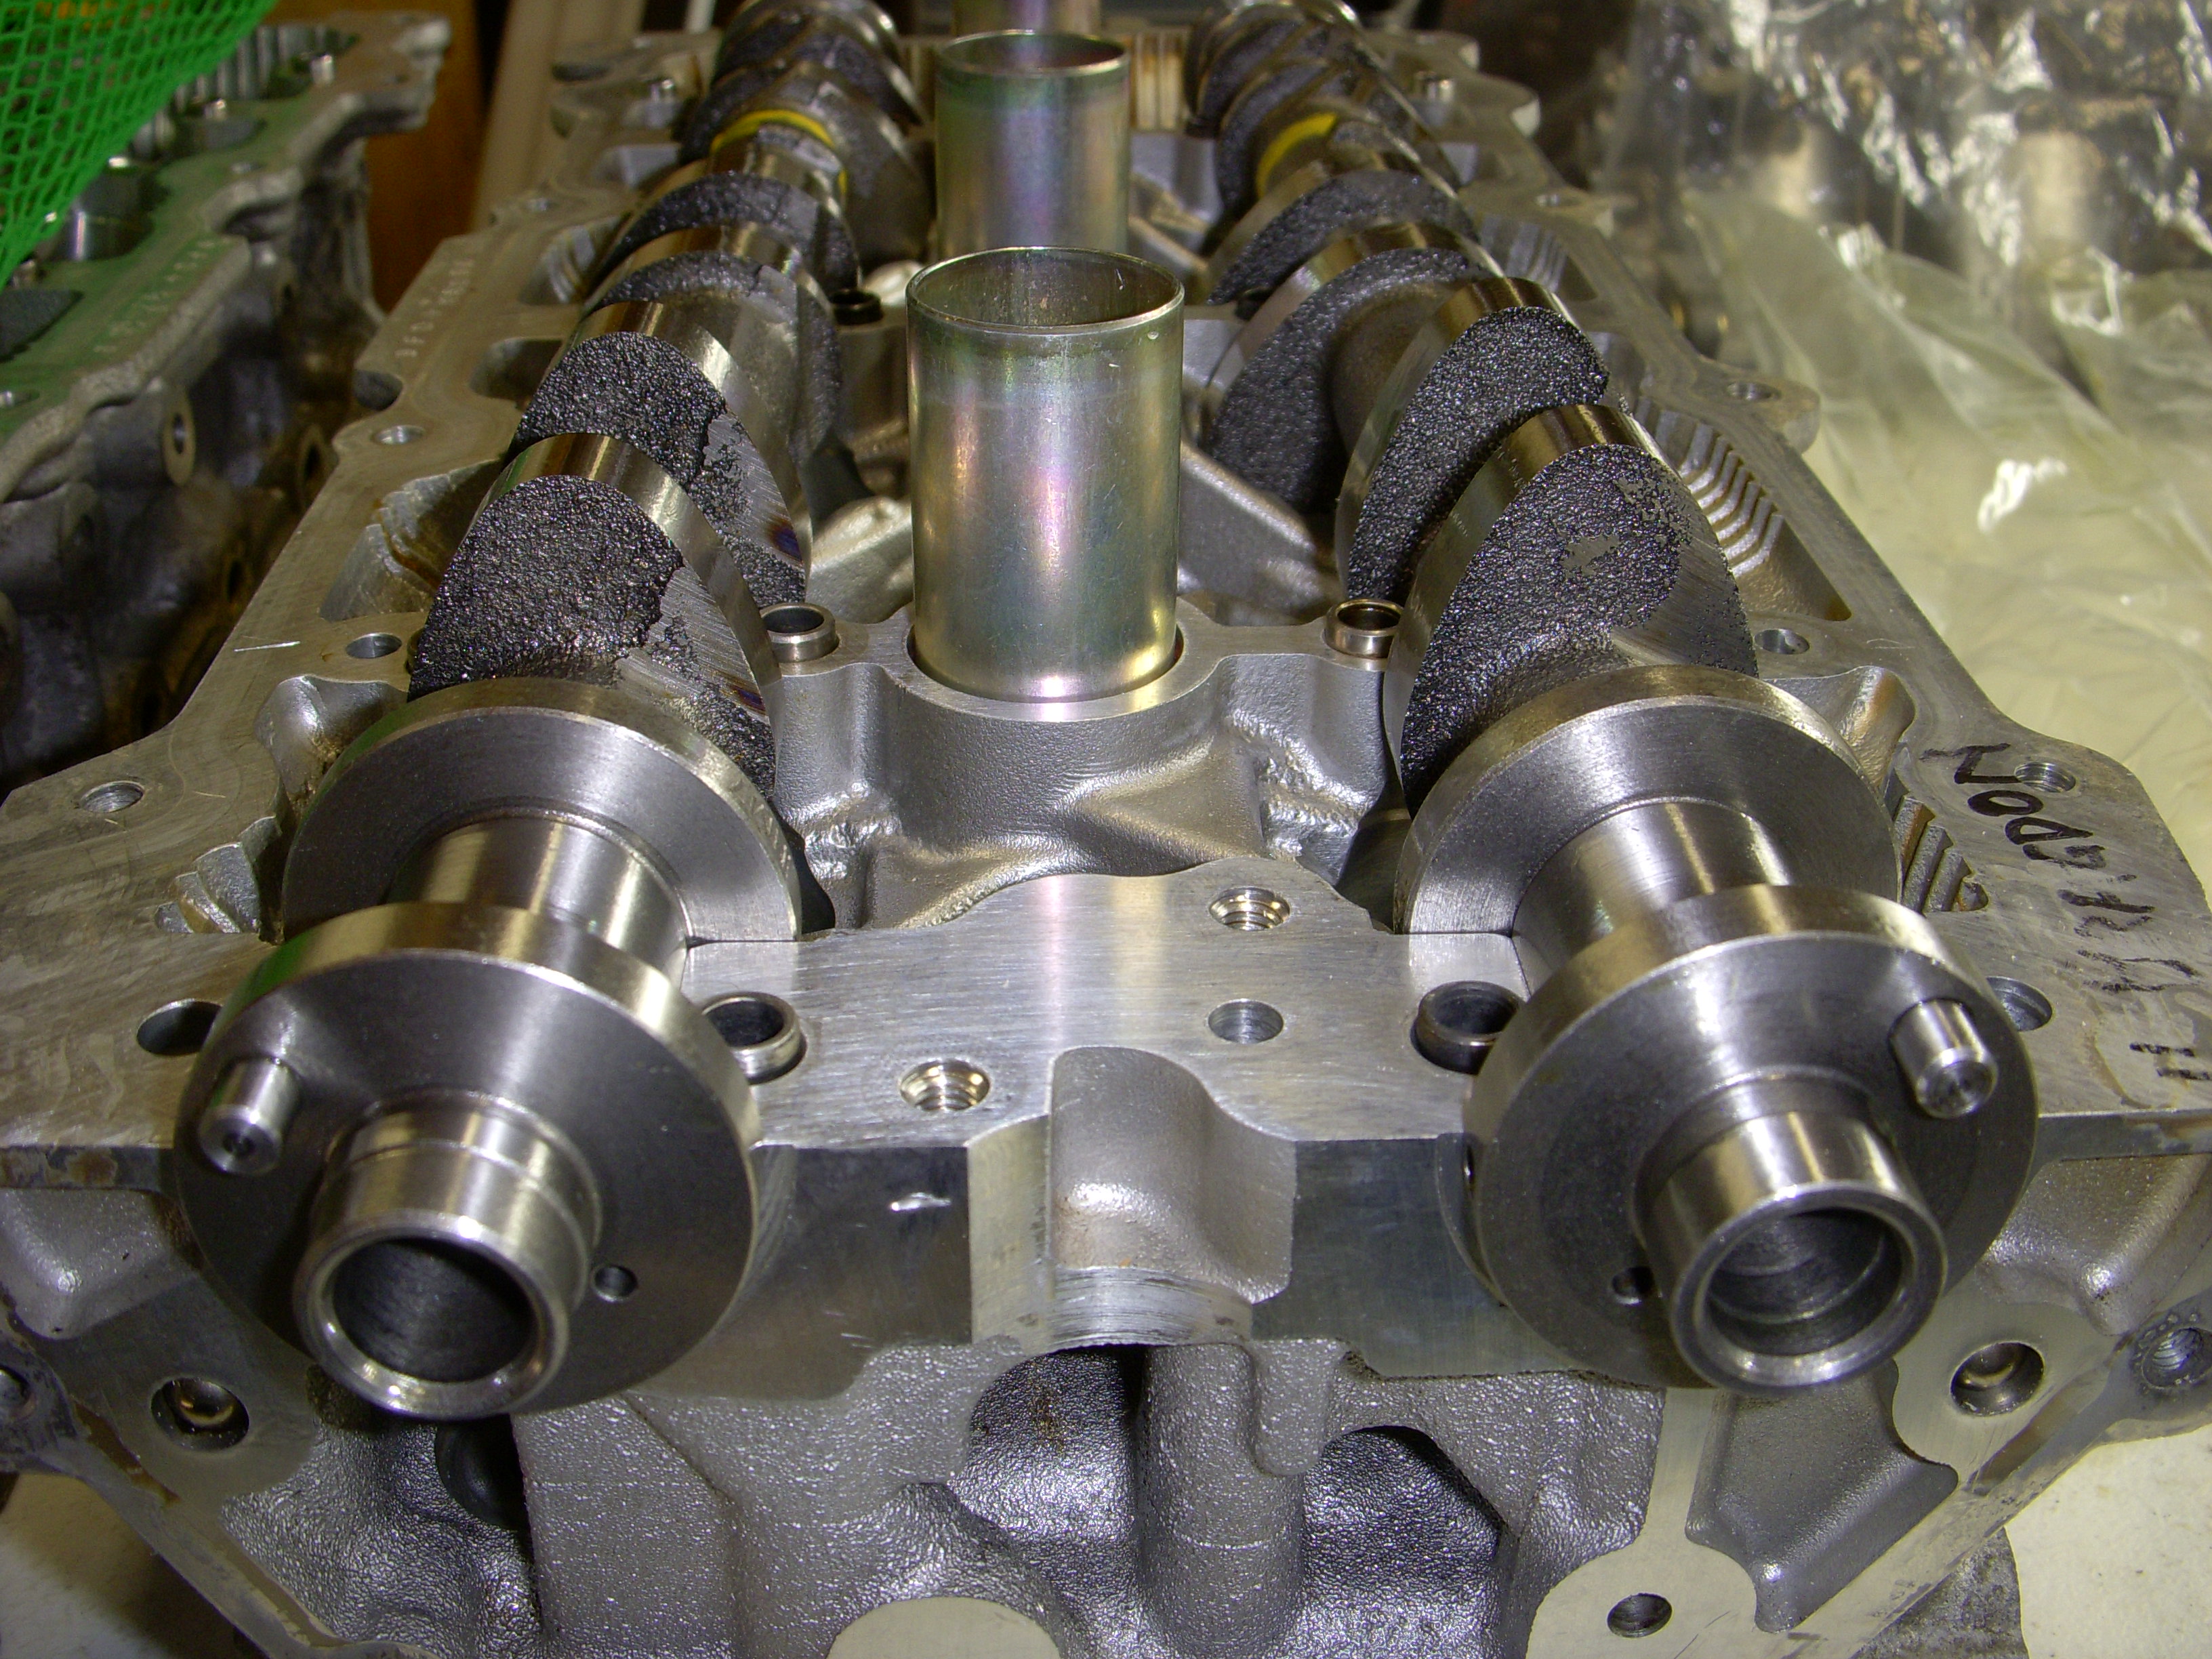
I spotted this when tearing down the old engine, but too busy to talk about it. When spinning the engine to get to TDC and align all the paint marks on the main chain, I saw that the cam chains were both off by two links. Question is, did this throw off the exhaust cams timing, because looking at the last photo, the exhaust cams look like they're lined up ok, and maybe the chains were installed two links off ???
Photos I had taken:
Photos I had taken:


Last edited by grey99max; 01-14-2017 at 11:41 AM.
10-14-2015, 08:30 AM
#1687
LandShark has Cosworth
Thread Starter
iTrader: (12)
Join Date: Jan 2004
Location: Topeka, KS
Posts: 4,327
JWT cam order is proceeding
Yesterday, after a 2-hour conversation with JWT, I have ordered the purchase and construction of C11/RZ1 cams for my HR heads. This requires that I completely strip both heads and ship to JWT, using the project ID I was given.
I can use the HR retainers but these cams require machining cam lobe clearance in the heads, new hand-selected springs, custom shims, possibly up to 24 new HR DLC lifters individually fitted to the cams, and special assembly instructions. Nissan HR head gaskets, of course, and using Mobil1 EP 0W-40 engine oil, which I already use, and Joe Gibbs break-in oil. $$$
Because race car. Pretty freaking exciting.....
Last edited by grey99max; 12-03-2015 at 06:55 PM.
10-14-2015, 11:34 AM
#1688

[B]I spotted this when tearing down the old engine, but too busy to talk about it. When spinning the engine to get to TDC and align all the paint marks on the main chain, I saw that the cam chains were both off by two links. Question is, did this throw off the exhaust cams timing, because looking at the last photo, the exhaust cams look like they're lined up ok, and maybe the chains were installed two links off ???
Why is cyl.#3 your reference point and not cyl.#1? Am I missing something?
Last edited by ABIGBRAIN; 10-14-2015 at 11:44 AM.
10-14-2015, 02:36 PM
#1689
LandShark has Cosworth
Thread Starter
iTrader: (12)
Join Date: Jan 2004
Location: Topeka, KS
Posts: 4,327
If I recall correctly, it can up to 7 full cycles of crankshaft rotation to get all of the timing marks properly aligned. During those rotations the marks should line up. If not, you know that timing was off.
Why is cyl.#3 your reference point and not cyl.#1? Am I missing something?
Why is cyl.#3 your reference point and not cyl.#1? Am I missing something?
I'm really temped to put in windows (plexiglass viewing ports) so I can see the timing marks without dissecting the front of the engine.
Again, that's history....
10-16-2015, 05:15 PM
#1690
LandShark has Cosworth
Thread Starter
iTrader: (12)
Join Date: Jan 2004
Location: Topeka, KS
Posts: 4,327
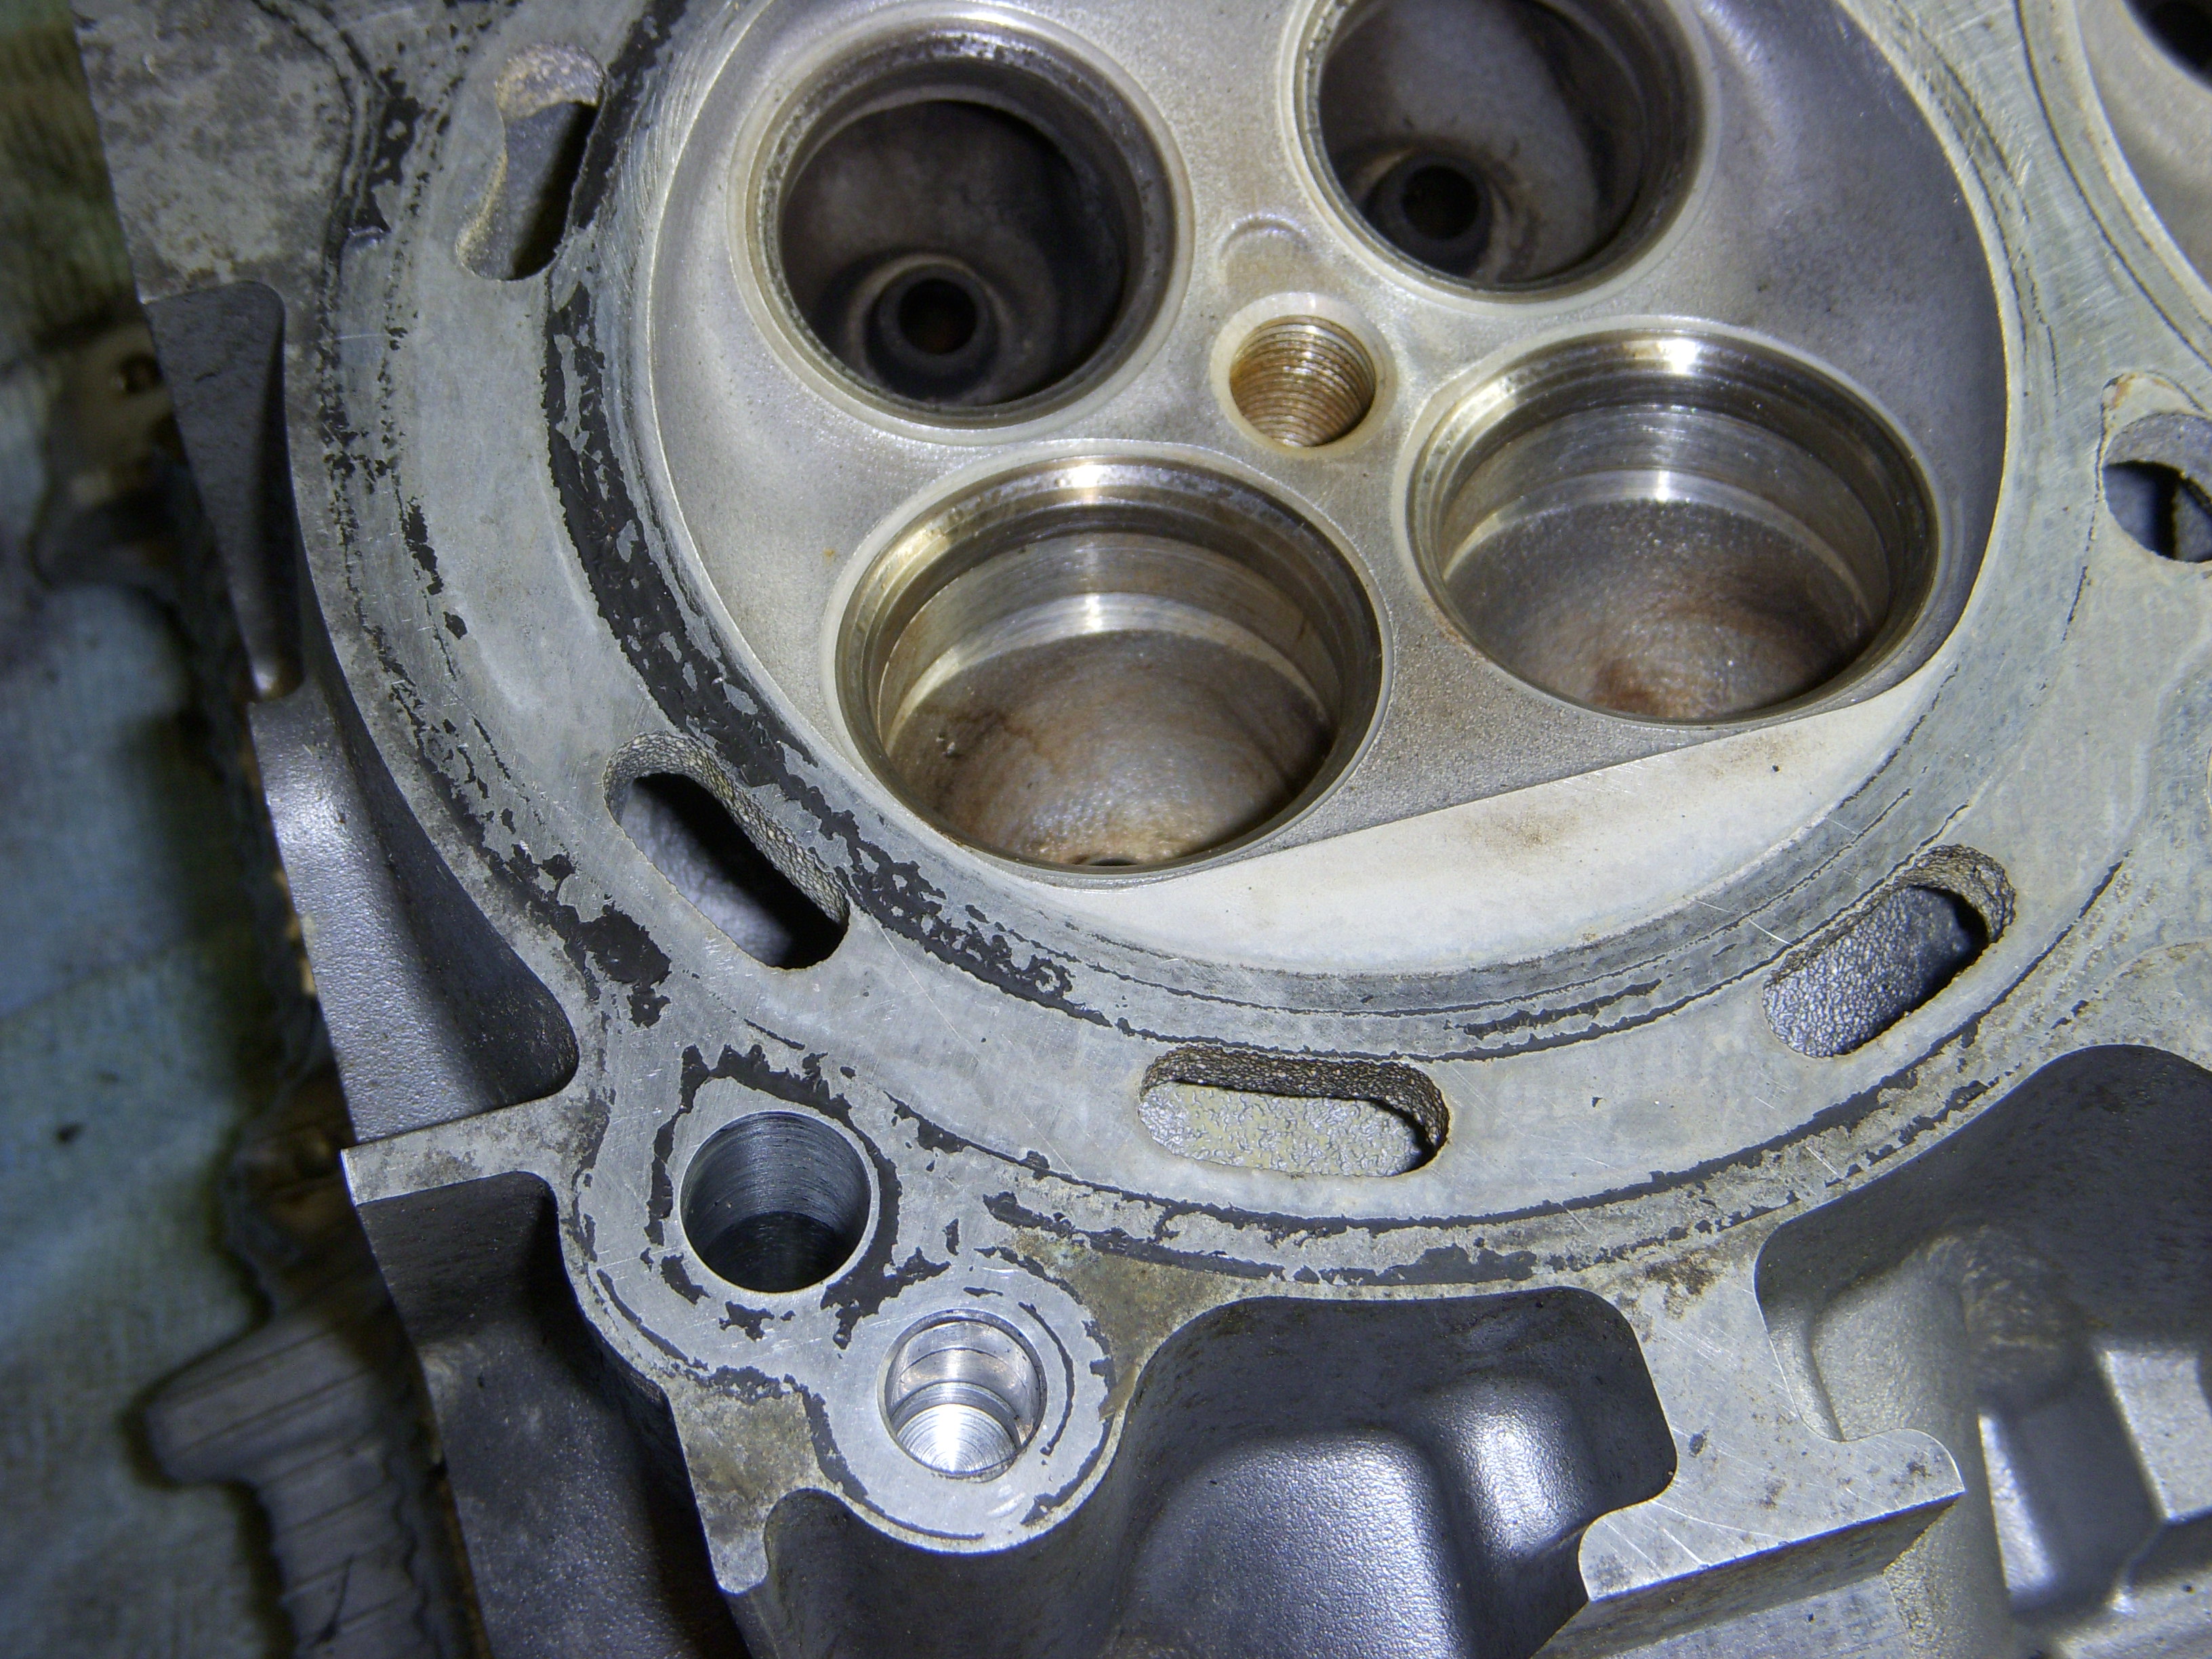
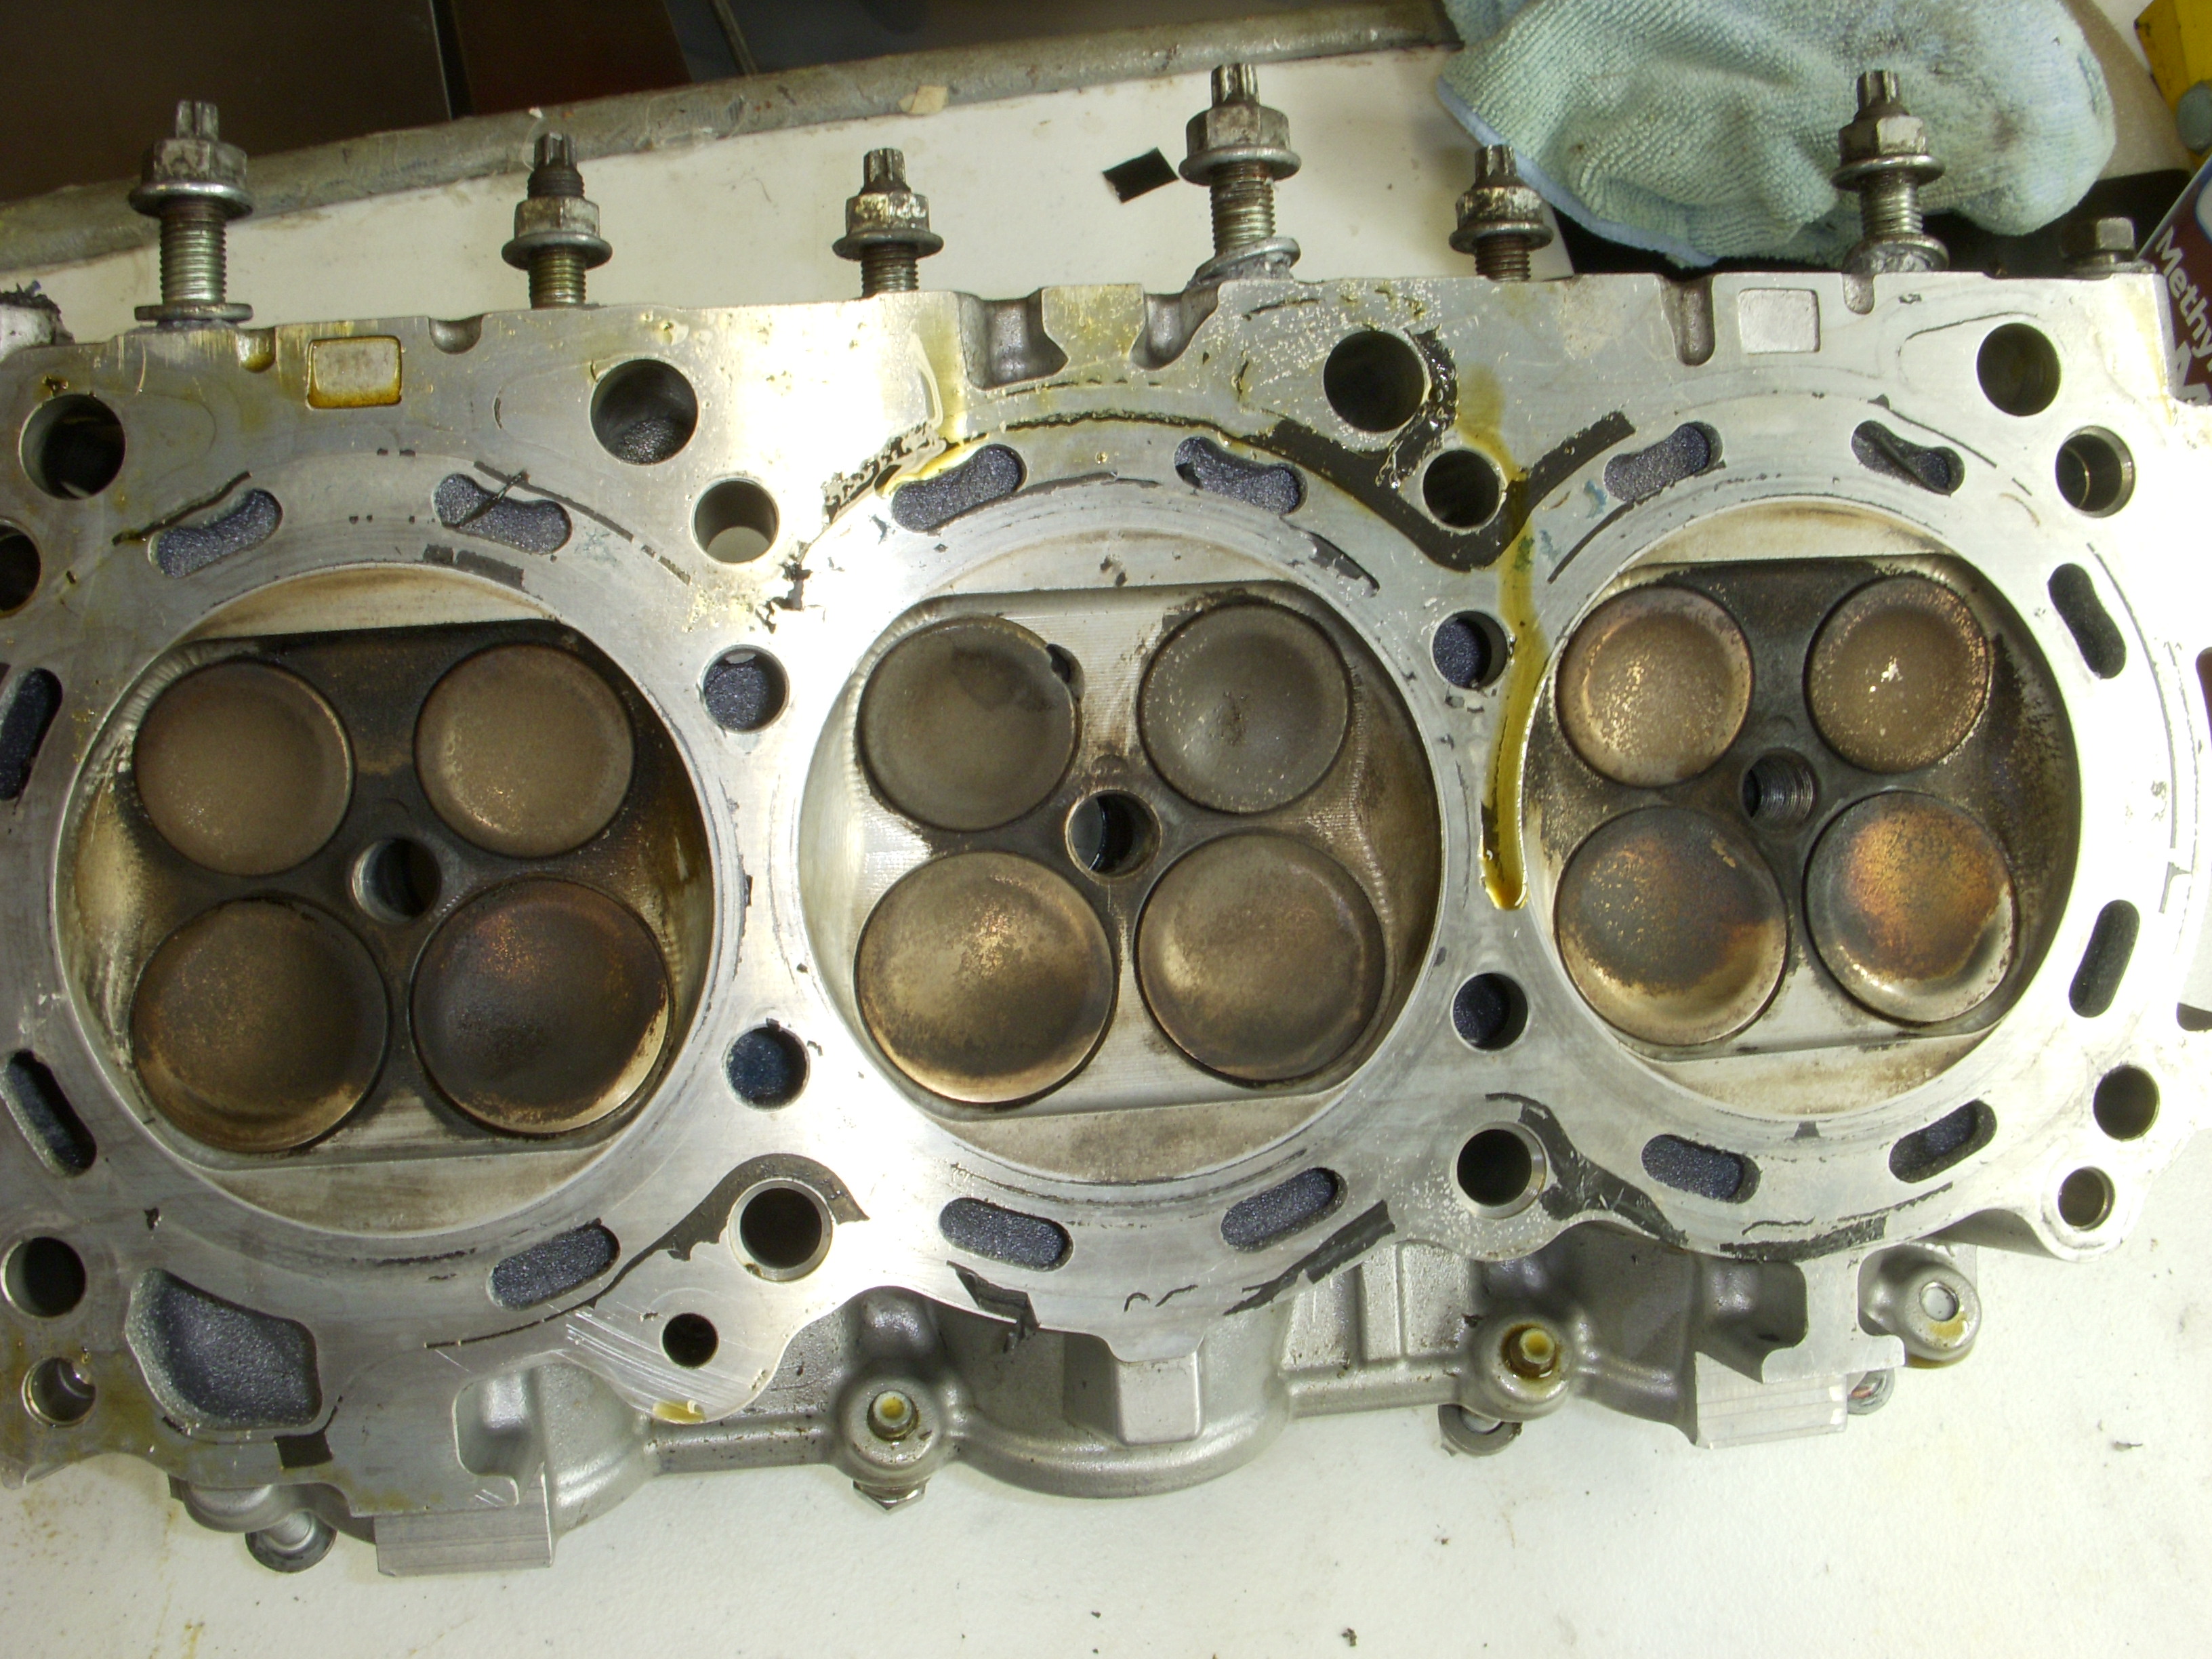
NW S Warning - bare nekked HR head seen here
I stripped the left HR head down to casting marks, to get ready to ship both heads to JWT for cam installation and machine work to clear lobes. Used my eBay valve compressor, valve seal tool, two small flat-blade magnetized screwdrivers and customized needlenose pliers that I also magnetized to remove the steel spacer under the valve springs. Now on to the good stuff:
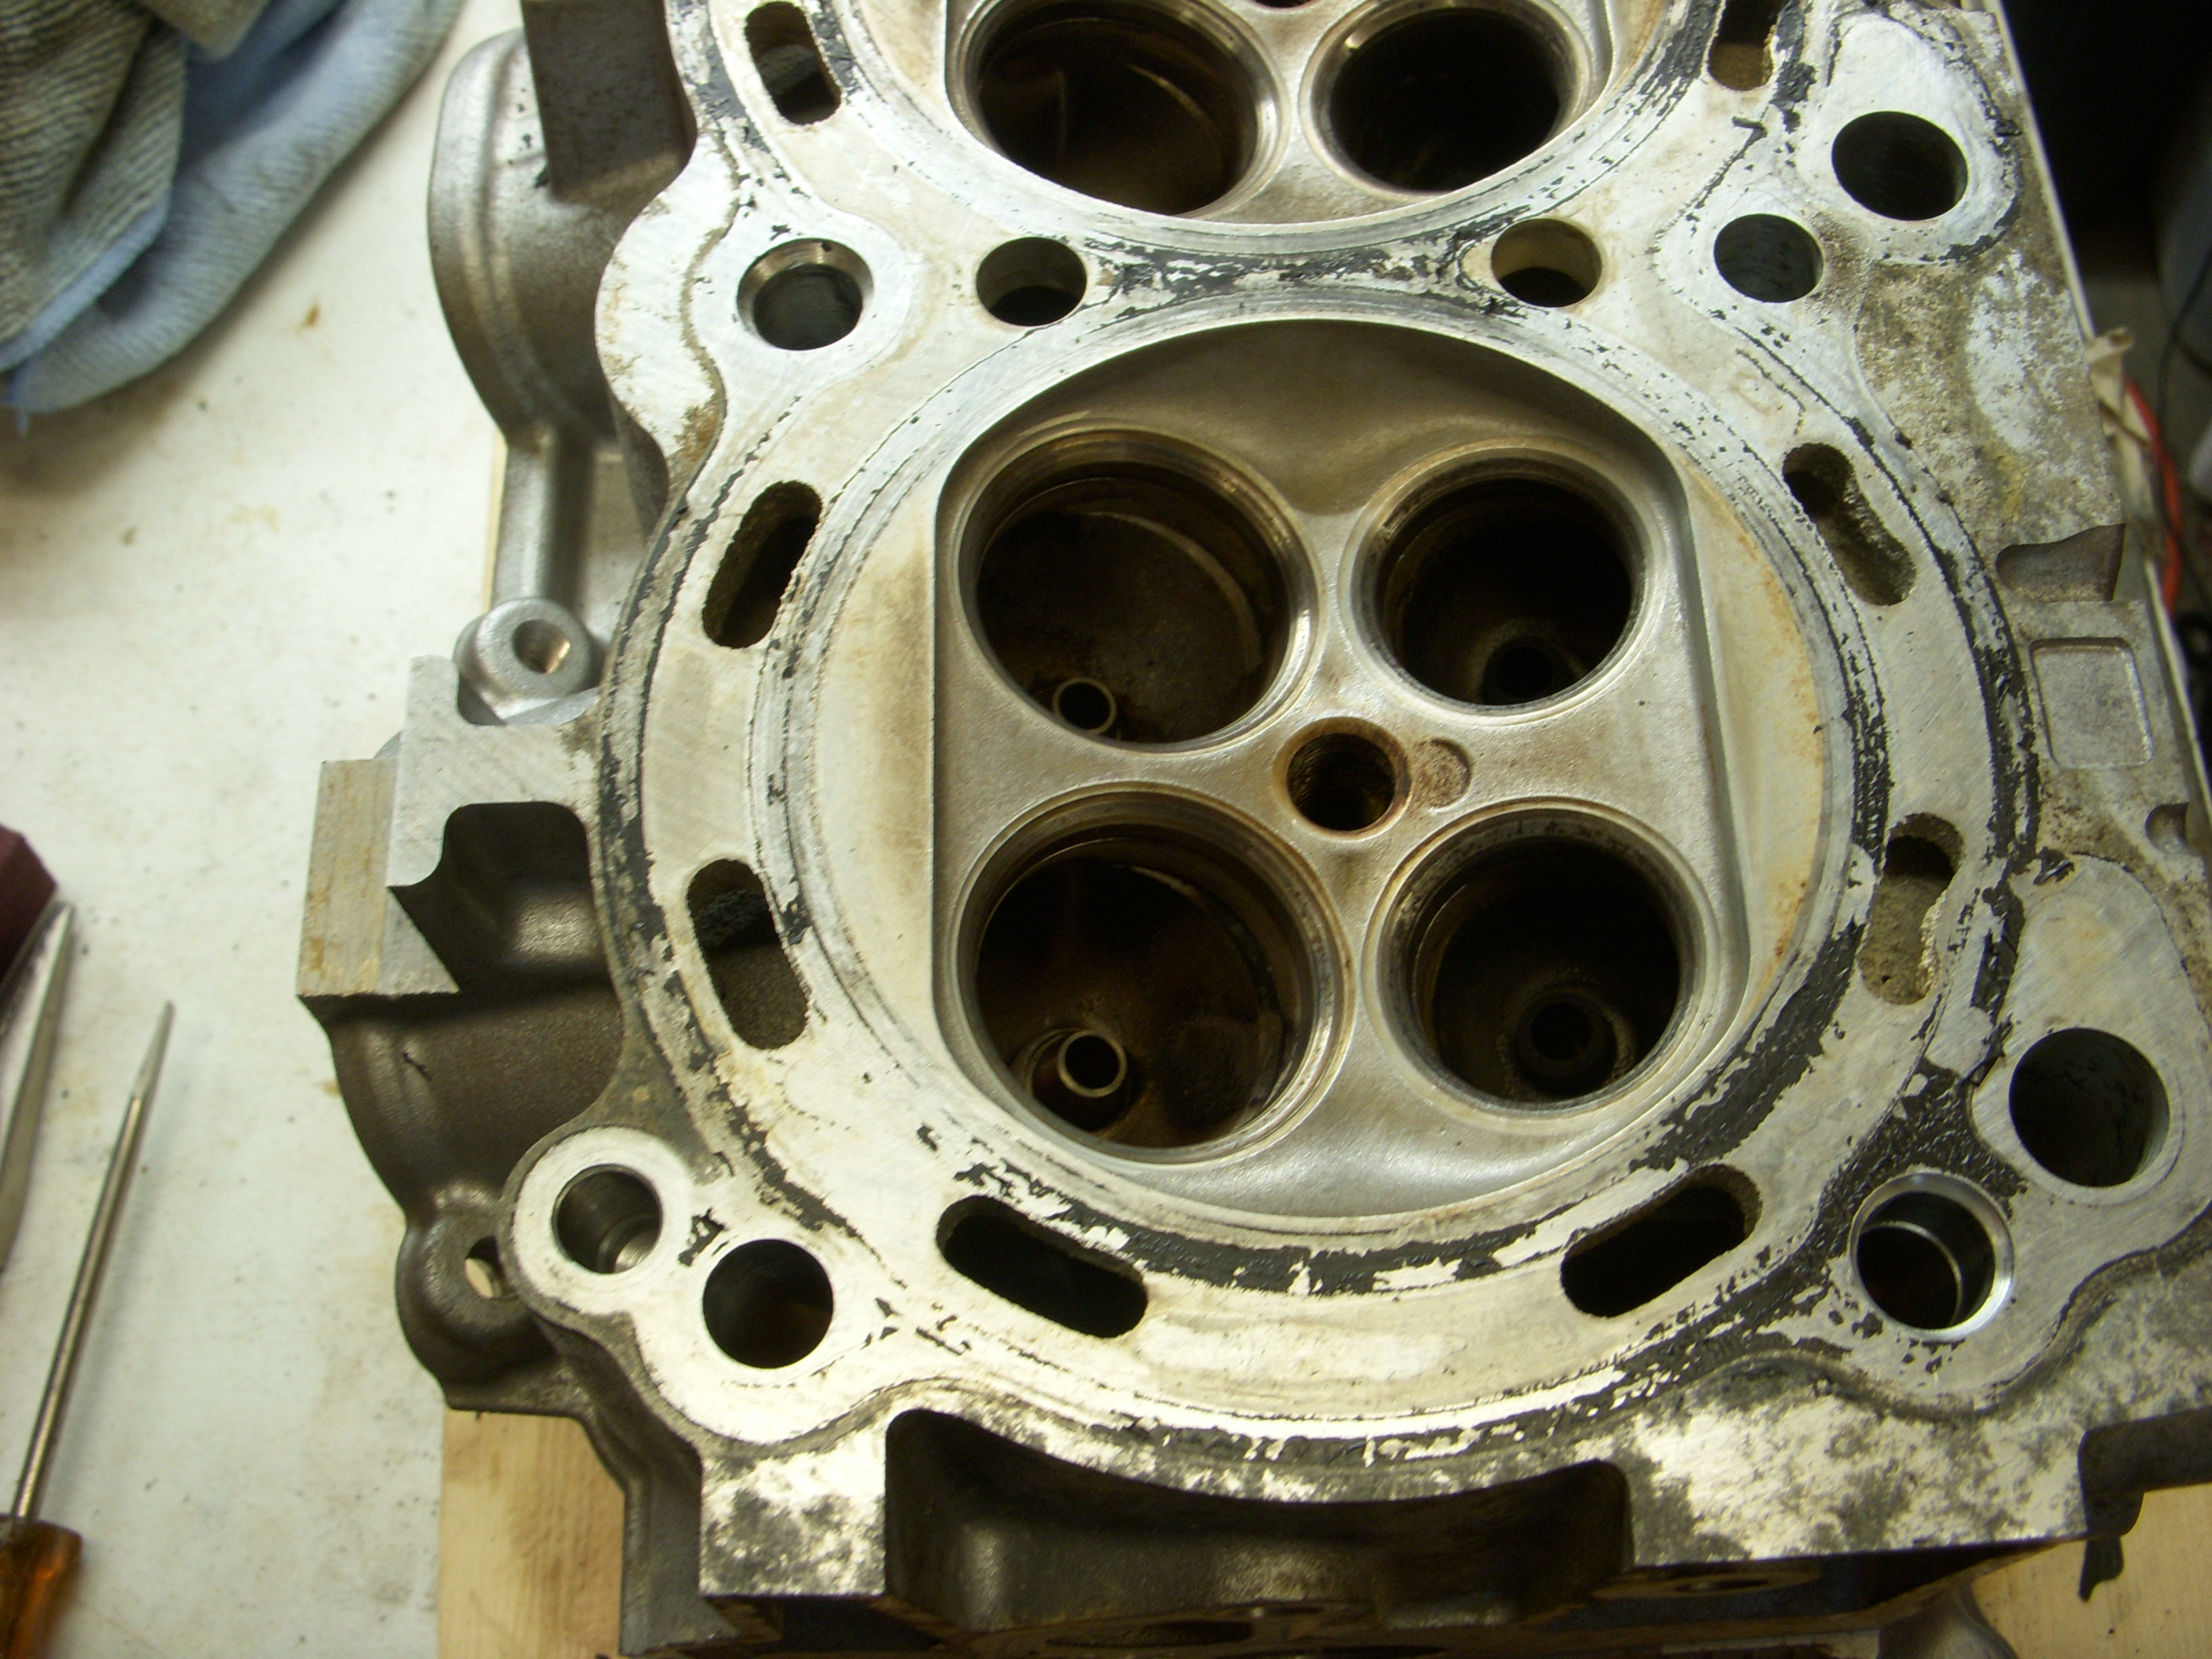
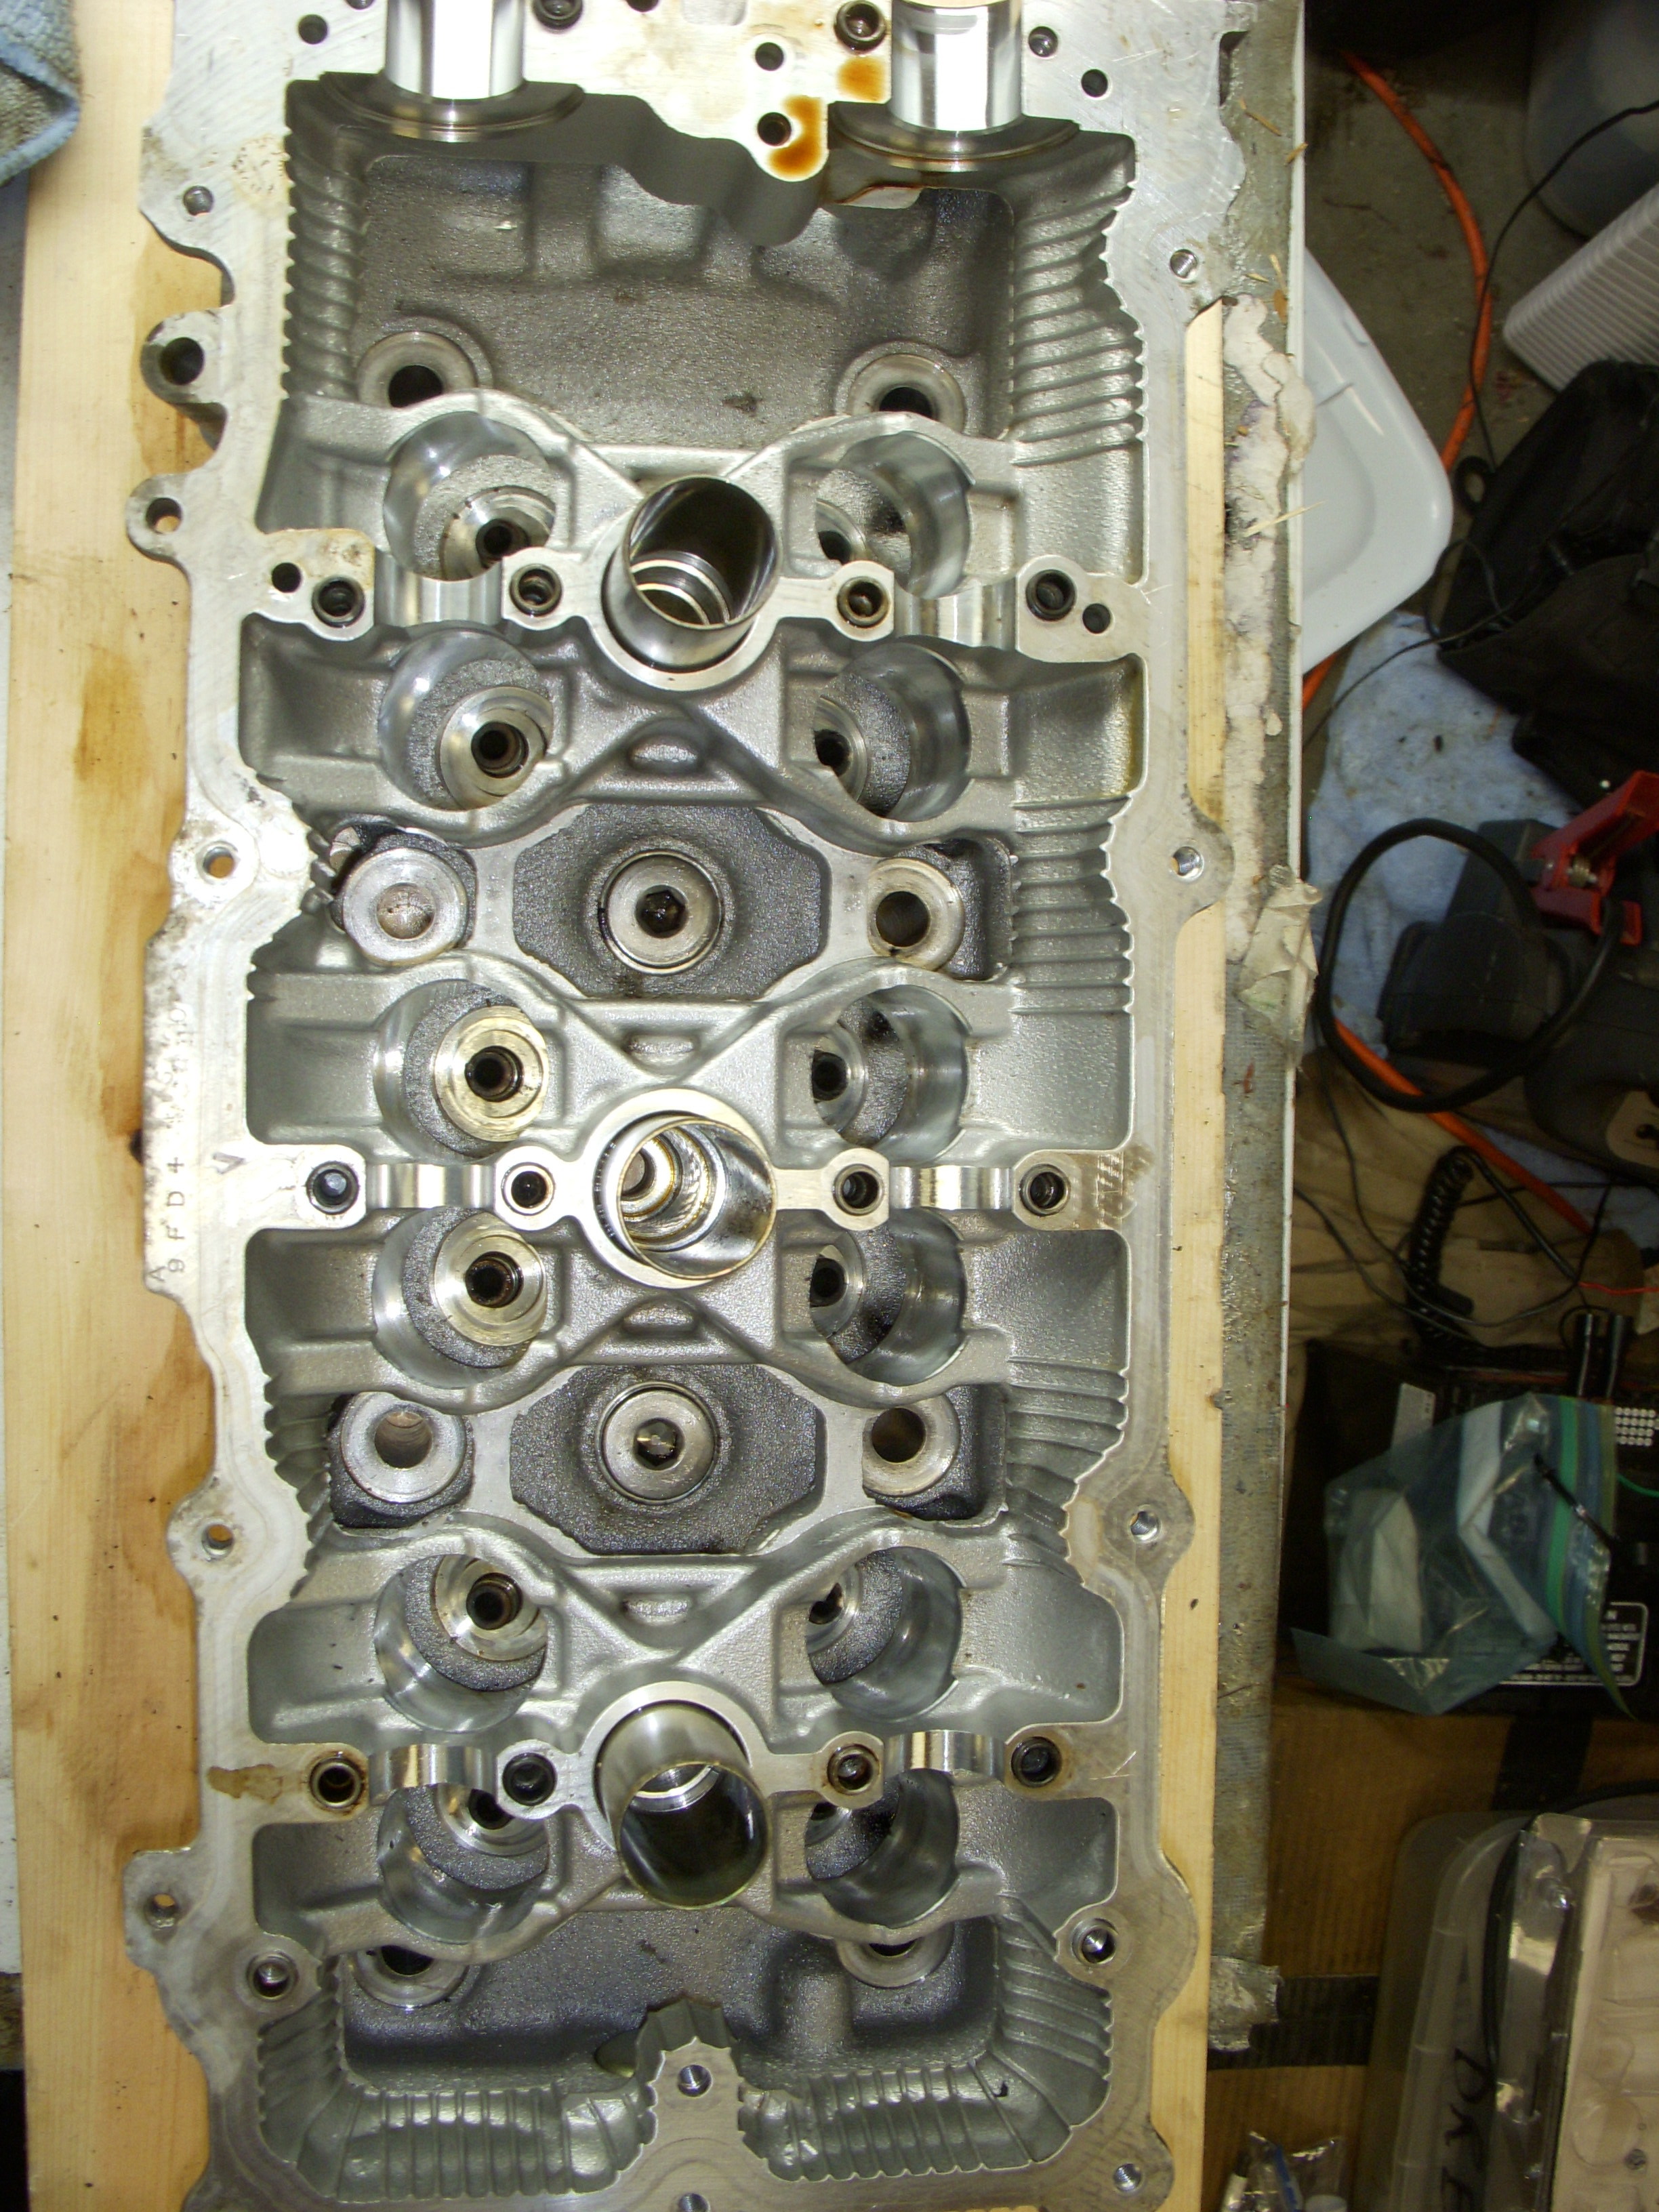
This went well - I'll have the other head down to bare metal tomorrow, then back them back in their original shipping containers for their trip to sunny California for a bunch of work.
Oh, and the difference between DE and HR valve bowls is very obvious - the combustion chamber is much tighter in the HR as well - the dividers between the valves are not knife-edged, but more rounded and closer to the valves. Considering the increase in flow, there's some very advanced engineering going on there. When these heads come back, there's going to be massive cuts in the inside of the head to allow for lobe clearances. I also got the two new Altima HR valve covers today, along with all new cover gaskets. They fit just fine on the heads. Will need to lap in the valves - just because. The intakes are magnetic - the exhaust valves are not. I'm to re-use the aluminum valve retainers and the steel clips. Custom-fitted valve springs and spacers will be provided, and I'll install Viton valve seals which also must be custom-fitted because of the extreme lobes. Also new spark plug tubes will be installed - the old ones gotta come out for making lobe clearance cuts in the heads.
Then I get to order 24 new DLC valve lifters and fit them to the cams - probably need to order 5 at first, with a wide spacing in gap, so I can - install lifter - install cam - measure lash(if any) - record each lobe - decide what to do to order the final lash - and repeat. Today they are $19.65 each from Courtesy in Richardson TX. For a MINIMUM of 28 DLC lifters, that's at least $550 - plus shipping. Plus they don't hold up as well as people think - I had 6 of the 12 DLC lifters in one Cosworth head with damage in the coating - some pretty severe - with 2,000 miles total on them. At least I had figured out a way to use a dremel grinder to take a bit off the mushroom stem to open the gap a little at a time when setting up initial valve lash - saves money - takes more time.
Last edited by grey99max; 01-14-2017 at 11:40 AM.


 10-17-2015, 04:44 PM
#1692
LandShark has Cosworth
Thread Starter
iTrader: (12)
Join Date: Jan 2004
Location: Topeka, KS
Posts: 4,327
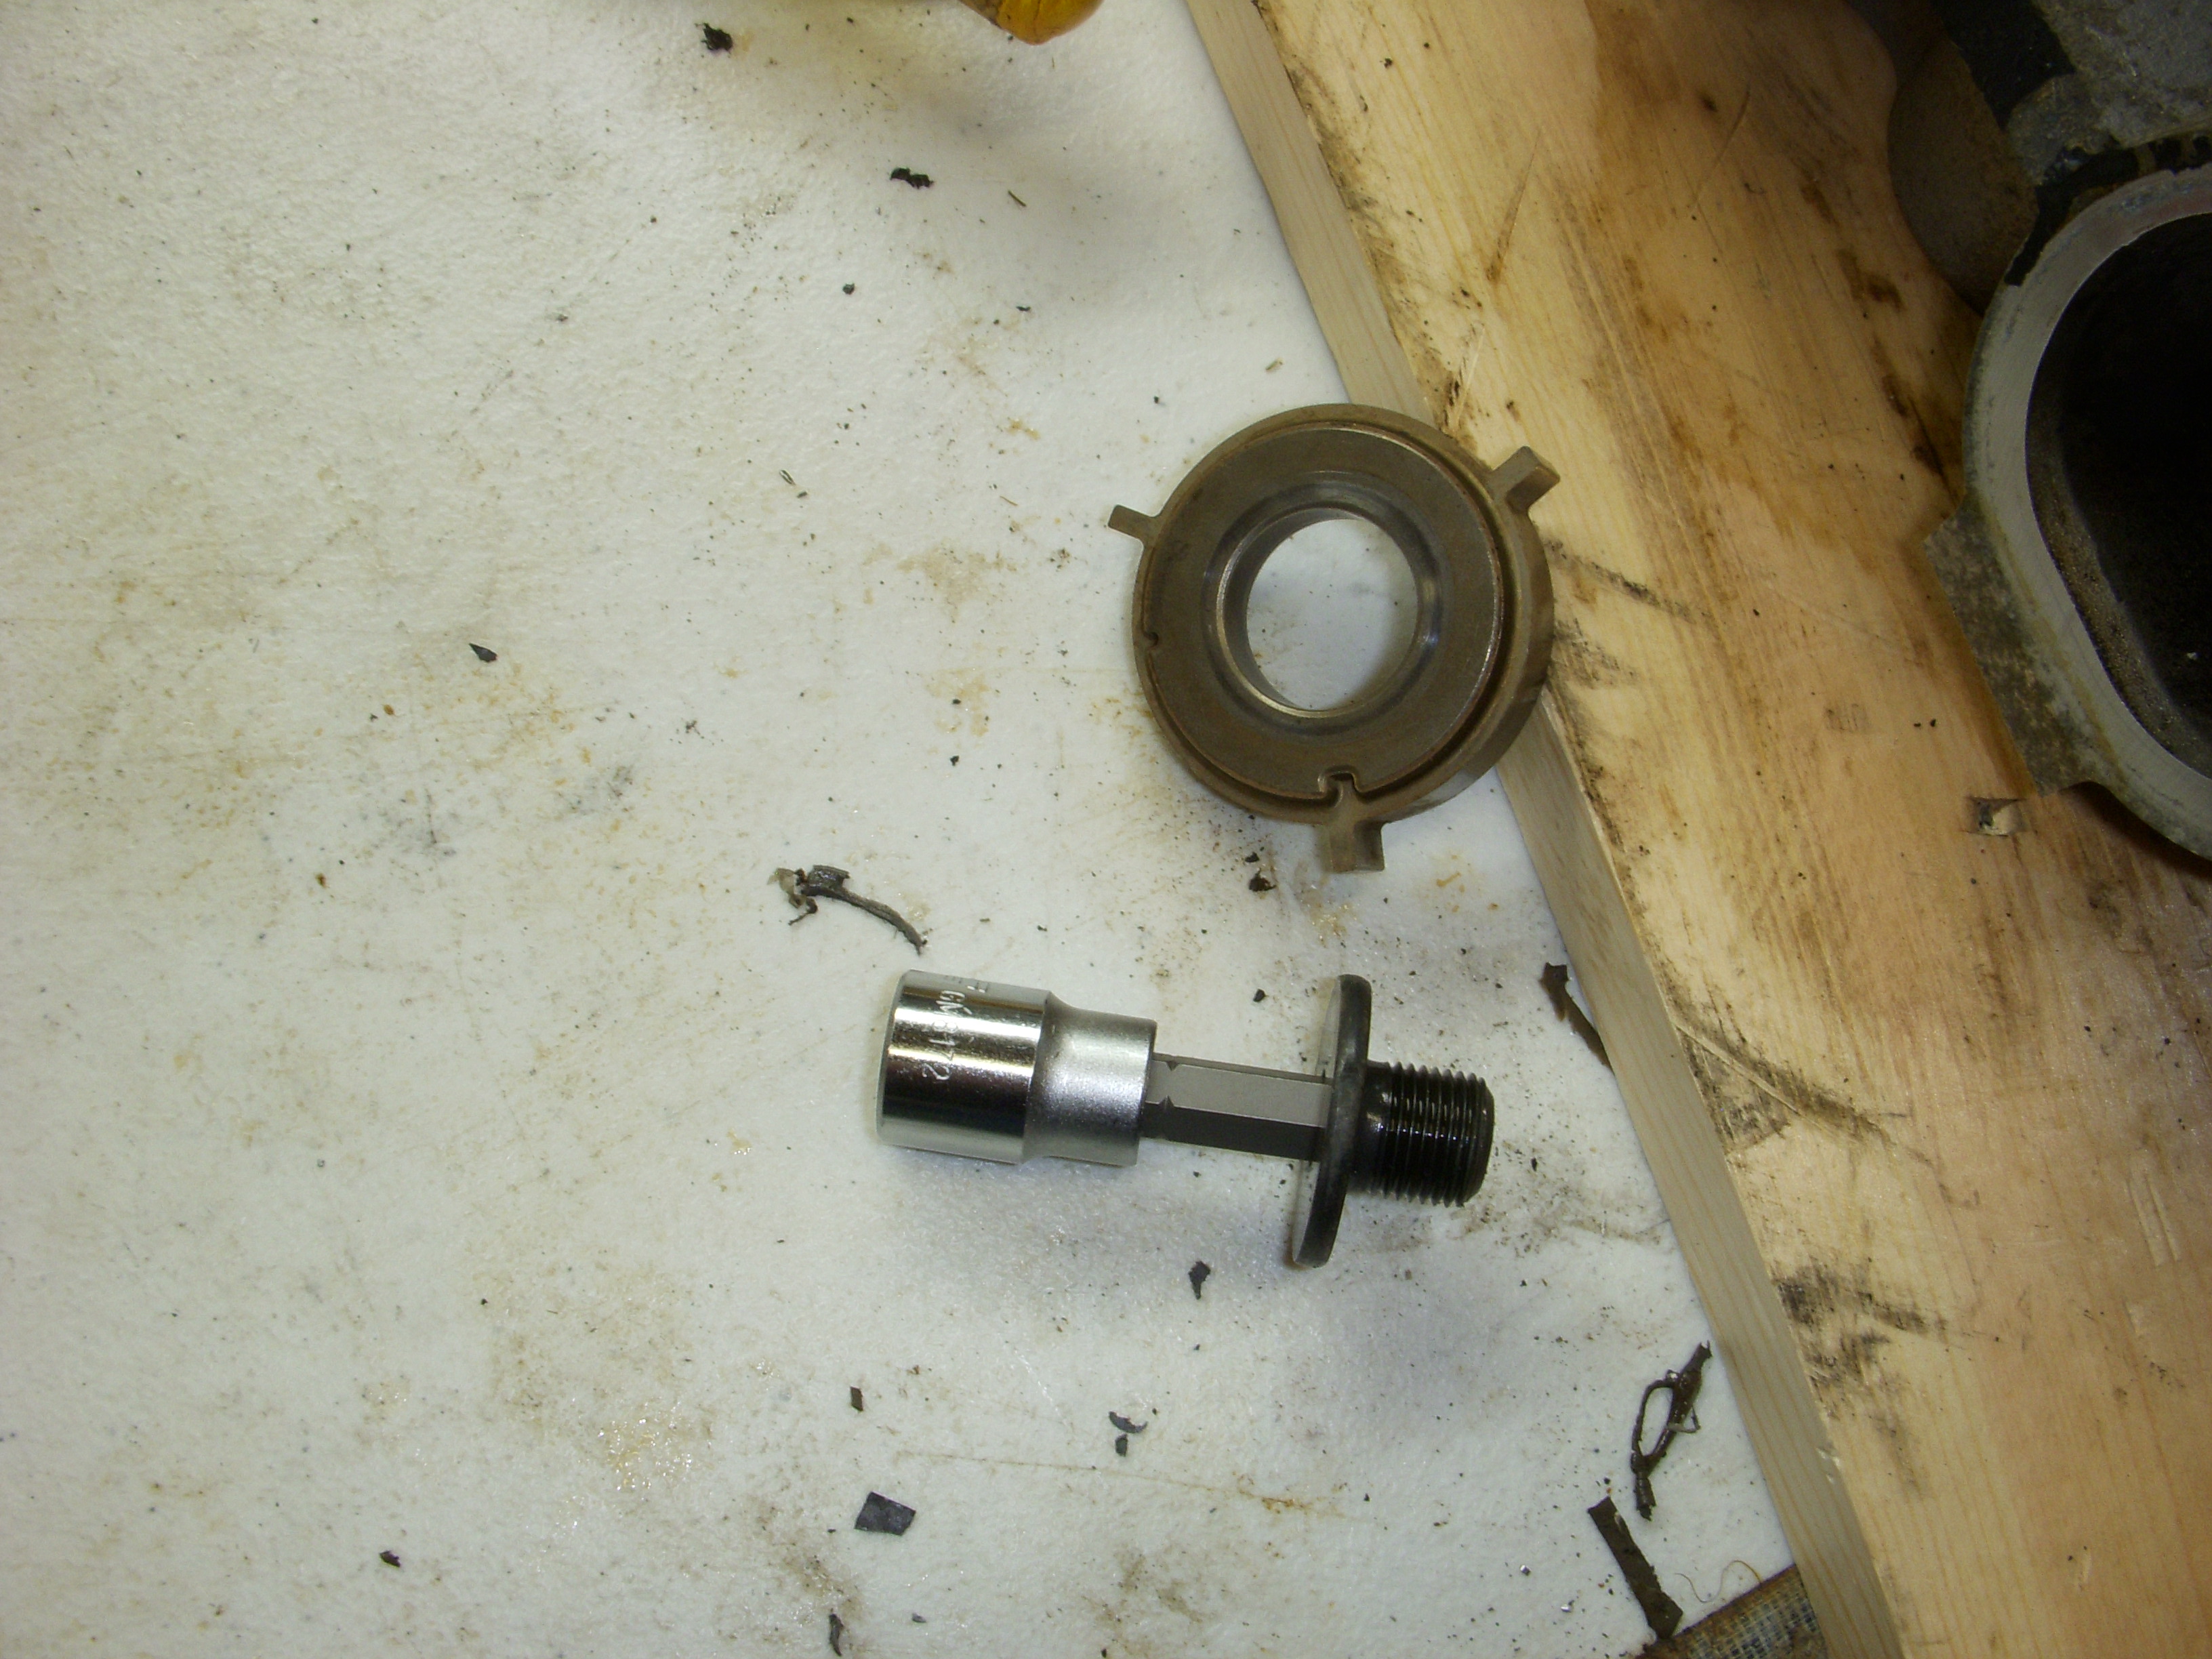
Taking the timing cam off the end of a cam - 8mm impact socket from O'Reillys..
Bare head - no hardware left on it...
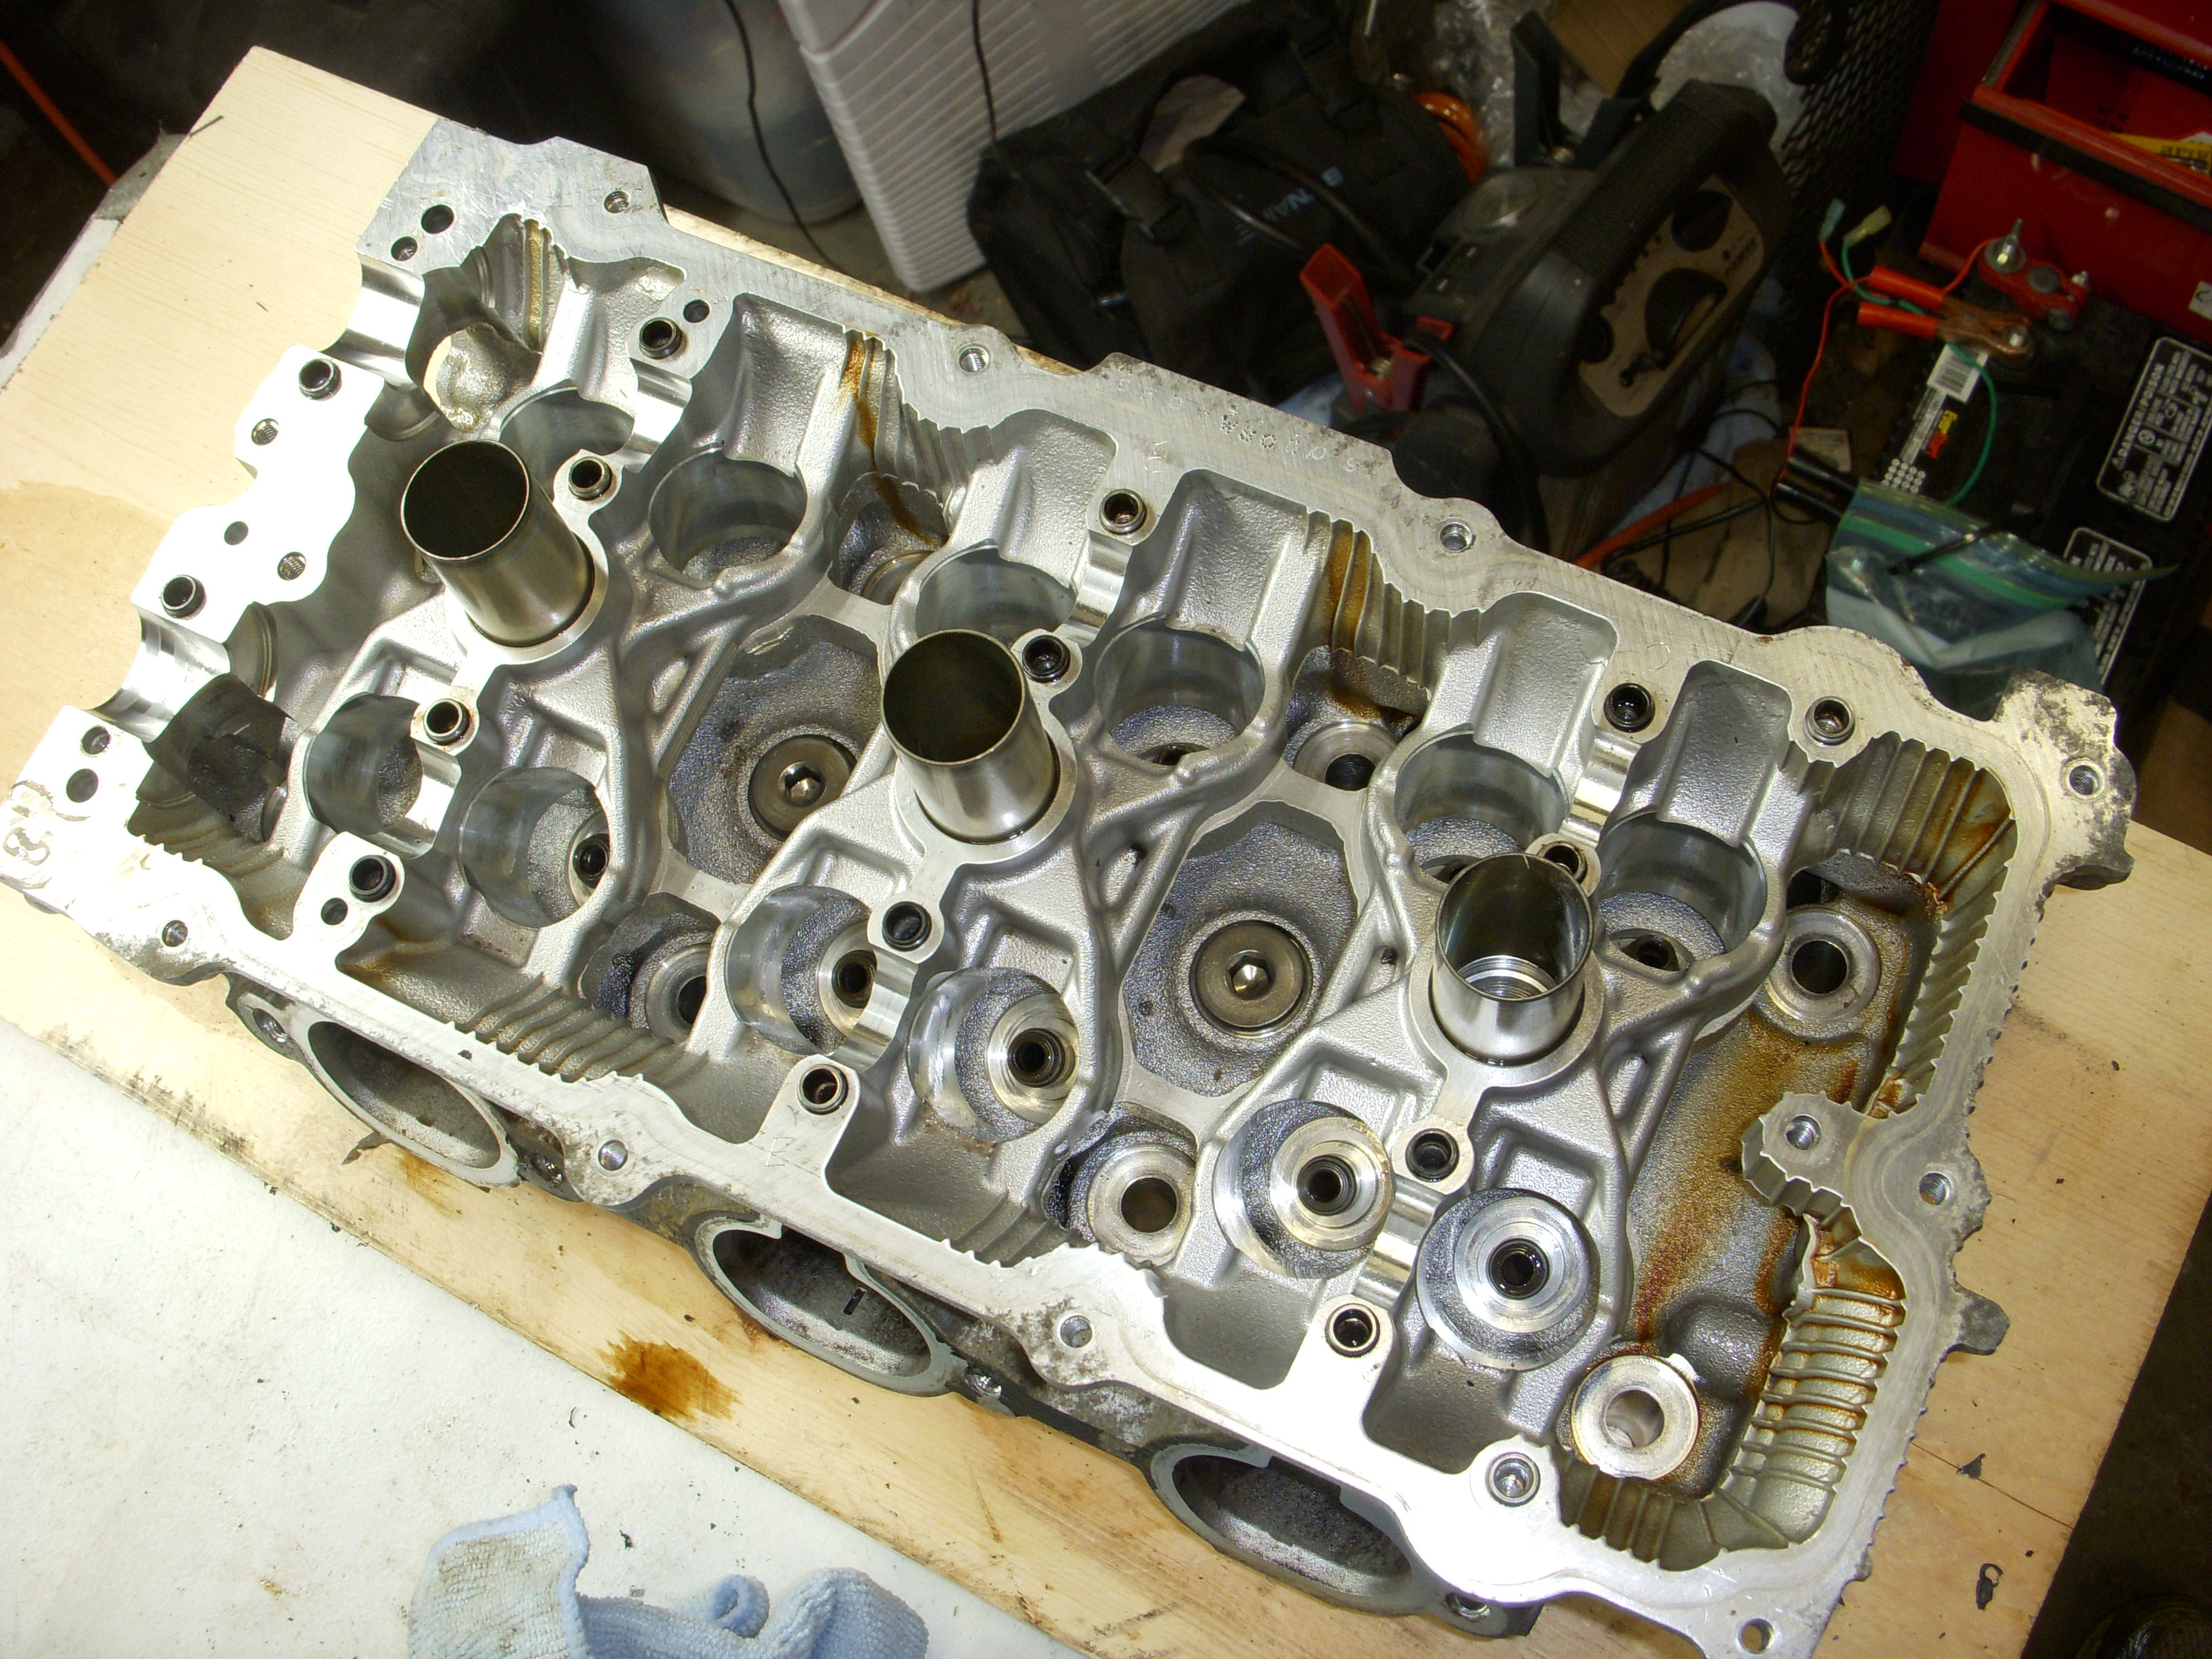
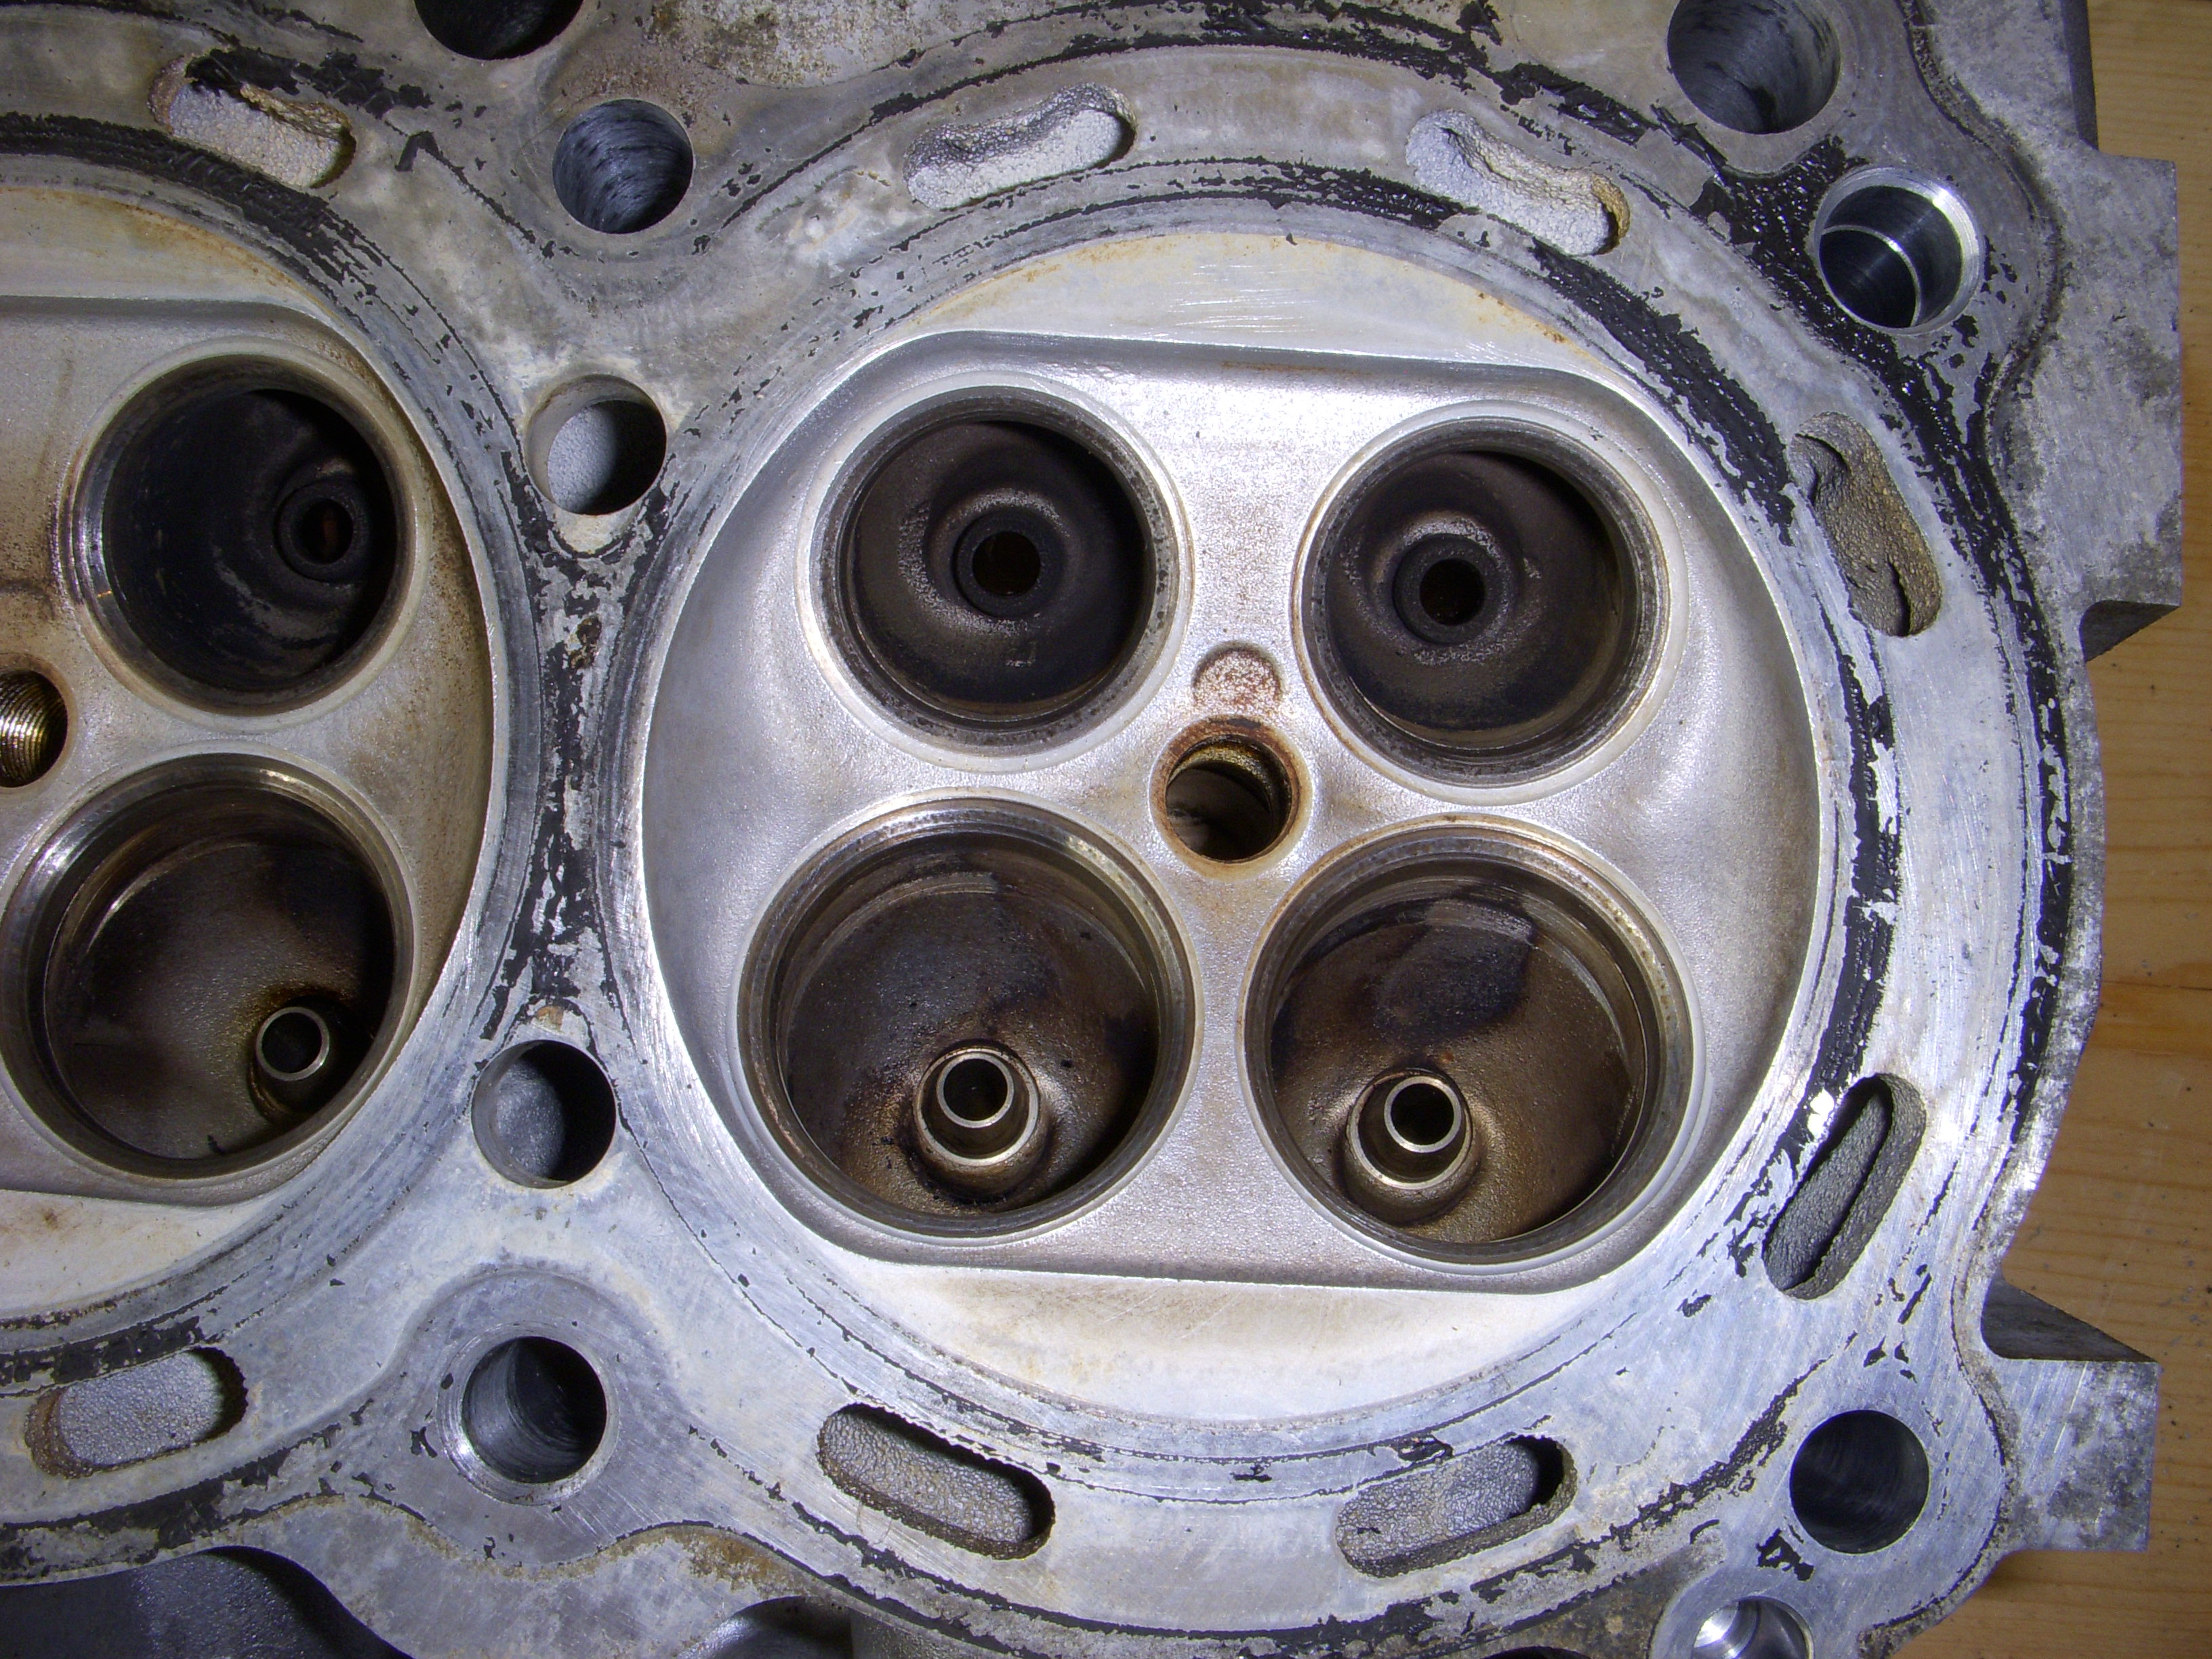
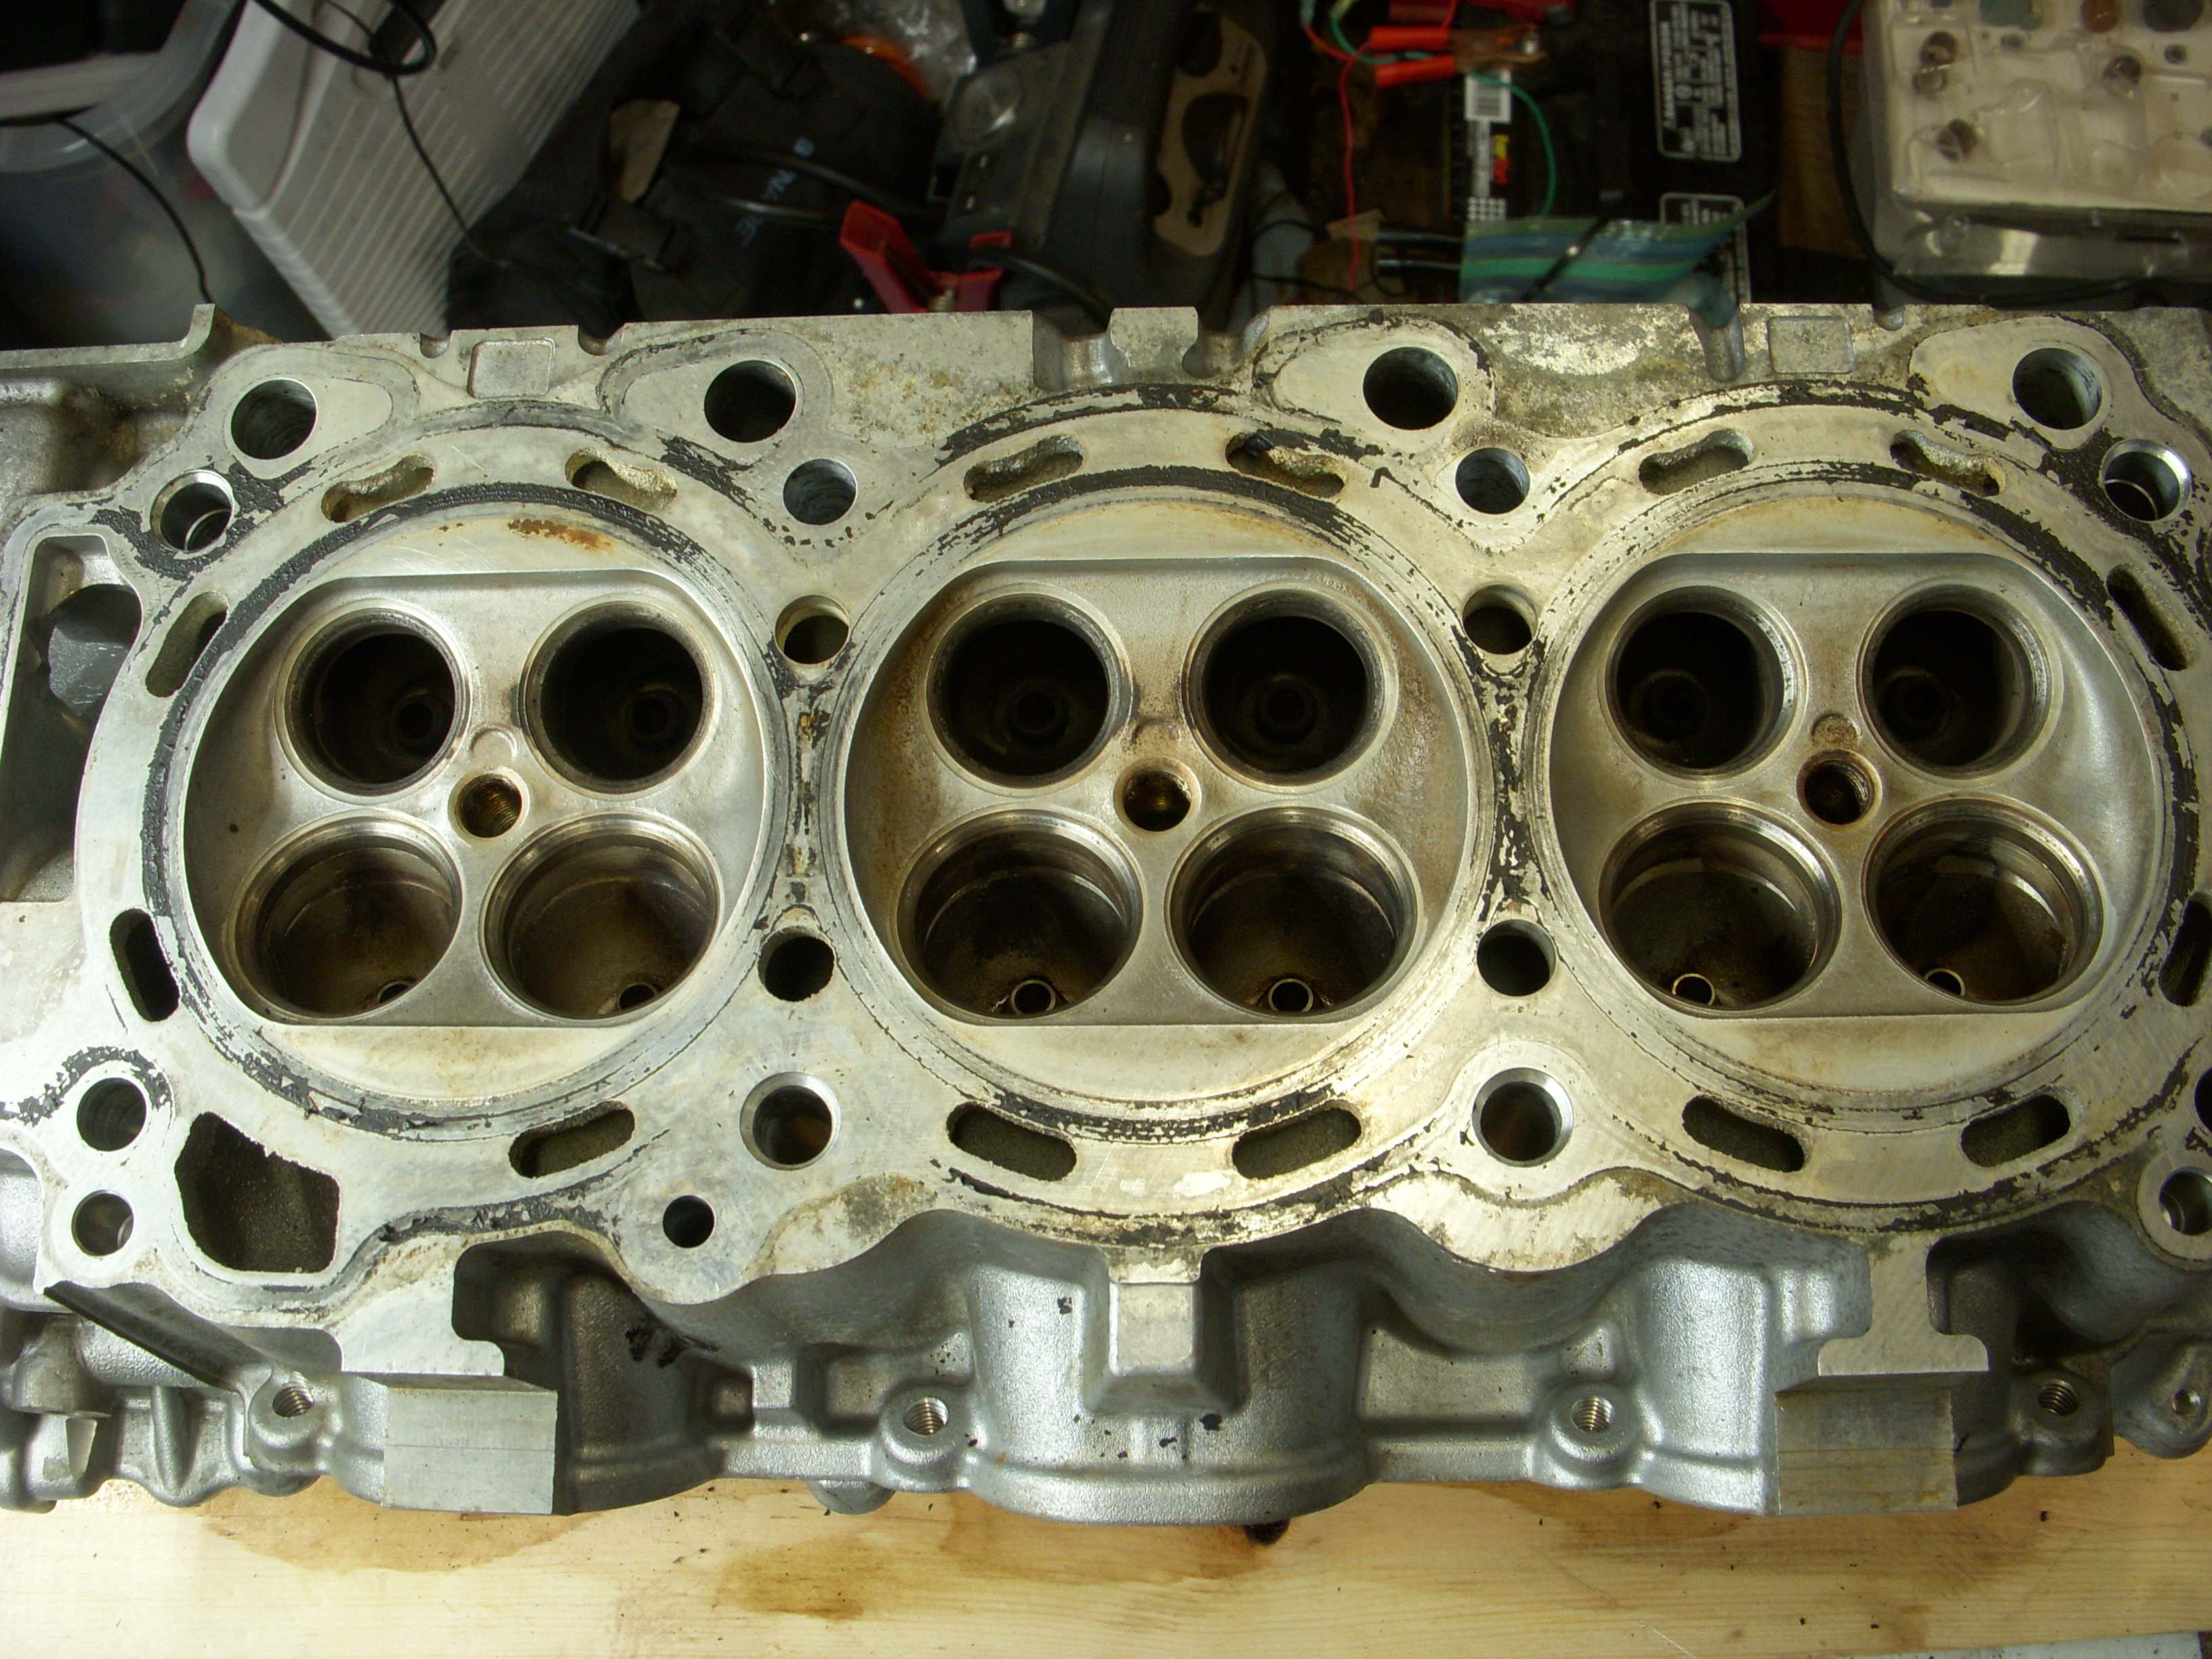
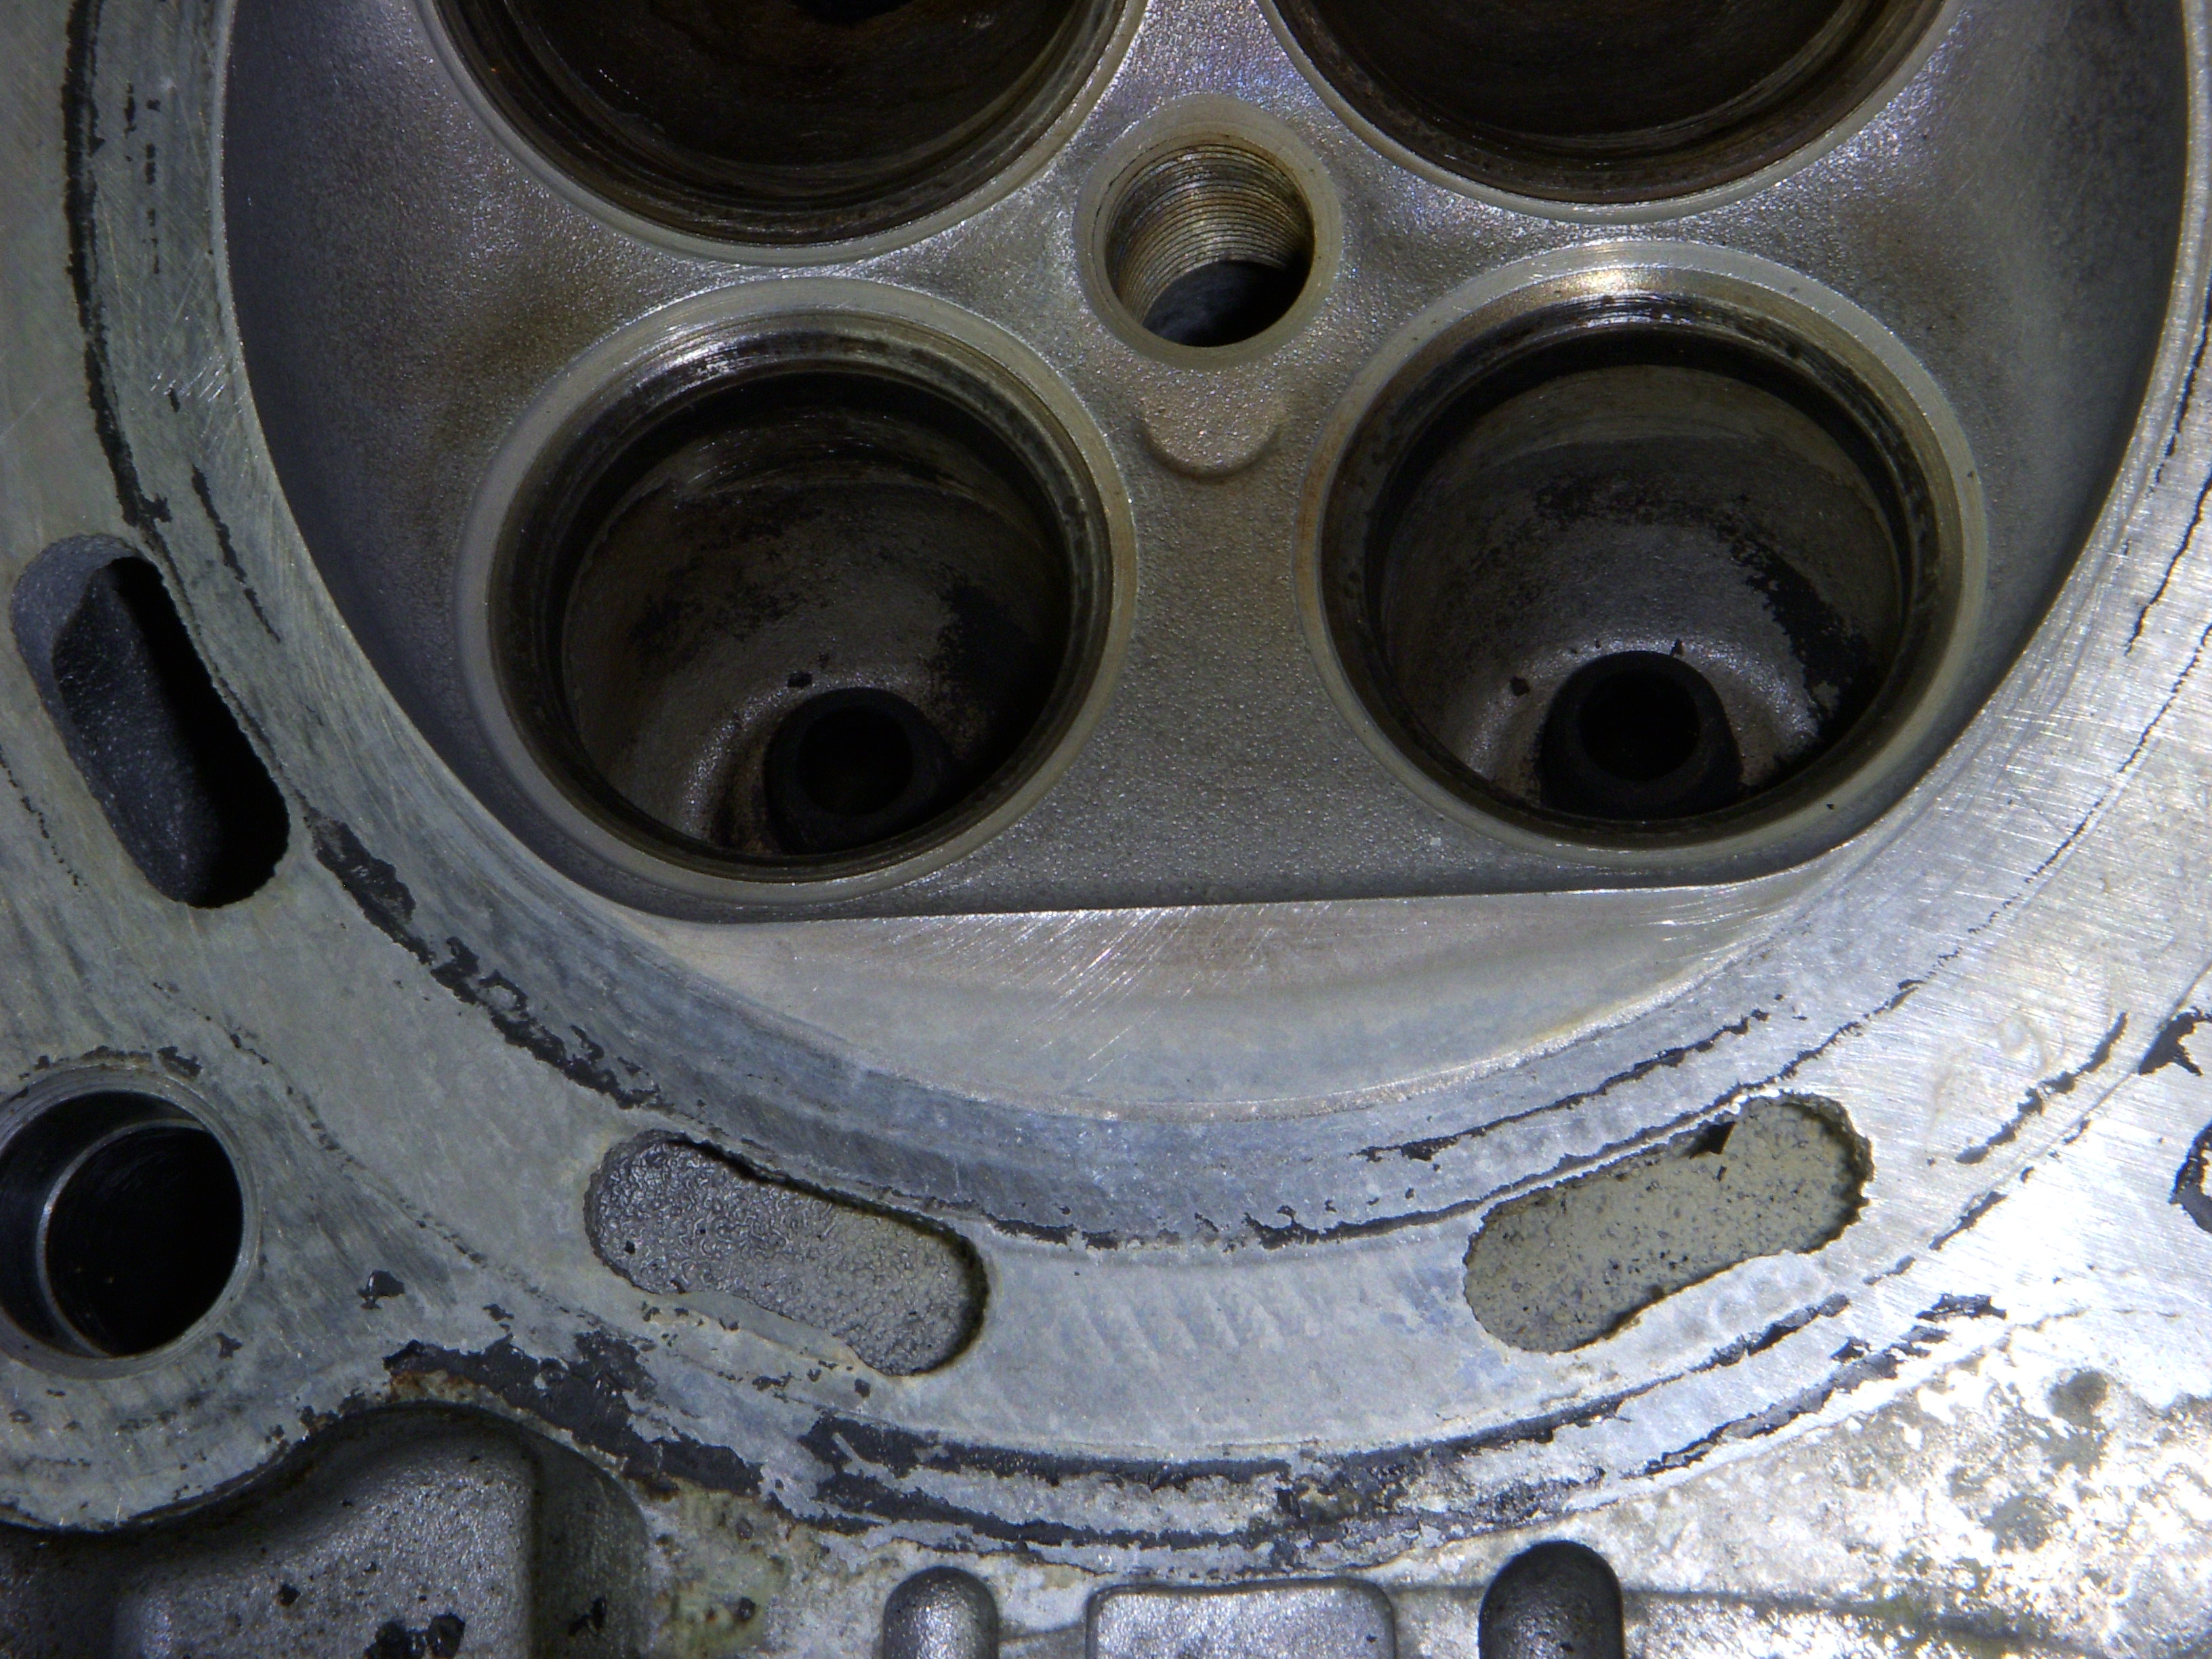
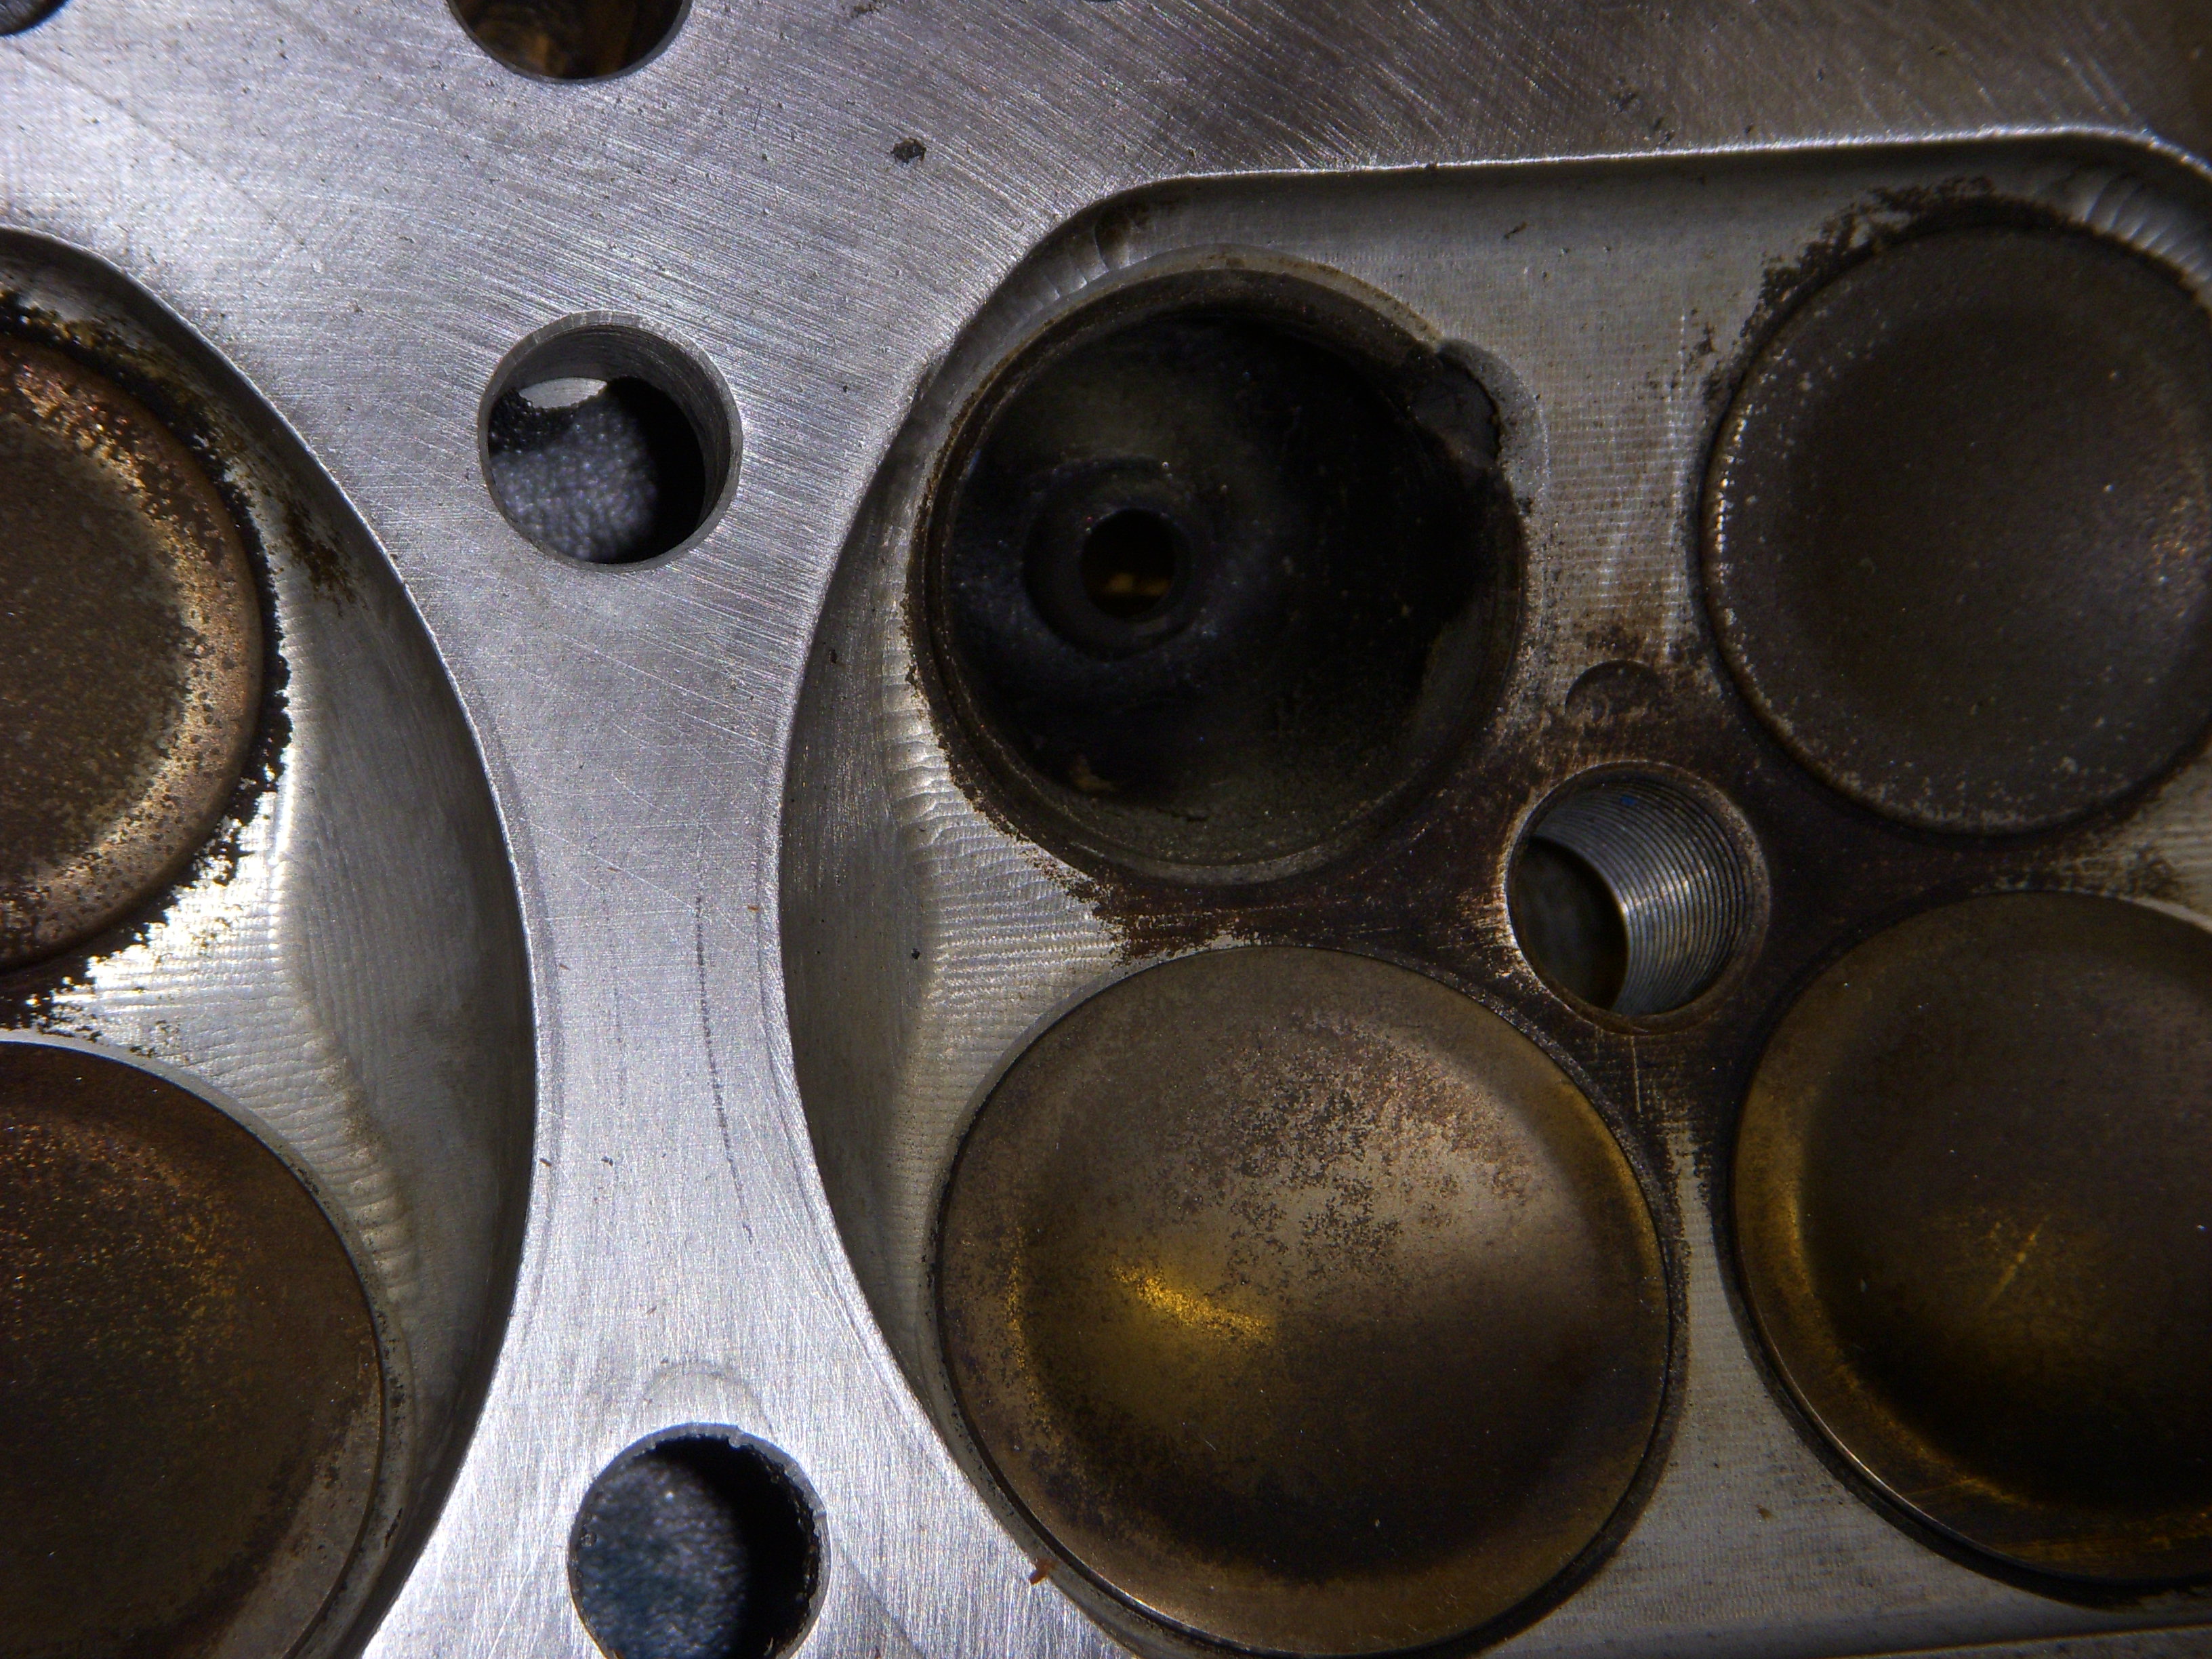
A look at the intake valve bowls.. two views of the machine work..
Exhaust valve bowls:
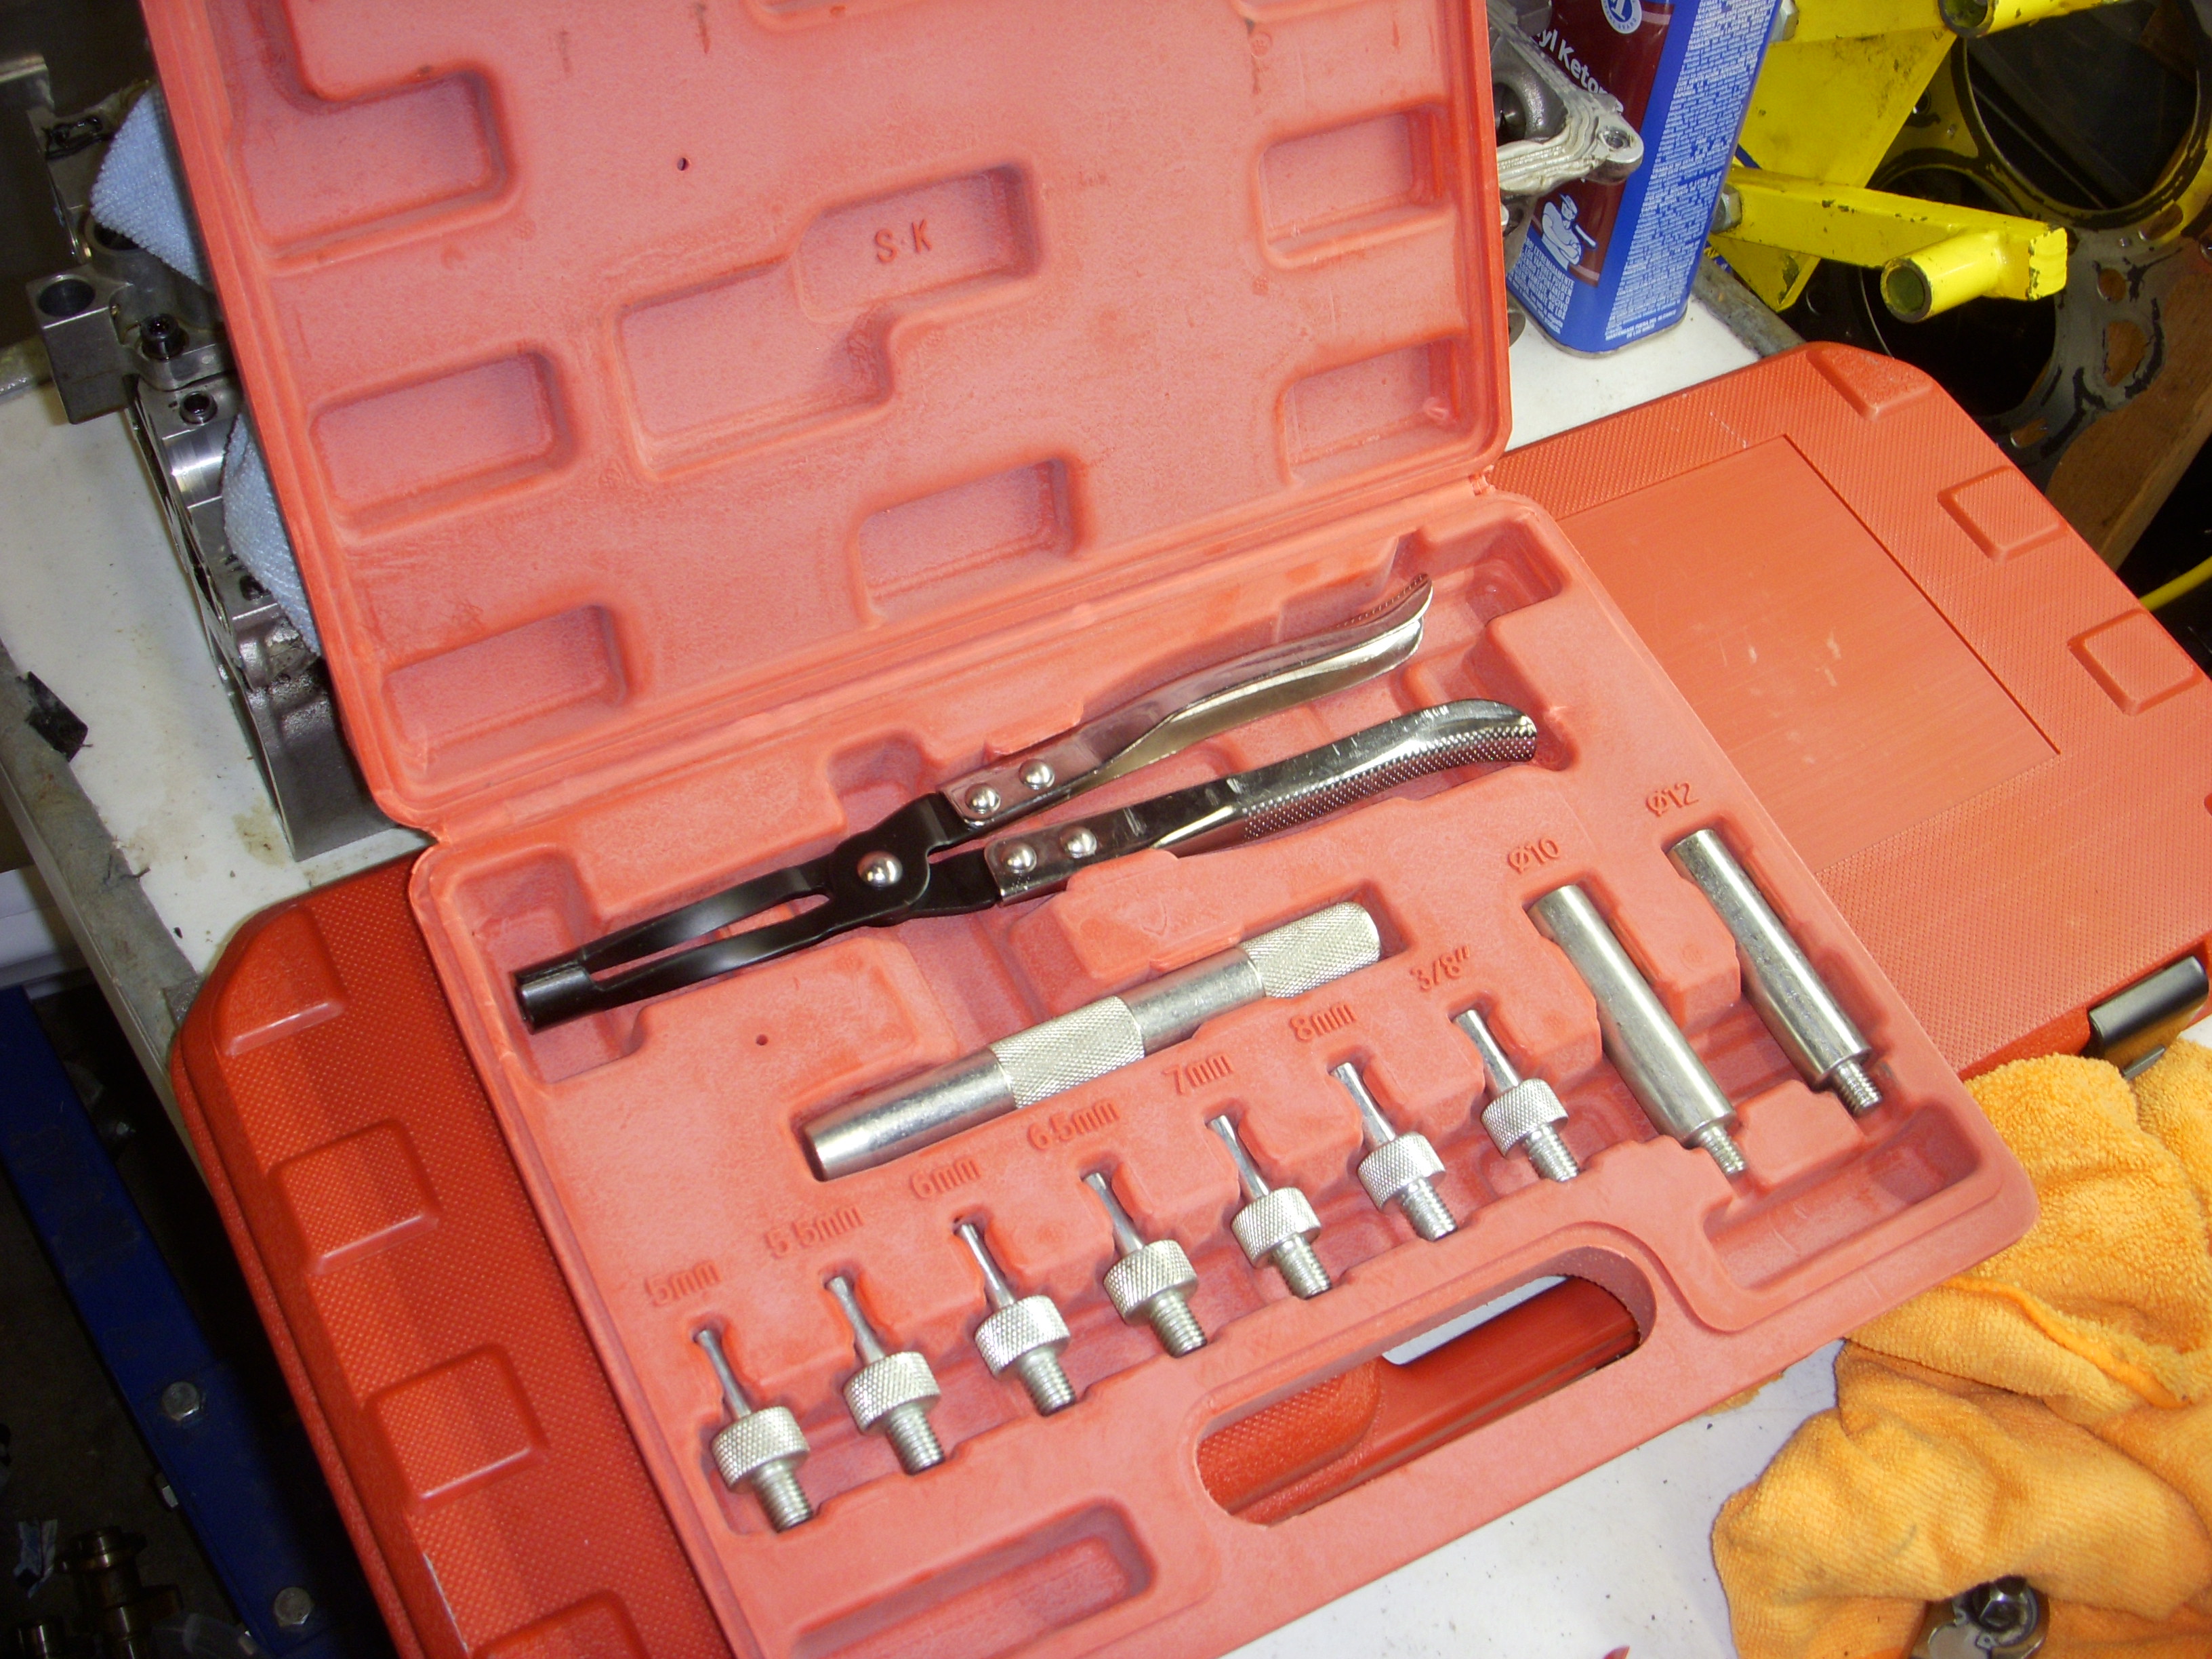
Valve compressor:

Valve seal remover-inserver tool:
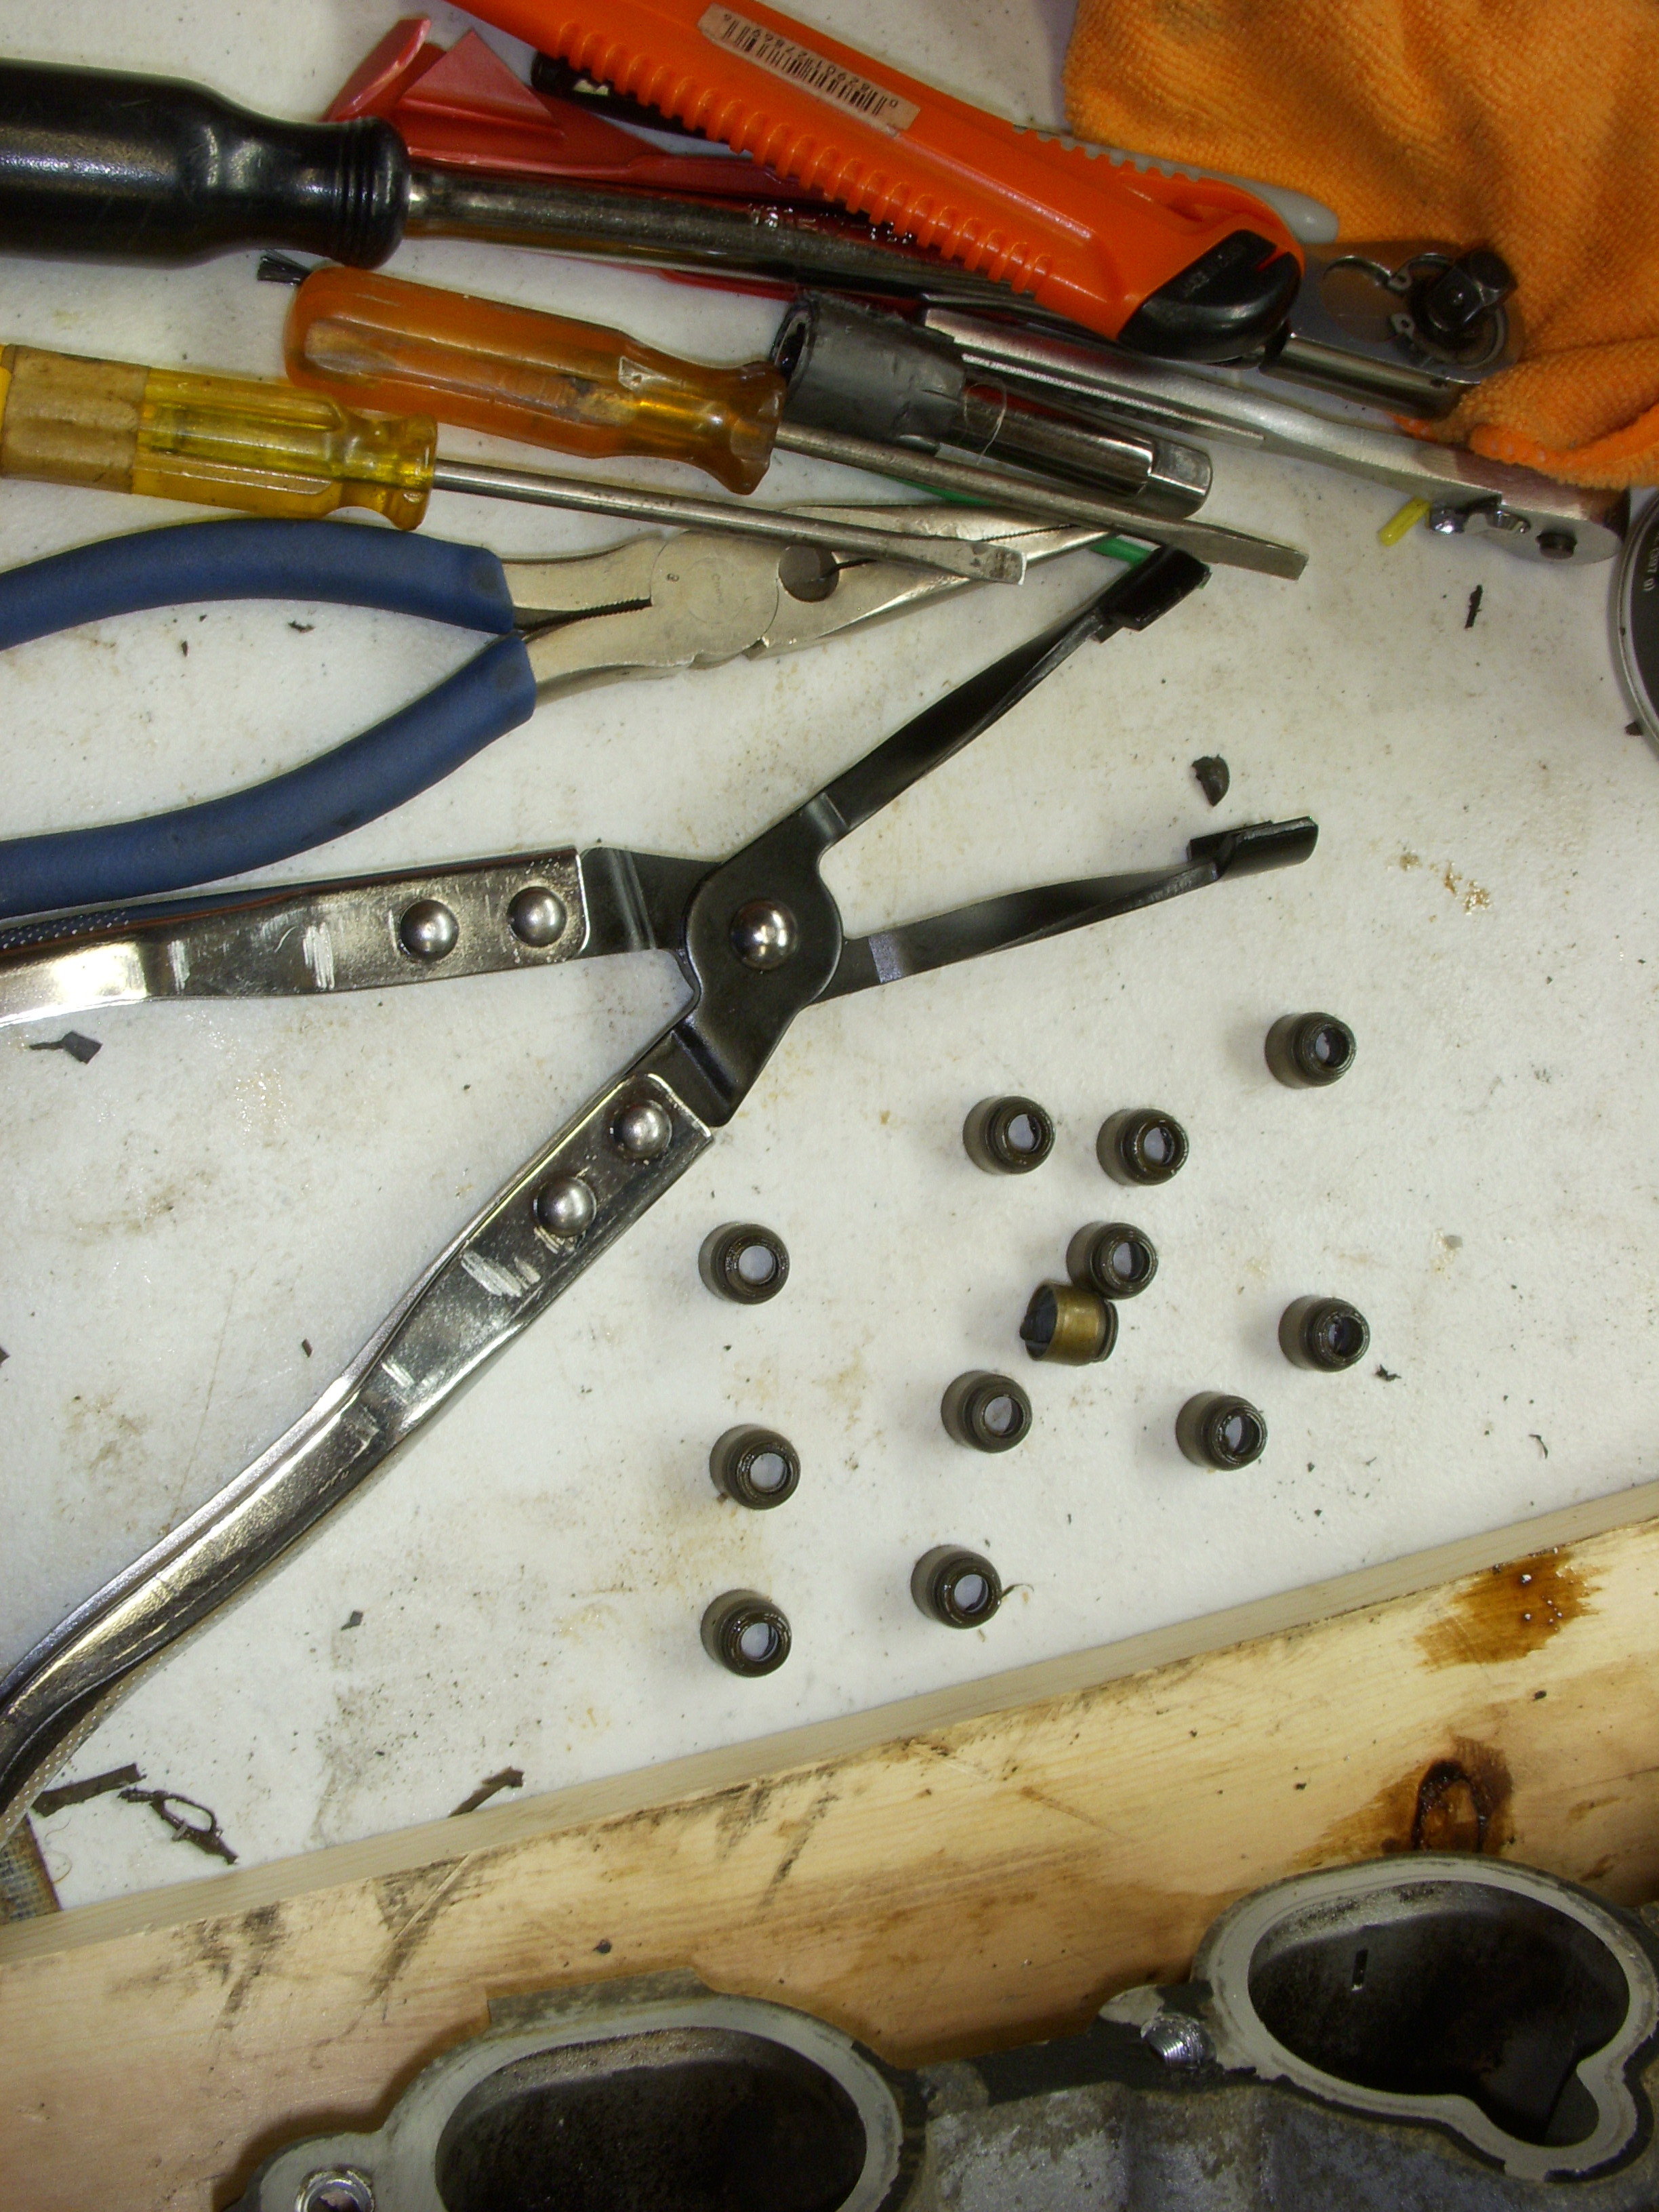
Seals plucked:
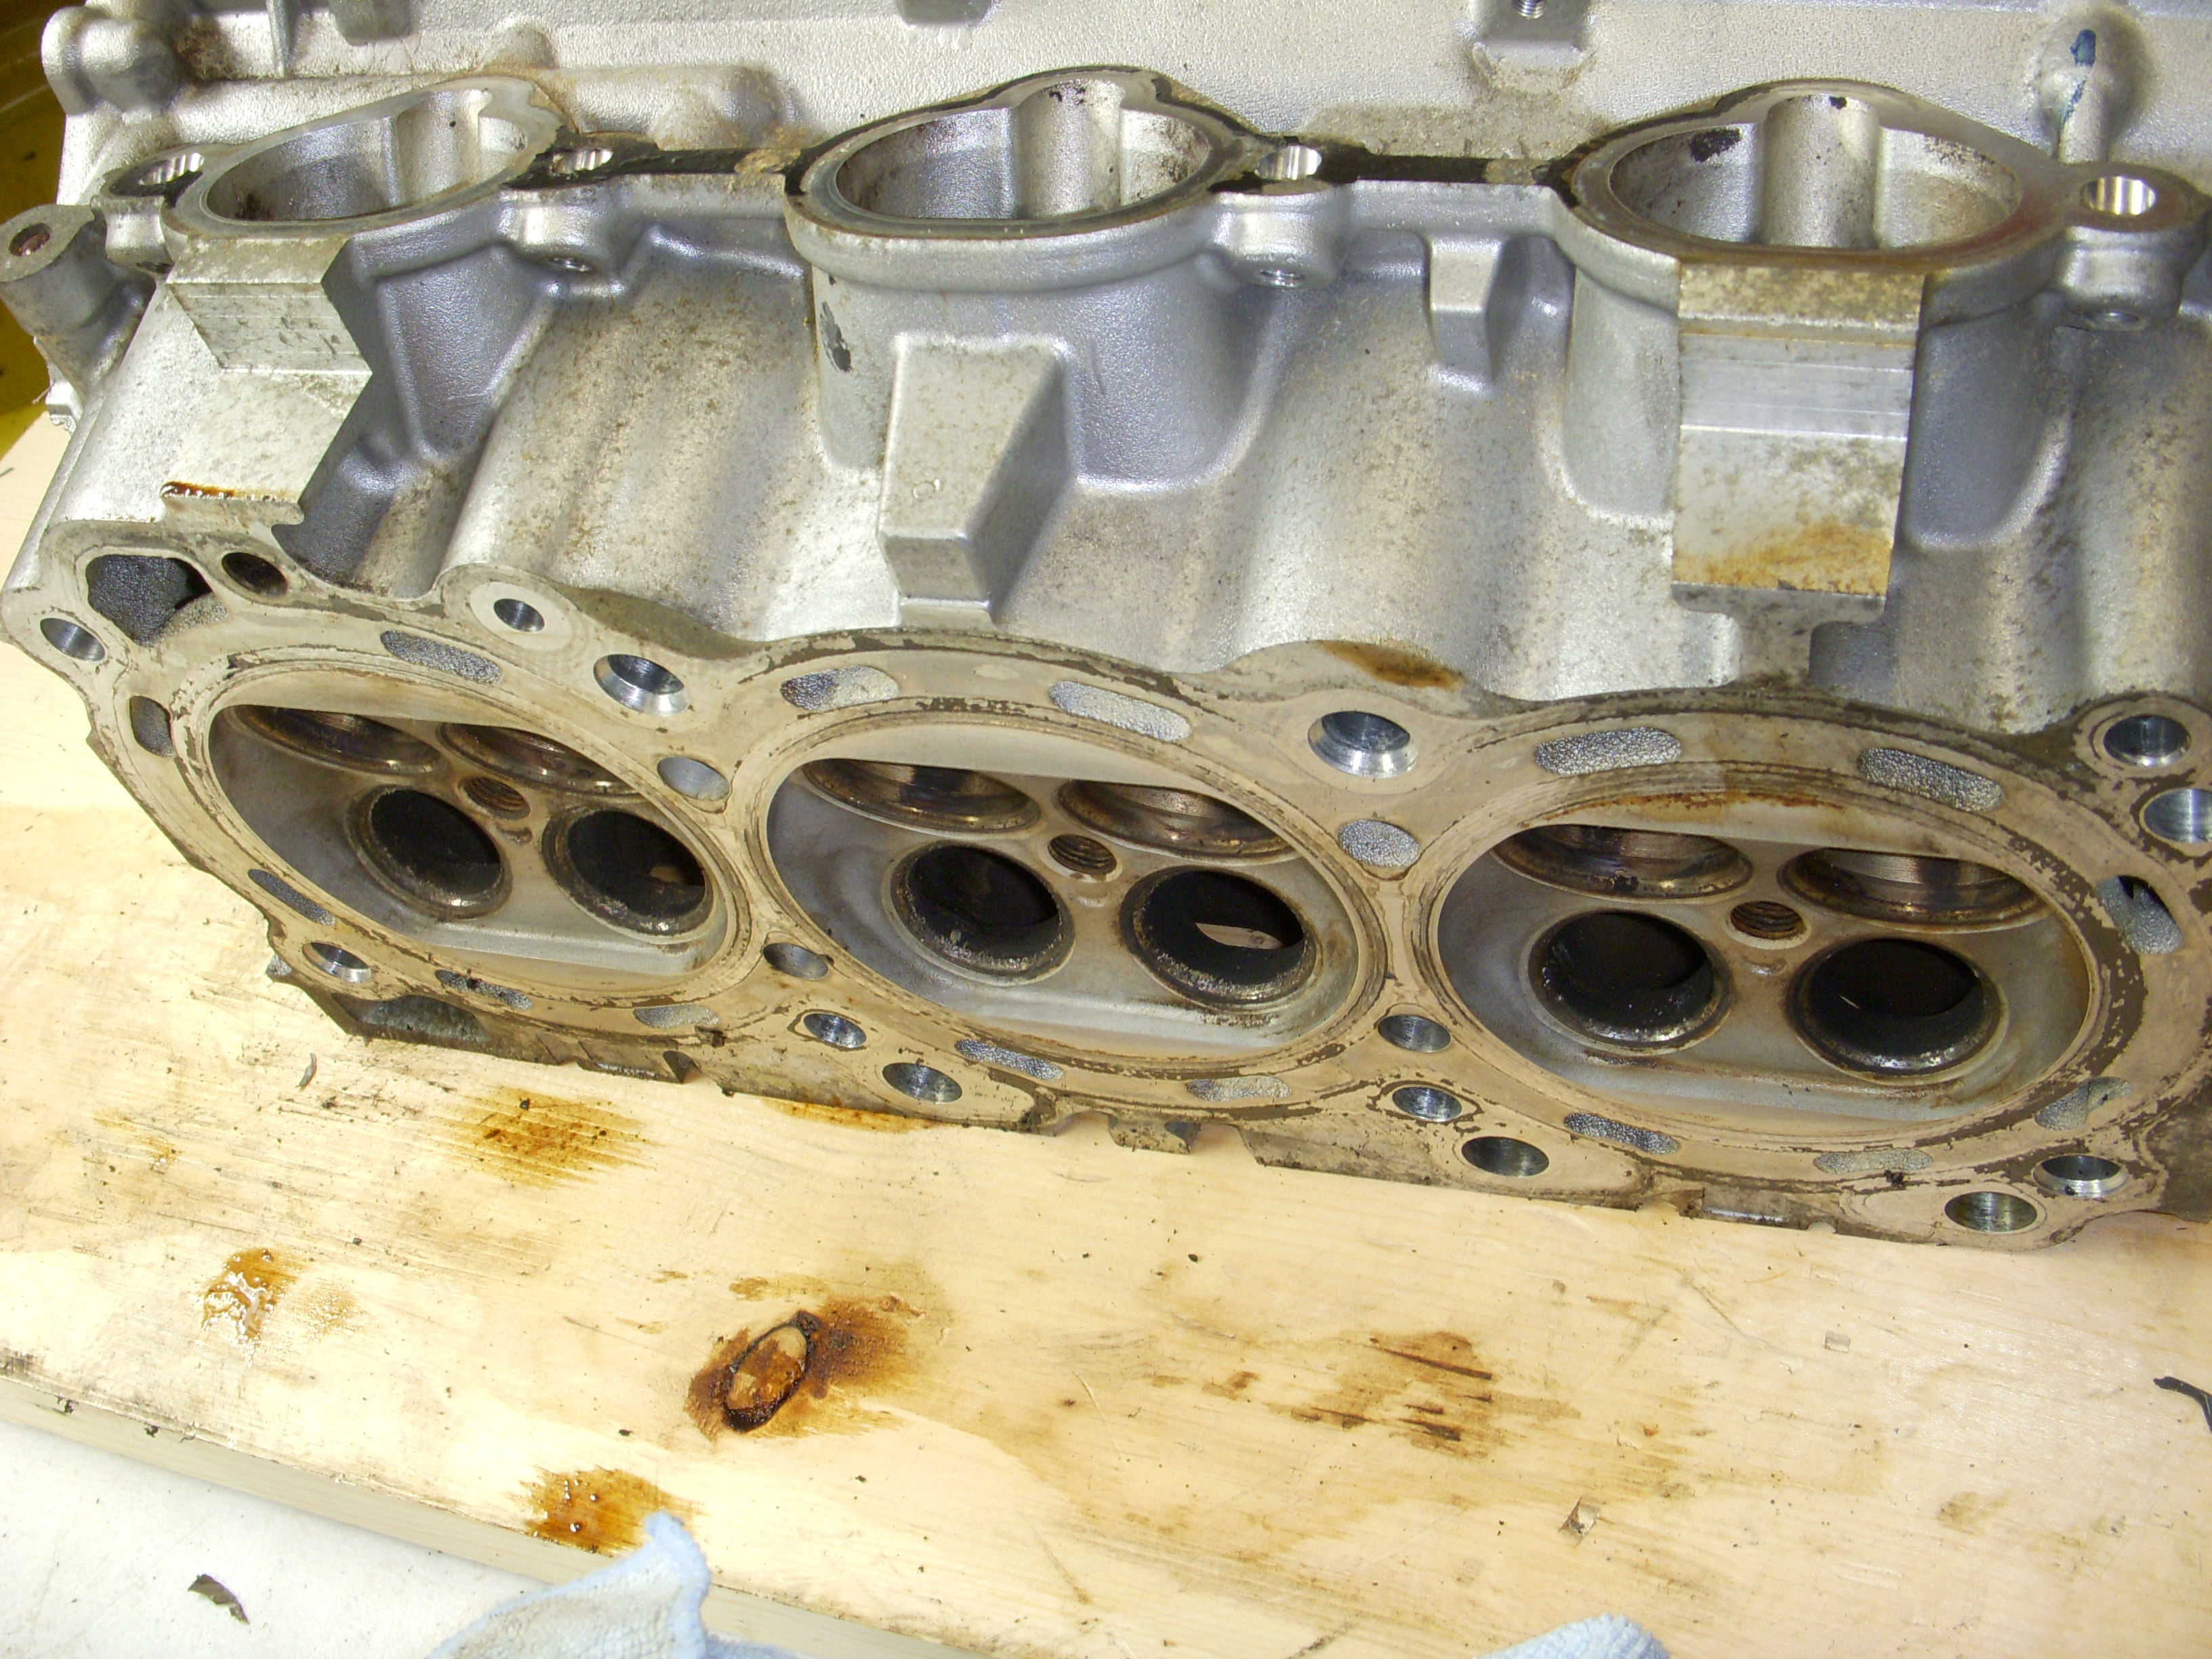
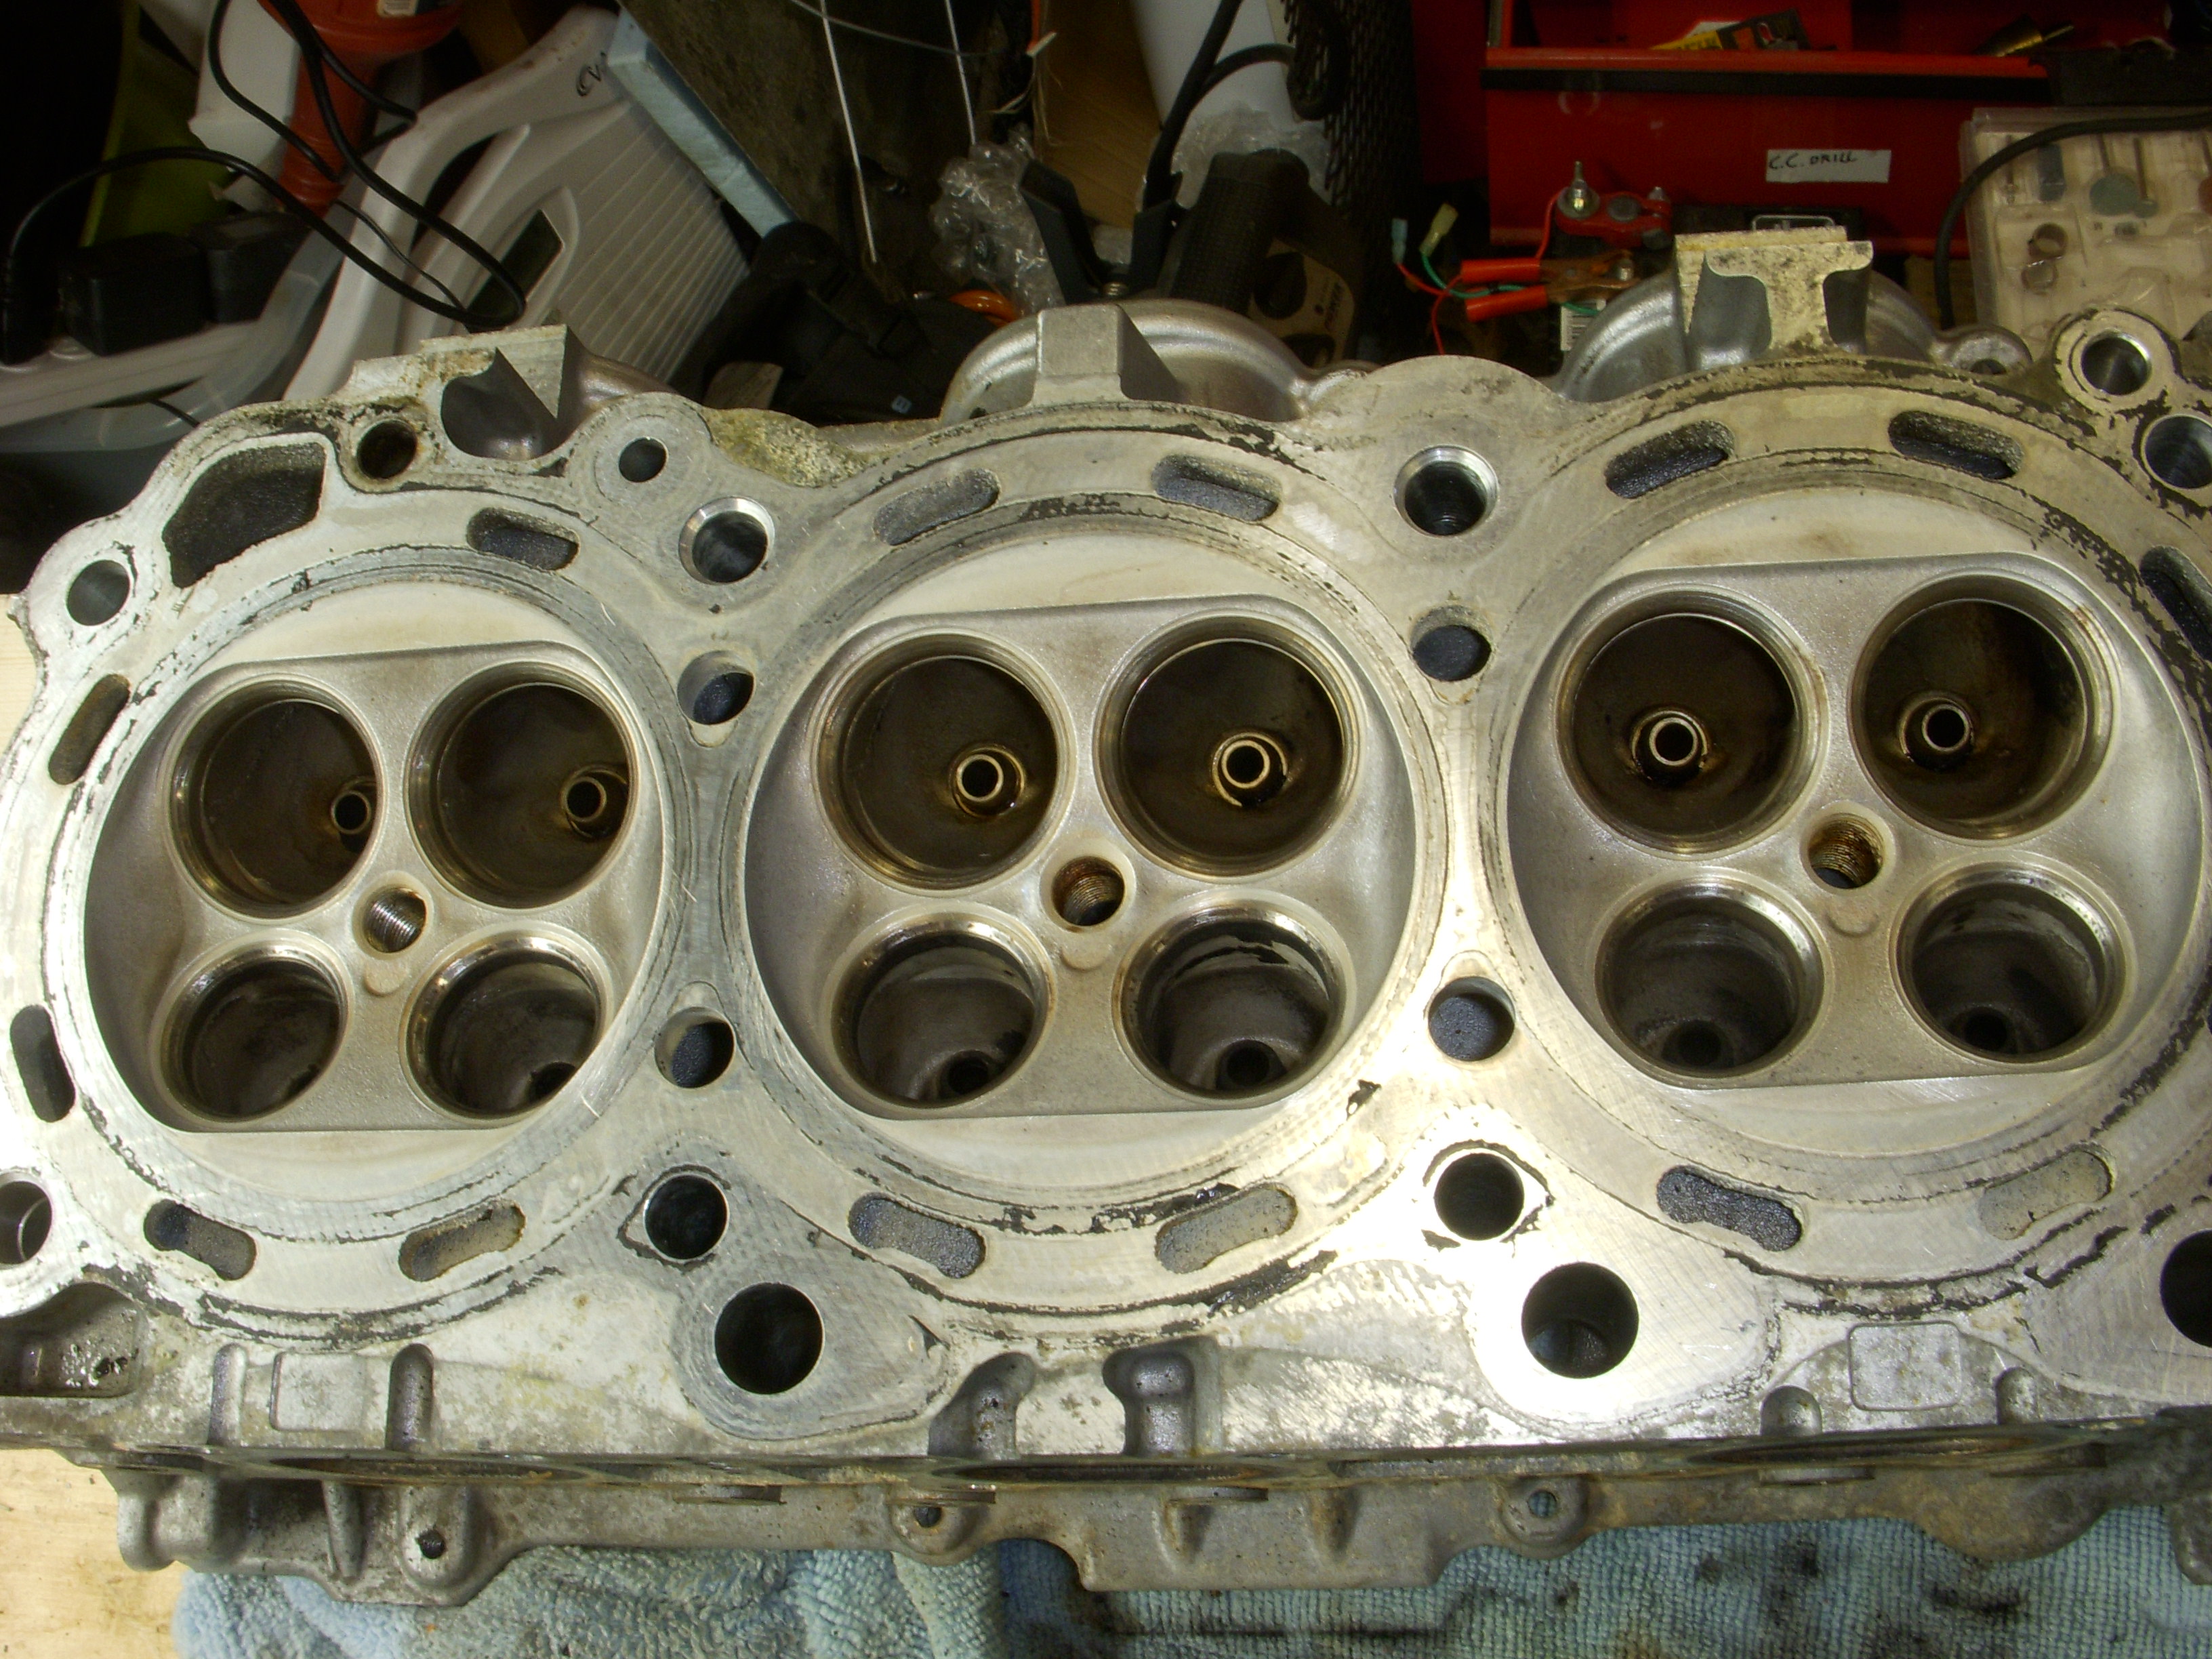
Cosworth CNCed combustion chambers
HR head combustion chambers:

Bare head - no hardware left on it...

A look at the intake valve bowls.. two views of the machine work..


Exhaust valve bowls:

Valve compressor:

Valve seal remover-inserver tool:

Seals plucked:

Cosworth CNCed combustion chambers

HR head combustion chambers:

Last edited by grey99max; 01-14-2017 at 12:15 PM.
10-17-2015, 05:53 PM
#1693
LandShark has Cosworth
Thread Starter
iTrader: (12)
Join Date: Jan 2004
Location: Topeka, KS
Posts: 4,327
Original assembled "Cosworth" 3.5 in my car when new
Engine dis-assembly photo showing ?? cam position chains 10-14-2015:
<a href="http://s48.photobucket.com/user/hwb123/media/10_OCT_2015/DSCN3825_zpsv6yh5uxw.jpg.html" target="_blank"><img src="http://i48.photobucket.com/albums/f216/hwb123/10_OCT_2015/DSCN3825_zpsv6yh5uxw.jpg" border="0" alt=" photo DSCN3825_zpsv6yh5uxw.jpg"/></a>
Original engine timing chains during assembly 8-17-2009 : over six years ago !!
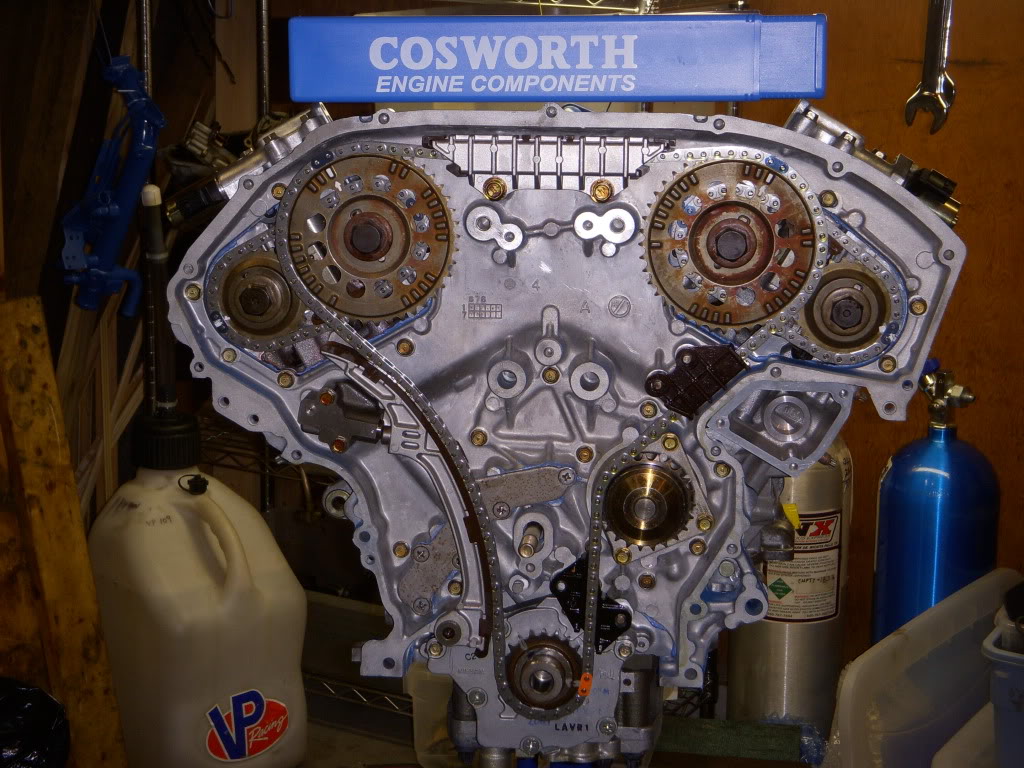
The cam pins seem to be the same relative positions in both photos, but ??? Maybe I should have spun the engine another 7, or 14, or 21,or 28 times....
<a href="http://s48.photobucket.com/user/hwb123/media/10_OCT_2015/DSCN3825_zpsv6yh5uxw.jpg.html" target="_blank"><img src="http://i48.photobucket.com/albums/f216/hwb123/10_OCT_2015/DSCN3825_zpsv6yh5uxw.jpg" border="0" alt=" photo DSCN3825_zpsv6yh5uxw.jpg"/></a>
Original engine timing chains during assembly 8-17-2009 : over six years ago !!
The cam pins seem to be the same relative positions in both photos, but ??? Maybe I should have spun the engine another 7, or 14, or 21,or 28 times....
Last edited by grey99max; 10-17-2015 at 06:12 PM.
10-19-2015, 04:55 PM
#1694
LandShark has Cosworth
Thread Starter
iTrader: (12)
Join Date: Jan 2004
Location: Topeka, KS
Posts: 4,327
HR heads in the mail today, and other stuff ...
[B]After stripping everything off the two 350Z HR heads, I wrapped them in their individual boxes, added my return address on each one, then trundled them off to the local UPS store. To ship both individual boxes to JWT in El Cajon CA was $80 - to tape them together and ship that way to CA was a bit over $220 !!! I took the cheaper way.
My machine shop called about what to do with the oil squirters on the stroker block - I called BC about it and they said to wait until the new pistons were in hand, - they were coating them today, and would notch the pistons for oil squirter clearance, because that make a real difference and the squirters should stay. They should be here this week. The block will still need clearanced, but that's just some grinder work.
I called the "guy" at Jim Wolf and let him know that Capital One just issued me a chipped credit card and some numbers changed - just to keep everything clean when getting the new cams installed. Can't mess that up...
Busy day...
10-22-2015, 07:38 PM
#1695
LandShark has Cosworth
Thread Starter
iTrader: (12)
Join Date: Jan 2004
Location: Topeka, KS
Posts: 4,327
Thursday...
Today I packaged up the group of damaged DLC valve lifters off the left Cosworth head, tagged the package with my assigned project number, and mailed them to my guy at JWT (OK, I forgot about them when I UPS-ed the heads). Several were missing chunks of the DLC coating, and he wanted to see them. So, done...
Yesterday's tomato crop from my wife's garden. It's been like this for months - from 5 plants, and one is cherry tomatoes. Still warm weather and occasional rain, so still tomatoes... and BACON in sammiches...

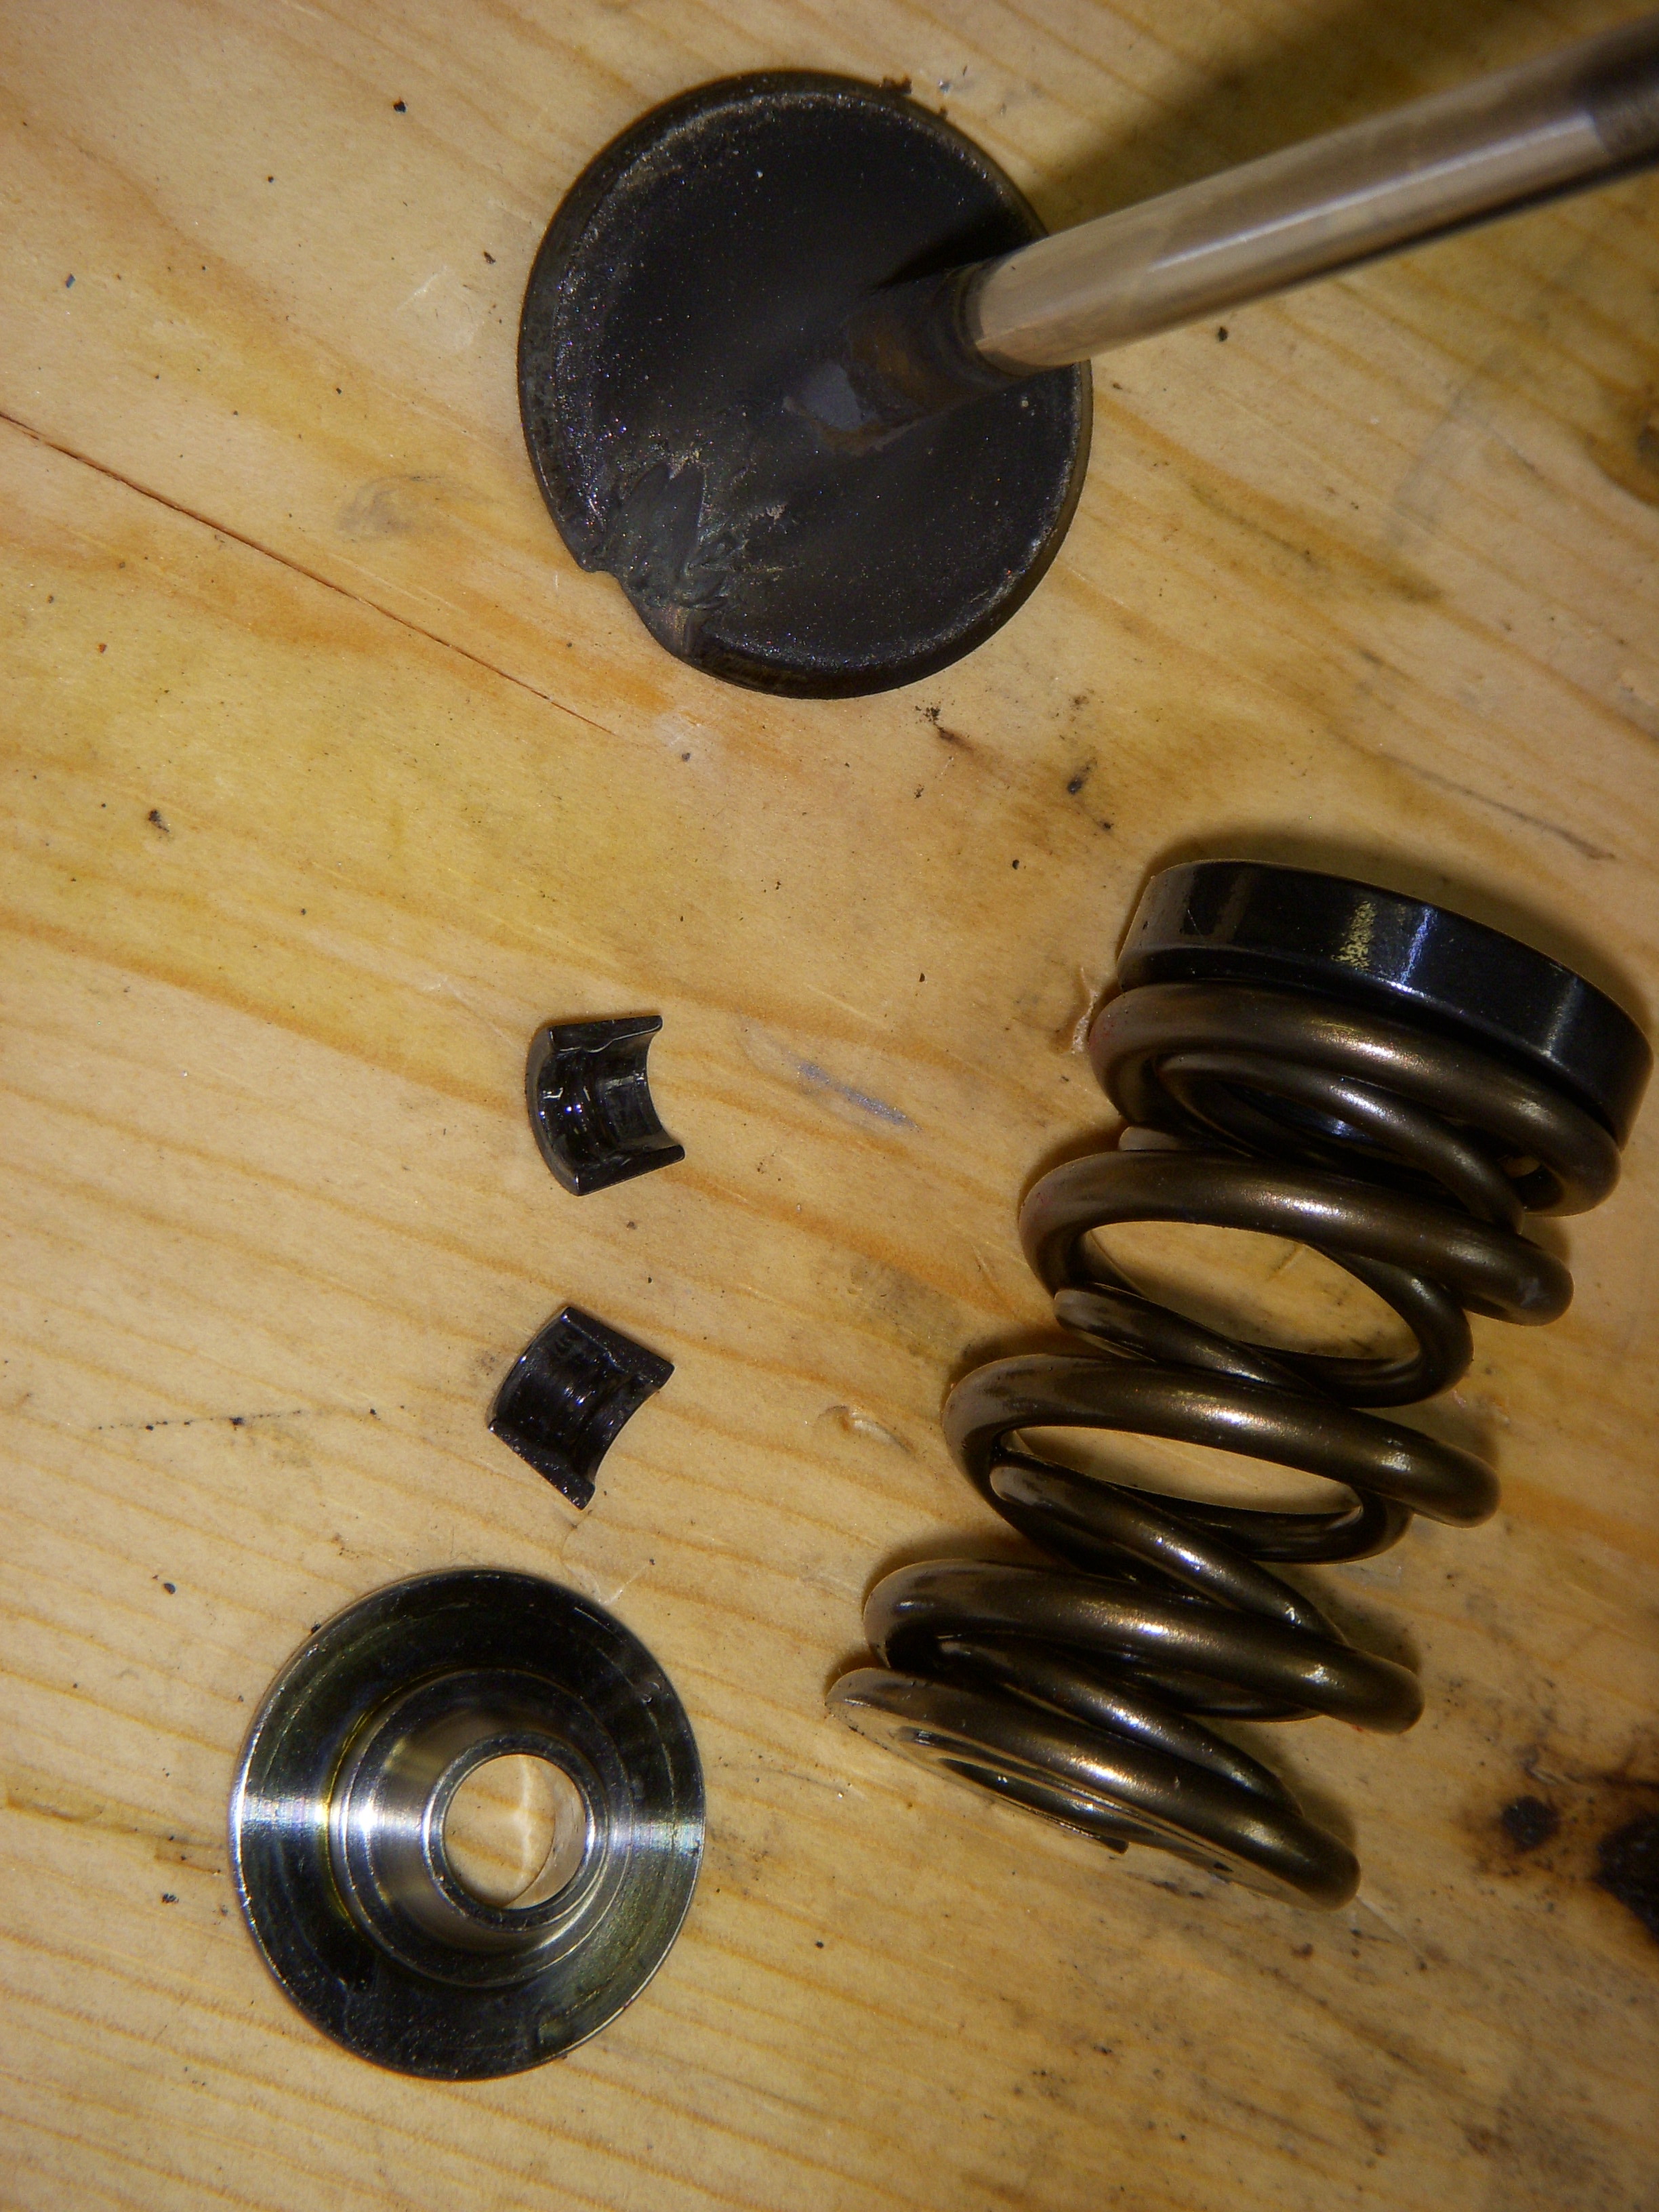
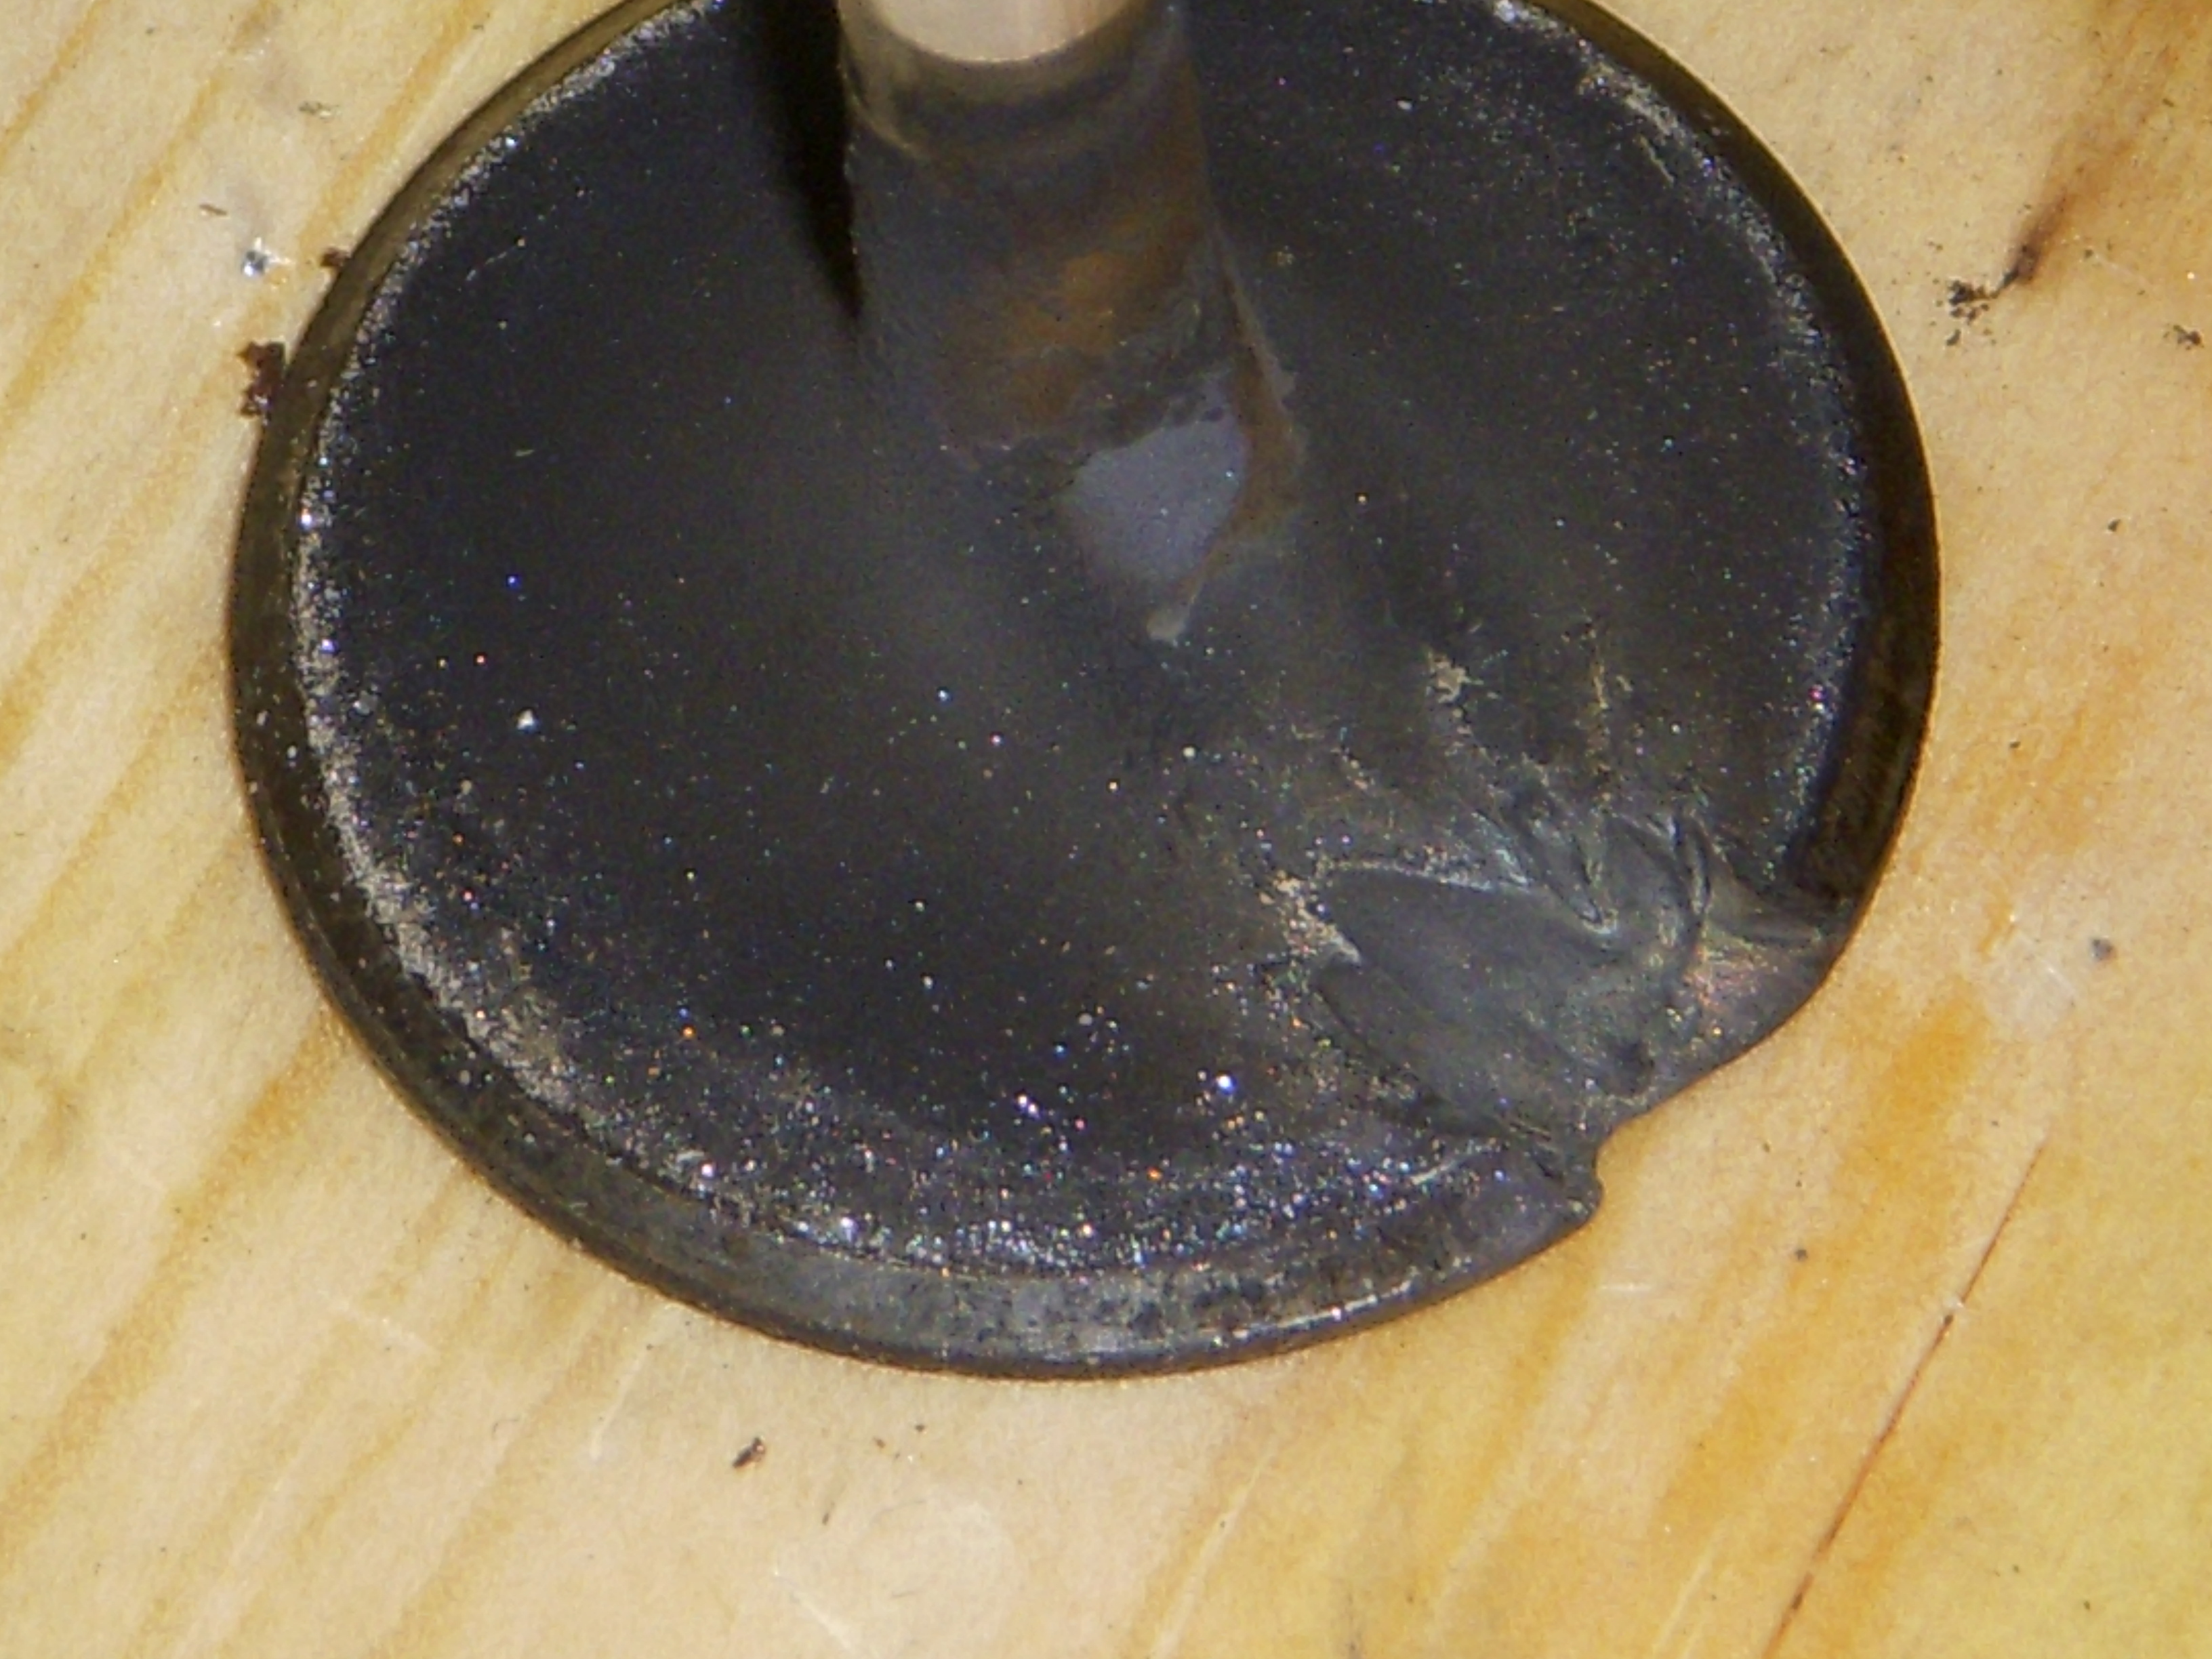
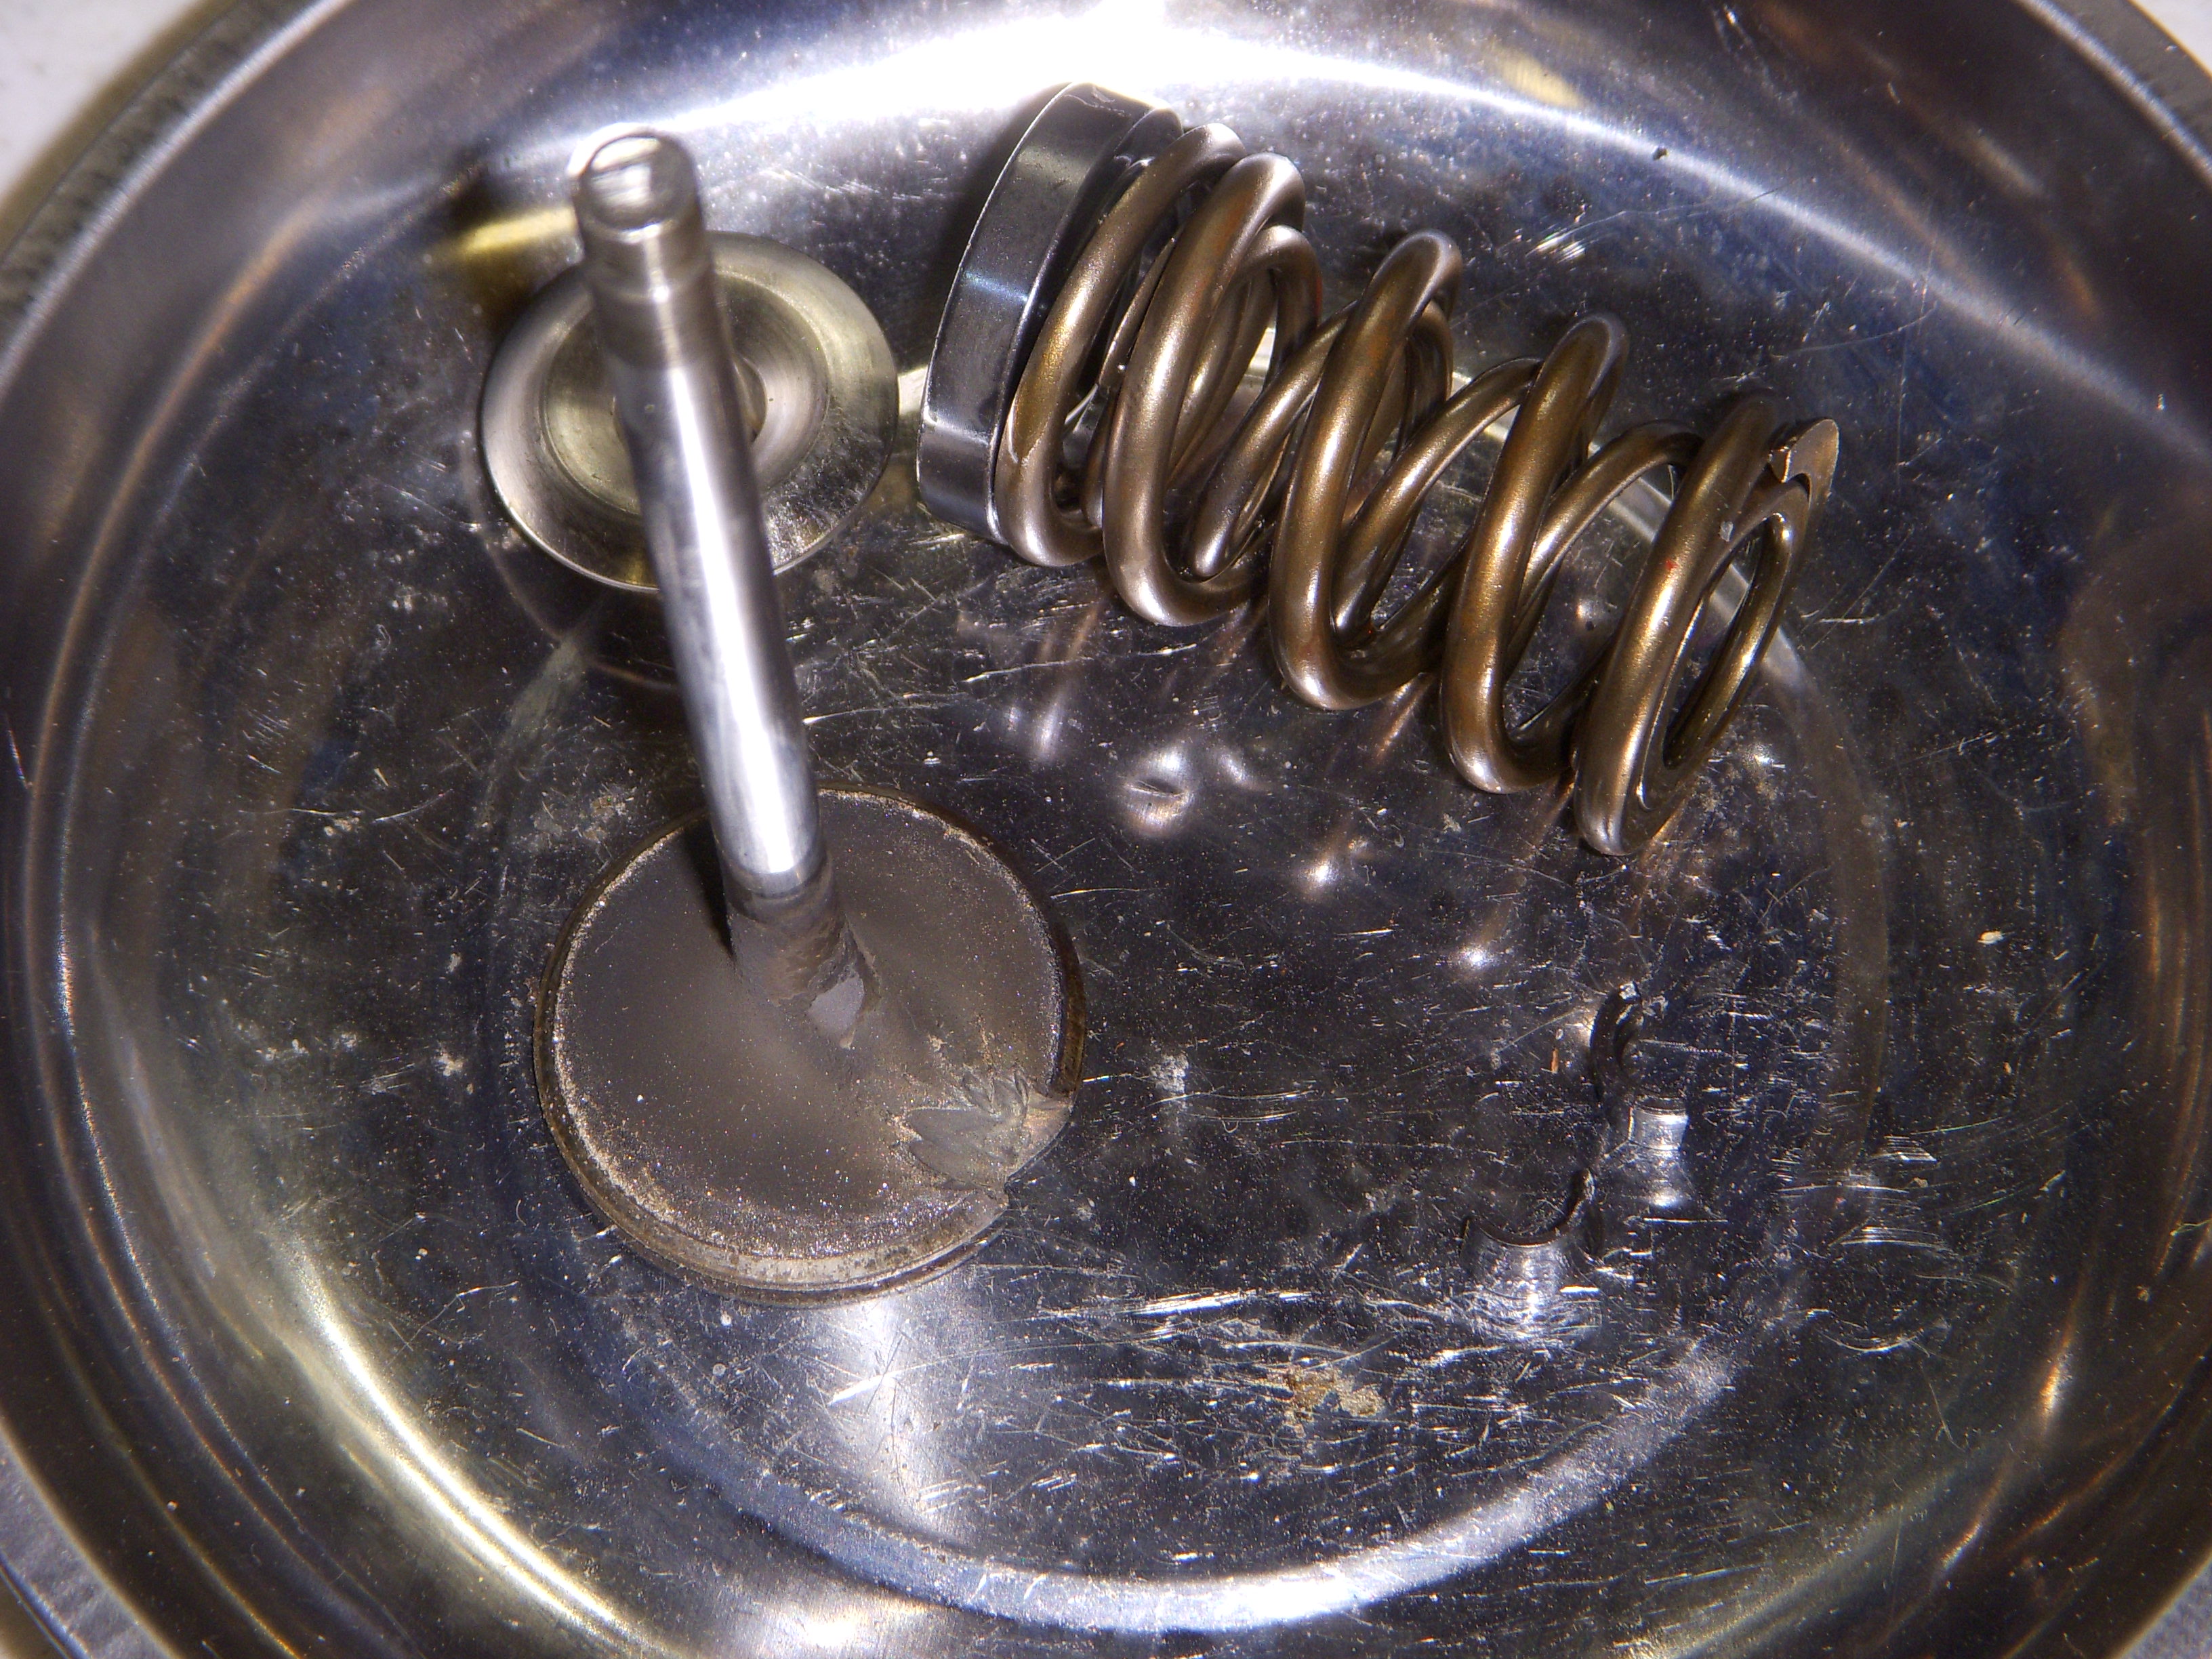
Today I removed the bad exhaust valve for a look-see, partly because I heard about the heavy dual springs and other strange stuff in the Cosworth heads. Yup, dual springs, really thick steel spring spacer, titanuim spring retainer. Really pretty hard to compress the springs enough to pop out the locks...
Ouch - that's Inconel !
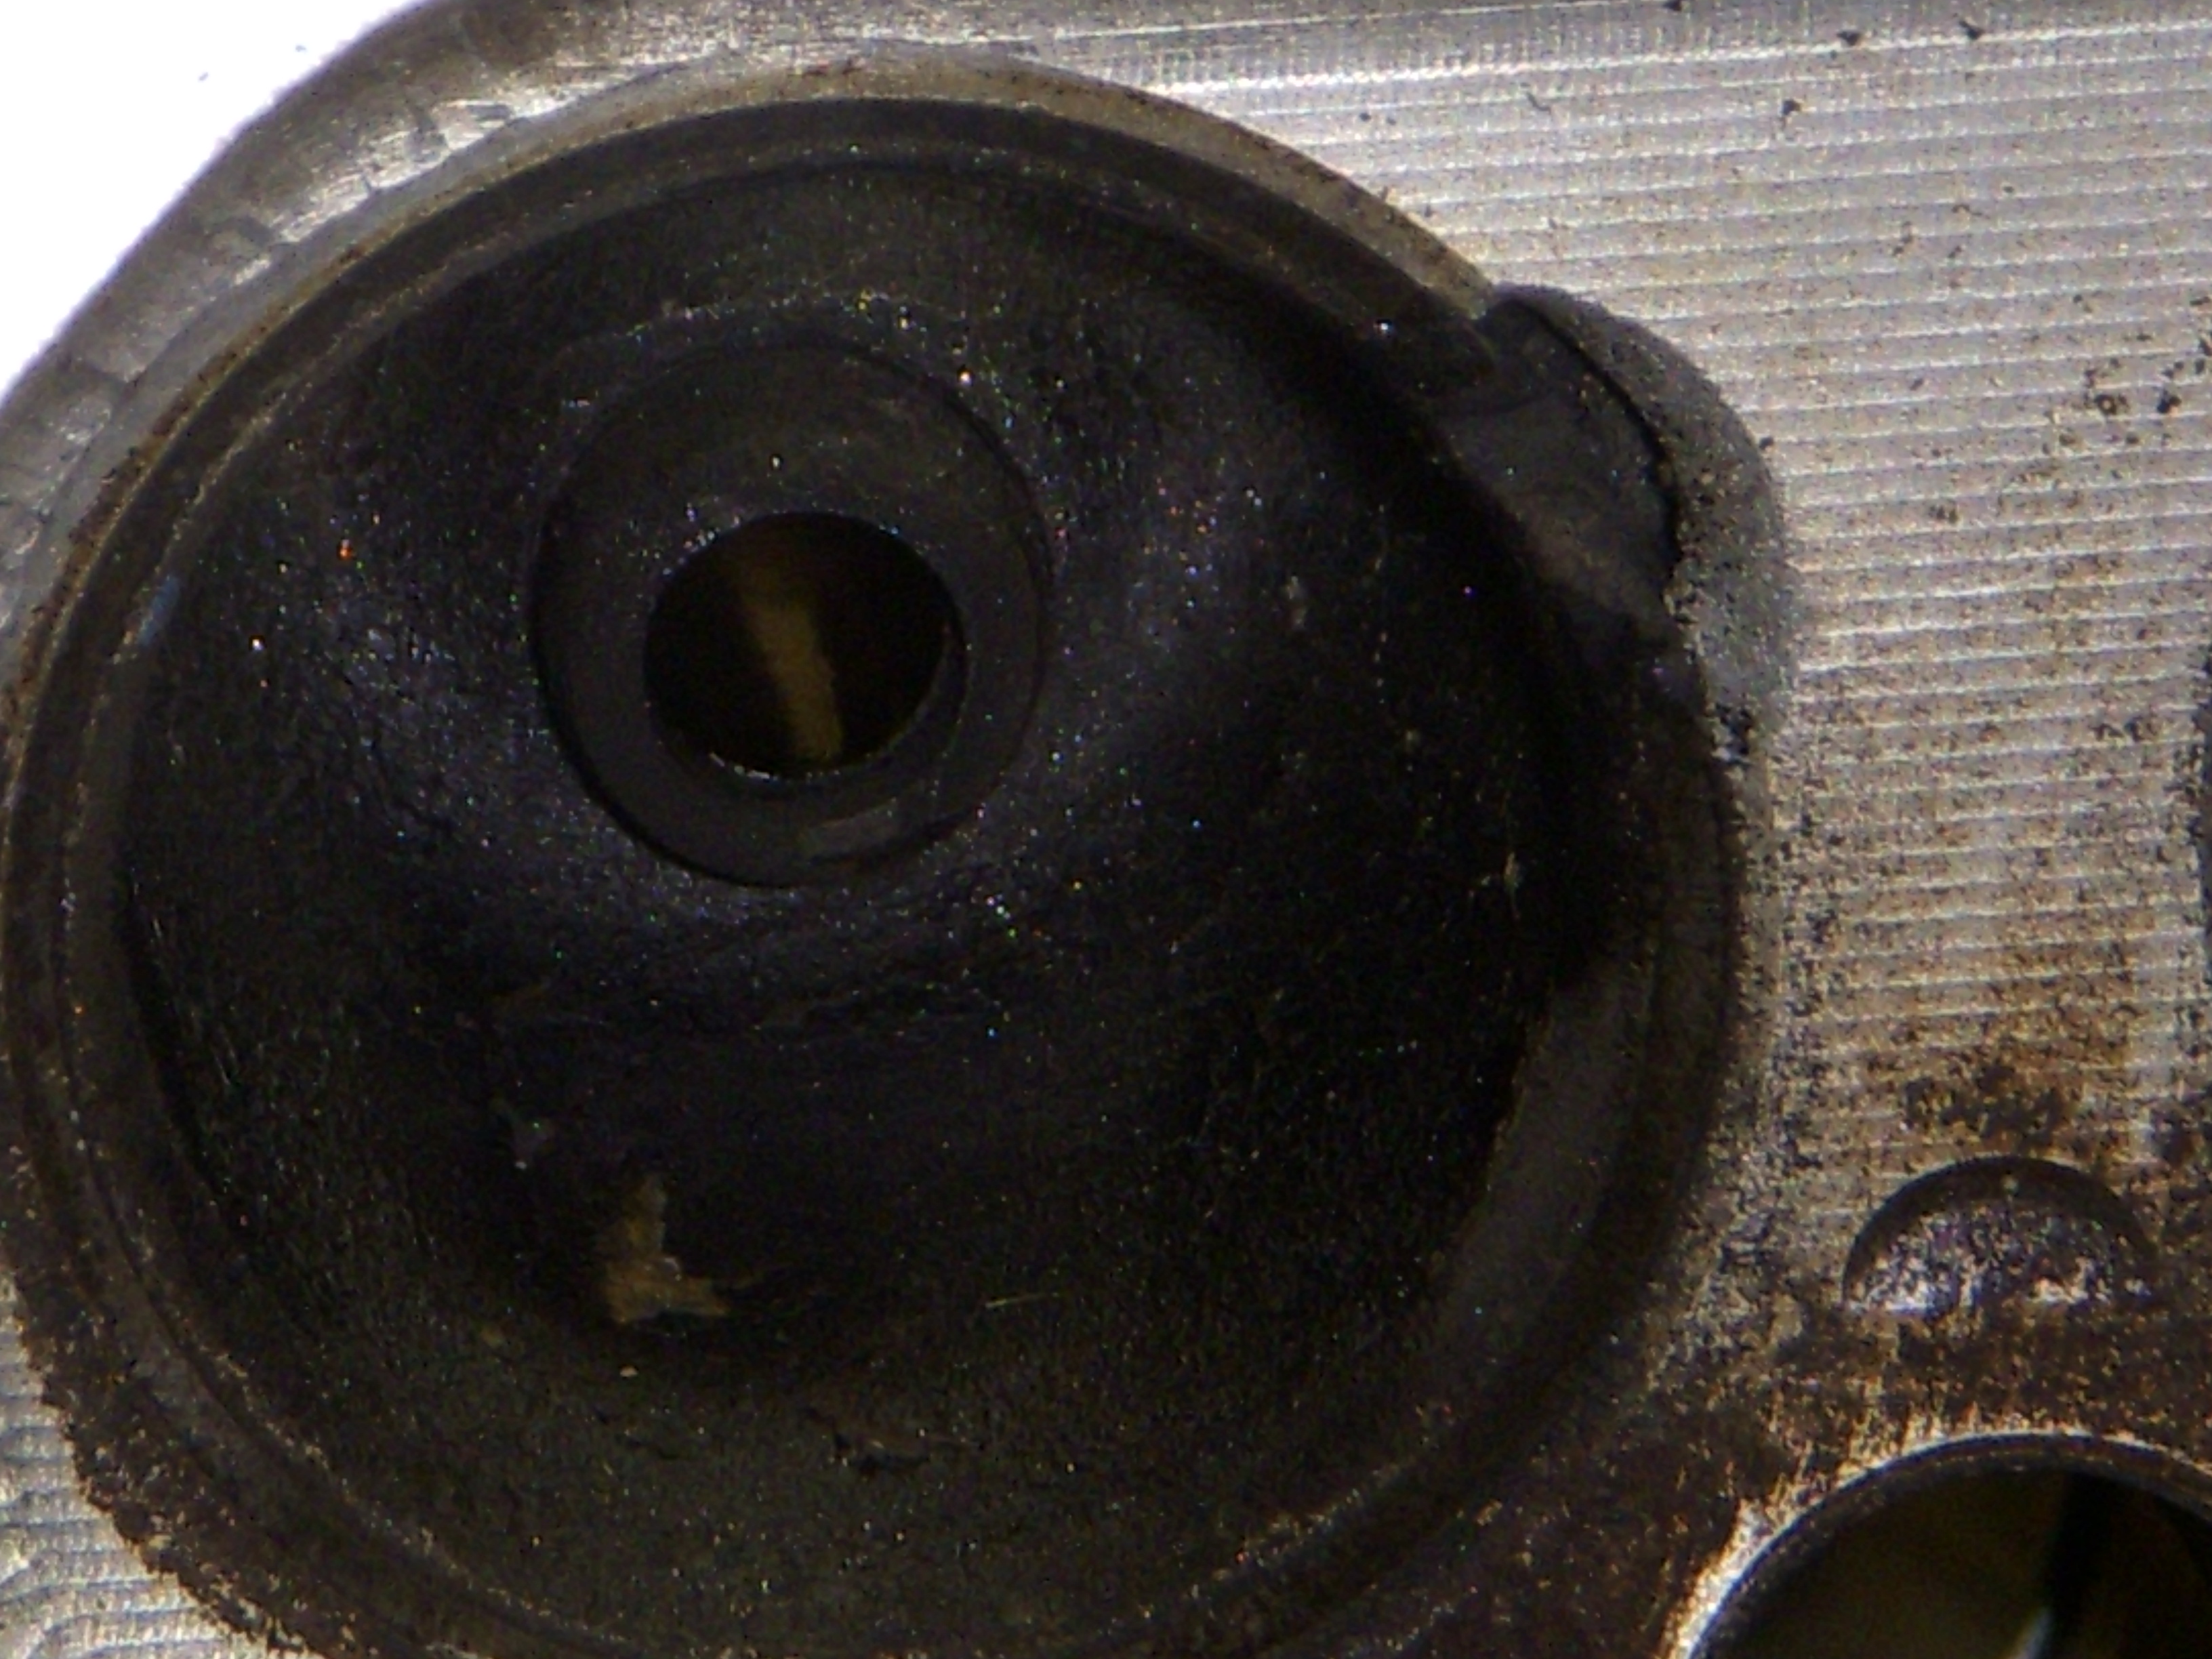
Burn-thru into the head...
Another hardware shot - hella thick spacer there.
I'm shopping for a shop to repair the Cosy head - I have a replacement SpeedTech valve, but I think the head needs some surgery - pull the damaged seat, maybe replace bronze valve guide, weld up the head around the melted spot, machine out a new spot for a new valve seat, mate up the valve to the seat, and dress down the height of the valve to OEM specs.
If that works, lap in all the valves, (and replace all the valve seals with Viton). Then, Hmmm.. I will have a 3.5 balanced crank, Carrillo H-beam rods, and 11:1 forged CP pistons - and a spare 3.5 block to hang the Cosworth heads and cams upon. Maybe it's time for some 8.8:1 pistons and think about building a turbo engine for a "spare".
Maybe in a Sentra ?? 6 spd ??
I also ordered some Joe Gibbs break-in oil ( with Zn and Ph ) and assembly lube. Joe Gibbs products were highly recommended by my guy at JWT, along with Mobil1 0W-40 EP oil for me and the many track racers. Works for me.. Also decided to order some Permatex valve lapping compound and a couple of wooden sticks with suction cups to spin some valves, to see if I remember how - besides the HR heads will need some touch-up work. I think I'll get a JWT oil pan spacer, to add another 1 Qt capacity in the pan (now ordered and shipping)
Yesterday's tomato crop from my wife's garden. It's been like this for months - from 5 plants, and one is cherry tomatoes. Still warm weather and occasional rain, so still tomatoes... and BACON in sammiches...

Today I removed the bad exhaust valve for a look-see, partly because I heard about the heavy dual springs and other strange stuff in the Cosworth heads. Yup, dual springs, really thick steel spring spacer, titanuim spring retainer. Really pretty hard to compress the springs enough to pop out the locks...


Ouch - that's Inconel !

Burn-thru into the head...

Another hardware shot - hella thick spacer there.

I'm shopping for a shop to repair the Cosy head - I have a replacement SpeedTech valve, but I think the head needs some surgery - pull the damaged seat, maybe replace bronze valve guide, weld up the head around the melted spot, machine out a new spot for a new valve seat, mate up the valve to the seat, and dress down the height of the valve to OEM specs.
If that works, lap in all the valves, (and replace all the valve seals with Viton). Then, Hmmm.. I will have a 3.5 balanced crank, Carrillo H-beam rods, and 11:1 forged CP pistons - and a spare 3.5 block to hang the Cosworth heads and cams upon. Maybe it's time for some 8.8:1 pistons and think about building a turbo engine for a "spare".
Maybe in a Sentra ?? 6 spd ??
I also ordered some Joe Gibbs break-in oil ( with Zn and Ph ) and assembly lube. Joe Gibbs products were highly recommended by my guy at JWT, along with Mobil1 0W-40 EP oil for me and the many track racers. Works for me.. Also decided to order some Permatex valve lapping compound and a couple of wooden sticks with suction cups to spin some valves, to see if I remember how - besides the HR heads will need some touch-up work. I think I'll get a JWT oil pan spacer, to add another 1 Qt capacity in the pan (now ordered and shipping)
Last edited by grey99max; 01-14-2017 at 12:23 PM.
10-31-2015, 03:48 PM
#1696
LandShark has Cosworth
Thread Starter
iTrader: (12)
Join Date: Jan 2004
Location: Topeka, KS
Posts: 4,327
Still waiting on pistons, heads & cams, so other stuff
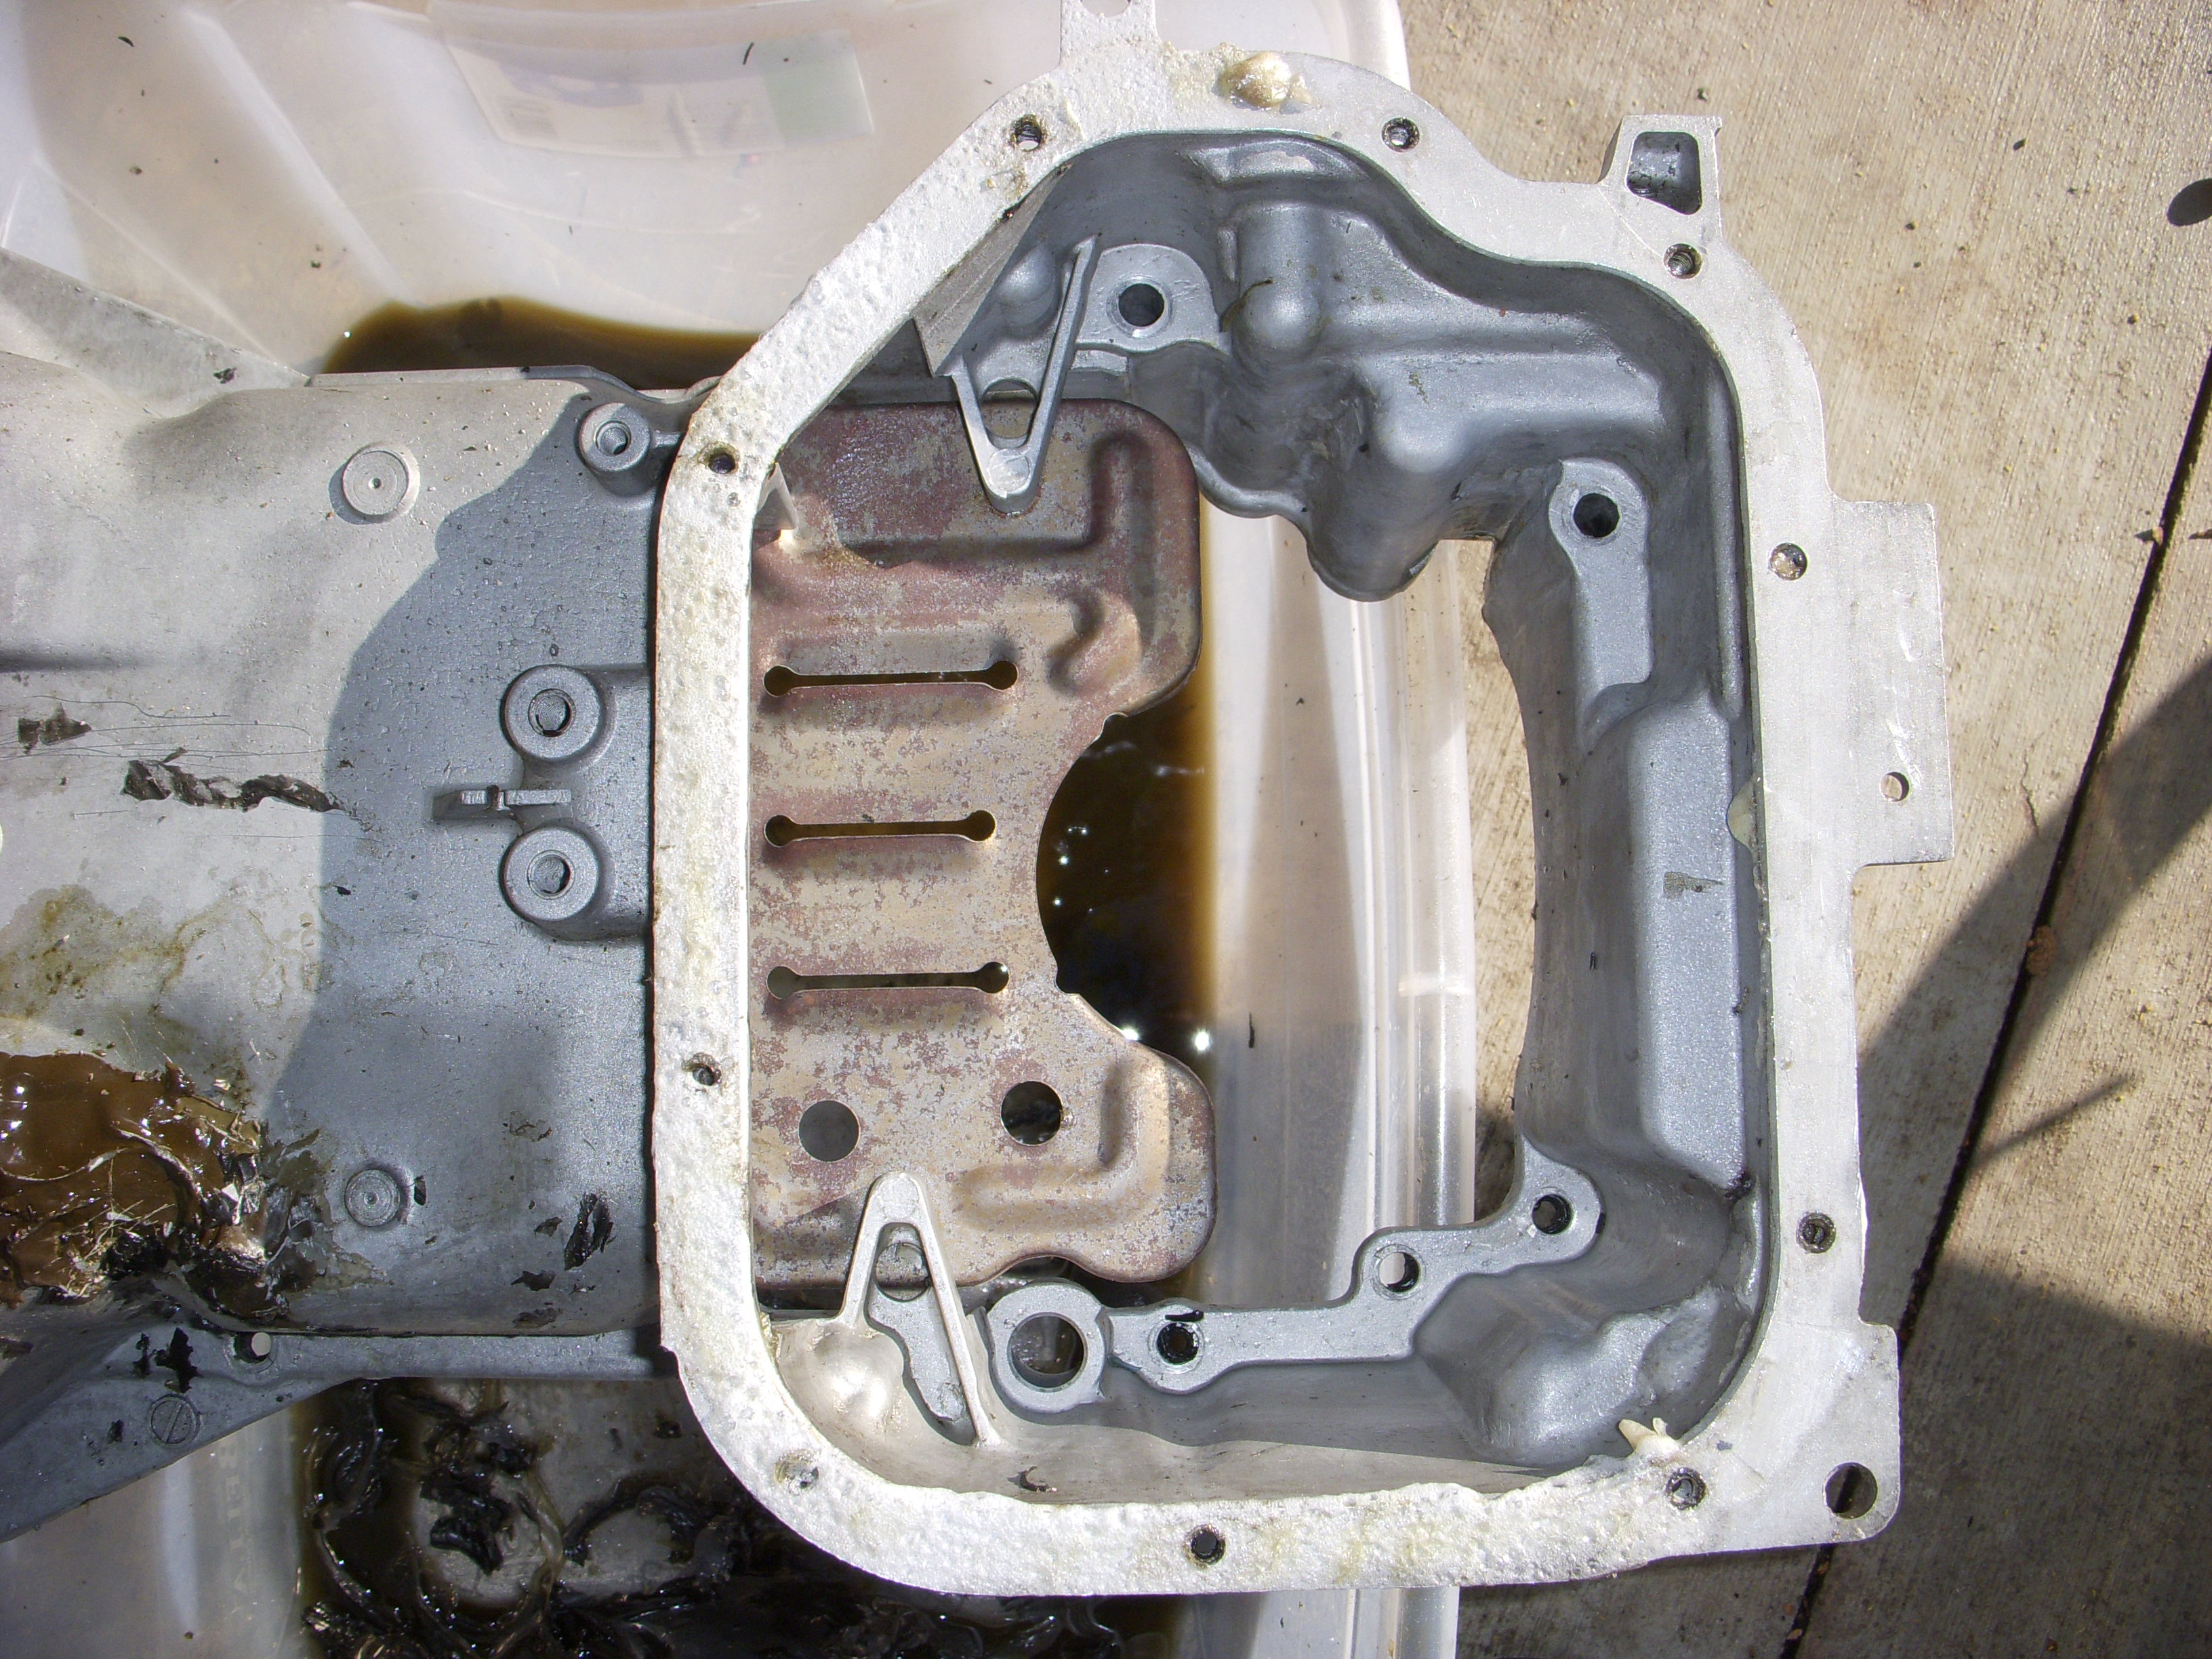
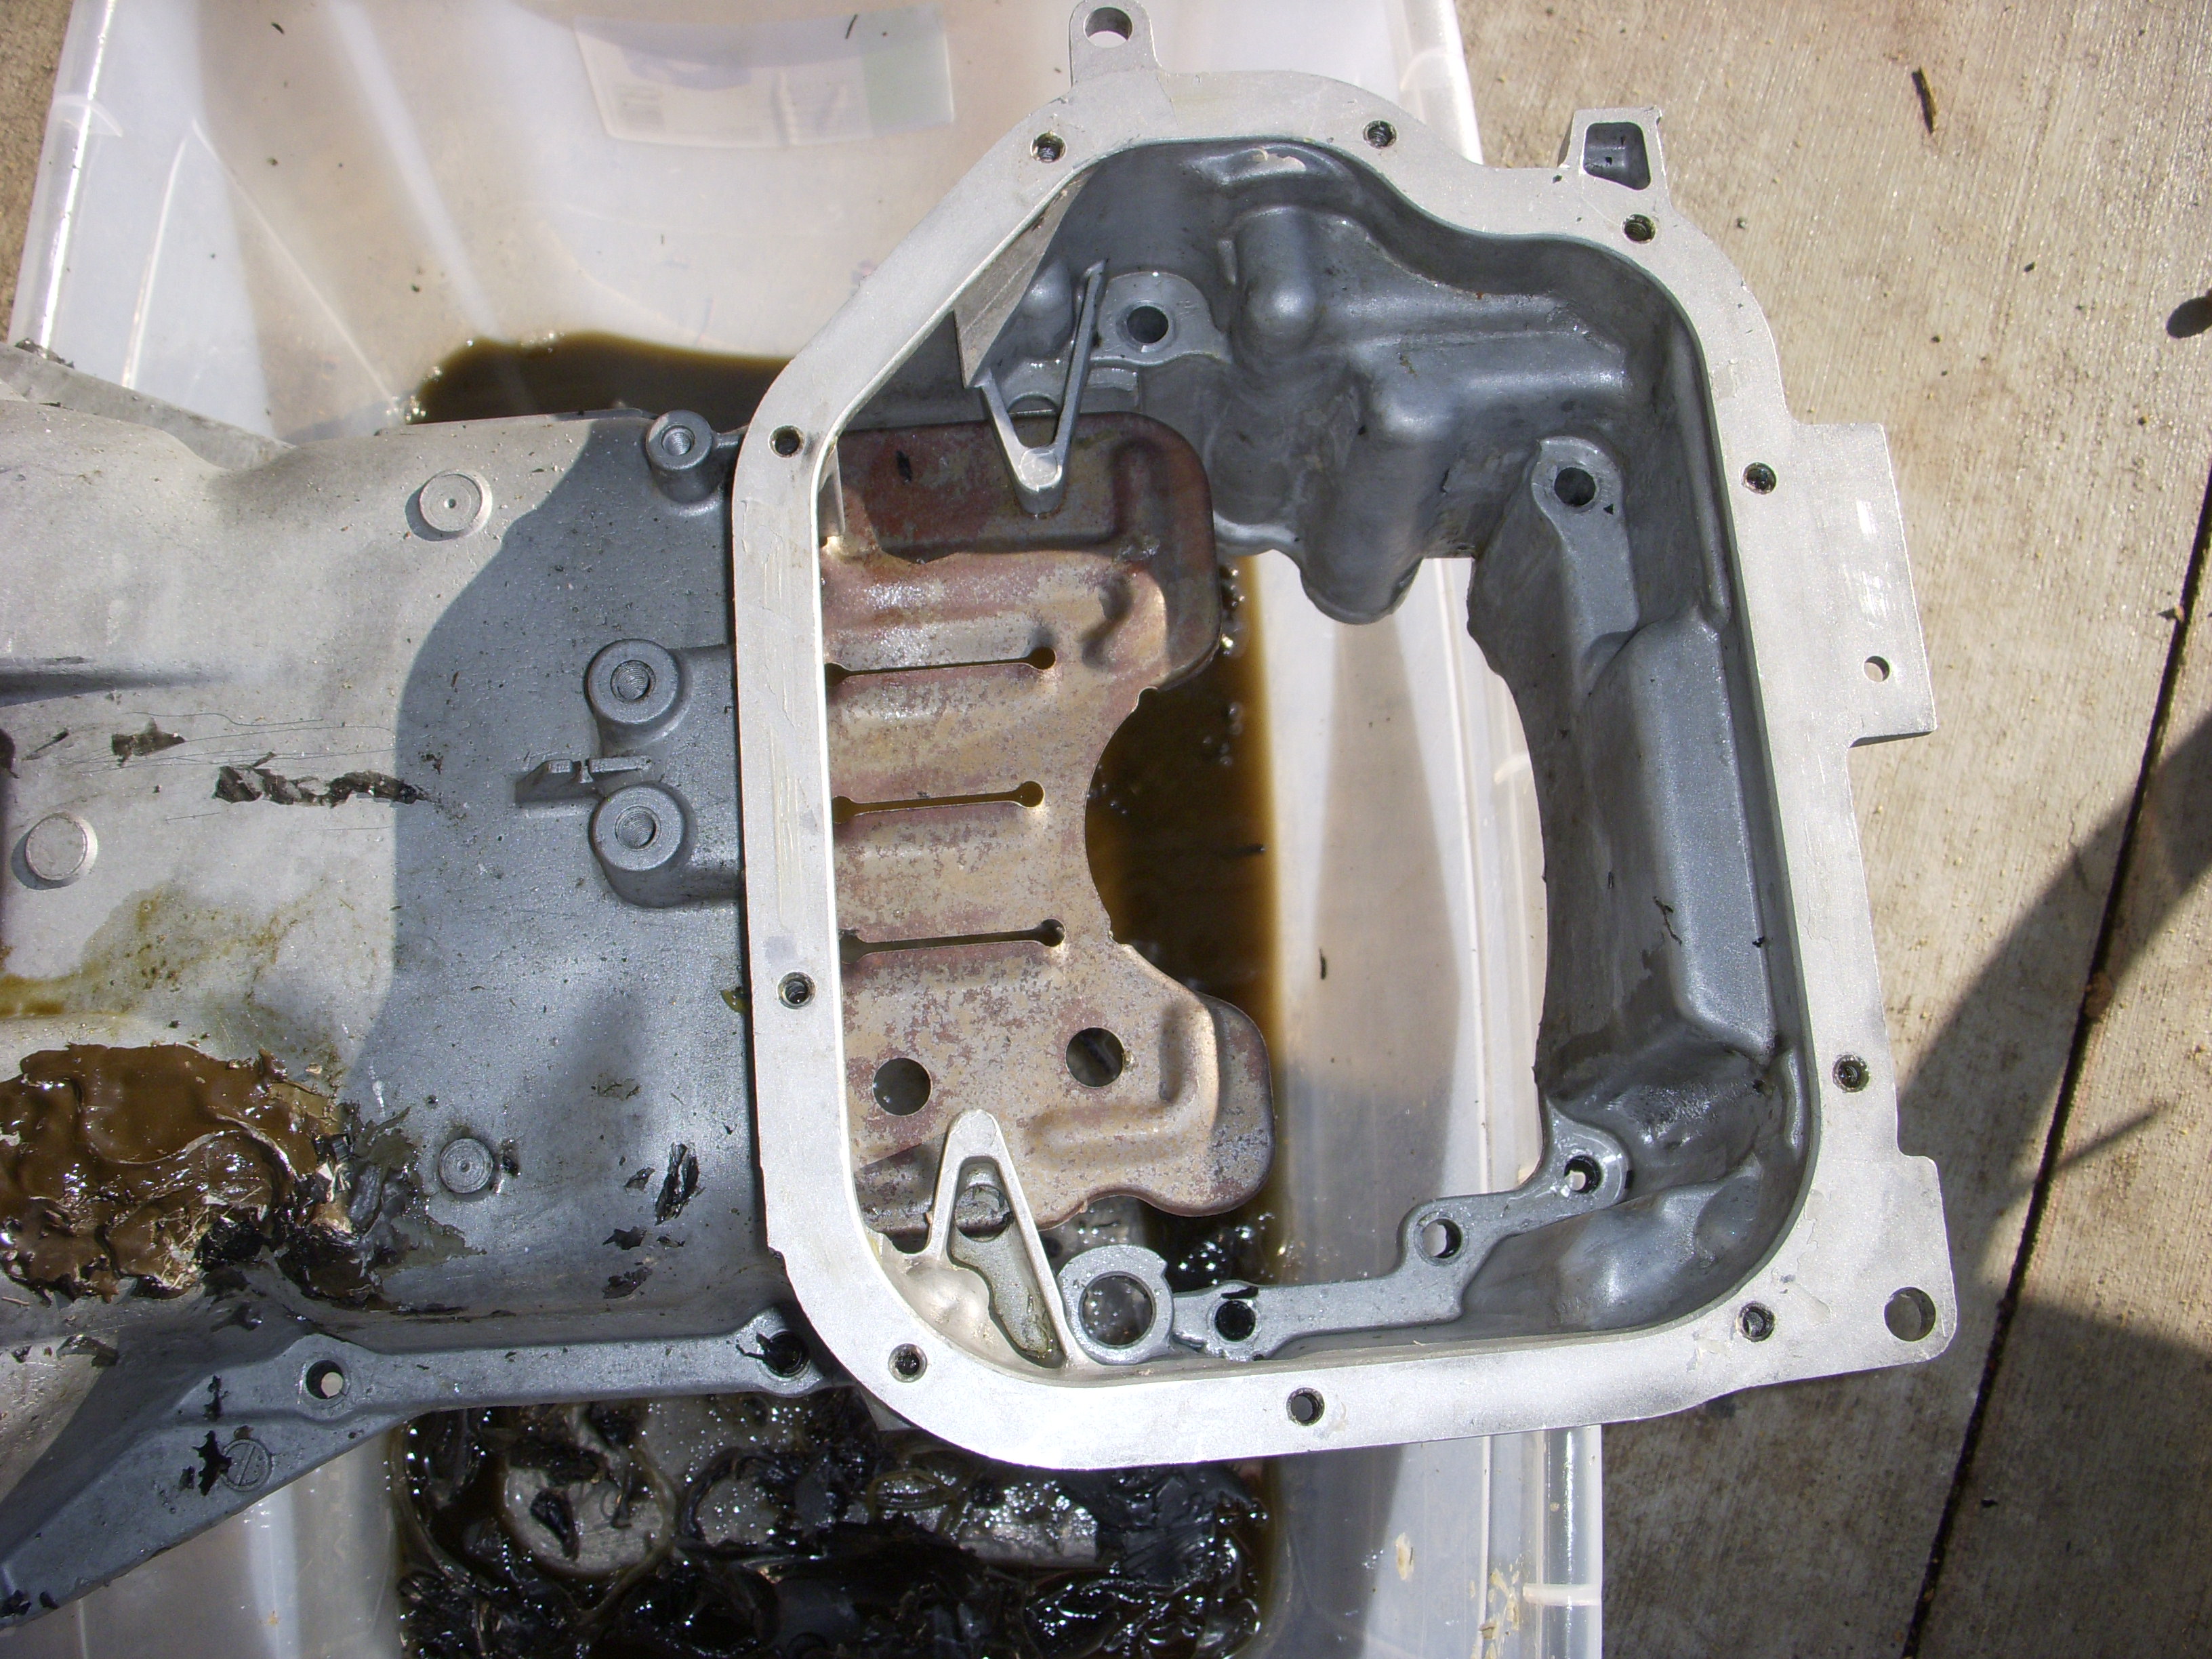
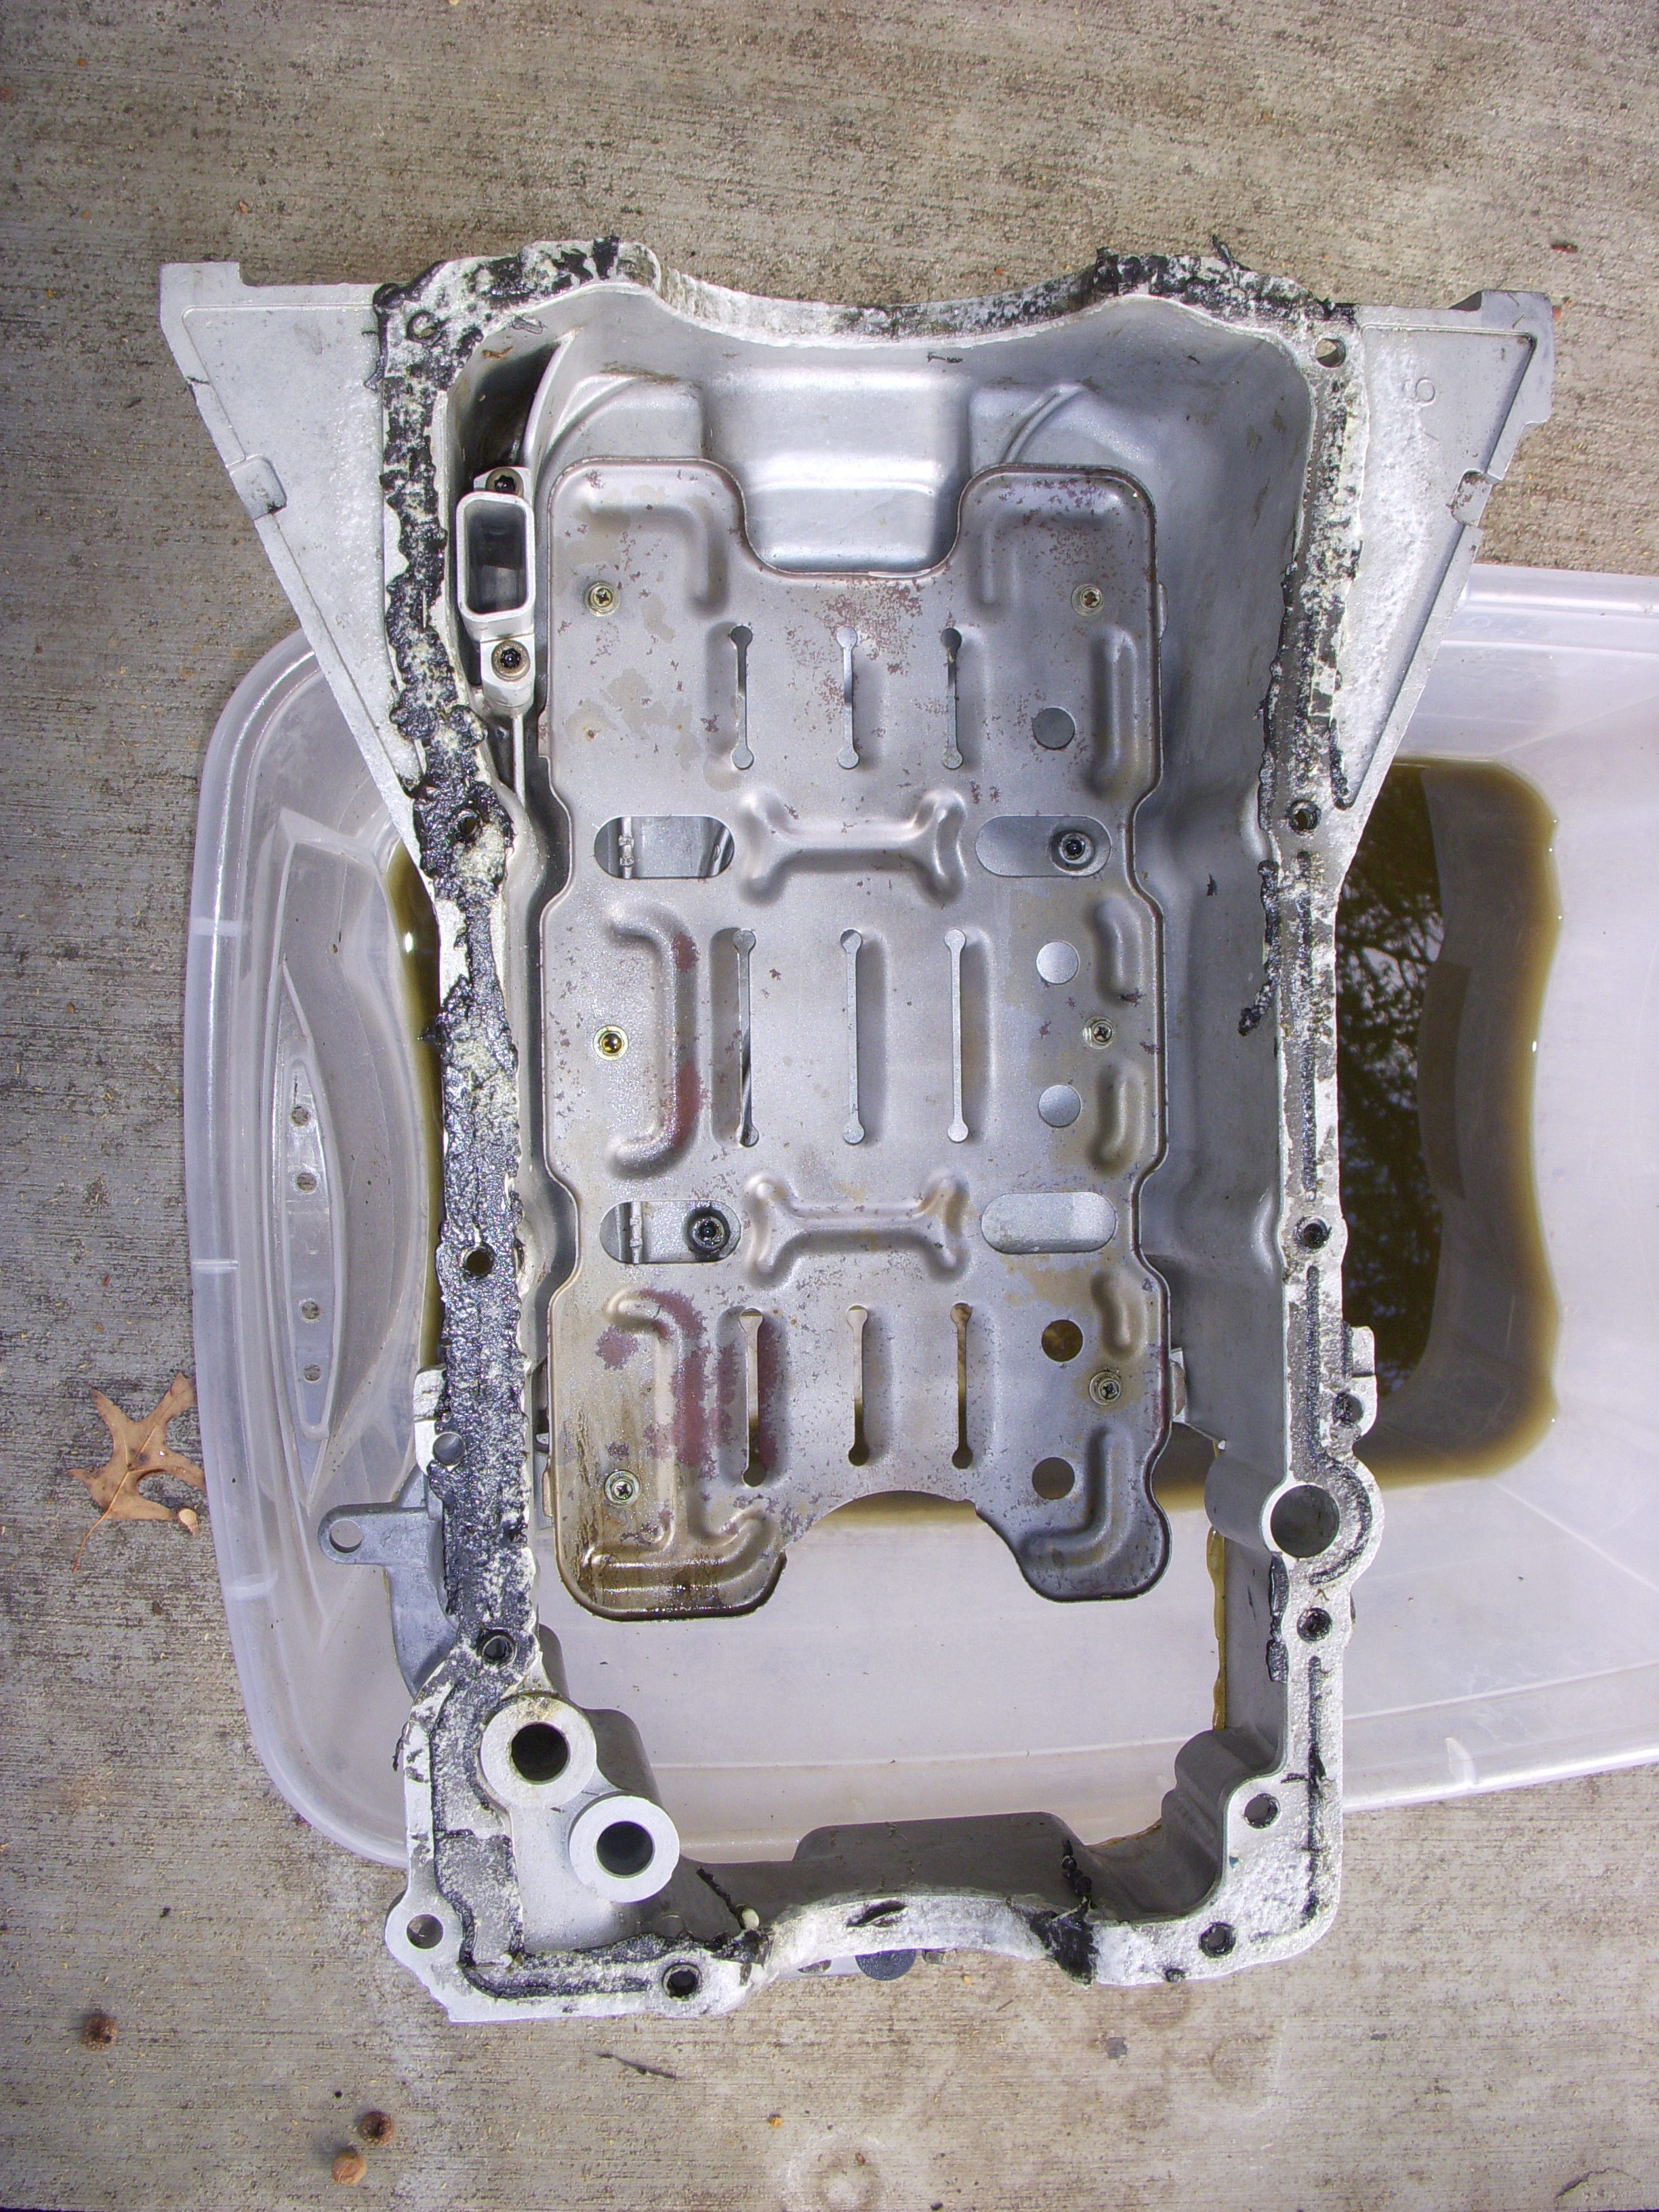
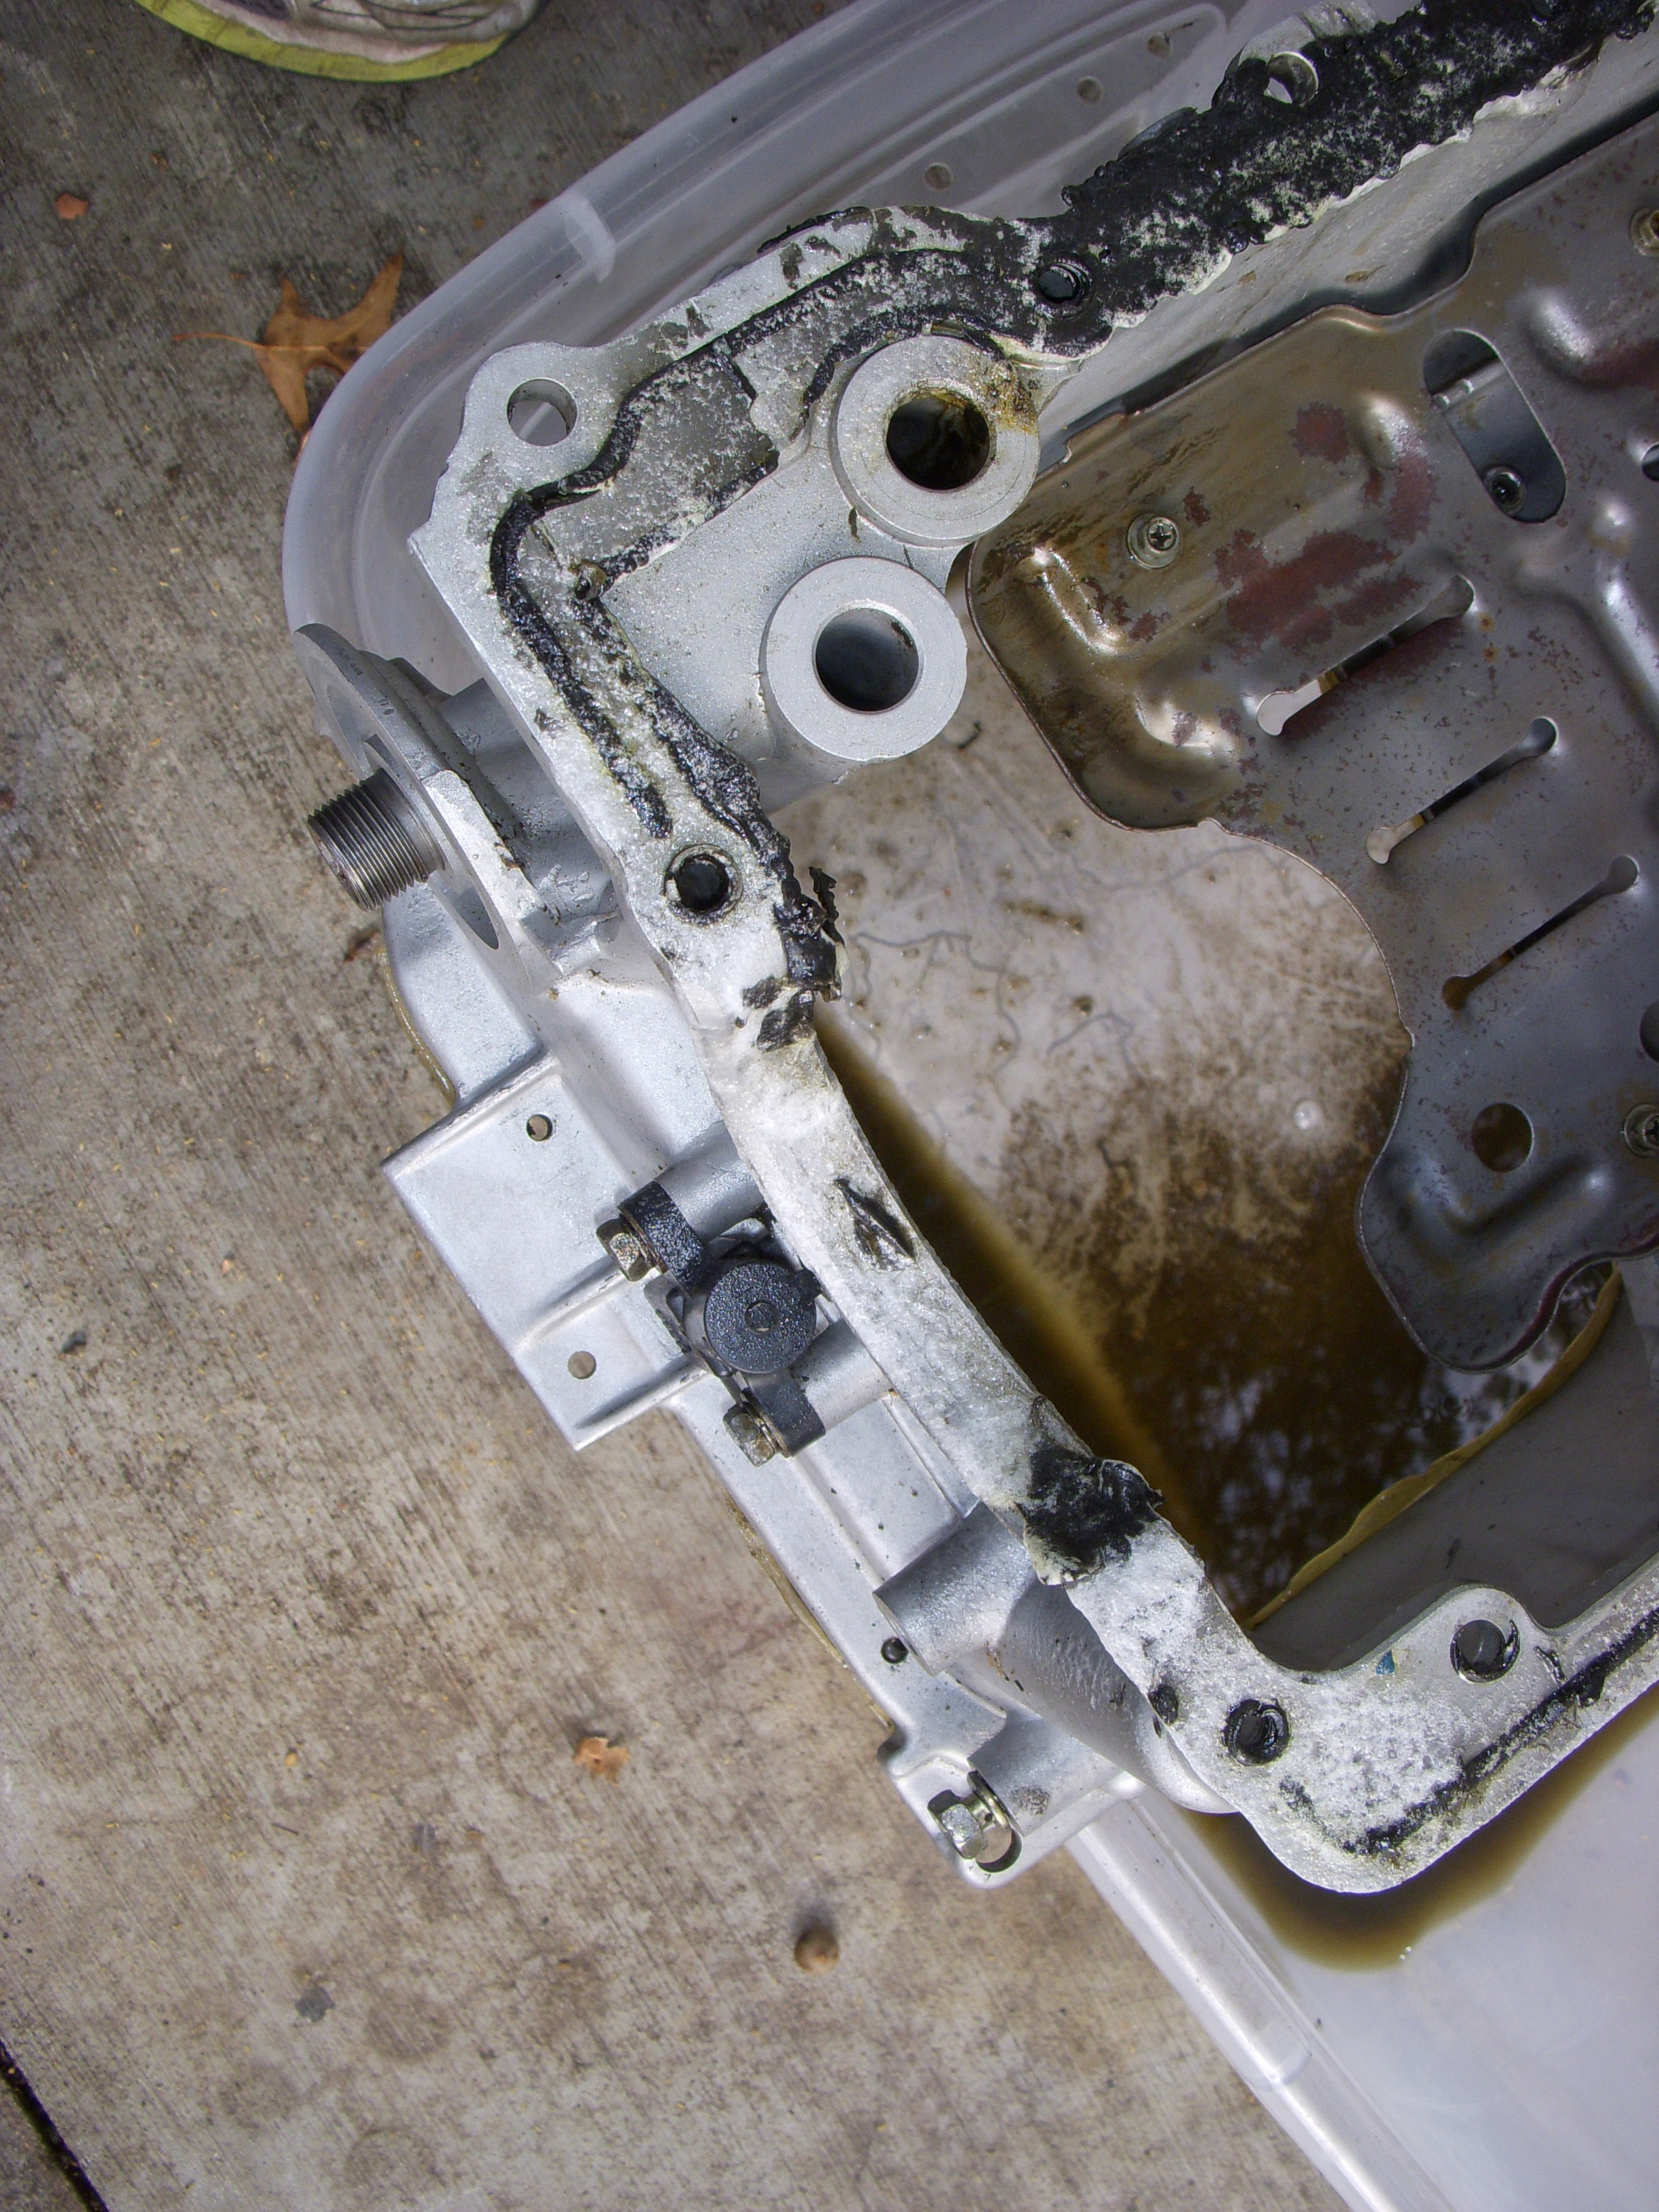
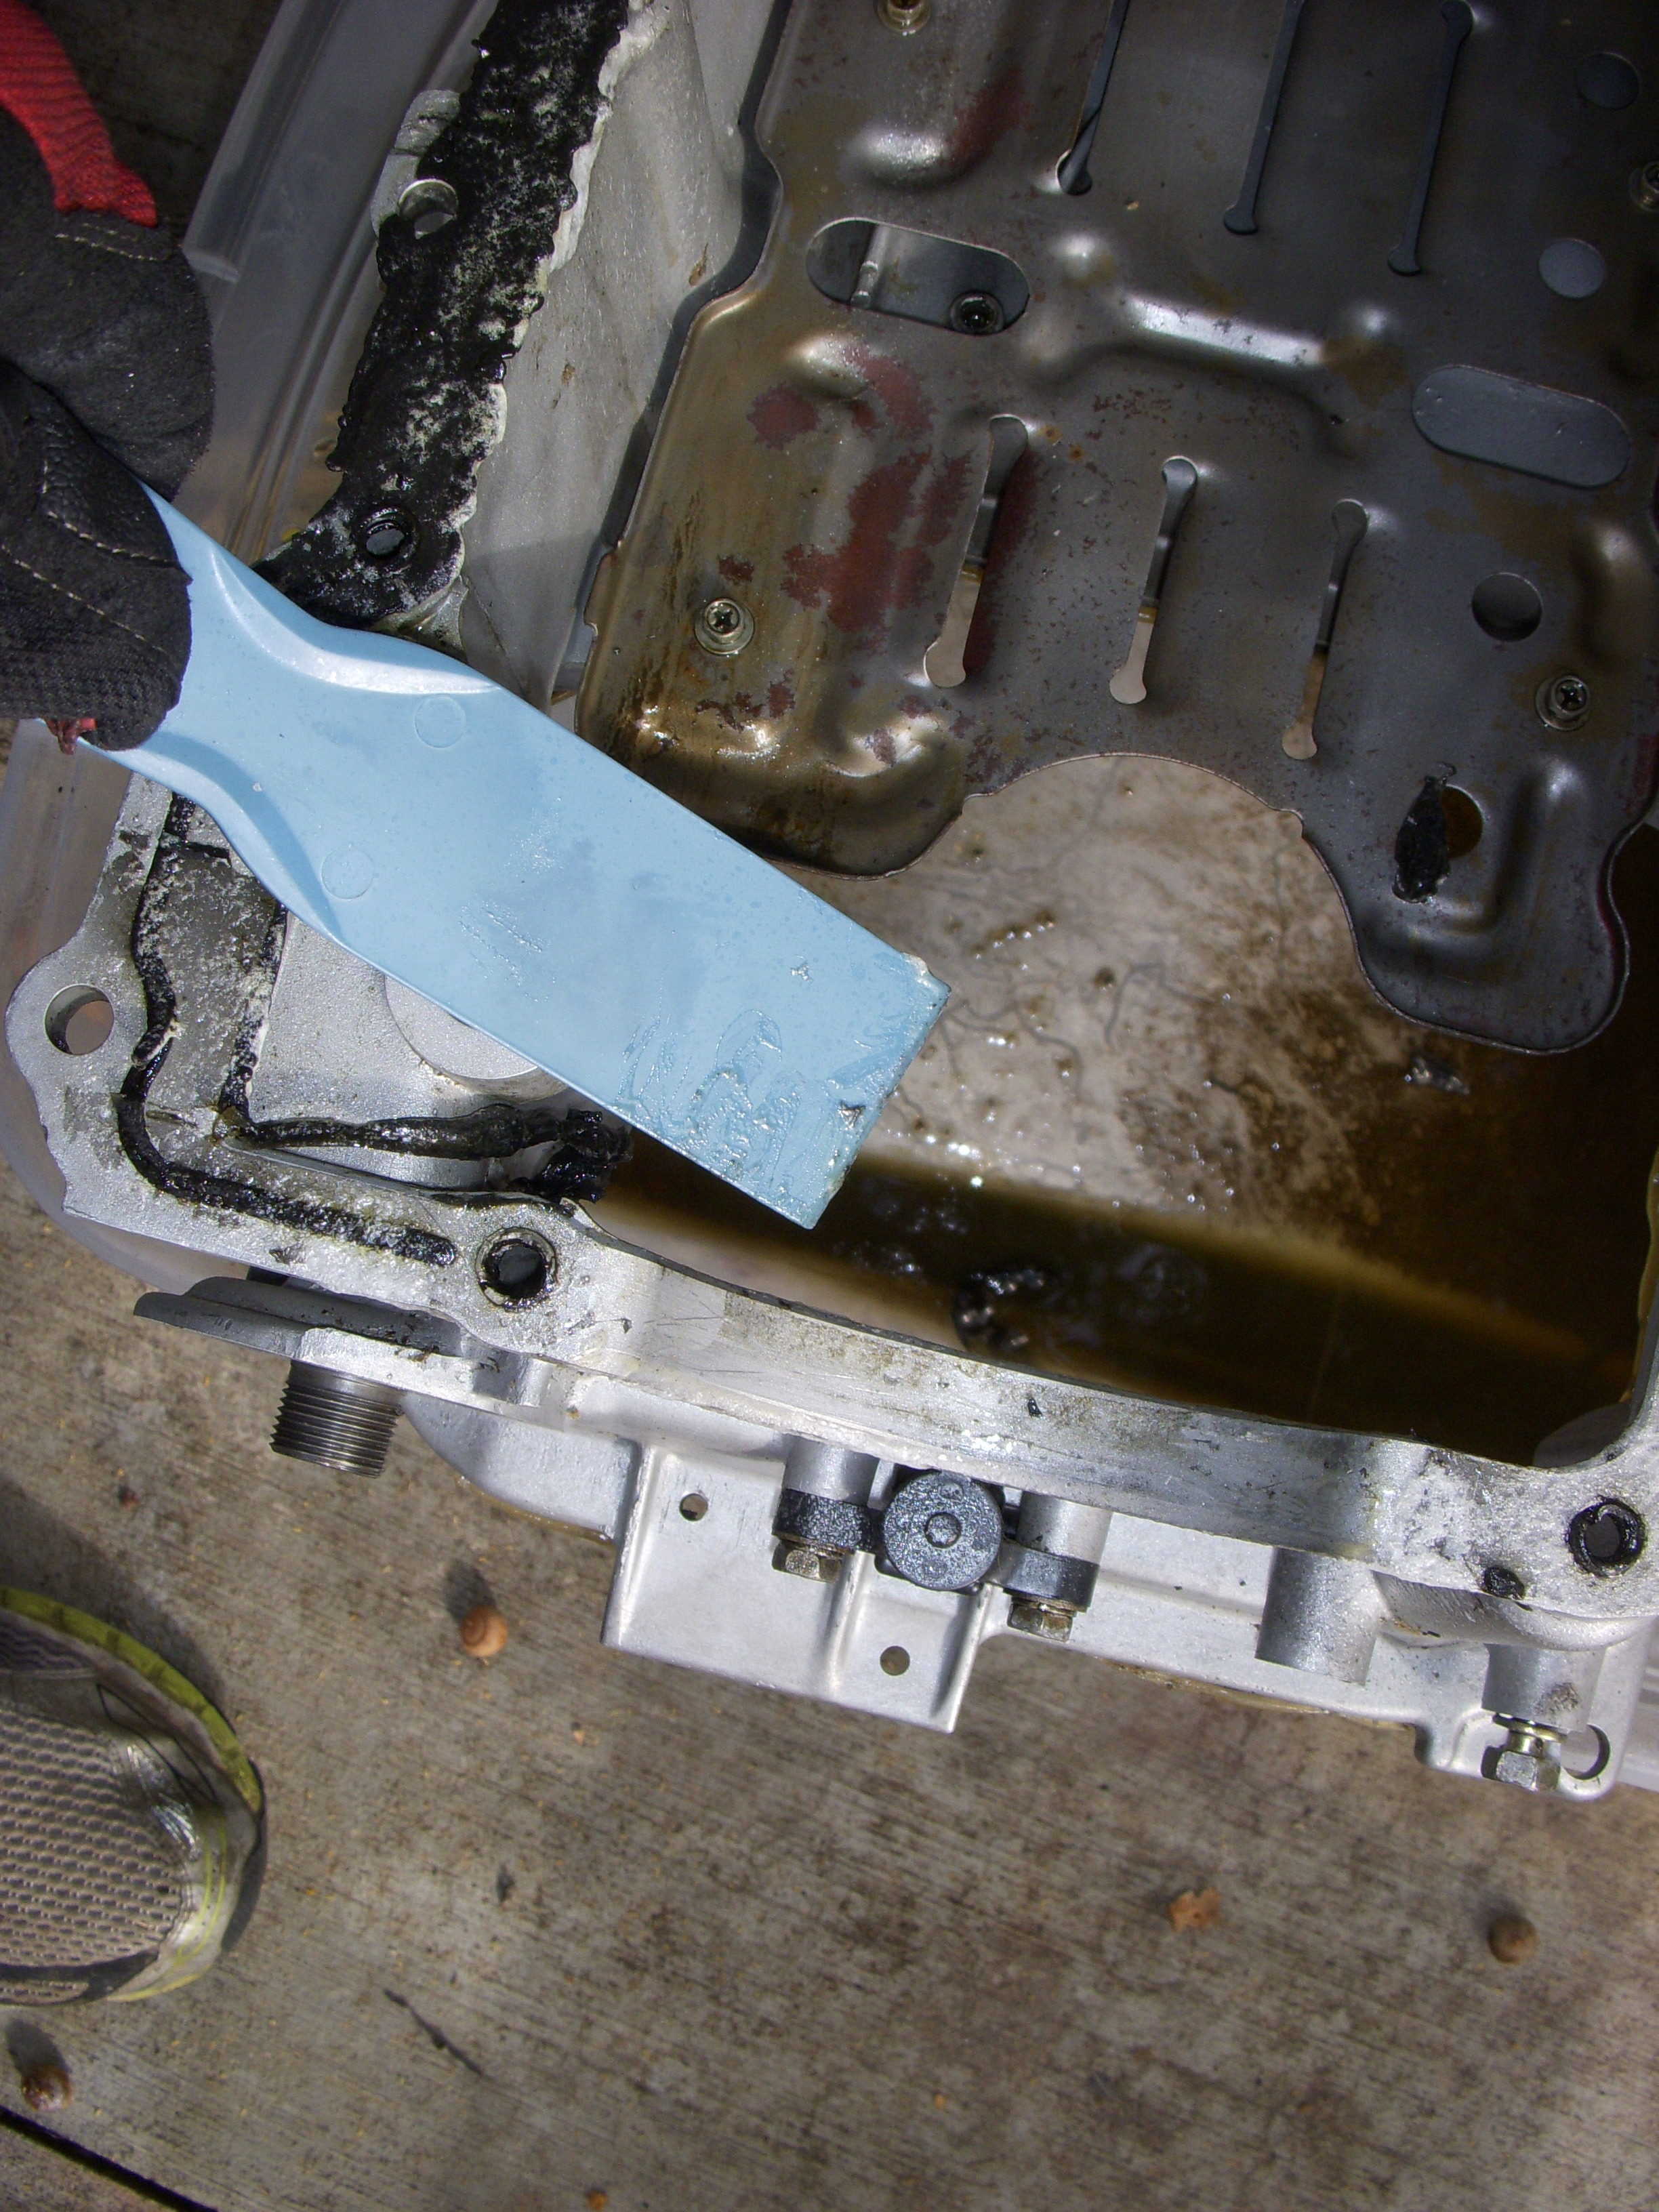
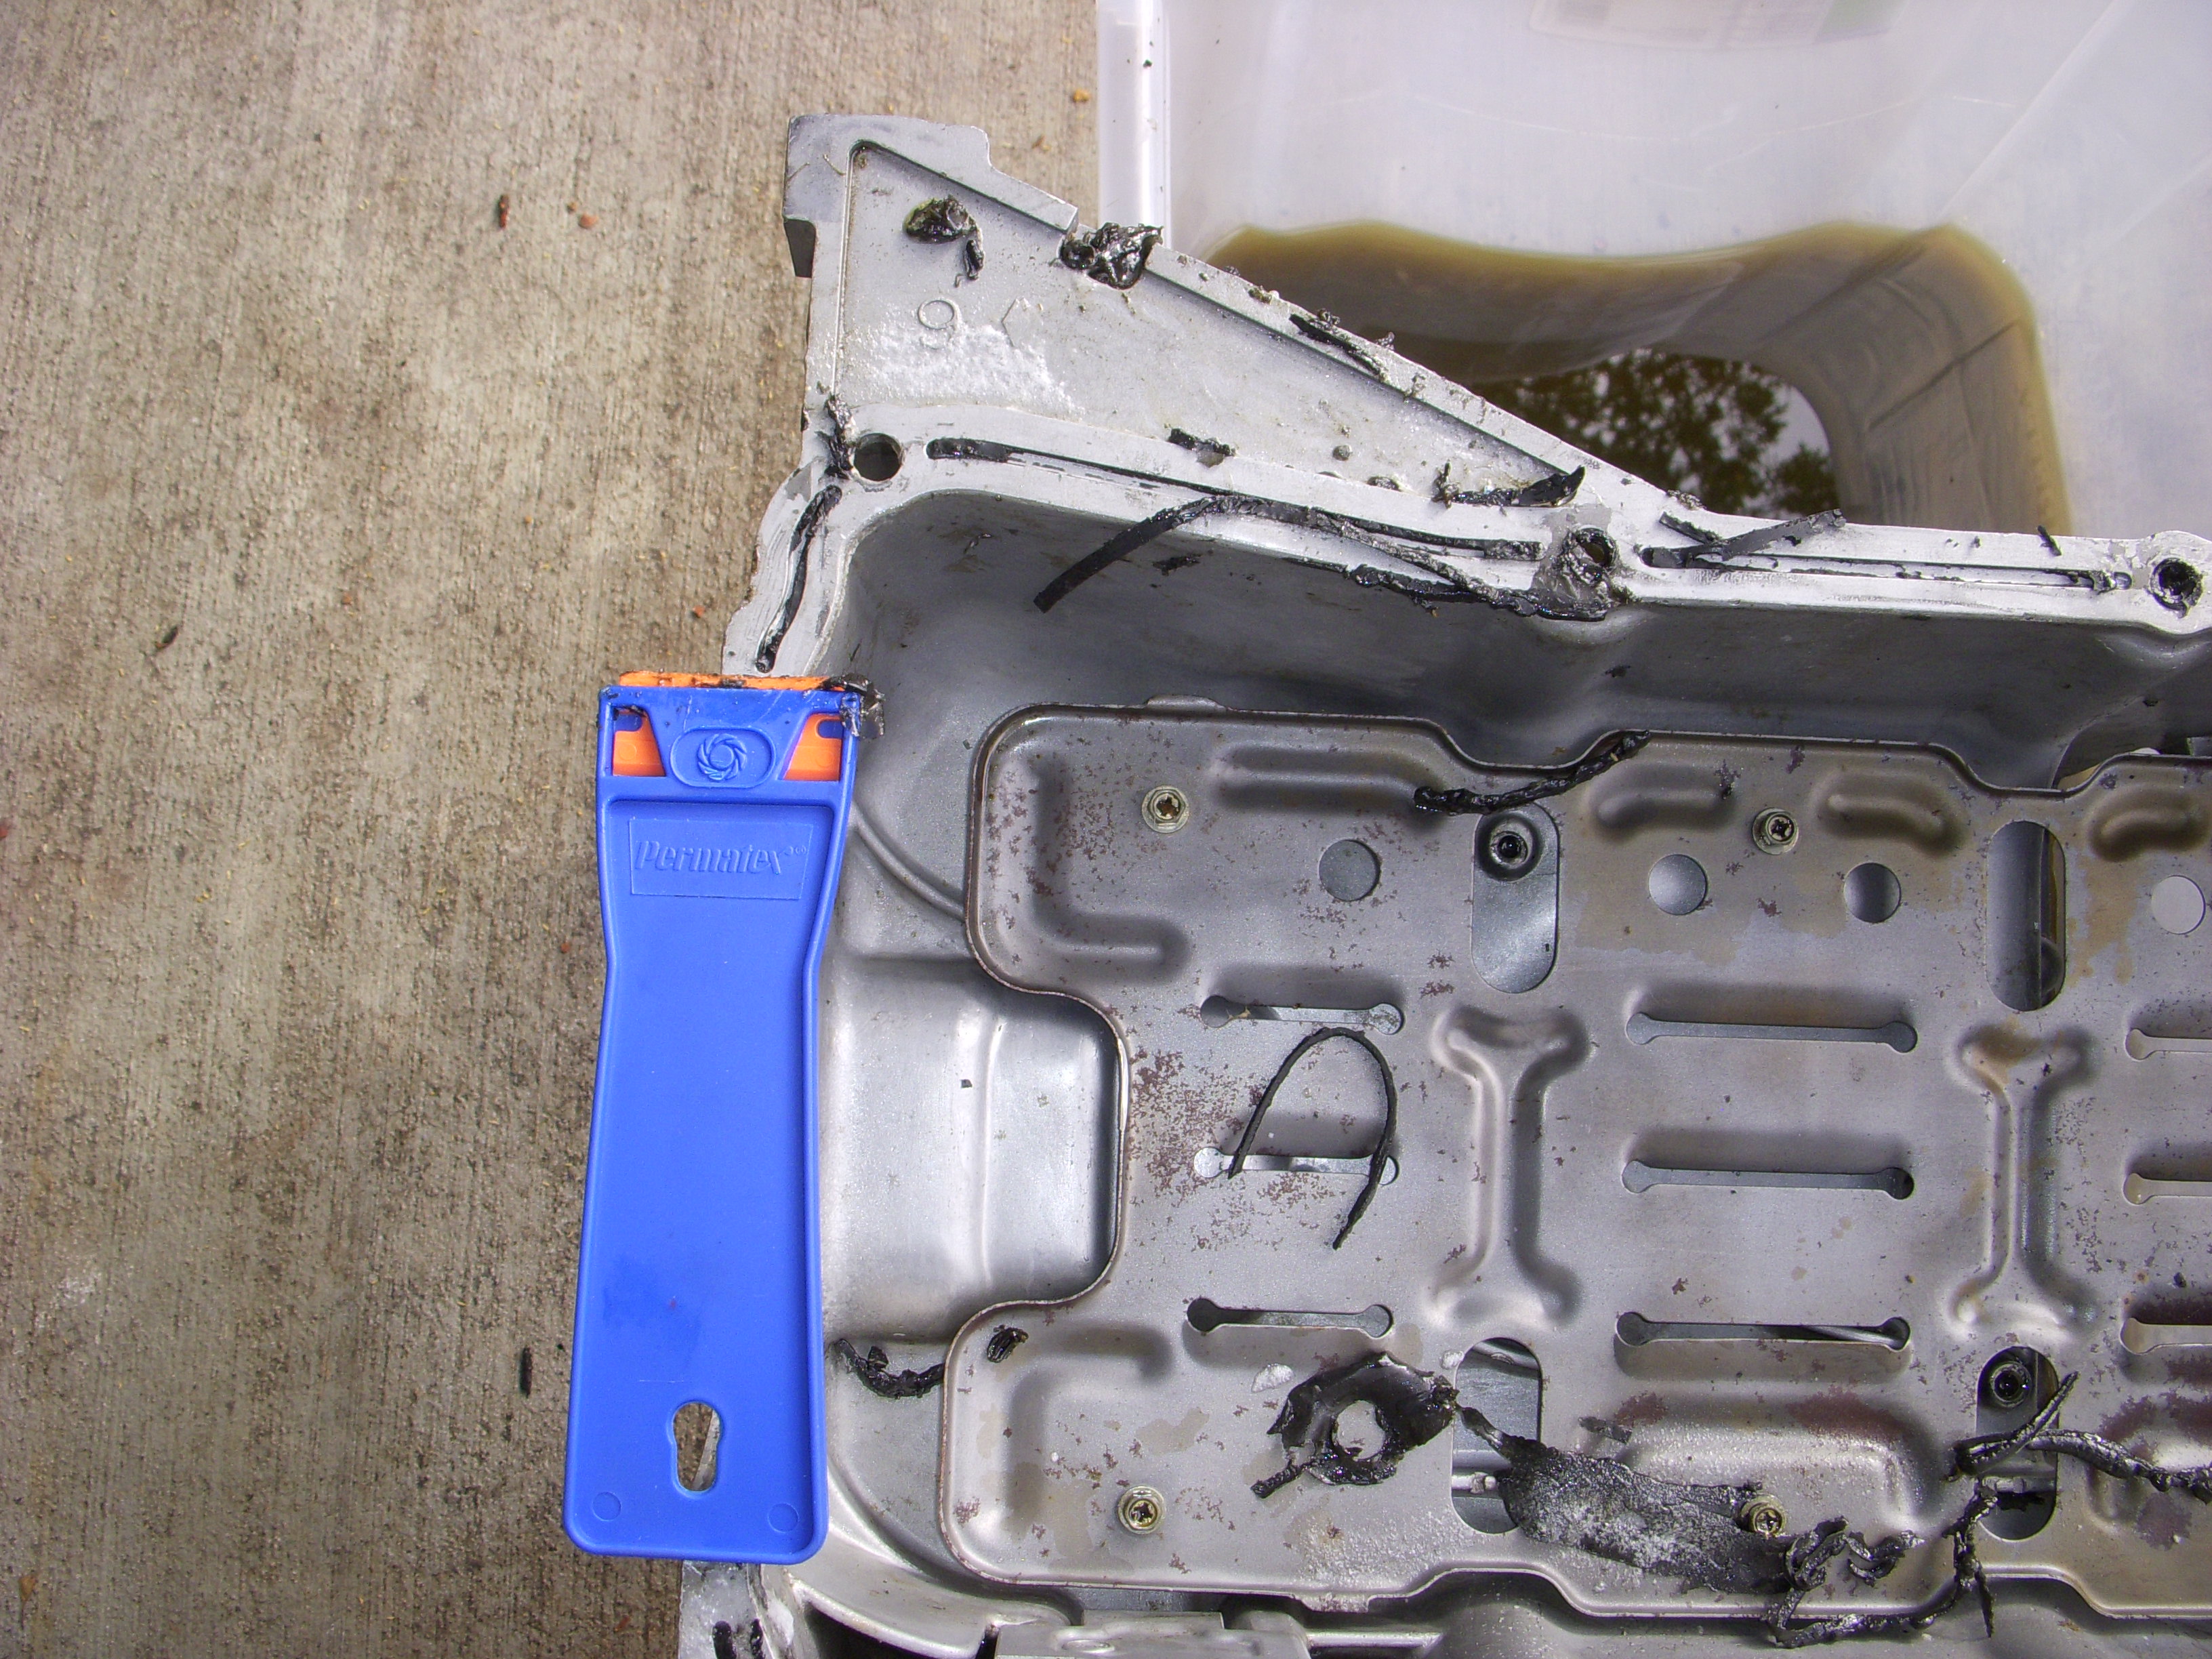
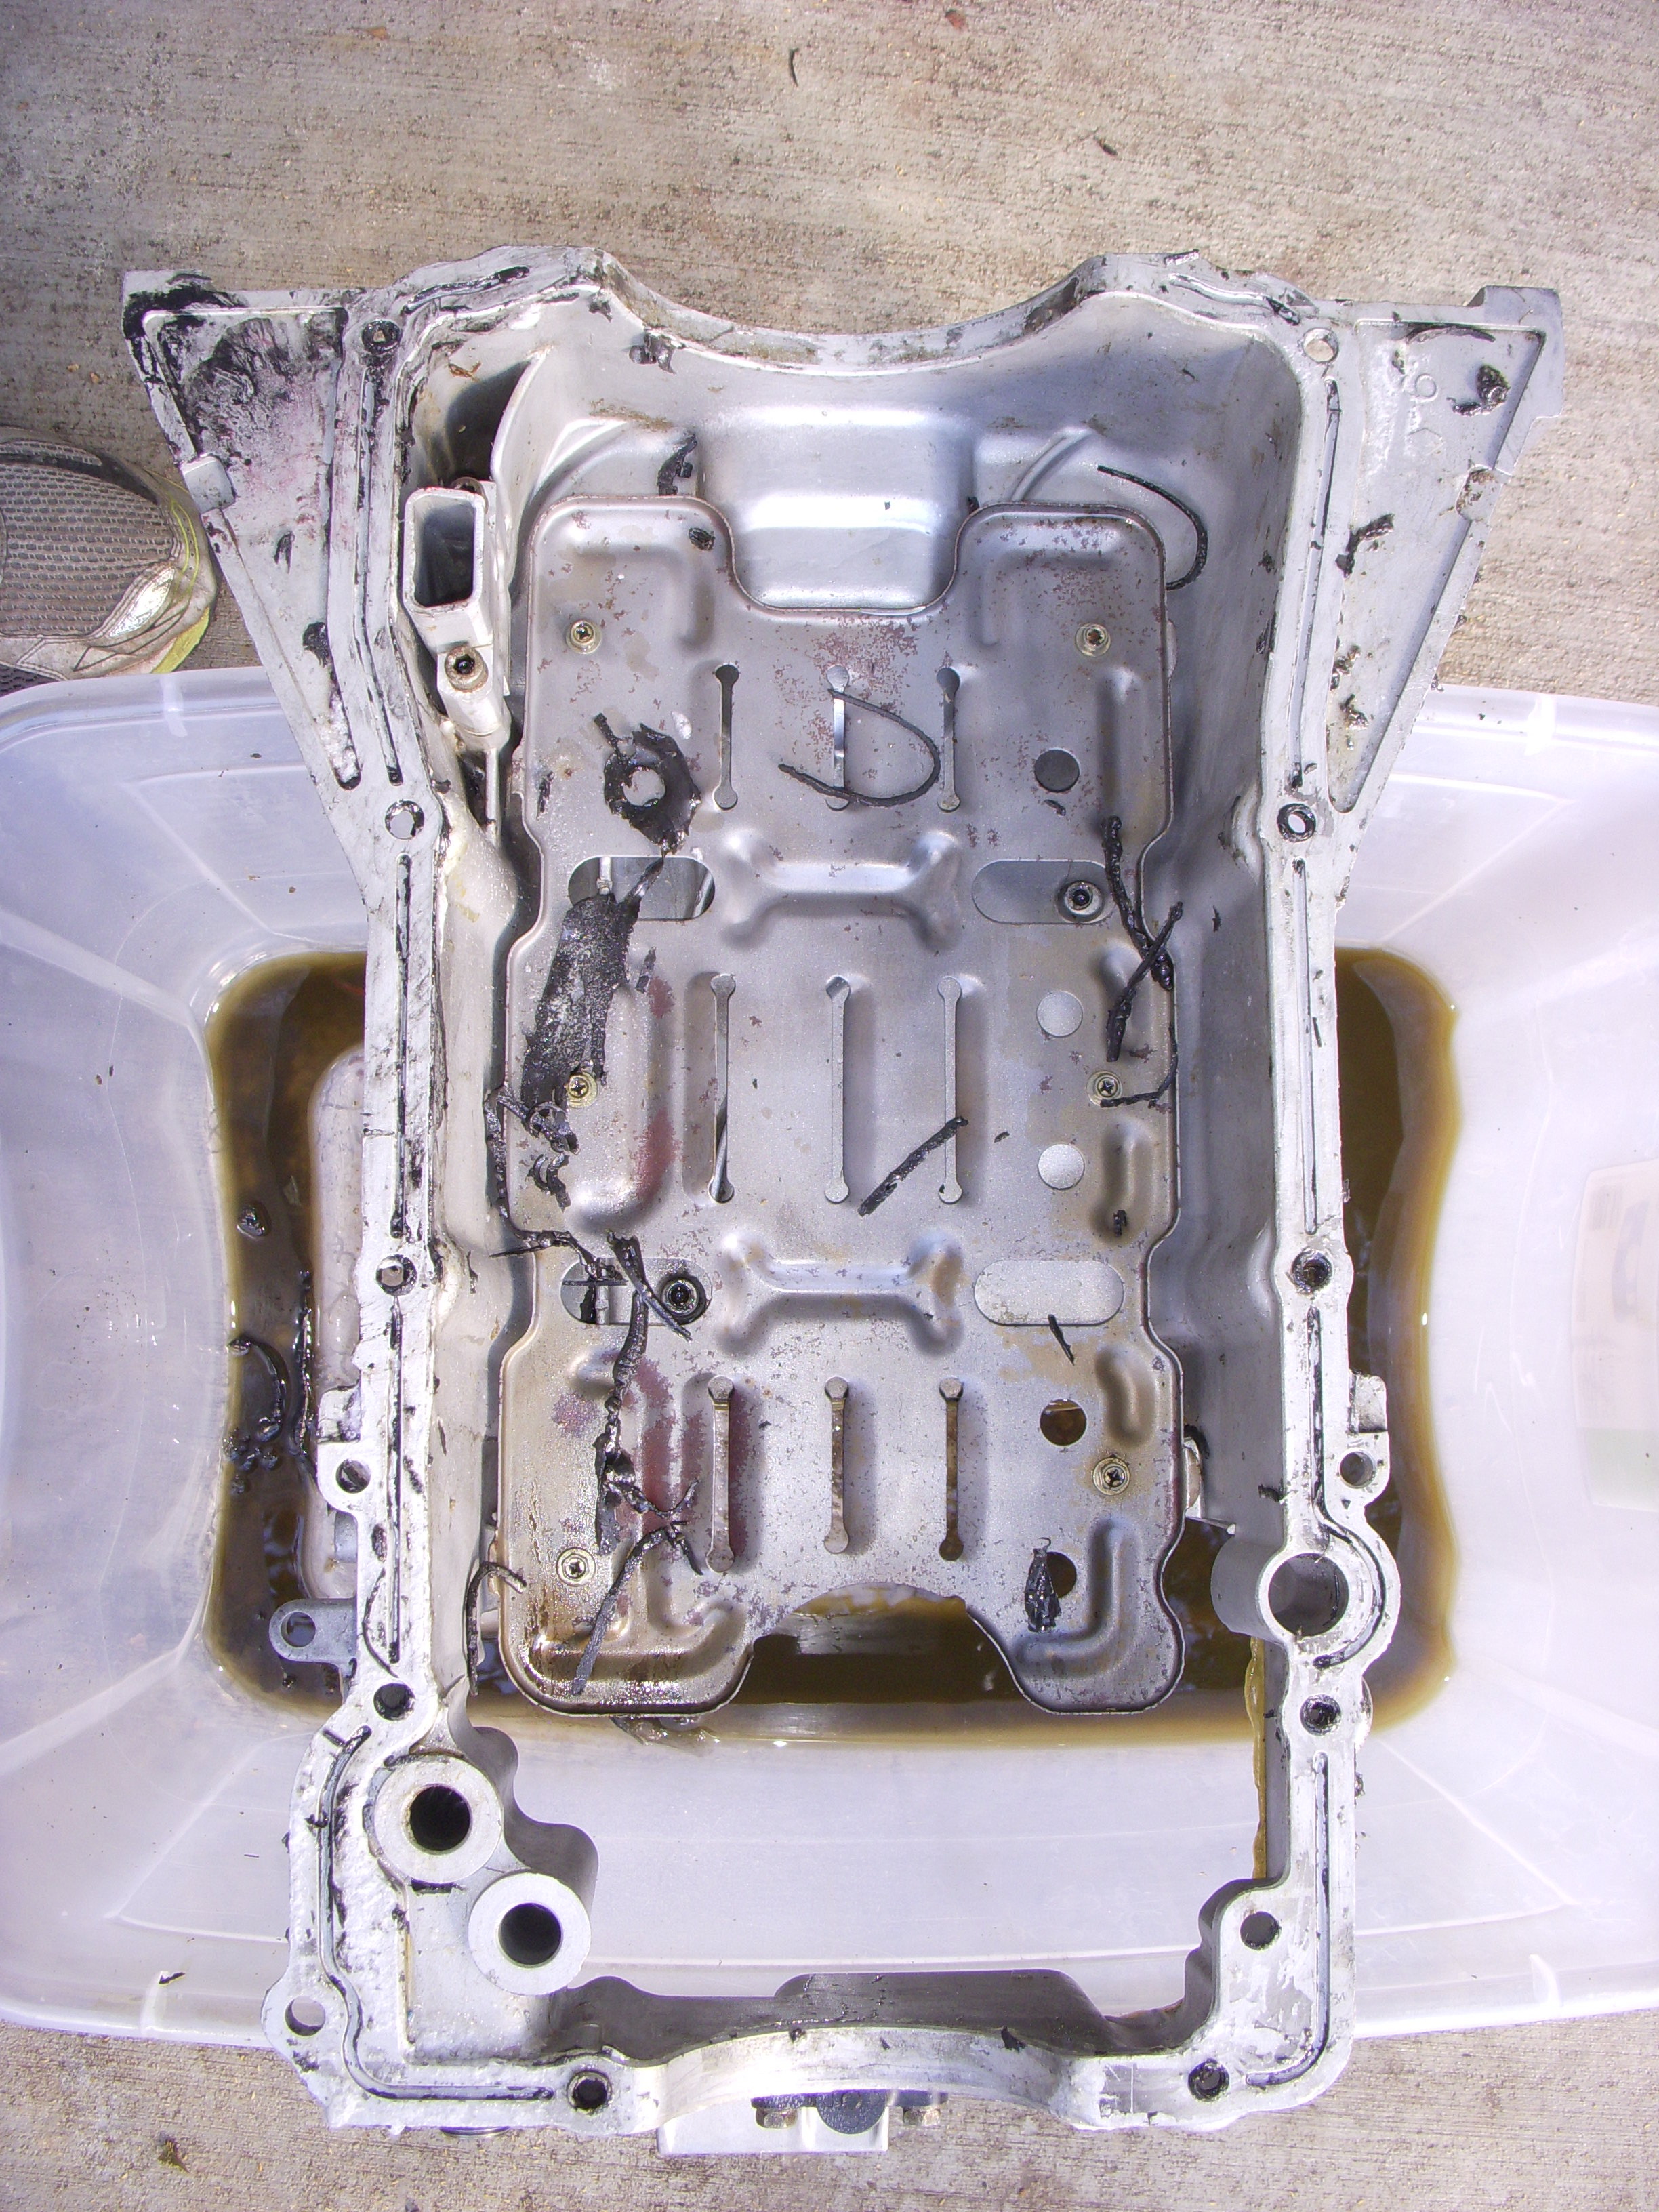
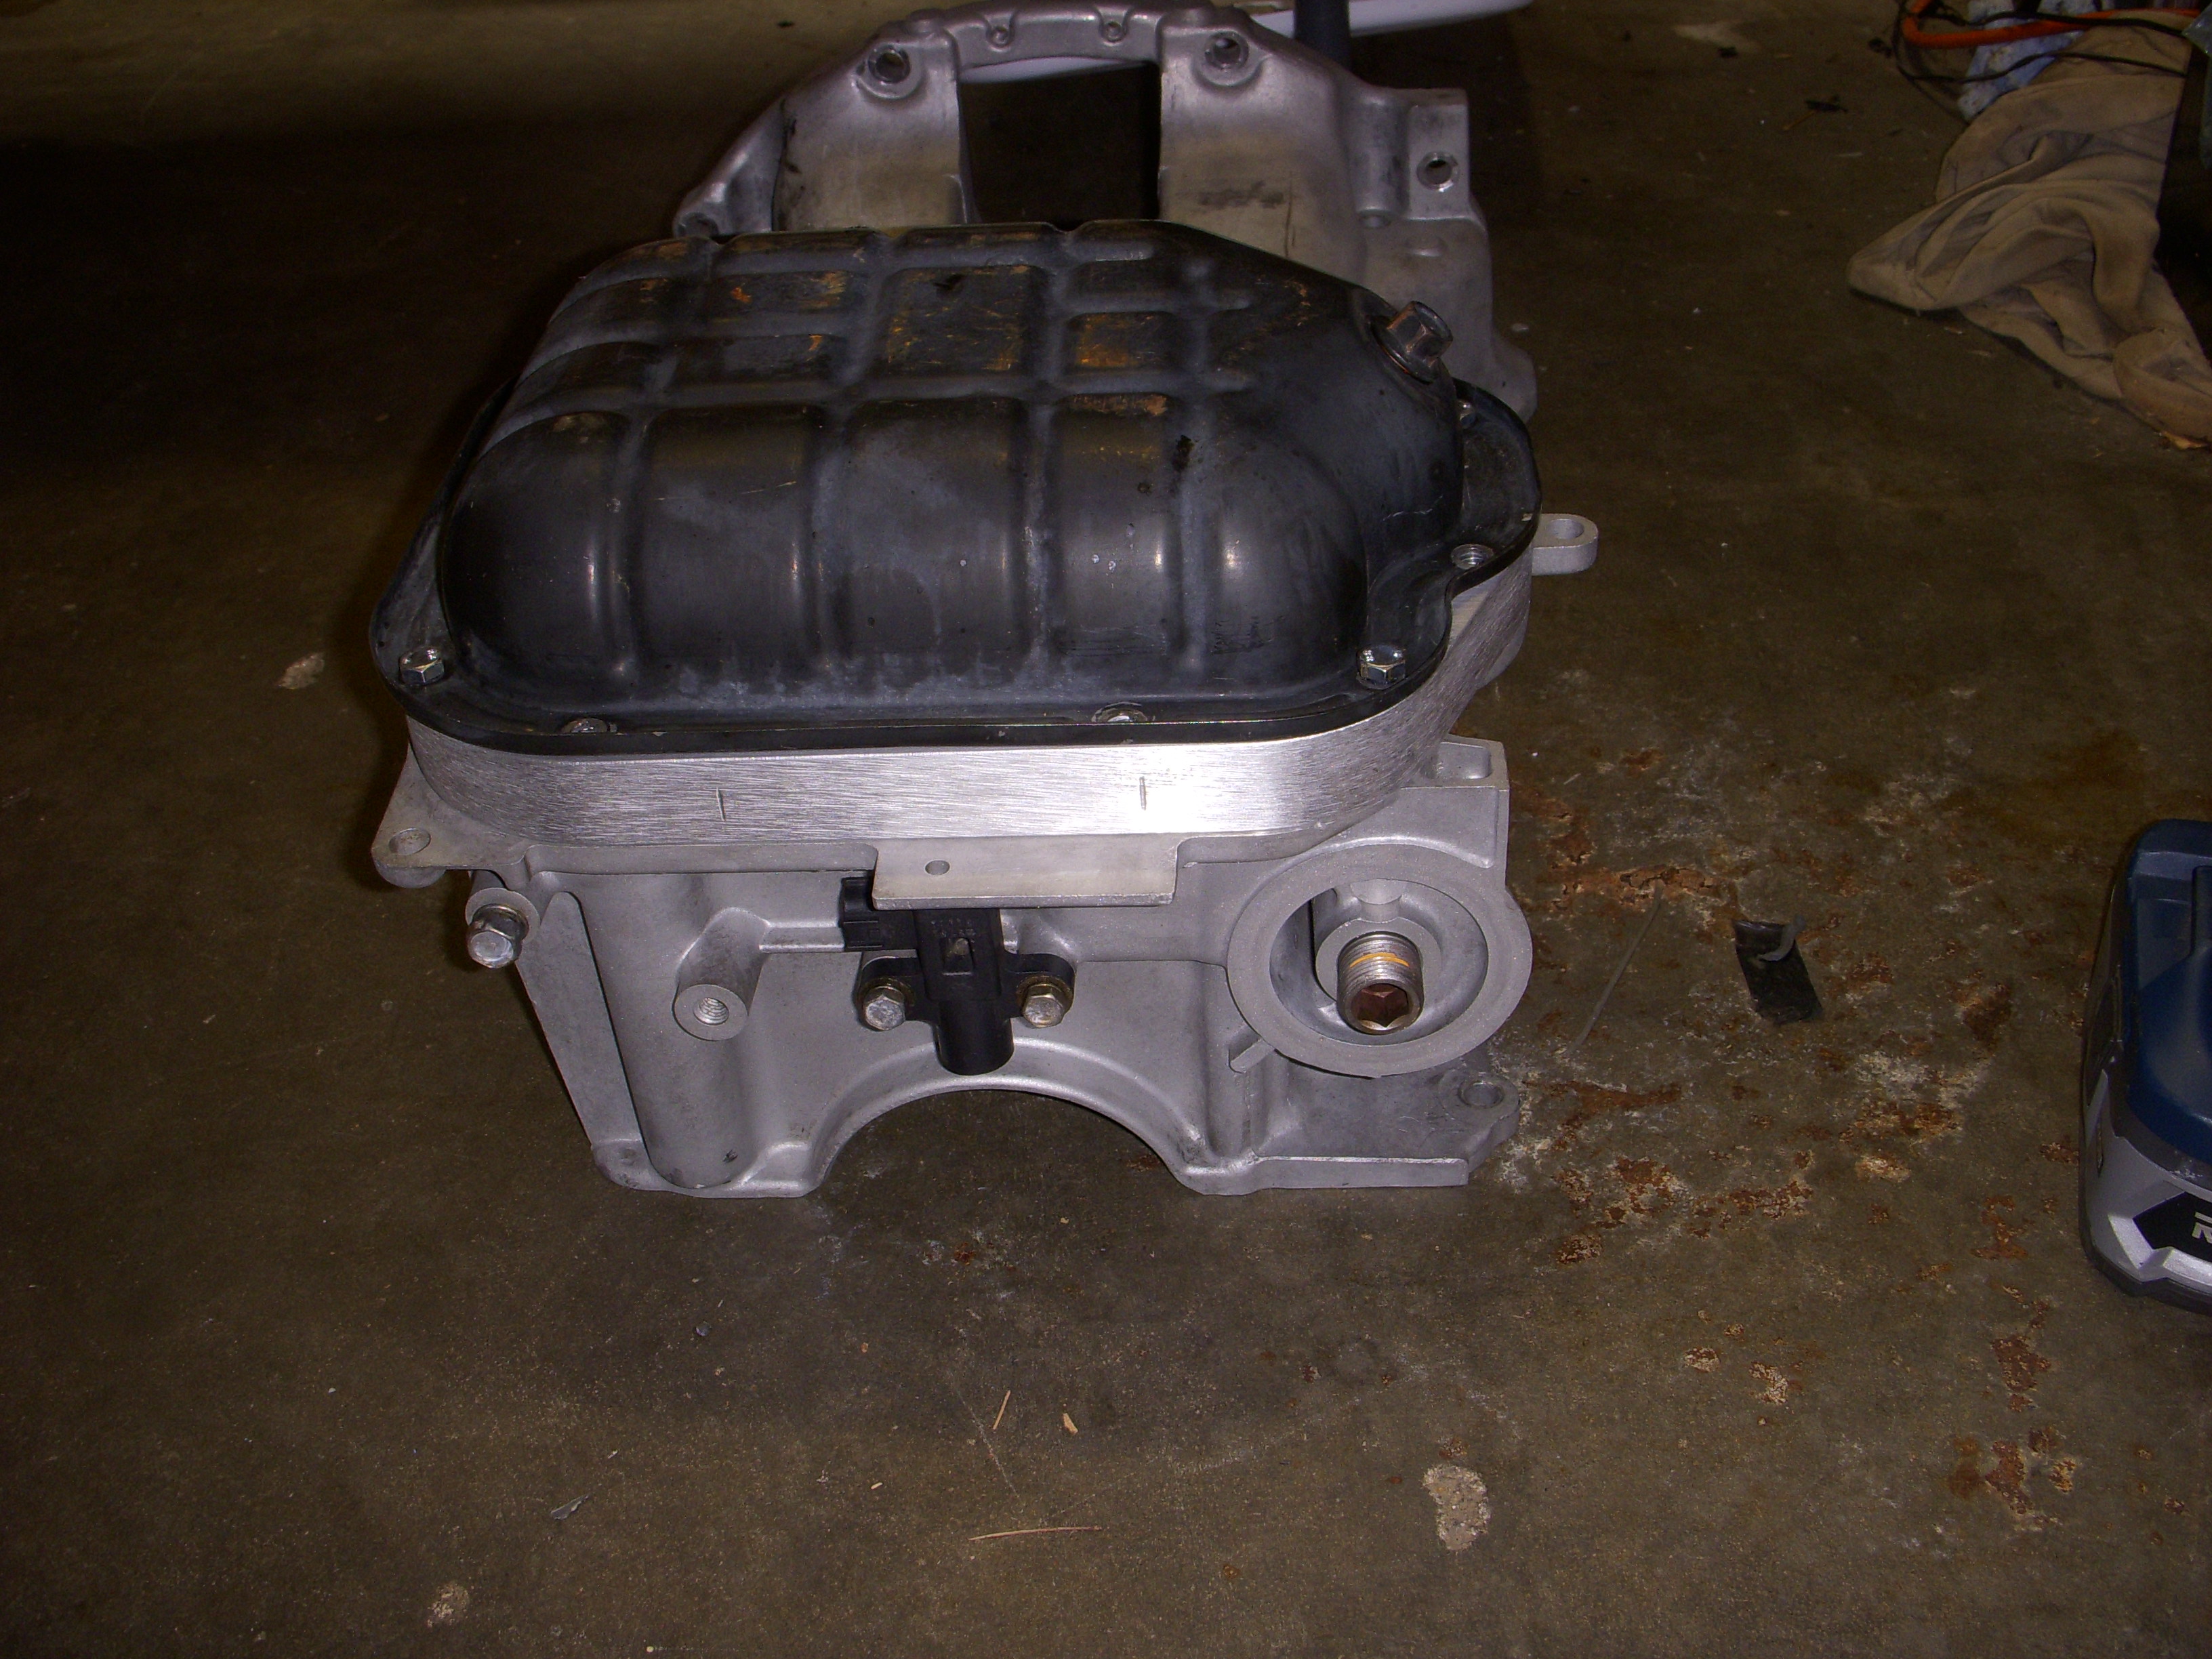
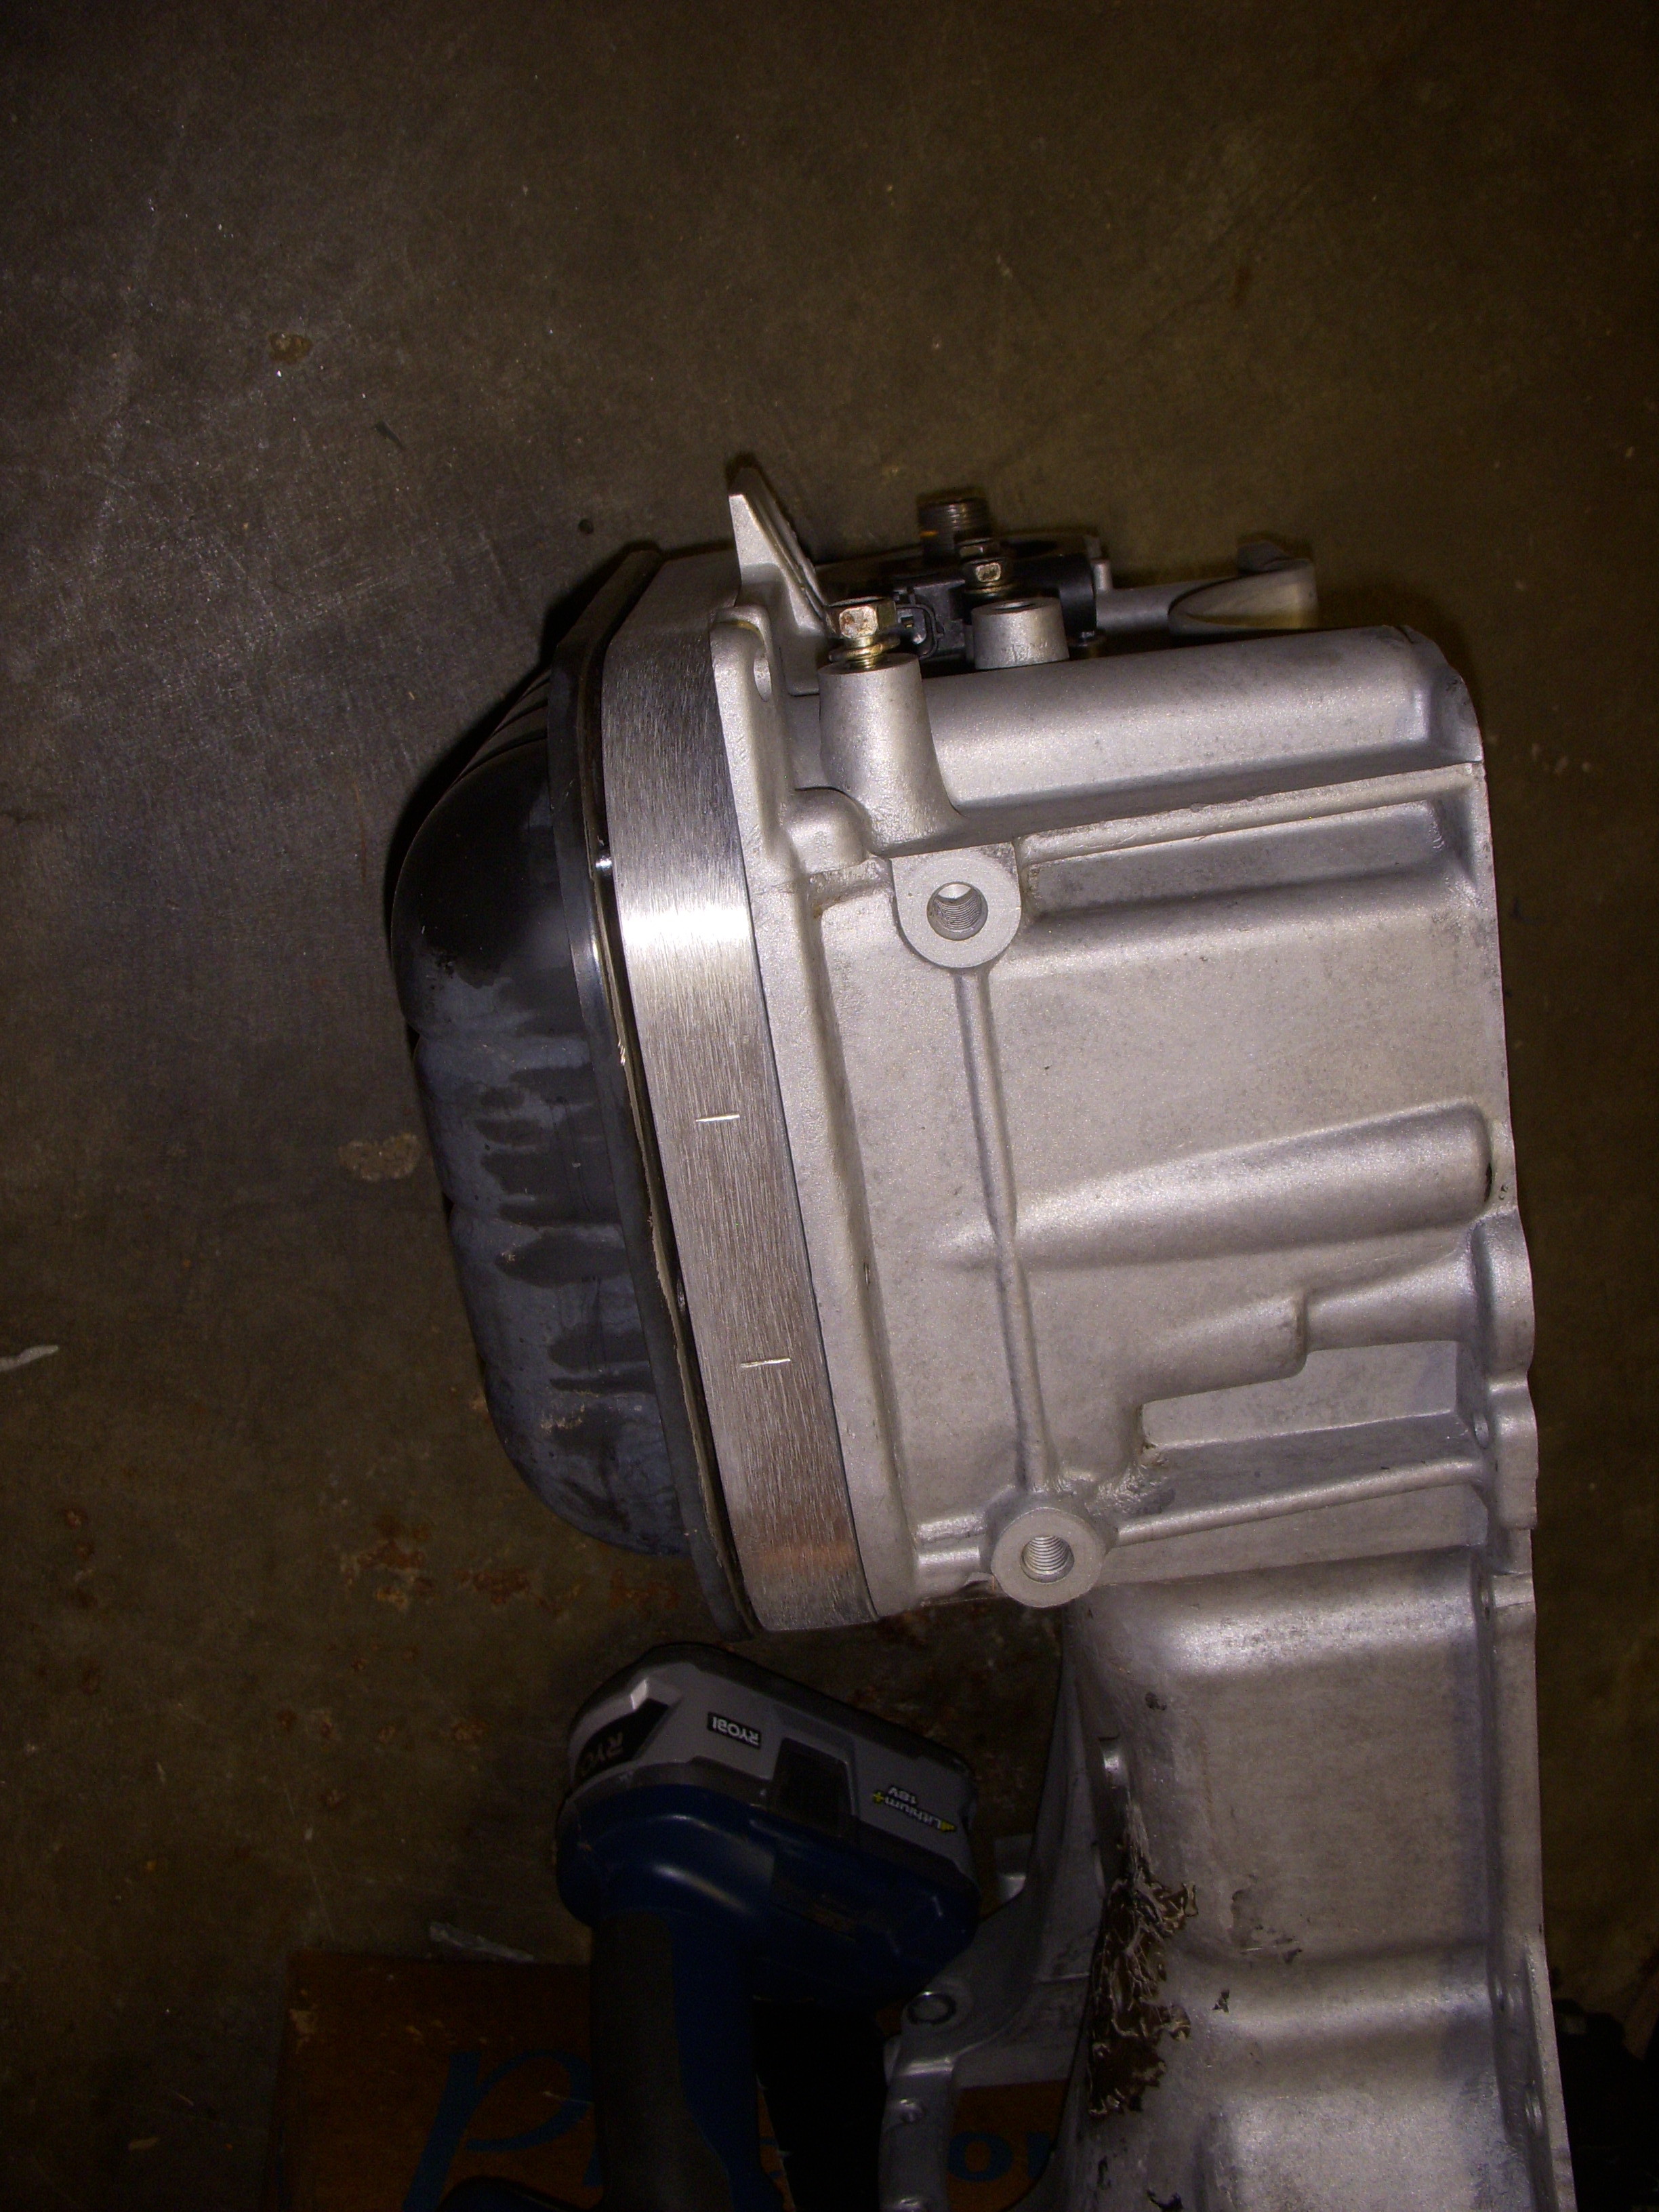
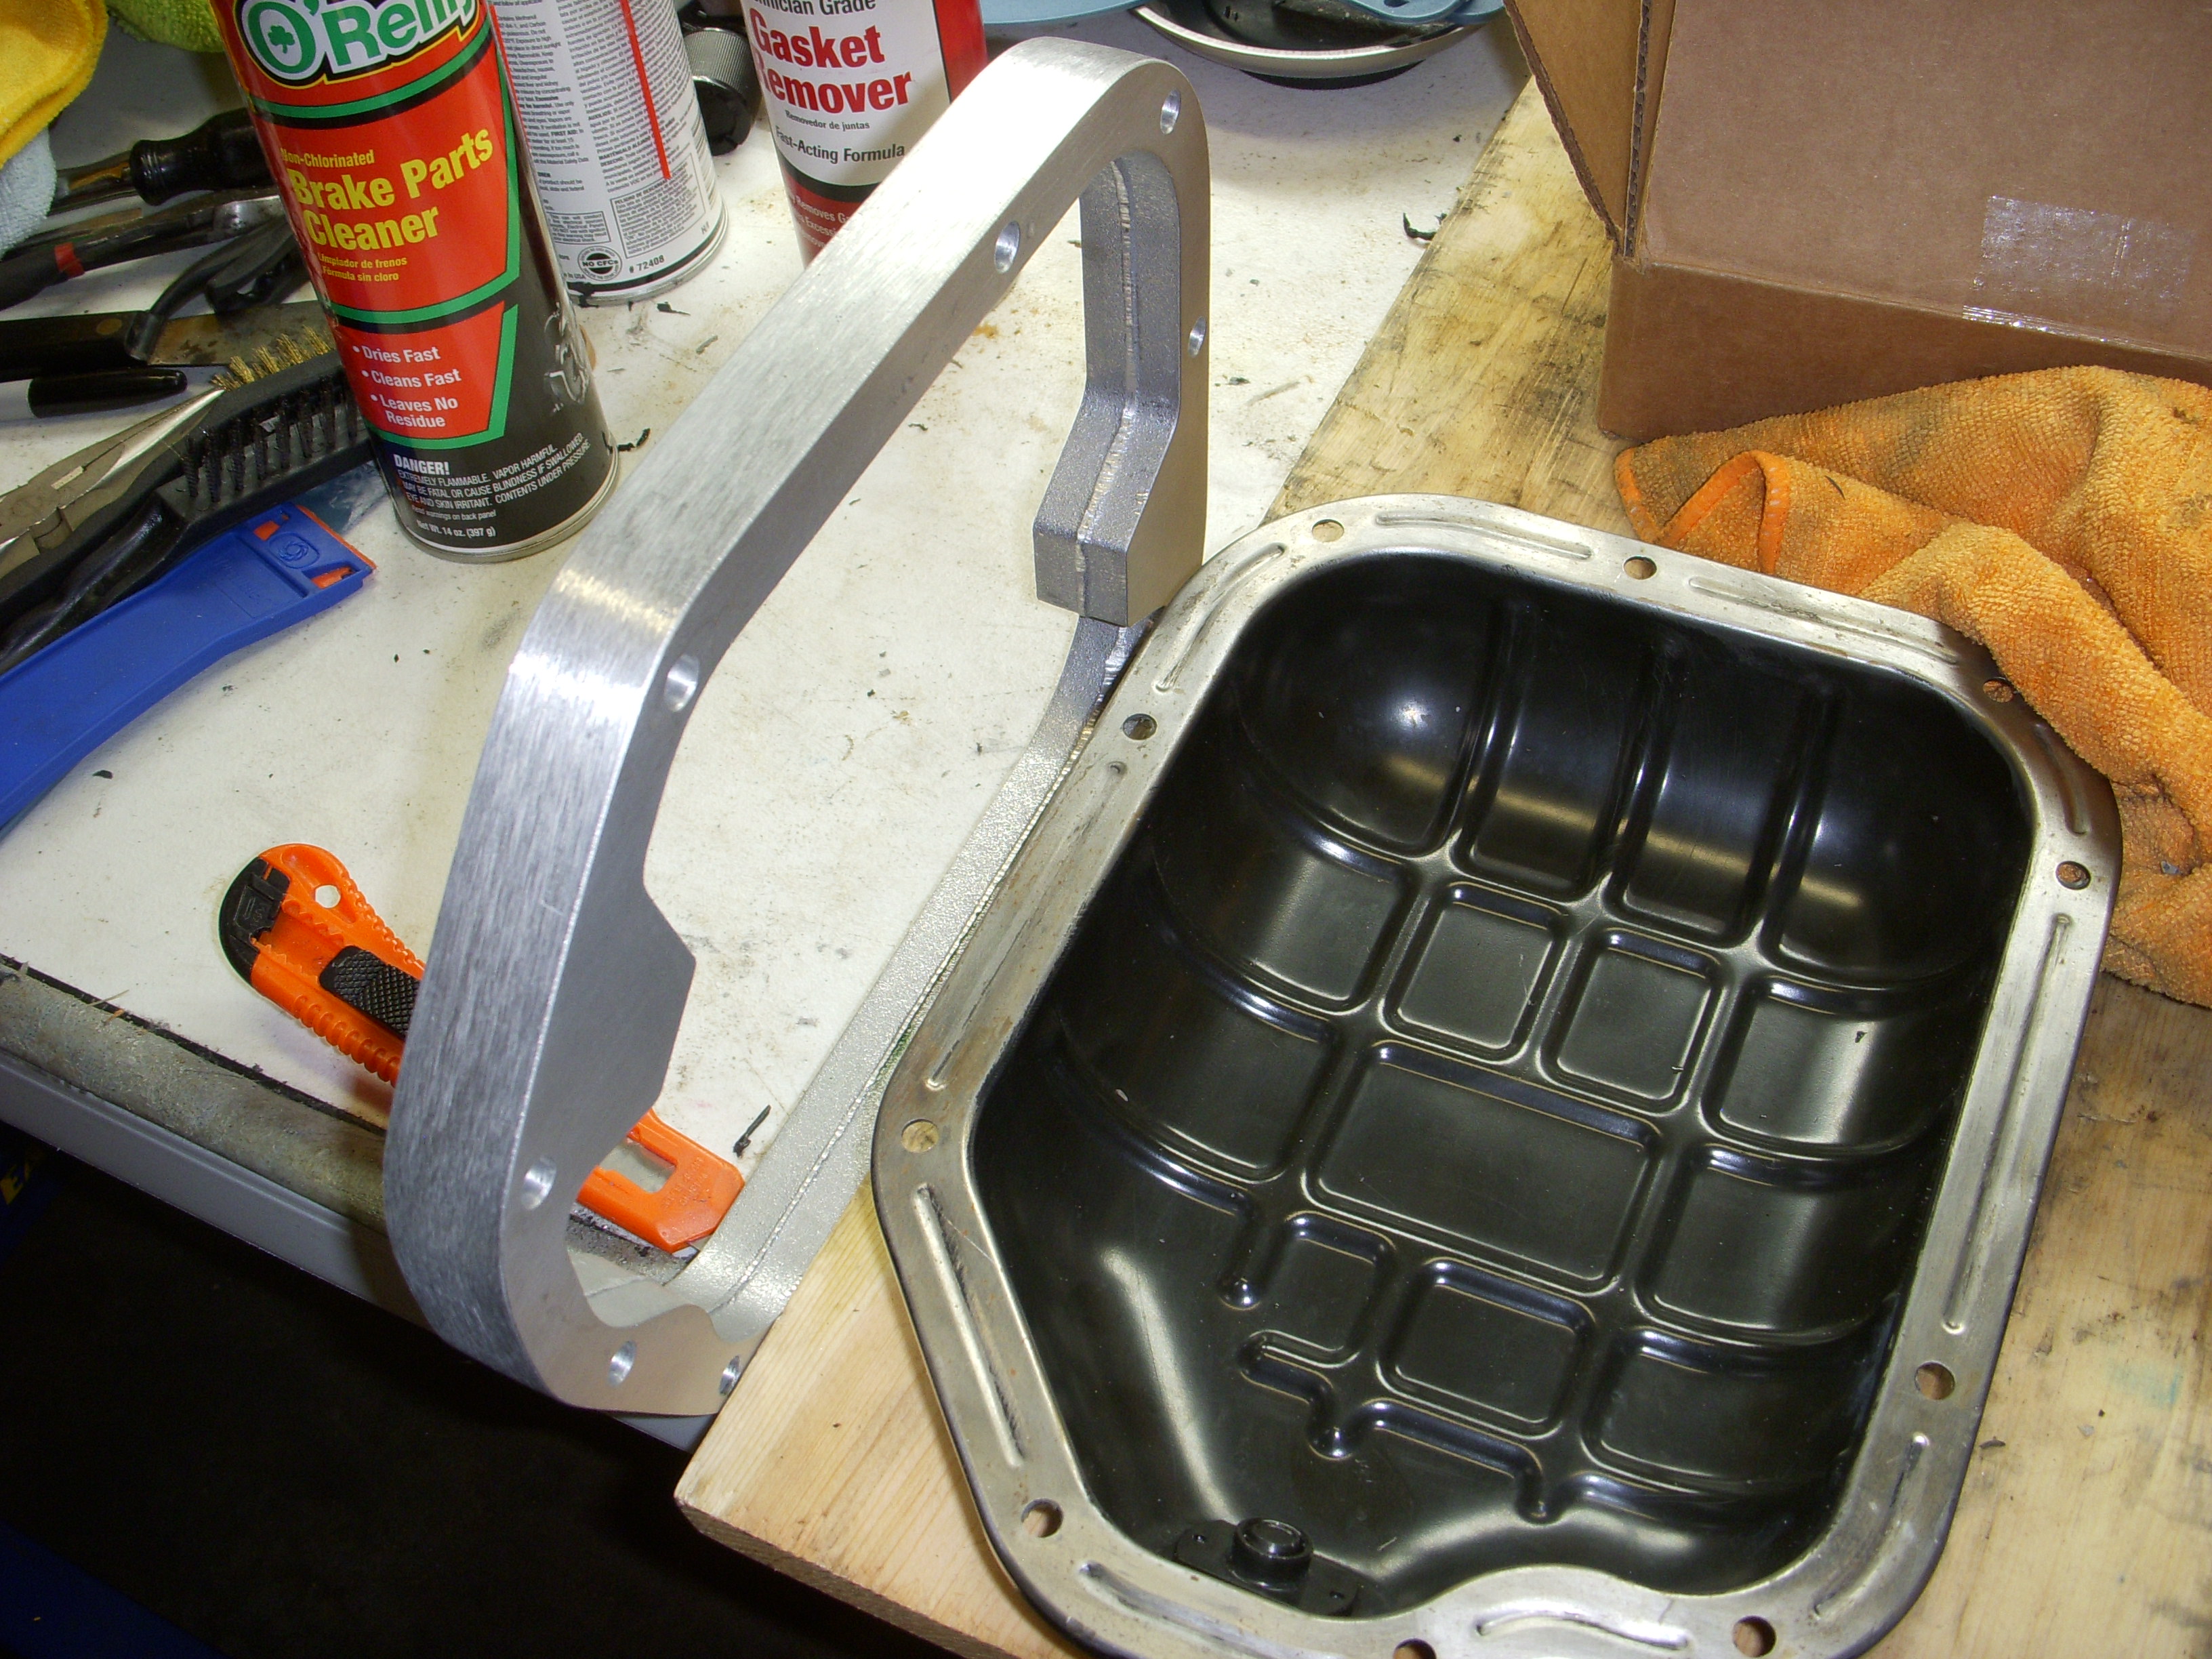
I know I'm going to have to remove a lot of RTV from covers and oil pans (two engines coming) so I decided to hunt for the right chemicals to easily remove RTV from aluminum - and you know what? - I think I found the Right Stuff !! I get this from Amazon, now $9.00 / can. This cleaned up the lower oil pan.
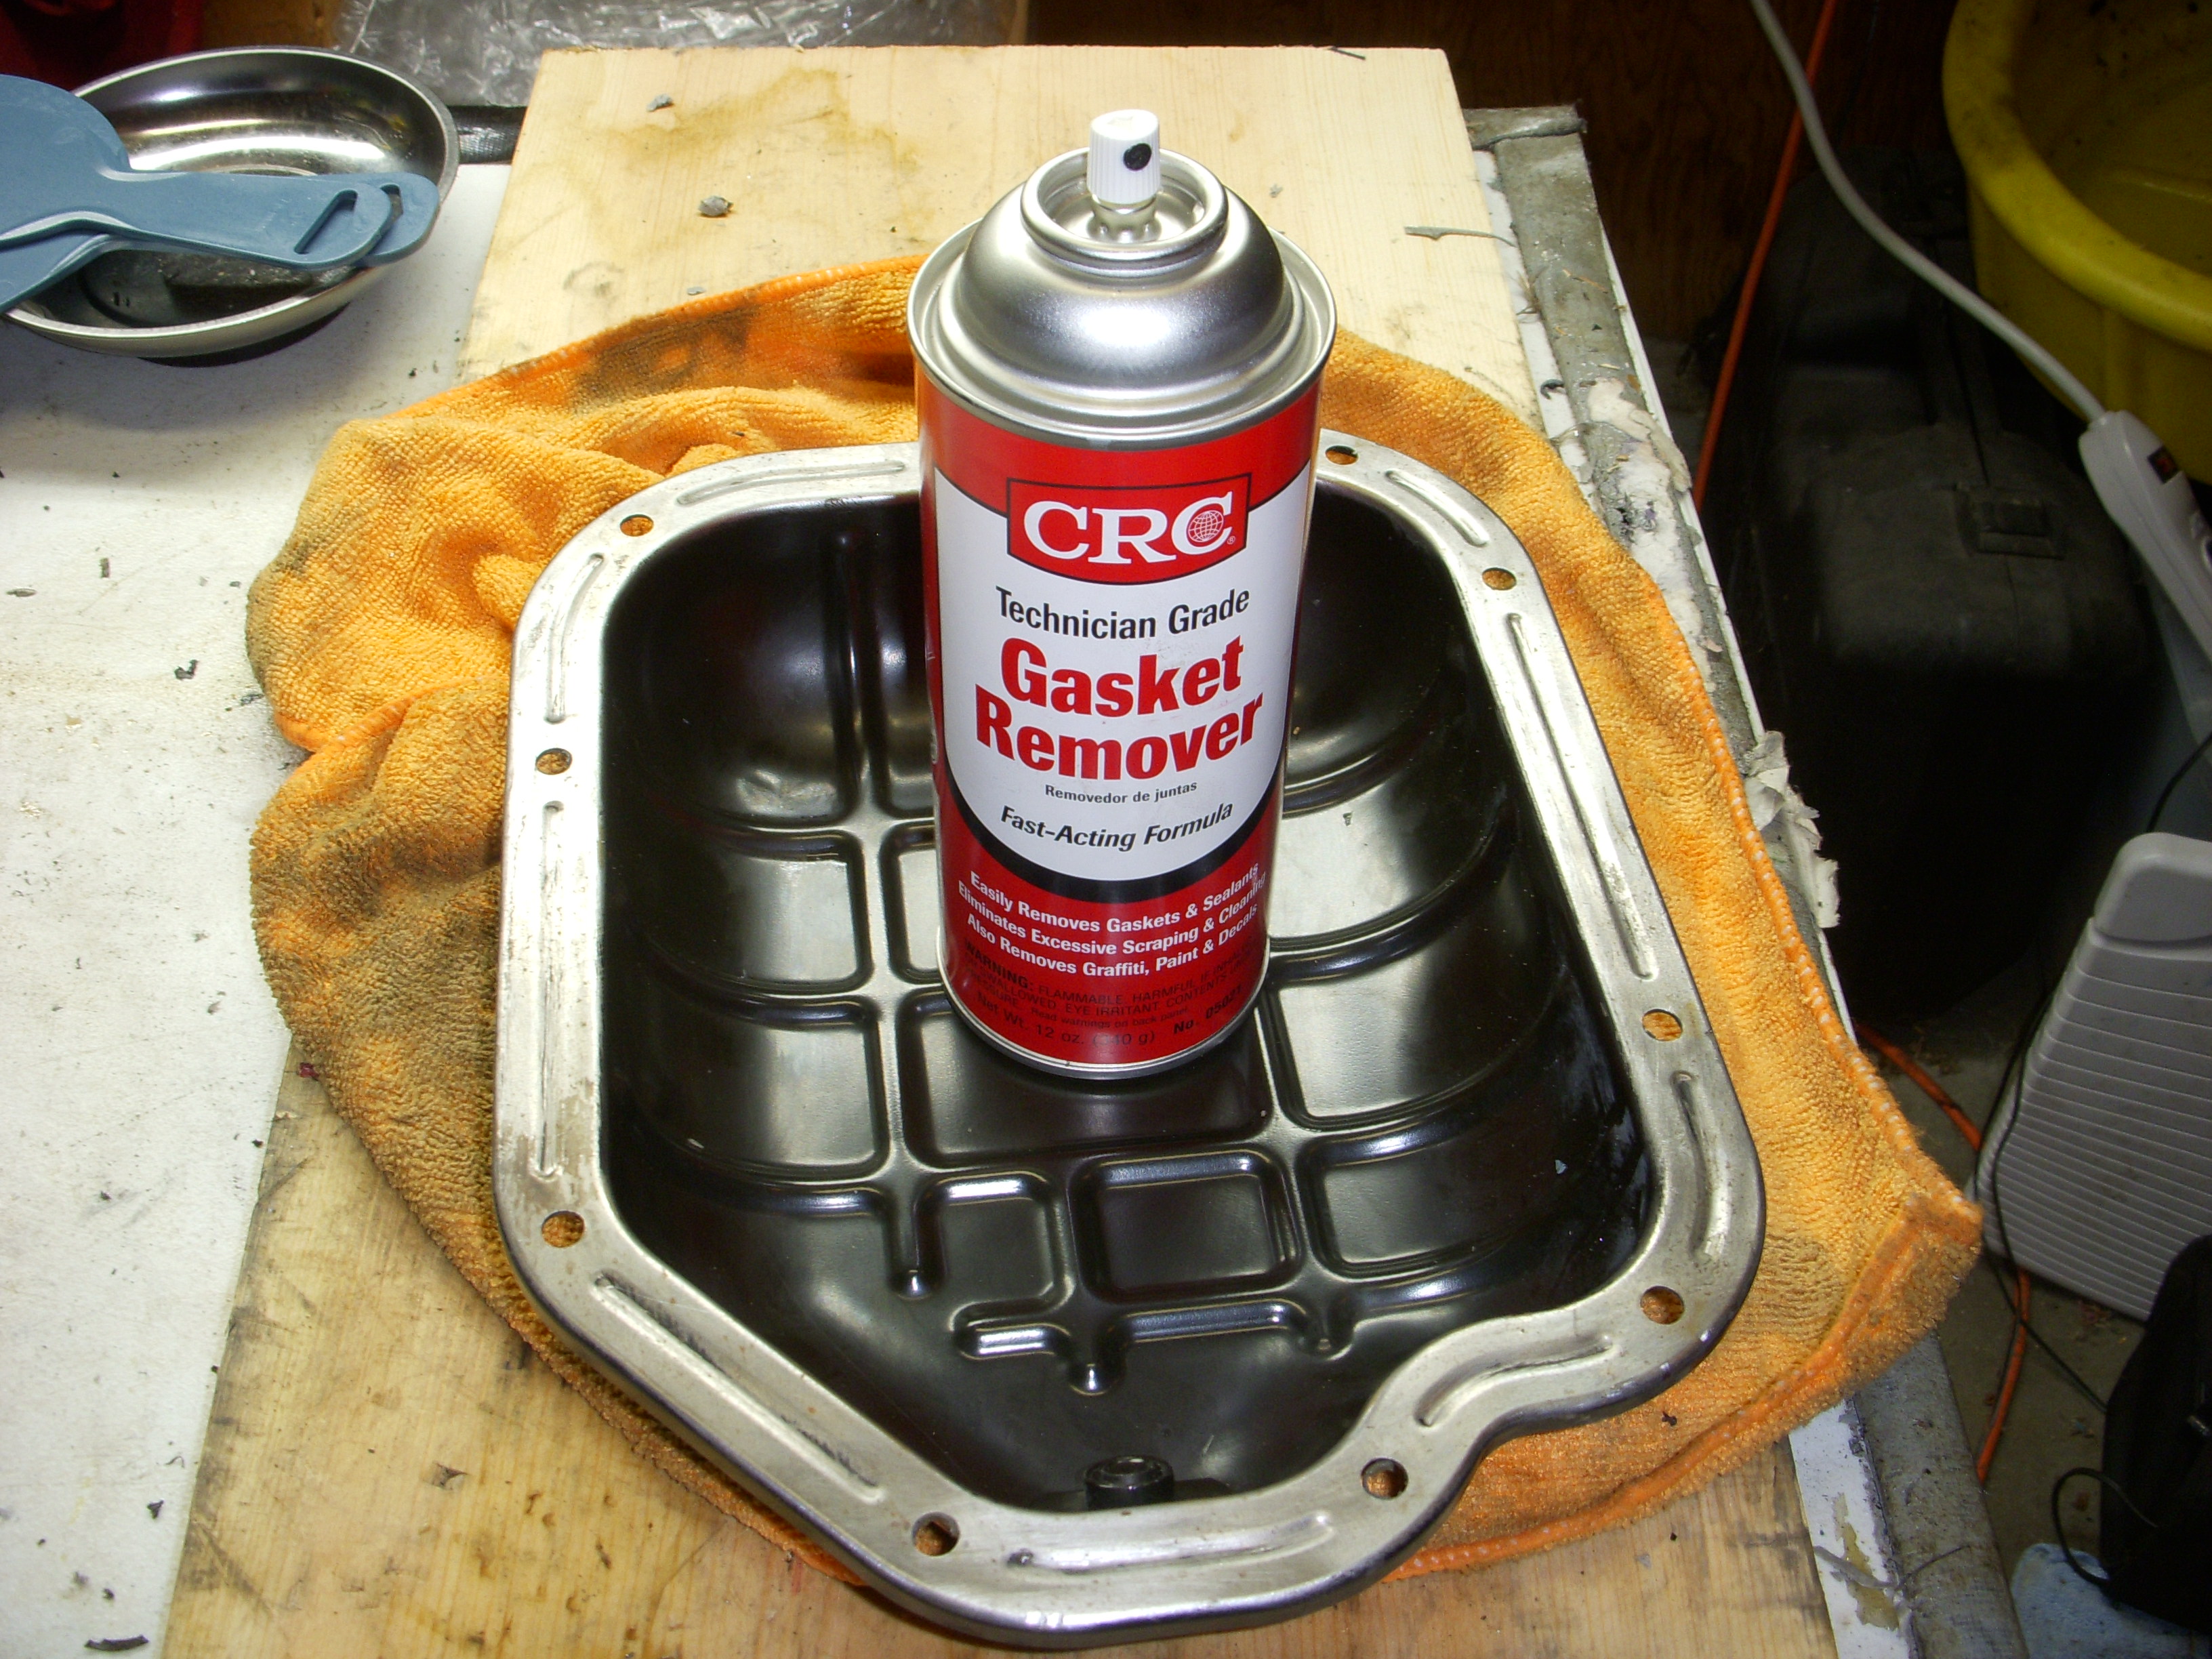
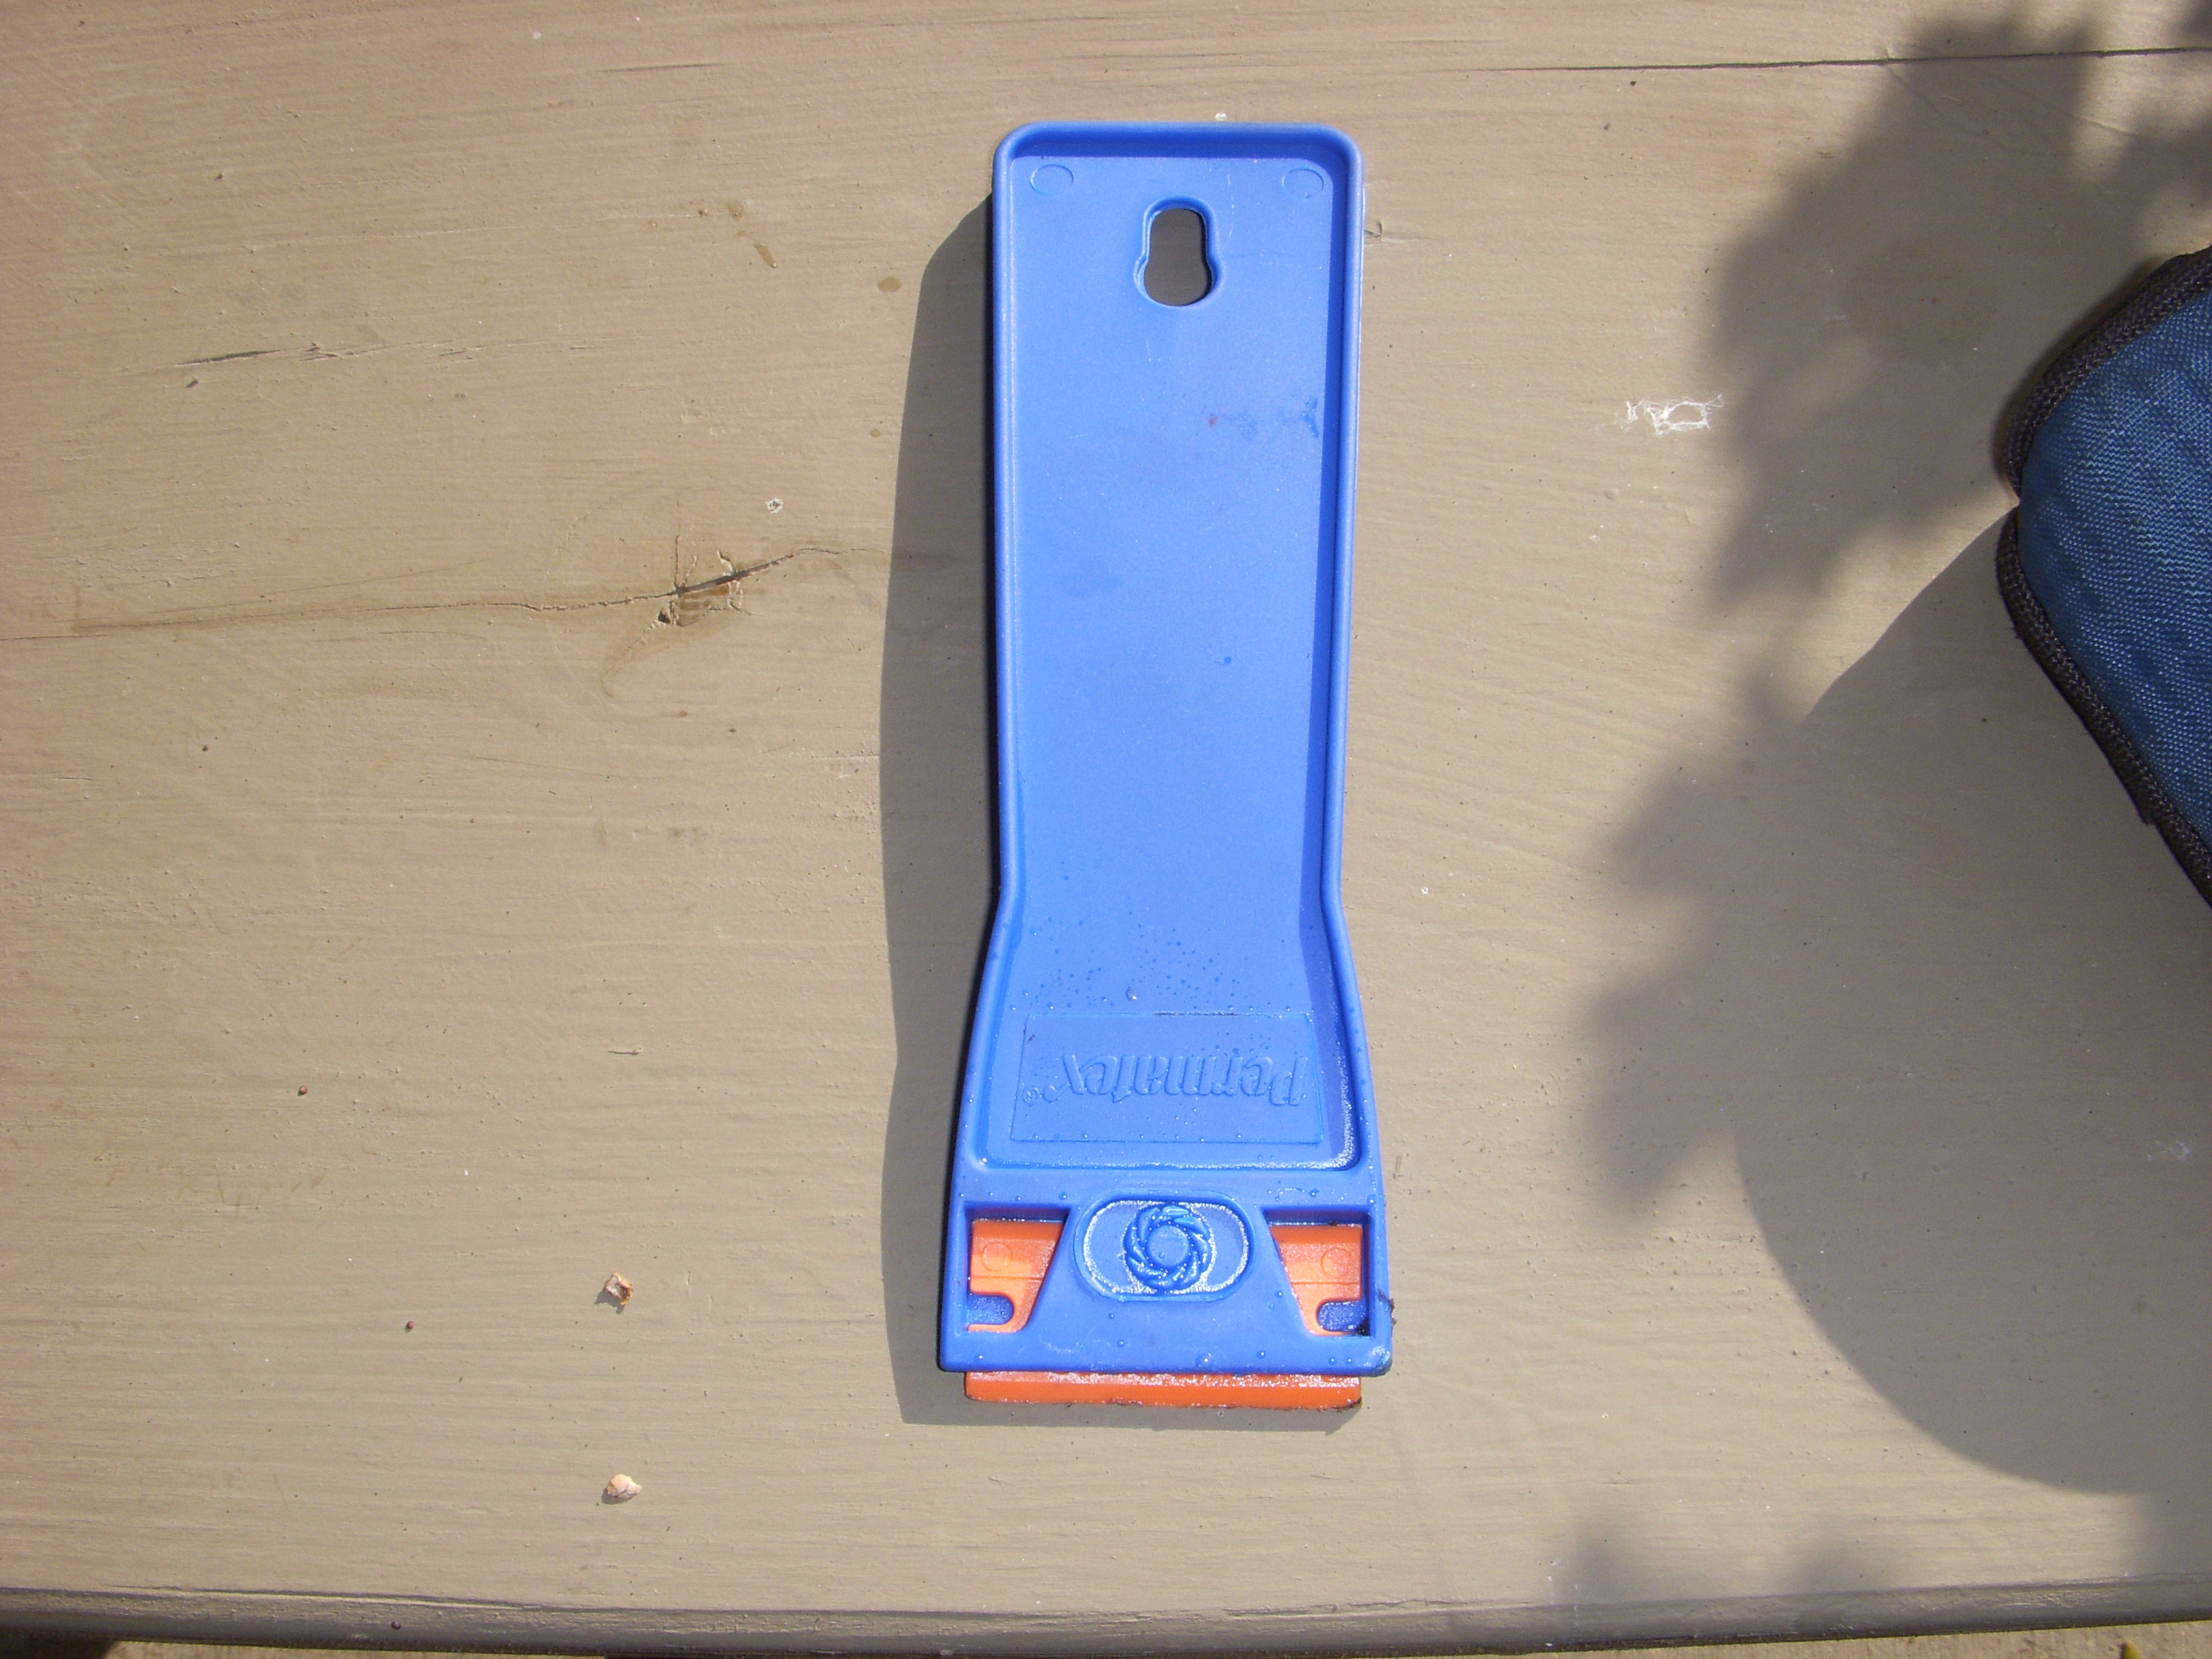
You spray it on, let it sit for 10-15 minutes, then scrape off the RTV. This is one 3.0 oil pan on the Cosworth 3.5 that I recently tore down. I have a plastic putty knife and a Permatex plastic "razor blade" scraper. Last one works the best, and you can buy bags of 10 blades - all from Amazon.
Lower pan surface foamed up:
Lower pan surface cleaned up:
Spray it on - it foams up :
Comes right off:
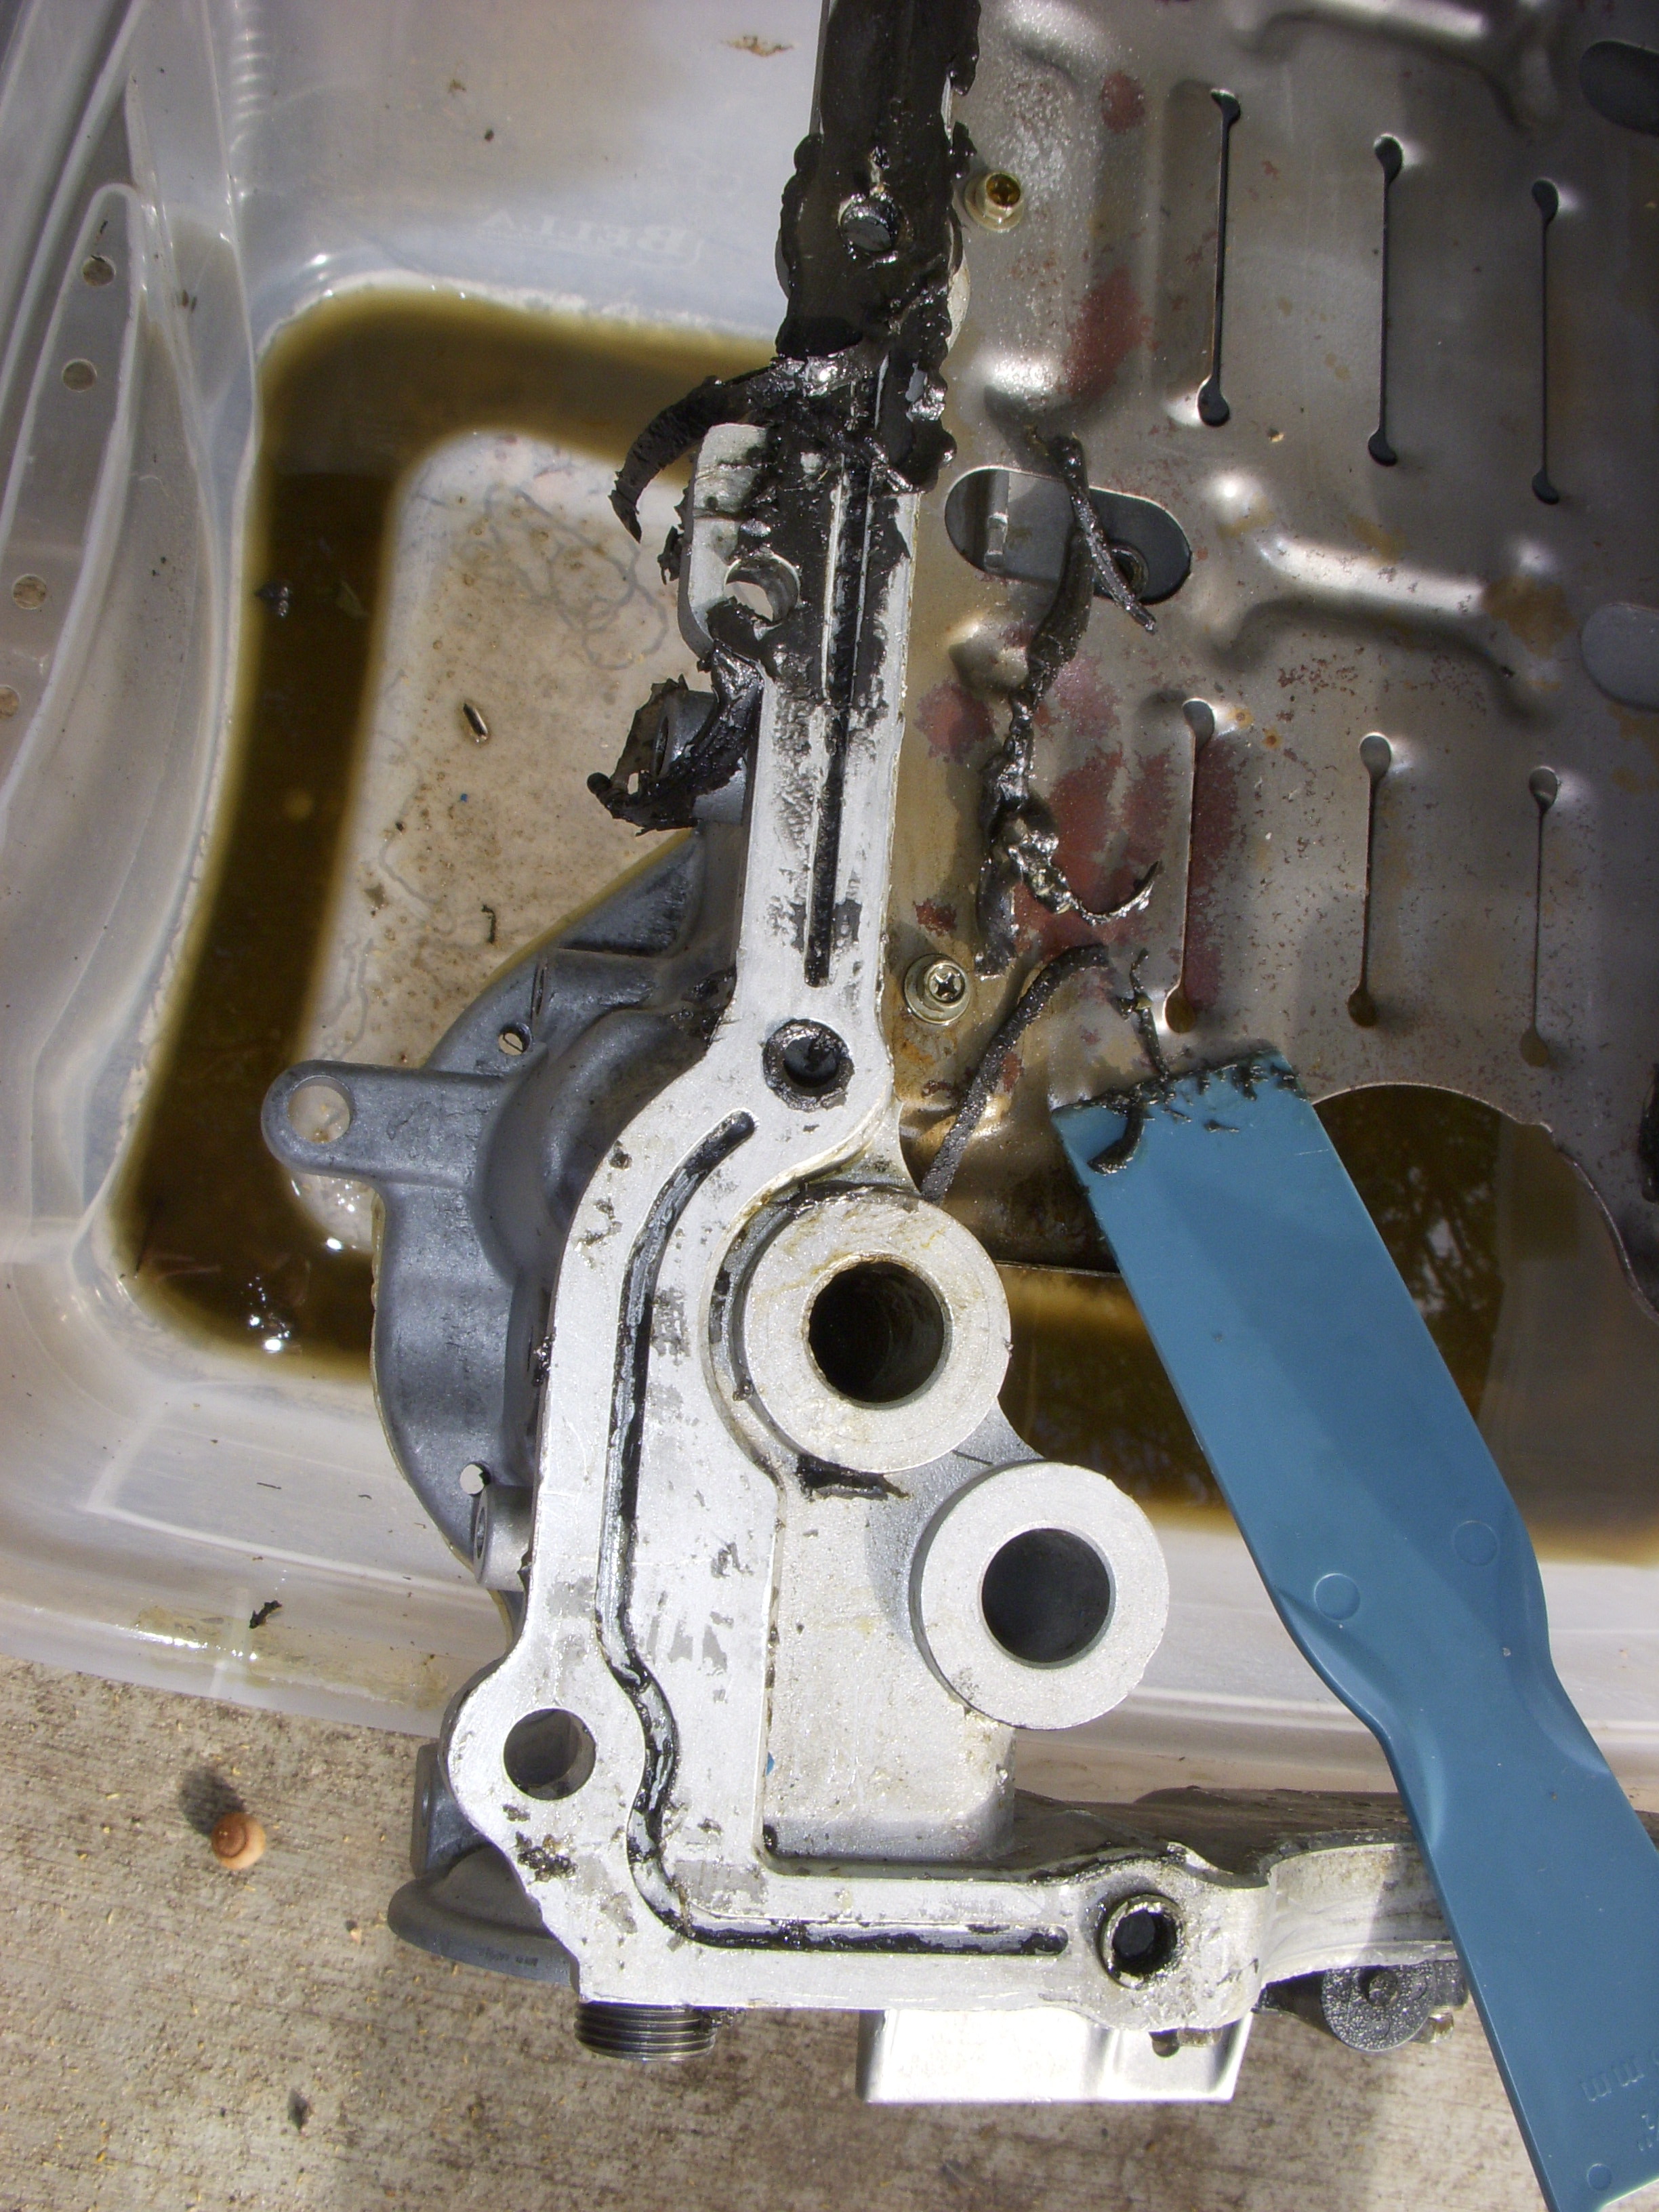
Grooves take a little more attention, but it all comes off easily:
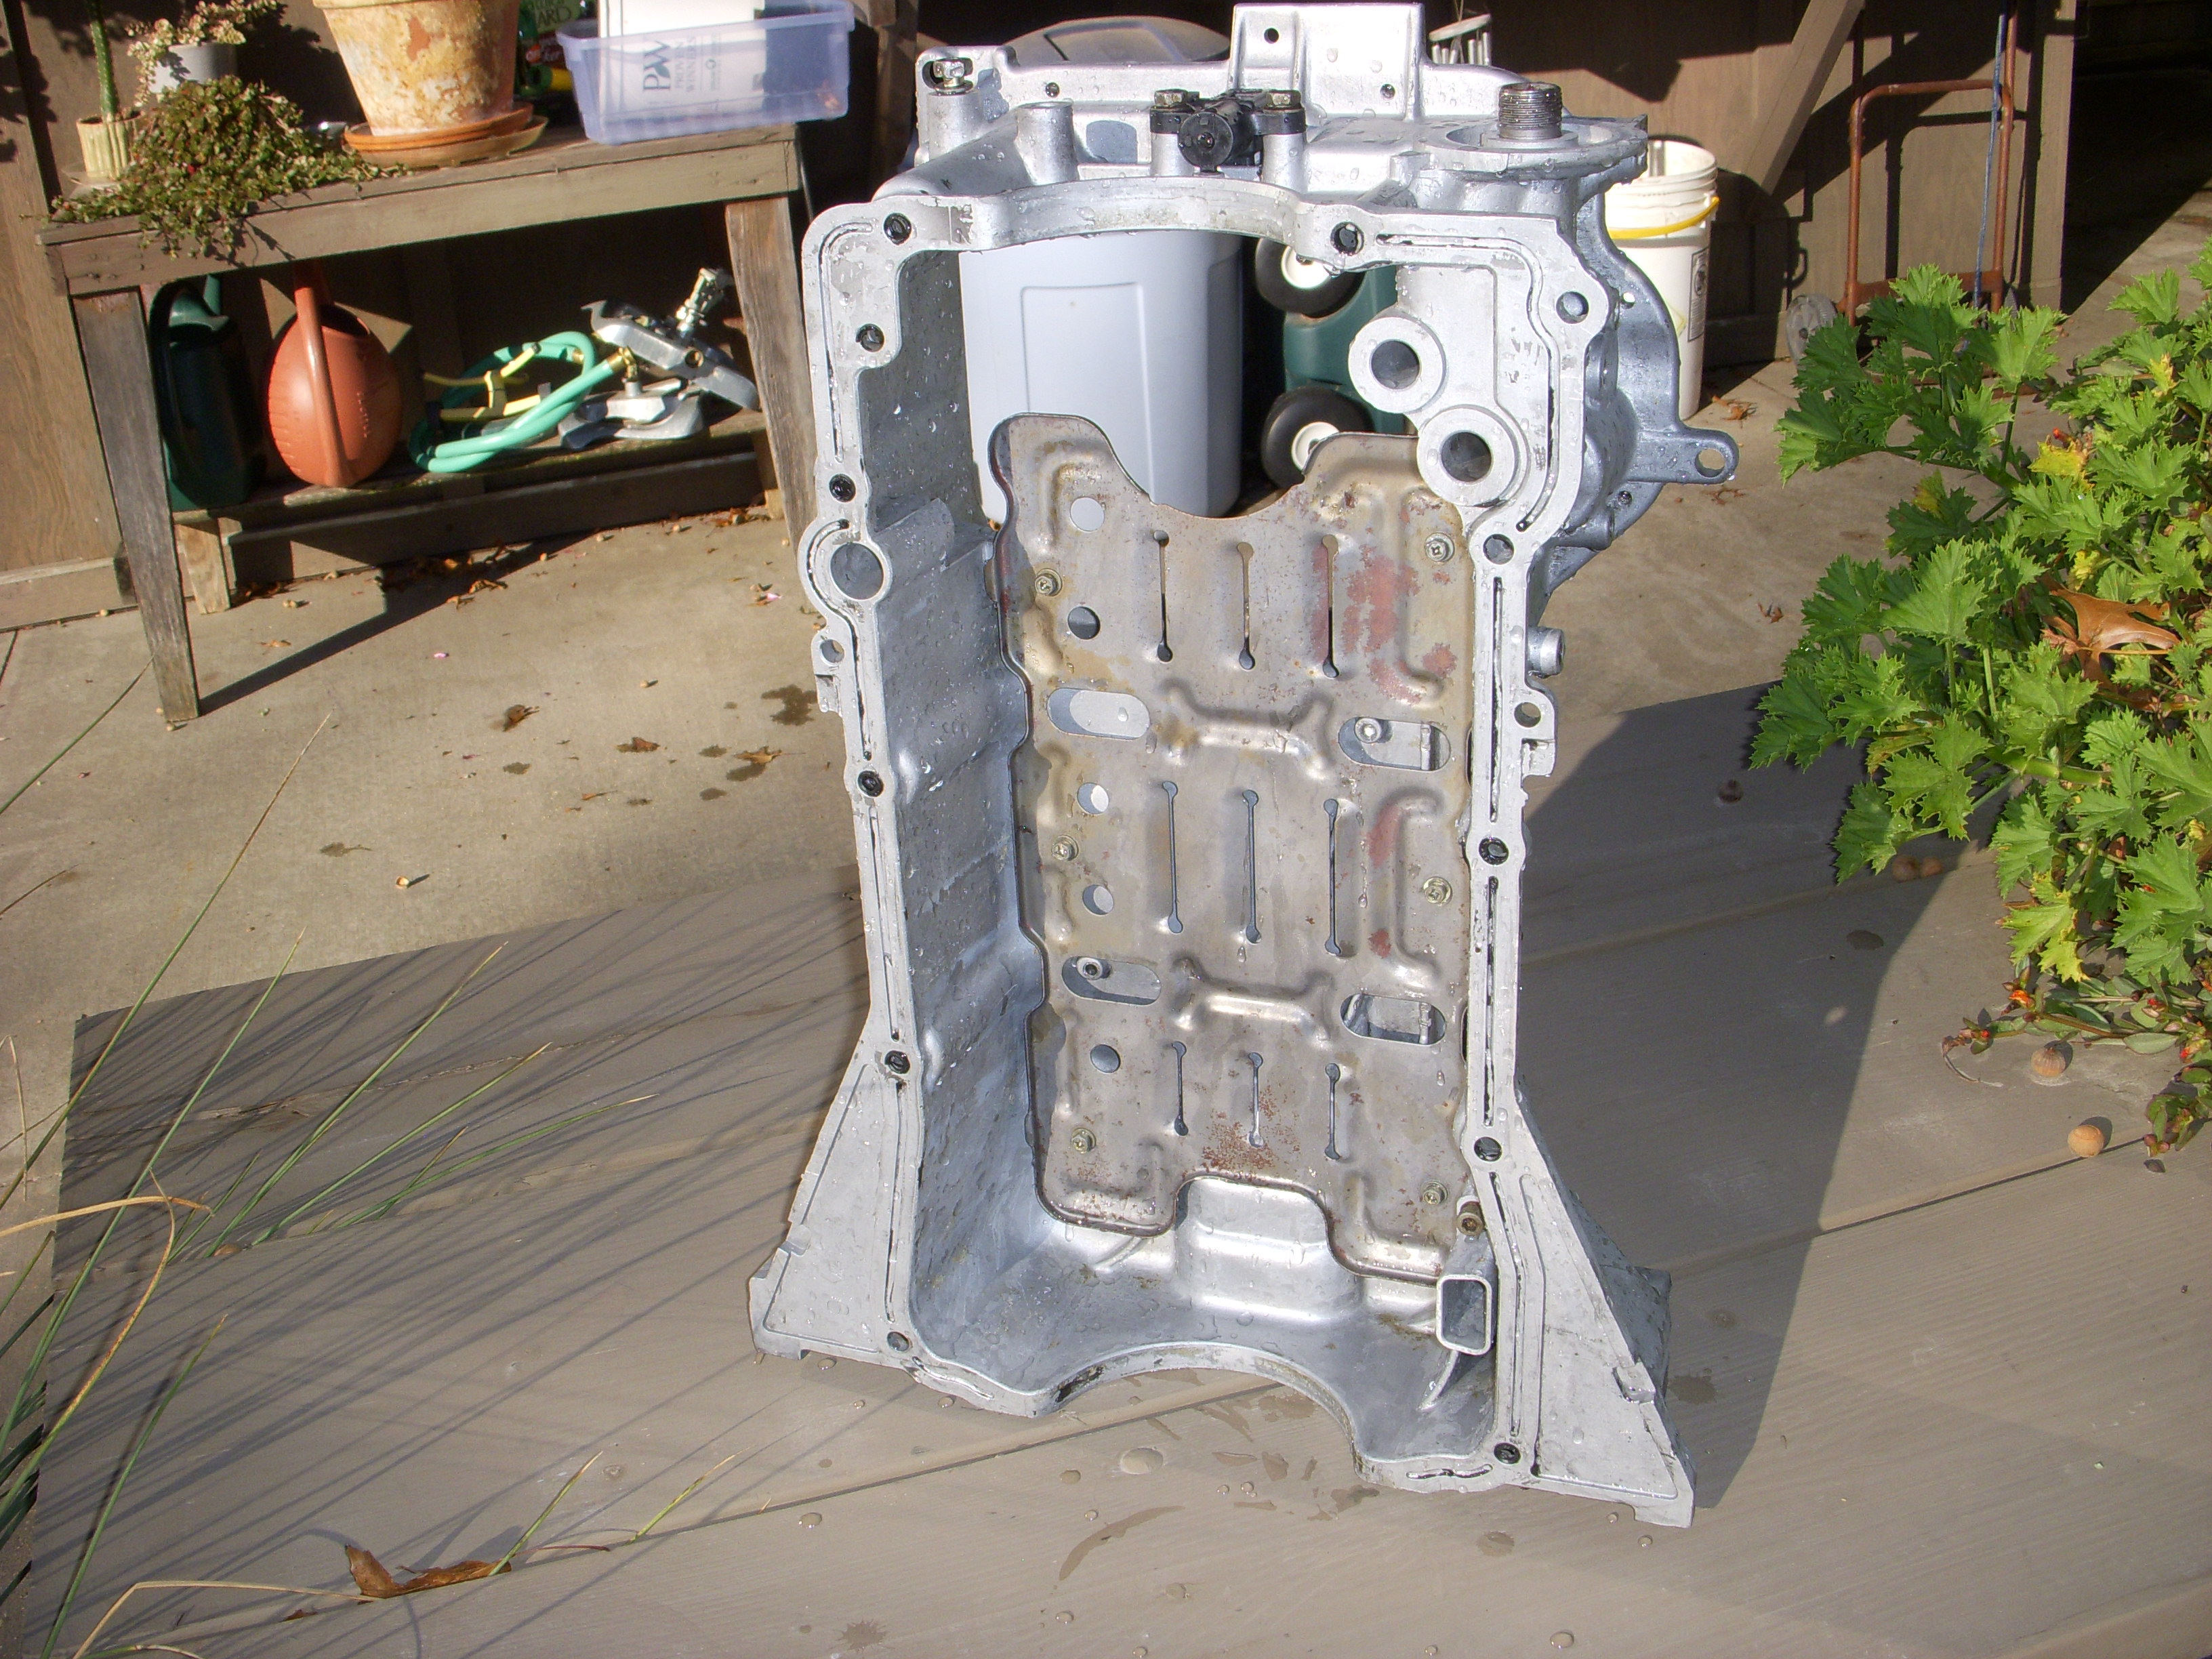
Poof! The upper pan surface is cleaned off. Just needs wiped off..
All washed off with a hose and ready to go on the stroker block...

You spray it on, let it sit for 10-15 minutes, then scrape off the RTV. This is one 3.0 oil pan on the Cosworth 3.5 that I recently tore down. I have a plastic putty knife and a Permatex plastic "razor blade" scraper. Last one works the best, and you can buy bags of 10 blades - all from Amazon.
Lower pan surface foamed up:

Lower pan surface cleaned up:

Spray it on - it foams up :


Comes right off:

Grooves take a little more attention, but it all comes off easily:

Poof! The upper pan surface is cleaned off. Just needs wiped off..

All washed off with a hose and ready to go on the stroker block...

Last edited by grey99max; 01-14-2017 at 12:32 PM.
11-03-2015, 02:20 PM
#1697
LandShark has Cosworth
Thread Starter
iTrader: (12)
Join Date: Jan 2004
Location: Topeka, KS
Posts: 4,327
JWT Oil Pan Spacer
The JWT oil pan spacer arrived today, so I tried a test fit, and everything seems fine. I bought one without the two oil drain ports, because no turbo or 'charger. I can always drill-and-tap anything I need.
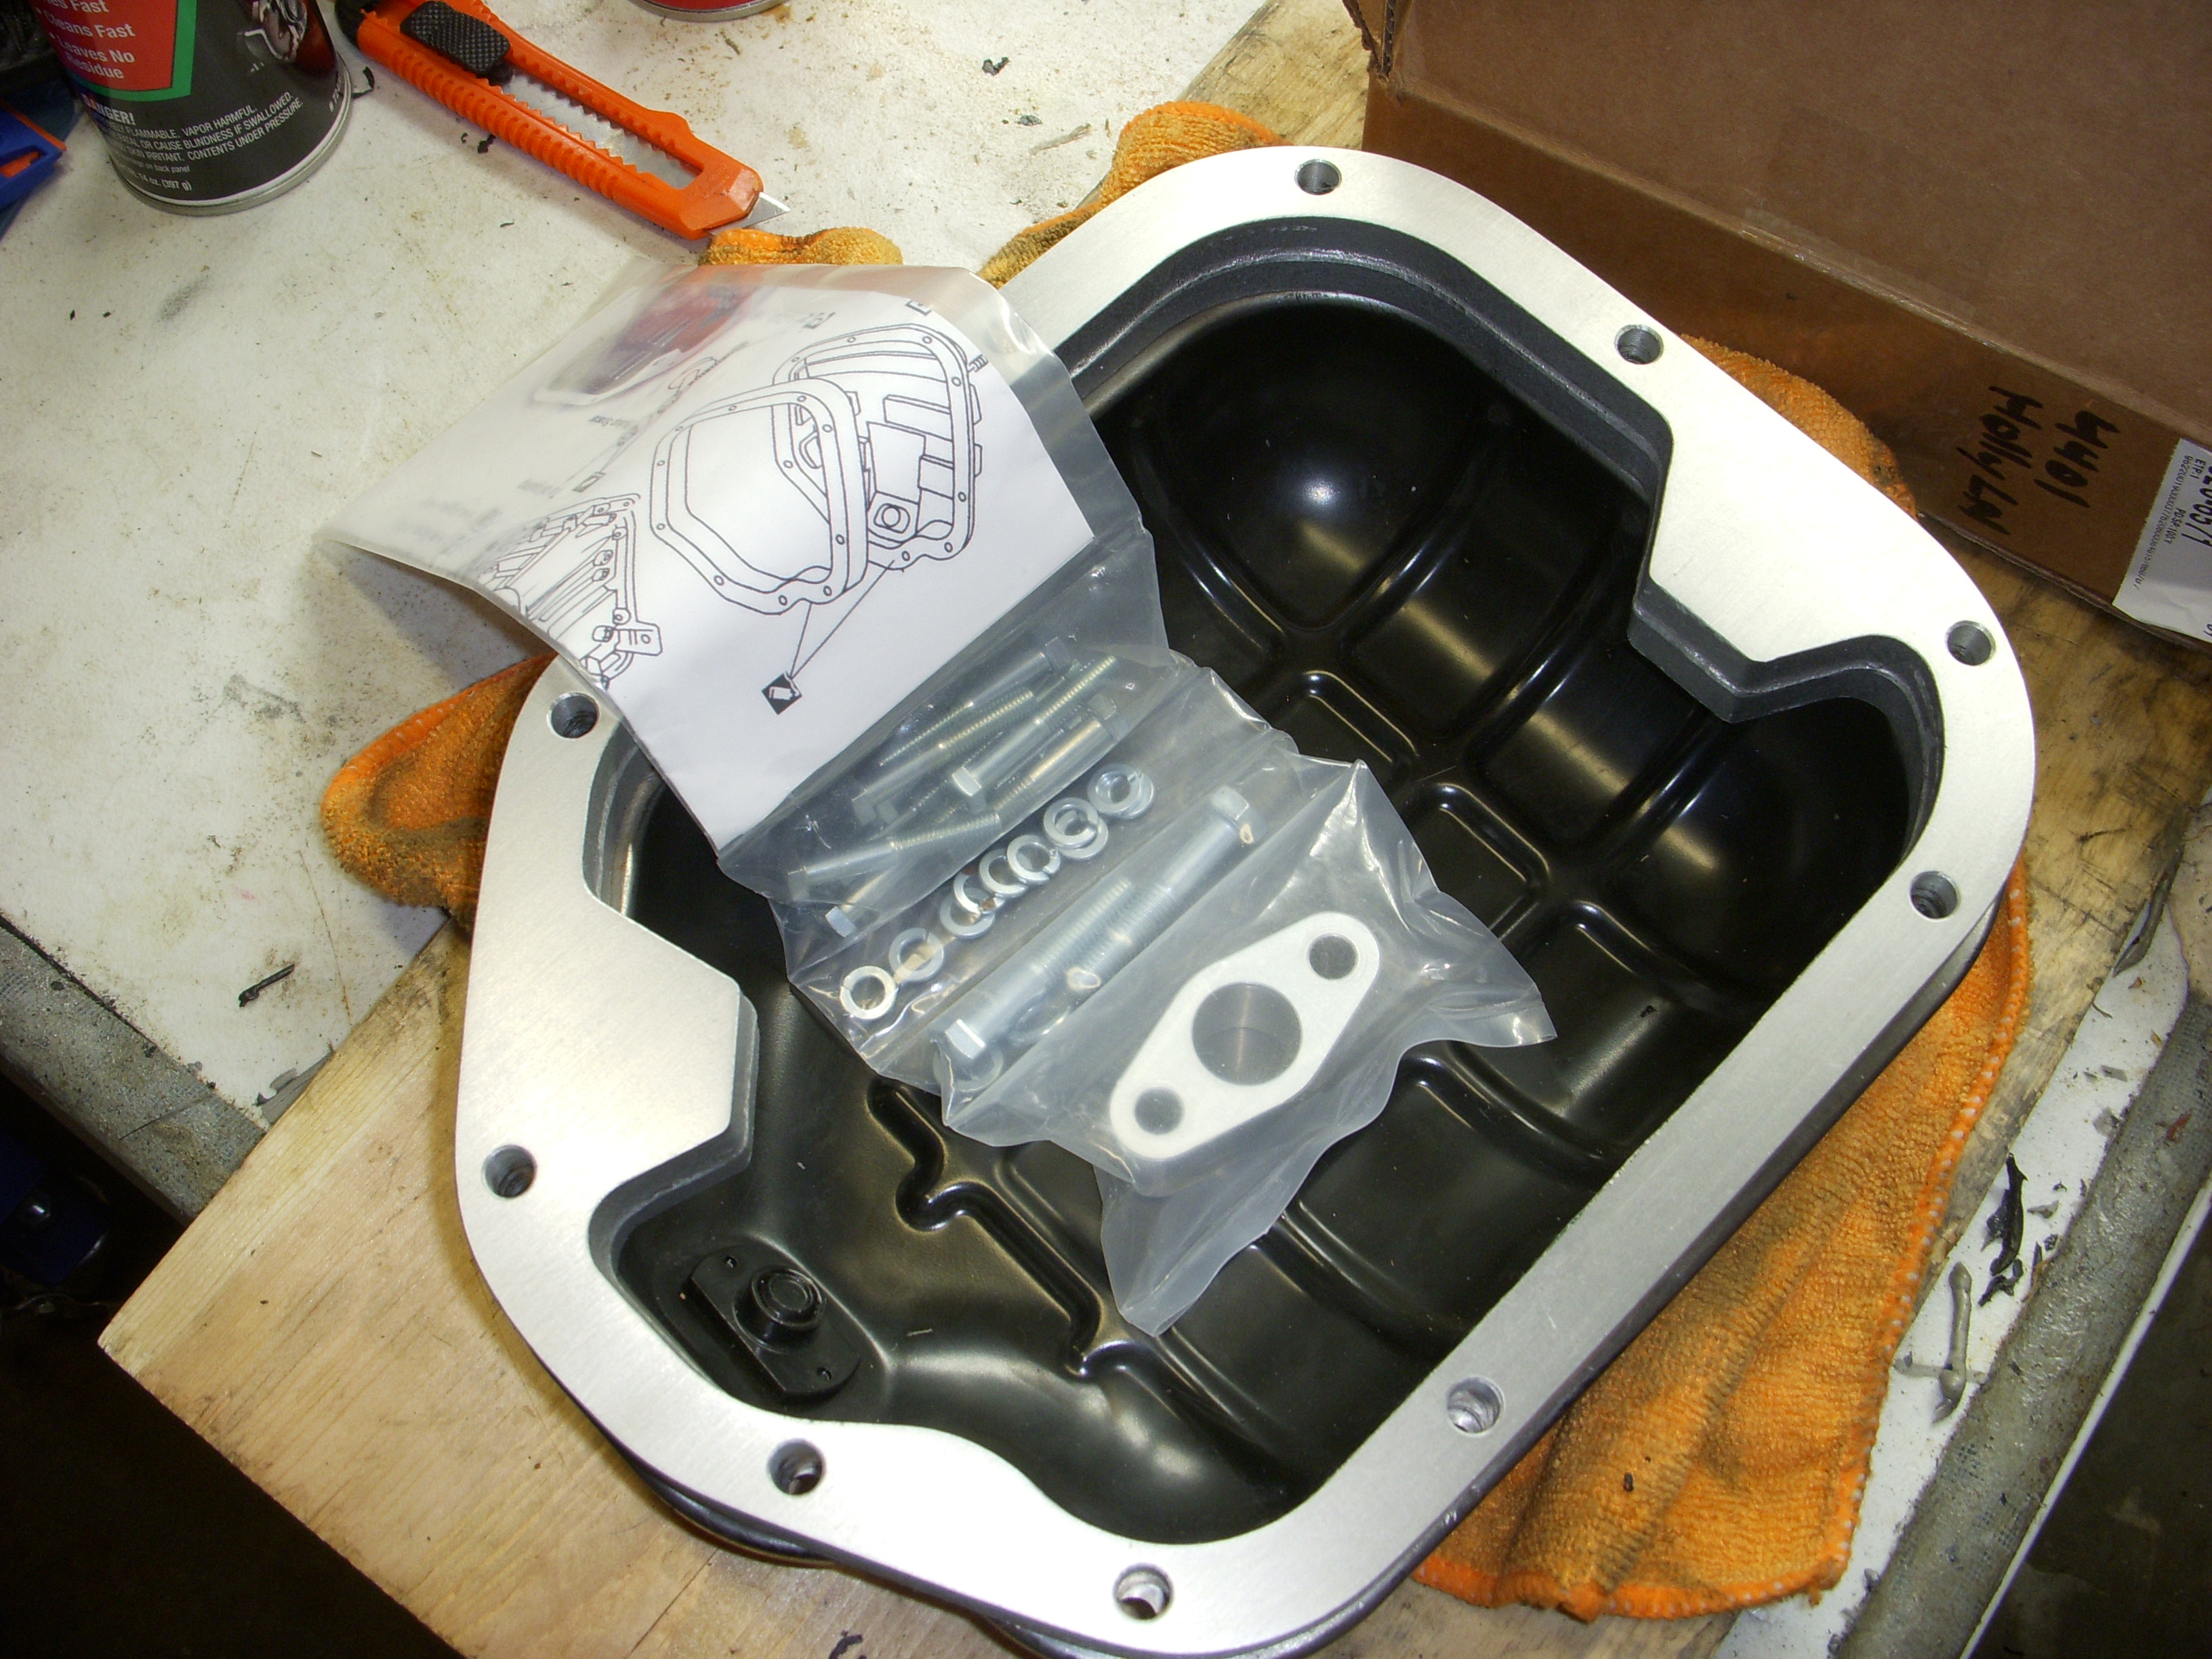
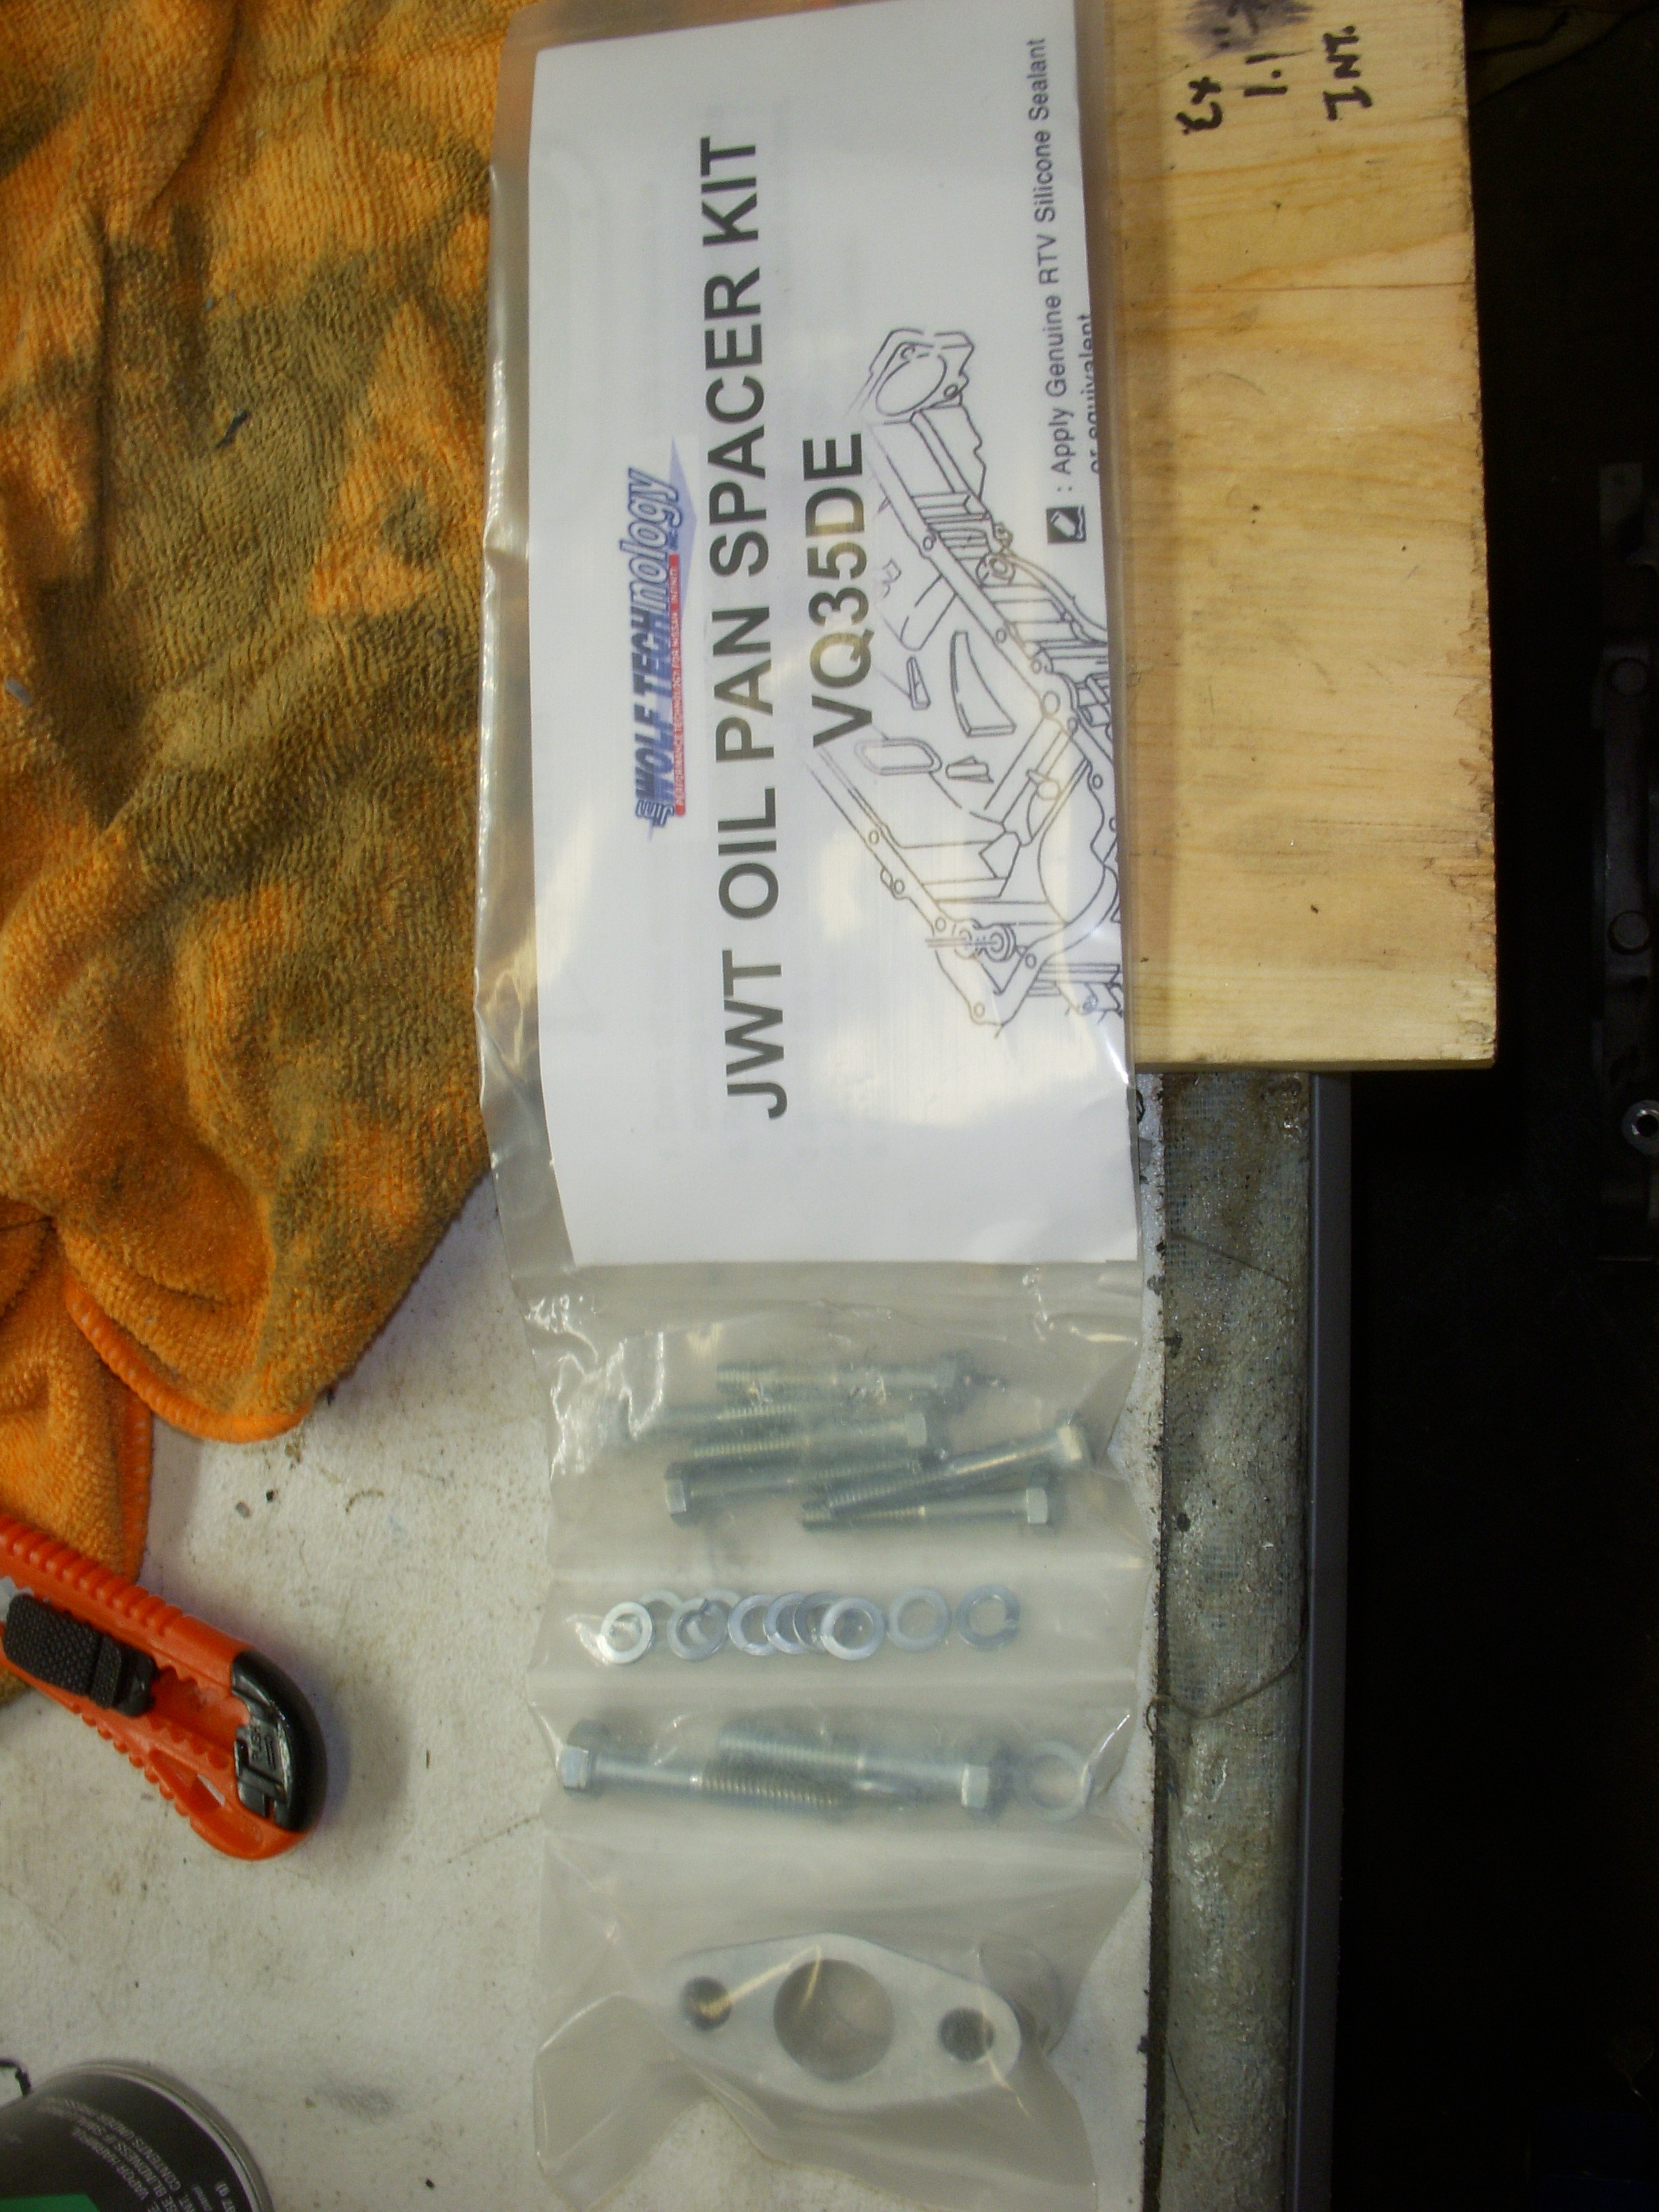
When I get to the point of pouring 5 qts of Joe Gibbs' finest break-in oil into the engine, I'll mark the dipstick for future reference.
Still waiting for pistons....


When I get to the point of pouring 5 qts of Joe Gibbs' finest break-in oil into the engine, I'll mark the dipstick for future reference.
Still waiting for pistons....
Last edited by grey99max; 01-14-2017 at 01:17 PM.
11-04-2015, 06:05 PM
#1698
LandShark has Cosworth
Thread Starter
iTrader: (12)
Join Date: Jan 2004
Location: Topeka, KS
Posts: 4,327
Pistons are in the mail
The newly-coated CP pistons are in UPS mail, and should be here late Monday. Then, off to the machinist with them !!!
For the second time, I've ordered a replacement Cosworth exhaust valve and a Nissan exhaust valve seat, because both items were canceled the first time by two vendors. These are for the damaged left Cosworth head, because I might think of something to use them for....
For the second time, I've ordered a replacement Cosworth exhaust valve and a Nissan exhaust valve seat, because both items were canceled the first time by two vendors. These are for the damaged left Cosworth head, because I might think of something to use them for....
11-10-2015, 02:21 PM
#1700
LandShark has Cosworth
Thread Starter
iTrader: (12)
Join Date: Jan 2004
Location: Topeka, KS
Posts: 4,327
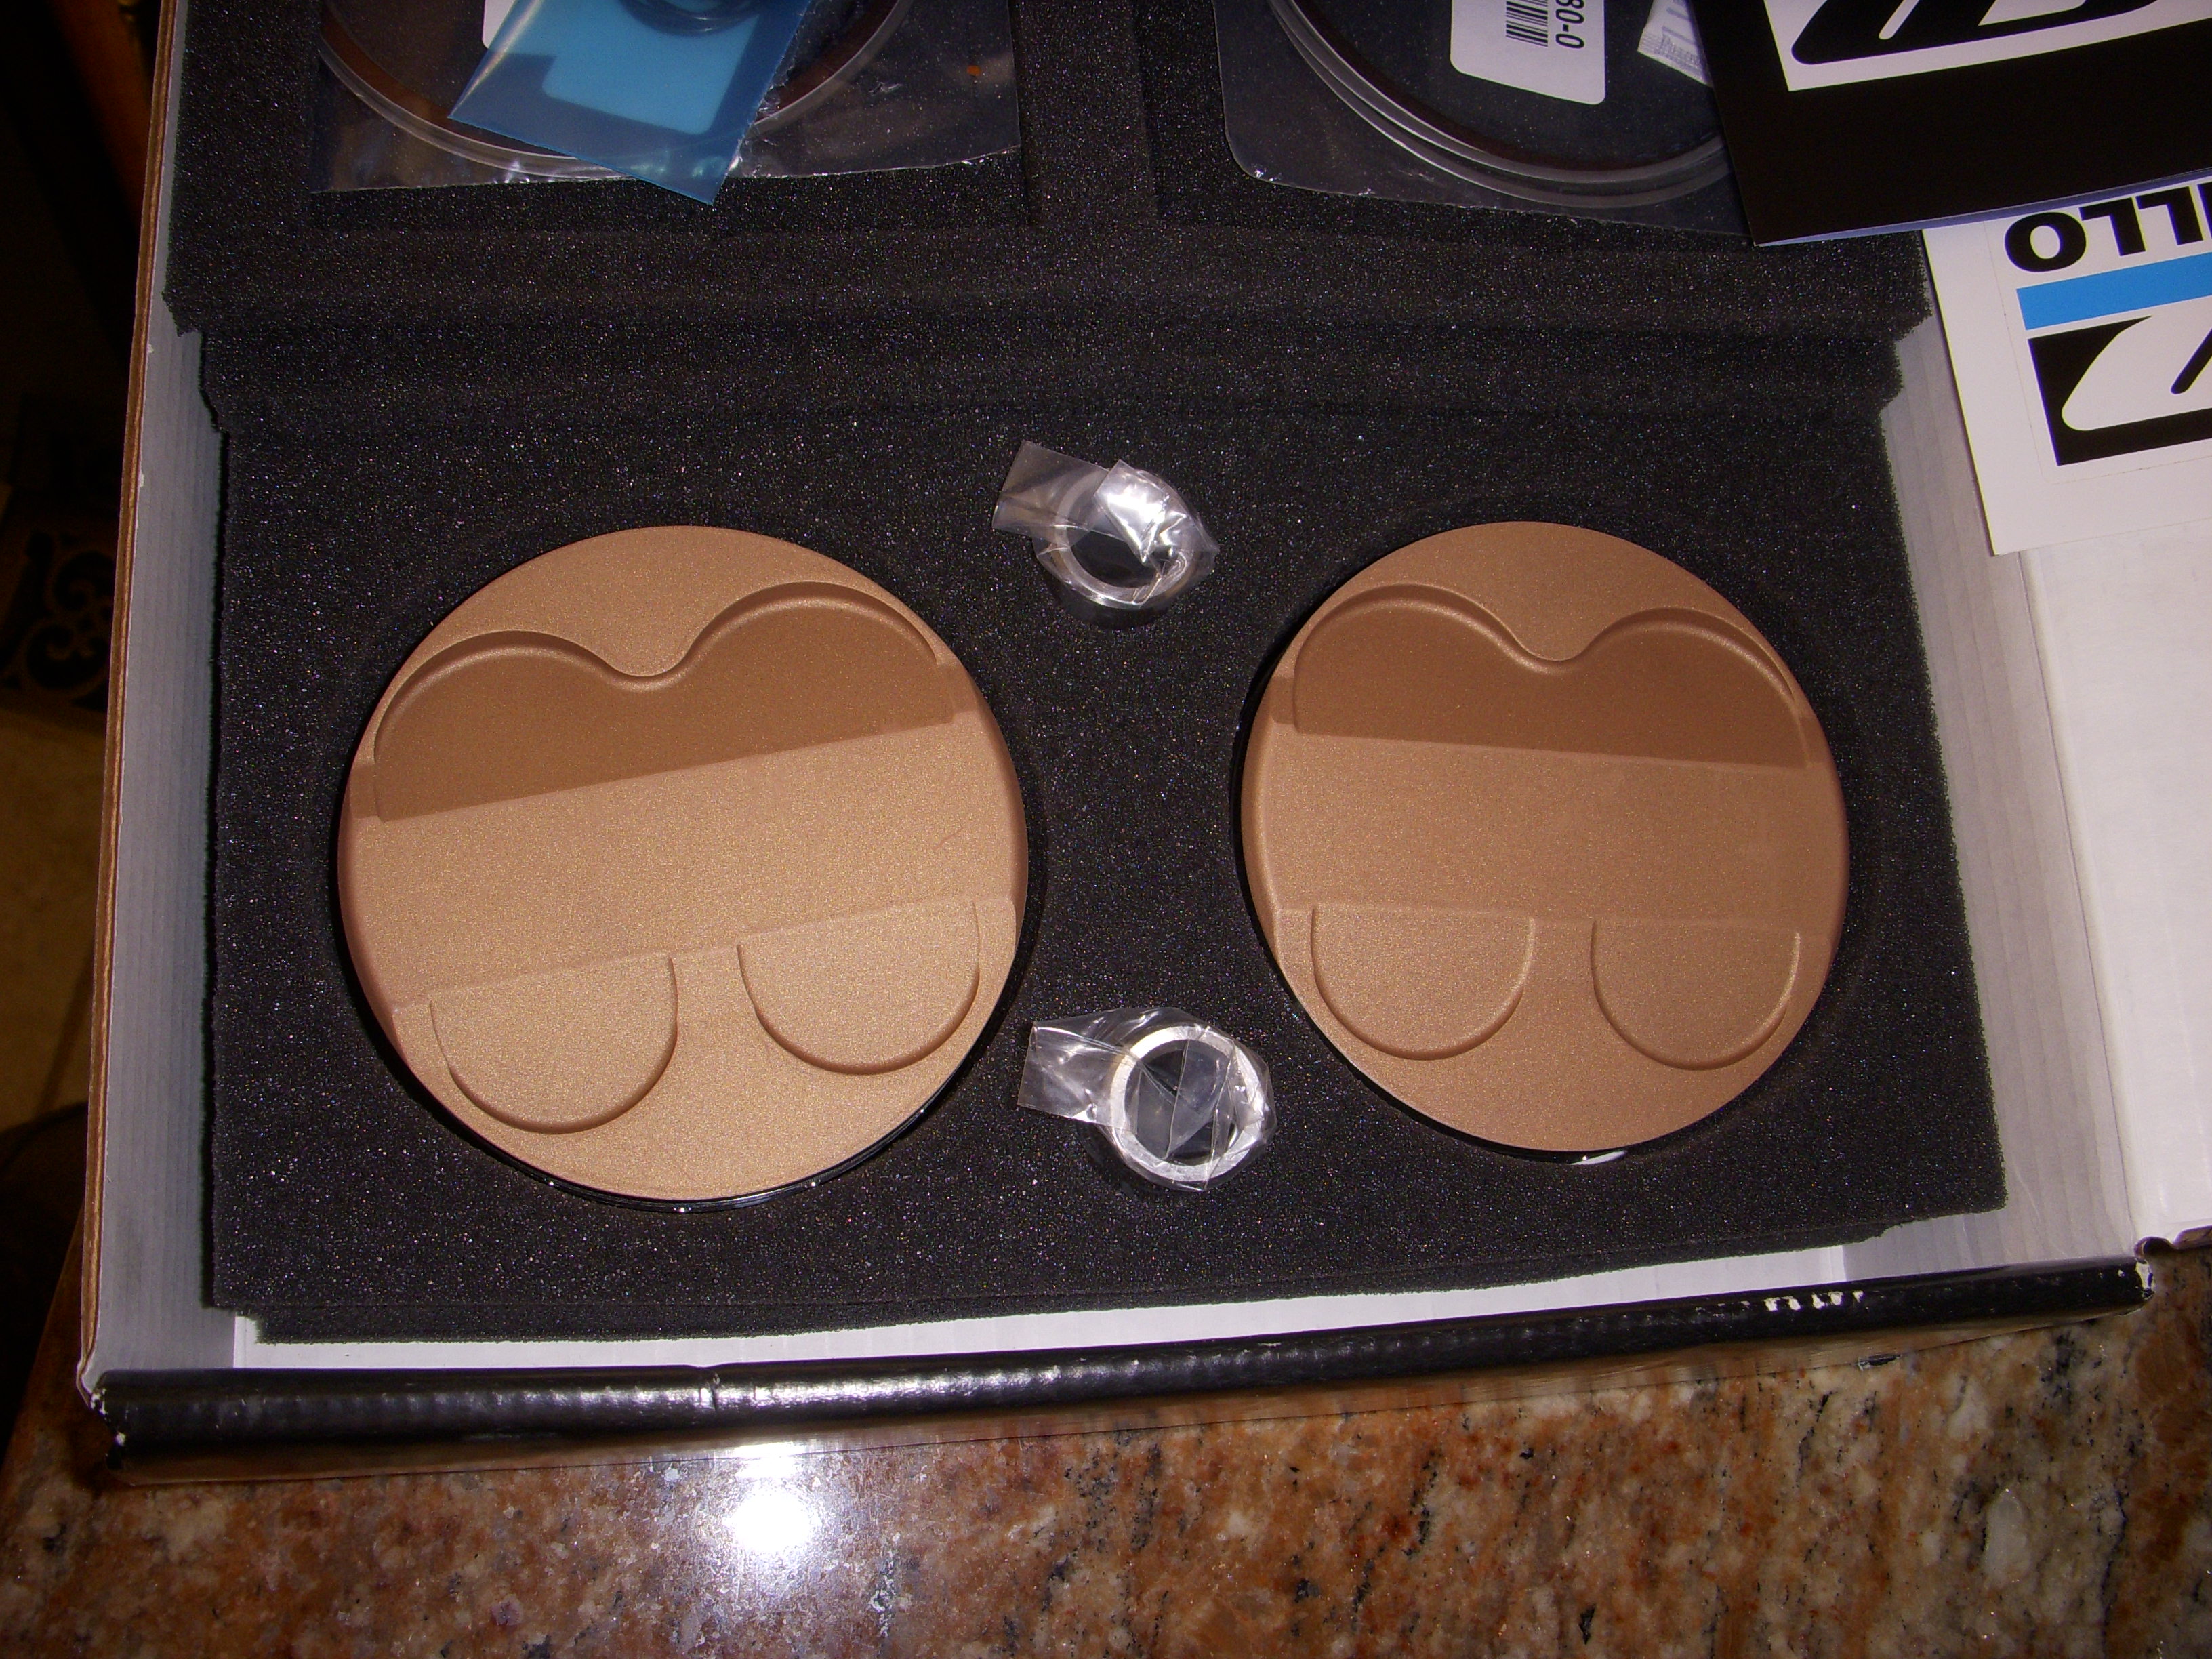
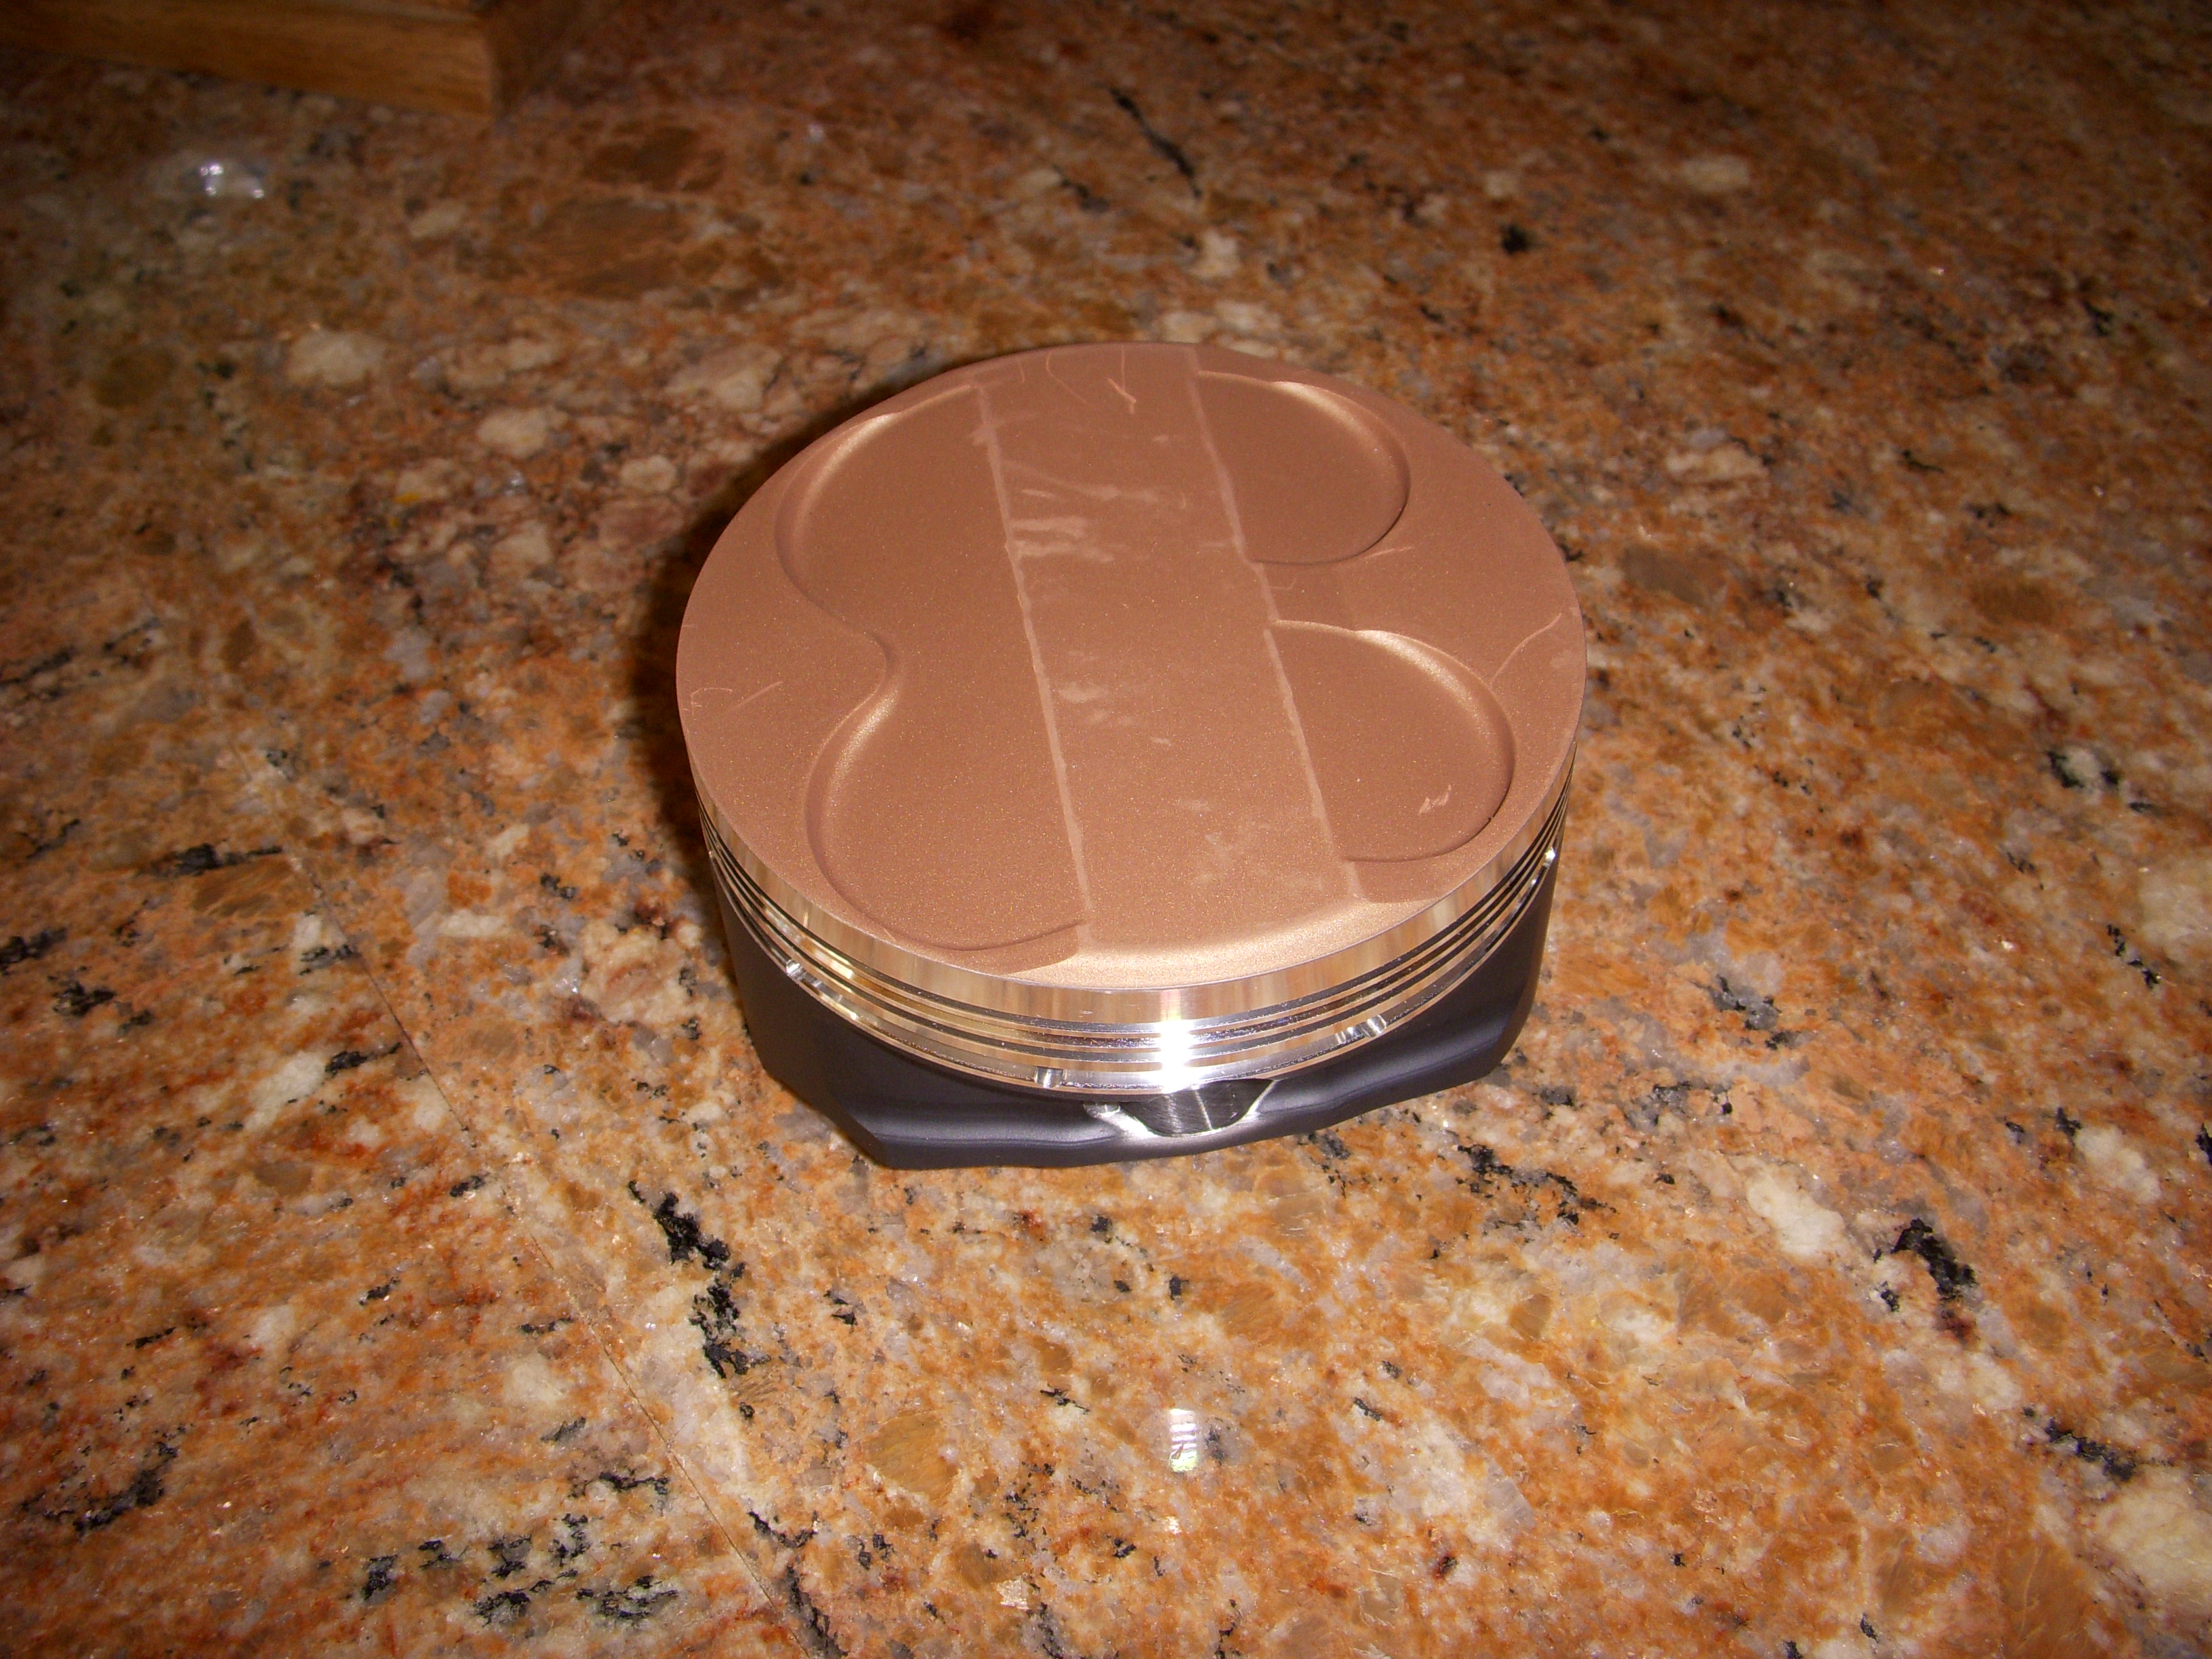
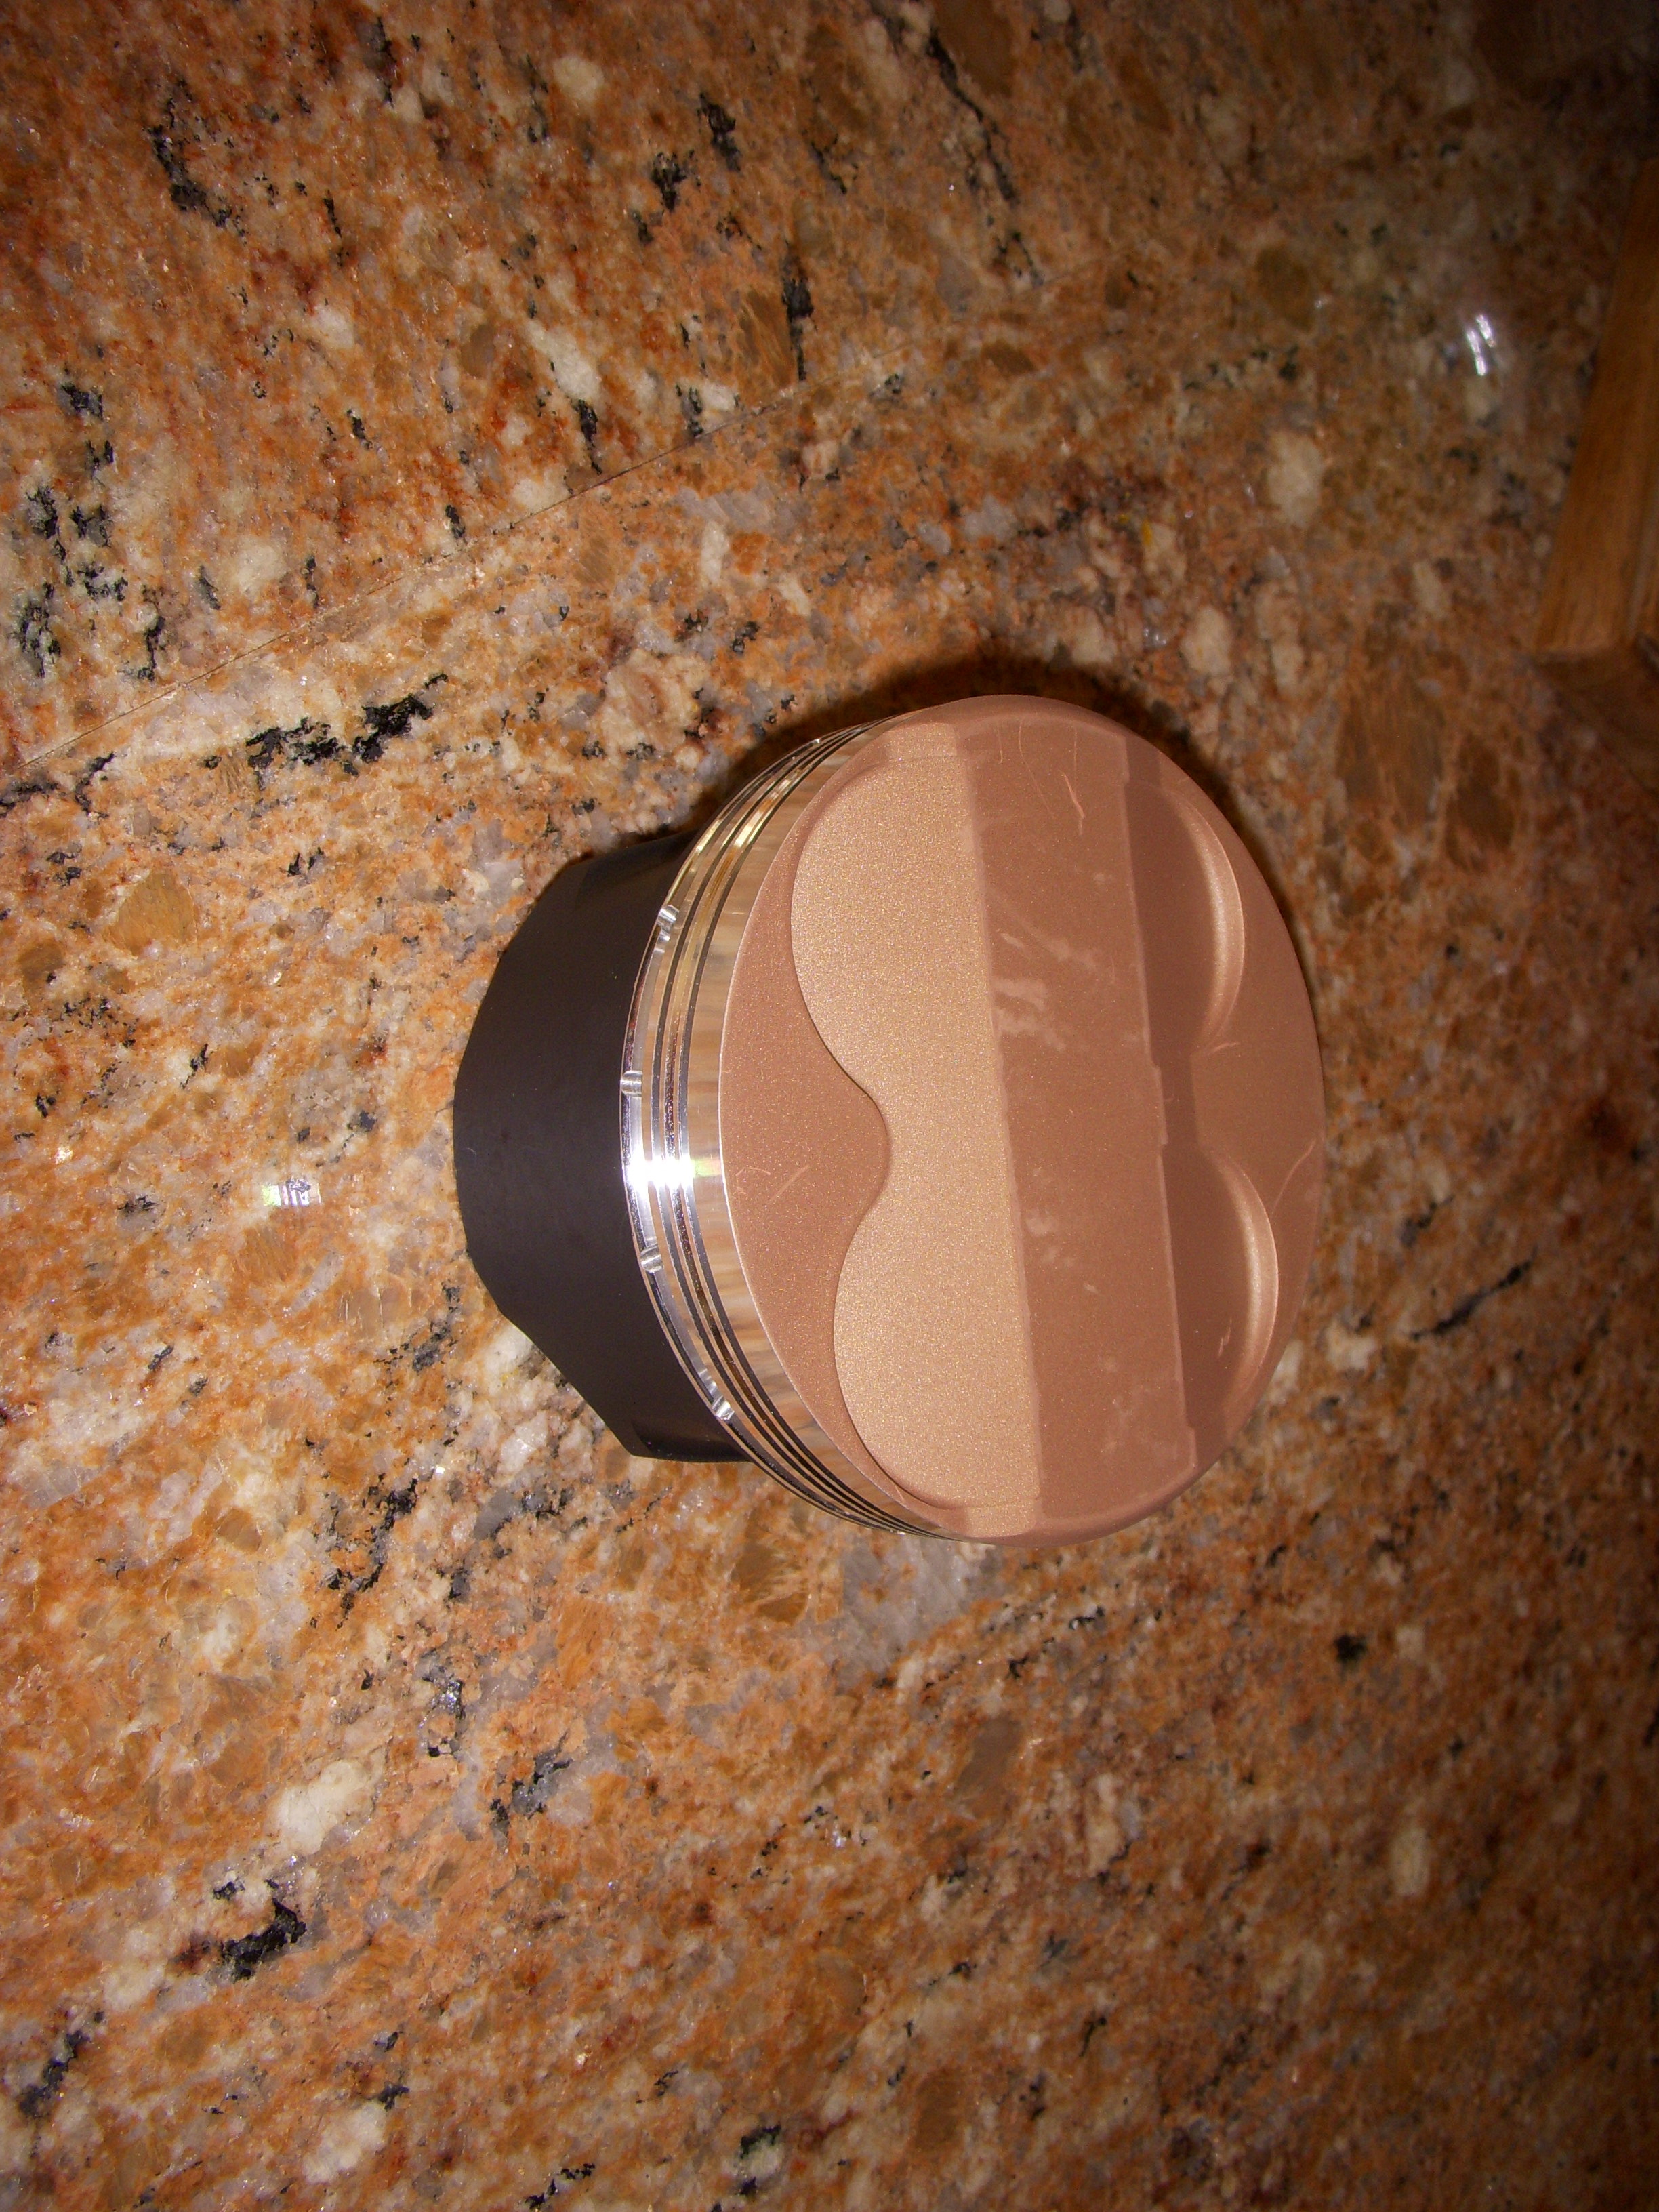
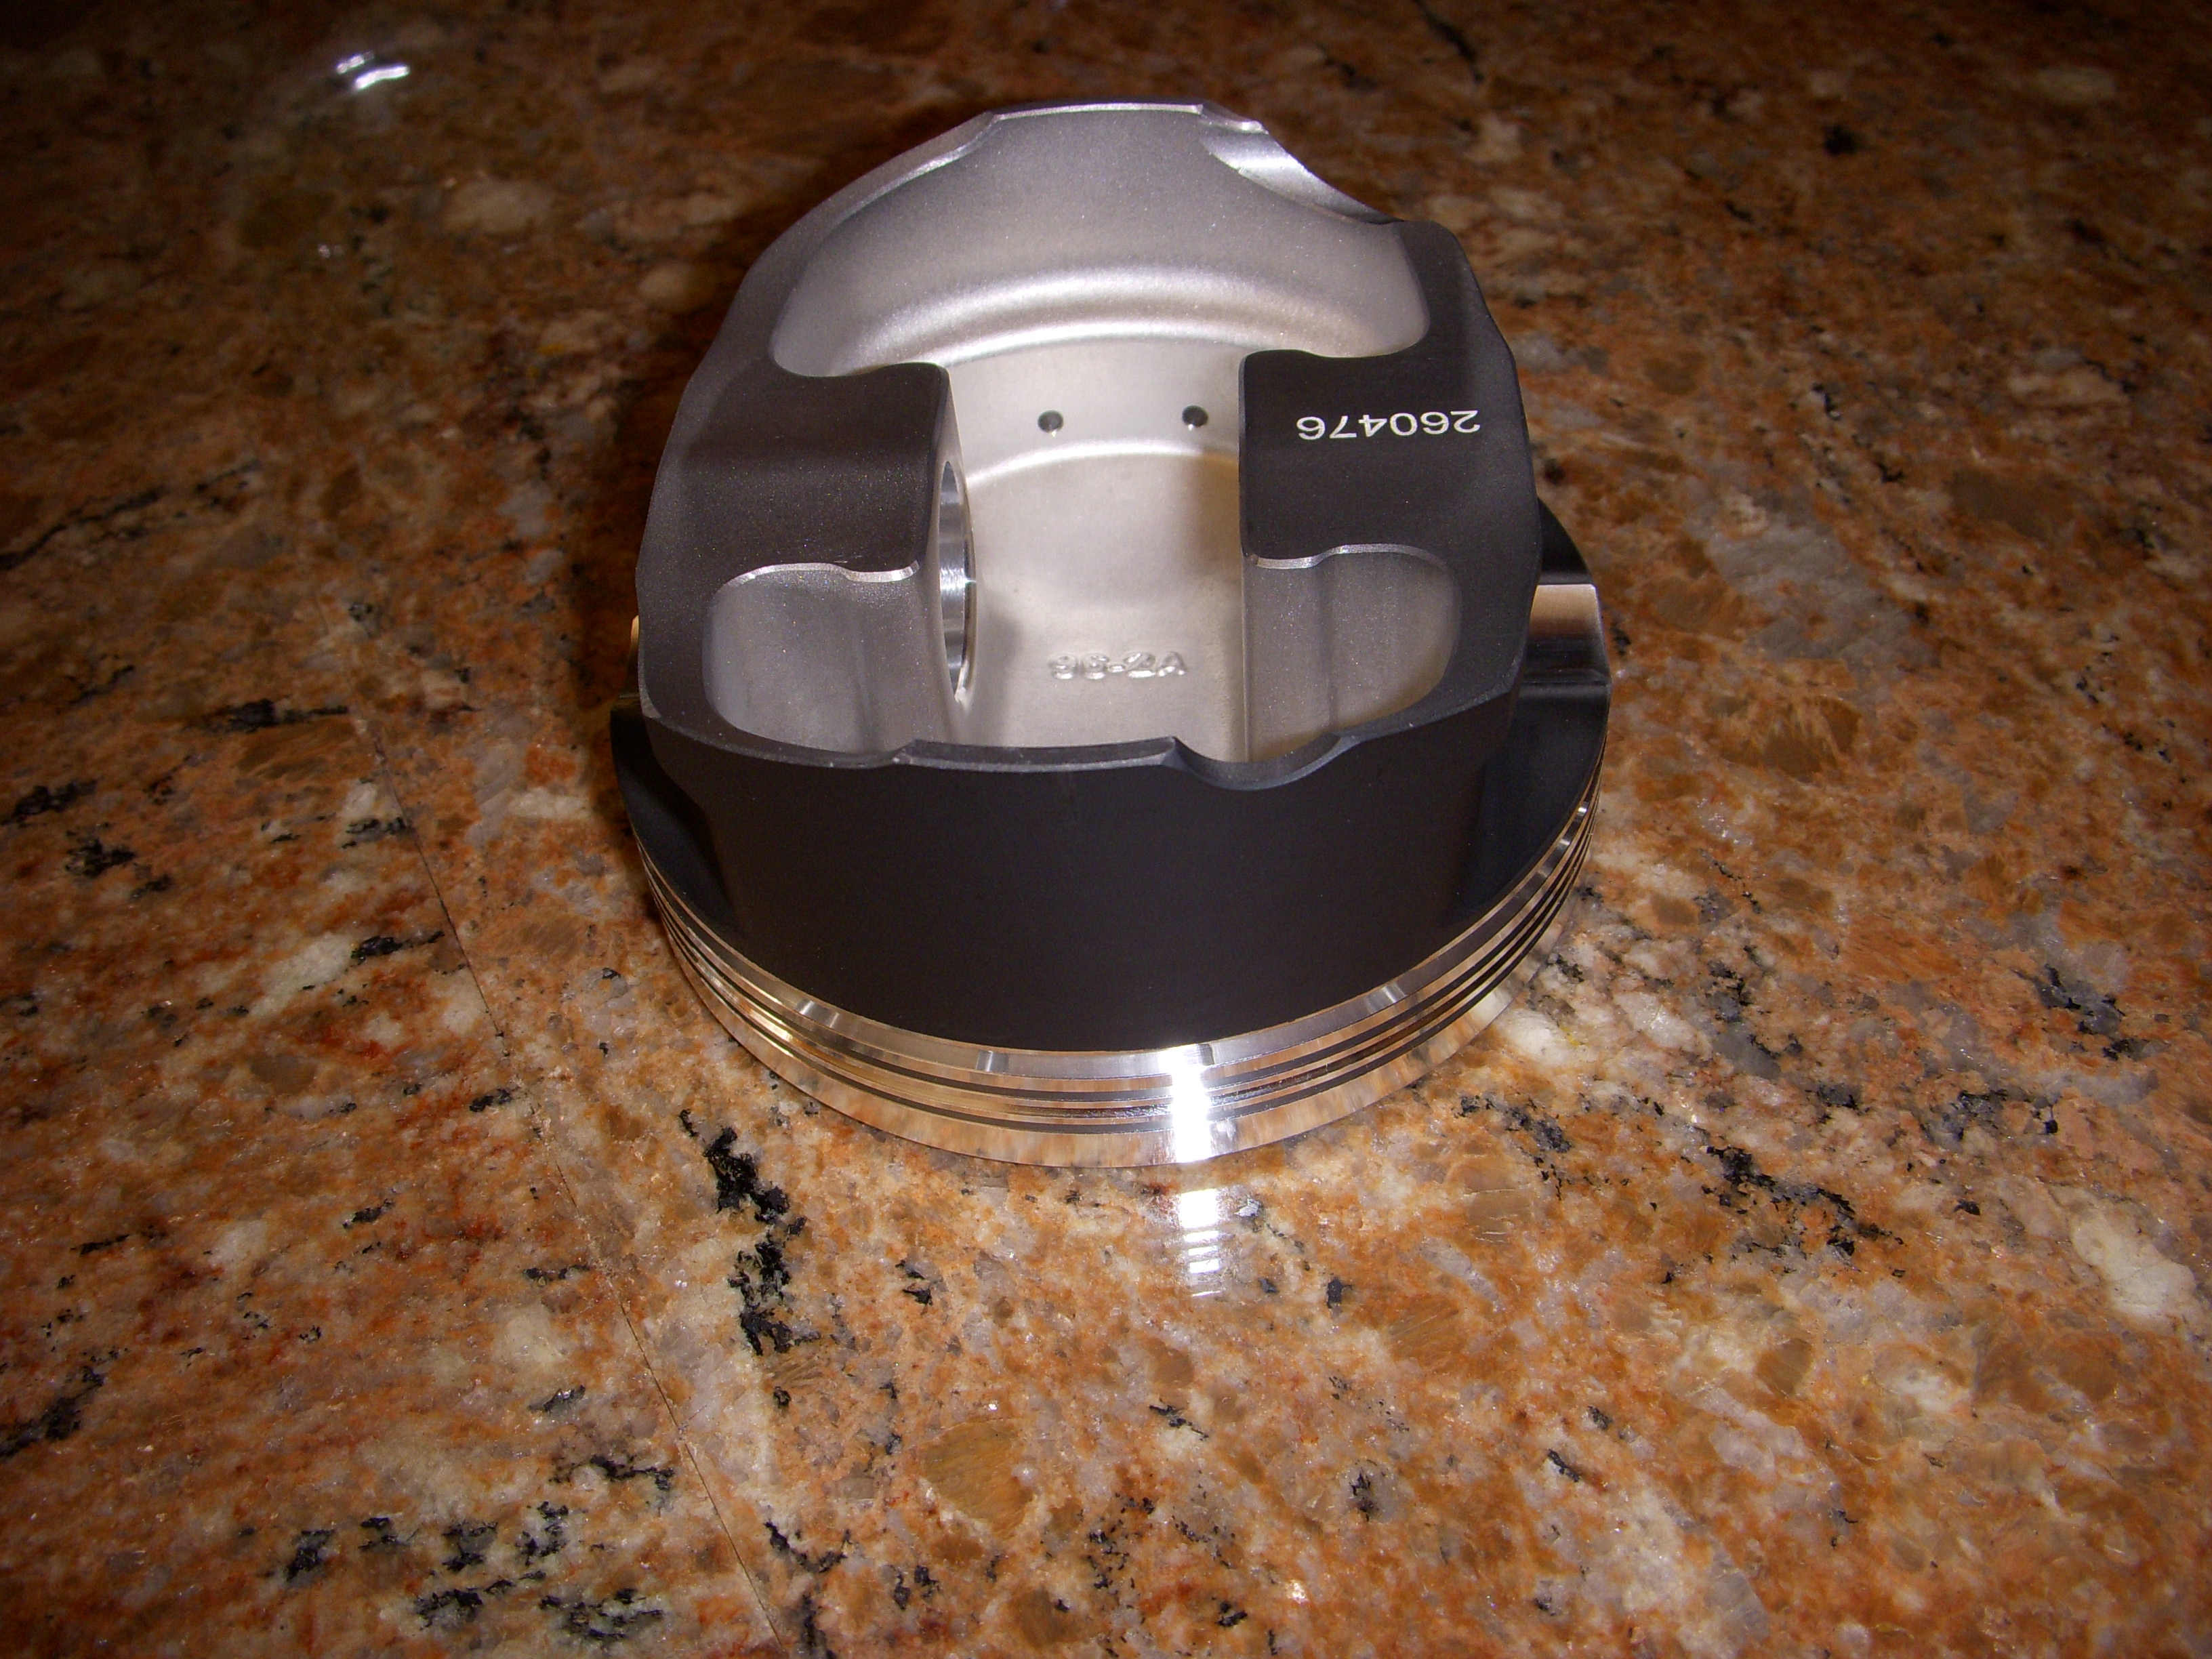
Piston Pix ..
Oooh.... Shiny....
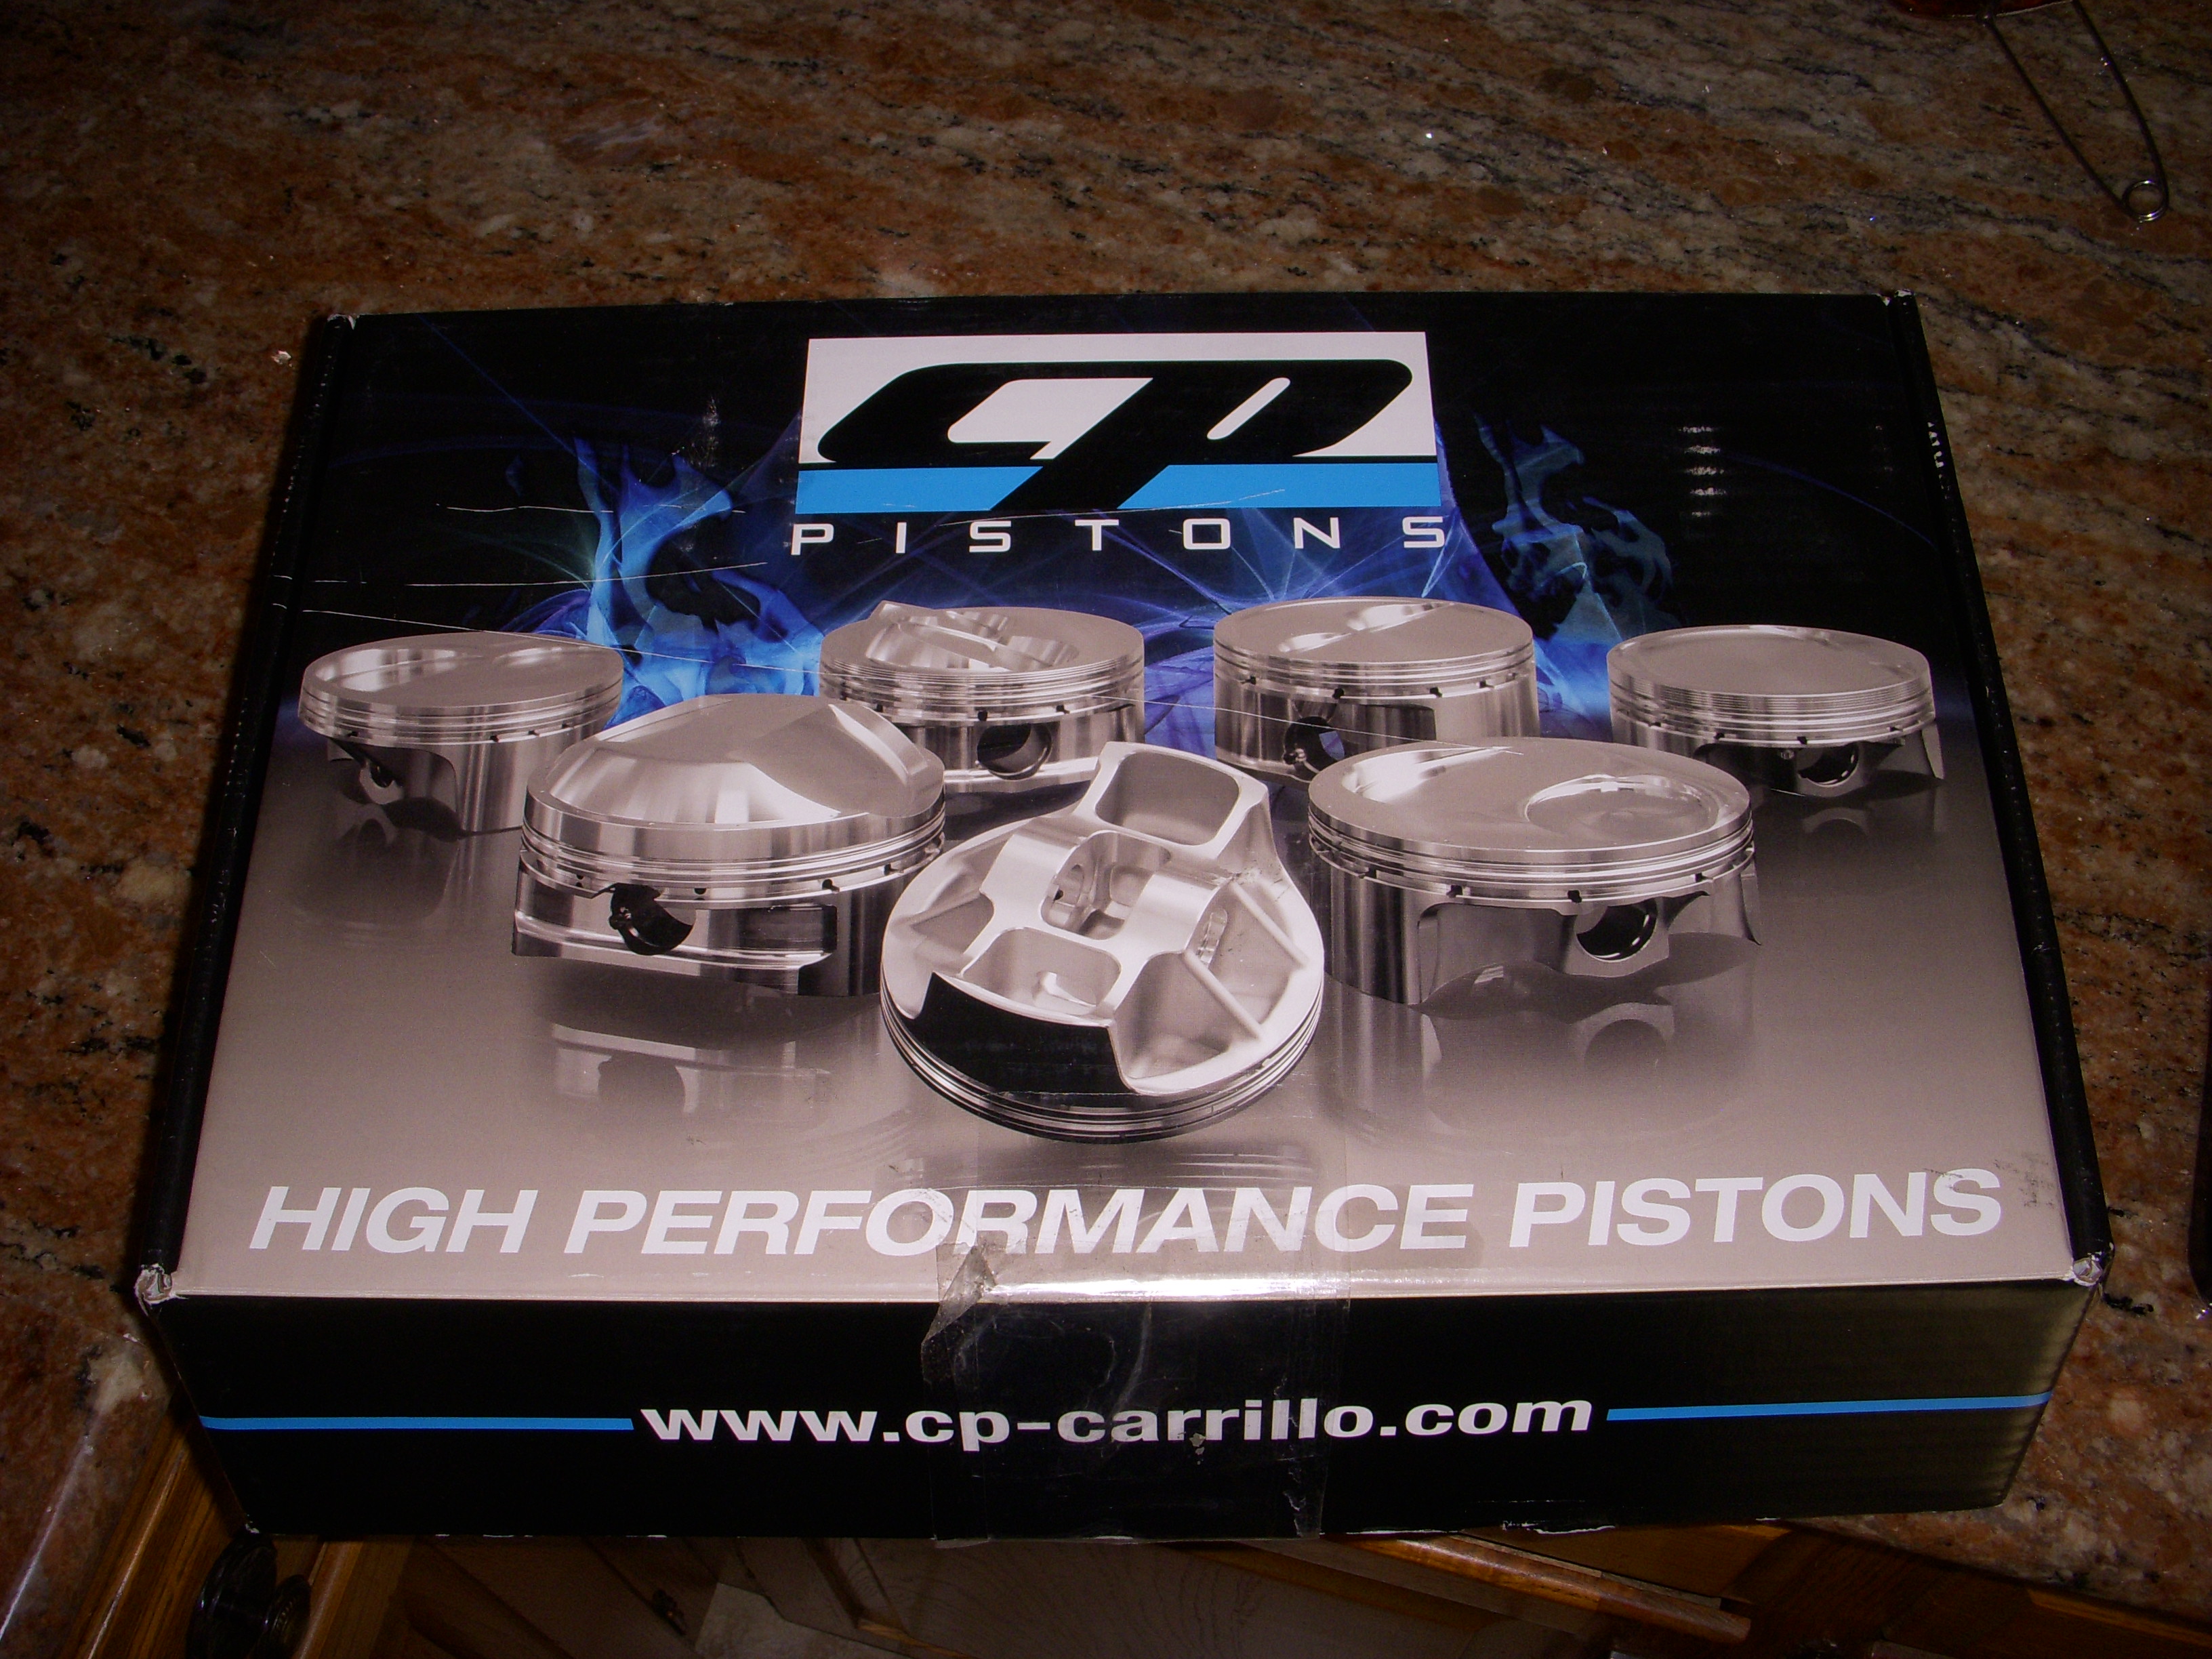
Who's on top ?? Notice the much larger single cutout for intake valves - thank you IMSA racers
Coated tops, slickery on skirts...
View up the skirt
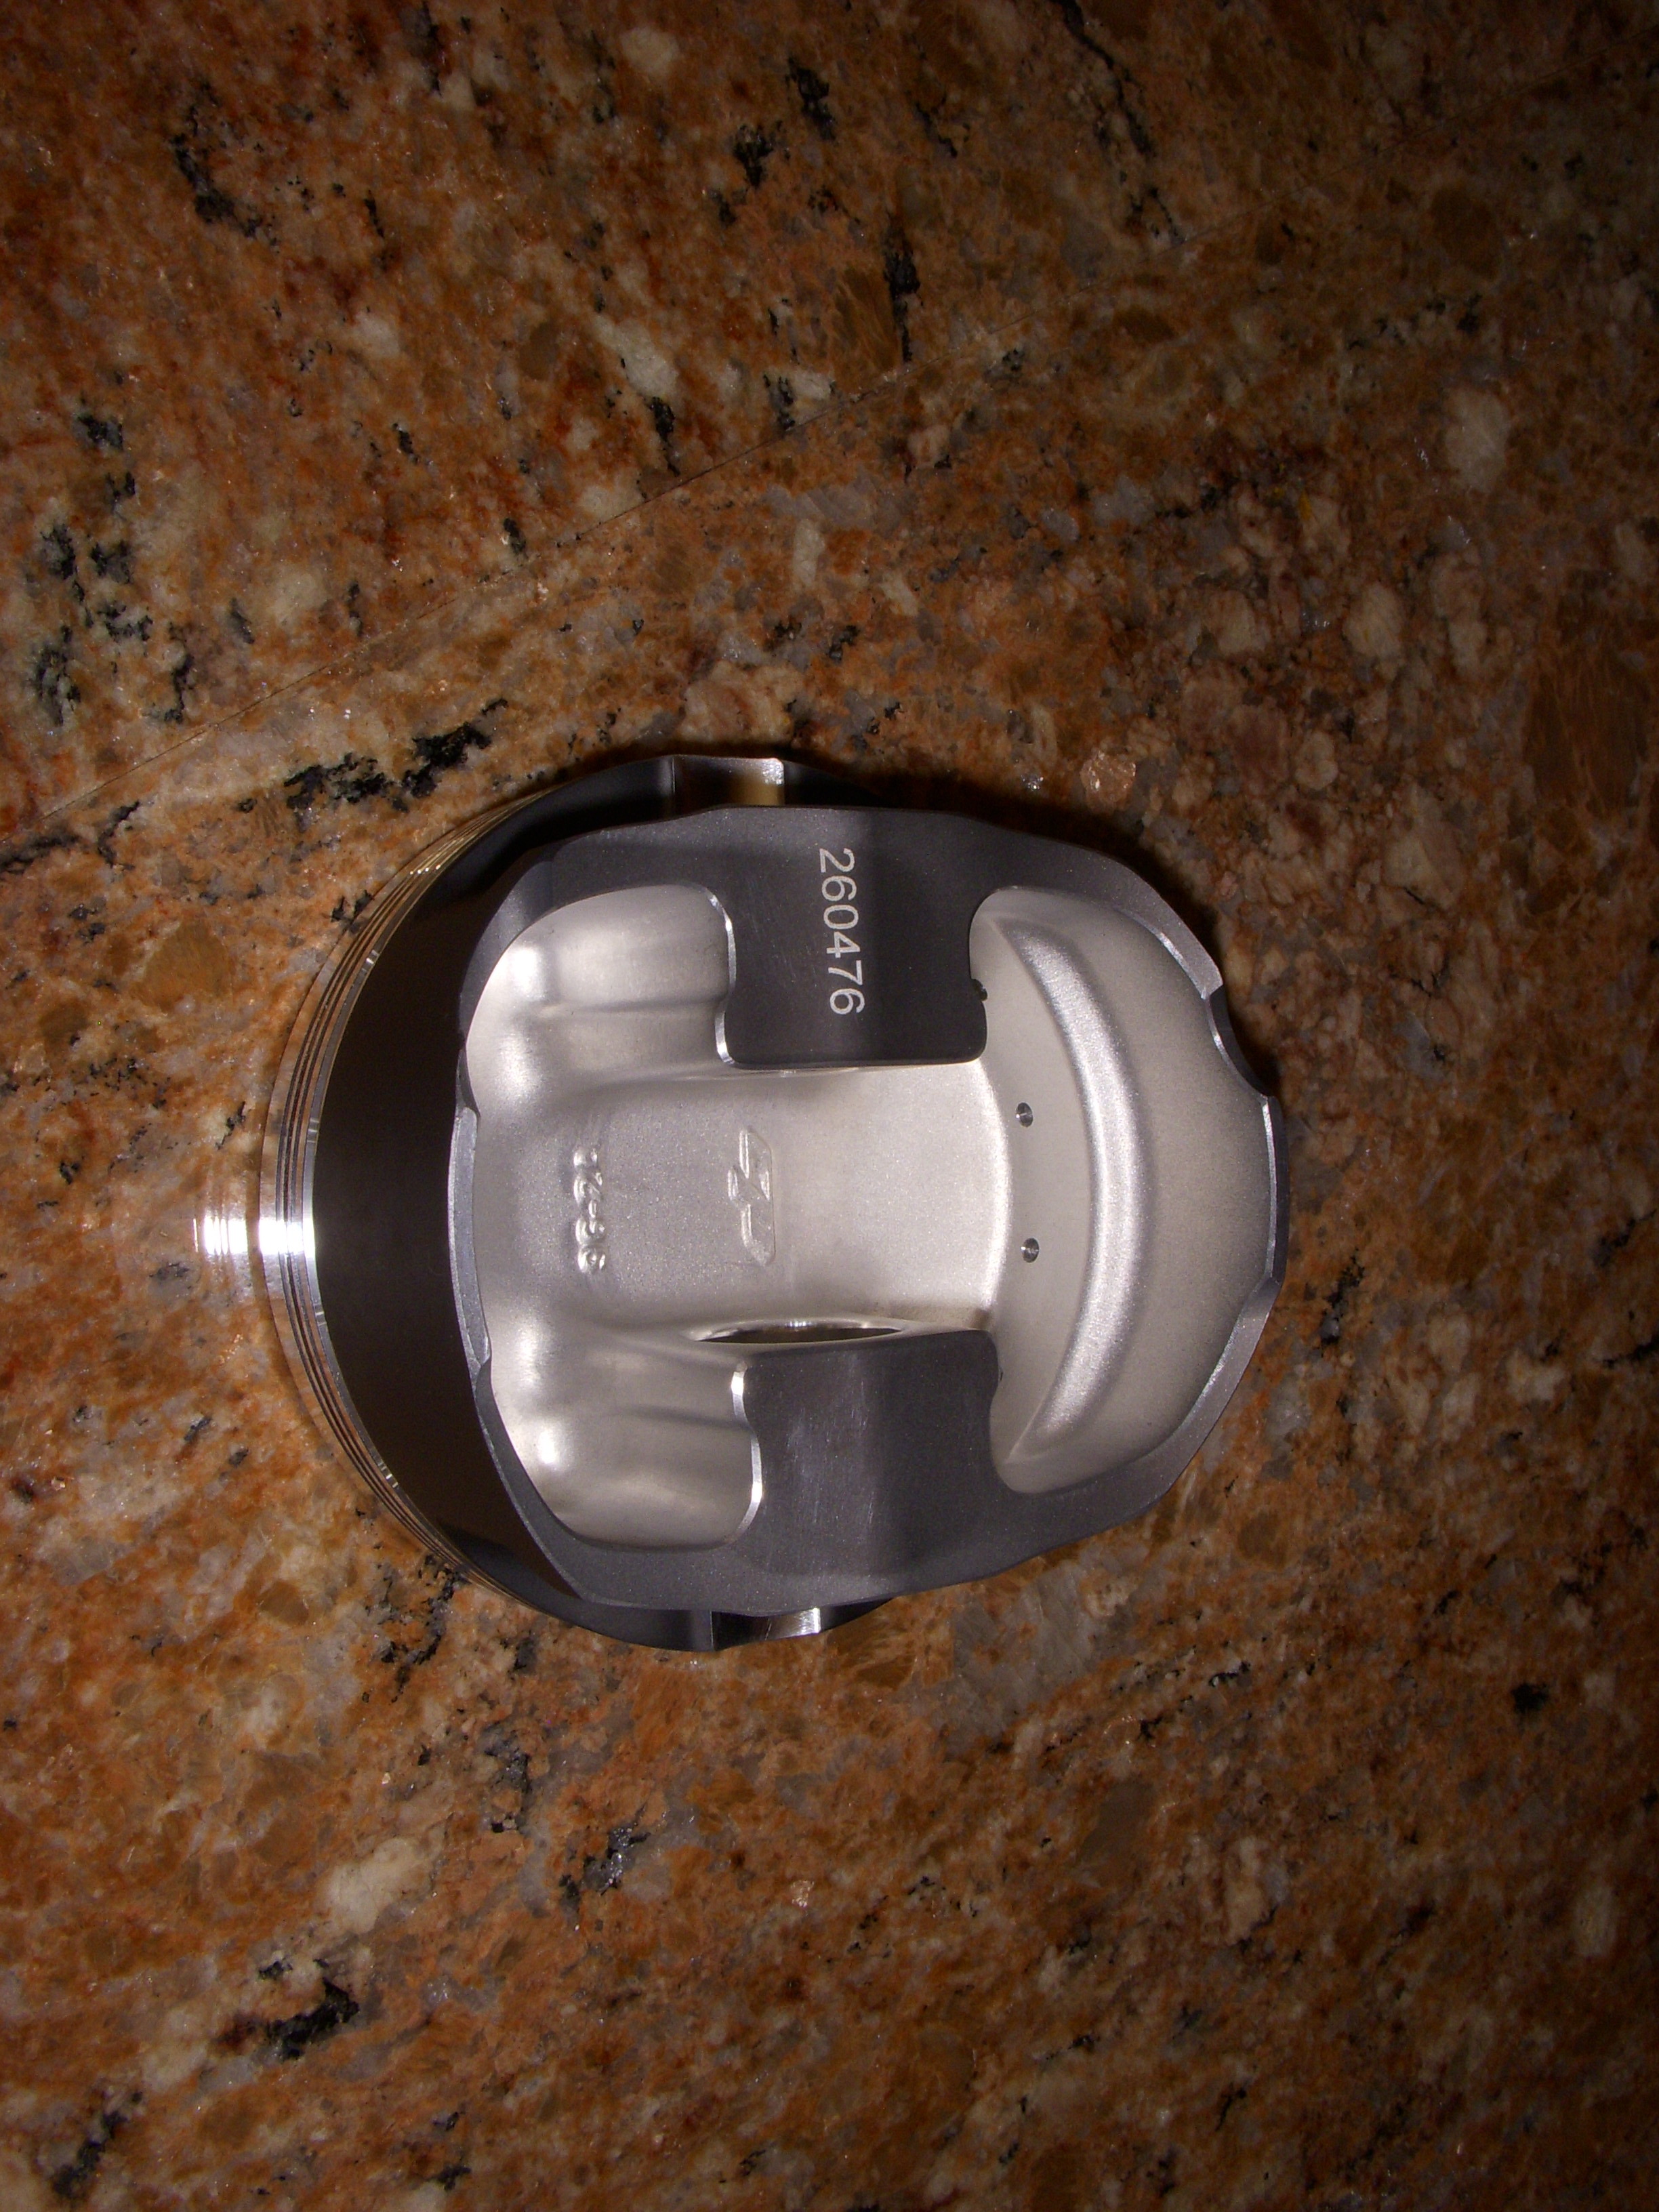
Pistons notched in two places for stroker ...

Who's on top ?? Notice the much larger single cutout for intake valves - thank you IMSA racers

Coated tops, slickery on skirts...


View up the skirt

Pistons notched in two places for stroker ...

Last edited by grey99max; 01-14-2017 at 01:23 PM.
11-10-2015, 02:48 PM
#1701
LandShark has Cosworth
Thread Starter
iTrader: (12)
Join Date: Jan 2004
Location: Topeka, KS
Posts: 4,327
Ordered new injectors..
Just ordered a brand-new set of Bosch EV-14 52lb 550cc fuel injectors with six new connectors...
More displacement = needs more E85 ...
AND ... a new cam position sensor for the Altima HR head - which I hope will do the job for the Megasquirt3-Pro ..
More displacement = needs more E85 ...
AND ... a new cam position sensor for the Altima HR head - which I hope will do the job for the Megasquirt3-Pro ..
Last edited by grey99max; 11-10-2015 at 03:25 PM.
11-13-2015, 02:10 PM
#1702
LandShark has Cosworth
Thread Starter
iTrader: (12)
Join Date: Jan 2004
Location: Topeka, KS
Posts: 4,327
HR Valve retainers ??
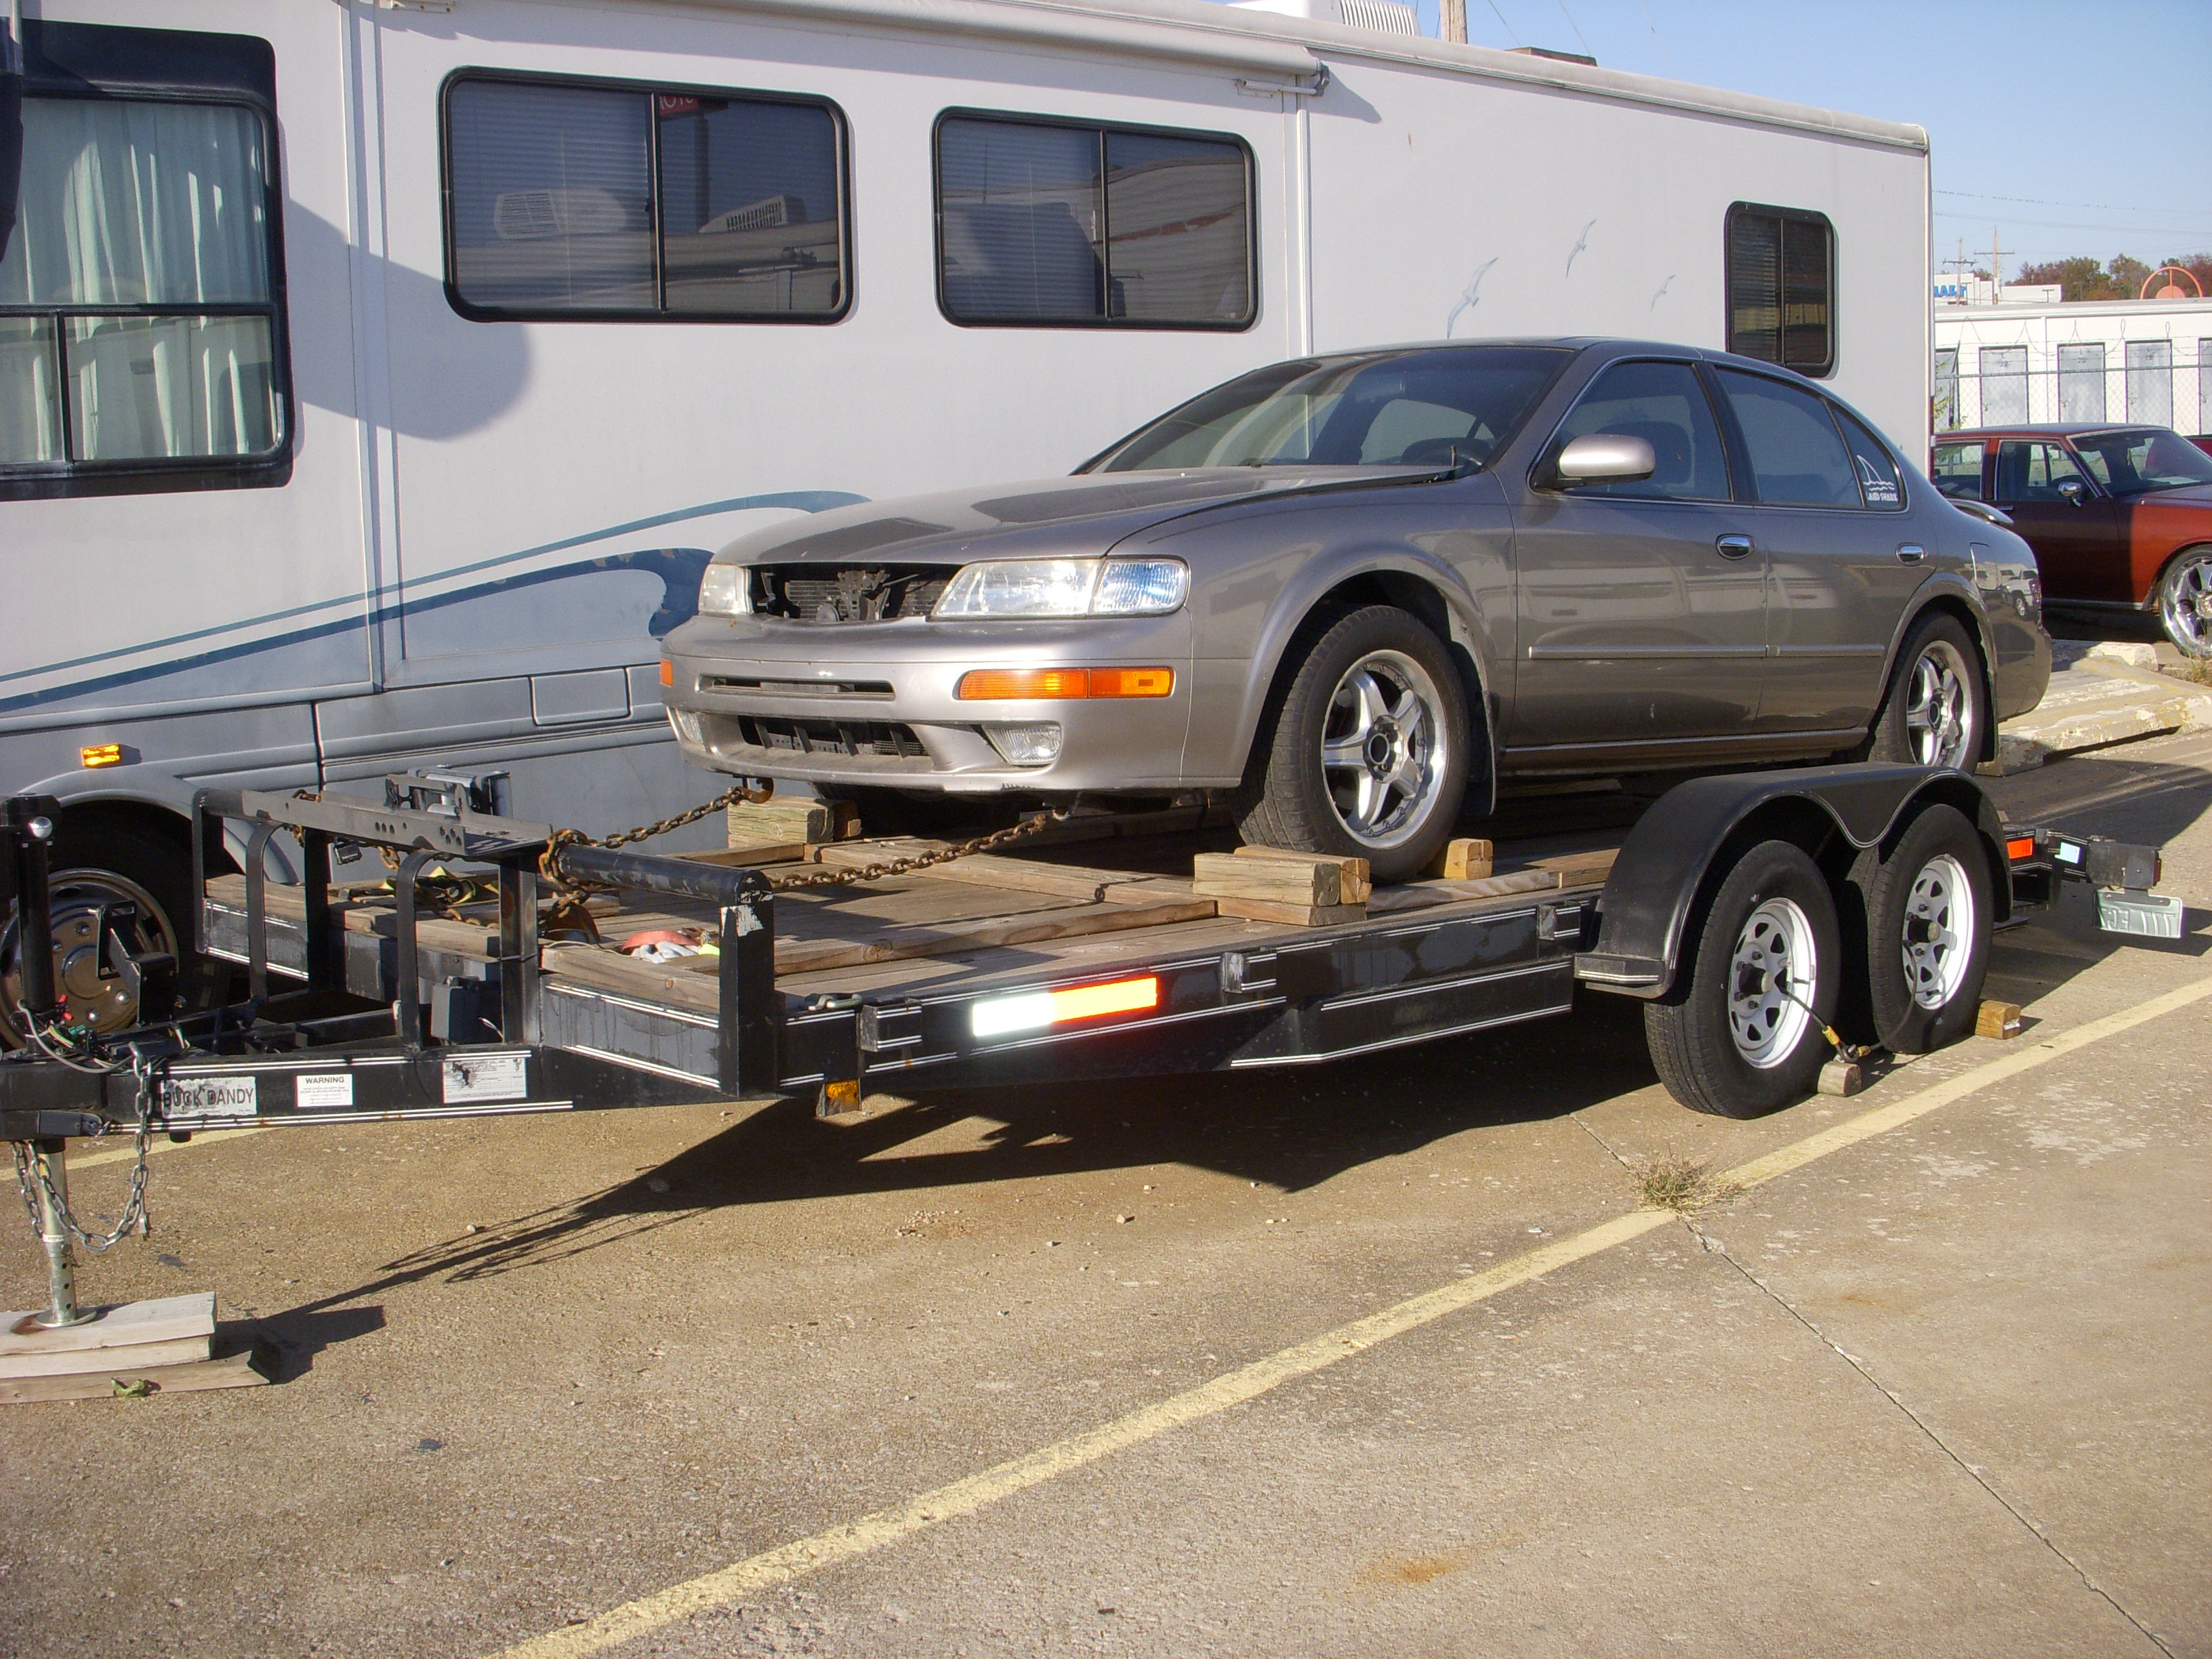
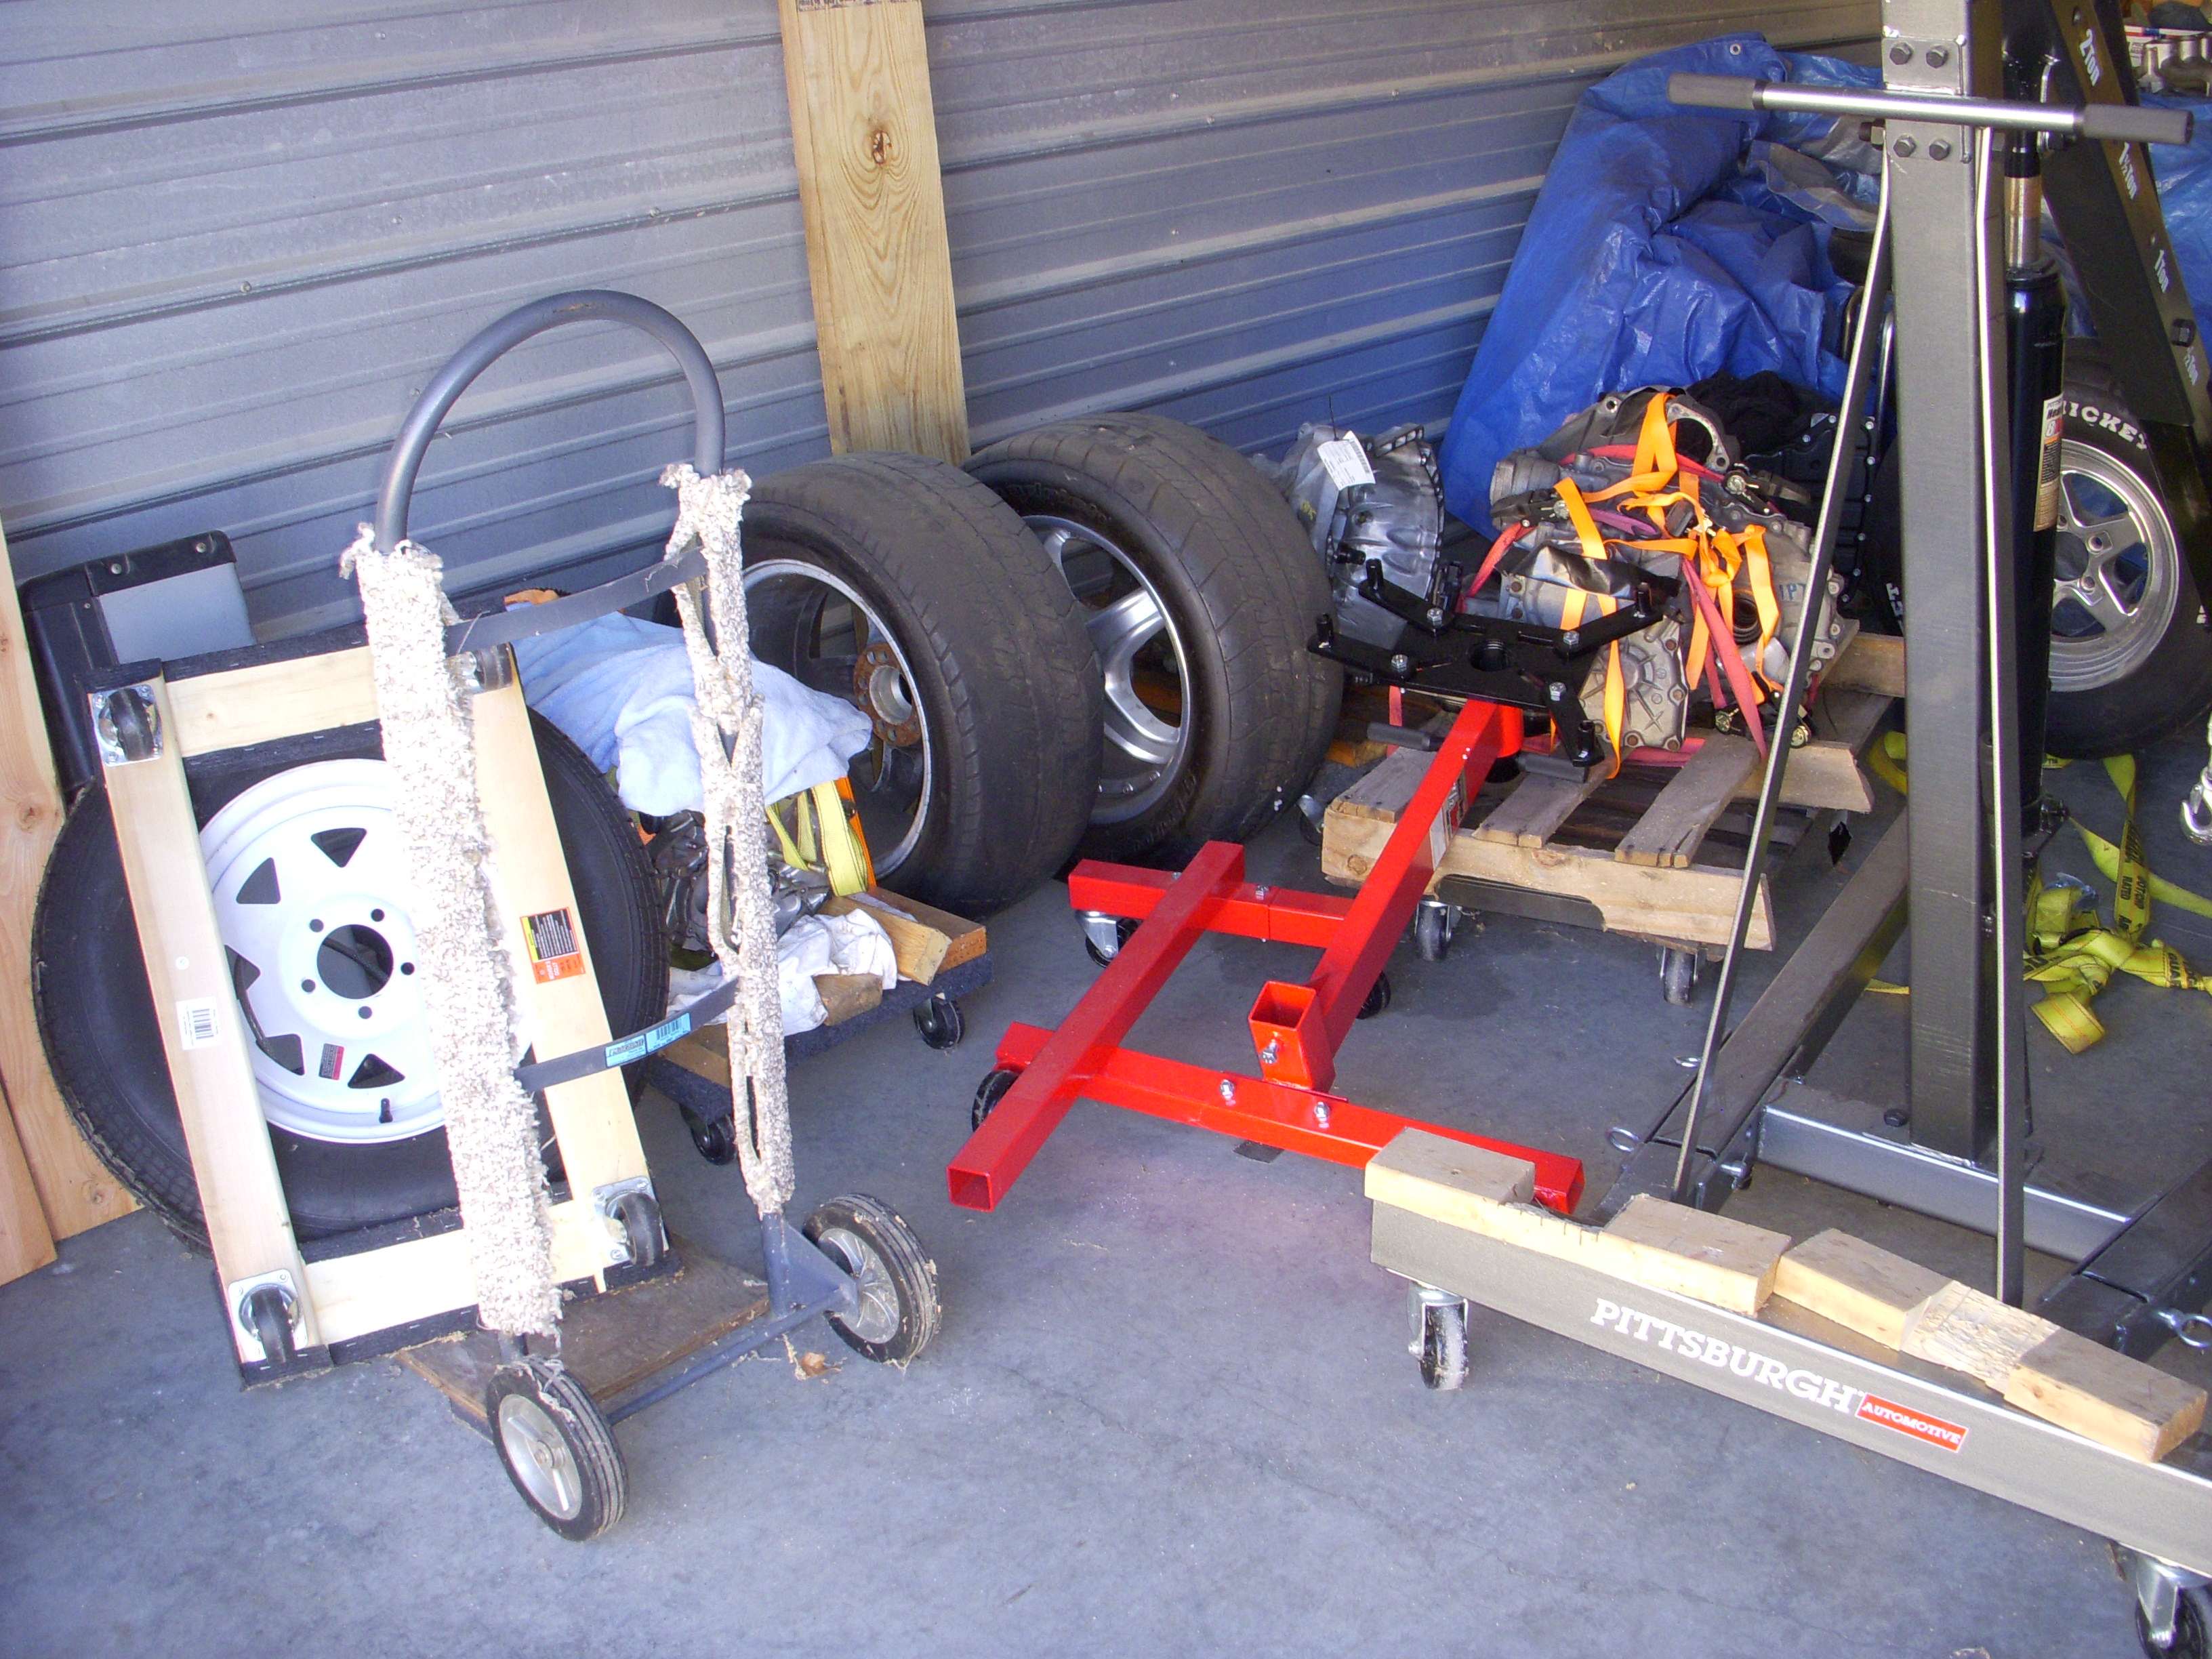
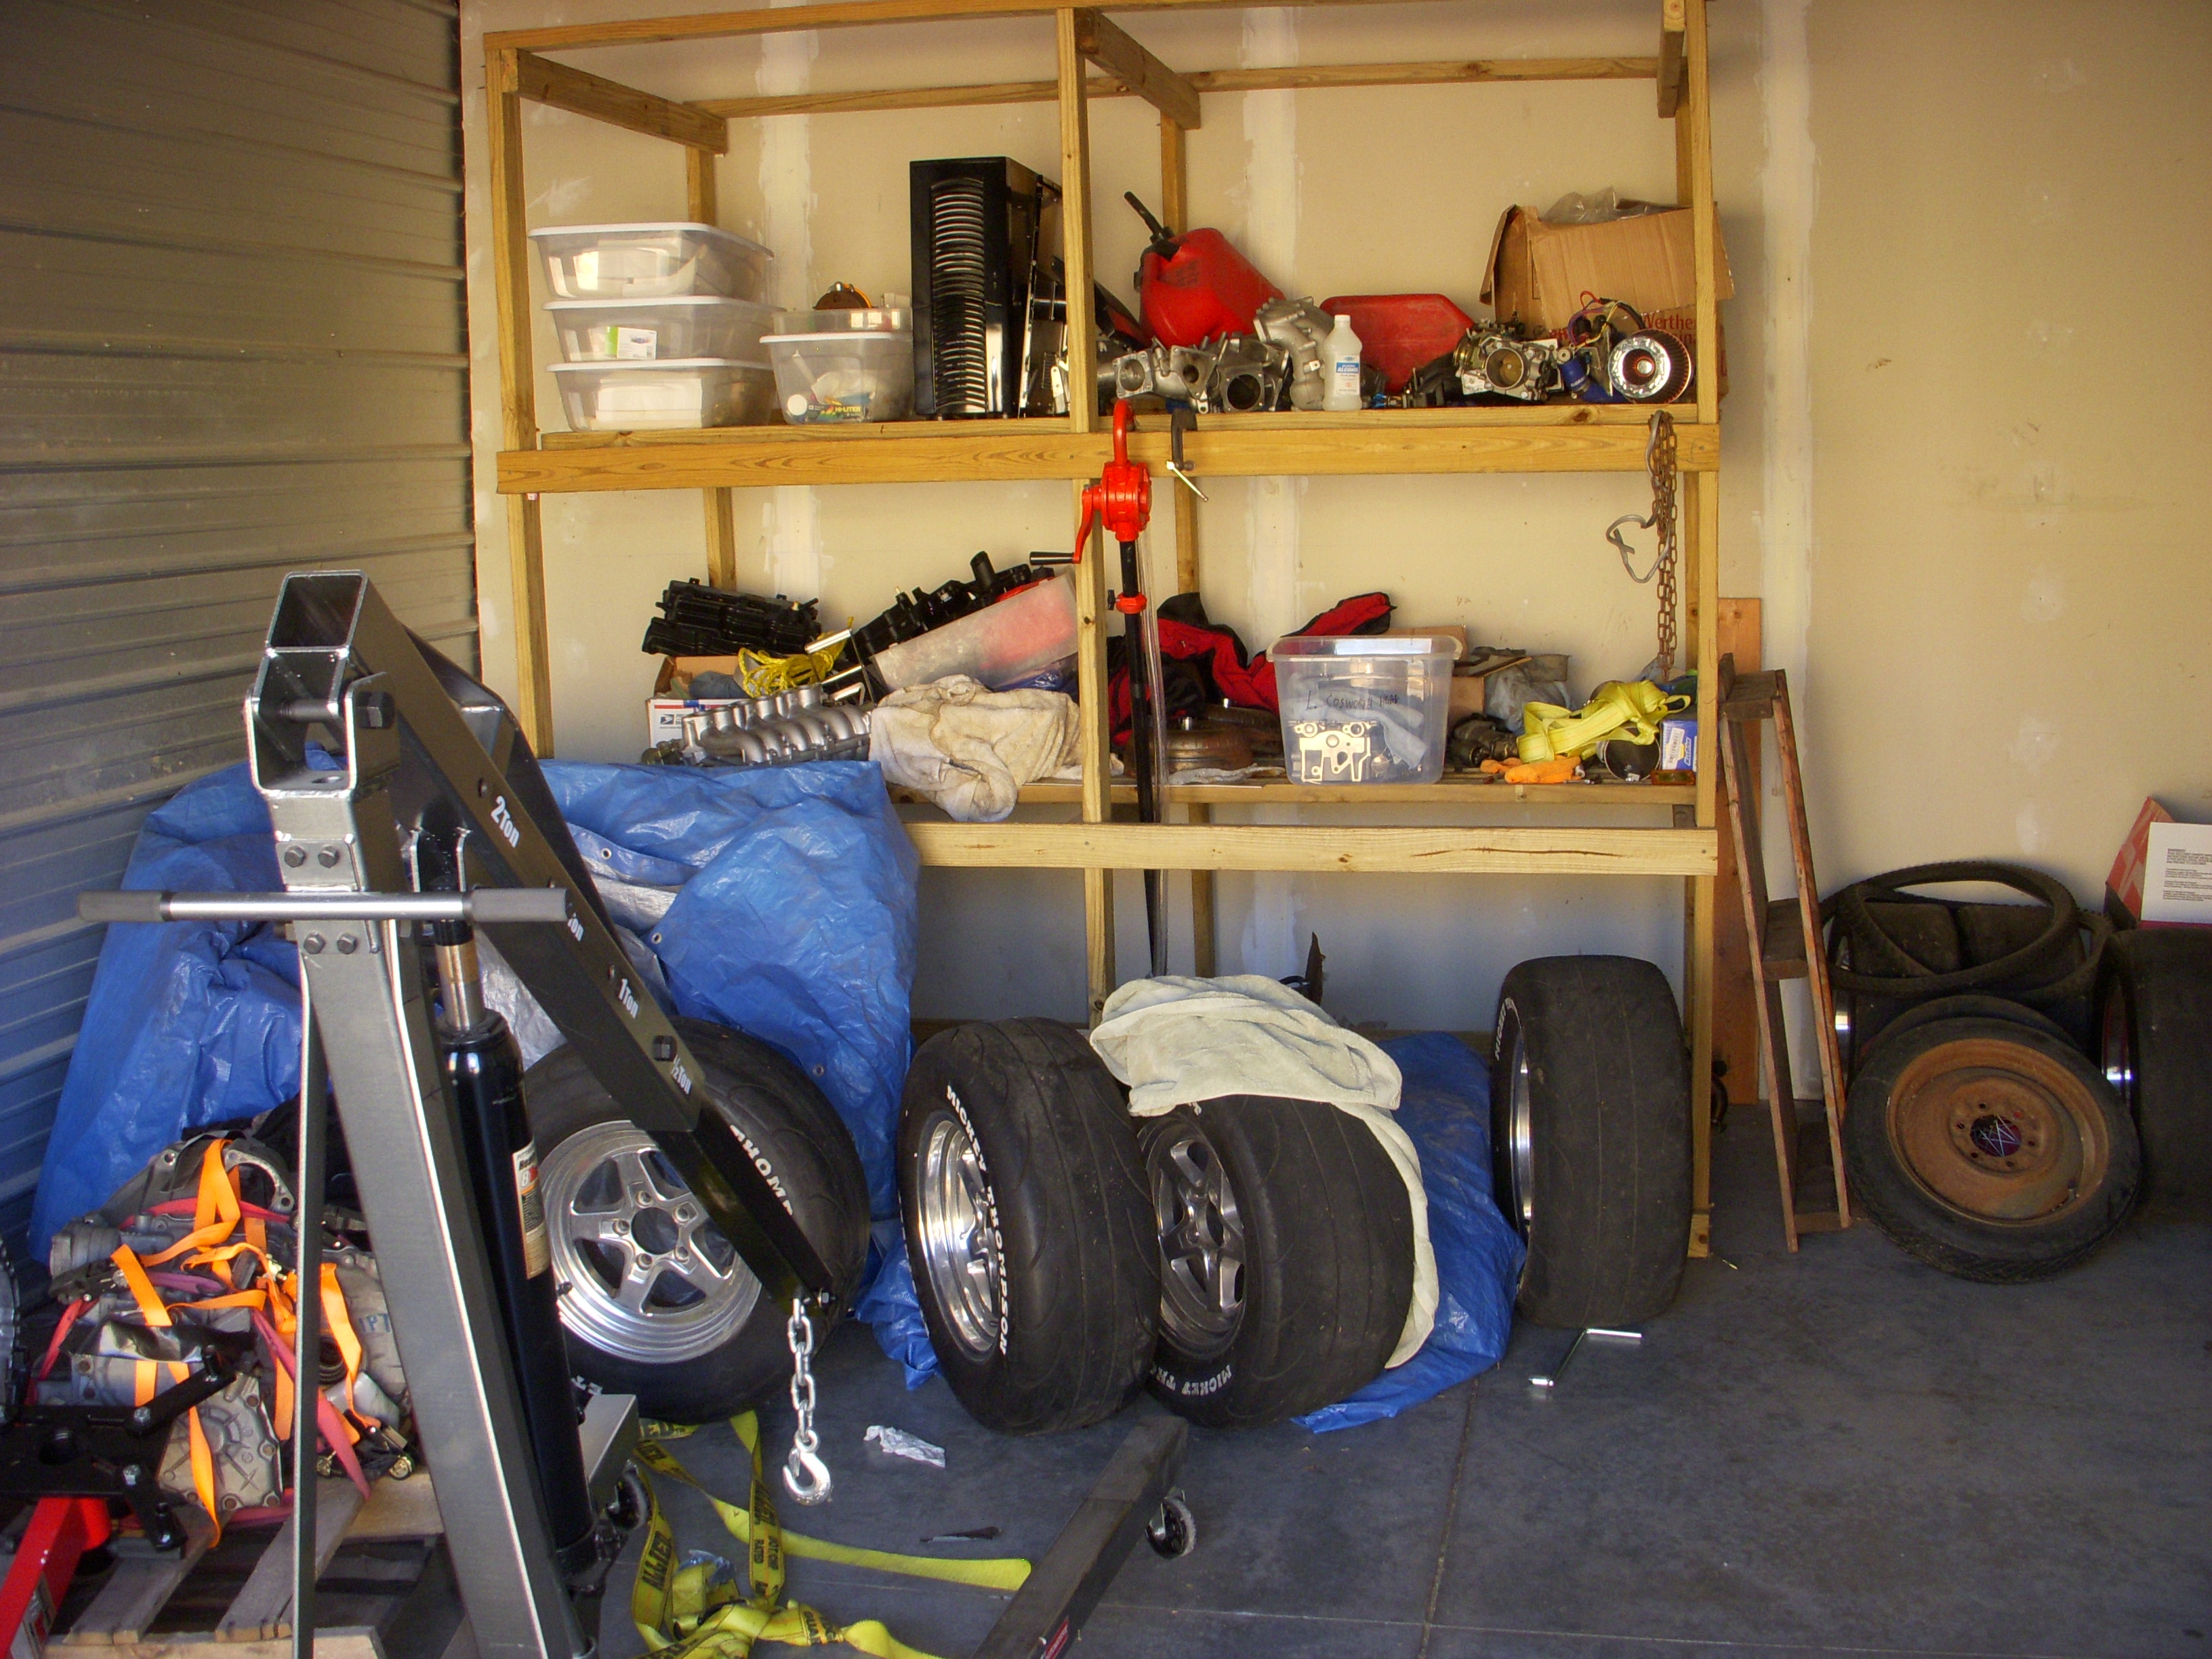
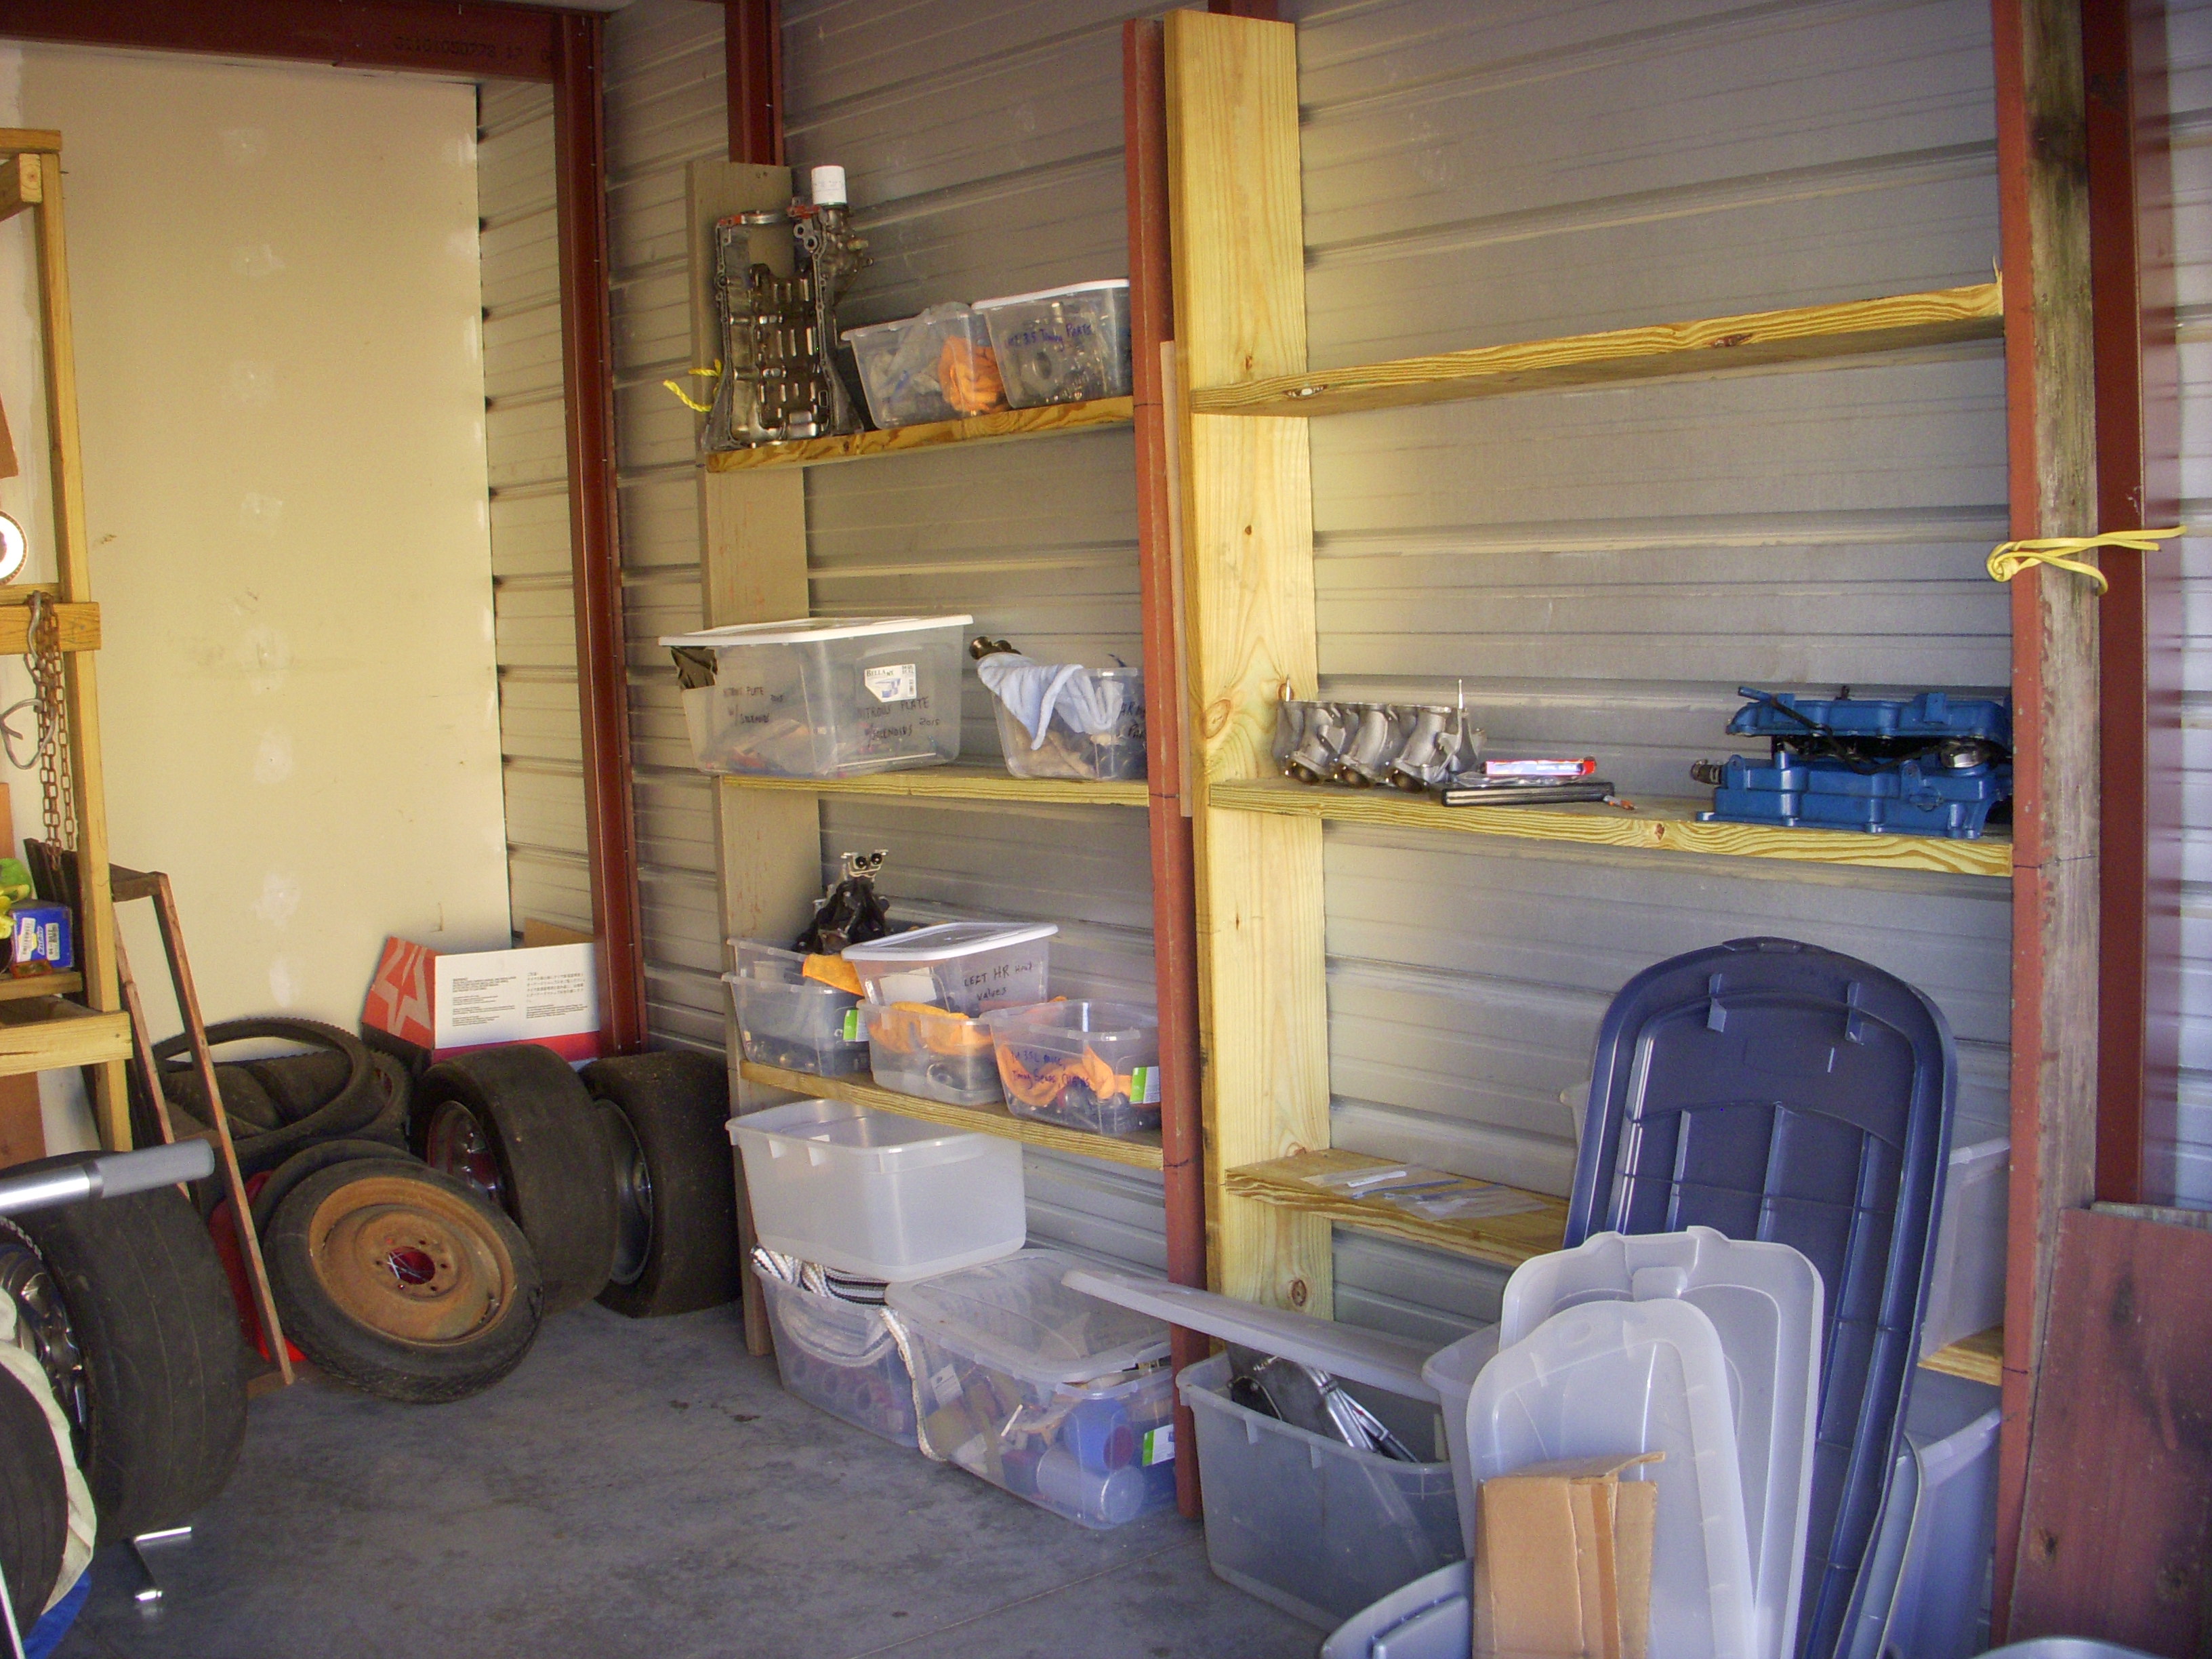
Car is sitting on my trailer in the storage yard, but it has company. Looks like a Donk in the background...

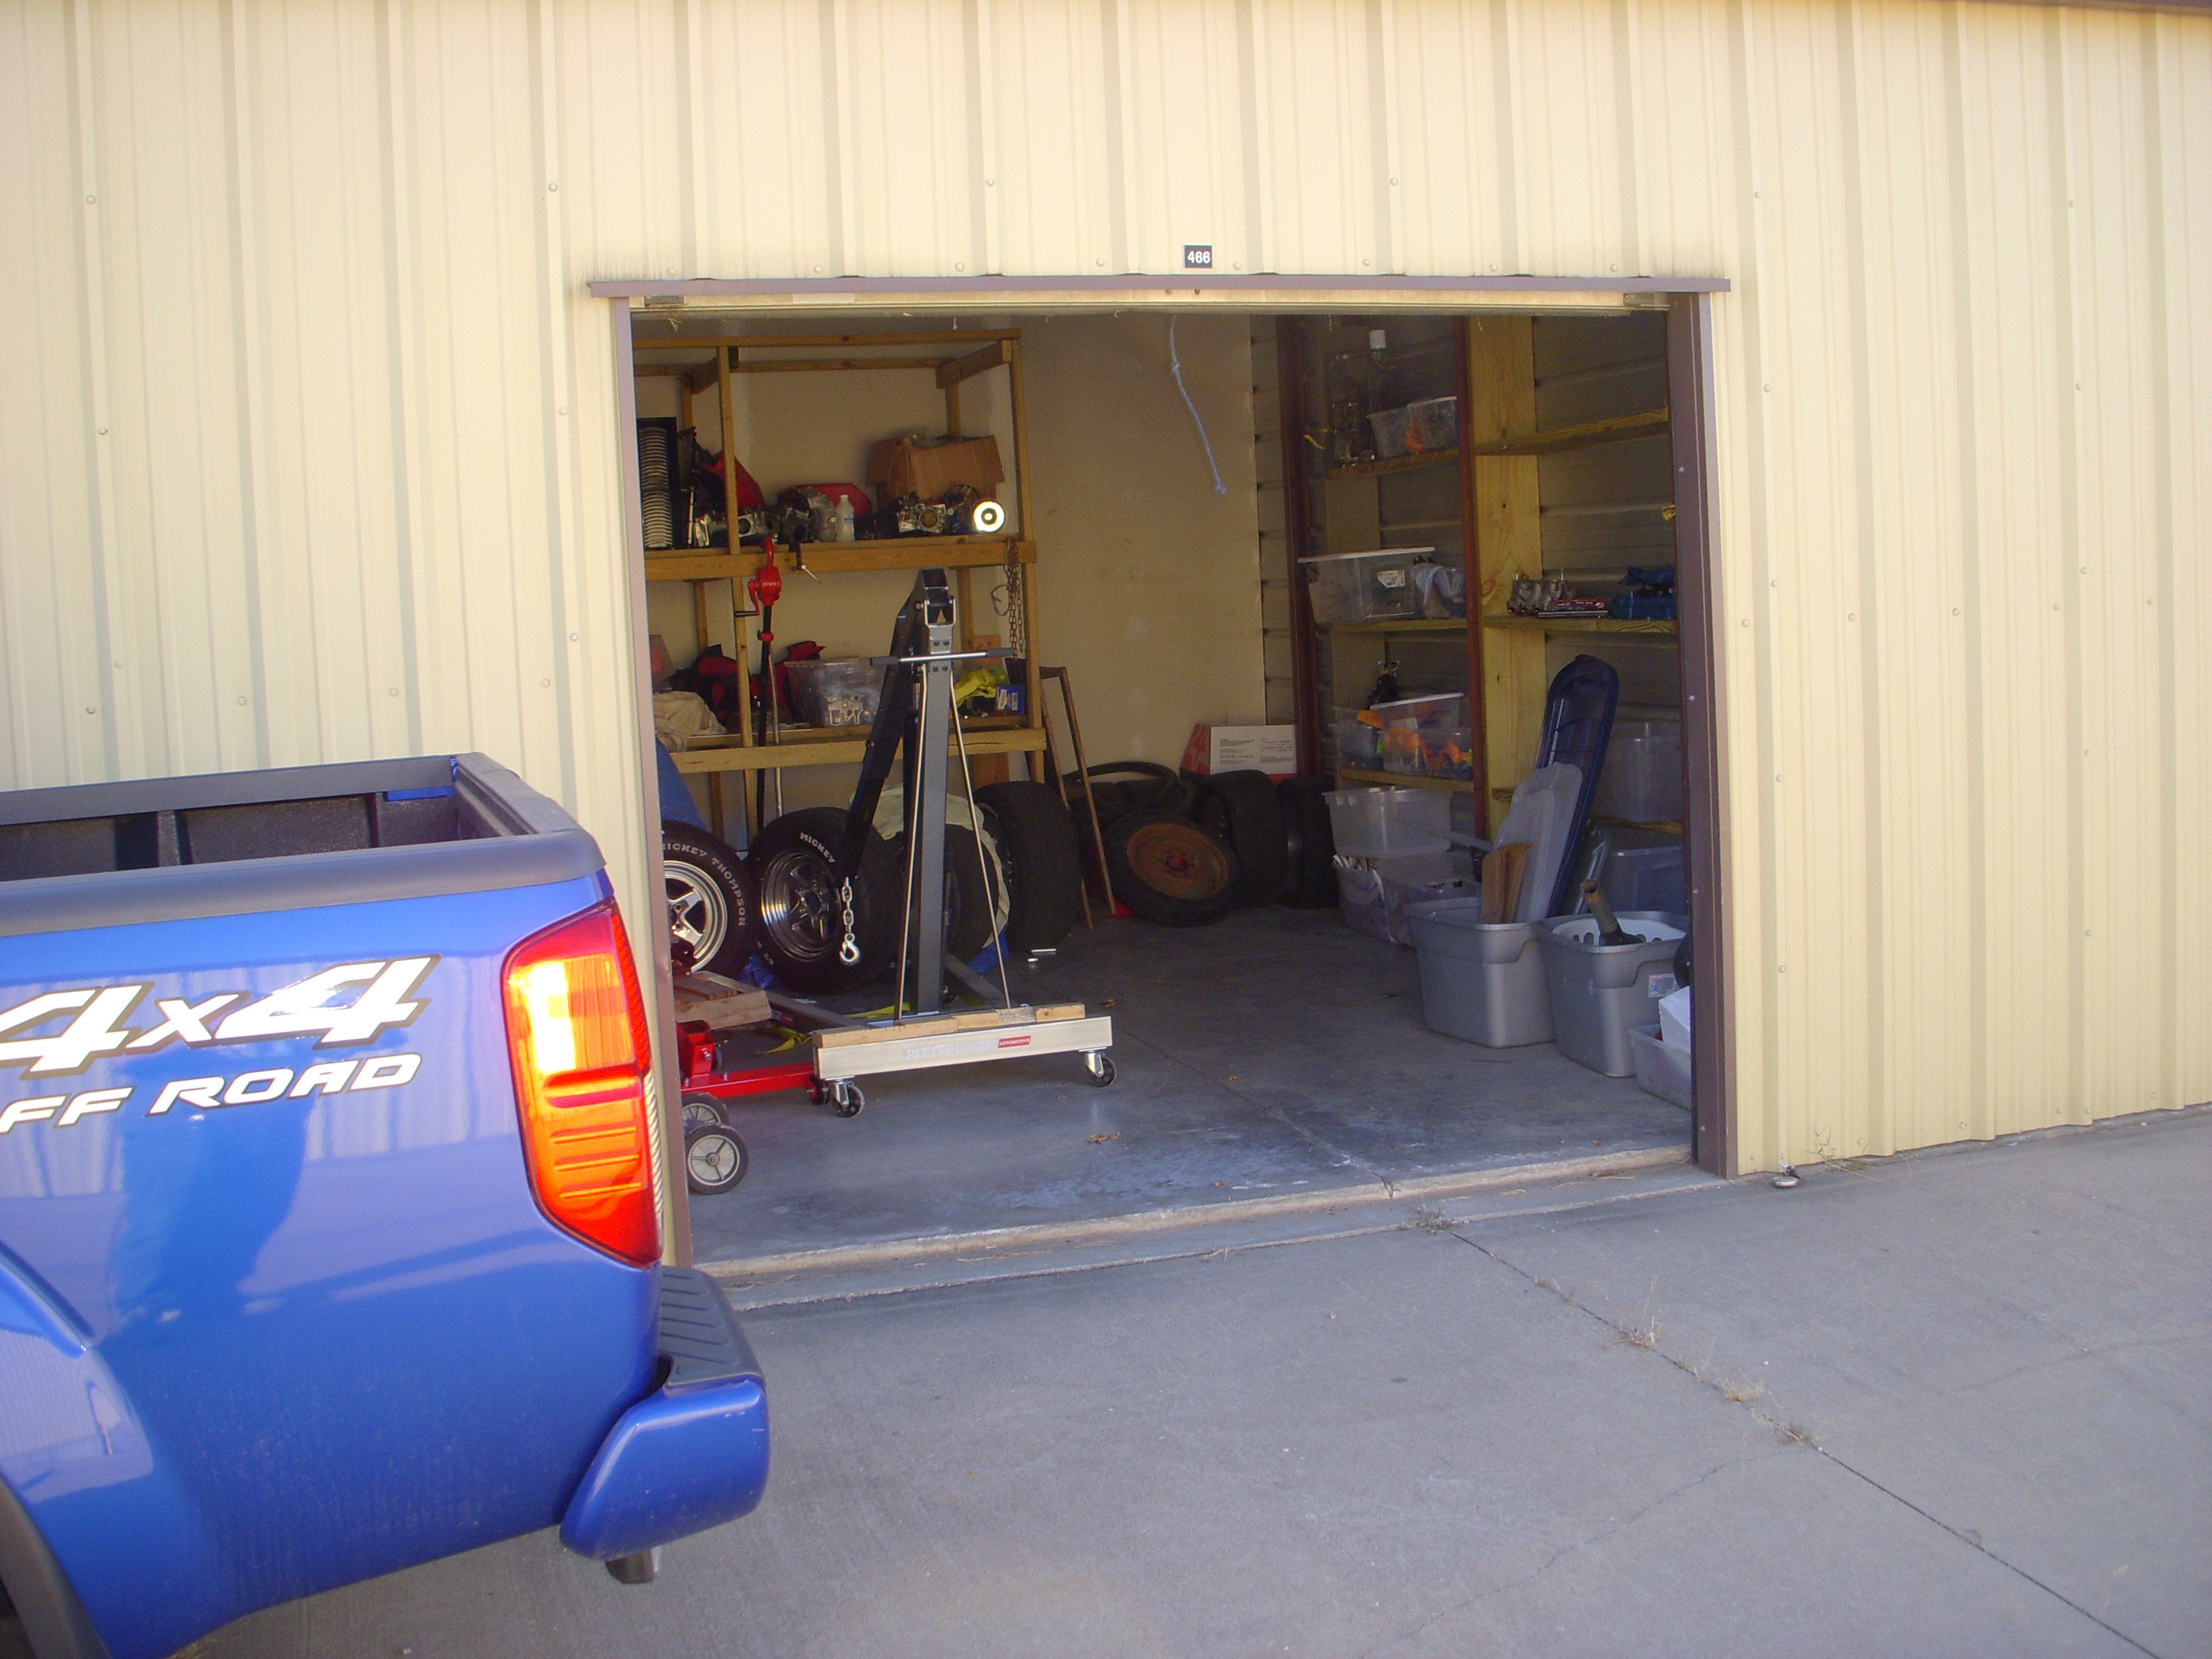
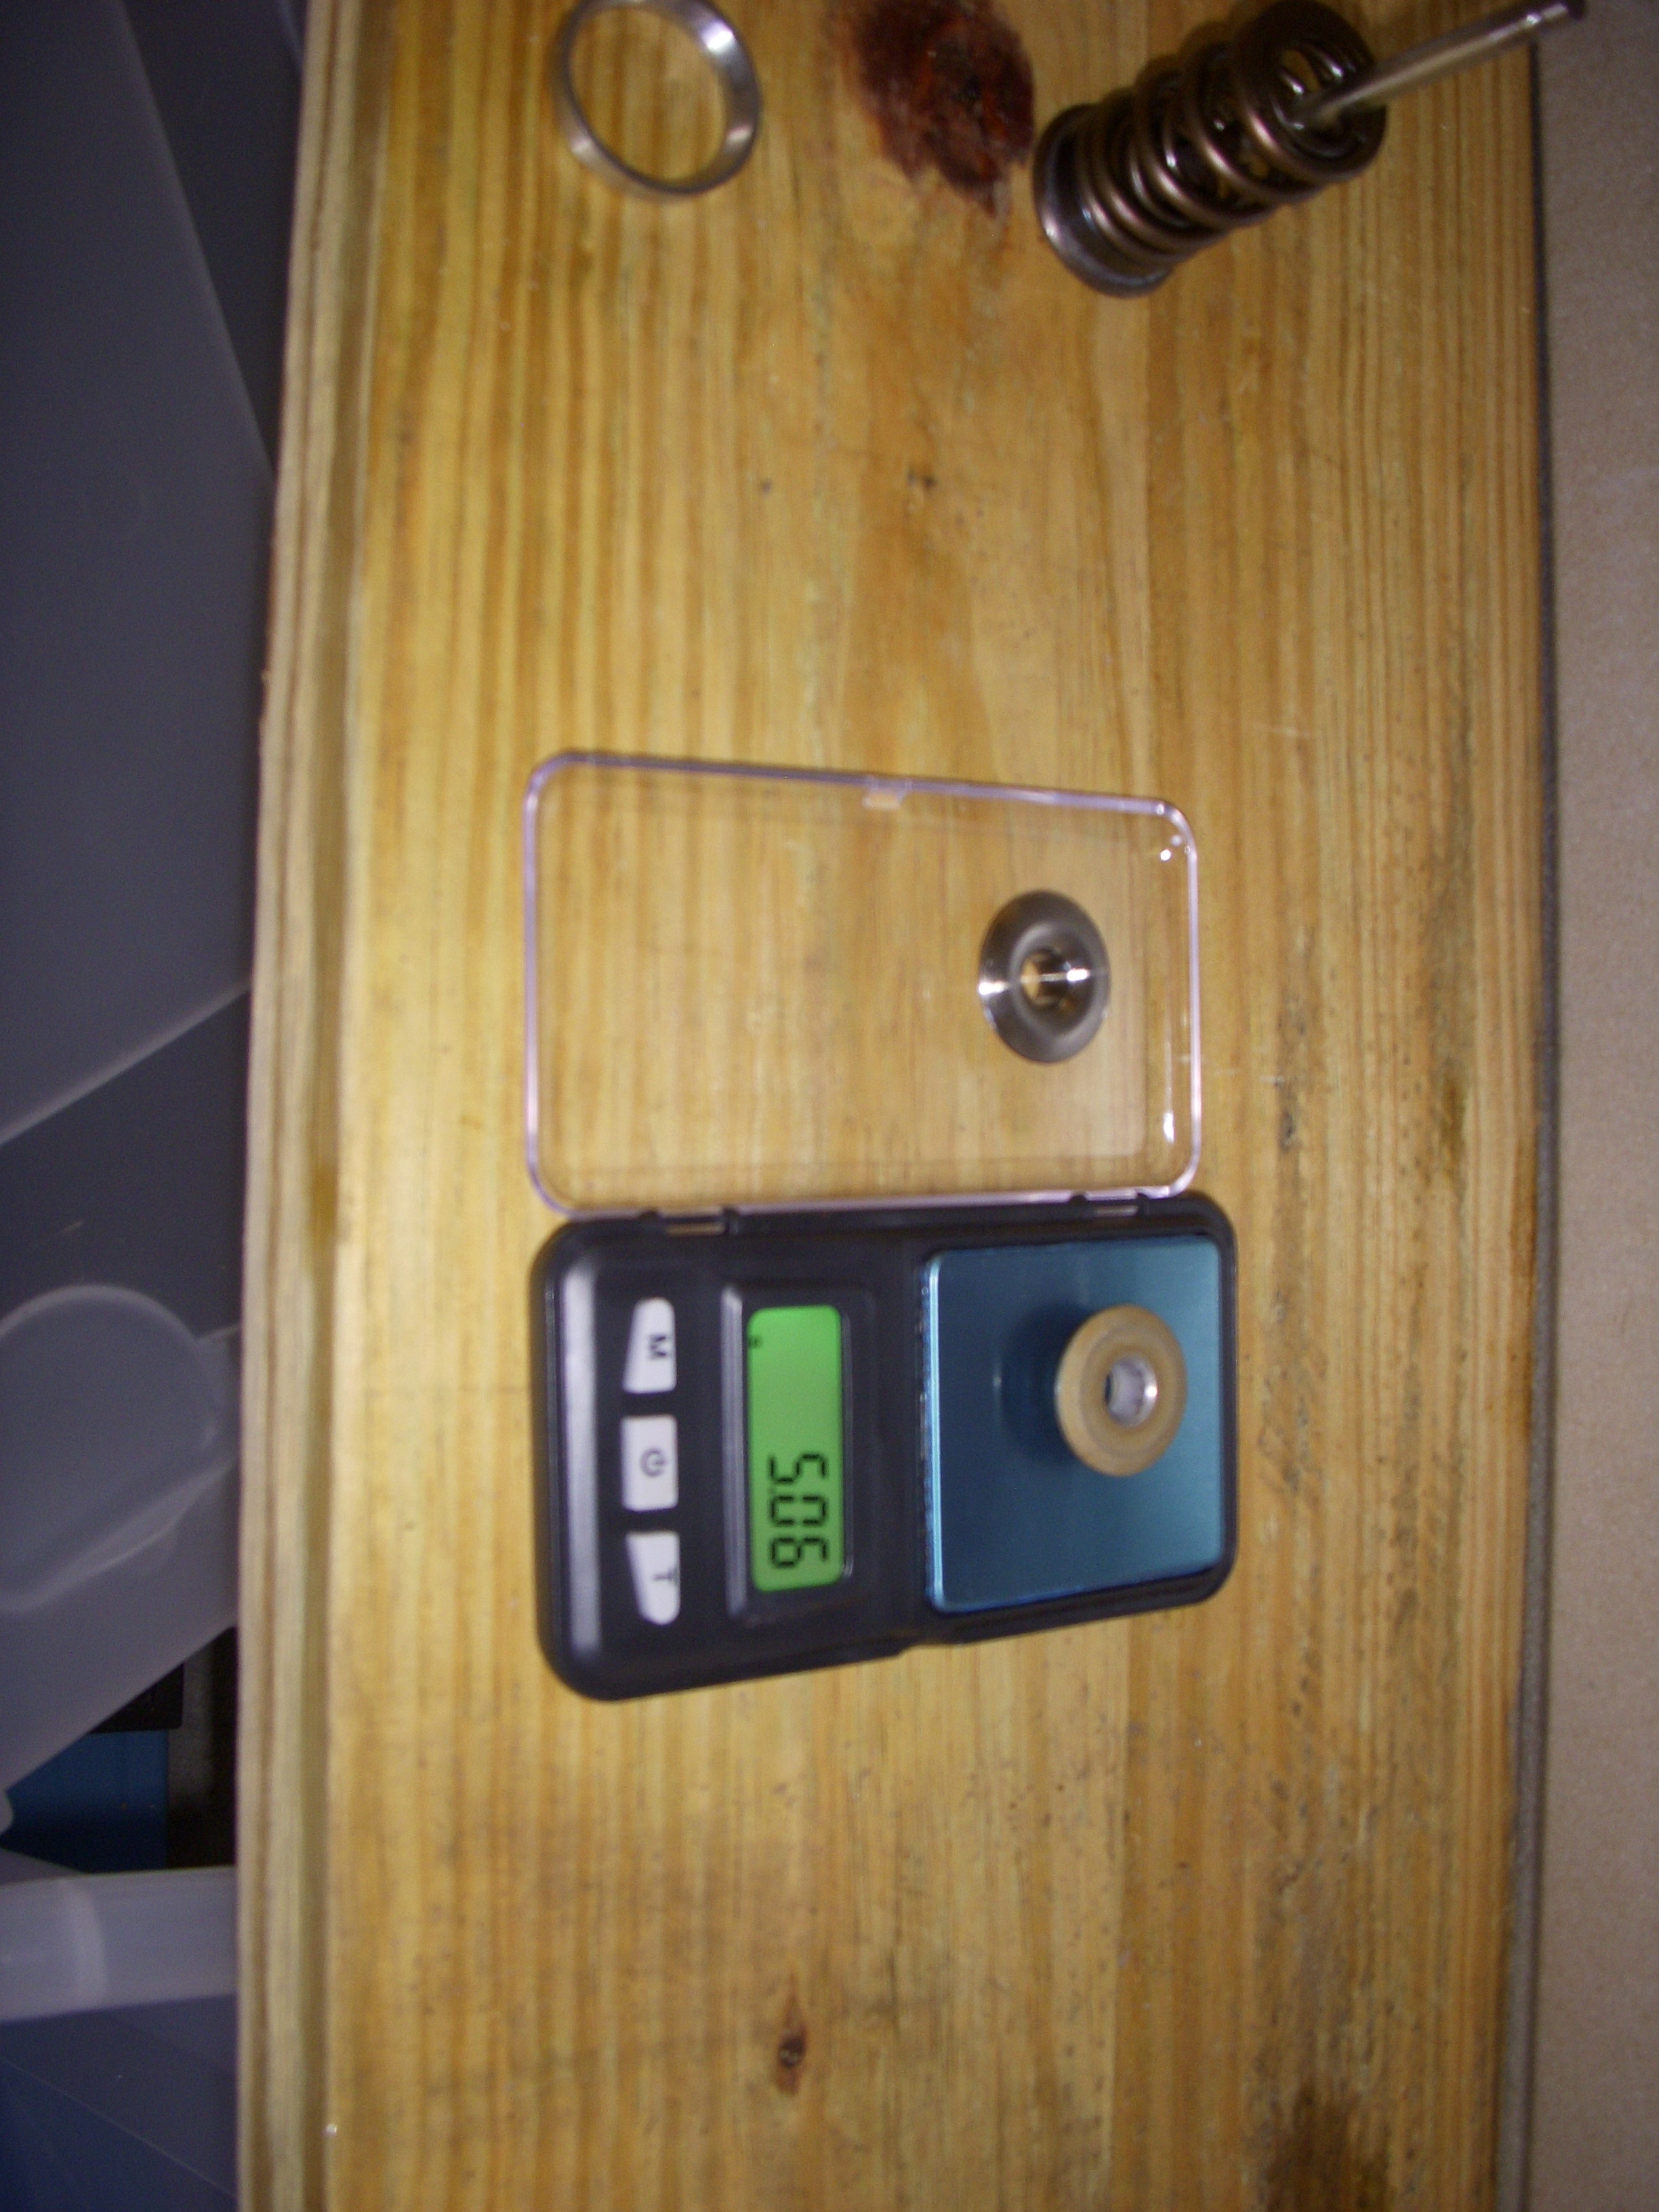
I was thinking about ordering Titanium valve retainers for my new HR heads, but there's some considerations. The new JWT cams have such high lift that the new HR valve springs must be hand-selected so they don't bind - which means I can't buy just any brand of spring. The stock HR valve retainer is aluminum, not steel, so Hmmm let's buy a digital gram scale and compare the HR aluminum retainers to the Cosworth titanium retainer weight. Went to my storage unit to look at some engine parts...
What's inside:
Titanium 5.6 gms.
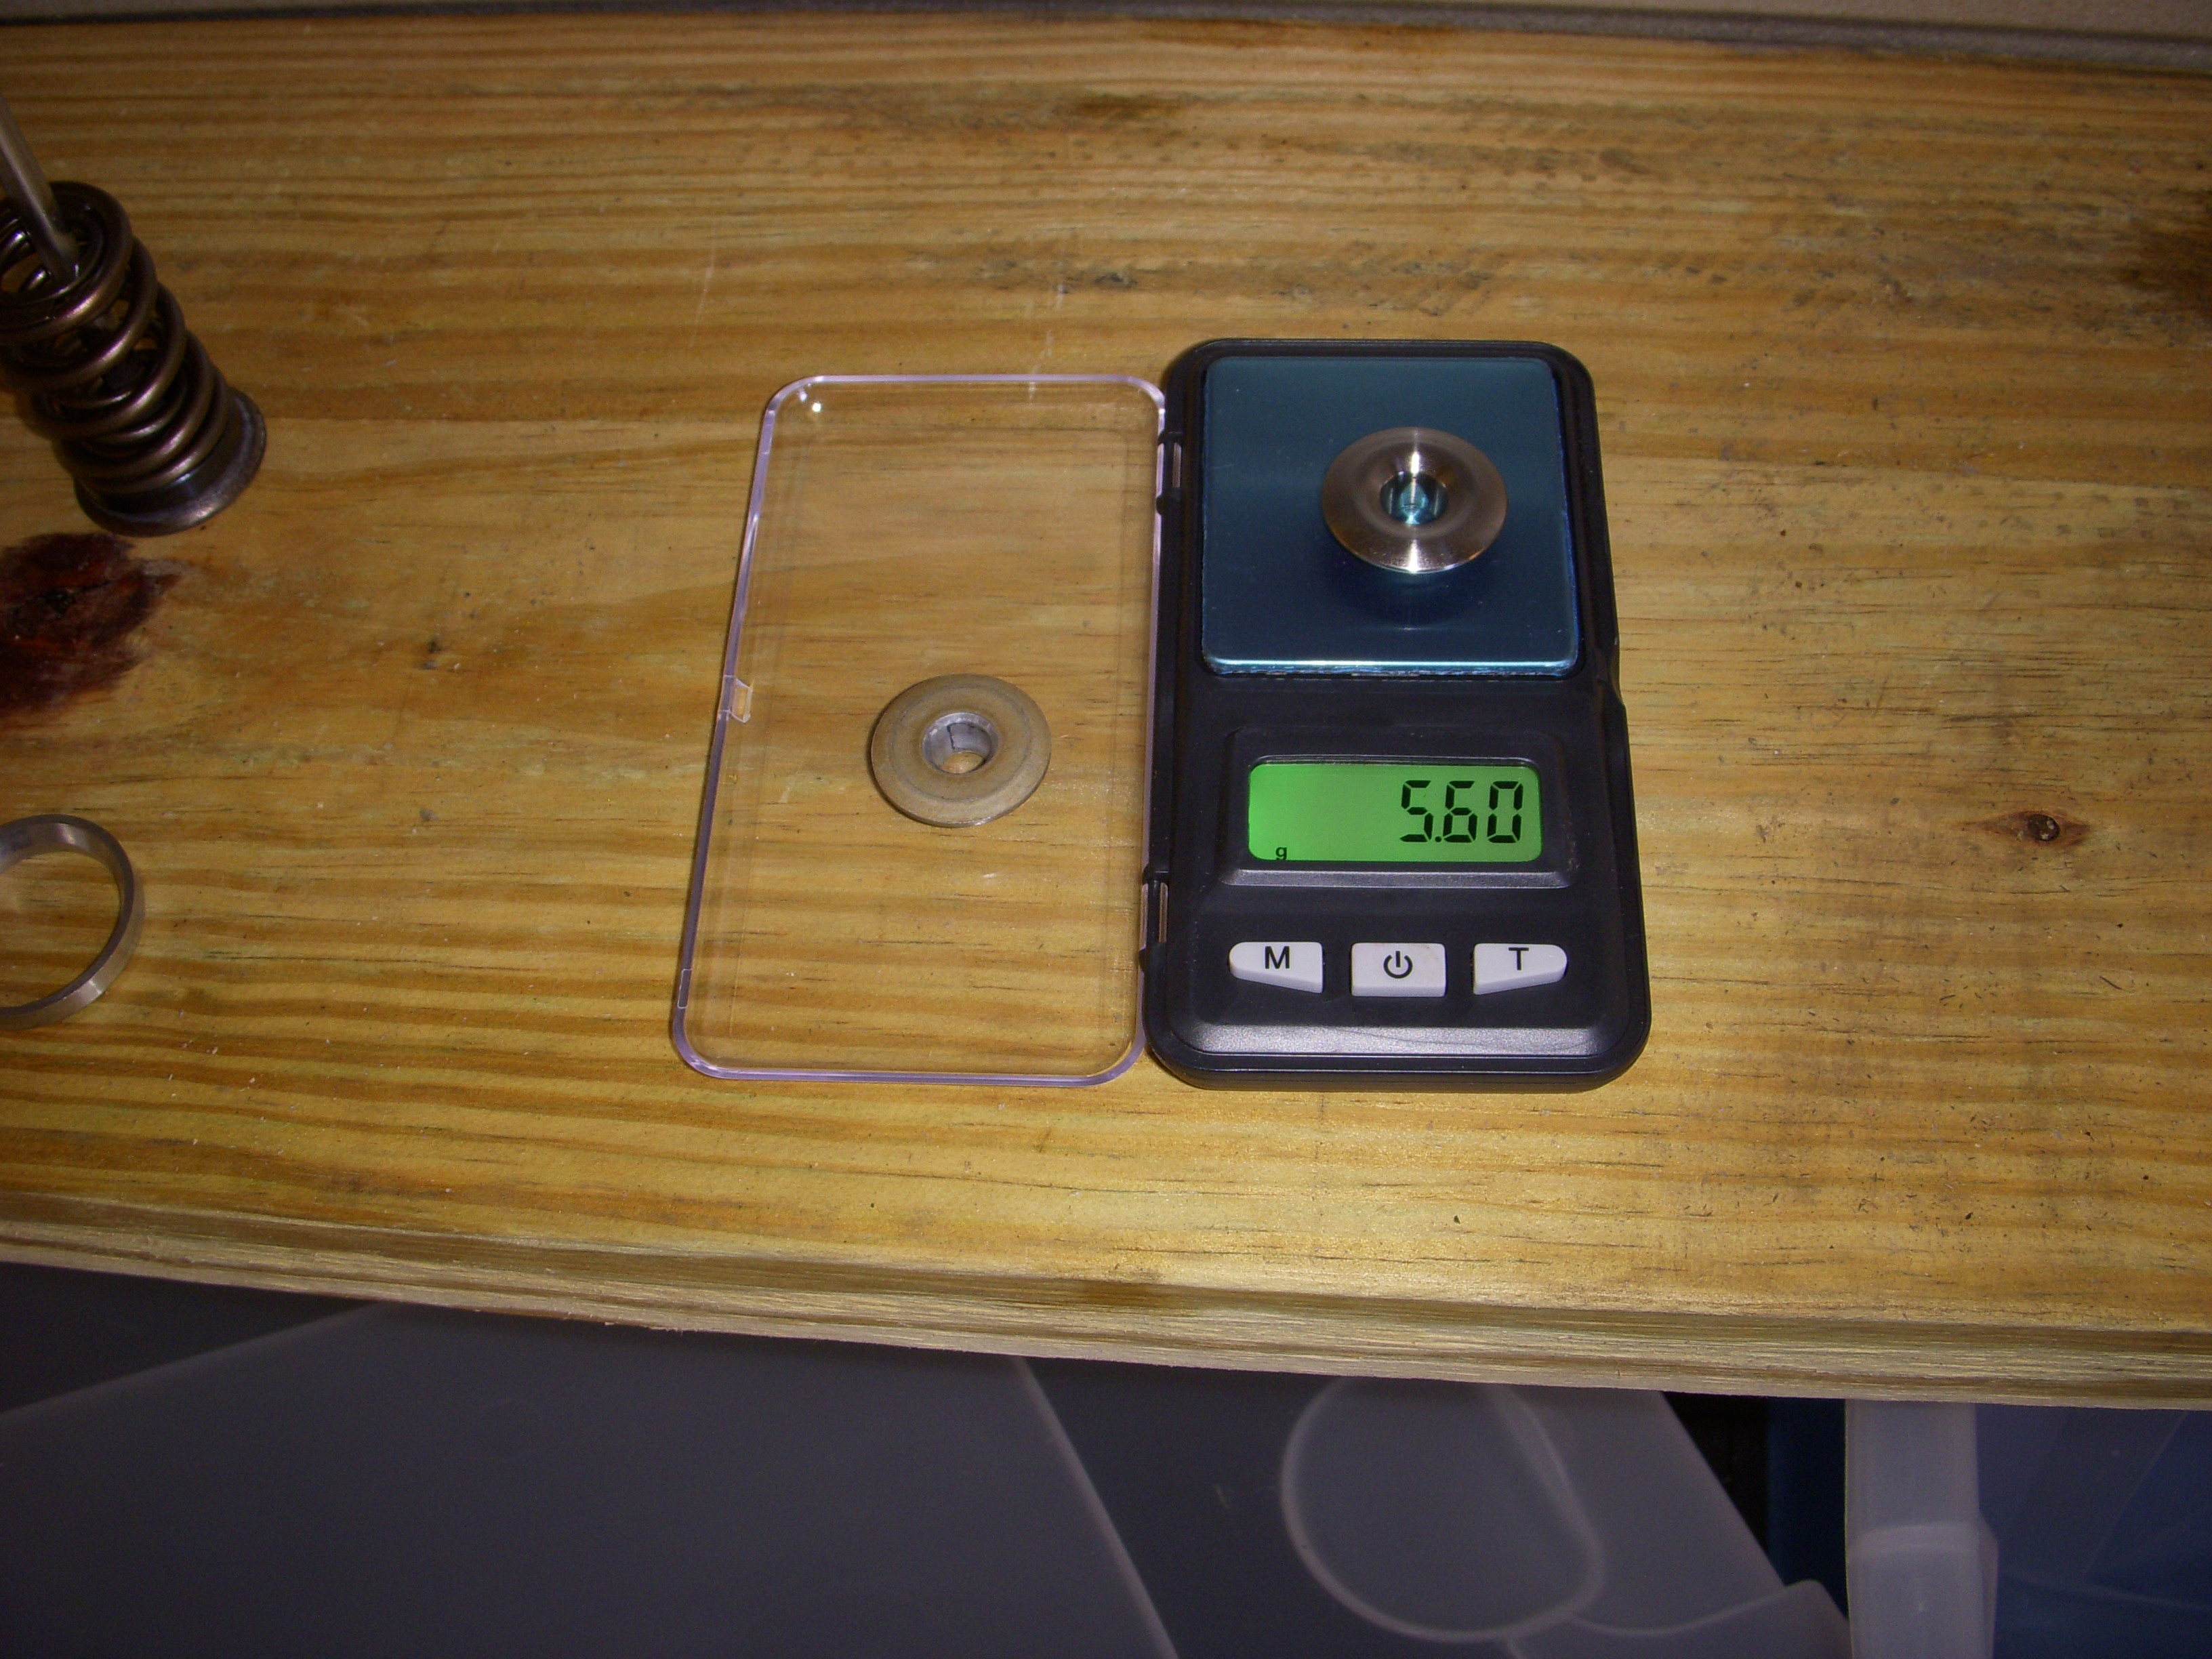
Aluminum 5.06 gms. Stock HR...
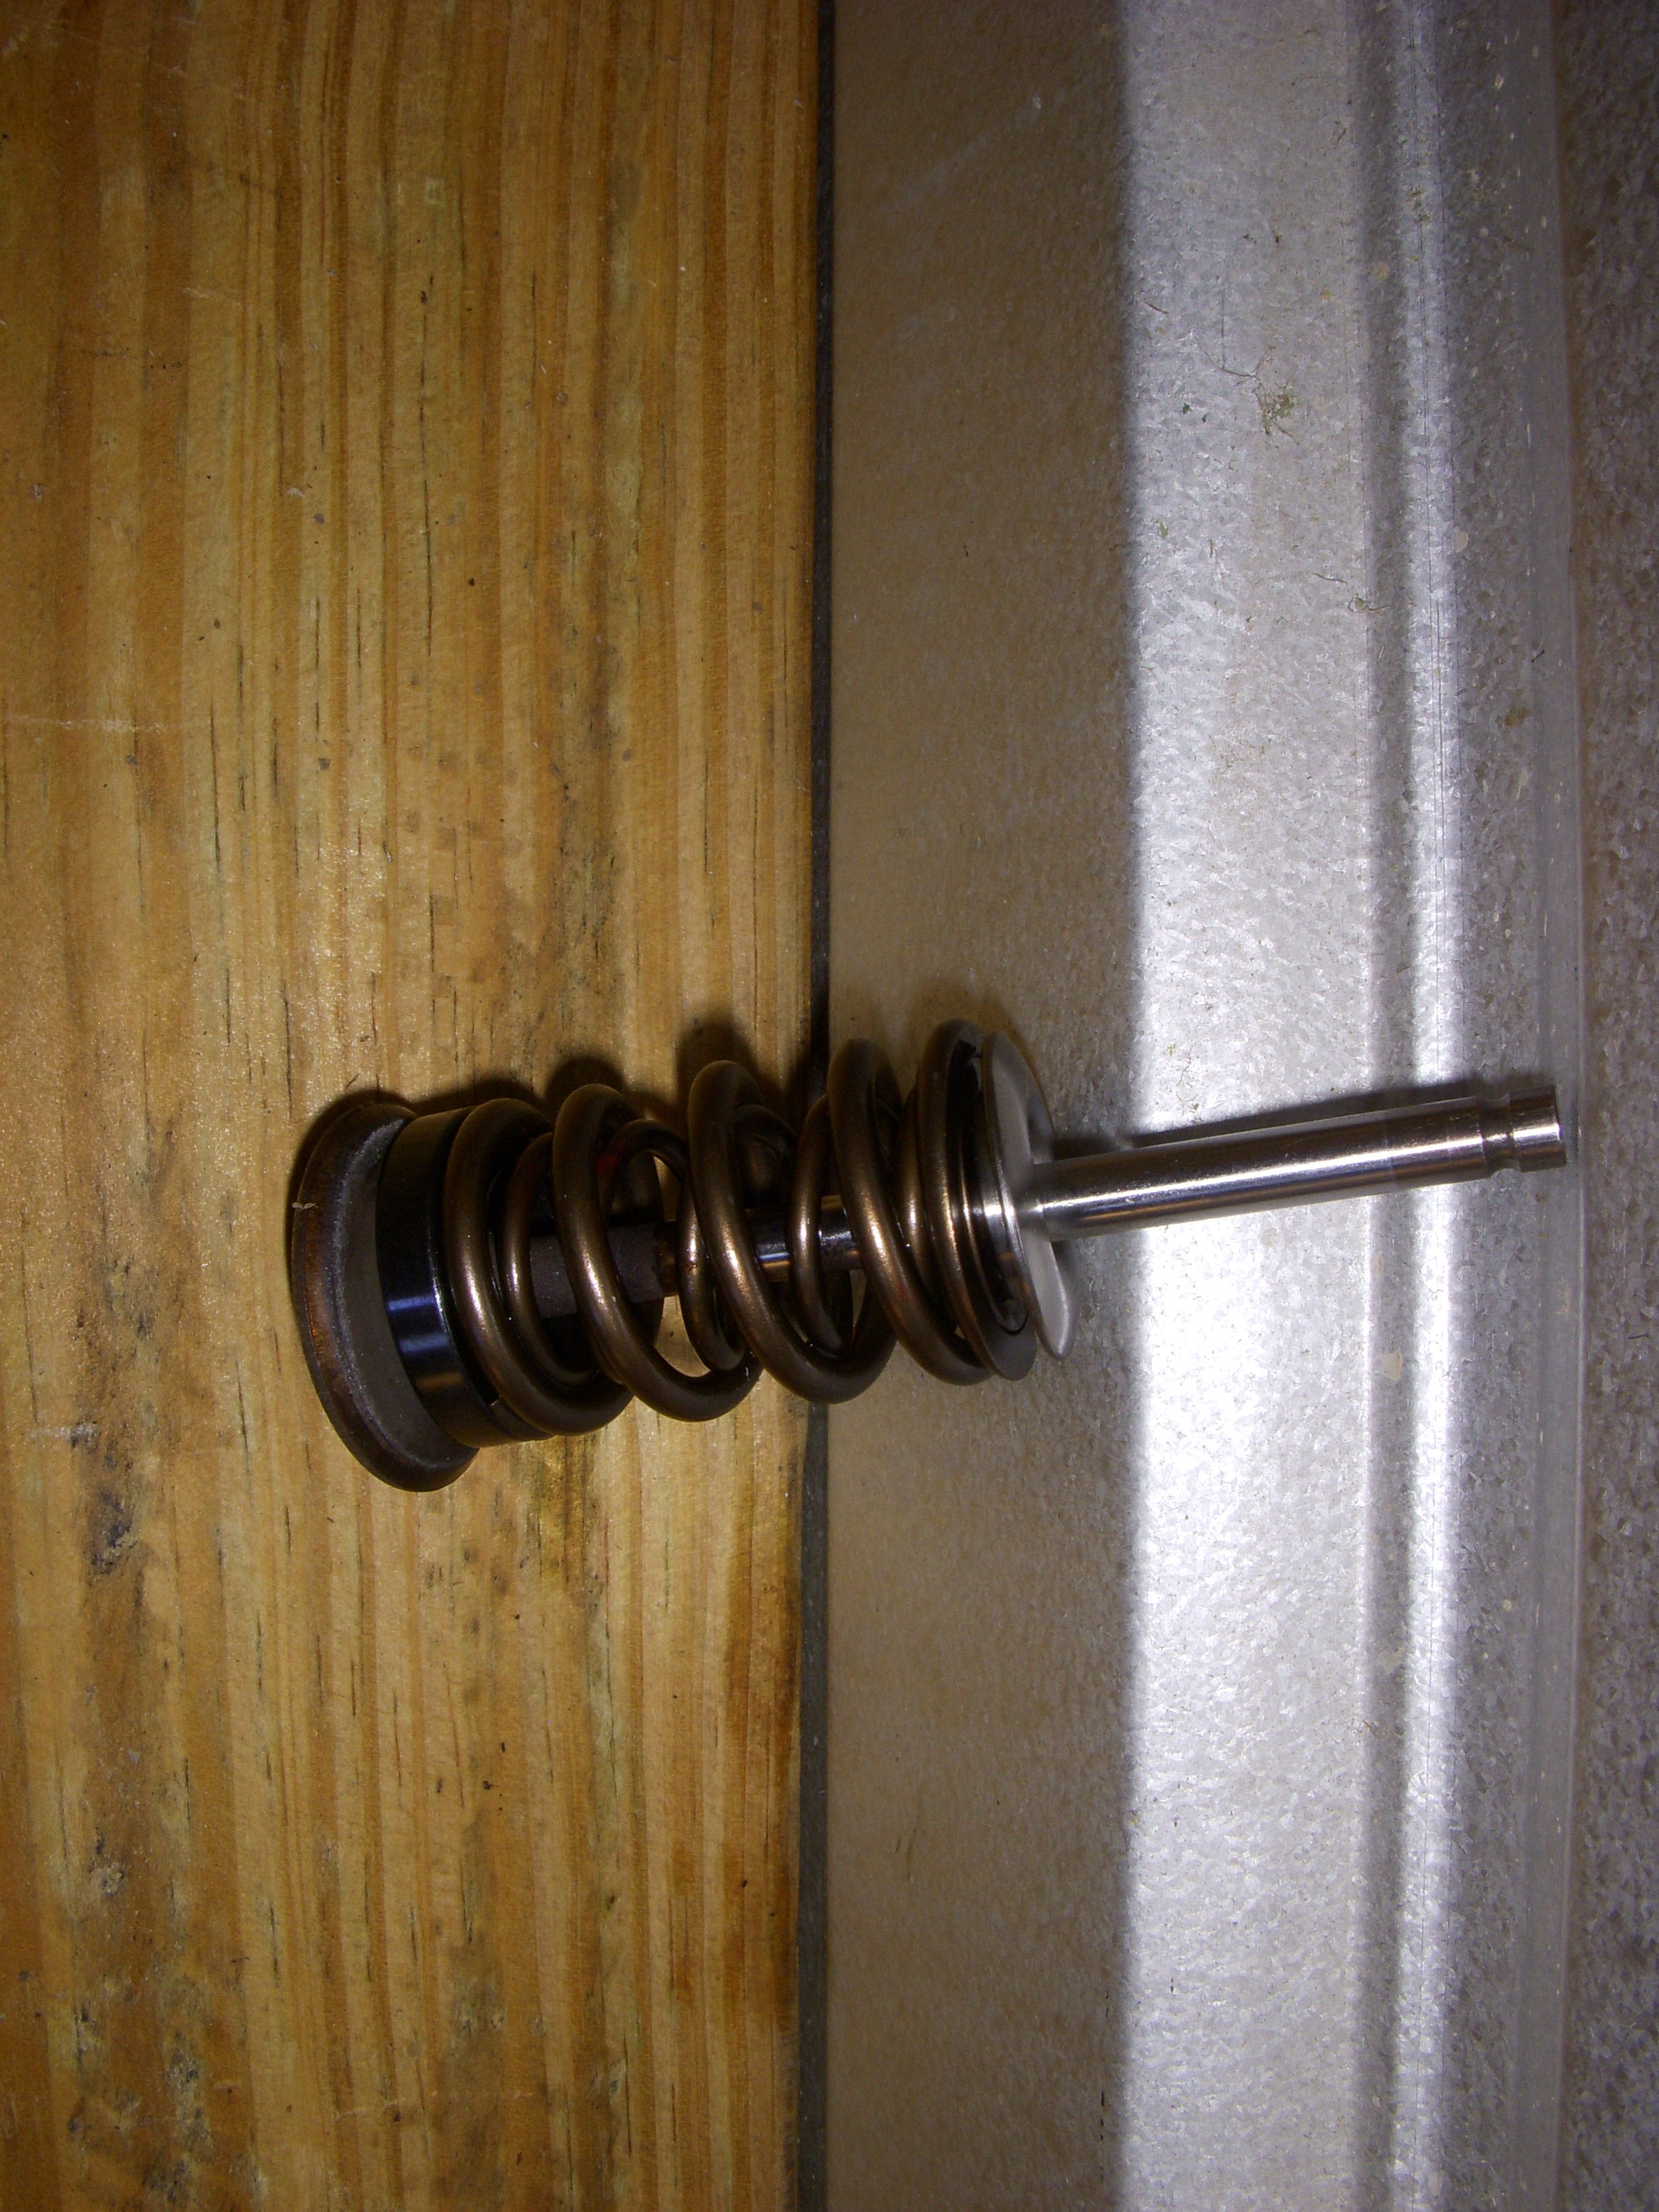
Cosworth dual-springs, +1mm Ex valve, titanium retainer ( rated to 10,500 RPM )
Stock HR spring and some weak springs to degree in the cams...

Long story short - the HR retainers are about 1/2 gram lighter than titanium ones !!


I was thinking about ordering Titanium valve retainers for my new HR heads, but there's some considerations. The new JWT cams have such high lift that the new HR valve springs must be hand-selected so they don't bind - which means I can't buy just any brand of spring. The stock HR valve retainer is aluminum, not steel, so Hmmm let's buy a digital gram scale and compare the HR aluminum retainers to the Cosworth titanium retainer weight. Went to my storage unit to look at some engine parts...

What's inside:


Titanium 5.6 gms.

Aluminum 5.06 gms. Stock HR...

Cosworth dual-springs, +1mm Ex valve, titanium retainer ( rated to 10,500 RPM )

Stock HR spring and some weak springs to degree in the cams...

Long story short - the HR retainers are about 1/2 gram lighter than titanium ones !!
Last edited by grey99max; 01-14-2017 at 01:33 PM.
11-17-2015, 07:40 PM
#1703
 11-18-2015, 08:15 AM
#1704
LandShark has Cosworth
Thread Starter
iTrader: (12)
Join Date: Jan 2004
Location: Topeka, KS
Posts: 4,327
Hey, it's been a while !! This build is taking some time to get all the parts together - the machine shop (in Manhattan KS) is still fussing over rod and main clearances, and my guy in JWT is still building the HR heads with his favorite pair of killer race cams, so I'm spending my time cleaning up engine covers, buying miscellaneous parts, and thinking about building a radical new intake manifold, since I have more spare time now....

I could also build the second engine up during the winter, but I don't have any definite plans yet, and since I don't know anything about boosting, I dunno. Now if I built another 3.5 with N/A in mind, I could put another set of modded HR heads and super JWT cams on it, along with Megasquirt 3 Pro ecu, and ITBs, and shoehorn that into a Sentra w/6spd for fun on the streets. That's within my comfort zone, since FI is totally unknown to me. So far, anyway.
Good to hear from you again - still enjoying the sunshine out there in California ??
 11-25-2015, 12:52 PM
#1705
LandShark has Cosworth
Thread Starter
iTrader: (12)
Join Date: Jan 2004
Location: Topeka, KS
Posts: 4,327
some more details
I have the front covers, coolant pipes, and the oil pan all cleaned up and kinda polished with brass wire brushes. To keep the surface looking good, I've ordered some hi-temp clear engine spray paint (cause no local stock anymore) from Amazon - maybe 1-2 weeks delivery w/holidays...
The HR heads with modded JWT cams should be here within two weeks, and I have 25 soft springs ordered (17lbs) so I can check valve timing and gaps with a timing wheel - these suckars are hard to find that match the dimensions of the stock HR springs - $90+ for 25. This will probably require new DLC valve lifters because of the cam changes and lapping in all the valves - that can eat up a couple of thousands right there - and $19 each with 24 total needed -. Because of the extreme lift of the DWT cams, the HR springs are hand-selected by JWT. No spring shims can be used because of the lift - but I will use the HR retainers because they are lighter than titanium retainers. Good enough for IMSA racers....
My machinist and I have been having words with CP pistons, because after I talked to them about oil-squirter clearances, the guy I talked to at CP ordered a clearance notch cut into each piston so I can keep the squirters. However, they somehow overlooked that the newest CP pistons have the larger intake valves cutout in the piston, so they're not all the same, but two different pistons for left and right banks. When the machinist tried to assemble the block again, he found that three pistons hit the squirters, because the new notch was on the wrong side of those three pistons. CP offered to create another set of pistons with full coatings and notched according to their most recent computer program designed for the recent piston design, but this would take another 3-4 weeks to build and ship. 
I talked to the owner of the machine shop and we agreed to have his machinist cut notches in all pistons, at both locations. The amount of aluminum removed is very light and won't affect balance, and can be done in an hour, including weighing all of them. If all else fails, CP still owes me six good pistons. The rod and main bearings required parts for three different bearing sets ( !! ) because BC rods are way loose and crank mains were kinda tight. We agreed on 2.5mm oil clearances on rods and mains, of course thrust bearings were not standard, either.
I have received the six Bosch 52lb 550cc injectors and connectors, with no drama. Whew... $270 shipped...
"it's always something"
The HR heads with modded JWT cams should be here within two weeks, and I have 25 soft springs ordered (17lbs) so I can check valve timing and gaps with a timing wheel - these suckars are hard to find that match the dimensions of the stock HR springs - $90+ for 25. This will probably require new DLC valve lifters because of the cam changes and lapping in all the valves - that can eat up a couple of thousands right there - and $19 each with 24 total needed -
. Because of the extreme lift of the DWT cams, the HR springs are hand-selected by JWT. No spring shims can be used because of the lift - but I will use the HR retainers because they are lighter than titanium retainers. Good enough for IMSA racers....My machinist and I have been having words with CP pistons, because after I talked to them about oil-squirter clearances, the guy I talked to at CP ordered a clearance notch cut into each piston so I can keep the squirters. However, they somehow overlooked that the newest CP pistons have the larger intake valves cutout in the piston, so they're not all the same, but two different pistons for left and right banks. When the machinist tried to assemble the block again, he found that three pistons hit the squirters, because the new notch was on the wrong side of those three pistons.
CP offered to create another set of pistons with full coatings and notched according to their most recent computer program designed for the recent piston design, but this would take another 3-4 weeks to build and ship. I talked to the owner of the machine shop and we agreed to have his machinist cut notches in all pistons, at both locations. The amount of aluminum removed is very light and won't affect balance, and can be done in an hour, including weighing all of them. If all else fails, CP still owes me six good pistons. The rod and main bearings required parts for three different bearing sets ( !! ) because BC rods are way loose and crank mains were kinda tight. We agreed on 2.5mm oil clearances on rods and mains, of course thrust bearings were not standard, either.
I have received the six Bosch 52lb 550cc injectors and connectors, with no drama. Whew... $270 shipped...
"it's always something"
Last edited by grey99max; 11-25-2015 at 01:01 PM.
11-30-2015, 09:44 PM
#1707
Hey, it's been a while !! This build is taking some time to get all the parts together - the machine shop (in Manhattan KS) is still fussing over rod and main clearances, and my guy in JWT is still building the HR heads with his favorite pair of killer race cams, so I'm spending my time cleaning up engine covers, buying miscellaneous parts, and thinking about building a radical new intake manifold, since I have more spare time now....
I could also build the second engine up during the winter, but I don't have any definite plans yet, and since I don't know anything about boosting, I dunno. Now if I built another 3.5 with N/A in mind, I could put another set of modded HR heads and super JWT cams on it, along with Megasquirt 3 Pro ecu, and ITBs, and shoehorn that into a Sentra w/6spd for fun on the streets. That's within my comfort zone, since FI is totally unknown to me. So far, anyway.
Good to hear from you again - still enjoying the sunshine out there in California ??
Glad to see you're building this awesome motor. Can't wait to see it in action!
Awesome that's good news!
12-01-2015, 07:31 PM
#1708
LandShark has Cosworth
Thread Starter
iTrader: (12)
Join Date: Jan 2004
Location: Topeka, KS
Posts: 4,327
Woops
I should have said that "the short block is completely finished", since the HR heads and cams are still in California. Lots of work left after the heads come back - lots of work..
Say, could you run over to JWT in El Cajon and check on the heads for me?
Just kidding... but they DO nissans there, big time...
Say, could you run over to JWT in El Cajon and check on the heads for me?
Just kidding... but they DO nissans there, big time...
12-02-2015, 05:31 PM
#1709
I should have said that "the short block is completely finished", since the HR heads and cams are still in California. Lots of work left after the heads come back - lots of work..
Say, could you run over to JWT in El Cajon and check on the heads for me?
Just kidding... but they DO nissans there, big time...
Say, could you run over to JWT in El Cajon and check on the heads for me?
Just kidding... but they DO nissans there, big time...
They're only about 100 miles away, I just looked. That's pretty close.
Those heads and cams are going to be awesome on that shortblock you had built.
12-03-2015, 07:25 AM
#1710
LandShark has Cosworth
Thread Starter
iTrader: (12)
Join Date: Jan 2004
Location: Topeka, KS
Posts: 4,327
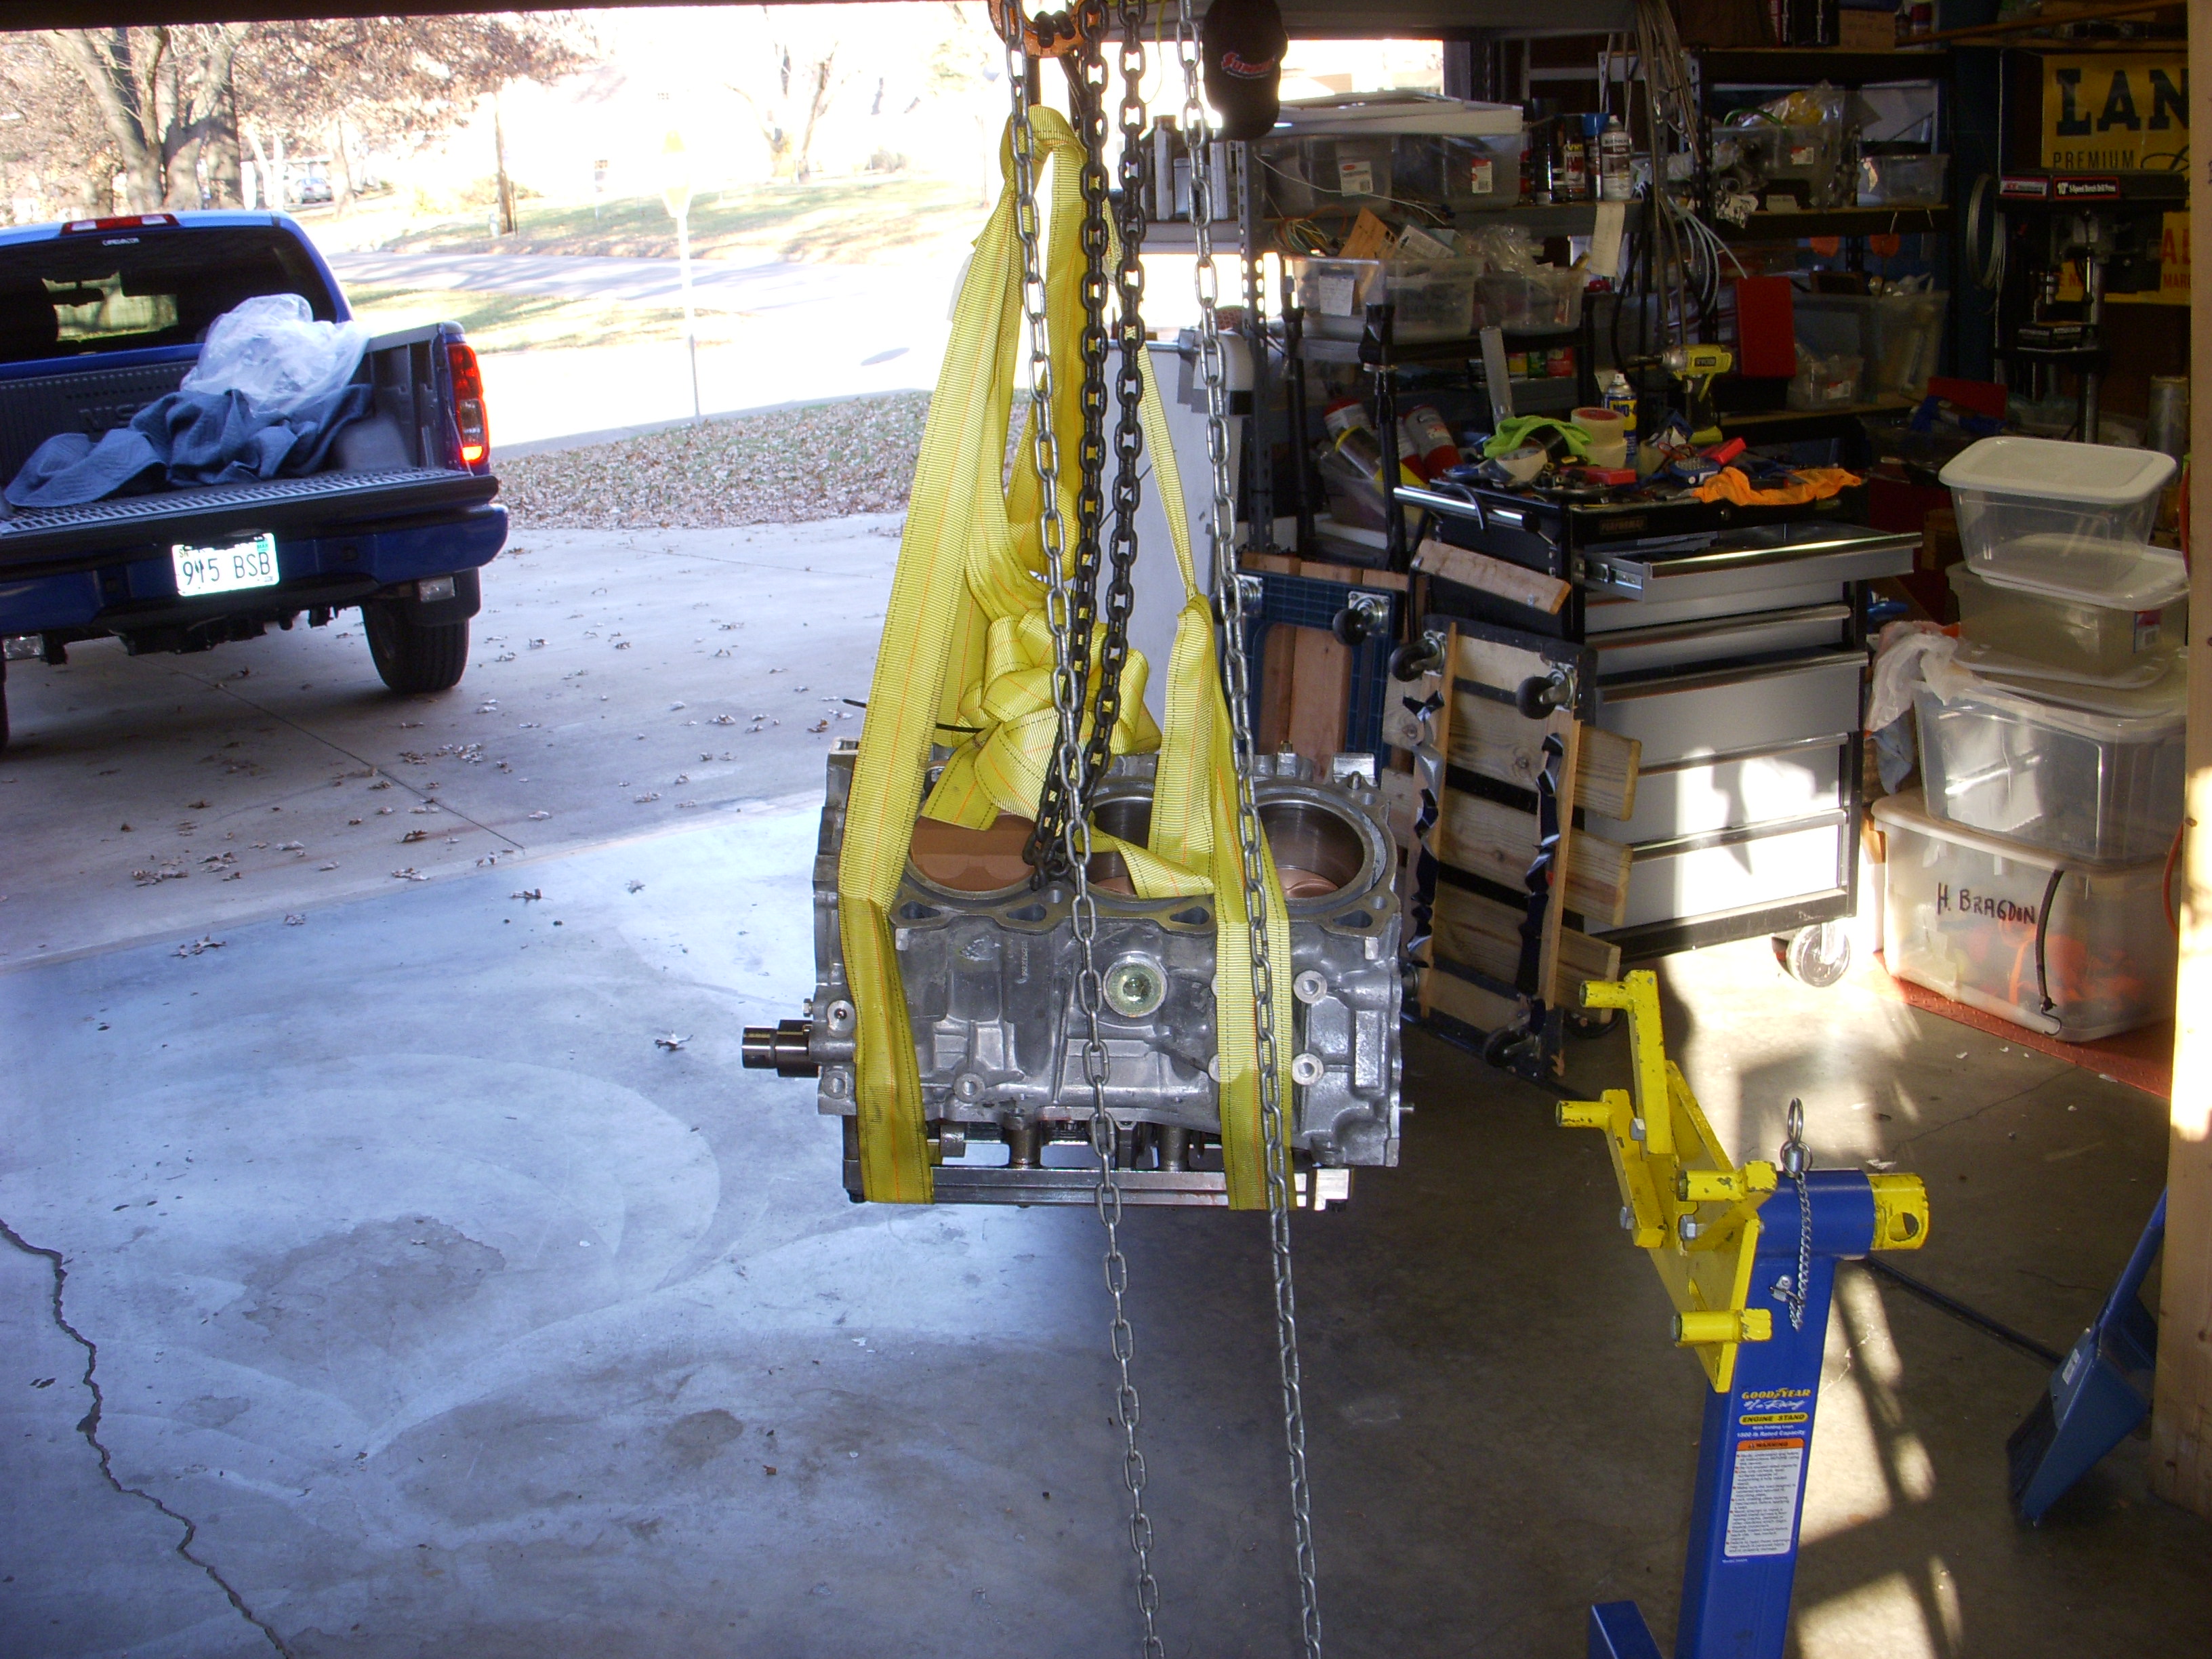
I'm going to pick up the short block today, from Precision Machine in Manhattan KS, and mount it on the engine stand. Waiting for heads, still, but they will go back to the machine shop to get decked, then back home. It's a PITA to have machine work done 60 miles away, but no competent shops locally. Well, maybe decking and cleaning the heads, but I only have engine work done by racers - they understand what's important.
When I get the heads back, I'll lap in all the HR valves, install the 17lb valve springs, re-install the ARP head studs, bolt the heads down on used gaskets, install the rear timing cover, TDC the block, install the cams, install all the timing gears, tensioners, chains, water and oil pumps, and then start with mounting the degree wheel and begin rotating the crank while checking valve clearances and valve travel (especially intake lobes) with a depth micrometer, and verifying the position of each cam. This might take a couple of days !! When finished, I'll know how many DLC lifters i need for each head, and order them. Then I can remove the chains, take the heads off the block, install the hand-picked HR springs, install the final set of lifters, install the heads again, and do final rotations of the engine while measuring individual valve travel to make sure there that no valve spring is fully compressed. Then, check each cylinder for valve-piston clearance through intake and exhaust cycles. If everything passes the tests, then it's time to remove the heads and bolt them down on new HR gaskets and assemble the timing gears and chains for the final time.
I'm sure this is not a complete or accurate task list, but the last time I assembled a race engine was 2010. After it runs on the 1999 ECU and is broken in, I'll order the Megasquirt MS3-Pro ECU and cables and work on getting the engine to run on Megasquirt. Hear that, Aaron?
I'm not going to spray this engine until I get it running well N/A, and maybe not ever, depending on WHP on ITBs...
12-03-2015, 03:39 PM
#1711

I'm pretty sure you mentioned something about hp earlier in the thread. It was a while back and I don't remember, but what hp range are you hoping to make? Also, what hp number would you be thrilled with and what number would you be disappointed in? Much respect to the dedication and hard work you put into all of your builds. It's inspiring to say the least.
You mentioned something a while back about maybe trying a turbo setup. Is that something you're still considering? Is that being considered for this motor or a different motor?? If you do spray this motor, what size shot are you thinking? I know I've asked a lot of questions but I've been reading all the updates you post and haven't had the time to ask you any questions.
You mentioned something a while back about maybe trying a turbo setup. Is that something you're still considering? Is that being considered for this motor or a different motor?? If you do spray this motor, what size shot are you thinking? I know I've asked a lot of questions but I've been reading all the updates you post and haven't had the time to ask you any questions.
12-03-2015, 06:30 PM
#1712
LandShark has Cosworth
Thread Starter
iTrader: (12)
Join Date: Jan 2004
Location: Topeka, KS
Posts: 4,327
I'm pretty sure you mentioned something about hp earlier in the thread. It was a while back and I don't remember, but what hp range are you hoping to make? Also, what hp number would you be thrilled with and what number would you be disappointed in? Much respect to the dedication and hard work you put into all of your builds. It's inspiring to say the least.
You mentioned something a while back about maybe trying a turbo setup. Is that something you're still considering? Is that being considered for this motor or a different motor?? If you do spray this motor, what size shot are you thinking? I know I've asked a lot of questions but I've been reading all the updates you post and haven't had the time to ask you any questions.
You mentioned something a while back about maybe trying a turbo setup. Is that something you're still considering? Is that being considered for this motor or a different motor?? If you do spray this motor, what size shot are you thinking? I know I've asked a lot of questions but I've been reading all the updates you post and haven't had the time to ask you any questions.
Any HP expectations are a guess, but I know that a 3.5L can produce 350 WHP with ported heads and lesser JWT cams, and with ITBs it's 370+ up to 400 WHP for the IMSA N/A racers. Once I get to the point where the MS3-Pro ECU is installed and working, after all the engine is assembled and running, then I can use the VE tuning to install and use ITBs - then we can talk big NA WHP. Probably new long-tube headers....
Considering that I'm going to continue to use the 3.0 timing gears and chains, I'd be shickled titless to reach 350 WHP at 8,000. Of course I expect the engine to be running later in the spring, because there is a boatload of custom work still to be done, including stuff I don't know about yet - like the fact I discovered earlier tonight - the '99 oil pan won't fit on the block anymore
- contact with the monster mains girdle required for the BC stroker. I think I can grind away the bumps and ridges in the oil pan, but that's for tomorrow. Nitrous, maybe the week (just kidding) after that. 700+ WHP would be pretty exciting - good for grudge racing, for sure. No nitrous until I'm running on the Megasquirt ECU... Since I have another 3.5 block that used some nitrous to run mid to low 12s, I thought I might install the 11:1 CP pistons, Carrillo rods, and balanced crank that just came out of the newest engine into the older block, along with Cosworth heads and cams... I don't know anything about "Turbo" but I do know people that do. Subbing 8.5:1 pistons into the pile of spare parts would let my machine shop create a dandy turbo-friendly engine, I think. Hmmmm, maybe I should do that then trade the built engine for some really special headers - how about it, Tom??? I really want individual tubes out of the fenders, like Kamakazie and his "elcam" on Street Outlaws. So badazz..
Some fresh-today photos to follow....
.
.
Last edited by grey99max; 12-03-2015 at 06:33 PM.
12-03-2015, 06:51 PM
#1713
LandShark has Cosworth
Thread Starter
iTrader: (12)
Join Date: Jan 2004
Location: Topeka, KS
Posts: 4,327
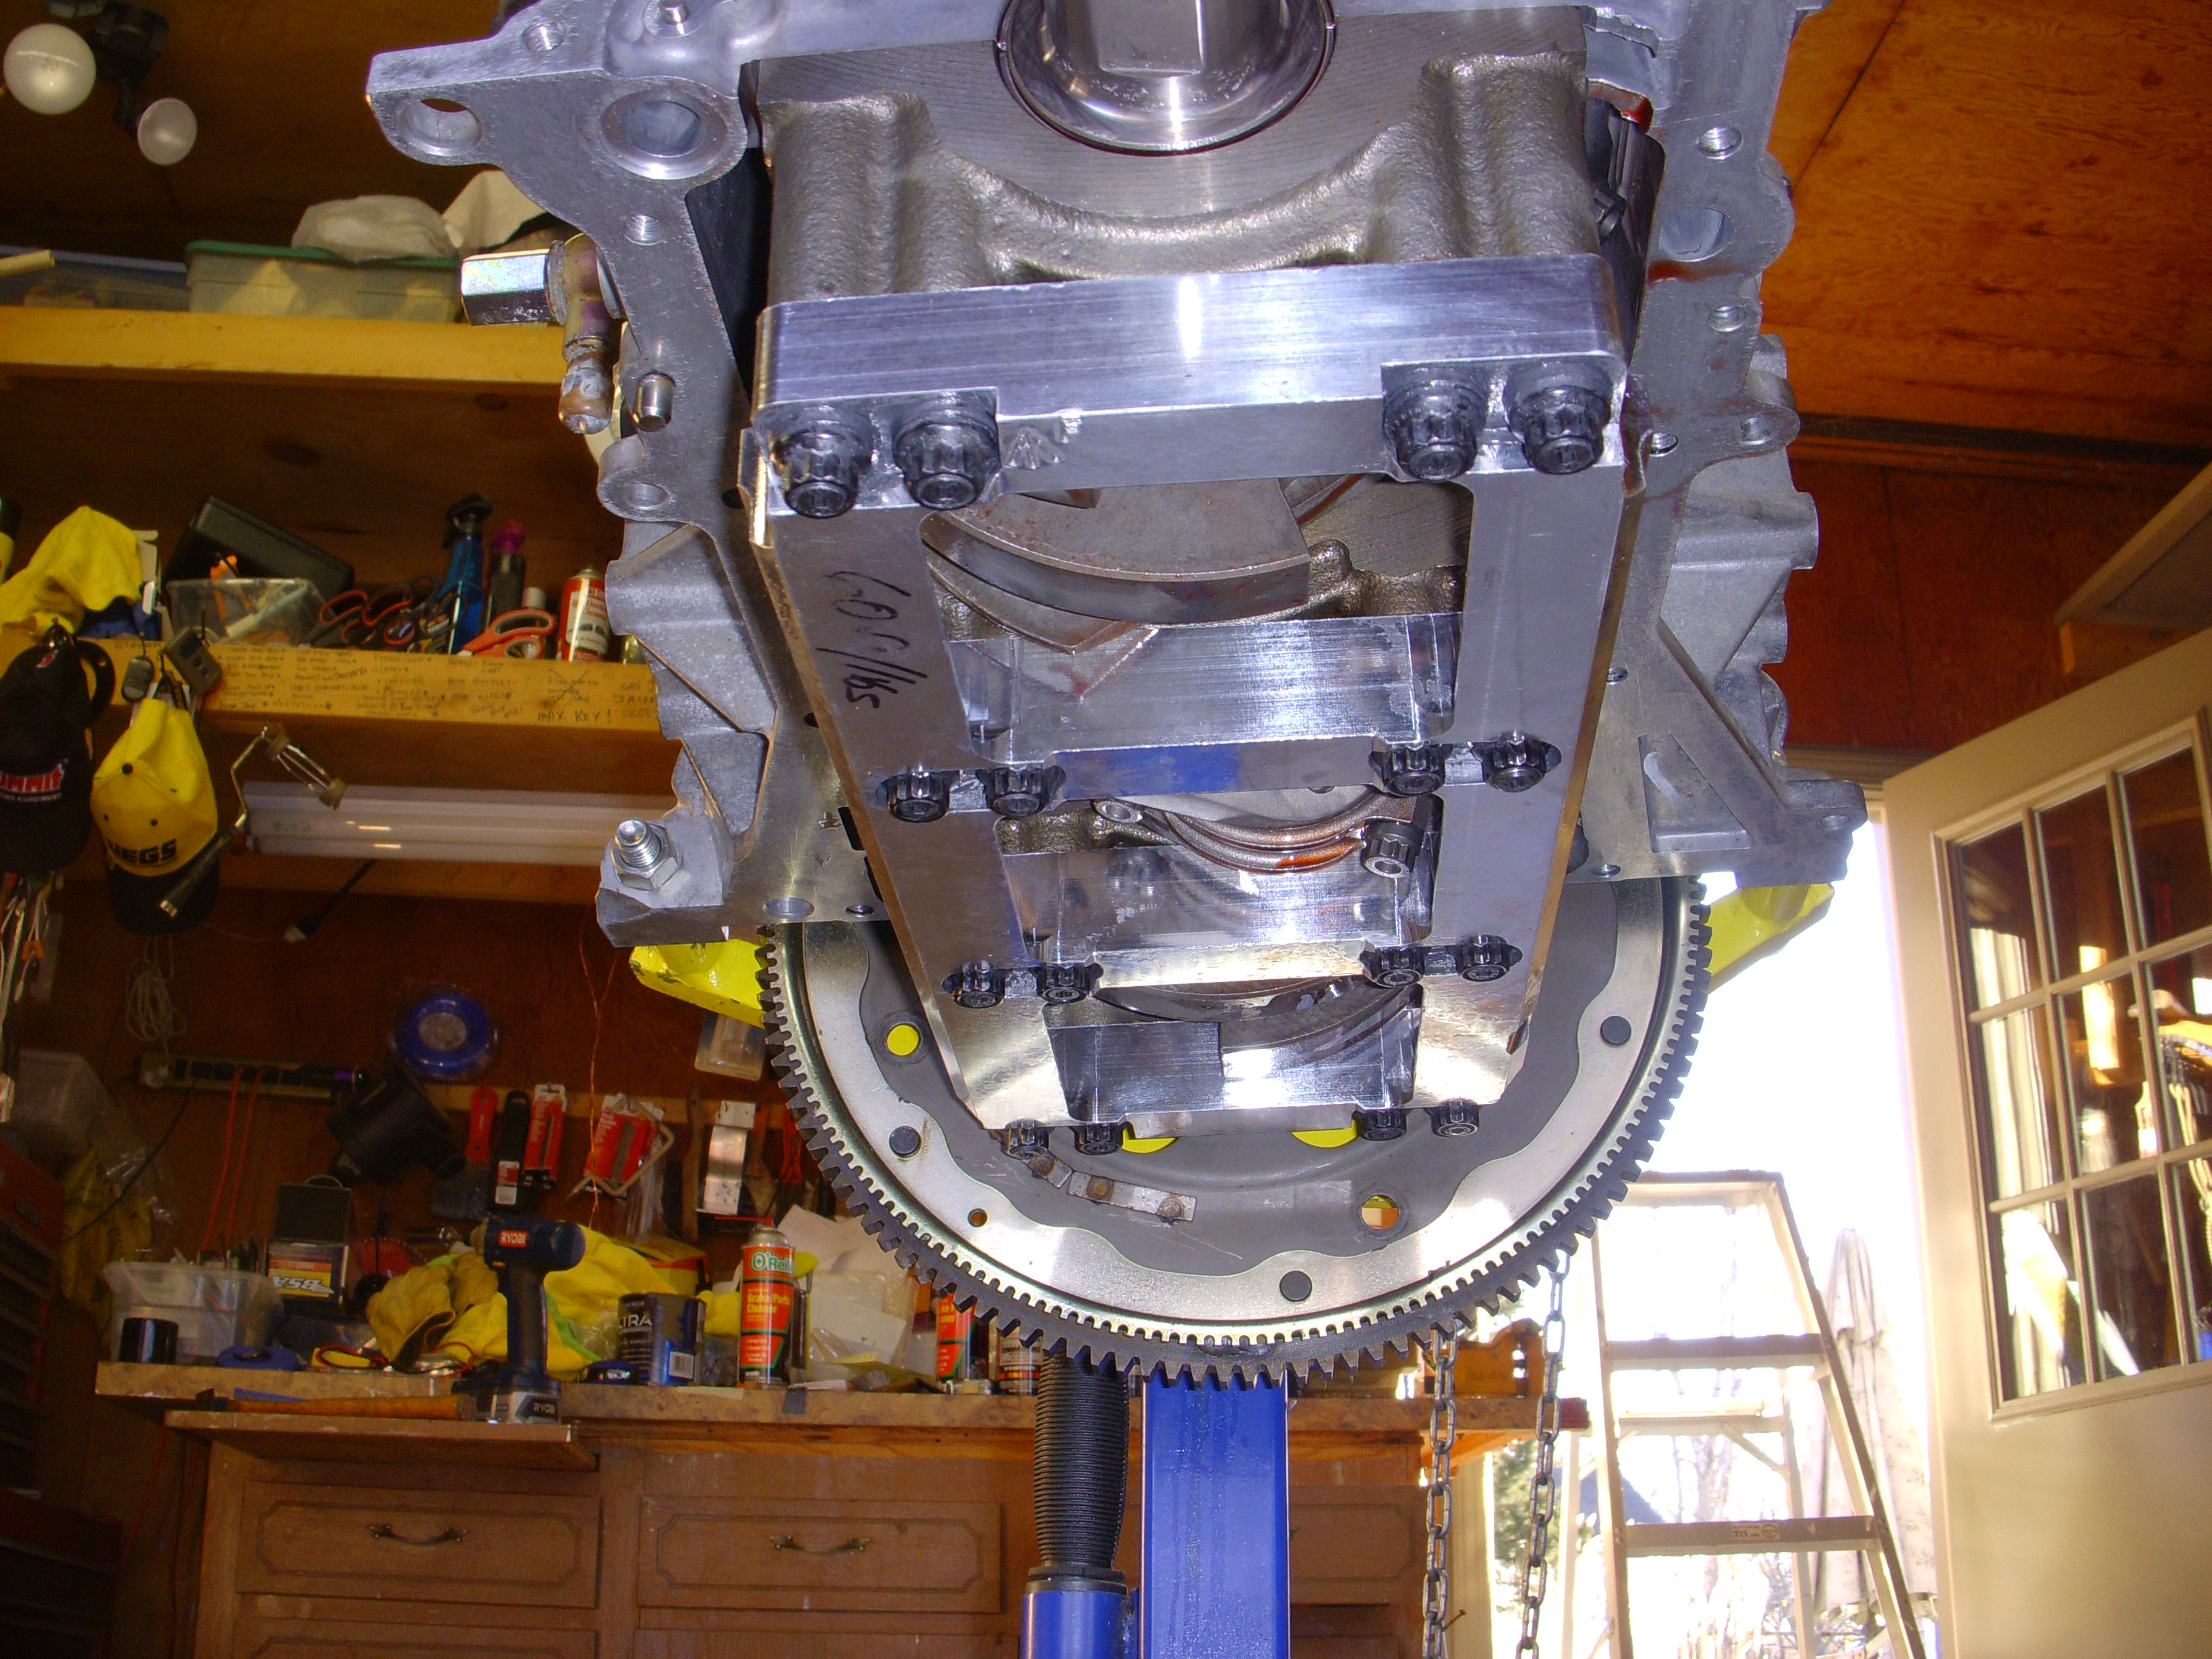
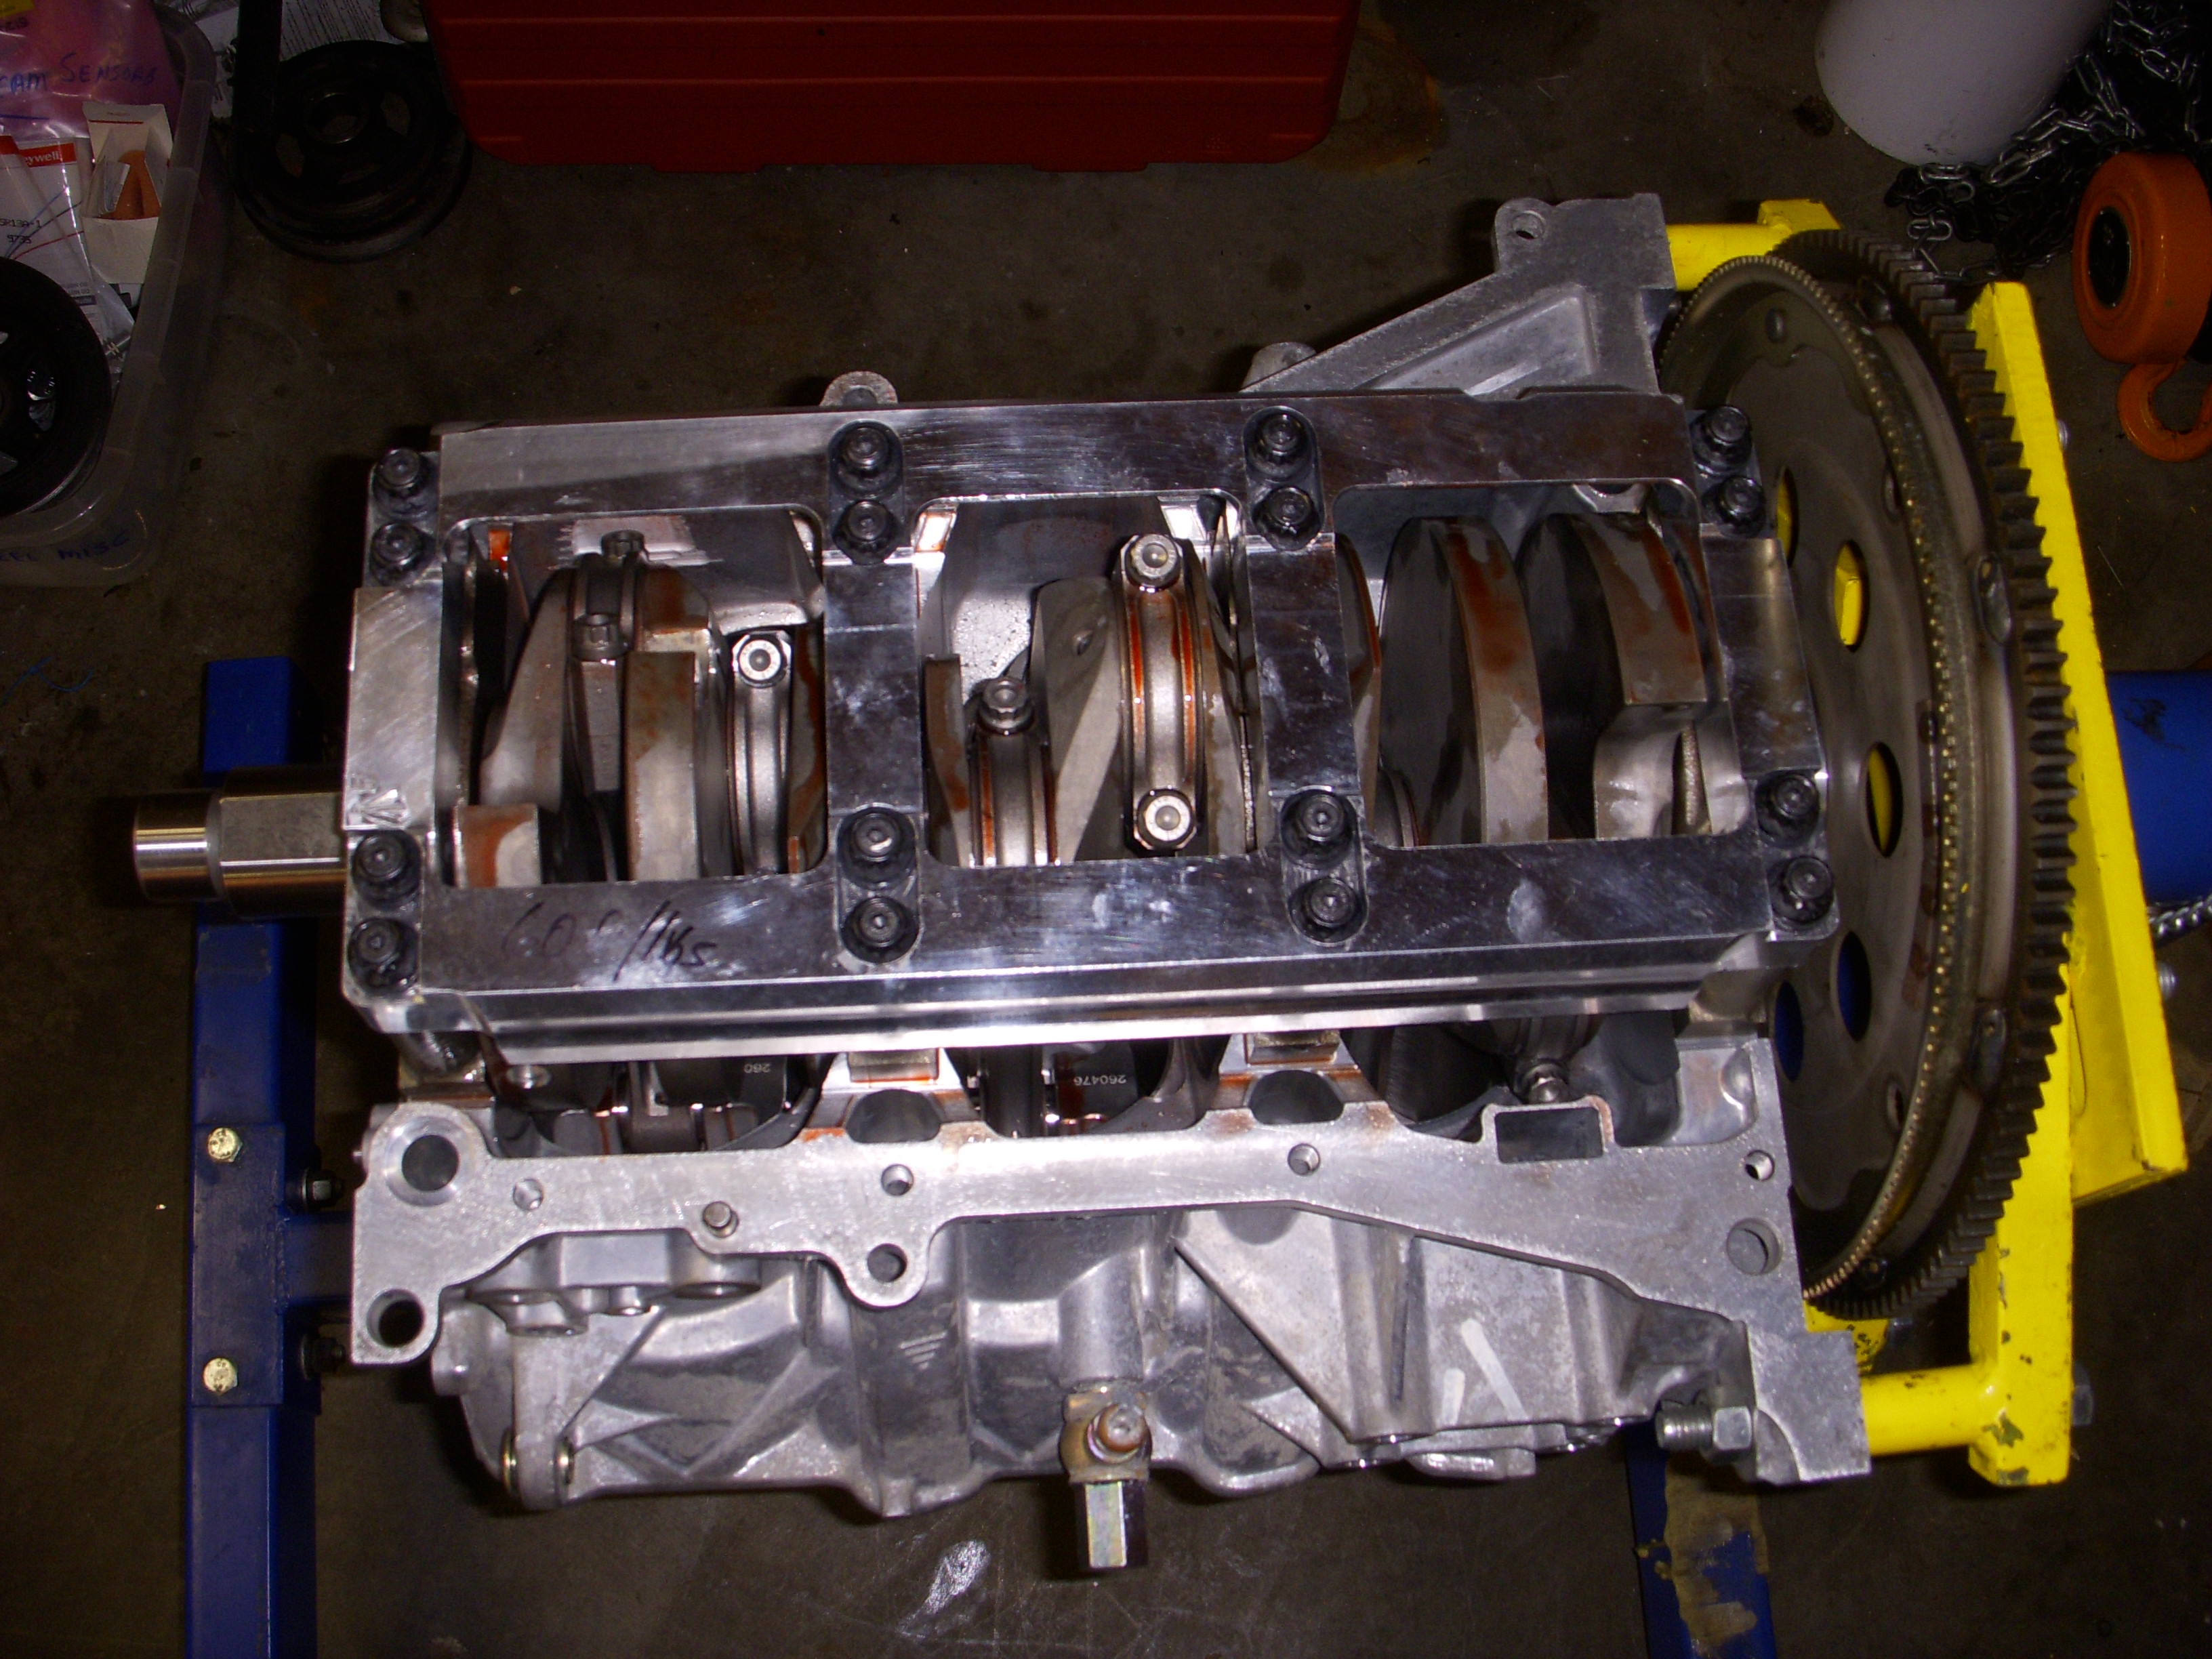
Fresh from the machine shop, some photos, in no particular order.

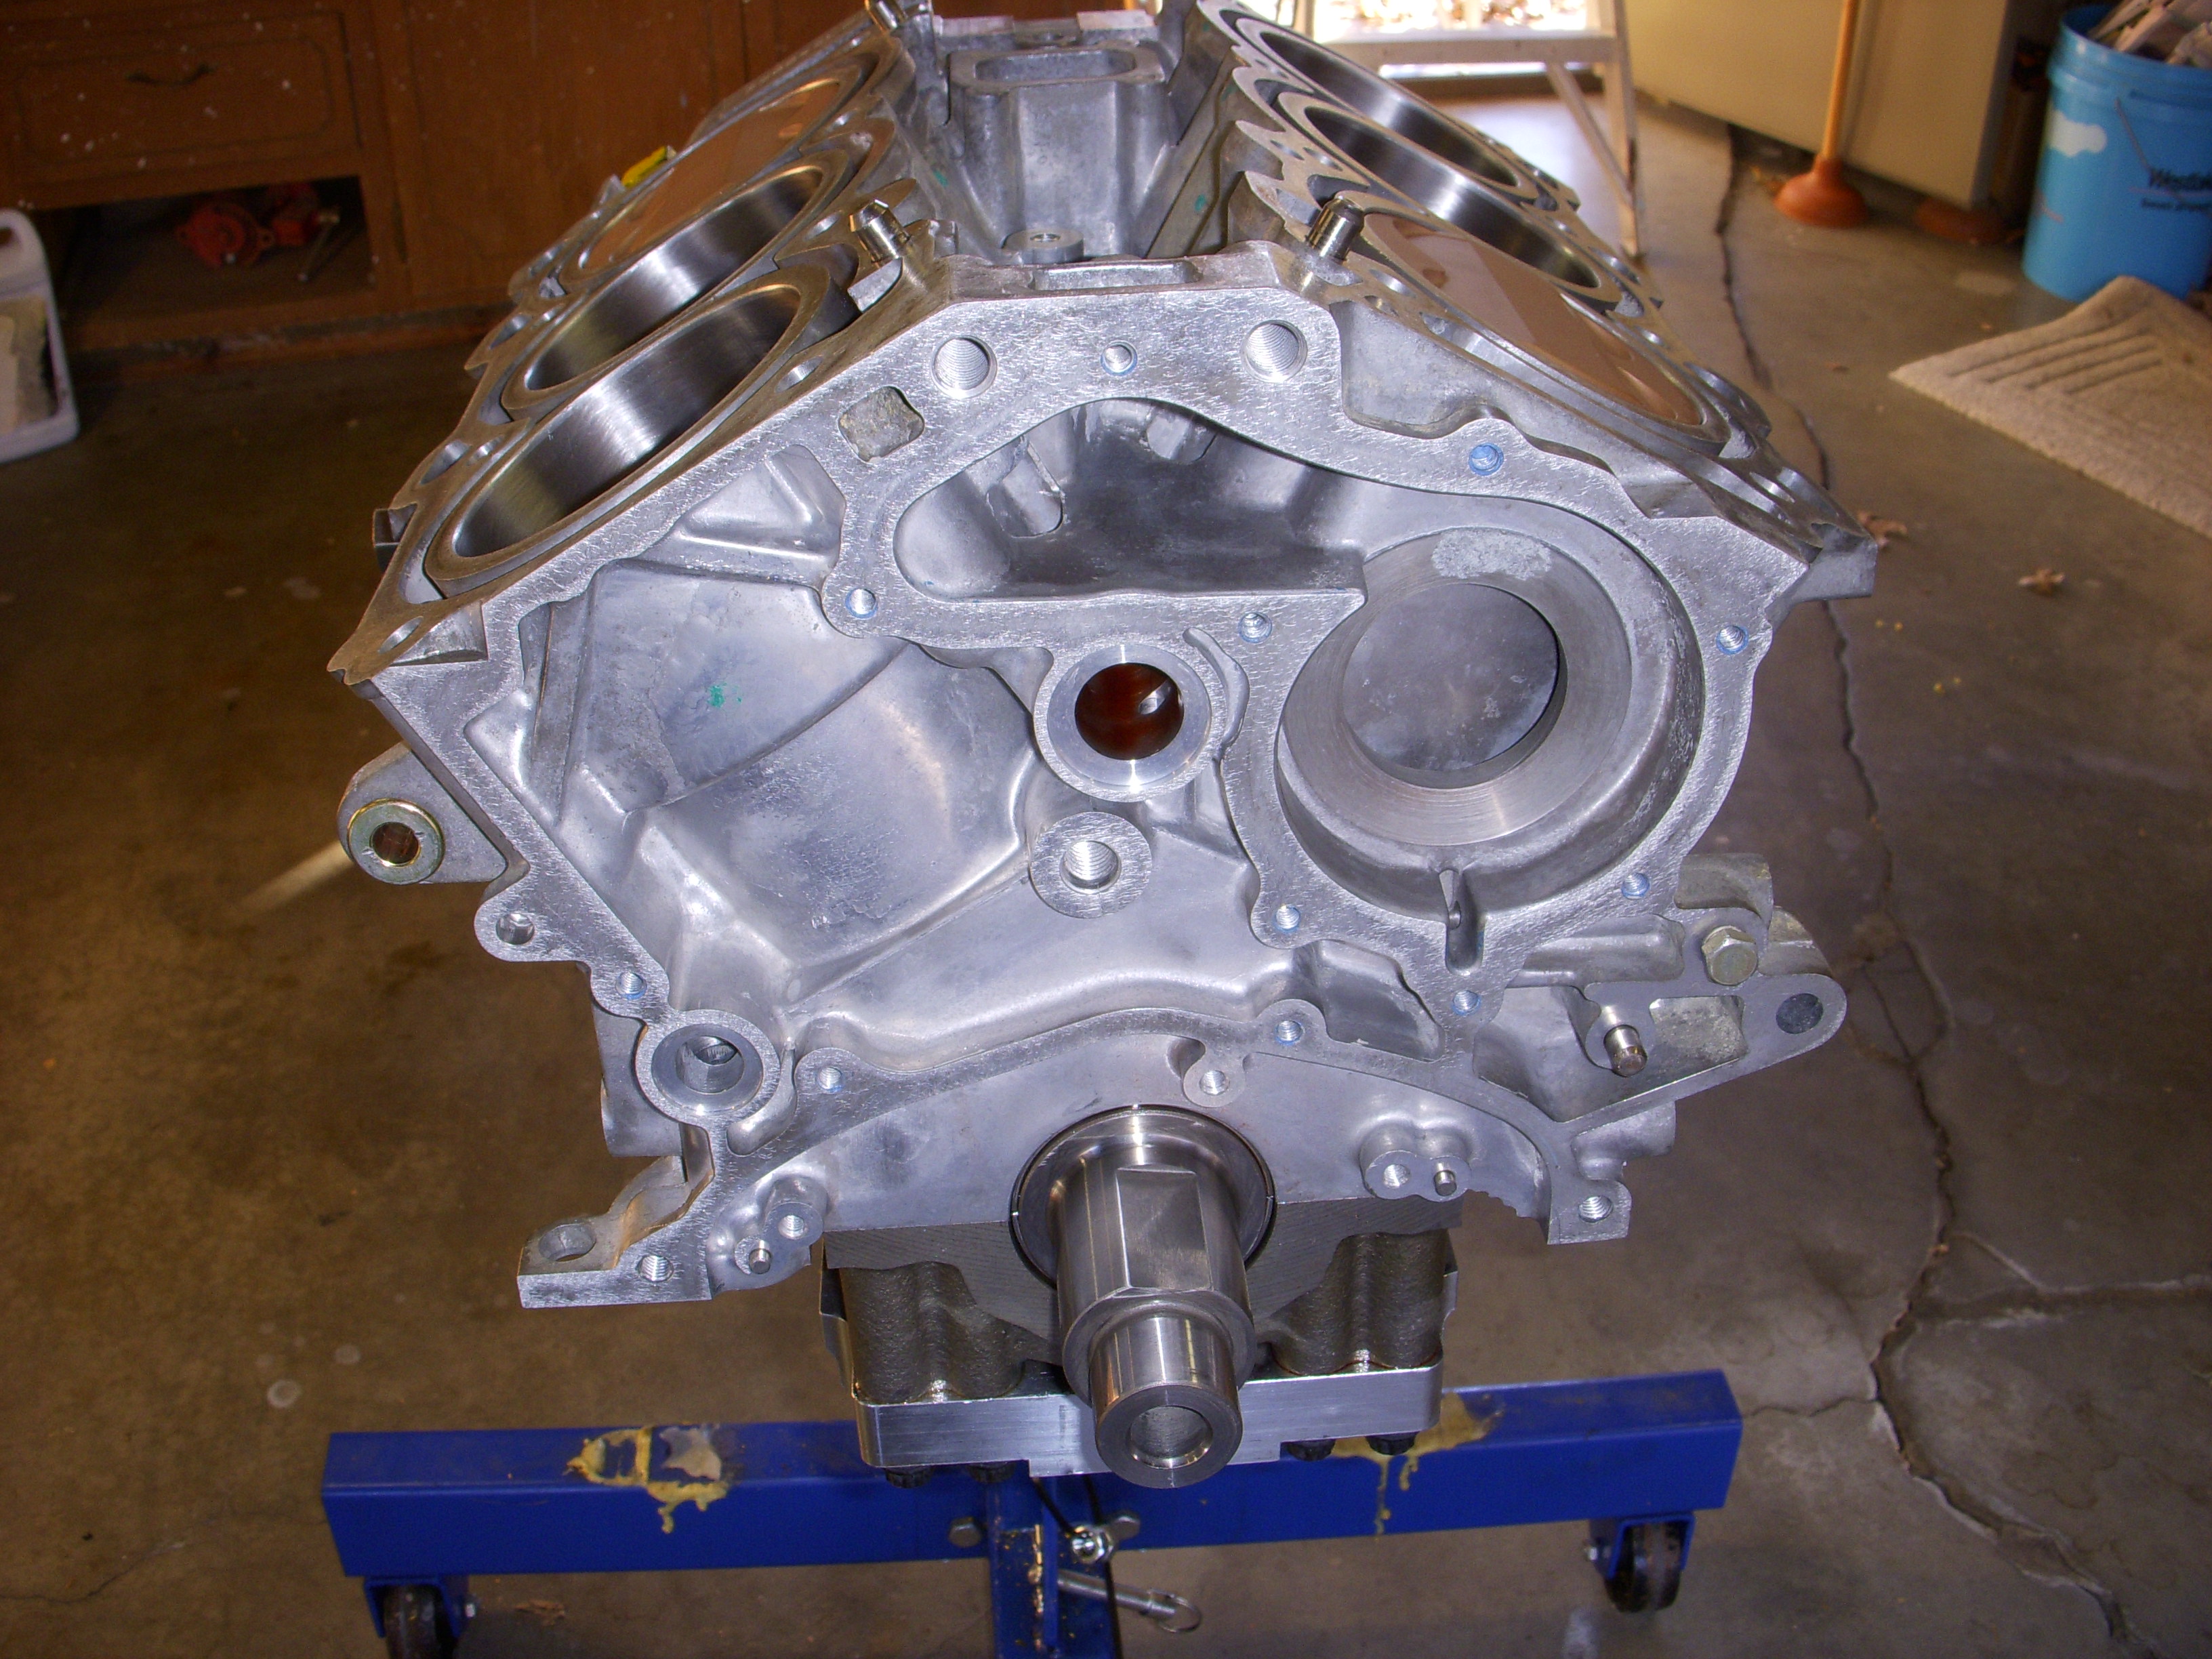
This girdle is for when the fat lady sings:
A good place to hang around:
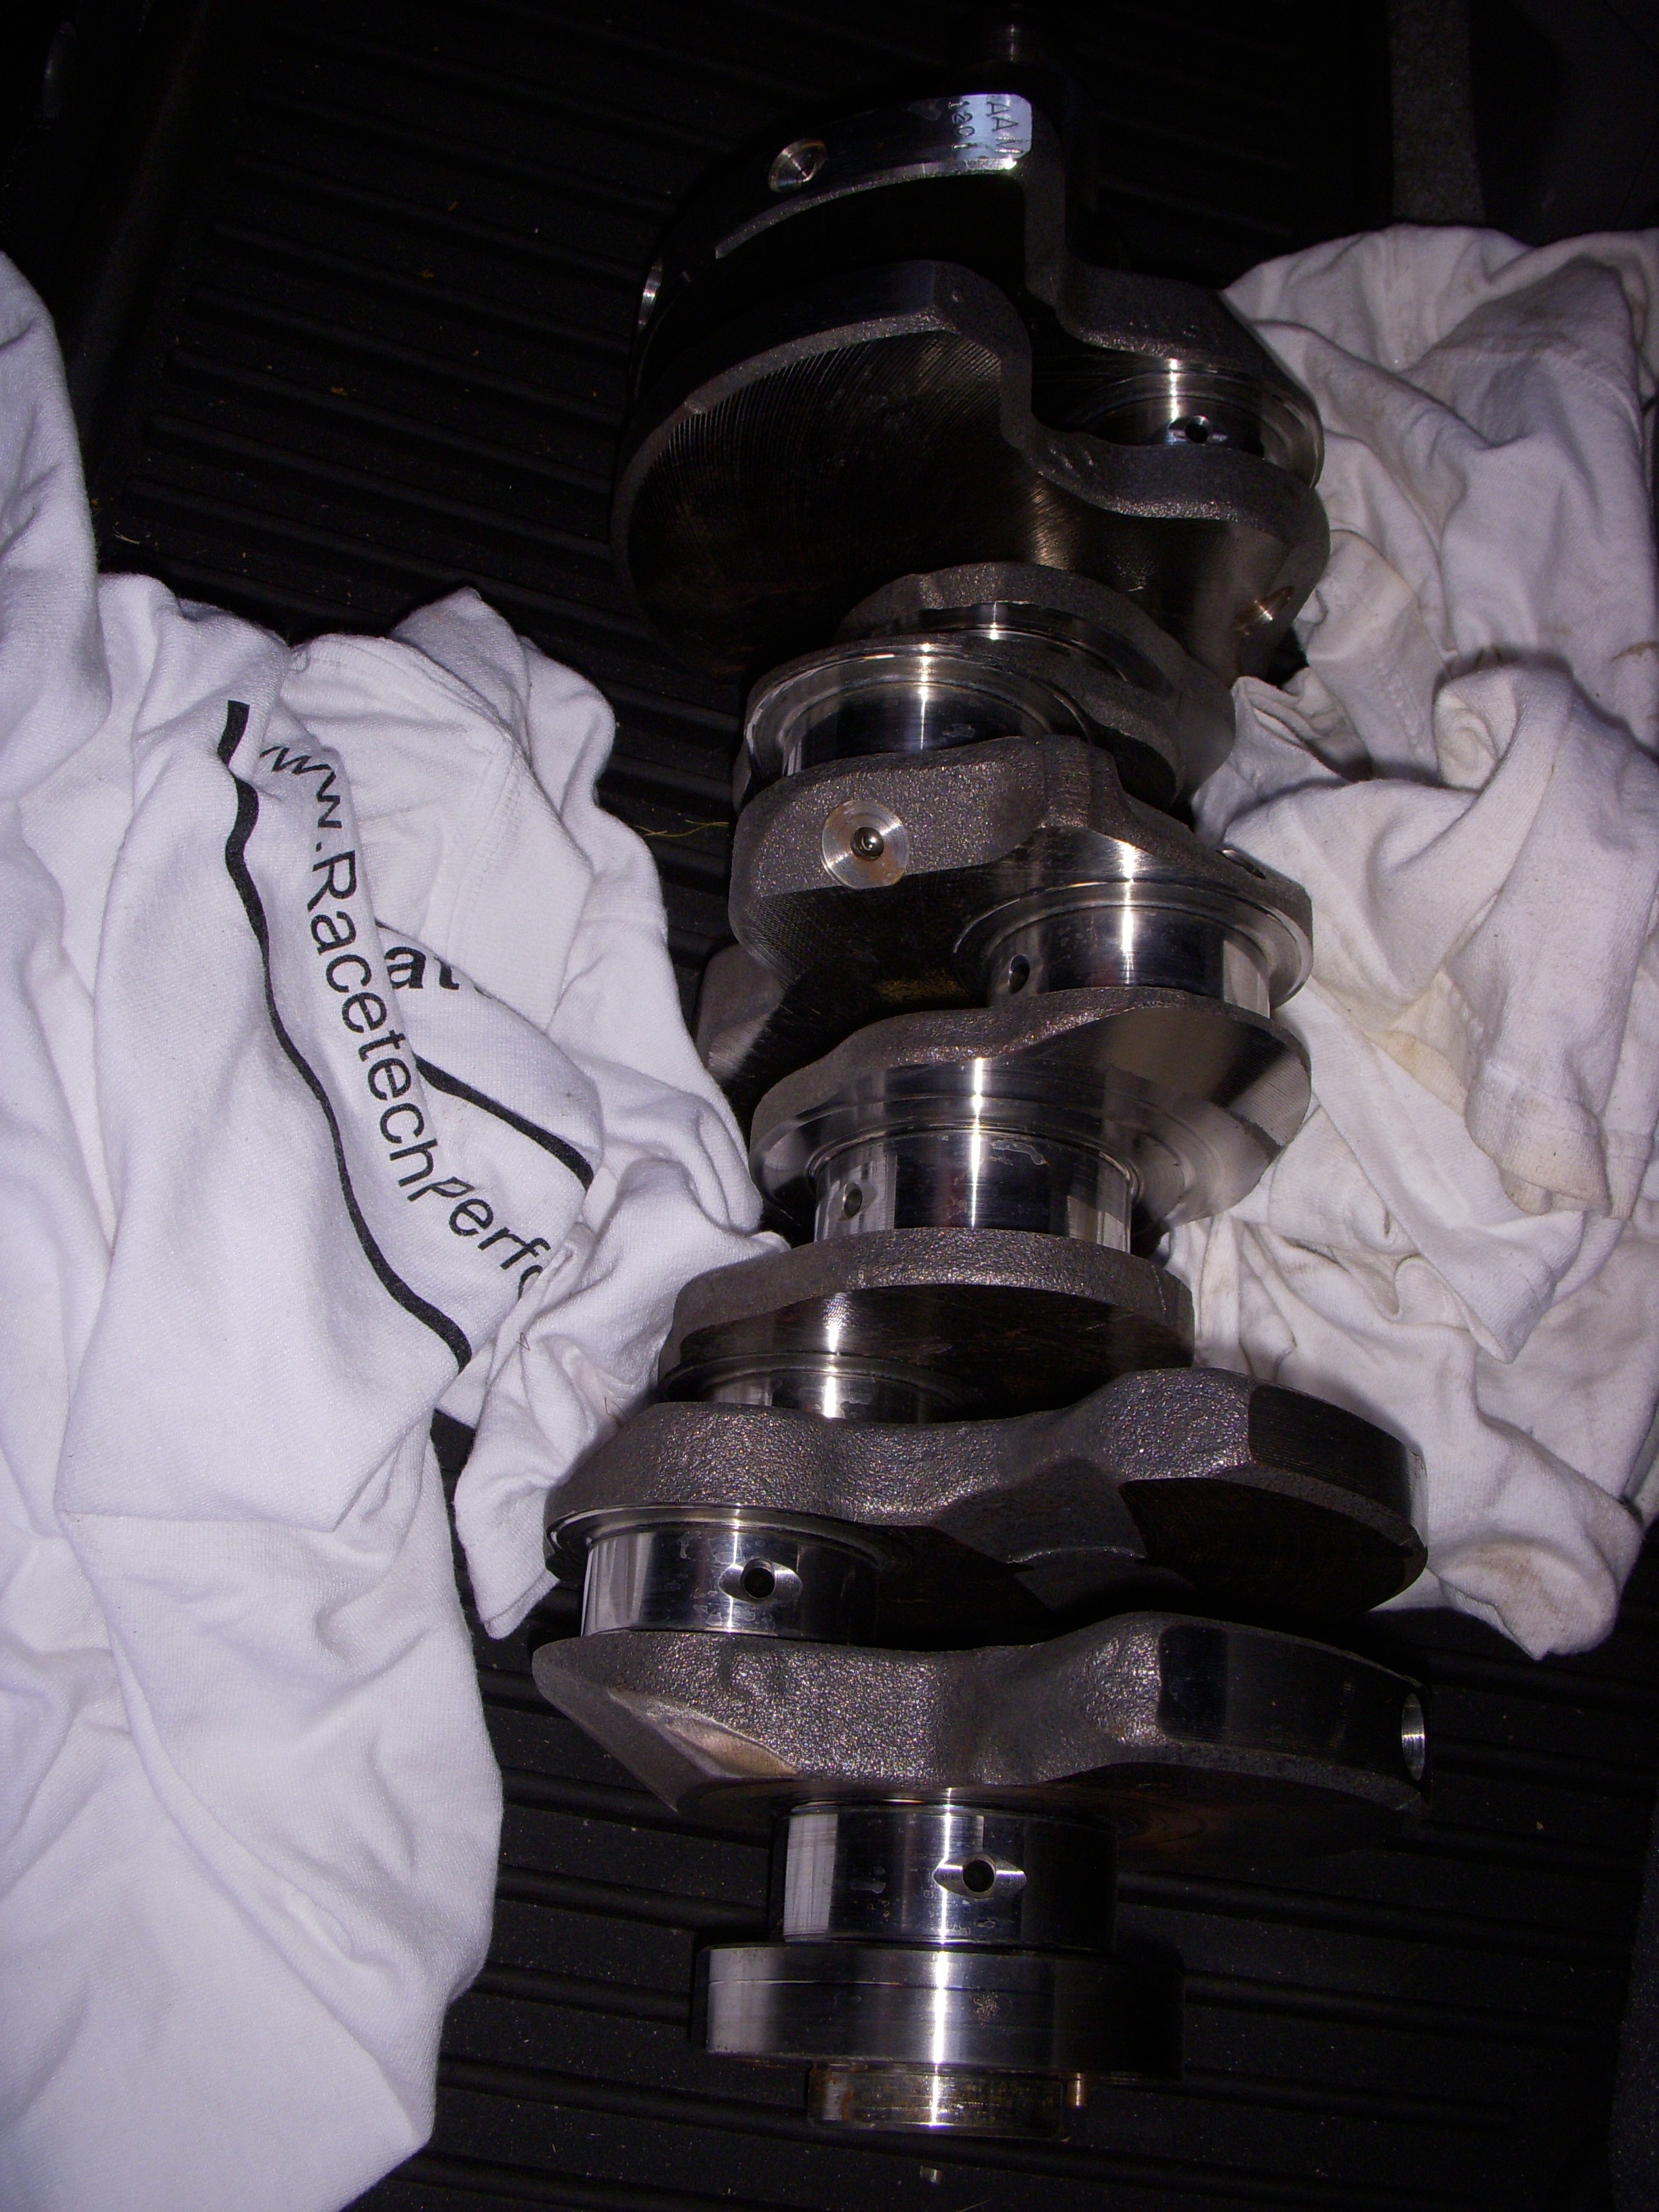
Previous balanced crank - see the chamfered oil holes?
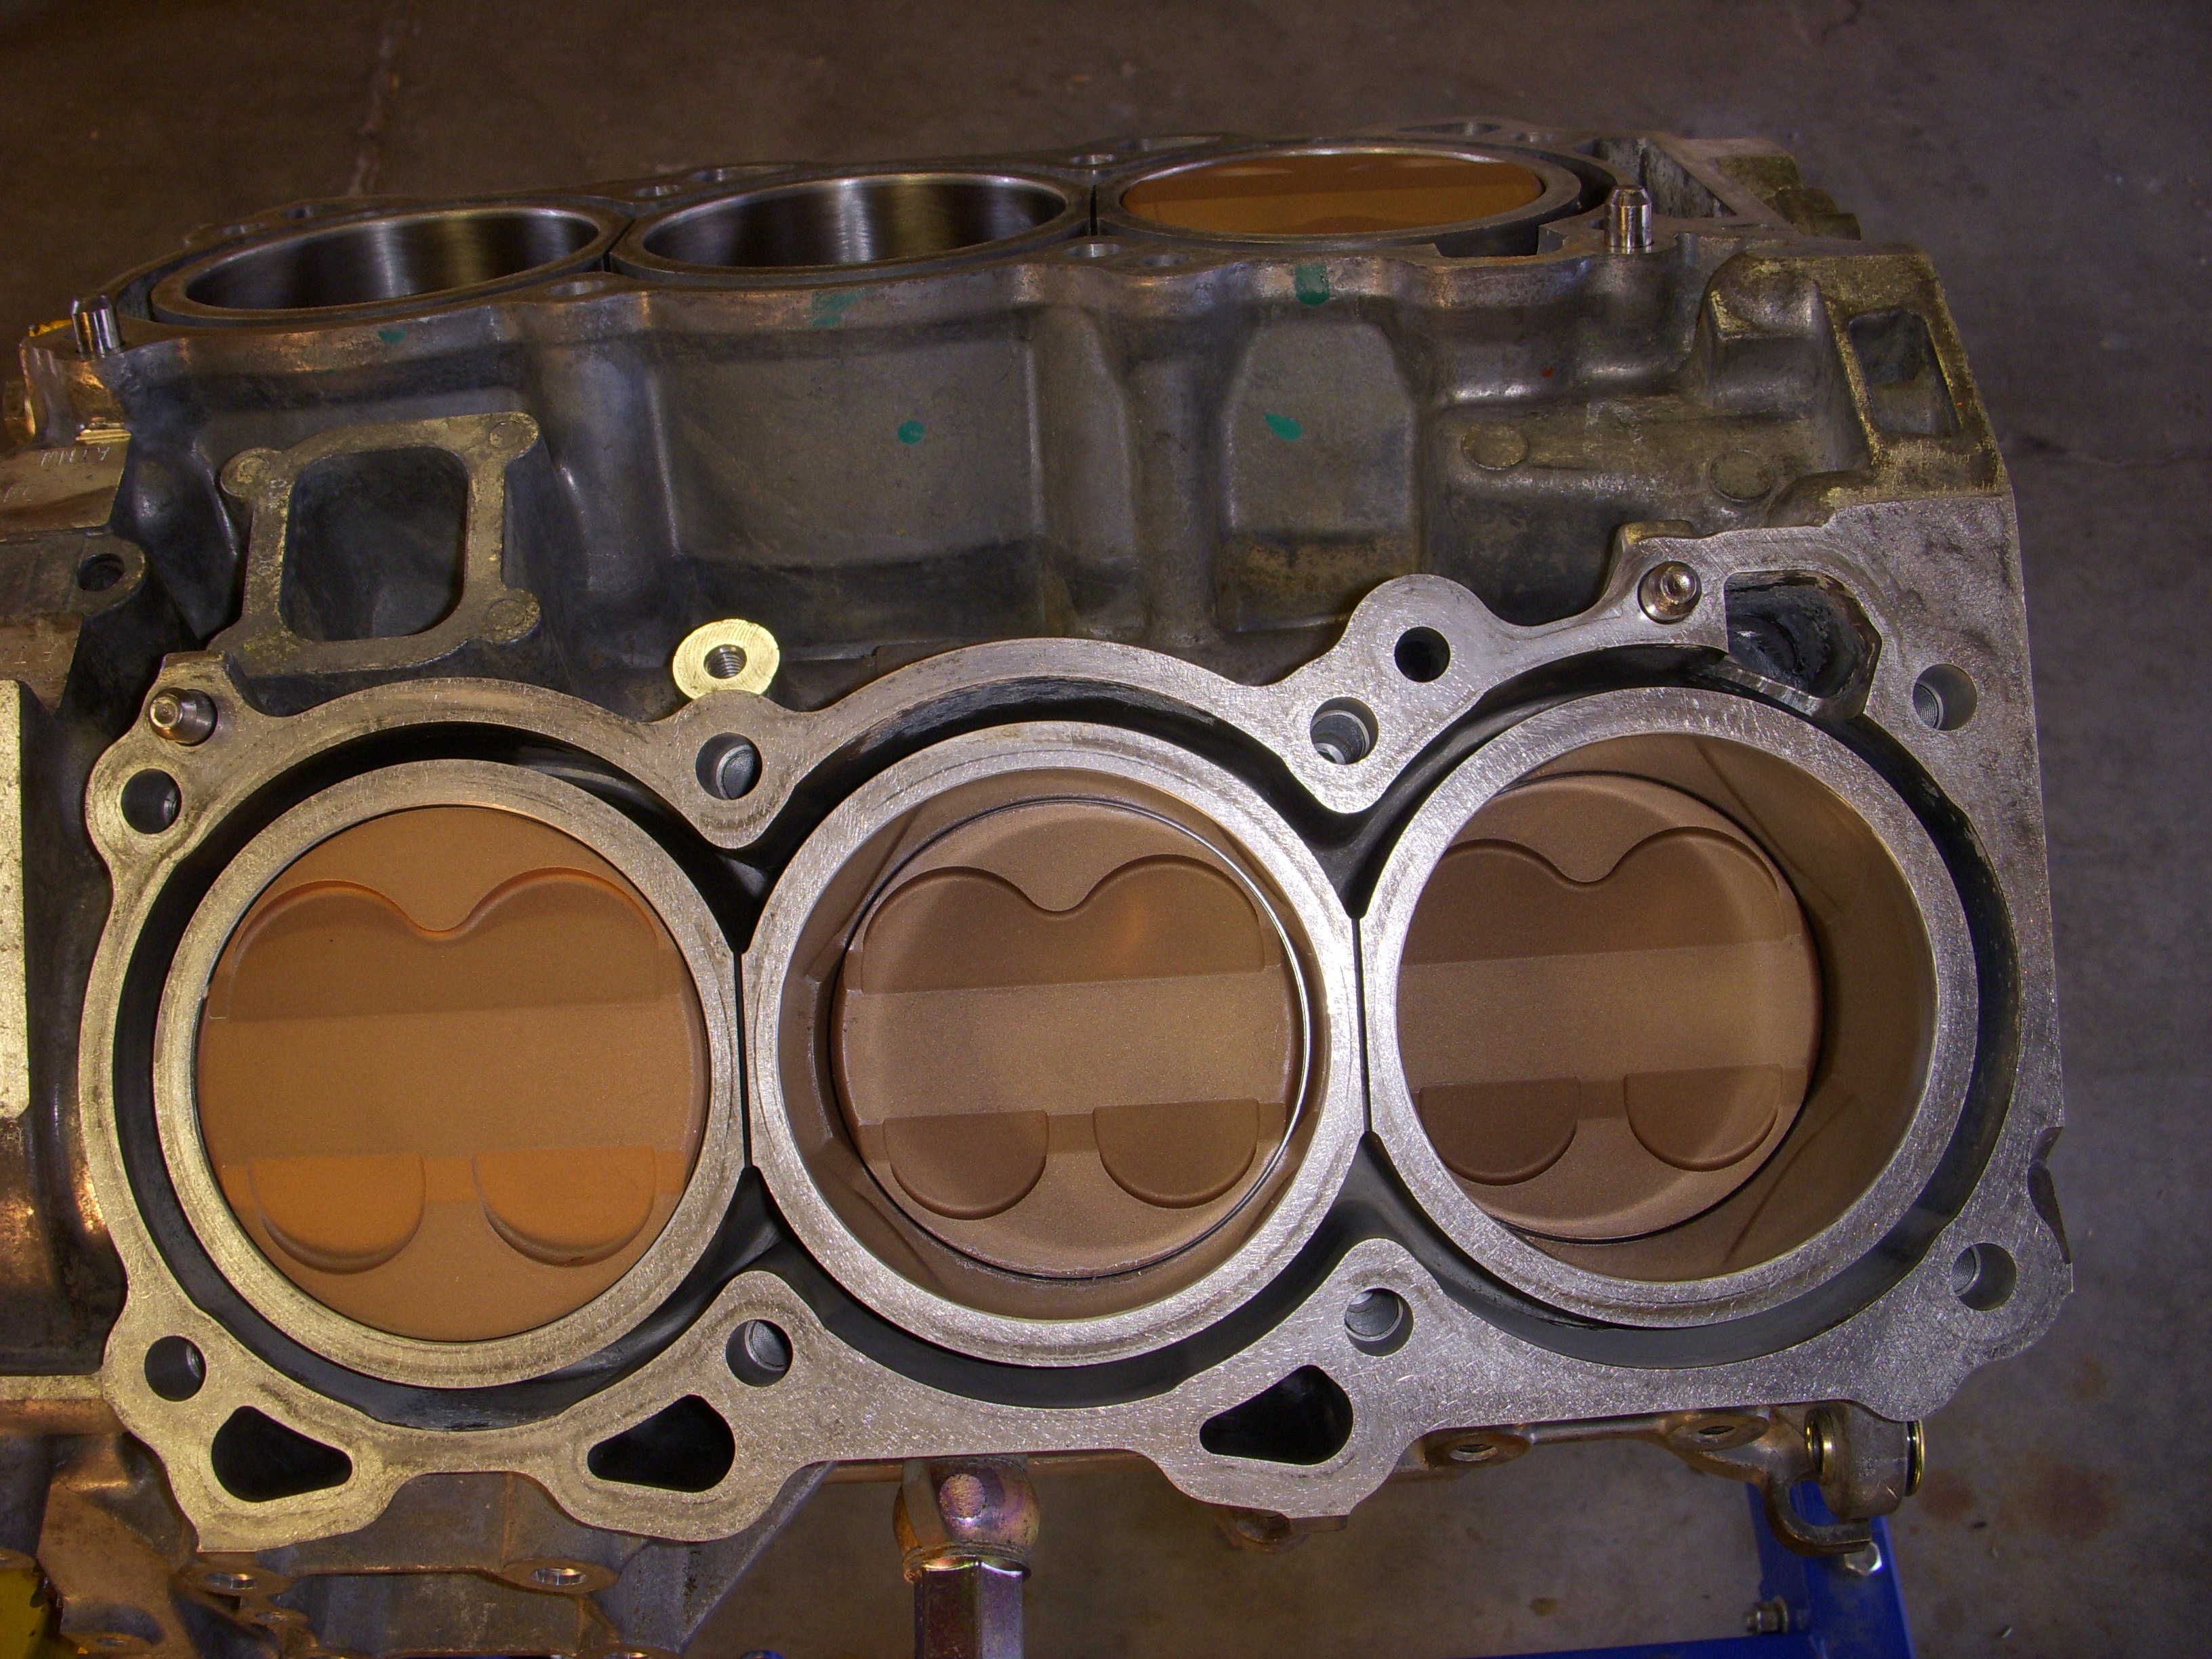
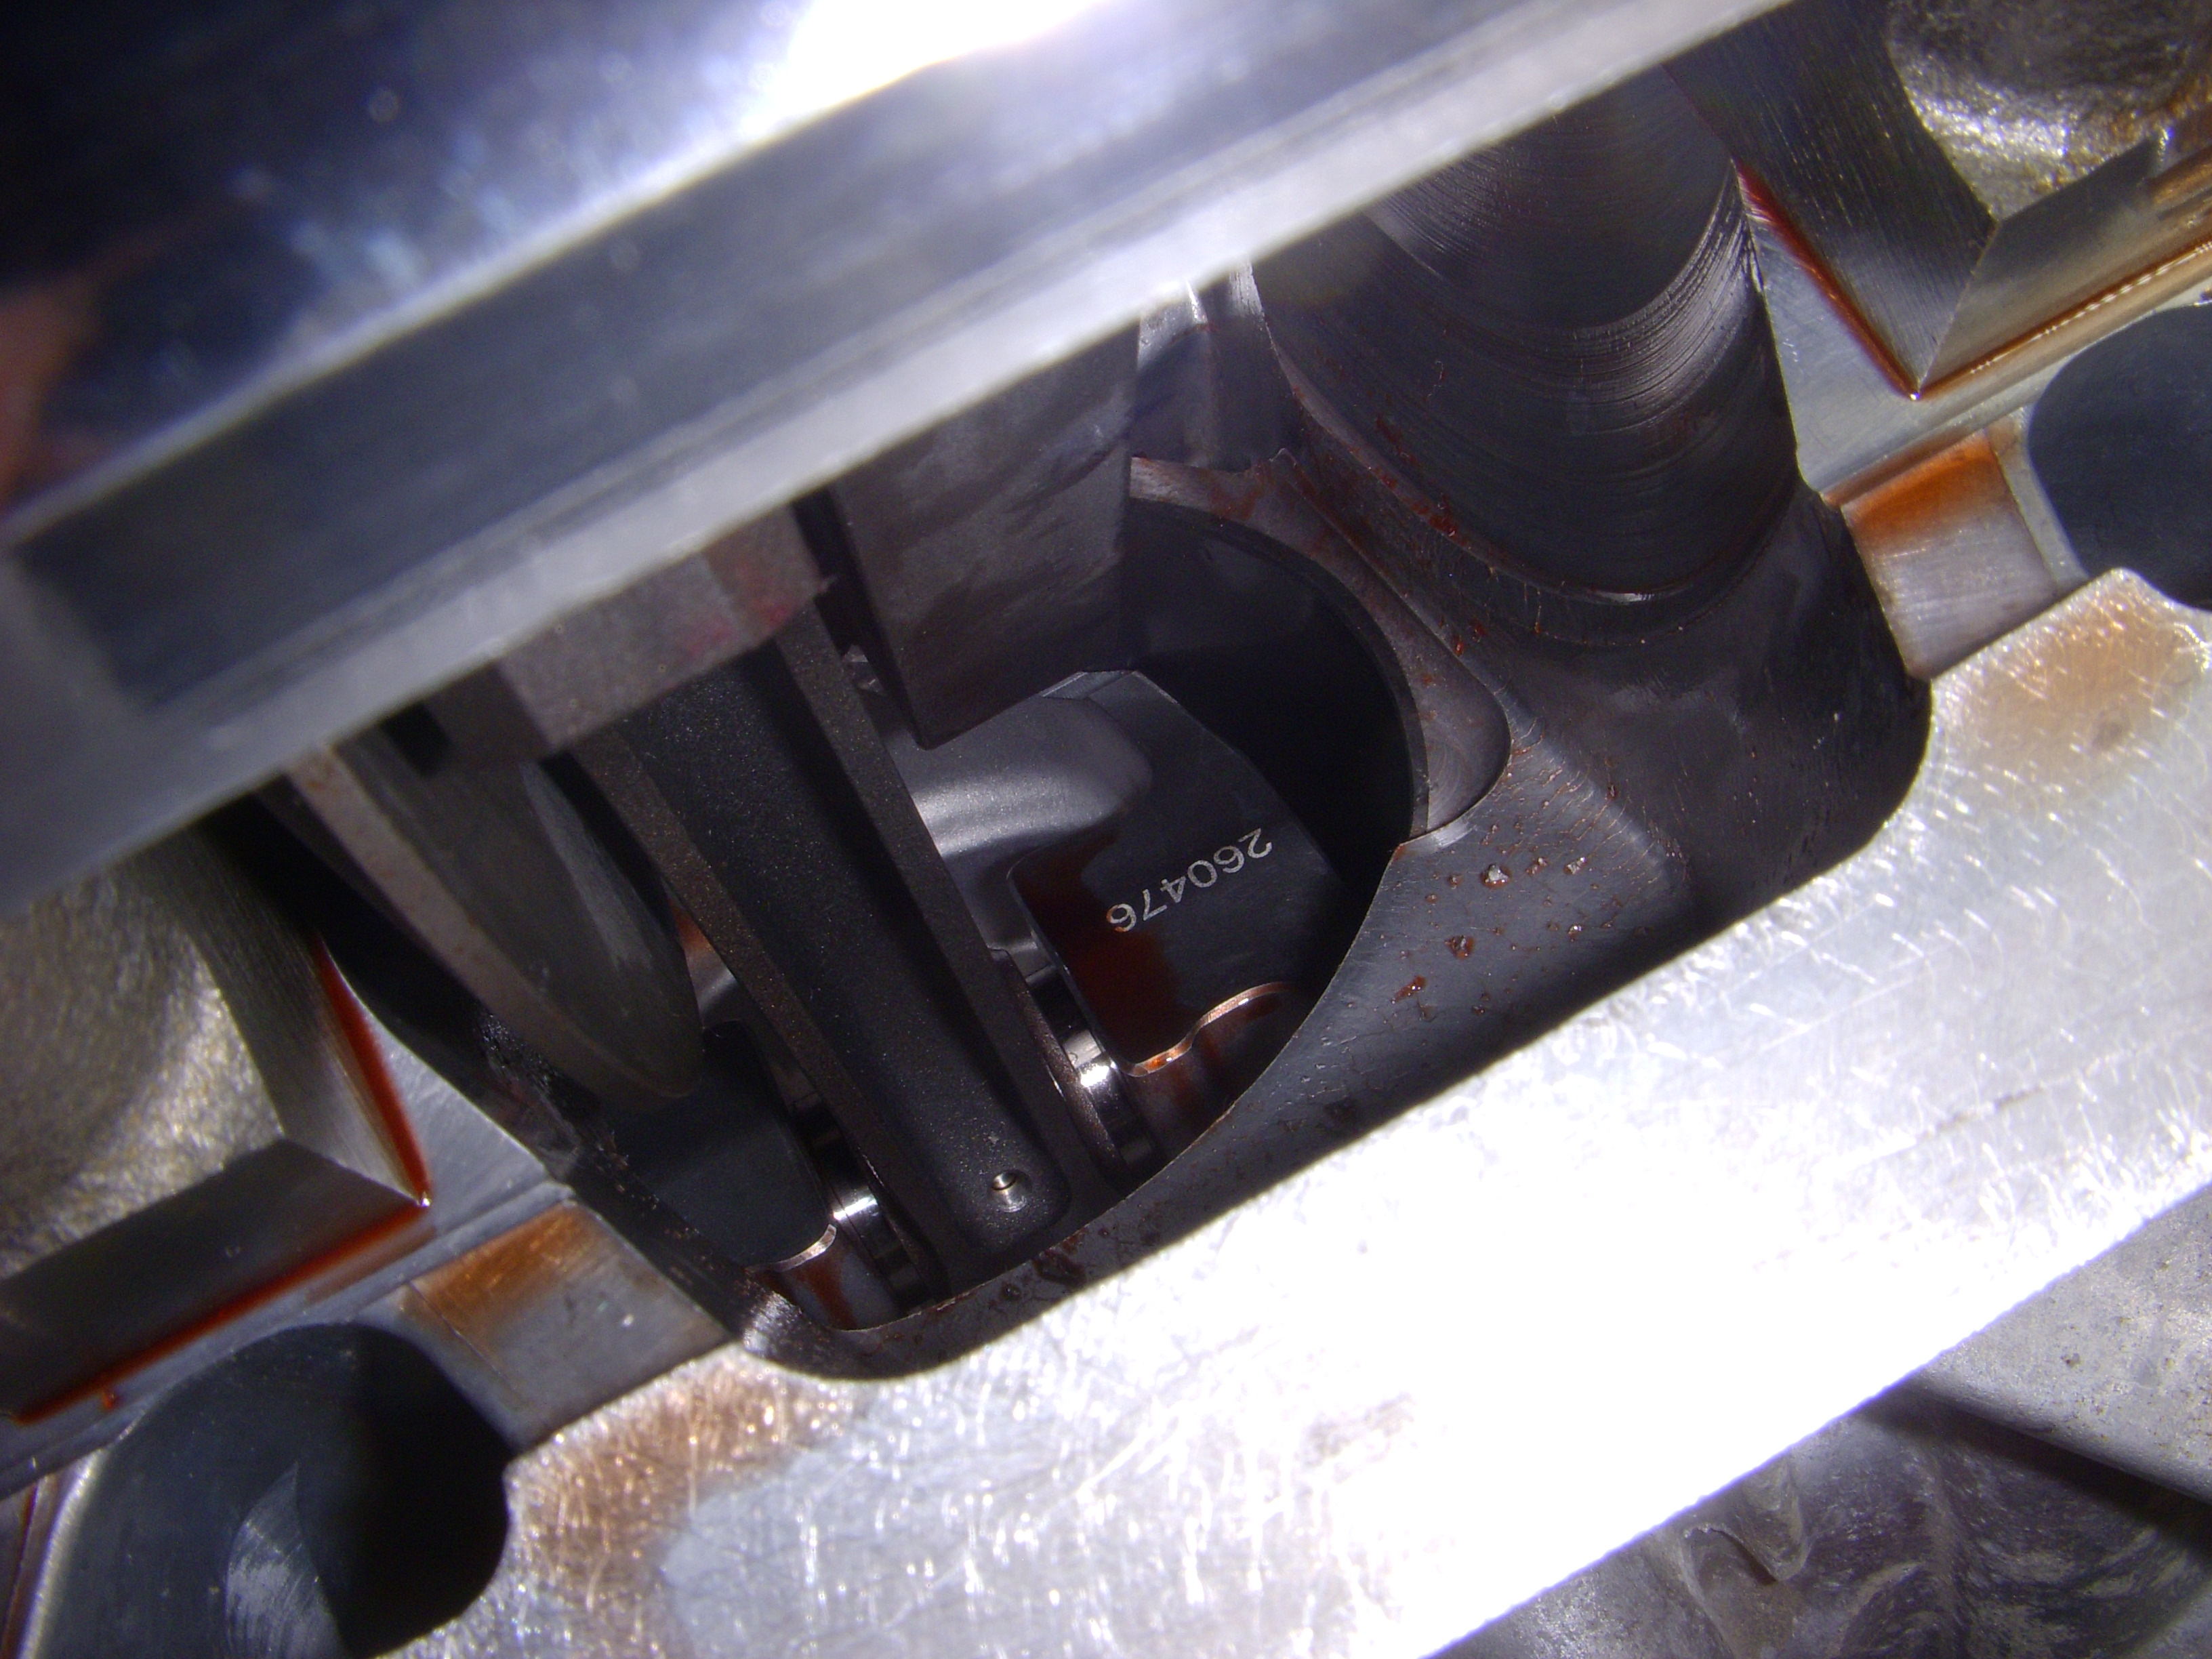
Bowels of the beast:
All them special parts:

Oil squirter clearance cut into piston - block has been machined to clear crank
.


This girdle is for when the fat lady sings:

A good place to hang around:


Previous balanced crank - see the chamfered oil holes?

Bowels of the beast:

All them special parts:

Oil squirter clearance cut into piston - block has been machined to clear crank

.
Last edited by grey99max; 01-14-2017 at 01:59 PM.
12-03-2015, 08:31 PM
#1714
Fresh from the machine shop, some photos, in no particular order. <a href="http://s48.photobucket.com/user/hwb123/media/12_December_2015/DSCN4001_zpszlib940s.jpg.html" target="_blank"><img src="http://i48.photobucket.com/albums/f216/hwb123/12_December_2015/DSCN4001_zpszlib940s.jpg" border="0" alt=" photo DSCN4001_zpszlib940s.jpg"/></a> <a href="http://s48.photobucket.com/user/hwb123/media/12_December_2015/DSCN4003_zpscmeyffbm.jpg.html" target="_blank"><img src="http://i48.photobucket.com/albums/f216/hwb123/12_December_2015/DSCN4003_zpscmeyffbm.jpg" border="0" alt=" photo DSCN4003_zpscmeyffbm.jpg"/></a> <a href="http://s48.photobucket.com/user/hwb123/media/12_December_2015/DSCN4004_zpsgknlbiis.jpg.html" target="_blank"><img src="http://i48.photobucket.com/albums/f216/hwb123/12_December_2015/DSCN4004_zpsgknlbiis.jpg" border="0" alt=" photo DSCN4004_zpsgknlbiis.jpg"/></a> <a href="http://s48.photobucket.com/user/hwb123/media/12_December_2015/DSCN4005_zpsrzecanln.jpg.html" target="_blank"><img src="http://i48.photobucket.com/albums/f216/hwb123/12_December_2015/DSCN4005_zpsrzecanln.jpg" border="0" alt=" photo DSCN4005_zpsrzecanln.jpg"/></a> This girdle is for when the fat lady sings: <a href="http://s48.photobucket.com/user/hwb123/media/12_December_2015/DSCN4006_zpspxsxzecj.jpg.html" target="_blank"><img src="http://i48.photobucket.com/albums/f216/hwb123/12_December_2015/DSCN4006_zpspxsxzecj.jpg" border="0" alt=" photo DSCN4006_zpspxsxzecj.jpg"/></a> A good place to hang around: <a href="http://s48.photobucket.com/user/hwb123/media/12_December_2015/DSCN4007_zpscur0chuy.jpg.html" target="_blank"><img src="http://i48.photobucket.com/albums/f216/hwb123/12_December_2015/DSCN4007_zpscur0chuy.jpg" border="0" alt=" photo DSCN4007_zpscur0chuy.jpg"/></a> <a href="http://s48.photobucket.com/user/hwb123/media/12_December_2015/DSCN4009_zpskpxyopxy.jpg.html" target="_blank"><img src="http://i48.photobucket.com/albums/f216/hwb123/12_December_2015/DSCN4009_zpskpxyopxy.jpg" border="0" alt=" photo DSCN4009_zpskpxyopxy.jpg"/></a> Previous balanced crank - see the chamfered oil holes? <a href="http://s48.photobucket.com/user/hwb123/media/12_December_2015/DSCN4010_zpsjcxsu2me.jpg.html" target="_blank"><img src="http://i48.photobucket.com/albums/f216/hwb123/12_December_2015/DSCN4010_zpsjcxsu2me.jpg" border="0" alt=" photo DSCN4010_zpsjcxsu2me.jpg"/></a> Bowels of the beast: <a href="http://s48.photobucket.com/user/hwb123/media/12_December_2015/DSCN4013_zpslkcbqliw.jpg.html" target="_blank"><img src="http://i48.photobucket.com/albums/f216/hwb123/12_December_2015/DSCN4013_zpslkcbqliw.jpg" border="0" alt=" photo DSCN4013_zpslkcbqliw.jpg"/></a> All them special parts: <a href="http://s48.photobucket.com/user/hwb123/media/12_December_2015/DSCN4014_zpsboxd4z3e.jpg.html" target="_blank"><img src="http://i48.photobucket.com/albums/f216/hwb123/12_December_2015/DSCN4014_zpsboxd4z3e.jpg" border="0" alt=" photo DSCN4014_zpsboxd4z3e.jpg"/></a> Oil squirter clearance cut into piston - block has been machined to clear crank <a href="http://s48.photobucket.com/user/hwb123/media/12_December_2015/DSCN4017_zpsszjboofj.jpg.html" target="_blank"><img src="http://i48.photobucket.com/albums/f216/hwb123/12_December_2015/DSCN4017_zpsszjboofj.jpg" border="0" alt=" photo DSCN4017_zpsszjboofj.jpg"/></a> .
12-04-2015, 07:23 PM
#1715
LandShark has Cosworth
Thread Starter
iTrader: (12)
Join Date: Jan 2004
Location: Topeka, KS
Posts: 4,327
" Wow that's a lot of machine work. Has that been shot peen? The attention to detail is unreal. I'm not familiar with megasquirt. I've heard of it but don't know anything about it. Is it as functional as like a haltech or does it surpass it? Or is it totally different then a haltech type ecu? "
Well, nothing's been shotpeened - the stroker crank is fresh billet steel, Carrillo rods are billet H-beam, CP pistons are fresh something-or-other of billet aluminum, that huge girdle is billet CNCed aluminum, and three separate sets of ACL bearings gave their life to give me .0025" rod oil clearance and .0028" for the mains - because race car... Also, the shop made three clearance cuts in the block for crank clearance, with .030" clearance - so the crank can spin. You can see at least one cut in the previous photos.
Megasquirt MS3-Pro? Very similar to Haltech's top-of the-line ECU, and they are fantastic if you know how to tune them, but their home port is in Australia - you gotta find a local tuner to make it work, and the closest to me is in Dallas TX - for the experts (500 miles). MS is actually originally from England, but a US company now makes the MS3-pro just north of Atlanta GA. Plus the MS3-Pro is 1/2 of the price of Haltech. Lots of engine builders and racers like and use the MS product, like the winner of the Hod Rod 2015 Engine Masters builder contest. It's all about what you think you can live with - and I've already designed and built the required 36-1 trigger wheel for the crank.
Their web site: http://www.ms3pro.com/
When I got back from taking my wife to dinner, I had a call from Ben at JWT - a message to call back their cam guy on Monday for a couple of questions. Those are always interesting calls... If he's nice, I'll tell him where I got those 24 special lightweight HR valve springs that let you set valve lash and measure lifter travel and not get a hernia fighting the monster HR OEM springs. Maybe... yeah, I would tell him.
Tonight I tracked down the clearance problem with the oil pan and had to remove a splash shield, four mounts for that shield, and banged on the rear of the oil pan (trying to re-shape the metal) until I cracked the AL alloy, then Dremeled out an opening large enough to clear the new billet girdle - which is twice as thick as the original one. Now I can weld a plate over the opening and get on with building.
Pix:
<a href="http://s48.photobucket.com/user/hwb123/media/12_December_2015/DSCN4023_zpsh5mz5i17.jpg.html" target="_blank"><img src="http://i48.photobucket.com/albums/f216/hwb123/12_December_2015/DSCN4023_zpsh5mz5i17.jpg" border="0" alt=" photo DSCN4023_zpsh5mz5i17.jpg"/></a>
<a href="http://s48.photobucket.com/user/hwb123/media/12_December_2015/DSCN4026_zps1qzebm3c.jpg.html" target="_blank"><img src="http://i48.photobucket.com/albums/f216/hwb123/12_December_2015/DSCN4026_zps1qzebm3c.jpg" border="0" alt=" photo DSCN4026_zps1qzebm3c.jpg"/></a>
<a href="http://s48.photobucket.com/user/hwb123/media/12_December_2015/DSCN4027_zpsob9ra6h8.jpg.html" target="_blank"><img src="http://i48.photobucket.com/albums/f216/hwb123/12_December_2015/DSCN4027_zpsob9ra6h8.jpg" border="0" alt=" photo DSCN4027_zpsob9ra6h8.jpg"/></a>
<a href="http://s48.photobucket.com/user/hwb123/media/12_December_2015/DSCN4025_zpsmtujan8d.jpg.html" target="_blank"><img src="http://i48.photobucket.com/albums/f216/hwb123/12_December_2015/DSCN4025_zpsmtujan8d.jpg" border="0" alt=" photo DSCN4025_zpsmtujan8d.jpg"/></a>
<a href="http://s48.photobucket.com/user/hwb123/media/12_December_2015/DSCN4024_zpsinlyacjf.jpg.html" target="_blank"><img src="http://i48.photobucket.com/albums/f216/hwb123/12_December_2015/DSCN4024_zpsinlyacjf.jpg" border="0" alt=" photo DSCN4024_zpsinlyacjf.jpg"/></a>
Last edited by grey99max; 12-05-2015 at 08:52 AM.
12-14-2015, 06:47 PM
#1717
LandShark has Cosworth
Thread Starter
iTrader: (12)
Join Date: Jan 2004
Location: Topeka, KS
Posts: 4,327
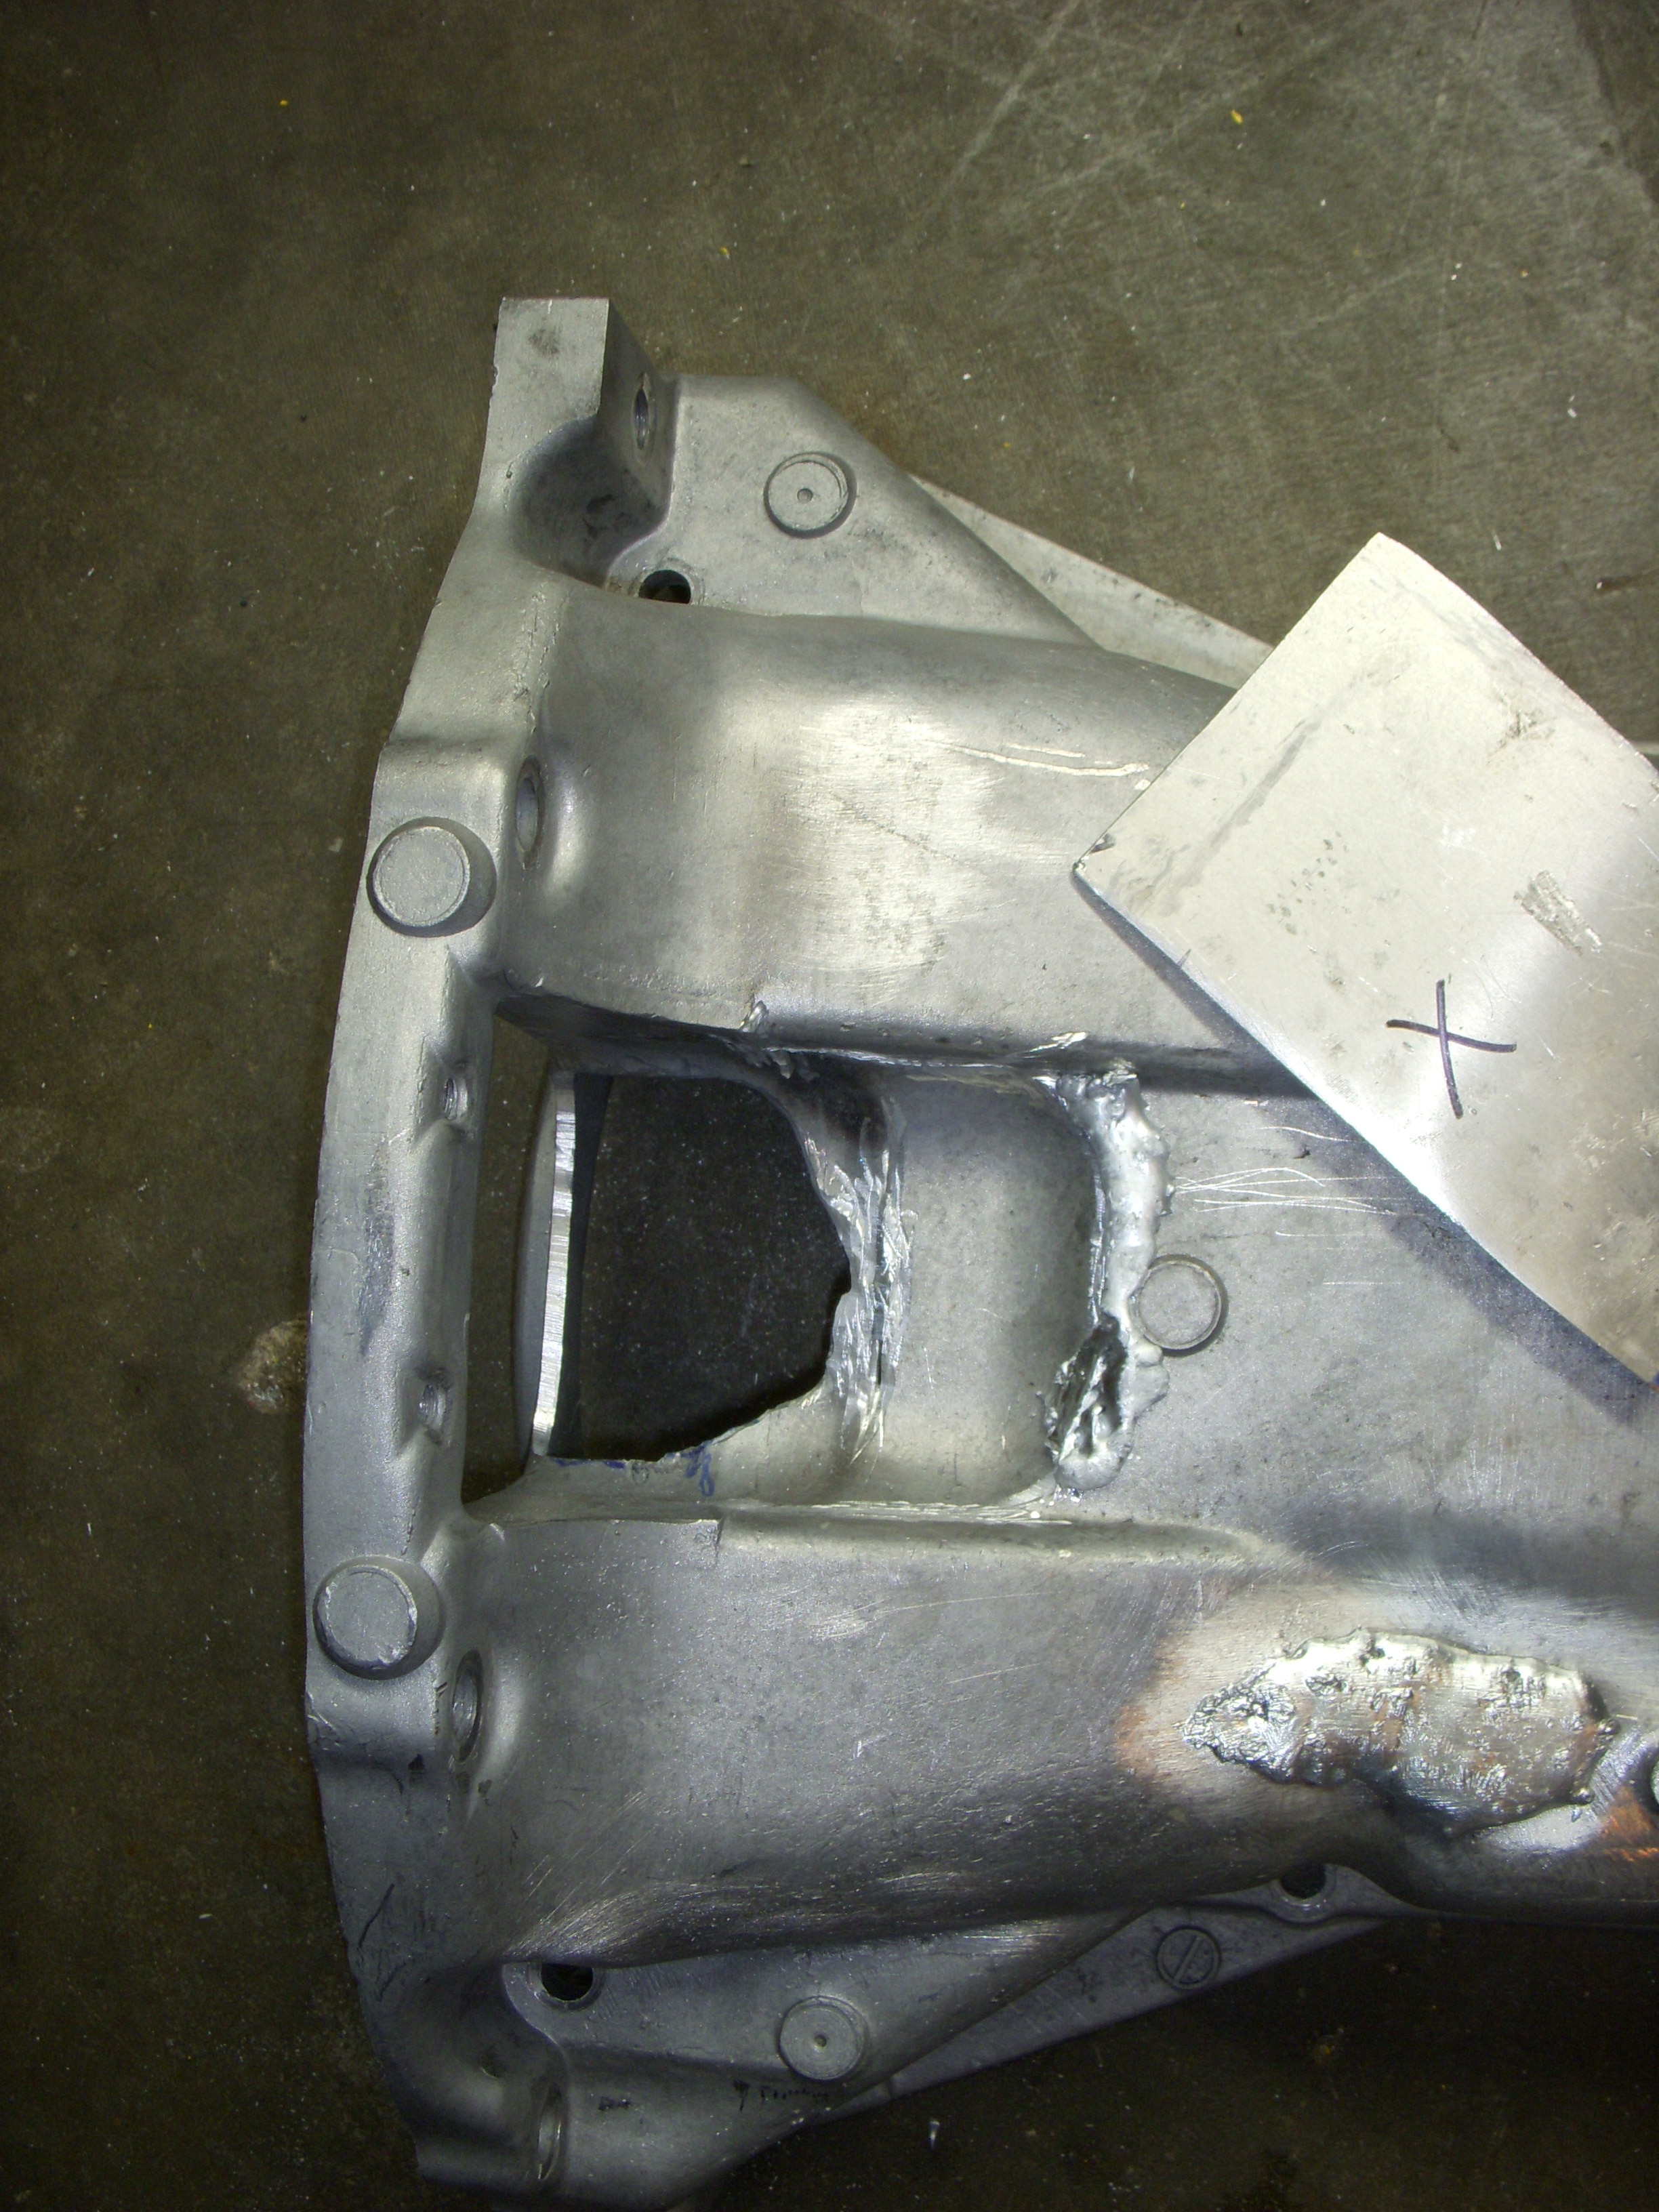
changes to oil pan - ren't working out, yet...
I've been trying to come with a way to weld in a 1/8" AL plate to completely fill the hole left by hacking a chunk out of the pan, to clear the much thicker billet mains girdle needed for the BC stroker. No luck so far - I thought I had it, but then DUH - torque converter bolts gotta go thru the flexplate, and what I made blocks access to the 4 TC bolts.
I had previously hammered out a nice plate of .025" 6061 AL which would have allowed bolt clearance, but that plate will require a gasket of some Hi-Temp material and still seal a complicated formed plate - without leaks.
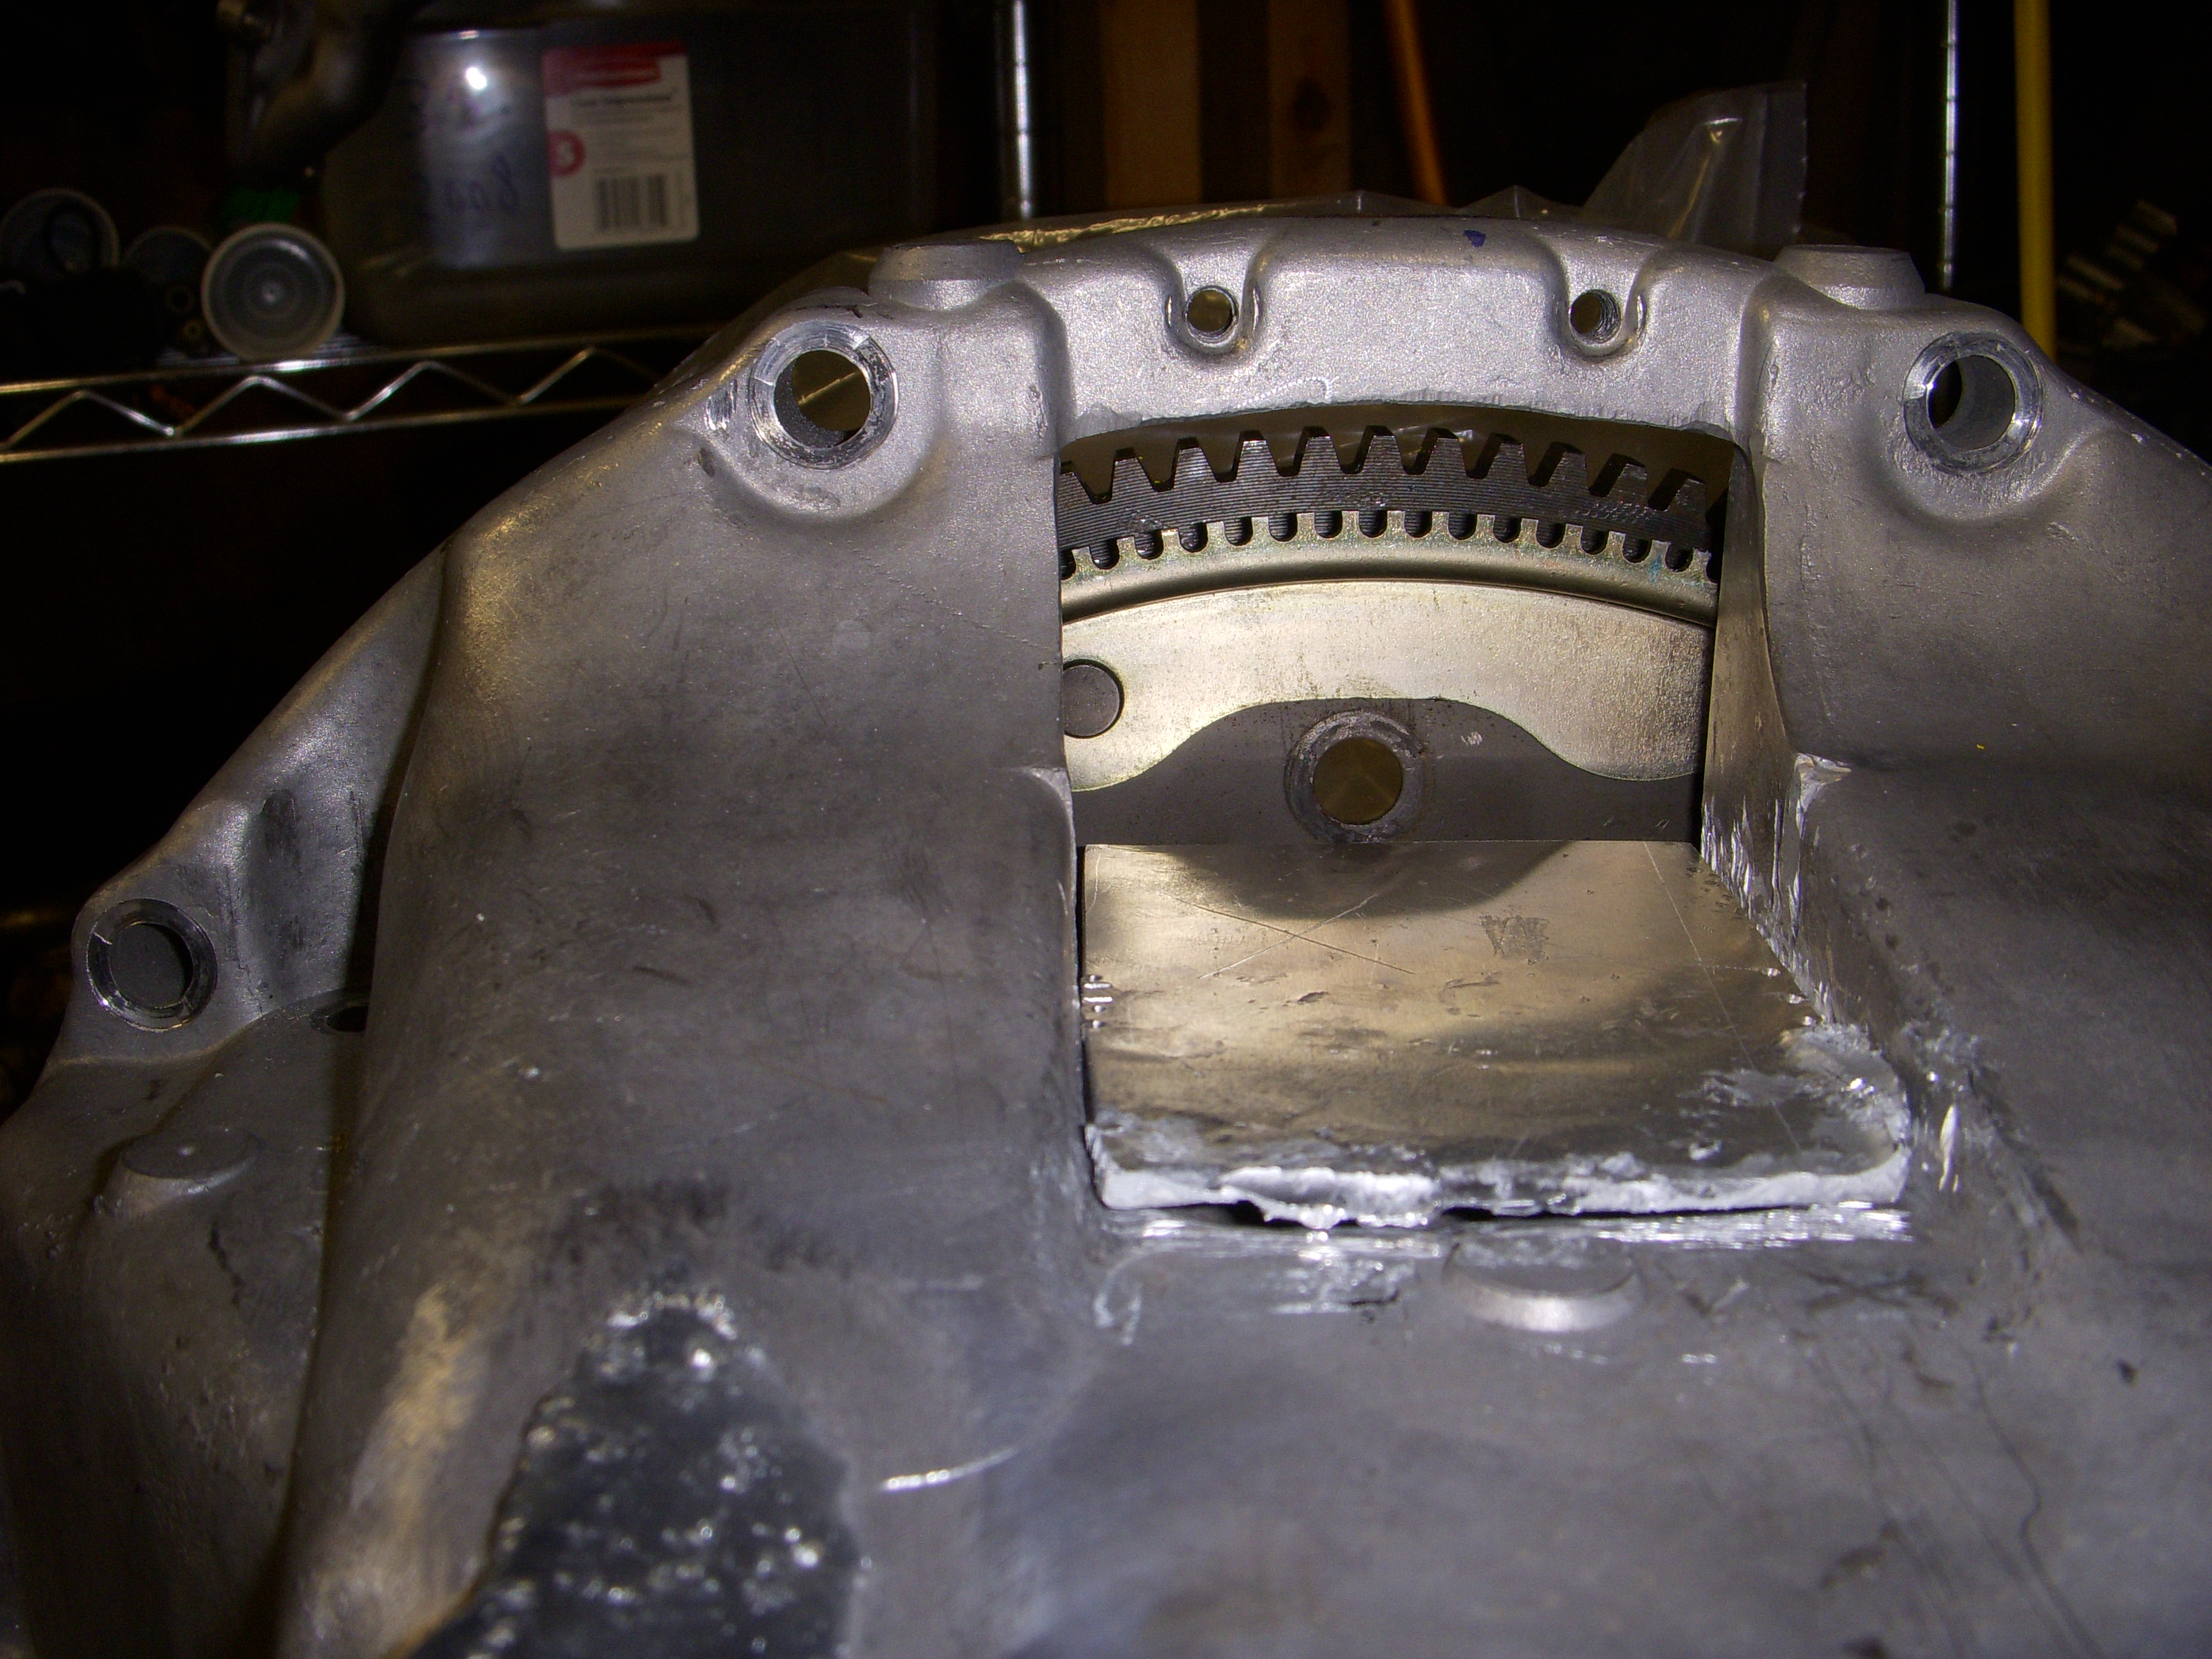
PIX of the partially-brazed 1/8" plate first::
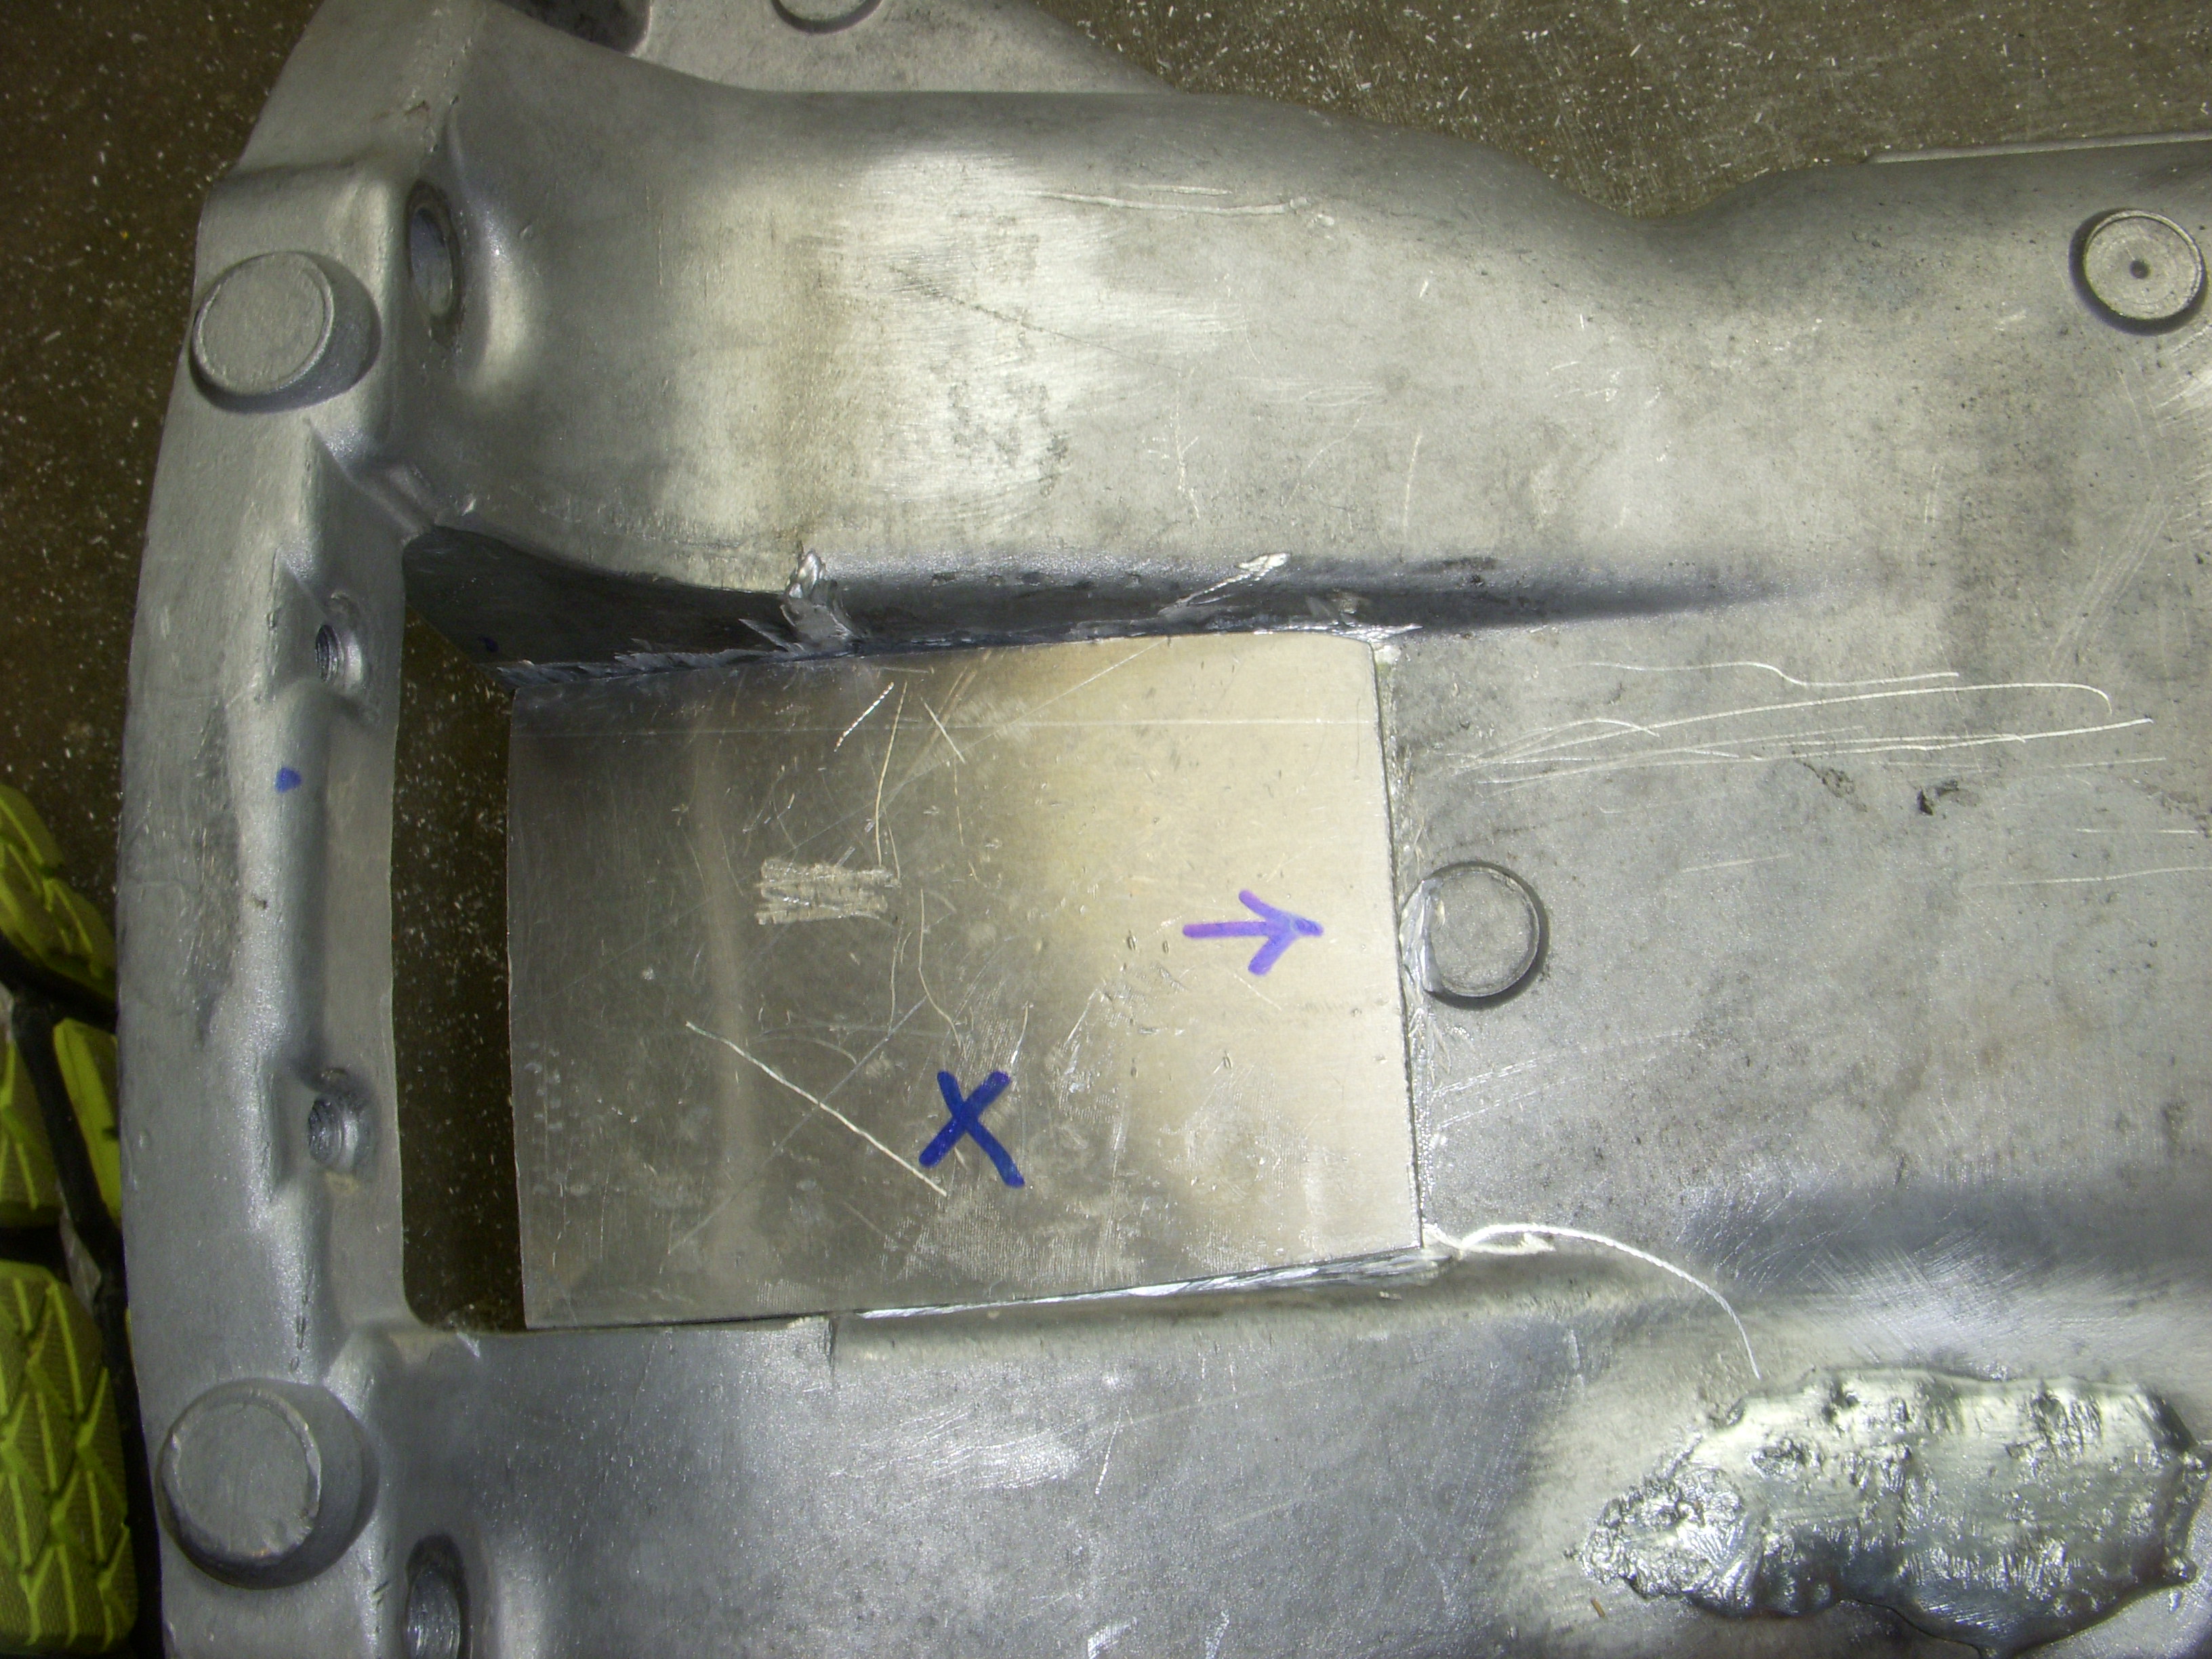
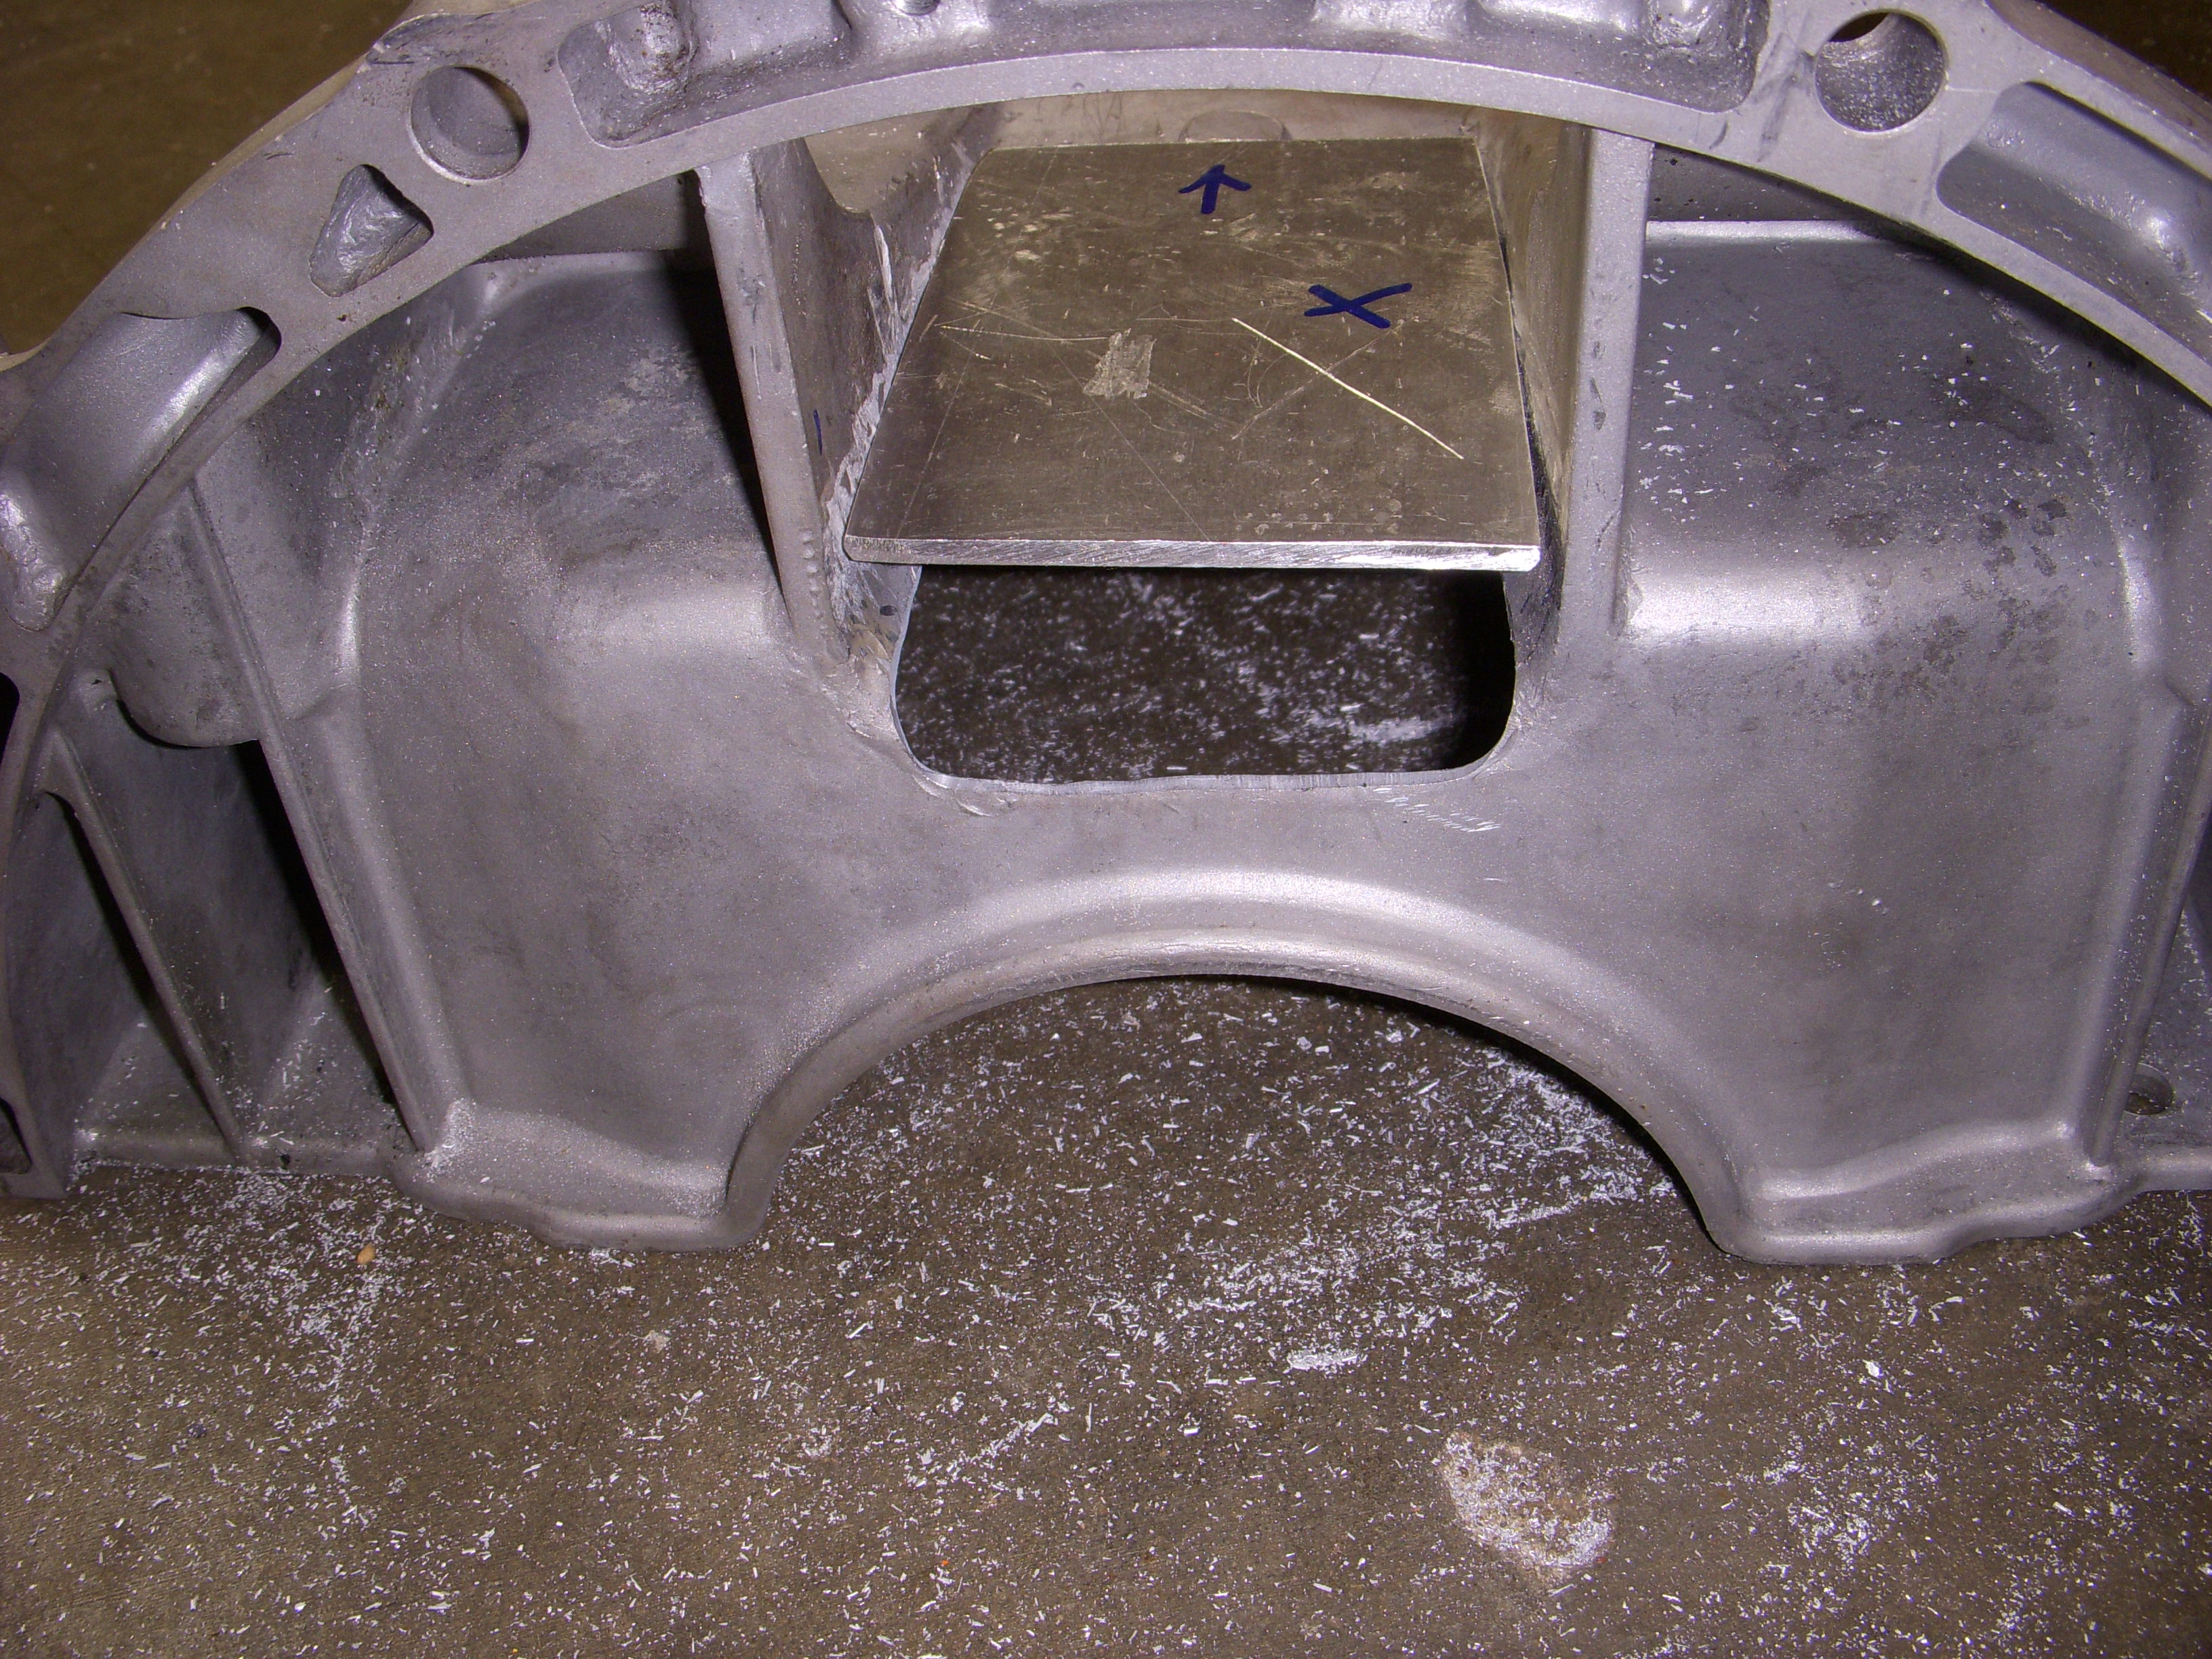
Then the "WOOPS" part :: (removed plate before the pix)
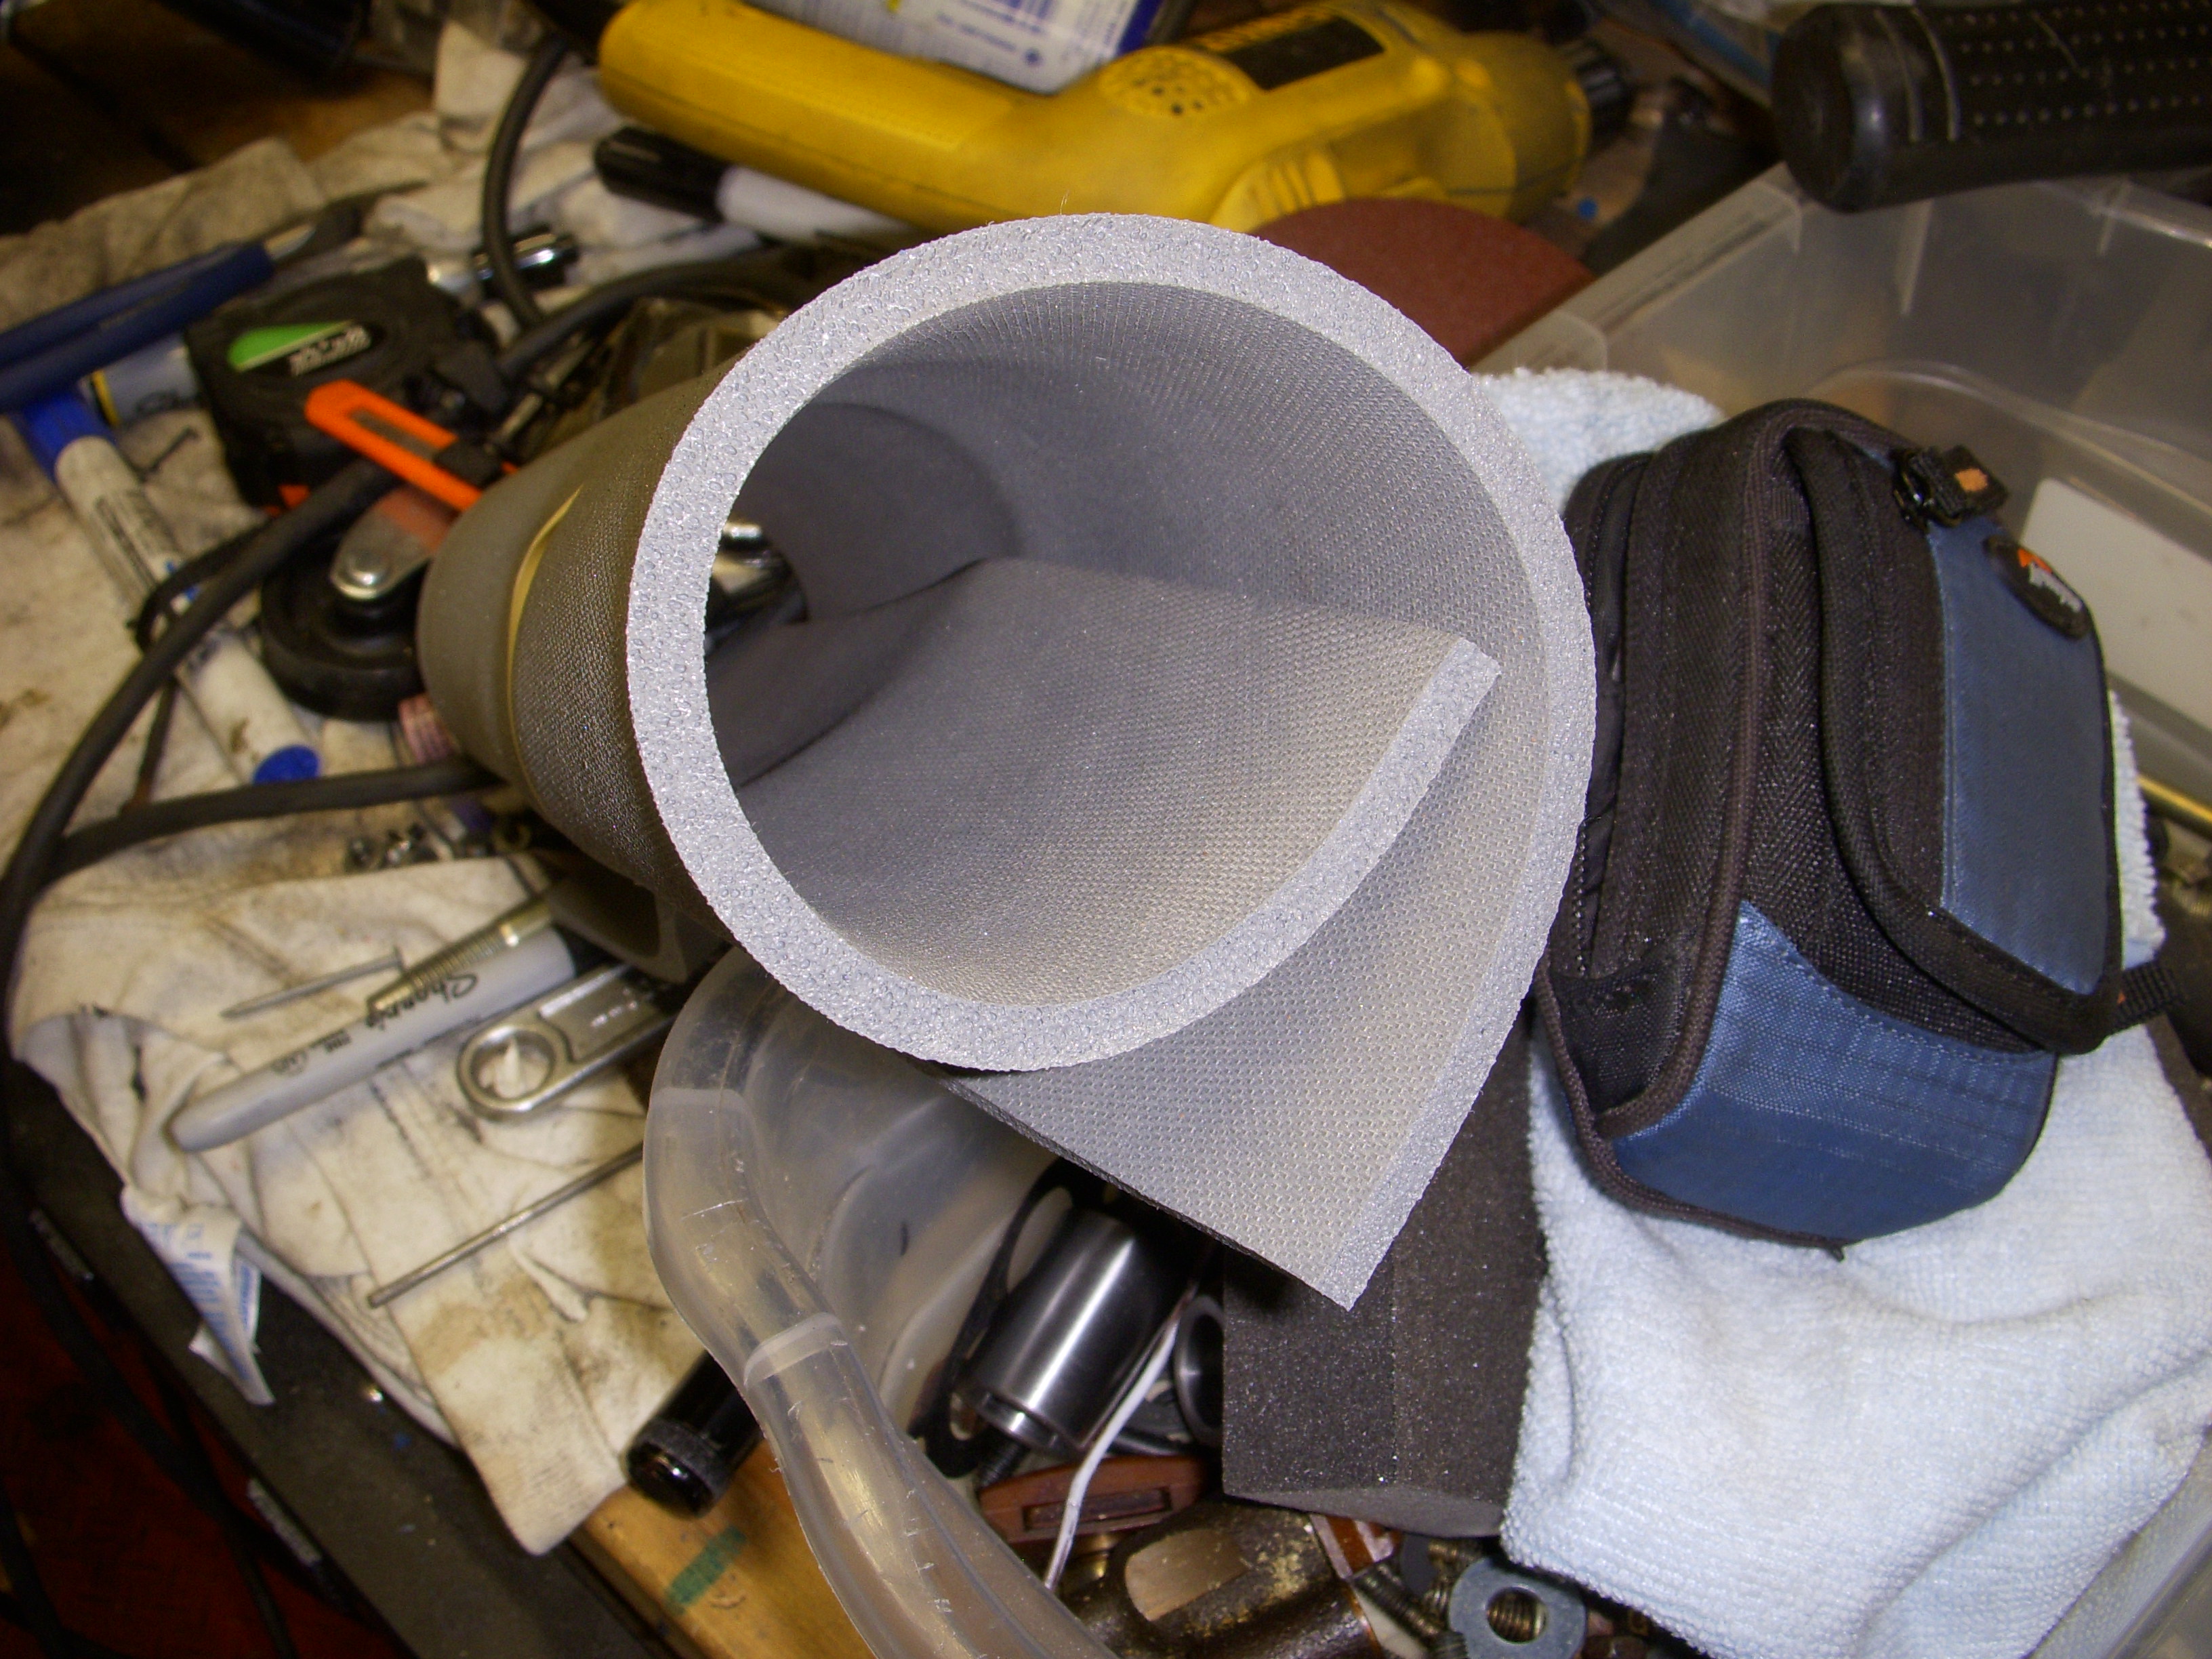
And the prospective 1/4" closed-cell Hi-Temp foam insulation:
I didn't shoot the hammer-formed plate, but there would be plenty of clearance, but I would need to use small self-tapping stainess screws and star washers all around the edges - and I'm betting there would be leaks.
Dunno where to go at this point - ???
I had previously hammered out a nice plate of .025" 6061 AL which would have allowed bolt clearance, but that plate will require a gasket of some Hi-Temp material and still seal a complicated formed plate - without leaks.
PIX of the partially-brazed 1/8" plate first::


Then the "WOOPS" part :: (removed plate before the pix)

And the prospective 1/4" closed-cell Hi-Temp foam insulation:

I didn't shoot the hammer-formed plate, but there would be plenty of clearance, but I would need to use small self-tapping stainess screws and star washers all around the edges - and I'm betting there would be leaks.
Dunno where to go at this point - ???
Last edited by grey99max; 01-14-2017 at 02:22 PM.
12-15-2015, 02:33 PM
#1719
LandShark has Cosworth
Thread Starter
iTrader: (12)
Join Date: Jan 2004
Location: Topeka, KS
Posts: 4,327
Hmmm... not so simple with a billet girdle that's twice as thick as the OEM girdle. The pan was raised up about 1/4" above the block, and there were several points of contact to deal with. I cut off everything else, but the rear of the pan was still sitting on the girdle at the rear-most ARP studs. I'll figure out something - I think that I can shape some 1/8" aluminum with a narrow hammer to follow the slope of the new opening and then aluminum-braze it all in place. That would give the clearance needed for those four TC bolts....
And maybe getting a HR FWD oil pan would be good insurance...
"never a dull moment"
And maybe getting a HR FWD oil pan would be good insurance...
"never a dull moment"
Last edited by grey99max; 12-15-2015 at 05:29 PM.
12-15-2015, 02:51 PM
#1720
LandShark has Cosworth
Thread Starter
iTrader: (12)
Join Date: Jan 2004
Location: Topeka, KS
Posts: 4,327
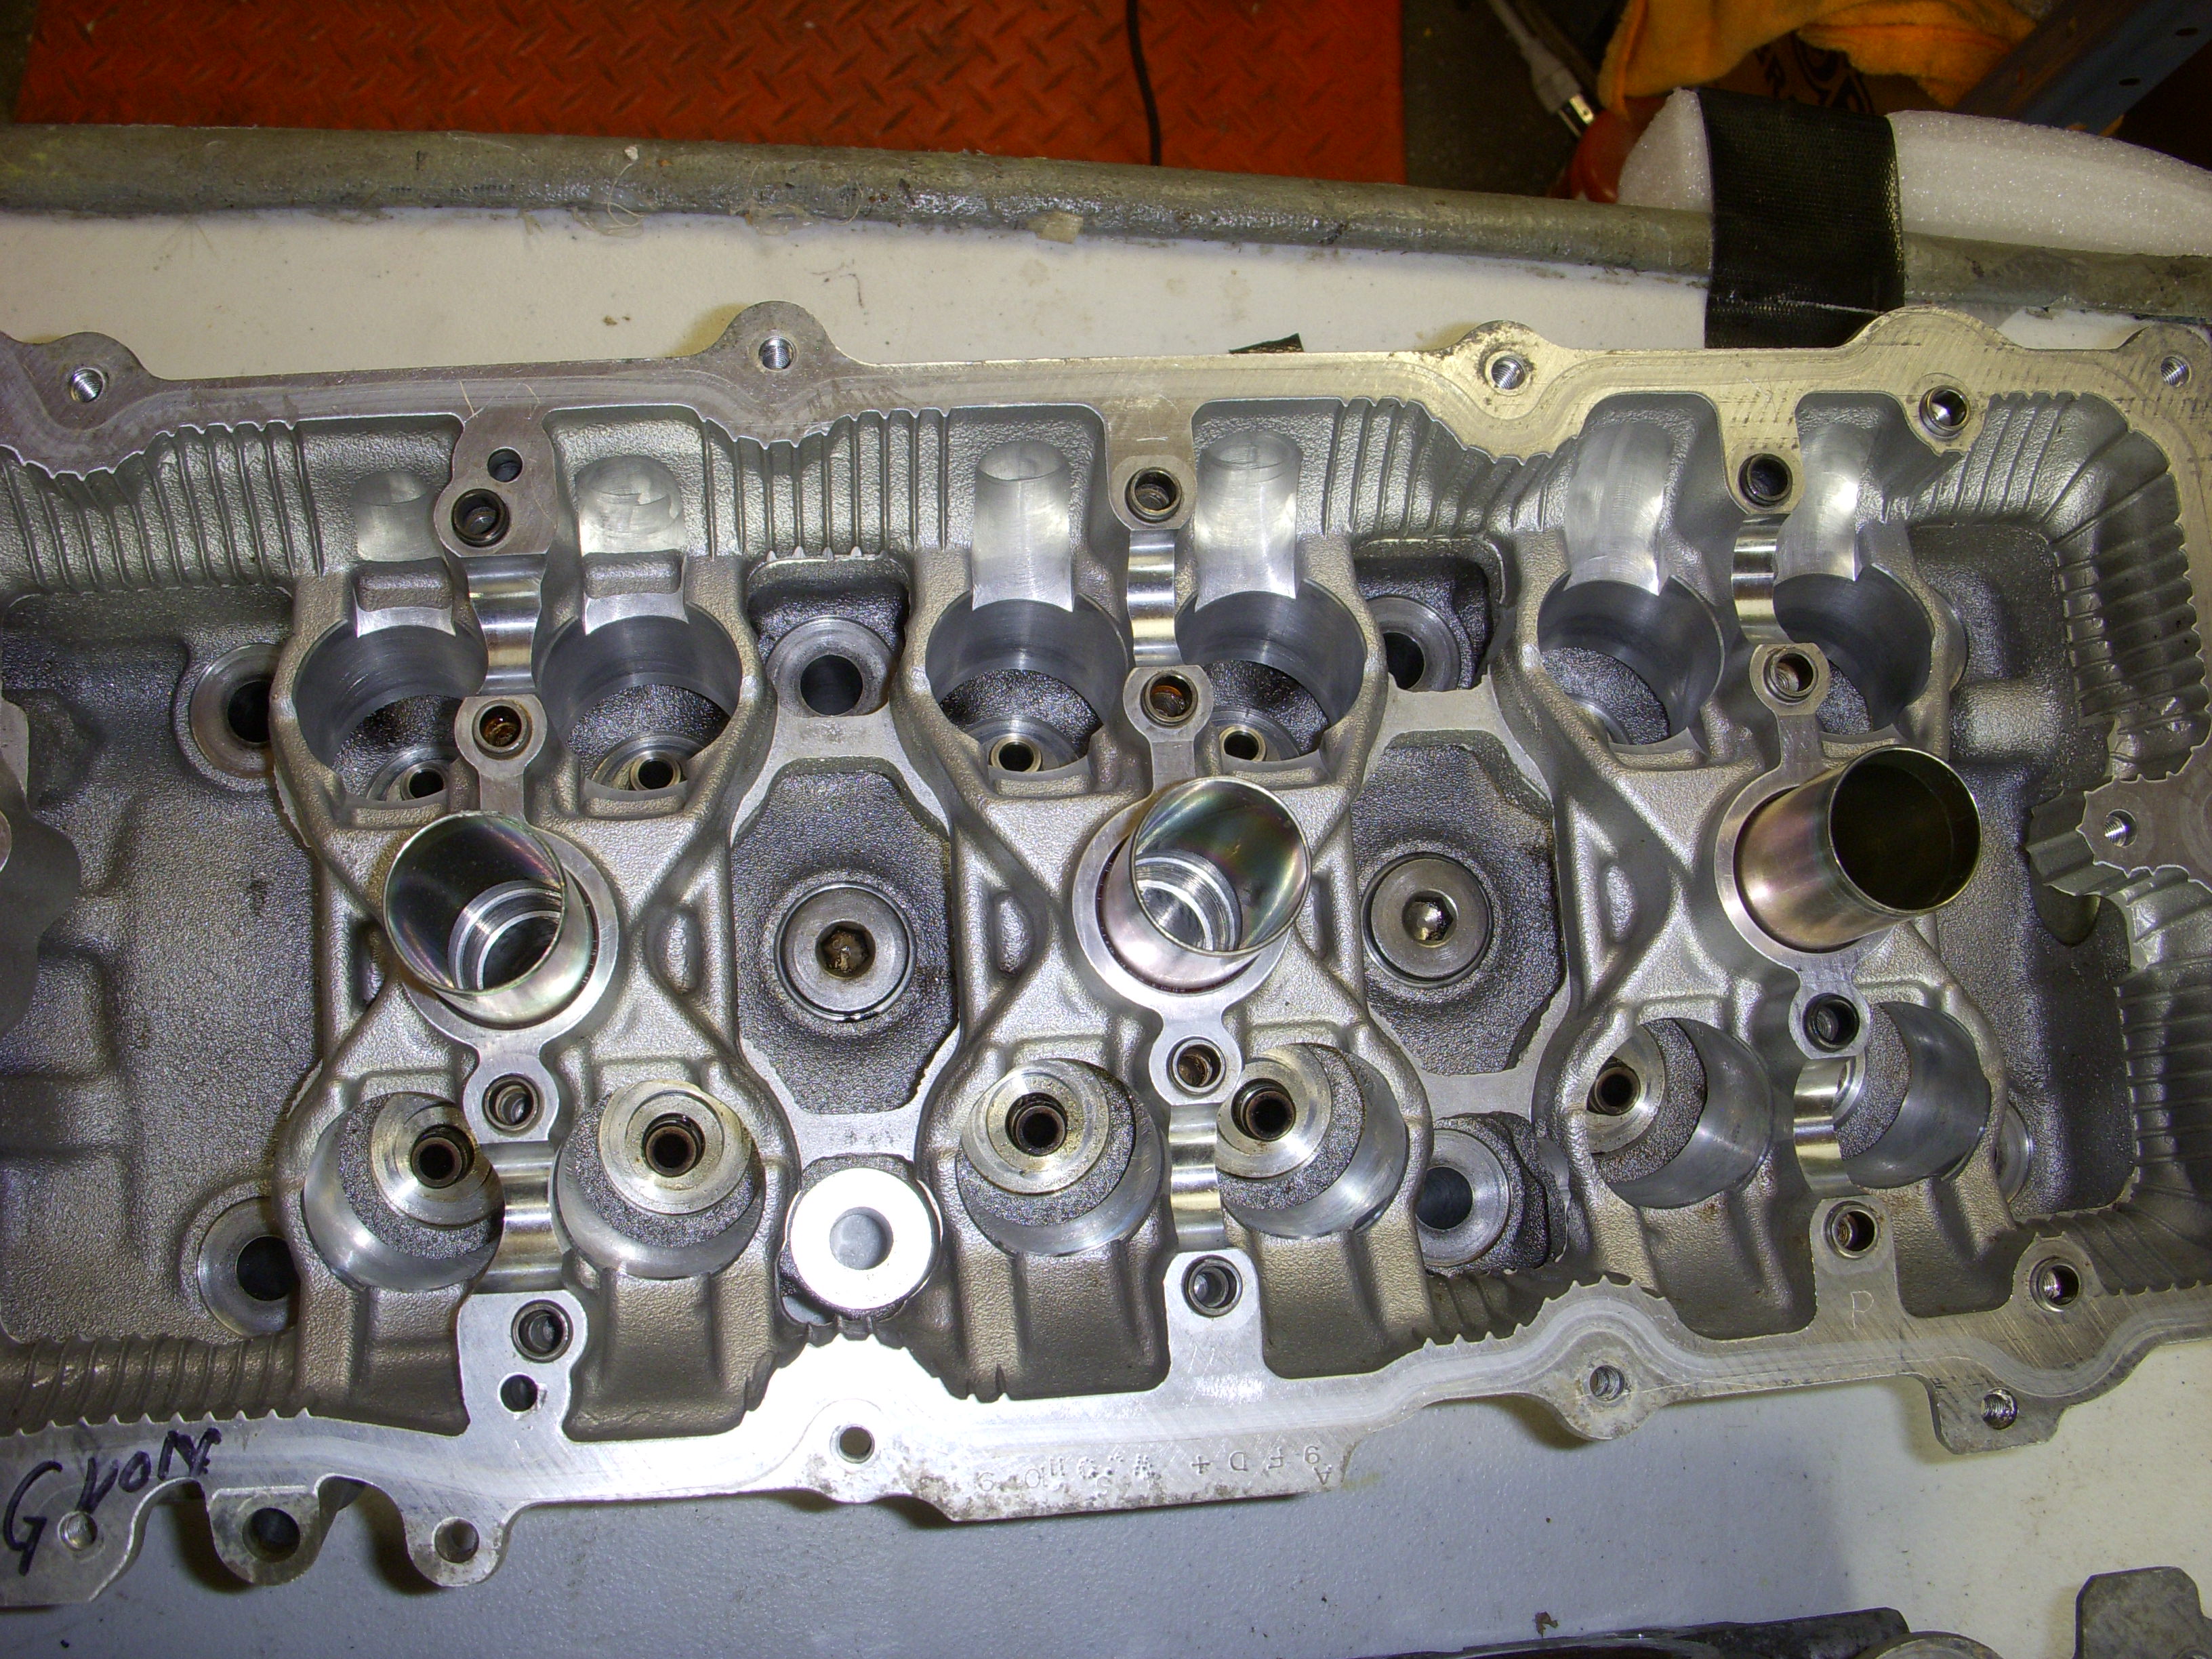
Heads Up !!!
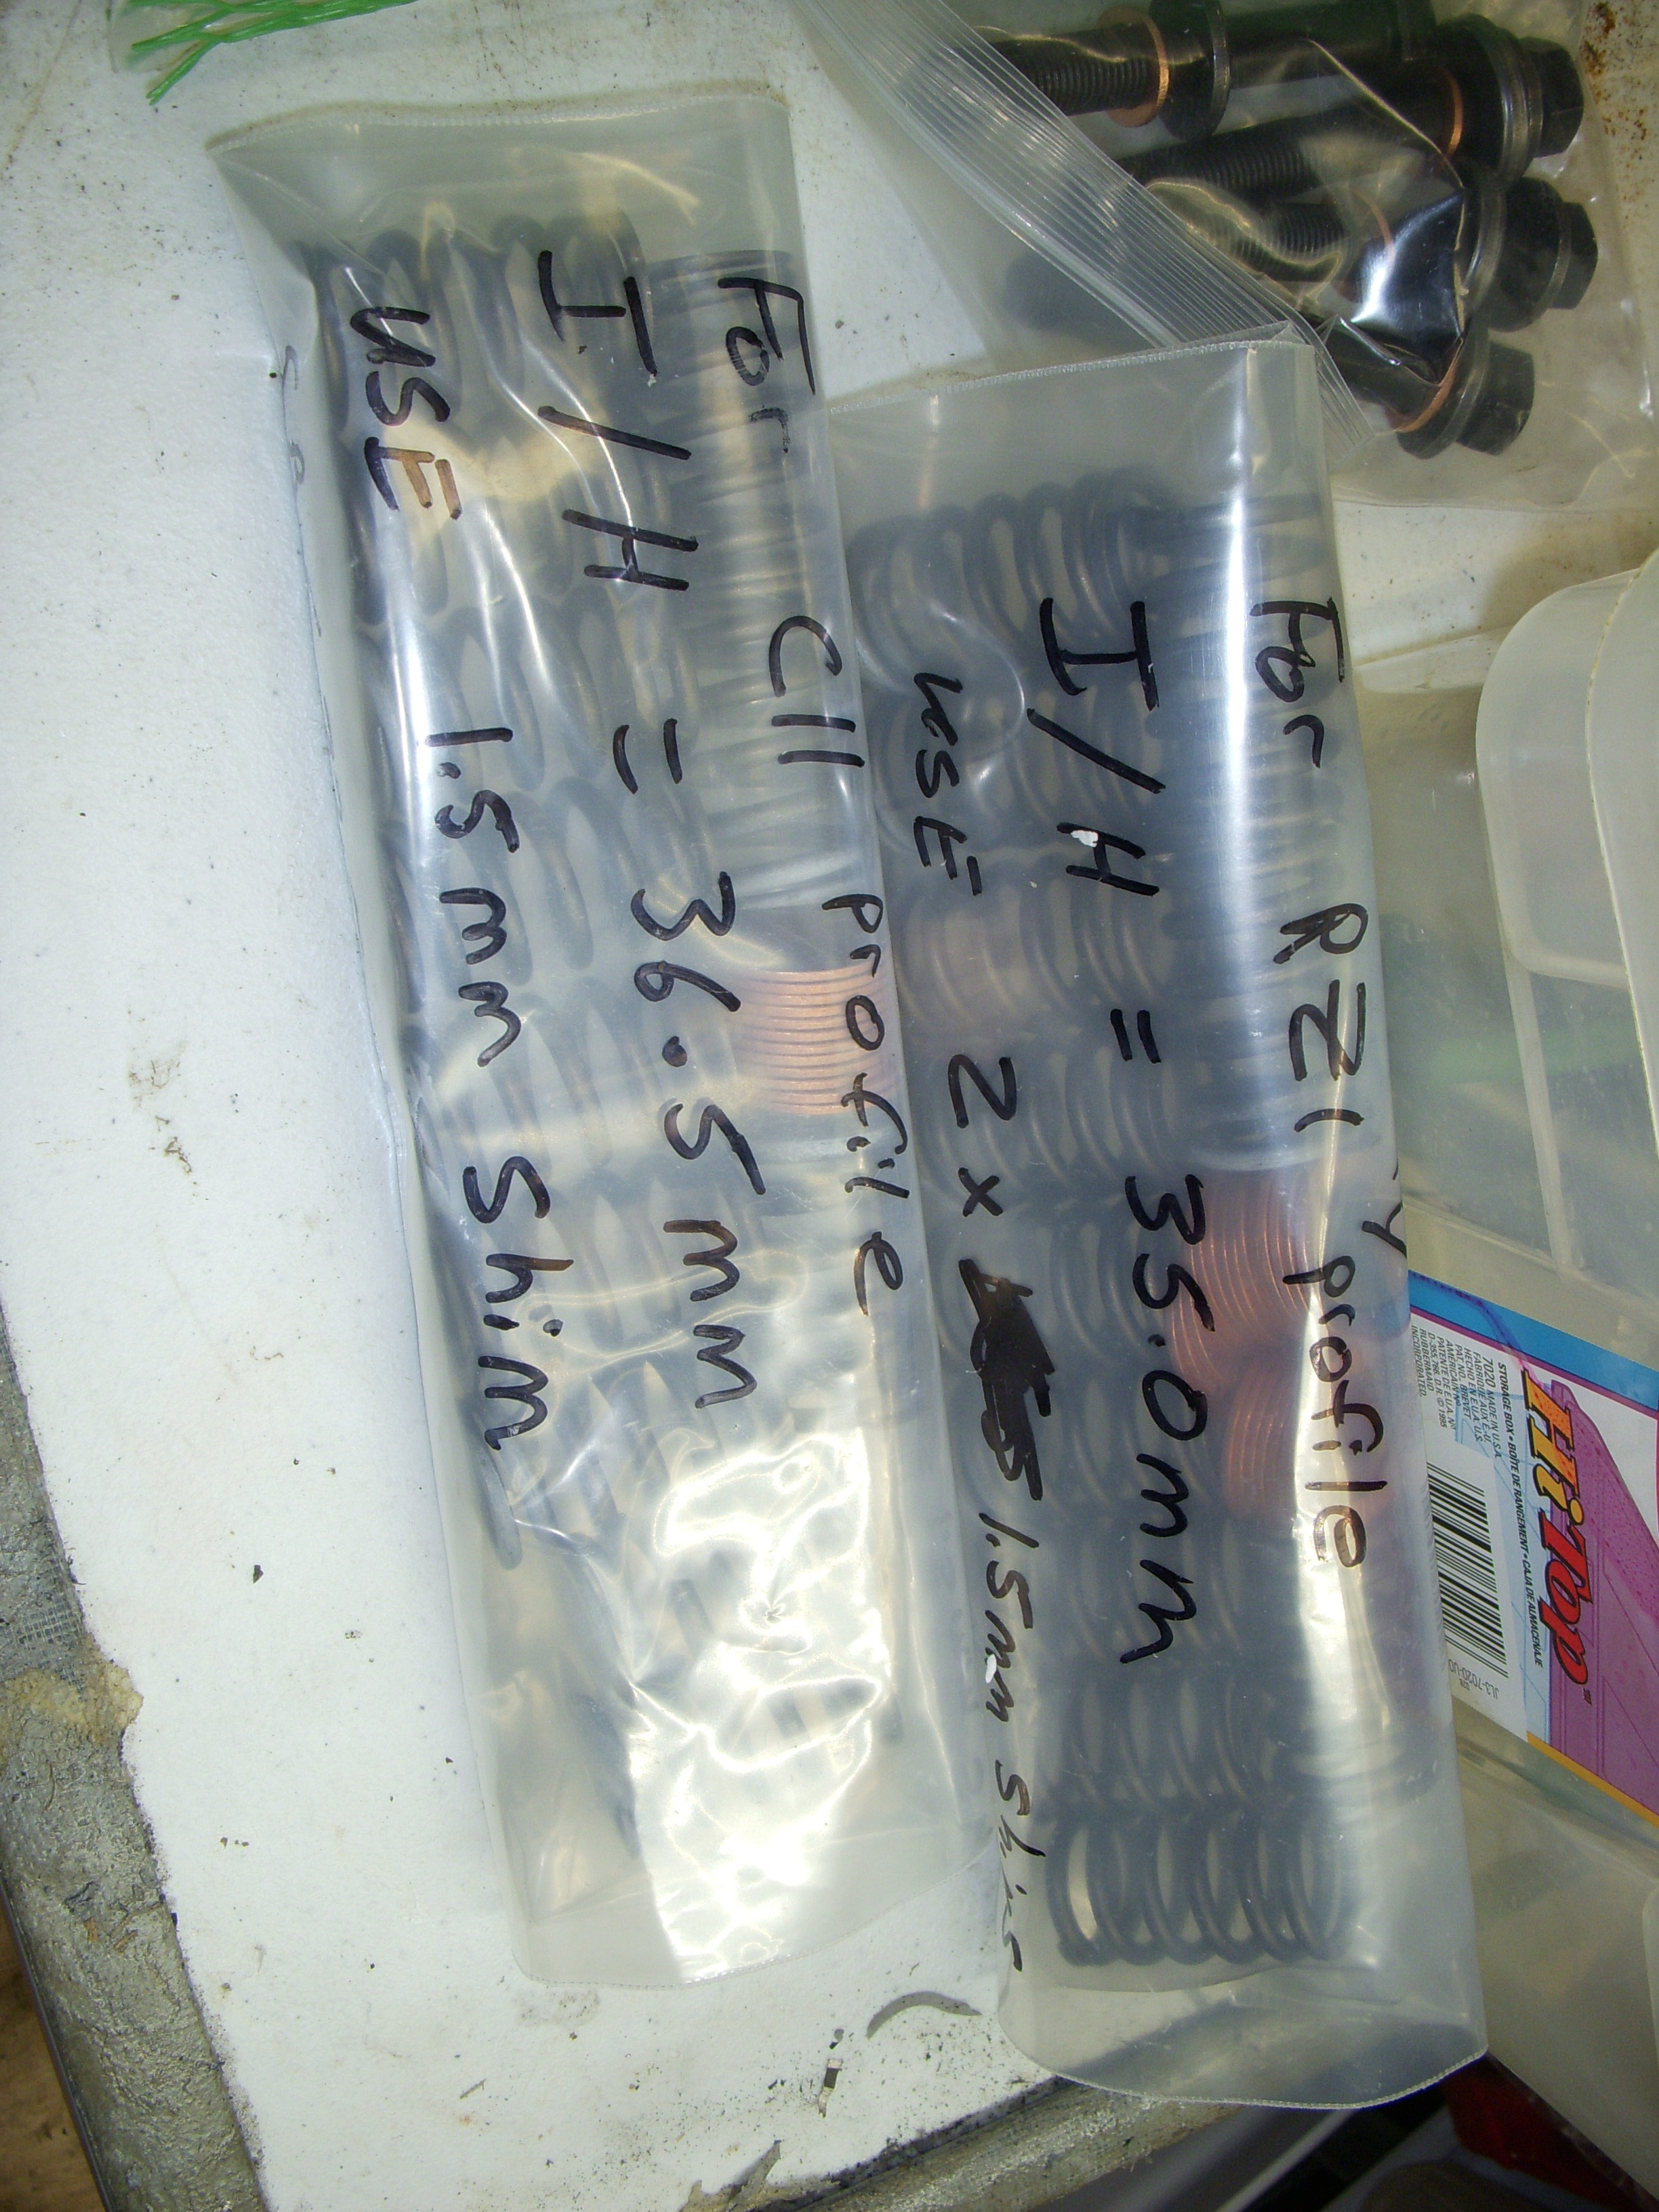
Today the FedEx truck dropped off the new custom cams, a couple of bags of hand-selected valve springs, timing specs (written on a piece of yellow note pad !!) and four bumpy cams ground and drilled for the 3.0 timing setup.
Head with machined intake grooves:
Bags of valve springs, shims, and those special "N" bolts with special crush washers for spacing:
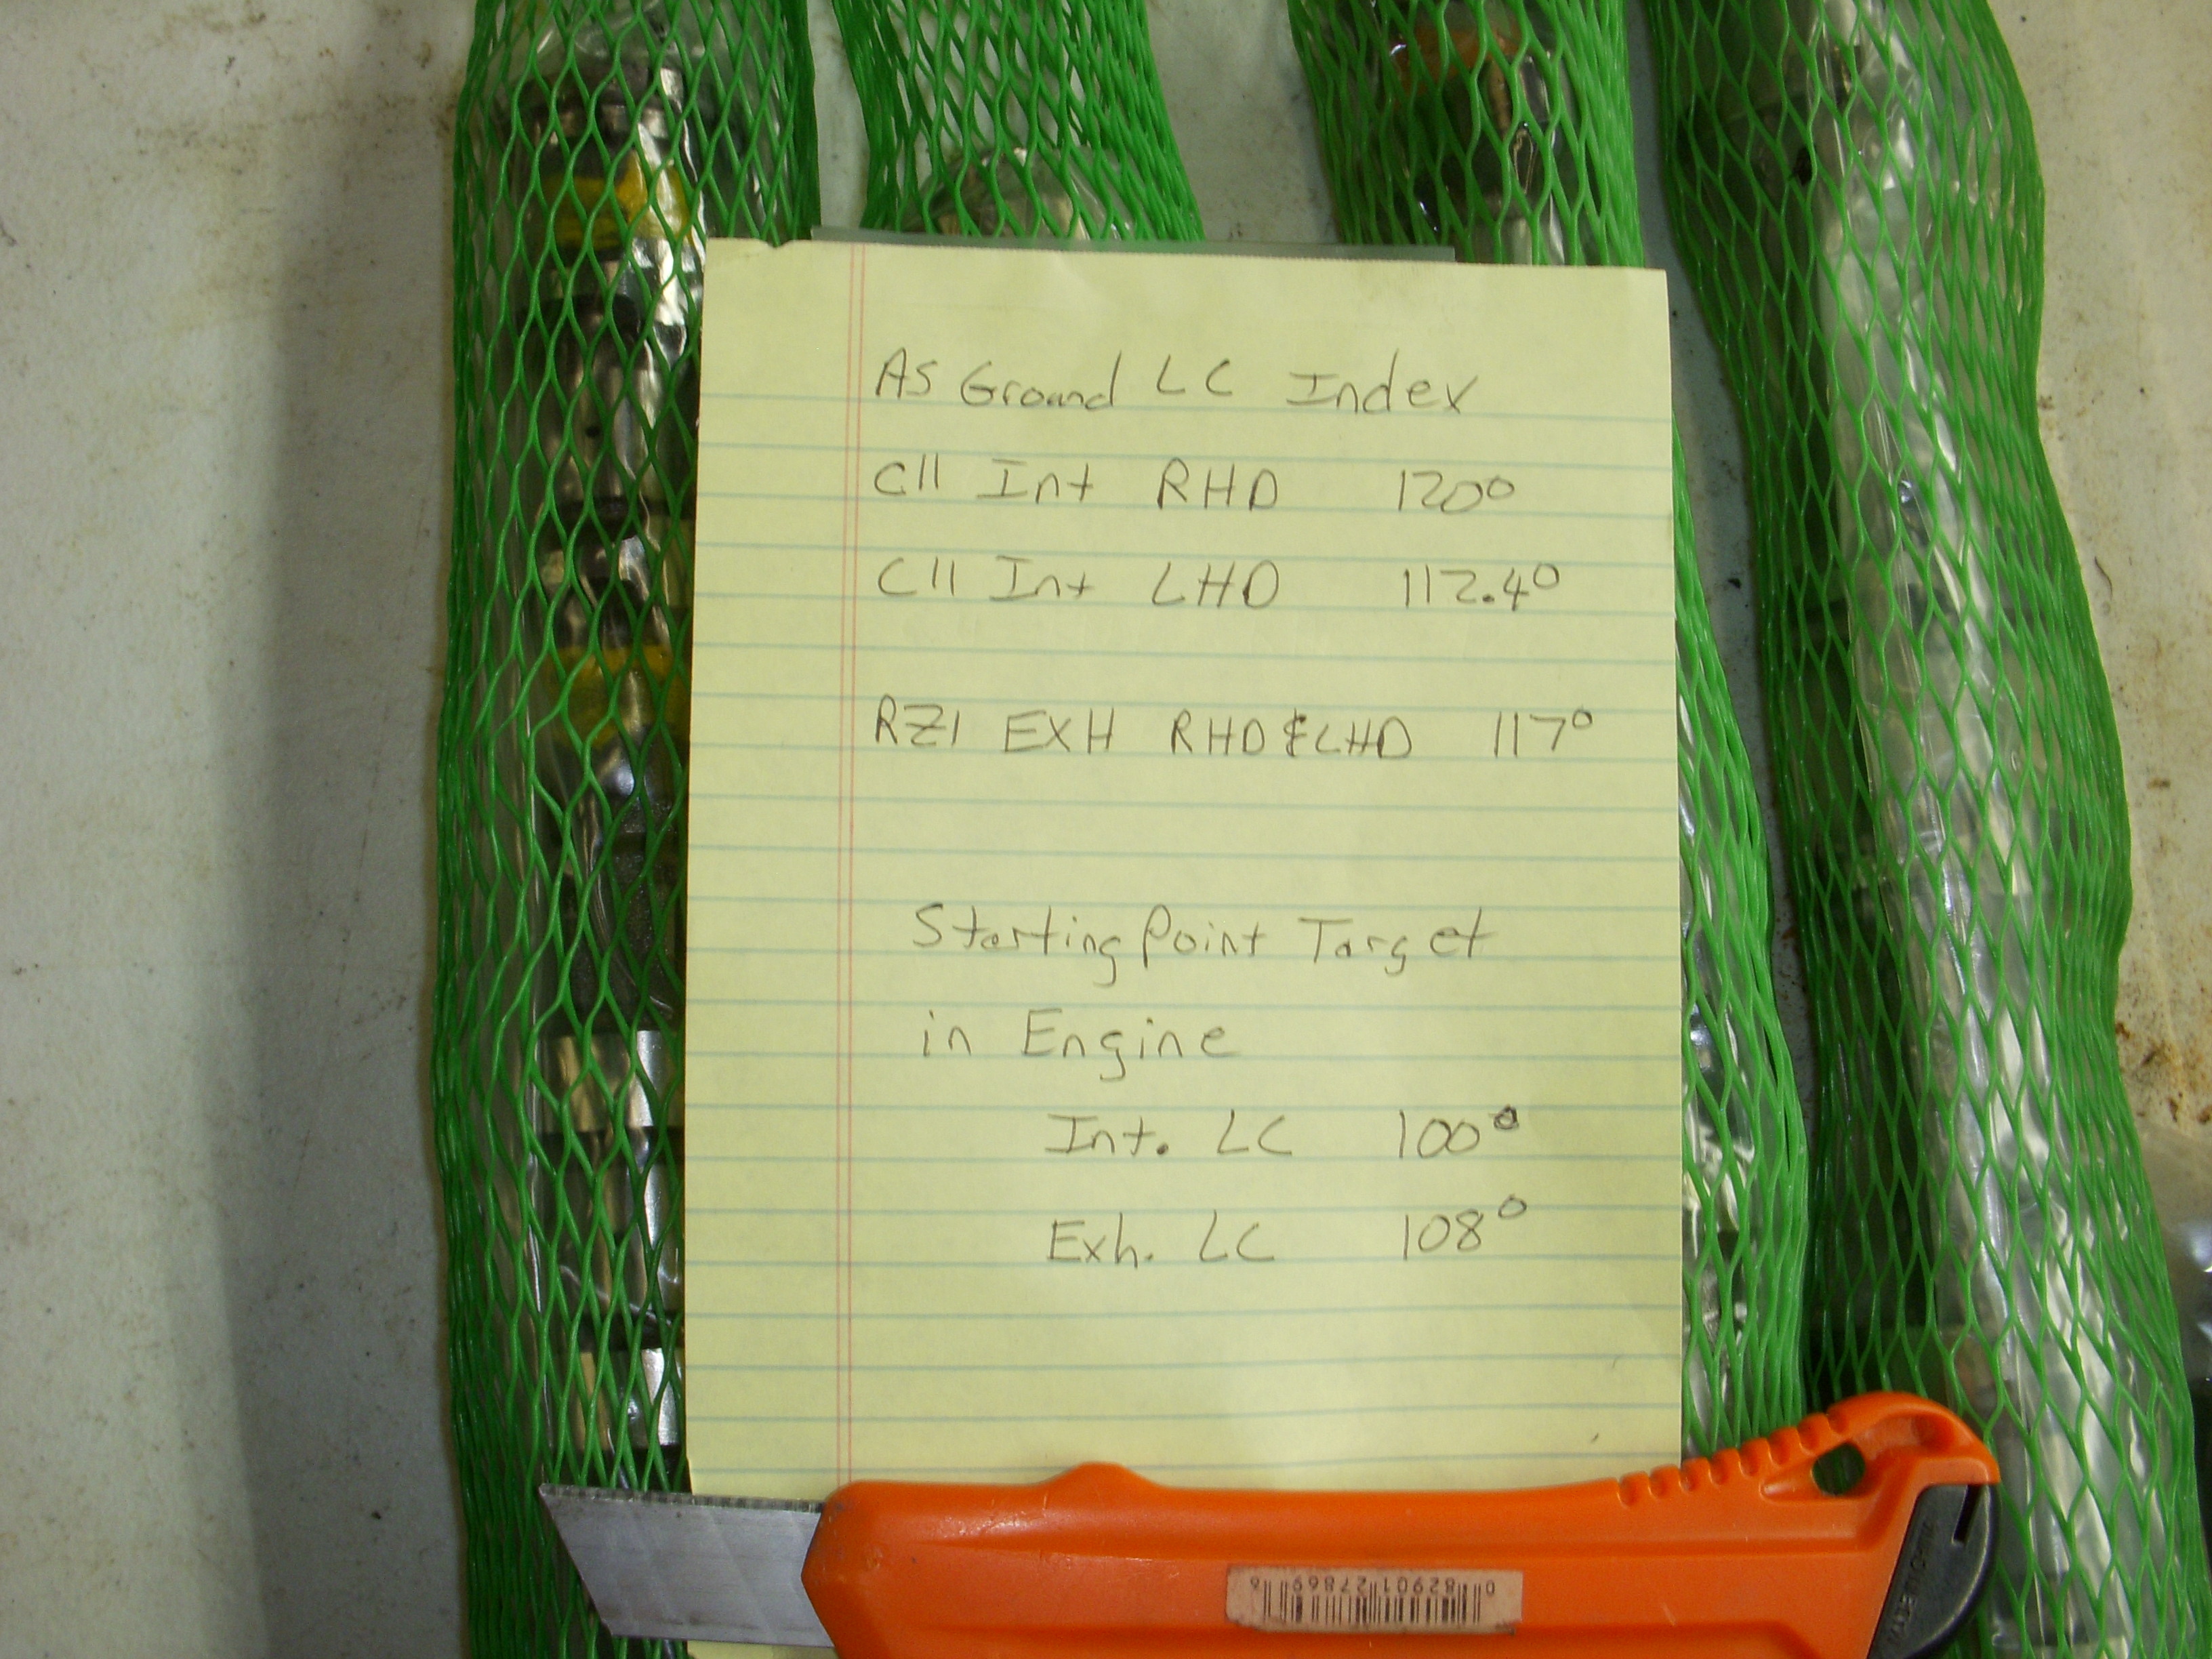
Cam spec card with installation instructions:
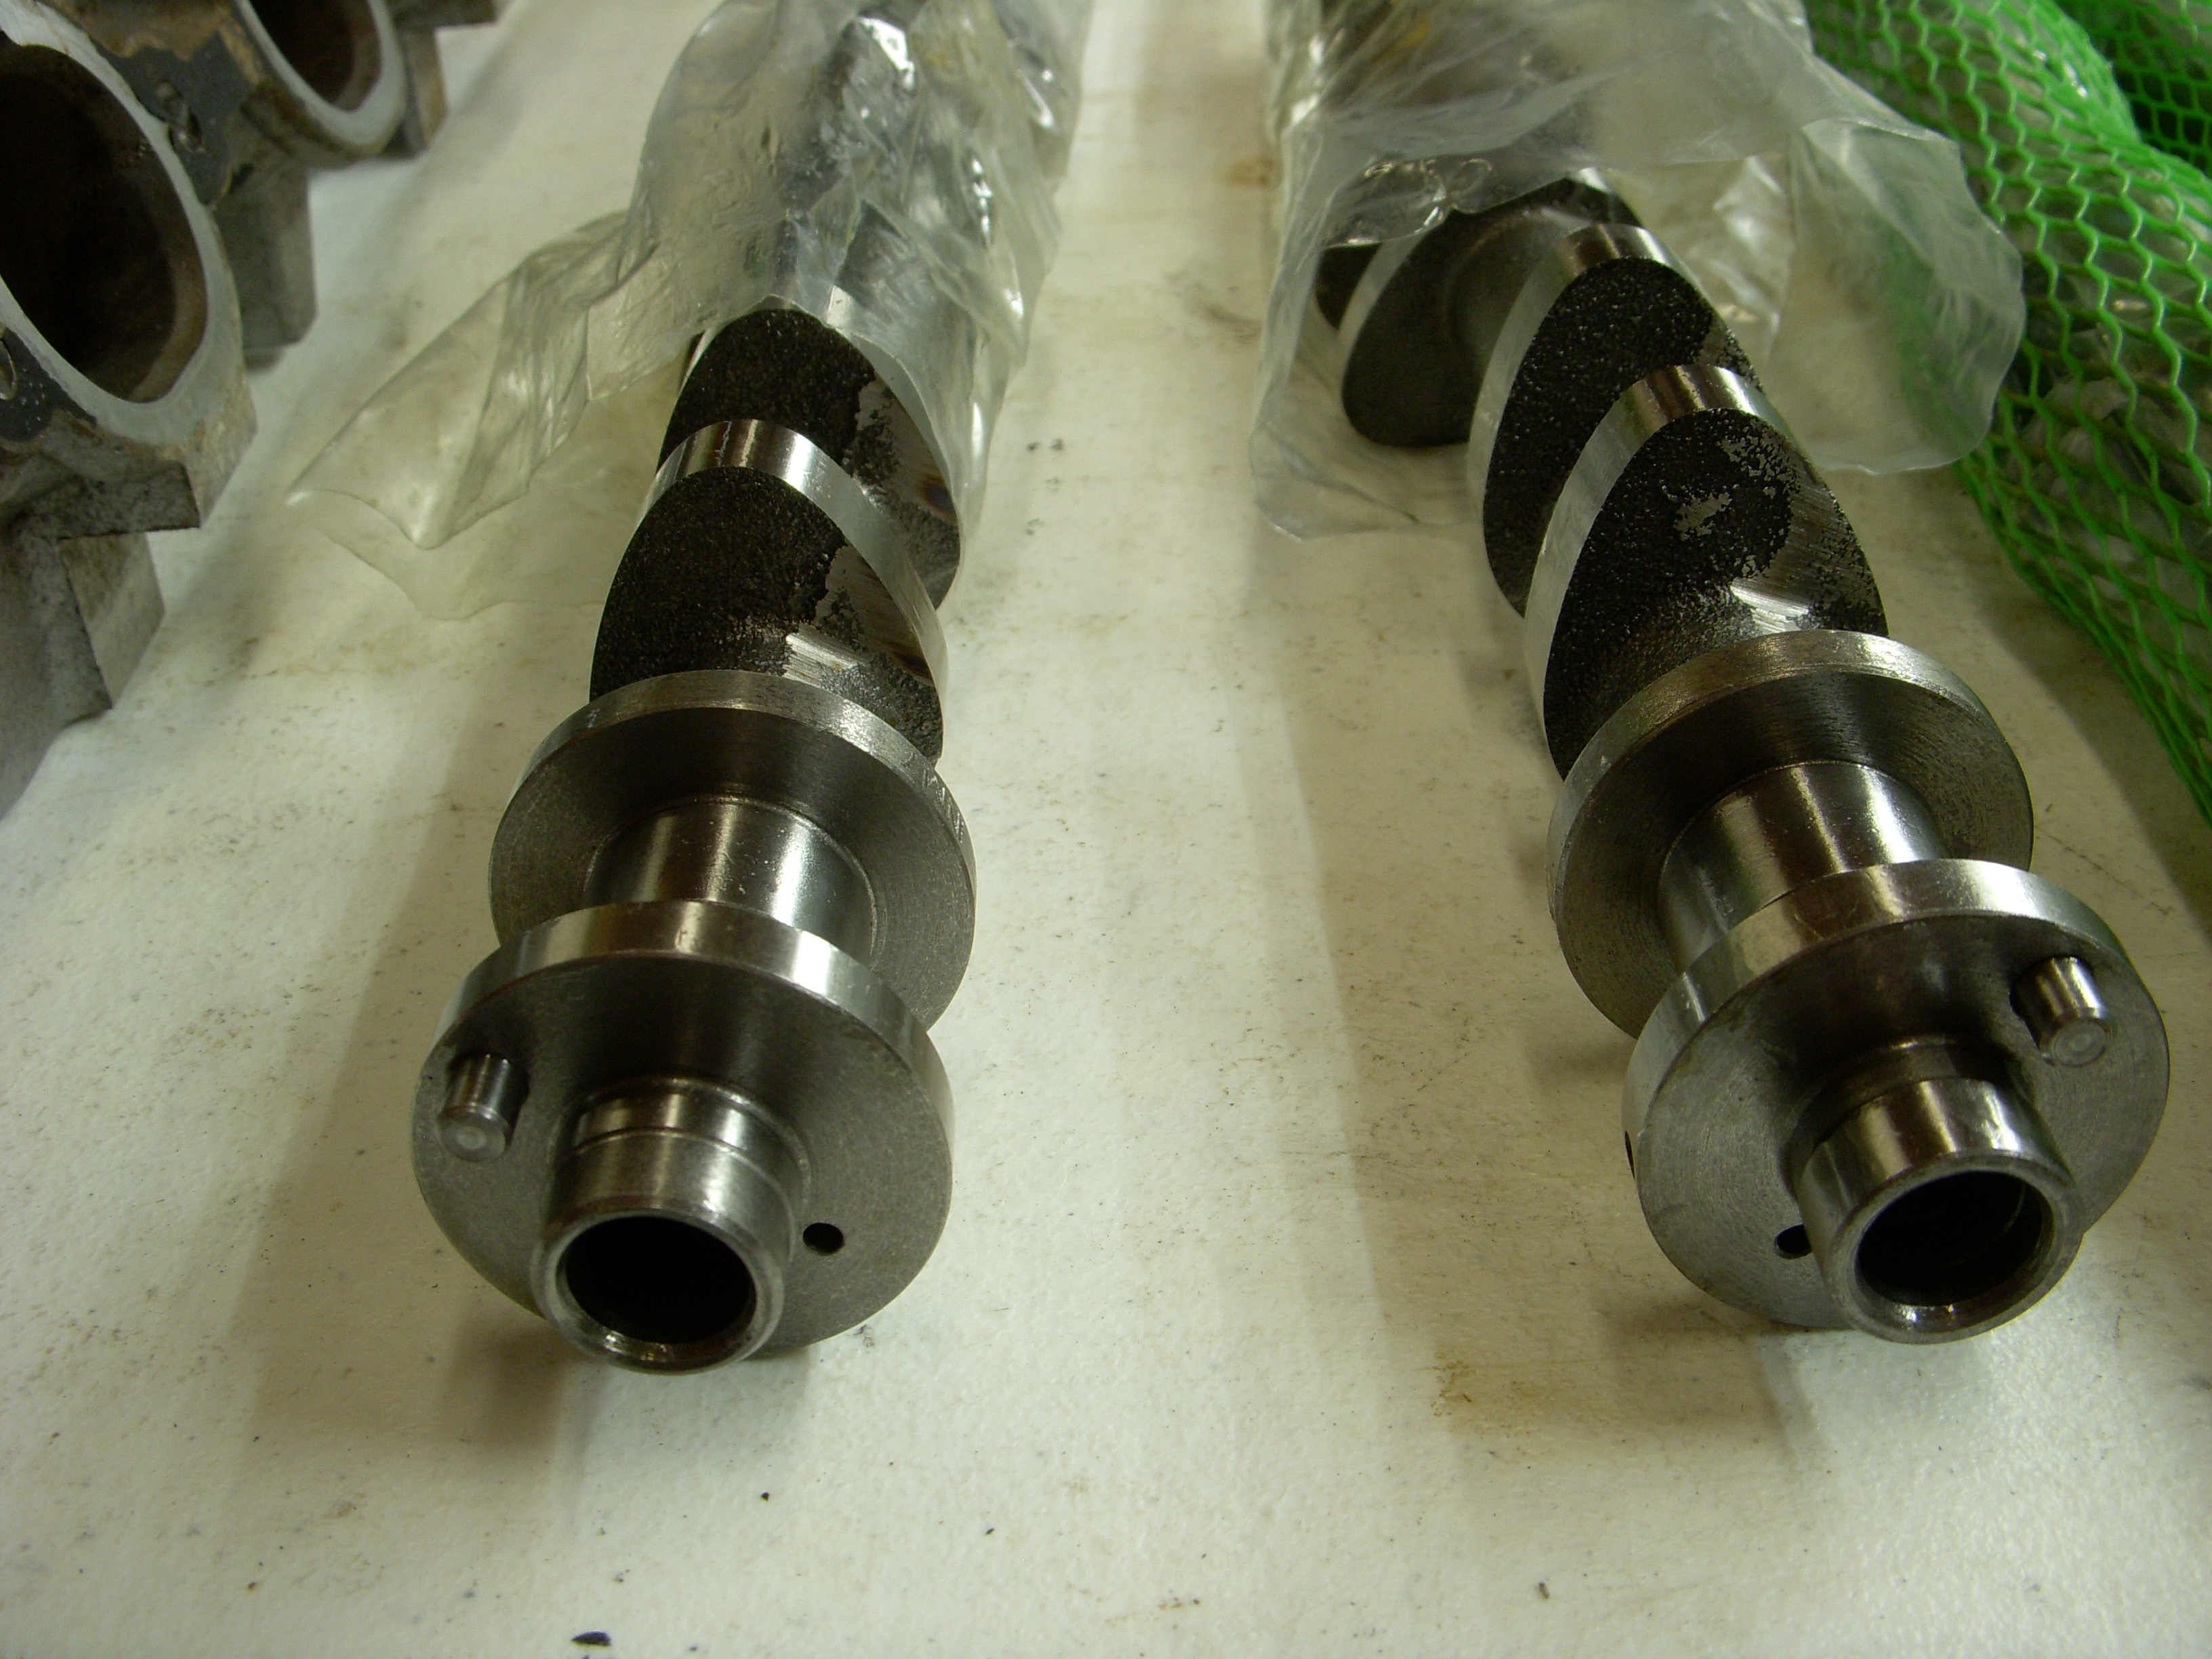
Exhaust and Intake cams, plenty "bumpy" lobes there:
Click here for details on the C11 / RZ1 cam specs, with pretty pictures ...
http://www.jimwolftechnology.com/wol...RC11_RZ1EX.pdf
The heads go to the machinist tomorrow for a light decking cut, and general cleaning of oil passages. This is gonna be fun !!
Head with machined intake grooves:

Bags of valve springs, shims, and those special "N" bolts with special crush washers for spacing:

Cam spec card with installation instructions:

Exhaust and Intake cams, plenty "bumpy" lobes there:


Click here for details on the C11 / RZ1 cam specs, with pretty pictures ...
http://www.jimwolftechnology.com/wol...RC11_RZ1EX.pdf
The heads go to the machinist tomorrow for a light decking cut, and general cleaning of oil passages. This is gonna be fun !!
Last edited by grey99max; 01-14-2017 at 02:28 PM.