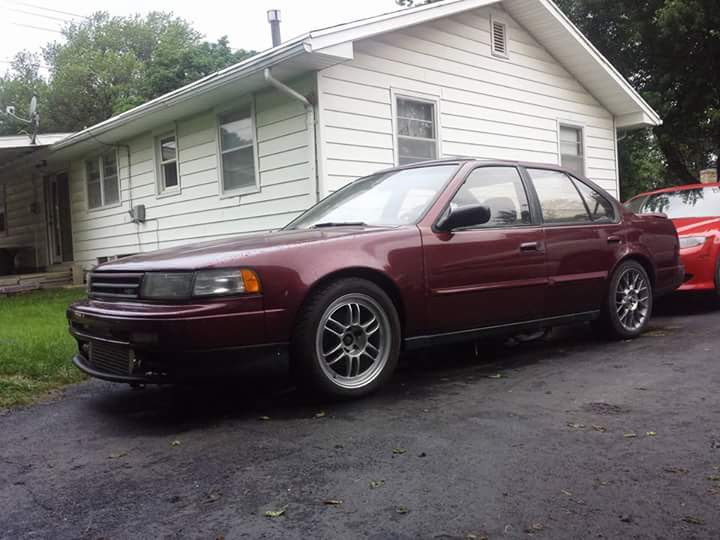
Rebuilding my turbo 3rd gen with big goals.


 02-12-2016, 08:17 PM
#42

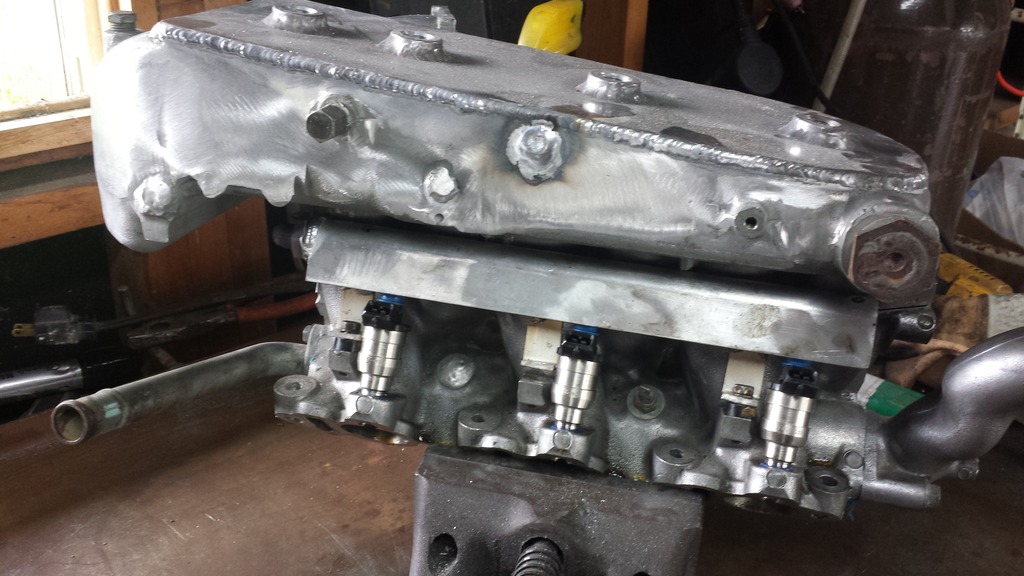
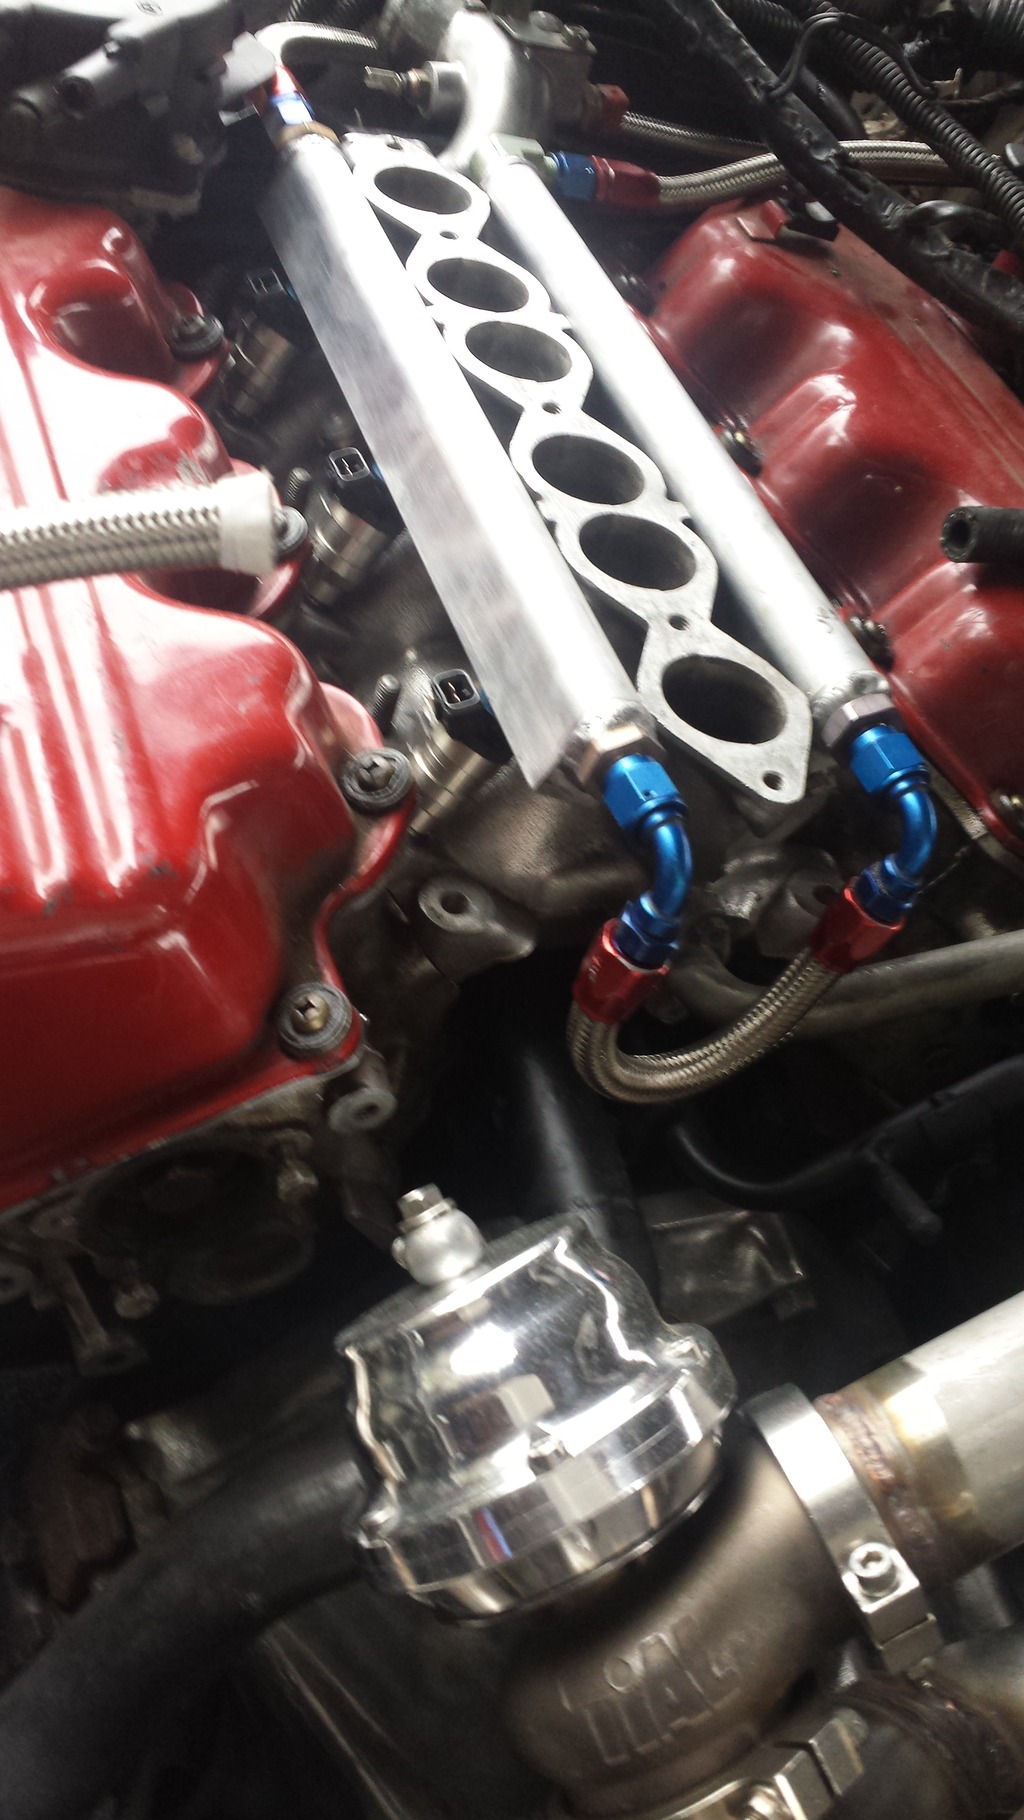
Its time I update this thread its way over due. I lost some pictures of some of the fab work on my old phone that my 3yr old decided chuck across the drive way. But if curious on something I can always snap some of the finished product better. Last update was working on my fuel system so this what I came up with. Injectors are FIC 1000cc for rb26 the are a low impedance which will work fine since I already have drop resistors soldered into my engine harness from the old 450cc. Total cost for rails and fittings was less than $40.
Rails and lower intake bolted in the car and started making fuel lines. Just -6 braided line bought a 20ft roll and had plenty left.
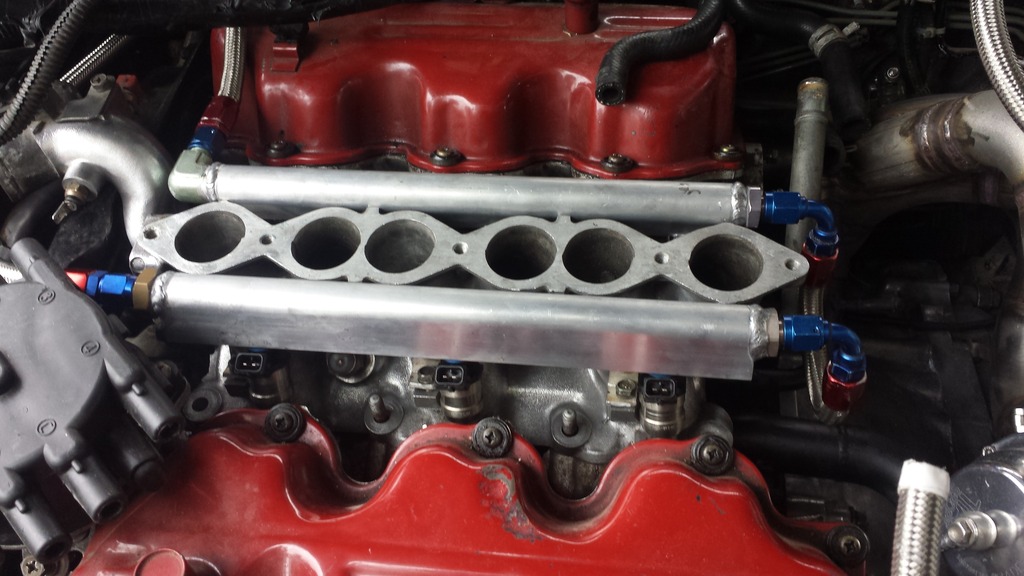
I had to loop it down for the intake to clear on back side of the motor.
Very tight squeeze past the z31 Dizzy. I ran the z31 dizzy for extra clearance. The Maxima probably would have worked but I need all the room I can get.

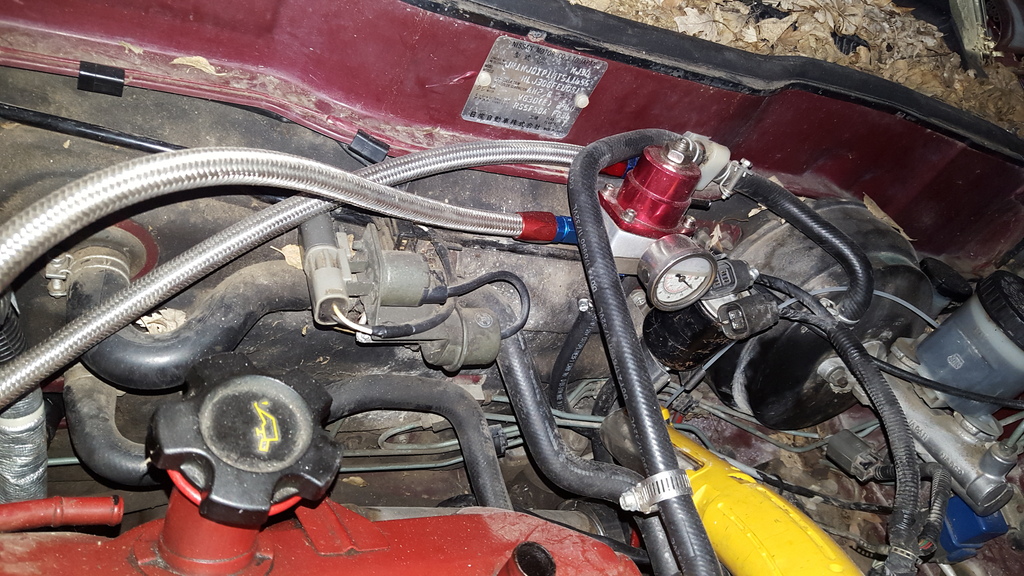
I bought a roll of -6 hard brake line straightened it out and bent to my needs from tank all way up to firewall. Then e85 compliant rubber hose into filter mounted on firewall then used a -6 an to 3/8 barb feed fitting to convert to the braided line. As for the return bottom of the regulator Just a -6 to 5/16 barb. I kept the stock return line as it should be big enough I hope. I can get new pics of all these fittings if someone wants. I lost those.

Rails and lower intake bolted in the car and started making fuel lines. Just -6 braided line bought a 20ft roll and had plenty left.

I had to loop it down for the intake to clear on back side of the motor.

Very tight squeeze past the z31 Dizzy. I ran the z31 dizzy for extra clearance. The Maxima probably would have worked but I need all the room I can get.


I bought a roll of -6 hard brake line straightened it out and bent to my needs from tank all way up to firewall. Then e85 compliant rubber hose into filter mounted on firewall then used a -6 an to 3/8 barb feed fitting to convert to the braided line. As for the return bottom of the regulator Just a -6 to 5/16 barb. I kept the stock return line as it should be big enough I hope. I can get new pics of all these fittings if someone wants. I lost those.
02-12-2016, 08:33 PM
#43
Now that the fuel system is covered primed the system fixed couple leaks move on to getting ac back in this thing. I kept everything there but never put compressor back on. My old charge pipe didn't clear the compressor so made it better. Still need to redo the drivers side 1 piece. I don't have pictures of the in progress but here is the result of about 45 min fab work from a ebay intercooler pipe kit. This is coming off the intercooler and turning up towards motor past the ac was tight squeeze. Was wanting make this solid one piece but had to put a coupler up by ac to connect the top side. Was a pita trying fit it on and off one piece. Ignore all the loose wires. This was from installing new engine harness. 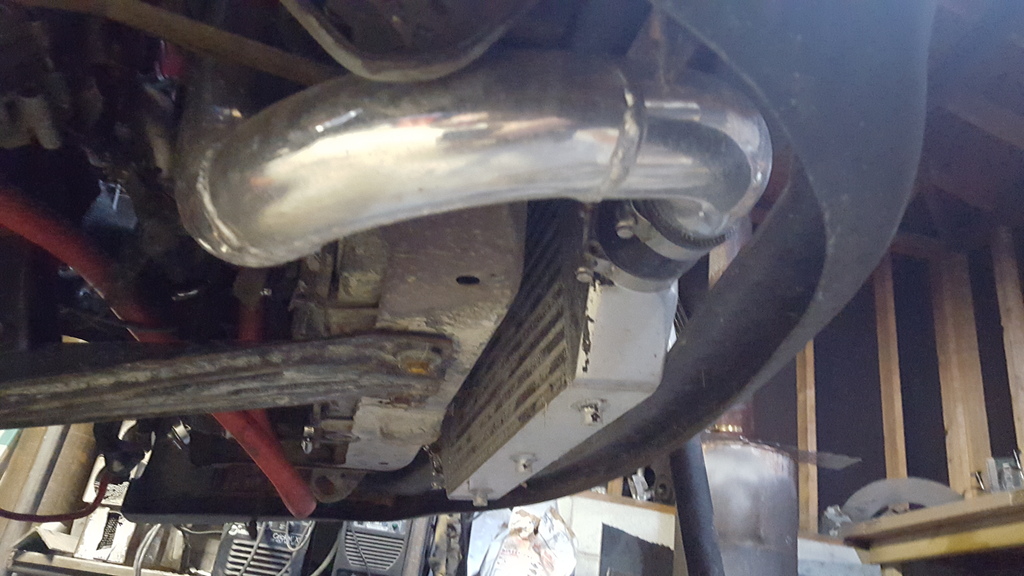
I probably have good finger width all way around the charge pipe.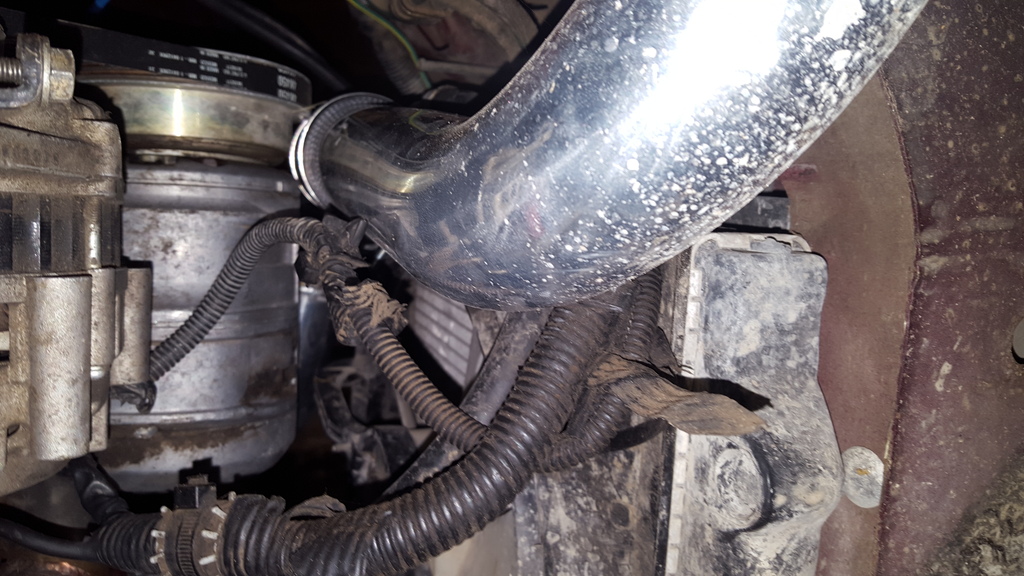
Top side of the new charge pipe. You can also see what I was doing with all those grind marks on my intake well hours and hours later gave it a slight polish. This was June 27th 2015 day before first startup. <a href="http://s484.photobucket.com/user/akurtzer57/media/11540938_10153017184516089_1132122023361755409_n_z pstlwnwld4.jpg.html" target="_blank"><img src="http://i484.photobucket.com/albums/rr209/akurtzer57/11540938_10153017184516089_1132122023361755409_n_z pstlwnwld4.jpg" border="0" alt=" photo 11540938_10153017184516089_1132122023361755409_n_z pstlwnwld4.jpg"/></a>

I probably have good finger width all way around the charge pipe.

Top side of the new charge pipe. You can also see what I was doing with all those grind marks on my intake well hours and hours later gave it a slight polish. This was June 27th 2015 day before first startup. <a href="http://s484.photobucket.com/user/akurtzer57/media/11540938_10153017184516089_1132122023361755409_n_z pstlwnwld4.jpg.html" target="_blank"><img src="http://i484.photobucket.com/albums/rr209/akurtzer57/11540938_10153017184516089_1132122023361755409_n_z pstlwnwld4.jpg" border="0" alt=" photo 11540938_10153017184516089_1132122023361755409_n_z pstlwnwld4.jpg"/></a>
02-12-2016, 08:50 PM
#44
Heres what the setup looks like basically all together. This was day of first start up. Keep in mind I had a lot loose vac lines that a quick thru on anxious to finally hear it run again. I may look into building some stainless hard lines for vacuum lines.
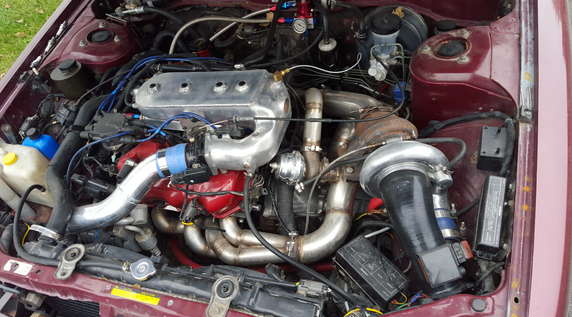
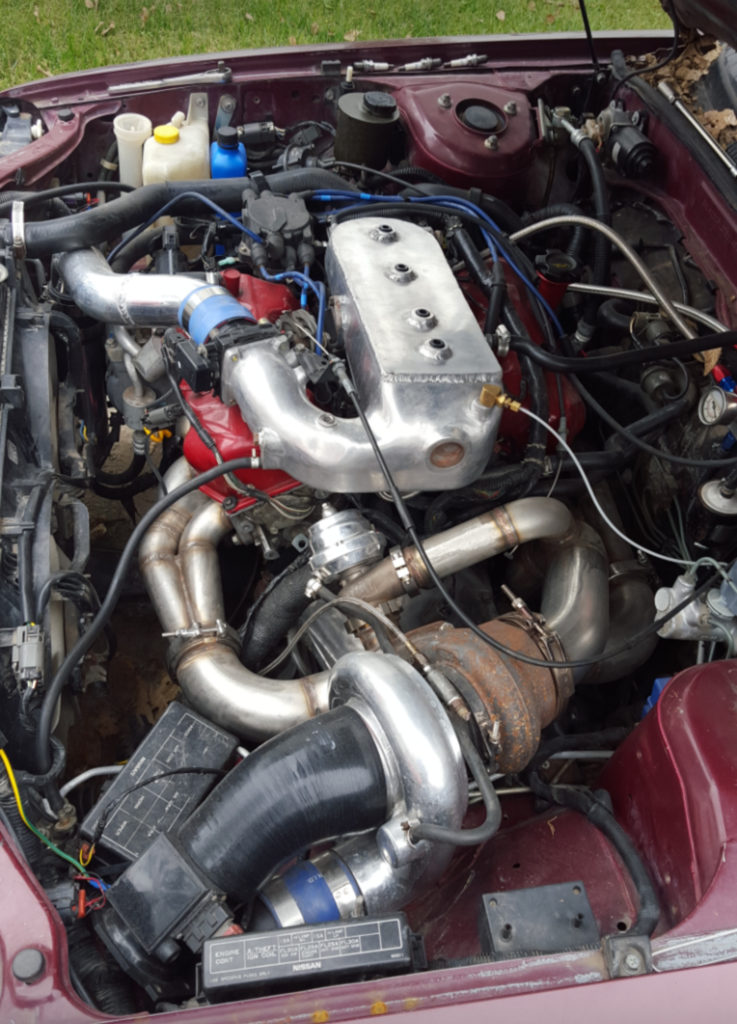
Car sittiing on the ground finally ready to start.
Pulled my tune got a quick base tune cranked built some oil pressure. Put fuel pump fuse and vroom fired right up. Played with my idle for 15-20 min or so getting afr and idle speed right for these cams. Called it a day and was going play with it next day right? Wrong. Try to connect to ecu with nistune nothing. Long story short I pushed the car aside for 7 months not touching it until 2 weeks ago. Come to find out my Ecu randomly took a crap. Got new ecu and everything seems to be working again. I cant start it until get a new 28 pin socket for my nistune and move it to new ecu and cross fingers my nistune board is ok. If not got shell out another $280.


Car sittiing on the ground finally ready to start.

Pulled my tune got a quick base tune cranked built some oil pressure. Put fuel pump fuse and vroom fired right up. Played with my idle for 15-20 min or so getting afr and idle speed right for these cams. Called it a day and was going play with it next day right? Wrong. Try to connect to ecu with nistune nothing. Long story short I pushed the car aside for 7 months not touching it until 2 weeks ago. Come to find out my Ecu randomly took a crap. Got new ecu and everything seems to be working again. I cant start it until get a new 28 pin socket for my nistune and move it to new ecu and cross fingers my nistune board is ok. If not got shell out another $280.
Last edited by akurtzer57; 02-12-2016 at 08:52 PM.
02-12-2016, 09:02 PM
#45
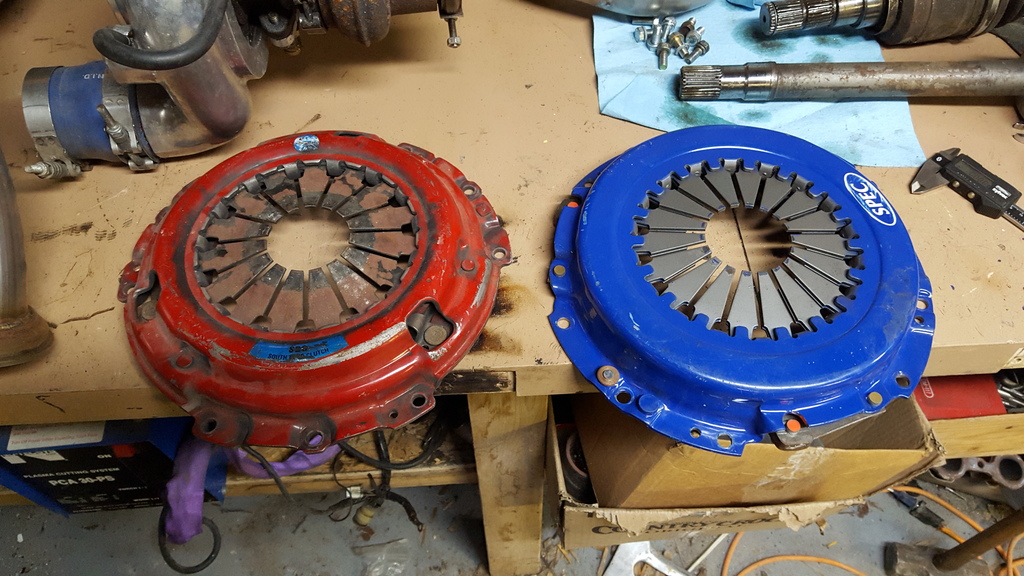
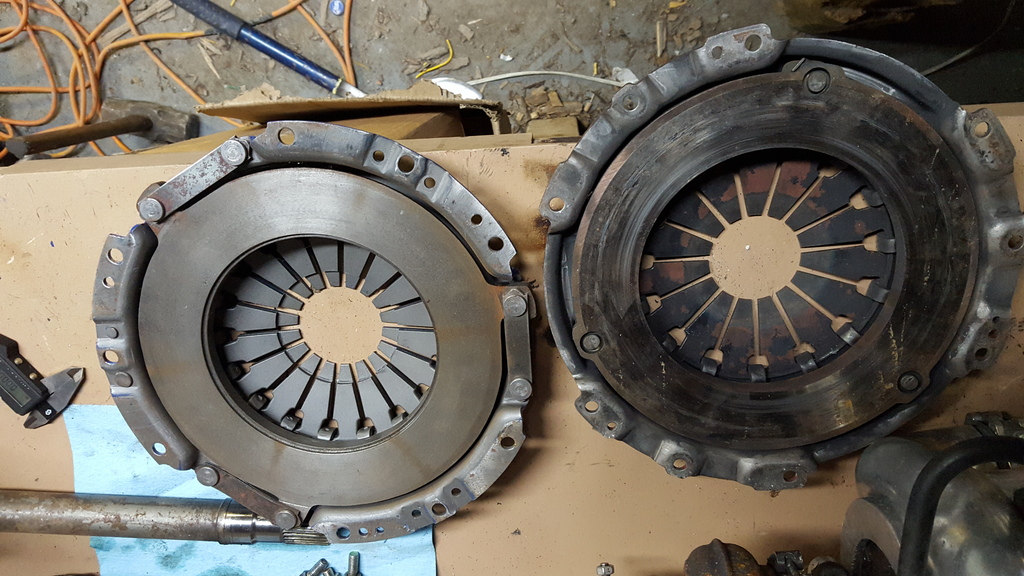
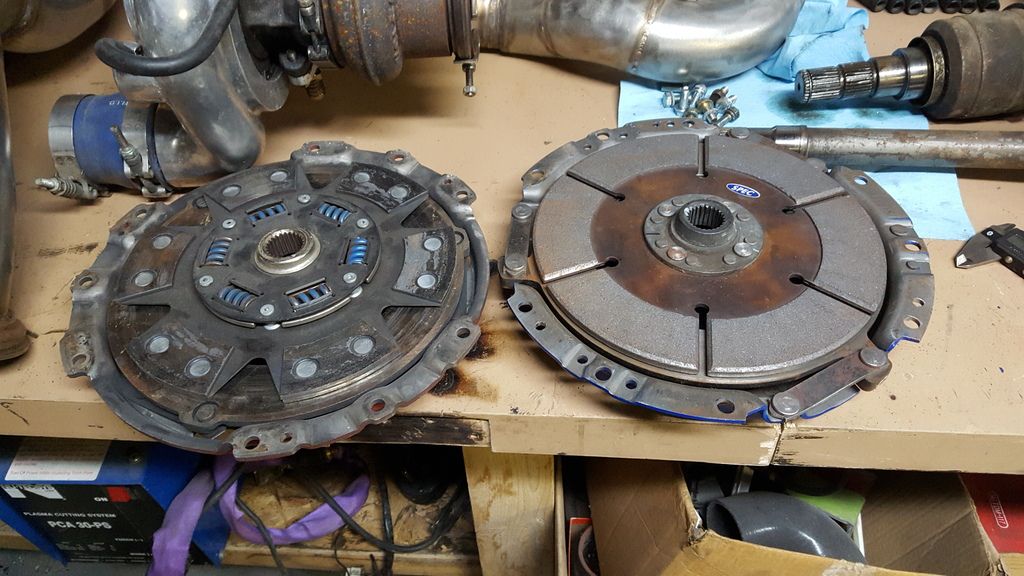
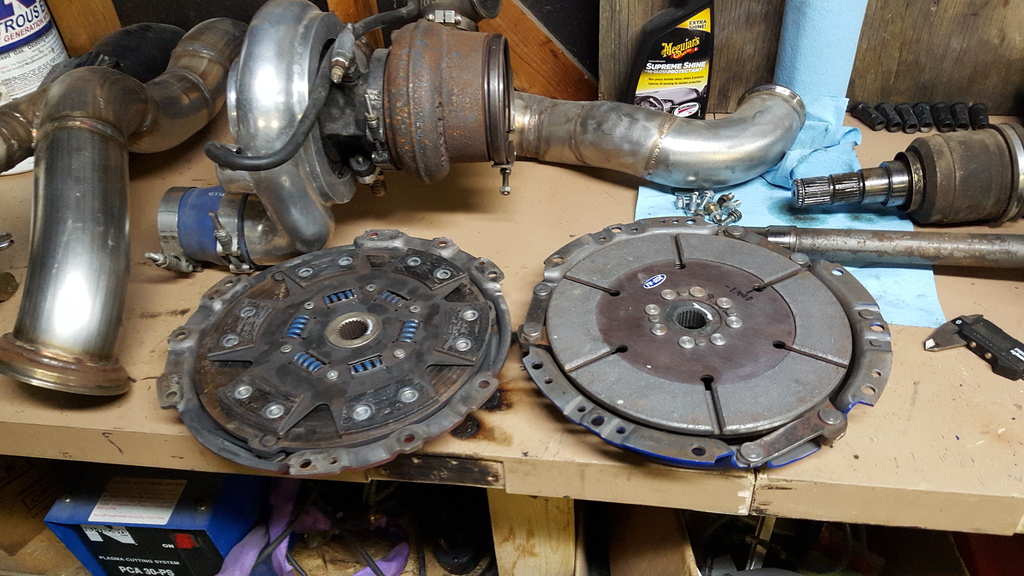
During the 7 months of not working on my Maxima I played with my silverado ss few bolt ons tune etc. Also got timing set done on my 6th gen maxima just in time. Got good news Wife and I are expecting little girl this march. So the 6th gen will be my new daily. But anyways now that I am working on my car again for last 2 weekends New ecu and engine harness are in. I cant do much but finish exhaust and address my clutch issue. Heres my clutch issue it will not fully disengage. So I put this new clutch in part number sns455 for a 84-86 300zx. The southbend clutch on left is my old clutch that is smoked. Every which way I measure there the same. Had clutch in the car running but will not disengage fully. At first thought throw out bearing or fork popped off pivot ball. Which all checked out ok. Only thing I'm left to think is my slave cylinder is too weak to press in this pressure plate fully. Here's few pics of clutches. The slave cylinder is stock 3/4. On the z31 forum guy suggested adjusting the clutch at the master cylinder? I hope I didn't pull my trans today for nothing today. Even though it takes less than an hour.


 02-15-2016, 07:35 PM
#46
Nice thread update man. You've been busy!
That's odd about the clutch. I'm not sure what the Z31 guy means about the adjustment though - is he saying you should try to adjust it for the pedal to make it try to engage lower?
That's odd about the clutch. I'm not sure what the Z31 guy means about the adjustment though - is he saying you should try to adjust it for the pedal to make it try to engage lower?
02-16-2016, 04:30 AM
#47
That's what I'm guessing. I was going look into it this weekend.
02-16-2016, 06:25 AM
#48
The only adjustment that I can think of would be on the length of the rod coming from the clutch master cylinder. If you shorten the rod, it would thus bring the pedal closer to the floorboard and seems like the engagement point would inherently be lowered as well.
I guess if the engagement point was low enough though, you'd effectively bottom out the physical clutch pedal before actually fully achieving all the necessary travel on the TOB/pressure plate side of things.
Thinking of it that way, maybe your adjustment should actually be to lengthen the master cylinder rod?
I have always just brought my clutch pedal up about even with the brake pedal (you may need to adjust the depth on that switch that bolts into the assembly), then adjusted the master cylinder rod length accordingly to "meet" the pedal. I've never had any engagement issues that way.
Hopefully you can get it figured out this weekend.
Is the pressure plate that stiff? My new ACT NM1-XTSS is pretty darn stiff and I have no issues with engagement. It's quite a workout to drive. I did beef up my pedal assembly with lots of cross bracing to take out any flex and also welded in a plate on the firewall where the master cylinder mounts so it won't flex there either.
 02-16-2016, 11:58 AM
#50
02-16-2016, 12:17 PM
#51
The only adjustment that I can think of would be on the length of the rod coming from the clutch master cylinder. If you shorten the rod, it would thus bring the pedal closer to the floorboard and seems like the engagement point would inherently be lowered as well.
I guess if the engagement point was low enough though, you'd effectively bottom out the physical clutch pedal before actually fully achieving all the necessary travel on the TOB/pressure plate side of things.
Thinking of it that way, maybe your adjustment should actually be to lengthen the master cylinder rod?
I have always just brought my clutch pedal up about even with the brake pedal (you may need to adjust the depth on that switch that bolts into the assembly), then adjusted the master cylinder rod length accordingly to "meet" the pedal. I've never had any engagement issues that way.
Hopefully you can get it figured out this weekend.
Is the pressure plate that stiff? My new ACT NM1-XTSS is pretty darn stiff and I have no issues with engagement. It's quite a workout to drive. I did beef up my pedal assembly with lots of cross bracing to take out any flex and also welded in a plate on the firewall where the master cylinder mounts so it won't flex there either.
I guess if the engagement point was low enough though, you'd effectively bottom out the physical clutch pedal before actually fully achieving all the necessary travel on the TOB/pressure plate side of things.
Thinking of it that way, maybe your adjustment should actually be to lengthen the master cylinder rod?
I have always just brought my clutch pedal up about even with the brake pedal (you may need to adjust the depth on that switch that bolts into the assembly), then adjusted the master cylinder rod length accordingly to "meet" the pedal. I've never had any engagement issues that way.
Hopefully you can get it figured out this weekend.
Is the pressure plate that stiff? My new ACT NM1-XTSS is pretty darn stiff and I have no issues with engagement. It's quite a workout to drive. I did beef up my pedal assembly with lots of cross bracing to take out any flex and also welded in a plate on the firewall where the master cylinder mounts so it won't flex there either.
02-24-2016, 07:51 PM
#52
Waiting on few misc things to switch nistune over to the ecu. Been working on my shiro in meantime get it on road while I wait for parts. Ill probably have small update this weekend as I relocate and clean few wiring up etc. Oh ya heres a fun fact. These headers were built in a storage unit. Can see the plywood walls and I was working on the ground alot cutting. I brought my welder to a friends shop at the time to weld them up as not enough power without blowing a breaker in storage.
 02-26-2016, 09:15 PM
#54
Not really I never really had much issues blow thru but with the power goal I have in mind trying to avoid any little rich lean issue possible and the boost level im at only time before I blow the maf apart. Im also debating if I still want to run a constant open loop tune or not.
04-07-2016, 07:41 PM
#55
Well not much to really update. Finally finished up my j30 brake upgrade for the front. Went fairly smoothly. For the rear I had huge help from fellow 3rd gen org member sourcing me some 89 torque members and the z31 brake upgrade. He also sent me few other goodies to fund a launch of 3rd gen maxima turbo manifolds to go into production. Also my turbo is shipped out and waiting for the bigger and better to support my goal. Should be a monster very shortly.
 04-09-2016, 10:57 AM
#57
Working on coming out with an affordable log style 304 sch 10 stainless manifold. Will mount the turbo up top alot like the 4th gen guys do on a reverse y pipe setup. Im really trying make this work for vg and ve it should be doable as long as the port spacing is the same. Need someone to measure some ve heads I dont have a set.
04-09-2016, 11:04 AM
#58
Landed a part time job today money been tight with adding a new baby to the family. Getting this part time job finally able send my turbo off for the upgrade heres a video of whats getting done to it. It is getting the 10 blade turbine wheel tho.
04-09-2016, 11:22 AM
#59
Working on coming out with an affordable log style 304 sch 10 stainless manifold. Will mount the turbo up top alot like the 4th gen guys do on a reverse y pipe setup. Im really trying make this work for vg and ve it should be doable as long as the port spacing is the same. Need someone to measure some ve heads I dont have a set.
04-09-2016, 11:59 AM
#60
Ok thanks ill hit you up soon thru a pm. Got another member 2.5 hours from me wanting a ve set possibly


Thread
Thread Starter
Forum
Replies
Last Post
6spd4dsc
5th Generation Classifieds (2000-2003)
4
03-04-2016 05:19 PM