88 SE turbo vg30 build thread
 09-28-2015, 06:25 AM
#1
Member
Thread Starter

Join Date: Mar 2015
Posts: 278
88 SE turbo vg30 build thread
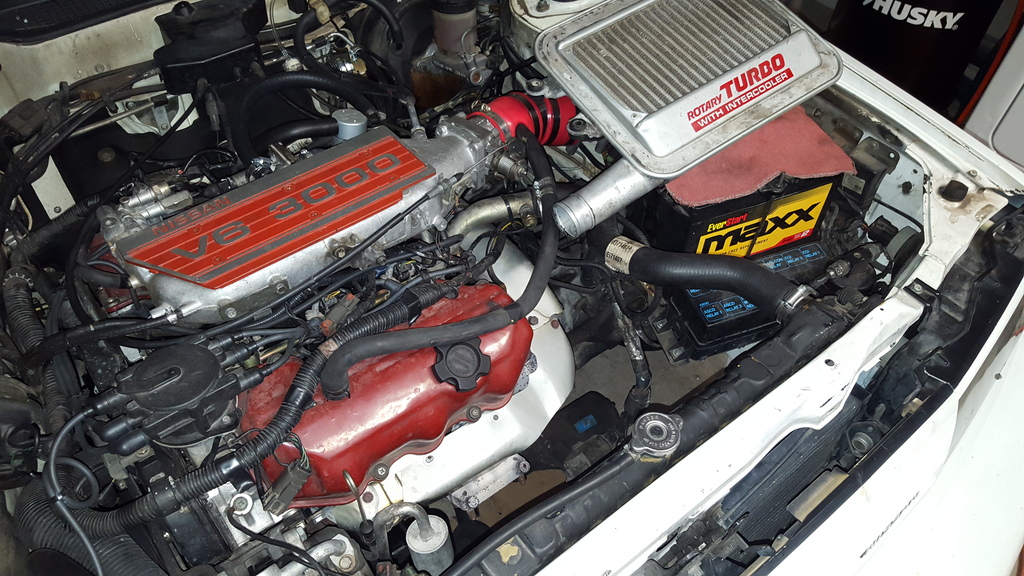
Hey guys, im starting the process of comverting my 88 SE to turbo. I had a general build thread in the second gen forum but since im going turbo now i thought this would be the most appropriate place to post. Ive already sourced the vast majority of the parts needed to make this happen. I plan on starting this as a relatively mild build, see how it responds to boost and go from there. So clean relatively low mile vg30(already in car) with no leaks or noises, runs well. Its a stock NA unit so its 9:1 compression. I have a stock 196 300zx t3 turbo and manifold. Manifold is already on car with temporary down pipe. Drove it that way for a couple months. Will be runnin a stock 1985 300zx turbo ECM with 260cc injectors. Using a later model mercury villager lower intake with updated side feed injectors. The rail will accept 180cc which are still in car from being NA. I have a full set of used 260cc red tops from a 240sx to start with and can fit q45 360cc injectors on the same rail for more power so that sets the initial power ceiling for the fuel rail. Im hoping to get to around 250-275whp out of this project. I start at stock 6psi boost and plan to progressivley work up to 12psi or so. Minor adjustments for tune will be made with an already installed apexi neo amd an adjustable fuel pressure regulator . Have not yet decided on air to air vs air to water. I have to fitment issues on a 2nd gen that 3rd gens dont have lol. And im keeping my AC. It texas yall! Ill keep everyone posted and gets some pics up hopefully toniggt
 09-29-2015, 09:13 AM
#2

Cool deal. Hope you'll be posting lots of pics. I love build threads with lots of pics. 
Unfortunately, I think even the boosted section of Maxima.org is pretty much dead these days. Seems like the glory years were about 6-8 years ago with all the 4th gen guys boosting like crazy.
What fitment issues do you mean that the 2nd gen has that the 3rd gen doesn't?
Unfortunately, I think even the boosted section of Maxima.org is pretty much dead these days. Seems like the glory years were about 6-8 years ago with all the 4th gen guys boosting like crazy.
What fitment issues do you mean that the 2nd gen has that the 3rd gen doesn't?
09-29-2015, 04:28 PM
#3
Member
Thread Starter
Join Date: Mar 2015
Posts: 278
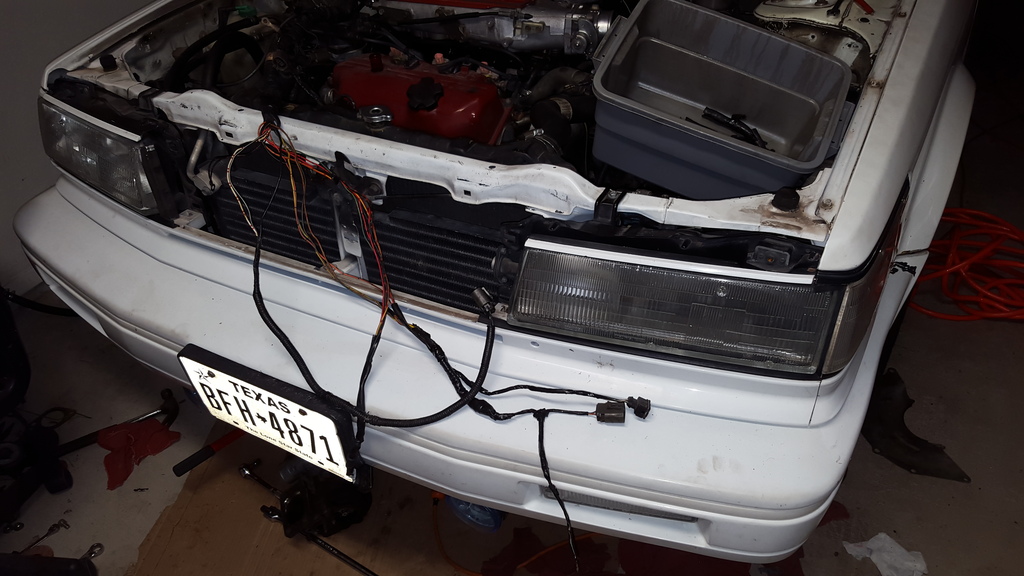
well dont worry about photos. if youve seen my thread in the 2nd gen section youll find that i LOVE pics! ill upload plenty. as far as fitment, I have a motor mount issue that is a lot harder to solve than it is in the 3rd gen, also 3rd gens have a bumper to tuck a front mount intercooler behind. this is my front end....
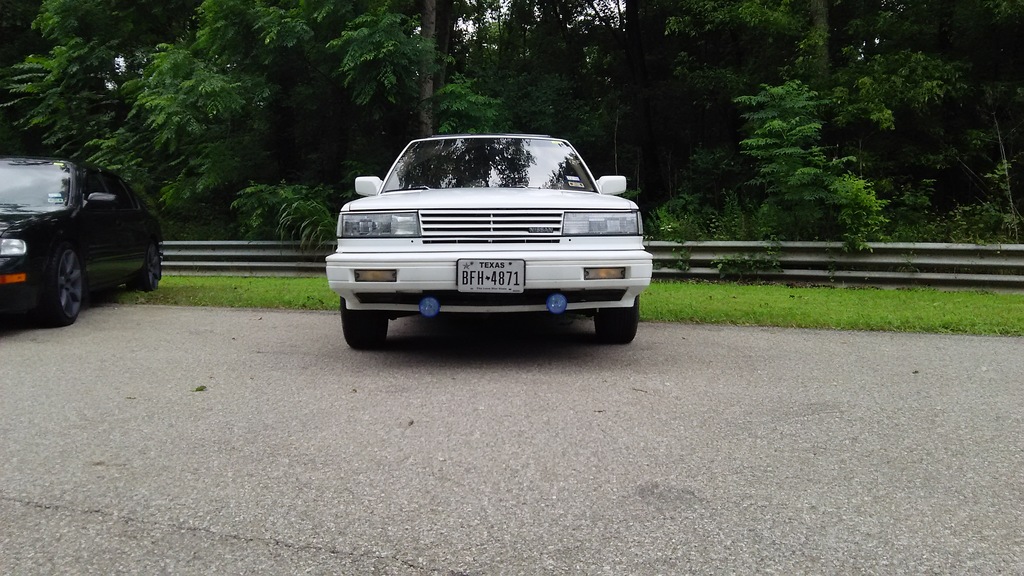
I really, really dont want to have a completely exposed core just hanging down there like that. it kinda ruins the sleeper effect lol. plus the piping would have to go under the car because my front clip isnt shaped like a 3rd gen, so i cant plum around the side of the radiator. so im either doing a top mount where the battery used to be with a scoop or an air to water setup. either way the battery is going to the trunk lol! Im trying to work out a deal on and air to water core right now. well see what happens. hang out for more.

I really, really dont want to have a completely exposed core just hanging down there like that. it kinda ruins the sleeper effect lol. plus the piping would have to go under the car because my front clip isnt shaped like a 3rd gen, so i cant plum around the side of the radiator. so im either doing a top mount where the battery used to be with a scoop or an air to water setup. either way the battery is going to the trunk lol! Im trying to work out a deal on and air to water core right now. well see what happens. hang out for more.
09-30-2015, 09:09 AM
#4
well dont worry about photos. if youve seen my thread in the 2nd gen section youll find that i LOVE pics! ill upload plenty. as far as fitment, I have a motor mount issue that is a lot harder to solve than it is in the 3rd gen, also 3rd gens have a bumper to tuck a front mount intercooler behind. this is my front end....

I really, really dont want to have a completely exposed core just hanging down there like that. it kinda ruins the sleeper effect lol. plus the piping would have to go under the car because my front clip isnt shaped like a 3rd gen, so i cant plum around the side of the radiator. so im either doing a top mount where the battery used to be with a scoop or an air to water setup. either way the battery is going to the trunk lol! Im trying to work out a deal on and air to water core right now. well see what happens. hang out for more.
I really, really dont want to have a completely exposed core just hanging down there like that. it kinda ruins the sleeper effect lol. plus the piping would have to go under the car because my front clip isnt shaped like a 3rd gen, so i cant plum around the side of the radiator. so im either doing a top mount where the battery used to be with a scoop or an air to water setup. either way the battery is going to the trunk lol! Im trying to work out a deal on and air to water core right now. well see what happens. hang out for more.
 Don't see why you couldn't plumb it around the frame rails like me. I have a black intercooler, black couplers, black clamps/nuts, and even black piping and with my Stillen lip I swear I've only had a couple of people even ever notice the intercooler. It's kind of surprising actually.
10-04-2015, 06:46 PM
Don't see why you couldn't plumb it around the frame rails like me. I have a black intercooler, black couplers, black clamps/nuts, and even black piping and with my Stillen lip I swear I've only had a couple of people even ever notice the intercooler. It's kind of surprising actually.
10-04-2015, 06:46 PM
#5
Member
Thread Starter
Join Date: Mar 2015
Posts: 278
well, we'll see what happens with the intercooler. ive got a rough plan and adjusting as i go since there isnt a lot of ground covered for me. ive only seen any evidence or documentation of what im doing by 2 people, big E dog and KALC. so i dont have a lot ofother peoples work to go on. what information those two shared is limited and all picture links are long since gone. anyhow.......
UPDATES!!!!
spent a lot of time on the car today, first time in weeks!
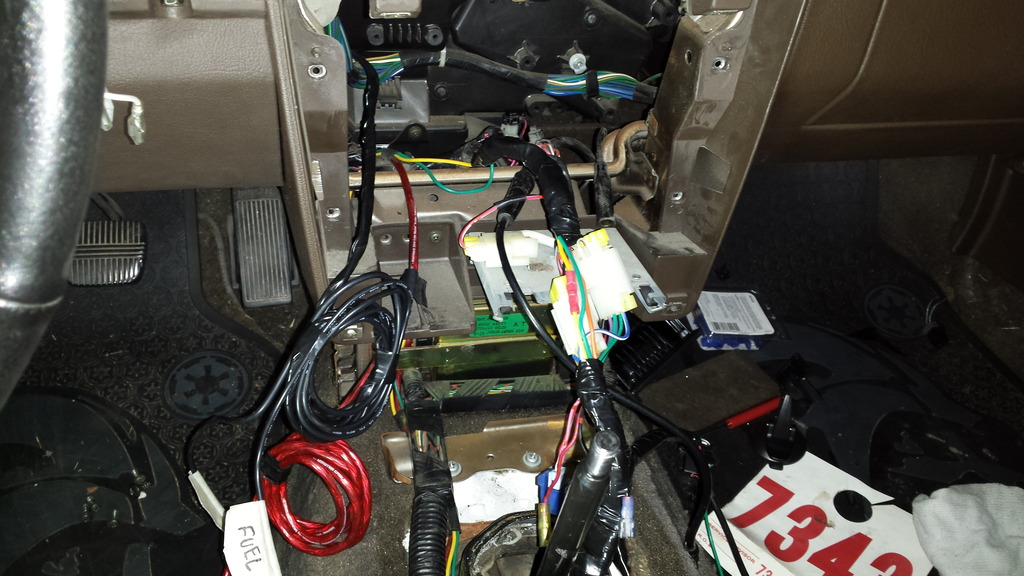
had an awesome mess of wiring behind the radio, had it apart to install gauges.
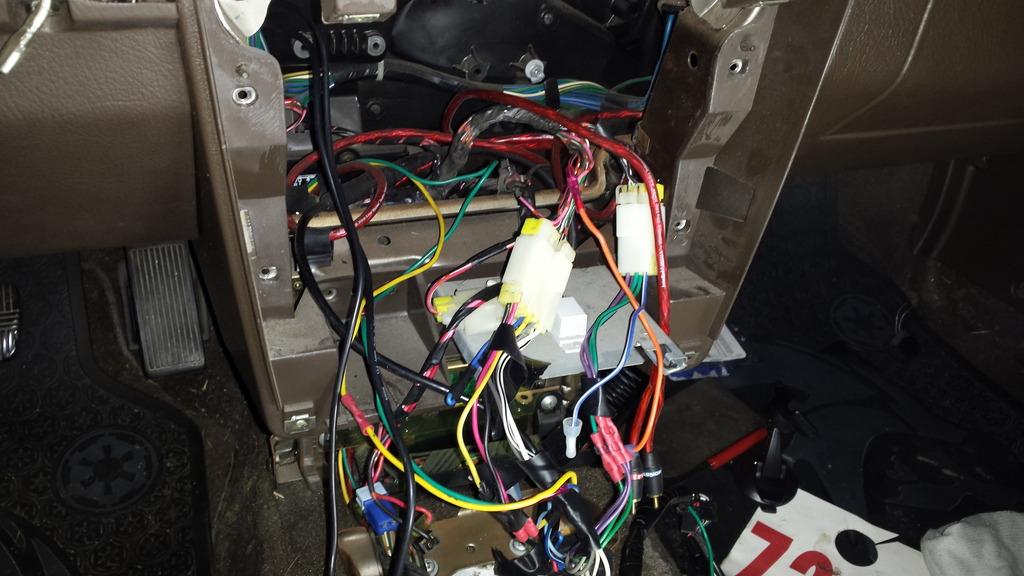
i got all that a little bit cleaned up.
UPDATES!!!!
spent a lot of time on the car today, first time in weeks!
had an awesome mess of wiring behind the radio, had it apart to install gauges.

i got all that a little bit cleaned up.
 10-04-2015, 06:52 PM
#6
Member
Thread Starter
Join Date: Mar 2015
Posts: 278
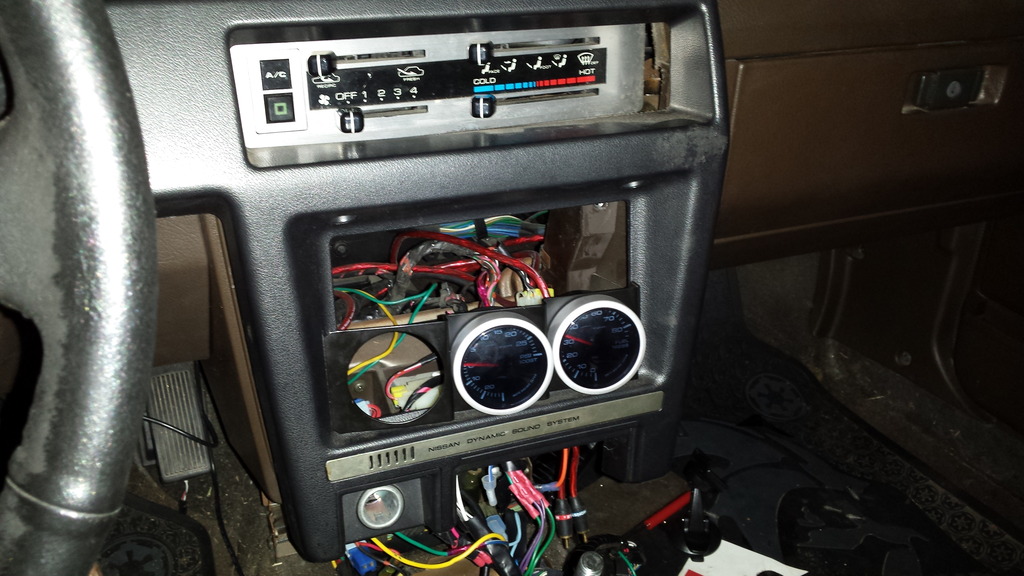
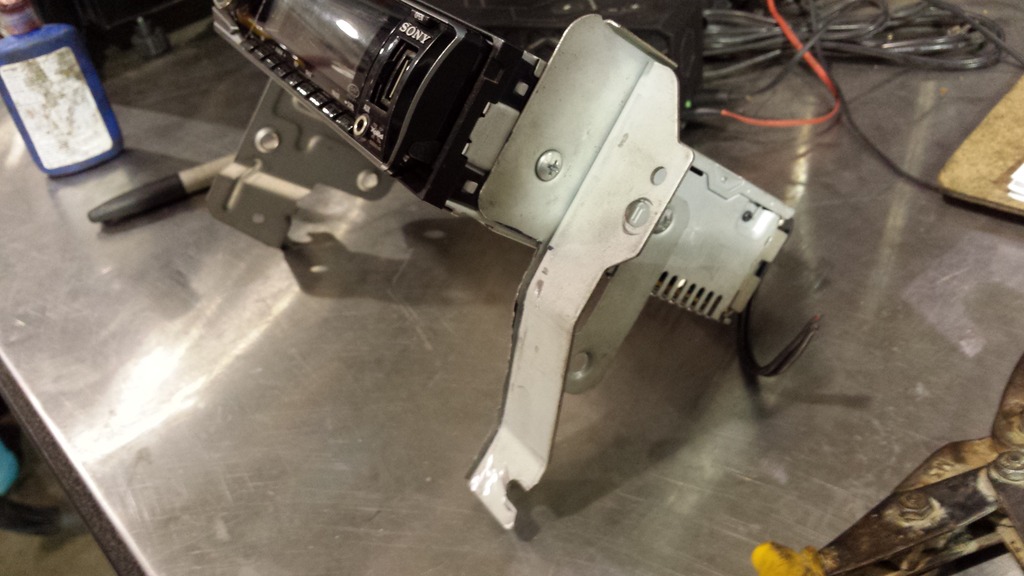
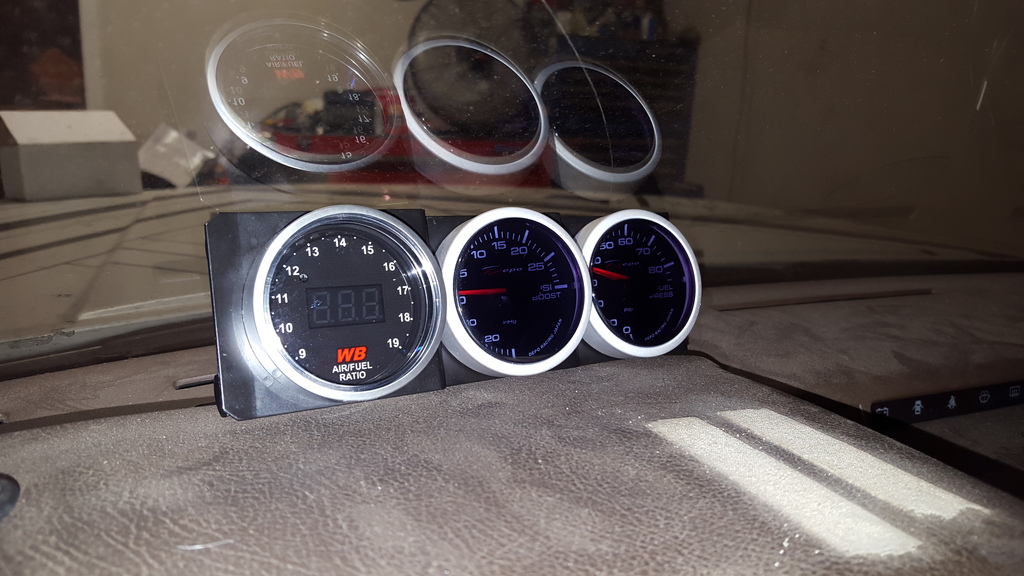
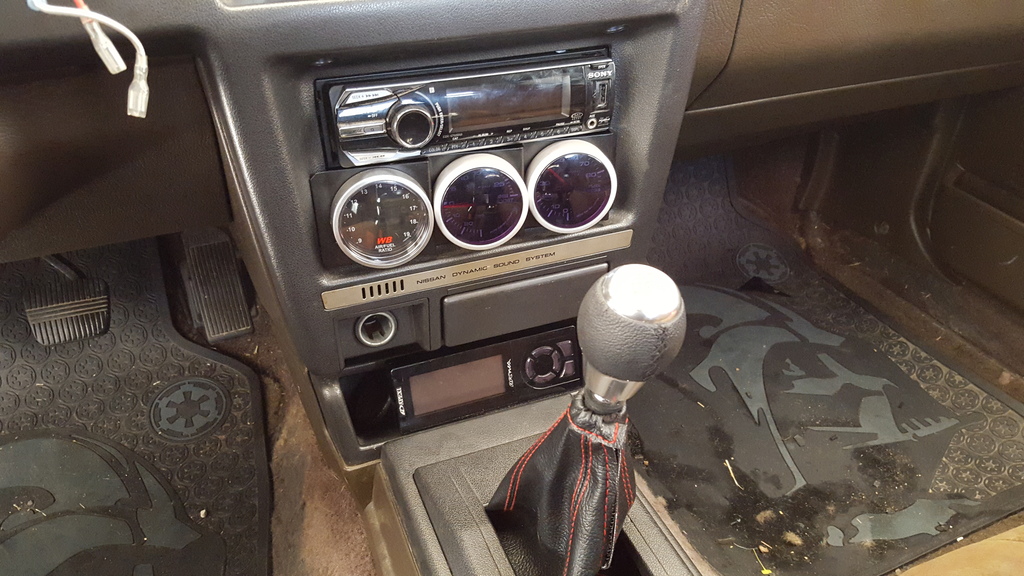
installed the gauge pod in the radio trim. not permanent this way, needs foam or something to fill in the gaps. thats what i get for ordering a junky glowshift pod. oh well.
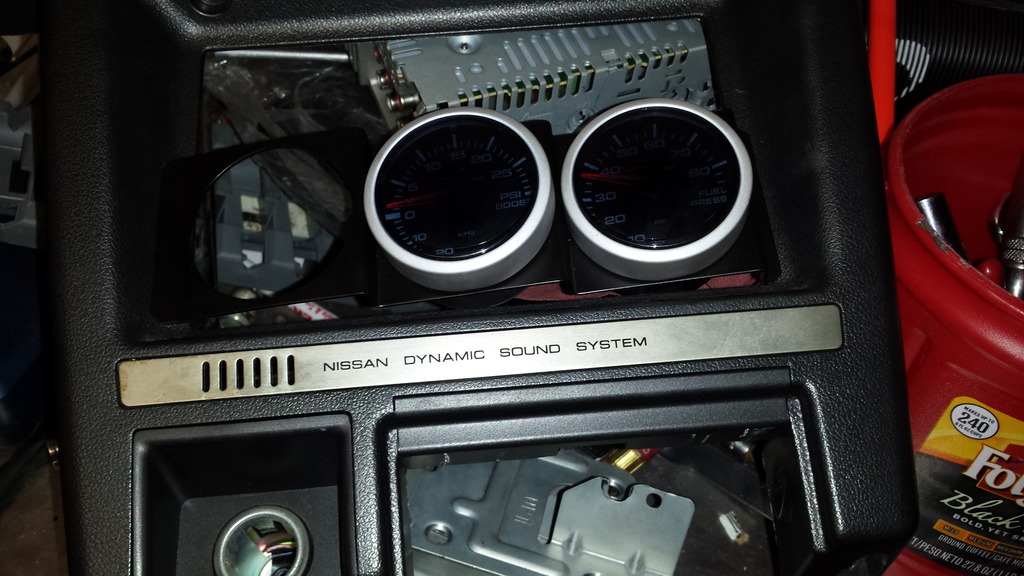
ive got boost pressure gauge and fuel pressure gauge in there right now. the missing gauge is wideband. i ordered one, but it had a jacked up harness when it came and looked used so i sent it back. im still waiting on the replacement to come in. should get here monday or tuesday. it looks like im gonna have to trim the braket that holds the radio in for clearance at the back of the gauges.
this is a rough test fit without the radio out. good enough i guess lol.
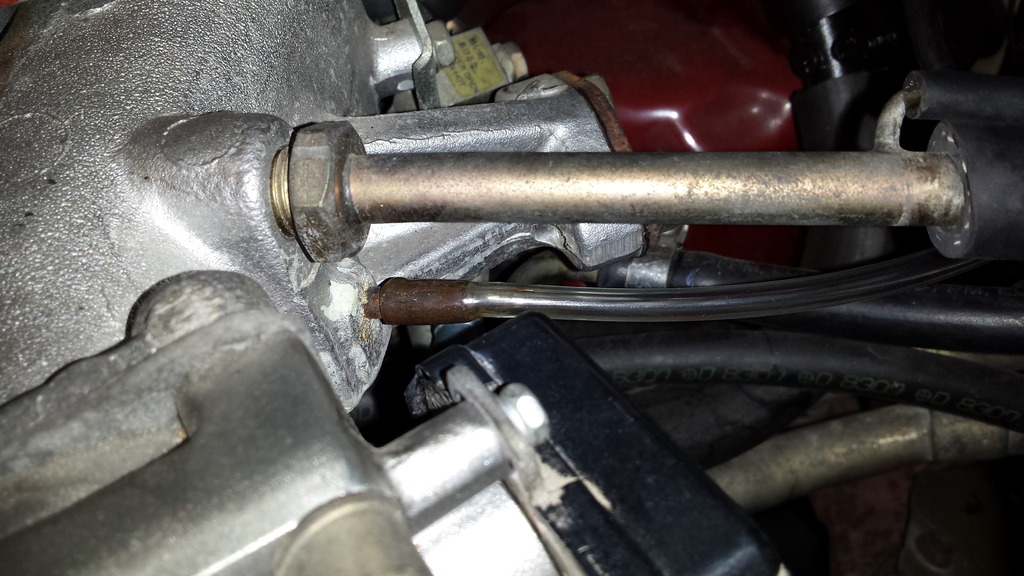
also got the fuel pressure sender installed in the the rail feed line. and mounted the boost pressure sender on the firewall.
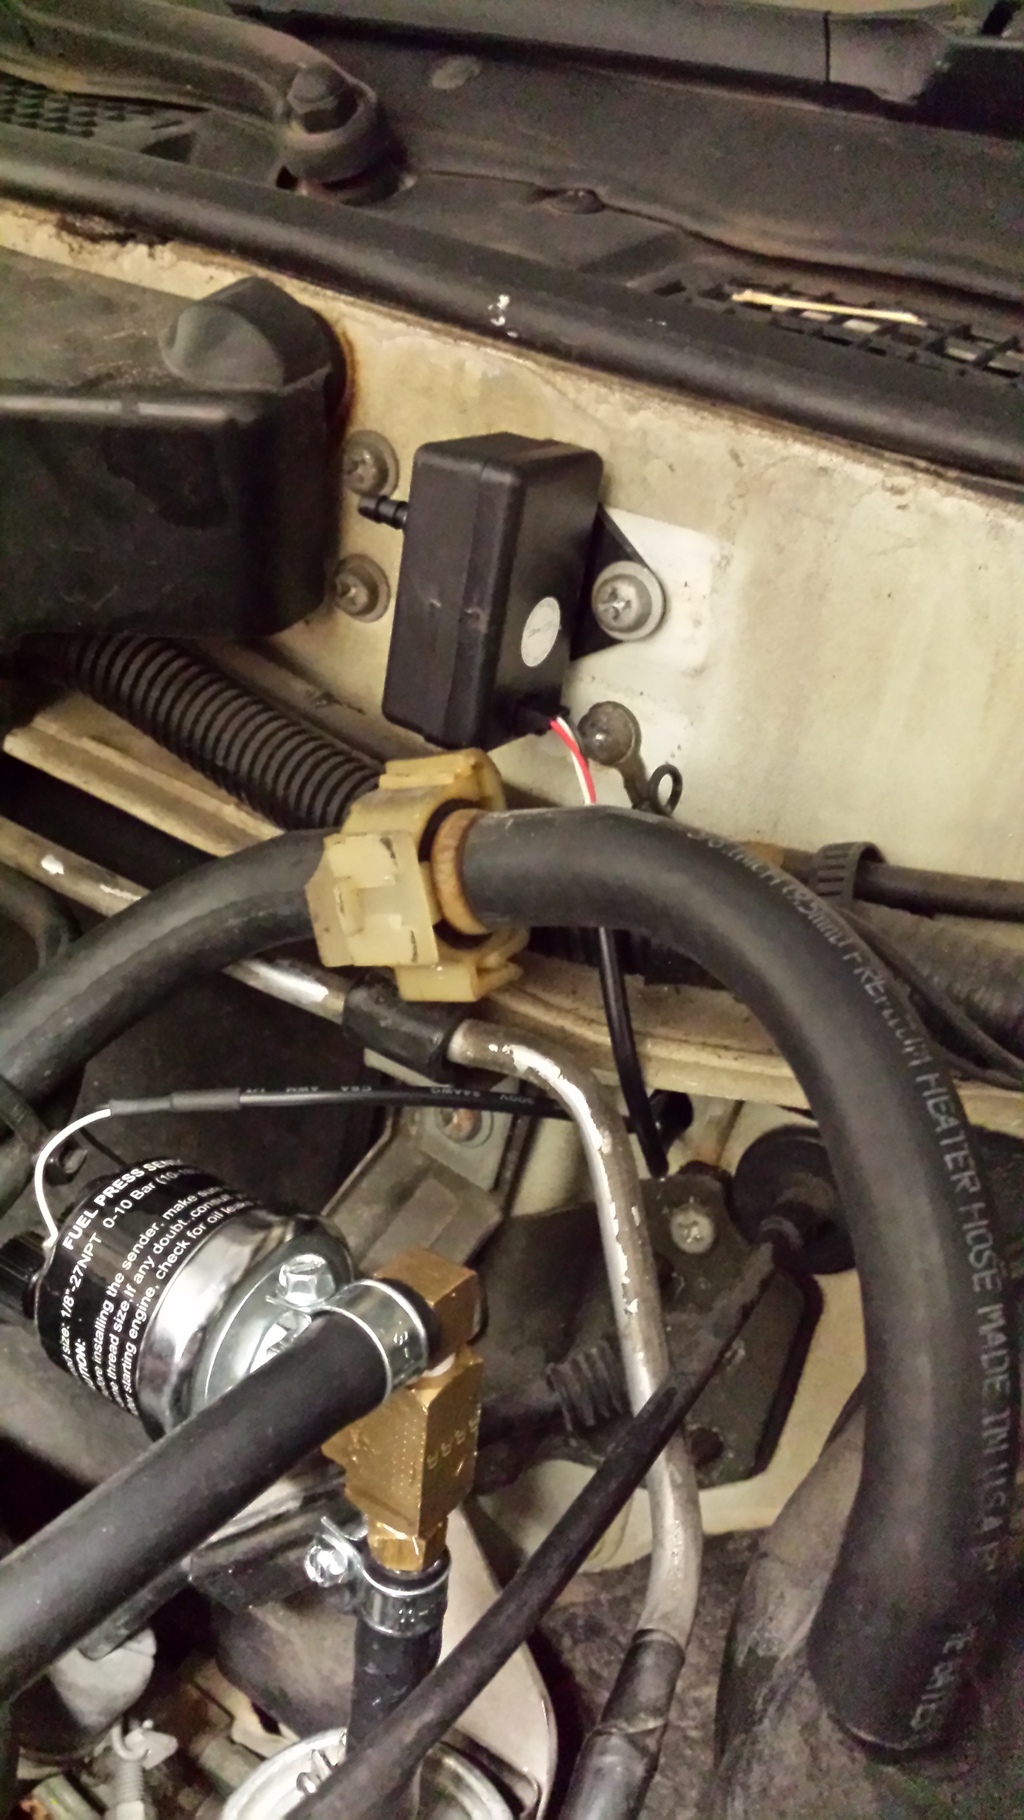
i drilled a small hole in the firewall just above where the throttle cable comes out so i could feed the wiring into the cabin.
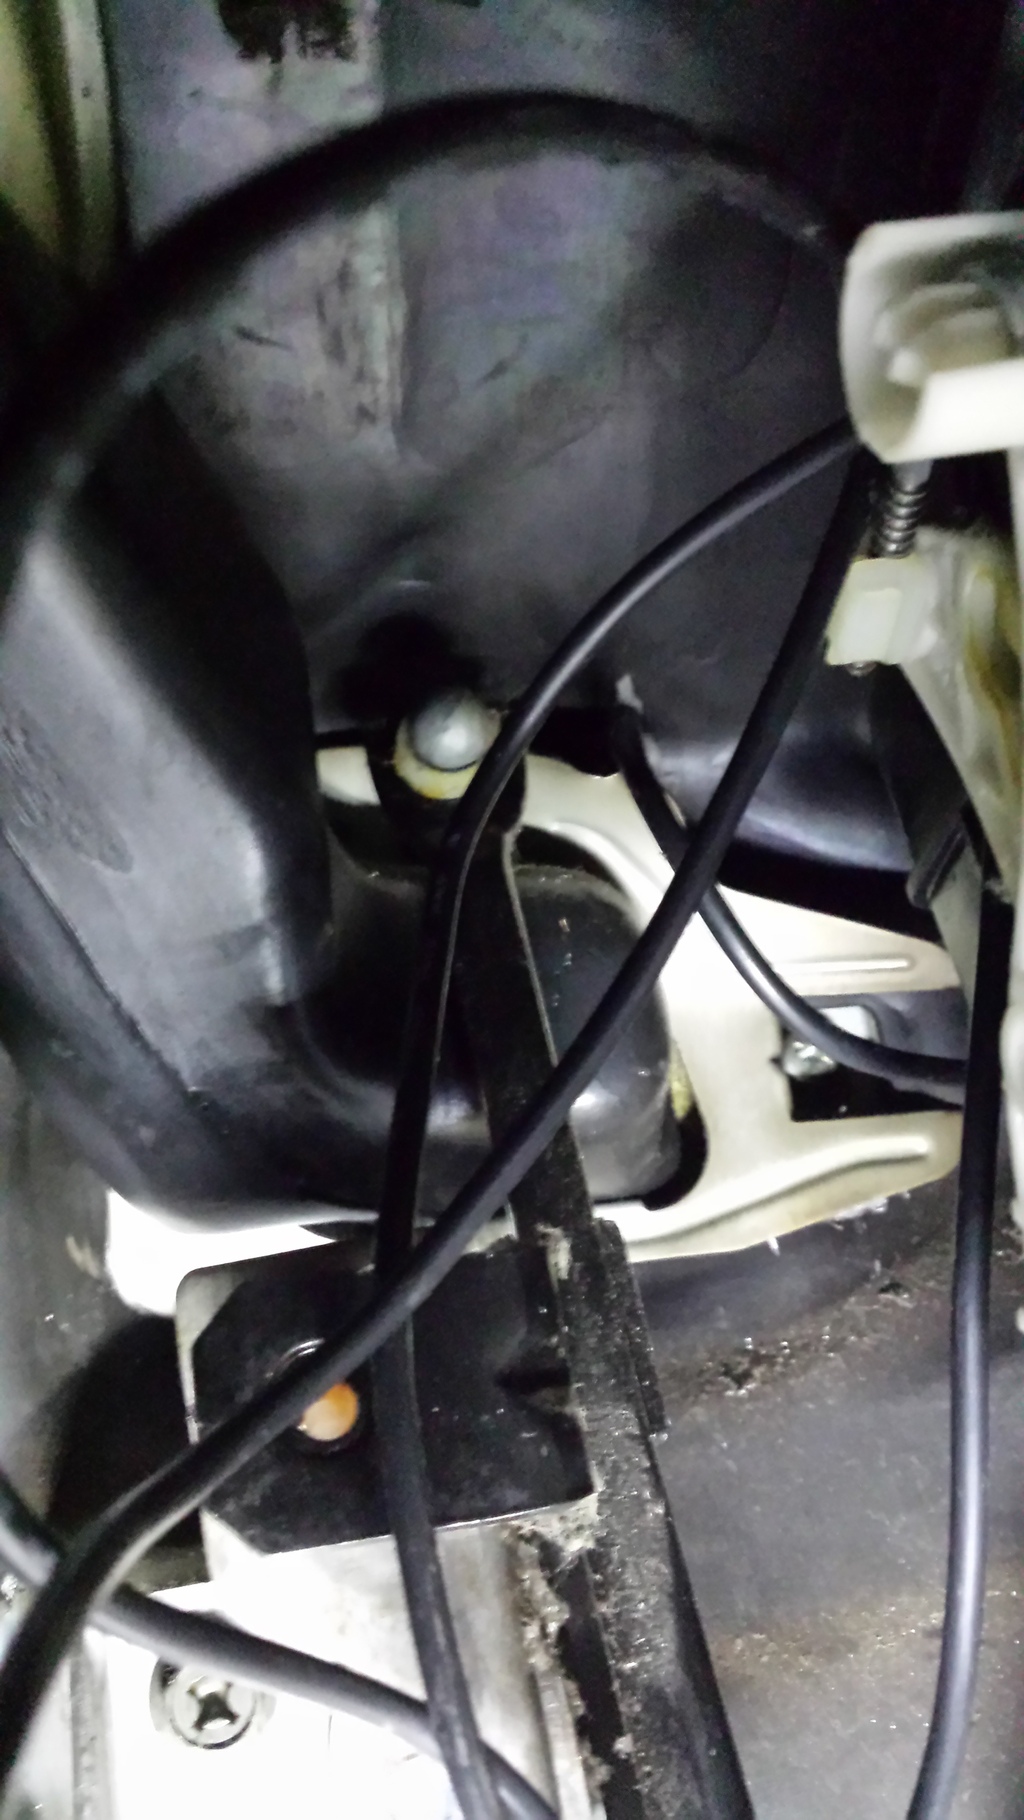
heres where the wires come through in the inside.

ive got boost pressure gauge and fuel pressure gauge in there right now. the missing gauge is wideband. i ordered one, but it had a jacked up harness when it came and looked used so i sent it back. im still waiting on the replacement to come in. should get here monday or tuesday. it looks like im gonna have to trim the braket that holds the radio in for clearance at the back of the gauges.
this is a rough test fit without the radio out. good enough i guess lol.

also got the fuel pressure sender installed in the the rail feed line. and mounted the boost pressure sender on the firewall.

i drilled a small hole in the firewall just above where the throttle cable comes out so i could feed the wiring into the cabin.
heres where the wires come through in the inside.

Last edited by aw11power; 10-04-2015 at 06:55 PM.
10-04-2015, 06:59 PM
#7
Member
Thread Starter
Join Date: Mar 2015
Posts: 278
i used some gray silicon as a grommet where they go through. doesnt look amazing, but i figure that its not the first thing people will be looking at and will both seal the hole and keep the wires from moving around and chaffing.
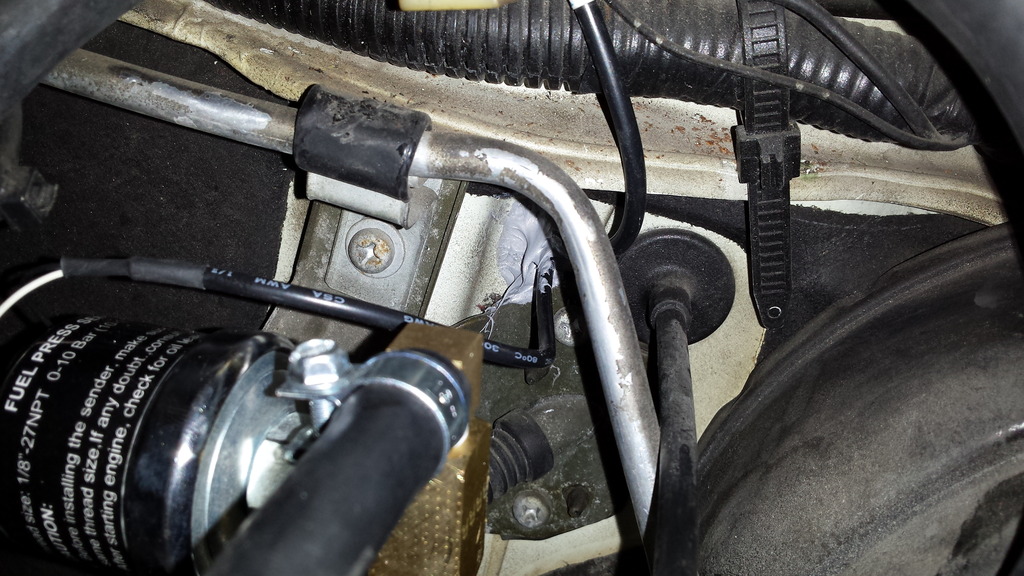
i got the line to the boost pressure sensor hooked up with a damper inline to prevent needle bounce.
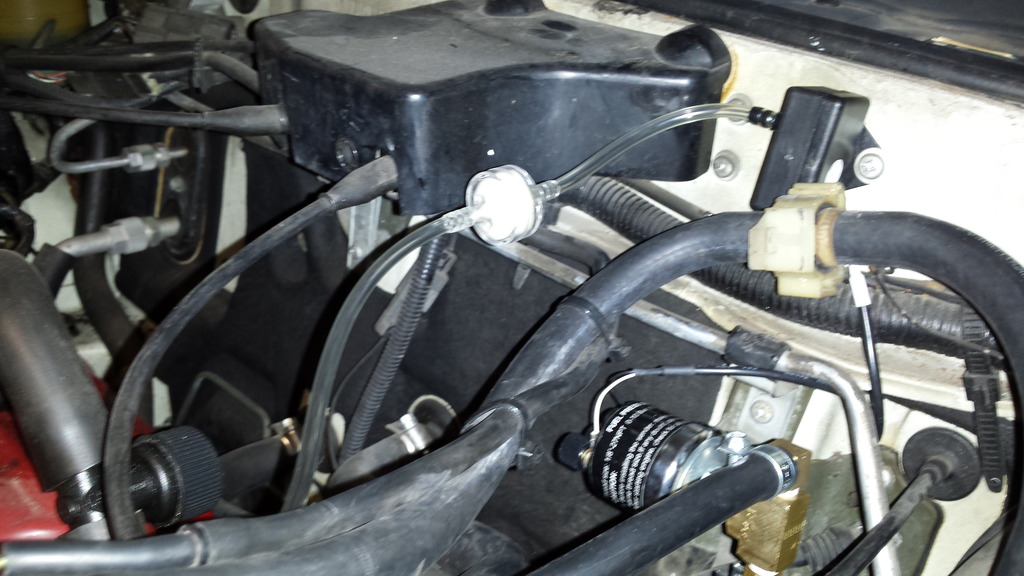
i hooked the boost gauge sender line directly to the manifold vaccum for hopefully accurate readings. ill need to find a tiny clamp for that hose. i doubt it will blow off with low boost, but ya never know.
 10-04-2015, 07:04 PM
#8
Member
Thread Starter
Join Date: Mar 2015
Posts: 278
the fuel pressure and boost pressure gauges im using are depo racing electronic gauges off amazon. ive used them before on my mr2 and was happy with them. they are reasonably priced, work well and look nice. i tested both of these with a high dollar hand vacuum pump to verify accuracy before starting the install. the wide band im using is an APSX. first time ive bought from them but ive heard good things. its priced inexpensive and comes with narrowband emulation output for my factory ecm so i can delete my stock O2 sensor and has a 5 volt out for datalogging that ill probably never use lol! Im hoping next payday i can get a vacuum distribution block for brake booster and cruise actuator to hook up with a check valve.
10-04-2015, 07:13 PM
#9
Member
Thread Starter
Join Date: Mar 2015
Posts: 278
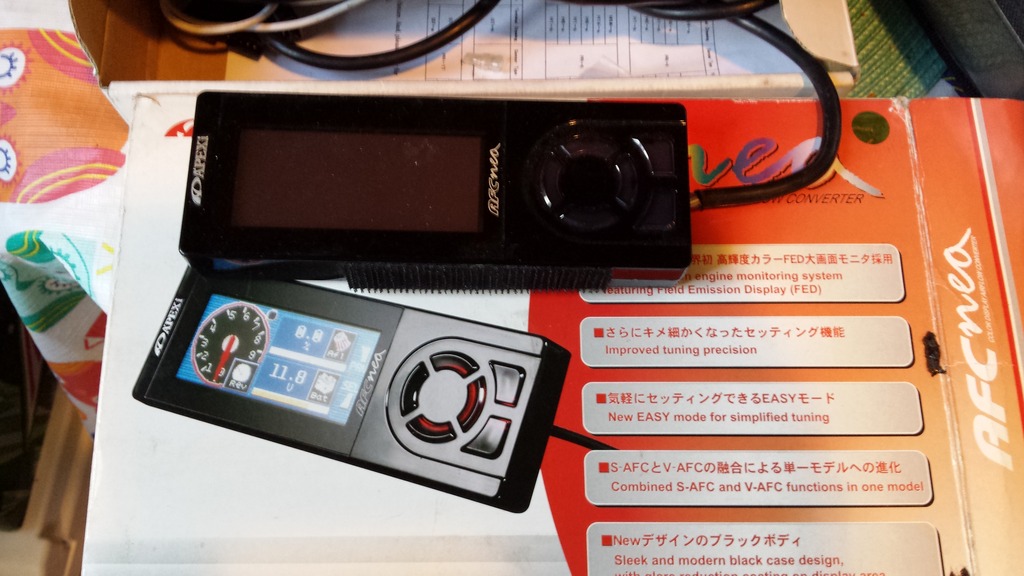
used apexi neo i got on the cheap from a buddy.
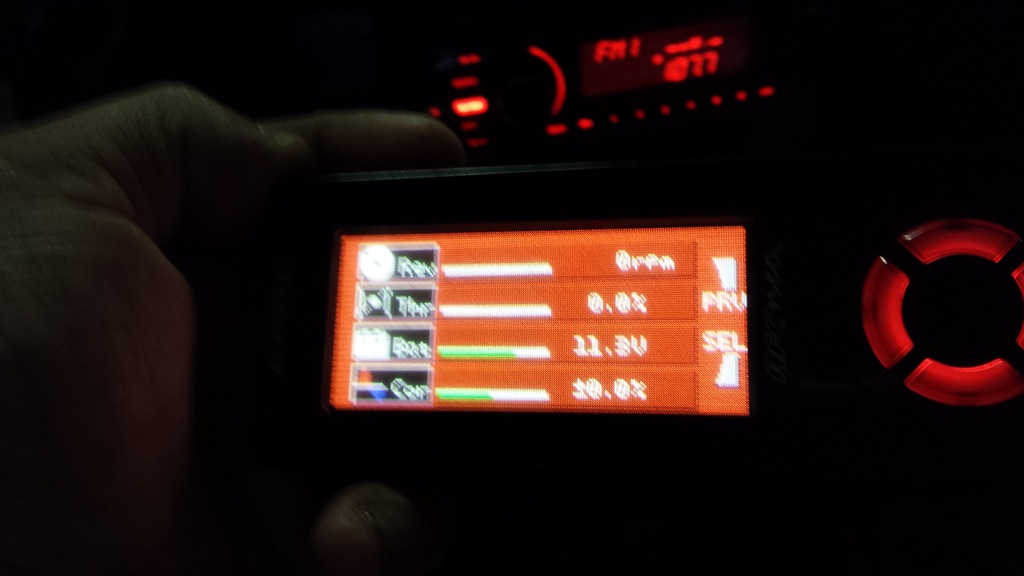
installation for this was hell since it really wasnt designed for this model. i dont have a linear throttle position sensor like it needs. 2nd gens only have a 3 pin throttle switch for idle, driving and WOT. the ecm is only has to pins to see idle and driving, the WOT pin was used for kickdown on the automatic trans. so its really just an idle switch. so i had to use a throttle switch off an 87 300sx. it has the idle switch my ECM needs but also has a linear output for the electonically controlled automatic in the 300zx. im using a 5 speed out of a 91 maxima at this point and ditched my automatic a while back. so that gave me the output i needed. only problem is the neo needs to see linear 5 volt, not 12. so i couldnt just give it battery power. I had to steal power from the fuel temperature sensor since, on this primitive fuel injection system its one of only to sensors that uses a 5 volt referance lol! so anyway, i got it all wired up and working,
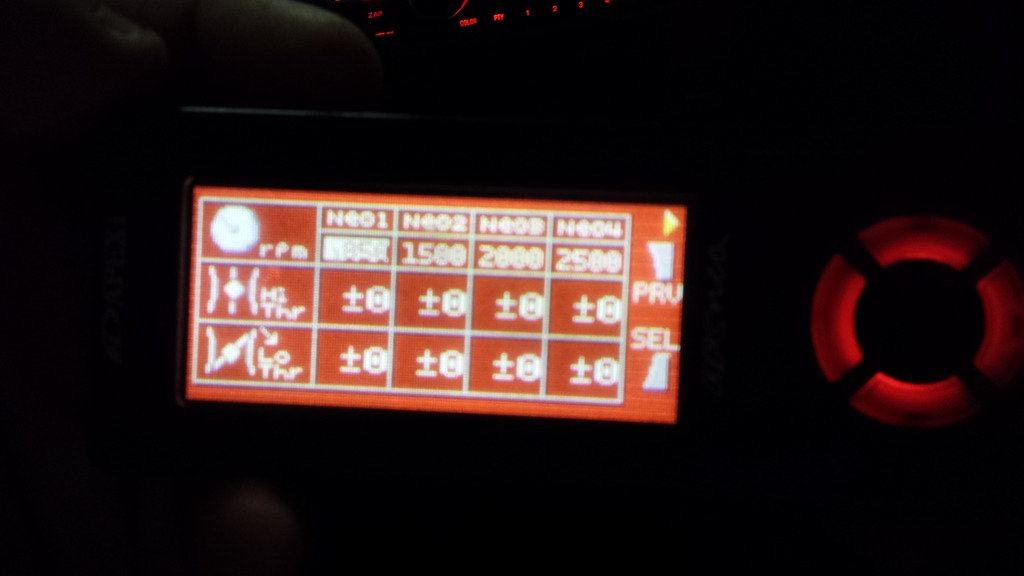
this is the 4 way digital multimonitor mode on it.
this is what the adjustable fuel correction map looks like
also, side note...you gotta pretty much pull out the passenger seat and a lot of carpet to get enough access to the ecm wiring so you can spice into the AFM signal wire for this thing. PAIN IN THE BUTT. just felt that was worth mentioning.

installation for this was hell since it really wasnt designed for this model. i dont have a linear throttle position sensor like it needs. 2nd gens only have a 3 pin throttle switch for idle, driving and WOT. the ecm is only has to pins to see idle and driving, the WOT pin was used for kickdown on the automatic trans. so its really just an idle switch. so i had to use a throttle switch off an 87 300sx. it has the idle switch my ECM needs but also has a linear output for the electonically controlled automatic in the 300zx. im using a 5 speed out of a 91 maxima at this point and ditched my automatic a while back. so that gave me the output i needed. only problem is the neo needs to see linear 5 volt, not 12. so i couldnt just give it battery power. I had to steal power from the fuel temperature sensor since, on this primitive fuel injection system its one of only to sensors that uses a 5 volt referance lol! so anyway, i got it all wired up and working,
this is the 4 way digital multimonitor mode on it.

this is what the adjustable fuel correction map looks like

also, side note...you gotta pretty much pull out the passenger seat and a lot of carpet to get enough access to the ecm wiring so you can spice into the AFM signal wire for this thing. PAIN IN THE BUTT. just felt that was worth mentioning.
10-07-2015, 07:15 PM
#10
Member
Thread Starter
Join Date: Mar 2015
Posts: 278
ok, so i marked off what was in the way on the radio brackets
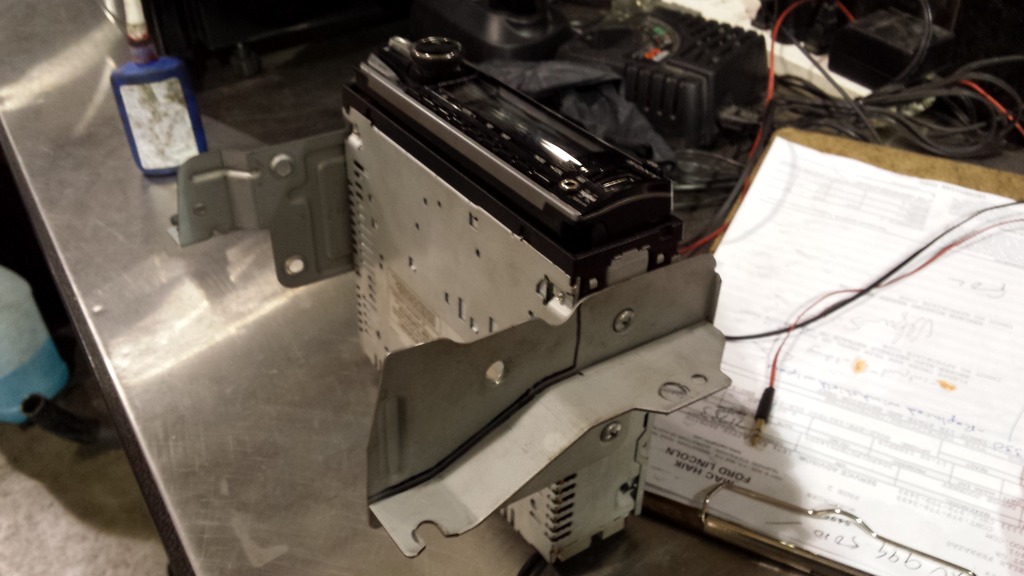
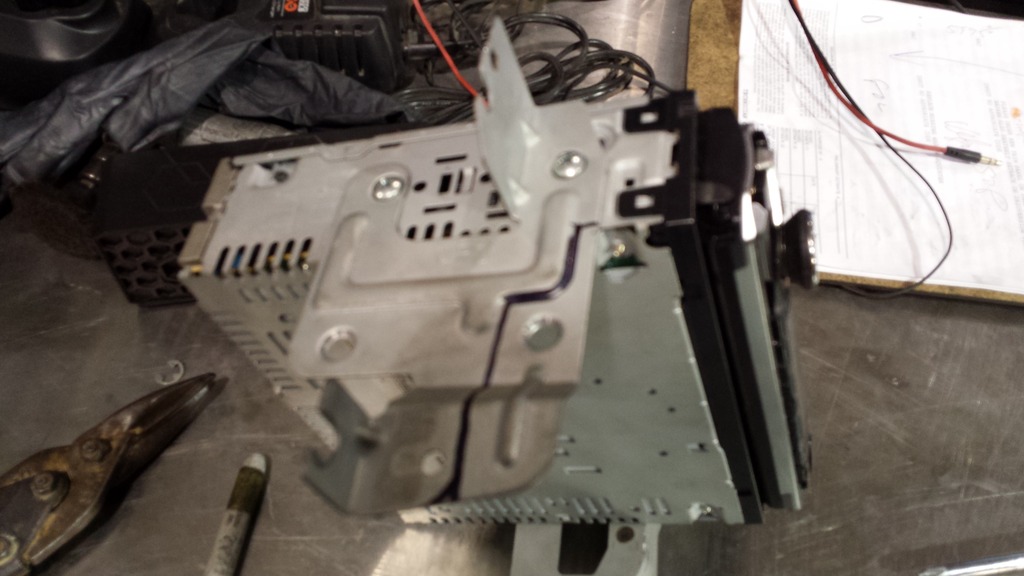
pulled the brackets off and carfully removed the offending material in such a way that the radio is still adequetly supported and the gauges will fit.
I hand filed the cut edges after that because I dont like leaving sharp things in my dash. dont know why, i just dont. here it is mounted back up to the radio.

I need to resolder my sub wires in the next couple days as I had an accident with them lol. and then I can put the radio back in the dash. also need to solder up a small harness from scratch to power my gauges, i want to be able to unplug them like OE stuff if I ever need to pull the trim again.


pulled the brackets off and carfully removed the offending material in such a way that the radio is still adequetly supported and the gauges will fit.

I hand filed the cut edges after that because I dont like leaving sharp things in my dash. dont know why, i just dont. here it is mounted back up to the radio.


I need to resolder my sub wires in the next couple days as I had an accident with them lol. and then I can put the radio back in the dash. also need to solder up a small harness from scratch to power my gauges, i want to be able to unplug them like OE stuff if I ever need to pull the trim again.
10-11-2015, 06:43 PM
#12
Member
Thread Starter
Join Date: Mar 2015
Posts: 278
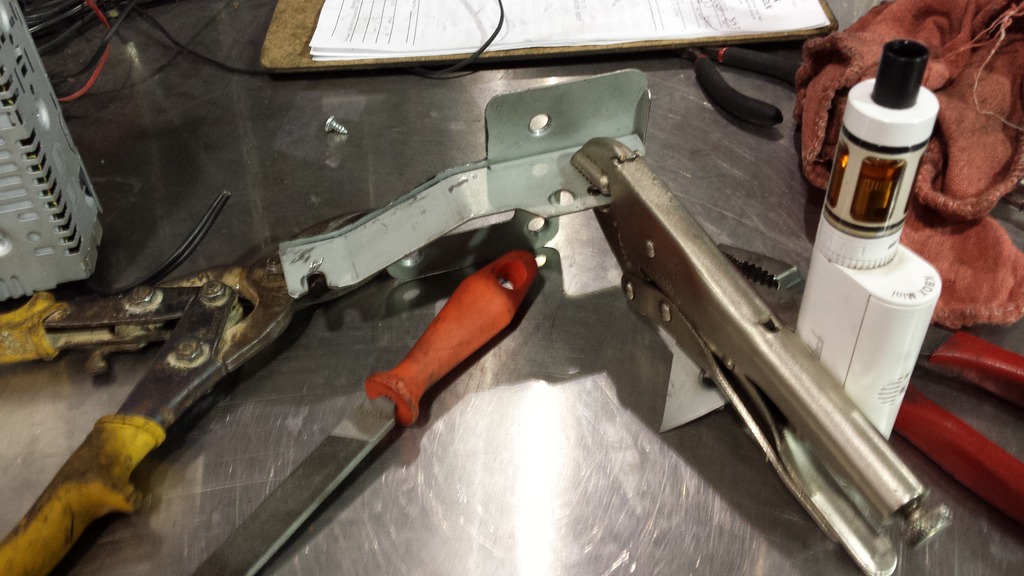
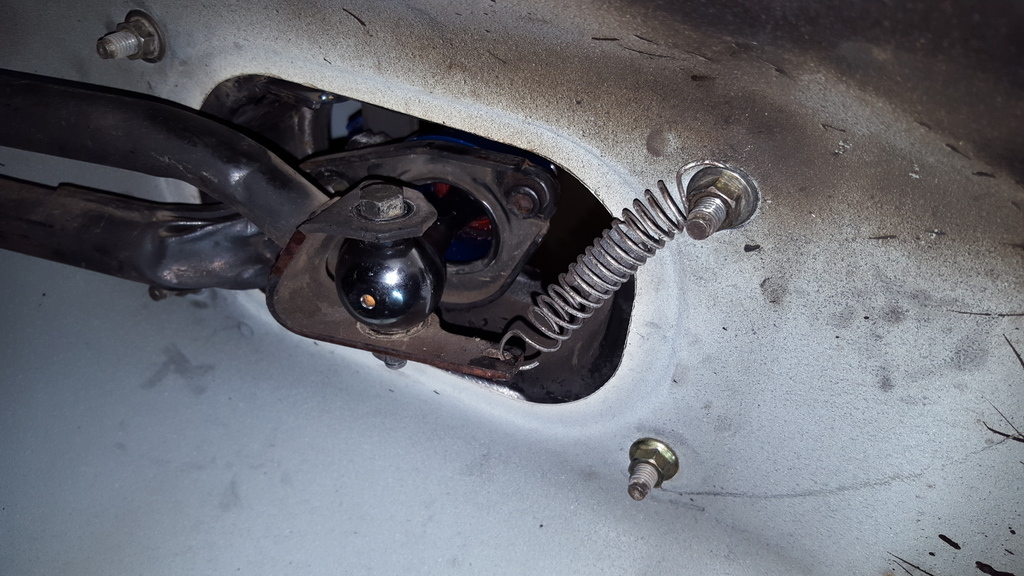
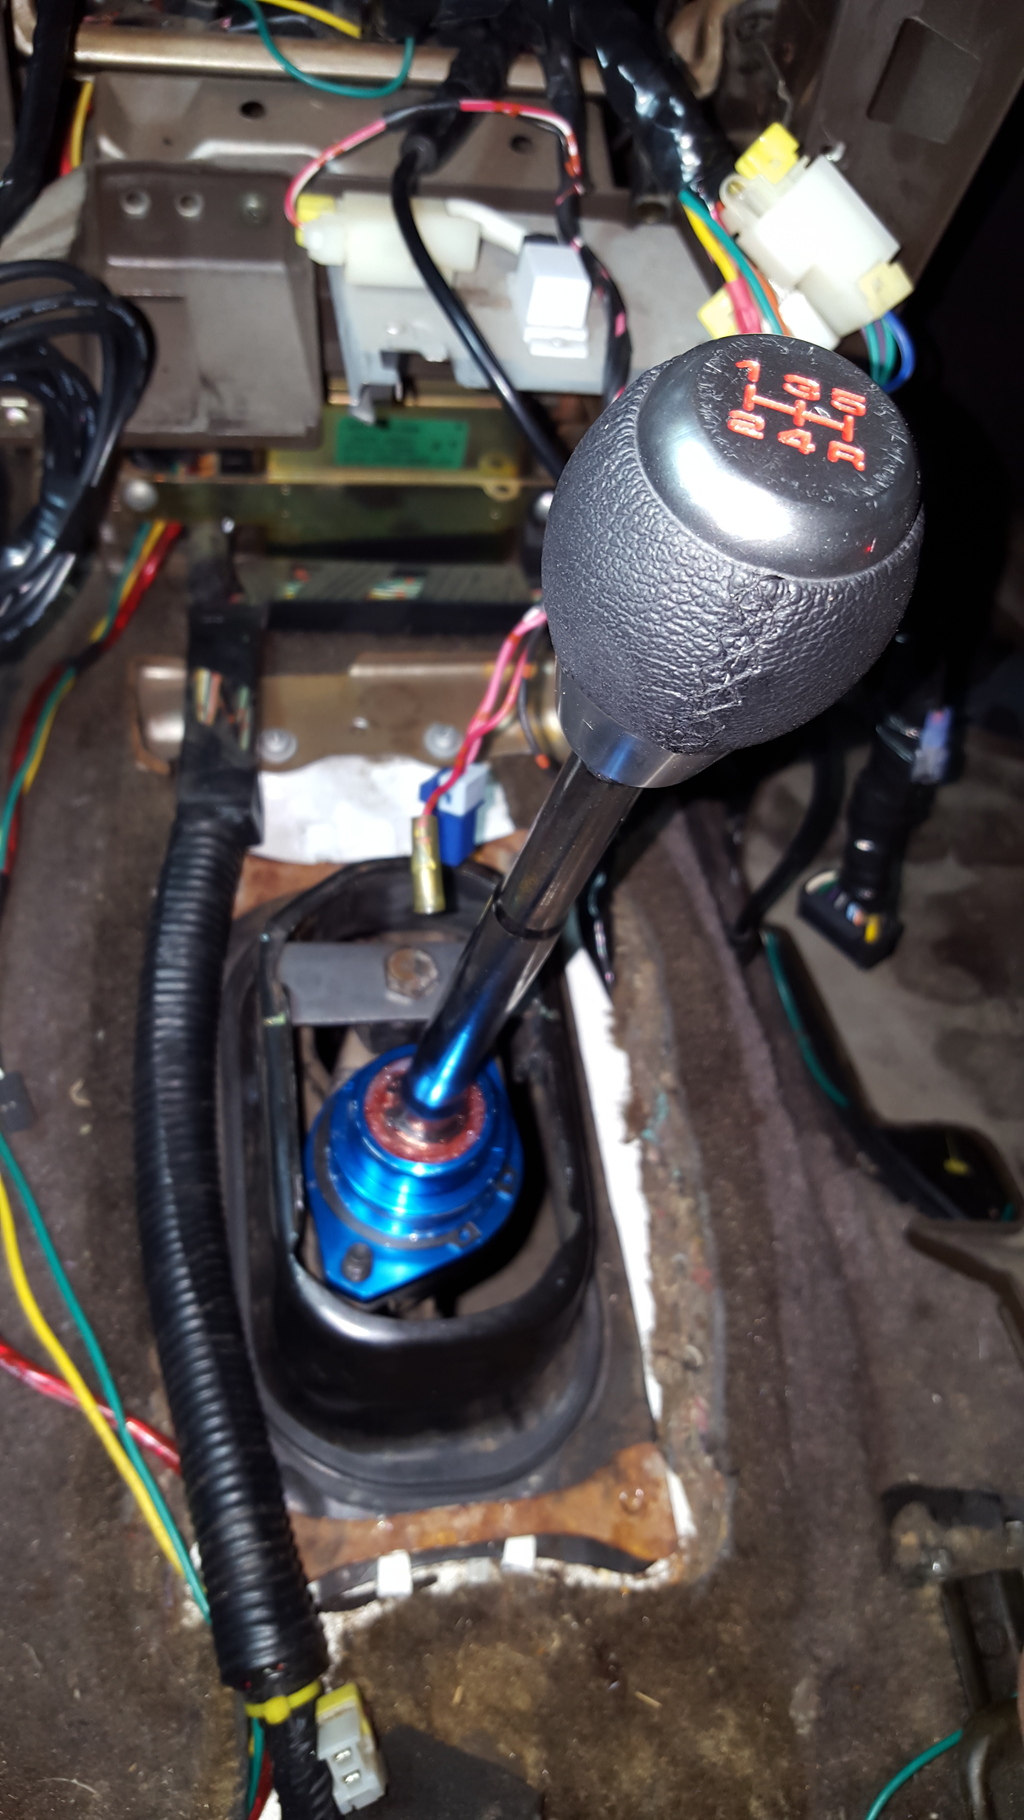
Ok, so heres the old shifter assembly next to the new one im putting in.
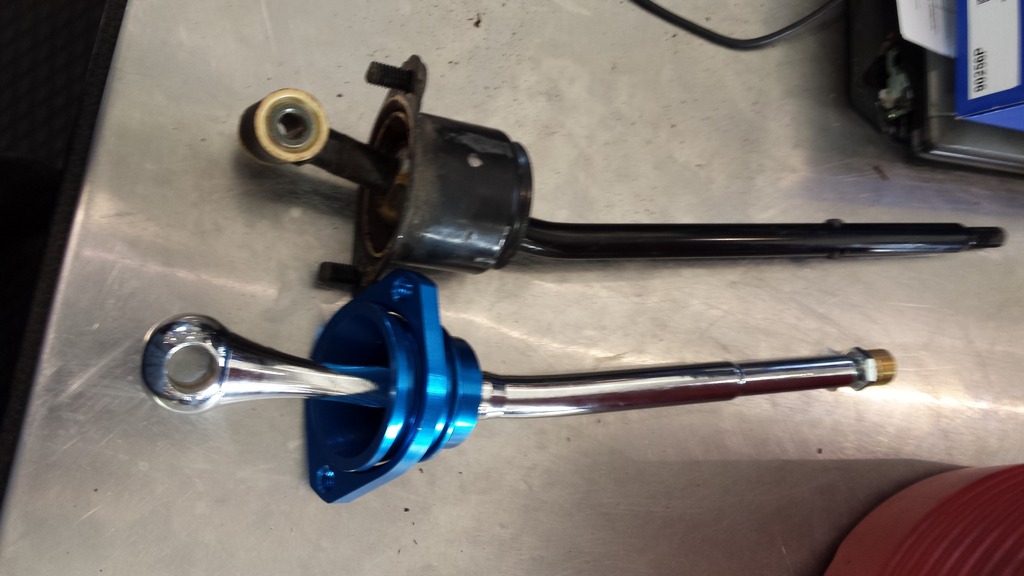
Yes, its a cheapo "HDGracing" unit off fleebay, but its a much higher pivot design with new bushings so itll certainly be an improvement. since this shifter is for a 4th gen and its going into a 3rd gen plate i had to remove the lever from the base plate to bolt it on because the ball on the bottom was too big for the hole.
bolted up the the support plate...
after that i had to insert the lever up from the bottom and install the snap ring retainer from the top.
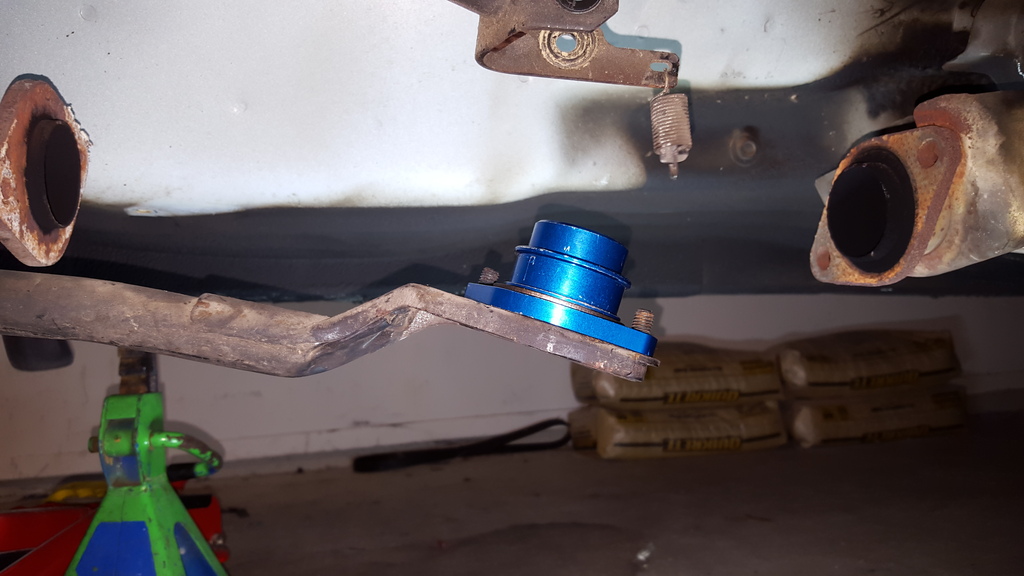
you may also notice that there is a solid metal plate in the shift assembly as opposed to the old rubber bushing that belongs in there. i welded that plate in there to hold the shifter assembly up. it makes the shifter tighter and ensures that the shifter will never fall down onto the converter shield again haha! im not too worried about movement as my motor mounts are all semi-solid rubber. a modification i do to pretty much all tranverse engine cars i own.
this is all mounted up on the bottom. I got rid of the spring retainer and pulled the spring tighter securing it to the assembly hold down nut. this was done to improve shift feel. personal preference of course.
schnazzy shift **** i bought. leather wrapped aluminum 4oz weighted.
Ill post a vid of the shift action here in a minute

Yes, its a cheapo "HDGracing" unit off fleebay, but its a much higher pivot design with new bushings so itll certainly be an improvement. since this shifter is for a 4th gen and its going into a 3rd gen plate i had to remove the lever from the base plate to bolt it on because the ball on the bottom was too big for the hole.
bolted up the the support plate...

after that i had to insert the lever up from the bottom and install the snap ring retainer from the top.

you may also notice that there is a solid metal plate in the shift assembly as opposed to the old rubber bushing that belongs in there. i welded that plate in there to hold the shifter assembly up. it makes the shifter tighter and ensures that the shifter will never fall down onto the converter shield again haha! im not too worried about movement as my motor mounts are all semi-solid rubber. a modification i do to pretty much all tranverse engine cars i own.
this is all mounted up on the bottom. I got rid of the spring retainer and pulled the spring tighter securing it to the assembly hold down nut. this was done to improve shift feel. personal preference of course.

schnazzy shift **** i bought. leather wrapped aluminum 4oz weighted.

Ill post a vid of the shift action here in a minute
10-11-2015, 06:51 PM
#13
Member
Thread Starter
Join Date: Mar 2015
Posts: 278
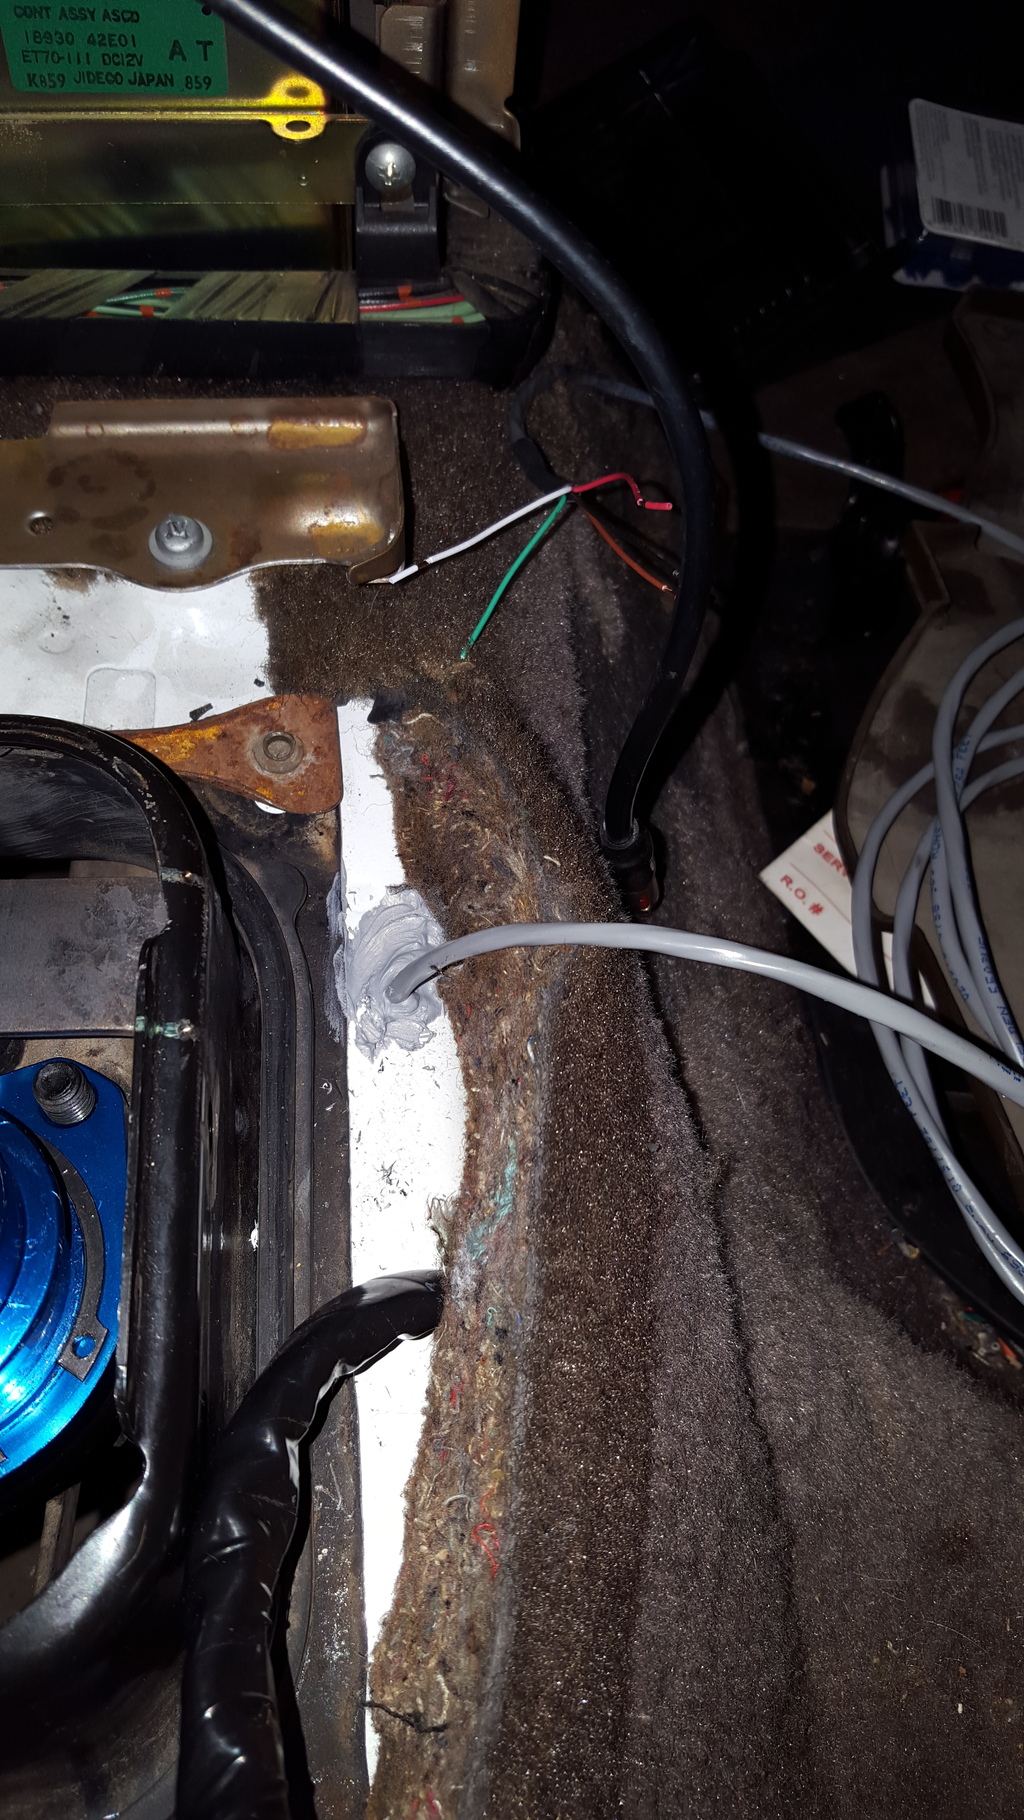
wideband replacement FINALLY come in. got the gauge/controller mounted in the pod. ill be putting the put in the radio trim once i finish wiring up a power harness for all of them.
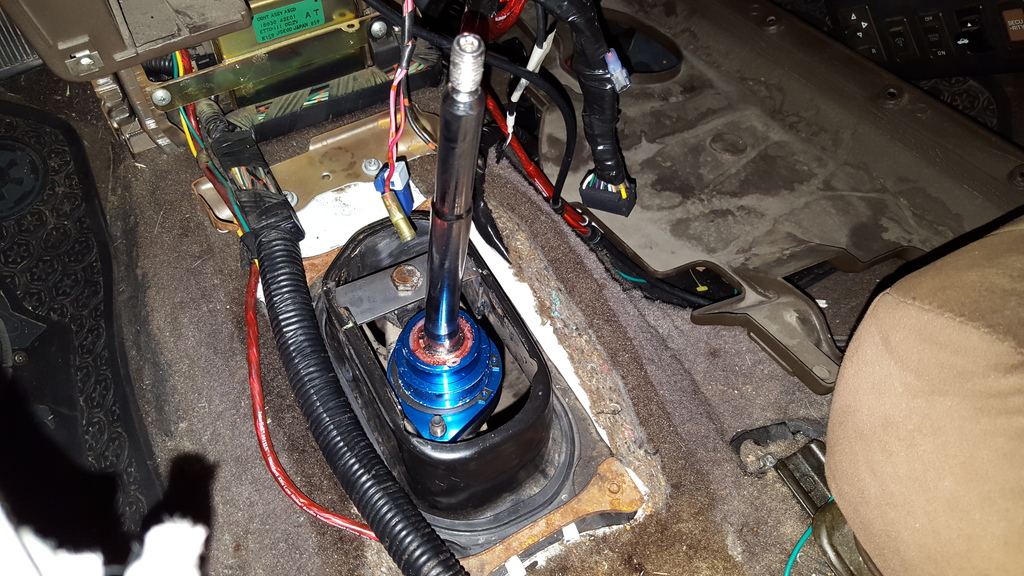
put a little hole on the tunnel next to the shifter to run the sensor wire for the wideband up behind the stereo where the gauges are being mounted.

put a little hole on the tunnel next to the shifter to run the sensor wire for the wideband up behind the stereo where the gauges are being mounted.
 10-18-2015, 07:16 PM
#15
Member
Thread Starter
Join Date: Mar 2015
Posts: 278
ok, got alot done this weekend and drove it for the first time in a month. forgot how much fun do drive it is. also forgot how much of a boat it is on corners. im gonna need some springs, stabilizers and possibly low pros to make this thing managable with a turbo. its already kinda hairy to drive it fast NA haha. new shifter feels great, very mechanical. probably too stiff for most peoples tastes but i really like it.
also, i hate soldering inside the vehicle. but i hate crummy crimp connectors even more. got all the wiring soldered up for the gauges and the apexi unit.
one wire at a time.....

also, i dont solder real pretty in car. its alot more difficult when you gotta worry about burning the interior. im spoiled from soldering on a bench.
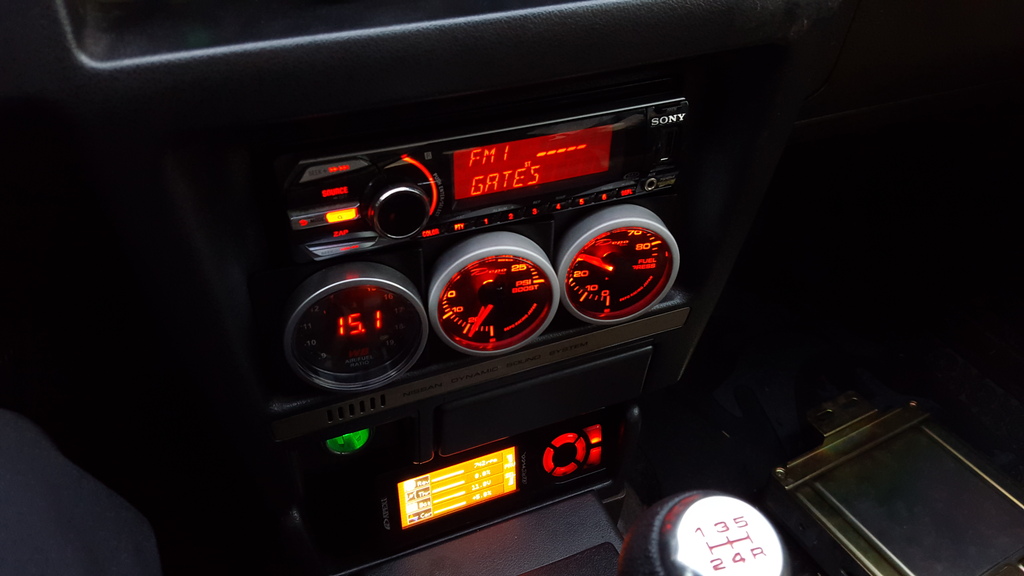
all put back together. looks stock...NOT
heres everything all powered up at idle.
also, i hate soldering inside the vehicle. but i hate crummy crimp connectors even more. got all the wiring soldered up for the gauges and the apexi unit.
one wire at a time.....

also, i dont solder real pretty in car. its alot more difficult when you gotta worry about burning the interior. im spoiled from soldering on a bench.
all put back together. looks stock...NOT

heres everything all powered up at idle.
 10-18-2015, 07:18 PM
#16
Member
Thread Starter
Join Date: Mar 2015
Posts: 278
heres a video of everything running. im glad im finally over this part of the project. now its all turbo plumbing fab work, plug in turbo ecm, swap injectors and run!
and yes, i plan on going back and changing the instument cluster, cig lighter and AC control bulbs to red to match all this.
now that its back in a temporarily drivable state, i need to run it to work and around town for a week till i burn up most of the 87 octane fuel thats in it so i can start fresh with 93 once the turbo is installed.
stay tuned guys!
Last edited by aw11power; 10-18-2015 at 07:21 PM.
 10-30-2015, 07:29 PM
#18
Member
Thread Starter
Join Date: Mar 2015
Posts: 278
thanks, i appreciate the kind words. this project has been a labor of love, a hobby, an irratation and a near meltdown at different points so far. a lot of work and time, a good bit of money and im still nowhere near where i want to be with it. all the while normal wear and tear stuff goes out and replacement parts for most of it are no longer available. so now im not only having to make things for my turbo project, im having to come up with clever ways to fix things with parts from similar cars and modify them to fit lol! makes me want to give up on this. but i have updates none the less.
Last edited by aw11power; 10-30-2015 at 07:40 PM. Reason: mispelling
10-30-2015, 07:40 PM
#19
Member
Thread Starter
Join Date: Mar 2015
Posts: 278
today i got my JLT aluminun catch can installed and fixed my PCV system, finally. also dug into the engine harness finally figured out why my idle up valve wasnt working, even tho i had repeatedly tested the valve and knew it worked. had a damaged wire causing the valve not to have ground. a little solder wire splice got that working again. set ignition timing to 15btdc(turbo ecm base timing) as opposed to 20btdc(n/a base timing) and adjusted both idle valves so the car has a stable 750 rpm idle with and without AC running. I cant remember the last time the car idled at the right speed lol! also soldered in a new pig tail for my throttle switch so no more poop connection there, that had been giving me cold start issues for a while now. fortunately that hasnt been to bothersome as of late as I finally ponied up and bought a damn near new car for day to day use so the maxima doesnt get beat on all the time. had to still be fun so i got a 2013 focus ST(2.0 turbo). love it. anyway, still plugging away on the Max as time permits. been using the wide band and making adjustments with the apexi controller everytime i drive it to get the fuel mixture dialed in. I know, it seems pointless since ill have to do that all over again once the turbo is in. but i figure its more seat time to get used to reading the data and making adjustments and learning the equipment. so in the meantime, my butt dyno is showing an obvious increase in power and also, the margin for error while learning the equipment is much broader right now since im still n/a at the moment. i wanna be pro with this stuff before i get the turbo on. nobody wants to melt pistons right?
11-07-2015, 07:34 PM
#20
Member
Thread Starter
Join Date: Mar 2015
Posts: 278
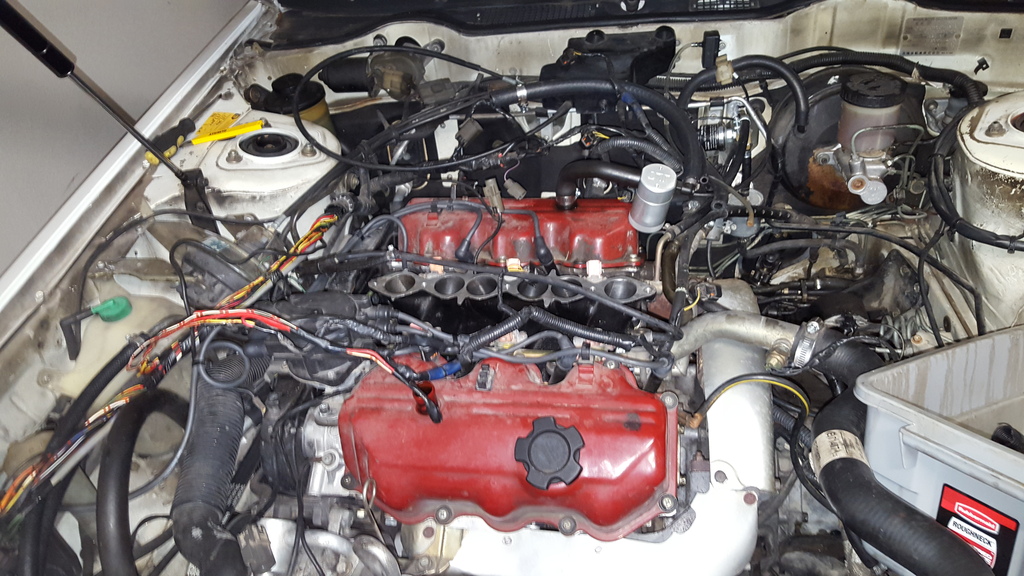
ok, guys here comes the meat of the project. got into the garage today and decided for good that this car is leaving this garage boosted gosh dangit! so first we'll observe that these fans are totally in the way.
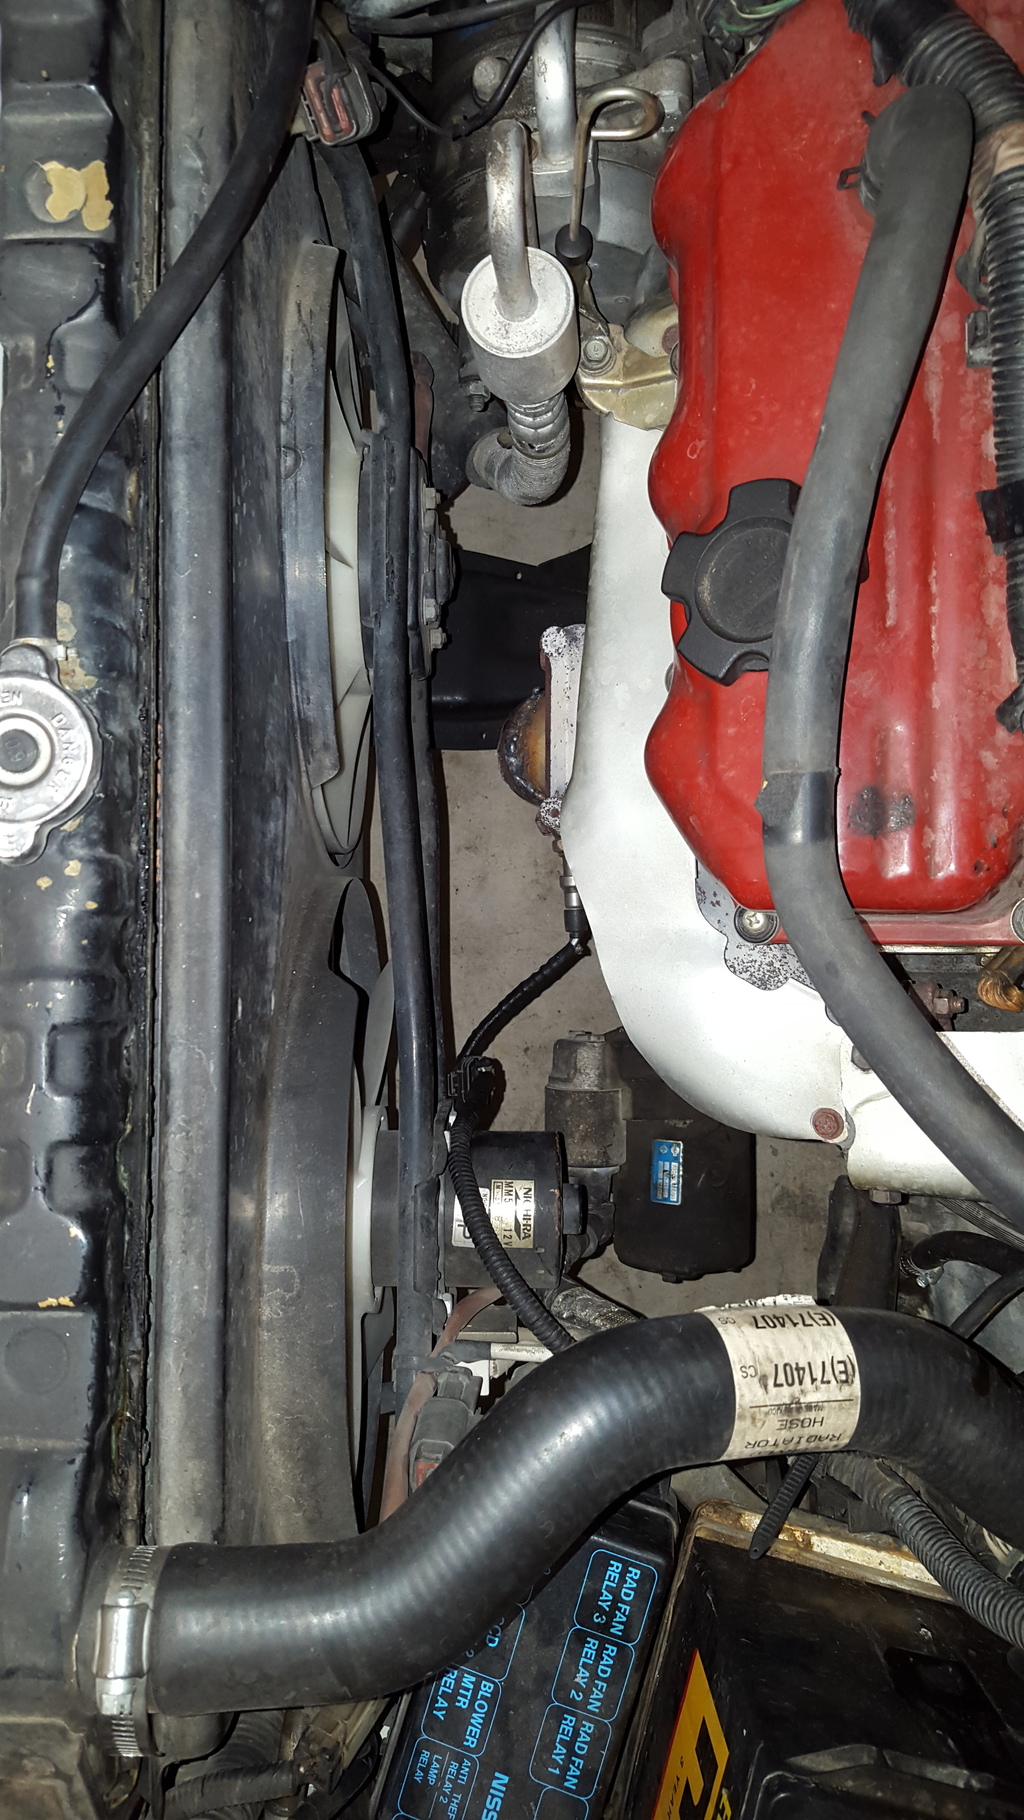
so out they come! ill be replacing them with some slim line style fans as work progresses.
but for now, they're out of the way.
I also plan on replacing that radiator while all this is apart.
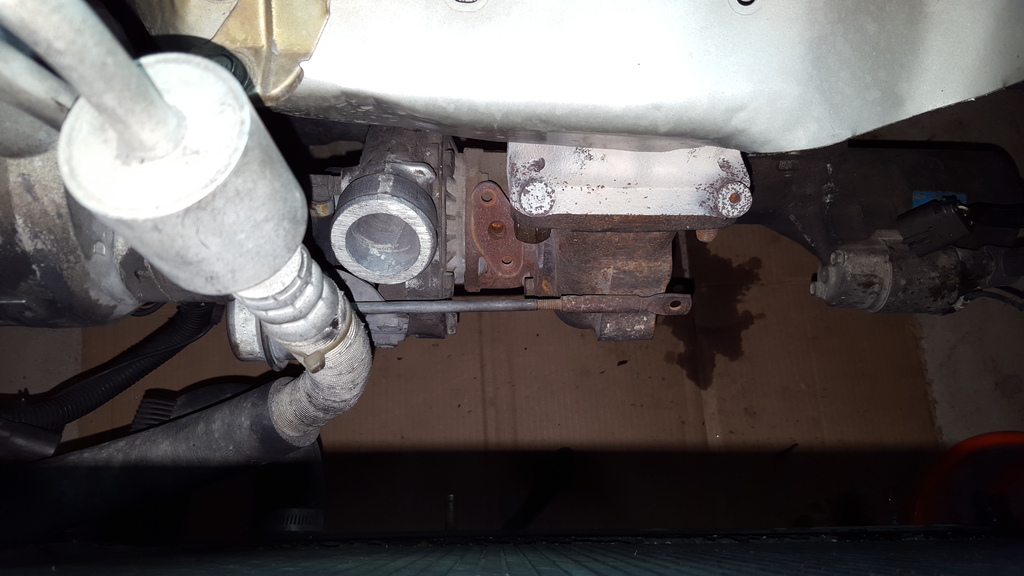
next up was dropping the temporary t3 downpipe i made. it has done its job.

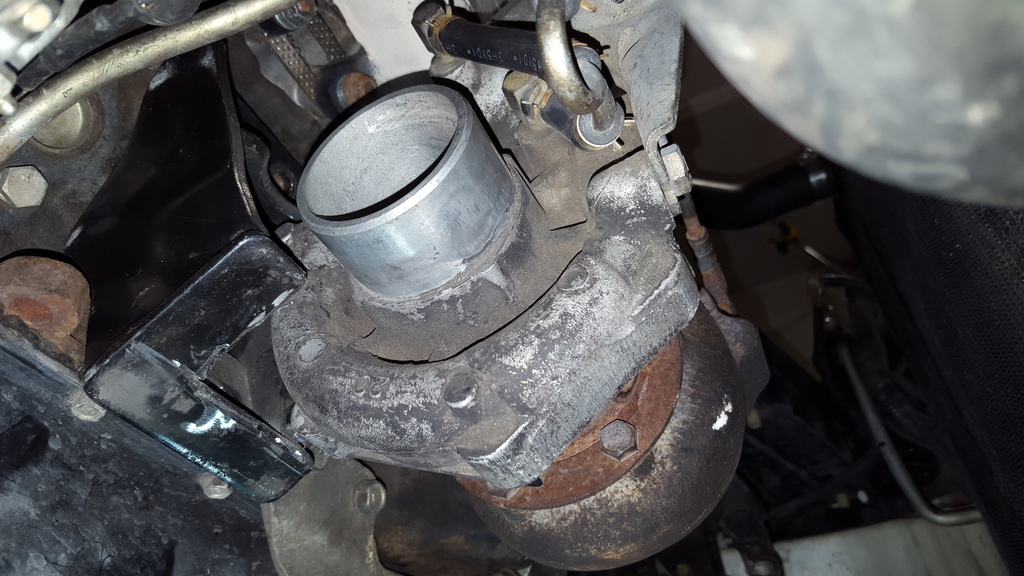
went ahead and slapped the turbo on. right now its loose fitted, with no gasket and only 2 nuts securing it. this of course is for mock up purposes so i can see whats in my way and start fabricating fixes for those issues.

so out they come! ill be replacing them with some slim line style fans as work progresses.
but for now, they're out of the way.

I also plan on replacing that radiator while all this is apart.
next up was dropping the temporary t3 downpipe i made. it has done its job.

went ahead and slapped the turbo on. right now its loose fitted, with no gasket and only 2 nuts securing it. this of course is for mock up purposes so i can see whats in my way and start fabricating fixes for those issues.

 11-07-2015, 07:43 PM
#21
Member
Thread Starter
Join Date: Mar 2015
Posts: 278
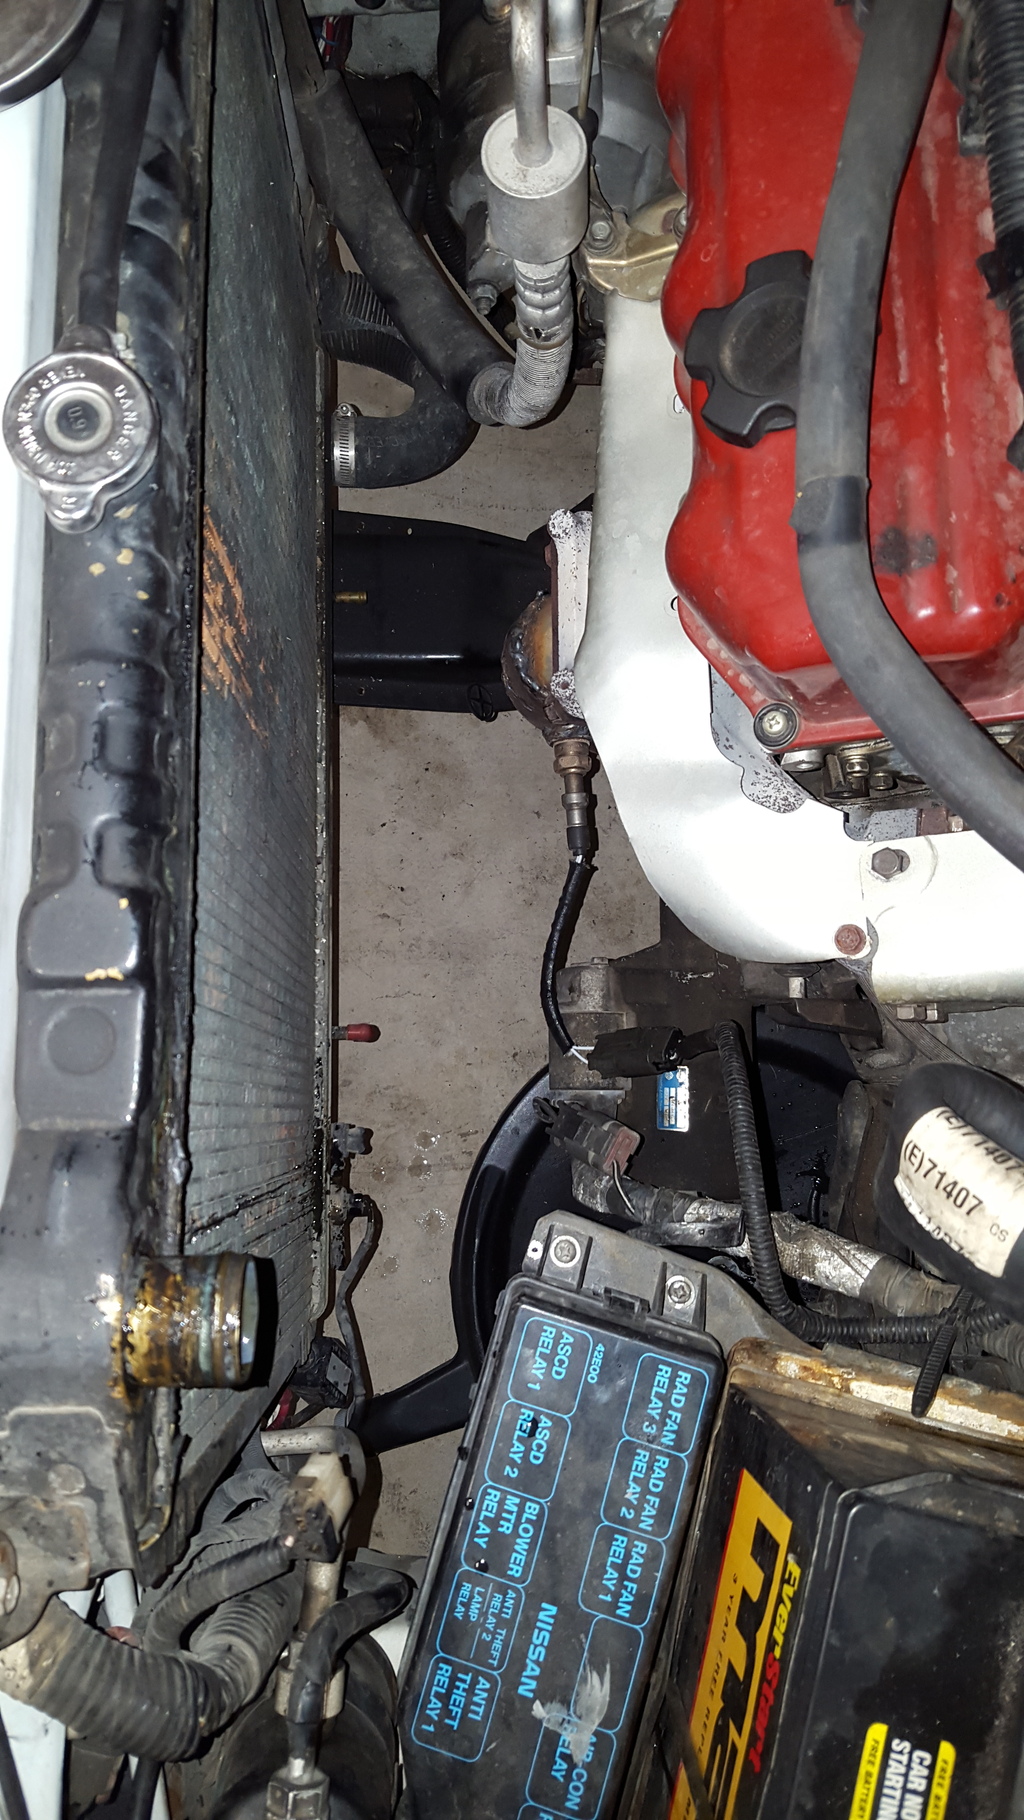
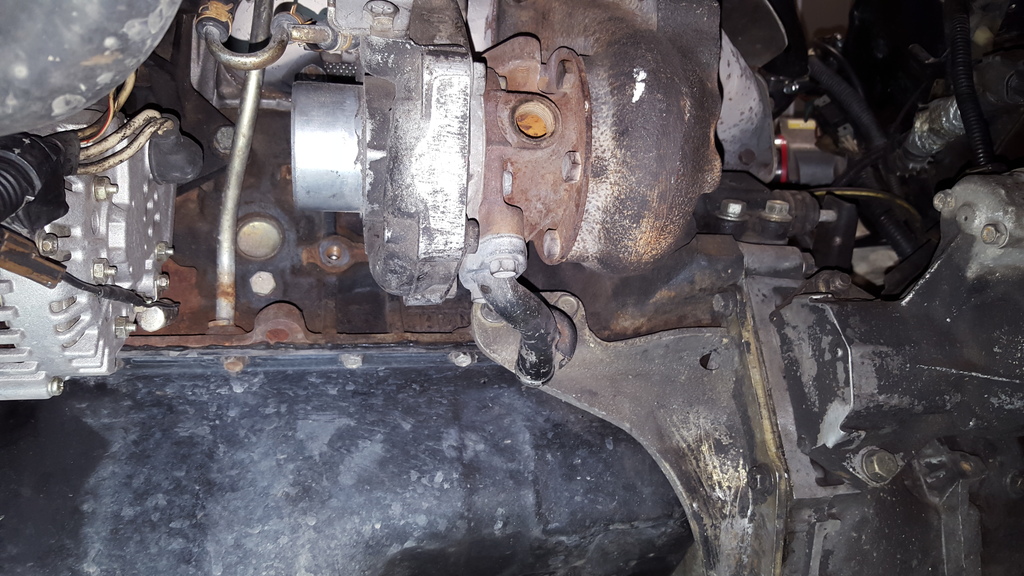
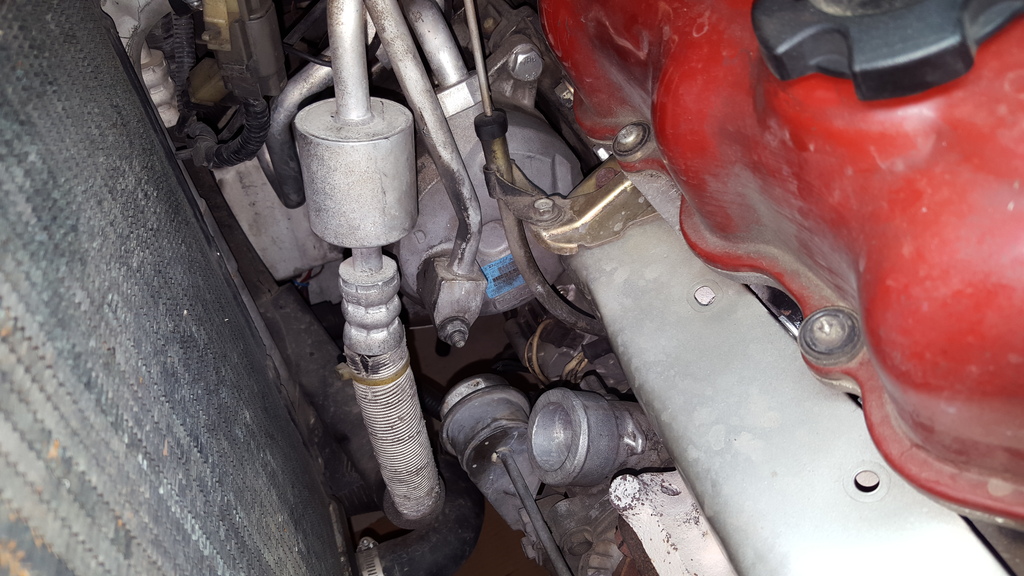
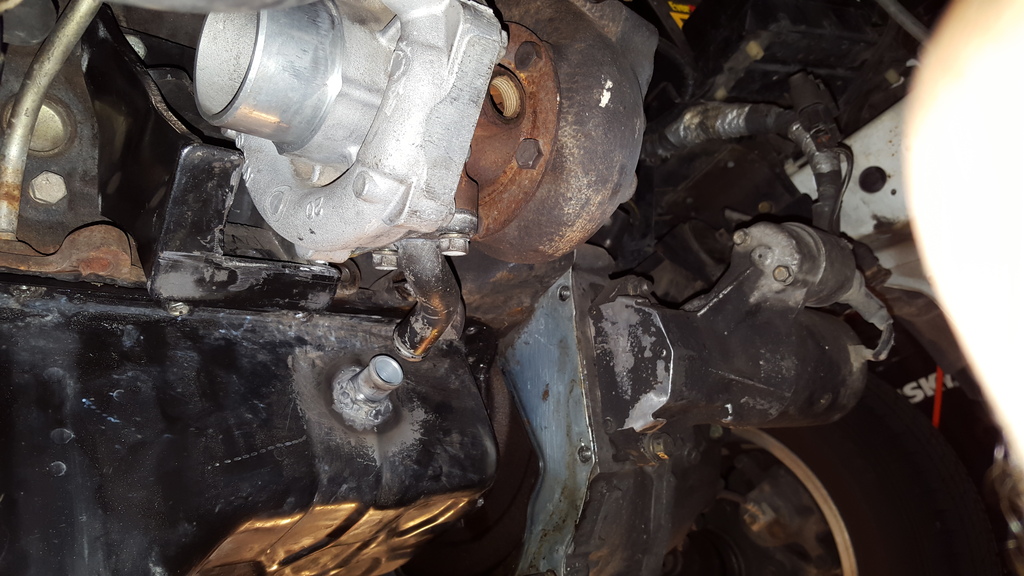
high pressure AC line was rubbing. I think I may have to end up getting a custom line made. For the time being I was able to carefully bend the aluminum section of the line to clear the wastegate actuator.
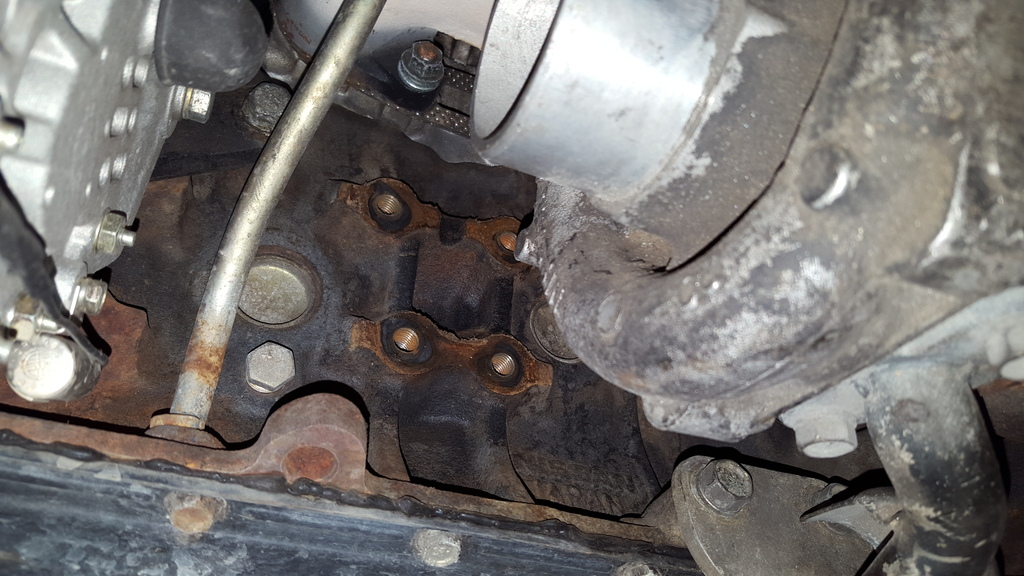
these 4 holes are for the old motor mount braket, it hit the compressor assembly so i took it off. gotta fab something up to fit in there that can still come down and mount to the crossmember. care will have to be taken so that whatever I make is thin, because the gray plug in the block in the left of the photo(next to the dipsitck) is the tap for the oil feed line.
This having been said, ill have to fab something on the crossmember side as well since the mount plate also interfered with the compressor housing. so I carefully cut the welds with a cut off tool and knocked the plate off with the BFH.
still looking around to source a Z31 turbo inlet pipe. I believe itll be much easier than custom making a pipe to clear the alternator.

these 4 holes are for the old motor mount braket, it hit the compressor assembly so i took it off. gotta fab something up to fit in there that can still come down and mount to the crossmember. care will have to be taken so that whatever I make is thin, because the gray plug in the block in the left of the photo(next to the dipsitck) is the tap for the oil feed line.

This having been said, ill have to fab something on the crossmember side as well since the mount plate also interfered with the compressor housing. so I carefully cut the welds with a cut off tool and knocked the plate off with the BFH.

still looking around to source a Z31 turbo inlet pipe. I believe itll be much easier than custom making a pipe to clear the alternator.
11-11-2015, 07:26 PM
#22
Member
Thread Starter
Join Date: Mar 2015
Posts: 278
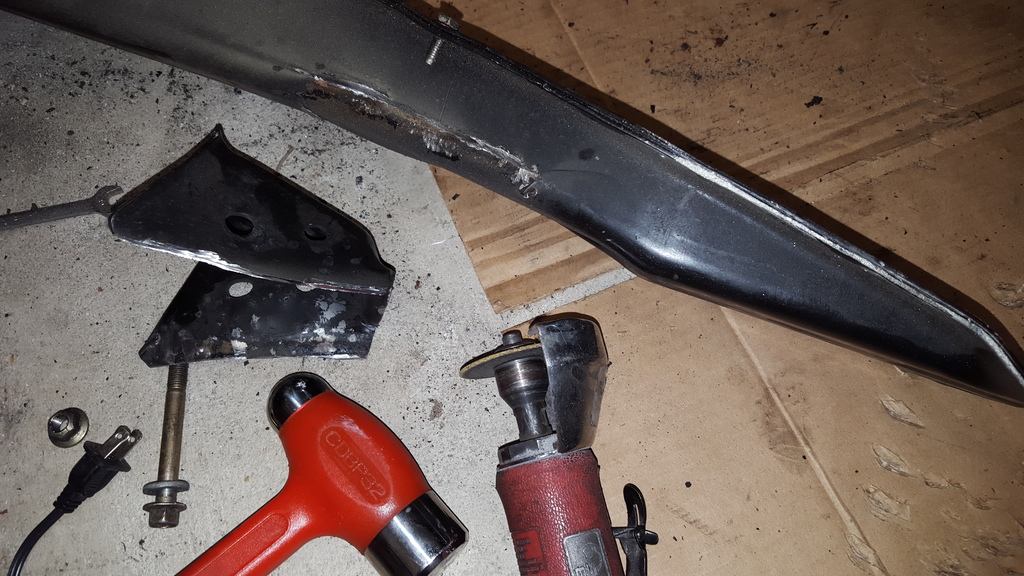
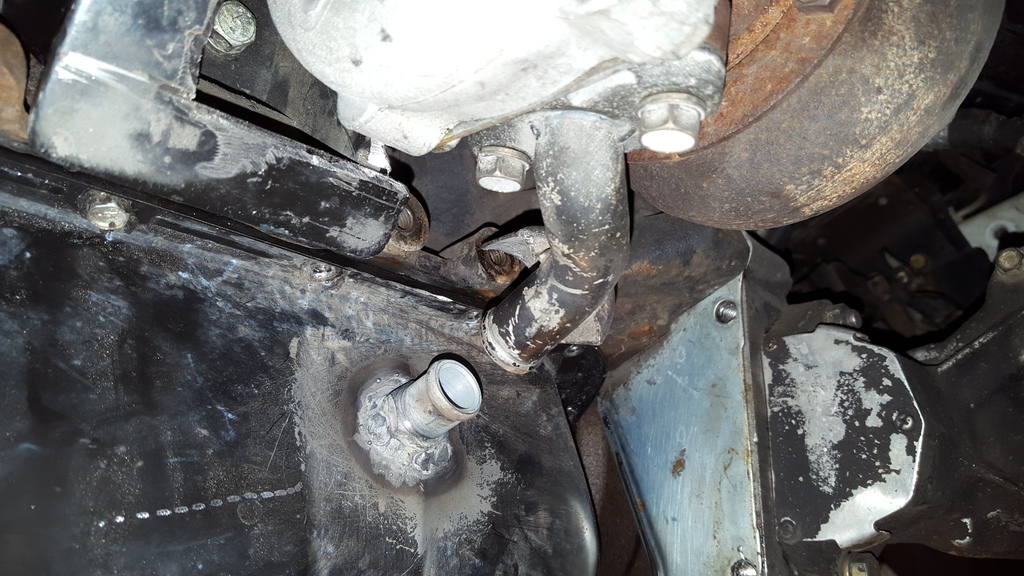
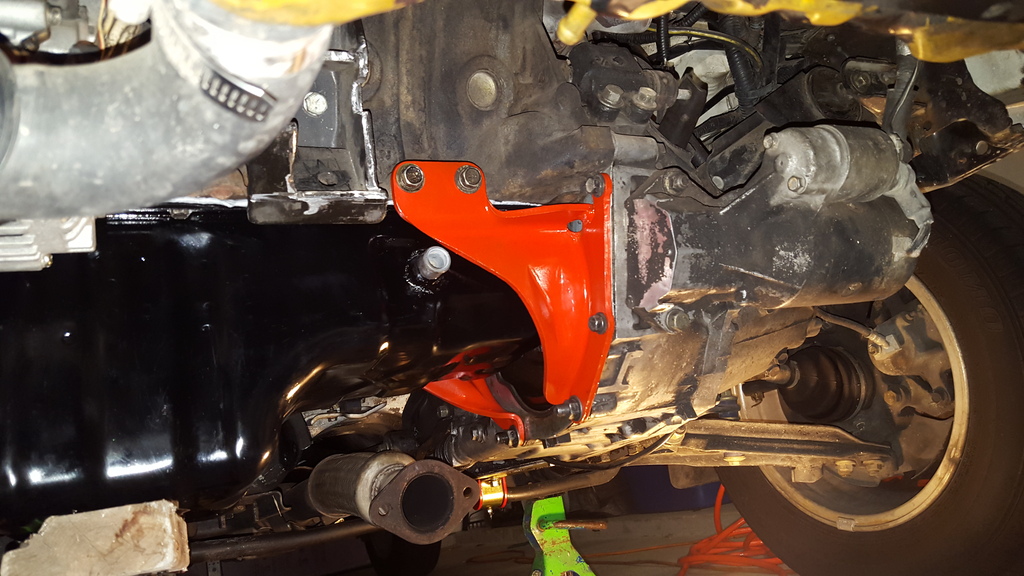
got some more work done last weekend. started by marking off the motor mount bracket where in interferes with the turbo. even took a fun action shot of grinding it a bit to get rid of sharp edges haha!
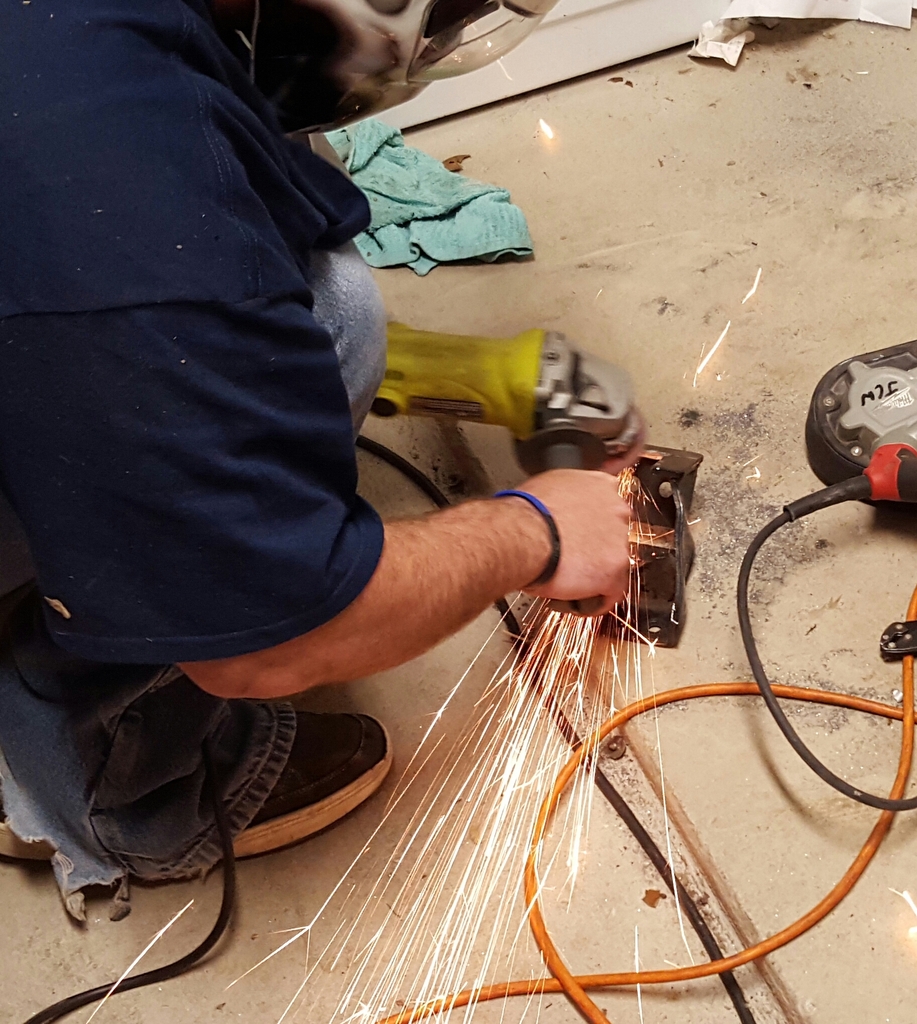
bolted the bracket back up to check clearance. my bro-inlaw is helping me with the welding bits as hes a much better welder than me. hes gonna weld an extension to the bracket to reach down and connect to the modified motor mount.

bolted the bracket back up to check clearance. my bro-inlaw is helping me with the welding bits as hes a much better welder than me. hes gonna weld an extension to the bracket to reach down and connect to the modified motor mount.
 11-11-2015, 07:42 PM
#23
Member
Thread Starter
Join Date: Mar 2015
Posts: 278
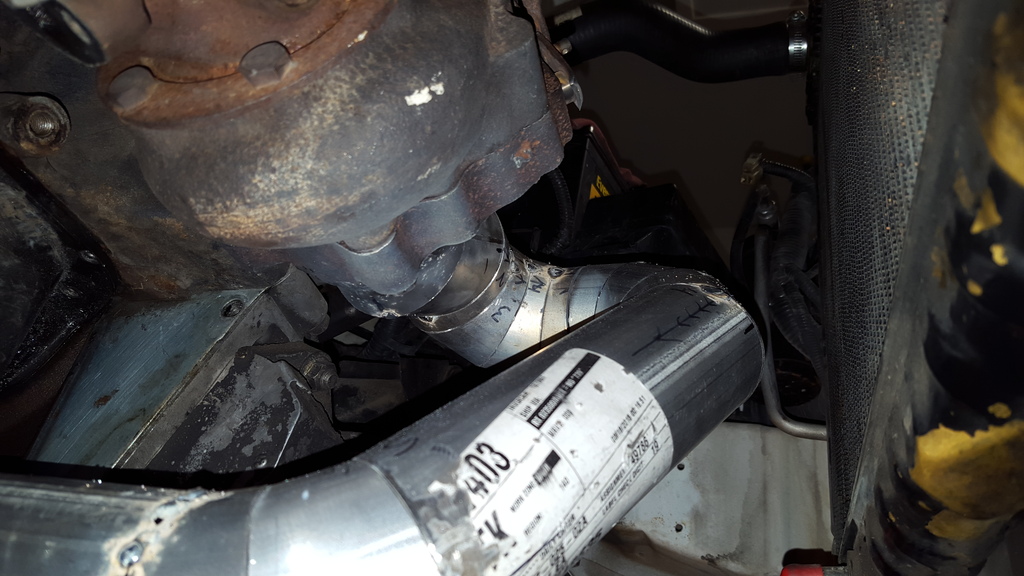
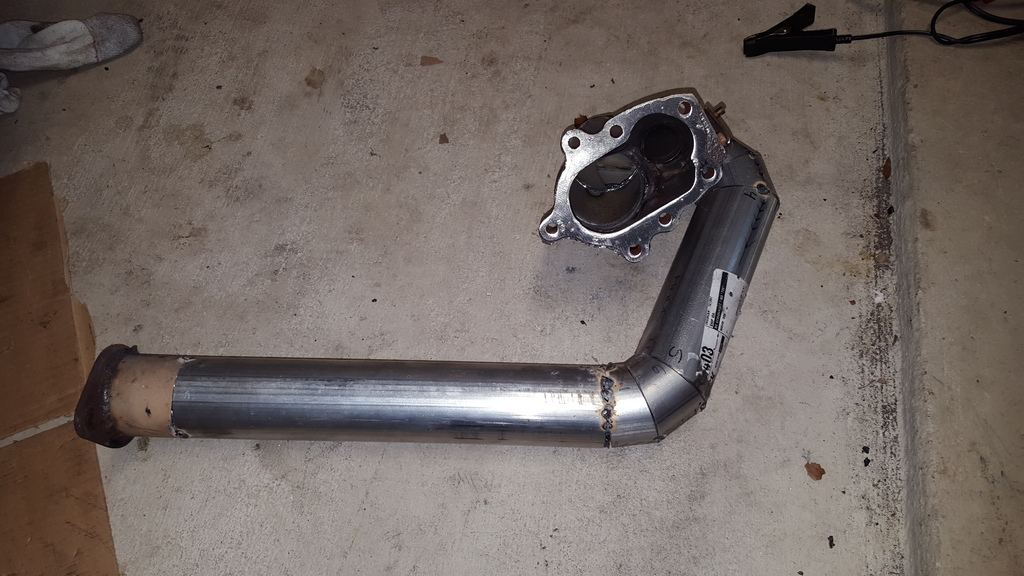
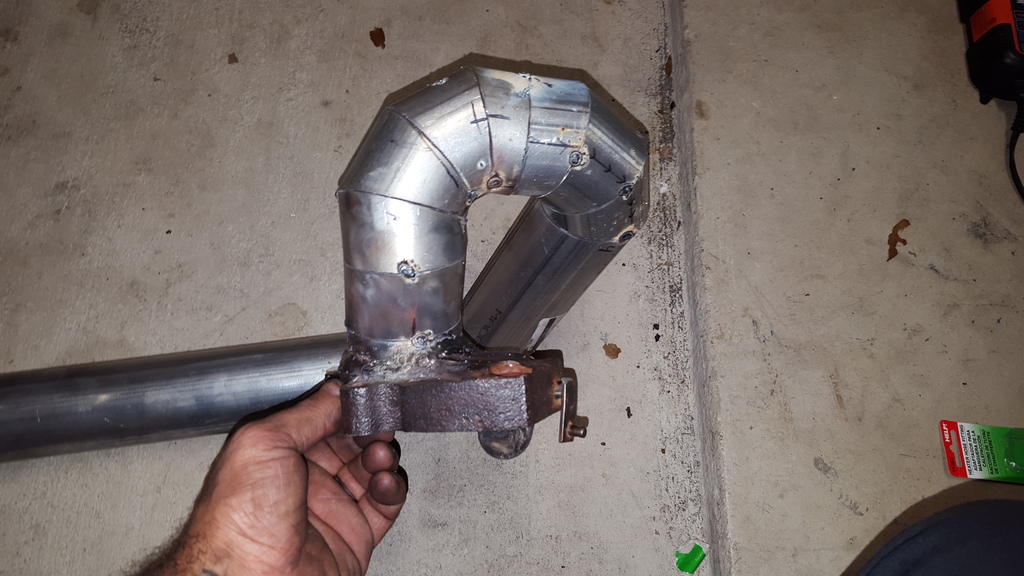
next order of business was to chop the curve off the dump pipe flange as it would run right into my starter(because it came from the rear wheel drive 300zx so , yeah. its different). we welded a straight piece of pipe directly to the flange to build a new dump pipe off of so it can go down and connect to the existing exhaust. using 2.5 inch pipe for a few reasons. 1, it can flow enough to meet my power goals. 2, it would be next to impossible to fit anything else under the car. 3, the actual outlet of the turbo is 2.5 so there would be no flow benefit in going any larger. the rest of my system is currently 1 7/8 pipe from the factory with a fancy sounding 2.25 muffler. once the car is operational, ill take to my friends at the muffler shop and have them run everything behind the turbo 2.5 all the way back. also, ill be using a bigger(quieter) muffler that allows higher flow. im thinking a stock muffler off a v8 chevy truck. itll be quiet and sneaky, but still flow more than enough for my power goals.

also purchased all new stainless hardware for the flange bolts. i didnt trust the ones from 1986, they didnt look too good.
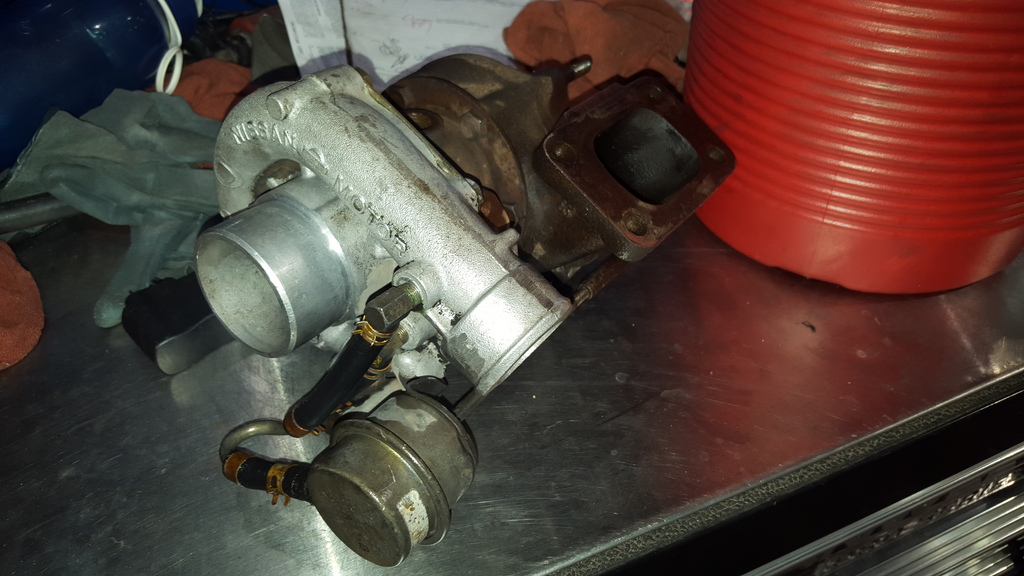
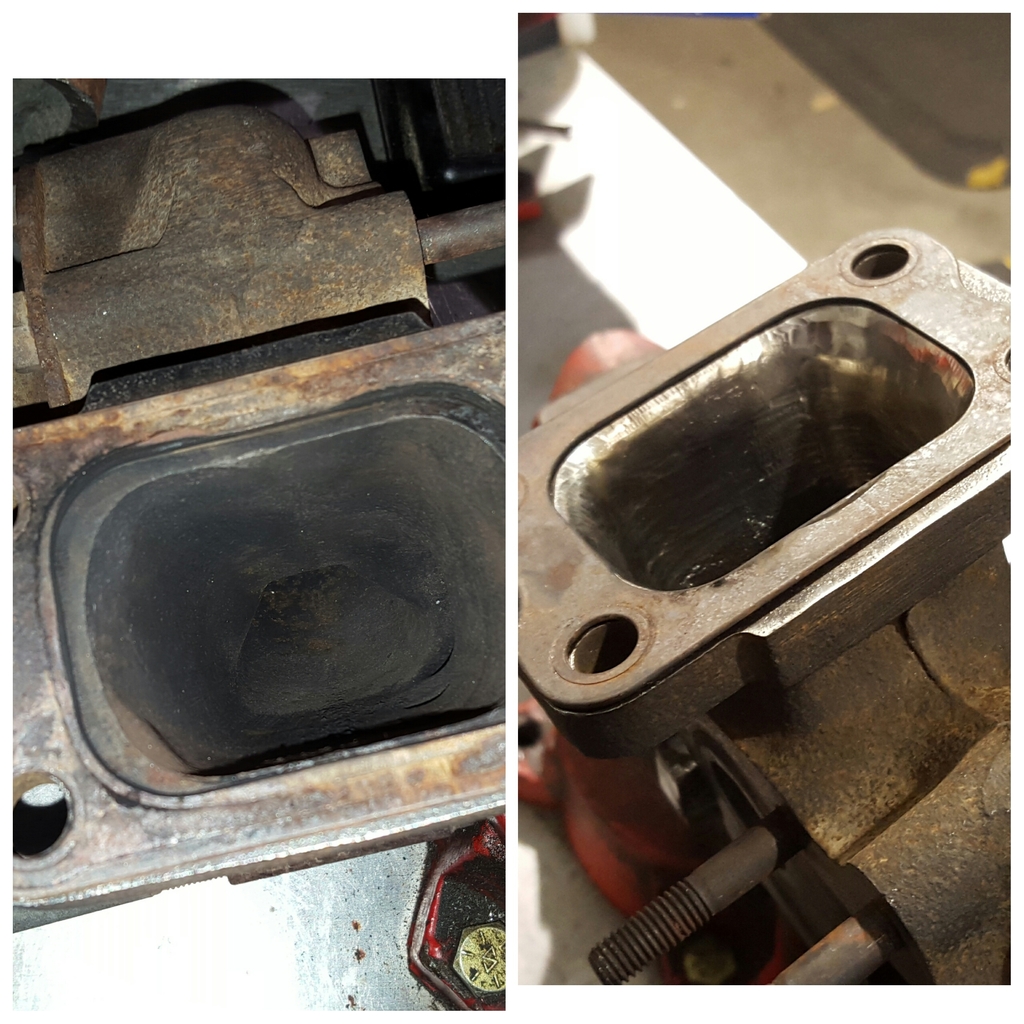
got some time yesterday at work and degreased to exterior of the turbo. it was pretty damn dirty. i still need to port/gasket match the T3 flange on the turbo. manifold ports and flange have already been gasket matched as has the lower intake(polished internally also).
after work i went and picked up a used top mount intercooler off an 89 rx7 for pennies thanks to craigslist. ive been looking for an intercooler solution for months and found one thatll fit perfectly where i want it, it was inexpensive and is in great condition. right now its just kinda sitting on a rag on the battery. the battery is gonna be relocated to the trunk. ill be building a box for it so i can duct cool air to it from under the bumper and inside the fender. i plan to also mount a fan under it and put a small reverse scoop on the hood above it. ill foam seal it to the hood so the heat has nowhere to go but up.
im gonna repaint the silver and have my friend who makes stickers cut me out a decal for it that says something nissan related, like "turbo 3000" or something.
more updates coming this week. stay tuned!

also purchased all new stainless hardware for the flange bolts. i didnt trust the ones from 1986, they didnt look too good.
got some time yesterday at work and degreased to exterior of the turbo. it was pretty damn dirty. i still need to port/gasket match the T3 flange on the turbo. manifold ports and flange have already been gasket matched as has the lower intake(polished internally also).

after work i went and picked up a used top mount intercooler off an 89 rx7 for pennies thanks to craigslist. ive been looking for an intercooler solution for months and found one thatll fit perfectly where i want it, it was inexpensive and is in great condition. right now its just kinda sitting on a rag on the battery. the battery is gonna be relocated to the trunk. ill be building a box for it so i can duct cool air to it from under the bumper and inside the fender. i plan to also mount a fan under it and put a small reverse scoop on the hood above it. ill foam seal it to the hood so the heat has nowhere to go but up.

im gonna repaint the silver and have my friend who makes stickers cut me out a decal for it that says something nissan related, like "turbo 3000" or something.
more updates coming this week. stay tuned!
Last edited by aw11power; 11-11-2015 at 07:45 PM.
 11-15-2015, 04:06 PM
#25
Member
Thread Starter
Join Date: Mar 2015
Posts: 278
thanks vernk. i had thought of that, but i want to see where everything lands once the down pipe is done. im either putting slim pusher fans in front of the condensor on or slim puller fans inside the existing shroud as its the support bars and motors that are in the way as of now, not the shroud. anyway....
update time!!!
update time!!!
11-15-2015, 06:26 PM
#26
Member
Thread Starter
Join Date: Mar 2015
Posts: 278
spent an awful lot if time on the car today. i cant take credit for much of this work was done by my bro in-law. hes got the mad fab and welding skills.
first up is a before and after shot of the the gasket match on the turbine housing inlet. i did exhaust manifold montsh ago in preperation.
pulled of the oil pan for drain back bung installation.
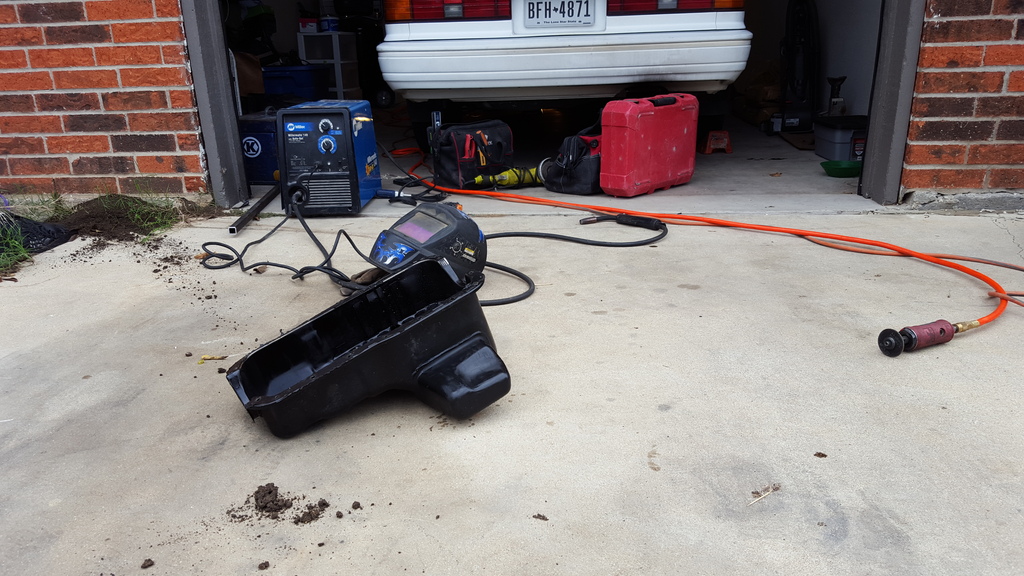
bung installation....
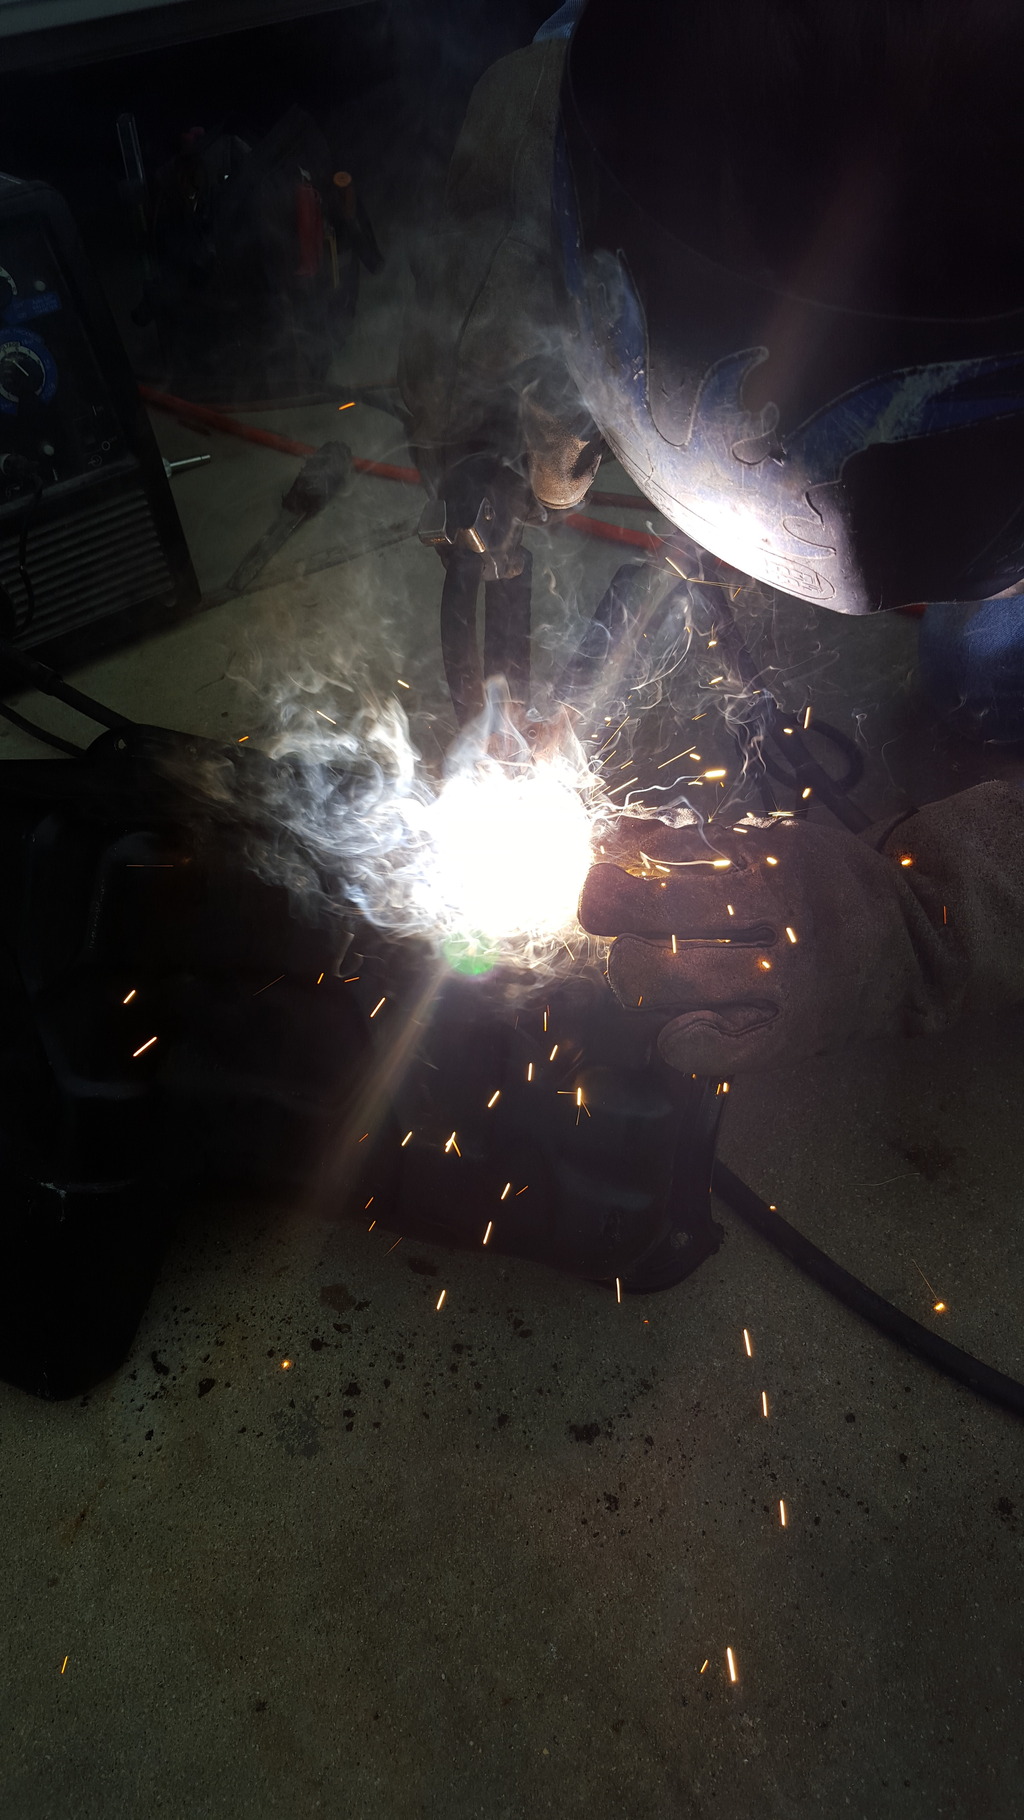
drain back bung installed.
a little close up. we're pretty proud of how well we got that lined up. couldnt be better. i already pulled the pan back off. its going to work tomorrow to get the gasket material removed and be repainted.
first up is a before and after shot of the the gasket match on the turbine housing inlet. i did exhaust manifold montsh ago in preperation.

pulled of the oil pan for drain back bung installation.

bung installation....

drain back bung installed.

a little close up. we're pretty proud of how well we got that lined up. couldnt be better. i already pulled the pan back off. its going to work tomorrow to get the gasket material removed and be repainted.
 11-15-2015, 06:32 PM
#27
Member
Thread Starter
Join Date: Mar 2015
Posts: 278
next is mock up for down pipe. my bro does duct work for a living, so he kept saying how its just like what he does at work only with smaller pipe lol. lots of crazy angles had to be made here of course. had to clear the starter, radiator, crossmember, oil pan and meet up with the OE exhaust. so here goes! right now its all tacked together. hes taking it to work to weld up all the seams and will bring it to me next weekend so i cant paint and install it.

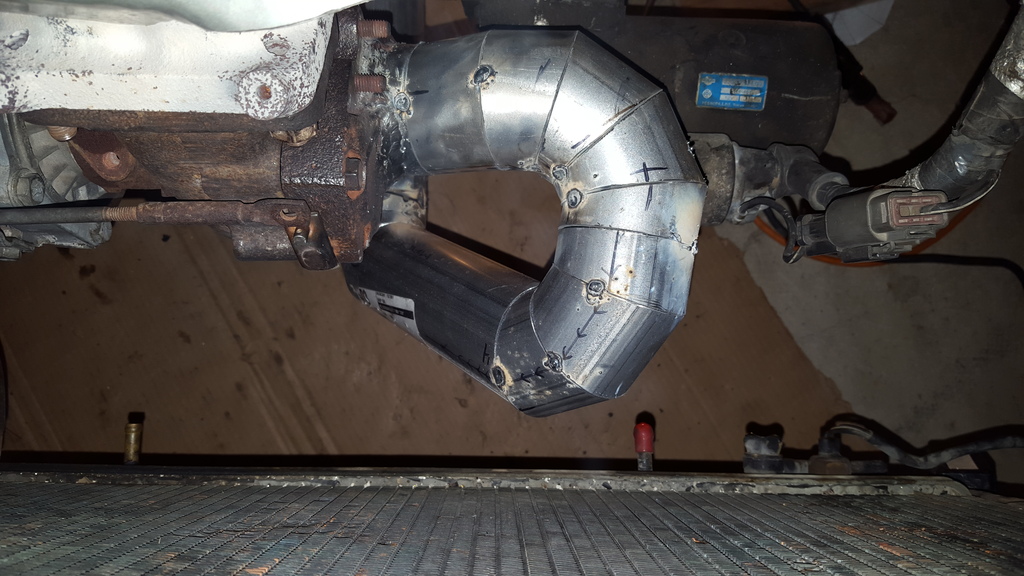
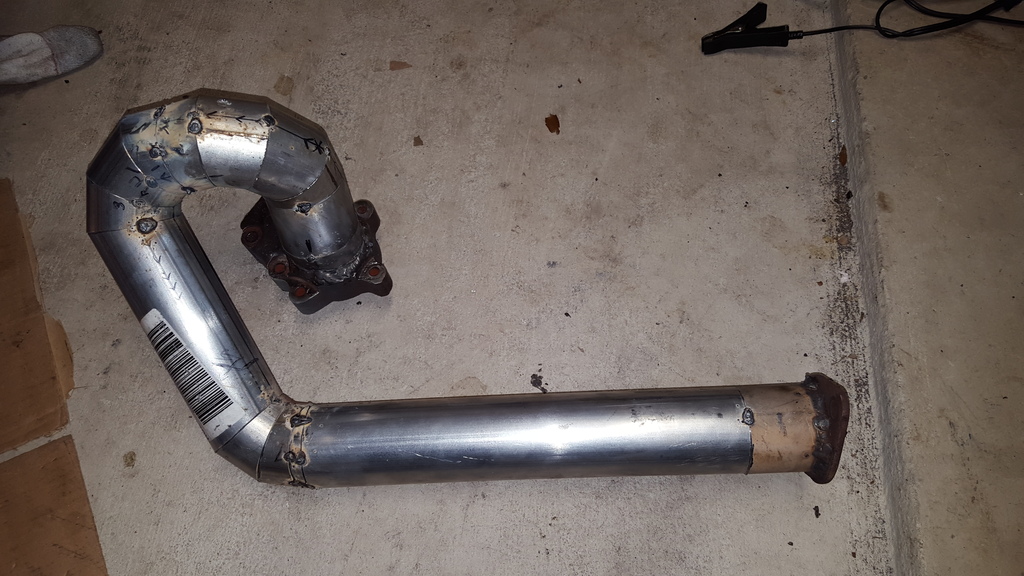
more coming soon!!!


more coming soon!!!
11-16-2015, 03:22 PM
#28

i have to ask you how old is that turbo and details on its condition? With the amount of work you are doing you might as well get a better turbo. Borg warners are going for pennies brand new these days and are strong reliable turbos. Your one of the few people that can make just about anything work so do not limit yourself to stock and or subpar supporting mods.
11-18-2015, 08:42 PM
#29
i have to ask you how old is that turbo and details on its condition? With the amount of work you are doing you might as well get a better turbo. Borg warners are going for pennies brand new these days and are strong reliable turbos. Your one of the few people that can make just about anything work so do not limit yourself to stock and or subpar supporting mods.
11-19-2015, 04:08 AM
#30
 I dont think he needs to do all that but its clear he is focused on response and a quick spool. A Borg Warner S256sx, should be good to support an easy 350whp but it would work great with his goals. The only issue is he would have to get a external wastegate. There are some wastegate'd Holsets but i would generally stay away from Holsets get a Garrett instead. Not that holsets are bad turbos just better options then them for the same price. I believe the GT32 you can get it in T3 and internally wastegate'd.
What i am concerned about is the seals on that turbo he has. if he starts it up and it just dumbs oil in the exhaust. That is such an annoying problem.
11-19-2015, 05:42 AM
#31
Member
Thread Starter
Join Date: Mar 2015
Posts: 278
i have to ask you how old is that turbo and details on its condition? With the amount of work you are doing you might as well get a better turbo. Borg warners are going for pennies brand new these days and are strong reliable turbos. Your one of the few people that can make just about anything work so do not limit yourself to stock and or subpar supporting mods.
Also, I'm using the factory injector size, turbo, MAF and ecm from an 86 300zx. So, basically I want to start with this turbo because my engine management is programmed around this turbo. Only difference is I'm using a 9:1 compression motor with an intercooler and opposed to the 300zx's 7.8:1 compression motor with out an intercooler. I only have the fuel controller and wide band for minor adjustments, not full fledged tuning. I just wanna make a fun little sleeper. If I end up with 250 hp, that's cool with me. As time goes on I'll upgrade things for more power, but for now I already got all these components for next to nothing and all this work needs to be done to boost the car anyway. BTW, I am definitely worried about the turbo seals. There is absolutely no sign of oil residue inside the turbo whatsoever, but I'm still nervous. What was on the outside of the turbo was from a valve cover leak long ago on the car it came from. I'd love to rebuild the turbo but I'm really nervous about possibly breaking it trying to reseal it...
11-19-2015, 06:52 AM
#32
I don't in any way disagree with you sentiment. I have a variety of reasons why I'm currently going the route I am. The turbo is a stock garret t3 from an early Z31 300zx. So yes, it's old. Very old in fact. It was also free. It spins freely and does not exhibit shaft play in any particular direction. It came off a running but wrecked 300zx. I've had several people knowledgeable in the area visually inspect the turbo all have given a thumbs up to the condition of the turbo. Honestly, I may very well use a different turbo later. But right now I want to use equipment that is compatible to a point to try and not grenade my engine. The only change I'll need to make later if I use a different turbo is weld a different flange on my downpipe since I'll most assuredly just be using a different T3.
Also, I'm using the factory injector size, turbo, MAF and ecm from an 86 300zx. So, basically I want to start with this turbo because my engine management is programmed around this turbo. Only difference is I'm using a 9:1 compression motor with an intercooler and opposed to the 300zx's 7.8:1 compression motor with out an intercooler. I only have the fuel controller and wide band for minor adjustments, not full fledged tuning. I just wanna make a fun little sleeper. If I end up with 250 hp, that's cool with me. As time goes on I'll upgrade things for more power, but for now I already got all these components for next to nothing and all this work needs to be done to boost the car anyway. BTW, I am definitely worried about the turbo seals. There is absolutely no sign of oil residue inside the turbo whatsoever, but I'm still nervous. What was on the outside of the turbo was from a valve cover leak long ago on the car it came from. I'd love to rebuild the turbo but I'm really nervous about possibly breaking it trying to reseal it...
Also, I'm using the factory injector size, turbo, MAF and ecm from an 86 300zx. So, basically I want to start with this turbo because my engine management is programmed around this turbo. Only difference is I'm using a 9:1 compression motor with an intercooler and opposed to the 300zx's 7.8:1 compression motor with out an intercooler. I only have the fuel controller and wide band for minor adjustments, not full fledged tuning. I just wanna make a fun little sleeper. If I end up with 250 hp, that's cool with me. As time goes on I'll upgrade things for more power, but for now I already got all these components for next to nothing and all this work needs to be done to boost the car anyway. BTW, I am definitely worried about the turbo seals. There is absolutely no sign of oil residue inside the turbo whatsoever, but I'm still nervous. What was on the outside of the turbo was from a valve cover leak long ago on the car it came from. I'd love to rebuild the turbo but I'm really nervous about possibly breaking it trying to reseal it...
For the most part all you need is Fuel adjustments. Talk to Autovaughn, they are where most of us are currently getting nistune from. It is honestly soo cheap compared to other options its not even funny, $420 buys you everything including tuning license and support cable, you just need boost control after that. But im looking at your build and im wondering why are not looking at doing a top feed rail with modern injectors, we are talking about 30 years of development. You have much better options. I have a set of RC440s i would pretty much give to you for it and they will be more flexible and efficient then the options you named so far. You seriously have the skill, know how, and support to do it. I can understand wanting to have a sleeper look but you can keep the look with the parts that are on the market currently. Budget can be an issue i do understand that but parts can be found in your budget.
It just seems like you are limiting yourself to stock parts, the best part is they are guaranteed to work but their are better options that will work great aswell, that's all I'm questioning.
11-19-2015, 06:29 PM
#33
Member
Thread Starter
Join Date: Mar 2015
Posts: 278
all good points and good questions crusher. id like to respond to a number of your points, in order. please offer what feedback you can. 1:im definately aware of the trans issues. thats one of the reasons im not shooting for 300+hp. i already ditch the factory automatic, it was failing at stock power levels haha! i got a used 5 speed(from a 91 3rd gen) and replaced all the bearings in it myself. from what i understand, 300-350hp is where this tranny starts to go. 2: i was planning on using the apexi neo and an adustable fuel pressure regulator to compensate for the compression difference since the turbo ecm i have is programmed for 7.8:1. also it was programmed rich as hell since the 300zx was not intercooled and ran on 87 pump gas. im kinda hoping that since ill be using an intercoller and running 93 octance, i may have less trouble. we'll see... 3: in reguards to nistune, I really, really want it but it isnt in the budget anytime soon. I think there is a big difference in the boards for certain generations. last i checked itd run me closer to 800 for one compatable with my crappy old school ECM. if i could get it for 400, i would be willing to save some pennies for that. im well aware that it is more than a superior method. its the best method, period. because i can adjust timing with it as well. more power, safer power and more consistent power with smoother driveability. please, get me the info to get it so cheap for a second gen. all the electronics on it are different than whats on the 3rd gen. 4:the injectors i have are a "for now" solution, just because like you said, they will work and i have them. i think you're right tho, i will need something much better very soon. i dont know much about fabbing a fuel rail tho. also, i cant properly control them without nistune. in the future tho, i could really use those 440s you mentioned lol.
lastly, all the equipment im starting with is just that, a start. i want to get it lightly boosted and drivable and then start getting better injectors, turbo and better ways to tune and manage them.
lastly, all the equipment im starting with is just that, a start. i want to get it lightly boosted and drivable and then start getting better injectors, turbo and better ways to tune and manage them.
11-19-2015, 06:35 PM
#34
Member
Thread Starter
Join Date: Mar 2015
Posts: 278
in the meantime, i got some little things done to get just a little closer to boost.
got the oil pan re-painted after bung was welded in. its installed again with fresh silicone. all sealed up. since i had the trans brace brackets off, i thouroghly degreased them and painted them, cuz i like things to look nice.
this weekend we will finish the crossmember modifications for the motor mount to fit next to the turbo. hopefully ill find time cleanup the finished down pipe my bro made for me and maybe get some high heat coats on it. ill keep you guys posted and look forward to hearing more input from you crusher. youve offered some of the most insightful and intelligent conversation ive had on a forum in quite some time.
got the oil pan re-painted after bung was welded in. its installed again with fresh silicone. all sealed up. since i had the trans brace brackets off, i thouroghly degreased them and painted them, cuz i like things to look nice.

this weekend we will finish the crossmember modifications for the motor mount to fit next to the turbo. hopefully ill find time cleanup the finished down pipe my bro made for me and maybe get some high heat coats on it. ill keep you guys posted and look forward to hearing more input from you crusher. youve offered some of the most insightful and intelligent conversation ive had on a forum in quite some time.
11-20-2015, 03:46 AM
#35
all good points and good questions crusher. id like to respond to a number of your points, in order. please offer what feedback you can. 1:im definately aware of the trans issues. thats one of the reasons im not shooting for 300+hp. i already ditch the factory automatic, it was failing at stock power levels haha! i got a used 5 speed(from a 91 3rd gen) and replaced all the bearings in it myself. from what i understand, 300-350hp is where this tranny starts to go. 2: i was planning on using the apexi neo and an adustable fuel pressure regulator to compensate for the compression difference since the turbo ecm i have is programmed for 7.8:1. also it was programmed rich as hell since the 300zx was not intercooled and ran on 87 pump gas. im kinda hoping that since ill be using an intercoller and running 93 octance, i may have less trouble. we'll see... 3: in reguards to nistune, I really, really want it but it isnt in the budget anytime soon. I think there is a big difference in the boards for certain generations. last i checked itd run me closer to 800 for one compatable with my crappy old school ECM. if i could get it for 400, i would be willing to save some pennies for that. im well aware that it is more than a superior method. its the best method, period. because i can adjust timing with it as well. more power, safer power and more consistent power with smoother driveability. please, get me the info to get it so cheap for a second gen. all the electronics on it are different than whats on the 3rd gen. 4:the injectors i have are a "for now" solution, just because like you said, they will work and i have them. i think you're right tho, i will need something much better very soon. i dont know much about fabbing a fuel rail tho. also, i cant properly control them without nistune. in the future tho, i could really use those 440s you mentioned lol.
lastly, all the equipment im starting with is just that, a start. i want to get it lightly boosted and drivable and then start getting better injectors, turbo and better ways to tune and manage them.
lastly, all the equipment im starting with is just that, a start. i want to get it lightly boosted and drivable and then start getting better injectors, turbo and better ways to tune and manage them.
http://www.autovaughnperformance.com...hk=1&Itemid=73
$420+shipping and your good to go. Mine cost me around $560 in total but i needed the dual rom board. But there is soo much stuff there for tuning with nistune, different mafs, flex fuel equipment.
http://www.nistune.com/equipment-products.php
you wont really have to worry about your trans until around 350wtq. then you in a bit of a danger soon. But in any case when you start putting down around 220wtq no more slamming gears, power shifts, sudden throttle inputs. Just be smooth with the transmission and it should hold up. Even though the VQ 5spd is a little different im getting ready to throw around 400wtq through it im just pray it holds up until i can afford a 6spd lol.
11-20-2015, 08:04 AM
#36
$420 is a great price for the whole shebang including the individual license. If I understand correctly, it appears he won't need the consult cable which I'm guessing is why the price is only $420 (consult cable is $80).
It seems AutoVaughn's prices have come down considerably in general.
I paid $620 for the Type 3 Package a couple of years ago. Now I see the same package is only $500.
It seems AutoVaughn's prices have come down considerably in general.
I paid $620 for the Type 3 Package a couple of years ago. Now I see the same package is only $500.
11-21-2015, 03:36 PM
#37
Junior Member

Join Date: Nov 2015
Location: Queens NY
Posts: 77
very cool build by you and your brother....i built something similar to my 88 200sx v6 and using the 300zx turbo stuff was all "plug and play"...Turbo ECU and AFM matched my stock harness without having to move any wires....same with the 02 sensor[small type like you have]]...turbo injectors fit fine...i'd recommend using a 87 300zx turbo ECU because it 'feels' better[than the 86] and has the 5 checking modes instead of 2.,,,,it idles at 14.7 and fuel mixture under boost[14psi is 11ish.....keep posting updates!
11-21-2015, 11:12 PM
#38

Yes z31 is type one ecu like I run. You won't need a consult cable just USB cable from ecu to laptop. For injectors good cheap setup would be some dsm 450, Mazda 460cc etc on early z31 top feed rail good for 400hp safely. 84-87 z31 ecu low impedance and 88-89 high keep that in mind when choosing injectors.
On the trans might get lucky me and never have issues not sure how that works as far as I know I run more boost than avg boosted maxima.
On the trans might get lucky me and never have issues not sure how that works as far as I know I run more boost than avg boosted maxima.
Last edited by akurtzer57; 11-21-2015 at 11:15 PM.
11-25-2015, 05:46 PM
#39
Member
Thread Starter
Join Date: Mar 2015
Posts: 278
hey guys, thanks for all the really helpful input on the subject. it has caused some changes in my plans. knowing the current prices for nistune puts it much more realistically within reach. I plan to get it. but since im a commision only mechanic it may have to wait til springs when its picks up a bit. winter time is always slow and i got car payments and mortgage and all like everyone else. so in the meantime im going to proceed with 80% of my plan as layed out. im looking at a variety of options for injectors right now. i may need to make a trip to the junkyard and source some different fuel rails but thats for another time. meantime im going to finish what im doing to installe the turbo, feed/drain lines, intercooler and modified motor mount. so im gonna run the turbo and intercooler i have with the 86 ecm, wideband and air fuel controller i have @ 6.8psi. stock boost pressure for the wastegate on this turbo. im looking for some injectors in the 370 range so that i can dail em back to run low boost, yet still have room to richen up for map inconsistensies on this computer i got. that would also leave me room for more boost. itll be a fun step up at stock boost and ill enjoy it like that for a bit. onces funds allow, ill install nistune and a manual boost controller so i can get in the 11-13 psi range and really have some fun. i believe 370 injectors will support that power range and be putting down the power im lookin for. i may need to get an adjustable fuel pressure regulator as well but ill have to see how it runs at that point. i dont have much to update otherwise for the moment. gotta see how my next check works out so i can order oil feed lines. ill keep yall posted.
12-09-2015, 04:47 AM
#40
Member
Thread Starter
Join Date: Mar 2015
Posts: 278
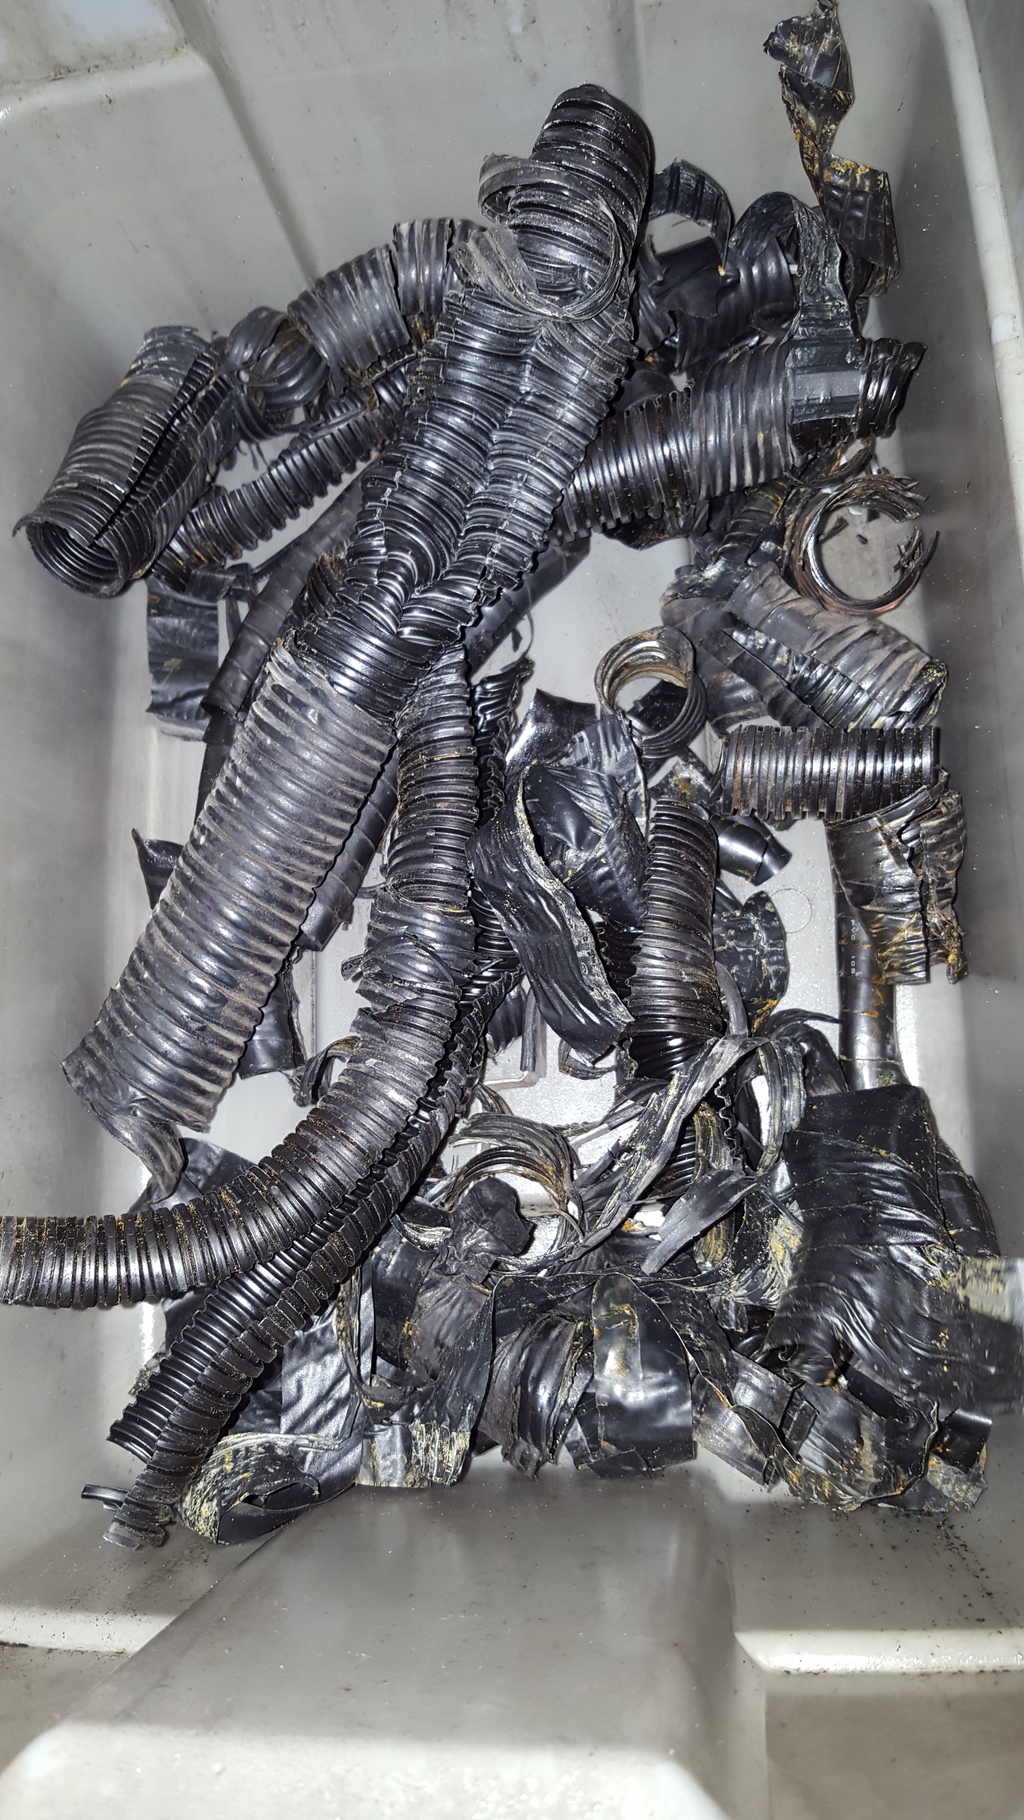
So I'm still waiting for my brother in law to get that downpipe back to me, should be soon tho. In the meantime the deconstruction of the wiring harness has begun.
I needed to open it up so I could relocate the wiring for the mass air flow meter since it will be mounted in a different spot so the turbo draws through it as opposed to blow through. Im also doing a general wire tuck for neatness and presentation lol. Deleting the remaining wiring from the emissions stuff that's gone just to simplify electrical troubleshooting down the line. And I'll be deleting the cruise control system as well since I need more room to move things. Still hell bent on keeping the damn AC tho haha!
I'll definitely keep the updates coming as they roll in. I also got my hands on a set of vq35 injectors with rail. I may modify those later. They were free and good my a car we swapped a motor in at the shop. Figured I should grab em just in case.

I needed to open it up so I could relocate the wiring for the mass air flow meter since it will be mounted in a different spot so the turbo draws through it as opposed to blow through. Im also doing a general wire tuck for neatness and presentation lol. Deleting the remaining wiring from the emissions stuff that's gone just to simplify electrical troubleshooting down the line. And I'll be deleting the cruise control system as well since I need more room to move things. Still hell bent on keeping the damn AC tho haha!


I'll definitely keep the updates coming as they roll in. I also got my hands on a set of vq35 injectors with rail. I may modify those later. They were free and good my a car we swapped a motor in at the shop. Figured I should grab em just in case.

