Turbo VG swapped stanza
 07-30-2017, 01:45 AM
#161
Member
Thread Starter

Join Date: Oct 2016
Posts: 284
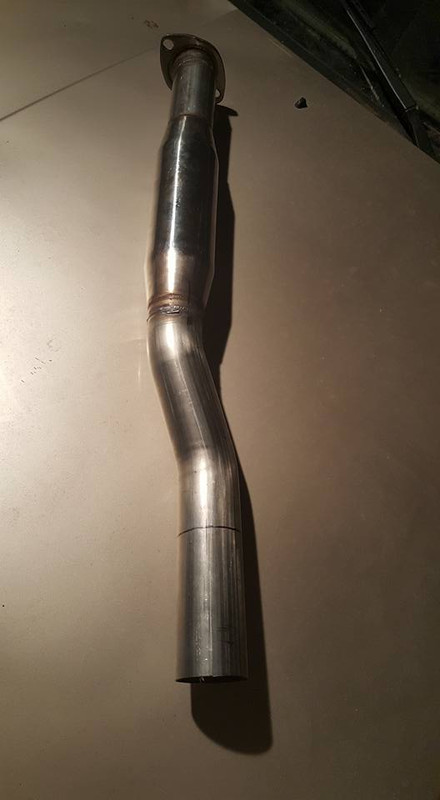
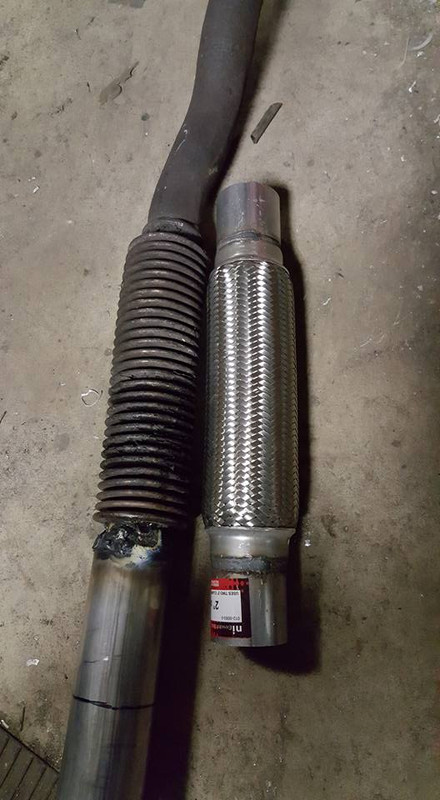
the exhaust is well on its way. probably will have it finished tomorrow. i used a pipe cutter to cut all the pieces apart which left an excellent fitup for welding so when it came time to weld these pieces up i was actually able to fusion weld almost everything together (meaning i didnt use filler rod and could go much faster)
the 90 degree bend at the back of this section will have to be cut off at an angle so ill probably use my bandsaw to do that, hopefully i can get a decent fitup without too much grinding and then i will need a short straight section to join this with the zig zagged middle section.

there are 3 potential outcomes for this muffler:
1. i like the way it sounds and leave it exactly the way it is. this is the least likely outcome lol
2. i hate how it sounds and try to pack it with something so it actually makes the car quieter instead of just being a giant resonator.
3. i make a custom muffler to replace it entirely.
not sure what i wanna do yet but for now its going on the car. i gotta hear what it sounds like lol
i did one of the hangers so i have a point of reference while im mocking up the rest of the exhaust and the other hangers, i cant really base them all off the stock ones because this exhaust is a totally different size so the spaces they occupy are going to change a lot but as of right now there is a lot of wiggle room.

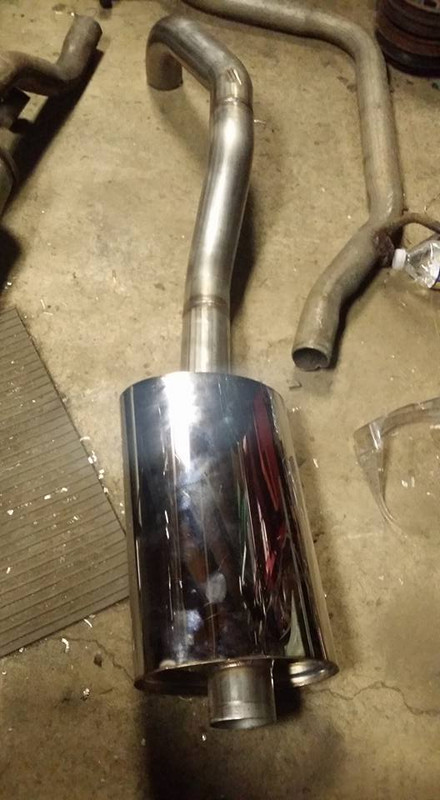
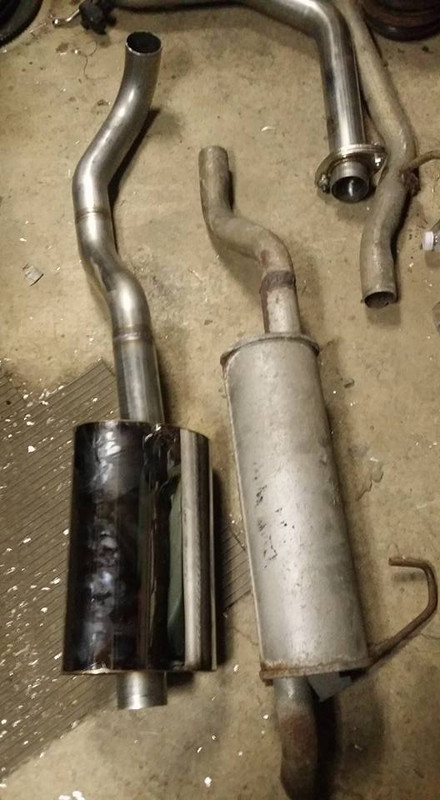
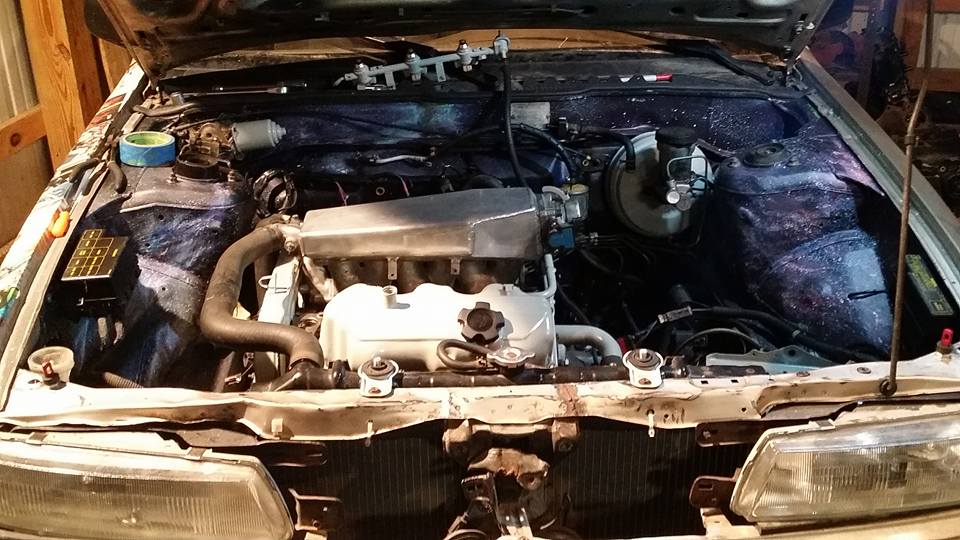
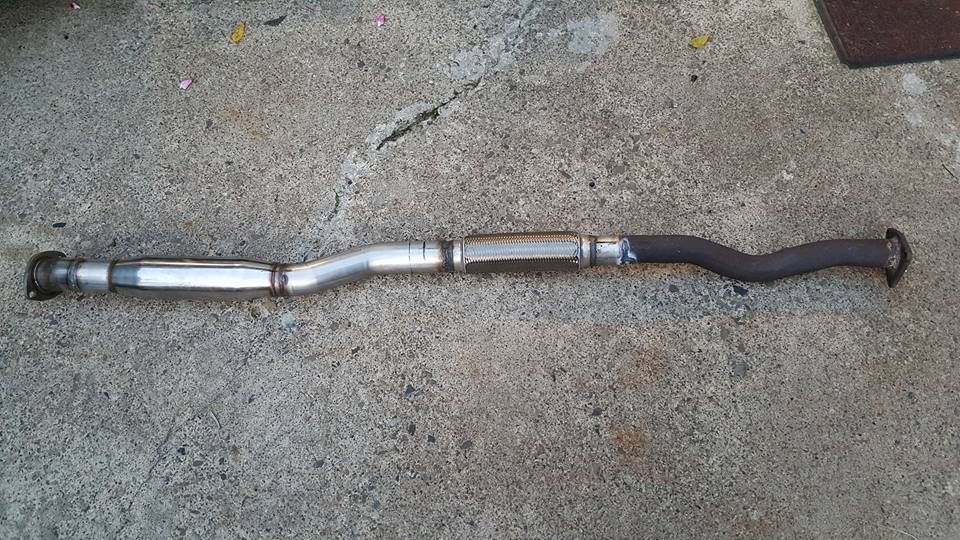
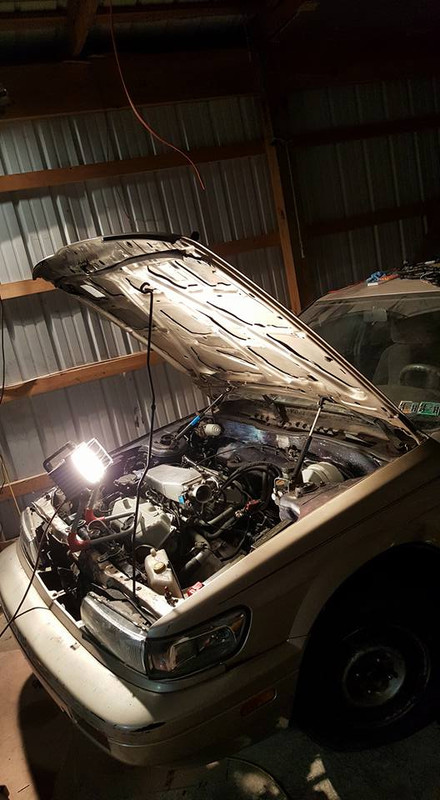
im pretty happy with how the new exhaust looks compared to the old one (besides the muffler...) it basically just looks like a bigger stainless version of the stock stuff which is kinda what i was going for. BTW the pipe going into the muffler was crooked like that when i took it out of the box lol i didnt cut or bend that **** at all.
i got a bigger extractor and collected some drill bits so im gonna work on that tomorrow, ill def post updates on how it goes.
the 90 degree bend at the back of this section will have to be cut off at an angle so ill probably use my bandsaw to do that, hopefully i can get a decent fitup without too much grinding and then i will need a short straight section to join this with the zig zagged middle section.
there are 3 potential outcomes for this muffler:
1. i like the way it sounds and leave it exactly the way it is. this is the least likely outcome lol
2. i hate how it sounds and try to pack it with something so it actually makes the car quieter instead of just being a giant resonator.
3. i make a custom muffler to replace it entirely.
not sure what i wanna do yet but for now its going on the car. i gotta hear what it sounds like lol
i did one of the hangers so i have a point of reference while im mocking up the rest of the exhaust and the other hangers, i cant really base them all off the stock ones because this exhaust is a totally different size so the spaces they occupy are going to change a lot but as of right now there is a lot of wiggle room.
im pretty happy with how the new exhaust looks compared to the old one (besides the muffler...) it basically just looks like a bigger stainless version of the stock stuff which is kinda what i was going for. BTW the pipe going into the muffler was crooked like that when i took it out of the box lol i didnt cut or bend that **** at all.
i got a bigger extractor and collected some drill bits so im gonna work on that tomorrow, ill def post updates on how it goes.
Last edited by Nate Boslet; 05-18-2018 at 10:45 AM.
 07-30-2017, 07:03 PM
#162


Have you finished the cylinder head or are you taking a break from that?
07-31-2017, 03:07 AM
#163
Member
Thread Starter
Join Date: Oct 2016
Posts: 284
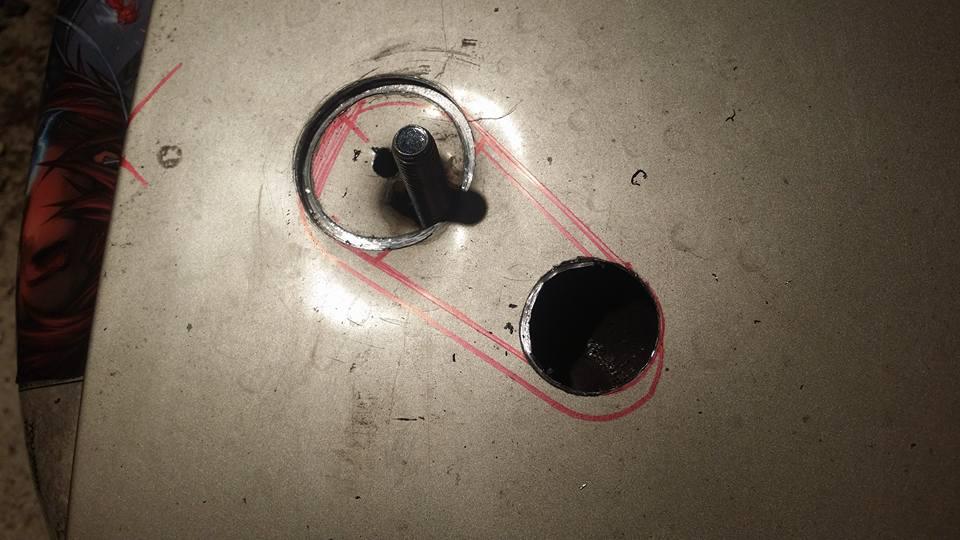
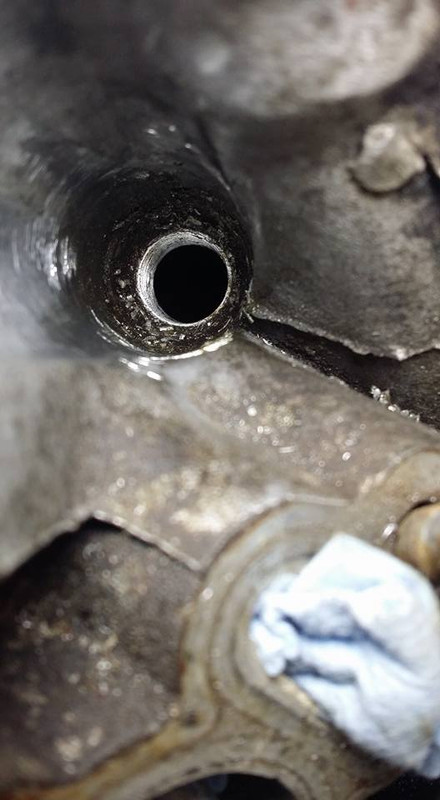
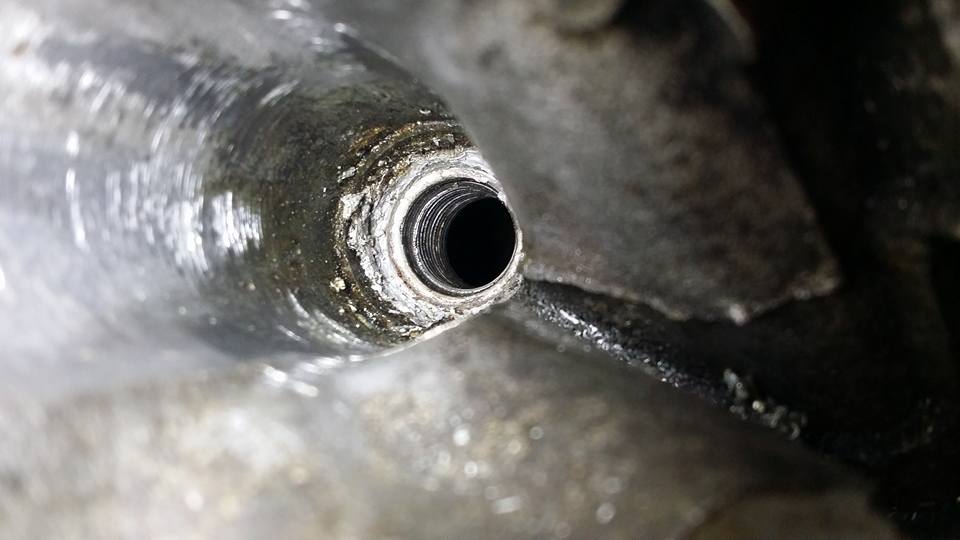
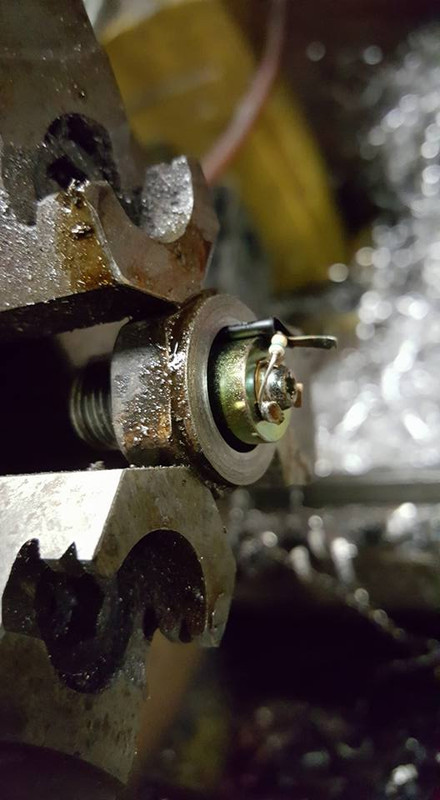
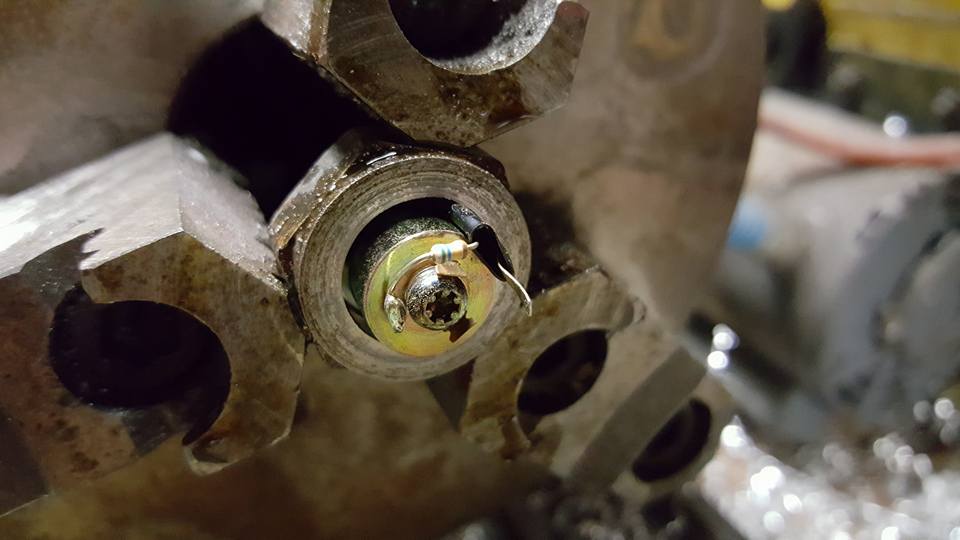
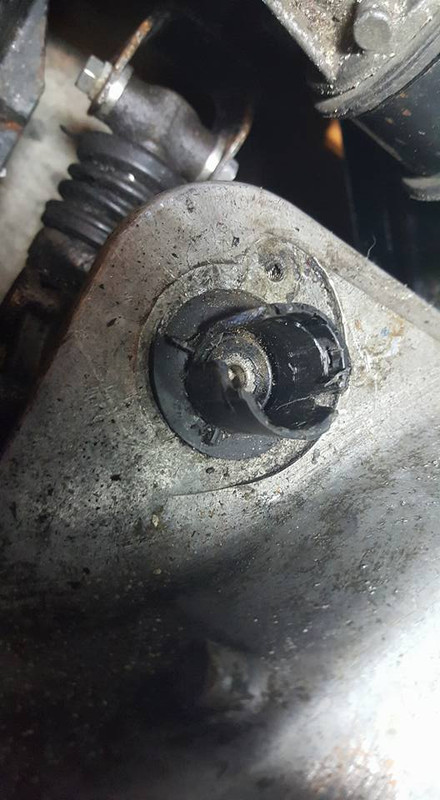
i had brought the larger extractor and drill bits to drill the plug out and hopefully get more grip on what was left of the plug, what actually happened was the drill bit was exactly the right size to drill everything except the threads of the plug out lol so using a shop vac and a magnet i was able to collect the chips from the plug hole and whatever fell inside of the cylinder.
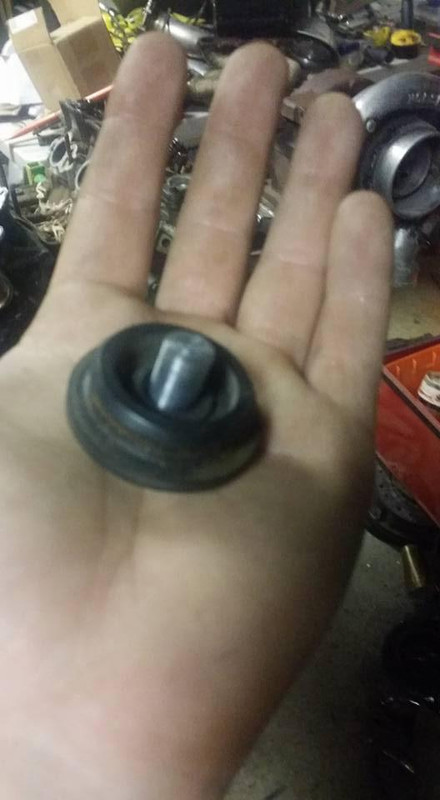
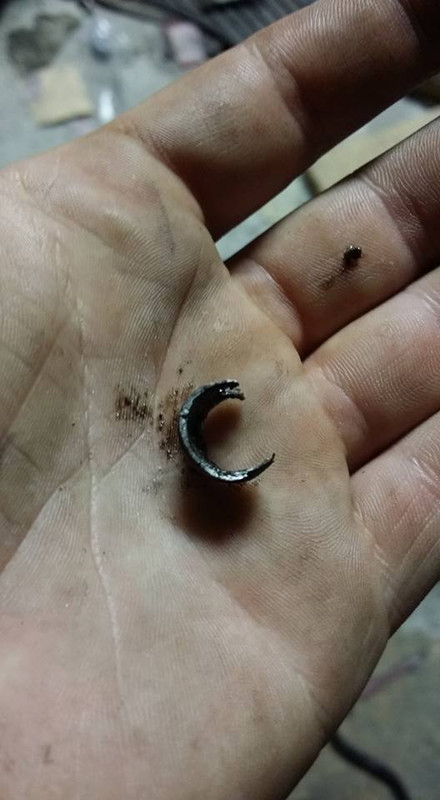
after i got the hole drilled out i was able to get the chunk of extractor i had hammered into the cylinder when it broke. the ring is actually the top of the spark plug which is all that came out when i used the extractor lol
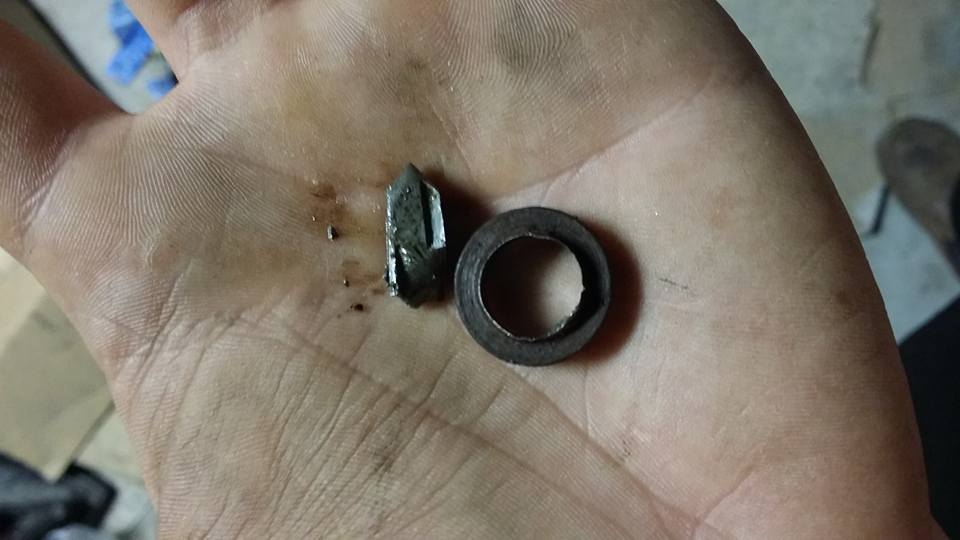
so the plan is now to use a pick and some needle nose pliers to pull whats left of the threads out and then ill cut some flutes into another spark plug to make a tap and retap the threads.
while i was at the garage earlier today i also brought the exhaust to take more measurements and try to get that finished up. ill probably make another post on that this afternoon.
Last edited by Nate Boslet; 05-18-2018 at 10:46 AM.
08-17-2017, 09:55 AM
#164
Member
Thread Starter
Join Date: Oct 2016
Posts: 284
i have been doing so many little things with the exhaust and have been very busy with other life things hence the long wait for this update but the exhaust is nearing completion and the car looks like it will be roadworthy soon. i am going to pick up a spark plug socket and an insert kit later today to either tap out whatever junk is left in the hole or just drill the threads out completely and install an insert. either way that should be the end of that issue.
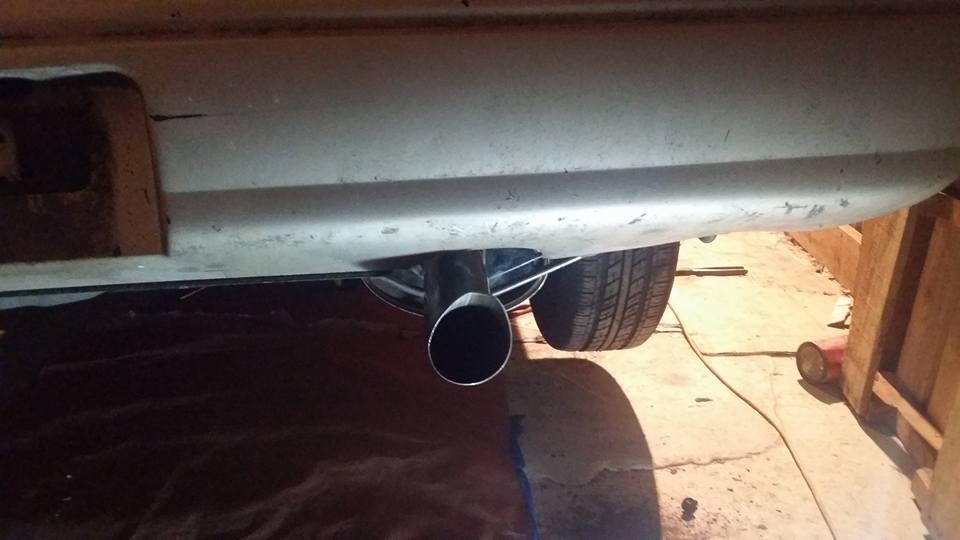
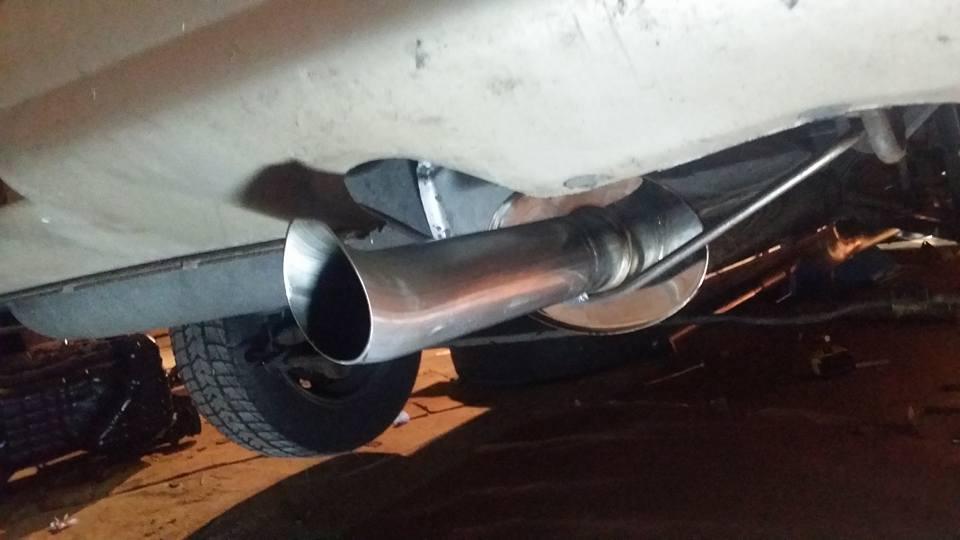
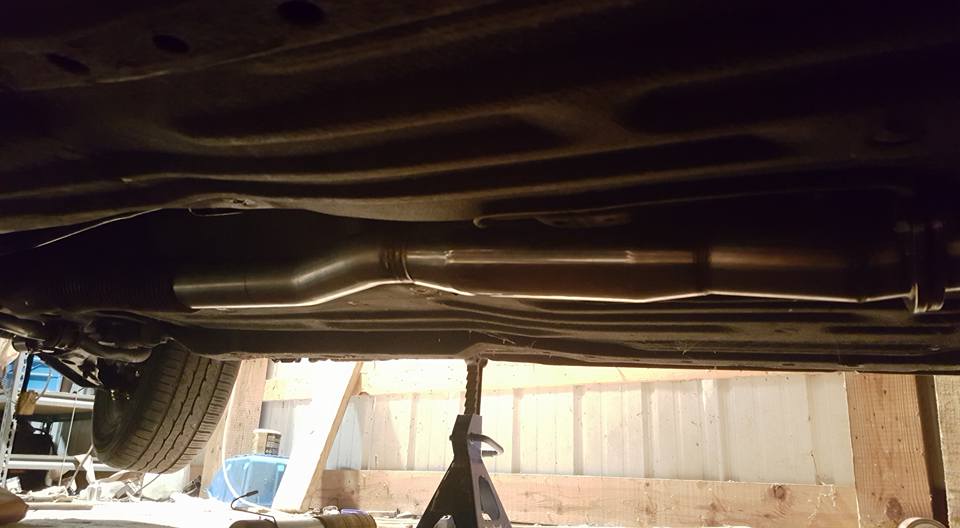
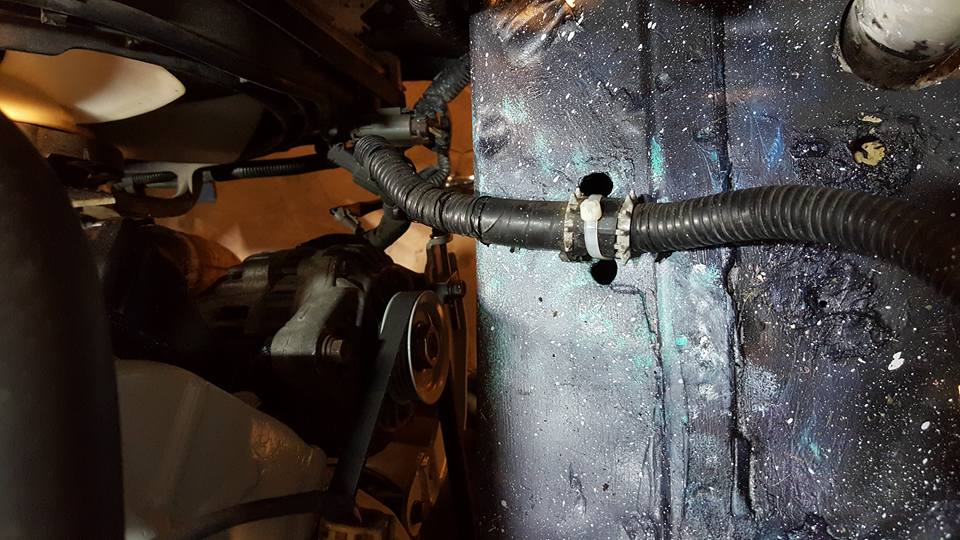
getting this exhaust to physically fit hasnt been as difficult as i expected, it feels like its twice as big as the stock stuff but really the hard part has been getting everything to line up properly, the only thing i had get in the way is the ebrake cable which i am going to probably have to attach to the rear torsion bar somehow without having it rub to the point of failing (more on that later)
the hangers on the rearmost section are all done and where i want them, the exhaust doesnt hit anything without swinging like an inch besides the suspension which will be much further out of the way with the car on the ground.
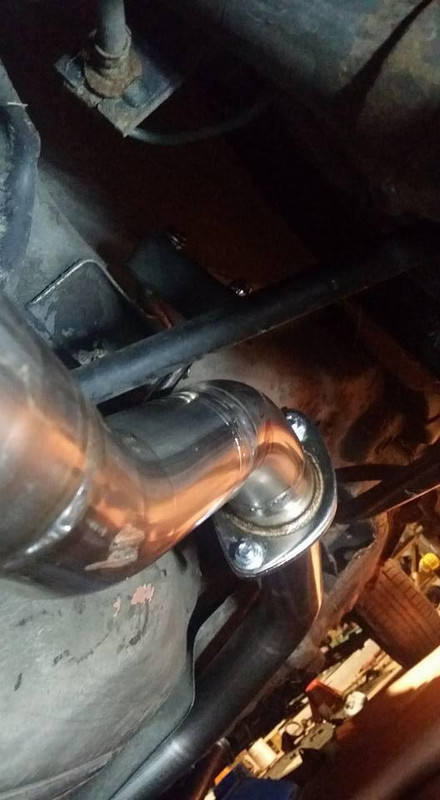
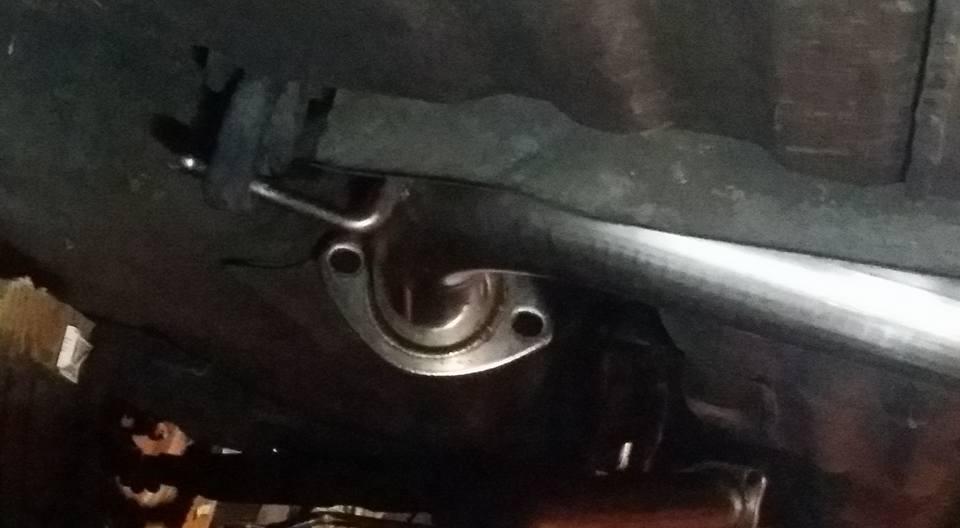
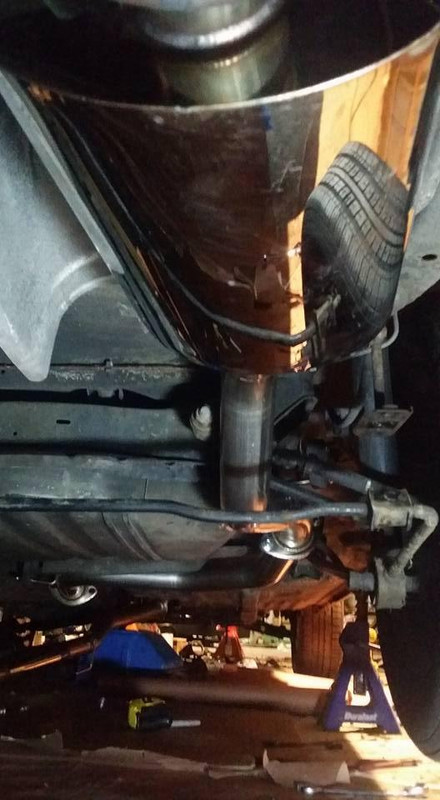
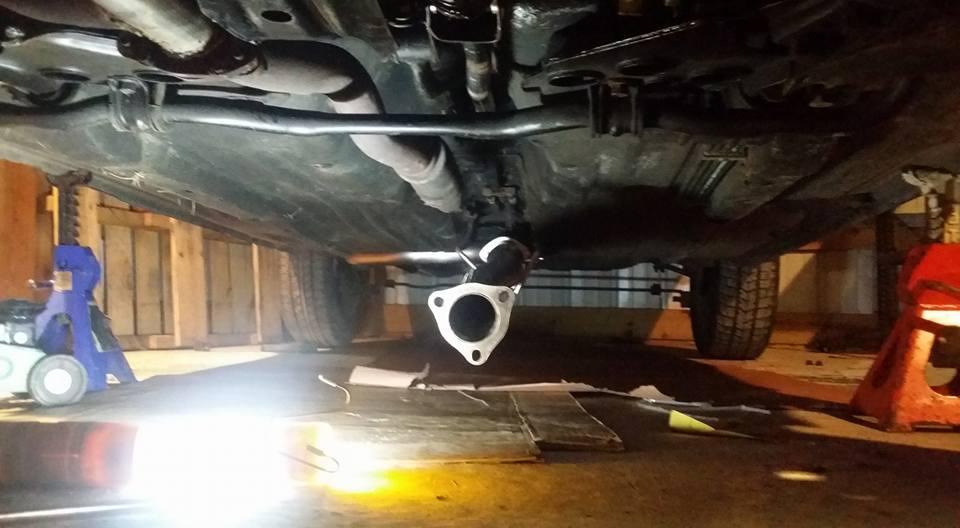
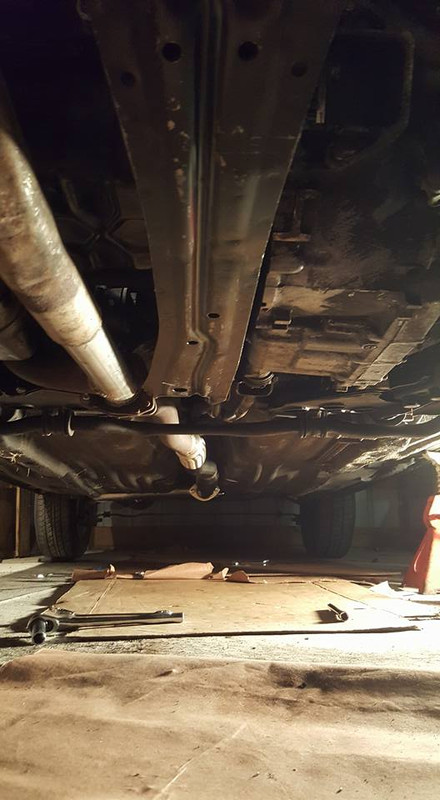
for some unexplainable reason this section of the exhaust is angled down like this without any sag from the hangers, i tried flipping the middle section and it still points down like this so i am going to have to cut this and weld it on at an angle to get it to line up properly but once that is done and i join it to the flex pipe area of the exhaust i will be finished, i can put the heat shields back on (one of which i already had to repair) and not have to mess with the exhaust again until i turbo the car..... i hope. lots of hope in this build lol
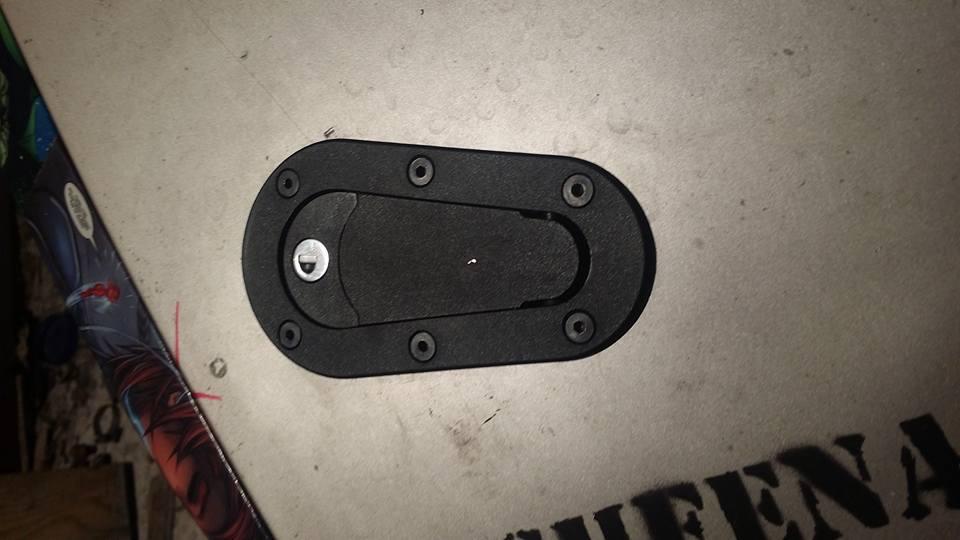
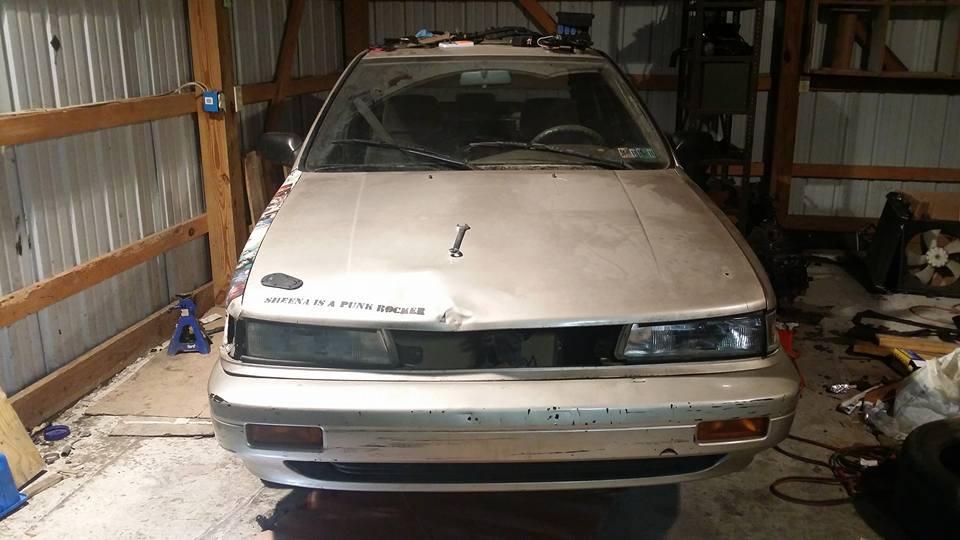
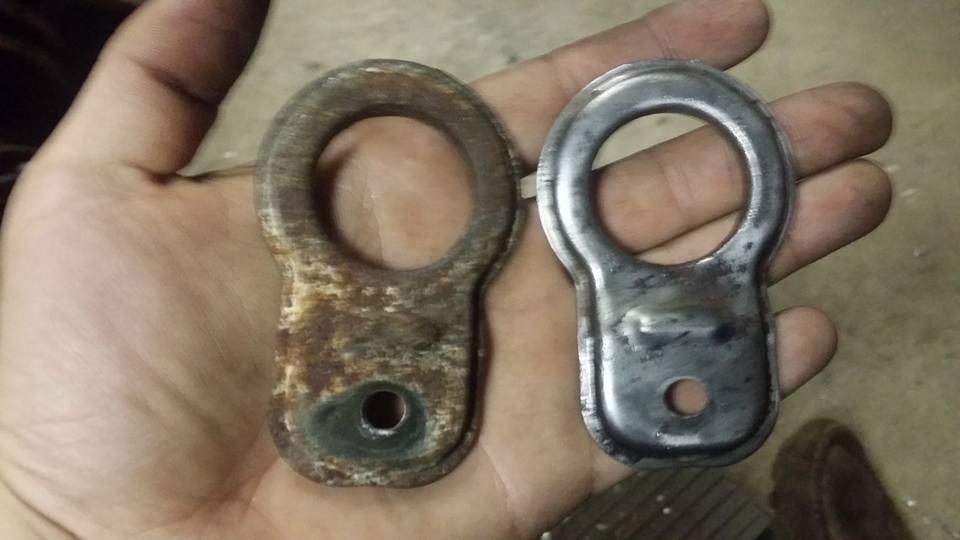
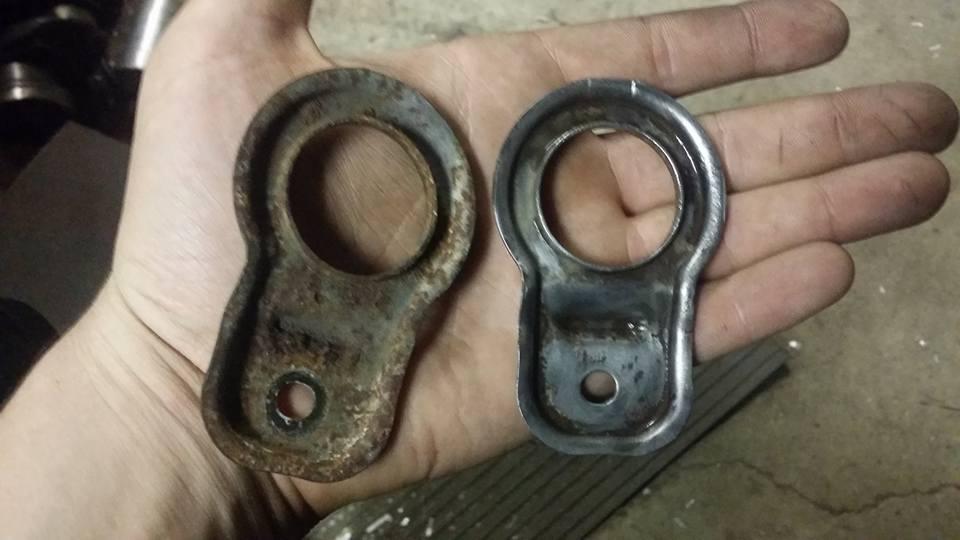
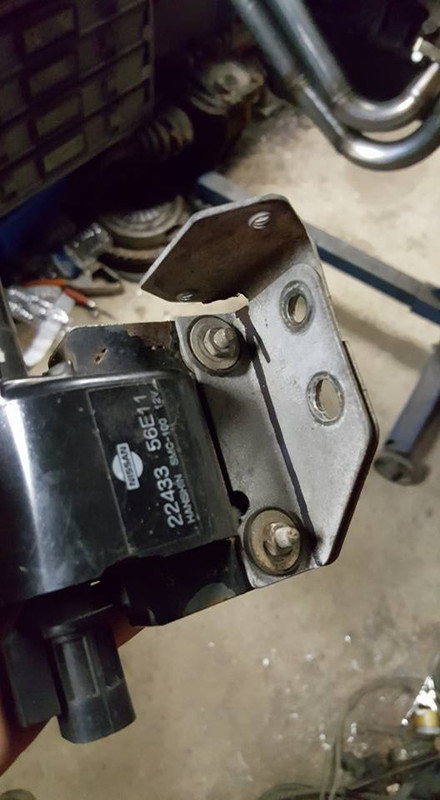
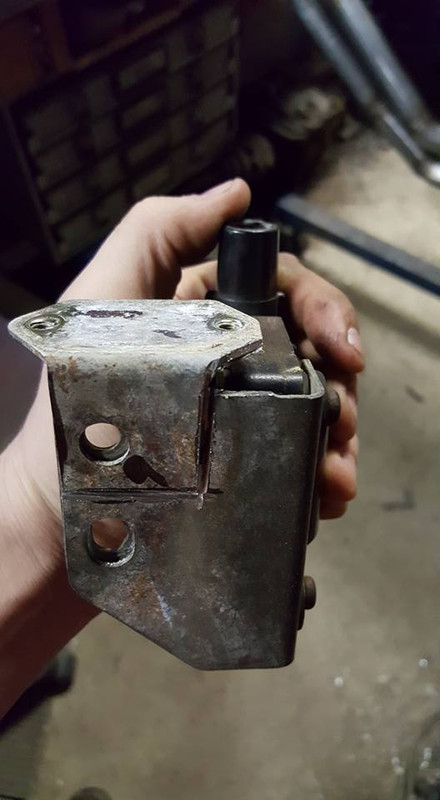
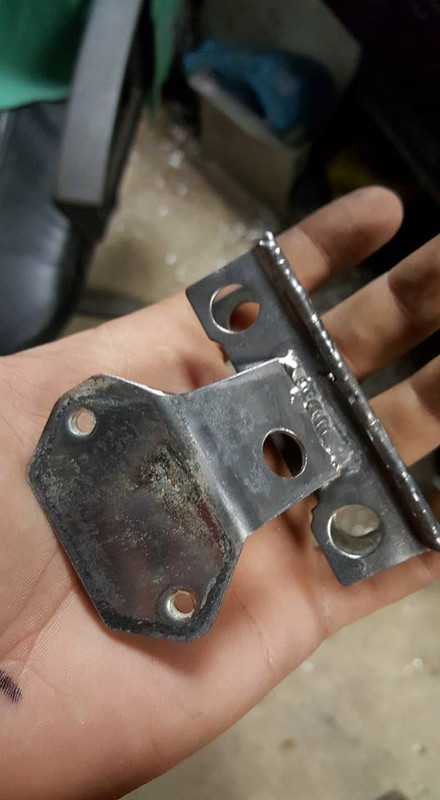
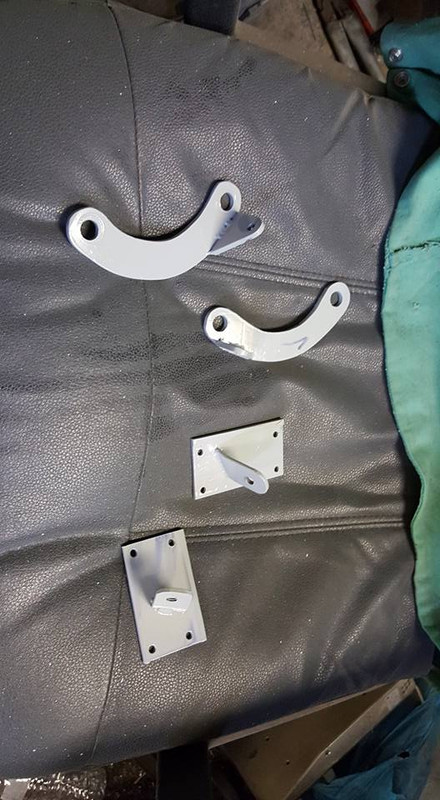
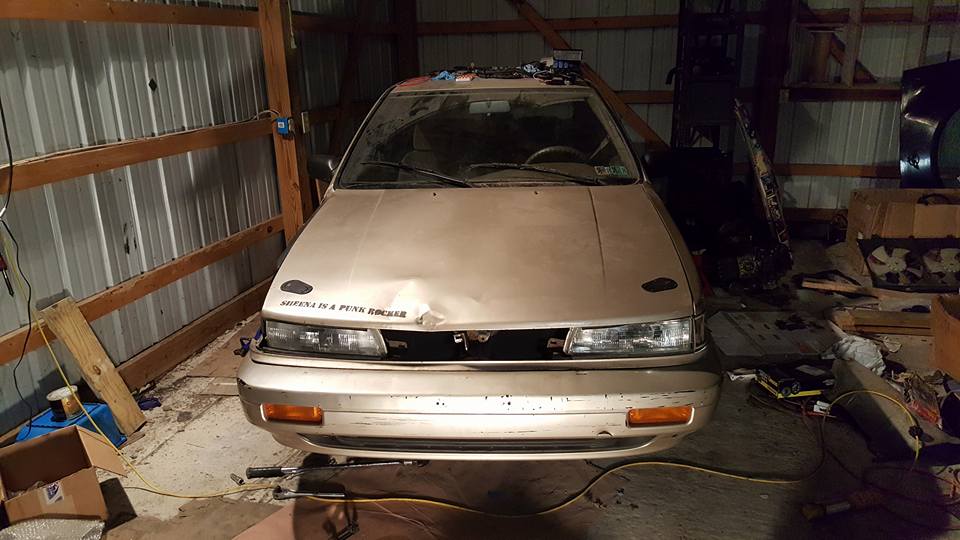
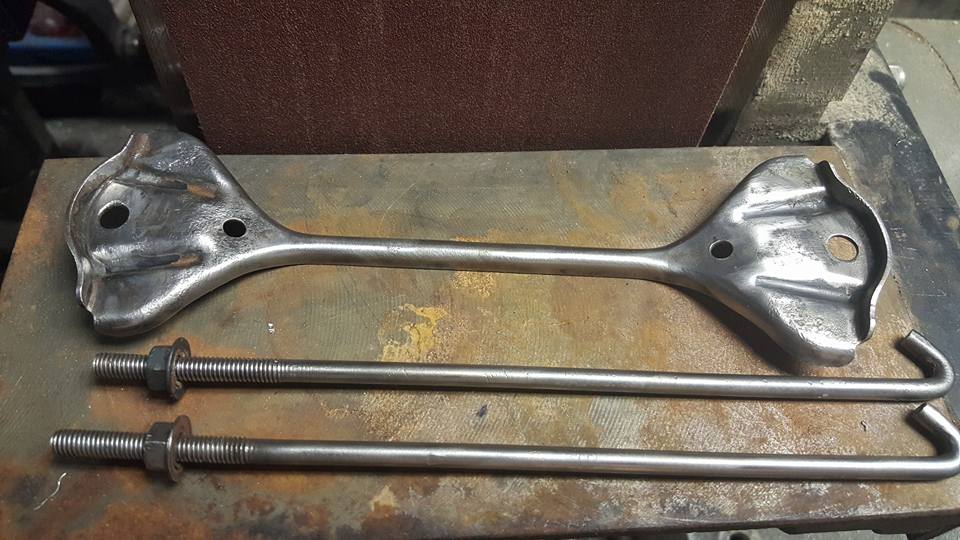
and finally, my hood latch has been completely screwed since i bought this car, the metal that holds it on was bent and wiggled back and forth so much that it completely cracked apart in 3 placed, i welded it back together at some point but it just cracked again so i had originally made homemade hood pins to keep the hood from flying off. while those did work, they were hideous, really ****ty and were pretty much ready to fail at any moment. so to remedy this, i bought these.
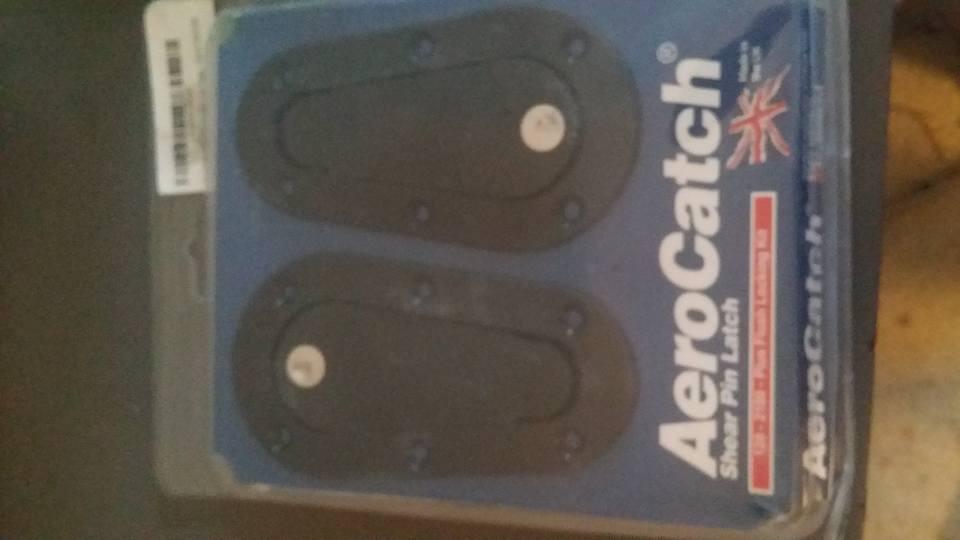

found them unused and never installed for 40 dollars on ebay (less than half what i paid for the pair on my z) the box is dirty and beat up, im assuming it was found in someones car that was impounded or in a junkyard but otherwise they are brand new. ill probably install these this weekend or possibly tonight if i get everything back together by then. no more hood latching issue.
getting this exhaust to physically fit hasnt been as difficult as i expected, it feels like its twice as big as the stock stuff but really the hard part has been getting everything to line up properly, the only thing i had get in the way is the ebrake cable which i am going to probably have to attach to the rear torsion bar somehow without having it rub to the point of failing (more on that later)
the hangers on the rearmost section are all done and where i want them, the exhaust doesnt hit anything without swinging like an inch besides the suspension which will be much further out of the way with the car on the ground.
for some unexplainable reason this section of the exhaust is angled down like this without any sag from the hangers, i tried flipping the middle section and it still points down like this so i am going to have to cut this and weld it on at an angle to get it to line up properly but once that is done and i join it to the flex pipe area of the exhaust i will be finished, i can put the heat shields back on (one of which i already had to repair) and not have to mess with the exhaust again until i turbo the car..... i hope. lots of hope in this build lol
and finally, my hood latch has been completely screwed since i bought this car, the metal that holds it on was bent and wiggled back and forth so much that it completely cracked apart in 3 placed, i welded it back together at some point but it just cracked again so i had originally made homemade hood pins to keep the hood from flying off. while those did work, they were hideous, really ****ty and were pretty much ready to fail at any moment. so to remedy this, i bought these.
found them unused and never installed for 40 dollars on ebay (less than half what i paid for the pair on my z) the box is dirty and beat up, im assuming it was found in someones car that was impounded or in a junkyard but otherwise they are brand new. ill probably install these this weekend or possibly tonight if i get everything back together by then. no more hood latching issue.
Last edited by Nate Boslet; 05-18-2018 at 10:47 AM.
08-17-2017, 01:50 PM
#165

What car is that exhaust intended for? If you said what it was meant for I guess I missed it but it looks just like a Civic/CRX exhaust to me - even down to the flanges. Really cool you're repurposing it for this.
08-17-2017, 04:20 PM
#166
Member
Thread Starter
Join Date: Oct 2016
Posts: 284
(idk if i can post links to ebay here) not sure what exact car its for but its definitely not for the stanza lol
it is surprisingly decent quality for 100 bucks, i could not have built one from scratch for less. thats not to say that it is in any way good, its junk and if i had a 3 door hatchback or whatever i wouldnt bolt this to it but the materials its made from truly are stainless steel (mostly) and it is definitely good enough for the stanza lol
Last edited by Nate Boslet; 08-17-2017 at 04:23 PM.


 08-20-2017, 11:27 AM
#174
Member
Thread Starter
Join Date: Oct 2016
Posts: 284
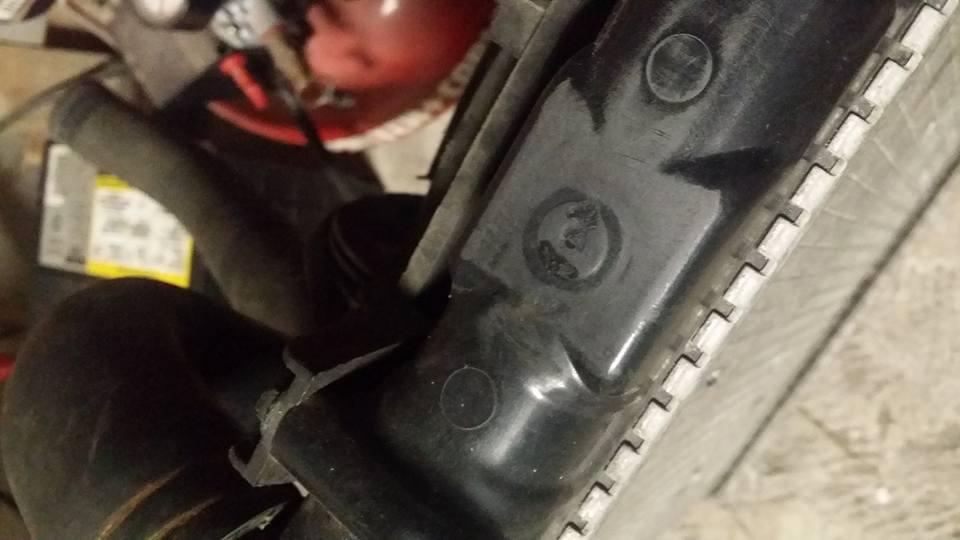
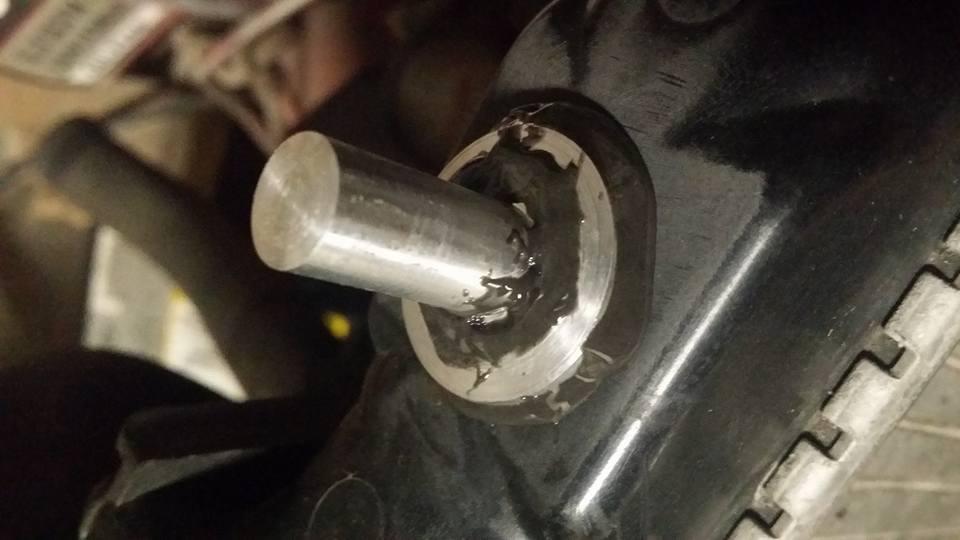
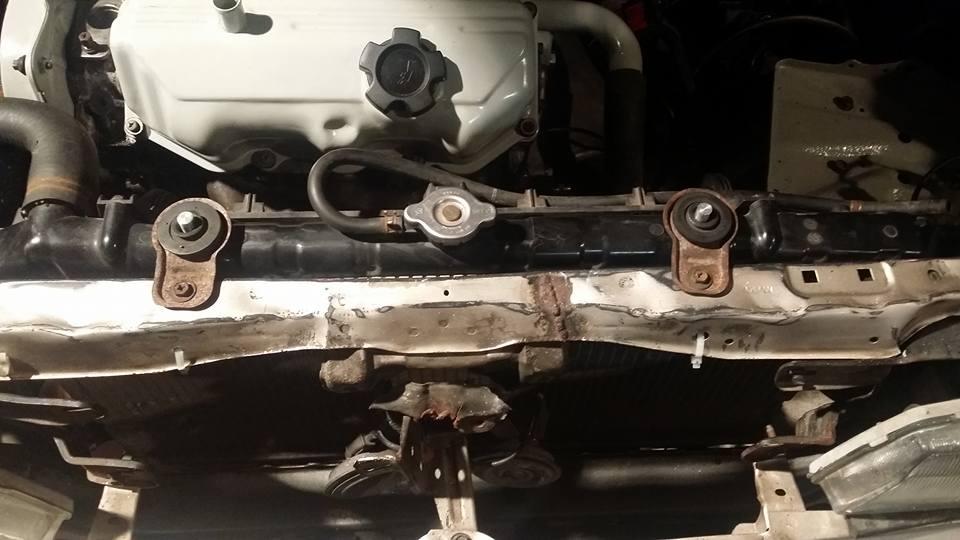
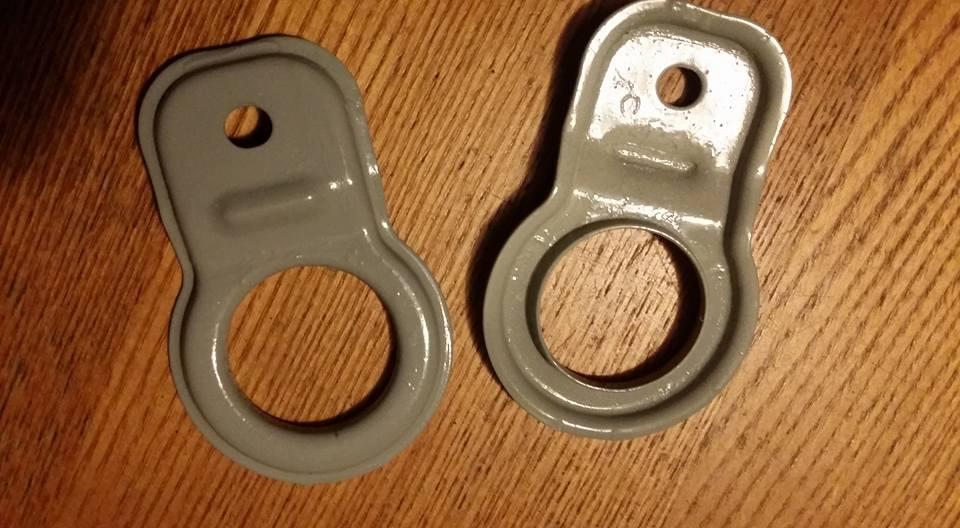
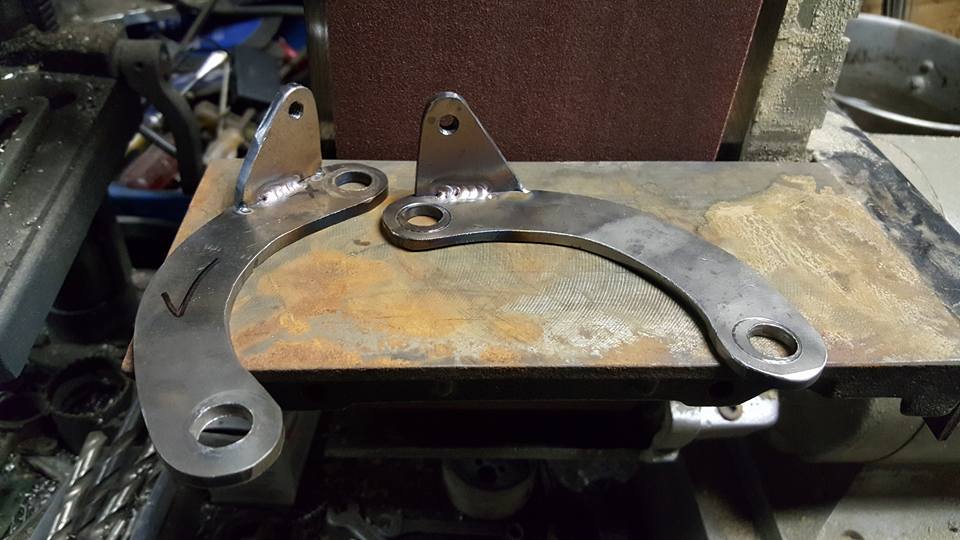
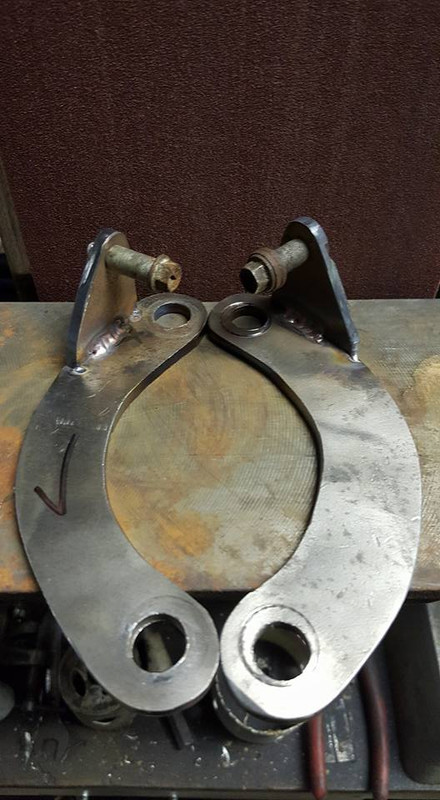
ok so i didnt really expect anyone to guess it but the pins were for the radiator, the previous owner got in a front end collision at some point and the top mounting pins of the radiator were snapped off, the holes i drilled in the bases were for the epoxy to flow through to make as strong of a bond as possible. first thing i had to do was file down some high spots and sand the area where the epoxy would be to give as solid of a bond as possible.
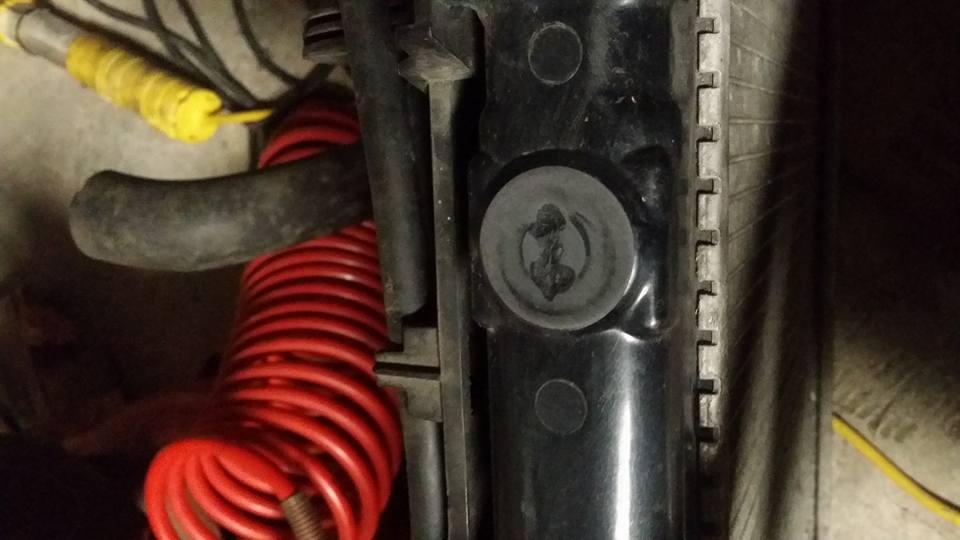
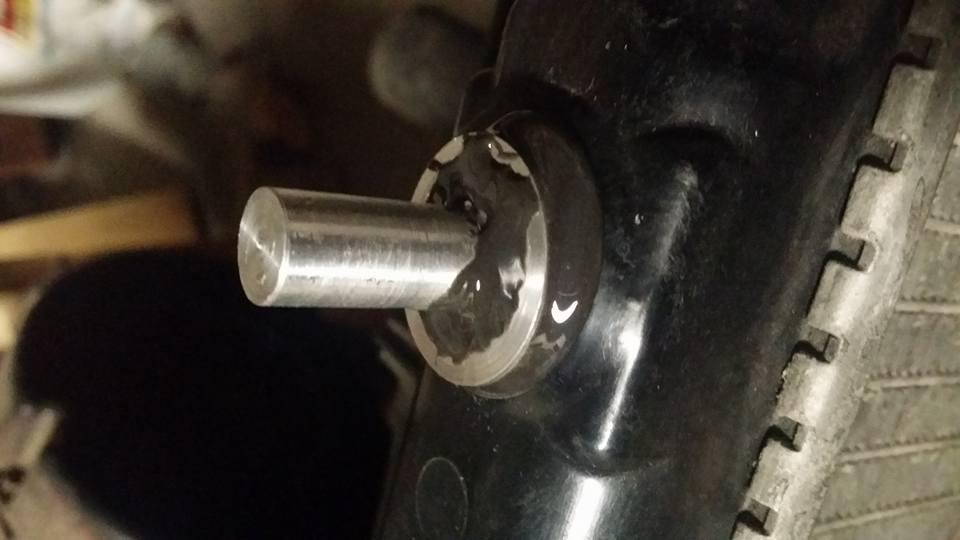
coated the bottoms of the pins in epoxy and mushed them on then i spread the epoxy on the top all around the tops of the base, the rubber grommet will cover all of this so i didnt try to make it look perfect, mainly concerned with function as usual.
i got a spark plug tap but i needed a slightly larger drill bit to get the tap to bite so i decided in the mean time i would spend the time i had to install the hood latches.
since i had already installed hood pins before i already had holes located to center the pins. in order to bend the base metal so the pin is perfectly centered i put a bolt in the hole and bent it until the bolt fit right into the hole in the hood, then i had to cut out the hole to mount the latch itself in the hood, one way to do this is to use hole saws to cut the radii on either end of the latch and then cut out whats left in the center, this is the method i used for the passenger side.
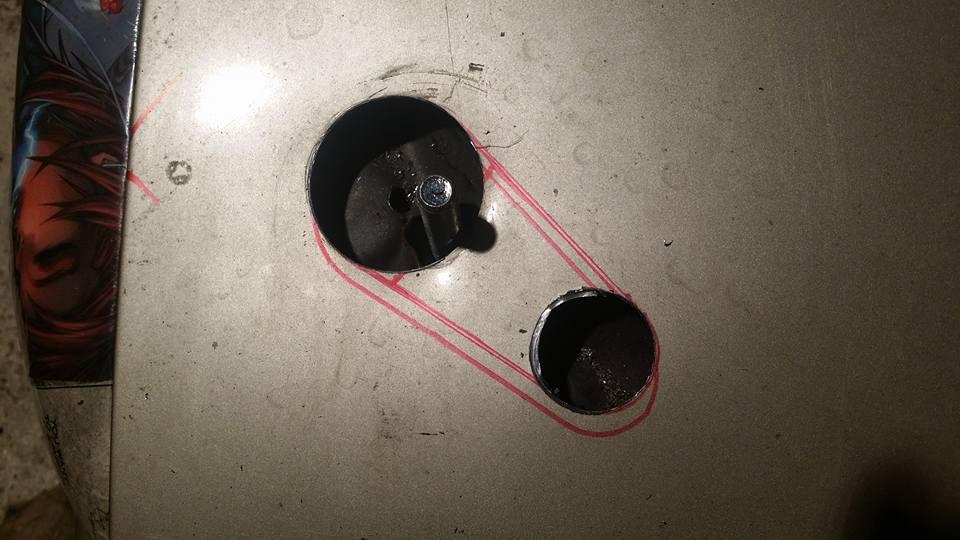
once the hole is cut out you can just file the edges smooth and it should drop in, the hole saw method tends to fit a little bit loosely but its relatively quick.
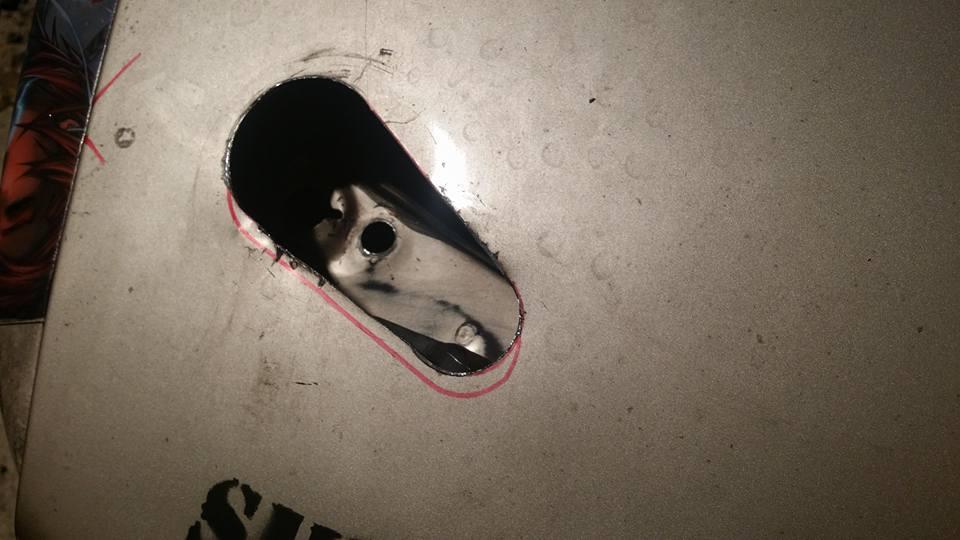
once the latch fits into the hole you drill out all of the smaller holes for the bolts and cut away any metal underneath the latch for clearance.
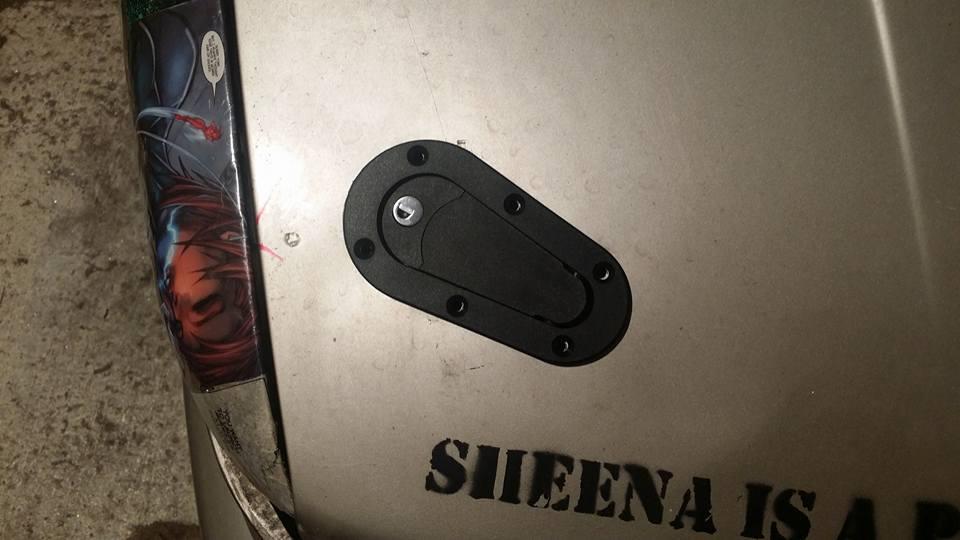
the kit comes with a sandwich ring that takes 6 nylon lock nuts to clamp the latch down securely on the hood.
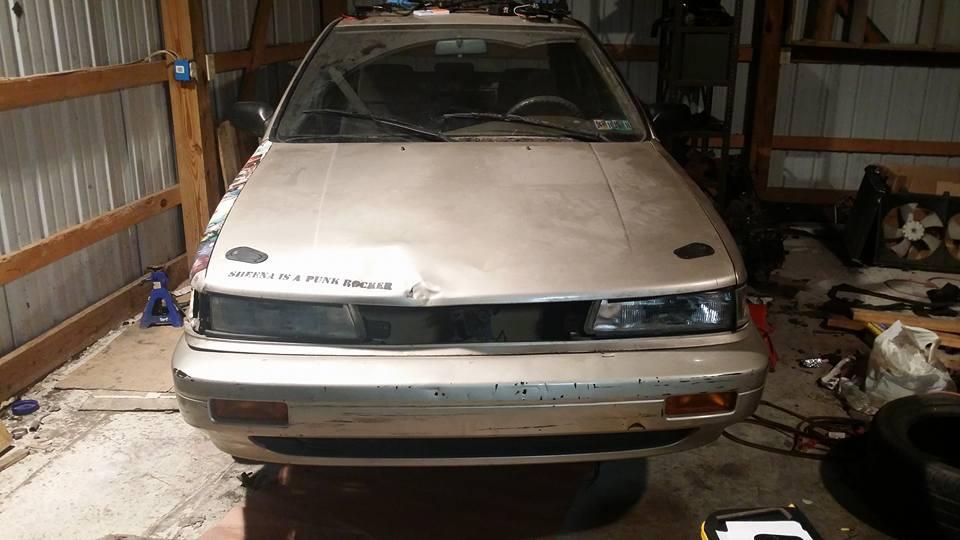
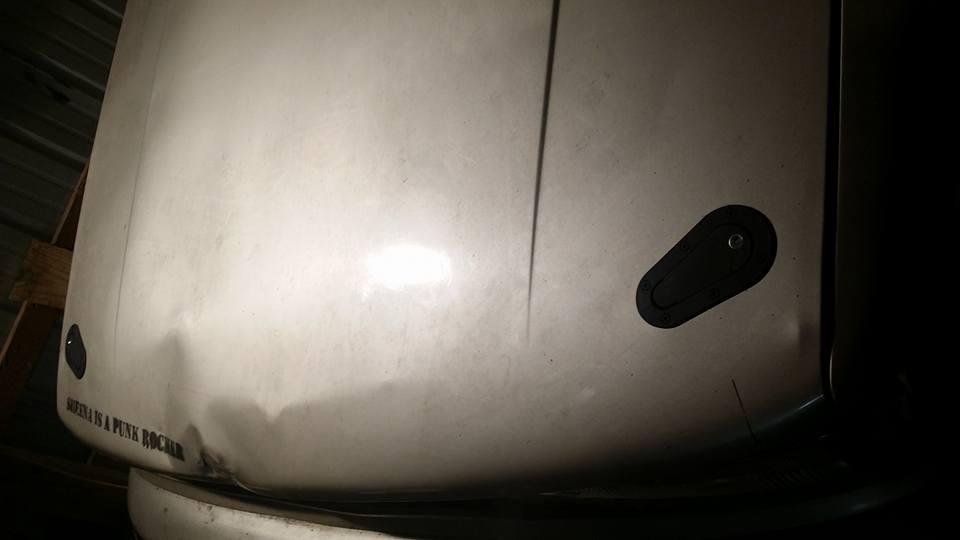
one down, now you have to figure out a way to line up the other side the same way as the finished side. this is harder when you install them out of alignment with any other features of the car like i did but its still pretty simple, what i did was use the two flat sides of the latch and placed painters tape stretching across the two edges of the hood, measured the straight lines from different ends of the hood and replicated the same tape lines on the other side and then lined up the template with the tape. you could always make a template that follows the features of your hood and just flip it over for the other side, or use painters tape or whatever to make straight lines across the hood in as many different dimensions that you need and then base your measurements or layout off of that. installing these isnt something you have to dedicate a weekend to, its not that serious but you also dont want to just wing it because they will end up being crooked or not functioning right. from start to finish i think i spent 3.5-4 hours doing the whole install.
poof.
gonna go back this afternoon/night to finish up with the spark plug, whether i tap out the threads or just drill it out entirely and throw an insert in there but either way its gonna be done and then its onto the exhaust and possibly first start up this week.
coated the bottoms of the pins in epoxy and mushed them on then i spread the epoxy on the top all around the tops of the base, the rubber grommet will cover all of this so i didnt try to make it look perfect, mainly concerned with function as usual.
i got a spark plug tap but i needed a slightly larger drill bit to get the tap to bite so i decided in the mean time i would spend the time i had to install the hood latches.
since i had already installed hood pins before i already had holes located to center the pins. in order to bend the base metal so the pin is perfectly centered i put a bolt in the hole and bent it until the bolt fit right into the hole in the hood, then i had to cut out the hole to mount the latch itself in the hood, one way to do this is to use hole saws to cut the radii on either end of the latch and then cut out whats left in the center, this is the method i used for the passenger side.
once the hole is cut out you can just file the edges smooth and it should drop in, the hole saw method tends to fit a little bit loosely but its relatively quick.
once the latch fits into the hole you drill out all of the smaller holes for the bolts and cut away any metal underneath the latch for clearance.
the kit comes with a sandwich ring that takes 6 nylon lock nuts to clamp the latch down securely on the hood.
one down, now you have to figure out a way to line up the other side the same way as the finished side. this is harder when you install them out of alignment with any other features of the car like i did but its still pretty simple, what i did was use the two flat sides of the latch and placed painters tape stretching across the two edges of the hood, measured the straight lines from different ends of the hood and replicated the same tape lines on the other side and then lined up the template with the tape. you could always make a template that follows the features of your hood and just flip it over for the other side, or use painters tape or whatever to make straight lines across the hood in as many different dimensions that you need and then base your measurements or layout off of that. installing these isnt something you have to dedicate a weekend to, its not that serious but you also dont want to just wing it because they will end up being crooked or not functioning right. from start to finish i think i spent 3.5-4 hours doing the whole install.
poof.
gonna go back this afternoon/night to finish up with the spark plug, whether i tap out the threads or just drill it out entirely and throw an insert in there but either way its gonna be done and then its onto the exhaust and possibly first start up this week.
Last edited by Nate Boslet; 05-18-2018 at 10:50 AM.
08-24-2017, 09:06 PM
#176
Member
Thread Starter
Join Date: Oct 2016
Posts: 284
the spark plug repair kit didnt physically fit inside of the head to tap out the hole with any of the sockets i have so i had to grab a socket from home to do that and havent gotten back yet so to stay busyish i brought home the radiator mounts and finished them up.
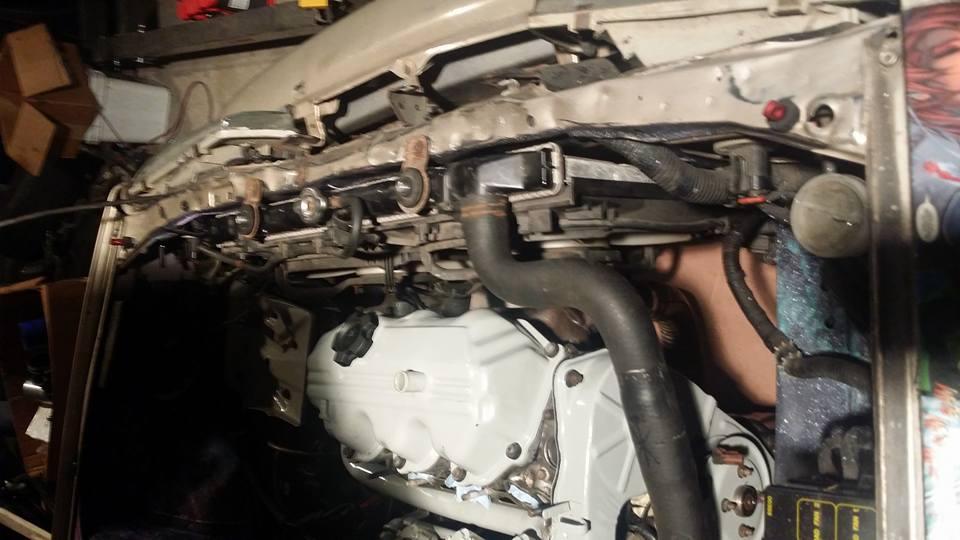
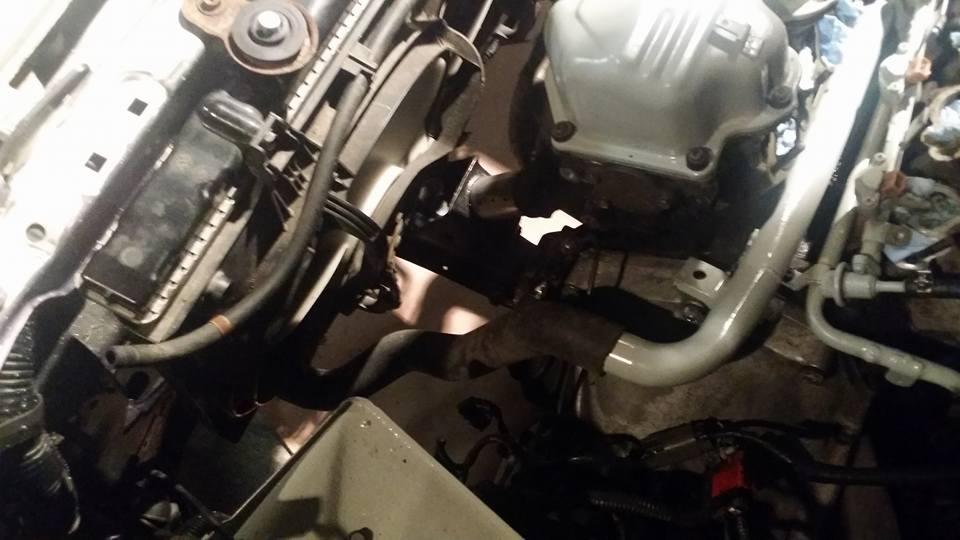
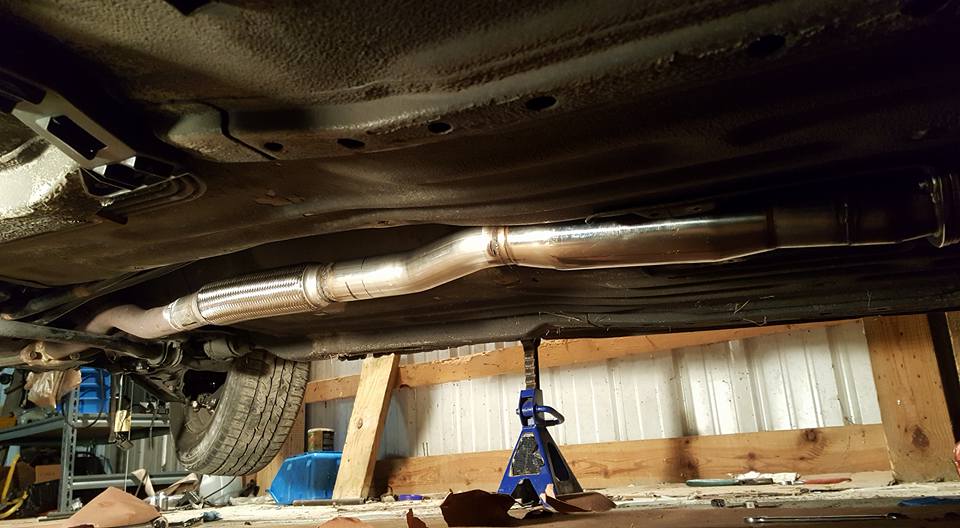
the clearance for the exhaust has gotten better since i pulled the core support back out.
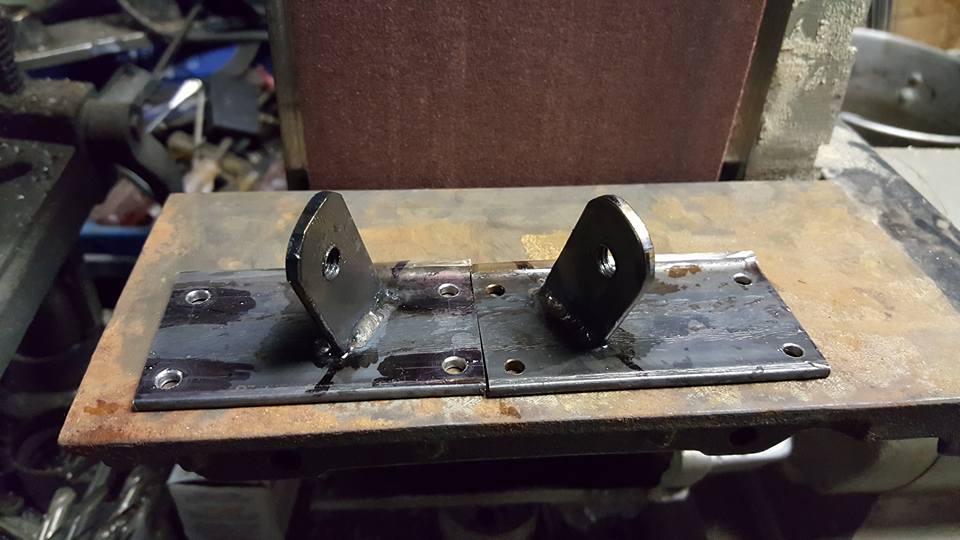
using a wire wheel in my drill press these cleaned right up.
and then a coat of the enamel paint to keep them from rusting again.

going back up tomorrow to do the plug (foreal this time) and then get started on putting everything back together. i did a cut and weld on the middle section of the exhaust to get it pointed back up to the flex pipe so i can get the exhaust finished and then hopefully this weekend i can attempt to start it.
the clearance for the exhaust has gotten better since i pulled the core support back out.
using a wire wheel in my drill press these cleaned right up.
and then a coat of the enamel paint to keep them from rusting again.
going back up tomorrow to do the plug (foreal this time) and then get started on putting everything back together. i did a cut and weld on the middle section of the exhaust to get it pointed back up to the flex pipe so i can get the exhaust finished and then hopefully this weekend i can attempt to start it.
Last edited by Nate Boslet; 05-18-2018 at 10:51 AM.


 08-25-2017, 09:19 PM
#179
Member
Thread Starter
Join Date: Oct 2016
Posts: 284
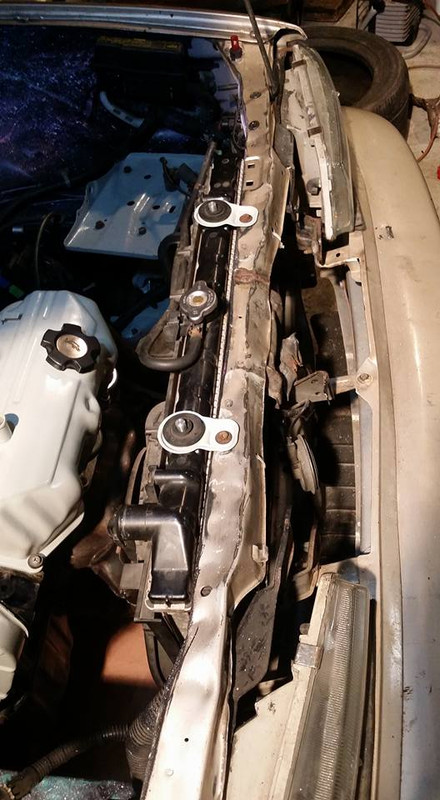
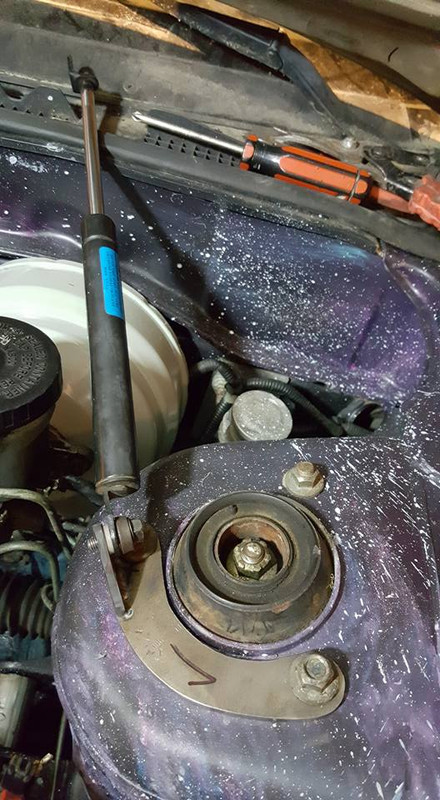
ok so heres the radiator mounts installed, they look cool yeah whatever who cares.
I. DID. IT.
i got the sonofabichbasterd spark plug out. i used an insert kit from autozone that had a surprisingly high quality tap in it dispite the fact that the head of it is a ****ing 19mm and i couldnt find a socket that would fit over it and inside of the head at the same time but i got my thinnest wall socket and sanded the head in some spots and got it.
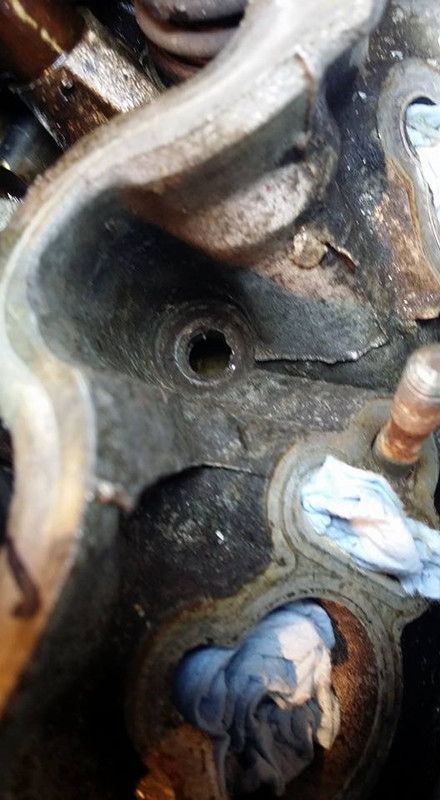
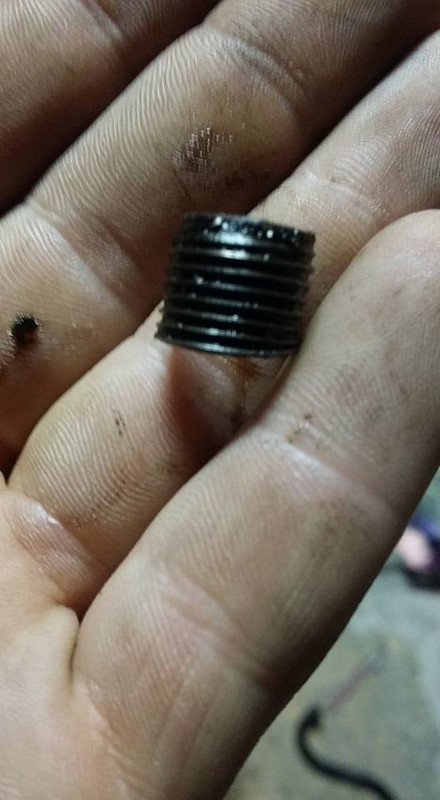
this is what was still left inside of the head, clearly i didnt drill it perfectly straight but i tried and thats all you can really expect of me right?
somehow i got this out of the inside of the cylinder with a magnet on the first try without even knowing it was in there lol
so after the hole was tapped you pick your insert length and then thread it in with some sealant.
then you take the little hammering tool thingy and smack it inside of the hole and it pushes the top of the threaded insert that has like teeth cut into it out into the head which will keep it from backing out.
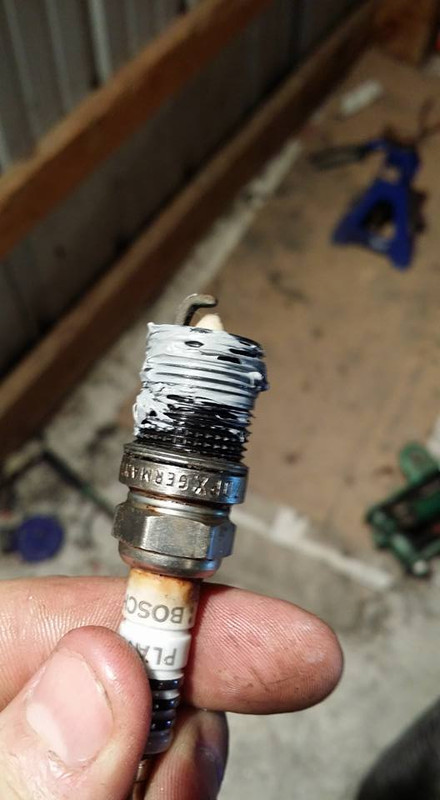
this is the plug i used to push the insert in and make sure it was bottomed out, the tape was to keep it stuck in the socket, ill replace all of the plugs with new ones before start up.

now i can FINALLY start final assembly and try firing it up for the first time.
i brought the exhaust over and took some measurements and brought it back home so that should be finished up tomorrow and we might get to try to start it sunday, we will see.
I. DID. IT.
i got the sonofabichbasterd spark plug out. i used an insert kit from autozone that had a surprisingly high quality tap in it dispite the fact that the head of it is a ****ing 19mm and i couldnt find a socket that would fit over it and inside of the head at the same time but i got my thinnest wall socket and sanded the head in some spots and got it.
this is what was still left inside of the head, clearly i didnt drill it perfectly straight but i tried and thats all you can really expect of me right?
somehow i got this out of the inside of the cylinder with a magnet on the first try without even knowing it was in there lol
so after the hole was tapped you pick your insert length and then thread it in with some sealant.
then you take the little hammering tool thingy and smack it inside of the hole and it pushes the top of the threaded insert that has like teeth cut into it out into the head which will keep it from backing out.
this is the plug i used to push the insert in and make sure it was bottomed out, the tape was to keep it stuck in the socket, ill replace all of the plugs with new ones before start up.
now i can FINALLY start final assembly and try firing it up for the first time.
i brought the exhaust over and took some measurements and brought it back home so that should be finished up tomorrow and we might get to try to start it sunday, we will see.
Last edited by Nate Boslet; 05-18-2018 at 10:52 AM.
08-26-2017, 09:58 AM
#180
08-26-2017, 04:50 PM
#181
Member
Thread Starter
Join Date: Oct 2016
Posts: 284
09-02-2017, 09:59 AM
#182
Member
Thread Starter
Join Date: Oct 2016
Posts: 284
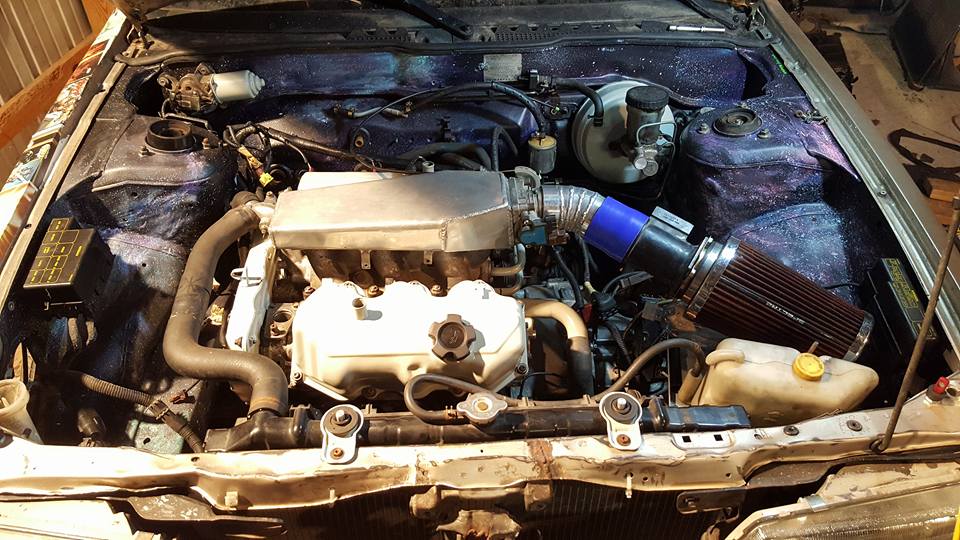
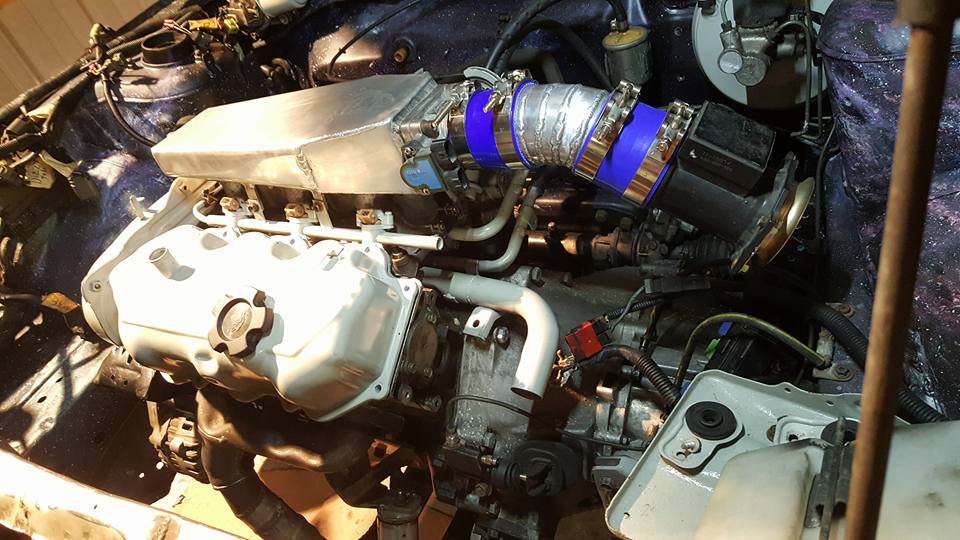
i have been trying to cobble together an intake with all of the random stock parts i have lying around but nothing would work with both my throttle body and the MAFs i have so as usual i decided to make one and what makes it even better is i didnt have any intercooler piping bends left over therefore my only course of action was..... PIE CUTS!
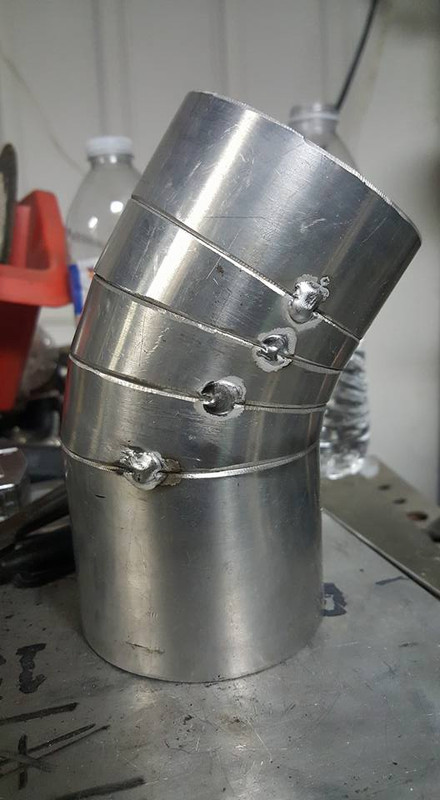
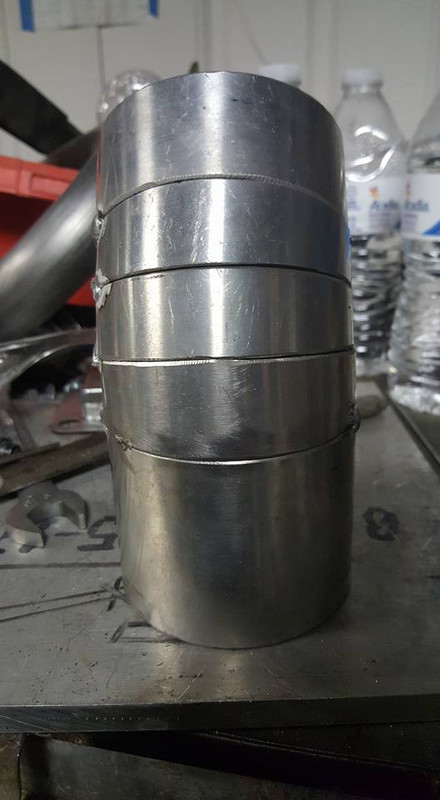
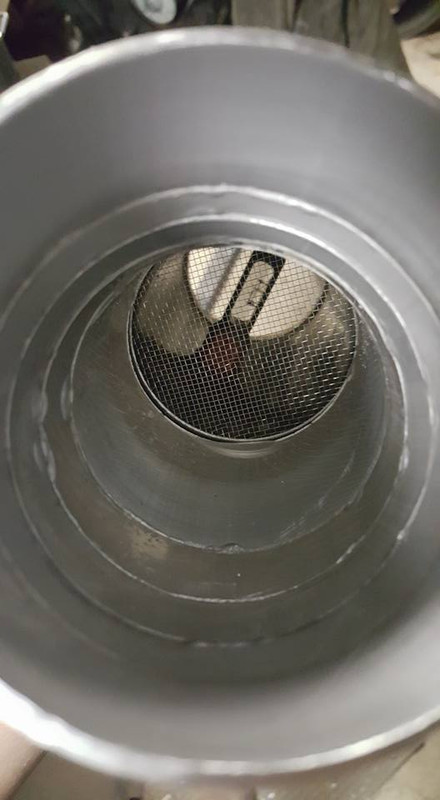
i ordered a reducer the other night so i can attach this pipe to the throttle body so when that comes in ill be able to finalize the intake.
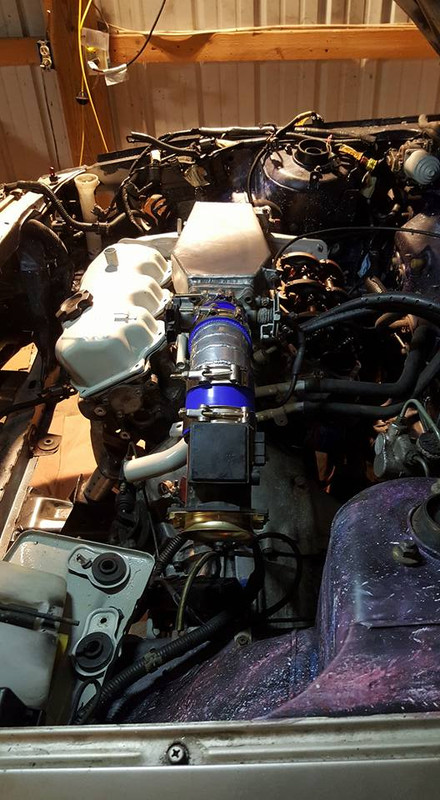
i may pull the battery relocation kit i made off of my z for the stanza which would free up some space for the only filter i own which is gigantic for no reason. i could just buy a smaller filter but the battery needs to be relocated eventually either way to make room for the turbo, whenever that happens...
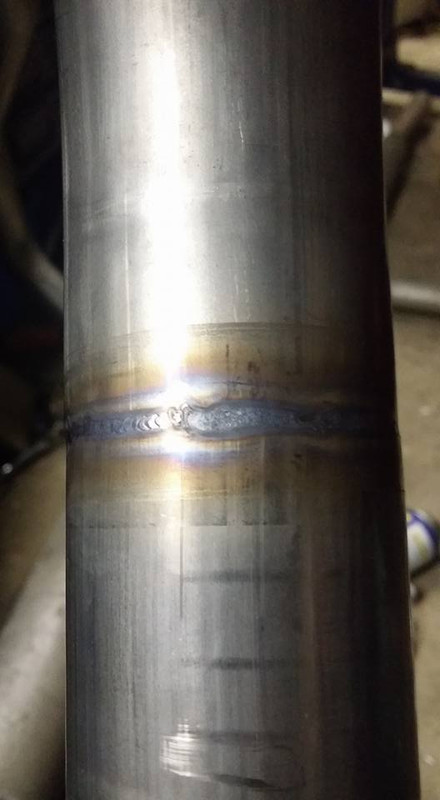
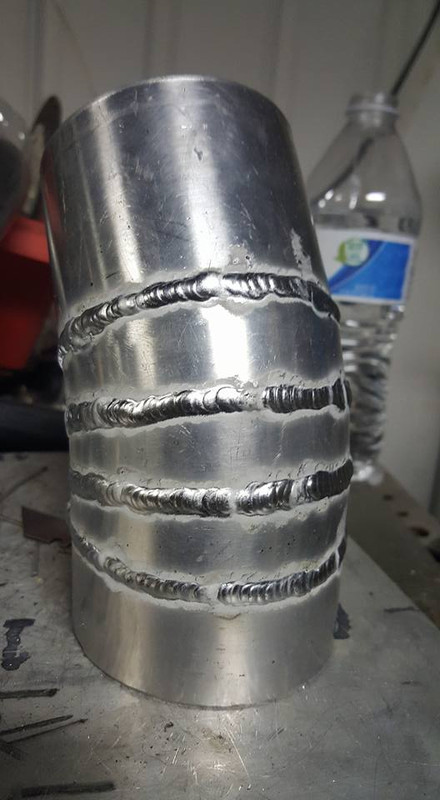
now onto the exahaust. here is the fully modefied mid section ready to be joined to the stock maxima exhaust.
and what it will look like on the car.
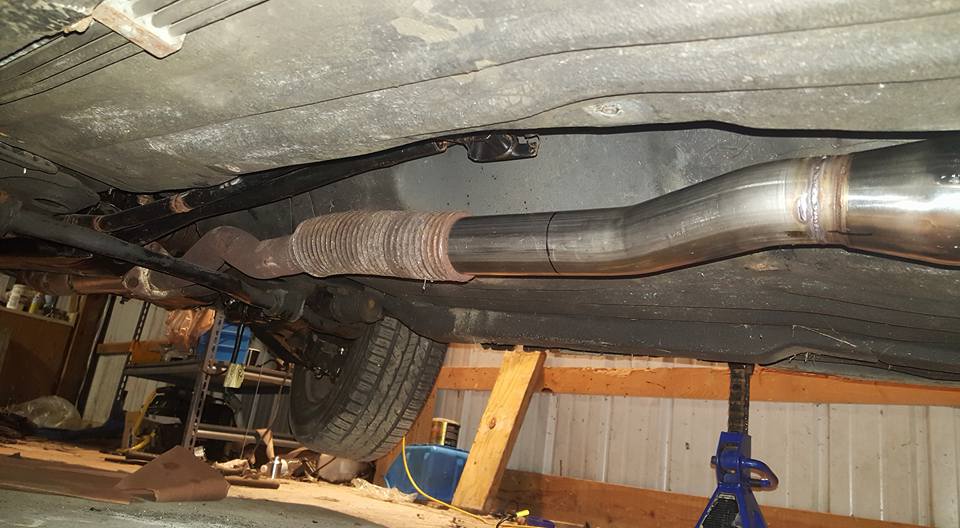
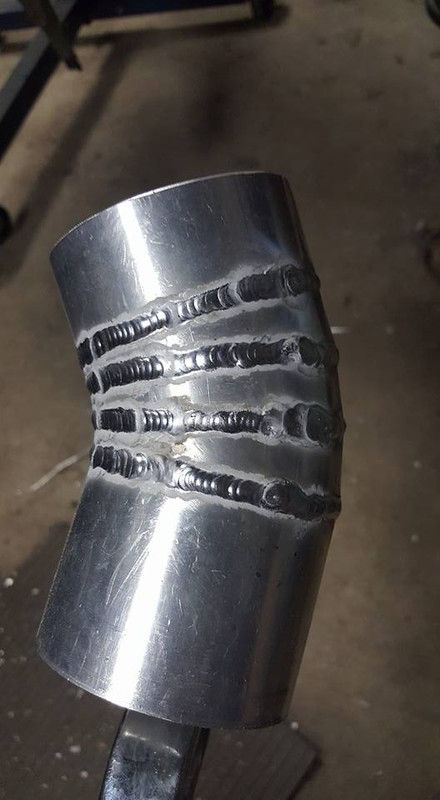
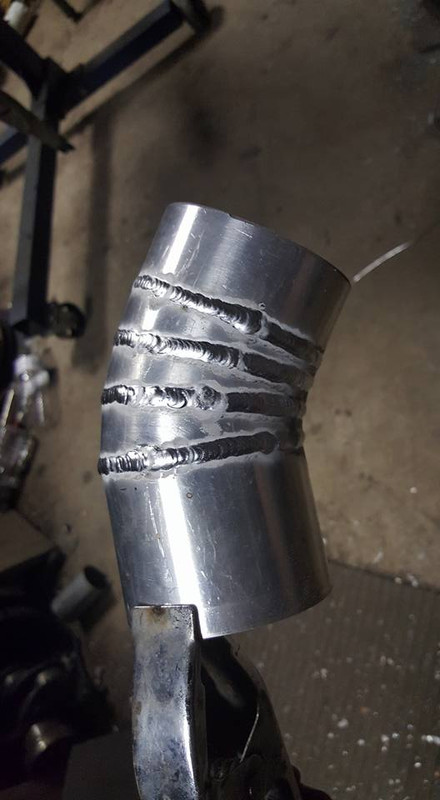
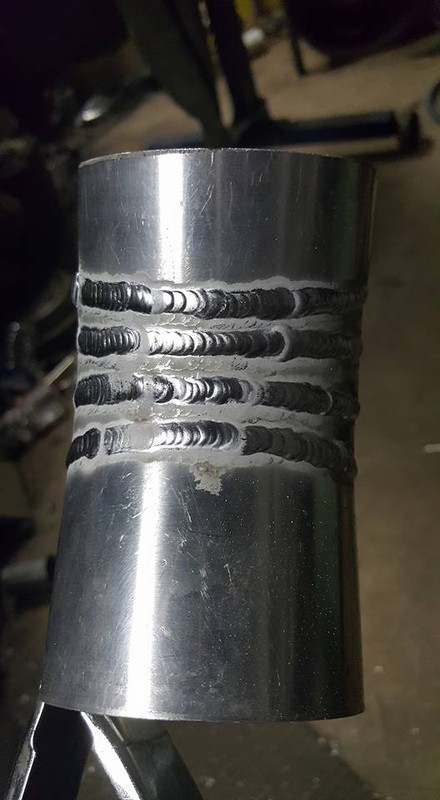
only problem is the material this stock stuff is made of is either not steel or has been thermally cycled to the point of being pure iron because when i try to weld to it it ends up looking like this. i decided instead of just having my welds crack and my exhaust break in half randomly ill just invest in a new flex pipe for 20 bucks. i may be forced to replace the entire section of pipe from the flange back but i think if i clean it up enough i can get down to some decent metal and get it to stick. we will see.
i ordered a reducer the other night so i can attach this pipe to the throttle body so when that comes in ill be able to finalize the intake.
i may pull the battery relocation kit i made off of my z for the stanza which would free up some space for the only filter i own which is gigantic for no reason. i could just buy a smaller filter but the battery needs to be relocated eventually either way to make room for the turbo, whenever that happens...
now onto the exahaust. here is the fully modefied mid section ready to be joined to the stock maxima exhaust.
and what it will look like on the car.
only problem is the material this stock stuff is made of is either not steel or has been thermally cycled to the point of being pure iron because when i try to weld to it it ends up looking like this. i decided instead of just having my welds crack and my exhaust break in half randomly ill just invest in a new flex pipe for 20 bucks. i may be forced to replace the entire section of pipe from the flange back but i think if i clean it up enough i can get down to some decent metal and get it to stick. we will see.
Last edited by Nate Boslet; 05-18-2018 at 10:54 AM.
09-09-2017, 02:23 AM
#183
Member
Thread Starter
Join Date: Oct 2016
Posts: 284
exhaust is fully done and in the car.
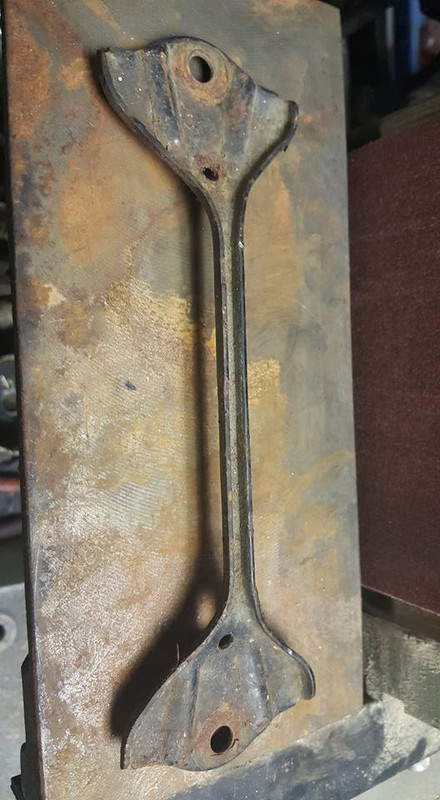
next i cleaned and painted the alternator bracket and wirewheeled the screw parts.

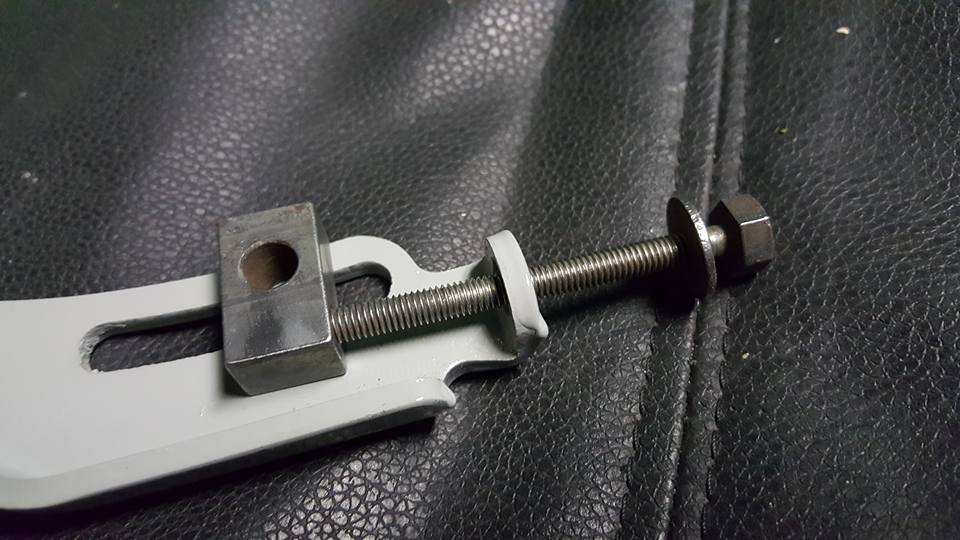
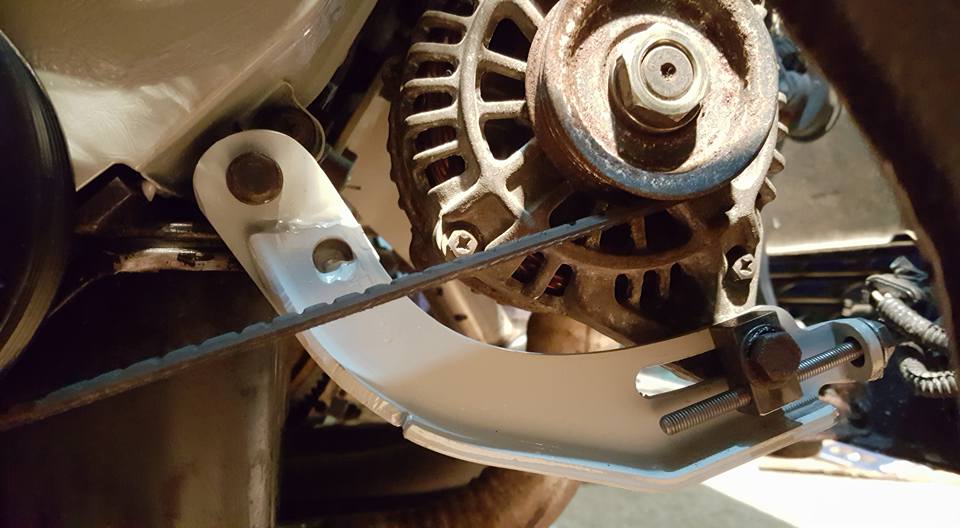
here it is on the car.
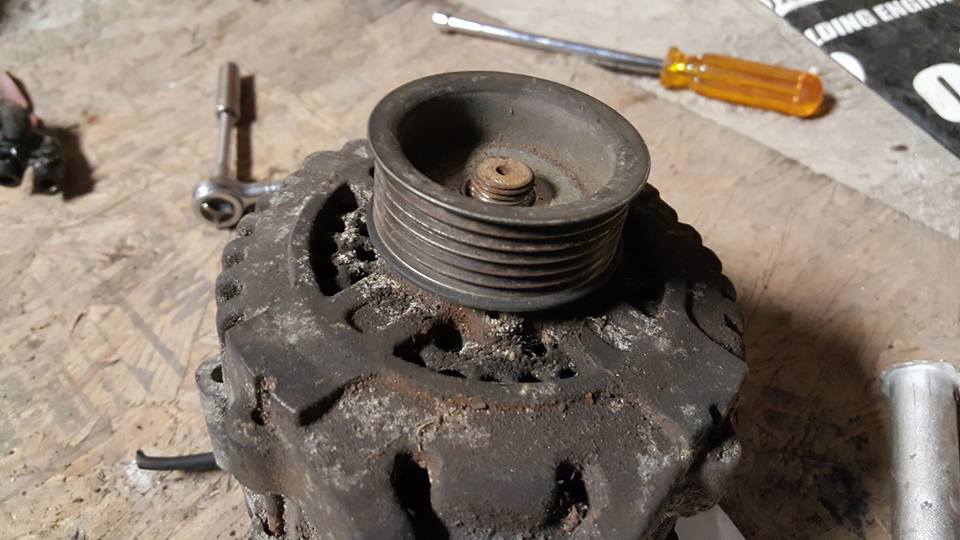
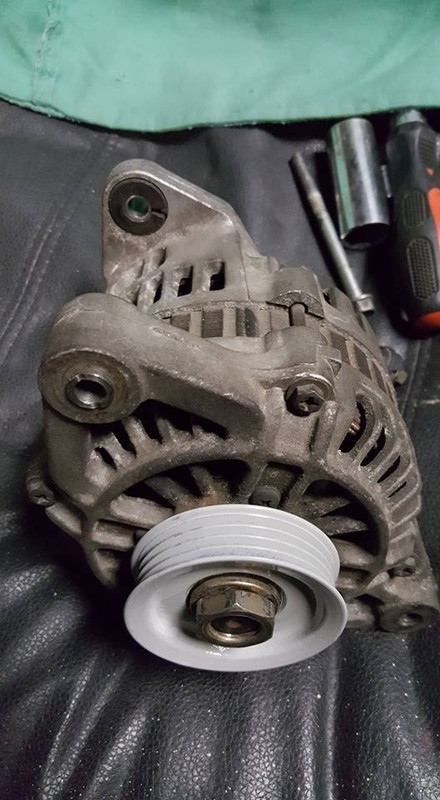
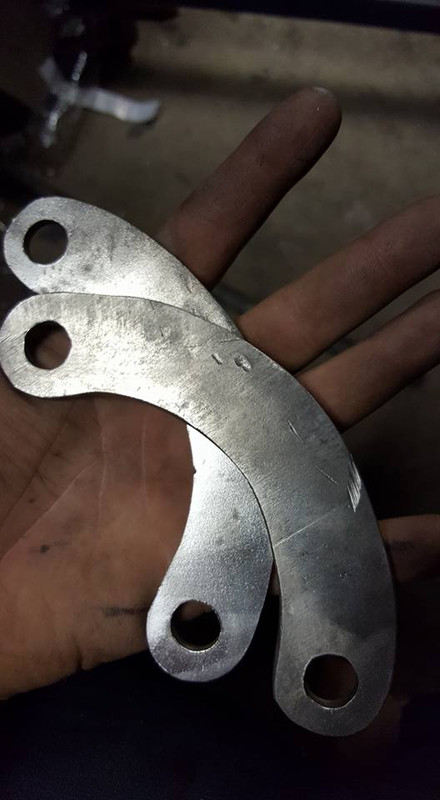
the 6 rib pulley that was on the stanzas alternator may have worked fine but i looked at the locked up maxima alternator i had and realized that i could probably just swap the 4 rib pulley on it onto the stanza alternator, so after i swapped them and did a mock up and made sure the belt was lined up right i took it back home and cleaned it up and painted it.
heres the 6 rib
and the painted 4 rib.
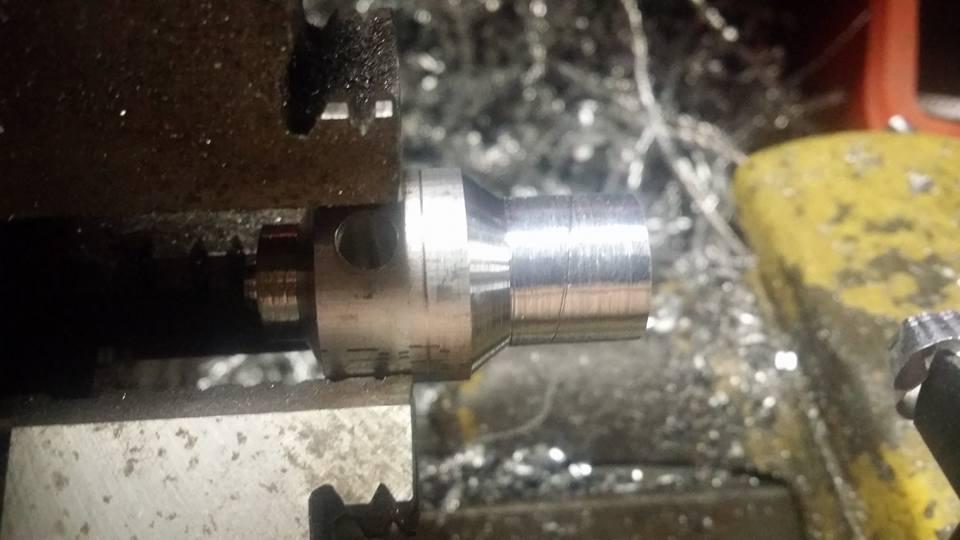
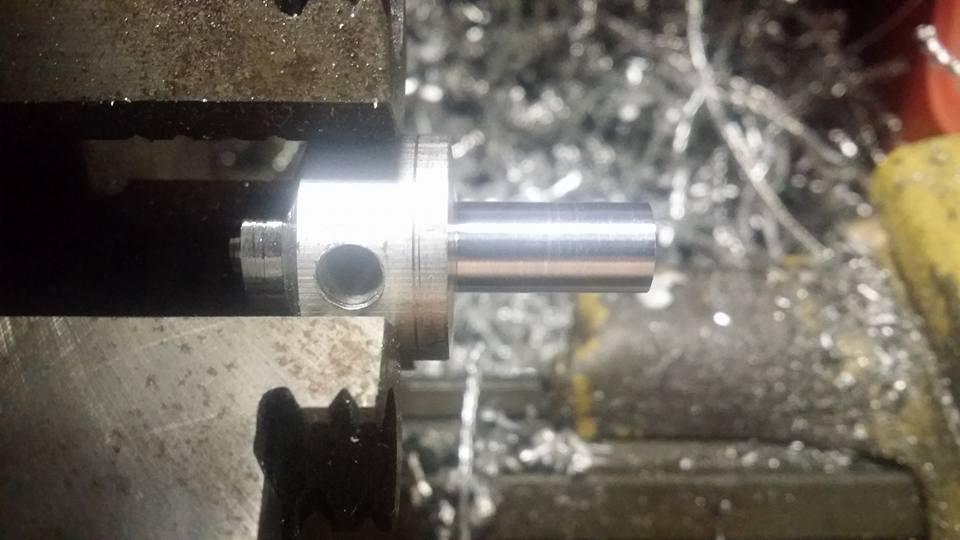
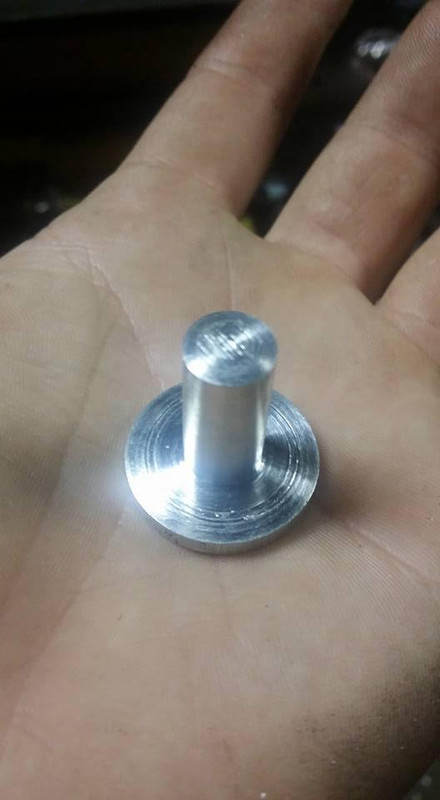
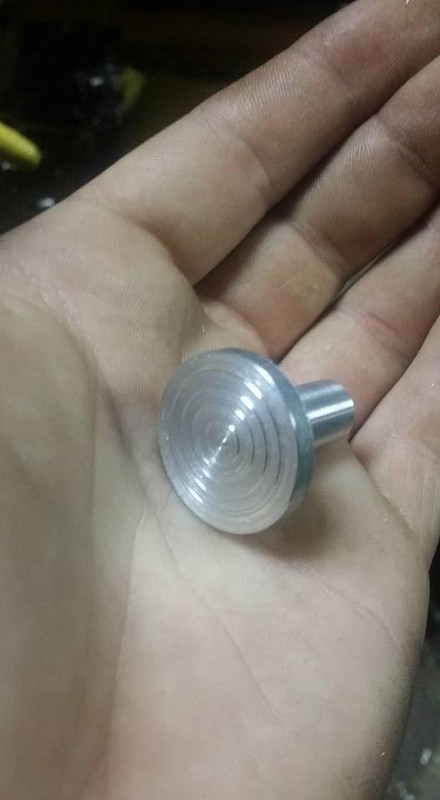
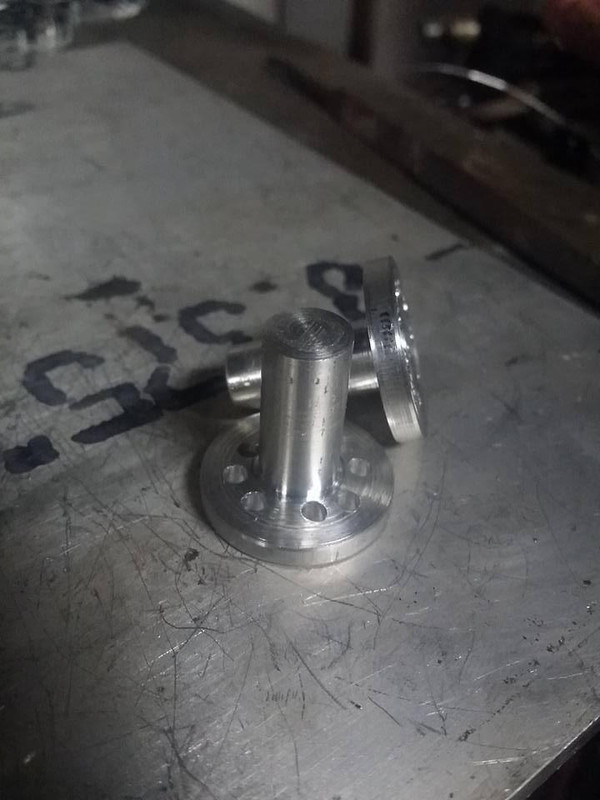
there was another difference between the stanza alternator and the maxima alternator. the hinge bolts for the KA alternator bracket are 14mm and the VG uses 12mm. there were two ways i could think of to address this; 1. i could drill and tap the holes in the bracket for 14mm bolts or 2. i could make sleeves to make the holes on the alternator for 12mm bolts. i would normally prefer to modify non parts that wont get changed like alternators and stuff but tapping cast iron sucks and making the sleeves took me like 20 minutes on the lathe so i went with option 2.

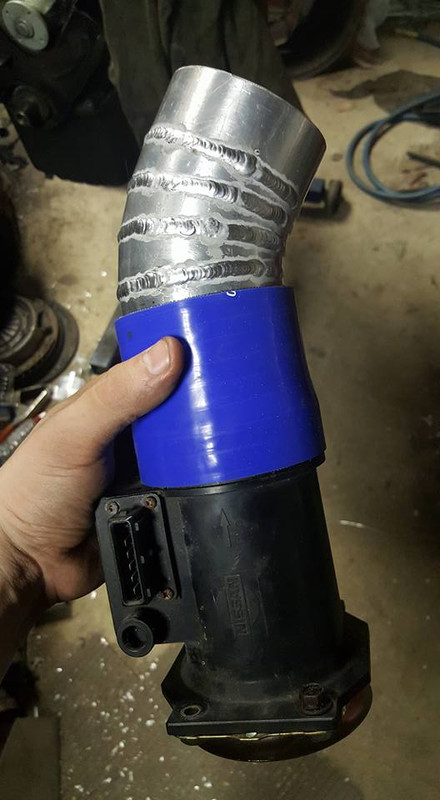
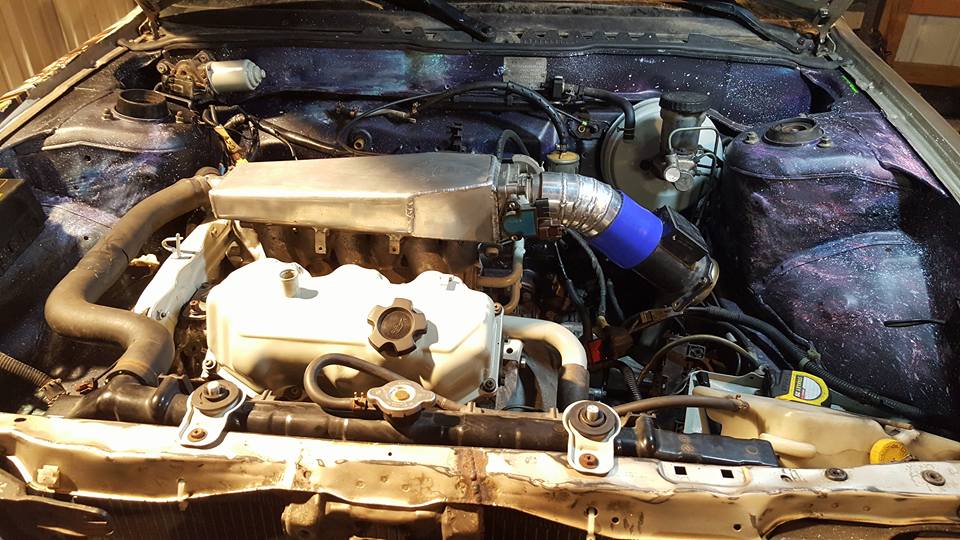
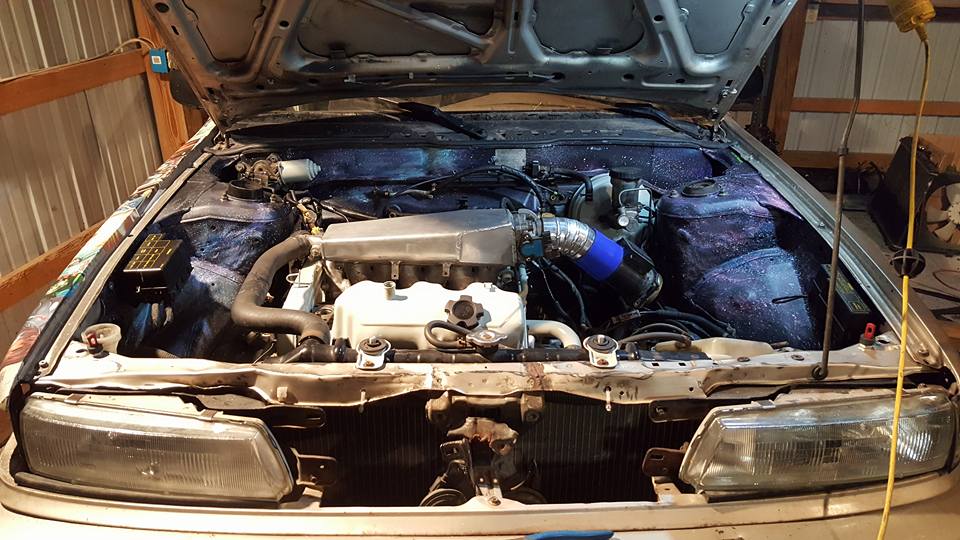
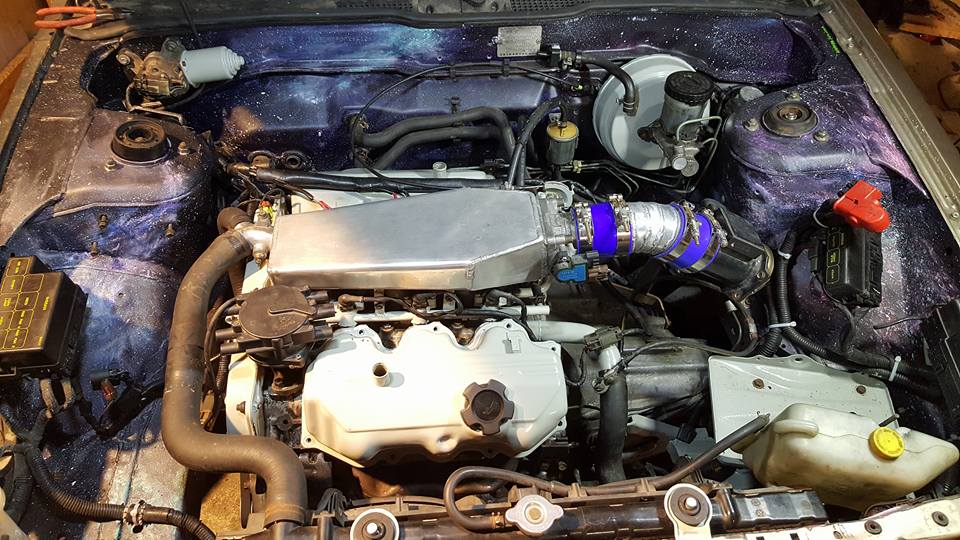
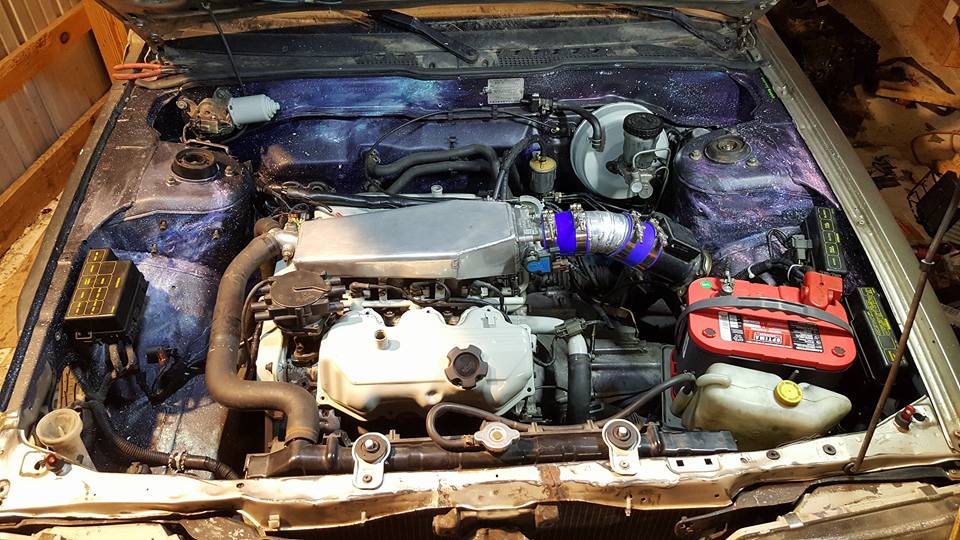
i got the coupler i needed for the intake the other day so i put that together, im not the biggest fan of how it looks but it should work well enough so im happy about that lol
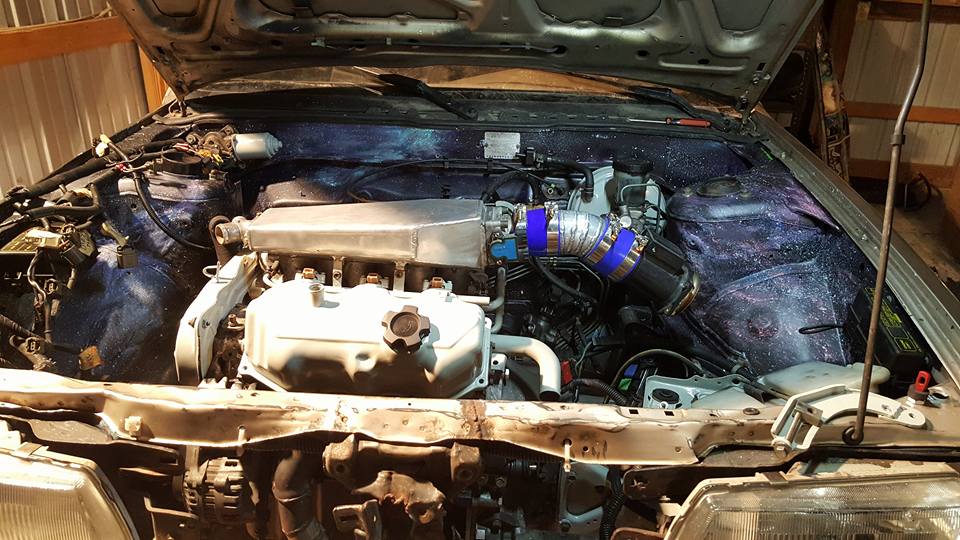
im gonna try my best to get the car started this weekend. been having some family stuff going on so im not sure if ill have time to try but if i do ill take a video for sure.
BTW. i need a transmission dust plate that will fit the trans i have since i have two that wont fit... (the plate that goes on the bottom half of the transmission in between the trans and engine to keep dust out) so if anyone has one let me know.
next i cleaned and painted the alternator bracket and wirewheeled the screw parts.
here it is on the car.
the 6 rib pulley that was on the stanzas alternator may have worked fine but i looked at the locked up maxima alternator i had and realized that i could probably just swap the 4 rib pulley on it onto the stanza alternator, so after i swapped them and did a mock up and made sure the belt was lined up right i took it back home and cleaned it up and painted it.
heres the 6 rib
and the painted 4 rib.
there was another difference between the stanza alternator and the maxima alternator. the hinge bolts for the KA alternator bracket are 14mm and the VG uses 12mm. there were two ways i could think of to address this; 1. i could drill and tap the holes in the bracket for 14mm bolts or 2. i could make sleeves to make the holes on the alternator for 12mm bolts. i would normally prefer to modify non parts that wont get changed like alternators and stuff but tapping cast iron sucks and making the sleeves took me like 20 minutes on the lathe so i went with option 2.
i got the coupler i needed for the intake the other day so i put that together, im not the biggest fan of how it looks but it should work well enough so im happy about that lol
im gonna try my best to get the car started this weekend. been having some family stuff going on so im not sure if ill have time to try but if i do ill take a video for sure.
BTW. i need a transmission dust plate that will fit the trans i have since i have two that wont fit... (the plate that goes on the bottom half of the transmission in between the trans and engine to keep dust out) so if anyone has one let me know.
Last edited by Nate Boslet; 05-18-2018 at 11:08 AM.
09-10-2017, 01:26 PM
#185
Member
Thread Starter
Join Date: Oct 2016
Posts: 284
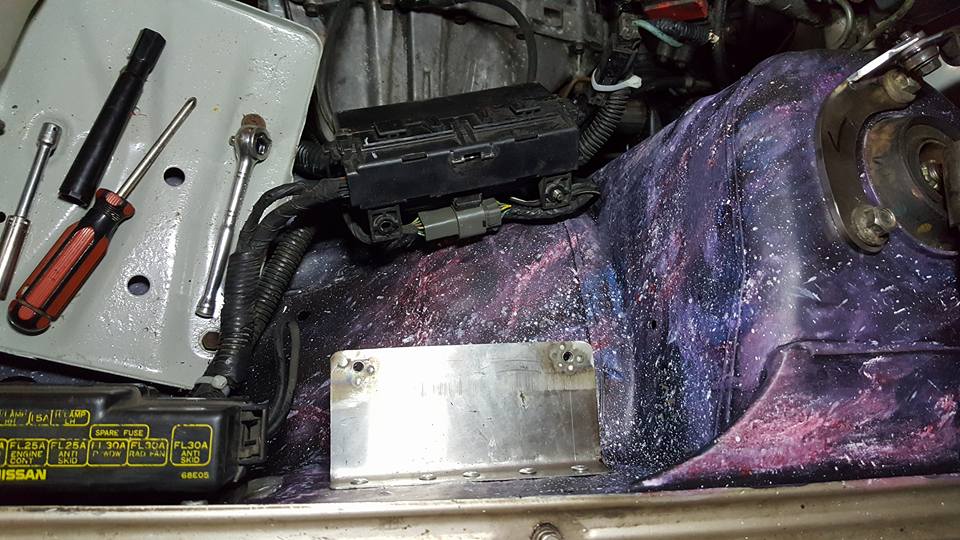
getting started some wiring management and am working on some brackets to hold the loom, mount the other fuse box, and finally install some hood struts.
needed to extend the alternator ground but otherwise it all has enough slack to reach and not be stretched so the alternator is totally finished.
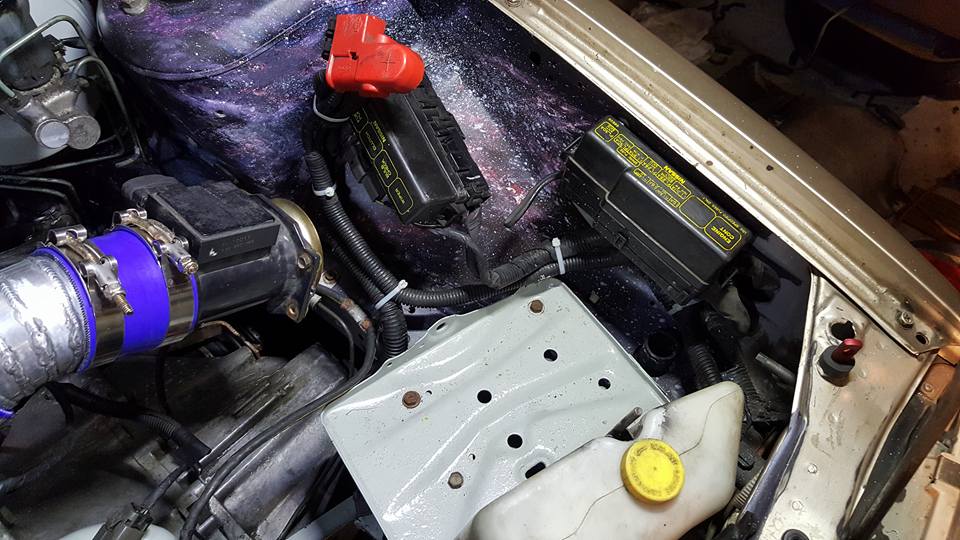
im making a bracket for this hanging fuse panel that ill rivet onto the body and then bolt the fuse panel to it. originally this fuse panel was kind of floating in the engine bay next to the battery, it was never really mounted correctly and there is a lot of extra harness to go to the starter so by mounting it here ill take up a lot of that slack and have it be in a better looking and more practical place.
im making a bracket for the coil to mount it to the strut tower as well and once that is done ill be able to try to start it.
im at the very least going to crank it over today. im not sure if the injector seals are fully seated with the mounts i made so if im losing compression ill have to pull everything back off and redo them but if not then ill throw some fluids in and try it.
i have no idea where the drain and fill plugs are on this transmission and cant seem to find a thread about it on here so if there is a thread or if someone can post a pic of them i would really appreciate it.
needed to extend the alternator ground but otherwise it all has enough slack to reach and not be stretched so the alternator is totally finished.
im making a bracket for this hanging fuse panel that ill rivet onto the body and then bolt the fuse panel to it. originally this fuse panel was kind of floating in the engine bay next to the battery, it was never really mounted correctly and there is a lot of extra harness to go to the starter so by mounting it here ill take up a lot of that slack and have it be in a better looking and more practical place.
im making a bracket for the coil to mount it to the strut tower as well and once that is done ill be able to try to start it.
im at the very least going to crank it over today. im not sure if the injector seals are fully seated with the mounts i made so if im losing compression ill have to pull everything back off and redo them but if not then ill throw some fluids in and try it.
i have no idea where the drain and fill plugs are on this transmission and cant seem to find a thread about it on here so if there is a thread or if someone can post a pic of them i would really appreciate it.
Last edited by Nate Boslet; 05-18-2018 at 11:09 AM.
09-11-2017, 10:03 AM
#186
I have missed the type of transmission you have, ie, manual or auto, and what year.
here is a link to most of Nissan's models. The manual trans are in section MT and the automatic trans is section AT.
http://www.nicoclub.com/nissan-service-manuals
For example, using the link below, for a 1990 300ZX with a manual trans, page MT 7 is a parts breakdown that shows the drain and filler plugs.
nicoclub.com/service-manual?fsm=300zx/1990/mt
 09-12-2017, 05:10 PM
#188
Member
Thread Starter
Join Date: Oct 2016
Posts: 284
I have missed the type of transmission you have, ie, manual or auto, and what year.
here is a link to most of Nissan's models. The manual trans are in section MT and the automatic trans is section AT.
http://www.nicoclub.com/nissan-service-manuals
For example, using the link below, for a 1990 300ZX with a manual trans, page MT 7 is a parts breakdown that shows the drain and filler plugs.
nicoclub.com/service-manual?fsm=300zx/1990/mt
here is a link to most of Nissan's models. The manual trans are in section MT and the automatic trans is section AT.
http://www.nicoclub.com/nissan-service-manuals
For example, using the link below, for a 1990 300ZX with a manual trans, page MT 7 is a parts breakdown that shows the drain and filler plugs.
nicoclub.com/service-manual?fsm=300zx/1990/mt
09-12-2017, 05:11 PM
#189
Member
Thread Starter
Join Date: Oct 2016
Posts: 284
thank you. i make intakes for z31s, this is essentially the same design but the plenum is flipped to face the opposite way for the FWD setup. check out the link in my signature if you wanna look at some of my other work.
09-13-2017, 03:39 AM
#190
Member
Thread Starter
Join Date: Oct 2016
Posts: 284
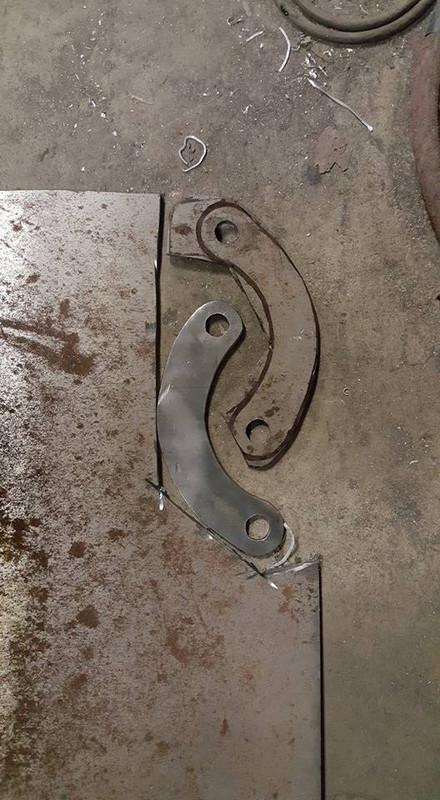
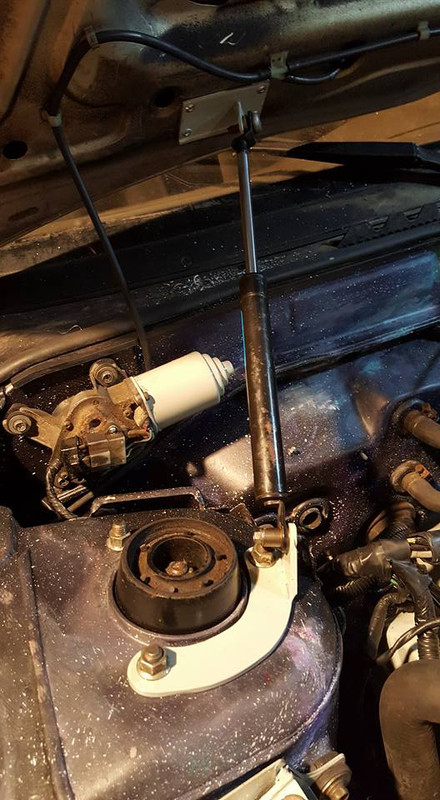
i have a lot to go over so im gonna have to break this update into several posts.... ill start with the coil. i have been trying to figure out where i would mount the coil for probably 2 months now and just kinda put it off because i wasnt coming up with anything i even slightly liked until i remembered the first hood strut mount failure that i made from the power steering reservoir mount, this location was perfect and it gave me features already on the car to mount to so i took the coil bracket and the mounting bracket and basically just cut and pasted stuff until it was the way i wanted it.
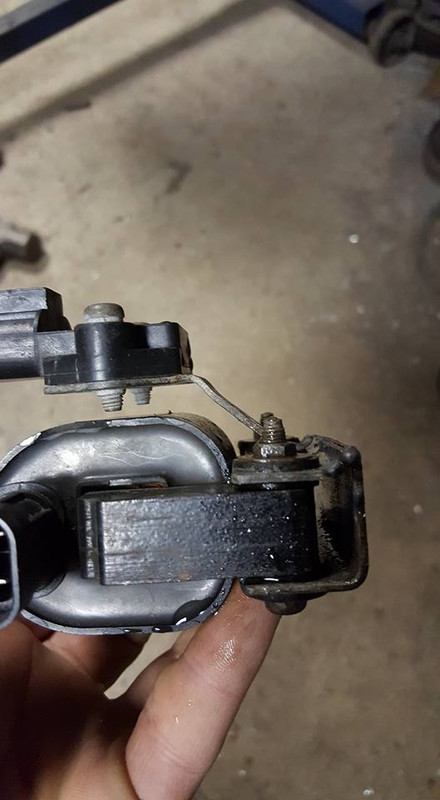
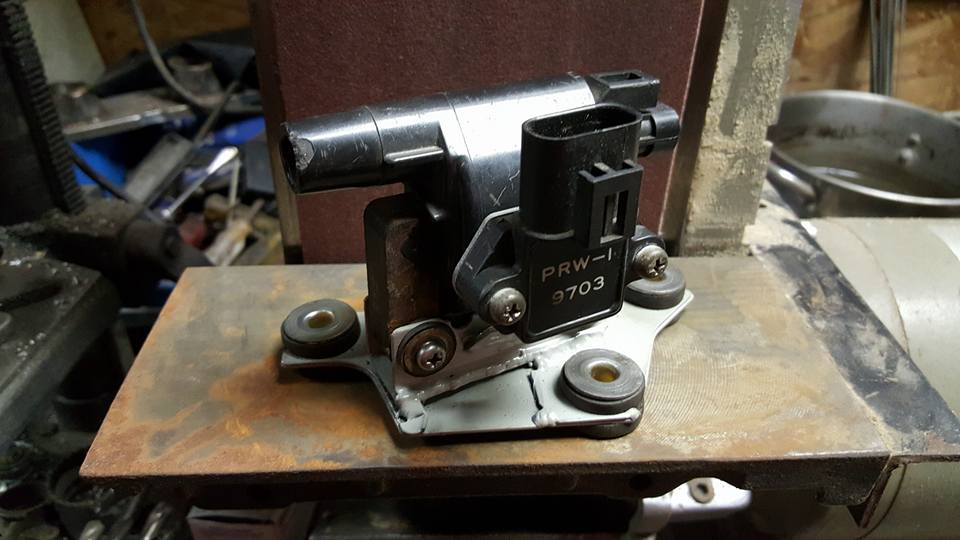
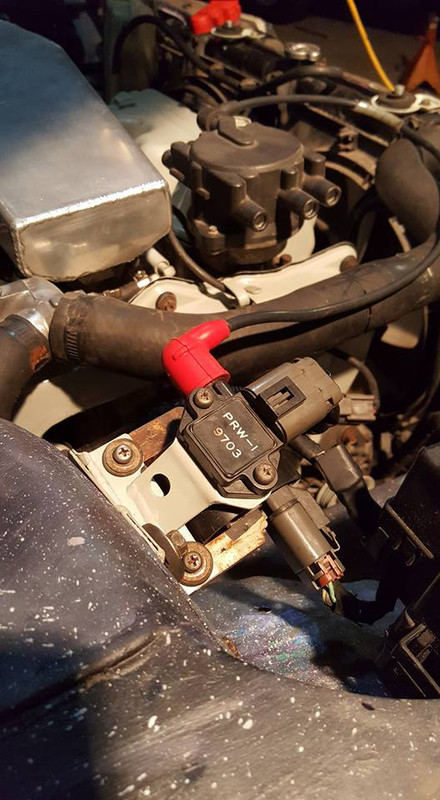
here it is on the car.
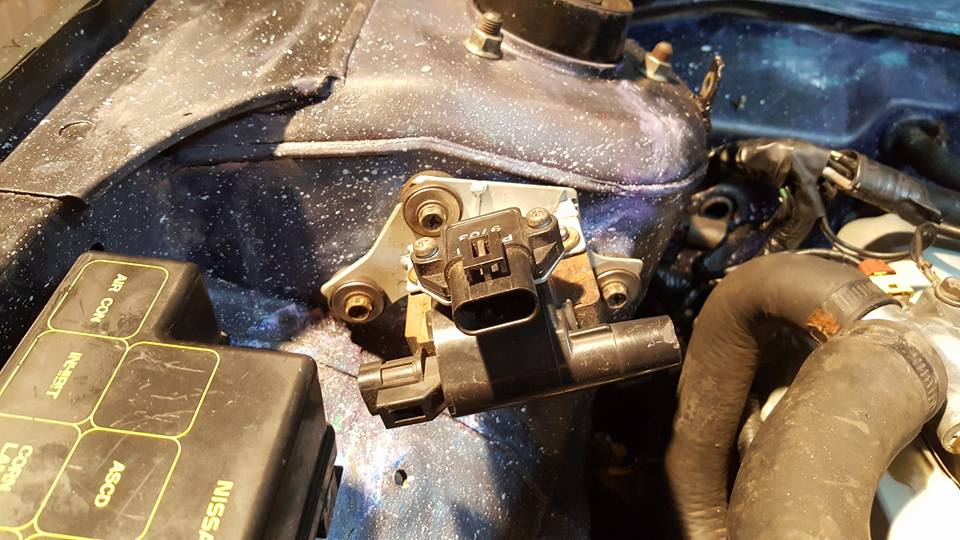
im probably not going to use this coil wire since its a little long, i have like 3 or 4 to choose from.
here it is on the car.
im probably not going to use this coil wire since its a little long, i have like 3 or 4 to choose from.
Last edited by Nate Boslet; 05-18-2018 at 11:12 AM.
09-13-2017, 03:56 AM
#191
Member
Thread Starter
Join Date: Oct 2016
Posts: 284
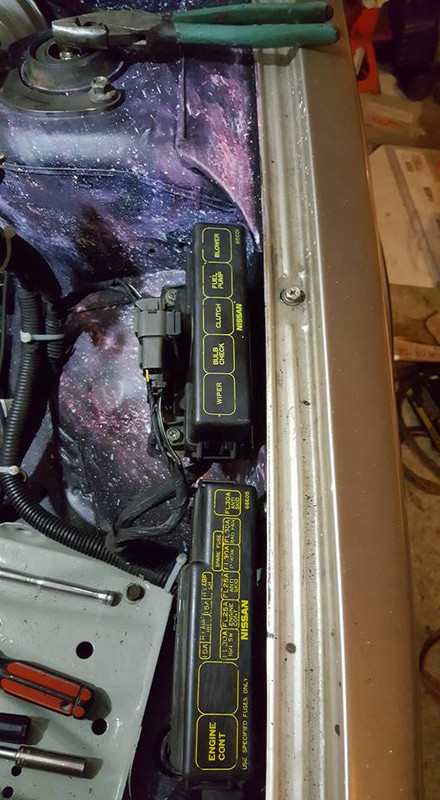
as i stated earlier i would be making a bracket to hold on the one loose fuse box, here is that bracket.
the spots around the holes are tacks, i tacked nuts to the underside of the bracket so i didnt need to hold them on when i invariably have to remove or install this fuse box another 20 times. the bracket is riveted onto the bay wall.
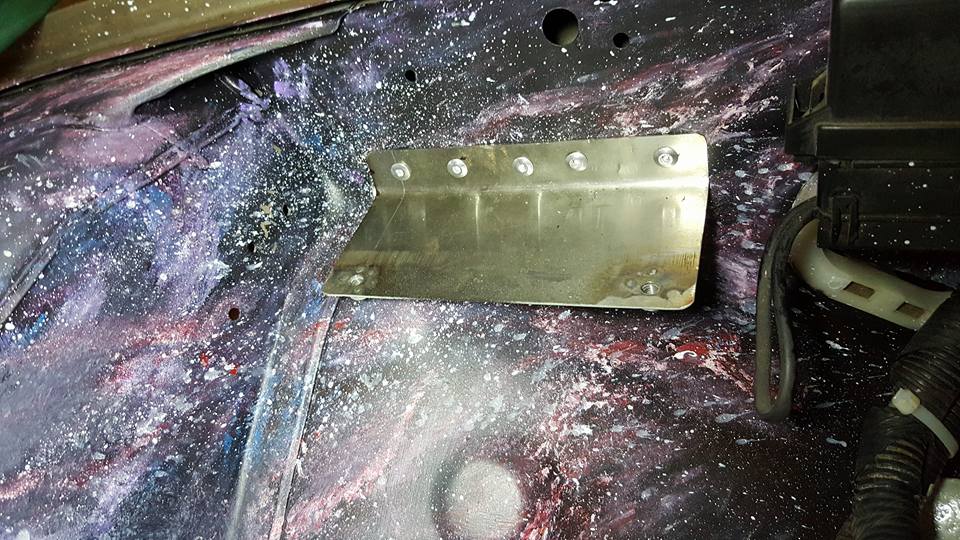
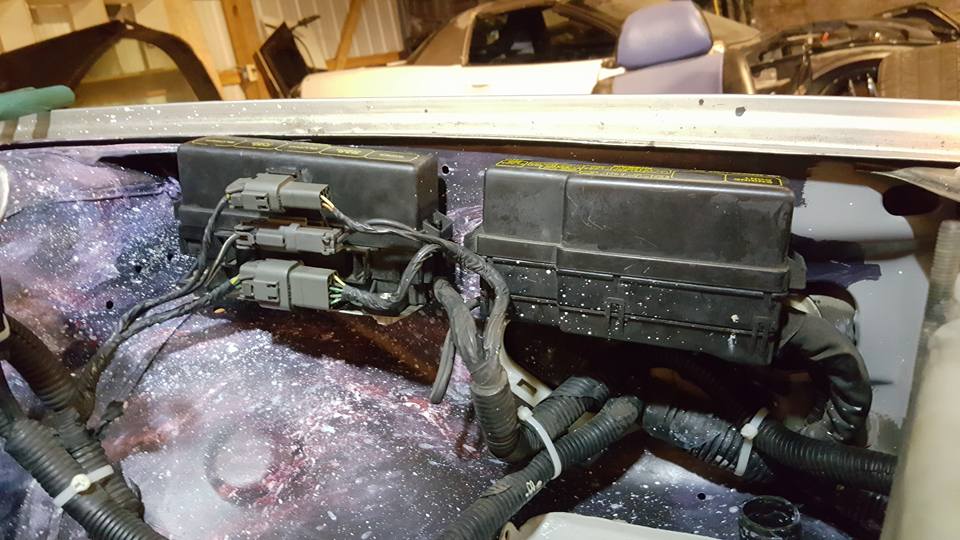
i tried my best to make this look like it belongs there, its not perfect but im happy with it.
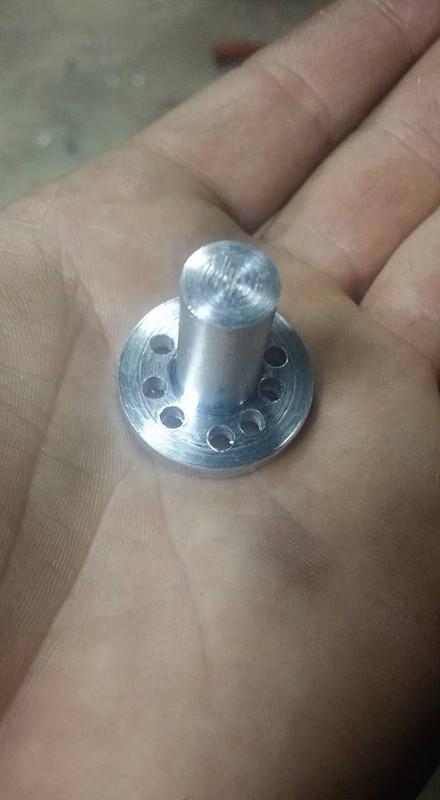
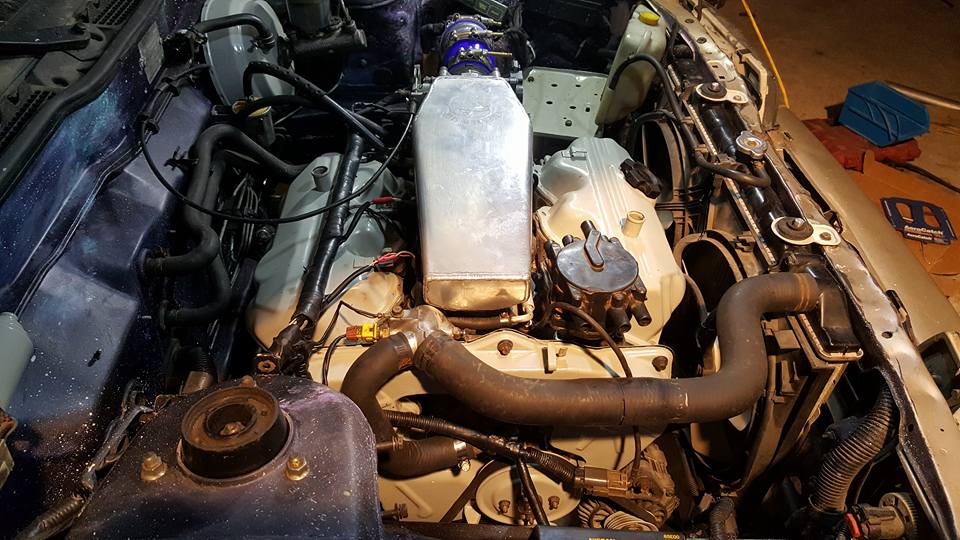
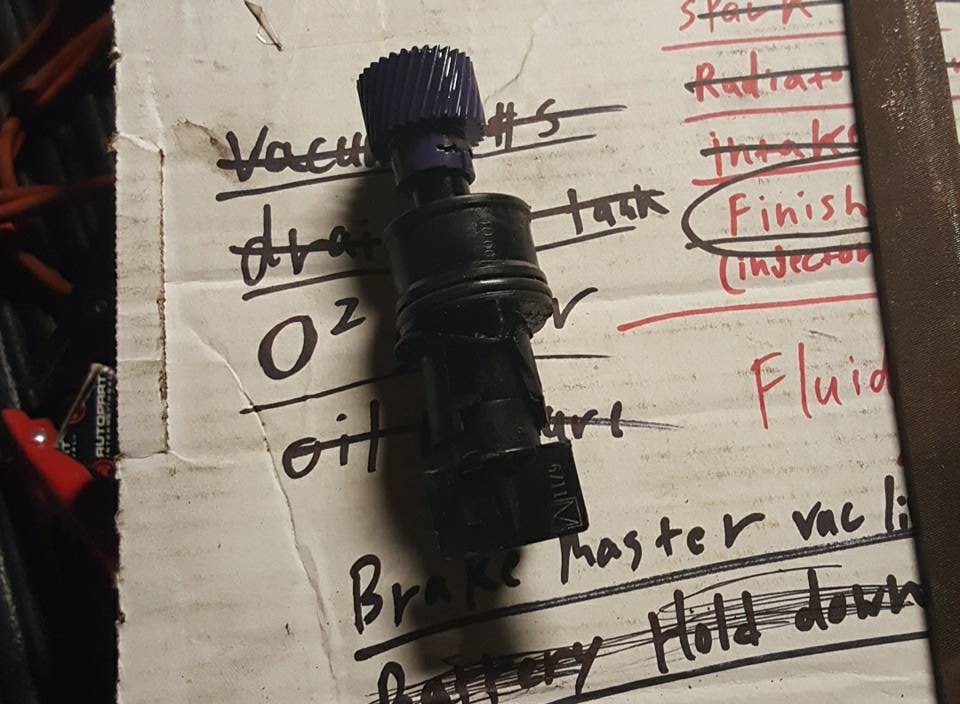
next was the oil pressure switch, the block has a hole much larger than the pressure switch i have will fit into, i needed an adapter but why would i spend money on something i can just make out of crap i have lying around right? so if anyone was wondering what is inside of a maxima oil pressure sensor, here you go.
after i pulled that stuff out of there (there was some other stuff but it just looked like some washers made of various materials, i assume they vary in resistance somehow to translate pressure into signal but idk how any of it actually works) i faced off the piece, drilled a hole all the way through it and then tapped it for the 1/8th NPT threads my pressure switch uses.
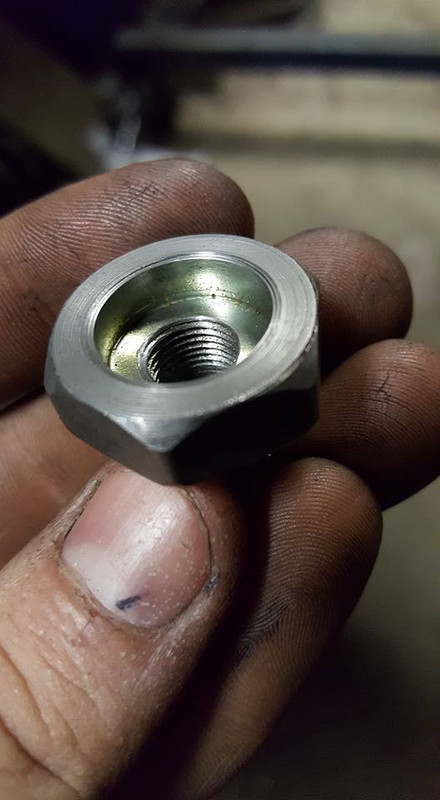
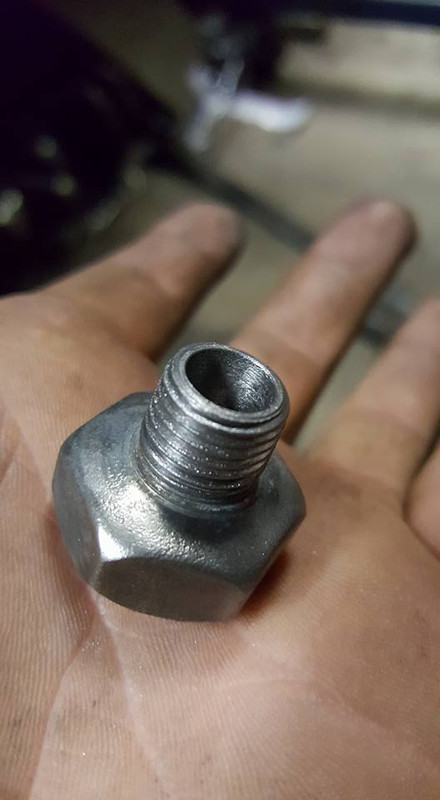
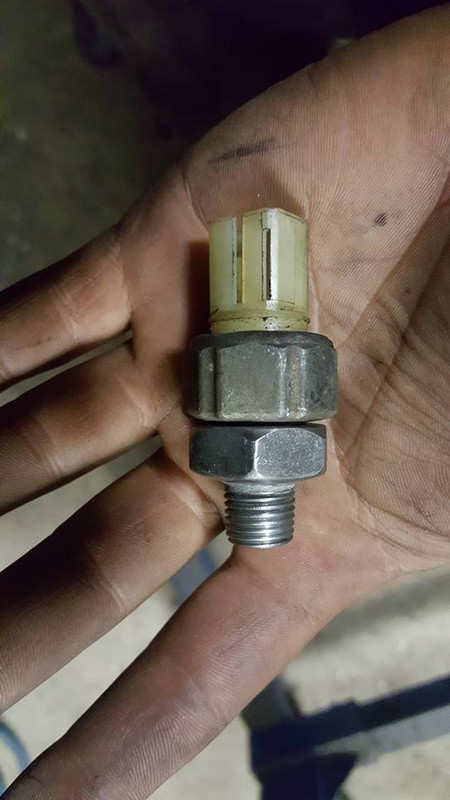
since i could thread it into the block i was able to extend the stock wiring over to the switch and everything should work the way it is supposed to unless i didnt wire that circuit in yet.
the spots around the holes are tacks, i tacked nuts to the underside of the bracket so i didnt need to hold them on when i invariably have to remove or install this fuse box another 20 times. the bracket is riveted onto the bay wall.
i tried my best to make this look like it belongs there, its not perfect but im happy with it.
next was the oil pressure switch, the block has a hole much larger than the pressure switch i have will fit into, i needed an adapter but why would i spend money on something i can just make out of crap i have lying around right? so if anyone was wondering what is inside of a maxima oil pressure sensor, here you go.
after i pulled that stuff out of there (there was some other stuff but it just looked like some washers made of various materials, i assume they vary in resistance somehow to translate pressure into signal but idk how any of it actually works) i faced off the piece, drilled a hole all the way through it and then tapped it for the 1/8th NPT threads my pressure switch uses.
since i could thread it into the block i was able to extend the stock wiring over to the switch and everything should work the way it is supposed to unless i didnt wire that circuit in yet.
Last edited by Nate Boslet; 05-18-2018 at 11:13 AM.
09-13-2017, 04:24 AM
#192
Member
Thread Starter
Join Date: Oct 2016
Posts: 284
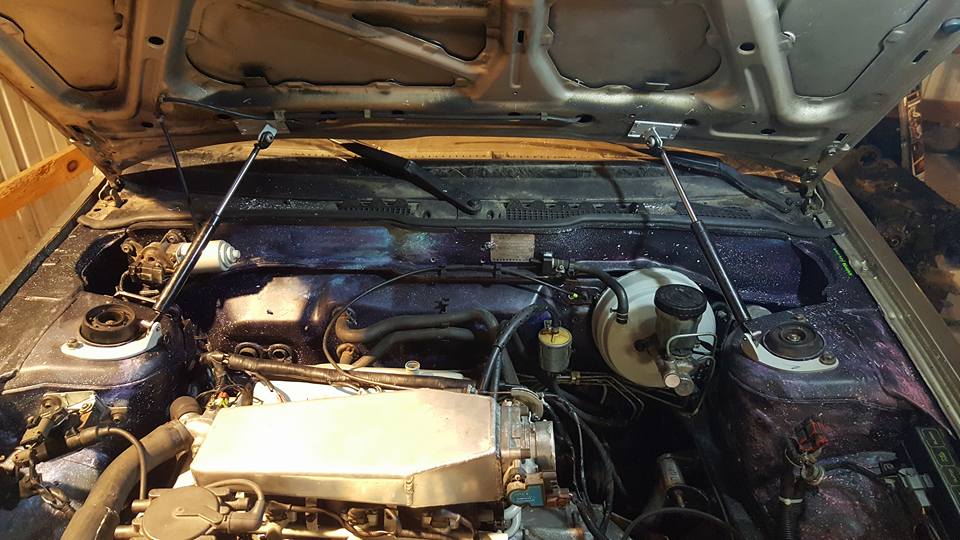
last but certainly not least comes the final, working iteration of the hood struts.
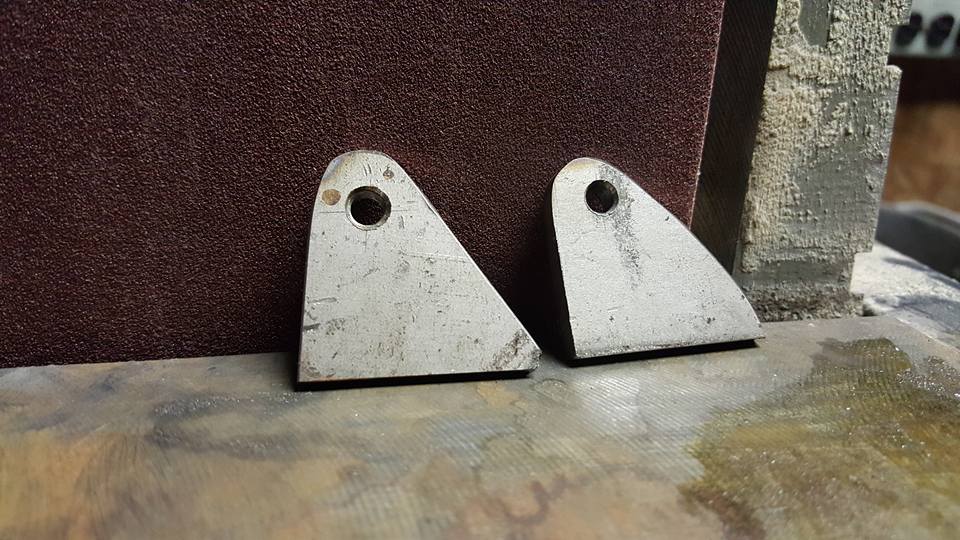
after a trial fit i brought everything home for paint which got kinda wonkey because of the marker being the most permanent marker i have ever witnessed. it didnt even come off when i wire wheeled it lol
i also turned some bushings for the lower mounts so they would have a little less play.
the hood is now 4 or 5 higher when open.
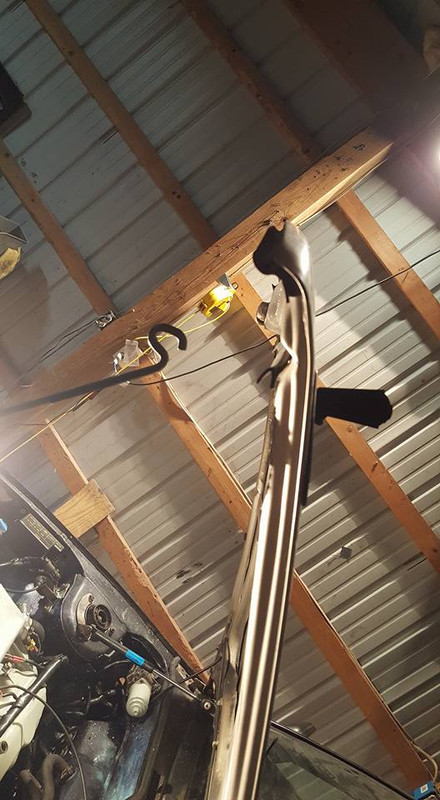
and what good would they be if i couldnt close the hood anymore.... im no mathmagician but i think i did a decent job. the struts still have a full inch before they are fully compressed with the hood closed so nothing binds up at all.
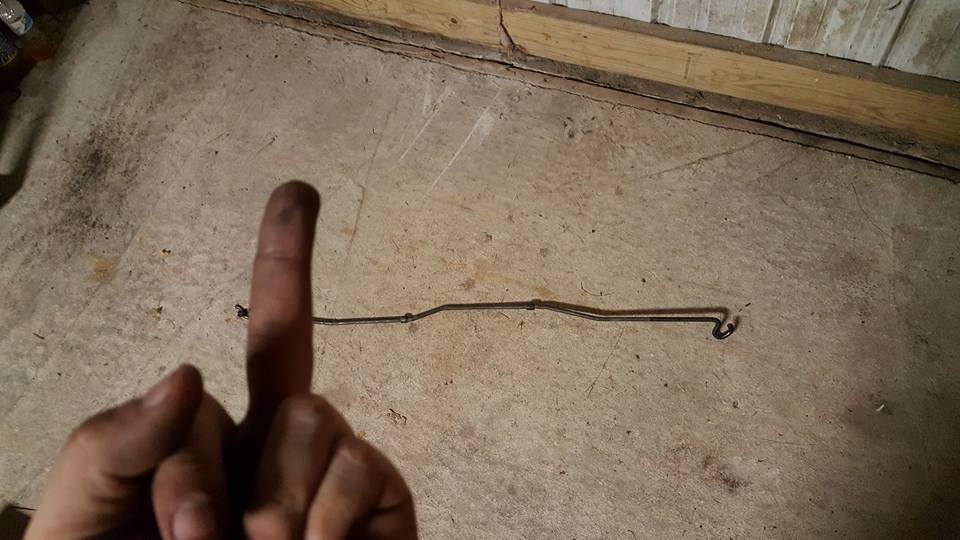
and best of all i got rid of this stupid ****ing stick.
im very pleased with how this all came out so far. i didnt get a chance to crank the car over yet because i cant find the dang fill plug on the transmission. even with the FSM im just not seeing it on the trans. i think i will just measure out my oil and dump it into the speedo sensor. i have a few more things on the list to take care of besides that but its looking pretty good.
after a trial fit i brought everything home for paint which got kinda wonkey because of the marker being the most permanent marker i have ever witnessed. it didnt even come off when i wire wheeled it lol
i also turned some bushings for the lower mounts so they would have a little less play.
the hood is now 4 or 5 higher when open.
and what good would they be if i couldnt close the hood anymore.... im no mathmagician but i think i did a decent job. the struts still have a full inch before they are fully compressed with the hood closed so nothing binds up at all.
and best of all i got rid of this stupid ****ing stick.
im very pleased with how this all came out so far. i didnt get a chance to crank the car over yet because i cant find the dang fill plug on the transmission. even with the FSM im just not seeing it on the trans. i think i will just measure out my oil and dump it into the speedo sensor. i have a few more things on the list to take care of besides that but its looking pretty good.
Last edited by Nate Boslet; 05-18-2018 at 11:34 AM.
09-14-2017, 12:04 AM
#194
Member
Thread Starter
Join Date: Oct 2016
Posts: 284
i considered it but it would be a lot of work for something that wont benefit this car much in its use. the only racing i am really planning is drag and this car is really first and foremost my daily driver/ something to show off my skills. maybe in the future if i get bored i will add that to the brackets i made but not right now. however i definitely will be making a strut bar for my z31 at some point, i will probably post about that in the future.
 09-20-2017, 06:44 PM
#197
Member
Thread Starter
Join Date: Oct 2016
Posts: 284
i decided to get the battery hold down figured out while i have the time to do it.
i didnt realize it needed to be modified to be used with the optima until after it was painted but you can see it in the last pic of this post done. i just wirewheeled the rods but it turns out i only needed one of these, the other rod is also the mount for the coolant overflow tank.
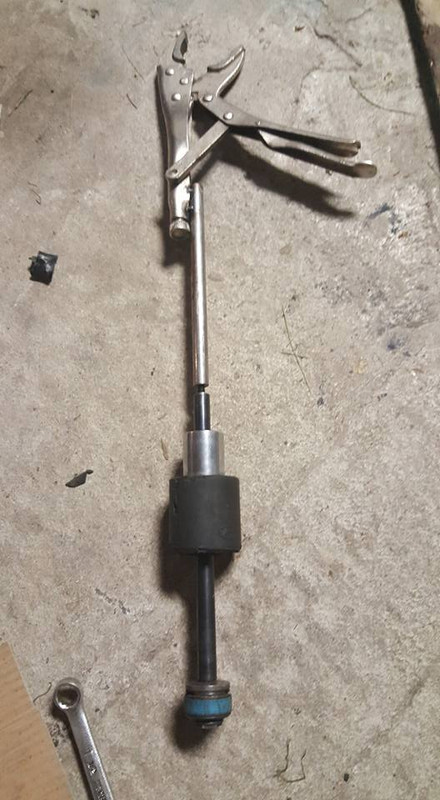
for some reason the speed sensor that easily slipped into its place became absolutely fused in its hole in the transmission and i spent like 5 hours the one day trying to get it out and it just broke apart and then the next time i came with some tools i made that i just barely managed to get it to move with, then welded a pair of vice grips to my home made slide hammer and finally got it out..
so after i got the speed sensor out i dumped a gallon of trans fluid into the trans and put some oil into the engine and started cranking. it seems to turn over well, i appear to be building some oil pressure but it is making some strange vibrations at kind of random moments while cranking, im not sure why or if its even anything to worry about but i think i will probably proceed to firing it up anyway.
the issue with firing it up however is that i have a dead injector.... i have been spinning the distributor to check for fuel and spark and i noticed i was only getting 5 clicks of the injectors per rev. i checked the resistance of every injector and found all of them were around 11 ohms but one, one was a dead short. so before i can start the car i need at least one injector. im debating on replacing all of them but money is still pretty tight and i cant afford to buy them new, im not too excited by the idea of buying 6 from the junkyard to potentially only get 2 working ones either but its looking like thats gonna be my course of action. really all i want is to see that the car will run safely and check for fuel leaks, if i see anything leaking or having issues then i may end up redoing the entire fuel rail setup anyway. im going to go to the junkyard tomorrow either way to look for another vg maxima and hopefully even find a stanza so i can get the other parts i need. hopefully ill get this sorted out soon and can post a video for you guys.
i didnt realize it needed to be modified to be used with the optima until after it was painted but you can see it in the last pic of this post done. i just wirewheeled the rods but it turns out i only needed one of these, the other rod is also the mount for the coolant overflow tank.
for some reason the speed sensor that easily slipped into its place became absolutely fused in its hole in the transmission and i spent like 5 hours the one day trying to get it out and it just broke apart and then the next time i came with some tools i made that i just barely managed to get it to move with, then welded a pair of vice grips to my home made slide hammer and finally got it out..
so after i got the speed sensor out i dumped a gallon of trans fluid into the trans and put some oil into the engine and started cranking. it seems to turn over well, i appear to be building some oil pressure but it is making some strange vibrations at kind of random moments while cranking, im not sure why or if its even anything to worry about but i think i will probably proceed to firing it up anyway.
the issue with firing it up however is that i have a dead injector.... i have been spinning the distributor to check for fuel and spark and i noticed i was only getting 5 clicks of the injectors per rev. i checked the resistance of every injector and found all of them were around 11 ohms but one, one was a dead short. so before i can start the car i need at least one injector. im debating on replacing all of them but money is still pretty tight and i cant afford to buy them new, im not too excited by the idea of buying 6 from the junkyard to potentially only get 2 working ones either but its looking like thats gonna be my course of action. really all i want is to see that the car will run safely and check for fuel leaks, if i see anything leaking or having issues then i may end up redoing the entire fuel rail setup anyway. im going to go to the junkyard tomorrow either way to look for another vg maxima and hopefully even find a stanza so i can get the other parts i need. hopefully ill get this sorted out soon and can post a video for you guys.
Last edited by Nate Boslet; 05-18-2018 at 11:36 AM.
09-21-2017, 04:08 AM
#198
If you want, you can start the engine with a bad injector. My 94 VG had 3 dead injectors and it still started and ran, quite poorly of course, before I finally replaced them. Since the engine and ECU have not worked together before, when the engine starts, it will most likely run like **** for a minute or two until the ECU "learns" the engine.
Knowing that you have a shorted injector, I would suggest you unplug the wires from that injector so that it doesn't short out the injector driver transistor in the ECU.
Knowing that you have a shorted injector, I would suggest you unplug the wires from that injector so that it doesn't short out the injector driver transistor in the ECU.
09-21-2017, 02:05 PM
#199
Yeah, I drove my VE home about 15 miles once on only 3 injectors. I had the car sitting at my brother's place and finally had to bring it home. I had forgotten that I'd unplugged the entire rear injector bank and was puzzled why it was running so poorly. It never did die on me though the whole way. Got it home and popped the hood and had d'oh moment remembering I had the entire rear bank unplugged 
09-21-2017, 06:09 PM
#200
Member
Thread Starter
Join Date: Oct 2016
Posts: 284
its not the dead injector so much as its the orings not being fully seated into the lower intake. im worried about a fuel vapor leak/fire. since i need new injectors anyway i just ordered a vq rail and injectors for 30 bucks shipped. just couldnt pass it up.... probably gonna be a huge pain in the *** to get to work correctly but its the cheapest and will probably be the easiest way to redo the rails so they wont leak. fire is a gigantic phobia of mine so i would rather take the precaution than end up losing everything.