Turbo VG swapped stanza


 11-20-2017, 07:48 PM
#242
Member
Thread Starter

Join Date: Oct 2016
Posts: 284
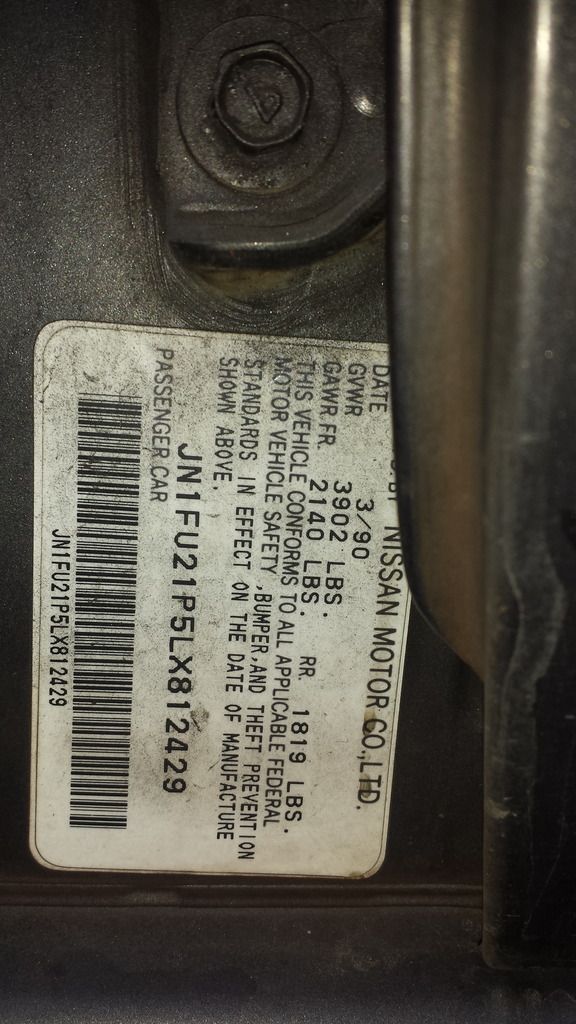
late 1989-1992. i thought i already asked but i think i was thinking of when i asked for the maxima parts. if anyone sees a stanza locally i would be eternally grateful for the lookout. reply on here or message me if you find anything. i live in 18042 btw
Last edited by Nate Boslet; 11-20-2017 at 09:00 PM.
11-21-2017, 11:46 AM
#243
Member
Thread Starter
Join Date: Oct 2016
Posts: 284
i found the exact part numbers through nissan, not sure if this will help anyone or not but you can look up the diagrams to see a picture of exactly the parts i need just in case i havent been clear enough.
the window master switch is 2540165E00
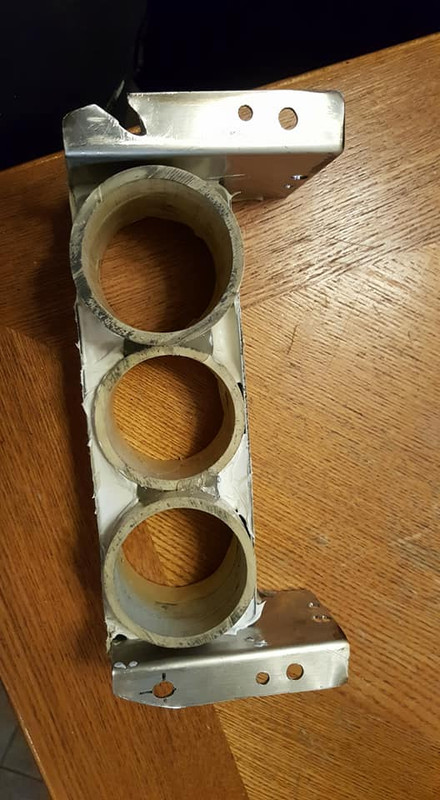
the radio brackets are 2803865E01 and 2803965E01
and the tail light is 2655465E00
i messaged the nissan facebook page and they sent me a few links for their dealership stuff but so far the prices have been, about what i expect for a brand new part for a 25 year old car, extremely expensive lol so still trying to find junkyard parts. honestly i dont even care about the condition of any of this stuff as long as it will work, im happy.
the window master switch is 2540165E00
the radio brackets are 2803865E01 and 2803965E01
and the tail light is 2655465E00
i messaged the nissan facebook page and they sent me a few links for their dealership stuff but so far the prices have been, about what i expect for a brand new part for a 25 year old car, extremely expensive lol so still trying to find junkyard parts. honestly i dont even care about the condition of any of this stuff as long as it will work, im happy.
11-21-2017, 12:37 PM
#244
Senior Member

Join Date: Apr 2007
Location: Albuquerque, NM
Posts: 1,323
are your switch's broken or just not working? they can be cleaned if they are just not working, also let me know when you are getting close to getting the MS installed I'll send you my tune to help get you started, you will have to change a bunch of the settings since I'm sequential and such but will have the settings if you want to use the factory head temp sensor and things like that
11-21-2017, 11:09 PM
#245
Member
Thread Starter
Join Date: Oct 2016
Posts: 284
are your switch's broken or just not working? they can be cleaned if they are just not working, also let me know when you are getting close to getting the MS installed I'll send you my tune to help get you started, you will have to change a bunch of the settings since I'm sequential and such but will have the settings if you want to use the factory head temp sensor and things like that
i have all of the proper GM sensors i need for the ms1 on my z im just gonna grab them off of that for now. im actually planning on swapping a vq40 into the z and possibly doing a twin turbo setup on it and probably gonna use an aem standalone on it. i keep hearing bad things about ms1 but also know many people who run it and like it, from what i learned on it so far you just have to be smart for it to work because its not intuitive at all lol ill definitely hit you up for that tune tho, how do you like MS? ever had any issues?
on another note i broke out the multimeter tonight (which i realized is a pos and i should have bought a different one) and found that when im cranking the car its not completely shutting off voltage to the one main wire i spliced into but there is a pretty substantial voltage drop from the starter that im wondering if its shutting off the ecu? is there maybe a capacitor or something that keeps the ecu seeing 12v during cranking? does the ecu need 12v to stay on or can it stay on at like 9v? im starting to run out of ideas but the current plan is just to look at the diagrams and run that wire to wherever it is supposed to be instead of trying to half *** splice it into a different wire. i was looking at the diagrams in the garage and they definitely look like that wire its spliced into should stay on during cranking (and it does) but its not keeping the ecu on. the only other thing i can think of is if there is another wire going to the ecu besides that one that needs to be feeding power or signal to keep the ecu on that is getting cut off during cranking even tho the ecu relay is on. whatever it is hopefully i will figure it out on paper tomorrow so i can go up to get the changes to the harness done on thanksgiving and get the car running before i eat lol
11-22-2017, 05:07 PM
#246
Senior Member
Join Date: Apr 2007
Location: Albuquerque, NM
Posts: 1,323
voltage drops due to starter draw, my MS shows 9v while cranking, I have been liking my MS3/MS3X, taking me a bit to get it tuned really well mainly due to tuning off data logs a little at a time, so what would take me a hour on a dyno is taking months but almost have it there just a little rich at idle yet and need to get a couple spots evened out. I thought just about use a MS1 but wanted to go sequential and be able to put coil pack on later or swap later and not have to get anything else. If you have a extra input I would hook up the head temp sensor it's nice knowing what your head temp is before it gets diluted by coolant.....
about the VQ40 so you know that it has a bell housing pattern thats not shared by any other VQ that I know of, if you look at pixs on ebay you will see that it is big and round which doesn't match any other VQ, and I don't know of a manual tranny for the VQ40 so unless you get a auto for a 2WD you don't have much for options....
about the VQ40 so you know that it has a bell housing pattern thats not shared by any other VQ that I know of, if you look at pixs on ebay you will see that it is big and round which doesn't match any other VQ, and I don't know of a manual tranny for the VQ40 so unless you get a auto for a 2WD you don't have much for options....
Last edited by vernk; 11-22-2017 at 05:13 PM.
11-22-2017, 05:47 PM
#247
Member
Thread Starter
Join Date: Oct 2016
Posts: 284
voltage drops due to starter draw, my MS shows 9v while cranking, I have been liking my MS3/MS3X, taking me a bit to get it tuned really well mainly due to tuning off data logs a little at a time, so what would take me a hour on a dyno is taking months but almost have it there just a little rich at idle yet and need to get a couple spots evened out. I thought just about use a MS1 but wanted to go sequential and be able to put coil pack on later or swap later and not have to get anything else. If you have a extra input I would hook up the head temp sensor it's nice knowing what your head temp is before it gets diluted by coolant.....
about the VQ40 so you know that it has a bell housing pattern thats not shared by any other VQ that I know of, if you look at pixs on ebay you will see that it is big and round which doesn't match any other VQ, and I don't know of a manual tranny for the VQ40 so unless you get a auto for a 2WD you don't have much for options....
about the VQ40 so you know that it has a bell housing pattern thats not shared by any other VQ that I know of, if you look at pixs on ebay you will see that it is big and round which doesn't match any other VQ, and I don't know of a manual tranny for the VQ40 so unless you get a auto for a 2WD you don't have much for options....
ive heard of people having issues with the software crashing over and over which has happened to me before but its not like a habitual issue, i put a bluetooth adaptor in mine and then used an app with a tablet..... dont do that lol the app sucks. it became virtually impossible to tune or change settings, pages randomly stop loading or change on their own, it just became a nightmare.
i hadnt thought about the trans for the vq, my main intention was to run a g35 trans but if i needed to make an adaptor plate i may go t56 but considering how cheap i am and the availability of parts and aftermarket i will probably end up just going vq35 or 37. definitely dont want an auto unless im making disgusting power to justify it... maybe a powerglide.... anyway this is all a bit off topic, the update today is that i have found where these wires SHOULD go and getting them there should be relatively easy. im gonna have to cut up a bunch of the harness but this whole harness is temporary anyway so i dont really mind how screwed up it gets. the G/B and brown or whatever it was were originally going to the inhibitor switch on the transmission and the transmission put power to them both from the fuse panel, im going to try to find that wire that brought power to the unhibitor switch and then run it directly into those two wires, that should make everything as if im just in park 100% of the time as far as the wiring is concerned. if that wont work ill just run the wires to the fuse panel itself into a fuse that is otherwise not in use and stays on during cranking but ideally ill be successful at plan A. we will see tomorrow.
11-24-2017, 02:59 PM
#248
Senior Member
Join Date: Apr 2007
Location: Albuquerque, NM
Posts: 1,323
I have bluetooth for mine, and app for my phone, but switched back to the cable for better data logging right after start and such till I get her well tuned then I'll go back to the bluetooth, I haven't had any crashes but also running lap top using usb plug for right now.
11-25-2017, 09:39 PM
#249
Member
Thread Starter
Join Date: Oct 2016
Posts: 284
https://www.youtube.com/watch?v=Kyfl...ature=youtu.be
when the key is off, nothing is on = good
when the key is on, the ecu turns on and the fuel pump primes = good
when the key is turned to START, the injctors fire and plugs spark and the engine starts = good
however as soon as the key is returned to on after cranking the ecu shuts off along with the signal to the fuel pump and the car dies from fuel starvation. i checked all of my grounds and they are all good, i went through all of the 12v input pins on the ecu such as the power supply, cranking signal, ignition switch and neutral switch pins, all appear to be correct. i am suspicious of one of these pins losing power once the car is running somehow but im not sure from where or how. im going to run some codes and then run through all of the power circuits again.
if these problems with the stock ecu continue i might just take the L and do the megasquirt install sooner rather than later. im hoping i wont have to since ive been having problems with my welder and havent been able to make any money all week. not sure what im going to do yet but hopefully things fall into place soon.
11-26-2017, 11:25 AM
#250

A while back the discussion was that the ECCS relay was not getting power. You did some some wiring changes after I suggested connecting the ECCS relay to pin 2 of the ignition switch. Is the ECCS relay staying energized or is it dropping out? Could the ignition switch have gone bad? Could it be that your wire connection has gone bad?
11-26-2017, 02:53 PM
#251
Member
Thread Starter
Join Date: Oct 2016
Posts: 284
A while back the discussion was that the ECCS relay was not getting power. You did some some wiring changes after I suggested connecting the ECCS relay to pin 2 of the ignition switch. Is the ECCS relay staying energized or is it dropping out? Could the ignition switch have gone bad? Could it be that your wire connection has gone bad?
i dont feel like the symptoms point to the ignition switch, it seems like all of the ignition switch functions are working as they should, i am more inclined to it being a relay or something wired incorrectly, i just have to find it. the eccs relay should be energized since the wire its getting its signal from isnt dropping voltage at any time after key on, plus there is supposed to be a delay for the ecu to shut off so even if the eccs relay lost power the ecu stays on for a few seconds before shutting down, thats not what im seeing, the ecu just drops instantly as soon as the car is running. the thing that is messing with me is that when the starter is disconnected the ecu stays on in START, so something must be telling the ecu to turn off besides the eccs relay. i think before i check for codes tonight im going to go through the wires to the pins that need to be energized to keep the ecu on and look through them all to see what might be dropping off. something has to be wrong.
11-28-2017, 02:15 PM
#253
Member
Thread Starter
Join Date: Oct 2016
Posts: 284
11-28-2017, 03:15 PM
#254
Member
Thread Starter
Join Date: Oct 2016
Posts: 284
https://www.youtube.com/watch?v=eWKt...ature=youtu.be
the car starts and runs consistently (like ****) so i can start dialing in the idle once i get some coolant in it and possibly take it for a spin. i put the car in gear and rolled it back and forth in its space earlier today and everything feels fine, no clunks or grinding at all. once i know that everything is working the way it should and i burn off all of the oil from the exhaust im going to get started on installing the MS1. i originally was going to buy a relay box and some wire from diyautotune but i decided theres really nothing wrong with the harness i have so what ill do is chop off the ecu, wire up what i need with the harness as it sits, get the car running and then pull the harness out and strip whatever is left over from the harness out and shorten the wires that are extra long for no reason. ill try to do some tucking and stuff so hopefully the engine bay will clean up a little more and then i can start thinking about my turbo setup and get started on my headers. ive been thinking about getting some NA g35 headers from ebay and seeing if i can squeeze them in. they are only 60 bucks so if they dont work out then ill at least be able to use the flanges for my Z.
the car starts and runs consistently (like ****) so i can start dialing in the idle once i get some coolant in it and possibly take it for a spin. i put the car in gear and rolled it back and forth in its space earlier today and everything feels fine, no clunks or grinding at all. once i know that everything is working the way it should and i burn off all of the oil from the exhaust im going to get started on installing the MS1. i originally was going to buy a relay box and some wire from diyautotune but i decided theres really nothing wrong with the harness i have so what ill do is chop off the ecu, wire up what i need with the harness as it sits, get the car running and then pull the harness out and strip whatever is left over from the harness out and shorten the wires that are extra long for no reason. ill try to do some tucking and stuff so hopefully the engine bay will clean up a little more and then i can start thinking about my turbo setup and get started on my headers. ive been thinking about getting some NA g35 headers from ebay and seeing if i can squeeze them in. they are only 60 bucks so if they dont work out then ill at least be able to use the flanges for my Z.
12-01-2017, 09:48 PM
#255
Member
Thread Starter
Join Date: Oct 2016
Posts: 284
12-04-2017, 12:23 AM
#256
Member
Thread Starter
Join Date: Oct 2016
Posts: 284
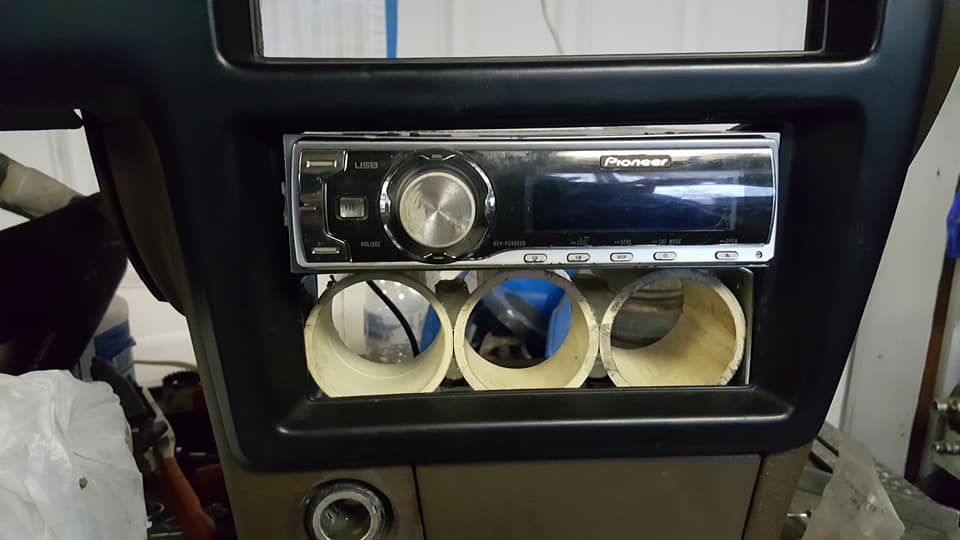
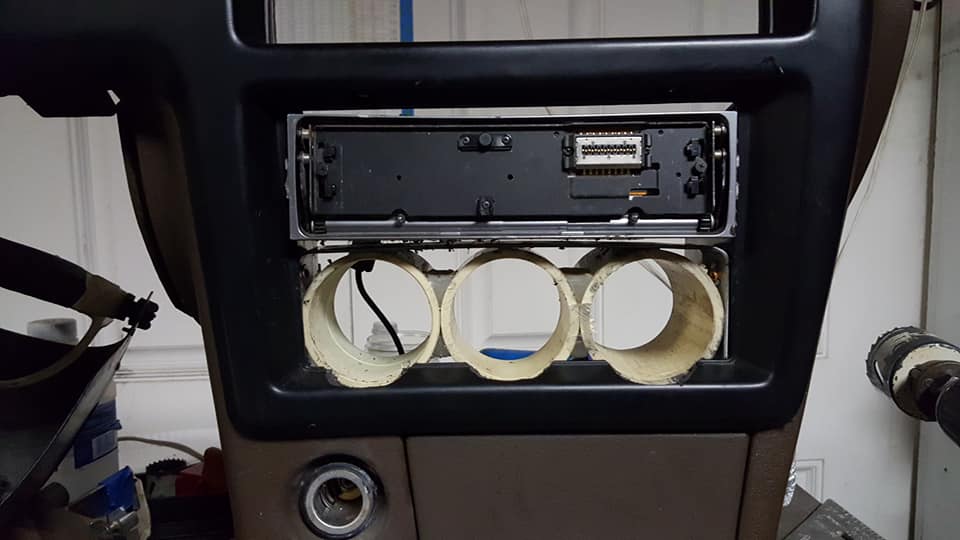
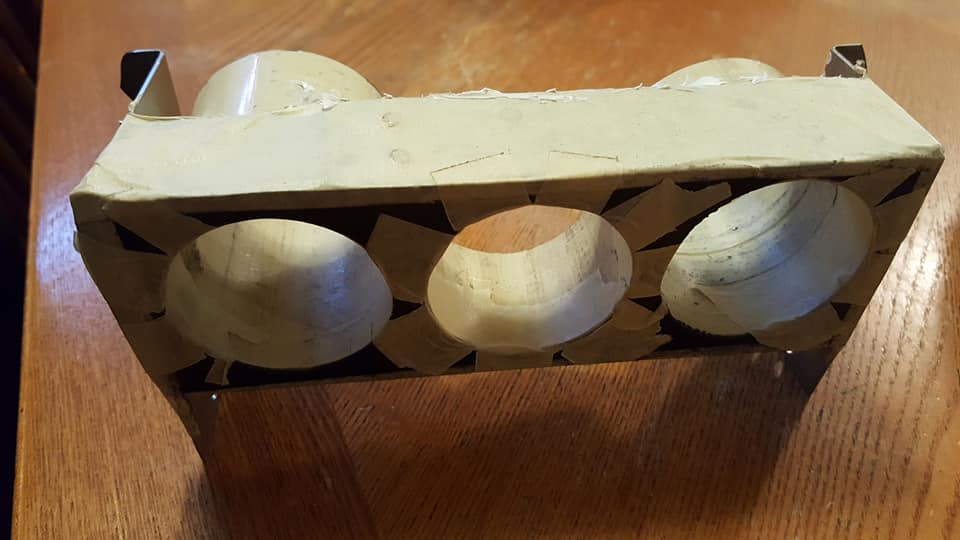
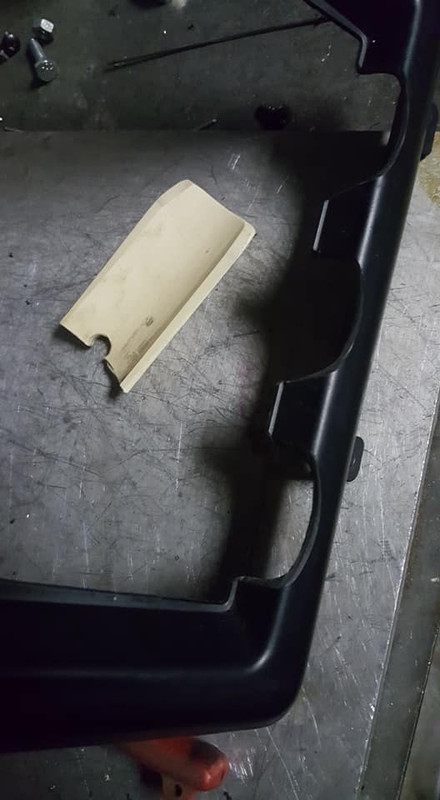
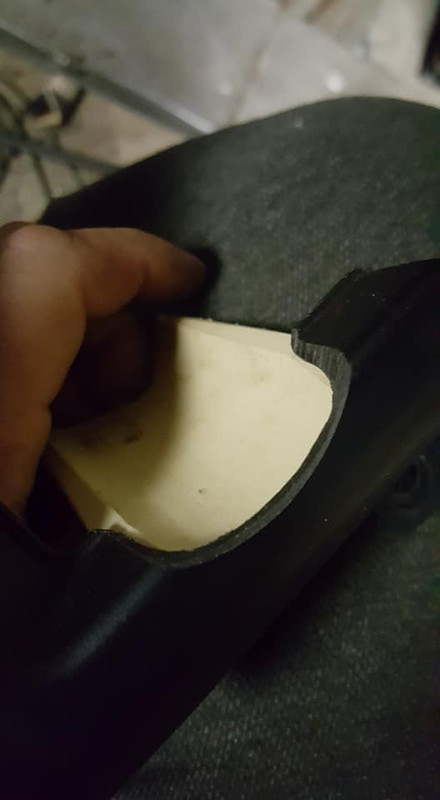
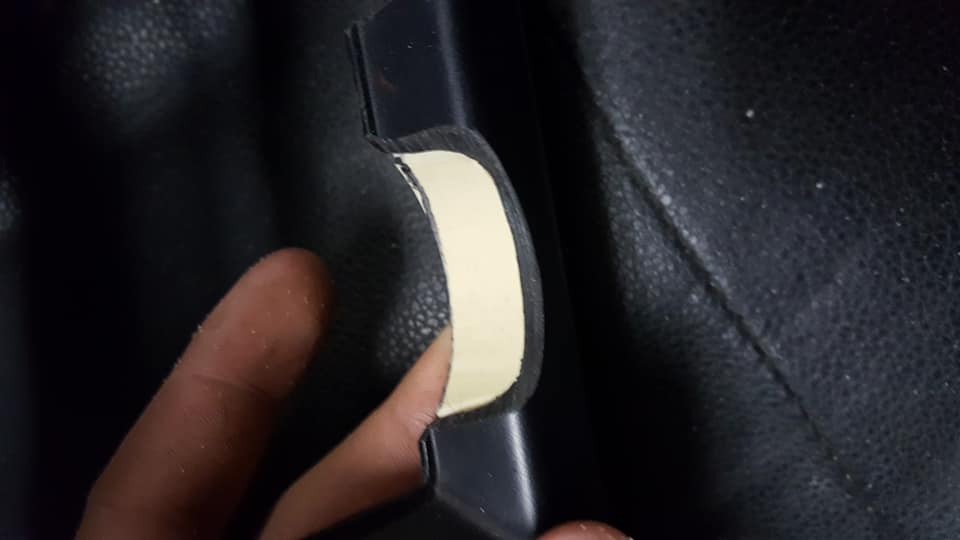
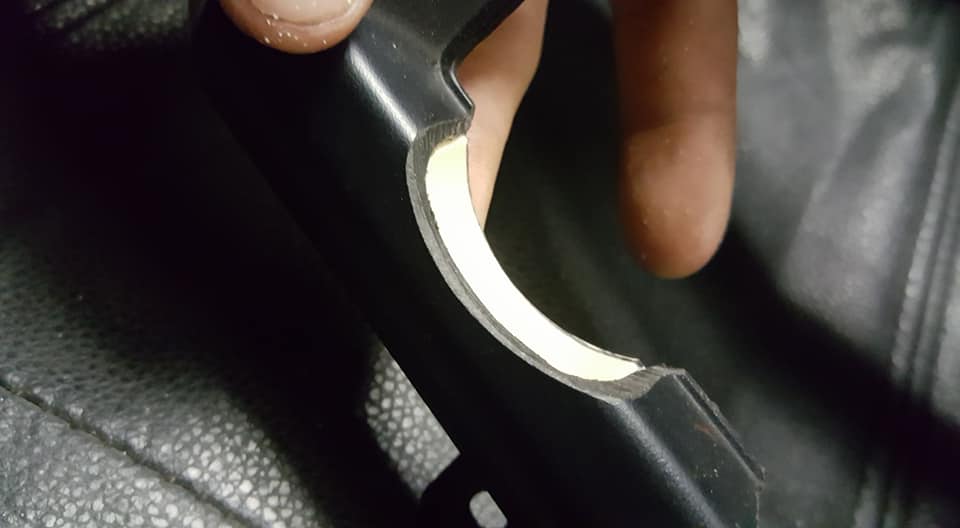
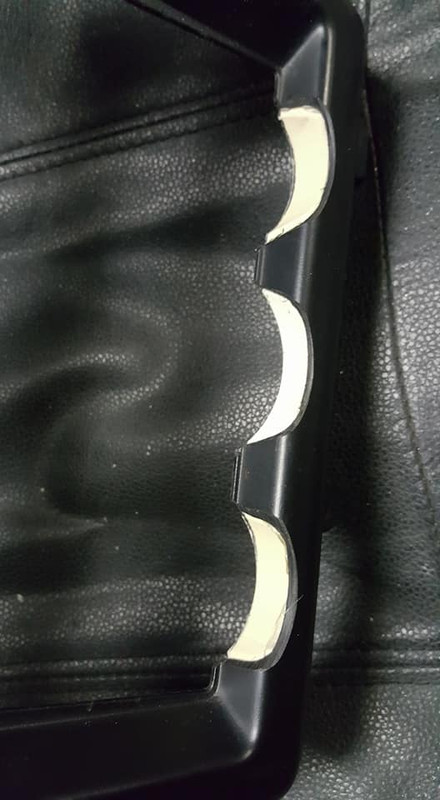
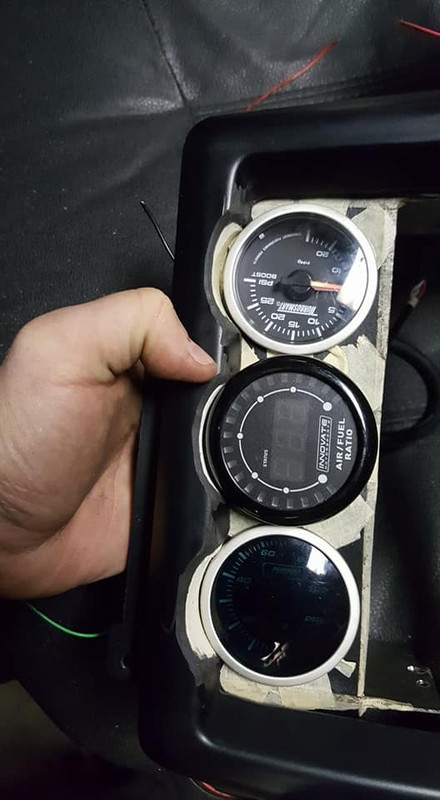
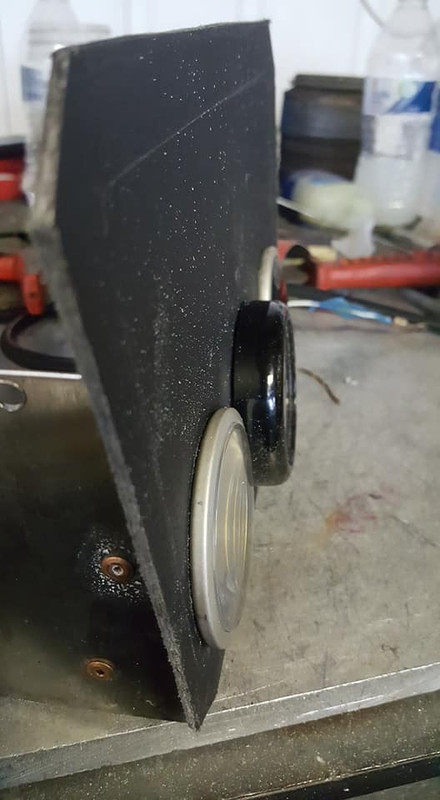
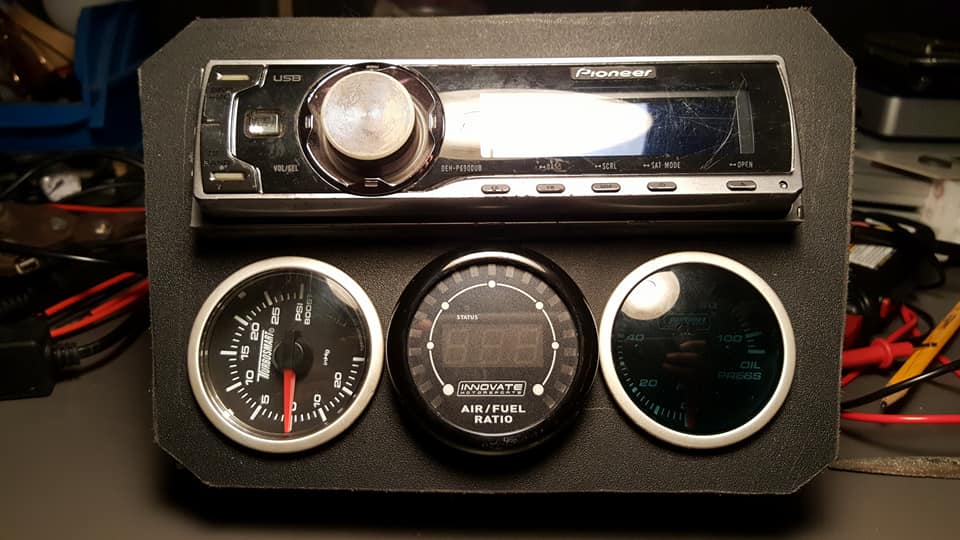
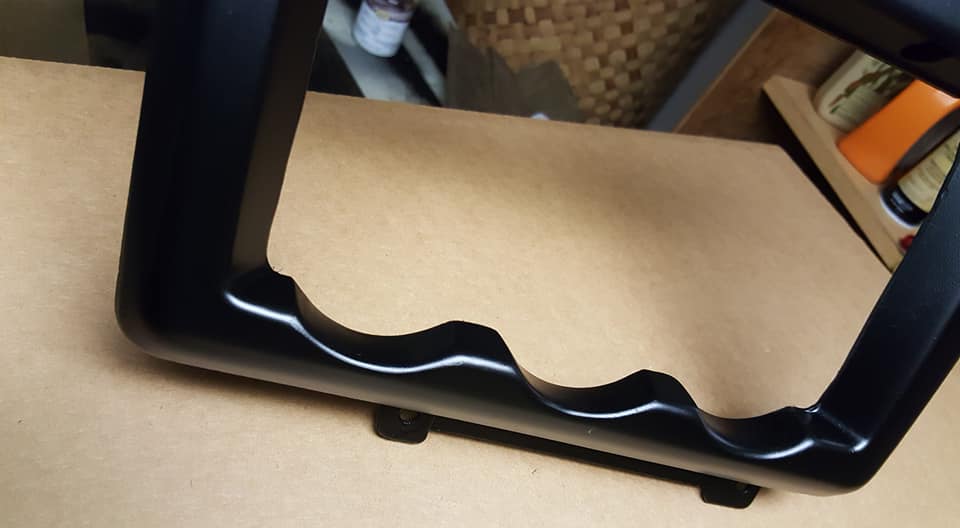
working on the gauge pod some more. this trim was going to be slightly in the way of the gauges, i probably could have left it alone but i cared enough to cut it because its something im gonna see literally every time i drive the car so i wanted to put some effort into making it look good.
of course my phone died at the very beginning of this process so i only got one picture of what they looked like after running a small holesaw through the tubes into the trim. this didnt really look right and the gauges still completely interfered with the trim so i had to figure out a way to cut away material that was bigger than the pvc tubes with a hole saw that needs to be anchored in material centric to what its cutting. what i did was take some round stock aluminum i had lying around and used my lathe to drill a hole in the center of it the same size as the pilot drill on my whole saw and then slid the aluminum plug into the pvc so i could then cut the trim. it worked well enough to get all of the reliefs cut enough to not interfere with the gauges.
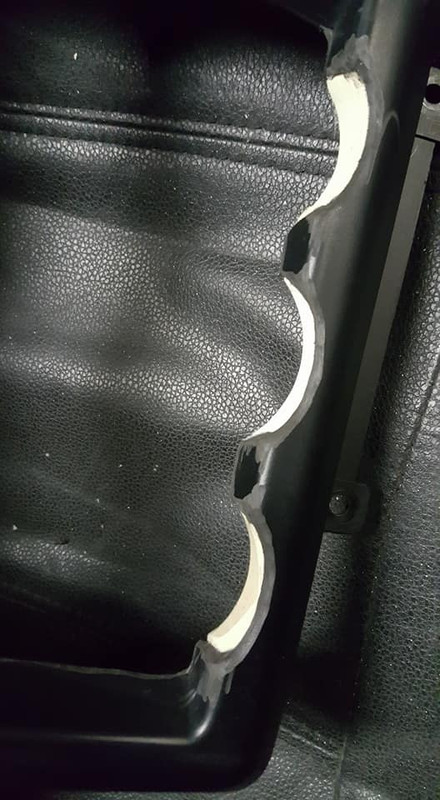
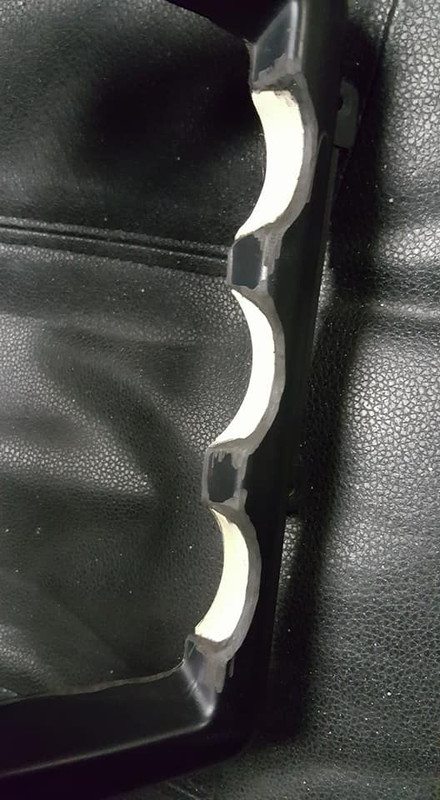
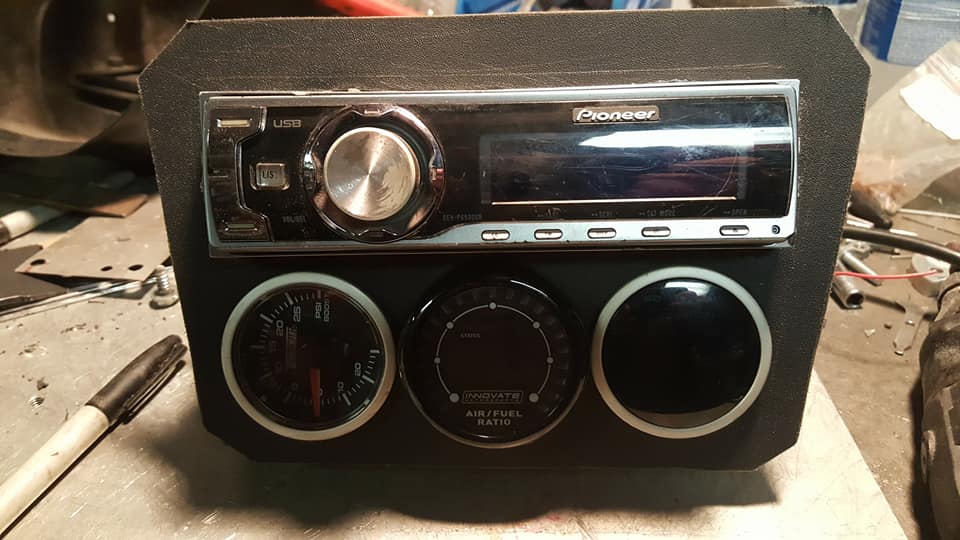
i wanted to fill in the space around the gauges with something to help it blend in with the rest of the interior better instead of just be a gaping hole/random building materials so i used a black binder cover that i make gaskets out of. i taped around the edges of everything and then filled the gaps with silicone. i meant to use industrial adhesive but i forgot i switched them out so i used the silicone by mistake lol im sure it will do just as well, though i may have to take the binder cover piece off and re-glue it on later if it peels off, im not sure the silicone will bond very well to that.
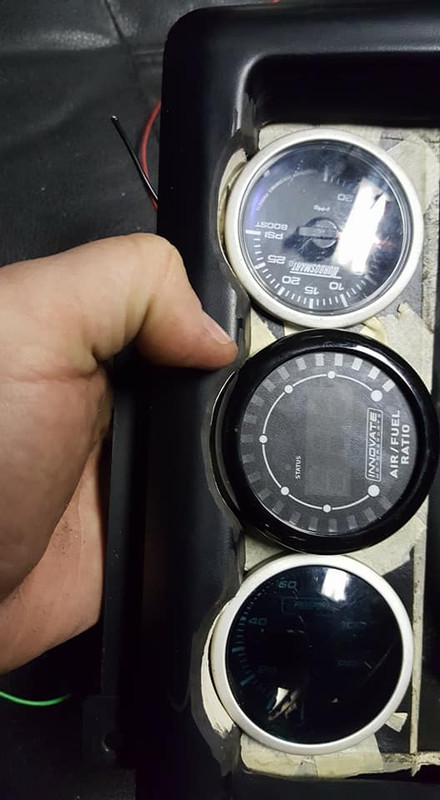
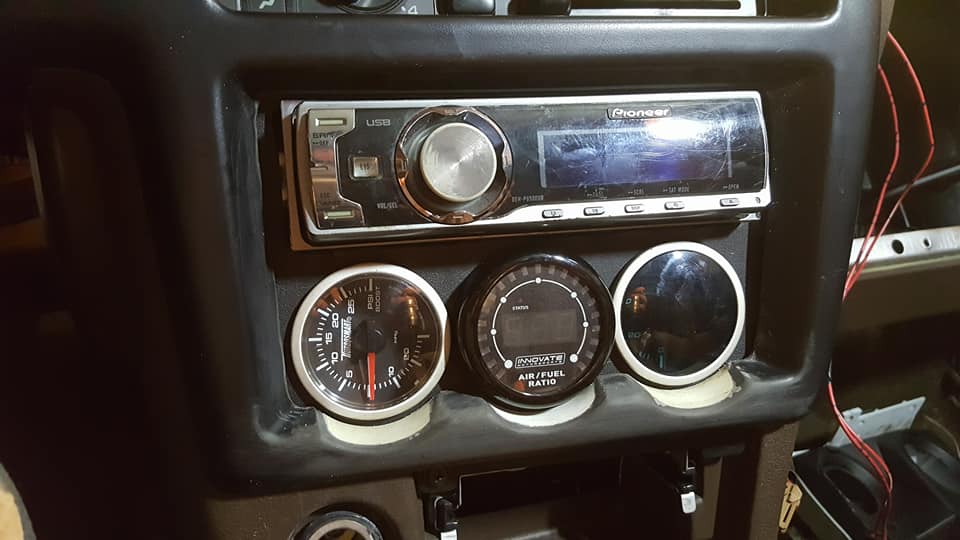
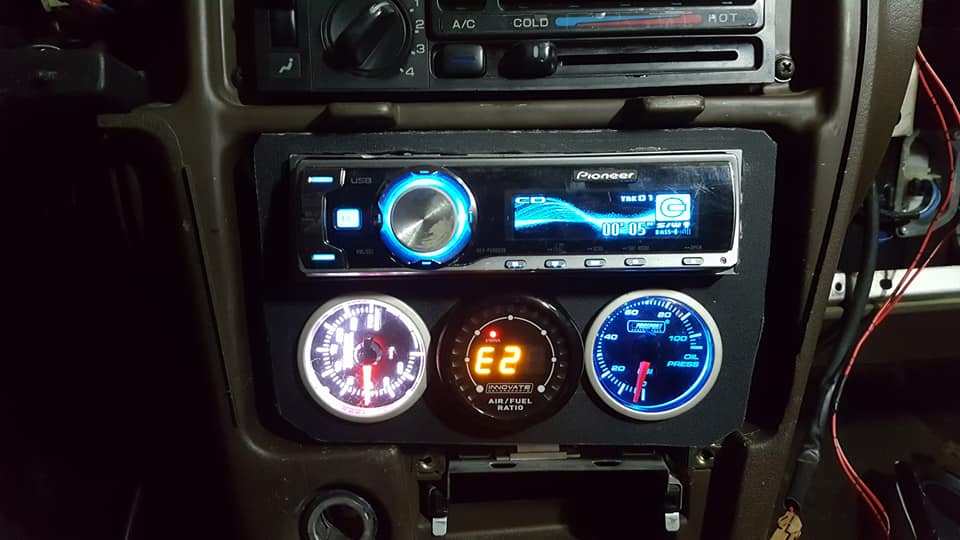
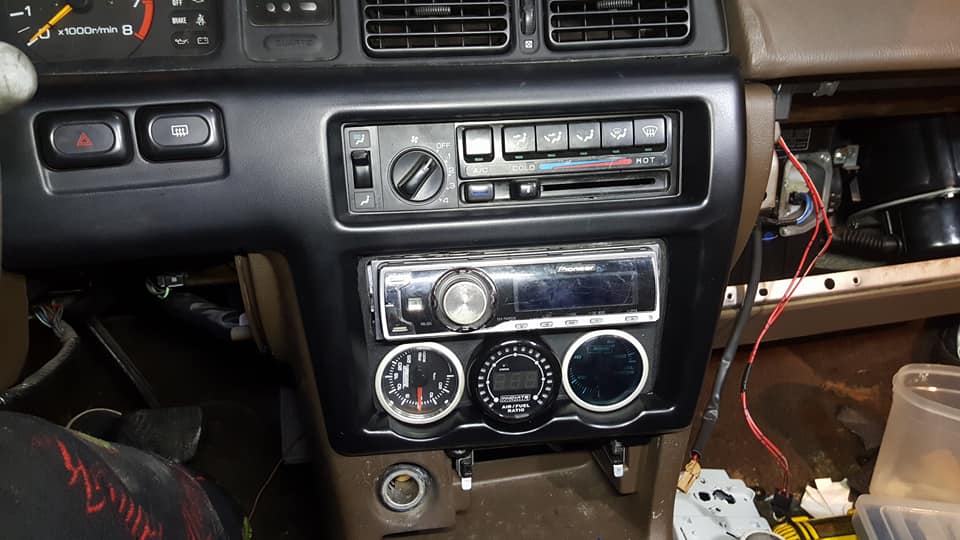
heres the test fit in the car. the tape is still on the gauge pod thing because the silicone still isnt fully cured. everything lines up well, im pretty happy with the way it came out considering i had to make all of it from scratch. the fitup of the radio could be better but you cant really tell with everything put in the car.
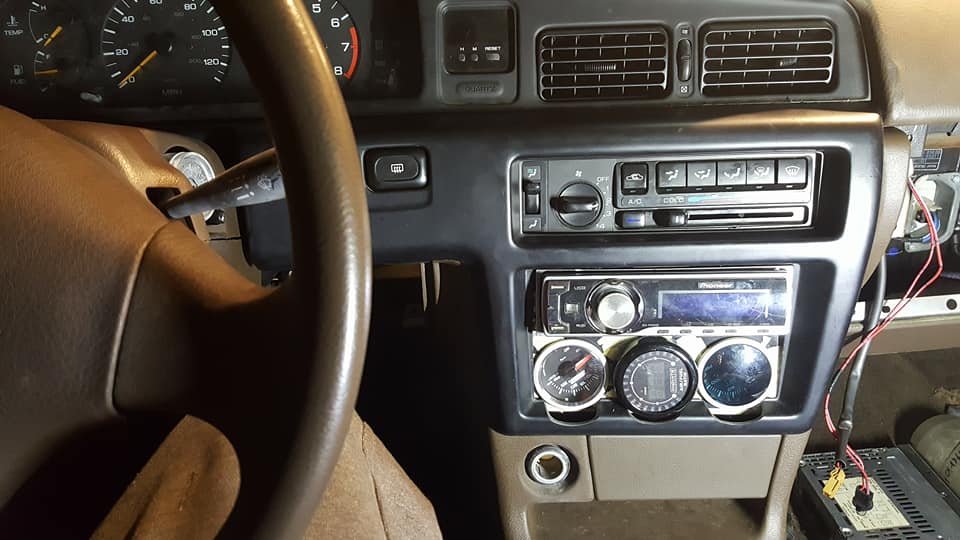
obviously the gauges wont be oriented this way for the final installation lol
so im gonna work on getting the holes in the trim filled in and smoothed out and then i have to move onto wiring everything in. ive decided that im going to try to drive the car on the stock ecu for now. im going to try to save up some money so i can get the turbo headers started asap because the headers leak like crazy and i dont like that but i really want to be able to legally drive the car down to my house for christmas. probably sometime in january ill get started on designing and building the turbo headers and getting the MS1 installed (unless i cant drive the car without doing that earlier, not sure if that will be the case or not) and all of that fun stuff. honestly i cant stop thinking about all of the ridiculous stuff i want to do with the turbo kit but i think its probably better to make sure there arent any issues with the drivetrain before i start putting boost into it.
of course my phone died at the very beginning of this process so i only got one picture of what they looked like after running a small holesaw through the tubes into the trim. this didnt really look right and the gauges still completely interfered with the trim so i had to figure out a way to cut away material that was bigger than the pvc tubes with a hole saw that needs to be anchored in material centric to what its cutting. what i did was take some round stock aluminum i had lying around and used my lathe to drill a hole in the center of it the same size as the pilot drill on my whole saw and then slid the aluminum plug into the pvc so i could then cut the trim. it worked well enough to get all of the reliefs cut enough to not interfere with the gauges.
i wanted to fill in the space around the gauges with something to help it blend in with the rest of the interior better instead of just be a gaping hole/random building materials so i used a black binder cover that i make gaskets out of. i taped around the edges of everything and then filled the gaps with silicone. i meant to use industrial adhesive but i forgot i switched them out so i used the silicone by mistake lol im sure it will do just as well, though i may have to take the binder cover piece off and re-glue it on later if it peels off, im not sure the silicone will bond very well to that.
heres the test fit in the car. the tape is still on the gauge pod thing because the silicone still isnt fully cured. everything lines up well, im pretty happy with the way it came out considering i had to make all of it from scratch. the fitup of the radio could be better but you cant really tell with everything put in the car.
obviously the gauges wont be oriented this way for the final installation lol
so im gonna work on getting the holes in the trim filled in and smoothed out and then i have to move onto wiring everything in. ive decided that im going to try to drive the car on the stock ecu for now. im going to try to save up some money so i can get the turbo headers started asap because the headers leak like crazy and i dont like that but i really want to be able to legally drive the car down to my house for christmas. probably sometime in january ill get started on designing and building the turbo headers and getting the MS1 installed (unless i cant drive the car without doing that earlier, not sure if that will be the case or not) and all of that fun stuff. honestly i cant stop thinking about all of the ridiculous stuff i want to do with the turbo kit but i think its probably better to make sure there arent any issues with the drivetrain before i start putting boost into it.
Last edited by Nate Boslet; 05-18-2018 at 11:51 AM.

 12-10-2017, 07:07 PM
#258
Member
Thread Starter
Join Date: Oct 2016
Posts: 284
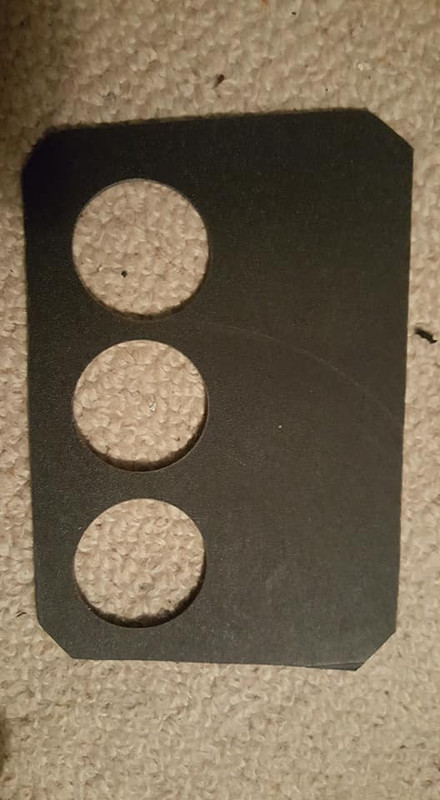
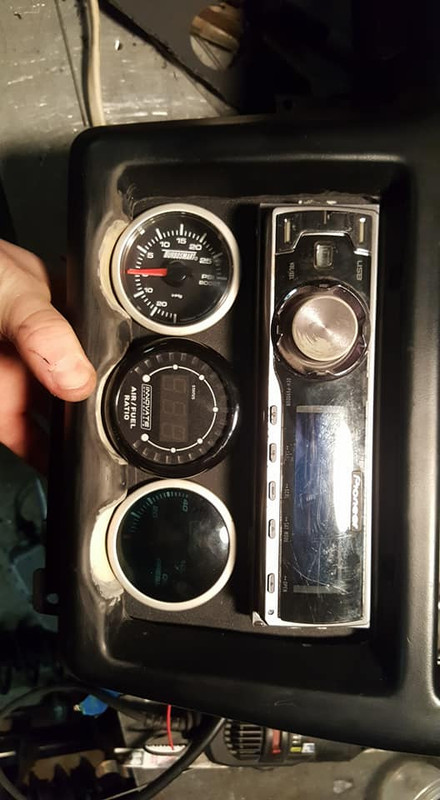
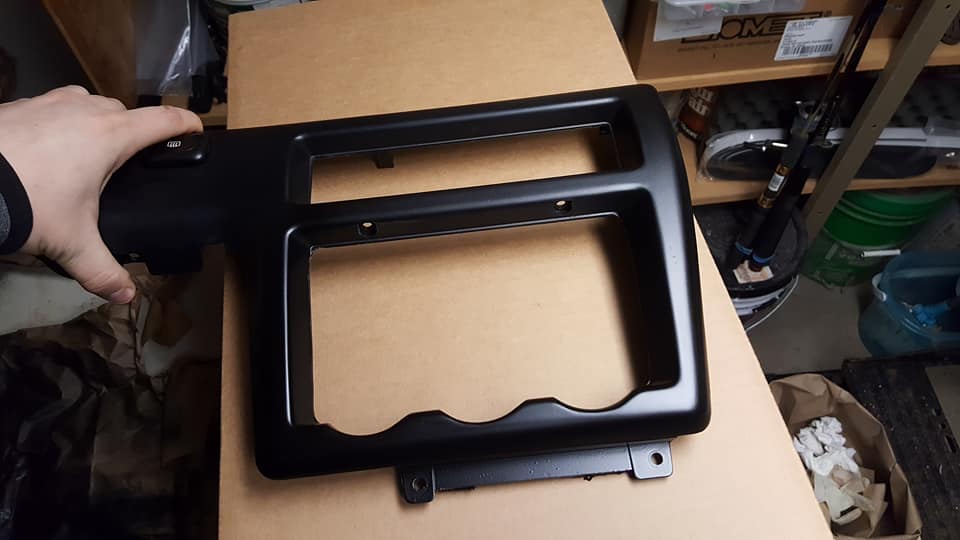
i found this binder cover that was made of 1/8 inch plastic to make a cover piece for my gauges so i just cut out a basic shape that would fit behind my dash trim and then fit the gauges. i had to trace the holes and then find the centers and cut them out with a hole saw so the holes were slightly off center at first but i purposely cut them out slightly too small so i could open them up with a dremel tool.
once i had the middle gauge fit in i could use it to locate the trim piece to help line up the other two holes for the best possible fit.
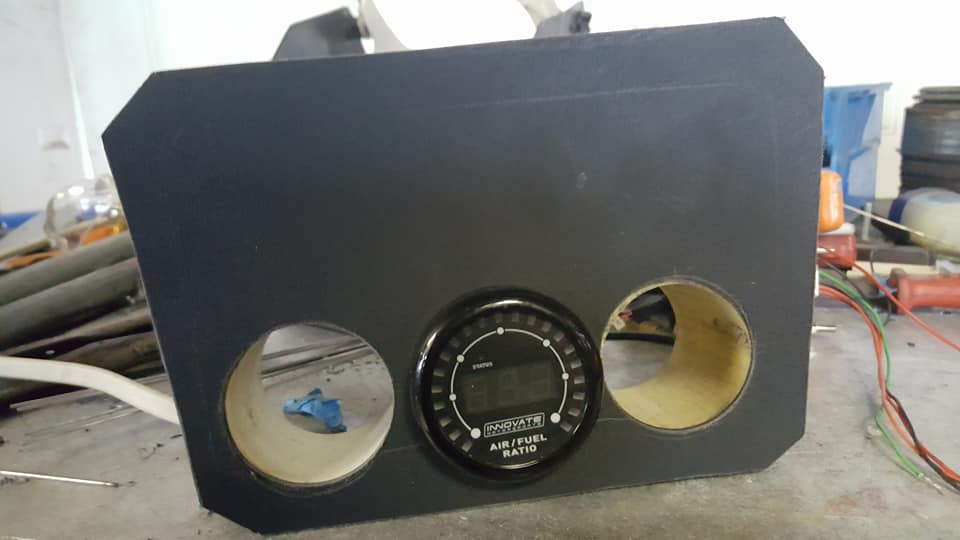
then i put the second gauge in so i could open up the final gauge hole.
next i cut out the hole for the head unit, i heated up a razor blade with a propane torch since i dont have a hot-knife. the hole that left was absolutely horrific looking but fortunately was too small so again i opened it up with the dremel which let me clean up the edges quite a bit. its still pretty bad but you cant really tell with everything assembled and im gonna try to find a trim piece to go around the head unit there to cover it up anyway but idk if i have one or if it will fit.
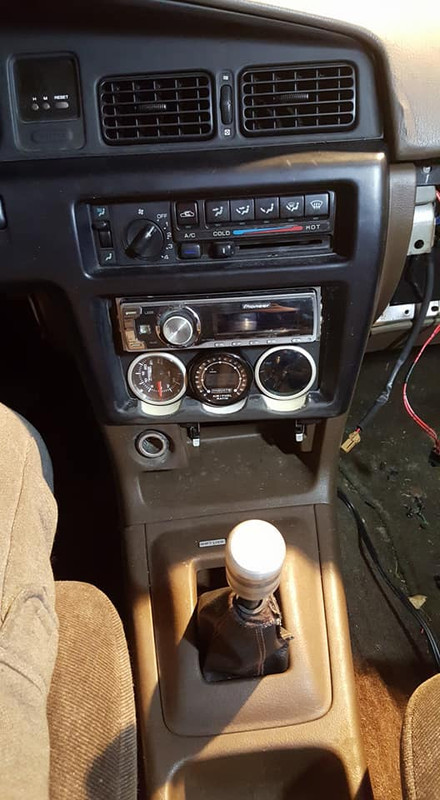
the dash trim looks like its still gonna fit after i added the jb weld and sanded it back. it still needs some sanding and paint but im gonna make sure it fits with the filler pieces i added before i put too much time into it.
heres the gauge wiring, i just put all of the positives and grounds together and then ran the oil sender wire and the afr output into their own wires so i only ended up needing a 4 pin plug. i was worried about ground looping but apparently if i ground the ecu and the gauge and everything at the same place i should be fine. everything is gonna go to the engine since thats apparently the ideal place to put a ground.
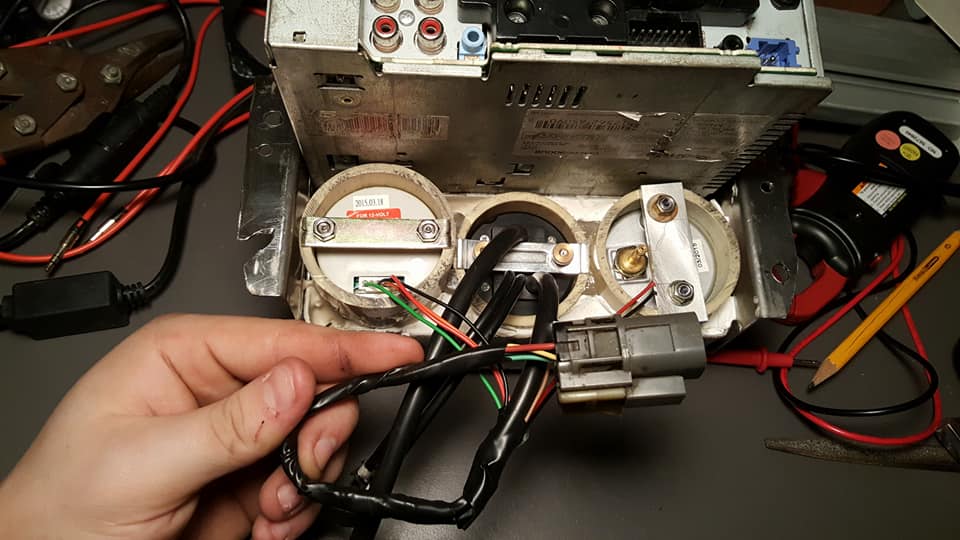
so all of this big chunk of stuff is basically done, all i have to do is wire in the other side of the plug and the headunit plug and its done.
i tried testing the oil pressure gauge the other night and it pegged at 100psi while the car was off, it didnt do its little start up sequence either so im not sure what that was all about but im hoping once its wired in correctly it will work again, if not ill have to send it out or get a new one or something. i filled the car with coolant and it doesnt leak or anything. it warmed up a little bit but the water temp gauge wasnt working and i realized i never wired it back in since it wasnt in the maxima harness for some reason but its only one wire so im sure that will only take a second. i think i know why the fuel pump isnt working right so im going to try to fix that as well. i got the car registered and insured last week so i can drive it on the street and not worry about it getting impounded. once its all clear im gonna get it inspected and daily it for a while. im gonna probably post a few videos of stuff working and me driving the car soon.
i still need a speed sensor. if anyone has one or can get one that would be sick. also the window switch....
once i had the middle gauge fit in i could use it to locate the trim piece to help line up the other two holes for the best possible fit.
then i put the second gauge in so i could open up the final gauge hole.
next i cut out the hole for the head unit, i heated up a razor blade with a propane torch since i dont have a hot-knife. the hole that left was absolutely horrific looking but fortunately was too small so again i opened it up with the dremel which let me clean up the edges quite a bit. its still pretty bad but you cant really tell with everything assembled and im gonna try to find a trim piece to go around the head unit there to cover it up anyway but idk if i have one or if it will fit.
the dash trim looks like its still gonna fit after i added the jb weld and sanded it back. it still needs some sanding and paint but im gonna make sure it fits with the filler pieces i added before i put too much time into it.
heres the gauge wiring, i just put all of the positives and grounds together and then ran the oil sender wire and the afr output into their own wires so i only ended up needing a 4 pin plug. i was worried about ground looping but apparently if i ground the ecu and the gauge and everything at the same place i should be fine. everything is gonna go to the engine since thats apparently the ideal place to put a ground.
so all of this big chunk of stuff is basically done, all i have to do is wire in the other side of the plug and the headunit plug and its done.
i tried testing the oil pressure gauge the other night and it pegged at 100psi while the car was off, it didnt do its little start up sequence either so im not sure what that was all about but im hoping once its wired in correctly it will work again, if not ill have to send it out or get a new one or something. i filled the car with coolant and it doesnt leak or anything. it warmed up a little bit but the water temp gauge wasnt working and i realized i never wired it back in since it wasnt in the maxima harness for some reason but its only one wire so im sure that will only take a second. i think i know why the fuel pump isnt working right so im going to try to fix that as well. i got the car registered and insured last week so i can drive it on the street and not worry about it getting impounded. once its all clear im gonna get it inspected and daily it for a while. im gonna probably post a few videos of stuff working and me driving the car soon.
i still need a speed sensor. if anyone has one or can get one that would be sick. also the window switch....
Last edited by Nate Boslet; 05-18-2018 at 11:53 AM.
12-10-2017, 08:18 PM
#259
The gauge cluster looks good! congrats.
The wire for the temperature sensor in the engine is black, green stripe. There should be one, it wasn't some sort of option. Maybe it got torn off.
I checked the junk yards in the Dallas/Ft Worth area and none have a Stanza.
The wire for the temperature sensor in the engine is black, green stripe. There should be one, it wasn't some sort of option. Maybe it got torn off.
I checked the junk yards in the Dallas/Ft Worth area and none have a Stanza.
12-10-2017, 11:04 PM
#260
Member
Thread Starter
Join Date: Oct 2016
Posts: 284
********this site has diagrams i have not seen anywhere else. if you ever need to find diagrams, this is an excellent resource. i found it through some dude on youtube***********
so anyway all i have to do is repin one wire in the 10 pin plug (F51) under my dash and run a wire to the spade connector and my water temp gauge will/should work again. its actually a L/B wire from the cluster, im assuming it would be L/B up to the sensor as well but keep in mind this is a stanza circuit not a maxima one so the wire colors are likely different.
as for the stanza parts, i have been having the same luck. i swear i had no idea this car was so heckin rare. im definitely going to have to jump the window switch to get the one window all the way up so i dont have stuff getting in the car all the time.
12-11-2017, 03:24 PM
#261
I have been using that BBB Industries site to look up info, mainly wiring diagrams and service bulletins. I have several other links that all do the same but this one is the most efficient. I guess this is the "back door" link because you don't have to sign up for it.
http://bbbindustries.com/free_tsb.html
(there is an underscore in free_tsb)
There is no separate URL for wiring diagrams,
you click on the link for wiring diagrams.
If you want actual Nissan service manuals, go to:
http://www.nicoclub.com/nissan-service-manuals
For the temp gauge thermal transducer, the maxima wire harness uses a B/G wire from the sensor to the gauge. If you find a L/B wire in the Maxima harness, it is not for the temperature gauge.
For the window, the way the motor works is fairly simple. There are 2 wires to the motor, connect them to 12 volts and the motor turns one way. Reverse the polarity and the motor turns the other way.
Last edited by DennisMik; 12-11-2017 at 03:32 PM.
12-12-2017, 03:55 PM
#263
Member
Thread Starter
Join Date: Oct 2016
Posts: 284
I have been using that BBB Industries site to look up info, mainly wiring diagrams and service bulletins. I have several other links that all do the same but this one is the most efficient. I guess this is the "back door" link because you don't have to sign up for it.
http://bbbindustries.com/free_tsb.html
(there is an underscore in free_tsb)
There is no separate URL for wiring diagrams,
you click on the link for wiring diagrams.
If you want actual Nissan service manuals, go to:
http://www.nicoclub.com/nissan-service-manuals
For the temp gauge thermal transducer, the maxima wire harness uses a B/G wire from the sensor to the gauge. If you find a L/B wire in the Maxima harness, it is not for the temperature gauge.
For the window, the way the motor works is fairly simple. There are 2 wires to the motor, connect them to 12 volts and the motor turns one way. Reverse the polarity and the motor turns the other way.
http://bbbindustries.com/free_tsb.html
(there is an underscore in free_tsb)
There is no separate URL for wiring diagrams,
you click on the link for wiring diagrams.
If you want actual Nissan service manuals, go to:
http://www.nicoclub.com/nissan-service-manuals
For the temp gauge thermal transducer, the maxima wire harness uses a B/G wire from the sensor to the gauge. If you find a L/B wire in the Maxima harness, it is not for the temperature gauge.
For the window, the way the motor works is fairly simple. There are 2 wires to the motor, connect them to 12 volts and the motor turns one way. Reverse the polarity and the motor turns the other way.
im saying when i thinned out the harness like 6 months ago or whenever, i cut that wire completely out of the harness already so i had to run a new one. i was working on the car last night and got the fuel pump issue sorted out, now the pump primes and runs while the engine does exactly the way it should, i had to basically bypass the safety relay circuit and run the 12v output to the stanza fuel pump relay. im not sure why i didnt do it that way to begin with, i think i didnt have the ecu pinout yet when i did that circuit. anyway im gonna try to finish up the wiring for the gauges and the water temp gauge tonight then ill be moving the car around in the garage, i might just take it around the block...
12-13-2017, 01:28 AM
#264
Member
Thread Starter
Join Date: Oct 2016
Posts: 284
it was so cold in my shop my phone told me it couldnt charge so i had to use a heat gun to warm it up lol i did some more sanding on the dash trim at home and test fitted it again and its looking pretty good. i still need to clearance the back of the rounded parts so it can sit flush against the rest of the dash, im gonna do that once the stanza is on the road so i can do it at home.
i think im gonna do something about that shift boot...
i got the gauges all wired up.
got the fender wiring tucked away.
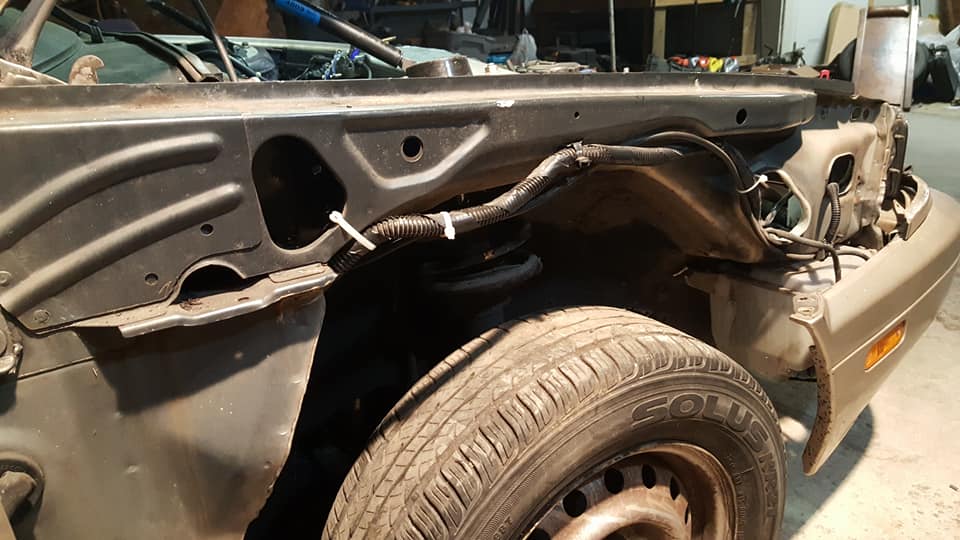
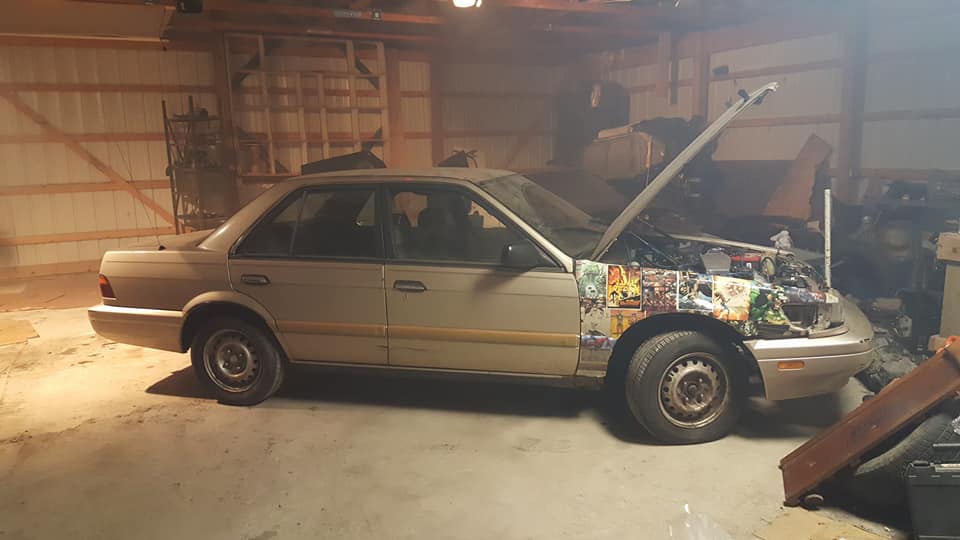
i cleaned up and finalized all the wiring and put the fender on so i could try to move the car around the garage a little to listen for any noises or anything. im hesitant to actually fully leave the garage for 2 reasons, 1. if i have an issue the entrance to the garage is really steep and theres absolutely no way i could push the car back in and 2 if the car starts dumping fluids everywhere i wont be able to tell in the grass. speaking of dumping oil.....
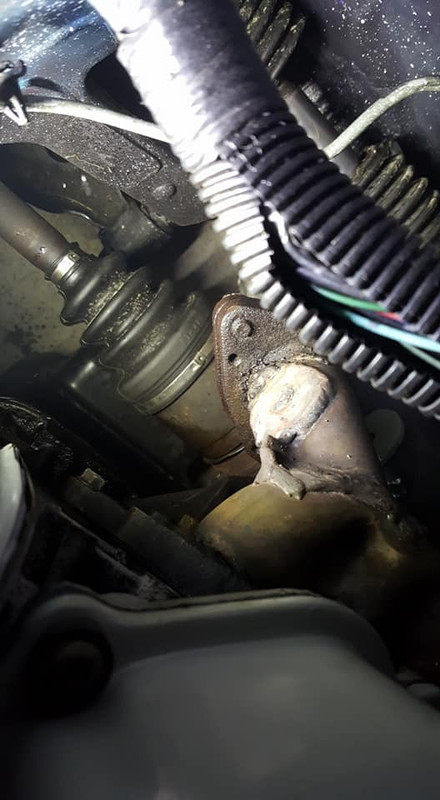
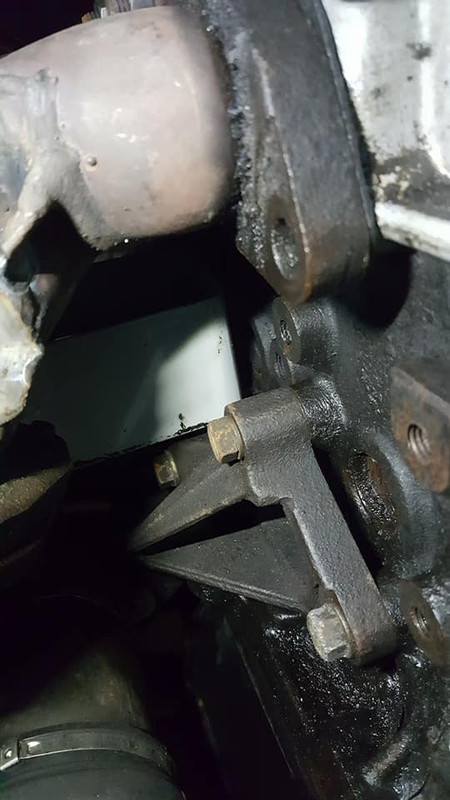
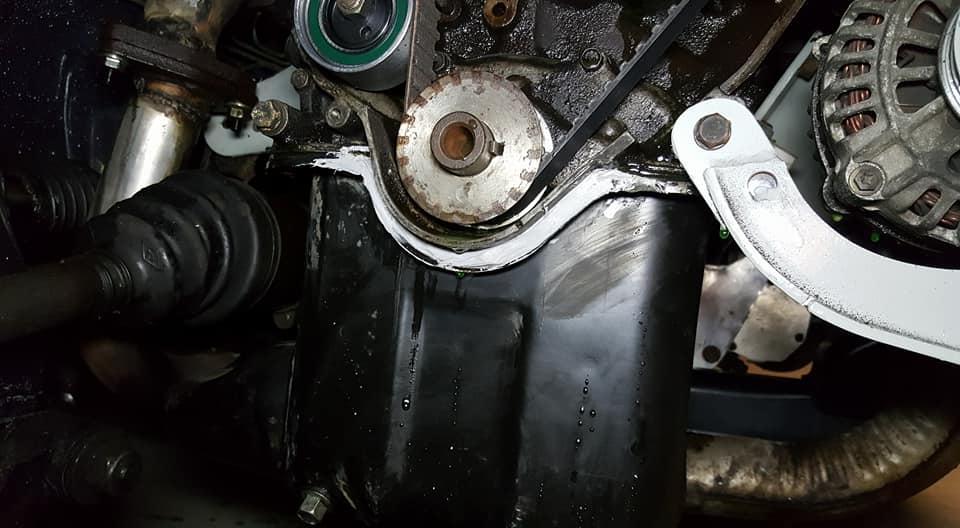
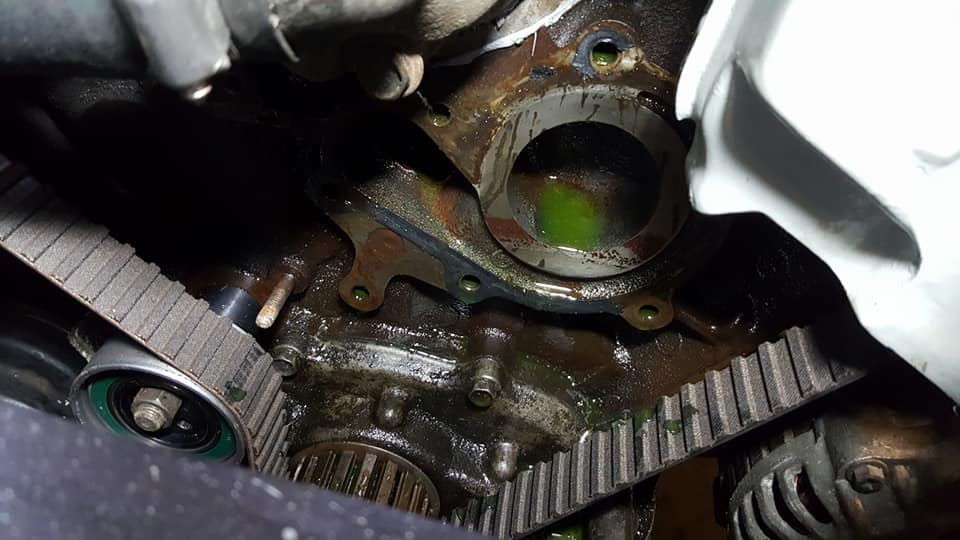
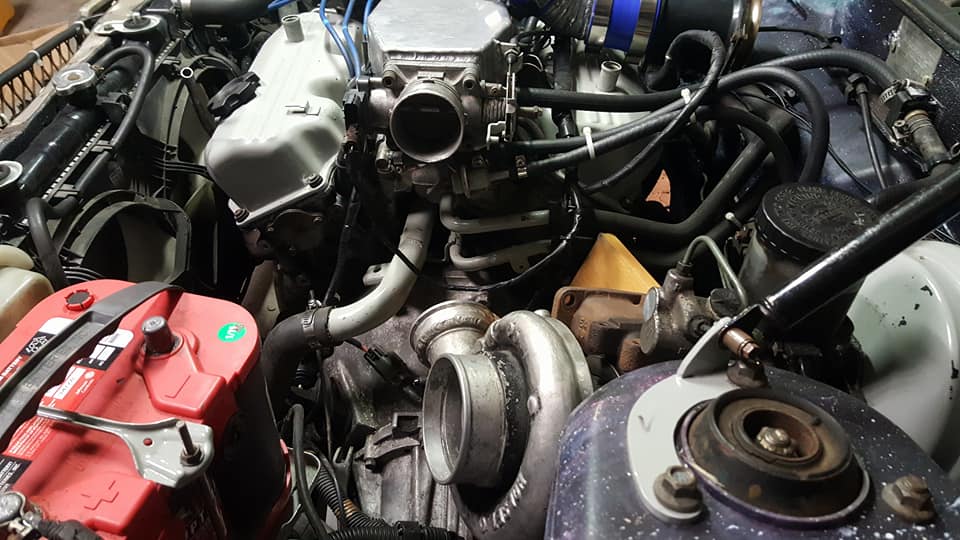
somehow oil is getting onto the exhaust here and making it smoke. i took all of these pictures to try to get an idea of where it is coming from but this was around 2am so i called it a night without looking too hard. next time i come up this is a priority.
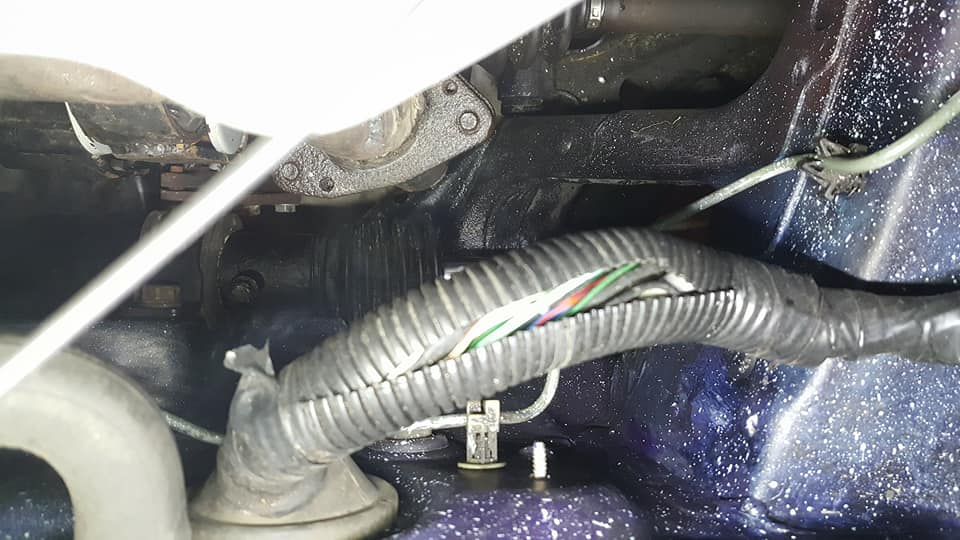
the head looks completely dry so i know its not the valve cover gasket.

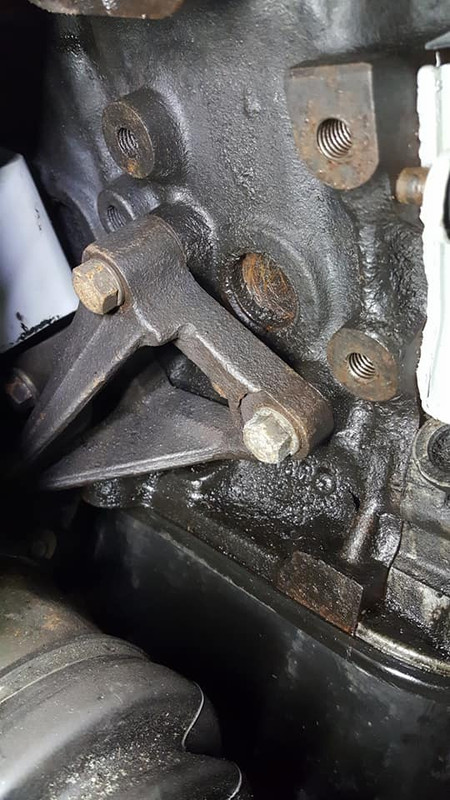
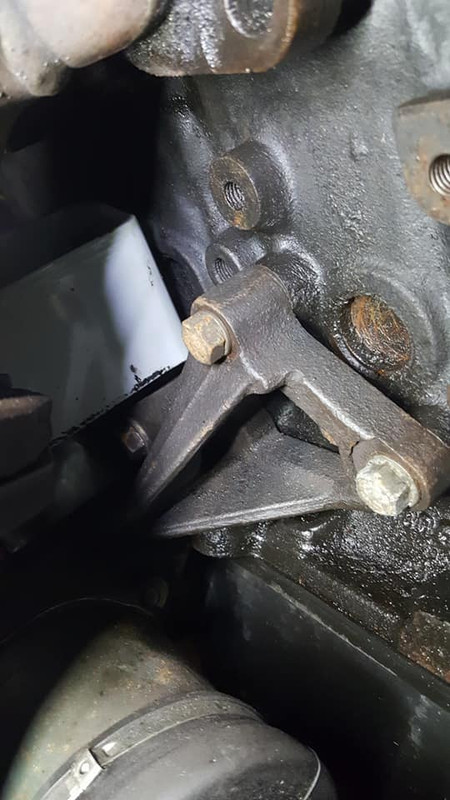

so besides that leaking, the front part of the oil pan gasket started dripping oil out after i moved the car so i have to do the same thing i did to the back of the oil pan gasket. i expected this to happen and i dont really even mind it at this point but the leaking on the exhaust is definitely bothering me more. im worried its gonna leak enough on there to start a fire which is probably my biggest fear. hopefully i can find the leak and easily fix it.
i think im gonna do something about that shift boot...
i got the gauges all wired up.
got the fender wiring tucked away.
i cleaned up and finalized all the wiring and put the fender on so i could try to move the car around the garage a little to listen for any noises or anything. im hesitant to actually fully leave the garage for 2 reasons, 1. if i have an issue the entrance to the garage is really steep and theres absolutely no way i could push the car back in and 2 if the car starts dumping fluids everywhere i wont be able to tell in the grass. speaking of dumping oil.....
somehow oil is getting onto the exhaust here and making it smoke. i took all of these pictures to try to get an idea of where it is coming from but this was around 2am so i called it a night without looking too hard. next time i come up this is a priority.
the head looks completely dry so i know its not the valve cover gasket.
so besides that leaking, the front part of the oil pan gasket started dripping oil out after i moved the car so i have to do the same thing i did to the back of the oil pan gasket. i expected this to happen and i dont really even mind it at this point but the leaking on the exhaust is definitely bothering me more. im worried its gonna leak enough on there to start a fire which is probably my biggest fear. hopefully i can find the leak and easily fix it.
Last edited by Nate Boslet; 05-18-2018 at 11:54 AM.
12-13-2017, 01:49 AM
#265
Glad to hear that you got the fuel pump issue figured out. Hope you can make quick work of the oil leak.
Out of curiosity, how far away from your house is the garage? I assumed the garage was at your house.
Out of curiosity, how far away from your house is the garage? I assumed the garage was at your house.
12-13-2017, 09:30 AM
#266
Member
Thread Starter
Join Date: Oct 2016
Posts: 284
its about a 15 minute drive. the car stays in there and then i have a shed at home i do a lot of work in as well, pretty much all of the fabrication stuff was done in the shed.
12-14-2017, 01:08 AM
#267
Member
Thread Starter
Join Date: Oct 2016
Posts: 284
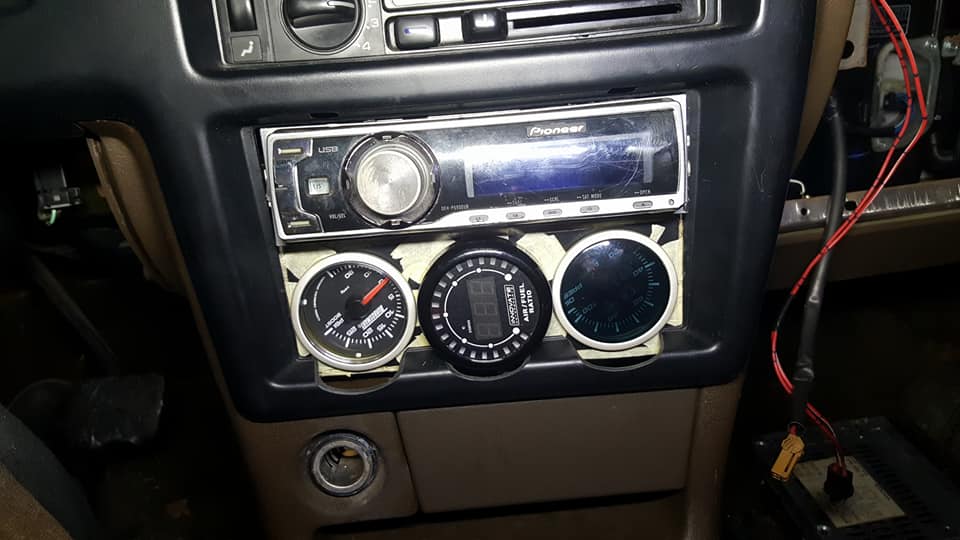
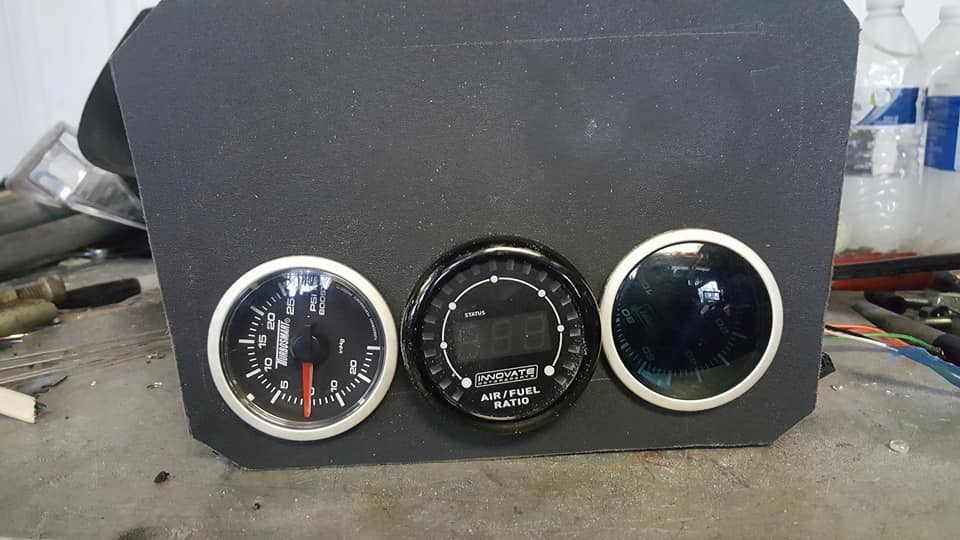
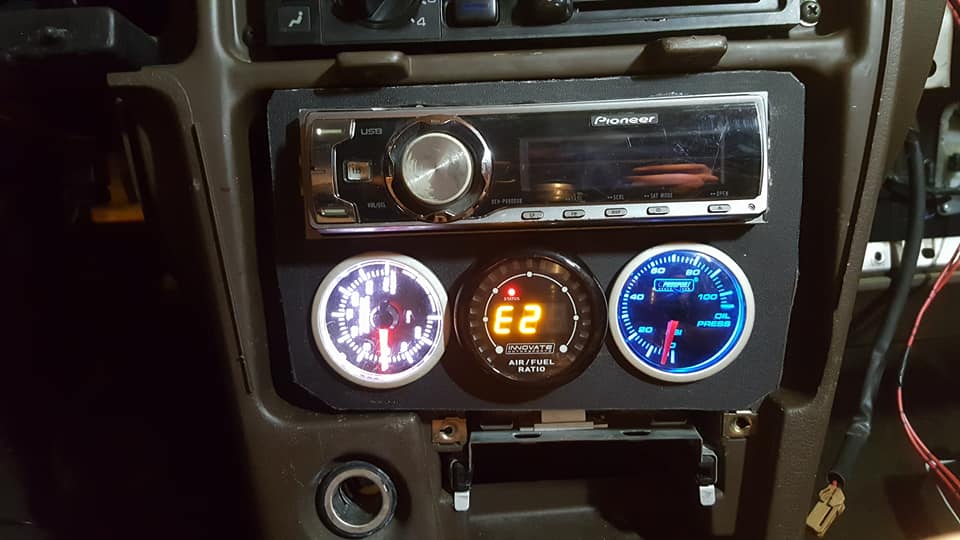
i just noticed i never posted the image of my oil pressure gauge working. neither the boost gauge or AFR are hooked up, the boost gauge because i dont have a spare fitting for it on the intake yet and dont want to T into the FPR just to see vacuum and the AFR because i dont want to foul the sensor from all of the oil and **** in the exhaust. i might actually hook the AFR up to a switch because i heard you can keep it healthier if you only turn it on once the car is warmed up.
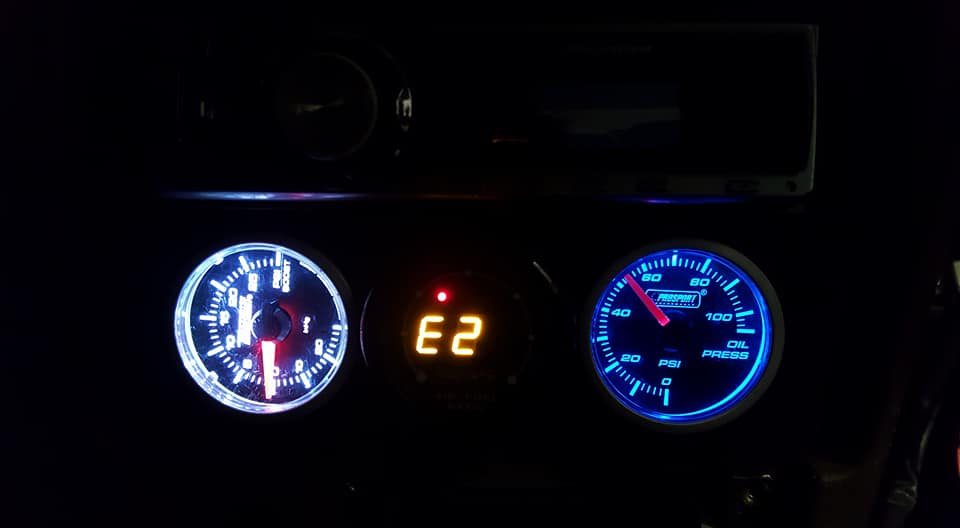
this was after the engine warmed up just a little bit. initially it was around 60psi at a cold 1500ish idle. the idle is kinda all over the place till it warms up and then it actually starts to idle really nice but i still havent gotten it warmed all the way up because of the oil getting onto the exhaust. ill either head over today or tomorrow and take care of the oil pan leak and the other leak wherever that is, hoping its not somewhere i cant get to without pulling half of the car apart again...
this was after the engine warmed up just a little bit. initially it was around 60psi at a cold 1500ish idle. the idle is kinda all over the place till it warms up and then it actually starts to idle really nice but i still havent gotten it warmed all the way up because of the oil getting onto the exhaust. ill either head over today or tomorrow and take care of the oil pan leak and the other leak wherever that is, hoping its not somewhere i cant get to without pulling half of the car apart again...
Last edited by Nate Boslet; 05-18-2018 at 11:55 AM.
12-18-2017, 03:11 AM
#268
Member
Thread Starter
Join Date: Oct 2016
Posts: 284
i wired in the radio which was much more complicated than just using the diagram because the diagram was completely inaccurate. that was pretty much the only thing that went well.
next i pulled off the crank pulley and went to seal up that pesky oil leak in the front of the oil pan.
....except it wasnt leaking. somehow the front oil pan seal looks like it actually fit properly. but while i was under there i decided to slather some RTV on it anyway cause i figure if it actually was leaking slightly and i couldnt tell i would be pissed and its not gonna hurt anything so whatever.
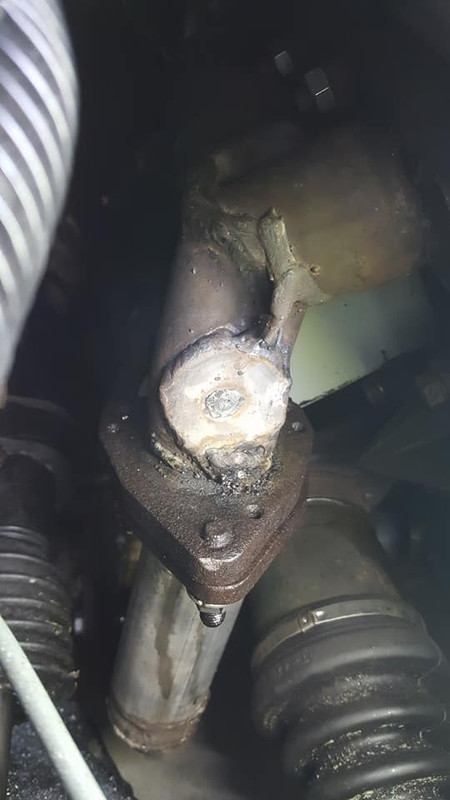
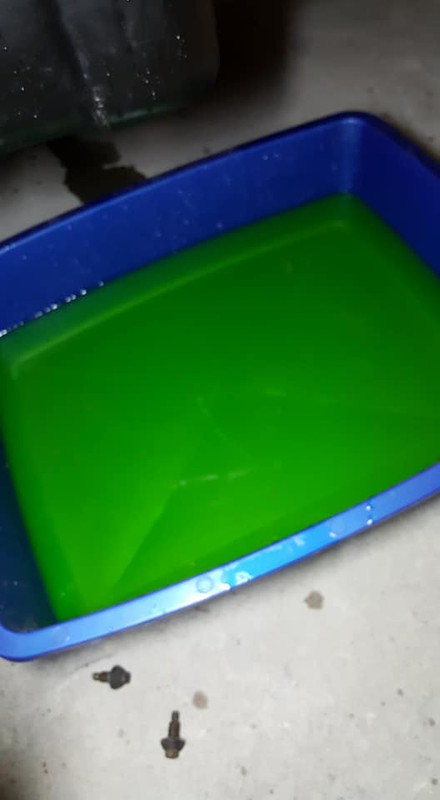
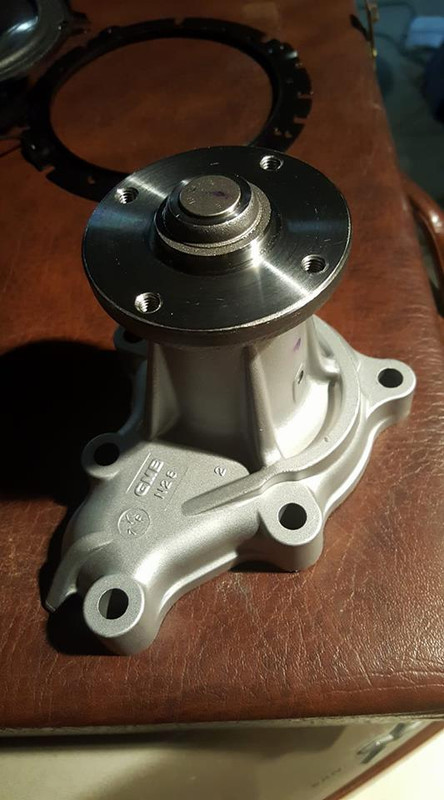
what the leak ACTUALLY was.. was the water pump. it was coming right out of the weep hole. i took the chance with this pump from the old motor because it had absolutely no play in it whatsoever, the bearings are practically brand new, but apparently the seal gave it up so im either gonna find the seal i need and somehow press the pump apart and replace the seal or im just going to cut the wings off of my vg33 pump and run that or conversely and probably the most intelligent course of action: i buy a new one. the good news is the coolant looks absolutely immaculate, so i know the inside of the block is clean.
i had a gasket for the water pump but i think i will use RTV to install it next time, not just because the gasket is all screwed up but i think i just have more faith in RTV than the gasket for this particular application.
so i didnt see anywhere for the oil to be getting onto the exhaust so my next guess is that the oil is actually inside of the exhaust. so the oil must be coming from the valve stem seals that i already replaced. which is awesome because i really enjoyed replacing those the first time, i was hoping i would get a chance to do that again as soon as possible... unless anyone has any ideas of what else it could be. its pretty obvious im not always accurate at diagnosing issues without tearing half of the car apart first.
next i pulled off the crank pulley and went to seal up that pesky oil leak in the front of the oil pan.
....except it wasnt leaking. somehow the front oil pan seal looks like it actually fit properly. but while i was under there i decided to slather some RTV on it anyway cause i figure if it actually was leaking slightly and i couldnt tell i would be pissed and its not gonna hurt anything so whatever.
what the leak ACTUALLY was.. was the water pump. it was coming right out of the weep hole. i took the chance with this pump from the old motor because it had absolutely no play in it whatsoever, the bearings are practically brand new, but apparently the seal gave it up so im either gonna find the seal i need and somehow press the pump apart and replace the seal or im just going to cut the wings off of my vg33 pump and run that or conversely and probably the most intelligent course of action: i buy a new one. the good news is the coolant looks absolutely immaculate, so i know the inside of the block is clean.
i had a gasket for the water pump but i think i will use RTV to install it next time, not just because the gasket is all screwed up but i think i just have more faith in RTV than the gasket for this particular application.
so i didnt see anywhere for the oil to be getting onto the exhaust so my next guess is that the oil is actually inside of the exhaust. so the oil must be coming from the valve stem seals that i already replaced. which is awesome because i really enjoyed replacing those the first time, i was hoping i would get a chance to do that again as soon as possible... unless anyone has any ideas of what else it could be. its pretty obvious im not always accurate at diagnosing issues without tearing half of the car apart first.
Last edited by Nate Boslet; 05-18-2018 at 11:55 AM.
12-26-2017, 12:51 AM
#269
Member
Thread Starter
Join Date: Oct 2016
Posts: 284
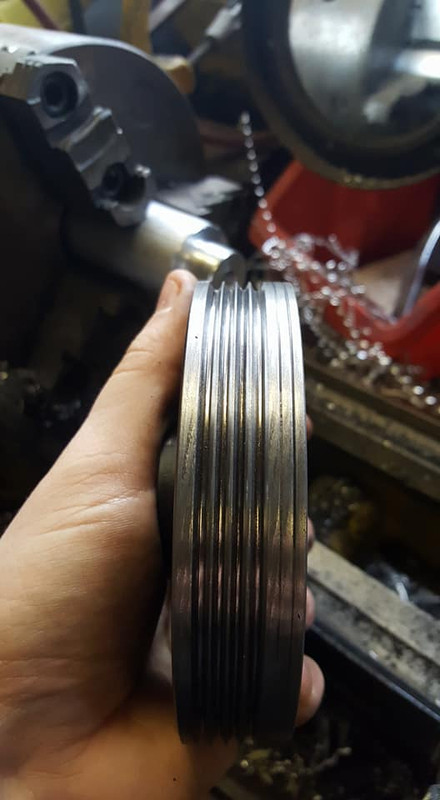
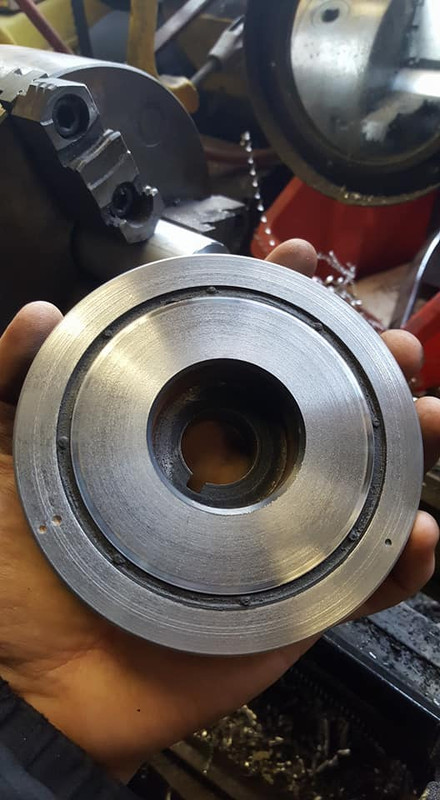
new water pump is installed. phone died before i could get more pics for the night but everything is most of the way back together, i brought home the crank pulley to do some machining on it before i completely put everything back together.
when i turned the crank the first time i chucked it up with the back portion of the pulley, that was good enough to get it round but it wasnt square in the chuck which i noticed while the engine was running. it made the belt wiggle about .020" back and forth, not enough to throw the belt but probably enough in the long term to cause premature wear or vibration issues. in order to get it square i made an arbor.
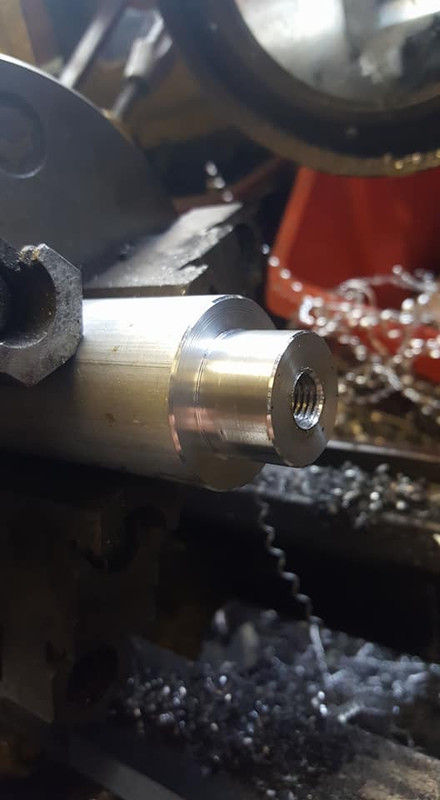
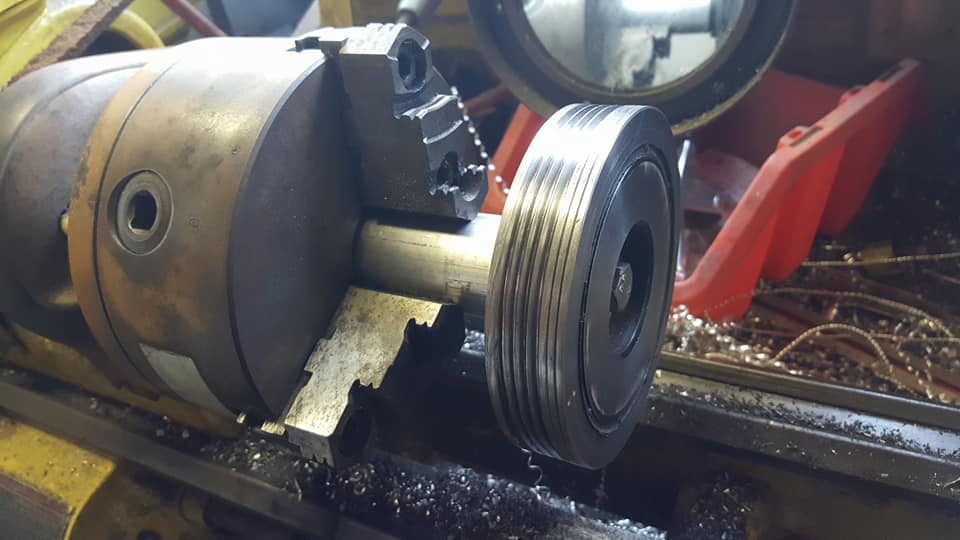
got it tightened in, faced, profiled and re-centered the ribs for the pulley. everything went a lot quicker and smoother this time since i got some new carbide insert tooling for the lathe, works like a champ.
ill have to paint it again and ill use the same paint on the dash trim to finish that up. i am going to be installing a speaker component system in the doors soon, trying to keep it as low profile as possible but more on that later.
when i turned the crank the first time i chucked it up with the back portion of the pulley, that was good enough to get it round but it wasnt square in the chuck which i noticed while the engine was running. it made the belt wiggle about .020" back and forth, not enough to throw the belt but probably enough in the long term to cause premature wear or vibration issues. in order to get it square i made an arbor.
got it tightened in, faced, profiled and re-centered the ribs for the pulley. everything went a lot quicker and smoother this time since i got some new carbide insert tooling for the lathe, works like a champ.
ill have to paint it again and ill use the same paint on the dash trim to finish that up. i am going to be installing a speaker component system in the doors soon, trying to keep it as low profile as possible but more on that later.
Last edited by Nate Boslet; 05-18-2018 at 11:56 AM.
12-26-2017, 01:16 PM
#270
It sounds like you spent your Christmas working on the car. I don't know that I would be that dedicated. But I think I saw that you were getting snow, so it is a good time for inside stuff.
12-26-2017, 10:02 PM
#271
Member
Thread Starter
Join Date: Oct 2016
Posts: 284
only a small portion of it. i spent almost the whole day with my family. im not a very traditional person so i dont have any problem working on christmas or my birthday or whatever.
01-01-2018, 02:28 PM
#272
Member
Thread Starter
Join Date: Oct 2016
Posts: 284
the car is once again back together. only thing left to do is put the coolant back in it but i did start it up and it still runs (its so cold it actually stalled out once but didnt the second crank) i noticed before that the crank pulley looked like it was sticking out a little farther than the other pulleys so i brought that home again to take about 25 thousandths off of the back of it. i didnt take any pics of that or much else because its nothing new.
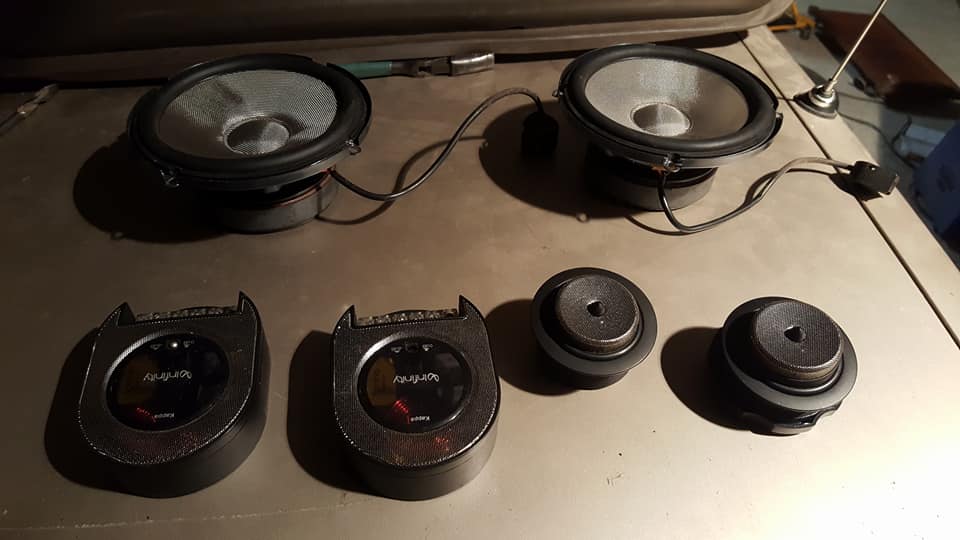
moving on to more audio stuff, ive had this component system for a long time, its always sounded great and while i had it amplified in the past, for now im just going to run it off of the head unit. im not as interested in my car being super loud as i used to be lol
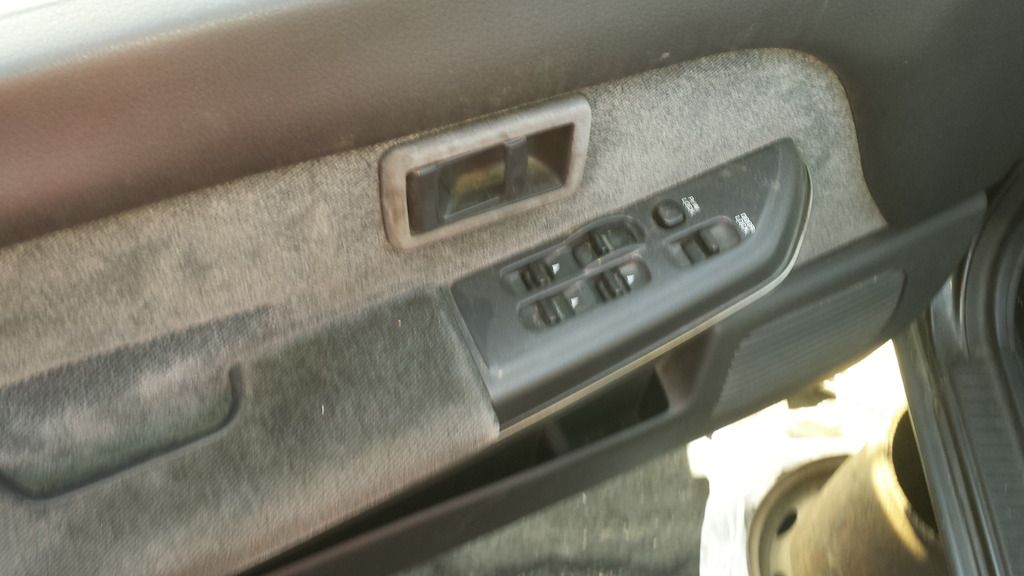
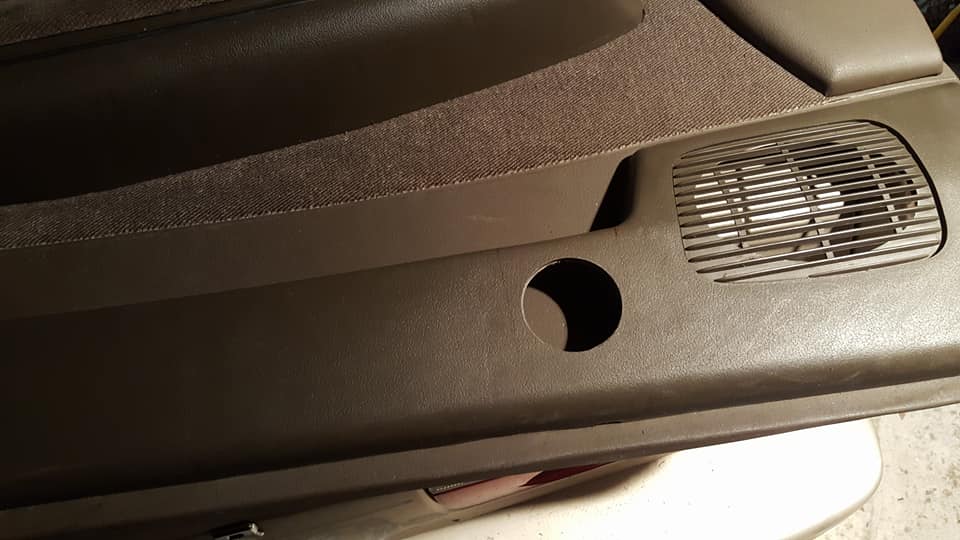
i am however interested in keeping this stuff as out of sight as possible. keeping with the sleeper theme i dont really want this car to look like i put any money or effort into it. everything is supposed to either look completely stock or like a car thats driven by someone who knows nothing about cars. here is the door panel i have to work with.
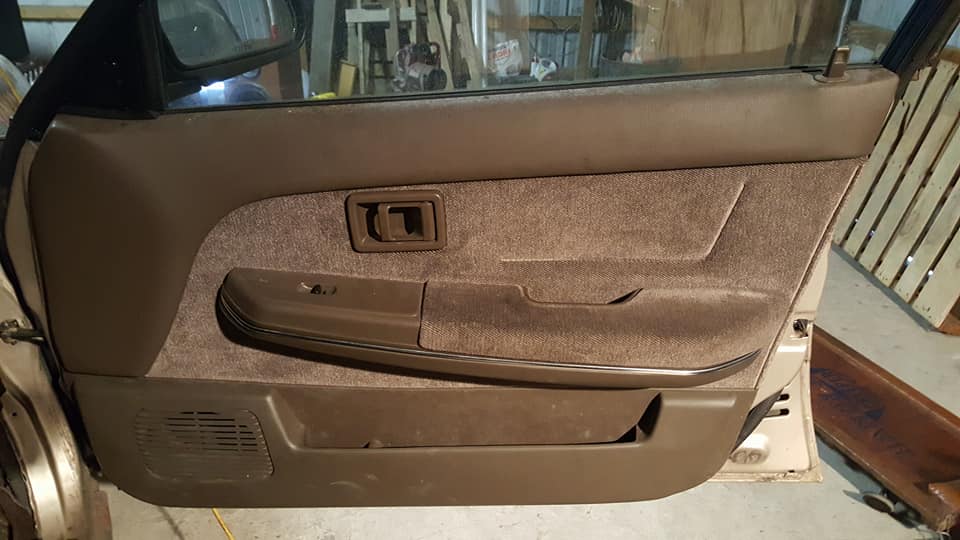
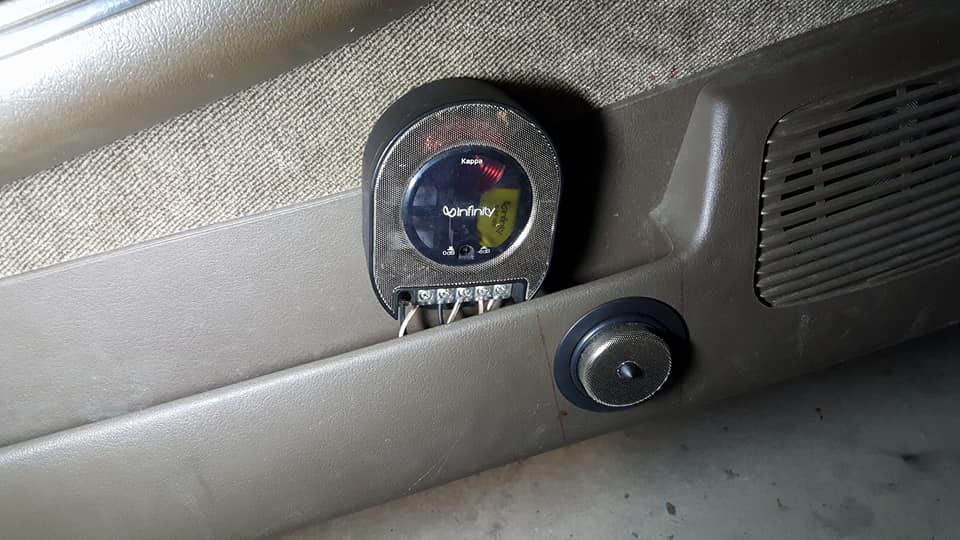
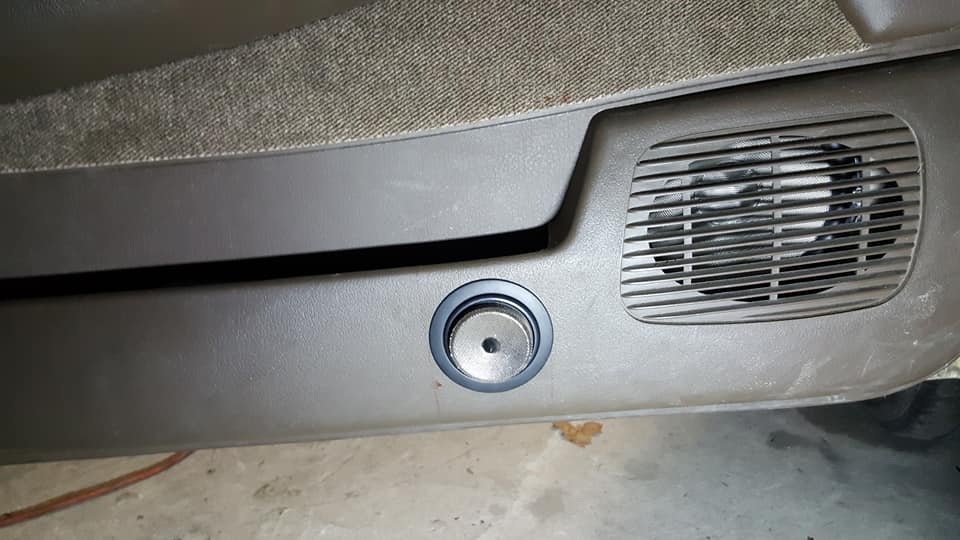
theres a tray in the door panel for garbage or used condoms or whatever people put in there... i never use it so i thought this would be the best place for my tweeters since i dont want them to be visible and i dont want to run 30 feet of wire to put them somewhere else in the car. after i took a bunch of measurements i drilled a hole through the side to run the wires and then used a hole saw to put the tweeter itself in.

the crossover just happens to fit perfectly tight enough in the compartment that i dont need to do any further securing to it so all i did next was install the woofer and wire everything up.
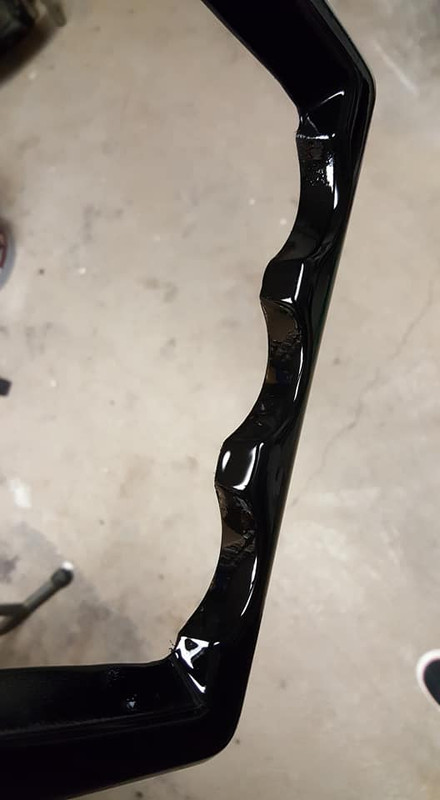
i did the one side and called it a night cause it was like 4 degrees in my garage. i did some more work on the dash trim at home and im happy with it, i just need to do some sanding on the back of the PVC pieces so it fits on the dash better, its about 1/4 inch off of the dash right now. the paint looks glossy wet but its satin finish so once it dries it actually looks pretty much identical to the original plastic so i didnt even have to paint the whole piece, just faded it in and you cant see where it starts or ends.

ive been starting to make a list of materials i need to get started on the turbo headers. its going to be relatively cheap compared to what i would pay for a ready made setup (like 10% of the cost lol) but work has been really slow this month as it always is so i dont quite have the income at the moment to order everything but in the mean time i should at least be able to start on the placement of the turbo. in the mean time im going to try to get the car warmed up again and take it for a drive to make sure there are no mechanical issues or anything. if all goes smoothly from there im going to install the MS1 and redo the wiring harness so its much tighter and better tucked, im going to reloom it as well so it will look all fancy. lots of cool fabrication stuff coming soonish.
moving on to more audio stuff, ive had this component system for a long time, its always sounded great and while i had it amplified in the past, for now im just going to run it off of the head unit. im not as interested in my car being super loud as i used to be lol
i am however interested in keeping this stuff as out of sight as possible. keeping with the sleeper theme i dont really want this car to look like i put any money or effort into it. everything is supposed to either look completely stock or like a car thats driven by someone who knows nothing about cars. here is the door panel i have to work with.
theres a tray in the door panel for garbage or used condoms or whatever people put in there... i never use it so i thought this would be the best place for my tweeters since i dont want them to be visible and i dont want to run 30 feet of wire to put them somewhere else in the car. after i took a bunch of measurements i drilled a hole through the side to run the wires and then used a hole saw to put the tweeter itself in.
the crossover just happens to fit perfectly tight enough in the compartment that i dont need to do any further securing to it so all i did next was install the woofer and wire everything up.
i did the one side and called it a night cause it was like 4 degrees in my garage. i did some more work on the dash trim at home and im happy with it, i just need to do some sanding on the back of the PVC pieces so it fits on the dash better, its about 1/4 inch off of the dash right now. the paint looks glossy wet but its satin finish so once it dries it actually looks pretty much identical to the original plastic so i didnt even have to paint the whole piece, just faded it in and you cant see where it starts or ends.
ive been starting to make a list of materials i need to get started on the turbo headers. its going to be relatively cheap compared to what i would pay for a ready made setup (like 10% of the cost lol) but work has been really slow this month as it always is so i dont quite have the income at the moment to order everything but in the mean time i should at least be able to start on the placement of the turbo. in the mean time im going to try to get the car warmed up again and take it for a drive to make sure there are no mechanical issues or anything. if all goes smoothly from there im going to install the MS1 and redo the wiring harness so its much tighter and better tucked, im going to reloom it as well so it will look all fancy. lots of cool fabrication stuff coming soonish.
Last edited by Nate Boslet; 05-18-2018 at 11:57 AM.
01-02-2018, 11:19 AM
#273
Used condoms in the front door??? NO. They go in the back door or under the front seat.
You are going to have a nice looking car when you are done. The original impression I got when I first started reading this was that you were making this car for track purposes. Obviously not.
You are going to have a nice looking car when you are done. The original impression I got when I first started reading this was that you were making this car for track purposes. Obviously not.
01-02-2018, 03:44 PM
#274
Member
Thread Starter
Join Date: Oct 2016
Posts: 284
Used condoms in the front door??? NO. They go in the back door or under the front seat.
You are going to have a nice looking car when you are done. The original impression I got when I first started reading this was that you were making this car for track purposes. Obviously not.
You are going to have a nice looking car when you are done. The original impression I got when I first started reading this was that you were making this car for track purposes. Obviously not.
01-02-2018, 10:08 PM
#275
I don't think of track cars as sleepers. To me, a car that runs at the track is going to be built up/modified for the purpose. It may be a good looking car or it may look like a refugee from the scrap yard.
A sleeper operates on the street. It looks decent, like a grandma's car, but it leaves them in the dust.
Our thoughts on this are probably an example of 2 people growing up in different parts of the country.
A sleeper operates on the street. It looks decent, like a grandma's car, but it leaves them in the dust.
Our thoughts on this are probably an example of 2 people growing up in different parts of the country.
01-03-2018, 04:06 AM
#276
Member
Thread Starter
Join Date: Oct 2016
Posts: 284
I don't think of track cars as sleepers. To me, a car that runs at the track is going to be built up/modified for the purpose. It may be a good looking car or it may look like a refugee from the scrap yard.
A sleeper operates on the street. It looks decent, like a grandma's car, but it leaves them in the dust.
Our thoughts on this are probably an example of 2 people growing up in different parts of the country.
A sleeper operates on the street. It looks decent, like a grandma's car, but it leaves them in the dust.
Our thoughts on this are probably an example of 2 people growing up in different parts of the country.
01-04-2018, 06:12 AM
#277
Member
Thread Starter
Join Date: Oct 2016
Posts: 284
the dash is essentially done
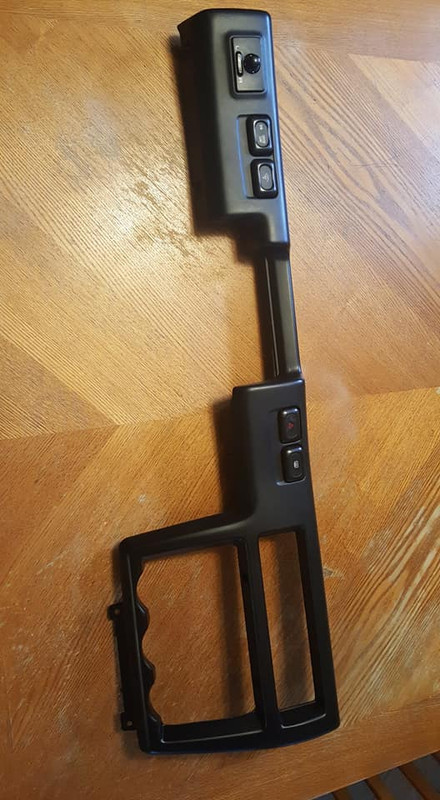
it needs some clearance on the back of the pvc so it can sit more flush against the dash but you really wouldnt be able to tell the difference from this angle so this is what its going to look like.

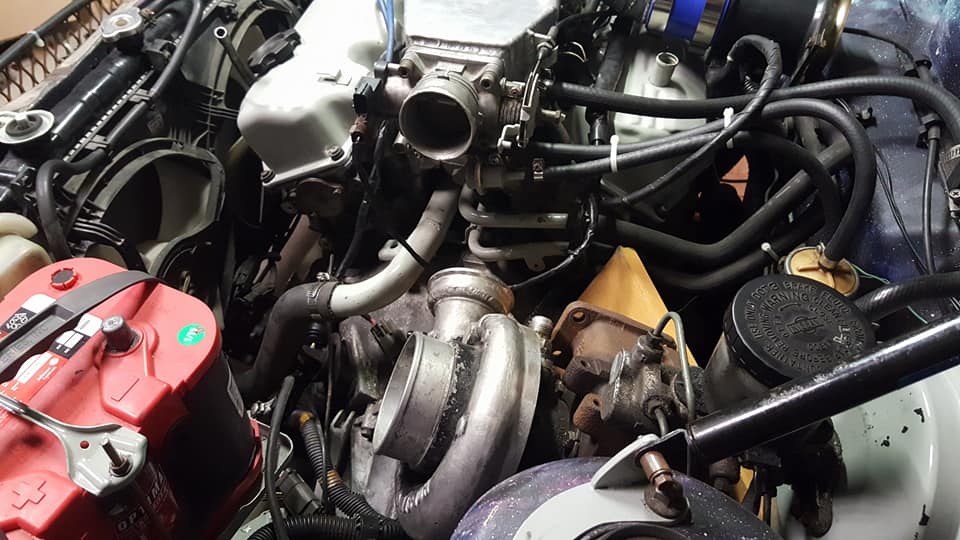
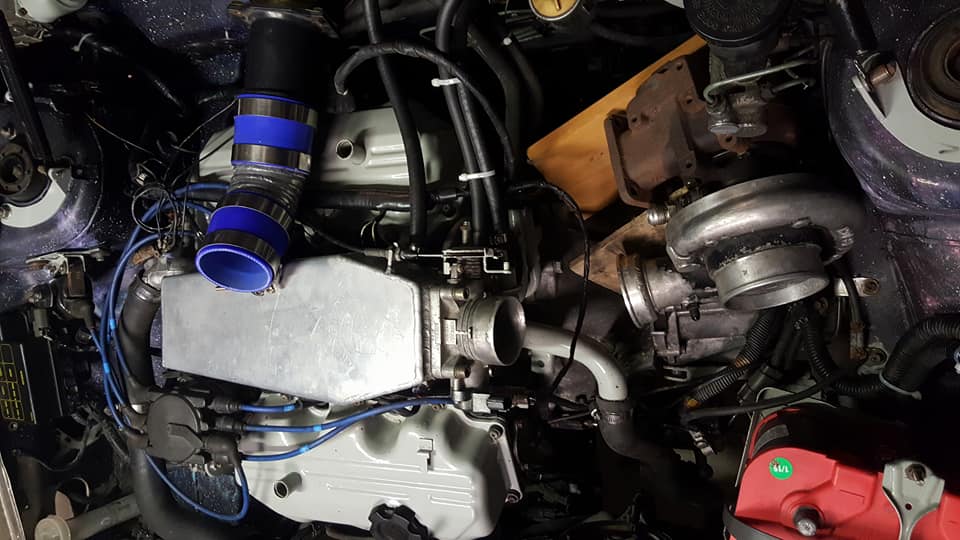
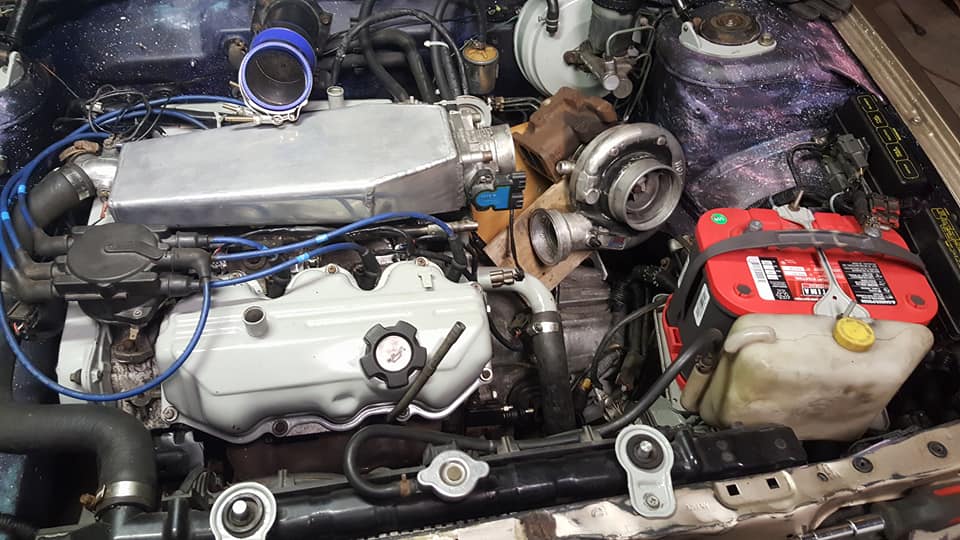
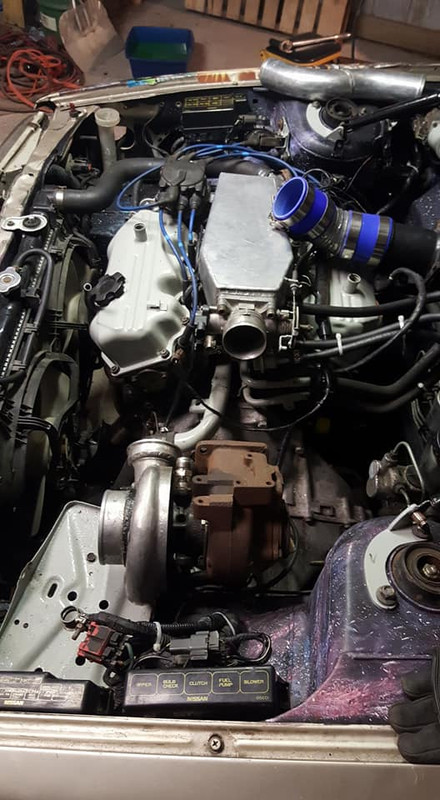
i brought my turbo to the garage to do some mockups, this is how i would place it if i wasnt going to run an intercooler which i would prefer not to because if i have an intercooler its going to be absolutely impossible to hide. this isnt exactly where it would be, it would be an inch or so higher up and angled differently, this was just the best i could do with what i had lying around. when i go to make the bracket and everything ill have to suspend the turbo more carefully. obviously the compressor side needs to be clocked to point toward the throttle more but it would basically just be a bend directly to the throttle with a blow off valve and an air temp sensor.
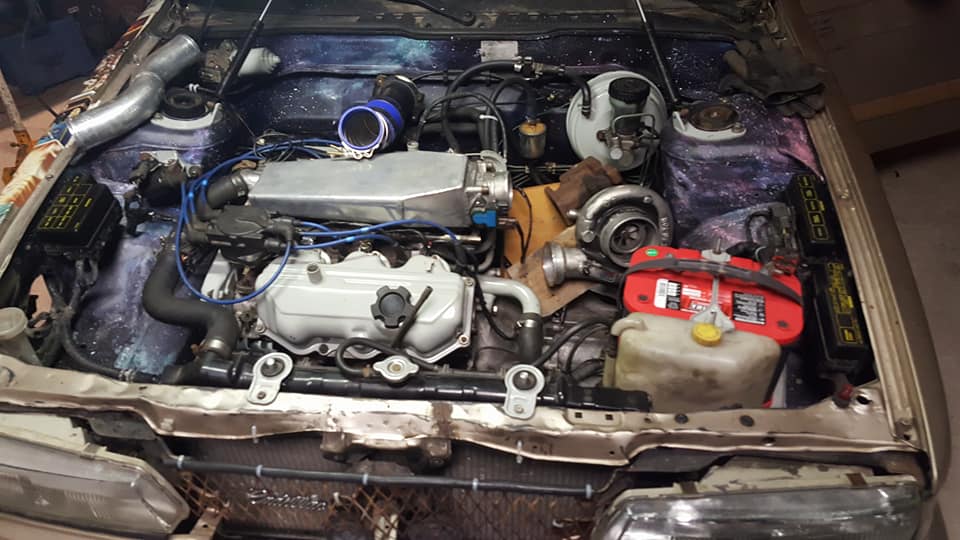

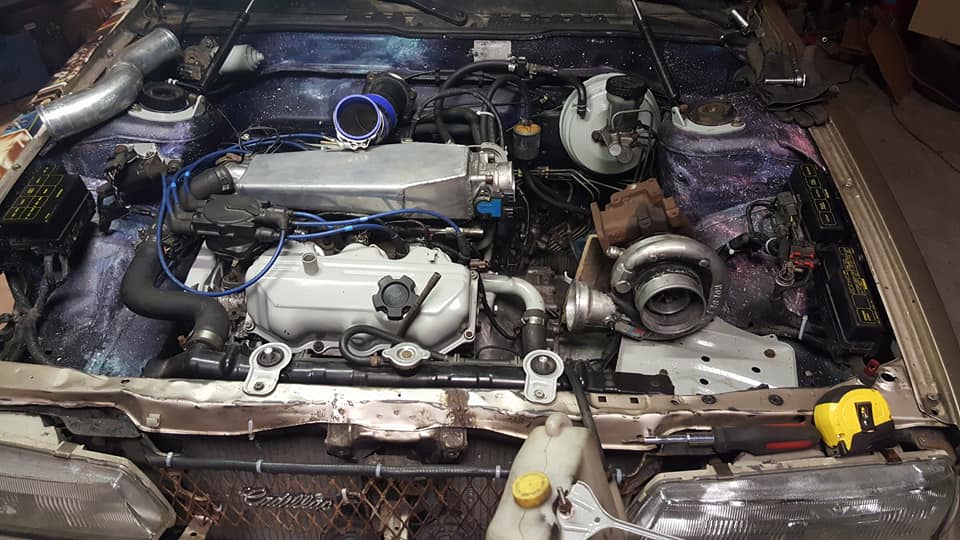
this is the intercooled option, i would definitely need to relocated the batter and cut up the body in places around the radiator to fit the intercooler ins and outs. the exhaust would be a little simpler and easier but realistically both options are going to be pretty difficult and tight. lots of heat wrap is a necessity.
i installed the speaker system in the other door and listened to the system for a minute and its easily the cleanest sounding system i have ever heard in any vehicle. it almost brought me to tears. i think its because most of my other systems had grounding issues because they werent grounded through the engine so it would cause some feedback or fuzz or whatever but there is absolutely no sound other than exactly what is being played through the speakers. im extremely happy with it. so next ill be putting the interior back together and putting the coolant in the car, im kind of wasting time putting the coolant back in just because theres no way im going to get stuck out of the garage with the car in a foot of snow and sub zero temps lol (they dont plow the road up to my garage, its way back in the boonies) but i will be temp cycling the car next time i go up and making sure everything is in order for a test drive, like i said once the mechanical parts are operating correctly ill move on to installing the MS1.
it needs some clearance on the back of the pvc so it can sit more flush against the dash but you really wouldnt be able to tell the difference from this angle so this is what its going to look like.
i brought my turbo to the garage to do some mockups, this is how i would place it if i wasnt going to run an intercooler which i would prefer not to because if i have an intercooler its going to be absolutely impossible to hide. this isnt exactly where it would be, it would be an inch or so higher up and angled differently, this was just the best i could do with what i had lying around. when i go to make the bracket and everything ill have to suspend the turbo more carefully. obviously the compressor side needs to be clocked to point toward the throttle more but it would basically just be a bend directly to the throttle with a blow off valve and an air temp sensor.
this is the intercooled option, i would definitely need to relocated the batter and cut up the body in places around the radiator to fit the intercooler ins and outs. the exhaust would be a little simpler and easier but realistically both options are going to be pretty difficult and tight. lots of heat wrap is a necessity.
i installed the speaker system in the other door and listened to the system for a minute and its easily the cleanest sounding system i have ever heard in any vehicle. it almost brought me to tears. i think its because most of my other systems had grounding issues because they werent grounded through the engine so it would cause some feedback or fuzz or whatever but there is absolutely no sound other than exactly what is being played through the speakers. im extremely happy with it. so next ill be putting the interior back together and putting the coolant in the car, im kind of wasting time putting the coolant back in just because theres no way im going to get stuck out of the garage with the car in a foot of snow and sub zero temps lol (they dont plow the road up to my garage, its way back in the boonies) but i will be temp cycling the car next time i go up and making sure everything is in order for a test drive, like i said once the mechanical parts are operating correctly ill move on to installing the MS1.
Last edited by Nate Boslet; 05-18-2018 at 11:58 AM.
01-04-2018, 09:51 AM
#278
The dash gauges look real good. The bezel looks like it was made for them.
I think you should put coolant in now and run the engine so the cooling system will pressurize and you can check for leaks. You probably have more time right now than you will when the weather warms up.
I think you should put coolant in now and run the engine so the cooling system will pressurize and you can check for leaks. You probably have more time right now than you will when the weather warms up.
01-04-2018, 03:21 PM
#279
Member
Thread Starter
Join Date: Oct 2016
Posts: 284
The dash gauges look real good. The bezel looks like it was made for them.
I think you should put coolant in now and run the engine so the cooling system will pressurize and you can check for leaks. You probably have more time right now than you will when the weather warms up.
I think you should put coolant in now and run the engine so the cooling system will pressurize and you can check for leaks. You probably have more time right now than you will when the weather warms up.
well technically it was lol
yeah thats what im going to do im just not going to take it out of the garage until the snow melts. the car may even run and drive perfectly fine but with the way up to my garage is i could still get stuck outside lol
01-08-2018, 10:49 AM
#280
I think I might have found something for you. 1990 Stanza. Do you want it?