Two Fuel Pumps - One Weekend
 05-28-2017, 07:26 PM
#1
Senior Member
Thread Starter

Join Date: Jan 2011
Location: Central AR
Posts: 3,041
Two Fuel Pumps - One Weekend
This weekend I replaced fuel pumps on the 98 GLE and 99 SE using J. Holley's Hitachi pump recommendation. Both pumps are working great.
Since the old pumps were working and this is preventative maintenance, I didn't see any difference in performance around town. However, my son and I both noticed a performance improvement during aggressive driving usually with a wide open throttle above 4,000 RPM to red line. The new pumps most likely do a better job of keeping up with the demand from a full dump on the accelerator. The difference is small but still a nice improvement.
The pictures tell the real story.
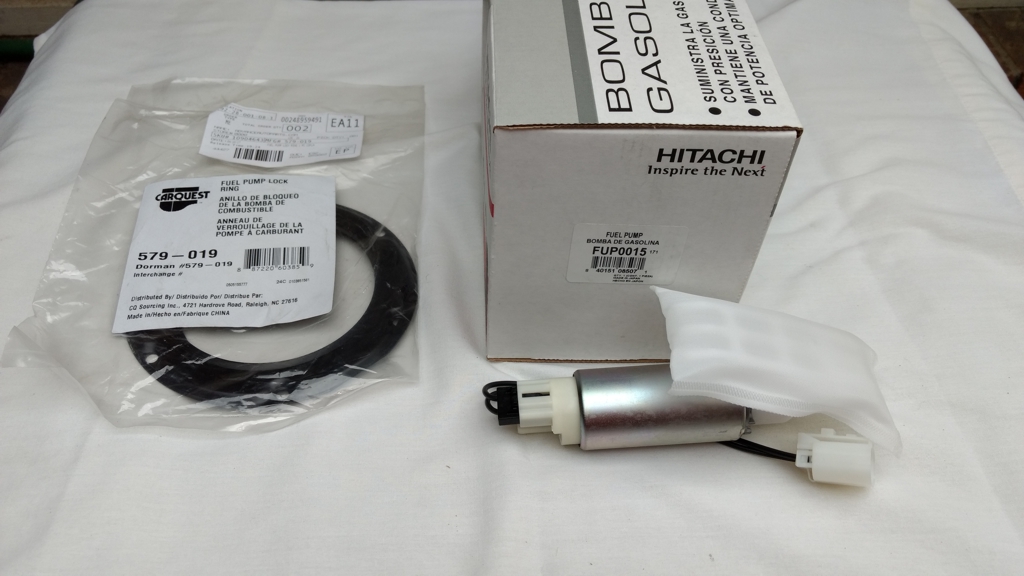
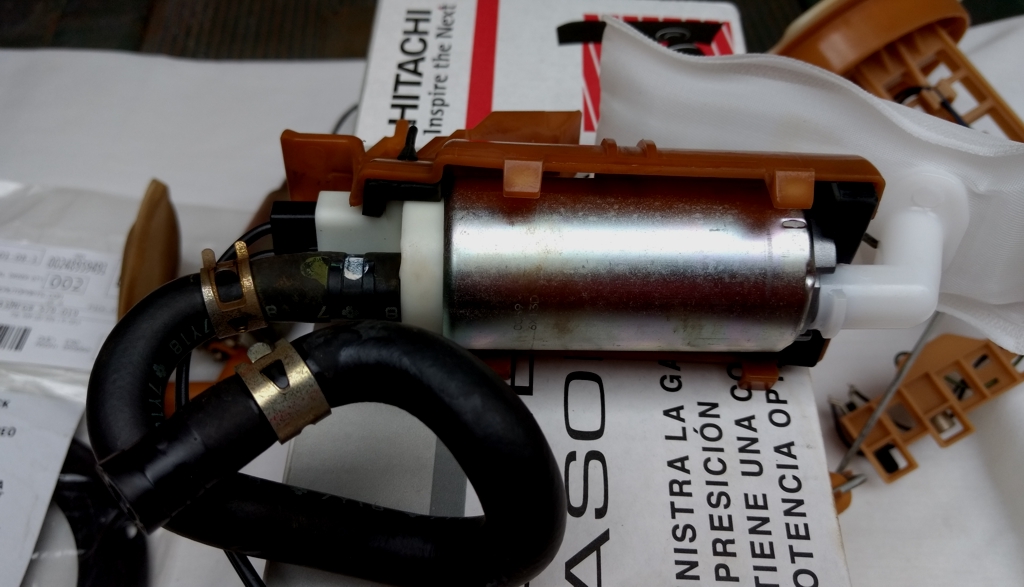
Here's a picture of the new Hitachi pump part number FUP0015 and a Dorman 579-019 tank seal kit that I purchased from Advance Auto. I didn't actually need the metal retaining ring, but I replaced it since it came in the seal kit.
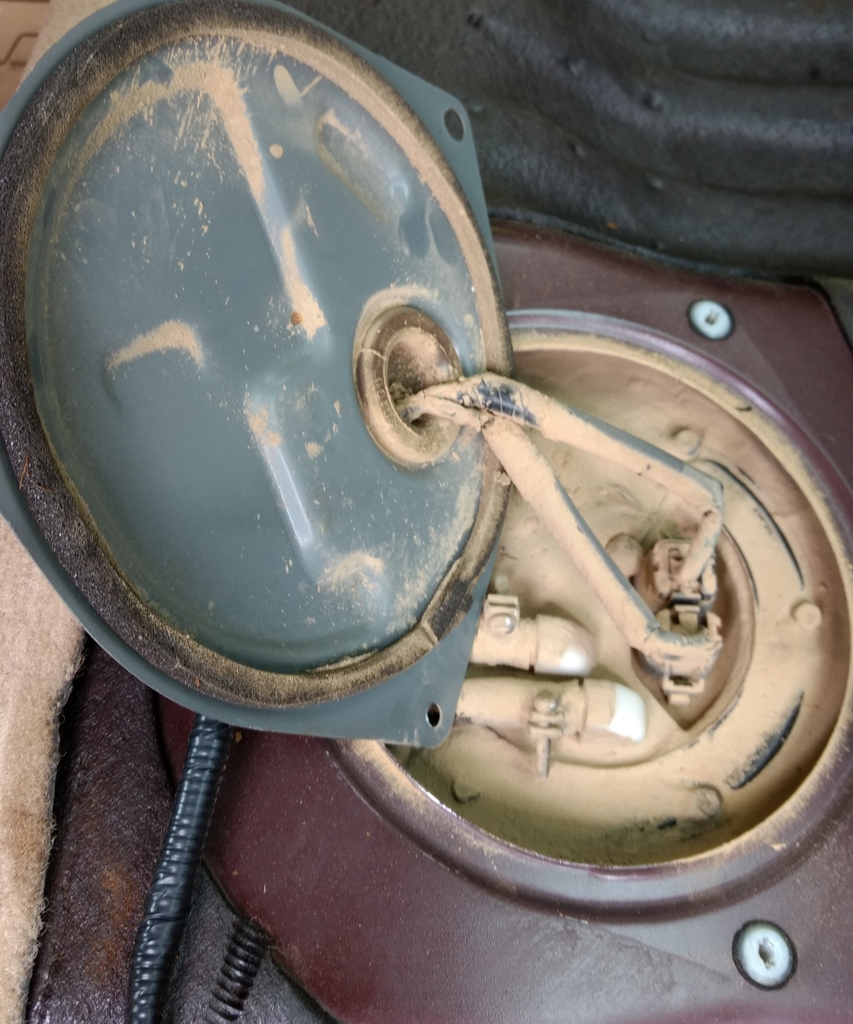
Look at all the dried MUD that caked up around 98 model's the sending unit cover.
The 99 model was better but I still vacuumed the area before removing the sending unit.
I used a vacuum to clean up the area before opening the seal.
On the 98 model I pulled the fuel pump fuse and ran the engine until I though all of the fuel had been removed from the lines. There was still a lot of fuel that came out of the lines. On the 99 model, I did not remove the fuse and run out fuel. I just removed the fuel tank cap. That worked well and I actually had less fuel running out of the lines on removal.
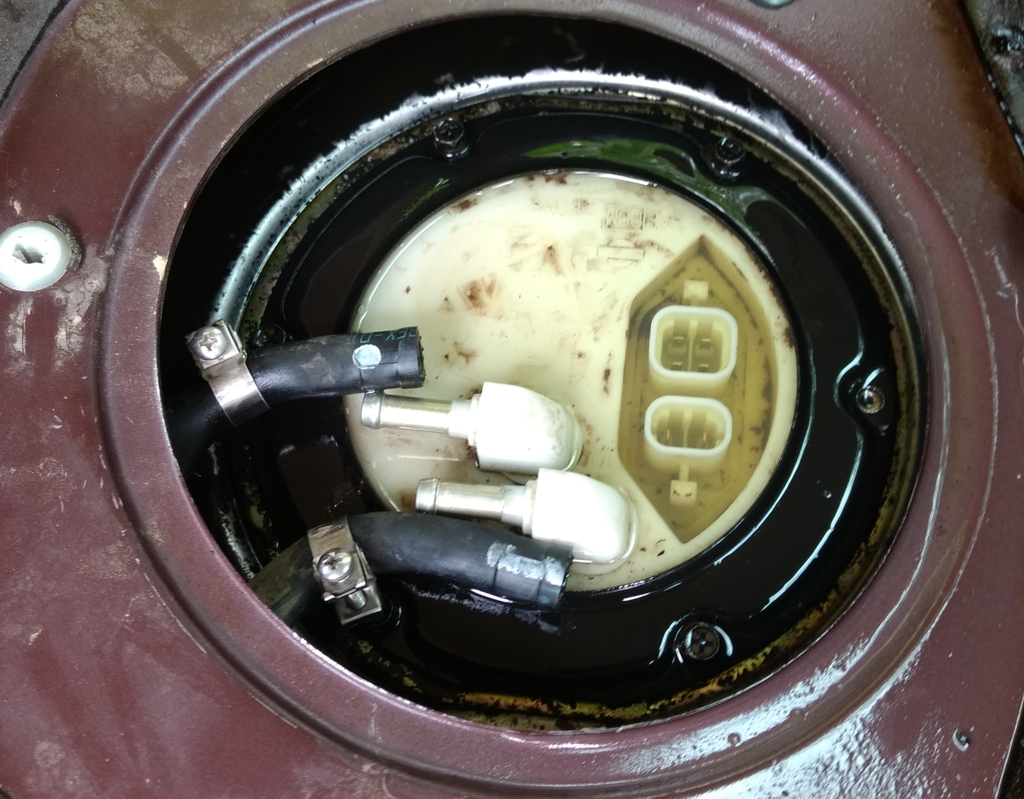
98 model's picture after removing the lines.
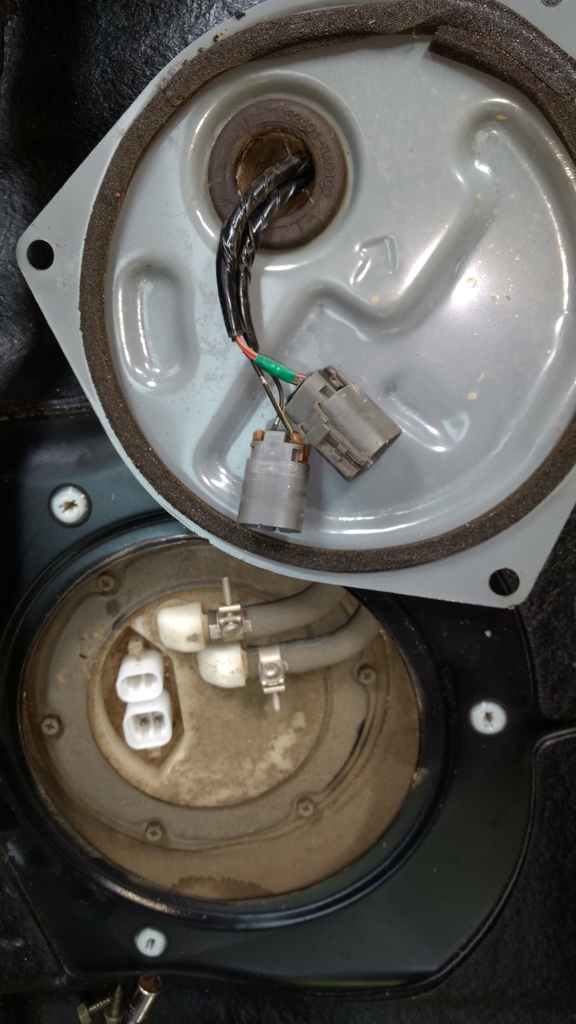
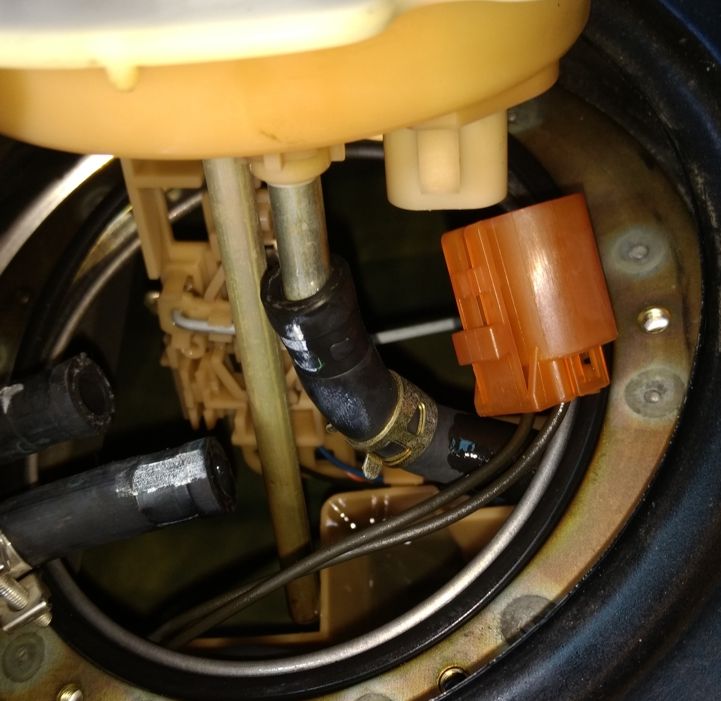
After lifting the sending unit out of the tank, I removed the electrical plug and the pump hose.
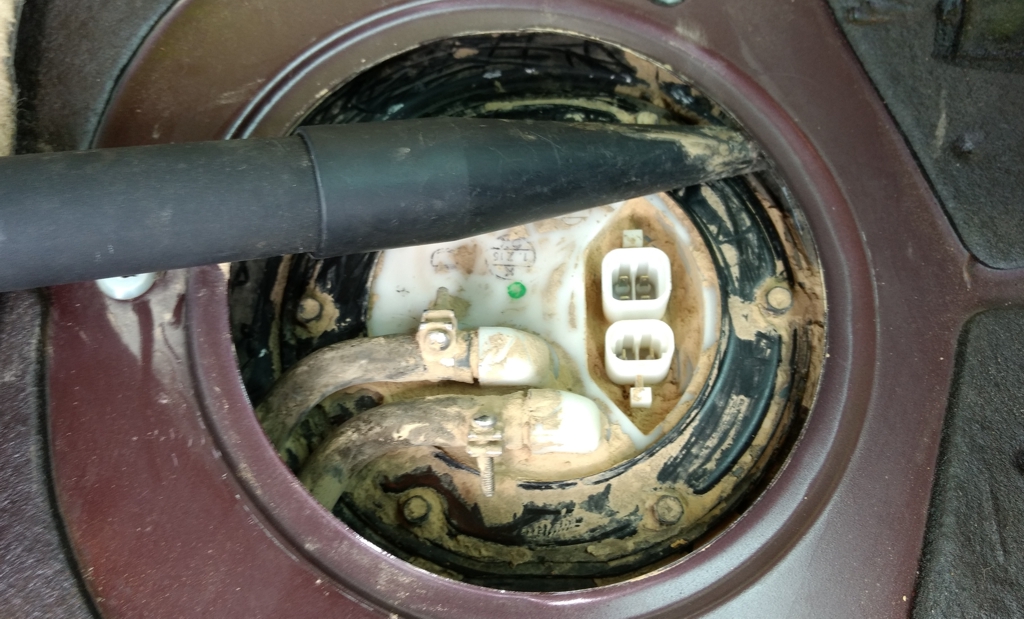
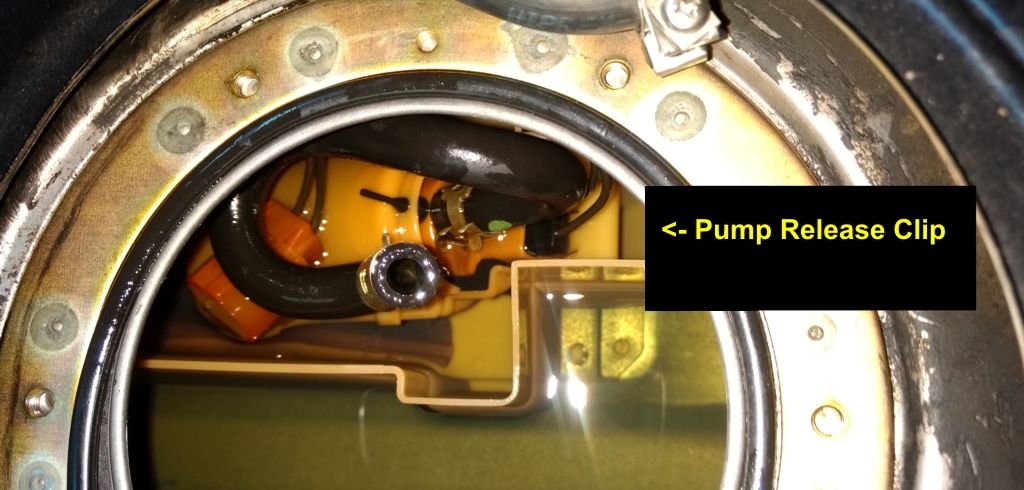
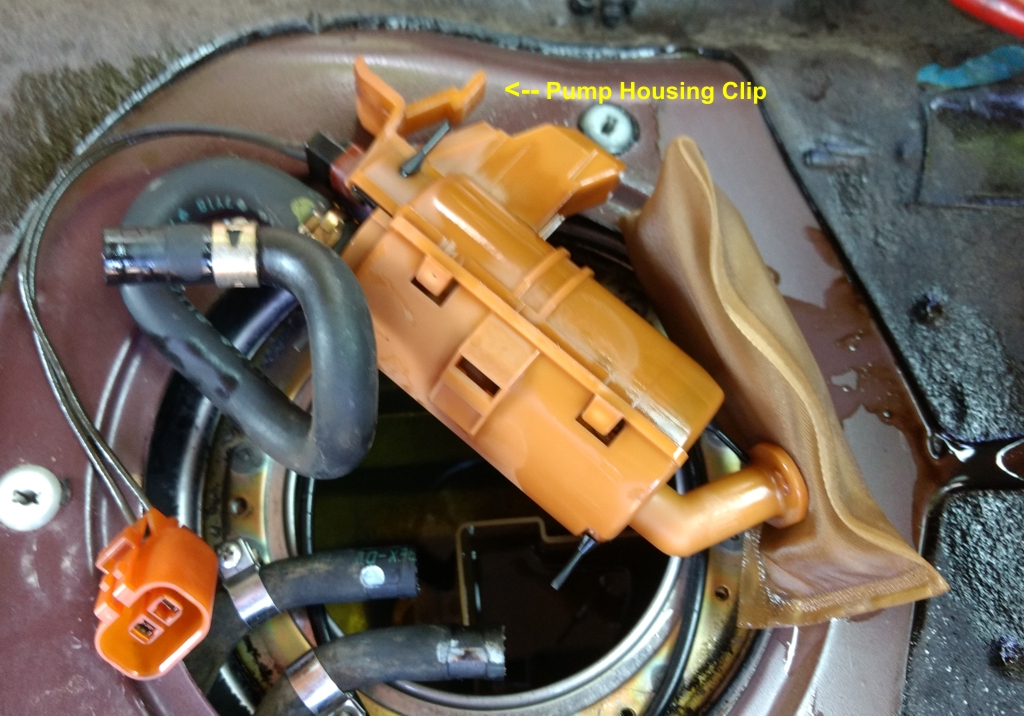
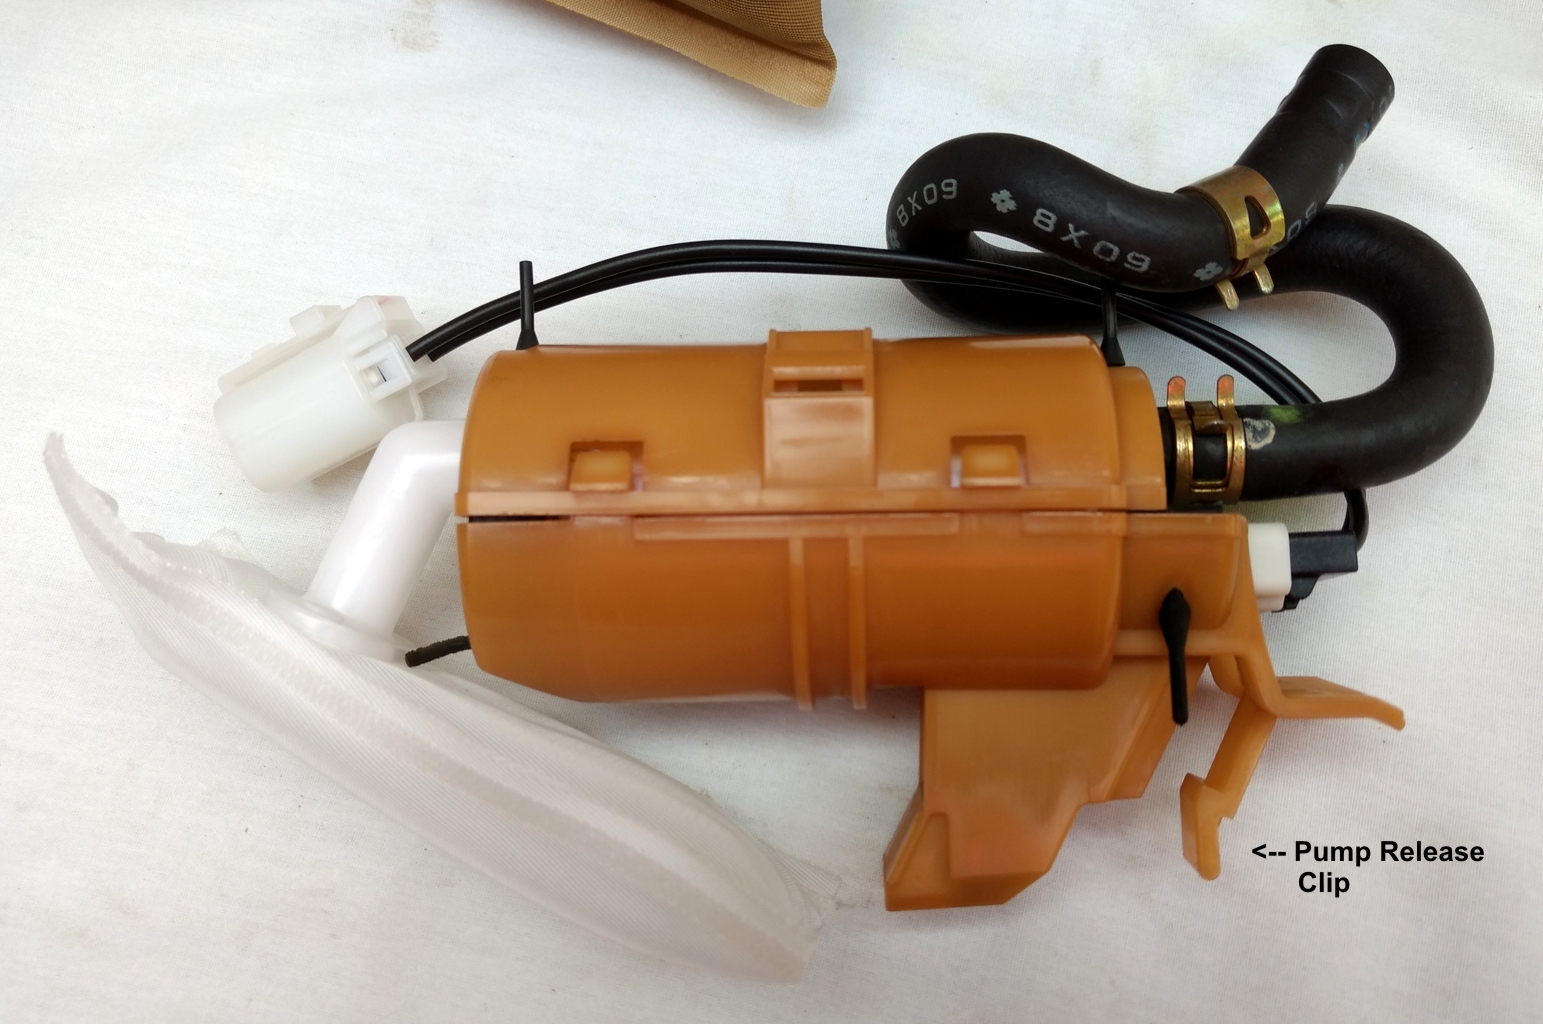
Here's a picture of the pump housing release clip. Lift the outer edge of clip upward to free the pump housing for removal.
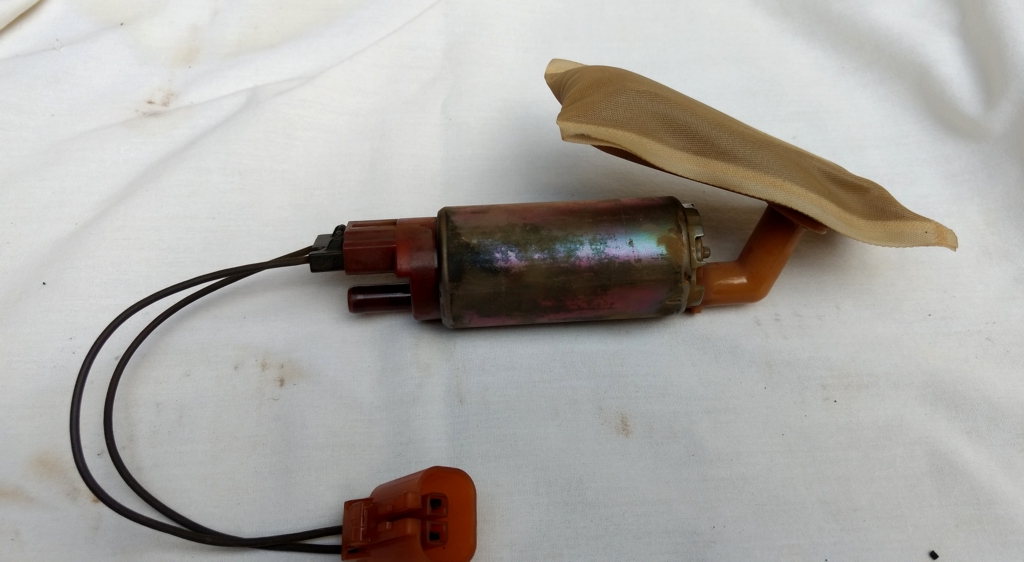
Here's a picture of the old pump from the 98 model.
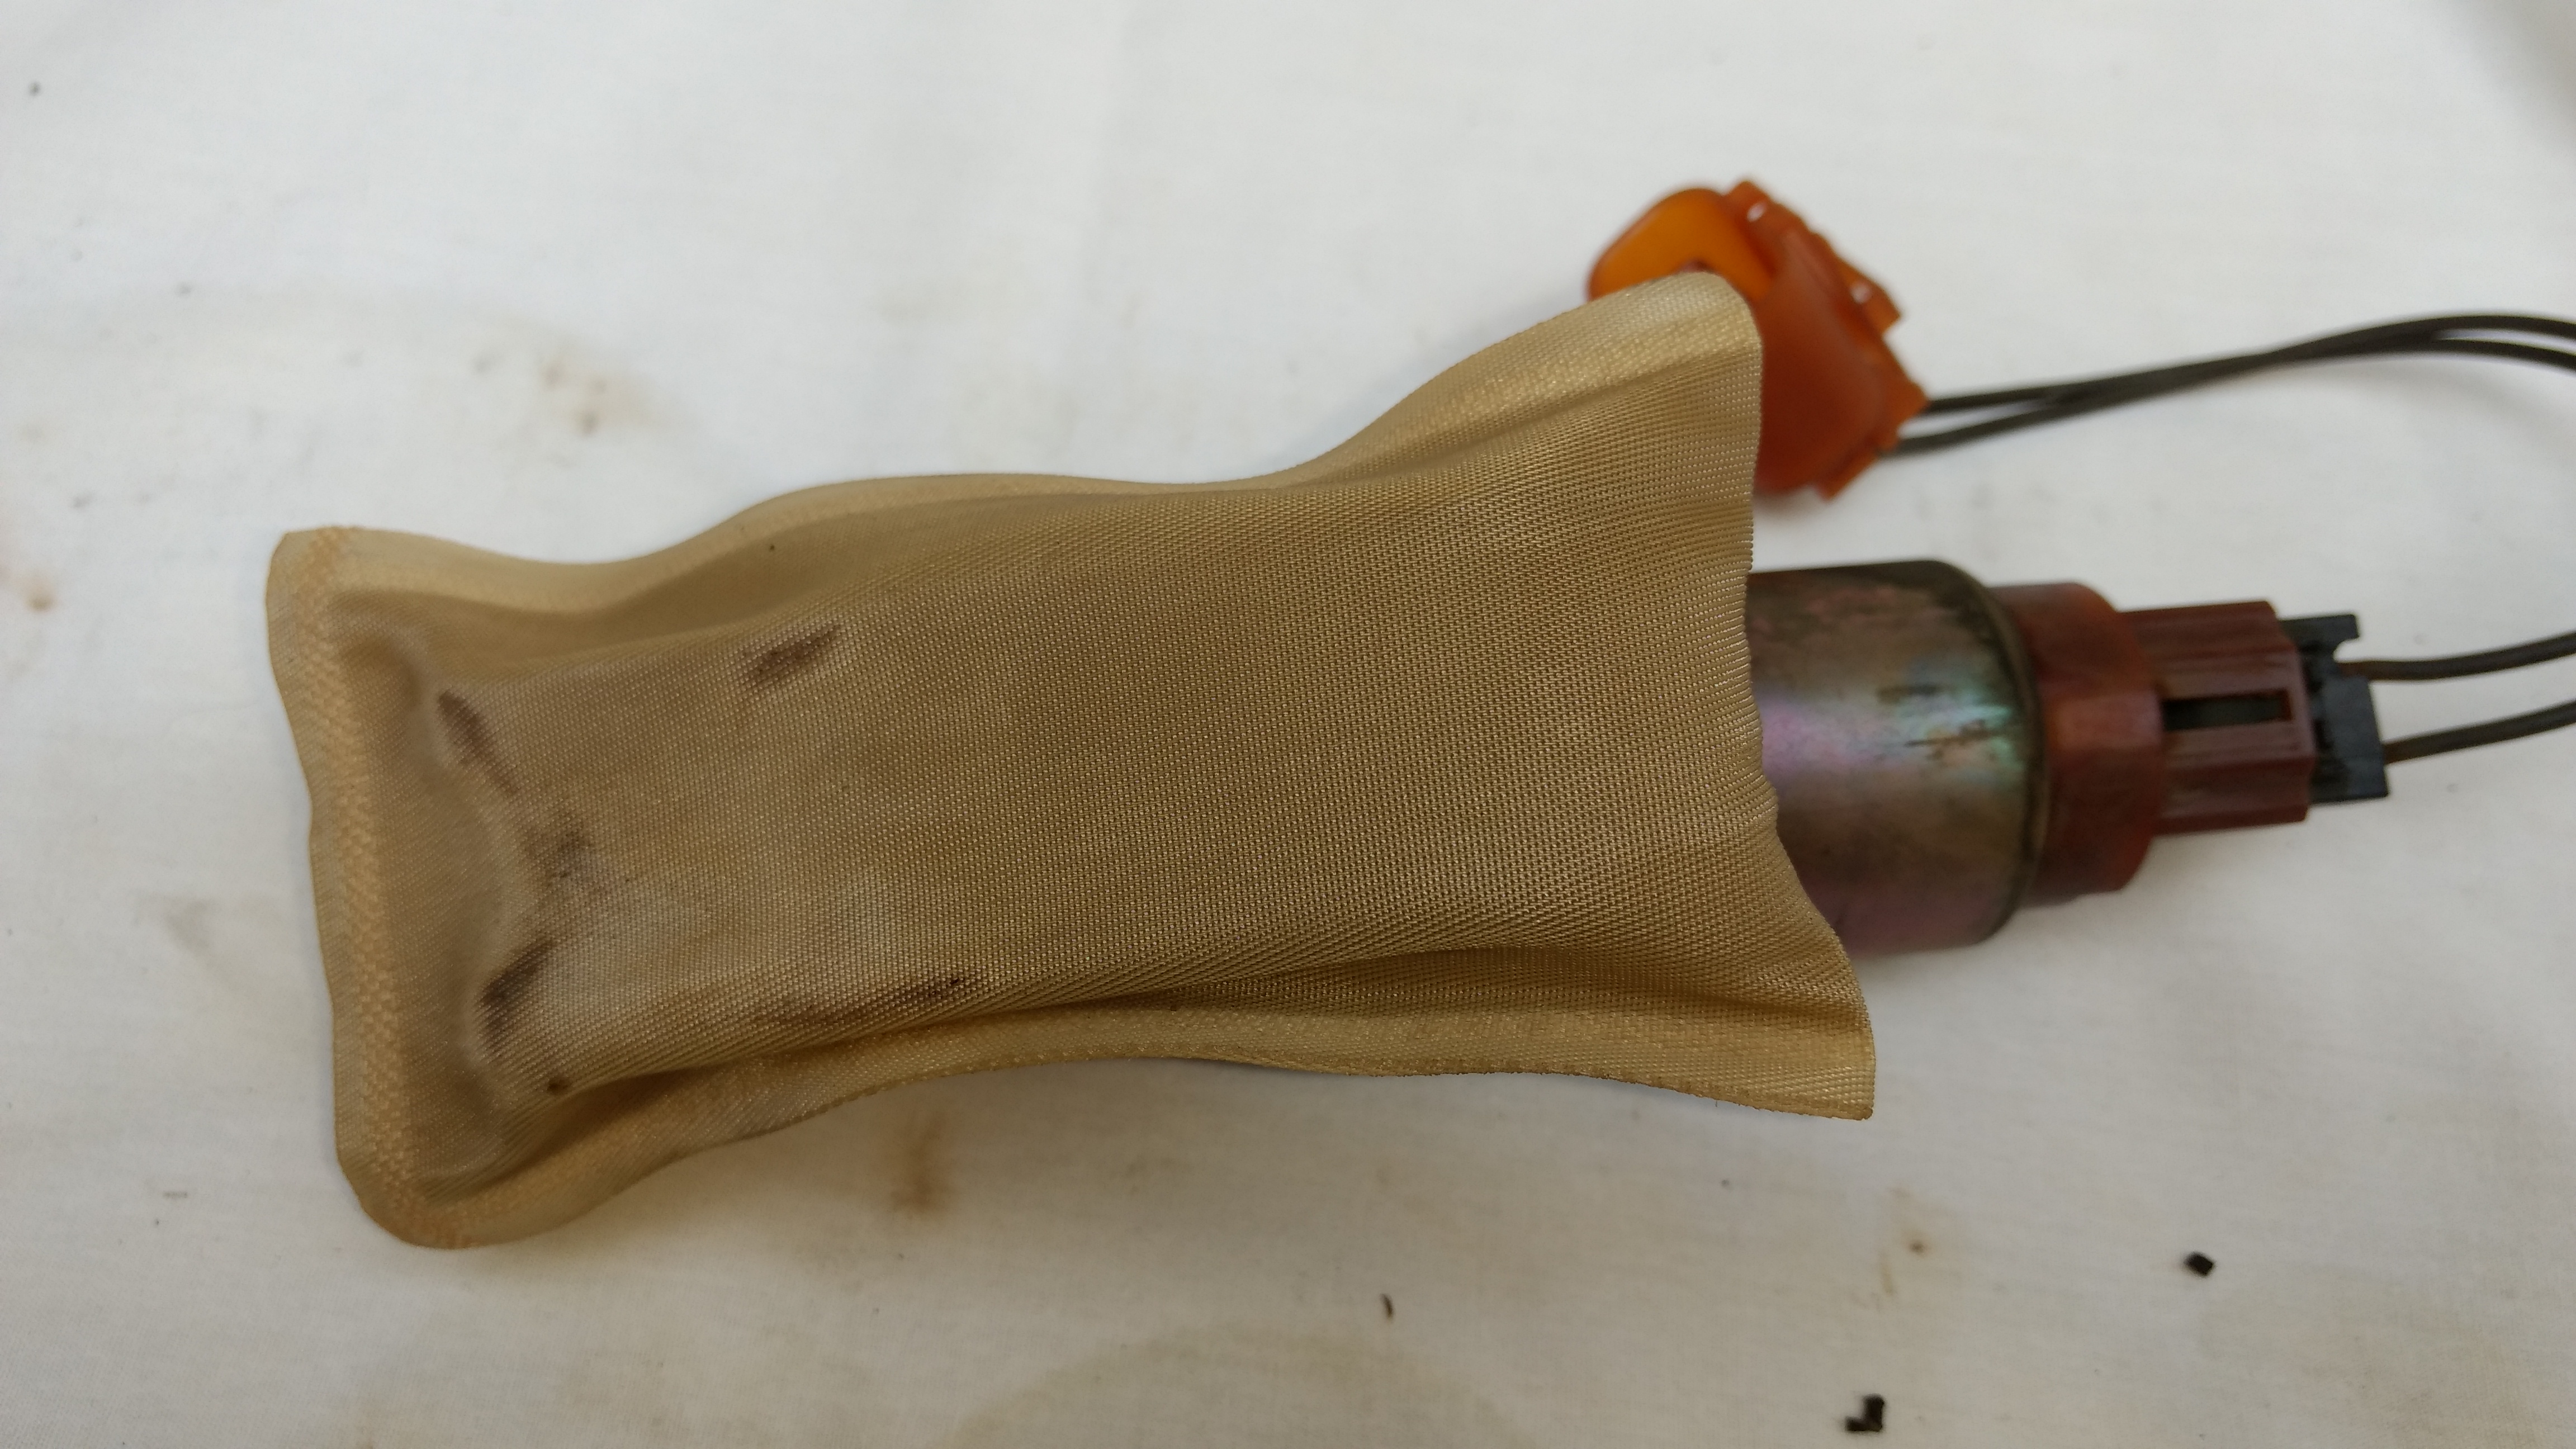
Another picture of the old 98 model pump.
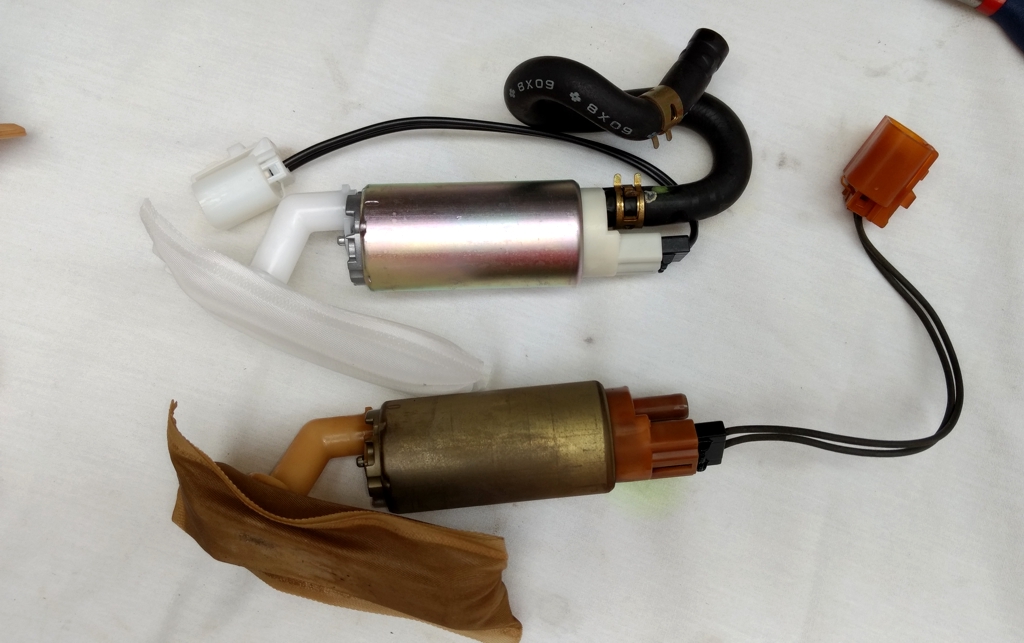
New compared to old.
Picture of the pump and housing after removal from the tank.
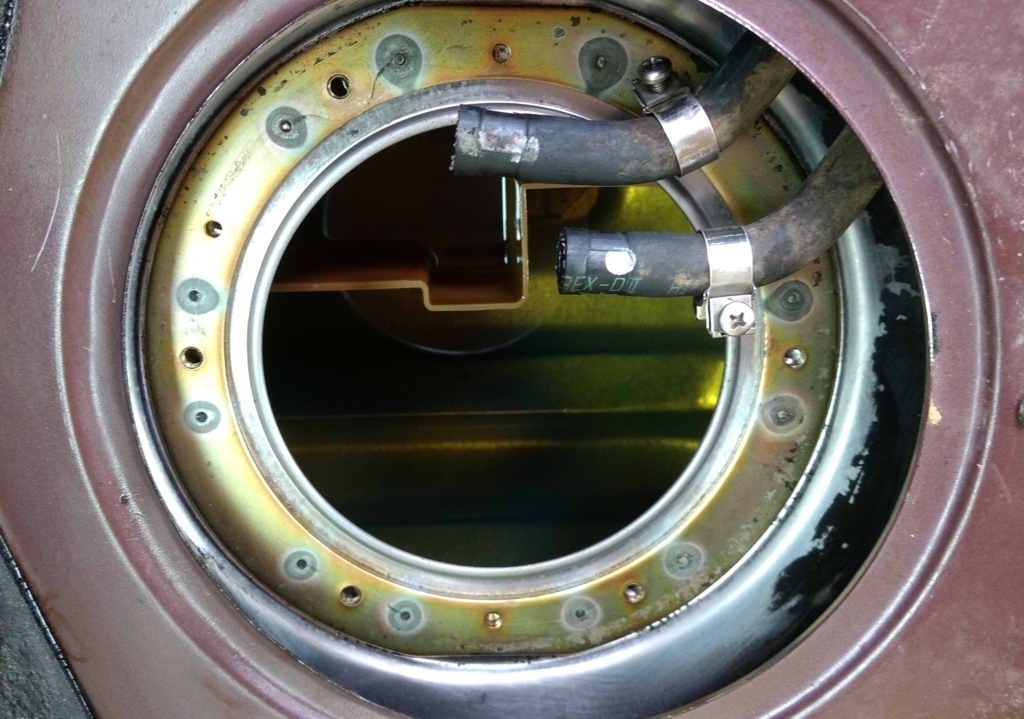
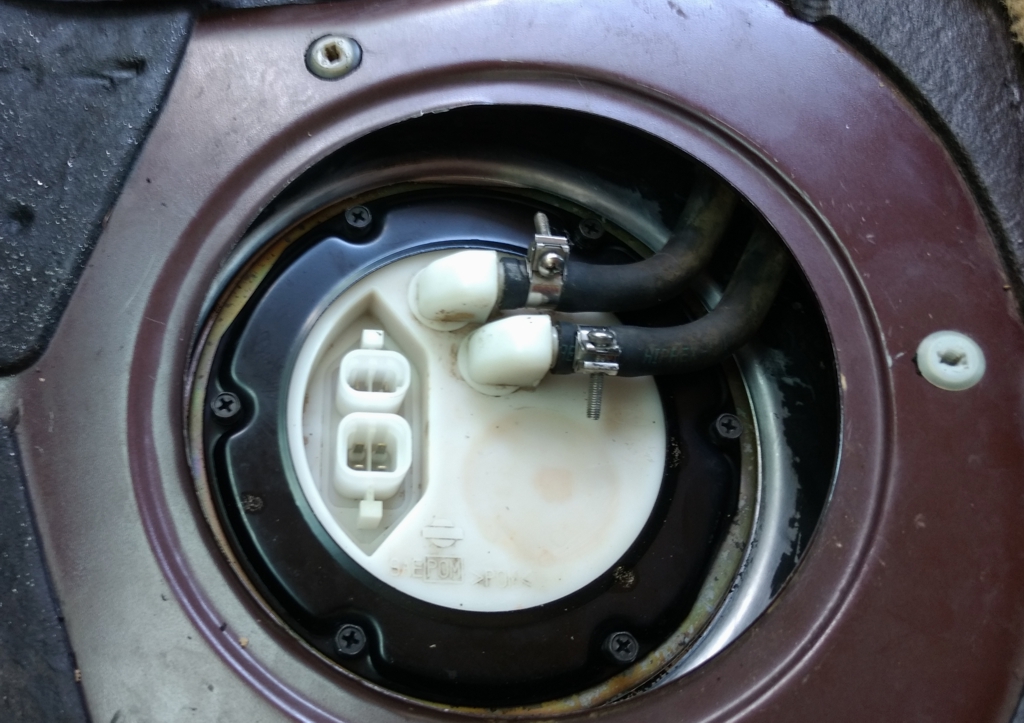
Looking down inside the tank. Surprisingly, I did not find any garbage at the tank bottom.
New pump and pump housing before closing the outer cover.
New pump mounted in the housing and ready for installation. Note the pump release clip location.
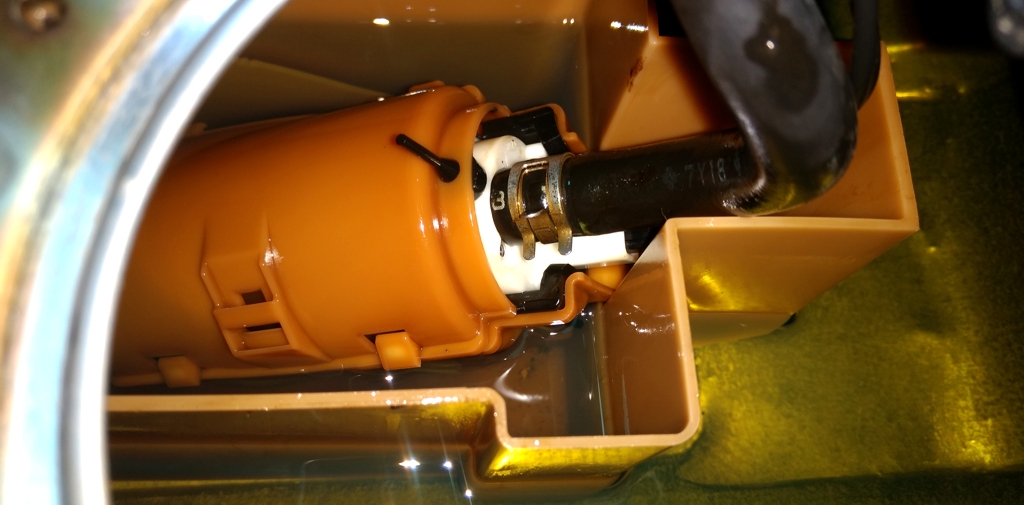
Submerging the new pump and housing into mounting area before reinstalling the sending unit.
All done..
Videos referenced before changing pumps.
Video 1
:
Video 2
This video is where I saw the vacuum being use to clean up the sending unit cover before removal.
:
Since the old pumps were working and this is preventative maintenance, I didn't see any difference in performance around town. However, my son and I both noticed a performance improvement during aggressive driving usually with a wide open throttle above 4,000 RPM to red line. The new pumps most likely do a better job of keeping up with the demand from a full dump on the accelerator. The difference is small but still a nice improvement.
The pictures tell the real story.
Here's a picture of the new Hitachi pump part number FUP0015 and a Dorman 579-019 tank seal kit that I purchased from Advance Auto. I didn't actually need the metal retaining ring, but I replaced it since it came in the seal kit.

Look at all the dried MUD that caked up around 98 model's the sending unit cover.

The 99 model was better but I still vacuumed the area before removing the sending unit.

I used a vacuum to clean up the area before opening the seal.

On the 98 model I pulled the fuel pump fuse and ran the engine until I though all of the fuel had been removed from the lines. There was still a lot of fuel that came out of the lines. On the 99 model, I did not remove the fuse and run out fuel. I just removed the fuel tank cap. That worked well and I actually had less fuel running out of the lines on removal.
98 model's picture after removing the lines.

After lifting the sending unit out of the tank, I removed the electrical plug and the pump hose.

Here's a picture of the pump housing release clip. Lift the outer edge of clip upward to free the pump housing for removal.

Here's a picture of the old pump from the 98 model.

Another picture of the old 98 model pump.

New compared to old.

Picture of the pump and housing after removal from the tank.

Looking down inside the tank. Surprisingly, I did not find any garbage at the tank bottom.

New pump and pump housing before closing the outer cover.

New pump mounted in the housing and ready for installation. Note the pump release clip location.

Submerging the new pump and housing into mounting area before reinstalling the sending unit.

All done..

Videos referenced before changing pumps.
Video 1
:
Video 2
This video is where I saw the vacuum being use to clean up the sending unit cover before removal.
:
Last edited by CS_AR; 05-29-2017 at 05:34 PM.
 05-28-2017, 07:47 PM
#2
Senior Member

Join Date: May 2012
Location: Long Island
Posts: 1,565
Man, that is a big job to do it right and clean everything up like new while in there!
Quick question..... Did your low fuel lights work before you did this? Would fixing that require an additional part? Do they work now?
No smoking! LOL
Little details annoy me when they don't work as they should!.
Congratulations!
I'm dropping my car off on Tuesday for the usual CS_AR midlife refresh.
I want the whole shebang!
05-28-2017, 07:55 PM
#3
Senior Member
Thread Starter
Join Date: Jan 2011
Location: Central AR
Posts: 3,041
So I guess I didn't throw anything off with the sending unit.
We try to refill when the gauge gets to 1/4 of a tank reading. It has been years since I've seen a low fuel indicator light on any of the Nissans.
05-29-2017, 03:32 PM
#4

Good luck with your Hitachi FU0015 fuel pumps. I installed mine in April 2016 and it's still operating fine 14,000+ later.
The FU0015 is a little stronger than the OEM fuel pump sending 40PSI while idling but with the FPR doing it's job no issues have evolved. Still getting 25mpg and no rich mixture code ever appeared.
My tank seal was rusted so I also replaced it. I'd much rather be covered in mud than cancerous rust.
The FU0015 is a little stronger than the OEM fuel pump sending 40PSI while idling but with the FPR doing it's job no issues have evolved. Still getting 25mpg and no rich mixture code ever appeared.
My tank seal was rusted so I also replaced it. I'd much rather be covered in mud than cancerous rust.
Last edited by jholley; 05-29-2017 at 03:45 PM.
05-30-2017, 01:48 PM
#5

I hope you didn't lose the gasket that seals the fuel pump connector on the bottom of the sending unit. Mine fell out and I lucked out and saw it. Took me a while to figure where it came from.
Also, you can calibrate the fuel gauge if it is incorrect. The procedure is in the FSM. The variable resistor on the float/sending unit is adjustable.
See photos here:
https://maxima.org/forums/4th-genera...ding-unit.html
Also, you can calibrate the fuel gauge if it is incorrect. The procedure is in the FSM. The variable resistor on the float/sending unit is adjustable.
See photos here:
https://maxima.org/forums/4th-genera...ding-unit.html
05-30-2017, 01:53 PM
#6
Senior Member
Thread Starter
Join Date: Jan 2011
Location: Central AR
Posts: 3,041
I hope you didn't lose the gasket that seals the fuel pump connector on the bottom of the sending unit. Mine fell out and I lucked out and saw it. Took me a while to figure where it came from.
Also, you can calibrate the fuel gauge if it is incorrect. The procedure is in the FSM. The variable resistor on the float/sending unit is adjustable.
See photos here:
https://maxima.org/forums/4th-genera...ding-unit.html
Also, you can calibrate the fuel gauge if it is incorrect. The procedure is in the FSM. The variable resistor on the float/sending unit is adjustable.
See photos here:
https://maxima.org/forums/4th-genera...ding-unit.html