Trunk Leak!
#41
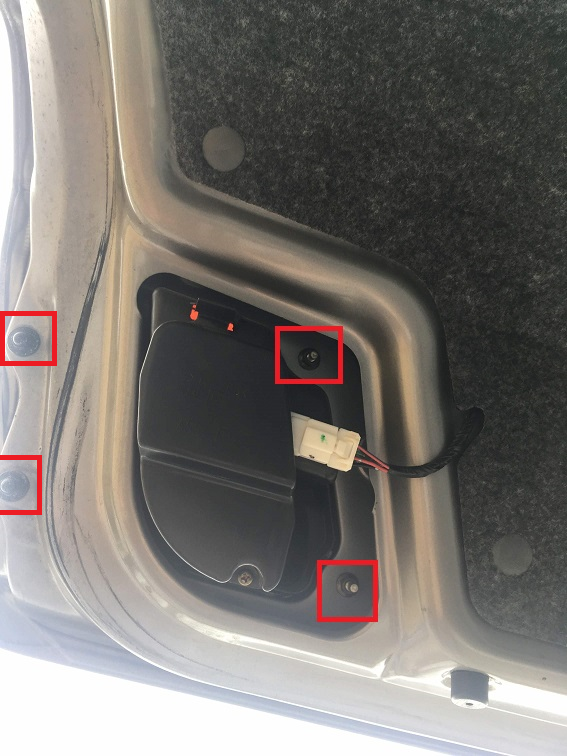
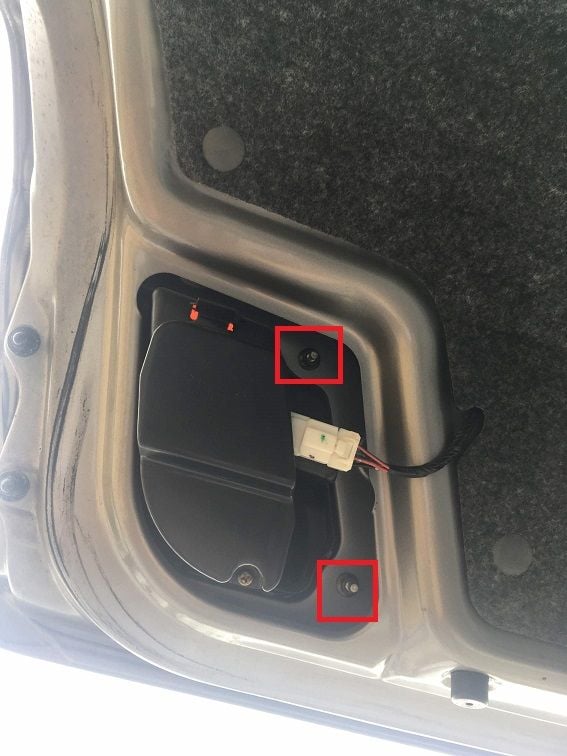
Besides the two bolts highlighted in your red squares, you have two more bolts to undo at the far left of your picture. Use a blowdryer on high. Push hard. Don't bother trying to clean up the remaining butyl, it will be impossible. Wear gloves, you don't want that butyl crap on your hands; it doesn't come off for days and multiple showers. Ask me how I know.
#42
Don't use the stuff from autozone, it won't like the bends you will need to make. I'm sure the stuff on nissanpartsdeal would work, but the price is up there. Plus you will have to pay for shipping, making it even more expensive. Either go with the stuff that CS_AR linked to or the stuff I suggested. Be advised that you will need to be filling a quarter inch gap or so in some spots.
 I'm getting the Morimoto butyl (recommended by CS_AR) overnighted as a kind friend is lending me their garage on Wednesday. I paid about the same as I would have for the OEM stuff without express shipping.
Besides the two bolts highlighted in your red squares, you have two more bolts to undo at the far left of your picture. Use a blowdryer on high. Push hard. Don't bother trying to clean up the remaining butyl, it will be impossible. Wear gloves, you don't want that butyl crap on your hands; it doesn't come off for days and multiple showers. Ask me how I know.

Should I try and do all the rear taillights at this point or just wait til I spot another leak? Wednesday evening might not be long enough to do more than the problem light, but it will certainly be a learning experience.
#44
+1 - Bad stuff. I had to use Kerosene to get it off my hands. Its like tar..
Last edited by CS_AR; 01-21-2019 at 04:51 AM.
#45
Ok just an update!
Got the tail light housing out last night and re-sealed it. Used a heat gun for about 60 seconds all around the area shown in the FSM. Pushed with the nuts on the studs to get it started and then it came right out, no problems. Easy peasy.
Butyl is like chewing gum from hell. It's like the tar pit of my nightmares... I got nitrile gloves on and scooped out as much of the old stuff as I could while my friend helped me remove what was on the body. Then I unrolled a long strip of the new stuff into the "track" on the back of the housing, making sure to marry the seam where I cut it to the start of the strip. I also made thin strips of butyl that I wrapped around the base of the studs after putting their gaskets back on. I figured that would help prevent leaks from where the studs go through the trunk lid. Put the housing back onto the trunk and then hit it with the heat gun a little while we torqued the bolts back down. Everything snugged up nicely.
I drove back home in the rain last night and didn't see any leaks, but the leak has *always* been intermittent. So we'll see!
Last edited by Shrout1; 01-24-2019 at 01:57 PM.
#47
+1 From 3 years ago,m I have a small drop on the passenger side trunk lid where an aftermarket spoiler was installed using the original spoiler holes. If the weather warms a bit next month, I think I will use some Butyl under the spoiler posts to plug that leak.
BTW - People use the Butyl roll you bought to reseal leaking R-34 (looking) headlights.
#48
She's been through two rainstorms with no major leaks now! I still need to replace the antenna nut  But I think I might have solved the major leak. Once I do a little work to the antenna I'm going to put the interior back in. Hopefully I got it!
 But I think I might have solved the major leak. Once I do a little work to the antenna I'm going to put the interior back in. Hopefully I got it!
#49
#54
yeah that butyl was gross but it seems to get the job done. Looks like they use it in boats a lot!
the key take away when I was researching butyl is that you canít turn a screw in it, rather you put it on the bottom of a bolt or stud and then tighten the nut down onto it. That prevents it from ripping a hole in your new butyl
the key take away when I was researching butyl is that you canít turn a screw in it, rather you put it on the bottom of a bolt or stud and then tighten the nut down onto it. That prevents it from ripping a hole in your new butyl

Thread
Thread Starter
Forum
Replies
Last Post


