
Maxima HID Retrofit Build
 09-26-2011, 12:09 AM
#81

00-01 E46 Bi-X Retro w/Di-Noc CF Vinyl wrapped bezel: 9/25/11 Complete
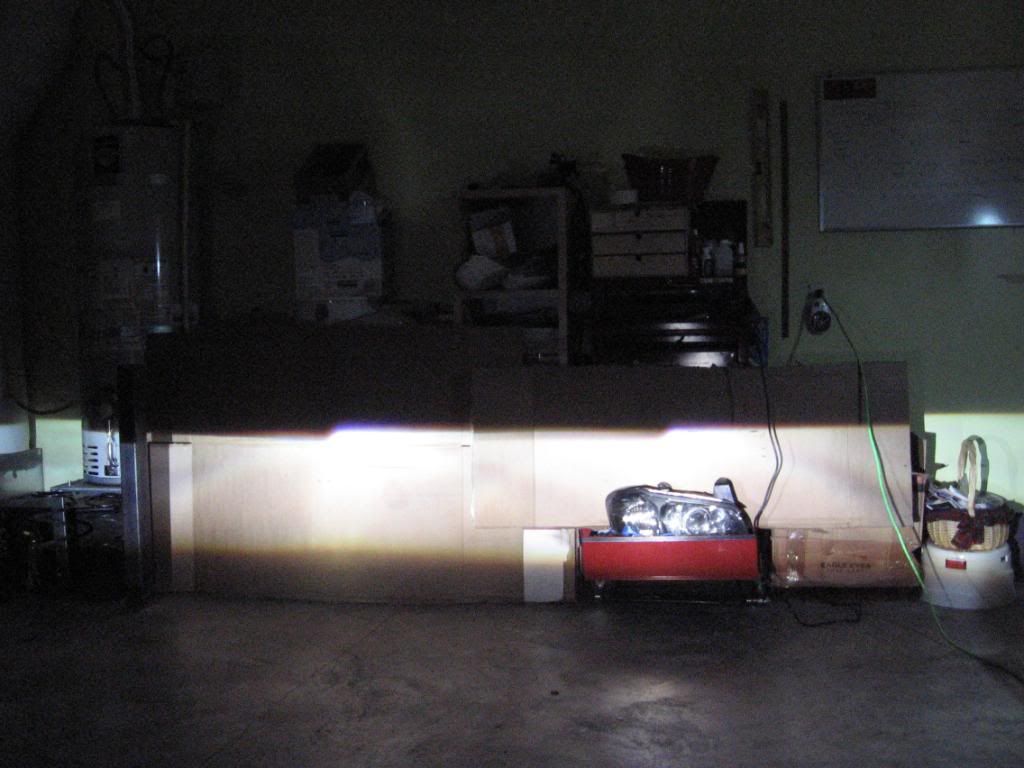
OK, just completed the retro and mounted.

It is AMAZING on the road. I've had half a dozen setup before, this is the best I've seen so far. It blew my old FX35 setup out of the water. It made the Mini H1 setup like Halogen. I'm shocked that E46 Bi-X can be this good.

I'm pretty happy with the result. I need to tweak the height adjustment a little since it is now at 1.5" drop or less and I'm already running out of height travel. Don't want to open it up again yet, so, I might have to shim/tilt the headlight a little bit down. I haven't tried the hi beam yet since I need few parts to complete the wiring. Cut off is awesome, I like this better than my old FX also. Not soo much blue, but purple and yellow instead. One thing that I'm impressed was the distance.
It is AMAZING on the road. I've had half a dozen setup before, this is the best I've seen so far. It blew my old FX35 setup out of the water. It made the Mini H1 setup like Halogen. I'm shocked that E46 Bi-X can be this good.
I'm pretty happy with the result. I need to tweak the height adjustment a little since it is now at 1.5" drop or less and I'm already running out of height travel. Don't want to open it up again yet, so, I might have to shim/tilt the headlight a little bit down. I haven't tried the hi beam yet since I need few parts to complete the wiring. Cut off is awesome, I like this better than my old FX also. Not soo much blue, but purple and yellow instead. One thing that I'm impressed was the distance.
Last edited by Genes1s; 09-26-2011 at 12:15 AM.
 09-26-2011, 08:05 AM
#82


Great job! They do look nice. Get some daytime pics of the headlights on the car. I'd live to see how the CF looks in there. It's an idea I've played with for a while but I was only going to use it in small sections of the R34's.
They should hold up well to heat. I've seen others use that stuff in their retros and it's fine.
They should hold up well to heat. I've seen others use that stuff in their retros and it's fine.
09-26-2011, 08:53 AM
#83

I still don't understand why people neglect the e46 projectors... with little modification they are as good if not better that the tsx or tl or fx projectors... those are just simply overrated and horribly overpriced. Good Job MSU2000.. I have a set of the E46 bi-xenons I am putting in my gf car and for my maxi I am working on a dual set of a single MDX/camry projector with 9005 high beam... I have heavily modified the mdx projector with custom shields and e30 clear lens and the output is as good as it is on the tsx and tl... Great job again man...
09-26-2011, 10:29 AM
#84
Great job! They do look nice. Get some daytime pics of the headlights on the car. I'd live to see how the CF looks in there. It's an idea I've played with for a while but I was only going to use it in small sections of the R34's.
They should hold up well to heat. I've seen others use that stuff in their retros and it's fine.
They should hold up well to heat. I've seen others use that stuff in their retros and it's fine.
 09-26-2011, 07:26 PM
#89
09-26-2011, 07:32 PM
#90
09-26-2011, 07:44 PM
#91
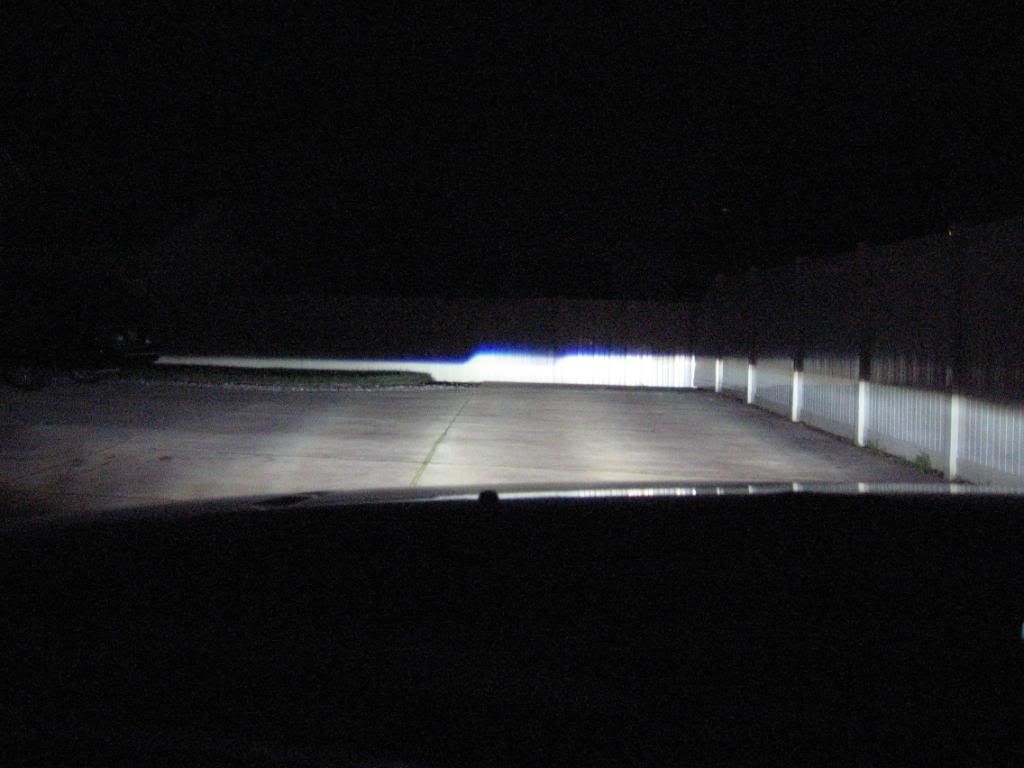
I need to find a flat wall to do wall shot and find out how wide the beam is....stay tune...
09-26-2011, 08:56 PM
#92
much much much better fit that the Morimoto... are you using the cutling shrouds on those?
I have seen a couple of people use the e-55r shrouds... looks good as well....
great figment one again ...
I have seen a couple of people use the e-55r shrouds... looks good as well....
great figment one again ...
09-26-2011, 10:30 PM
#93
Wiring issues: parking lights fuse keeps blowing.
Thanks everyone for the encouragement and support. I ran into several wiring problems tonight. Here is the scenario.
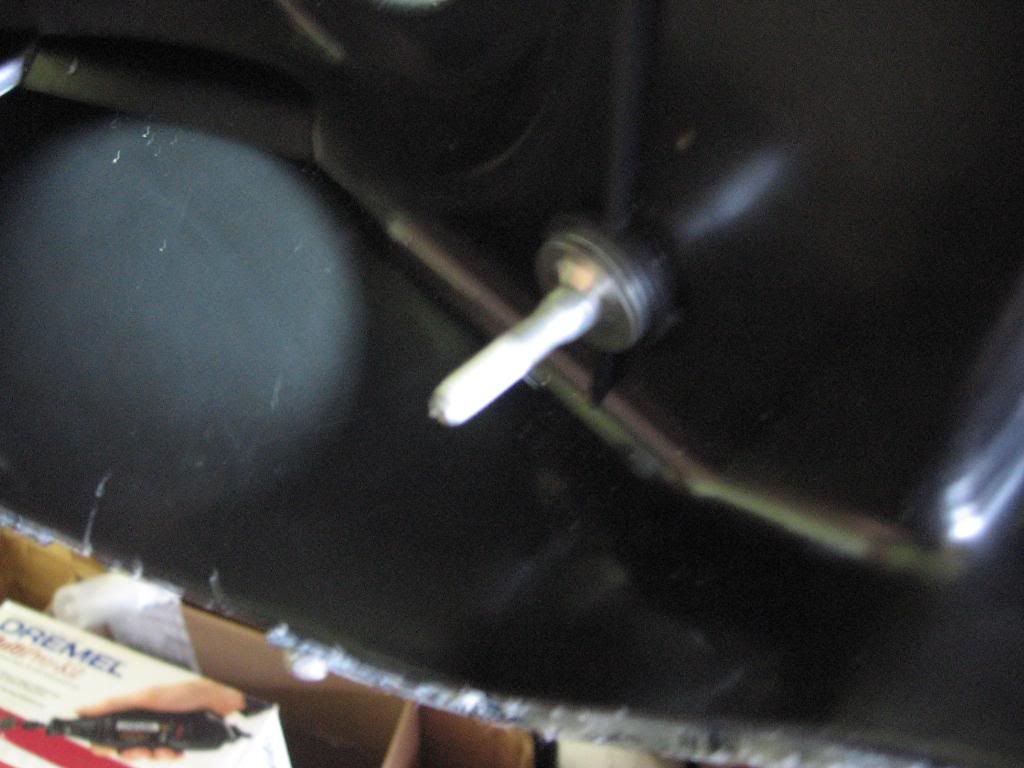
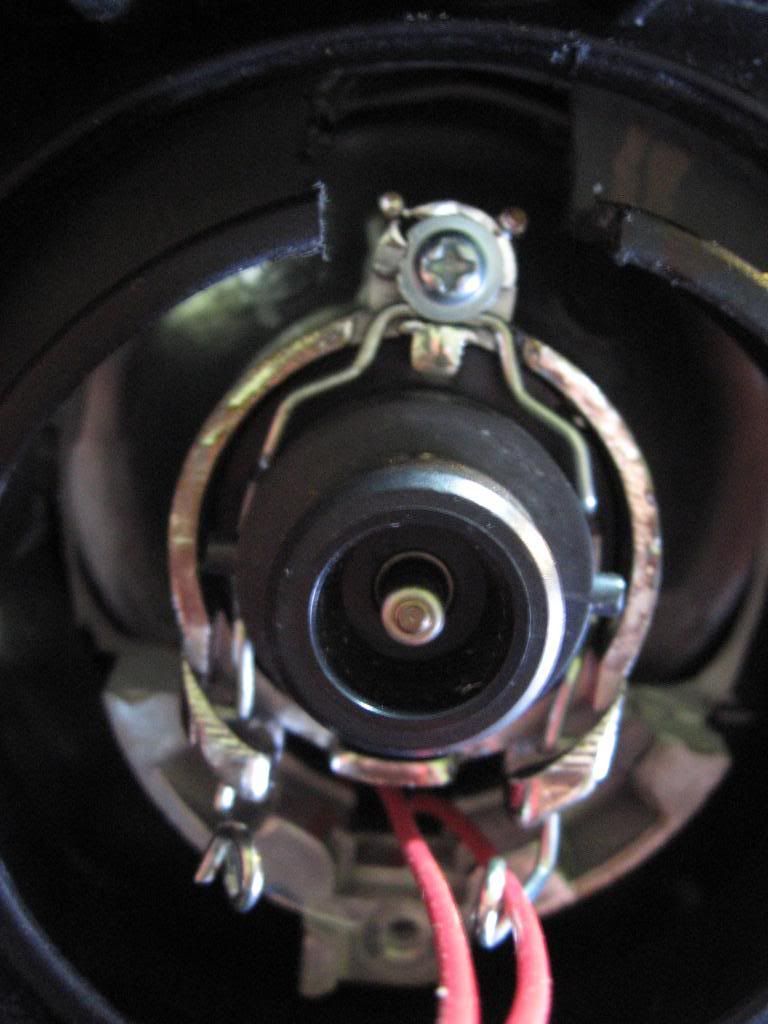
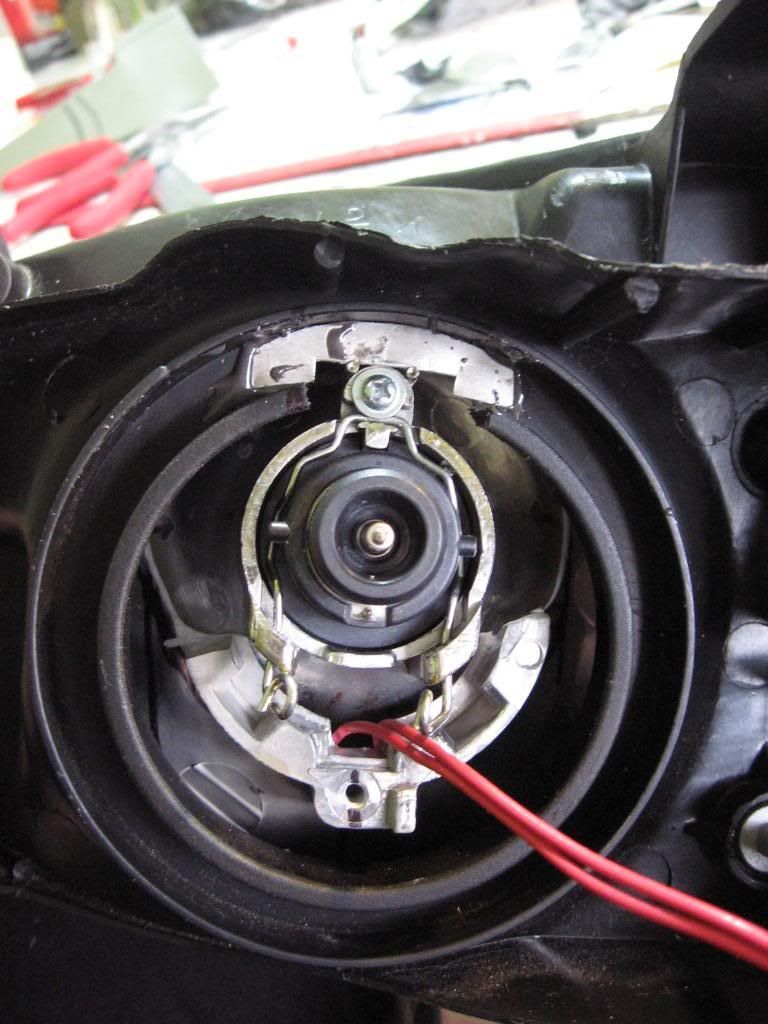
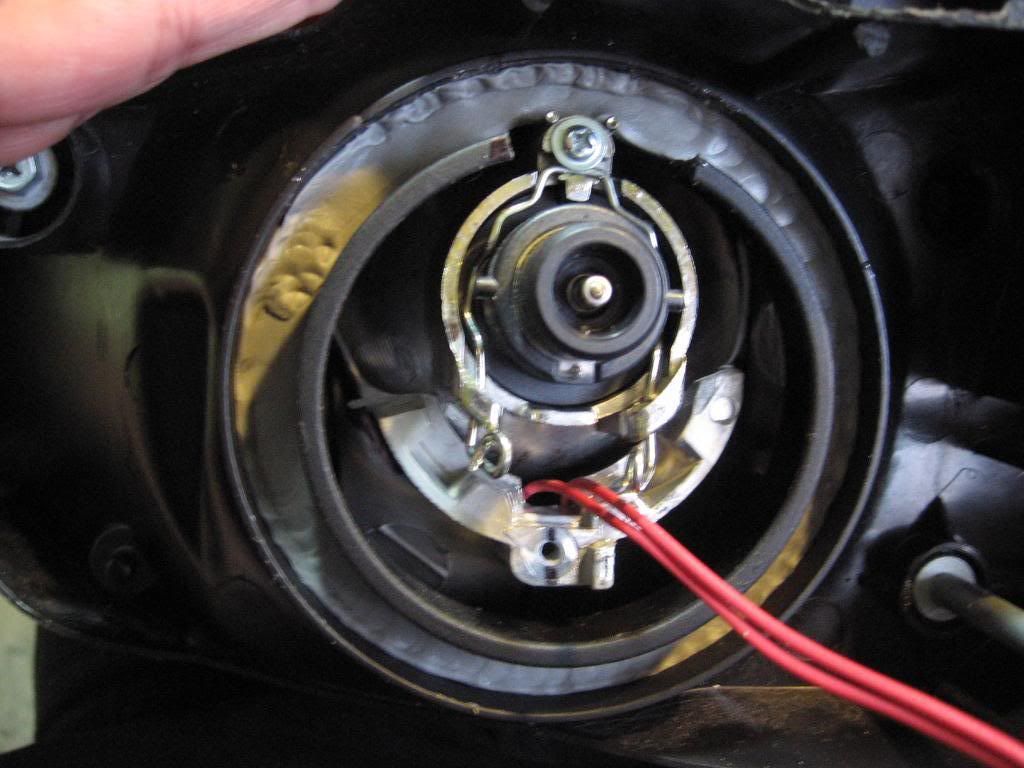
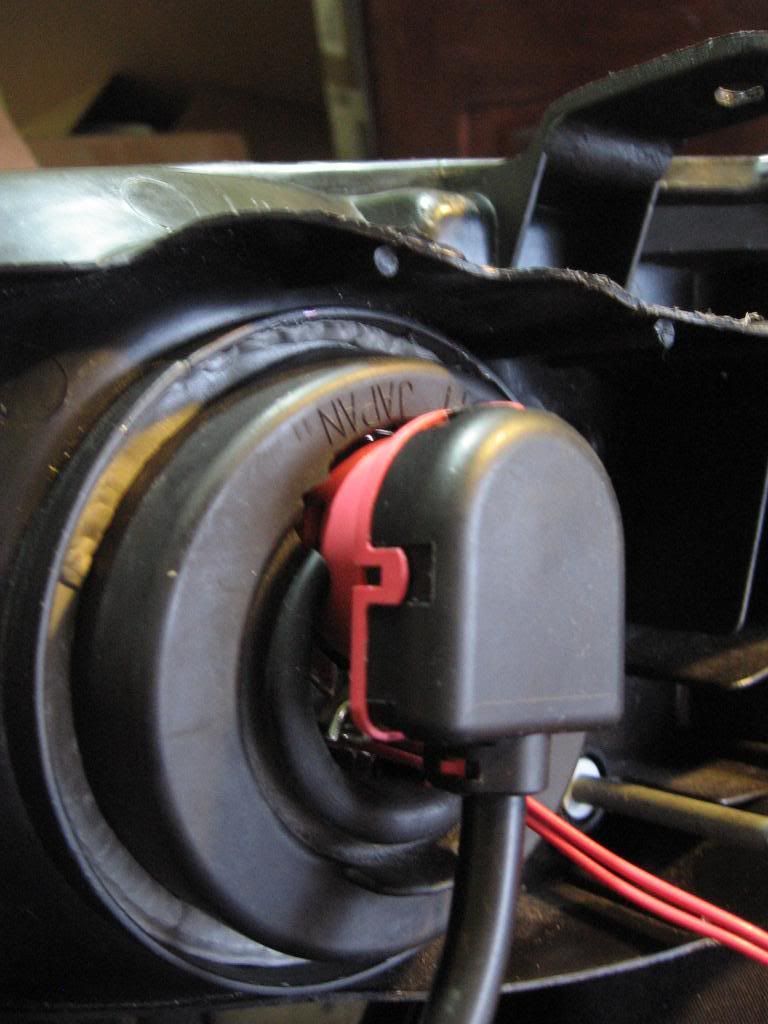
As you know the parking lights on the 5th gen Maxima is on bottom side (A) and next to the headlight (B).

The one next to the headlight (B) has dual filament bulbs and serves as both parking light and turn signal. It has 3 wires, 2+12V (one for corner light, one for turn signal light) and common ground (black). I wired my CCFL to +12V of the parking light (the one on the bottom side) and to - ground. Those black and red wires pointing to the top in the picture are the CCFL wires female connector leads. It was fine for awhile untill I blew both turn signal fuse (10amp) and corner light fuse (10 amp). Changed it twice and it blew again after 10-15 minutes.

Has anyone has any problem with this. CCFl should only take few hundred milli Amp. Should I wire the CCFL ground straight to main ground for better ground connection.
So I unpluged both CCFL connectors off and I still got blown tail light fuse which covers all dash lights, parking lights, and fog lights. Headlights, turn signals, and brake lights work just fine.
It made me to think that I might have short circuit somewhere. I used quick splice except on one ground connection (solder and taped). I even taped the open connector to the CCFl that I didn't use. Has anyone ran into problem like this?
As you know the parking lights on the 5th gen Maxima is on bottom side (A) and next to the headlight (B).
The one next to the headlight (B) has dual filament bulbs and serves as both parking light and turn signal. It has 3 wires, 2+12V (one for corner light, one for turn signal light) and common ground (black). I wired my CCFL to +12V of the parking light (the one on the bottom side) and to - ground. Those black and red wires pointing to the top in the picture are the CCFL wires female connector leads. It was fine for awhile untill I blew both turn signal fuse (10amp) and corner light fuse (10 amp). Changed it twice and it blew again after 10-15 minutes.
Has anyone has any problem with this. CCFl should only take few hundred milli Amp. Should I wire the CCFL ground straight to main ground for better ground connection.
So I unpluged both CCFL connectors off and I still got blown tail light fuse which covers all dash lights, parking lights, and fog lights. Headlights, turn signals, and brake lights work just fine.
It made me to think that I might have short circuit somewhere. I used quick splice except on one ground connection (solder and taped). I even taped the open connector to the CCFl that I didn't use. Has anyone ran into problem like this?
Last edited by Genes1s; 09-26-2011 at 10:33 PM.
09-26-2011, 10:37 PM
#94

Thanks everyone for the encouragement and support. I ran into several wiring problems tonight. Here is the scenario.
As you know the parking lights on the 5th gen Maxima is on bottom side (A) and next to the headlight (B).
The one next to the headlight (B) has dual filament bulbs and serves as both parking light and turn signal. It has 3 wires, 2+12V (one for corner light, one for turn signal light) and common ground (black). I wired my CCFL to +12V of the parking light (the one on the bottom side) and to - ground. Those black and red wires pointing to the top in the picture are the CCFL wires female connector leads. It was fine for awhile untill I blew both turn signal fuse (10amp) and corner light fuse (10 amp). Changed it twice and it blew again after 10-15 minutes.
Has anyone has any problem with this. CCFl should only take few hundred milli Amp. Should I wire the CCFL ground straight to main ground for better ground connection.
So I unpluged both CCFL connectors off and I still got blown tail light fuse which covers all dash lights, parking lights, and fog lights. Headlights, turn signals, and brake lights work just fine.
It made me to think that I might have short circuit somewhere. I used quick splice except on one ground connection (solder and taped). I even taped the open connector to the CCFl that I didn't use. Has anyone ran into problem like this?

 09-27-2011, 10:17 PM
#98
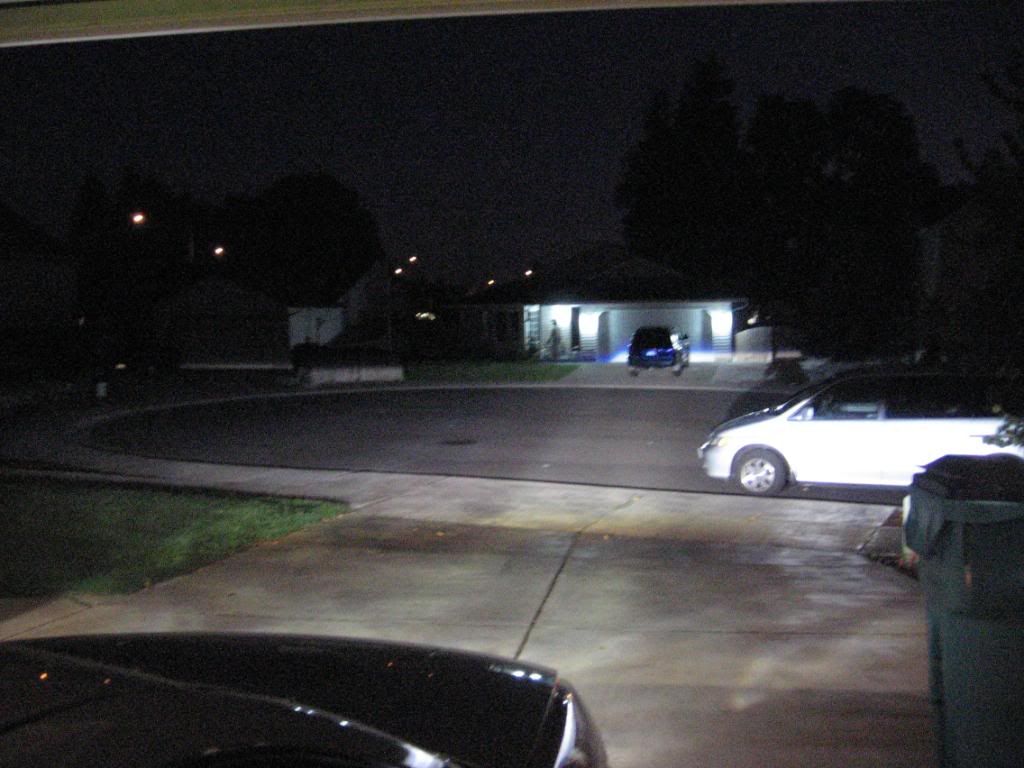
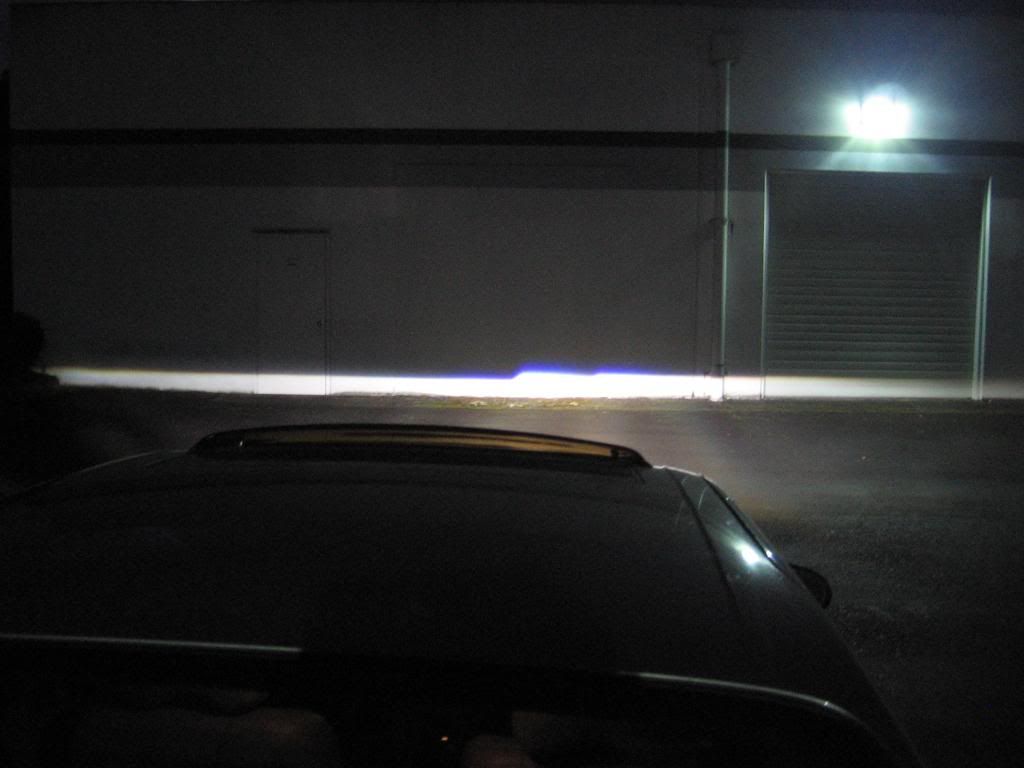
Thanks! Very pleased with the performance on the road. standing in front of the car, it doesn't look intense like TSX, RDX, or CTS, etc. Behind the wheel is where you see the intense cutoff bouncing off the wall at 200 feet.
10-03-2011, 09:23 PM
#99

 10-08-2011, 04:00 PM
#101
Looks good! The shroud can be tucked in a little deeper without having the projector lens sticking out IMO. I know what you mean, this 5.5 gen headight isn't to get the look right. It's hard to make it look better than its stock form IMO.
What are you going to do with your MatchBox?
What are you going to do with your MatchBox?
10-08-2011, 04:38 PM
#102
Looks good! The shroud can be tucked in a little deeper without having the projector lens sticking out IMO. I know what you mean, this 5.5 gen headight isn't to get the look right. It's hard to make it look better than its stock form IMO.
What are you going to do with your MatchBox?
What are you going to do with your MatchBox?
Def could have cut the shroud and fit it deeper but..I'm lazy and I hate trimming the shrouds so I let it be.
 10-08-2011, 09:34 PM
#105
You know, the Mini H1 should def fit in the low beam area even if you tuck it in deeper. The Mini is pretty skinny (width wise). The left/right adjustment screw is the culprit. You get wide flange or big dia projector in there and it will not sit flush due to adjustment screw in the way (unless you are OK with projector sticking out). Put H1 in the low beam and Matchbox back in high beam it's going to be money.
 10-16-2011, 09:06 AM
#107
FX-R Built: Sneak Peak
This is 00-01 FXR Retrofit for someone else. I have his permission to post the build process.

Cut Off at 15'
Cut Off at 140' or so
Cut Off at 50'
Both headlights. Driver side didn't have shroud yet.
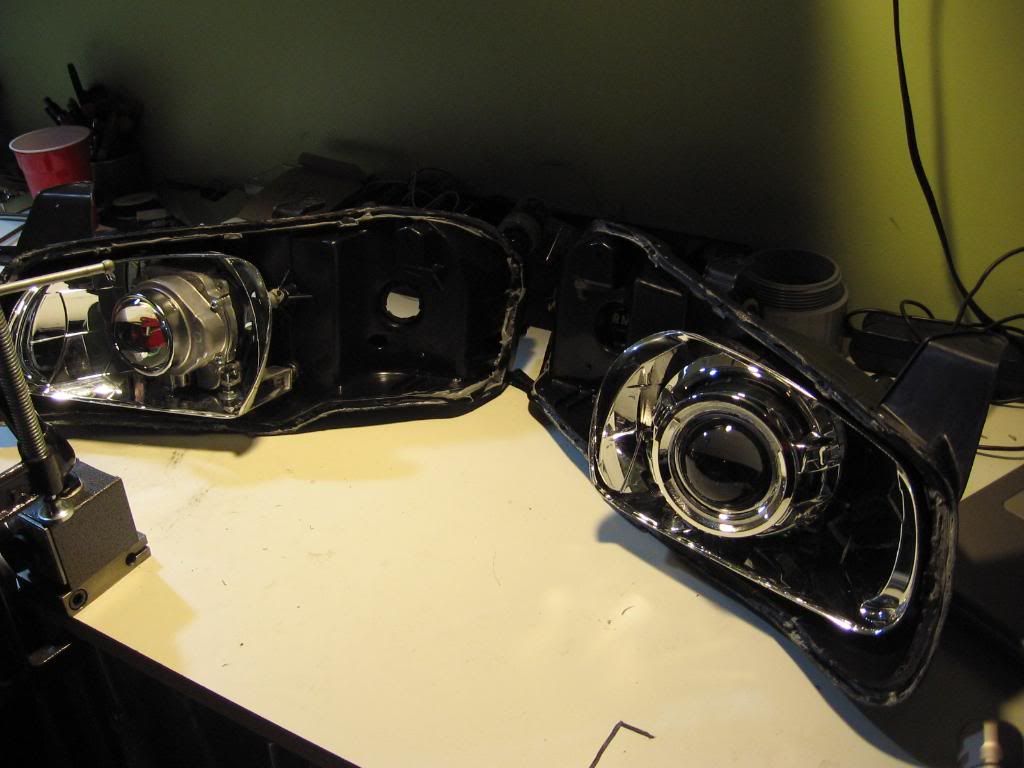
Stay tune.........
Cut Off at 15'
Cut Off at 140' or so
Cut Off at 50'
Both headlights. Driver side didn't have shroud yet.
Stay tune.........
Last edited by Genes1s; 10-18-2011 at 07:52 AM.
10-17-2011, 09:31 PM
#108
FX-R Built: Beginning stage
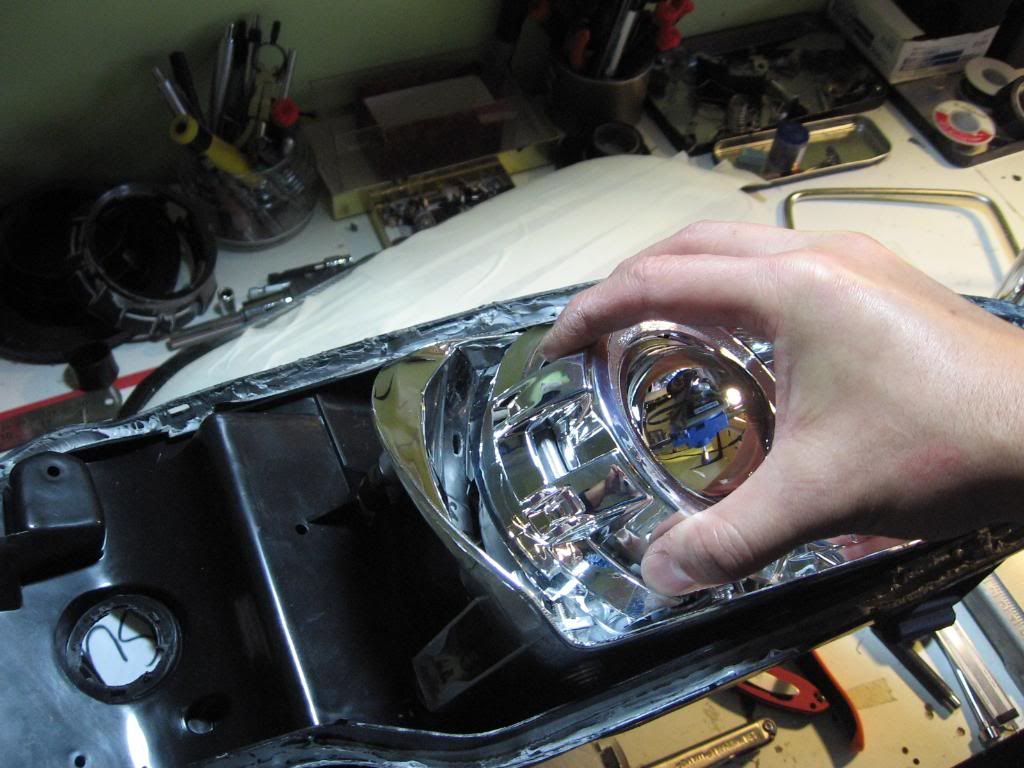
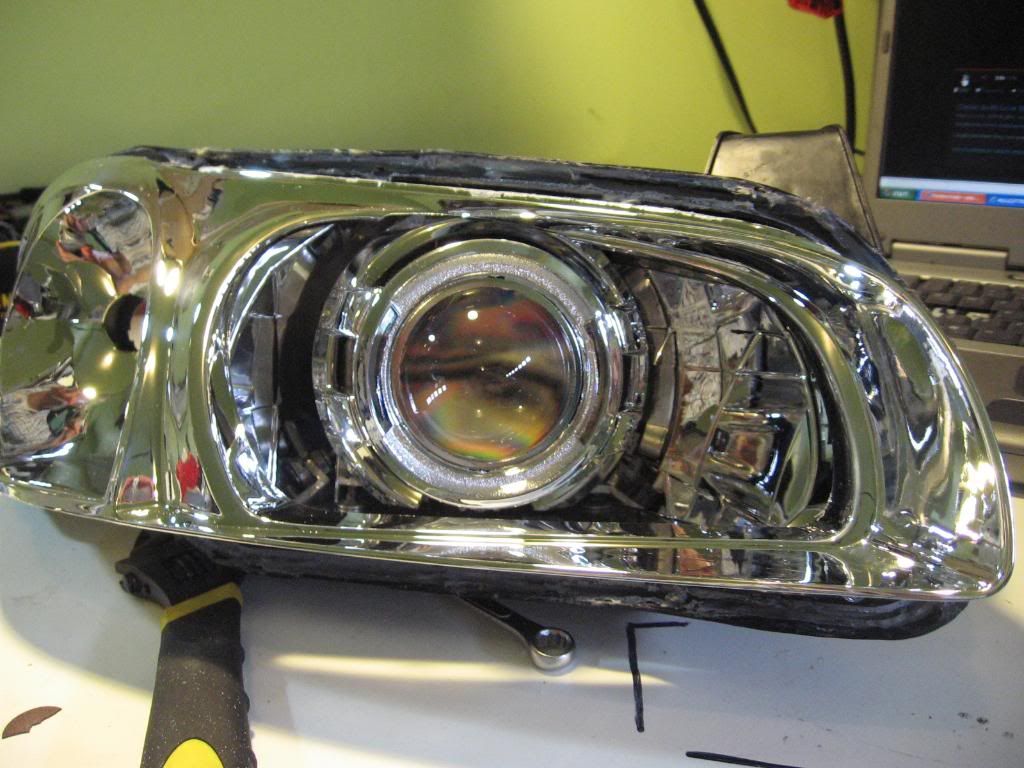
Headlights apart

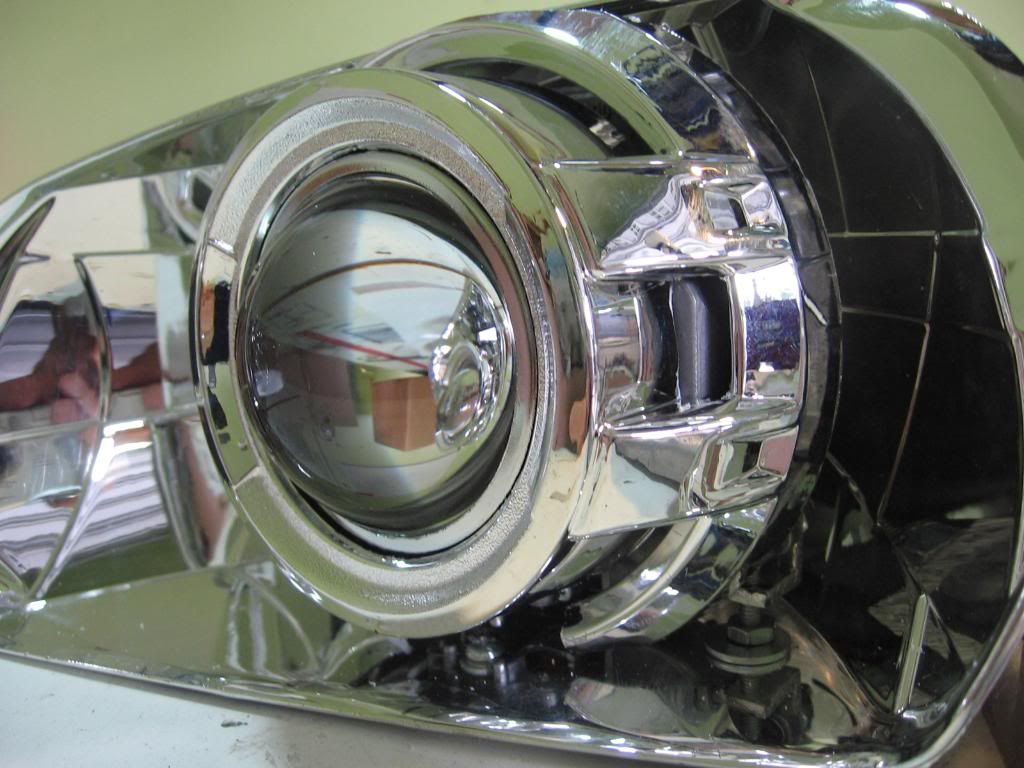
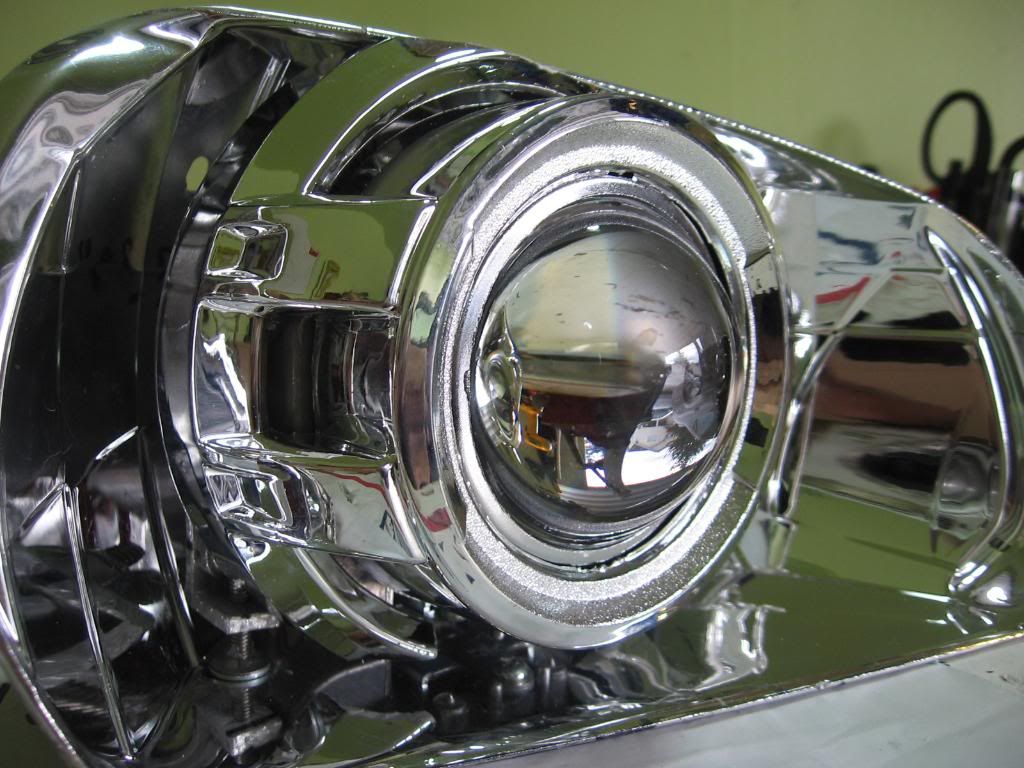
Trimmed projector

Test Fitting

Projector mounted

Beam shot

Test Fit Shroud
I was going to use GG shroud, but didn't look too good since it didn't cover the projector well. Used Apollo instead.


Alignment check

Wall shot

Trimmed projector
Test Fitting
Projector mounted
Beam shot
Test Fit Shroud
I was going to use GG shroud, but didn't look too good since it didn't cover the projector well. Used Apollo instead.
Alignment check
Wall shot
10-18-2011, 09:53 PM
#109
FX-R Vs E46 modded
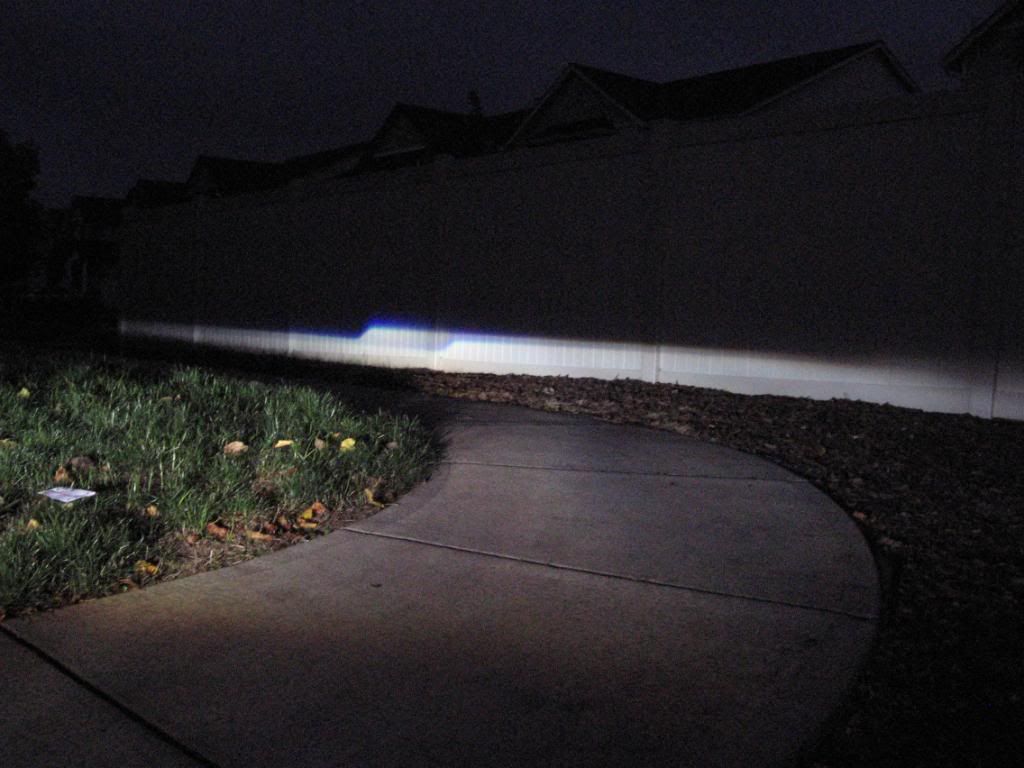
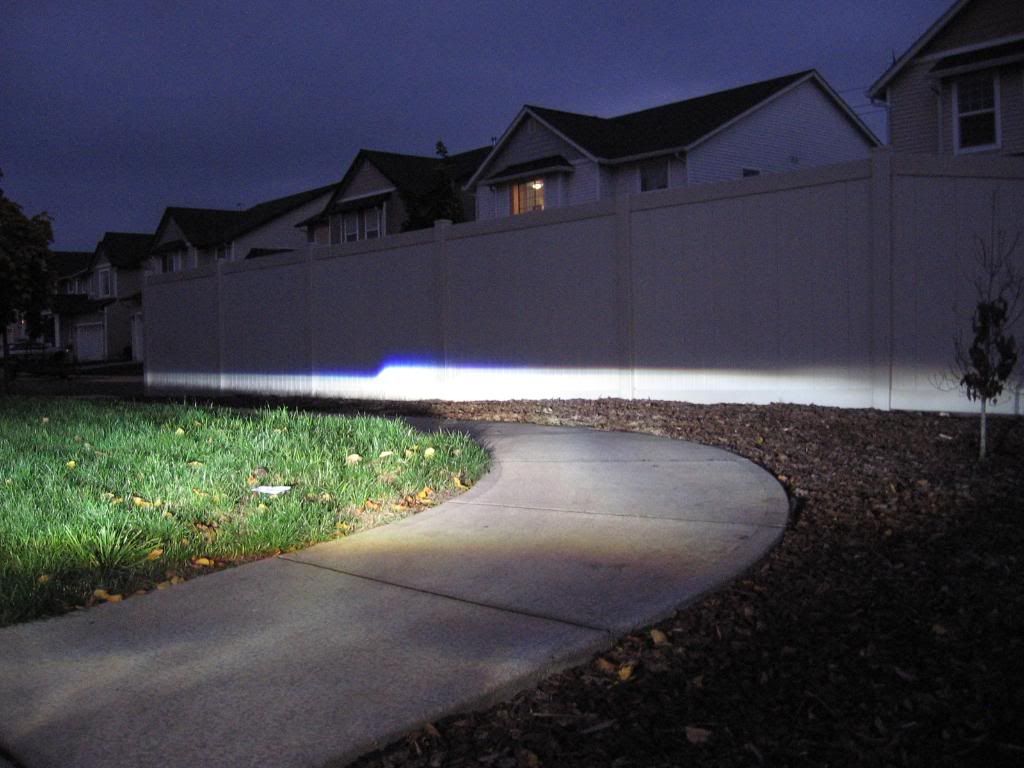
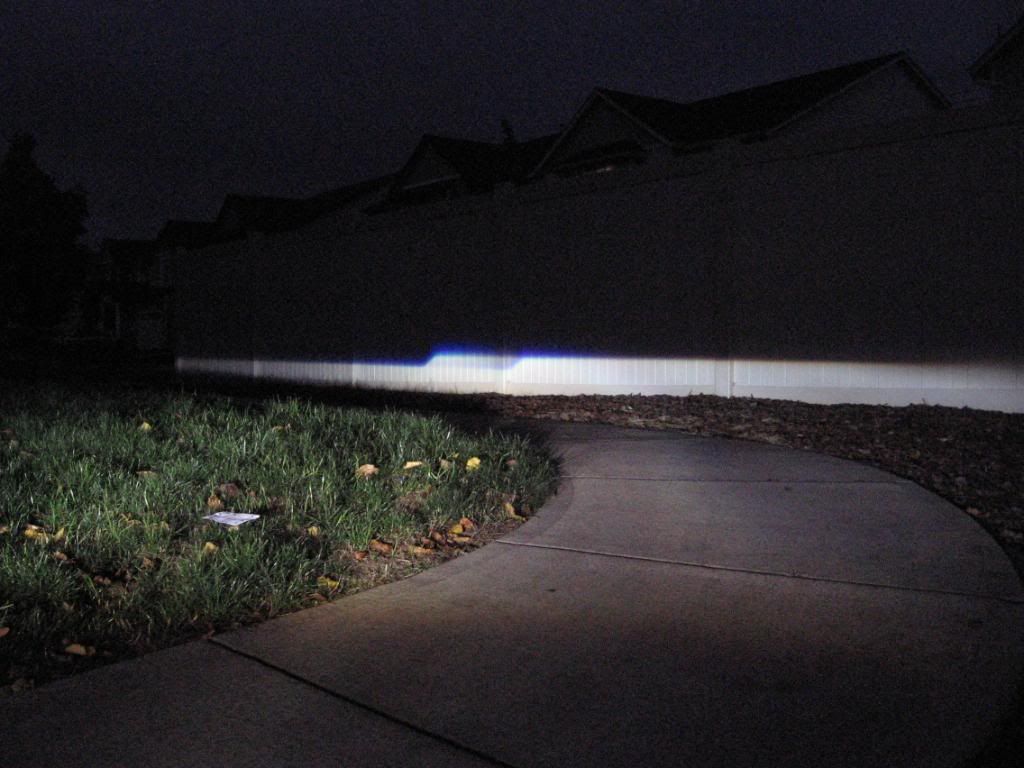
Ok, it's hard to find flat wall around my area, so this is best I can do so far. Same setting, HID components, same location.
50' wall shot
E46

FX-R


Overall, FX-R is more intense/brigthness below the cut off line, have sharper cut off, and more foreground than E46. I used to have FX35 OEM and it wasn't as intense as this FX-R.
Although E46 appeared to be dimmer, it has uniform beam pattern instead of spotty beam/pencil beam than FX-R has. It also has better high beam which throws the light down in the center more than FX-R. E46 blue band is also less agressive and pretty uniform along the cut off line. FX-R has far thicker blue band which produces crazy color flicker on the road.
We'll see how these two perform with 50W ballast.
50' wall shot
E46
FX-R
Overall, FX-R is more intense/brigthness below the cut off line, have sharper cut off, and more foreground than E46. I used to have FX35 OEM and it wasn't as intense as this FX-R.
Although E46 appeared to be dimmer, it has uniform beam pattern instead of spotty beam/pencil beam than FX-R has. It also has better high beam which throws the light down in the center more than FX-R. E46 blue band is also less agressive and pretty uniform along the cut off line. FX-R has far thicker blue band which produces crazy color flicker on the road.
We'll see how these two perform with 50W ballast.
10-19-2011, 07:33 AM
#110

Awesome work! Although the FX-R is more intense, I think the E46's are going to be much easier on the eyes while driving.
On a different - slightly off topic note, how did you seal the back of the 5.5 gen housings? My covers no longer fit on my fleabays and I can't come up with t good solution to seal them while leaving them accessible for bulb changes.
On a different - slightly off topic note, how did you seal the back of the 5.5 gen housings? My covers no longer fit on my fleabays and I can't come up with t good solution to seal them while leaving them accessible for bulb changes.
10-19-2011, 10:01 PM
#111
Awesome work! Although the FX-R is more intense, I think the E46's are going to be much easier on the eyes while driving.
On a different - slightly off topic note, how did you seal the back of the 5.5 gen housings? My covers no longer fit on my fleabays and I can't come up with t good solution to seal them while leaving them accessible for bulb changes.
On a different - slightly off topic note, how did you seal the back of the 5.5 gen housings? My covers no longer fit on my fleabays and I can't come up with t good solution to seal them while leaving them accessible for bulb changes.
My very first retro. Ran it for about 8 months in the WA/OR rainy season. No leak, condensation, no problem. Won't do this setup like this though if I can avoid it.

 10-22-2011, 09:27 PM
#115
FX-R Built: 90%done
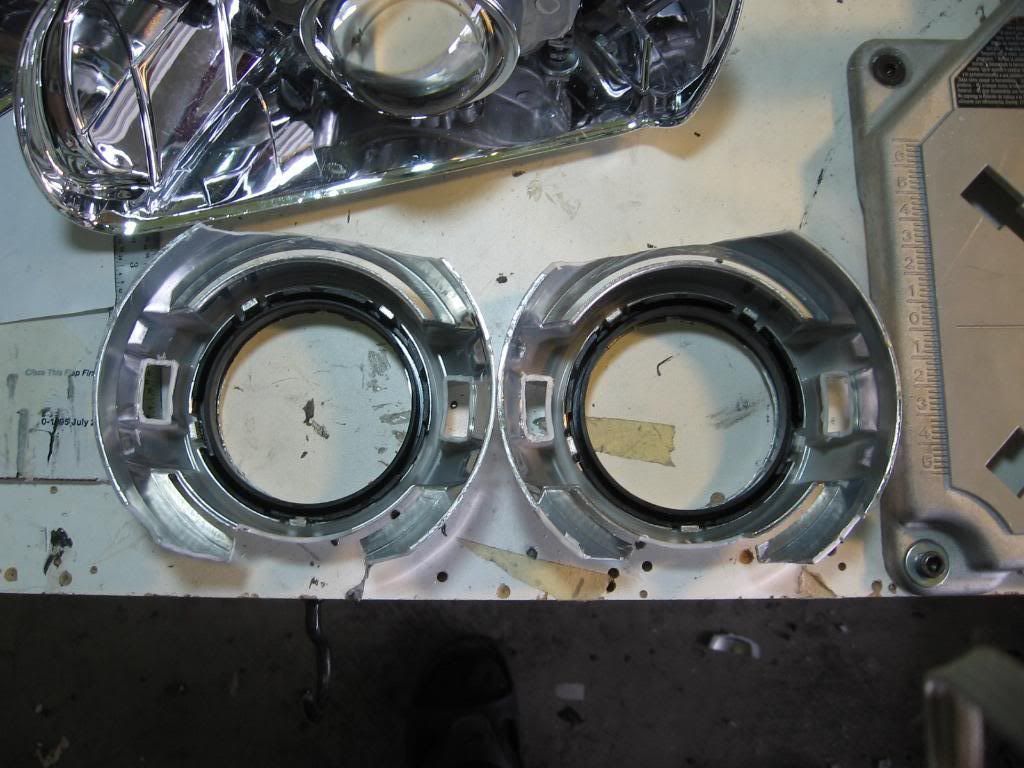
For some reason I have a lot of problem with these perticular brand headlights. From adjustment screws, to bezel won't budge open.
Anyway, I was planning to wrap it up and call it good tonight but instead have to wait few more days since I couldn't figure out to seperate the bezel from the headlight lens. I needed to trim the bezel a little to make clearance for verical adjustment since the Appolo is pretty big. I could've mounted the projector little futher back, but I was trying to maintain the clearance between D2S Connector and engine bay. So I had to make sacrifices.
Driver and passenger side are alligned to each other. Underexposed camera setting to show the beam pattern.
W/normal camera setting
Both at the same height w/underexposed setting
Car is about 30' off the wall

Now its time to trim and mount the shrouds.
Not necessary but I'd like to know if the part silicone part JB weld is doing its job to hold the shroud in place. Shake test.
More problem wit adjustment screw, this time is the horizontal adjustment screw. It's taped with silicone now.
It's time to figure how to seal the back of the housing. I had to cut the top portion of the holw to clear the projector, but I went a little too far thinking that I might not have enough to begin with.
Cut off aluminum flashing to take up the space, JB weld them and lay butyl tape on top to add more sealing surface.
W/OEM boot modified
Can't wait to get this done....
Anyway, I was planning to wrap it up and call it good tonight but instead have to wait few more days since I couldn't figure out to seperate the bezel from the headlight lens. I needed to trim the bezel a little to make clearance for verical adjustment since the Appolo is pretty big. I could've mounted the projector little futher back, but I was trying to maintain the clearance between D2S Connector and engine bay. So I had to make sacrifices.
Driver and passenger side are alligned to each other. Underexposed camera setting to show the beam pattern.
W/normal camera setting
Both at the same height w/underexposed setting
Car is about 30' off the wall
Now its time to trim and mount the shrouds.
Not necessary but I'd like to know if the part silicone part JB weld is doing its job to hold the shroud in place. Shake test.
More problem wit adjustment screw, this time is the horizontal adjustment screw. It's taped with silicone now.
It's time to figure how to seal the back of the housing. I had to cut the top portion of the holw to clear the projector, but I went a little too far thinking that I might not have enough to begin with.
Cut off aluminum flashing to take up the space, JB weld them and lay butyl tape on top to add more sealing surface.
W/OEM boot modified
Can't wait to get this done....
Last edited by Genes1s; 10-22-2011 at 09:34 PM.
10-22-2011, 11:22 PM
#117
10-23-2011, 02:55 PM
#118
FX-R Built: 10/23/11 update
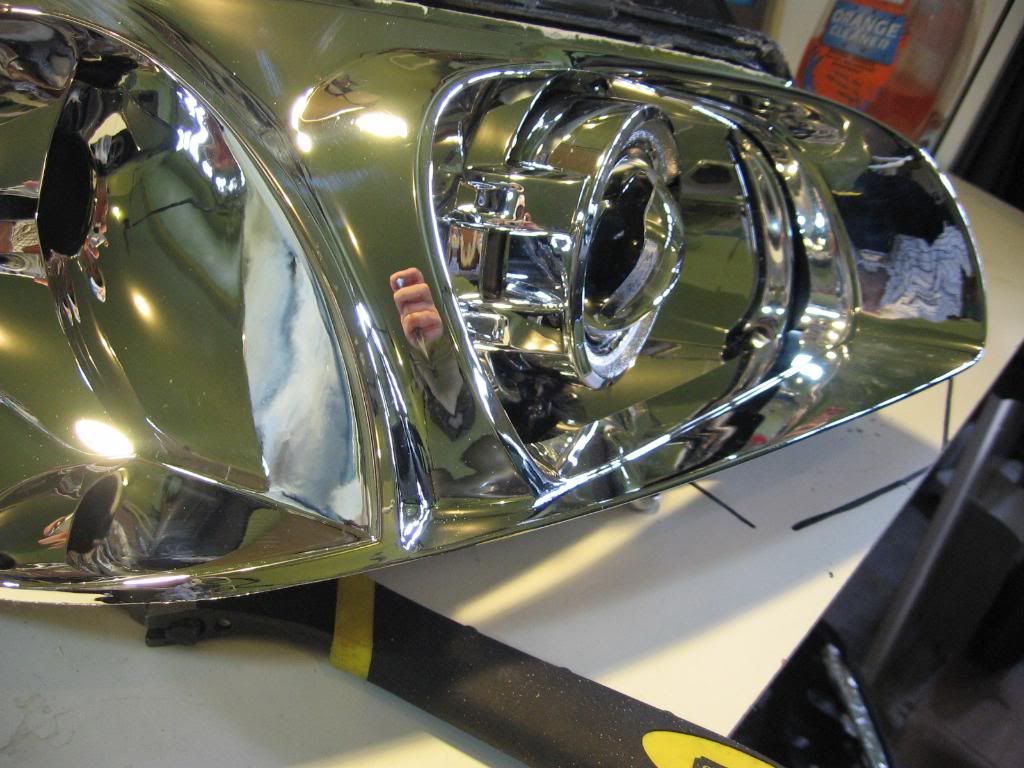
OK got the bezel out after heat gun and 1.5 hours of wrestling match with it. Bezel is trimmed ( took out about .125" material off the bottom edge) and looked pretty good EXCEPT my dremel wandered off and hit chrome area some of the chrome peeled off. I was about to throw the dremel away across the garage if my boy wasn't playing nearby. Sigh.....


Drive Side chrome damage

Passageer side
Passenger side
Drive Side chrome damage
Passageer side
Passenger side
10-24-2011, 01:49 PM
#119
Senior Member

Join Date: Jul 2011
Location: Ottawa, ON
Posts: 361
Omg, I am sooo jealous of the 5th gens right now I could beat my head against a wall, try fitting that thing into the 5.5 reflector bowl... good effin luck! love the FX-R's too by the way the highbeam is almost like an angel coming down from the heavens.