Interior overhaul and stereo upgrade
 01-04-2019, 09:40 AM
#41
Senior Member

Join Date: Aug 2013
Location: MO, greater KC Area-ish
Posts: 773
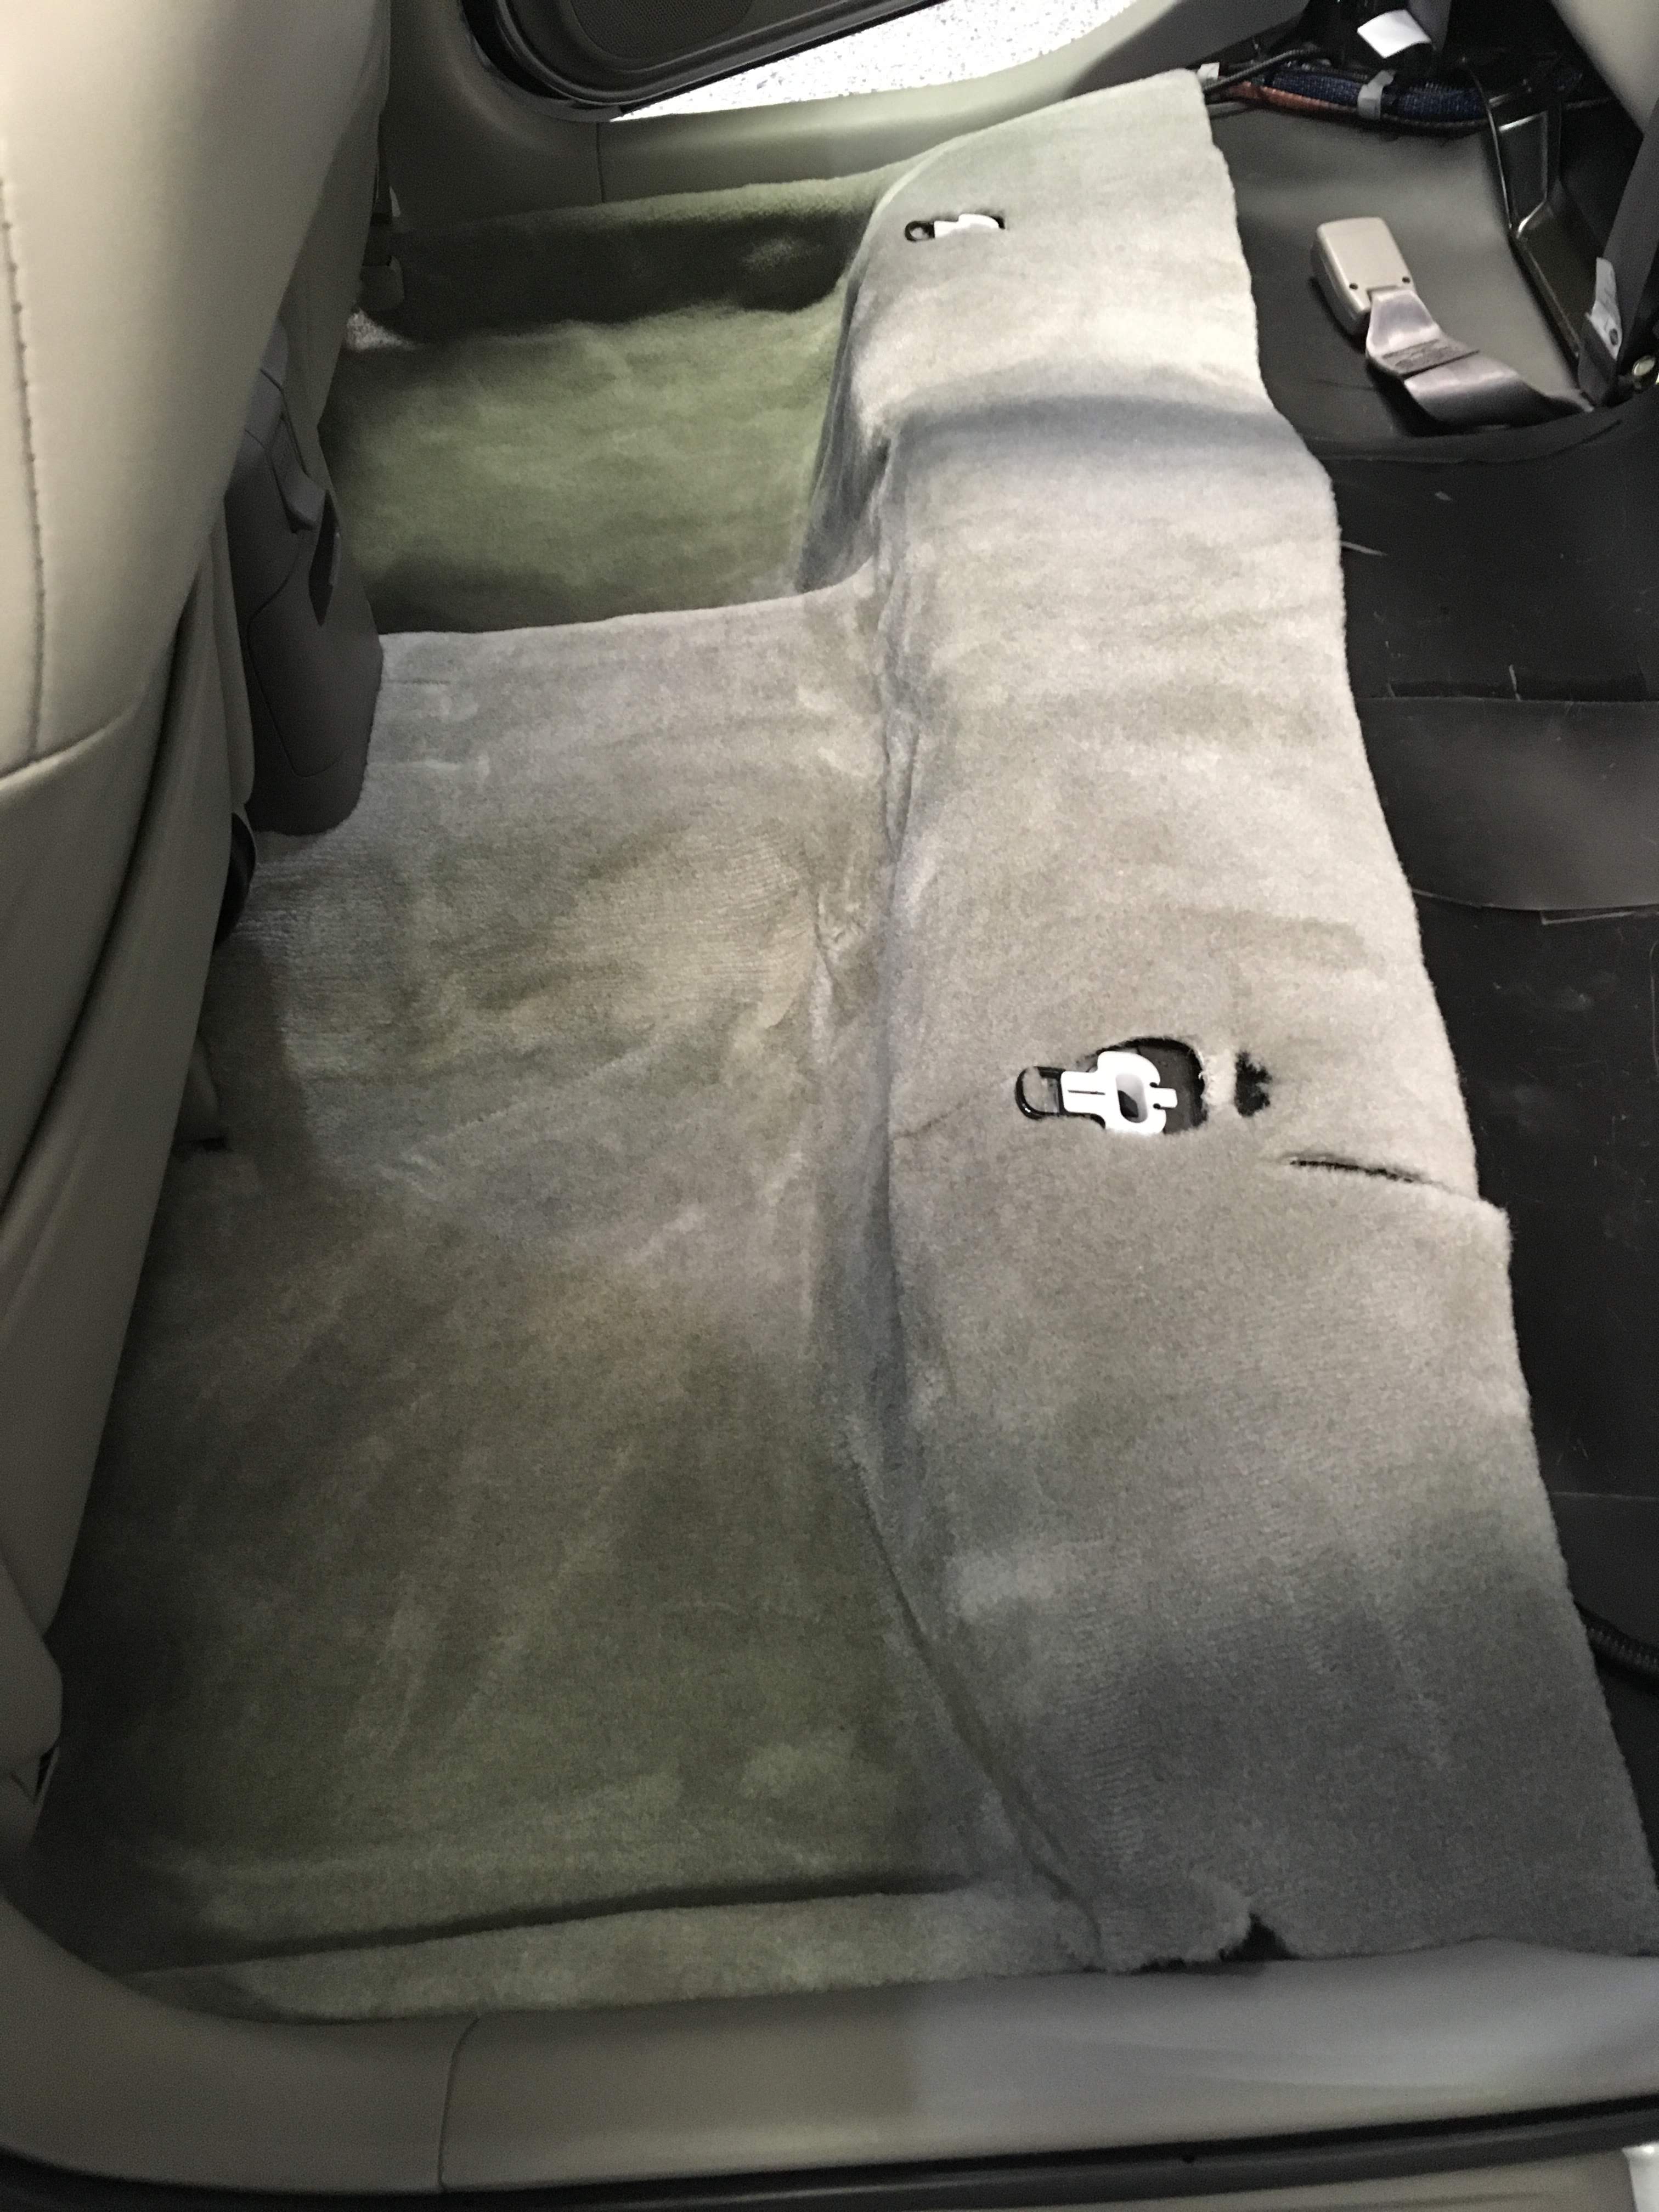
That's what I'm hoping for. It fits pretty well on it's own, but like any aftermarket product, it's not a 'factory fit'. And, it's a thicker carpet than the original, so that's also causing certain areas to not lay flush with the contours in the floor pan.
My thought is the steam will soften the backing of the carpet so I can "iron out" the lumpy parts and push them into the contours. Again, I'm open to suggestions. I've never installed carpet, so I'm just thinking of ways to get it to fit.
My thought is the steam will soften the backing of the carpet so I can "iron out" the lumpy parts and push them into the contours. Again, I'm open to suggestions. I've never installed carpet, so I'm just thinking of ways to get it to fit.
 01-07-2019, 07:40 AM
#43

this thread is WOW ! YoungMike85 this is top notch work my friend keep it up, I didn't want this thread to end! im going thru the process of audio currently and it has been annoying to say the least which is now resulting in me running new wires for the whole stereo after just running all the wires for the sub :/
but this is phenomenal homie great work.
but this is phenomenal homie great work.
01-07-2019, 08:02 AM
#44
Junior Member
Thread Starter

Join Date: Mar 2018
Location: Nashville, TN
Posts: 76
Thanks for the feedback, Prophecy and Danmack! Glad ya'll are enjoying the thread. I've enjoyed the time spent on the car and the org. I'd have more done sooner, but then I'd probably have to live in the car after the wife kicked me out of the house lol
01-07-2019, 08:54 AM
#45
Question for you about the bit when you're done, how does one accurately "tune" your speakers? Such as the gains and such. I'm taking it Full or HPF and adjust from there but is there a instrument to use or is it the way ive been doing it with just a ear for what it should sound like? ive always had the ability to have the stereo at max volume and "go for broke" I guess but is there a right way to do it? That's really the only thing I hate about doing my audio components is the fine tuning bit.
01-07-2019, 09:23 AM
#46
Junior Member
Thread Starter
Join Date: Mar 2018
Location: Nashville, TN
Posts: 76
Oh man. You've just opened Pandora's box! How deep down the rabbit hole do you wanna go?! Or, how much time/money do you want to spend?
There's nothing wrong with tuning by ear. In fact, that's the most important thing to keep in mind - your stereo should sound the way you like it! Why do all the work of upgrading your gear, installing components for weeks, and then tune it the way someone else says it should sound and then hate it?
Tuning speakers "accurately" or "the right way" is a very subjective process. Of course, you can get devices to measure your amplifier's output, and devices that measure the sound coming out of your speakers; you can get software designed to process all this data and give you graphs and charts; and there is literally a million pages on the internet about using this gear, interpreting this data, and making changes based on data (rather than your ear) to tune your stereo. But, like I said, you can go through this whole process and hate the way it sounds - even if the whole internet swears up and down your stereo is "tuned accurately".
I'd highly recommend spending some time here: diymobileaudio.com - to learn more about the options for tuning your stereo. They will do a much better job than I could explaining some of the basics of tuning, as I'm still learning myself. Good luck!
01-07-2019, 09:29 AM
#47
So what I see after reading that is just keep doing it by ear  I haven't blown or popped anything ever so unless im gonna enter a sound comp (which I never will) ill bang it out by ear. Gracias sir, cant wait to see how everything together and carpeted looks !
I haven't blown or popped anything ever so unless im gonna enter a sound comp (which I never will) ill bang it out by ear. Gracias sir, cant wait to see how everything together and carpeted looks !
01-07-2019, 01:51 PM
#48
Senior Member

Join Date: Feb 2016
Location: Buffalo
Posts: 339
danmack34 if you want some starter help with the stereo tuning start a new thread listing your DSP function availability ie: which hu, speakers, crossover, eq bands, etc. No need to clog up this thread.
User1 - almost forgot
User1 - almost forgot

01-09-2019, 08:33 AM
01-09-2019, 08:33 AM
#49
Junior Member
Thread Starter
Join Date: Mar 2018
Location: Nashville, TN
Posts: 76
More progress! This project is getting very close to being done. Here's what I've been working on lately -
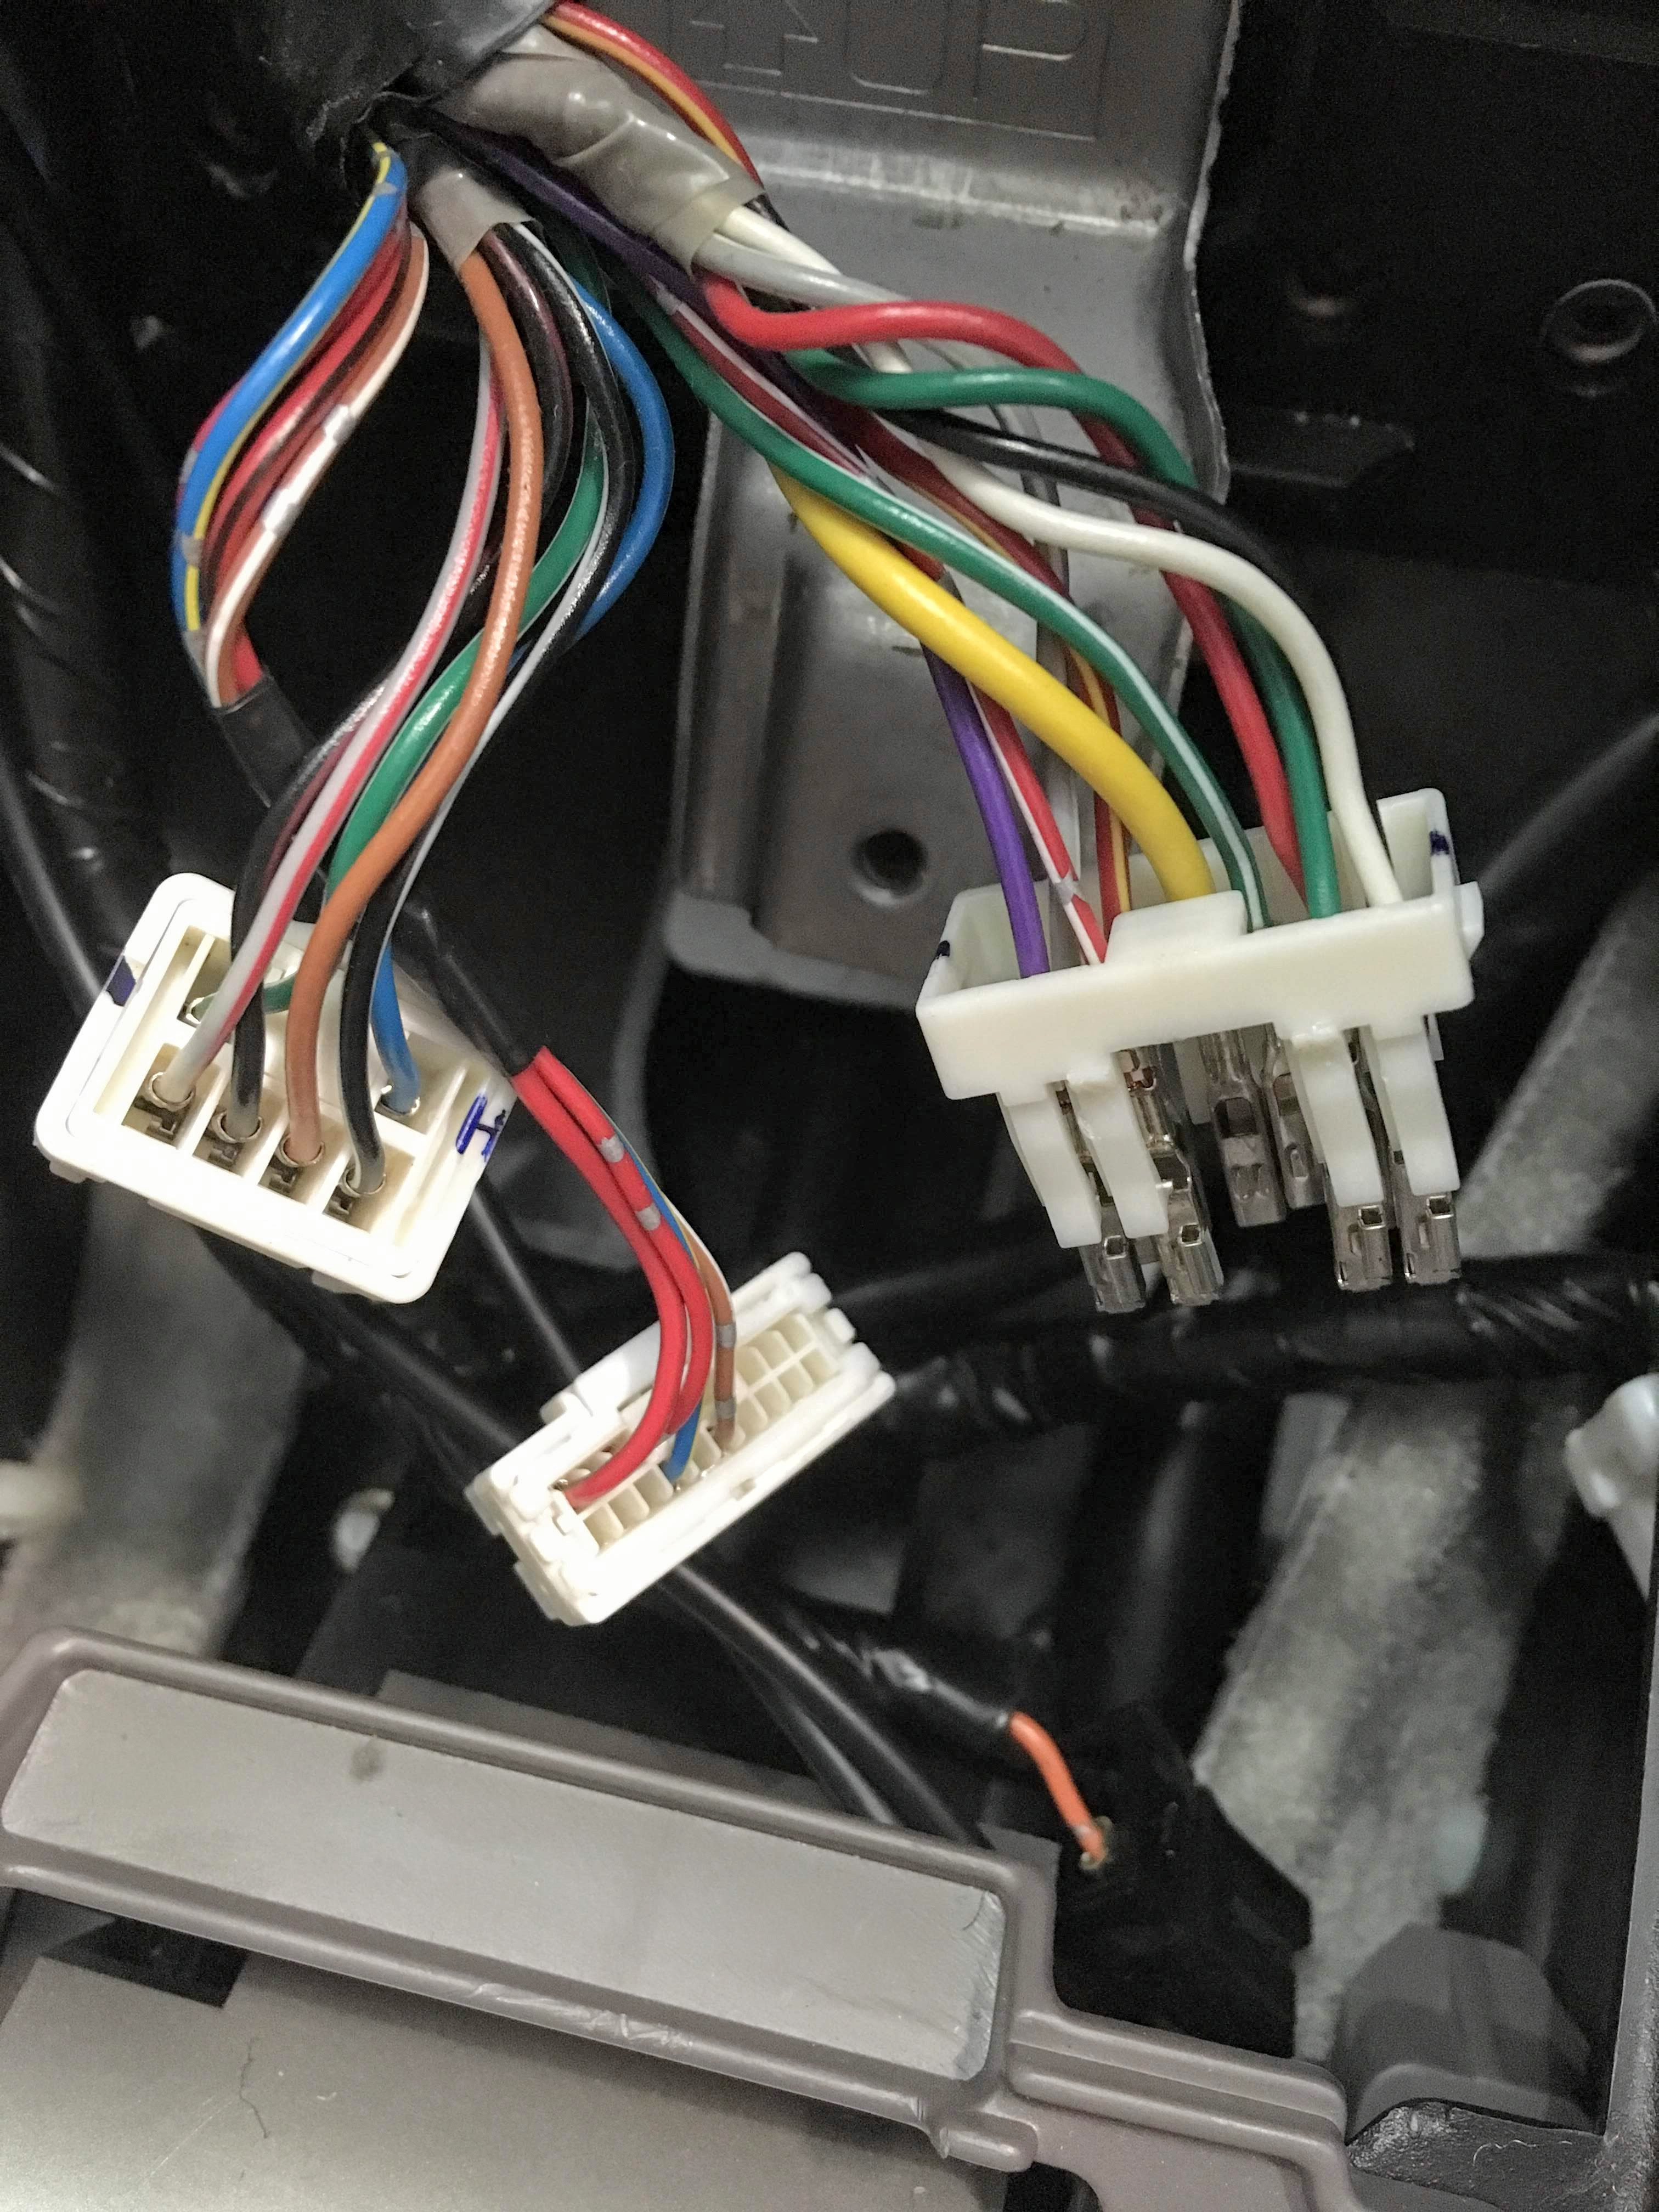
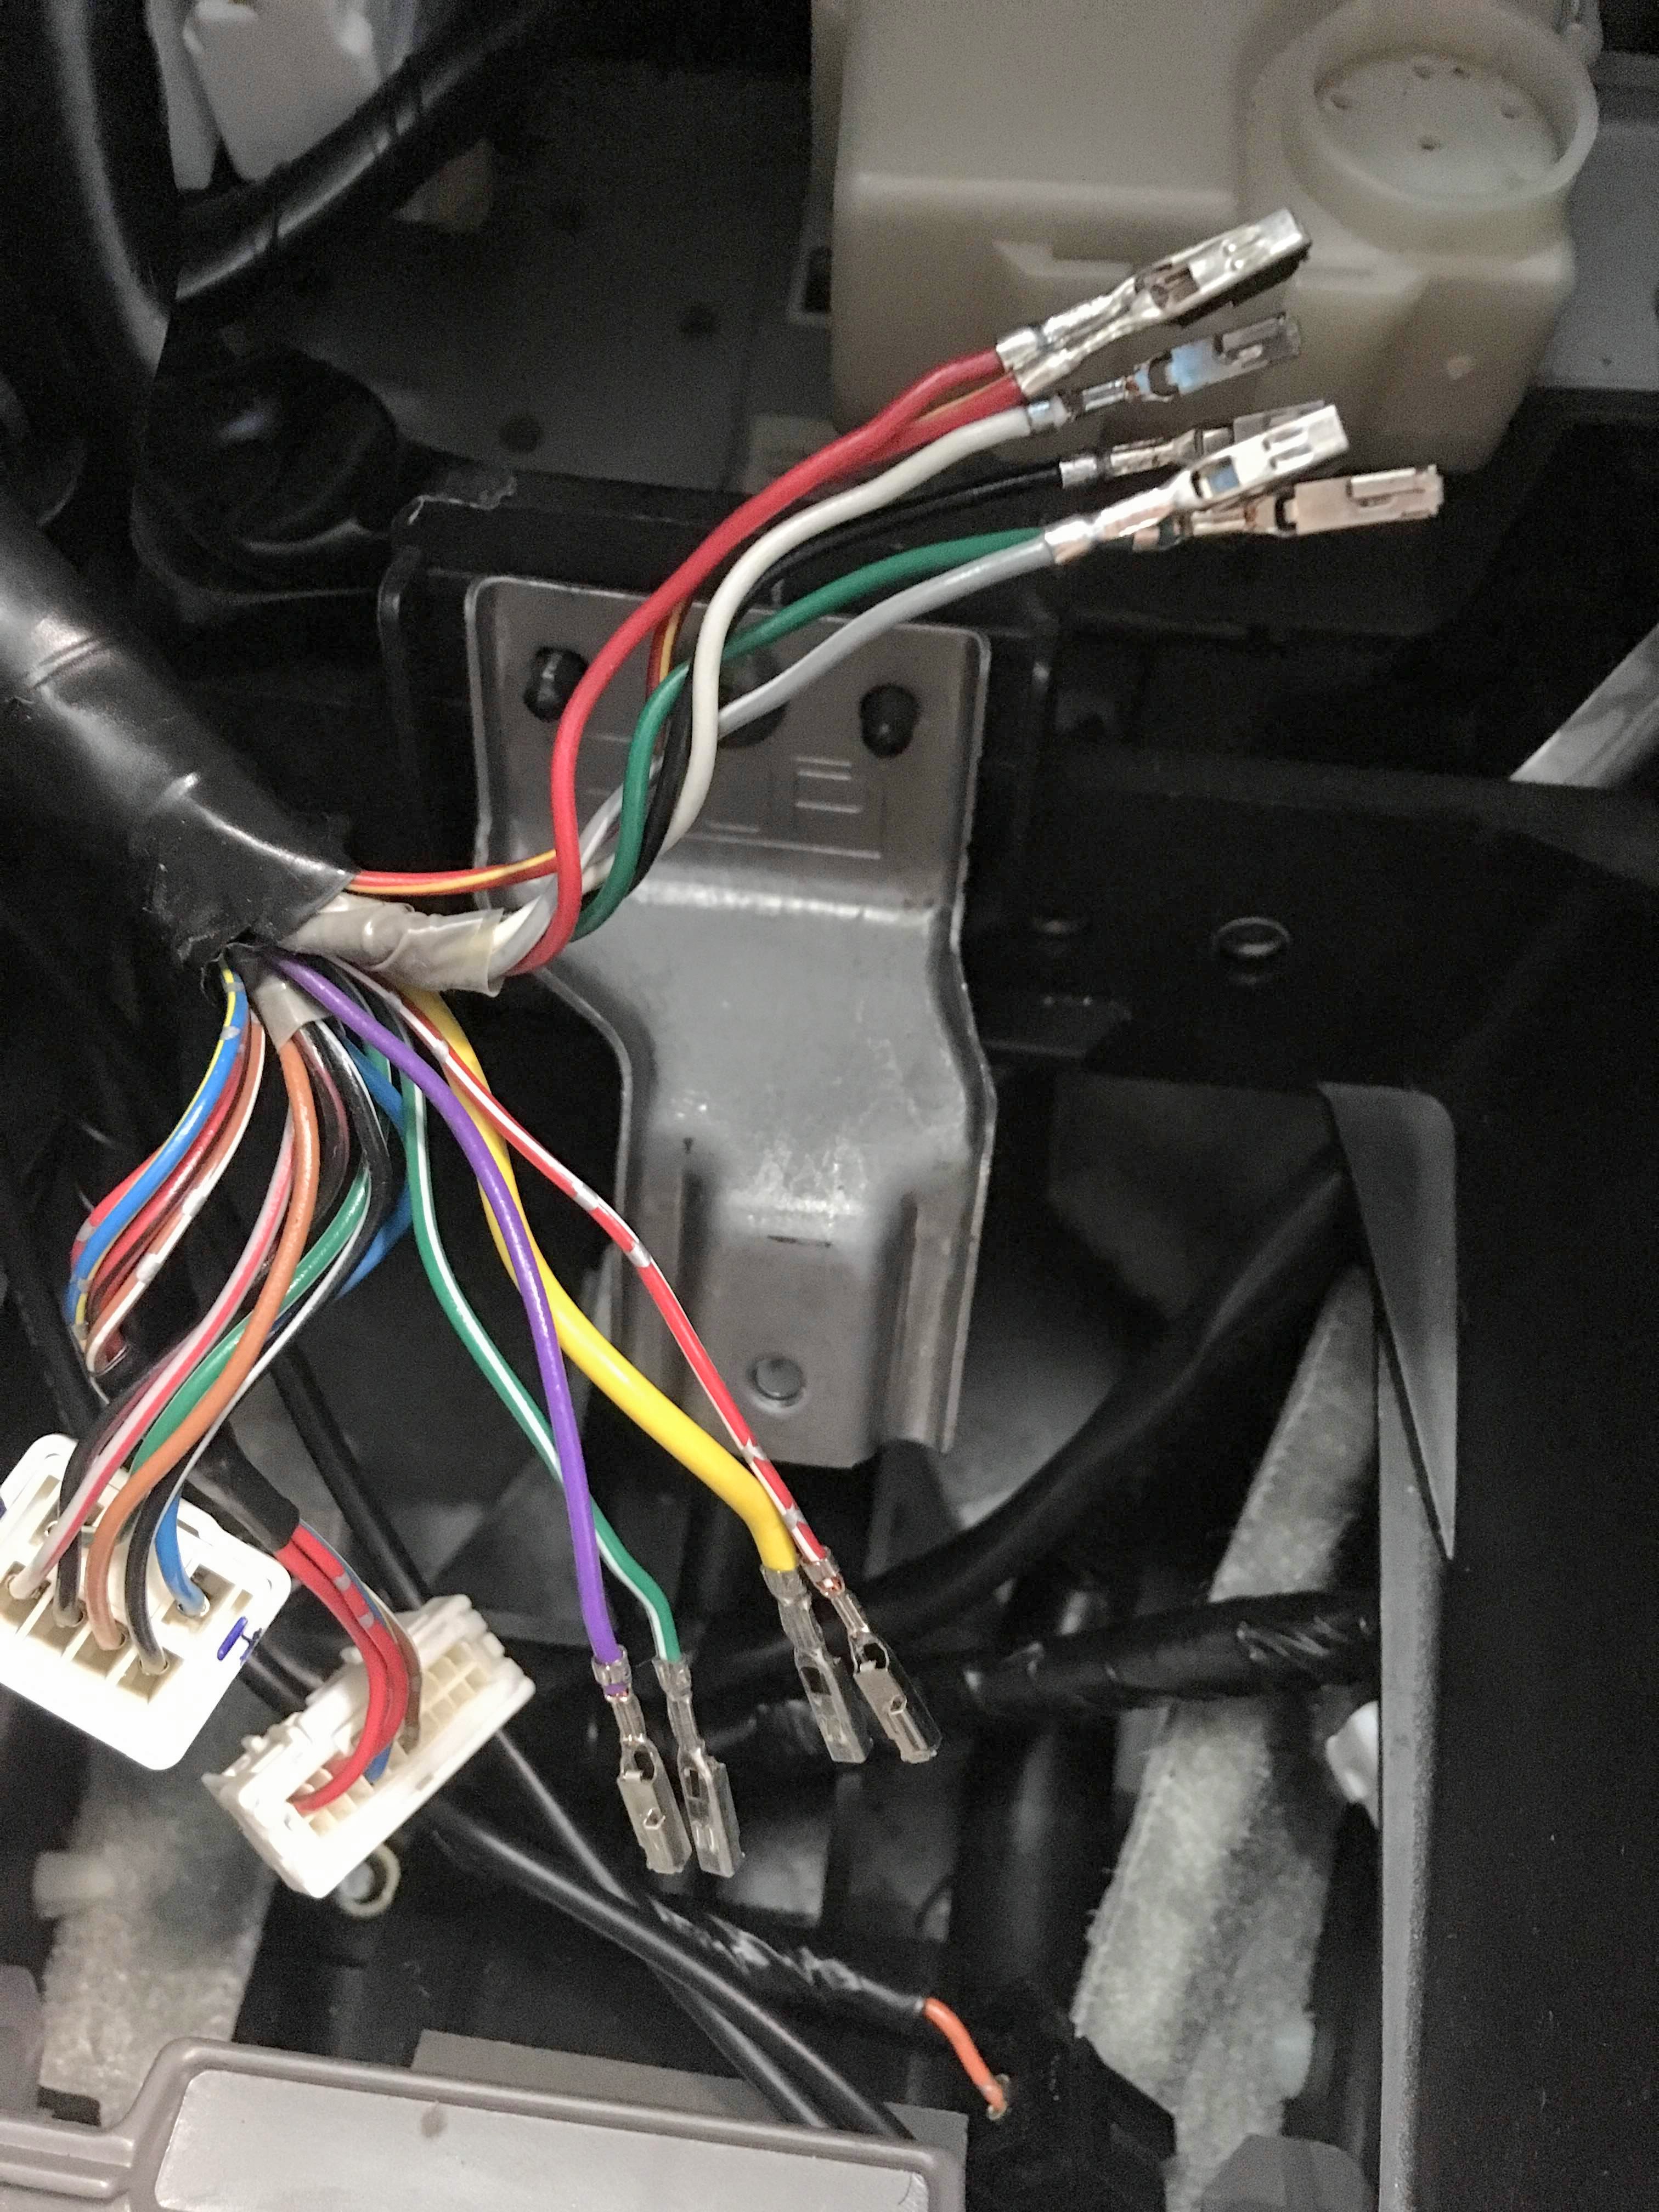
I had three different molex plugs in my factory HU. Plug 1 had +, -, ACC and the front speaker wires; Plug 2 had rear speaker wires and Plug 3 had steering wheel controls. I don't need any speaker wires, so I taped Plug 2 off, and I de-pinned the speaker wires from Plug 1. Since I only need two wires from Plug 3, I de-pinned those two steering control wires and put them back into the (now) open slots in Plug 1:
Stock plugs:
Plug 1, de-pinned:
Plug 3:

New Plug 1, with steering wheel controls:

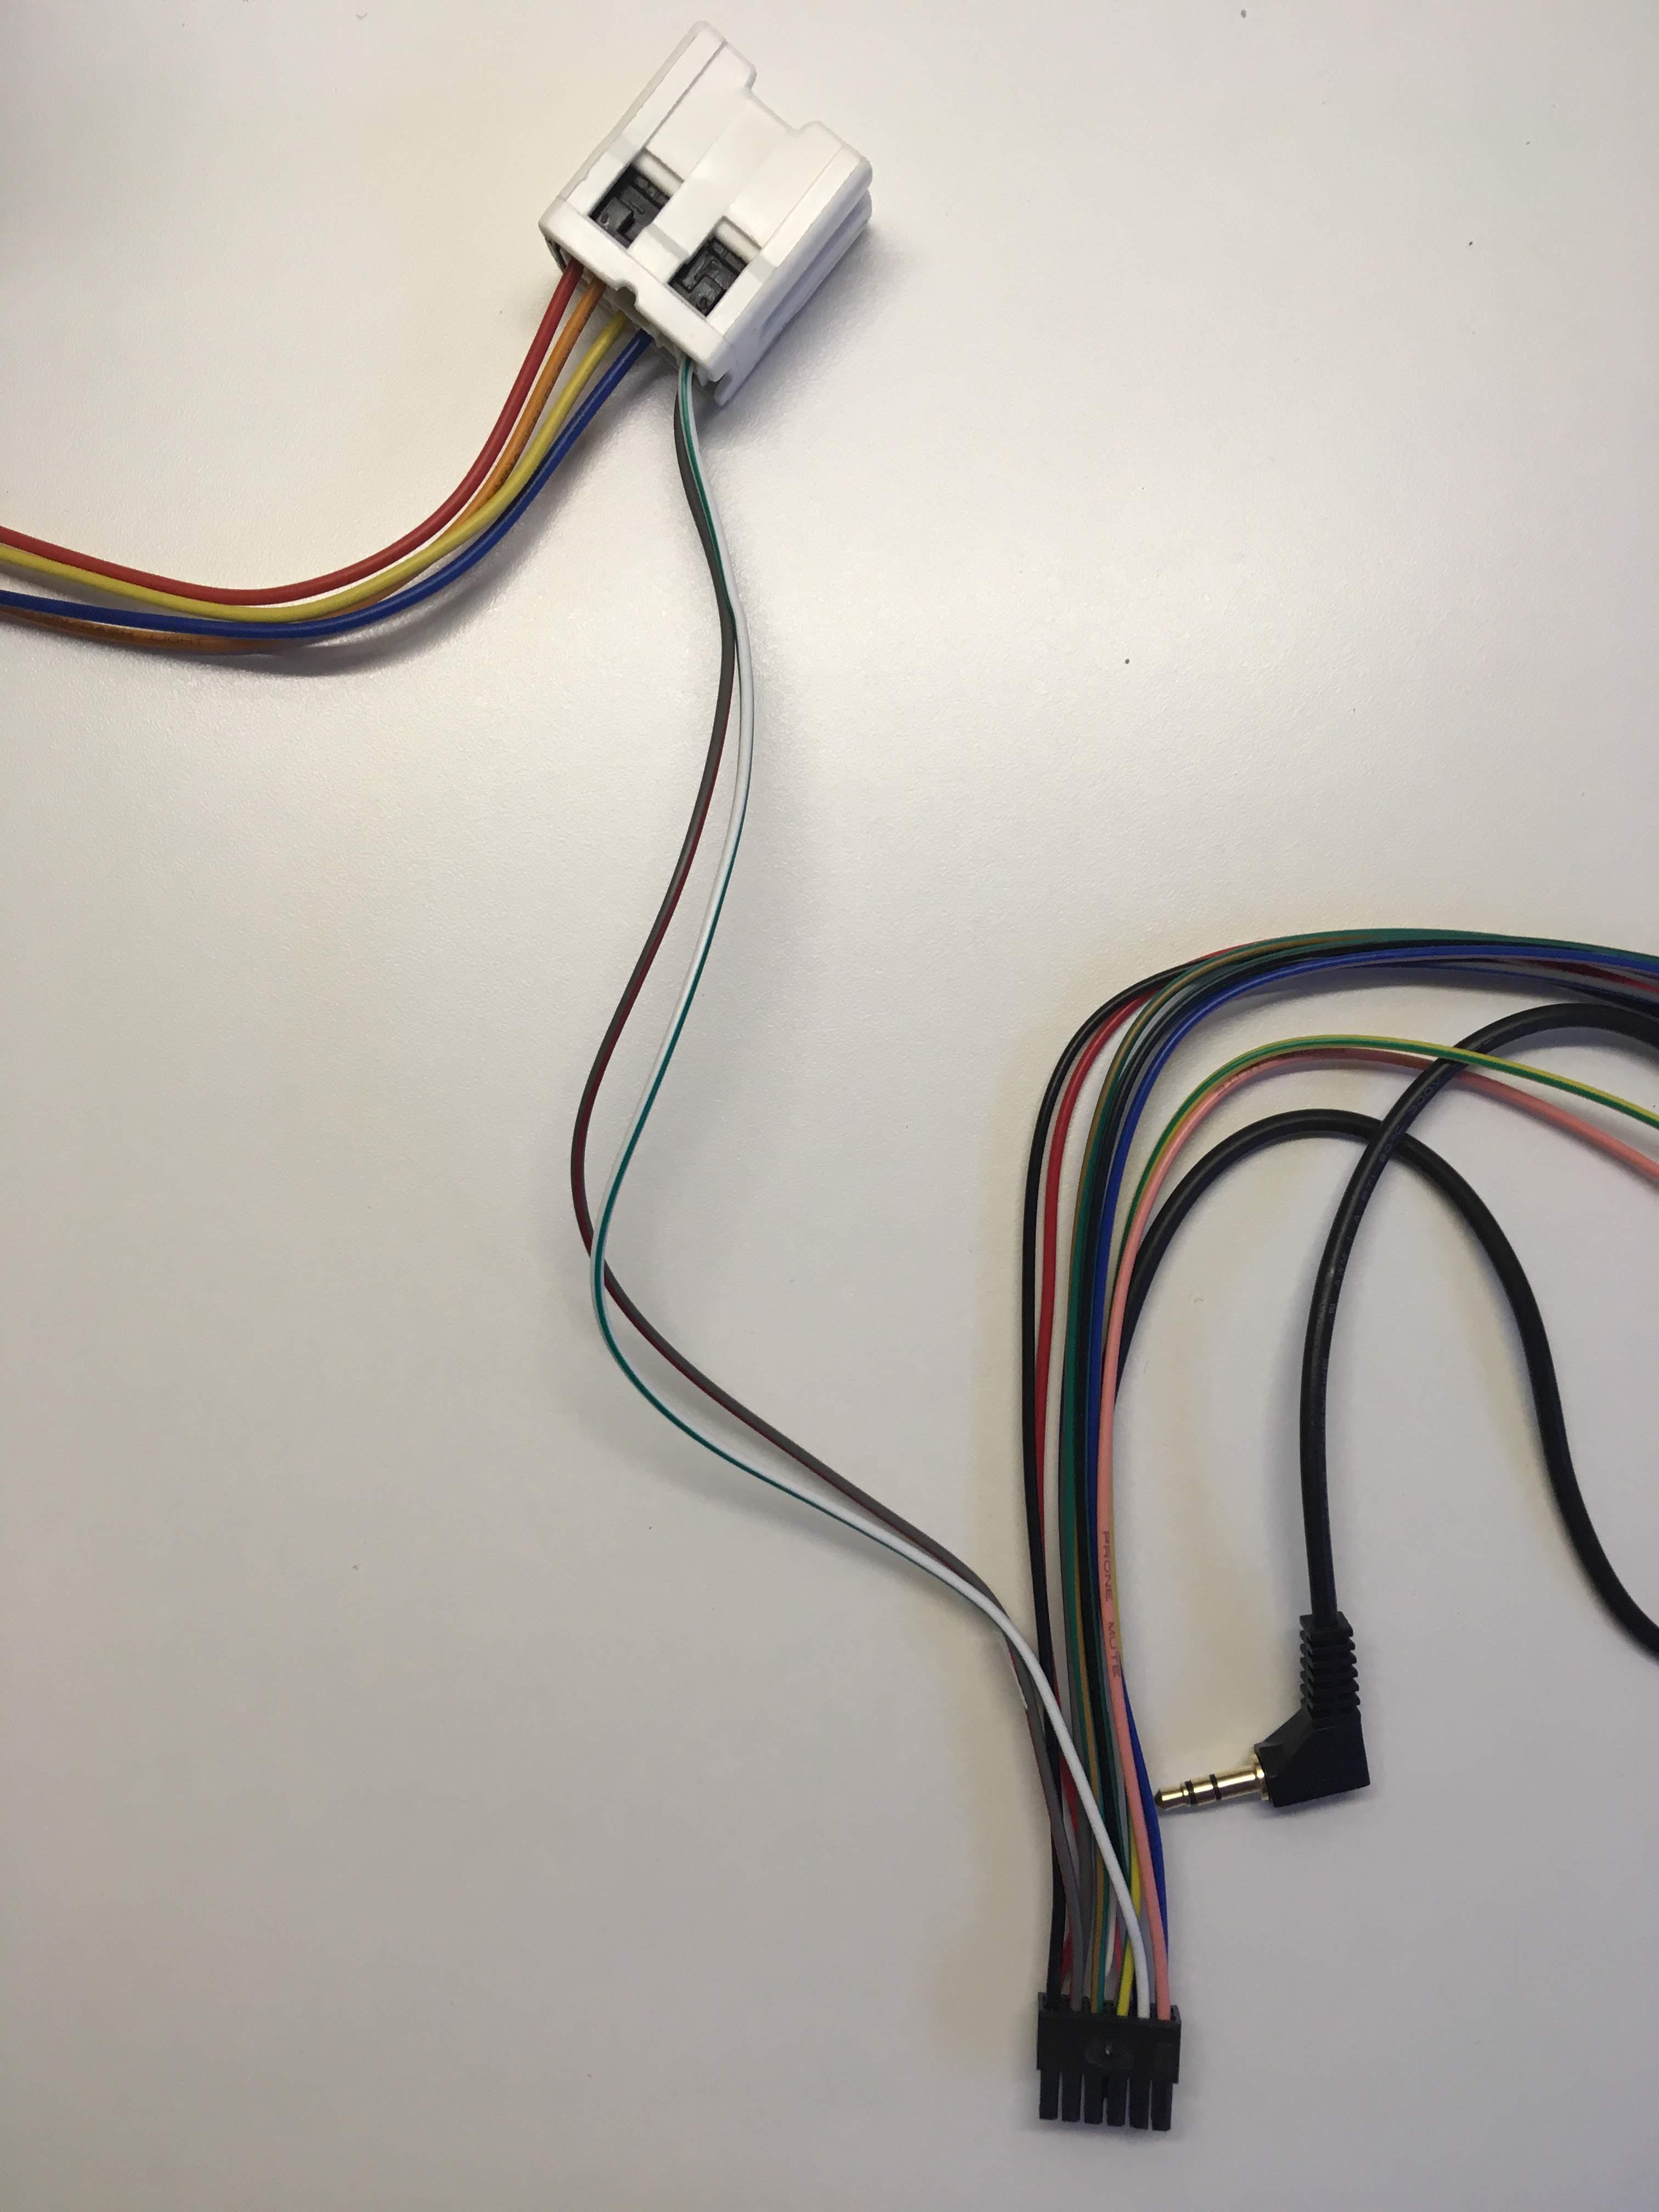
After moving the in-dash pins, I re-configured the molex-to-aftermarket pins, adding the ASWC-1's wires:
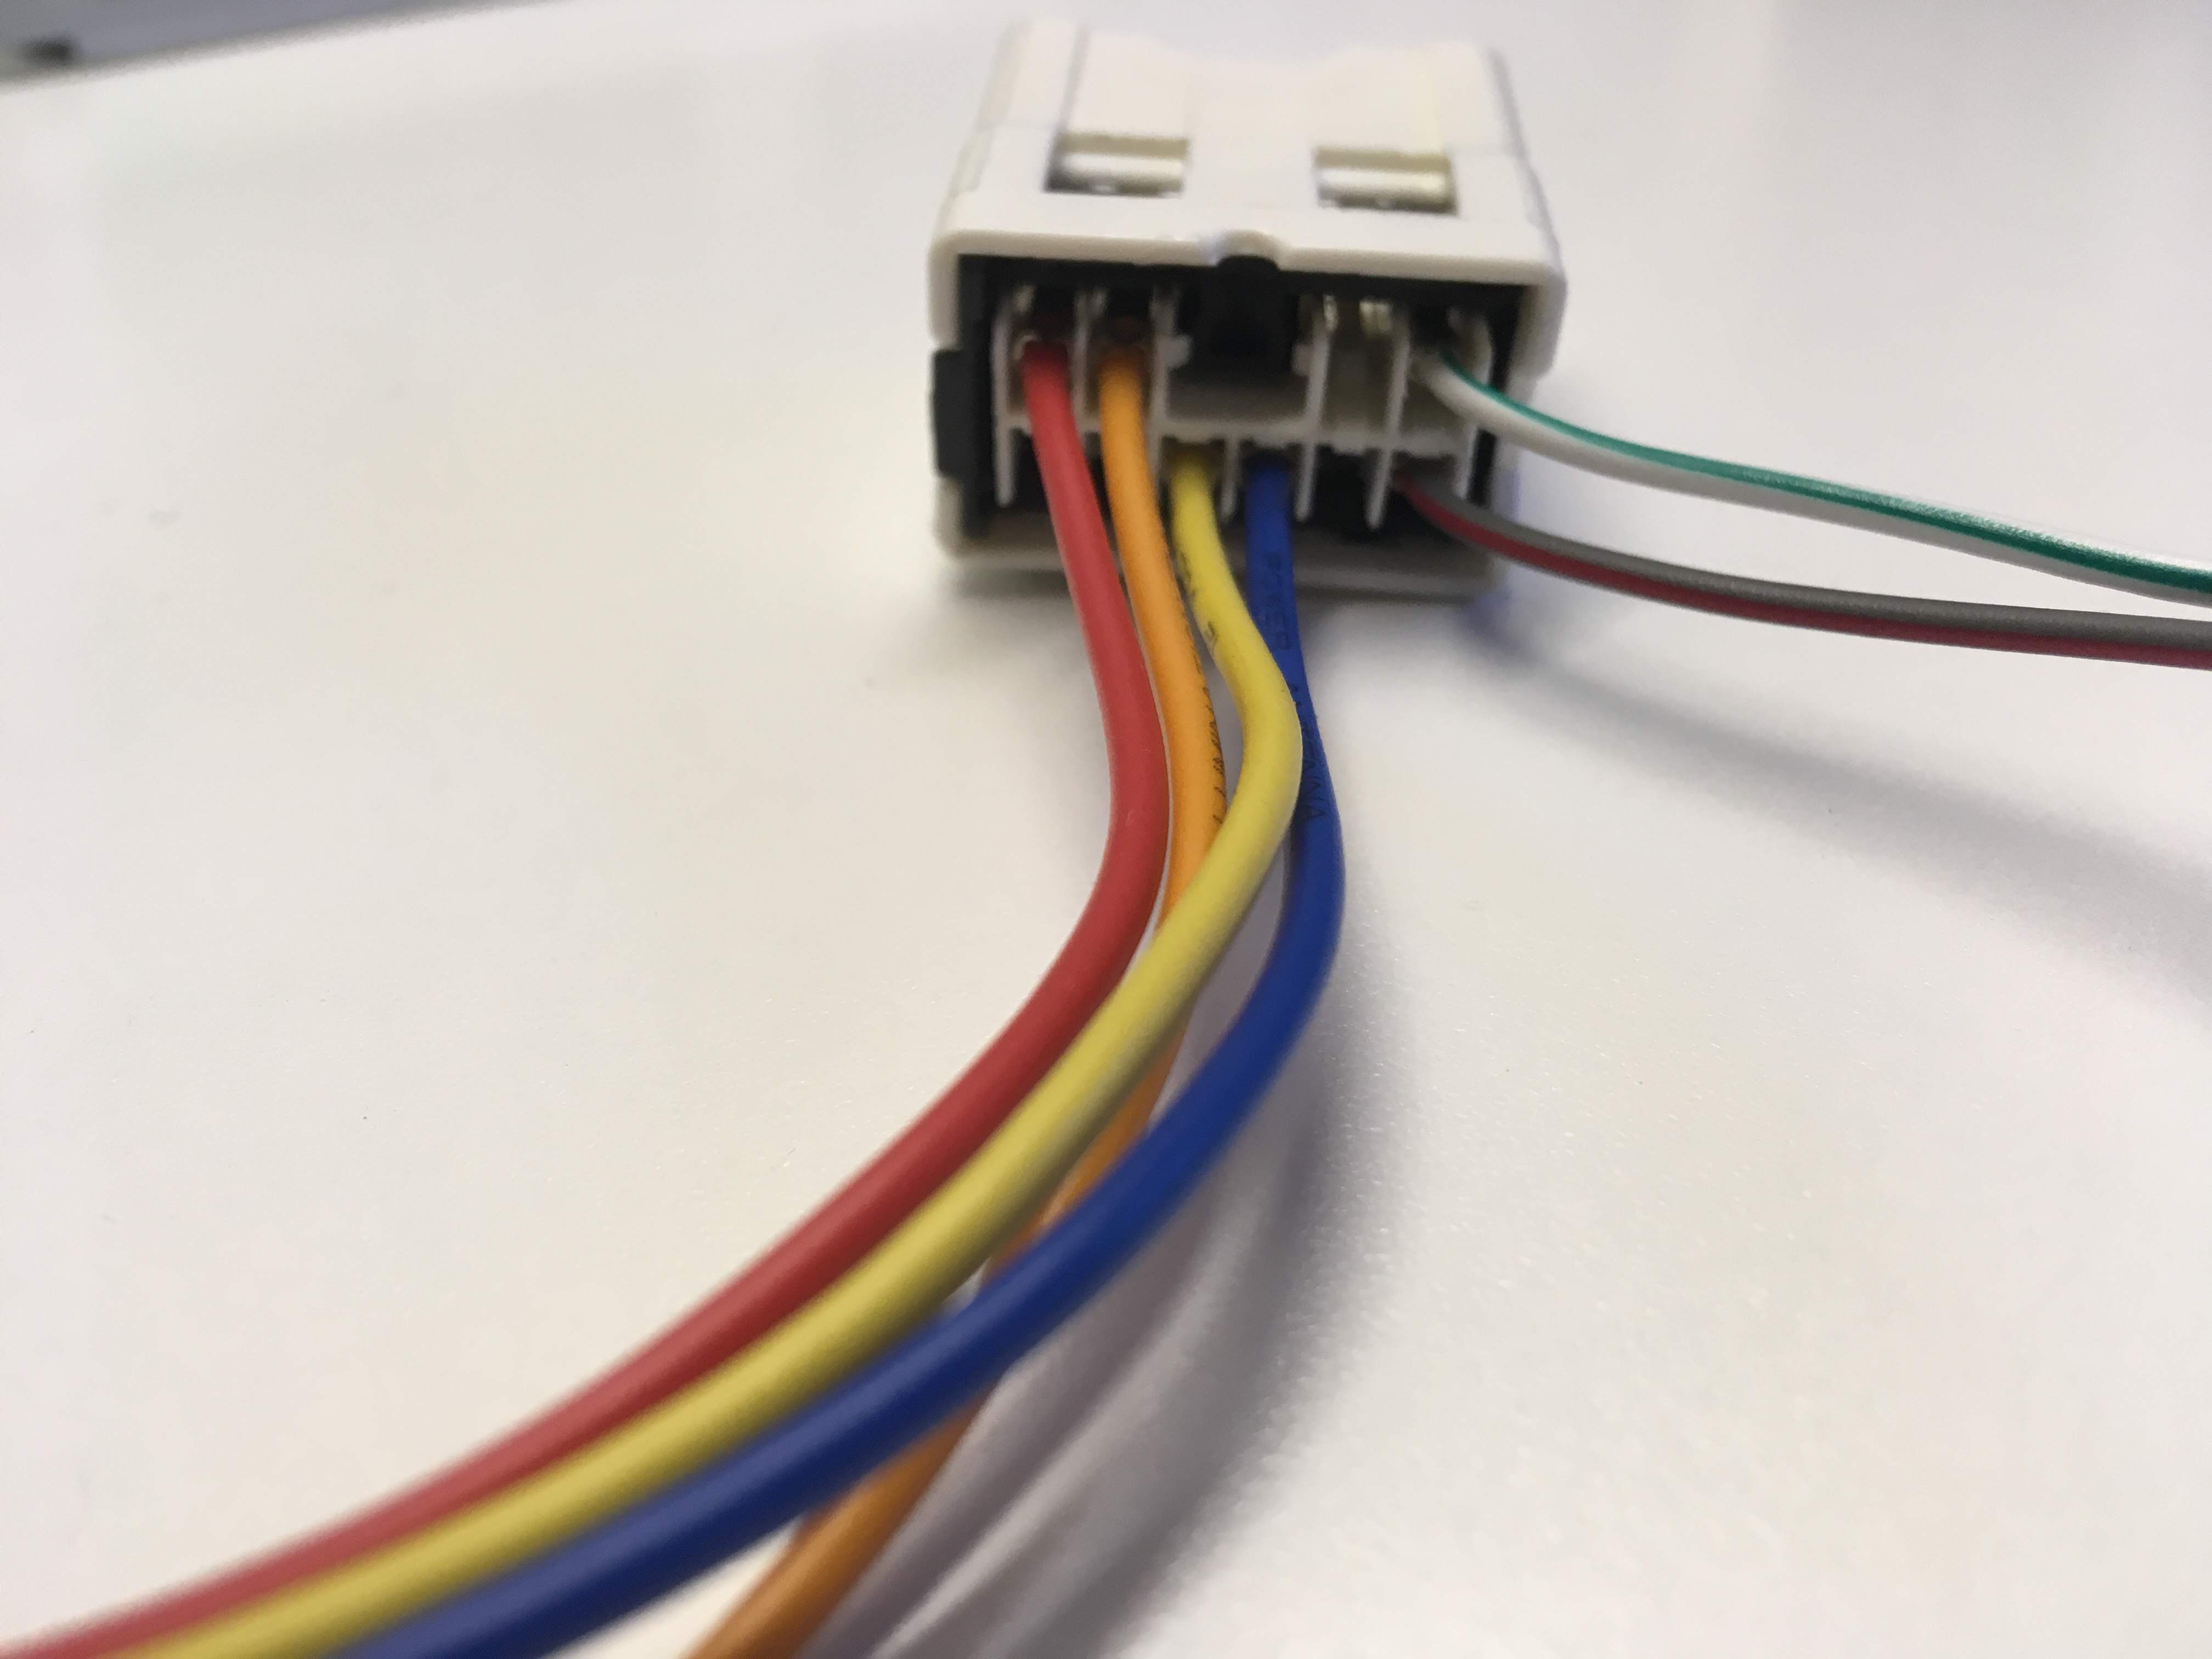
I connected the power for the ASWC on to the same wire as the HU, and grounded it to the same grounding point on the chassis.
And now for the best part - after doing all that work, the ASWC isn't working. Yay! It powers on and goes through the setup procedure as normal, but then it gives the slow red/green flashing; indicating the ASWC cannot detect the vehicle. Not sure where I went wrong, but if it means wires are mixed up, I probably won't go through the process of moving the pins around again. I'll just cut and splice - I'm over it.
More to come!
I had three different molex plugs in my factory HU. Plug 1 had +, -, ACC and the front speaker wires; Plug 2 had rear speaker wires and Plug 3 had steering wheel controls. I don't need any speaker wires, so I taped Plug 2 off, and I de-pinned the speaker wires from Plug 1. Since I only need two wires from Plug 3, I de-pinned those two steering control wires and put them back into the (now) open slots in Plug 1:
Stock plugs:
Plug 1, de-pinned:
Plug 3:
New Plug 1, with steering wheel controls:
After moving the in-dash pins, I re-configured the molex-to-aftermarket pins, adding the ASWC-1's wires:
I connected the power for the ASWC on to the same wire as the HU, and grounded it to the same grounding point on the chassis.
And now for the best part - after doing all that work, the ASWC isn't working. Yay! It powers on and goes through the setup procedure as normal, but then it gives the slow red/green flashing; indicating the ASWC cannot detect the vehicle. Not sure where I went wrong, but if it means wires are mixed up, I probably won't go through the process of moving the pins around again. I'll just cut and splice - I'm over it.
More to come!
01-09-2019, 09:46 AM
#50
Junior Member
Thread Starter
Join Date: Mar 2018
Location: Nashville, TN
Posts: 76
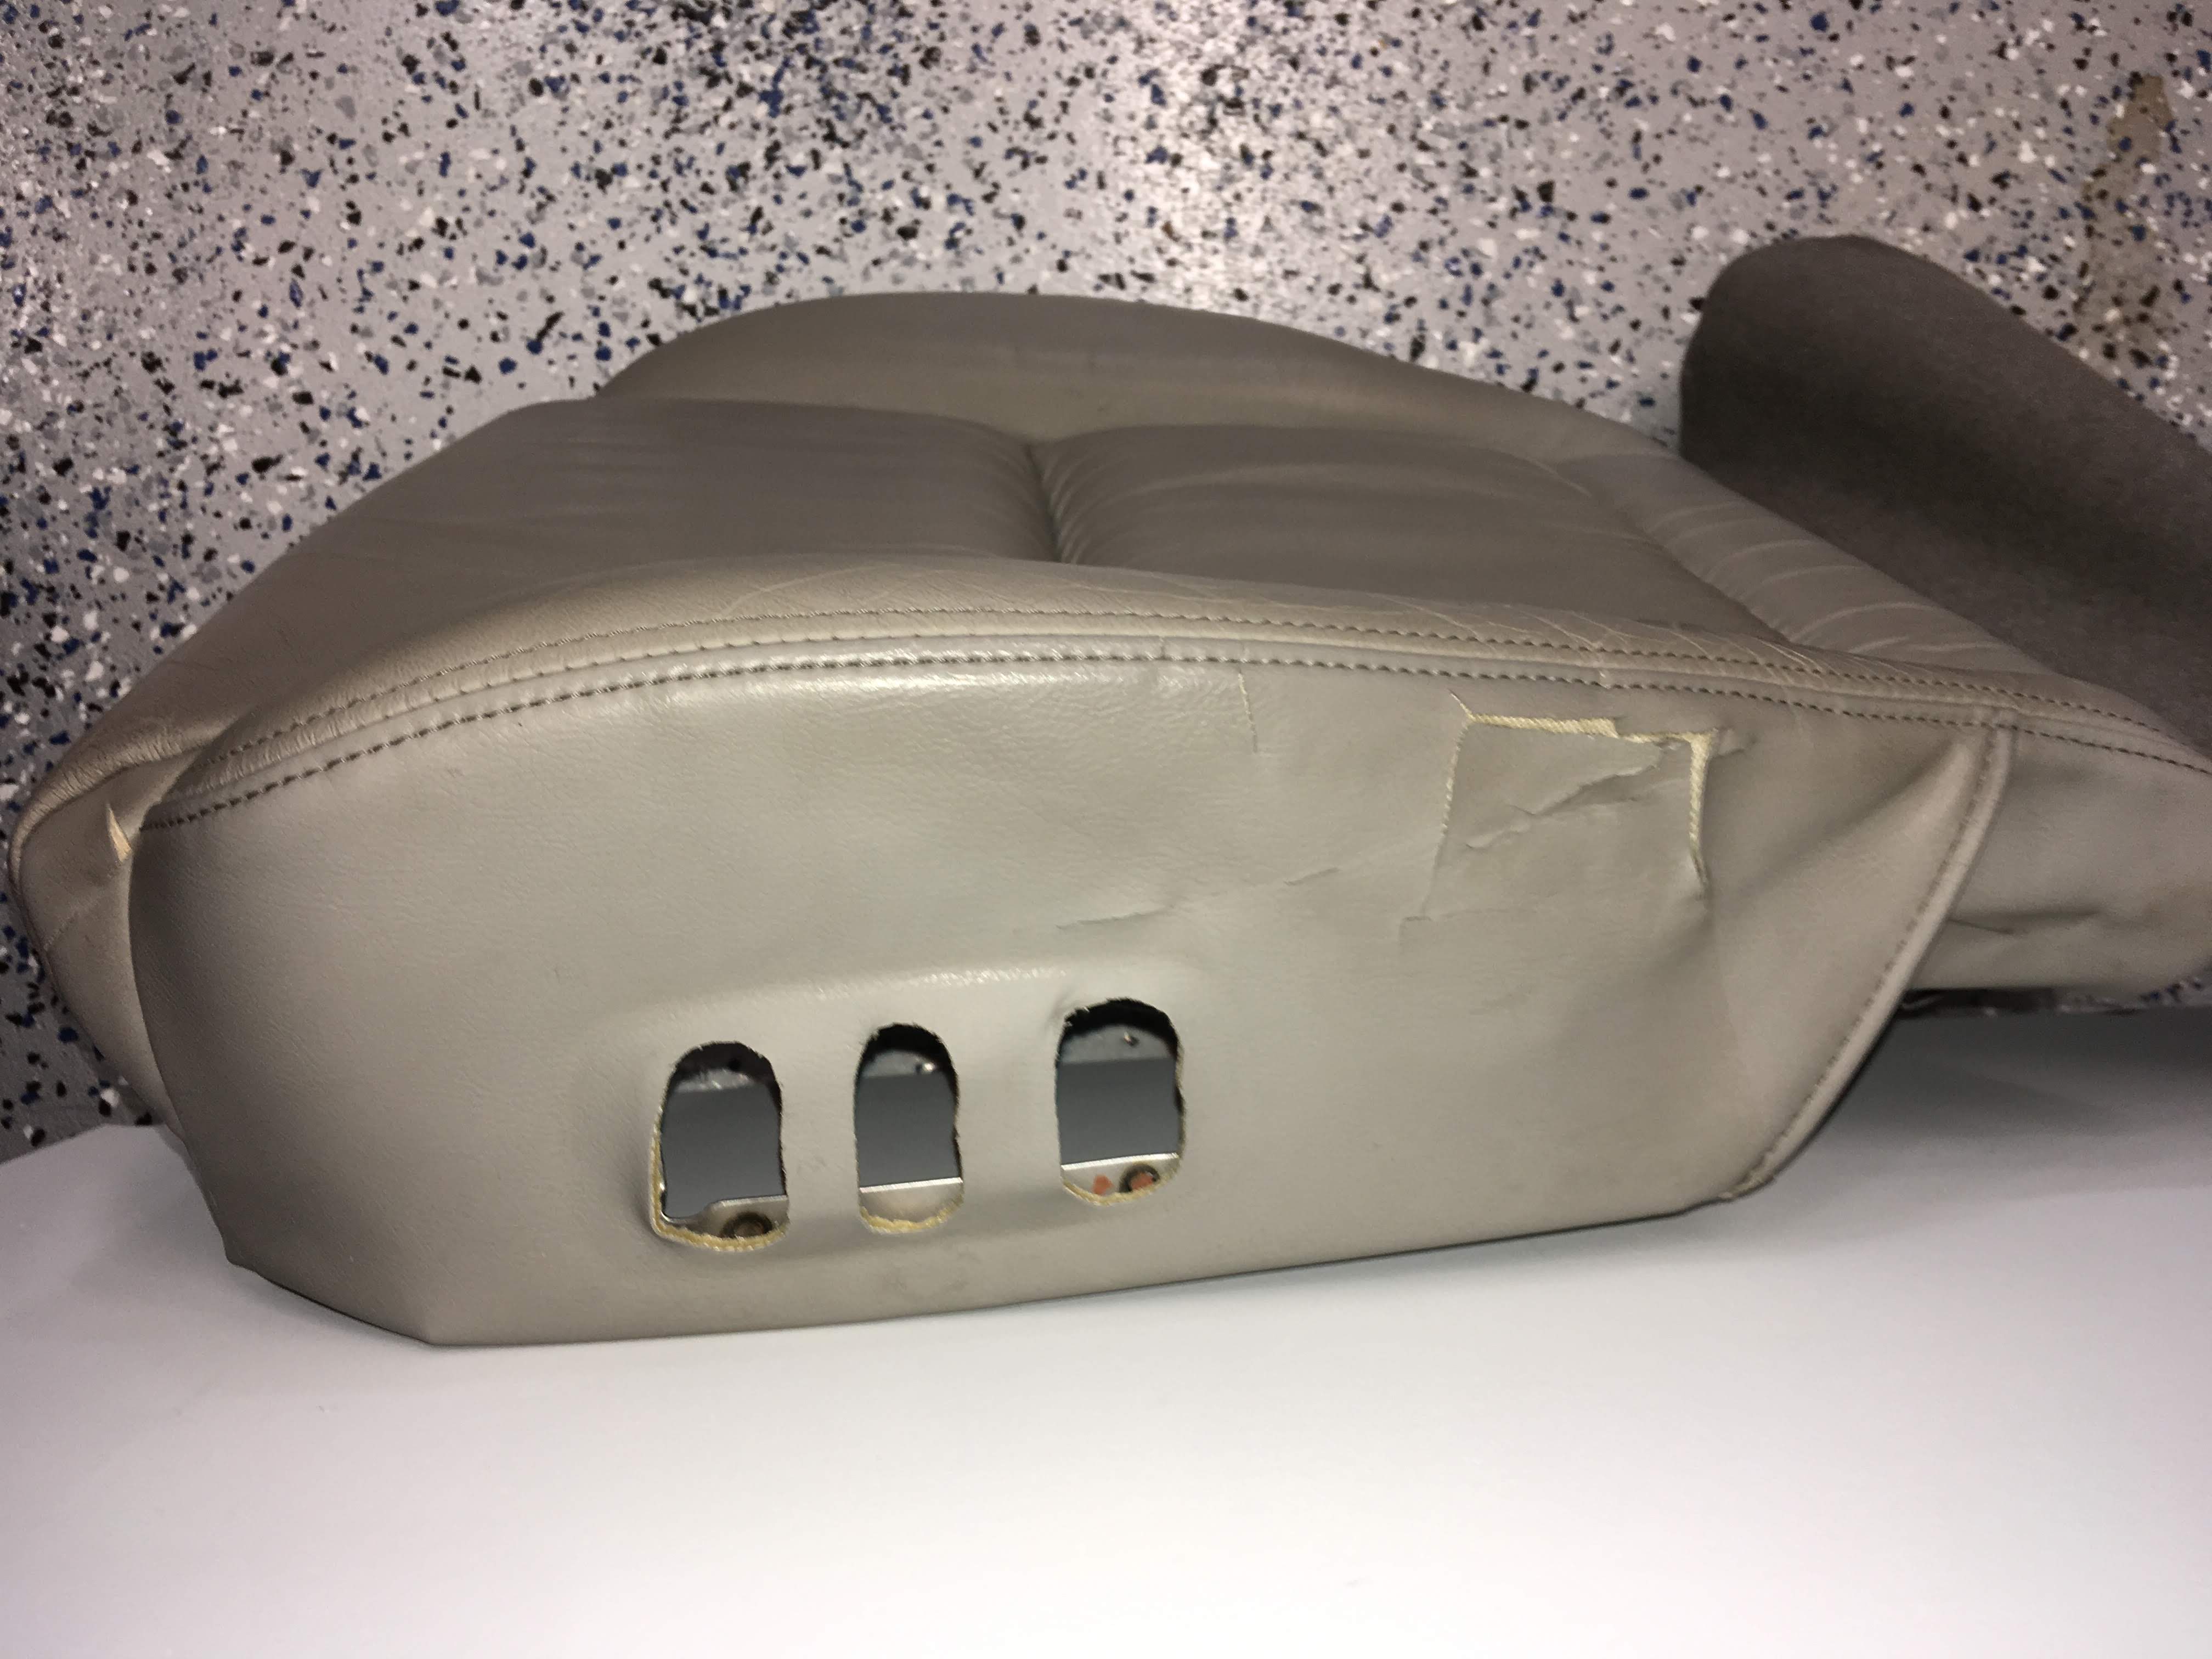
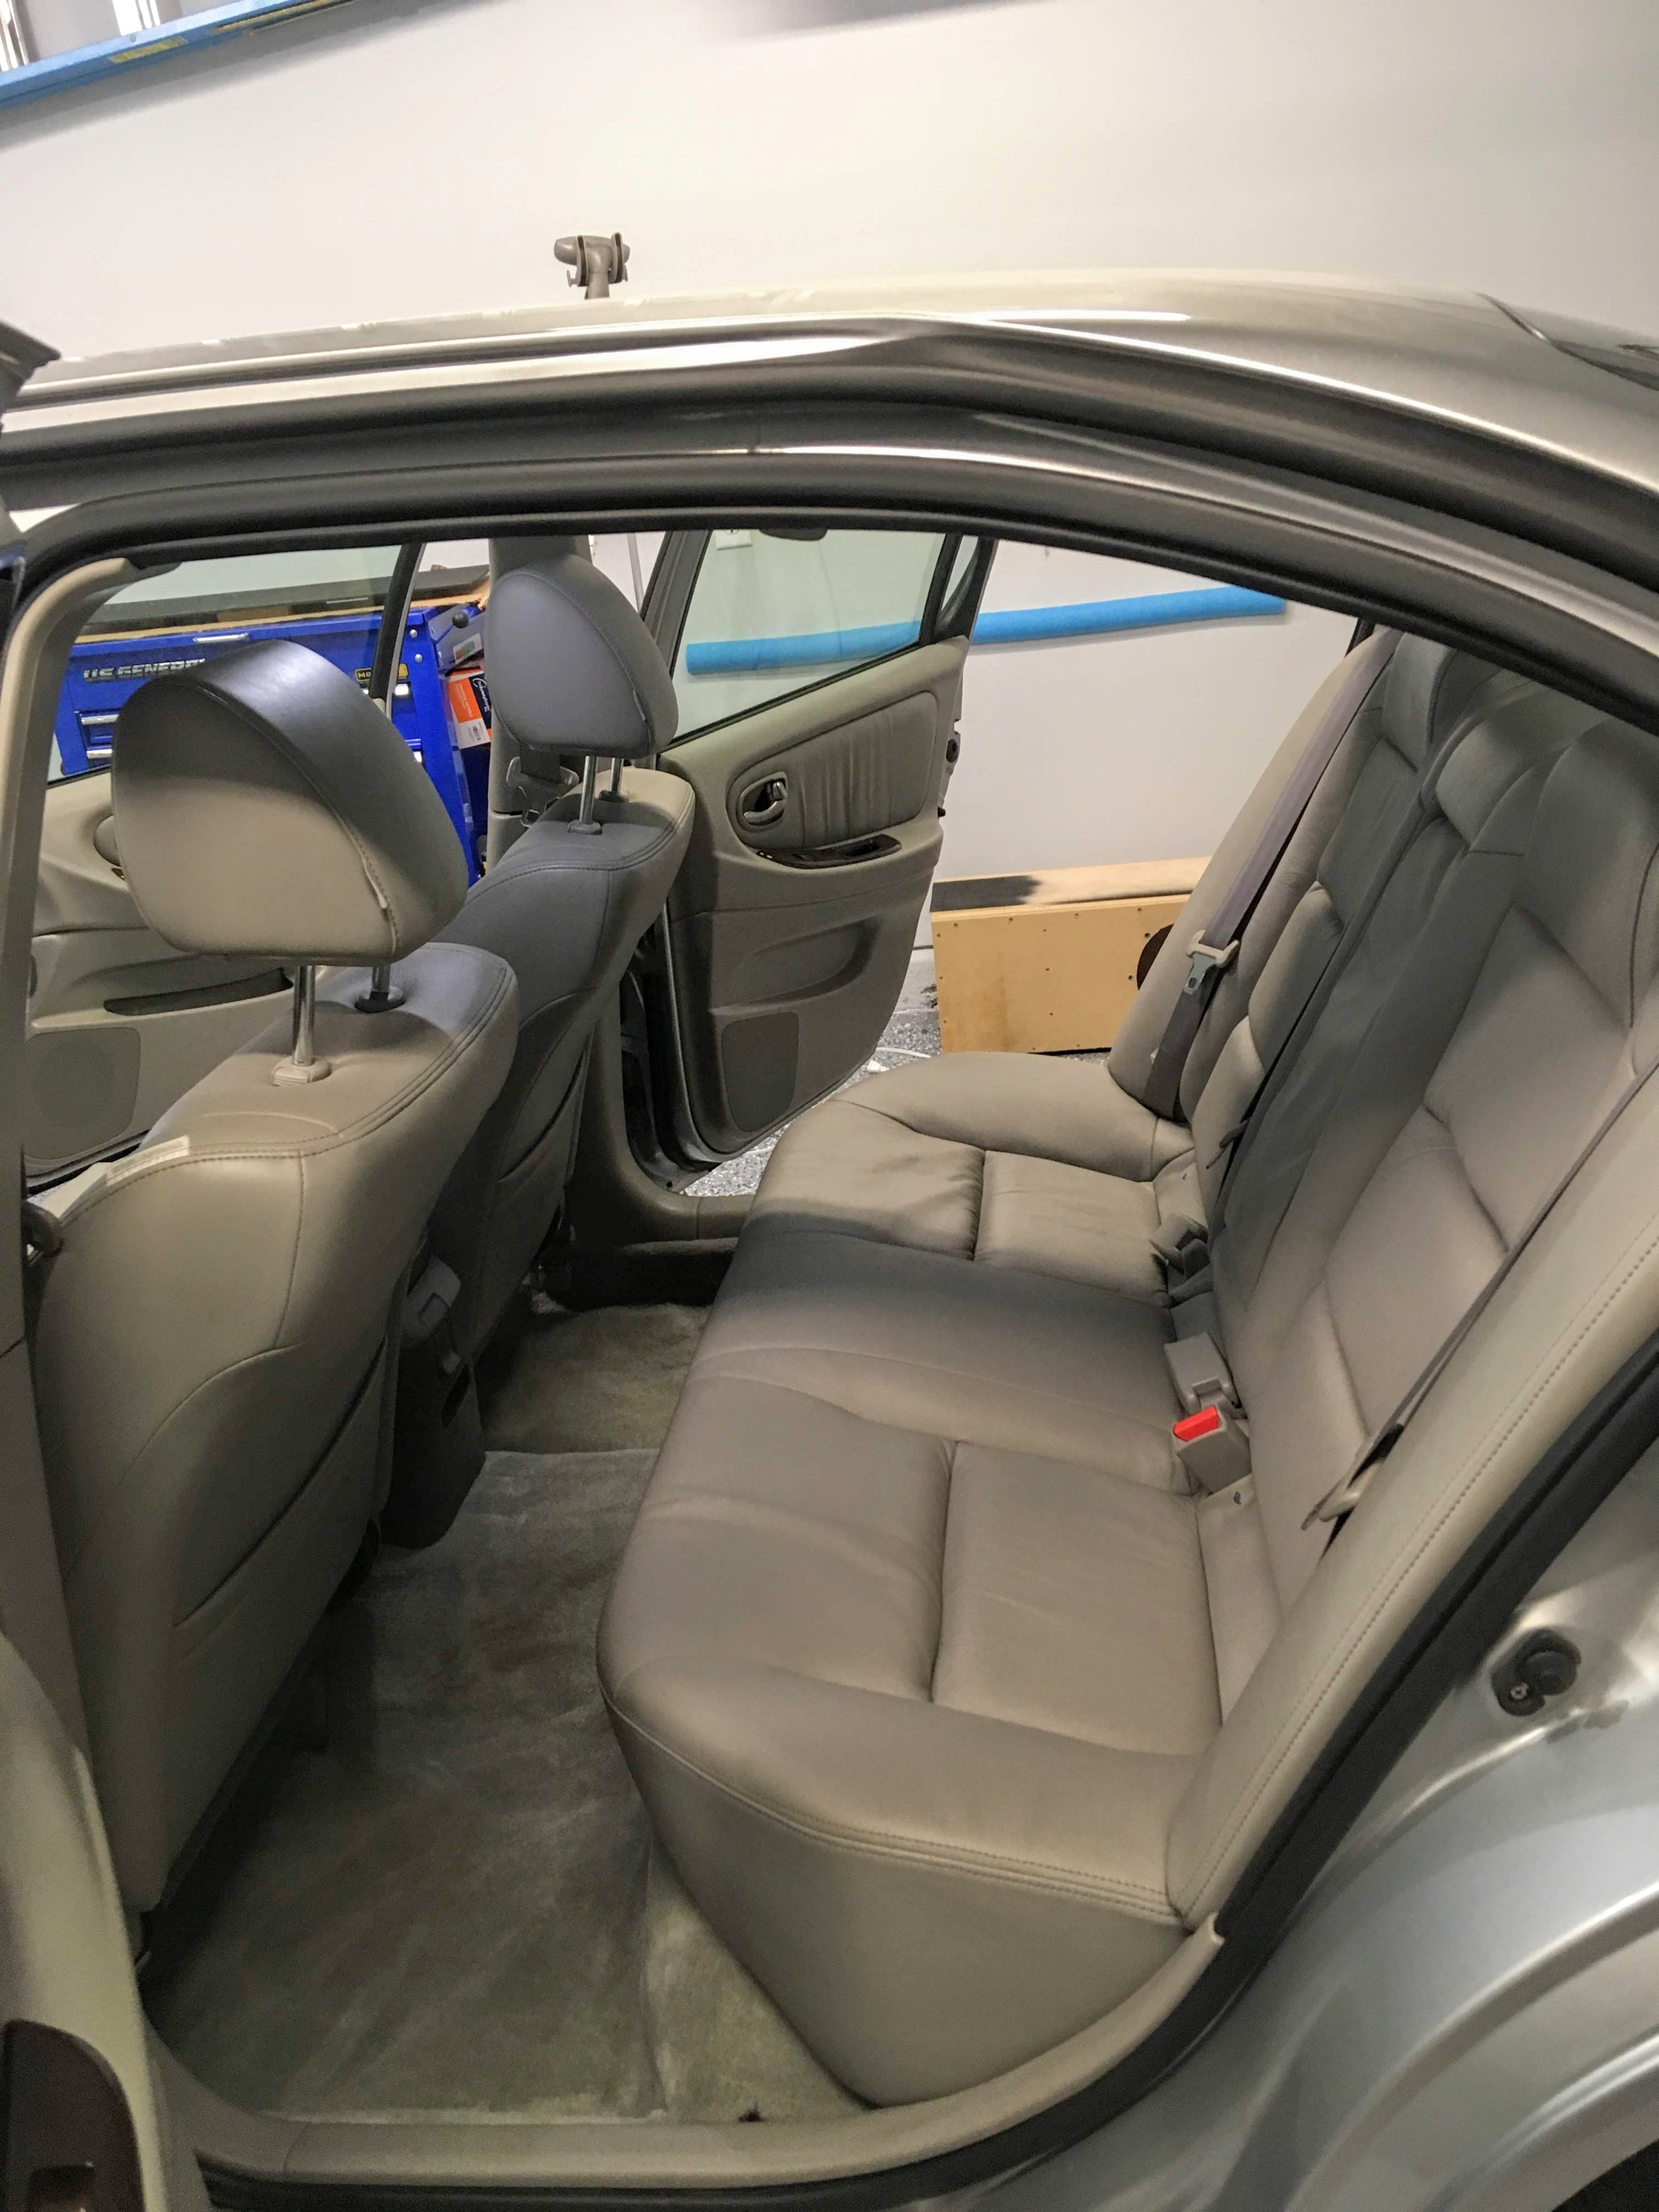
While working on the harness, I sent the driver's side seat to get repaired at a local shop. Previously, it had all the problems a 16 year old leather driver seat would have, plus a huge rip that somebody tried to (poorly) repair. I got the seat back, and was able to finish putting the interior back together:
Before:
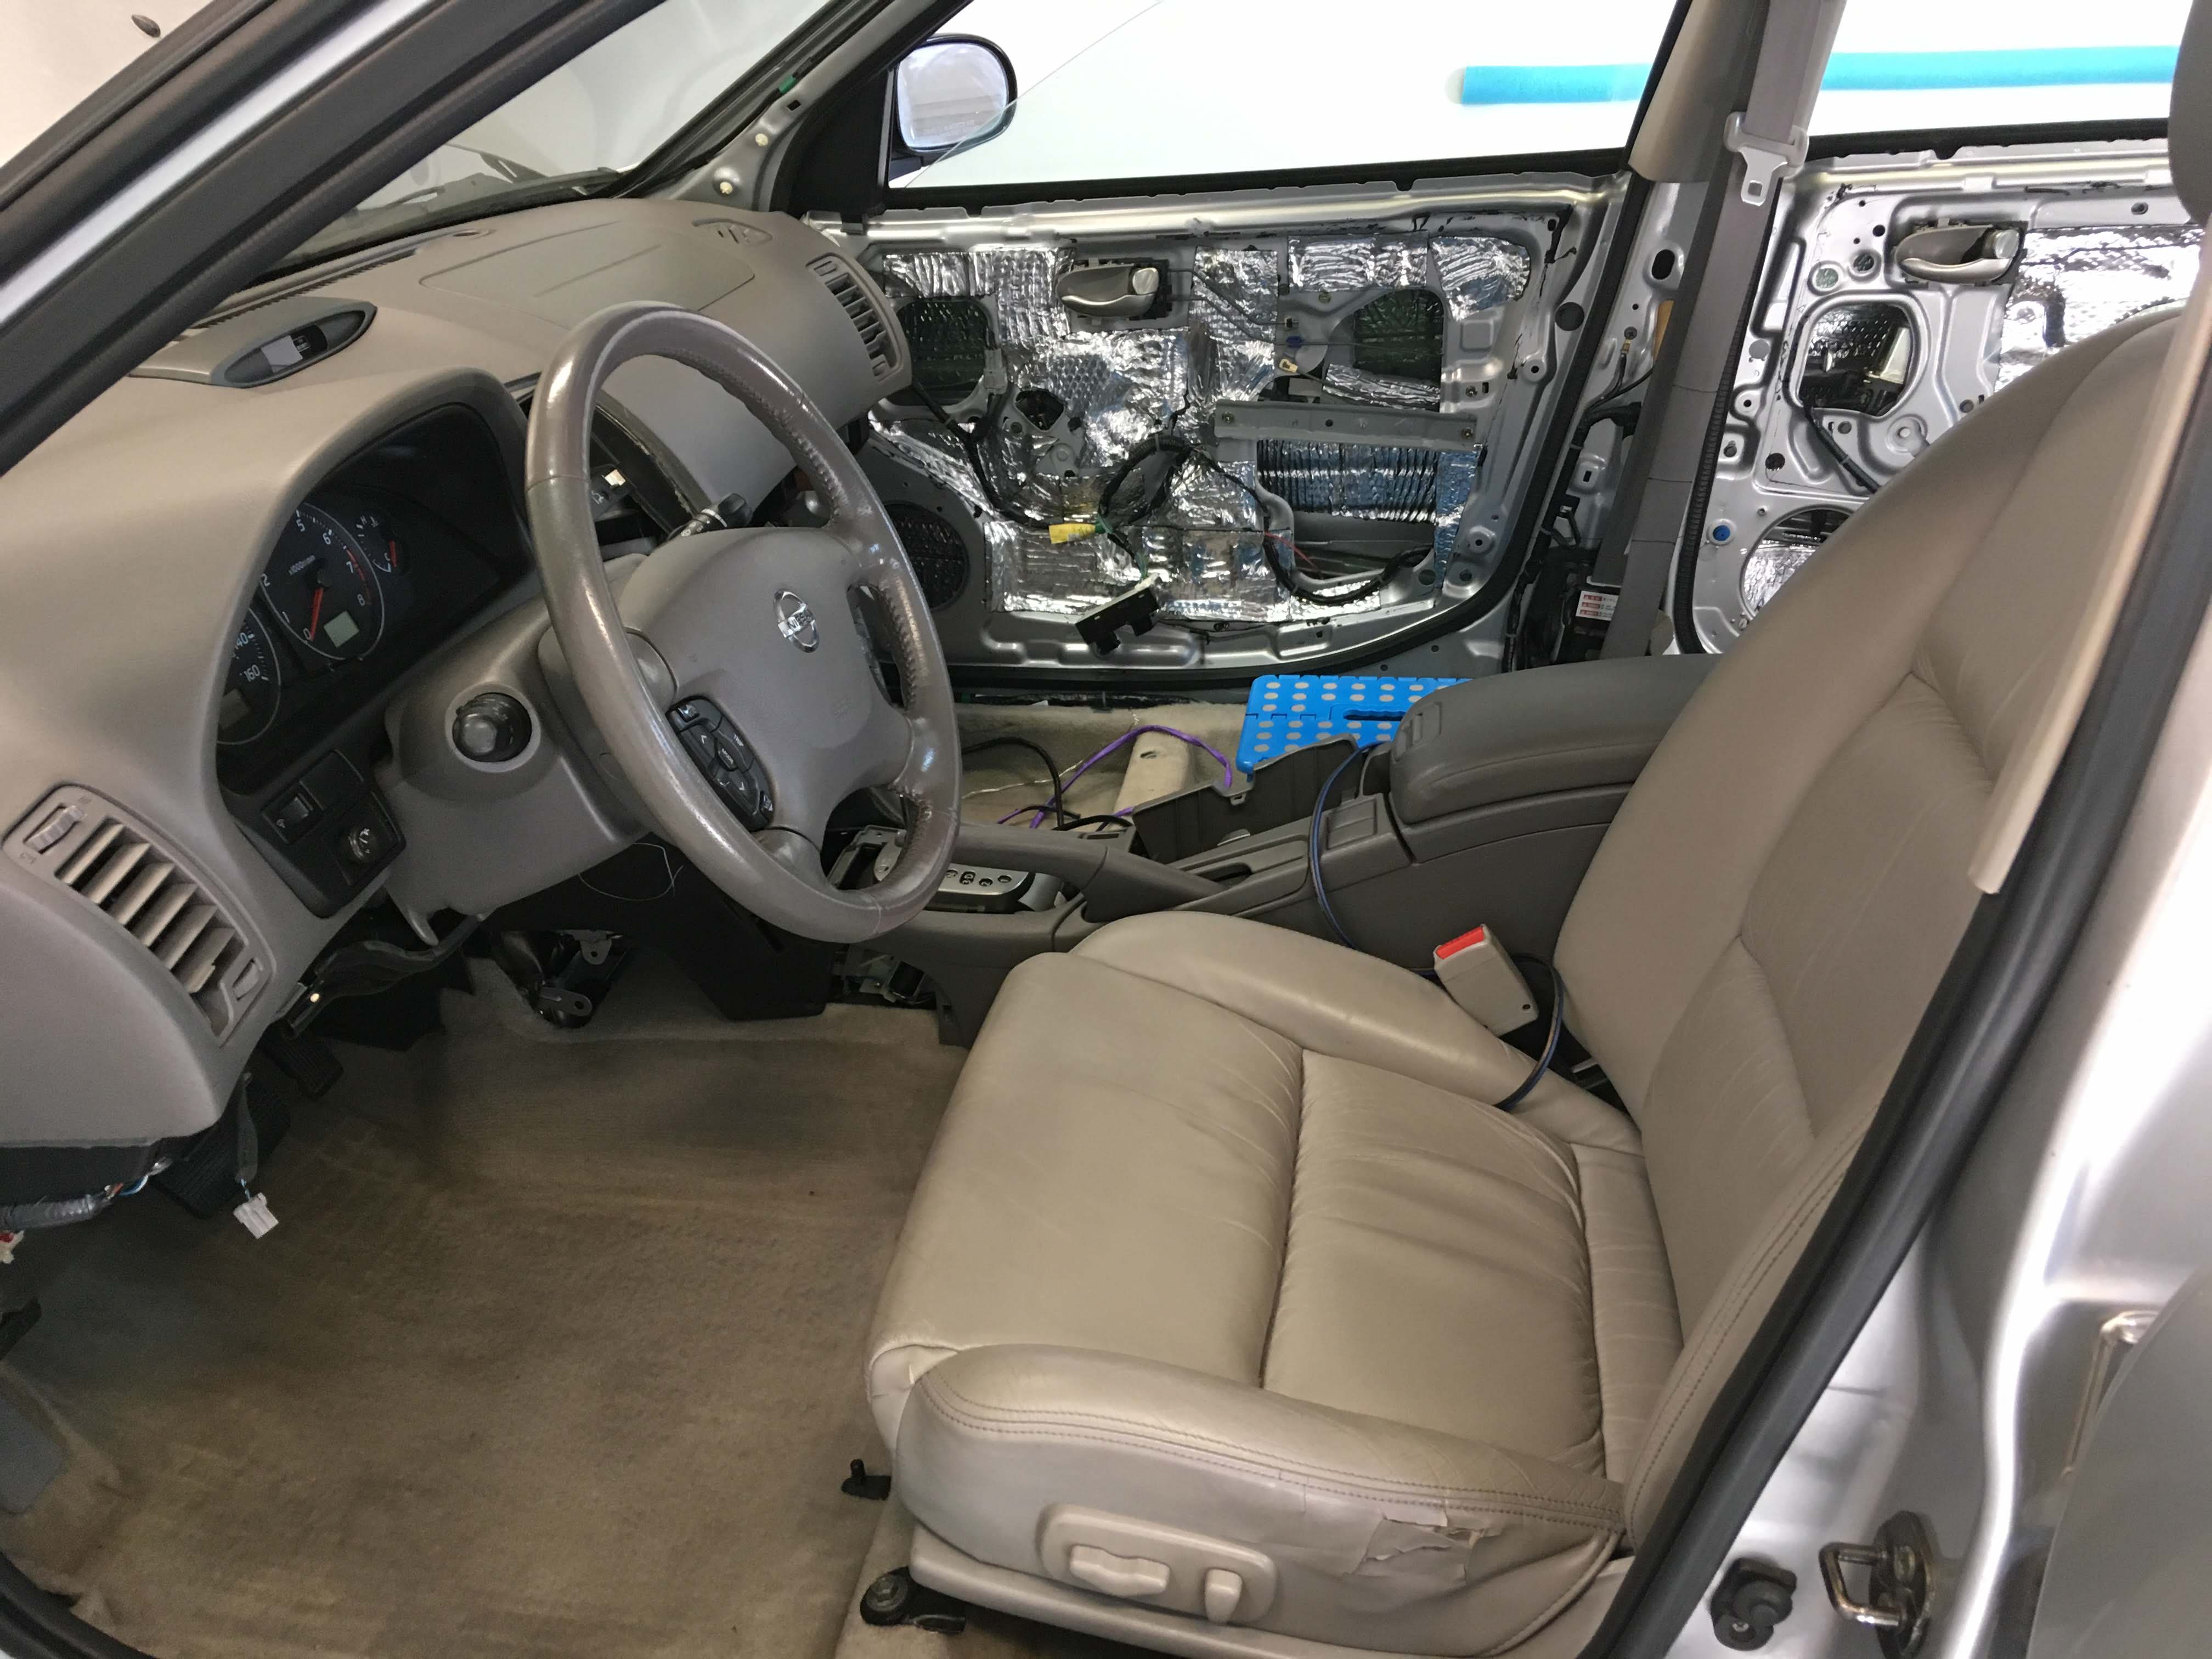
After:
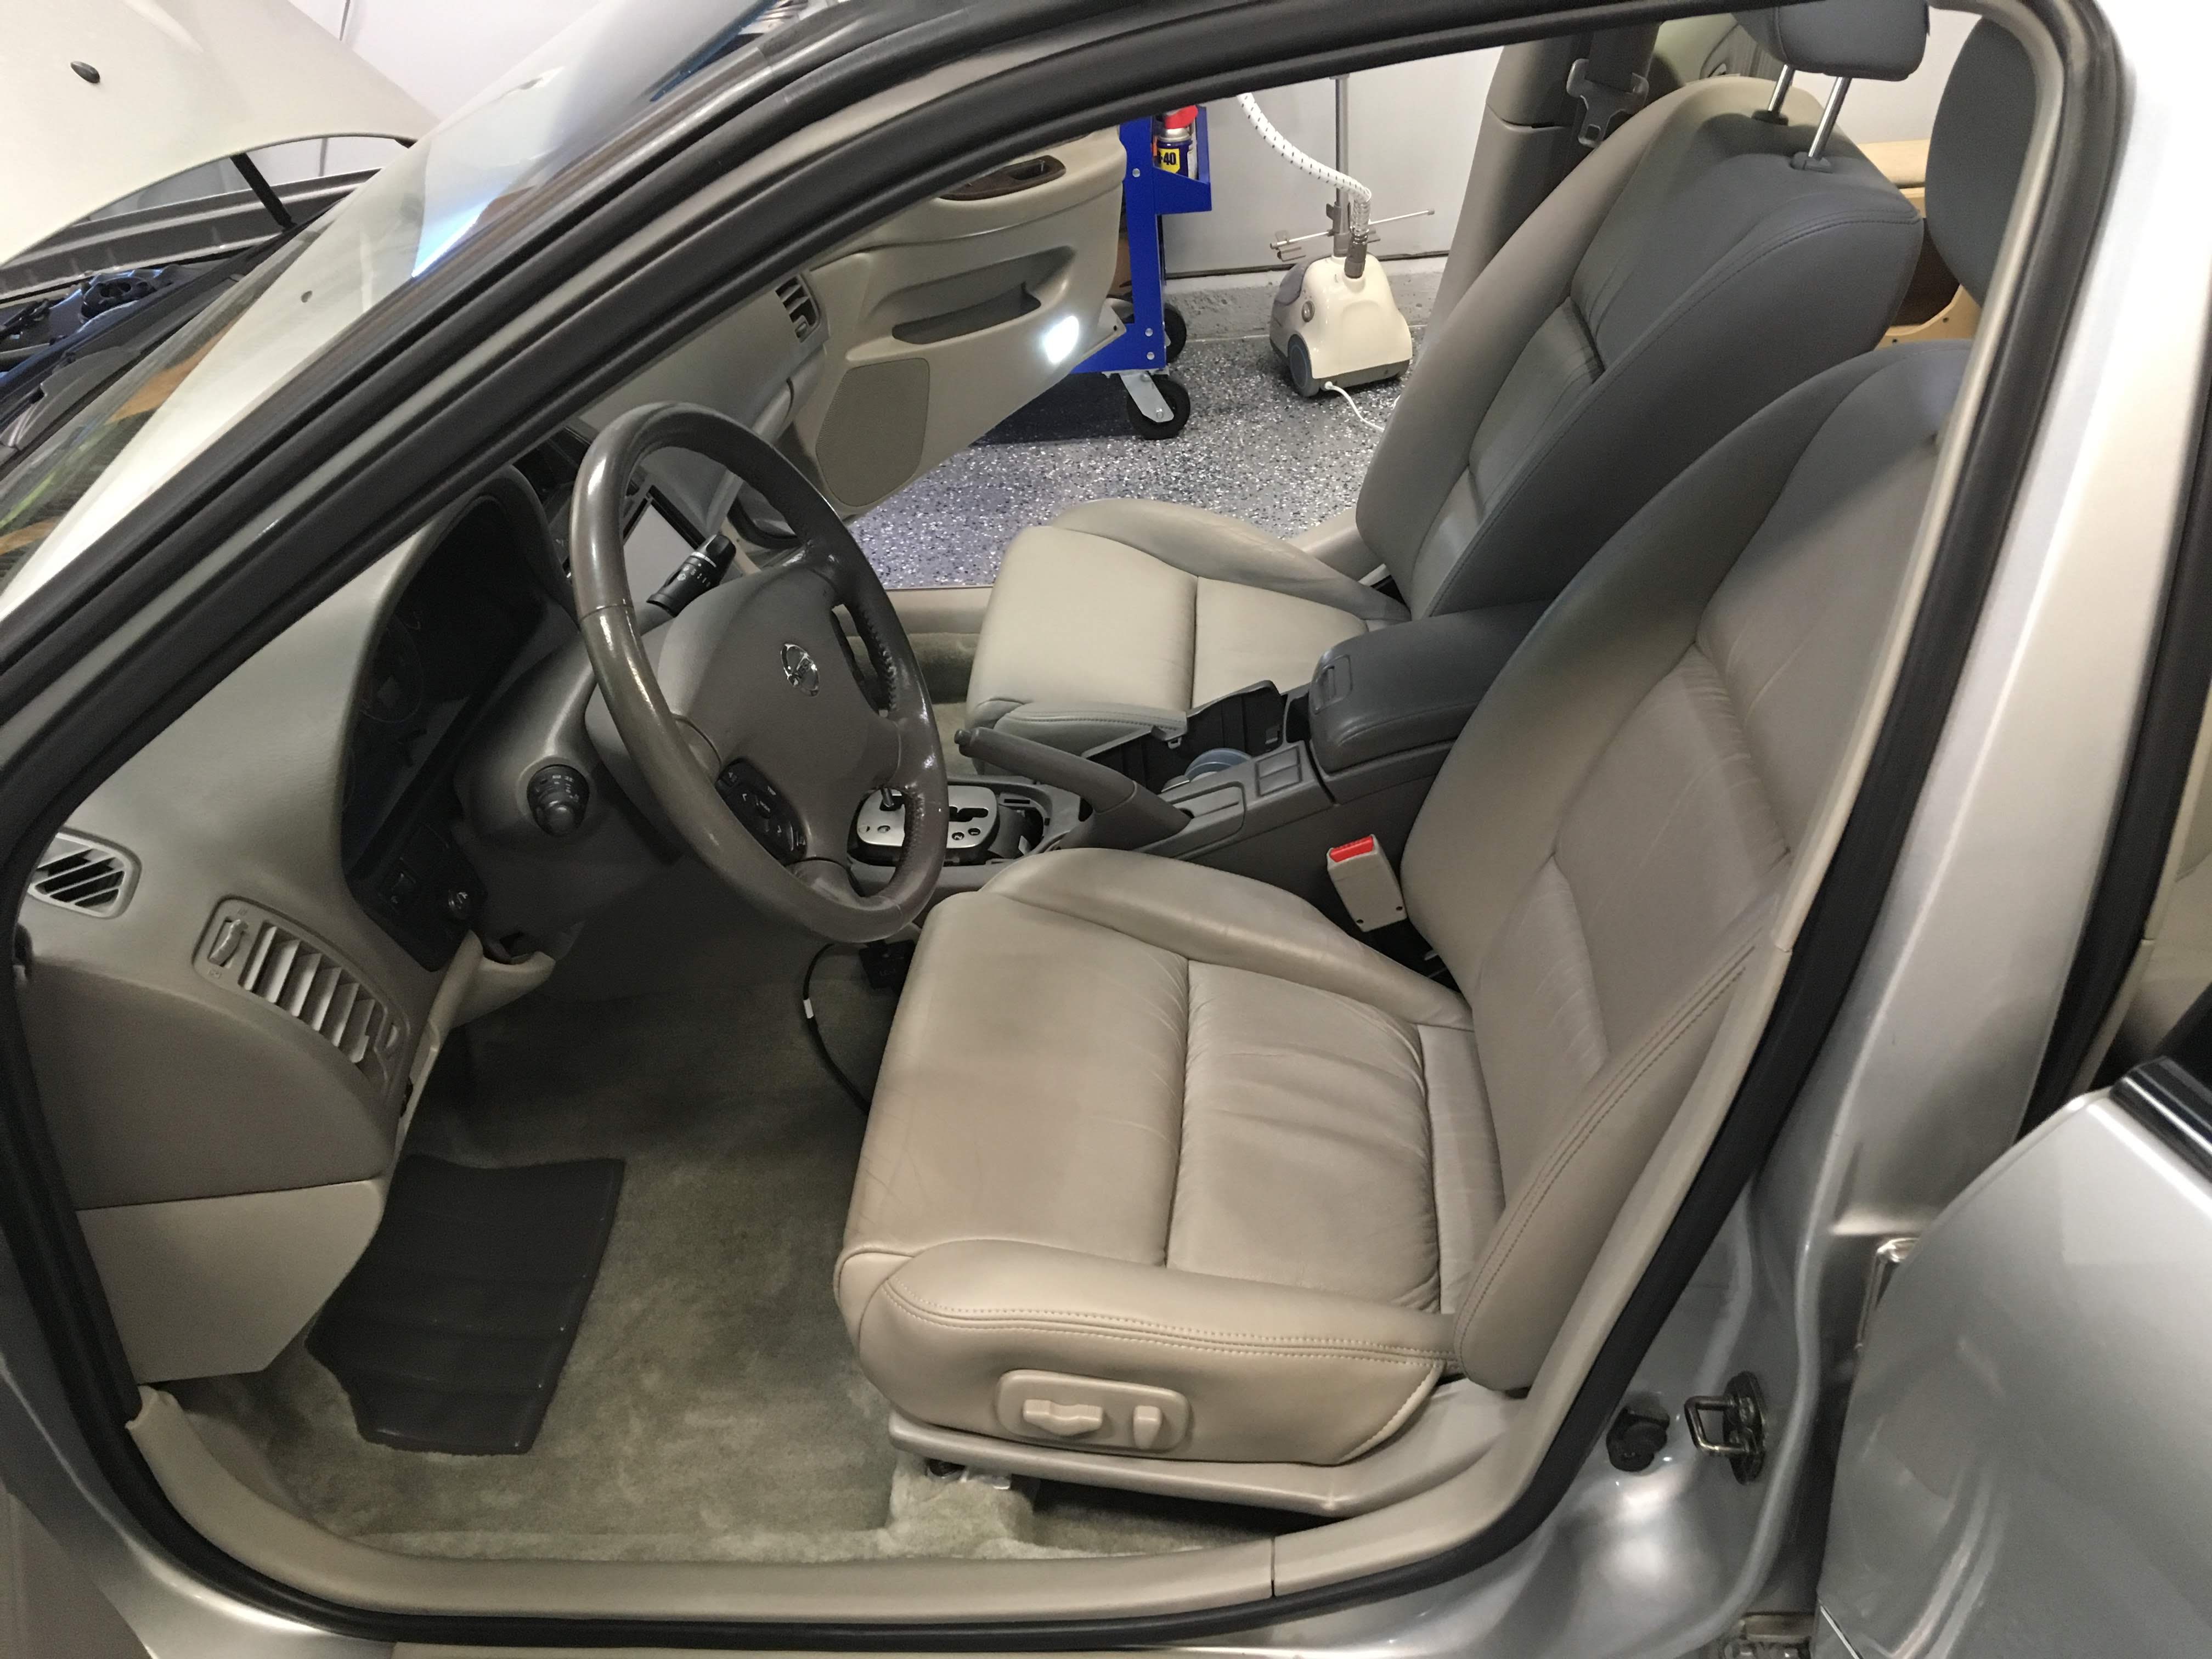
Just looking at those two shots makes me giddy...anywhoo...
Also, I did use a steam machine to work out some of the kinks in the rear carpet. It definitely made an improvement, and I was able to put rear seats back in after that:
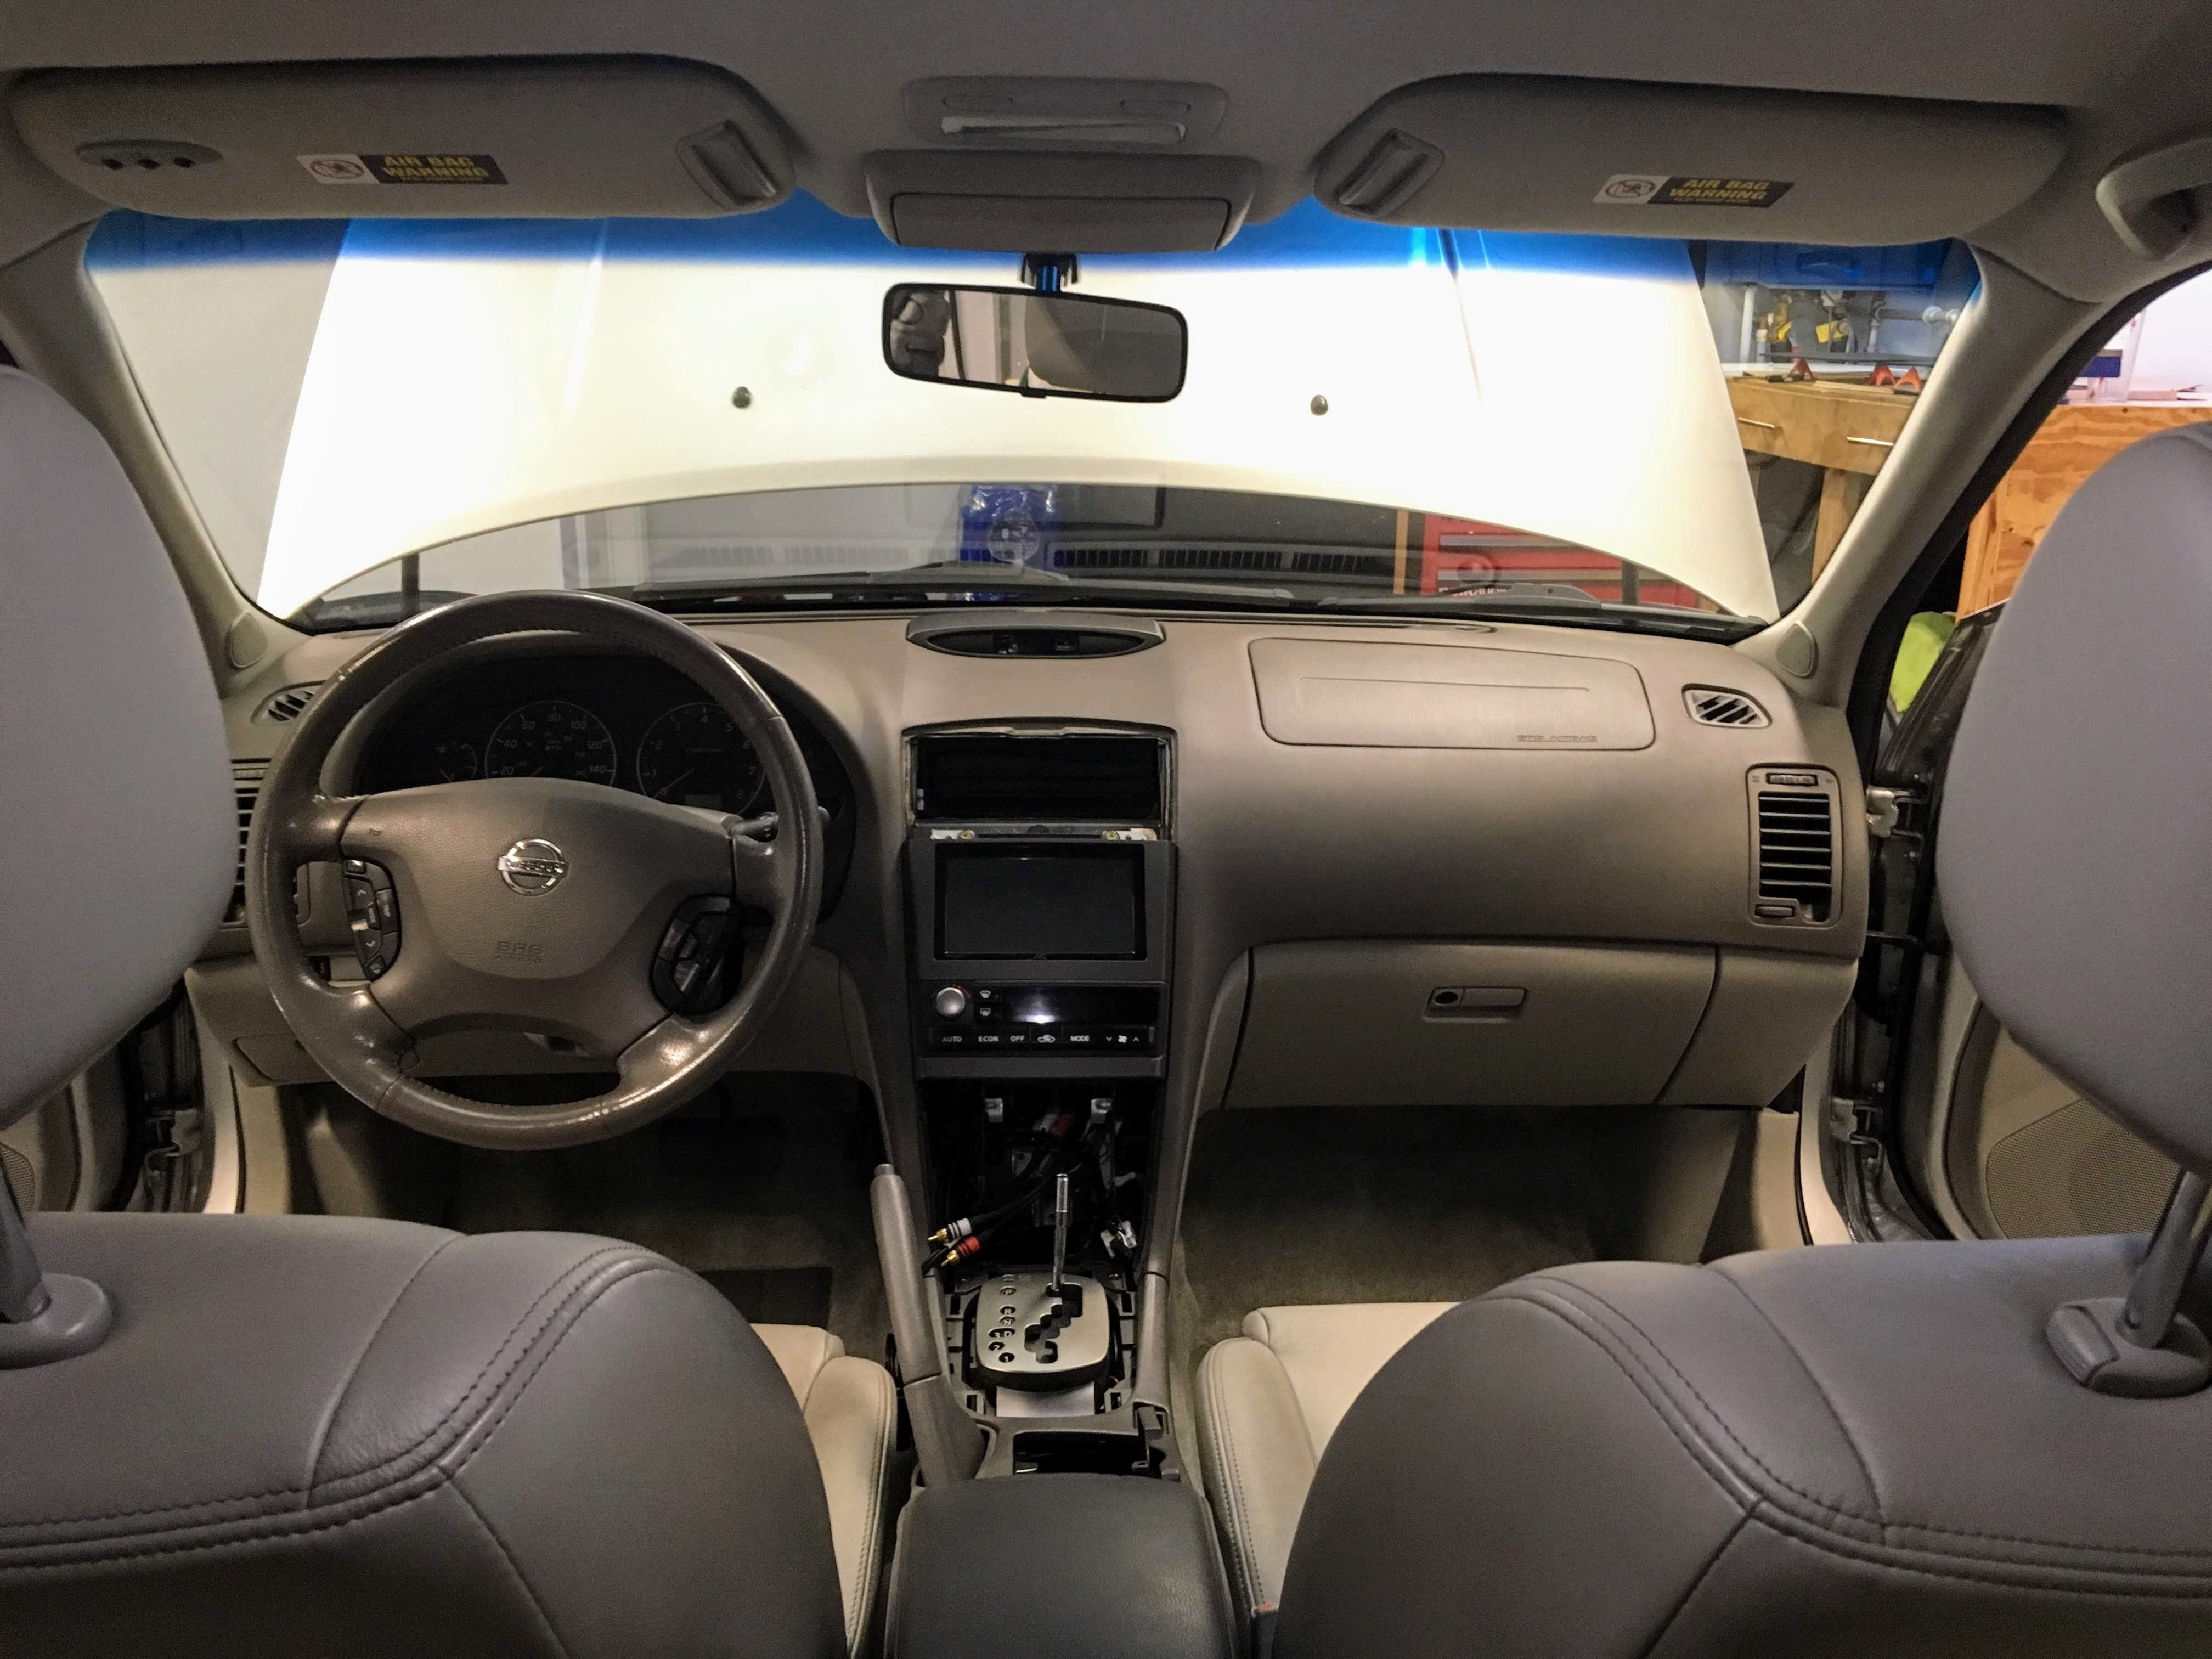
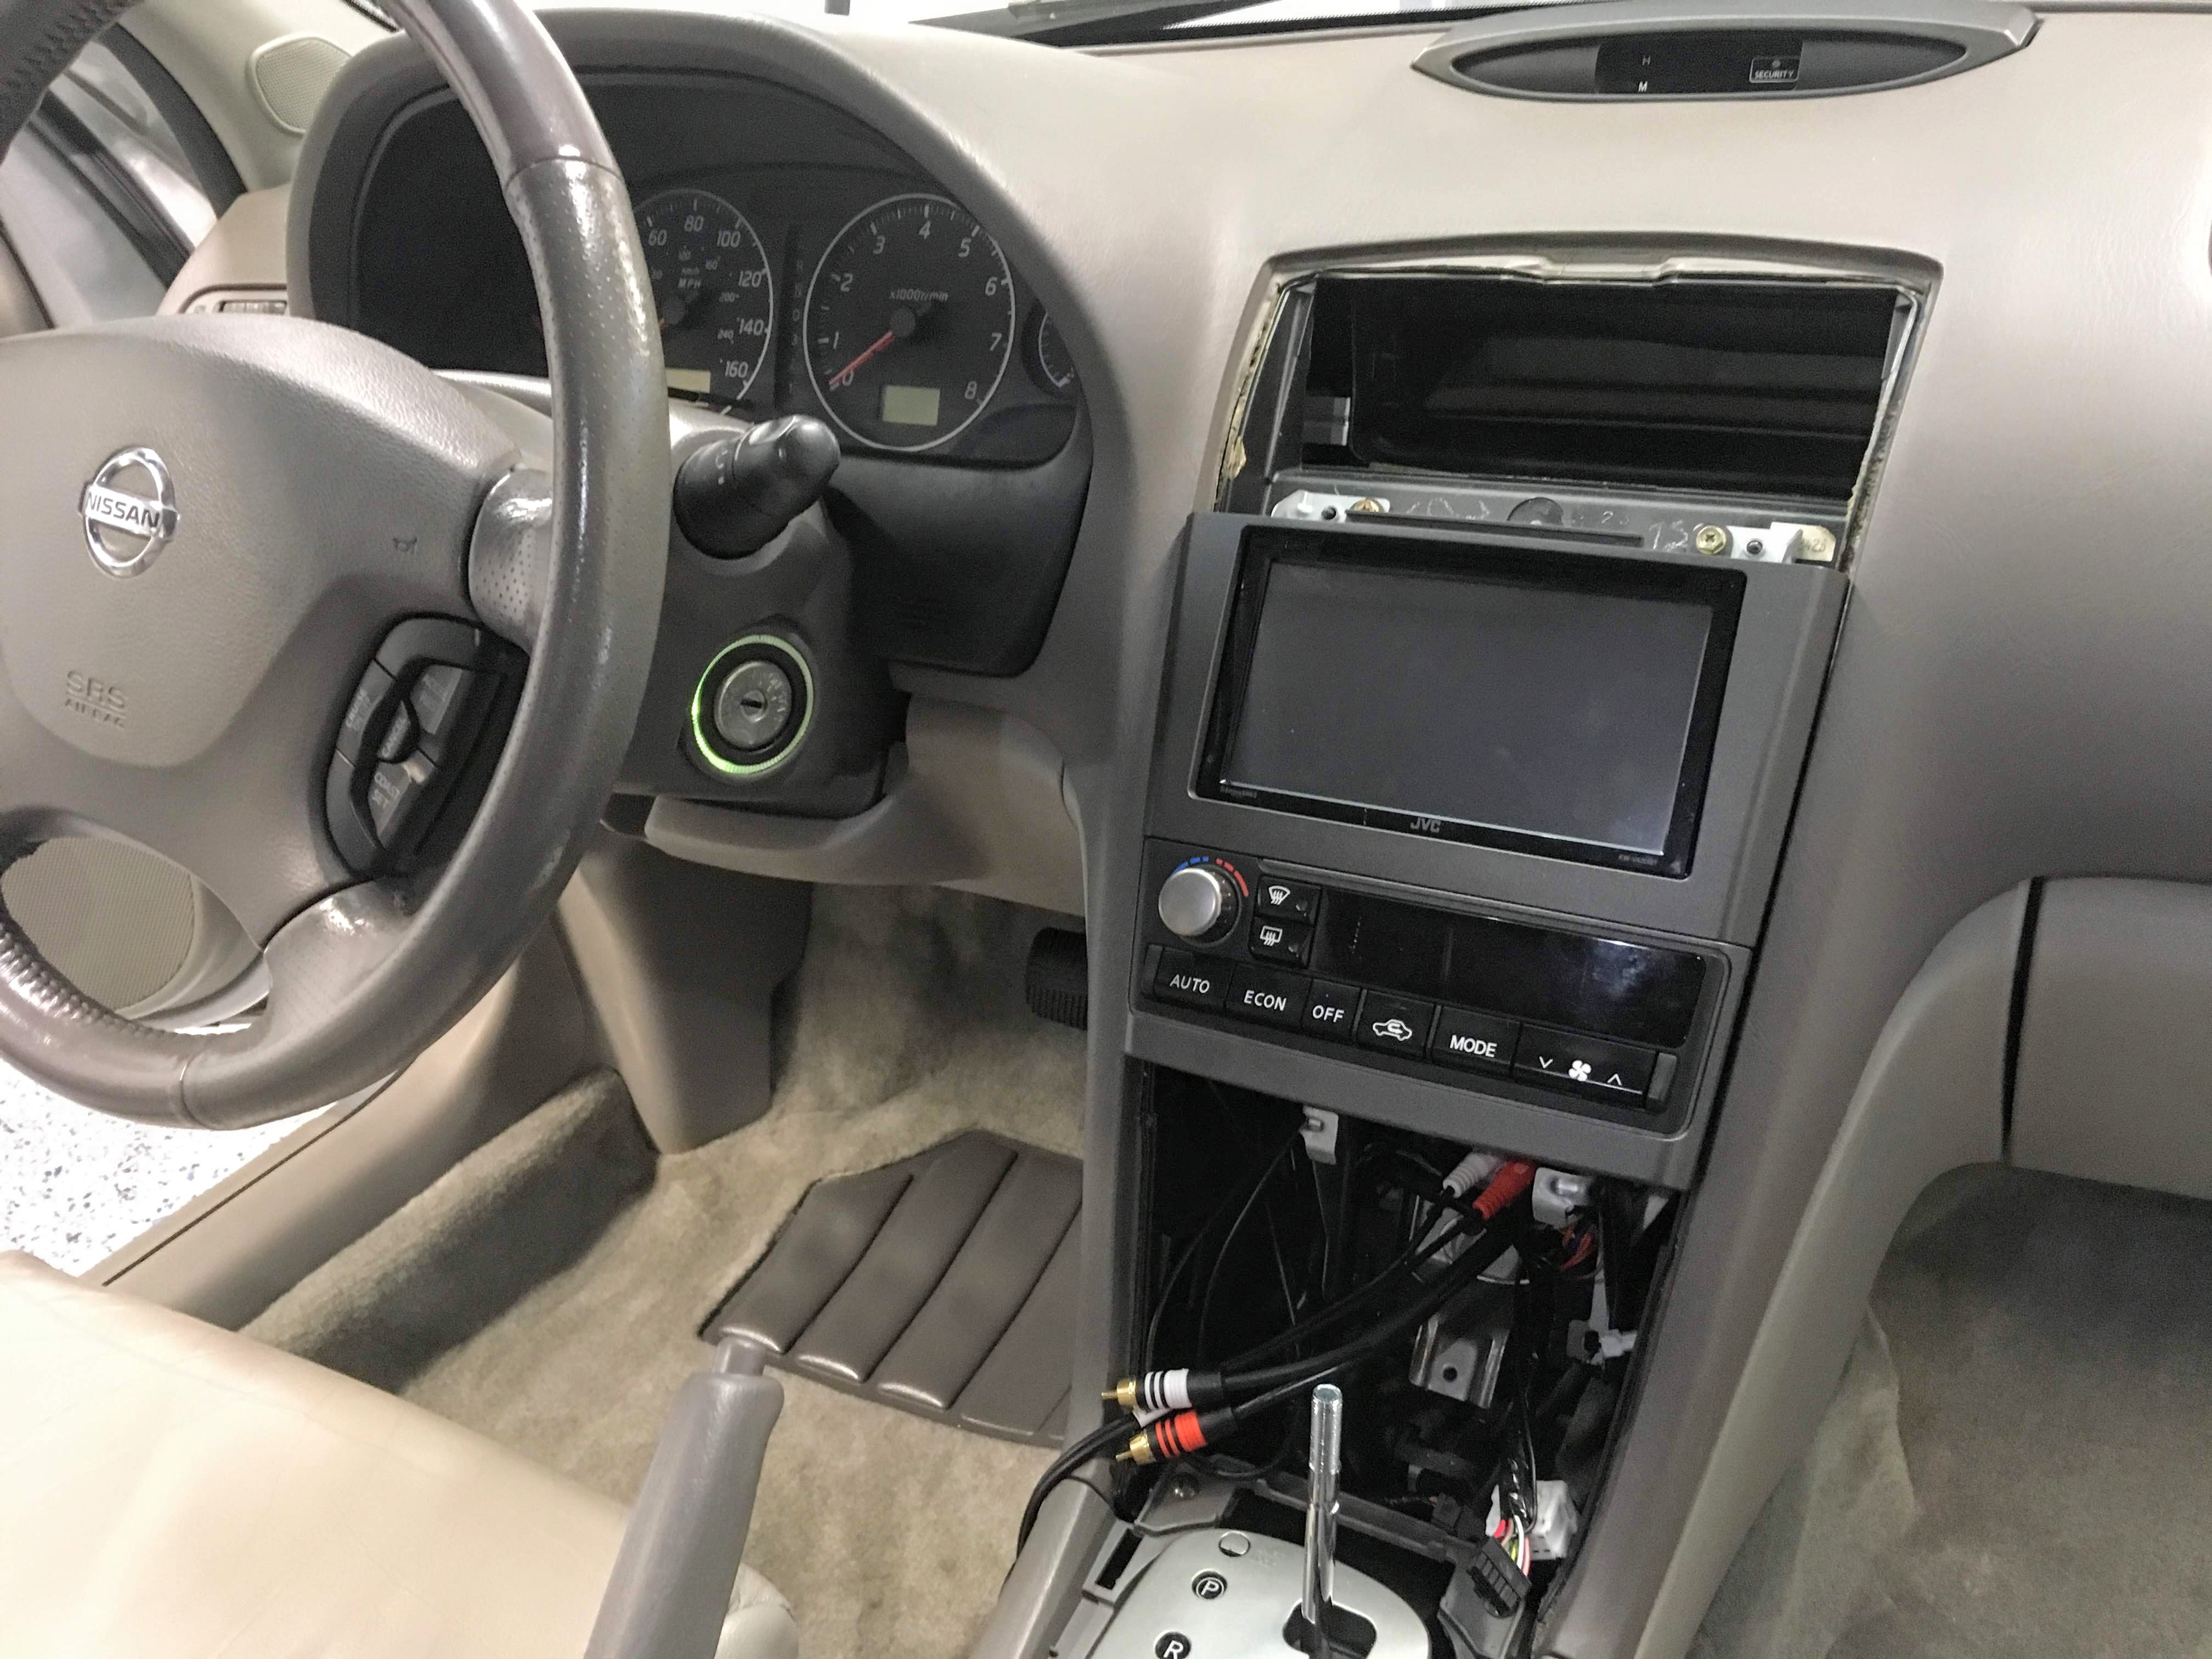
HU is in, but as I mentioned earlier, I still have some tinkering to do so I haven't put the last trim piece back:

Before:
After:
Just looking at those two shots makes me giddy...anywhoo...
Also, I did use a steam machine to work out some of the kinks in the rear carpet. It definitely made an improvement, and I was able to put rear seats back in after that:
HU is in, but as I mentioned earlier, I still have some tinkering to do so I haven't put the last trim piece back:
01-09-2019, 10:06 AM
#51
Junior Member
Thread Starter
Join Date: Mar 2018
Location: Nashville, TN
Posts: 76
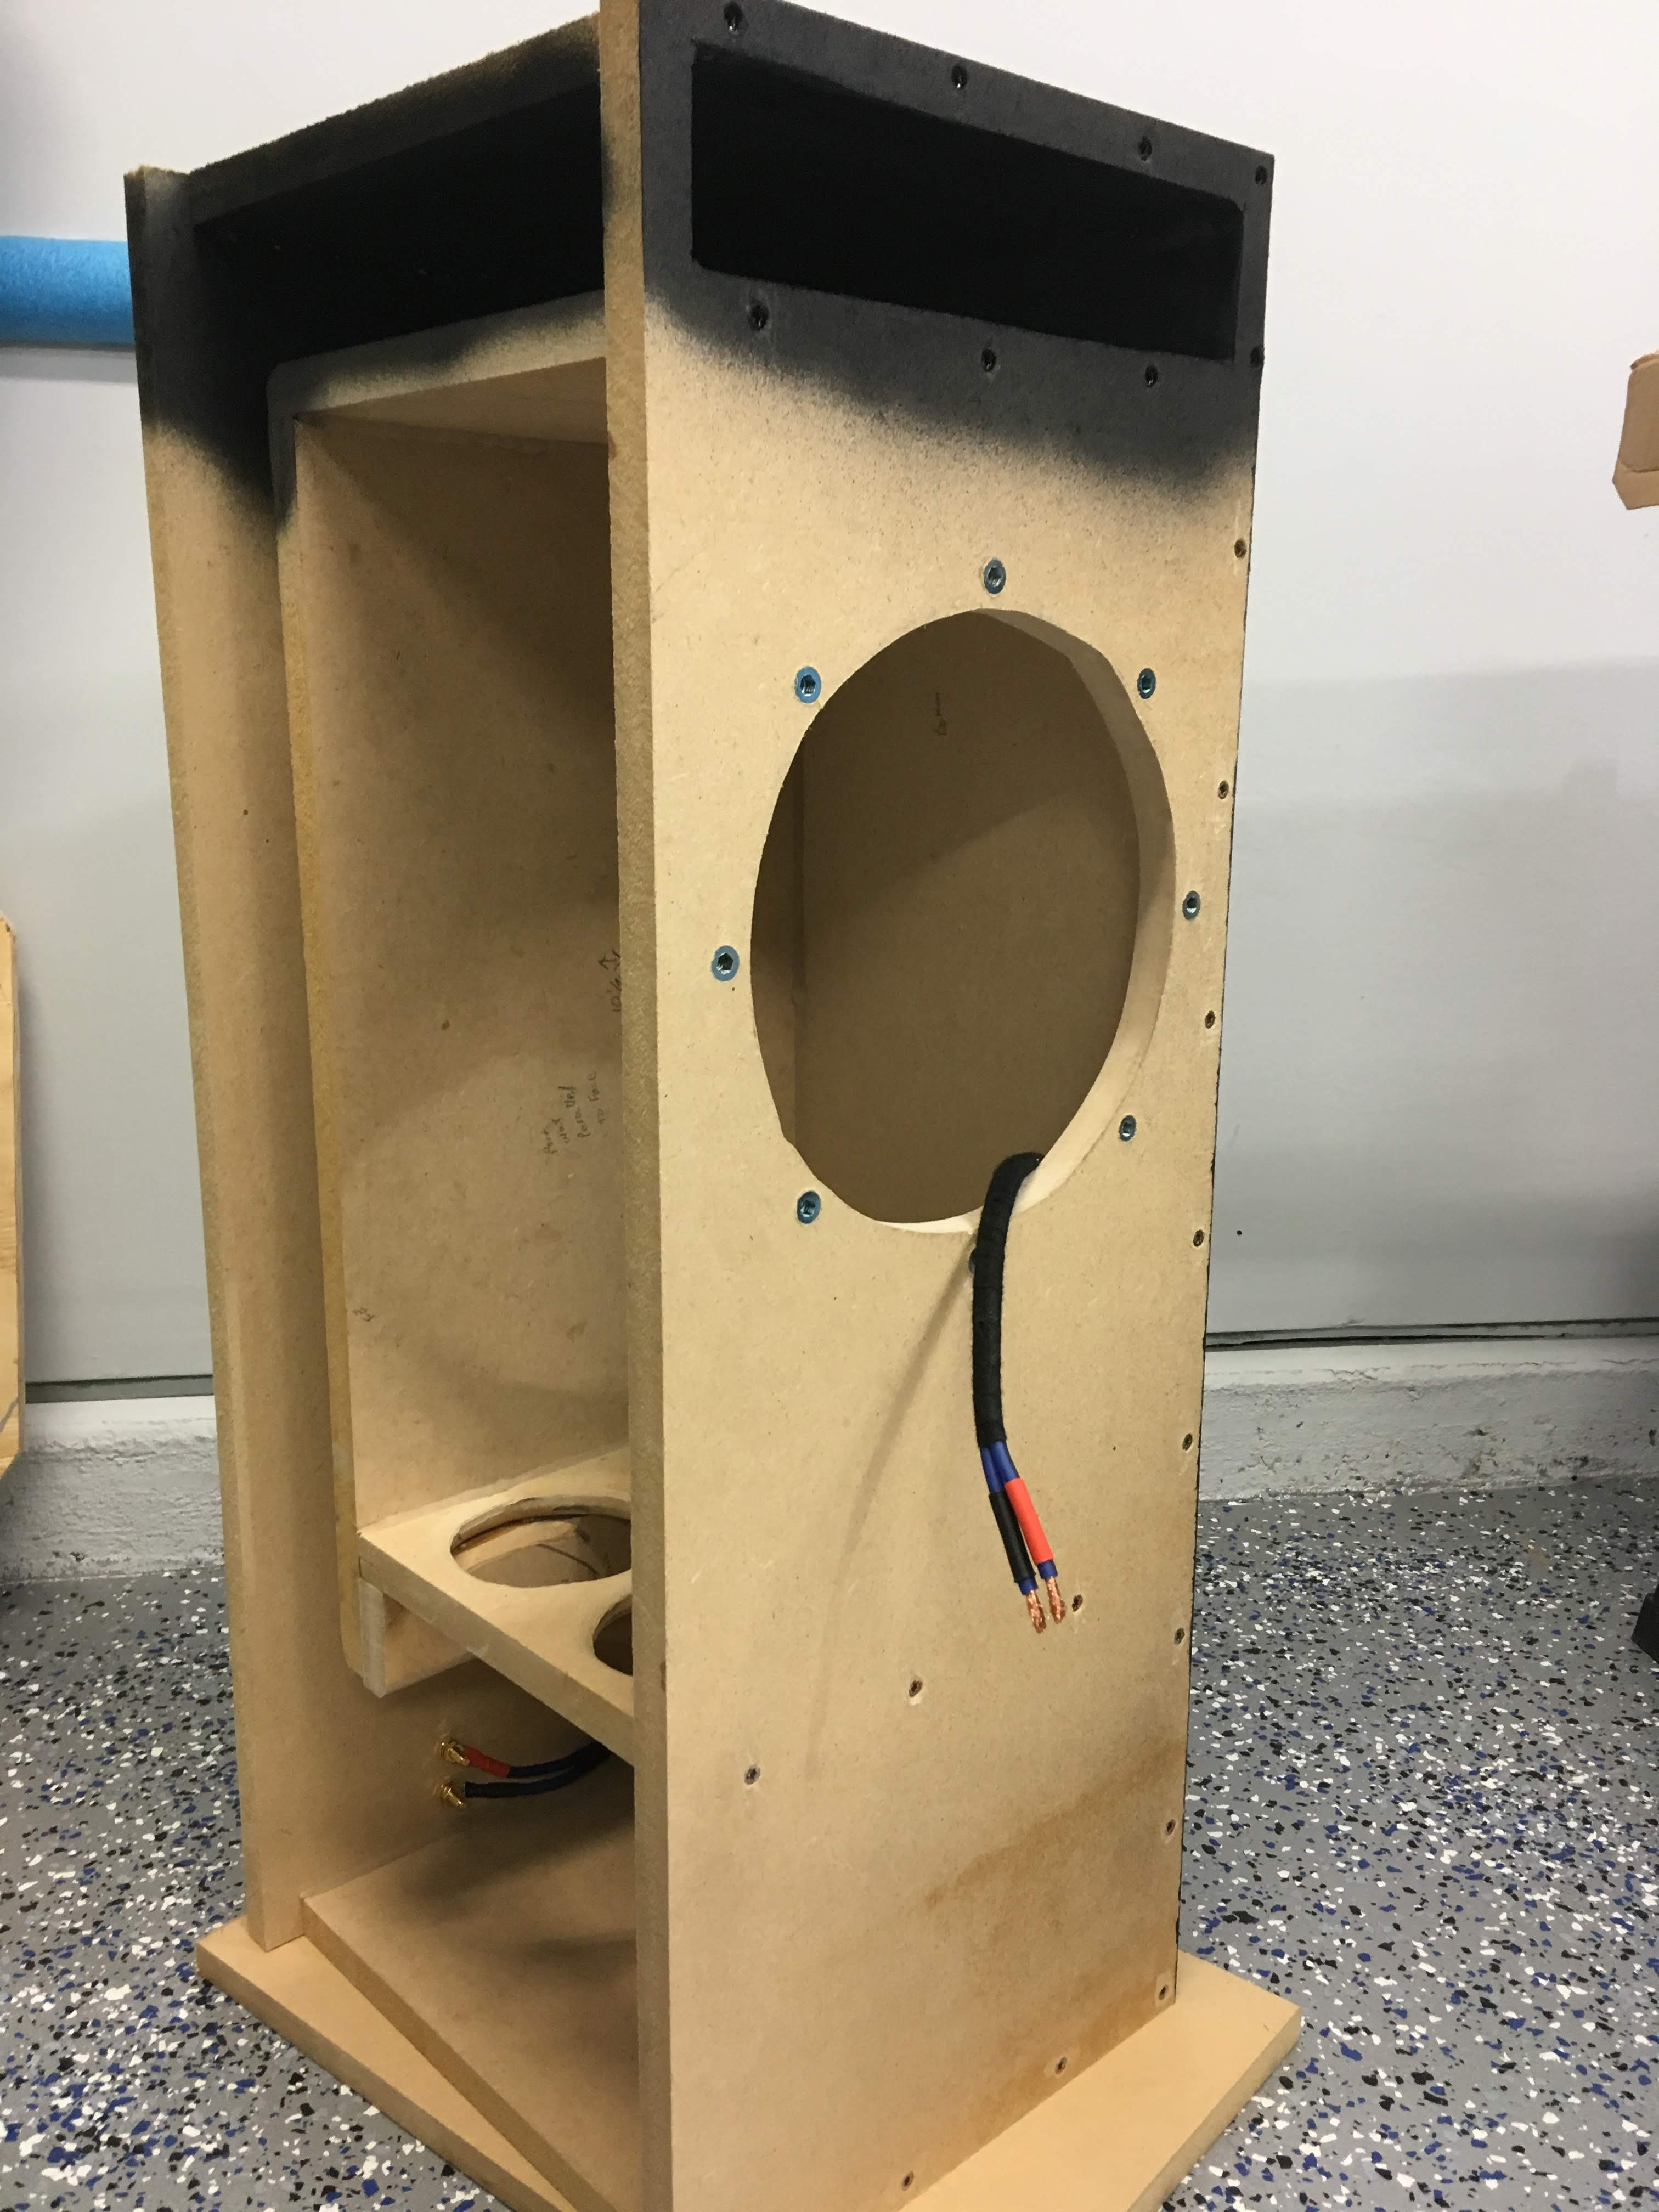
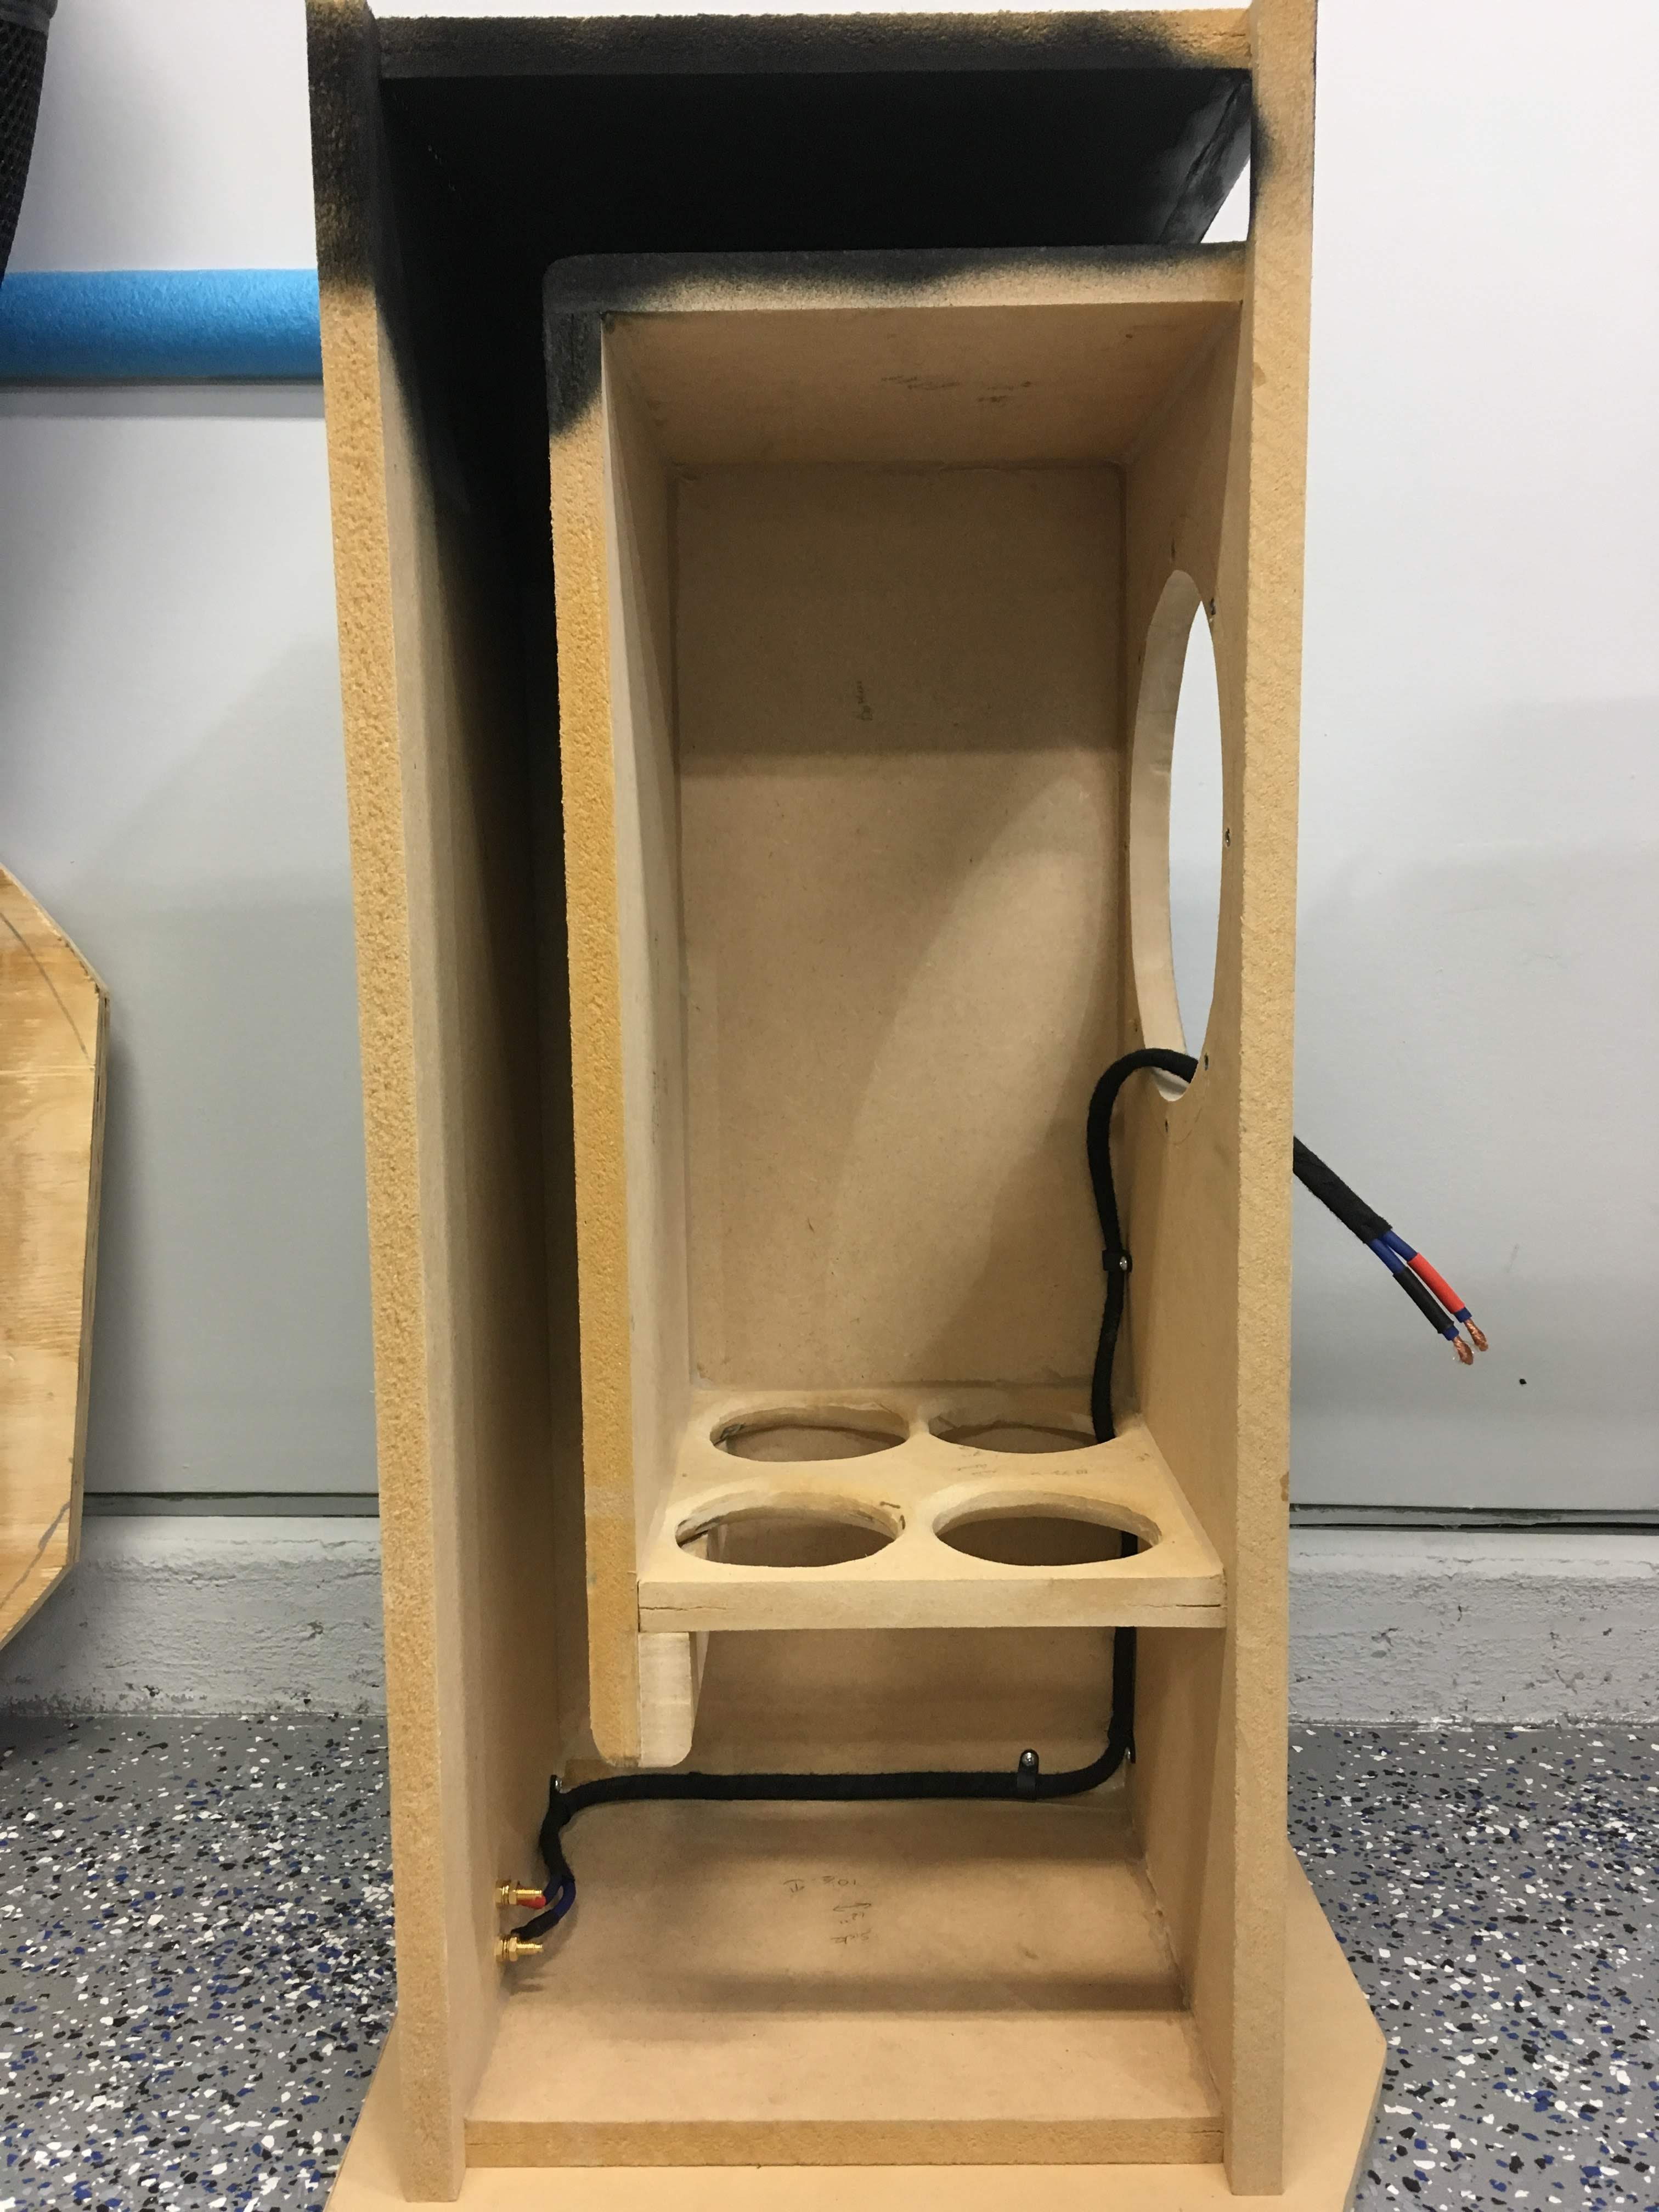
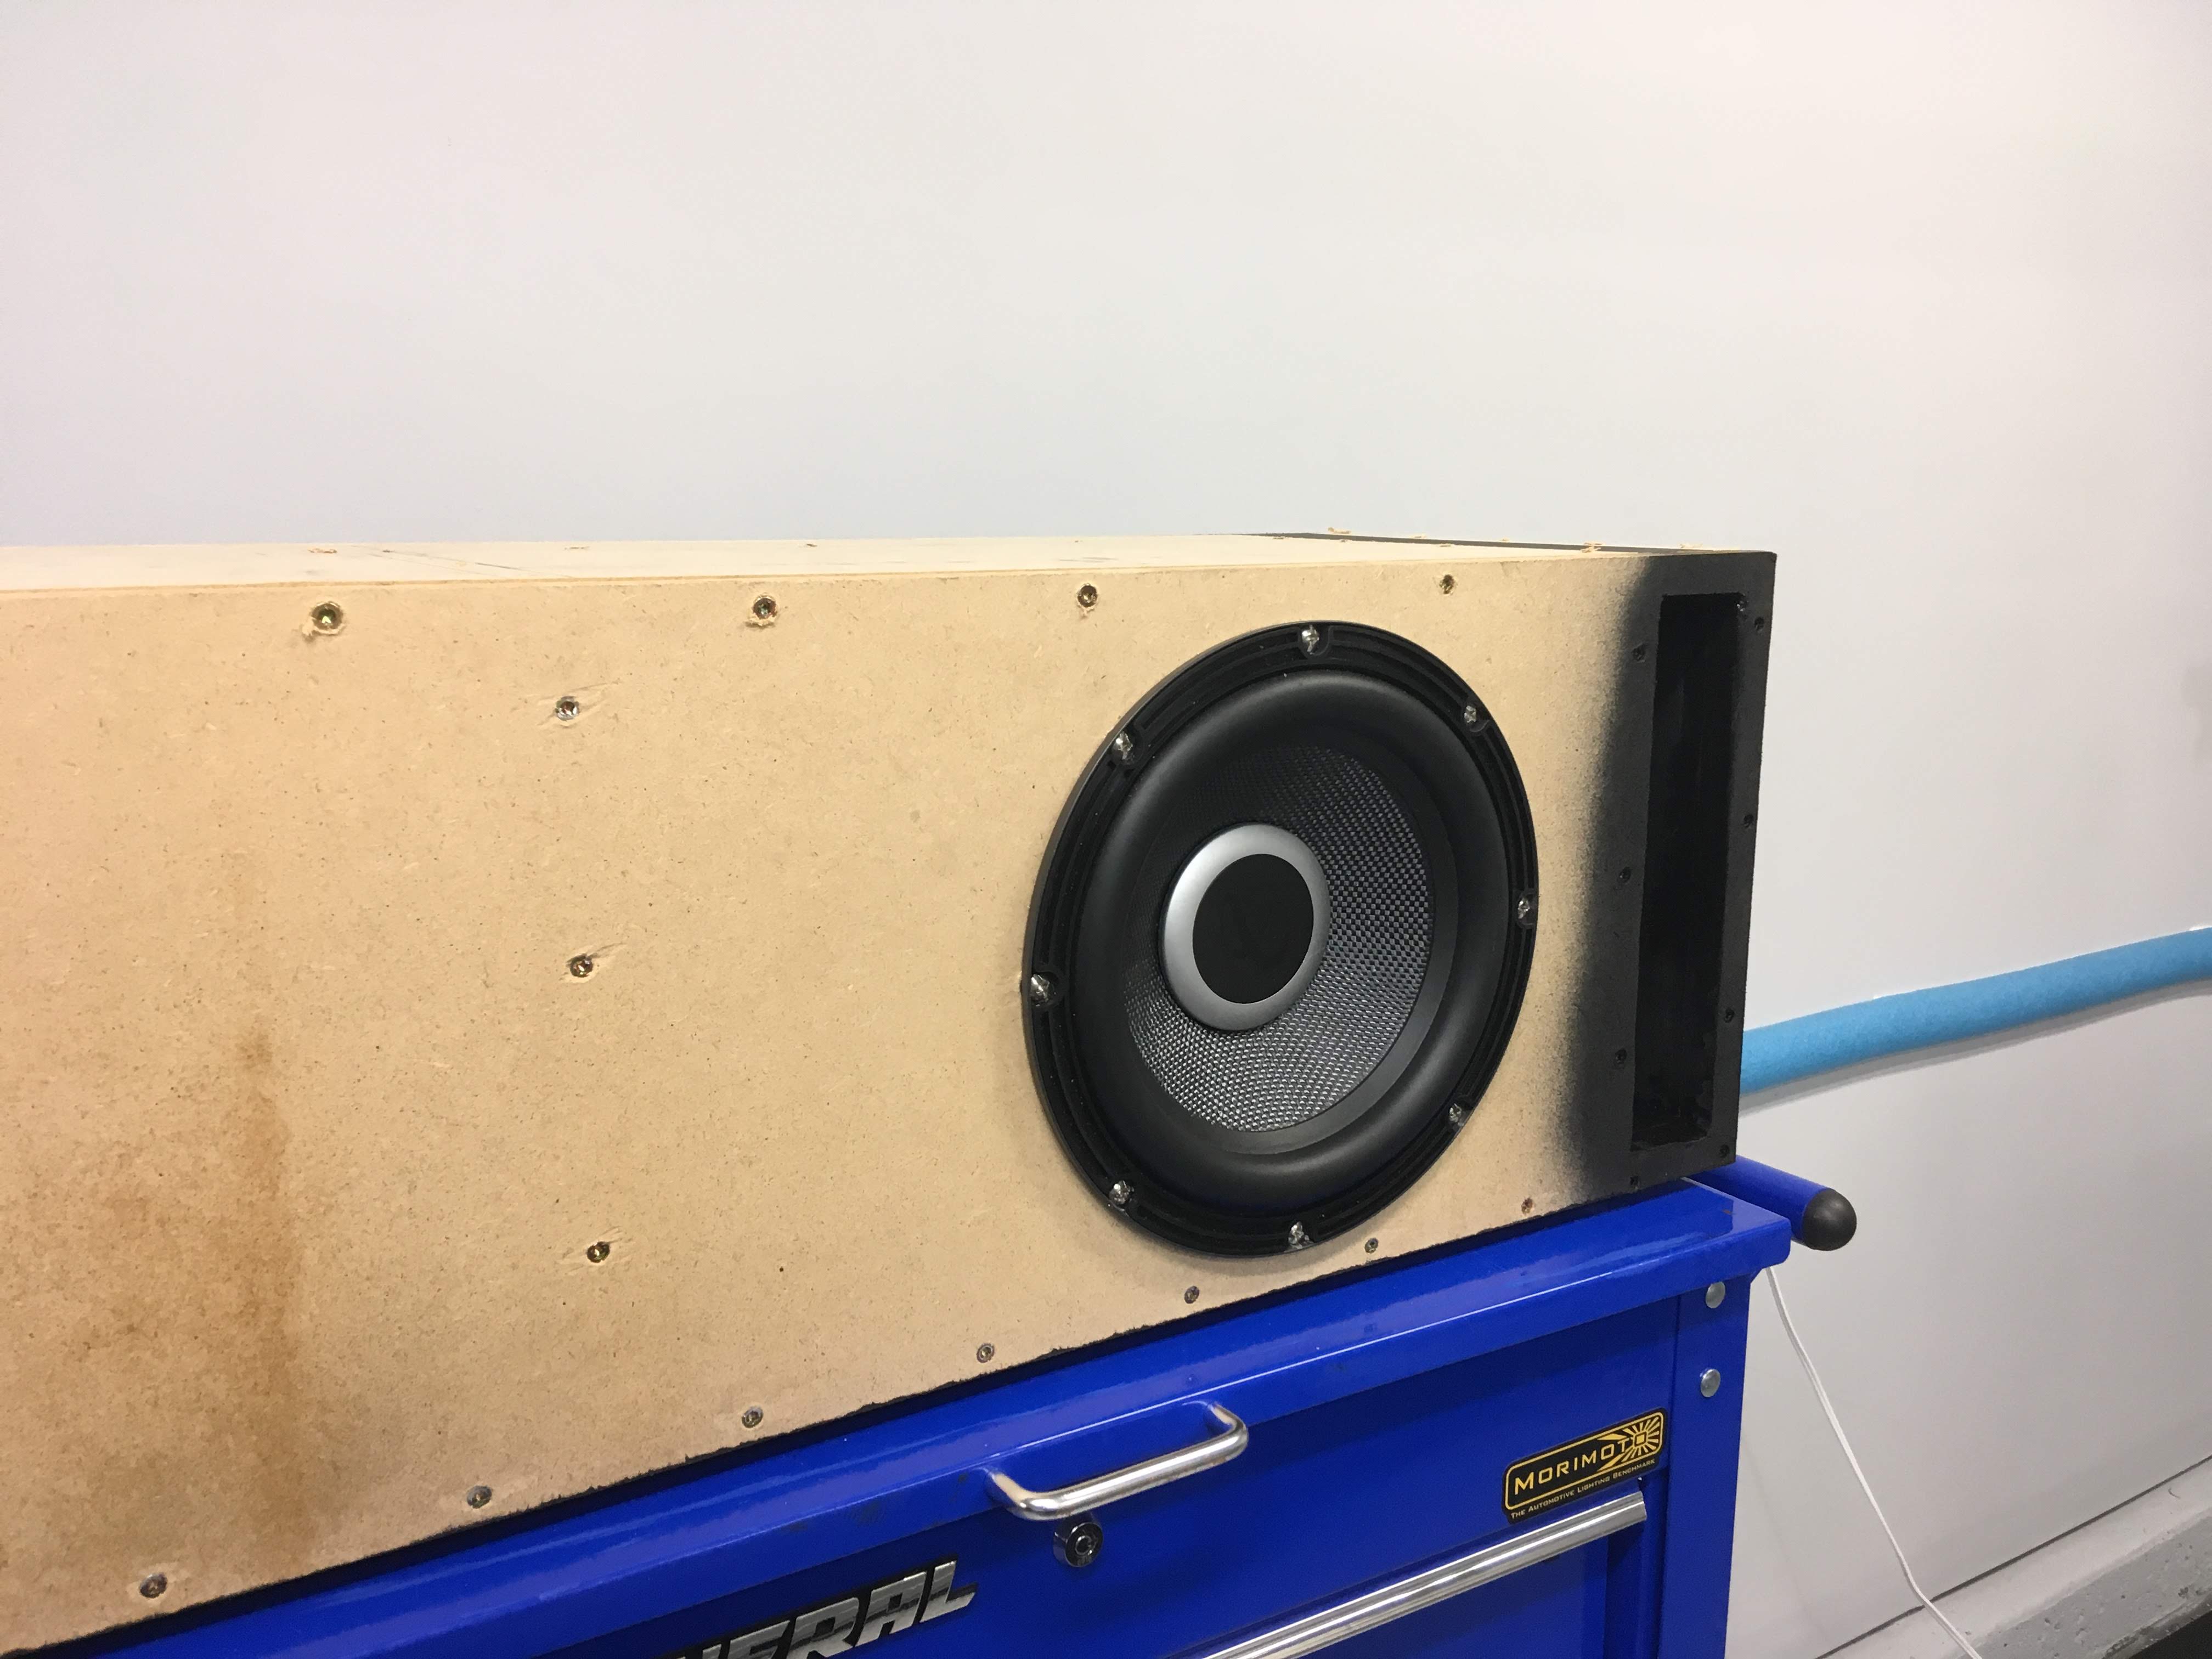
Because working on the interior and radio harness at the same time wasn't enough, I decided to steam ahead on the sub enclosure. I've made the initial enclosure out of 3/4" mdf, glued and screwed. I will go back with 1/4" hardwood to use as veneer. The veneer will add that finished look while hiding the screw holes and glue stains on the mdf. Gluing it on top means not using finish nails, so you'll only see the finish I've chosen and not the heads of the brads that always seem to show up in the end...
I've chosen an Infinity Kappa 10" sub, and using the selectable impedance, I'm setting it for 2 ohms.
Initial construction, with threaded inserts to mount the sub:

Painted the port to match veneer, then added my binding posts and clipped the wire inside the box:
Rough cut, pre-stained veneer panels:
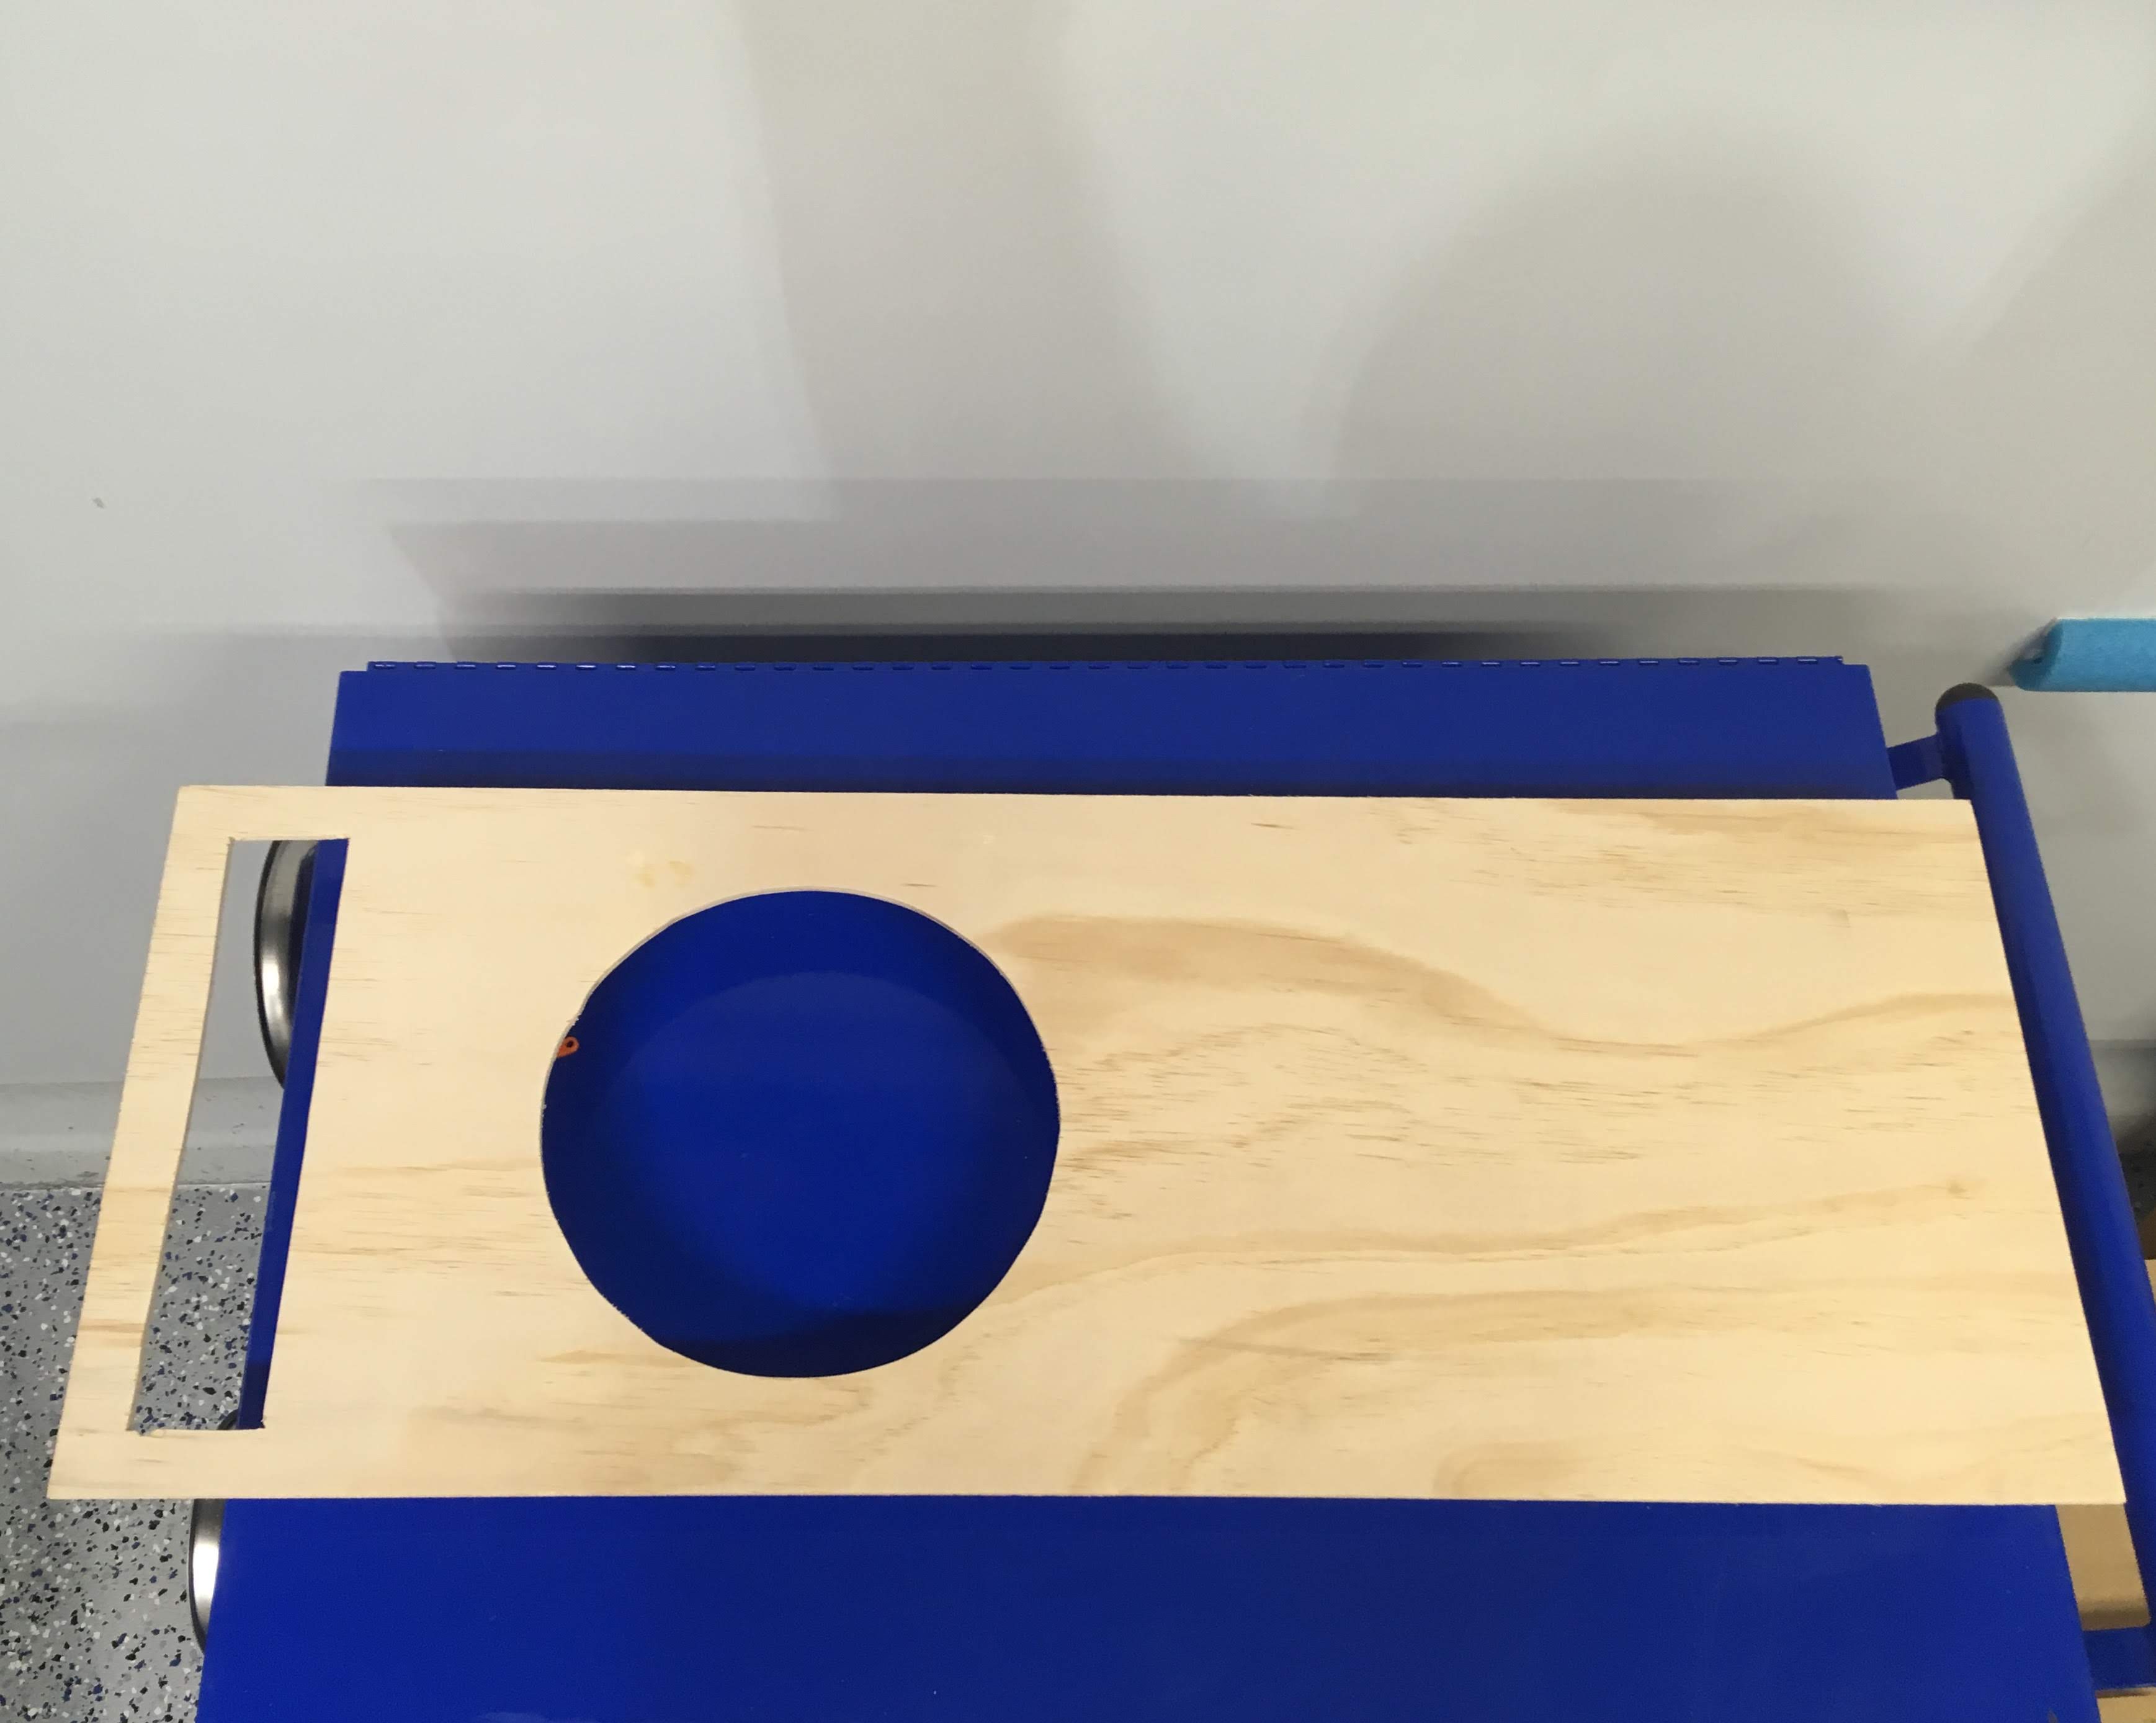
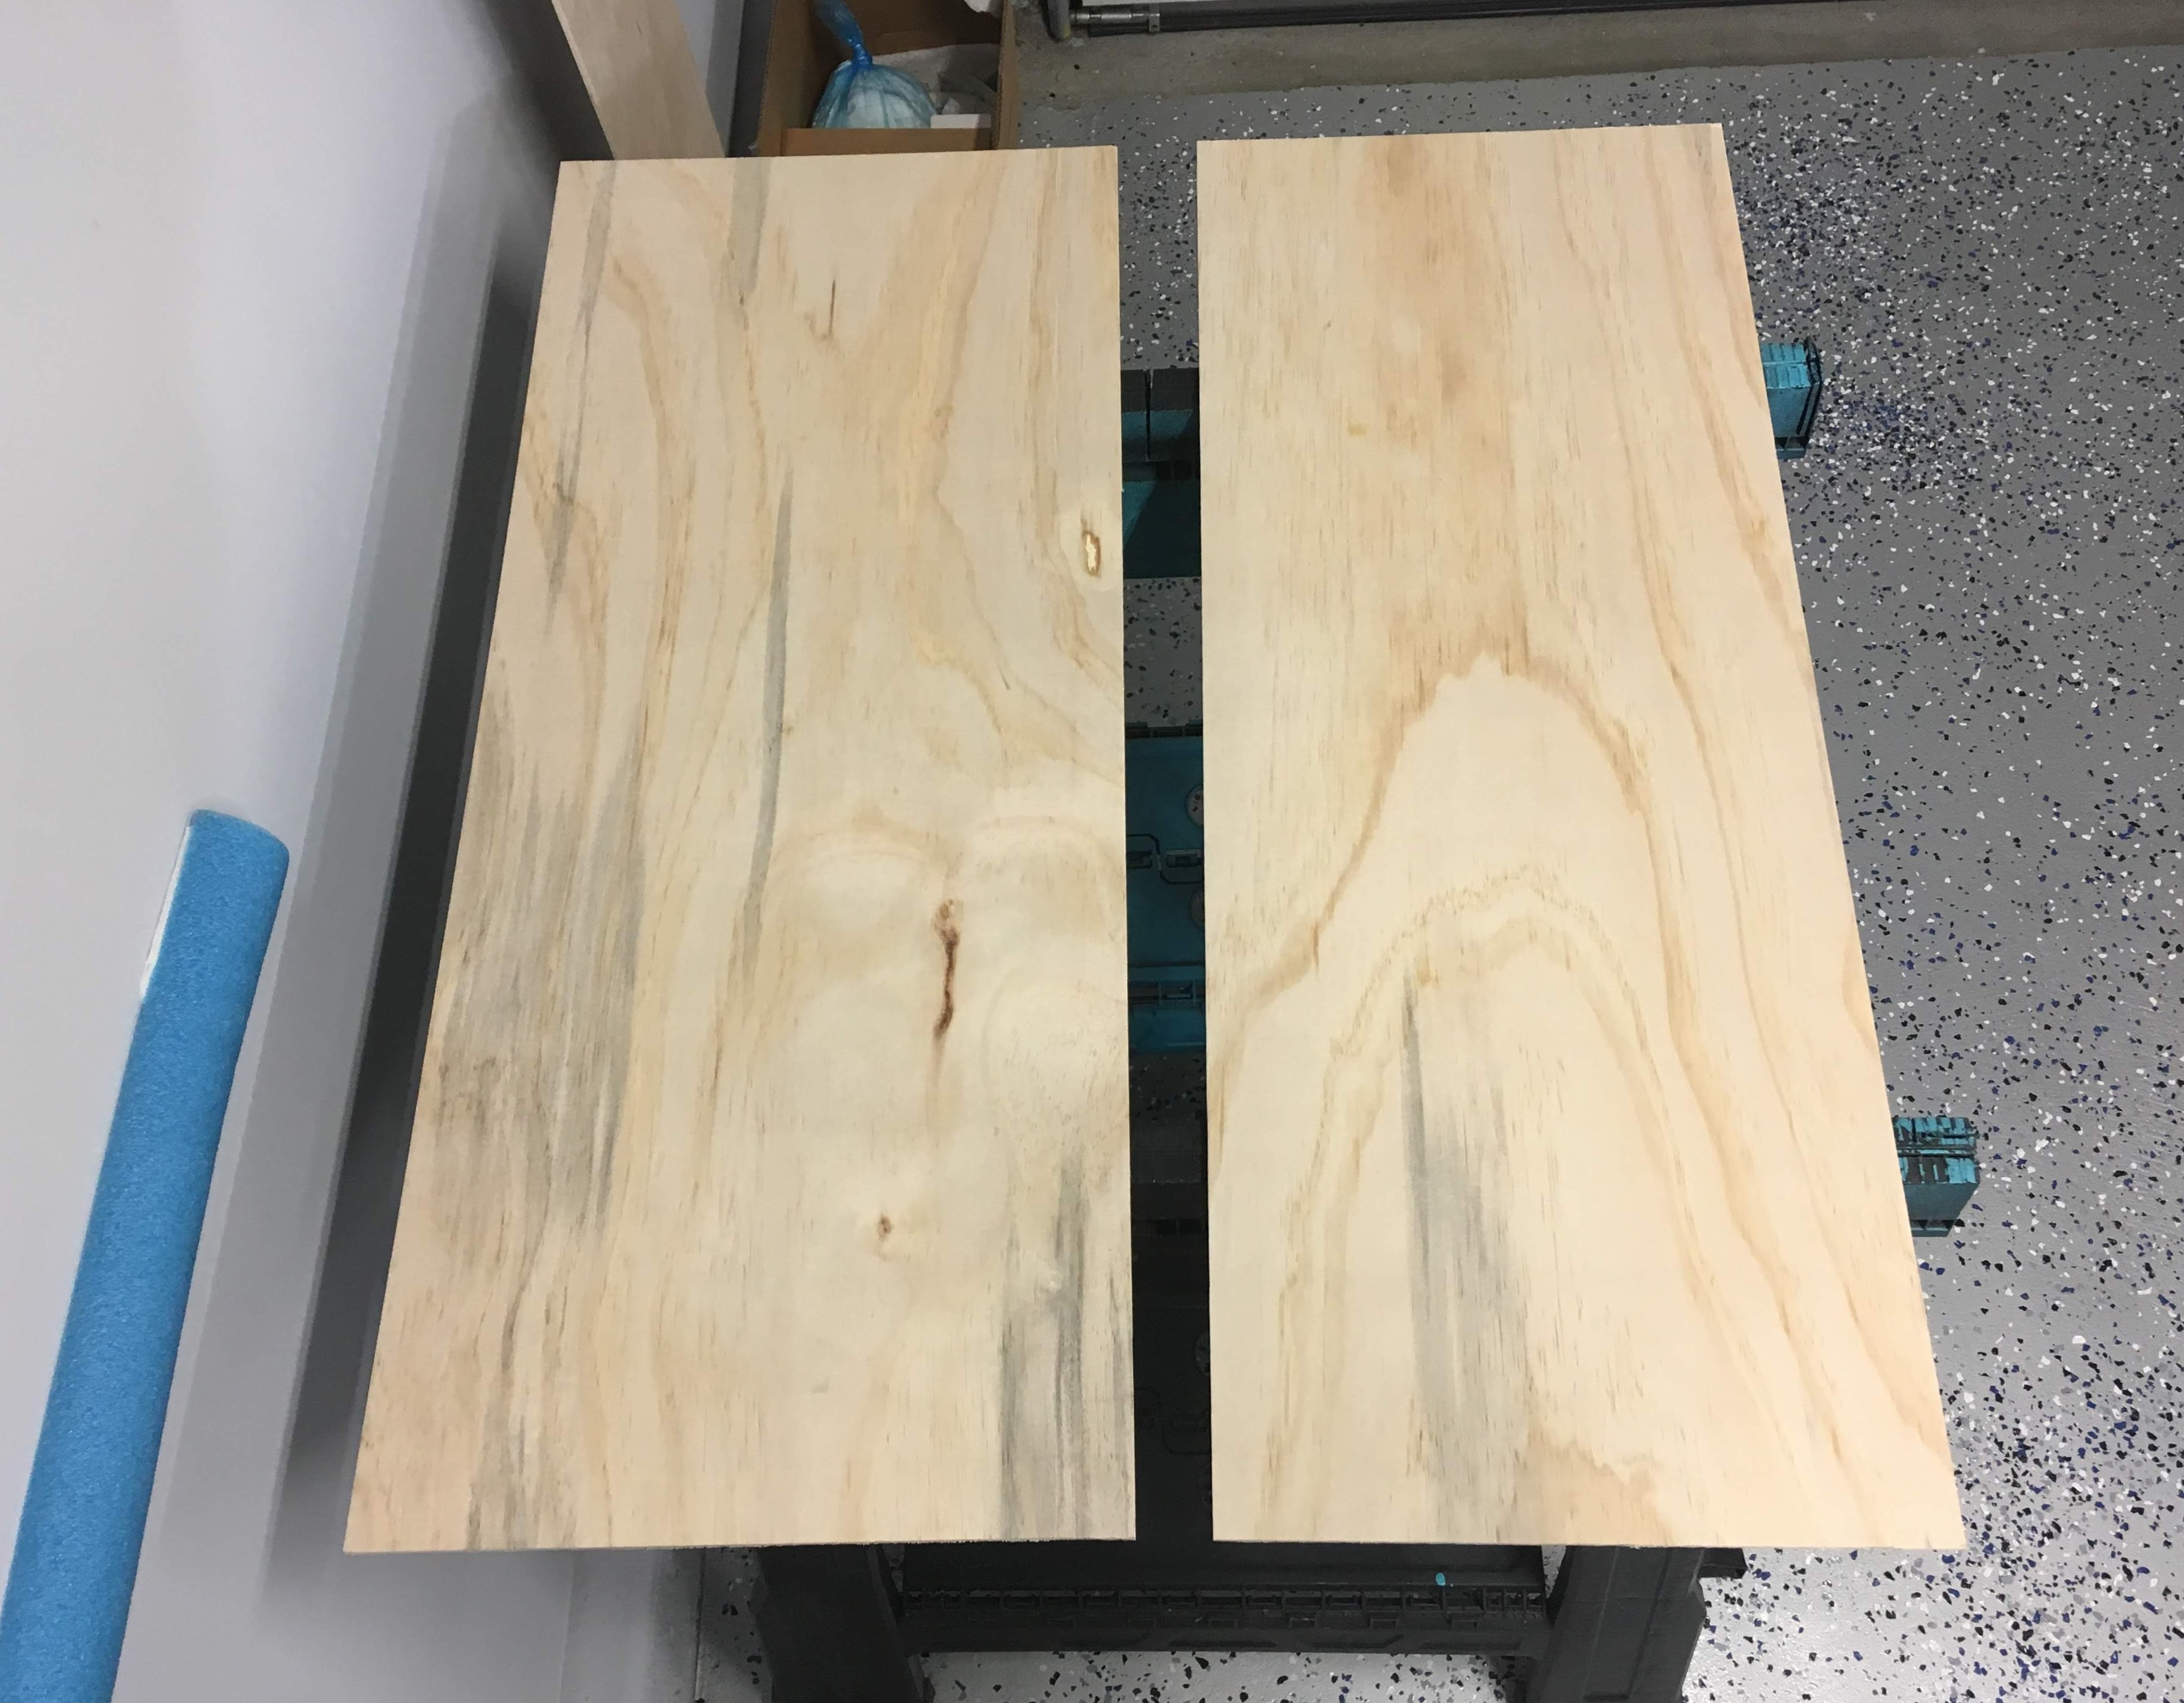
Veneer stained, test fit to box:

Next, I'm going to use a high gloss epoxy to seal and finish the veneer panels BEFORE I glue them to the box. Once the epoxy has cured, I can attach the panels to the box, and I'll use a thin bead of epoxy at each butt joint to ensure snug fit and smooth finish.
Until then, test fitting the sub in the box:
Good fit! Now let's see it in the trunk:
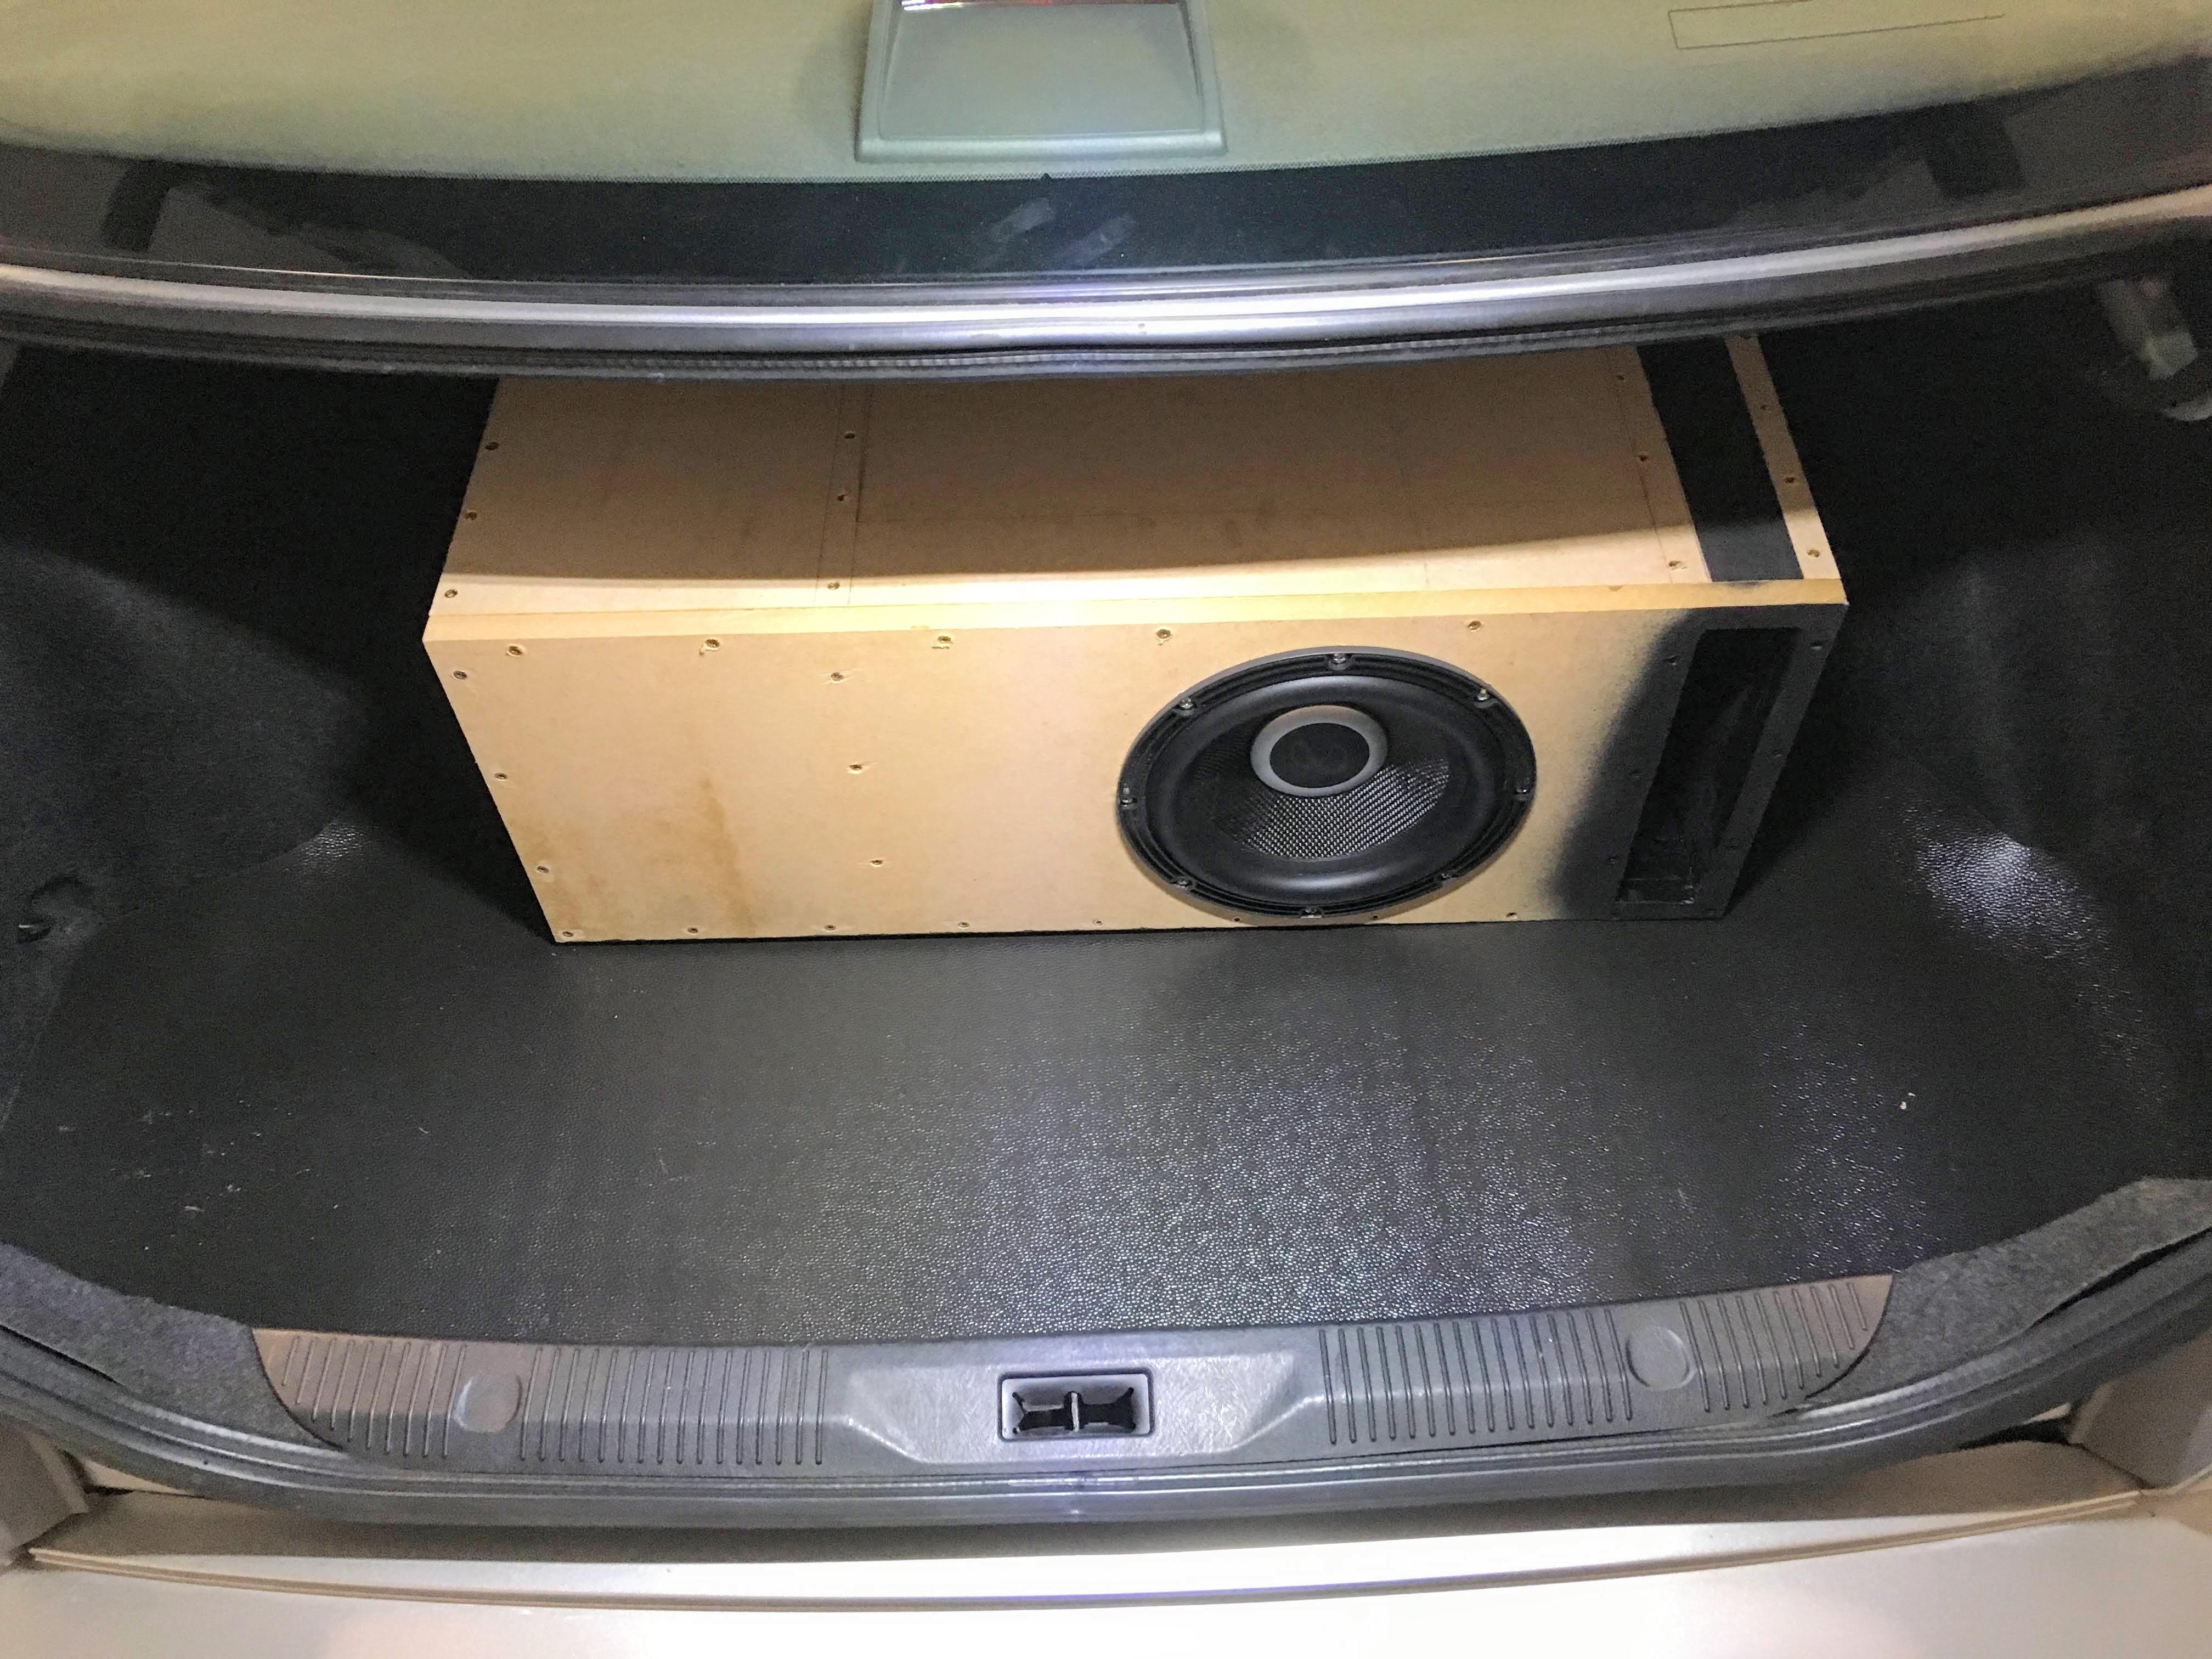
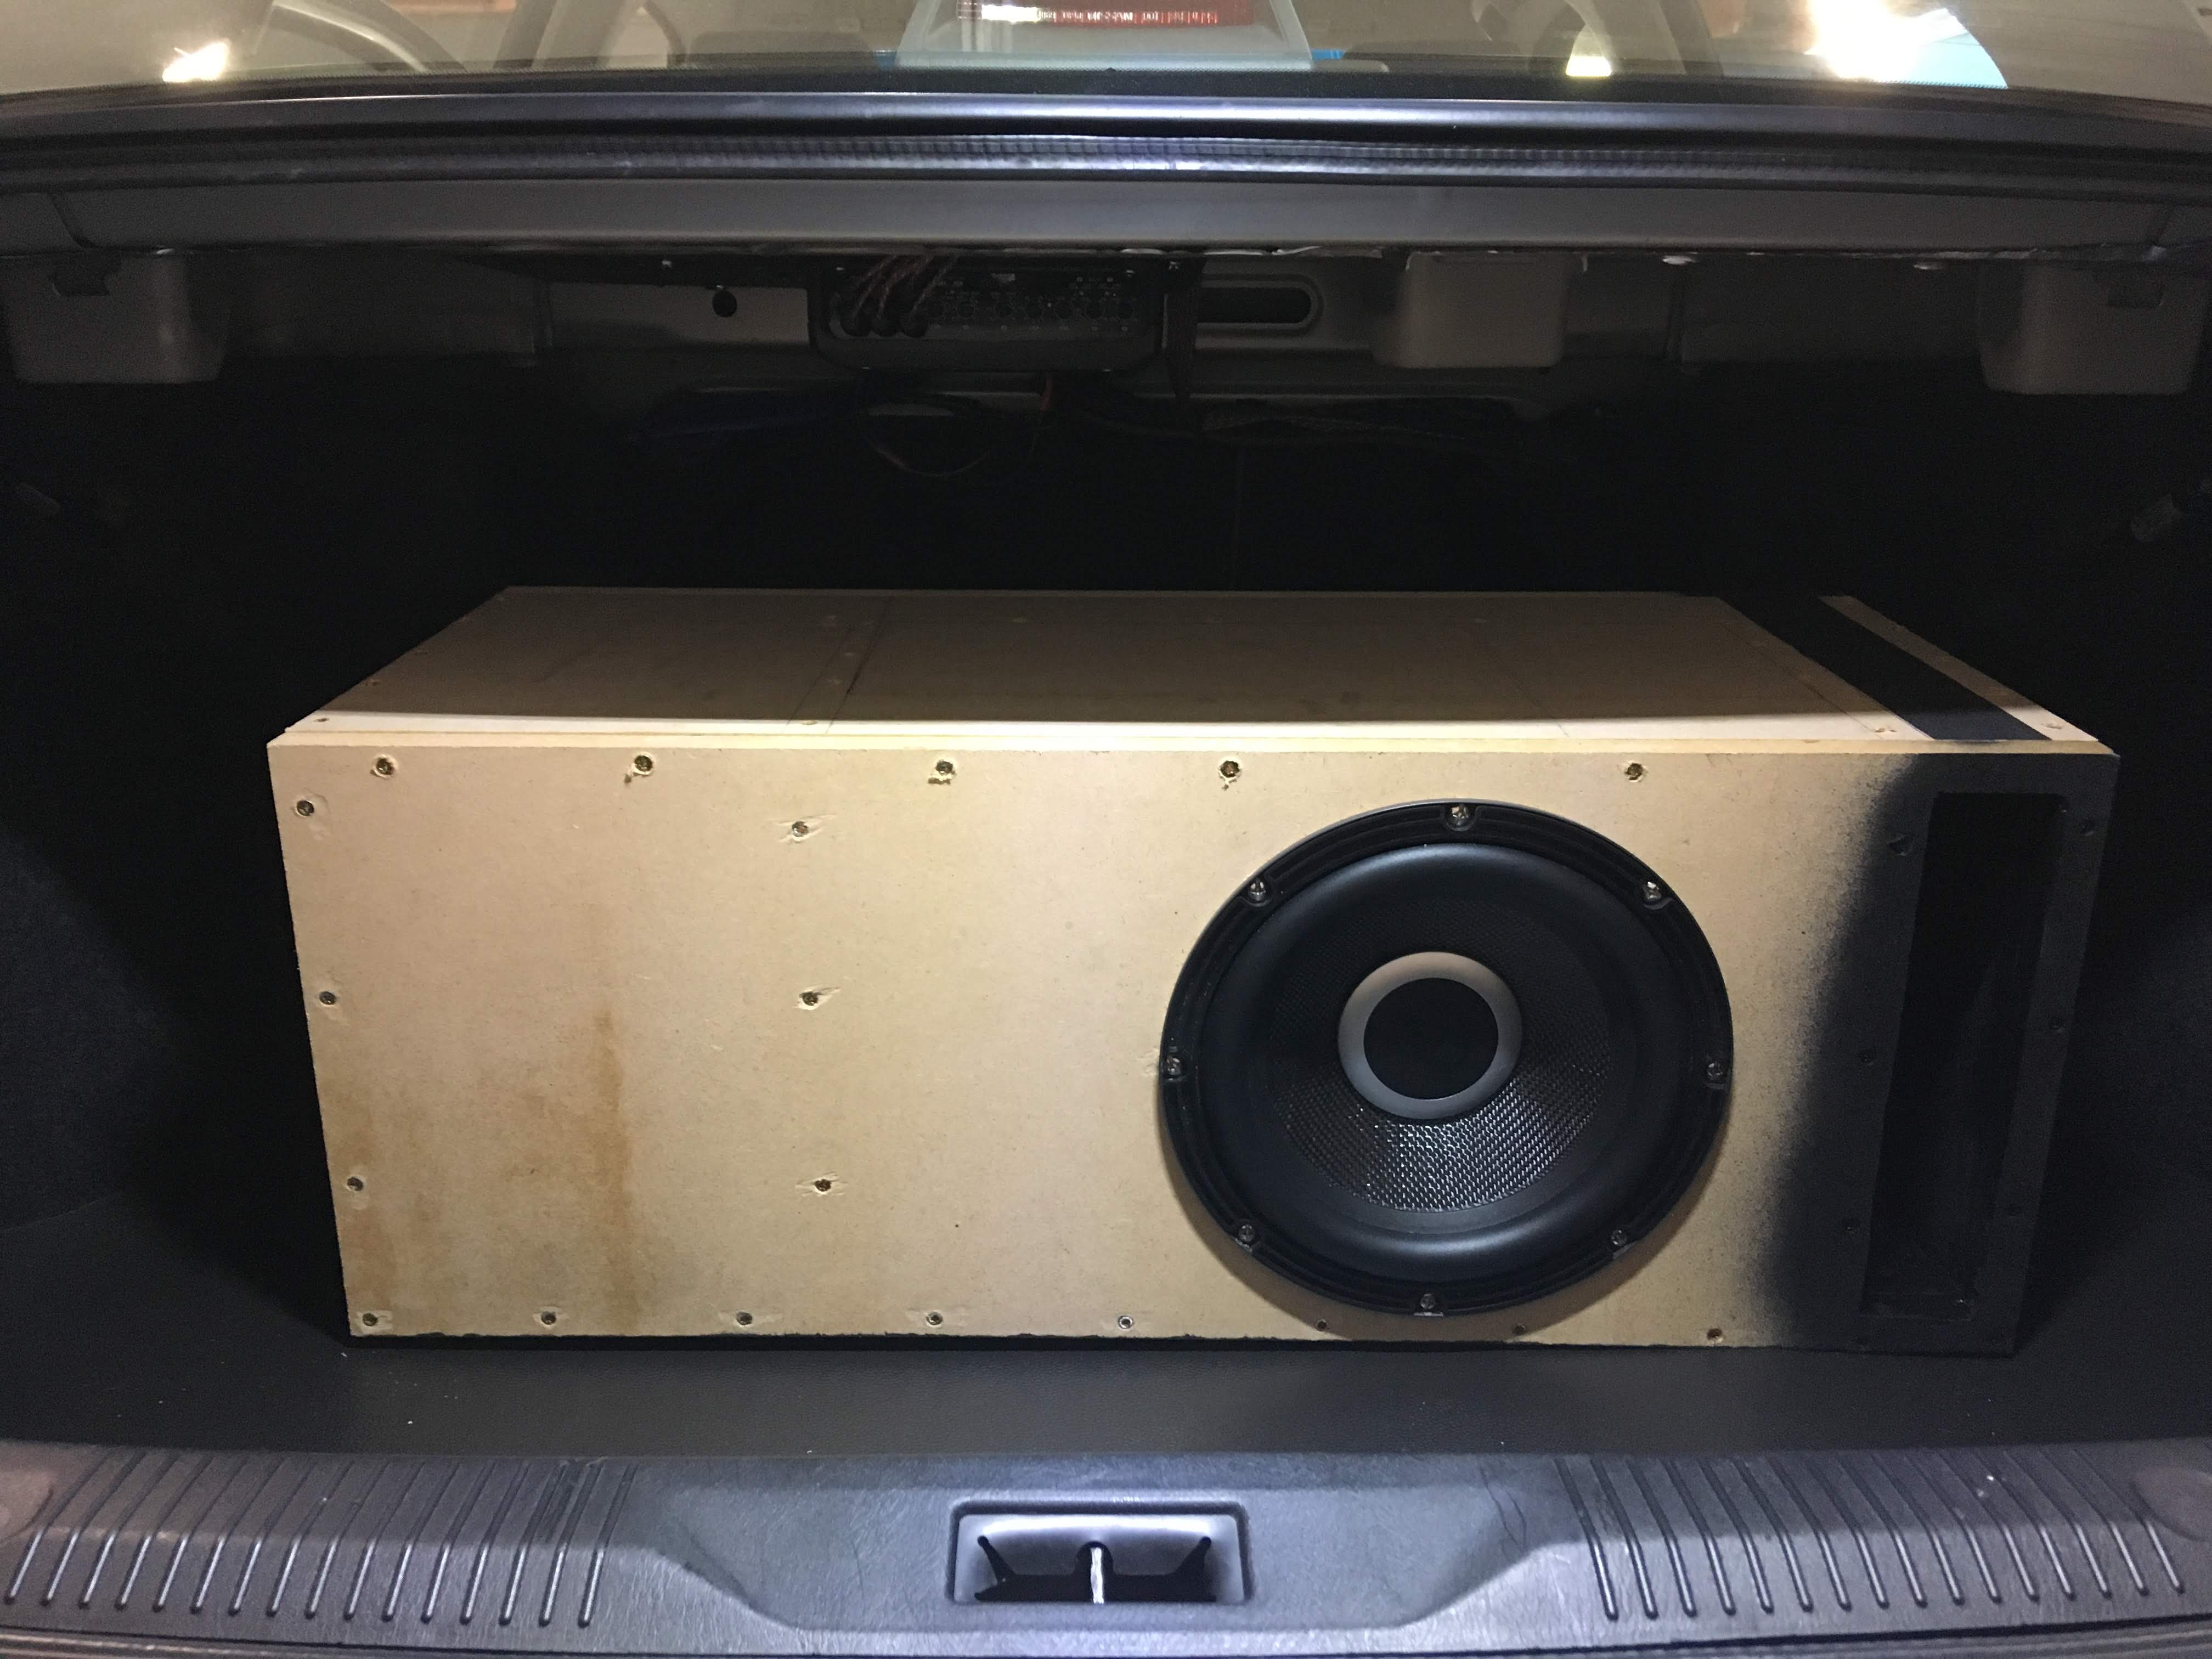
Crap! Bye-bye trunk...lol
Luckily, this is not the baby wagon or the grocery getter - but I definitely suck at estimating available space...ha! Honestly, I'm thinking about getting a smaller sub to swap with when I need more trunk space; ideally something that can fit against the rear seats - like a shallow mount 8".
As a consolation prize, I'm happy to report that this thing hits HARD. Doing a very rigorous scientific evaluation, I opened the dB meter app on my phone, shoved it in the port of the box, and blasted Emalkay's "When I look at you" and got 130 dB. Doing more research, I cranked up the bass boost on the amp, cruised down I-40 at 70 mph to the same song and can honestly say it hurt my ears. I've never said that about a sub, or a car system that I've personally encountered. Science!
I've chosen an Infinity Kappa 10" sub, and using the selectable impedance, I'm setting it for 2 ohms.
Initial construction, with threaded inserts to mount the sub:
Painted the port to match veneer, then added my binding posts and clipped the wire inside the box:
Rough cut, pre-stained veneer panels:
Veneer stained, test fit to box:
Next, I'm going to use a high gloss epoxy to seal and finish the veneer panels BEFORE I glue them to the box. Once the epoxy has cured, I can attach the panels to the box, and I'll use a thin bead of epoxy at each butt joint to ensure snug fit and smooth finish.
Until then, test fitting the sub in the box:
Good fit! Now let's see it in the trunk:
Crap! Bye-bye trunk...lol
Luckily, this is not the baby wagon or the grocery getter - but I definitely suck at estimating available space...ha! Honestly, I'm thinking about getting a smaller sub to swap with when I need more trunk space; ideally something that can fit against the rear seats - like a shallow mount 8".
As a consolation prize, I'm happy to report that this thing hits HARD. Doing a very rigorous scientific evaluation, I opened the dB meter app on my phone, shoved it in the port of the box, and blasted Emalkay's "When I look at you" and got 130 dB. Doing more research, I cranked up the bass boost on the amp, cruised down I-40 at 70 mph to the same song and can honestly say it hurt my ears. I've never said that about a sub, or a car system that I've personally encountered. Science!
 01-09-2019, 10:20 AM
#53
Junior Member
Thread Starter
Join Date: Mar 2018
Location: Nashville, TN
Posts: 76
A year ago, I never imagined MYSELF doing a project like this! I'm not sure what changed between now and January of 2018...I guess I was so sick of the musty smell and the crappy sound system I finally snapped...and this was the result!
01-10-2019, 05:28 AM
#54
Junior Member
Thread Starter
Join Date: Mar 2018
Location: Nashville, TN
Posts: 76
Thanks bud. He only replaced the side panel that was torn, and the piece just above that. The rest of the seat bottom is in surprisingly decent shape for it's age. Cost out the door was $165.
01-10-2019, 12:41 PM
#55
Supporting Maxima.org Member

iTrader: (3)
Join Date: Nov 2004
Location: Baton Rouge, LA
Posts: 5,432
Looking amazing! Also great to see people still taking such good care of their 5th gens. I have new leather on the seats and steering wheel on mine, but I'd love to do some sound deadening and rattle control in the near future, and I'd definitely like to replace the carpet. A full quart of new motor oil opened up in my passenger rear floorboard, and any object that makes its way over there gets a nice sheen on it now 
01-10-2019, 12:55 PM
#56
Junior Member
Thread Starter
Join Date: Mar 2018
Location: Nashville, TN
Posts: 76
Thanks man. That's part of the reason why I created this thread - to show that there are still plenty of sharp 5th gen's out there and being well cared for! Yours definitely falls under that category - I've lurked your page and was impressed, lol.
Sorry about your carpet...that sucks!
Sorry about your carpet...that sucks!
01-11-2019, 07:49 AM
#57
Junior Member
Thread Starter
Join Date: Mar 2018
Location: Nashville, TN
Posts: 76
I chose not to do anything on the roof. Since higher frequencies of sound are directional, it's safe to assume that there is not much noise coming down on top of you through the roof. Ultimately, I just did not see the advantage of it compared to the cost - both money for materials and time to disassemble/ reassemble the liner.
I did do a road test the other night after putting all the seats back in. Since it's been over 7 months since I've had it on the freeway, I can't say what it was like before. Also, I did not take any measurements of the cabin before the project. I took a dB measurement in the cabin the other night, got 85 dB at 70 mph, which is about average for a car at that speed. It's definitely not as quiet as a Benz. But, that wasn't my goal - I just wanted to reduce vibration and road noise, and increase performance of the door speakers. Subjectively, I feel like the mid-bass in the doors has improved, and that I can hear my own voice (and cabin conversation) better than before. So, in that way, I can say "mission accomplished". But I don't have any data to support that.
I also need new tires, so with those swapped I should see a drop by a dB or two after that. All in all, I'm happy with the results.
 01-16-2019, 06:16 AM
#59
i wish I lived closer to sit in that master piece once its done and hear how crazy its going to be! even if you take the epic stereo out of the equation think about how quiet the ride is going to be rolling down the street with all that sound deadening!
01-16-2019, 06:48 AM
#60
Junior Member
Thread Starter
Join Date: Mar 2018
Location: Nashville, TN
Posts: 76
Ya, RI is a bit of a drive from TN...lol
I wish I could say the car is "super quiet". Since I haven't driven the car in 7 months, and didn't take any measurements before the sound treatment, I can't honestly say if the sound treatment had any significant effect on the overall cabin noise. It certainly isn't as quiet as a Benz; but that was never my goal.
It may actually help if you or somebody with 5th gen did a side by side test - i.e., rode in a non-sound treated Max and then took a ride in mine and see if there is a difference. We could do a subjective "ear" test, and take some measurements as well. That would be a fun project.
01-16-2019, 09:39 AM
#61
Ya, RI is a bit of a drive from TN...lol
I wish I could say the car is "super quiet". Since I haven't driven the car in 7 months, and didn't take any measurements before the sound treatment, I can't honestly say if the sound treatment had any significant effect on the overall cabin noise. It certainly isn't as quiet as a Benz; but that was never my goal.
It may actually help if you or somebody with 5th gen did a side by side test - i.e., rode in a non-sound treated Max and then took a ride in mine and see if there is a difference. We could do a subjective "ear" test, and take some measurements as well. That would be a fun project.
I wish I could say the car is "super quiet". Since I haven't driven the car in 7 months, and didn't take any measurements before the sound treatment, I can't honestly say if the sound treatment had any significant effect on the overall cabin noise. It certainly isn't as quiet as a Benz; but that was never my goal.
It may actually help if you or somebody with 5th gen did a side by side test - i.e., rode in a non-sound treated Max and then took a ride in mine and see if there is a difference. We could do a subjective "ear" test, and take some measurements as well. That would be a fun project.
Just scrolled through the thread again (and again, holy crap), did you happen to sound deaden anything near the firewall/footwell sides? Basically the areas closest to the front wheels - this is supposedly where most roadnoise originates. Pretty sure the dash has to come out to get back there. If you missed that section theres a good possibility youll get a big reduction in noise if you go back and hit that area up.
Last edited by Slamrod; 01-16-2019 at 09:44 AM.
01-16-2019, 02:07 PM
#62
Junior Member
Thread Starter
Join Date: Mar 2018
Location: Nashville, TN
Posts: 76
lol...holy crap is right. I may never do a project like that again.
And no, I did not do any sound treatment on the firewall; as you are correct - the whole dash would have to be removed. I took as much of the dash apart as I was comfortable doing, partly because I was also interested in removing the AC evaporator. For whatever reason, the dash design for the 5.5 gen is more complicated than the 5th gen. There's a video on youtube where an org member, boredmder, explains how to access the evaporator on a 5th gen, says it works for all 5th gens, then proceeds to show how it all un-hooks. In 5.5 gen, it's totally different. Even to get to the evap, I'd have to take the dash off. And running under the dash and above the evap is the crossmember - the steel pipe that protects you in a front impact - which is welded to the frame and the dash is secured tightly to that. So, I poked and prodded, but to me, it just looked like waaaay more work than it was worth. I mean, these cars are only ever going to get so quiet, why do all that work just to bring down cabin noise by a dB or two? If you want a cabin as quiet as a Benz...buy a Benz lol. Then you're talking about double pane glass and a much heavier chassis - that's when you start noticing a big difference.
I think you hit the nail on the head - doing a side by side, "A/B" comparison, would be a great way to appreciate my efforts!
01-16-2019, 02:20 PM
#63
Interesting, i never pulled the dash on this car lol, i simply assumed it would be similar to the 4th gens ive dealt with which was a small pita.
One other thing came to mind when i was driving today - did you happen to do anything for the windows? Apparently most 5.5gens came defective from the factory and have lots of wind noise from the windows, particularly the rears. Nissan even put out a TSB for it, theres more info buried in the stickies somewhere.
Basically you get some sort of foam strip and jam it up in the top between the window and the frame and that fixes it, cheap and easy fix. Figured id mention it in case you didnt have it done already, its supposed to be a night and day fix.
01-16-2019, 02:27 PM
#64
Junior Member
Thread Starter
Join Date: Mar 2018
Location: Nashville, TN
Posts: 76
Yes, I did check out the rear windows. I'm the 3rd owner of this car, and from what I can tell, the rear window had already been fixed. I'm guessing previous owners took it in for the TSB. I'd also read about it here, and I did go back and add some additional weather stripping which did help kill that rear window whistle.
02-03-2019, 08:24 PM
#68
Junior Member

Join Date: Apr 2017
Posts: 53
And now for the best part - after doing all that work, the ASWC isn't working. Yay! It powers on and goes through the setup procedure as normal, but then it gives the slow red/green flashing; indicating the ASWC cannot detect the vehicle. Not sure where I went wrong, but if it means wires are mixed up, I probably won't go through the process of moving the pins around again. I'll just cut and splice - I'm over it.
More to come!
-Don't share the same ground as the headunit
-Keep the 3.5mm jack unplugged while going through the setup process.
I grounded the unit elsewhere, left the 3.5mm unplugged (but not touching anything metal), setup the box, shut everything off, then plugged the 3.5mm jack in. Works perfectly.
Regarding the molex plug and the speaker wire in the doors, is the spot for the speaker wire exactly in the same location on all 4 doors? I only plan on upgrading my front speakers but wanted to run new wire to the doors.
02-04-2019, 06:59 AM
#69
Junior Member
Thread Starter
Join Date: Mar 2018
Location: Nashville, TN
Posts: 76
Dude that's awesome! Thanks for that - I'll test it out this weekend.
The speaker pins were in similar positions for the front plugs, but the driver side was more difficult because it had more pins in use than the passenger. For whatever reason, my rear plugs were not in the pillar, so I was able to run the wire through the rubber cover without drilling through the Molex plug.
Funny thing - I did all the work to replace the rears, run new wire; and realized I didn't need them at all...lol
02-15-2019, 08:08 PM
#70
Junior Member
Join Date: Apr 2017
Posts: 53
Yeah I picked up a set of Focals 165as for the front and rear for cheap (hookup from Mexico), decided against throwing them in the rear, so I'm going to put them in my 4runner instead.
On a separate note, how hard was it to install the new carpet? I figured as I'm having to run new cables to each of the front doors, and mount an audiocontrol EQQ under the passenger seat, I might as well pull out the factory beige carpet that's beat to all hell. Tempted to throw black carpet in, but I don't know how I feel about two tone.
Btw, nice build and write up!
02-16-2019, 07:33 PM
#72
Junior Member
Thread Starter
Join Date: Mar 2018
Location: Nashville, TN
Posts: 76
Thanks man.
Focals are nice for sure; and if I had the hookup like that - it would have been an easy choice! But I picked up the Kappa's BNIB on Craigslist for $60...I was super happy about that deal.
Not sure what kit you mean, but I didn't use any kit for the speakers. I used the factory ring mounts, and just made sure to seal it well with gasket tape in between the speakers and the rings, and I used the foam weatherstripping that came with the speakers for outside the speakers. The front doors are 6.5" and the rears are 5.25".
Carpet was a *****. Get it from Rock Auto, and go with cutpile; instead of essex. Essex is ultra plush, but ultra thick. Made for a much harder install. If I were to do it again, I'd pick cutpile.
02-16-2019, 10:35 PM
#73
Junior Member
Join Date: Apr 2017
Posts: 53
Right back at you!
You make a good point, if one is to replace all the factory Bose stuff, might as well go all out. I have no intention on amplifying the rear speakers, so throwing a set of cheap speakers in the rear and powering it off of my alpine hu might be better.
I was speaking to the factory ring mounts, didn't know they worked with aftermarket speakers. I just picked up a set of 6.5" baffles for the front, also going to throw some felt at them to isolate the speakers from the door, along with some sound deadner like you did. Thanks for the recommendation on the carpet, all the abuse my BIL did a number on the factory carpet, I'll take a look at the cutpile.
02-17-2019, 05:35 PM
#74
Junior Member
Thread Starter
Join Date: Mar 2018
Location: Nashville, TN
Posts: 76
Ditto on the Bose swap. I know people have found components that are close replacements for the OEM Bose, and it's definitely a good route to go if you don't want to completely overhaul the system like I did. But I don't use the Max as a daily driver, so I was able to take my time, taking it down to the bare metal and re-doing it exactly how I wanted it.
Baffles are ok, but I doubt you'll need them. I almost went with something similar, called "boom mats", but ultimately decided against it for two reasons - 1. The factory mounts have a semi baffle built into them - they do a good job protecting the speaker from the elements and 2. if you seal the inner door skin like I did, you'll be really happy with the mid-bass response and you won't even miss the baffles. Save yourself $20 and get some extra CLD instead. Cover every single hole that you can see, treat it like a subwoofer enclosure, and you're trying to seal the part of the door where the back of the speaker sits. I cannot tell you how great the mid-bass is. I really don't even need the sub, because the front speakers sound so good!
And about the rears - I was leaning heavily toward powering them with the head unit, but ultimately never even hooked them up. Again - you won't even notice they're gone. Instead, I setup a 3 way active crossover, with the tweeters on channels 1 & 2, the front door speakers on ch's 3 & 4, and the sub on ch 5. I've got crossovers set on the headunit and amp to protect the tweeters. It doesn't sound bad, considering most this "processing" is being done from my JVC headunit. Eventually, I'll shell out the $150 and get the DSP 408 from Parts Express to really open up the sound.
Good luck!
Last edited by YoungMike85; 02-17-2019 at 05:39 PM.
02-22-2019, 11:57 PM
#75
Junior Member
Join Date: Apr 2017
Posts: 53
Hey, that's really really useful info, thank you for that. By not hooking up the rear speakers, I can disconnect the blows amp completely. Never been a fan of rear fill anyways. I had a set of boom mats in my Amazon shopping cart, glad I never went through with the purchase. I'll definitely pick up the CLD and seal up the front doors like what you did. Will probably help with the condensation issues I've been helping lately too.
For my components, I was planning on doing similar to what you did and going full active/bi-wire and wiring up each tweeter and mid to each channel of my 75x4, going through an audiocontrol EQQ prior to the amps. For the subs, I picked up a couple NVX VCW124s, powered by their own JBL GTO 1200.1s. Should be fun.
For my components, I was planning on doing similar to what you did and going full active/bi-wire and wiring up each tweeter and mid to each channel of my 75x4, going through an audiocontrol EQQ prior to the amps. For the subs, I picked up a couple NVX VCW124s, powered by their own JBL GTO 1200.1s. Should be fun.
02-23-2019, 08:41 AM
#76
Junior Member
Thread Starter
Join Date: Mar 2018
Location: Nashville, TN
Posts: 76
Yes! Even though I don't have one (yet), I think the DSP-408 is really the best bang for the buck. Audiocontrol is certainly a solid product, if you've got the budget for it. But you can save some coin and get more functions with the 408 than the EQQ.
02-23-2019, 06:40 PM
#77
Senior Member
Join Date: Feb 2016
Location: Buffalo
Posts: 339
Funny you mention the DSP 408. I was dead set on pulling the trigger on the Audiocontrol DM-810 up until about 3 weeks ago when I discovered the Dayton. I downloaded the software for the 408 just to play with. I love it and will be picking up two of them for less than the cost of the DM-810. The Dayton software and functionality far surpasses my knowledge of SQ and staging and will be more than enough for my taste and a great learning experience as well!
By the time you buy two bt dongles and wired remote your going to be over $400 shipped to your door. The app is great and you can stream music directly to the 408 with BT dongle but that would not be possible with 2. So your losing the only hardware feature the 408 has over the Minidsp. If you don't fiddle with your tune constantly then the app isn't a big advantage either. The Minidsp software is super easy to use and figure out. Maybe the easiest there is for a novice. You can get a wireless module for the 6x8, works over wi-Wi but it's $75. The Minidsp comes with a good wired remote that can be used as a subwoofer control and master volume.
I own both DSP'S . They both are great. They both have fantastic support. The 6x8 is far superior compared to the 408 and $100+ cheaper for your application.
02-28-2019, 06:50 PM
#78

Wow what a shame......all this work done to an auto.
haha jk man
This is an awesome thread. Thanks for taking the time to post all these pics and all the details.
A sound upgrade has been on my list for a while. Although I don't think I'm going to do all the sound deadening you did, I'm not sure I wanna add all the weight. I've used MLV before inside my house to attempt to make a sound-proof room (which didn't really work out lol), and man that stuff is heavy!
When you say you 'steamed' the new carpet you put down, can you explain a little bit more? Even snap a pic of what you used? I like the idea of a more plush carpet, and if it can be done even if it's a pain, I'm thinking that is a nicer route than going with the straight-up cut pile option.
02-28-2019, 07:07 PM
#79
Junior Member
Thread Starter
Join Date: Mar 2018
Location: Nashville, TN
Posts: 76
Wow what a shame......all this work done to an auto.
haha jk man
This is an awesome thread. Thanks for taking the time to post all these pics and all the details.
A sound upgrade has been on my list for a while. Although I don't think I'm going to do all the sound deadening you did, I'm not sure I wanna add all the weight. I've used MLV before inside my house to attempt to make a sound-proof room (which didn't really work out lol), and man that stuff is heavy!
When you say you 'steamed' the new carpet you put down, can you explain a little bit more? Even snap a pic of what you used? I like the idea of a more plush carpet, and if it can be done even if it's a pain, I'm thinking that is a nicer route than going with the straight-up cut pile option.
haha jk man
This is an awesome thread. Thanks for taking the time to post all these pics and all the details.
A sound upgrade has been on my list for a while. Although I don't think I'm going to do all the sound deadening you did, I'm not sure I wanna add all the weight. I've used MLV before inside my house to attempt to make a sound-proof room (which didn't really work out lol), and man that stuff is heavy!
When you say you 'steamed' the new carpet you put down, can you explain a little bit more? Even snap a pic of what you used? I like the idea of a more plush carpet, and if it can be done even if it's a pain, I'm thinking that is a nicer route than going with the straight-up cut pile option.
And correction...it's a 4 speed auto, lol. Yes, still auto, but way more fun than today's 10 speed.
Thanks for the kudos, I'm glad there are still people hear to enjoy projects like this.
As far as weight, I'd say I added around 100 lbs of total sound treatment (CLD+MLV). I already knew my sub was gonna weigh around 50 lbs finished, so I was just going for broke with the sound treatment. You probably don't have to do everything I did, but I'd still recommend doing the door panels, if for no other reason than to enhance mid-bass response.
On the carpet, I had to use a steamer to get some of the folds to lay down properly, since the MLV backing and the thicker essex mat made for a very stiff, hard to fold install. Here's the steamer I used:
So, just like ironing clothes, I used the steamer to soften the carpet so I could flatten it or fold it at the parts where the horizontal surfaces combined with vertical surfaces.
But, like I said earlier - if I had to do it over, I would choose cutpile. There's literally only a mm or two difference between the heights of the pile, so I doubt you'd really notice it if you were looking for it. So, that extra plushness doesn't add much to the final install compared to cutpile. And, that extra 2mm of height plus the extra thickness of essex makes for a very hard install. It was more than just steaming carpet - I could barely get the seats bolted back in because the fit was so tight. I wound up cutting a larger hole in the carpet because I could not bolt the seats onto the frame over the carpet, like the OEM carpet was done.

Thread
Thread Starter
Forum
Replies
Last Post
MaxiBronxBomber
Other For Sale/Wanted
2
10-19-2013 01:29 PM
maxfever1987
5th Generation Classifieds (2000-2003)
24
10-07-2012 10:44 AM