HID Install Writeup - '07
 05-20-2011, 06:56 AM
#1

HID Install Writeup - '07
I'm not claiming to be an expert on this by any means but thought I would post some pictures and advice on installing an aftermarket HID kit in a 6.5 Gen. I had purchased the relay kit so there are pictures in there on how to wire/run it but it did not activate the ballasts even though they were getting power, no idea why. I checked everything with my meter and the relay is closing and there is voltage at the connectors for the ballasts. I ended up hooking the kit up straight to the existing fuses/relays and it works fine. Has been for about a month. Nice and bright but not overkill or yellow/blue.
Kit details: 5000k 35watt 9006 style plug and play kit purchased from Operatic on the forum. It has the CanBus ballasts. Box says "Bada Bling" hah.
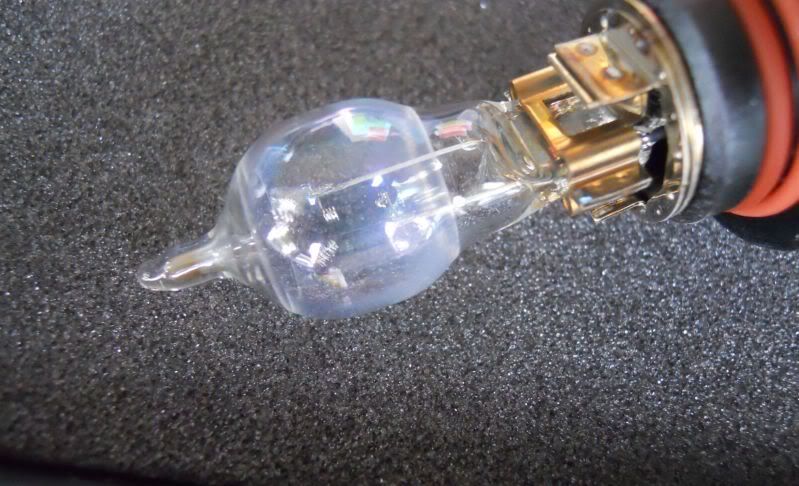
I have had a headlight go out in this car twice since owning it. The first time I put in a replacement pair of Toshiba 9012's at a crazy cost of $70 or so. Here is the latest culprit, broken filament:
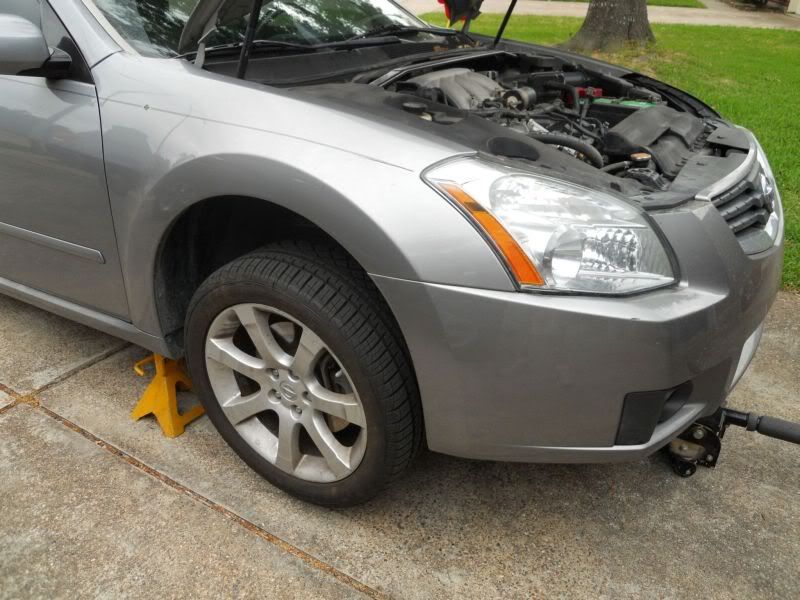
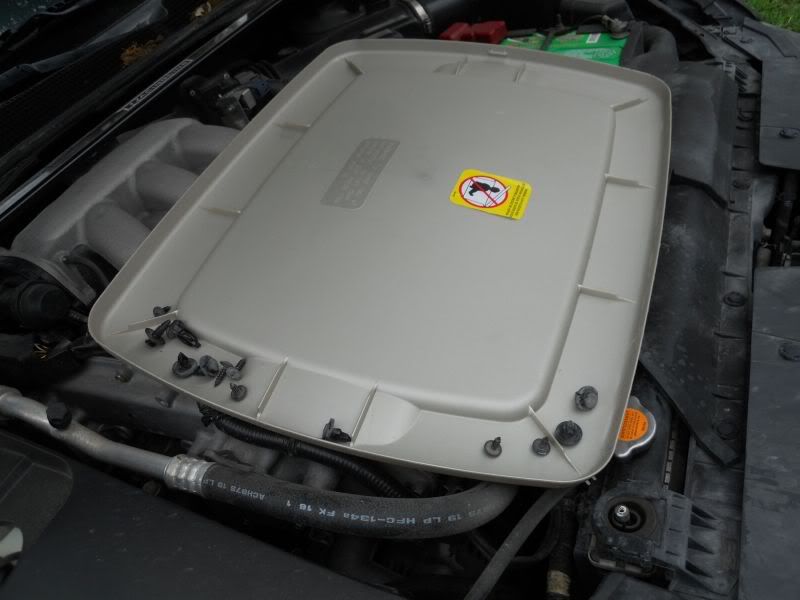
Install details: Jack up the car and use jack stands and a wheel chock out back. Engage e-brake.
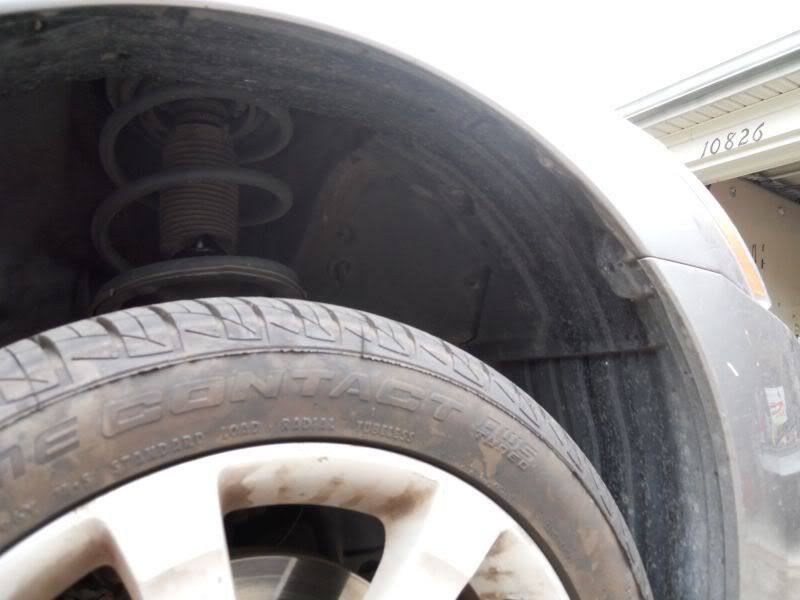
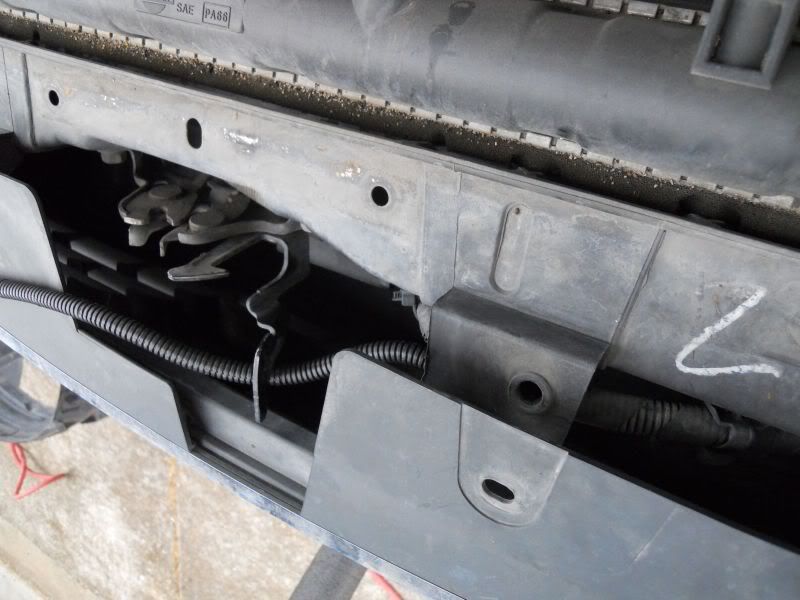
For the passenger side headlight housing you will have to remove the inner fender liner, a real pain. I wouldn't try to do it without removing the whole liner, even though some of the clips are hard to get out and what not. You don't have to remove the wheel/tire but it makes for more room.
The liner has two pieces connected on the lower right/front side, leave them together it will be easier.
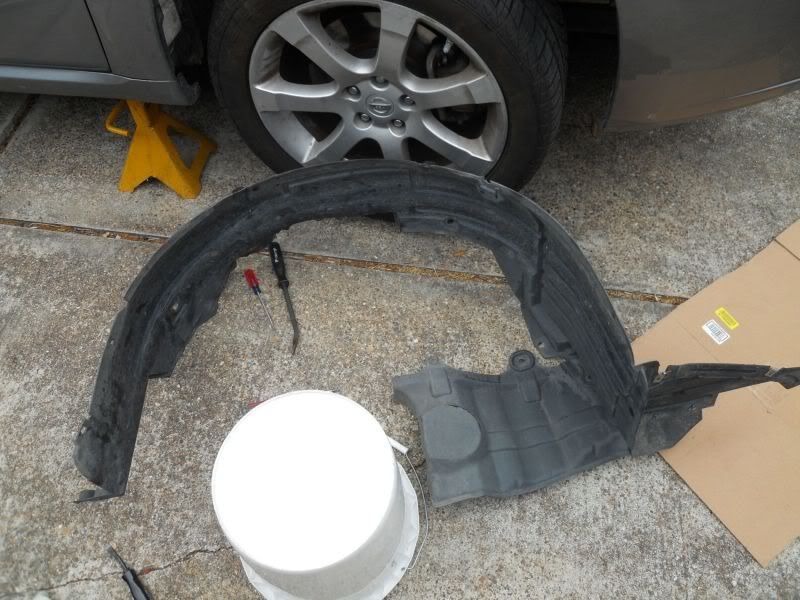
Keep all of your clips organized by area they came off if you can, there are a lot of them by the time you are done.
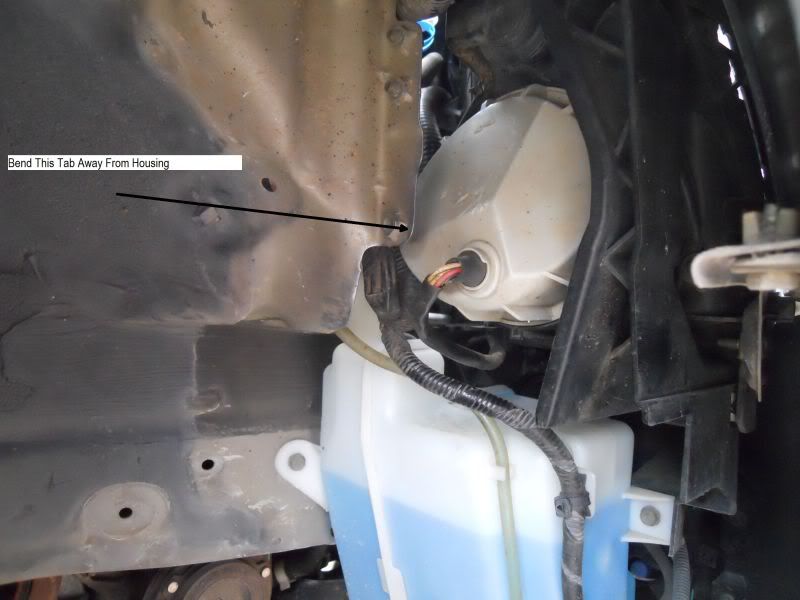
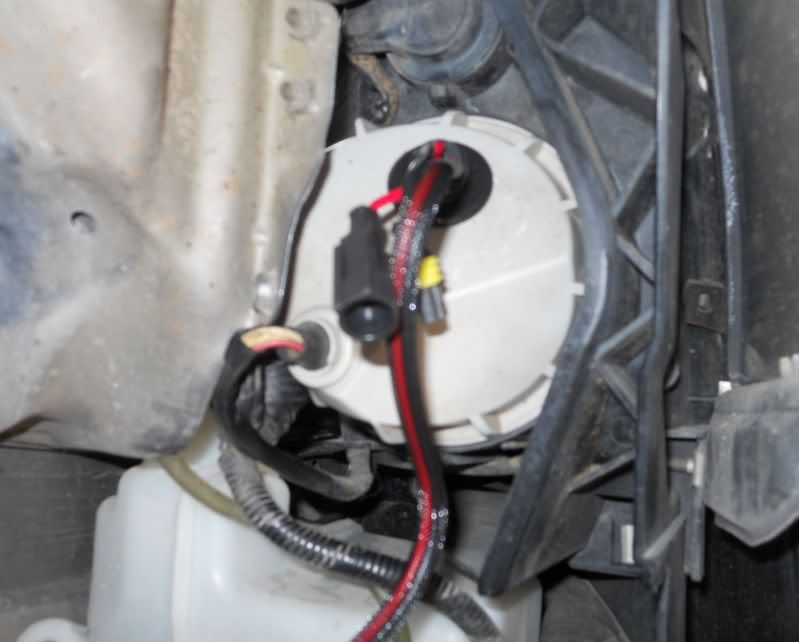
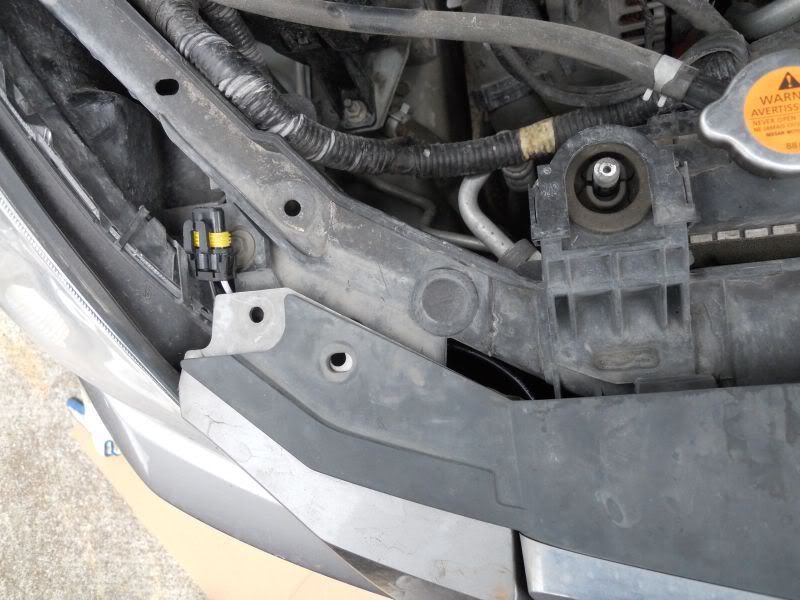
Once you remove the liner on the pass side you can see the light gray cap that seals the enclosure from water and dirt. It comes off clockwise I believe, backwards from what would make sense. The o-ring is very tight and requires a lot of force. It also mis-aligns the light when you mess with it, how convenient. It makes it much easier to remove the cap if you bend the tab back with a pair of channellocks. Nothing attaches to that nut that I know of.
You can test your kit (both bulbs/ballasts!) at this point to see if it works before taking the car apart further or cutting the cap etc. Connect the two loose wires from the ballast to the two loose wires on the new bulb and the 1 large connector to the factory head light connector. That nasty goo on the cap is from the first bulb replacement where the retaining clips broke during winter, they are very delicate and you don't need to touch them. Simply rotate the old bulb out.

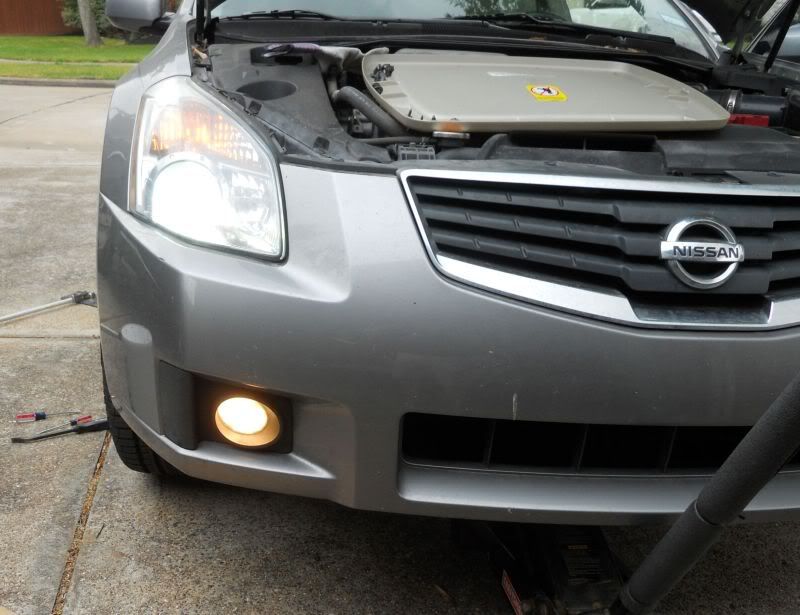
You can now turn on your headlights with key to RUN etc. With any luck they will slowly power up and be bright. You will now notice how ugly and yellow the fogs are, ugh, more money to spend.
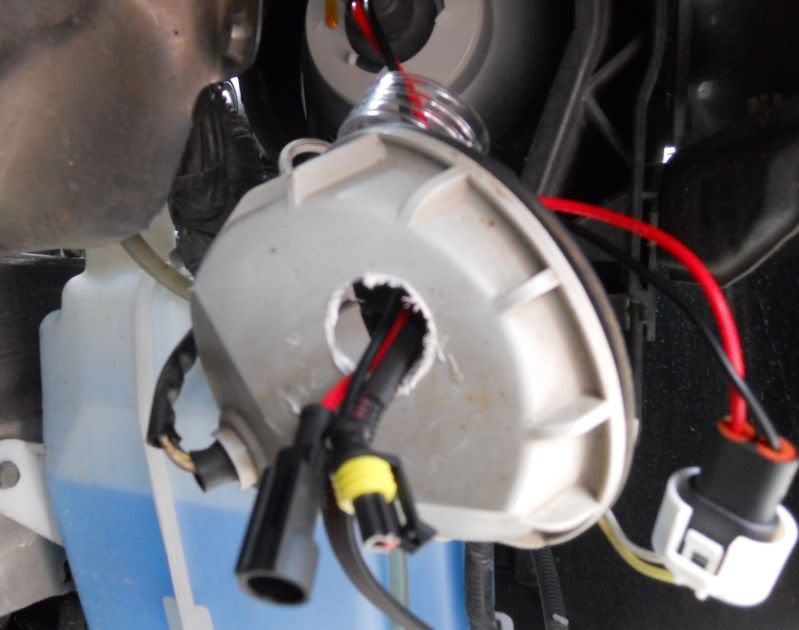
Using a 3/4" to 1" paddle bit or hole saw, cut a hole in the cap away from the center. You want it to be slightly undersized to the inner ID of the grommet that comes with the kit for a good seal. The plastic ring that protects the bulb during shipping can be snipped off with some side cutters, just watch those wires.
Cap back on the housing with the grommet installed. Rotate the housing about 90� until it firmly seats. After I did this I pushed back on the whole assembly the opposite way as the torquing of the cap will throw off the headlight alignment. I am not aware of any adjustment screws or levers, go figure.
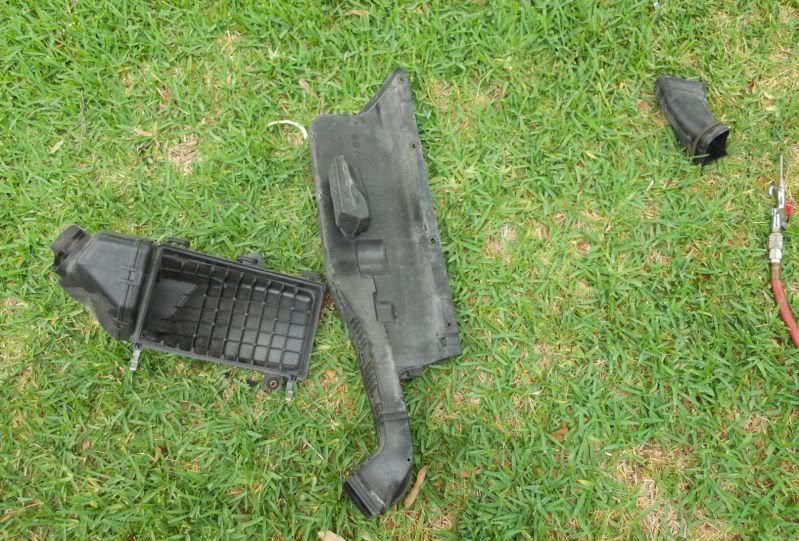
Got lucky on the drivers side. I pulled the air filter housing upper and lower boxes and saw that you can remove the light cap without taking out the fender liner. It's not super easy but not that bad if you take your time working the cap around the existing bulb and sheetmetal.
Repeat the following procedure of removing the existing bulb carefully to avoid breaking the retainers and drill the cap. Install HID bulb and plug in ballasts etc. Reinstall and check your work. I do not have pictures of where I mounted my ballasts as they are not very well located, don't have the time I used to. Try to mount them so they are isolated from road impacts and engine vibration if possible. Farther from heat the better.
Kit details: 5000k 35watt 9006 style plug and play kit purchased from Operatic on the forum. It has the CanBus ballasts. Box says "Bada Bling" hah.
I have had a headlight go out in this car twice since owning it. The first time I put in a replacement pair of Toshiba 9012's at a crazy cost of $70 or so. Here is the latest culprit, broken filament:
Install details: Jack up the car and use jack stands and a wheel chock out back. Engage e-brake.
For the passenger side headlight housing you will have to remove the inner fender liner, a real pain. I wouldn't try to do it without removing the whole liner, even though some of the clips are hard to get out and what not. You don't have to remove the wheel/tire but it makes for more room.
The liner has two pieces connected on the lower right/front side, leave them together it will be easier.
Keep all of your clips organized by area they came off if you can, there are a lot of them by the time you are done.
Once you remove the liner on the pass side you can see the light gray cap that seals the enclosure from water and dirt. It comes off clockwise I believe, backwards from what would make sense. The o-ring is very tight and requires a lot of force. It also mis-aligns the light when you mess with it, how convenient. It makes it much easier to remove the cap if you bend the tab back with a pair of channellocks. Nothing attaches to that nut that I know of.
You can test your kit (both bulbs/ballasts!) at this point to see if it works before taking the car apart further or cutting the cap etc. Connect the two loose wires from the ballast to the two loose wires on the new bulb and the 1 large connector to the factory head light connector. That nasty goo on the cap is from the first bulb replacement where the retaining clips broke during winter, they are very delicate and you don't need to touch them. Simply rotate the old bulb out.
You can now turn on your headlights with key to RUN etc. With any luck they will slowly power up and be bright. You will now notice how ugly and yellow the fogs are, ugh, more money to spend.
Using a 3/4" to 1" paddle bit or hole saw, cut a hole in the cap away from the center. You want it to be slightly undersized to the inner ID of the grommet that comes with the kit for a good seal. The plastic ring that protects the bulb during shipping can be snipped off with some side cutters, just watch those wires.
Cap back on the housing with the grommet installed. Rotate the housing about 90� until it firmly seats. After I did this I pushed back on the whole assembly the opposite way as the torquing of the cap will throw off the headlight alignment. I am not aware of any adjustment screws or levers, go figure.
Got lucky on the drivers side. I pulled the air filter housing upper and lower boxes and saw that you can remove the light cap without taking out the fender liner. It's not super easy but not that bad if you take your time working the cap around the existing bulb and sheetmetal.
Repeat the following procedure of removing the existing bulb carefully to avoid breaking the retainers and drill the cap. Install HID bulb and plug in ballasts etc. Reinstall and check your work. I do not have pictures of where I mounted my ballasts as they are not very well located, don't have the time I used to. Try to mount them so they are isolated from road impacts and engine vibration if possible. Farther from heat the better.
Last edited by QwikKota; 05-20-2011 at 07:00 AM.
 05-20-2011, 06:57 AM
#2
The next pictures/steps correlate to using a relay harness, ignore if you are using the plug and pray.
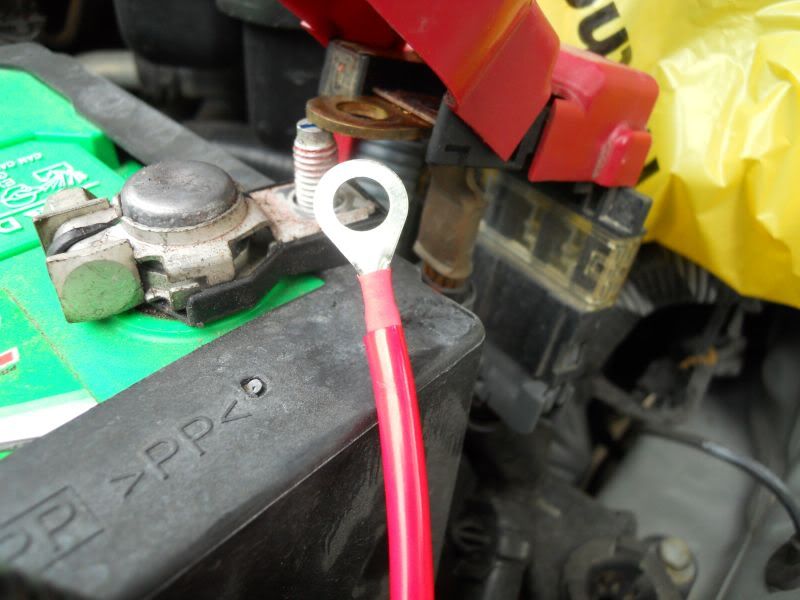
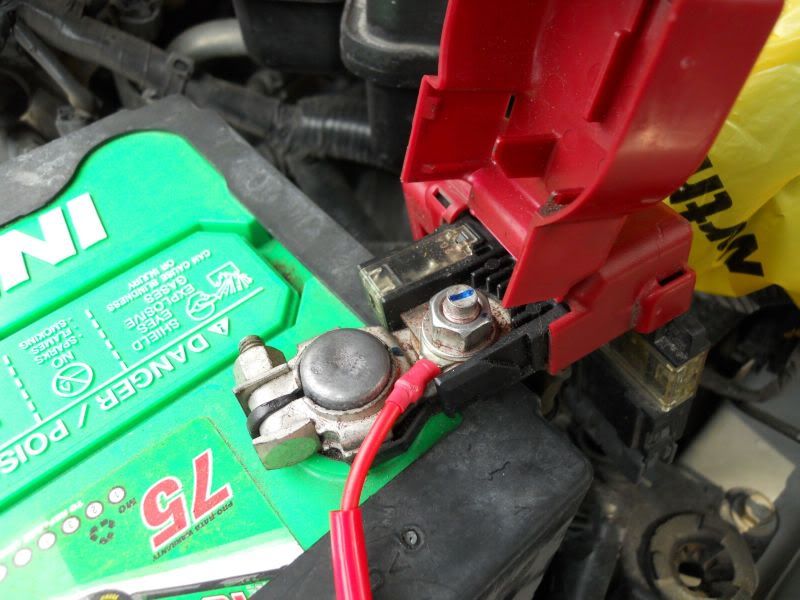
The relay harness works by using direct battery power with a large fuse and relay which closes it's circuit by a contactor that runs off of power from a head light connector for activation. There should be one extra plug on the harness by the battery for connecting and on the contrary the passenger side head light plug from the vehicle is left unattached. You can tap into the battery by using the post at the back of the battery terminal, you may need to trim the heat shrinking tubing around the eyelet connector a bit to get a good connection.
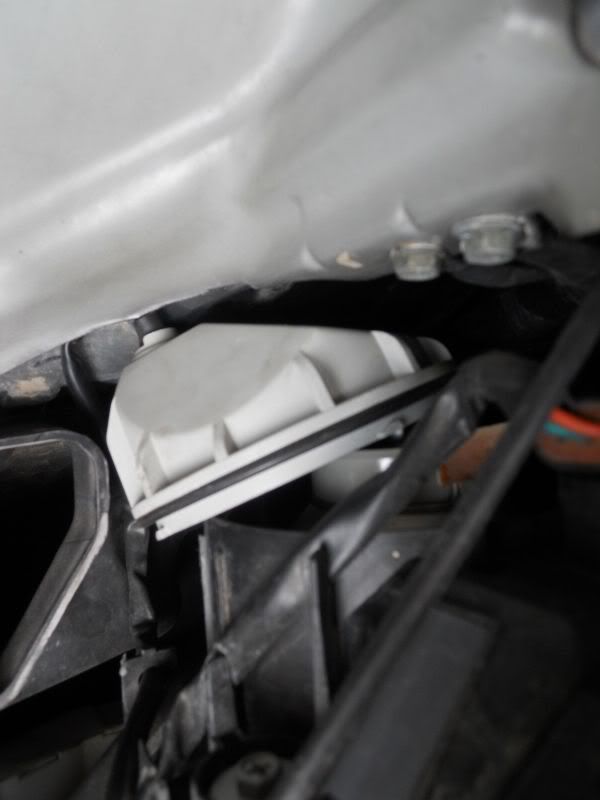
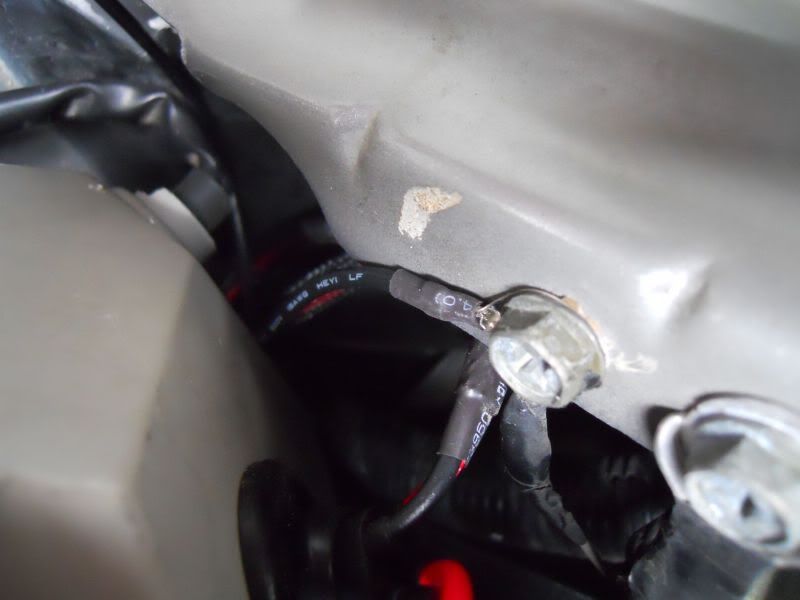
There is a factory ground screw next to the headlight cap that can be used for the ground on the harness. There is also one like this on the passenger side but I did not take a picture.
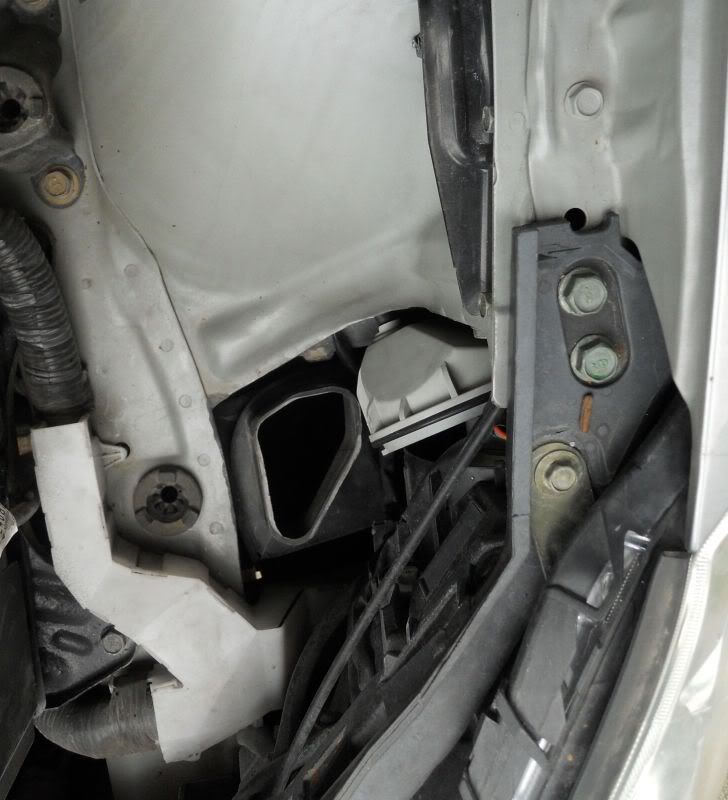
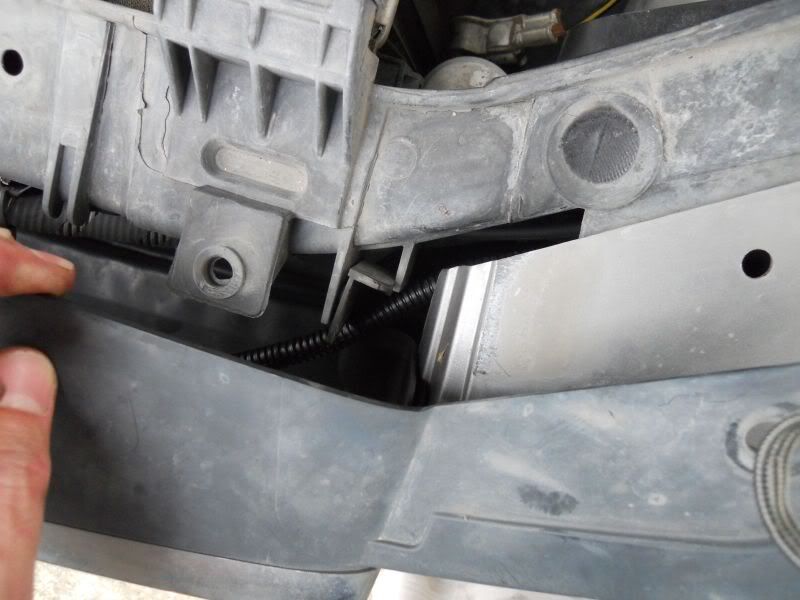
I ran the harness through an opening near the air box ram air intake, behind the grill, over to the other side and under the radiator core support. There are better ways to do it, it did not concern me too much.
Now you can test your relay setup, you should hear an audible *click* when you turn on your headlights indication the relay is closing and sending power to the ballasts. Hopefully yours works better than mine did. Operatic recommended I try reversing the polarity (flipping 180�) on the connector that goes from the relay the ballasts but I did not try that yet.
Hopefully this was helpful, I will try to get some night time pictures, but I do not really have a before and after but I know it is brighter and about the same costs as buying replacement bulbs. The projector housing does a decent job of directing the light but it's not a true HID housing so not perfect. Hopefully this kit lasts a few years as I hate working on things like this that do not add to engine performance or handling.
The relay harness works by using direct battery power with a large fuse and relay which closes it's circuit by a contactor that runs off of power from a head light connector for activation. There should be one extra plug on the harness by the battery for connecting and on the contrary the passenger side head light plug from the vehicle is left unattached. You can tap into the battery by using the post at the back of the battery terminal, you may need to trim the heat shrinking tubing around the eyelet connector a bit to get a good connection.
There is a factory ground screw next to the headlight cap that can be used for the ground on the harness. There is also one like this on the passenger side but I did not take a picture.
I ran the harness through an opening near the air box ram air intake, behind the grill, over to the other side and under the radiator core support. There are better ways to do it, it did not concern me too much.
Now you can test your relay setup, you should hear an audible *click* when you turn on your headlights indication the relay is closing and sending power to the ballasts. Hopefully yours works better than mine did. Operatic recommended I try reversing the polarity (flipping 180�) on the connector that goes from the relay the ballasts but I did not try that yet.
Hopefully this was helpful, I will try to get some night time pictures, but I do not really have a before and after but I know it is brighter and about the same costs as buying replacement bulbs. The projector housing does a decent job of directing the light but it's not a true HID housing so not perfect. Hopefully this kit lasts a few years as I hate working on things like this that do not add to engine performance or handling.
05-21-2011, 03:54 AM
#4
Senior Member

Join Date: Nov 2007
Location: New Brunswick, Canada
Posts: 497
If you did not seal those holes up with a sealant, then you better get back in there and seal them. Those rubber "thingamajiggers" will not keep dirt/water(condensation) out of your headlamp housing.
 05-23-2011, 07:50 AM
#7
The grommets fit pretty snug and sit flat, at least when new they do. The wheel well liner should keep water from being flung against the headlight cap.
05-23-2011, 04:48 PM
#8
Senior Member

Join Date: May 2010
Location: inside my own mind
Posts: 1,506
No problem, there are some people that have reported their kits lasting as long as 2 yrs or more. I'm coming close to a year now myself. The ddmtuning kits come with a lifetime warranty. So, in that way it's worth it and the kits are cheap too. Also, they use Apexcone bulbs which are great in quality.
Anyways, the grommets should be fine. Speaking about water and moisture, it does get in there regardless of the wheel well liner. There's also the hood and the opening in the grille. I've actually put some clear RVT silicone sealant on the bottom and around the grommet to prevent anything from happening.
Anyways, the grommets should be fine. Speaking about water and moisture, it does get in there regardless of the wheel well liner. There's also the hood and the opening in the grille. I've actually put some clear RVT silicone sealant on the bottom and around the grommet to prevent anything from happening.
 05-23-2011, 11:07 PM
#10
Senior Member
Join Date: May 2010
Location: inside my own mind
Posts: 1,506
05-23-2011, 11:56 PM
#12

i HATE new cars. changing bulbs on 4th and 5th gen was a 5 minute job. pop the hood and twist the cap on the back of headlight housing and swap the bulbs. now you gotta go through alllllllllllllll this trouble....
recently put fog light and headlight HID's in a friends IS250 and we had to take off the entire front bumper just to do that. I almost wanted to kick that car afterwards !
recently put fog light and headlight HID's in a friends IS250 and we had to take off the entire front bumper just to do that. I almost wanted to kick that car afterwards !


 12-20-2013, 11:17 AM
#16
Just as an update the light kit is still going strong and I like the color and throw very much. I want to put a kit in my wife's 4Runner now. The high beams work also but never really need them and no one has ever flashed me to say mine are too bright on low which is nice.

Thread
Thread Starter
Forum
Replies
Last Post
MaxLife17
8th Generation Maxima (2016-)
43
06-27-2019 01:37 PM