3rd gen VQ35DE Full ECU Swap Progress Thread
 03-10-2009, 07:28 PM
#361
But, I am only off by a VERY tiny amount. What my biggest question is (not necessarily direct at you), why did Nissan put .008" as the maximum amount you can mill off these heads when it appears you can get away with removing as much as .020" or .030"?
The timing cover should be able to still bolt back up with .020" removed since there is a little slack in the diameter of the bolt holes. So my first guess would be that it would raise the compression ratio too much for the engine tune. A 20 thou mill should raise the CR to somewhere around 10.8:1.
I'm not exactly sure how much the cam timing will be effected by milling more than .008". If anybody has some guesses, please feel free to post.
 03-11-2009, 08:04 AM
#363
But, the reason why I'm trying to determine why Nissan said .008" in the FSM, is that I want to be able to tell my machinist what I will need in order to correct this problem.
I wonder if he should pay for my thicker HGs as well as if he should have to correct that 5 thousandths slope on the head when .0016" was the max slope before.
I just want to know as much as I can before I worry him over something that very well may be nothing.
03-11-2009, 12:03 PM
#364
I just calculated the amount of degrees my cam timing will retard. With a .006" head resurface and I am only looking at 0.276 degrees of cam timing retard.
Here's what I did to calculate it:
Cam gear Diameter: 2.493"
Cam gear Circumference: 7.8312" (d x pi)
7.8312" = 360
------- -----
0.0060" = x
360 degrees x .006" = 2.16
2.16 / 7.8312" = .276 degrees
Here's what I did to calculate it:
Cam gear Diameter: 2.493"
Cam gear Circumference: 7.8312" (d x pi)
7.8312" = 360
------- -----
0.0060" = x
360 degrees x .006" = 2.16
2.16 / 7.8312" = .276 degrees
Last edited by Aaron92SE; 03-11-2009 at 12:10 PM.
03-11-2009, 05:34 PM
#367
but i think the real question is this: if you set the cam so that it's JUST where the lobe starts, and rotate it .276* into the lobe, how much will the valve open (on your aftermarket cams)? i highly doubt that having the valves shut .276* later than normal would have them open wide enough for anything bad to happen, since you should have plenty of PTV clearance anyways. i think on stock cams you can mis-time the engine by a tooth in either direction (tho i don't recommend it) without having anything bad happen. that margin of error, minus the extra lift/duration of your upgraded cams, should still result in a positive number.
03-11-2009, 06:01 PM
#368
i'm pretty sure the variable valve timing moves it more than a few degrees. using the VE as an example, look at EC-176 in the 1994 FSM. If i'm reading it right, the advance is by 20 degrees... so, almost 75x the error that you have.
but i think the real question is this: if you set the cam so that it's JUST where the lobe starts, and rotate it .276* into the lobe, how much will the valve open (on your aftermarket cams)? i highly doubt that having the valves shut .276* later than normal would have them open wide enough for anything bad to happen, since you should have plenty of PTV clearance anyways. i think on stock cams you can mis-time the engine by a tooth in either direction (tho i don't recommend it) without having anything bad happen. that margin of error, minus the extra lift/duration of your upgraded cams, should still result in a positive number.
but i think the real question is this: if you set the cam so that it's JUST where the lobe starts, and rotate it .276* into the lobe, how much will the valve open (on your aftermarket cams)? i highly doubt that having the valves shut .276* later than normal would have them open wide enough for anything bad to happen, since you should have plenty of PTV clearance anyways. i think on stock cams you can mis-time the engine by a tooth in either direction (tho i don't recommend it) without having anything bad happen. that margin of error, minus the extra lift/duration of your upgraded cams, should still result in a positive number.
I just calculated the degrees of retard cause I am trying to get an idea why Nissan says .008" is the limit of a head resurface. I think it's mostly to cover their butts. They don't want to put .015" as the limit if it's slightly possible you could run into timing cover fitment issues b/c of it. Plus, production tolerances straight from the factory aren't perfect to begin with. All they care about is that it's in spec. So I'm guessing that if the head height is barely in spec to begin with, then .008" removed will still be ok.
03-11-2009, 07:21 PM
#369
Yeah, the FSM says that IVT is adjusted from 0 to 30 degrees. So you're right with the margin of error I have.
I just calculated the degrees of retard cause I am trying to get an idea why Nissan says .008" is the limit of a head resurface. I think it's mostly to cover their butts. They don't want to put .015" as the limit if it's slightly possible you could run into timing cover fitment issues b/c of it. Plus, production tolerances straight from the factory aren't perfect to begin with. All they care about is that it's in spec. So I'm guessing that if the head height is barely in spec to begin with, then .008" removed will still be ok.
I just calculated the degrees of retard cause I am trying to get an idea why Nissan says .008" is the limit of a head resurface. I think it's mostly to cover their butts. They don't want to put .015" as the limit if it's slightly possible you could run into timing cover fitment issues b/c of it. Plus, production tolerances straight from the factory aren't perfect to begin with. All they care about is that it's in spec. So I'm guessing that if the head height is barely in spec to begin with, then .008" removed will still be ok.
03-13-2009, 04:59 PM
#370
Well, I spent a few minutes tonight assembling the engine just to make sure I wouldn't run into any bolt alignment issues with the timing cover or lower intake manifold. Nope. Everything fits absolutely perfect!
I guess I'm ready to start assembling the heads since nobody has any ideas what problems I would run into by machining as much as .009" from these heads.
I guess I'm ready to start assembling the heads since nobody has any ideas what problems I would run into by machining as much as .009" from these heads.
03-13-2009, 07:54 PM
#371
Member

Join Date: Oct 2008
Posts: 53
Right now, I don't think it will. Shaving too much from the heads will cause the compression ratio to rise, cam timing to retard, and possibly the timing cover and lower intake manifold not to bolt up correctly.
But, I am only off by a VERY tiny amount. What my biggest question is (not necessarily direct at you), why did Nissan put .008" as the maximum amount you can mill off these heads when it appears you can get away with removing as much as .020" or .030"?
The timing cover should be able to still bolt back up with .020" removed since there is a little slack in the diameter of the bolt holes. So my first guess would be that it would raise the compression ratio too much for the engine tune. A 20 thou mill should raise the CR to somewhere around 10.8:1.
I'm not exactly sure how much the cam timing will be effected by milling more than .008". If anybody has some guesses, please feel free to post.
For what it's worth, us Saturn guys routinely take off 30 thou off our heads to gain about 0.5 CR. I believe it advances our cam timing by about a degree as well.
03-13-2009, 08:33 PM
#372
I'm sure I'm in the clear. I just wanted to see what everyone else thought before I started to assemble everything.
 03-19-2009, 08:13 AM
#375
Yeah, I've been trying to put watermarks in every one of my pictures since people elsewhere on the internet will use this picture for other reasons and I just want the world to know who the owner is.
Right now, I'm busy cleaning up the exhaust valve seats and valves with lapping compound. I will be done with all that tonight and will take pictures. After that, I am going to clean the heads up the best I can, then install the new valve seals and assemble the rest of the heads with the double shimmed HR valve springs. Then, I have to grind a little material away from the coolant port on the block to allow for the HR headgaskets. After that, the engine gets put back together and installed.
I also have to fill the 4th gen engine mounts with polyurethane and fab up the custom crossmember brackets I am going to machine. Once those brackets are welded on the car, they will allow you to easily bolt a 4th gen crossmember to the 3rd gen.
I'm hoping to have the engine installed in the car by the end of April, hopefully sooner! After that, it's all wiring from then on out.
03-19-2009, 08:49 AM
#377
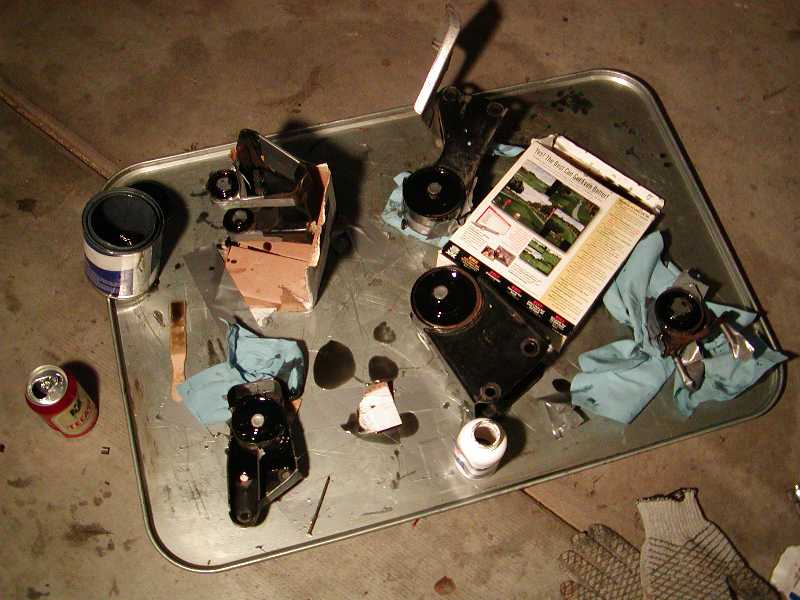
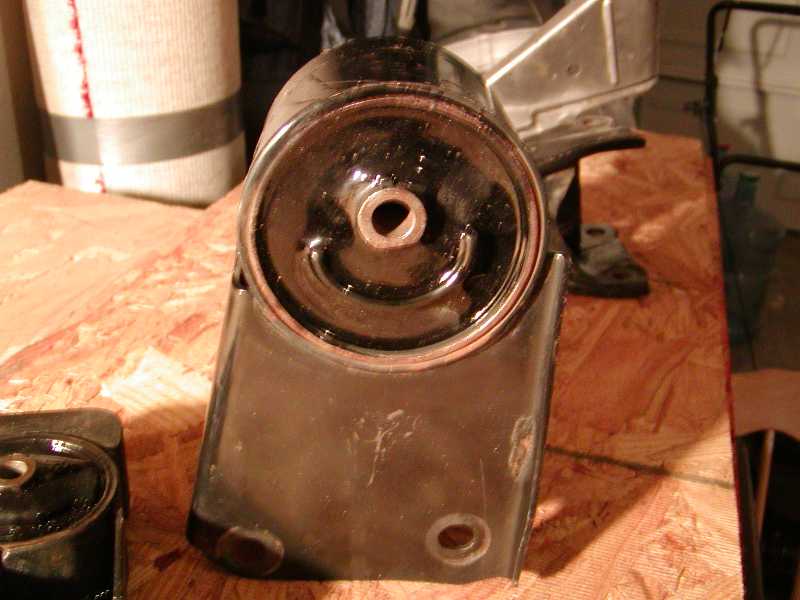
Aren't they just inserts? They don't replace the stock rubber, right? That's what the polyurethane does, but it fills much better and only costs $20. Sure it's messy and takes 2 weeks to cure properly, but it's worth it for me.
I did this on the VE mounts and I was amazed with the performance increase over my stock worn engine mounts. After over 5 years, the mounts still look like the day I installed them.
Here are the pics of the VE mounts I filled back in 2004:
I did this on the VE mounts and I was amazed with the performance increase over my stock worn engine mounts. After over 5 years, the mounts still look like the day I installed them.
Here are the pics of the VE mounts I filled back in 2004:
03-19-2009, 09:03 AM
#378
Aren't they just inserts? They don't replace the stock rubber, right? That's what the polyurethane does, but it fills much better and only costs $20. Sure it's messy and takes 2 weeks to cure properly, but it's worth it for me.
I did this on the VE mounts and I was amazed with the performance increase over my stock worn engine mounts. After over 5 years, the mounts still look like the day I installed them.
Here are the pics of the VE mounts I filled back in 2004:
I did this on the VE mounts and I was amazed with the performance increase over my stock worn engine mounts. After over 5 years, the mounts still look like the day I installed them.
Here are the pics of the VE mounts I filled back in 2004:
Brian Catts sells them, around $90 I believe - http://forums.maxima.org/group-deals...year-sale.html
03-19-2009, 09:09 AM
#379
They're not MMIs like you'd find for the A34, they replace the entire stock rubber sectiion. I guess 'inserts' isn't quite the correct word for them.
Brian Catts sells them, around $90 I believe - http://forums.maxima.org/group-deals...year-sale.html
Brian Catts sells them, around $90 I believe - http://forums.maxima.org/group-deals...year-sale.html
Plus, I got my mounts from an AT 4th gen, which won't work entirely. I also will have a torque link that braces my engine down for the drag strip. So I'm not too concerned about engine movement.
Edit: Yes, you do have to press out all the old rubber. And the 4th gen GXE AT engine mounts will work only if it's not the 4" electric mount, which I chose not to get at the junkyard. Lucky for me, I got the 3.5" non-electric mount. But, I will probably still fill mine with PU cause it's cheaper and for the fact I will have my engine mounted solid with the torque link.
Last edited by Aaron92SE; 03-19-2009 at 09:21 AM.
03-19-2009, 10:00 AM
#380
Oh ok. So you have to have a press in order to remove the all the stock rubber from the mount?
Plus, I got my mounts from an AT 4th gen, which won't work entirely. I also will have a torque link that braces my engine down for the drag strip. So I'm not too concerned about engine movement.
Edit: Yes, you do have to press out all the old rubber. And the 4th gen GXE AT engine mounts will work only if it's not the 4" electric mount, which I chose not to get at the junkyard. Lucky for me, I got the 3.5" non-electric mount. But, I will probably still fill mine with PU cause it's cheaper and for the fact I will have my engine mounted solid with the torque link.
03-19-2009, 10:12 AM
#381
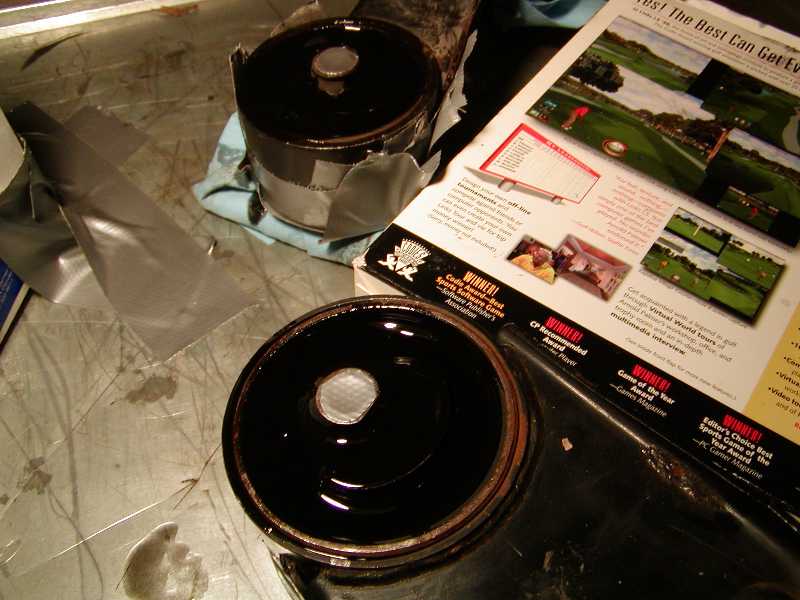
Ah. You don't have to press out the rubber, but it's a lot easier. And filliong is definitely cheaper, but may not be as reliable or last as long. I filled my front one a while back with some crap poly, but so far it looks like it's holding up fine. Just takes forever to cure.
The trick to the PU fill is not to rush it. Some people have tried only letting it cure for 1 week and it didn't hold up. I let mine cure for just over 2 weeks in the hot and dry Las Vegas environment. I might let mine cure longer than that in NC. One guy tried speeding up the cure process by baking them and it appeared to have worked at first. But they quickly fell apart after installed on the car.
Plus, if you don't do a perfect tape job, the PU resin will leak out. I thought I did a perfect tape job and it still leaked. So, it's best to let it thicken up slightly before pouring the resin.
I could create a jig and replace ALL the old rubber with the PU resin. But that's a lot more work that I'm not interested in doing. I just need half decent mounts for street driving.
03-19-2009, 11:02 AM
#382
Senior Member
iTrader: (1)

Join Date: Jan 2002
Location: Miami, FL. / Indianapolis, IN.
Posts: 2,610
Yeah, I've been trying to put watermarks in every one of my pictures since people elsewhere on the internet will use this picture for other reasons and I just want the world to know who the owner is.
Right now, I'm busy cleaning up the exhaust valve seats and valves with lapping compound. I will be done with all that tonight and will take pictures. After that, I am going to clean the heads up the best I can, then install the new valve seals and assemble the rest of the heads with the double shimmed HR valve springs. Then, I have to grind a little material away from the coolant port on the block to allow for the HR headgaskets. After that, the engine gets put back together and installed.
I also have to fill the 4th gen engine mounts with polyurethane and fab up the custom crossmember brackets I am going to machine. Once those brackets are welded on the car, they will allow you to easily bolt a 4th gen crossmember to the 3rd gen.
I'm hoping to have the engine installed in the car by the end of April, hopefully sooner! After that, it's all wiring from then on out.
Right now, I'm busy cleaning up the exhaust valve seats and valves with lapping compound. I will be done with all that tonight and will take pictures. After that, I am going to clean the heads up the best I can, then install the new valve seals and assemble the rest of the heads with the double shimmed HR valve springs. Then, I have to grind a little material away from the coolant port on the block to allow for the HR headgaskets. After that, the engine gets put back together and installed.
I also have to fill the 4th gen engine mounts with polyurethane and fab up the custom crossmember brackets I am going to machine. Once those brackets are welded on the car, they will allow you to easily bolt a 4th gen crossmember to the 3rd gen.
I'm hoping to have the engine installed in the car by the end of April, hopefully sooner! After that, it's all wiring from then on out.
03-19-2009, 11:30 AM
#383
The watermark removal requires work and most people won't bother. I am doing it mainly b/c of when someone stumbles across the picture in a Google Image search or something. And they may use it to post on another forum. It's just a quick and easy way to brand all your photos on your website.
03-19-2009, 12:31 PM
#384
Senior Member
iTrader: (1)
Join Date: Jan 2002
Location: Miami, FL. / Indianapolis, IN.
Posts: 2,610
I could possibly make a couple extra brackets, but I won't stock them through NWP Engineering. Not enough demand. But let me know when you need some and I will have a couple sets made and will keep the price close to my costs just to help out fellow 3rd genners.
The watermark removal requires work and most people won't bother. I am doing it mainly b/c of when someone stumbles across the picture in a Google Image search or something. And they may use it to post on another forum. It's just a quick and easy way to brand all your photos on your website.
The watermark removal requires work and most people won't bother. I am doing it mainly b/c of when someone stumbles across the picture in a Google Image search or something. And they may use it to post on another forum. It's just a quick and easy way to brand all your photos on your website.
03-19-2009, 12:50 PM
#385
I will have a local machinist make these brackets for me though since it's easier that way. He has a CNC machine in house and all the proper cutting and welding machinery. So the price will be determined by what I get charged. It should be under $100 though for the pair of brackets. At least I sure hope it'll be!
 03-19-2009, 01:32 PM
#386
I don't have the slightest clue right now since I haven't even made the prototypes yet. But they will be a very basic plate with two studs welded in place for the crossmember to bolt to. All you'll have to do is weld the plate in place and voila, you'll have studs on your 3rd gen.
I will have a local machinist make these brackets for me though since it's easier that way. He has a CNC machine in house and all the proper cutting and welding machinery. So the price will be determined by what I get charged. It should be under $100 though for the pair of brackets. At least I sure hope it'll be!
I will have a local machinist make these brackets for me though since it's easier that way. He has a CNC machine in house and all the proper cutting and welding machinery. So the price will be determined by what I get charged. It should be under $100 though for the pair of brackets. At least I sure hope it'll be!
03-19-2009, 01:41 PM
#388
Yea, I'm an idiot. Even M16 doesn't sound right, considering they're 17mm heads. Probably M12 or M14.
03-19-2009, 03:42 PM
#390
The stock exhaust valve seats didn't look in that great of shape. They were dull and pitted. The engine only has 49K miles on it, but the exhaust seats looked much older than that.
So, I used some fine lapping compound to smooth them out a tad. All you do is attach the valve stem to a drill. I used a 1/2" long piece of small vacuum hose to fit snugly over the valve stem. Then I jammed a small socket tightly over the hose. With a tiny bit of lapping compound on the valve itself, you spin the drill while giving light pressure on the base of the valve. Do this process a few times with fresh compound each time and you end up with a much cleaner valve seat. And you don't want to over do it. Less is probably best or you may misshape the valve seats or remove too much material.
The intake valve seats look just fine, so I will leave those alone.
Here are what the seats looked like before:
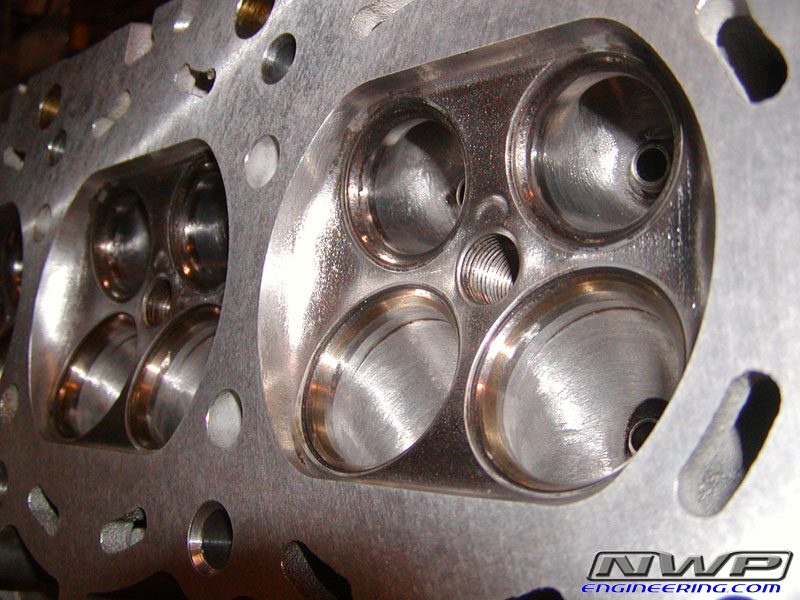
After valve lapping process:
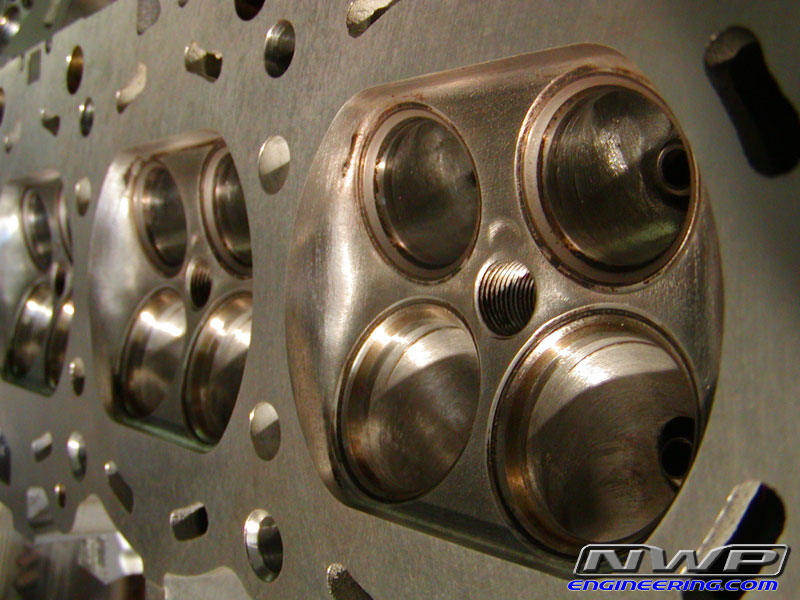
So, I used some fine lapping compound to smooth them out a tad. All you do is attach the valve stem to a drill. I used a 1/2" long piece of small vacuum hose to fit snugly over the valve stem. Then I jammed a small socket tightly over the hose. With a tiny bit of lapping compound on the valve itself, you spin the drill while giving light pressure on the base of the valve. Do this process a few times with fresh compound each time and you end up with a much cleaner valve seat. And you don't want to over do it. Less is probably best or you may misshape the valve seats or remove too much material.
The intake valve seats look just fine, so I will leave those alone.
Here are what the seats looked like before:
After valve lapping process:
03-20-2009, 02:58 AM
#391
Yeah. The ES mounts definitely looks like the best option.
The trick to the PU fill is not to rush it. Some people have tried only letting it cure for 1 week and it didn't hold up. I let mine cure for just over 2 weeks in the hot and dry Las Vegas environment. I might let mine cure longer than that in NC. One guy tried speeding up the cure process by baking them and it appeared to have worked at first. But they quickly fell apart after installed on the car.
Plus, if you don't do a perfect tape job, the PU resin will leak out. I thought I did a perfect tape job and it still leaked. So, it's best to let it thicken up slightly before pouring the resin.
I could create a jig and replace ALL the old rubber with the PU resin. But that's a lot more work that I'm not interested in doing. I just need half decent mounts for street driving.
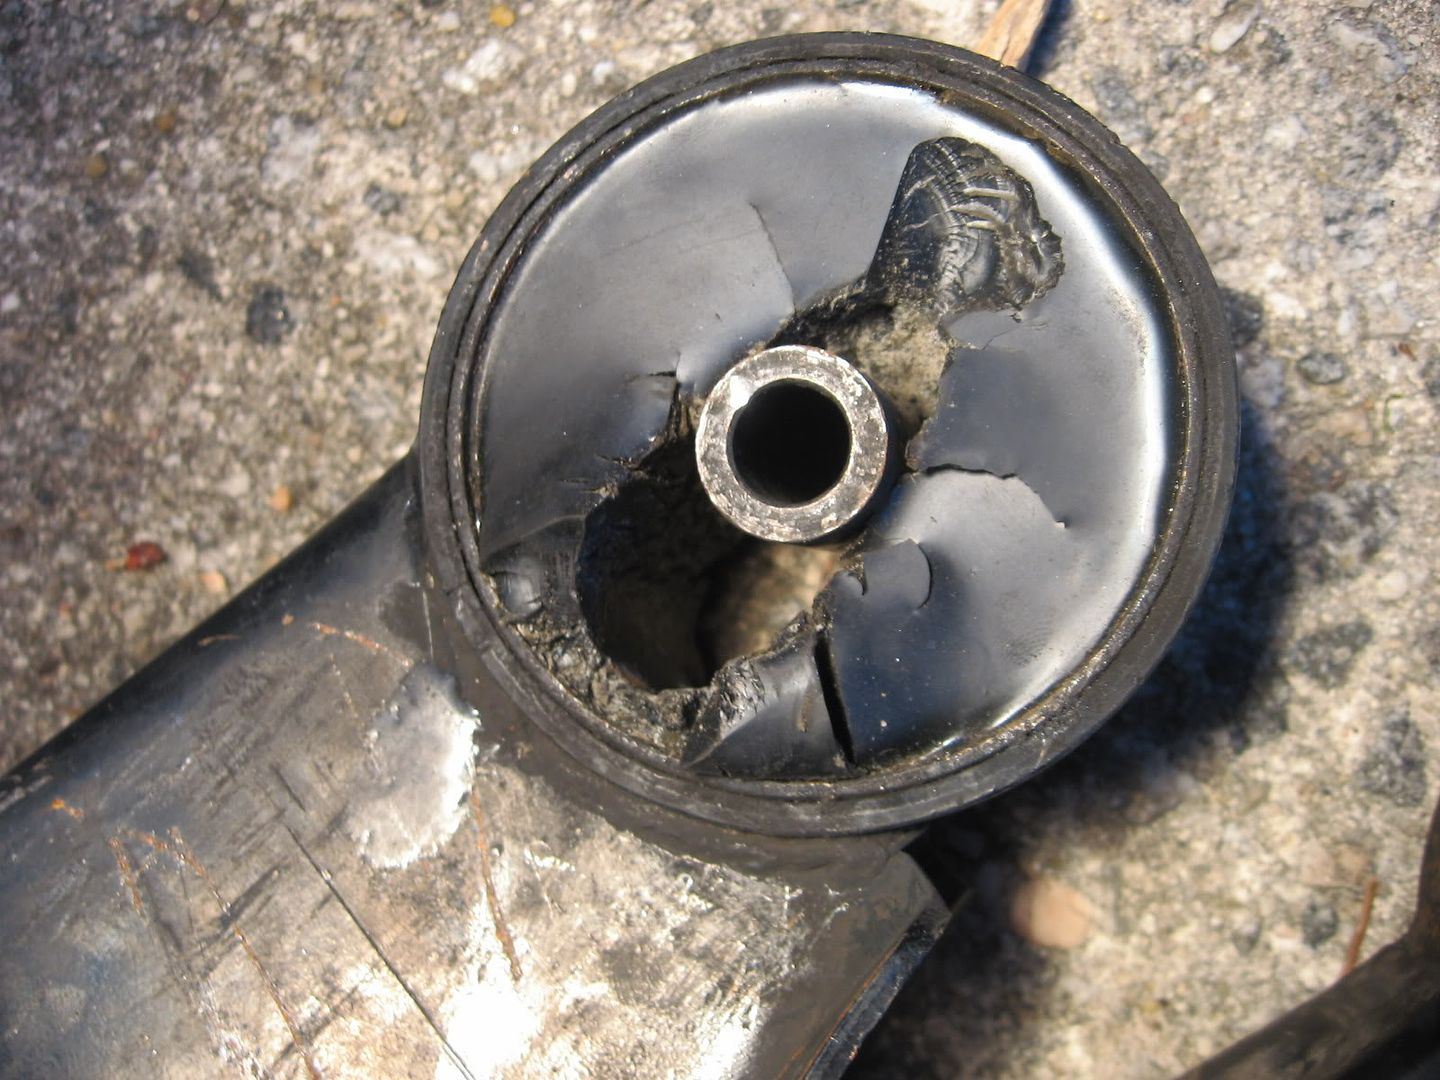
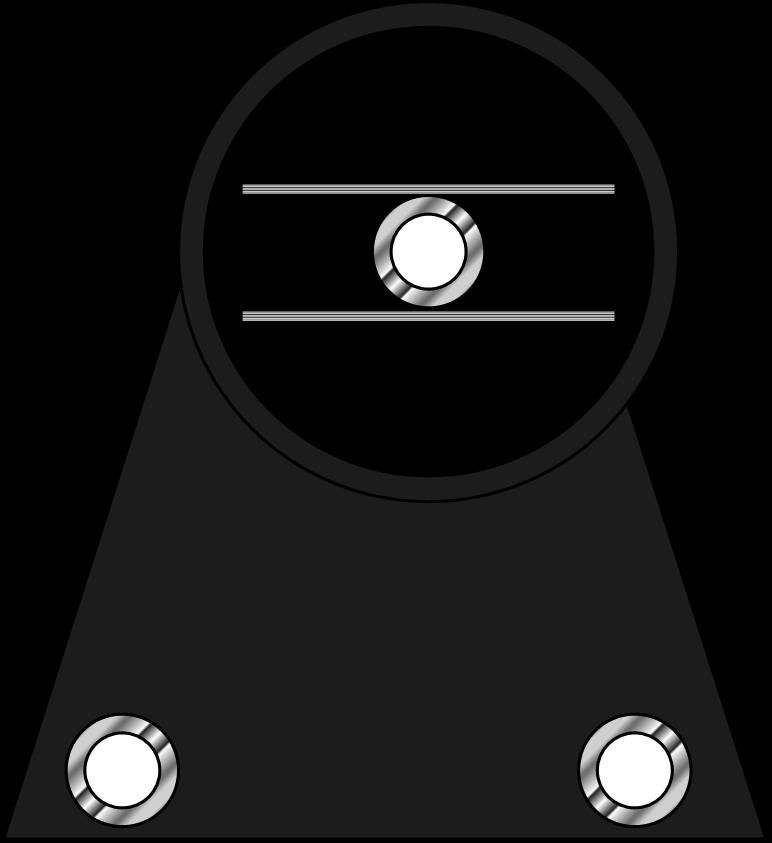
this was with the 80a compound. if i had to do it again, i'd use the 94a stuff, and i'd insert 2 thickish (4ga steel) plates through it like this, welded to the center sleeve, about 80% as wide as the cylindrical body of the mount ring (so it doesn't poke out the ends). that way it's like a snowshoe, distributing the force across ALL of the poly, not just focusing the pressure on the center. that should be a big step up in terms of longevity for pure poly mounts.
 03-20-2009, 06:10 AM
#392
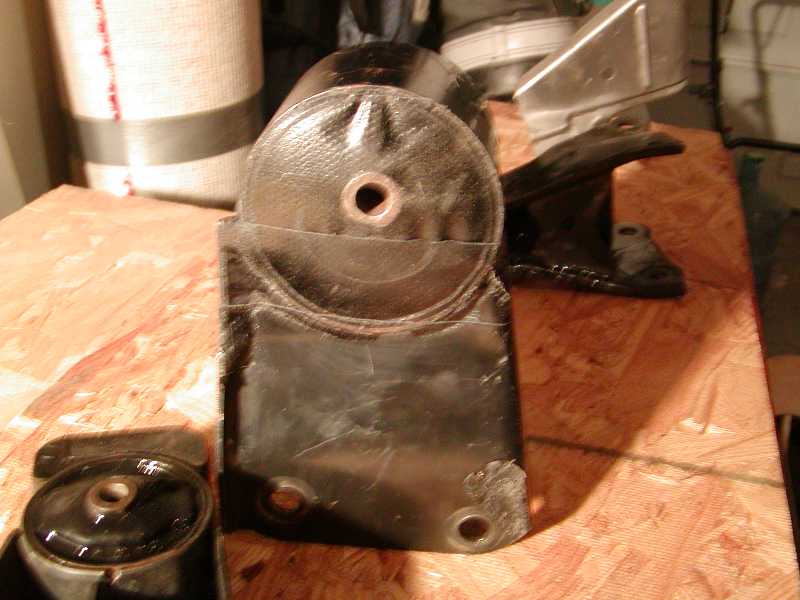
I see. I used the 80a PU as well, but I just filled my old and busted stock mounts. The rubber was completely torn as well in some spots. On one of the mounts, you could completely remove the metal sleeve and half the rubber. But, I filled them anyway with the broke piece of rubber and they still look brand new. I will probably be selling those along with all my other VE goodies after my 3.5 is installed and running.
I don't know where you went wrong. I was careful to mix the two parts thoroughly. I poured the resin probably within 2 minutes after mixing. Then I left them untouched for over 2 weeks in a 70 degree and dry garage (humidity under 20%). How long did yours cure before you tried to install them?
But I think the 80a is plenty firm enough in my experience for the performance I need at the drag strip. I thought about going with a harder resin, but I have already had good results with the 80a and will just go with that. I also see that the price of the same exact resin raised from $20 to $30 in the past 5 years.
 03-20-2009, 08:25 AM
#394
Senior Member
iTrader: (1)
Join Date: Jan 2002
Location: Miami, FL. / Indianapolis, IN.
Posts: 2,610
I don't have the slightest clue right now since I haven't even made the prototypes yet. But they will be a very basic plate with two studs welded in place for the crossmember to bolt to. All you'll have to do is weld the plate in place and voila, you'll have studs on your 3rd gen.
I will have a local machinist make these brackets for me though since it's easier that way. He has a CNC machine in house and all the proper cutting and welding machinery. So the price will be determined by what I get charged. It should be under $100 though for the pair of brackets. At least I sure hope it'll be!
I will have a local machinist make these brackets for me though since it's easier that way. He has a CNC machine in house and all the proper cutting and welding machinery. So the price will be determined by what I get charged. It should be under $100 though for the pair of brackets. At least I sure hope it'll be!
03-20-2009, 08:46 AM
#395
Taking my Maxima to the Max!

iTrader: (3)
Join Date: Dec 2003
Location: Alachua, FL 32615
Posts: 1,096
I see. I used the 80a PU as well, but I just filled my old and busted stock mounts. The rubber was completely torn as well in some spots. On one of the mounts, you could completely remove the metal sleeve and half the rubber. But, I filled them anyway with the broke piece of rubber and they still look brand new. I will probably be selling those along with all my other VE goodies after my 3.5 is installed and running.
I don't know where you went wrong. I was careful to mix the two parts thoroughly. I poured the resin probably within 2 minutes after mixing. Then I left them untouched for over 2 weeks in a 70 degree and dry garage (humidity under 20%). How long did yours cure before you tried to install them?
But I think the 80a is plenty firm enough in my experience for the performance I need at the drag strip. I thought about going with a harder resin, but I have already had good results with the 80a and will just go with that. I also see that the price of the same exact resin raised from $20 to $30 in the past 5 years.
I don't know where you went wrong. I was careful to mix the two parts thoroughly. I poured the resin probably within 2 minutes after mixing. Then I left them untouched for over 2 weeks in a 70 degree and dry garage (humidity under 20%). How long did yours cure before you tried to install them?
But I think the 80a is plenty firm enough in my experience for the performance I need at the drag strip. I thought about going with a harder resin, but I have already had good results with the 80a and will just go with that. I also see that the price of the same exact resin raised from $20 to $30 in the past 5 years.
Last edited by mrkanda; 03-20-2009 at 08:48 AM.
03-20-2009, 08:53 AM
#397
Hmmm.... Interesting. I still have the broken mounts to fill with the 80a PU I purchased for that purpose. Are you suggesting that one should leave the old rubber in the mounts and just fill in the gaps with the PU? If so, is that because straight PU will be too hard and therefor too brittle? Also, what if I live in Florida with higher humidity, like now it's 57% humidity. How long should I leave the mounts to cure? Thanks.
Whether you fill the stock mounts the way they are or make your own by removing all the rubber first, both should work.
I would let a MINIMUM of 2 weeks go by for cure time before you even lay a hand on the mounts. After I pour mine outside, I will probably bring it inside my house to let them cure in a stable 70 degree environment. The humidity in the house is 30-40%. I am not even sure if humidity plays a big role in the curing process, but temperature certainly does. The hotter it is, the faster it cures.
I can't suggest what everyone else should do. But, what I have done in the past and what I will be doing again with these 4th gen mounts is just fill them with the existing cracked rubber in place.
03-20-2009, 01:30 PM
#398
I see. I used the 80a PU as well, but I just filled my old and busted stock mounts. The rubber was completely torn as well in some spots. On one of the mounts, you could completely remove the metal sleeve and half the rubber. But, I filled them anyway with the broke piece of rubber and they still look brand new. I will probably be selling those along with all my other VE goodies after my 3.5 is installed and running.
I don't know where you went wrong. I was careful to mix the two parts thoroughly. I poured the resin probably within 2 minutes after mixing. Then I left them untouched for over 2 weeks in a 70 degree and dry garage (humidity under 20%). How long did yours cure before you tried to install them?
But I think the 80a is plenty firm enough in my experience for the performance I need at the drag strip. I thought about going with a harder resin, but I have already had good results with the 80a and will just go with that. I also see that the price of the same exact resin raised from $20 to $30 in the past 5 years.
I don't know where you went wrong. I was careful to mix the two parts thoroughly. I poured the resin probably within 2 minutes after mixing. Then I left them untouched for over 2 weeks in a 70 degree and dry garage (humidity under 20%). How long did yours cure before you tried to install them?
But I think the 80a is plenty firm enough in my experience for the performance I need at the drag strip. I thought about going with a harder resin, but I have already had good results with the 80a and will just go with that. I also see that the price of the same exact resin raised from $20 to $30 in the past 5 years.
now i have a set of spares, so i can moreso take my time on them. tho it depends how well my ghettofabulous (stuffed the open spaces with some useless 1/4" drive deep sockets that had to be hammered HARD to fit) current set of mounts works out... will be trying them for the first time on sunday.
 03-21-2009, 02:53 PM
#400
i only let mine cure 6 days. and what happened was, i had the mount off0center, so when i mounted it on the xmember, then let the engine down onto it, it snagged one side and just pulled it down HARD and formed a hairline crack under all the stress, then it finally sprung back into place, but the damage was already done. i was under alot of pressure to get my car running again, that's why i didn't wait any longer.
now i have a set of spares, so i can moreso take my time on them. tho it depends how well my ghettofabulous (stuffed the open spaces with some useless 1/4" drive deep sockets that had to be hammered HARD to fit) current set of mounts works out... will be trying them for the first time on sunday.
now i have a set of spares, so i can moreso take my time on them. tho it depends how well my ghettofabulous (stuffed the open spaces with some useless 1/4" drive deep sockets that had to be hammered HARD to fit) current set of mounts works out... will be trying them for the first time on sunday.


