When you click on links to various merchants on this site and make a purchase, this can result in this site earning a commission. Affiliate programs and affiliations include, but are not limited to, the eBay Partner Network.
How to: Install a 6 speed in a 4th gen, 2023 edition
**I do not give permission for my guide or pictures to be re-posted on any other website.**
I recently installed a 6 speed into my 4th gen using one of the how-tos, and while it was improved over the original guide, it left out a lot of details, so I wanted to make my own guide with new pictures and details to help people do this swap in the future. New parts are also available now that weren't available when older guides were written which make the swap easier and reversible.
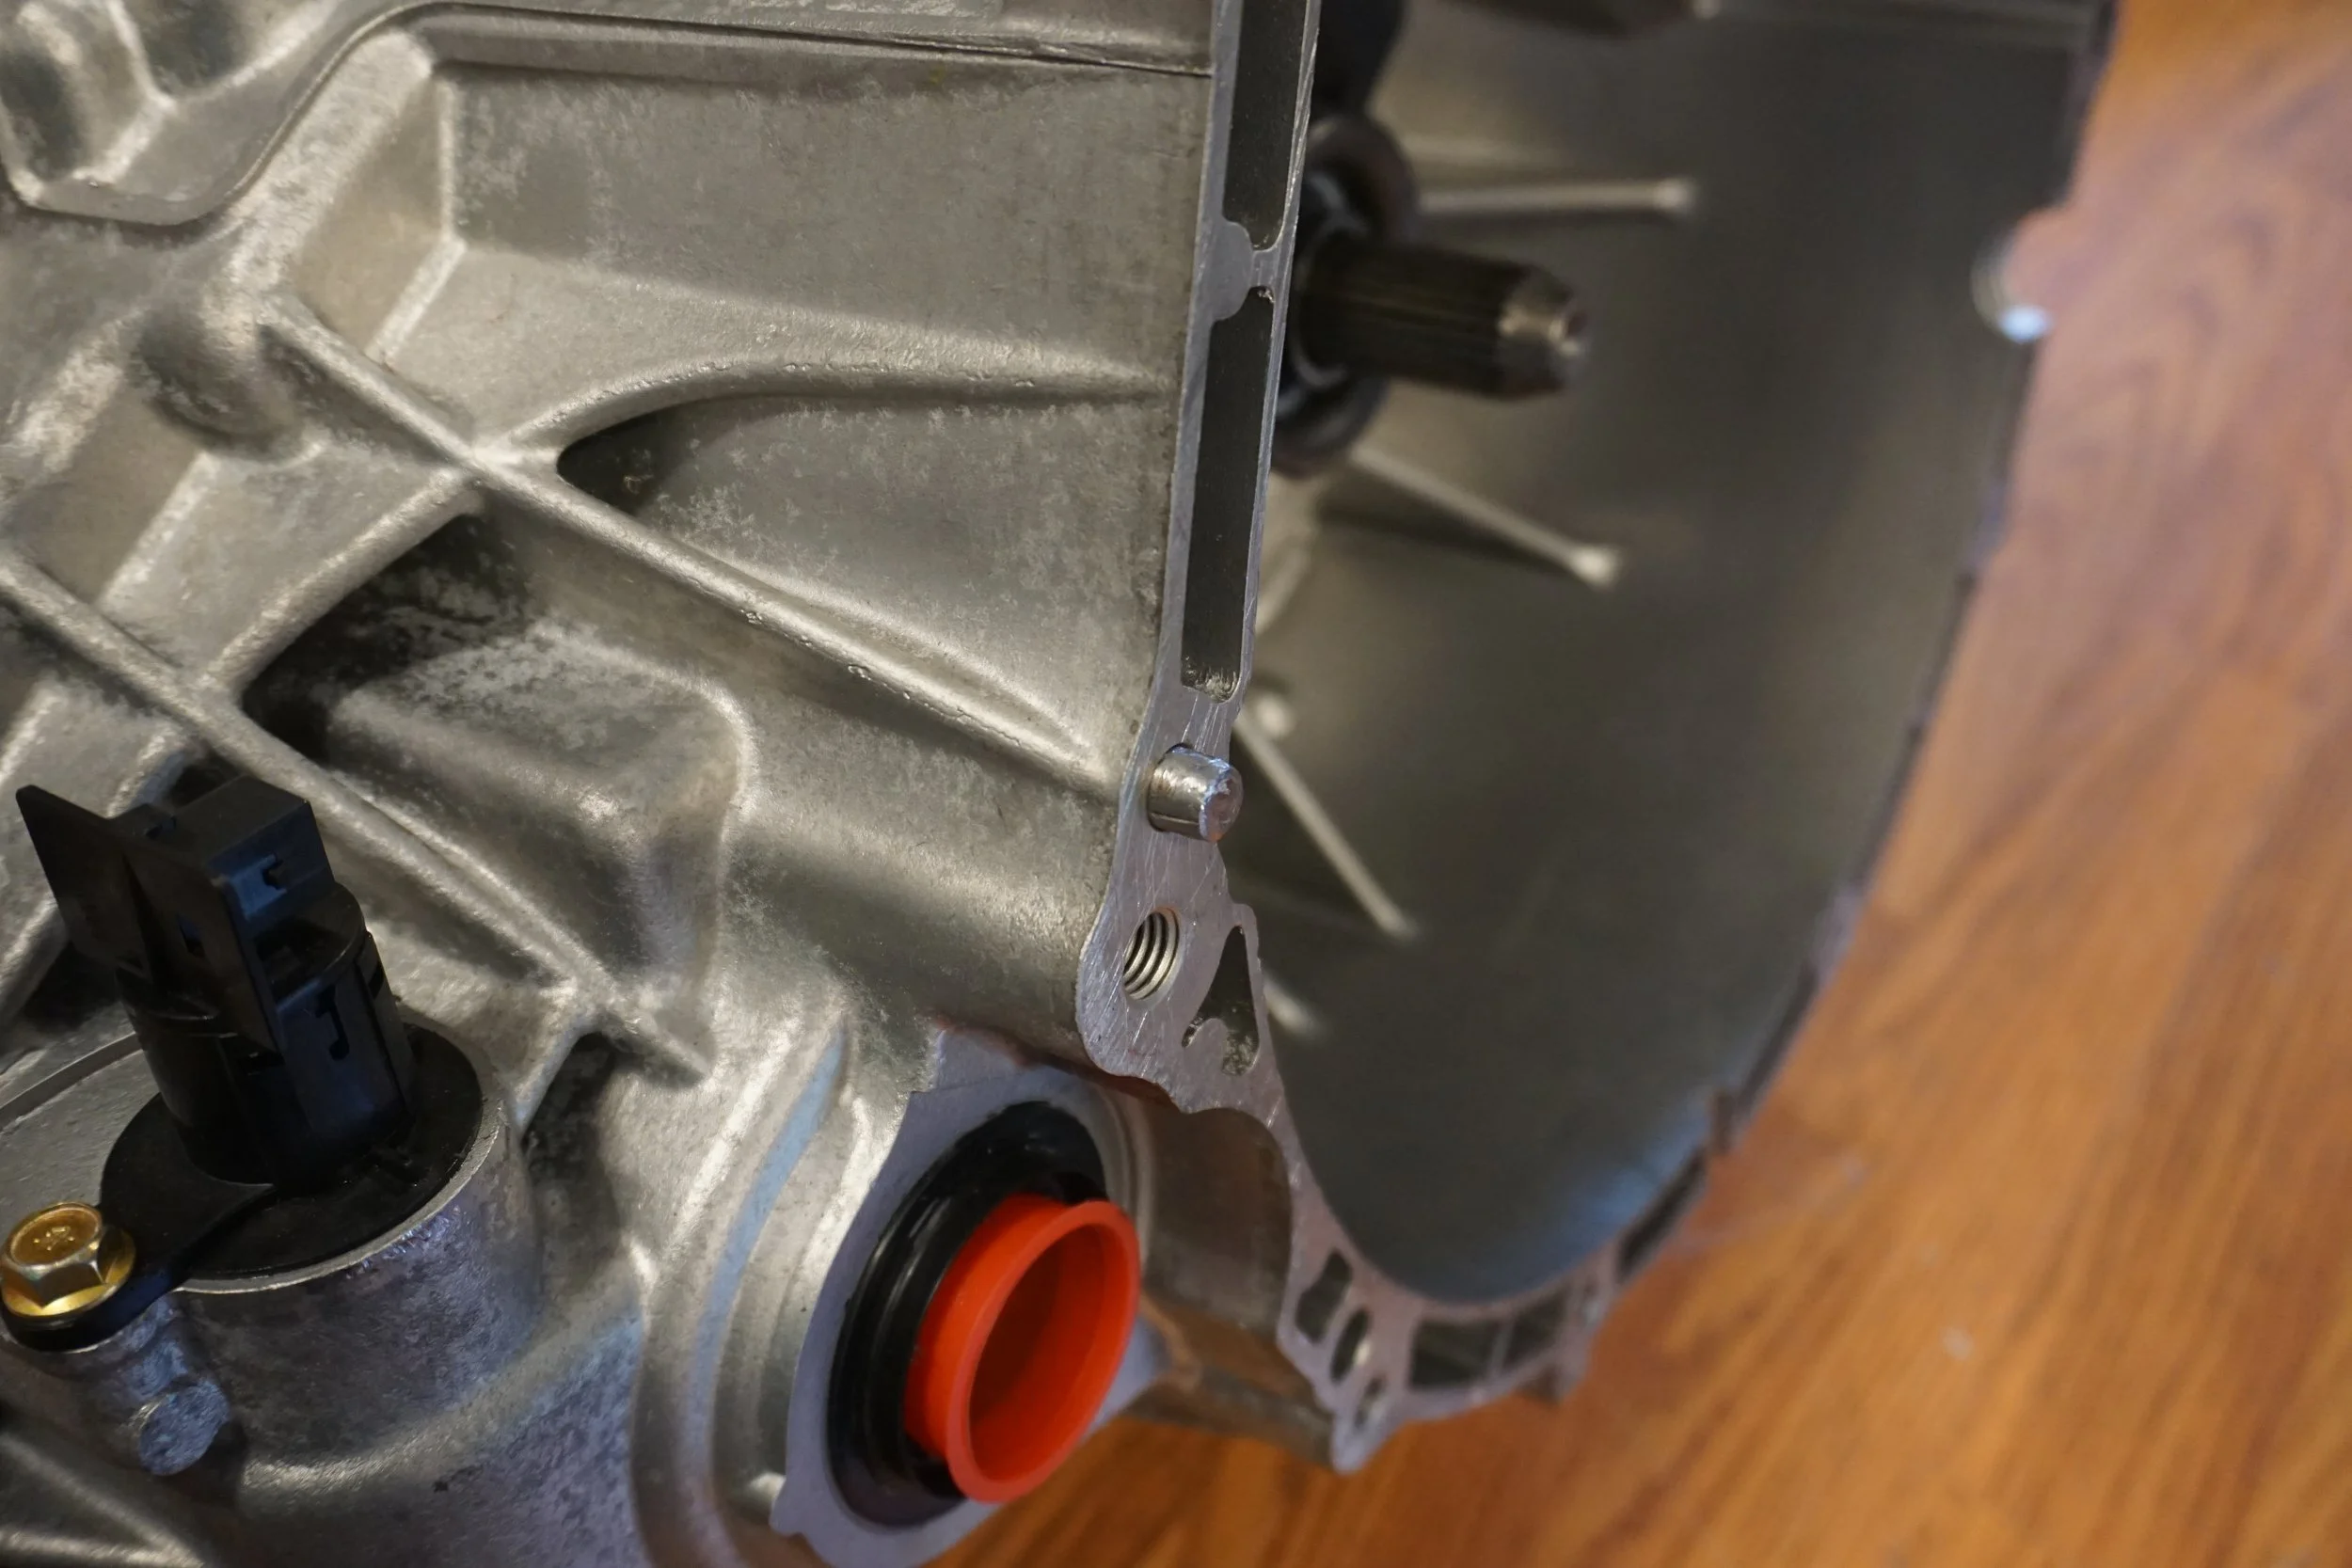
REQUIRED PARTS 6spd Maxima transmission-You can use the 6 speed from 5.5th or 6th gen Maximas. The external physical dimensions are the same, but internal differences include different final drive ratios (3.8 for 5.5th gen, 4.1 for 6th gen) and synchros (double for 5.5th gen, triple for most 6th gen). 5.5 gen 6spd Maxima shifter assembly- I didn't try, but I'm pretty sure the 6th gen shifter assembly can also be used. 5.5 gen 6spd Maxima shifter cables- 6th gen cables are longer and will be more difficult to fit. Attempt at your own risk. 5.5 gen 6spd drivers side axle- Not actually necessary, as the stock 5 speed (open diff only, not VLSD) axle can be used. 5.5 gen 6spd passenger axle 6spd frame transmission mount- Buy the front (drivers side) motor mount for an SR20 Sentra. 11210-0M800, about $30. Will also need Energy Suspension poly insert for that mount, 6spd transmission mount bracket- Buy the custom adapter bracket made by Schmellyfart (schmellyfart@gmail.com), which allows you to use the factory frame mount so you don't need to cut it off like in previous guides. This allows you to easily revert back to a 5 speed if desired.
Passenger side axle carrier bracket- You can reuse your 4th gen bracket, it's the same as a 5.5th gen bracket.
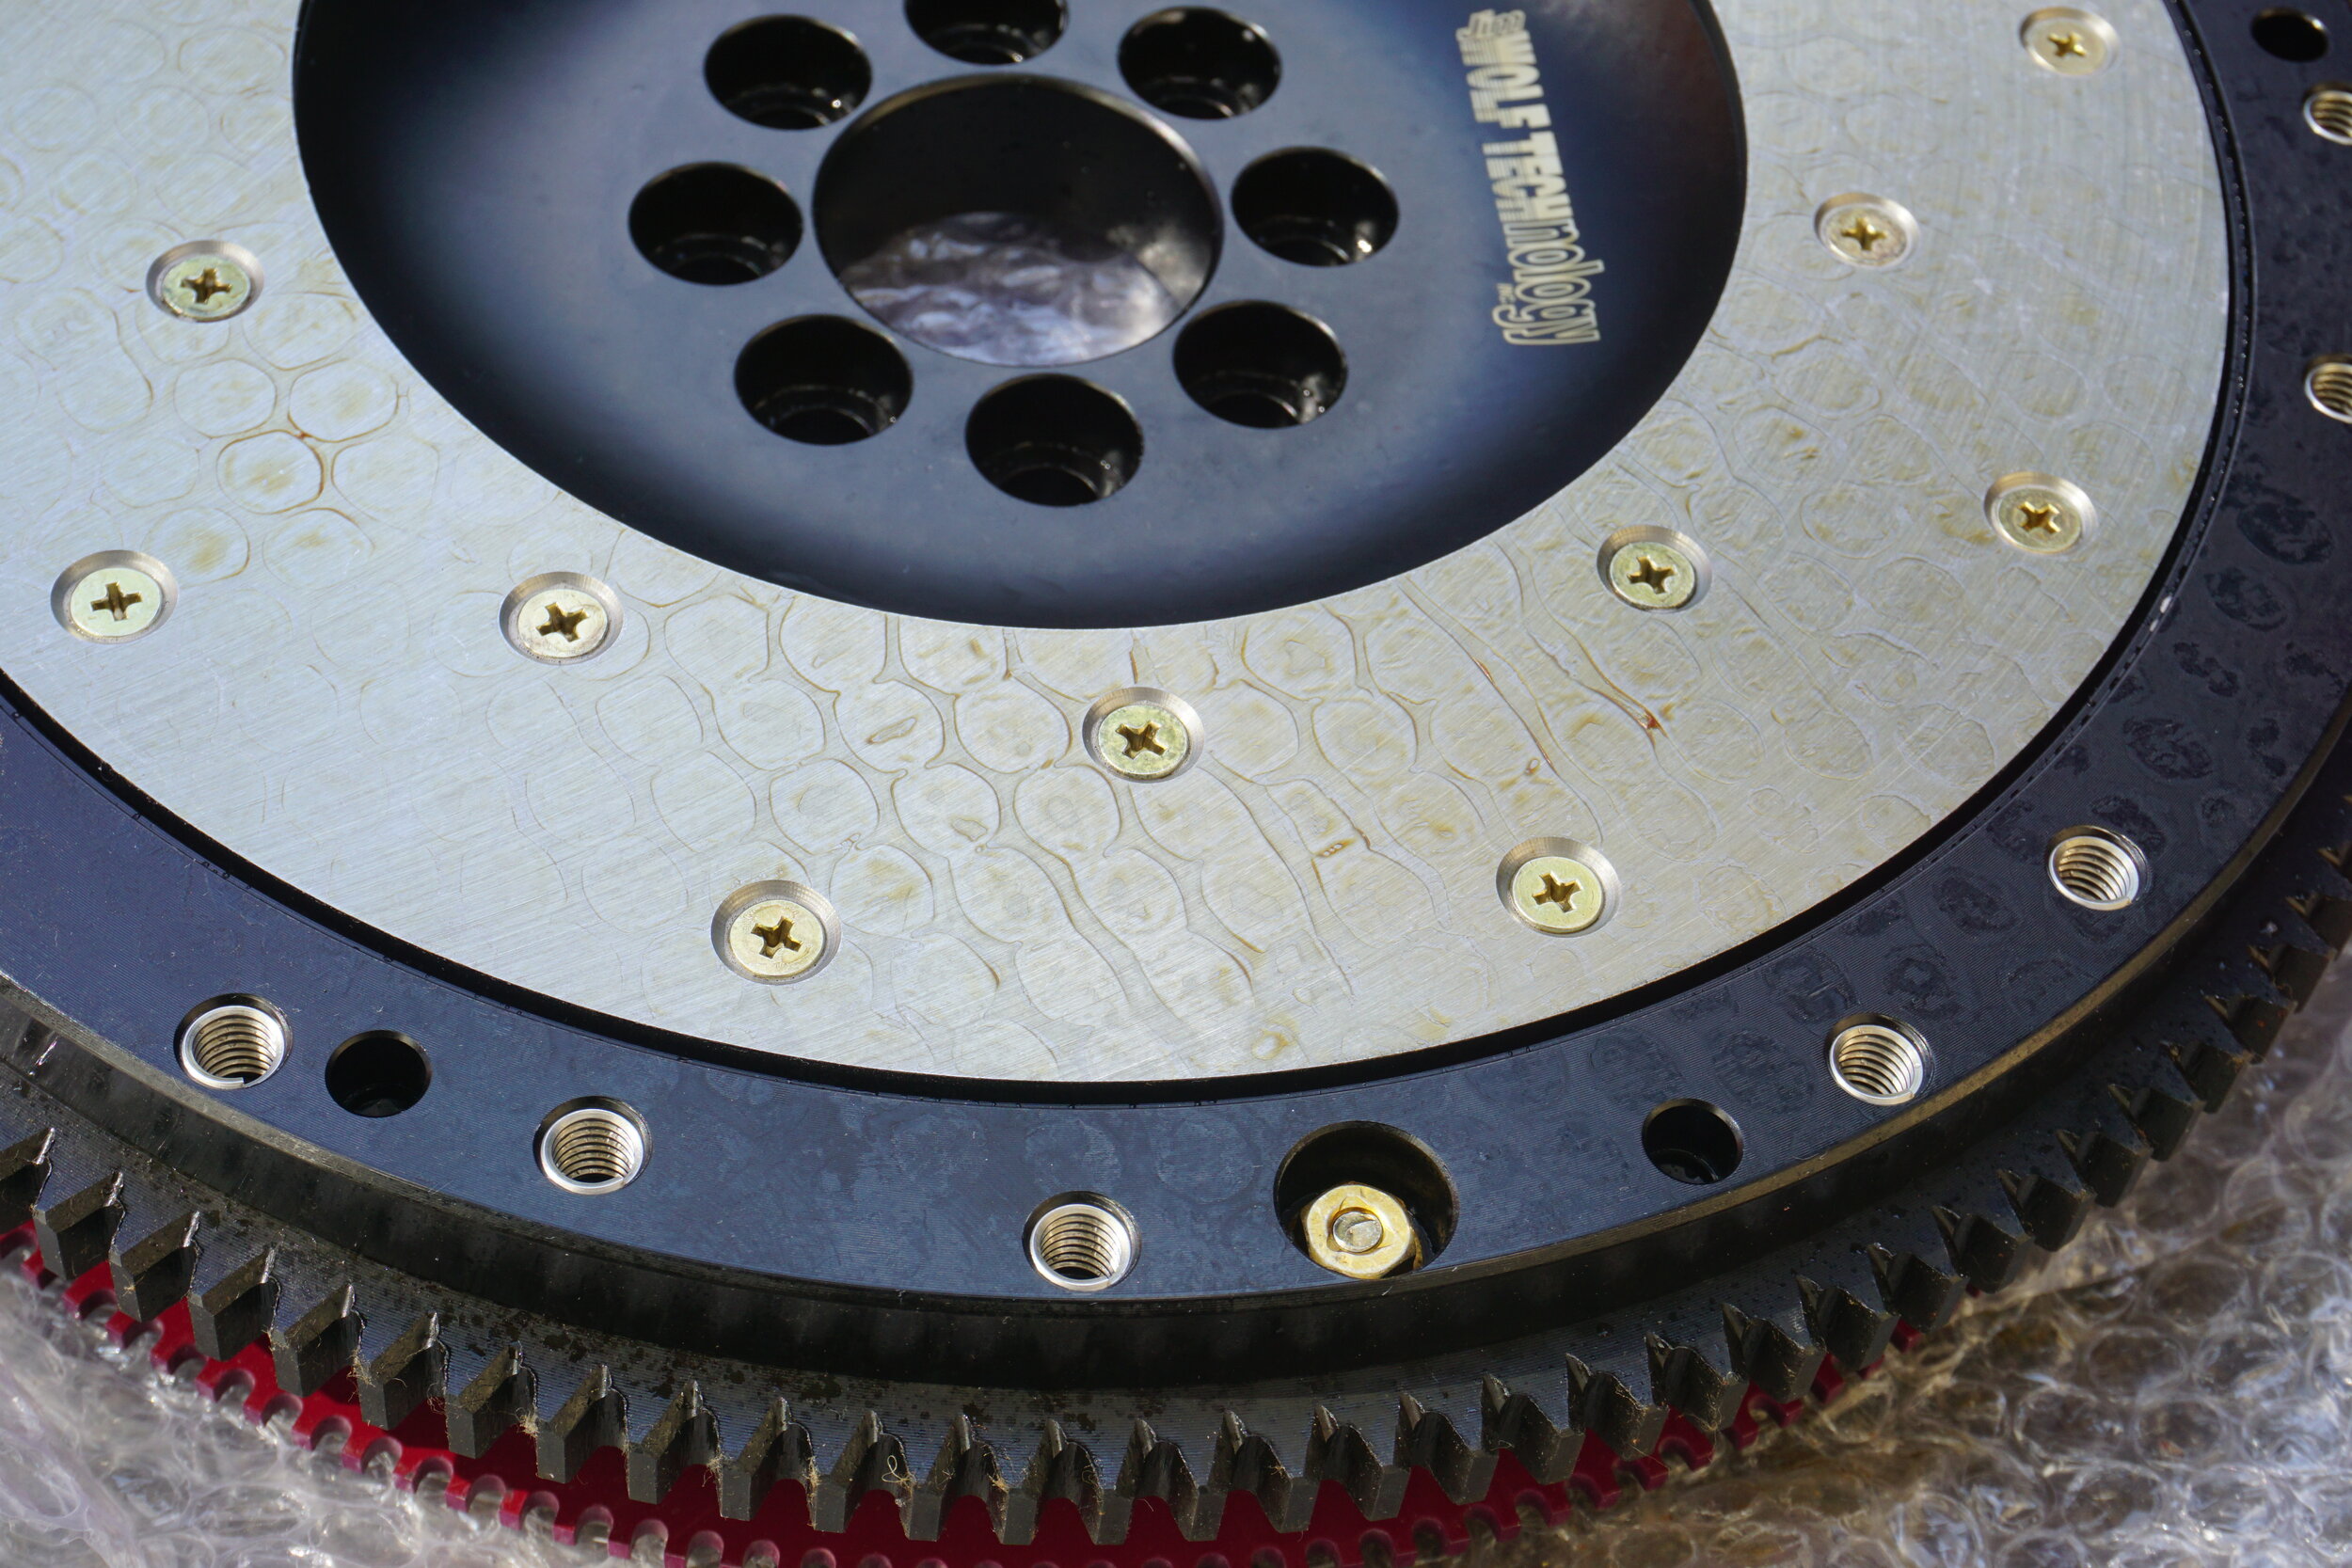
Aftermarket Maxima 6spd flywheel - I used a JWT flywheel, but Fidanza can also be used. Around $450. 6spd clutch- I put together OEM parts for my clutch/PP setup. Users report this setup can support 300 whp.
-2003-2005 350z clutch disk 30100-CD019 - $135
-2005 Maxima pressure plate 30210-7Y010 - $210
-9 bolts (PP to FW) 30223-07S00 - $11
-9 washers 30240-07S00 - $22 (JWT flywheel includes washers, so these may not be necessary)
-8 Flywheel bolts 12315-8J100 - $22
-Pilot bearing 32202-B950A - $4
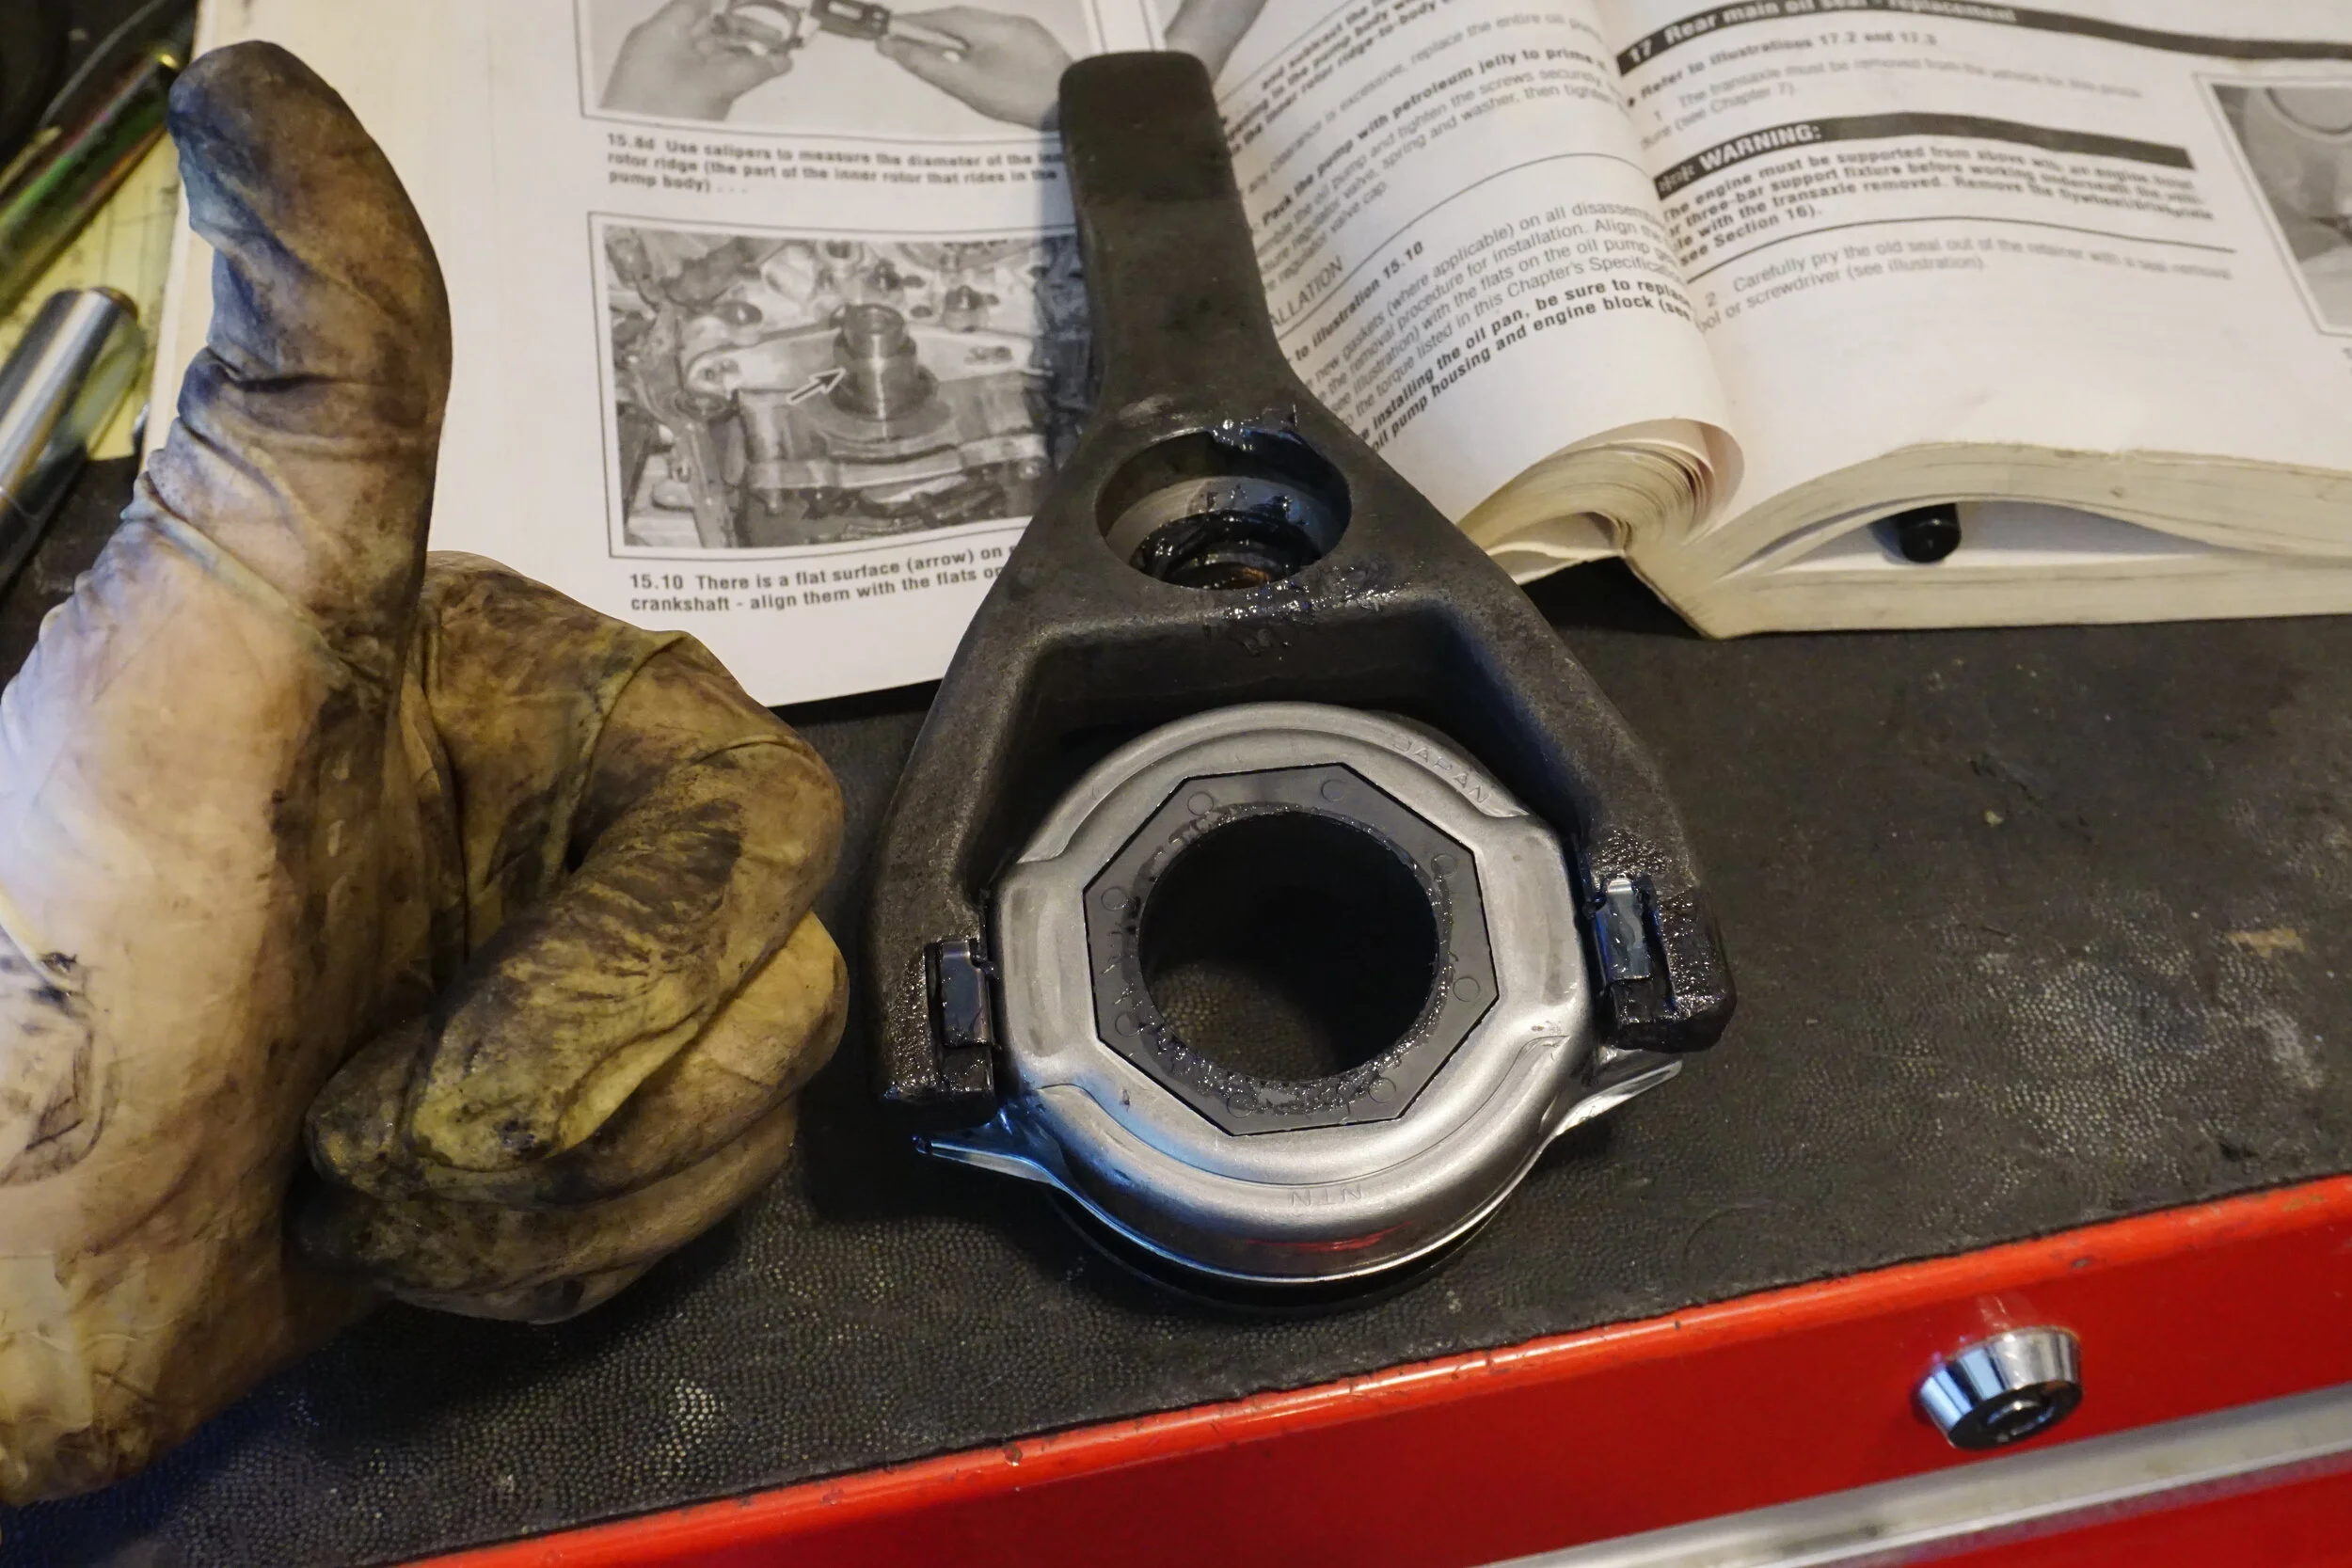
-Throw out bearing 30502-41U20 - $47
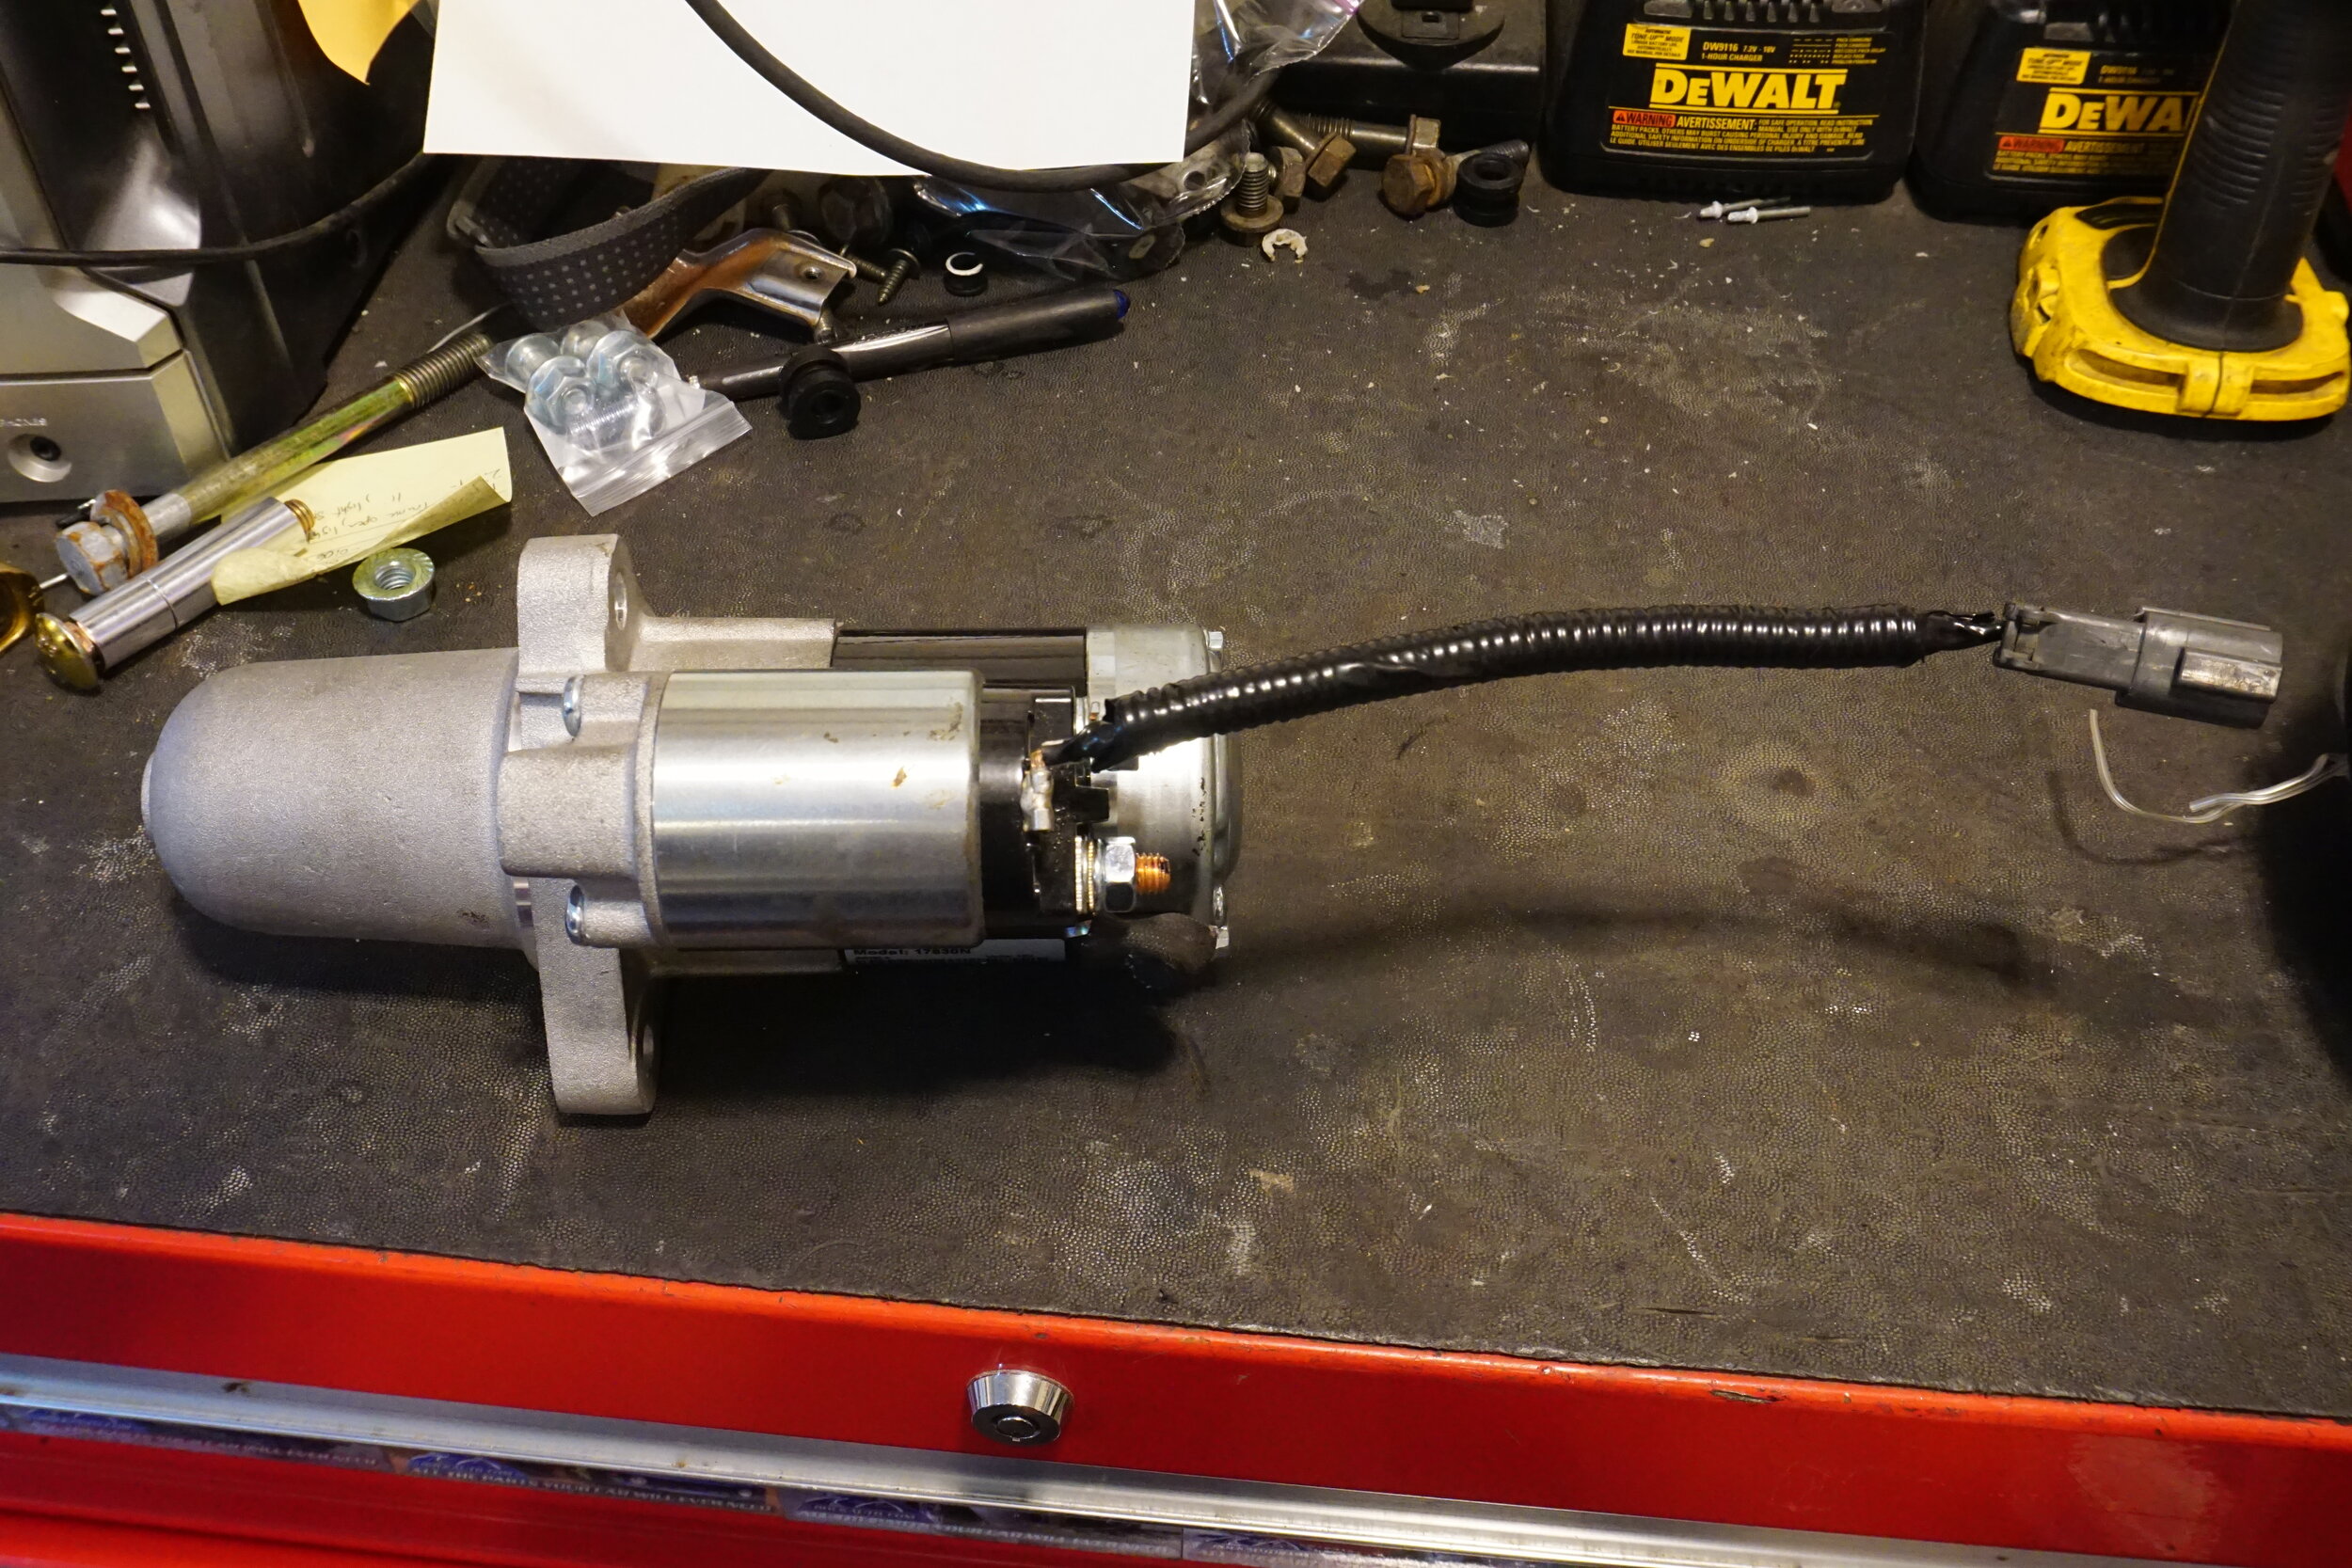
Custom 5 spd timing ring (same number of teeth and spaces as 5 speed, but no offset)- Schmellyfart (schmellyfart@gmail.com) makes these as well, support him so he can make ever more cool parts for our cars! 6spd starter- I paid about $100 for a new one on RockAuto 6spd slave cylinder- I paid about $20 for a new one on RockAuto 5spd or 6spd bell housing bolts
FLUIDS
Brake fluid
GL-4 transmission fluid (Motul, Red Line or Amsoil preferred)
Brake parts cleaner
Red Loctite
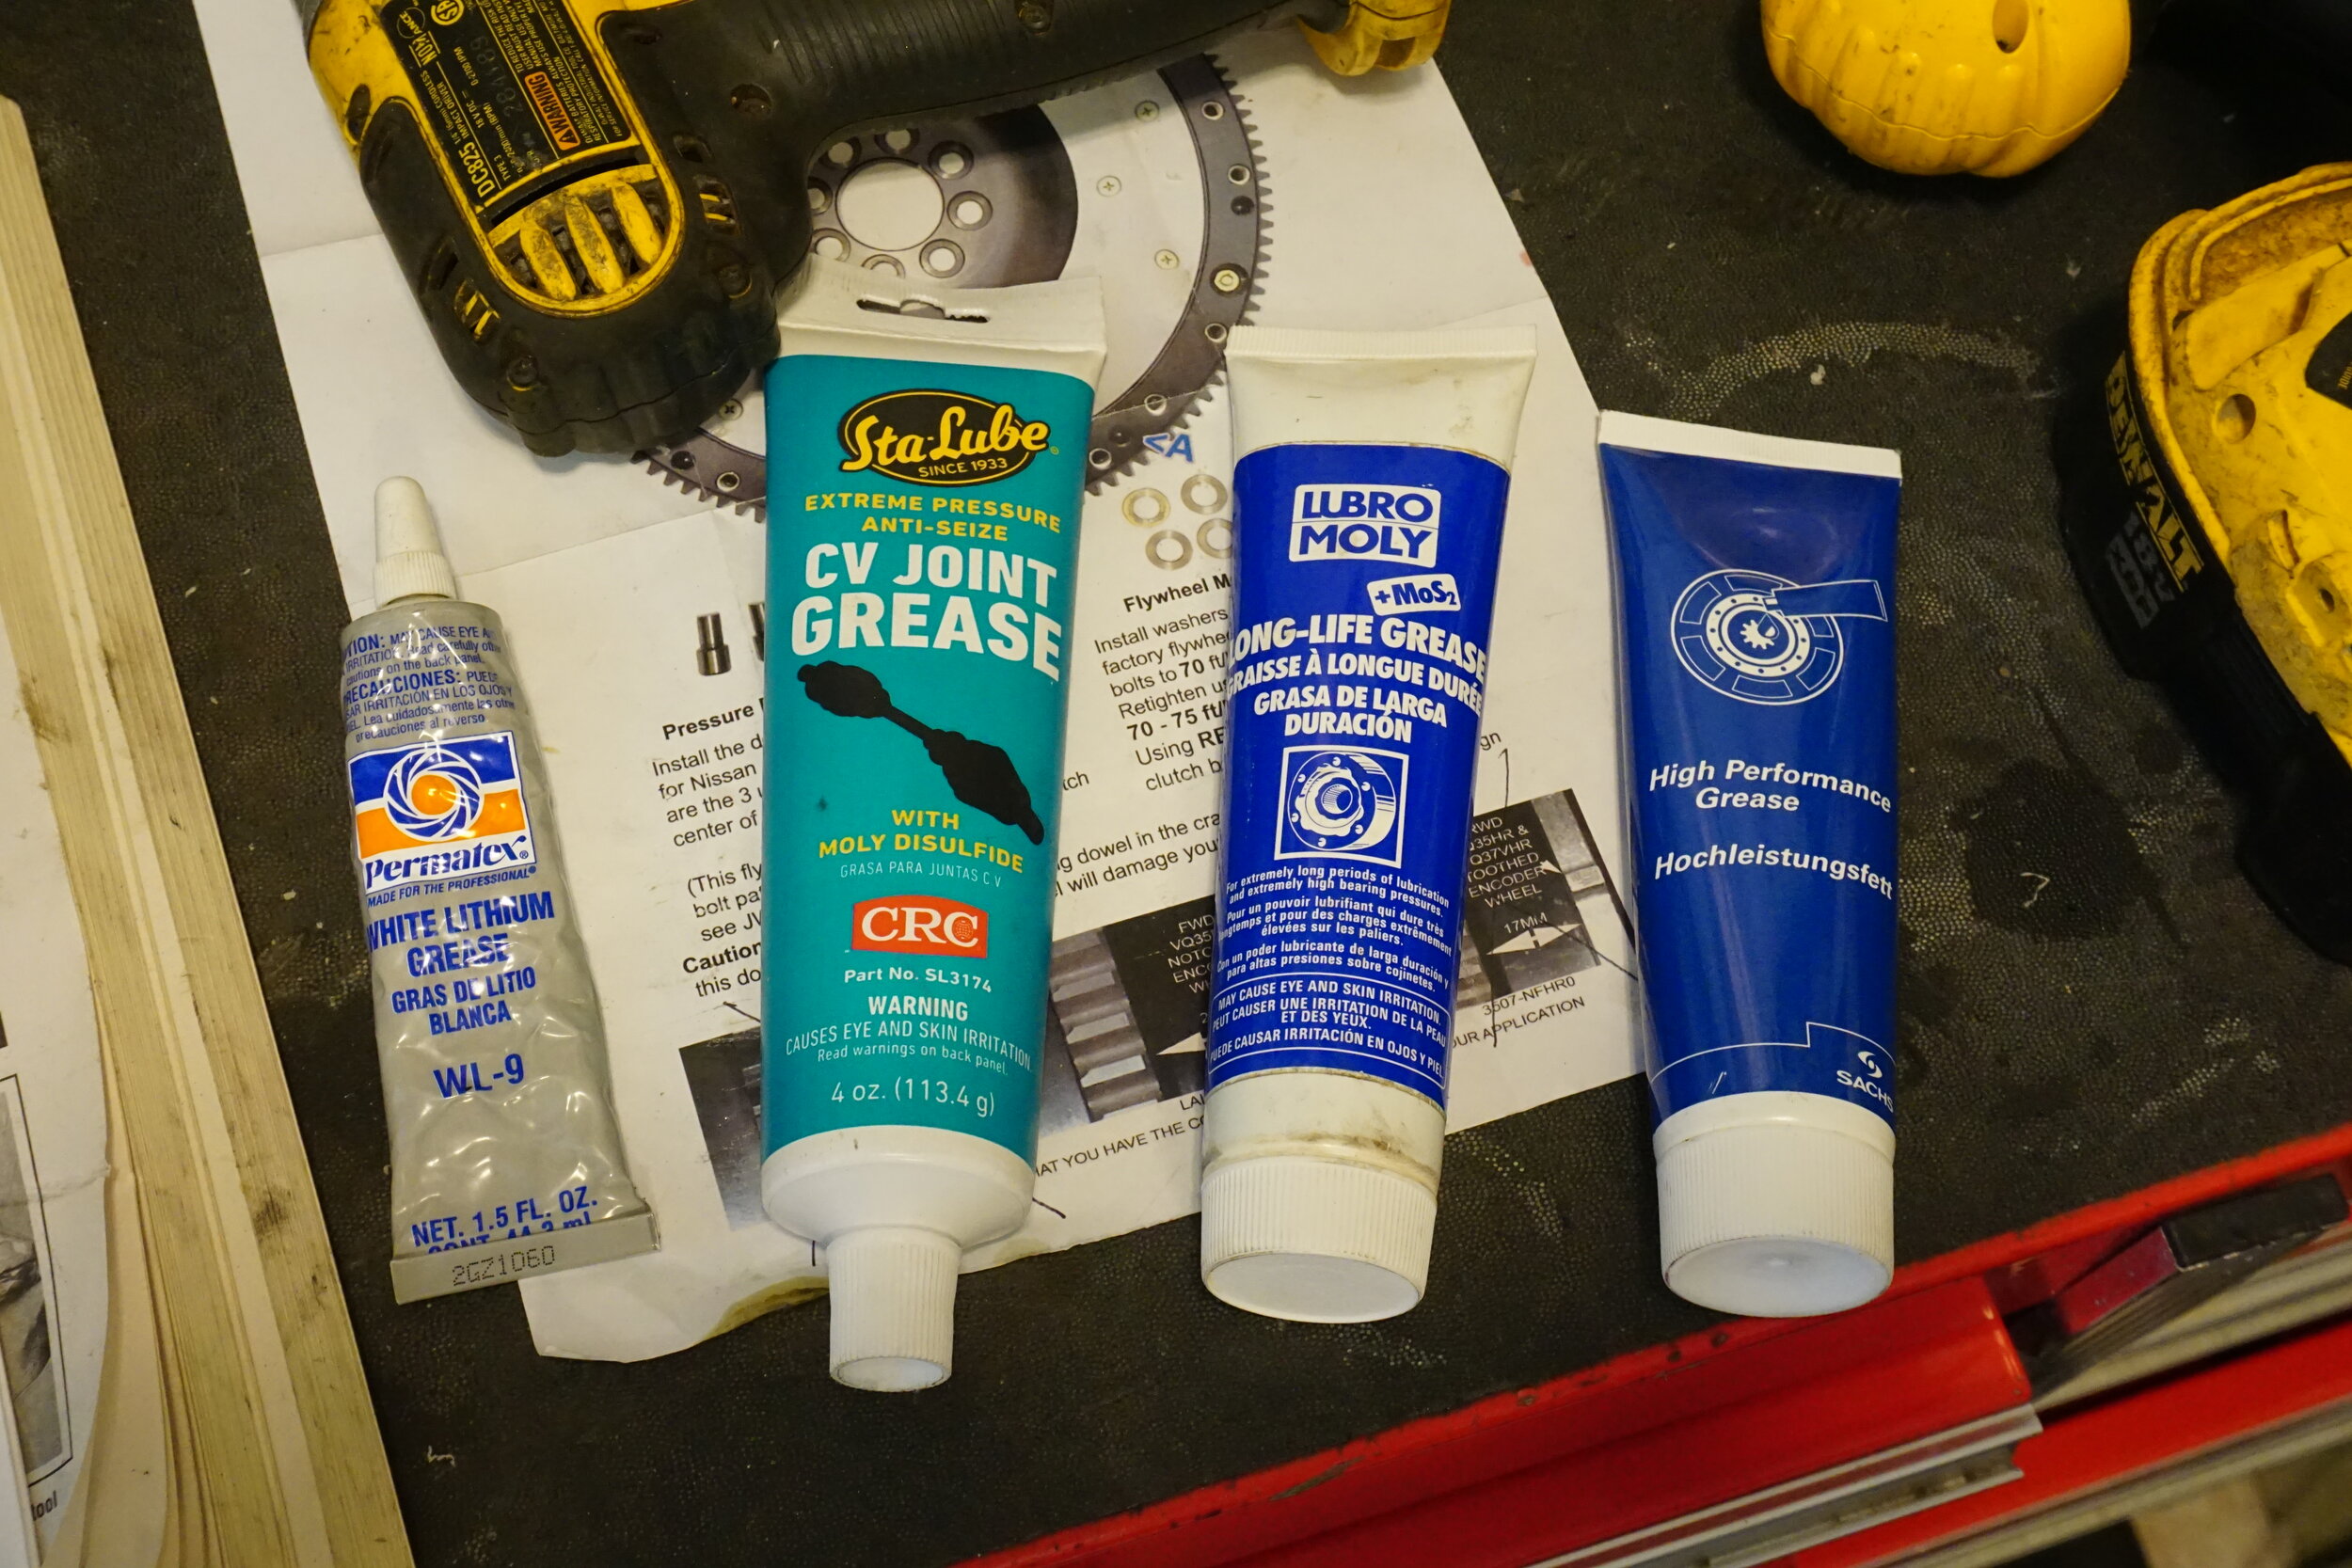
White lithium grease / Lubro-Moly Long Life Grease + MoS2 / Sachs High Performance Clutch Spline Grease for the throw out bearing and associated parts (follow the directions in the FSM!)
OPTIONAL PARTS
Rear main seal
Shift assembly lower cover from 2002/2003 Maxima with the 6 speed. This goes under the car and protects and insulates the shifter assembly. Highly recommended if you can find one, but they have a tendency to rust out. NLA from Nissan, must be found used.
I bought 2J Racing delrin shifter bushings. Red Lion Racing (on Facebook) and Energy Suspension shifter cable bushings can also be purchased.
Axle seals
Short throw shifter - I bought one from Axxtion, but 2J Racing also makes one. Users report the 2JR kit will leave the shifter slightly tilted to the front, while the Axxtion kit leaves it centered in the correct position. Unfortunately the Axxtion kit doesn't fit A32s with ABS without repositioning the ABS pump.
Stainless steel clutch slave cylinder line
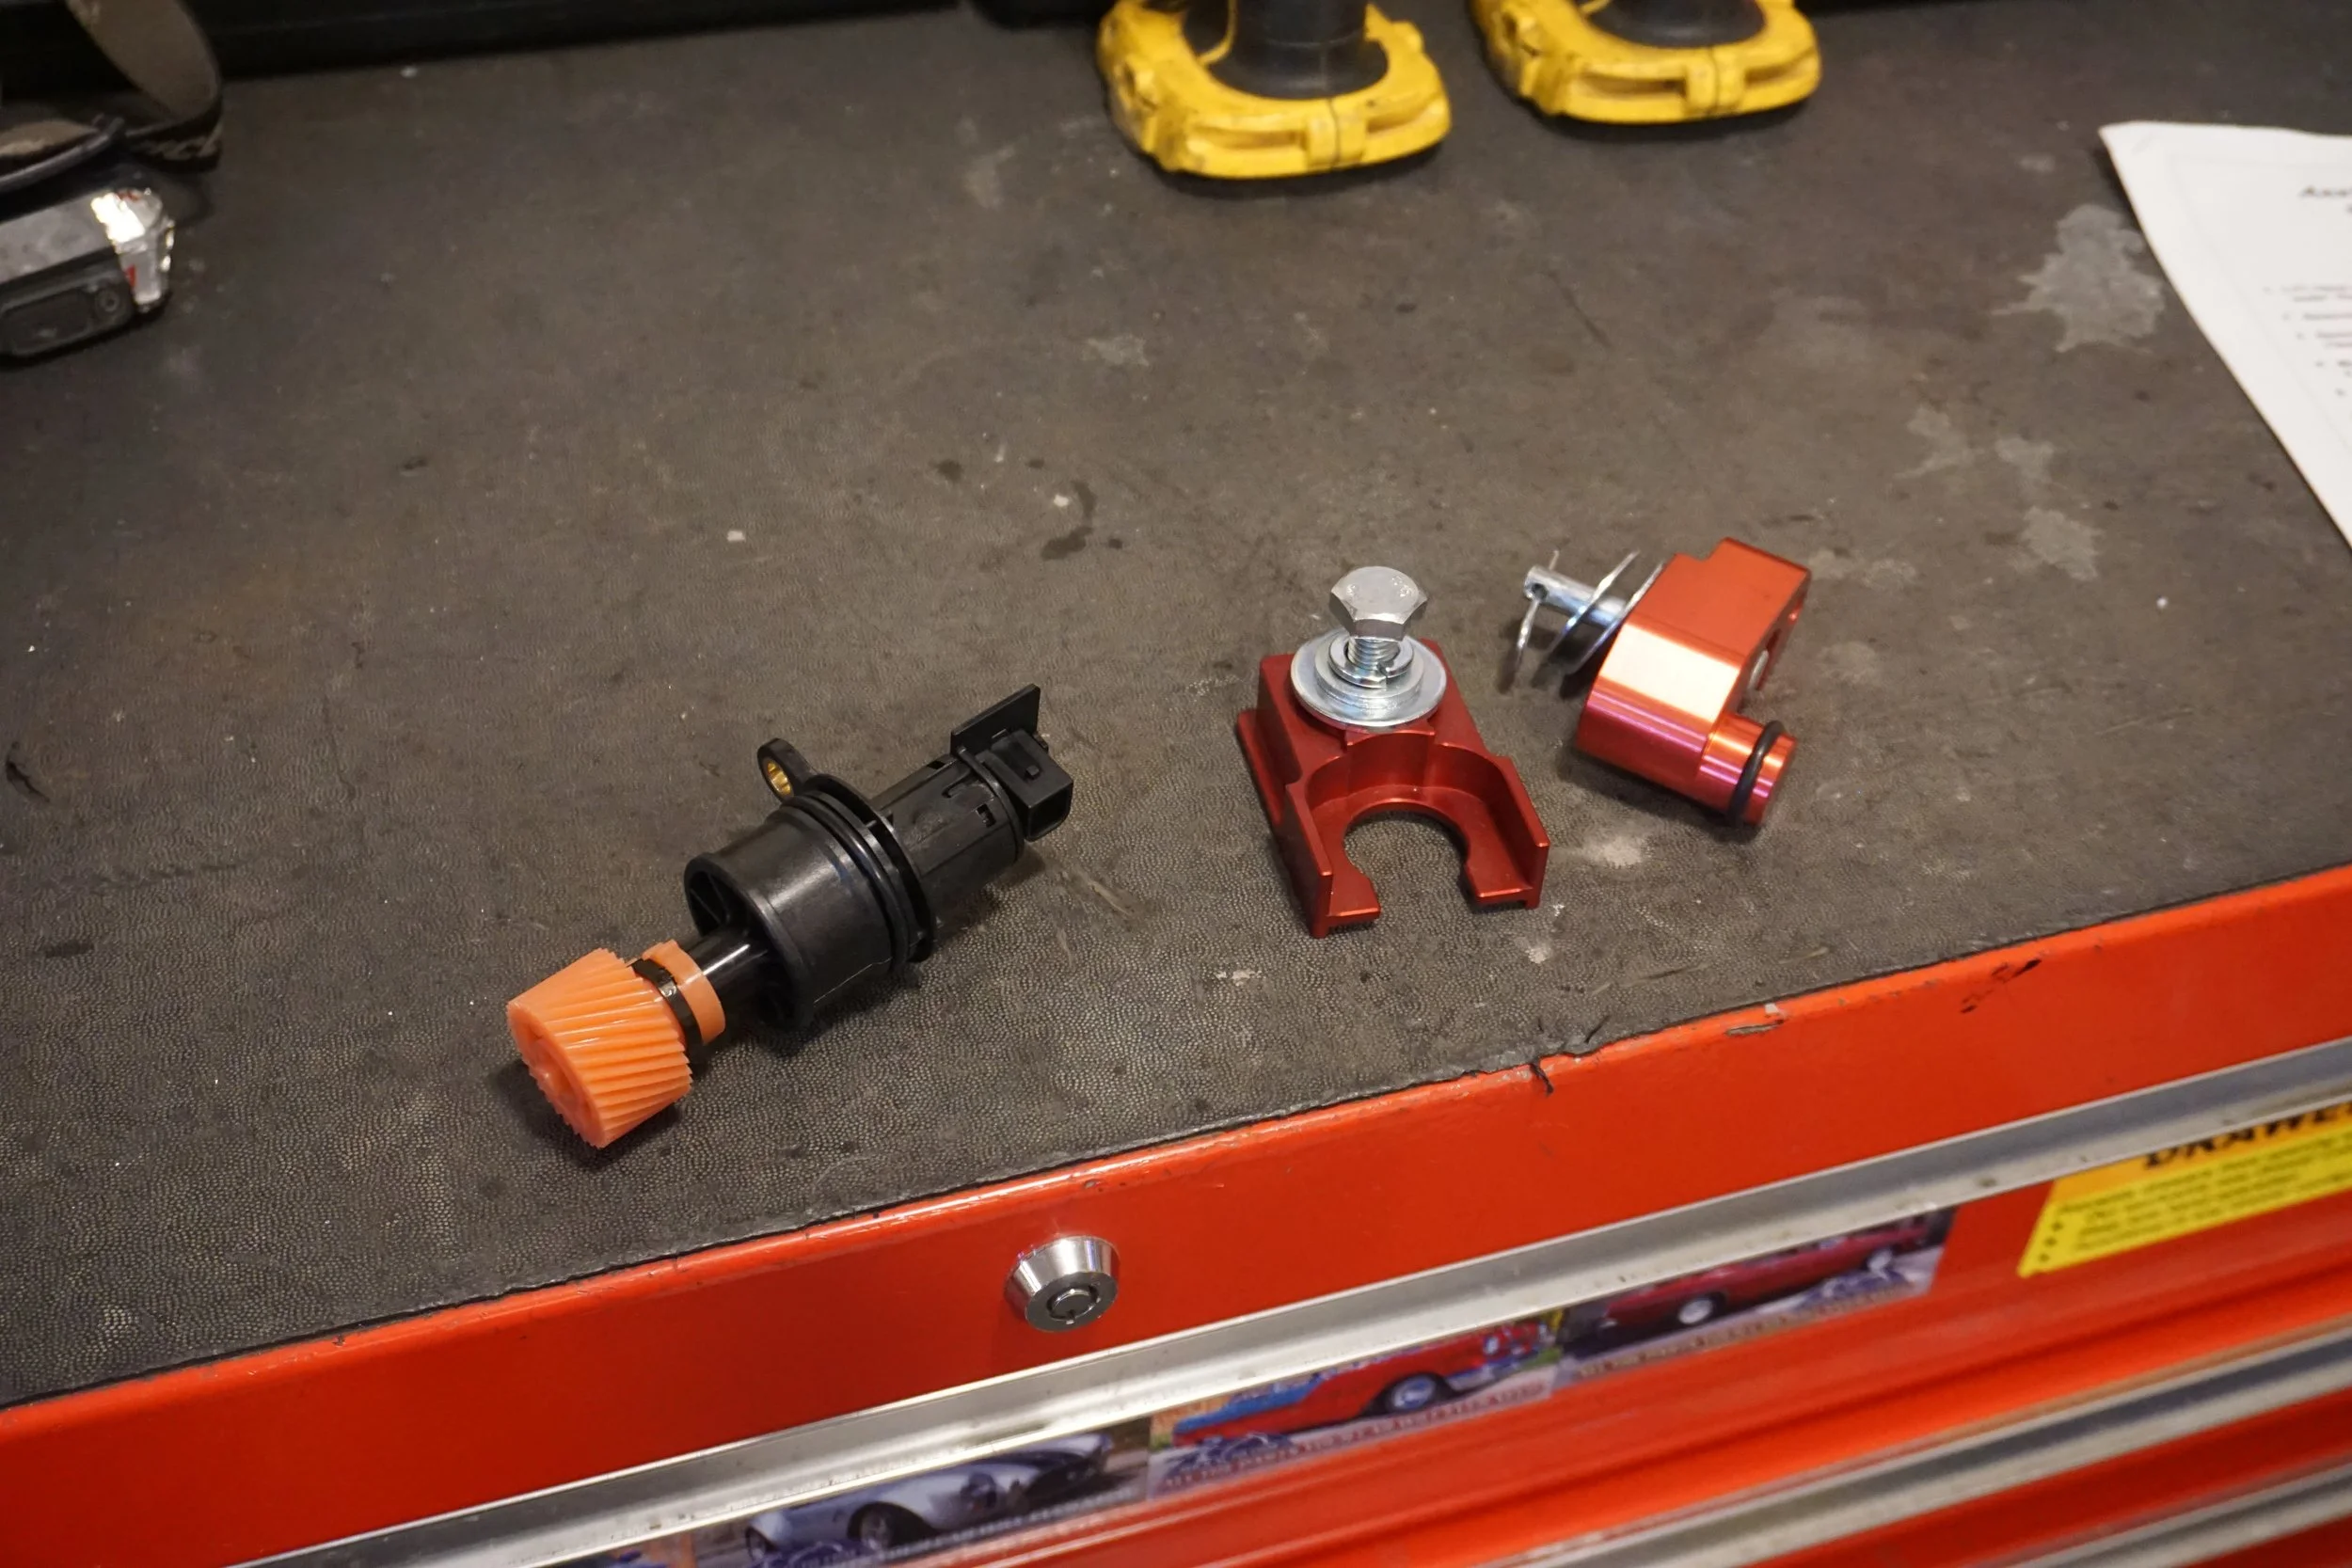
Speedometer pinion/sensor (if necessary) (32702-AD012). This plugs right into the 4th harness, no wiring modifications are necessary.
Various sized metric nuts and bolts
EQUIPMENT
Drill and step bits
Tap and die set
Impact gun
Flare nut wrenches
Bolt cutters/electric saw/angle grinder/metal cutting tool
Dremel with reinforced cut off wheels and metal grinding bits
Propane/MAP torch
OTC 4754 Universal Pulley Holder Wrench (optional but helpful)
Wire crimping supplies and/or solder iron and supplies
Electrical tape and/or split wire loom tubing, heat shrink tubing
Engine Traverse Bar (to support engine from above when you remove crossmember)
Helpful notes:
Identifying transmissions in junkyards:
You can also visually inspect the transmission and tell if it's HLSD. If you look through the axle holes on either tranny you can see out the other side. On the HLSD you can see through with nothing in the way. You'll see a perfect circle. On the open diff tranny there is a round bar in the way partially blocking the view through. You'll see a half circle.
How to tell if HLSD?
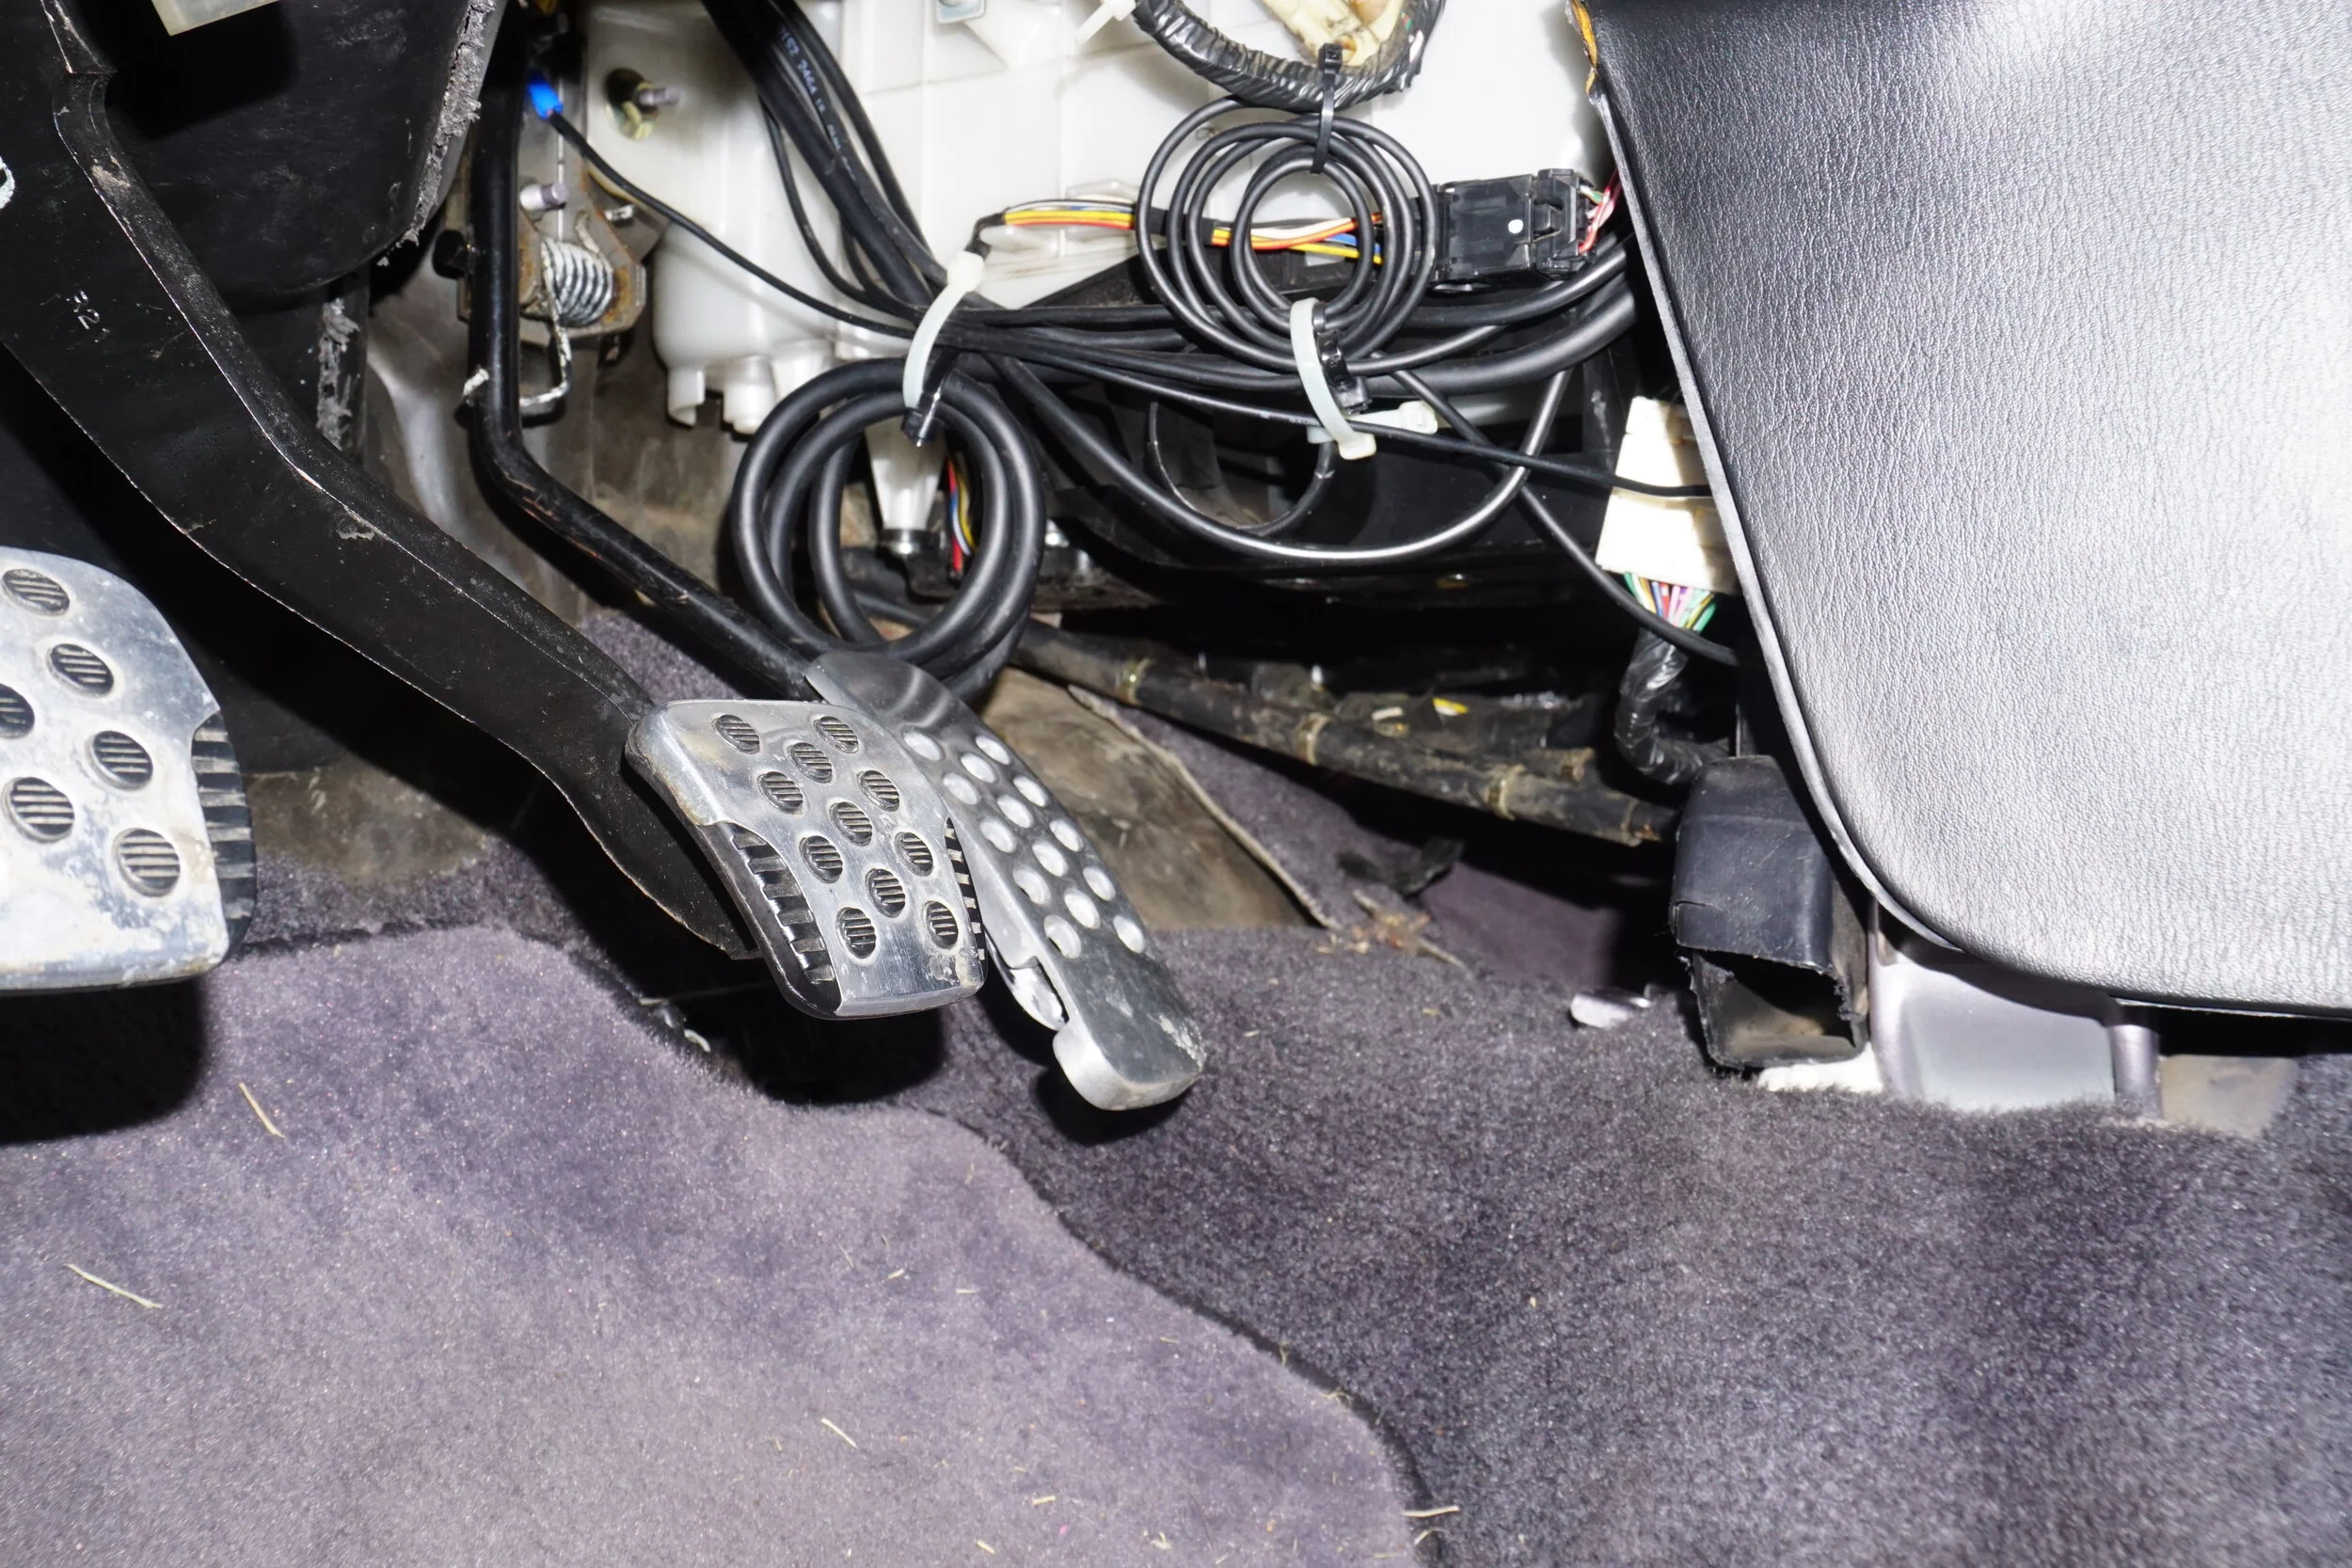
-Metal pedals with rubber grips
-Plate on firewall by driver, RS6F51H, H as last digit means HLSD, A is open diff
6th gen axle info:
6th gen passenger side axles are slightly longer than 5.5th gen axles, and 5.5th gen axles are quite a bit longer than 4th gen axles. When installed, 5.5th gen axles are already compressed and close to binding, so 6th gen axles are not recommended for 4th gens. Also, the carrier bracket for 6th gens is very different from 4th/5.5th gens, and can only be used with 6th gen axles.
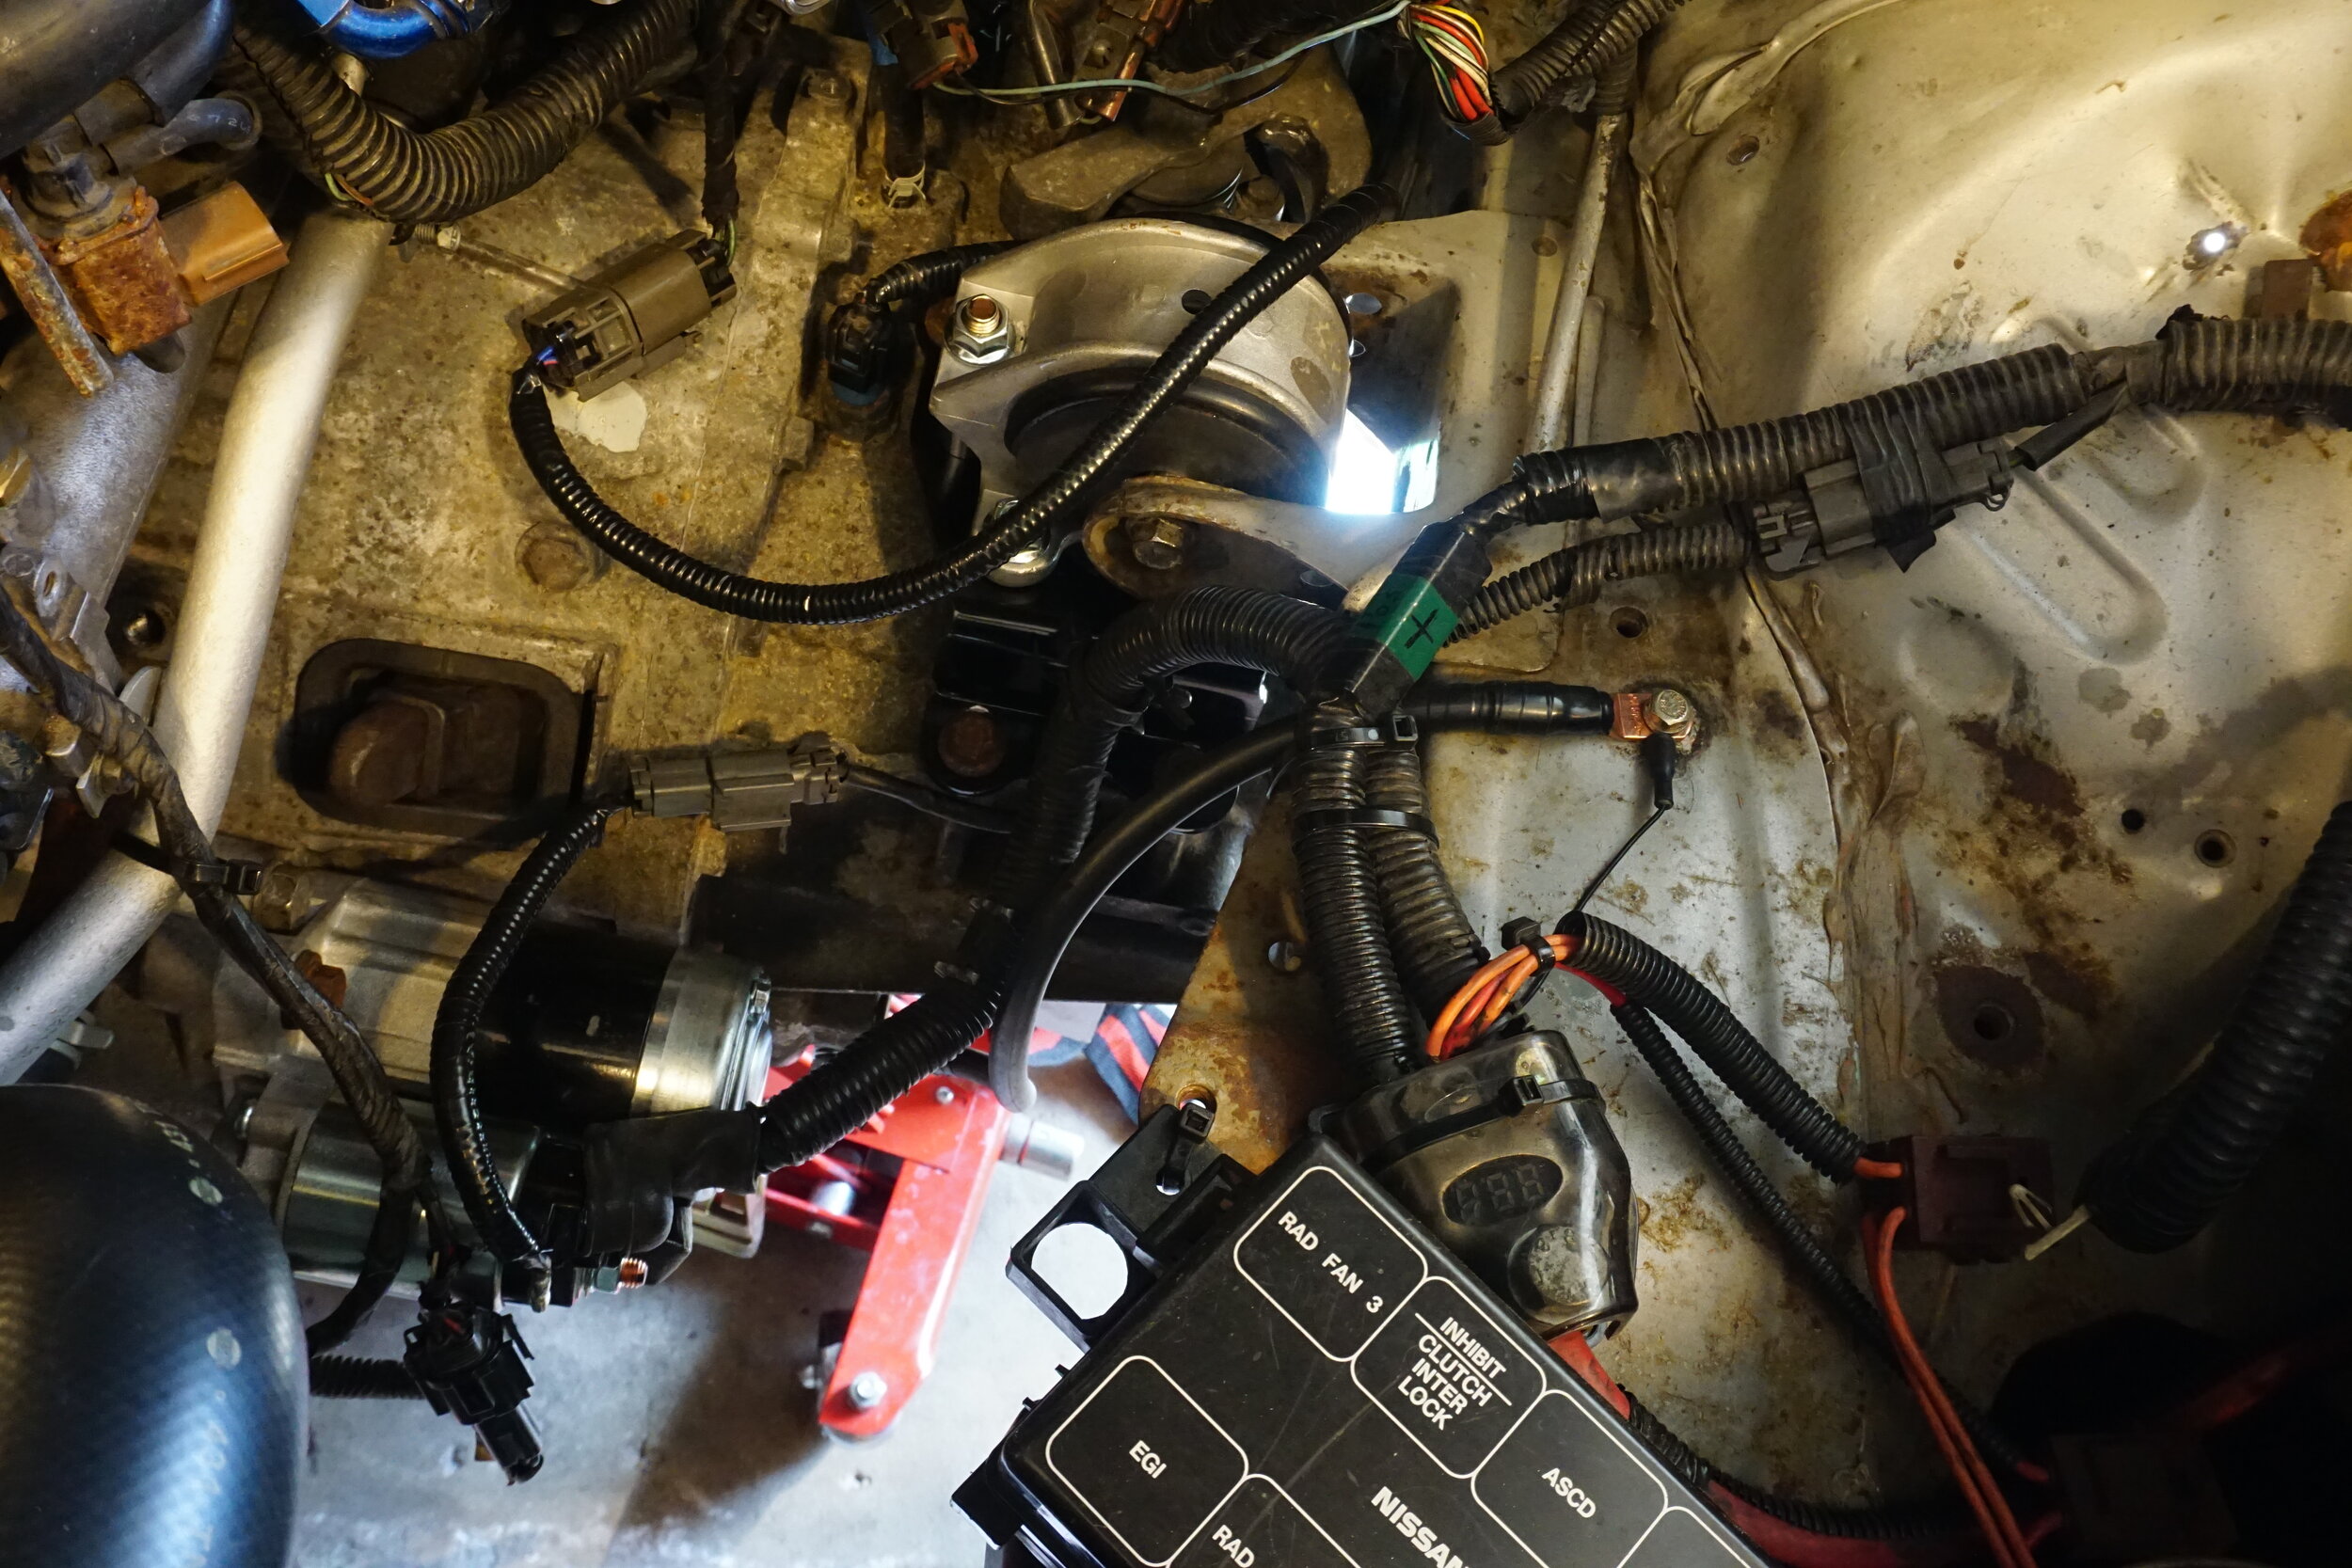
Wiring up the 6 speed starter:
The 6 speed starter ground cable is a female connector, and so is the connector on the engine harness. I cut the male connector off of a 5 speed starter and soldered it onto the 6spd starter. Don't forget to slide some heat shrink tubing on the wire before soldering together. I forgot to do this! For extra protection you can wrap the area with electrical tape. And for an OEM look, protect all the wires with split wire loom tubing.
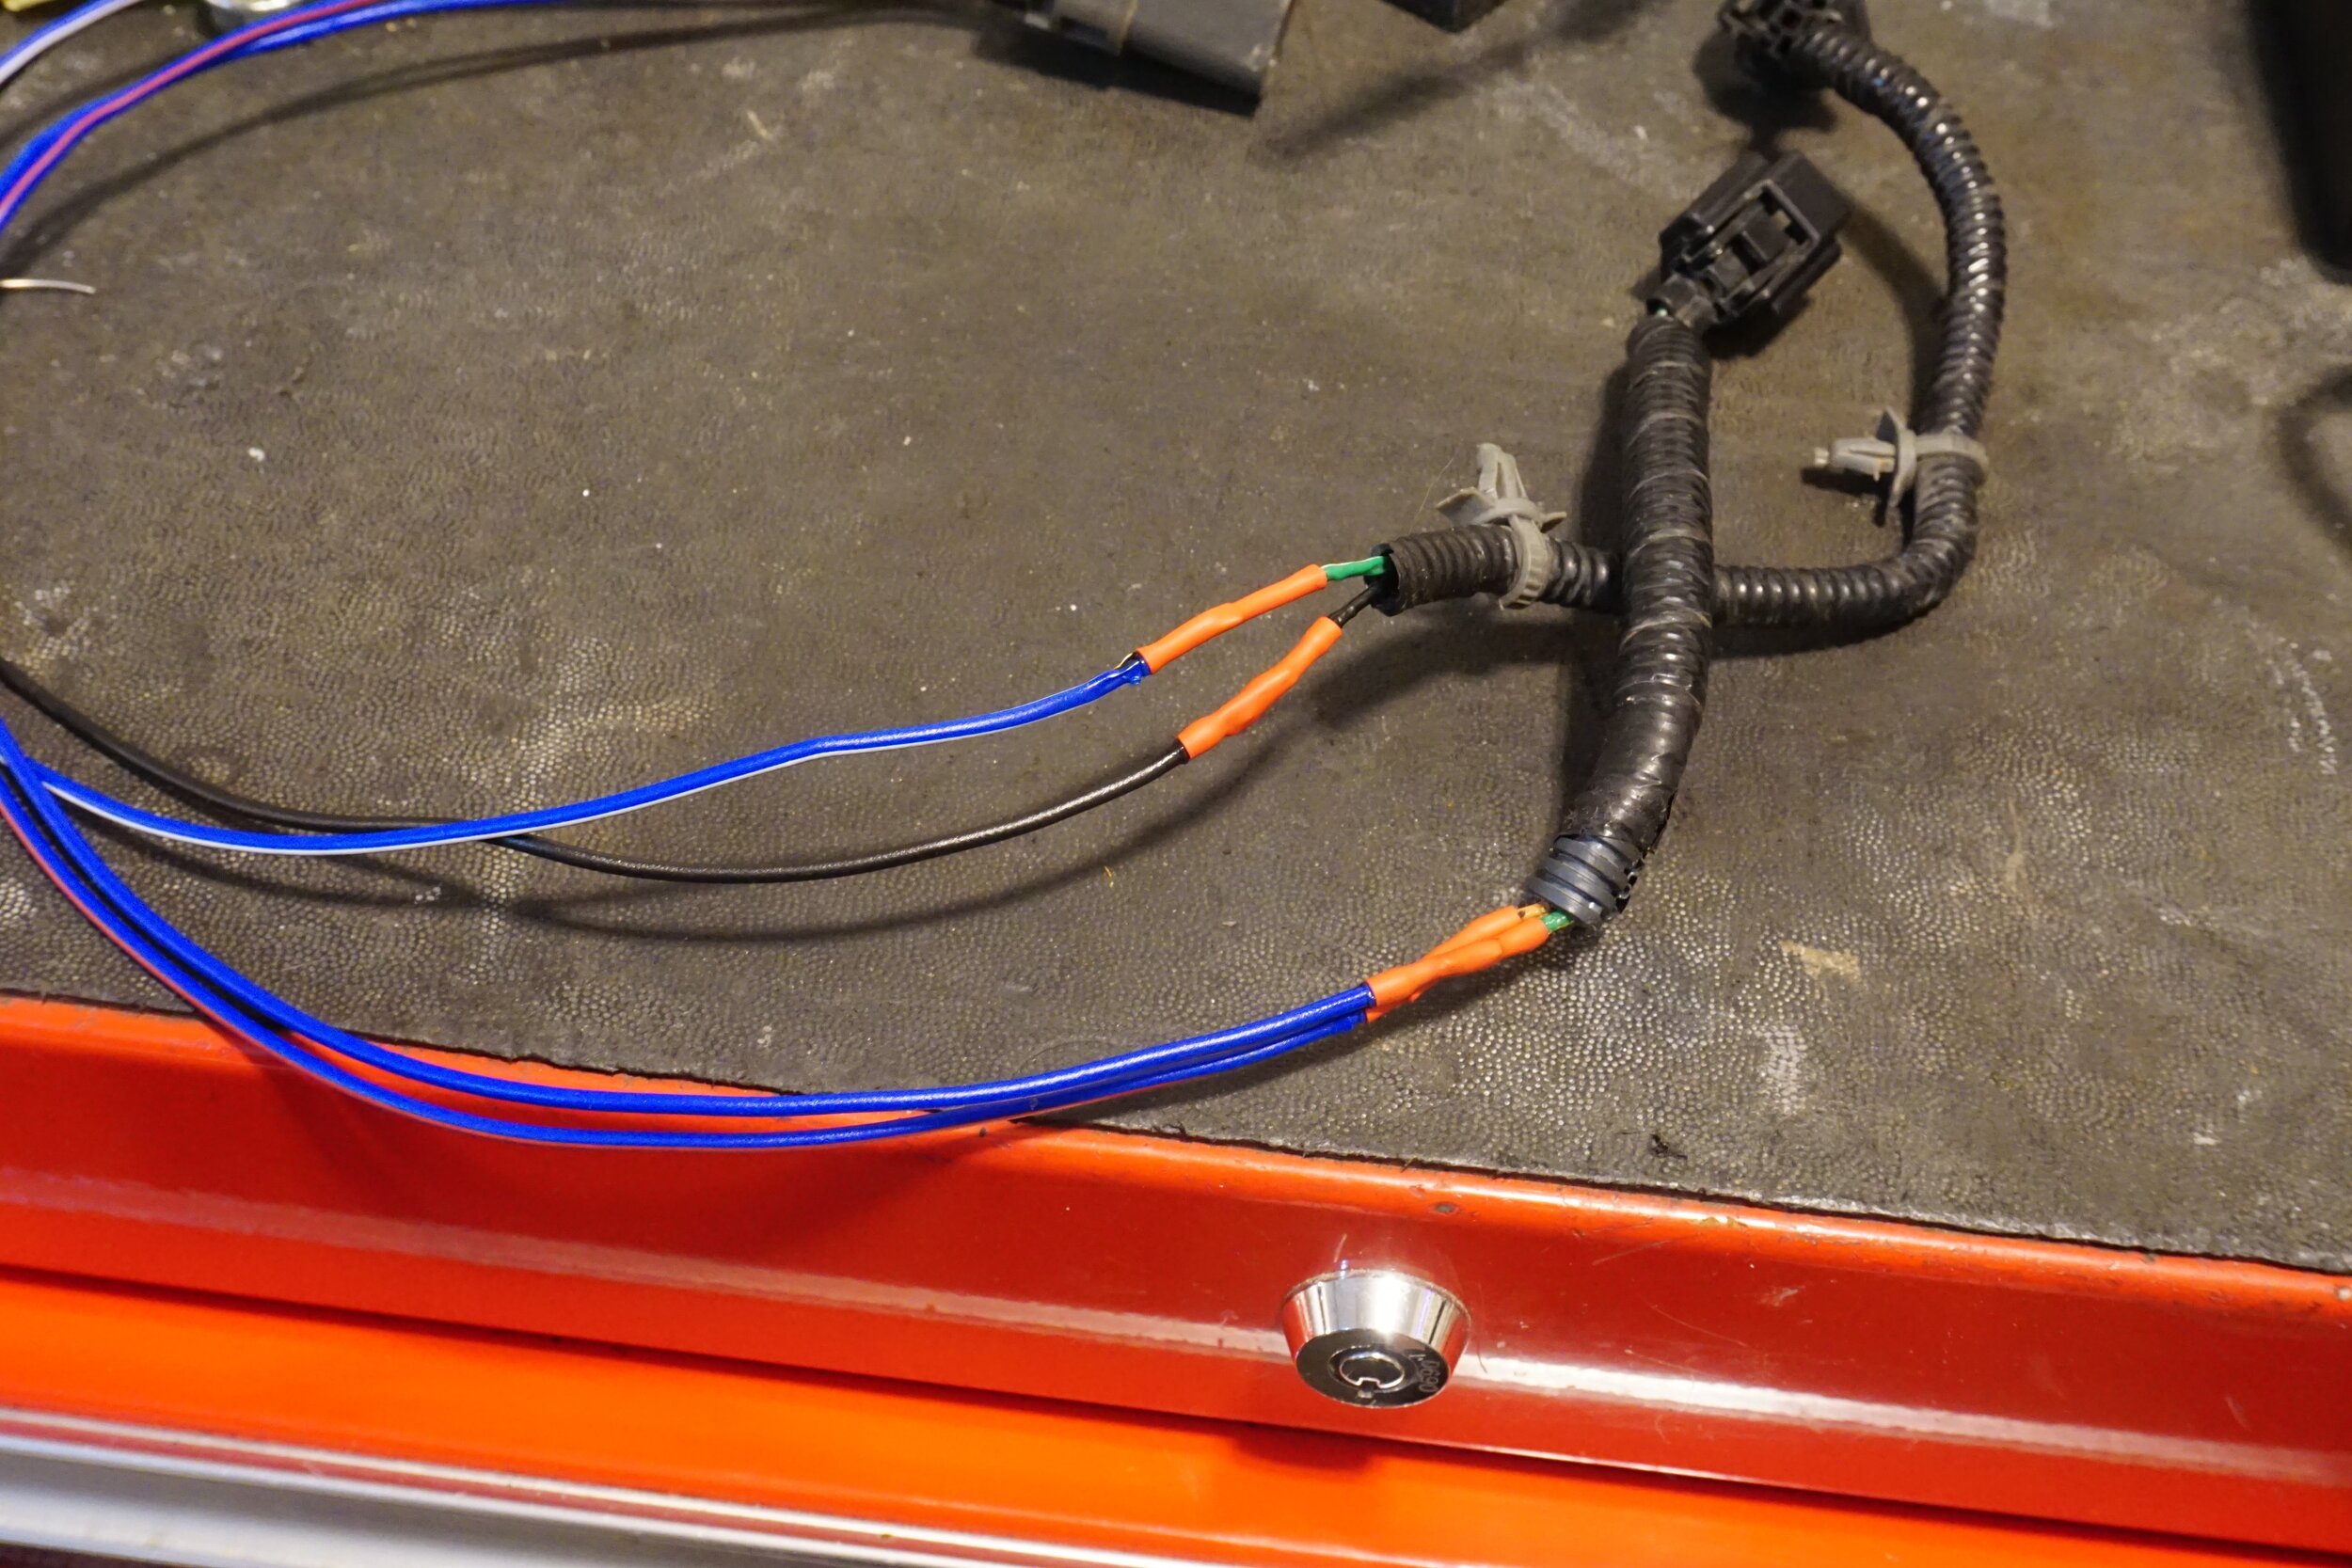
Wiring up the park/neutral position sensors for the 6 speed:
On 5 speeds the PNP switch/sensor is a single piece on the bottom of the trans. On 6 speeds, it was switched to being two switches/sensors, so you will need to need to splice wires together so your car gets the right signals and doesn't throw a CEL. You want your reverse lights to work, don't you? On the 6 speed, the blue sensor on top is for reverse lights, and the black one on side back is for neutral. Cut off the wires from the PNP switch on your 5 speed so you're left with about 12" of wires and the connector that plugs into your body harness. Leave the switch in the 5 speed. Here's how you're going to wire that up to the connectors for the 6 speed.
Reverse (blue connector on top of the trans)
Connect the orange (12V+) wire on the 6 speed harness to the blue/red wire on the 5 speed PNP harness.
Connect the green/white (to backup lamps) wire on the 6 speed harness to the solid blue wire on the 5 speed PNP harness.
Neutral (black connector on the back of the trans)
Connect the green/white (to ECM) wire on the 6 speed harness to the blue/white wire on the 5 speed PNP harness.
Connect the black (to ground) wire on the 6 speed harness to the black wire on the 5 speed PNP harness.
Make sure you slide some heat shrink onto the wires before you crimp or solder them together to protect the connection from moisture. For extra protection you can wrap the area with electrical tape. And for an OEM look, protect all the wires with split wire loom tubing.
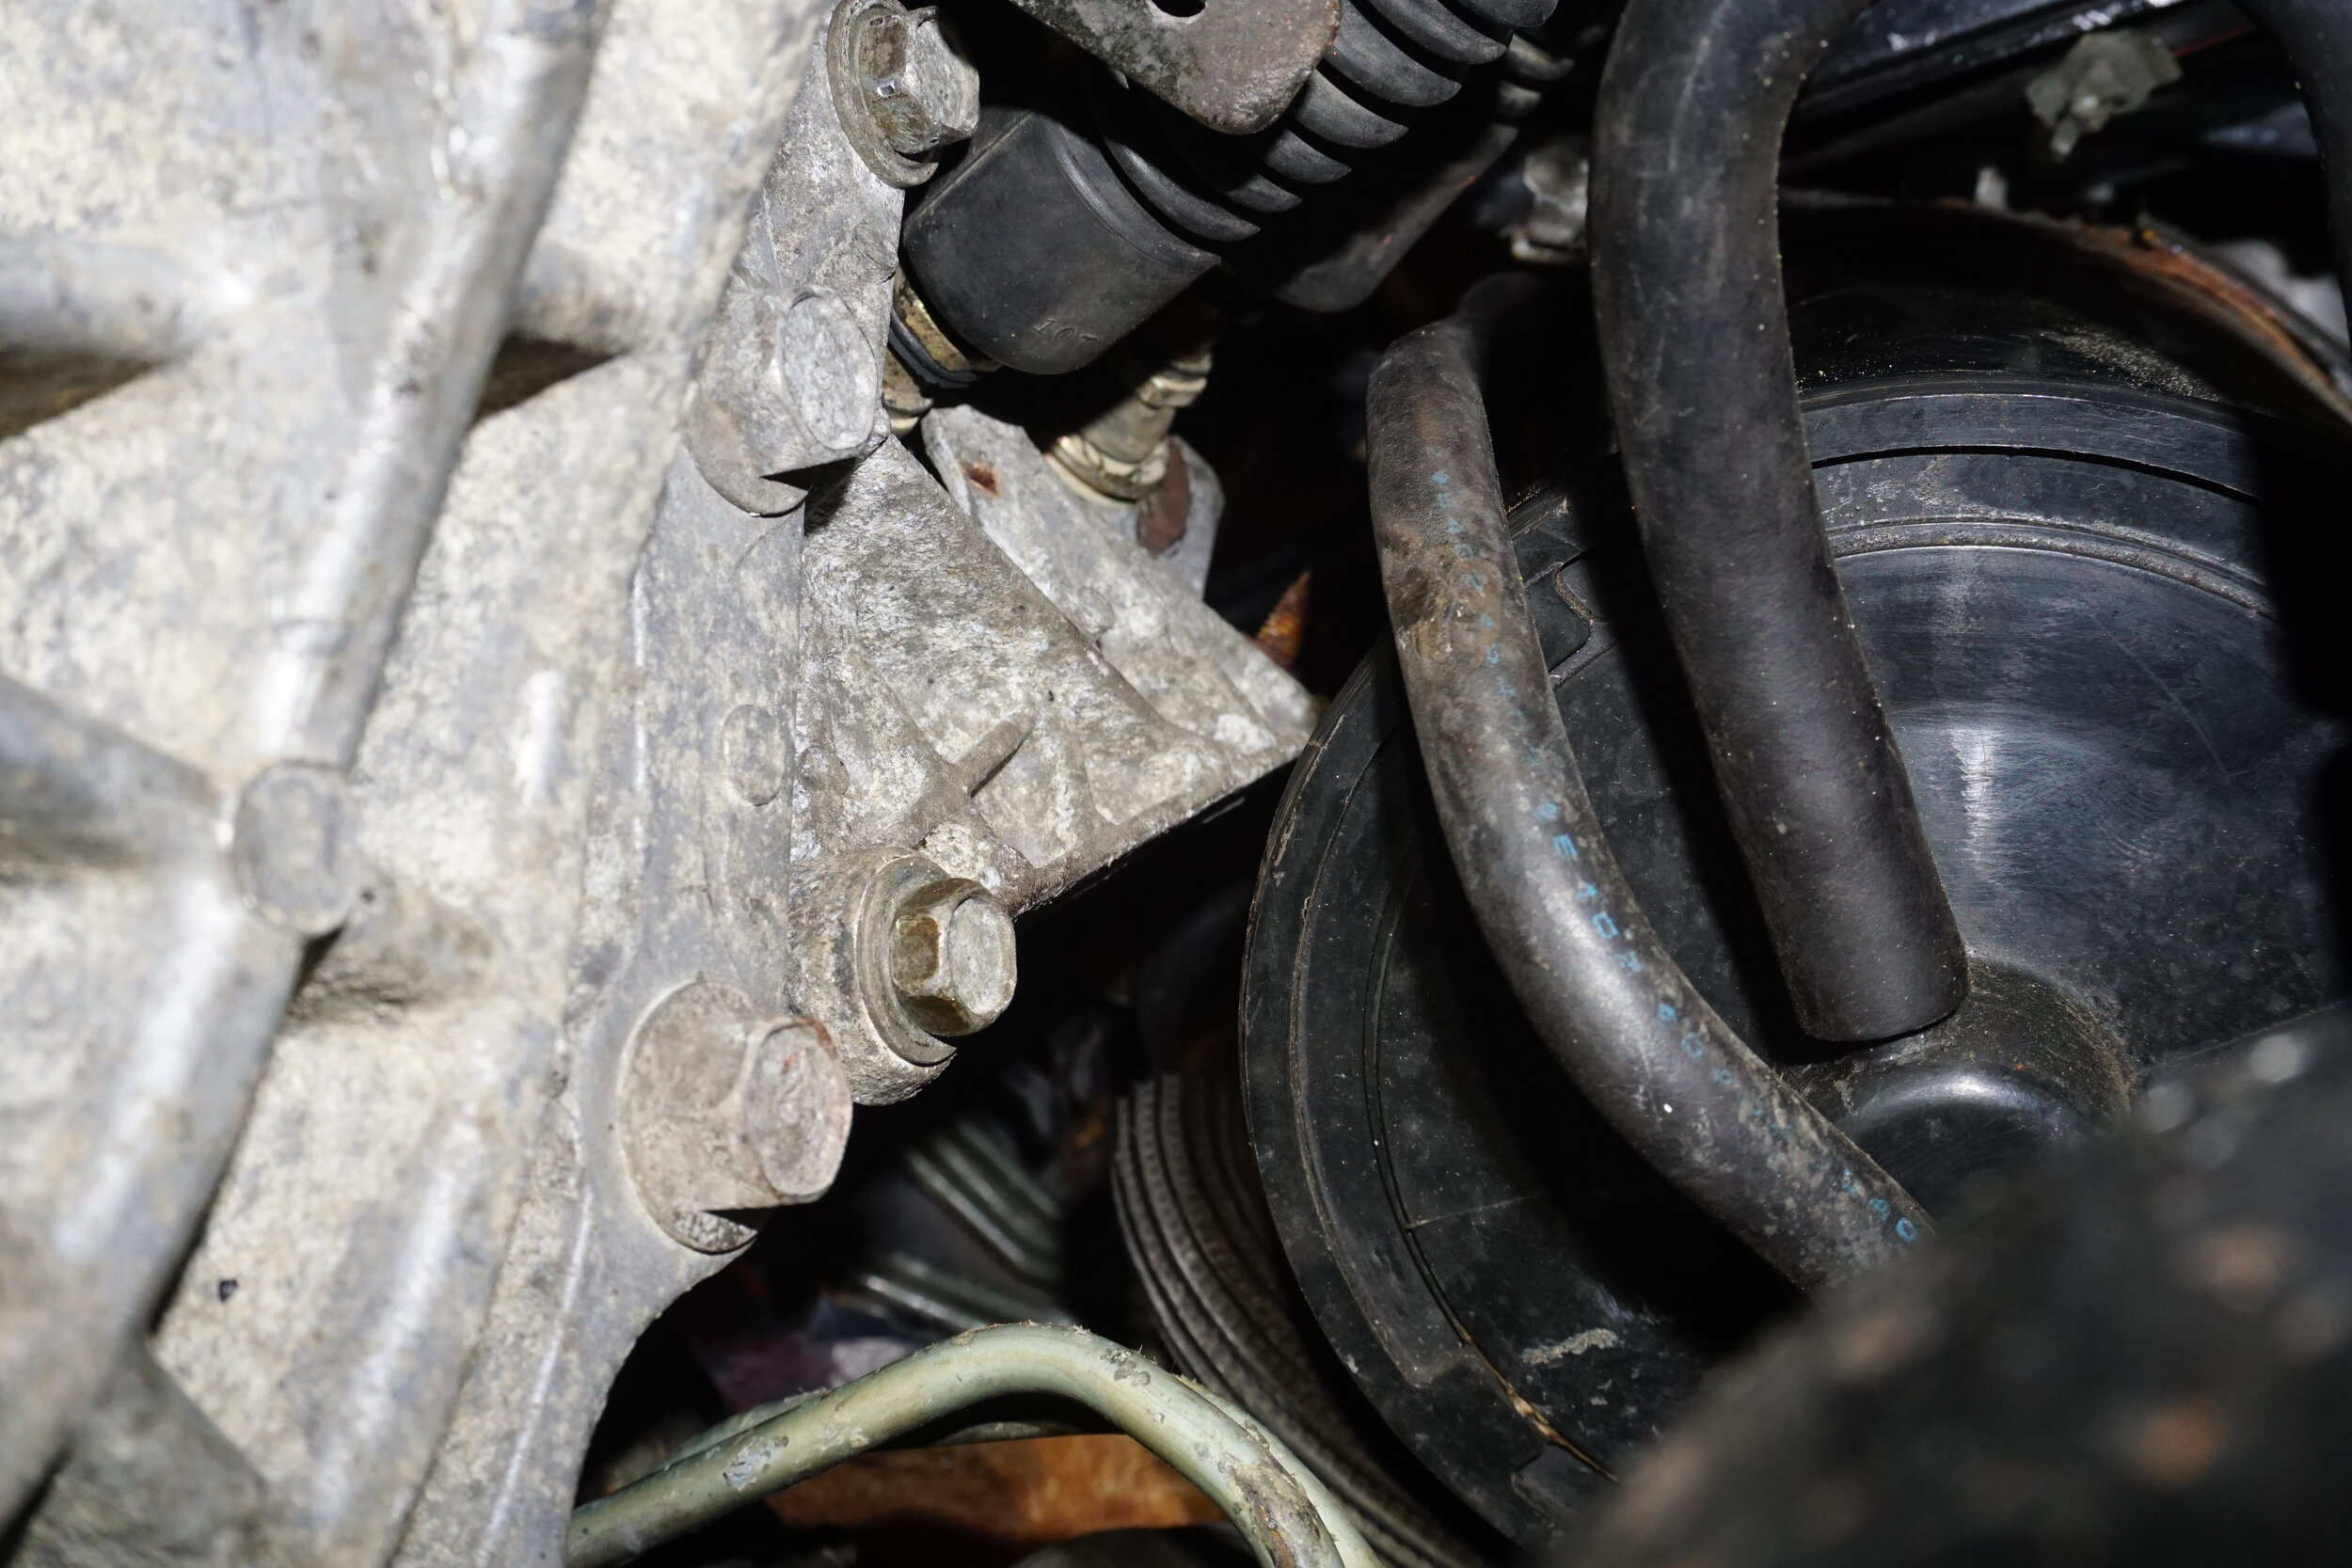
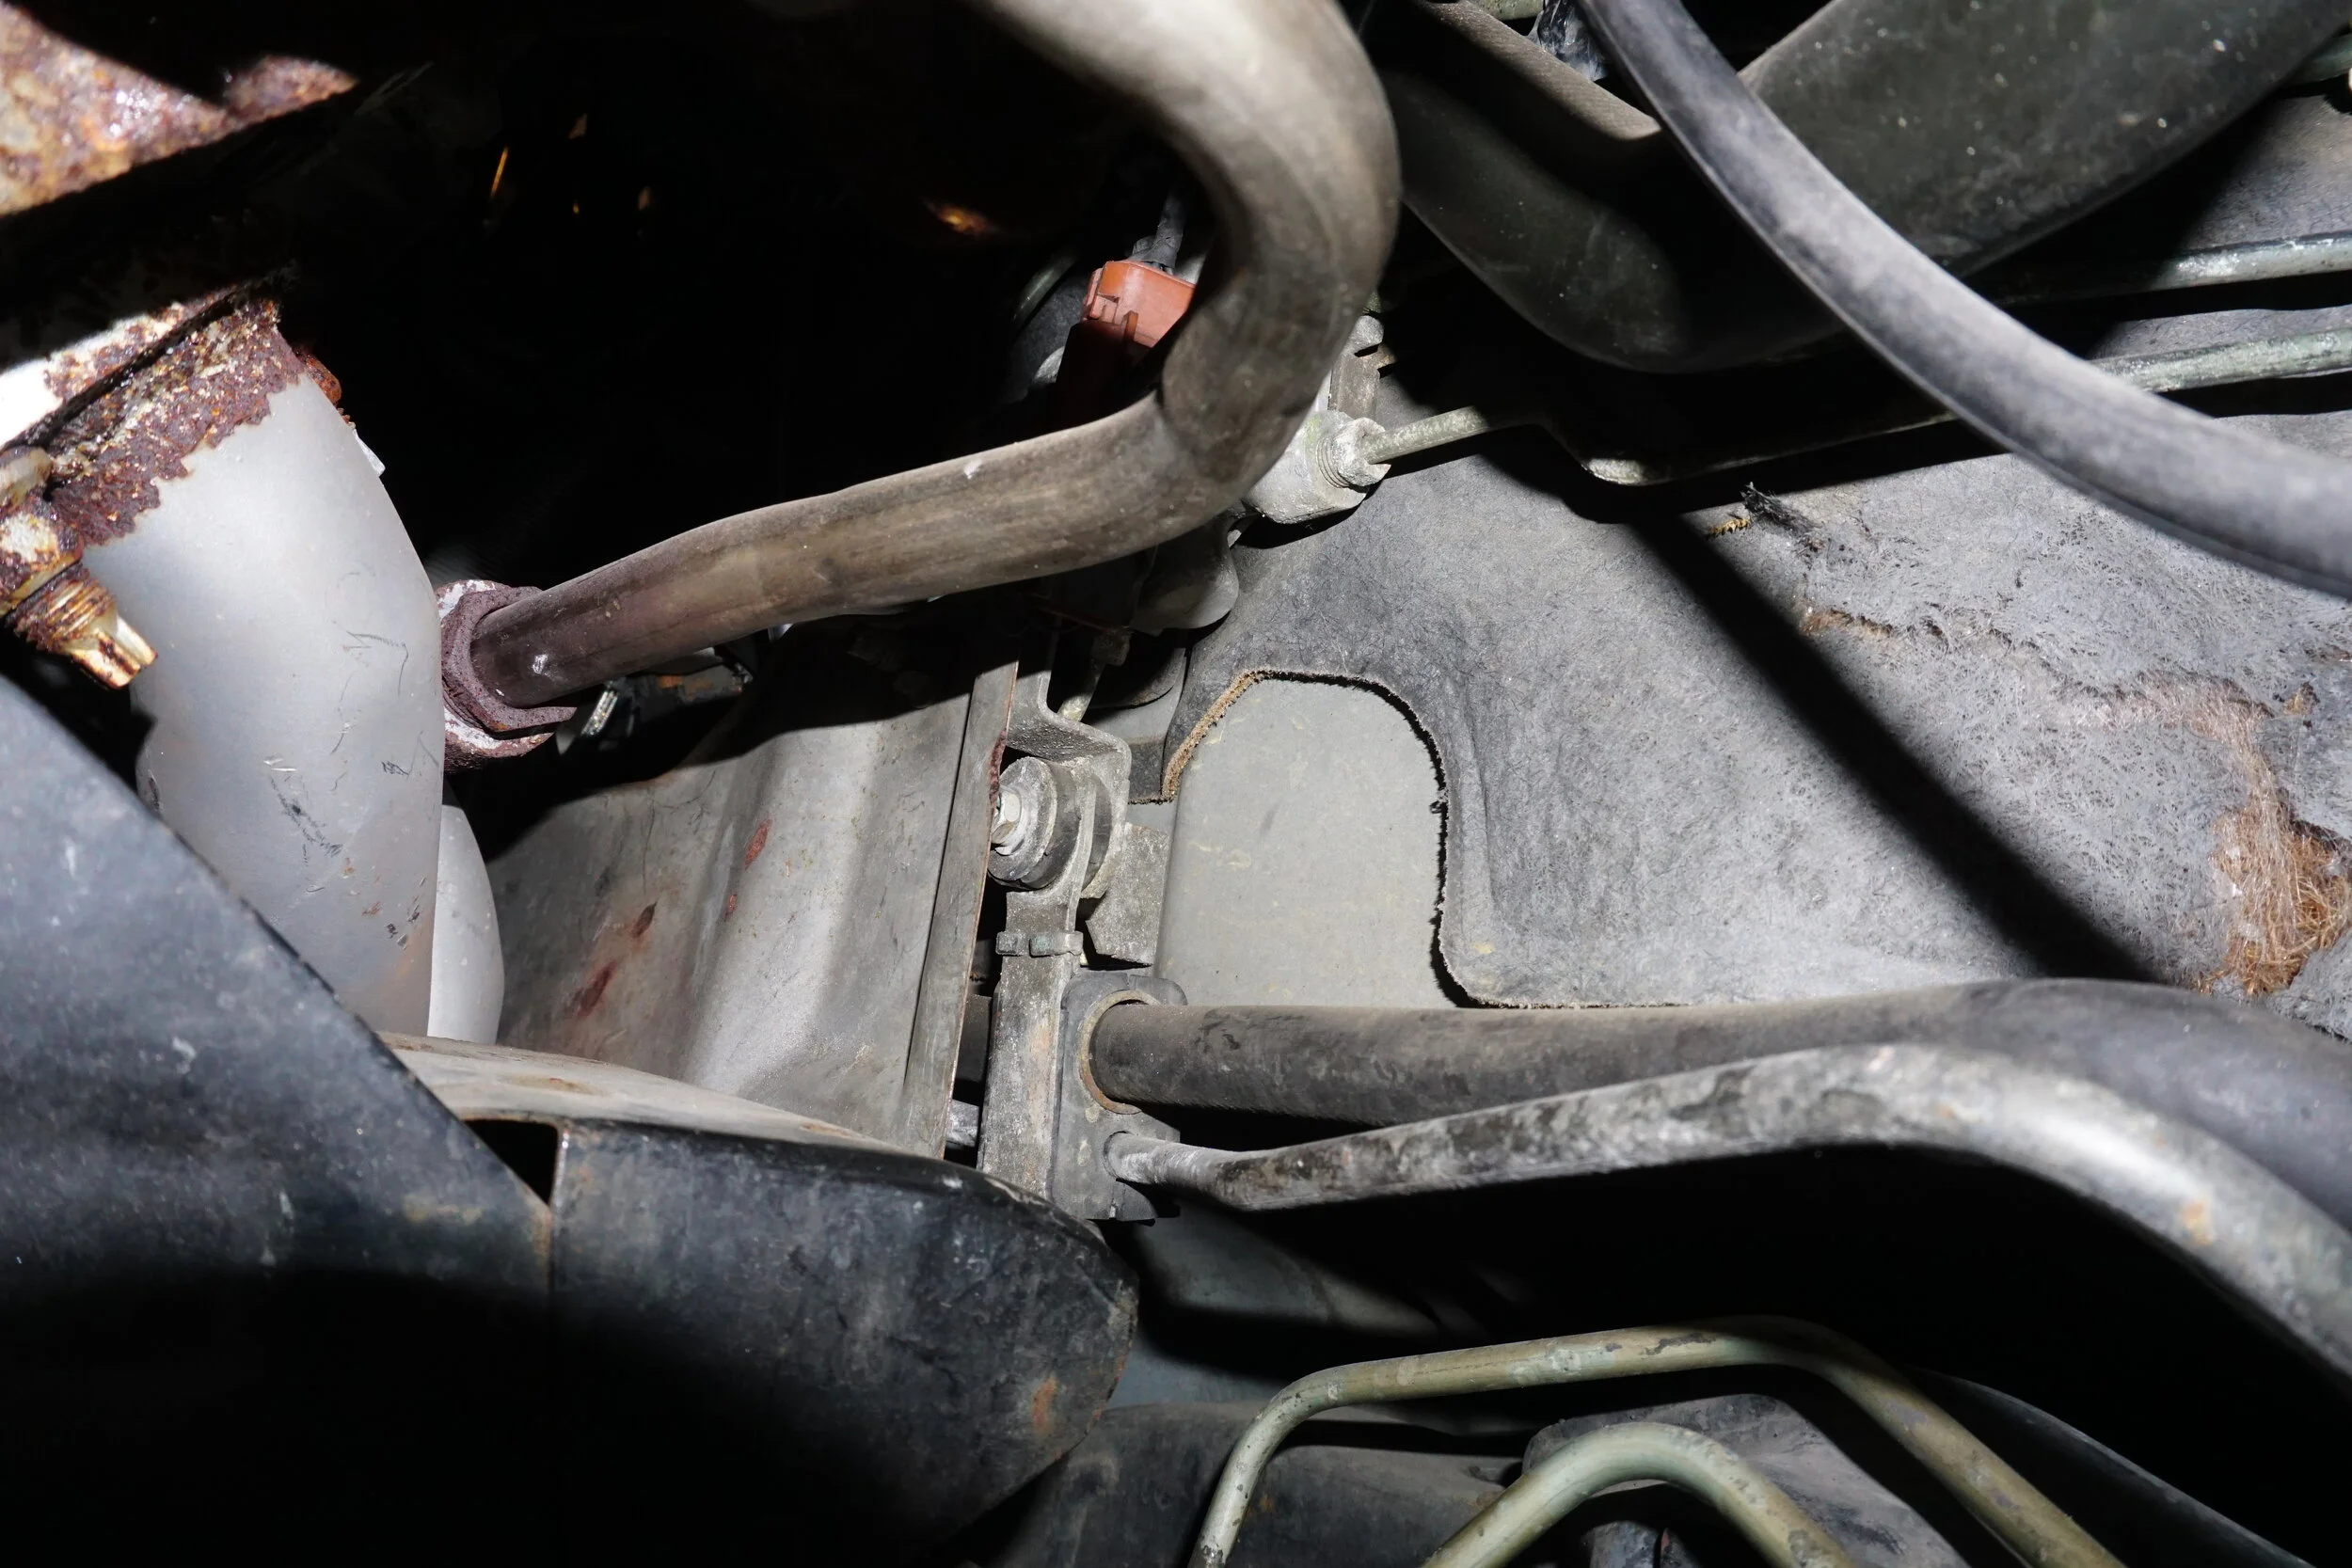
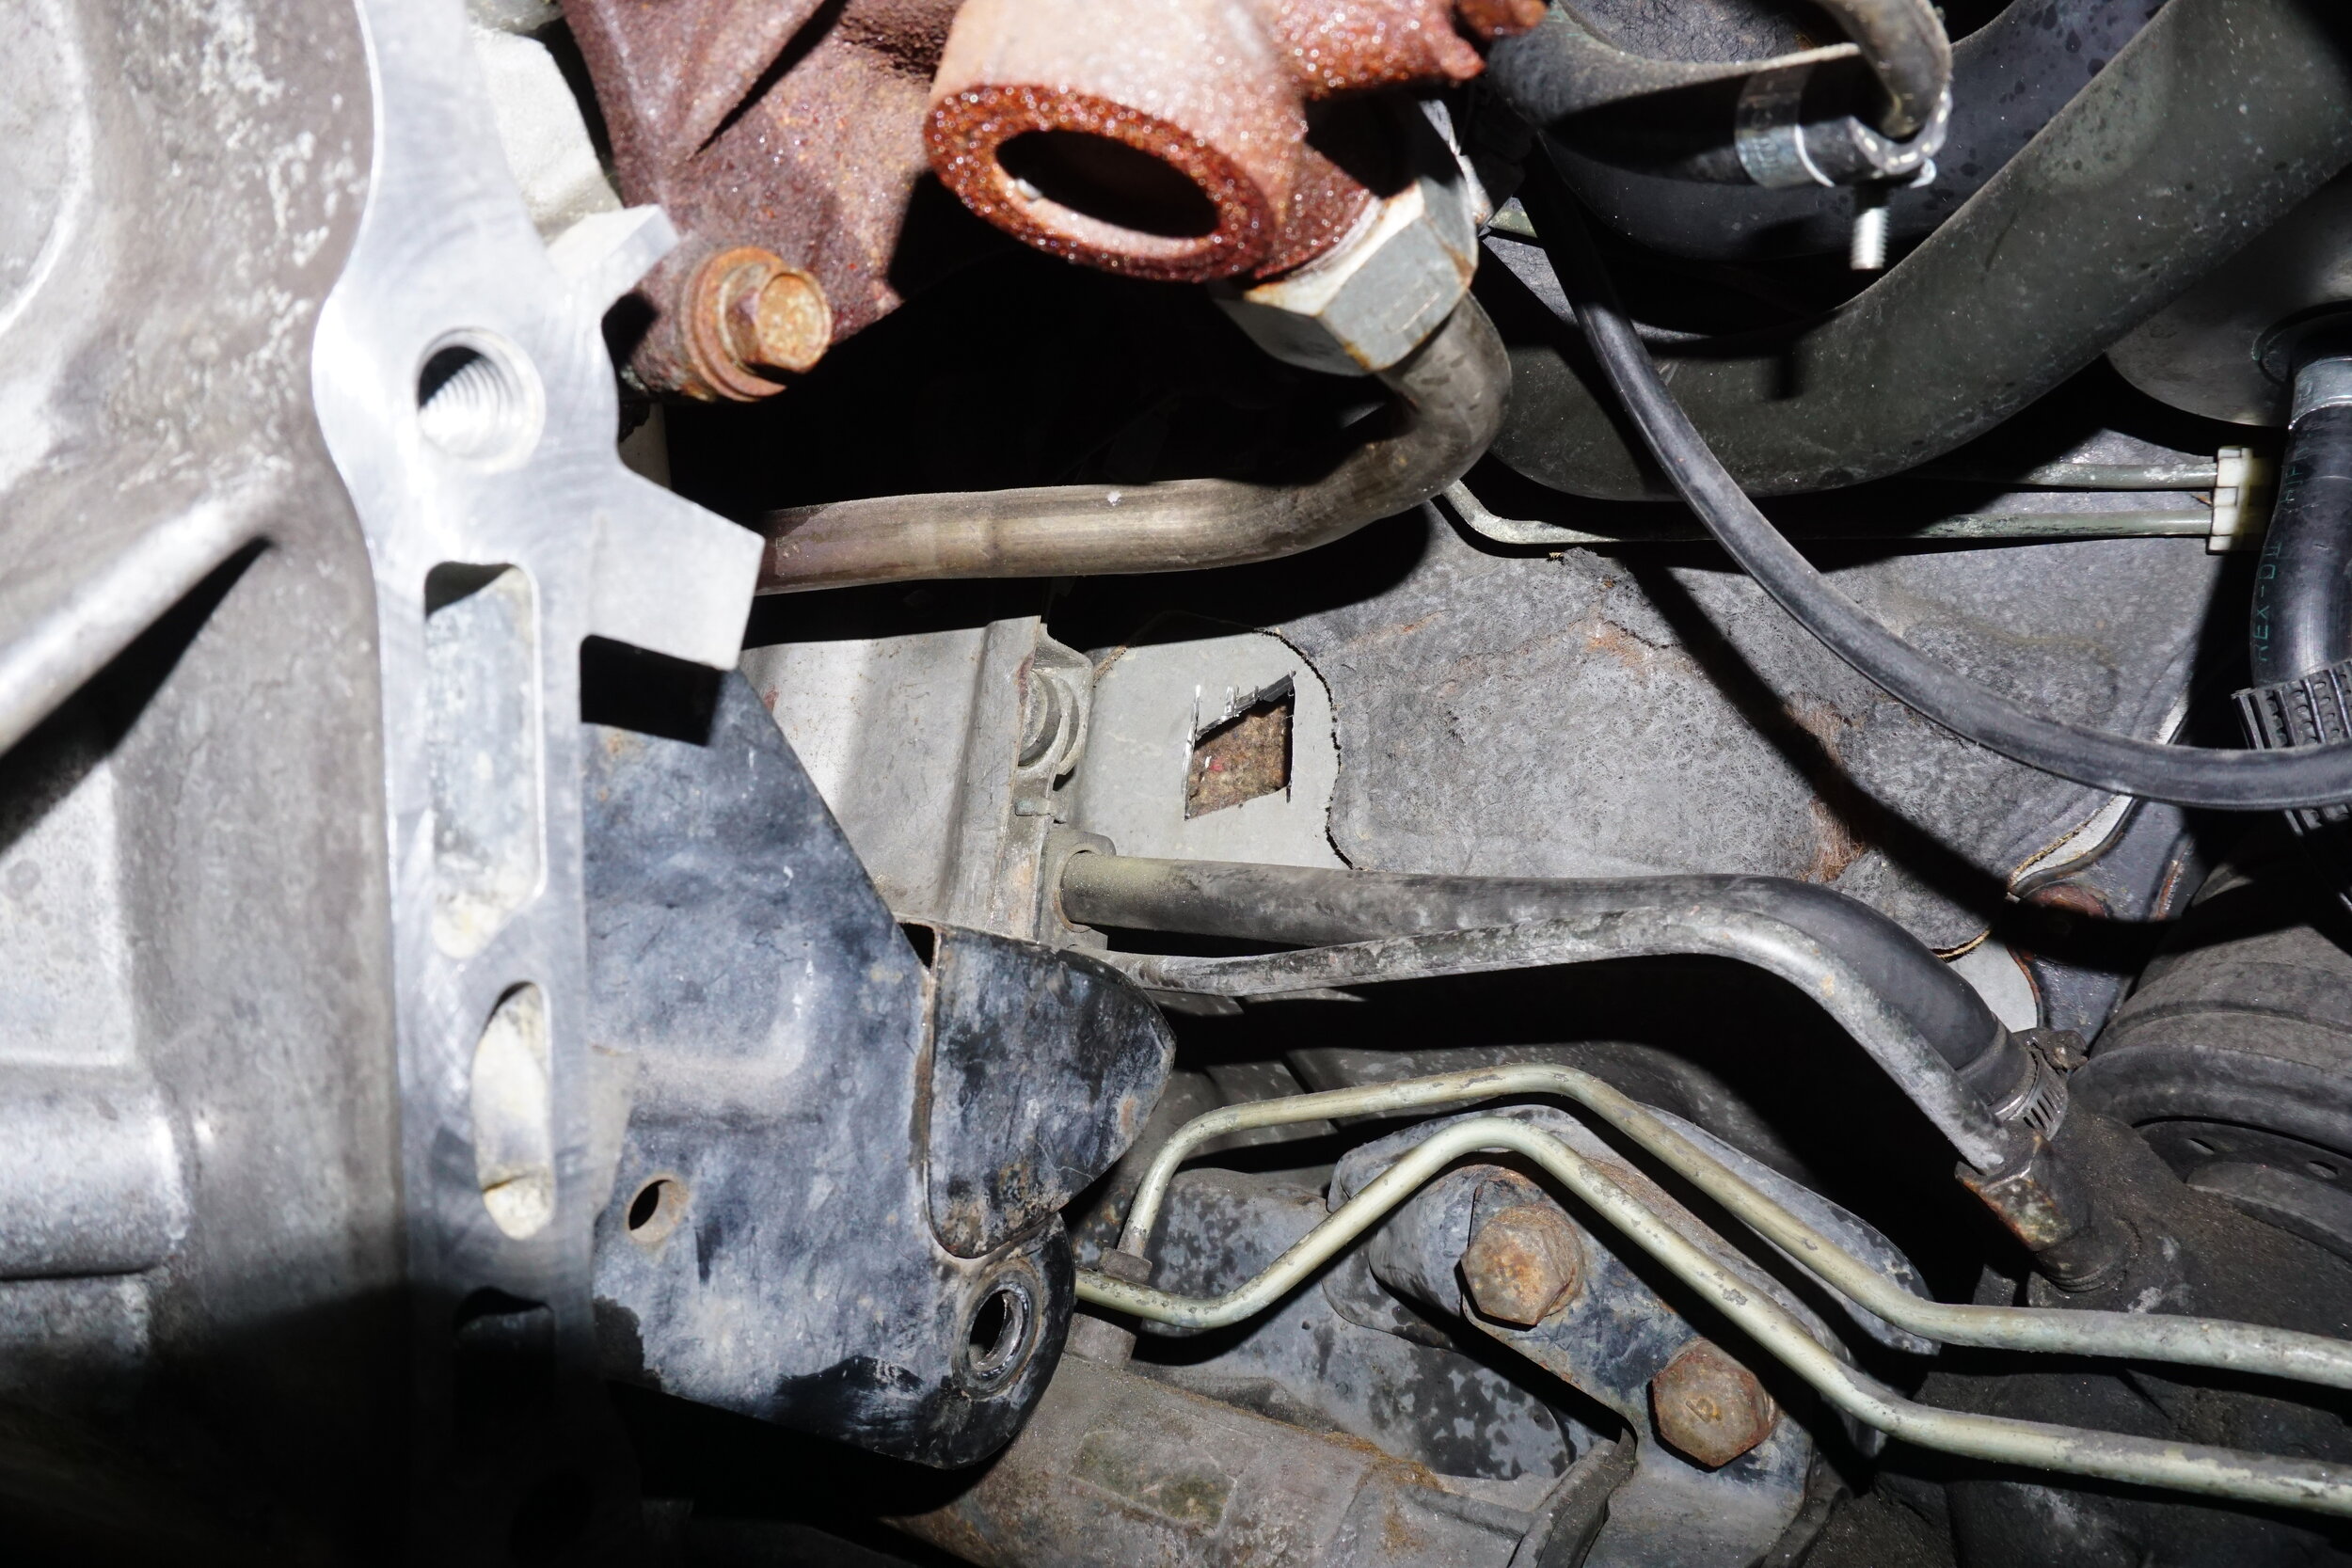
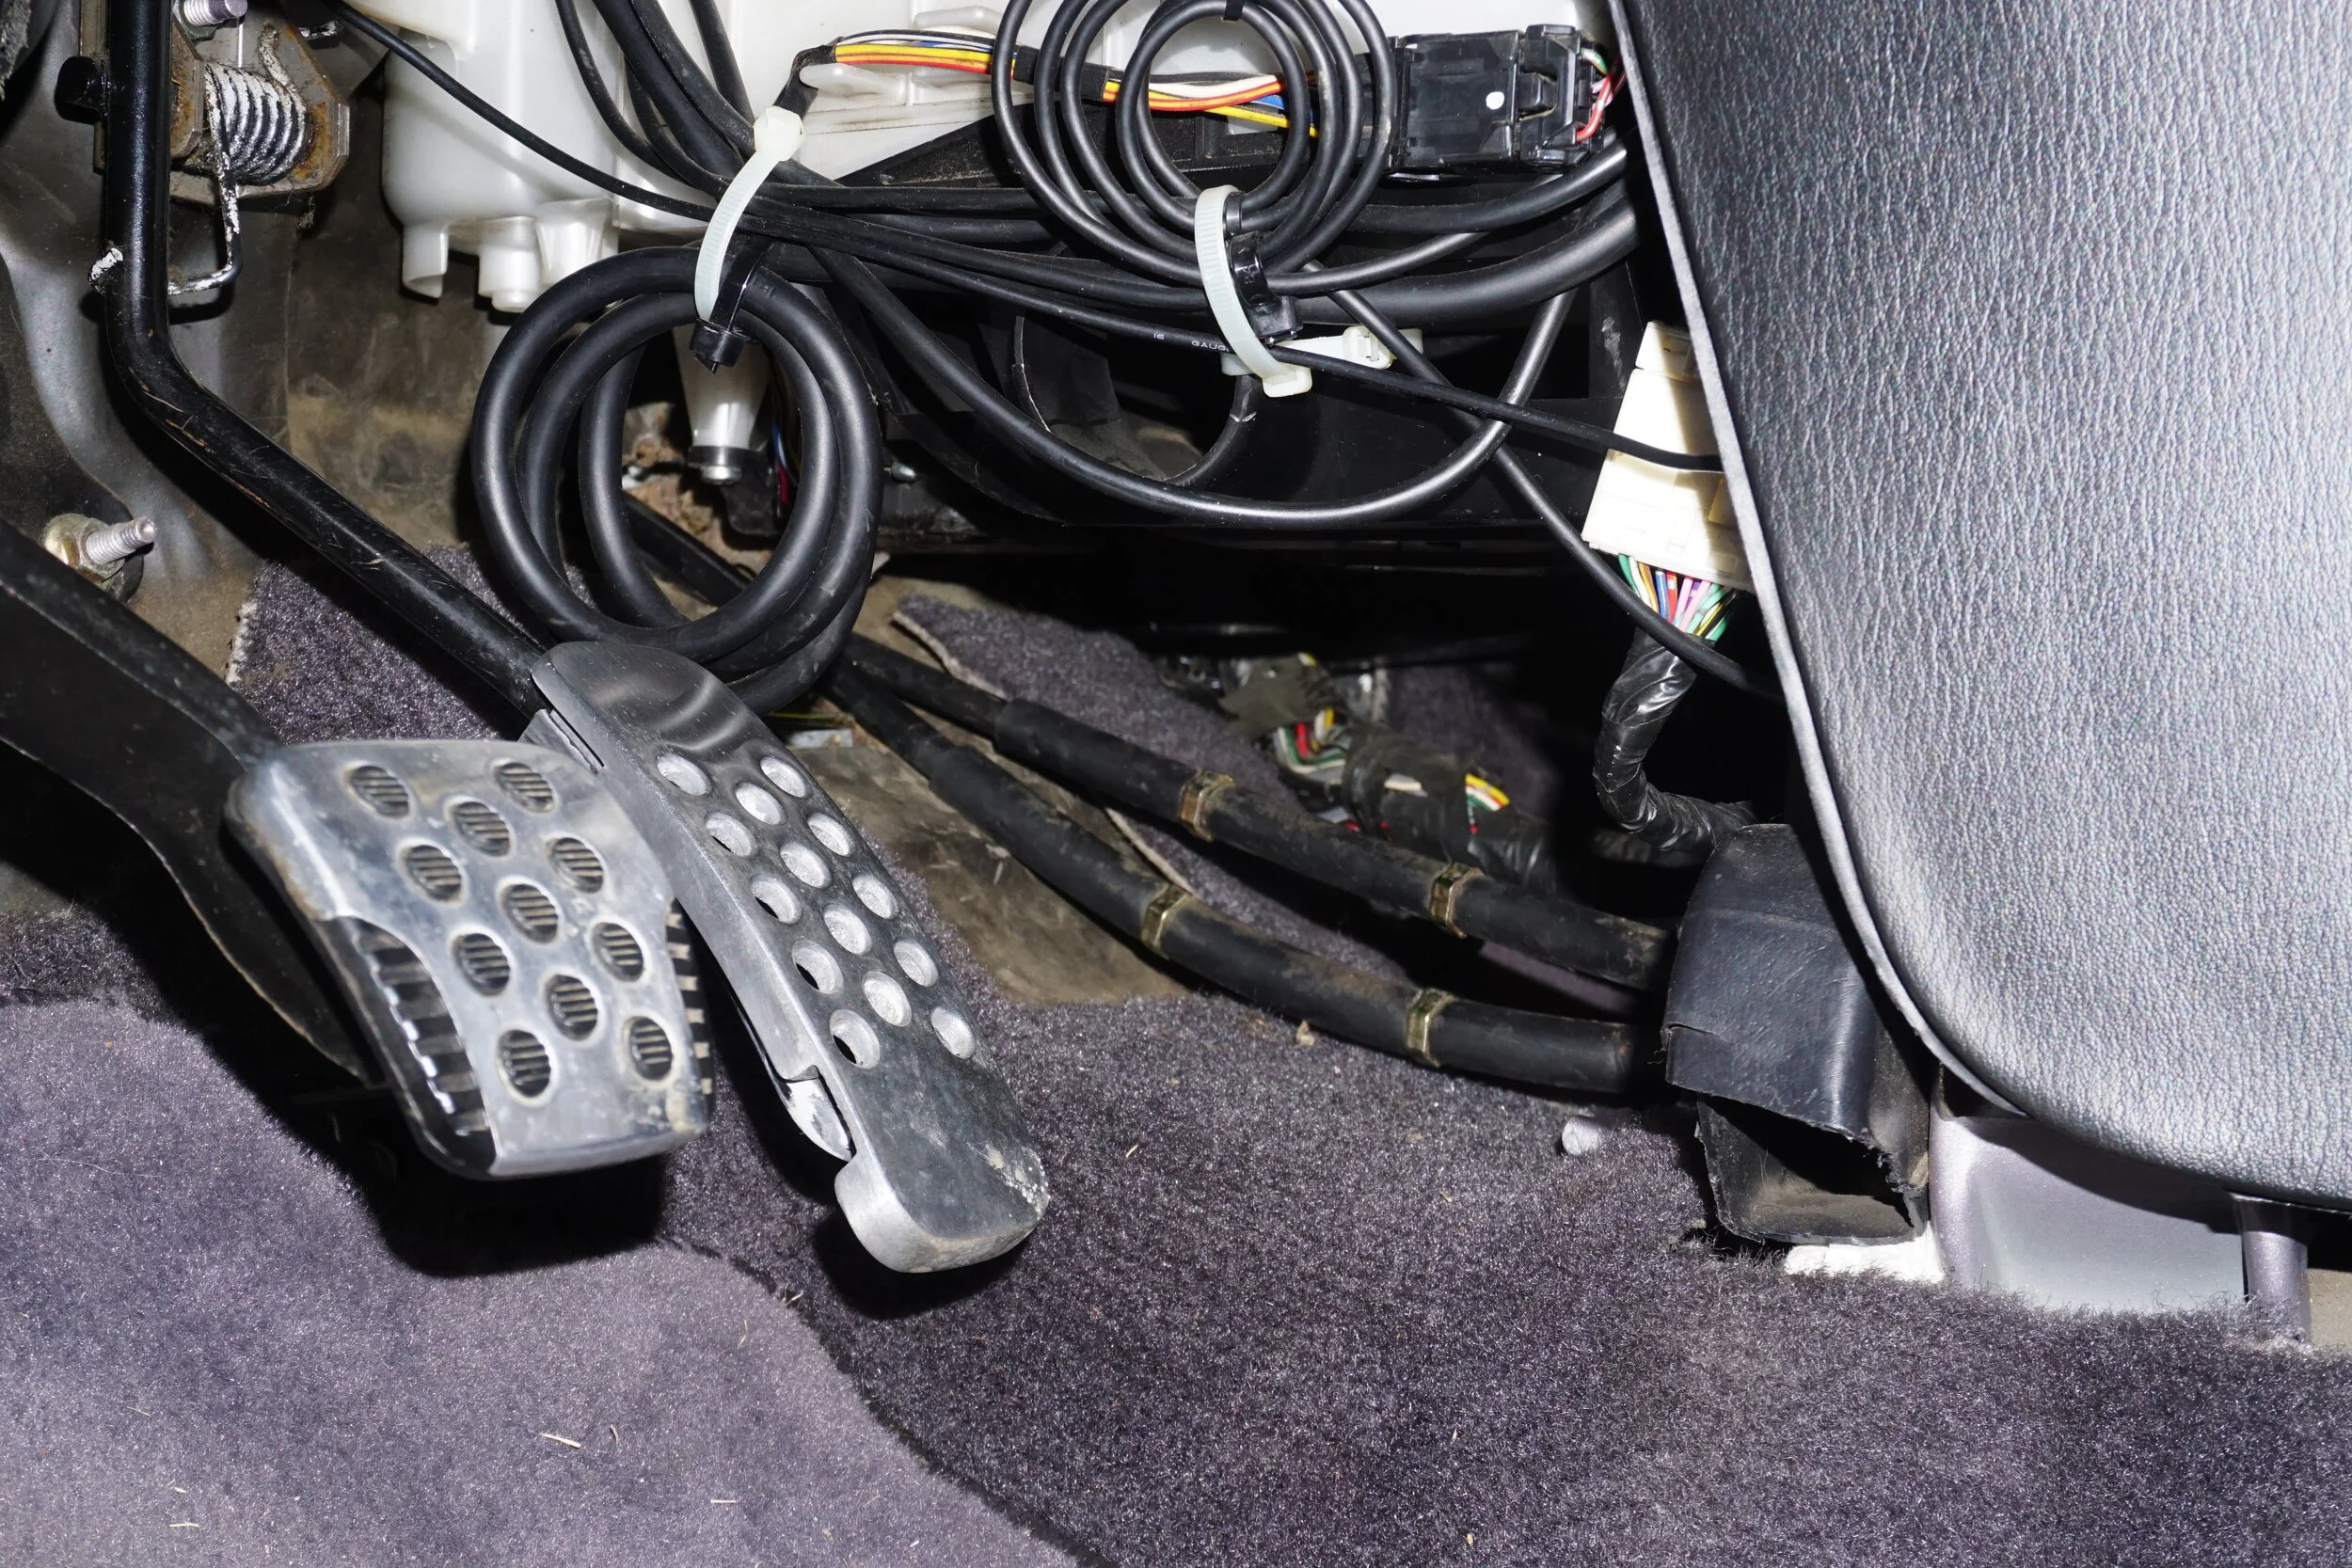
1995/96 cars with giant EVAP canister on firewall under master cylinder:
You will need to cut/grind the shifter cable bracket so it doesn't break your EVAP canister when you try to get the trans mounted in place.
Interference:
Original:
After cutting and grinding:
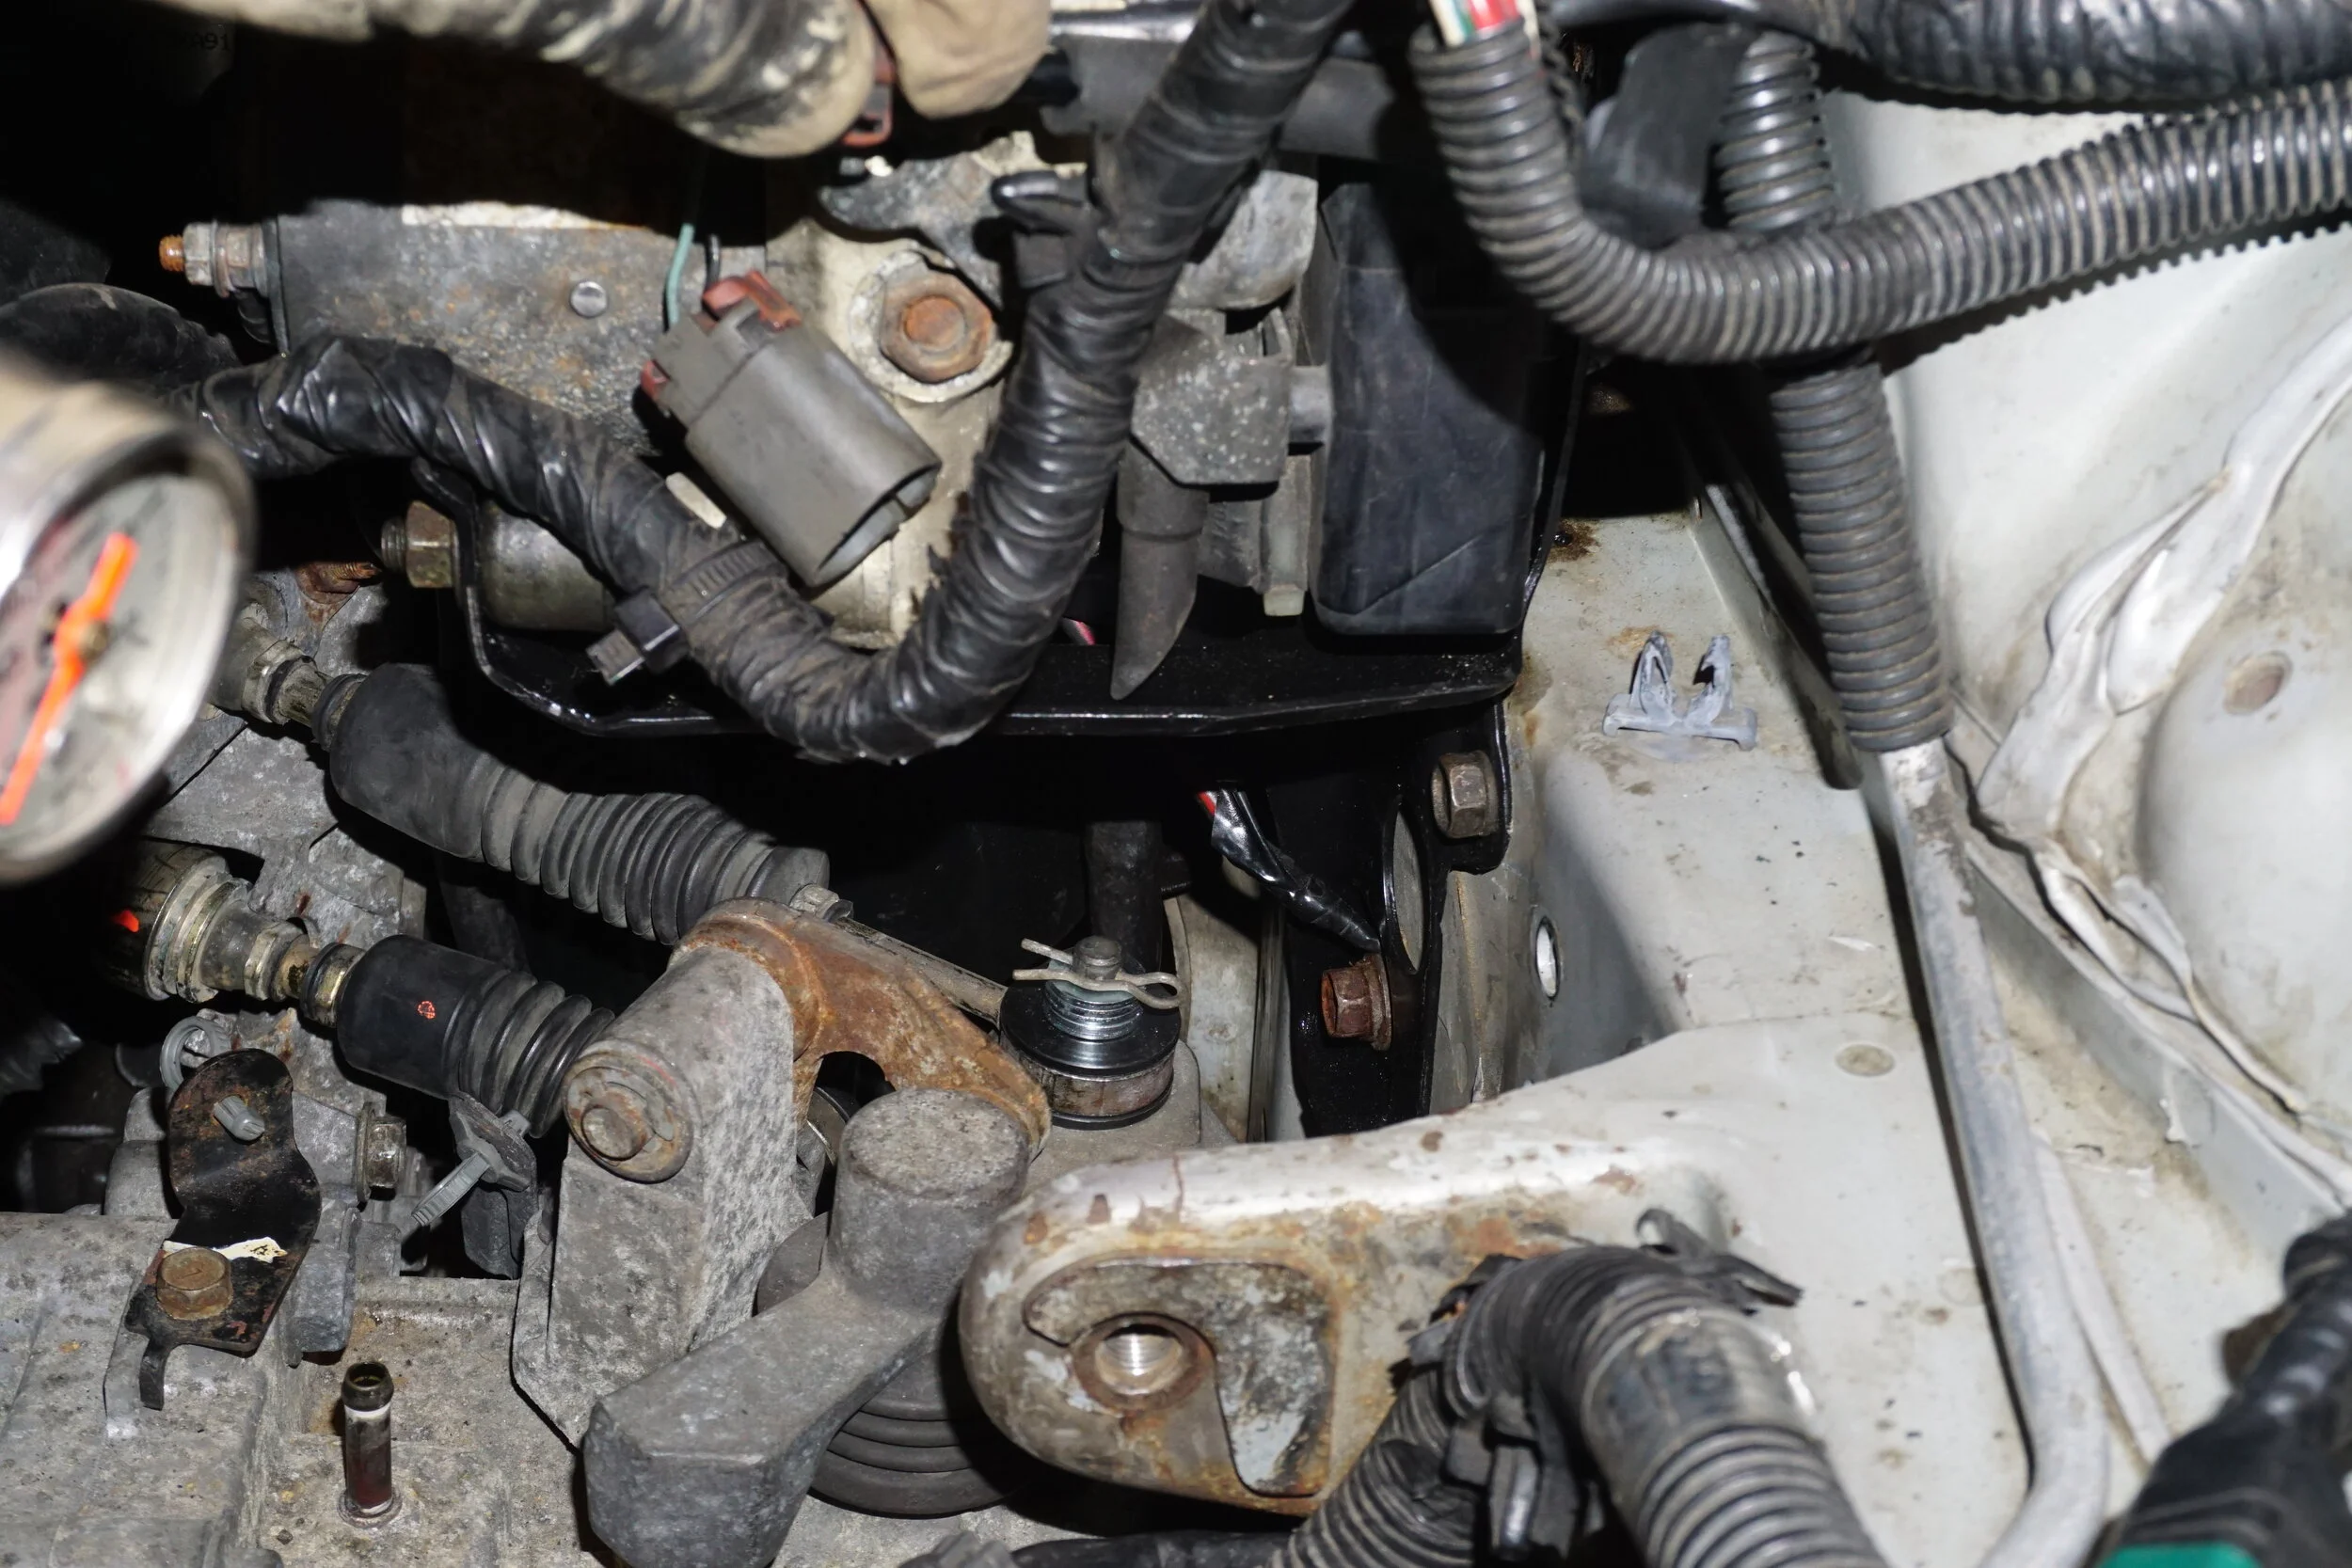
If your car has ABS:
Previous guides correctly noted that the bracket for the ABS pump (under and in front of master cylinder) gets in the way of the shifter cables/levers and said to remove the bracket for the ABS pump. I believe this is unsafe and strongly recommend you do not do this. Their solution was to hang the heavy ABS pump with a zip tie from the master cylinder. This is a bad idea and would not pass tech inspection at any sort of racing organization. The proper solution to this problem is to use either an angle grinder with a cutoff wheel or a Dremel with reinforced cutoff wheels to remove portions of the bracket that interfere with the shifter parts, and leave the rest of the bracket to support the pump. This is much easier with the bracket removed from the vehicle, so remove and cut yours while you don't have a transmission in the car. I recommend painting the bracket when you're done cutting to prevent the bare metal from rusting.
Original bracket:
Cut and painted:
Install guide:
JWT Flywheel: To install the custom timing ring from Schmellyfart onto your JWT or Fidanza flywheel, you will need some sort of torch to apply heat to the screws that hold on the ring that JWT supplies. JWT uses Red Loctite to the small screws, so if they are not heated up you run a very good chance of stripping them, which is really going to suck. Heat them up one at a time, then loosen by hand, do not use an impact. One they are all removed, remove the JWT timing ring and install the one from Schmellyfart. Apply Red Loctite to all the little screws and reinstall them. Since they are so small there is no torque spec, just make them hand tight and do not tighten with an impact.
The JWT flywheel arrived with a thick waxy/oily coating to prevent the surface from rusting. This will need to be fully removed before installing so you don't contaminate your clutch disc material. I first used some 3M Adhesive Remover on rags, making sure to also remove the wax from the top of the screw heads. Once it looked clean, I blasted the whole thing with brake cleaner to remove any residue. Make sure you also spray your new pressure place with brake cleaner for the same reason.
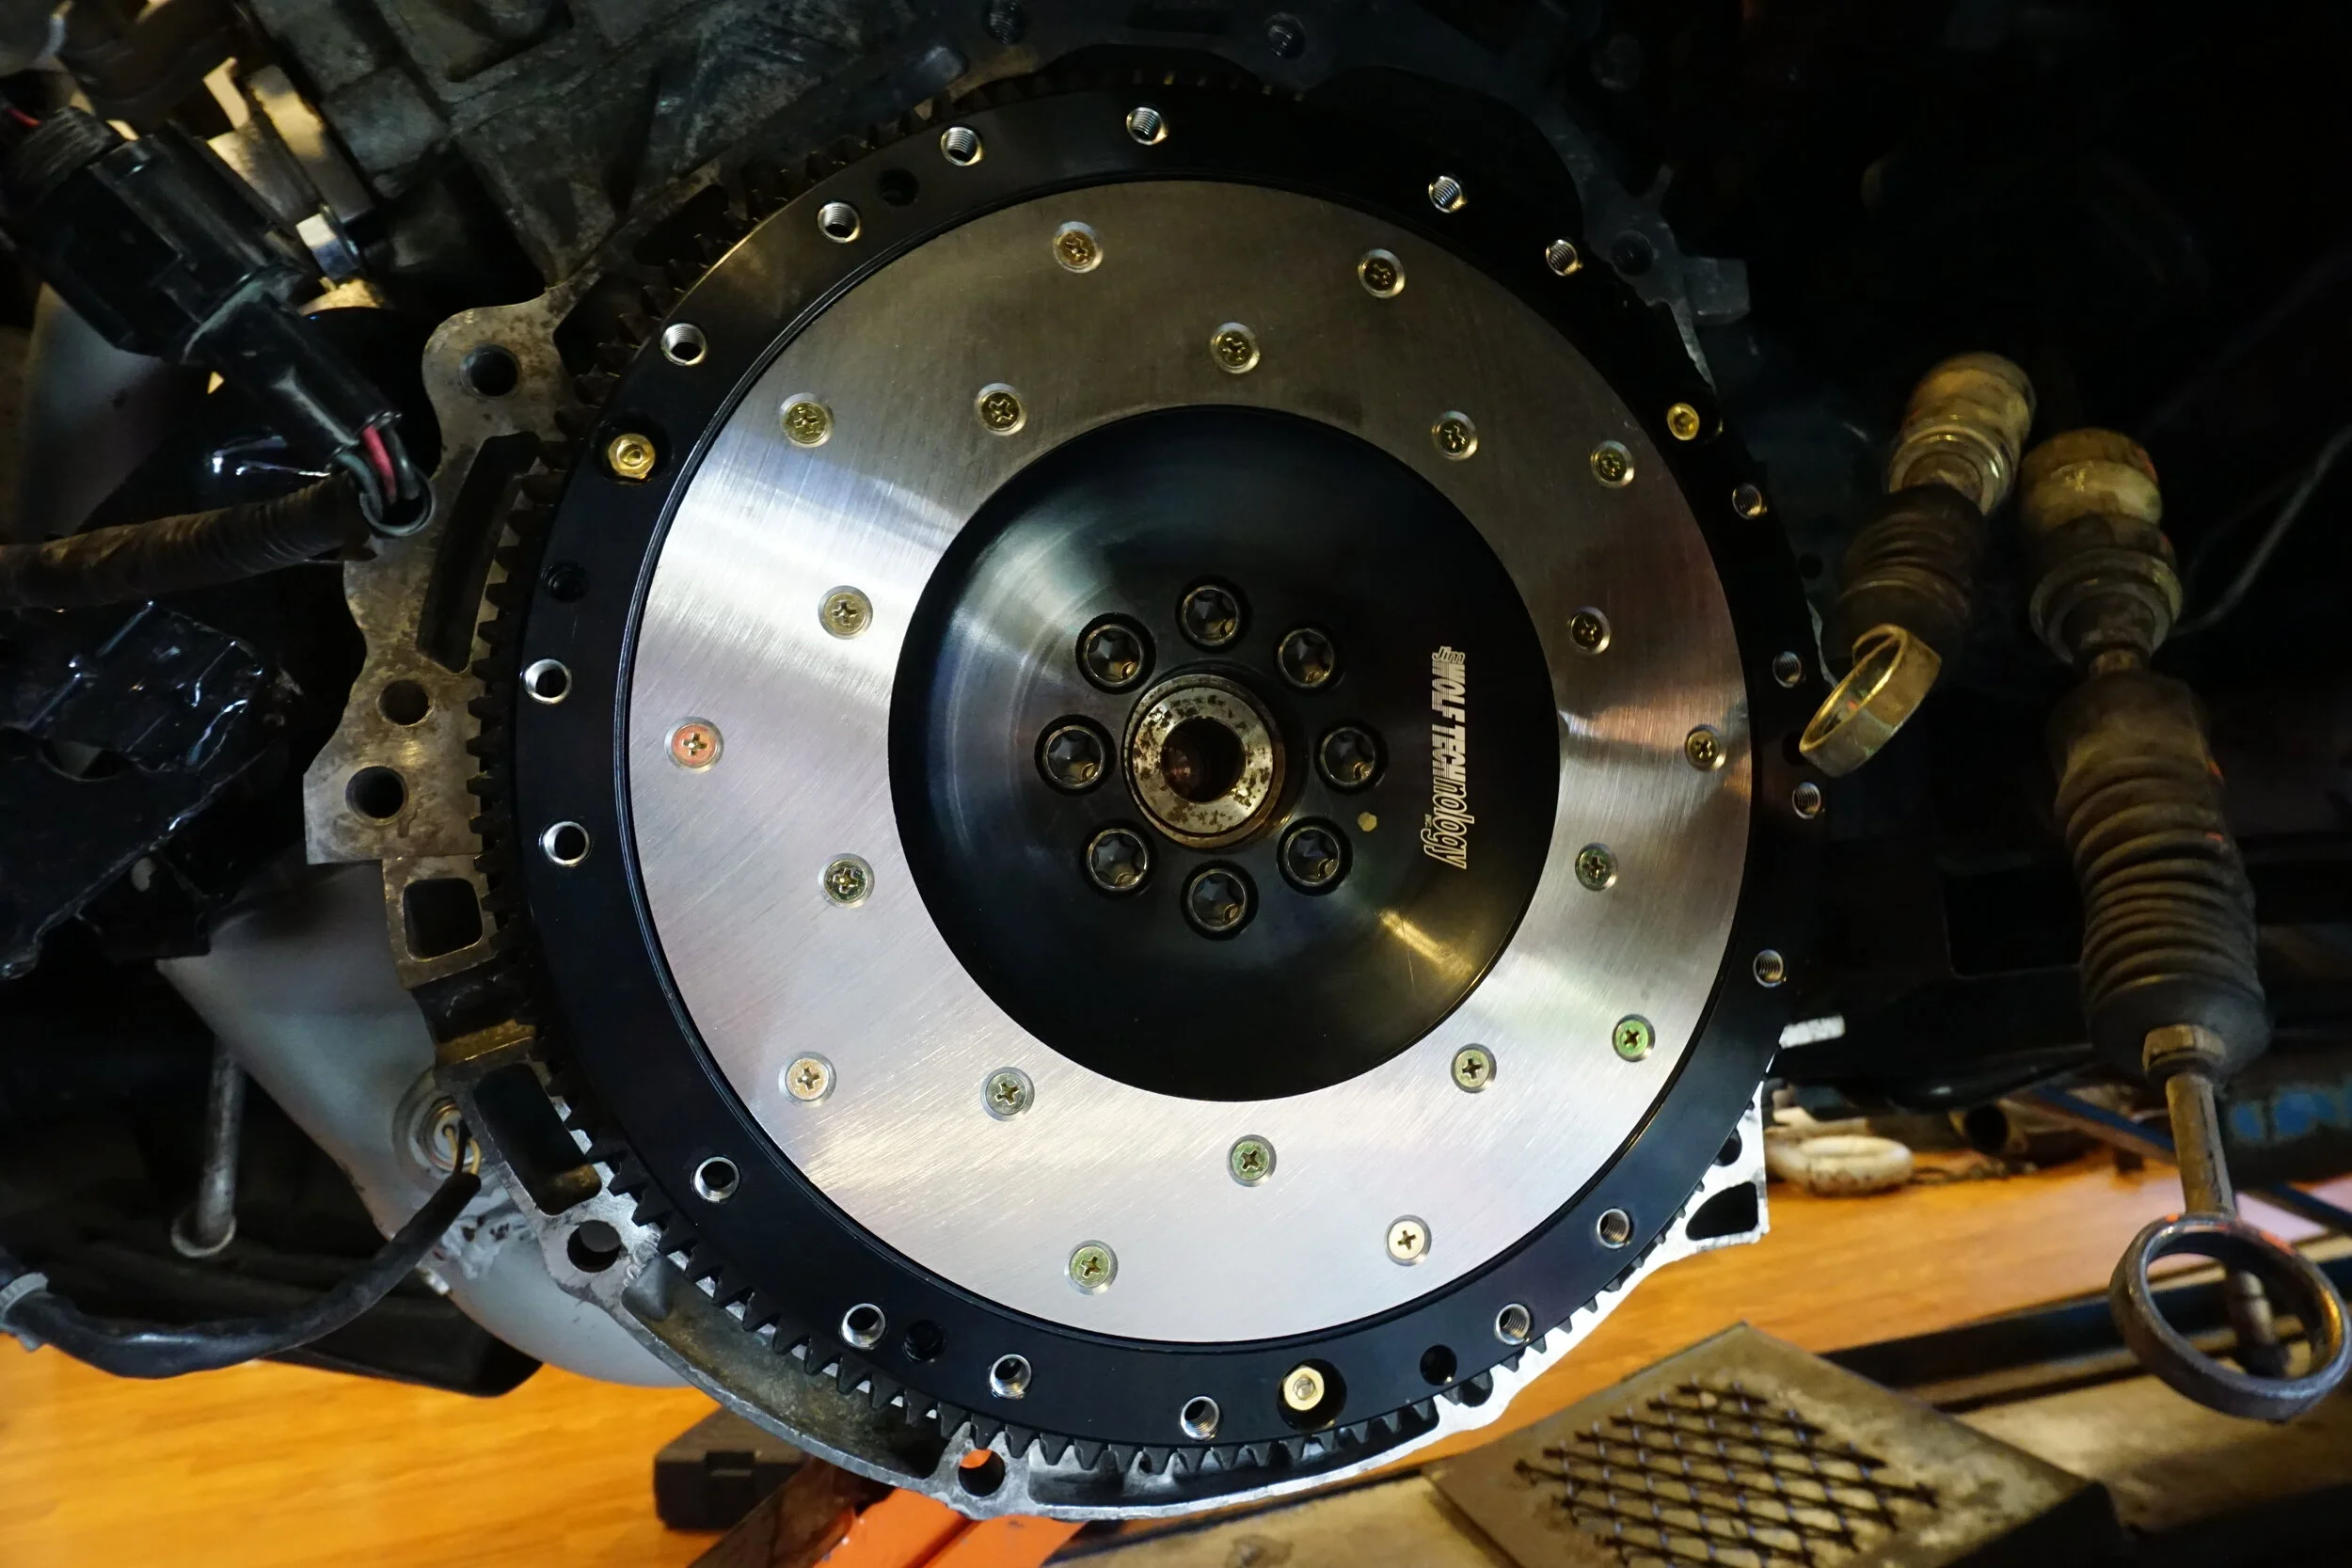
To install the JWT flywheel follow the included directions. Mine barely fit over the crankshaft and had to be hammered on with a rubber mallet. I recommend leaving the flywheel in the sun for a few hours before installing so the metal heats up and expands. You will need something to keep the crankshaft from rotating while you torque the bolts that attach the flywheel to the crank. I used the OTC Pulley Holder tool mentioned above, although some people will just put a socket over the crank bolt and hold it with a breaker bar. I chose to have a helper hold the pulley holder tool for me while I worked the flywheel bolts. It's very important that you torque the flywheel bolts to the proper spec and that the flywheel is perfectly flush with the crank. JWT also recommends using Red Loctite on the flywheel bolts, and while that may make them damn near impossible to remove in the future, I chose to follow their instructions. I just didn't apply very much. If you need to remove them later, be sure to use plenty of heat.
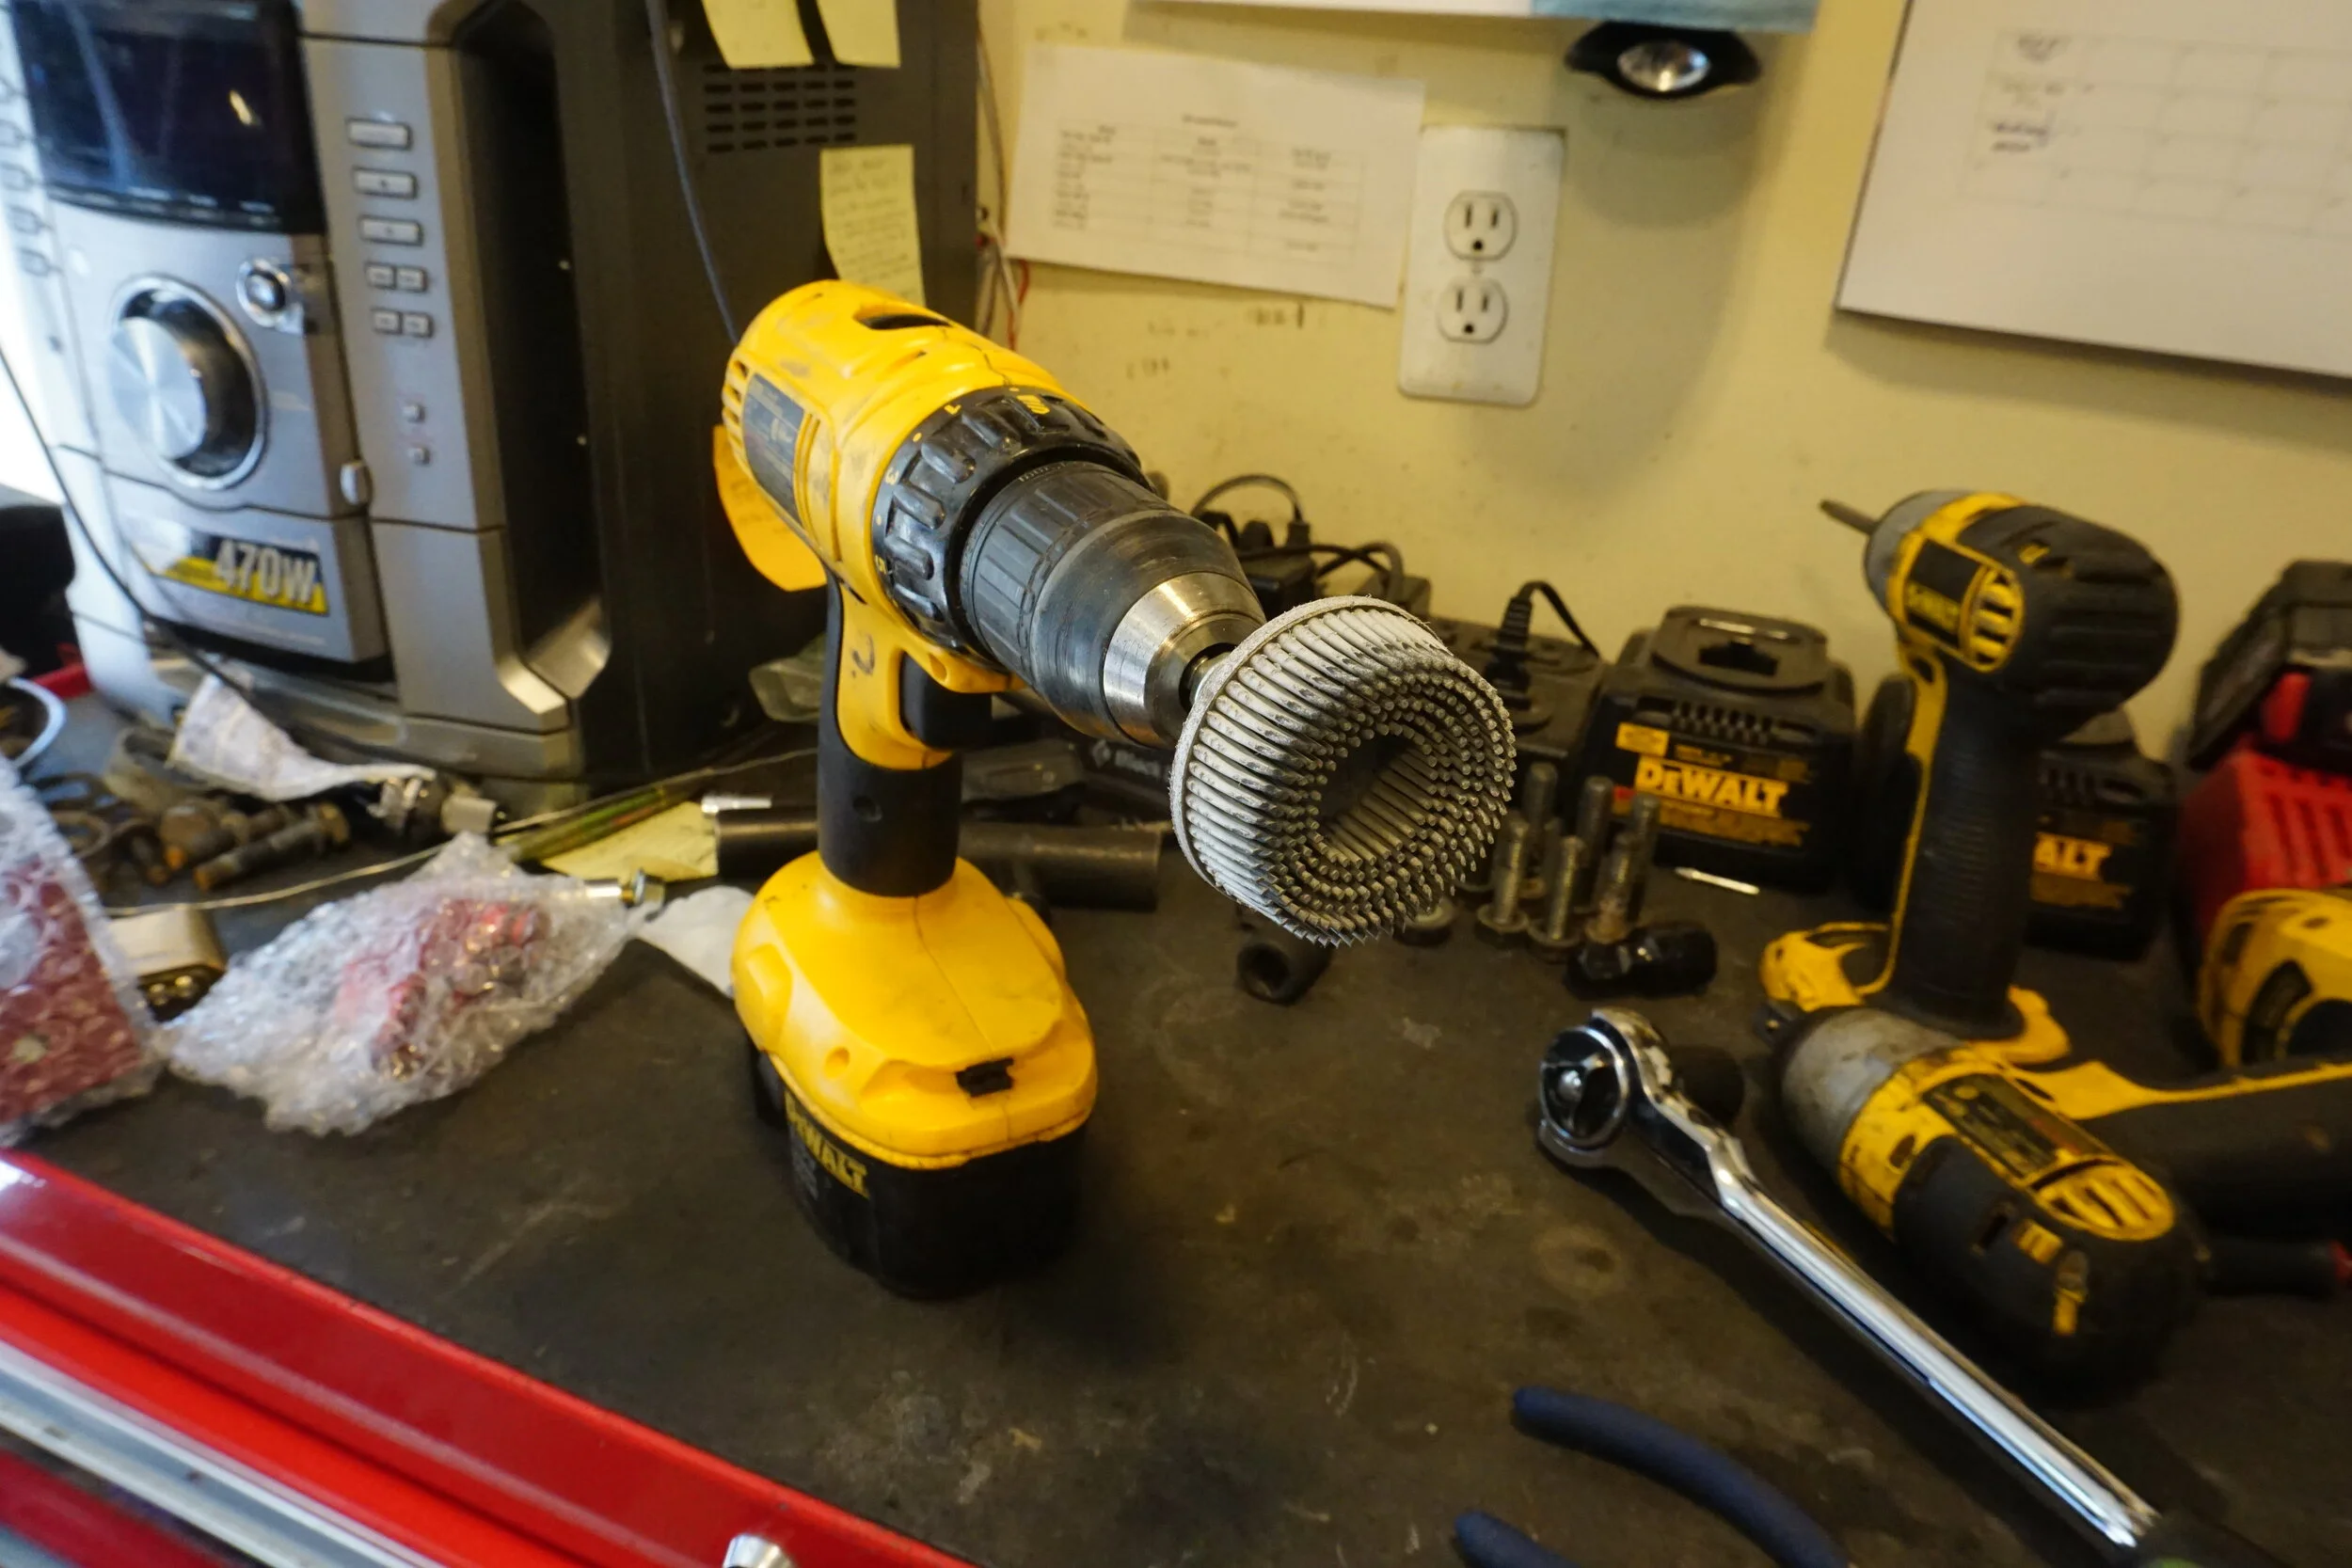
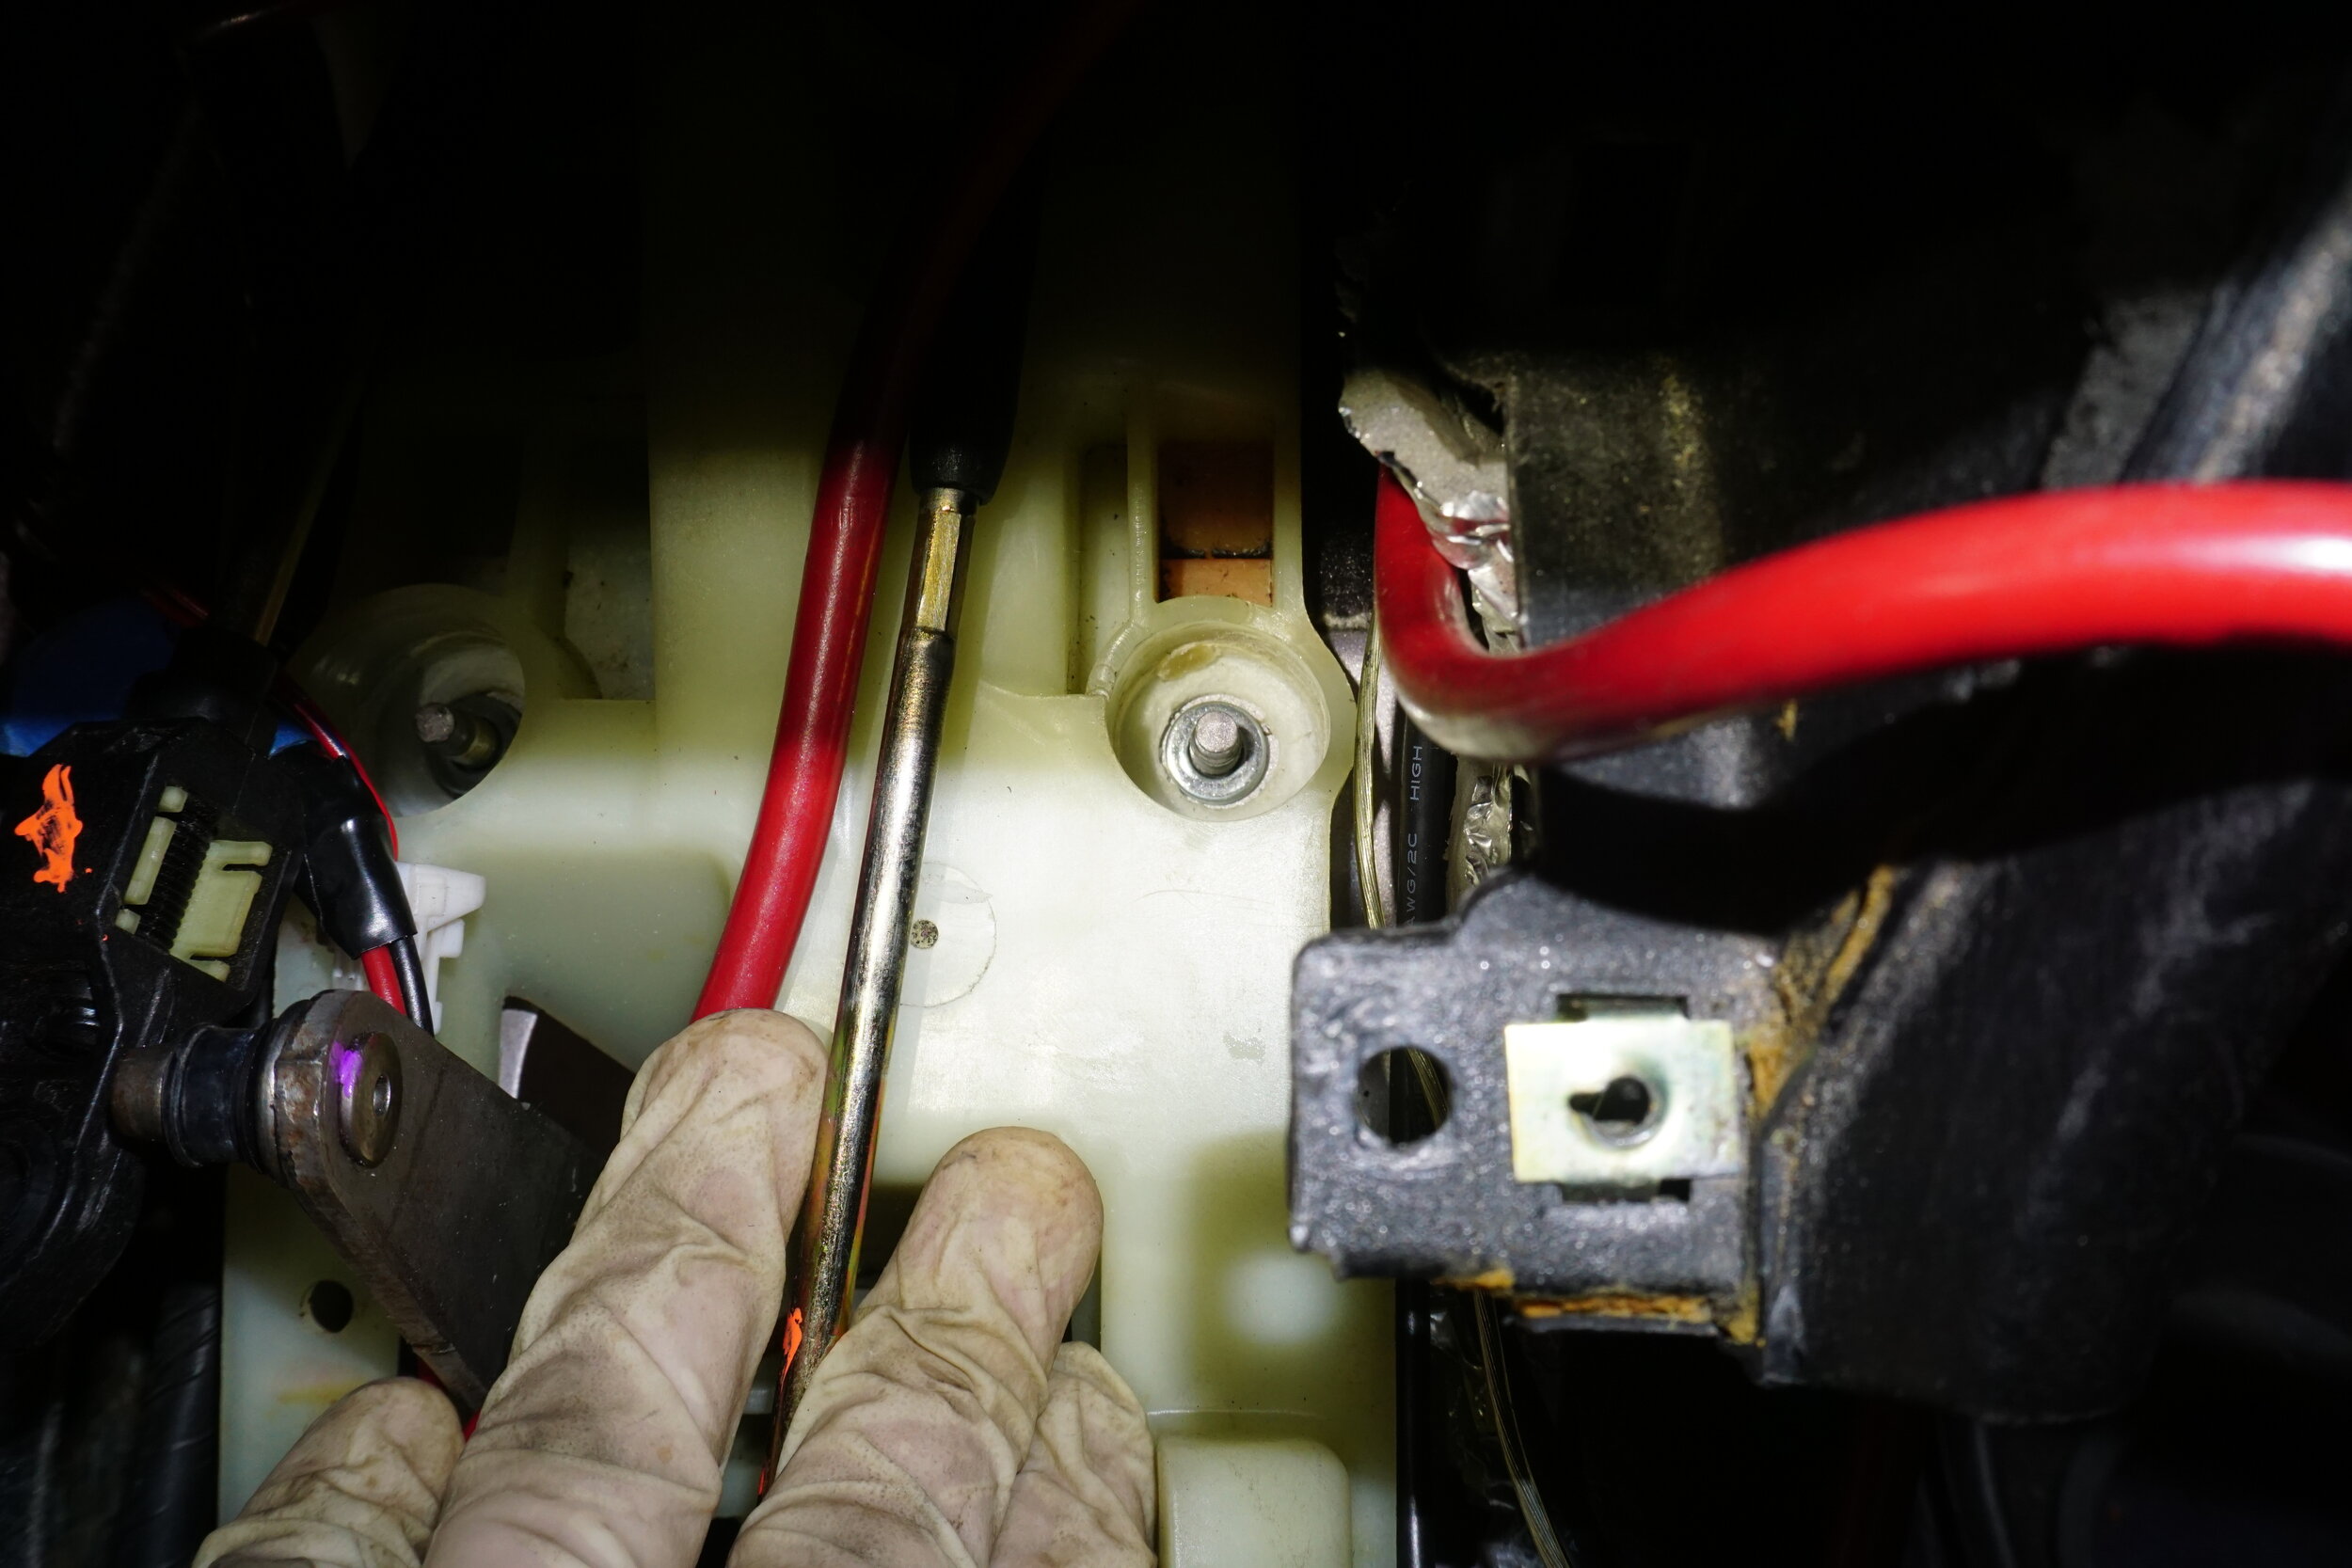
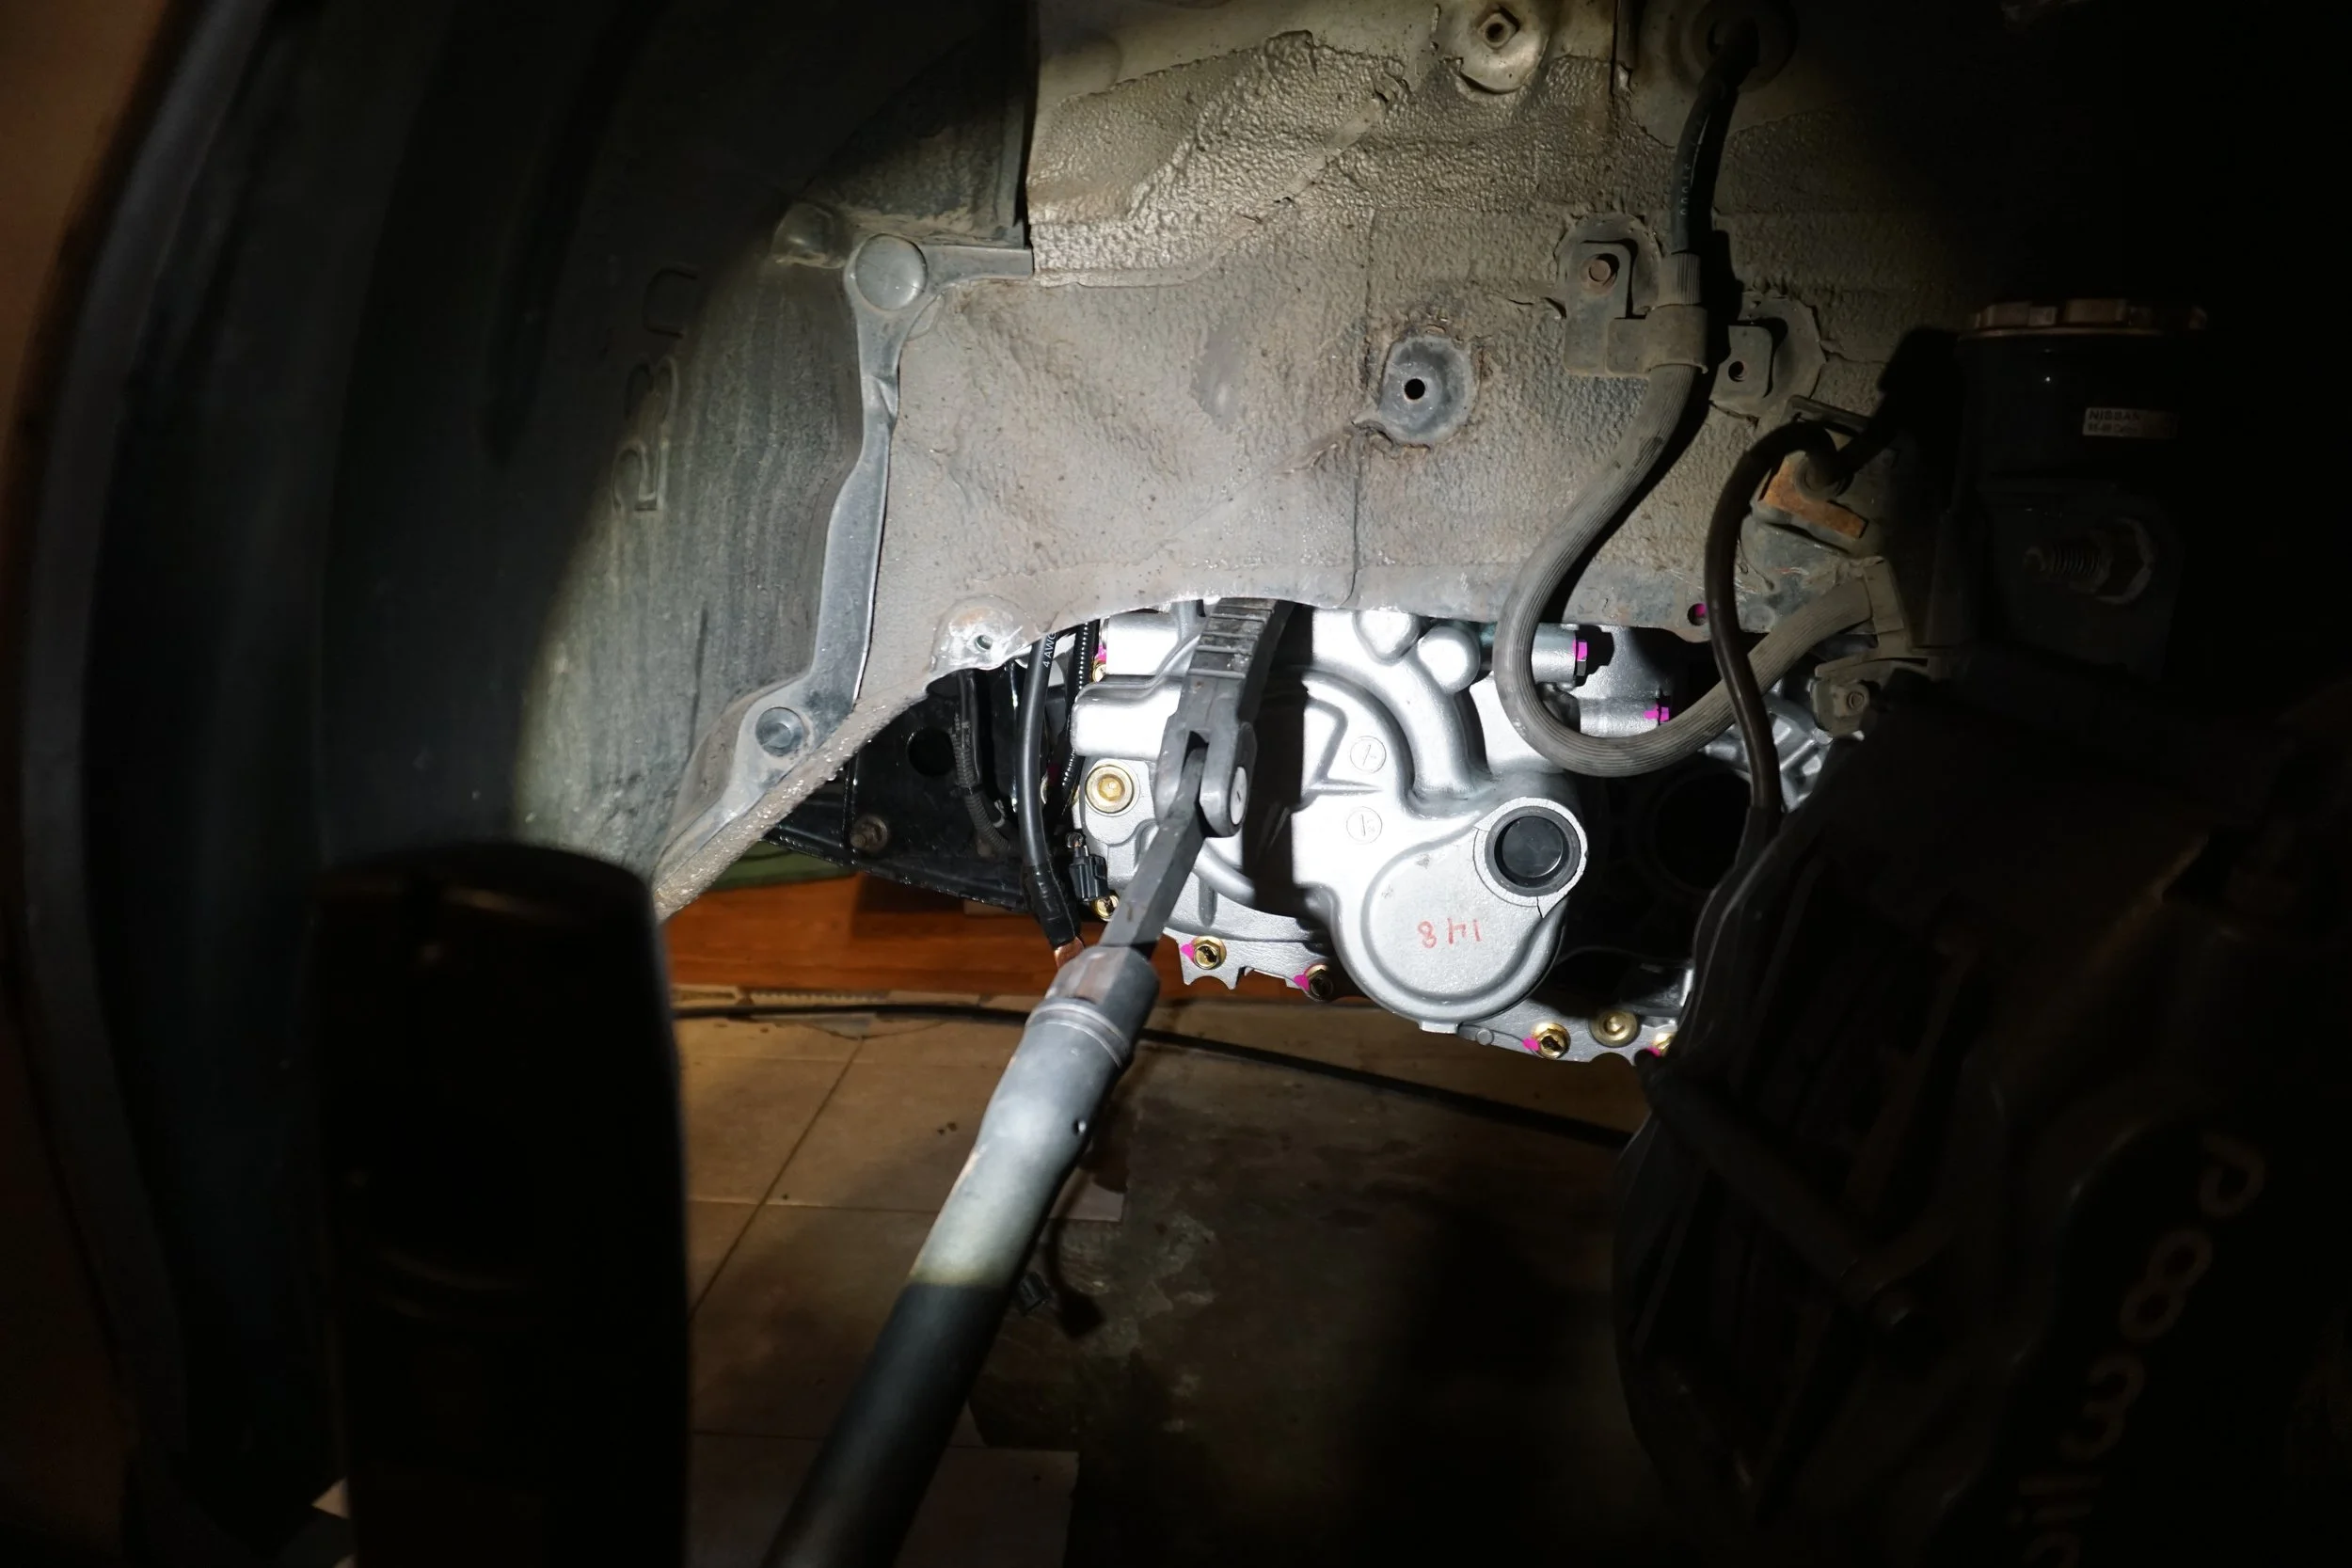
Don't forget to very thoroughly clean up the mating surface between the engine and transmission, otherwise your starter might not have a good ground path and the car won't start. Clean both the engine and the transmission! I used one of these plastic bristle things so I wouldn't damage the aluminum.
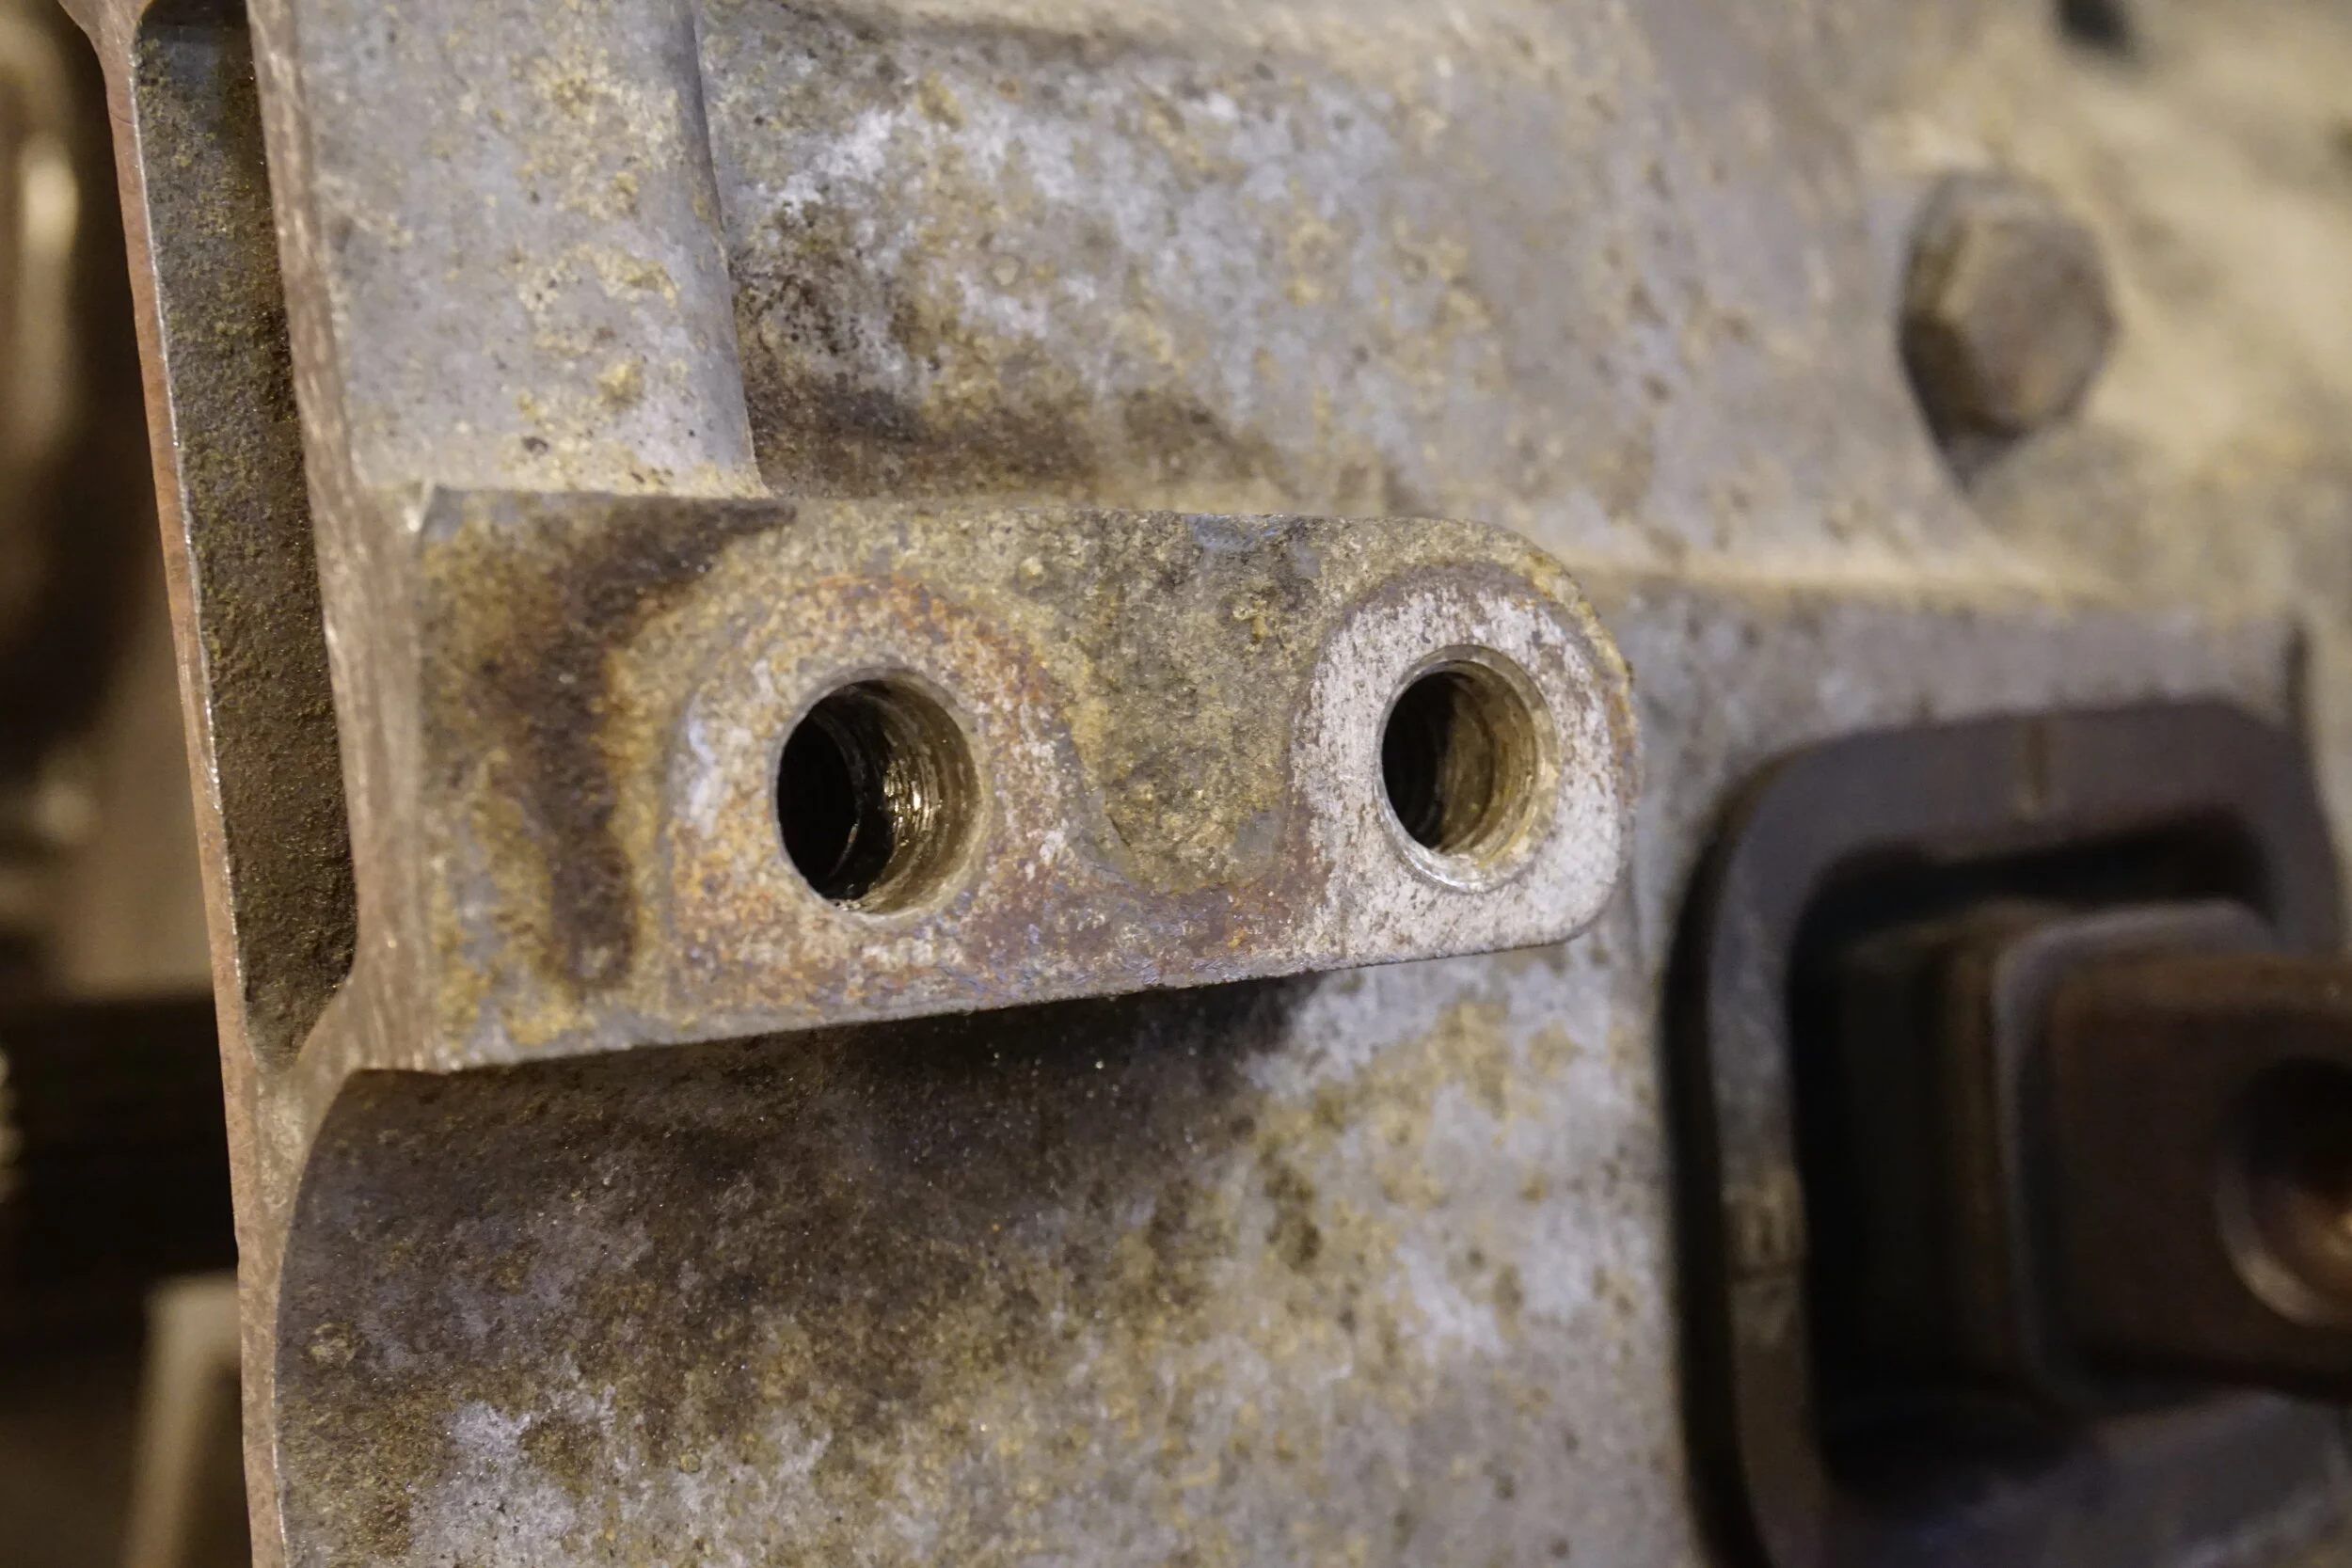
Now is a good time to chase the threads for the two bolts that hold the slave cylinder in place, mine were pretty grungy.
I recommend also cleaning up the area around the ground cable on the transmission so it can make a good connection.
Make a new ground cable using the appropriate glue-lined heat shrink.
Here's how mine looked when I was done:
Last edited by 95maxrider; 07-09-2023 at 09:57 AM.
Getting the transmission in place:
I removed my crossmember when I removed the 5 speed. You will need to support the engine from the top before you remove the crossmember so the engine doesn't fall on you. Theoretically you could support the engine oil pan with a jack stand, but that's really not a good idea as your only means of support. Best bet is to use an Engine Traverse Bar.
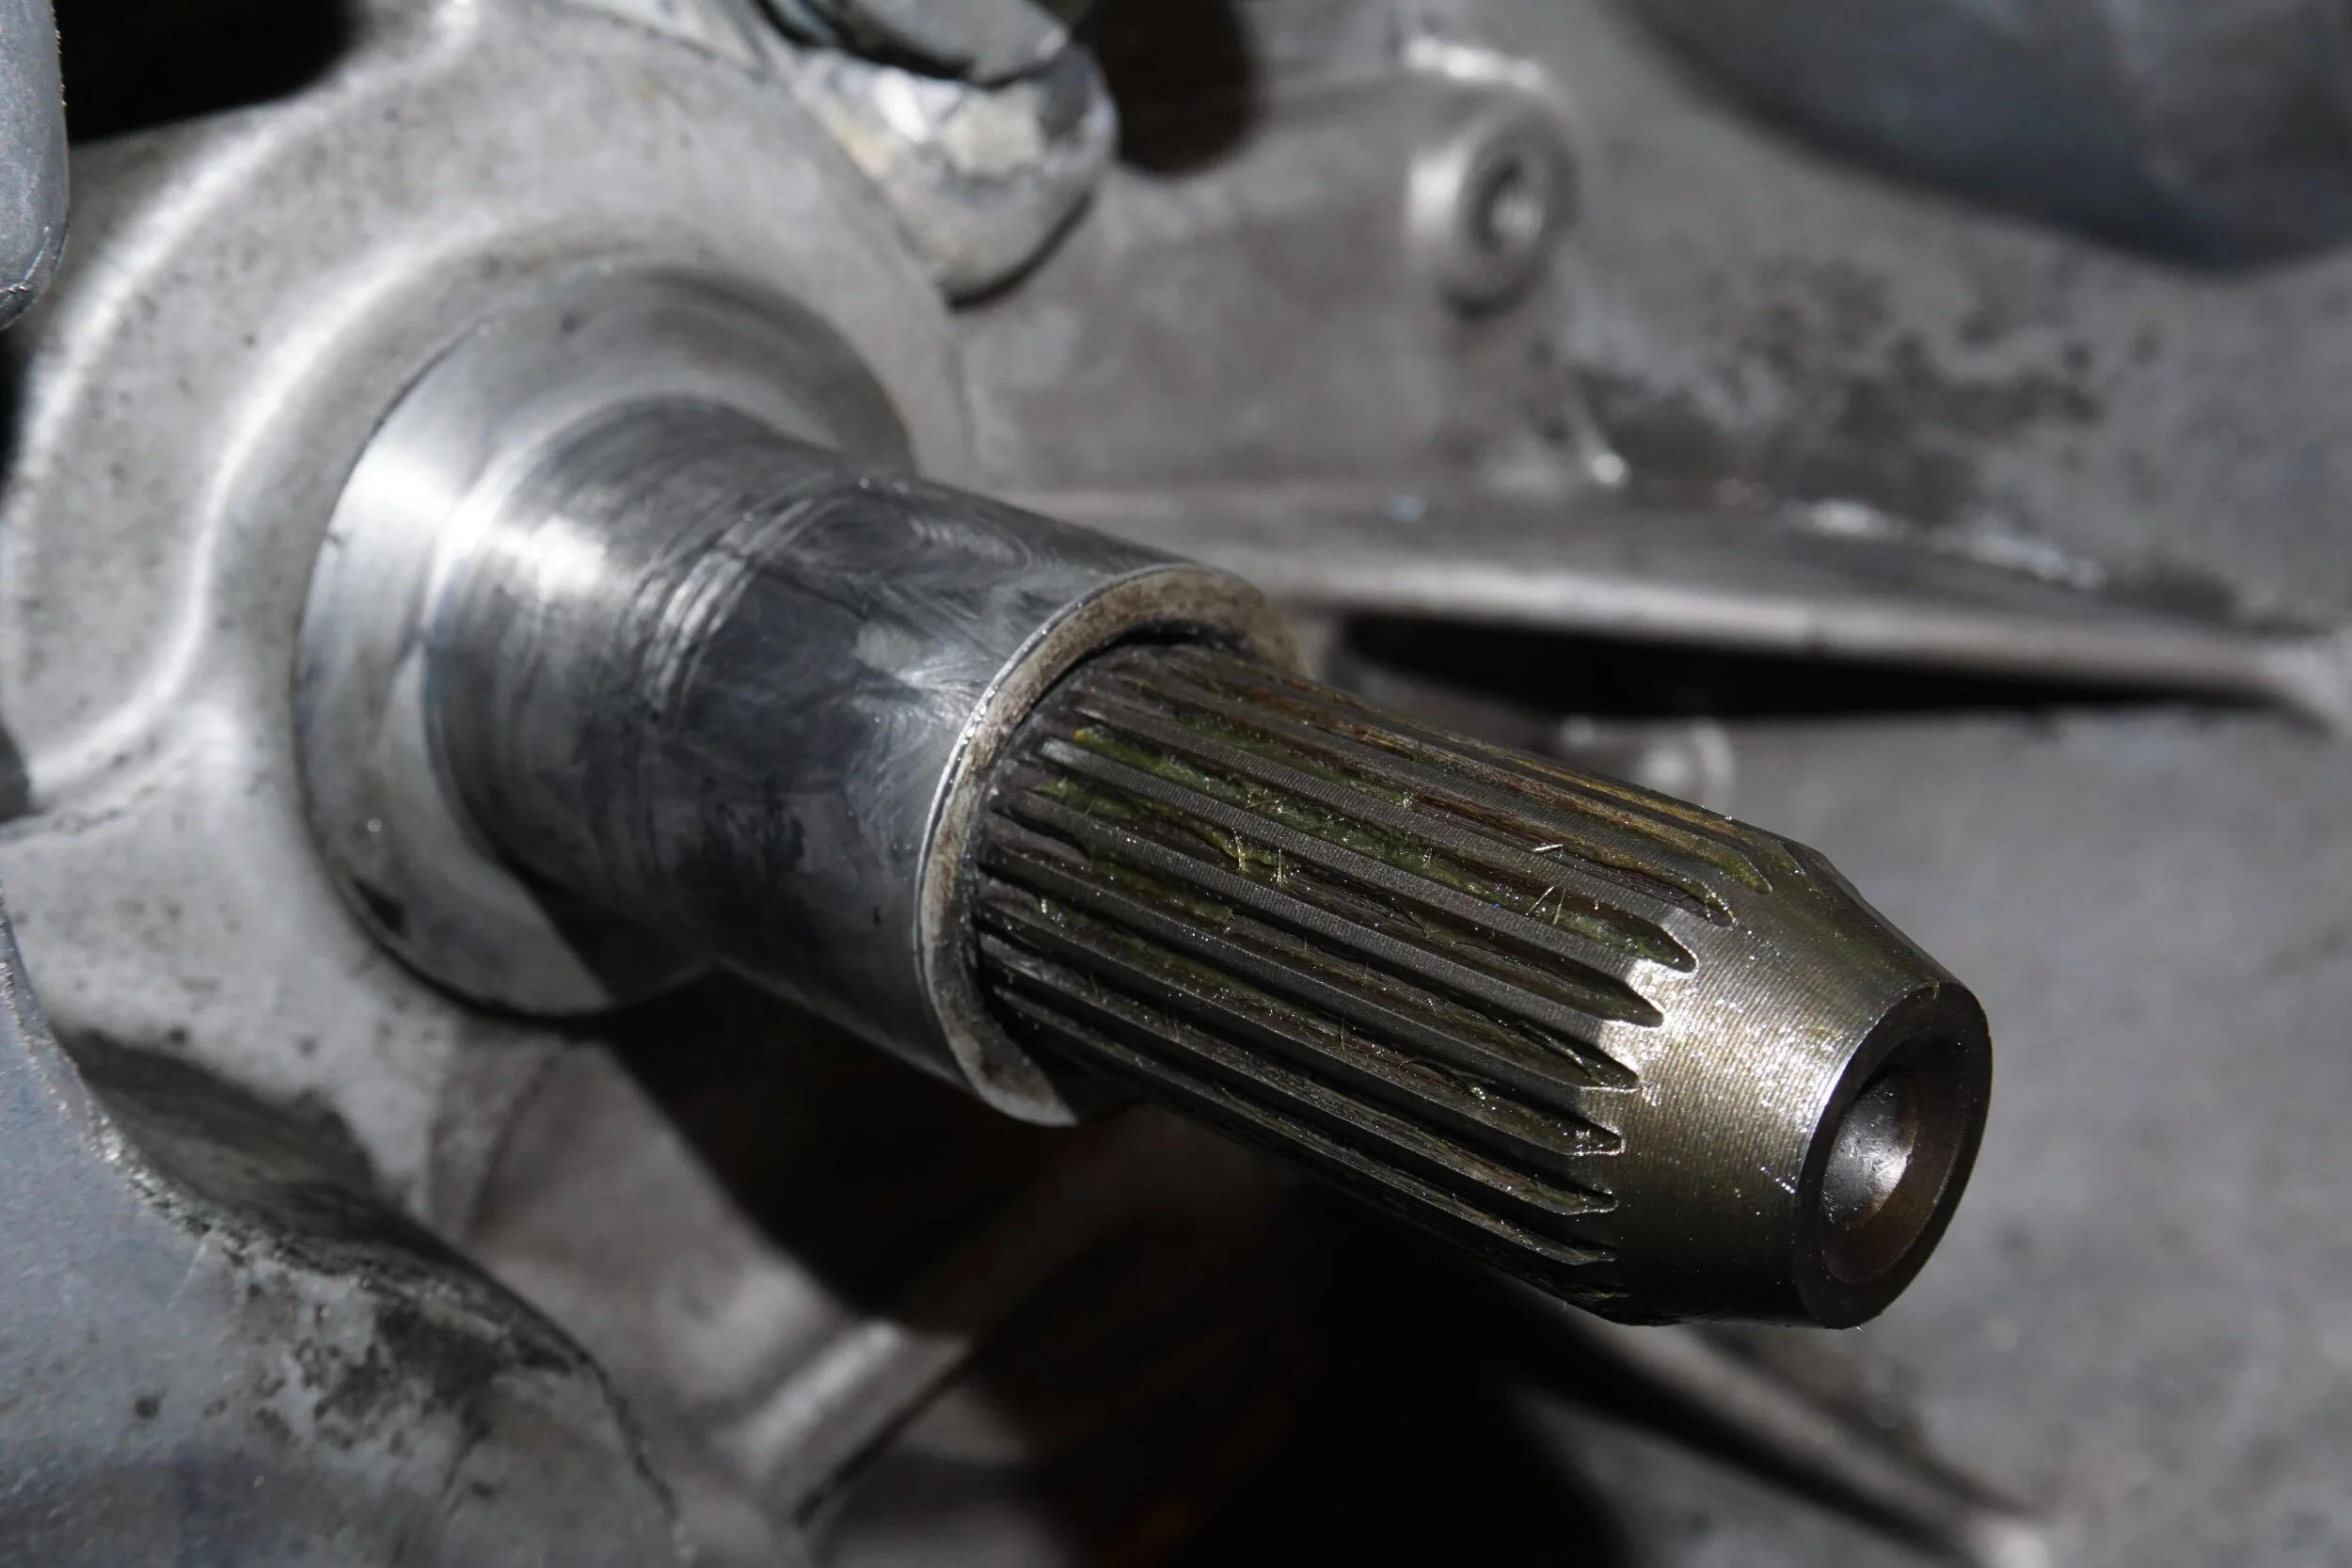
I tried to use my transmission jack to get the 6 speed in place, but no matter how I oriented things, it just wouldn't fit. Don't waste time like me, just bench press the trans until the input shaft lines up with the hole in the crankshaft, it takes like two minutes. Be mindful of the dowel pin on the rear, it needs to line up before you start tightening bolts.
I removed the shifter cable bracket from the trans before installing it, which made getting it into place much easier.
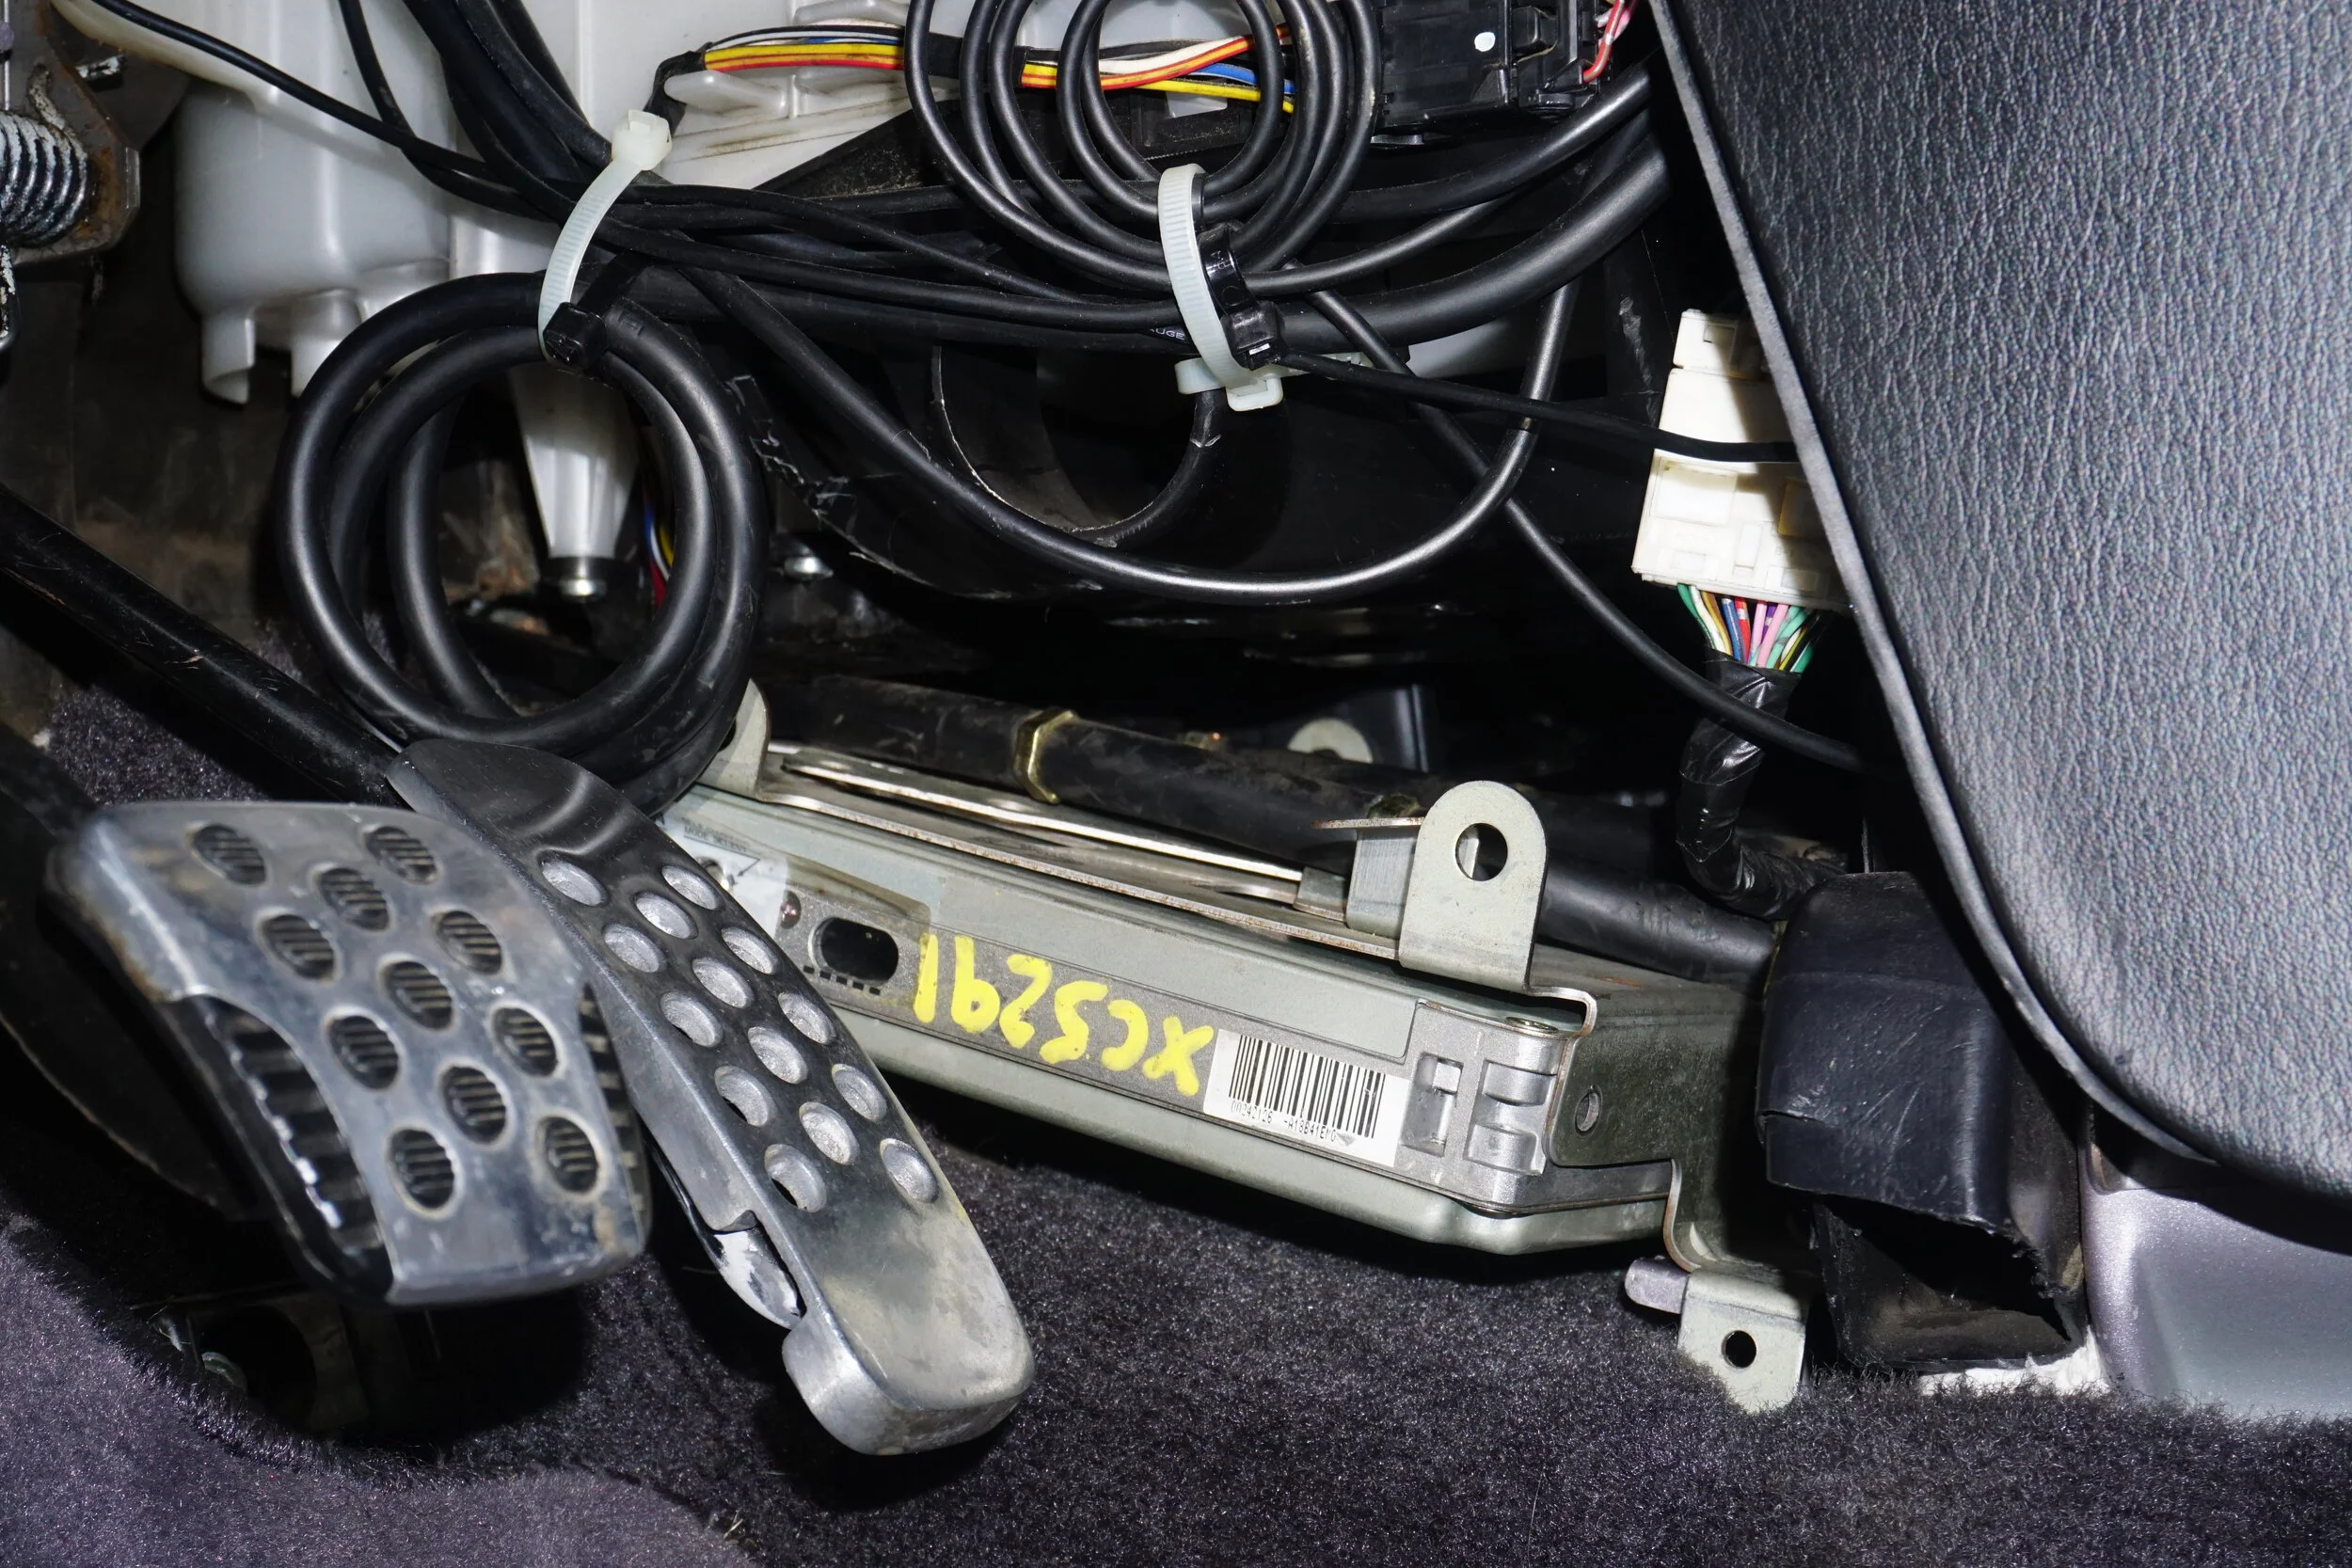
Cutting the firewall, running the shifter cables, and installing the shifter:
If you are doing this with the engine still installed, be prepared for a tight squeeze. I could not get a straight shot on the firewall to use a step bit on my drill gun to make a nice round hole, so I had to improvise. I have a flexible arm attachment for my Dremel that allows it to reach into tight areas very easily, and that's what I used to cut my ugly, square-ish hole with reinforced cutoff wheels. I'm embarrassed by the results, but it's what I could do with the space available. You will need to seal the hole in some way, either with sound deadening material, silver HVAC tape, or something else. When I pull my engine I plan on drilling two holes and hard mounting it to the firewall.
I had a hard time getting the cables into the cabin of the car. I chose to remove the ECU and the metal ECU cage from the car as I just didn't see a way to get the cables to the shifter with them in place. This part is much easier if you have a helper guiding the cables in the car while you push from the engine bay. Get the cables roughly in place and reinstall the ECU cage and ECU. I had to fold some metal flat on top of the cage to allow the cables to go where they wanted to go since space is so limited in this area.
As for the shifter assembly, there are bushings on each of the 4 bolt holes. The two front bushings must be removed because if not, the bolts attached to the floor won�t be tall enough for nuts to thread onto. You will need 2 nuts and bolts for the back holes. I noticed that even with the front bushings removed there were very few threads for the nuts to grab onto, so I decided to grind away some of the plastic from the top and bottom of the shifter assembly around the bolts to thin the plastic out and allow the nuts to grab more threads on the studs from the body. I used an oval grinding stone on my Dremel to grind away material from the top down, and then a flap wheel on my angle grinder on the bottom. I'm guessing I removed about half of the material thickness, and this allowed me to securely install nuts. Before installing the nuts, I installed a washer or two in the hole so that the washers were level with the plastic, which I hope will prevent any movement in the shifter assembly and will also provide the best base for the nuts to clamp down on.
Regarding the shifter cables and bushings on the transmission, I used a set of 2J Racing delrin bushings instead of the stock rubber bushings. I added a couple washers above and below the bushings to bring the stack up closer to the retaining pin/clip. But the assembly needs to rotate freely, so do not stack washers too tightly against the pin/clip.
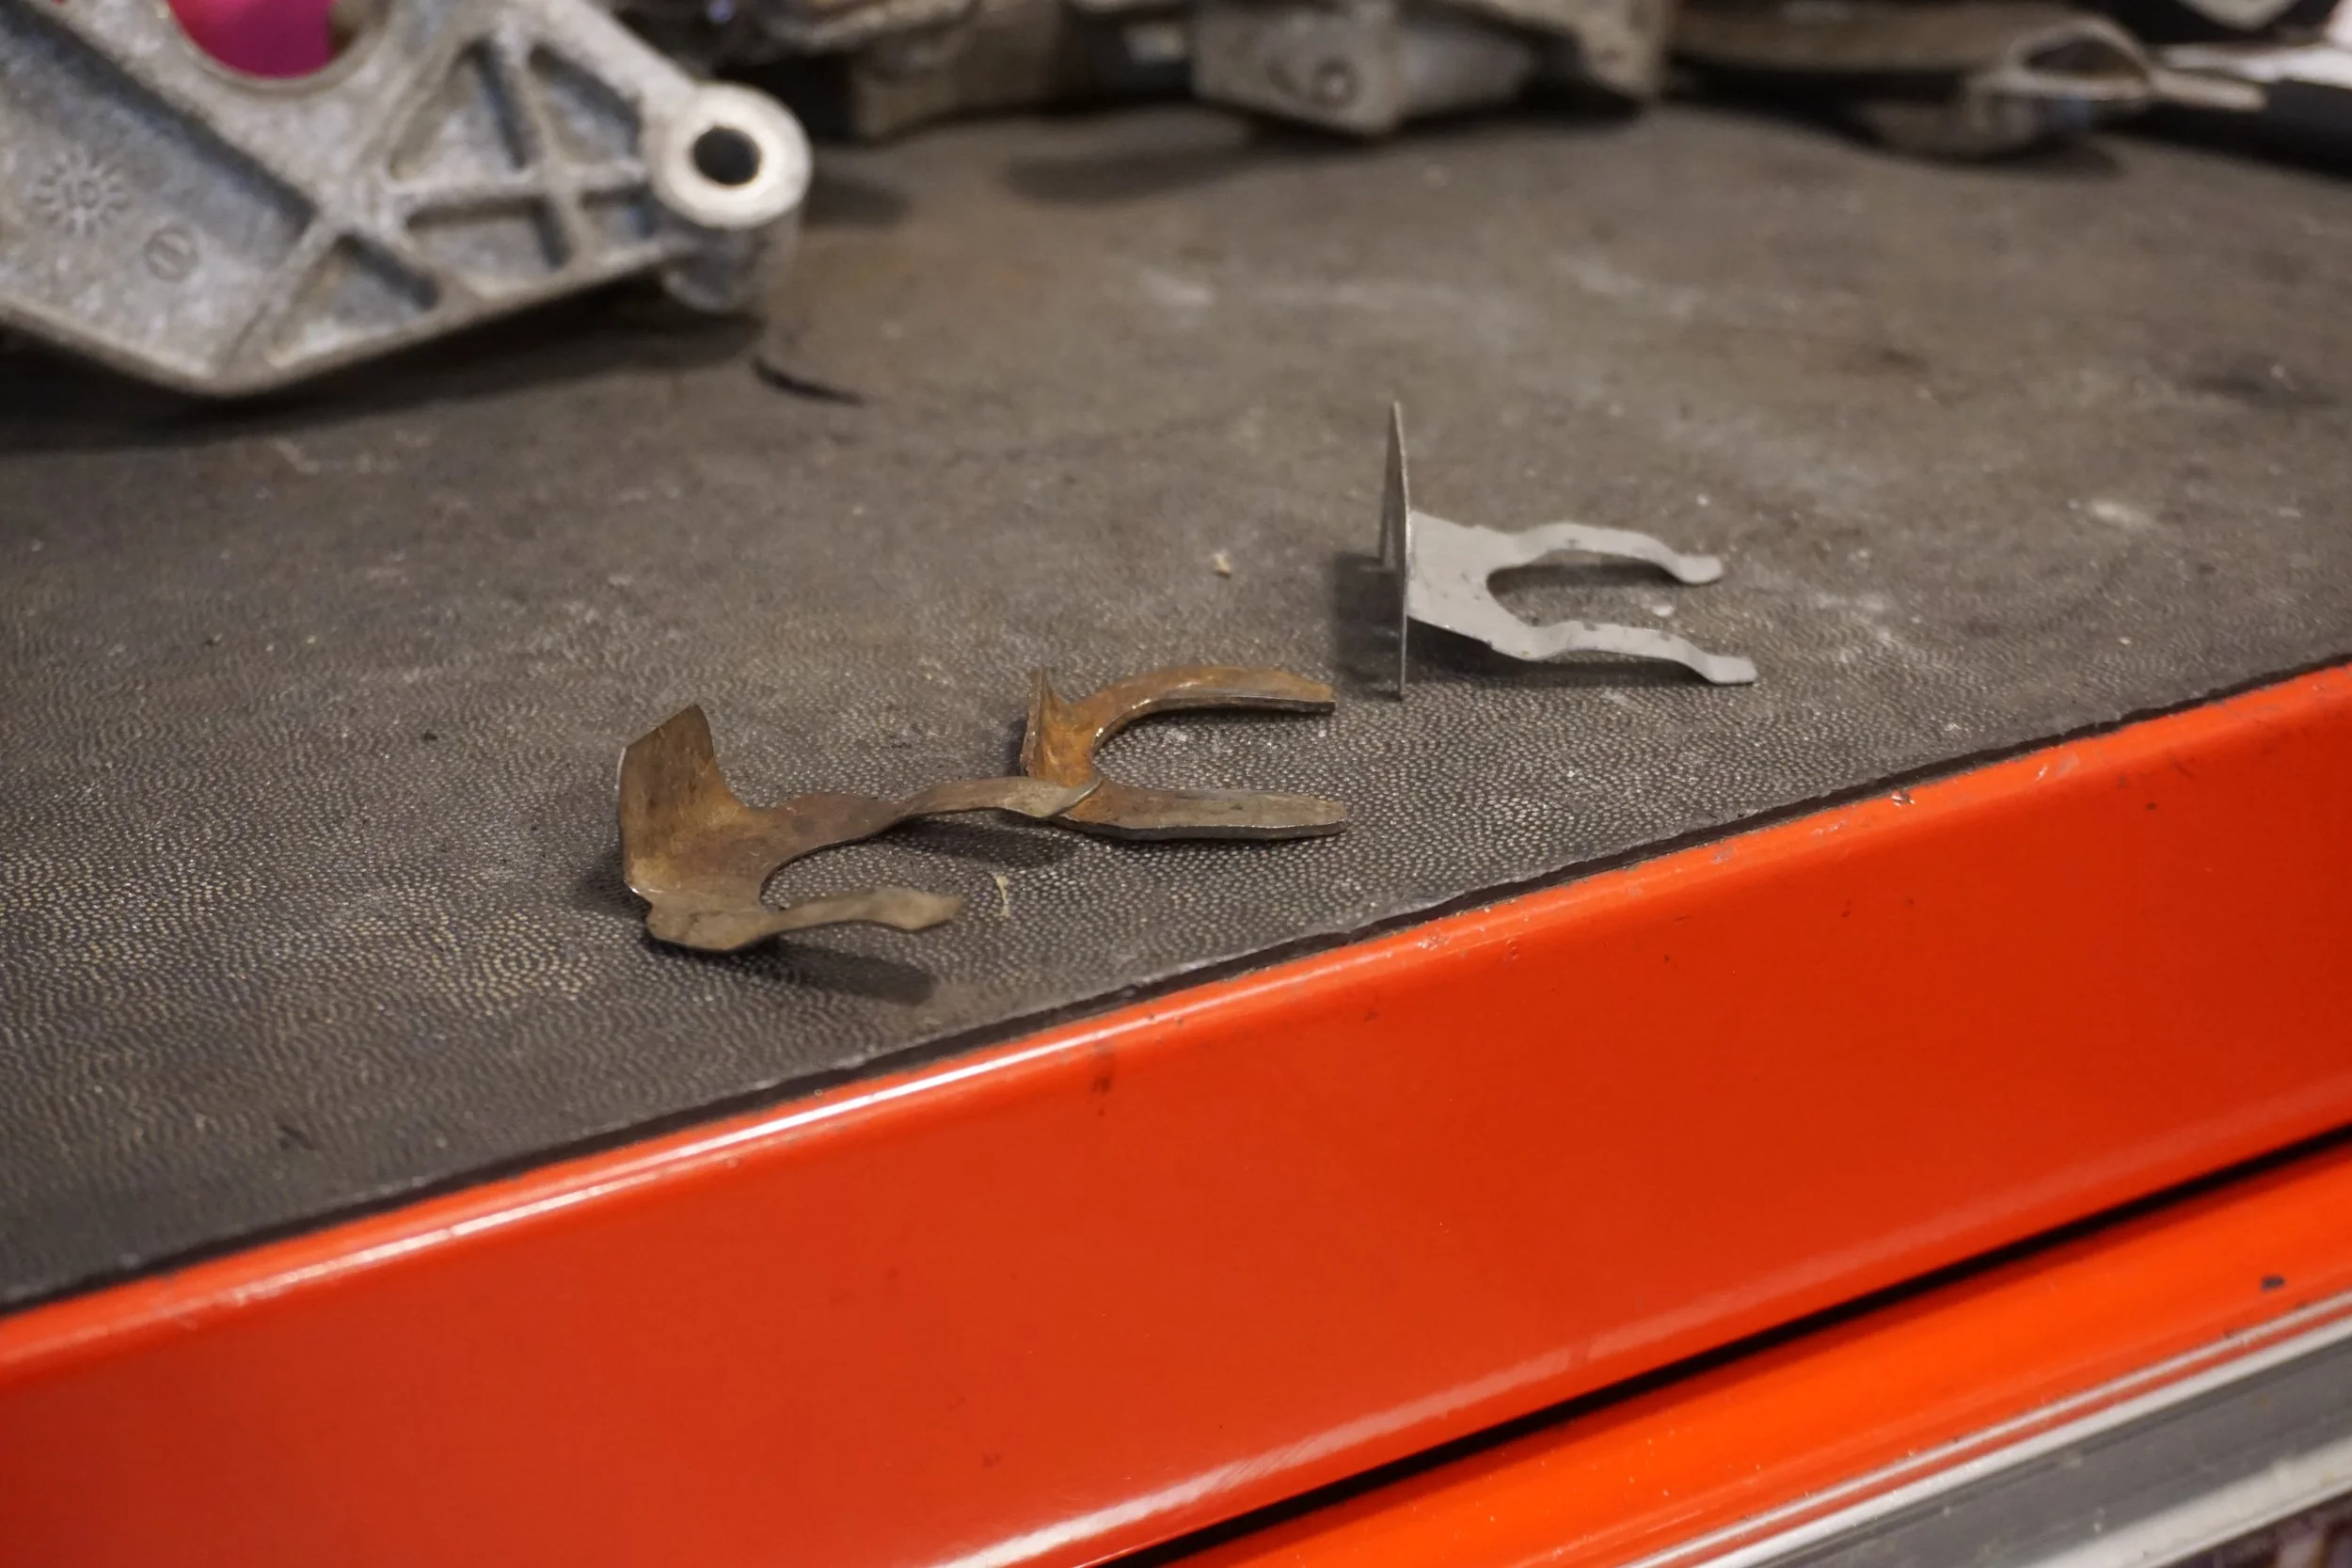
Another thing I learned was that the retaining clips that holds the shifter cables to the bracket really should be the thicker variety, rather than the thinner and flimsier version. I no longer remember which cars had which version (whether 5.5th or 6th gen), so if you only have the thinner ones, you may want to order the beefier versions from the dealer or go scrounge around in junkyards. If you can only get the thinner ones, the more important thing to note is their orientation when you install them. I initially installed one of them from the top down, but this allowed the bottom of the shifter cable to not seat fully and wasn't flush with the bracket. Installing the clip from the side resolved the issue and the cable was properly secured against the bracket.
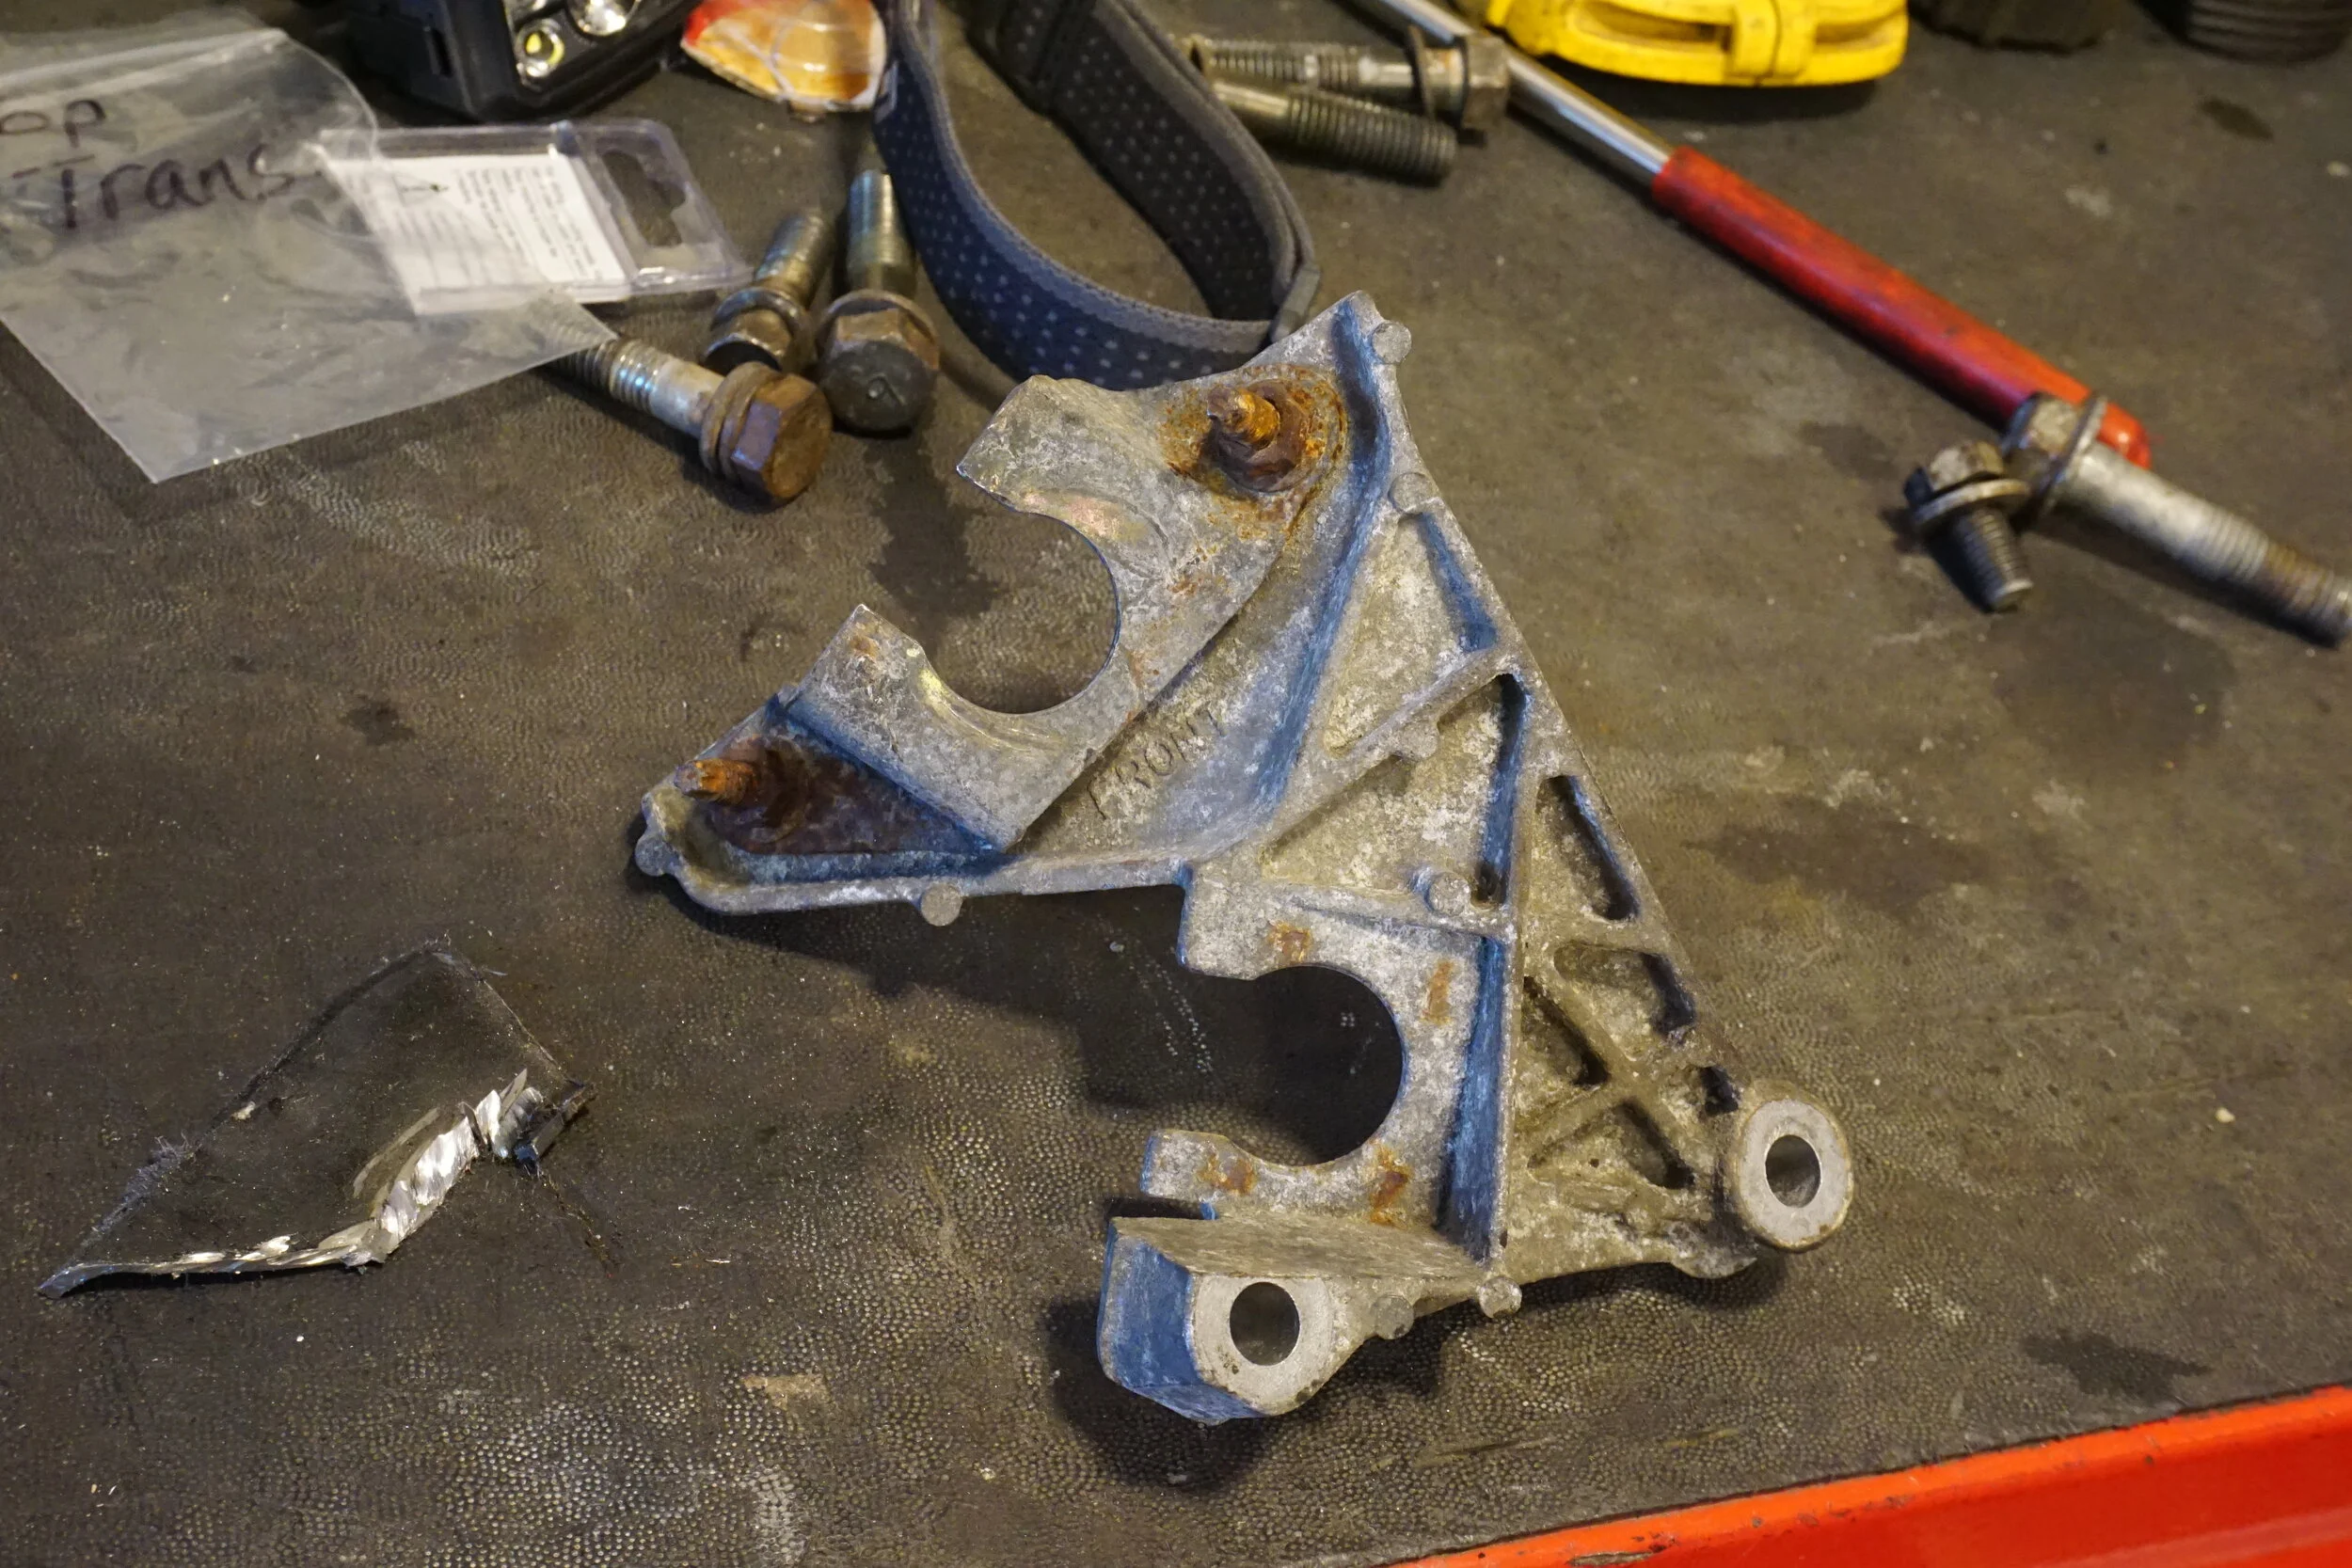
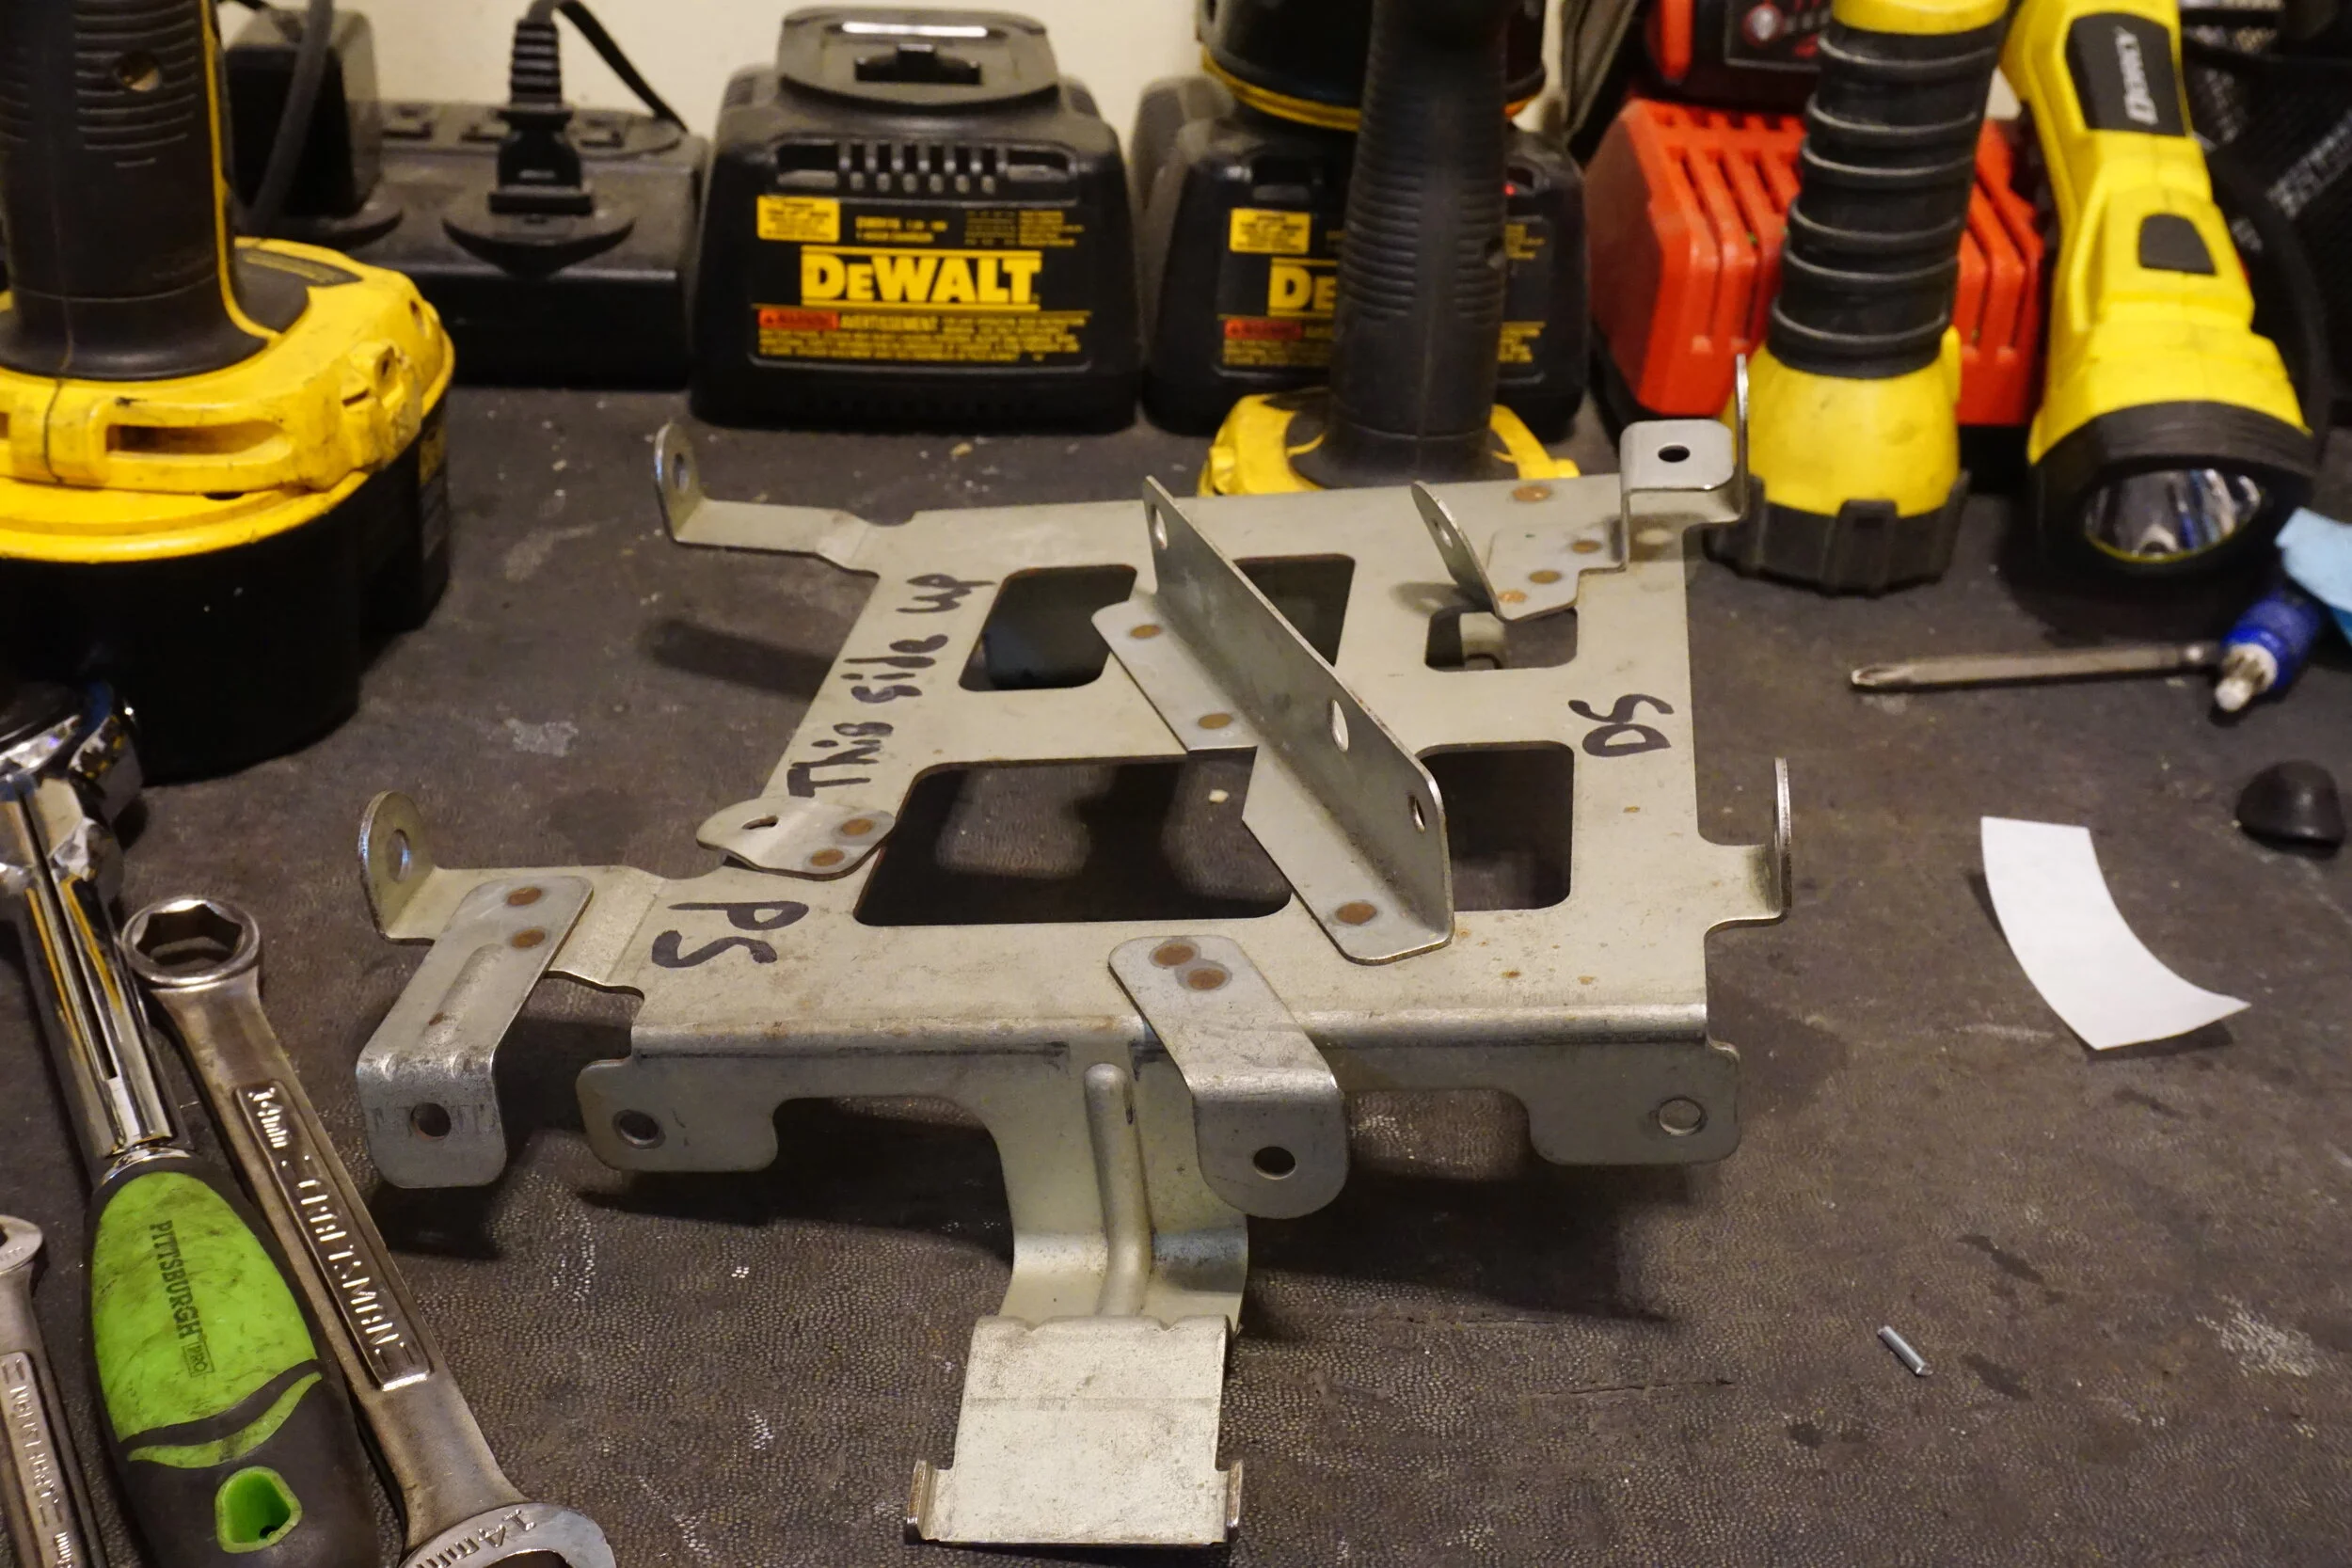
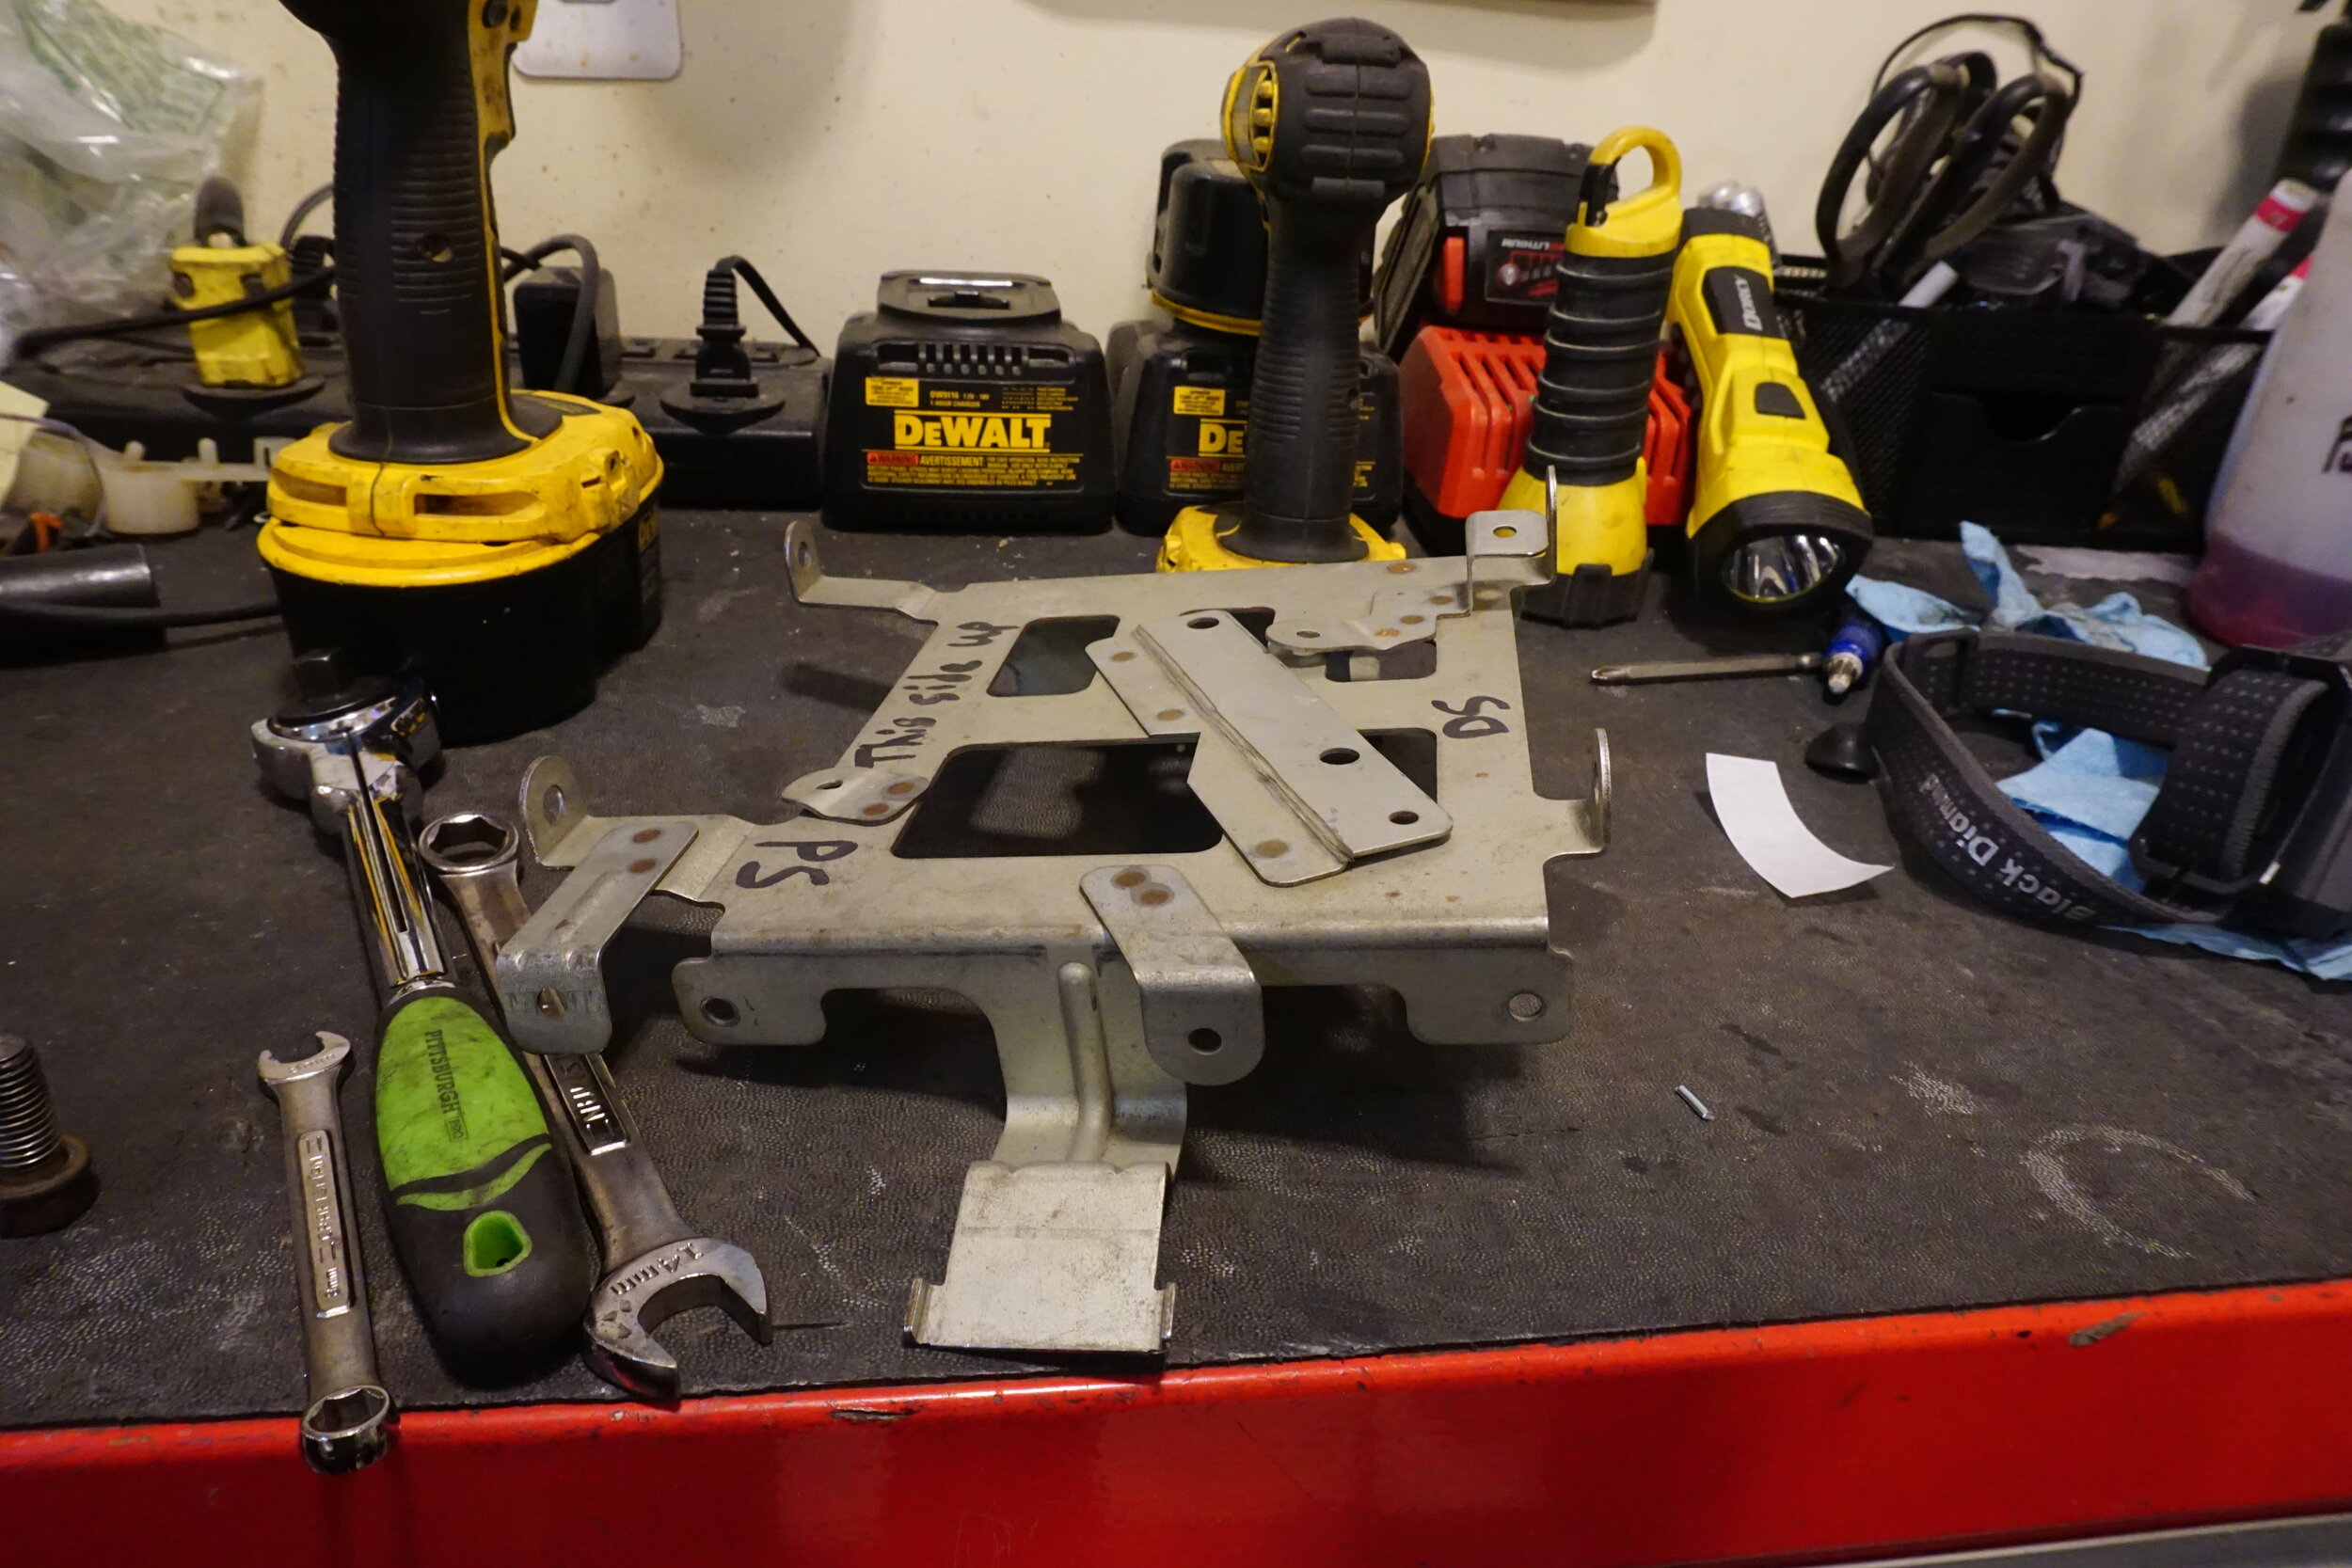
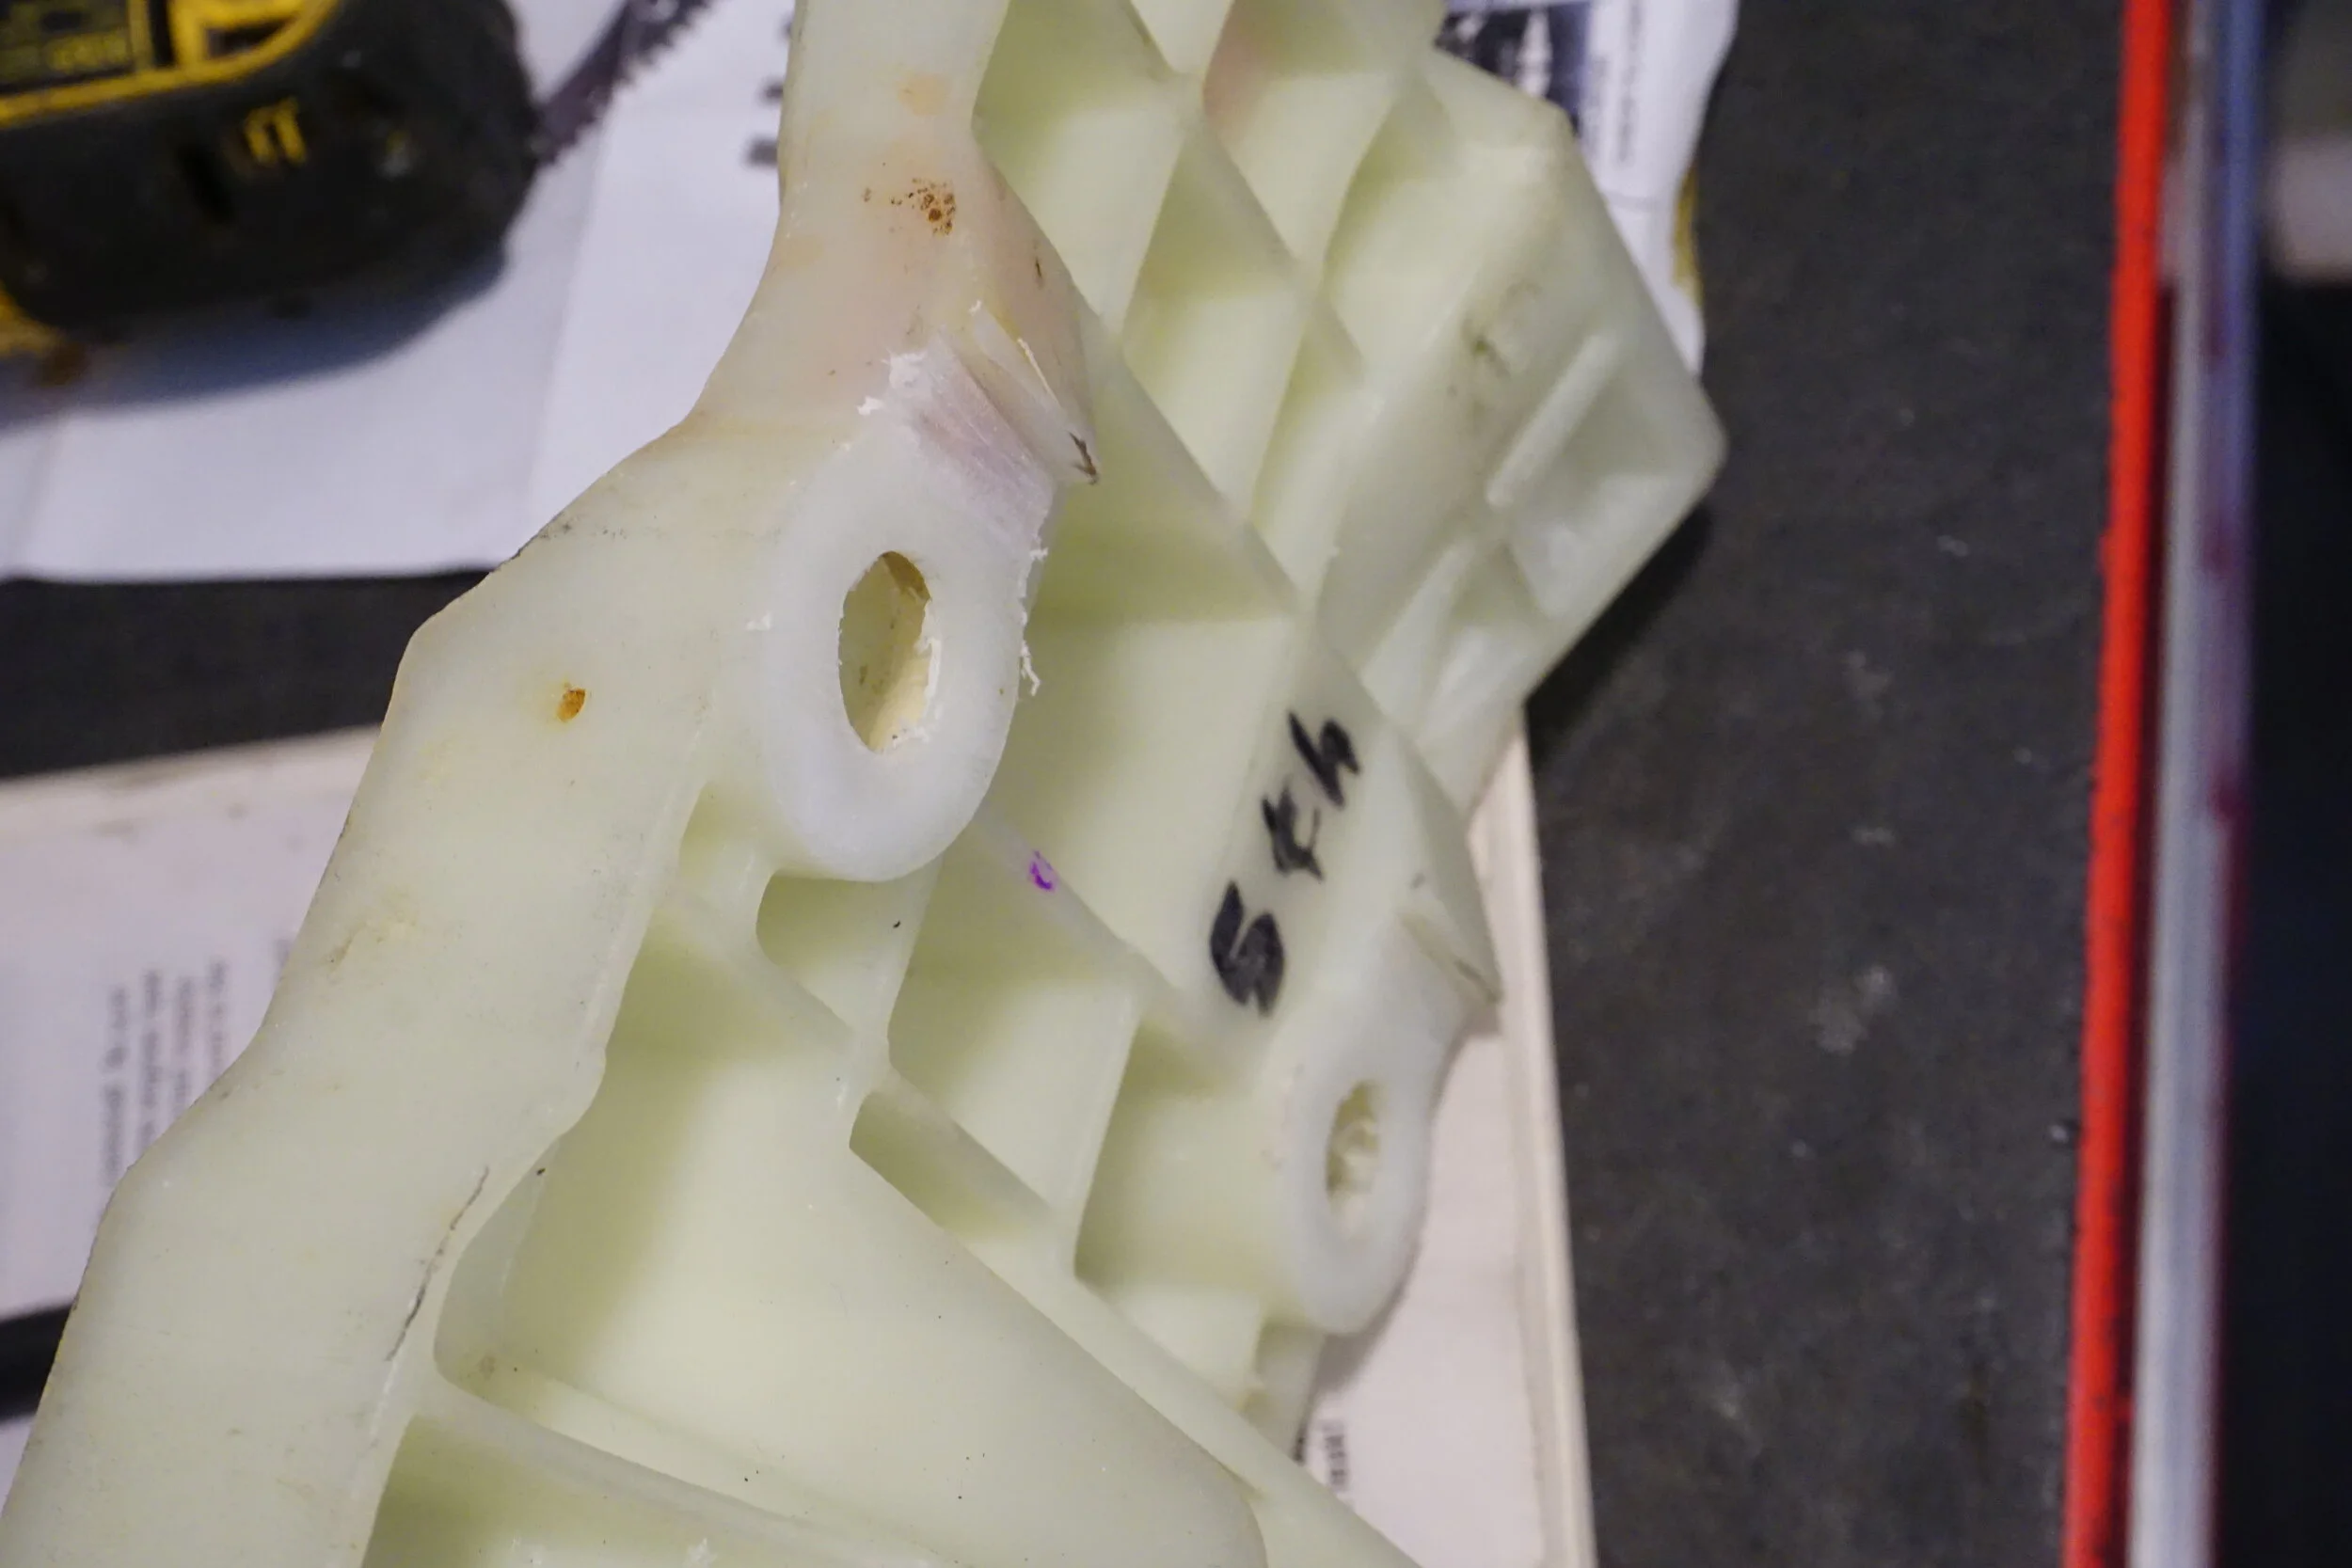
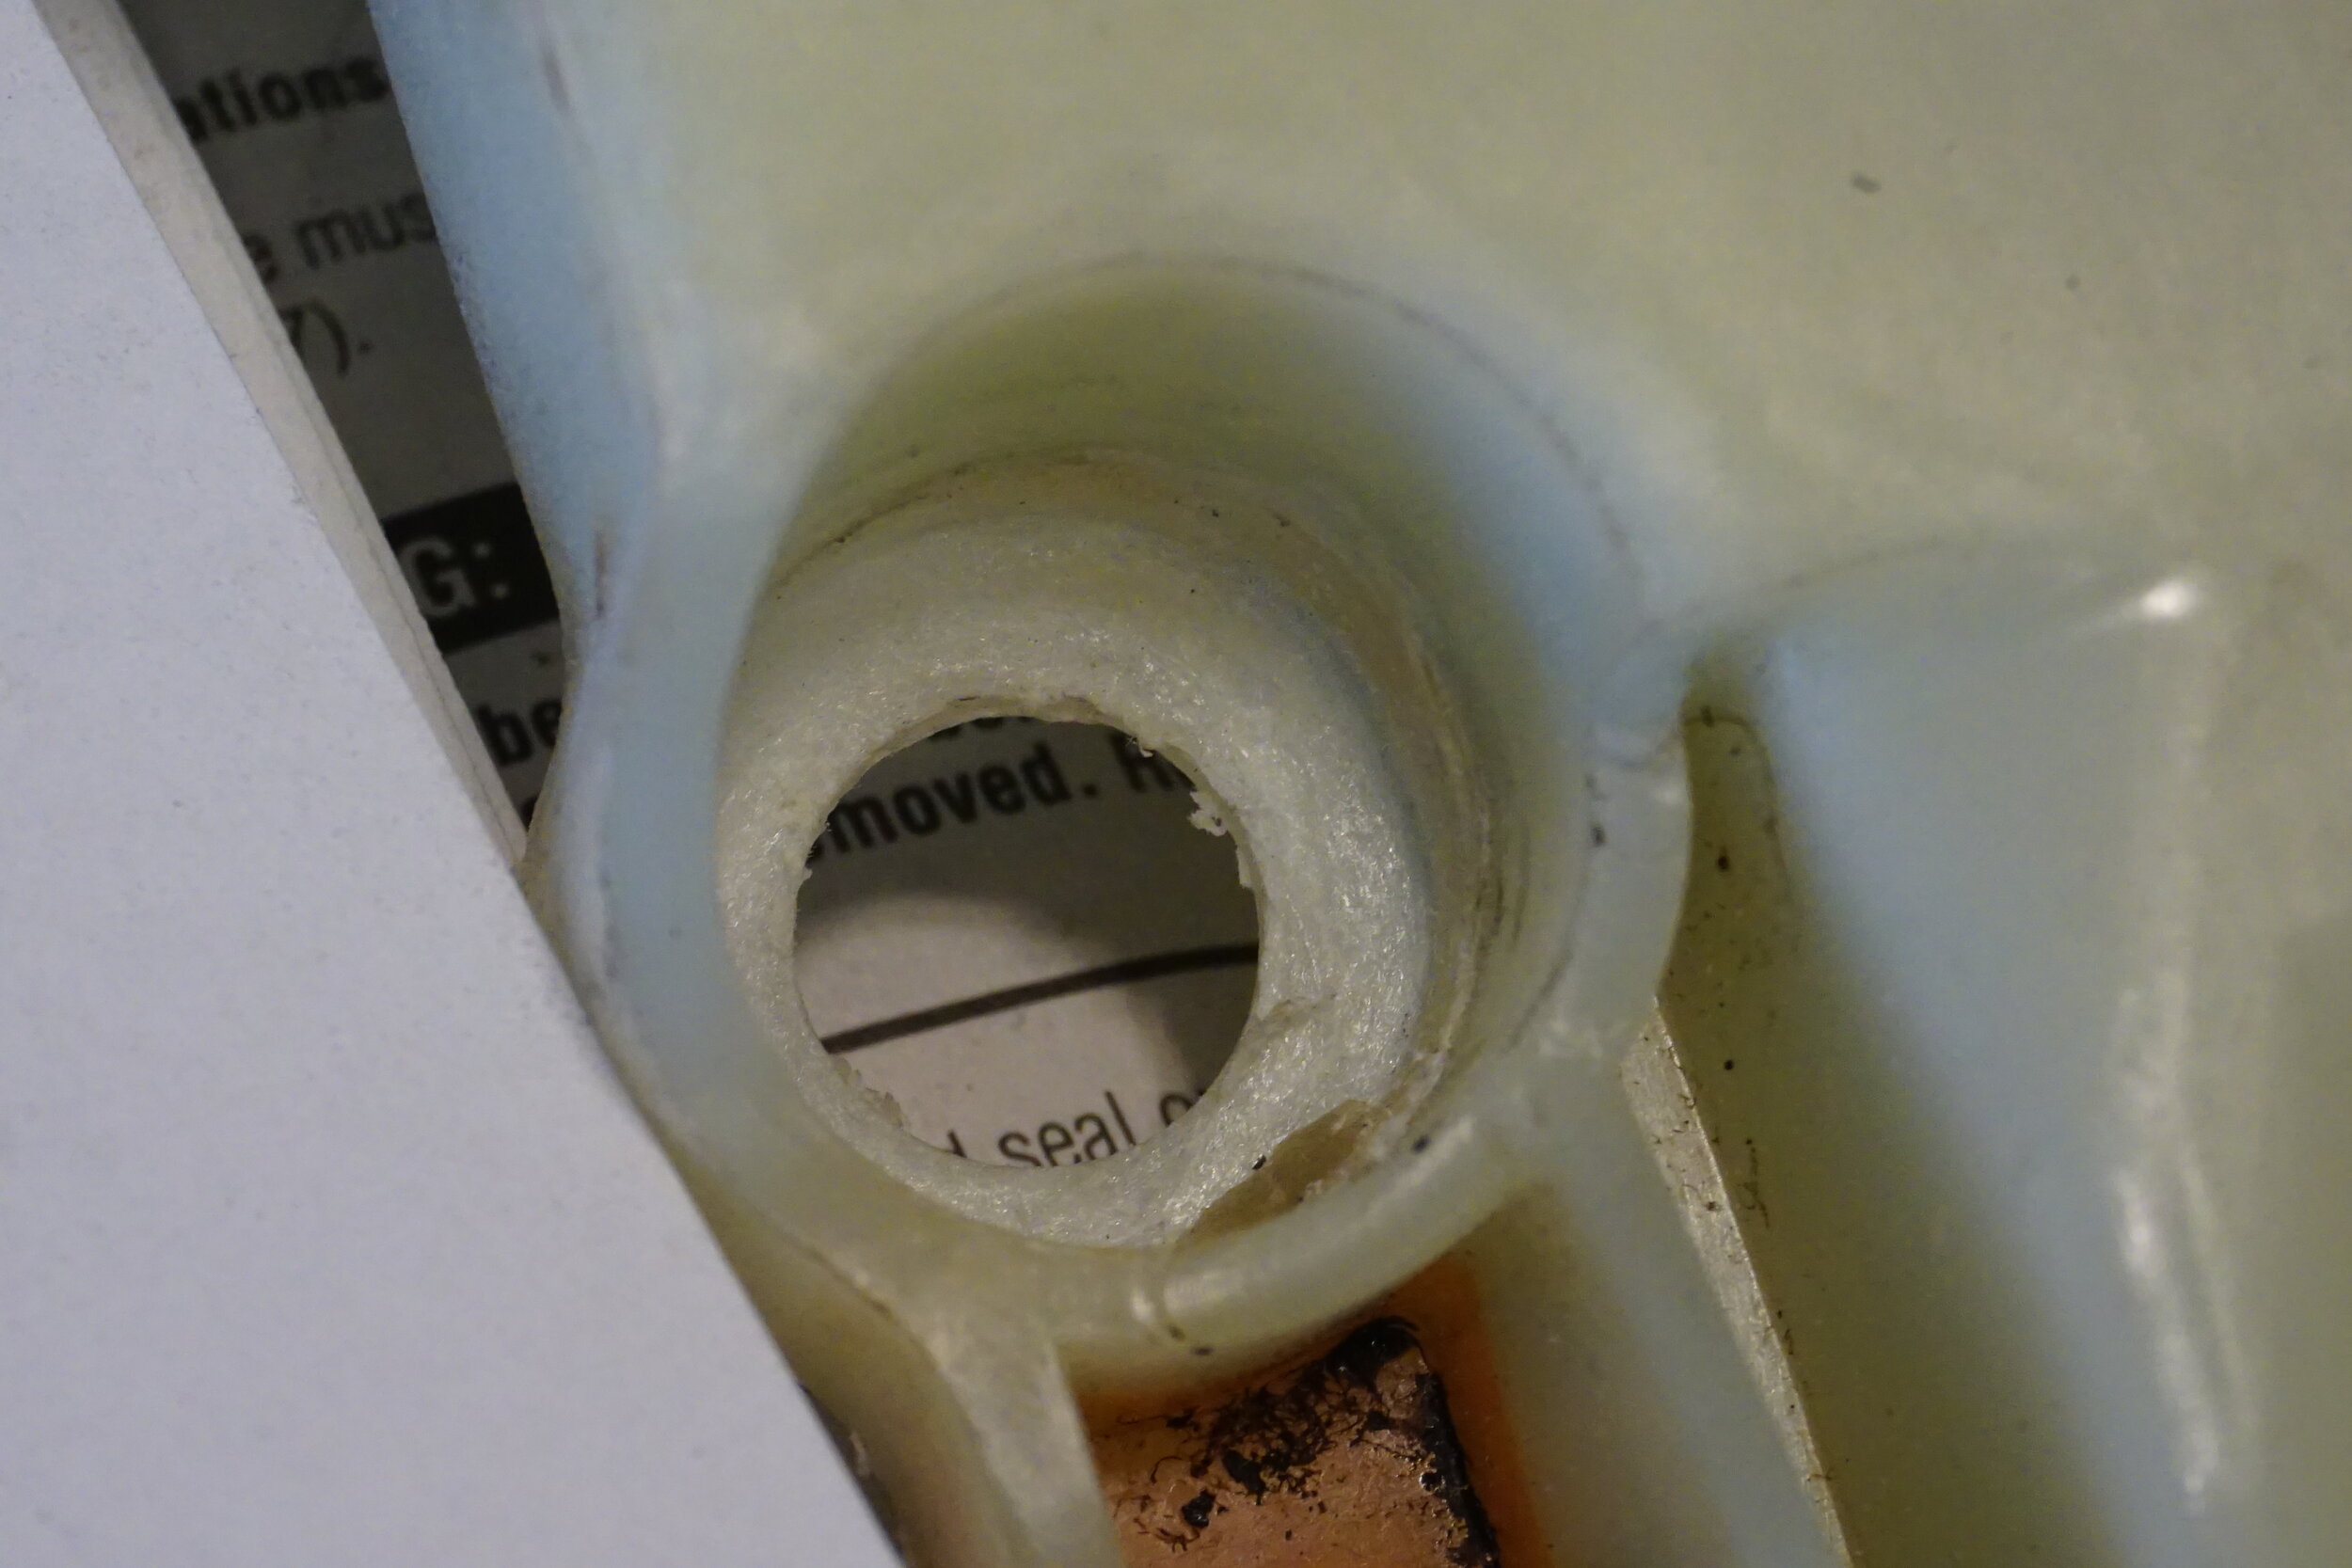
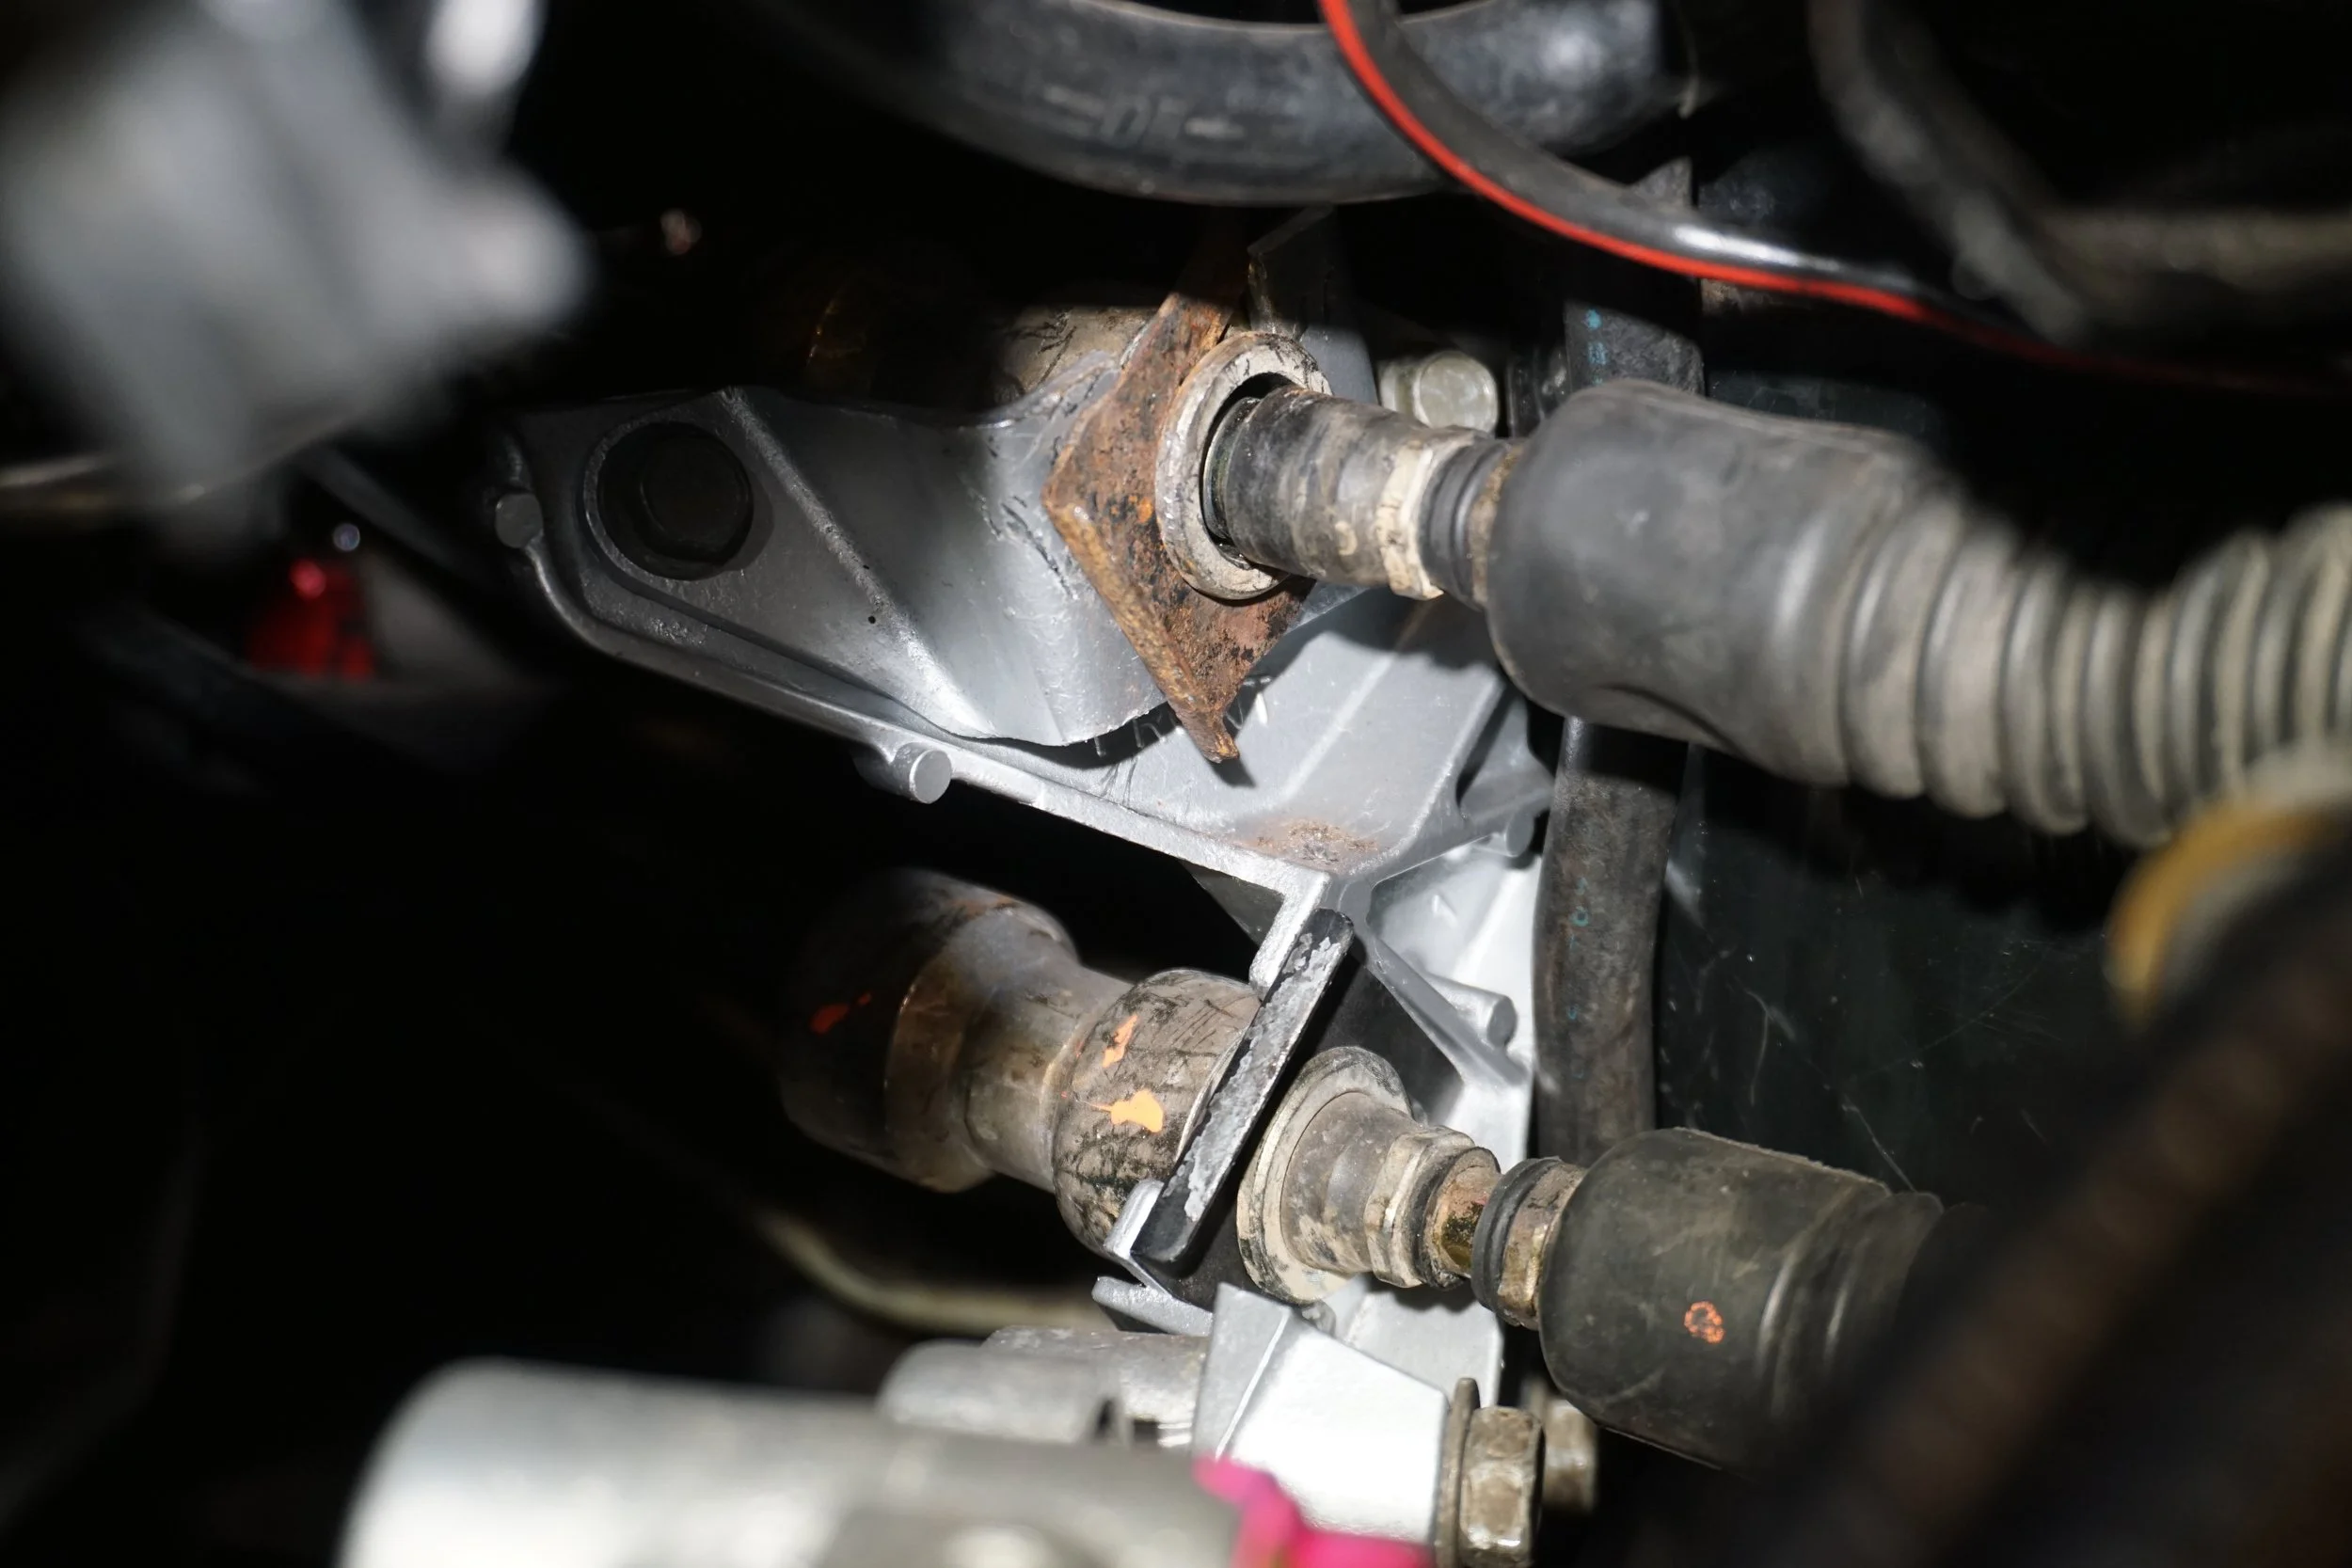
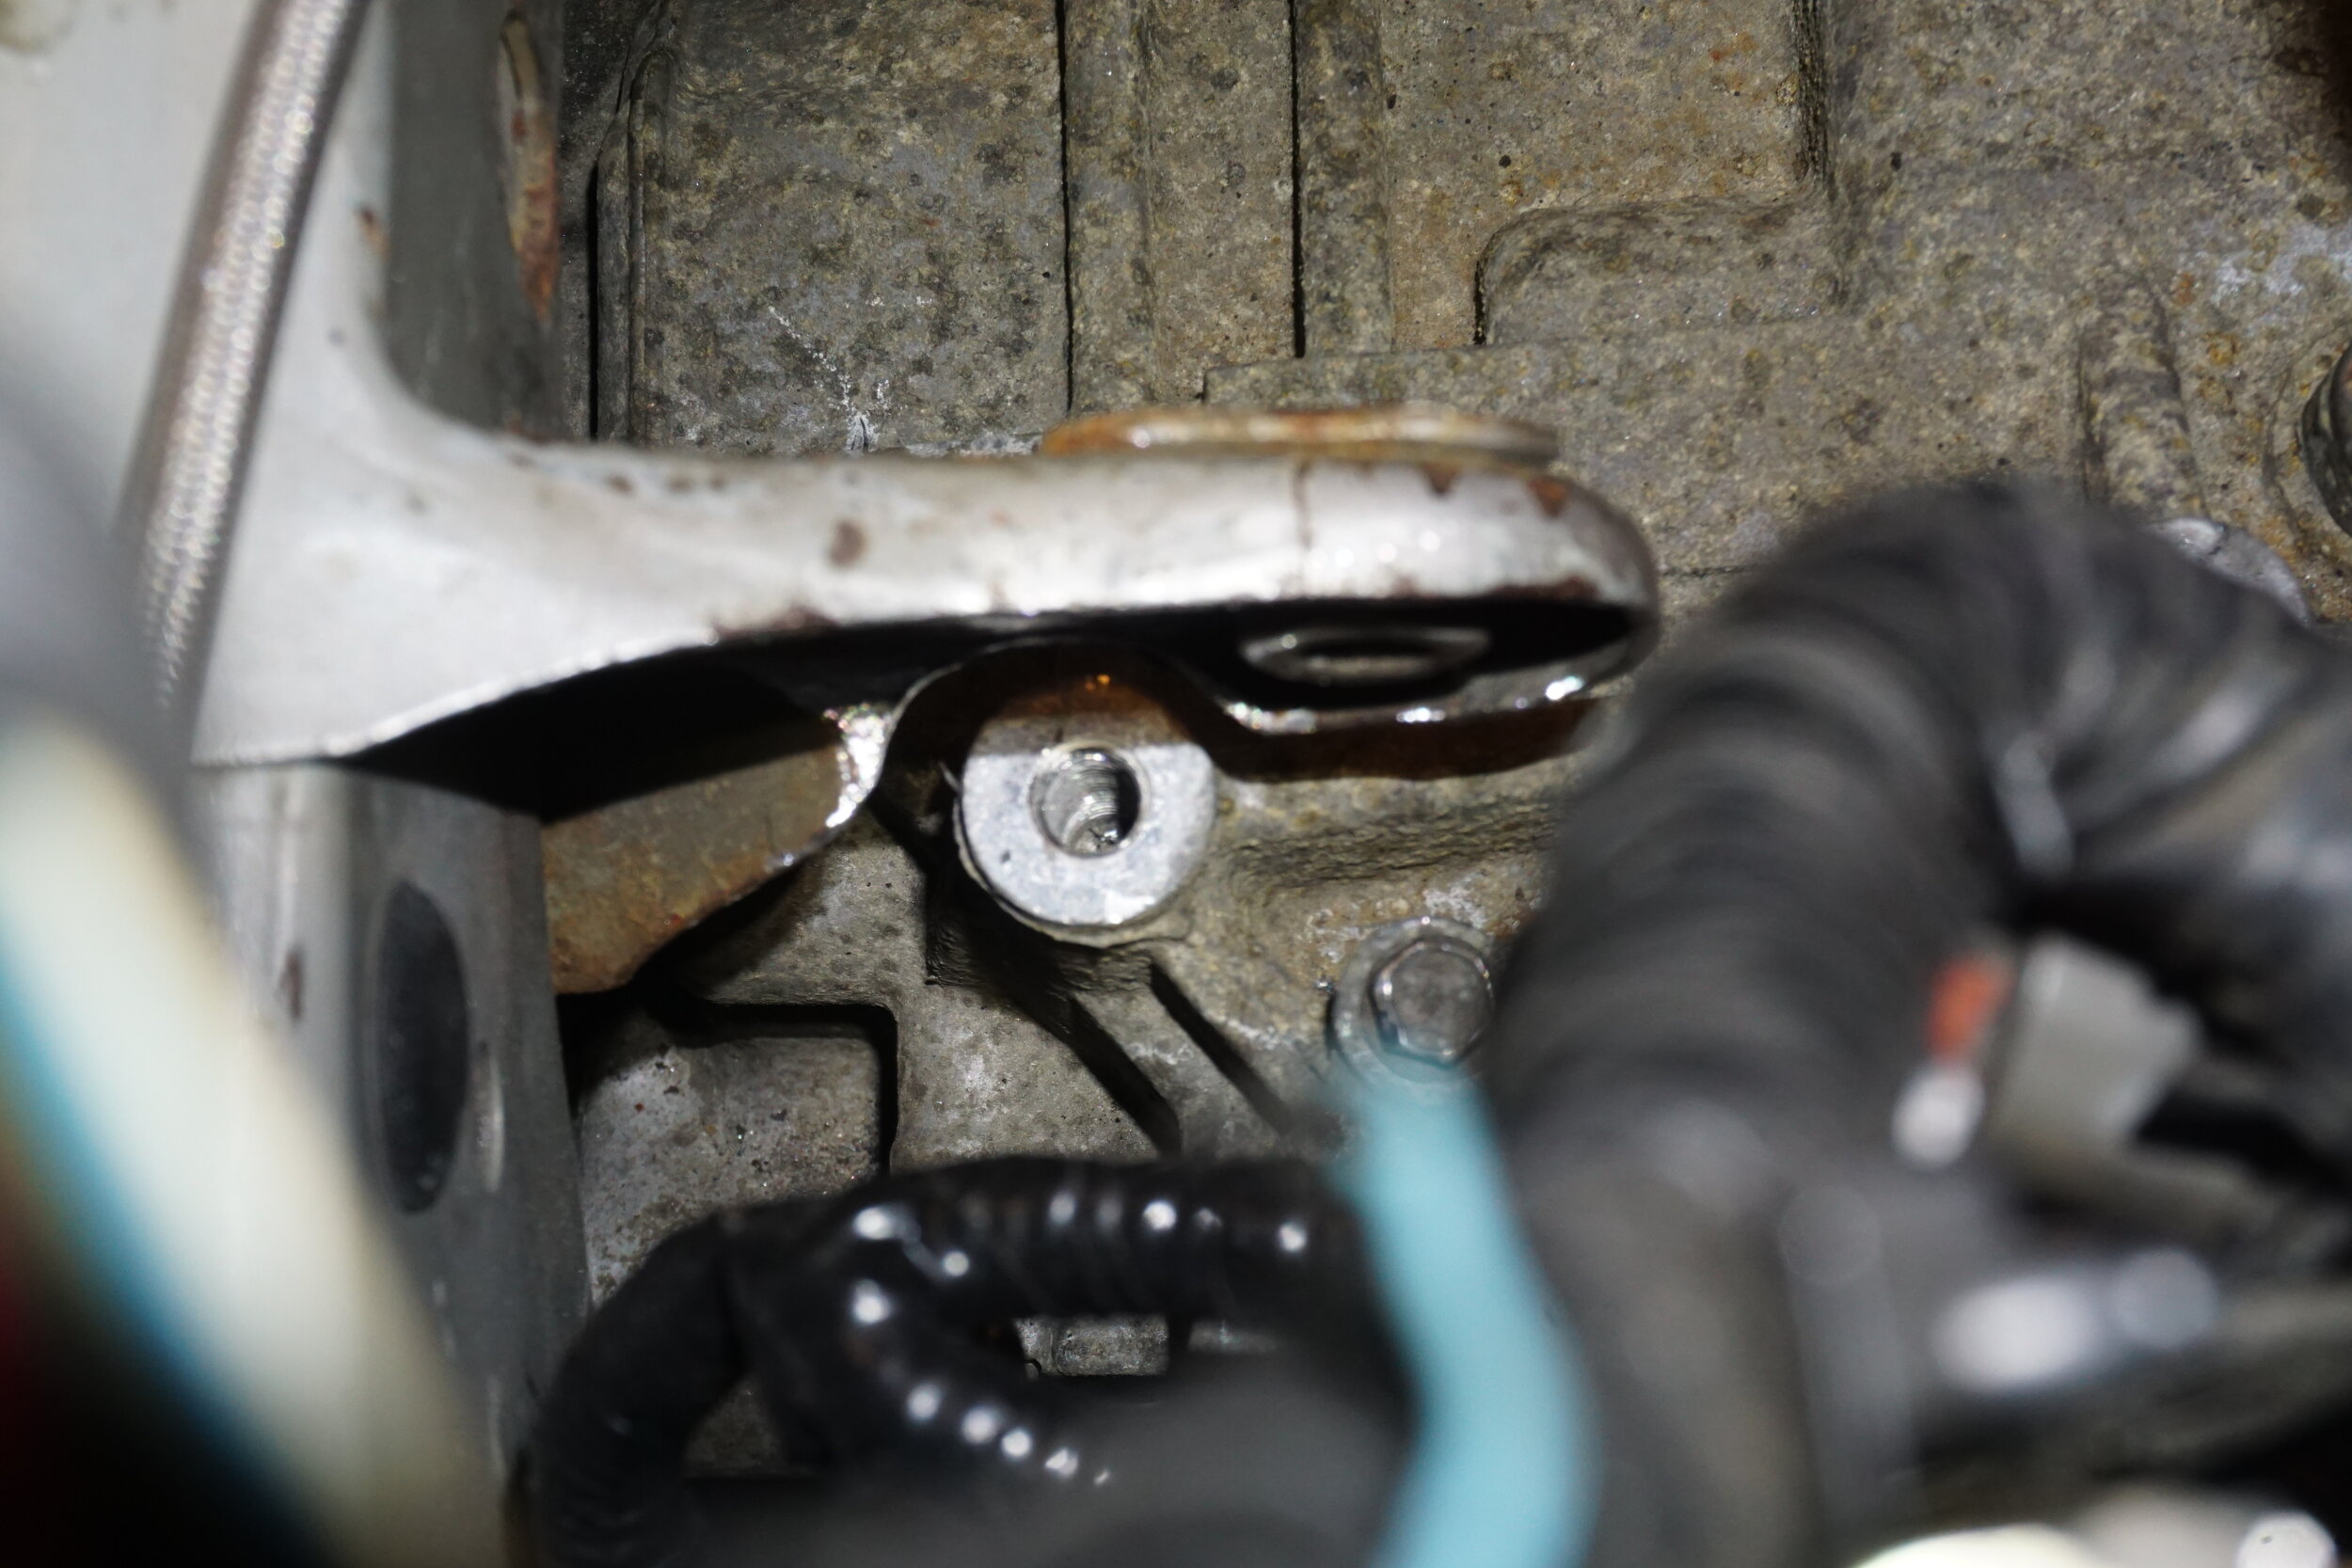
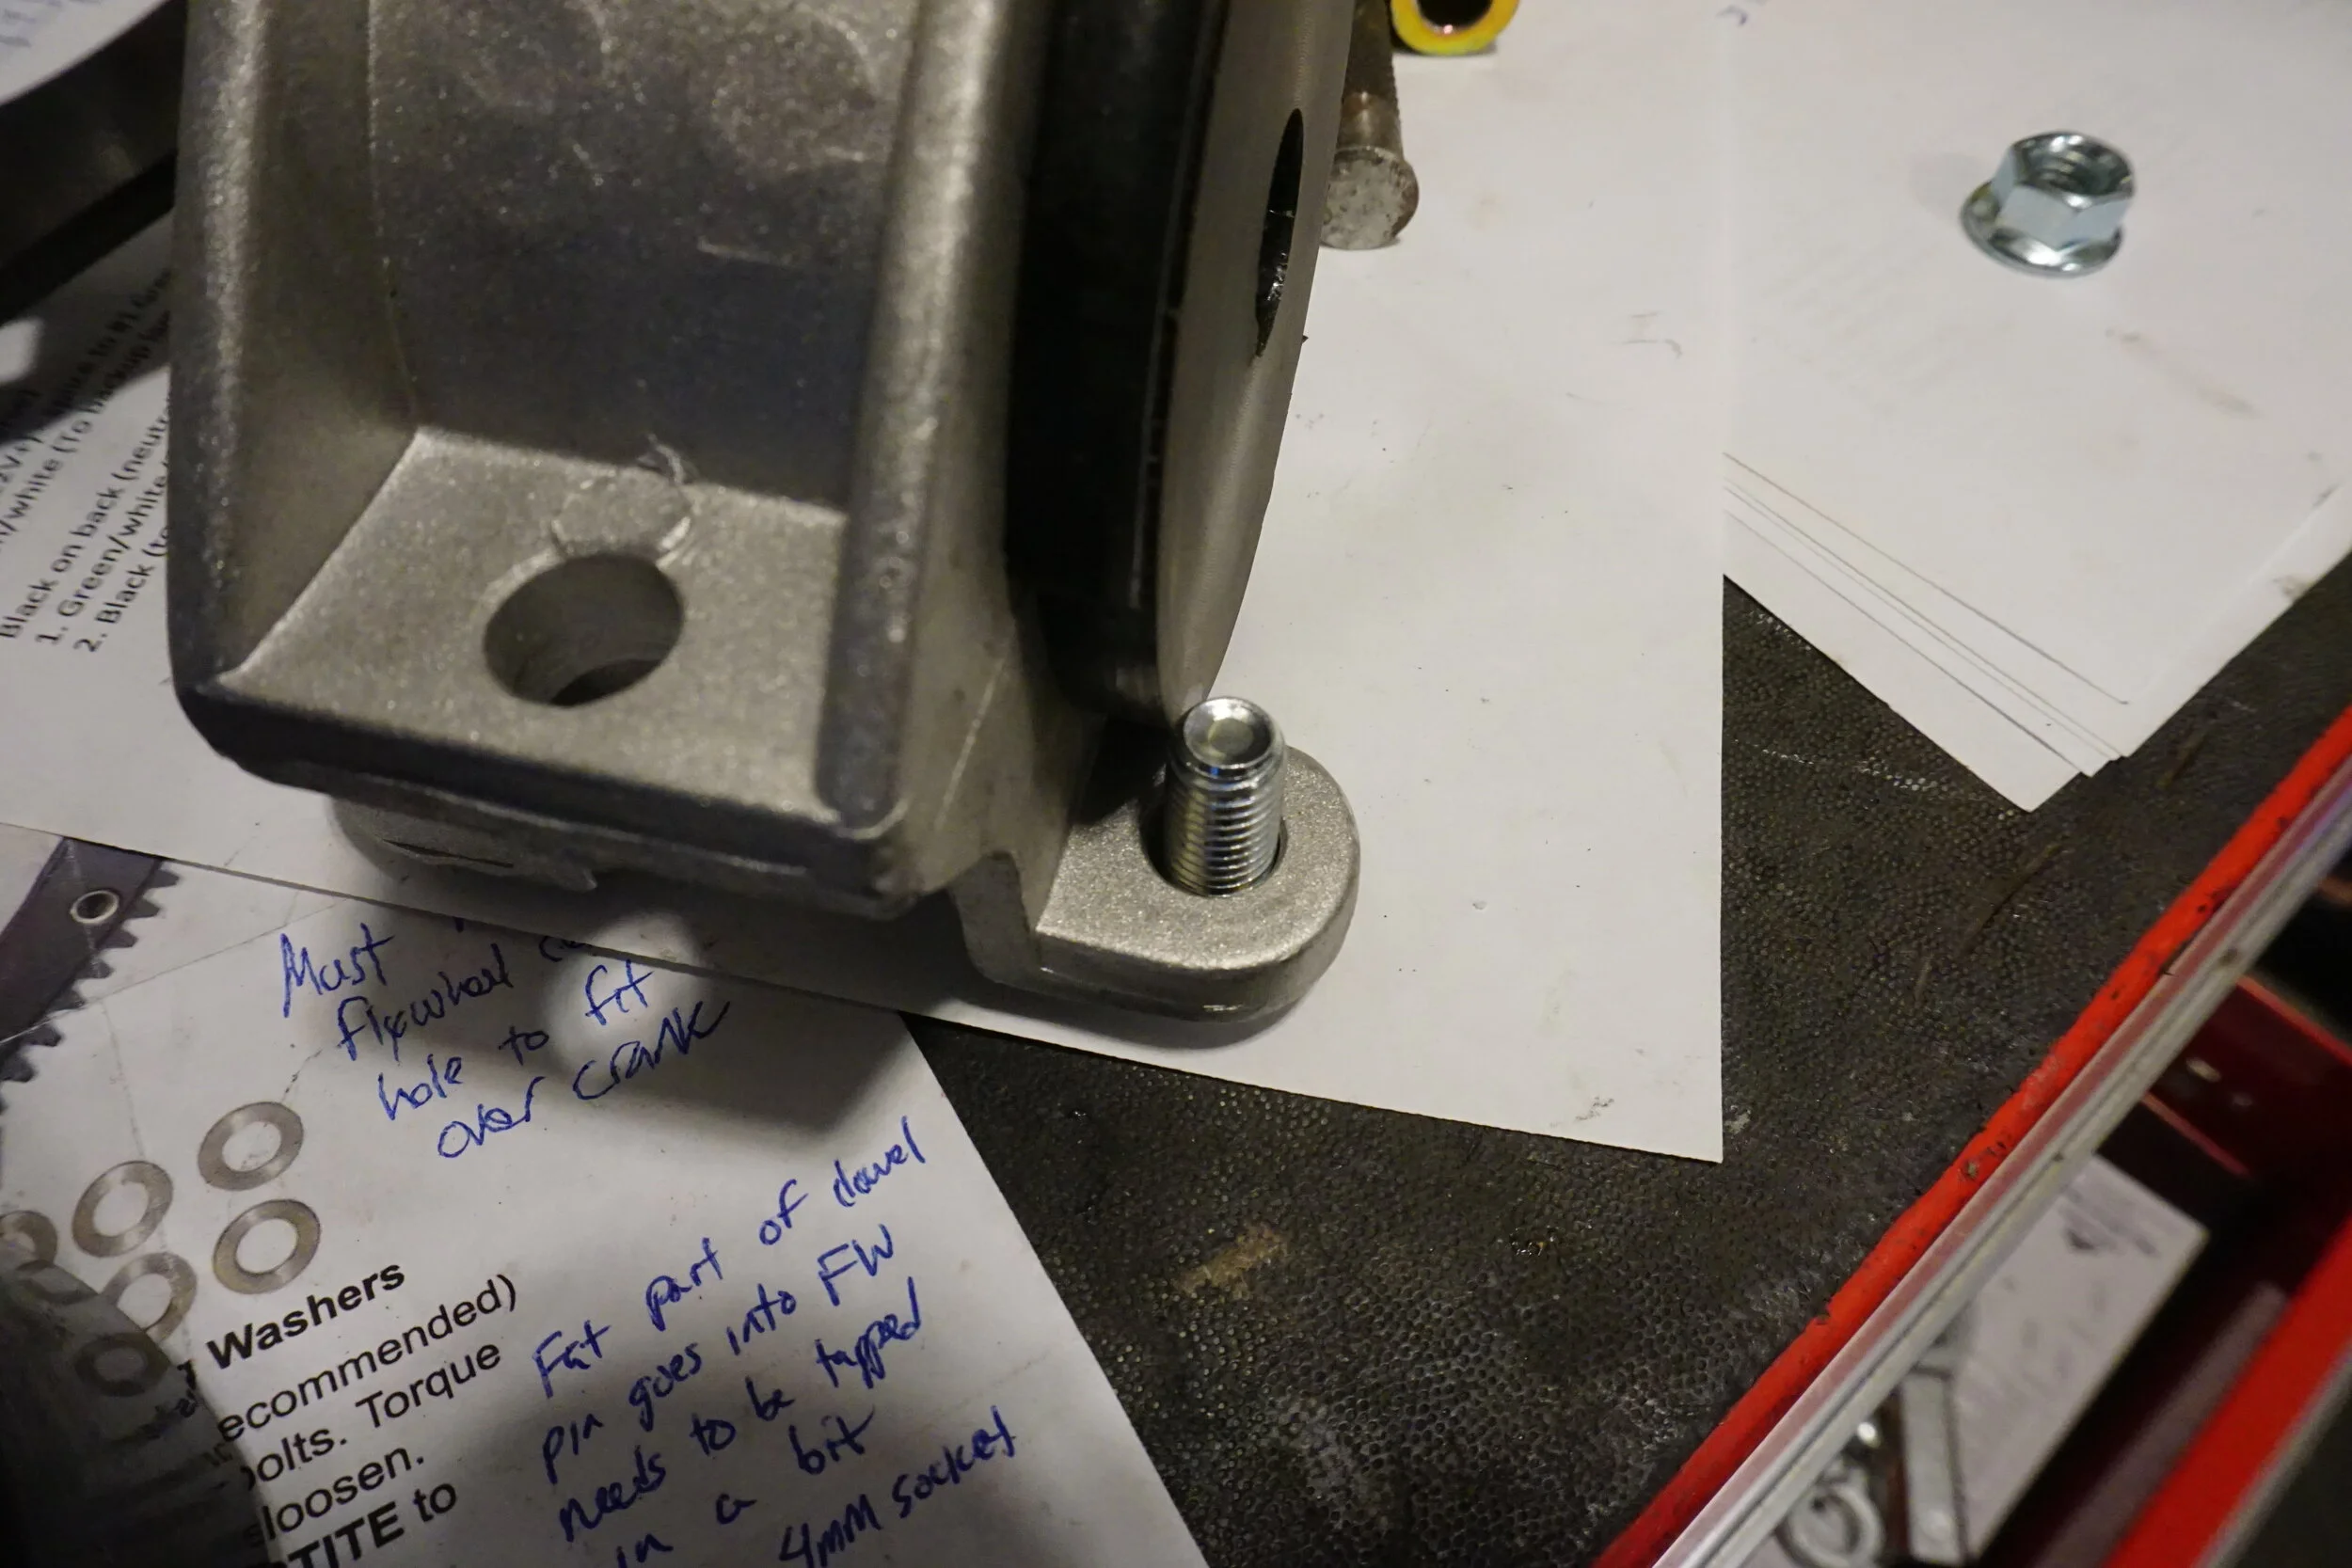
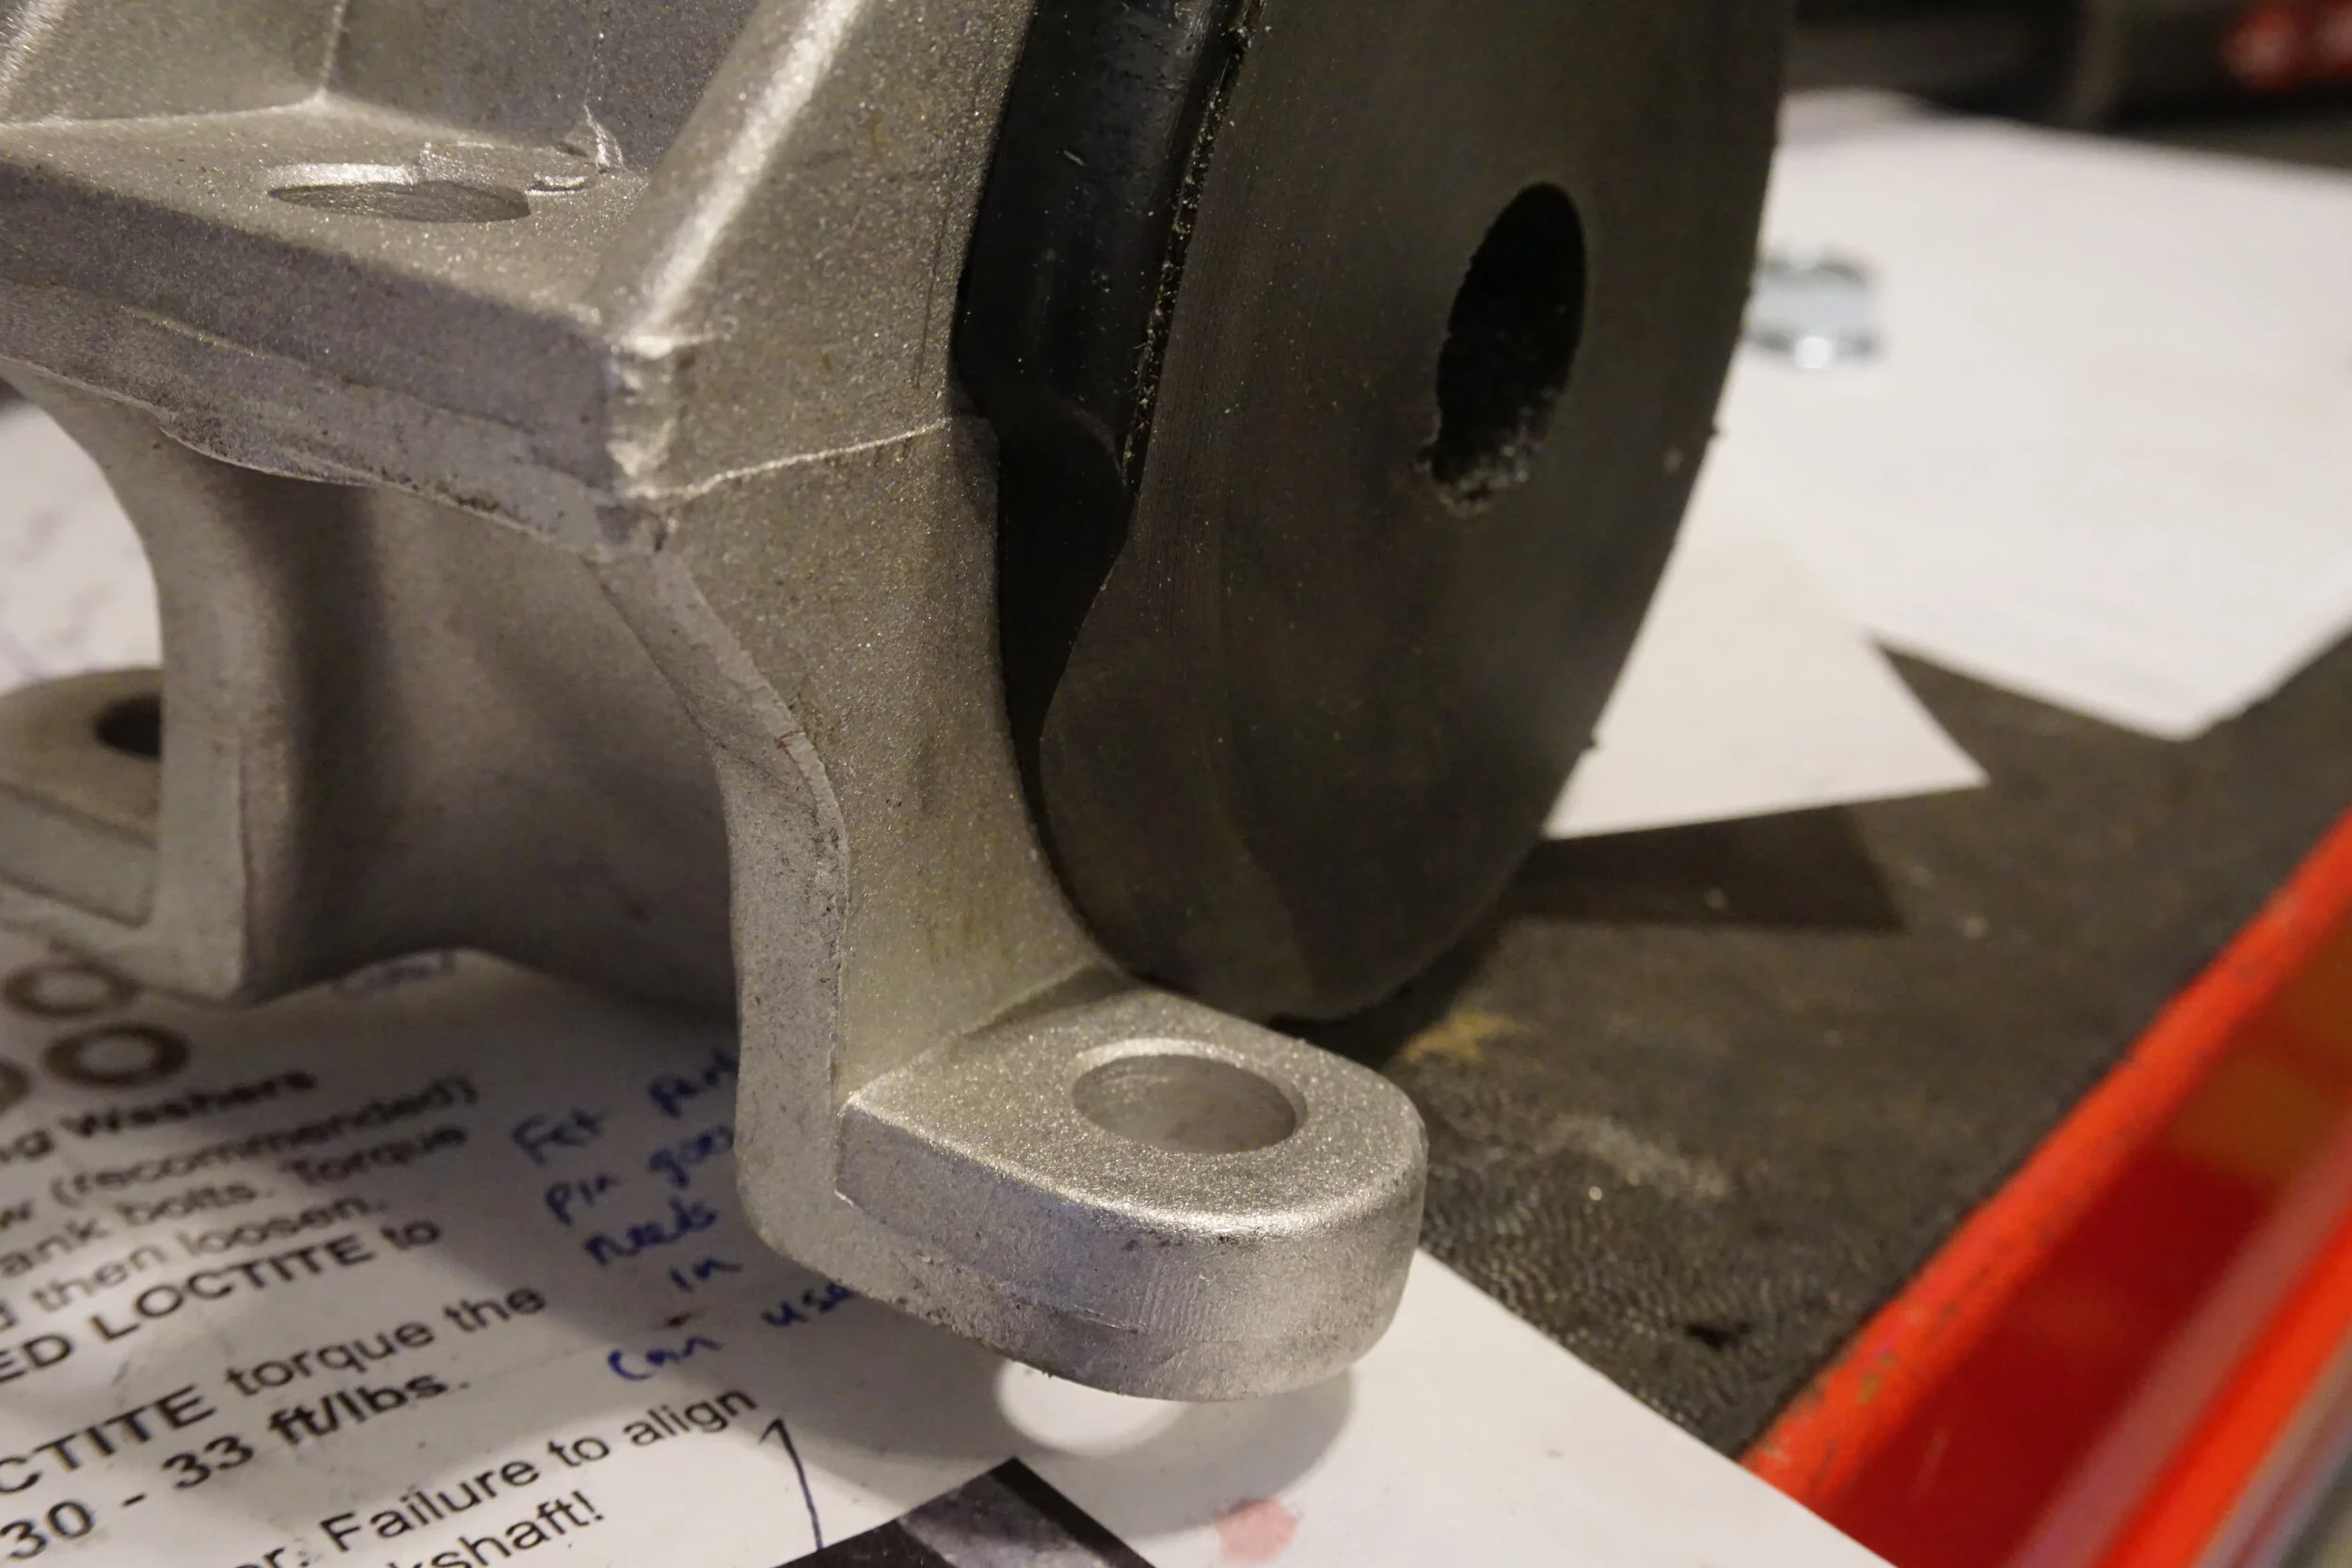
I'm writing this section something like two years after I did the install, so I'm going to gloss over a lot and possibly forget things. The bracket I got from Schmelly was a prototype, so fitment wasn't perfect. Things may be different now, so please check with him. I basically had to grind some metal from a couple areas, nothing too serious.
First up was a small area of the body mount, on the rear part of the mount. Do this while the transmission is still out of the car!
I eventually took even more metal out to make tightening up the bolt below easier.
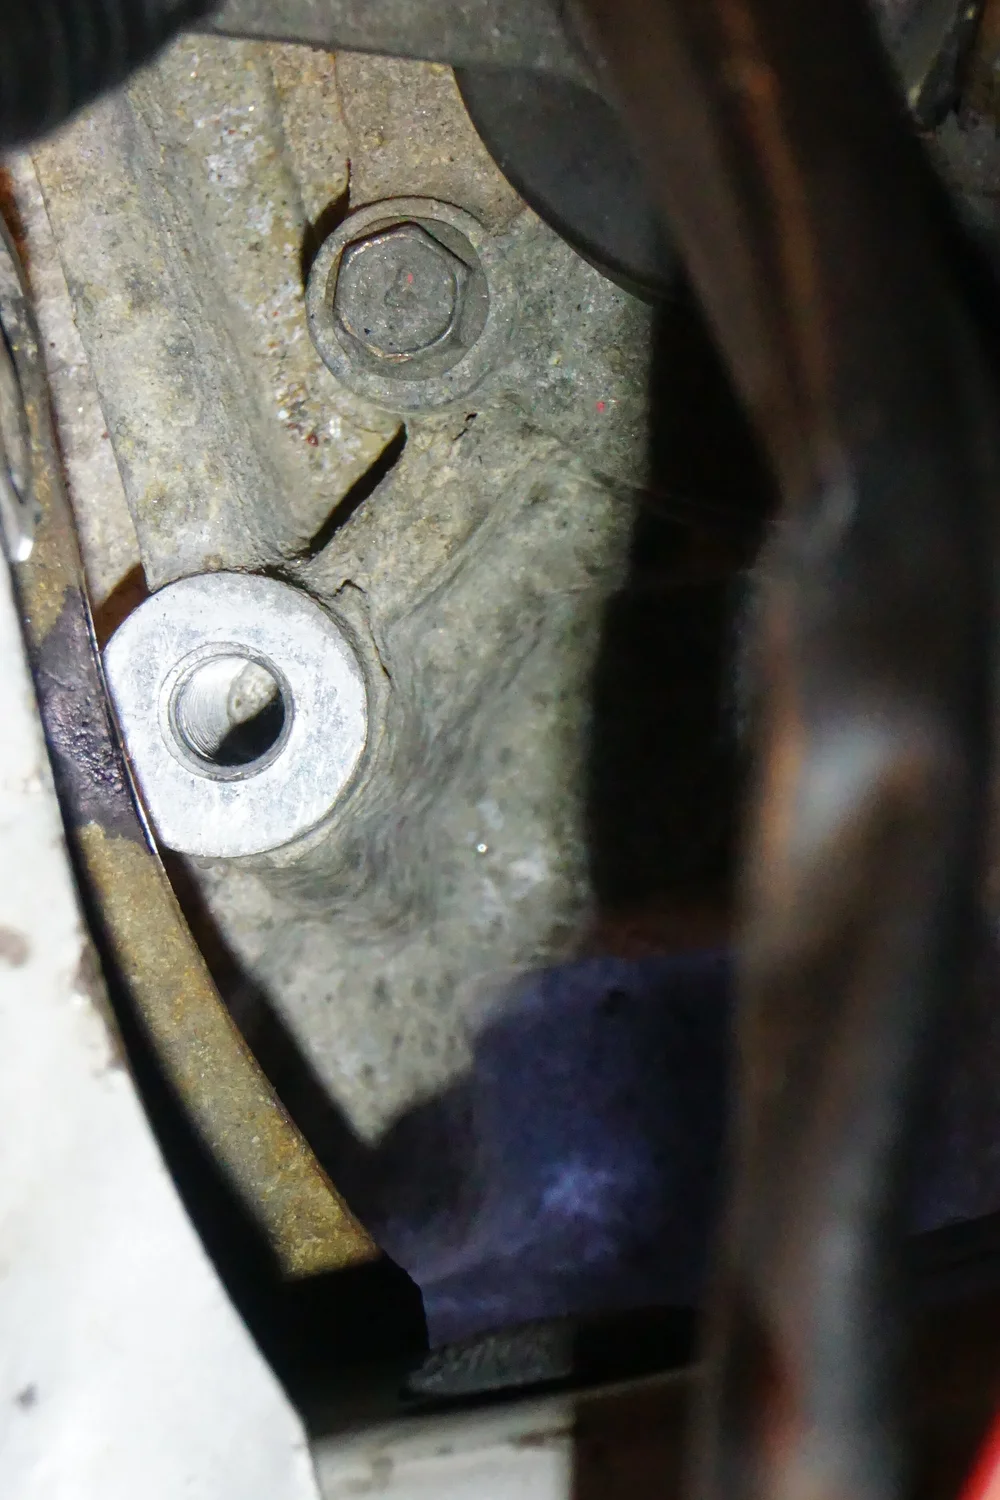
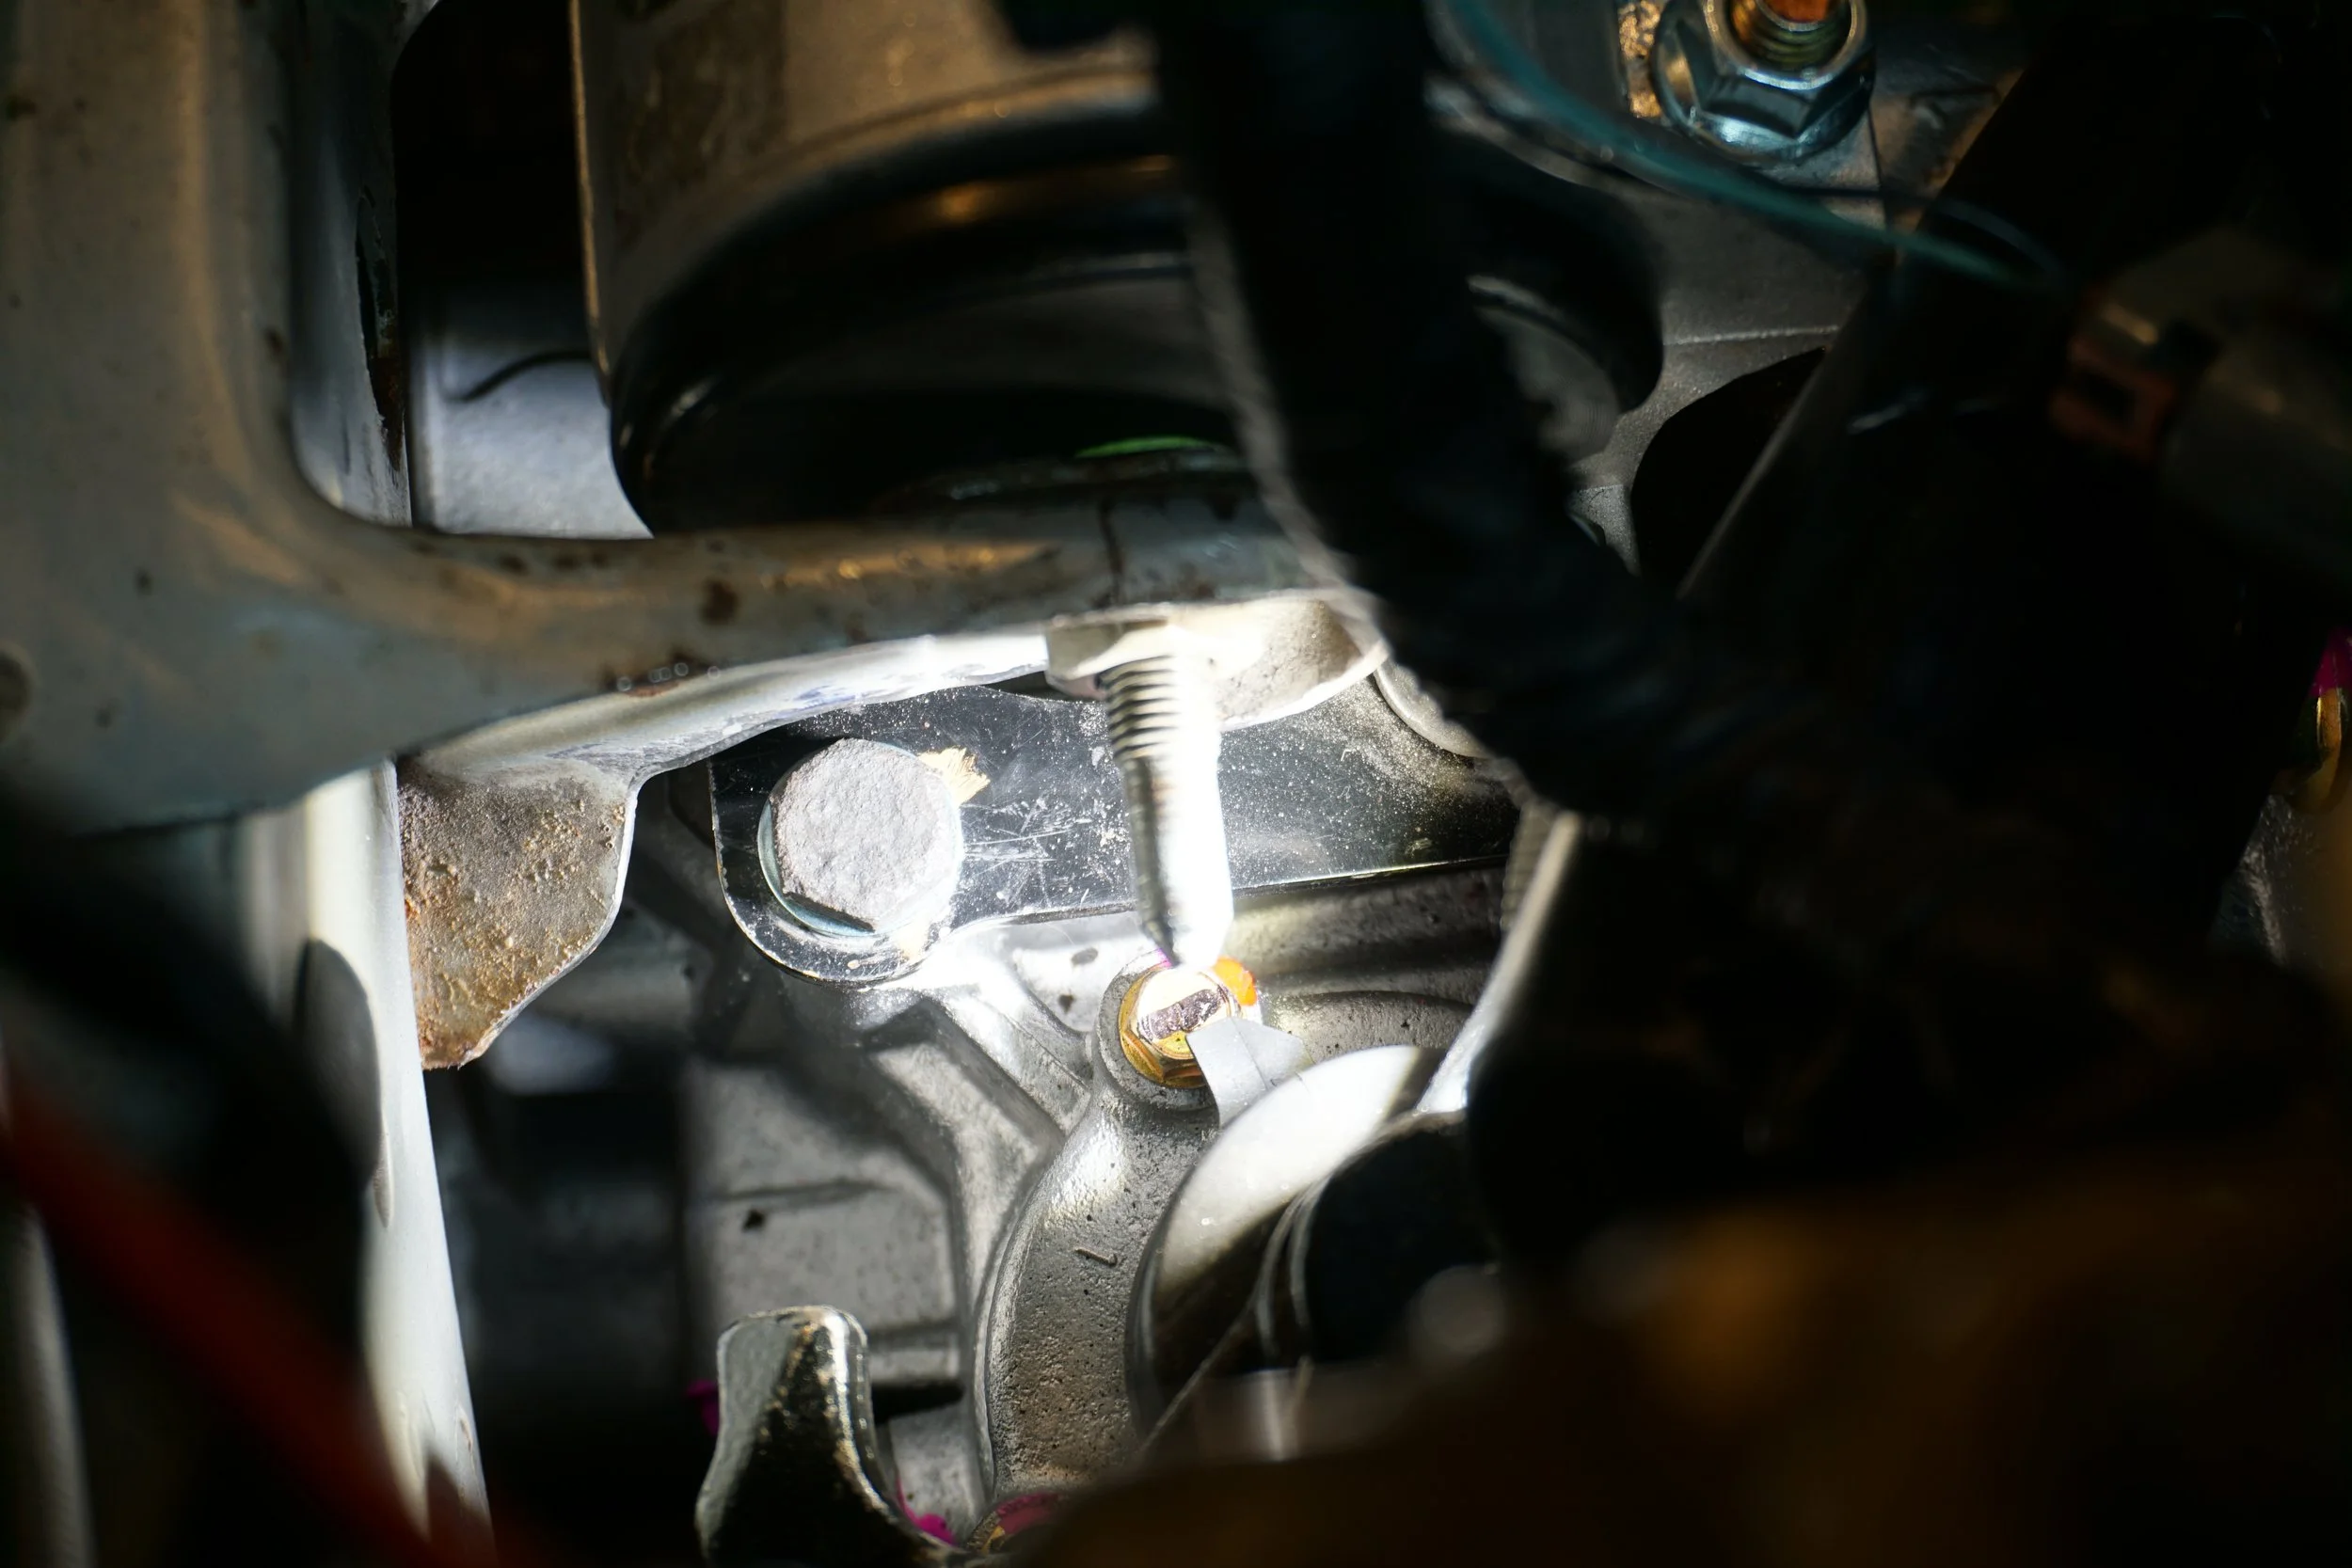
Then I had to grind a bit from the SR20 mount so the nut could sit flush, as I encountered some interference from rough casting marks.
One of the bolts was too close to the Energy Suspension insert for the SR20 mount, so I shaved off some poly.
And to get the bolt/holes to line up for the mount, I had to use a pry bar between the frame and the trans to force things into alignment.
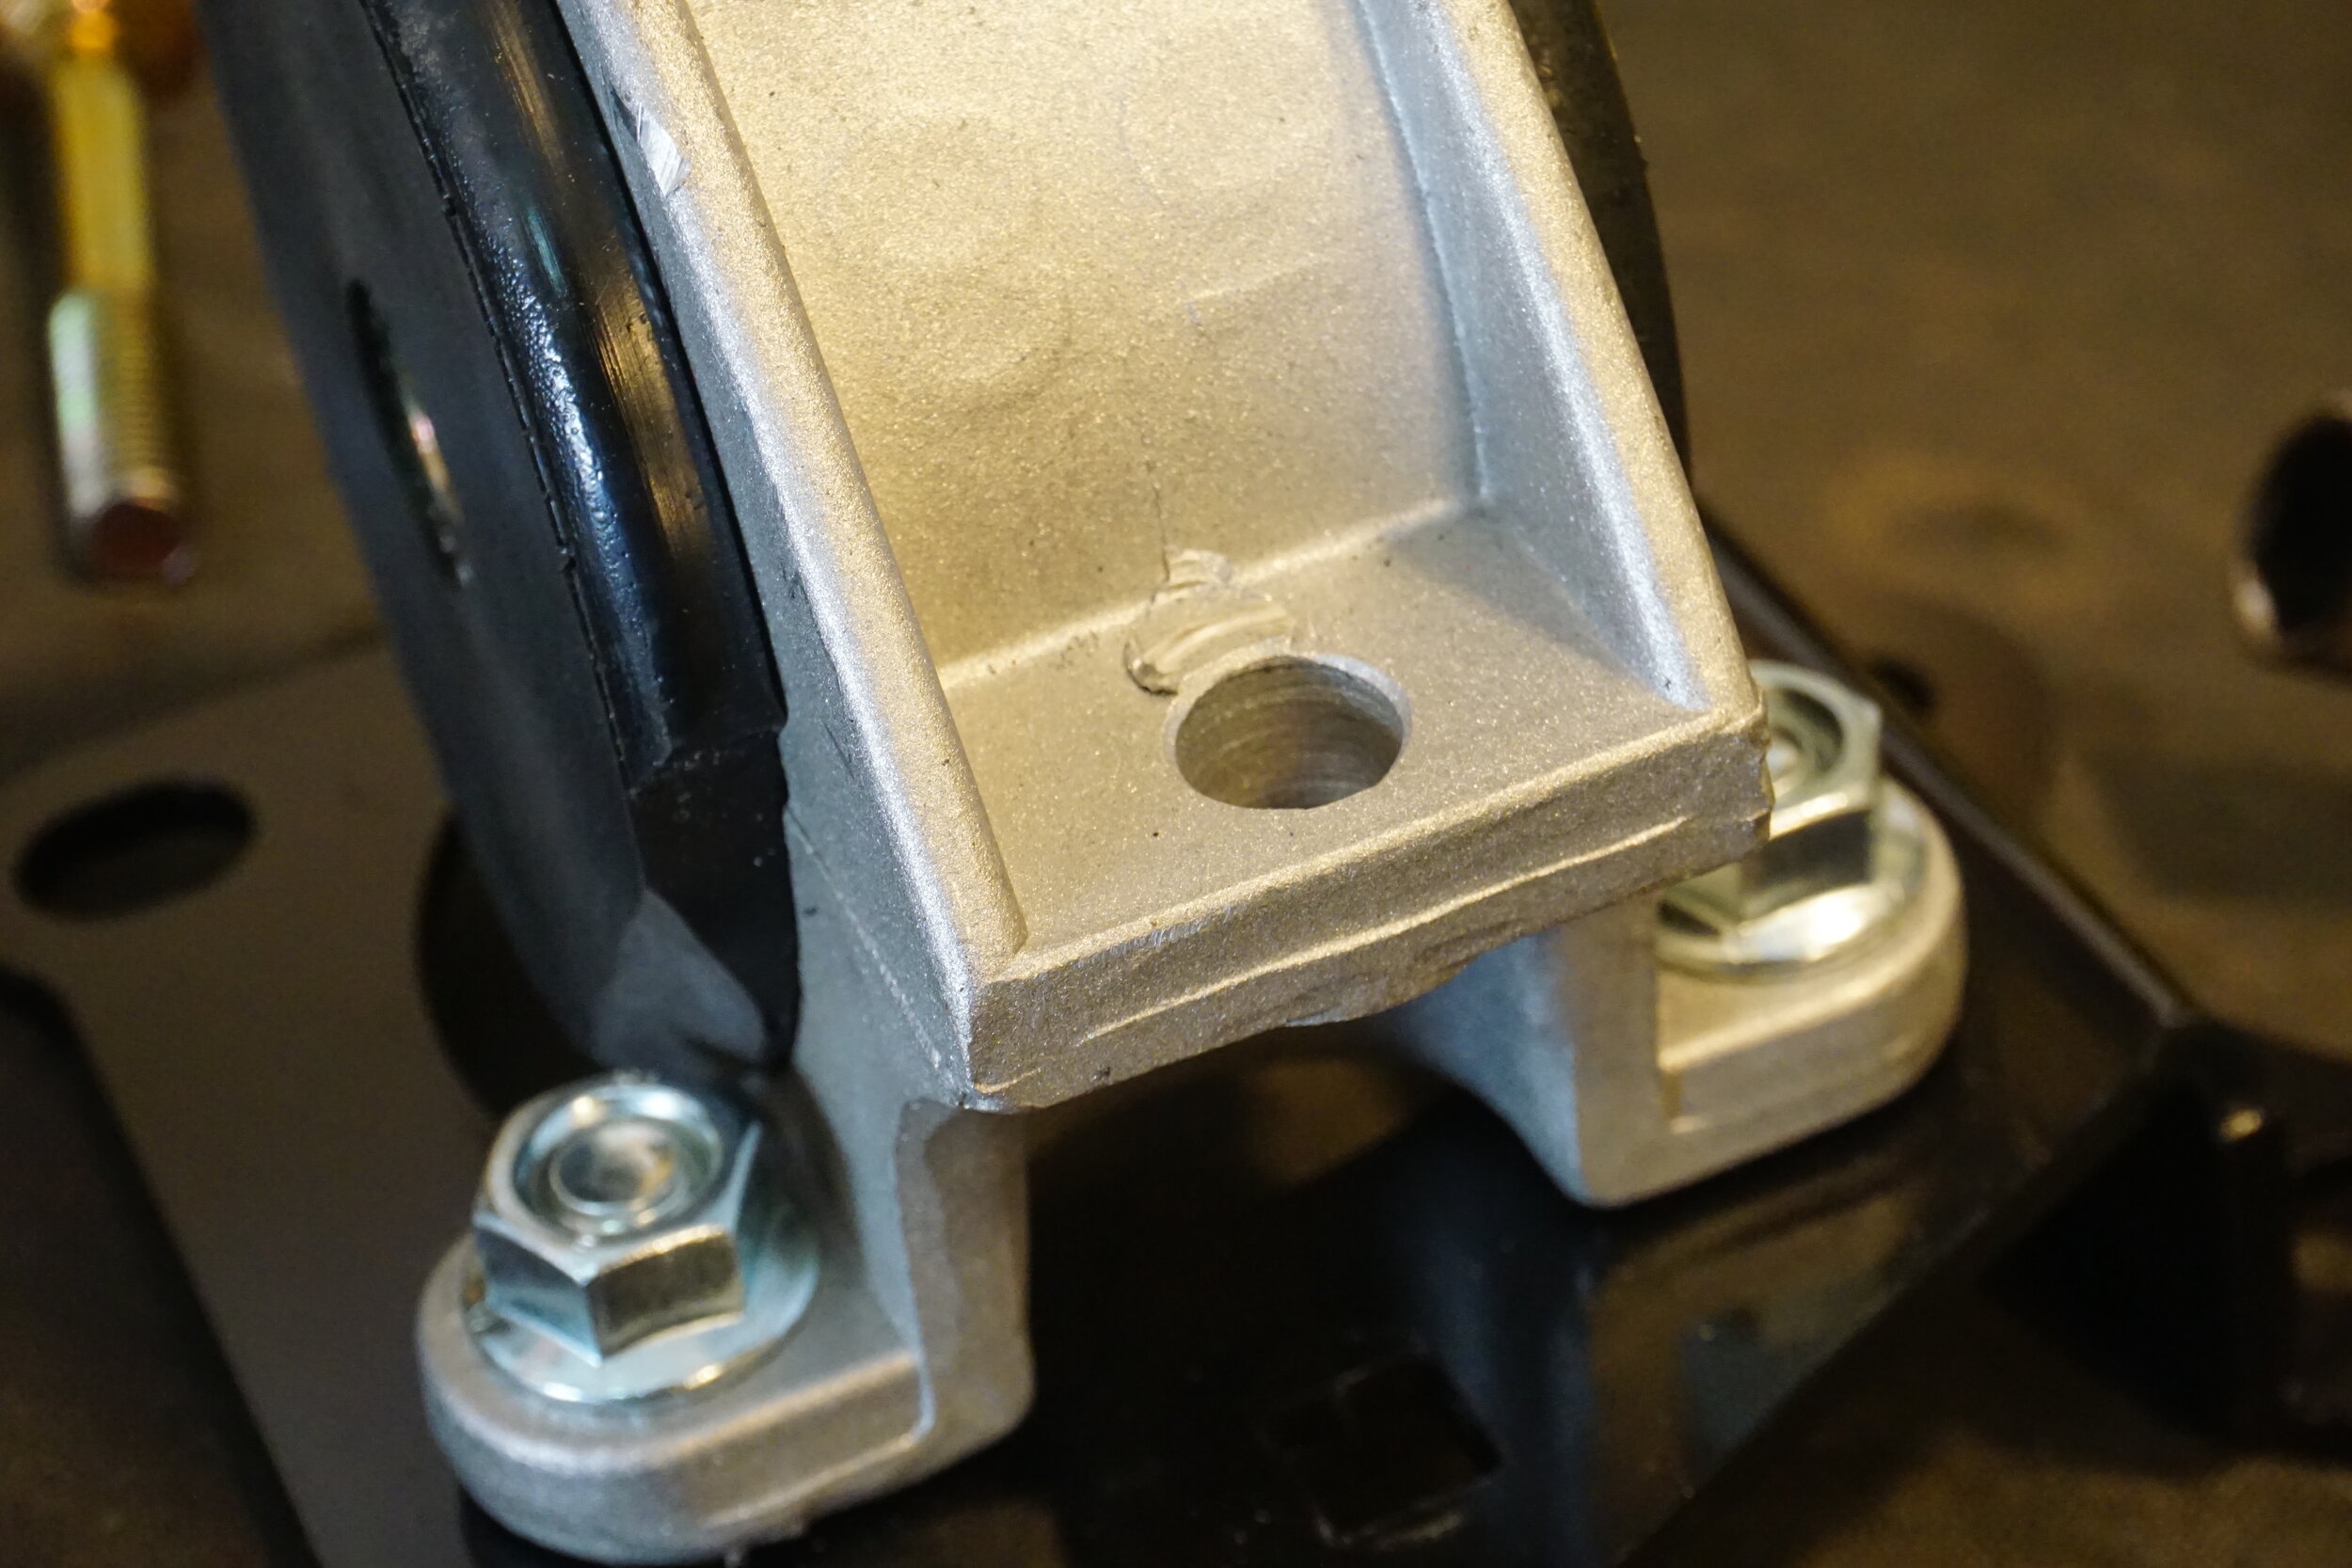
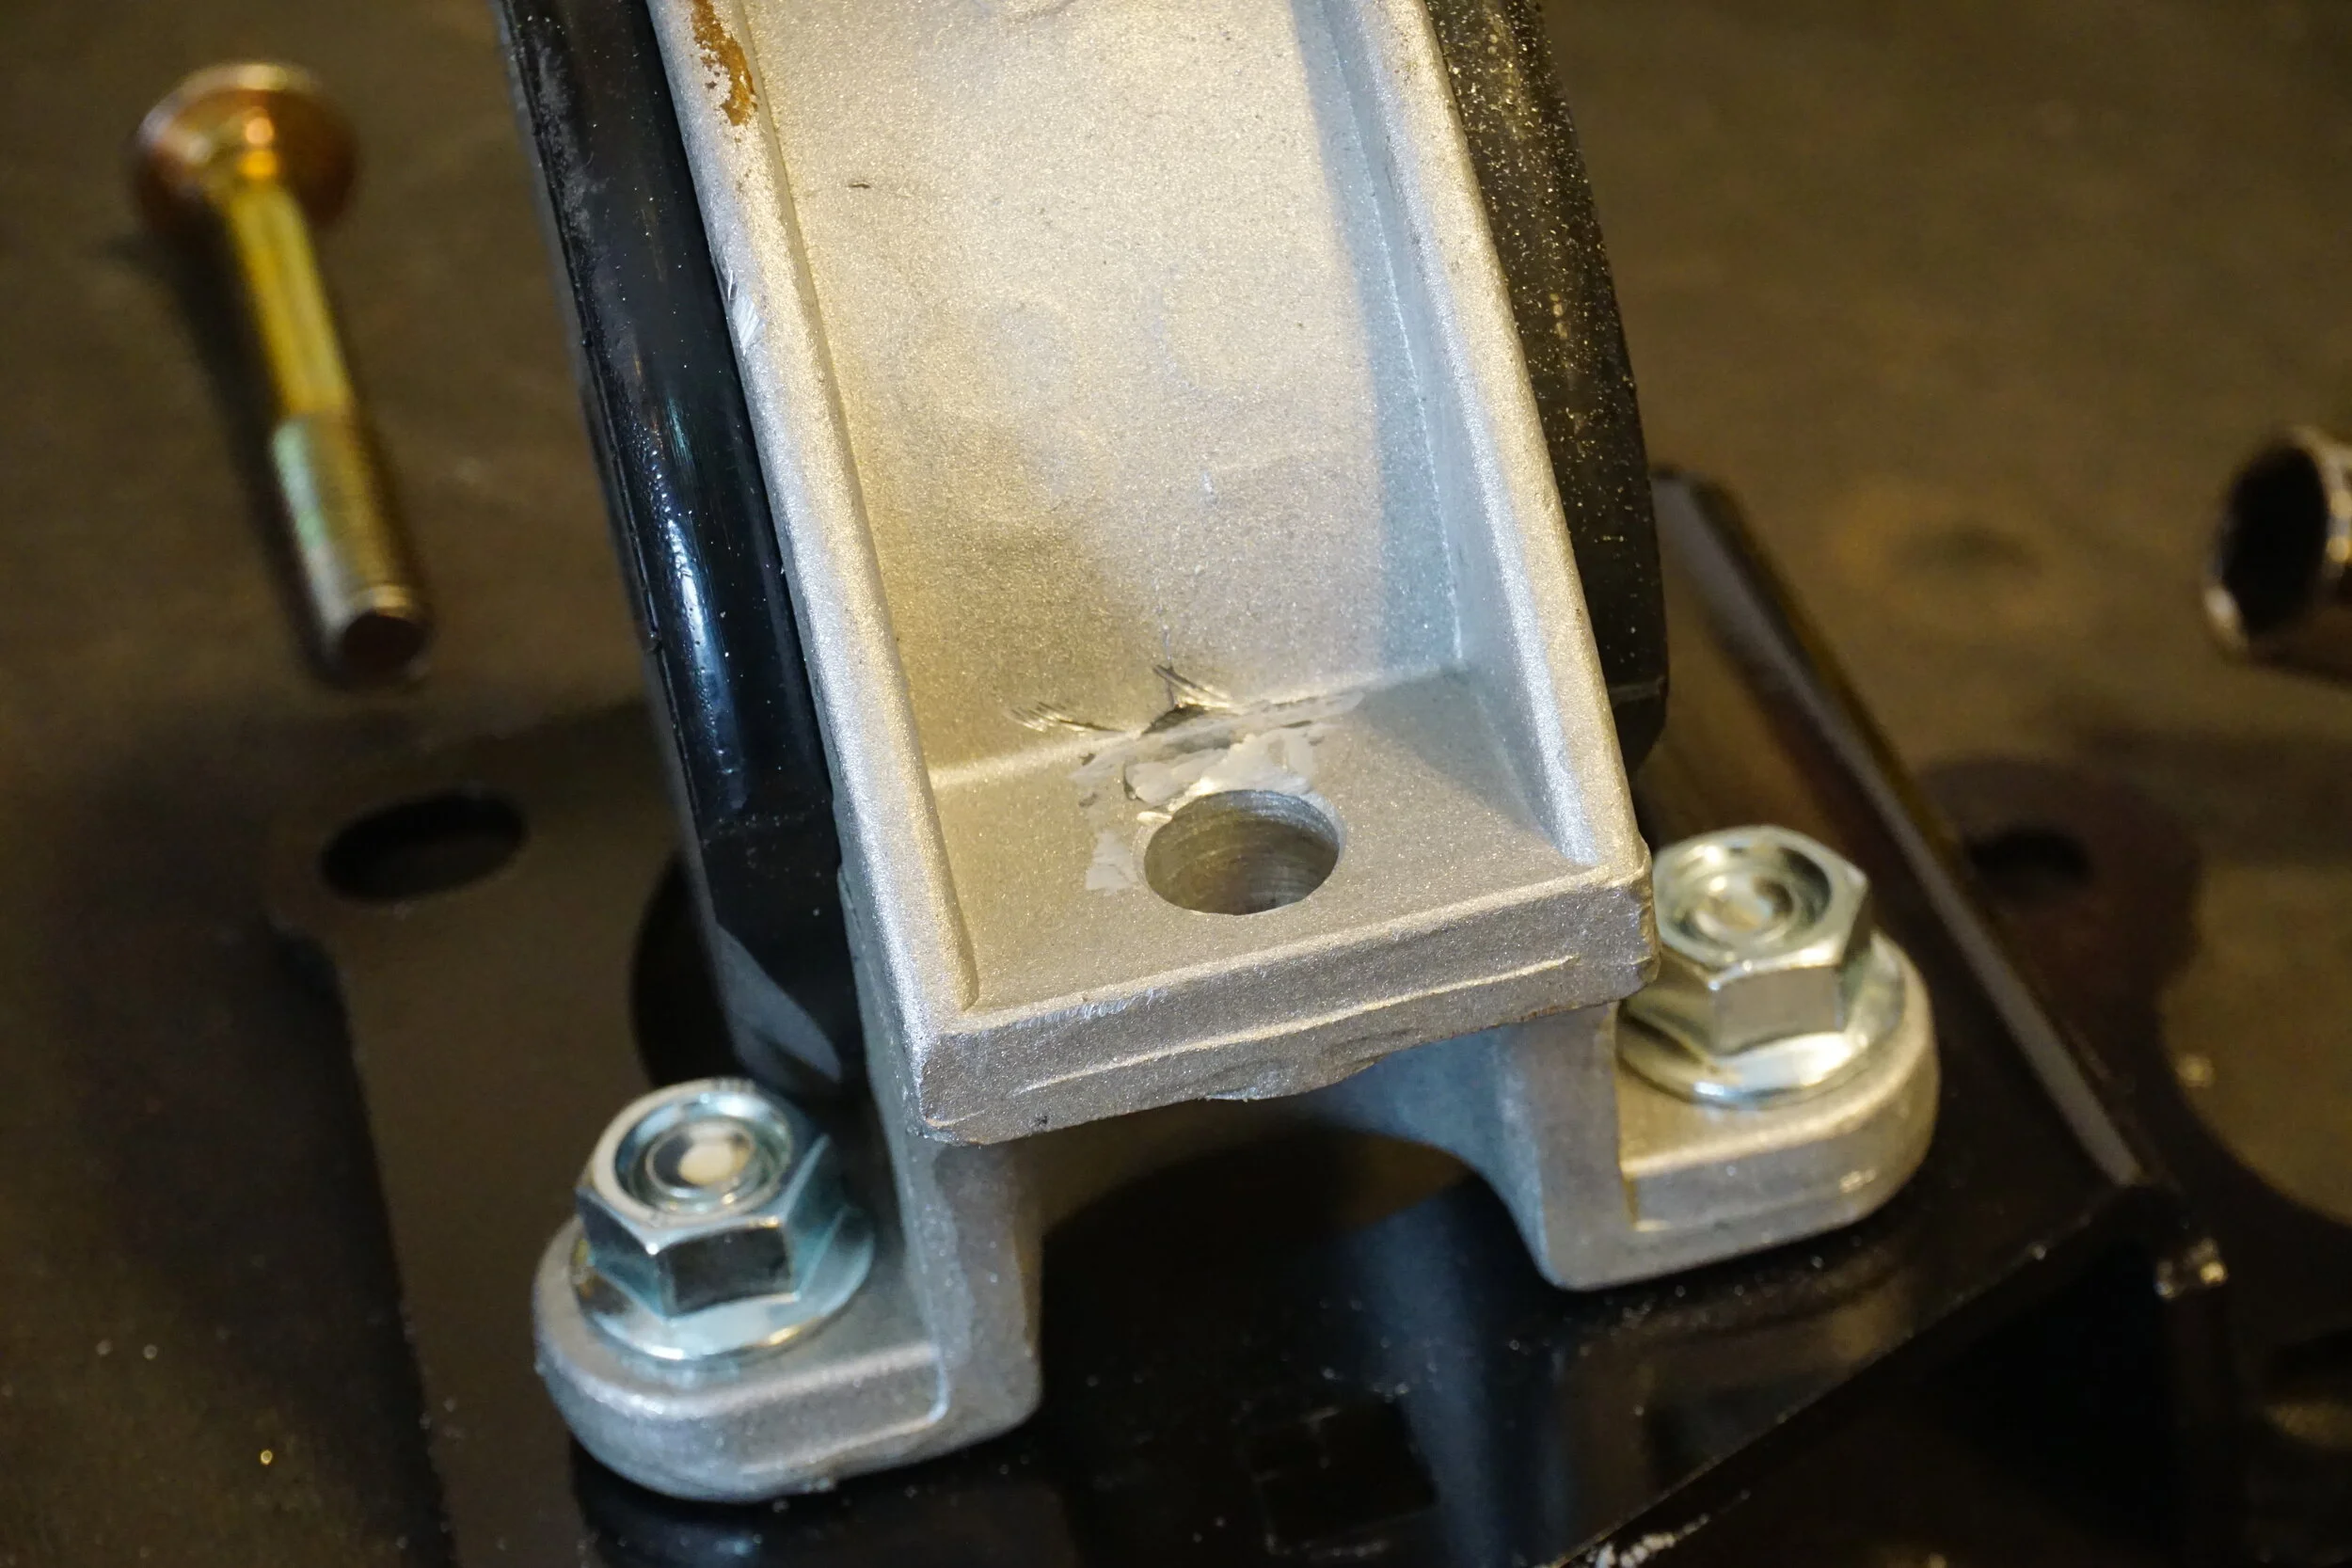
All done!
**I do not give permission for my guide or pictures to be re-posted on any other website.**
Last edited by 95maxrider; 07-09-2023 at 09:50 AM.
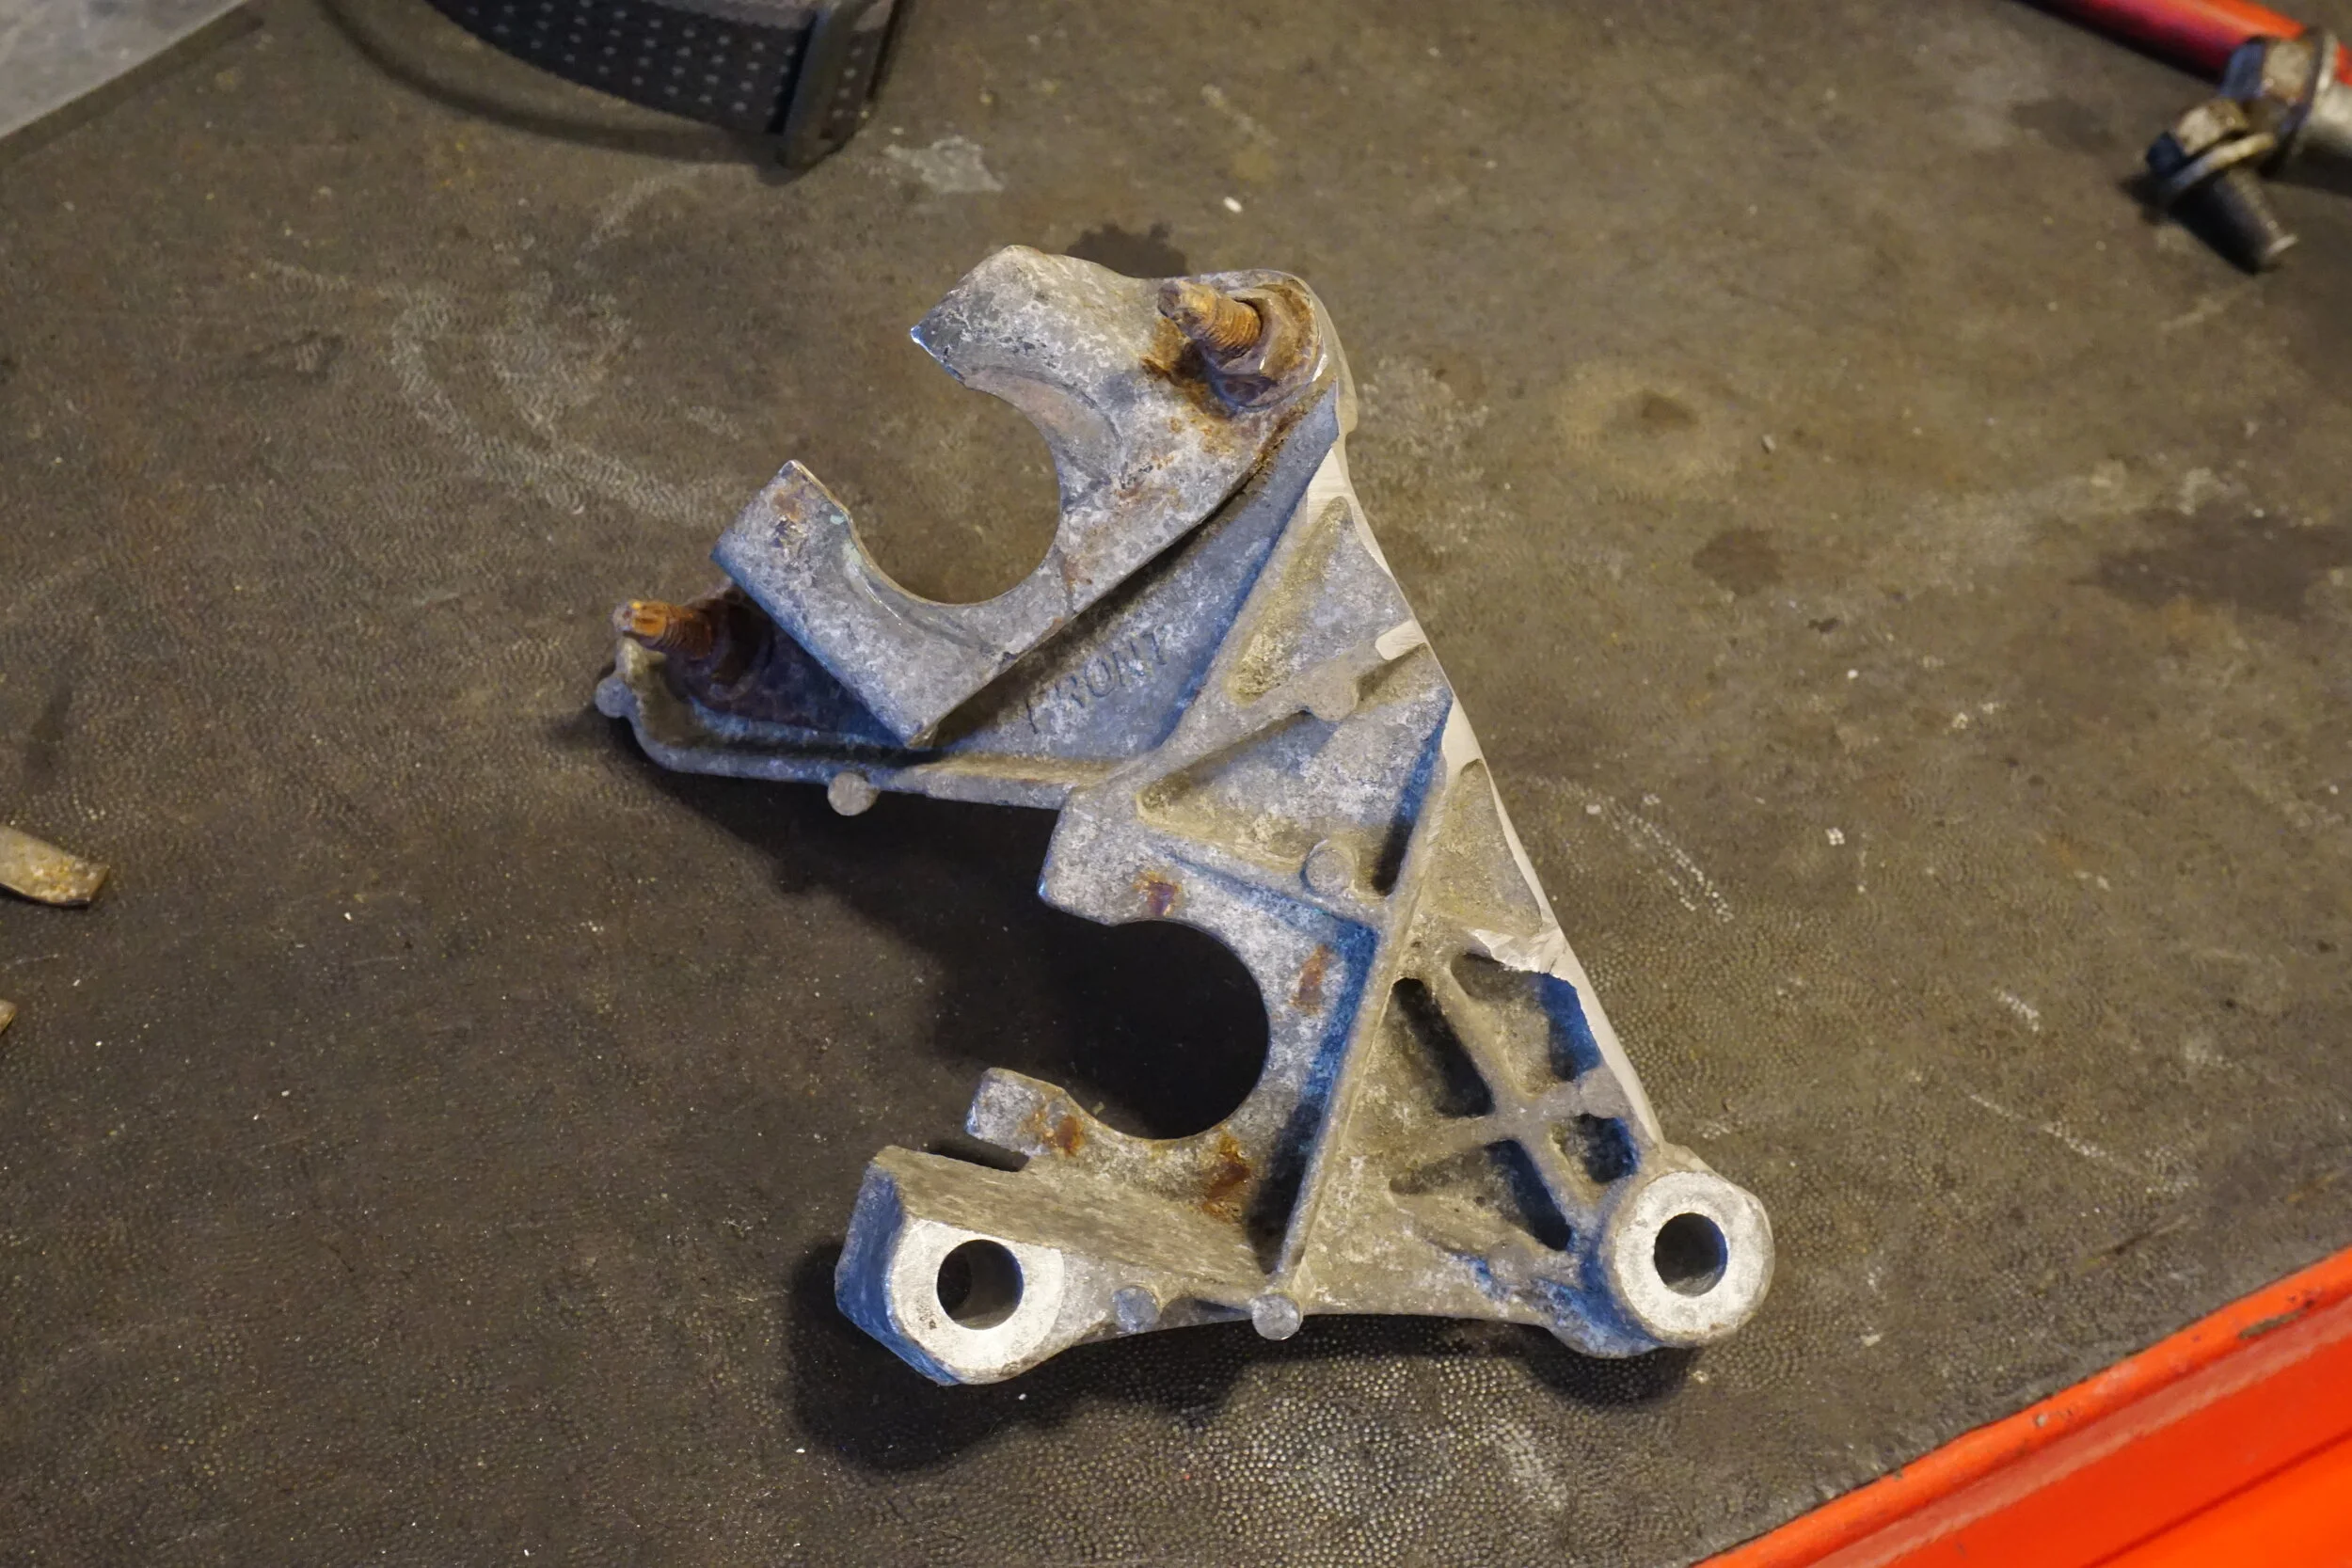
If you come across this bracket at any point in your life, quickly remove it and insert it into the trash. This early version was quickly trashed by Nissan for a reason. Use the later style 1 piece bracket. There are no fitment or changes that need to be made parts wise concerning the 6MT parts.
Bonus tip: besides accounting for the differences using a 3.0 ECU this guide can be used to install a F51 transmission into a 95-03 (mayyybee a 89-94 if you have VQ swapped it)
This will give you an idea on whats needed for the 04-08s but only an idea, there are some differences parts wise and how you run some things but conceptually its the same.
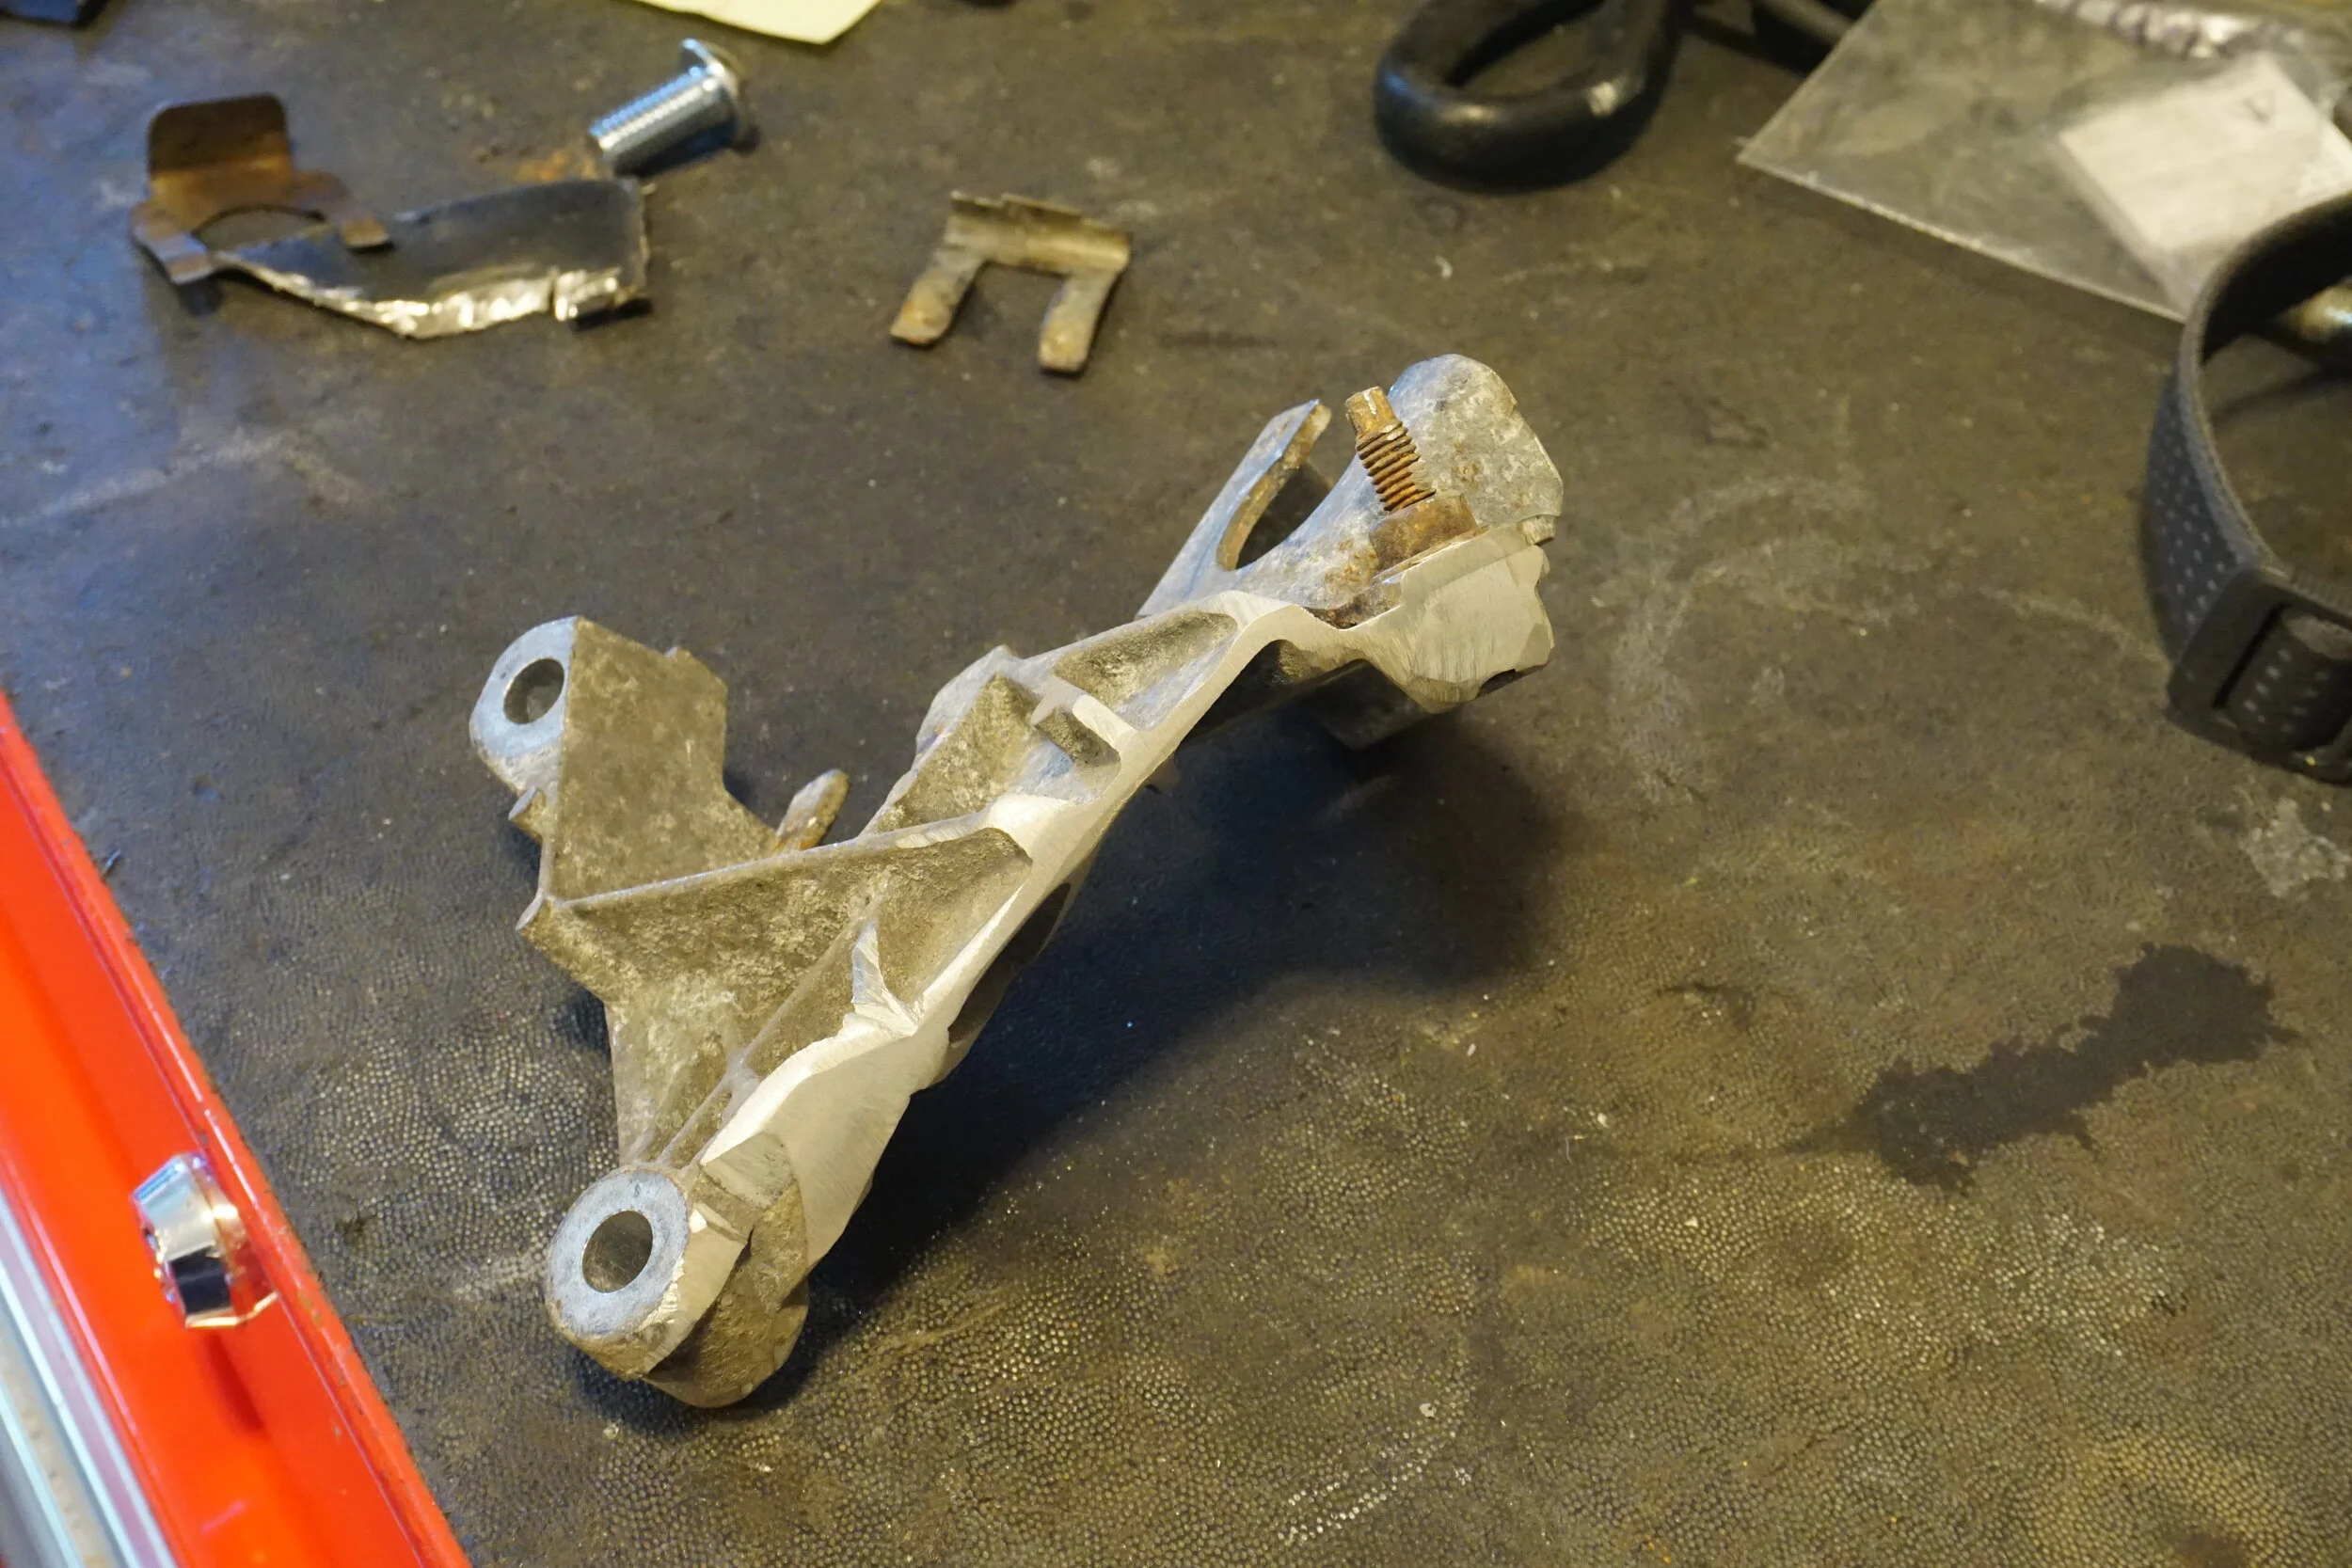
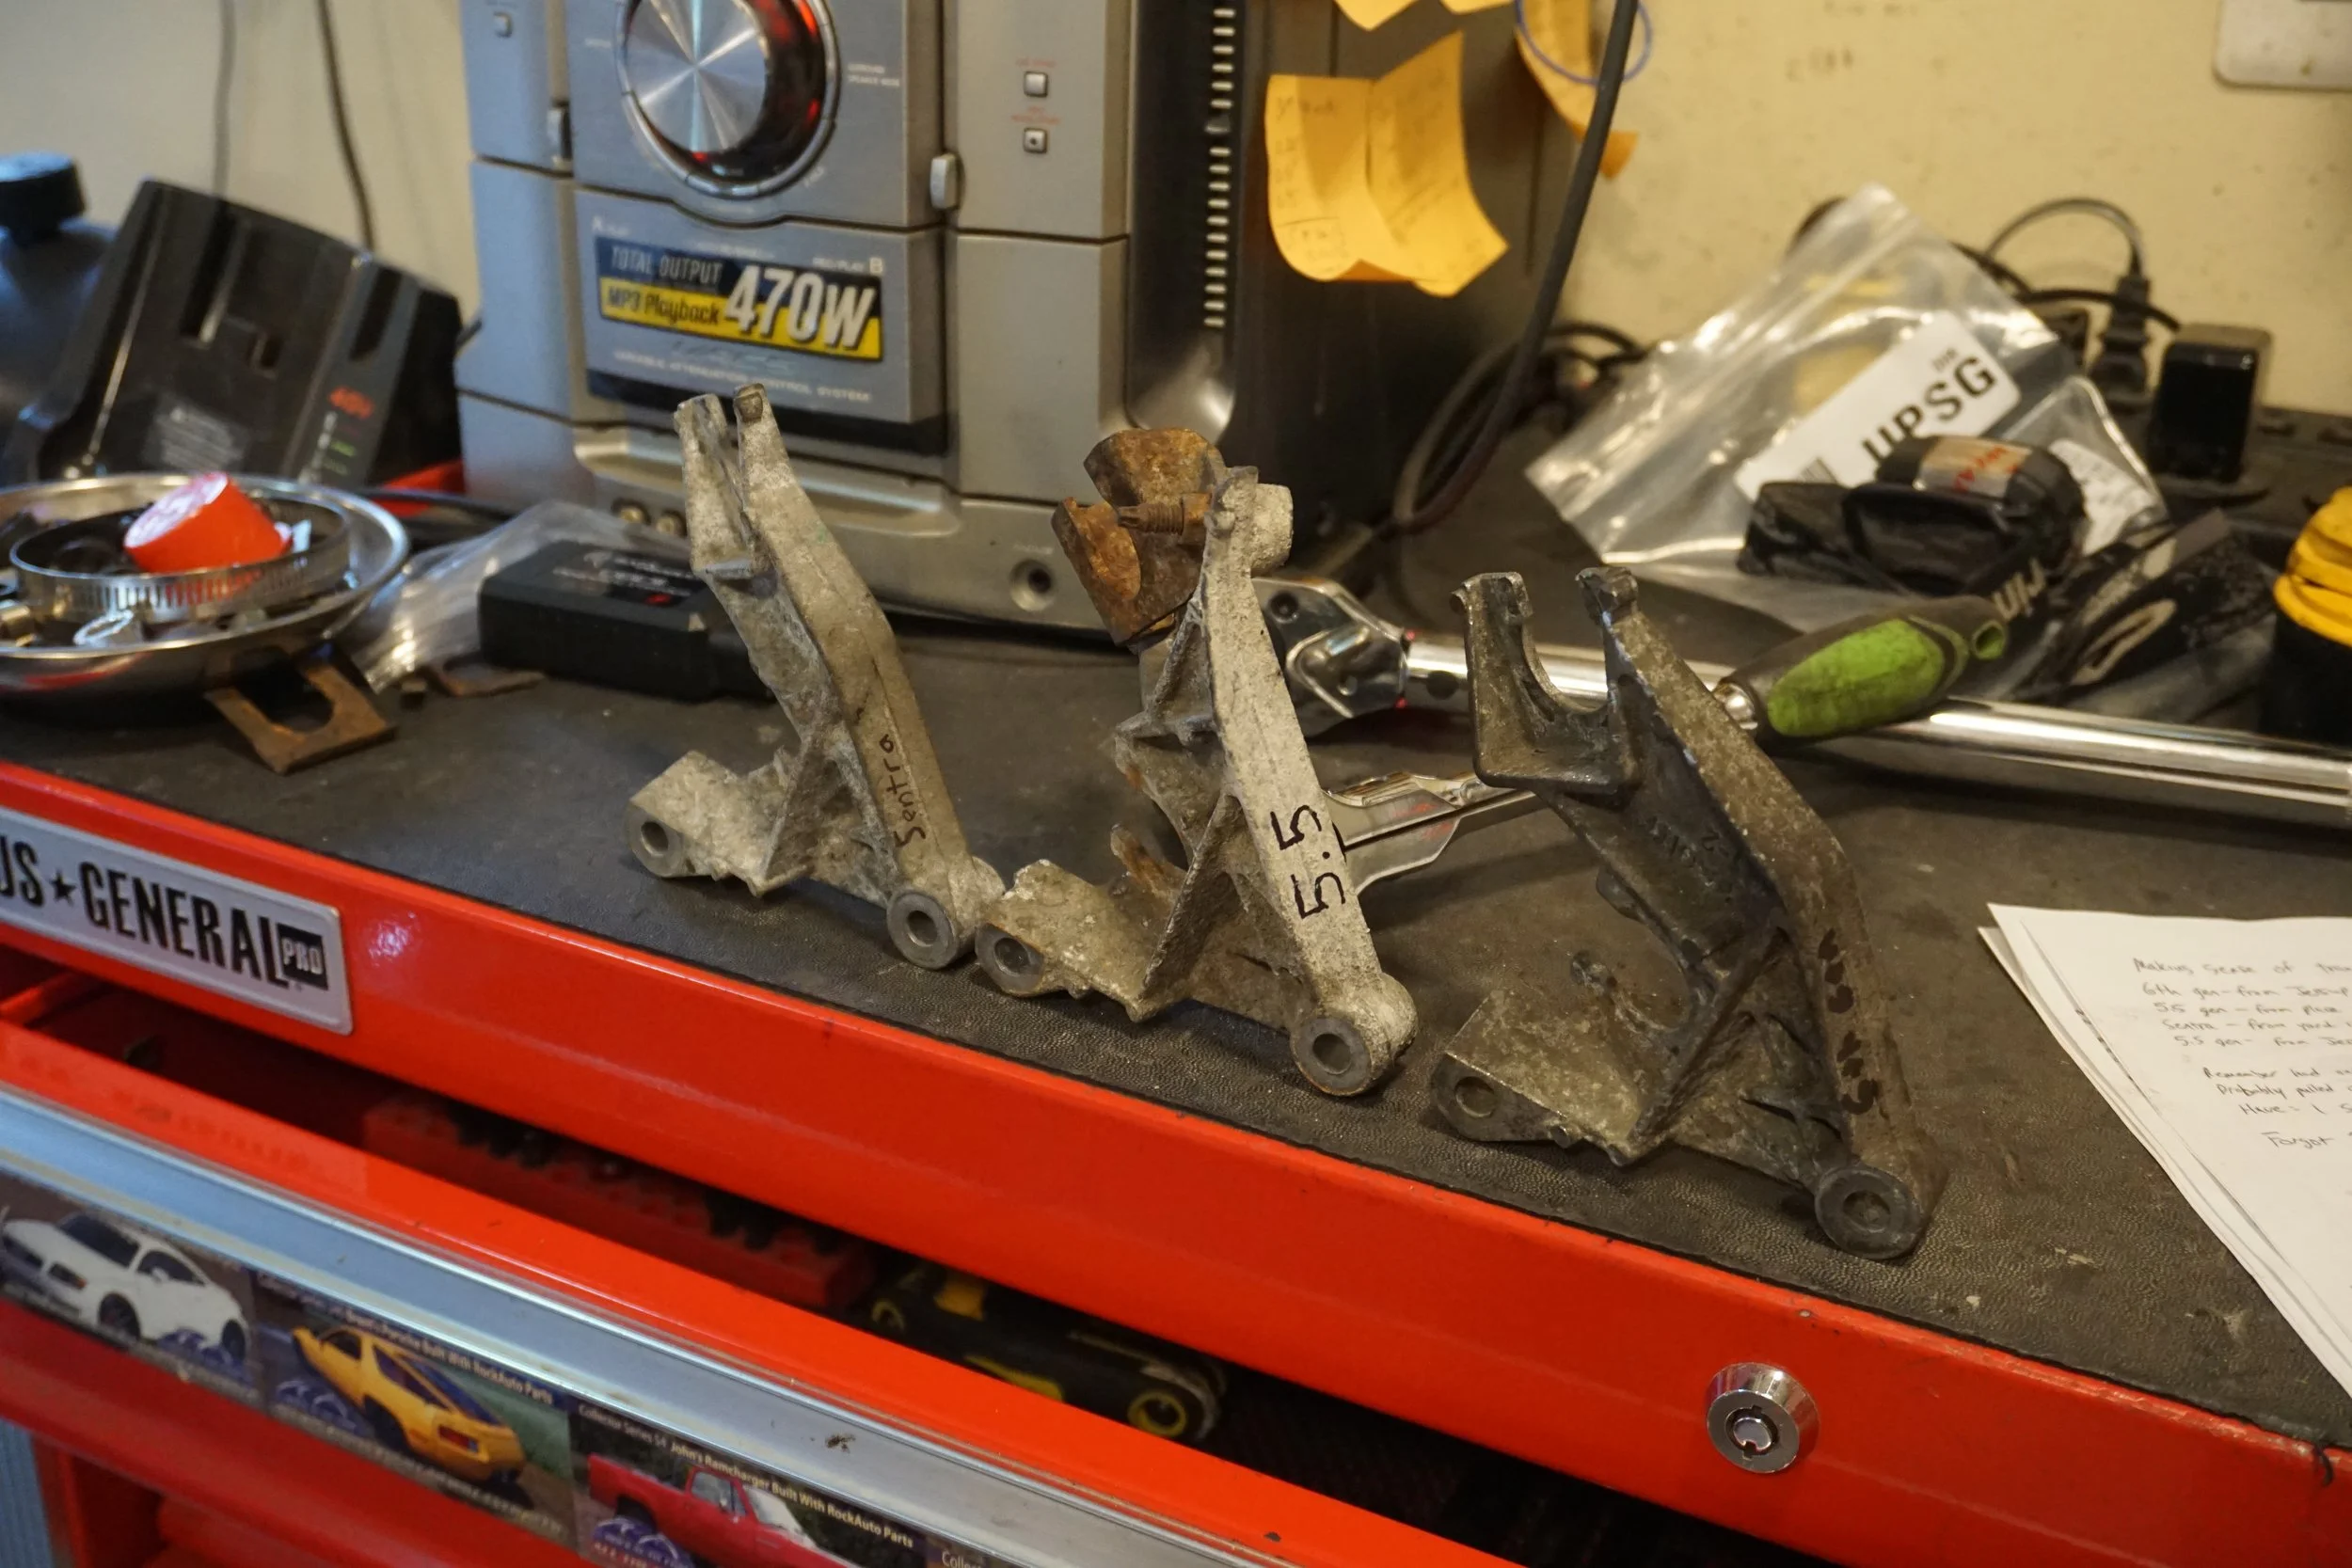
Well then I guess I made the wrong choice, since I had two of the one-piece designs to choose from:
Big fail on my part. Thankfully it hasn't broken yet.
On a similar note, I wonder if the fancy billet piece from Vision One Racing is worth the $185 cost:
 07-09-2023, 09:38 AM