My Massive I30 Revival and Build Thread
 03-18-2018, 04:09 AM
#441

Nice on all the poly upgrades.
FWIW you can just pop the ball joint loose to do the axles. I've done it more times than I can count to avoid an alignment. If you have the front in the air and you jack up the rotor slightly while you hit the knuckle at the balljoint with a mini-sledge, it will come loose.
FWIW you can just pop the ball joint loose to do the axles. I've done it more times than I can count to avoid an alignment. If you have the front in the air and you jack up the rotor slightly while you hit the knuckle at the balljoint with a mini-sledge, it will come loose.
 03-19-2018, 04:37 AM
#442


Nice on all the poly upgrades.
FWIW you can just pop the ball joint loose to do the axles. I've done it more times than I can count to avoid an alignment. If you have the front in the air and you jack up the rotor slightly while you hit the knuckle at the balljoint with a mini-sledge, it will come loose.
FWIW you can just pop the ball joint loose to do the axles. I've done it more times than I can count to avoid an alignment. If you have the front in the air and you jack up the rotor slightly while you hit the knuckle at the balljoint with a mini-sledge, it will come loose.
This is how I've always changed mine to avoid an alignment. Also I was going through axles more often than most. lol
03-19-2018, 06:05 AM
#443

So you knock the knuckle up off the ball joint? Because you sure can't knock the ball joint down from the top without having the axle already out. I can see how that might work if you do it annually, but aren't ball joints notoriously difficult to get unstuck? Even with a pickle fork those things are difficult to remove!
03-19-2018, 11:28 PM
#444

Wow still working on this gem? My car has been sitting for ages not getting much use.
If you have tried everything to fix the EGR and cleaned out the tubes, there was a similar issue I had when I was running my OEM '96 ECU and getting that EGR code. Where have you tapped the vacuum source for the EGR solenoid? Is it just from the intake manifold vacuum or from the Pathfinder TB? On the first half year of the '01 Pathy TBs they have this little vacuum port that sits around 12 o clock if you are looking at the front of the Pathy TB. Tap this partial vacuum source to the EGR solenoid only. I just doubled checked my setup and this is what cured the EGR 400 code on my car back when I had the '96 ECU. I was running all of the factory emissions from the OEM DE motor with the DEK intake manifold swap with no codes.
As far as cold starts with swapped motors these are notorious to fix. Back when I got good at DEK swaps I used to retain the 4th gen OEM IACV stuff with an adapter plate and drill & tap a port into the DEK plastic manifold a little bit past the TB. Then with the Pathy TB I would re-use the 4th gen TPS but re-calibrate with shims to the specs listed in the Haynes manual. Also when using another TB you also have to be mindful where its factory idle set screws are set in relation the 4th gen TPS sensor. I recall having a customer's Maxima with massive idle and cold start problems. Come to find out that a previous mechanic completely messed up the factory TB set screw calibration after half assing the TPS sensor replacement. The original cause of the problem with the TPS was damaged wires on the TPS harness that I repaired, then I had to recal everything to correct the idle and cold start issues.
03-21-2018, 09:16 PM
#445

So you knock the knuckle up off the ball joint? Because you sure can't knock the ball joint down from the top without having the axle already out. I can see how that might work if you do it annually, but aren't ball joints notoriously difficult to get unstuck? Even with a pickle fork those things are difficult to remove!
I leave that in when i change an axle.
03-29-2018, 06:57 AM
#446
Wow still working on this gem? My car has been sitting for ages not getting much use.
If you have tried everything to fix the EGR and cleaned out the tubes, there was a similar issue I had when I was running my OEM '96 ECU and getting that EGR code. Where have you tapped the vacuum source for the EGR solenoid? Is it just from the intake manifold vacuum or from the Pathfinder TB? On the first half year of the '01 Pathy TBs they have this little vacuum port that sits around 12 o clock if you are looking at the front of the Pathy TB. Tap this partial vacuum source to the EGR solenoid only. I just doubled checked my setup and this is what cured the EGR 400 code on my car back when I had the '96 ECU. I was running all of the factory emissions from the OEM DE motor with the DEK intake manifold swap with no codes.
As far as cold starts with swapped motors these are notorious to fix. Back when I got good at DEK swaps I used to retain the 4th gen OEM IACV stuff with an adapter plate and drill & tap a port into the DEK plastic manifold a little bit past the TB. Then with the Pathy TB I would re-use the 4th gen TPS but re-calibrate with shims to the specs listed in the Haynes manual. Also when using another TB you also have to be mindful where its factory idle set screws are set in relation the 4th gen TPS sensor. I recall having a customer's Maxima with massive idle and cold start problems. Come to find out that a previous mechanic completely messed up the factory TB set screw calibration after half assing the TPS sensor replacement. The original cause of the problem with the TPS was damaged wires on the TPS harness that I repaired, then I had to recal everything to correct the idle and cold start issues.
If you have tried everything to fix the EGR and cleaned out the tubes, there was a similar issue I had when I was running my OEM '96 ECU and getting that EGR code. Where have you tapped the vacuum source for the EGR solenoid? Is it just from the intake manifold vacuum or from the Pathfinder TB? On the first half year of the '01 Pathy TBs they have this little vacuum port that sits around 12 o clock if you are looking at the front of the Pathy TB. Tap this partial vacuum source to the EGR solenoid only. I just doubled checked my setup and this is what cured the EGR 400 code on my car back when I had the '96 ECU. I was running all of the factory emissions from the OEM DE motor with the DEK intake manifold swap with no codes.
As far as cold starts with swapped motors these are notorious to fix. Back when I got good at DEK swaps I used to retain the 4th gen OEM IACV stuff with an adapter plate and drill & tap a port into the DEK plastic manifold a little bit past the TB. Then with the Pathy TB I would re-use the 4th gen TPS but re-calibrate with shims to the specs listed in the Haynes manual. Also when using another TB you also have to be mindful where its factory idle set screws are set in relation the 4th gen TPS sensor. I recall having a customer's Maxima with massive idle and cold start problems. Come to find out that a previous mechanic completely messed up the factory TB set screw calibration after half assing the TPS sensor replacement. The original cause of the problem with the TPS was damaged wires on the TPS harness that I repaired, then I had to recal everything to correct the idle and cold start issues.

Krismax: Yeah, talking about ways to remove the axles without disturbing the camber bolts.
 03-31-2018, 06:02 PM
#448
Hey Joe! What's the story with your car, why is it sitting? That thing was sweet when I got to see it! Sorry for the delayed response. I've been working on my M3 lately so I haven't had the I30 in the garage to inspect some of those things, but I will soon. I've had either a DEK or this 3.5 in my car since 2005, and this is the first cold starting problem that I can remember, so I think something is just wearing out or leaking, instead of a calibration issue. Even with all of this time away from these cars you still seem like you know a hell of a lot more about them than I do. You should come down to VA and go over my car with a fine tooth comb. I'll pay you
Krismax: Yeah, talking about ways to remove the axles without disturbing the camber bolts.
Krismax: Yeah, talking about ways to remove the axles without disturbing the camber bolts.
 Finishing my degree then possibly graduate school. But still working full time as well. So I have no time to track the car anymore. Just keeping the truck running and other basic maintenance.
 I can recall the emissions battle of '05~'07 for my car and getting it past with full readiness and no CELs using the DEK swap; then full DEK engine swap a year later after the OEM motor died following Maxus. First with the '96 OEM ECU then with the '95 Fed spec ECU. So that stuff is still burned in my mind. But remembering stuff for college courses, yeah not so much.
Last edited by 98SEBlackMax; 03-31-2018 at 06:07 PM.
04-10-2018, 06:23 PM
#449
I got the car aligned at a different race shop this year since the experience at PTuning last year left a lot to be desired. I went to RRT, which is where I take my M3 for alignments. These guys really know their stuff! They did quick work and the owner offered up a lot of helpful tips and observations on the car. Anyways, as for the alignment, same as last year pretty much:
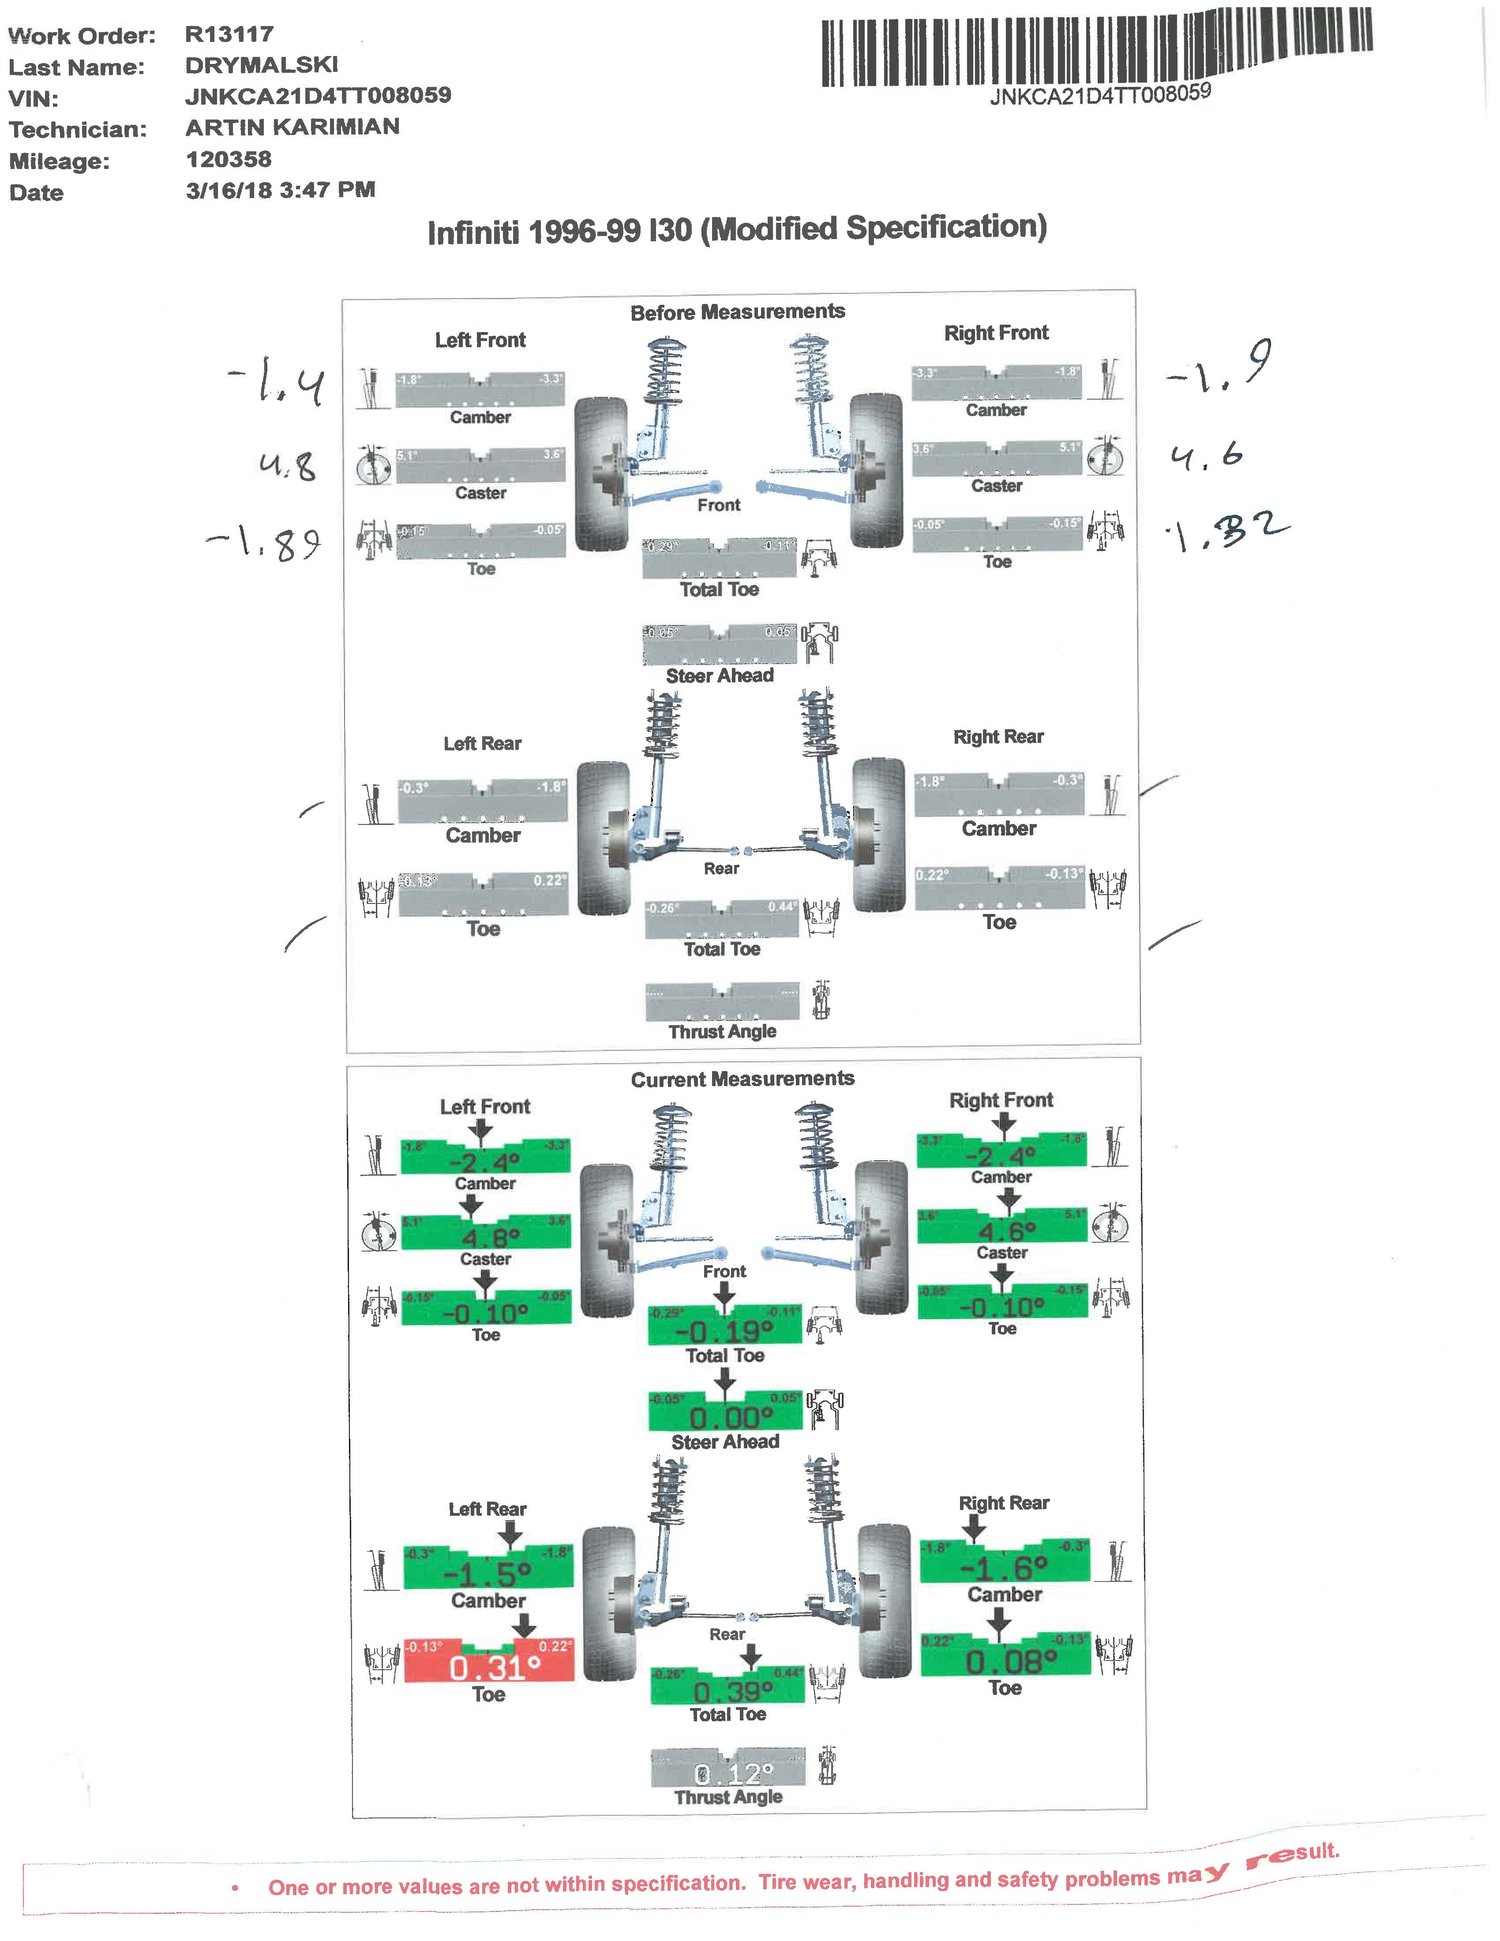
That toe in on the DS rear is killing me! Does anyone know if people still bend beams? I need to get my beam bent
And they pointed out what was obvious the second I pulled out of my driveway, that the control arm still grinds on the rotors at close to full lock. I went home and started up again with the dremel, only to get fed up and grab the angle grinder instead. I had to be real careful to not grind the ball joint, but it saved a ton of time and took a ton of material off quickly.
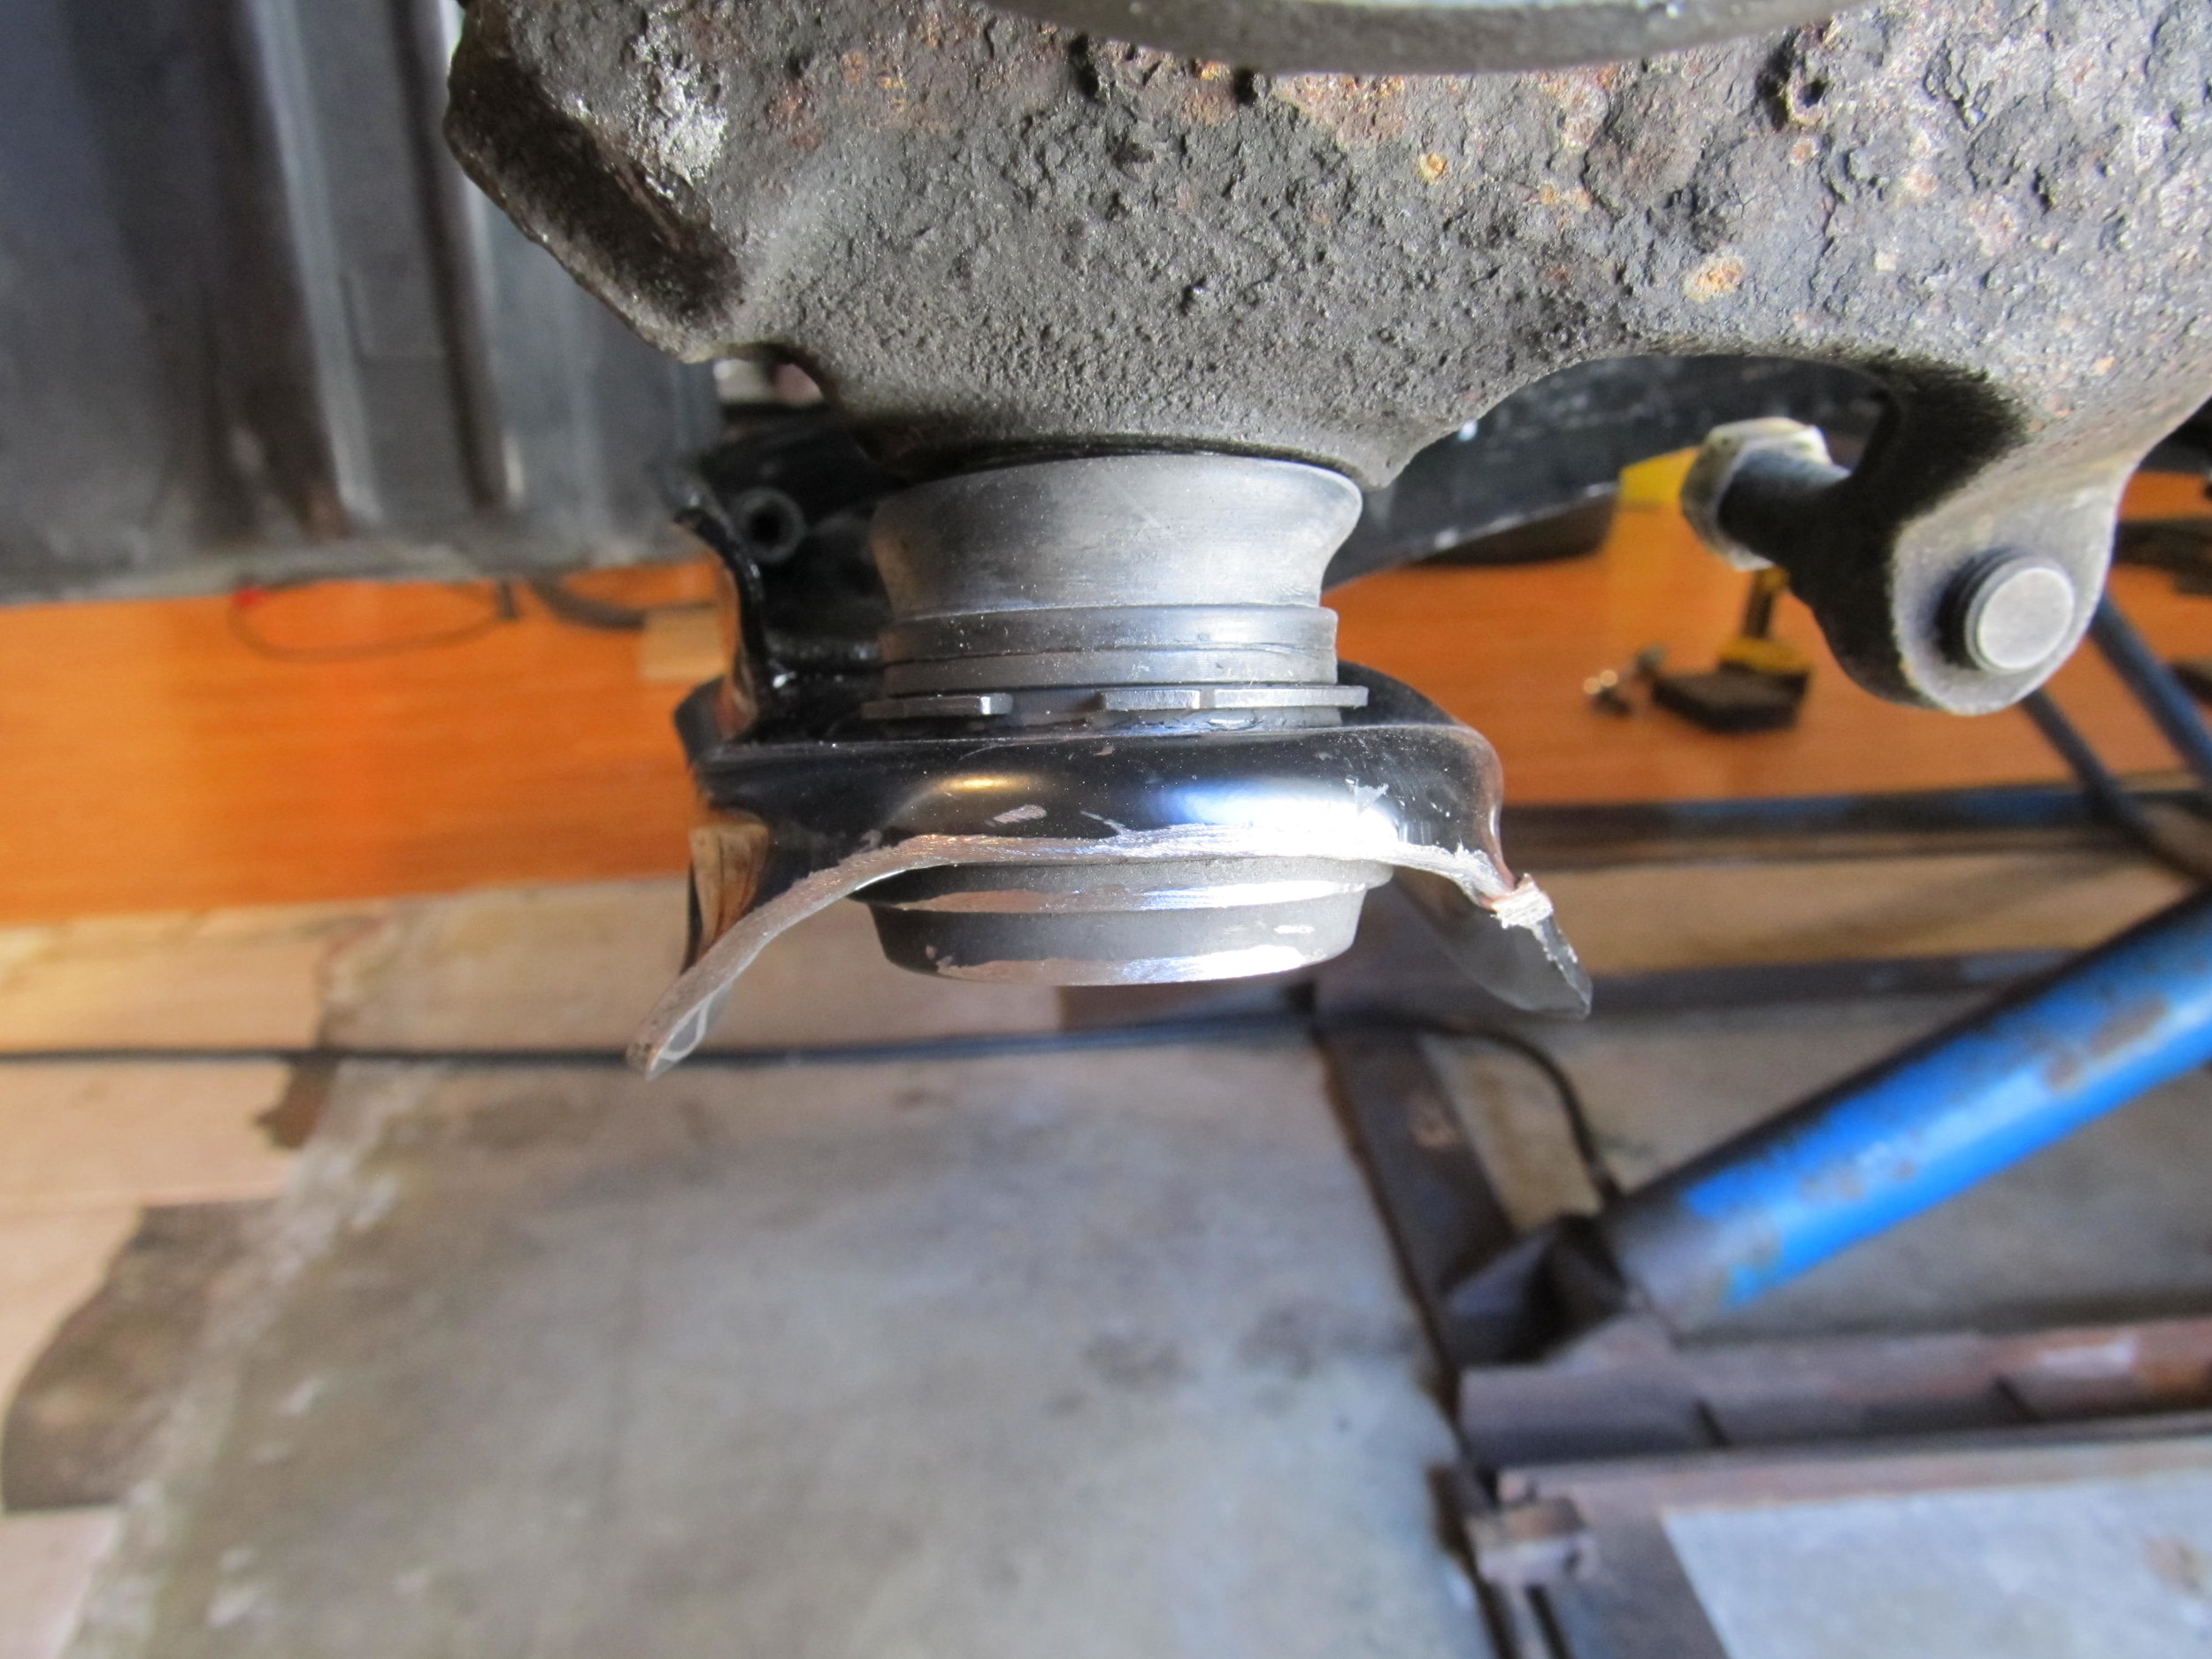
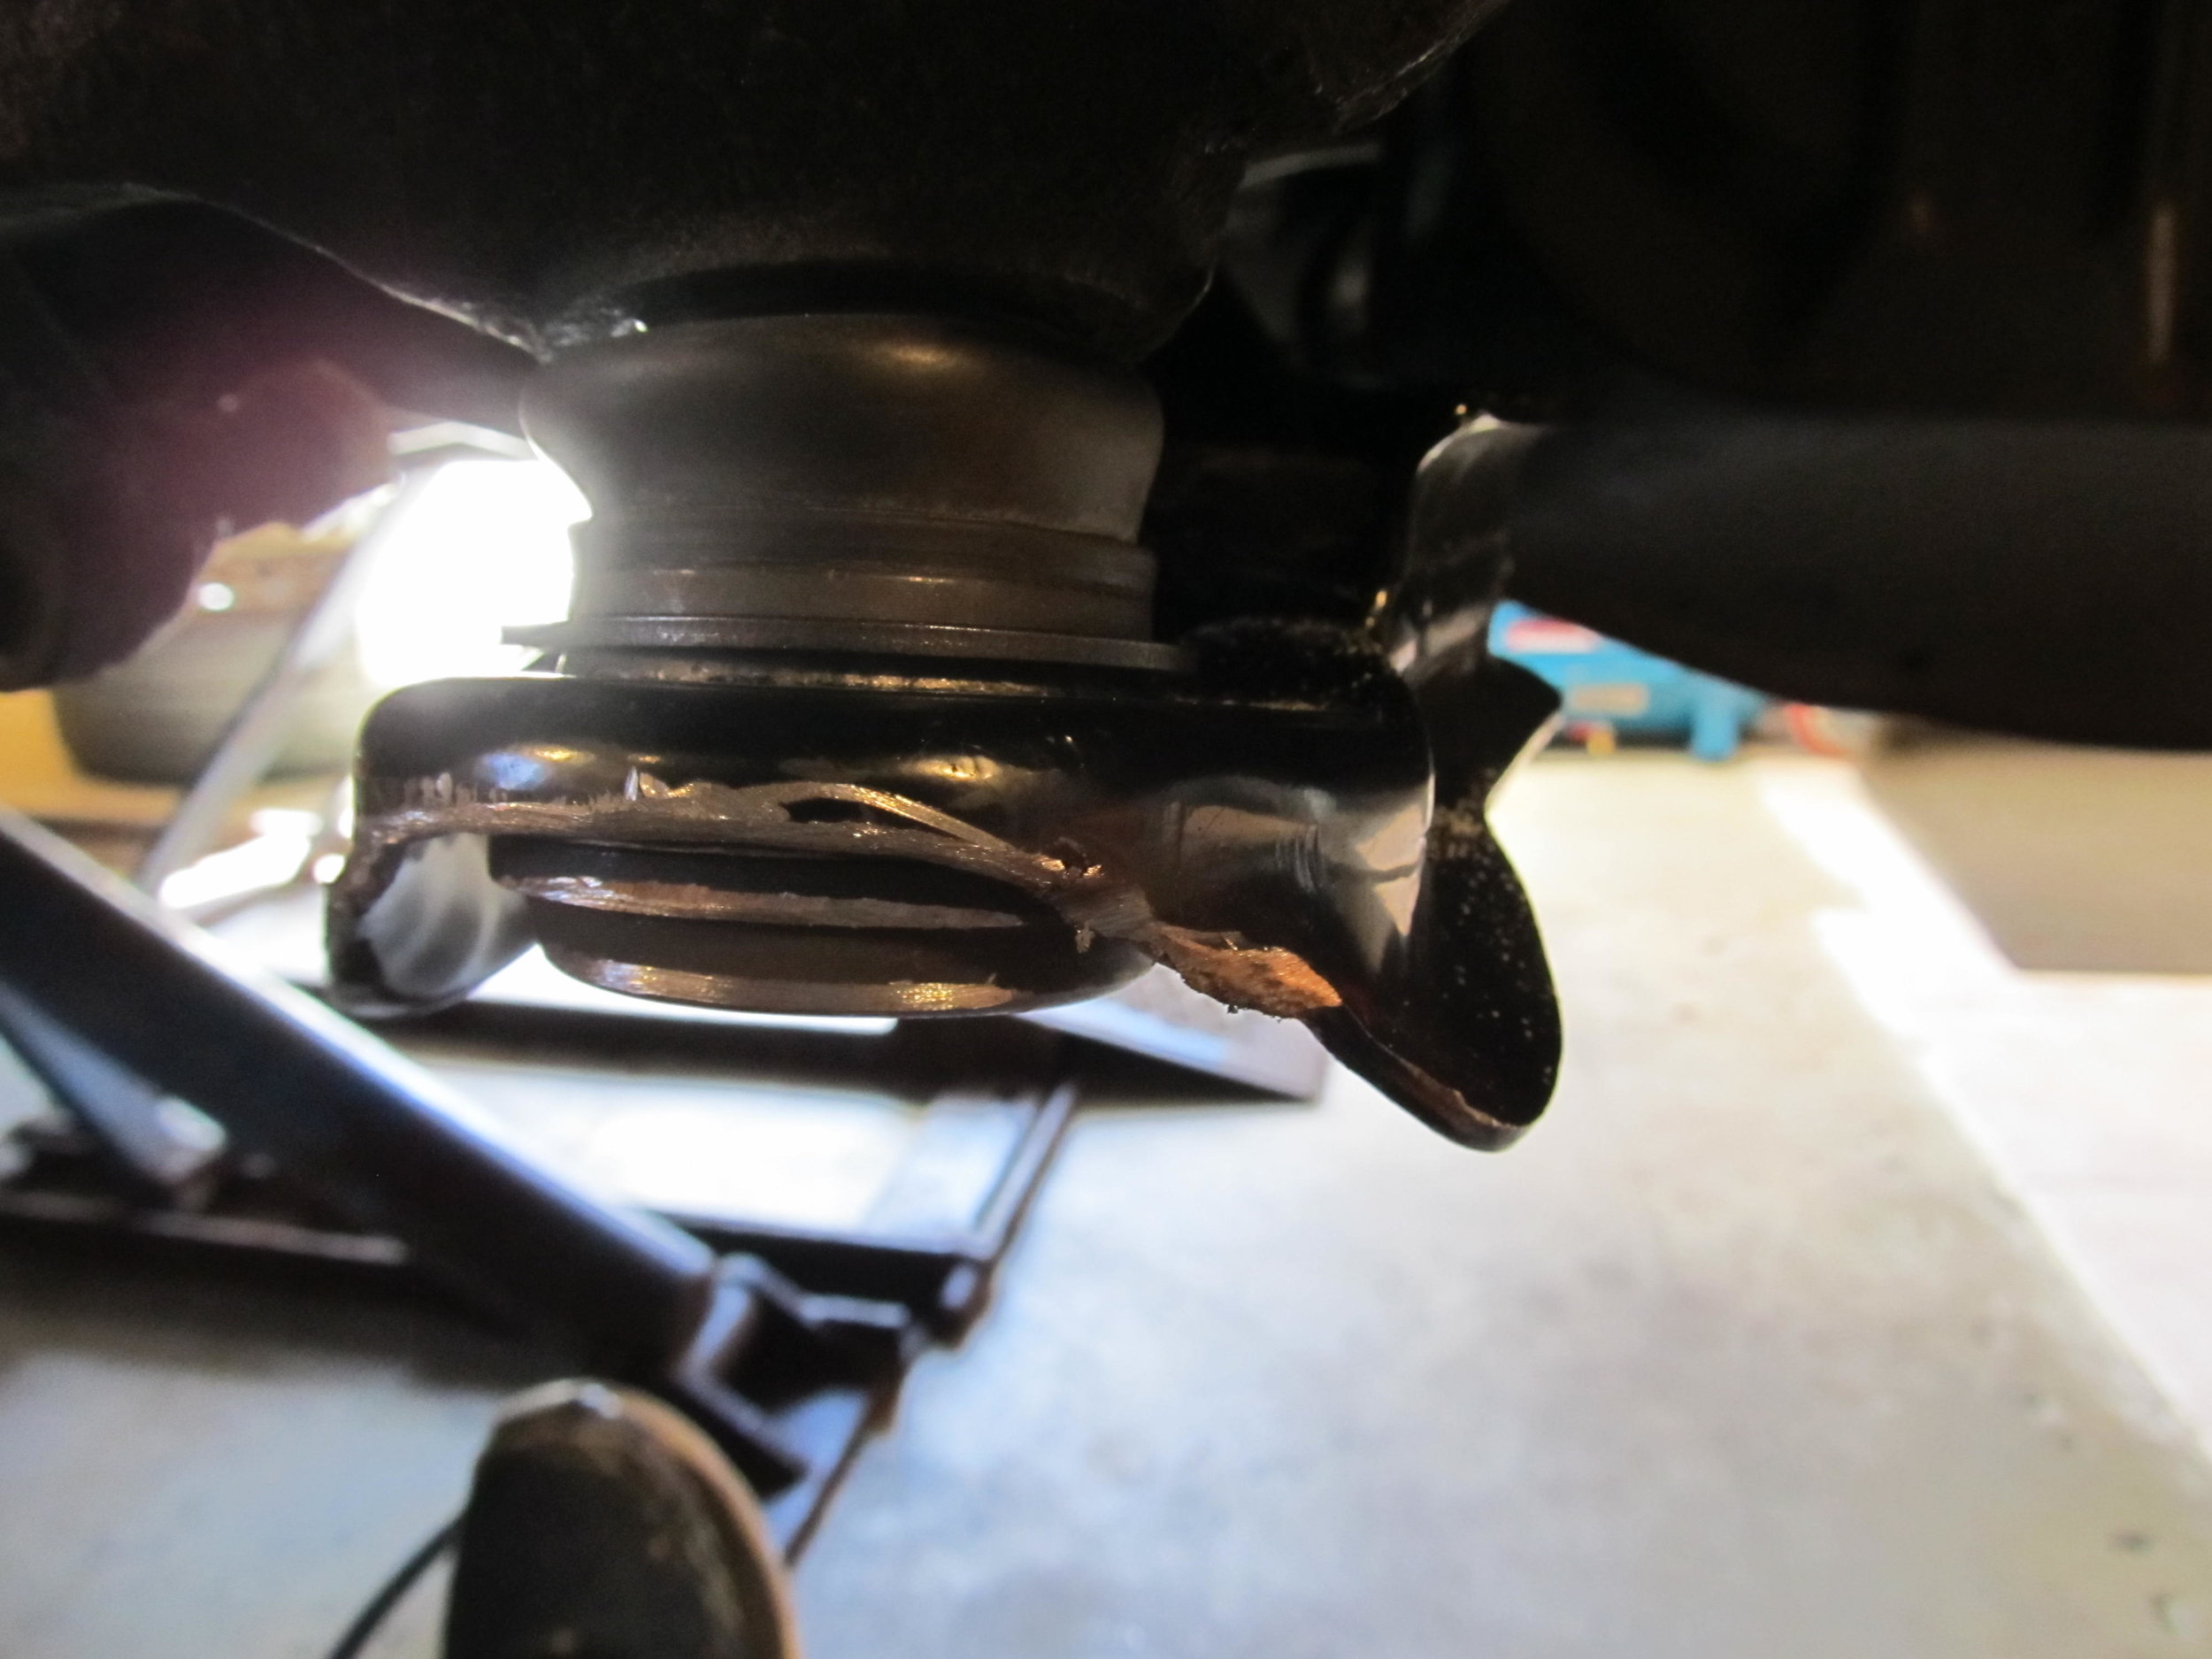
I also took it to the rust and lip of the inside of the rotors to get that extra smidgen of clearance.
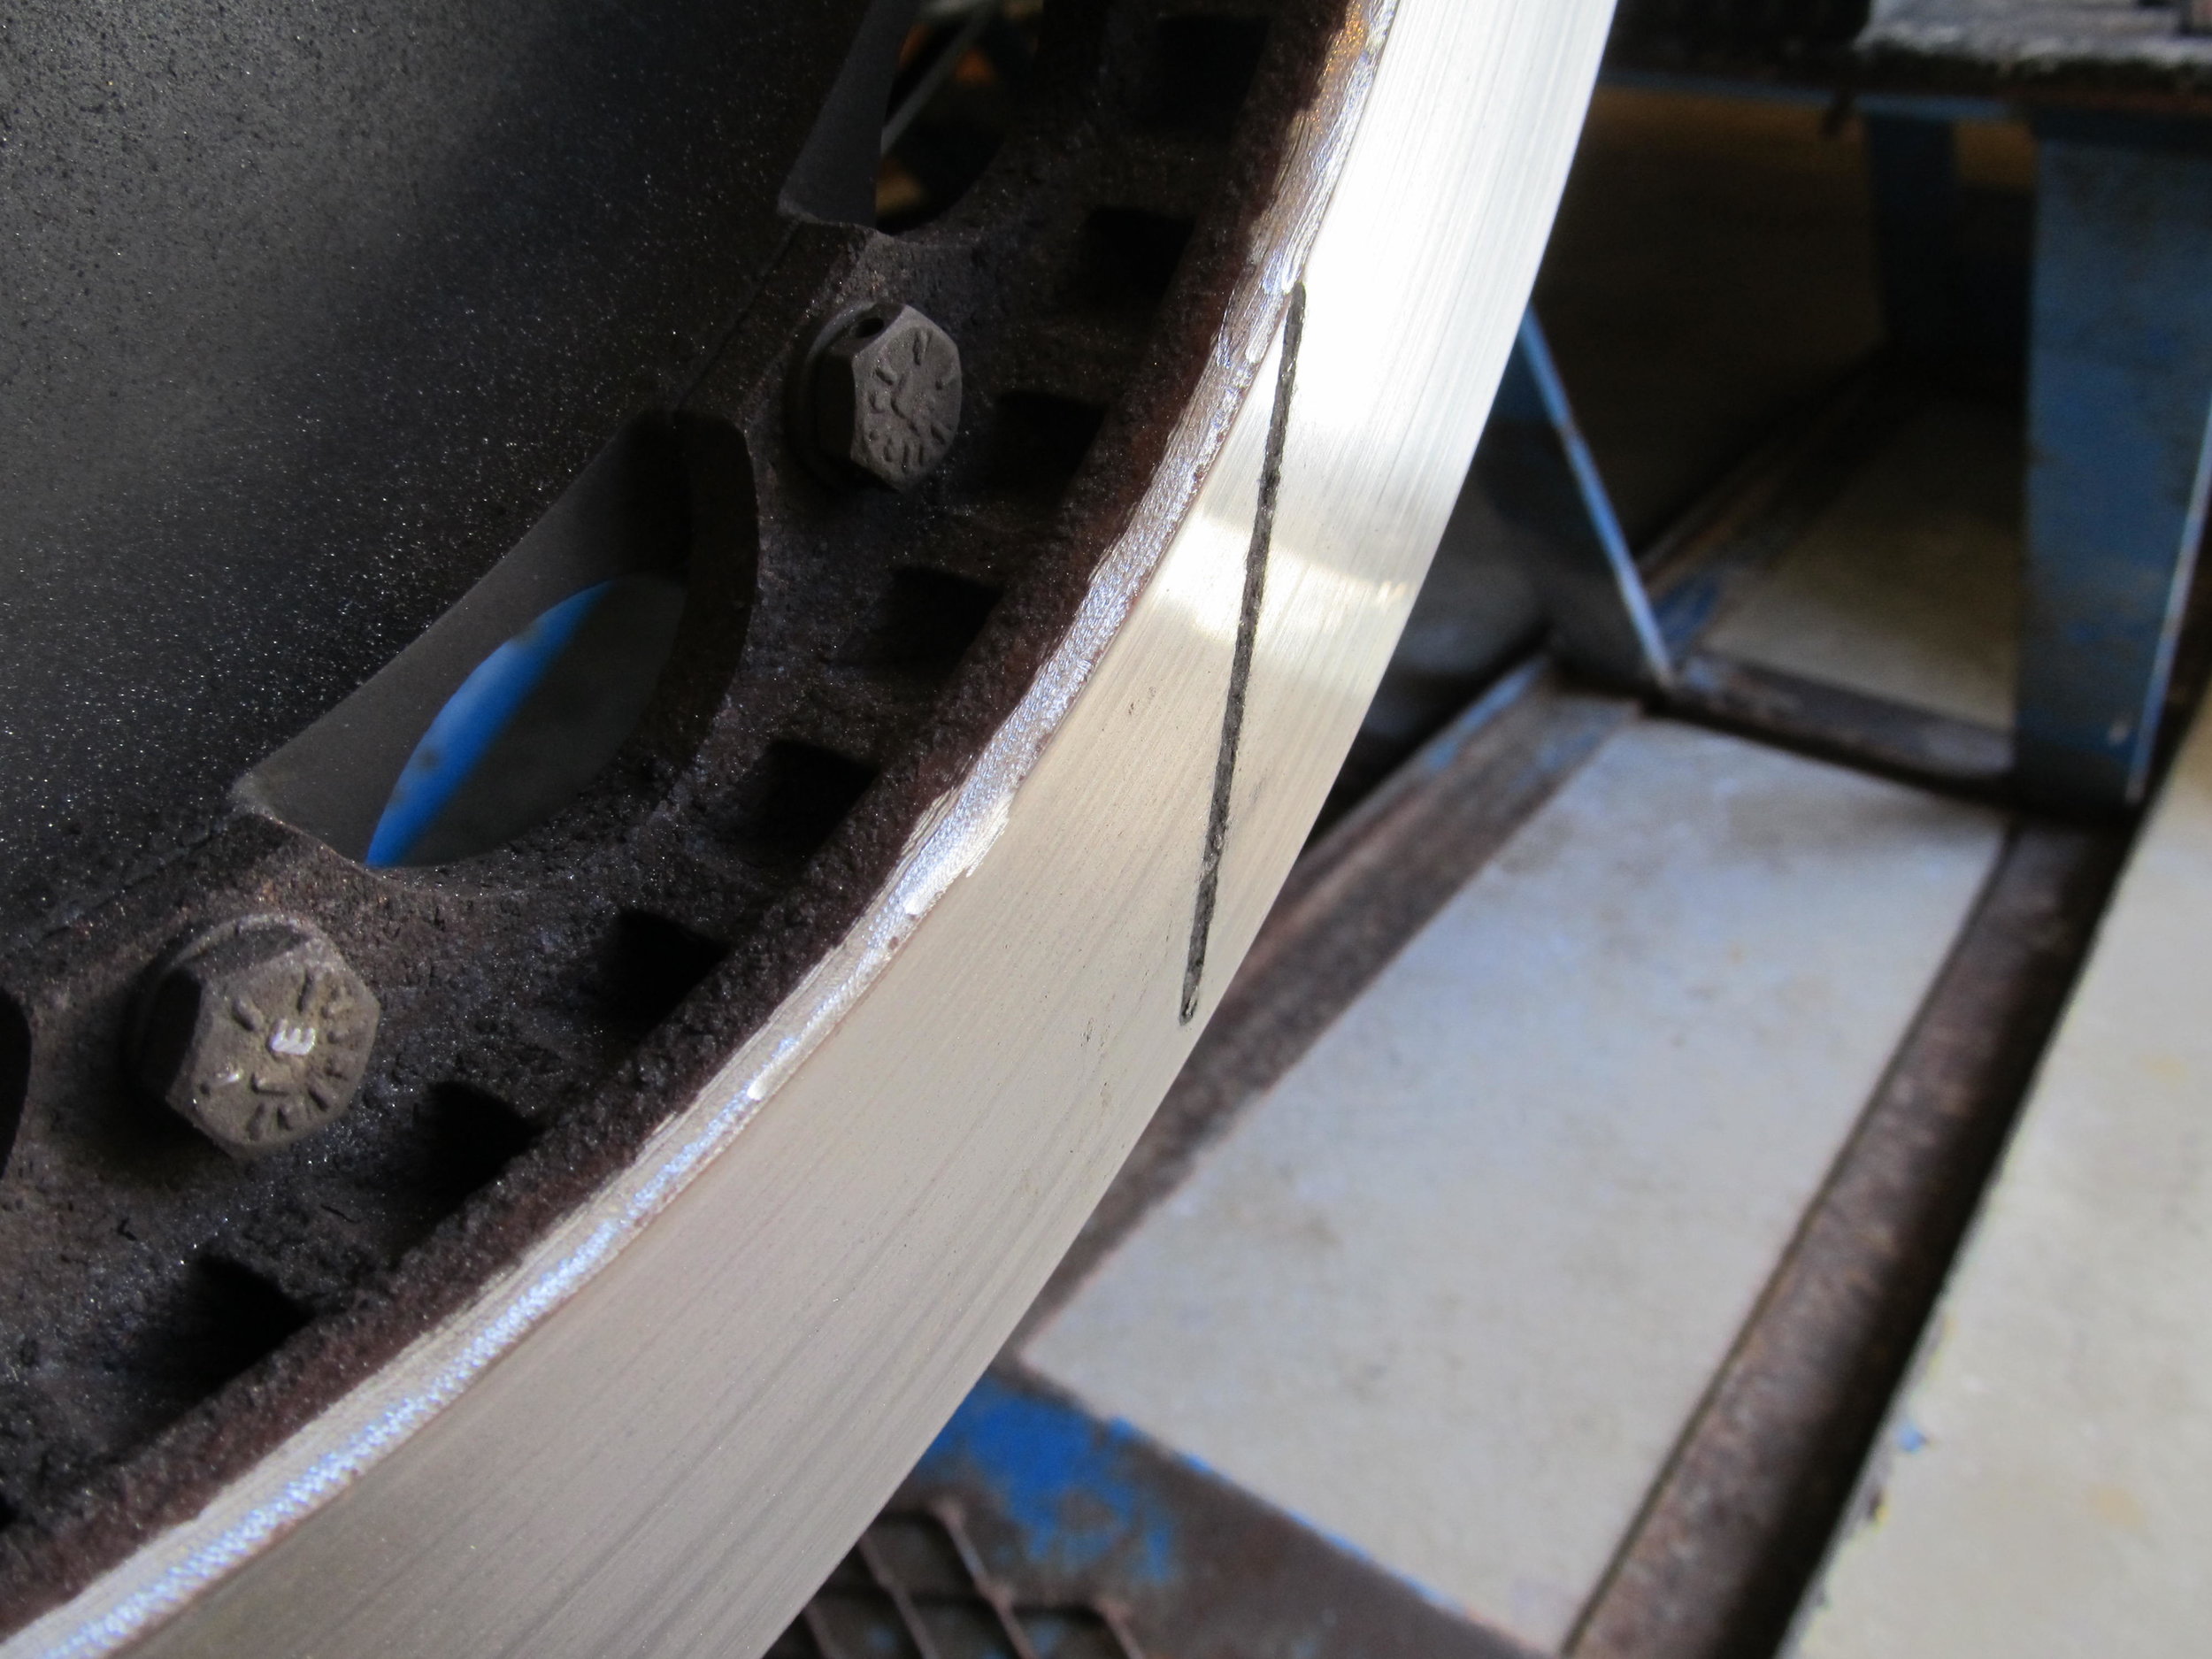
After a week or so of driving, not a single noise, so I'm considering this solved!
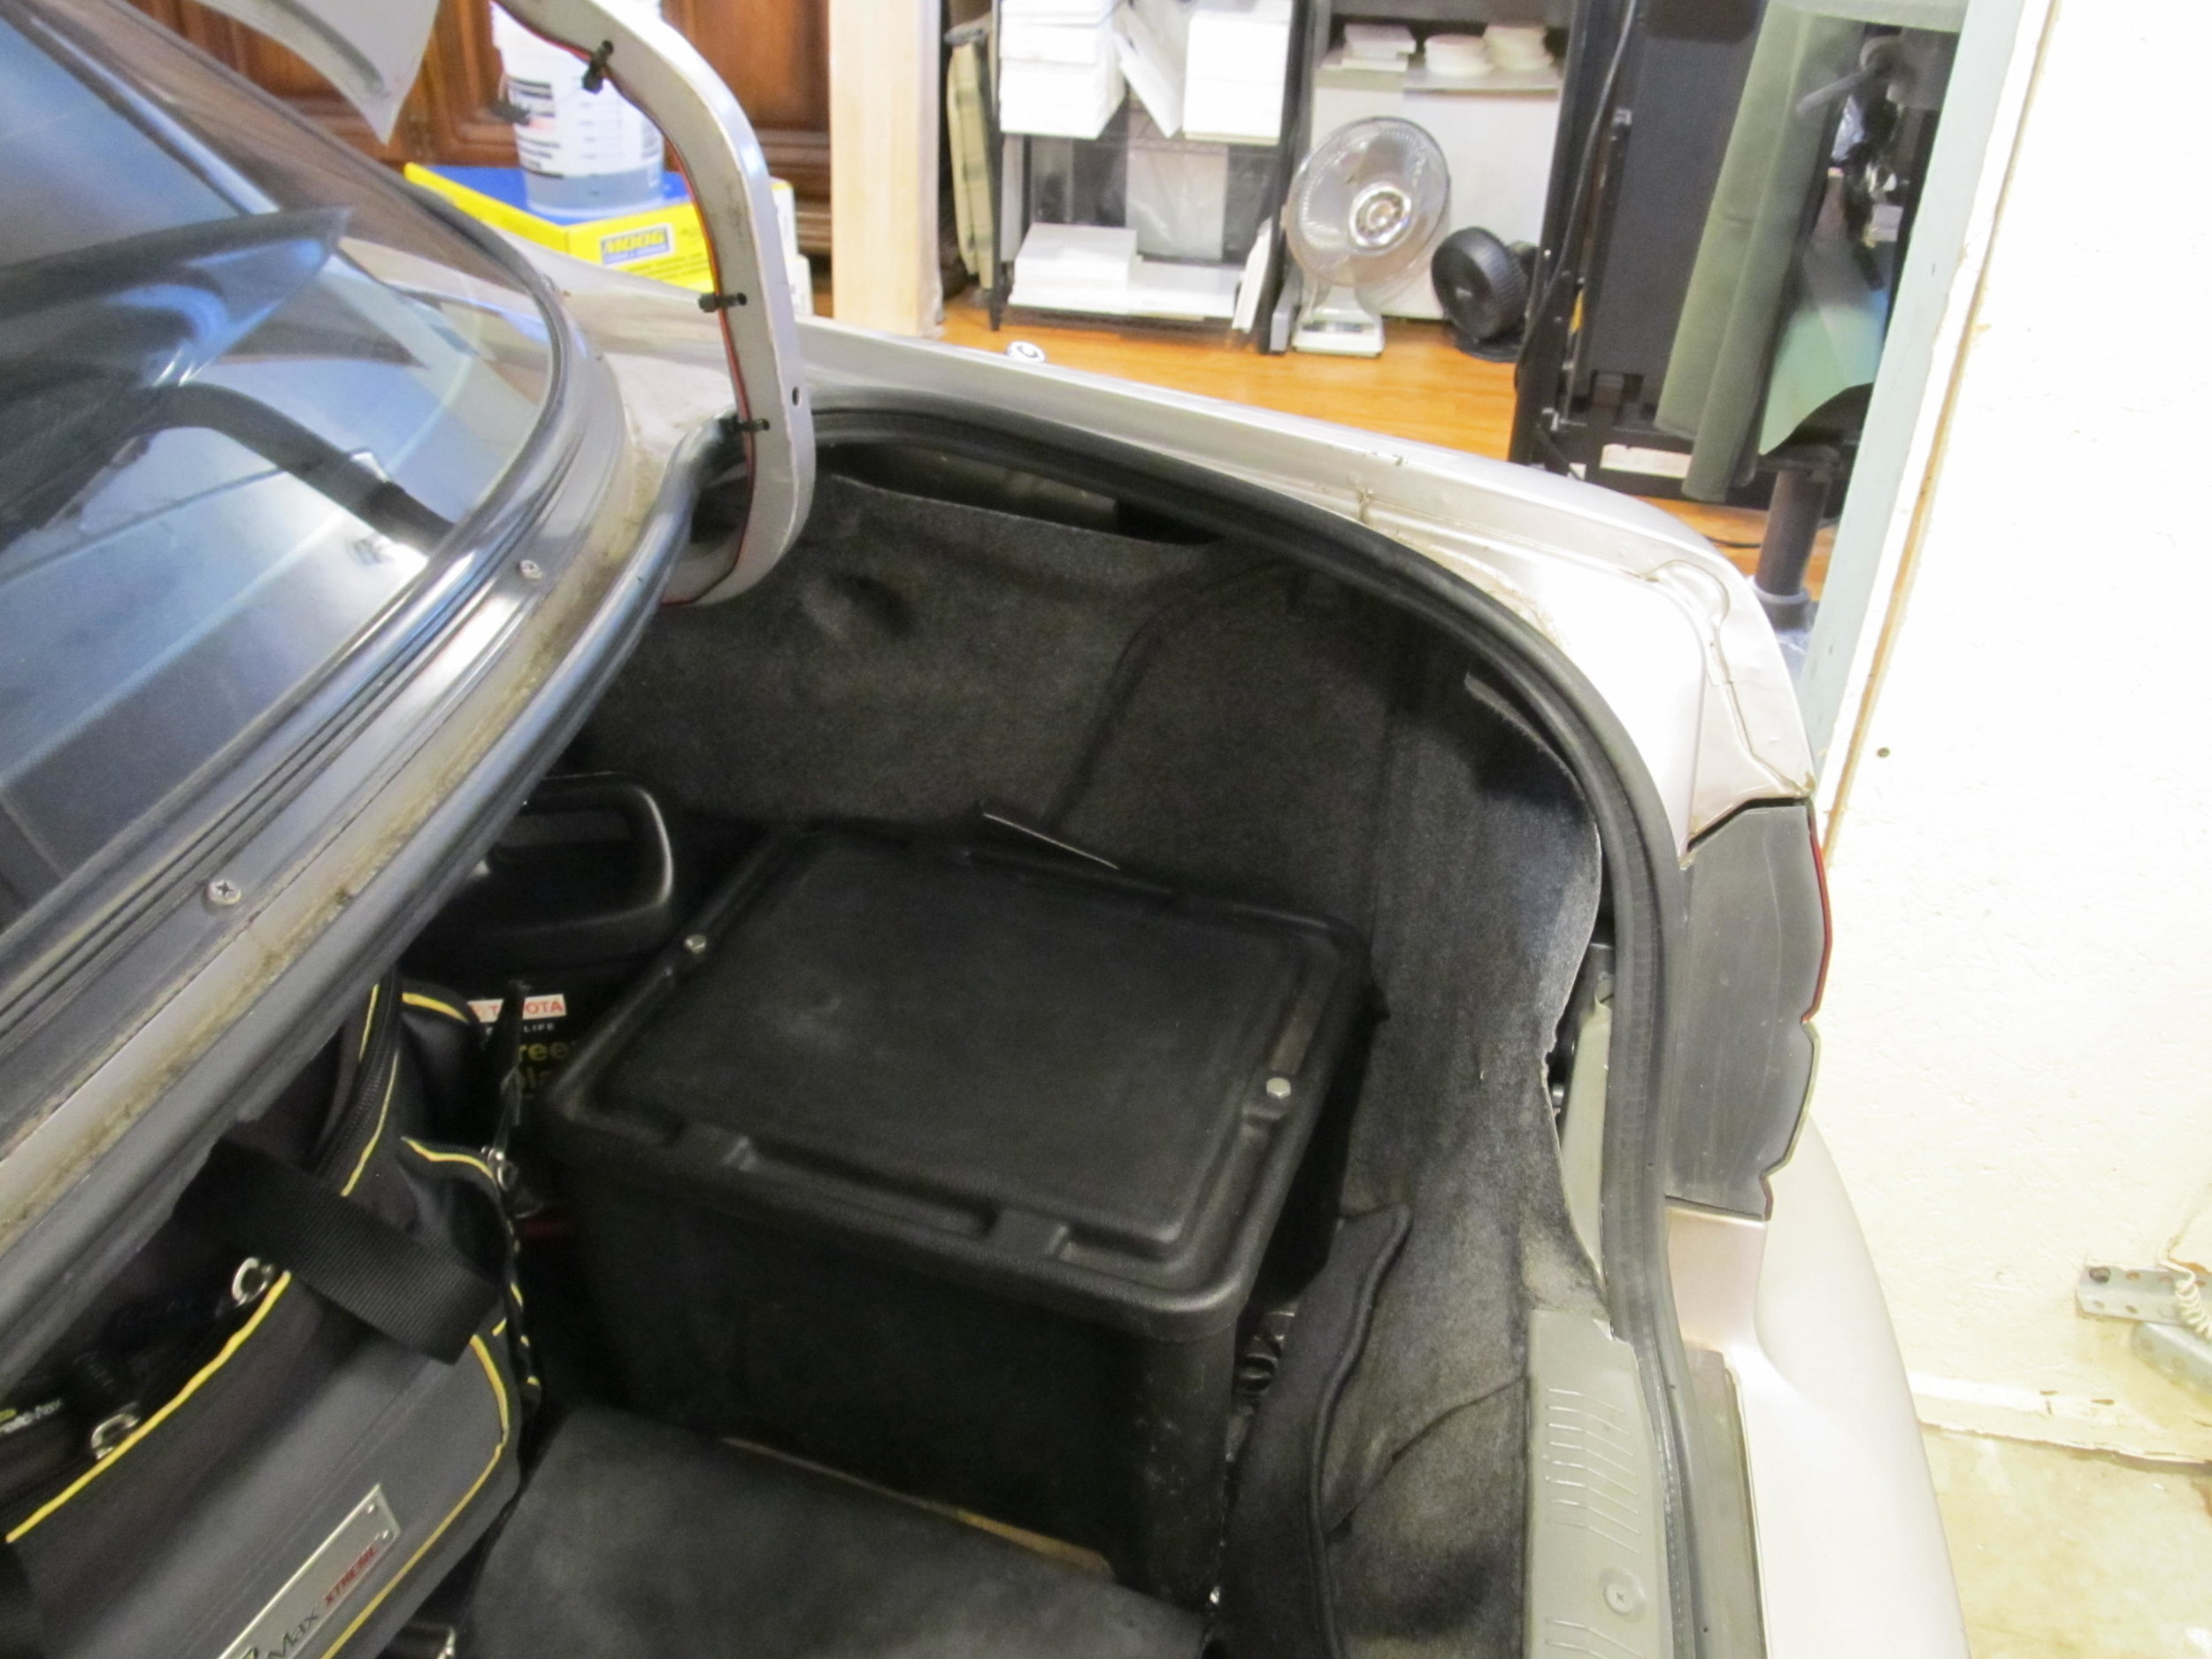
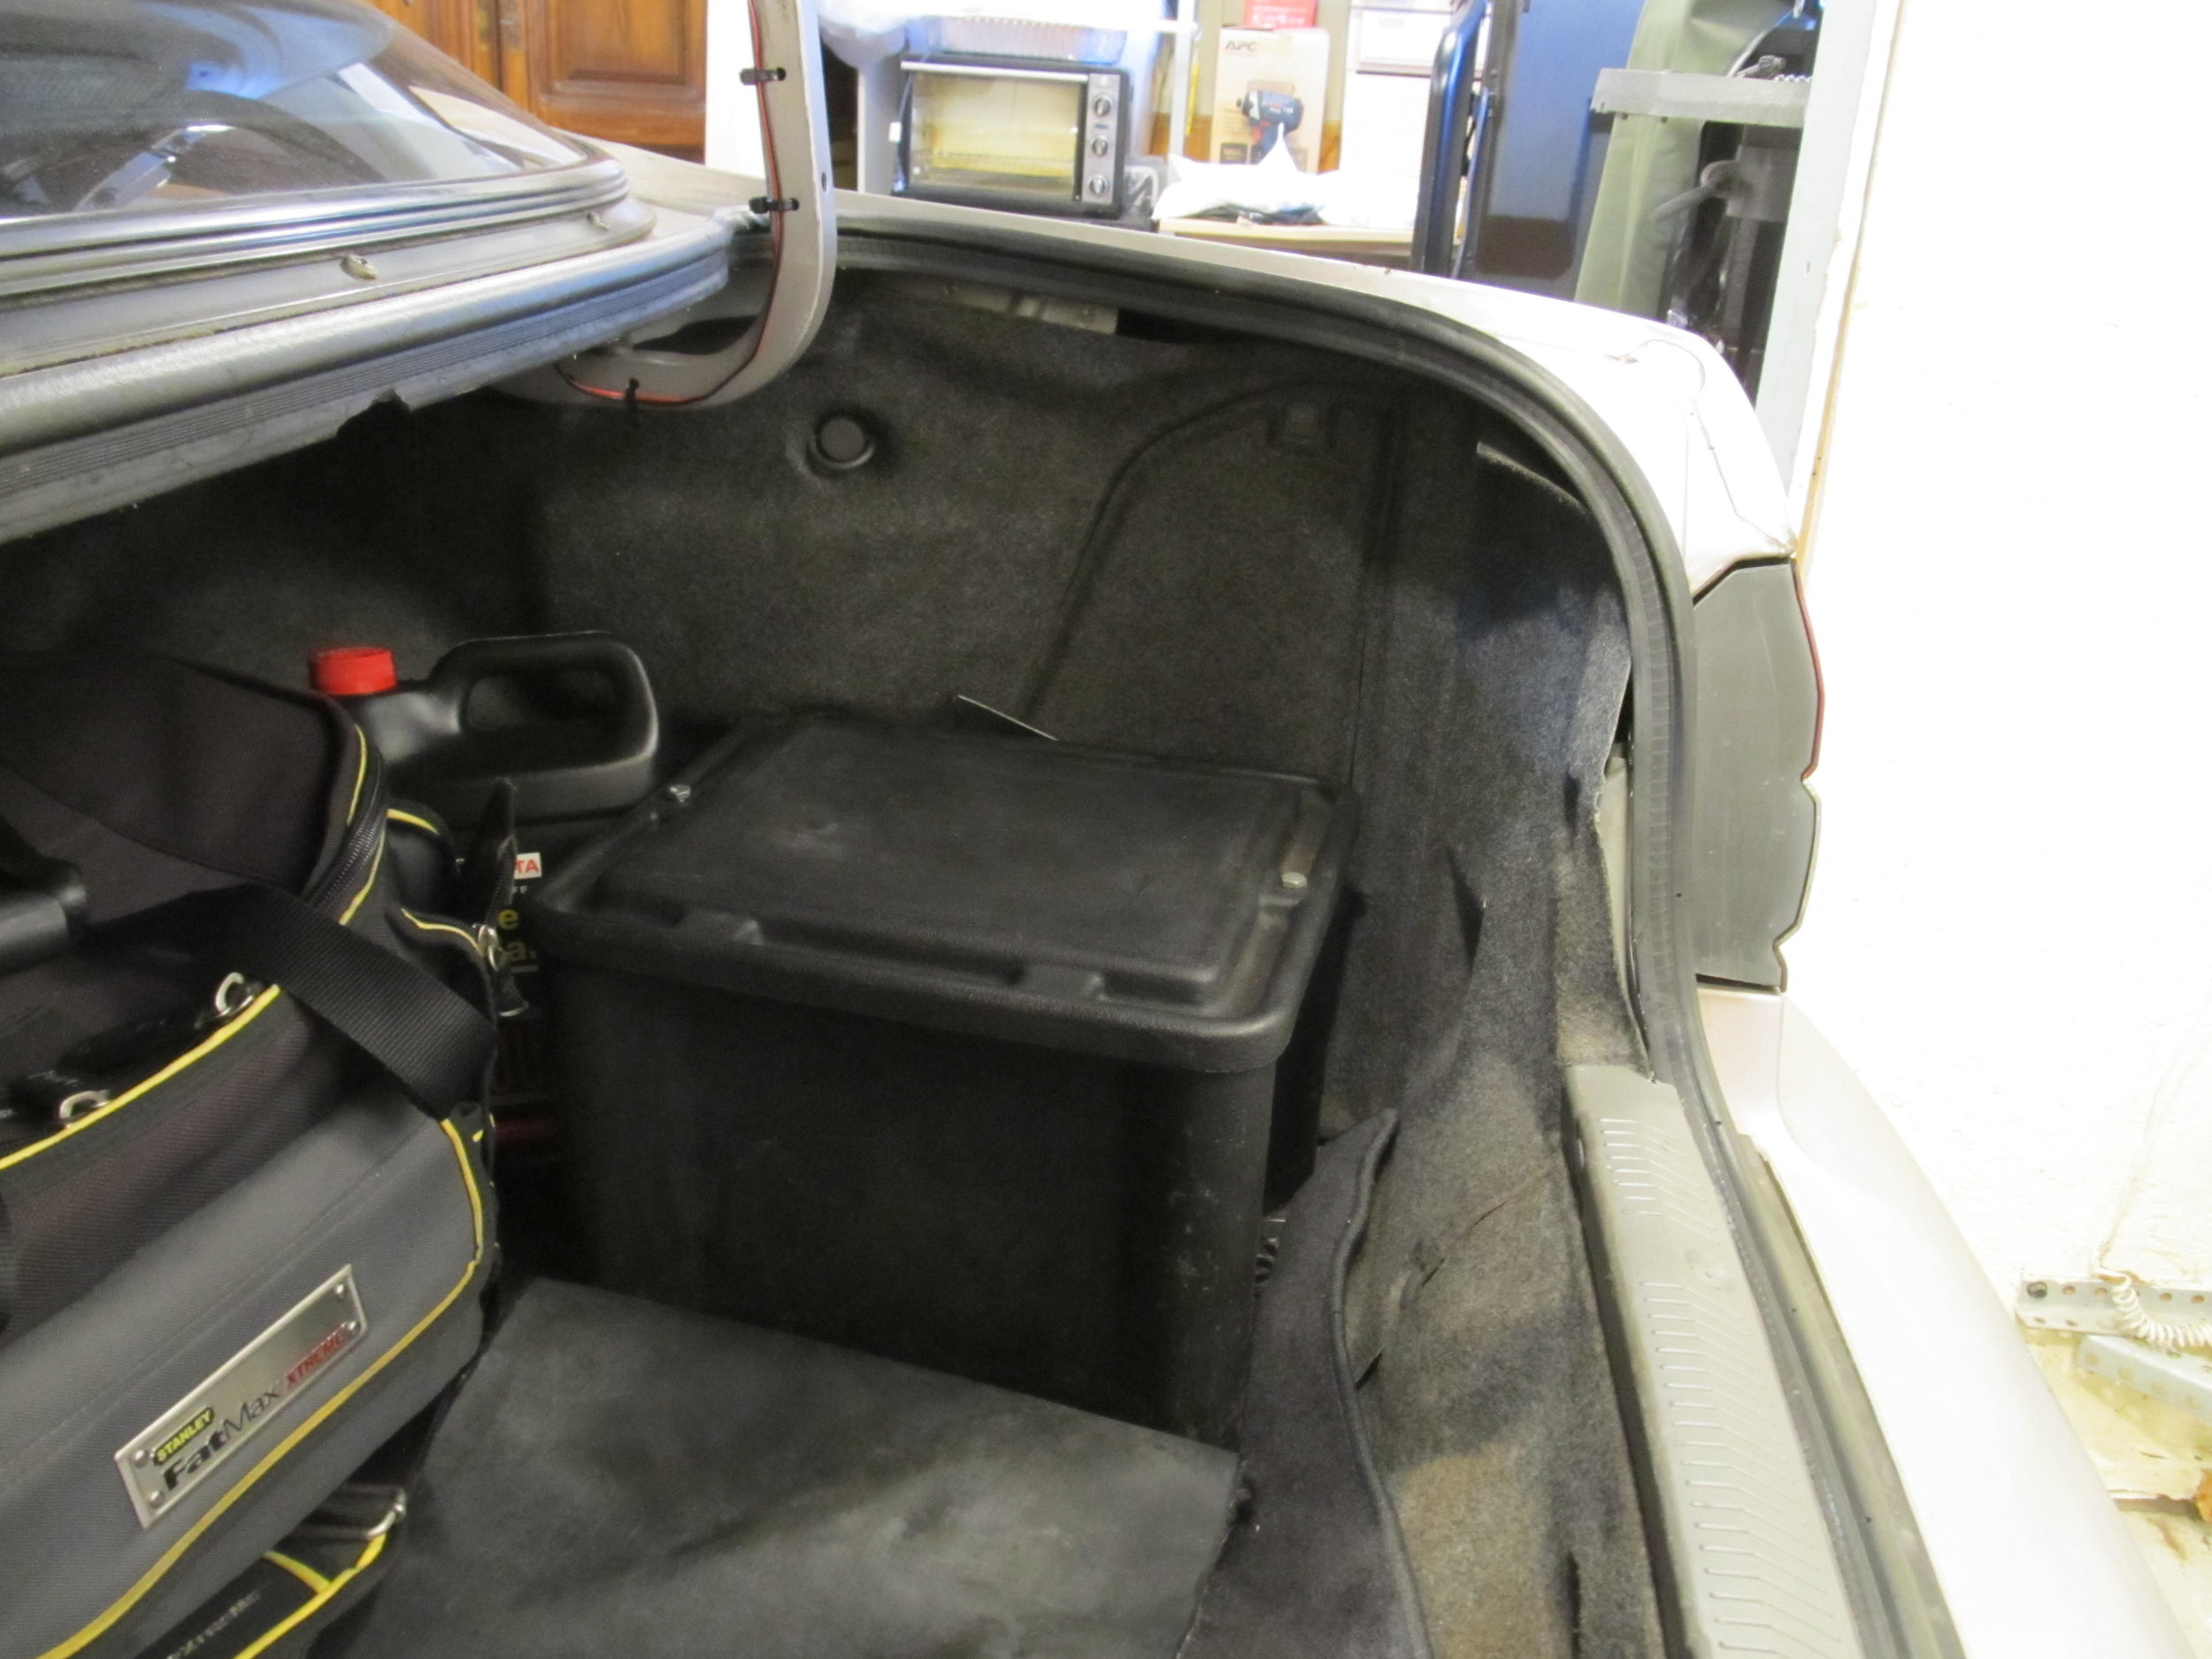
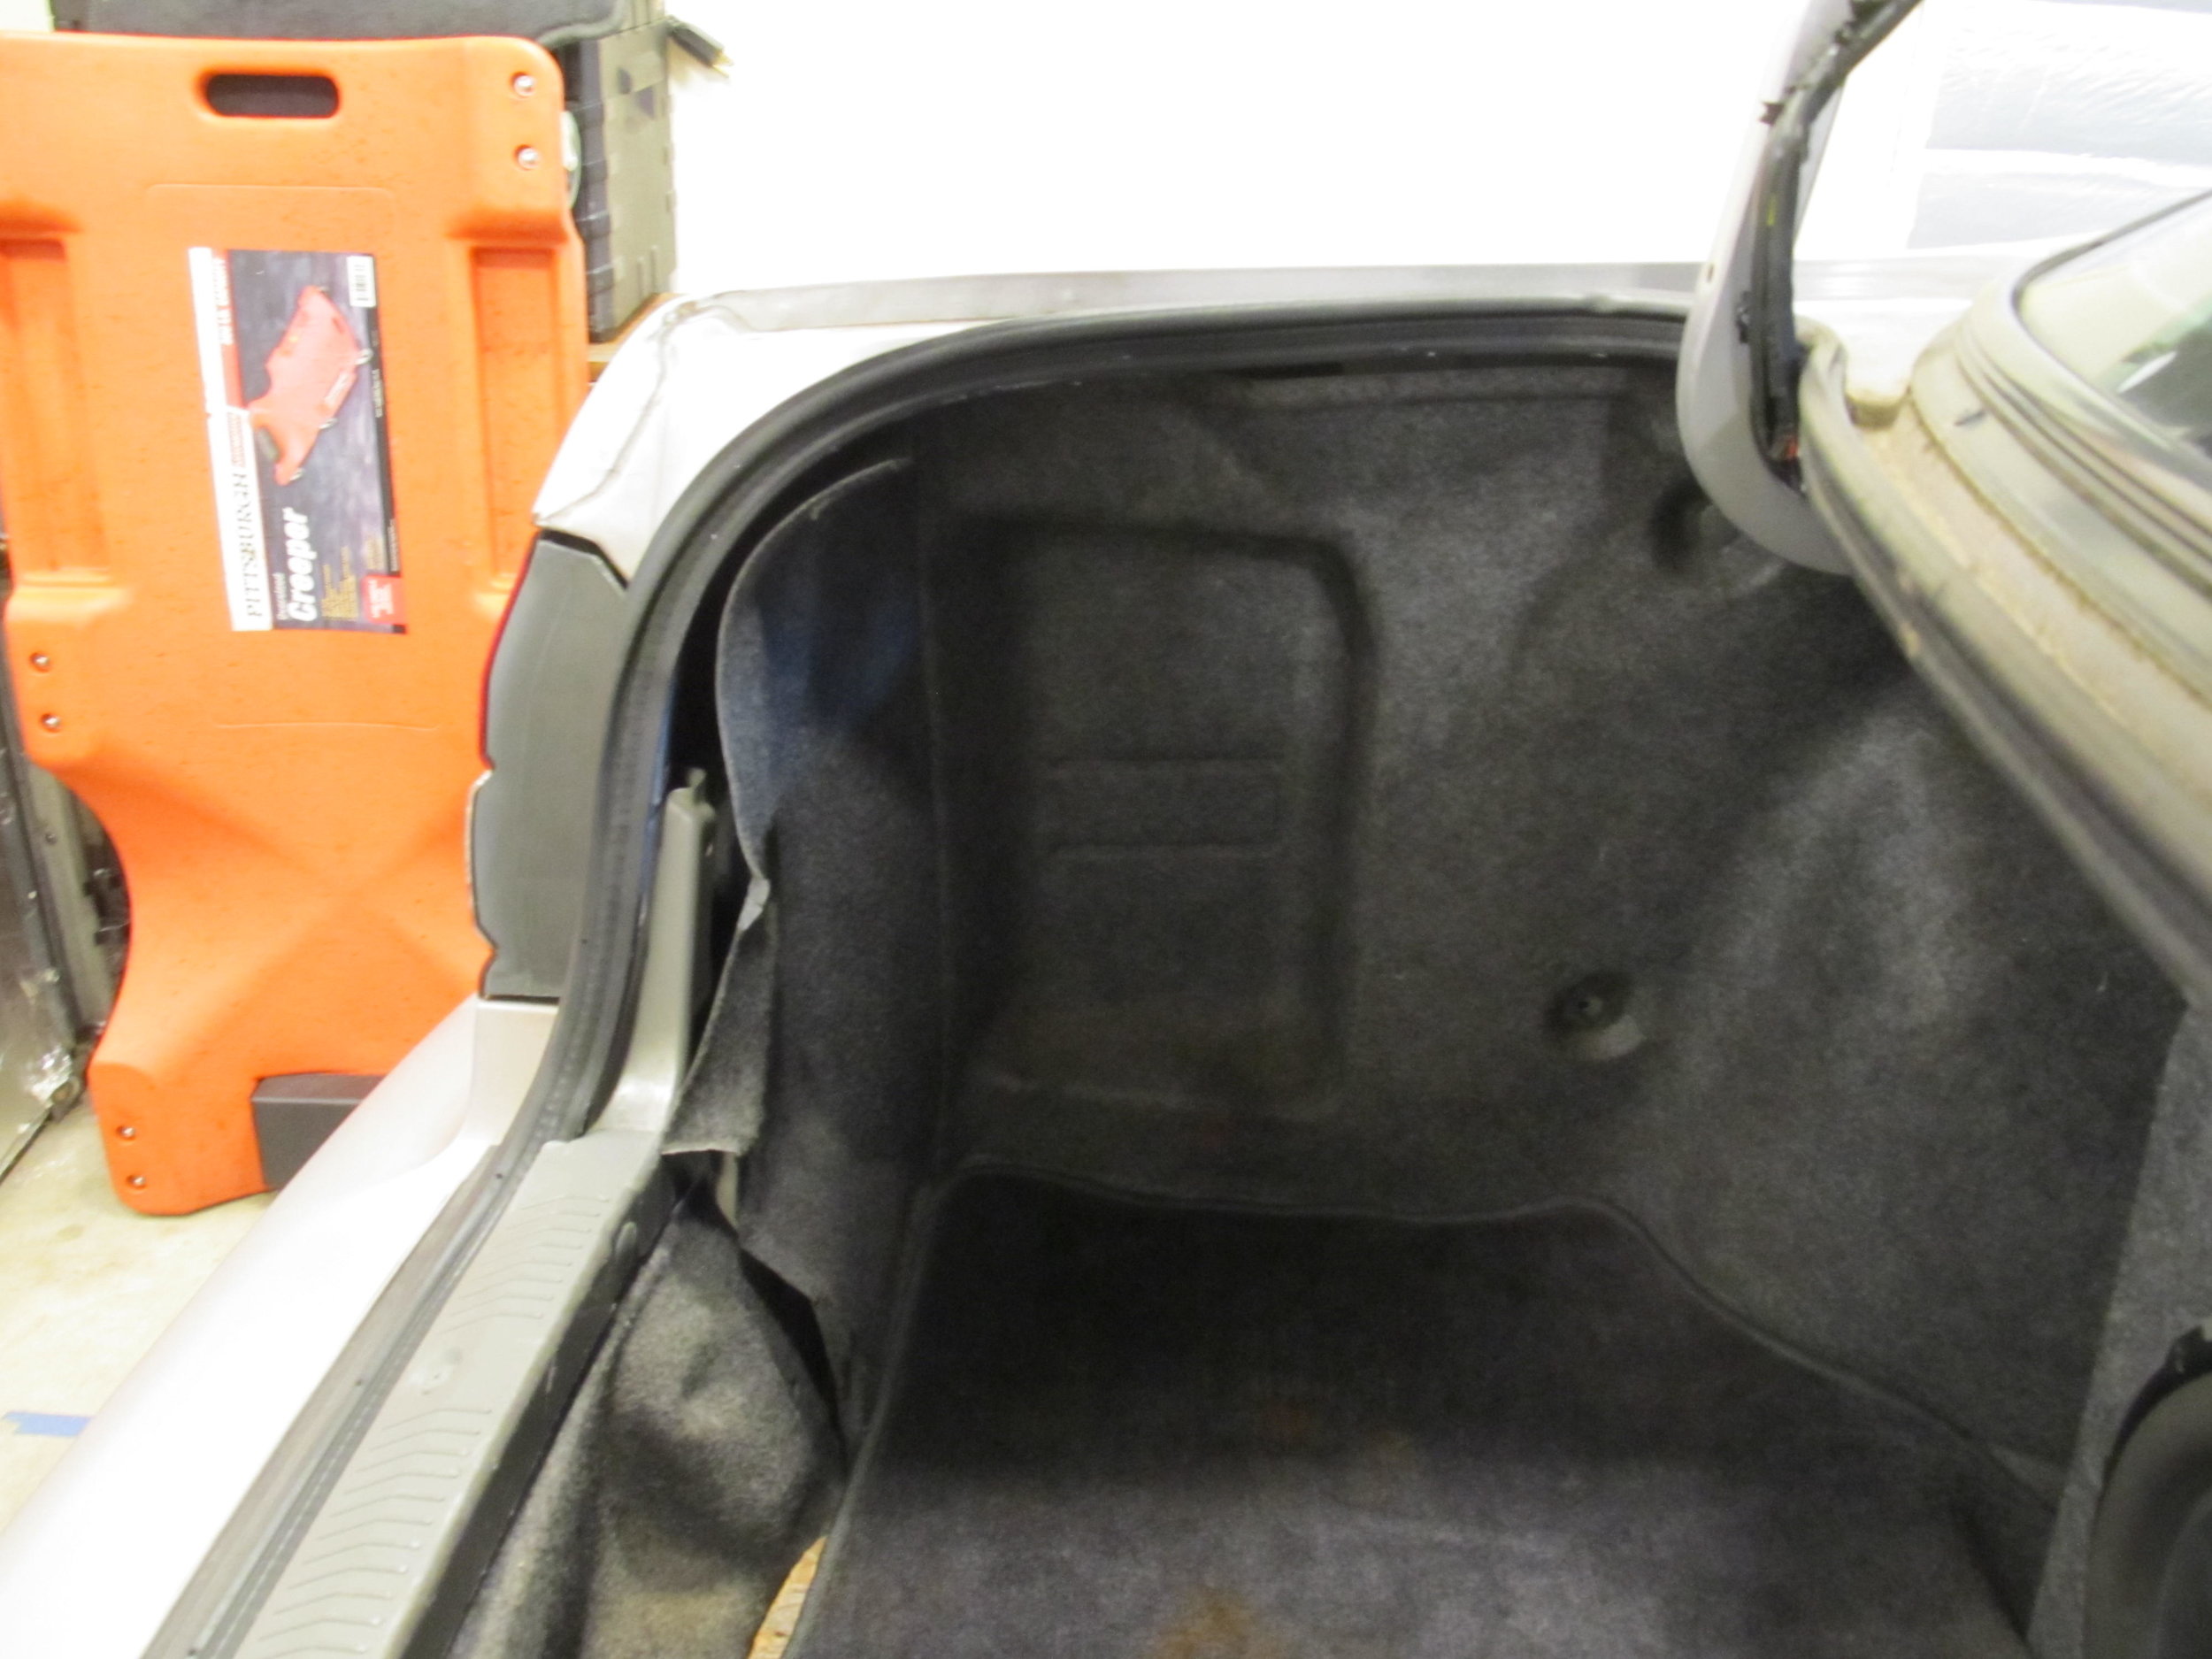
I stopped by the junkyard on the way to a friend's place (I think I'm starting to like going to the junkyard....) and grabbed a bunch of trunk clips to replace all of my broken and missing ones and made my trunk look almost normal for the first time in many years!
I always wondered why the trim piece didn't stay in place. It's because I had been using the wrong type of clip:
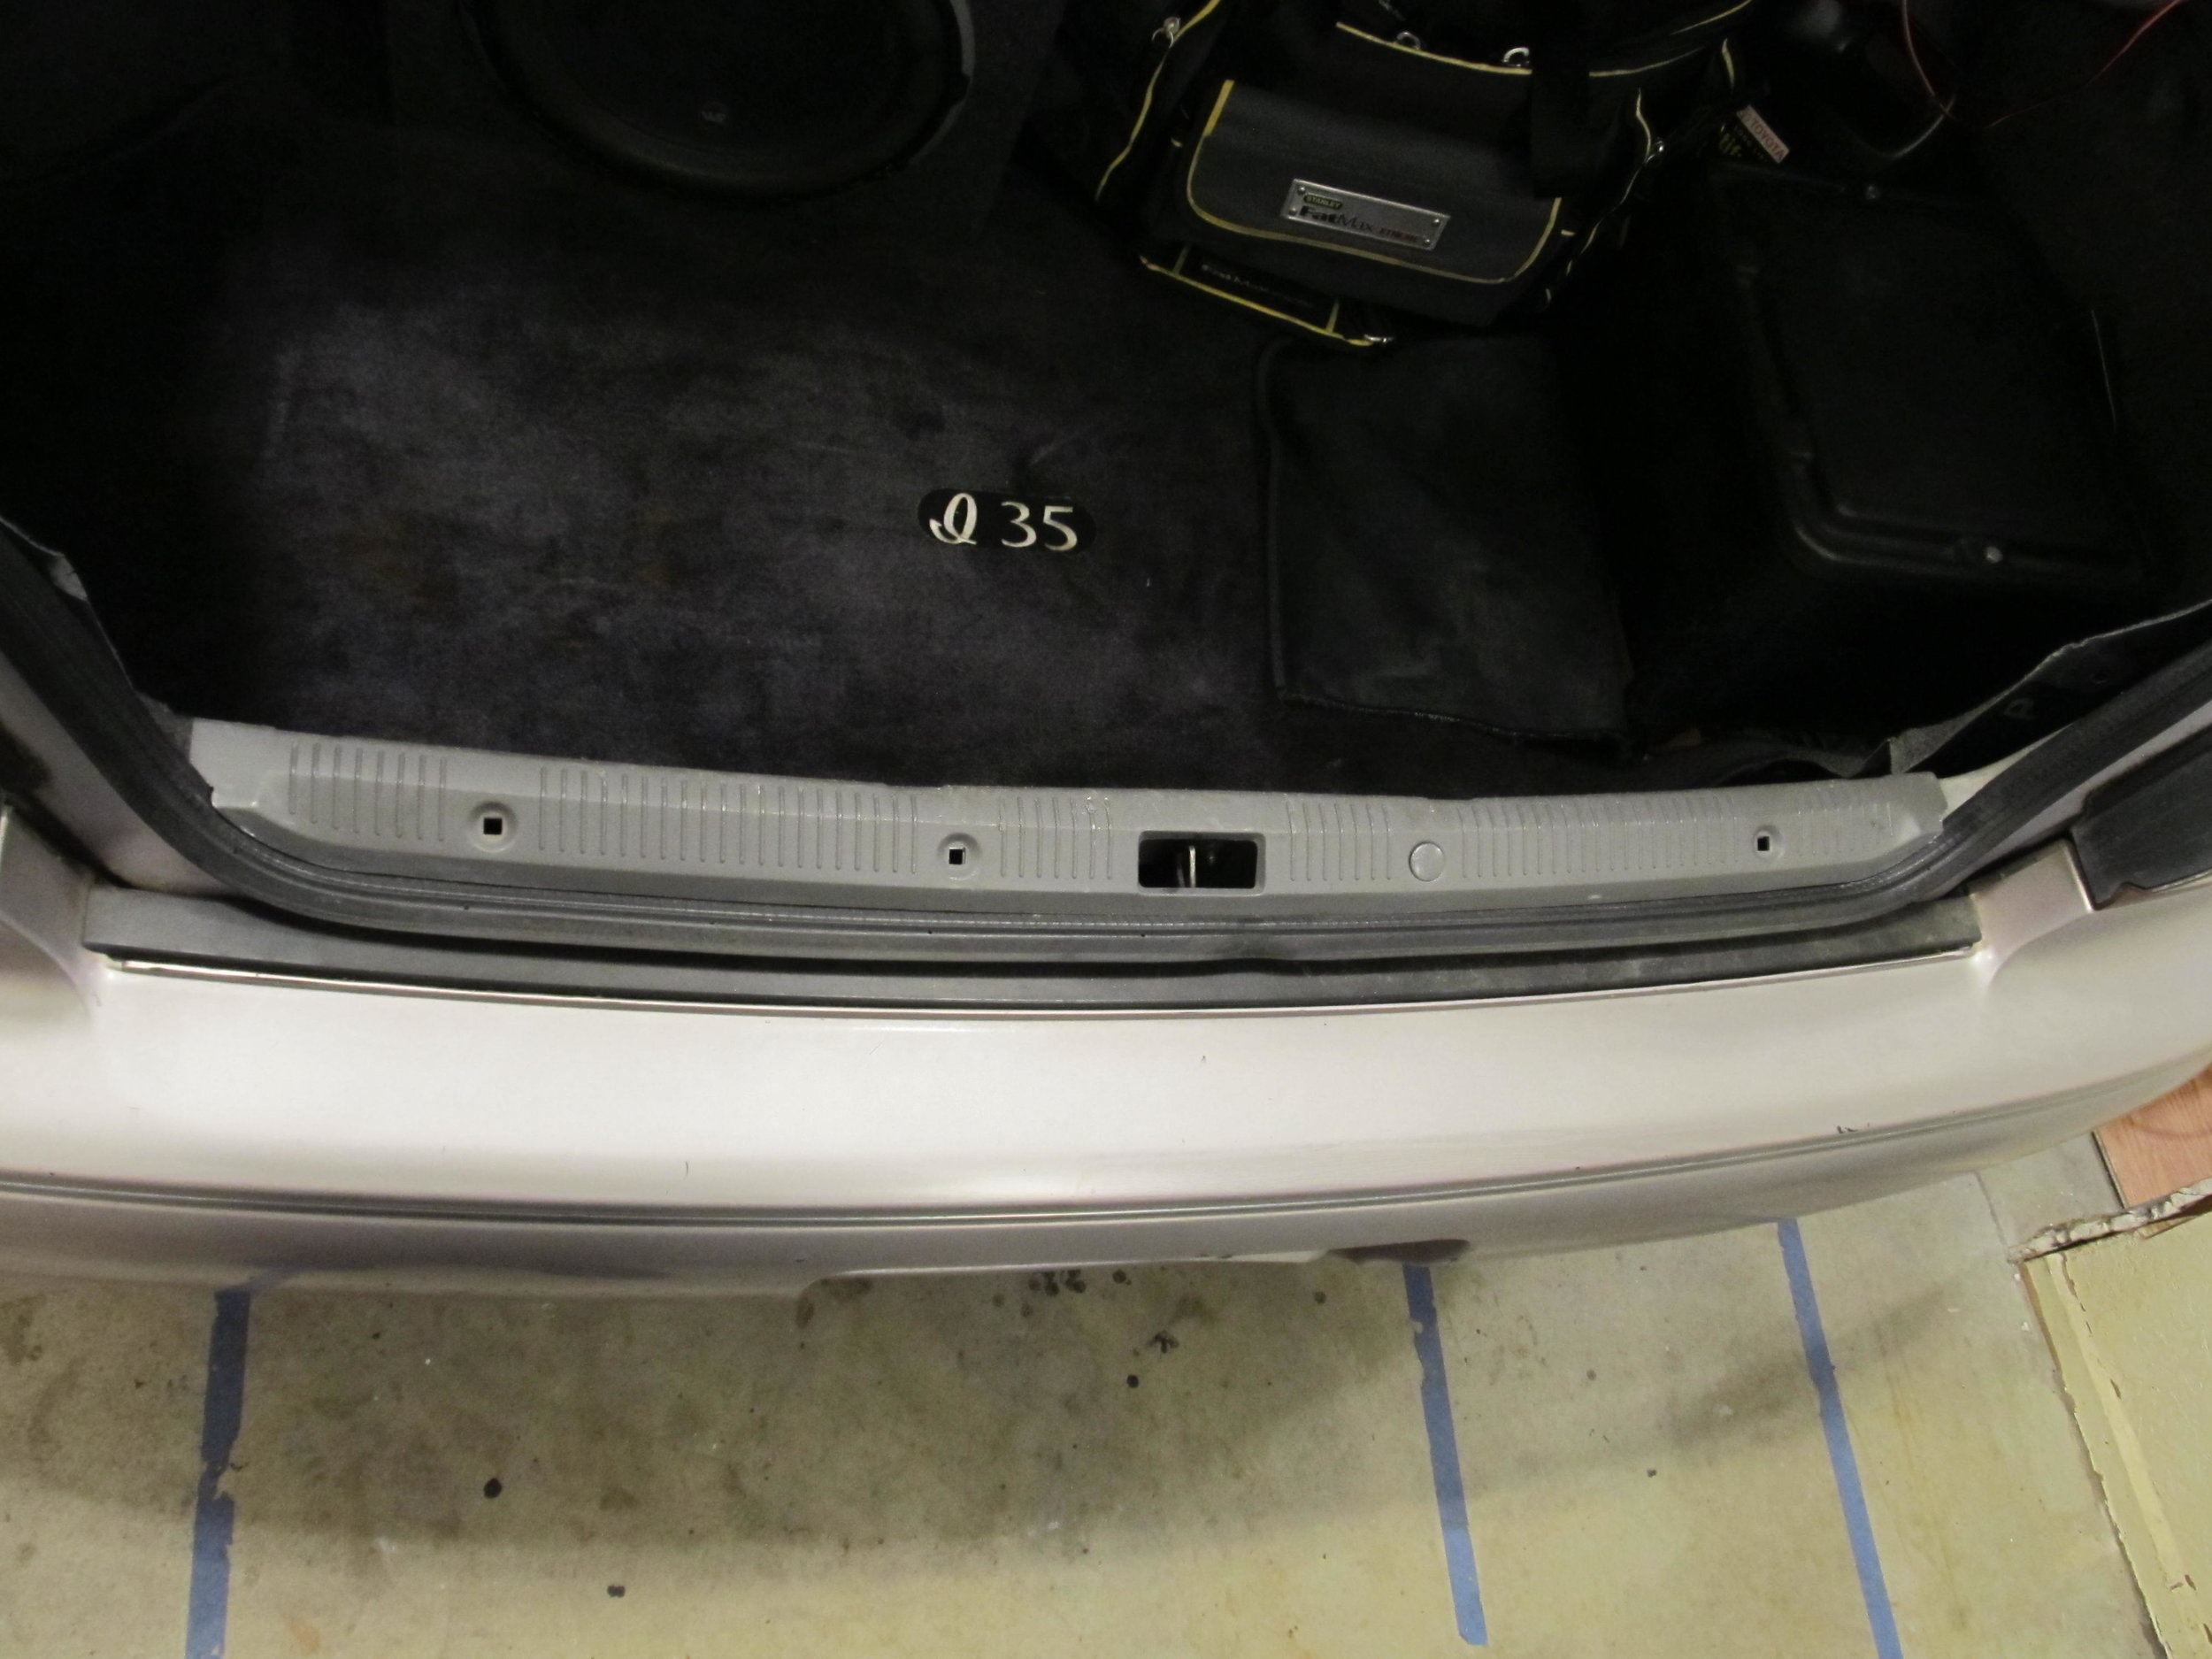
Correct:


That toe in on the DS rear is killing me! Does anyone know if people still bend beams? I need to get my beam bent
And they pointed out what was obvious the second I pulled out of my driveway, that the control arm still grinds on the rotors at close to full lock. I went home and started up again with the dremel, only to get fed up and grab the angle grinder instead. I had to be real careful to not grind the ball joint, but it saved a ton of time and took a ton of material off quickly.
I also took it to the rust and lip of the inside of the rotors to get that extra smidgen of clearance.
After a week or so of driving, not a single noise, so I'm considering this solved!
I stopped by the junkyard on the way to a friend's place (I think I'm starting to like going to the junkyard....) and grabbed a bunch of trunk clips to replace all of my broken and missing ones and made my trunk look almost normal for the first time in many years!
I always wondered why the trim piece didn't stay in place. It's because I had been using the wrong type of clip:
Correct:
04-11-2018, 05:27 AM
#450
You might ask 2J Racing in Atlanta about the beam bending. Years back I heard a rumor they did that on their B15. I had bought a spare beam years back but never found a shop in the midwest willing to fab up a jig. My solution was to replace the A32 instead 
04-11-2018, 05:41 AM
#451
Senior Member

Join Date: Jul 2001
Location: state of confusion
Posts: 1,341
I've heard of tapered shims that can be used to correct "non-adjustable" alignment angles. Brake & Front End magazine, which has an online version that you may be able to access.
Places that align 18-wheelers may be able to help, though they're accustomed to bending rather stiffer stuff than this.
Norm
Places that align 18-wheelers may be able to help, though they're accustomed to bending rather stiffer stuff than this.
Norm
04-11-2018, 06:03 AM
#452
Originally Posted by Norm Peterson
I've heard of tapered shims that can be used to correct "non-adjustable" alignment angles. Brake & Front End magazine, which has an online version that you may be able to access.
Places that align 18-wheelers may be able to help, though they're accustomed to bending rather stiffer stuff than this.
Norm
Places that align 18-wheelers may be able to help, though they're accustomed to bending rather stiffer stuff than this.
Norm

 04-11-2018, 09:19 AM
#454

Thought I'd update you on my brother's situation..
We went back to a stock style IACV set up using an adapter and his cold start is better but it still won't hold without giving it gas Now rather than holding the gas pedal for 30 seconds he only has to hold it for about 5. Still annoying nonetheless.
We went back to a stock style IACV set up using an adapter and his cold start is better but it still won't hold without giving it gas
Now rather than holding the gas pedal for 30 seconds he only has to hold it for about 5. Still annoying nonetheless.
04-11-2018, 09:29 AM
#455
Thought I'd update you on my brother's situation..
We went back to a stock style IACV set up using an adapter and his cold start is better but it still won't hold without giving it gas Now rather than holding the gas pedal for 30 seconds he only has to hold it for about 5. Still annoying nonetheless.
We went back to a stock style IACV set up using an adapter and his cold start is better but it still won't hold without giving it gas
Now rather than holding the gas pedal for 30 seconds he only has to hold it for about 5. Still annoying nonetheless.
04-11-2018, 09:34 AM
#457
I've heard of tapered shims that can be used to correct "non-adjustable" alignment angles. Brake & Front End magazine, which has an online version that you may be able to access.
Places that align 18-wheelers may be able to help, though they're accustomed to bending rather stiffer stuff than this.
Norm
Places that align 18-wheelers may be able to help, though they're accustomed to bending rather stiffer stuff than this.
Norm
This won't work on the A32/A33 beam as the wheel bearing bolts to the stubs that are part of the rear beam.
The guy I get my race alignments and corner balancing used to race old VWs and this was his first suggestion on how to adjust rear camber and toe. He put my Maxima on the lift and saw that this won't work on these Nissan beam designs.
04-11-2018, 09:52 AM
#458
This was a cool trick used on older VWs with rear beams. IIRC the entire hub/bearing/brake assembly can be unbolted from the rear beam and shims can be added to adjust for some toe and camber.
This won't work on the A32/A33 beam as the wheel bearing bolts to the stubs that are part of the rear beam.
The guy I get my race alignments and corner balancing used to race old VWs and this was his first suggestion on how to adjust rear camber and toe. He put my Maxima on the lift and saw that this won't work on these Nissan beam designs.
04-18-2018, 11:11 AM
#459
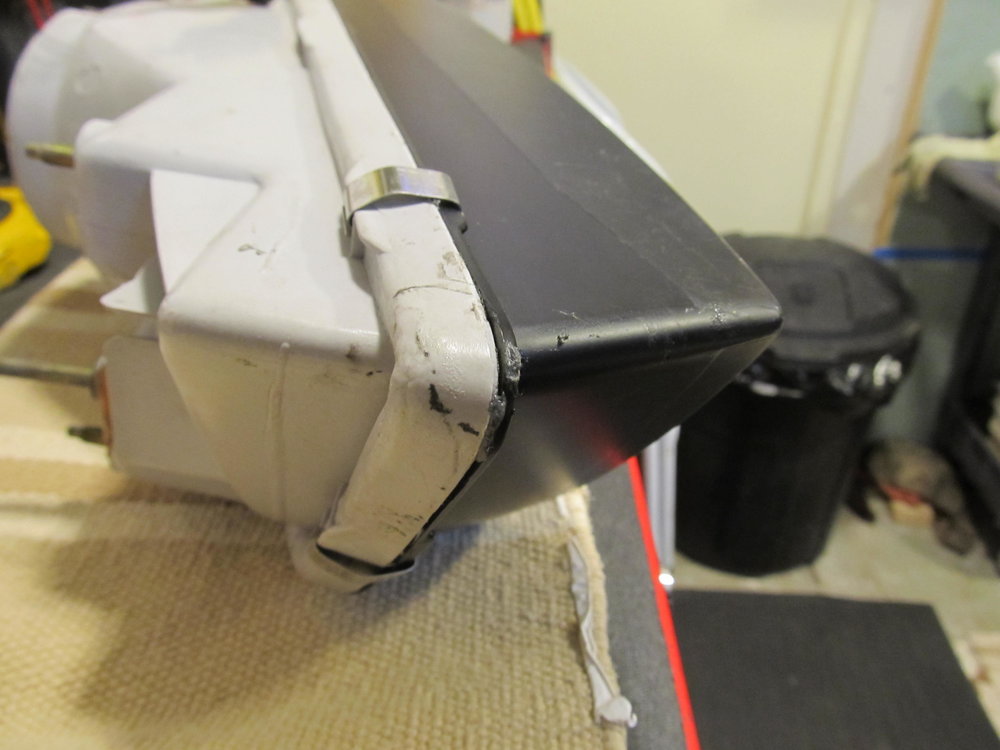
I had been putting off repairing my busted DS projector for many months, dreading what I assumed would be a tricky and time-consuming job. I was not wrong! ChrisMan287 did the original retrofit for my headlights and fogs back around 2012, but the reflective covering inside the DS projector failed, which meant I had to rip out the projectors and get new ones installed correctly. I had no idea how to do this, but eventually I ran out of other things to do to the car, so I just had to figure this out. I watched some videos and ordered a few tools, and prayed it would all turn out okay in the end. Spoiler alert: Meh.
All my parts were from The Retrofit Source, so I called them up for replacements. I had the original version (V1) of the FX-R projectors, but they are now selling V3, which supposedly are improved over earlier versions. They were nice enough to give me a little discount for the failed projector since it was such an odd failure, and they gave me new shrouds for free! TRS has certainly earned my business. I went with the same E55 shrouds, since they are the cleanest/simplest ones they sell. Chris had to trim mine down pretty heavily originally, and I wanted to see if I could get away with less trimming.
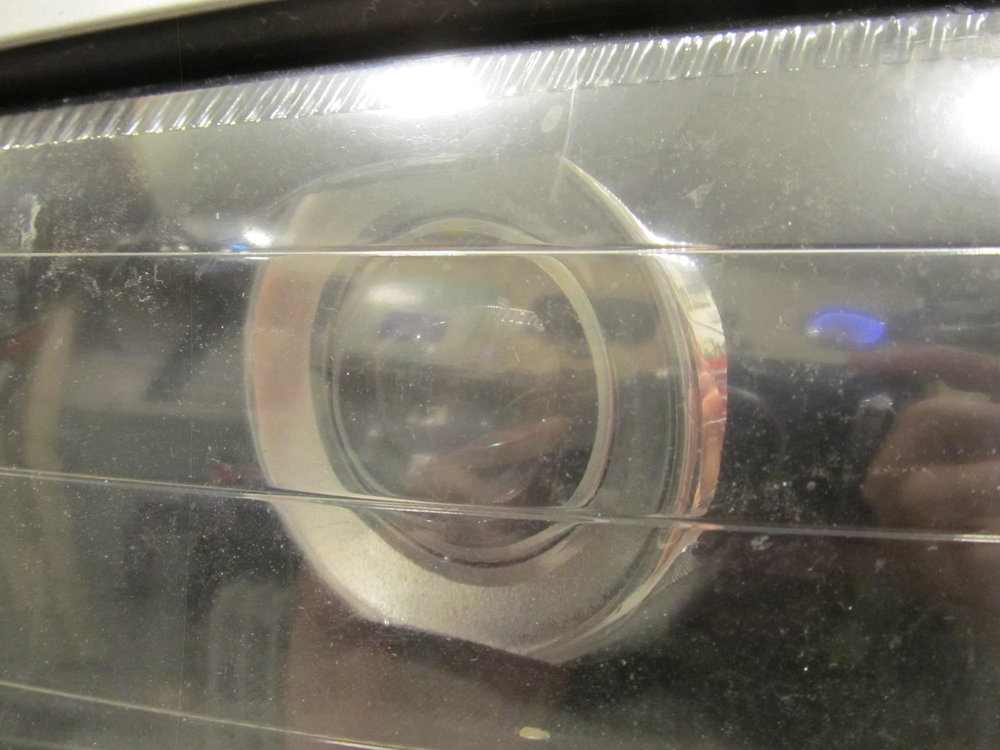
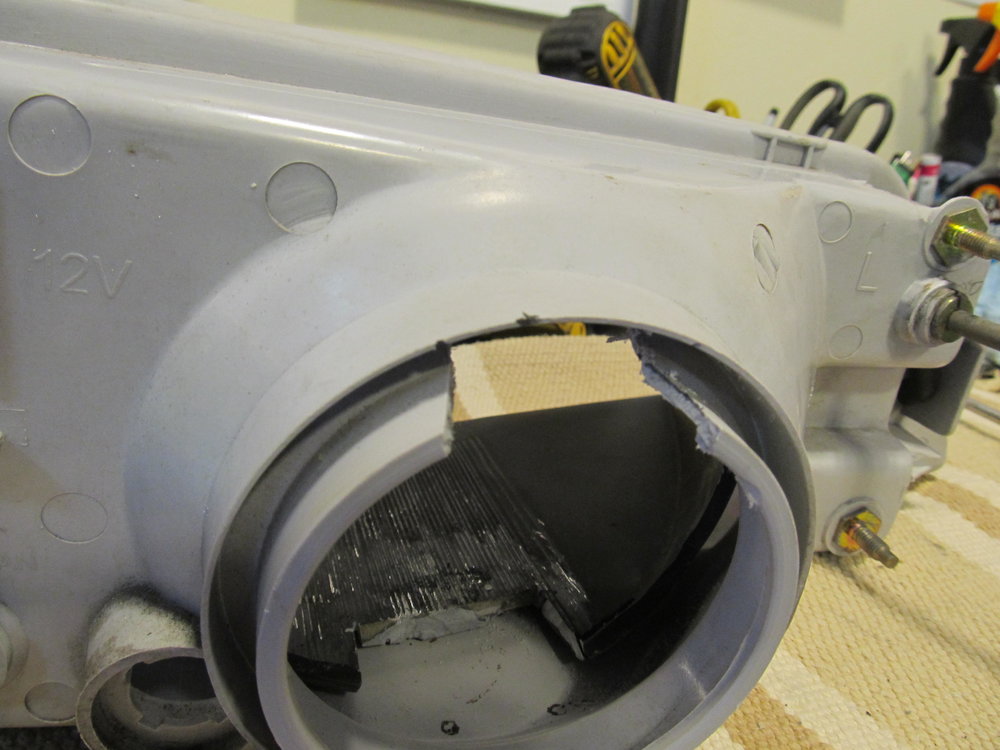
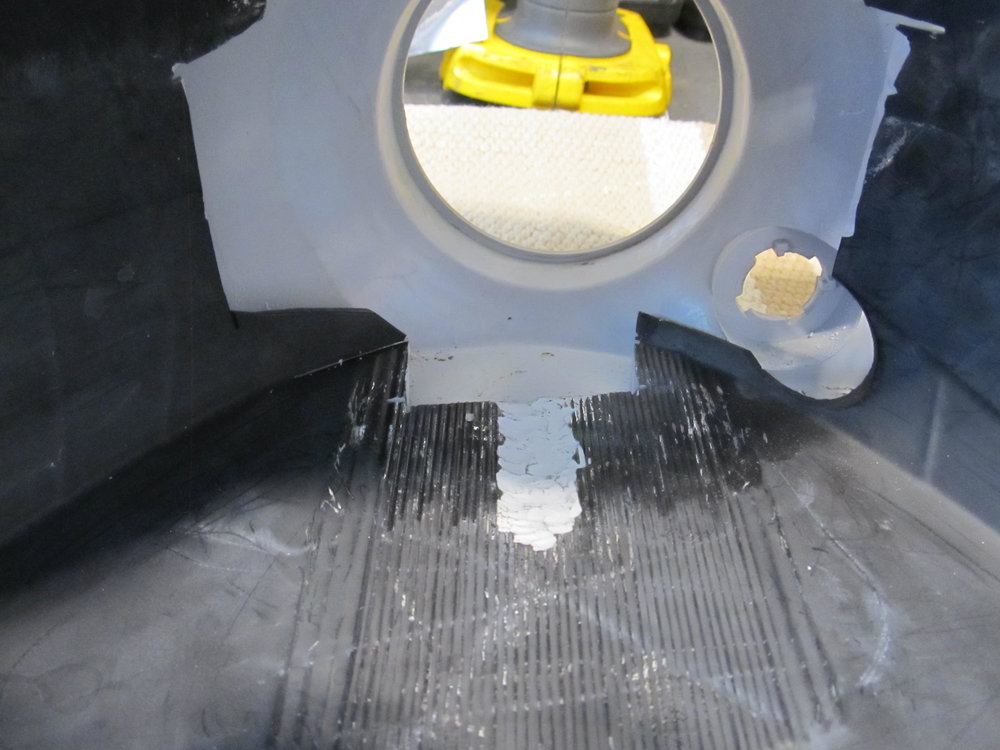
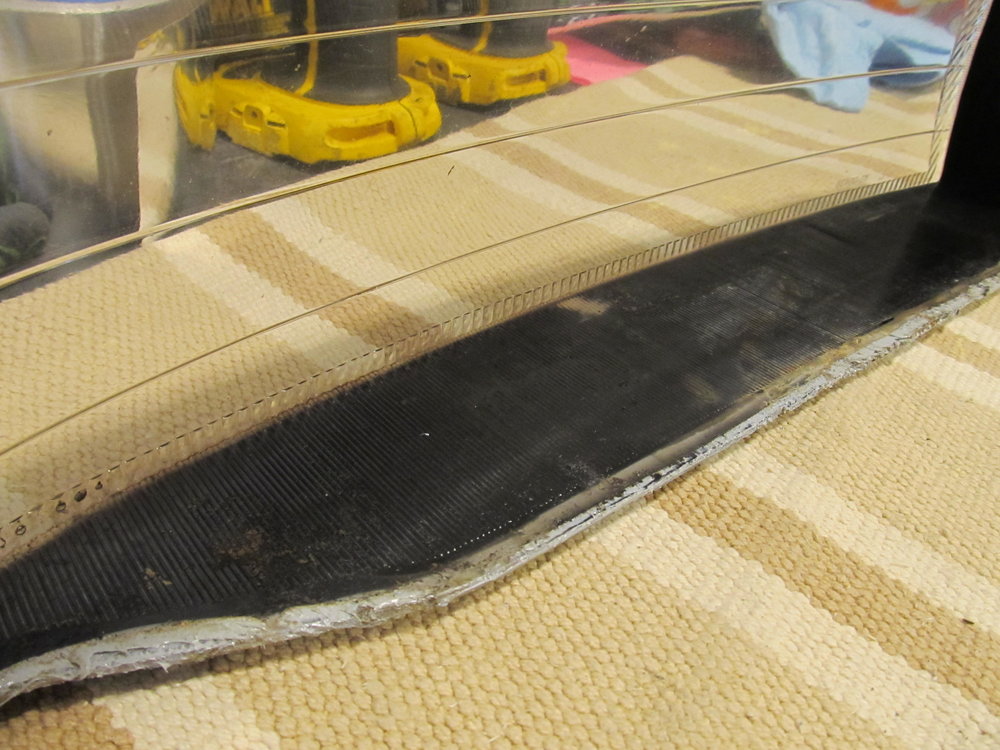
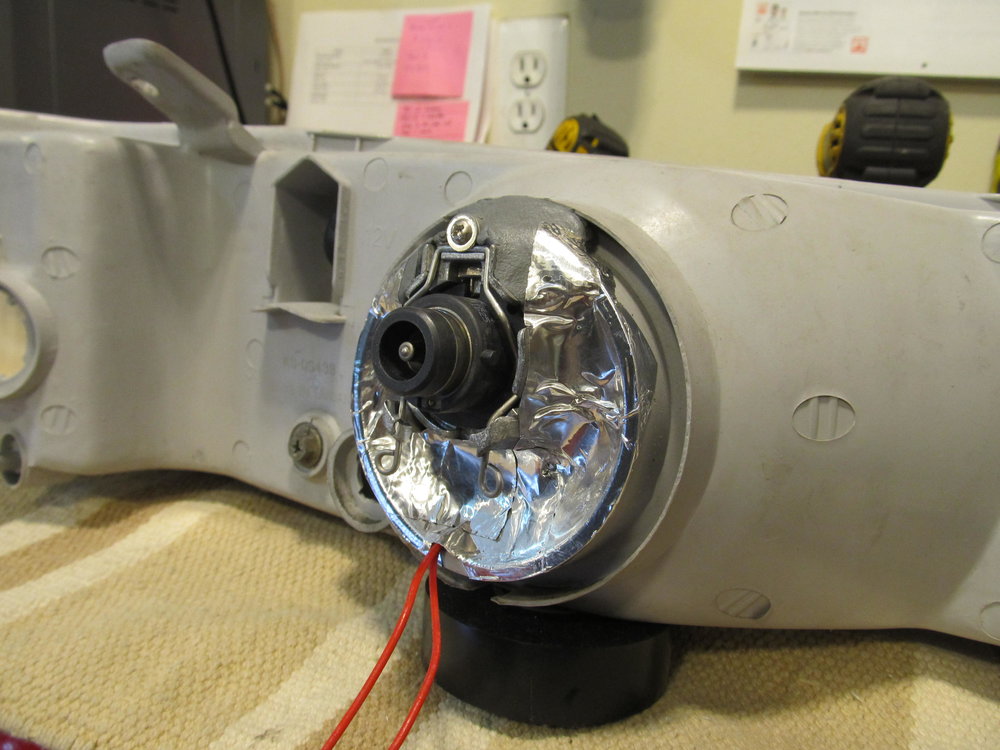
Here's a before of the problem projector:
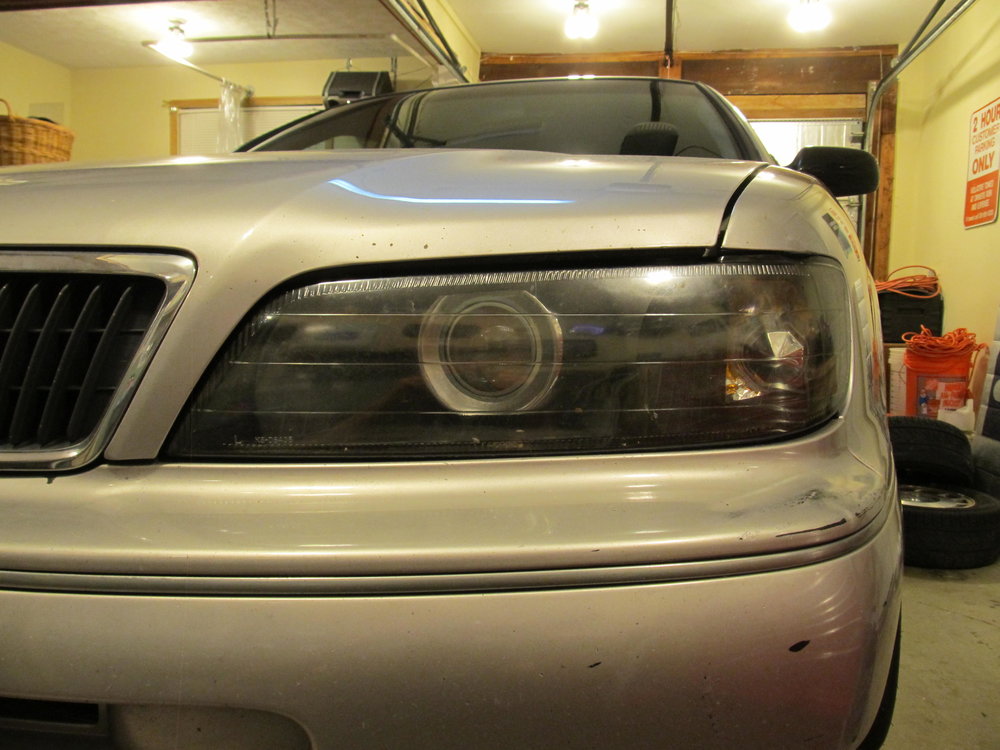
The outer lens's clear coat is failing, but a fair amount of debris has made its way into the housing since the back was never sealed up.
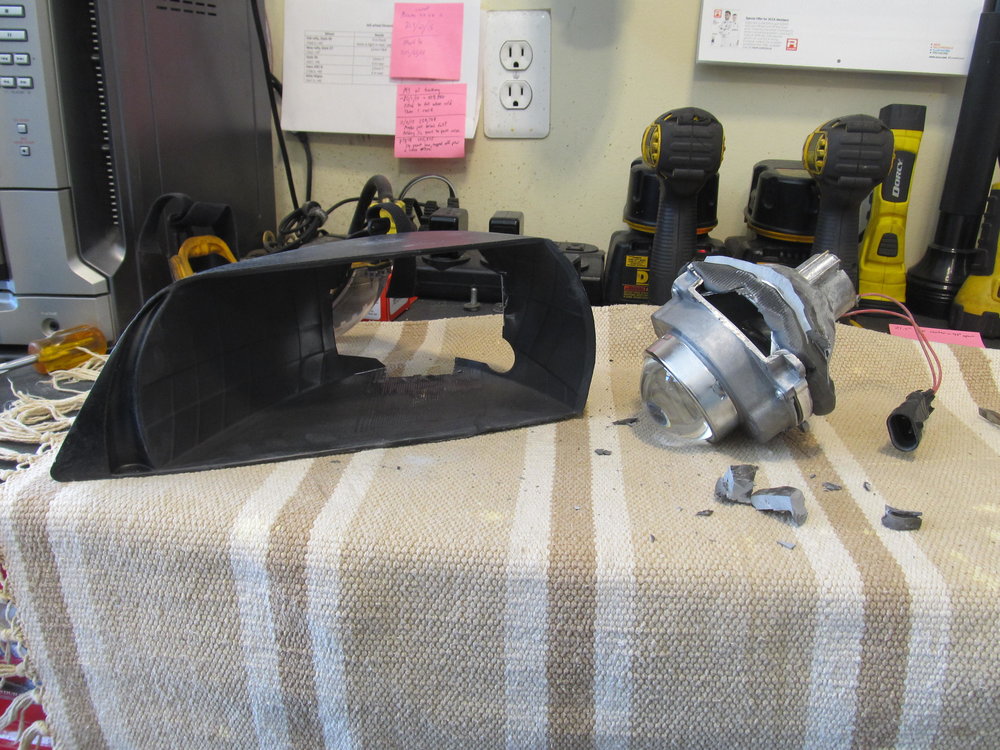
To open up the housing, I baked it in the over for 20 minutes at 240* and used a bearing spreading tool to pry the two halves apart. Thankfully, this part was very easy. I soon had it broken down to this:

After spraying JB Weld dust over literally everything in my garage when using the Dremel to cut it up, I finally was able to separate the projector. Lesson learned, I did the PS one outside!
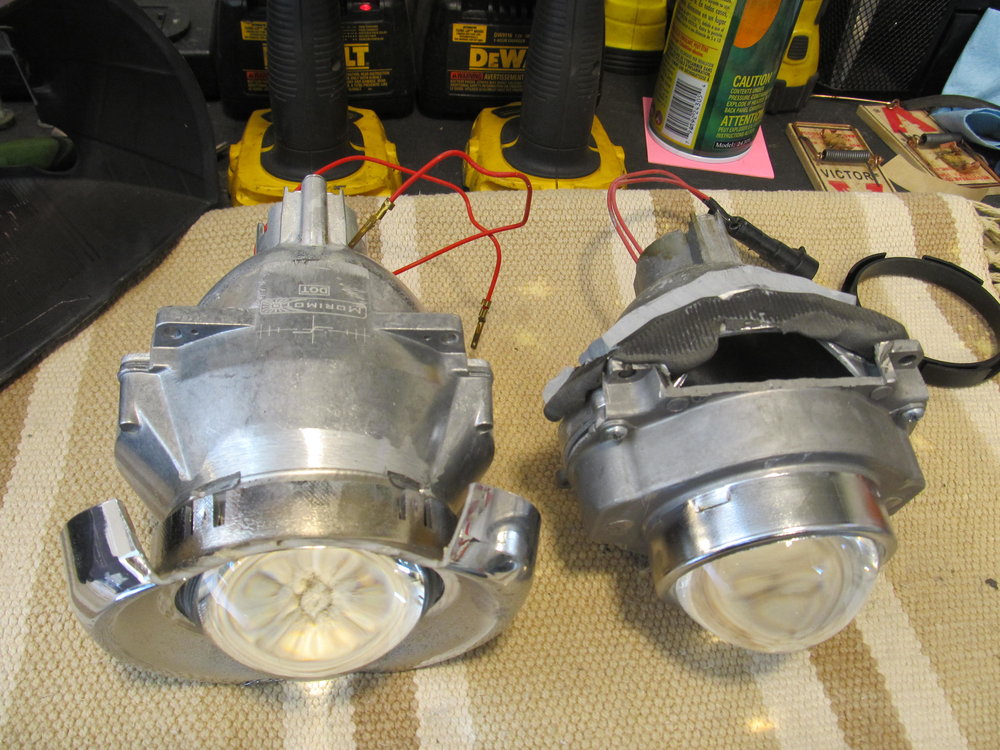
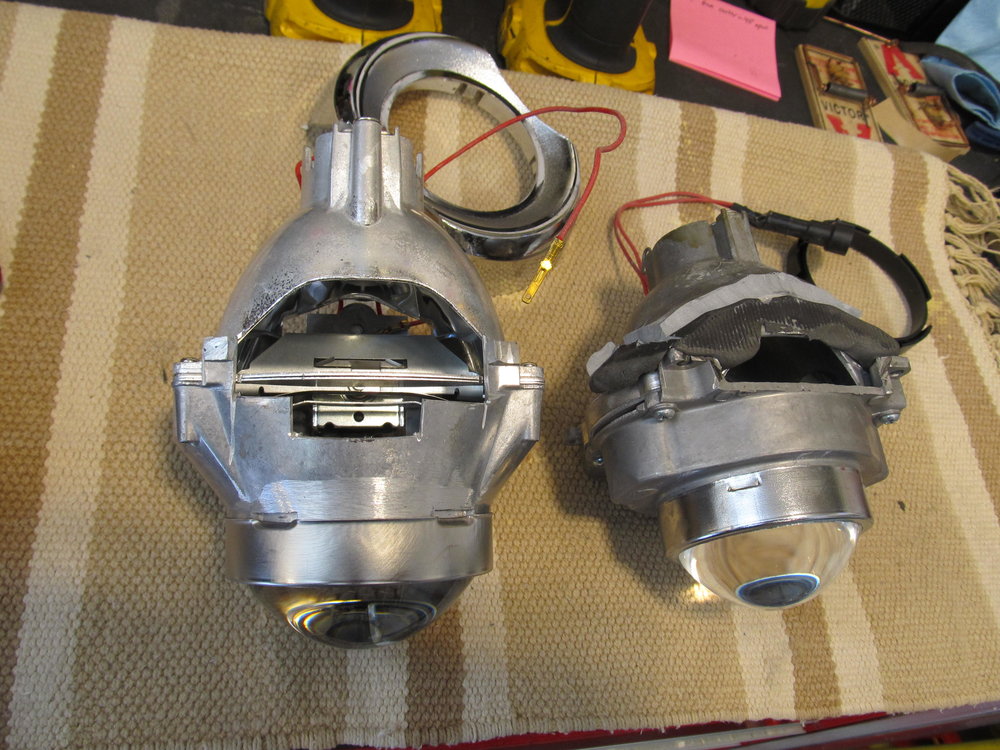
The V3 of the FX-Rs are available in 2.5" and 3.0" versions. The body is the same size, so I decided to upgrade to the 3.0" version. Apparently output is the same between the two, but the 3" fills things up a little better. New on the left, old on the right.

Chris had to cut off quite a bit of the original to get it to fit, so I mimicked those cuts on the new ones.
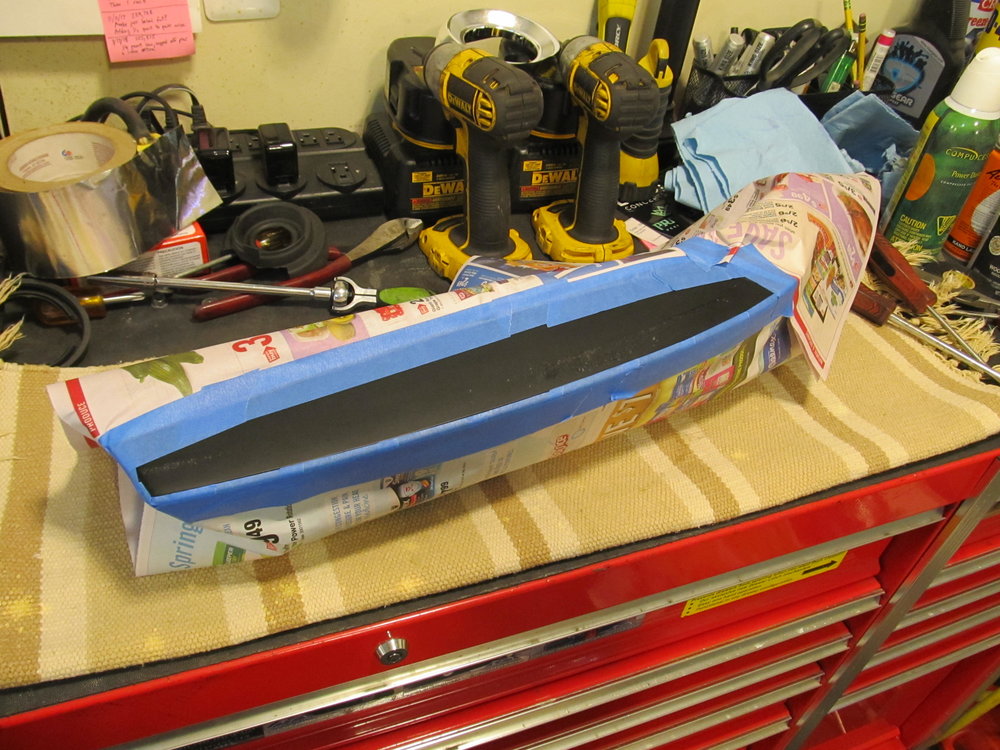
The new ones are a little bigger than the originals, so I had to trim the housing some more:
After I had test fit everything, I used some of my favorite silver HVAC tape to seal up the area that I had cut out. I don't want any debris getting in there!

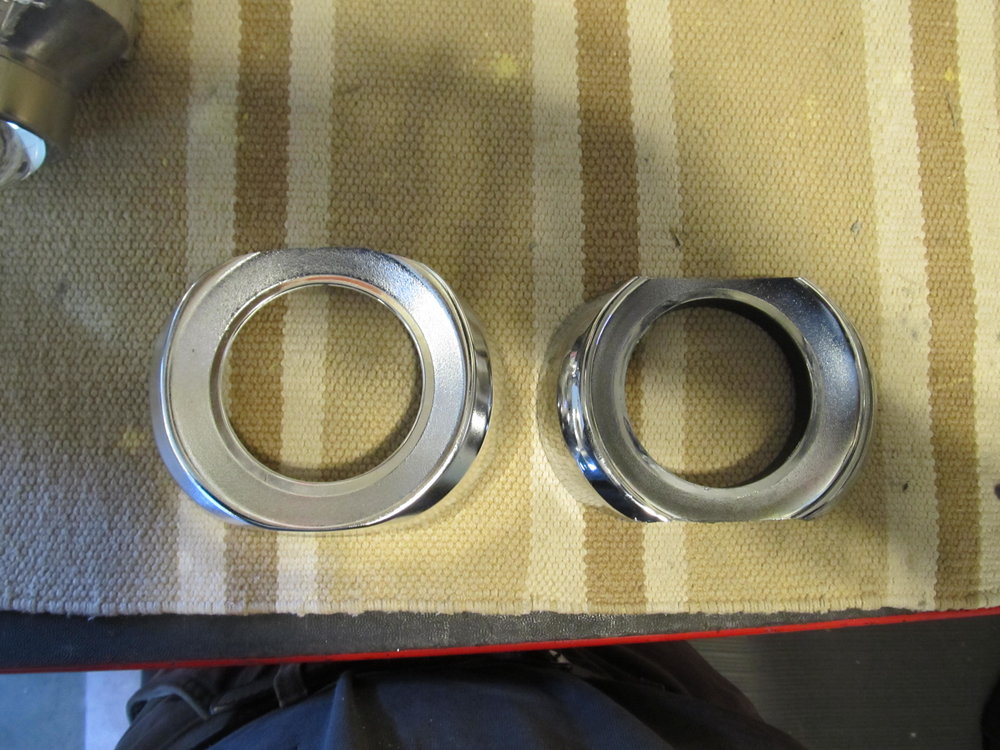
I trimmed a bit off the top of the new shroud, but wanted to leave the bottom alone, since that's what you see most when it's installed in the car.
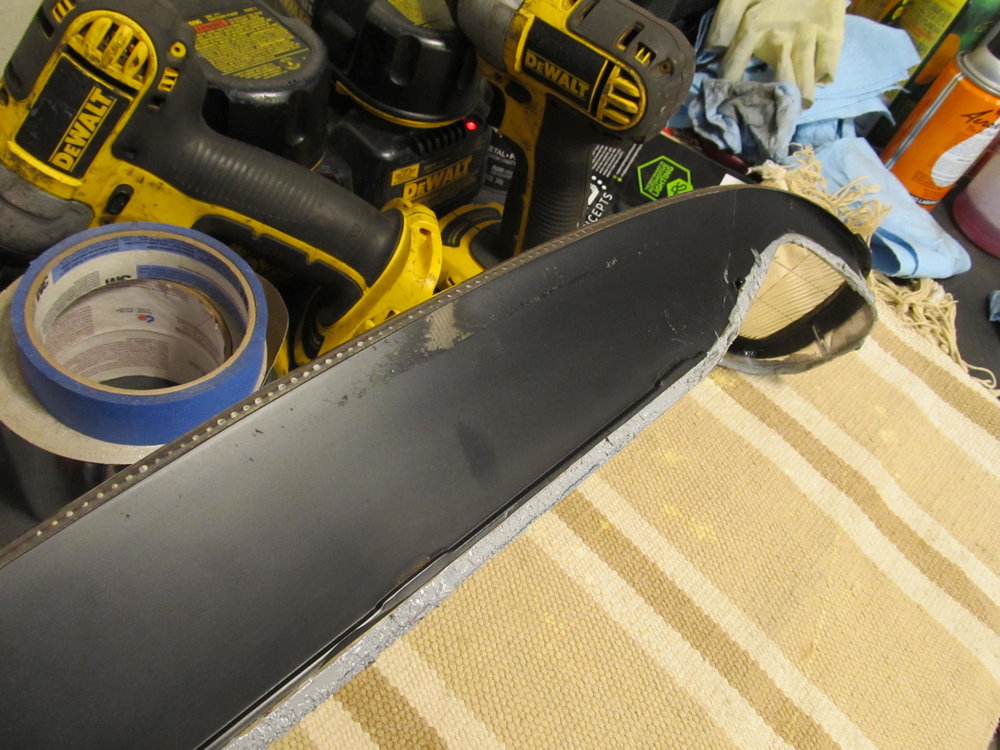
To get this to work, I took a lot of material out of the top of the housing:
I also had to grind down some material on the bottom of the housing to make more room for a screw on the bottom of the projector:
This of course necessitated repainting of the housing:


As I mentioned earlier, the backs on the headlights were never sealed up (the rubber boots were cut up to allow the projector to fit, but that made them useless) so crap made its way in there over the years and made them look dumpy. I scrubbed them until they were clean (not shown...).
The black paint on the bottom of the clear cover had worn away, allowing the paint from the bumper beneath to show through, so I sanded them down and painted them too:
I trimmed off the "ears" of the projector on the bottom to get more room:
New vs old:

It was at this point that the project took a turn for the worse. I was all ready to set the projector in place with some Quik Steel, but the ballast wasn't firing, so I couldn't aim the damn thing! It would ignite every ten tries, then every twenty, and then it just refused to turn on. The PS ballast was still working, but all of my on-off attempts must have made it unhappy, as it too completely stopped working, so I was unable to align the new projector, so the project was put on hold while I ordered new ones. Hooray!
A few days later, new ballasts and igniters arrived from TRS. Again, they are a few generations newer than the stuff I had in the car, and they have now separated the ballast from the igniter to make troubleshooting easier. The new parts are the XB35 Computer and the corresponding D2 igniter:

Due to the length of the new wires, I had to reroute the feed wires coming from the DS to get it to reach on the PS. Before, the lead wires ran between the radiator and the headers, but they now run in front of the condenser and are attached to the bracket for the oil and PS coolers.
All my parts were from The Retrofit Source, so I called them up for replacements. I had the original version (V1) of the FX-R projectors, but they are now selling V3, which supposedly are improved over earlier versions. They were nice enough to give me a little discount for the failed projector since it was such an odd failure, and they gave me new shrouds for free! TRS has certainly earned my business. I went with the same E55 shrouds, since they are the cleanest/simplest ones they sell. Chris had to trim mine down pretty heavily originally, and I wanted to see if I could get away with less trimming.
Here's a before of the problem projector:
The outer lens's clear coat is failing, but a fair amount of debris has made its way into the housing since the back was never sealed up.
To open up the housing, I baked it in the over for 20 minutes at 240* and used a bearing spreading tool to pry the two halves apart. Thankfully, this part was very easy. I soon had it broken down to this:
After spraying JB Weld dust over literally everything in my garage when using the Dremel to cut it up, I finally was able to separate the projector. Lesson learned, I did the PS one outside!
The V3 of the FX-Rs are available in 2.5" and 3.0" versions. The body is the same size, so I decided to upgrade to the 3.0" version. Apparently output is the same between the two, but the 3" fills things up a little better. New on the left, old on the right.
Chris had to cut off quite a bit of the original to get it to fit, so I mimicked those cuts on the new ones.
The new ones are a little bigger than the originals, so I had to trim the housing some more:
After I had test fit everything, I used some of my favorite silver HVAC tape to seal up the area that I had cut out. I don't want any debris getting in there!
I trimmed a bit off the top of the new shroud, but wanted to leave the bottom alone, since that's what you see most when it's installed in the car.
To get this to work, I took a lot of material out of the top of the housing:
I also had to grind down some material on the bottom of the housing to make more room for a screw on the bottom of the projector:
This of course necessitated repainting of the housing:
As I mentioned earlier, the backs on the headlights were never sealed up (the rubber boots were cut up to allow the projector to fit, but that made them useless) so crap made its way in there over the years and made them look dumpy. I scrubbed them until they were clean (not shown...).
The black paint on the bottom of the clear cover had worn away, allowing the paint from the bumper beneath to show through, so I sanded them down and painted them too:
I trimmed off the "ears" of the projector on the bottom to get more room:
New vs old:
It was at this point that the project took a turn for the worse. I was all ready to set the projector in place with some Quik Steel, but the ballast wasn't firing, so I couldn't aim the damn thing! It would ignite every ten tries, then every twenty, and then it just refused to turn on. The PS ballast was still working, but all of my on-off attempts must have made it unhappy, as it too completely stopped working, so I was unable to align the new projector, so the project was put on hold while I ordered new ones. Hooray!
A few days later, new ballasts and igniters arrived from TRS. Again, they are a few generations newer than the stuff I had in the car, and they have now separated the ballast from the igniter to make troubleshooting easier. The new parts are the XB35 Computer and the corresponding D2 igniter:
Due to the length of the new wires, I had to reroute the feed wires coming from the DS to get it to reach on the PS. Before, the lead wires ran between the radiator and the headers, but they now run in front of the condenser and are attached to the bracket for the oil and PS coolers.
Last edited by 95maxrider; 04-19-2018 at 07:54 AM.
04-18-2018, 11:15 AM
#460
Anyways, with new ballasts installed, everything fired up beautifully, and I was able to set the projectors in place. I used Quik Steel for this, as it sets up in five minutes and isn't runny.
Old on left, new on right:

I also bought a roll of the Morimoto RetroRubber Butyl sealant to make sure the two halves seal up nice and tight. I used my vice grips and random clamps to make sure I got a tight seal:
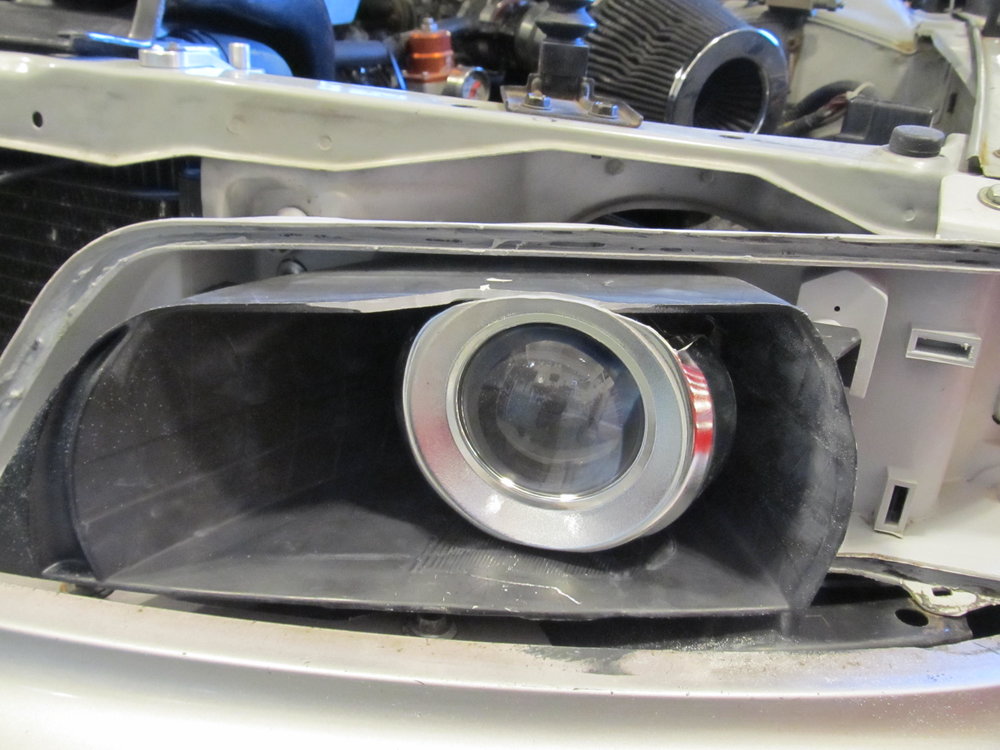
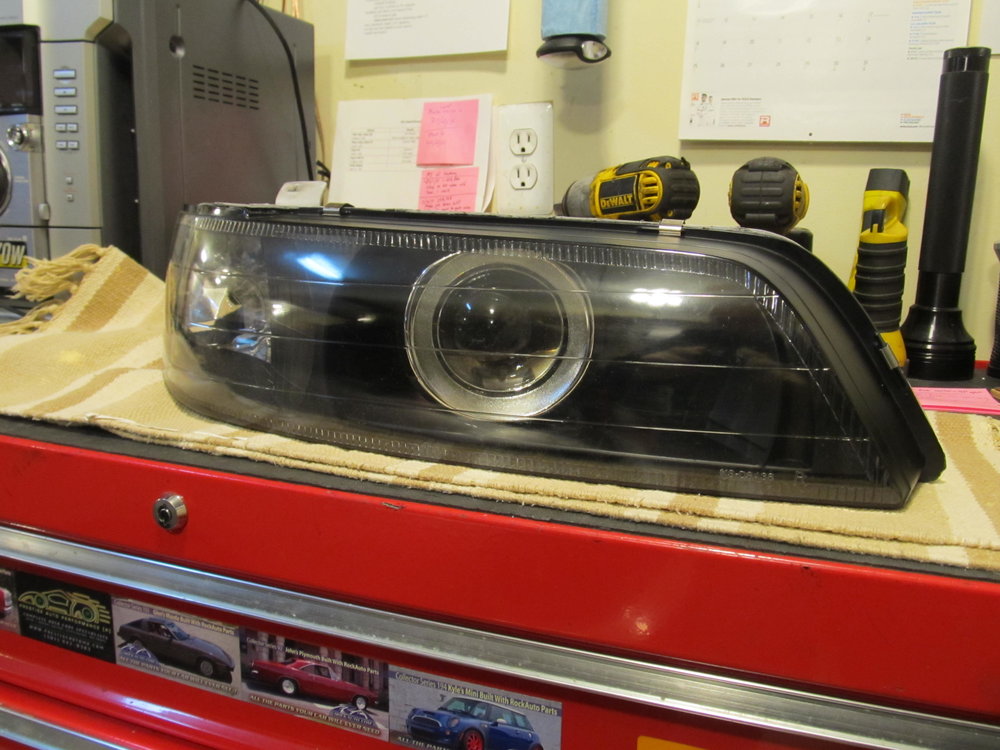
Finished product:
I again used my HVAC tape to seal up the backs to try and keep debris out:
As this was my first attempt at a retrofit, I was pleased to have completed it, but disappointed by how it turned out. First off, since I trimmed so much material off the tops of the housings, it looks like I didn't need to trim anything off the tops of the shrouds to get them to fit. I just started copying the work Chris had done, but that turns out to have not been necessary. So I cut up my shrouds for no reason, and now they don't look as good as they should. Second, while I was so worried about getting the projectors aimed properly, I neglected to keep an eye on where they were actually sitting inside the housing. The DS projector is sitting fine, but the PS one sits forward about 1/2" compared to the DS one. I'm pretty pissed about how this turned out. Also, I learned that the JB Weld's Quik Steel equivalent (SteelStik) is garbage. The outer layer was dry and crumbly, and didn't mix well with the inner layer. I don't know if I got a bad batch or what, but I've never had that problem with Quik Steel. Other JB Weld products have been great, but this SteelStik really sucked. I also realized after doing the DS that I should have reset the adjuster screws to their middle position before setting the projector in place. I set the screws back to where they were set before, but that apparently was not in a neutral/centered position, so the inner housing isn't quite straight on the DS. I REALLY don't want to re-do all of this, but it's going to be hard living with such an imperfect job. We'll see how long I can stand it. Oh well, at least I can legally drive the car at night again!
Old on left, new on right:
I also bought a roll of the Morimoto RetroRubber Butyl sealant to make sure the two halves seal up nice and tight. I used my vice grips and random clamps to make sure I got a tight seal:
Finished product:
I again used my HVAC tape to seal up the backs to try and keep debris out:
As this was my first attempt at a retrofit, I was pleased to have completed it, but disappointed by how it turned out. First off, since I trimmed so much material off the tops of the housings, it looks like I didn't need to trim anything off the tops of the shrouds to get them to fit. I just started copying the work Chris had done, but that turns out to have not been necessary. So I cut up my shrouds for no reason, and now they don't look as good as they should. Second, while I was so worried about getting the projectors aimed properly, I neglected to keep an eye on where they were actually sitting inside the housing. The DS projector is sitting fine, but the PS one sits forward about 1/2" compared to the DS one. I'm pretty pissed about how this turned out. Also, I learned that the JB Weld's Quik Steel equivalent (SteelStik) is garbage. The outer layer was dry and crumbly, and didn't mix well with the inner layer. I don't know if I got a bad batch or what, but I've never had that problem with Quik Steel. Other JB Weld products have been great, but this SteelStik really sucked. I also realized after doing the DS that I should have reset the adjuster screws to their middle position before setting the projector in place. I set the screws back to where they were set before, but that apparently was not in a neutral/centered position, so the inner housing isn't quite straight on the DS. I REALLY don't want to re-do all of this, but it's going to be hard living with such an imperfect job. We'll see how long I can stand it. Oh well, at least I can legally drive the car at night again!
Last edited by 95maxrider; 04-18-2018 at 11:23 AM.
04-19-2018, 07:37 AM
#461
I feel your pain. We tackle the DIY jobs and strive for perfection. When something is off by a wee bit we will remember that forever.
I just did my tail lights a few times to get it 100%. In reality no one else will have a clue.
I just did my tail lights a few times to get it 100%. In reality no one else will have a clue.
04-19-2018, 07:50 AM
#462
SteelStick is absolutely horribleeee. I've learned that lesson!
The lights look good though. They look like that second pair I built that I showed you. I definitely learned a lot the second time around.
I wouldn't have epoxied the projectors to the plastic housings. That's going to limit you from aiming them should you have to.
The lights look good though. They look like that second pair I built that I showed you. I definitely learned a lot the second time around.
I wouldn't have epoxied the projectors to the plastic housings. That's going to limit you from aiming them should you have to.
04-19-2018, 07:53 AM
#463
Originally Posted by ChrisMan287
SteelStick is absolutely horribleeee. I've learned that lesson!
The lights look good though. They look like that second pair I built that I showed you. I definitely learned a lot the second time around.
I wouldn't have epoxied the projectors to the plastic housings. That's going to limit you from aiming them should you have to.
The lights look good though. They look like that second pair I built that I showed you. I definitely learned a lot the second time around.
I wouldn't have epoxied the projectors to the plastic housings. That's going to limit you from aiming them should you have to.
04-19-2018, 08:03 AM
#464
If they're only a little off and you don't want to go through that hassle you can space the headlights from the radiator support but if they're way off that's not going to work for you.
04-20-2018, 04:38 AM
#465
freaking insane dude ! absoltuely insane ! nice work brotha !! wow !! determination , patience, and creativity,
Props !!! we need installed pics now!
and looks like your cabinets need some hardware
Props !!! we need installed pics now!
and looks like your cabinets need some hardware
04-20-2018, 09:27 PM
#467
Sorry for the late response on the ball joint thing.
With the car in the air, wheel off and ball joint nut removed, you need to clock the steering wheel so you can get access to the bottom of the knuckle with a mini sledge. Support the rotor so it compresses the suspension a couple inches. The sway bar will be putting tension on the LCA to go back down. Beat on the bottom of the knuckle at the side where the ball joint goes through and it'll pop down. It'll take a couple good wacks but it'll pop loose.
I've done this many many times and on other cars too. When on a lift, I just an exhaust jack on the rotor, in my garage I use a scissor jack. The safest way to do it is to put the axle nut back on and tight so you don't pull the bearing apart. But, I've never bothered. Also obviously you don't want to jack up the suspension to where the weight of the car isn't on the stands or lift legs anymore.
04-21-2018, 03:45 AM
#468
Sorry for the late response on the ball joint thing.
With the car in the air, wheel off and ball joint nut removed, you need to clock the steering wheel so you can get access to the bottom of the knuckle with a mini sledge. Support the rotor so it compresses the suspension a couple inches. The sway bar will be putting tension on the LCA to go back down. Beat on the bottom of the knuckle at the side where the ball joint goes through and it'll pop down. It'll take a couple good wacks but it'll pop loose.
I've done this many many times and on other cars too. When on a lift, I just an exhaust jack on the rotor, in my garage I use a scissor jack. The safest way to do it is to put the axle nut back on and tight so you don't pull the bearing apart. But, I've never bothered. Also obviously you don't want to jack up the suspension to where the weight of the car isn't on the stands or lift legs anymore.
With the car in the air, wheel off and ball joint nut removed, you need to clock the steering wheel so you can get access to the bottom of the knuckle with a mini sledge. Support the rotor so it compresses the suspension a couple inches. The sway bar will be putting tension on the LCA to go back down. Beat on the bottom of the knuckle at the side where the ball joint goes through and it'll pop down. It'll take a couple good wacks but it'll pop loose.
I've done this many many times and on other cars too. When on a lift, I just an exhaust jack on the rotor, in my garage I use a scissor jack. The safest way to do it is to put the axle nut back on and tight so you don't pull the bearing apart. But, I've never bothered. Also obviously you don't want to jack up the suspension to where the weight of the car isn't on the stands or lift legs anymore.


 06-08-2018, 01:37 PM
#470
Hey guys, I need some advice on wiring up a new negative battery wire for my 3rd gen. The OEM wire is a single/continuous piece of wire that goes from battery negative to a weird body ground, and then on to the engine. I wish I had a good picture of it right now, but I don't. The body ground is the thing that's confusing me, but there's a chance I'm very much overthinking this whole thing. If you're good with wiring and electricity, help me out!
The body ground uses a section of the wire with the insulation stripped off, and is then clamped with a bracket that is then bolted to the body. All exposed portions of the wire are corroded, and I want to replace it, but I don't want to pay OEM money to get OEM results. However, I want to be damn sure I'm not downgrading my car in the process. I've spent good money on quality copper welding cable (4 awg and 1/0 awg), closed copper lugs/terminals, and glue-lined heat shrink. I even bought a "fancy" lug crimping tool that will do the large stuff perfectly. I'm trying to figure out if I should try to reuse the OEM body ground and stay with the single piece of wire, or if I can use two separate pieces of wire and have them meet at the body ground (battery to body, and then body to engine). I'm also wondering if using lugs/terminals will be as good of a connection as the current body ground. I'm ALSO wondering if it would be better to instead go from battery to engine, and then engine to body, using the engine as the intermediate point, versus the body being the intermediate point.
Here are my thoughts on it all from what I've read. Please correct me if I'm wrong! Regarding the route of the wires, I believe keeping the stock orientation of having the body be the intermediate point between the two wires would be better than having the engine be the mid point. I say this because on my E36 the battery is in the trunk, and the negative goes only to body, so clearly this is a fine solution that's acceptable to BMW. I'm also pretty confidant that using two separate wires that meet at the body will provide as good of a connection as a single wire, assuming that my lugs are crimped properly. My assumption is that Nissan used one piece of wire mainly just to save money and keep things simple, rather than for any sort of electrical benefits.
So, what do you guys think?
06-13-2018, 08:31 AM
#472
06-13-2018, 09:25 AM
#473
Senior Member
Join Date: Jul 2001
Location: state of confusion
Posts: 1,341
Norm
06-22-2018, 07:05 AM
#474
One of the first mods I did to this car was to install the fancy door sills off the Limited model, but over 15 years they have gotten scuffed and scratched. I've used various liquid/paste polishes over the years, but none really remove scratches, they just shine it up a bit. After doing a bit of research watching Youtube videos, I decided to buy some new polish and applicators.
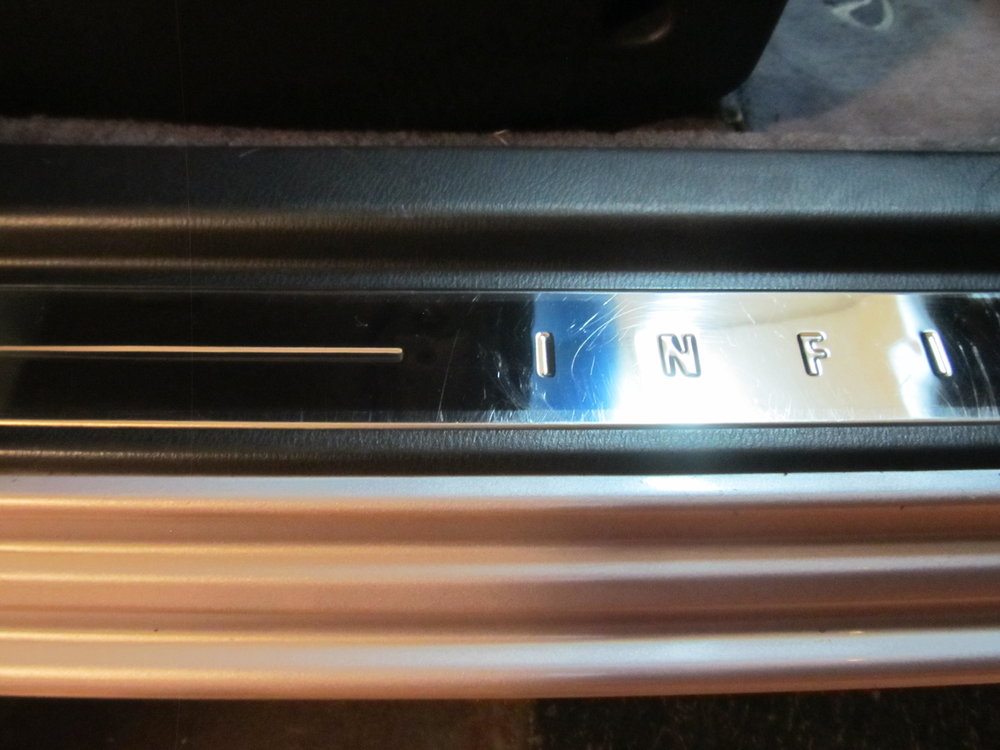
It was tough getting a good picture of the scratches, but here's an idea of the minor stuff. There were a few deeper scratches elsewhere.
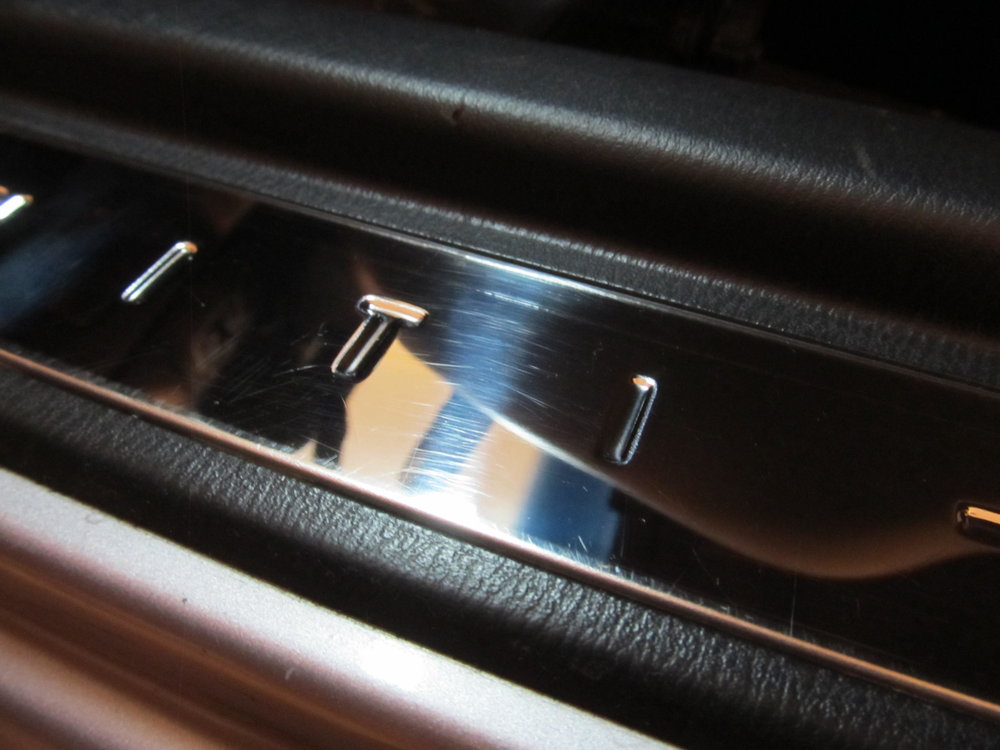
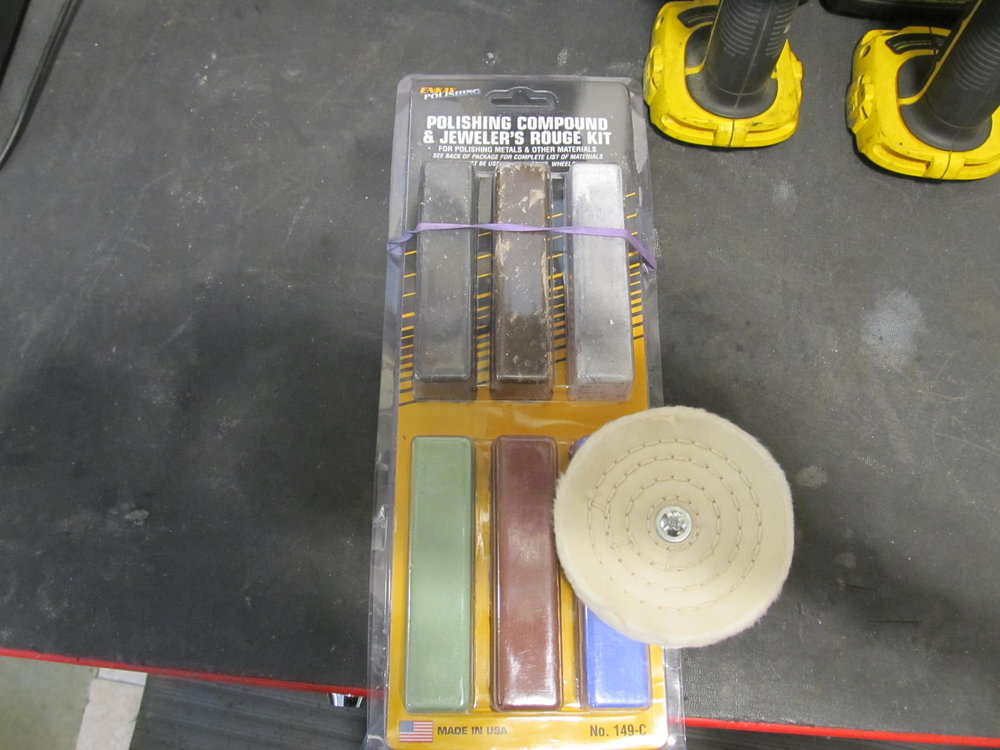
The new polish is called "Polishing compound & jewler's rouge kit" and is a variety of hard polish sticks that you rub onto to applicator:
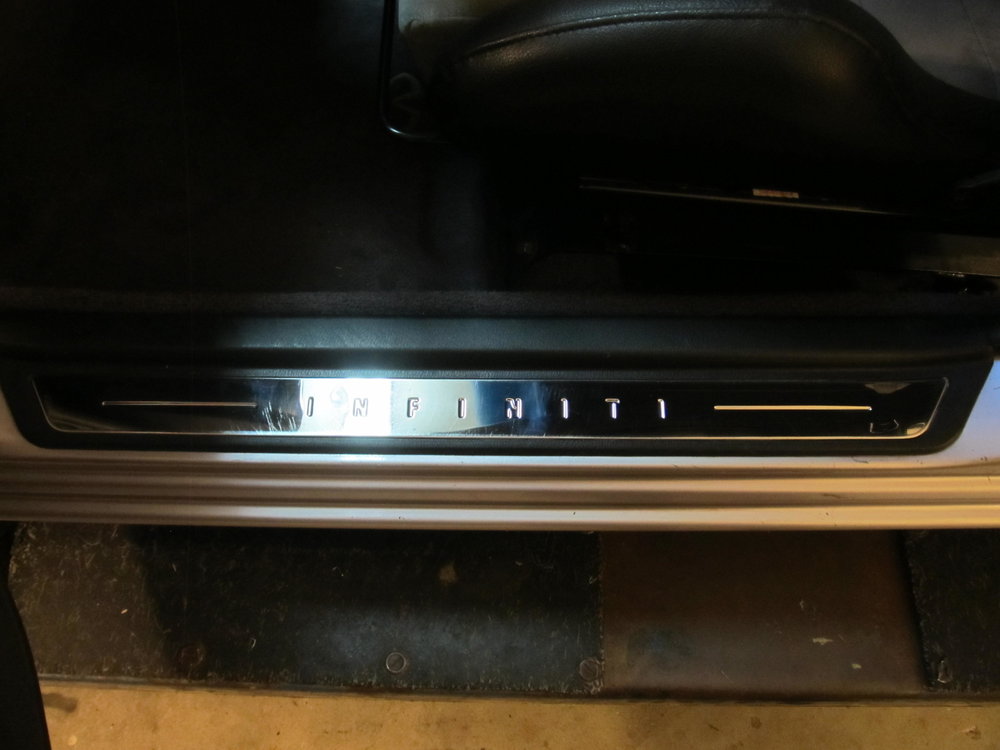
I taped off the edges to make sure I didn't make the plastic all white from the polish, but I taped a little too much. Still, this gives you a good idea of what all the work produced:
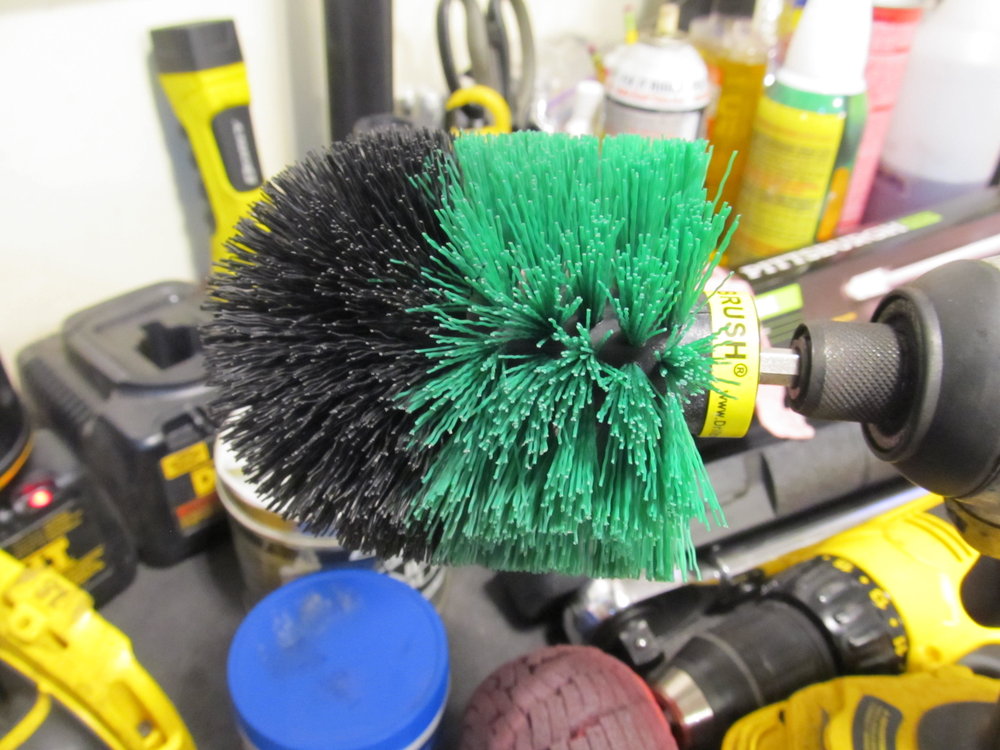
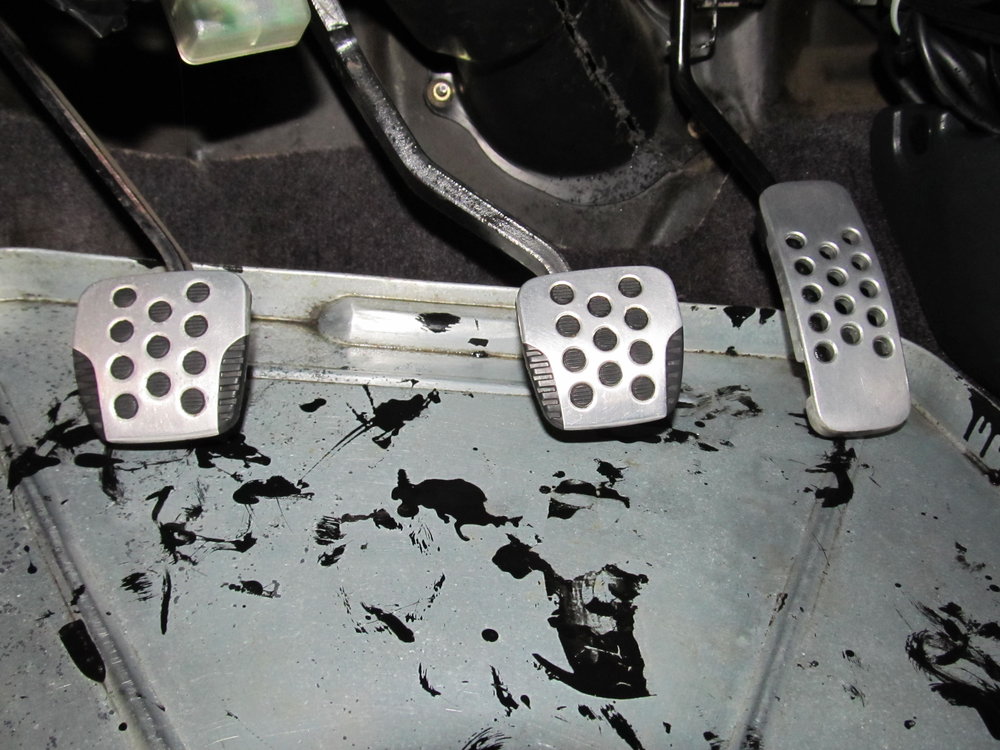
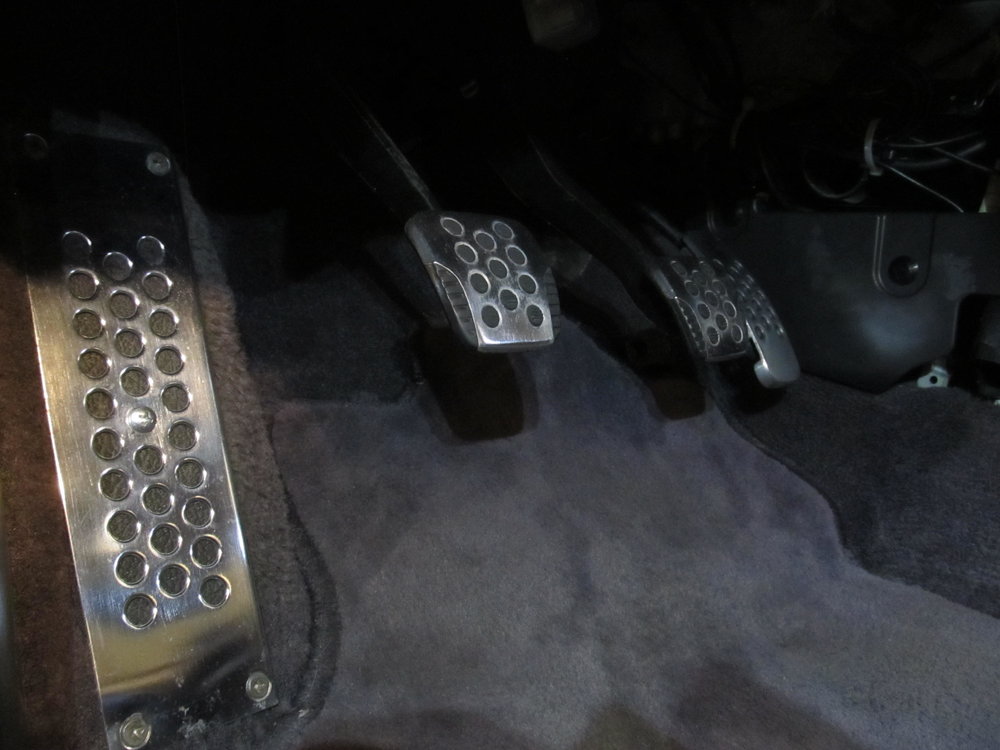
Next up was cleaning the 350z pedals. They too have been on the car for near 15 years and were pretty grungy. I broke out my awesome plastic drill brush and Purple Power and got busy.
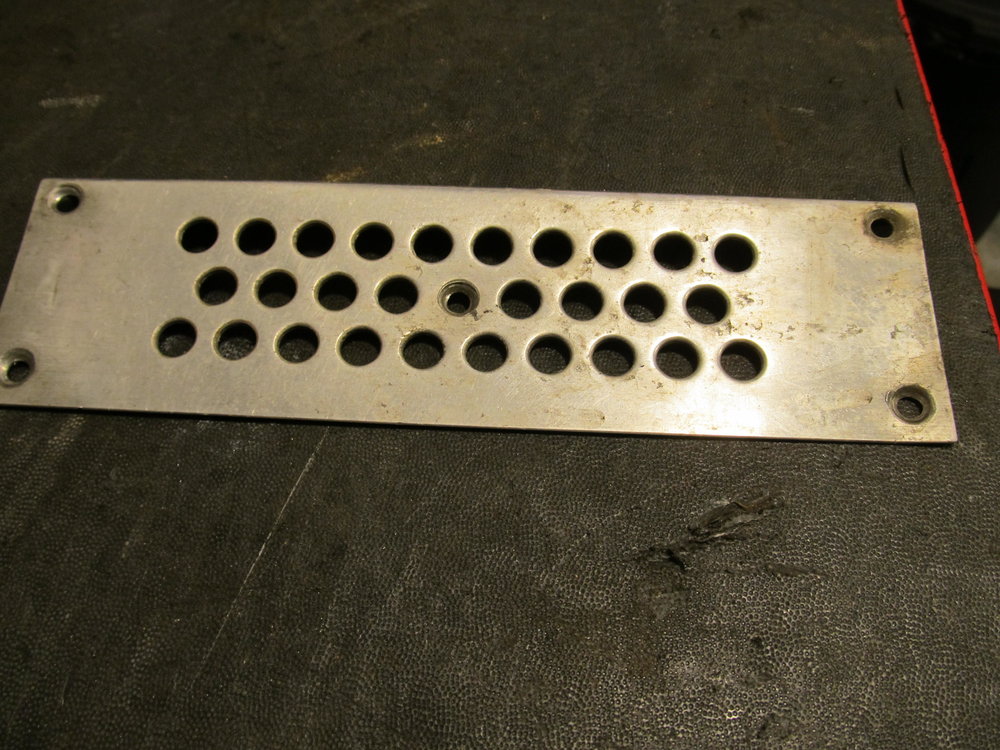
Before/after:
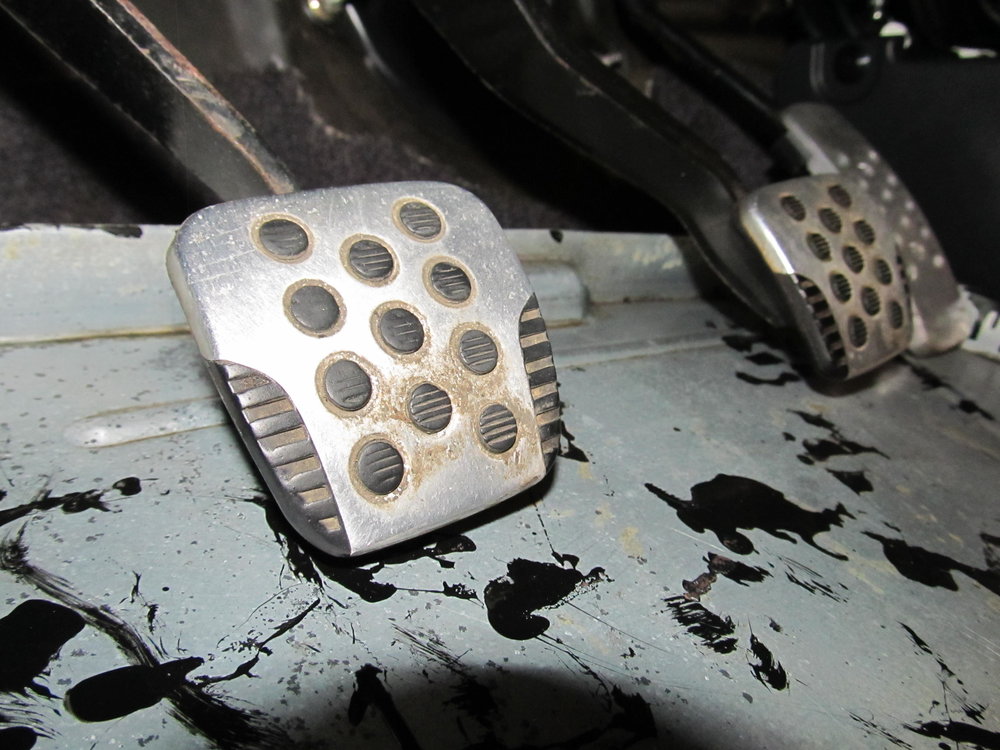
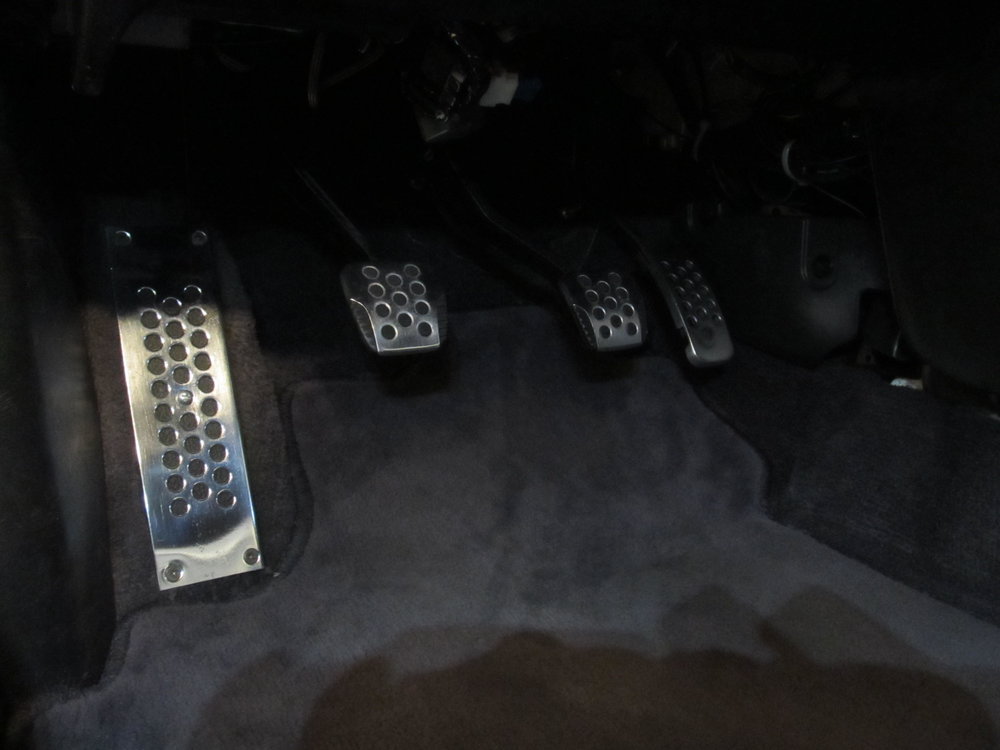
I then used some of my old sissy liquid polish on everything. I think I may have gone overboard!
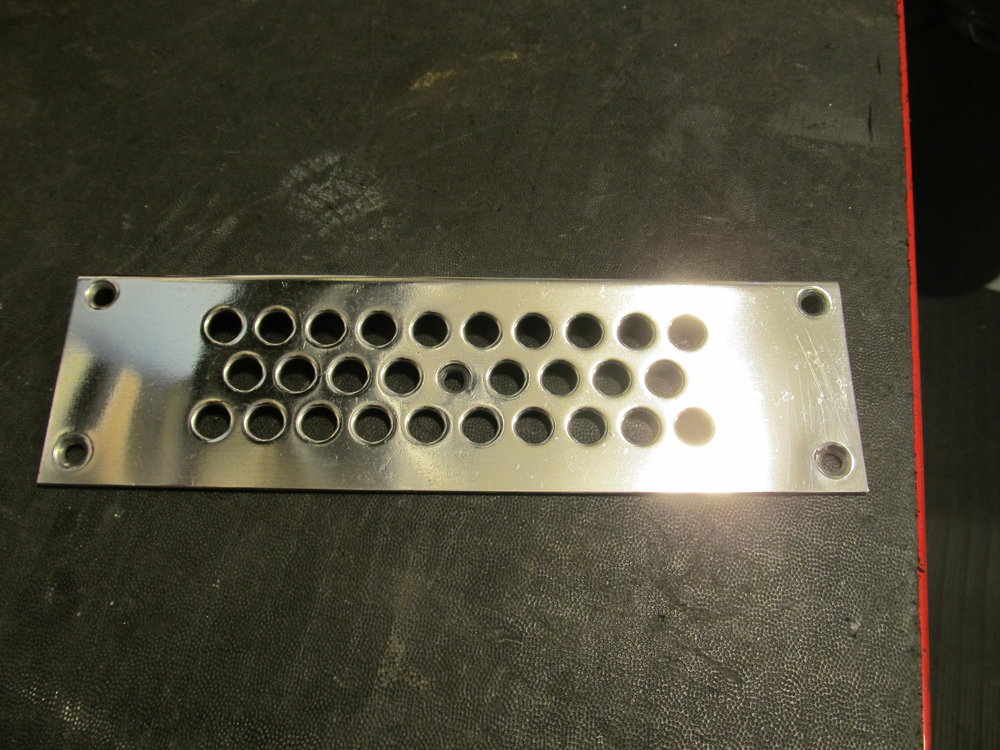
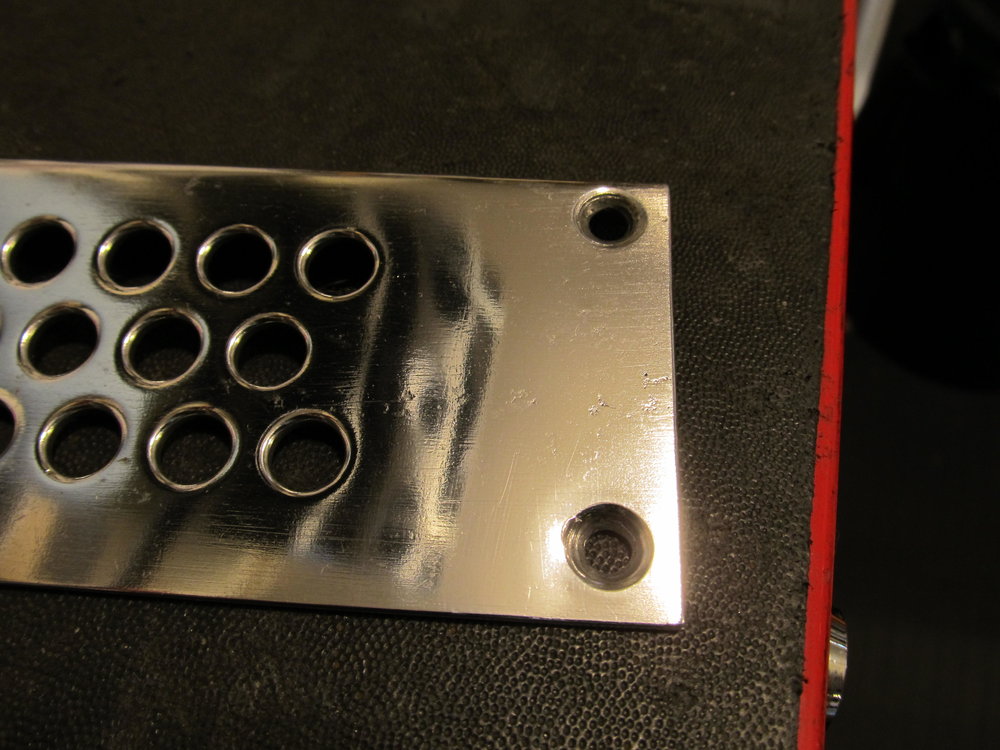
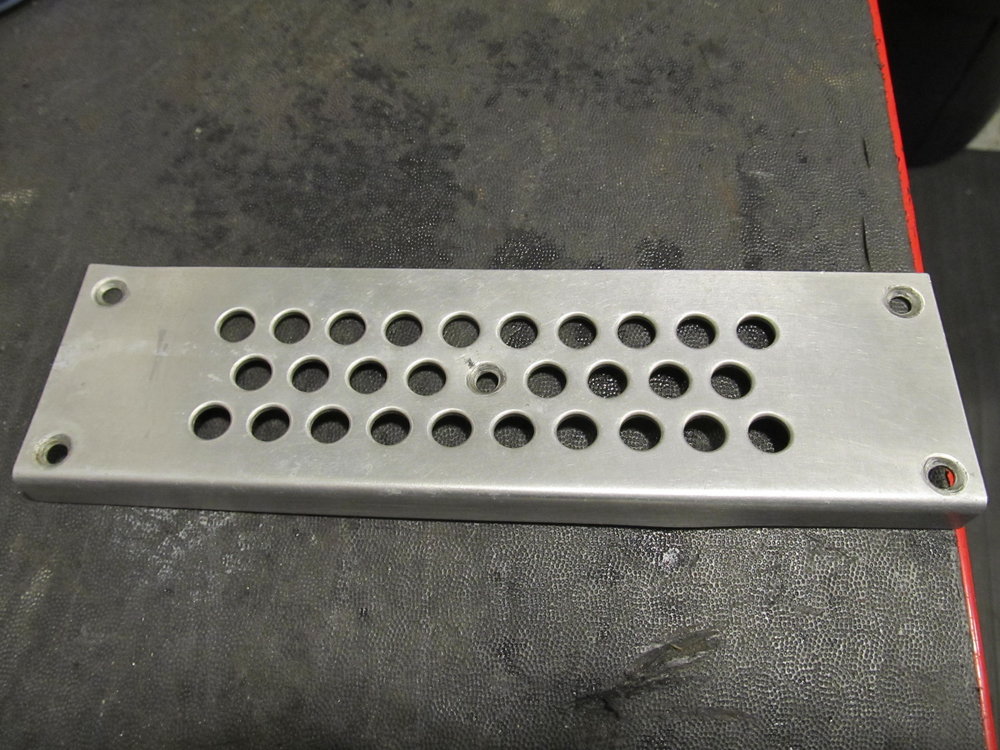
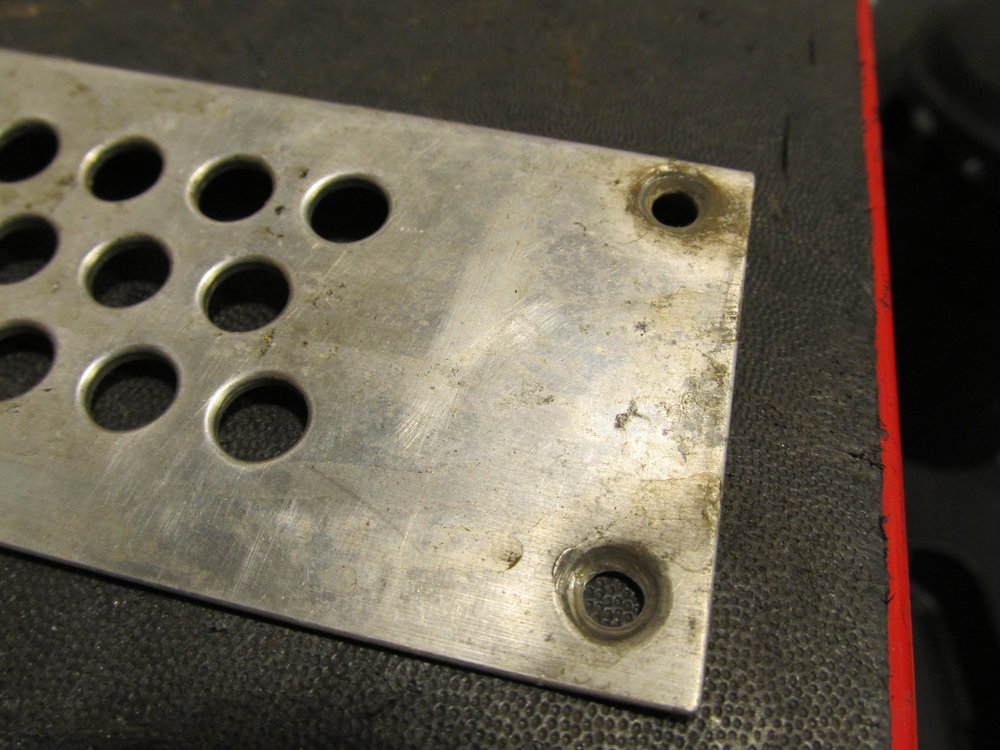
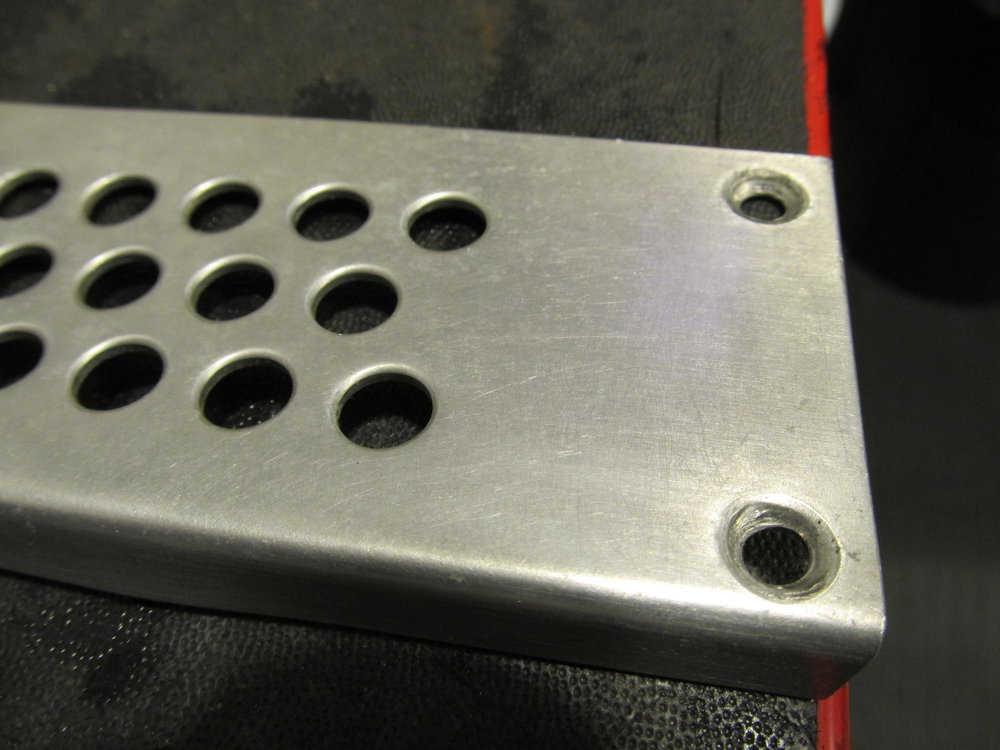
Also for possibly the first time I properly attached the dead pedal to some sheet metal instead of just through a lot of carpet, so it's nice and firm and not moving around under my feet. All it took was a little longer screw and a little patience getting things lined up.
It was tough getting a good picture of the scratches, but here's an idea of the minor stuff. There were a few deeper scratches elsewhere.
The new polish is called "Polishing compound & jewler's rouge kit" and is a variety of hard polish sticks that you rub onto to applicator:
I taped off the edges to make sure I didn't make the plastic all white from the polish, but I taped a little too much. Still, this gives you a good idea of what all the work produced:
Next up was cleaning the 350z pedals. They too have been on the car for near 15 years and were pretty grungy. I broke out my awesome plastic drill brush and Purple Power and got busy.
Before/after:
I then used some of my old sissy liquid polish on everything. I think I may have gone overboard!
Also for possibly the first time I properly attached the dead pedal to some sheet metal instead of just through a lot of carpet, so it's nice and firm and not moving around under my feet. All it took was a little longer screw and a little patience getting things lined up.
 06-22-2018, 09:58 AM
#476
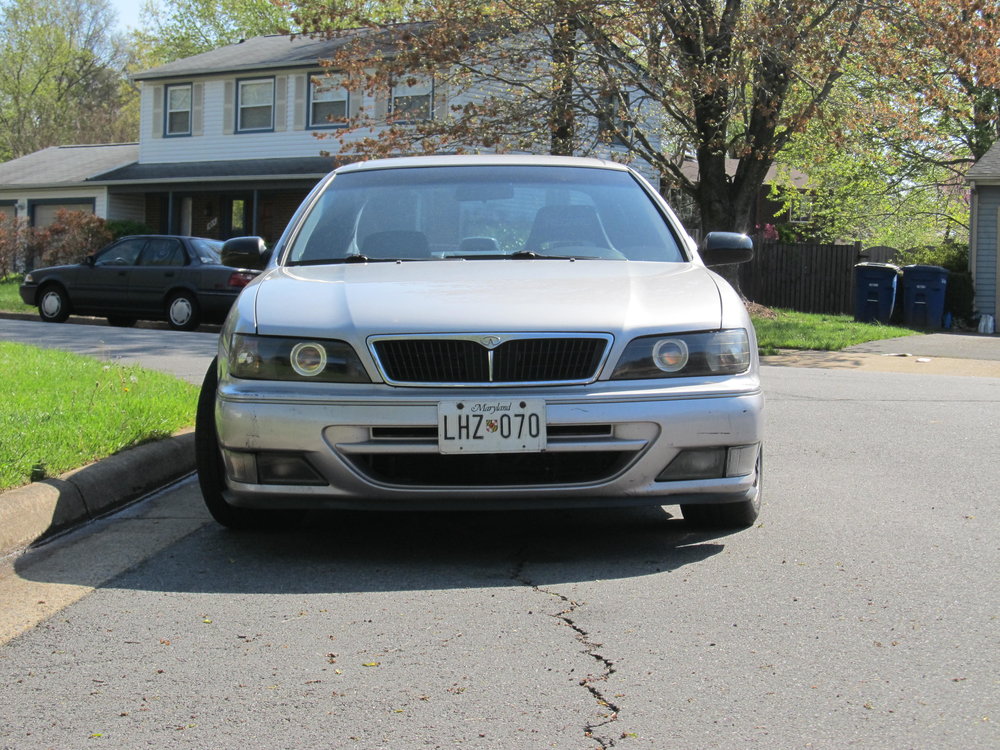
I took a couple pics of the new projectors, but the car is filthy.

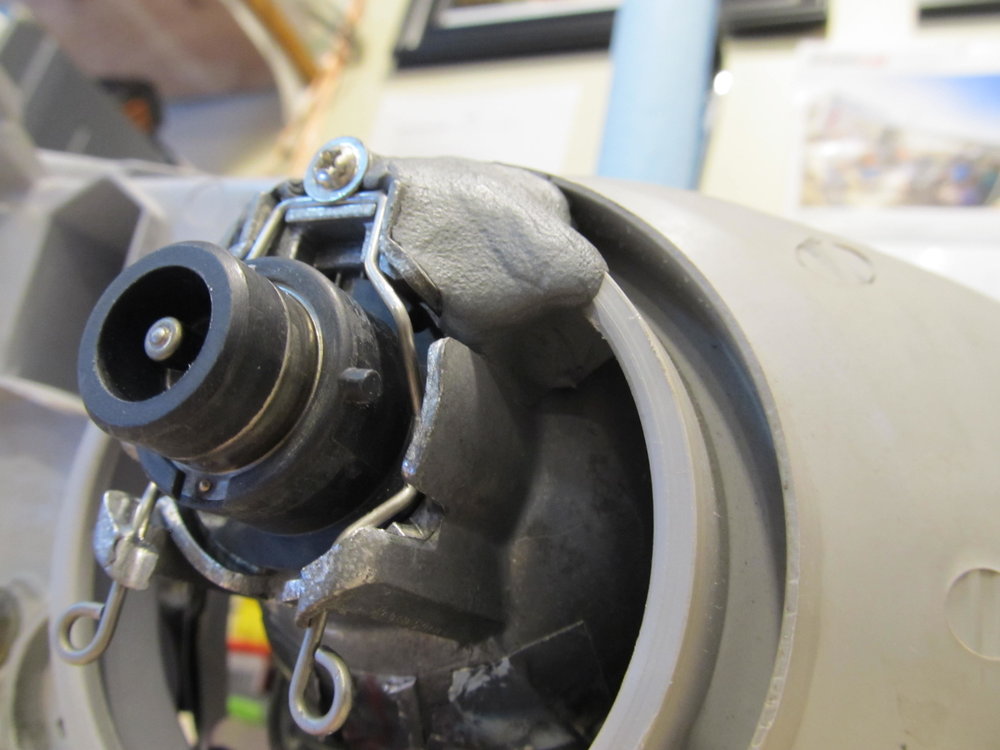
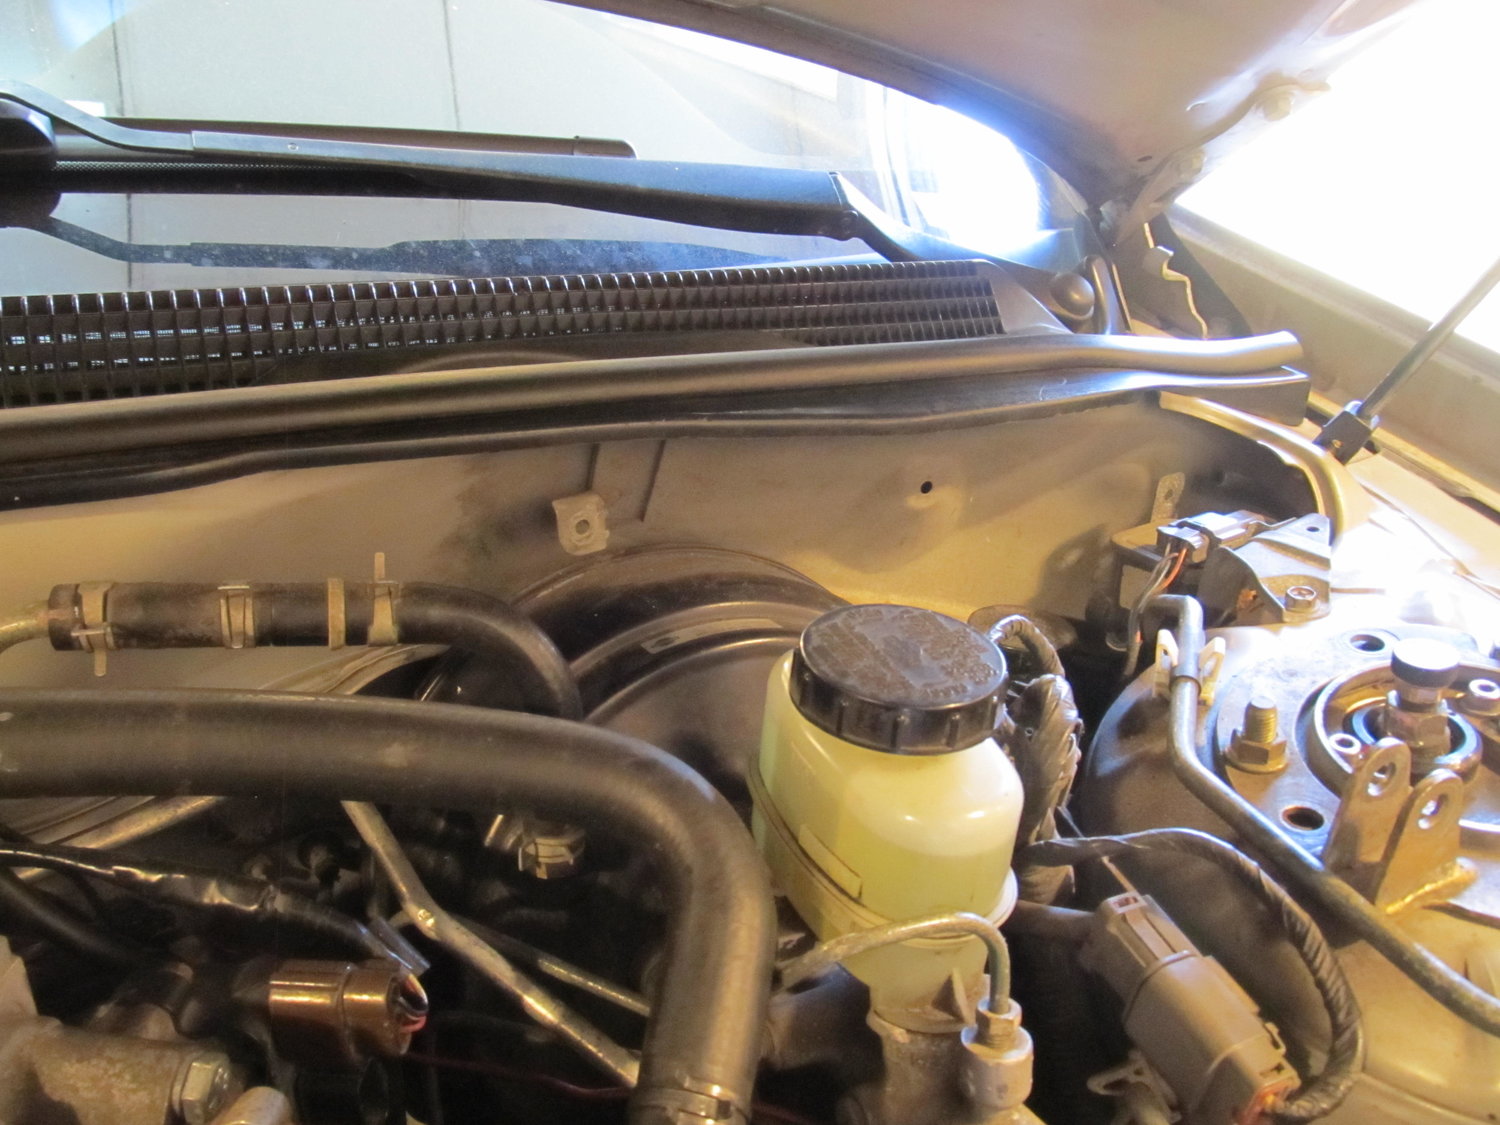
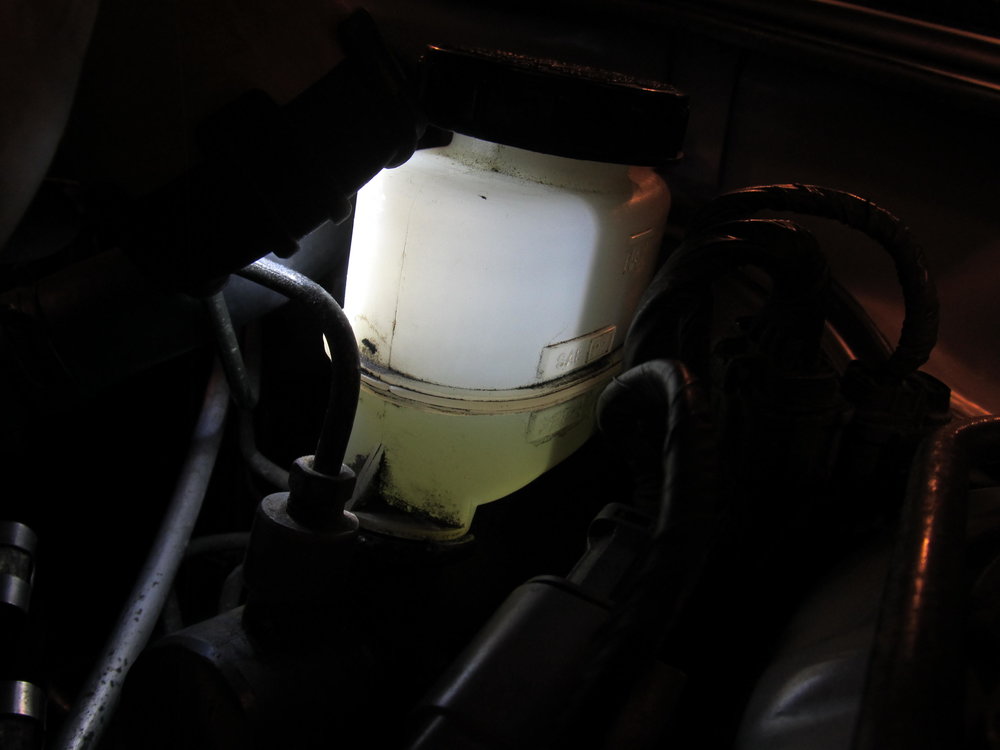
Then one day I was driving to a concert and about a mile from my house the brake light on the dash comes on. I initially thought my e-brake was stuck, as it did/does that when it's cold outside, but it wasn't cold outside, and it had never gotten itself stuck after the car was in motion, so I was a little confused. I pull over before getting on the highway and did some Googling. In my state of semi-panic, I forgot the most obvious thing: brake fluid level. Sure enough, my brake fluid was at the low mark!
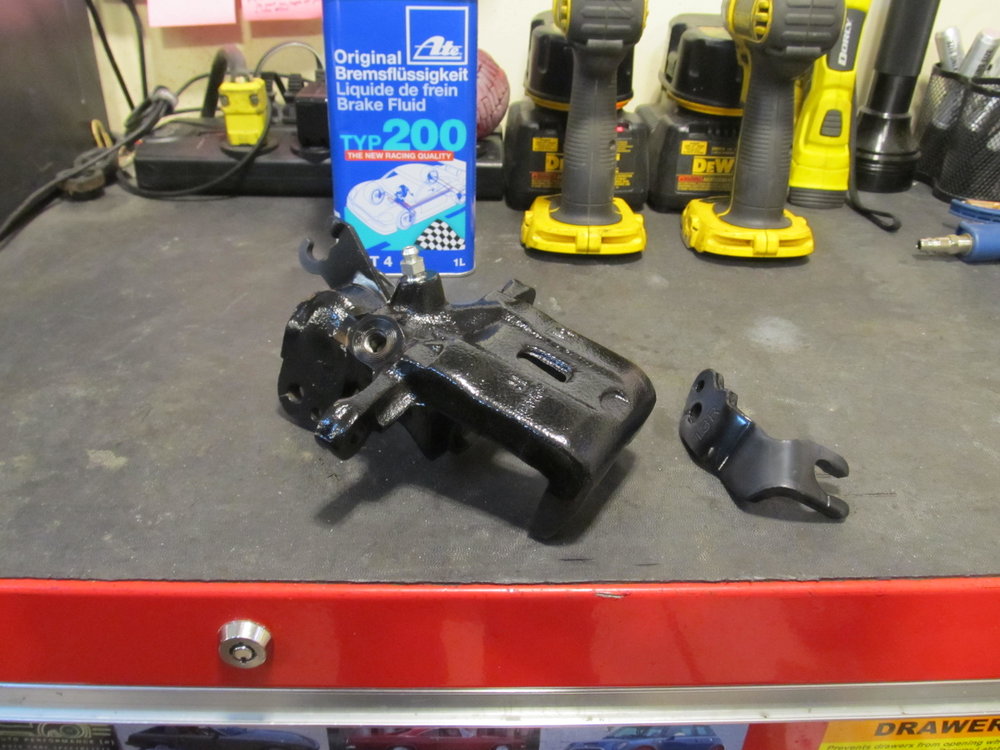
This was about two months after I had install those new rear calipers. I limped the car home and sped off in the M3. I later discovered that the new PS caliper sprung an internal leak at the seal:
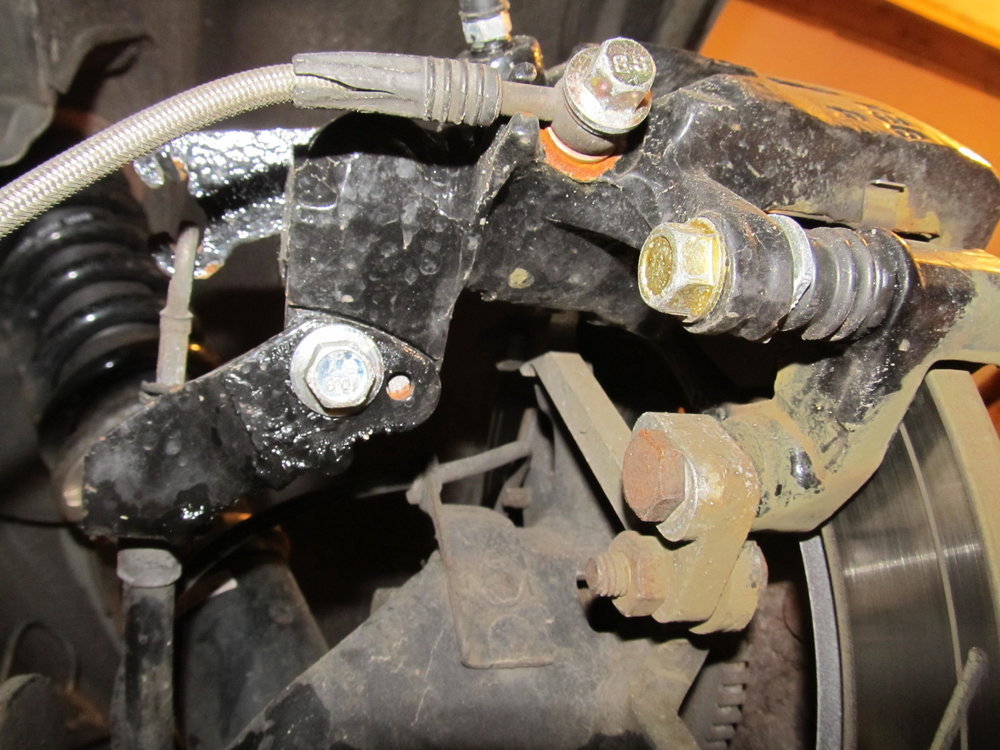
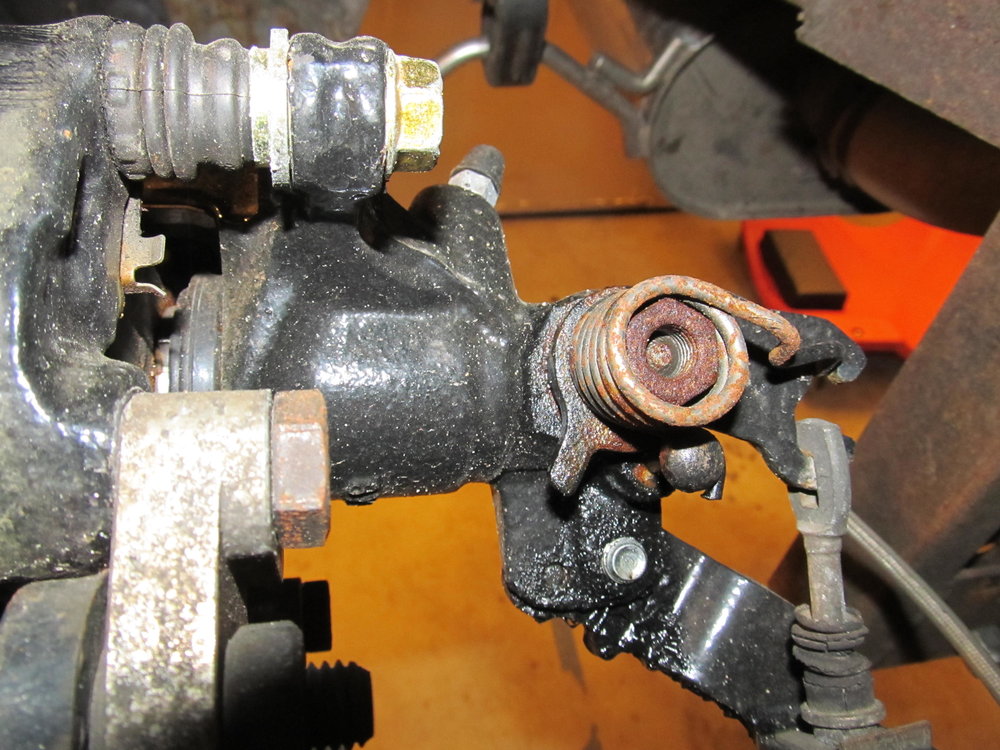
Not the brake line, not the bleeder valve, the damn seal. This of course meant prepping and repainting a new caliper, which sucked. I convinced the guy at Advance to give me a can of caliper paint for free due to the failure of a two month old caliper, so there's that at least. Unfortunately the brake fluid got on my wheel and the rear beam, so some paint has peeled off them, which I'm pretty pissed about. Oh well.
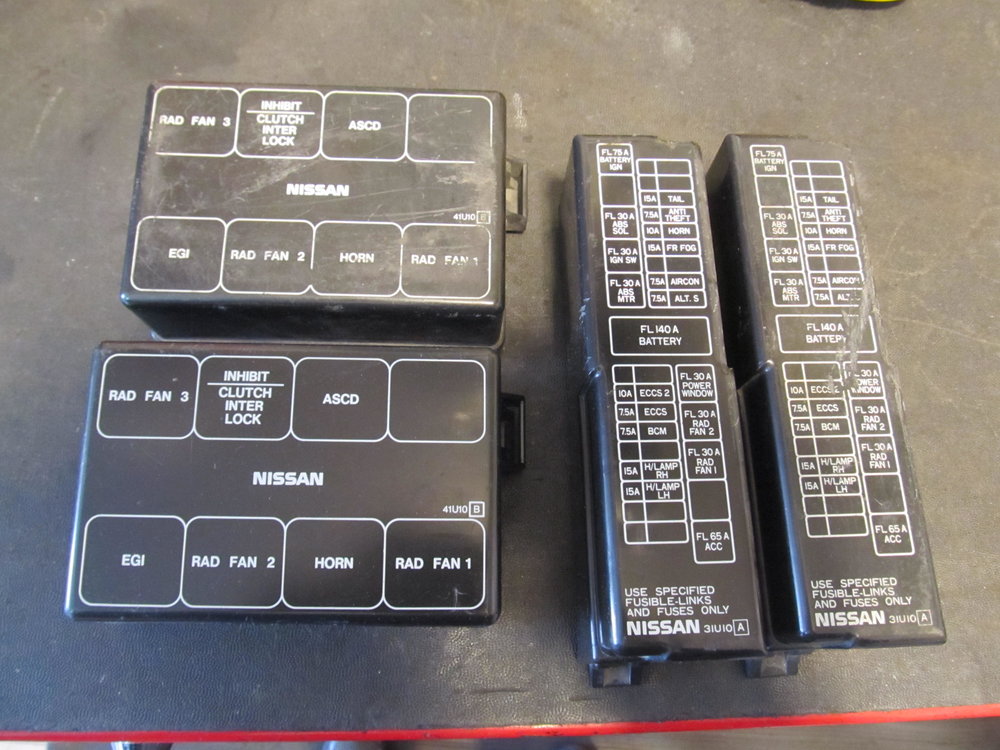
When I was at the junkyard last I picked up some fresher covers for the fuse boxes in the engine bay. Mine have been abused for a long time, and I'm quite happy to replace them with nicer ones.
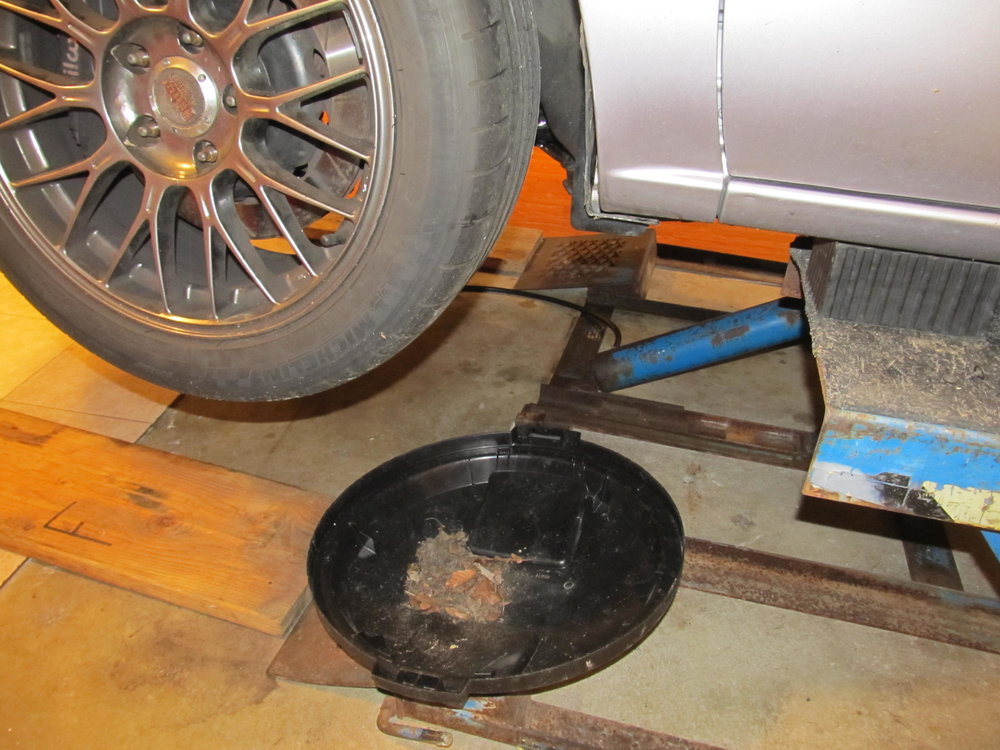
I did my annual cleanup of the area at the back of the fender liners by the mud flap:
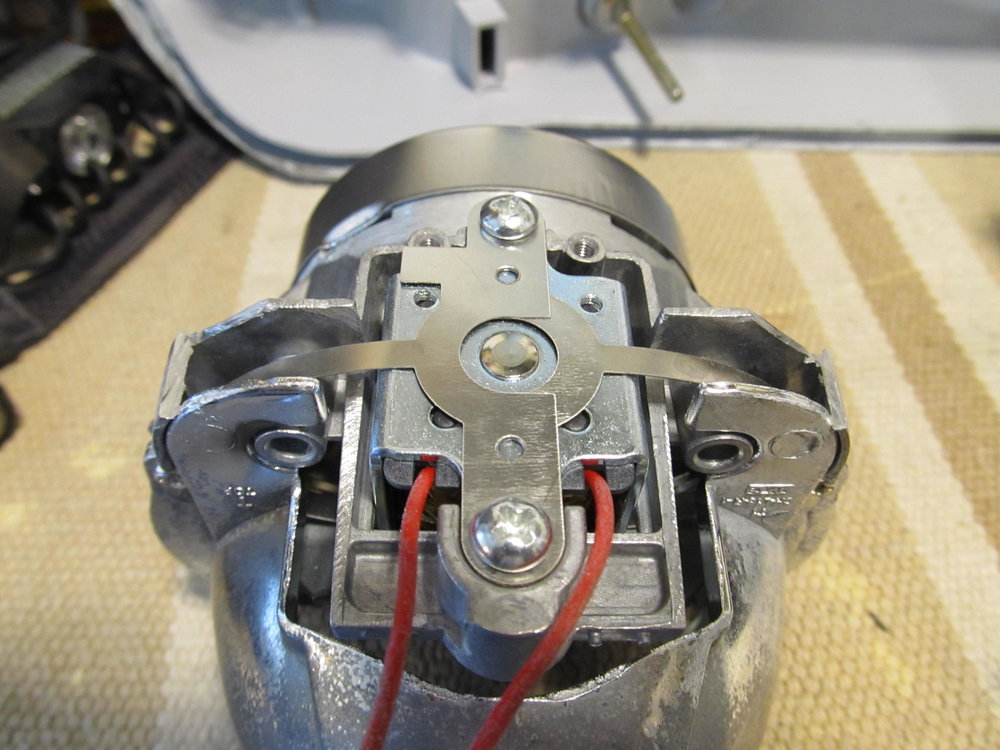
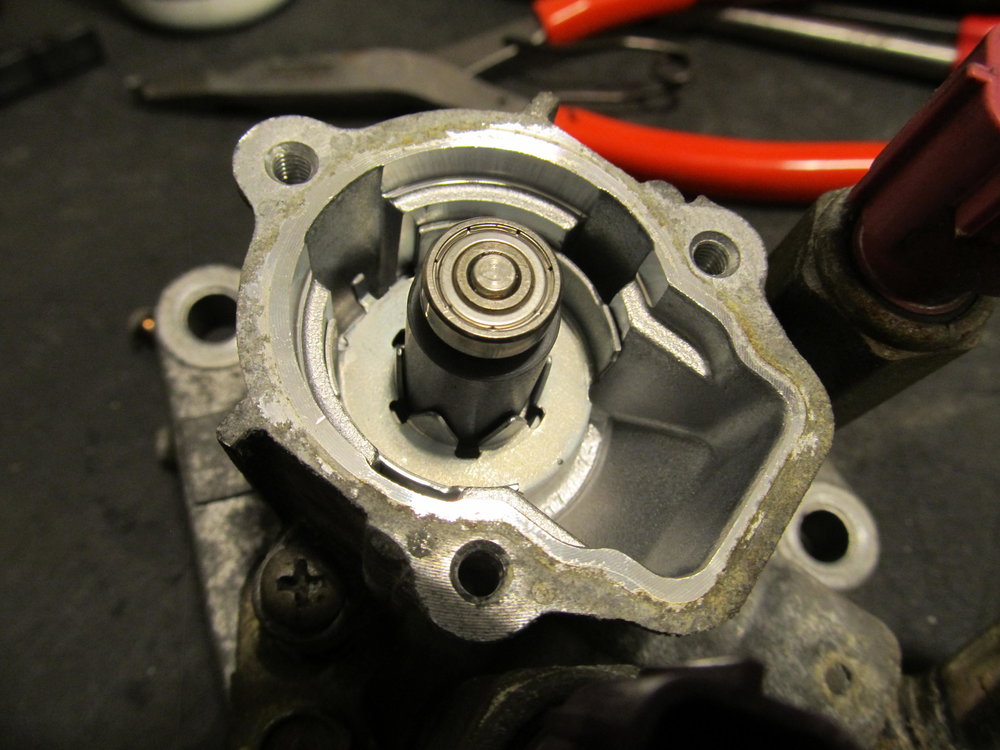
I also picked up an IACV at the junkyard. The new one is on the left, my old on the right. Apparently the adapter/block-off is something Tilley did when he put this 3.5 motor in Darius's old car, and the spacer isn't thick enough to allow the use of that little cap thingy, so it has been removed from the new one.
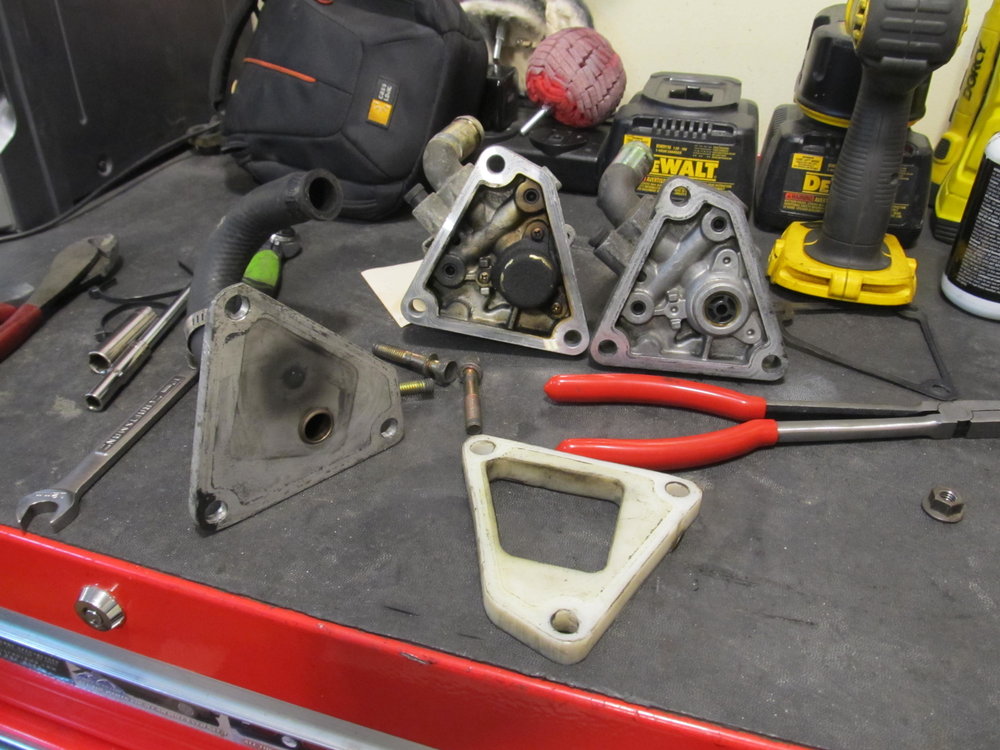
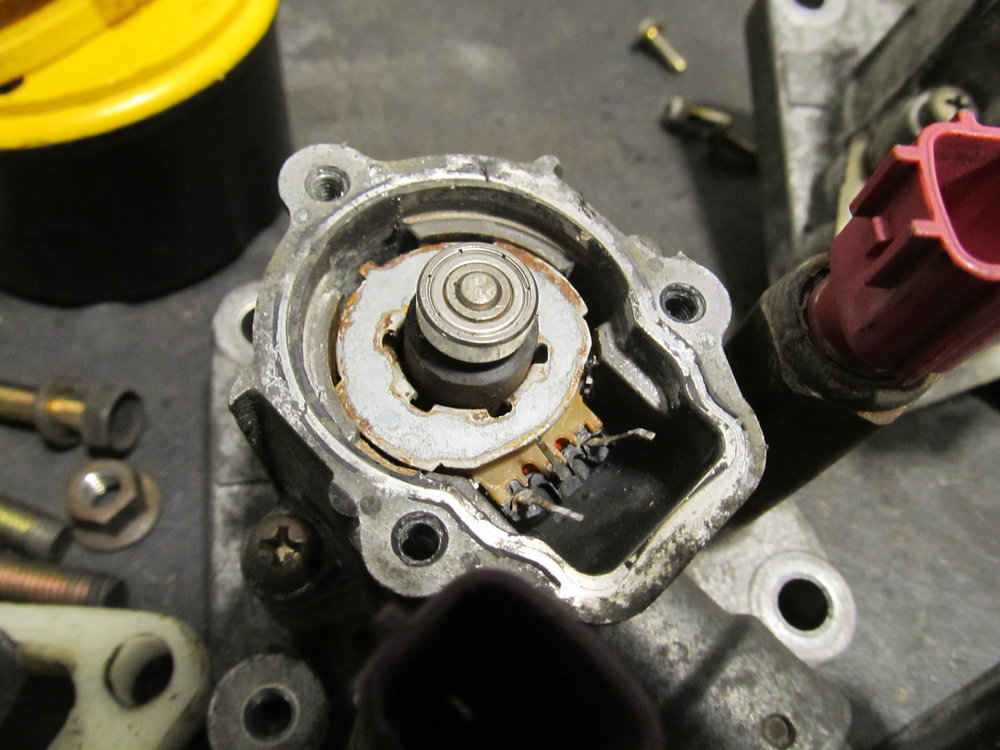
When I disassembled the "new" IACV, everything slid apart nice and easy. When I tried to do the same to my old one, the plastic piece inside was completely stuck. The plunger in the center was also seized, while the junkyard one was perfectly smooth, so at that point I just ripped out the old plastic piece and broke it, since I knew I wasn't ever going to use it again.
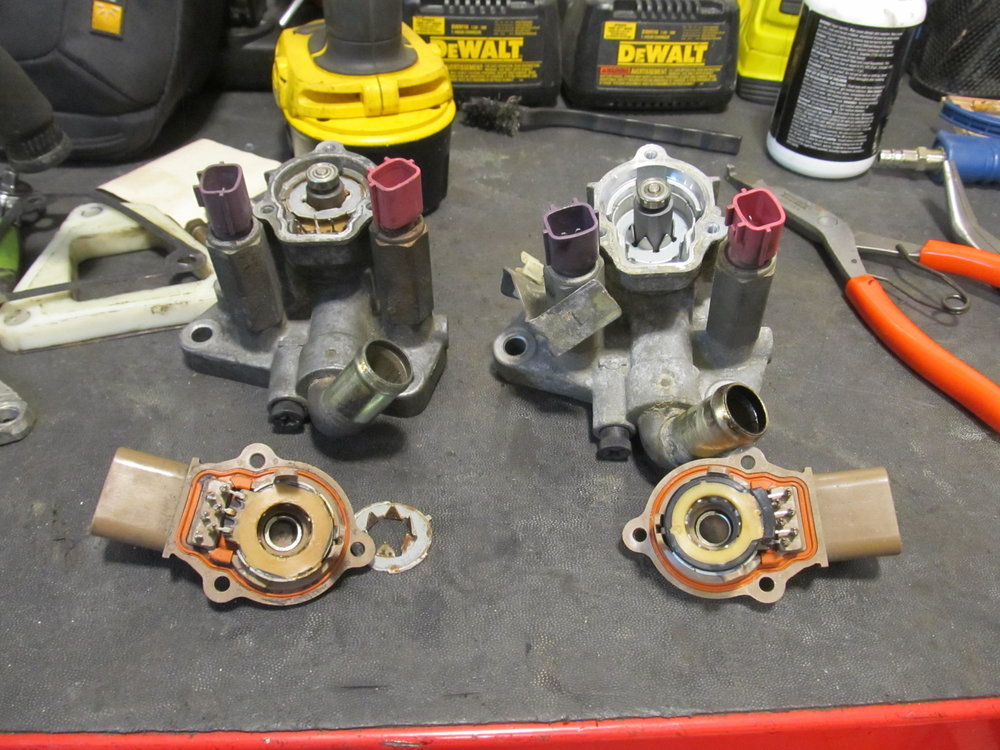
You can see all the corrosion on my old one, and absolutely none on the "new" one:
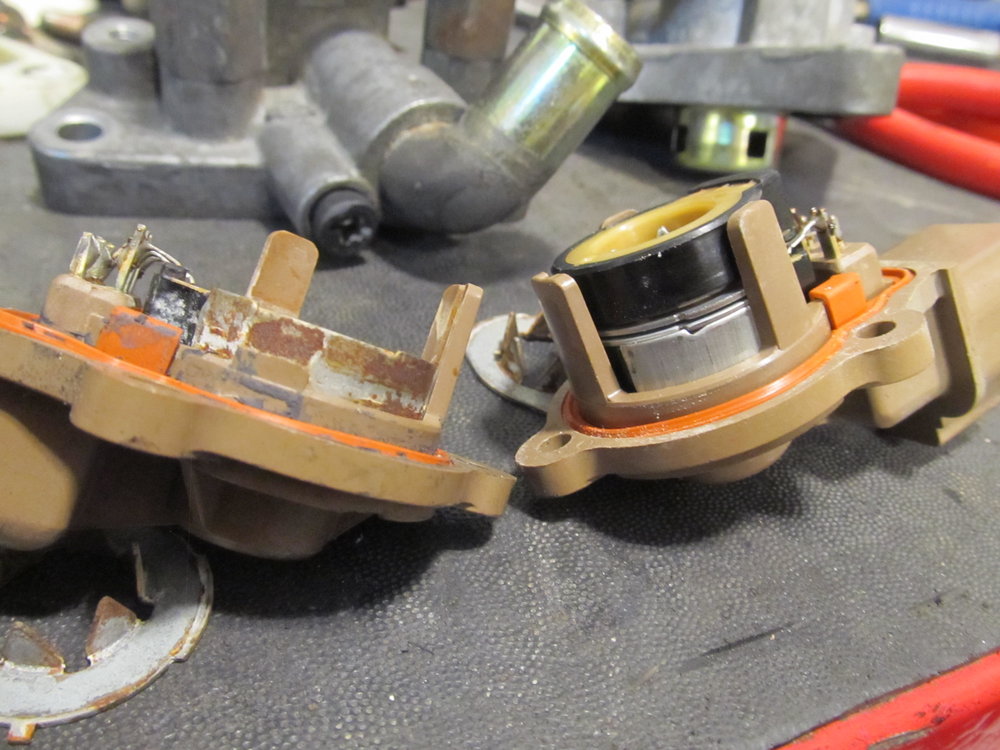
Old one with piece still stuck inside:
The one from the junkyard was perfectly clean inside, I didn't do anything to it:
By this time it was nice and warm out, so I won't know if this solved my cold starting problem until this winter. But given how stuck the old plunger was, I wouldn't be surprised if it makes a difference. The car does seem to do a better job of letting the revs fall smoothly to idle speed, so I'm hopeful!
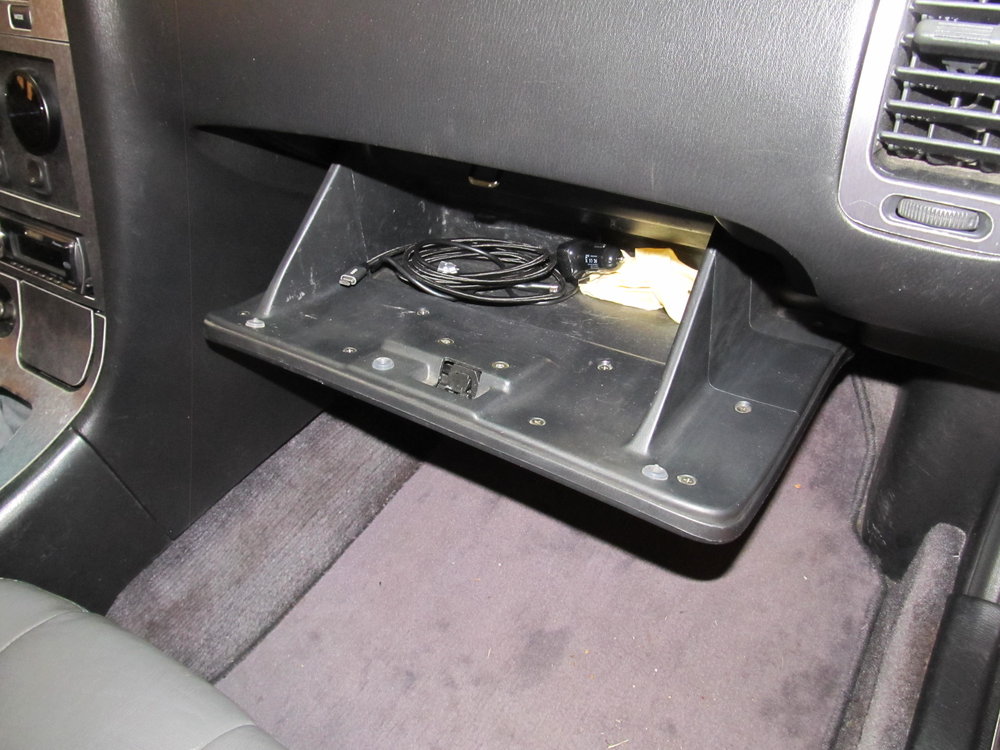
I have also been bothered by my glove box rattling at idle. With poly engine and trans mounts the car does vibrate a tad. The vibration itself is not really noticeable just sitting in the car, what's annoying are the noises it creates, one of which is the glove box. I took a quick look at the latch mechanism and realized there was no easy way to adjust it to close tighter, so I did the next best thing. I took three little rubber bumpers for drawers/cabinets in your kitchen, and stuck them on the glove box in locations that would have them meet up with the existing/stock rubber bumpers on the dashboard. The glove box is a little harder to close now, but the noise from the vibration is completely eliminated. Hooray!
Then one day I was driving to a concert and about a mile from my house the brake light on the dash comes on. I initially thought my e-brake was stuck, as it did/does that when it's cold outside, but it wasn't cold outside, and it had never gotten itself stuck after the car was in motion, so I was a little confused. I pull over before getting on the highway and did some Googling. In my state of semi-panic, I forgot the most obvious thing: brake fluid level. Sure enough, my brake fluid was at the low mark!
This was about two months after I had install those new rear calipers. I limped the car home and sped off in the M3. I later discovered that the new PS caliper sprung an internal leak at the seal:
Not the brake line, not the bleeder valve, the damn seal. This of course meant prepping and repainting a new caliper, which sucked. I convinced the guy at Advance to give me a can of caliper paint for free due to the failure of a two month old caliper, so there's that at least. Unfortunately the brake fluid got on my wheel and the rear beam, so some paint has peeled off them, which I'm pretty pissed about. Oh well.
When I was at the junkyard last I picked up some fresher covers for the fuse boxes in the engine bay. Mine have been abused for a long time, and I'm quite happy to replace them with nicer ones.
I did my annual cleanup of the area at the back of the fender liners by the mud flap:
I also picked up an IACV at the junkyard. The new one is on the left, my old on the right. Apparently the adapter/block-off is something Tilley did when he put this 3.5 motor in Darius's old car, and the spacer isn't thick enough to allow the use of that little cap thingy, so it has been removed from the new one.
When I disassembled the "new" IACV, everything slid apart nice and easy. When I tried to do the same to my old one, the plastic piece inside was completely stuck. The plunger in the center was also seized, while the junkyard one was perfectly smooth, so at that point I just ripped out the old plastic piece and broke it, since I knew I wasn't ever going to use it again.
You can see all the corrosion on my old one, and absolutely none on the "new" one:
Old one with piece still stuck inside:
The one from the junkyard was perfectly clean inside, I didn't do anything to it:
By this time it was nice and warm out, so I won't know if this solved my cold starting problem until this winter. But given how stuck the old plunger was, I wouldn't be surprised if it makes a difference. The car does seem to do a better job of letting the revs fall smoothly to idle speed, so I'm hopeful!
I have also been bothered by my glove box rattling at idle. With poly engine and trans mounts the car does vibrate a tad. The vibration itself is not really noticeable just sitting in the car, what's annoying are the noises it creates, one of which is the glove box. I took a quick look at the latch mechanism and realized there was no easy way to adjust it to close tighter, so I did the next best thing. I took three little rubber bumpers for drawers/cabinets in your kitchen, and stuck them on the glove box in locations that would have them meet up with the existing/stock rubber bumpers on the dashboard. The glove box is a little harder to close now, but the noise from the vibration is completely eliminated. Hooray!
Last edited by 95maxrider; 06-22-2018 at 10:00 AM.
06-23-2018, 09:03 PM
#477
Annual fender cleaning. It's amazing how much can build up there.
I think you went a bit over board polishing those pedals. Mine are a bit discolored too. I like the brushed look and don't want to lose that.
I'm glad you have kept you car so near and dear to you all these years. There aren't many documenting mods, much less general stuff like this any more.
It's amazing how much can build up there.I think you went a bit over board polishing those pedals. Mine are a bit discolored too. I like the brushed look and don't want to lose that.
I'm glad you have kept you car so near and dear to you all these years. There aren't many documenting mods, much less general stuff like this any more.
06-24-2018, 04:56 AM
#478
Annual fender cleaning. It's amazing how much can build up there.
I think you went a bit over board polishing those pedals. Mine are a bit discolored too. I like the brushed look and don't want to lose that.
I'm glad you have kept you car so near and dear to you all these years. There aren't many documenting mods, much less general stuff like this any more.
It's amazing how much can build up there.I think you went a bit over board polishing those pedals. Mine are a bit discolored too. I like the brushed look and don't want to lose that.
I'm glad you have kept you car so near and dear to you all these years. There aren't many documenting mods, much less general stuff like this any more.