My Massive I30 Revival and Build Thread
 08-23-2012, 12:36 PM
#121

I think your sensor is getting heat soak from its mounting point and not really getting the true intake air temps.
Suggestion: ridiculous I know this may sound, but extned the sensor with some wires and mount it, just hanging inside the CAI, preferrably before the MAF. That way the entire sensor is cooled by the incoming air.
Of course the ridiculousness of it is the risk of it flying off or something, but you get the idea. I'm sure you can figure something out from that.
DW
I also had the idea of extending the wiring for the IAT sensor and move it into the fender well with the filter, but I wanted to try some wrap first. I don't think putting the entire sensor inside the CAI would be good for airflow though, so I don't think I'll be doing that.
So I did some digging on the DEI gold wrap, and came up with some interesting reads.
The first is a WRX forum where a guy wraps his intake box with the DEI wrap and got some good results. Now granted, he was measuring temperature with a laser gun, and not the IAT, but he did see positive results.
The second comes from the Evo forums. Apparently the DEI wrap only reflects 40% of the heat, while the TRUE gold wrap used on race cars reflects 97% of the heat. So the DEI wrap is good, but it's not the real deal. Well there's another product available called Aero-Lite Heat Reflective Tape that's available from Earl's Indy and reflects 96% of the heat, but for a fraction of the cost of the real gold wrap. I haven't called them yet to see if it's still available, so when I do, I will get prices and post back in here.
 08-23-2012, 01:31 PM
#122


 08-23-2012, 01:49 PM
#123
I don't understand what you mean by temporary testing purposes. The IAT is firmly attached to the midpipe after the MAF, which is where I would like to keep it. Testing/observing IAT temps is mostly done at auto-x events, where I monitor it before/after each run.
08-23-2012, 07:36 PM
#124
I've been MIA for a while.
I made my LTB fit with headers, had to extend it a little and bend it to fit. I did hit it once or twice on the road, and broke it once, but man the handling improvements are worth it by far.
I made my LTB fit with headers, had to extend it a little and bend it to fit. I did hit it once or twice on the road, and broke it once, but man the handling improvements are worth it by far.
08-23-2012, 07:45 PM
#125
That's pretty much what I've been thinking. I assume you made a 'stage 1' bar?
08-24-2012, 06:26 AM
#126

DW
08-24-2012, 06:41 AM
#127
I assumed that since the piping is not only steel, but black, that it will absorb a good amount of the ambient heat in the engine bay.
08-26-2012, 05:10 PM
#128
Member

Join Date: Feb 2009
Posts: 140
Well, I sent this info in a PM since I didn't want to hijack this thread but the OP has asked me to share this info here as well.
A while ago I made my own multi-point DIY trunk brace that connected the rear frame rails, strut towers, chassis of the car, and the areas in between via tensioned cables and Al bars. The results were more than I could've hoped for. Prior to these braces the rear of the car would stay on the ground while jacking from the front control arm. Now with the trunk brace the whole side of the car comes off the ground. The ride which was rough before due to chassis deflection and stiffer spring rates than stock is now still stiff, but it is more cushioned since the suspension is doing it's job instead of deflecting into the body.
Link to my trunk brace,
http://www.nissanclub.com/forums/gen...k-bracing.html
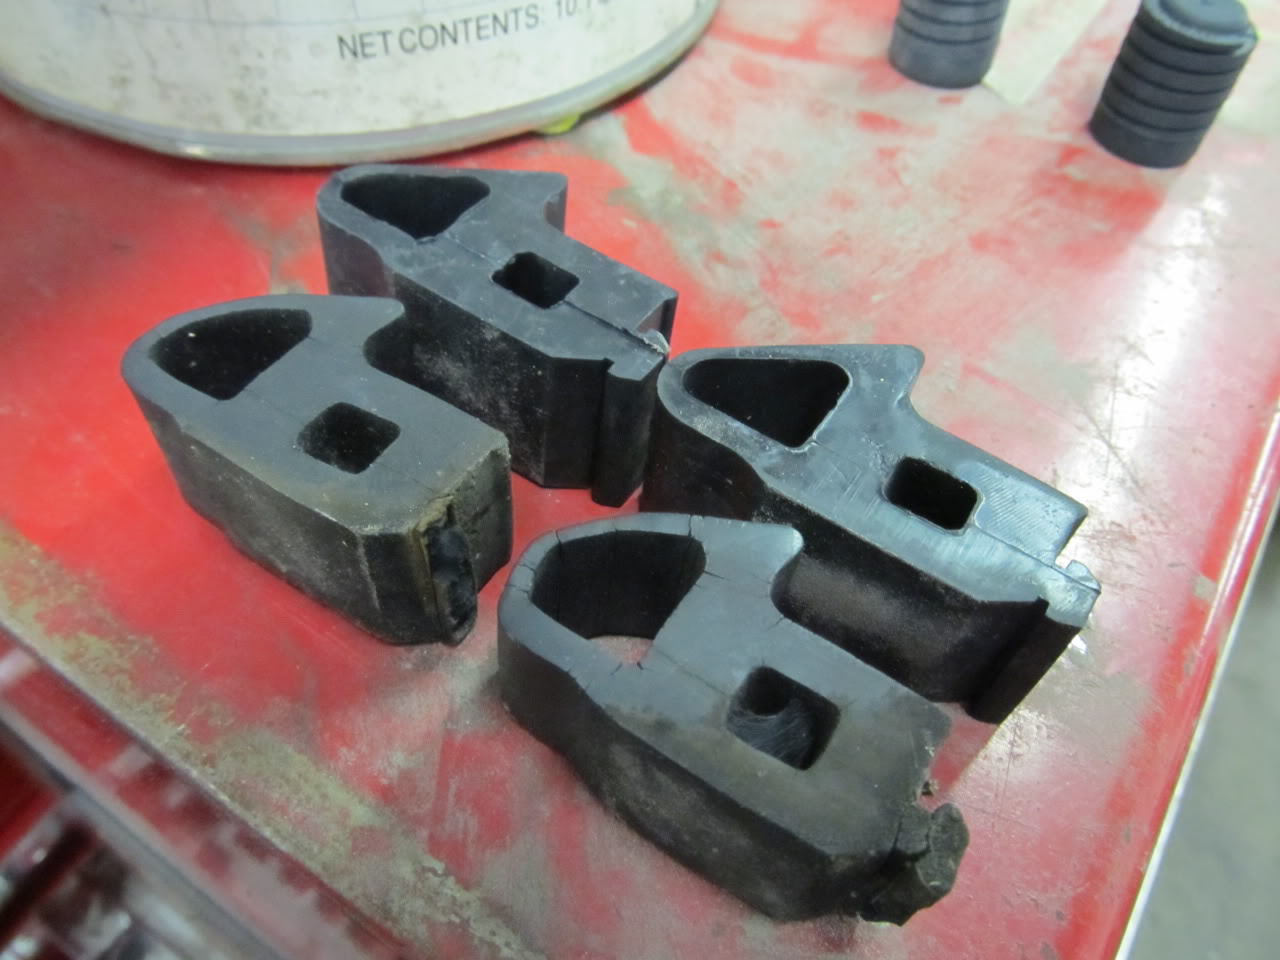
The second point of this post is the new bushings I have installed. Last year we noticed that my front sub-frame was rotting out around the LCA's. Well an OG over on NissanClub offered to make me new bushings front and rear to have pressed in while we swapped out the front sub-frame. Now a year later the rear trailing arms, rear knuckles, rear sub-frame, and F/R motor mounts have been pressed in with these new bushings. I should be picking up my car tomorrow and can give a full review of these then. But for now here's a pic of the rear trailing arms after they were wire wheeled, painted, and had the new bushings pressed in.
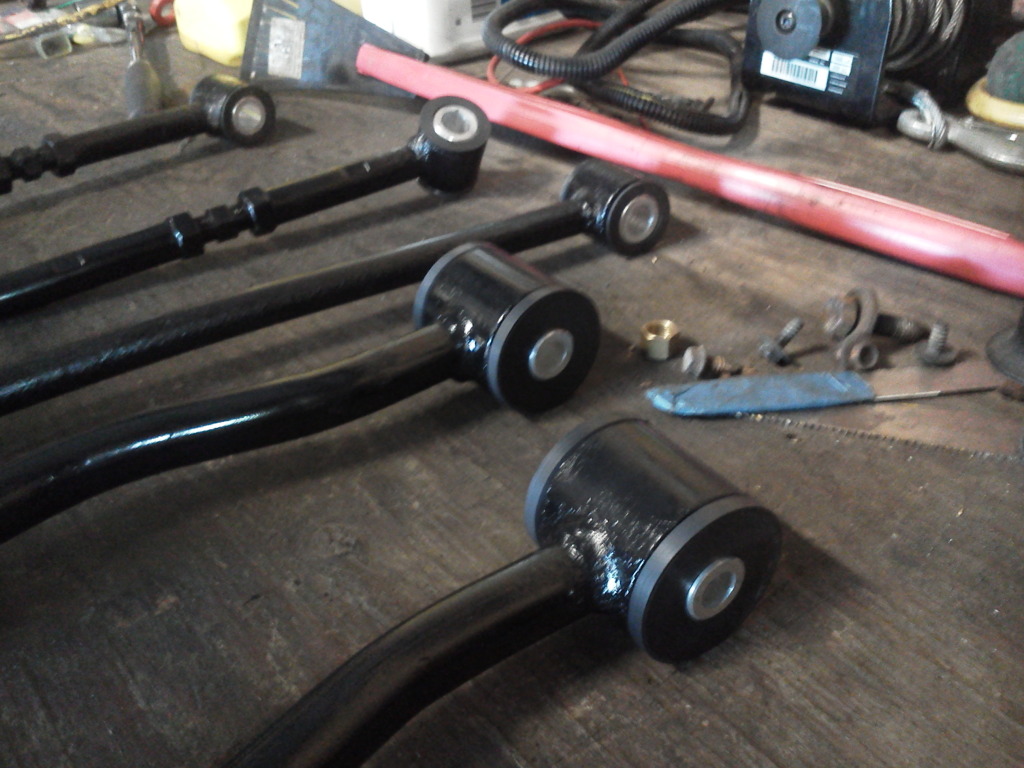
I should also add this is all on an 01 Altima. Although not everything will be applicable it should at least get some wheels turning. These bushings/sleeves were made by Red Lion. I believe he has an acct here but I'm not positive.
A while ago I made my own multi-point DIY trunk brace that connected the rear frame rails, strut towers, chassis of the car, and the areas in between via tensioned cables and Al bars. The results were more than I could've hoped for. Prior to these braces the rear of the car would stay on the ground while jacking from the front control arm. Now with the trunk brace the whole side of the car comes off the ground. The ride which was rough before due to chassis deflection and stiffer spring rates than stock is now still stiff, but it is more cushioned since the suspension is doing it's job instead of deflecting into the body.
Link to my trunk brace,
http://www.nissanclub.com/forums/gen...k-bracing.html
The second point of this post is the new bushings I have installed. Last year we noticed that my front sub-frame was rotting out around the LCA's. Well an OG over on NissanClub offered to make me new bushings front and rear to have pressed in while we swapped out the front sub-frame. Now a year later the rear trailing arms, rear knuckles, rear sub-frame, and F/R motor mounts have been pressed in with these new bushings. I should be picking up my car tomorrow and can give a full review of these then. But for now here's a pic of the rear trailing arms after they were wire wheeled, painted, and had the new bushings pressed in.
I should also add this is all on an 01 Altima. Although not everything will be applicable it should at least get some wheels turning. These bushings/sleeves were made by Red Lion. I believe he has an acct here but I'm not positive.
 09-27-2012, 01:52 PM
#130
When you change the oil, drain the oil pan as normal and remove the old filter. But also remove the sandwich plate with the -AN fittings so the old oil from the cooler drains out as well. When I add the new oil I just put in 6 quarts and let the engine idle till the oil thermostat opens and fills the oil cooler while I check for any leaks. When the cooler gets warm I know oil is moving through the cooler.
Let's assume that when you do an oil change, you wait until the oil is cool, and below the 180* point necessary for the thermostat to open. This means that the thermostat should be closed when you do the oil change. If this is true, doesn't that mean if you just remove the sandwich plate (and not the AN lines going to it) the oil will be trapped in the cooler and won't drain unless you remove the lines from the plate?
This leads me to another idea I've been trying to wrap my head around. If the car has been running at operating temperature and you turn it off, does the oil in the cooler and lines drain back into the oil pan (while the thermostat is still open)? If so, wouldn't that make checking your oil level after the thermostat closes very difficult, since you wouldn't know how much oil drained back into the system from the cooler? I'm wondering if it makes a difference as to the relative height of the cooler to the engine, whether it should be at the same height as the top of the engine (or the highest place the oil resides), higher, or lower.
Any help would be appreciated!


 09-27-2012, 03:08 PM
#132
 09-27-2012, 08:45 PM
#133
Sooo stealing a few mods
 (Fender bracing to name a few).
That altima guy has already done the back bracing things, I found out how flexible our chassis are @ work, with a naked chassis you can flex it with your bare hands. I'm sure with the doors and other components on the vehicle it's a bit tougher, but still compared to a Z or a current G sedan, the older nissans chassis are pretty flimsy.
I first got a notion of this while I was on the road course, hearing the chassis creak under hard cornering without the flimsy rear brace behind the seat, it's actually more important than it looks, from there I figured by making a tougher one would increase rigity.
That Altima guy hit up some of my dirty tricks... But I have a few cleaner ones in mind.... Like ones to actually sell
Last edited by aackshun; 09-27-2012 at 08:48 PM.
09-28-2012, 04:51 AM
#134
Alright, I've been going back and forth with a buddy about this issue and I wanted to pose a question to the forum.
Let's assume that when you do an oil change, you wait until the oil is cool, and below the 180* point necessary for the thermostat to open. This means that the thermostat should be closed when you do the oil change. If this is true, doesn't that mean if you just remove the sandwich plate (and not the AN lines going to it) the oil will be trapped in the cooler and won't drain unless you remove the lines from the plate?
This leads me to another idea I've been trying to wrap my head around. If the car has been running at operating temperature and you turn it off, does the oil in the cooler and lines drain back into the oil pan (while the thermostat is still open)? If so, wouldn't that make checking your oil level after the thermostat closes very difficult, since you wouldn't know how much oil drained back into the system from the cooler? I'm wondering if it makes a difference as to the relative height of the cooler to the engine, whether it should be at the same height as the top of the engine (or the highest place the oil resides), higher, or lower.
Any help would be appreciated!
DW
09-28-2012, 06:32 AM
#135
Not stupid at all.
The thermostat is actually located inside the sandwich adapter that the AN lines connect to, not in the cooler itself. And not all oil cooler kits come with a thermostat either, you should check before buying.
The thermostat is actually located inside the sandwich adapter that the AN lines connect to, not in the cooler itself. And not all oil cooler kits come with a thermostat either, you should check before buying.
09-28-2012, 10:51 AM
#136

Alright, I've been going back and forth with a buddy about this issue and I wanted to pose a question to the forum.
Let's assume that when you do an oil change, you wait until the oil is cool, and below the 180* point necessary for the thermostat to open. This means that the thermostat should be closed when you do the oil change. If this is true, doesn't that mean if you just remove the sandwich plate (and not the AN lines going to it) the oil will be trapped in the cooler and won't drain unless you remove the lines from the plate?
This leads me to another idea I've been trying to wrap my head around. If the car has been running at operating temperature and you turn it off, does the oil in the cooler and lines drain back into the oil pan (while the thermostat is still open)? If so, wouldn't that make checking your oil level after the thermostat closes very difficult, since you wouldn't know how much oil drained back into the system from the cooler? I'm wondering if it makes a difference as to the relative height of the cooler to the engine, whether it should be at the same height as the top of the engine (or the highest place the oil resides), higher, or lower.
Any help would be appreciated!
Let's assume that when you do an oil change, you wait until the oil is cool, and below the 180* point necessary for the thermostat to open. This means that the thermostat should be closed when you do the oil change. If this is true, doesn't that mean if you just remove the sandwich plate (and not the AN lines going to it) the oil will be trapped in the cooler and won't drain unless you remove the lines from the plate?
This leads me to another idea I've been trying to wrap my head around. If the car has been running at operating temperature and you turn it off, does the oil in the cooler and lines drain back into the oil pan (while the thermostat is still open)? If so, wouldn't that make checking your oil level after the thermostat closes very difficult, since you wouldn't know how much oil drained back into the system from the cooler? I'm wondering if it makes a difference as to the relative height of the cooler to the engine, whether it should be at the same height as the top of the engine (or the highest place the oil resides), higher, or lower.
Any help would be appreciated!
I've never had an issue with any of this with my cooler setup. I remove the oil filler cap on the engine, drain the oil pan, then remove old filter, then remove sandwich plate, and let everything drip out for a few minutes while I work on other stuff. I run the signature Amsoil oil and drive the car a couple thousand miles a year at most. So I only change the oil once a year so this isn't a big deal if it takes a couple extra minutes of my time for an oil change.
I run six quarts of oil with this cooler setup and when the engine is cool the oil line sits right at the full mark on the dipstick. I think between the thermostat in the sandwich plate and the anti drain back valve on the oil filter this keeps the extra oil out of the engine. When its hot and oil is flowing the level stays constant as well and the oil pressure is what moves everything through.
Last edited by 98SEBlackMax; 09-28-2012 at 10:58 AM.
10-02-2012, 04:51 PM
#137
Member
Join Date: Feb 2009
Posts: 140
I'm comin for jo0o in dem corners!
Sooo stealing a few mods (Fender bracing to name a few).
That altima guy has already done the back bracing things, I found out how flexible our chassis are @ work, with a naked chassis you can flex it with your bare hands. I'm sure with the doors and other components on the vehicle it's a bit tougher, but still compared to a Z or a current G sedan, the older nissans chassis are pretty flimsy.
I first got a notion of this while I was on the road course, hearing the chassis creak under hard cornering without the flimsy rear brace behind the seat, it's actually more important than it looks, from there I figured by making a tougher one would increase rigity.
That Altima guy hit up some of my dirty tricks... But I have a few cleaner ones in mind.... Like ones to actually sell
Sooo stealing a few mods
(Fender bracing to name a few).That altima guy has already done the back bracing things, I found out how flexible our chassis are @ work, with a naked chassis you can flex it with your bare hands. I'm sure with the doors and other components on the vehicle it's a bit tougher, but still compared to a Z or a current G sedan, the older nissans chassis are pretty flimsy.
I first got a notion of this while I was on the road course, hearing the chassis creak under hard cornering without the flimsy rear brace behind the seat, it's actually more important than it looks, from there I figured by making a tougher one would increase rigity.
That Altima guy hit up some of my dirty tricks... But I have a few cleaner ones in mind.... Like ones to actually sell
What other "dirty tricks" do you have in mind? I'd be curious to hear them.
 10-15-2012, 04:14 PM
#139
10-16-2012, 02:47 AM
#140
 yea i know... im running a 19x10.5 in the rear with a +23 offset. hopefully a 235 35 tire and some fender pulling with fix it
10-16-2012, 01:01 PM
yea i know... im running a 19x10.5 in the rear with a +23 offset. hopefully a 235 35 tire and some fender pulling with fix it
10-16-2012, 01:01 PM
#142
10-16-2012, 09:51 PM
#144
Well since youz a bish and you have folding rear seats (Not jealous at all  ), it actually won't be similar, you'd be loosing the complete function of it if you were to implement my idea.
If you read my earlier post closer, and are familiar with the rear seat on the A32s you'll know exactly what I'm up to, nothing I'm sure that hasn't been brought up on here before.
You guys will see it in a few months before the year is up.... Focusing my free time and efforts on two cars... One nightmare and one project.
), it actually won't be similar, you'd be loosing the complete function of it if you were to implement my idea.If you read my earlier post closer, and are familiar with the rear seat on the A32s you'll know exactly what I'm up to, nothing I'm sure that hasn't been brought up on here before.
You guys will see it in a few months before the year is up.... Focusing my free time and efforts on two cars... One nightmare and one project.
Last edited by aackshun; 10-16-2012 at 09:53 PM.
10-18-2012, 07:10 PM
#145
Member
Join Date: Feb 2009
Posts: 140
Well since youz a bish and you have folding rear seats (Not jealous at all ), it actually won't be similar, you'd be loosing the complete function of it if you were to implement my idea.
If you read my earlier post closer, and are familiar with the rear seat on the A32s you'll know exactly what I'm up to, nothing I'm sure that hasn't been brought up on here before.
You guys will see it in a few months before the year is up.... Focusing my free time and efforts on two cars... One nightmare and one project.
), it actually won't be similar, you'd be loosing the complete function of it if you were to implement my idea.If you read my earlier post closer, and are familiar with the rear seat on the A32s you'll know exactly what I'm up to, nothing I'm sure that hasn't been brought up on here before.
You guys will see it in a few months before the year is up.... Focusing my free time and efforts on two cars... One nightmare and one project.
Can't wait to see what you have in store for it though.
10-19-2012, 06:53 AM
#146
Random update time!
Well most of the major projects are over and done with, so it's time to start tying up the loose ends and find some time to relax.
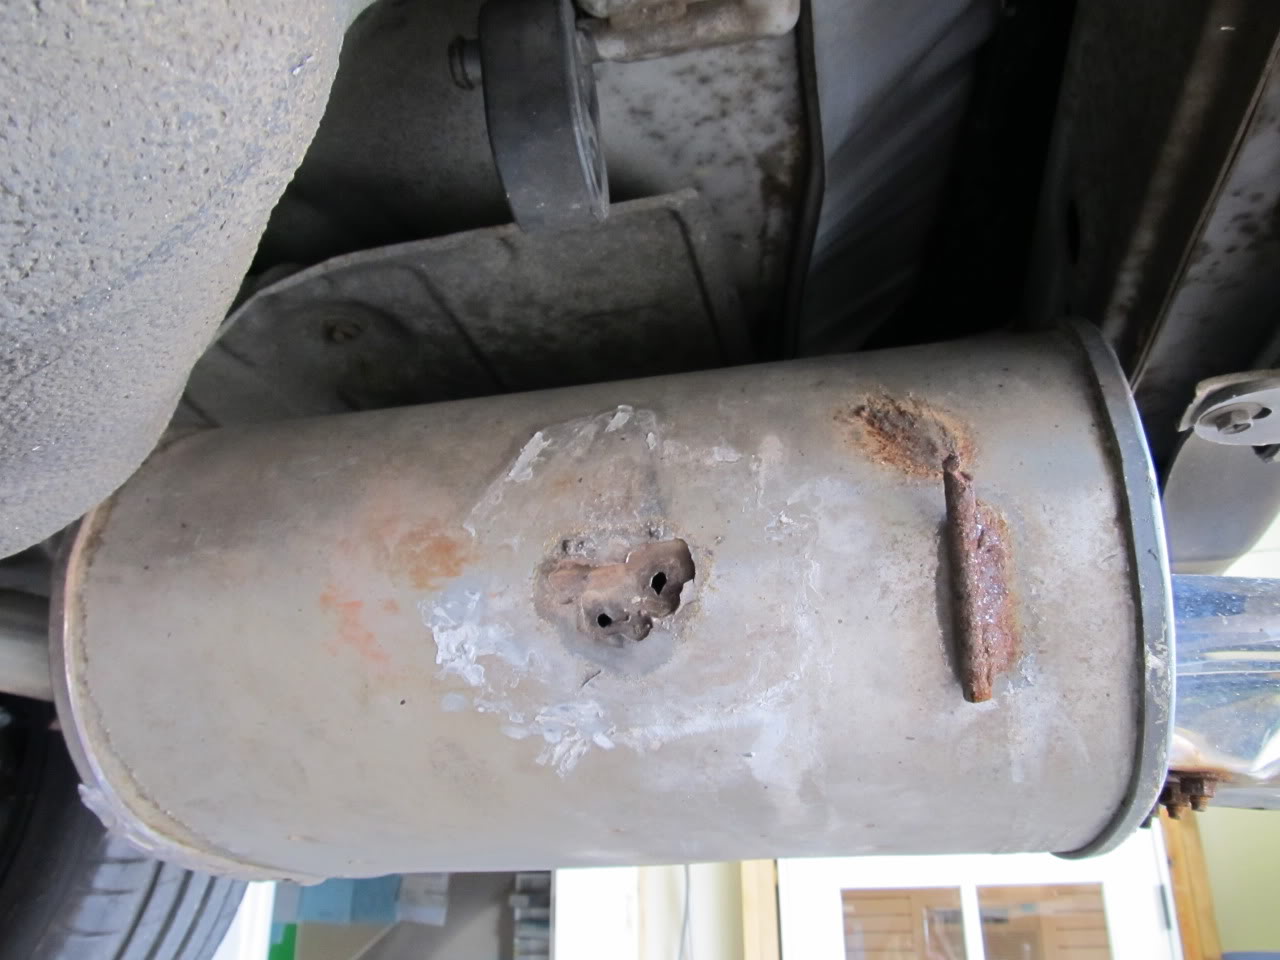
Ever since I installed the G35 muffler it had a hole in the side of it from a previous hanger welding job that got too hot and burned two small holes through the side of the muffler. Well that hanger was basically not attached very well any more, and the muffler was hanging on for dear life, so it was time to get a new muffler and start fresh. I got this one from a junkyard and it's in much better condition than the old muffler. Additionally, Eric had some neat ideas about the proper way to attach hangers to it (to the stronger folded/crimped sections instead of the thin sheet metal).
Here's what the old busted hanger looked like:
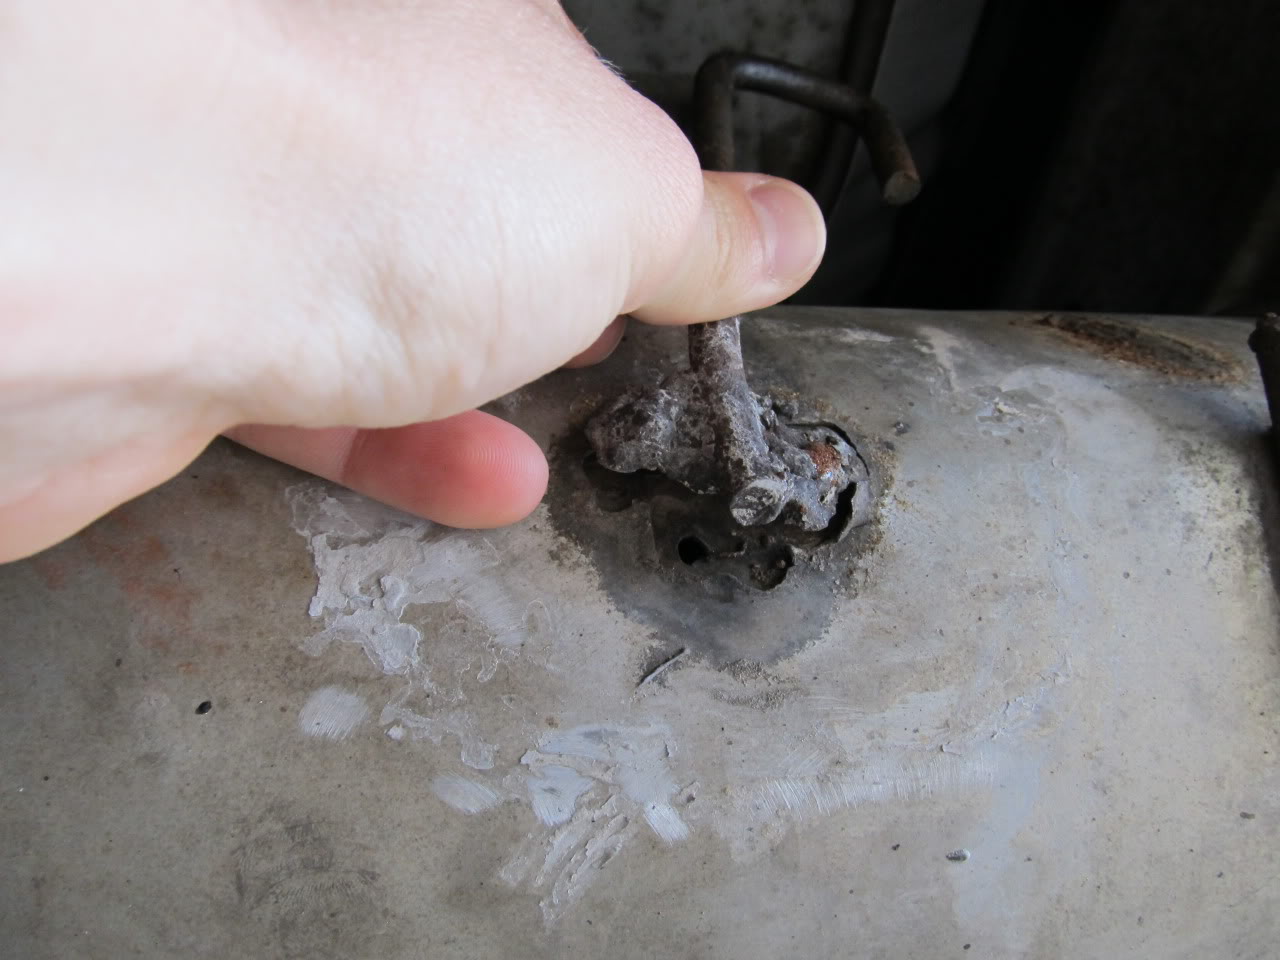
It really wasn't attached very well at this point....
FIRE!!
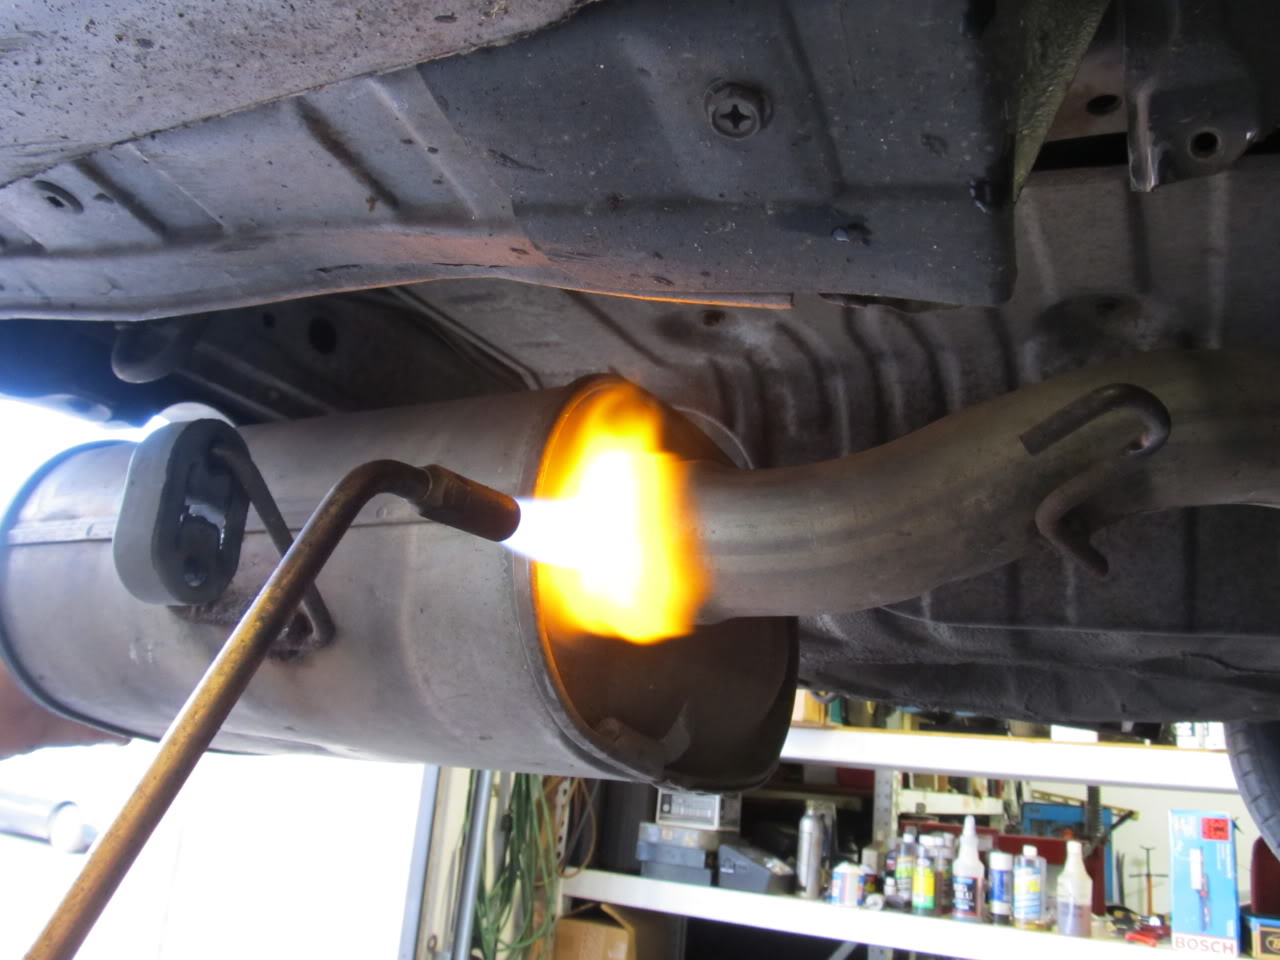
Due to the location of the welds, some painting was necessary to cover up the heat marks, so we decided to just paint the whole damn thing:
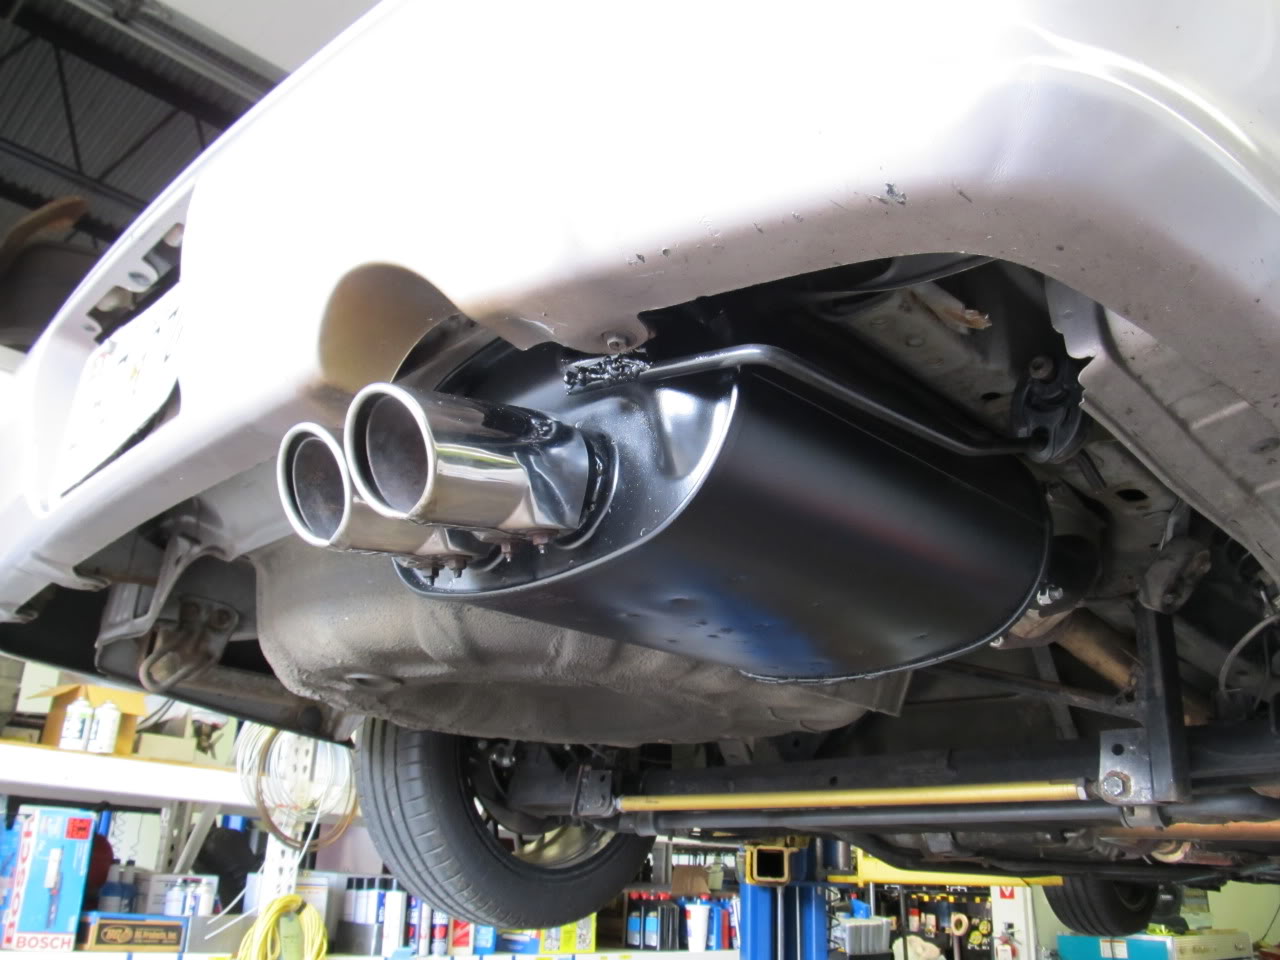
After it's all said and done the muffler is more tucked away than the previous setup, the tips are in better shape, and some of the rasp is gone now that it doesn't have holes in it. It took a couple hours to get it all right, but I'm very happy with the results. The car sounds just about perfect at this point IMO. It could stand to be a little quieter, but it's totally livable.
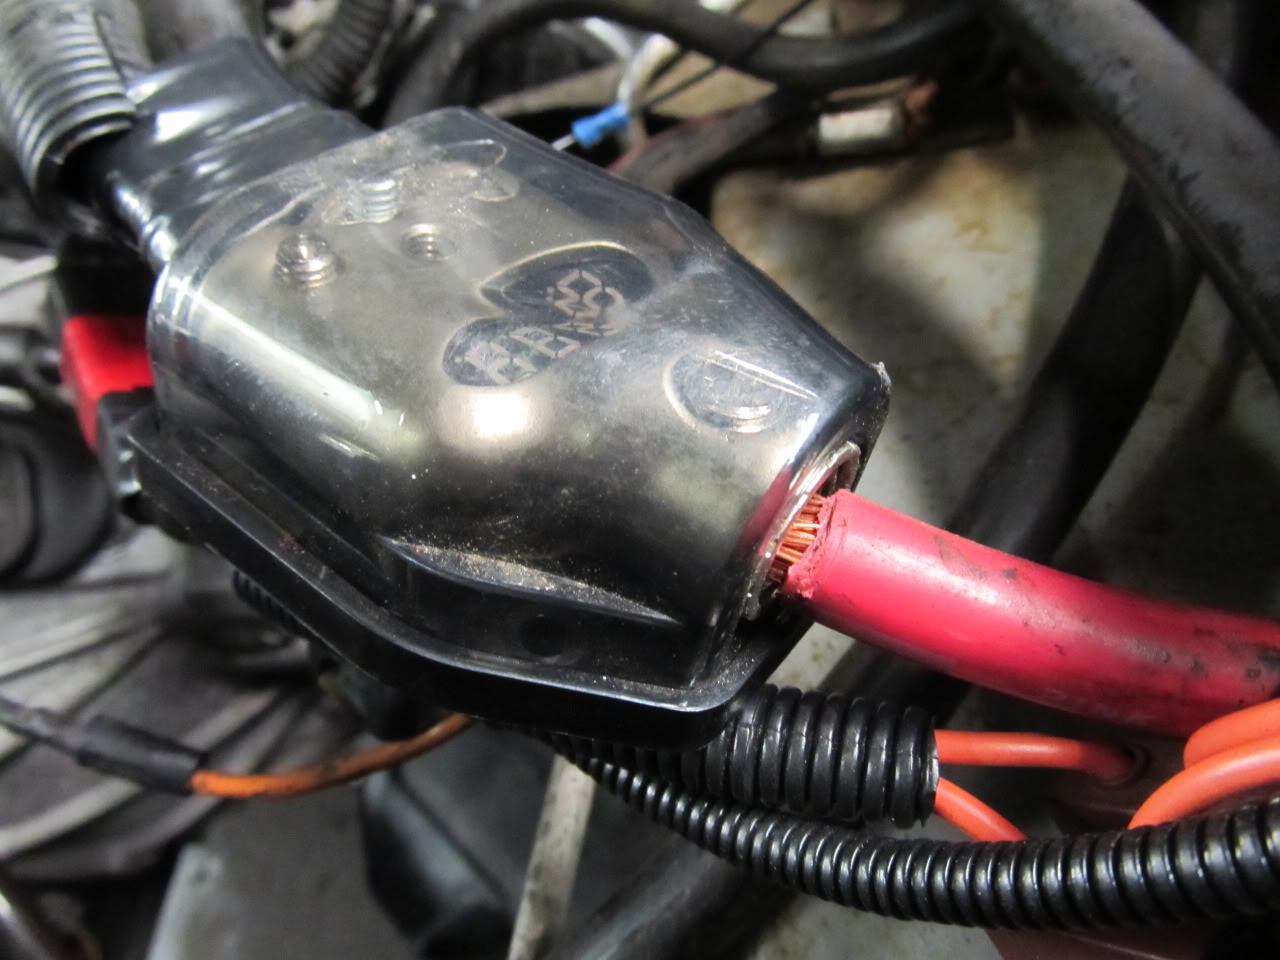
We also cleaned up a lot of messy wiring that was done when the battery was located. This is the distribution block from the battery and some of the connections had come loose over time, and some of the wires coming out of it were in rough shape, so we redid most of them and now I'm more confidant in my electrical connections.
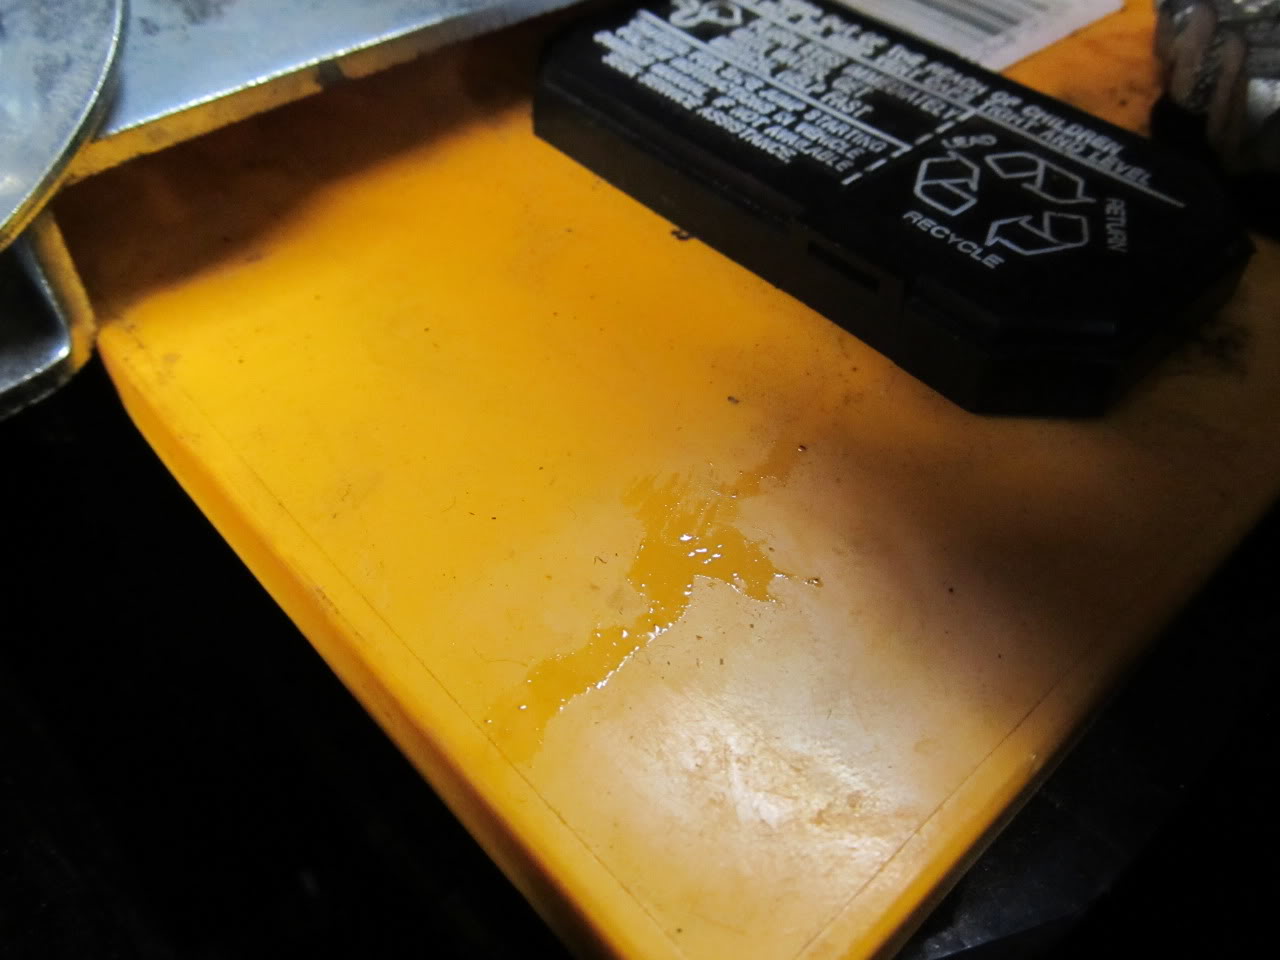
I happened to take a close look at my battery and noticed some acid had appeared to leak out of the top. I then saw that the battery tie down that came with the relocation kit wasn't sitting flush on the battery and was causing one of the caps to become loose on one side, so we got some washers and electrical tape, and made some risers to even out the load. Problem solved!
Acid:
After loosening up the tie down:
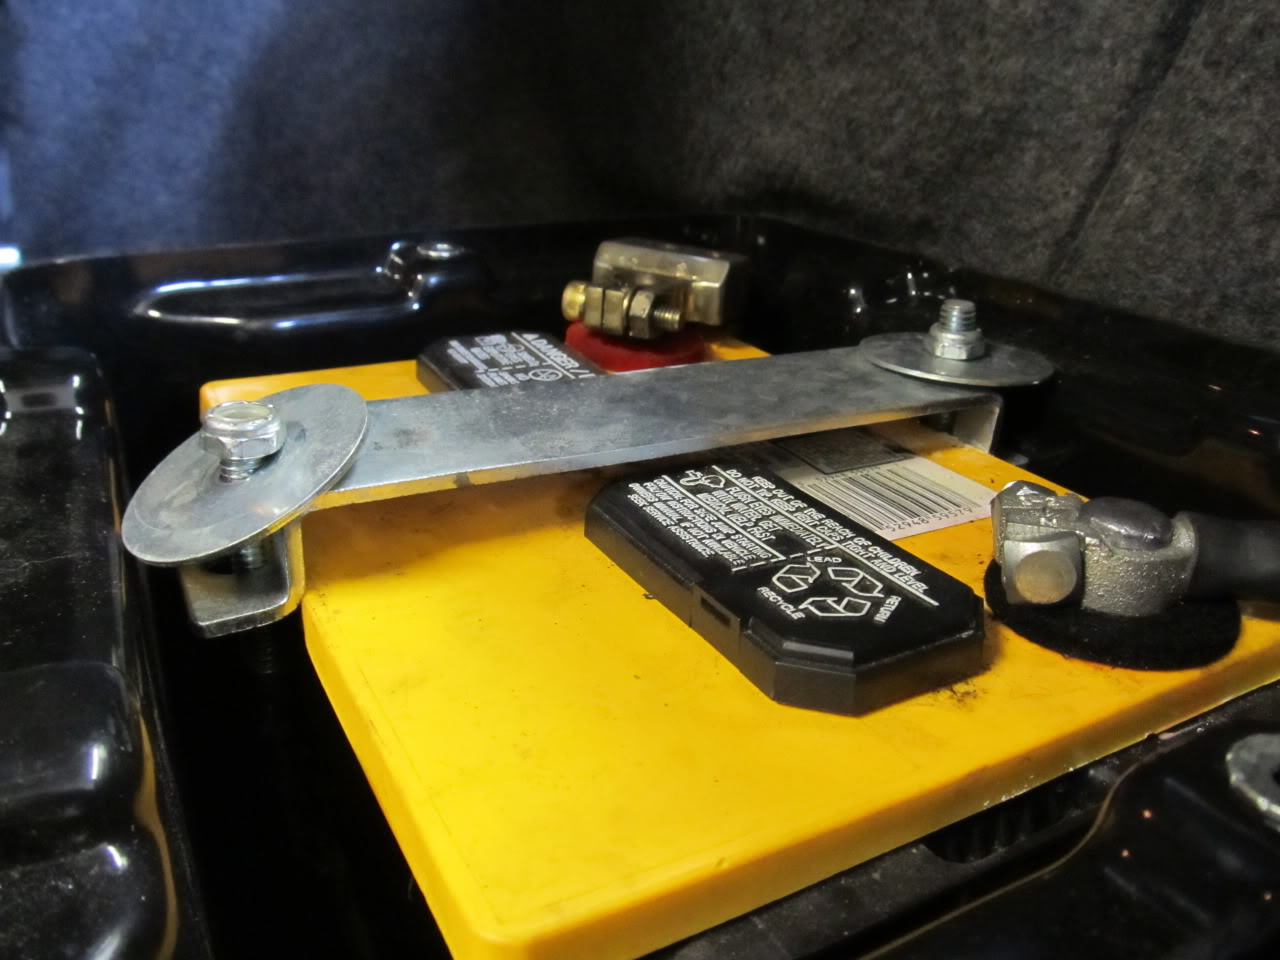
Risers:
Finished!
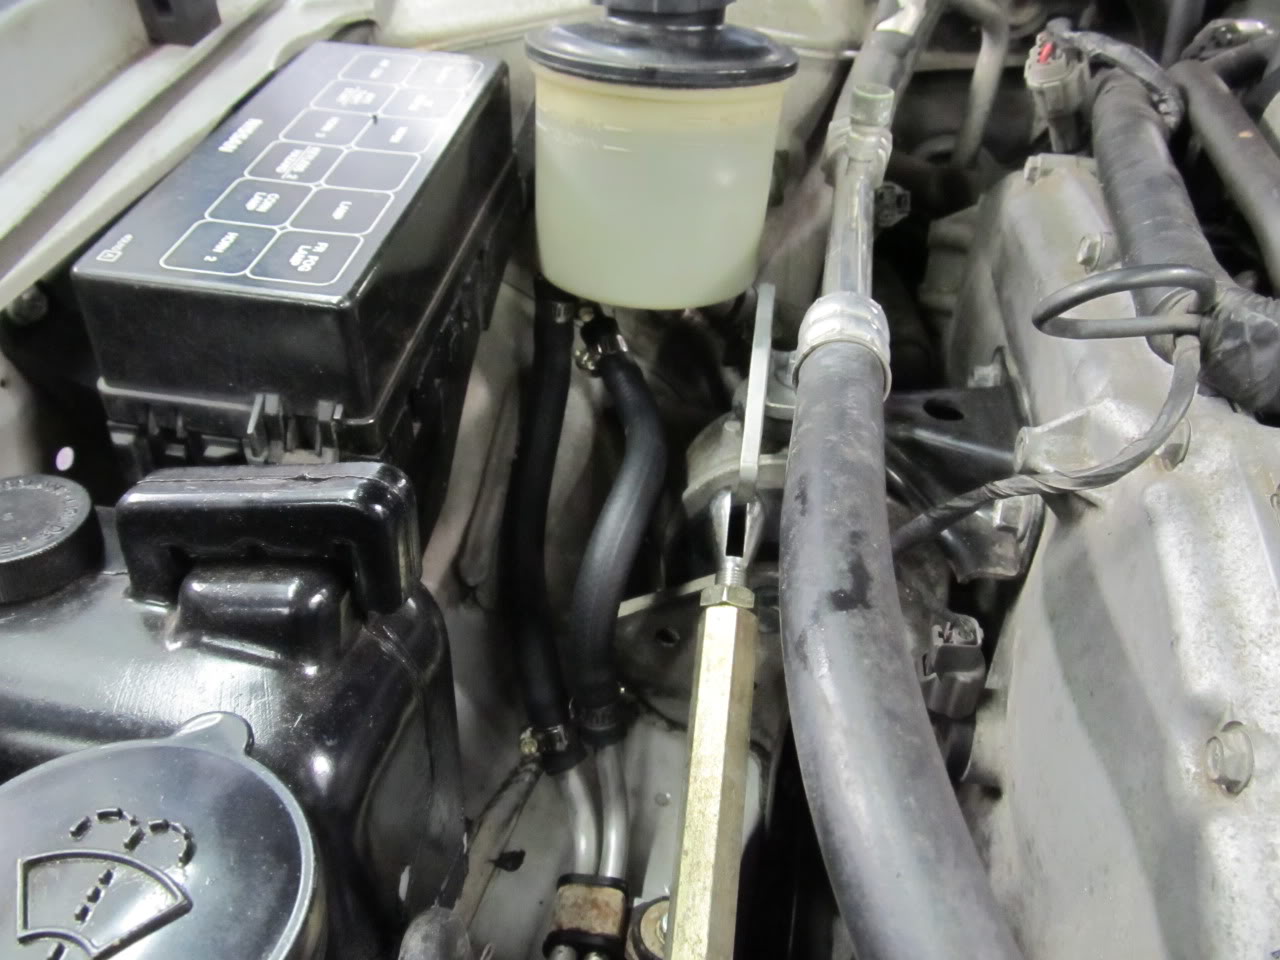
During the previous weekend at the garage I had noticed what appeared to be a substantial either oil or power steering fluid leak. Up on closer inspection, it looked like it was coming from the two rubber hoses coming out of the PS reservoir. I knew when I did the PS cooler that those lines were leaking a bit of fluid, but at $30+ each from the dealer (they are molded hoses), I decided to wait it out. Well I guess they've been under a fair amount of stress and started leaking more than before. Take a look and see:

New hoses!
I know none of this stuff is mind blowing, but the small things add up. I've got some more fun stuff to post up soon, so be on the lookout!
Ever since I installed the G35 muffler it had a hole in the side of it from a previous hanger welding job that got too hot and burned two small holes through the side of the muffler. Well that hanger was basically not attached very well any more, and the muffler was hanging on for dear life, so it was time to get a new muffler and start fresh. I got this one from a junkyard and it's in much better condition than the old muffler. Additionally, Eric had some neat ideas about the proper way to attach hangers to it (to the stronger folded/crimped sections instead of the thin sheet metal).
Here's what the old busted hanger looked like:
It really wasn't attached very well at this point....
FIRE!!
Due to the location of the welds, some painting was necessary to cover up the heat marks, so we decided to just paint the whole damn thing:
After it's all said and done the muffler is more tucked away than the previous setup, the tips are in better shape, and some of the rasp is gone now that it doesn't have holes in it. It took a couple hours to get it all right, but I'm very happy with the results. The car sounds just about perfect at this point IMO. It could stand to be a little quieter, but it's totally livable.
We also cleaned up a lot of messy wiring that was done when the battery was located. This is the distribution block from the battery and some of the connections had come loose over time, and some of the wires coming out of it were in rough shape, so we redid most of them and now I'm more confidant in my electrical connections.
I happened to take a close look at my battery and noticed some acid had appeared to leak out of the top. I then saw that the battery tie down that came with the relocation kit wasn't sitting flush on the battery and was causing one of the caps to become loose on one side, so we got some washers and electrical tape, and made some risers to even out the load. Problem solved!
Acid:
After loosening up the tie down:
Risers:
Finished!
During the previous weekend at the garage I had noticed what appeared to be a substantial either oil or power steering fluid leak. Up on closer inspection, it looked like it was coming from the two rubber hoses coming out of the PS reservoir. I knew when I did the PS cooler that those lines were leaking a bit of fluid, but at $30+ each from the dealer (they are molded hoses), I decided to wait it out. Well I guess they've been under a fair amount of stress and started leaking more than before. Take a look and see:
New hoses!
I know none of this stuff is mind blowing, but the small things add up. I've got some more fun stuff to post up soon, so be on the lookout!
10-19-2012, 07:00 AM
#147
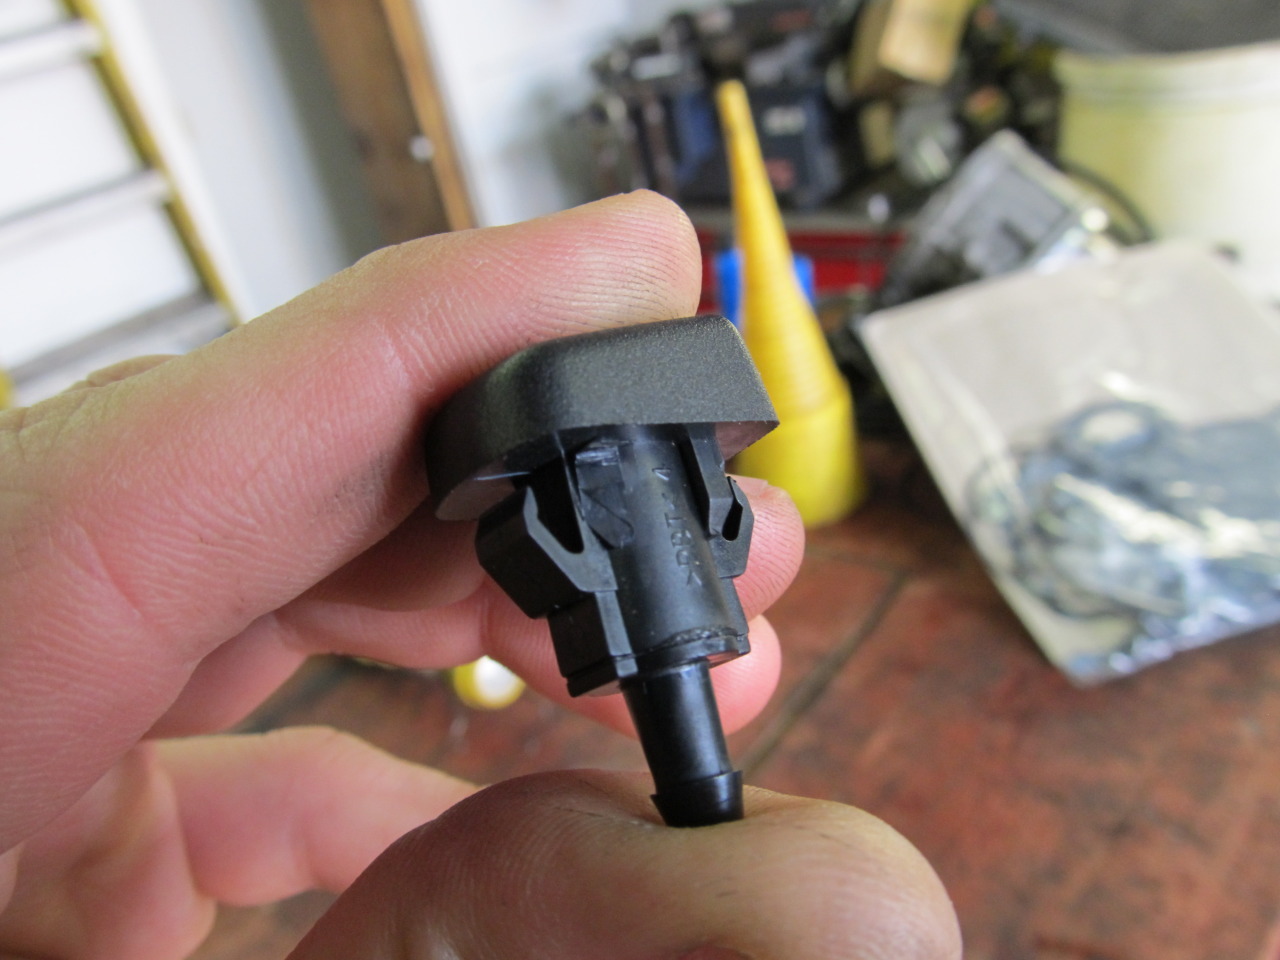
Murano washer nozzles
I got around to doing the Murano windshield washer nozzle upgrade and was pleasantly surprised with the results. Not much to see here, just a trimmed tab and an awesome spray pattern!
12-10-2012, 06:35 AM
#148
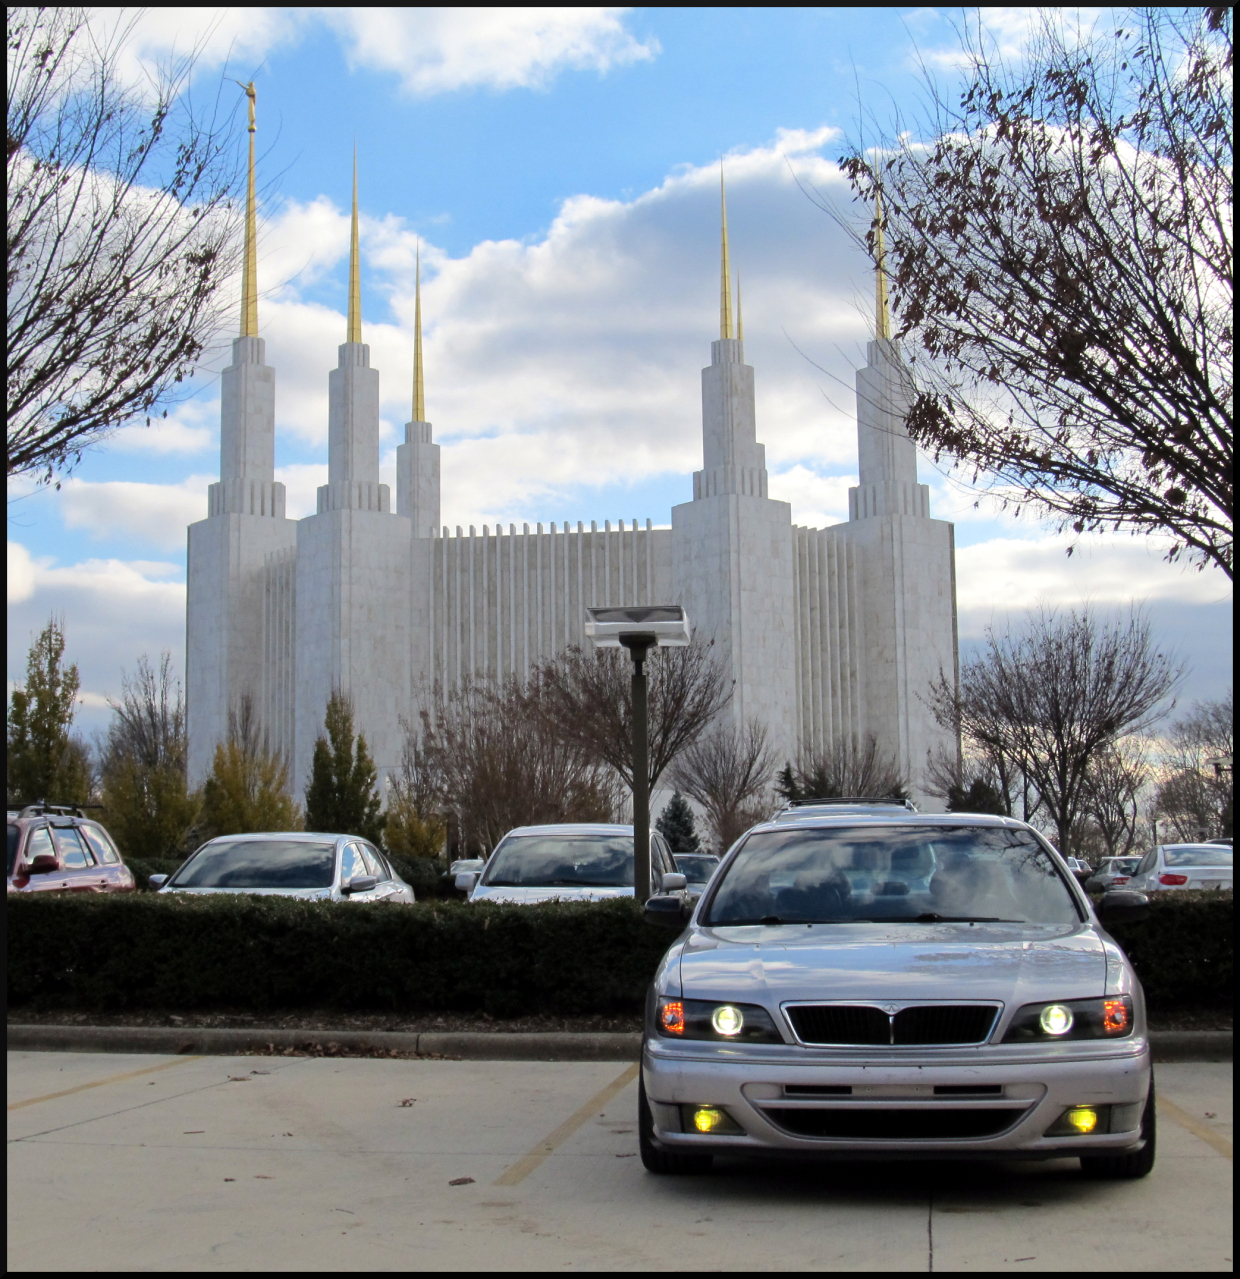
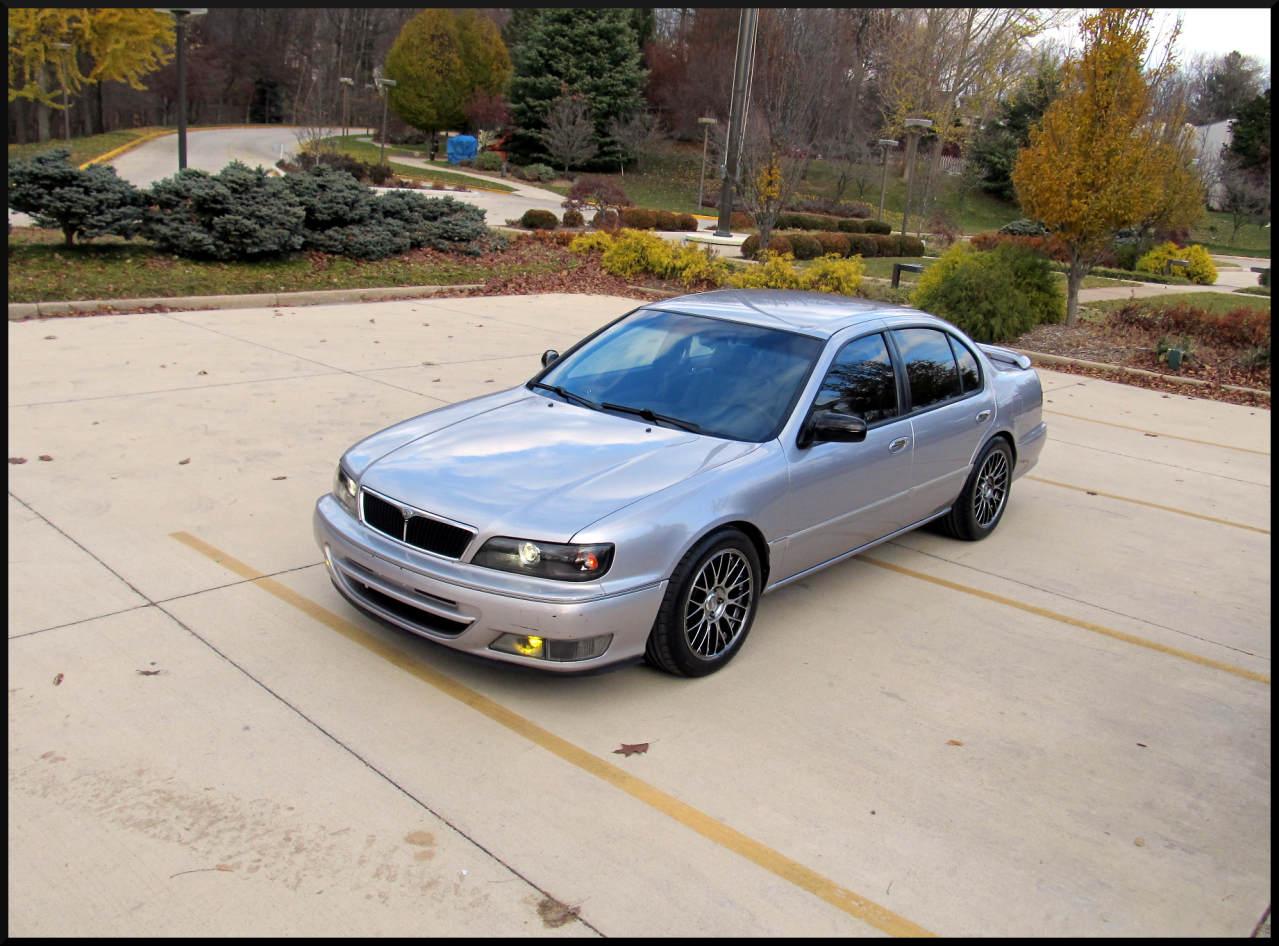
2012 Photoshoot!
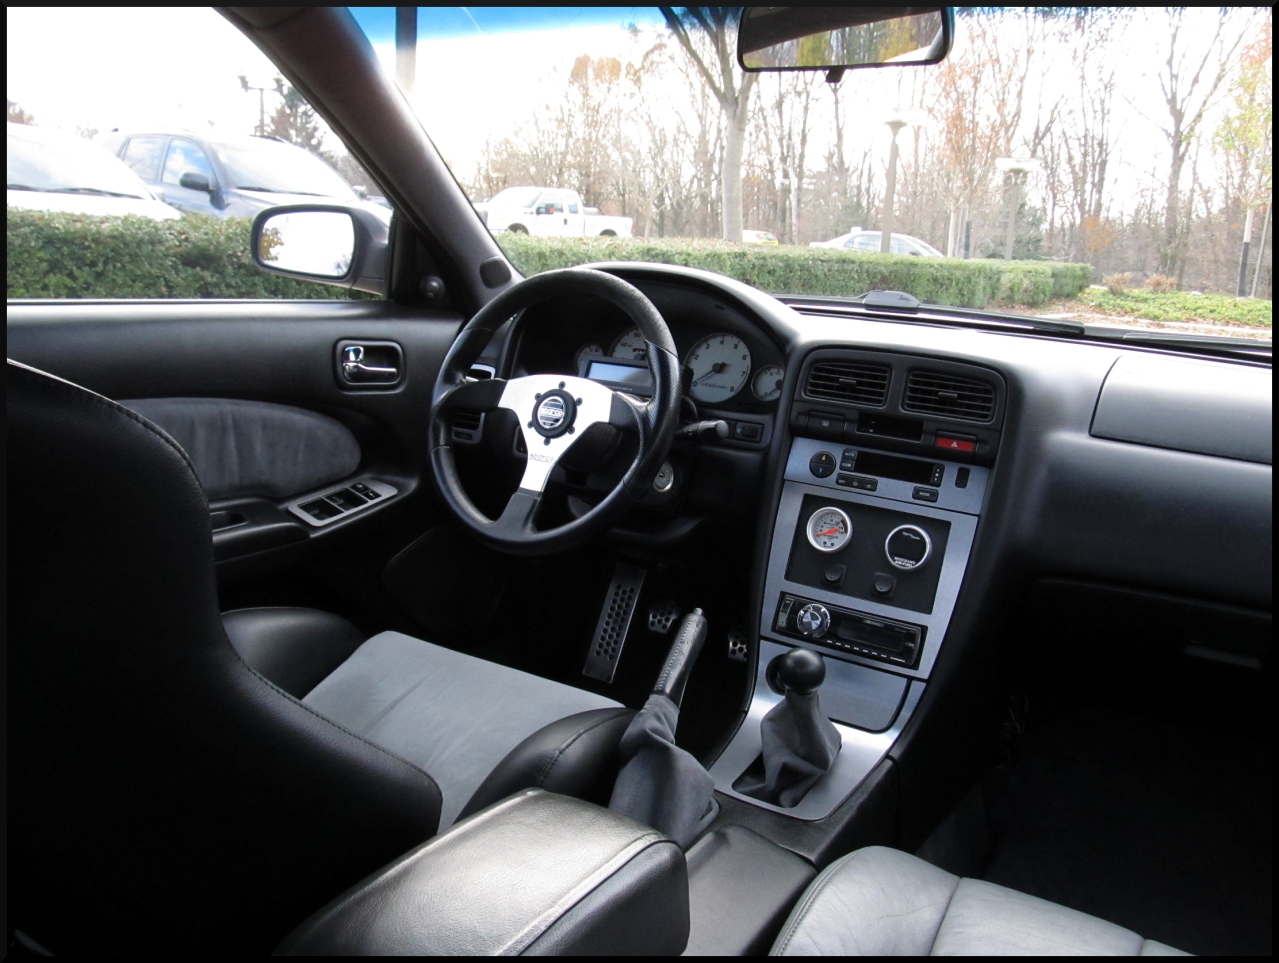
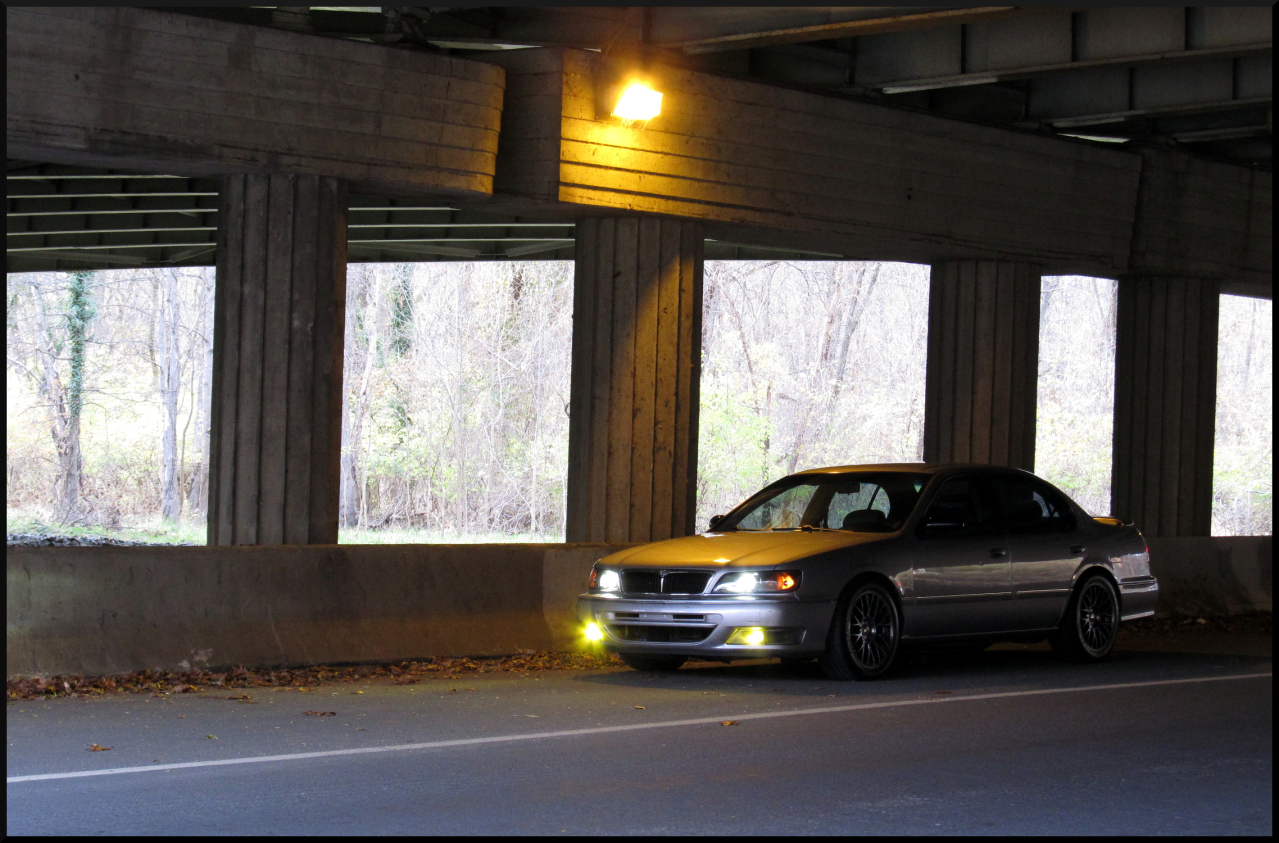
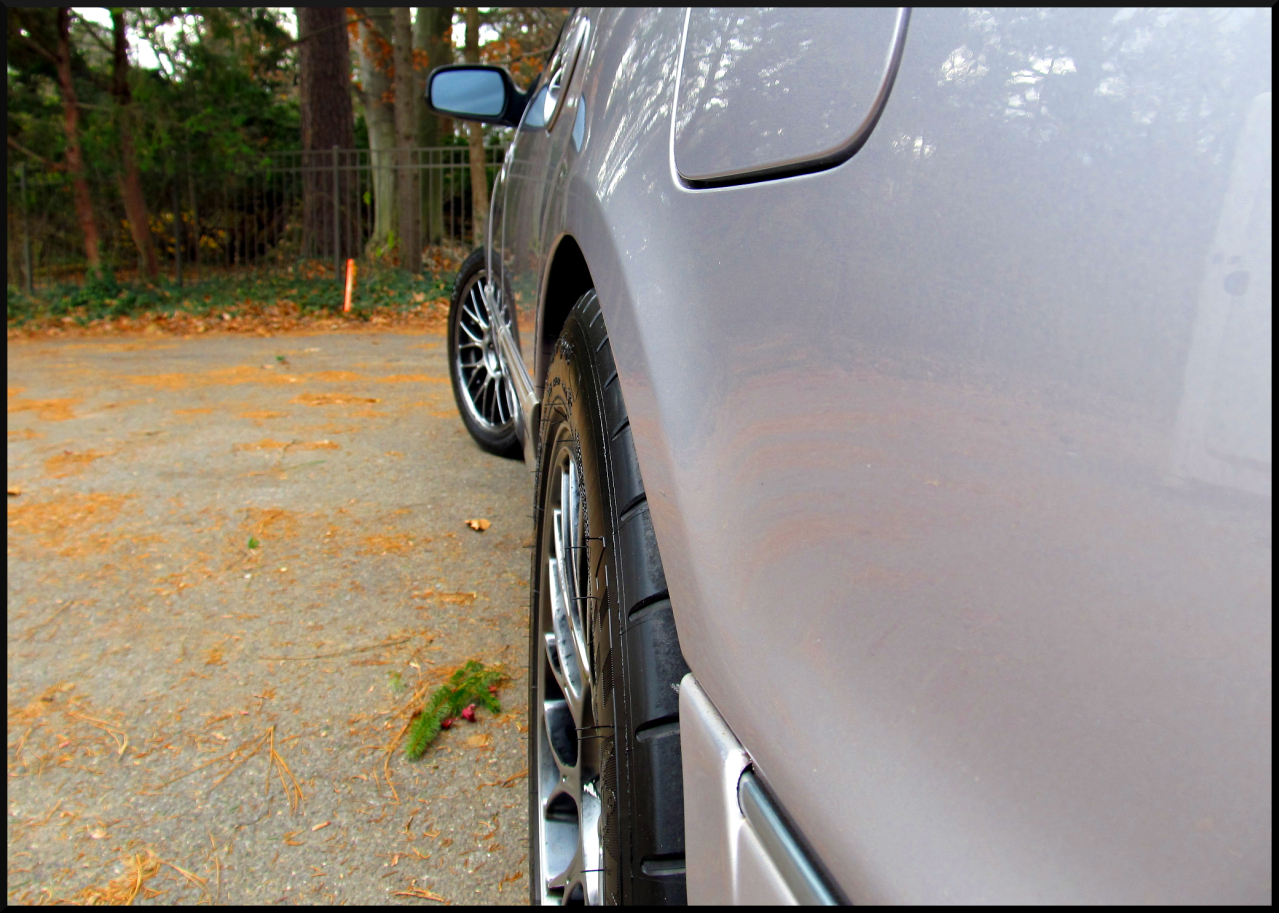
I finally got the car cleaned up and took some nice pics, go check them out in this thread. Here are some teasers!
 12-24-2012, 03:03 PM
#152
More little things
Well, most of the big, fun work has been completed on this car and now it's time to iron out the rough patches.
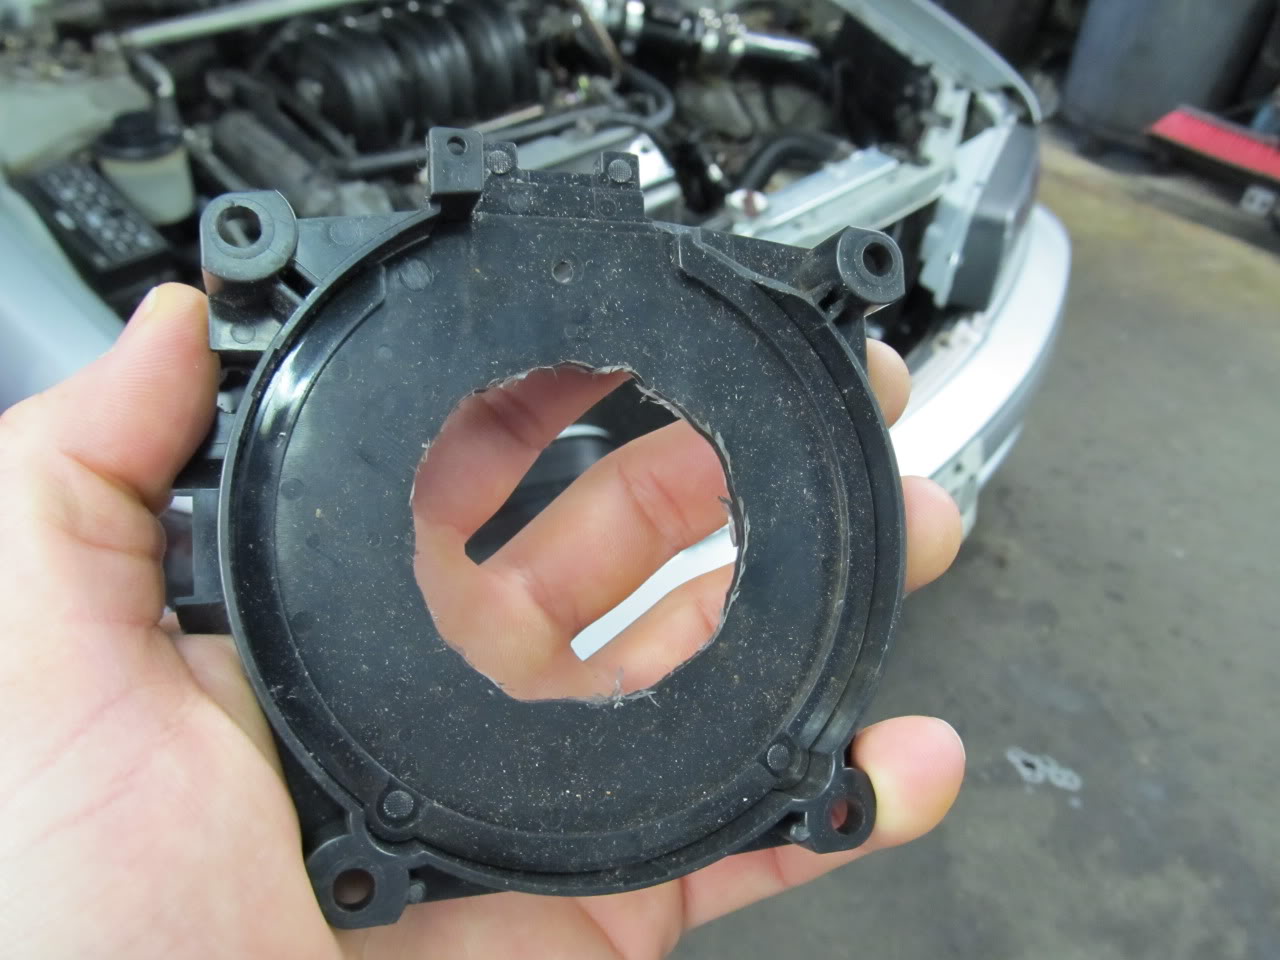
My car doesn't have the smoothest idle now with the poly side mounts (already had poly motor mounts and torque link), and now with the heater on it really does a fair amount of vibrating when idling. It's gotten rather embarrassing lately, because the rough idle makes itself known through my grille rattling against my hood, and it's pretty annoying. I've tried insulating the grille from vibrations coming though the hood, but to no avail, so I was stuck buying new hood insulator rubber. Each piece was about $5 online, and I can say it was money well spent. Check out the condition of the old ones:
Side rubber:
Front rubber adjusters:
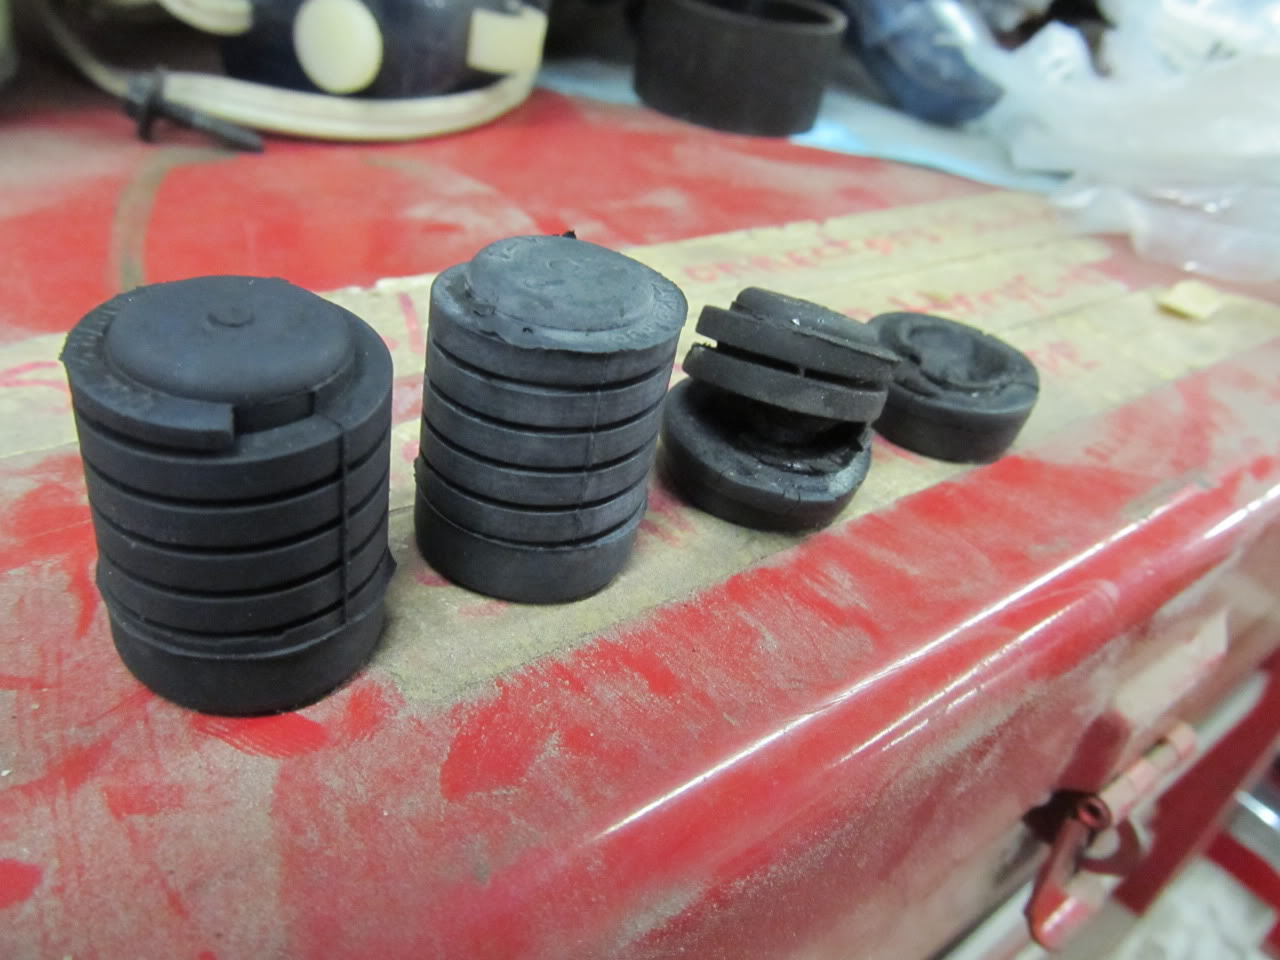
Center rubber on hood:
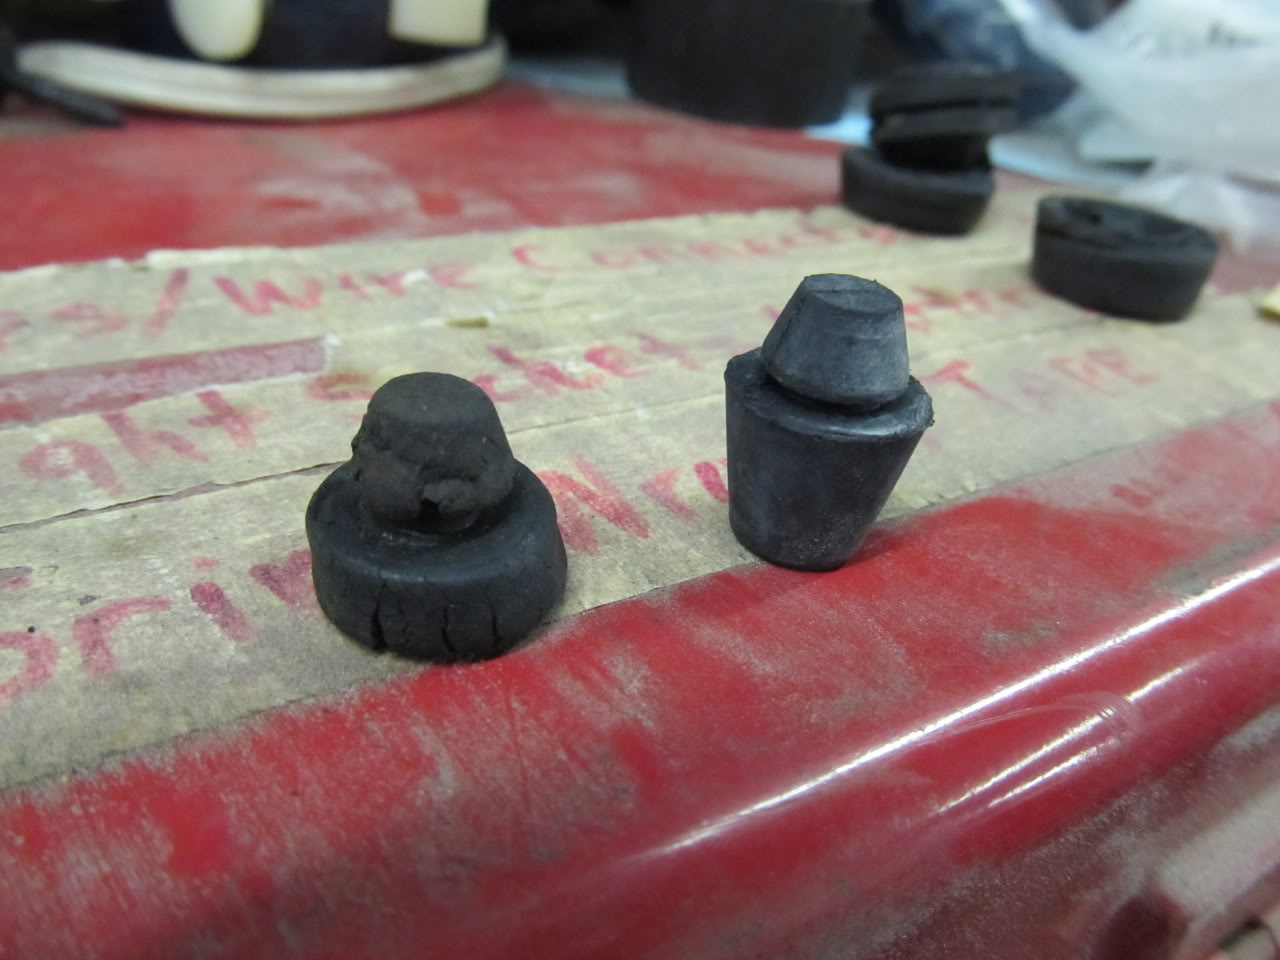
Needless to say, the hood closes much nicer now and the grille doesn't vibrate/rattle any more. Hooray!
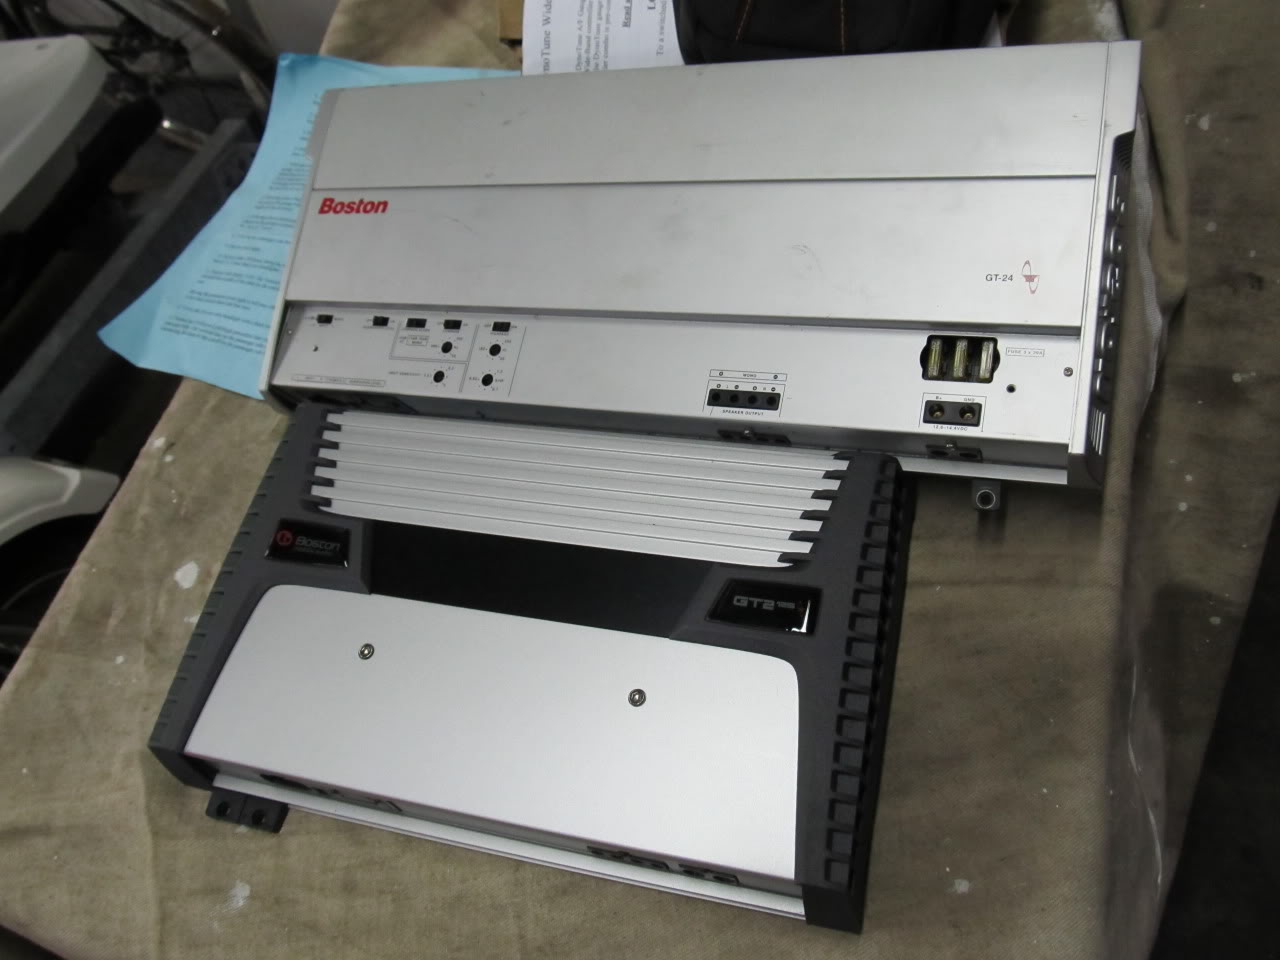
I've also been dealing with a somewhat faulty Boston GT-24 2-channel amp for my front speakers for a while, and I've run out of patience. I bought it reconditioned from Boston last year but have had problems with it cutting out if I crank it up too high. Since cranking up the volume is the entire point of having an amp, this needed to be rectified. Well, I came across another good deal on a Boston amp, although this time it was new. I bought a Boston GT-2125 which is good for 125w x 2 RMS, and it's also a little smaller than the old amp. Good news: it fucking rocks! No more cutting out, just pure, permanent ear damage!
The old one just barely fit under the passenger seat. I've got a little more room to play with now.
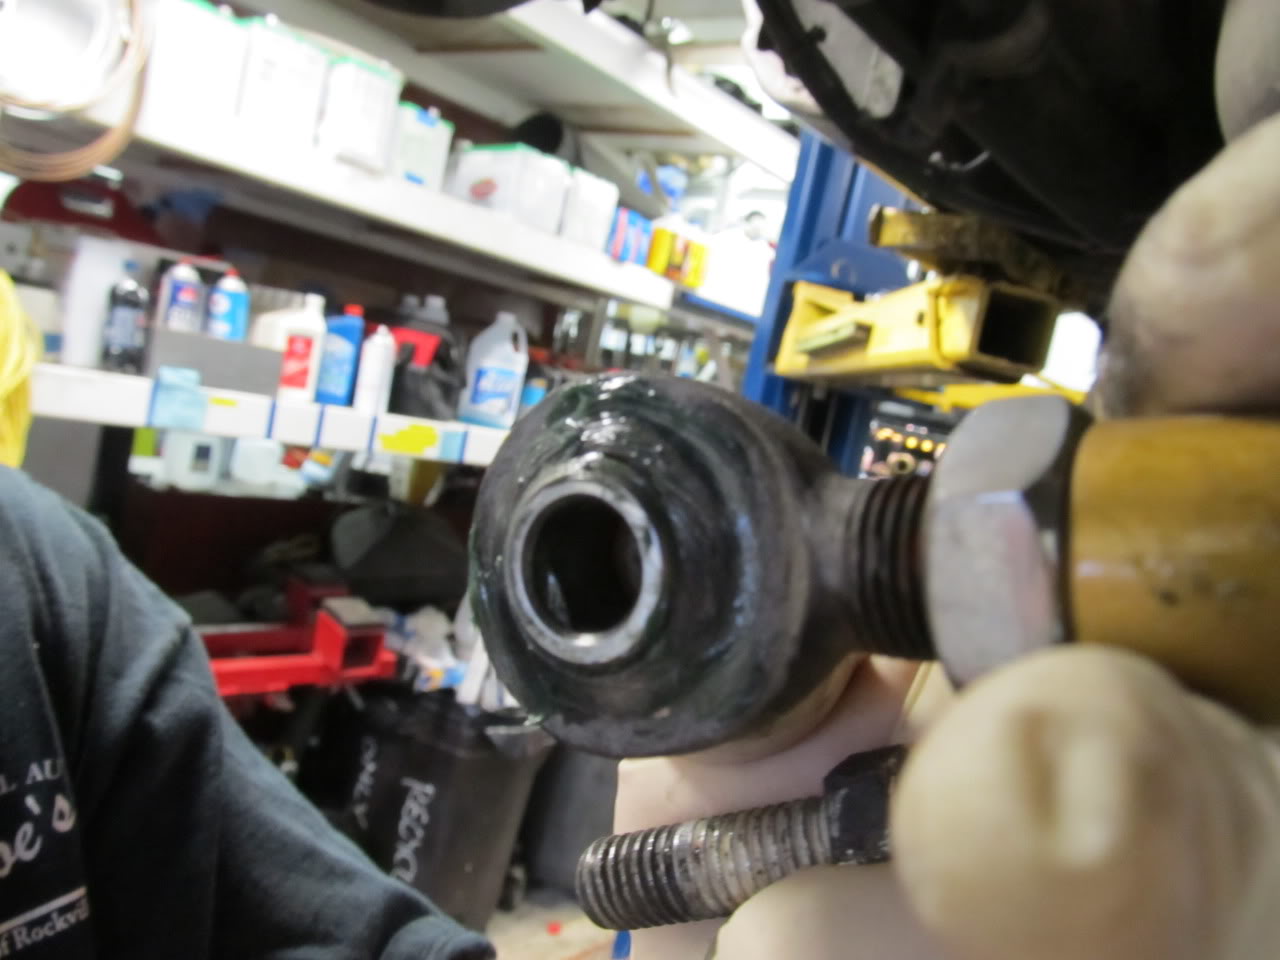
I decided it would be a good idea to re-lubricate my 2J Racing panhard rod. I have used the silver Permatex anti seize in the past, but it seems to dry out, so this time I used some of that thick greenish wheel bearing grease instead. I'm sure it's all in my head, but the car seems to be a little smoother with this stuff in there now. Who knows. At least I've got some fresh grease in there before winter really hits.
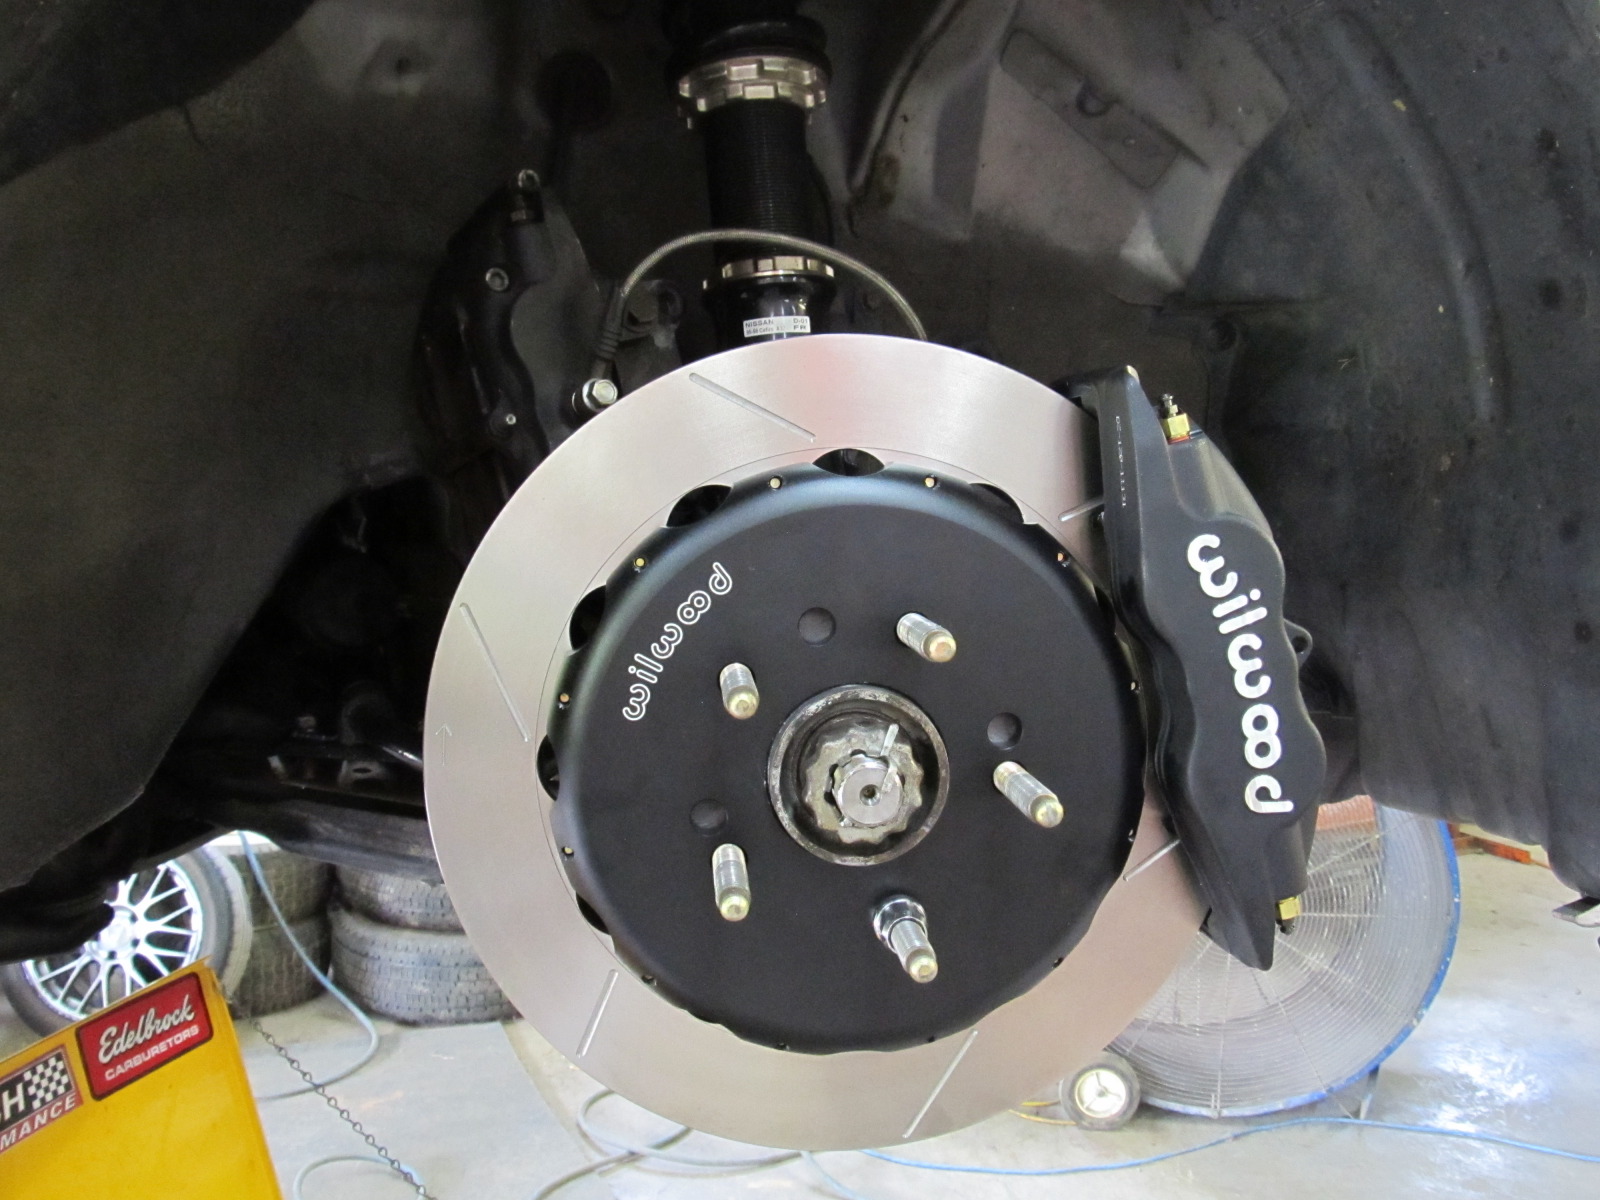
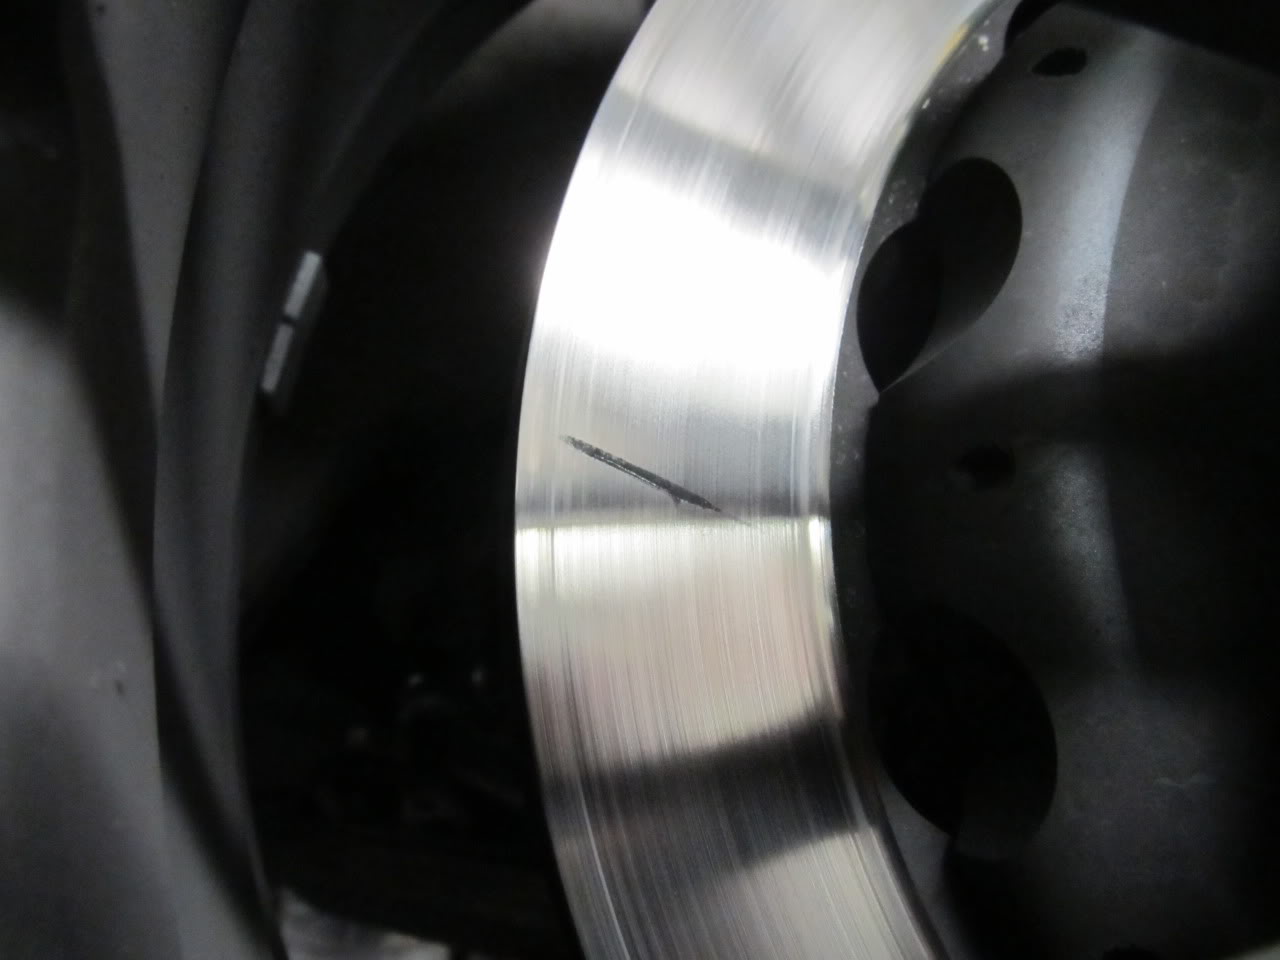
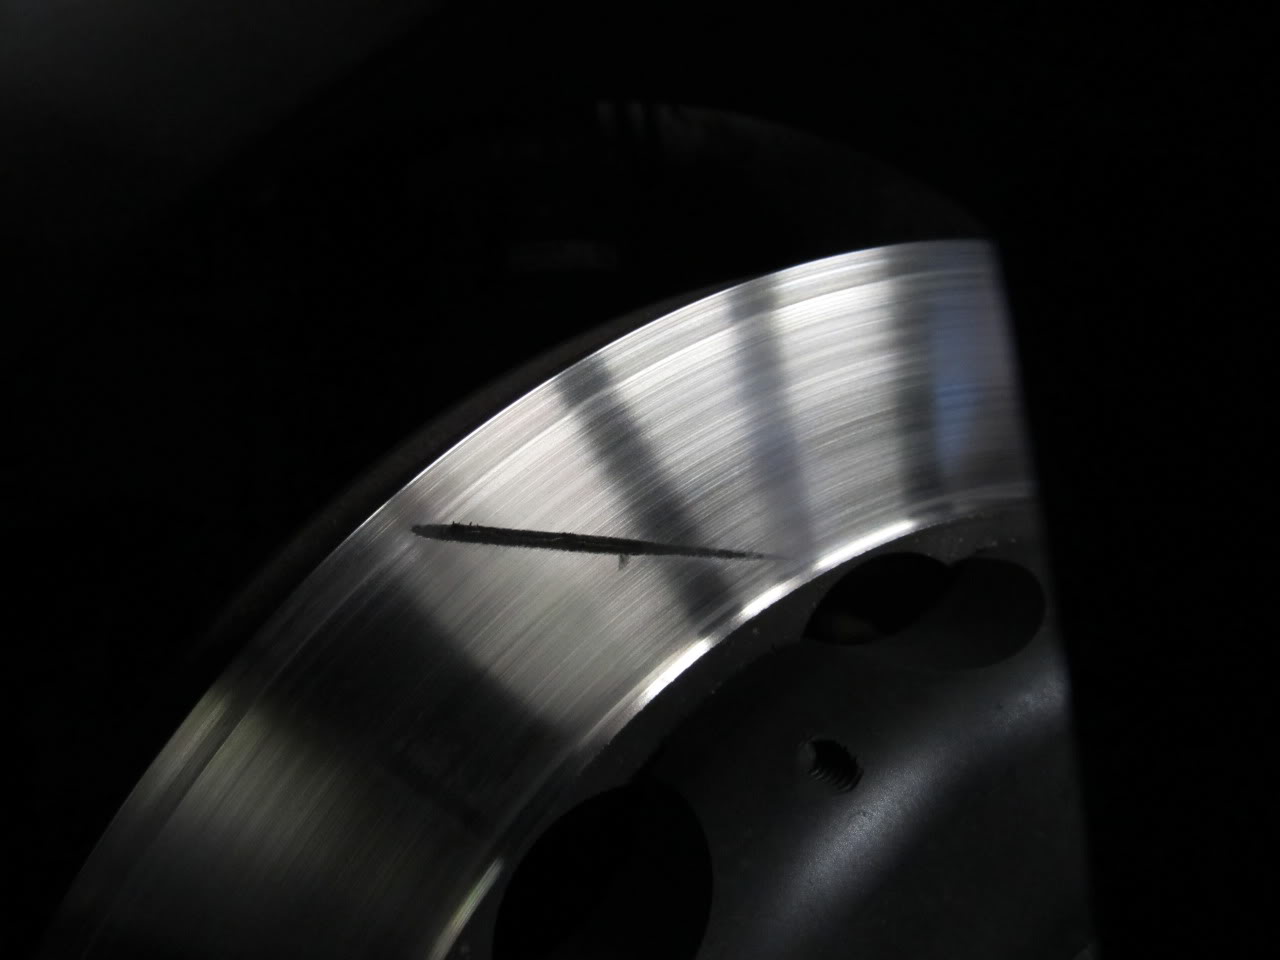
During my inspection, I noticed how low my front rotors have gotten, at least compared to the slots in them. The slots are almost gone, and I don't think I've put more than 3,000 miles on them! Granted, they did see 4-20 minute sessions on a fast track (Summit Point, Shenandoah Circuit) and a couple auto-x events, but DAMN!
Before:
Now:
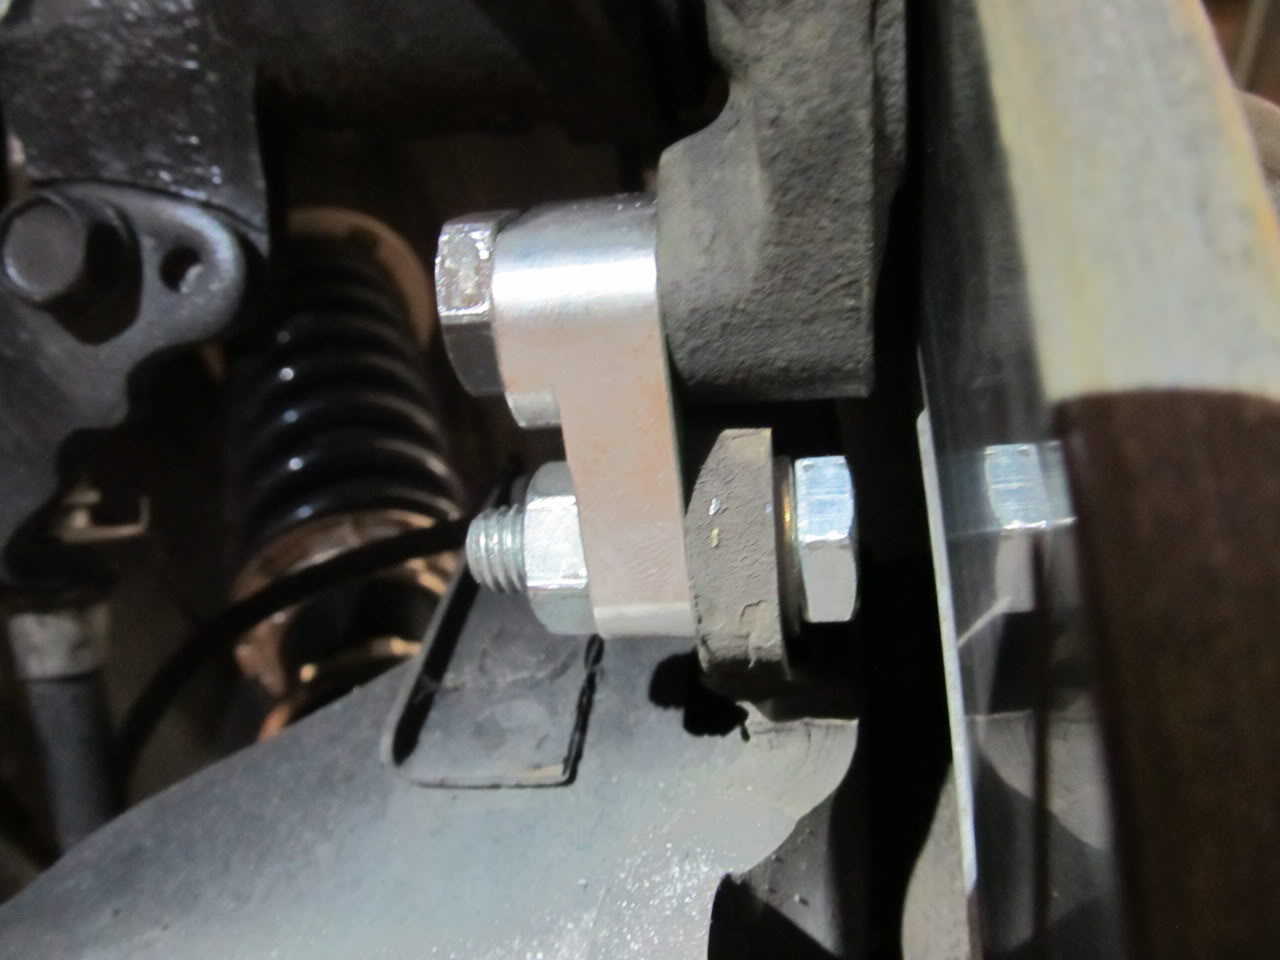
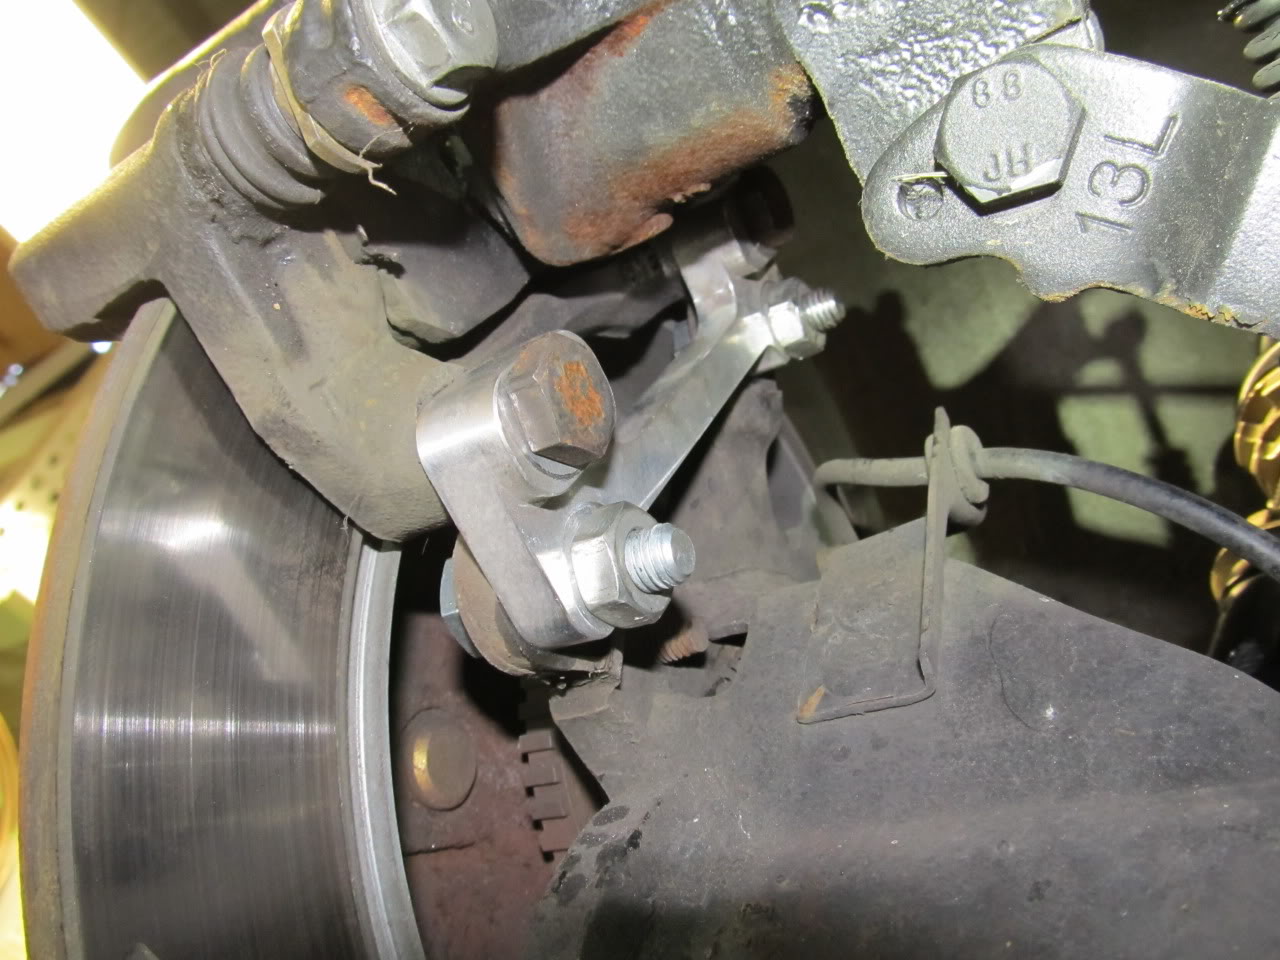
And I decided to follow the lead of someone else on here who went against the directions from Fast Brakes and flipped the caliper bracket around for their rear 12.3" BBK.
This is what it looks like if you follow the FB directions, 4 spacers!
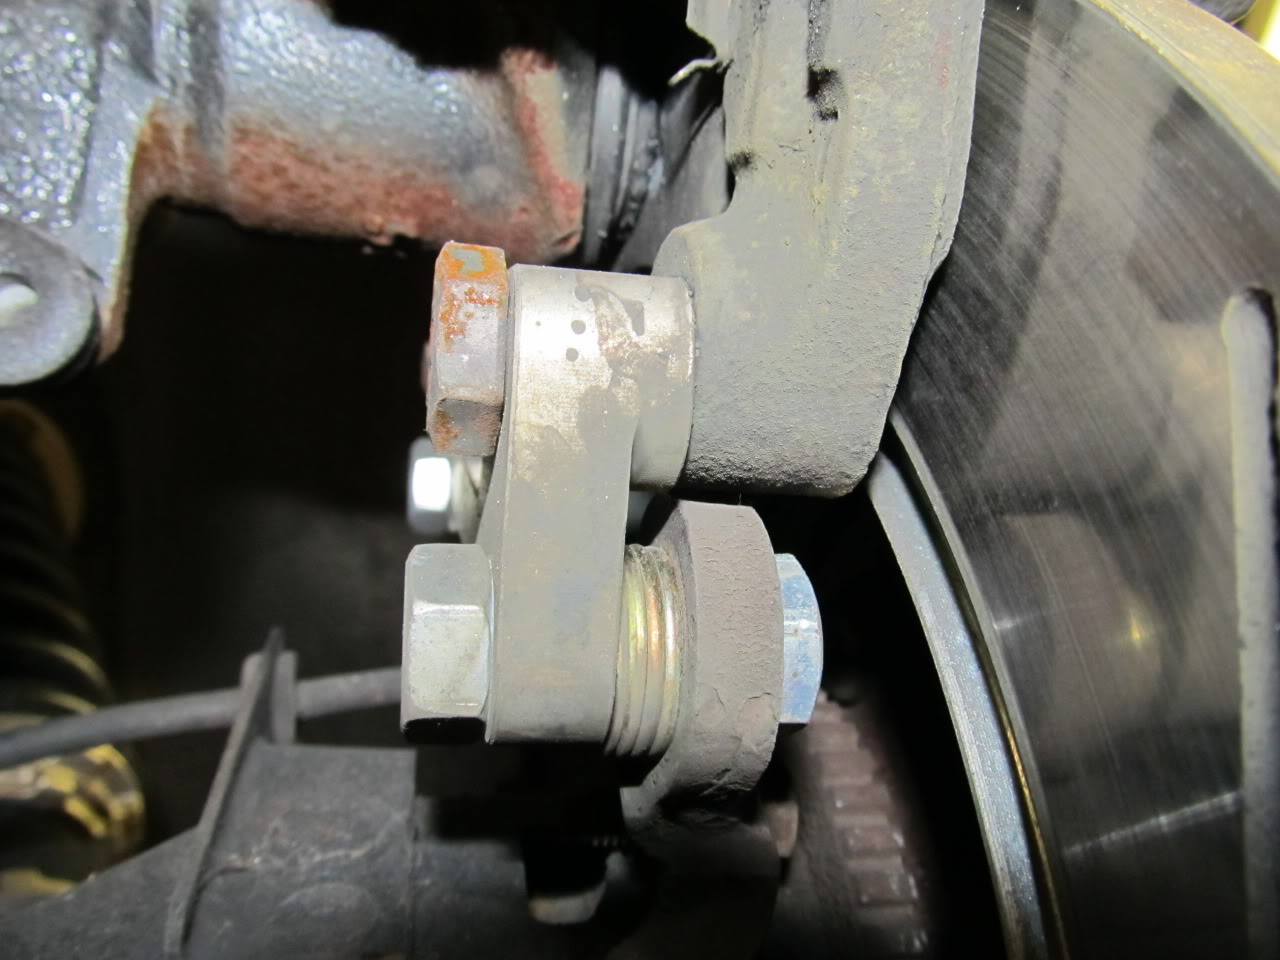
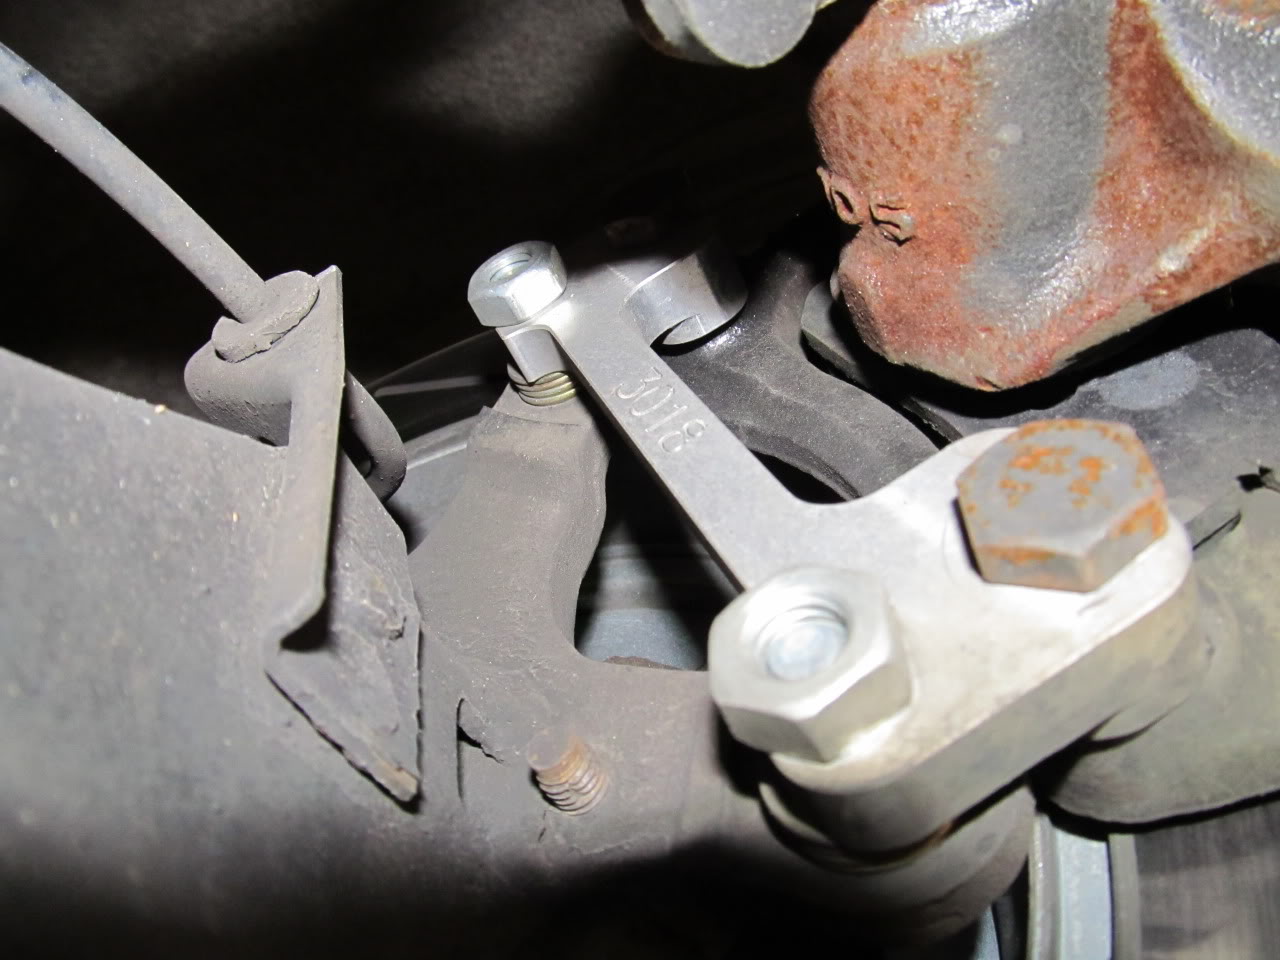
Not so good. Well we flipped them, and guess what? It's perfect!
My car doesn't have the smoothest idle now with the poly side mounts (already had poly motor mounts and torque link), and now with the heater on it really does a fair amount of vibrating when idling. It's gotten rather embarrassing lately, because the rough idle makes itself known through my grille rattling against my hood, and it's pretty annoying. I've tried insulating the grille from vibrations coming though the hood, but to no avail, so I was stuck buying new hood insulator rubber. Each piece was about $5 online, and I can say it was money well spent. Check out the condition of the old ones:
Side rubber:
Front rubber adjusters:
Center rubber on hood:
Needless to say, the hood closes much nicer now and the grille doesn't vibrate/rattle any more. Hooray!
I've also been dealing with a somewhat faulty Boston GT-24 2-channel amp for my front speakers for a while, and I've run out of patience. I bought it reconditioned from Boston last year but have had problems with it cutting out if I crank it up too high. Since cranking up the volume is the entire point of having an amp, this needed to be rectified. Well, I came across another good deal on a Boston amp, although this time it was new. I bought a Boston GT-2125 which is good for 125w x 2 RMS, and it's also a little smaller than the old amp. Good news: it fucking rocks! No more cutting out, just pure, permanent ear damage!
The old one just barely fit under the passenger seat. I've got a little more room to play with now.
I decided it would be a good idea to re-lubricate my 2J Racing panhard rod. I have used the silver Permatex anti seize in the past, but it seems to dry out, so this time I used some of that thick greenish wheel bearing grease instead. I'm sure it's all in my head, but the car seems to be a little smoother with this stuff in there now. Who knows. At least I've got some fresh grease in there before winter really hits.
During my inspection, I noticed how low my front rotors have gotten, at least compared to the slots in them. The slots are almost gone, and I don't think I've put more than 3,000 miles on them! Granted, they did see 4-20 minute sessions on a fast track (Summit Point, Shenandoah Circuit) and a couple auto-x events, but DAMN!
Before:
Now:
And I decided to follow the lead of someone else on here who went against the directions from Fast Brakes and flipped the caliper bracket around for their rear 12.3" BBK.
This is what it looks like if you follow the FB directions, 4 spacers!
Not so good. Well we flipped them, and guess what? It's perfect!
12-24-2012, 03:24 PM
#153
Getting a horn to work with an aftermarket steering wheel
Aside from the never ending vibration coming from my motor, this has been the bane of my existence. For two whole years now I've driven around without a horn in my car because I could never figure out how to get one to work. I've resorted to using my high beams and my motor as makeshift horns, and neither really worked very well.
Well, good ol' Eric at Joe's Professional Auto Care got an idea one day and ran with it. He hacked apart my old clockspring, and got it down to this:
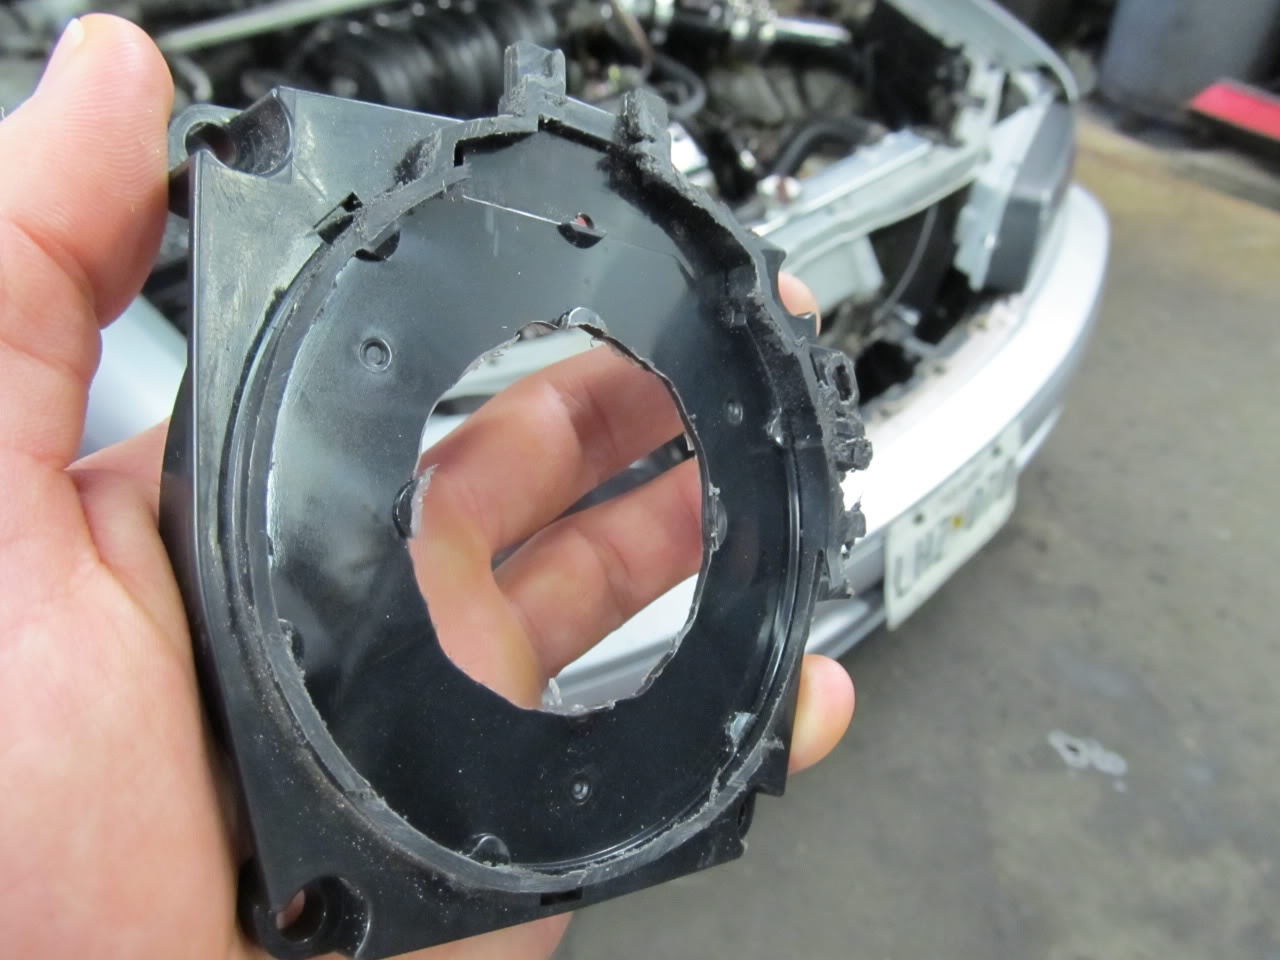
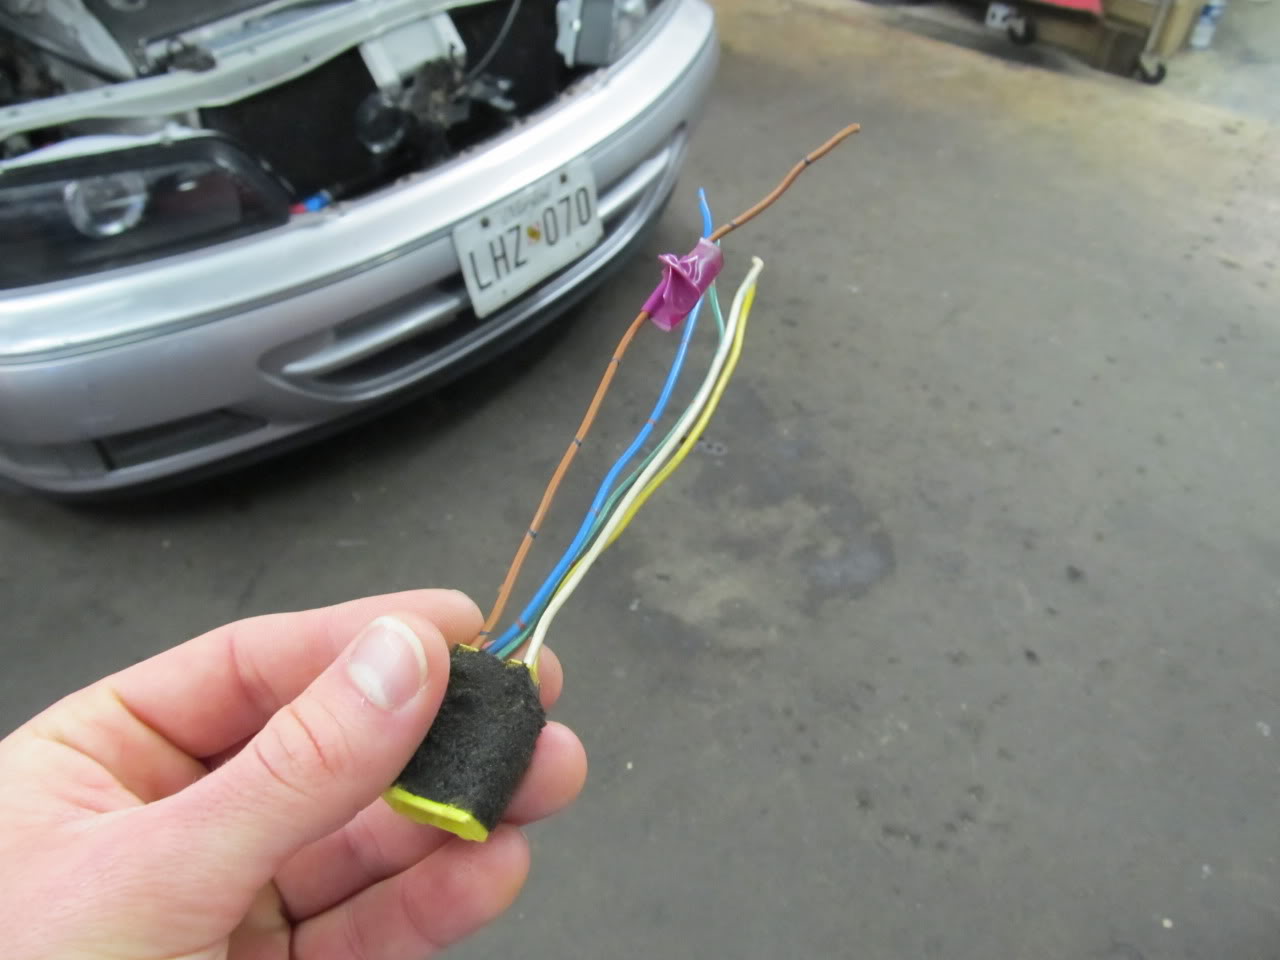
This is the connector for the clockspring. The horn wire is green under the dash, but when it reaches this connector it switches to being the brown wire.
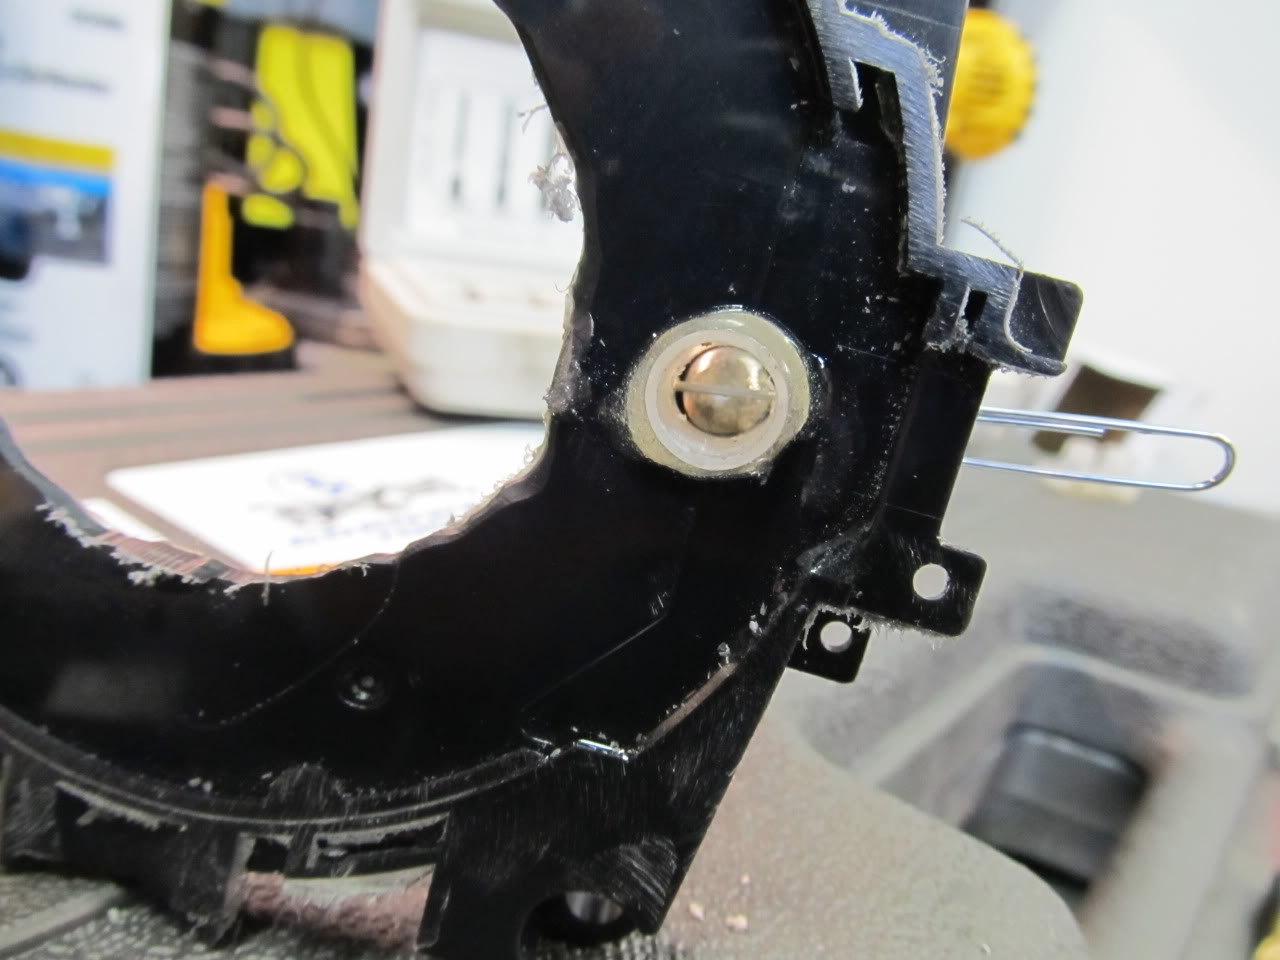
Note the metal ring around the steering column:
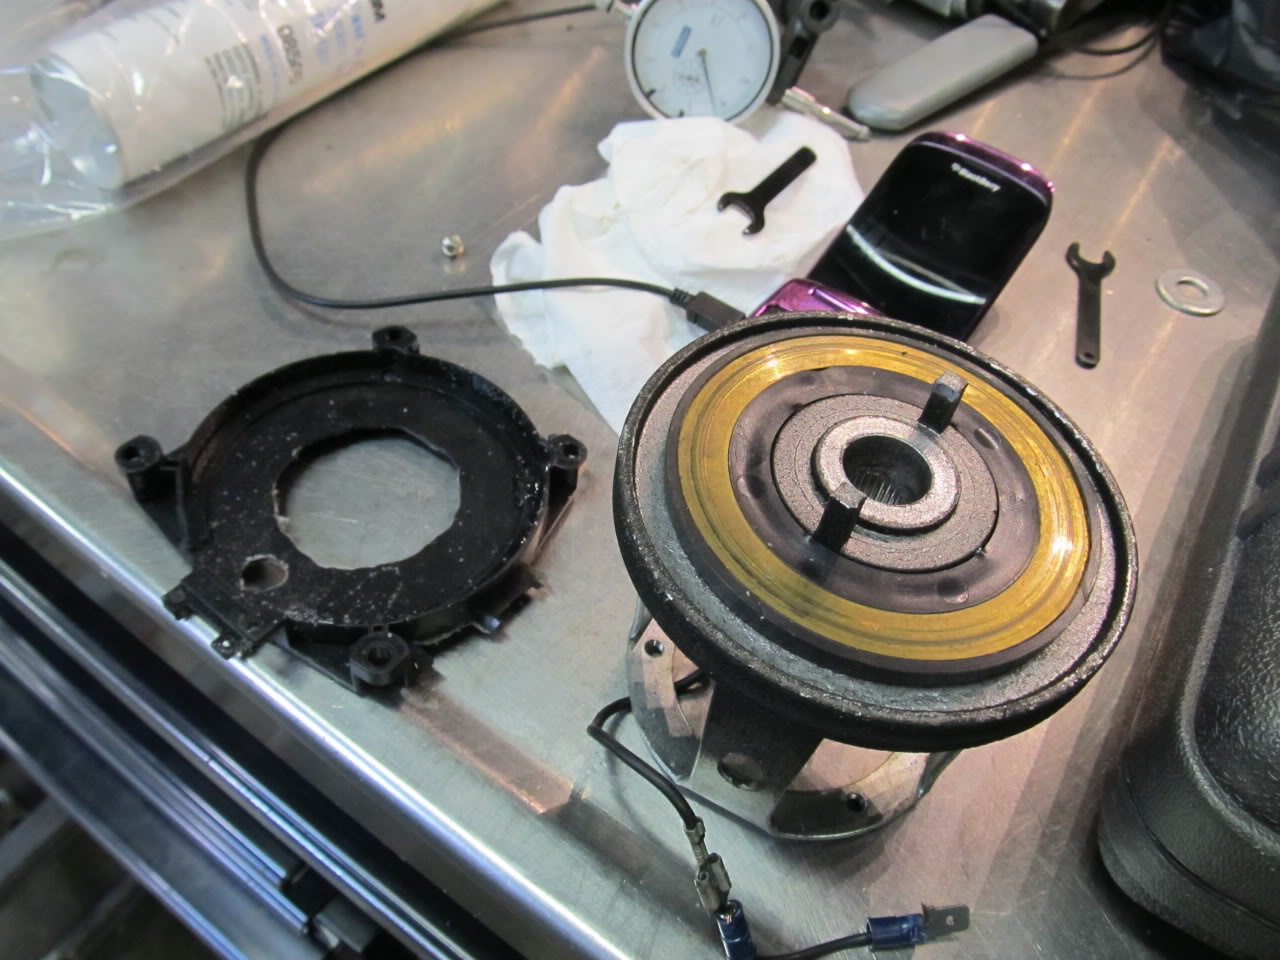
See that hole in the clockspring that allows access to the metal?

A ball bearing from some small wheel bearing and a random spring
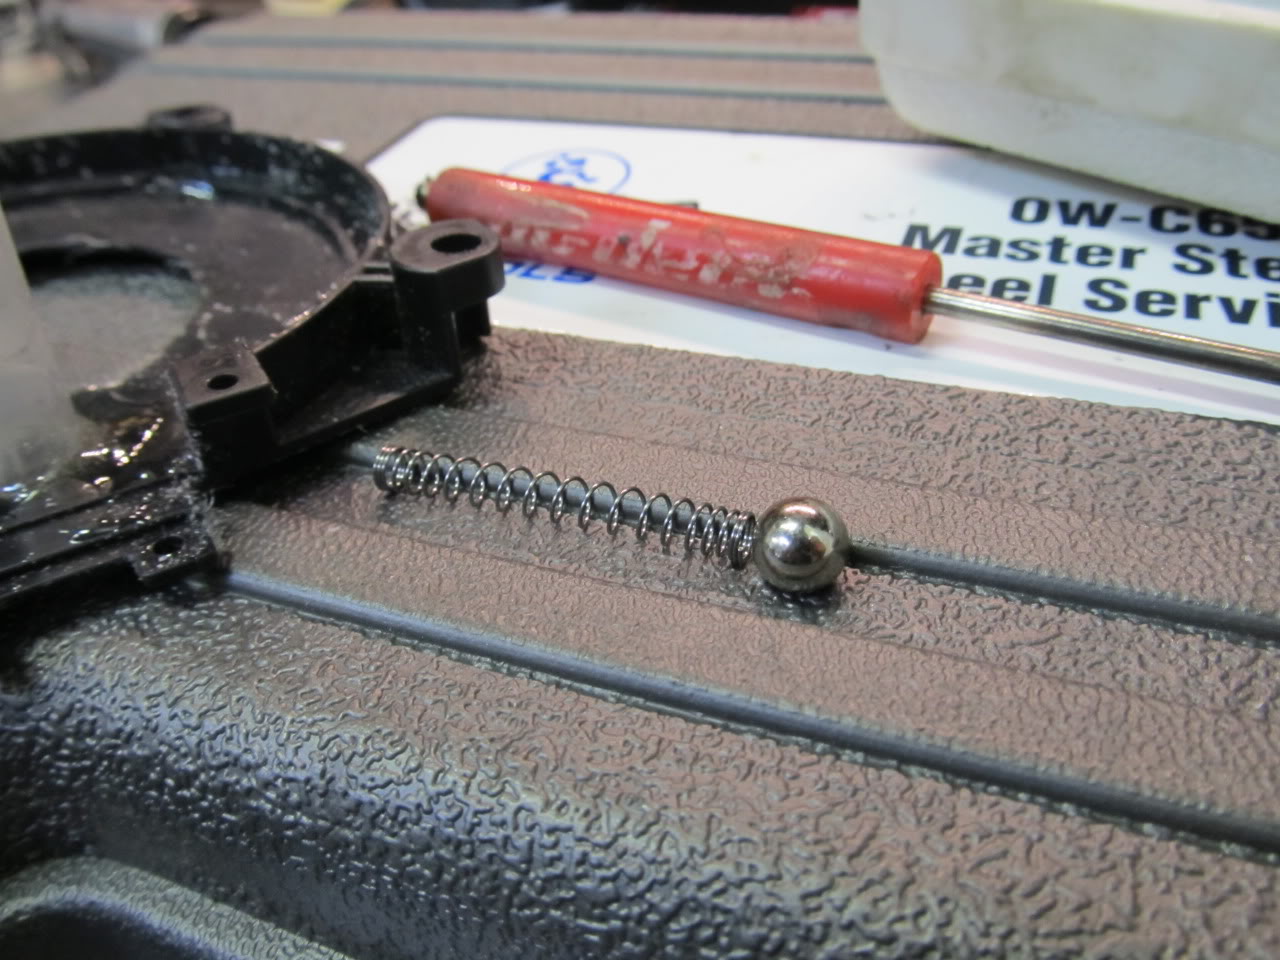
And a tube epoxied to the clockspring
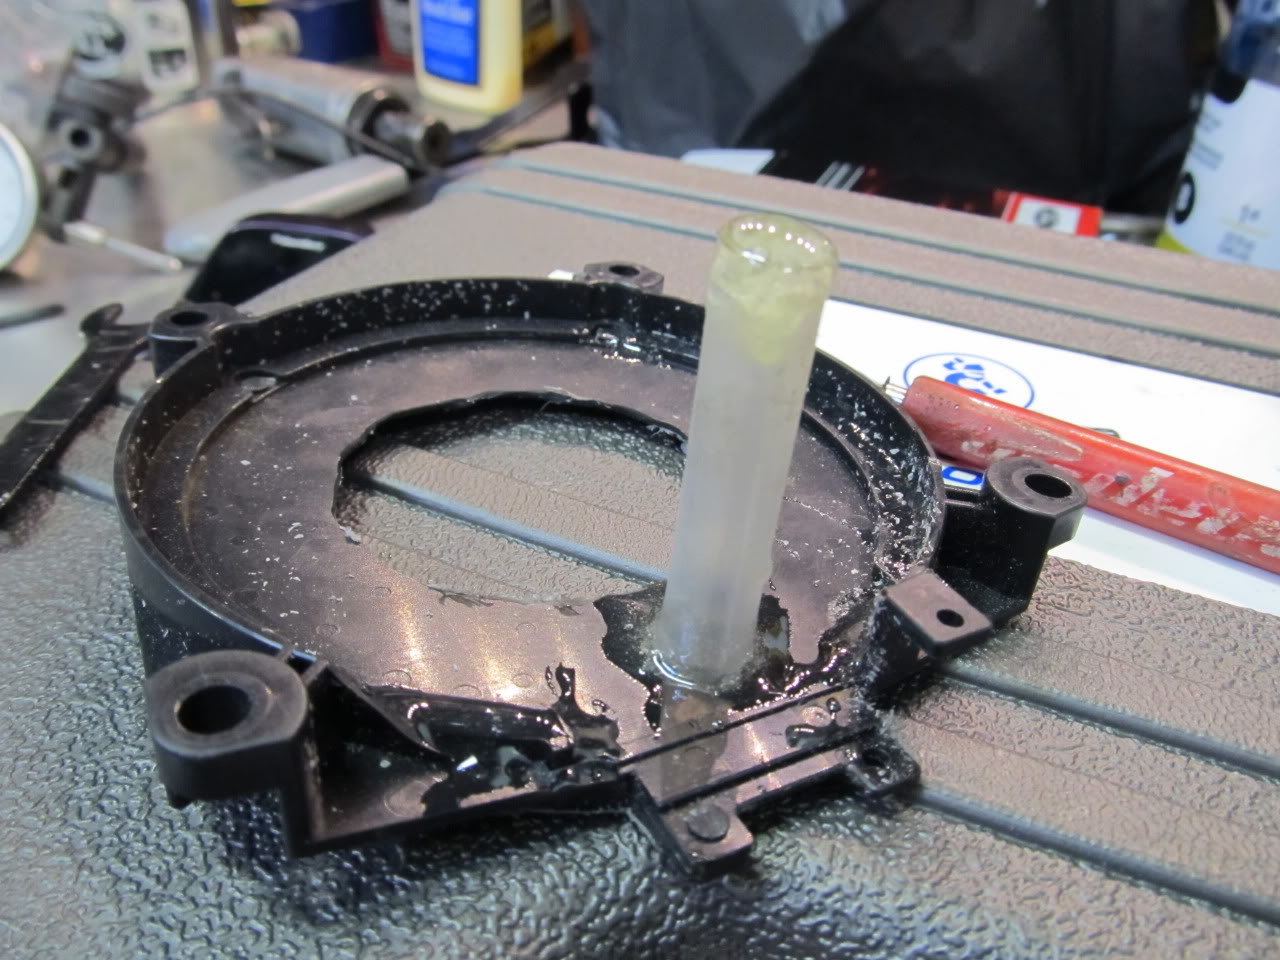
You can't see it, but the spring and the ball bearing are hidden inside the tube underneath the electrical tape. The paper clip is holding them inside before installation, and the brown wire is touching the spring.

You can kind of see what's going on here
So we installed everything, pulled out the paper clip, and VIOLA, I HAVE A ****ING HORN IN MY CAR AGAIN. Damn it feels good to honk at people again! I had forgotten how nice these 350z horns sound compared to the weak/worn out I30 horns. You have no idea how nice this is after two years of not having a horn.
I also tightened up all the bolts for my Recaro seat, as I thought I felt it shift around on me once or twice. Sure enough, a couple needed to be tightened up. Nothing major or unsafe, but it needed to be done, and feels very tight now.
I also got around to working on my Innovate Motorsport LC-1 wideband O2 sensor. My old sensor died over a year ago, and the last time I tried to get the brain to accept a new sensor I couldn't get it to work. I blame the three different sets of instructions I've gotten from IM over the years that are very different and confusing. Well this time I tried a different set and sure enough it works! The car is a steady 14.7 at idle, but at WOT I have a major problem. According to the WB, I'm at 14.0:1 at WOT near redline. The last time this thing was working I was at a perfect 13.0:1 at redline. How the car is running so lean now boggles my mind, especially since the car smells like it's running rich. I'm going to recalibrate the sensor, but if it comes back rich again, I'm either going to bump up my fuel pressure with my Nismo AFPR or take it to a dyno and see what their sensor says.
Ugh, I gotta rush out the door. I'll finish this up later!
Well, good ol' Eric at Joe's Professional Auto Care got an idea one day and ran with it. He hacked apart my old clockspring, and got it down to this:
This is the connector for the clockspring. The horn wire is green under the dash, but when it reaches this connector it switches to being the brown wire.
Note the metal ring around the steering column:
See that hole in the clockspring that allows access to the metal?
A ball bearing from some small wheel bearing and a random spring
And a tube epoxied to the clockspring
You can't see it, but the spring and the ball bearing are hidden inside the tube underneath the electrical tape. The paper clip is holding them inside before installation, and the brown wire is touching the spring.
You can kind of see what's going on here
So we installed everything, pulled out the paper clip, and VIOLA, I HAVE A ****ING HORN IN MY CAR AGAIN. Damn it feels good to honk at people again! I had forgotten how nice these 350z horns sound compared to the weak/worn out I30 horns. You have no idea how nice this is after two years of not having a horn.
I also tightened up all the bolts for my Recaro seat, as I thought I felt it shift around on me once or twice. Sure enough, a couple needed to be tightened up. Nothing major or unsafe, but it needed to be done, and feels very tight now.
I also got around to working on my Innovate Motorsport LC-1 wideband O2 sensor. My old sensor died over a year ago, and the last time I tried to get the brain to accept a new sensor I couldn't get it to work. I blame the three different sets of instructions I've gotten from IM over the years that are very different and confusing. Well this time I tried a different set and sure enough it works! The car is a steady 14.7 at idle, but at WOT I have a major problem. According to the WB, I'm at 14.0:1 at WOT near redline. The last time this thing was working I was at a perfect 13.0:1 at redline. How the car is running so lean now boggles my mind, especially since the car smells like it's running rich. I'm going to recalibrate the sensor, but if it comes back rich again, I'm either going to bump up my fuel pressure with my Nismo AFPR or take it to a dyno and see what their sensor says.
Ugh, I gotta rush out the door. I'll finish this up later!
Last edited by 95maxrider; 12-24-2012 at 03:26 PM.
12-25-2012, 01:00 PM
#154
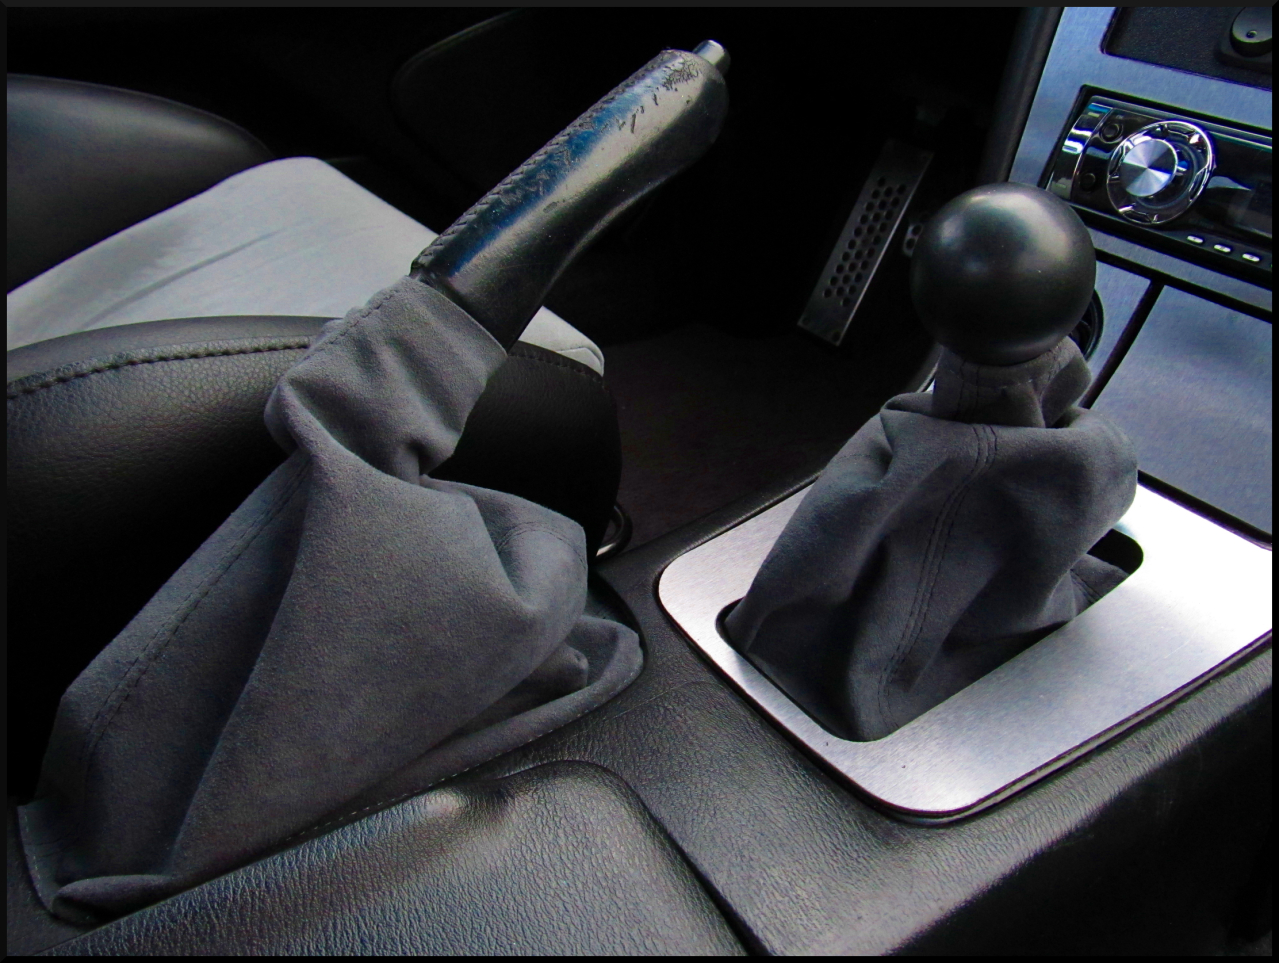
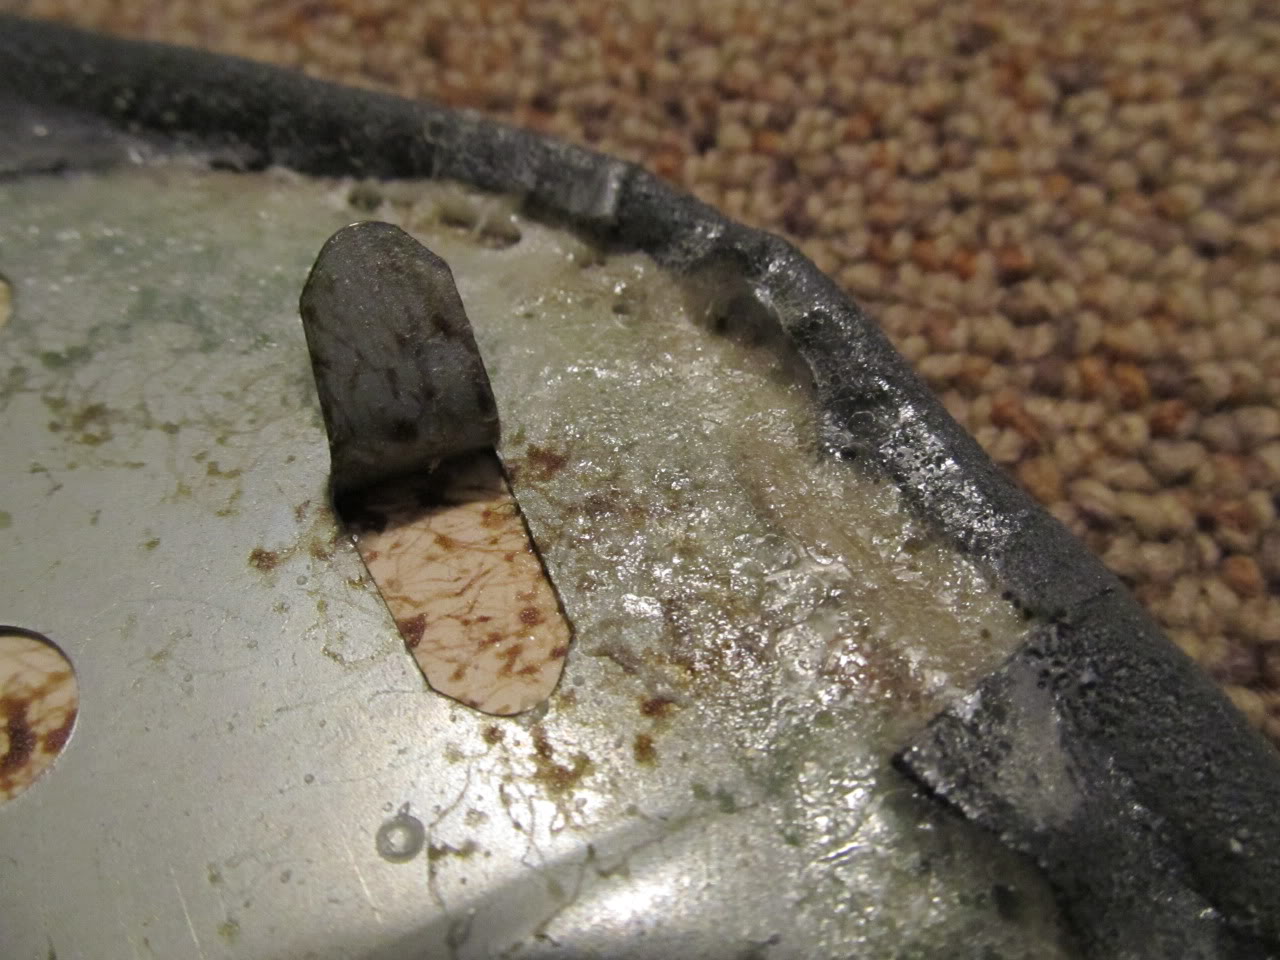
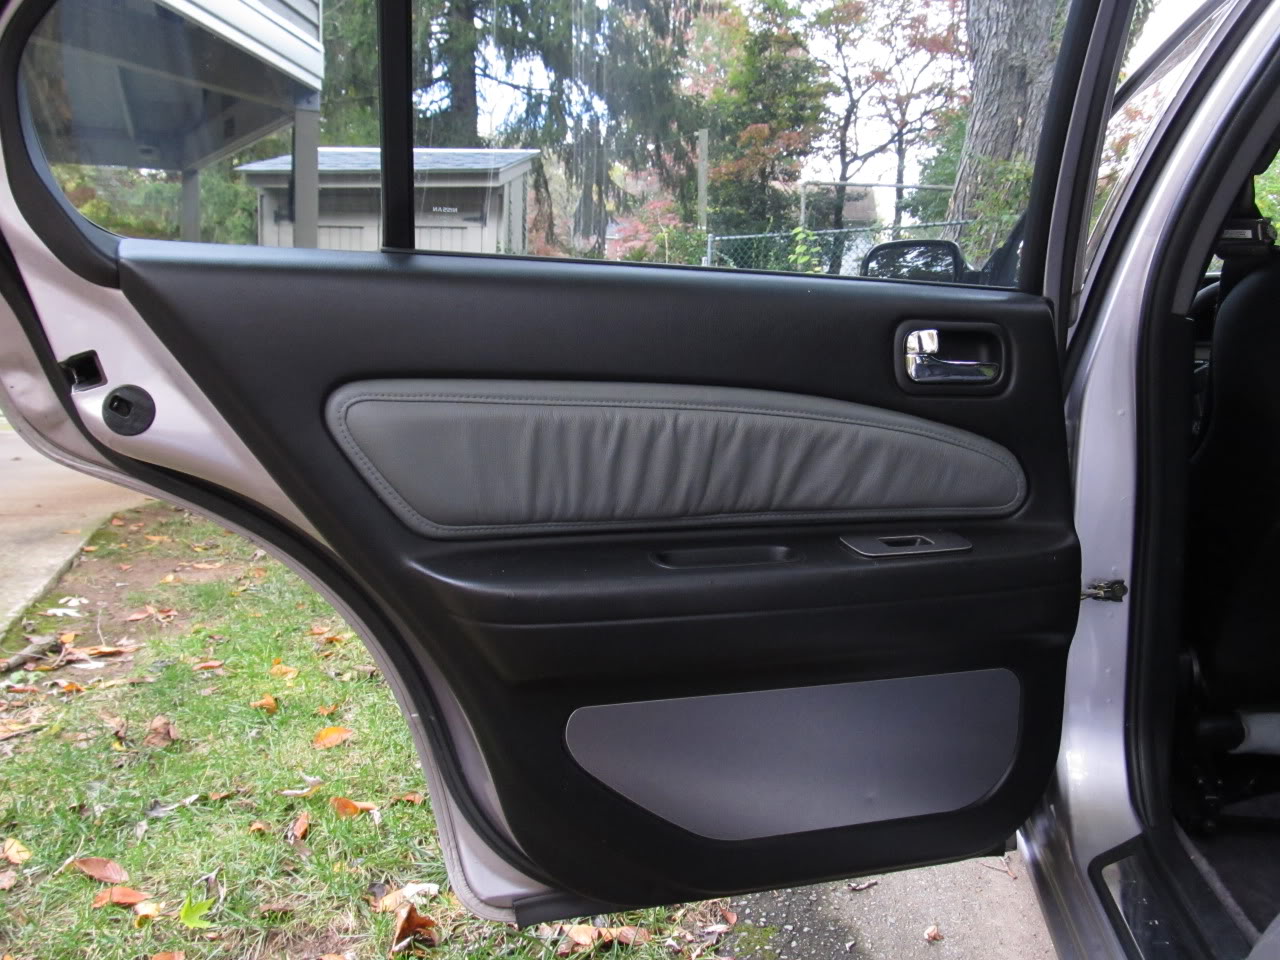
Custom alcantara covered door panel inserts
If you go back a few pages you can check out the first half of this project, which was ordering some alcantara, and sending half of it off to Poland to have Redline Goods make me some shift/e-brake boots. A 3'x5' sheet cost $100 and Redline made the boots for something like $60 shipped.
Pic:
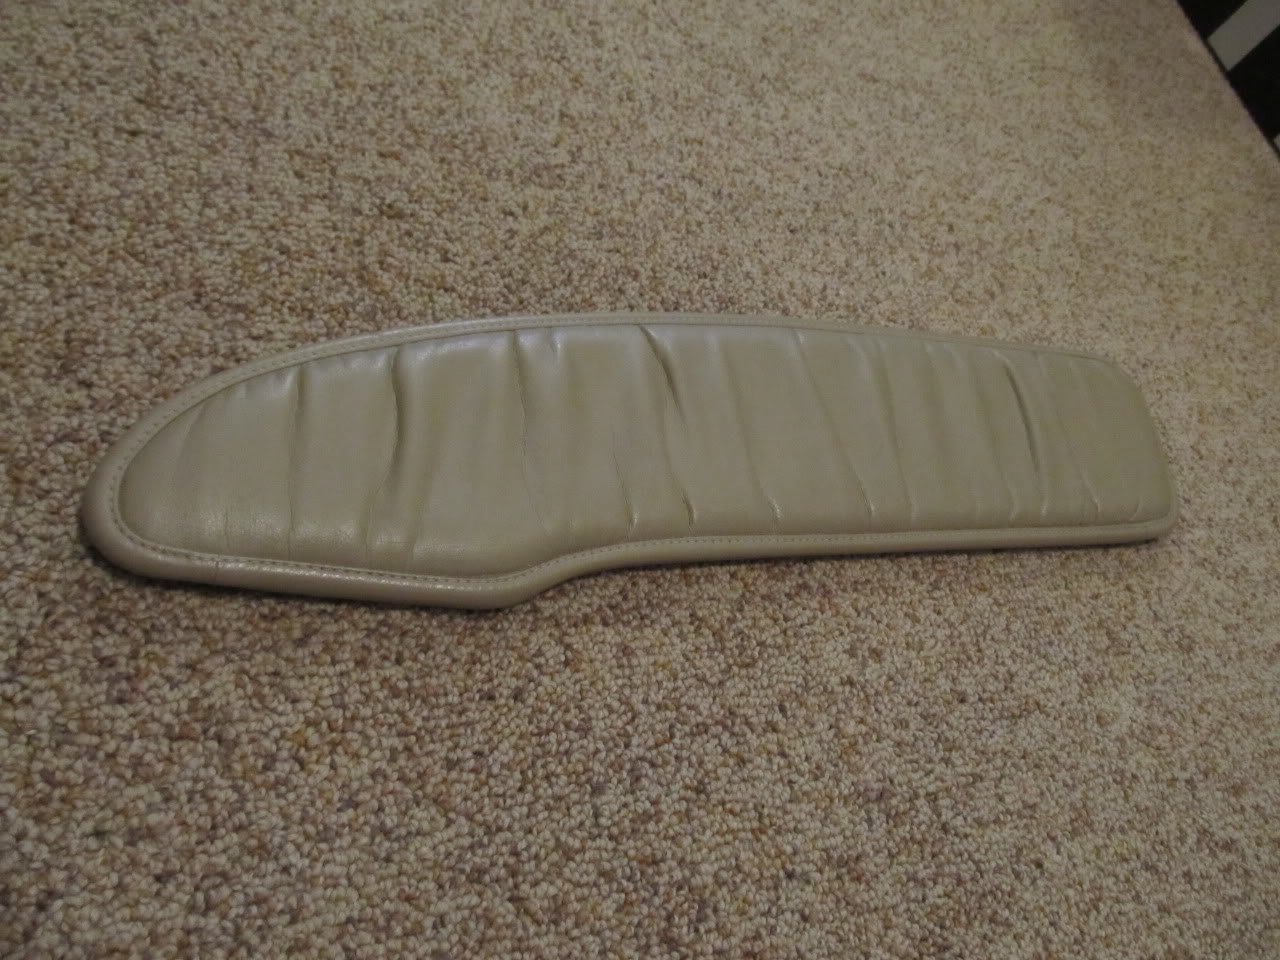
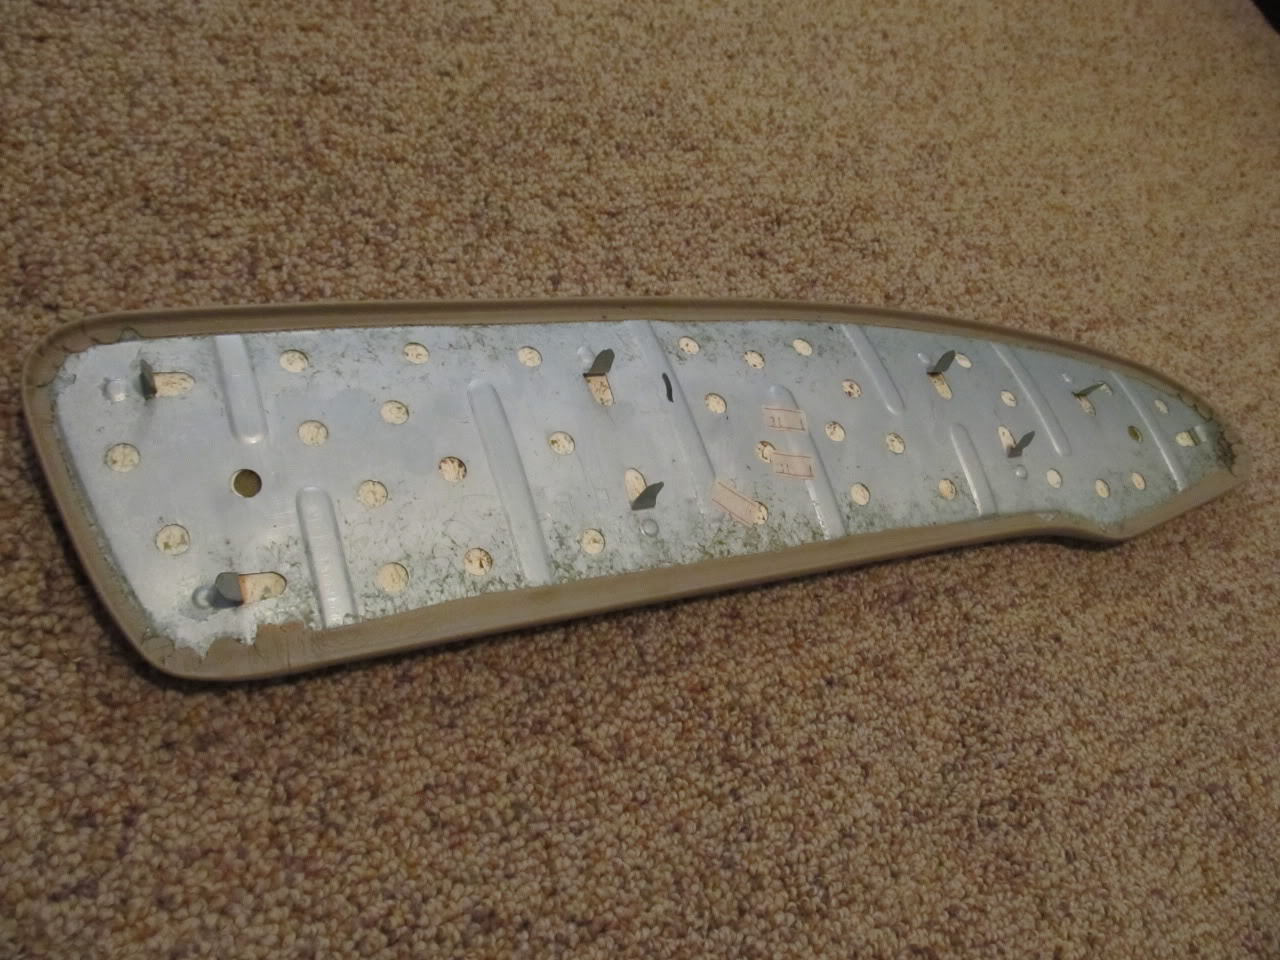
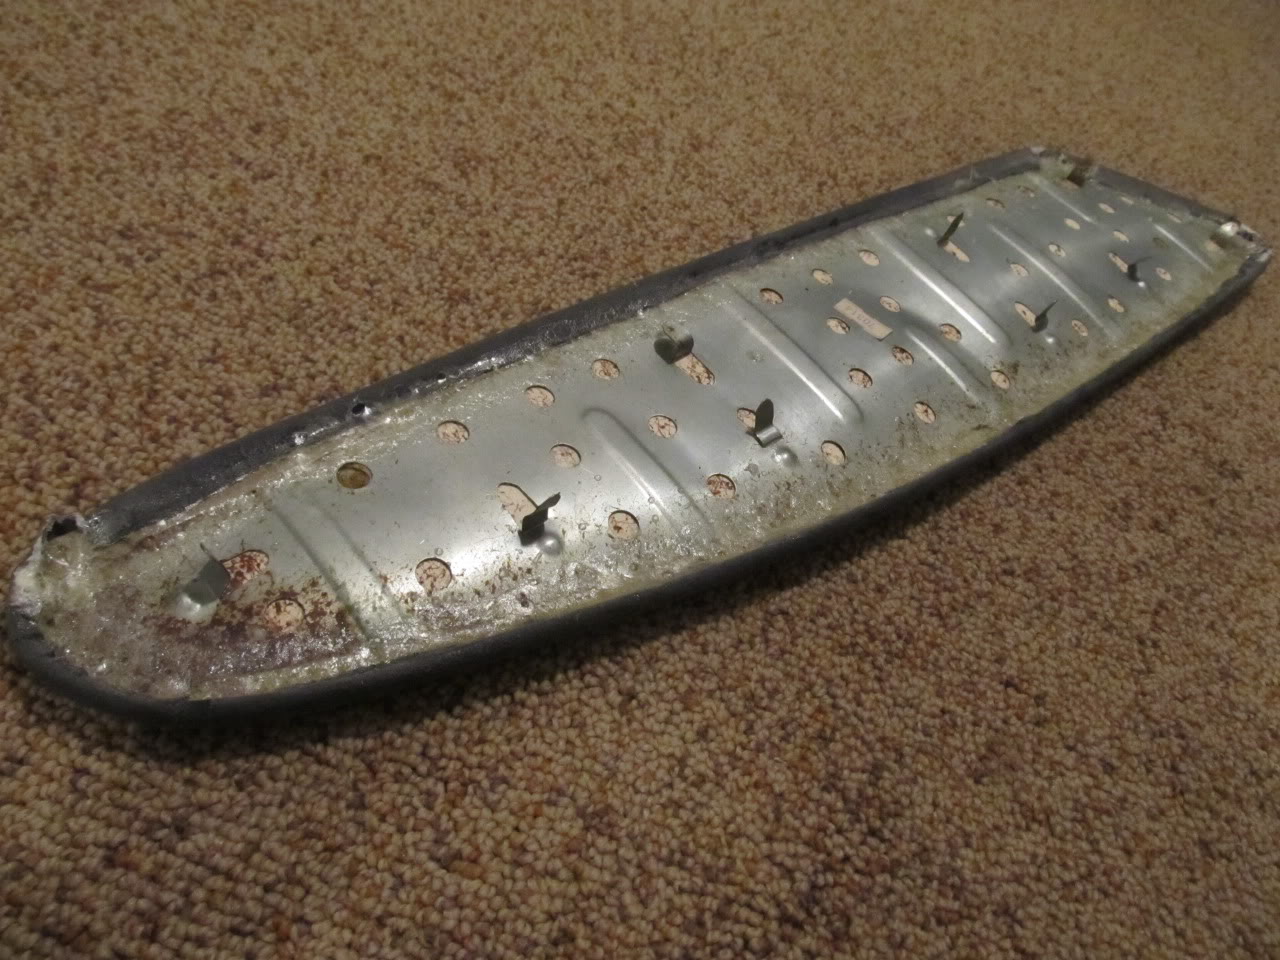
The second half of the project was on me to do, and I put it off for as long as I could, as I really wasn't looking forward to it. I had a general idea of what I needed to do, but wasn't sure of the specifics. Luckily Patrick (phenryiv1) told me about a great product called 3M Super 77 Spray Adhesive to attach the alcantara to the spare leather door panel insert. I cut my remaining alcantara into four sheets, sprayed both the door insert and the back of the alcantara, and stuck 'em together. Getting it to stick on the main part of the panel was easy, but getting it clean and tight around the edges was a nightmare.
Here's what I started with:
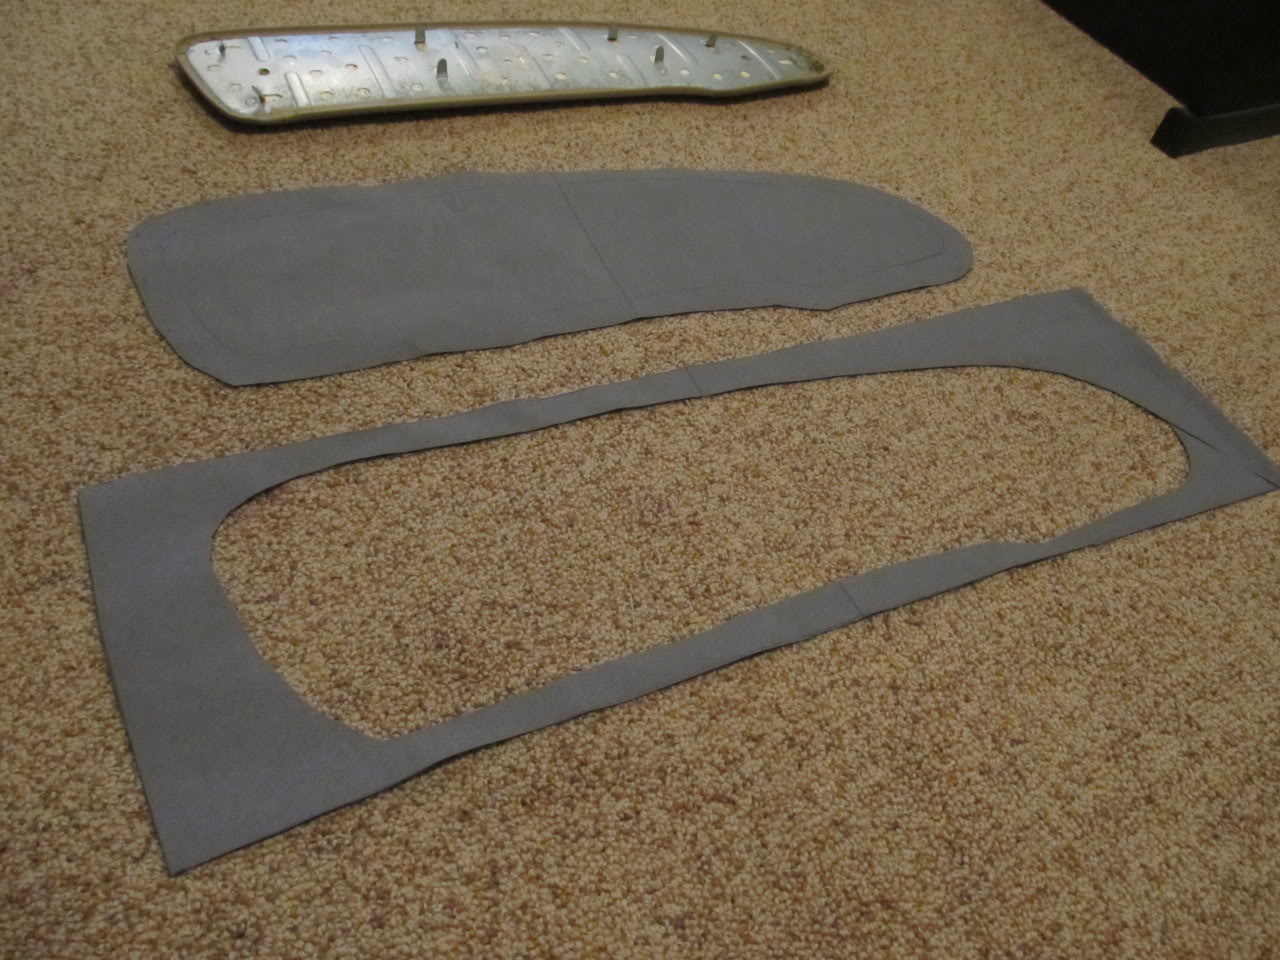
Now when I started I wasn't thinking very hard about what to do with the edges, so some of them have a lot more extra material to work with than others. Suffice to say that you need some extra around all the edges or it will never properly stick, but too much can make it difficult to keep the edges smooth.

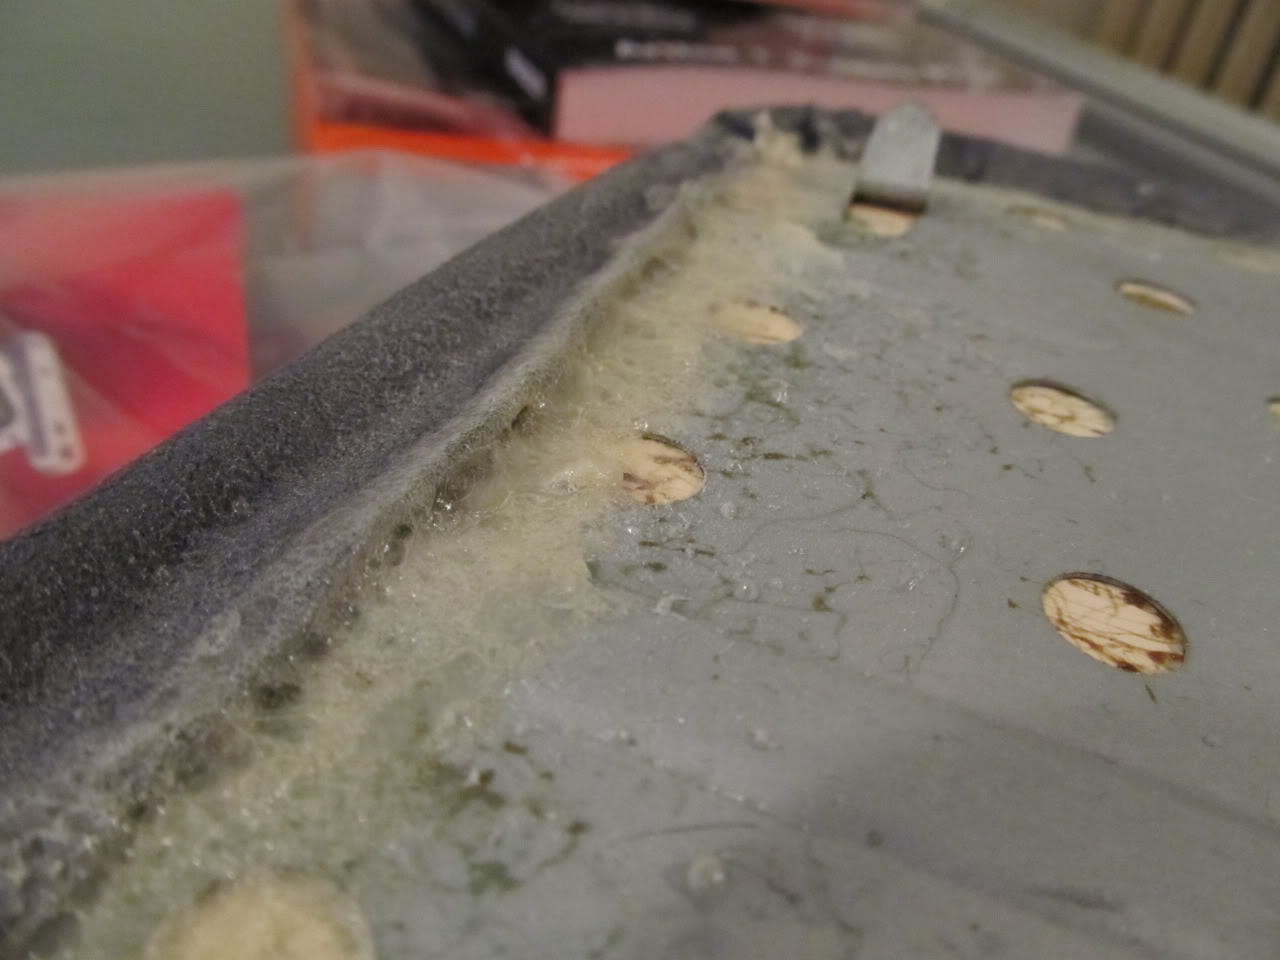
It seemed that no matter how much spray I used, the edges never stuck, so I had to improvise.
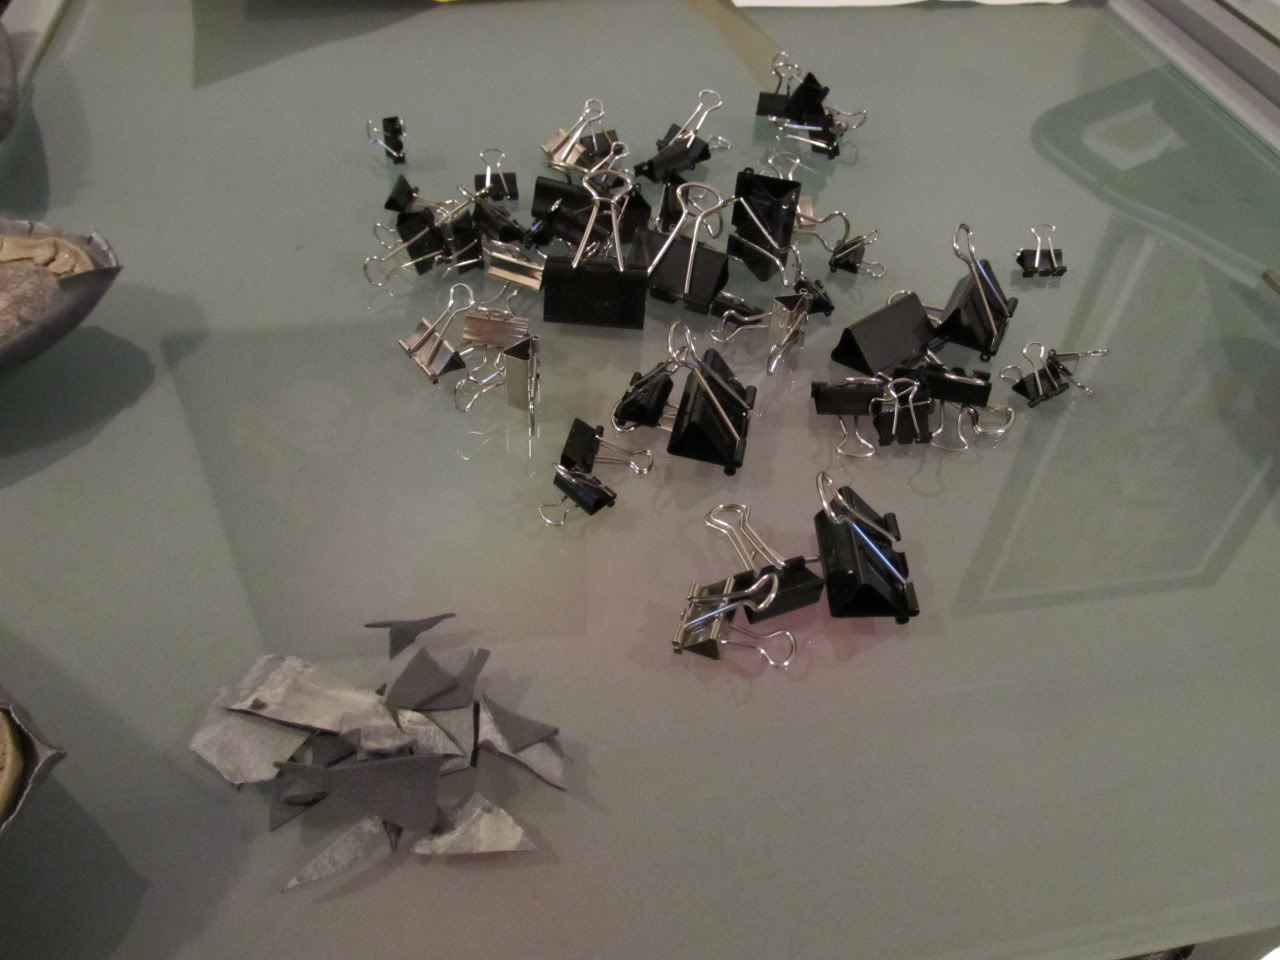
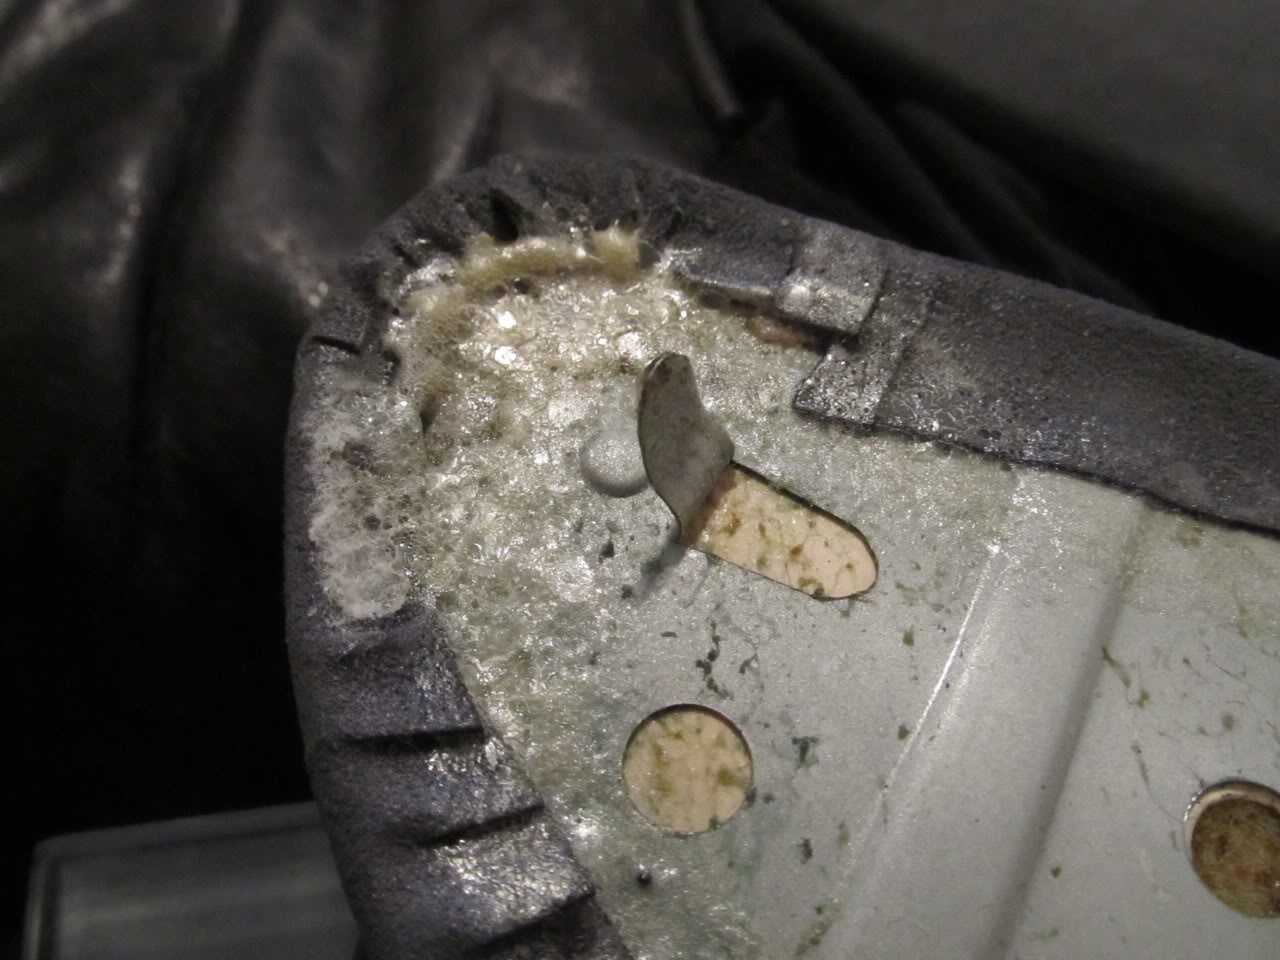
Which, after some trial and error (mostly error) led to this:
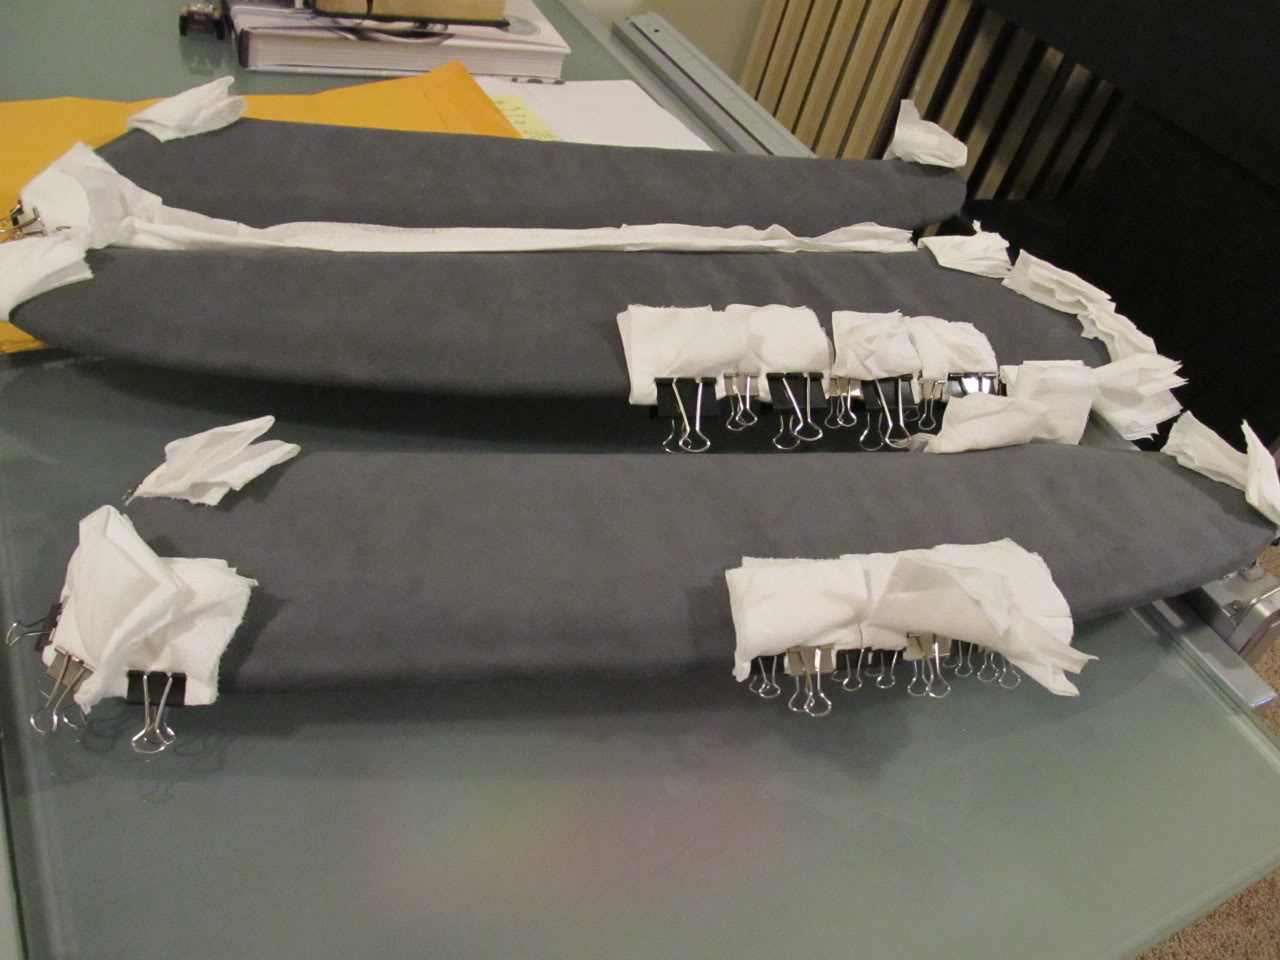
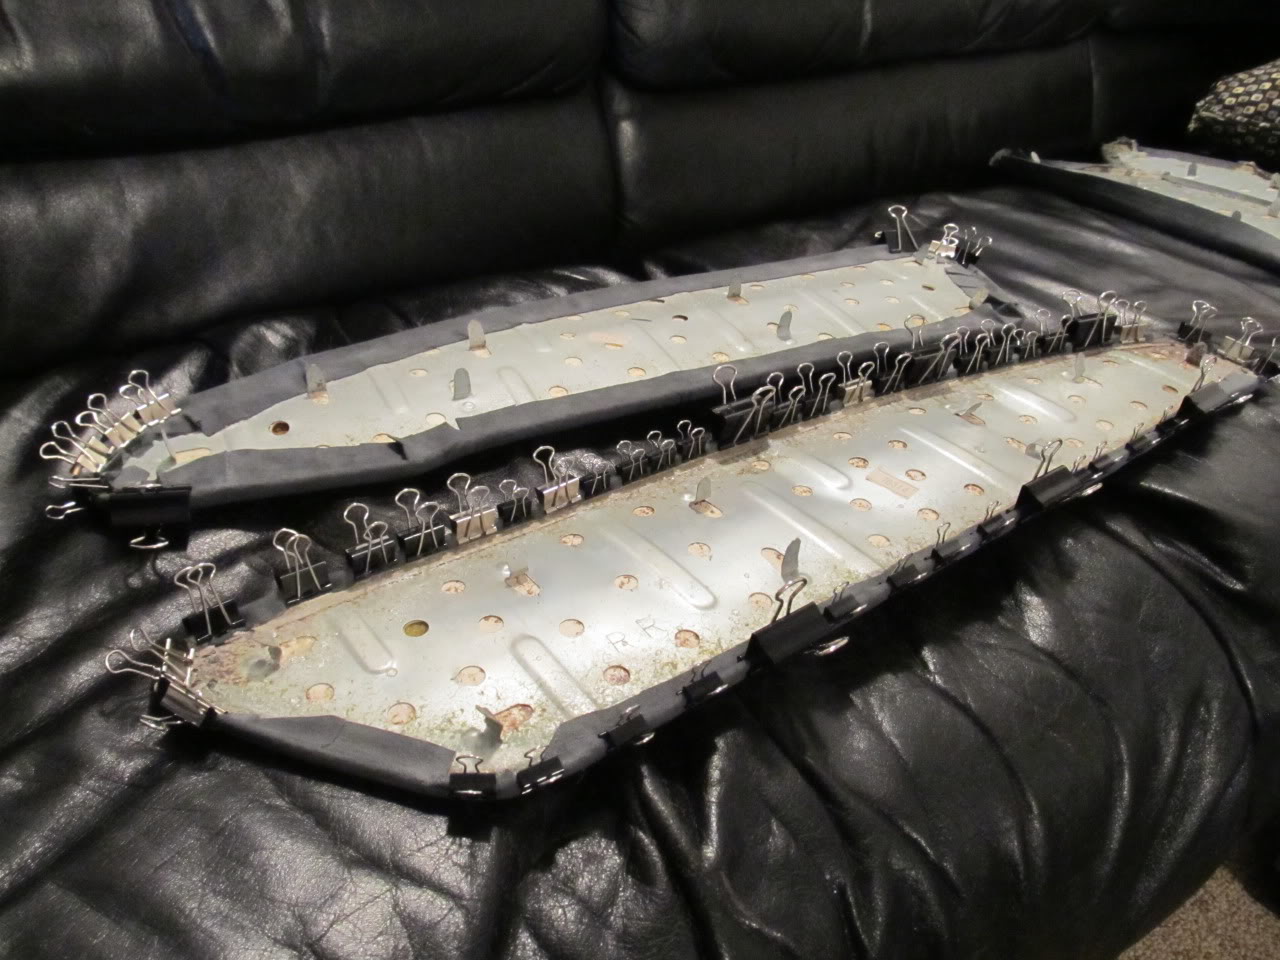
The tissue paper was used to keep the clips from leaving indents in the alcantara.
After doing this a few times to each panel and each one was sticking to my liking, I decided to go the extra step and spray more adhesive all around the already stuck down edges so they would be less likely to get pulled up during installation.
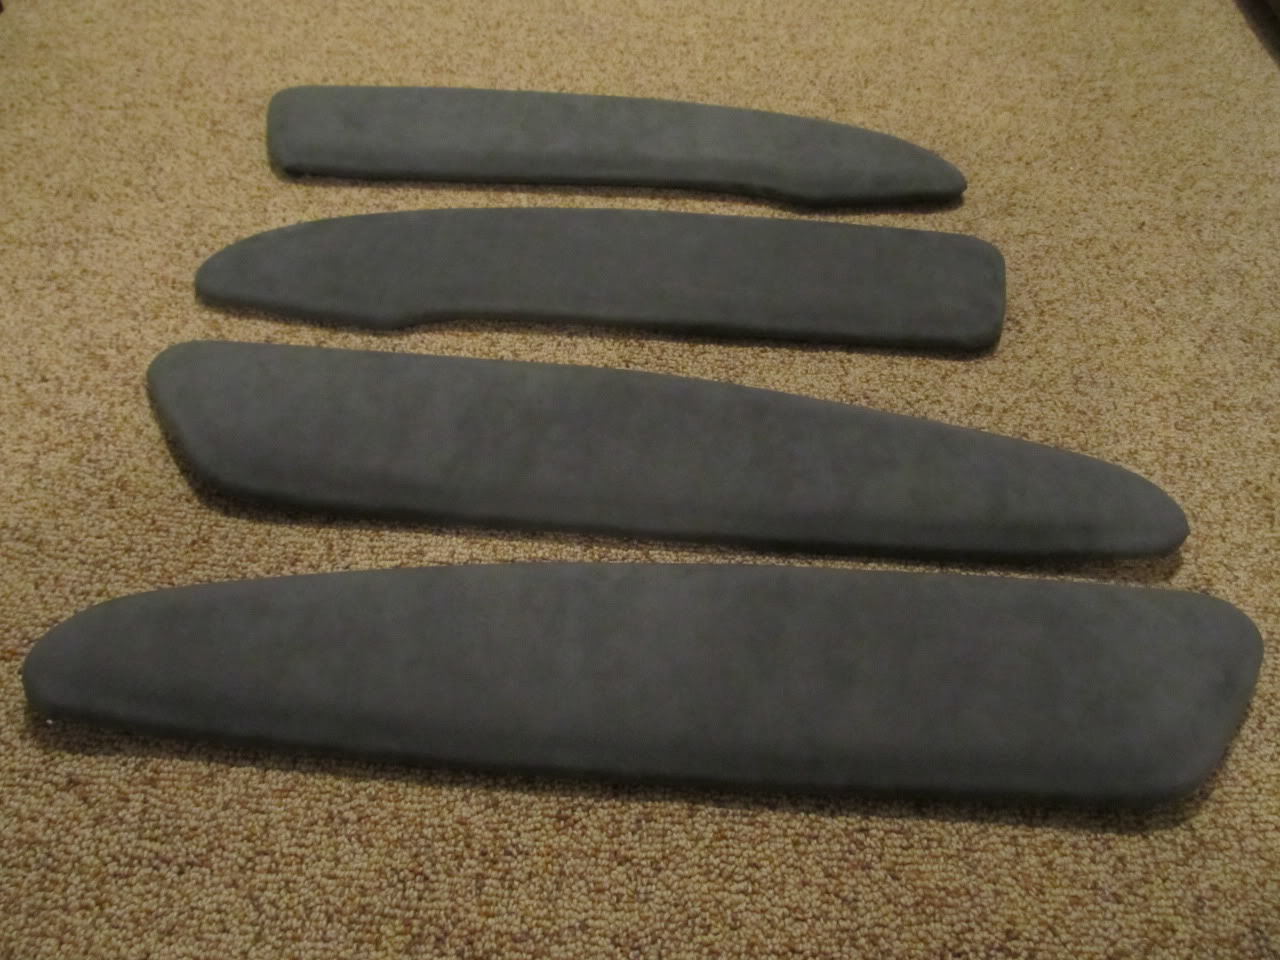
And the finished product!
Pic:
The second half of the project was on me to do, and I put it off for as long as I could, as I really wasn't looking forward to it. I had a general idea of what I needed to do, but wasn't sure of the specifics. Luckily Patrick (phenryiv1) told me about a great product called 3M Super 77 Spray Adhesive to attach the alcantara to the spare leather door panel insert. I cut my remaining alcantara into four sheets, sprayed both the door insert and the back of the alcantara, and stuck 'em together. Getting it to stick on the main part of the panel was easy, but getting it clean and tight around the edges was a nightmare.
Here's what I started with:
Now when I started I wasn't thinking very hard about what to do with the edges, so some of them have a lot more extra material to work with than others. Suffice to say that you need some extra around all the edges or it will never properly stick, but too much can make it difficult to keep the edges smooth.
It seemed that no matter how much spray I used, the edges never stuck, so I had to improvise.
Which, after some trial and error (mostly error) led to this:
The tissue paper was used to keep the clips from leaving indents in the alcantara.
After doing this a few times to each panel and each one was sticking to my liking, I decided to go the extra step and spray more adhesive all around the already stuck down edges so they would be less likely to get pulled up during installation.
And the finished product!
12-25-2012, 01:00 PM
#155
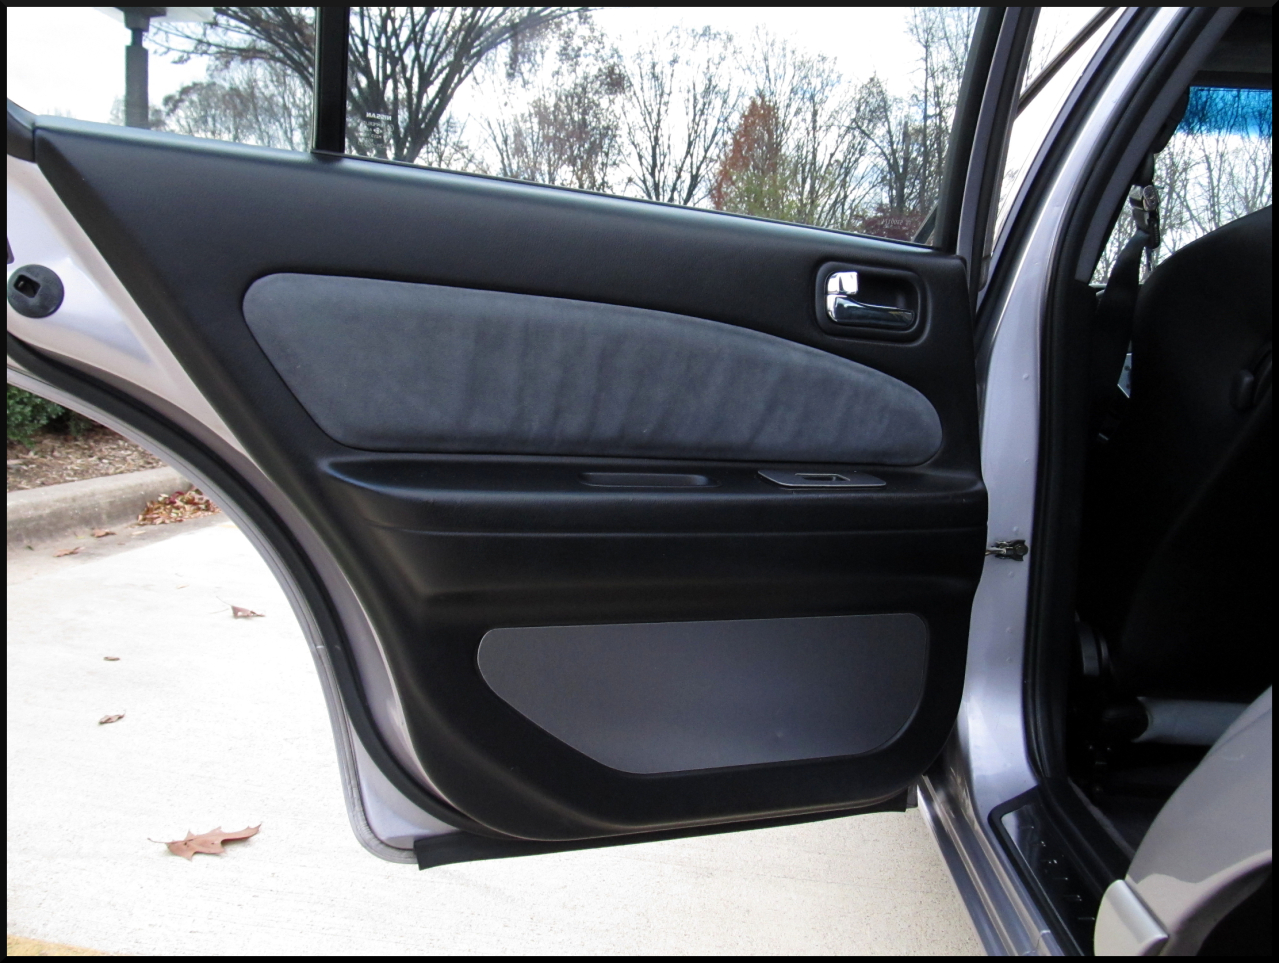
Strangely enough, even though my car has "leather" door panels, it has the cloth-style doors, which meant I had to cut some holes in the panel for the inserts to stick their tabs through (not shown).

Before:
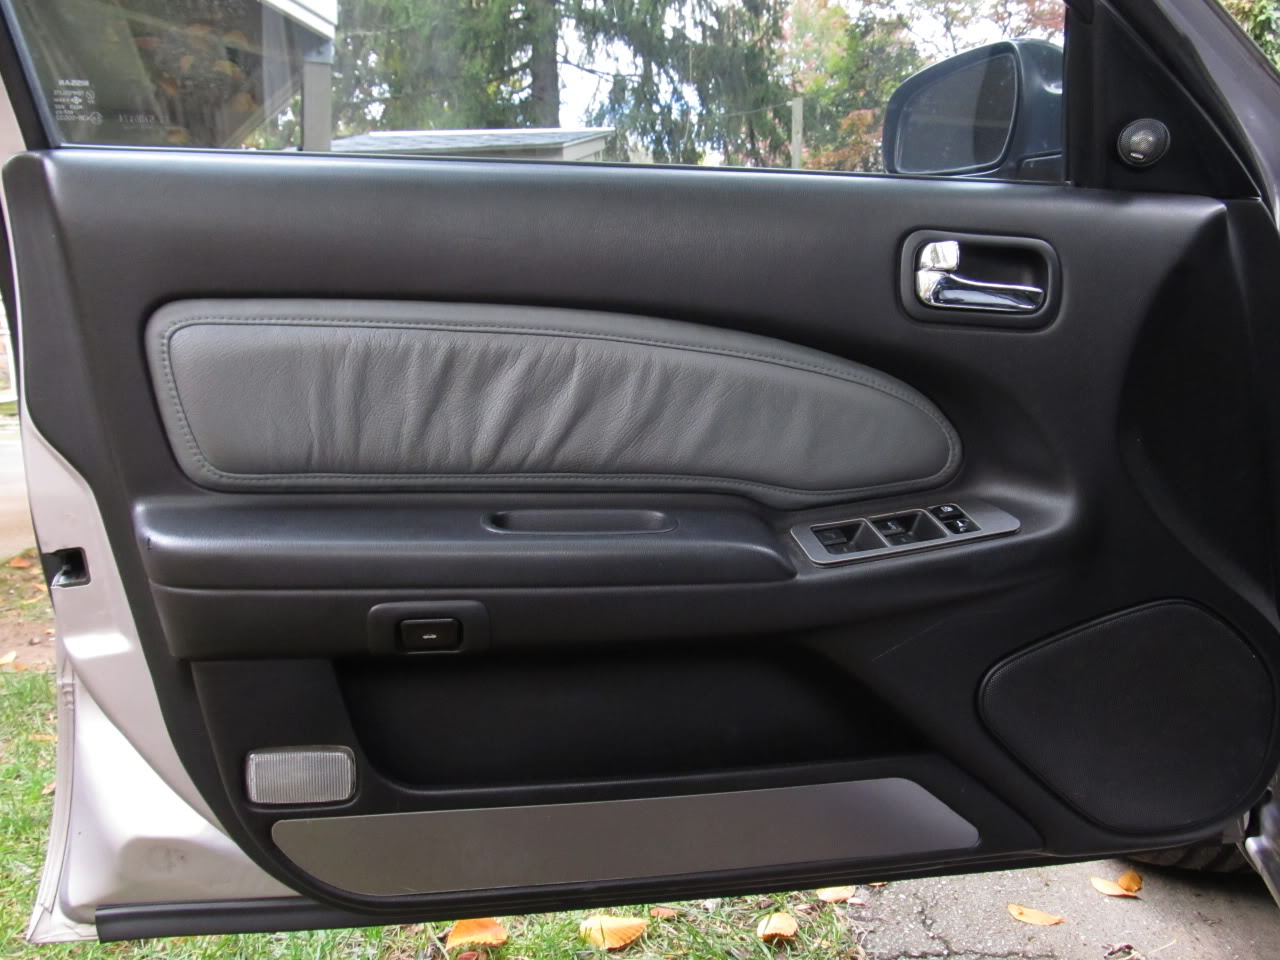
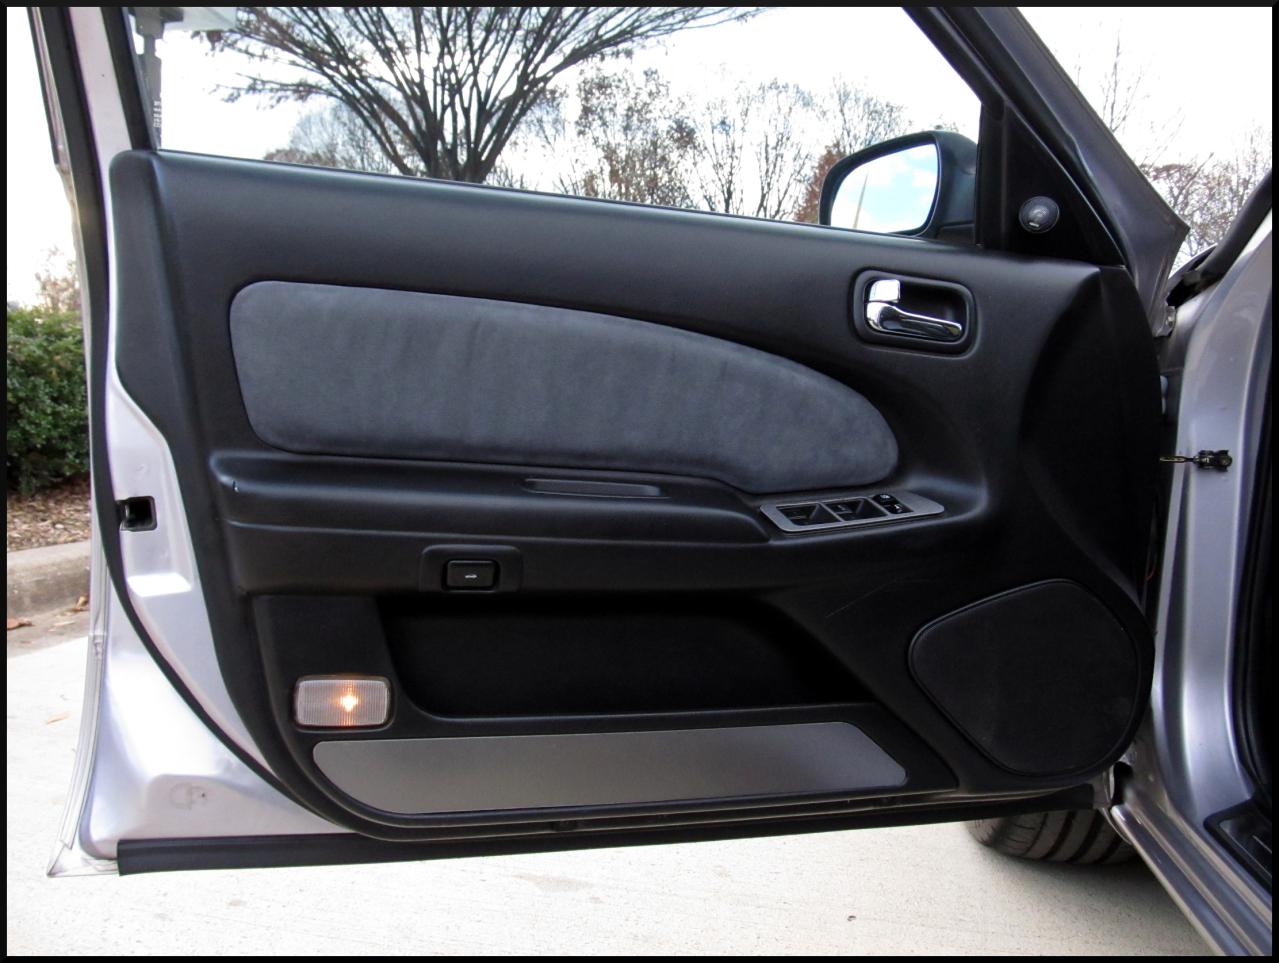
After:
Before:
After:
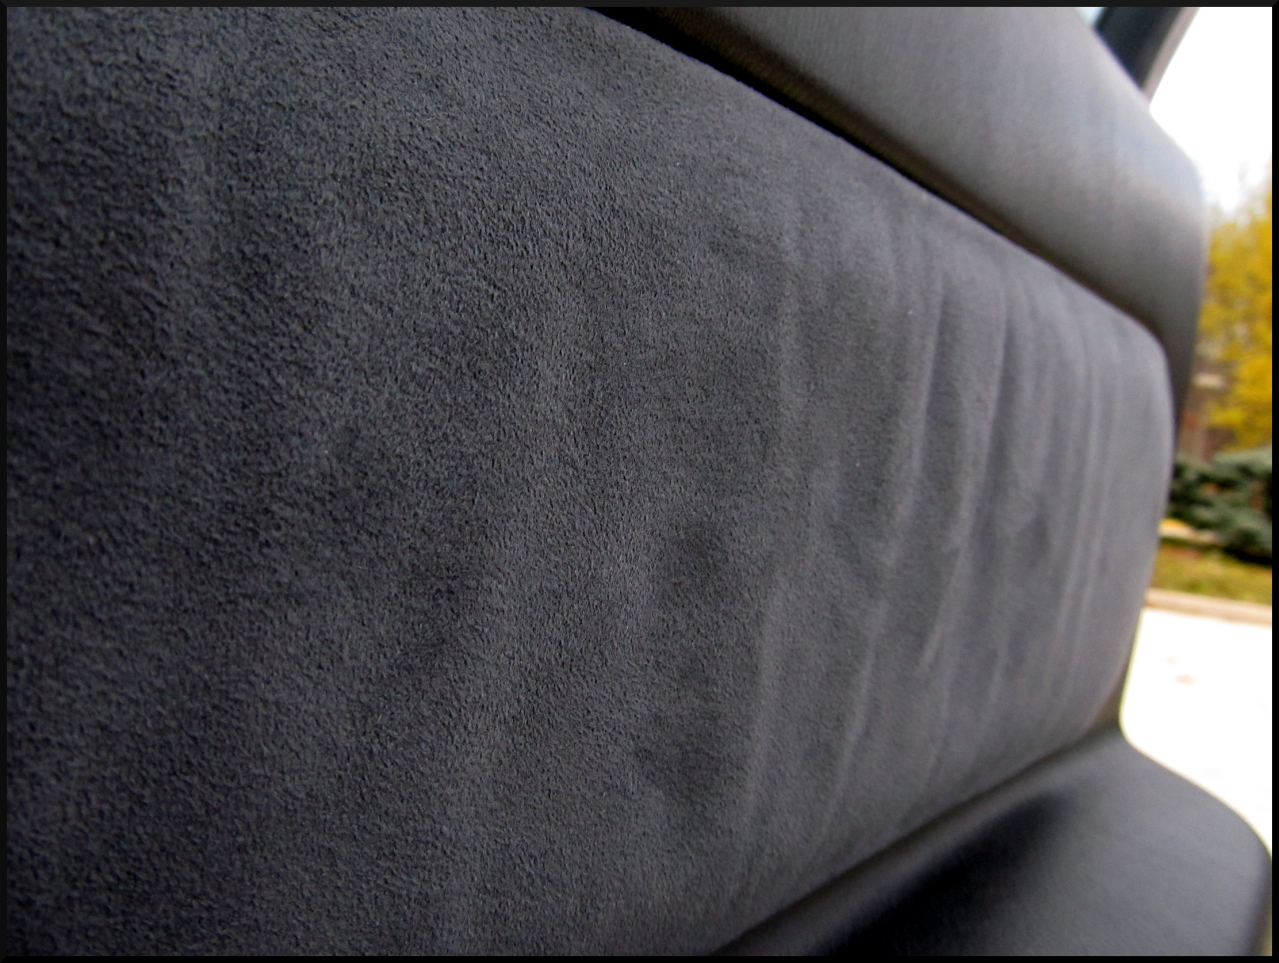
Up close:
So it took a little longer than it should have, but I'm very pleased with the results, and I'm confidant they will stay together for a very long time. What do you guys think?
Before:
After:
Before:
After:
Up close:
So it took a little longer than it should have, but I'm very pleased with the results, and I'm confidant they will stay together for a very long time. What do you guys think?
12-25-2012, 09:35 PM
#156

Just wanted to say that your have a very clean build, and its an inspiration to mine. All your mods are purpose driven and thats exactly how I've been trying to mod mine. The door panels are super fresh.
I've been trying to get some new wheels (probably evo take offs), and am wondering what the specs are on your wheels/tires for the street? Sorry if i missed it earlier in the thread, might've overlooked it. Thanks, and merry christmas.
I've been trying to get some new wheels (probably evo take offs), and am wondering what the specs are on your wheels/tires for the street? Sorry if i missed it earlier in the thread, might've overlooked it. Thanks, and merry christmas.
12-26-2012, 08:06 AM
#157
Just wanted to say that your have a very clean build, and its an inspiration to mine. All your mods are purpose driven and thats exactly how I've been trying to mod mine. The door panels are super fresh.
I've been trying to get some new wheels (probably evo take offs), and am wondering what the specs are on your wheels/tires for the street? Sorry if i missed it earlier in the thread, might've overlooked it. Thanks, and merry christmas.
I've been trying to get some new wheels (probably evo take offs), and am wondering what the specs are on your wheels/tires for the street? Sorry if i missed it earlier in the thread, might've overlooked it. Thanks, and merry christmas.
As for my DD wheels, they are a 17x8 with I believe a +45 offset. My summer tires are a 245/45/17 and my A/S tires are 235/45/17, but they both seem to rub a bit in the rear. More so with the 245s.

