When you click on links to various merchants on this site and make a purchase, this can result in this site earning a commission. Affiliate programs and affiliations include, but are not limited to, the eBay Partner Network.
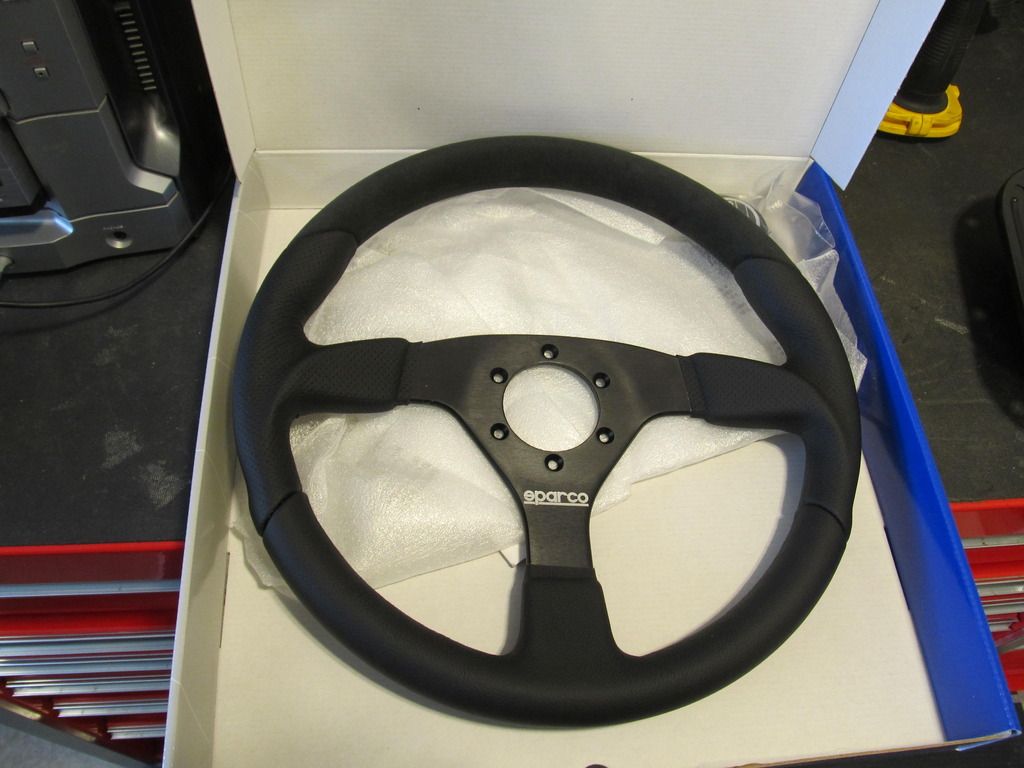
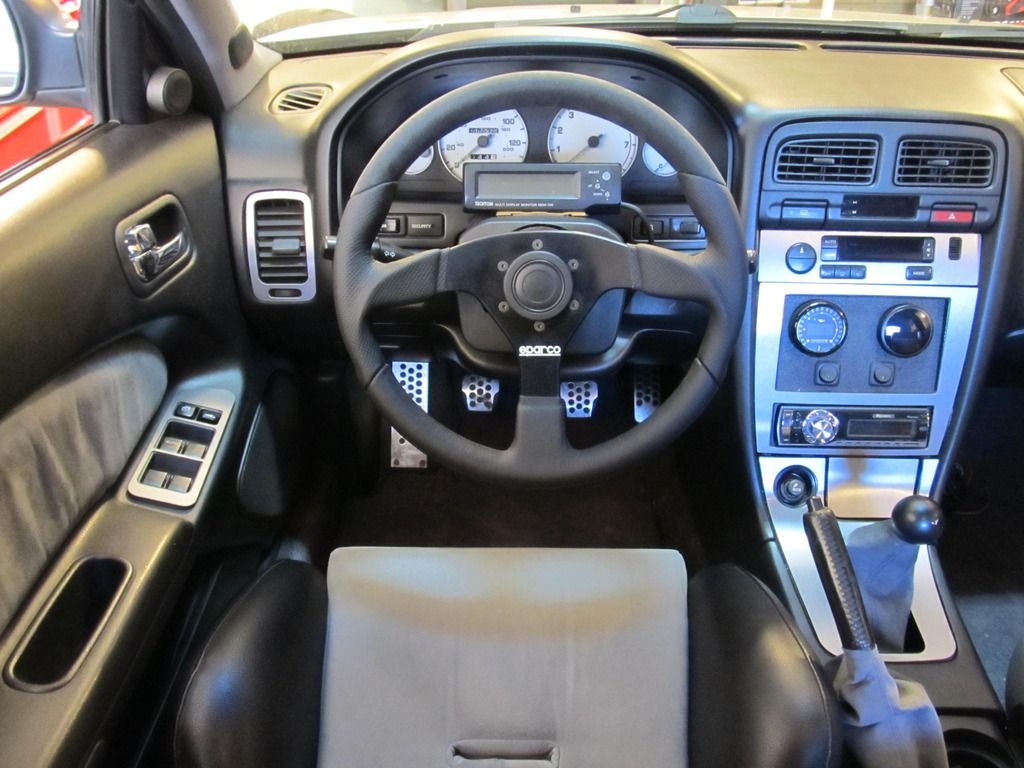
The I30 is finally under the knife and things are going well enough! Before I get into the heavy stuff, let's start with a small project: installing a new steering wheel. The old Sparco now lives in the M3, and since I loved the design so much, I wanted to get the same thing for the I30 again. The wheel is the Sparco L505. They must have revised it a tad, as the old center section was silver, and the new one is black. Still though, same great shape and thickness, and new alcantara sure is smooth!
Much more later
How did you get your horn to work? I have an OMP wheel and the horn is well.....silent.
Aside from the never ending vibration coming from my motor, this has been the bane of my existence. For two whole years now I've driven around without a horn in my car because I could never figure out how to get one to work. I've resorted to using my high beams and my motor as makeshift horns, and neither really worked very well.
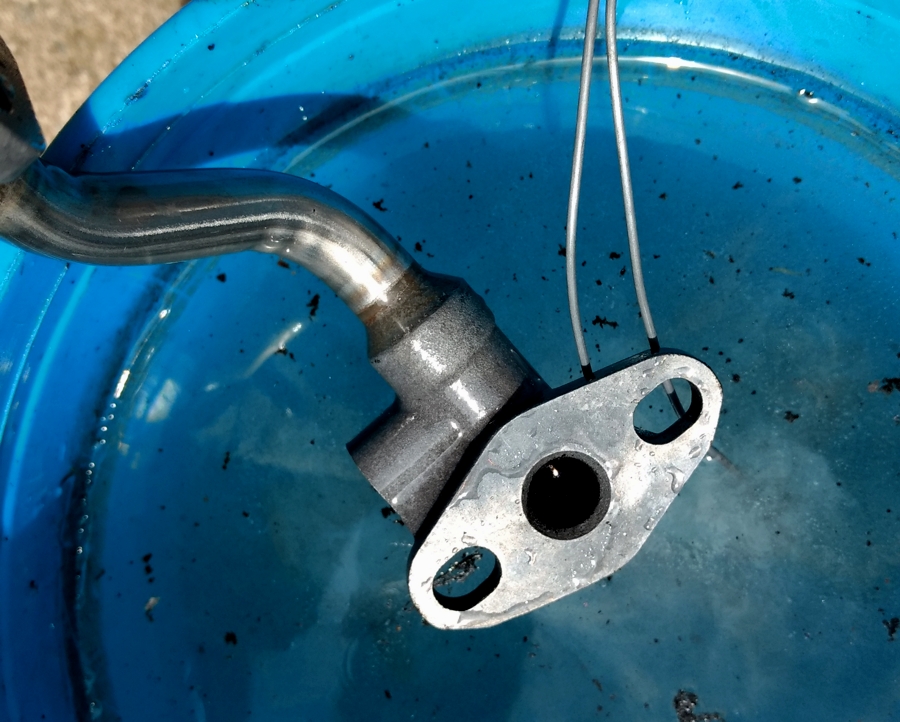
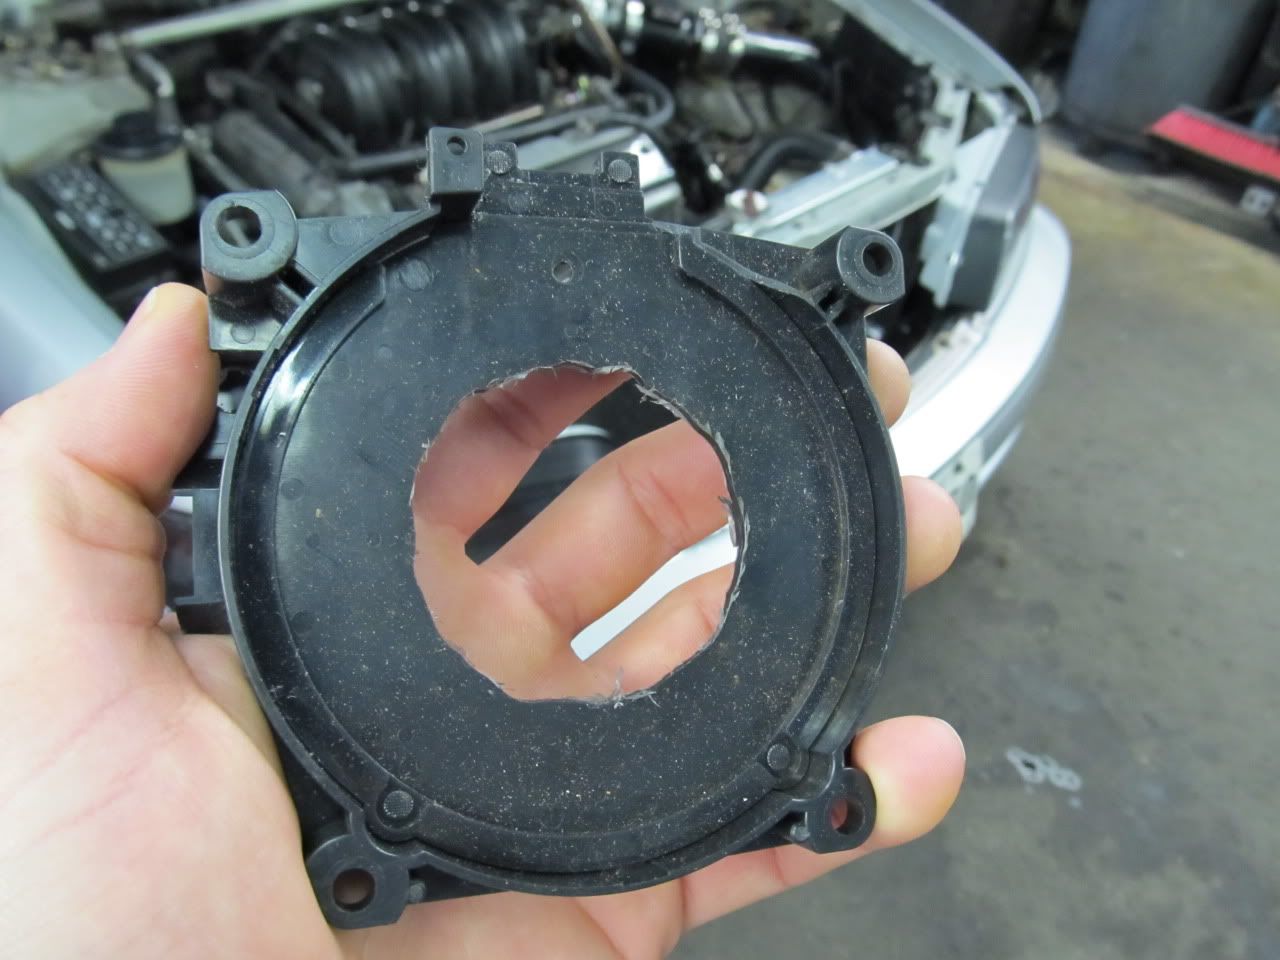
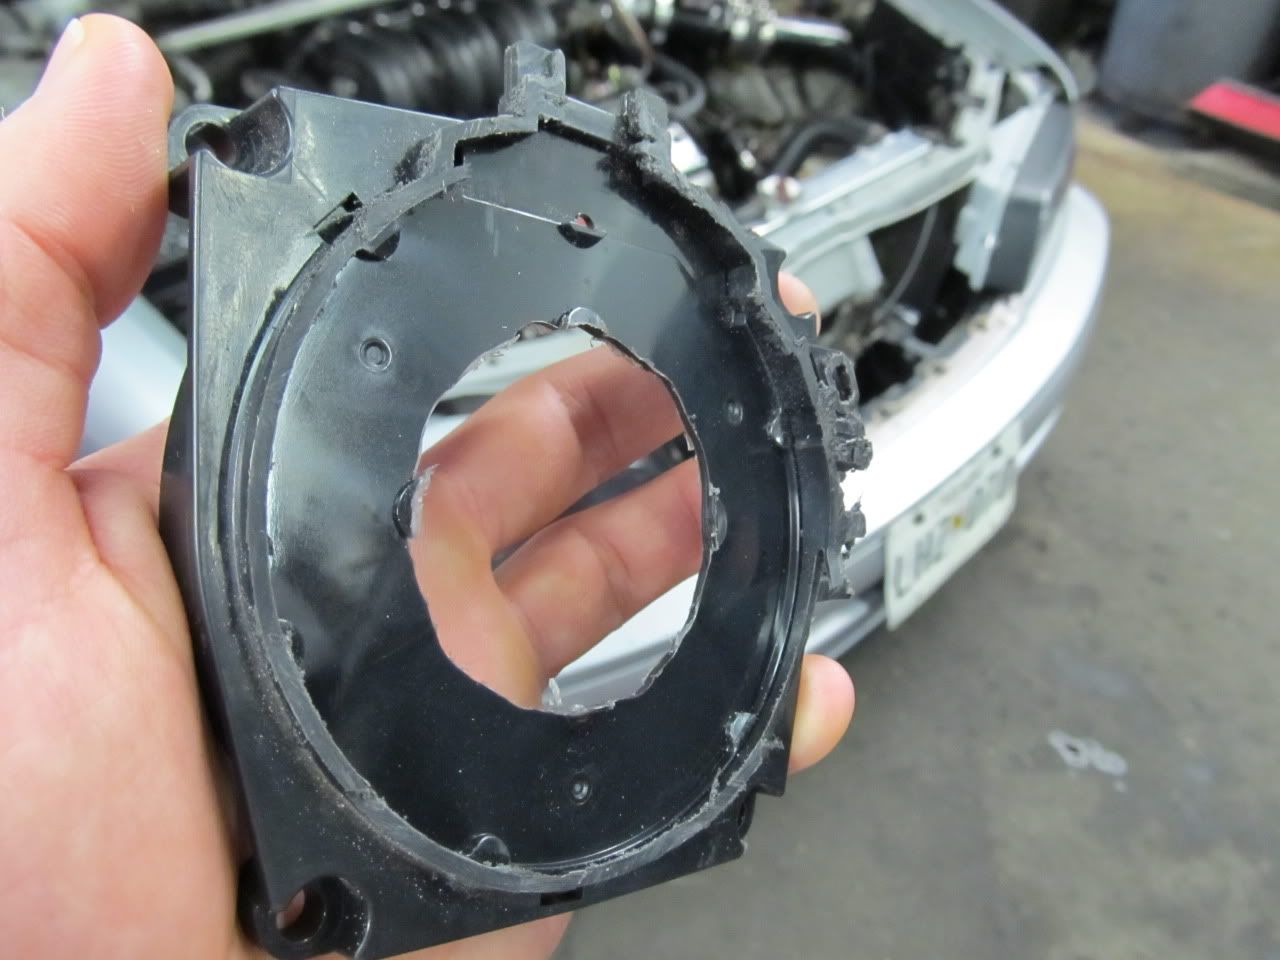
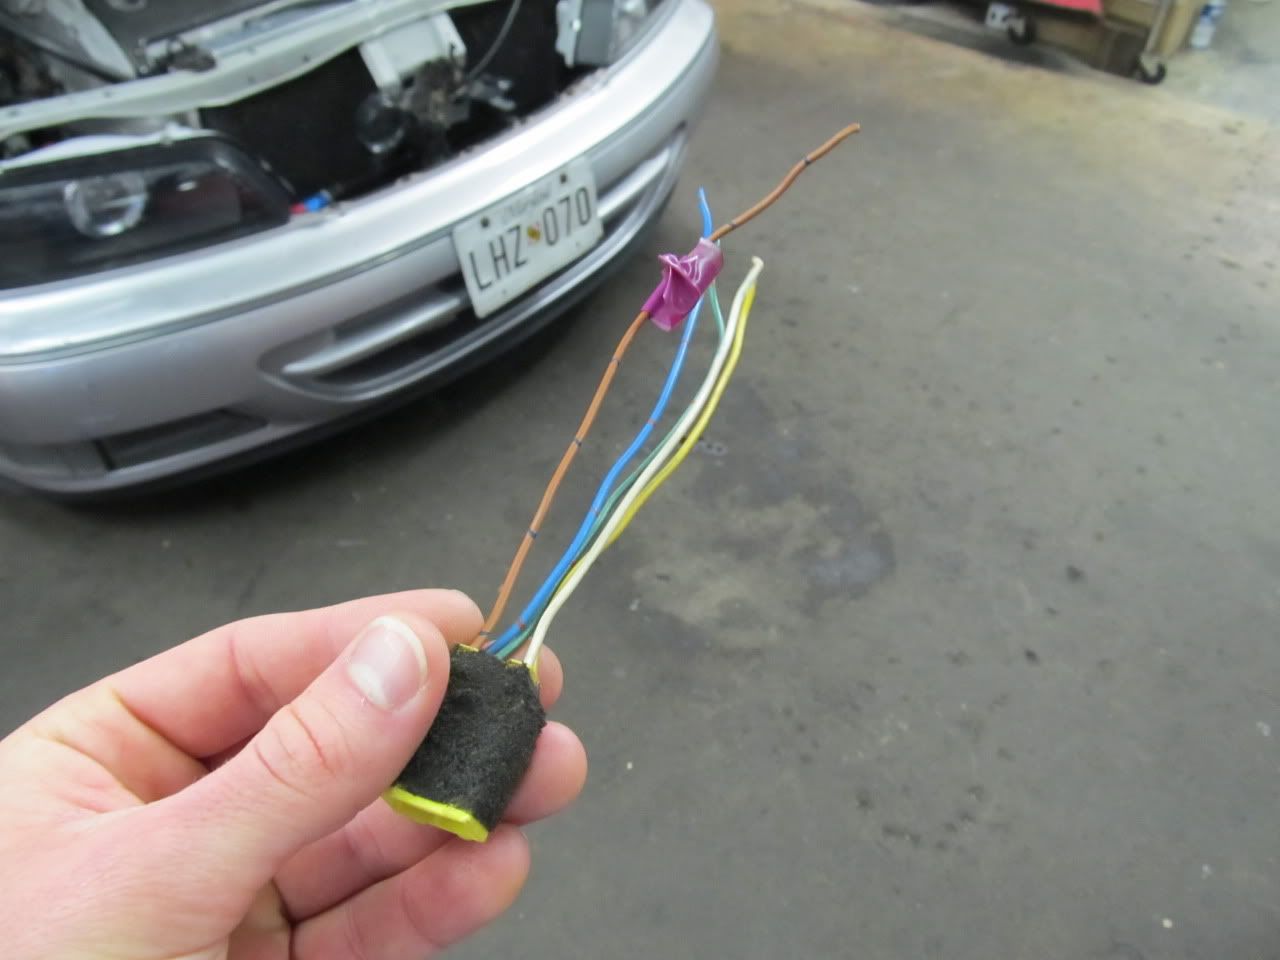
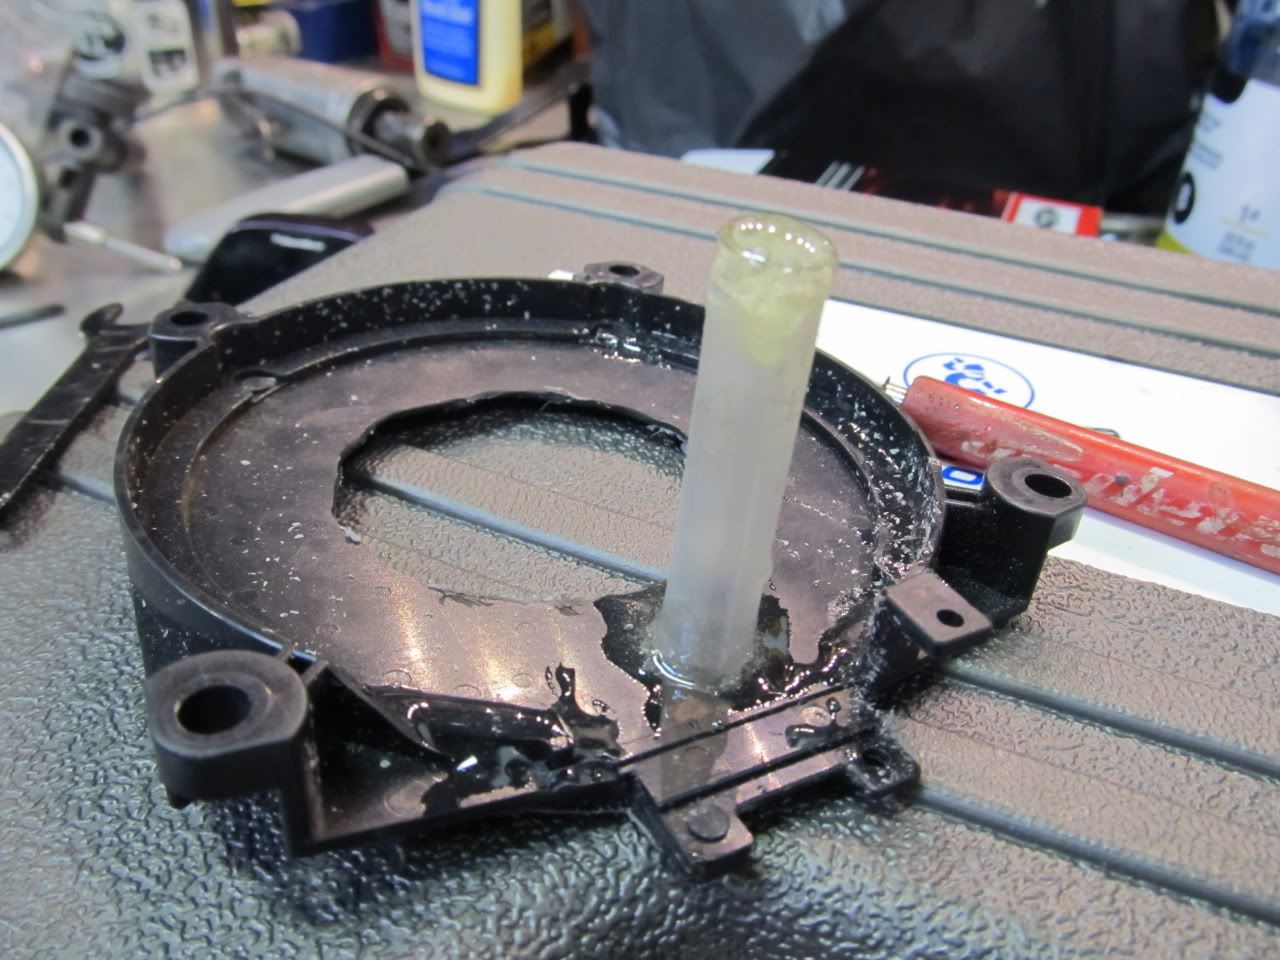
Well, good ol' Eric at Joe's Professional Auto Care got an idea one day and ran with it. He hacked apart my old clockspring, and got it down to this:
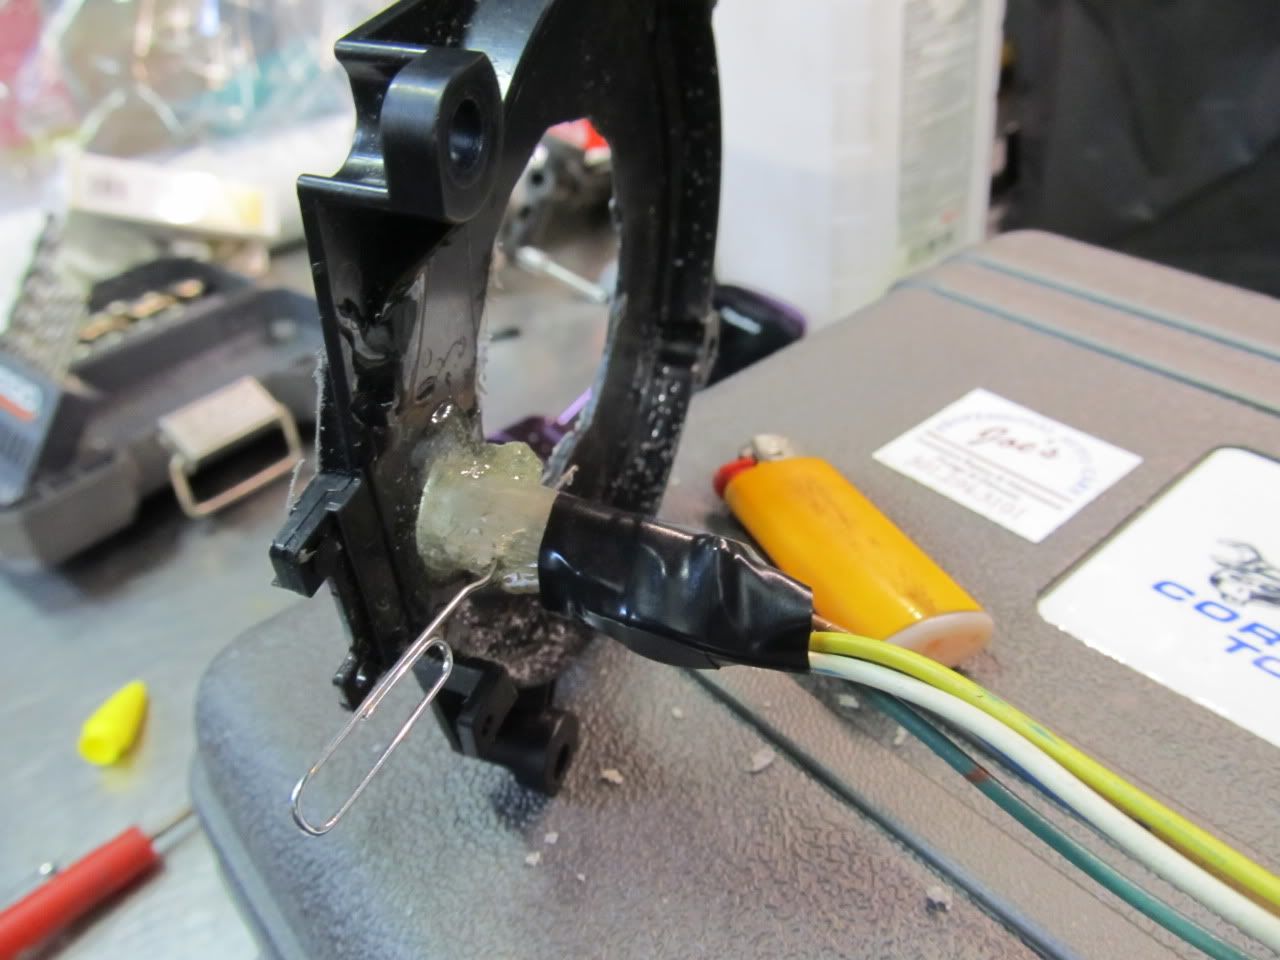
This is the connector for the clockspring. The horn wire is green under the dash, but when it reaches this connector it switches to being the brown wire.
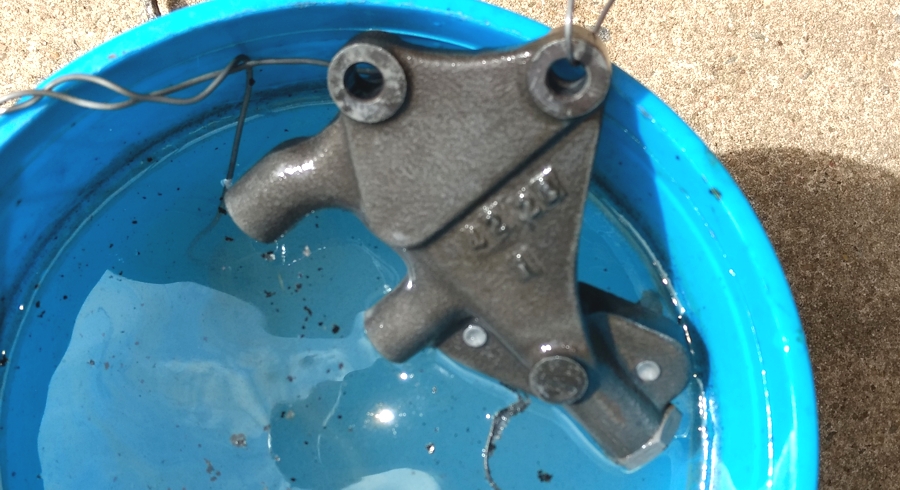
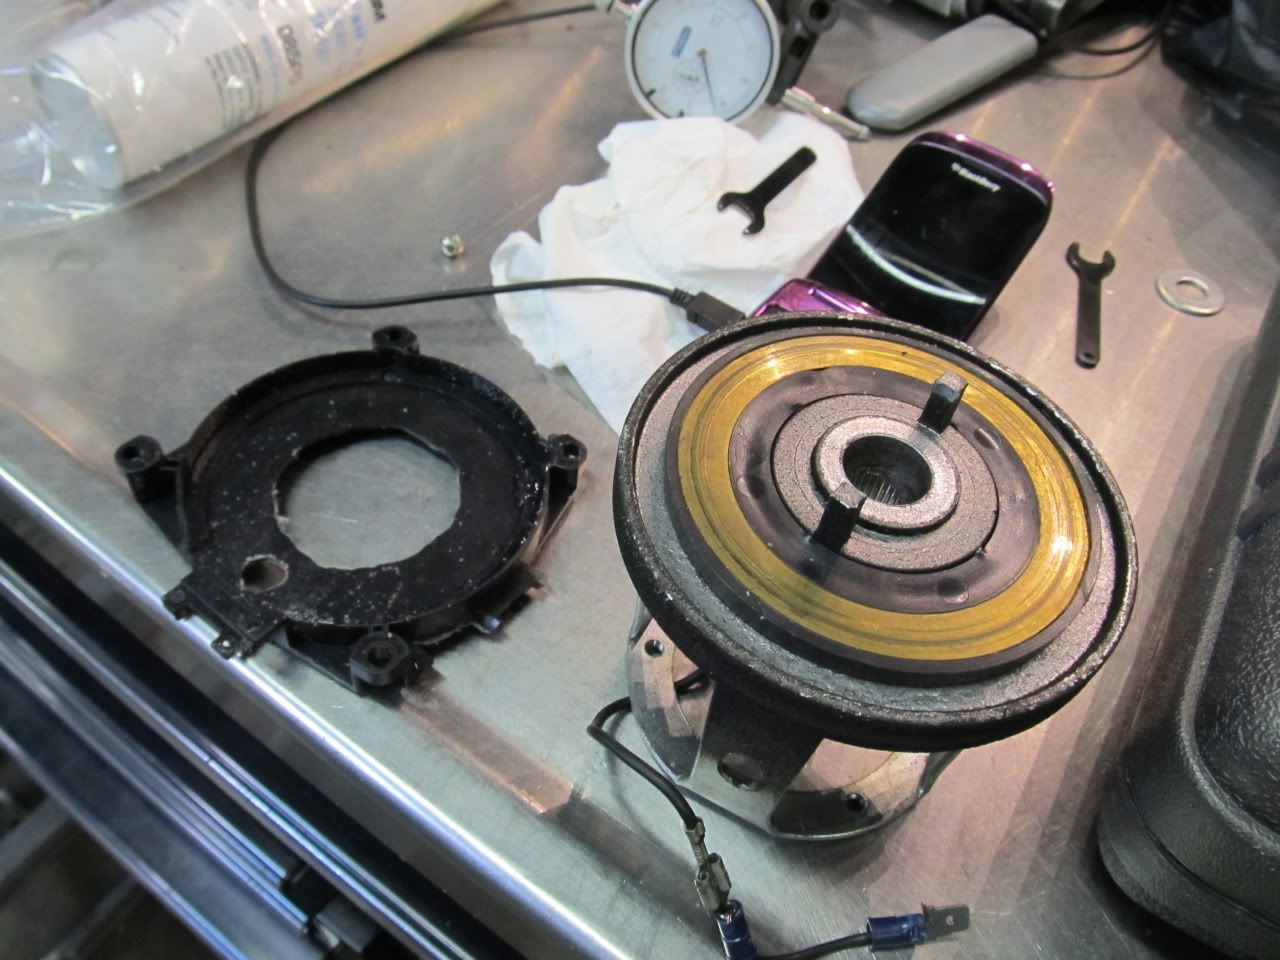
Note the metal ring around the steering column:
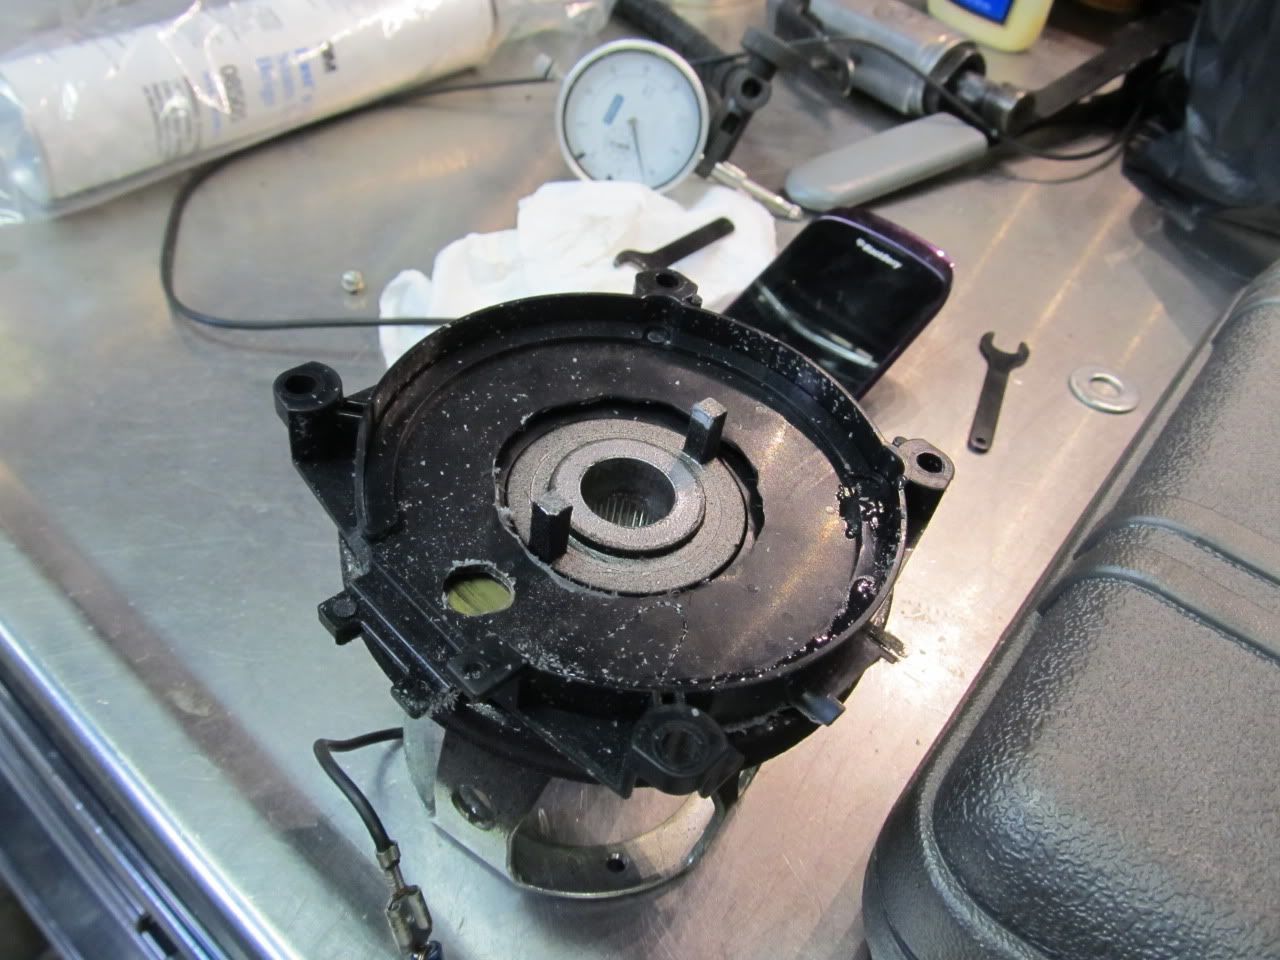
See that hole in the clockspring that allows access to the metal?
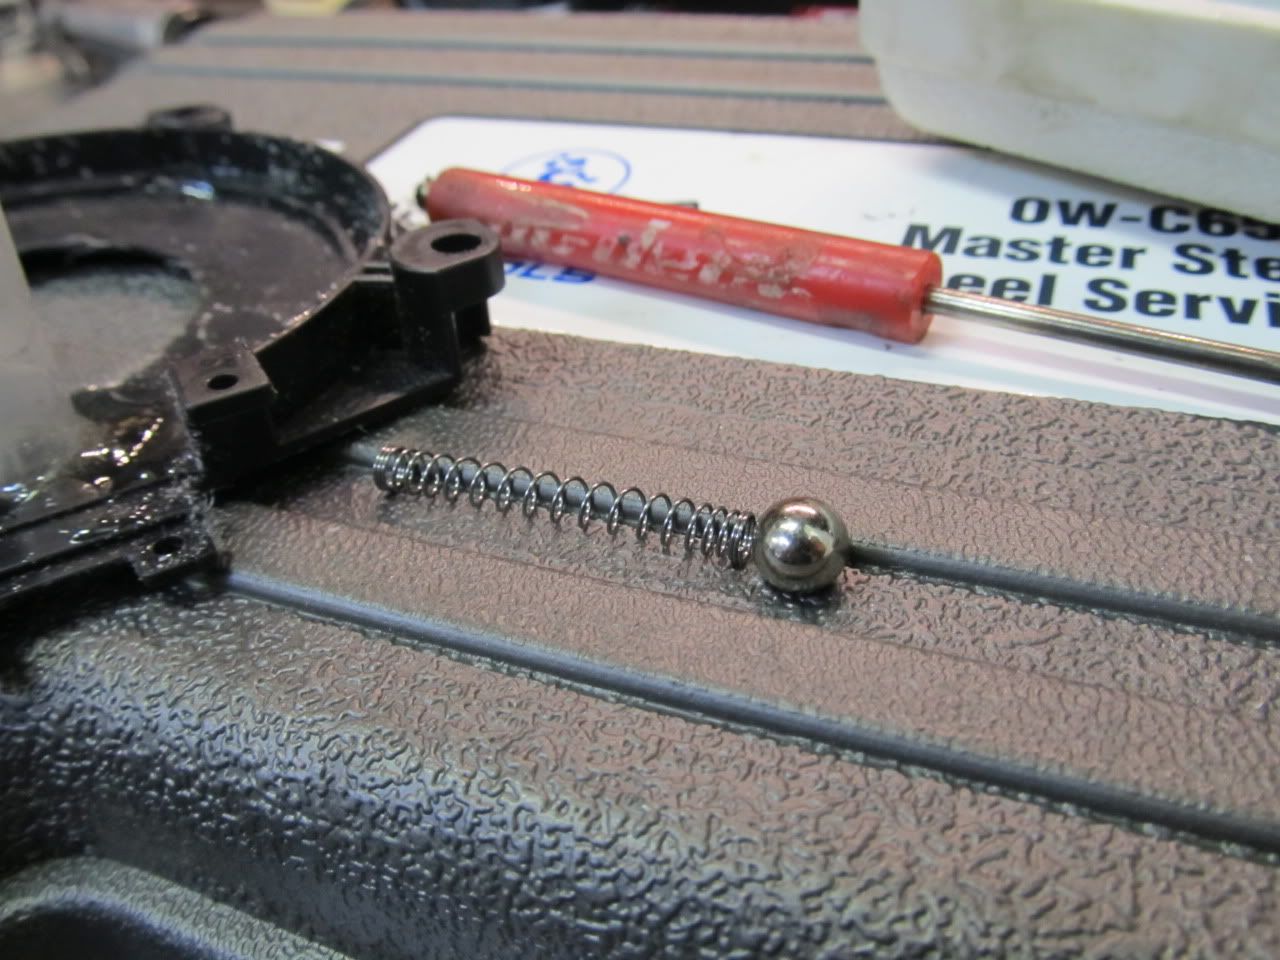
A ball bearing from some small wheel bearing and a random spring
And a tube epoxied to the clockspring
You can't see it, but the spring and the ball bearing are hidden inside the tube underneath the electrical tape. The paper clip is holding them inside before installation, and the brown wire is touching the spring.
You can kind of see what's going on here
So we installed everything, pulled out the paper clip, and VIOLA, I HAVE A ****ING HORN IN MY CAR AGAIN. Damn it feels good to honk at people again! I had forgotten how nice these 350z horns sound compared to the weak/worn out I30 horns. You have no idea how nice this is after two years of not having a horn.
This is a repost of post #153 for Crusher I apparently need to re-do this since my horn no longer works...ugh.
Very nice, thanks for the tip! I would love to see how the two products compare. I wonder if Evapo Rust has the same active ingredient...
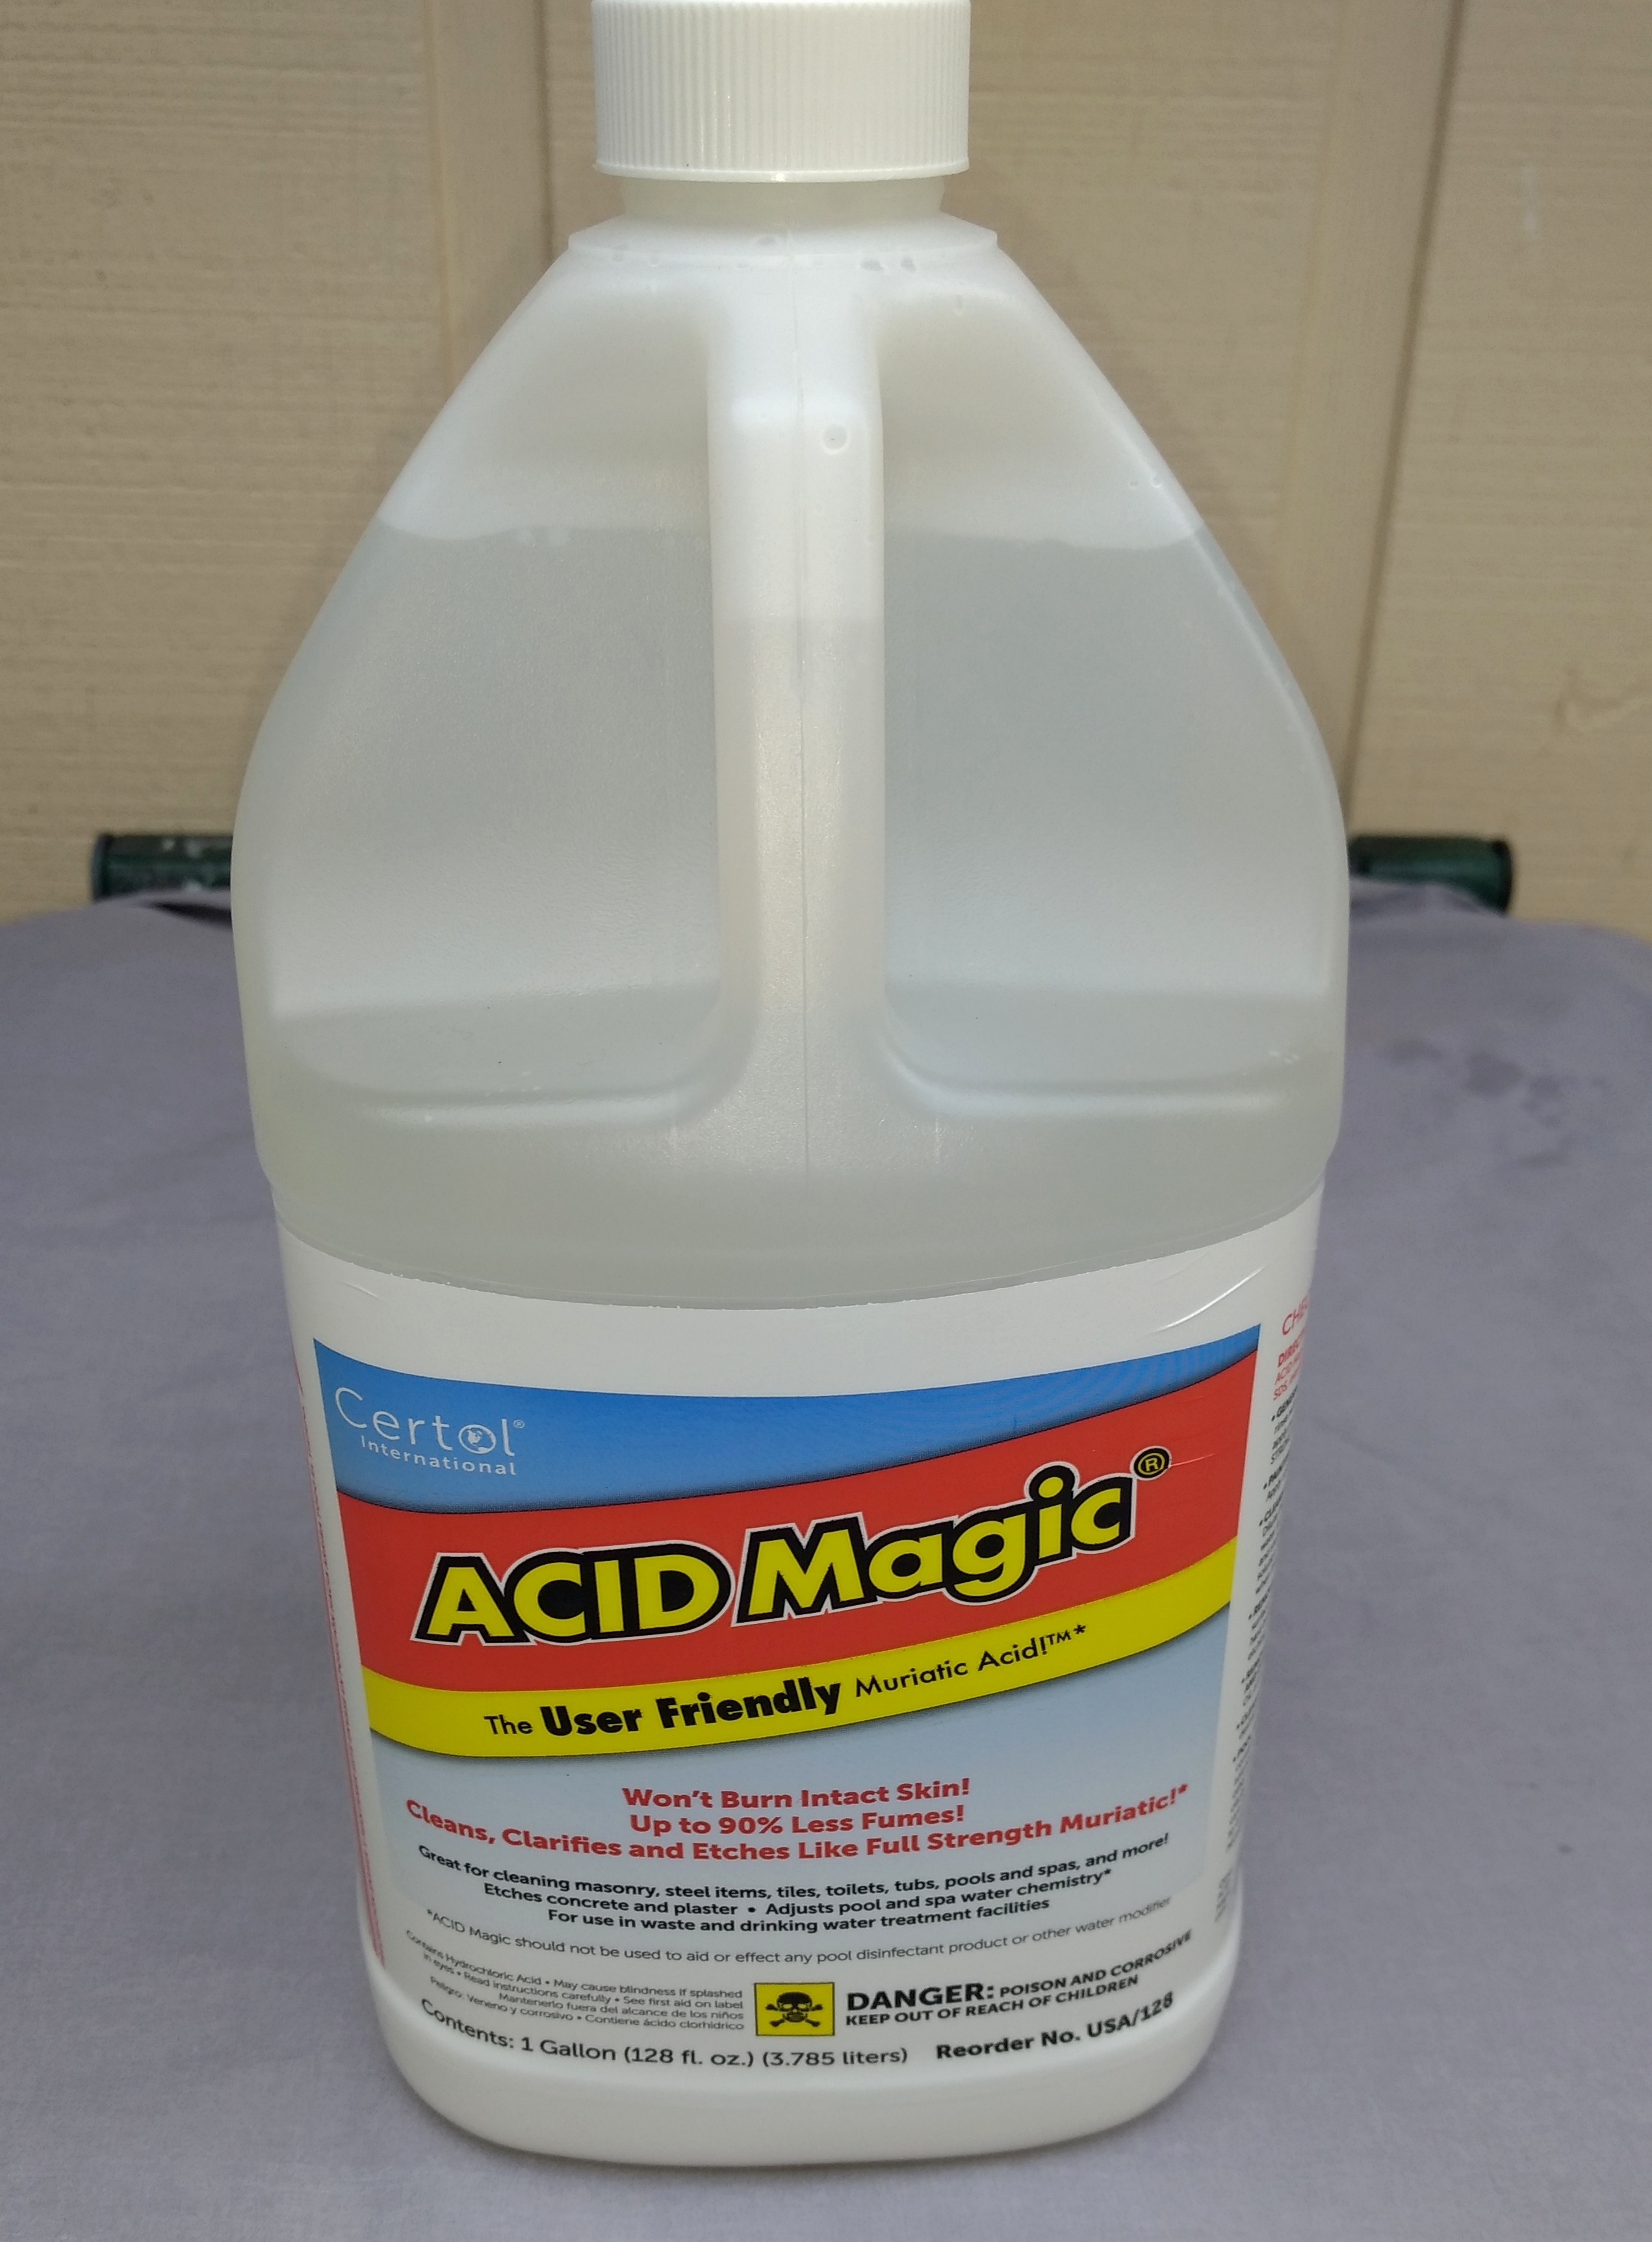
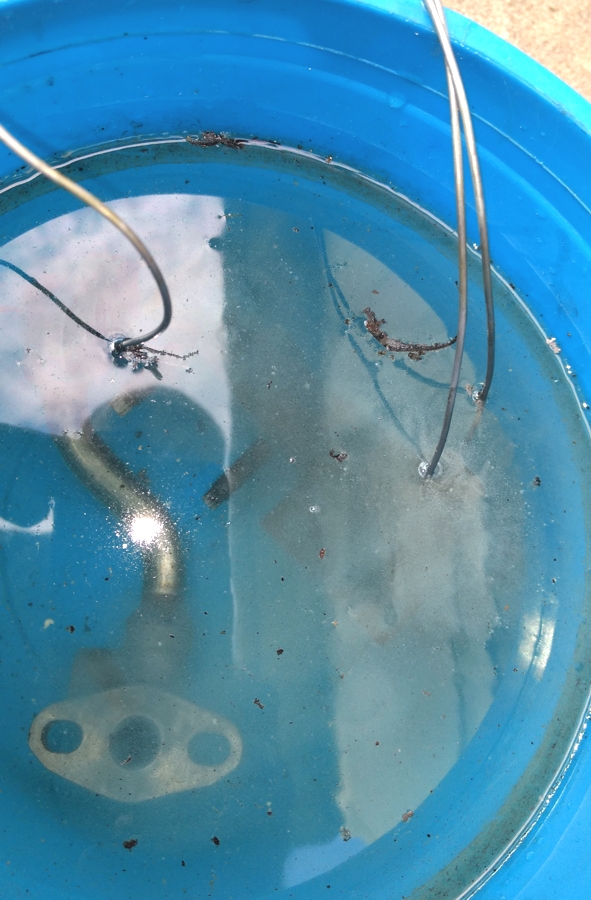
In looking at the Evapo-rust chemical ingredients, outside of the secret sauce references, it looks like a version of lye soap. Here's a video about using a lye soap dip to clean up old iron skillets. Where as a rusty part dipped in muriatic acid will fizz like an alka seltzer until the acid has dissipated or there is no more rust to dissolve.
When using muriatic acid to remove rust, I've found that I need to quickly soak the part in kerosene or carb cleaner until I start prepping it for painting or a thin film of rust will return.
It might be worth a try on a small part to get a feel for how it works. I bought the Acid Magic at Ace Hardware. IIRC is also comes in quart bottles.
"Evapo-Rust Super Safe Rust Remover
Evapo-Rust Super Safe Rust Remover is the #1 non-toxic rust remover in America. Rust removal can take a lot of time and money but not with Evapo-Rust rust remover. A product of extensive research, Evapo-Rust rust remover is an environmentally safe, water based product that has been proven to make even deep rust disappear in minutes without scrubbing. It�s so easy to use, anyone can restore their rusted antiques, camping gear, hardware, tools, cast iron, gardening tools, BBQ grill, auto parts, even firearms to like-new condition. Evapo-Rust will not harm metals, rubber, plastic, wood, glass, PVC, Viton, most paints, most chrome, or non-rusted steel. In fact, immersing un-rusted steel in Evapo-Rust rust remover provides excellent long-term rust protection. Best of all, Evapo-Rust Super Safe Rust Remover is safe to use. It�s non-toxic, non-corrosive, and contains no acids, bases, or petroleum solvents. Evapo-Rust is also biodegradable. Evapo-Rust is the easy metal restorer that�s easy on your skin! Just soak, rinse, and reuse. Let Evapo-Rust Super Safe Rust Remover do all the work for you without having to use any gloves, masks, or protective eyewear. Evapo-Rust can be used over and over again on multiple projects. One gallon of Evapo-Rust can treat up to 300 pounds of parts. Pure Evapo-Rust can be safely poured into the city sewer. When the solution is spent the solution will turn completely black and only the iron content will dictate the disposal method. Evapo-Rust is available in quarts, gallons, 5 gallon pails, and larger for industrial accounts. Check your local store for size availability and pricing. Find us on Facebook and see all the projects people have done using Evapo-Rust!"
I like this because it is not a acid. you need no gloves or anything like that. water based.
Okay, before I clog up the thread with tons of pictures, I need some help with one more item!
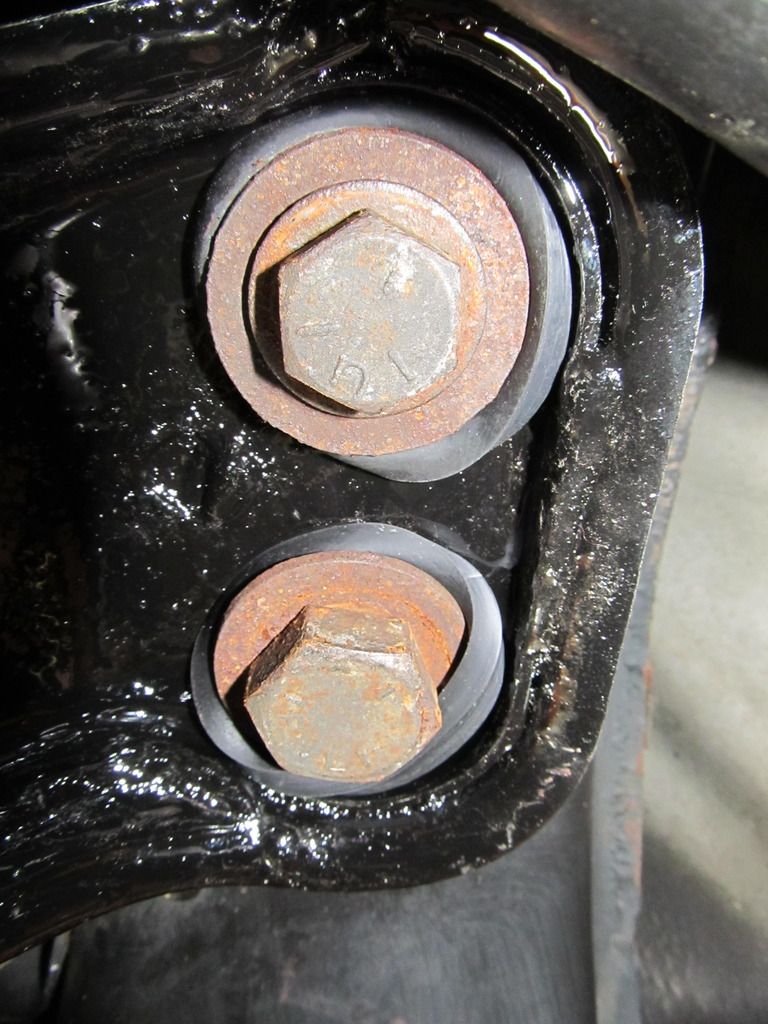
My new needed new crossmember bushings, so I picked up an ES set. My two rear bolts that attach the crossmember to the body are larger than stock (17mm is stock- one is 19mm the other is 24mm) because the threads got really chewed up at one point and needed to be re-threaded, but I can't see how that would matter. My problem is that when I go to tighten the bolts, the lower/outer bushing ring squishes out around the washer for each bolt.
I assembled everything in the correct order, and am nowhere near over-torquing the bolts. Why do these outer bushings keep squishing out around the washer? Anyone have any tips for me?
where to get the ES bushings? didn't know they existed
The amount of work is a typical weekend for me but actually documenting and poasting it... I can't even!!!
Also, sup guyz?
Sup buddy! Yeah, doing the write up for this took a few hours, but it was worth it. If I don't do this, I'll forget all the details. Being able to go back through this thread and see everything can actually be very helpful.
Sup buddy! Yeah, doing the write up for this took a few hours, but it was worth it. If I don't do this, I'll forget all the details. Being able to go back through this thread and see everything can actually be very helpful.
I can see that. I almost forgot how much work went into my 03 until i bought this 02.
So you still autox or has that thing been on a road course yet?
I can see that. I almost forgot how much work went into my 03 until i bought this 02.
So you still autox or has that thing been on a road course yet?
I just mounted up another used set of Hoosiers, so it will see plenty of auto-x duty this year. It's been on a road course before, and I still have my track pads, so I would like to make it to a few HPDEs this year as well. I need to make up for lost time!
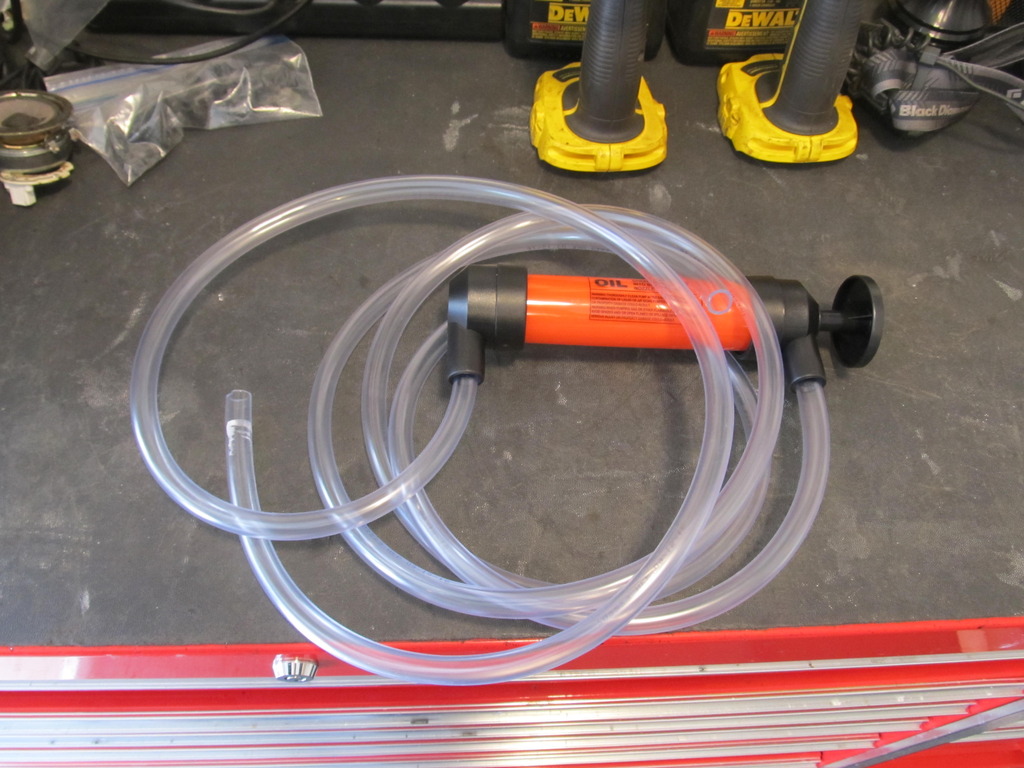
So for some reason I decided filling up my gas tank was a good idea last spring (even though I knew I wasn't going to be driving it soon), so I had year old gas in my tank that I wanted to remove. I tried a few times to go WOT and the car seemed to stutter a bit, so that motivated me to get the old gas out. My old hand pump (for fish tanks...) died so I picked up a better one from Home Depot for $10 along with 10' of hose.
For whatever reason, I couldn't get the hose to go to the bottom of the tank through the fill tube, so I pulled up the back seat and sucked it out through the top of the tank. With all but about a gallon of old gas out, I put in a can of Liqui Moly Valve Clean and fresh 93 octane, and was ready to roll!
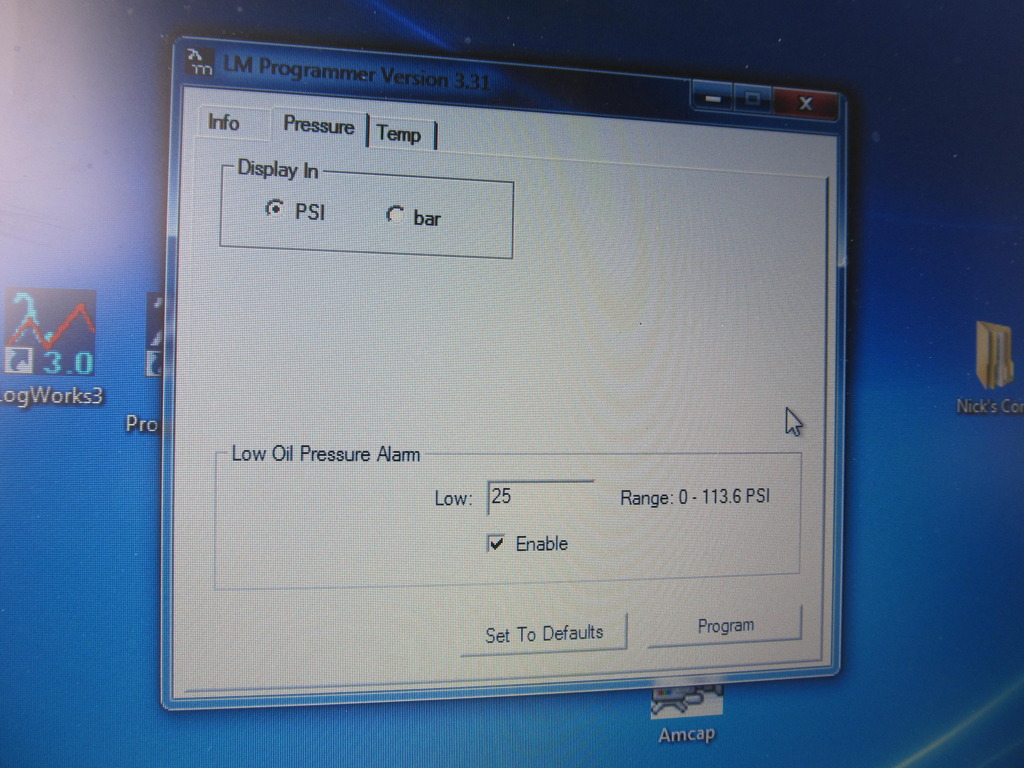
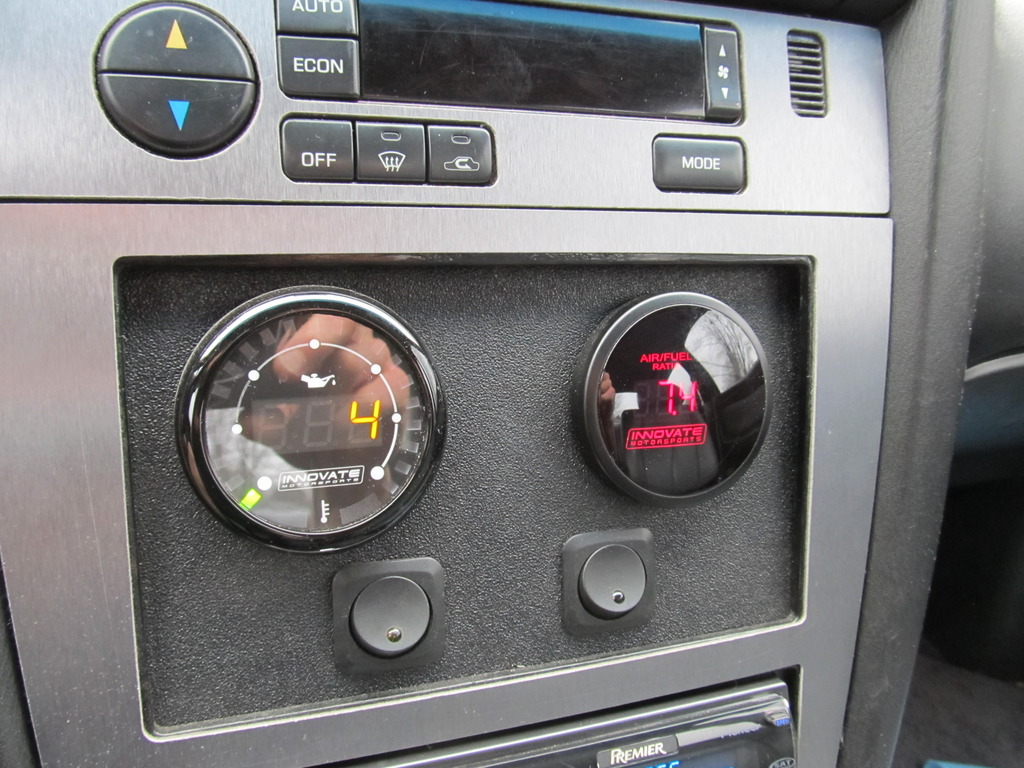
Then it was on to tweaking the settings of my Innovate Motorsports oil pressure/temp gauge. You can set alarms for high temp and low pressure, and change the temperature ranges of the LEDs.
First up, I set my low pressure alarm to go off if pressure drops below 25 psi. After driving around for a week or so, I haven't seen pressure drop below 33-35 at idle, so I might raise the warning level to 30 psi.
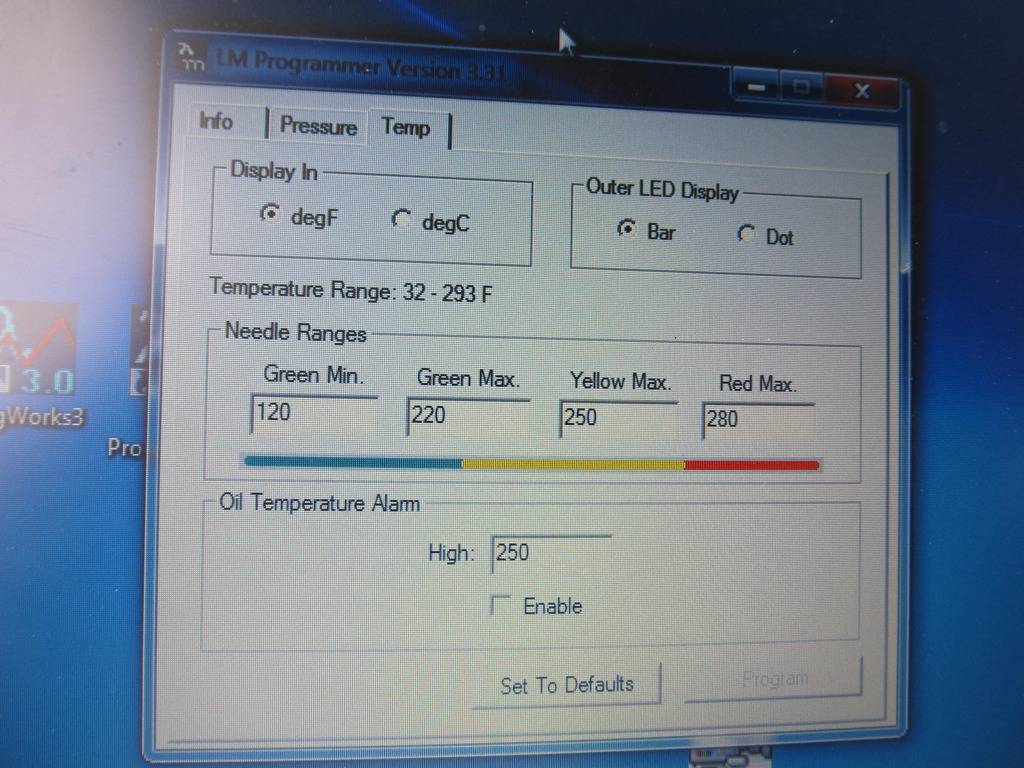
These were the stock settings for temperature:
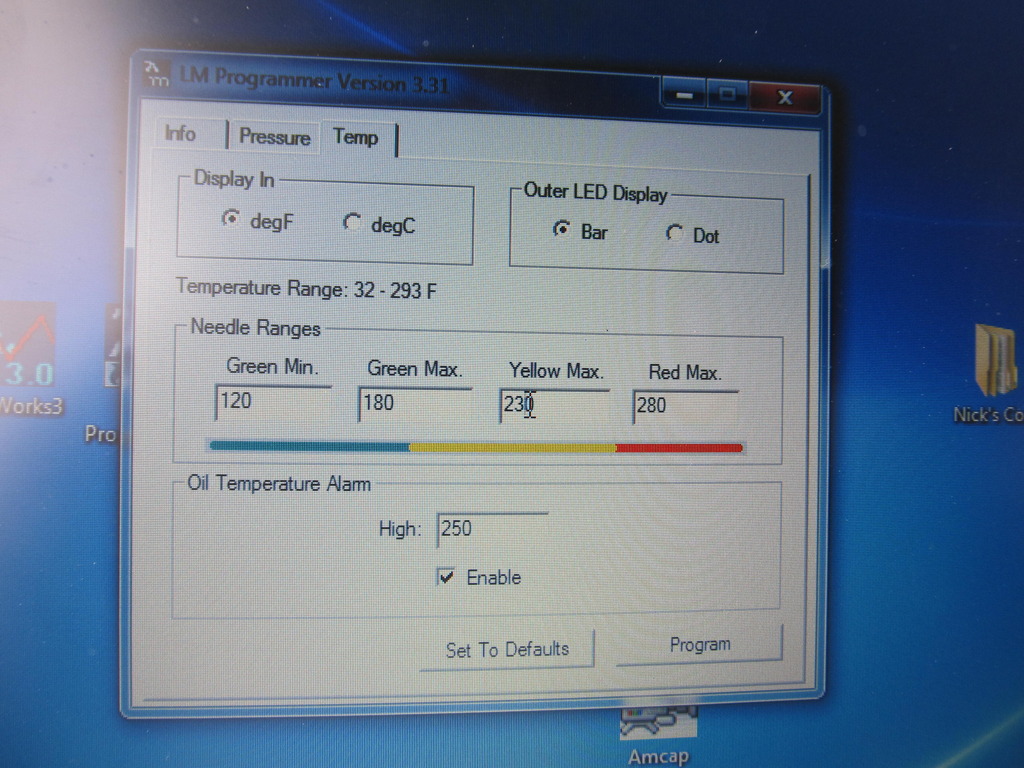
I wanted to know when the oil was up to operating temperature so I knew it was safe to go WOT, and after a bit of research, it seems 180* F is a safe number, so I set the yellow LEDs to begin at 180* instead of 220*. I also enabled the alarm.
Since 2008, my primary source of music in my car was my trusty 120GB Microsoft Zune. It was dead nuts reliable for 8 years, but the battery finally gave out a few months ago, so it was time to update some wiring for the stereo. The Zune had been hooked up using proprietary wiring that not only sent the signal to the HU, but also changed the unit at the same time, which was very convenient. I removed all that wiring and installed a regular 1/8" cable to the same spot in the center console for my new Fiio music player (which plays FLAC files!) and phones.
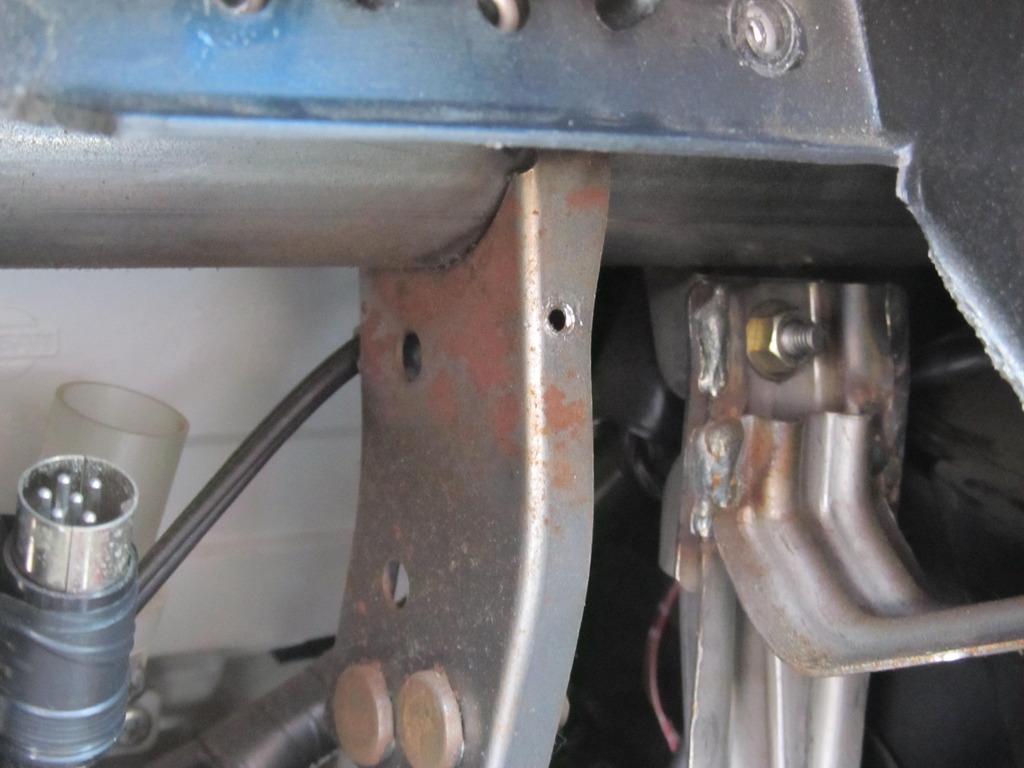
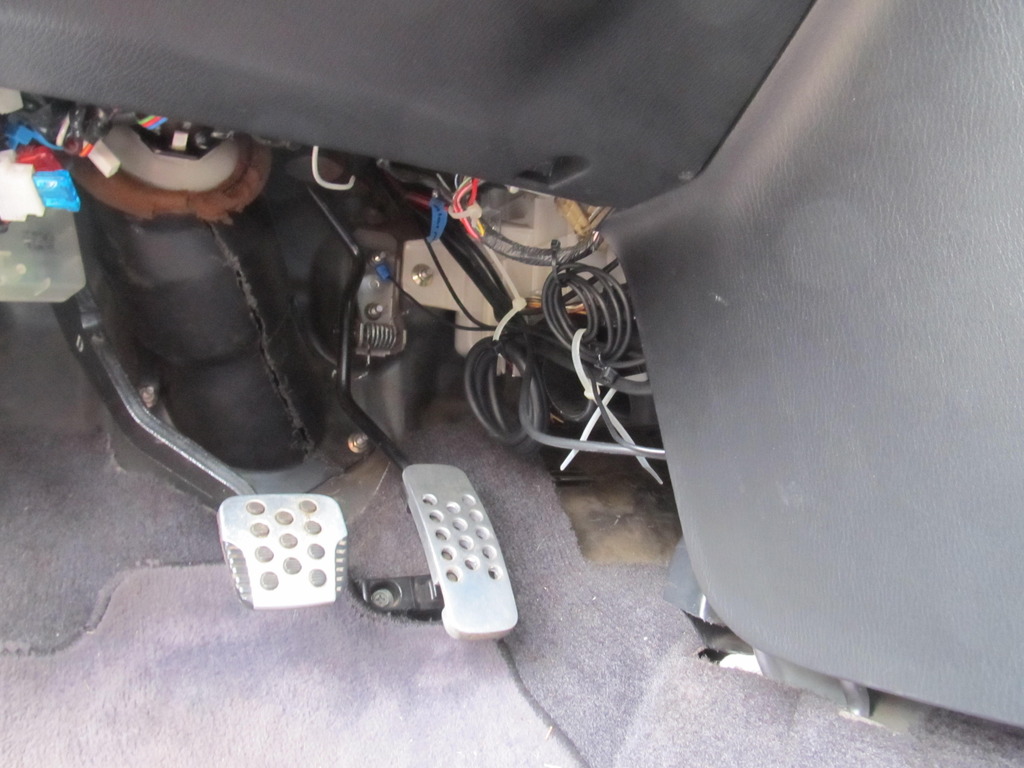
While I was back there, I wanted to tidy things up a bit. From doing the HU install in the 3rd gen, I knew that running a dedicated ground wire is important in these cars, and I wanted to make sure my HU had one. Thankfully, it did, but it was run to the metal tubing in the dash, and I wasn't sure of how great of a ground that would provide. I wanted to be extra sure, so I extended the wire and ran it to a stud around the gas pedal on the firewall.
I used my Dremel and tiny wire wheel to clean up the paint to ensure a good ground:
I then used some zip ties to tidy up the mess of wires running from the console through the firewall:
Not the greatest pic, but it gives you an idea of what the gauges look like:
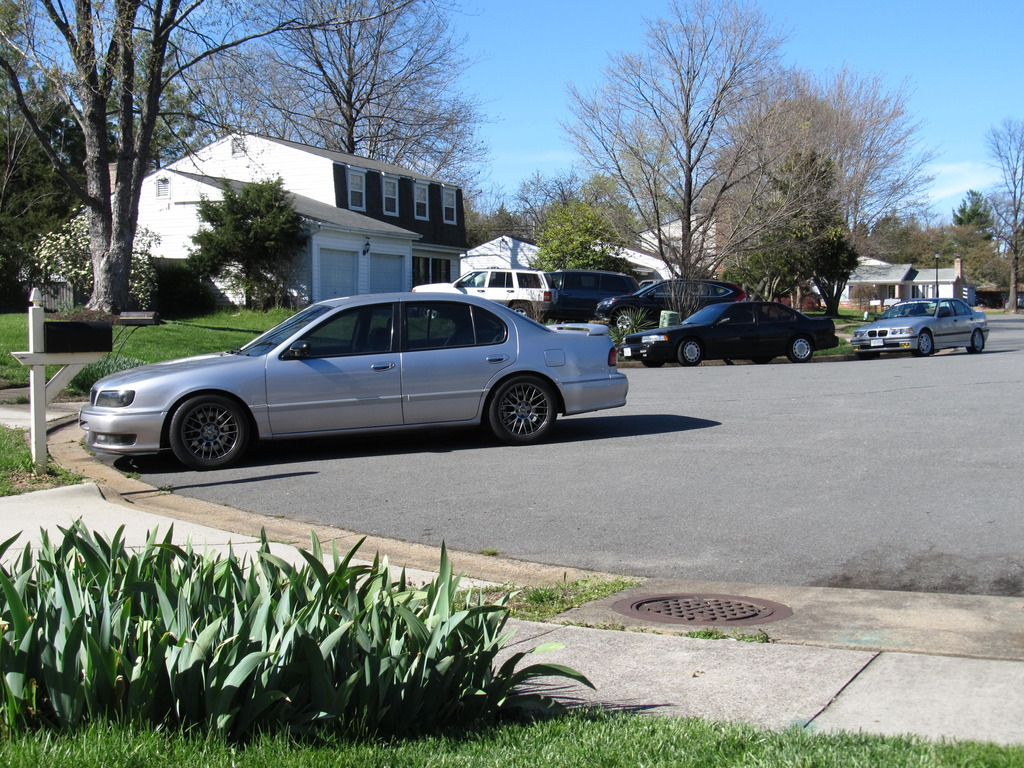
Group picture time!
Last edited by 95maxrider; 04-21-2017 at 08:10 AM.
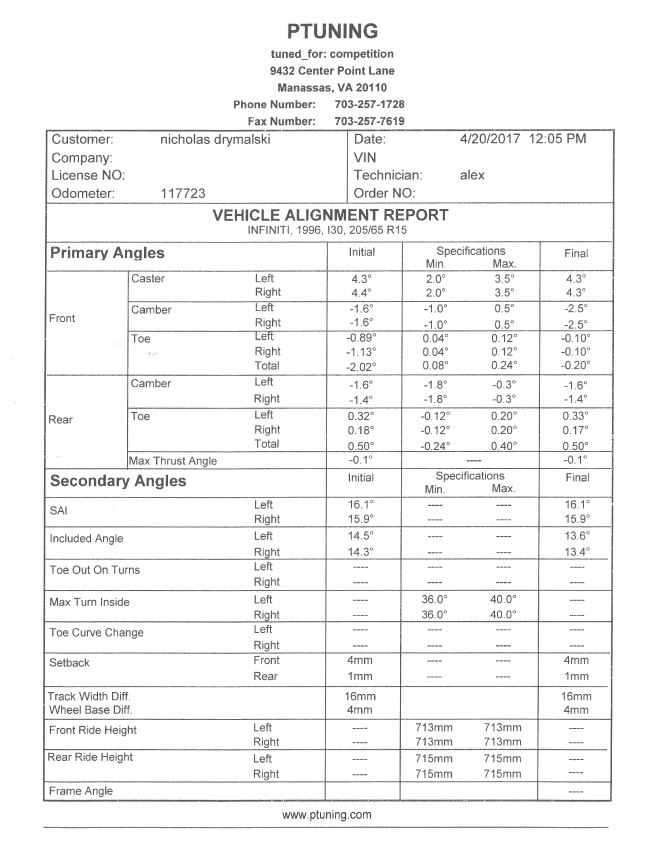
With race season right around the corner, it was time to get another alignment! When I did the big job a month ago I marked the camber bolts to ensure I could put it all back together without throwing it too far out of spec. To my surprise, the car actually drove nice and straight after reassembly, so I was pretty pleased with myself! However, there were a few times when the car felt a little twitchy, so I figured an alignment was a good idea.
I went back to PTuning in Manassas, VA since they're now only about 30 minutes from my house (I moved from MD to VA about 18 months ago). This is the shop that redrilled my front strut towers so I could use my camber plates as caster plates. I bought new camber bolts for them to install because the one on my PS wasn't torquing like it was supposed to, so I'm pretty sure I messed up the threads a bit when I was removing it two years ago and didn't quite know what I was doing. I bought the same ones that have been in the car for four years,
After much waiting, confusion, and frustration, they finally gave me my car back some 3 hours after they started working on it (on a one hour job). I was the first one in the door in the morning, and the lack of good communication and slowness really turned me off. I will not be going back to PTuning. Oh, and they somehow drained my battery from having that tool hold down the brake pedal, which was an added bonus. Either way, I left there pretty angry, but at least I had a good alignment.
I have no idea how I gained so much toe out since my last alignment. The only stuff I've done to the suspension since my last alignment in 2015 was new ball joints and ES control arm bushings. The car feels very stable again, and I haven't pushed it yet, but so far I'm pleased with the results.
I would like to touch on a discussion in this thread from a few years ago, mainly the safety of camber bolts. I've read some horror stories about them breaking, and the technical writings from Norm Peterson showing them to be a potential problem, but I must say that I have abused the **** out of my car (frequent auto-x on Hoosiers, that time I hit a speed bump at 40 mph and broke my PS axle carrier bearing bracket, etc) and these camber bolts have taken it all in stride. The OEM strut to spindle bolts should get 110 ft/lb of torque, and these camber bolts require 97 ft/lb. I can't help but wonder how many camber bolts problems are due to over-torquing. I welcome further discussion!
The OEM strut to spindle bolts should get 110 ft/lb of torque, and these camber bolts require 97 ft/lb. I can't help but wonder how many camber bolts problems are due to over-torquing. I welcome further discussion!
Being allowed 97 against 110 OE is one thing, but not all cars are going to have crash bolts that are that close to the OE spec (around 88%).
One of my cars lists crash bolts at 77 ft*lbs vs a 148 spec (not much over 50%) . . . but know that the OE 148 was later revised upward to 166 (and the knuckle thickened slightly) when it was discovered that 148 wasn't guaranteed to provide sufficient clamp load. There were a number of occurrences where the knuckle fractured under hard use.
Without having both torque specs in hand, I can't assume that any reduced-shank bolt will have anywhere near OE strength if it provides much adjustability at all. Blind acceptance of aftermarket crash bolts . . . you'll never get that from me.
That's not to say I'm opposed to correcting camber at the strut to knuckle joint - I've done it myself (oversize holes in the strut 'ears', OE bolts, full OE torque, plus a method of ensuring that bolt location is retained).
Norm
Last edited by Norm Peterson; 05-04-2017 at 10:12 AM.
Another testimonial here supporting camber bolts under aggressive cornering loads. I used Eibach, Progress, and SpecProd for years. Never had one snap or spin on me. Welcome back to the lots-of-toe-out club...
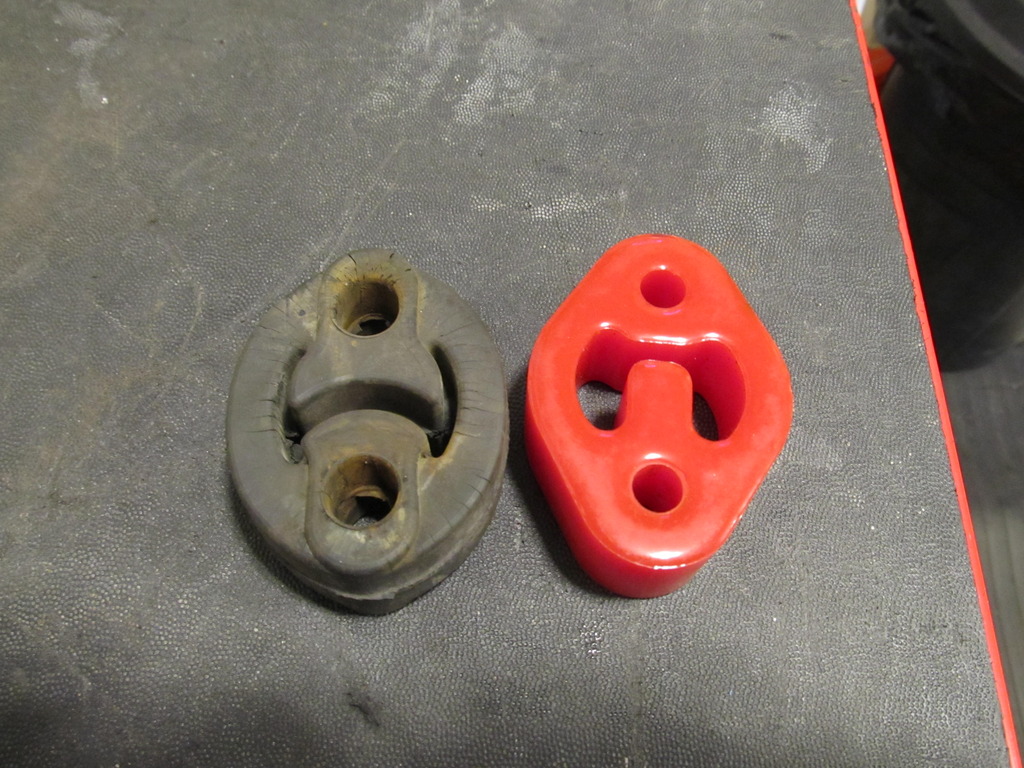
The G35 sedan muffler has always banged around when I go over large bumps, but I had gotten used to it. Now that I'm relearning the car after not having driven it last year, I'm noticing certain things, like how much the muffler banging on things bugs me. Time to take a look and see what's going on.
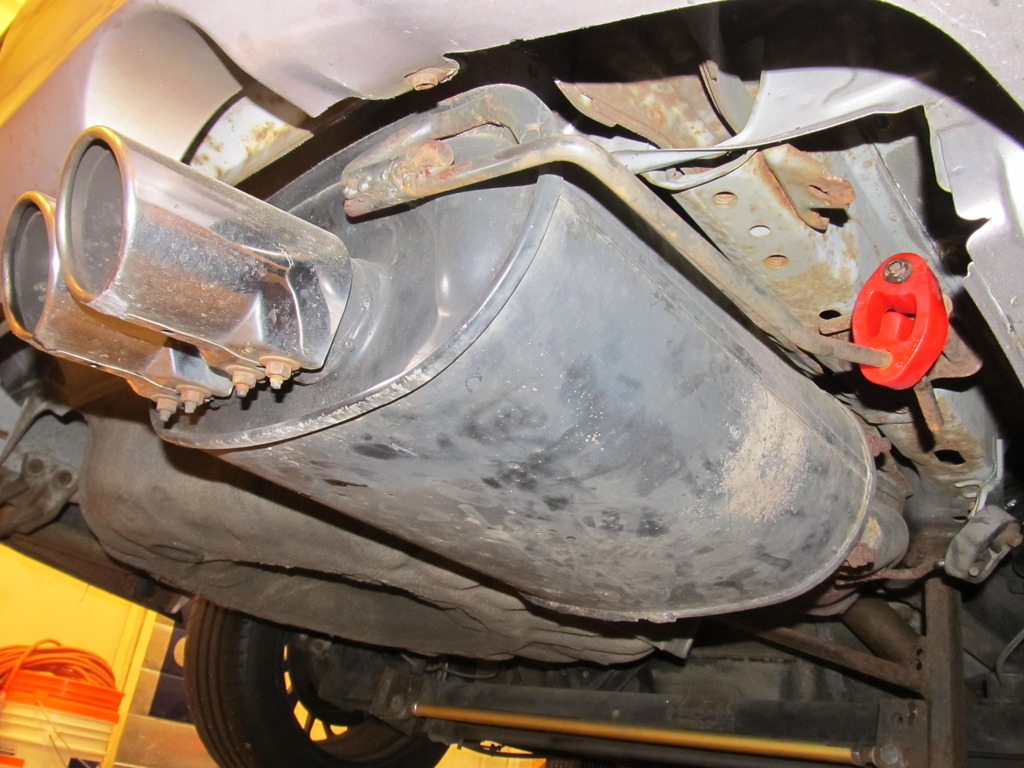
I had a spare poly one lying around so I threw it on...
Woo, red! Thankfully, you can't see it unless you're under the car.
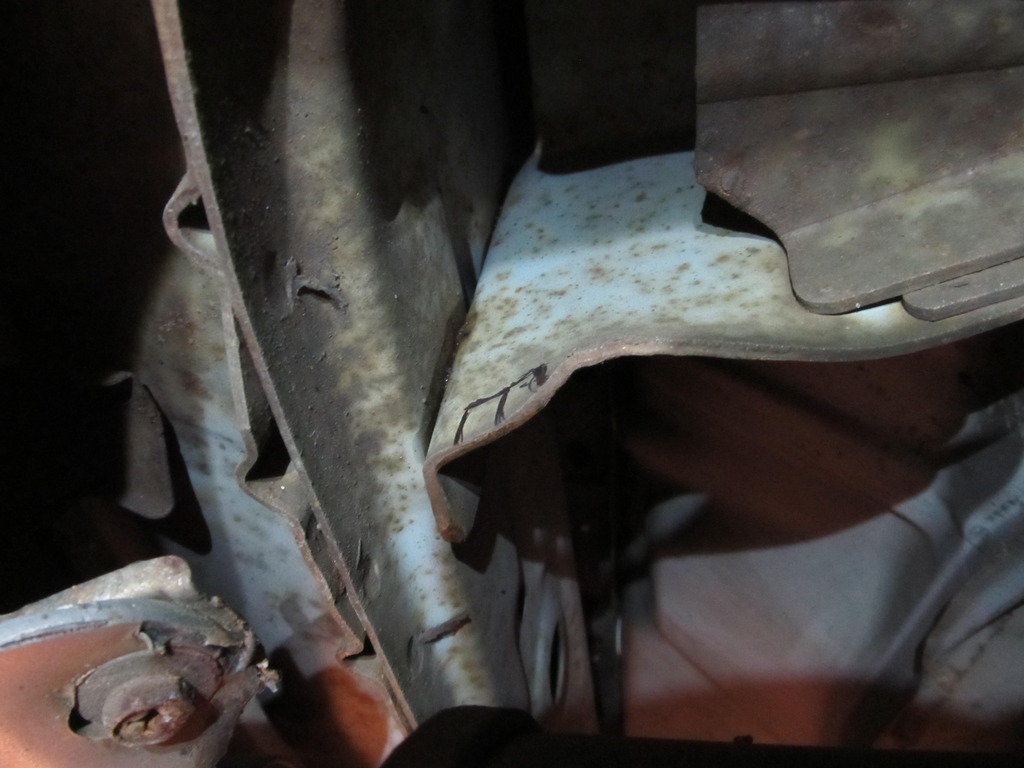
While I had the hanger off, I started playing with the muffler to see where it was hitting, and it was towards the back on top. I wanted to use my angle grinder on it, but that would have required taking off the cat-back, which I was in no mood to do, so it was up to the Dremel to get things done. Naturally, this took much longer than the angle grinder with a cutout wheel would have, but it worked.
I marked off the area I wanted to cut out:
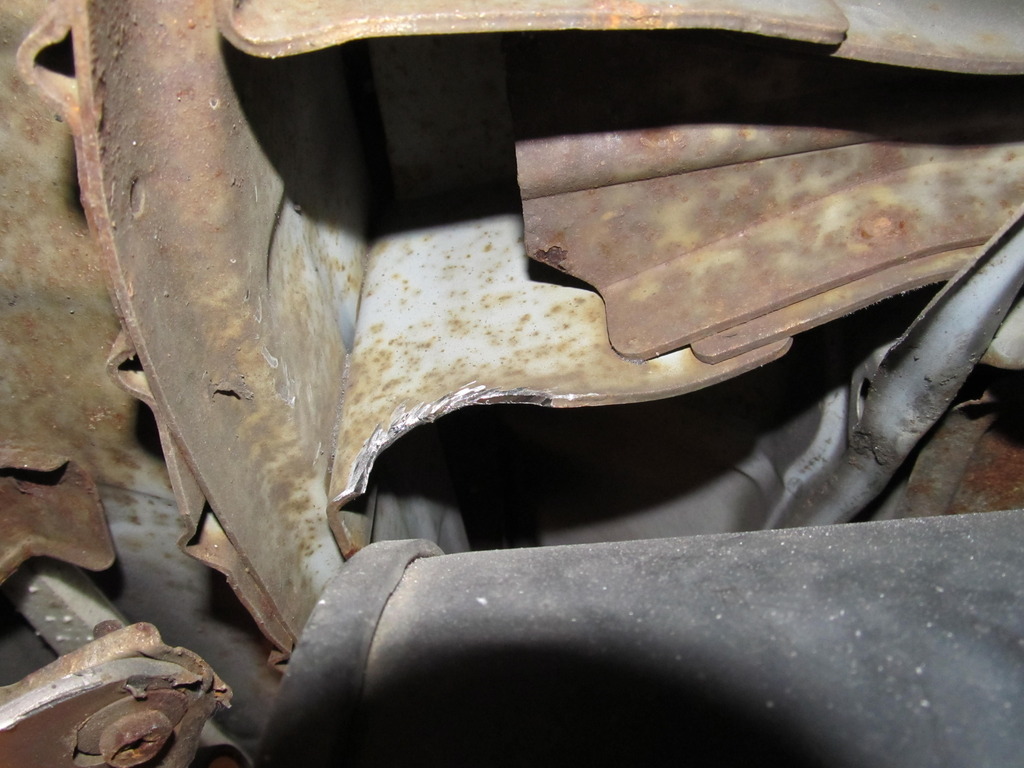
And got to work:
After that, I could get the muffler to hit, but it was much harder. After driving around for a few days, I did hear it bang a few times, but not nearly as often as before. I think I'm going to trim some more out to see if I can completely eliminate the banging. More updates coming!
Hey guys, I've got a quick question for you all- Does anyone know if our flywheel bolts are stretch/torque to yield bolts or if they're reusable? I'm doing a clutch/flywheel job on the M3 and it needs new TTY bolts for the flywheel, and it made me realize I reused my flywheel bolts on the 3.5. Can anyone give me a definitive answer? Thanks!
Hey guys, I've got a quick question for you all- Does anyone know if our flywheel bolts are stretch/torque to yield bolts or if they're reusable? I'm doing a clutch/flywheel job on the M3 and it needs new TTY bolts for the flywheel, and it made me realize I reused my flywheel bolts on the 3.5. Can anyone give me a definitive answer? Thanks!
Gosh i don't have the answer but i have always reused them .
I just clean them , loctite them, and properly torque them.
i have had ones on and off three times. Then had them last just fine on my car about 10 years
When i take it apart in a month or so ,i will see if they loosened at all.
Well......technically you are suppose to replace them everytime you take the flywheel off. Kind of like our Axle nuts are suppose to be replaced every time we take the axle off....i have reused my flywheel bolts like 3 times now. But you know cheap maxima owner i have reused a cotter pin, saved myself around $1 in gas and parts.
Hey everyone! In case you haven't heard, there are fixes out now to enable viewing of the locked out Photobucket pictures!
If you're using Google Chrome, go to the three dots on the right side of the screen and click them. A drop down should appear. Hover your mouse over "More Tools," and when the next drop down appears, click on extensions. Go to the link towards the bottom that says "Get more extensions." In the search box, type "Photobucket Fix," and hit enter. Click the install button and once it's done, you should be able to see Photobucket pictures again.
For Firefox users, click on the three bars on the right side of the screen, then click on add-ons. Click search for "Photobucket hotlink" and click install. Same result.
HAHAHAHAHAHAH That is awesome, so someone programmed a plugin as a big **** you to photobucket.
FYI I went on their site to try and grab pictures and the ads are just so bad it crashes my rig with an i7 32gb ram.
Last edited by DrunkieTheBear; 10-18-2017 at 11:10 AM.
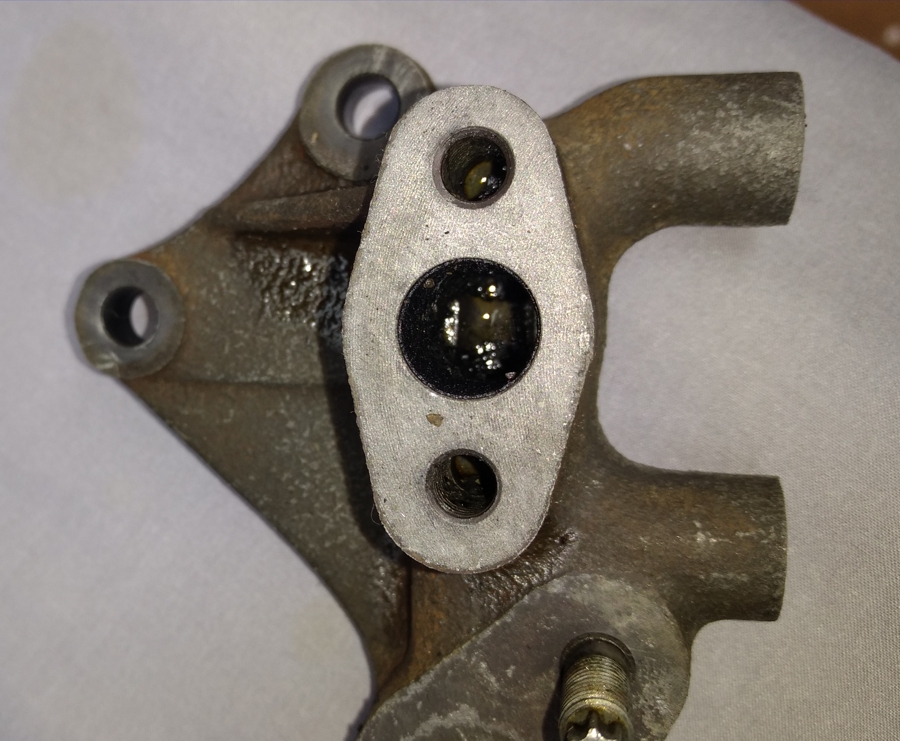
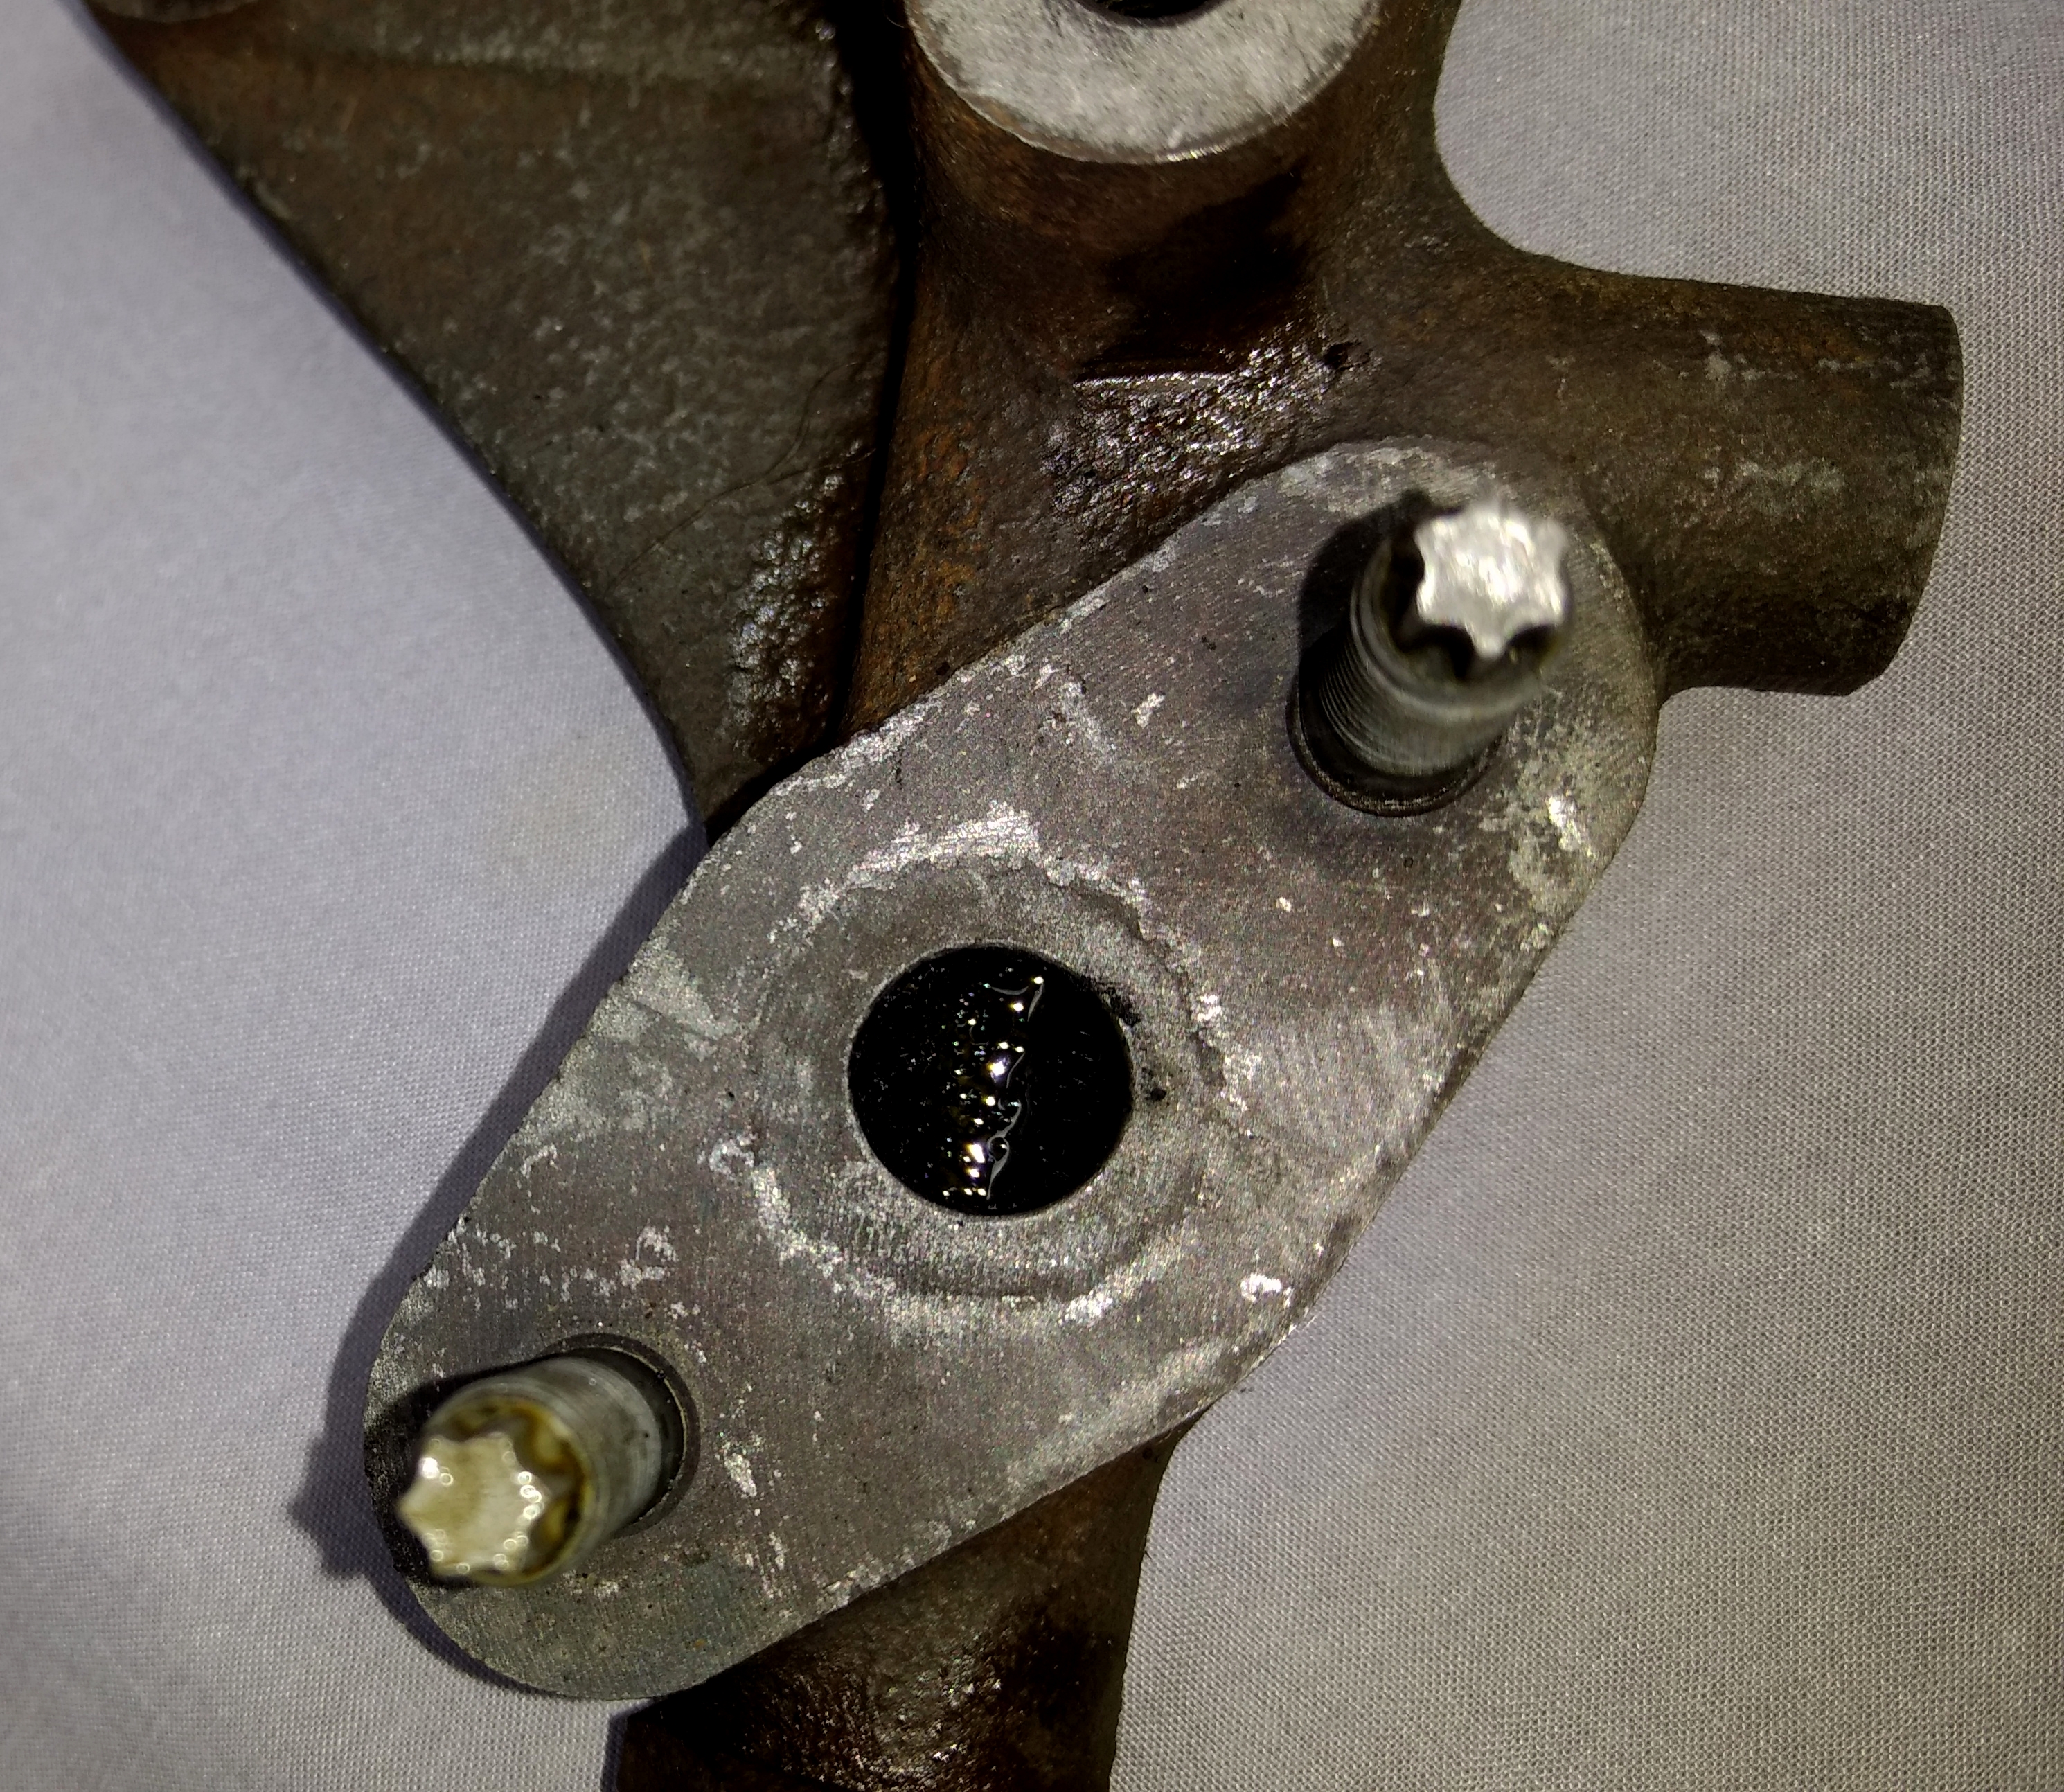
Hey guys, I could use some help getting rid of a P0400 EGR code! I've read all the threads on the topic, and did everything I could think to do, but the code still hasn't cleared itself, and my emissions due date is rapidly approaching, and I need some help! Unfortunately, I can't post pics right now of all the work I've done so far, but here's the run down:
-I have my EGR blocked off so it can't dump back into the IM. From what I can tell, my EGR system is all from a 4th gen, but it's on my 3.5 motor.
-I cleaned out my semi-clogged EGR tube. It wasn't 100% blocked, maybe 75%.
-I tested the resistance of the EGR temp sensor with a pot of boiling water and the resistance was correct.
-I tested the resistance of the EGR control valve solenoid and it is good. I cleaned the EGR control valve solenoid to allow the metal cap inside to move freely and now it does. Before, it was semi-stuck.
-I replaced all EGR gaskets.
-All EGR hoses are intact and attached.
-I also installed a new OEM Nissan gas cap since one person said that solved their problem.
The only thing I can't test (or don't know how to test) is the EGR vacuum solenoid that sits on top of the EGR valve.
Am I missing anything here? If my EGR tube isn't clogged, the temp sensor is good, the control solenoid is good, what else is there?
I've been running one since '05 in my 99 00vi pftb headers cams etc; 96 3.5swap headers etc; 96 dek cams SC headers etc; 98 dek swap headers (daily) etc - No EGR, no EVAP on either. I passed NYS emissions every single year.
96s were a direct plug in no repining necessary.
98 - I had to repin the rear o2 sensor on the 98 ECU connector to a different pin to matchup 95-96 style
99 - I had to repin a lot more sensors for it to even work.
since you have EGR blocked off from the header, ECU is not sensing the flow change in the EGR BPT valve.
my 99 had the Electronic EGR and I had a similar effect when running the 99 ECU with headers without EGR, the EGR tube welded shut into engine EGR components - I would get a periodic EGR code that i would clear and it wouldn't show up for about 500 - 2000 miles.
you can message me if you need more info.. don't want to clutter your thread
You're not cluttering up my thread, don't be ridiculous! So how do you determine what is early 1995 vs normal/late 1995 ECU? Do you think that will work 100% with my I30? I checked for codes again today and the EGR was gone, but the 0420 and 0430 are back! I don't have any cats on my car, but then I haven't had them on since 2003, and this is the first time I've gotten this code (and can't get rid of it). So I replaced the rear header O2 and the post-cat O2, but the codes keep coming back! Since I replaced the front cat O2 about 6 months ago, that means that all three on the car are pretty much brand new, and good quality. I know I don't have any cats on the car, but I haven't for 14 years and I've never had trouble with these codes before. What gives?
PLEASE do not get him started on swapping ECUs again, that was a nightmare.
On my car basically i just unscrewed the EGR sensor from the tube and let in dangle. No EGR code since.
Also iirc you have nistune there are ways to disable things like the EGR valve in nistune. I wouldn't waste too much time on it when you can just delete the whole system and save yourself some trouble as well as a much cleaner intake.
Yeah, someone remembers!
If you just unscrewed the EGR sensor and let it dangle, wouldn't you have a massive exhaust leak? So the NisTune is on a Maxima ECU, and for some reason two readiness monitors never finish, so it can't go through emissions. So I have to switch back to the stock ECU when I go through emissions every two years. And now for the first time I'm dealing with EGR and cat codes that I can't get rid of.
If you just unscrewed the EGR sensor and let it dangle, wouldn't you have a massive exhaust leak? So the NisTune is on a Maxima ECU, and for some reason two readiness monitors never finish, so it can't go through emissions. So I have to switch back to the stock ECU when I go through emissions every two years. And now for the first time I'm dealing with EGR and cat codes that I can't get rid of.
For cars 2000 and older you're allowed to have 2 readiness monitors not ready.
"For most 1996 to 2000 model year vehicles, up to 2 monitors are allowed to be in a �Not Ready� condition. For most 2001 and newer model year vehicles, only one monitor is allowed to be in a �Not Ready� condition. If more than the allowed number of monitors are �not ready,� the vehicle will be rejected from testing."
"For most 1996 to 2000 model year vehicles, up to 2 monitors are allowed to be in a �Not Ready� condition. For most 2001 and newer model year vehicles, only one monitor is allowed to be in a �Not Ready� condition. If more than the allowed number of monitors are �not ready,� the vehicle will be rejected from testing."
Hey Mike
The I30 is still registered in Maryland. Maybe it has three readiness monitors that weren't complete, I can't exactly remember anymore. Either way, I need to figure out these P0420 and P0430 codes ASAP! I'm considering just buying a cheap cat at a parts store and slapping it on and seeing what happens, since I'm pretty much out of ideas aside from looking for exhaust leaks...
So it sounds like the P0420 and P0430 refer to the pre-cats in the factory y-pipe and not the main one after the pipes merge. Can anyone comment on O2 sensor spacers? I've heard some things about them from friends trying to get modified cars through emissions, but not much here on the org. Anyone have any feedback on if a spacer might help my problem? If the codes are for pre-cats, would installing a new main cat (in place of my straight pipe) have any chance of helping the situation?
So it sounds like the P0420 and P0430 refer to the pre-cats in the factory y-pipe and not the main one after the pipes merge. Can anyone comment on O2 sensor spacers? I've heard some things about them from friends trying to get modified cars through emissions, but not much here on the org. Anyone have any feedback on if a spacer might help my problem? If the codes are for pre-cats, would installing a new main cat (in place of my straight pipe) have any chance of helping the situation?
Those are pretty generic "cats stopped working" codes. I haven't encountered a car that needs pre-cats before... usually they're just for cold starts until the main cat can light.
basically all the car knows is that it's not seeing the expected change between the upstream o2 and the down stream o2. Both cats should be between them, right?
you can throw a cat on, but de-foulers work just as well .
Jim had 4? de-foulers on his old supercharged s2000 with a race pipe. passed emissions completely fine a few times They just space the down stream o2 out of the exhaust stream a bit so it doesn't get a good reading.
or you could just get some historic plates
Ha, yep, that's pretty much the conclusion I came to. Yes, all cats on my car should between the primary and secondary O2 sensors. I'm going to try the O2 spacer/spark plug anti-fouler method and see what happens. Unfortunately, the rear O2 is the smaller type, M14 I believe, and almost all of the spacers/anti foulers are for M18, so I hope the parts I picked up will work. I still can't make heads or tails of why the ECU decided that now, after 14 years, it decided that my levels were below threshold, but whatever!
The fed 95 has the whole EVAP system under the hood.
It is not tied to any sensor or the ECU for that matter at all. Under certain conditions the EVAP solonoid (green thing) is told to open and close. ECU isn't linked.
To tell in the junk yard,look for this under the hood. The EVAP canister is near the strut tower driver side.
This is the car to get the ECU off.
And vipervadim i want that ECU back How high have you revved it to?
 04-07-2017, 06:12 AM


 I apparently need to re-do this since my horn no longer works...ugh.