Bringing a VE 5 speed 3rd gen back to life!


 09-20-2016, 12:03 PM
#42
Well it's been almost a year of uneventful commuting in the 3rd gen, and it finally required some maintenance!
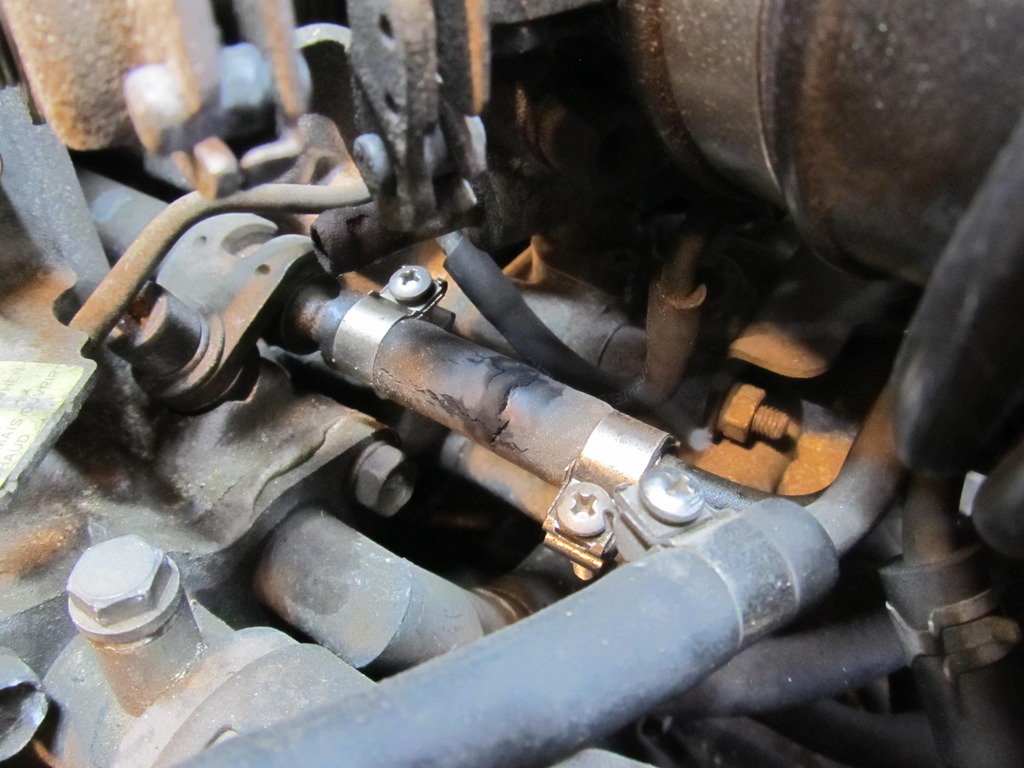
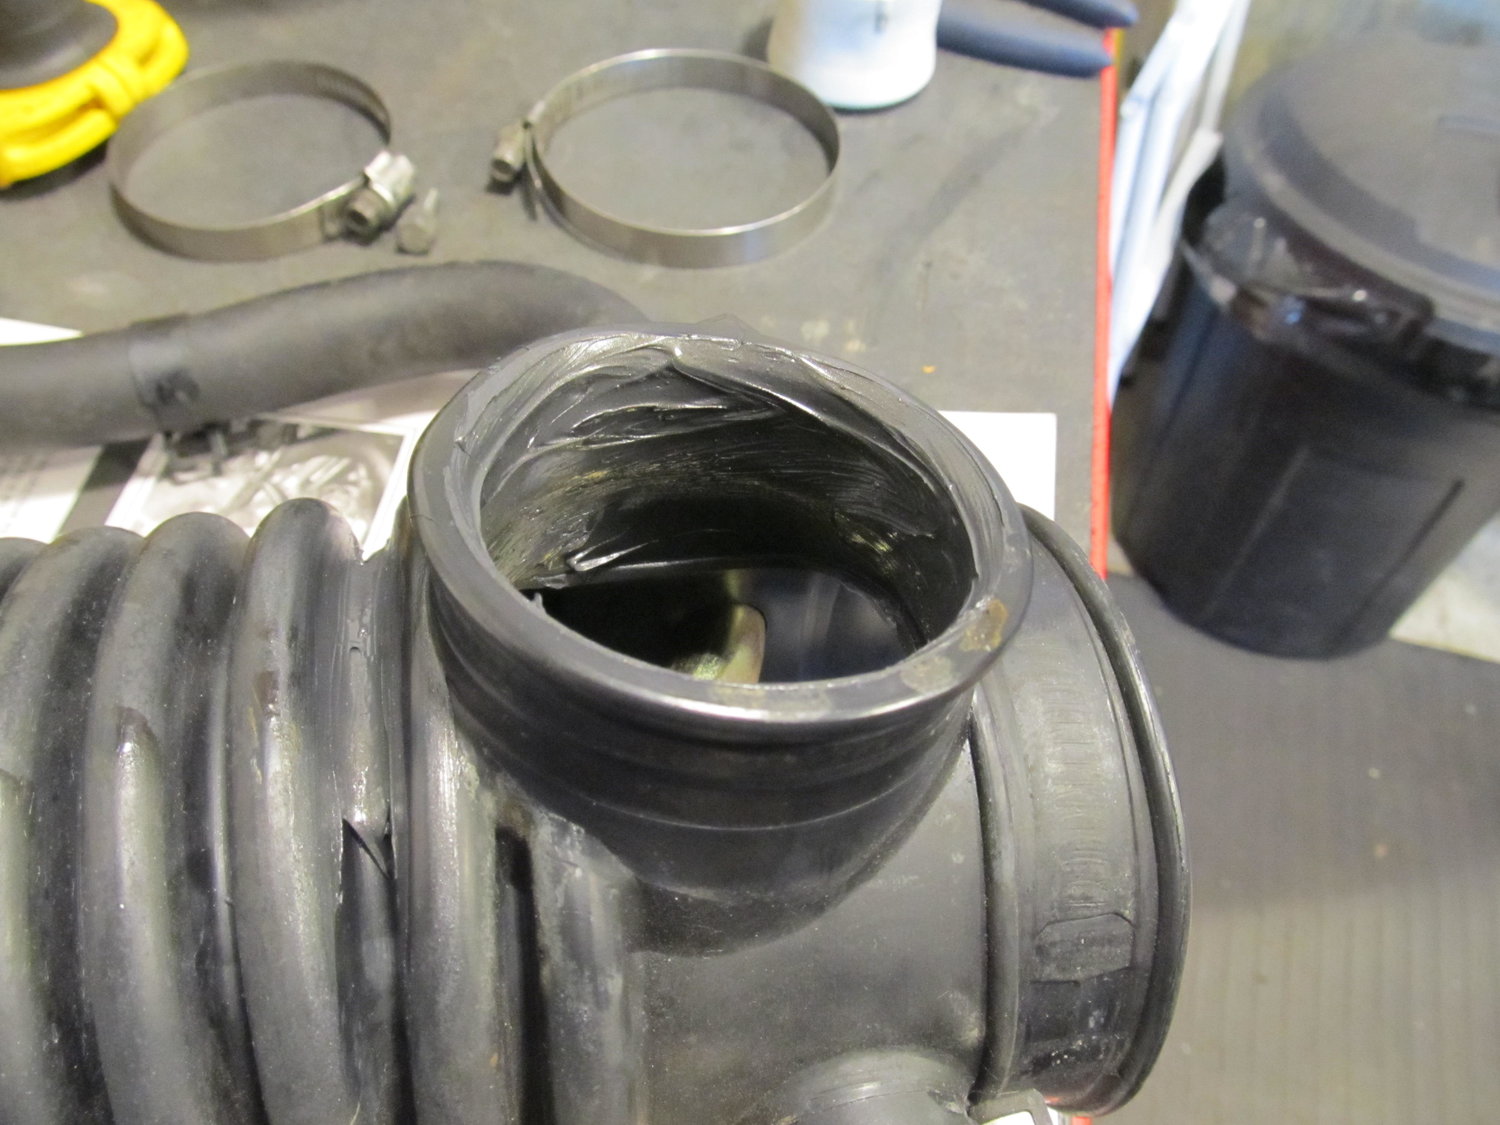
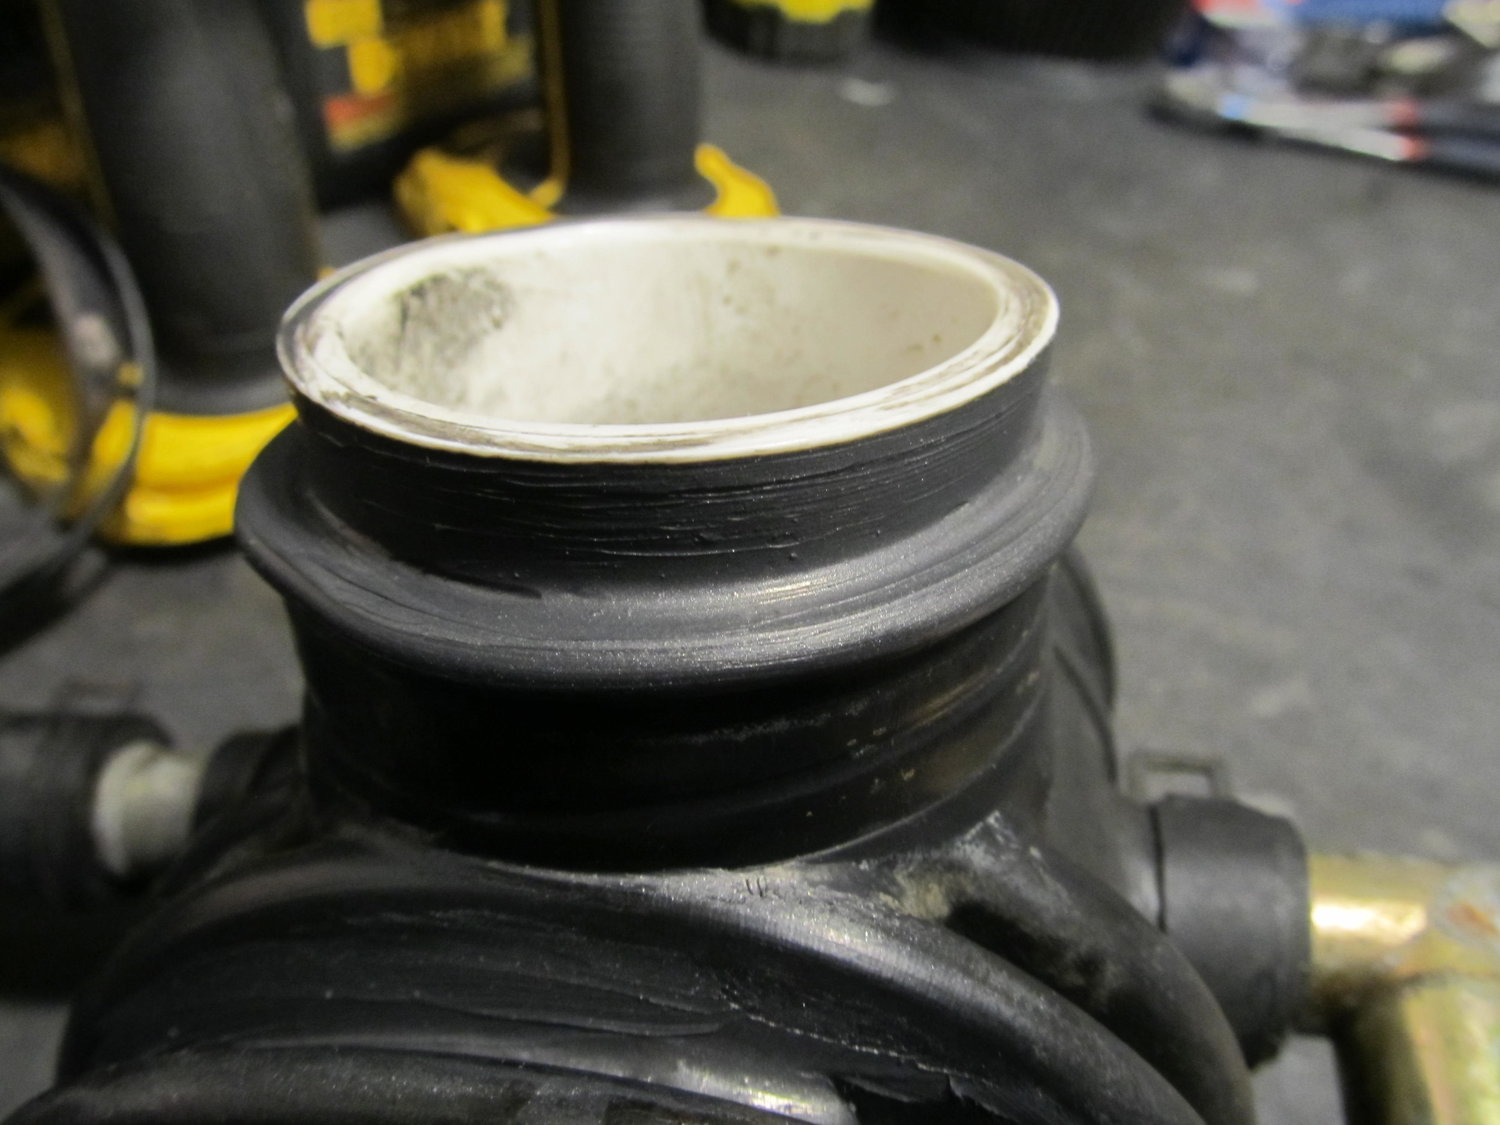
I started to smell fuel when driving the car about a month ago, but decided to ignore it for a while. I knew that one of the rubber fuel lines on the engine had some cracks in it, but I didn't see it leaking anything, so I let it slide until I had some spare time. Well, I finally had some spare time and pulled the car into the garage. Apparently the fuel line HAD started leaking.....
Woops!
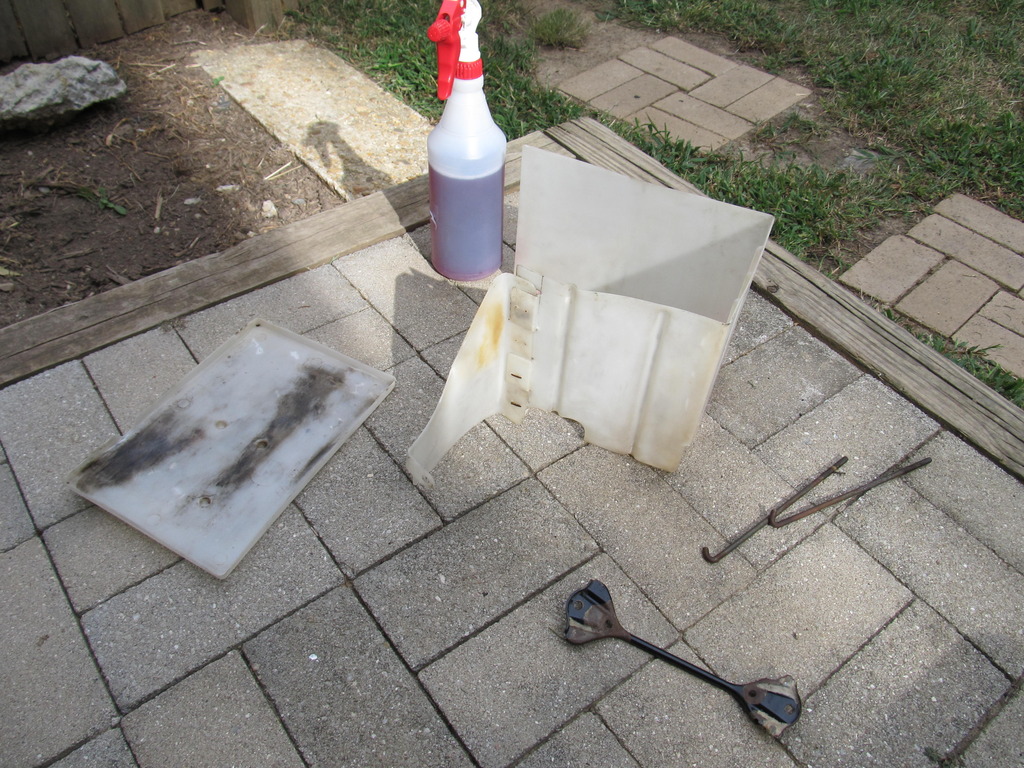
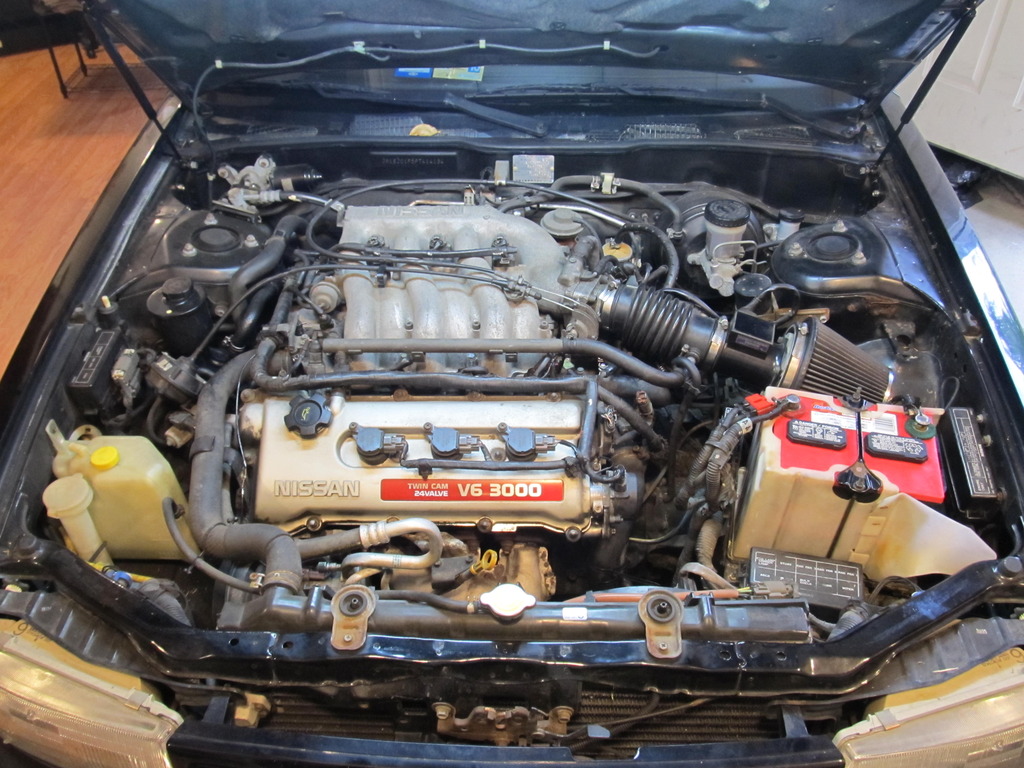
Thankfully I had bought three rolls of Gates high pressure fuel line from RockAuto so I didn't have to go out and buy any. While I was in there, I decided to take apart the intake to make things easier for myself. While I was doing that, I also decided I wanted to clean up the nasty mess that was my battery and plastic shield. I also cleaned up the terminals with the wire brush thingy.
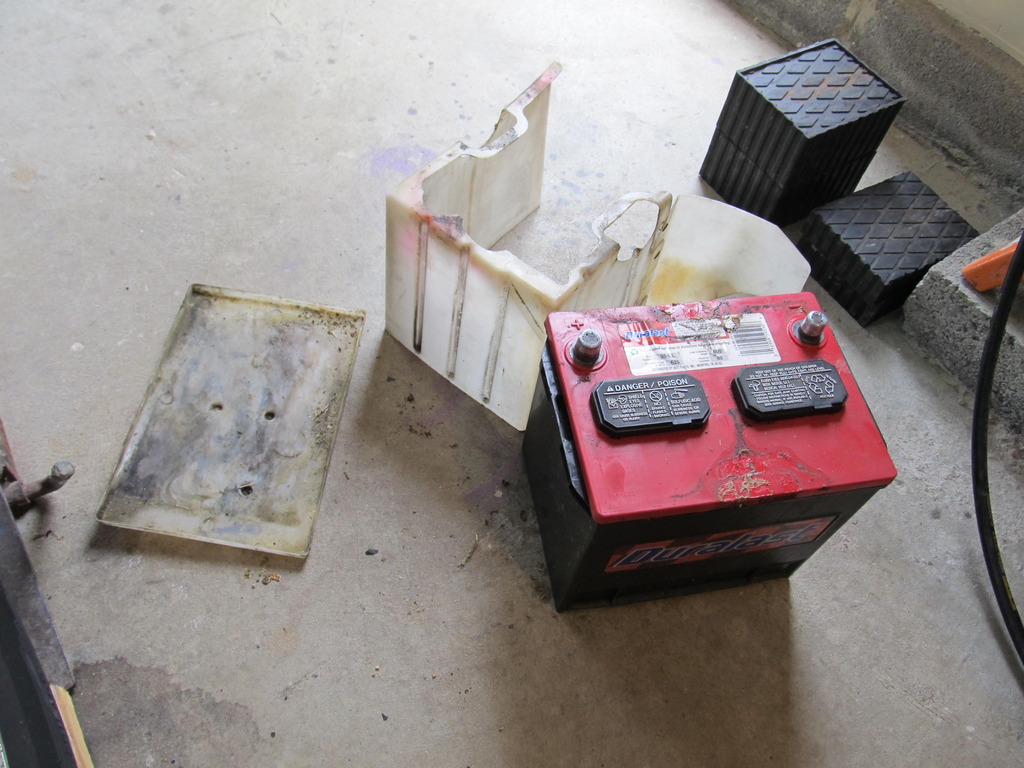
Some Purple Power cleaned that right up!
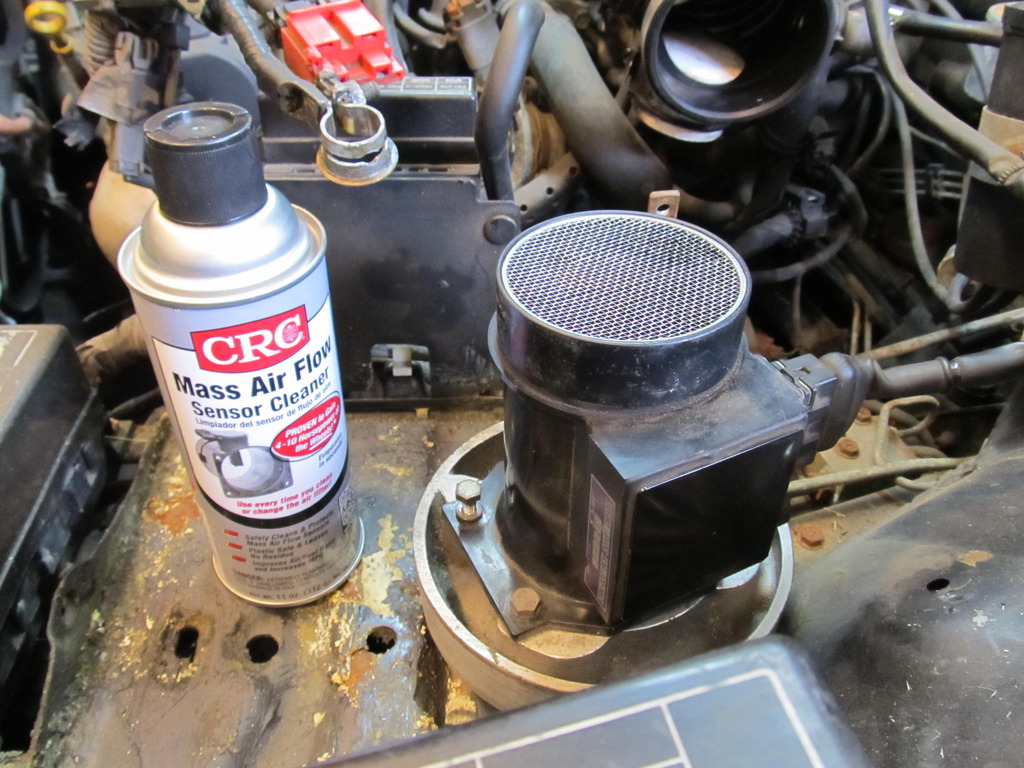
For some reason I was unable to figure out how to remove the connector from the MAF, so rather than risk cracking 25+ brittle plastic, I just put a bucket under it and sprayed the MAF cleaner through it!
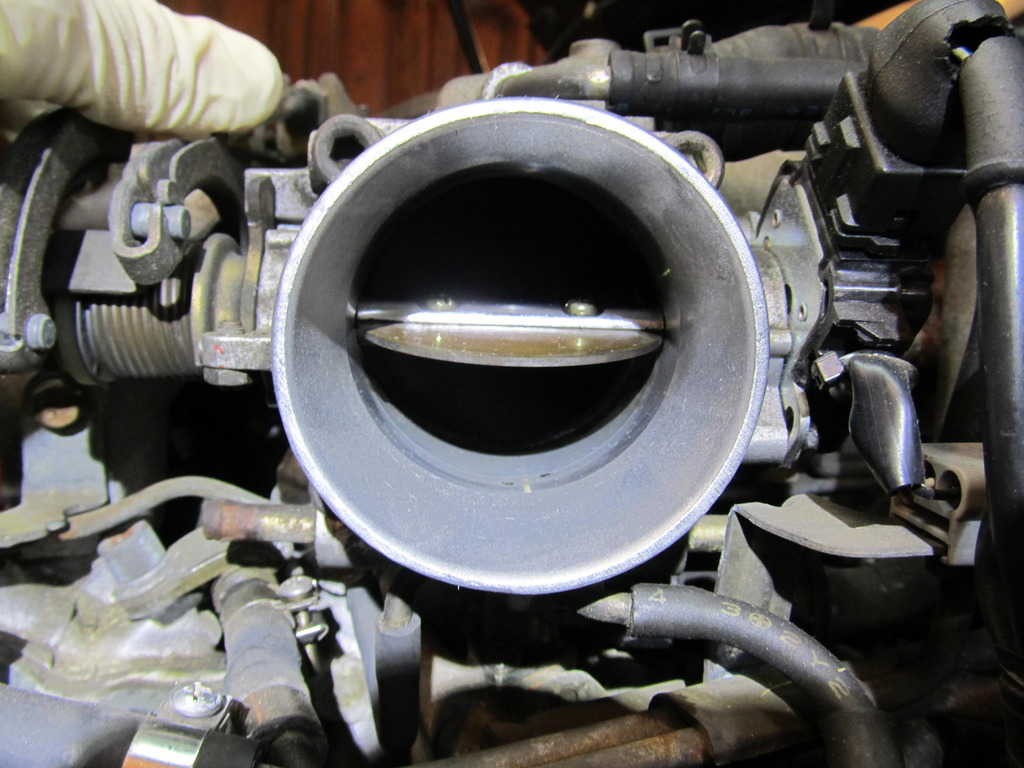
Then I cleaned up the throttle body, which was pretty gross inside.
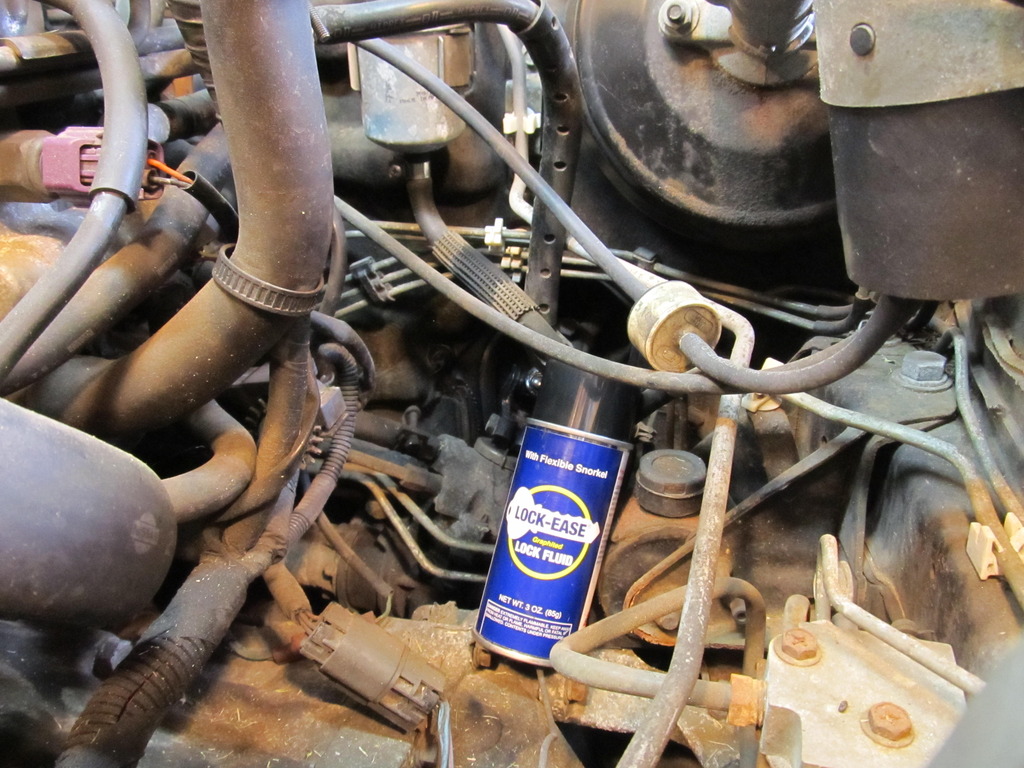
Then I tried a trick I learned from my M3, which was to spray the u-joint in the steering column with brake cleaner to remove all the grime, then lubricate it with graphite spray. It worked wonders in smoothing out the admittedly sticky steering in the M3, but since the Maxima didn't have that problem, I didn't notice any benefits. Oh well!
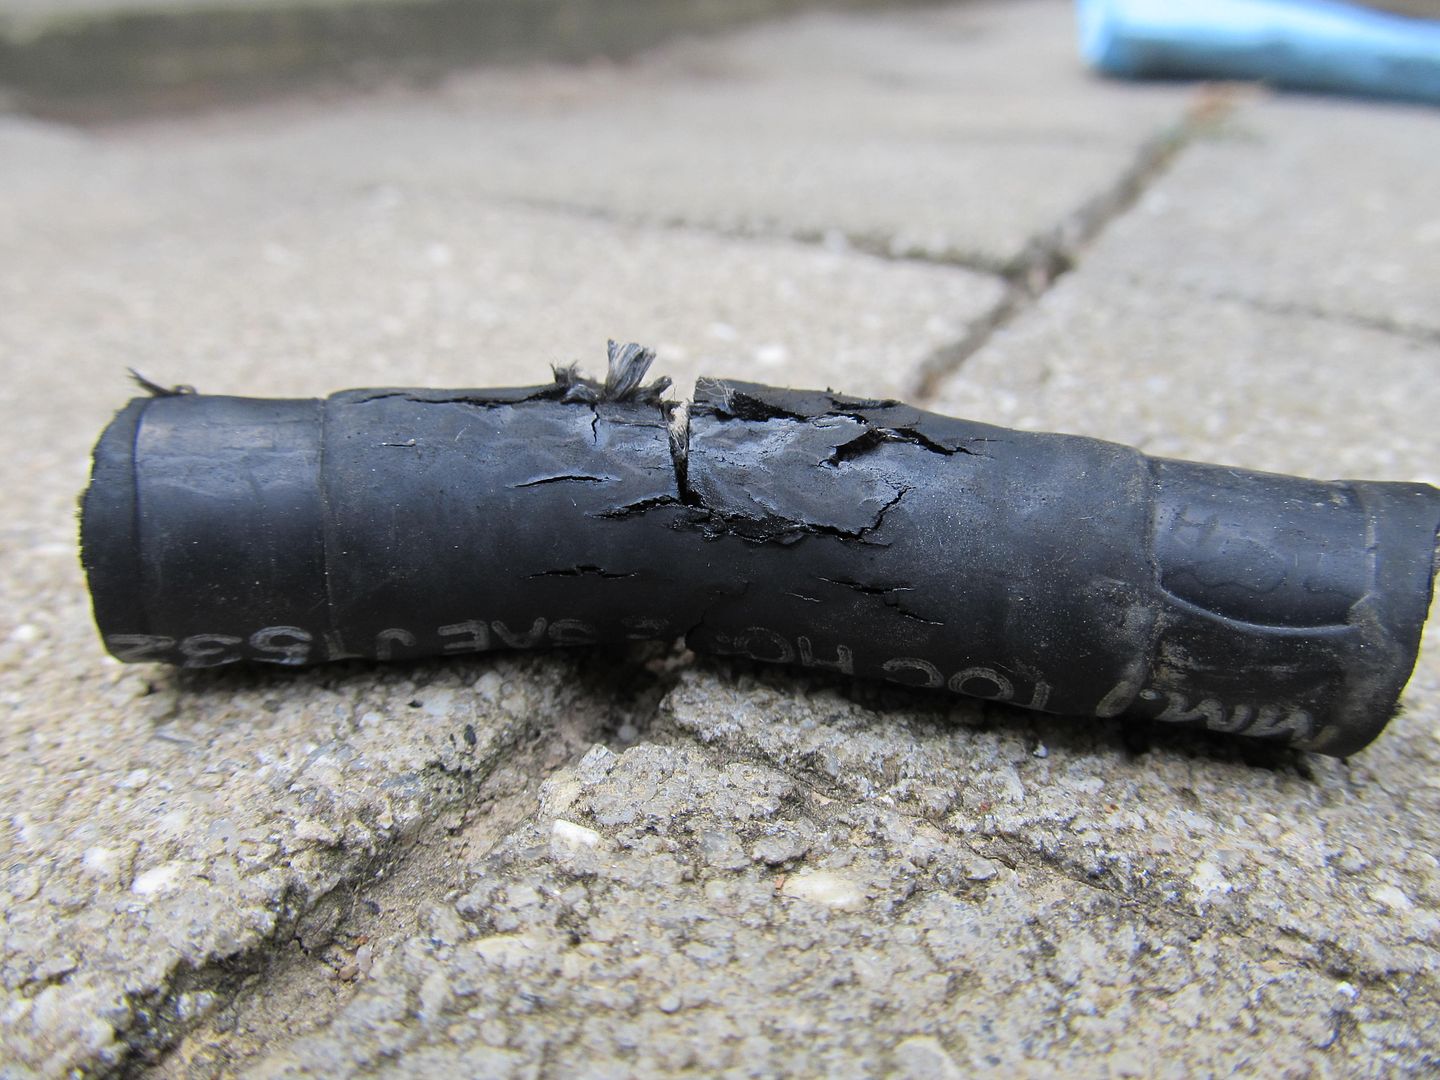
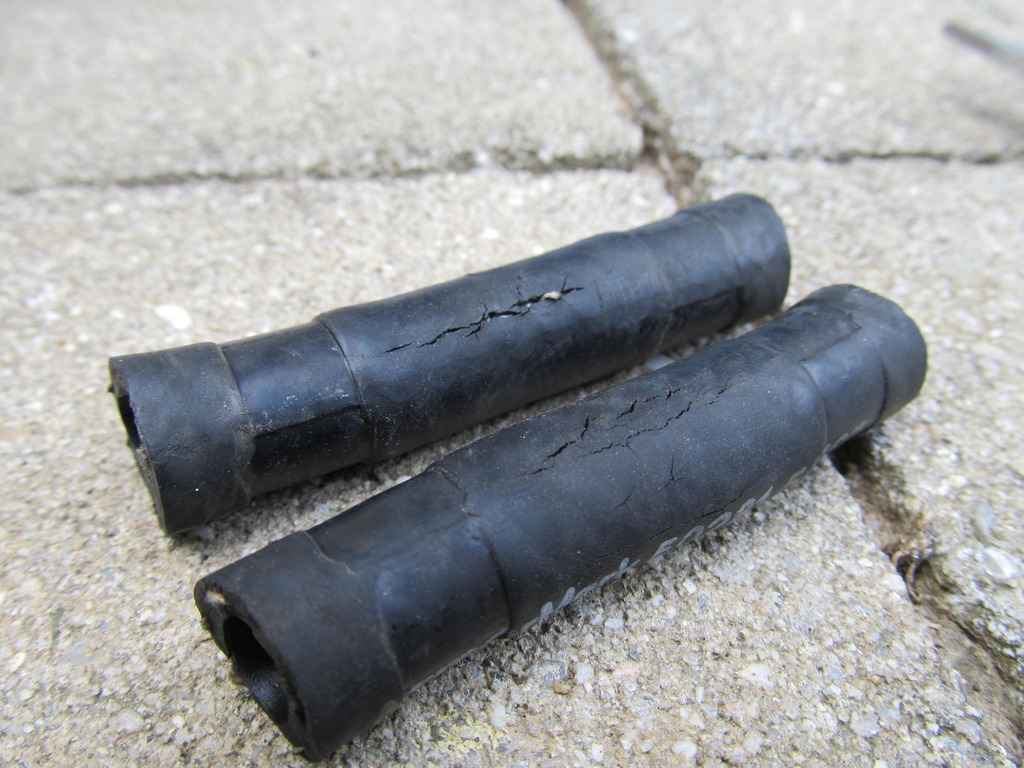
Anyways, back to the job at hand. That line was in seriously bad condition (not including the cut I made to it):
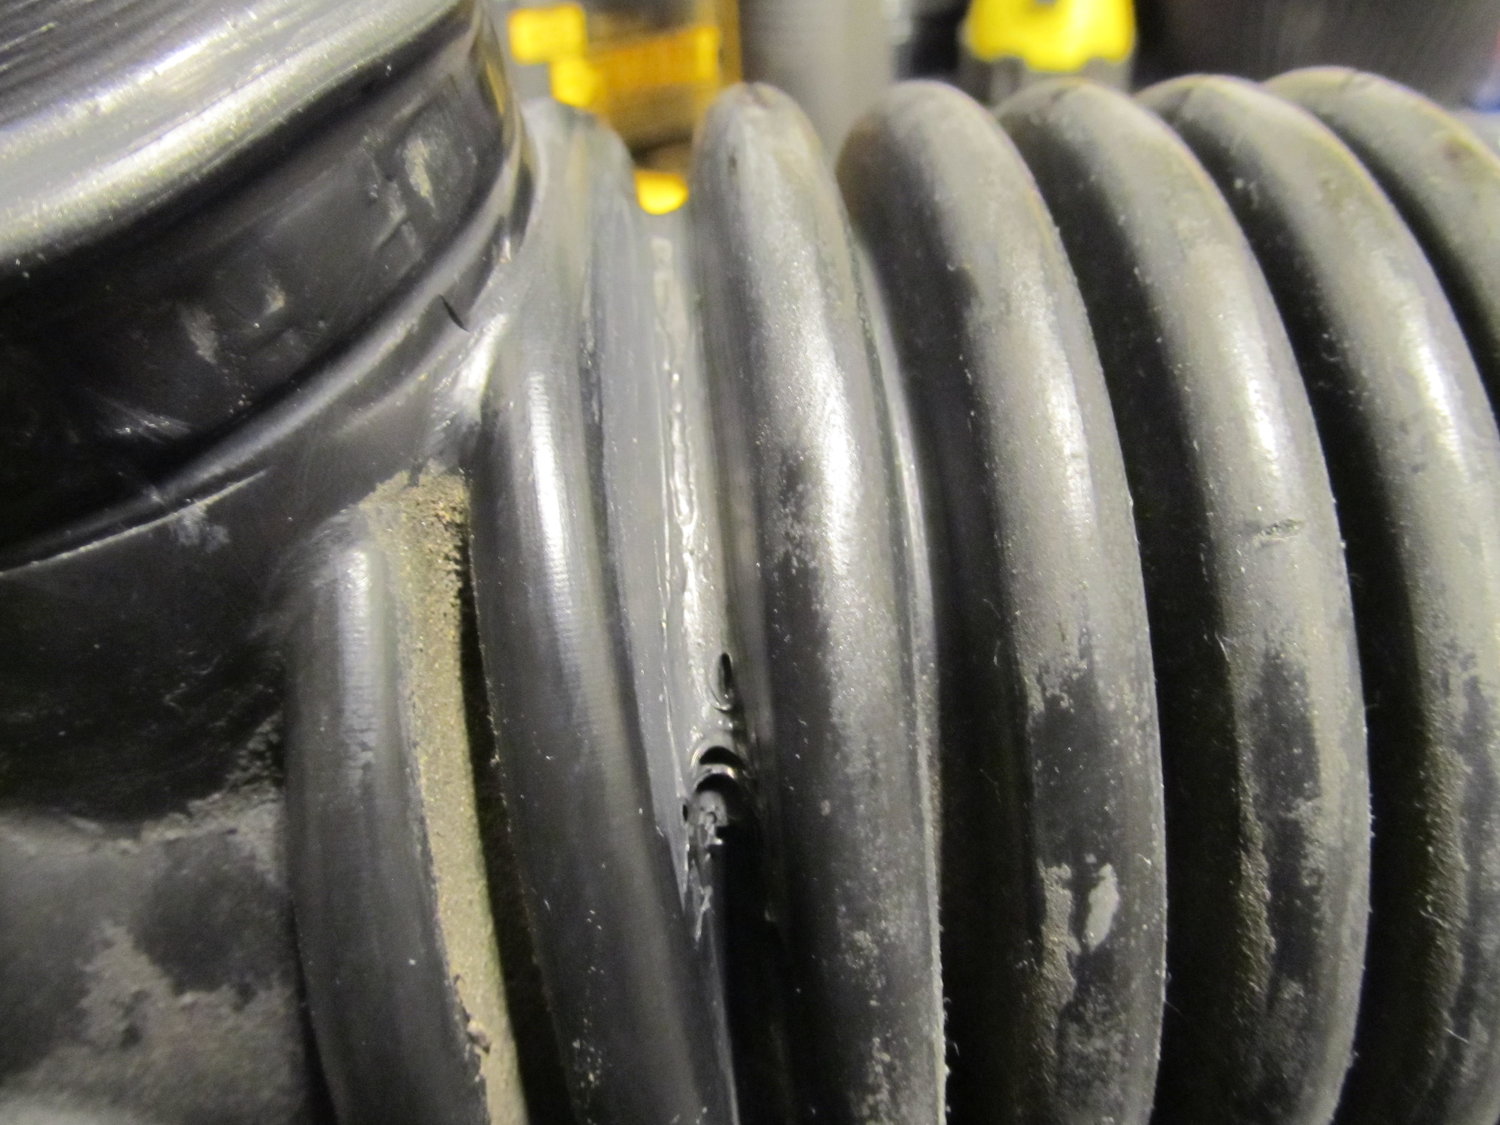
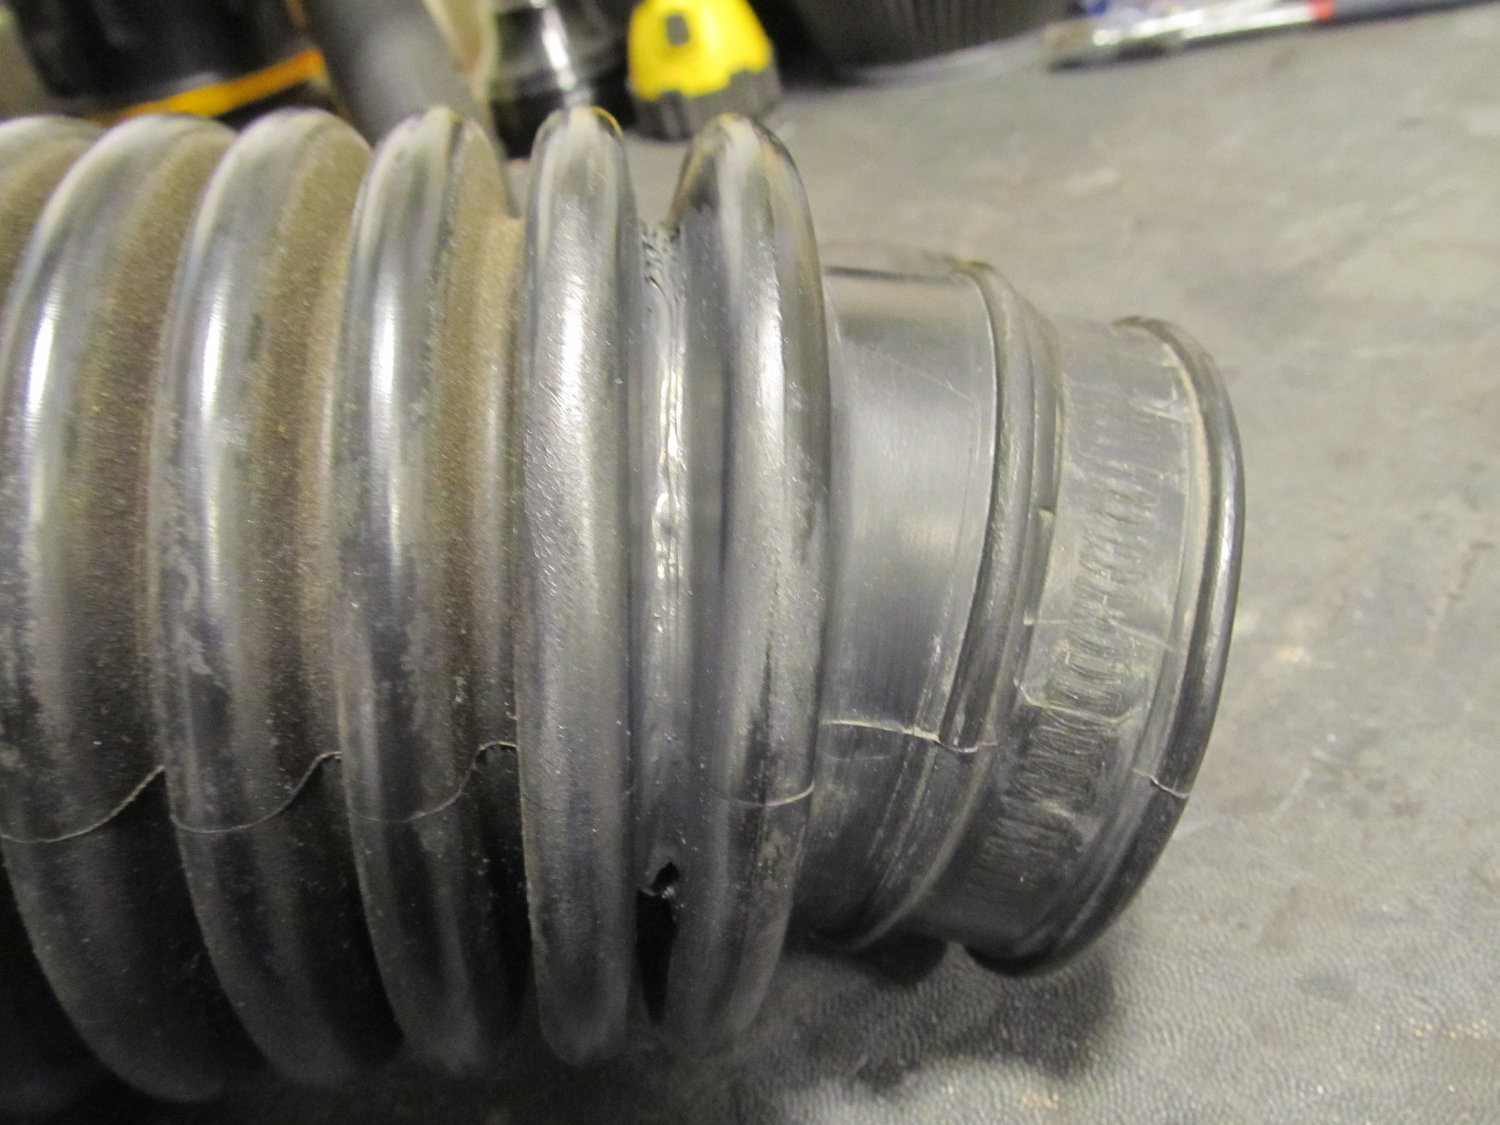
The other line wasn't looking as bad, but I wasn't about the get lazy now, so I replaced it too:
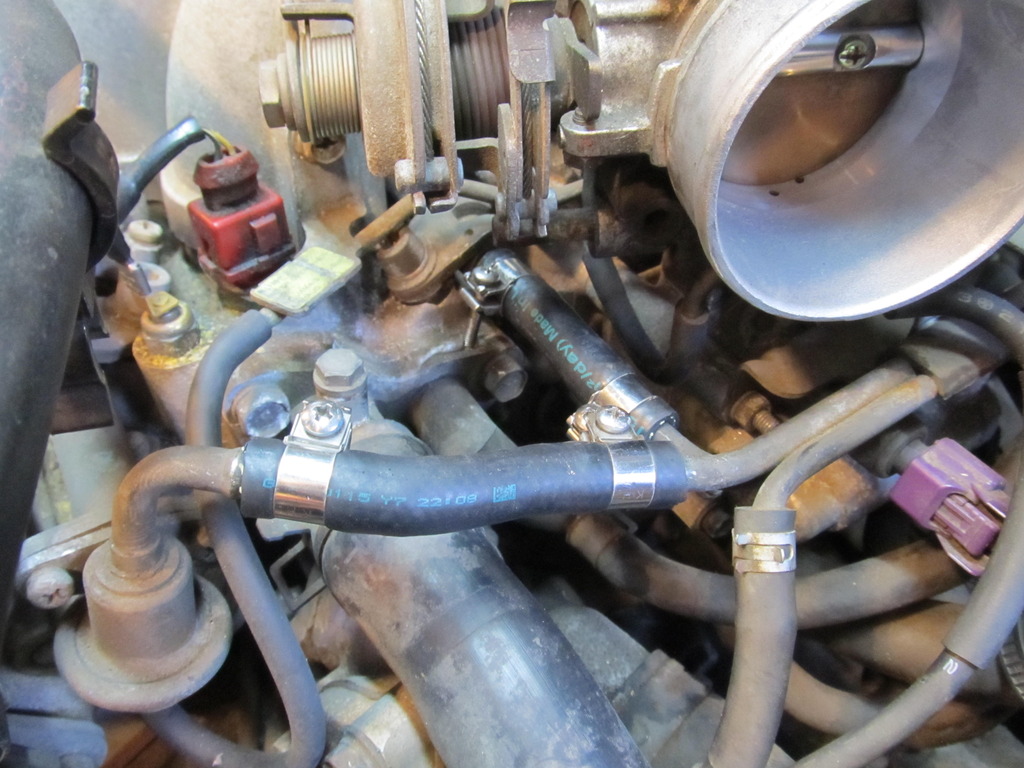
The two lines on the passenger side were showing small cracks, so I replaced them as well:
The longer lines running to and from the fuel filter appeared to be crack-free, so I didn't touch them. After getting everything back together I used a can of brake clean on the front of the motor to clean up decades worth of oil leaks. It looks slightly more presentable now!
I've driven the car for two days now and it feels great! I'm guessing the car was bleeding off fuel pressure through the hole in the hose, but I'm guessing the MAF cleaner helped out a bit too since the car has a K&N filter on it.
And with that, I'm done working on this car until another catastrophic situation arises. I still need to get the I30 back on the road!!
I started to smell fuel when driving the car about a month ago, but decided to ignore it for a while. I knew that one of the rubber fuel lines on the engine had some cracks in it, but I didn't see it leaking anything, so I let it slide until I had some spare time. Well, I finally had some spare time and pulled the car into the garage. Apparently the fuel line HAD started leaking.....

Woops!
Thankfully I had bought three rolls of Gates high pressure fuel line from RockAuto so I didn't have to go out and buy any. While I was in there, I decided to take apart the intake to make things easier for myself. While I was doing that, I also decided I wanted to clean up the nasty mess that was my battery and plastic shield. I also cleaned up the terminals with the wire brush thingy.

Some Purple Power cleaned that right up!

For some reason I was unable to figure out how to remove the connector from the MAF, so rather than risk cracking 25+ brittle plastic, I just put a bucket under it and sprayed the MAF cleaner through it!

Then I cleaned up the throttle body, which was pretty gross inside.

Then I tried a trick I learned from my M3, which was to spray the u-joint in the steering column with brake cleaner to remove all the grime, then lubricate it with graphite spray. It worked wonders in smoothing out the admittedly sticky steering in the M3, but since the Maxima didn't have that problem, I didn't notice any benefits. Oh well!

Anyways, back to the job at hand. That line was in seriously bad condition (not including the cut I made to it):

The other line wasn't looking as bad, but I wasn't about the get lazy now, so I replaced it too:

The two lines on the passenger side were showing small cracks, so I replaced them as well:

The longer lines running to and from the fuel filter appeared to be crack-free, so I didn't touch them. After getting everything back together I used a can of brake clean on the front of the motor to clean up decades worth of oil leaks. It looks slightly more presentable now!

I've driven the car for two days now and it feels great! I'm guessing the car was bleeding off fuel pressure through the hole in the hose, but I'm guessing the MAF cleaner helped out a bit too since the car has a K&N filter on it.
And with that, I'm done working on this car until another catastrophic situation arises. I still need to get the I30 back on the road!!
 09-30-2016, 11:53 AM
#44
09-30-2016, 09:48 PM
#45
 10-01-2016, 05:22 AM
#46
10-01-2016, 09:56 AM
#47
Nothing more than what you already have. Just swap the timing equipment. i have the 07 alti in my car basically the same process to get it working. The only difference in the swap is you HAVE to use the OEM throttle body. The Pathy TB wont fit on the newer manifold.
12-12-2016, 11:37 AM
#48
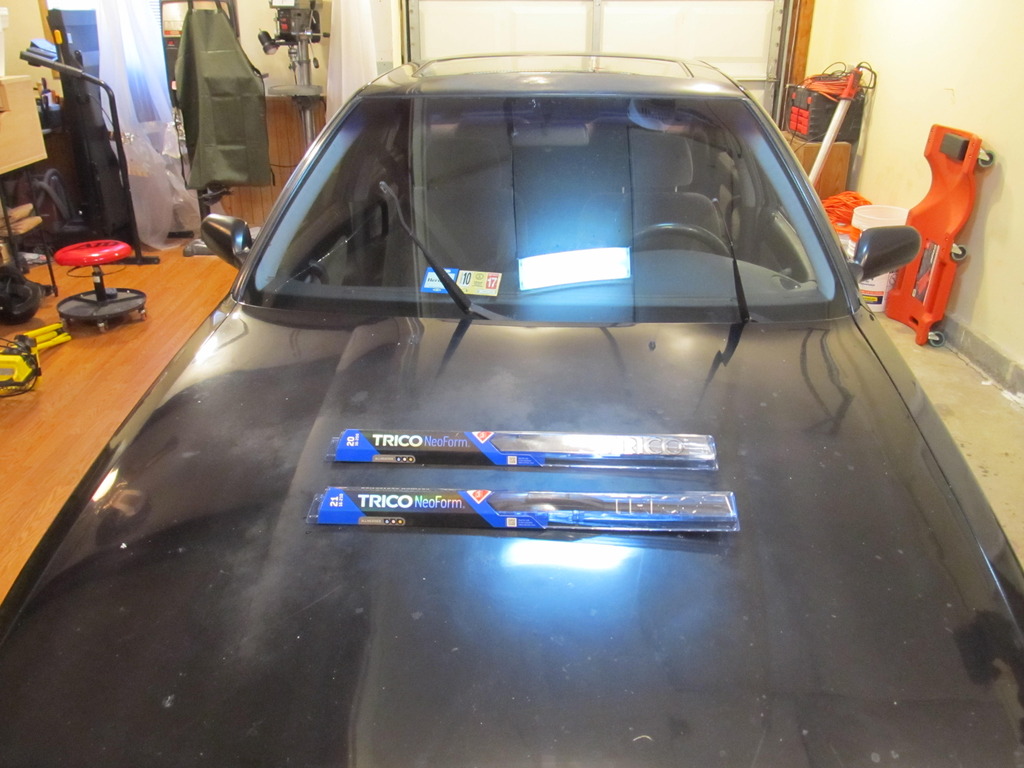
Time for some more updates! I'm still using this car as a DD beater until I have time to fix up the I30. The M3 rally-x car is now pretty well buttoned up, so I have some time to do small things to the Maxima. First up? The all-important wiper blades. The blades on the car were shot, and driving in the rain wasn't really safe, so after I got a coupon, I plopped down the money for a nice new set.
I also replaced a dead tail light bulb. Big stuff here people!
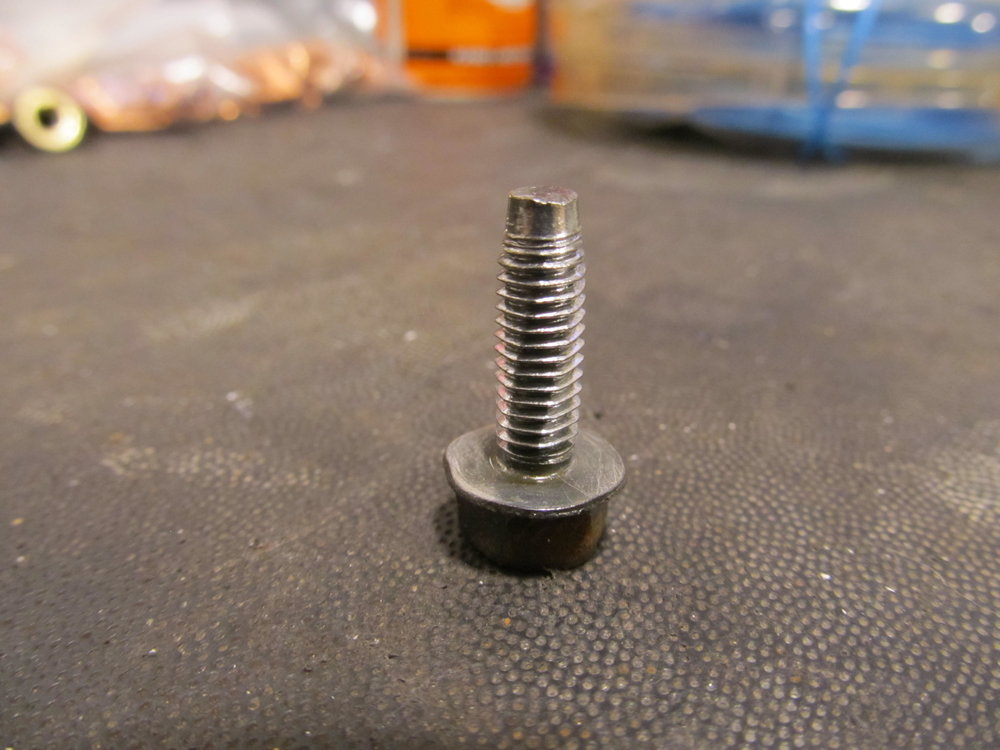
Next, I followed up on the tip James gave me almost a year ago about checking the clutch pedal assembly. To refresh your memory, sometimes when I'm in first gear and I have my foot down on the clutch pedal and rev the motor, it feels like the clutch is trying to grab a bit. Well, I found one of the problems James mentioned, which was a loose nut on the clutch rod.
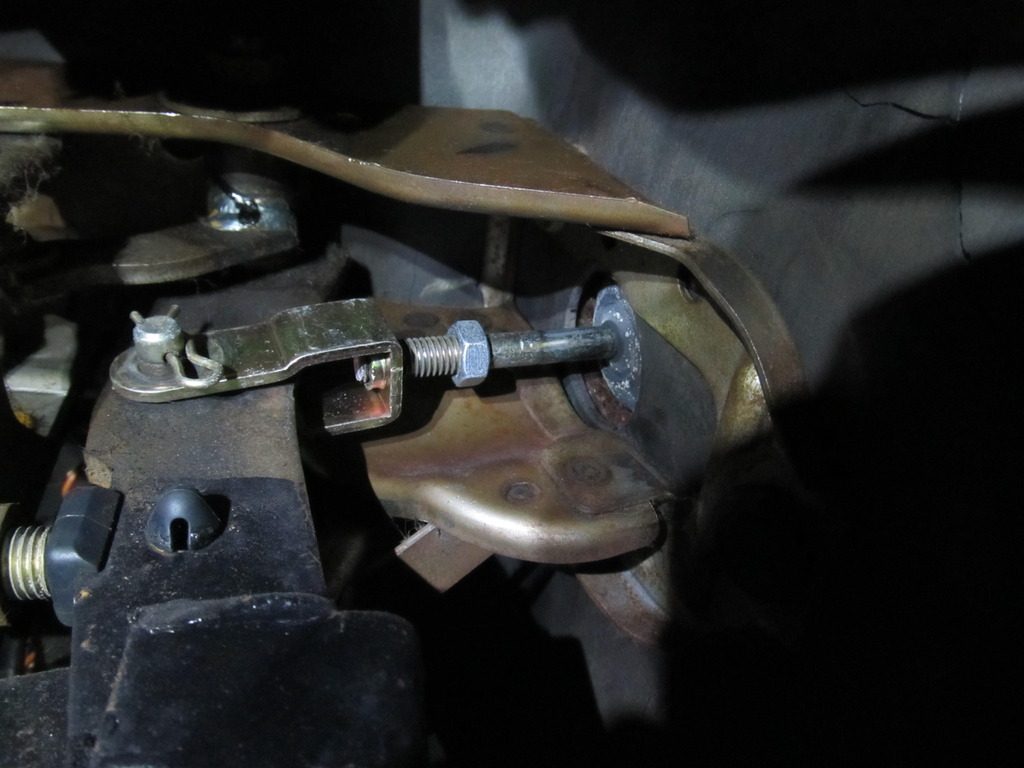
So I snugged it up, but once it reached the end it just started rotating the rod and didn't get any tighter.
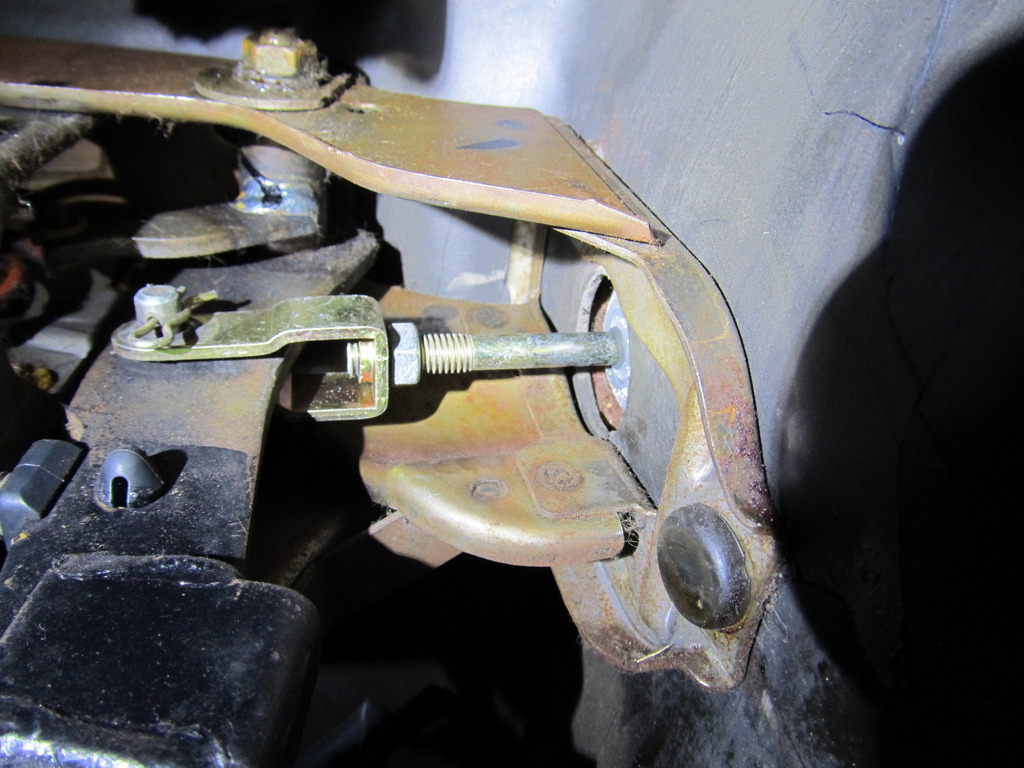
I'm not sure what to make of this. I vaguely remember something similar happening to my I30 many years ago. Am I supposed to adjust the rod length? Maybe that's the reason why my clutch tries to grab even when I have my foot on the floor. But which way do I adjust it, towards the firewall, I assume?
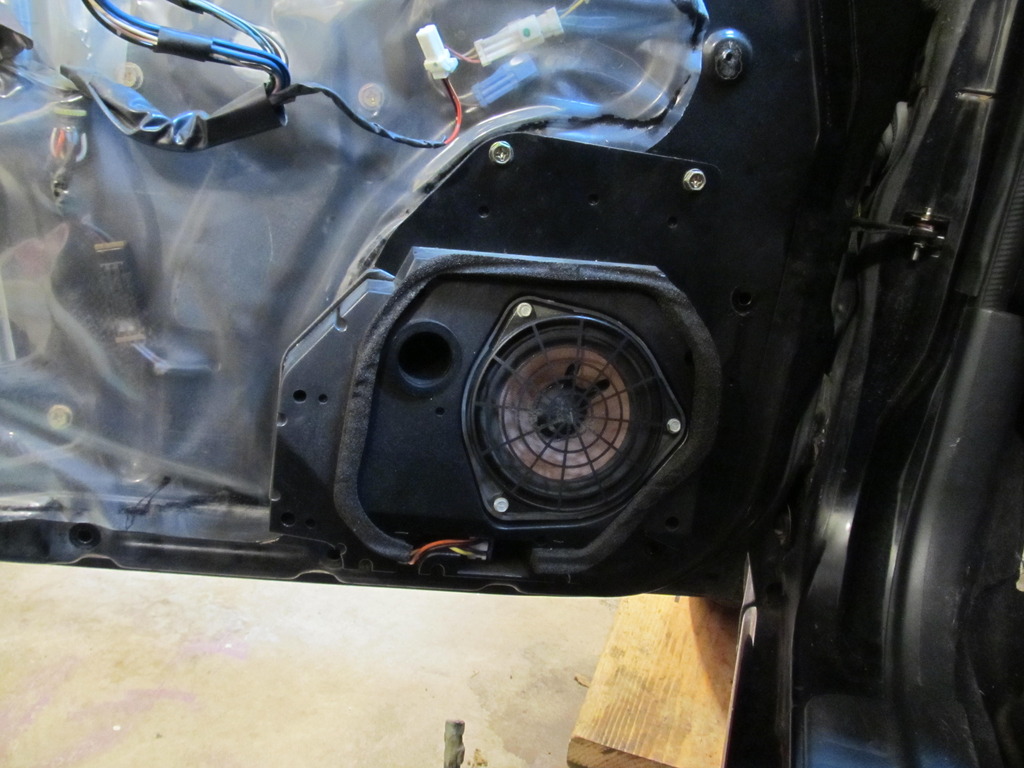
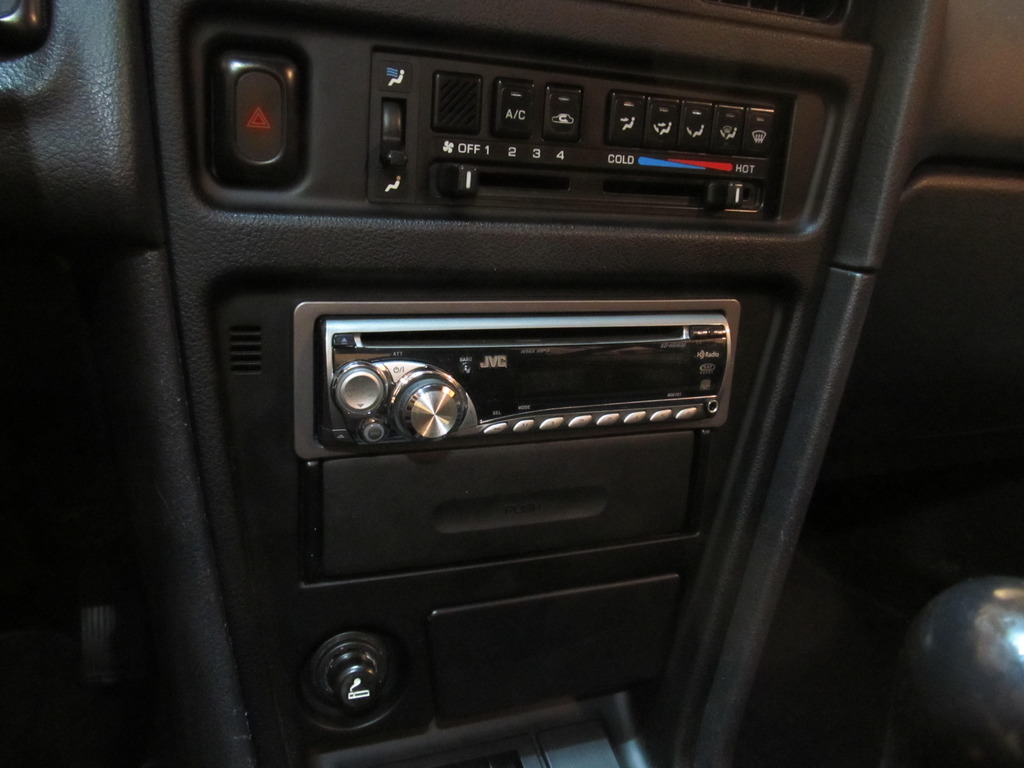
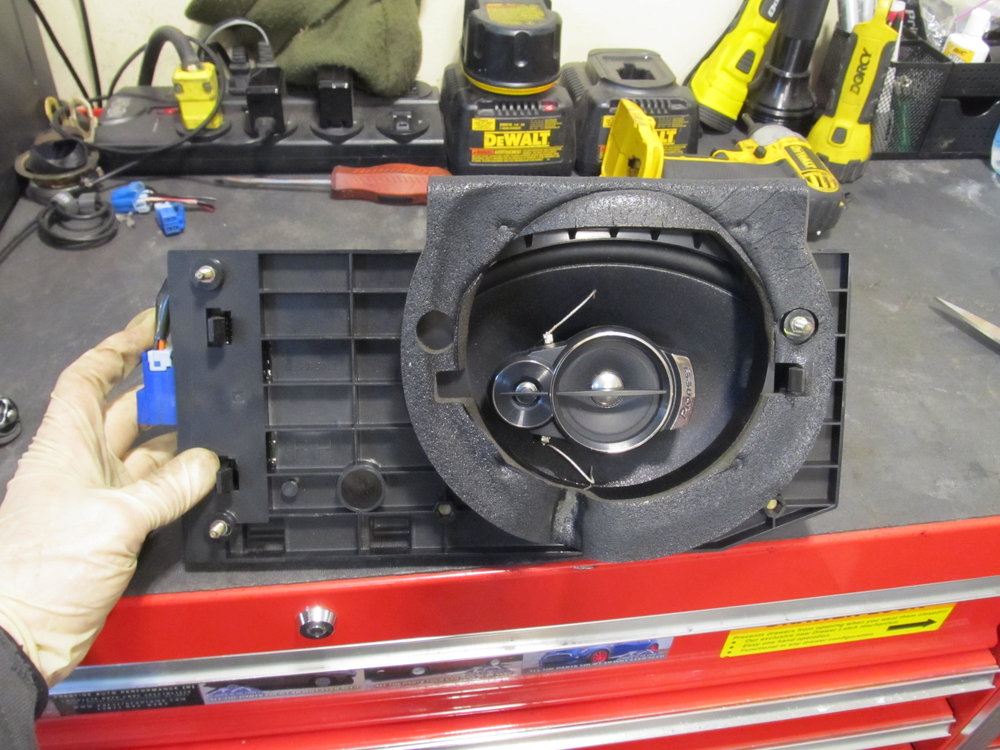
Anyways, on to the fun stuff! The car came with a dead Bose stereo, and I've been just using the speakers on my phone to listen to music in the mean time, but I couldn't take it any more. I put a new headunit in the M3, and decided to put the old one in the Maxima. From there, I decided on some 6.5" JBL GTO638 3-way speakers. Nice and cheap, at $45. Now, the stock front speakers on a Bose-equipped 3rd gen are 4". That is not acceptable! Seeing as how I make custom speaker spacers/adapters I figured I should probably make a set for the 3rd gen!
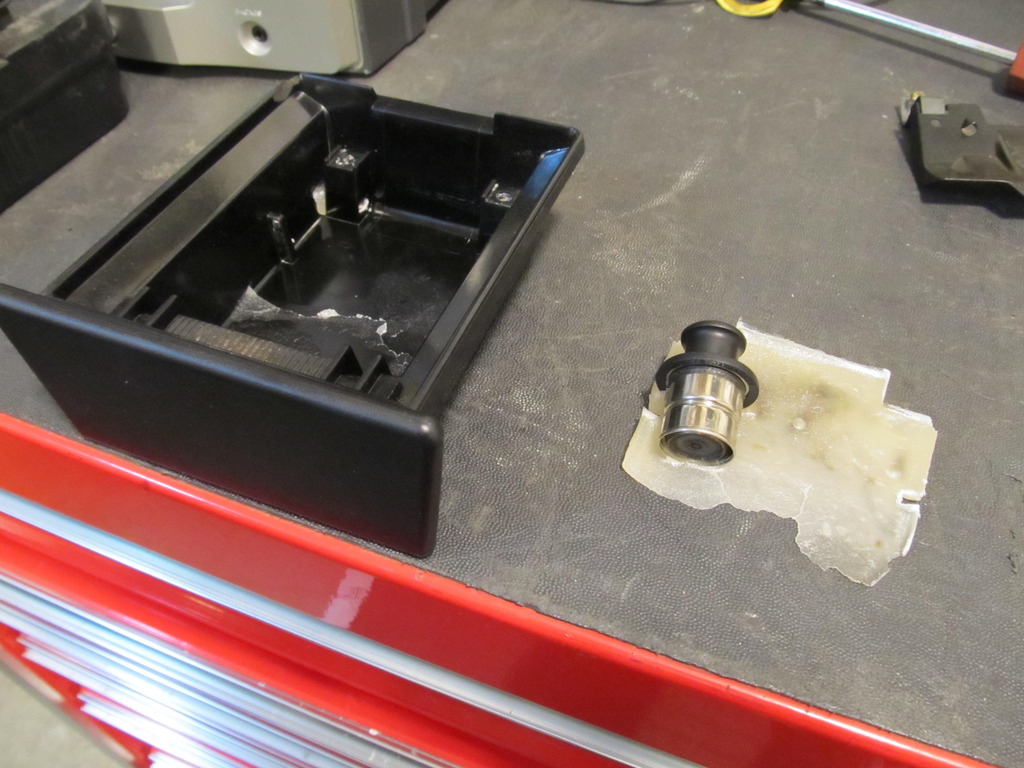
I started with disassembly, which led me to this melted wax in the ash tray. So many questions....
Stock 4" Bose speakers:
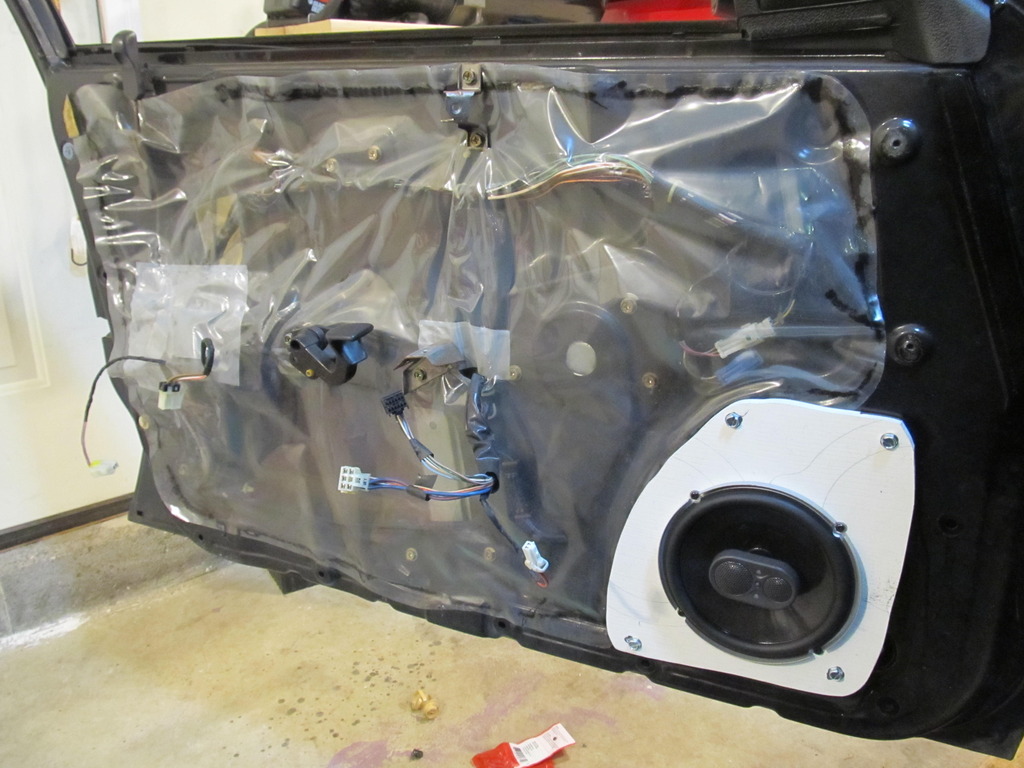
It took a couple tries to get the holes to line up, and a trip to Home Depot for some #14 1-1/4" sheet metal screws, but things actually went together pretty smoothly! The Bose speakers have two sets of wires going to them; one thick set for power, and a thin set for signal. I capped off the power wires and just kept signal. I used 1/2" material for this job. Normally, I would use all sorts of sound deadening material, but for this car, with these parts, I just didn't care enough.

Getting the crappy JVC headunit in was a bit of a pain. Apparently, these cars really like getting a dedicated chassis ground for headunits, but there is nothing to really ground to inside the dash. Oh sure, there's the crash beam in there, but good luck drilling a hole in that. I eventually settled on a stud down by the gas pedal on the firewall. No hisses or pops or interference. Hooray, stereo complete!
I don't think I'll be spending any money on rear speakers, and for a grand total of $45 I'm pretty pleased with these results! If any of you 3rd gen guys want custom adapters for 6.5" front speakers, just let me know!

I also replaced a dead tail light bulb. Big stuff here people!
Next, I followed up on the tip James gave me almost a year ago about checking the clutch pedal assembly. To refresh your memory, sometimes when I'm in first gear and I have my foot down on the clutch pedal and rev the motor, it feels like the clutch is trying to grab a bit. Well, I found one of the problems James mentioned, which was a loose nut on the clutch rod.

So I snugged it up, but once it reached the end it just started rotating the rod and didn't get any tighter.

I'm not sure what to make of this. I vaguely remember something similar happening to my I30 many years ago. Am I supposed to adjust the rod length? Maybe that's the reason why my clutch tries to grab even when I have my foot on the floor. But which way do I adjust it, towards the firewall, I assume?
Anyways, on to the fun stuff! The car came with a dead Bose stereo, and I've been just using the speakers on my phone to listen to music in the mean time, but I couldn't take it any more. I put a new headunit in the M3, and decided to put the old one in the Maxima. From there, I decided on some 6.5" JBL GTO638 3-way speakers. Nice and cheap, at $45. Now, the stock front speakers on a Bose-equipped 3rd gen are 4". That is not acceptable! Seeing as how I make custom speaker spacers/adapters I figured I should probably make a set for the 3rd gen!
I started with disassembly, which led me to this melted wax in the ash tray. So many questions....

Stock 4" Bose speakers:

It took a couple tries to get the holes to line up, and a trip to Home Depot for some #14 1-1/4" sheet metal screws, but things actually went together pretty smoothly! The Bose speakers have two sets of wires going to them; one thick set for power, and a thin set for signal. I capped off the power wires and just kept signal. I used 1/2" material for this job. Normally, I would use all sorts of sound deadening material, but for this car, with these parts, I just didn't care enough.


Getting the crappy JVC headunit in was a bit of a pain. Apparently, these cars really like getting a dedicated chassis ground for headunits, but there is nothing to really ground to inside the dash. Oh sure, there's the crash beam in there, but good luck drilling a hole in that. I eventually settled on a stud down by the gas pedal on the firewall. No hisses or pops or interference. Hooray, stereo complete!

I don't think I'll be spending any money on rear speakers, and for a grand total of $45 I'm pretty pleased with these results! If any of you 3rd gen guys want custom adapters for 6.5" front speakers, just let me know!
Last edited by 95maxrider; 12-12-2016 at 11:42 AM.
12-12-2016, 12:27 PM
#49
Actually, I wasn't talking about the rod on the master cylinder. I guess it's possible I mentioned that but I don't remember if so. What I did mean was the actual clutch pedal assembly itself - the upper bolt on the clutch pedal mount. That is a very common failure point on these cars. The bolt head faces directly downward. If you follow the clutch pedal framework - just out of frame to the left of your pictures - there is a single bolt that screws into the upper mount. Again the bolt head faces directly downward.
This upper mount very commonly breaks and as a result the bolt will never stay tight. It'll just spin in place. Without this upper bolt being secure it allows the entire pedal assembly to flex when you press the clutch in and this flex can result in the exact sort of symptoms you're having.
Nice job on the Blose bypass. That's definitely an essential 3rd gen mod. Sadly most of us started having to do that way back in the early 2000's when these cars weren't even 10 years old lol.
Your 6.5" speakers must be pretty shallow. Have you tried to roll your windows down yet with those in place?
I ask because for years I made/sold 6.5" bolt-on speaker brackets for these cars. When I was a younger I used to sell them for $25 shipped on here and it'd give me a little gas money lol. In fact, a Google image search still turns up some results for my old bolt on mounts:

Anyway, as you can see, I had to put those spacer rings on the brackets because almost any 6.5" speaker is so deep it would interfere with the ability of the glass to roll down. The flat adapter bracket was never a go unless it was some inordinately shallow speakers.
One of my current VE's I actually just modified the factory Bose enclosures to accept 6.5" speakers as I didn't have any MDF and didn't feel like going to buy some. They actually sound pretty good since they're still in an enclosure (albeit not technically volumetrically proper - but still).
I know you said you don't want to spend any more money, but you should grab some really cheapo 6x9's and stick them in the back. Even the crummiest of 6x9's makes a huge difference. I got some Roadmaster 6x9's for something like $8 at Walmart one time and was amazed the difference it made just because it filled out the back with some sound.
This upper mount very commonly breaks and as a result the bolt will never stay tight. It'll just spin in place. Without this upper bolt being secure it allows the entire pedal assembly to flex when you press the clutch in and this flex can result in the exact sort of symptoms you're having.
Nice job on the Blose bypass. That's definitely an essential 3rd gen mod. Sadly most of us started having to do that way back in the early 2000's when these cars weren't even 10 years old lol.
Your 6.5" speakers must be pretty shallow. Have you tried to roll your windows down yet with those in place?
I ask because for years I made/sold 6.5" bolt-on speaker brackets for these cars. When I was a younger I used to sell them for $25 shipped on here and it'd give me a little gas money lol. In fact, a Google image search still turns up some results for my old bolt on mounts:
Anyway, as you can see, I had to put those spacer rings on the brackets because almost any 6.5" speaker is so deep it would interfere with the ability of the glass to roll down. The flat adapter bracket was never a go unless it was some inordinately shallow speakers.
One of my current VE's I actually just modified the factory Bose enclosures to accept 6.5" speakers as I didn't have any MDF and didn't feel like going to buy some. They actually sound pretty good since they're still in an enclosure (albeit not technically volumetrically proper - but still).
I know you said you don't want to spend any more money, but you should grab some really cheapo 6x9's and stick them in the back. Even the crummiest of 6x9's makes a huge difference. I got some Roadmaster 6x9's for something like $8 at Walmart one time and was amazed the difference it made just because it filled out the back with some sound.
12-12-2016, 02:04 PM
#50
Actually, I wasn't talking about the rod on the master cylinder. I guess it's possible I mentioned that but I don't remember if so. What I did mean was the actual clutch pedal assembly itself - the upper bolt on the clutch pedal mount. That is a very common failure point on these cars. The bolt head faces directly downward. If you follow the clutch pedal framework - just out of frame to the left of your pictures - there is a single bolt that screws into the upper mount. Again the bolt head faces directly downward.
This upper mount very commonly breaks and as a result the bolt will never stay tight. It'll just spin in place. Without this upper bolt being secure it allows the entire pedal assembly to flex when you press the clutch in and this flex can result in the exact sort of symptoms you're having.
Nice job on the Blose bypass. That's definitely an essential 3rd gen mod. Sadly most of us started having to do that way back in the early 2000's when these cars weren't even 10 years old lol.
Your 6.5" speakers must be pretty shallow. Have you tried to roll your windows down yet with those in place?
I ask because for years I made/sold 6.5" bolt-on speaker brackets for these cars. When I was a younger I used to sell them for $25 shipped on here and it'd give me a little gas money lol. In fact, a Google image search still turns up some results for my old bolt on mounts:
Anyway, as you can see, I had to put those spacer rings on the brackets because almost any 6.5" speaker is so deep it would interfere with the ability of the glass to roll down. The flat adapter bracket was never a go unless it was some inordinately shallow speakers.
One of my current VE's I actually just modified the factory Bose enclosures to accept 6.5" speakers as I didn't have any MDF and didn't feel like going to buy some. They actually sound pretty good since they're still in an enclosure (albeit not technically volumetrically proper - but still).
I know you said you don't want to spend any more money, but you should grab some really cheapo 6x9's and stick them in the back. Even the crummiest of 6x9's makes a huge difference. I got some Roadmaster 6x9's for something like $8 at Walmart one time and was amazed the difference it made just because it filled out the back with some sound.


 02-06-2017, 12:10 PM
#52
I finally got a bunch of studying and test taking completed, so after a month away, I was able to get back out to the garage and do some work. Yay!! After doing an oil change on the wife's Escape, I brought the Maxima in. First thing? Oil change! I've only put on something like 1,000 miles since I bought the car some 14 months ago, but I knew new oil would do the car good. There are some oil leaks on the motor, and since I'm not about to tear the whole damn thing apart to fix all of them, I decided to try something new- LiquiMoly products. I've already added a can on their Valve Clean to the gas, but now it was time to put their products elsewhere.
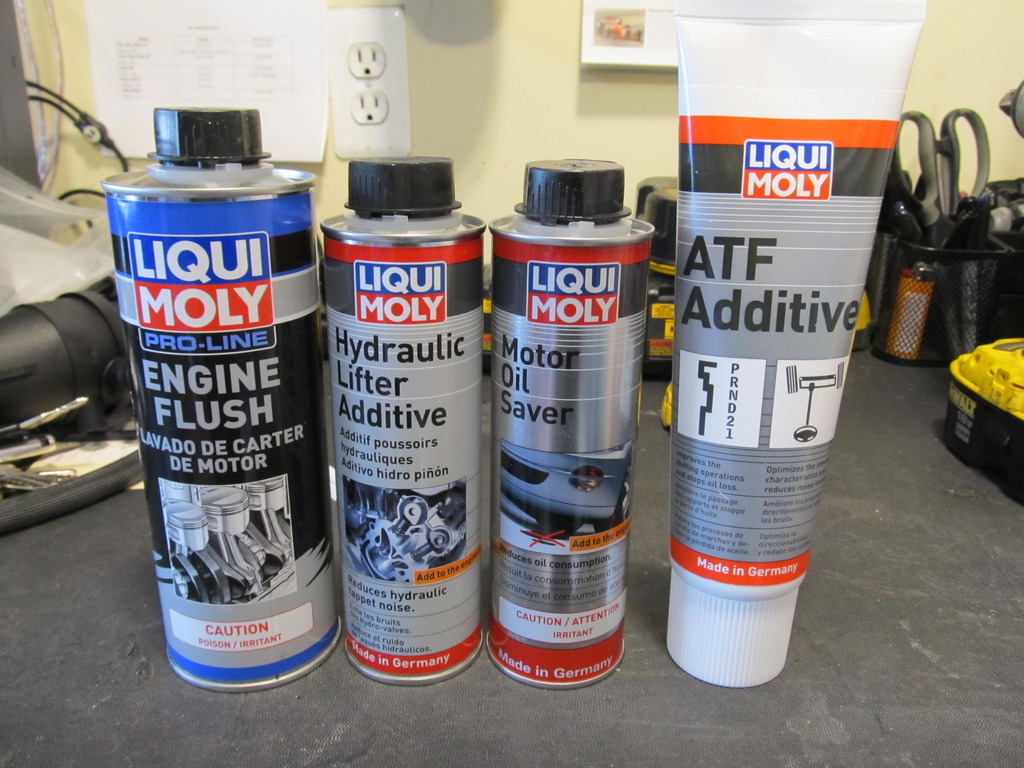
Normally I'm pretty skeptical of these types of products. The only things I've pretty much ever used before is just Seafoam in the gas. But after reading a lot of reviews for all of these LM products, they sounded legit enough. Hey, they're all made in Germany, how bad can they be? First up was the Engine Flush. You put it in the oil and let the engine idle for 10 minutes, then drain it all out. The stuff is thinner than oil. I did a little before/after comparison with oil from the dipstick to see if it got any darker after running it through, but I couldn't tell a change. Oh well.
Then on to some new oil and a new Toyota filter.
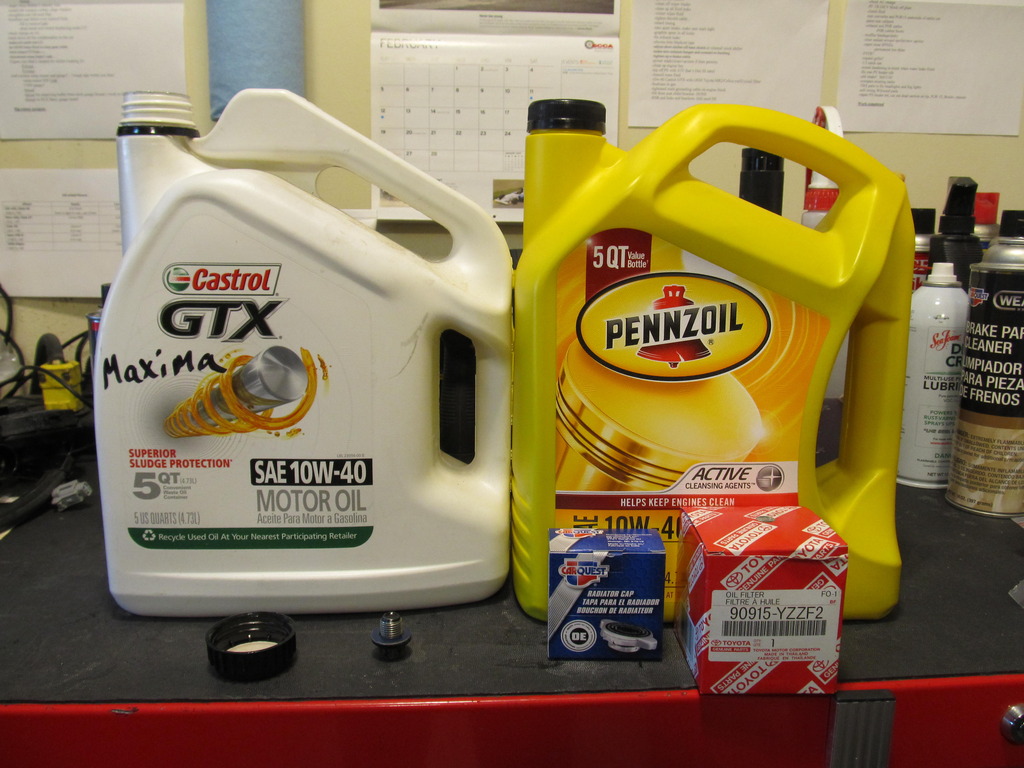
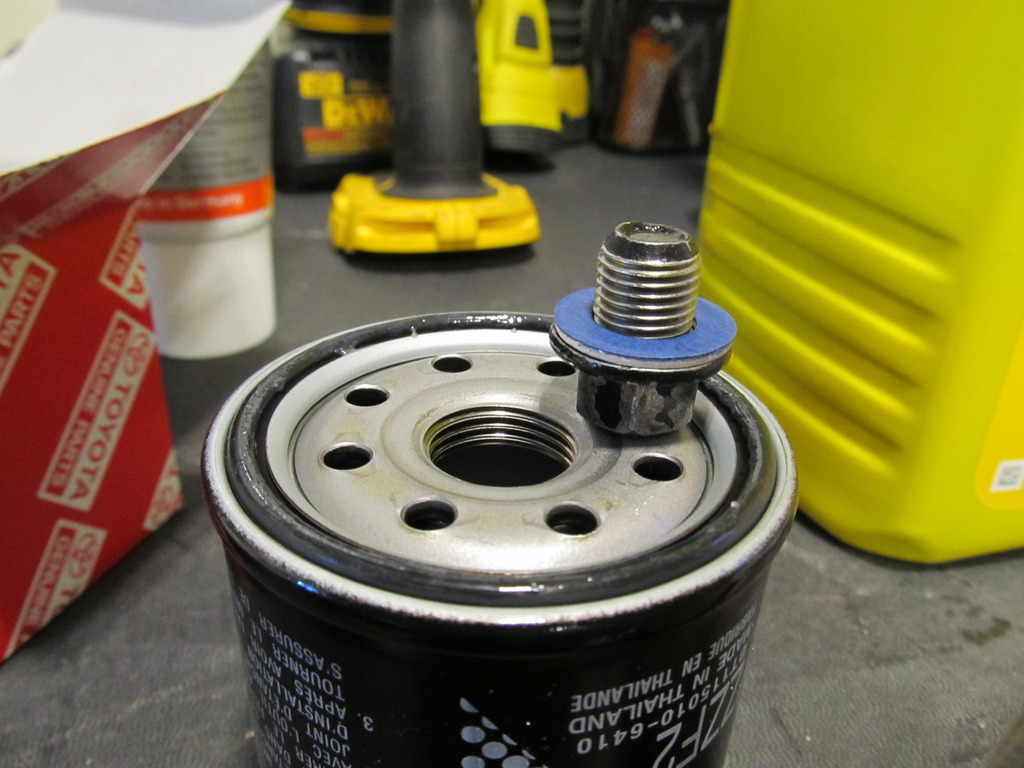
This has gotta be the nicest filter I've ever bought. Not only does it come with a new crush gasket for the drain plug (that just so happens to fit the 3rd gen plug) but the o-ring comes pre-lubed with something that looks like vaseline. What thoughtful touches! I poured in the stop leak stuff and the hydraulic valve lifter noise stuff, and both were thick like honey, then put the oil in after to make sure I didn't overfill it.
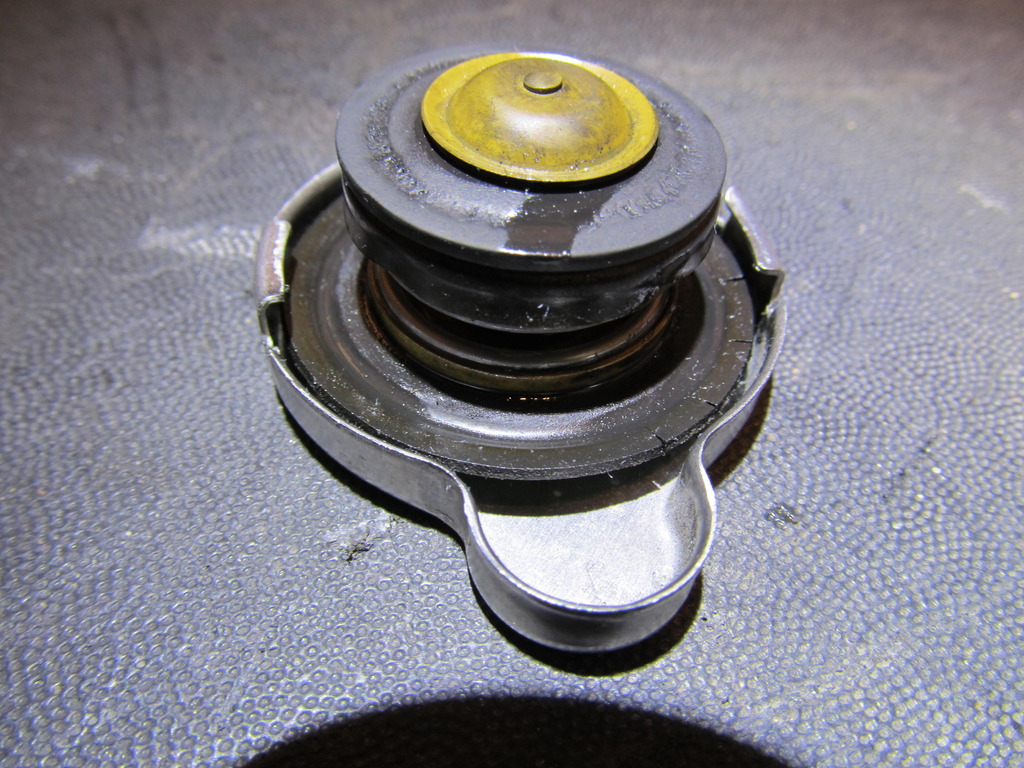
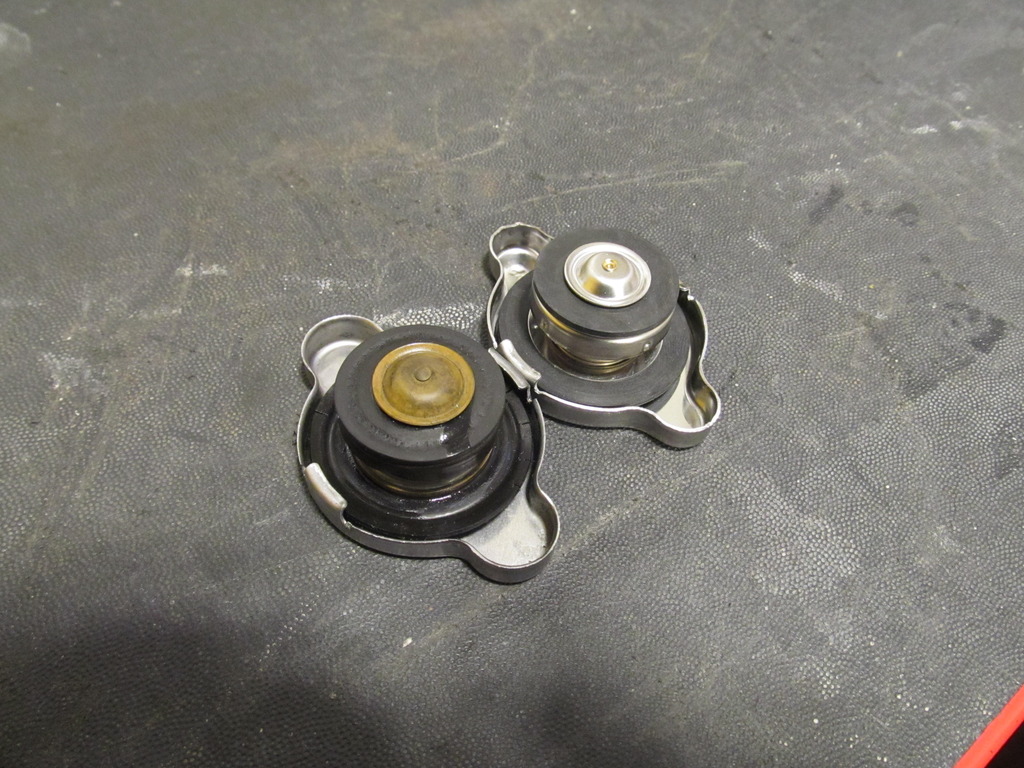
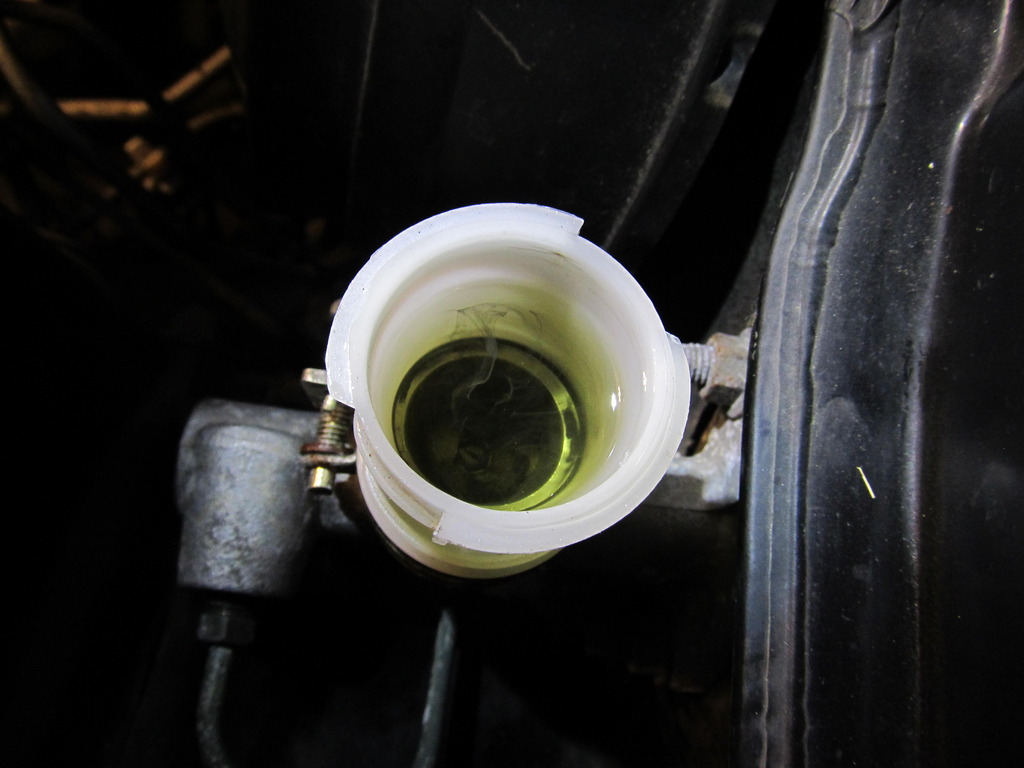
I've noticed that my coolant overflow tank slowly seems to drain itself, but I can never find any evidence of where the coolant was going. I tried to use my cooling system pressure tester, but I couldn't get it to seal right on the radiator. I took a look at the radiator cap only to find cracked rubber seals. Time for a new cap! 15 minutes and $7 later, I had a new cap. I mixed up a batch of coolant and considered the job done for now.
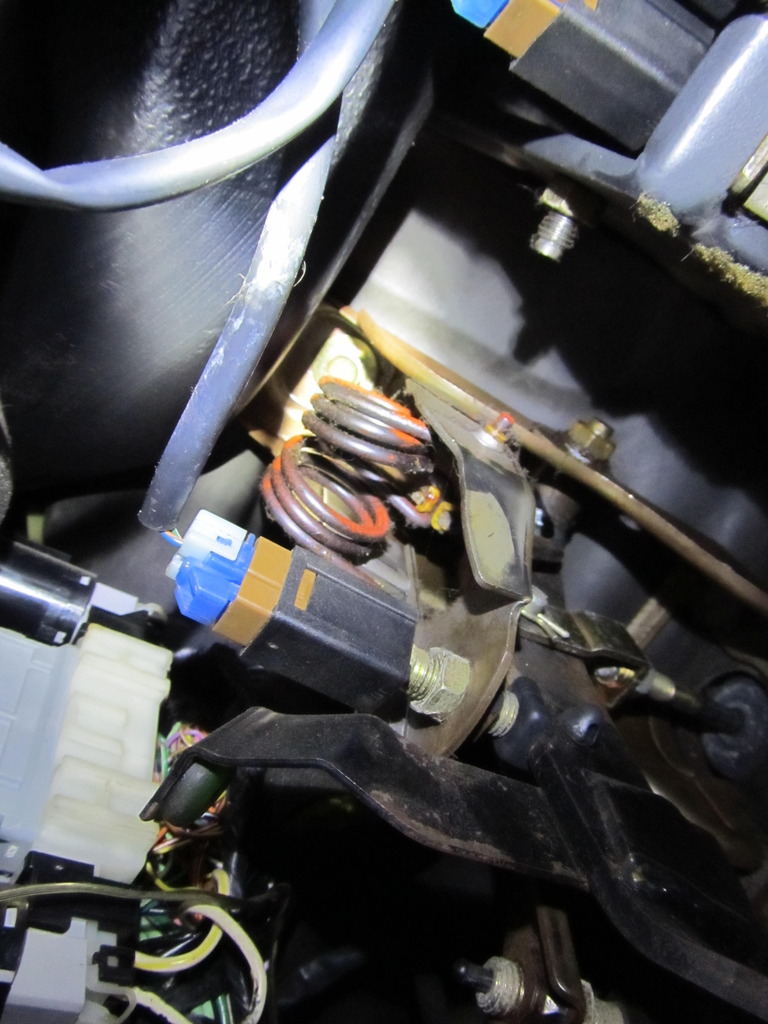
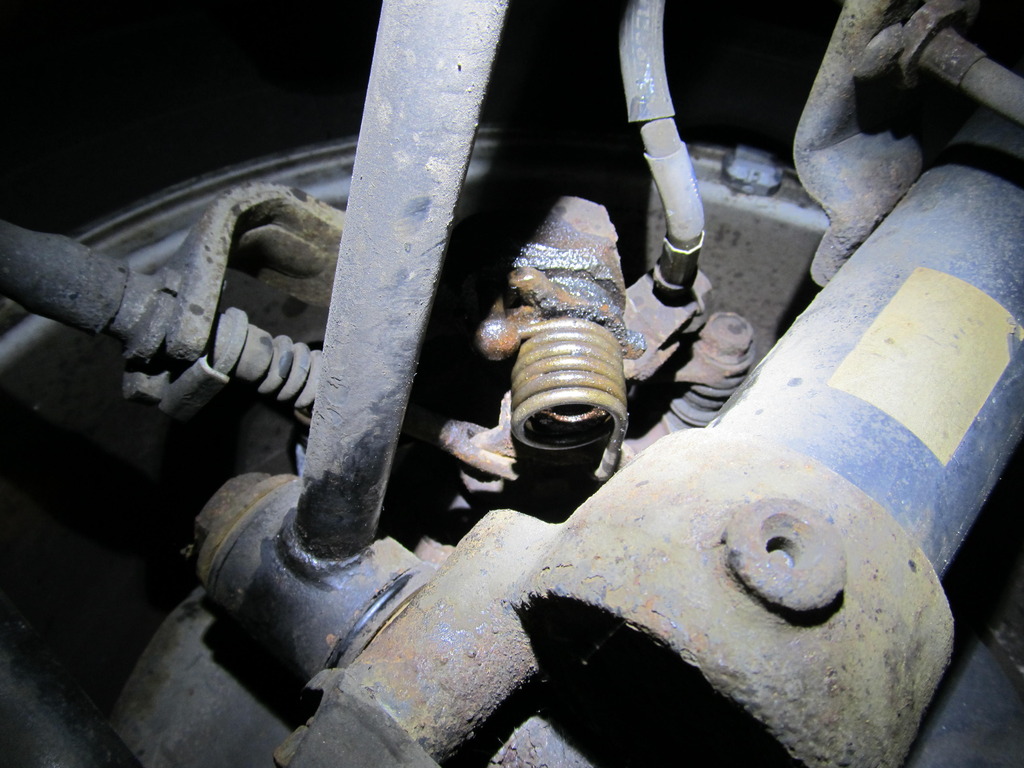
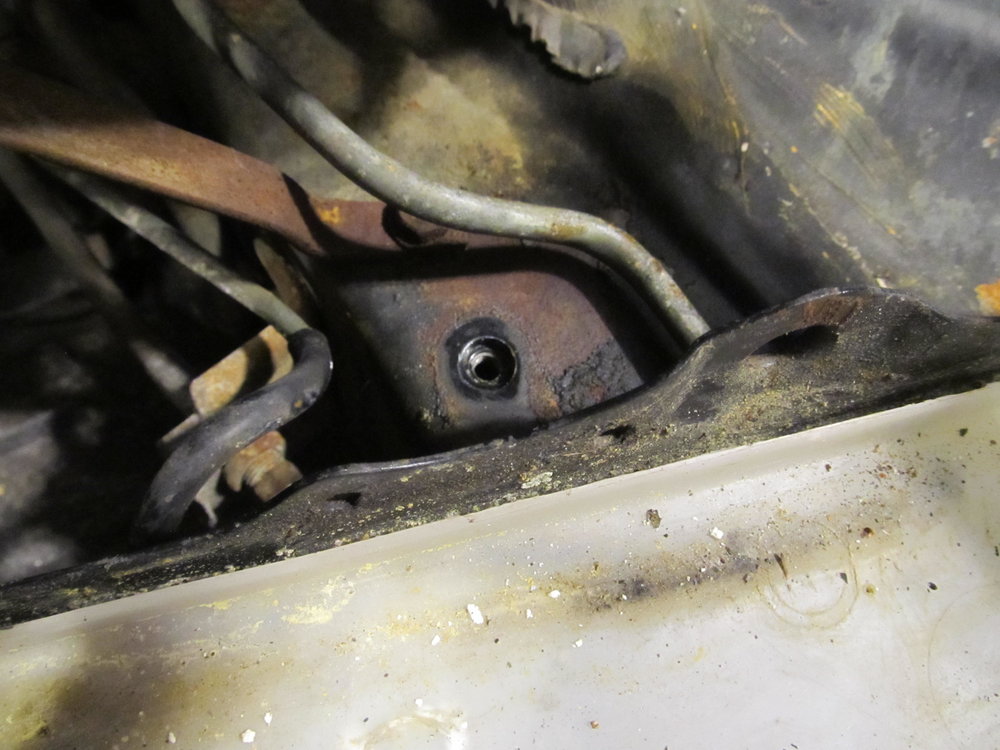
Then it was time to crawl inside the car to take a look at the clutch pedal bolt that James told me to check out. It seemed to be nice and tight, which is a good thing. Except now I'm not sure where to look for my occasional clutch pedal weirdness. I'm guessing this hard to photograph bolt is the one he's referring to:
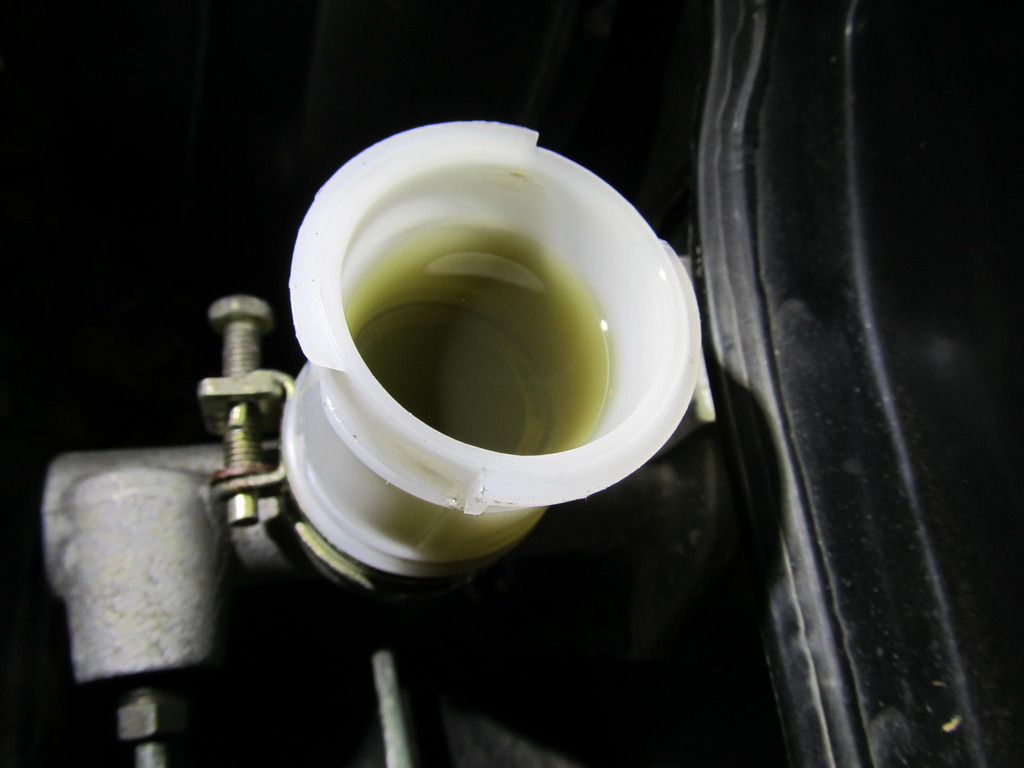
Then I had a thought- what if the clutch fluid is so nasty that it's not fully disengaging the clutch when I have my foot on it. I didn't use my testing kit to get the percentage of water in the fluid, but it was probably pretty high. I wouldn't be at all surprised if this fluid was 25 years old.
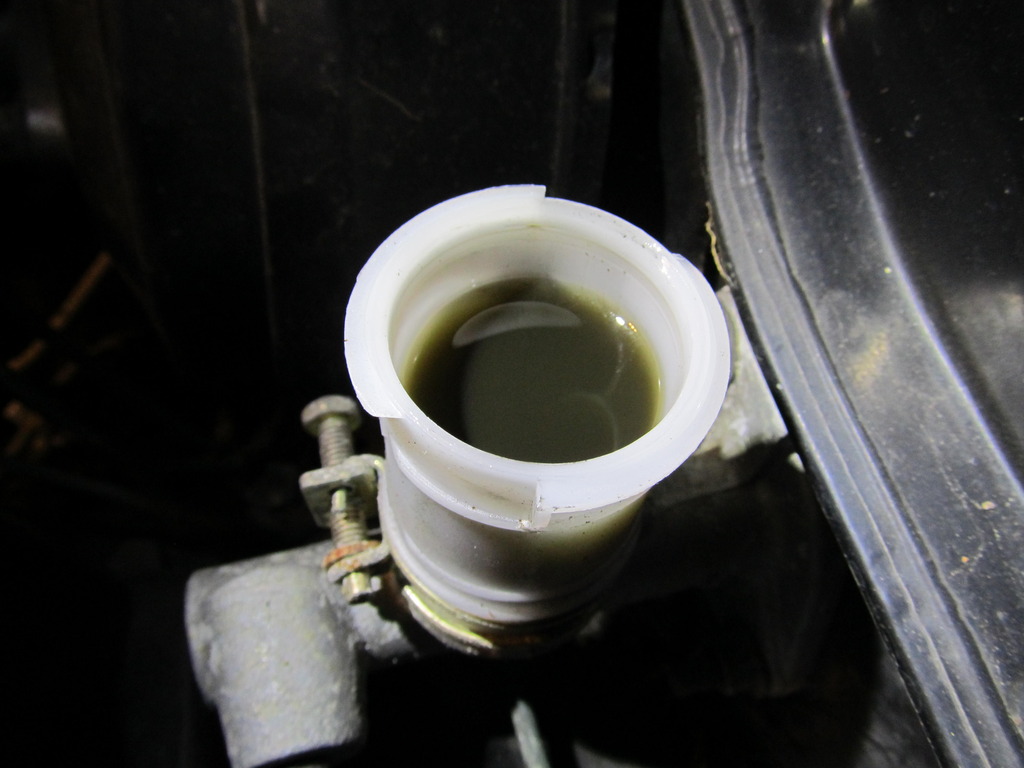
After using a turkey baster to suck out the old fluid about ten times, I was finally able to get the fluid in the reservoir nice and clean. Hooray! I didn't look, but is it easy to bleed the clutch line on this car?
I then sucked out the ATF from the PS reservoir and added some of the LM ATF additive in an attempt to stop the lines from leaking. We shall see if it works.
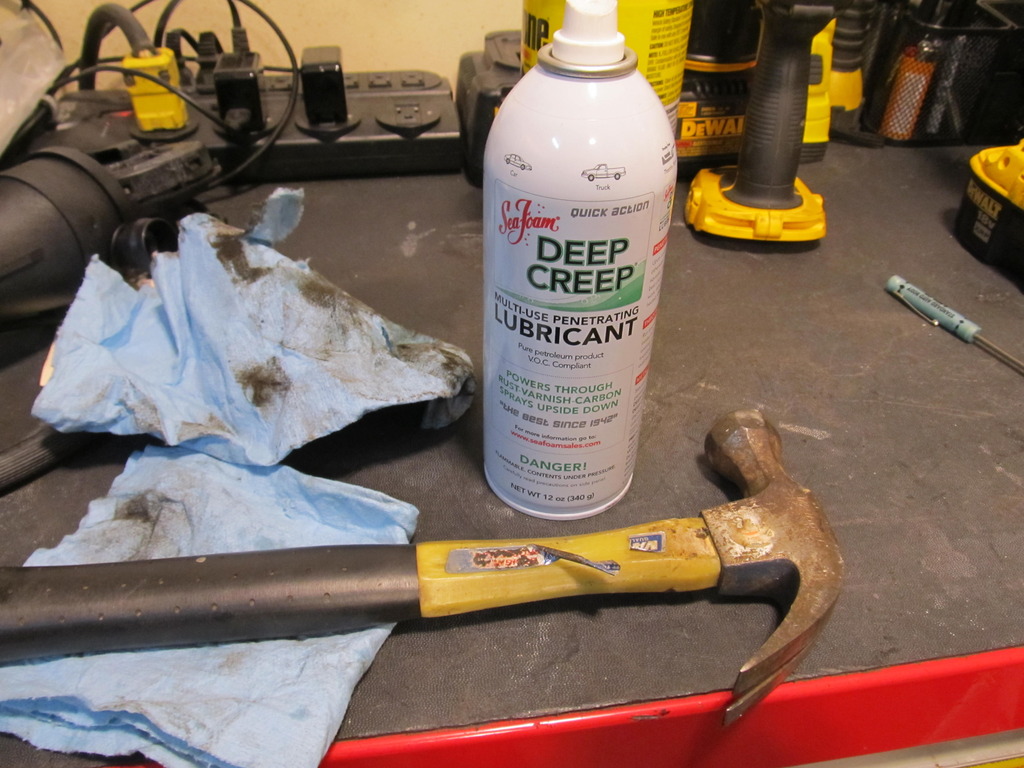
Then I crawled under the car to see if I couldn't figure out why the e-brake doesn't work on the PS wheel. The little arm thing that the e-brake cable pulls on wasn't moving freely so I hit it with some new, apparently better than PB Blaster Seafoam stuff and a hammer.
Yeah, no dice. Still mostly stuck.
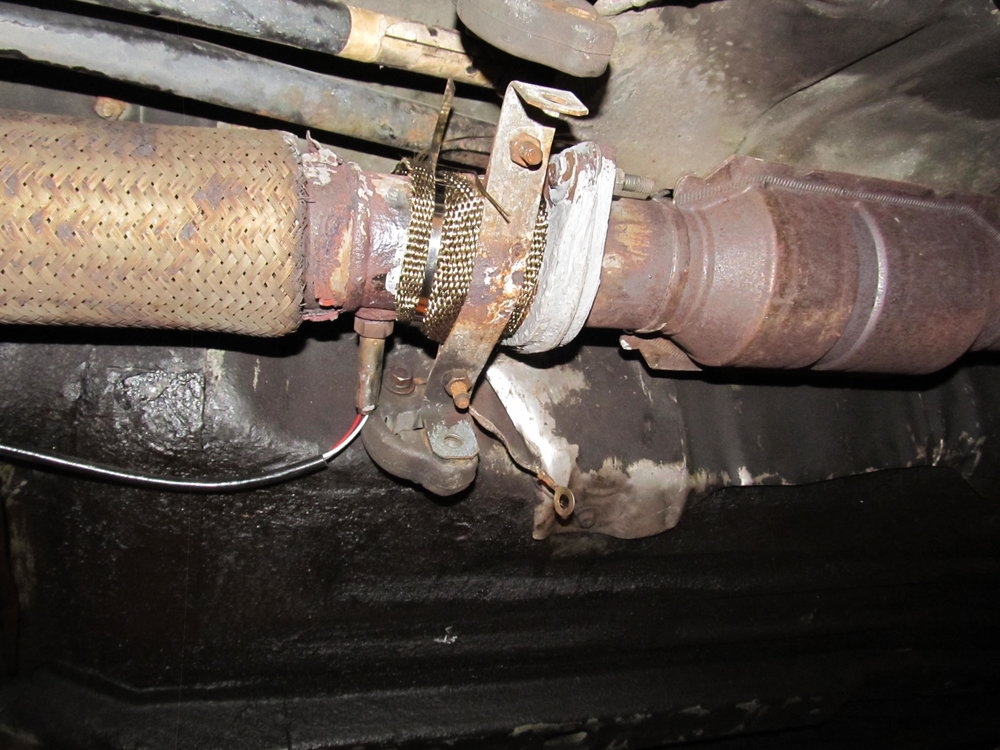
Last project was to stop the cat back from hitting the RSB. It's held in place with a variety of ghetto hangers that let it dangle way too low. I assume it was done on purpose, and I can only assume it was to stop the resonator from banging the heat shield. It looked like the easiest way to fix the problem was to simply remove an extra hanger that had been installed and just use the stock hanger.
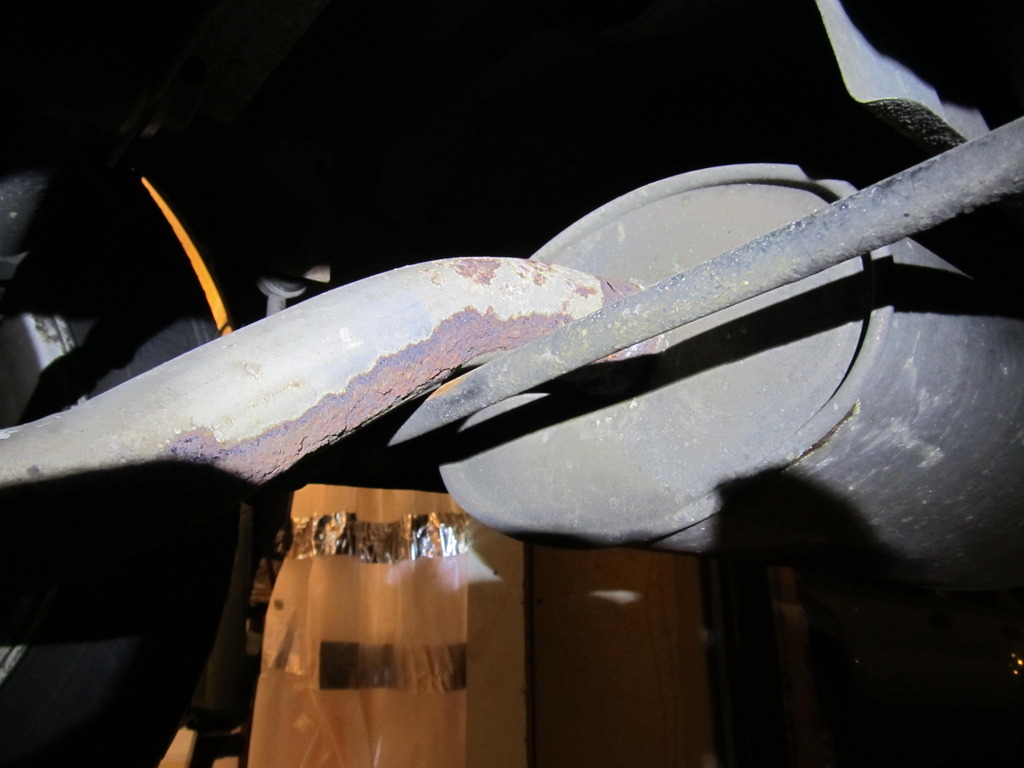
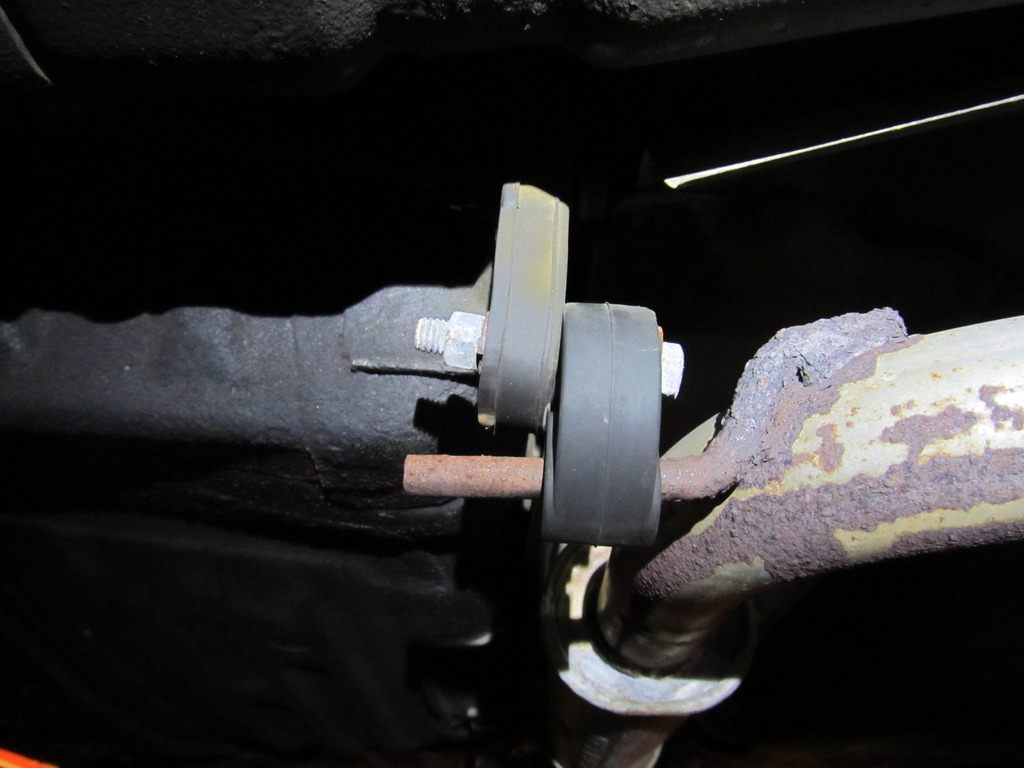
With that removed and the exhaust in the original hanger, I had plenty of room over the RSB, but it was rubbing up against the heat shield. I decided it would be best to just "tweak" the shield with my snips, a hammer, and a punch tool. Five minutes later I had all the clearance I needed and a non-rattling exhaust. Success again!
I didn't get to drive it yet, but I have high hopes. Oh, and I tweaked the EQ setting on the head unit and now those 6.5" front JBL GTO speakers sound pretty good! I'm excited to drive it around some more now to see how it reacted to the maintenance. I'll keep you posted!

Normally I'm pretty skeptical of these types of products. The only things I've pretty much ever used before is just Seafoam in the gas. But after reading a lot of reviews for all of these LM products, they sounded legit enough. Hey, they're all made in Germany, how bad can they be? First up was the Engine Flush. You put it in the oil and let the engine idle for 10 minutes, then drain it all out. The stuff is thinner than oil. I did a little before/after comparison with oil from the dipstick to see if it got any darker after running it through, but I couldn't tell a change. Oh well.
Then on to some new oil and a new Toyota filter.


This has gotta be the nicest filter I've ever bought. Not only does it come with a new crush gasket for the drain plug (that just so happens to fit the 3rd gen plug) but the o-ring comes pre-lubed with something that looks like vaseline. What thoughtful touches! I poured in the stop leak stuff and the hydraulic valve lifter noise stuff, and both were thick like honey, then put the oil in after to make sure I didn't overfill it.
I've noticed that my coolant overflow tank slowly seems to drain itself, but I can never find any evidence of where the coolant was going. I tried to use my cooling system pressure tester, but I couldn't get it to seal right on the radiator. I took a look at the radiator cap only to find cracked rubber seals. Time for a new cap! 15 minutes and $7 later, I had a new cap. I mixed up a batch of coolant and considered the job done for now.


Then it was time to crawl inside the car to take a look at the clutch pedal bolt that James told me to check out. It seemed to be nice and tight, which is a good thing. Except now I'm not sure where to look for my occasional clutch pedal weirdness. I'm guessing this hard to photograph bolt is the one he's referring to:

Then I had a thought- what if the clutch fluid is so nasty that it's not fully disengaging the clutch when I have my foot on it. I didn't use my testing kit to get the percentage of water in the fluid, but it was probably pretty high. I wouldn't be at all surprised if this fluid was 25 years old.

After using a turkey baster to suck out the old fluid about ten times, I was finally able to get the fluid in the reservoir nice and clean. Hooray! I didn't look, but is it easy to bleed the clutch line on this car?

I then sucked out the ATF from the PS reservoir and added some of the LM ATF additive in an attempt to stop the lines from leaking. We shall see if it works.
Then I crawled under the car to see if I couldn't figure out why the e-brake doesn't work on the PS wheel. The little arm thing that the e-brake cable pulls on wasn't moving freely so I hit it with some new, apparently better than PB Blaster Seafoam stuff and a hammer.

Yeah, no dice. Still mostly stuck.

Last project was to stop the cat back from hitting the RSB. It's held in place with a variety of ghetto hangers that let it dangle way too low. I assume it was done on purpose, and I can only assume it was to stop the resonator from banging the heat shield. It looked like the easiest way to fix the problem was to simply remove an extra hanger that had been installed and just use the stock hanger.


With that removed and the exhaust in the original hanger, I had plenty of room over the RSB, but it was rubbing up against the heat shield. I decided it would be best to just "tweak" the shield with my snips, a hammer, and a punch tool. Five minutes later I had all the clearance I needed and a non-rattling exhaust. Success again!


I didn't get to drive it yet, but I have high hopes. Oh, and I tweaked the EQ setting on the head unit and now those 6.5" front JBL GTO speakers sound pretty good! I'm excited to drive it around some more now to see how it reacted to the maintenance. I'll keep you posted!
02-14-2017, 12:19 PM
#53
Nothing much to report except some new fluids and a reinstalled battery tray. Still, progress!
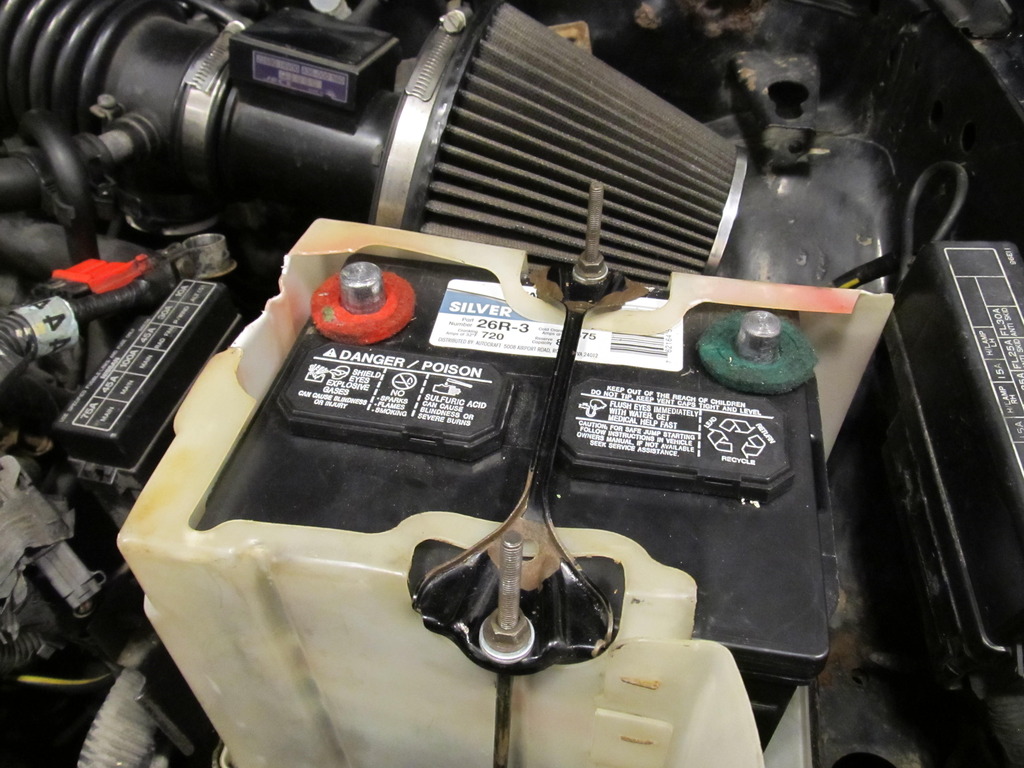
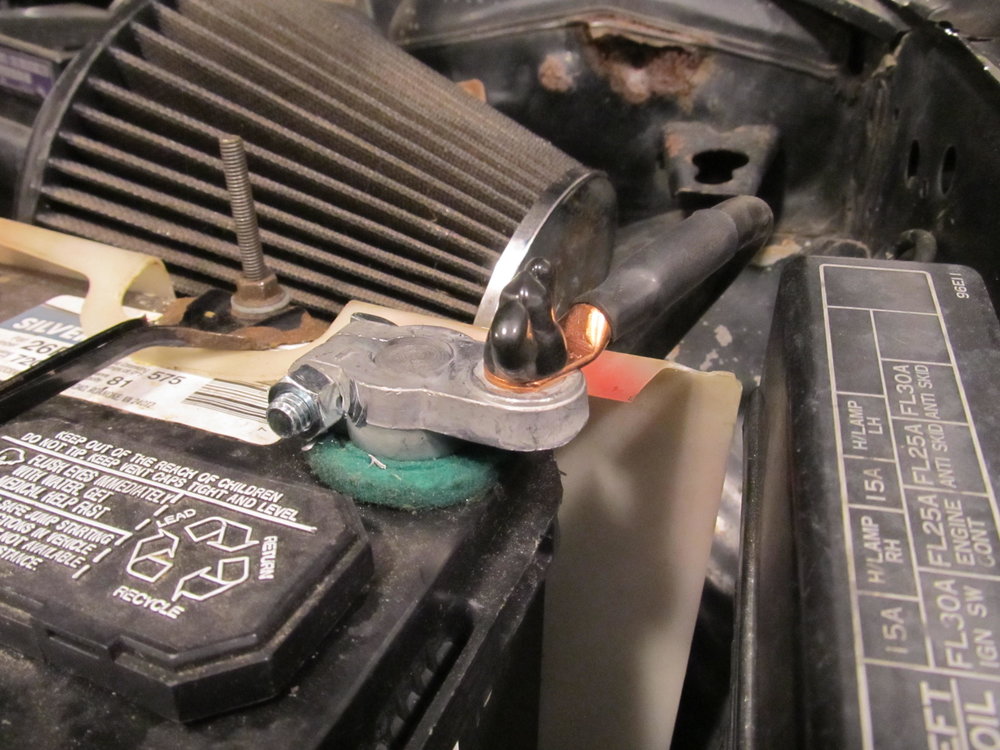
So the battery died a few weeks ago so I bought a new one from Advance Auto, but apparently it was a different size than the stock one, so I had to trim the plastic battery surround to get the positive terminal to fit. It also needed some washers on the posts to hold it down tight.
Good, done!
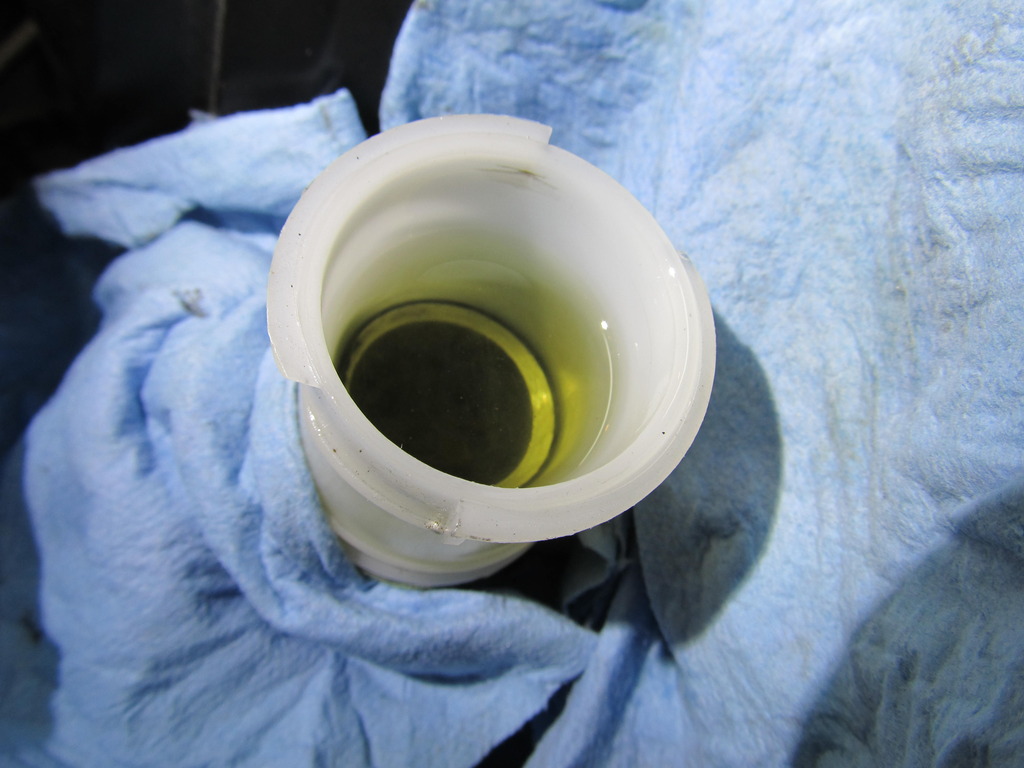
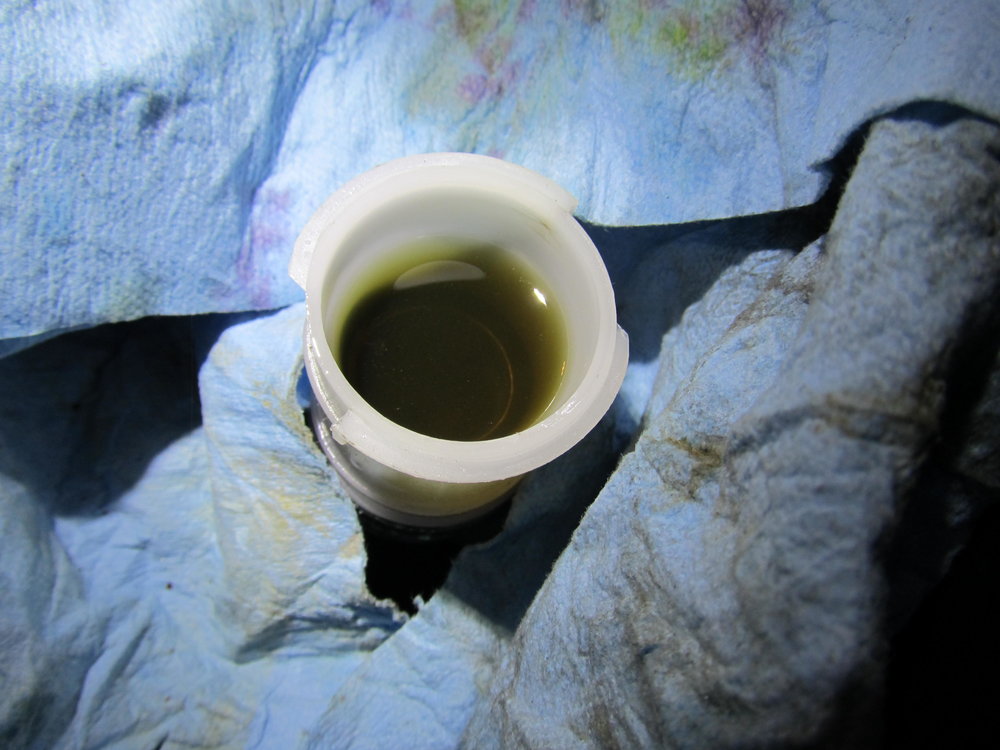
I was planning on bleeding the brakes and clutch fluid, but it turns out I don't have the correct adapter for my Motive power bleeder, and I didn't have time to do it manually, so I just swapped some fluids from the reservoirs. First up was the clutch fluid, which I had cleaned and refilled the reservoir last week. Apparently the stuff in the reservoir mixed up nicely with the dirty stuff in the line, so I decided the suck it out and put more new fluid in.
Fresh!
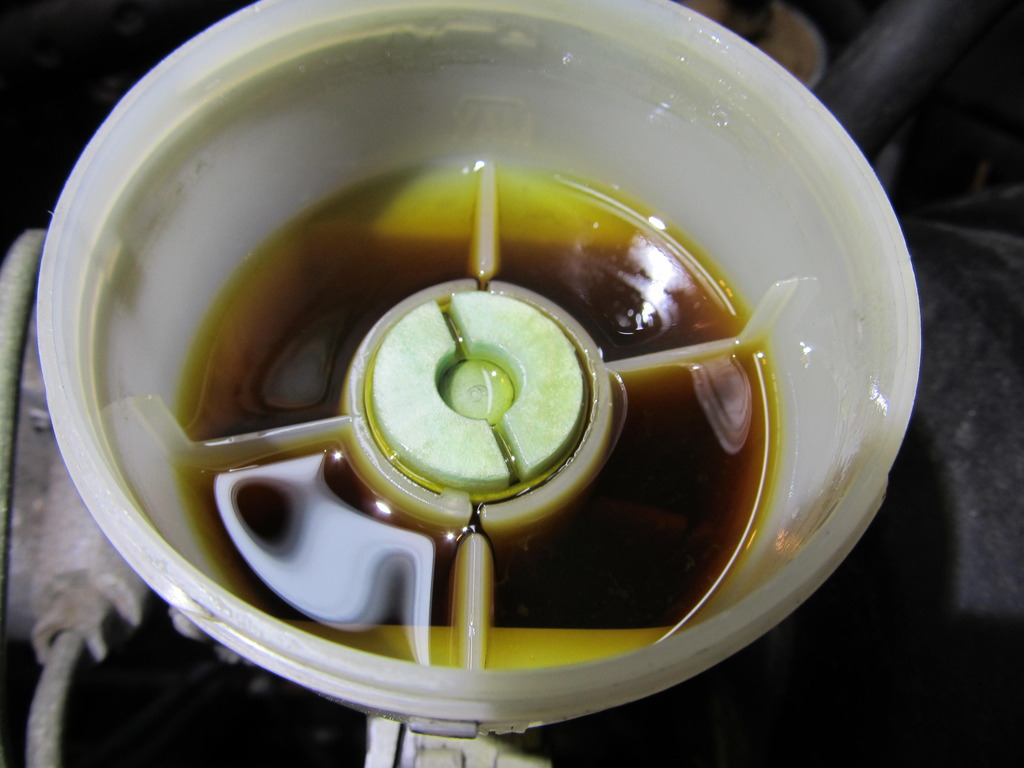
Next up was the disgusting brake fluid. I can't remember the last time I saw fluid this nasty!
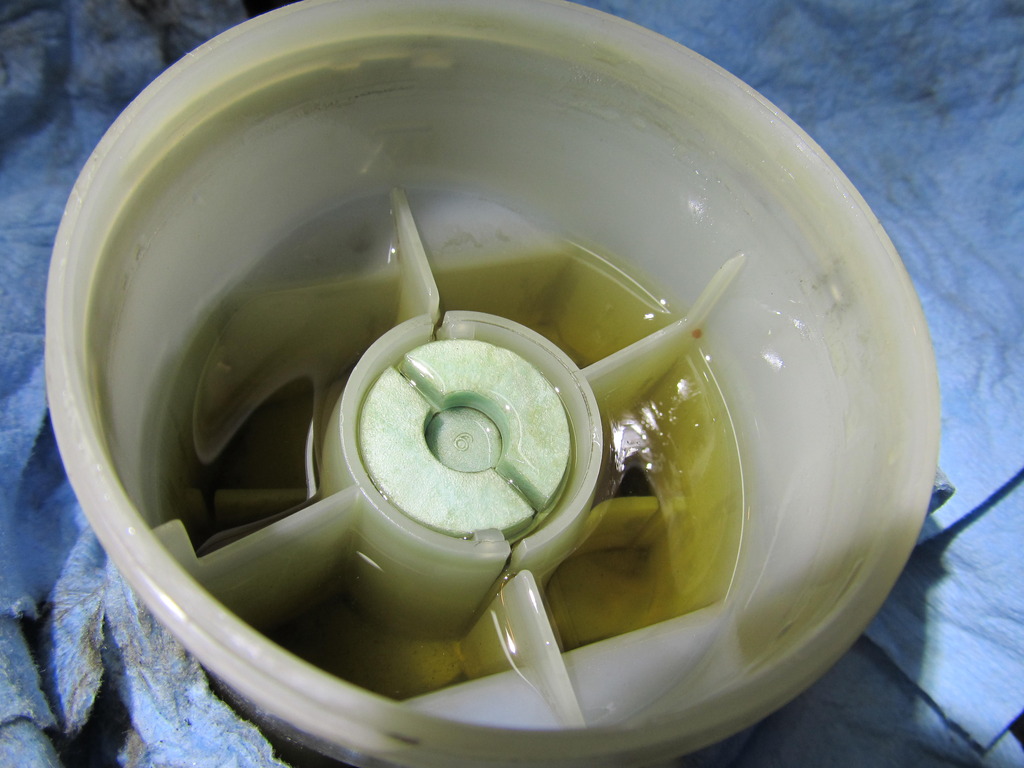
All fresh...well, at least in the reservoir.
More to come....
So the battery died a few weeks ago so I bought a new one from Advance Auto, but apparently it was a different size than the stock one, so I had to trim the plastic battery surround to get the positive terminal to fit. It also needed some washers on the posts to hold it down tight.

Good, done!
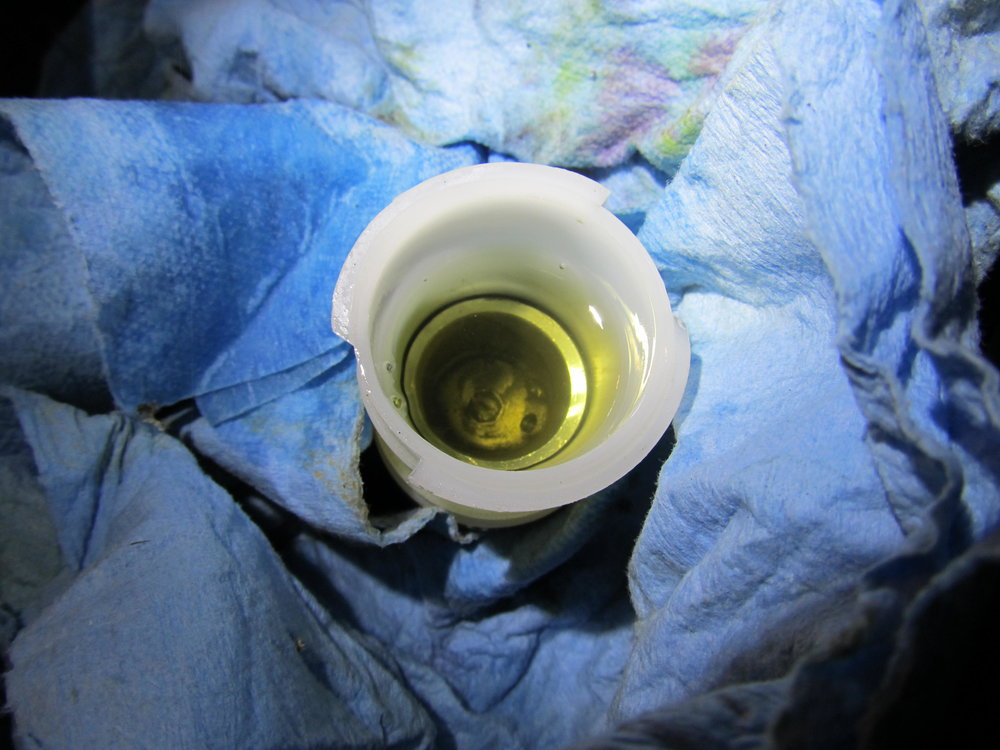
I was planning on bleeding the brakes and clutch fluid, but it turns out I don't have the correct adapter for my Motive power bleeder, and I didn't have time to do it manually, so I just swapped some fluids from the reservoirs. First up was the clutch fluid, which I had cleaned and refilled the reservoir last week. Apparently the stuff in the reservoir mixed up nicely with the dirty stuff in the line, so I decided the suck it out and put more new fluid in.

Fresh!

Next up was the disgusting brake fluid. I can't remember the last time I saw fluid this nasty!

All fresh...well, at least in the reservoir.

More to come....
05-06-2017, 01:13 PM
#54
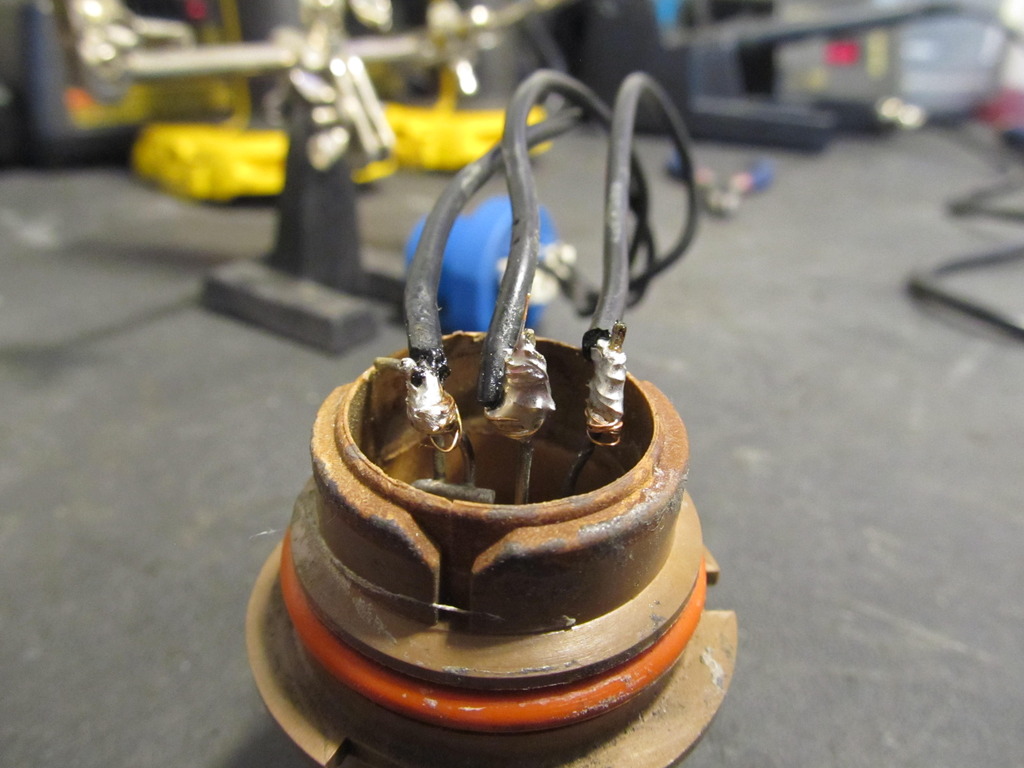
With the I30 back on the road, the Maxima hasn't been getting driven much. Apparently when I was mucking about with the battery I must have knocked the wiring going to the DS headlight, which no longer worked. The PO mentioned he did some bulb conversion to get better output, but failed to mention how poorly the conversion had been done. Now, to be fair, it did last more than a year, which is mighty impressive given what I found, but still some pretty shoddy work. If you're using duct tape on a car, you're probably doing it wrong.
Yup, duct tape was holding this whole thing together!

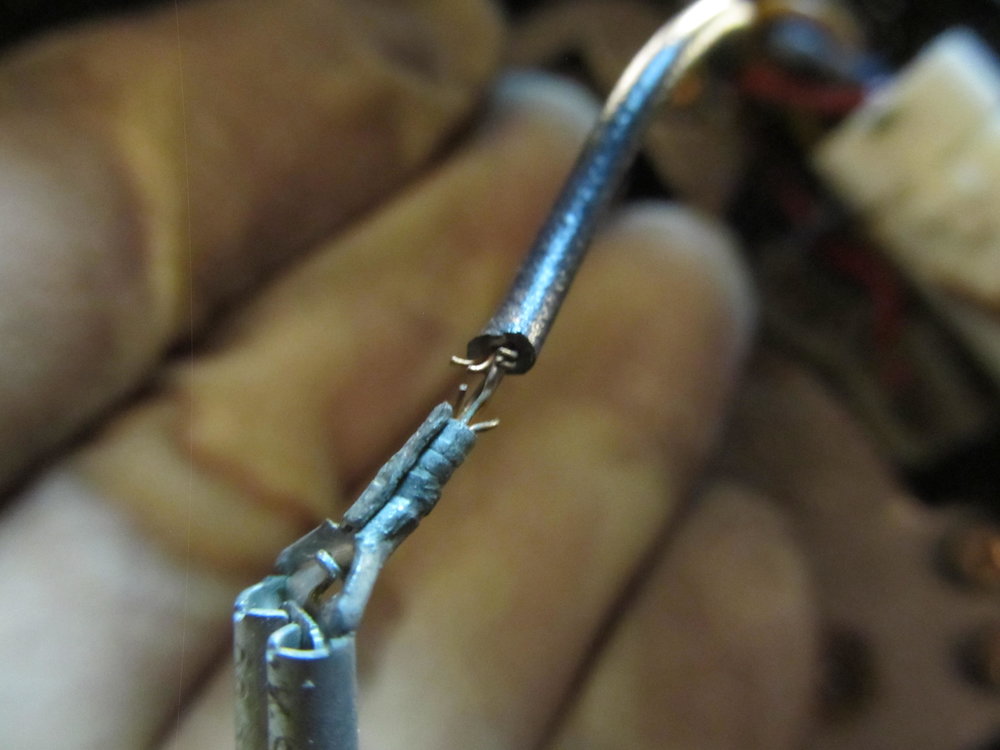
It should come as no surprise that a light amount of friction caused the wires to fall off their posts, since they were just twisted on!
Attachment 11635
So I brought out the soldering iron and put my crappy skills to work:

I pulled on the wires with a decent amount of force and they didn't come off. Success!! Time to finish the job properly with some electrical tape:
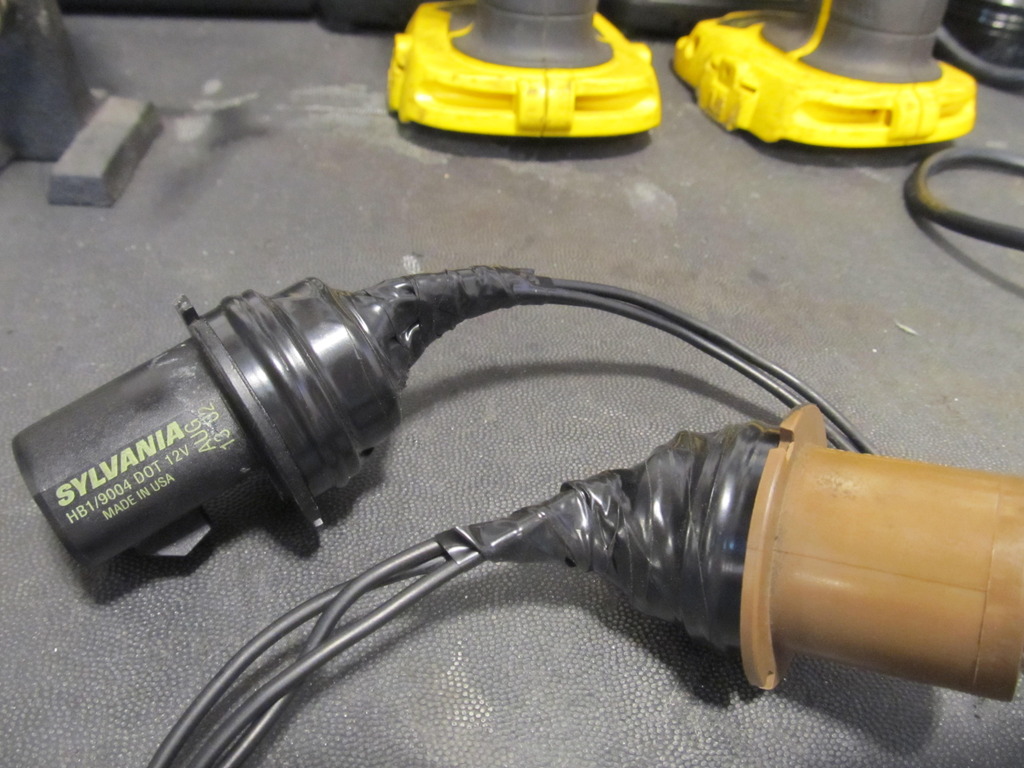
And because the tabs didn't seem like they were grabbing very well, I threw on some zip ties to make sure nothing could back out and disconnect:

And with that I have functioning and now more reliable headlights. Job done!
Yup, duct tape was holding this whole thing together!

It should come as no surprise that a light amount of friction caused the wires to fall off their posts, since they were just twisted on!
Attachment 11635
So I brought out the soldering iron and put my crappy skills to work:


I pulled on the wires with a decent amount of force and they didn't come off. Success!! Time to finish the job properly with some electrical tape:

And because the tabs didn't seem like they were grabbing very well, I threw on some zip ties to make sure nothing could back out and disconnect:

And with that I have functioning and now more reliable headlights. Job done!
05-29-2017, 07:14 AM
#55
Hey guys, so the time has come and it's about time I start preparing the 3rd gen for sale. Before doing so, I want to fix a couple hopefully easy things to make it a little more appealing to the average buyer, and I could use some feedback from 3rd gen guys about how hard they will be to do.
-My front DS window works flawlessly, but the other three windows usually don't work. It doesn't matter if I do it from the DS master switch or from the individual doors. Sometimes they all work, but most of the time they don't. I'm guessing this might be related to the master switch in the DS door, but this is just a guess. Can anyone give me any info on this?
-My temp gauge in the dash pretty much stopped working. When I bought the car I replaced the sensor on the engine that feeds the dash gauge. For a while, both before and after replacing the sensor, it would work until it got to operating temp, and then it would fall back to zero. Now, it pretty much never works at all. Smacking the dash board seemed to make it work occasionally. From what I remember reading, I might just need to reflow the solder on the back of the temp gauge. Is this correct, or is the problem potentially elsewhere?
-The clock doesn't work. Does anyone have a good one for sale?
Thanks guys!
10-18-2017, 09:30 AM
#57
Hey everyone! In case you haven't heard, there are fixes out now to enable viewing of the locked out Photobucket pictures!
If you're using Google Chrome, go to the three dots on the right side of the screen and click them. A drop down should appear. Hover your mouse over "More Tools," and when the next drop down appears, click on extensions. Go to the link towards the bottom that says "Get more extensions." In the search box, type "Photobucket Fix," and hit enter. Click the install button and once it's done, you should be able to see Photobucket pictures again.
For Firefox users, click on the three bars on the right side of the screen, then click on add-ons. Click search for "Photobucket hotlink" and click install. Same result.
12-12-2017, 01:20 PM
#58
I've made some decent progress on the car, so it's time for updates!
For a while now I've been having problems with the windows and auto locks not behaving, so I figured it was the DS window/lock switch. Rather than buy new, or muck about trying to clean up all the contacts in my old one, I went to a junkyard and got some parts. My clock and temp gauge have never worked, so I picked up those as well.
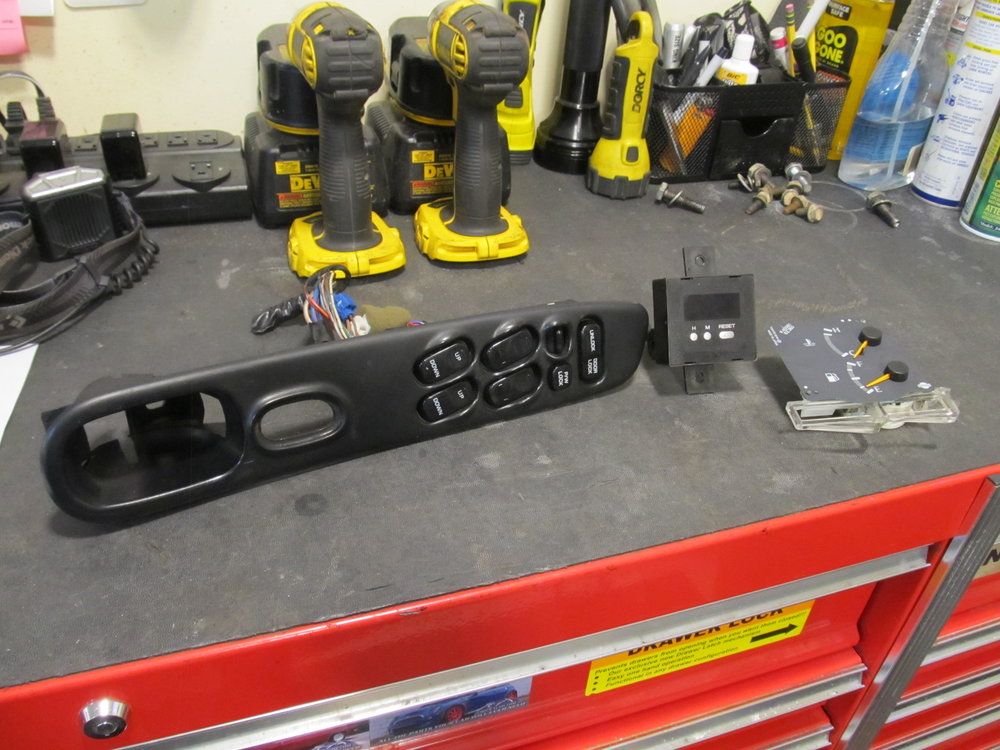
Five minutes later, and I had working windows and locks, success! Installing the temp gauge and clock was a little more involved, as the entire dash needs to come out along with the covers for the steering column, but it wasn't too bad. Thankfully the new clock works, another success! I was hoping I could swap my white gauge faces onto the non-SE temp gauge pod, but I couldn't figure out how to remove the needles, so in the end I just removed the SE temp/fuel pod and installed the black GXE version. It's not pretty, but I now have a working temp gauge. Another success, and all for about $10 in parts!

It's amazing how working windows, door locks, clock, and temp gauge make the car so much nicer to use and be in!
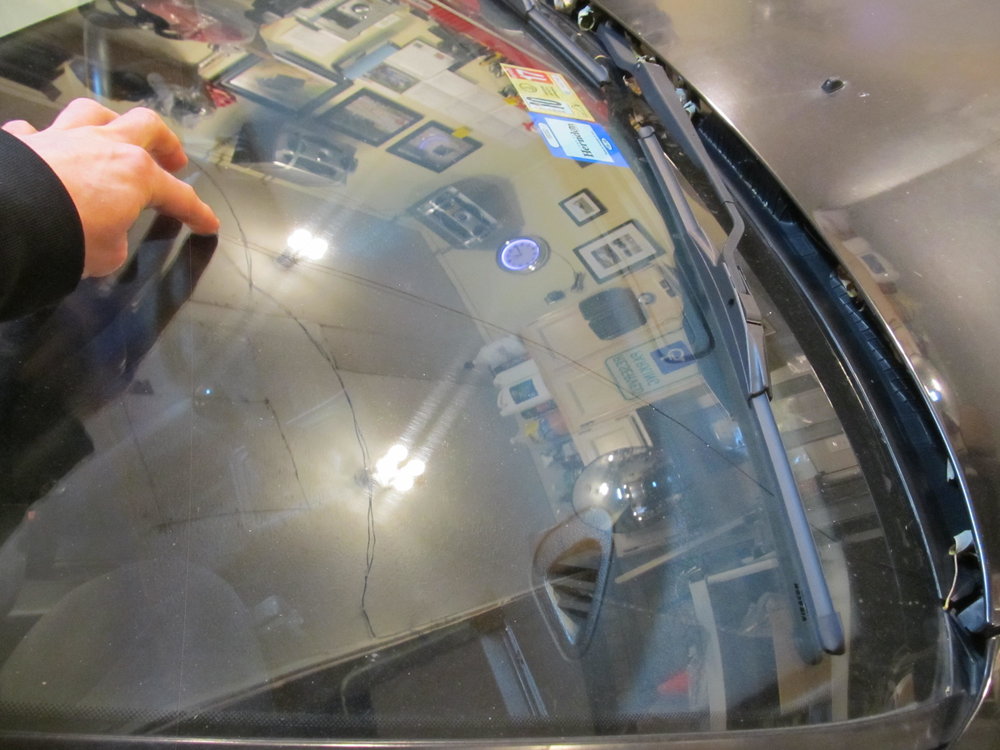
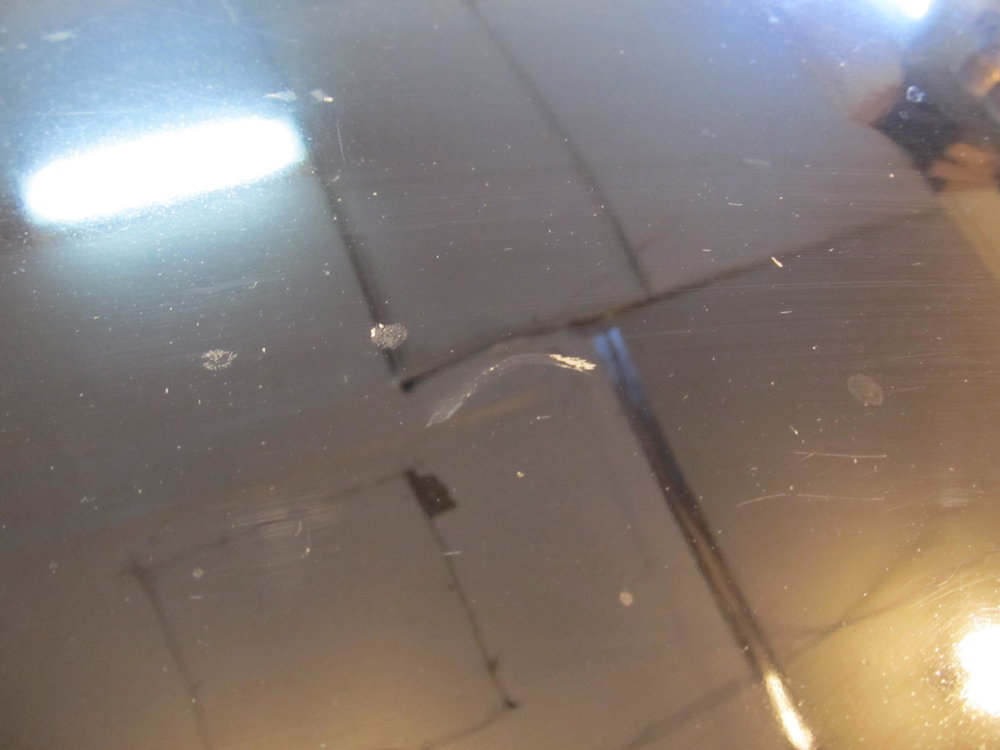
I then bit the bullet and had the windshield replaced. It got a crack in it about two years ago, and I was able to squeak it through inspection last year, but the crack grew a bit so I figured they would fail me this year. I found a good shop that replaced it and the top molding for $200. Boy is it nice to have a perfect windshield! Here's how bad the crack had gotten:
My brake and clutch fluid were both still looking nasty even after I had put fresh fluid in their reservoirs, so I decided it was time for proper flushes. My Motive power bleeder doesn't have an adapter for the 3rd gen, so I had to bleed them manually. I used regular DOT 3 fluid for this car since it won't see any racing duty.
Brake fluid before:

and after:

Clutch fluid before:
and after:
And with that, my weird clutch issues seem to have disappeared!
A little later, I swapped on the wheels/tires from the I30 to get the Maxima through its annual state inspection. The tires on the Maxima have severe camber wear on the inside and I'm pretty sure they would fail the car. Unfortunately, when I rolled up the inspector tested the horn, and for the first time since I've owned the car the horn didn't work! WTF?! He also revved the motor a few times, and he seemed to be listening to my exhaust leak. Thankfully he let me go home without putting the FAILED sticker in my windshield, but I then had to figure out what had happened to the horn. The horns worked when I hooked them up to my jump box, the fuse was intact, and I gambled that the relay didn't just up and die for no reason, so I started thinking about other potential causes. Well, I did just have most of the interior ripped out to do the gauge cluster, maybe I had knocked something loose? I saw a wire heading behind the steering wheel, but I couldn't see what it was doing without removing the wheel. First, I removed the horn cover thingy, and saw a potential culprit- the wire that comes from the horn/cover and goes to the car's harness had most of its wires snapped:
So I fixed that up, but still no horn. I then got the wheel off, and was greeted by this:
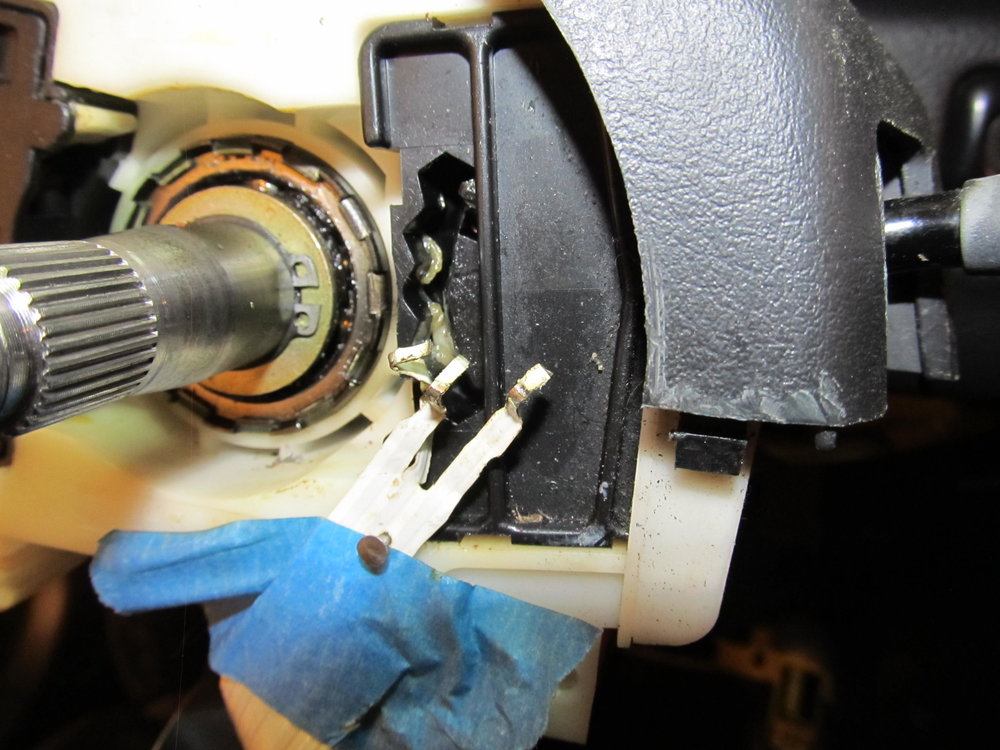
WTF is this? Painters tape, a nail, and exposed ribbon cable? Now might be the time to remind you that the car came with an S13 240sx steering wheel, and apparently this is what needed to be done to make the horn work, per the previous owner. Well, to make a long story short, I cleaned up all the contact points on the horn/cover thing, cut and re-stripped the ribbon cable, and eventually got the horn working again. Note to self: the horn wire must contact the middle of the three rings on the back of the steering wheel, and the horn won't work unless the wheel is installed on the column.
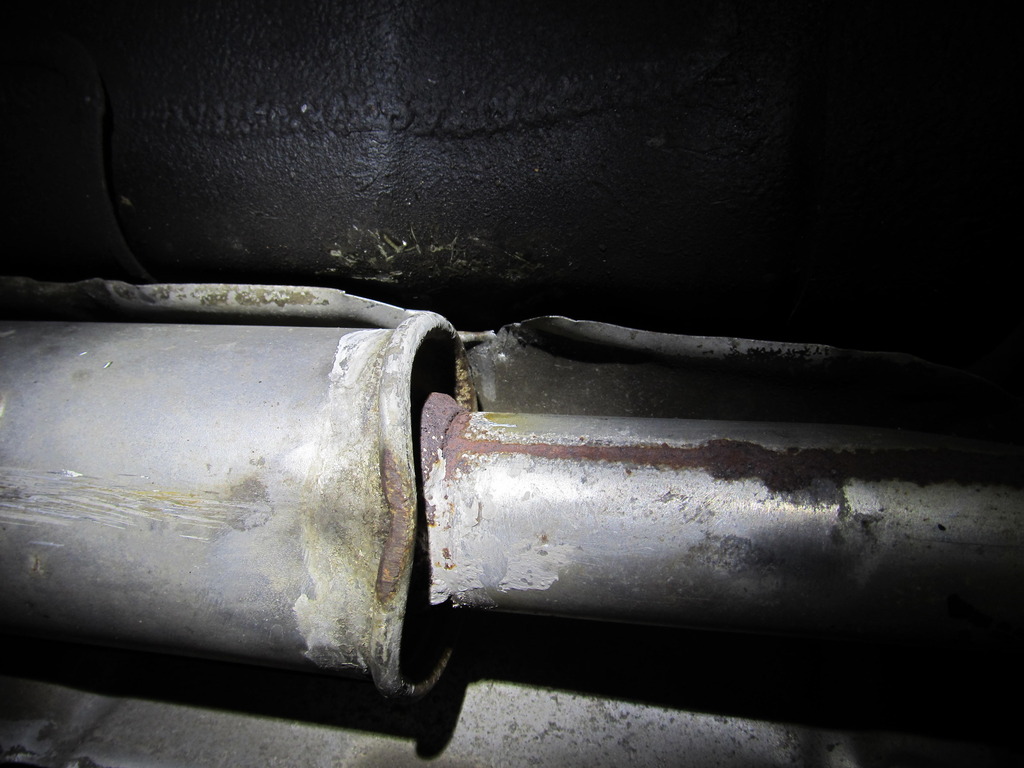
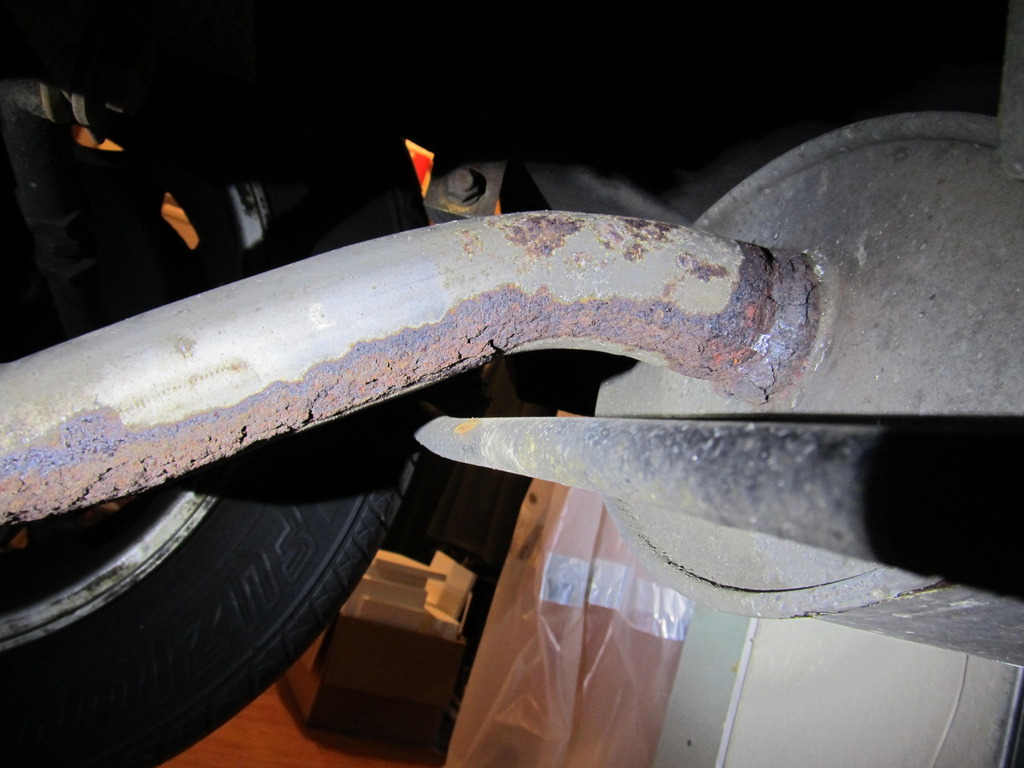
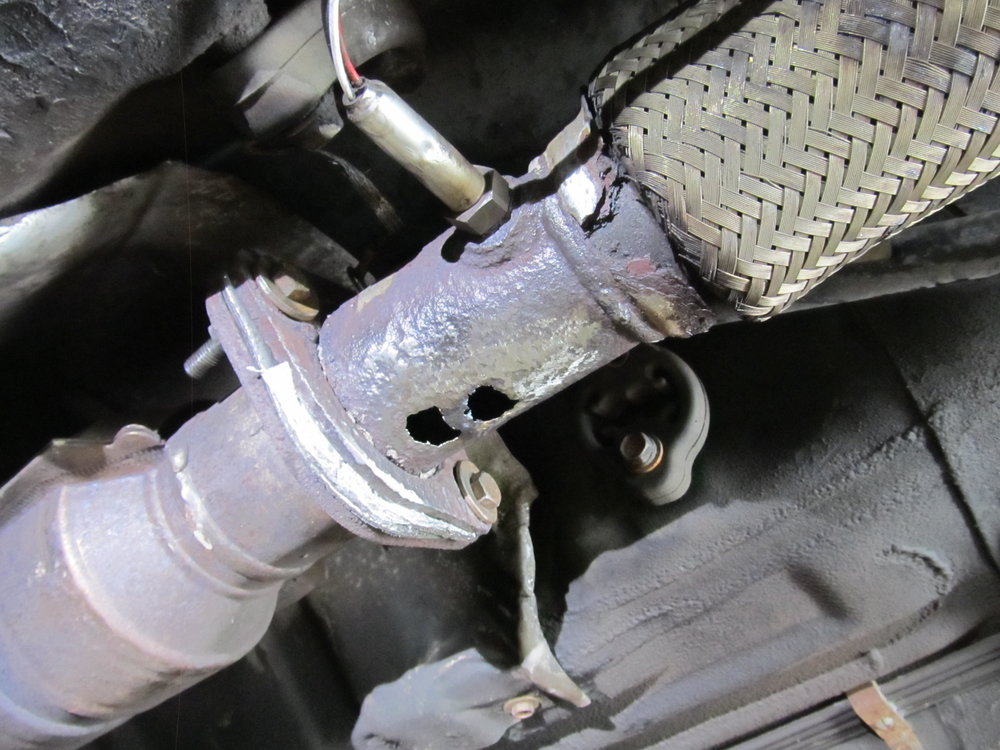
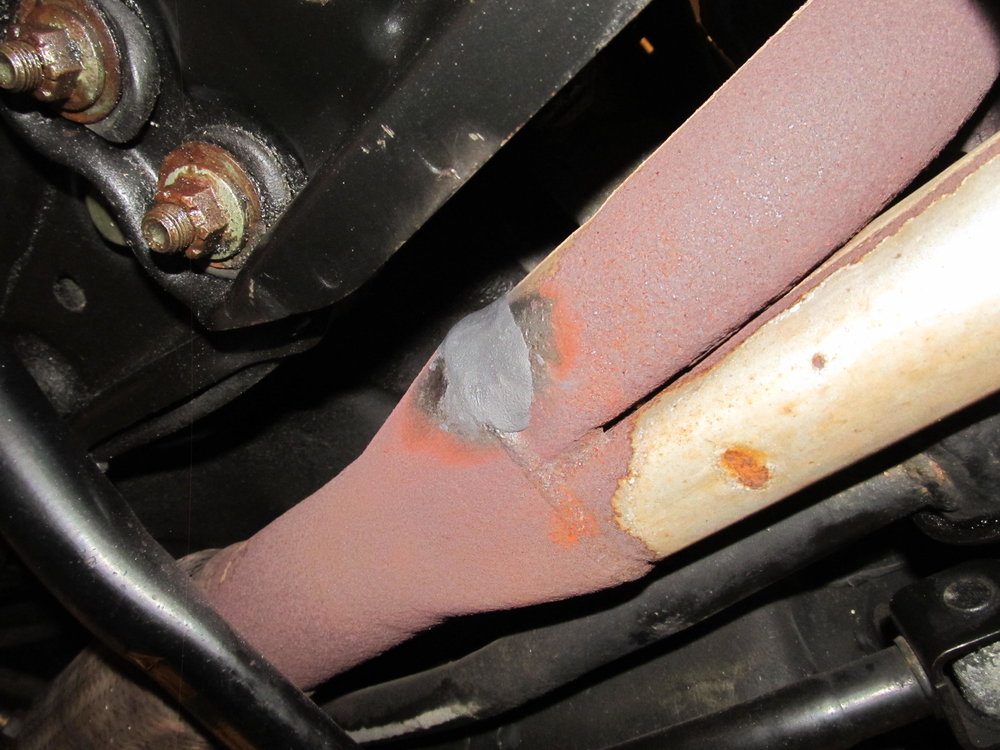
Then it was on to the exhaust leak. I had replaced the gasket at the front of the cat when I first bought the car, as it was leaking and I had to pass inspection (see a theme here?). I didn't do a very good job the first time due to very tight working space, and the gasket had blown out on the bottom. I hoped that installing two gaskets would be enough to seal it up. Naturally, the nuts and bolts there were seized, so I had to remove the support bracket in front of the cat to get better access. Well, when I got that off I was greeted by a nice quarter sized hole in the y-pipe. Oh goody, more work! I sure as hell didn't want to mess with removing the y-pipe to get new metal welded in, so I decided to go the cheap route and try patching the holes using the Permatex gray exhaust goop and their red exhaust sealing wrap. To give the products the best chance of working, I cleaned the hell out of the area, first with my wire wheel, then brake clean, and then after it had all evaporated, with my MAPP torch.
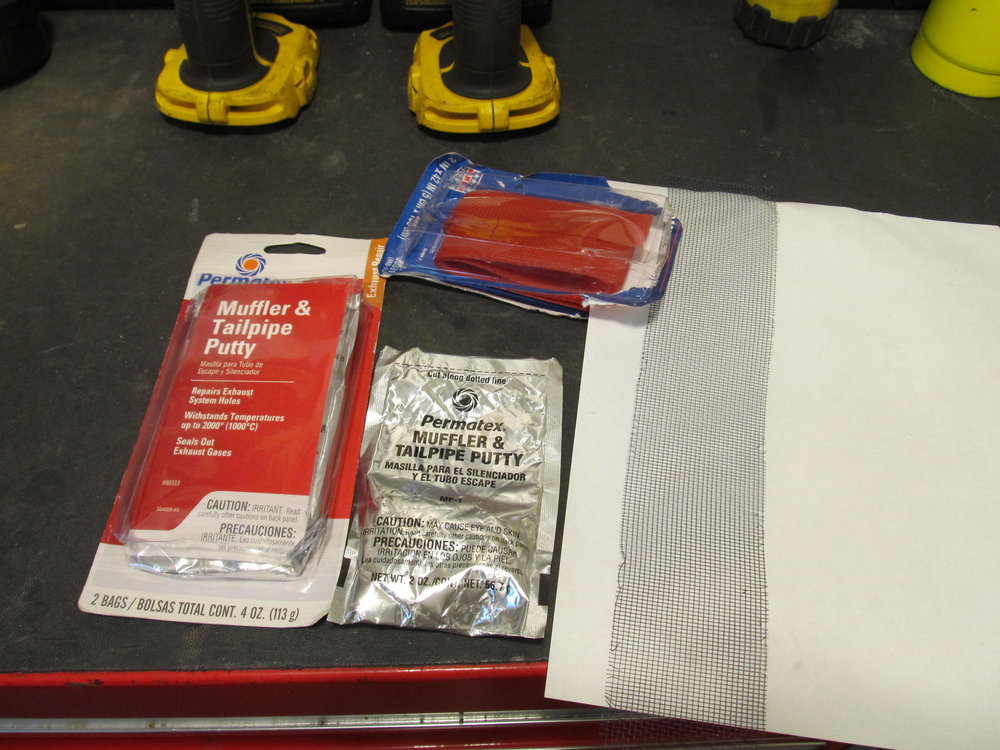
To give the goop some strength, I wrapped the pipe in some aluminum screen door mesh.

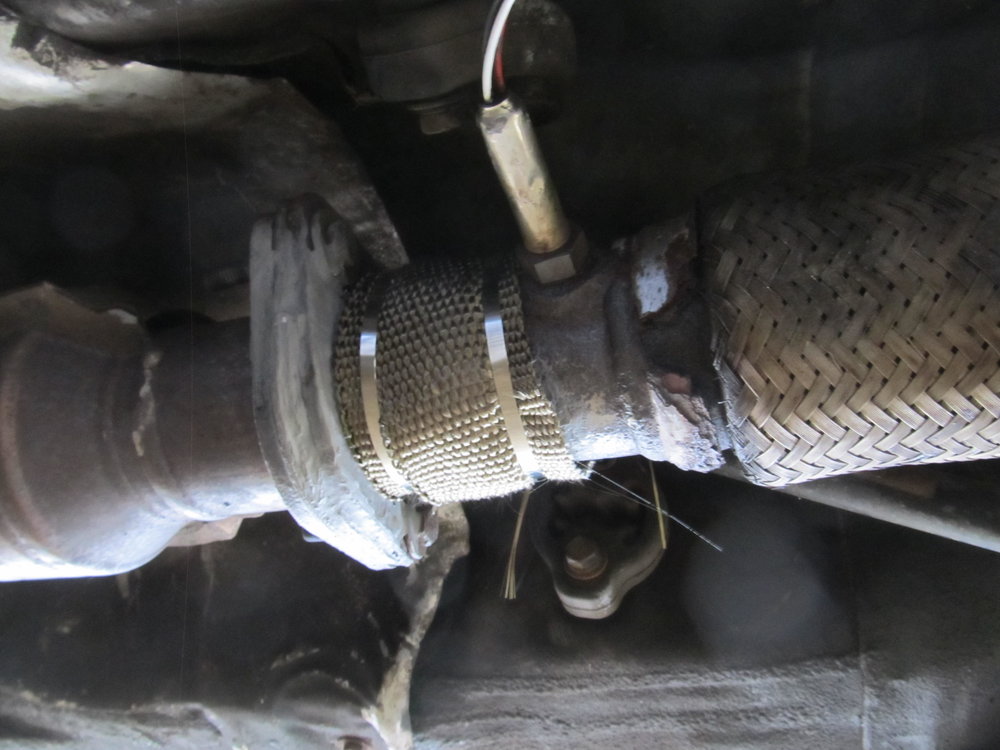
Now for the red wrap (gotta run the car for 30 minutes to make it melt on. I removed the zip ties before the next step).

And finally, some exhaust wrap:
And after all that, it seems to have worked! The car is silent, and after a few days of driving it has stayed that way, so I'm hopeful this is a semi-permanent repair. I now have a car with working windows, door locks, clock, temp gauge, horn, fresh fluid in the brakes and clutch, and a sealed up exhaust. Not too shabby for something like $20 in parts!
For a while now I've been having problems with the windows and auto locks not behaving, so I figured it was the DS window/lock switch. Rather than buy new, or muck about trying to clean up all the contacts in my old one, I went to a junkyard and got some parts. My clock and temp gauge have never worked, so I picked up those as well.
Five minutes later, and I had working windows and locks, success! Installing the temp gauge and clock was a little more involved, as the entire dash needs to come out along with the covers for the steering column, but it wasn't too bad. Thankfully the new clock works, another success! I was hoping I could swap my white gauge faces onto the non-SE temp gauge pod, but I couldn't figure out how to remove the needles, so in the end I just removed the SE temp/fuel pod and installed the black GXE version. It's not pretty, but I now have a working temp gauge. Another success, and all for about $10 in parts!
It's amazing how working windows, door locks, clock, and temp gauge make the car so much nicer to use and be in!
I then bit the bullet and had the windshield replaced. It got a crack in it about two years ago, and I was able to squeak it through inspection last year, but the crack grew a bit so I figured they would fail me this year. I found a good shop that replaced it and the top molding for $200. Boy is it nice to have a perfect windshield! Here's how bad the crack had gotten:
My brake and clutch fluid were both still looking nasty even after I had put fresh fluid in their reservoirs, so I decided it was time for proper flushes. My Motive power bleeder doesn't have an adapter for the 3rd gen, so I had to bleed them manually. I used regular DOT 3 fluid for this car since it won't see any racing duty.
Brake fluid before:
and after:
Clutch fluid before:
and after:
And with that, my weird clutch issues seem to have disappeared!
A little later, I swapped on the wheels/tires from the I30 to get the Maxima through its annual state inspection. The tires on the Maxima have severe camber wear on the inside and I'm pretty sure they would fail the car. Unfortunately, when I rolled up the inspector tested the horn, and for the first time since I've owned the car the horn didn't work! WTF?! He also revved the motor a few times, and he seemed to be listening to my exhaust leak. Thankfully he let me go home without putting the FAILED sticker in my windshield, but I then had to figure out what had happened to the horn. The horns worked when I hooked them up to my jump box, the fuse was intact, and I gambled that the relay didn't just up and die for no reason, so I started thinking about other potential causes. Well, I did just have most of the interior ripped out to do the gauge cluster, maybe I had knocked something loose? I saw a wire heading behind the steering wheel, but I couldn't see what it was doing without removing the wheel. First, I removed the horn cover thingy, and saw a potential culprit- the wire that comes from the horn/cover and goes to the car's harness had most of its wires snapped:
So I fixed that up, but still no horn. I then got the wheel off, and was greeted by this:
WTF is this? Painters tape, a nail, and exposed ribbon cable? Now might be the time to remind you that the car came with an S13 240sx steering wheel, and apparently this is what needed to be done to make the horn work, per the previous owner. Well, to make a long story short, I cleaned up all the contact points on the horn/cover thing, cut and re-stripped the ribbon cable, and eventually got the horn working again. Note to self: the horn wire must contact the middle of the three rings on the back of the steering wheel, and the horn won't work unless the wheel is installed on the column.
Then it was on to the exhaust leak. I had replaced the gasket at the front of the cat when I first bought the car, as it was leaking and I had to pass inspection (see a theme here?). I didn't do a very good job the first time due to very tight working space, and the gasket had blown out on the bottom. I hoped that installing two gaskets would be enough to seal it up. Naturally, the nuts and bolts there were seized, so I had to remove the support bracket in front of the cat to get better access. Well, when I got that off I was greeted by a nice quarter sized hole in the y-pipe. Oh goody, more work! I sure as hell didn't want to mess with removing the y-pipe to get new metal welded in, so I decided to go the cheap route and try patching the holes using the Permatex gray exhaust goop and their red exhaust sealing wrap. To give the products the best chance of working, I cleaned the hell out of the area, first with my wire wheel, then brake clean, and then after it had all evaporated, with my MAPP torch.
To give the goop some strength, I wrapped the pipe in some aluminum screen door mesh.
Now for the red wrap (gotta run the car for 30 minutes to make it melt on. I removed the zip ties before the next step).
And finally, some exhaust wrap:
And after all that, it seems to have worked! The car is silent, and after a few days of driving it has stayed that way, so I'm hopeful this is a semi-permanent repair. I now have a car with working windows, door locks, clock, temp gauge, horn, fresh fluid in the brakes and clutch, and a sealed up exhaust. Not too shabby for something like $20 in parts!
Last edited by 95maxrider; 12-12-2017 at 01:24 PM.
12-29-2017, 06:47 AM
#61
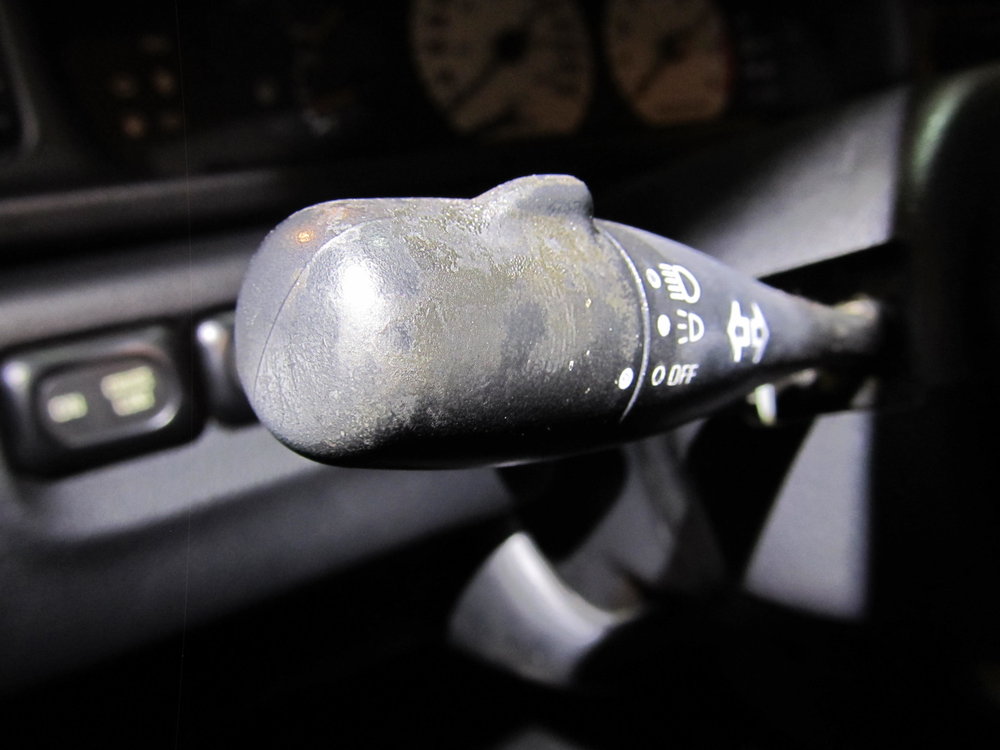
With the important repairs out of the way, and the car finally passing VA inspection, I had some time to do a little cleaning. First up was the turn signal stalk, which I apparently never cleaned when I bought the car. Naturally, it was disgusting, but nothing a little Magic Eraser couldn't clean up:

The inspection shop found a little pinhole leak in the y-pipe, upstream from the larger holes that I had already repaired. I cleaned it up with the wire wheel and the MAP torch, and threw some QuikSteel on it. After more than a week of driving it seems to be holding, and the car is quieter than ever!
I also tightened up the exhaust hanger support thingy for the y-pipe, but was thoroughly confused by the ground strap down there. Does anyone know what this is doing down there? It goes from the body to the metal bracket. I can't make any sense of it:
I then got to play with some of my cleaning toys. I did an initial round of cleaning when I bought the car two years ago, but have only power washed it since, and the wheels were looking pretty nasty.
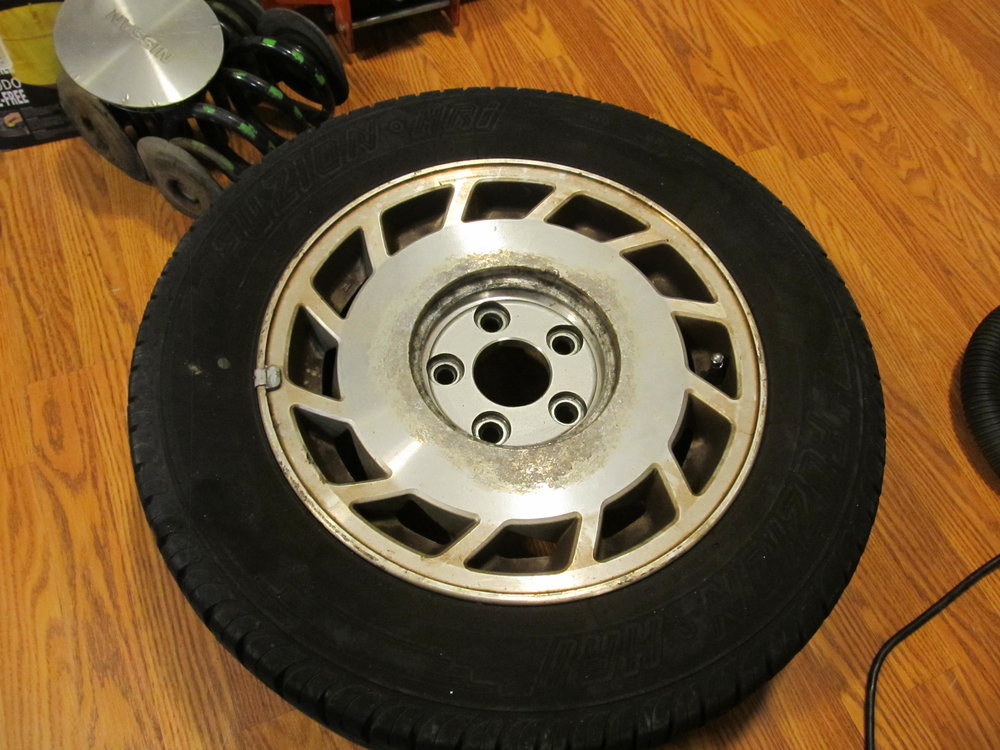
These stupid little crevices are tough to clean!

Ugh...
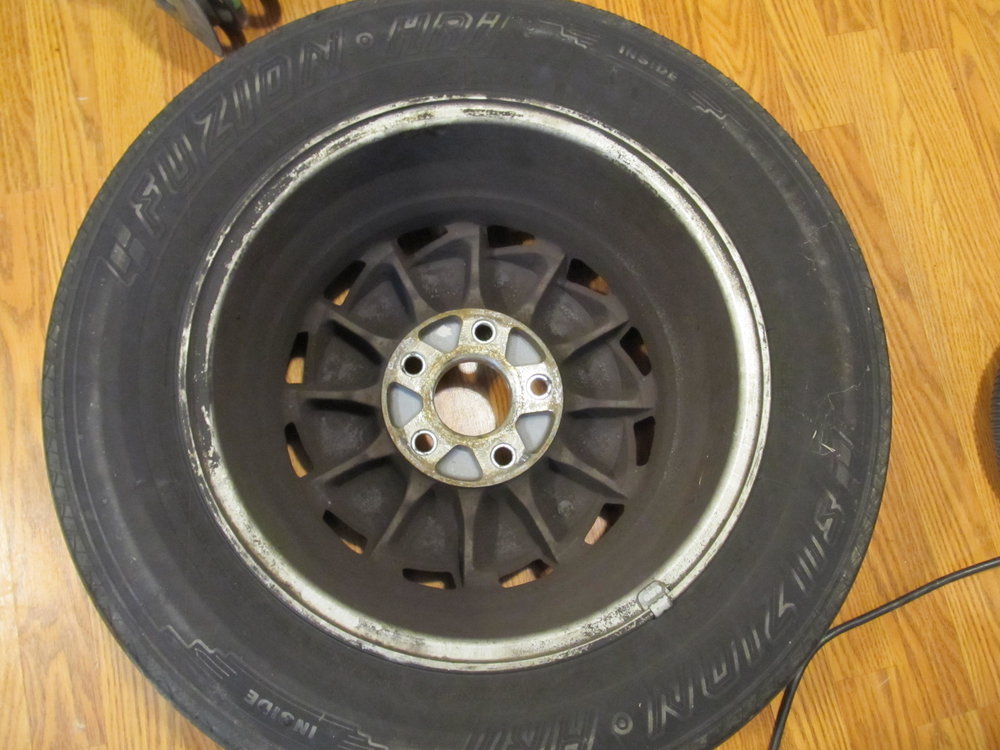
Thankfully, I have these plastic brushes that I can put in my drill, which make cleaning wheels about a million times easier.
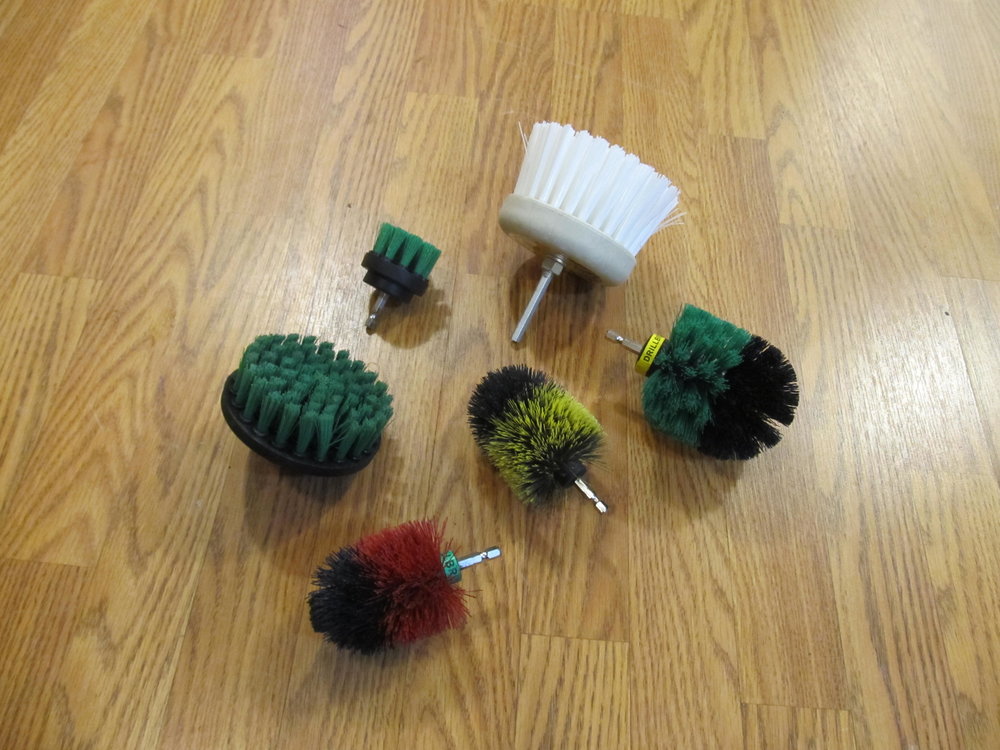
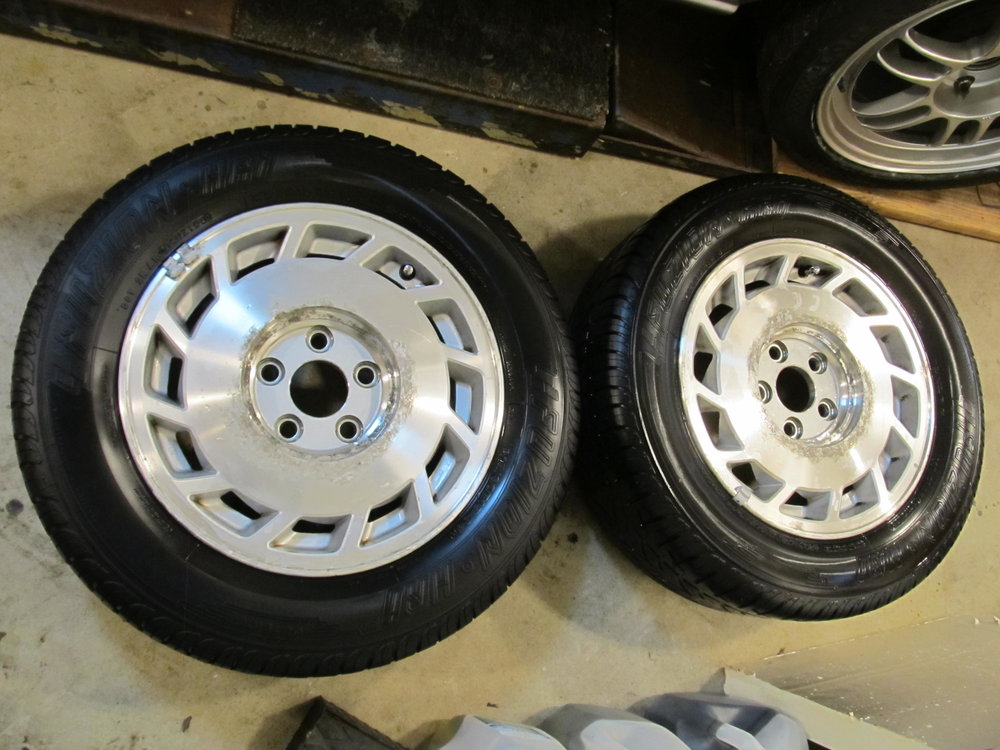
After about ten minutes of work per wheel, I got them looking like this:
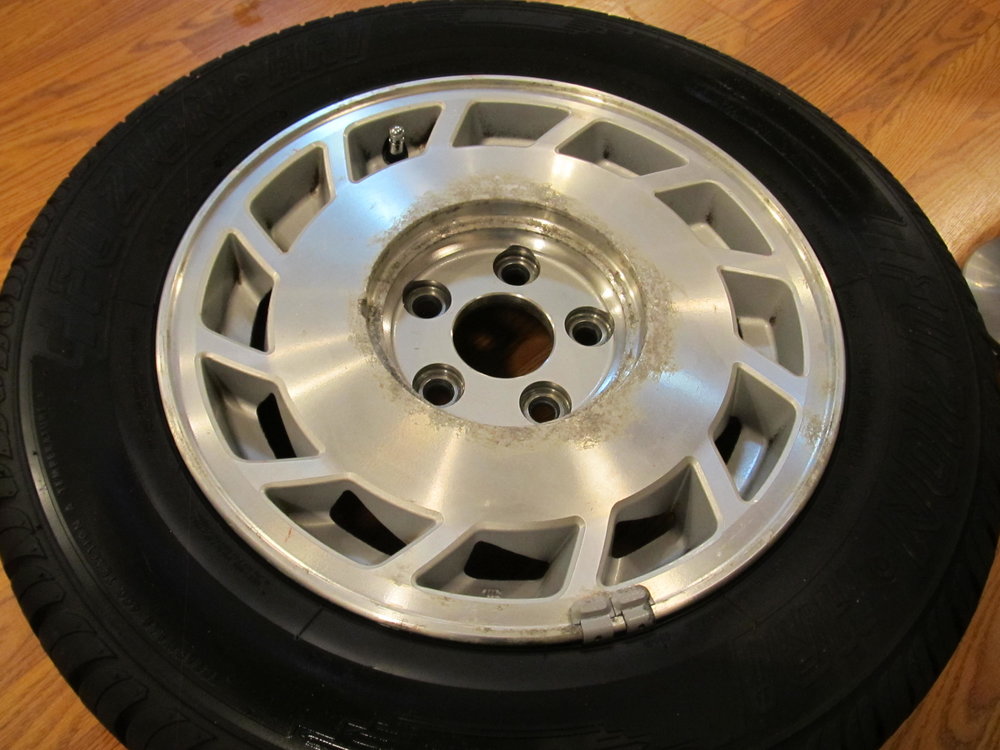
Not perfect, as I couldn't get in the tight corners, but it's good enough for now.

I also cleaned up a few grounds in the engine bay. One on what I assume is the VTC unit, and another two for the fuel injectors on the IM:


I later power washed the engine bay a bit and found another ground on the PS of the bay that I'll clean up later, but for now the car is in great shape and will be my trusty companion over the winter while I try to keep the I30 and M3 off the salty roads. As a reward for passing inspection, I splurged on a $40 set of rear 6x9 Pioneer speakers, which will be going in soon. Woo!! Long live the 3rd gen!
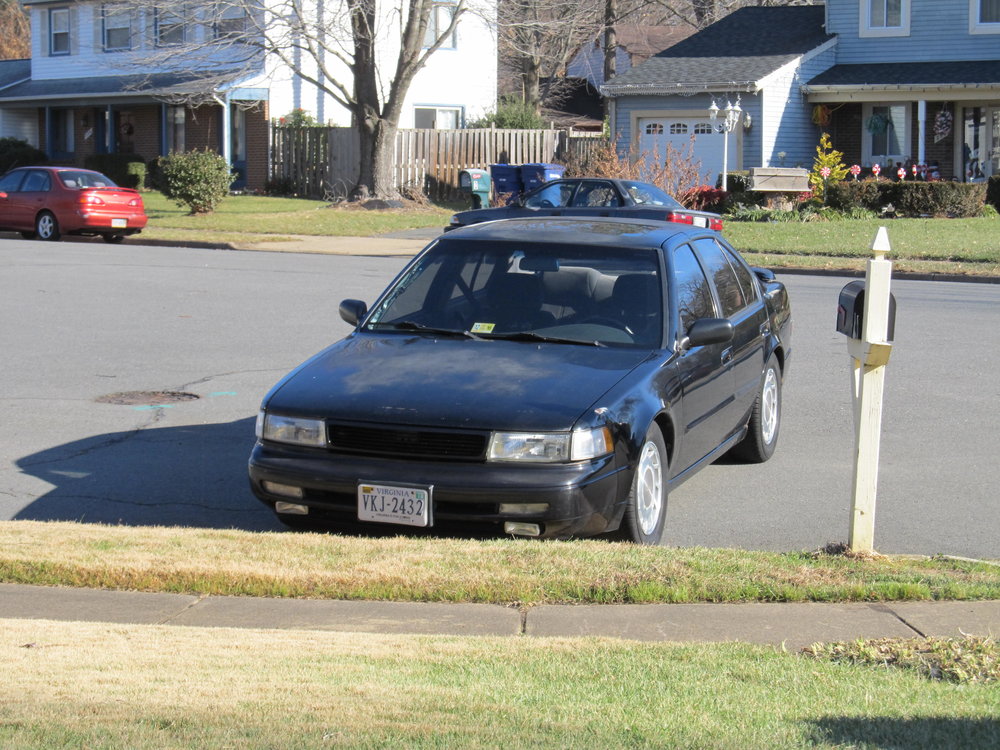
EDIT: Almost forgot, I also power washed the car since it was covered in road salt. Now that it's cleaner you can clearly see the body rot around the rear fenders...
The inspection shop found a little pinhole leak in the y-pipe, upstream from the larger holes that I had already repaired. I cleaned it up with the wire wheel and the MAP torch, and threw some QuikSteel on it. After more than a week of driving it seems to be holding, and the car is quieter than ever!
I also tightened up the exhaust hanger support thingy for the y-pipe, but was thoroughly confused by the ground strap down there. Does anyone know what this is doing down there? It goes from the body to the metal bracket. I can't make any sense of it:
I then got to play with some of my cleaning toys. I did an initial round of cleaning when I bought the car two years ago, but have only power washed it since, and the wheels were looking pretty nasty.
These stupid little crevices are tough to clean!
Ugh...
Thankfully, I have these plastic brushes that I can put in my drill, which make cleaning wheels about a million times easier.
After about ten minutes of work per wheel, I got them looking like this:
Not perfect, as I couldn't get in the tight corners, but it's good enough for now.
I also cleaned up a few grounds in the engine bay. One on what I assume is the VTC unit, and another two for the fuel injectors on the IM:
I later power washed the engine bay a bit and found another ground on the PS of the bay that I'll clean up later, but for now the car is in great shape and will be my trusty companion over the winter while I try to keep the I30 and M3 off the salty roads. As a reward for passing inspection, I splurged on a $40 set of rear 6x9 Pioneer speakers, which will be going in soon. Woo!! Long live the 3rd gen!
EDIT: Almost forgot, I also power washed the car since it was covered in road salt. Now that it's cleaner you can clearly see the body rot around the rear fenders...
Last edited by 95maxrider; 12-29-2017 at 06:55 AM.
01-03-2018, 07:42 AM
#62
Alright guys, I need some help diagnosing an intermittent misfire on this car! A few months ago I was driving the car for the first time in a few weeks, and after getting it warmed up I gave it some gas. About ten seconds later, it acted like it was trying to stall out, but I was able to keep it running by giving it more gas. After about 30 seconds of this, it cleared up and drove fine. A few weeks went by with no problems. Then one day I had driven for about ten minutes then parked and went into a store. When I restarted it, it was misfiring (running very rough) pretty bad, but it wasn't trying to stall. After about 2-3 minutes of driving, the misfire went away and it ran like normal. A few more weeks went by with no problems. Now the misfire seems to be occurring more regularly. Sometimes it seems like it goes away if I rev it over 4000 rpm, and most of the time it goes away if I continue driving for a few minutes.
I've read all about misfires with these 3rd gens, and potential solutions really run the gamut. Bad MAF, bad MAF wiring, bad injector wiring, bad knock sensor, bad grounds, vacuum leaks, bad O2 sensor, etc. I've checked the ECU and there are no fault codes stored. The PO replaced the O2 sensor and spark plugs, and I've cleaned up and checked all the grounds I could find. I need to do a smoke test to check for vacuum leaks, but for the most part the car idles beautifully. I'm kind of leaning towards the MAF going out or a bad KS. Given what's involved with replacing the KS, I'm really hoping it's not that.
Can anyone think of what could be causing intermittent misfires that seem to clear themselves up after a bit?
01-03-2018, 05:43 PM
#63
this thing is the perfect candidate for some C4 vette sawblades. they have ridiculously high offset so with some adapters you should be in the clear. It will mantain the look of the car just more aggressive.
01-04-2018, 01:39 PM
#64
To reward myself/the car for passing the annual inspection, I splurged and spent $40 on a pair of 6x9 Pioneer TS-A6966R speakers for the rear of the car. Sure, having functioning speakers in front is a hell of a lot better than the broken nothingness the car came with, but they left something to be desired. That desire was for more sound, and these speakers fit the bill quite nicely.

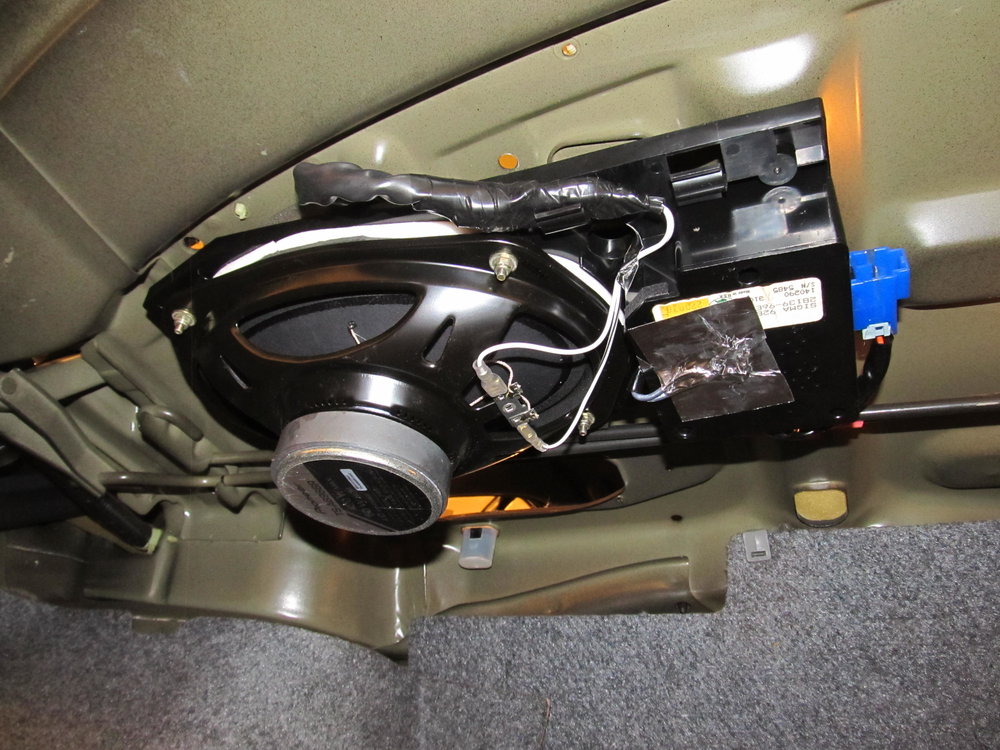
For some reason, I decided it would be a good idea to remove the Bose pod from the car, which meant taking apart the back seat and rear shelf, which resulted in many broken clips. This was entirely unnecessary, and looking back, I'm left wondering WTF I was thinking. Anyways, with them out, I applied some weatherstripping around the pod to prevent "leakage" and rattles.

All bolted up:

I can only wonder why they made these things for 6x9s but only made the cutout big enough for a 6.5"....
So just like the front speakers, there are two sets of wires going to the original Bose speakers, a thicker pair for power, and a thinner pair for the signal. I capped off the power wires, bundled things up as best I could, and installed everything. The shiny HVAC tape was used to prevent the formerly-dangling wires from getting snagged when things are thrown in the trunk.

And wouldn't you know, after doubling the number of speakers in the car, the stereo sounds twice as good! For a grand total of like $85, this (entire) stereo was worth every penny.
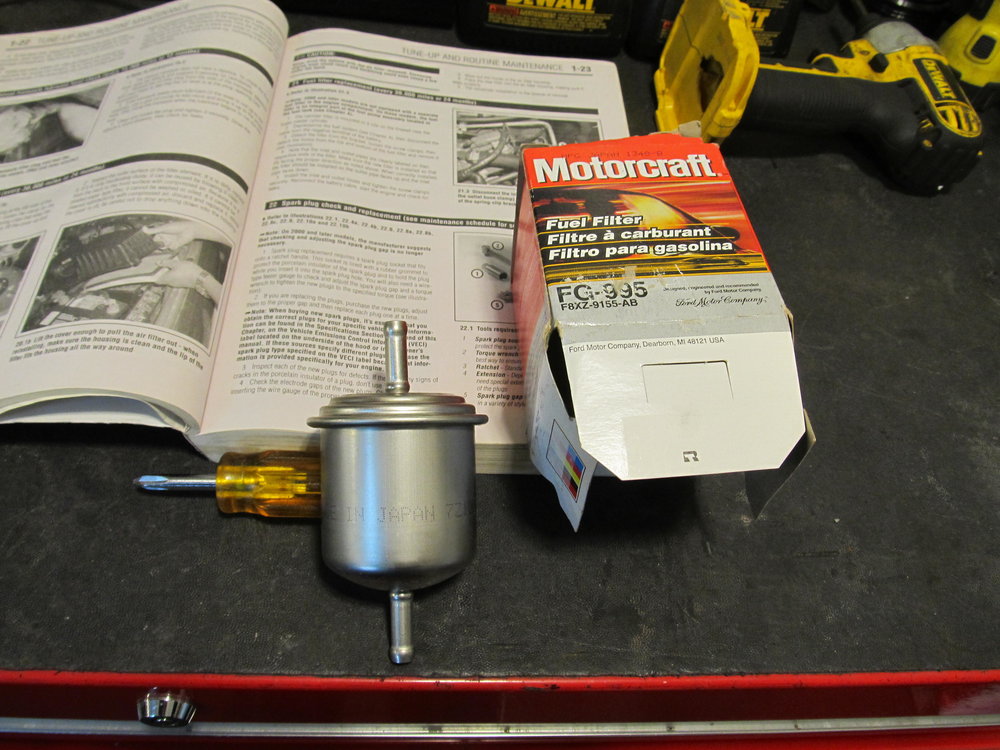
The previous owner had apparently recently replaced the fuel filter, but I wasn't sure exactly when that was, and given that I rarely put in more than half a tank in the car (I drive so few miles that I don't want the gas/ethanol to go bad) I figured the filter had probably collected its fair share of crap. Filters are cheap and easy to replace, so why not?
I've been having good luck with Motorcraft parts recently (my wife has a 2001 Escape that I've done tons of work to) and I've yet to get a Motorcraft part from China. Most are made in the US, with a radiator made in Mexico. This fuel filter was made in Japan, and one I got for the I30 (from a 300zx) was made in the US.
First, disconnect the battery...and clean the terminals and posts...

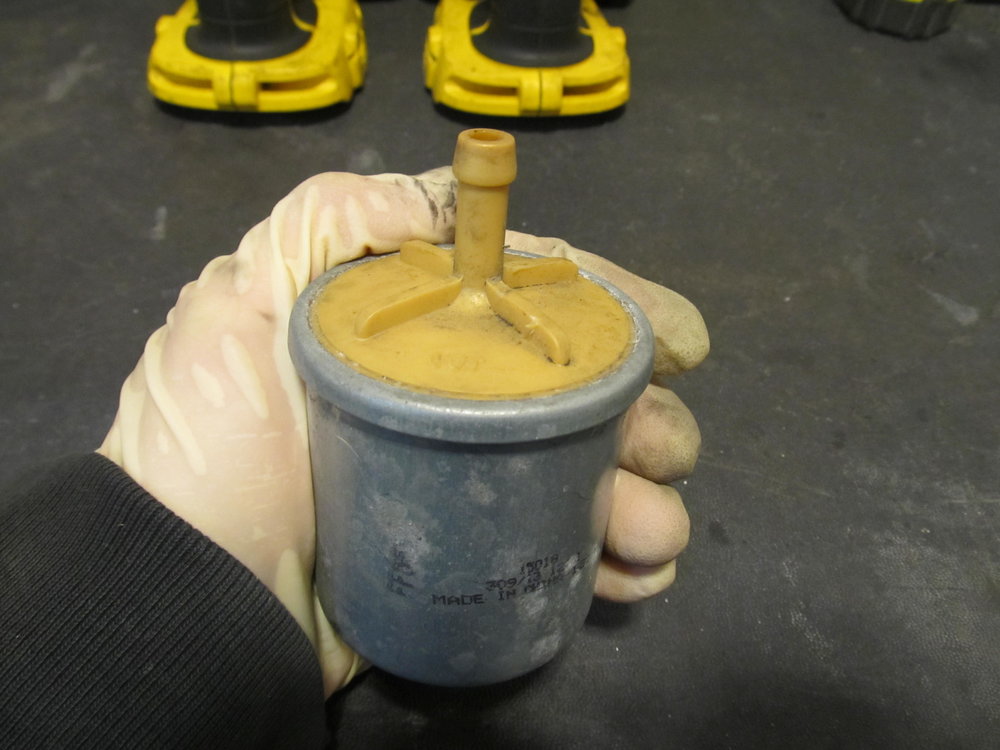
Remove the old "made in China" filter with a PLASTIC TOP:
And install a nice, new, all metal, Japanese filter:

Now, I just need to figure out what is up with the now constant misfiring/rough running. It kinda feels like it did when the last battery died, but it's only 10 months old or something, so that's unlikely....
Last edited by 95maxrider; 01-04-2018 at 01:44 PM.
 01-13-2018, 03:54 PM
#66
Alright guys, I need some help diagnosing an intermittent misfire on this car! A few months ago I was driving the car for the first time in a few weeks, and after getting it warmed up I gave it some gas. About ten seconds later, it acted like it was trying to stall out, but I was able to keep it running by giving it more gas. After about 30 seconds of this, it cleared up and drove fine. A few weeks went by with no problems. Then one day I had driven for about ten minutes then parked and went into a store. When I restarted it, it was misfiring (running very rough) pretty bad, but it wasn't trying to stall. After about 2-3 minutes of driving, the misfire went away and it ran like normal. A few more weeks went by with no problems. Now the misfire seems to be occurring more regularly. Sometimes it seems like it goes away if I rev it over 4000 rpm, and most of the time it goes away if I continue driving for a few minutes.
I've read all about misfires with these 3rd gens, and potential solutions really run the gamut. Bad MAF, bad MAF wiring, bad injector wiring, bad knock sensor, bad grounds, vacuum leaks, bad O2 sensor, etc. I've checked the ECU and there are no fault codes stored. The PO replaced the O2 sensor and spark plugs, and I've cleaned up and checked all the grounds I could find. I need to do a smoke test to check for vacuum leaks, but for the most part the car idles beautifully. I'm kind of leaning towards the MAF going out or a bad KS. Given what's involved with replacing the KS, I'm really hoping it's not that.
Can anyone think of what could be causing intermittent misfires that seem to clear themselves up after a bit?
I've read all about misfires with these 3rd gens, and potential solutions really run the gamut. Bad MAF, bad MAF wiring, bad injector wiring, bad knock sensor, bad grounds, vacuum leaks, bad O2 sensor, etc. I've checked the ECU and there are no fault codes stored. The PO replaced the O2 sensor and spark plugs, and I've cleaned up and checked all the grounds I could find. I need to do a smoke test to check for vacuum leaks, but for the most part the car idles beautifully. I'm kind of leaning towards the MAF going out or a bad KS. Given what's involved with replacing the KS, I'm really hoping it's not that.
Can anyone think of what could be causing intermittent misfires that seem to clear themselves up after a bit?
Help!
01-14-2018, 09:15 AM
#67
Newbie - Just Registered

Join Date: Oct 2015
Posts: 8
I would check for vacuum leaks first. spray some brake cleaner on intake manifold and see if the idle changes :-) (try not to light the car on fire)
then start testing the resistance of sensors like the coolant temp, air temp and knock sensors.
step 3... put a stand-alone in it.
then start testing the resistance of sensors like the coolant temp, air temp and knock sensors.
step 3... put a stand-alone in it.
01-14-2018, 02:41 PM
#68
I would check for vacuum leaks first. spray some brake cleaner on intake manifold and see if the idle changes :-) (try not to light the car on fire)
then start testing the resistance of sensors like the coolant temp, air temp and knock sensors.
step 3... put a stand-alone in it.
then start testing the resistance of sensors like the coolant temp, air temp and knock sensors.
step 3... put a stand-alone in it.

Should it be brake cleaner or carb cleaner? Or does it not matter?
I just downloaded the FSM and tried to find the resistance values for different things, but it doesn't seem to list them. Does anyone know how I can find that info?
01-15-2018, 07:09 PM
#69
Newbie - Just Registered
Join Date: Oct 2015
Posts: 8
I just needs to be a flammable liquid
In mazda FSMs there are ways to test sensors to make sure they're good... usually involves a pot of boiling water haha
or you could just replace all your sensors... they're probably old anyway ;-)
In mazda FSMs there are ways to test sensors to make sure they're good... usually involves a pot of boiling water haha
or you could just replace all your sensors... they're probably old anyway ;-)
01-16-2018, 07:57 AM
#70
Yup, I'm just gonna throw some parts at it and see what happens. Did spark plugs and coolant temp sensor yesterday, waiting for RTV to dry on my slightly cracked intake boot before starting it back up. Pics and more work coming soon....at least I didn't see any cracks on the coil packs!
01-18-2018, 05:25 PM
#71
Alrighty, so I worked on the car Monday but still haven't driven it to see the results. But here's what I did:
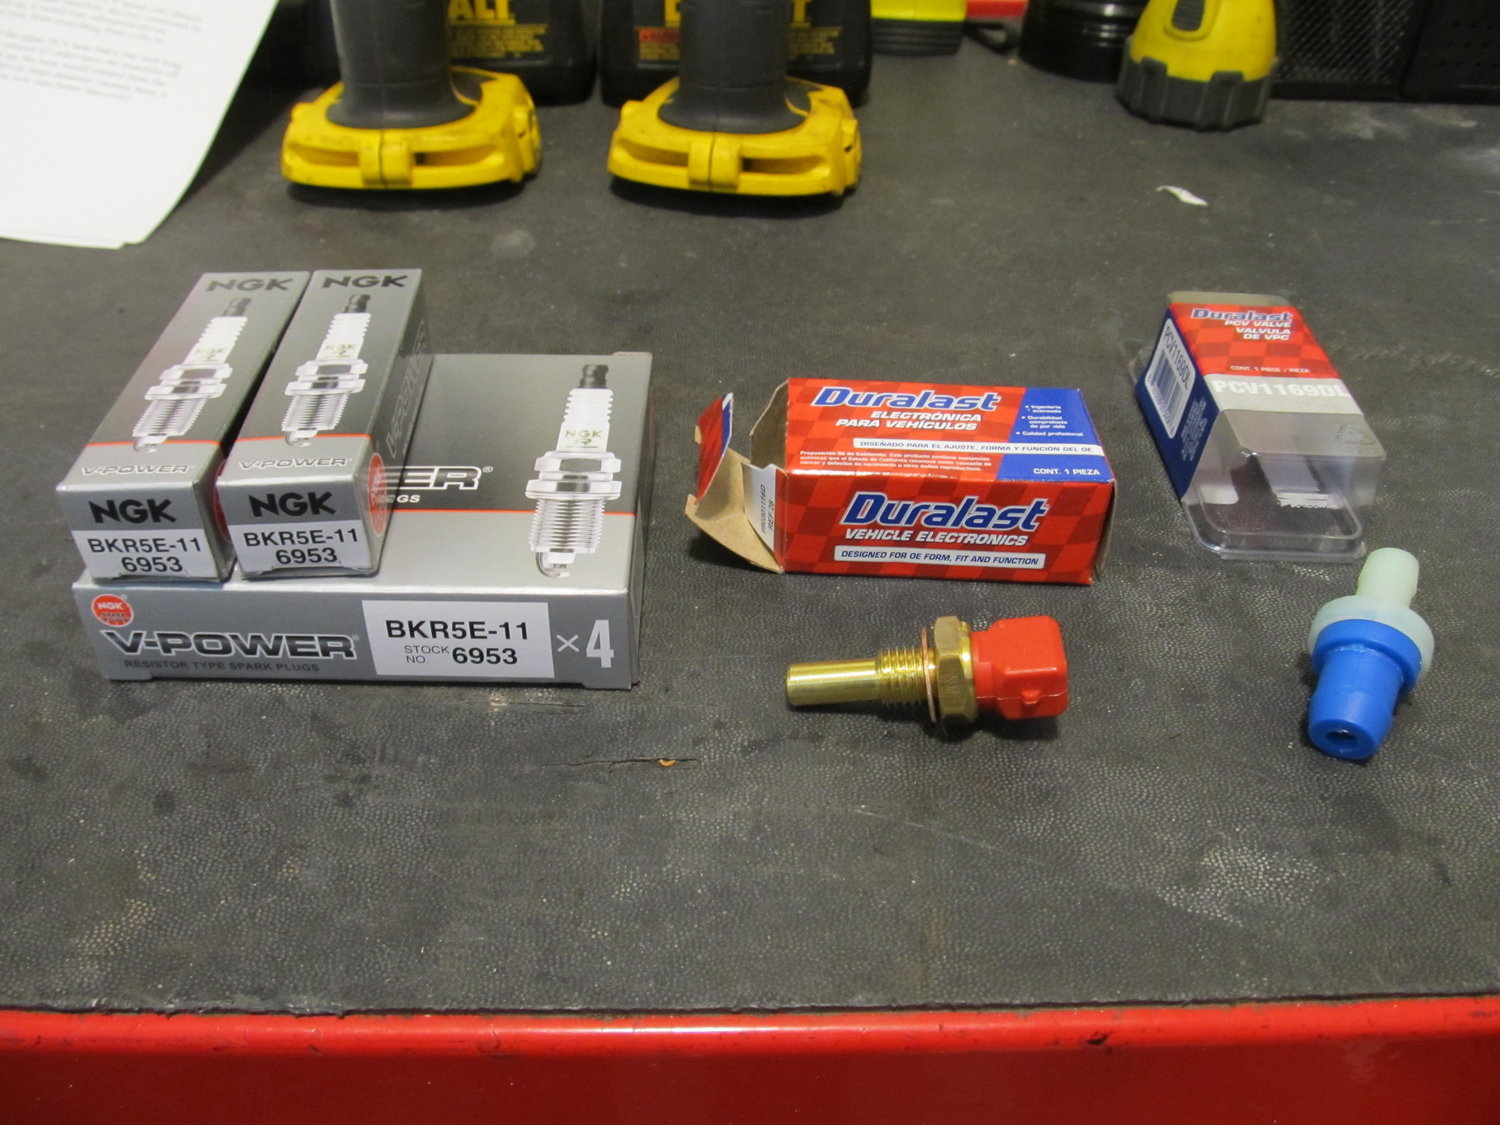
I installed some NGK BKR5E-11 (6953) copper spark plugs and a Duralast coolant temperature sensor. The PCV valve appeared to be incorrect since it's unthreaded, so I didn't bother messing with that. The recommended gap range for the motor is 0.039-0.043, but the new plugs came gapped around 0.043. I tightened them all up to about 0.039.
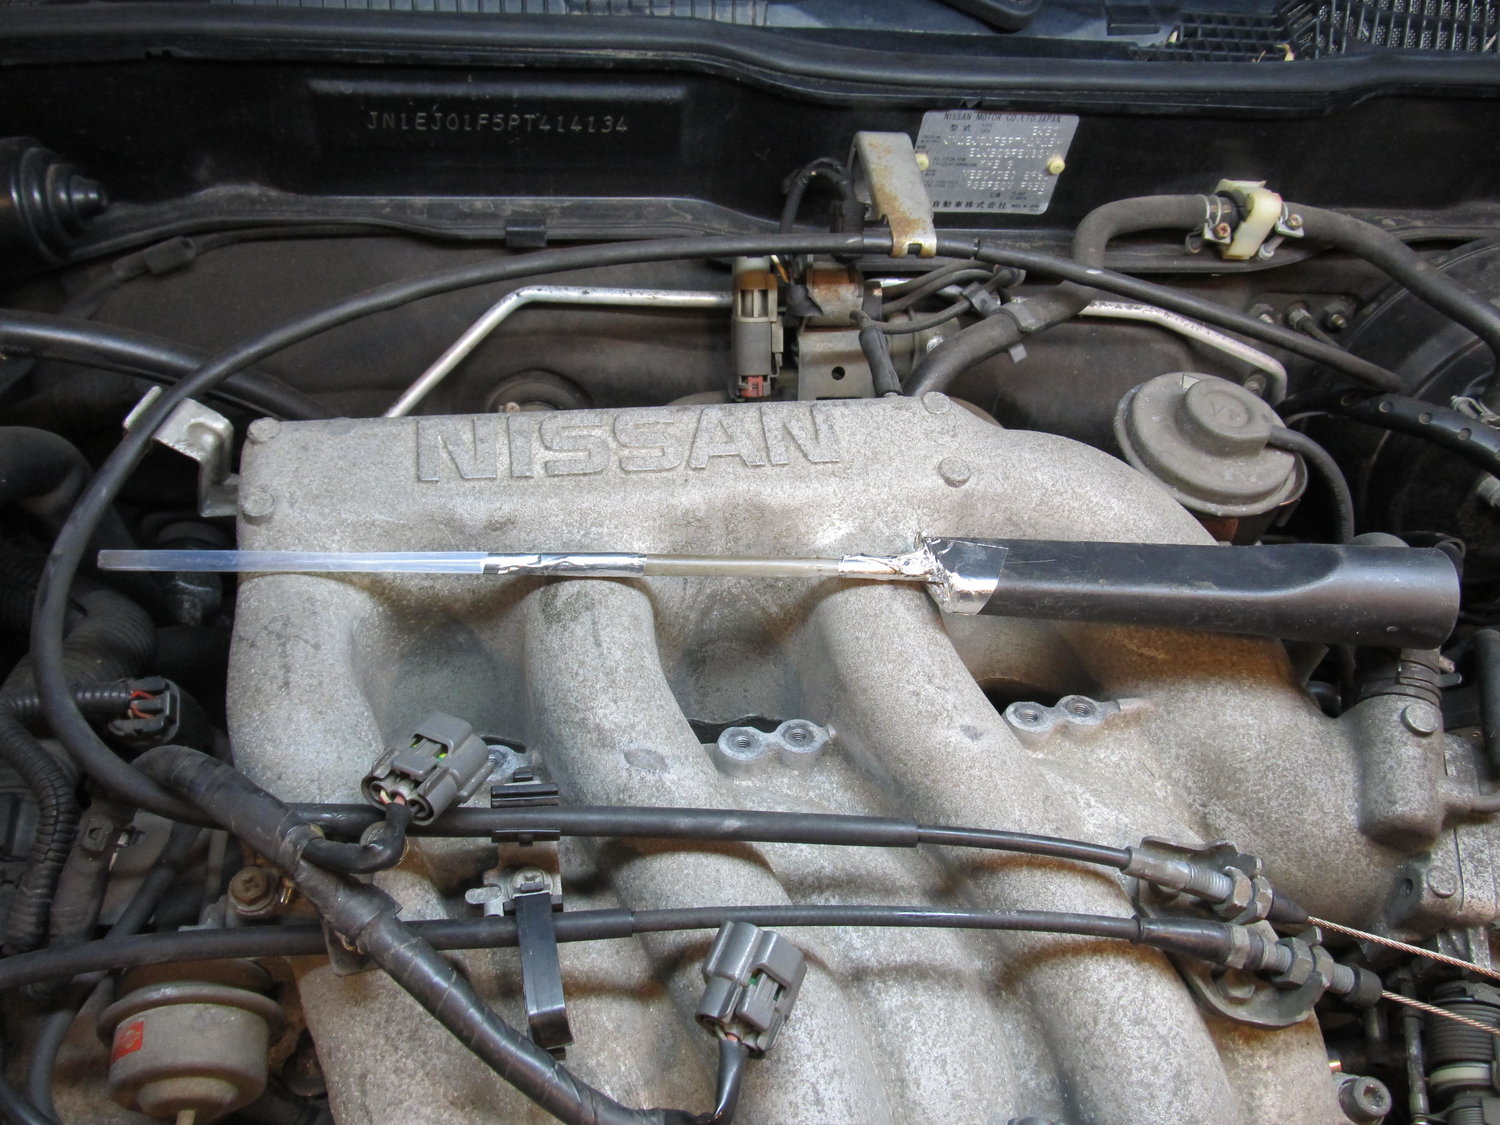
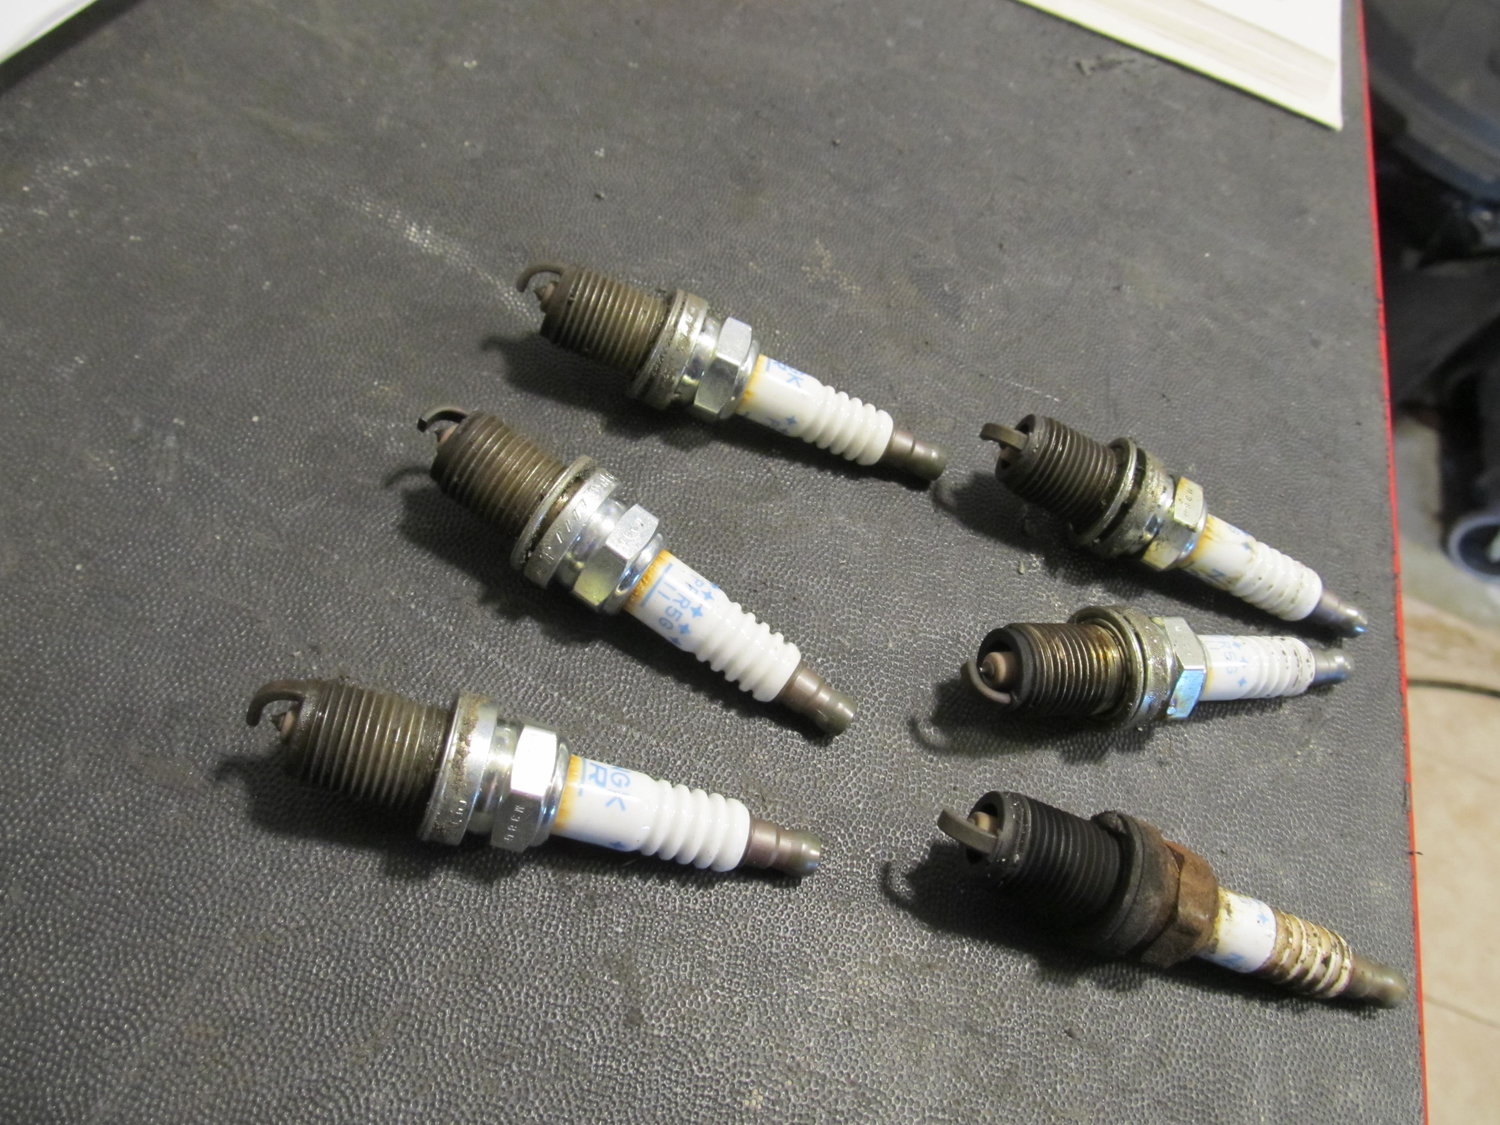
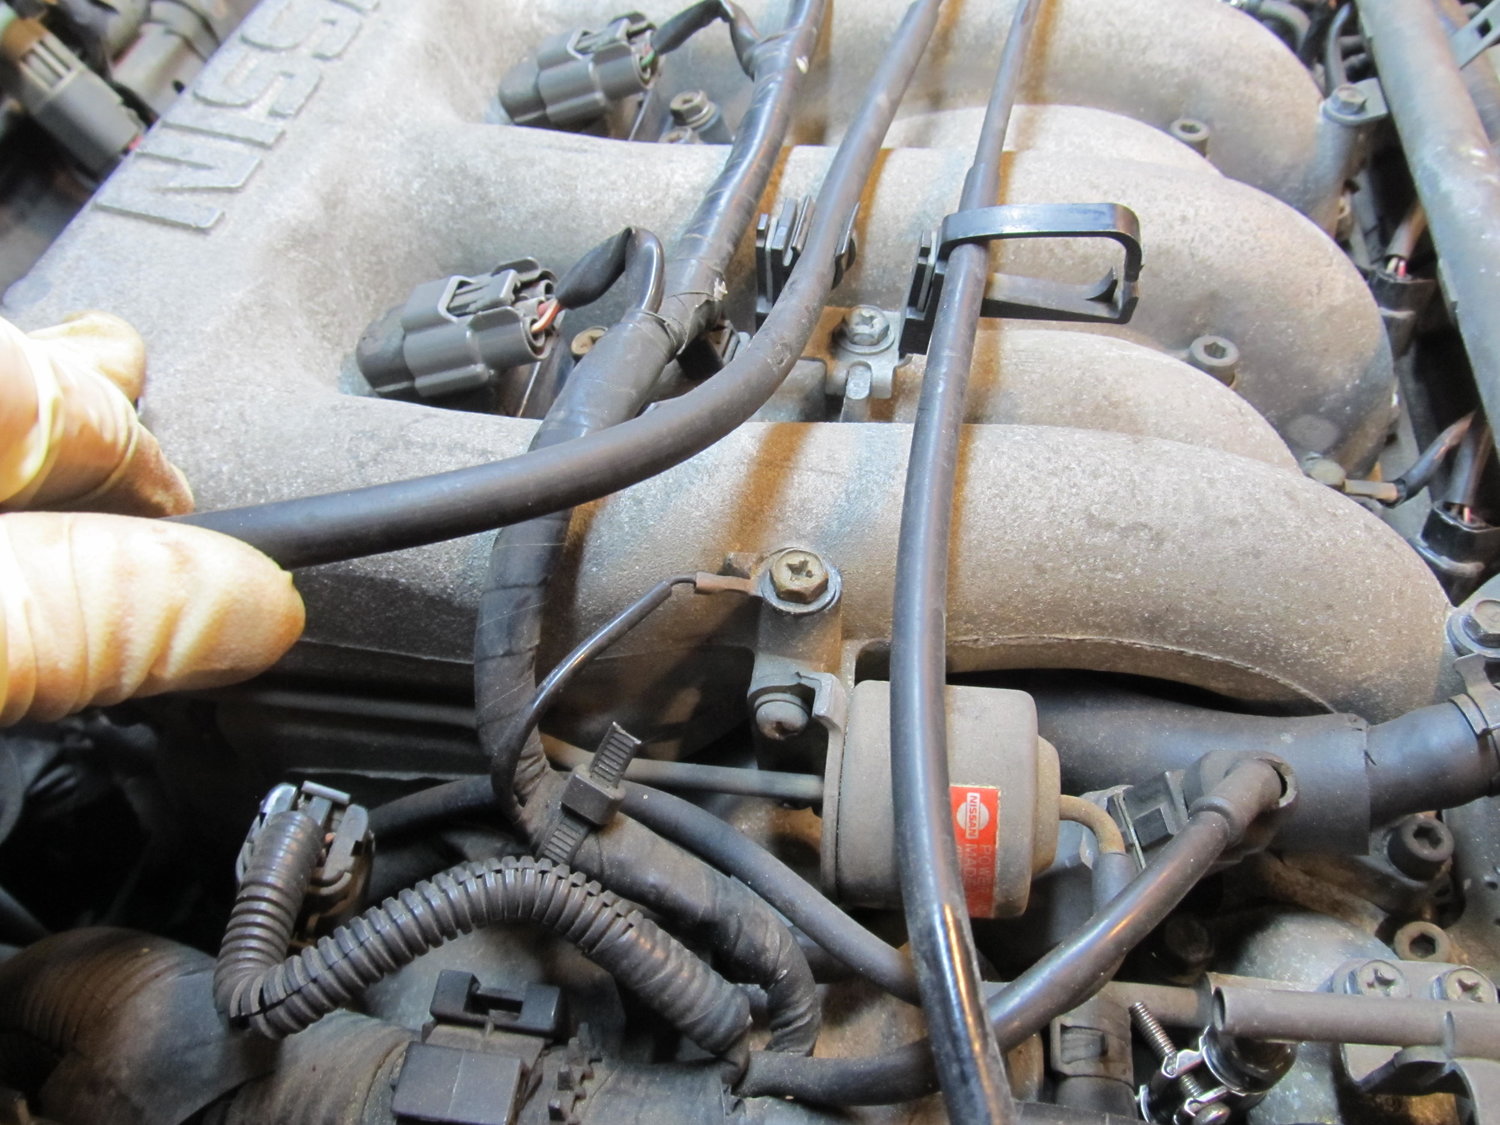
Here are the front coil packs as they would appear installed in the motor. The closest one (the one on the PS) definitely had some caked on oil residue and appeared to almost be wet with water, but how could that be? I cleaned them all out with electrical parts cleaner but not much came out. I didn't see any cracks on any of the coil packs.

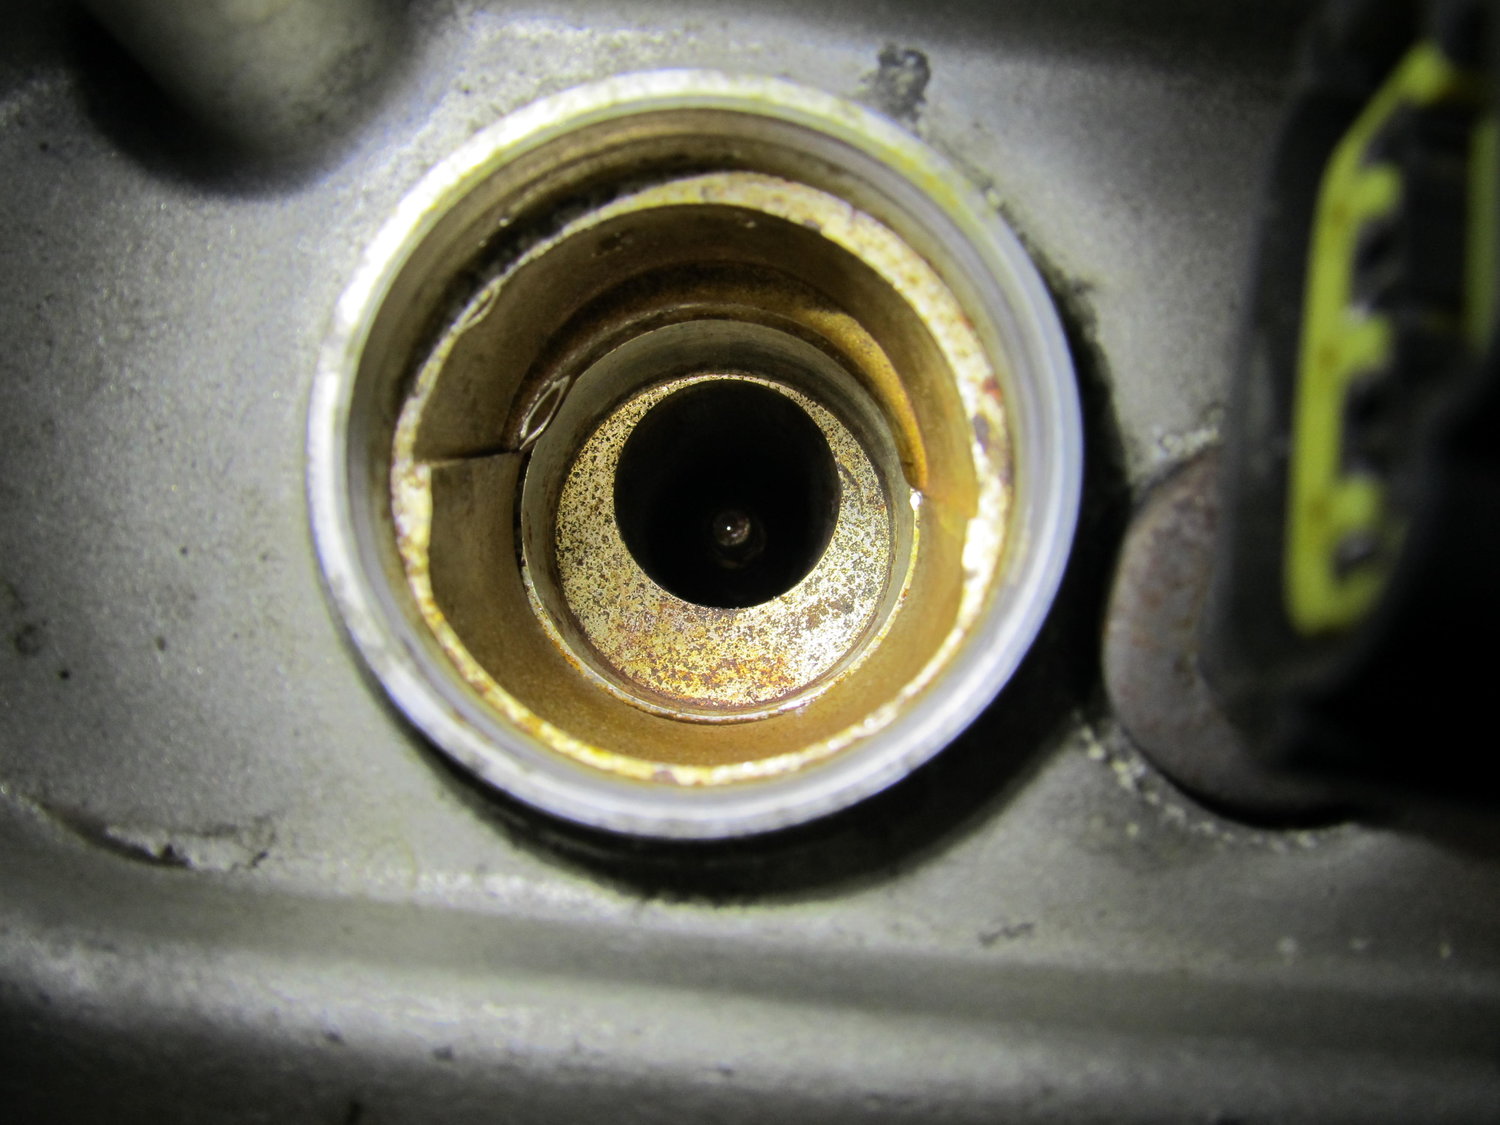
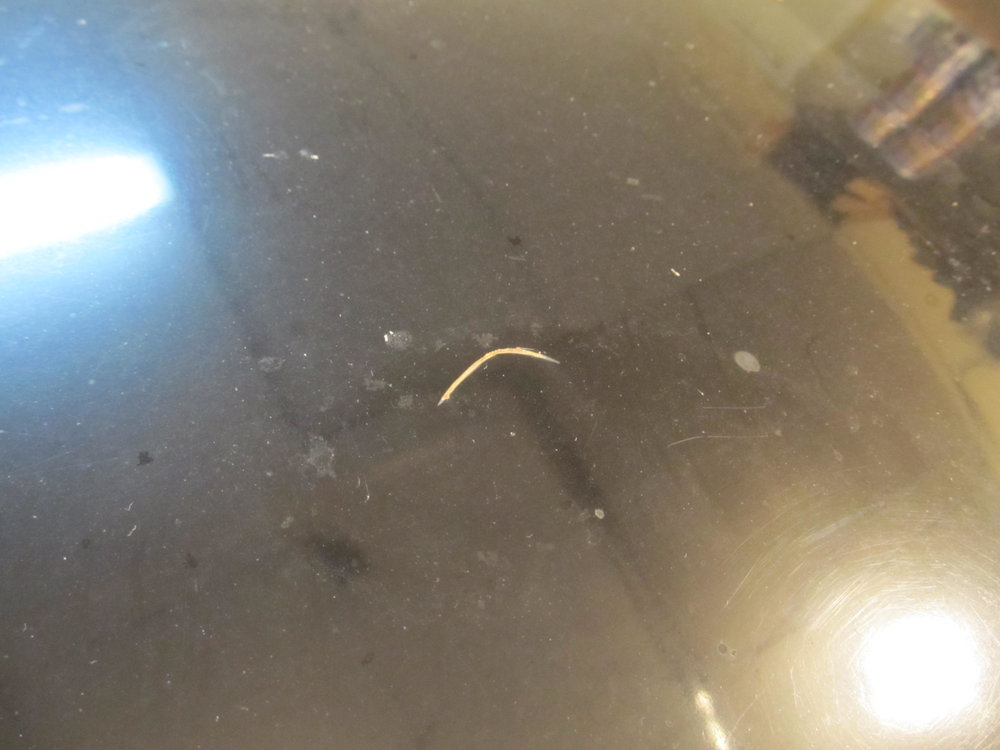
And look at that, the spark plug hole is kinda rusty looking. There was no oil down there either.
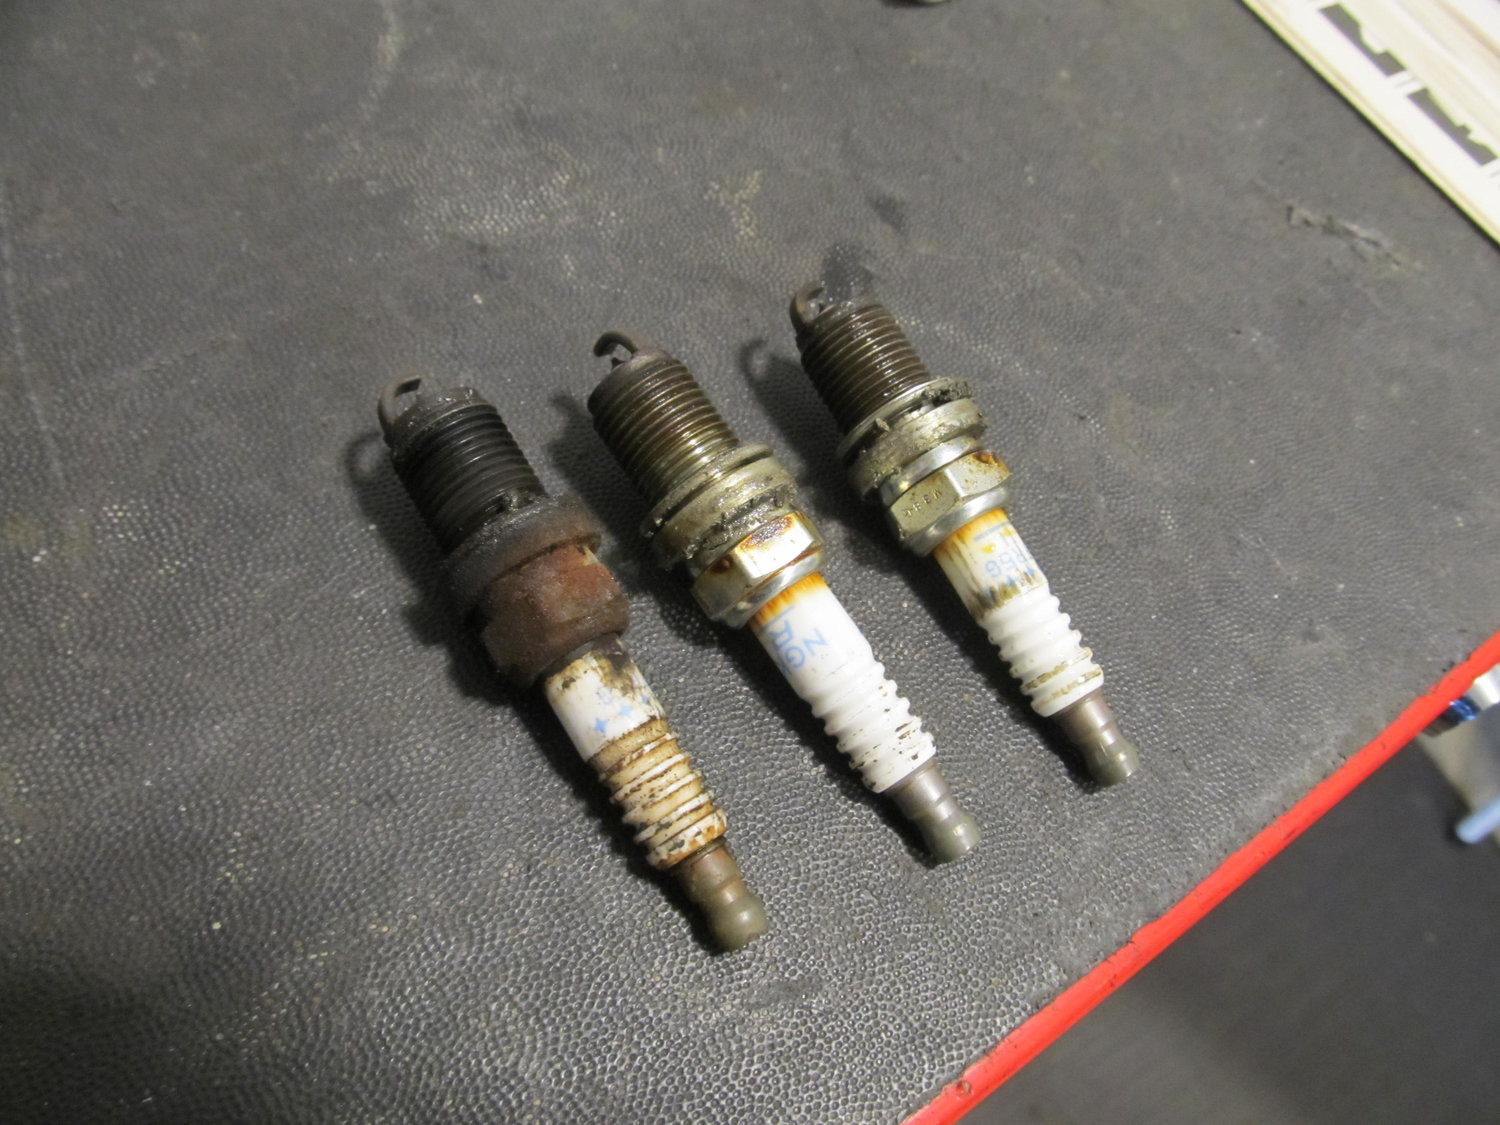
Here's what the other two looked like:
And here's the matching spark plug! WTF is this? Why is it rusty??
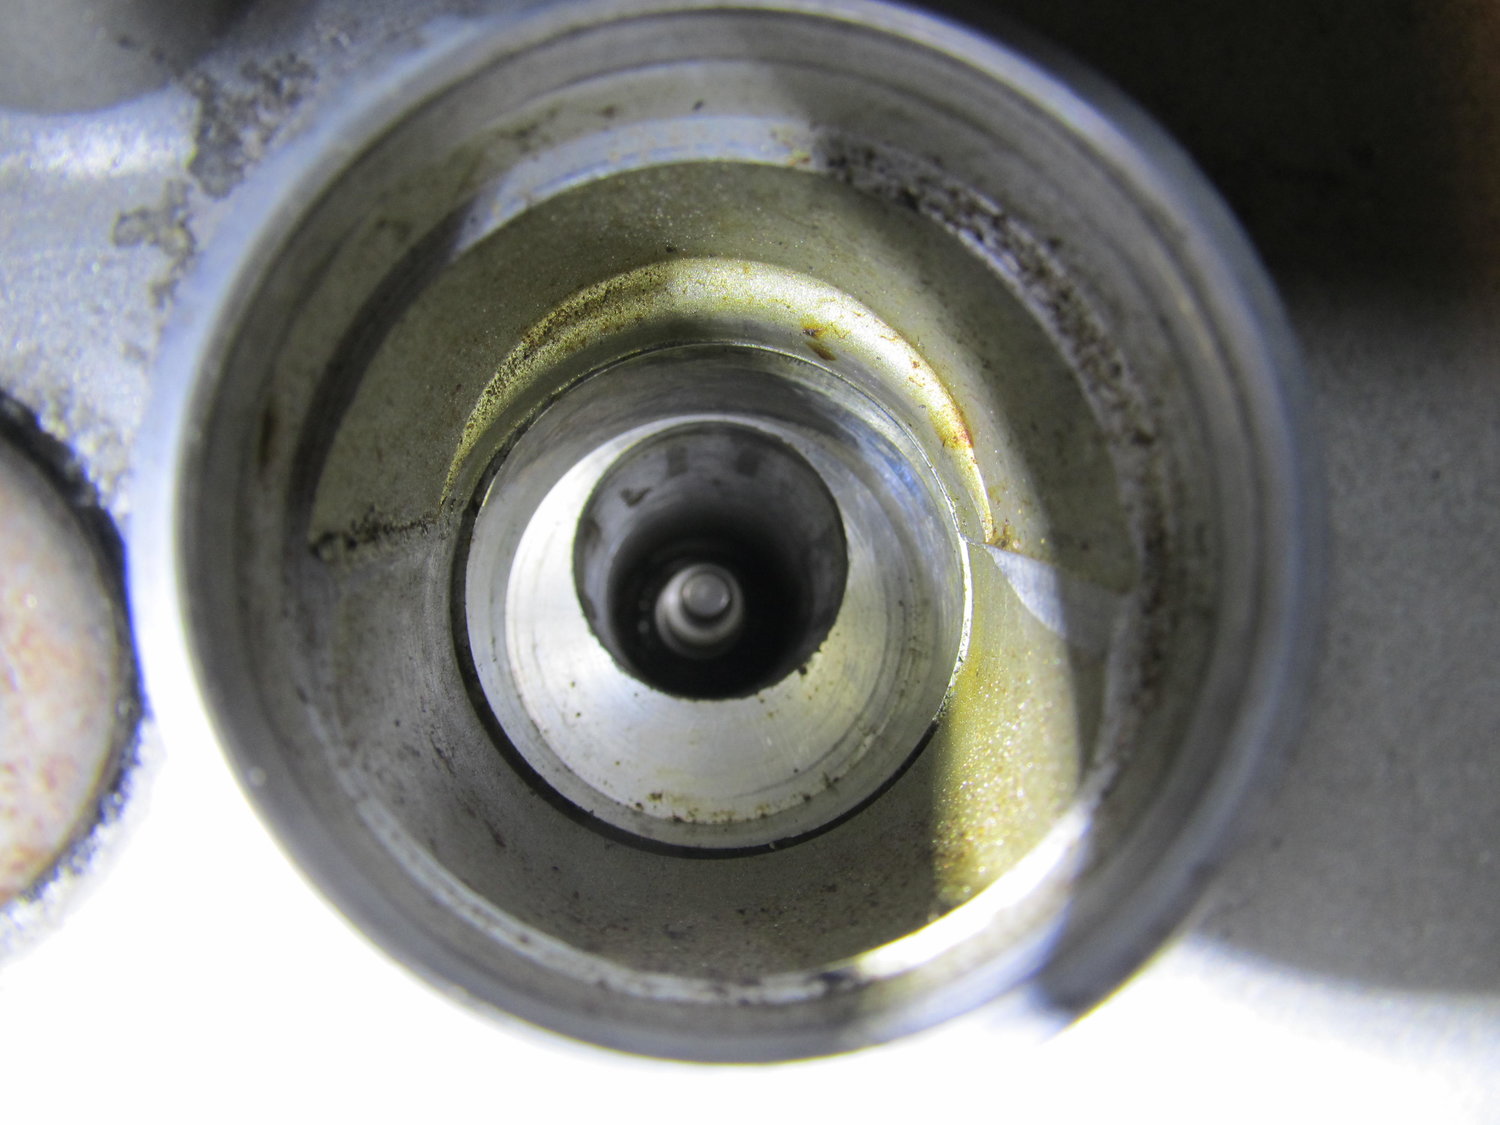
Anyways, on to the rear I suppose. I used my super straw attached to my shop vac to clean out the spark plug holes, and the rear ones on this motor are super deep!
All of the other plugs looked fine:
I found another ground to clean up, so I did.
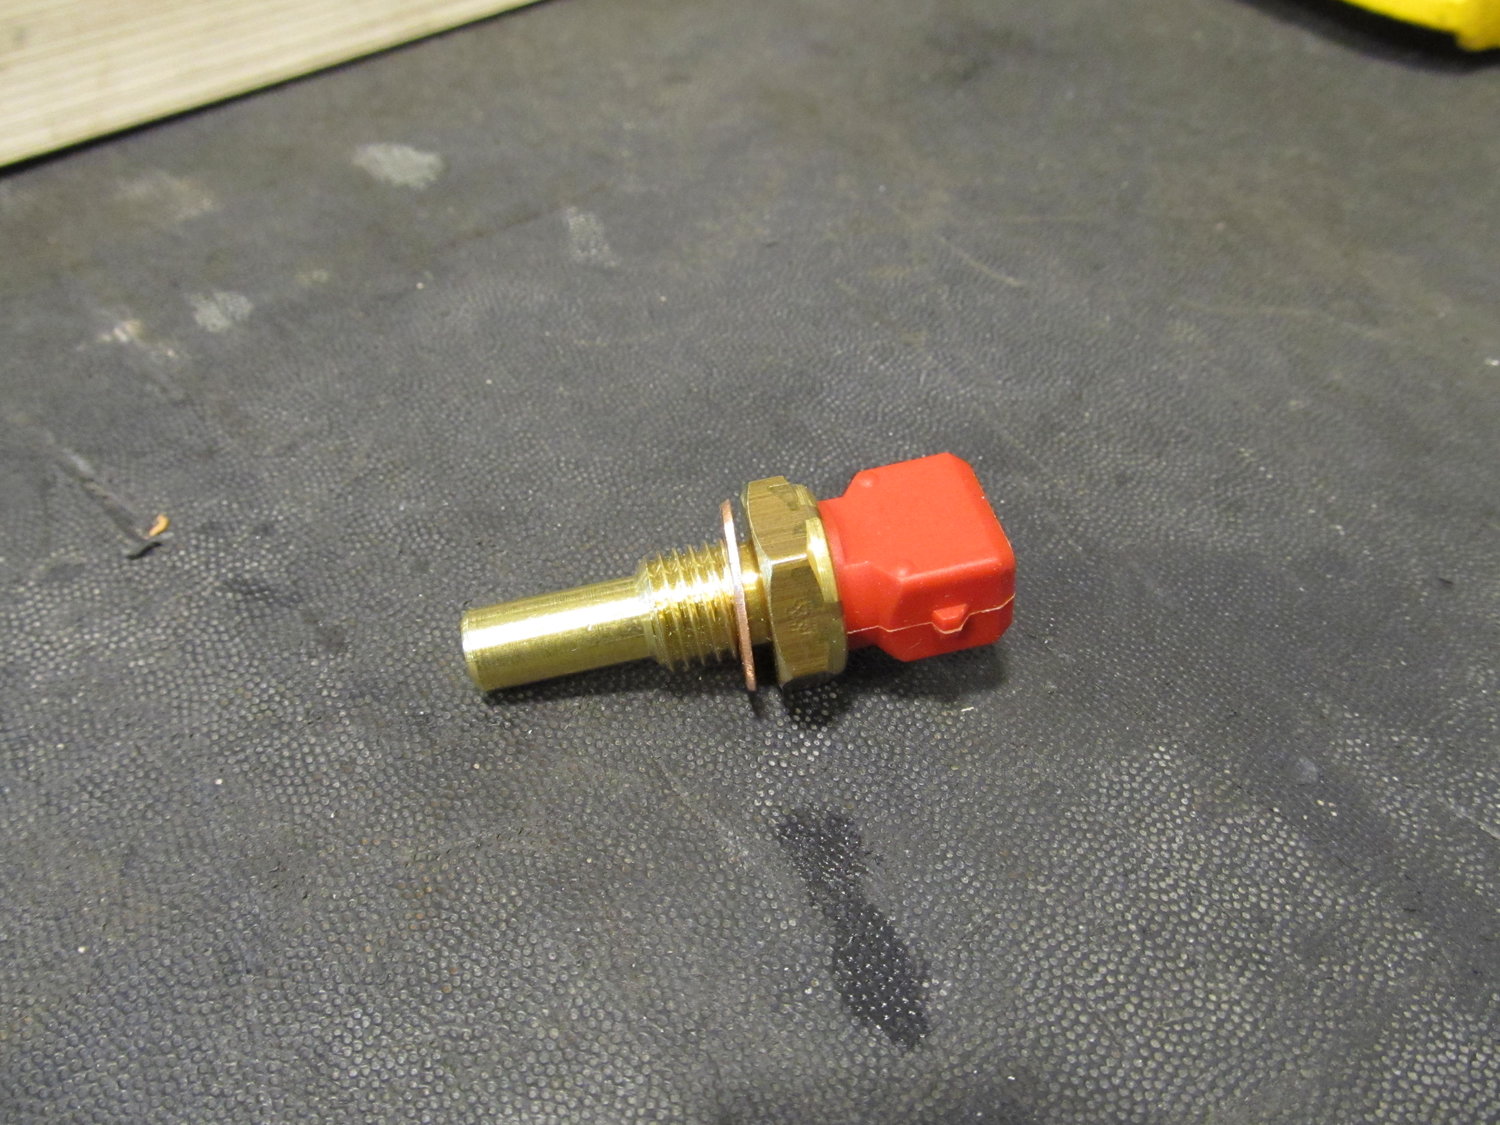
The new coolant temp sensor:
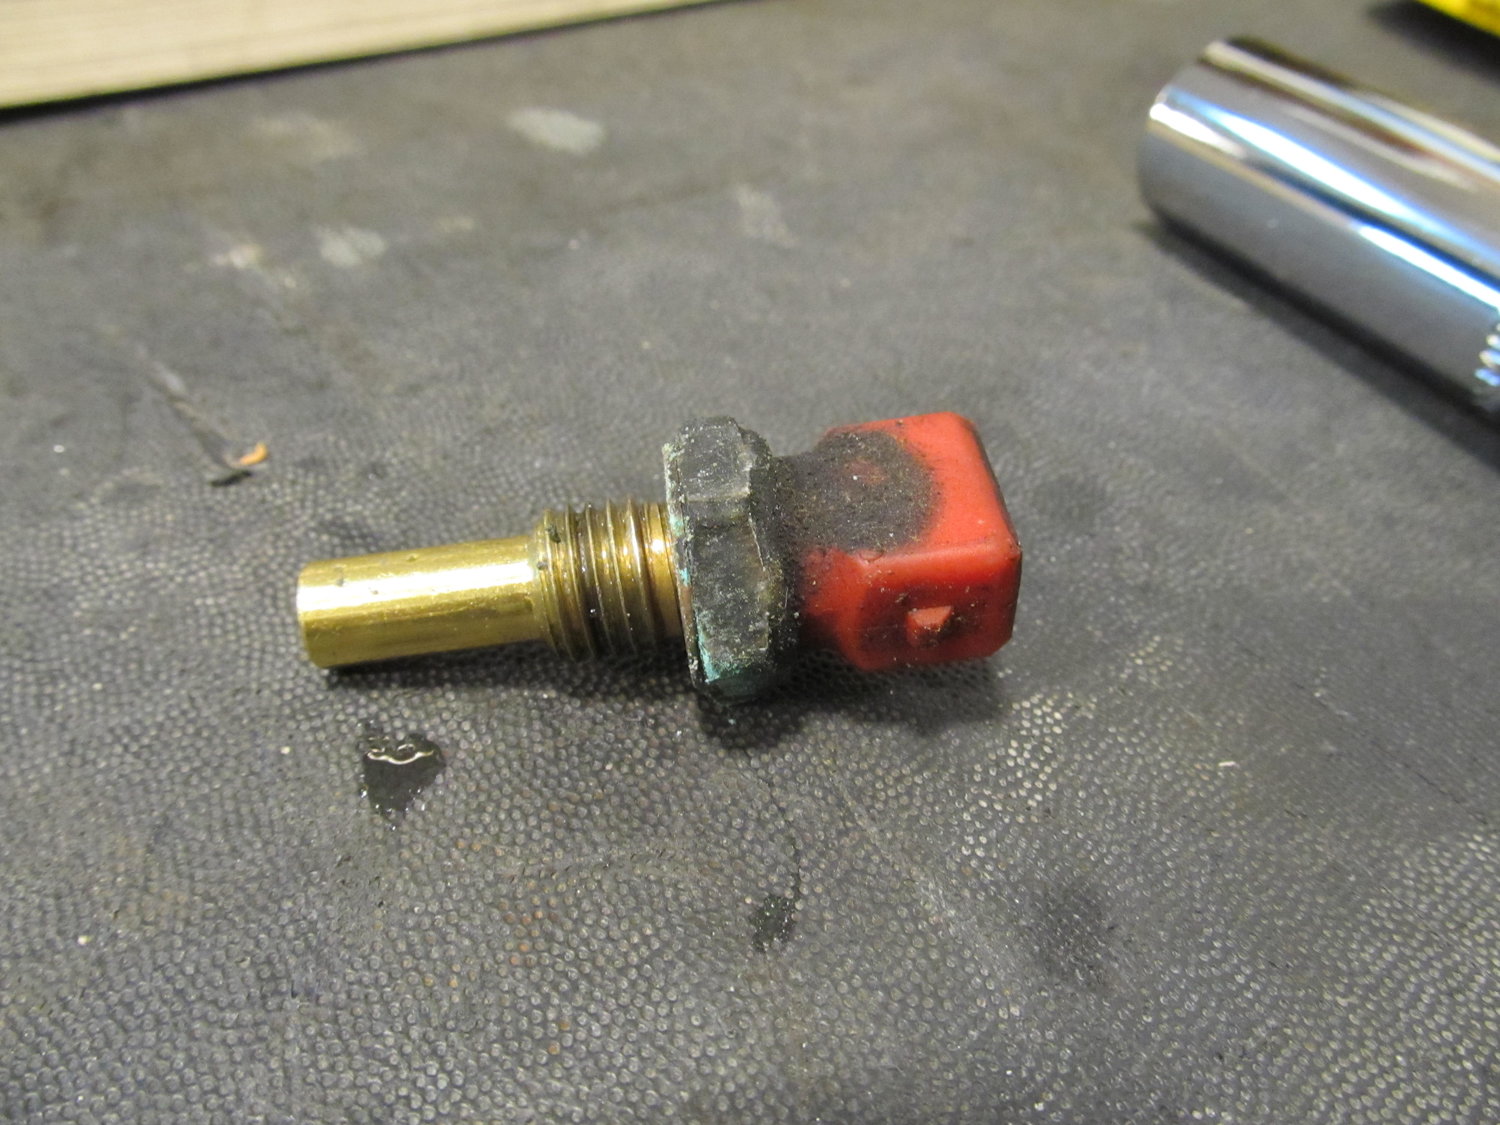
Replacing the old....
The intake boot was kind of a mess. I noticed some cracks forming a few weeks ago and made a note to fix them up with some RTV. Well, this seemed like a good time to do it.


Now that it cured, this plug is so secure there's no need for the hose clamp! It looks like the pressure from the one point of the hose clamp was warping the plug, and probably causing a vacuum leak. It ain't going anywhere now!
My throttle position sensor's clip had a broken piece that kept it from securely clipping onto the sensor, so the car came with a piece of paper towel wedged between the two to keep them from coming apart. I'm not proud to say that I have kept that tradition alive during my ownership, but I decided to try something a little new: more RTV. So I put a dab in there and it seems to be pretty secure now, which is probably a good thing.

I installed some NGK BKR5E-11 (6953) copper spark plugs and a Duralast coolant temperature sensor. The PCV valve appeared to be incorrect since it's unthreaded, so I didn't bother messing with that. The recommended gap range for the motor is 0.039-0.043, but the new plugs came gapped around 0.043. I tightened them all up to about 0.039.
Here are the front coil packs as they would appear installed in the motor. The closest one (the one on the PS) definitely had some caked on oil residue and appeared to almost be wet with water, but how could that be? I cleaned them all out with electrical parts cleaner but not much came out. I didn't see any cracks on any of the coil packs.
And look at that, the spark plug hole is kinda rusty looking. There was no oil down there either.
Here's what the other two looked like:
And here's the matching spark plug! WTF is this? Why is it rusty??
Anyways, on to the rear I suppose. I used my super straw attached to my shop vac to clean out the spark plug holes, and the rear ones on this motor are super deep!
All of the other plugs looked fine:
I found another ground to clean up, so I did.
The new coolant temp sensor:
Replacing the old....
The intake boot was kind of a mess. I noticed some cracks forming a few weeks ago and made a note to fix them up with some RTV. Well, this seemed like a good time to do it.
Now that it cured, this plug is so secure there's no need for the hose clamp! It looks like the pressure from the one point of the hose clamp was warping the plug, and probably causing a vacuum leak. It ain't going anywhere now!
My throttle position sensor's clip had a broken piece that kept it from securely clipping onto the sensor, so the car came with a piece of paper towel wedged between the two to keep them from coming apart. I'm not proud to say that I have kept that tradition alive during my ownership, but I decided to try something a little new: more RTV. So I put a dab in there and it seems to be pretty secure now, which is probably a good thing.
Last edited by 95maxrider; 01-18-2018 at 05:42 PM.
01-20-2018, 08:10 AM
#72
Ha! Ahahahahaha! I just got done driving the car for the first time after having done the work and it's back to normal! I only drove it a mile or so, but it feels great with no signs of rough running. I can still hear some faint misfire "pops" coming from the muffler at idle if I stand back there and listen, but those have been there the whole time I've owned the car, so I consider that normal operation. Maybe once the computer relearns stuff a little bit those will go away too. Anyways, crisis averted, at least for now!
Still though, what was going on with that rusted spark plug? Why is there moisture down in only one spark plug hole?
Still though, what was going on with that rusted spark plug? Why is there moisture down in only one spark plug hole?
02-08-2018, 05:18 PM
#73
Update: It's been almost three weeks and a lot more miles driven than usual, and the car has been flawless! I still feel like it could idle smoother, but it's always been like that. Once you're moving it's smooth and responsive with good power. It's also got some great intake honk going on above 5000 rpm at WOT! With a quiet exhaust the intake can sound so loud, but it's totally awesome.
05-15-2018, 12:57 PM
#74
Alrighty, question time for all of you VE experts out there!
My VE has always leaked oil on the PS/front of the motor, but I think it has gotten worse recently. Now, with the motor running, it drips every five seconds or so. I haven't cleaned it up yet with brake cleaner to really find the source(s) of the leak, but I have a feeling one is the front main seal. I found a thread talking about replacing it on a VE here. It sounds like you just need to remove the crank pulley to get to it. I've got a seal puller and pulley puller, so I think I've got the necessary tools to handle the job. Does anyone have experience doing this job? I really hope it's not leaking from the HG.....
My VE has always leaked oil on the PS/front of the motor, but I think it has gotten worse recently. Now, with the motor running, it drips every five seconds or so. I haven't cleaned it up yet with brake cleaner to really find the source(s) of the leak, but I have a feeling one is the front main seal. I found a thread talking about replacing it on a VE here. It sounds like you just need to remove the crank pulley to get to it. I've got a seal puller and pulley puller, so I think I've got the necessary tools to handle the job. Does anyone have experience doing this job? I really hope it's not leaking from the HG.....
06-08-2018, 01:37 PM
#75
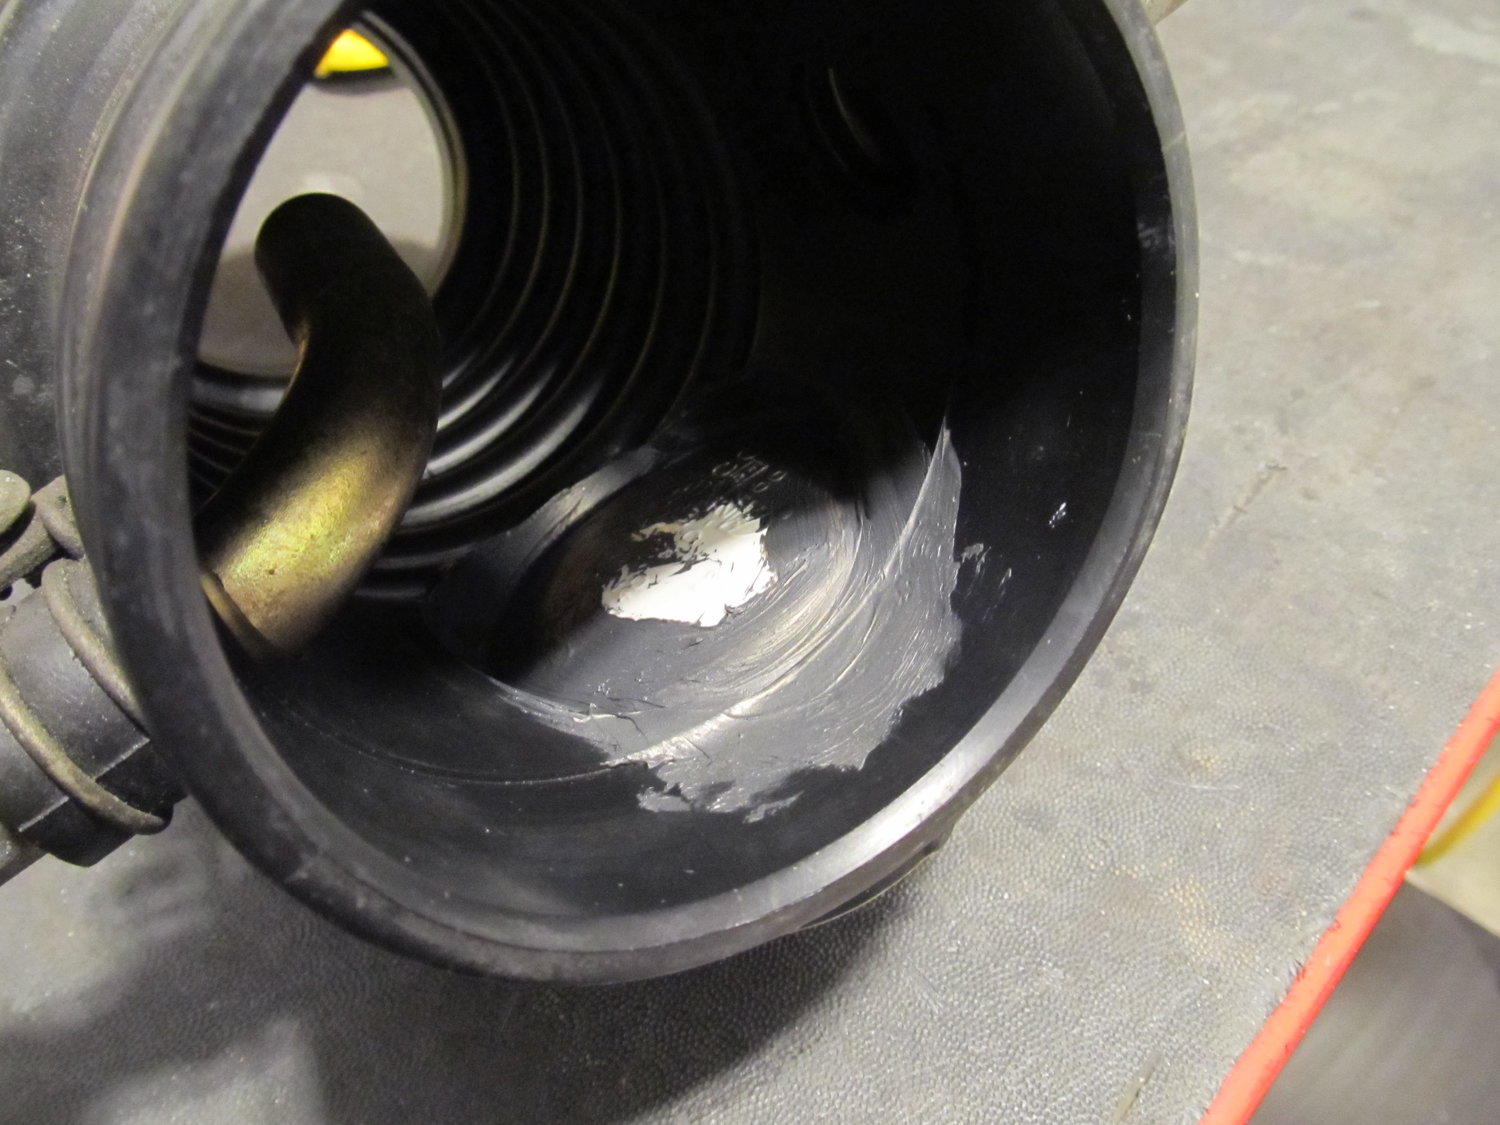
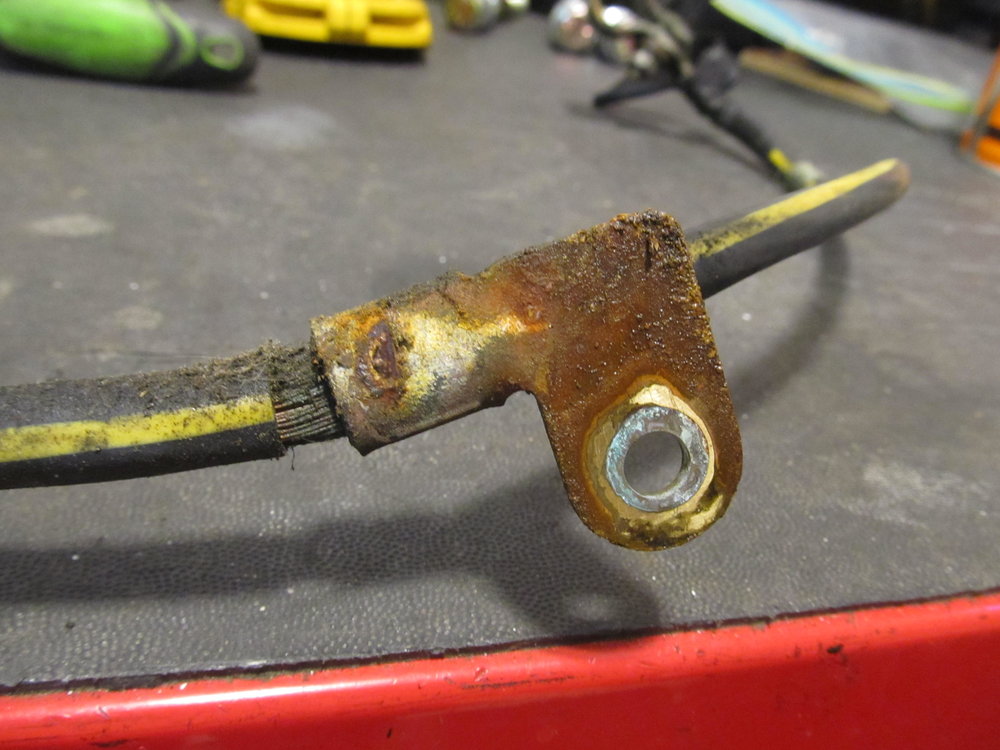
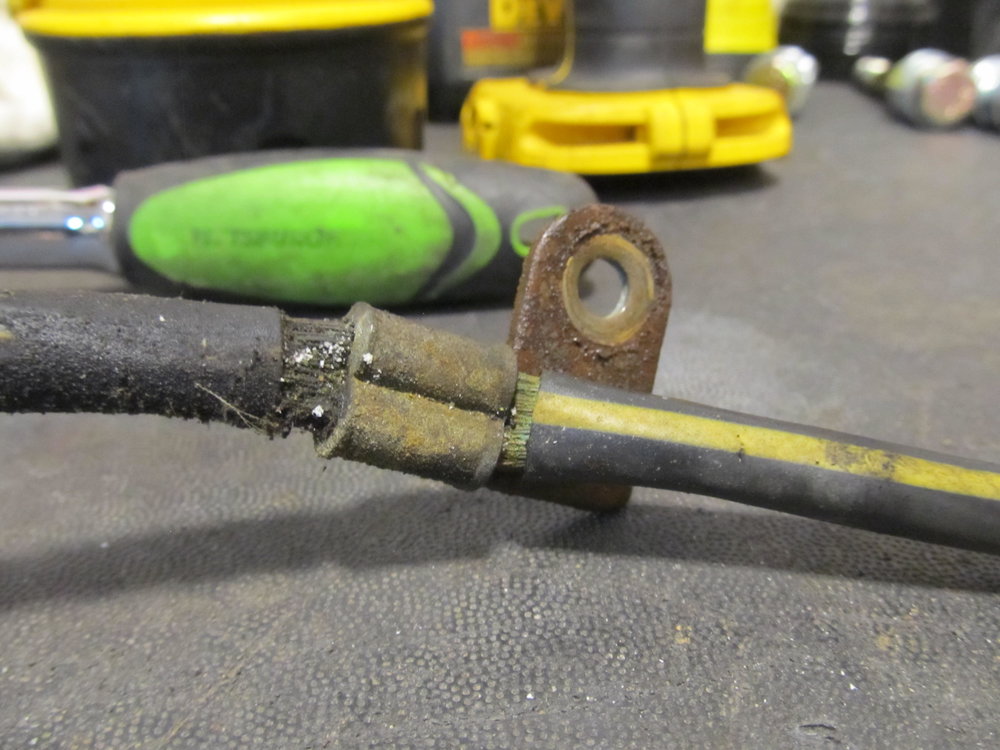
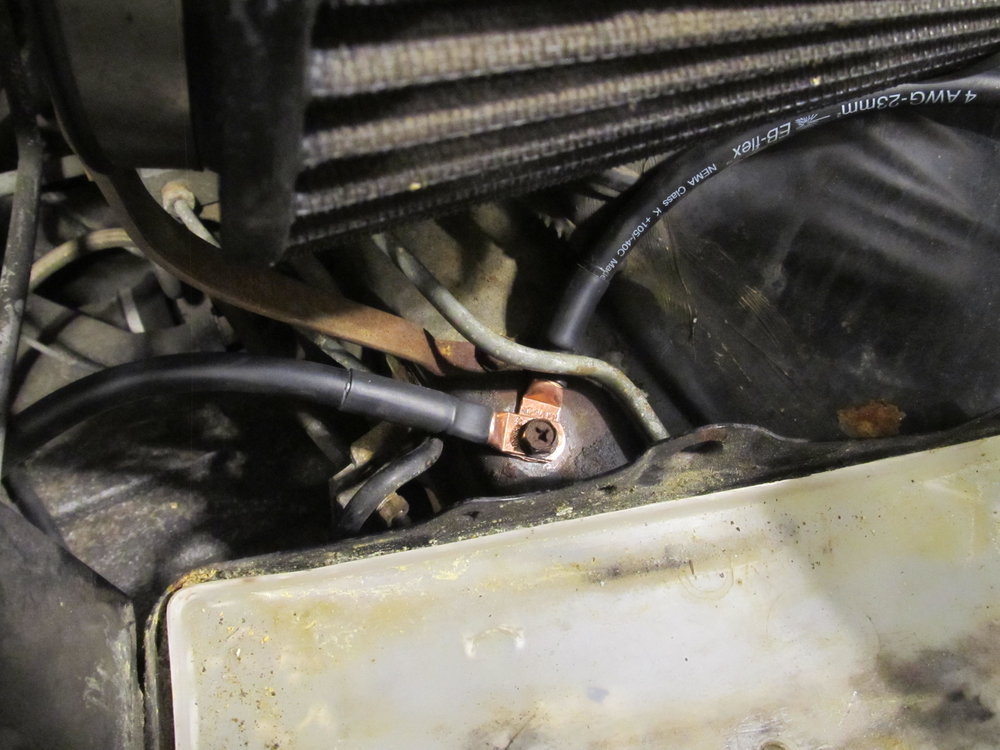
Hey guys, I need some advice on wiring up a new negative battery wire for the 3rd gen. The OEM wire is a single/continuous piece of wire that goes from battery negative to a weird body ground, and then on to the engine. I wish I had a good picture of it right now, but I don't. The body ground is the thing that's confusing me, but there's a chance I'm very much overthinking this whole thing. If you're good with wiring and electricity, help me out!
The body ground uses a section of the wire with the insulation stripped off, and is then clamped with a bracket that is then bolted to the body. All exposed portions of the wire are corroded, and I want to replace it, but I don't want to pay OEM money to get OEM results. However, I want to be damn sure I'm not downgrading my car in the process. I've spent good money on quality copper welding cable (4 awg and 1/0 awg), closed copper lugs/terminals, and glue-lined heat shrink. I even bought a "fancy" lug crimping tool that will do the large stuff perfectly. I'm trying to figure out if I should try to reuse the OEM body ground and stay with the single piece of wire, or if I can use two separate pieces of wire and have them meet at the body ground (battery to body, and then body to engine). I'm also wondering if using lugs/terminals will be as good of a connection as the current body ground. I'm ALSO wondering if it would be better to instead go from battery to engine, and then engine to body, using the engine as the intermediate point, versus the body being the intermediate point.
Here are my thoughts on it all from what I've read. Please correct me if I'm wrong! Regarding the route of the wires, I believe keeping the stock orientation of having the body be the intermediate point between the two wires would be better than having the engine be the mid point. I say this because on my E36 the battery is in the trunk, and the negative goes only to body, so clearly this is a fine solution that's acceptable to BMW. I'm also pretty confidant that using two separate wires that meet at the body will provide as good of a connection as a single wire, assuming that my lugs are crimped properly. My assumption is that Nissan used one piece of wire mainly just to save money and keep things simple, rather than for any sort of electrical benefits.
So, what do you guys think?
08-06-2018, 08:10 AM
#76
Time to start playing with some new toys!
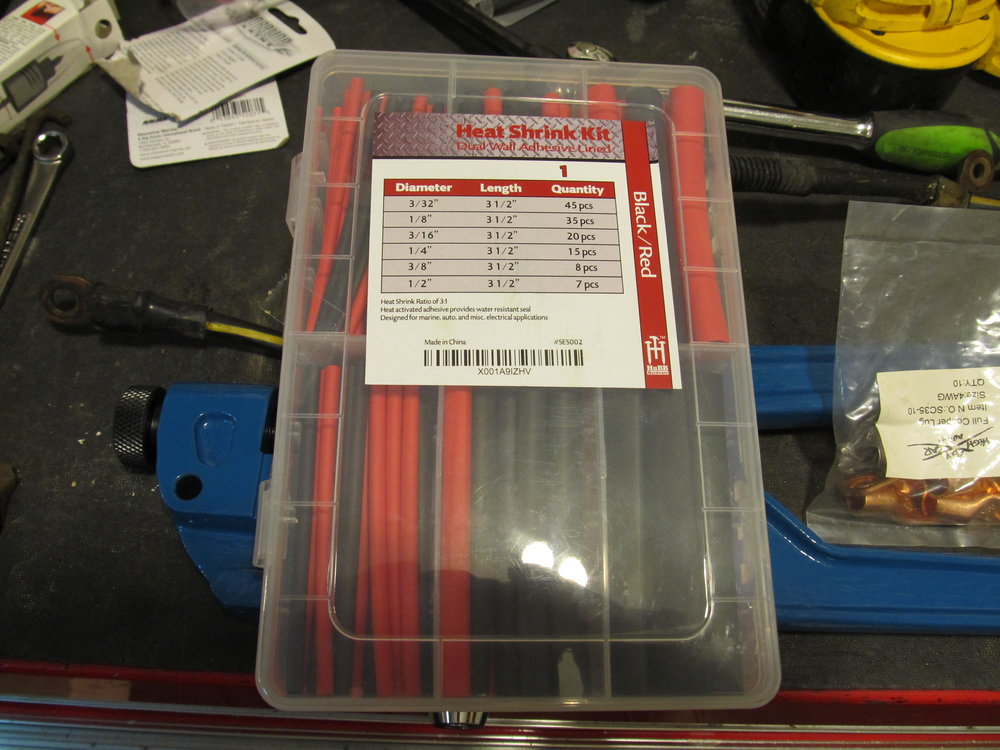
I bought a ton of 1/0, 4, and 6 AWG EB Flex (best prices and also rated to 105*C) welding cable with the idea of tackling a bunch of random wiring projects across all the cars. To crimp things properly, I bought a proper crimping tool made by TEMco ($55), and also bought an assortment of closed-end full copper lugs made by Selterm. The first test of all of this would be new negative battery cables for the Maxima!
The original negative cable incorporated both the body and engine ground into a single cable. With open lugs, the wires were exposed to the elements and showed signs of corrosion. The body ground had rusted up pretty good and I can't imagine it was doing very much.

New toys!


I found some heat shrink that's glue-lined, so they should help create a waterproof seal.
Crimping was a breeze with the new tool! With closed lugs and glue-lined heat shrink, these cables should remain in perfect condition for quite some time!

The screw for the body ground had a layer of paint on it, so I wire wheeled it all off to make sure the whole thing was bare metal to make sound the ground was solid.
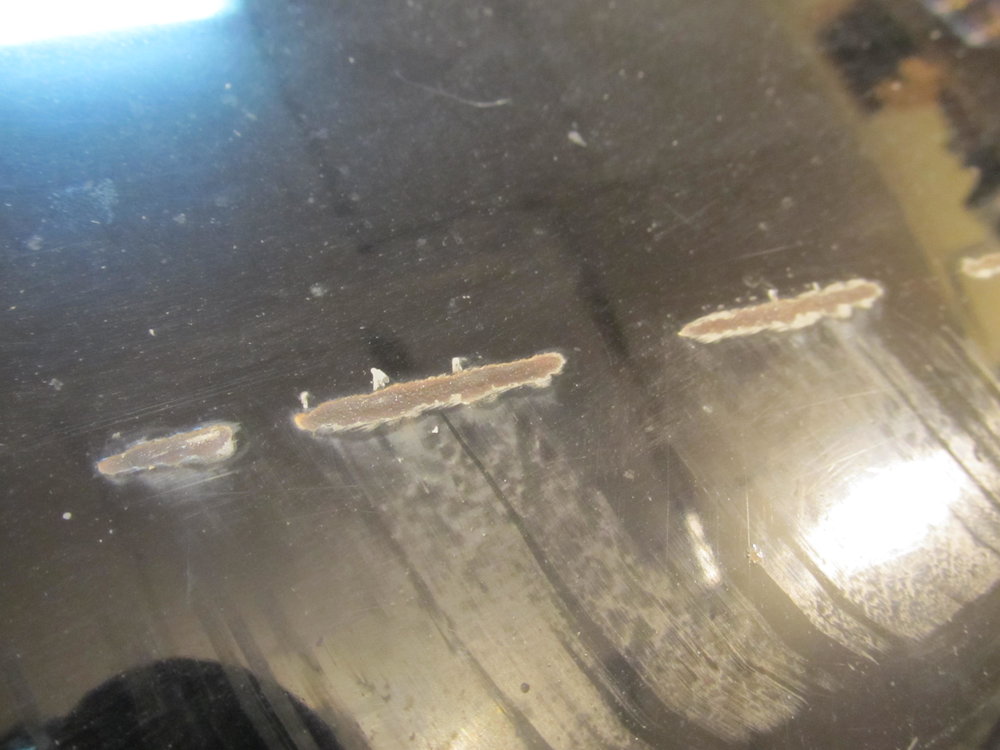
The body ground itself was pretty nasty, and even new, I'm surprised it worked. The whole area is painted aside from the threads for the bolt, so I have no idea how it was making a solid connection. I used a grinding wheel on my Dremel to get it down to bare metal.
Before and afters:


Installed:
I also finally changed the coolant on the car, since I have no idea when it was last changed.
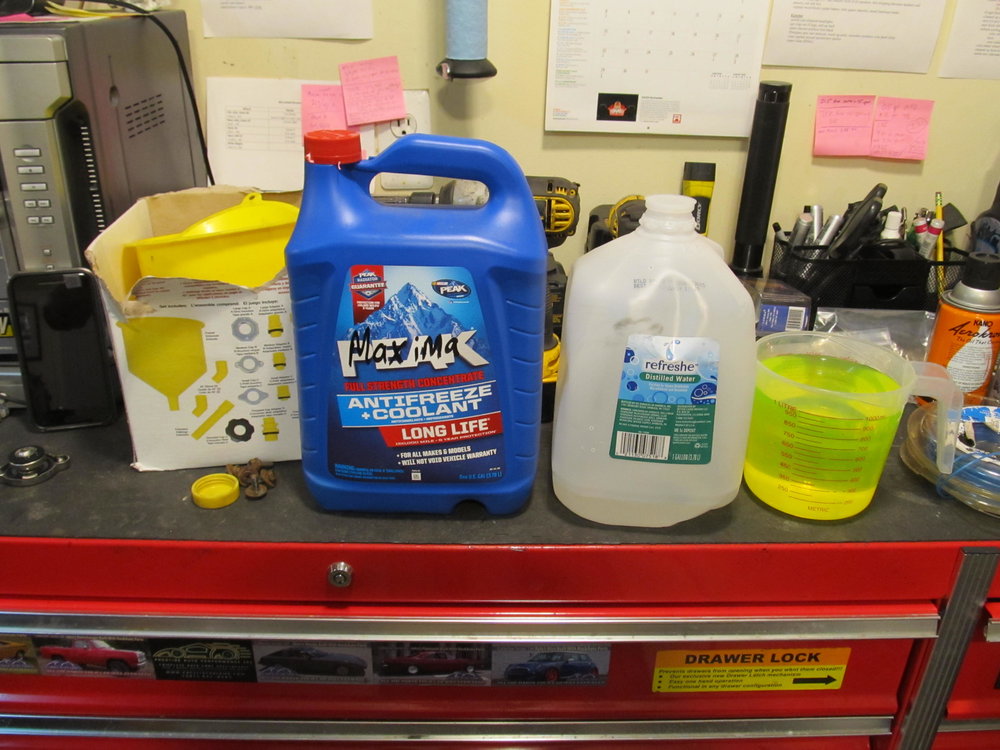
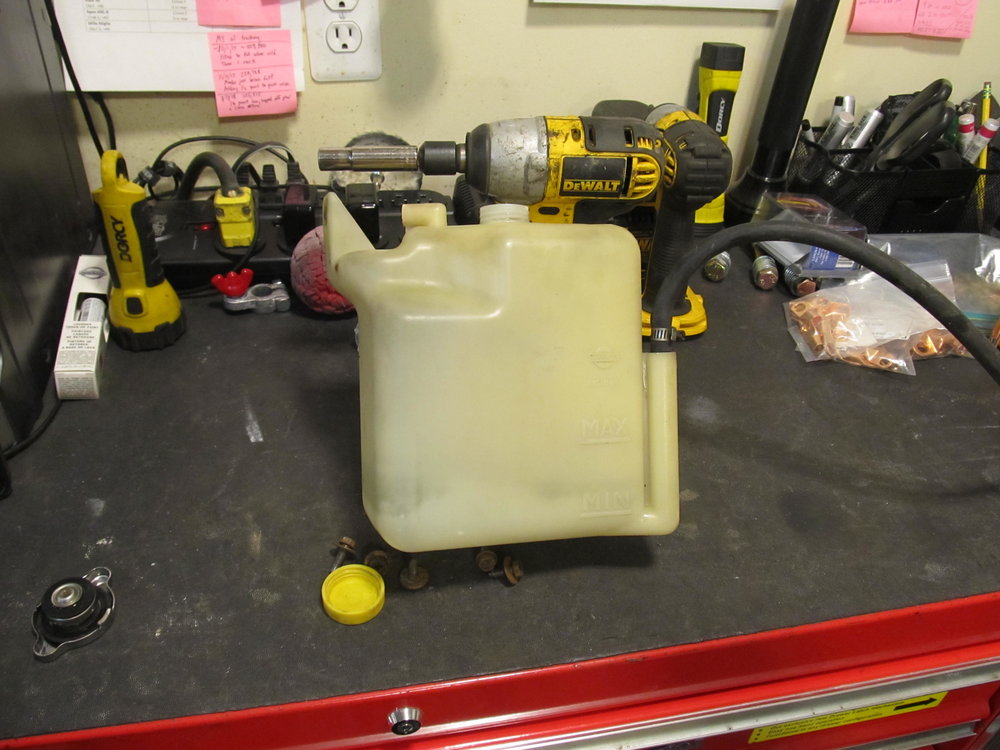
I pulled the overflow tank from the car and hosed it out since there was all sorts of nasty crap at the bottom of it.
I bought a ton of 1/0, 4, and 6 AWG EB Flex (best prices and also rated to 105*C) welding cable with the idea of tackling a bunch of random wiring projects across all the cars. To crimp things properly, I bought a proper crimping tool made by TEMco ($55), and also bought an assortment of closed-end full copper lugs made by Selterm. The first test of all of this would be new negative battery cables for the Maxima!
The original negative cable incorporated both the body and engine ground into a single cable. With open lugs, the wires were exposed to the elements and showed signs of corrosion. The body ground had rusted up pretty good and I can't imagine it was doing very much.
New toys!
I found some heat shrink that's glue-lined, so they should help create a waterproof seal.
Crimping was a breeze with the new tool! With closed lugs and glue-lined heat shrink, these cables should remain in perfect condition for quite some time!
The screw for the body ground had a layer of paint on it, so I wire wheeled it all off to make sure the whole thing was bare metal to make sound the ground was solid.
The body ground itself was pretty nasty, and even new, I'm surprised it worked. The whole area is painted aside from the threads for the bolt, so I have no idea how it was making a solid connection. I used a grinding wheel on my Dremel to get it down to bare metal.
Before and afters:
Installed:
I also finally changed the coolant on the car, since I have no idea when it was last changed.
I pulled the overflow tank from the car and hosed it out since there was all sorts of nasty crap at the bottom of it.
Last edited by 95maxrider; 08-06-2018 at 08:13 AM.
08-06-2018, 08:11 AM
#77
Then it was on to try my hand at some paint repair. The hood I picked up at the junkyard 2 years ago had some damage on it, but I never bothered to fix it. Now that I'm seriously considering selling this car, I want to make it a little more appealing to the general public. I had some touch up paint lying around, so I got to work.
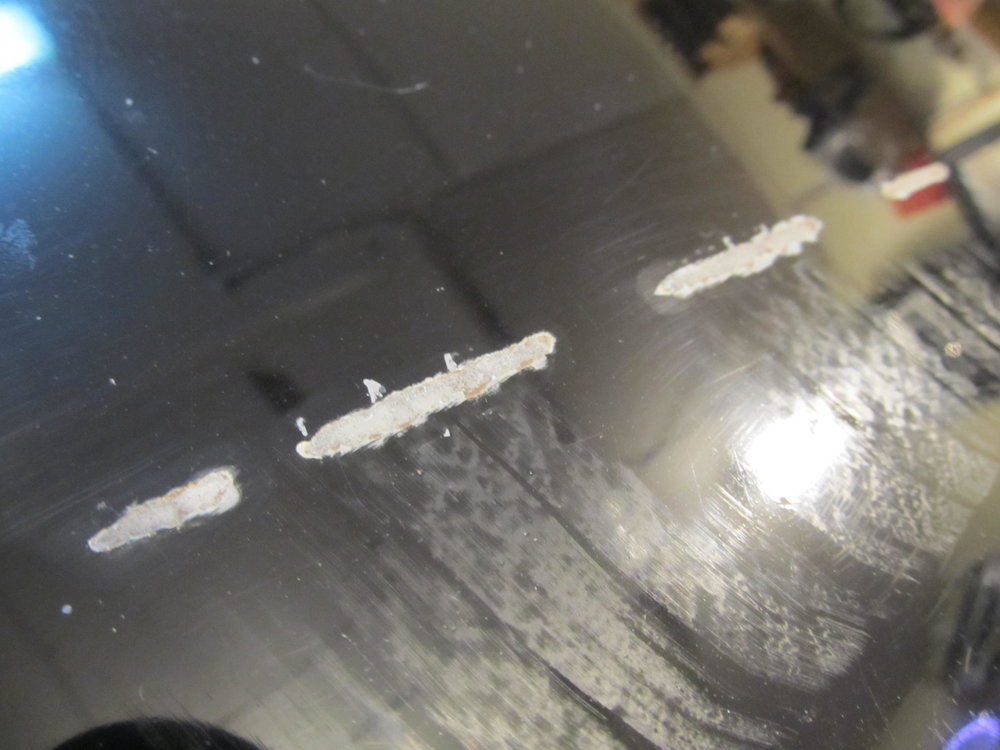
Here's what the damage looks like, it's pretty rusty:


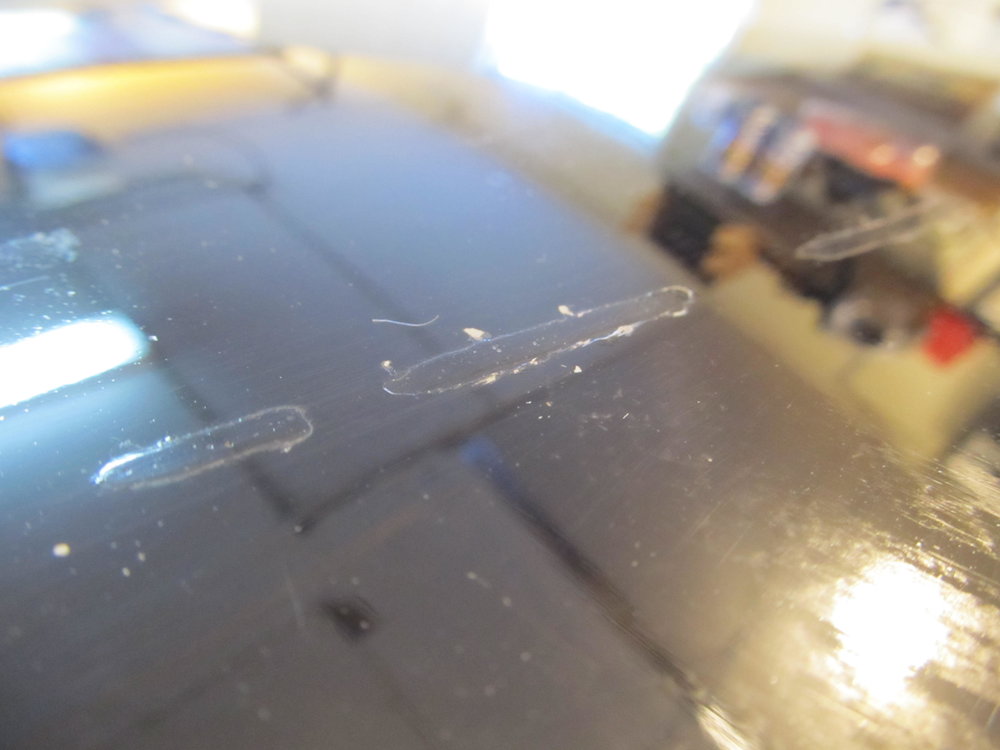
To get rid of the rust, I put a tiny wire wheel on my Dremel and carefully smoothed things out:
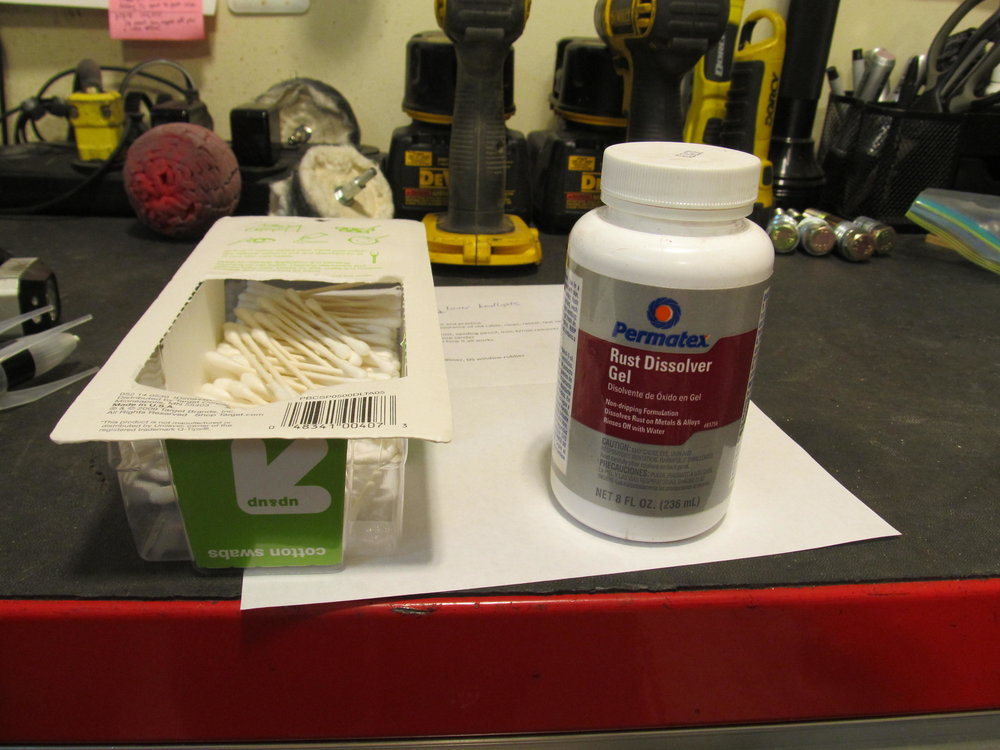
I then used some rust remover gel on the areas:
Ten minutes later and most of the rust was gone:
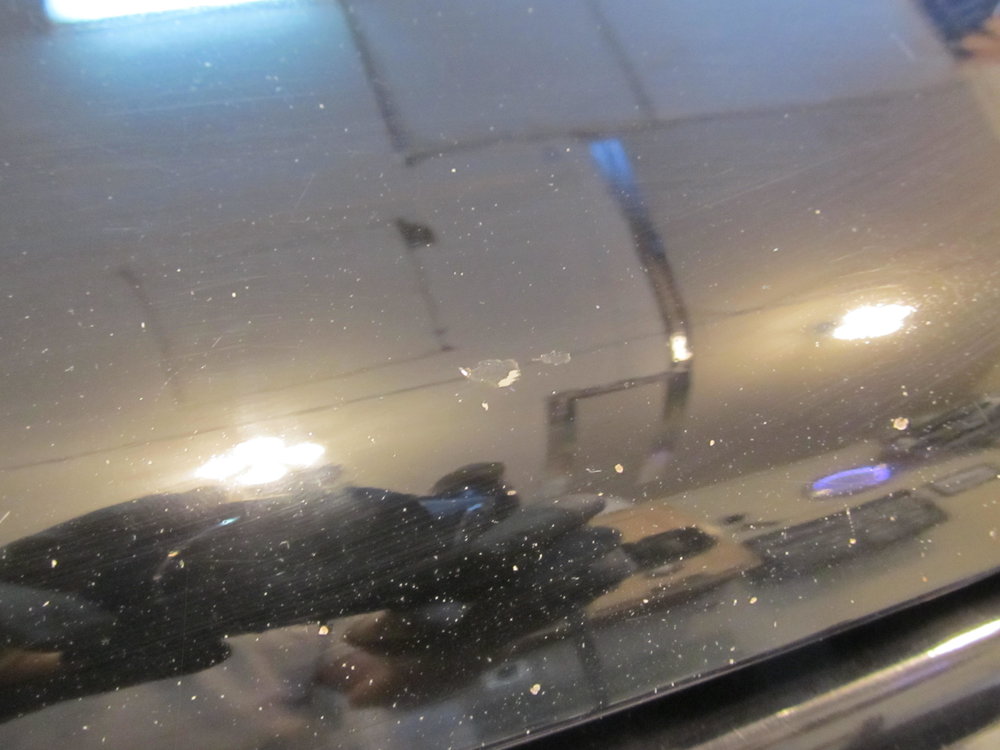
I then put on four coats of touch up paint. I put it on heavy on purpose, because I had a secret weapon.


This Blob Eliminator kit supposedly helps smooth out touch up paint. Smear some goo over the new paint (after letting it dry at least two hours) and then rub it around with a piece of plastic and a cotton cloth. It took a while, but it seems to have worked! It's by no means perfect, but I think it did what it was supposed to:


I think I need to go back and touch up a couple small areas where bare metal got exposed again, but overall I'm happy with how it turned out. It sure beats rust! More amateur body work coming up!
Here's what the damage looks like, it's pretty rusty:
To get rid of the rust, I put a tiny wire wheel on my Dremel and carefully smoothed things out:
I then used some rust remover gel on the areas:
Ten minutes later and most of the rust was gone:
I then put on four coats of touch up paint. I put it on heavy on purpose, because I had a secret weapon.
This Blob Eliminator kit supposedly helps smooth out touch up paint. Smear some goo over the new paint (after letting it dry at least two hours) and then rub it around with a piece of plastic and a cotton cloth. It took a while, but it seems to have worked! It's by no means perfect, but I think it did what it was supposed to:
I think I need to go back and touch up a couple small areas where bare metal got exposed again, but overall I'm happy with how it turned out. It sure beats rust! More amateur body work coming up!
Last edited by 95maxrider; 08-06-2018 at 08:16 AM.
09-28-2018, 01:40 PM
#79
I haven't been driving the car much since the other two are running great, but I take it out occasionally just to give it a workout and keep things moving. On my last drive with the car a month or so ago, the exhaust got real loud. A quick inspection revealed the muffler had mostly detached from the b-pipe, and given how rusty the whole thing was, welding it back together wasn't an option, it had to be replaced. With a 20% coupon I was able to get a new Bosal catback delivered for $130, and with that, it was time to get to work. I was worried about the bolts holding the catback to the cat, but after wire wheeling the crap out of them, I was able to get the bolts out without having to cut them, which was a huge relief.
One problem this car has had since I bought it was that the catback wasn't really held in place very well. One of the mid hangers didn't line up with the car, and the two hangers on the back of the muffler had rotted off, so there was only one hanger working properly. I'm sure this accelerated the demise of the whole thing since it wasn't supported very well. Luckily, the new Bosal (the one on the car was also a Bosal) had that one hanger oriented properly, so it was actually properly attached to the car!
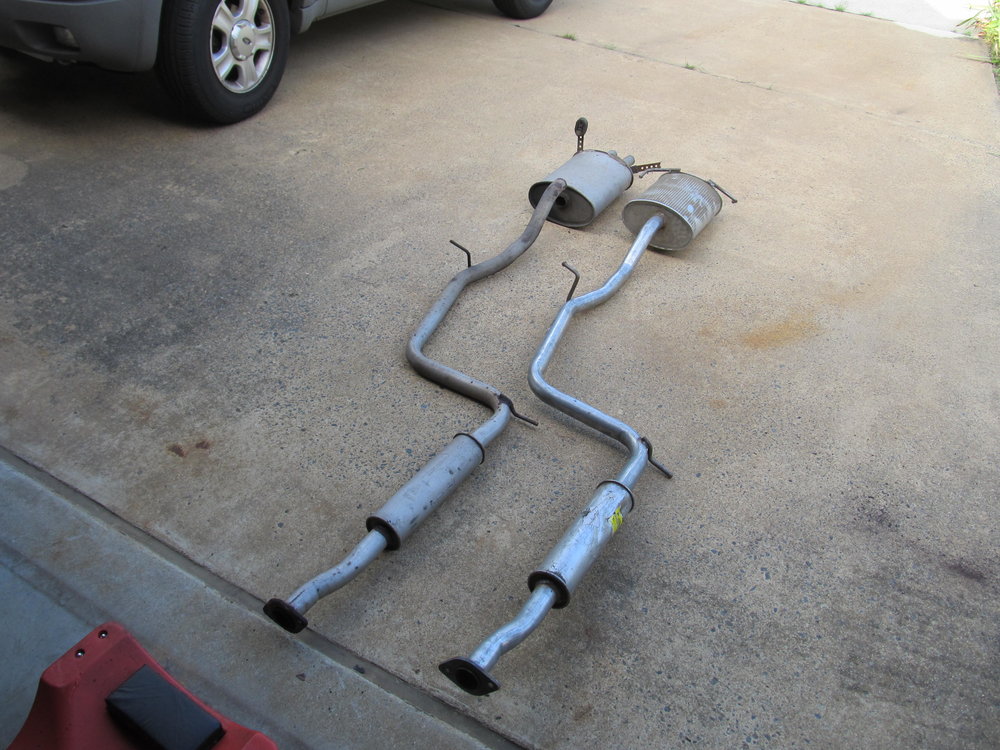
Yup, that's broken.

I like the new hangers better than the old ones!

Installed!

Another issue that the car has had since day one was a busted boot on the PS axle. I paid $50 shipped for a new one and got busy.

I really don't understand how this thing was still functioning and in one piece after all these years with a torn boot. The joint was floppy as hell and filthy water poured out when I tilted it.
The install wasn't too bad, the worst part was trying to un-stick the old axle from the carrier bearing assembly. I made sure to sand down the inside of the assembly before installing the new one, since there was some rust/crud buildup.
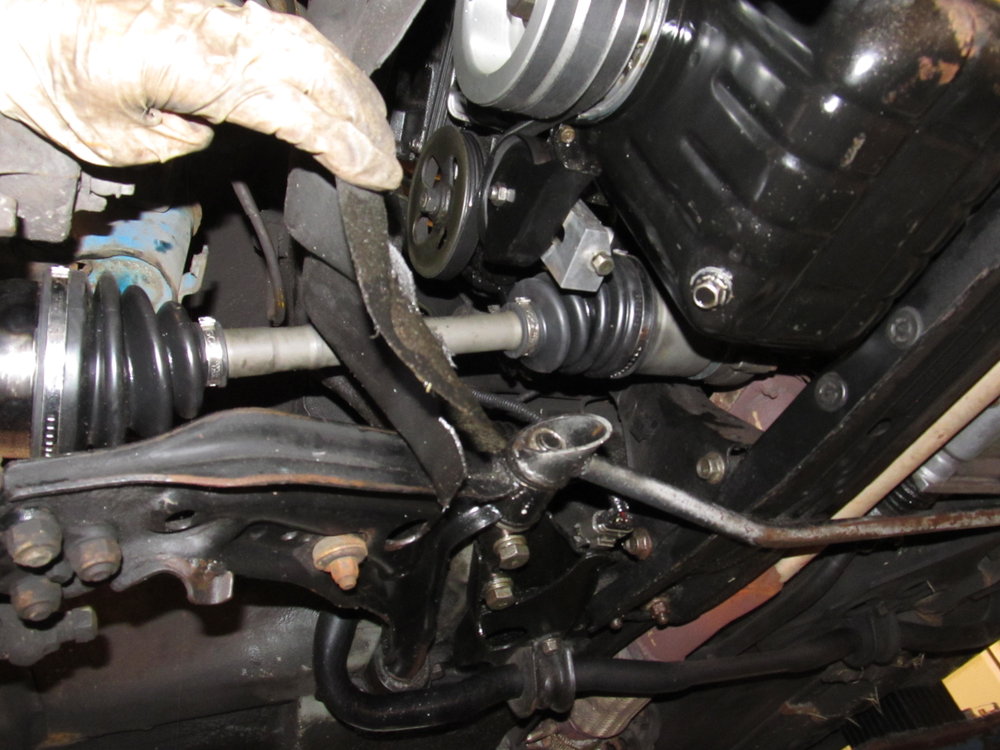
I also took the opportunity to remove the camber bolts from the car and install the stock bolts. I want to get it aligned before I sell it, and I didn't feel comfortable selling it with such an aggressive alignment and questionable camber bolts. Yes, I've had no problems auto-xing on camber bolts on my I30 with Hoosiers, but I wanted to play it safe for this car.
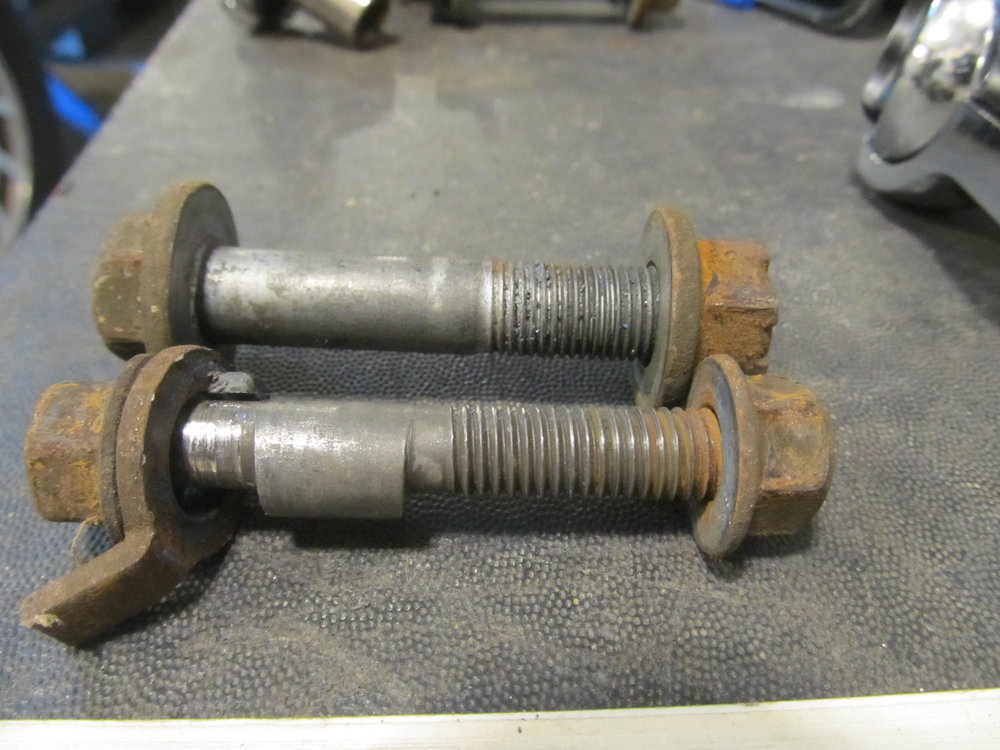
Axle nut properly torqued to 200 ft/lbs, new cotter pin, and a job well done. Feels good!
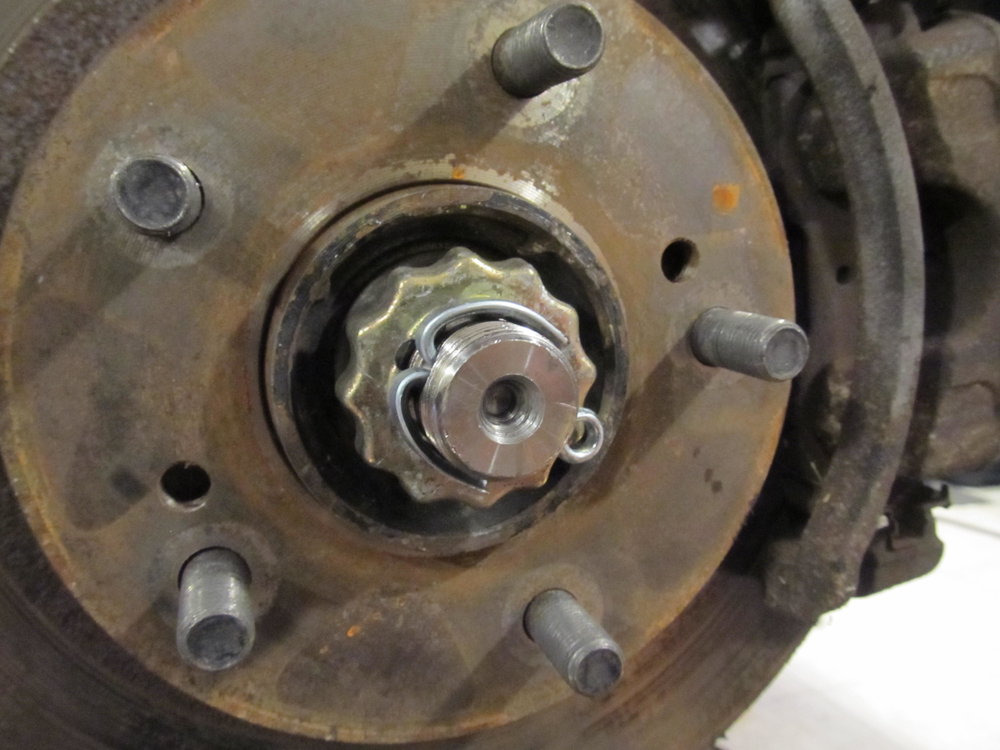
Next up: Detailing, PDR, rust repair, and putting it up for sale!
One problem this car has had since I bought it was that the catback wasn't really held in place very well. One of the mid hangers didn't line up with the car, and the two hangers on the back of the muffler had rotted off, so there was only one hanger working properly. I'm sure this accelerated the demise of the whole thing since it wasn't supported very well. Luckily, the new Bosal (the one on the car was also a Bosal) had that one hanger oriented properly, so it was actually properly attached to the car!
Yup, that's broken.
I like the new hangers better than the old ones!
Installed!
Another issue that the car has had since day one was a busted boot on the PS axle. I paid $50 shipped for a new one and got busy.
I really don't understand how this thing was still functioning and in one piece after all these years with a torn boot. The joint was floppy as hell and filthy water poured out when I tilted it.
The install wasn't too bad, the worst part was trying to un-stick the old axle from the carrier bearing assembly. I made sure to sand down the inside of the assembly before installing the new one, since there was some rust/crud buildup.
I also took the opportunity to remove the camber bolts from the car and install the stock bolts. I want to get it aligned before I sell it, and I didn't feel comfortable selling it with such an aggressive alignment and questionable camber bolts. Yes, I've had no problems auto-xing on camber bolts on my I30 with Hoosiers, but I wanted to play it safe for this car.
Axle nut properly torqued to 200 ft/lbs, new cotter pin, and a job well done. Feels good!
Next up: Detailing, PDR, rust repair, and putting it up for sale!
Last edited by 95maxrider; 09-28-2018 at 01:50 PM.
10-01-2018, 08:56 AM
#80
Believe it or not, I've been wanting to detail this car since I bought it, but more important things have always needed to come first. With the car mechanically sound and the weather cooling off, it was finally time to give this car the detailing it deserved. I spread the work out over two weekends and some weeknights, and I'm still sore as I type this. This was the worst paint I've ever worked with, but I think the effort was worth it. I mainly used Menzerna Intensive Polish for the initial correction, and then one final pass with the Menzerna Final Finish to smooth things out before applying my Klasse Sealant Glaze for protection. The hood was by far the worst part of the car. This is a hood I got from the junkyard, so it was in different condition than the rest of the car. The clear coat had started to fail in the center of the hood, as well as the roof and a section of the trunk. These are the sections that look white or chalky, and had zero gloss to them. I lost count, but I would say I did at least 8 passes on the hood, and 3-4 on the roof and trunk. The rest of the car got one pass with the IP and one with the FF. I also played around with a hot glue PDR kit I bought. While I wasn't able to make dents go away 100%, I was able to make most of them at least 50% less noticeable, and some closer to 80-90% removed. There were an absurd number of little dents on the hood that didn't present themselves until I had brought some gloss back to it, so I had to do PDR in a few stages.
To make viewing the results easier or more fun, I've done my best to arrange the pics in a before/after manner. I hope you can tell the difference without me having to say which is which!
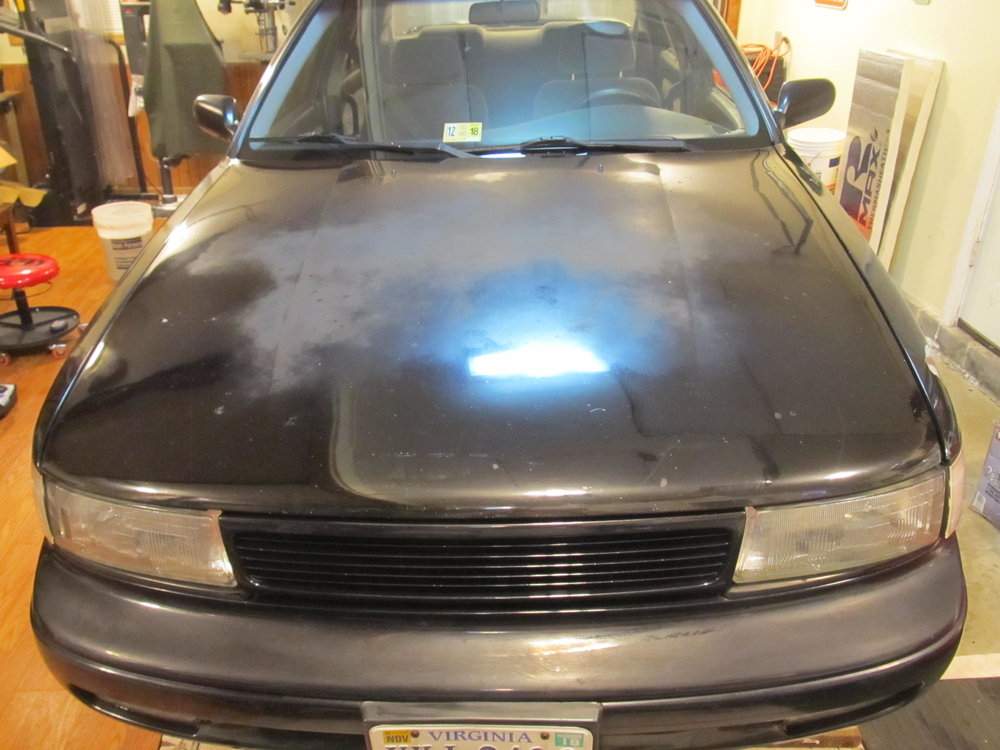
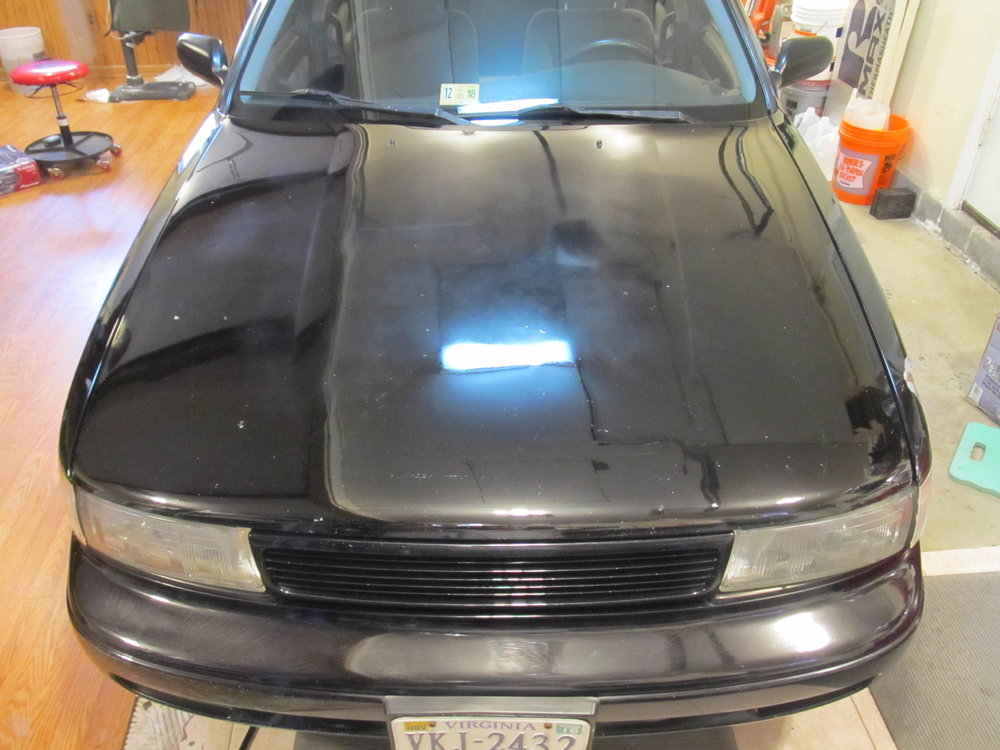
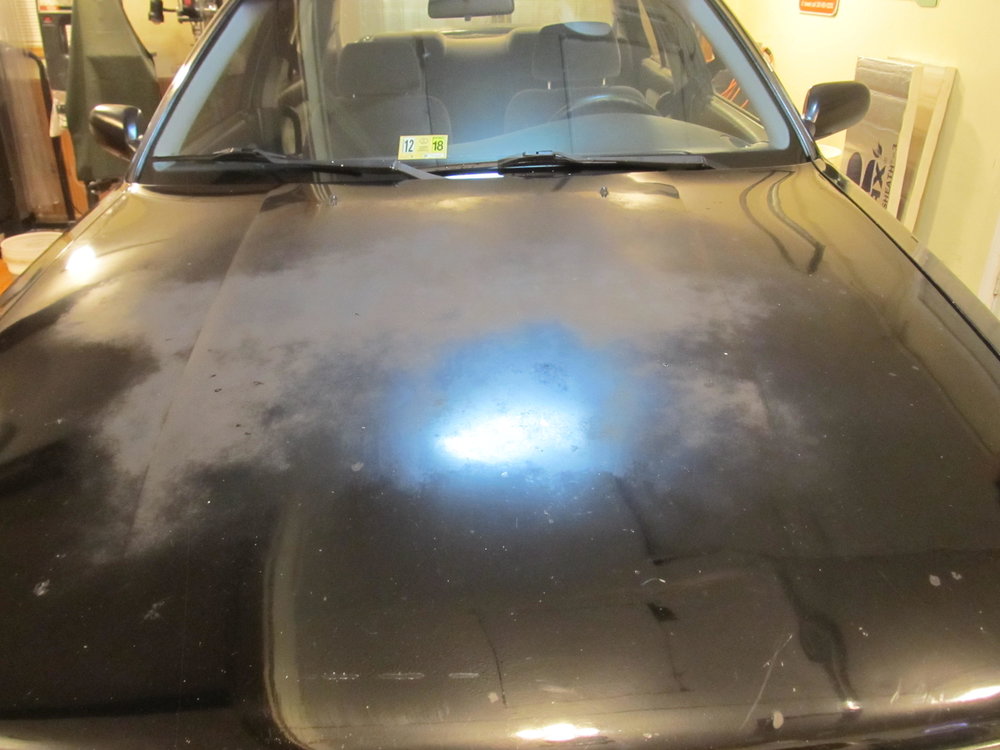
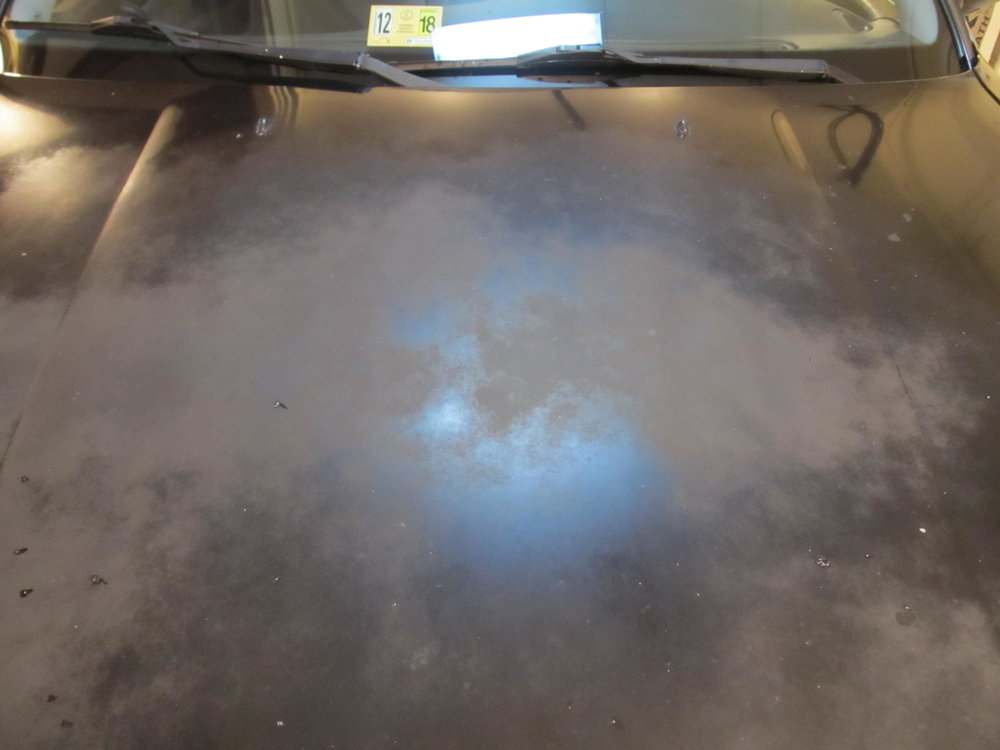

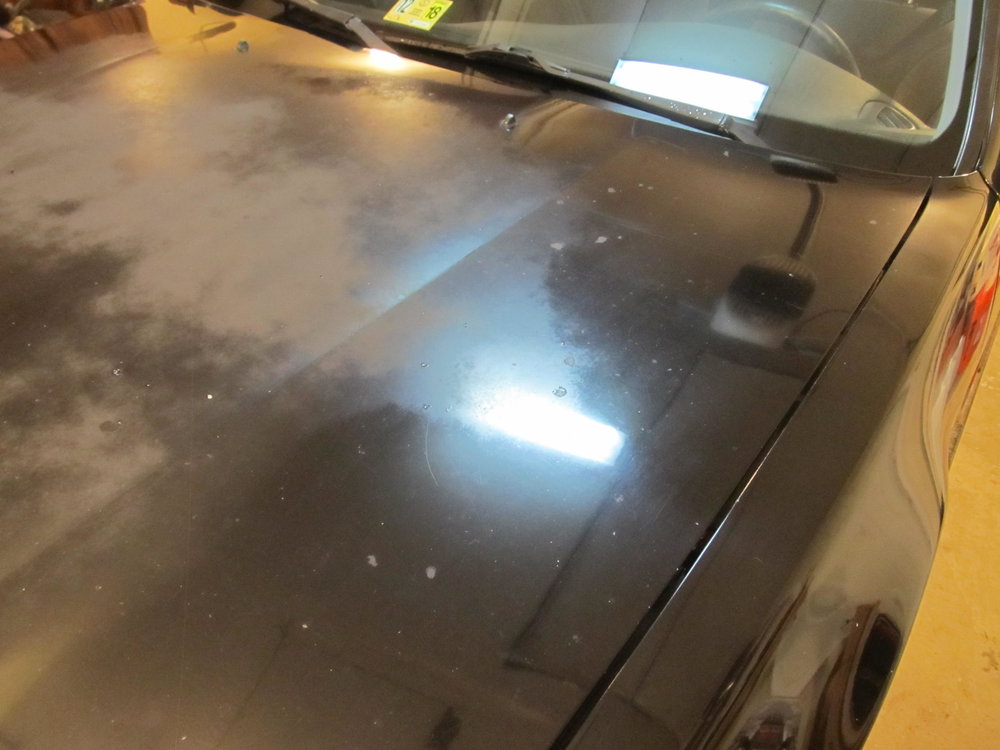
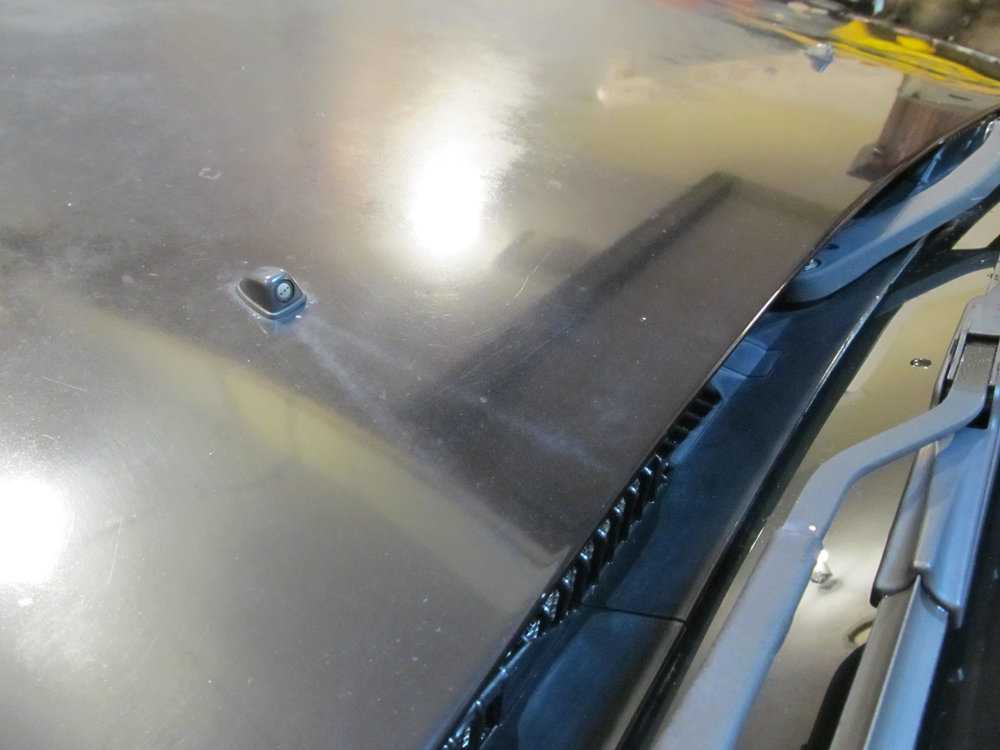

Here's that touch up work I did a month ago (before polish)
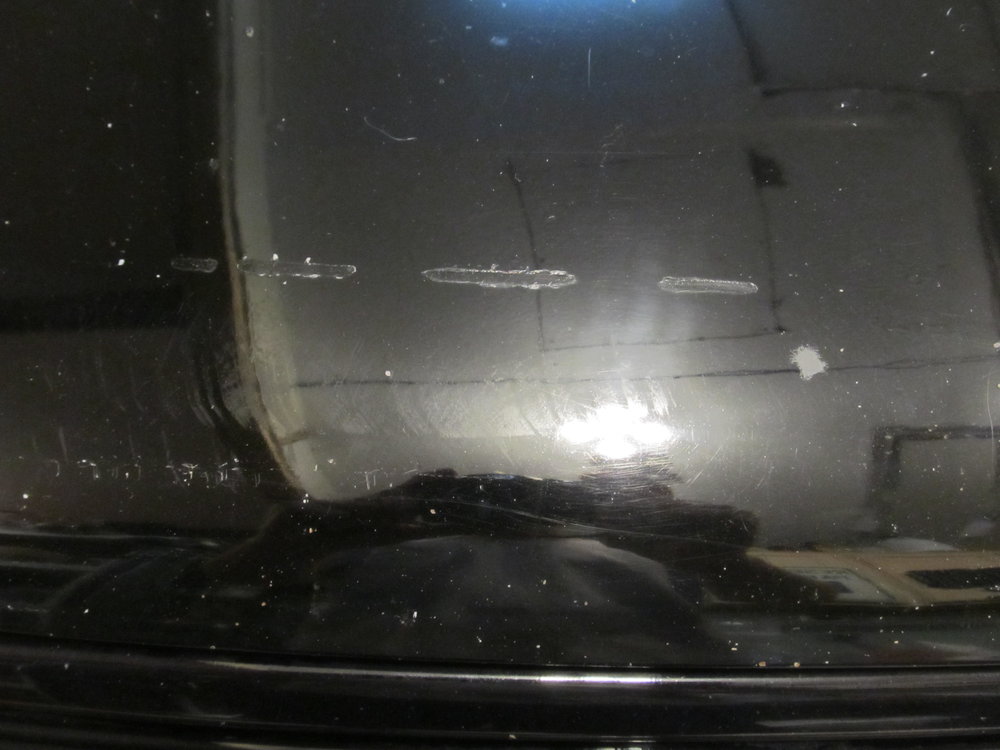
And after:
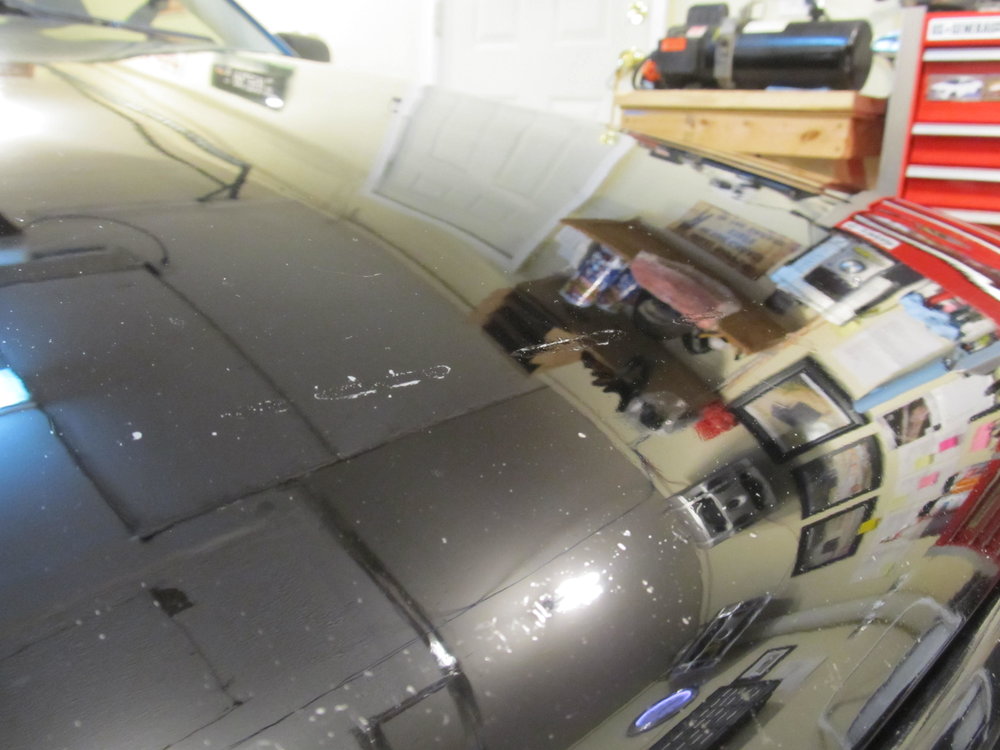
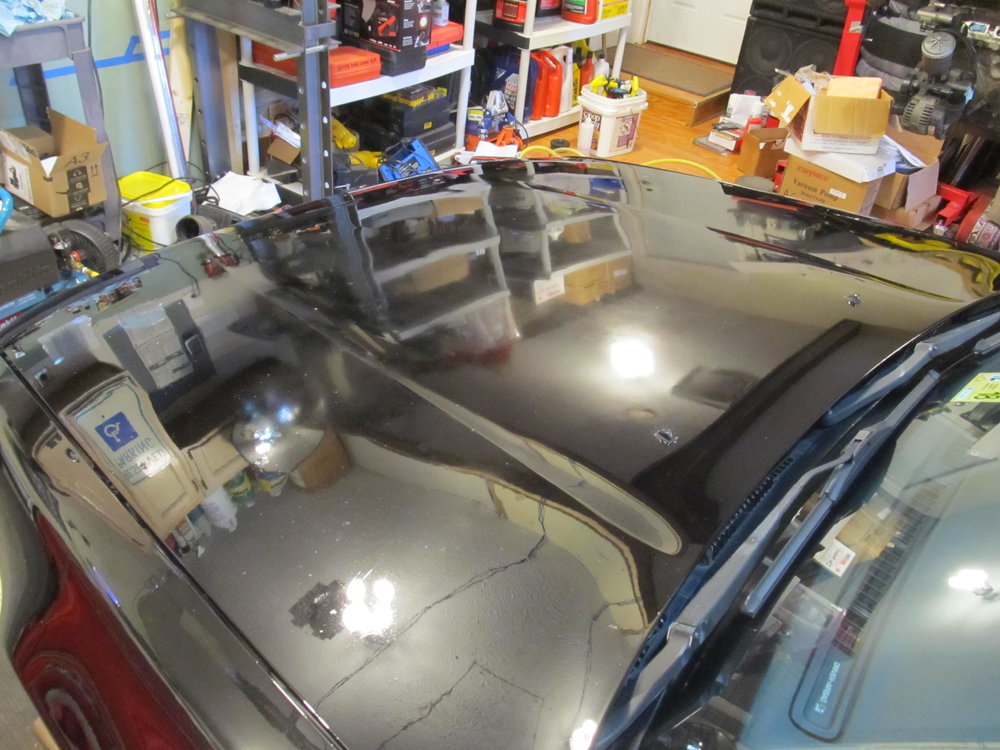
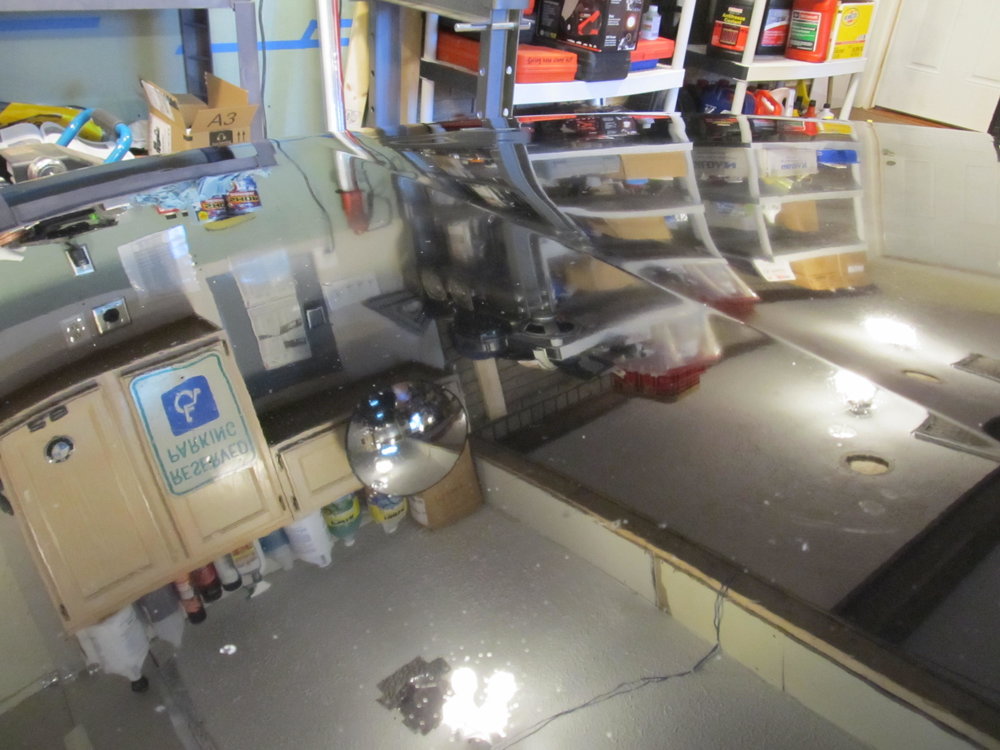

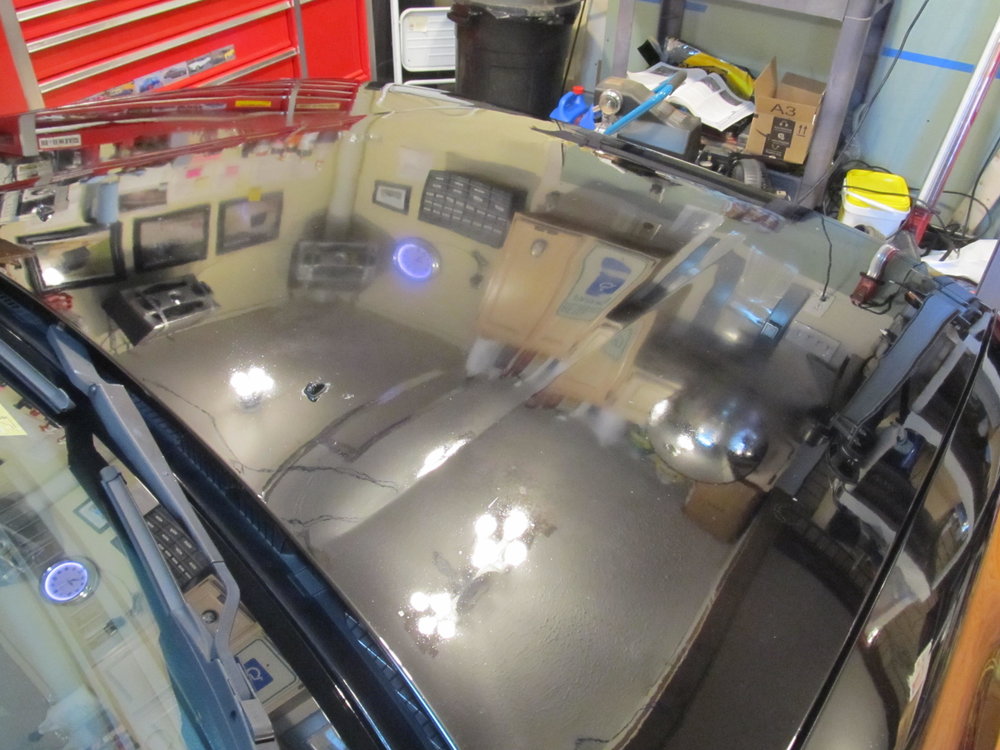

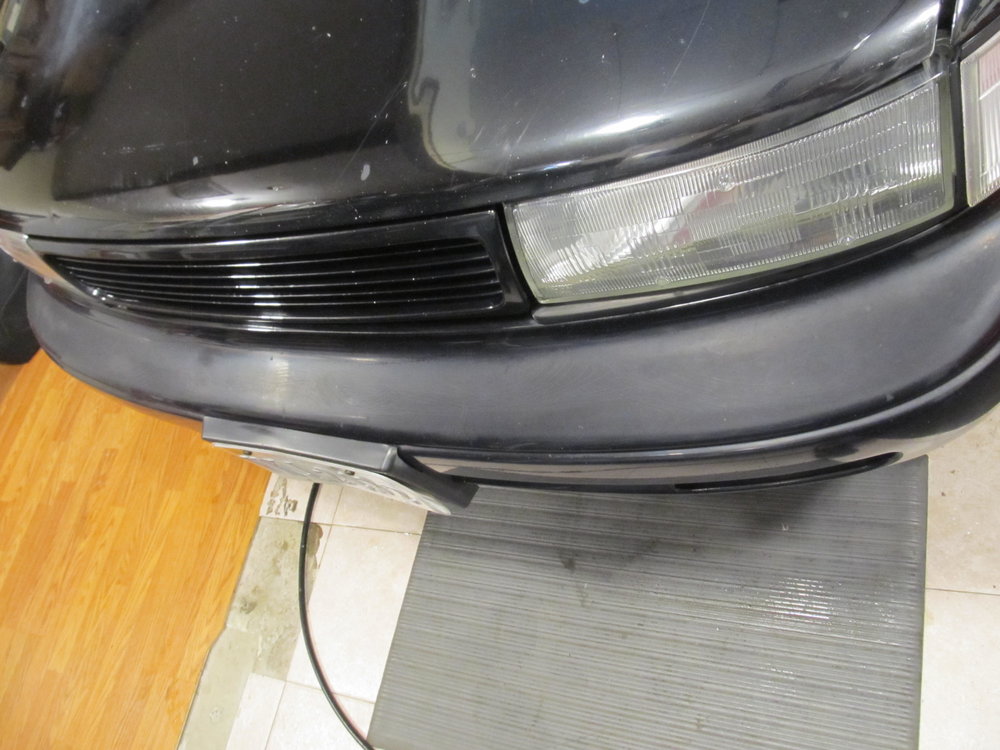
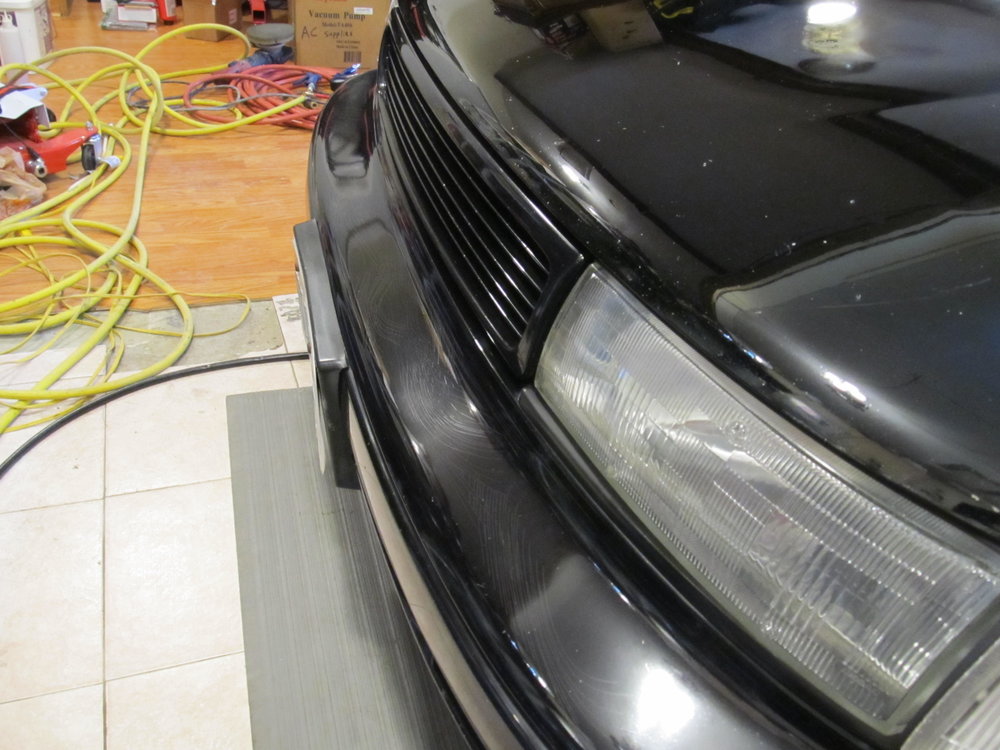
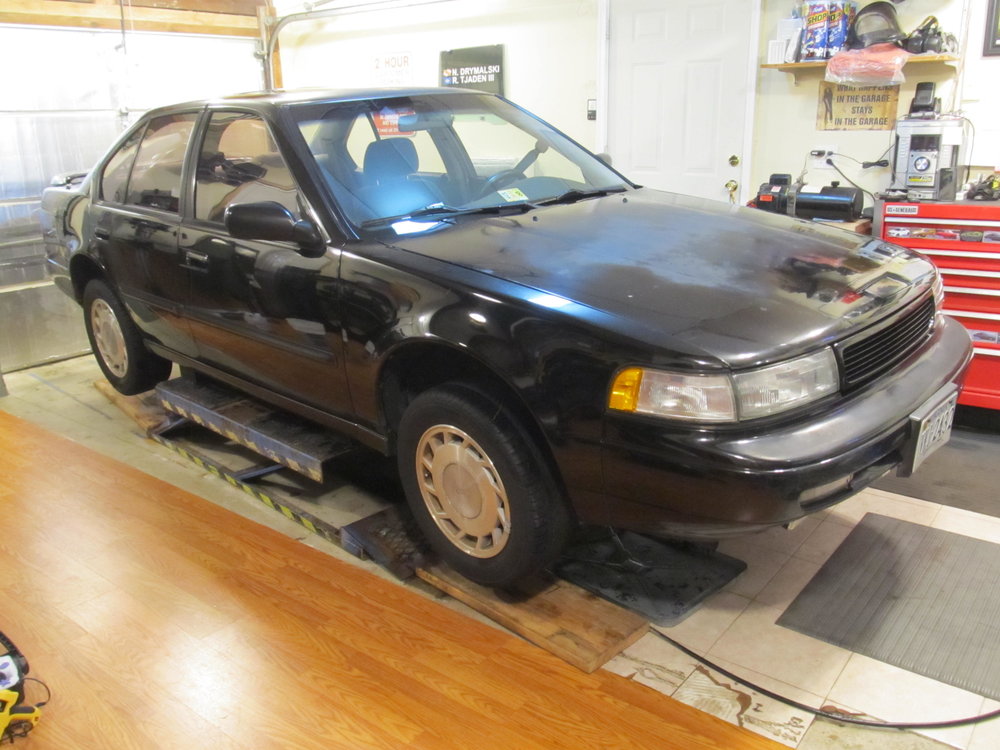
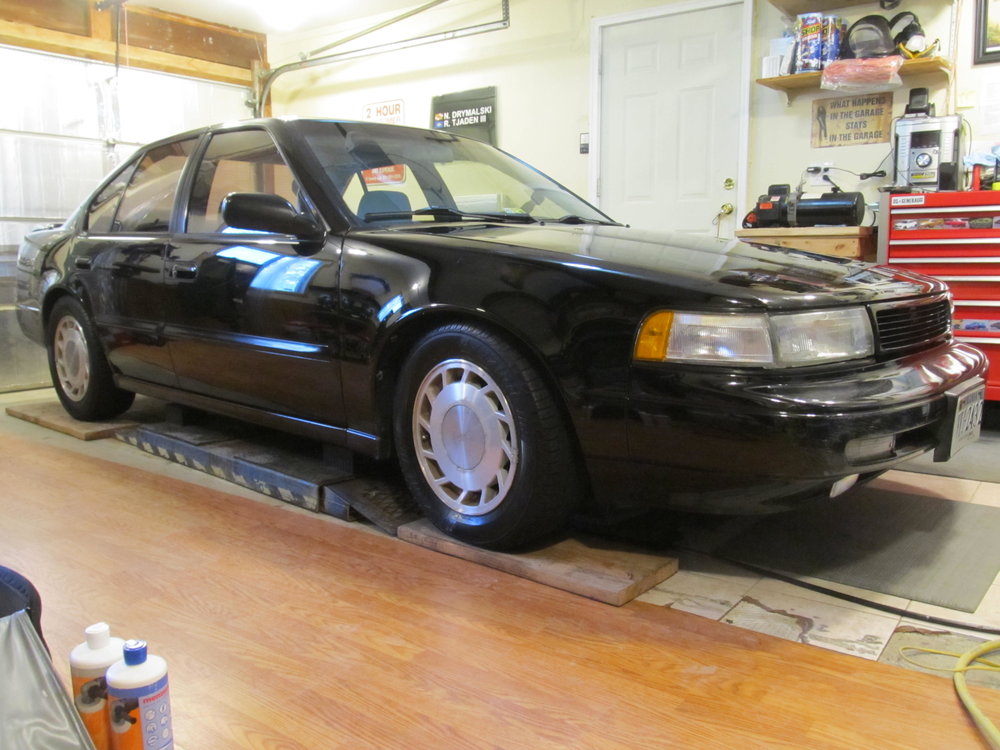
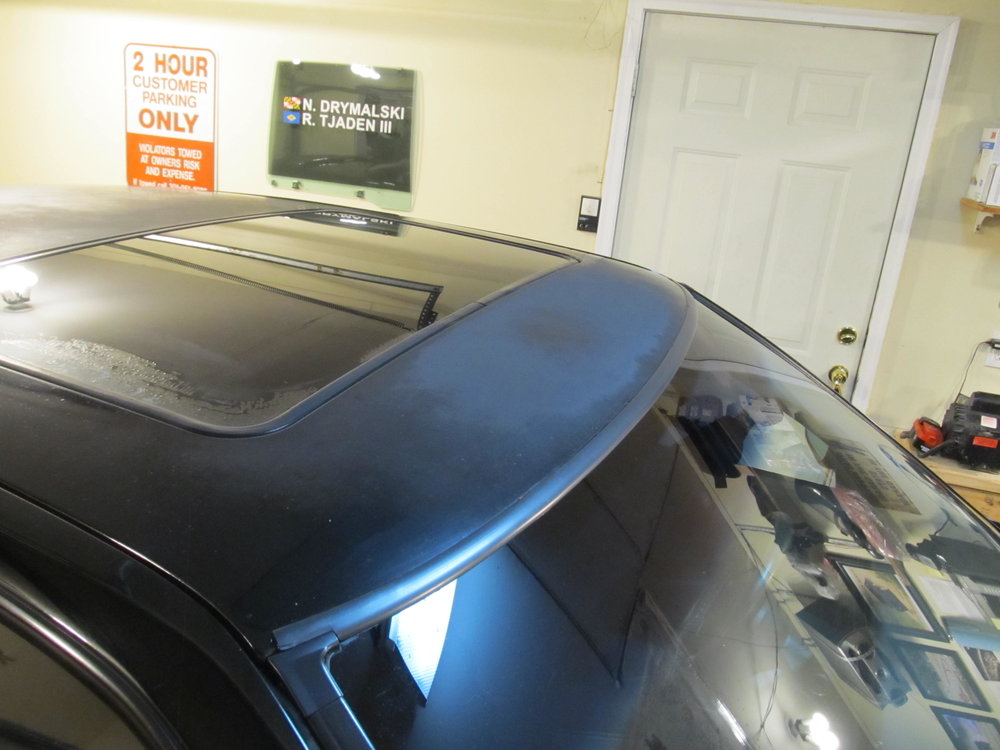
To make viewing the results easier or more fun, I've done my best to arrange the pics in a before/after manner. I hope you can tell the difference without me having to say which is which!
Here's that touch up work I did a month ago (before polish)
And after:

