
HOW-TO: Removing and Installing Exterior Door Handles (picture intensive)


HOW-TO: Removing and Installing Exterior Door Handles (picture intensive)
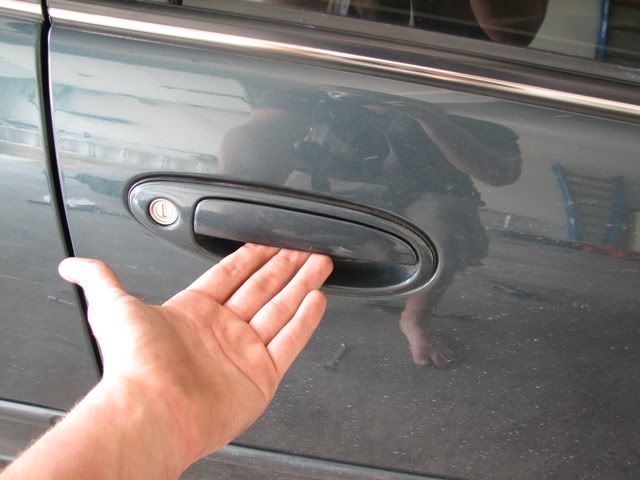
Figured I'd do a write-up because there's next to no information about this procedure on this site. That, and a shop wanted $350 to remove and install - talk about a joke.
This is generally regarded as an extremely frustrating, time-consuming, impossible procedure, but in reality it's quite easy if you know what you're doing and you use a couple tricks I discovered. The driver's side, since I had no idea what I was doing, took me roughly four hours of work, along with many bruises and foul words uttered. However, the passenger's side, even with taking all of these pictures, only took me about an hour.
Following these instructions, I'd say this job's about a 3 out of 10 on a difficulty scale. Don't let a shop gouge you for this job, you can do it without much trouble.
TOOLS NEEDED:
Flathead screwdriver
Small and large phillips head screwdrivers
10 mm socket and extension
Ratchet
10 mm wrench
Optional: Magnetic grabber (bolts like to fall out of your hands and into the door crevices...this helps.)

Okay, let's get started!
This is generally regarded as an extremely frustrating, time-consuming, impossible procedure, but in reality it's quite easy if you know what you're doing and you use a couple tricks I discovered. The driver's side, since I had no idea what I was doing, took me roughly four hours of work, along with many bruises and foul words uttered. However, the passenger's side, even with taking all of these pictures, only took me about an hour.
Following these instructions, I'd say this job's about a 3 out of 10 on a difficulty scale. Don't let a shop gouge you for this job, you can do it without much trouble.
TOOLS NEEDED:
Flathead screwdriver
Small and large phillips head screwdrivers
10 mm socket and extension
Ratchet
10 mm wrench
Optional: Magnetic grabber (bolts like to fall out of your hands and into the door crevices...this helps.)
Okay, let's get started!
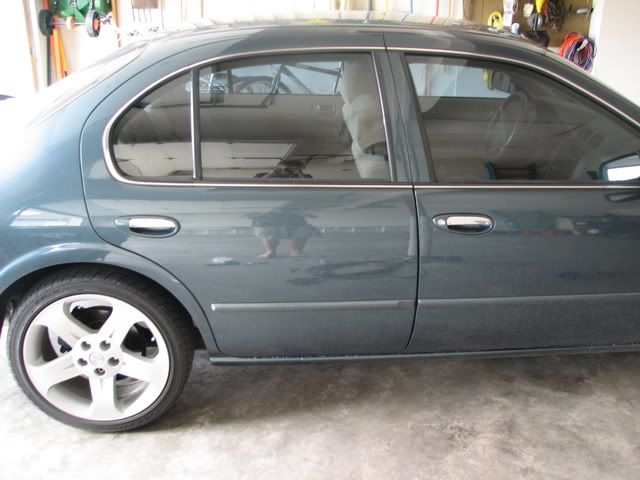
FRONT DOOR
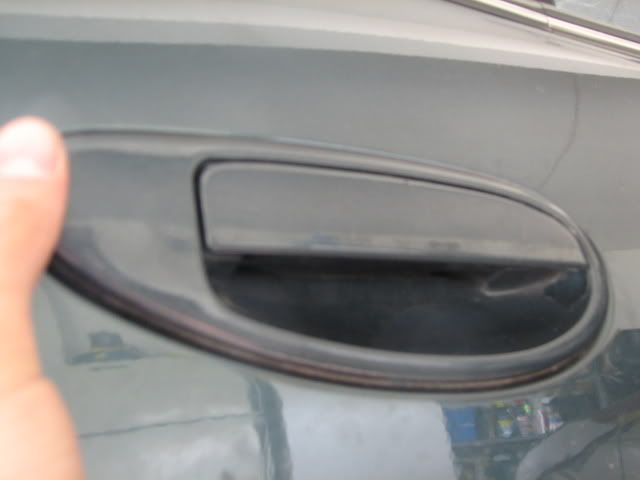
1. Make sure the window is rolled up before beginning work.
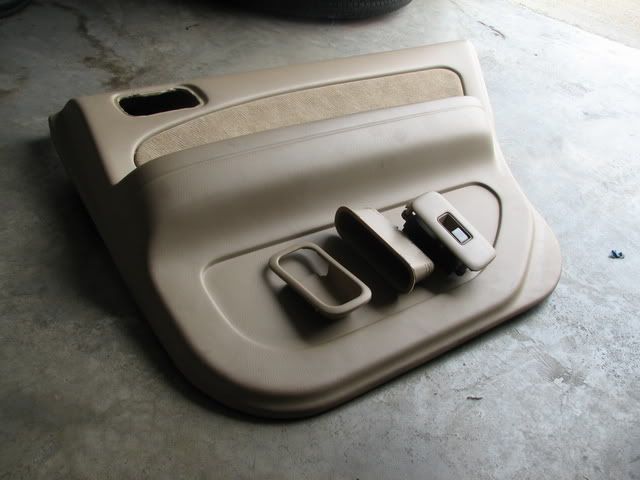
2. Remove all accessories on the inner door panel. Pop the handle trim off with a flathead. Be gentle, as it will snap with too much force. Remove the cup handle's screw and pop it out. Use a flathead to remove the window switch. Undo the connector and set it aside. Remove the light's lens, remove the two screws, and undo the connector.
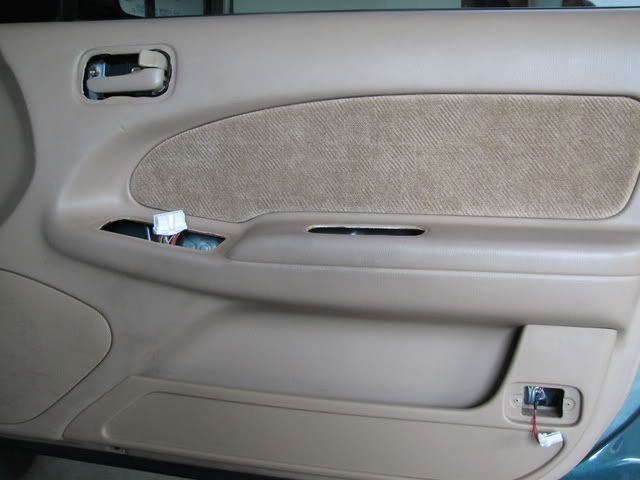
3. Remove the two screws on the bottom of the door panel.
4. Remove the door panel. It is held in by a bunch of snap-in pieces that Nissan likes to use everywhere. Lift it upwards and away and set it aside with all of its accessories. (note: the driver's side has an extra connector on the back for the trunk popper. Remove it.)
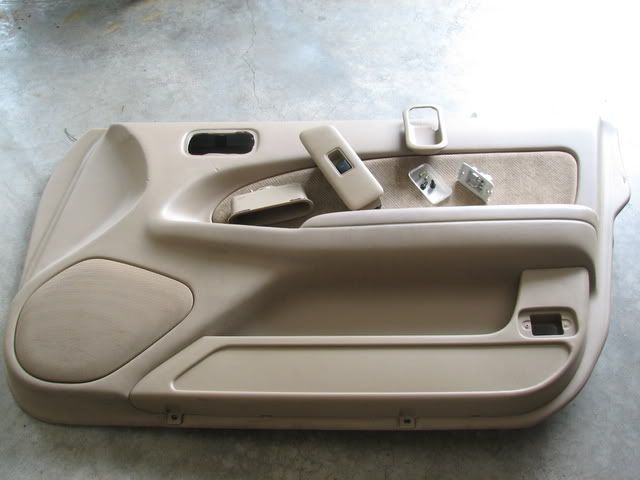
5. You should now be looking at the door with the panel removed.
1. Make sure the window is rolled up before beginning work.
2. Remove all accessories on the inner door panel. Pop the handle trim off with a flathead. Be gentle, as it will snap with too much force. Remove the cup handle's screw and pop it out. Use a flathead to remove the window switch. Undo the connector and set it aside. Remove the light's lens, remove the two screws, and undo the connector.
3. Remove the two screws on the bottom of the door panel.
4. Remove the door panel. It is held in by a bunch of snap-in pieces that Nissan likes to use everywhere. Lift it upwards and away and set it aside with all of its accessories. (note: the driver's side has an extra connector on the back for the trunk popper. Remove it.)
5. You should now be looking at the door with the panel removed.
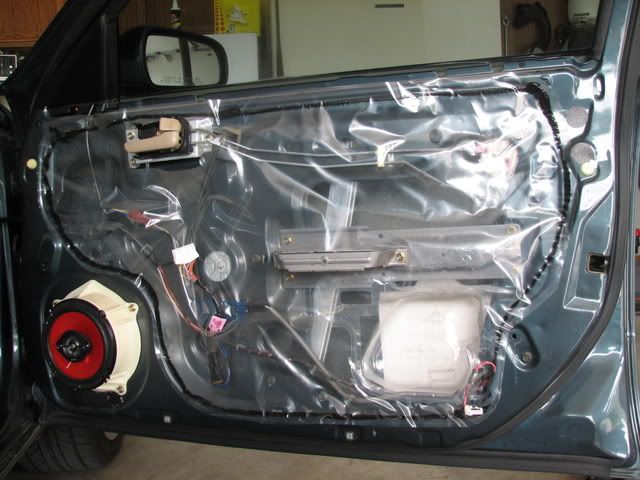
6. Start peeling away the weather covering. It is sealed with a black goop. Try to conserve the integrity of the goop so you don't have to apply more sealant when you replace the covering.

7. Peel away enough to give you some room to work with.
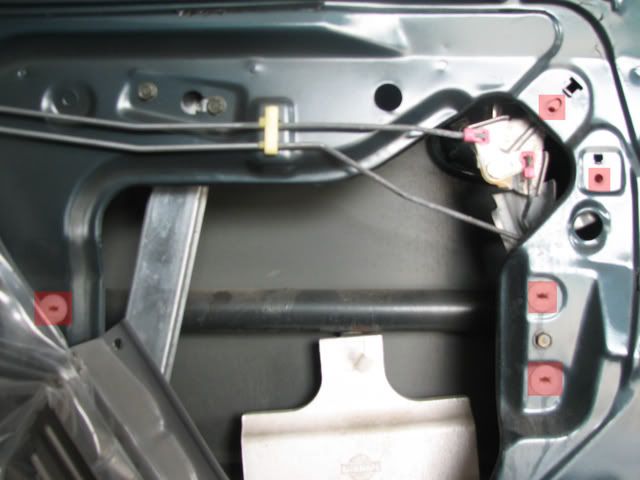
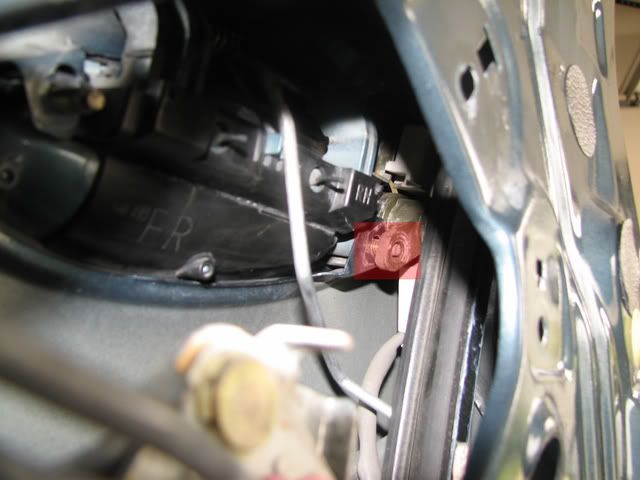
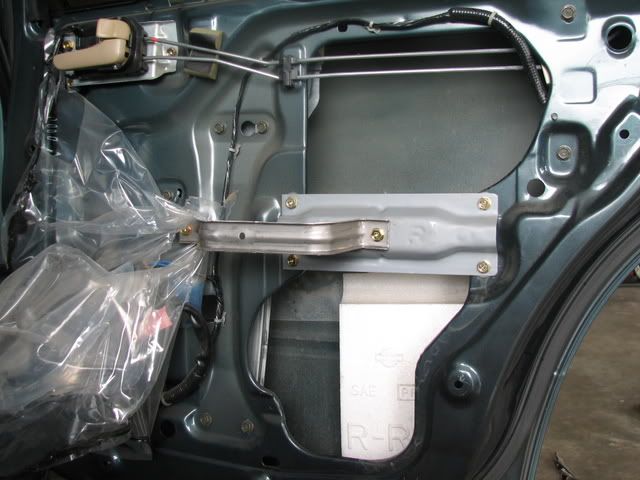
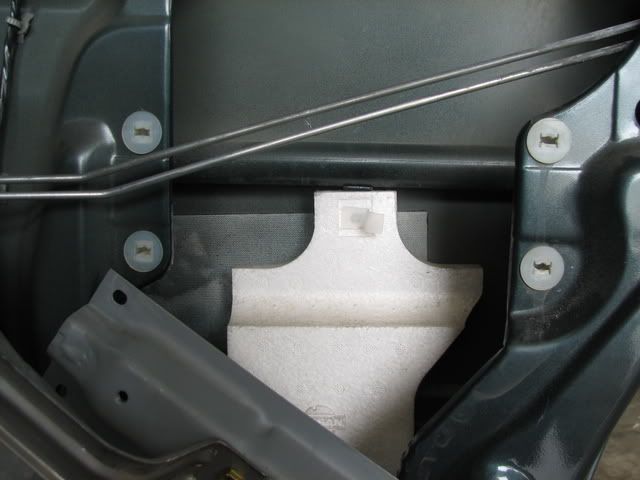
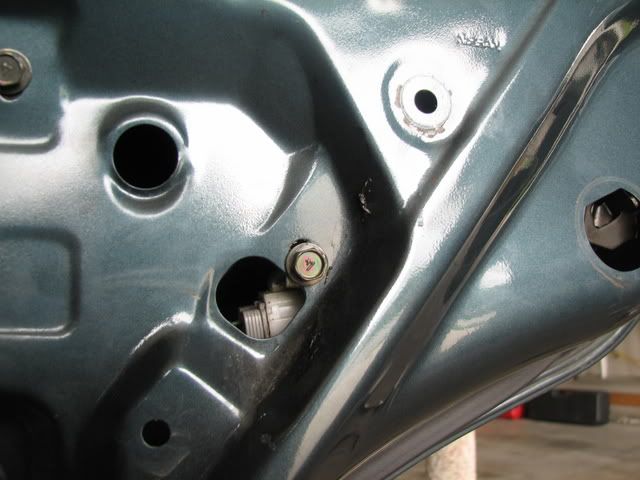
8. Remove the bolts highlighted in the picture below - 5 in total. Push the middle bar downwards and out of the way.
7. Peel away enough to give you some room to work with.
8. Remove the bolts highlighted in the picture below - 5 in total. Push the middle bar downwards and out of the way.
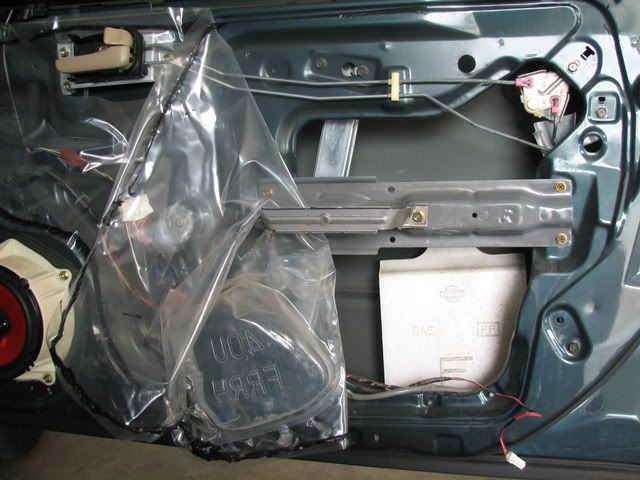
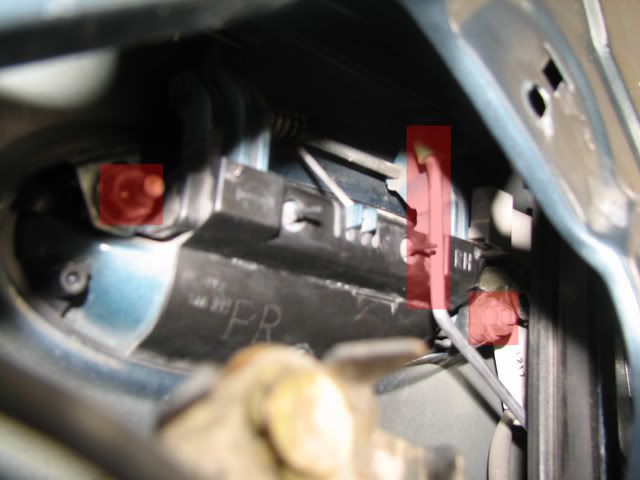
9. Remove the lower bolt holding this metal piece in and remove it.
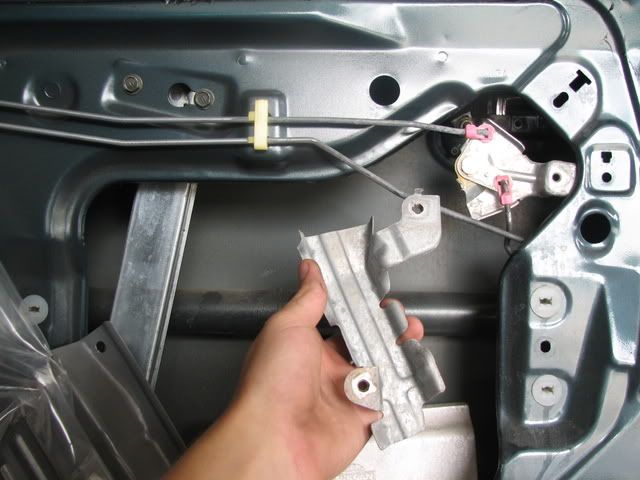
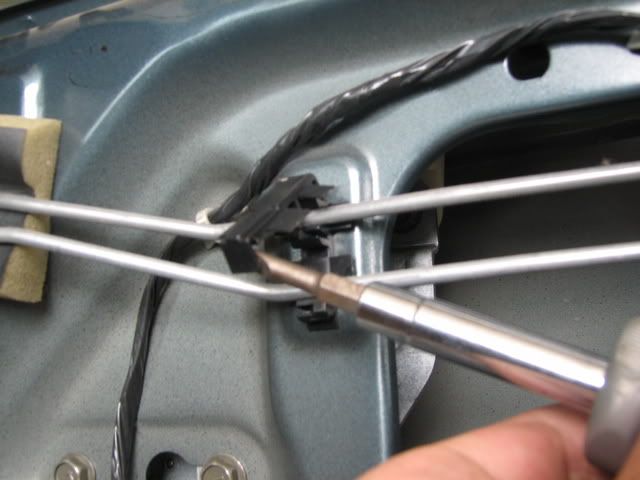
10. Unclip the whiteish-yellow piece holding the two bars in place. Move the assembly downward and out of the way.
11. Remove the left nut holding the handle in place.
10. Unclip the whiteish-yellow piece holding the two bars in place. Move the assembly downward and out of the way.
11. Remove the left nut holding the handle in place.
12. Use the 10 mm wrench to remove the right nut holding the handle in place.

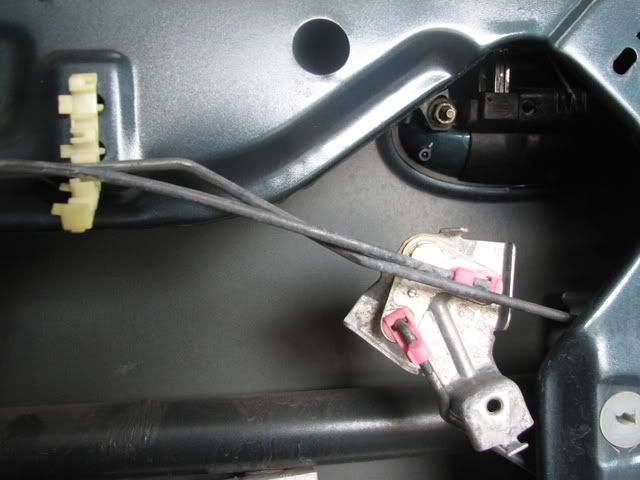
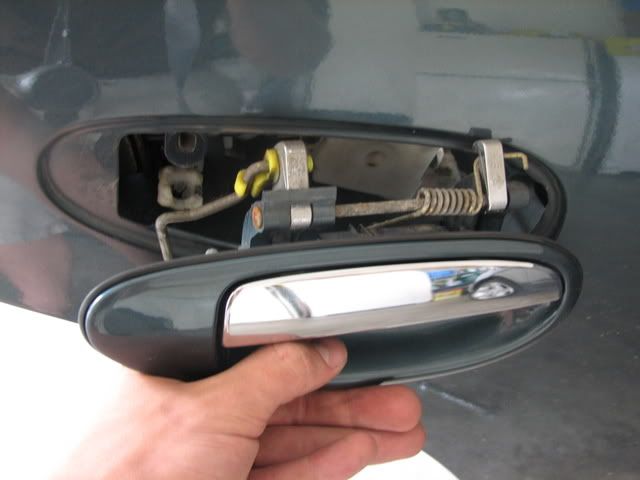
13. Pull out the bar inserted into the handle, shown removed below:
14. Remove the handle from the outside.
13. Pull out the bar inserted into the handle, shown removed below:
14. Remove the handle from the outside.
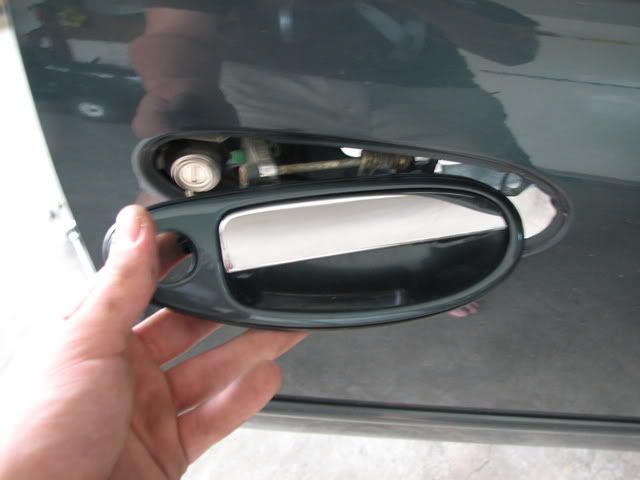
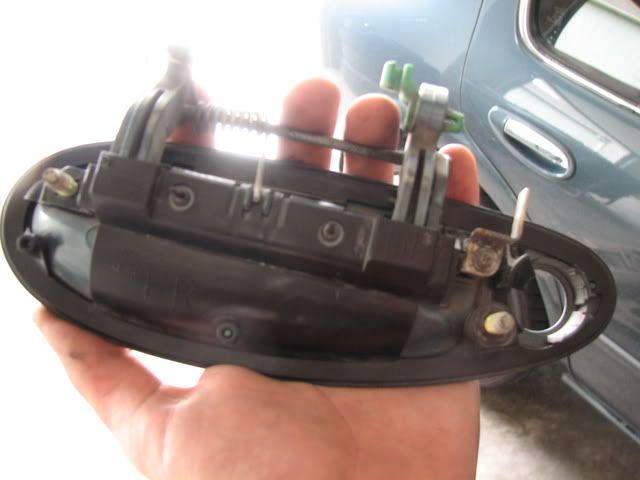
15. Examine the replacement handle. Make sure it operates correctly and has everything installed on the reverse side.
16. Insert the handle most of the way into the door.
17. On the back side, line up the bracket for the keyhole with the bolt on the back of the handle. It won't go all of the way through yet, as the keyhole is not inserted into the handle.
16. Insert the handle most of the way into the door.
17. On the back side, line up the bracket for the keyhole with the bolt on the back of the handle. It won't go all of the way through yet, as the keyhole is not inserted into the handle.
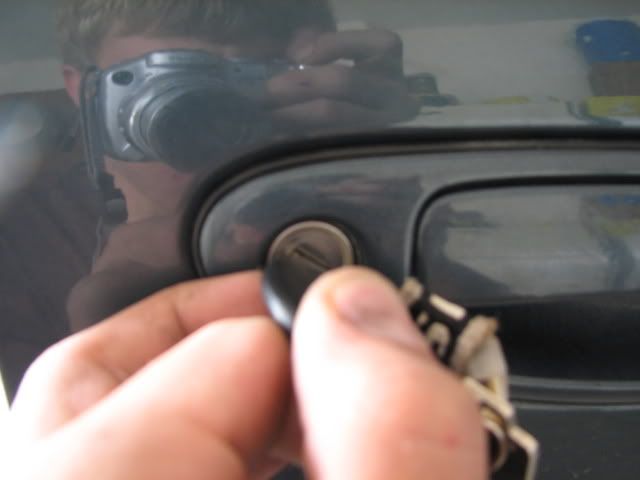
18. I found that the keyhole is almost impossible to push into the handle. I figured out the best way to do it is to take your key and insert it into the keyhole and turn it left. This locks the key in the hole, enabling you to pull it through the handle.
19. You can now thread and tighten the right nut, which will pull the keyhole all of the way through. Don't forget to remove your key afterwards! Reinstall the left nut and insert the latch rod back into the handle.
20. MAKE SURE THE HANDLE WORKS before continuing work. If it doesn't, recheck that the latch rod is installed correctly.
21. Reinstall the removed metal plate. Move the large metal bracket back upwards and reinstall all bolts. Don't forget to re-fasten the white-ish yellow bar guide.
22. Double check that everything has been re-installed, then replace the weather covering. Make sure the sealant is applied so no water can get through.
23. Reinstall the door panel and all accessories.
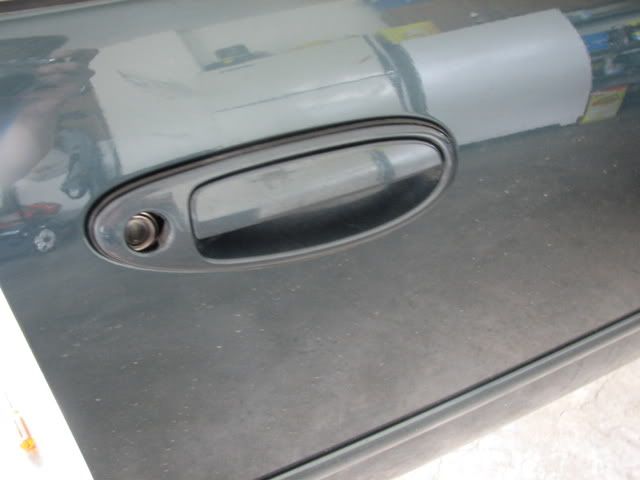
24. You're done with the front side!
23. Reinstall the door panel and all accessories.
24. You're done with the front side!
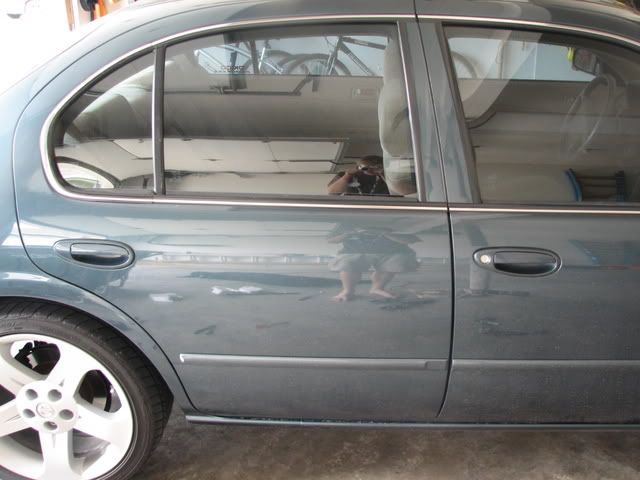
REAR DOOR
Some steps here are similar to the front door procedure - if instructions are vague, refer to steps above.
1. Make sure the window is rolled up before beginning work.
2. Remove all accessories on the inner door panel. Remove door panel and set aside with accessories.
3. Peel away the majority of the weather covering - you'll need a lot of room to work.
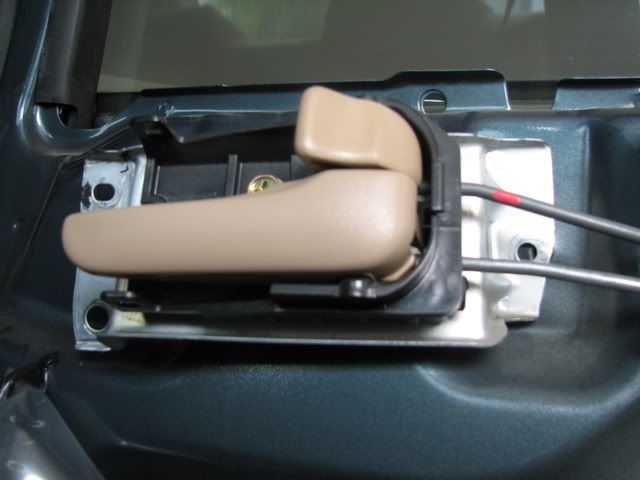
4. Remove the three bolts holding the inner handle in place.
Some steps here are similar to the front door procedure - if instructions are vague, refer to steps above.
1. Make sure the window is rolled up before beginning work.
2. Remove all accessories on the inner door panel. Remove door panel and set aside with accessories.
3. Peel away the majority of the weather covering - you'll need a lot of room to work.
4. Remove the three bolts holding the inner handle in place.
5. Unclip the black plastic guide and remove the bars.
6. You can access the left nut holding the outer handle in place with the socket and extension. Remove it.
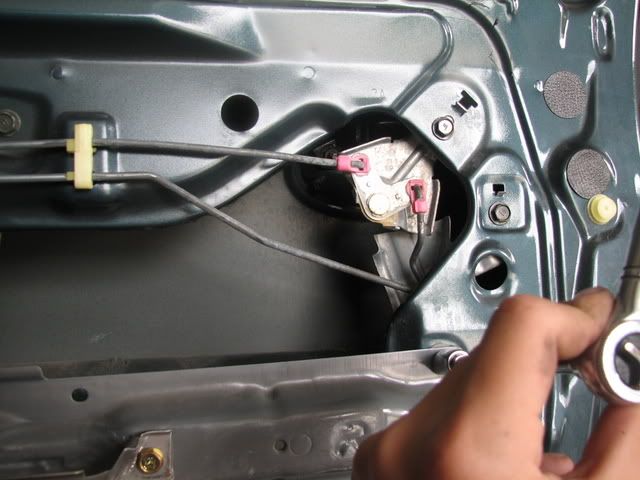
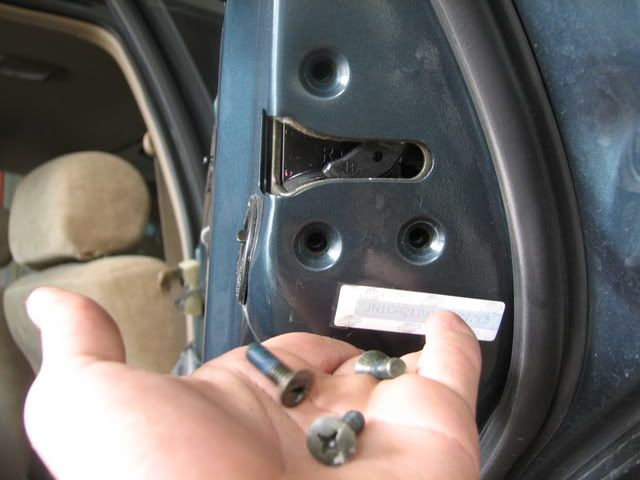
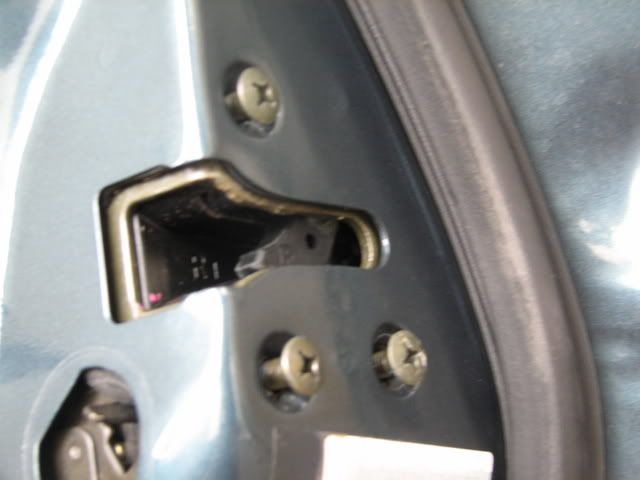
7. Remove the three screws holding the latch assembly on the side of the door.
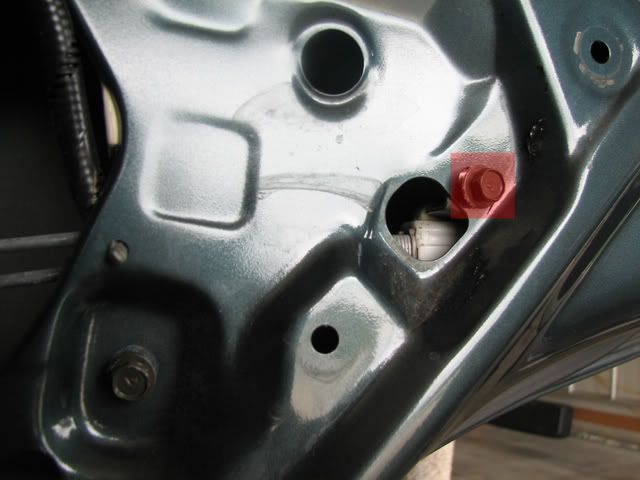
8. Remove the bolt highlighted in the below picture. The latch and rod assembly will come loose.
6. You can access the left nut holding the outer handle in place with the socket and extension. Remove it.
7. Remove the three screws holding the latch assembly on the side of the door.
8. Remove the bolt highlighted in the below picture. The latch and rod assembly will come loose.
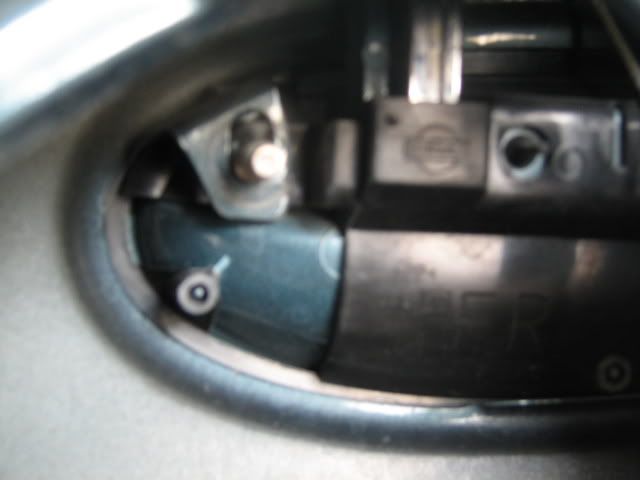
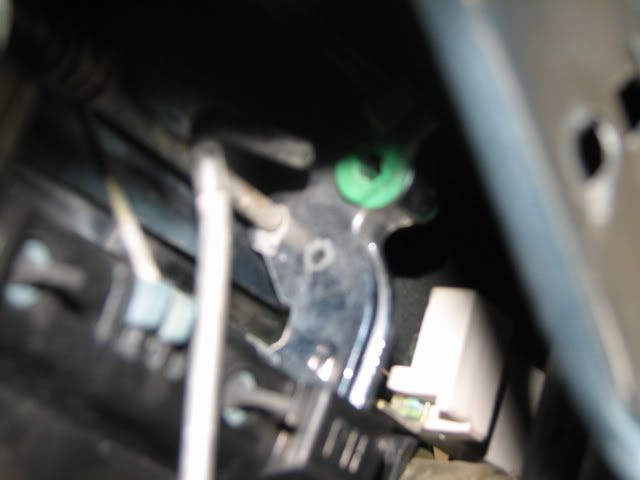
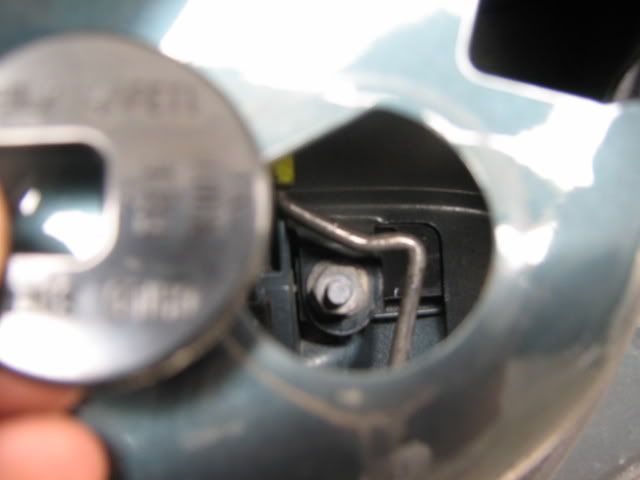
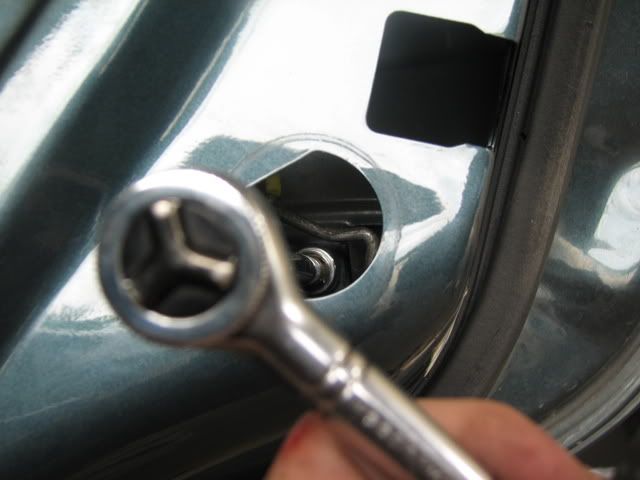
9. Remove the black "child safety" plastic piece. If the latch and rod assembly is moved to the side enough, the right nut for the handle will be visible through this hole. Remove it with the socket and extension.
10. Remove the handle, with the latch rod, through the other side.
11. Examine the new handle. Make sure the handle operates. Make sure it contains the latch rod - if not, install the one from the old handle.
12. Fit the new handle into the door.
10. Remove the handle, with the latch rod, through the other side.
11. Examine the new handle. Make sure the handle operates. Make sure it contains the latch rod - if not, install the one from the old handle.
12. Fit the new handle into the door.
13. Reinstall the right nut through the child safety hole. Move the latch and rod assembly if needed to install the left nut.
14. Remove the 4 bolts holding in the large metal bracket and push it downwards, out of the way.
15. Reinstall this bolt into the assembly finger tight to hold the assembly in place.
14. Remove the 4 bolts holding in the large metal bracket and push it downwards, out of the way.
15. Reinstall this bolt into the assembly finger tight to hold the assembly in place.
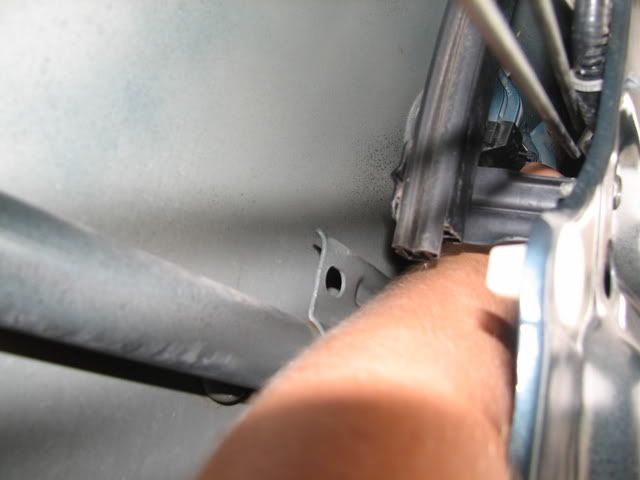
16. Here's where it gets tricky. Remember the latch rod that goes from the outer handle to the latch and makes the outer handle work? That couldn't be installed until now because the left and right nuts for the handle had to be installed first. This has to be done by feel, and it helps to have a long arm. Stick your arm along the bottom of the door, upwards until you feel the latch rod. Grab it, then feel around for a lever with a hole in it. Push this lever down and insert the rod into the hole. It's too far back to get a picture, but feel around and you can get it.
The proper way to run your arm up there:
17. Once the latch rod is in place, reinstall the three screws for the latch.
18. MAKE SURE THE HANDLE WORKS before continuing work. If it doesn't, recheck that the latch rod is installed correctly.
The proper way to run your arm up there:
17. Once the latch rod is in place, reinstall the three screws for the latch.
18. MAKE SURE THE HANDLE WORKS before continuing work. If it doesn't, recheck that the latch rod is installed correctly.
19. Re-tighten the bolt you hand-tightened. Replace the inner rods in the black keeper and snap it shut. Reinstall the three bolts for the inner handle. Replace the large metal bracket and install the 4 bolts. Make sure all screws and bolts are reinstalled and tight.

20. Replace the weather covering.
21. Reinstall the door panel and accessories.
22. You're done with the rear side!
20. Replace the weather covering.
21. Reinstall the door panel and accessories.
22. You're done with the rear side!


wow awesome write up! and what a BIG PITA to remove just the handles.
did you paint those or buy new ones of your body color?
i thought about changing mine to black, but its kinda grown on me, i actually like the chrome now, just adds a bit of contrast to the car
did you paint those or buy new ones of your body color?
i thought about changing mine to black, but its kinda grown on me, i actually like the chrome now, just adds a bit of contrast to the car
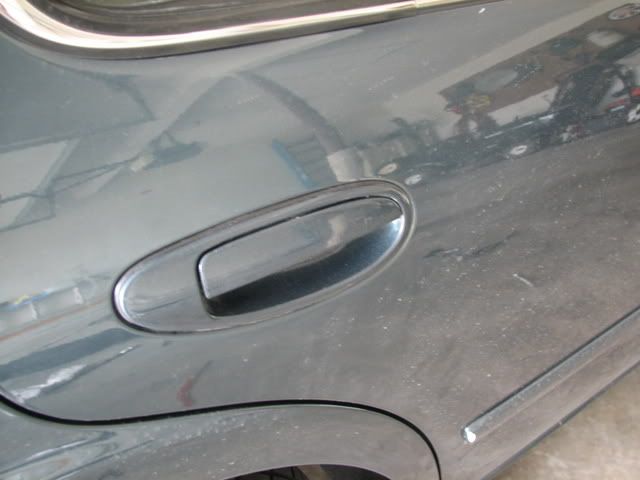
I bought a set off of a FS0 SE. I was originally going to have them painted, but I figured they'd start flaking after a couple of months because the handles get used every day.


Actually there the same size and you can use the front door latch setup. The front bolt is in a different spot but the rear bolt is in the correct spot. I have done it and only used the one bolt/nut to secure it to the door with no problems but I hardly have any passengers. You can make a bracket for the front bolt/nut very easily.


I threw the door handles, moldings, and side view mirror back on the right doors today after painting them last week. I'll be doing the left doors sometime this week.
Great Writeup!

Thread
Thread Starter
Forum
Replies
Last Post
MAXSE5SPD
Other For Sale/Wanted
2
Aug 23, 2015 12:06 PM