
96 Maxima Bearing swap - DIY w/PICs


96 Maxima Bearing swap - DIY w/PICs
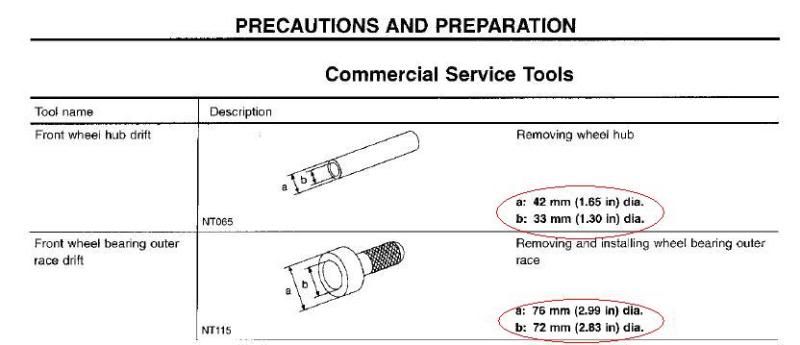
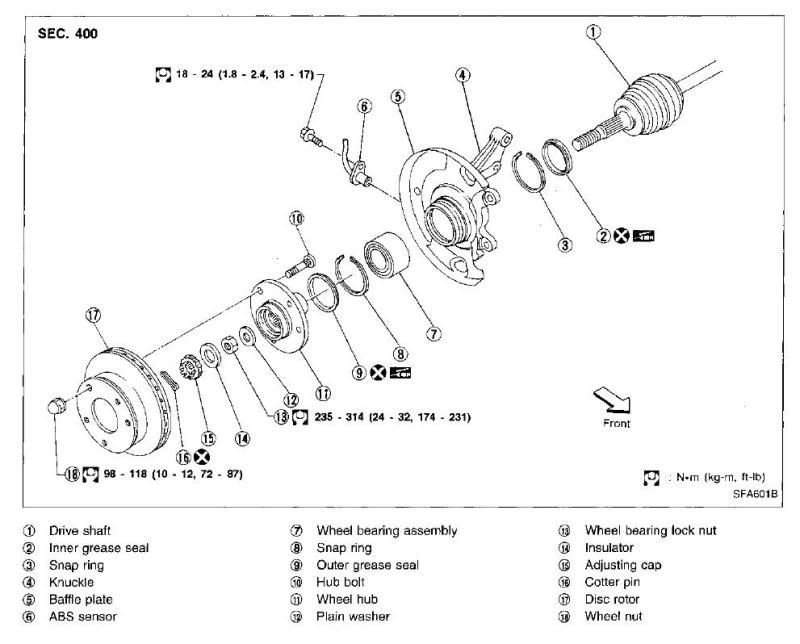
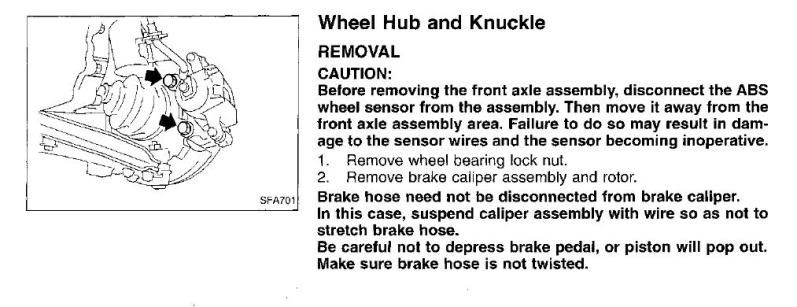
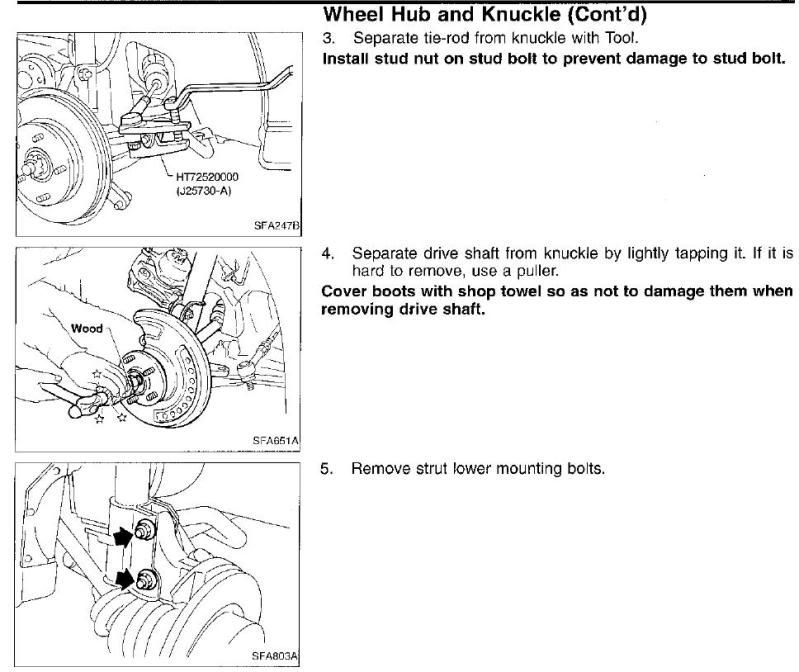
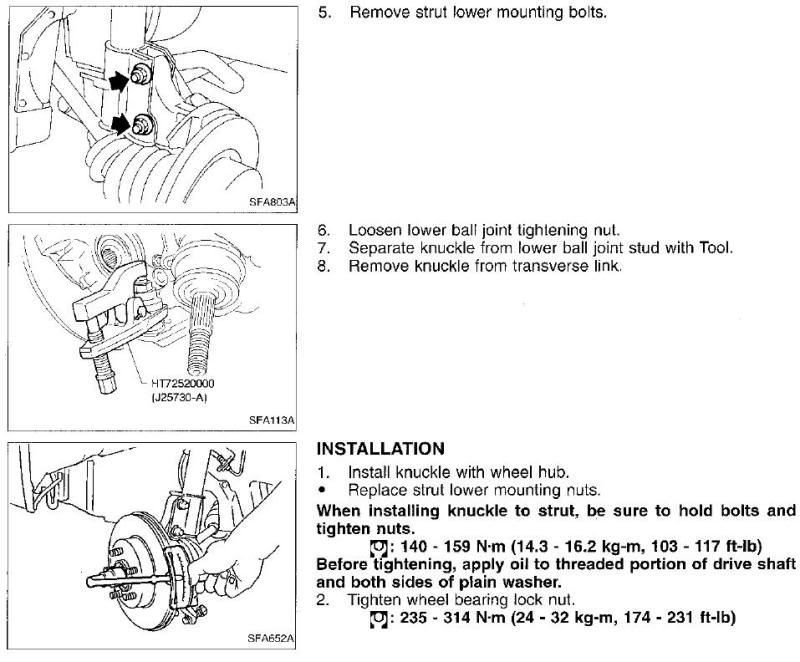
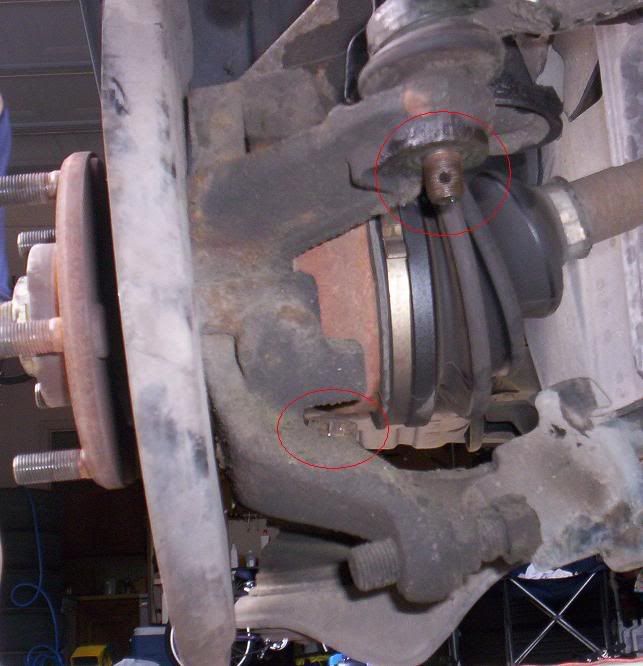
I know theres a DIY out there already but here it goes. This is from the FSM and gives you an idea of what you need to complete this job.
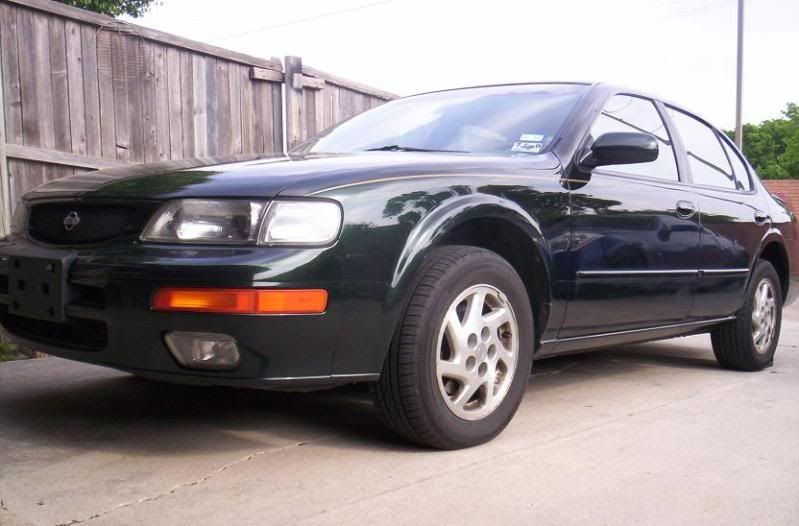
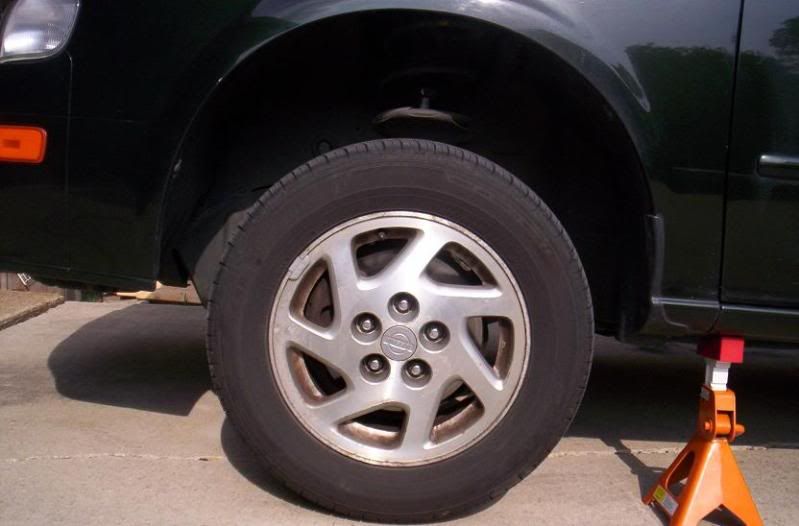
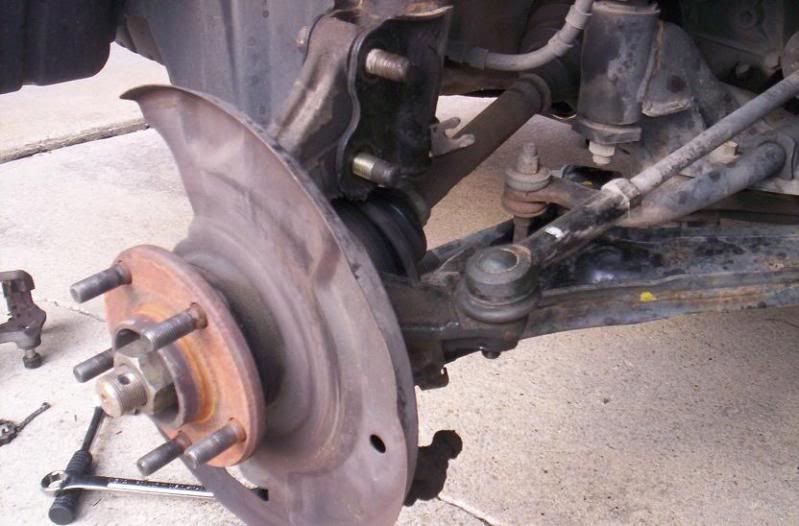
And here are some pics of my swap. I did this for someone who didnt want to pay out the a$$ at a shop or a stealership. Im no mechanic but I love to turn some wrenches and Im all about some DIY. So with that being said - do this at your own risk - I claim NO responsibility for any screwup that may happen cause if you follow the FSM and have the right tools - this is a cake swap.
And here are some pics of my swap. I did this for someone who didnt want to pay out the a$$ at a shop or a stealership. Im no mechanic but I love to turn some wrenches and Im all about some DIY. So with that being said - do this at your own risk - I claim NO responsibility for any screwup that may happen cause if you follow the FSM and have the right tools - this is a cake swap.
Last edited by AcidJake75; Apr 19, 2010 at 07:21 PM.

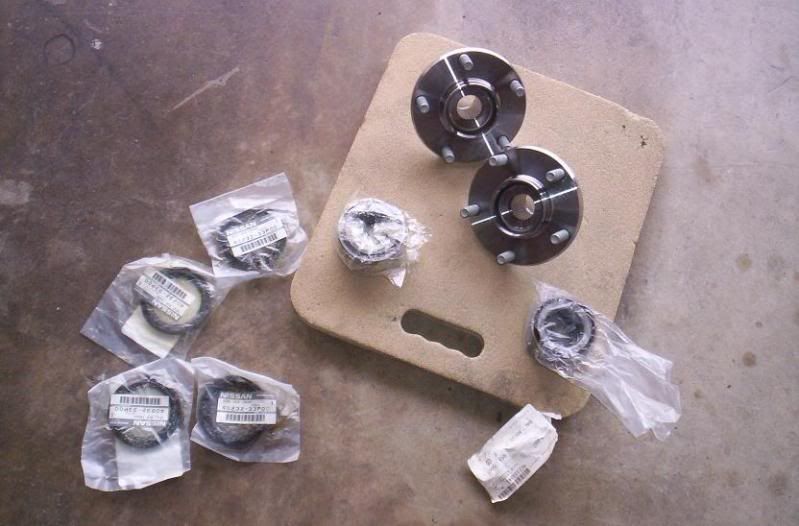
[40202M] HUB ASSY-ROAD WHEEL,FRONT - Your Price: $64.89 x 2
Product SKU: 40202-A32B002
[40210] BEARING ASSY-FRONT WHEEL - Your Price: $57.04 x 2
Product SKU: 40210-A32B001
[40232] GREASE SEAL
Fits this vehicle: Maxima (A32B) - Your Price: $14.59 x 4
Product SKU: 40232-A32B003
This is from courtesyparts.com
Last edited by AcidJake75; Apr 19, 2010 at 06:56 PM.
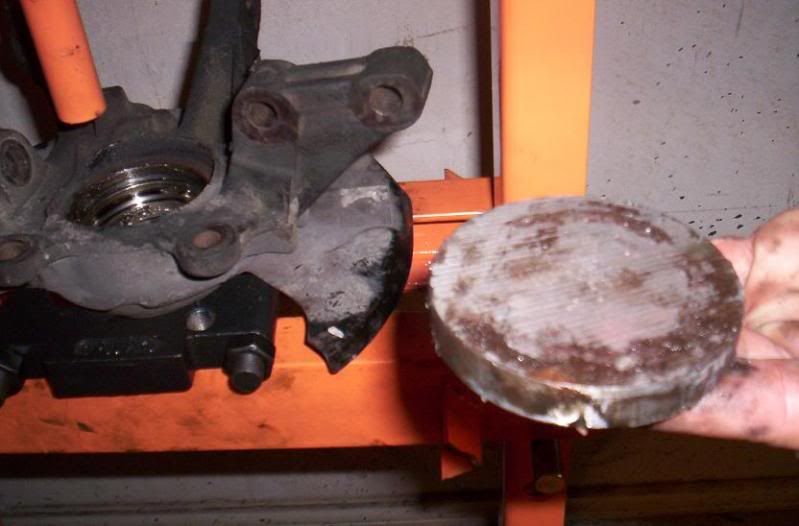
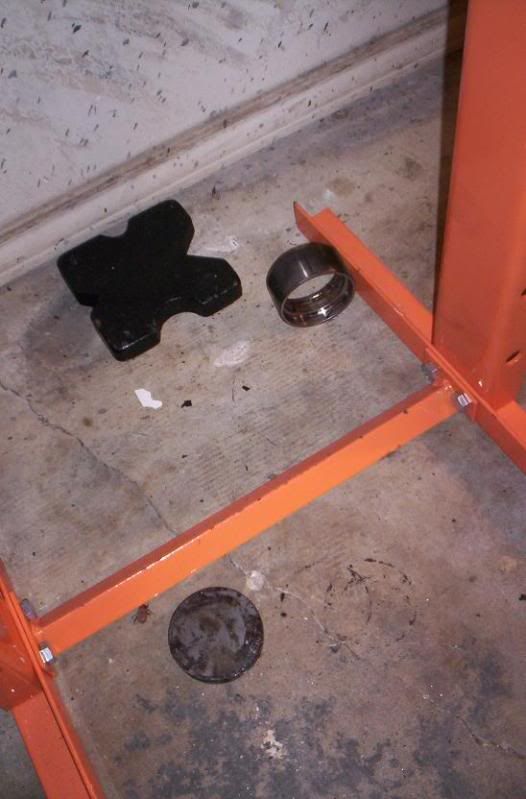
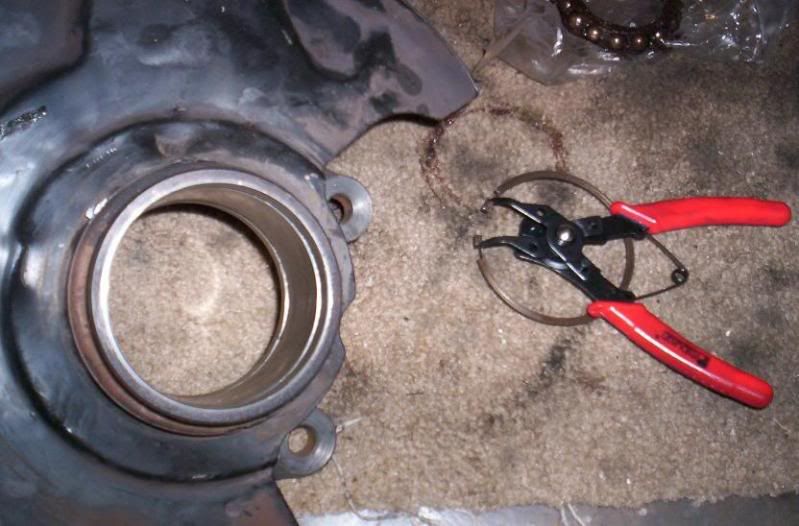
Remember the FSM stated you needed a 2.999 inch reciever to push out the bearing - well I just got a machine shop to make me a little 1/2 inch thick 3 inch plate for 12 bucks and then I just shaved the outside a little.. worked like a champ..
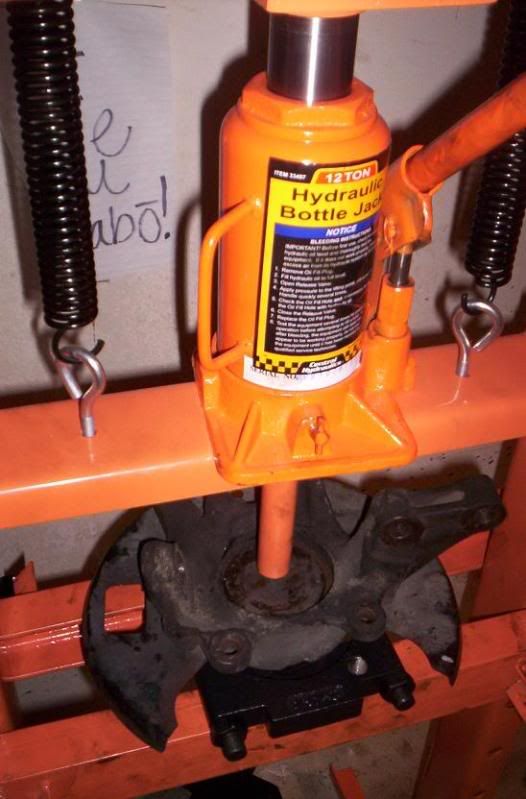
Last edited by AcidJake75; Apr 19, 2010 at 07:01 PM.

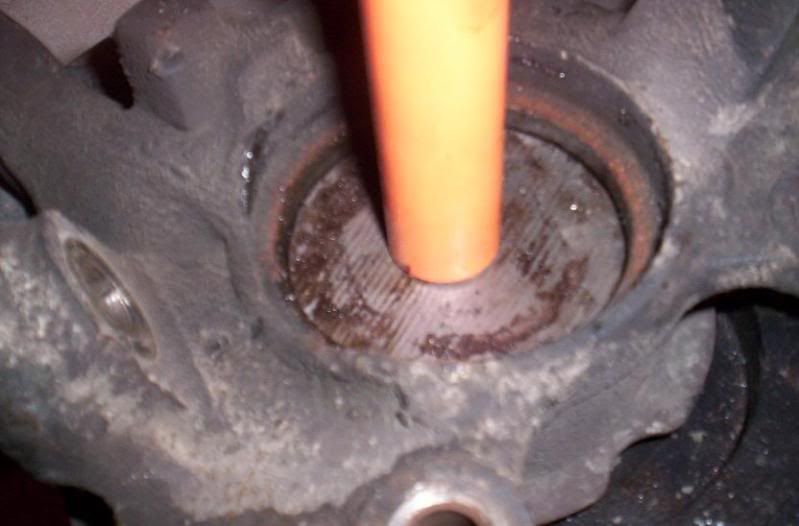
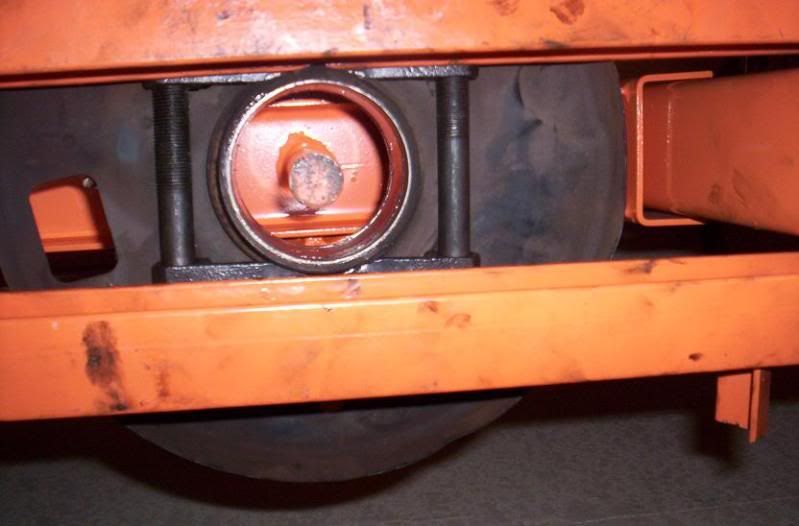
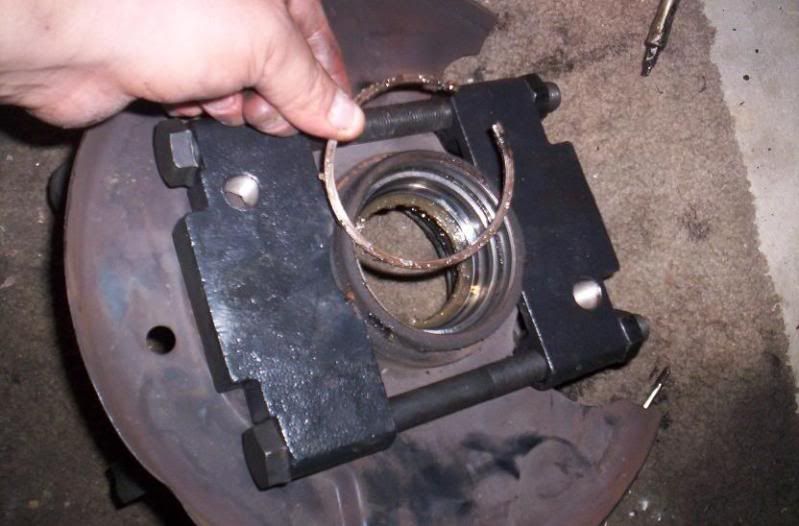
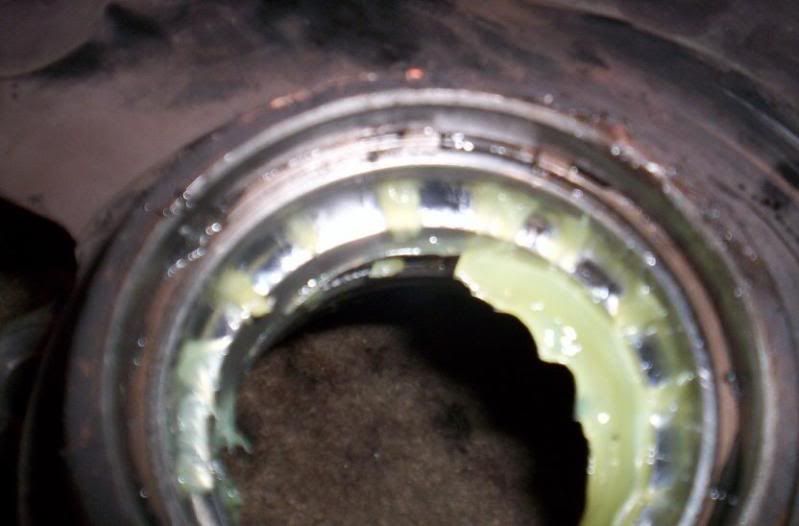
Be sure to put in the snap ring so that when you press in the bearing you have a stopping point and then you will have enough space to put the other snap ring in - you can feel when the bearing is pressed against the bearing so this was cake..
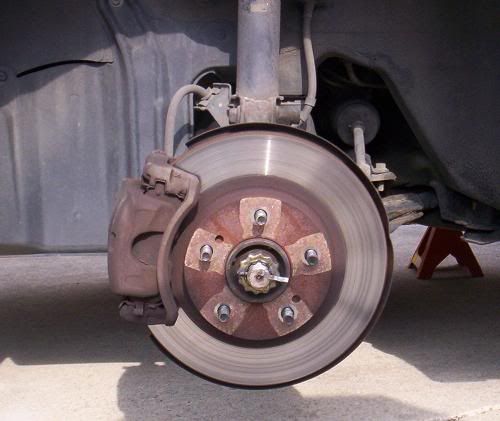
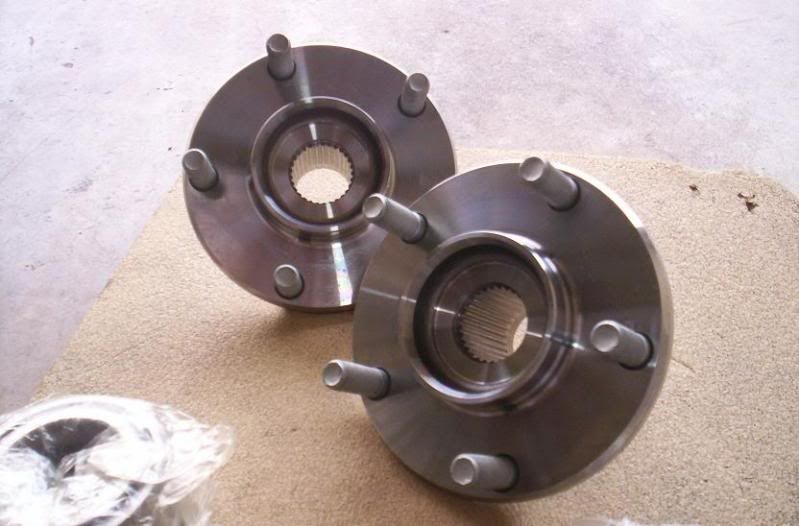
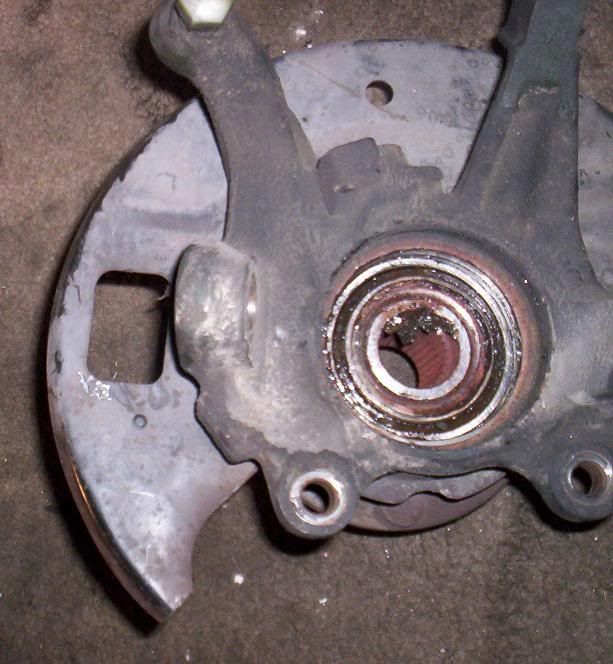
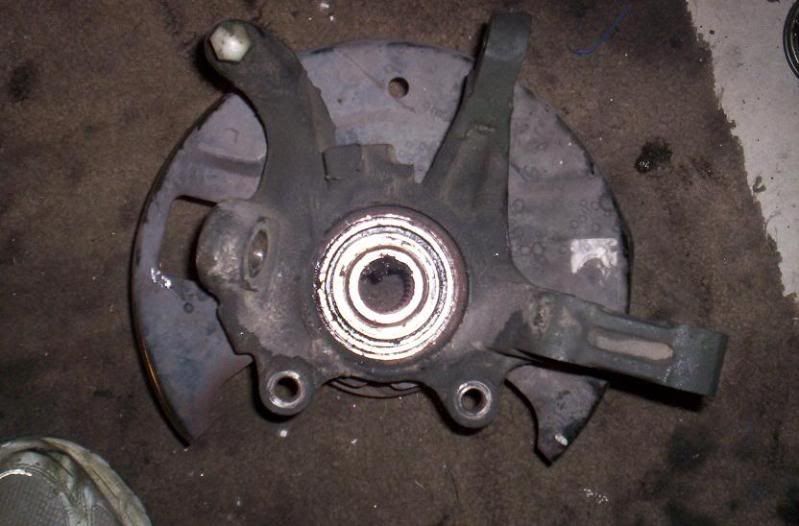
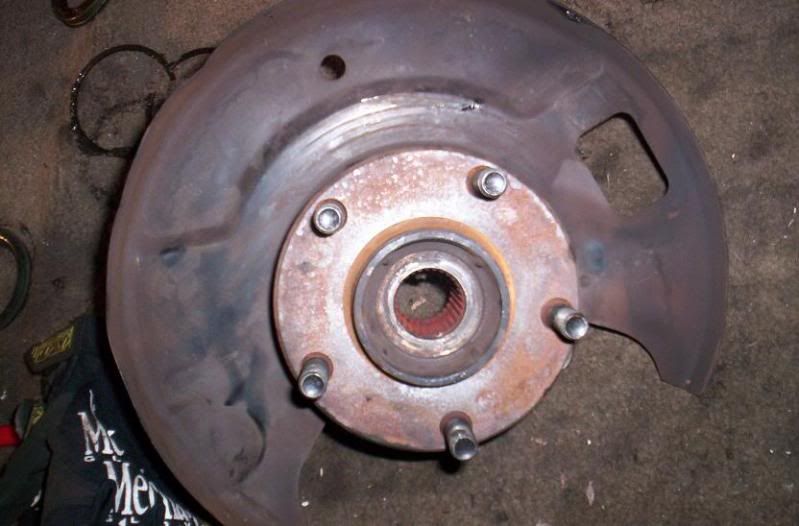
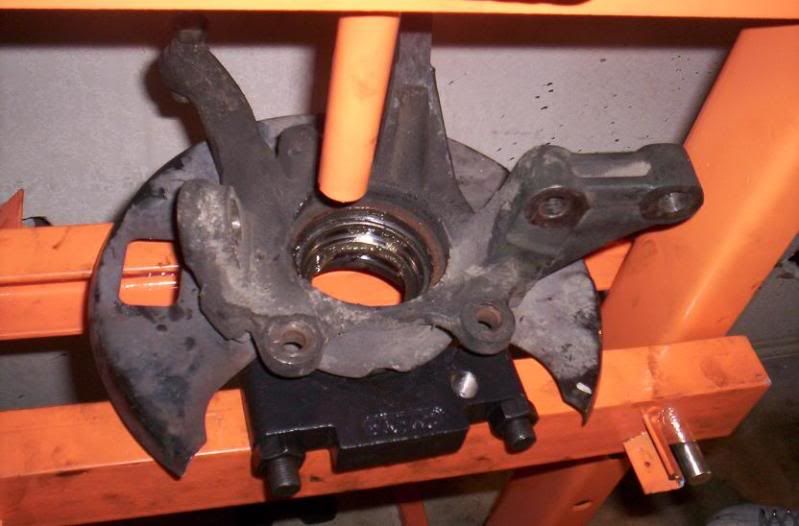
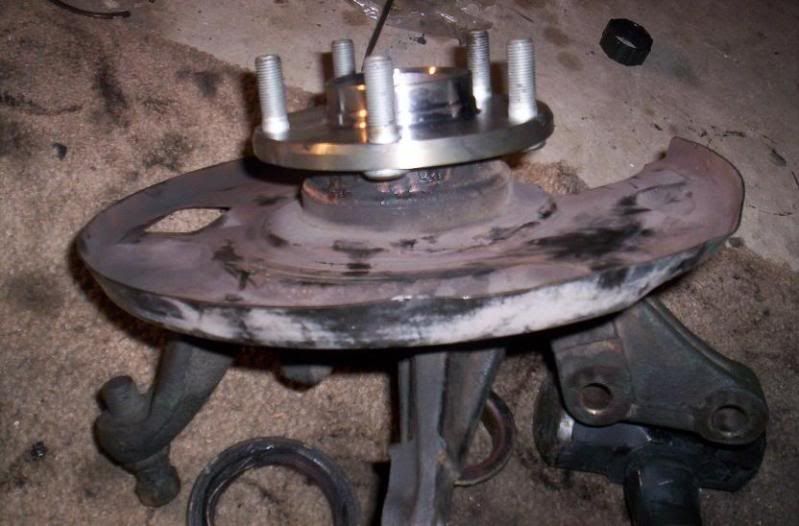
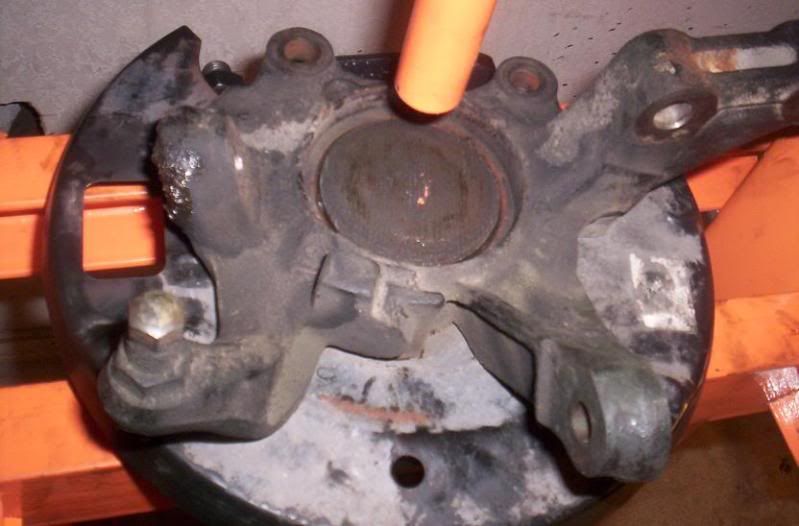
New hub with seal under it on
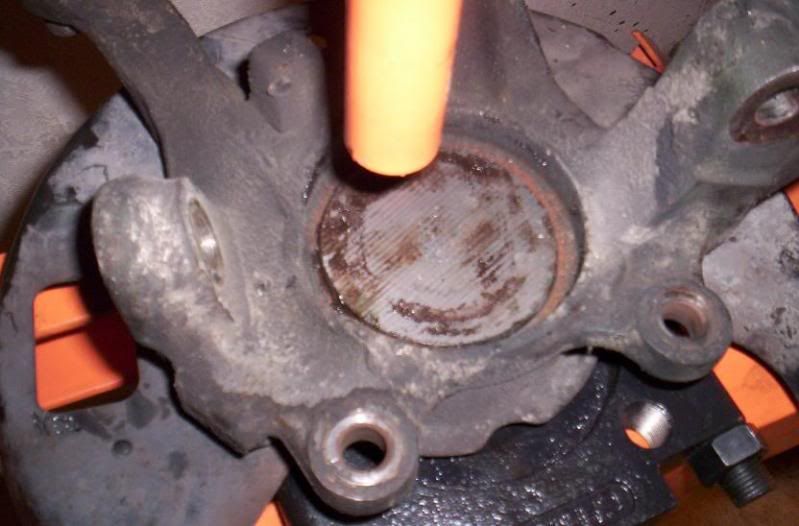
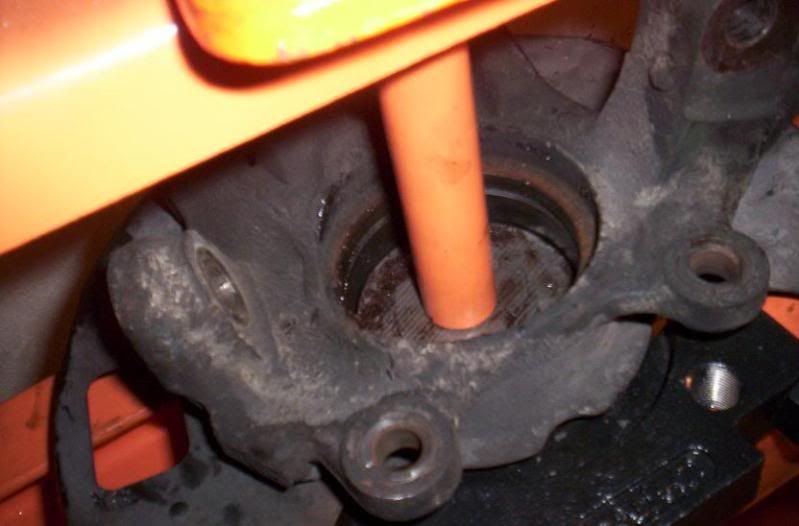
new oil seals - i just used my lil plate to hammer (tap) in..
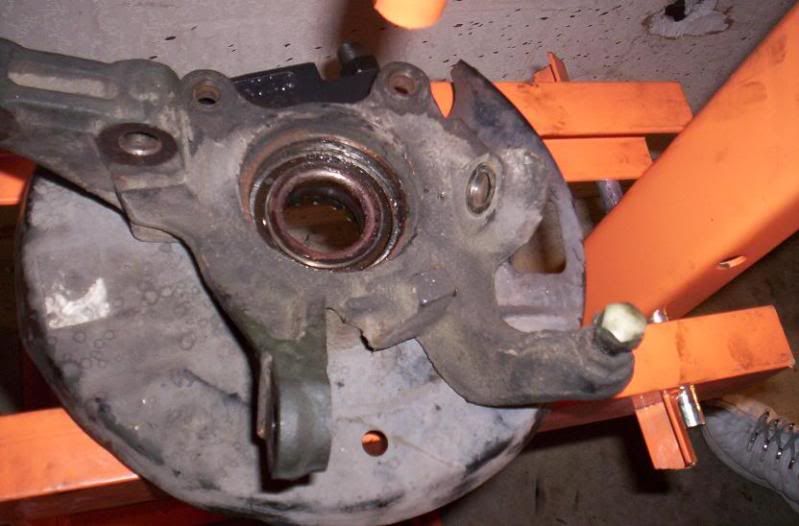
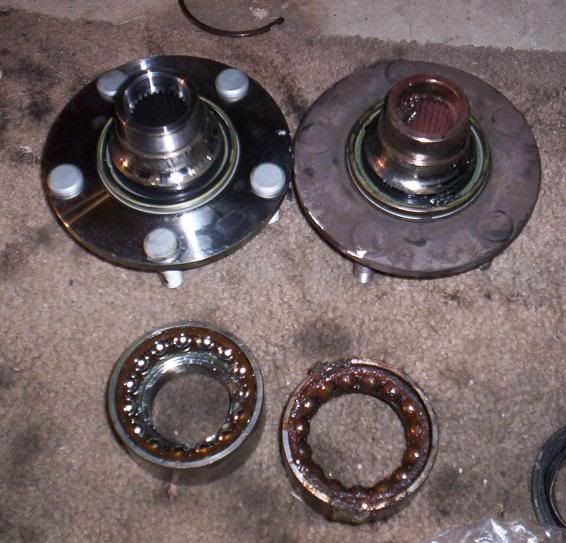
Old VS the new
New hub with seal under it on
new oil seals - i just used my lil plate to hammer (tap) in..
Old VS the new
Last edited by AcidJake75; Apr 19, 2010 at 07:07 PM.
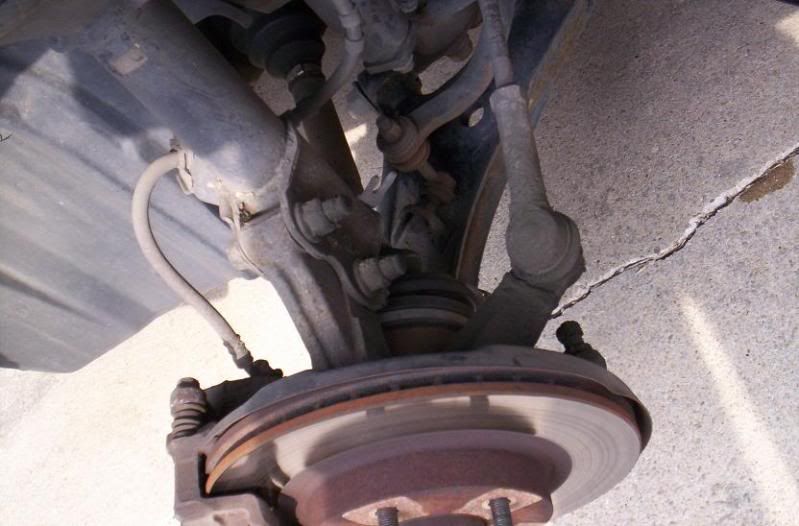
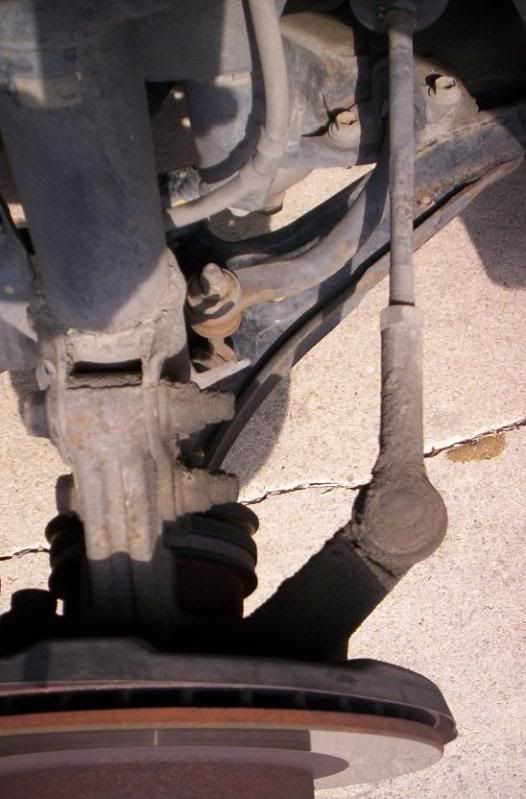
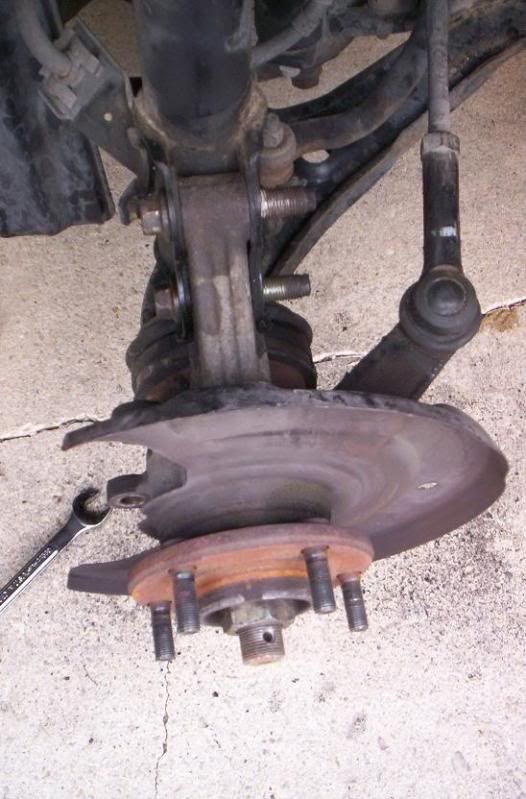
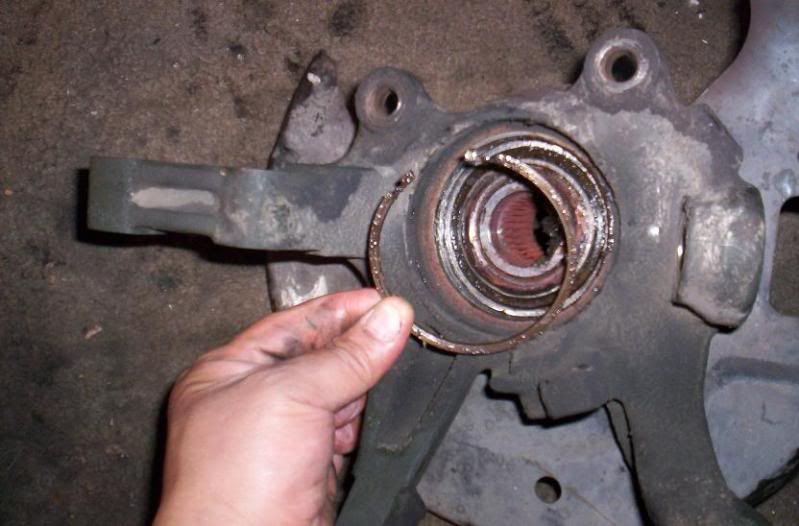
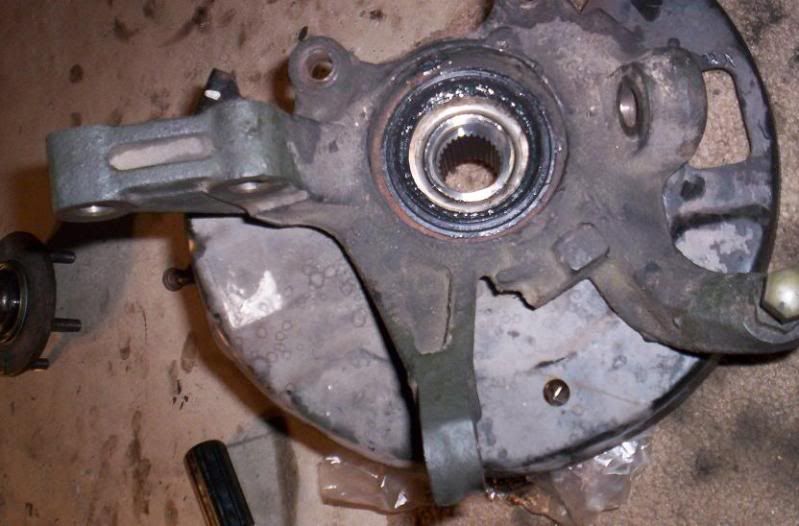
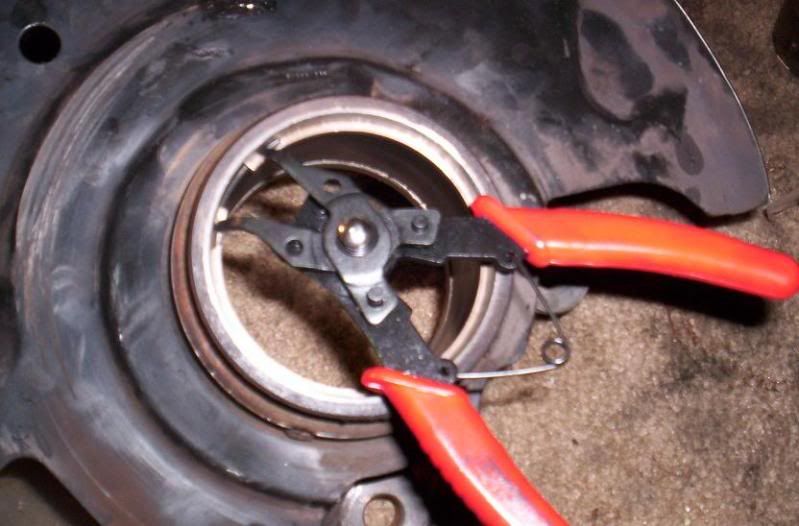
Pics of the other side...you can see where the snap rings go in on both sides..
I bought these snap rings for 7 bucks
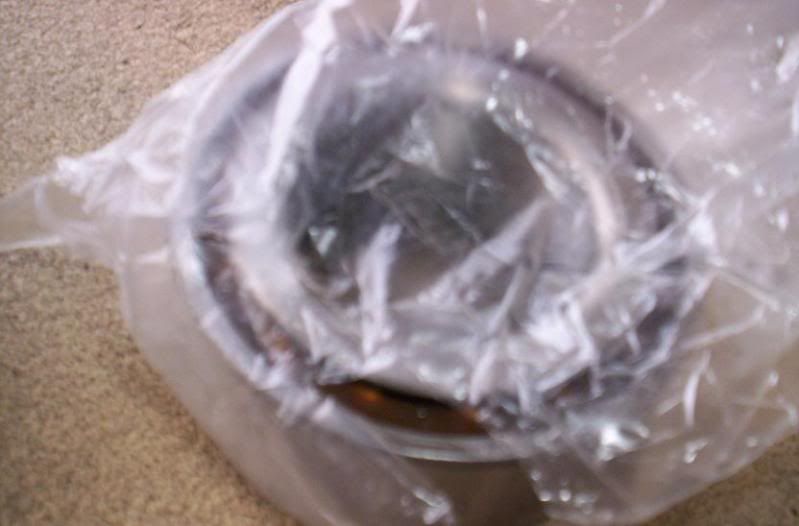
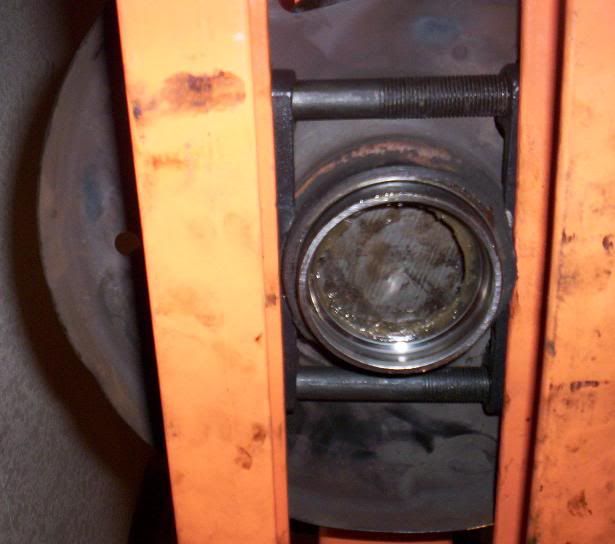
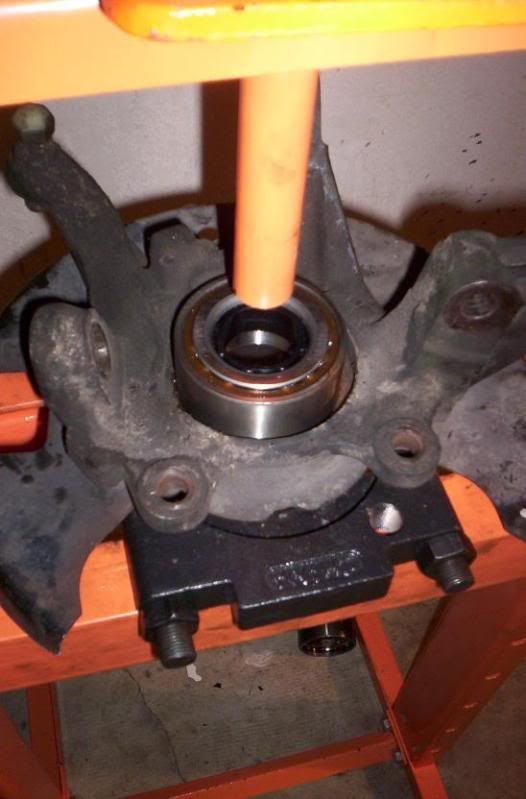
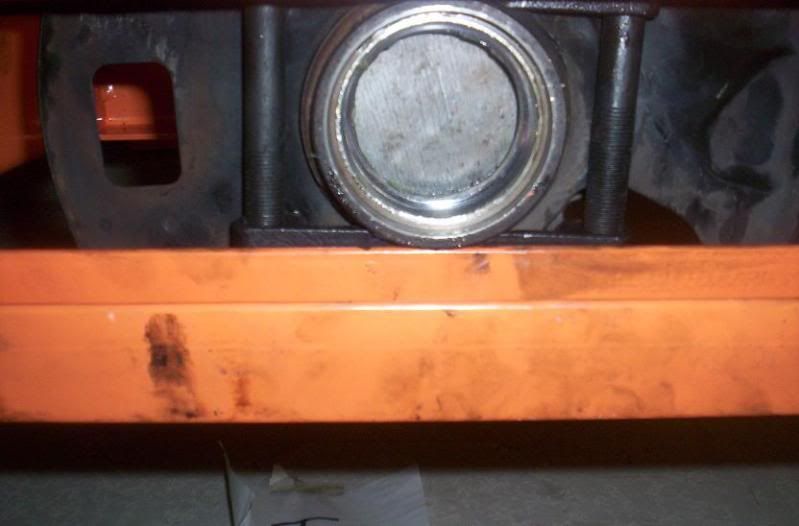
New bearing getting pressed in - using outside part only - notice the inside part is not in while being pressed in..
The press was on sale at Harbor freight for 80 bucks.. been a life saver for me..
I bought these snap rings for 7 bucks
New bearing getting pressed in - using outside part only - notice the inside part is not in while being pressed in..
The press was on sale at Harbor freight for 80 bucks.. been a life saver for me..
Last edited by AcidJake75; Apr 20, 2010 at 05:17 AM.


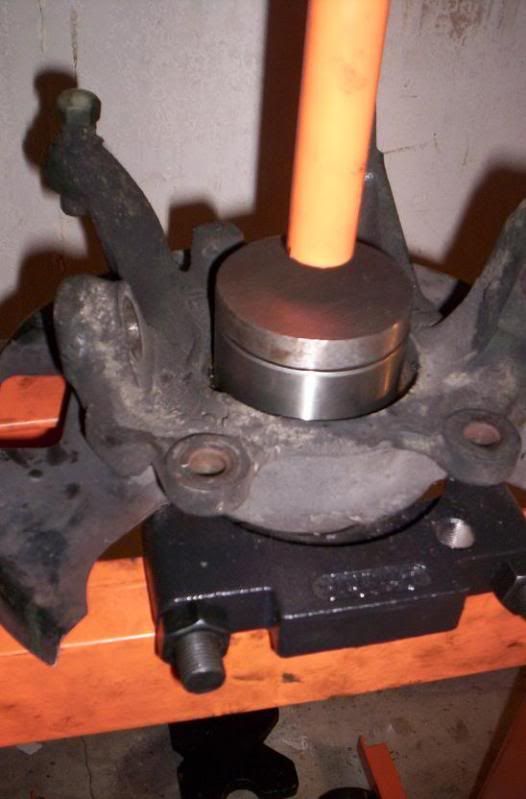
Pressing the new bearing
Nice write up. One thing that's unclear-is the metal disc you used to press the bearing in and out recessed on one side? The FSM specifies that it's very important to press in the new bearing by applying pressure to the outer bearing race only. Using a flat disc will apply pressure to the inner race only, since it's slightly raised in relation to the outer race, and will potentially cause damage to the ball bearings/race surface that might affect the longevity of your bearing.
My bad if I missed mention of it in the writeup, but it's an important point in the installation.
Cheers!
My bad if I missed mention of it in the writeup, but it's an important point in the installation.
Cheers!
Biggest piece of advice. Make sure you get a new hub as well. I thought that my used hub would work, but it was too worn and it needed to be replaced. So my car sat for 5 days while I waited on a new hub.
I just did mine as well.
Great write up.
I just did mine as well.
Great write up.
Nice write up. One thing that's unclear-is the metal disc you used to press the bearing in and out recessed on one side? The FSM specifies that it's very important to press in the new bearing by applying pressure to the outer bearing race only. Using a flat disc will apply pressure to the inner race only, since it's slightly raised in relation to the outer race, and will potentially cause damage to the ball bearings/race surface that might affect the longevity of your bearing.
My bad if I missed mention of it in the writeup, but it's an important point in the installation.
Cheers!
My bad if I missed mention of it in the writeup, but it's an important point in the installation.
Cheers!
that just depends on how worn the hubs are - you may need them and you may not - I just didnt want to put everything back together and find out that I had to take everything apart later to put new hubs in -
Last edited by AcidJake75; Apr 20, 2010 at 05:20 AM.

Member
Joined: Jan 2009
Posts: 263
So what's your opinion of that Harbor Freight 12 ton press? I hear wildly different opinions, from total junk to great deal.
Did you consider getting the Harbor Freight wheel bearing adapter kit (also for about $80) instead of a press? I can't tell if the adapter kit comes with everything you need. Compared to a $300 Hub Tamer Elite, there seems to be some important pieces missing.
Very nicely done and informative post. Thanks.

Good write up, nice innovation with that press tool.
Getting that bearing out can be a PITA. I used an old bearing race that was grinded down a bit and used it to tap the old one out and then tap the new one in.
Your method is much better.
Getting that bearing out can be a PITA. I used an old bearing race that was grinded down a bit and used it to tap the old one out and then tap the new one in.
Your method is much better.

Senior Member
Joined: Jul 2009
Posts: 189
From: Richmond, VA
Another tip if you're using this method is to stick the new bearing in the freezer for a couple of hours before you try to press it in. The metal contracts just enough to make it considerably easier to press in than the old one was to remove. Still a good workout, but not quite so unbearably difficult.
If you're going to be doing more than one of these operations, or if you need it done in one day, go ahead and spring for the press. I would have, but the only one they had was broken. Should be total cake if you get the press and the adapter kit.
So you used this kit to put the bearing back in? If so, you wouldn't need a press if you used the kit that AutoZone has which removes the bearing then? I mean we don't care much about the bearing as long as the inner walls are not damaged in the process.


Senior Member
Joined: Jul 2009
Posts: 189
From: Richmond, VA
Note: If anyone goes aftermarket with these parts, don't get the Dorman hubs because they don't fit. I'm using National bearings, though, and they're working out well so far. Had to spring for the much more expensive Nissan hubs after shipping the Dorman crap back to RockAuto.

Thread
Thread Starter
Forum
Replies
Last Post
Slamrod
4th Generation Maxima (1995-1999)
5
Apr 10, 2016 05:24 PM
Finkle
4th Generation Maxima (1995-1999)
13
Sep 27, 2015 09:53 PM
FanaticMadMax
5th Generation Maxima (2000-2003)
7
Aug 10, 2015 08:55 PM