7th Generation Maxima (2009-2015) Come in and talk about the 7th generation Maxima

Color Change On Trim (Pics of Progress)

Thread Tools
 
Search this Thread
 
Old Jan 31, 2014 | 09:36 PM
  #1  
maxipad2011's Avatar
Thread Starter
Member
 
Joined: Nov 2013
Posts: 260
Color Change On Trim (Pics of Progress)

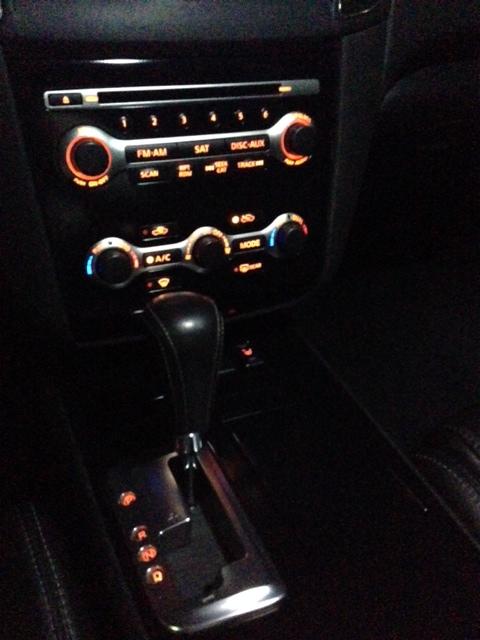
I'm going to finally be taking that ugly fake carbon fiber trim and making it gloss black tomorrow. I've seen many swapping trims and vinyl wrapping to change their trim but I will be painting mine so I thought some may benefit from seeing the progress of this process. Stay tuned!
Old Jan 31, 2014 | 11:46 PM
  #2  
trailer54's Avatar
Senior Member
 
Joined: Jan 2013
Posts: 478
From: Menifee, CA
Subbed! What's the stock "carbon fiber" look like?! I've always wondered! Mines the stock silver!!
Old Feb 1, 2014 | 08:55 AM
  #3  
maxipad2011's Avatar
Thread Starter
Member
 
Joined: Nov 2013
Posts: 260
Ok here's some before pics of it as carbon fiber still:
Name:  FDE3F48F-2DEA-4D0E-BF15-B9AB4AD04FDE_zpssf9kydbi.jpg
Views: 71
Size:  147.6 KB
Name:  4B11FC94-4909-4E51-B0B2-6C3470A8503E_zpsfydutwvb.jpg
Views: 86
Size:  145.7 KB
Old Feb 1, 2014 | 09:27 AM
  #4  
maxipad2011's Avatar
Thread Starter
Member
 
Joined: Nov 2013
Posts: 260
Name:  8805C1A5-073C-41D2-AEA0-C58854D1E38D_zpsrhgdi5ym.jpg
Views: 98
Size:  112.0 KB

Hitting it with this:
Name:  AEB9F72C-2A85-49CC-9EFA-D93898B1E2BE_zpsuzicrrem.jpg
Views: 80
Size:  84.4 KB
Old Feb 1, 2014 | 10:29 AM
  #5  
MeHoW's Avatar
Junior Member
 
Joined: Jan 2014
Posts: 28
how to i take out this cover where AC plug is? do i have to take whole console out?
Old Feb 1, 2014 | 10:42 AM
  #6  
maxipad2011's Avatar
Thread Starter
Member
 
Joined: Nov 2013
Posts: 260
For the portion with radio/AC controls/etc yes the upper part around your navigation comes out to expose two screws at the top. The lower portion tucked under with the seat heater buttons etc the console doesn't have to be completed removed but it does have to be loosened and pulled back a bit.
Old Feb 1, 2014 | 11:23 AM
  #7  
maxipad2011's Avatar
Thread Starter
Member
 
Joined: Nov 2013
Posts: 260
Paint updates. This is after 5 coats of paint, that many coats it will be wet sanding before applying the clearcoat:

Name:  FD03B50F-5E02-4D04-80AD-5DA184C397F9_zpsbpov4cvo.jpg
Views: 96
Size:  139.6 KB
Name:  B1648534-4BE6-47D4-B95D-2AE39295C8BE_zps3zugpgtv.jpg
Views: 83
Size:  152.9 KB
Old Feb 1, 2014 | 12:07 PM
  #8  
trailer54's Avatar
Senior Member
 
Joined: Jan 2013
Posts: 478
From: Menifee, CA
Oh wow, that's a cool carbon fiber look! I love the new black too! Looks great!!
Old Feb 1, 2014 | 12:16 PM
  #9  
maxipad2011's Avatar
Thread Starter
Member
 
Joined: Nov 2013
Posts: 260
Originally Posted by trailer54
Oh wow, that's a cool carbon fiber look! I love the new black too! Looks great!!
Thanks man! Many on here will tell you that the carbon fiber in person looks cheap, especially up close but I'm pumped about the black!
Old Feb 1, 2014 | 02:08 PM
  #10  
maxipad2011's Avatar
Thread Starter
Member
 
Joined: Nov 2013
Posts: 260
Progress pic after 4 coats of black and 5 coats of clear. Wet sanding and polish tomorrow:

Name:  22E84F8B-490B-4B87-9558-0108EED6966C_zpsq9m0jrmi.jpg
Views: 193
Size:  93.1 KB
Old Feb 1, 2014 | 02:09 PM
  #11  
Richard66's Avatar
Senior Member
 
Joined: Jun 2011
Posts: 1,690
The painted ones look silver or is that the primer color, or too much lighting?
Old Feb 1, 2014 | 02:11 PM
  #12  
maxipad2011's Avatar
Thread Starter
Member
 
Joined: Nov 2013
Posts: 260
Originally Posted by Richard66
The painted ones look silver or is that the primer color, or too much lighting?
It's the lighting, sorry. It's the sheen from the finish since it was satin before hitting it with gloss.
Old Feb 2, 2014 | 02:55 PM
  #13  
stealthmaxDFW's Avatar
Junior Member
 
Joined: Jan 2014
Posts: 28
Please post pics of the final installation.
Old Feb 7, 2014 | 10:42 AM
  #14  
maxipad2011's Avatar
Thread Starter
Member
 
Joined: Nov 2013
Posts: 260
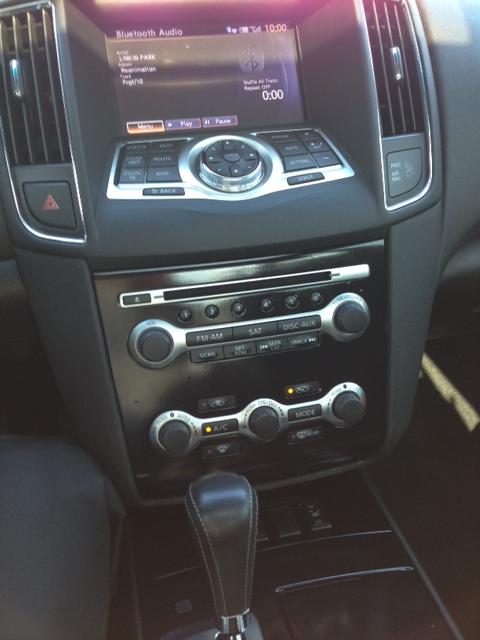
Ok here are the final pics! Small glitch in the process, I didn't like the finish the gloss black paint was giving me so I went with a vinyl wrap instead. I still wanted to post pics of the change though:

Name:  photo15_zps4c4e9a37.jpg
Views: 86
Size:  34.4 KB
Name:  photo26_zpsfd5bb24b.jpg
Views: 83
Size:  36.4 KB
Name:  photo34_zps63673f2f.jpg
Views: 88
Size:  159.3 KB
Name:  photo41_zps66a4fbec.jpg
Views: 95
Size:  120.2 KB
Name:  photo5_zps814c76dd.jpg
Views: 92
Size:  34.6 KB

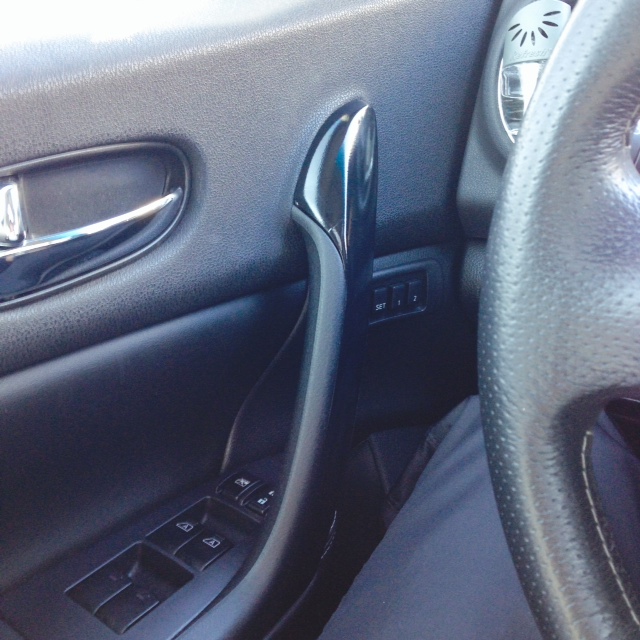
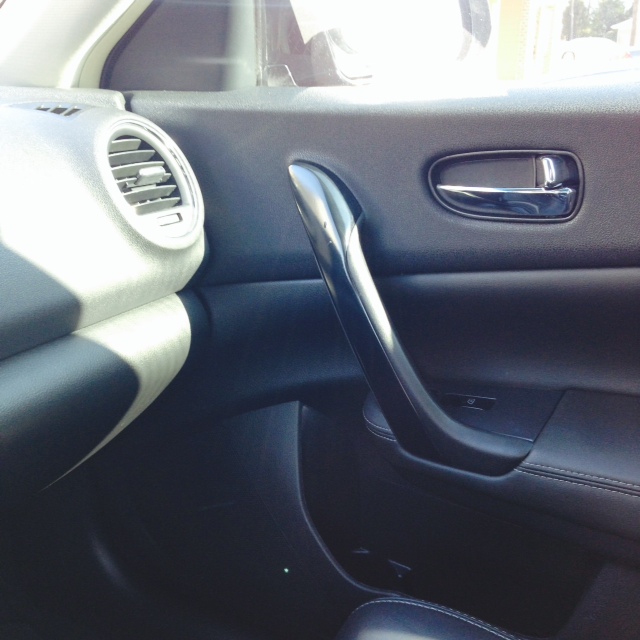
You can see the air bubbles in some of the pics so I will take pictures once those air out as an update!
Old Feb 10, 2014 | 06:17 AM
  #15  
JimShady84's Avatar
Junior Member
 
Joined: Feb 2012
Posts: 29
Pretty nice dude!
Old Feb 10, 2014 | 06:53 AM
  #16  
maxipad2011's Avatar
Thread Starter
Member
 
Joined: Nov 2013
Posts: 260
Originally Posted by JimShady84
Pretty nice dude!
Thanks brother! It's only been a few days and most of the air bubbles are already gone too. 👍
Old Feb 12, 2014 | 08:35 PM
  #17  
zdawg7thgen's Avatar
Junior Member
 
Joined: Jul 2013
Posts: 54
Originally Posted by maxipad2011
For the portion with radio/AC controls/etc yes the upper part around your navigation comes out to expose two screws at the top. The lower portion tucked under with the seat heater buttons etc the console doesn't have to be completed removed but it does have to be loosened and pulled back a bit.
How does the upper part around the navi come off?
Old Feb 13, 2014 | 06:58 AM
  #18  
maxipad2011's Avatar
Thread Starter
Member
 
Joined: Nov 2013
Posts: 260
You just get in between the edge of your dash and the part that juts out over your navigation screen with a flat head screwdriver. Don't be gentle...work your way across and then tug with some good force to pop it out!
Old Feb 13, 2014 | 11:56 AM
  #19  
Propa Teknique's Avatar
Senior Member
 
Joined: Apr 2006
Posts: 966
From: Houston, TX
Nice work!
Old Feb 13, 2014 | 01:03 PM
  #20  
maxipad2011's Avatar
Thread Starter
Member
 
Joined: Nov 2013
Posts: 260
Originally Posted by Propa Teknique
Nice work!
Thanks brother!
Old Feb 13, 2014 | 06:33 PM
  #21  
MIA_SHIFT's Avatar
Member
 
Joined: Oct 2004
Posts: 225
From: Miami,Florida
Looks better, great job man!!
Old Feb 13, 2014 | 07:04 PM
  #22  
zdawg7thgen's Avatar
Junior Member
 
Joined: Jul 2013
Posts: 54
Originally Posted by maxipad2011
You just get in between the edge of your dash and the part that juts out over your navigation screen with a flat head screwdriver. Don't be gentle...work your way across and then tug with some good force to pop it out!
Thank you very much! Looks good by the way. Good job!
Old Feb 13, 2014 | 08:52 PM
  #23  
maxipad2011's Avatar
Thread Starter
Member
 
Joined: Nov 2013
Posts: 260
Originally Posted by zdawg7thgen
Thank you very much! Looks good by the way. Good job!
Thank you!
Old Mar 5, 2014 | 01:16 PM
  #24  
MEINEKEMAX's Avatar
Member
 
Joined: Jul 2013
Posts: 156
From: Fair Lawn NJ
nice work looks good
Old Mar 5, 2014 | 09:54 PM
  #25  
Masroor's Avatar
Junior Member
 
Joined: Dec 2012
Posts: 25
Carbon trim.. that's stock? Because here in GCC specs it comes with a wooden trim..
Old Mar 6, 2014 | 03:55 AM
  #26  
maxipad2011's Avatar
Thread Starter
Member
 
Joined: Nov 2013
Posts: 260
Originally Posted by MEINEKEMAX
nice work looks good
Thank you!
Old Mar 6, 2014 | 03:57 AM
  #27  
maxipad2011's Avatar
Thread Starter
Member
 
Joined: Nov 2013
Posts: 260
Originally Posted by Masroor
Carbon trim.. that's stock? Because here in GCC specs it comes with a wooden trim..
Yes those before shots are of the stock carbon fiberish pattern that came stock on my Maxi.
Related Topics
Thread
Thread Starter
Forum
Replies
Last Post
Maxima_Joe
4th Generation Classifieds (1995-1999)
16
Nov 25, 2015 08:19 AM
Maxima_Joe
4th Generation Classifieds (1995-1999)
0
Aug 27, 2015 12:01 AM
RealityCheck
4th Generation Maxima (1995-1999)
2
Aug 5, 2015 06:18 AM


All times are GMT -7. The time now is 02:47 AM.