Something I'm thinking about doing...
 08-12-2016, 12:02 PM
#1801

I did see that... Darren Surratt is the man for all things vqhr... he has heads and I am thinking about picking em up and then swapping the valvetrain stuff I have in...
but I will have to talk to some people who are much mo knowledgeable than me.
are you doing a dry sump oil pump? you naughty monkey.
 08-12-2016, 04:41 PM
#1802
LandShark has Cosworth

Thread Starter
iTrader: (12)
Join Date: Jan 2004
Location: Topeka, KS
Posts: 4,327
I did see that... Darren Surratt is the man for all things vqhr... he has heads and I am thinking about picking em up and then swapping the valvetrain stuff I have in...
but I will have to talk to some people who are much mo knowledgeable than me.
are you doing a dry sump oil pump? you naughty monkey.
but I will have to talk to some people who are much mo knowledgeable than me.
are you doing a dry sump oil pump? you naughty monkey.

Dry sump? Who, me? Actually, I'll need a different oil pan than any of the stock VQ35 pains - the BC stroker uses up all available space - more to come.
08-13-2016, 06:32 AM
#1803
Well, maybe pushing your button a bit - but I don't rag on peoples I respect, so there. Actually the JWT head HR-head guy Clark is who you should talk with - centuries of racing and building experience. Darren is purty good with head jobs too, I hear.
Dry sump? Who, me? Actually, I'll need a different oil pan than any of the stock VQ35 pains - the BC stroker uses up all available space - more to come.
Dry sump? Who, me? Actually, I'll need a different oil pan than any of the stock VQ35 pains - the BC stroker uses up all available space - more to come.
nah no buttons being pushed man, I am just a victim of my own addiction to learning. I noticed you doing some complex and neat looking cam stuff a bit ago. I am trying to do a REV UP cam in my 3.0. I have the JWT spacer set, but there is some confusion about whether or not I need to adapt the spacers to actually make them work? Can you shed some light on this?
08-13-2016, 10:04 AM
#1804
LandShark has Cosworth
Thread Starter
iTrader: (12)
Join Date: Jan 2004
Location: Topeka, KS
Posts: 4,327
nah no buttons being pushed man, I am just a victim of my own addiction to learning. I noticed you doing some complex and neat looking cam stuff a bit ago. I am trying to do a REV UP cam in my 3.0. I have the JWT spacer set, but there is some confusion about whether or not I need to adapt the spacers to actually make them work? Can you shed some light on this?
Also, does anyone still sell the needed StephenMax 3.0 / 3.5 cam adapters? You might find a used set out there somewhere... Hope this helps.. I gave my last spare set to Aaron from Houston. Or, you can redrill the RevUp cams to match the 3.0 cams. I think members here have done that - check recent postings.

Last edited by grey99max; 10-16-2016 at 08:57 AM.
08-14-2016, 10:14 AM
#1805
Did you know that the 350Z one-year RevUp engine was the first Nissan test of HR upper-end? Now about the spacers - that's because using the the 3.0 timing parts means you need an extra 3mm spacer to align the gears to the main timing chain - but since the 3.5 DE cams had the holes for the cam pins 180* offset from 3.0 cam holes, that's why the original spacers with extra relocated pins were made for 3.5 cams and 3.0 timing. A side question is where the RevUp cam holes are located - are they the same as the VQ35DE cam pins ??
Also, does anyone still sell the needed StephenMax 3.0 / 3.5 cam adapters? You might find a used set out there somewhere... Hope this helps.. I gave my last spare set to Aaron from Houston. Or, you can redrill the RevUp cams to match the 3.0 cams. I think members here have done that - check recent postings.
Also, does anyone still sell the needed StephenMax 3.0 / 3.5 cam adapters? You might find a used set out there somewhere... Hope this helps.. I gave my last spare set to Aaron from Houston. Or, you can redrill the RevUp cams to match the 3.0 cams. I think members here have done that - check recent postings.
Jim Wolf makes a spacer that has been the standard for the 3.0 - 3.5 swap. I have them but in doing my research someone (don't know if you remember vipervadim? But I was talking to him and he said that one set of the spacers has to be modified to make the rev up cams work properly...
 )
)I havent thought about redrilling the cams to fit the timing, that might be worth looking into...
As far as recent postings here?
"Help EGR is broken."
"1999 Maxima with 350k miles no start TRIED NOTHING...can't get it started"
"Problem w/ my Coilpacks."

Other than what you and darren are doing, I haven't seen a recent build thread.
08-14-2016, 01:37 PM
#1806
LandShark has Cosworth
Thread Starter
iTrader: (12)
Join Date: Jan 2004
Location: Topeka, KS
Posts: 4,327
I didn't know that the RevUp engine was a "test" for the de... that makes sense. The RevUp cam holes are located in the same location on a DE.
Jim Wolf makes a spacer that has been the standard for the 3.0 - 3.5 swap. I have them but in doing my research someone (don't know if you remember vipervadim? But I was talking to him and he said that one set of the spacers has to be modified to make the rev up cams work properly...)
I havent thought about redrilling the cams to fit the timing, that might be worth looking into...
As far as recent postings here?
"Help EGR is broken."
"1999 Maxima with 350k miles no start TRIED NOTHING...can't get it started"
"Problem w/ my Coilpacks."
Other than what you and darren are doing, I haven't seen a recent build thread.
Jim Wolf makes a spacer that has been the standard for the 3.0 - 3.5 swap. I have them but in doing my research someone (don't know if you remember vipervadim? But I was talking to him and he said that one set of the spacers has to be modified to make the rev up cams work properly...
)I havent thought about redrilling the cams to fit the timing, that might be worth looking into...
As far as recent postings here?
"Help EGR is broken."
"1999 Maxima with 350k miles no start TRIED NOTHING...can't get it started"
"Problem w/ my Coilpacks."
Other than what you and darren are doing, I haven't seen a recent build thread.
A quote from "All Motor":
"2nd gen vq35 swap in a 4th gen with 3.0timing
hey guys it's been a while since I posted on the org but i'm just looking for some tips or advice, I recently purchased a 2014 Nissan Murano engine Which I'm going to install in a 96 Maxima (Lachingadera) i have a upper and lower pan. I'm going to get a set of cam adapters form a good buddy Of mine Schmelly, All i need is to take apart the 3.5 that's in the car and salvage As much as i can ,the 3.5 that's in the car has rod knock due to over250k on the engine And it had a hard last 60k On it. I beat the crap out of it. ..Lol thanks in advance "
Also, do this web search for lots of 3.0/3.5 cam adapter info...
site:maxima.org 3.5 cam adapters for 3.0
Last edited by grey99max; 08-14-2016 at 01:49 PM.
 08-16-2016, 03:46 PM
#1808
LandShark has Cosworth
Thread Starter
iTrader: (12)
Join Date: Jan 2004
Location: Topeka, KS
Posts: 4,327

Sounds harsh? Probably, but newbs gotta earn their reputation,so work on doing it something like I do. And yeah, I'm familiar with welding issues on aluminum heads - I have a set of CNCd $4400 Cosworth VQ35DE heads with a melted exhaust valve and seat and head that needs major surgery, which means a trip to a speciality shop in Ohio for repairs. I'm not a welder, so off to an expert. Photos of all that are in this thread. Heck, I've wrecked 3 or 4 other sets of heads with nitrous.
And yes, I would like to see photos of the work you talked about.
08-22-2016, 05:21 PM
#1809
LandShark has Cosworth
Thread Starter
iTrader: (12)
Join Date: Jan 2004
Location: Topeka, KS
Posts: 4,327
August - some catchup for this month
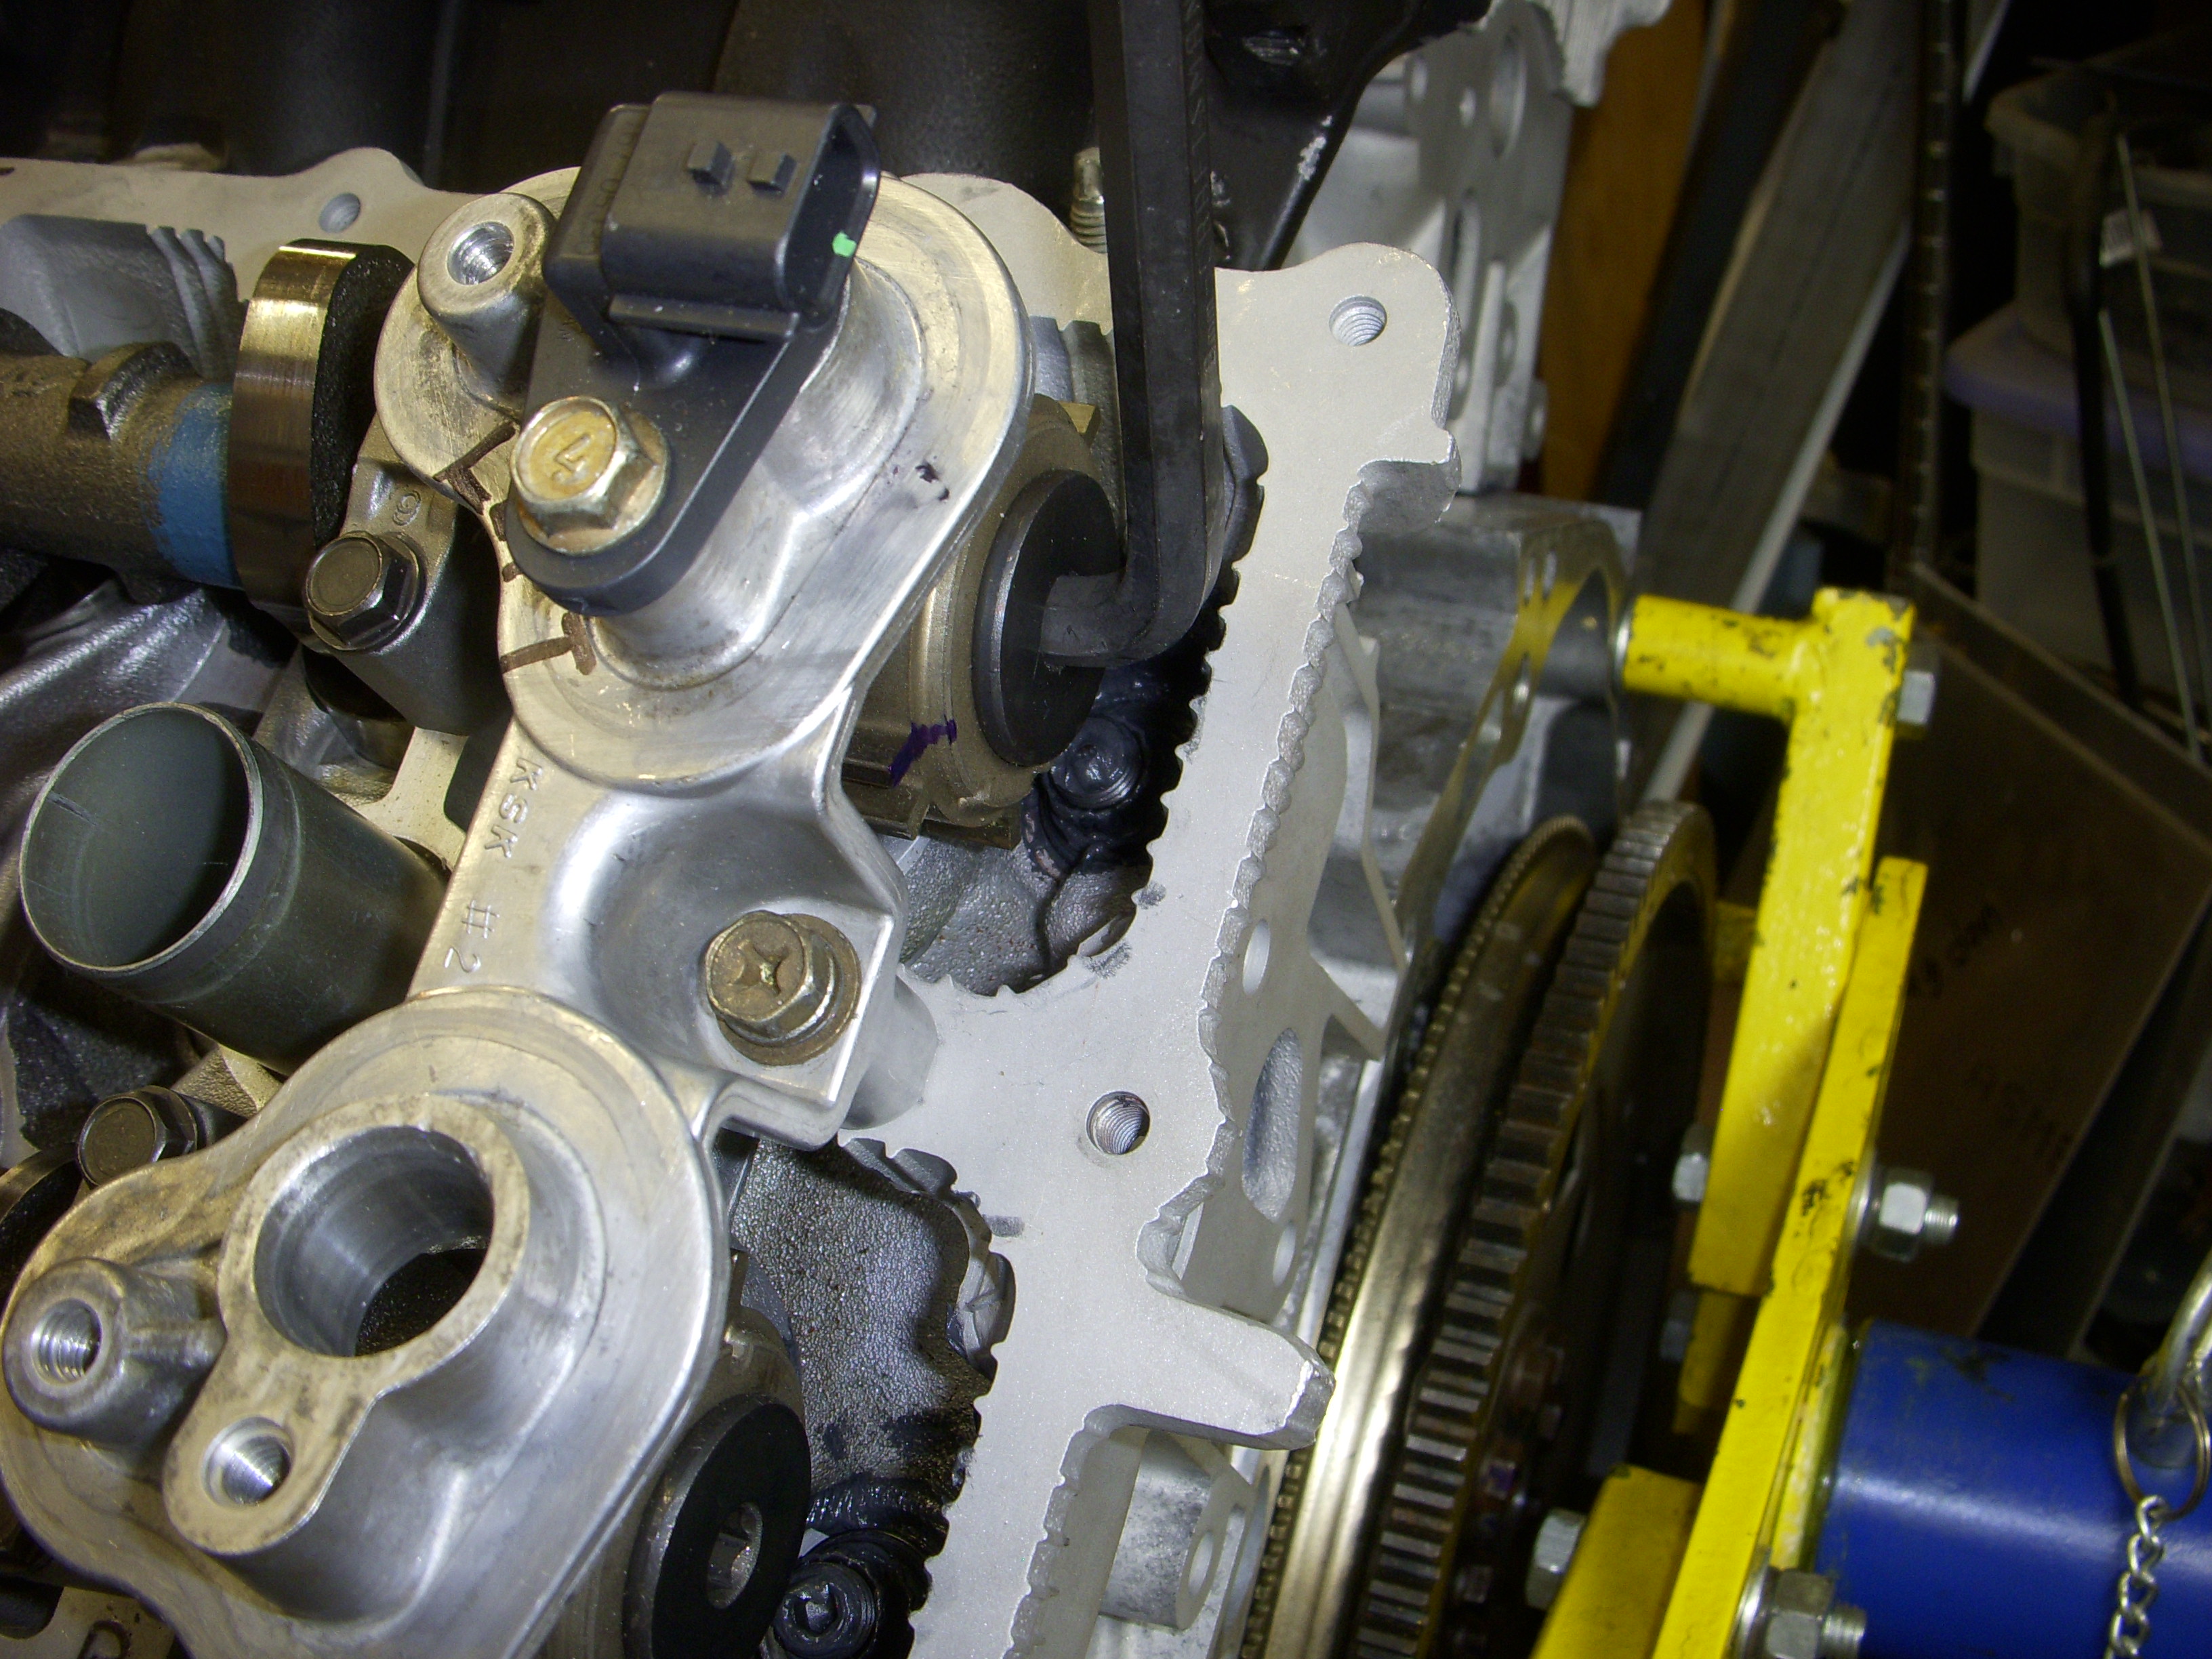
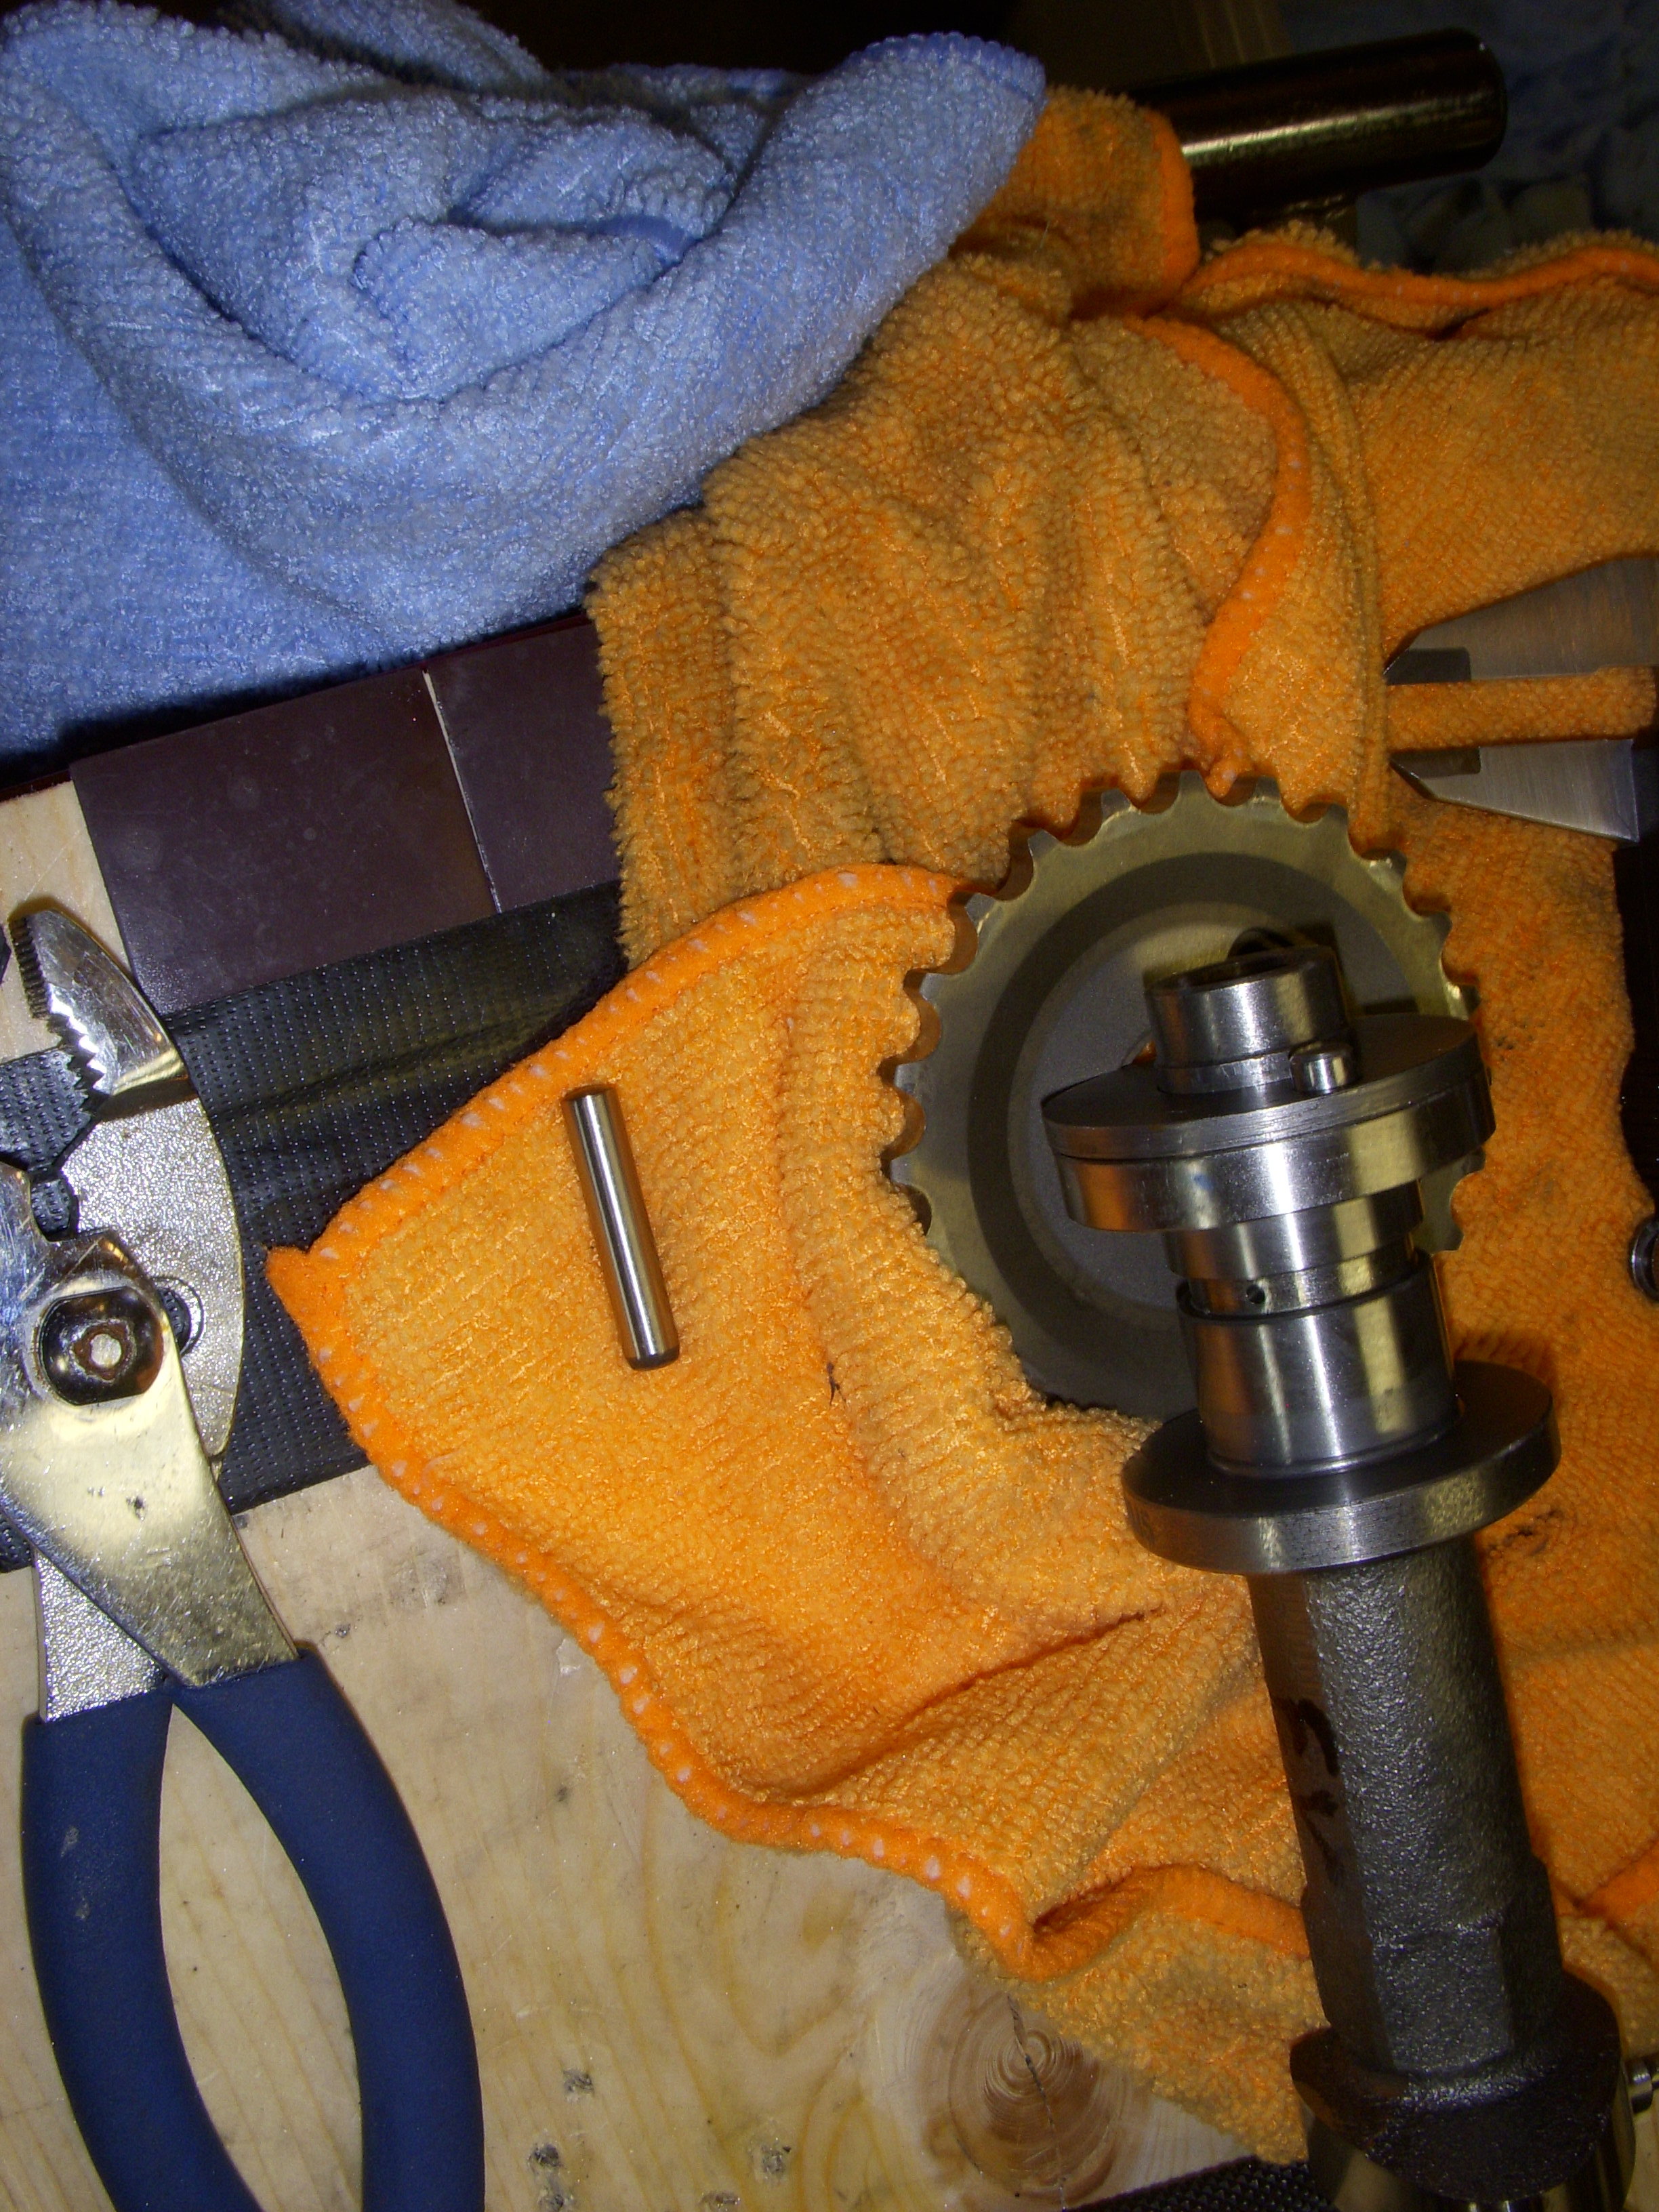
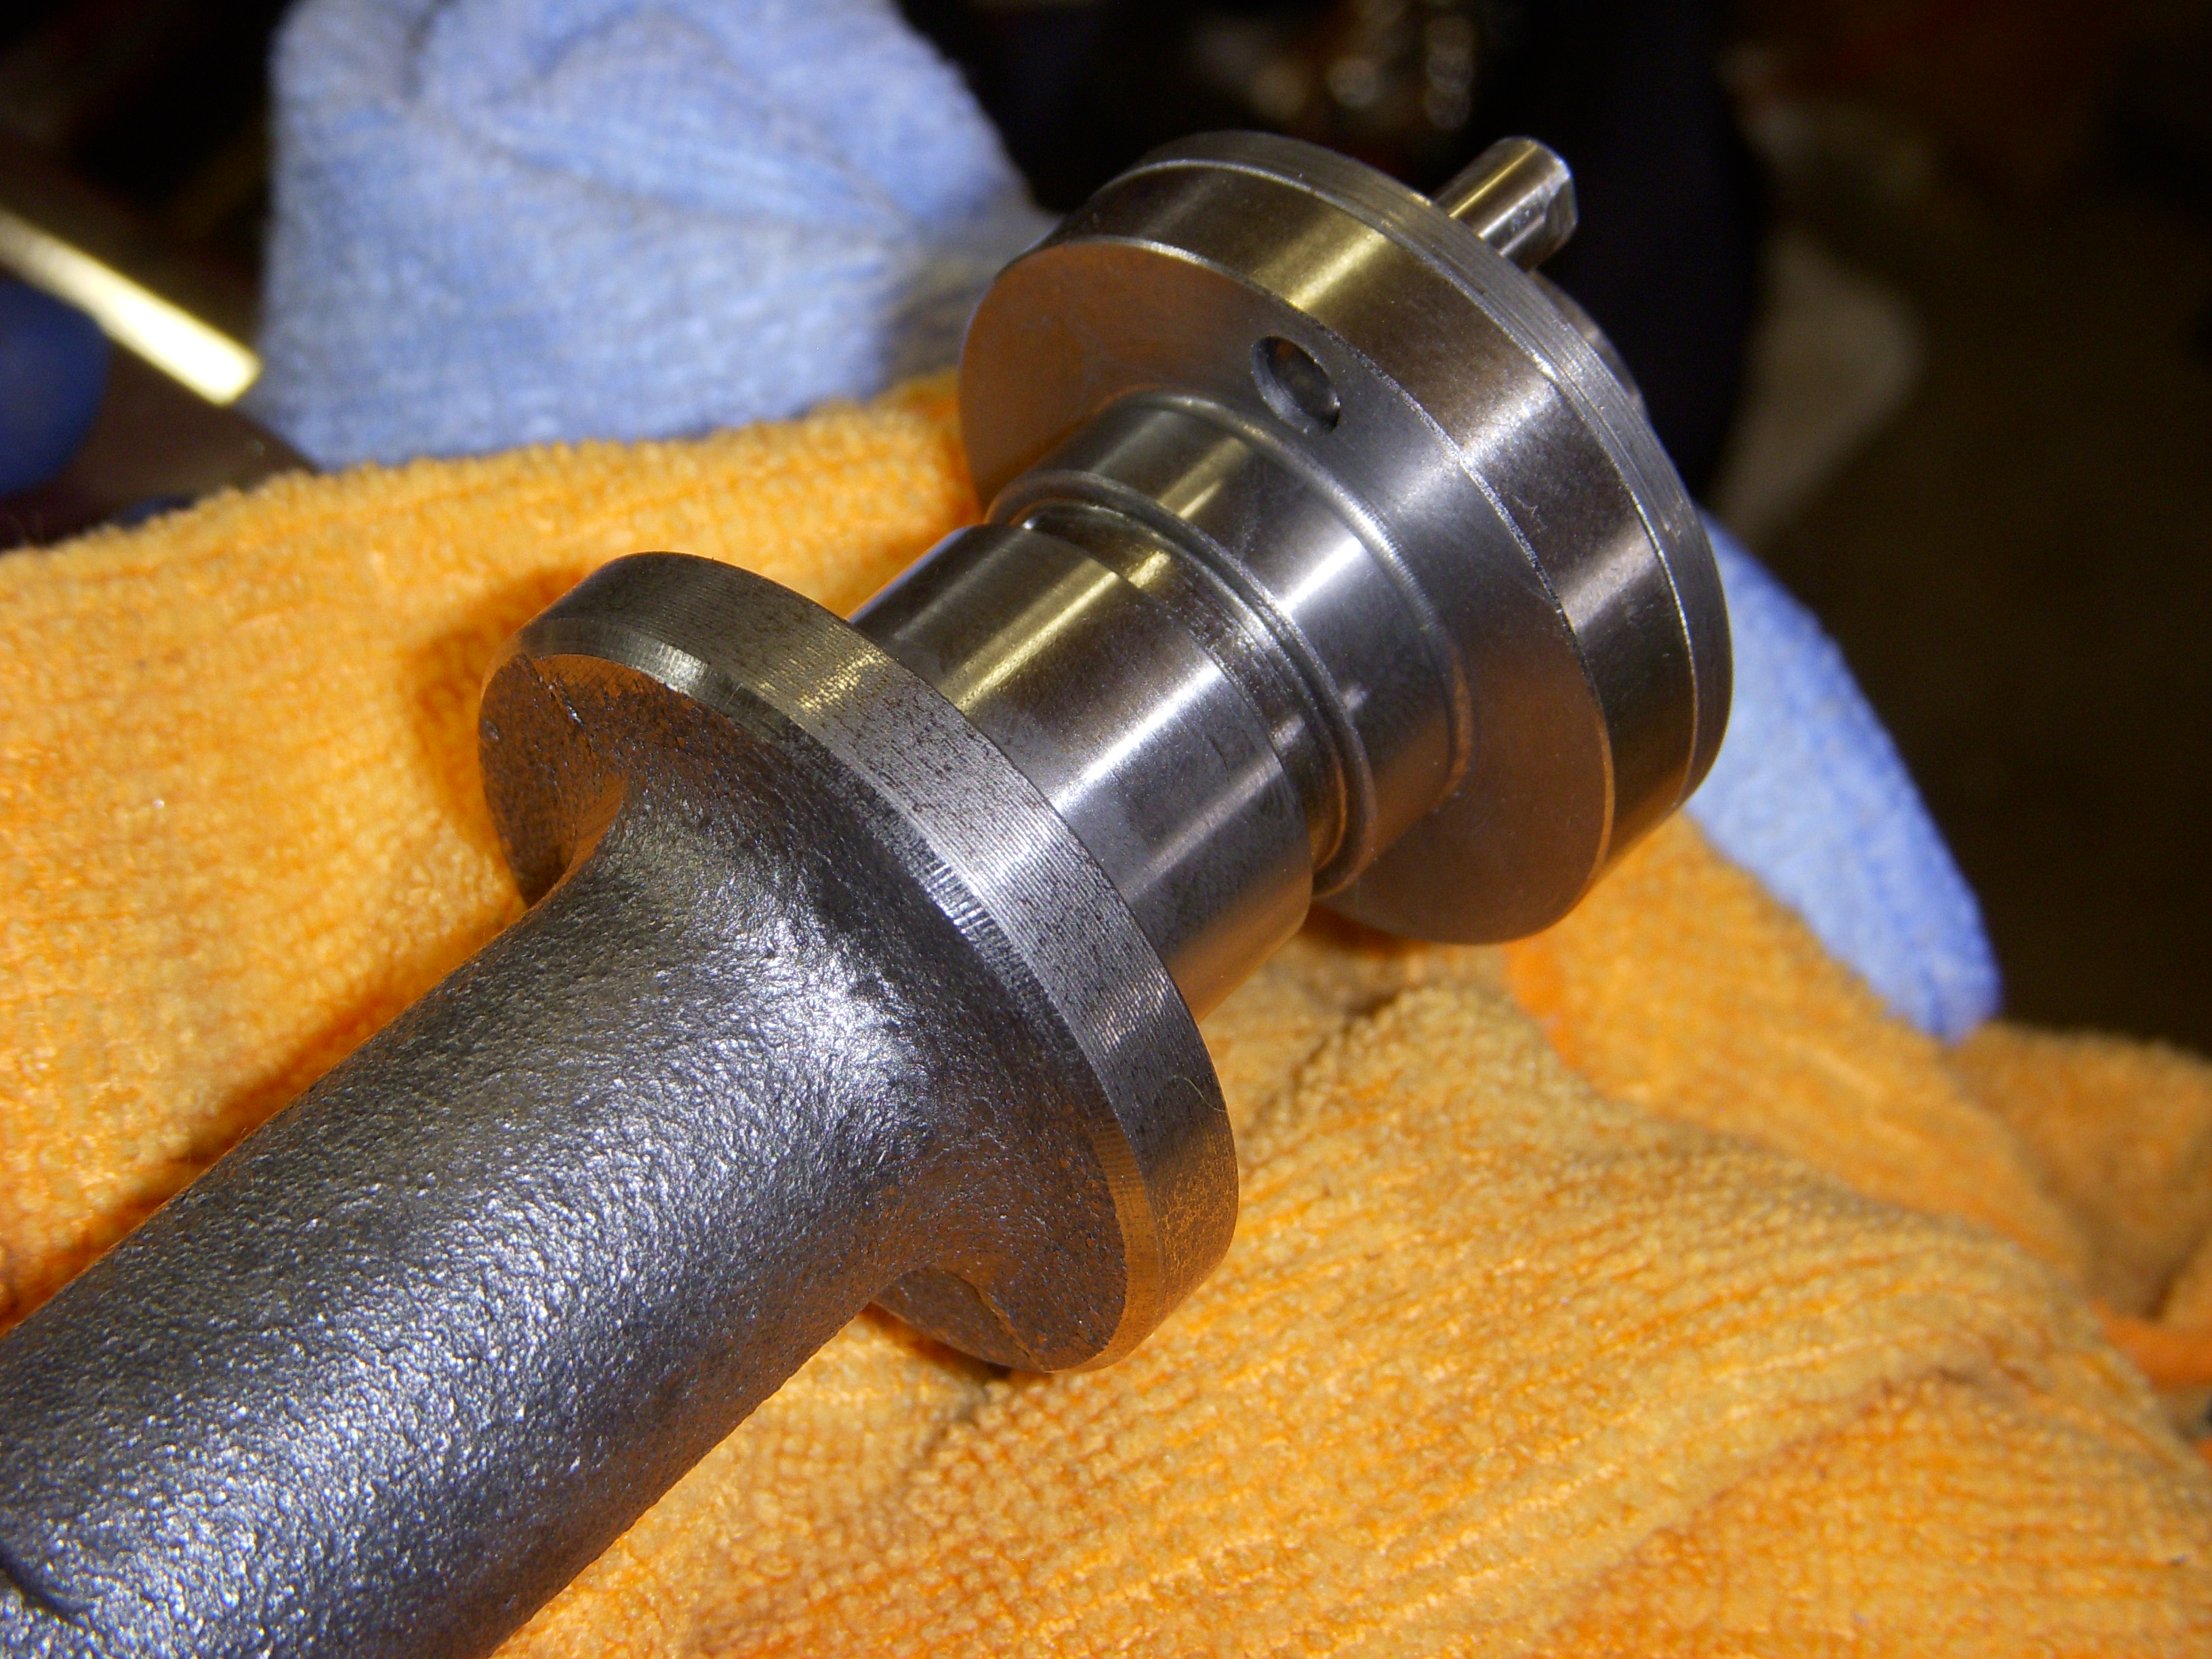
I did figure out how to use an intake cam for the cam trigger signal for the Megasquirt3-PRO, using one of the bumps on the add-on lobe on the back of the intake cam. This could be done from the exhaust cam also, but I'm not going to use either one. I have an OEM Hall sensor that fits thru the 2007 Altima valve cover. I'll grind off the other three lobes when I'm sure.
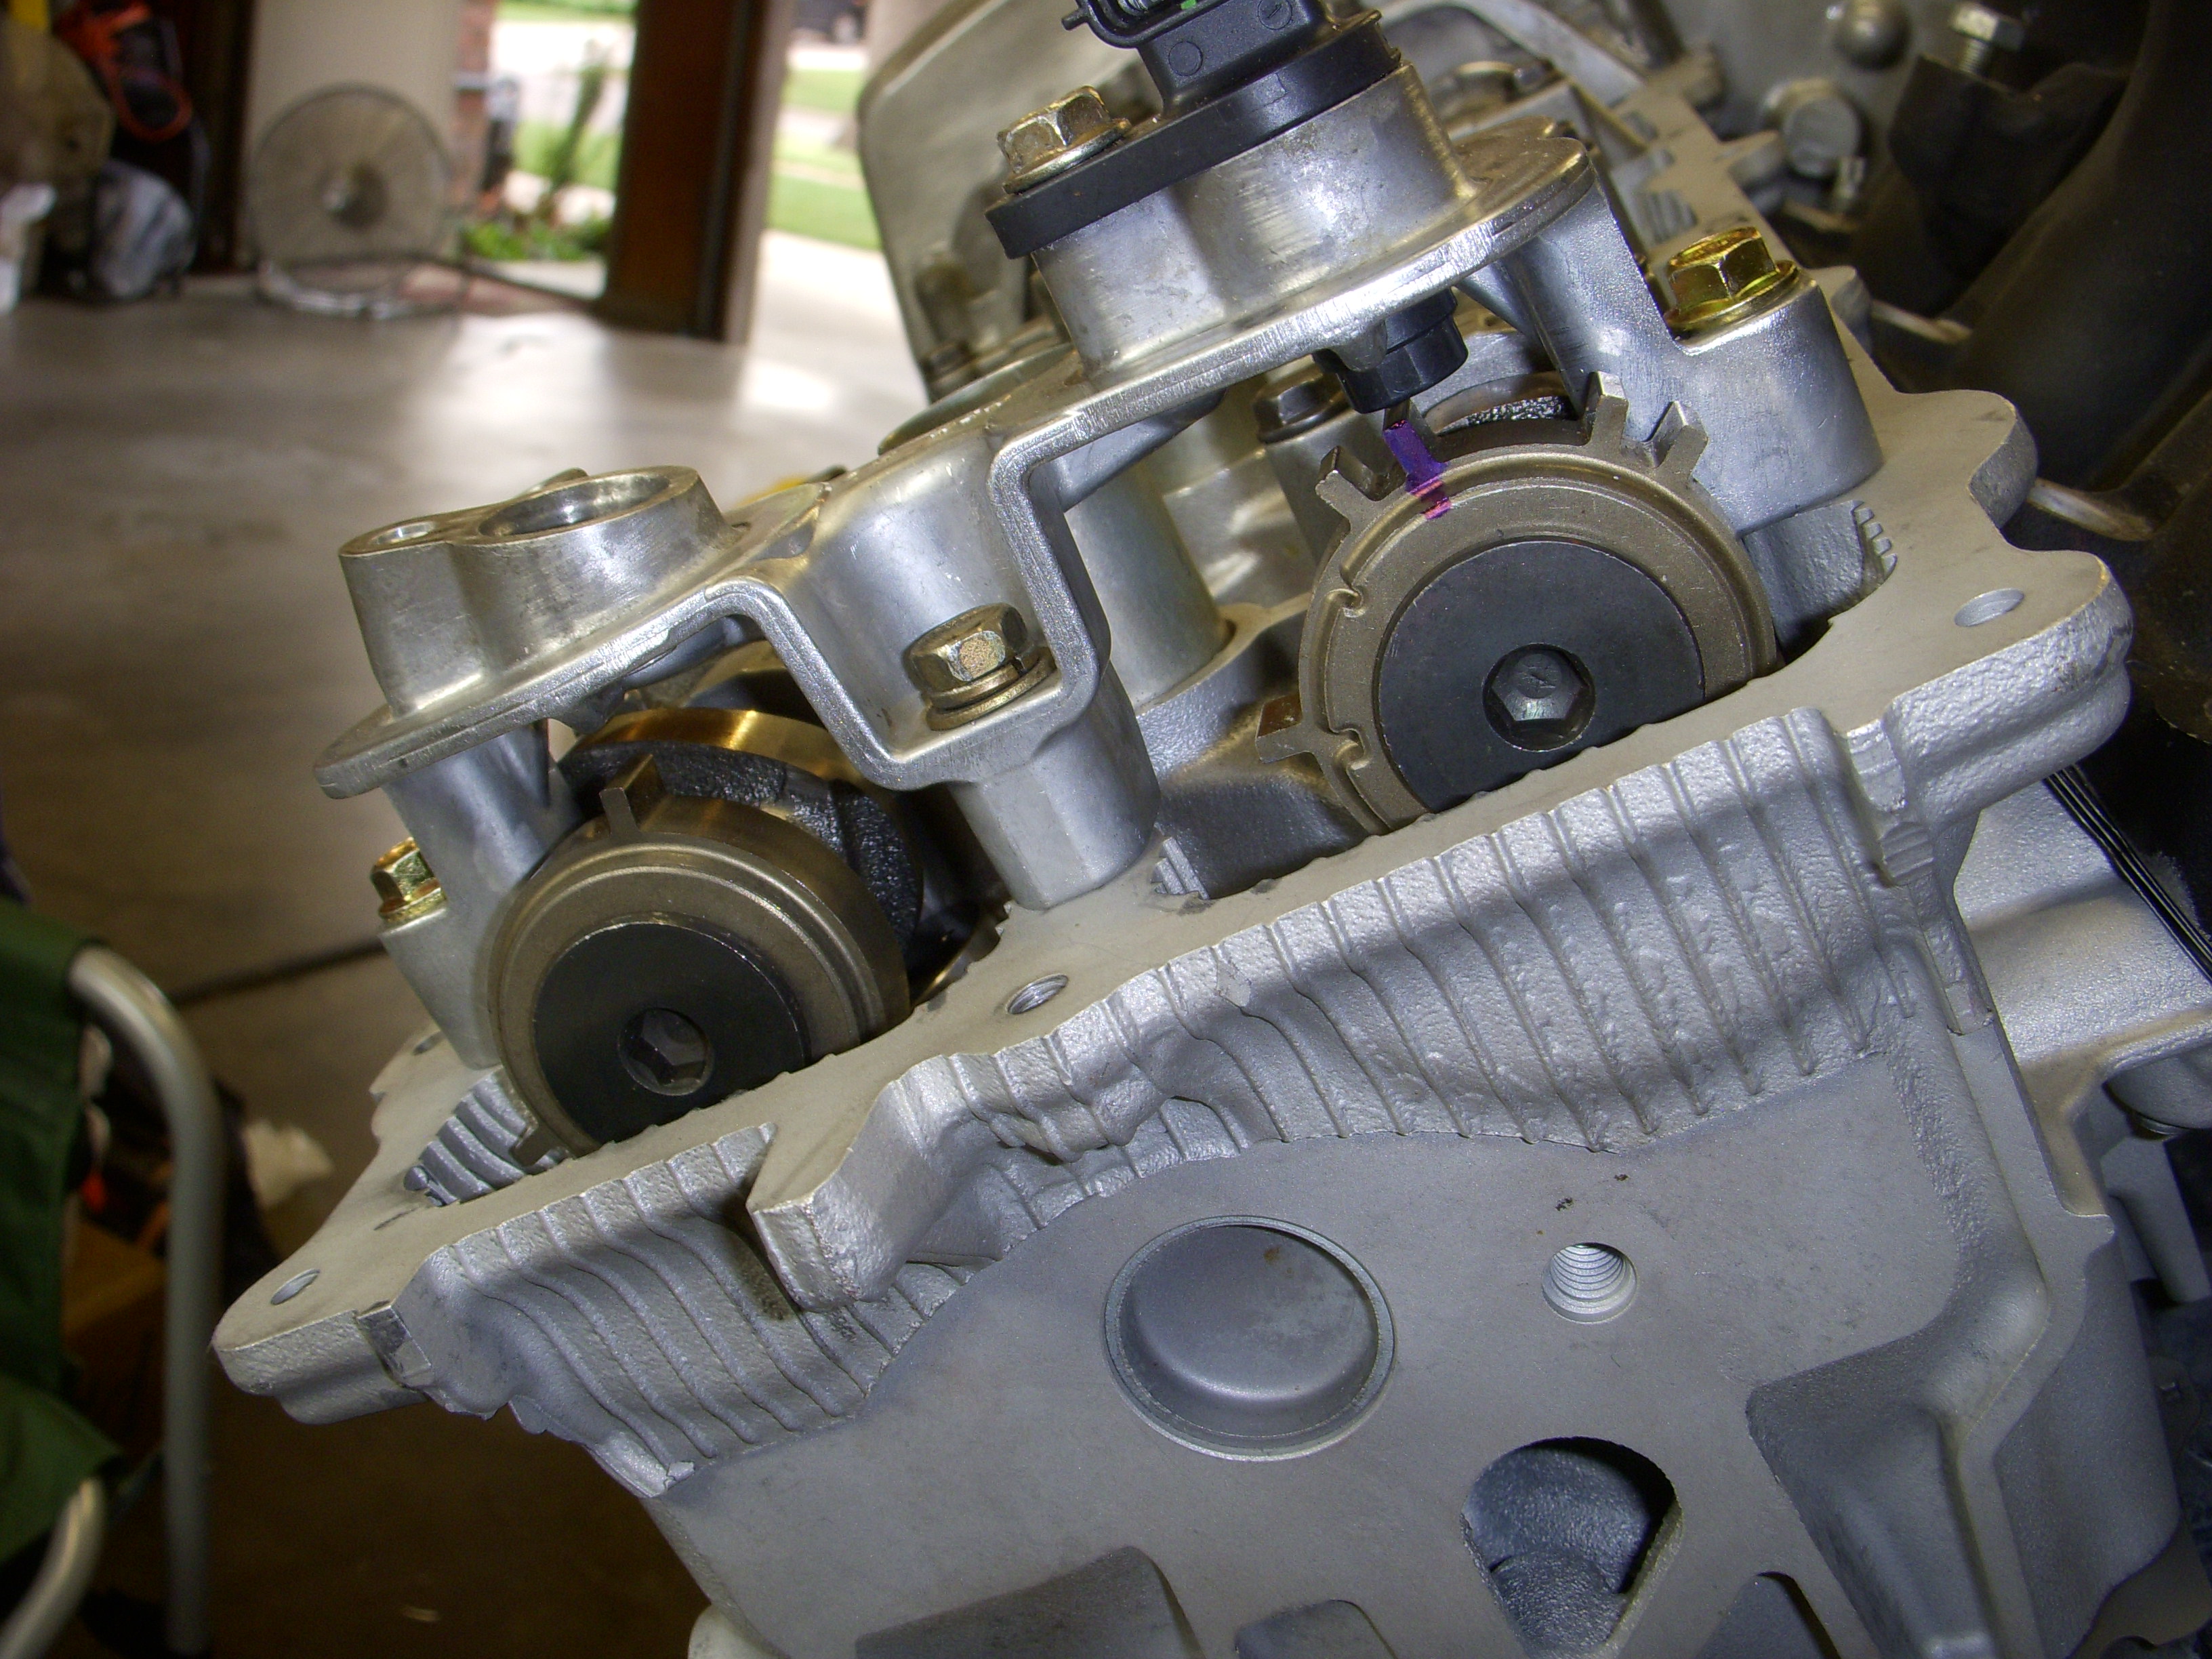
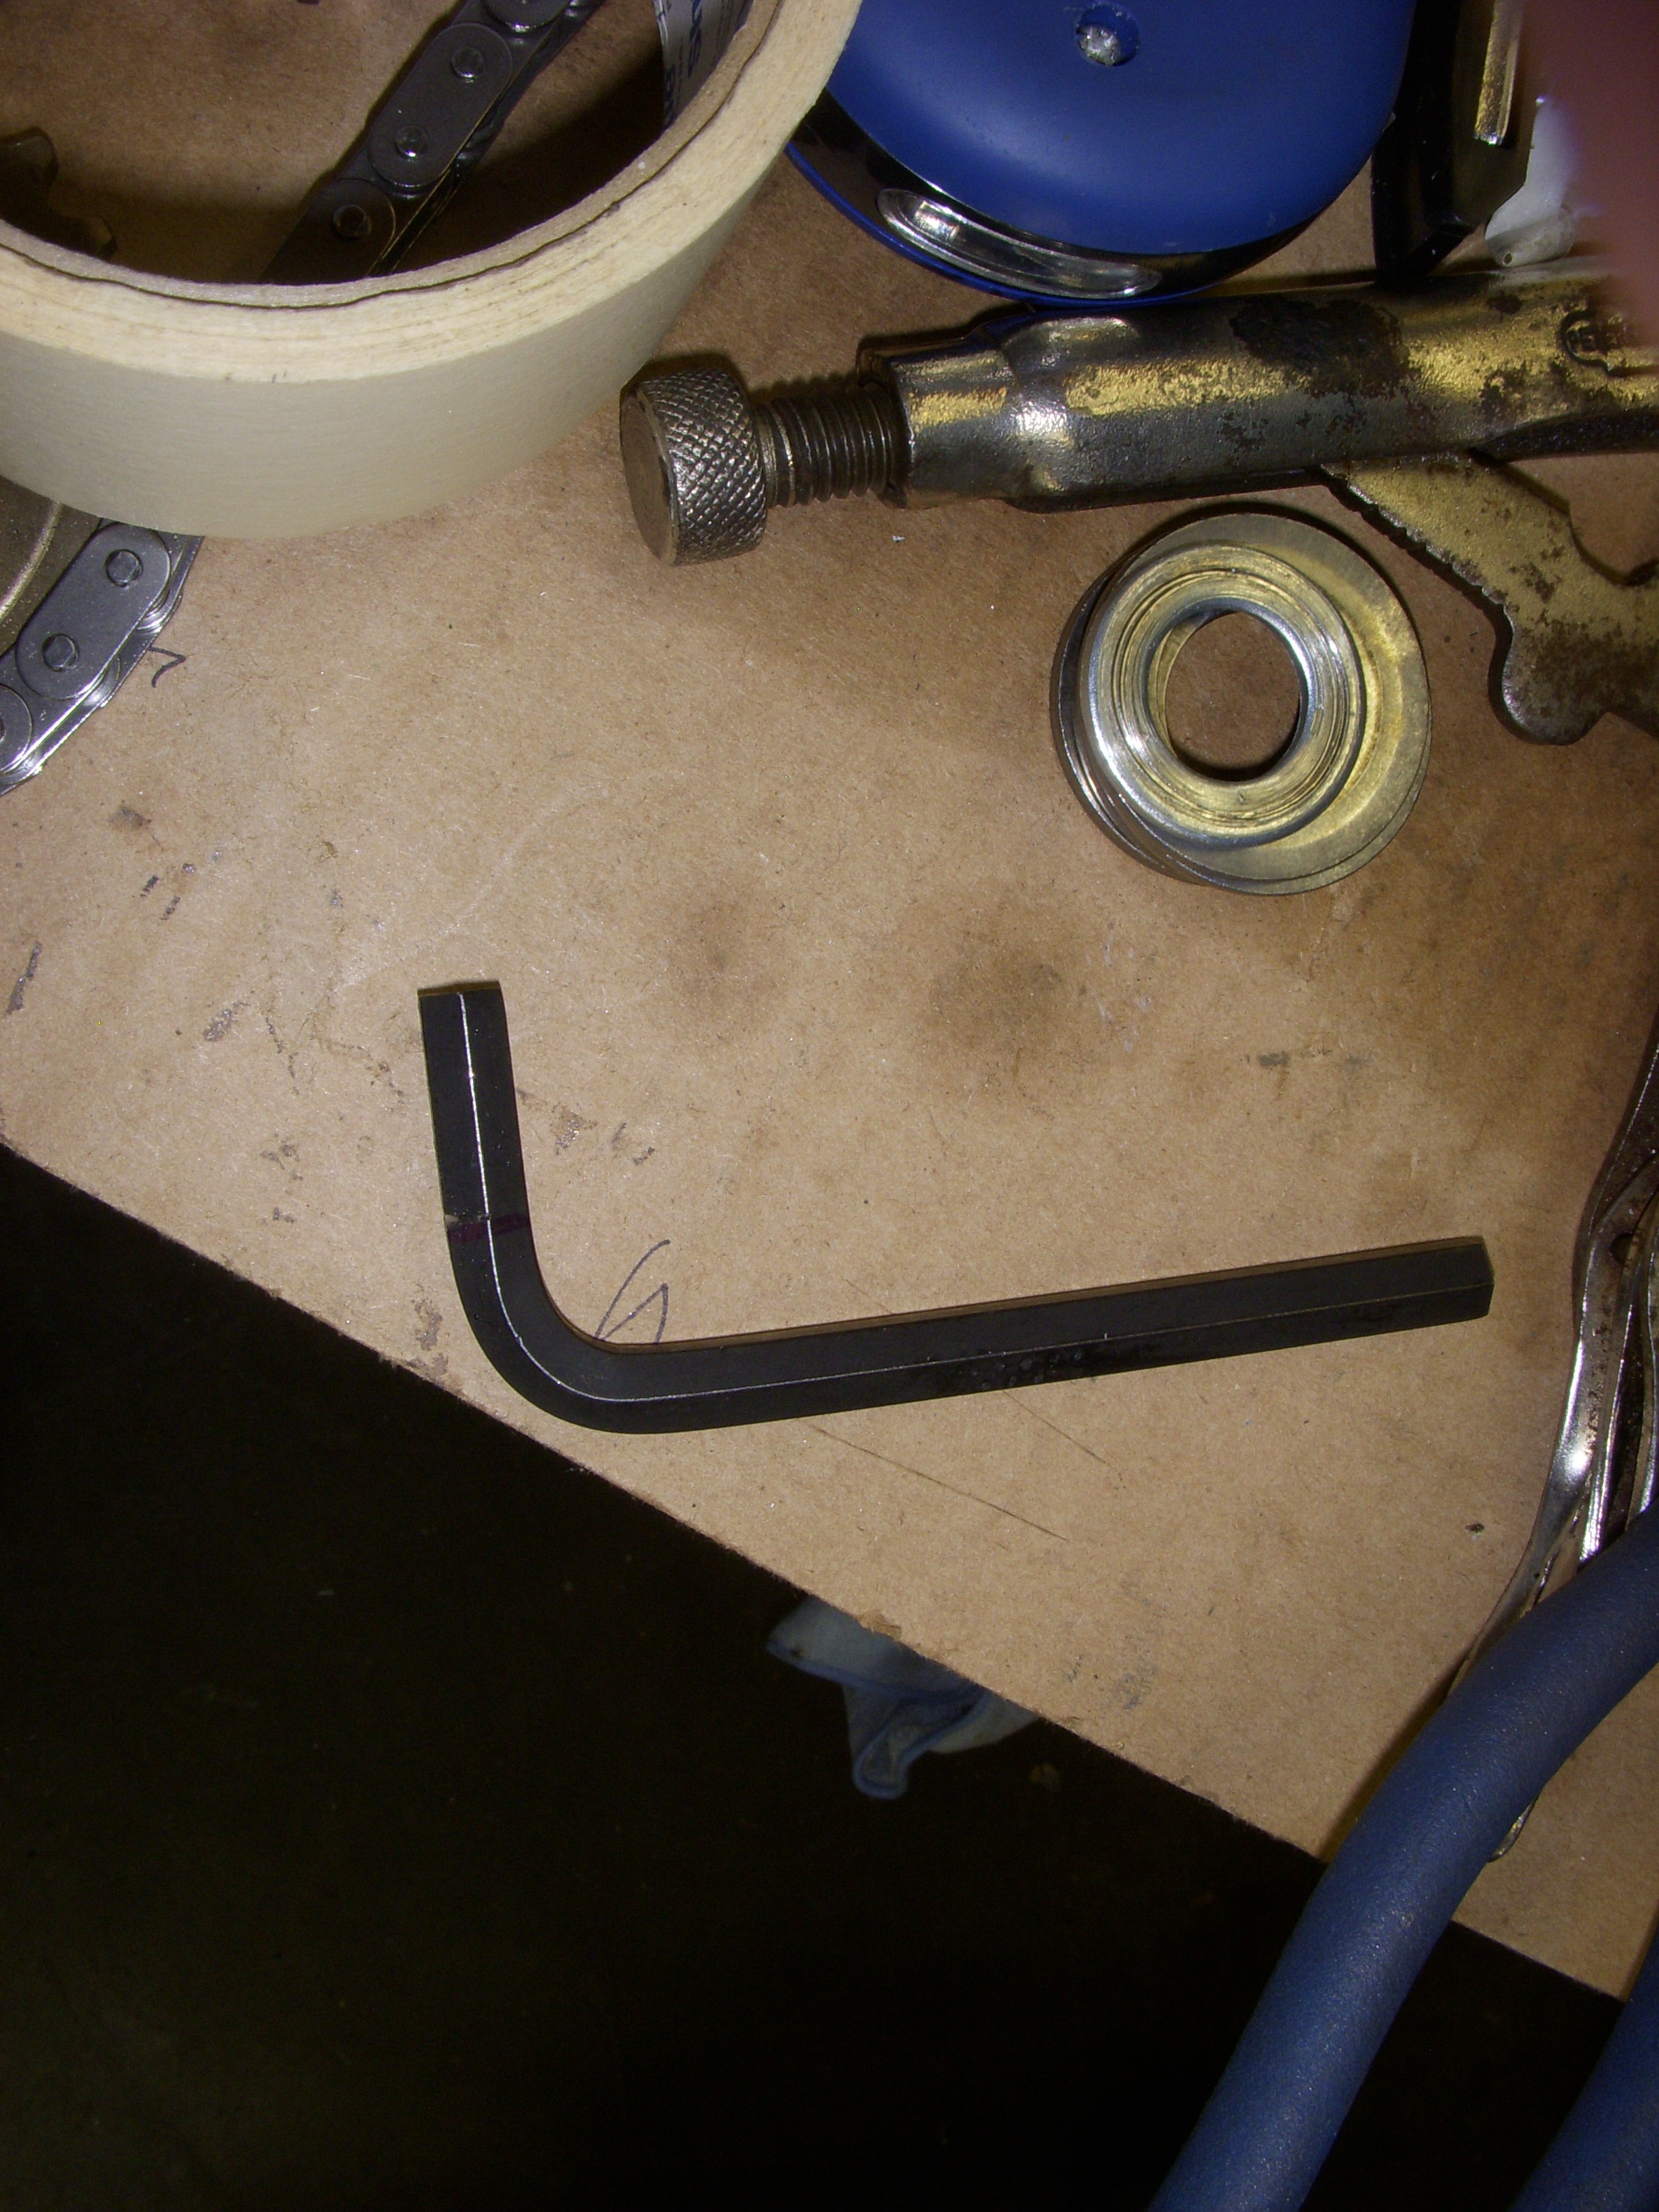
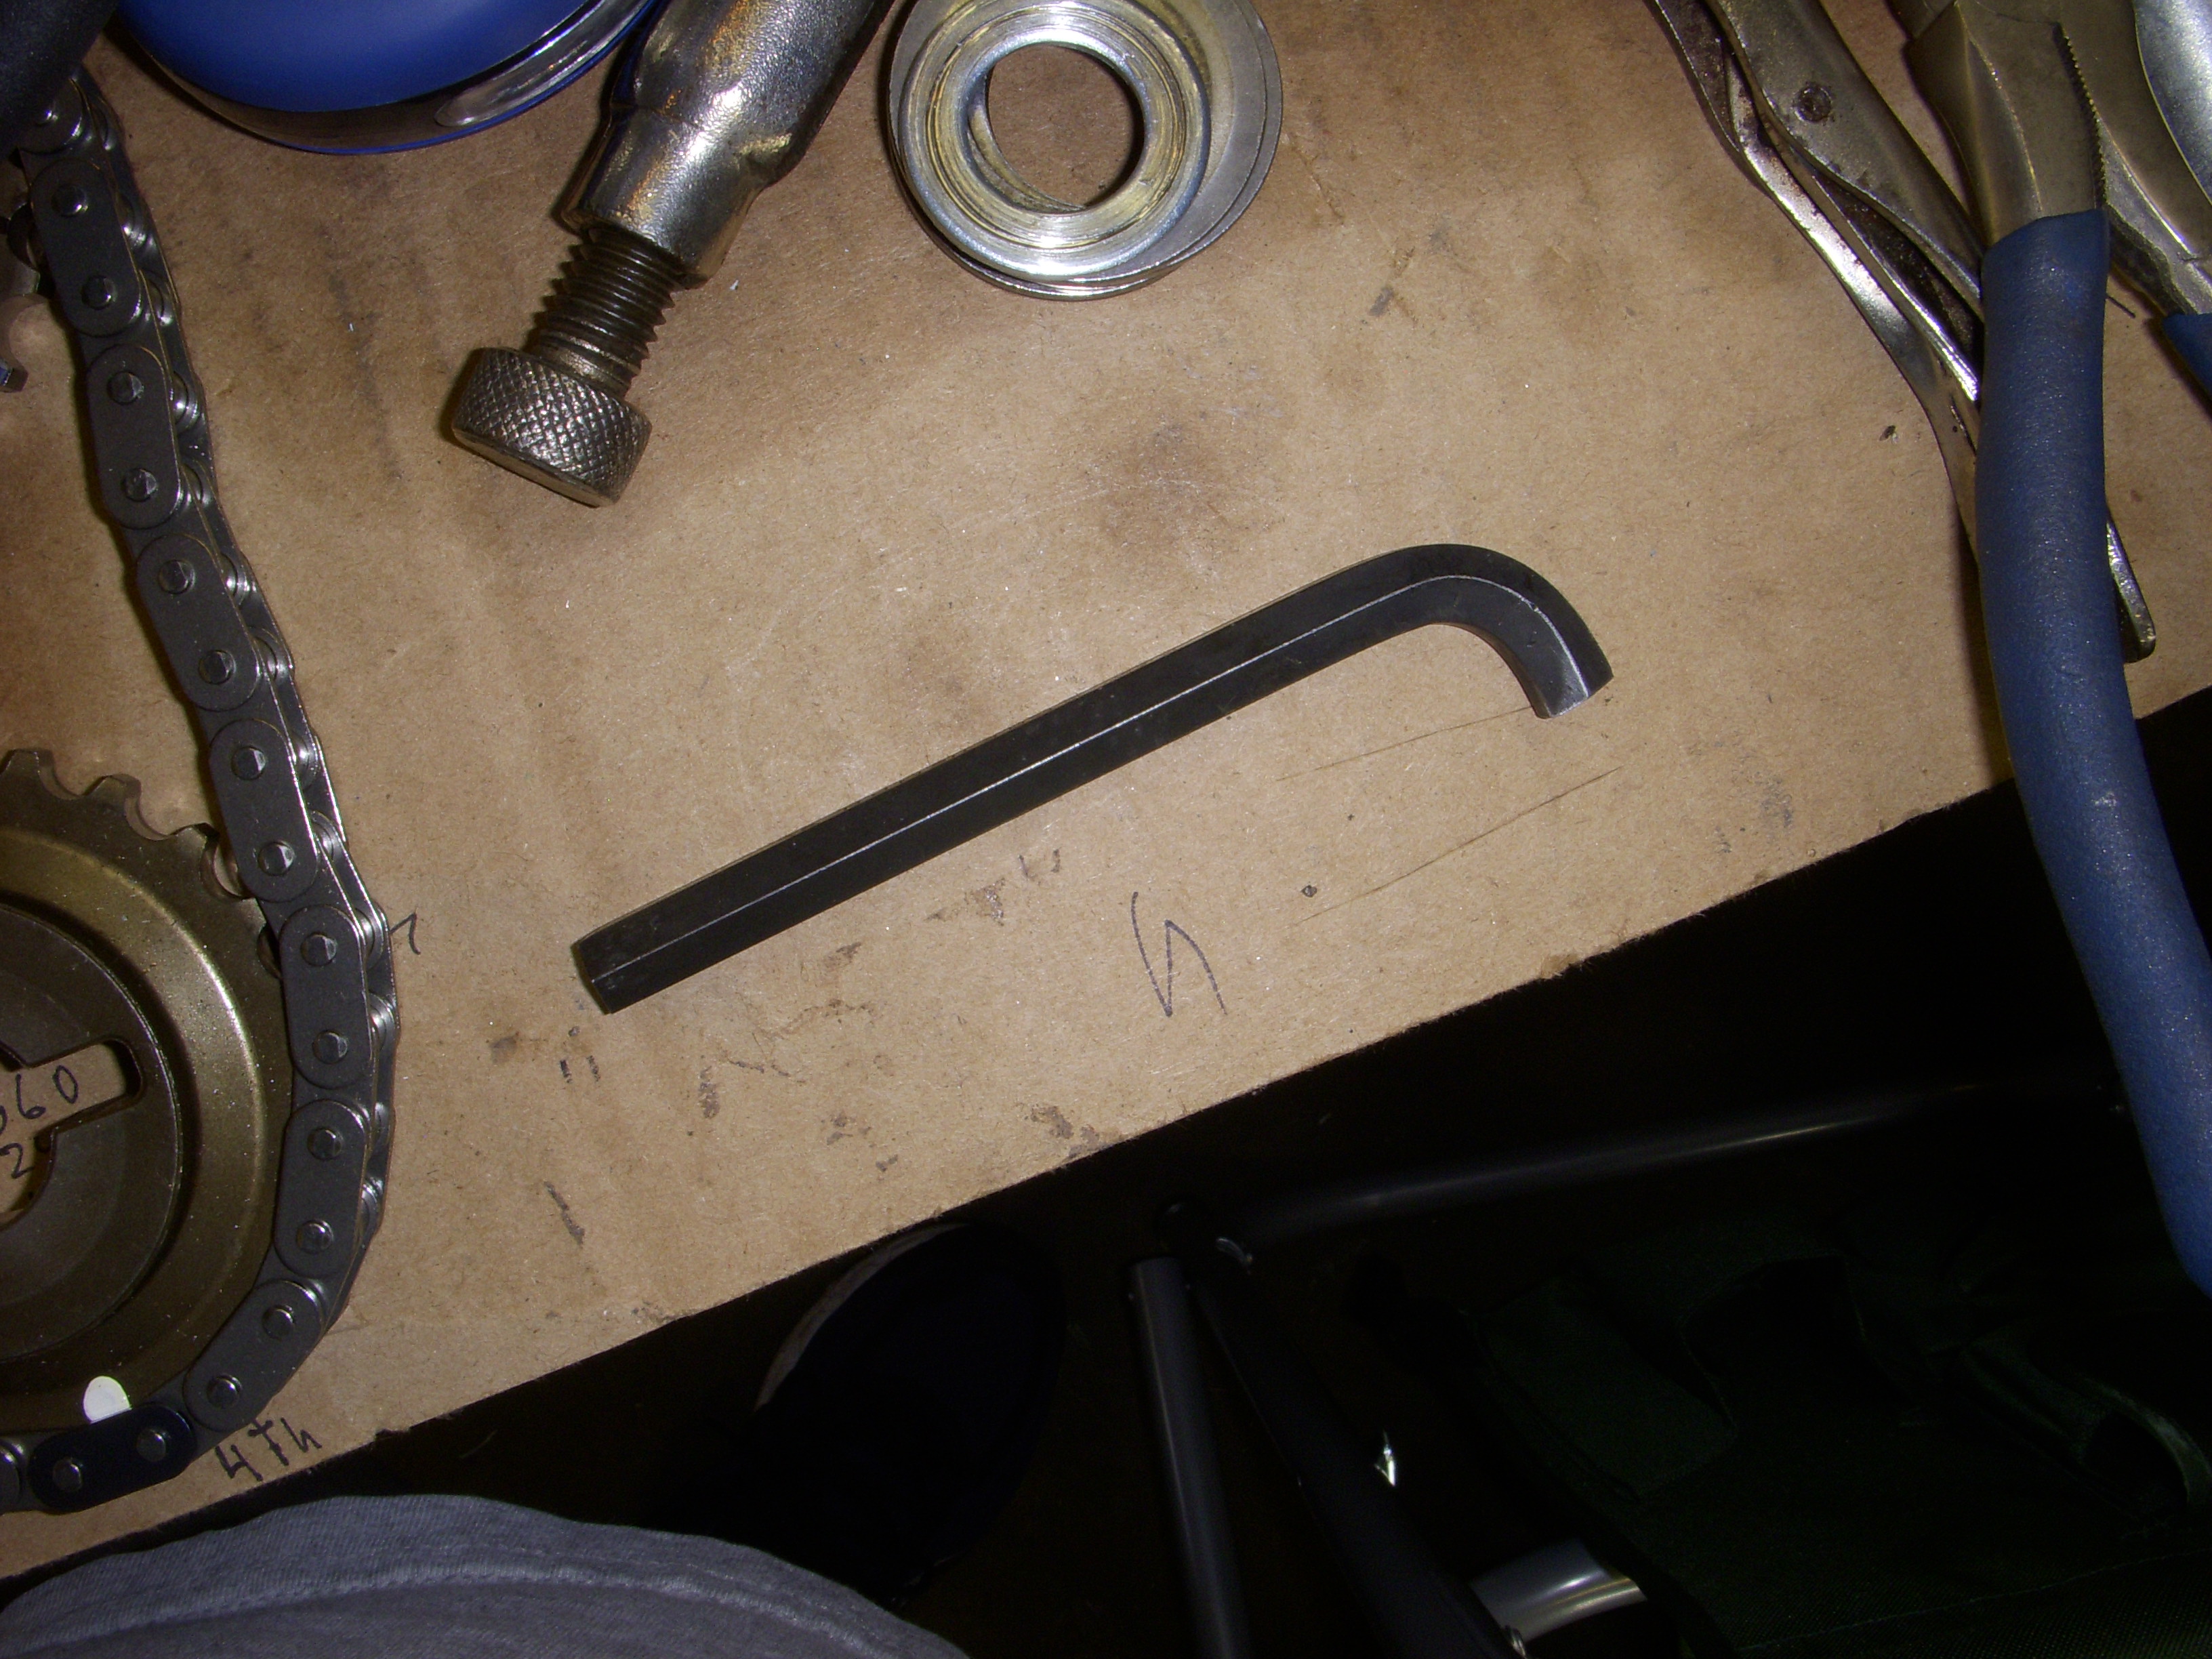
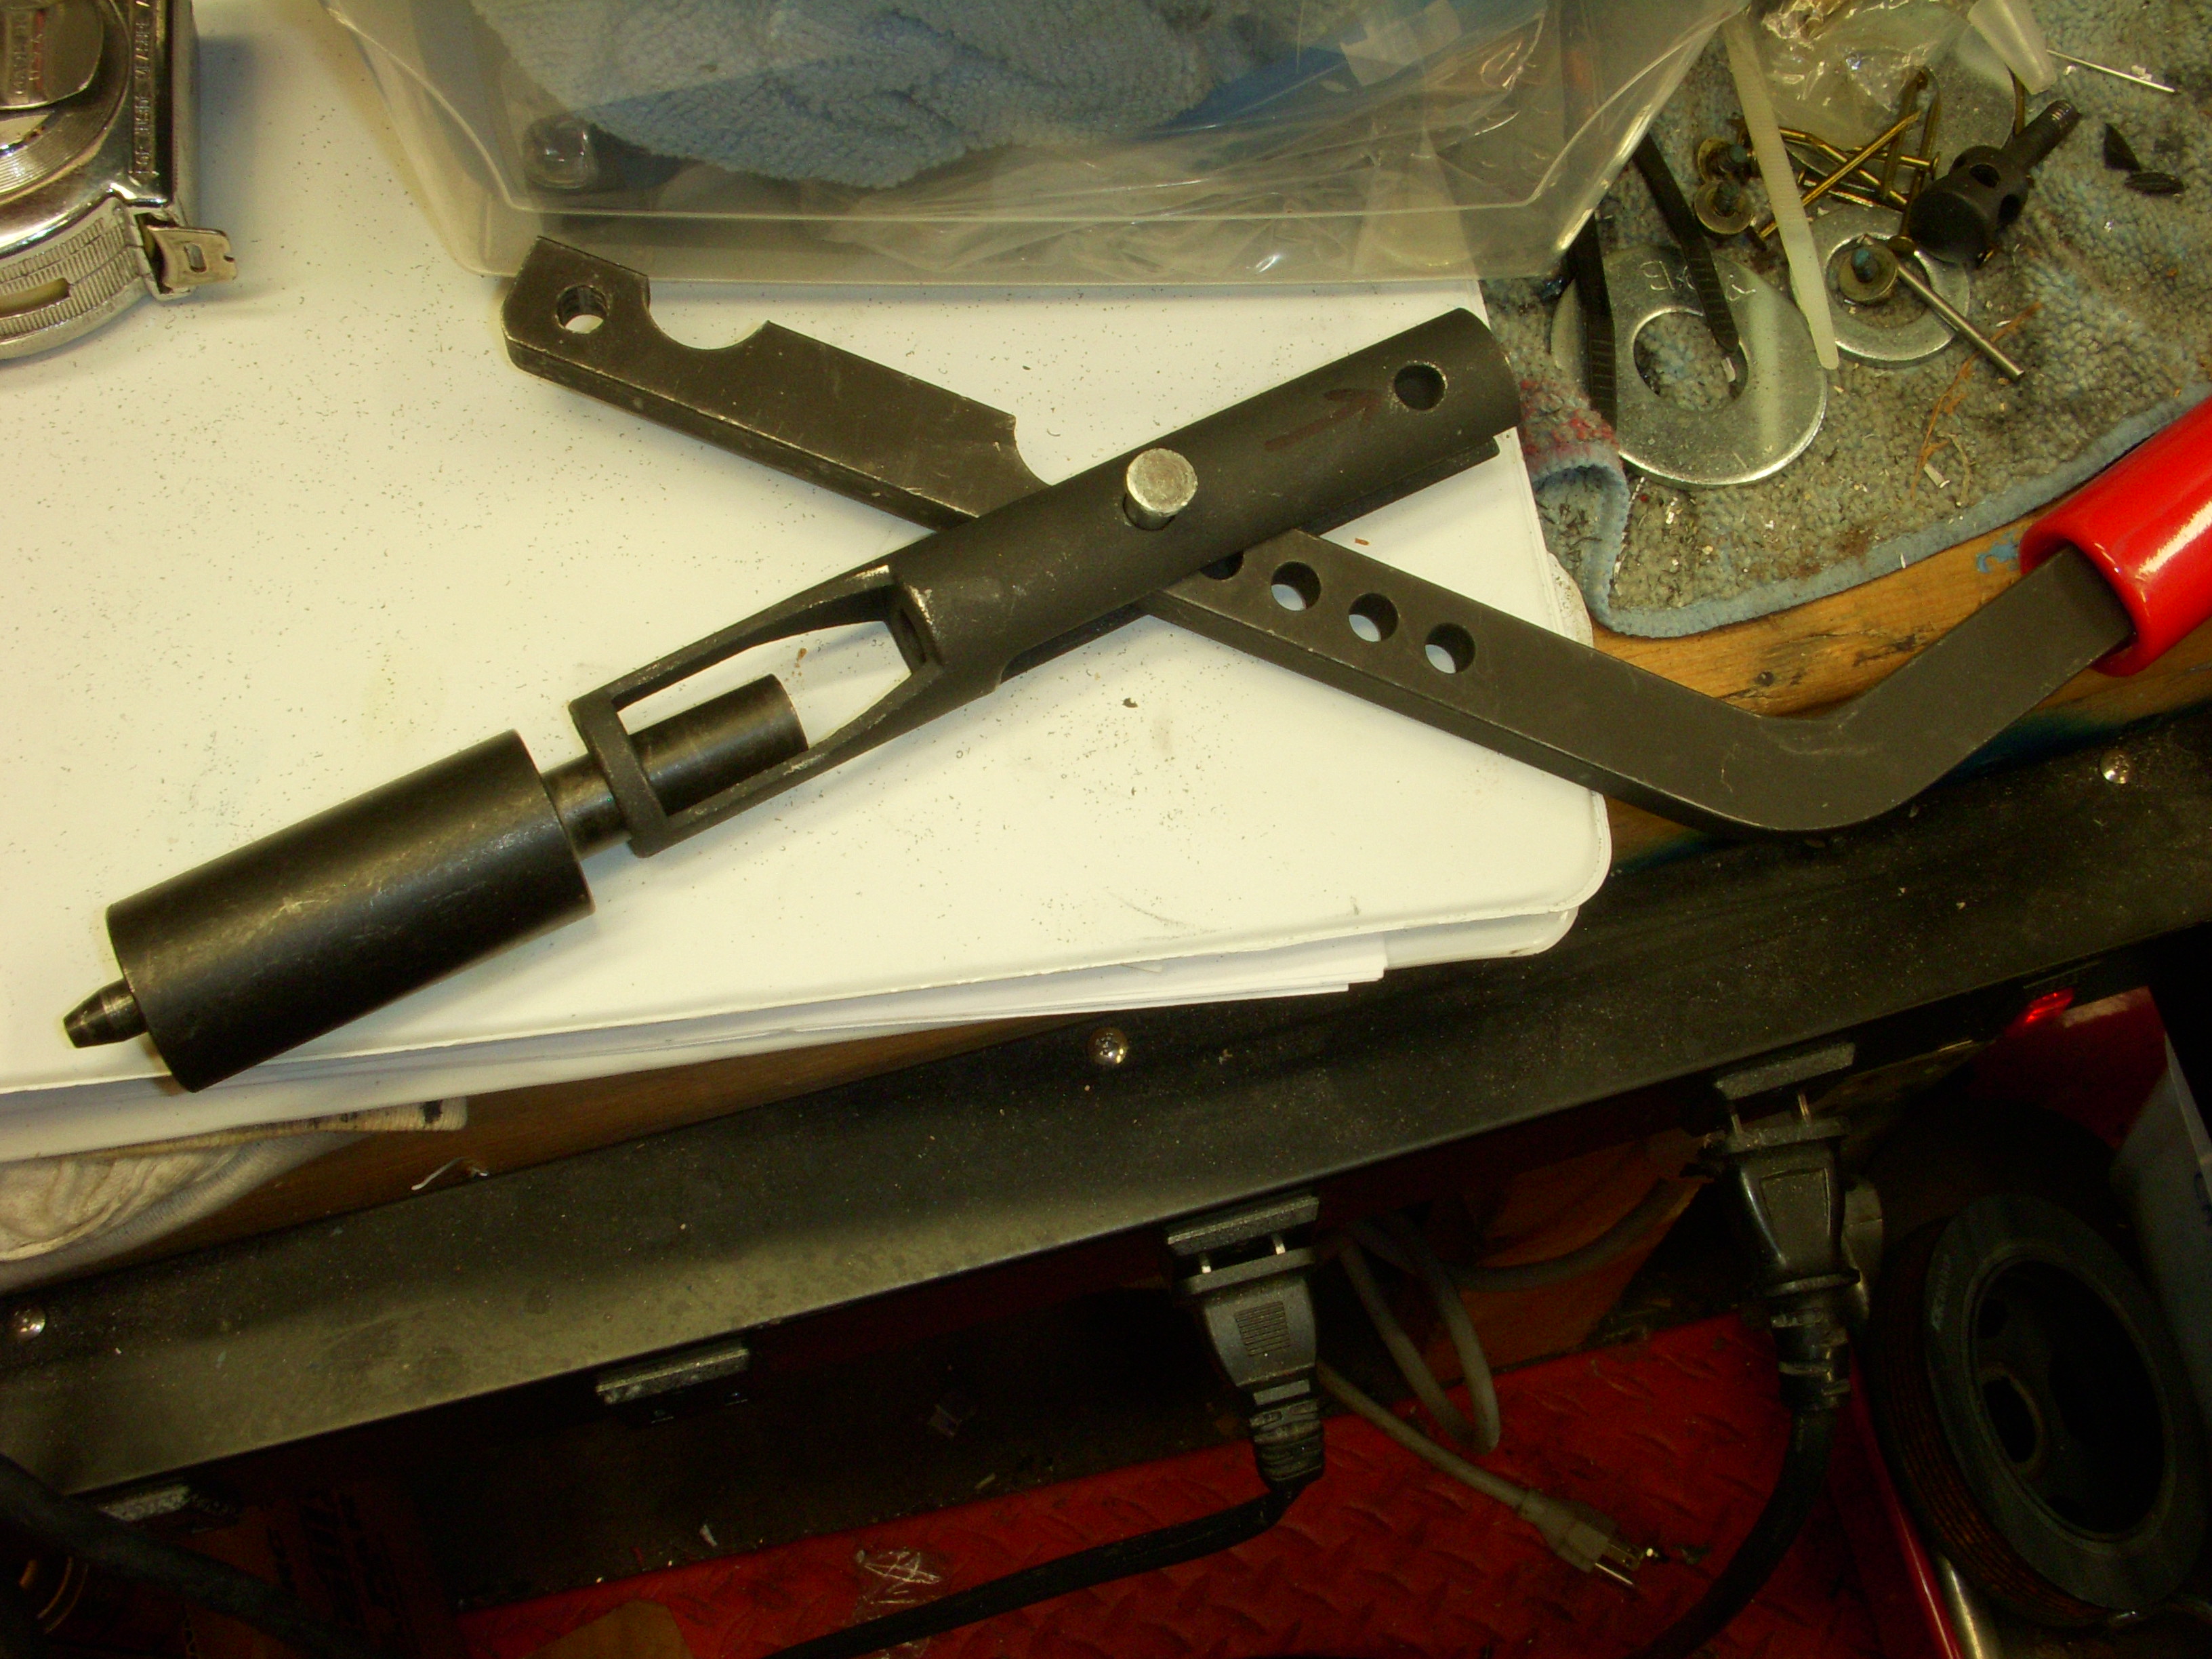
Since that part comes off the back of either cam, and it needs a 8mm allen wrench to loosen the retaining screw/bolt, I had to create one from an existing 8mm allen wrench so I can change parts without taking out cams.
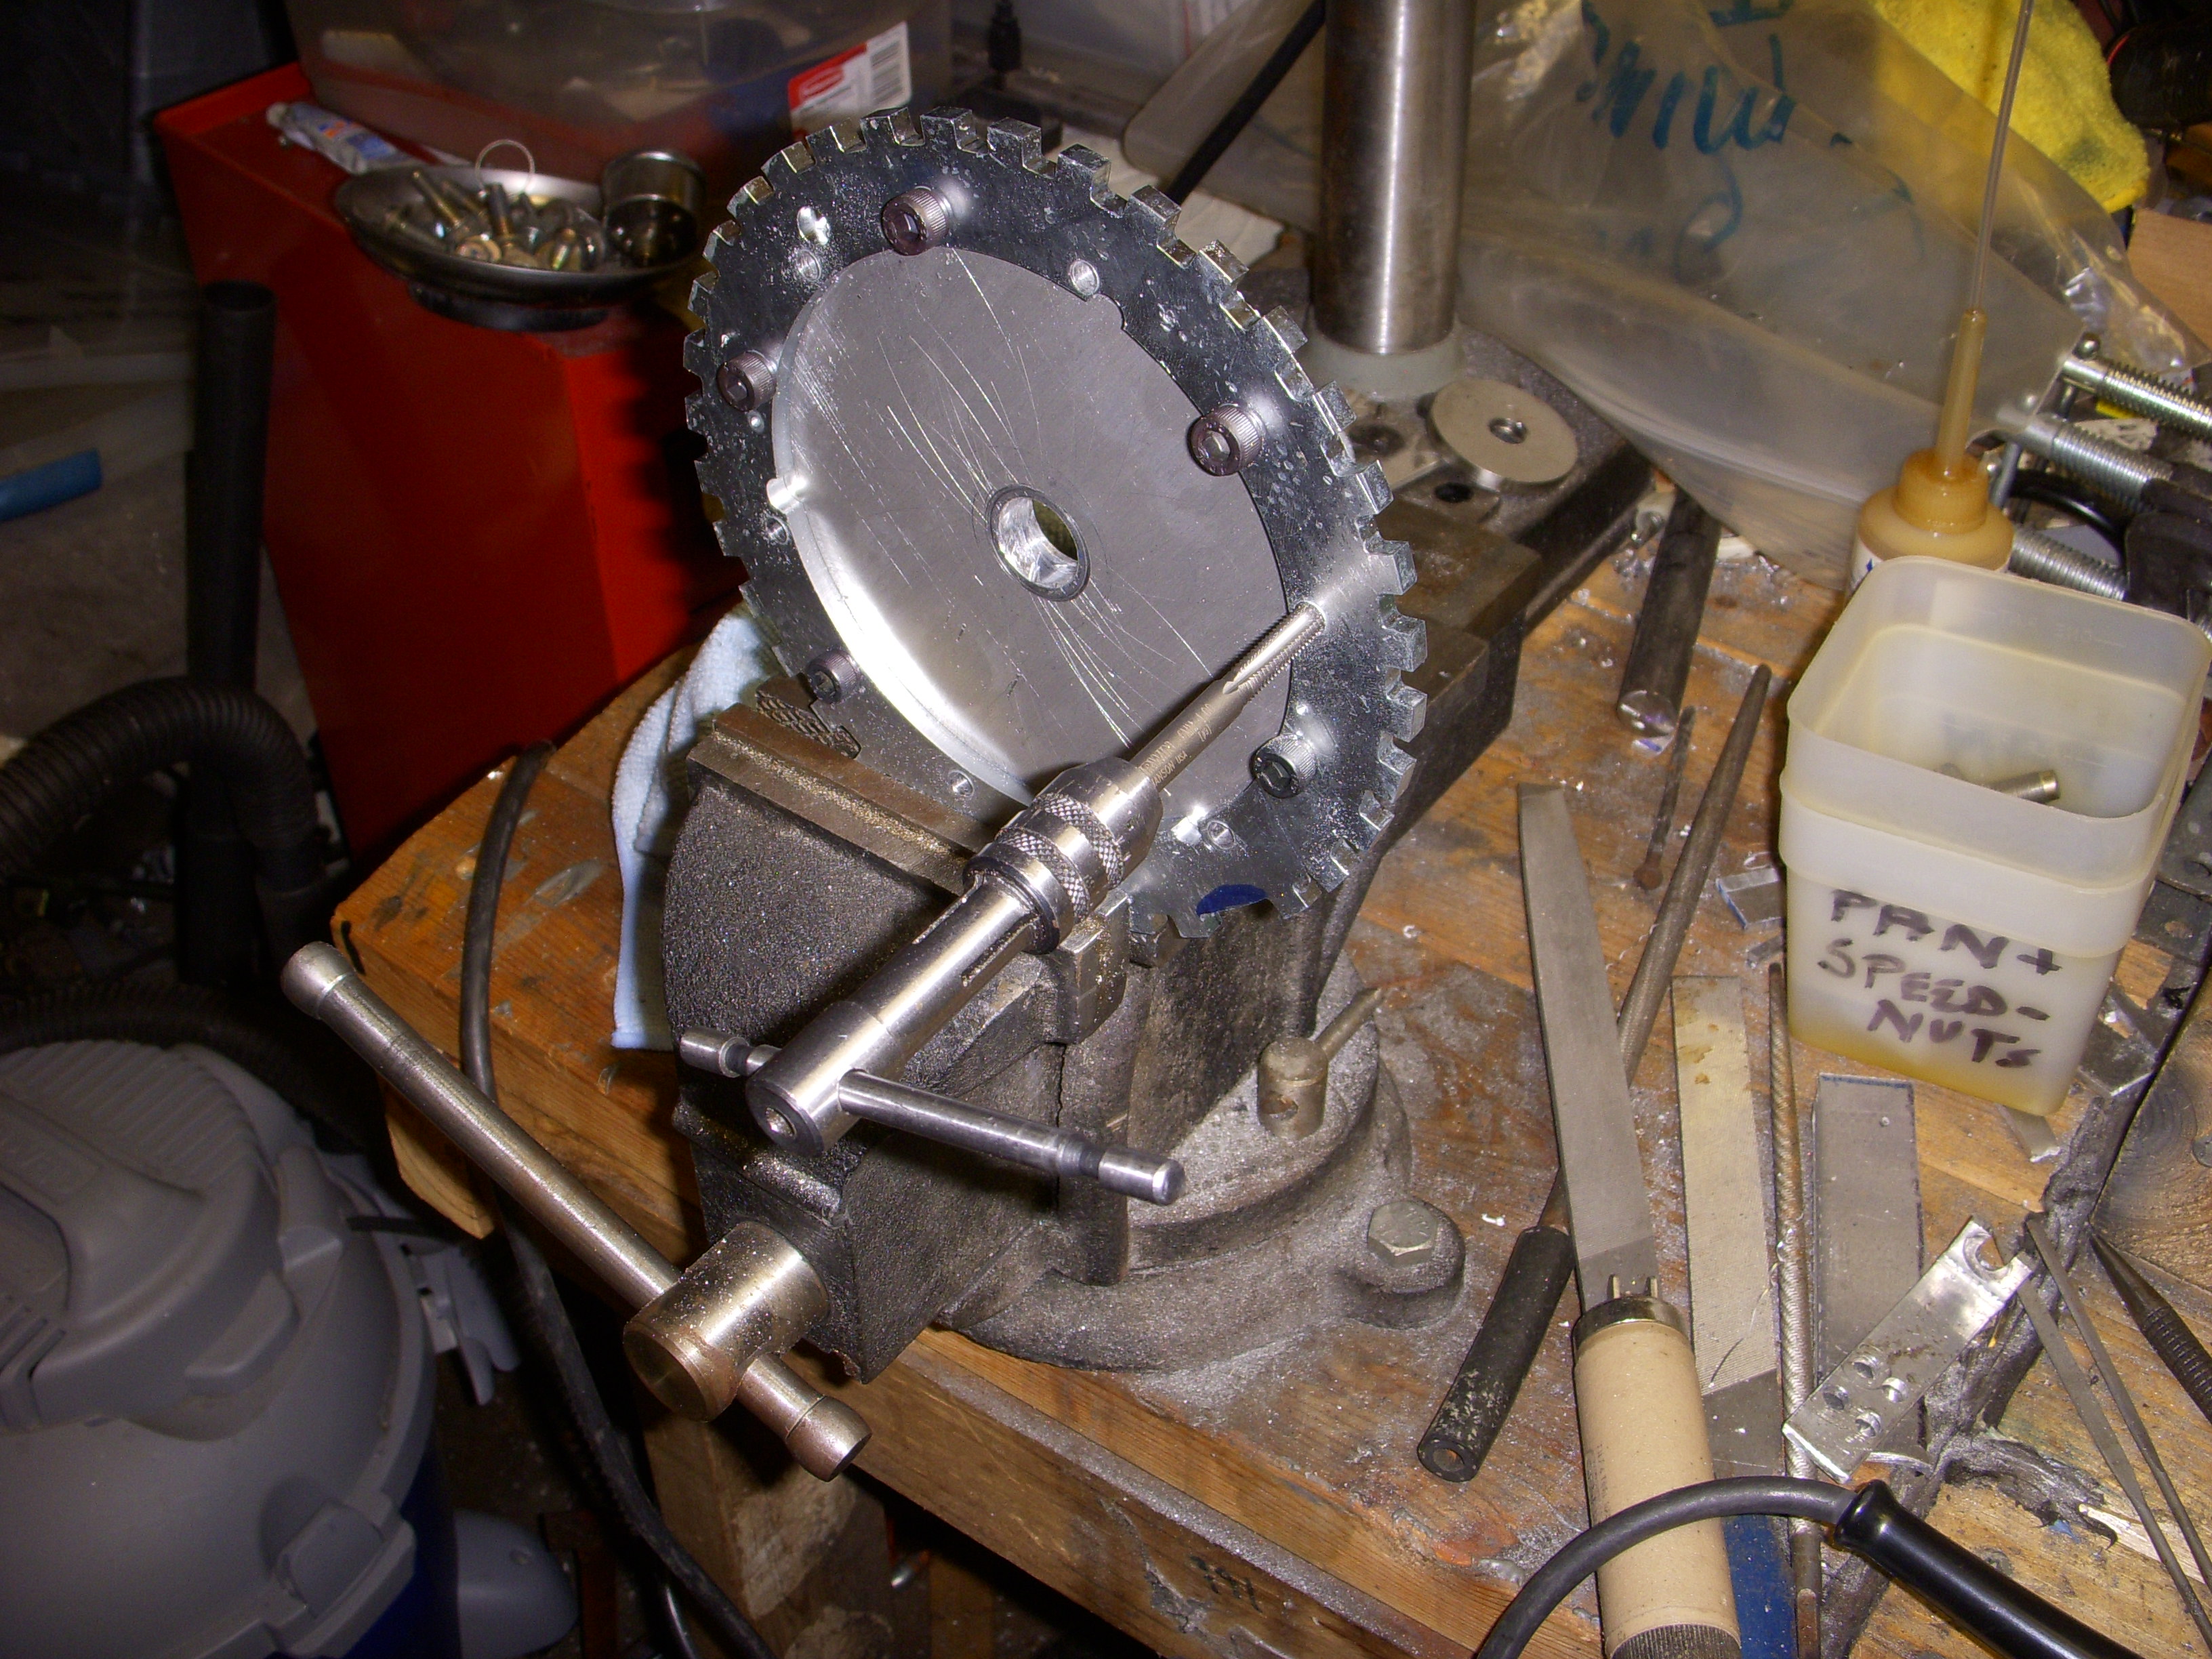
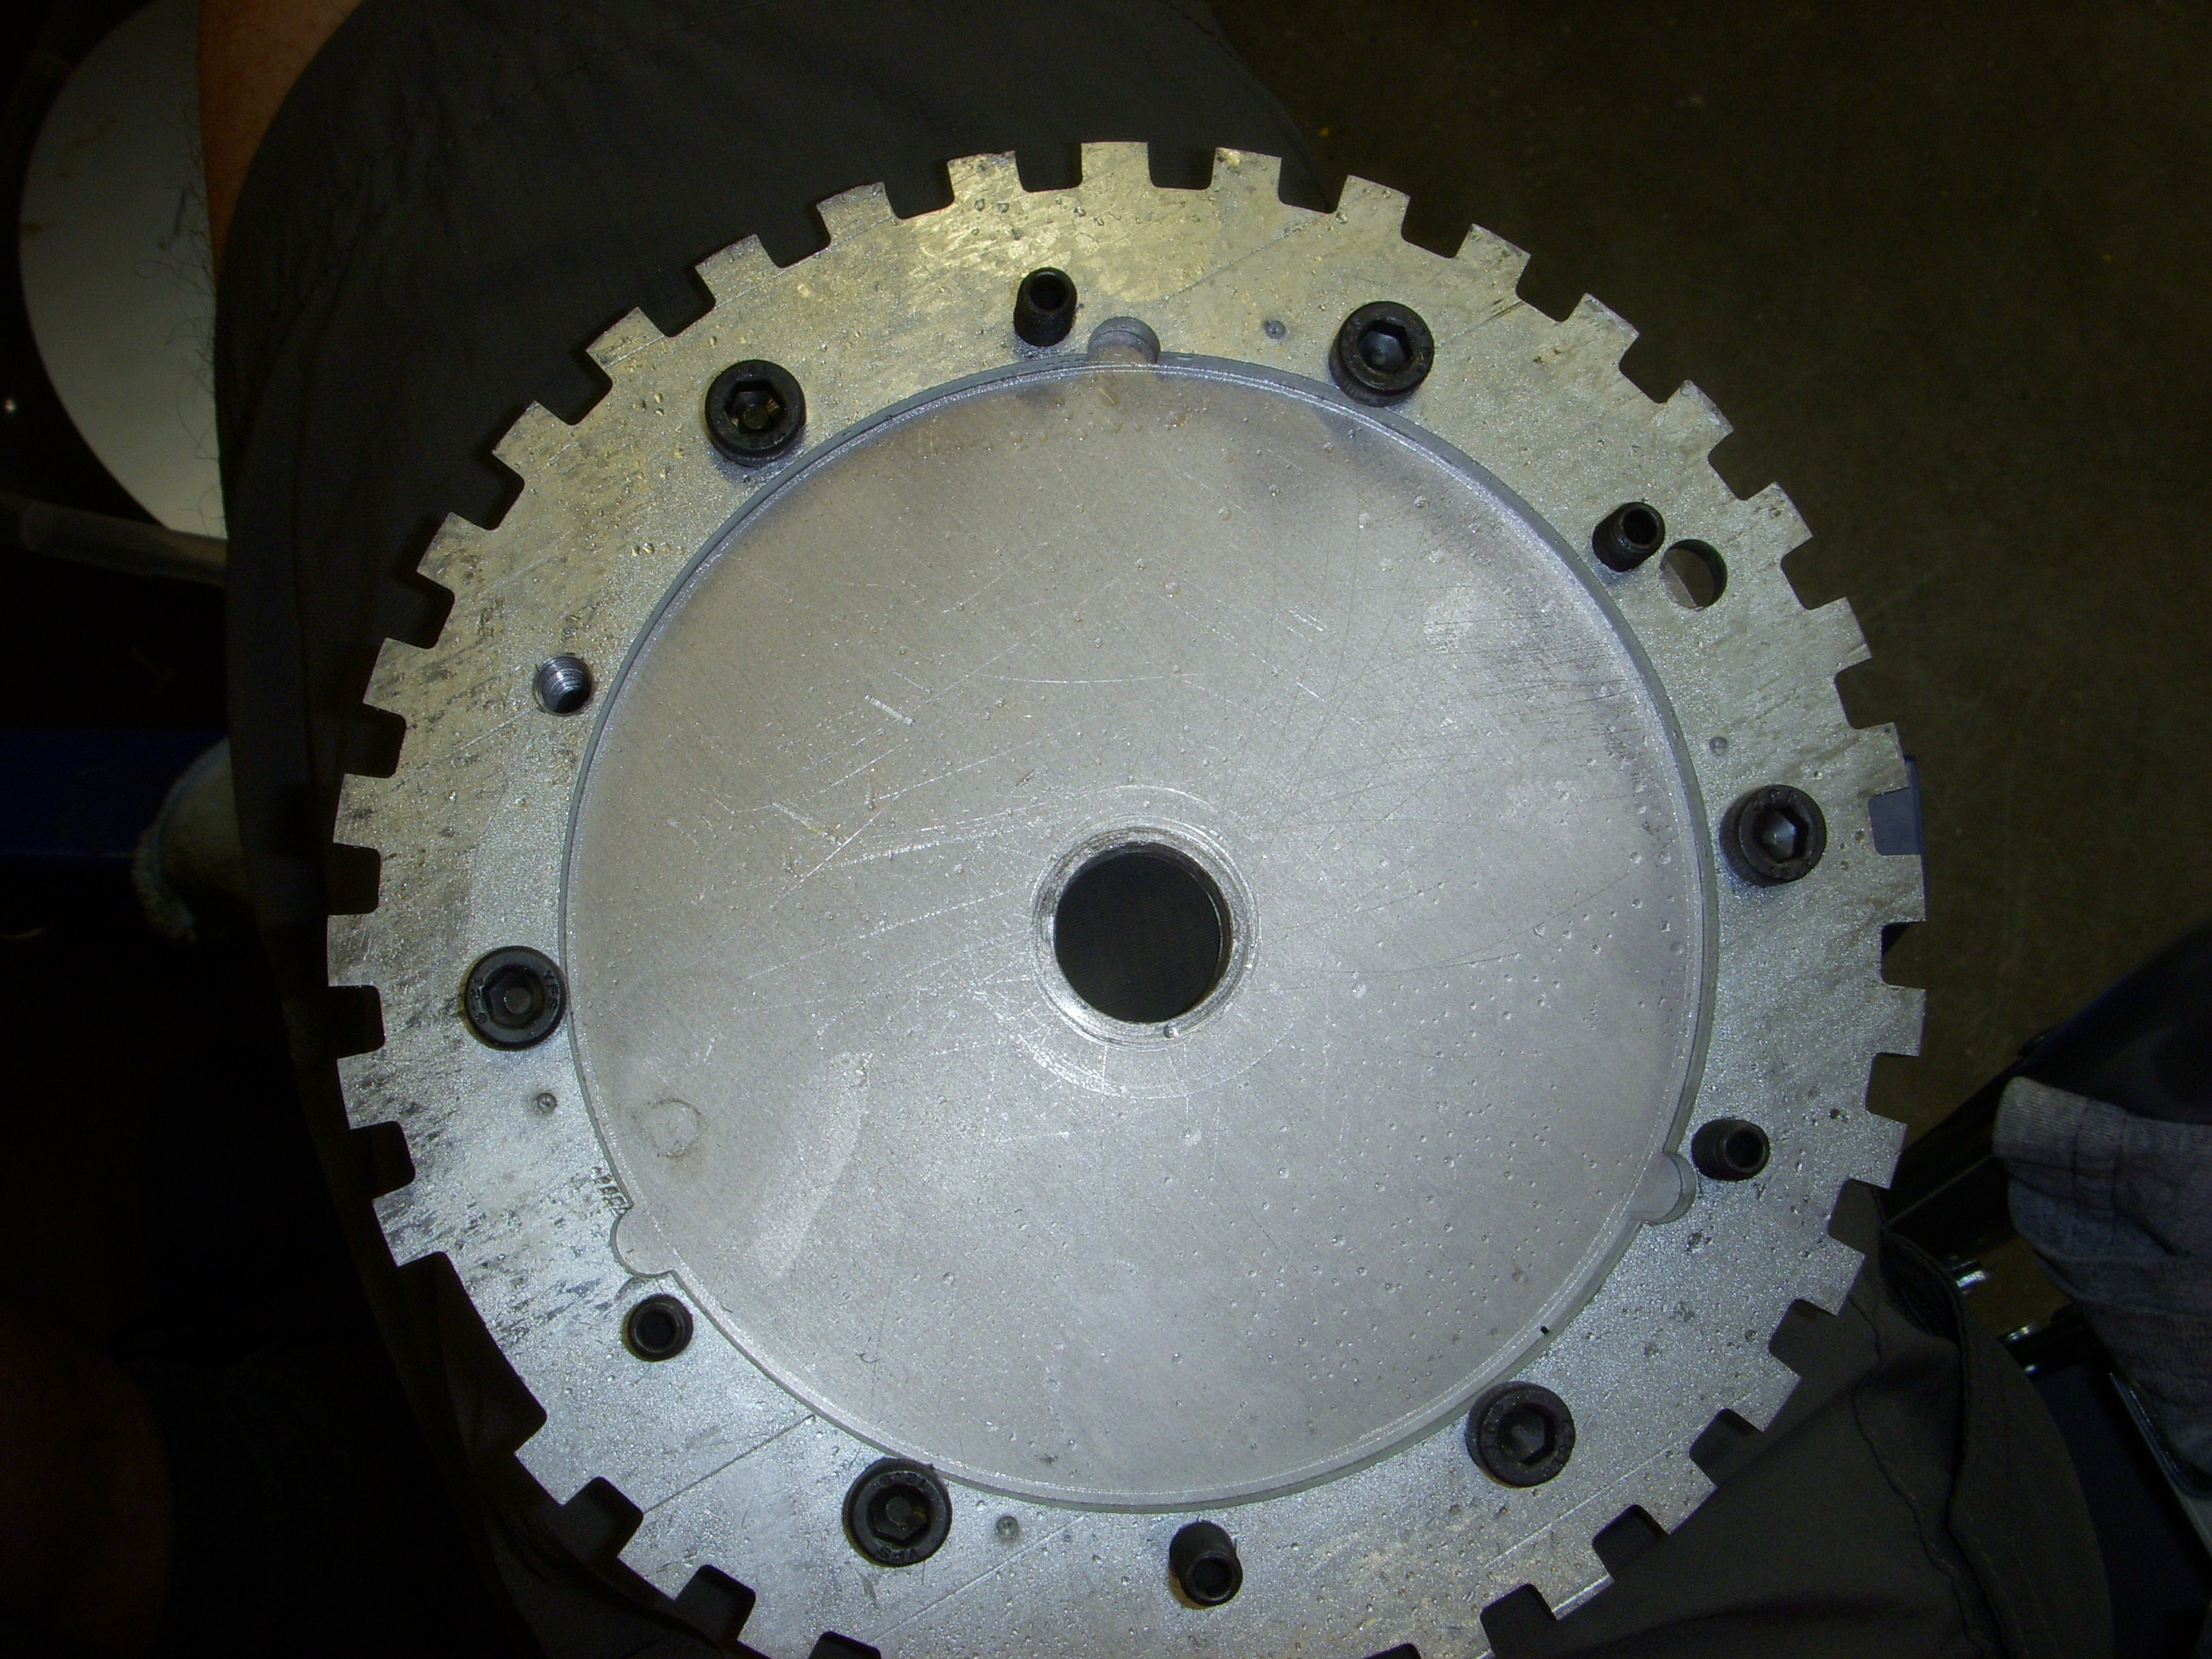
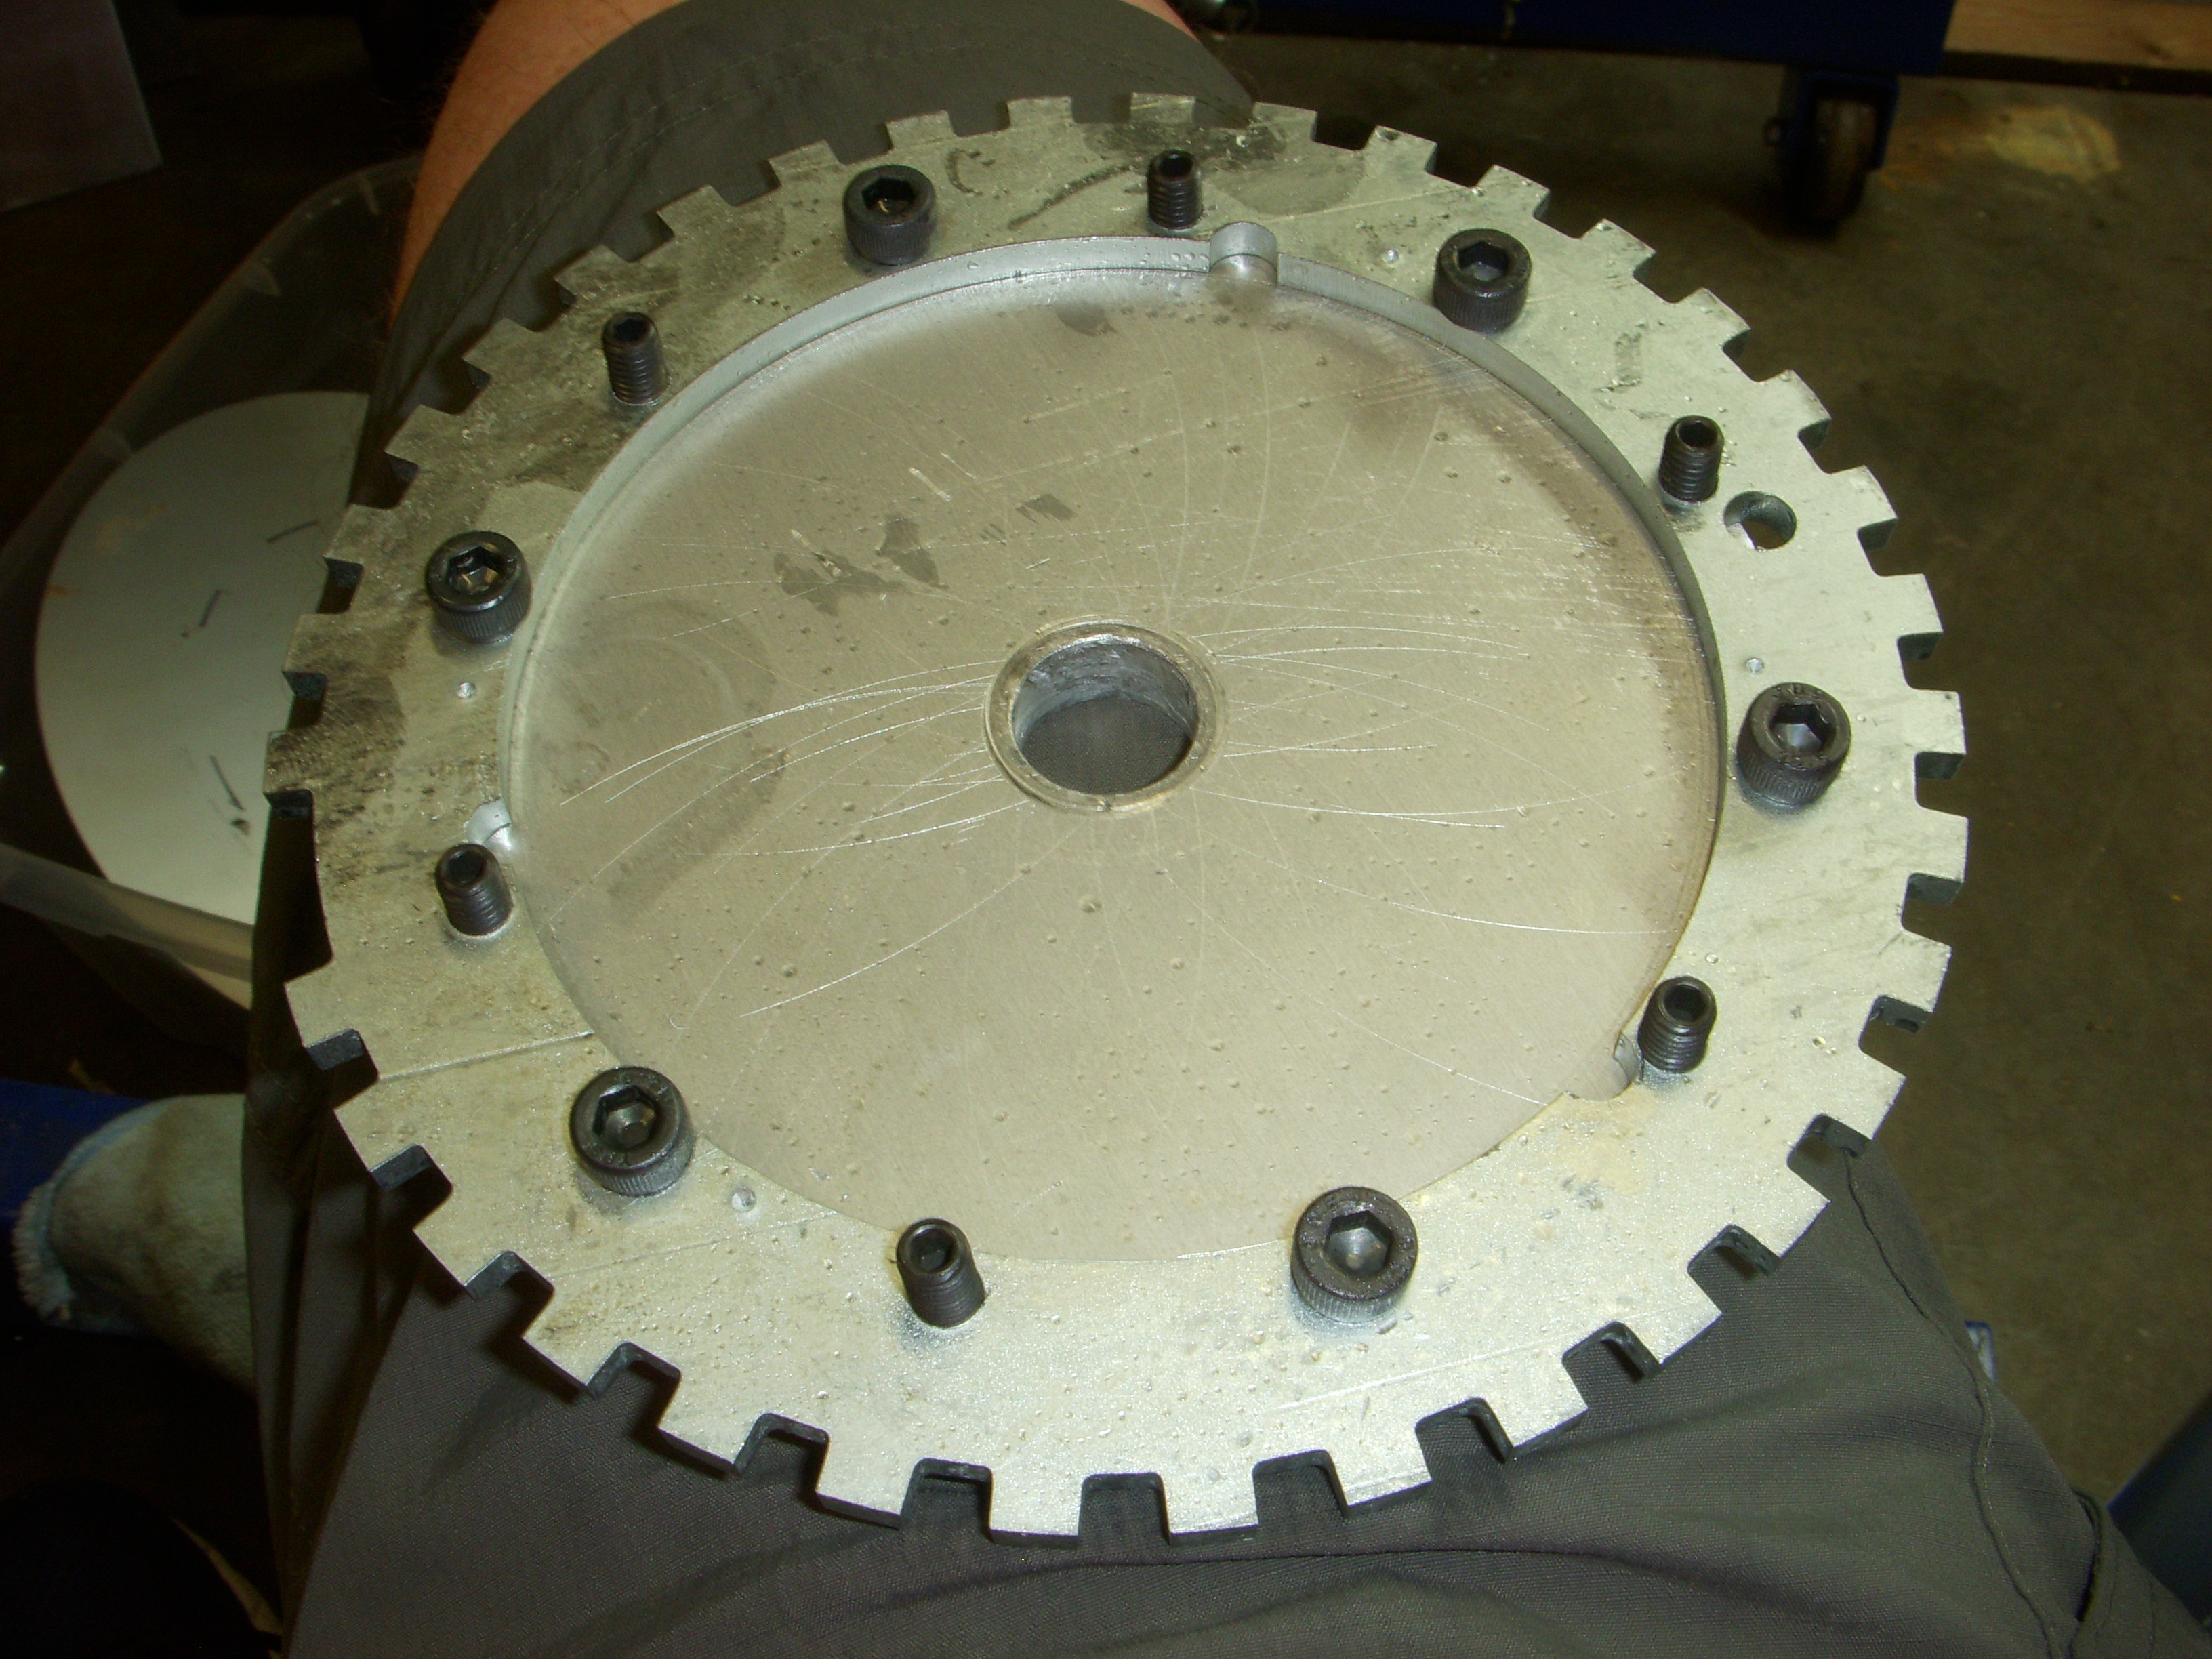
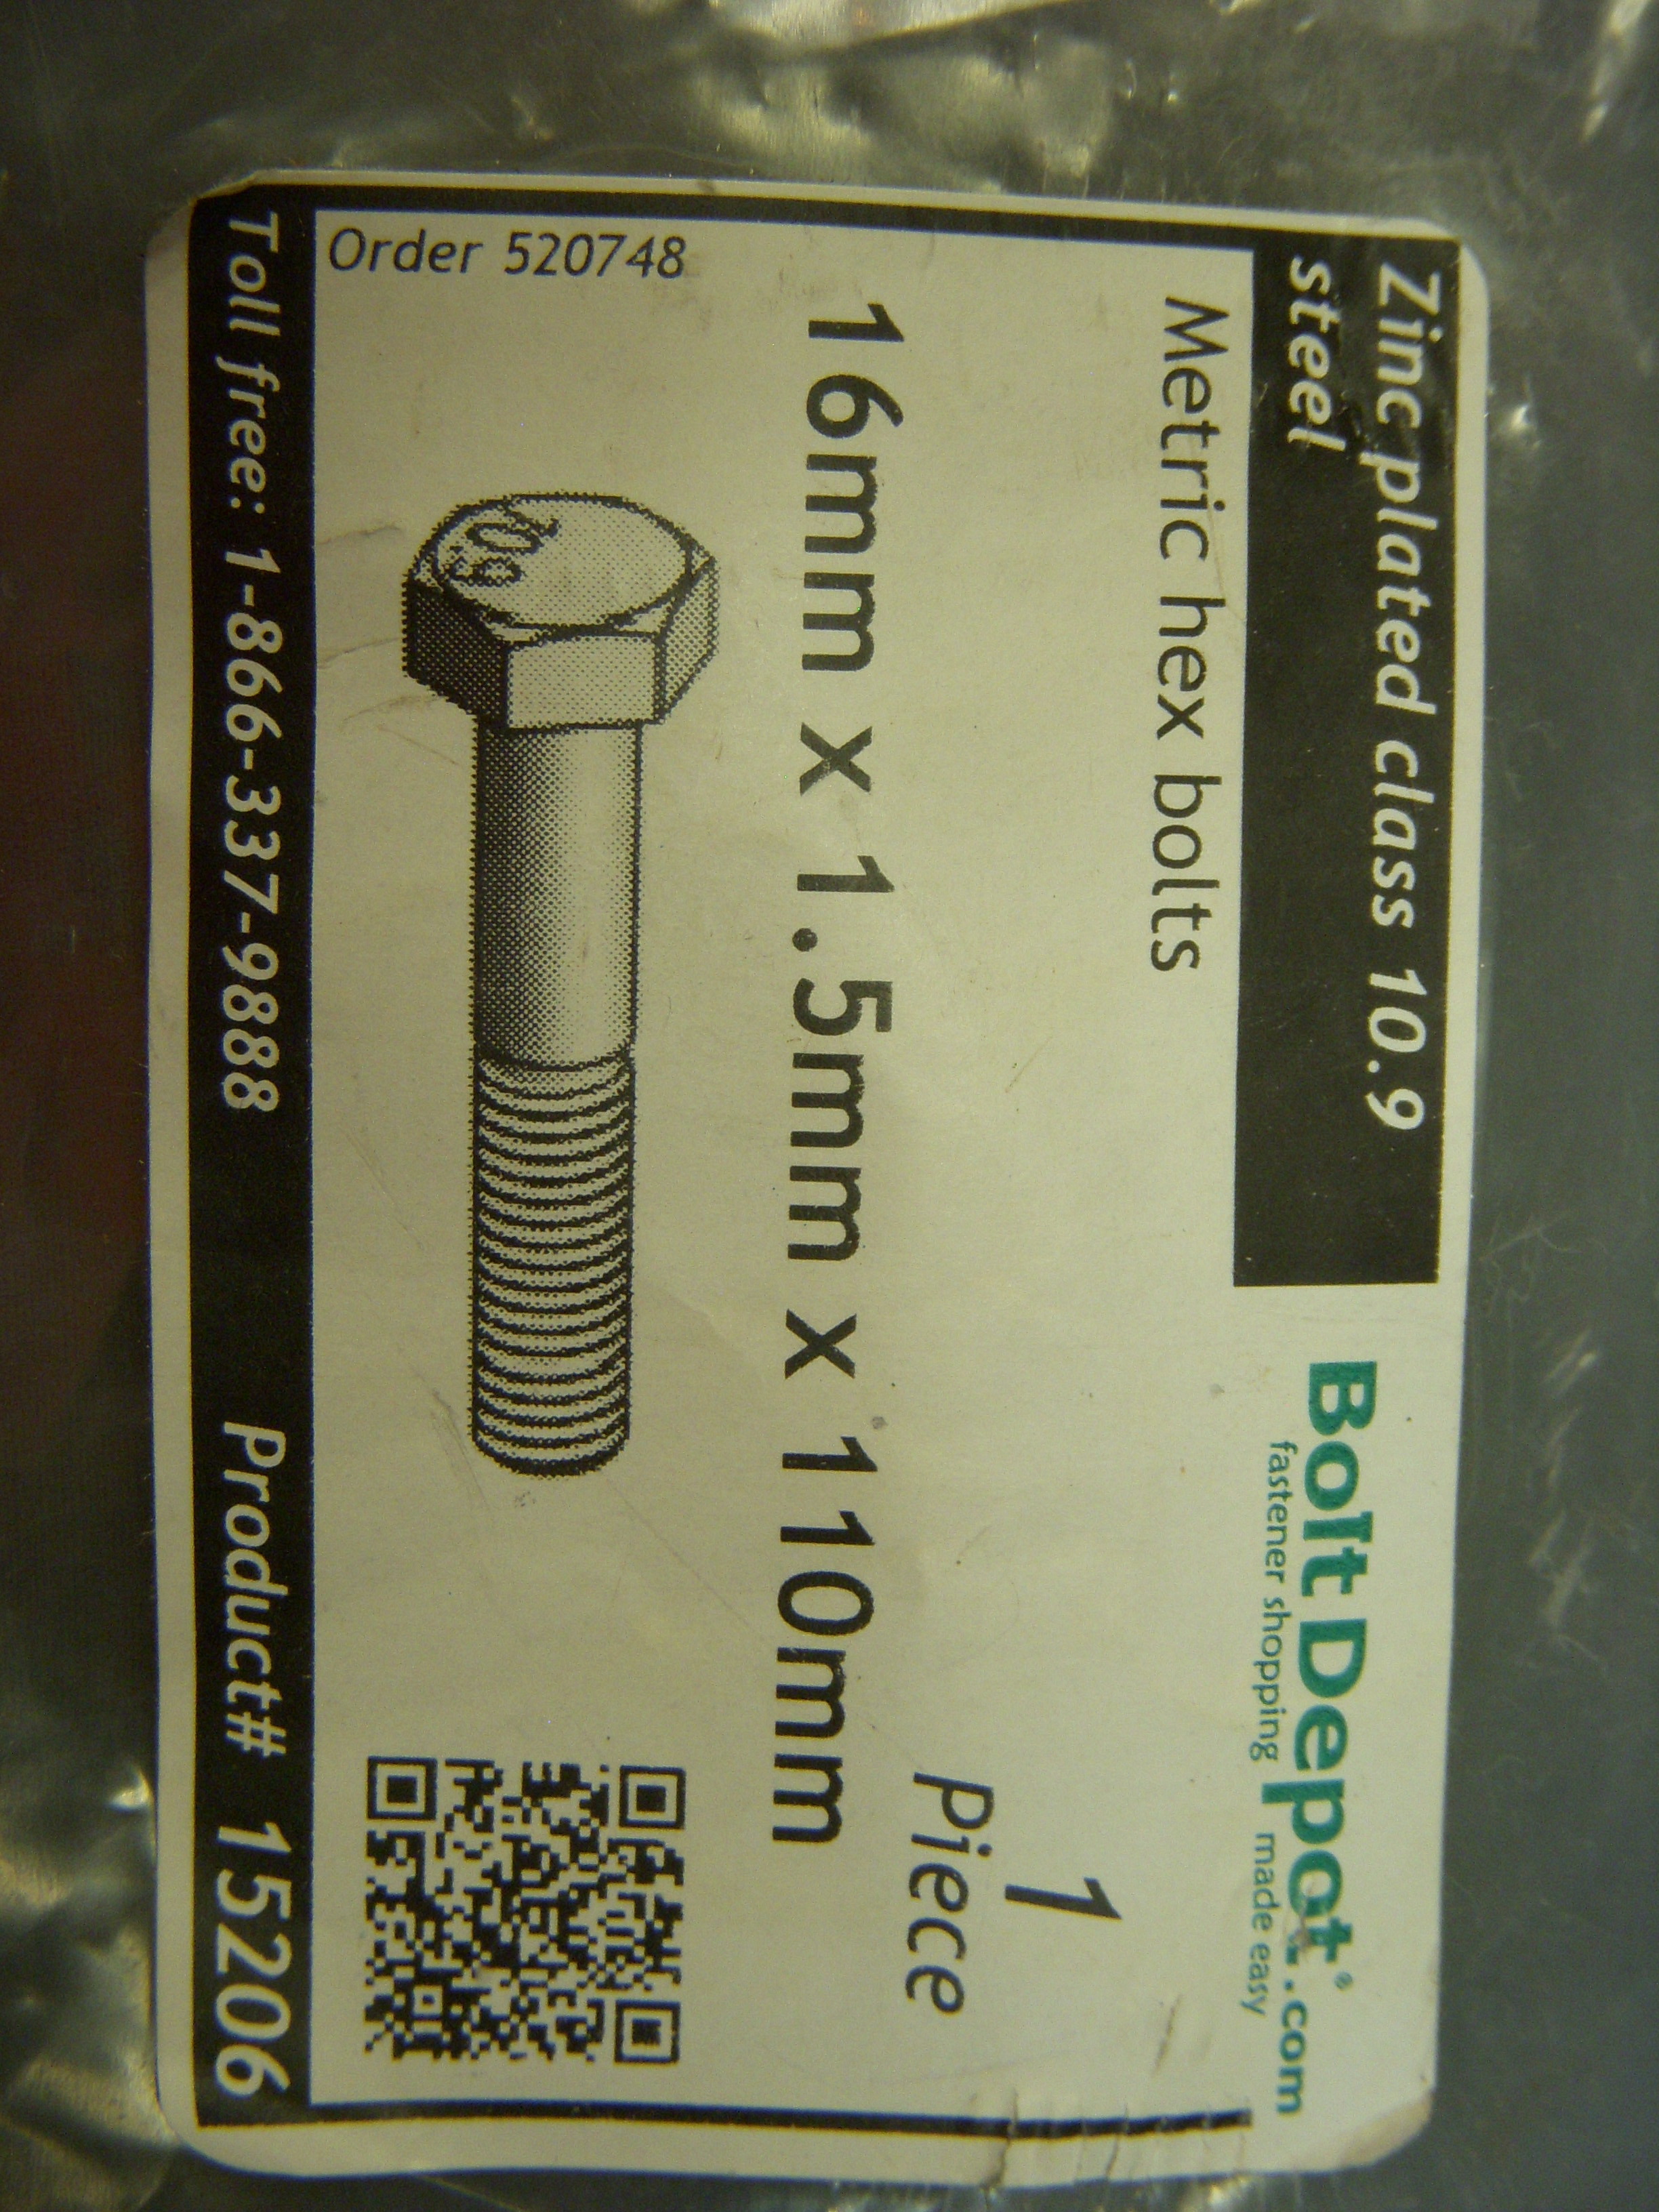
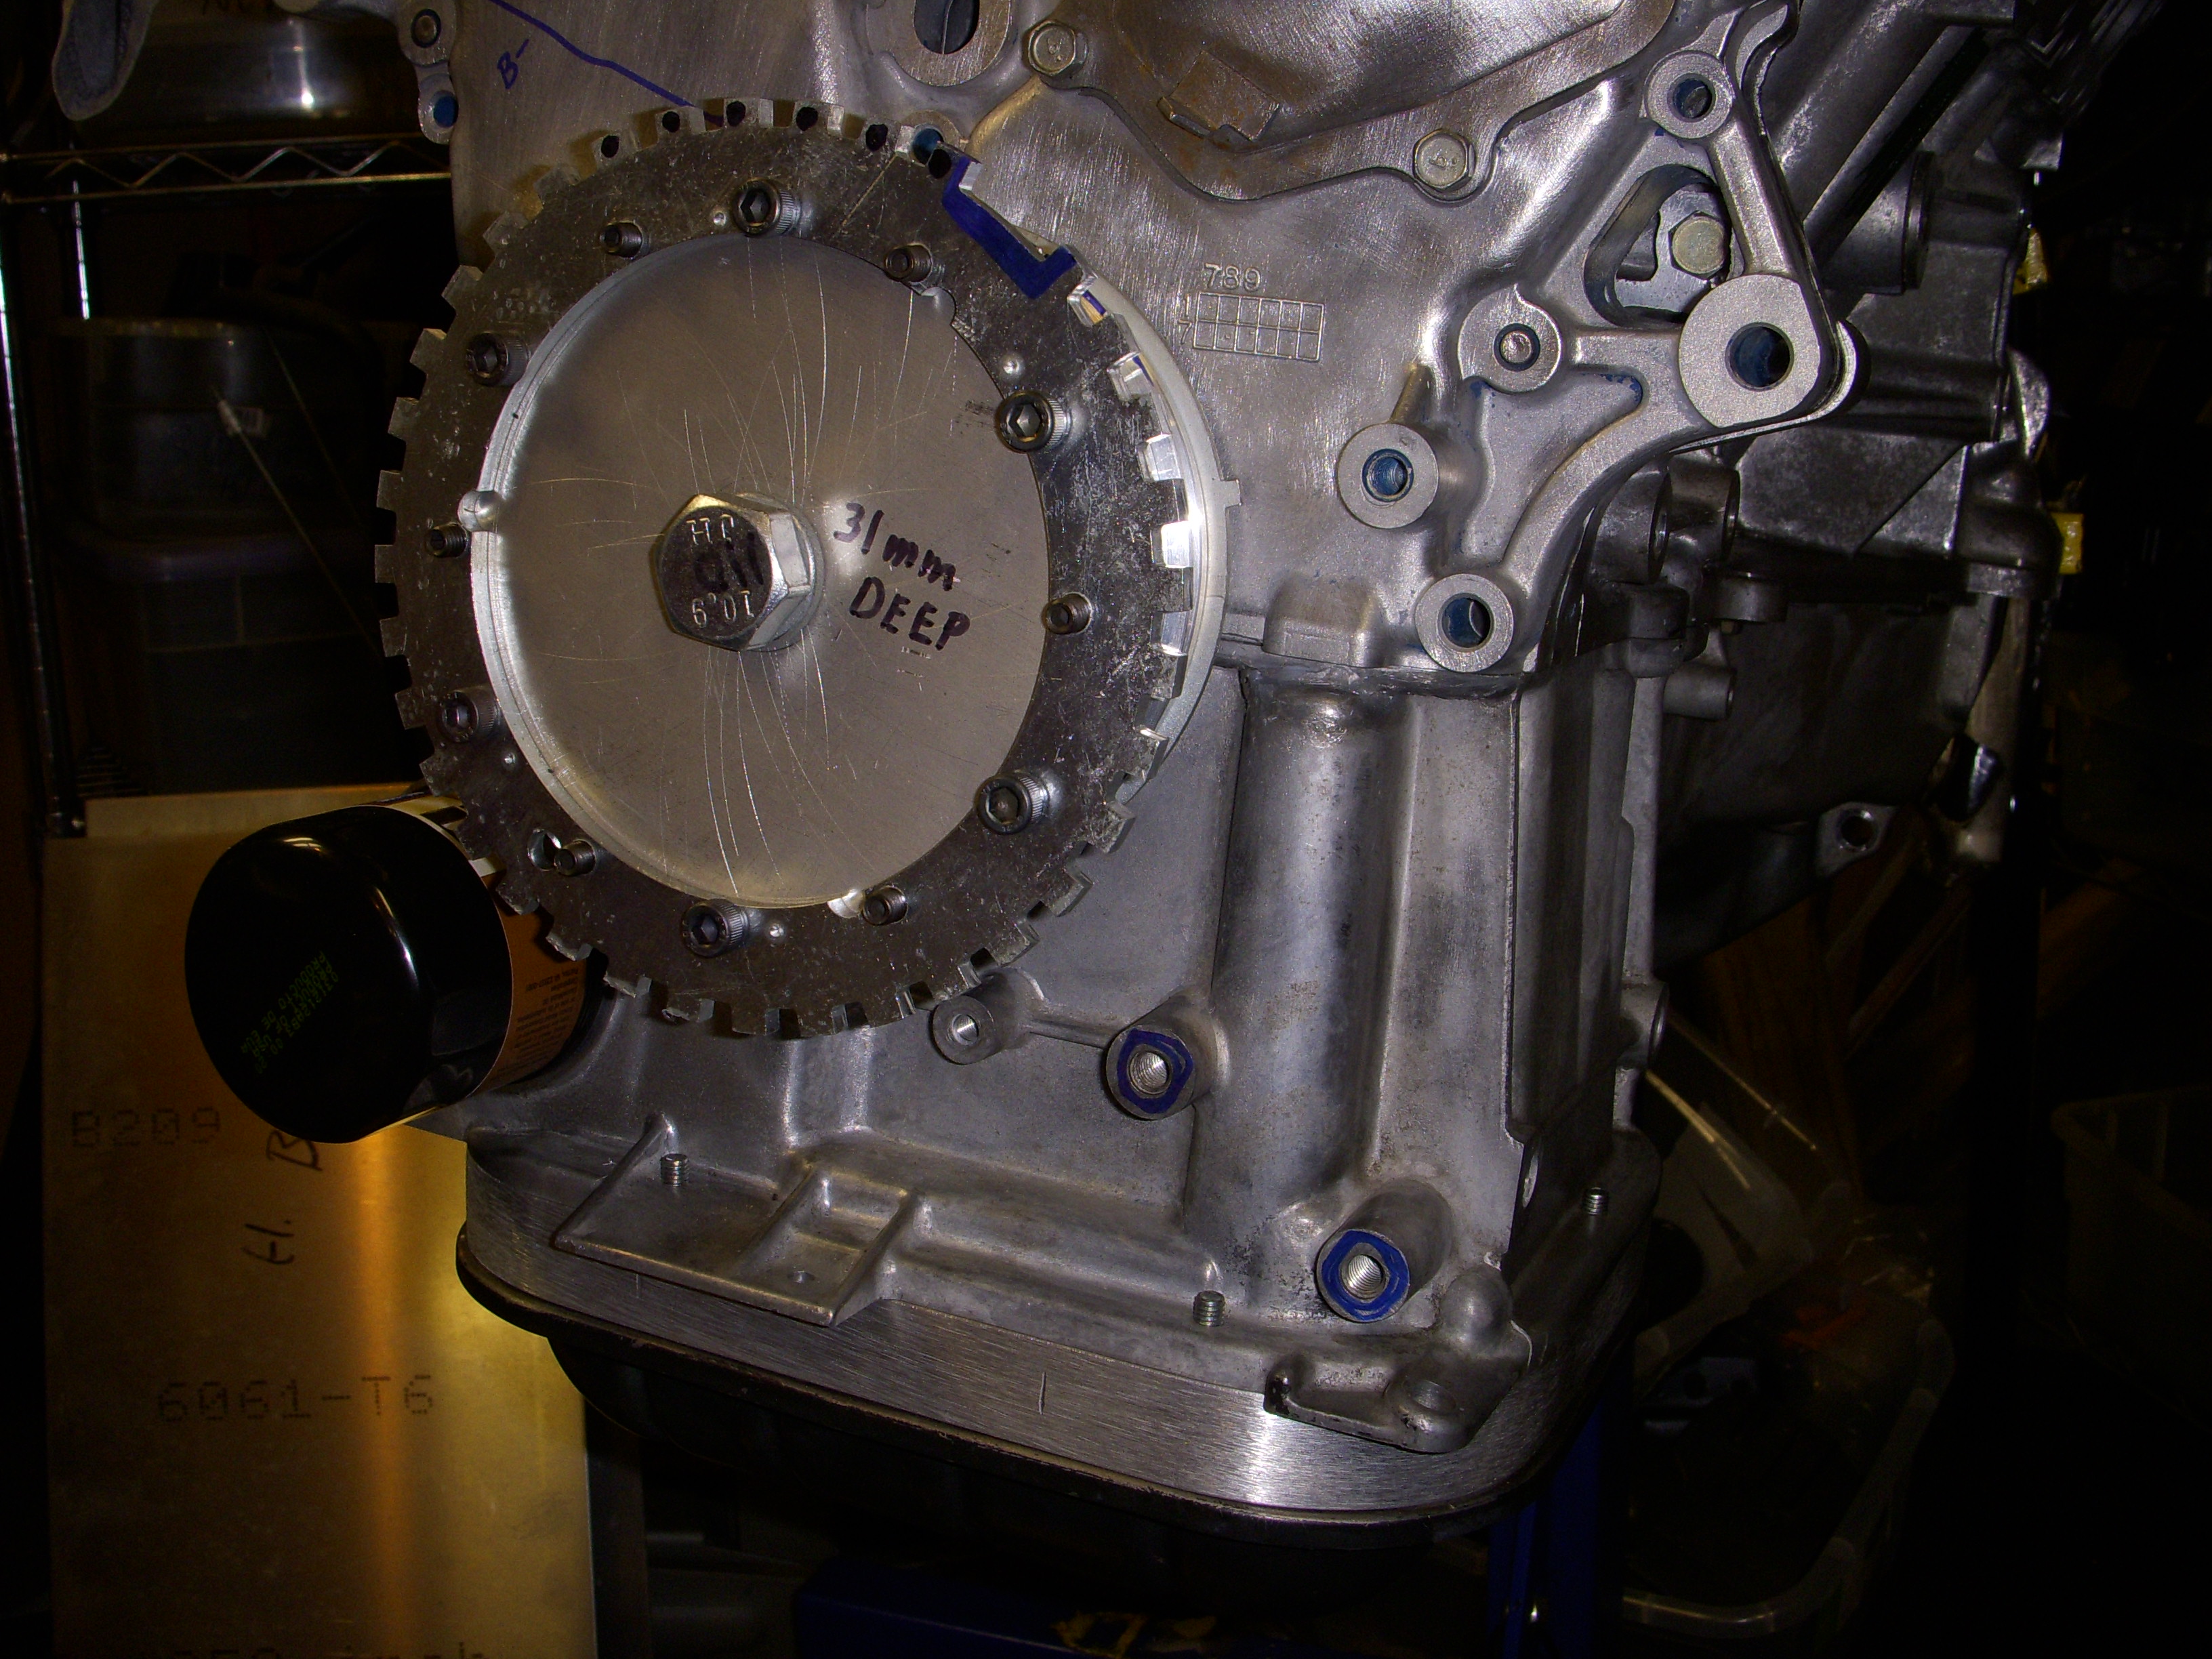
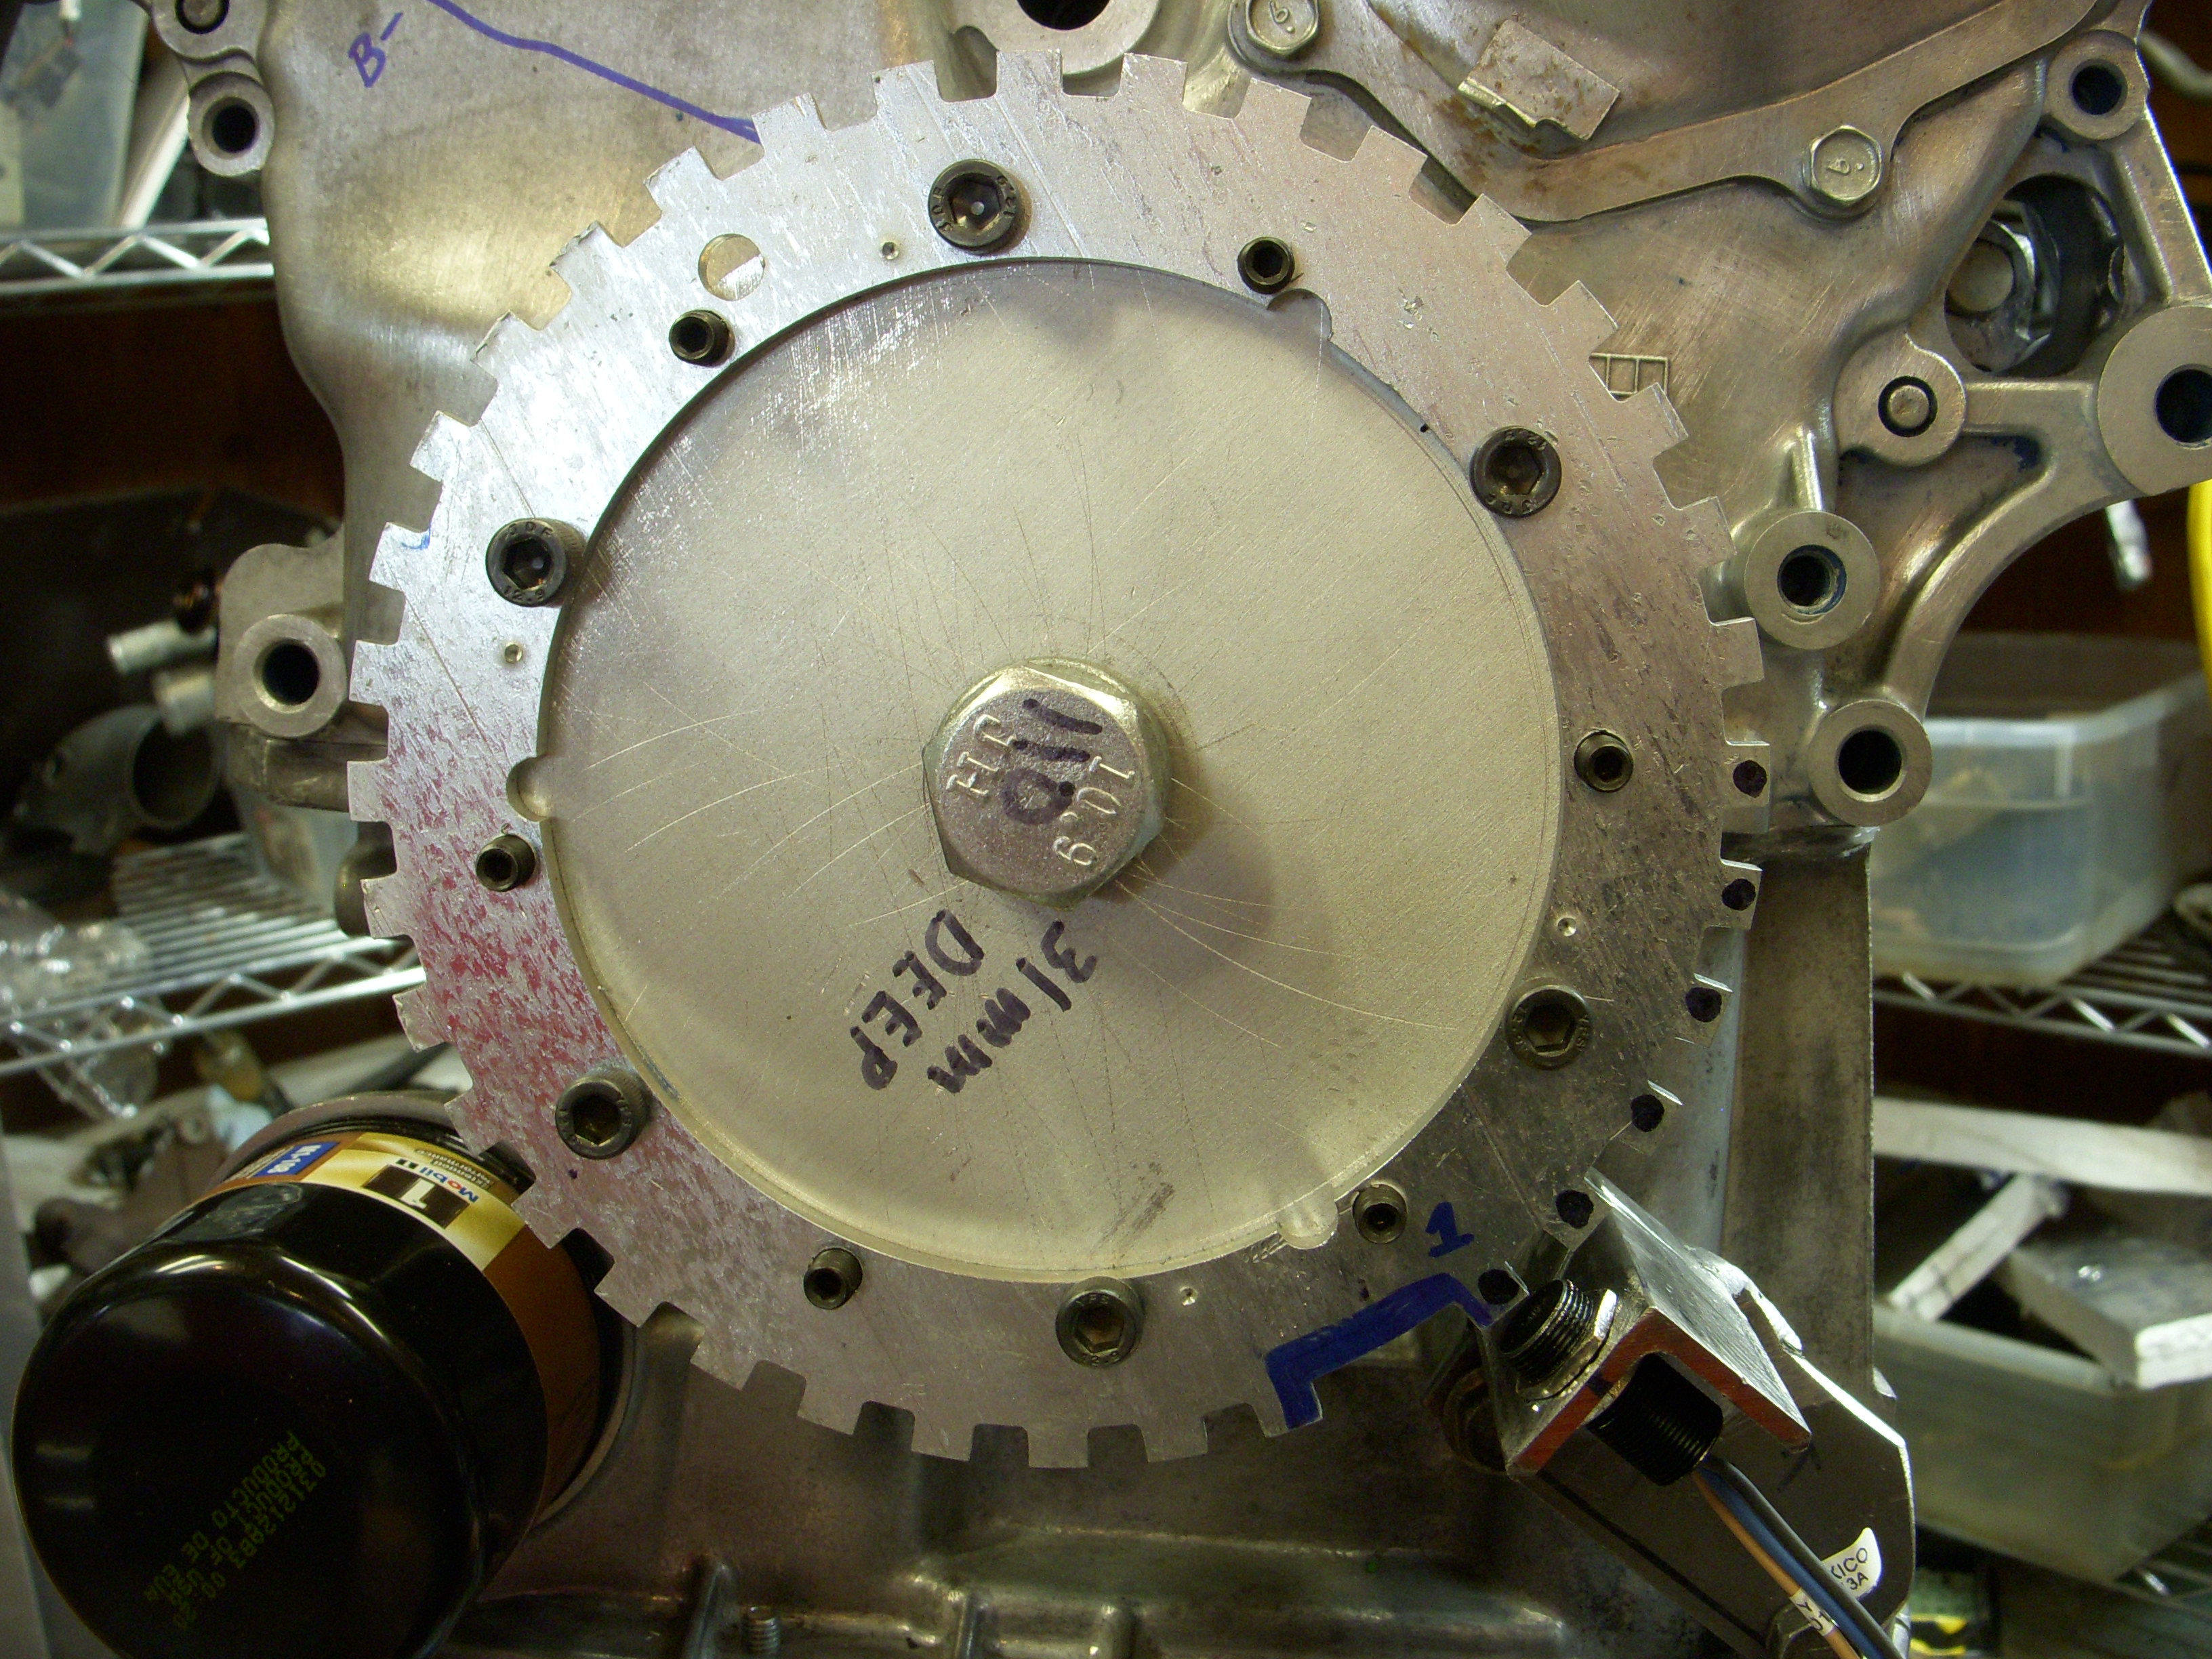
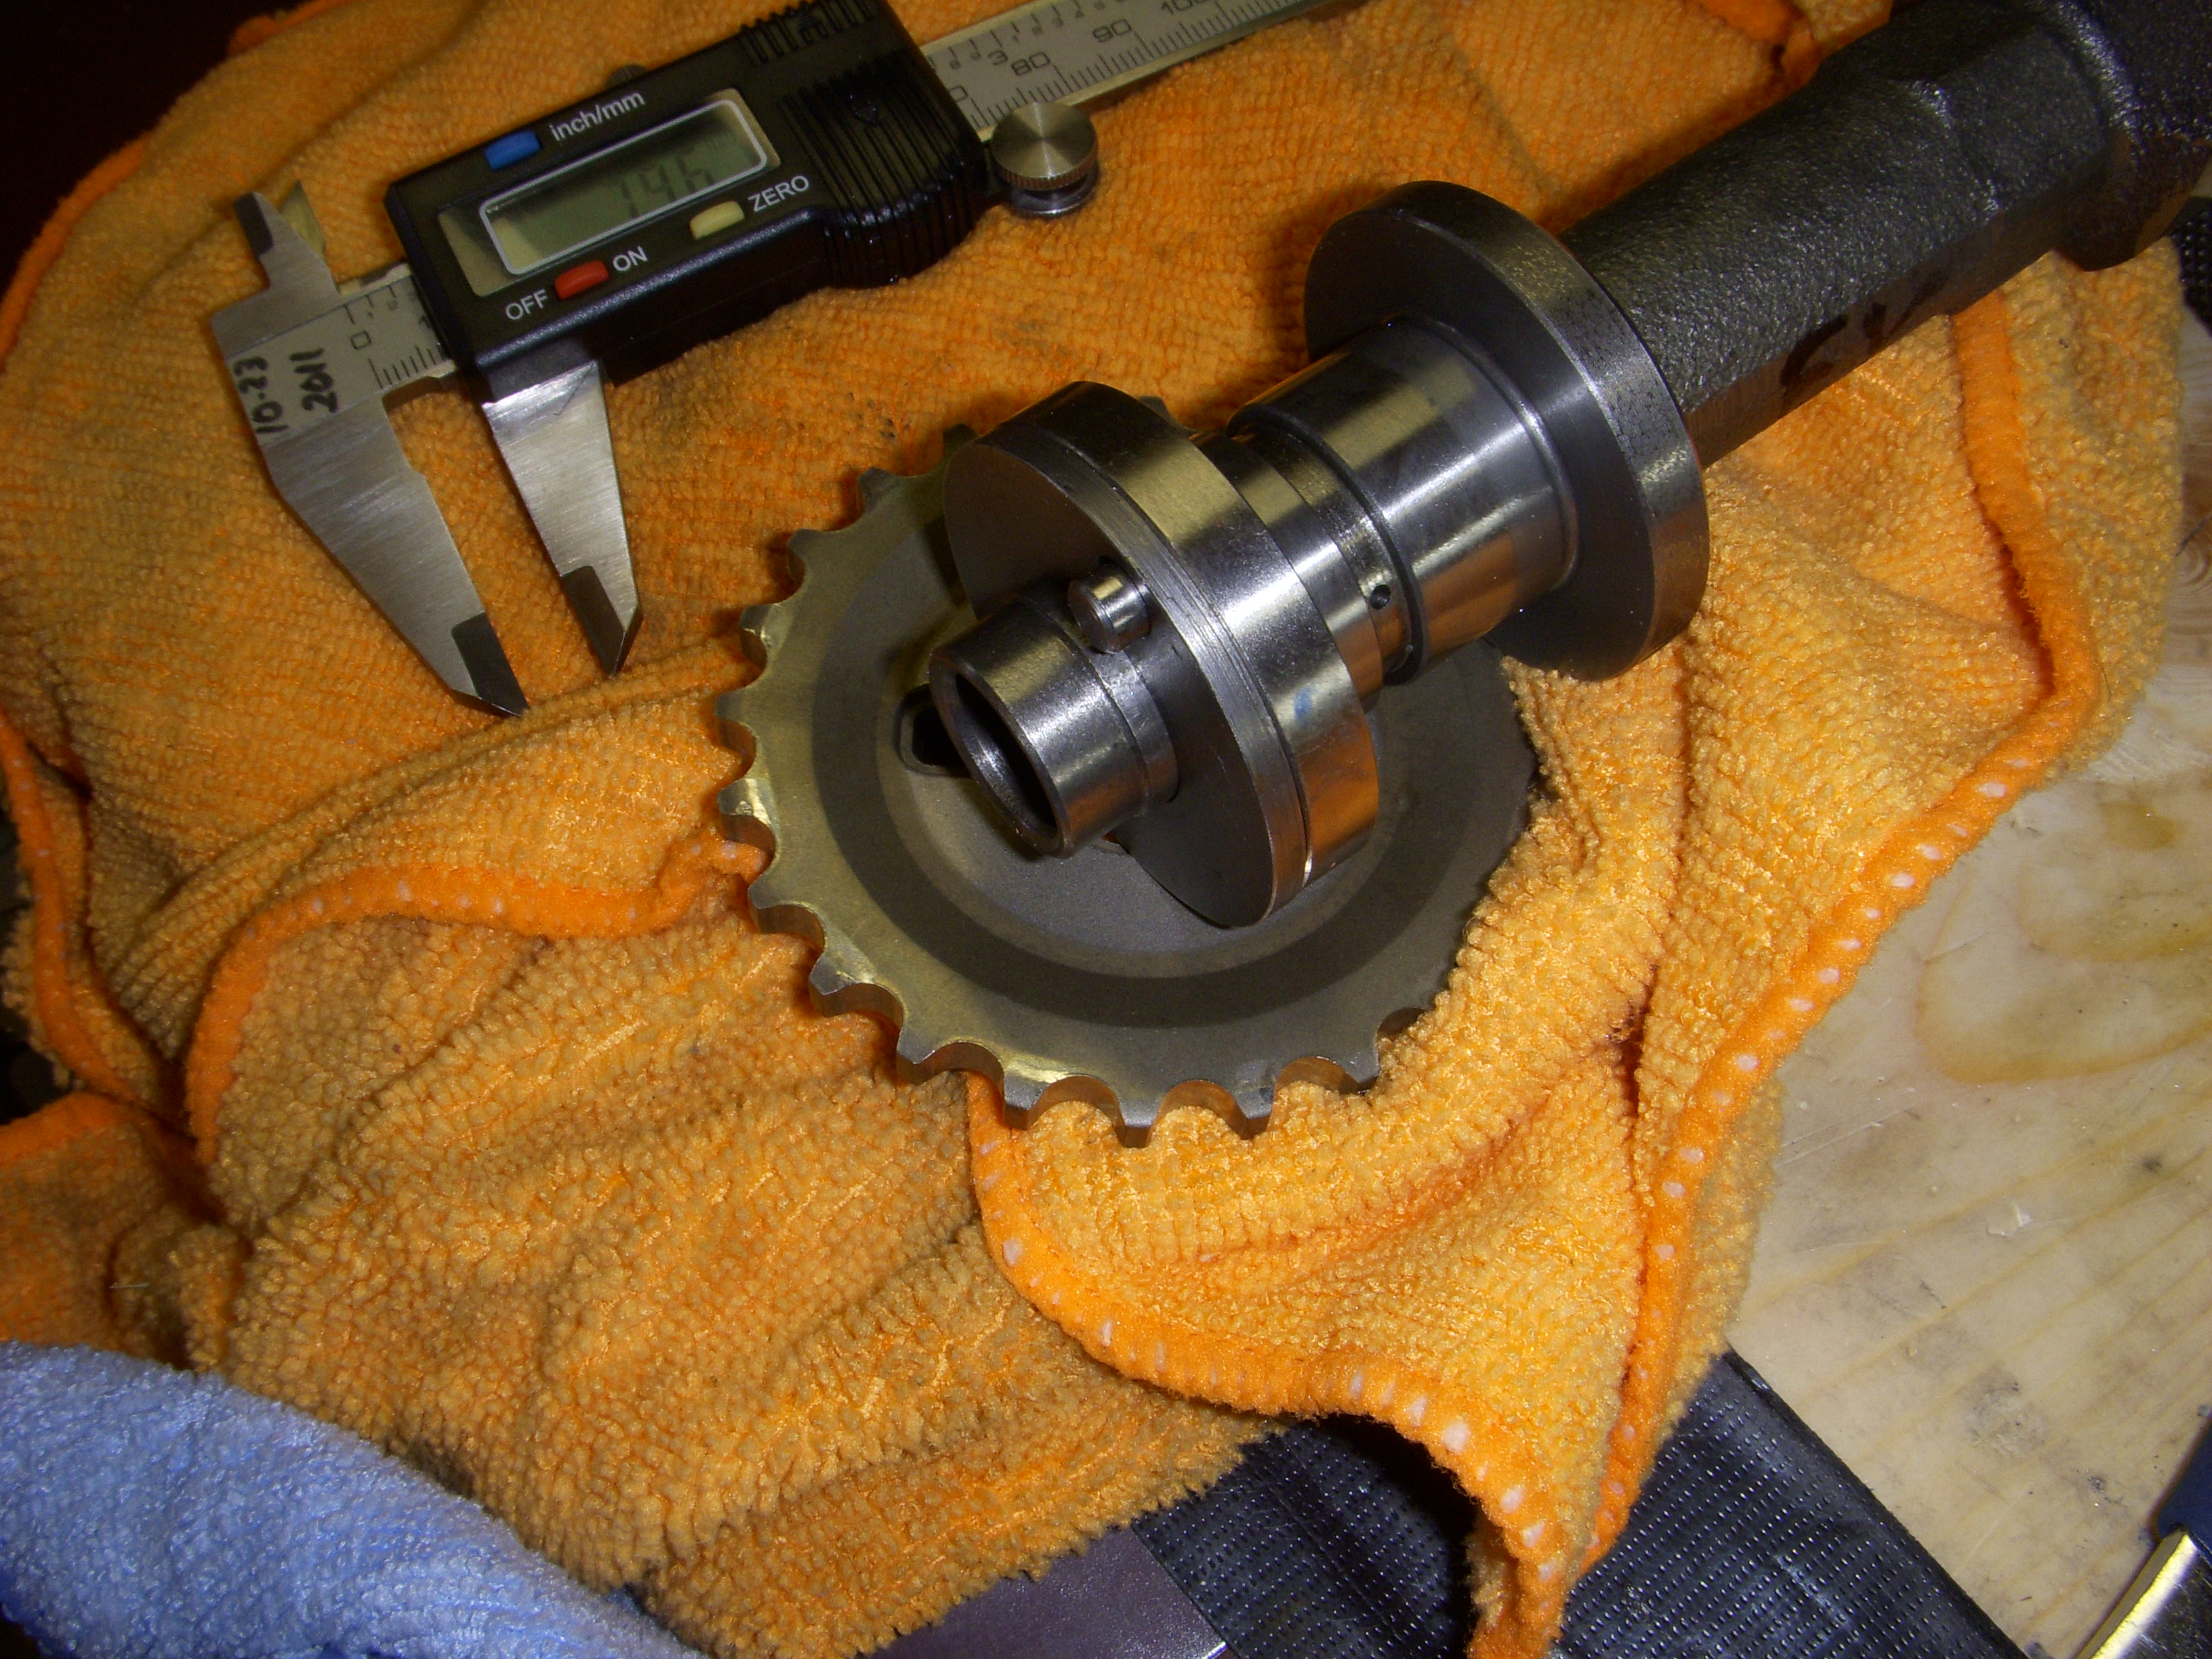
Time to drill and tap the 36-1 timing gear wheel so it can be mounted on the 3/8" thick disc, which in turn bolts onto the new alloy pulley. I use pointed allen screws to dig into the pully when everything is aligned. I have a monster 10.9 110mm monster bolt going thru the 3/8" disc and a measured stack of aluminum discs to clamp everything tight.


Since that part comes off the back of either cam, and it needs a 8mm allen wrench to loosen the retaining screw/bolt, I had to create one from an existing 8mm allen wrench so I can change parts without taking out cams.


Time to drill and tap the 36-1 timing gear wheel so it can be mounted on the 3/8" thick disc, which in turn bolts onto the new alloy pulley. I use pointed allen screws to dig into the pully when everything is aligned. I have a monster 10.9 110mm monster bolt going thru the 3/8" disc and a measured stack of aluminum discs to clamp everything tight.


Last edited by grey99max; 01-16-2017 at 05:22 PM.
08-22-2016, 06:08 PM
#1810
LandShark has Cosworth
Thread Starter
iTrader: (12)
Join Date: Jan 2004
Location: Topeka, KS
Posts: 4,327
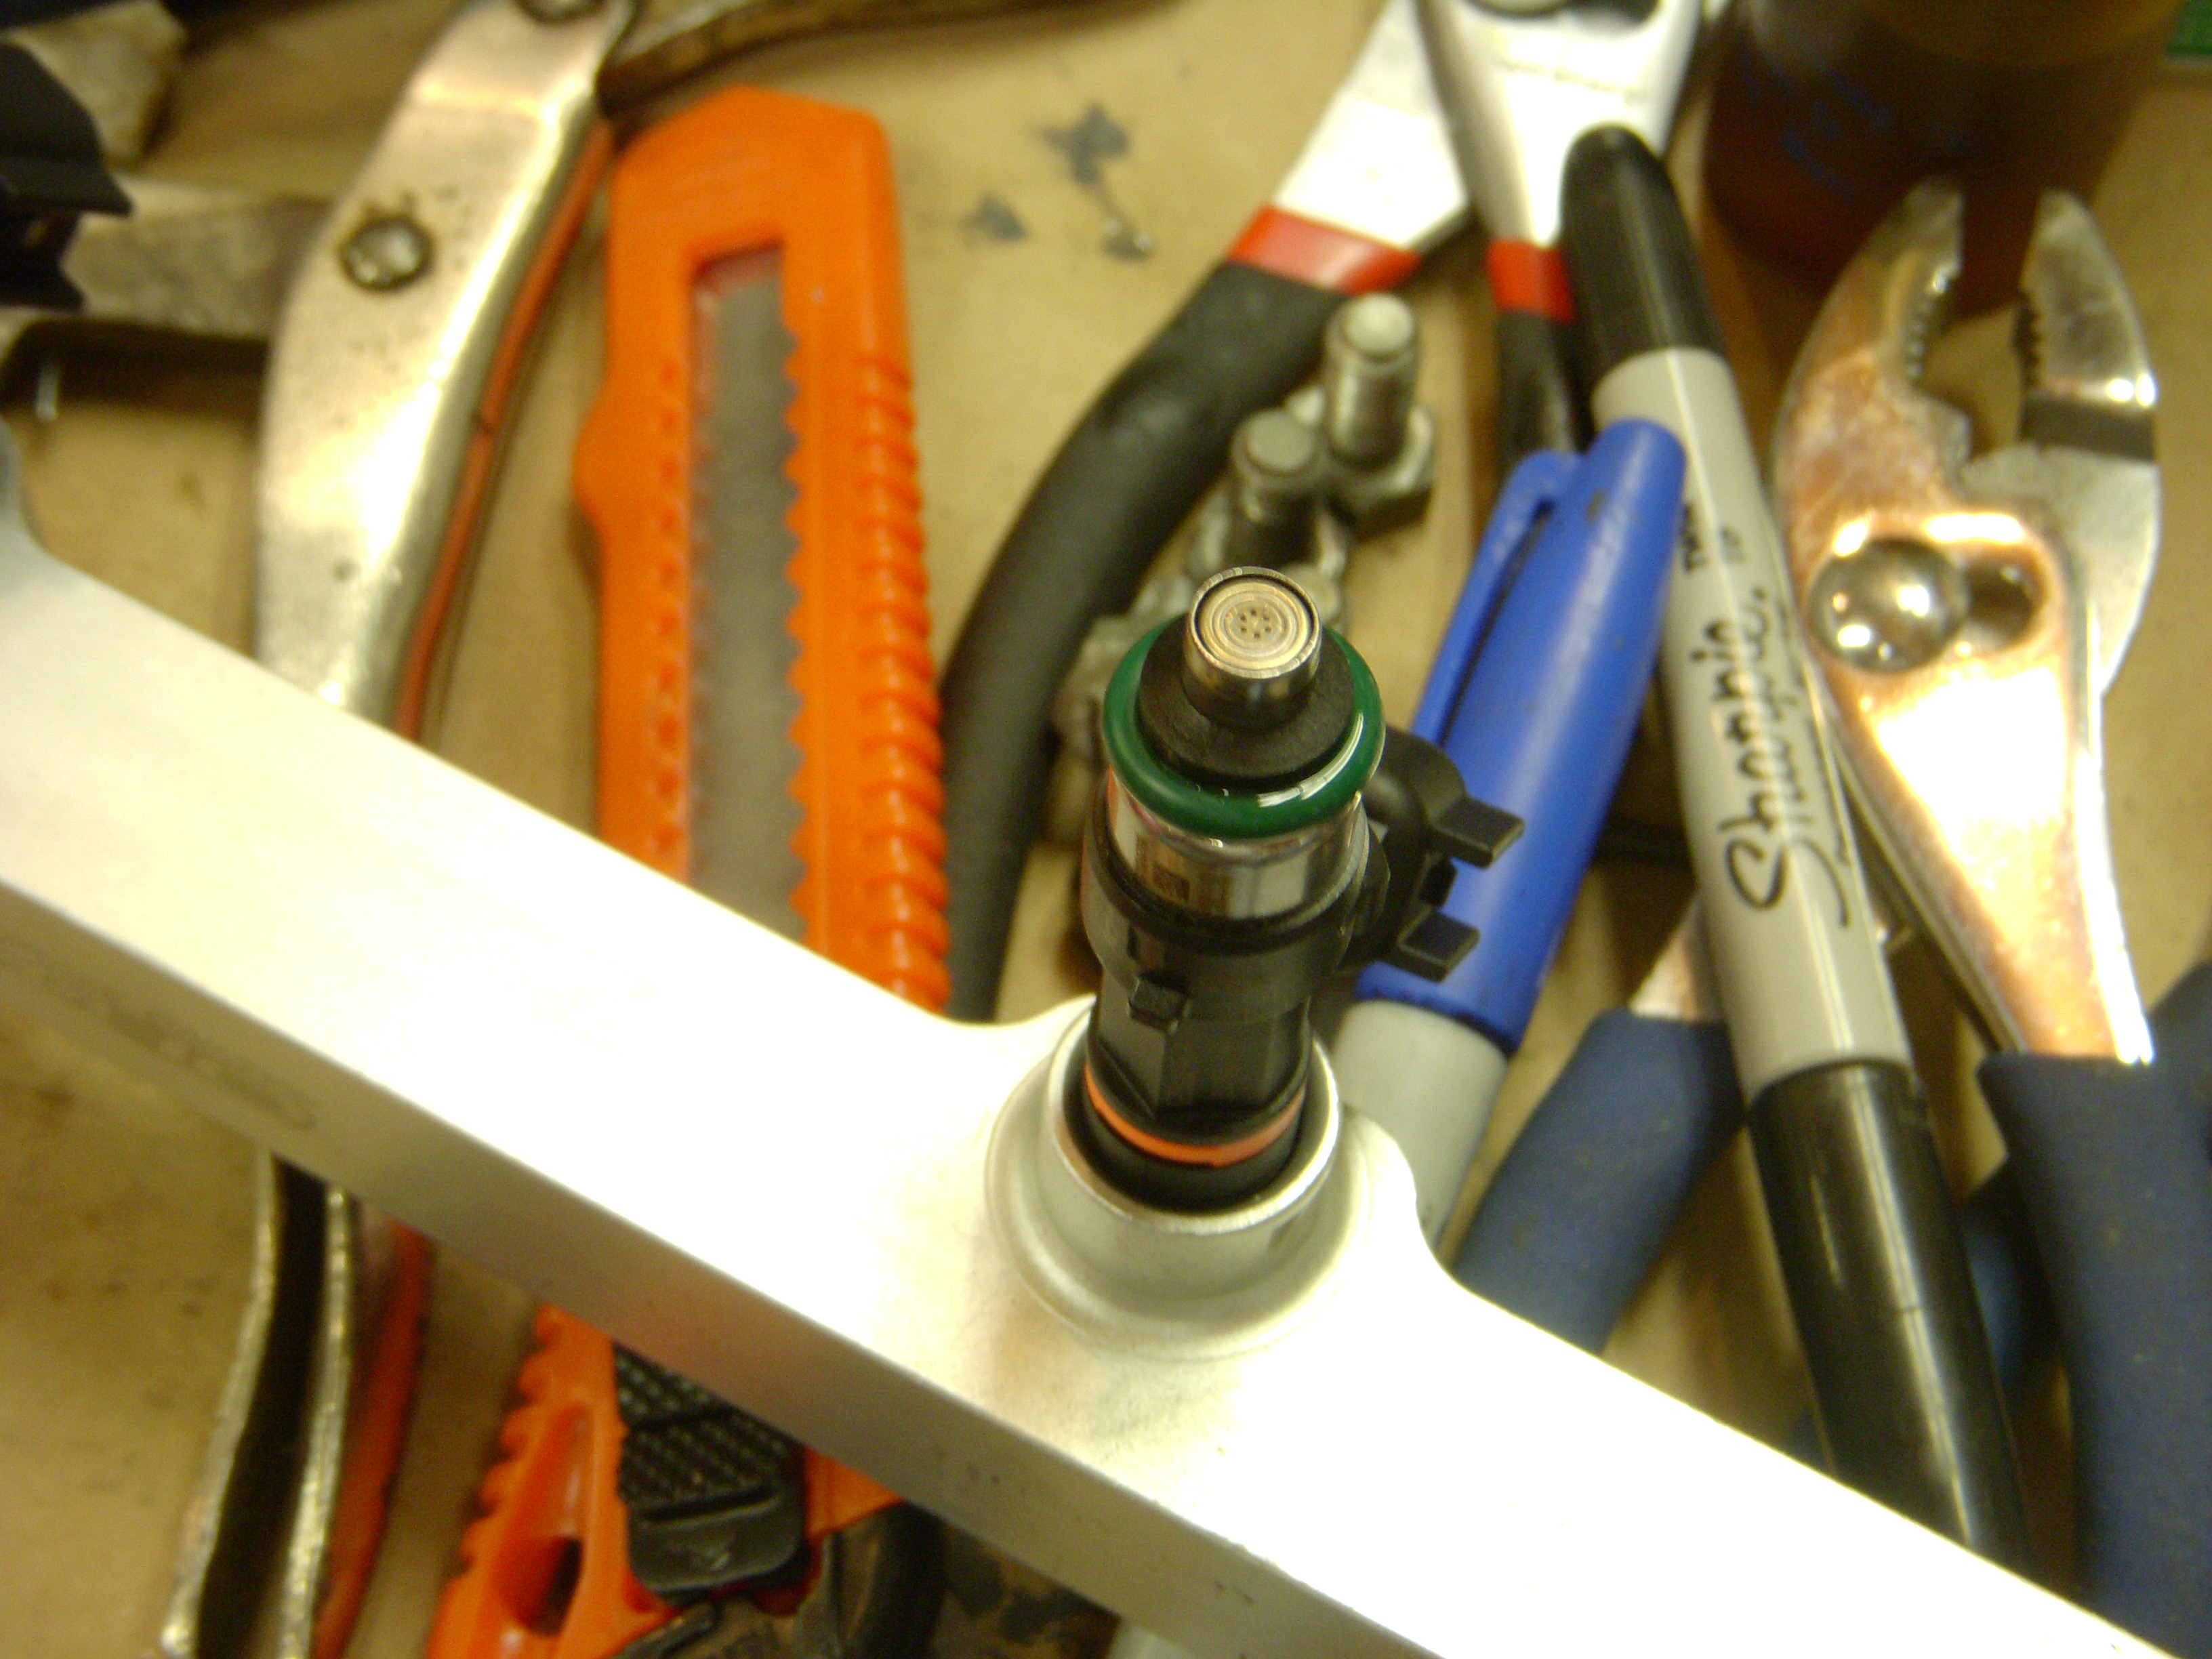
Some nice fresh new 550cc Bosch injectors for the last modded LIM from the previous engine.
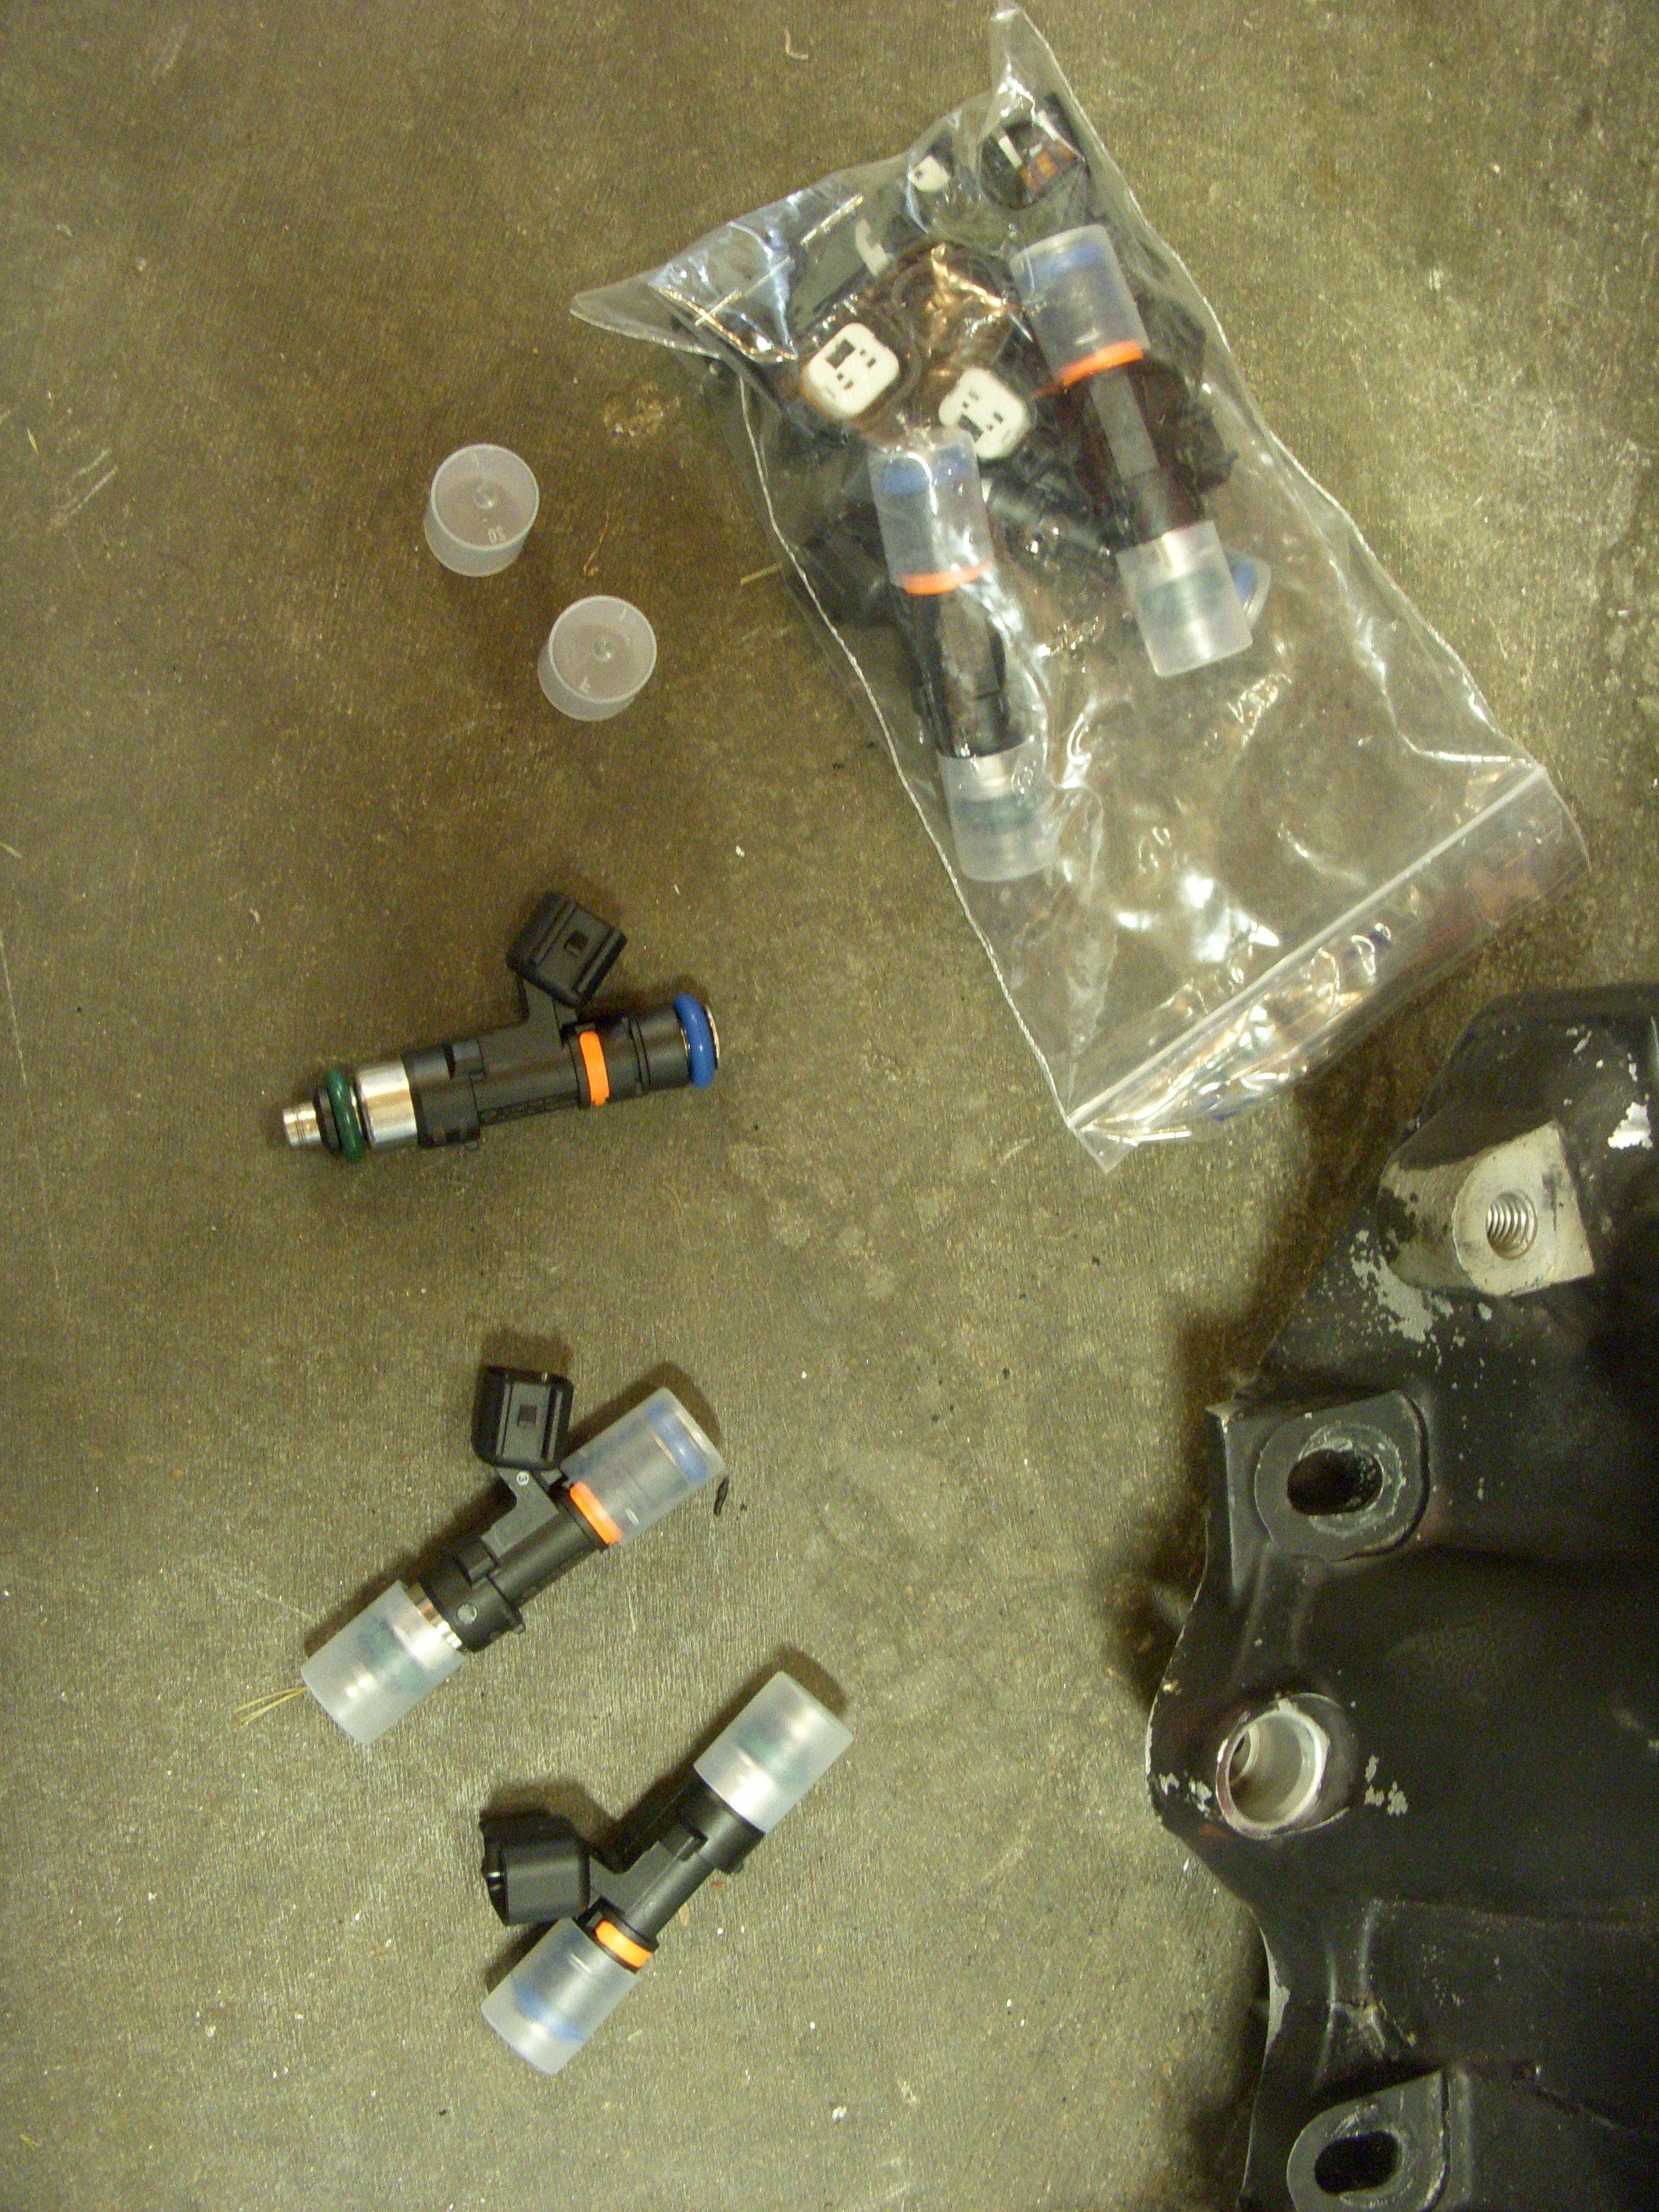
With adapters:

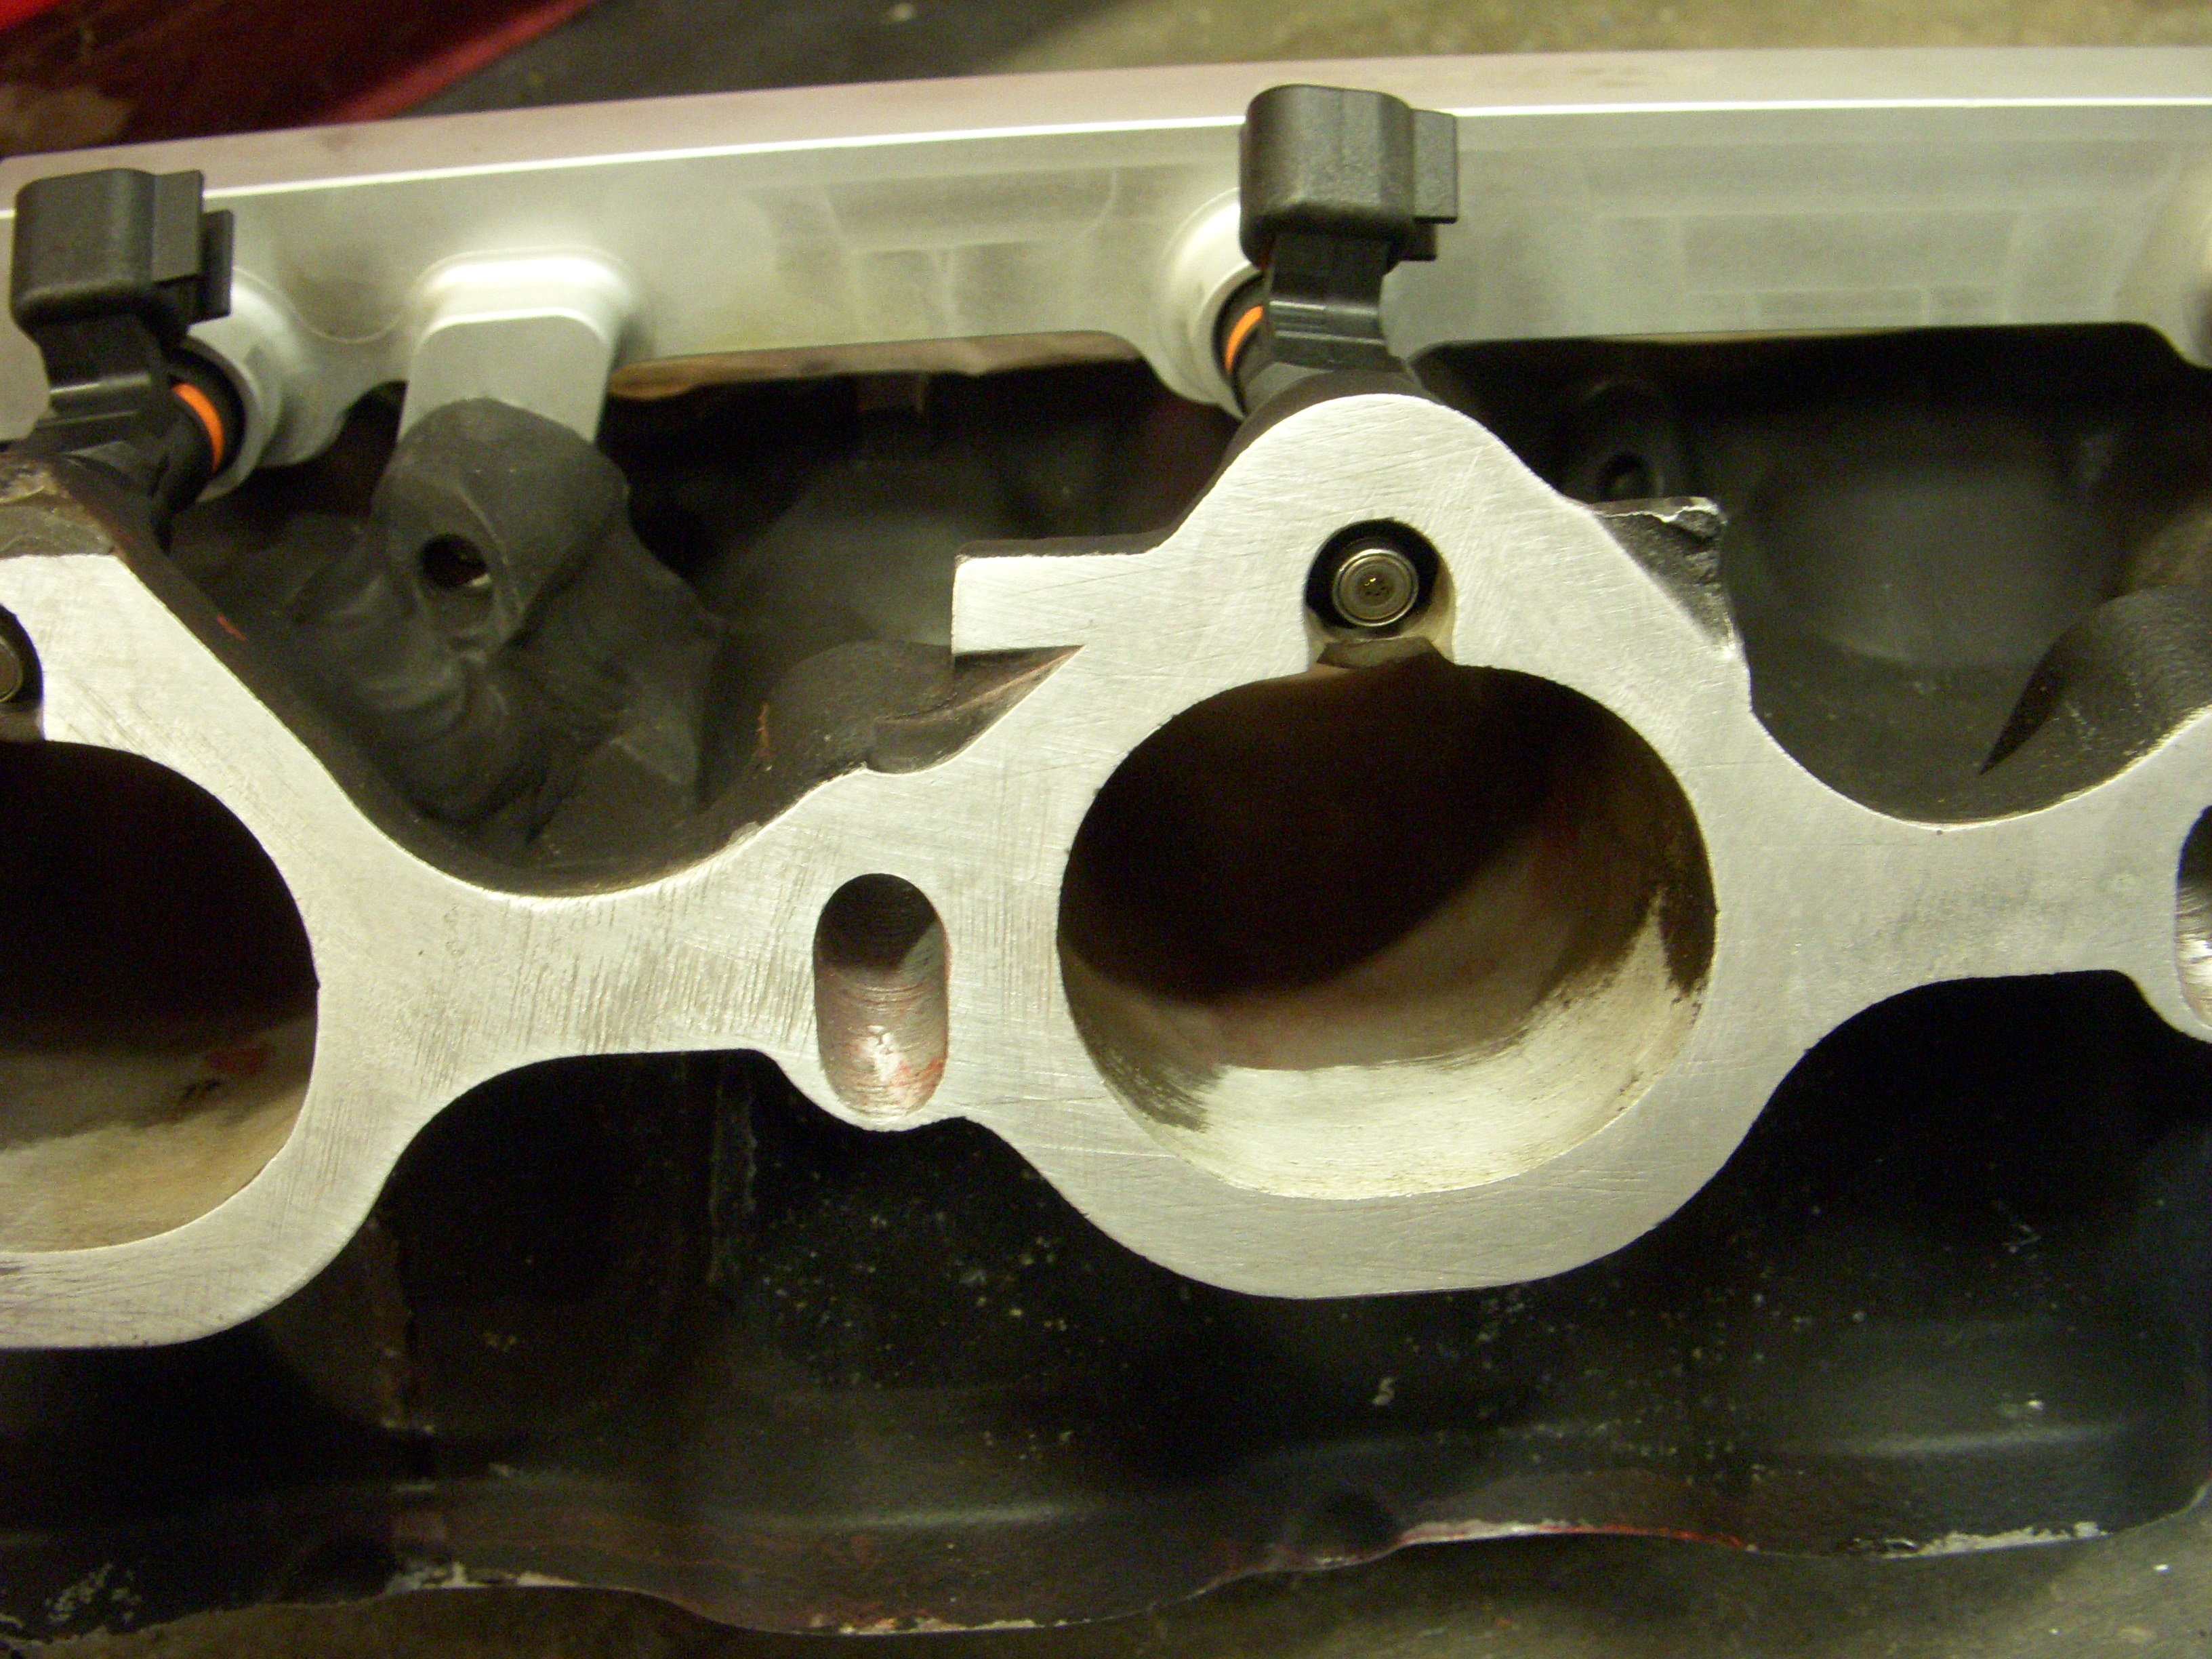
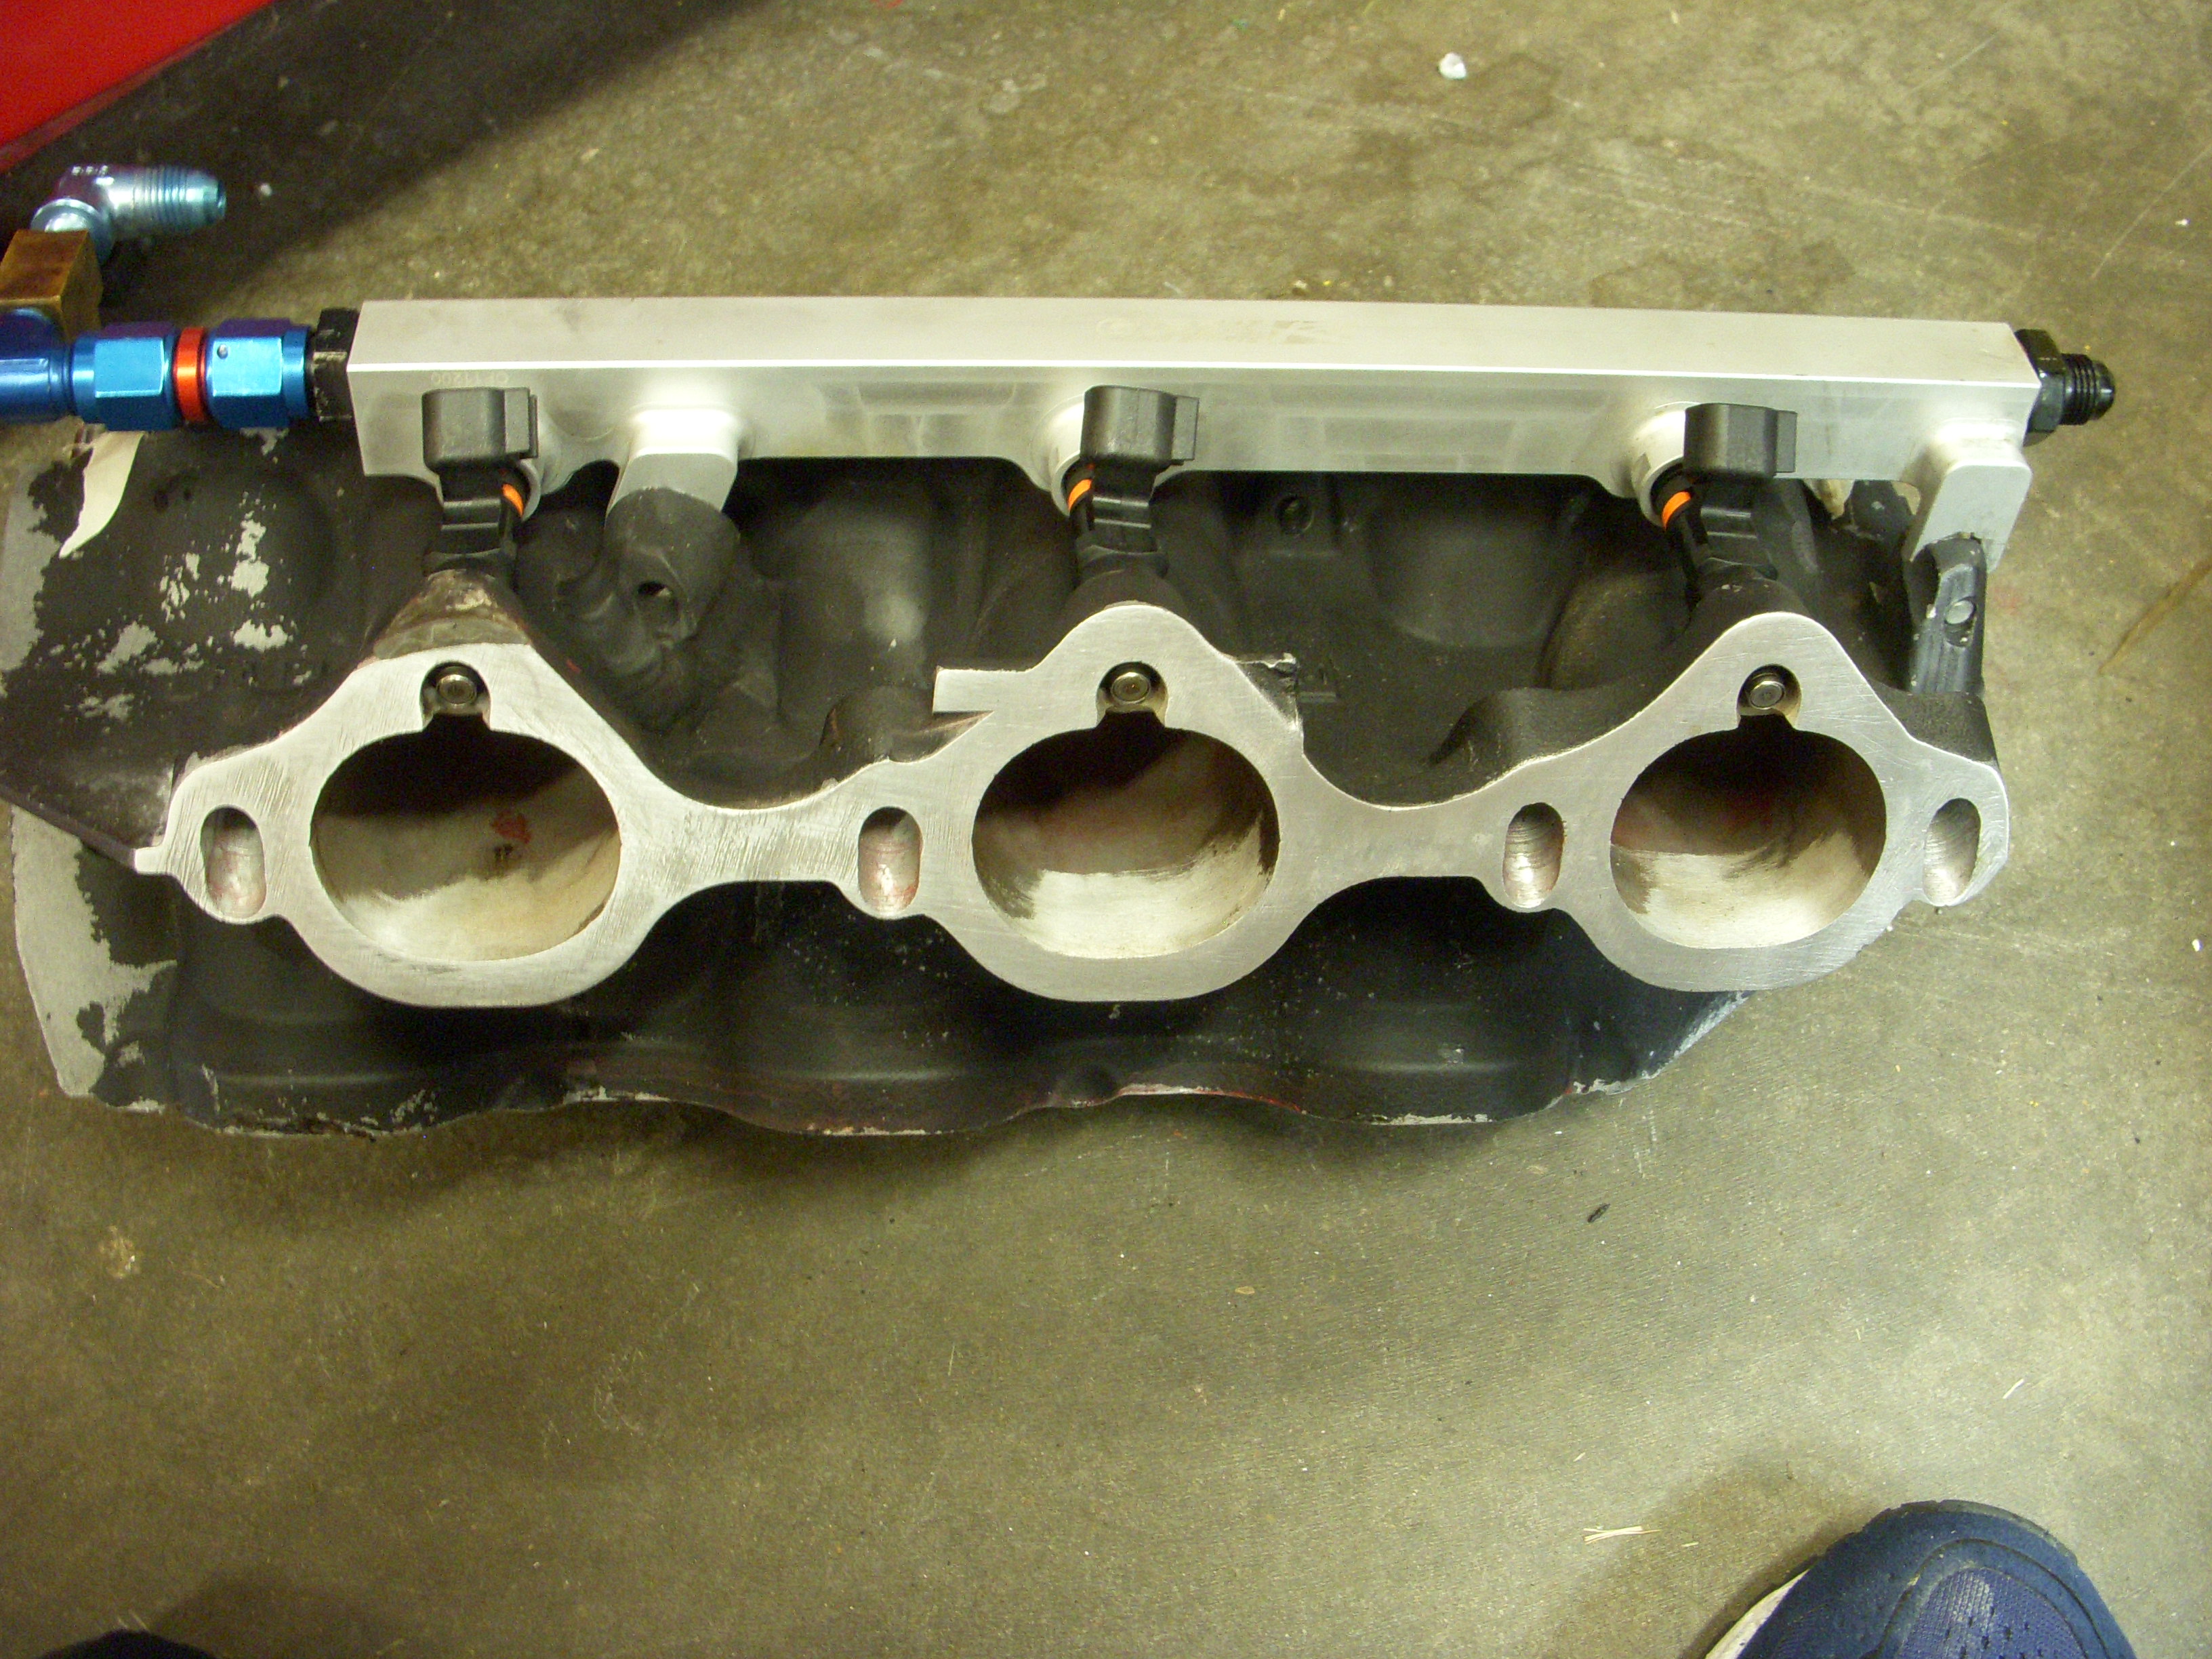
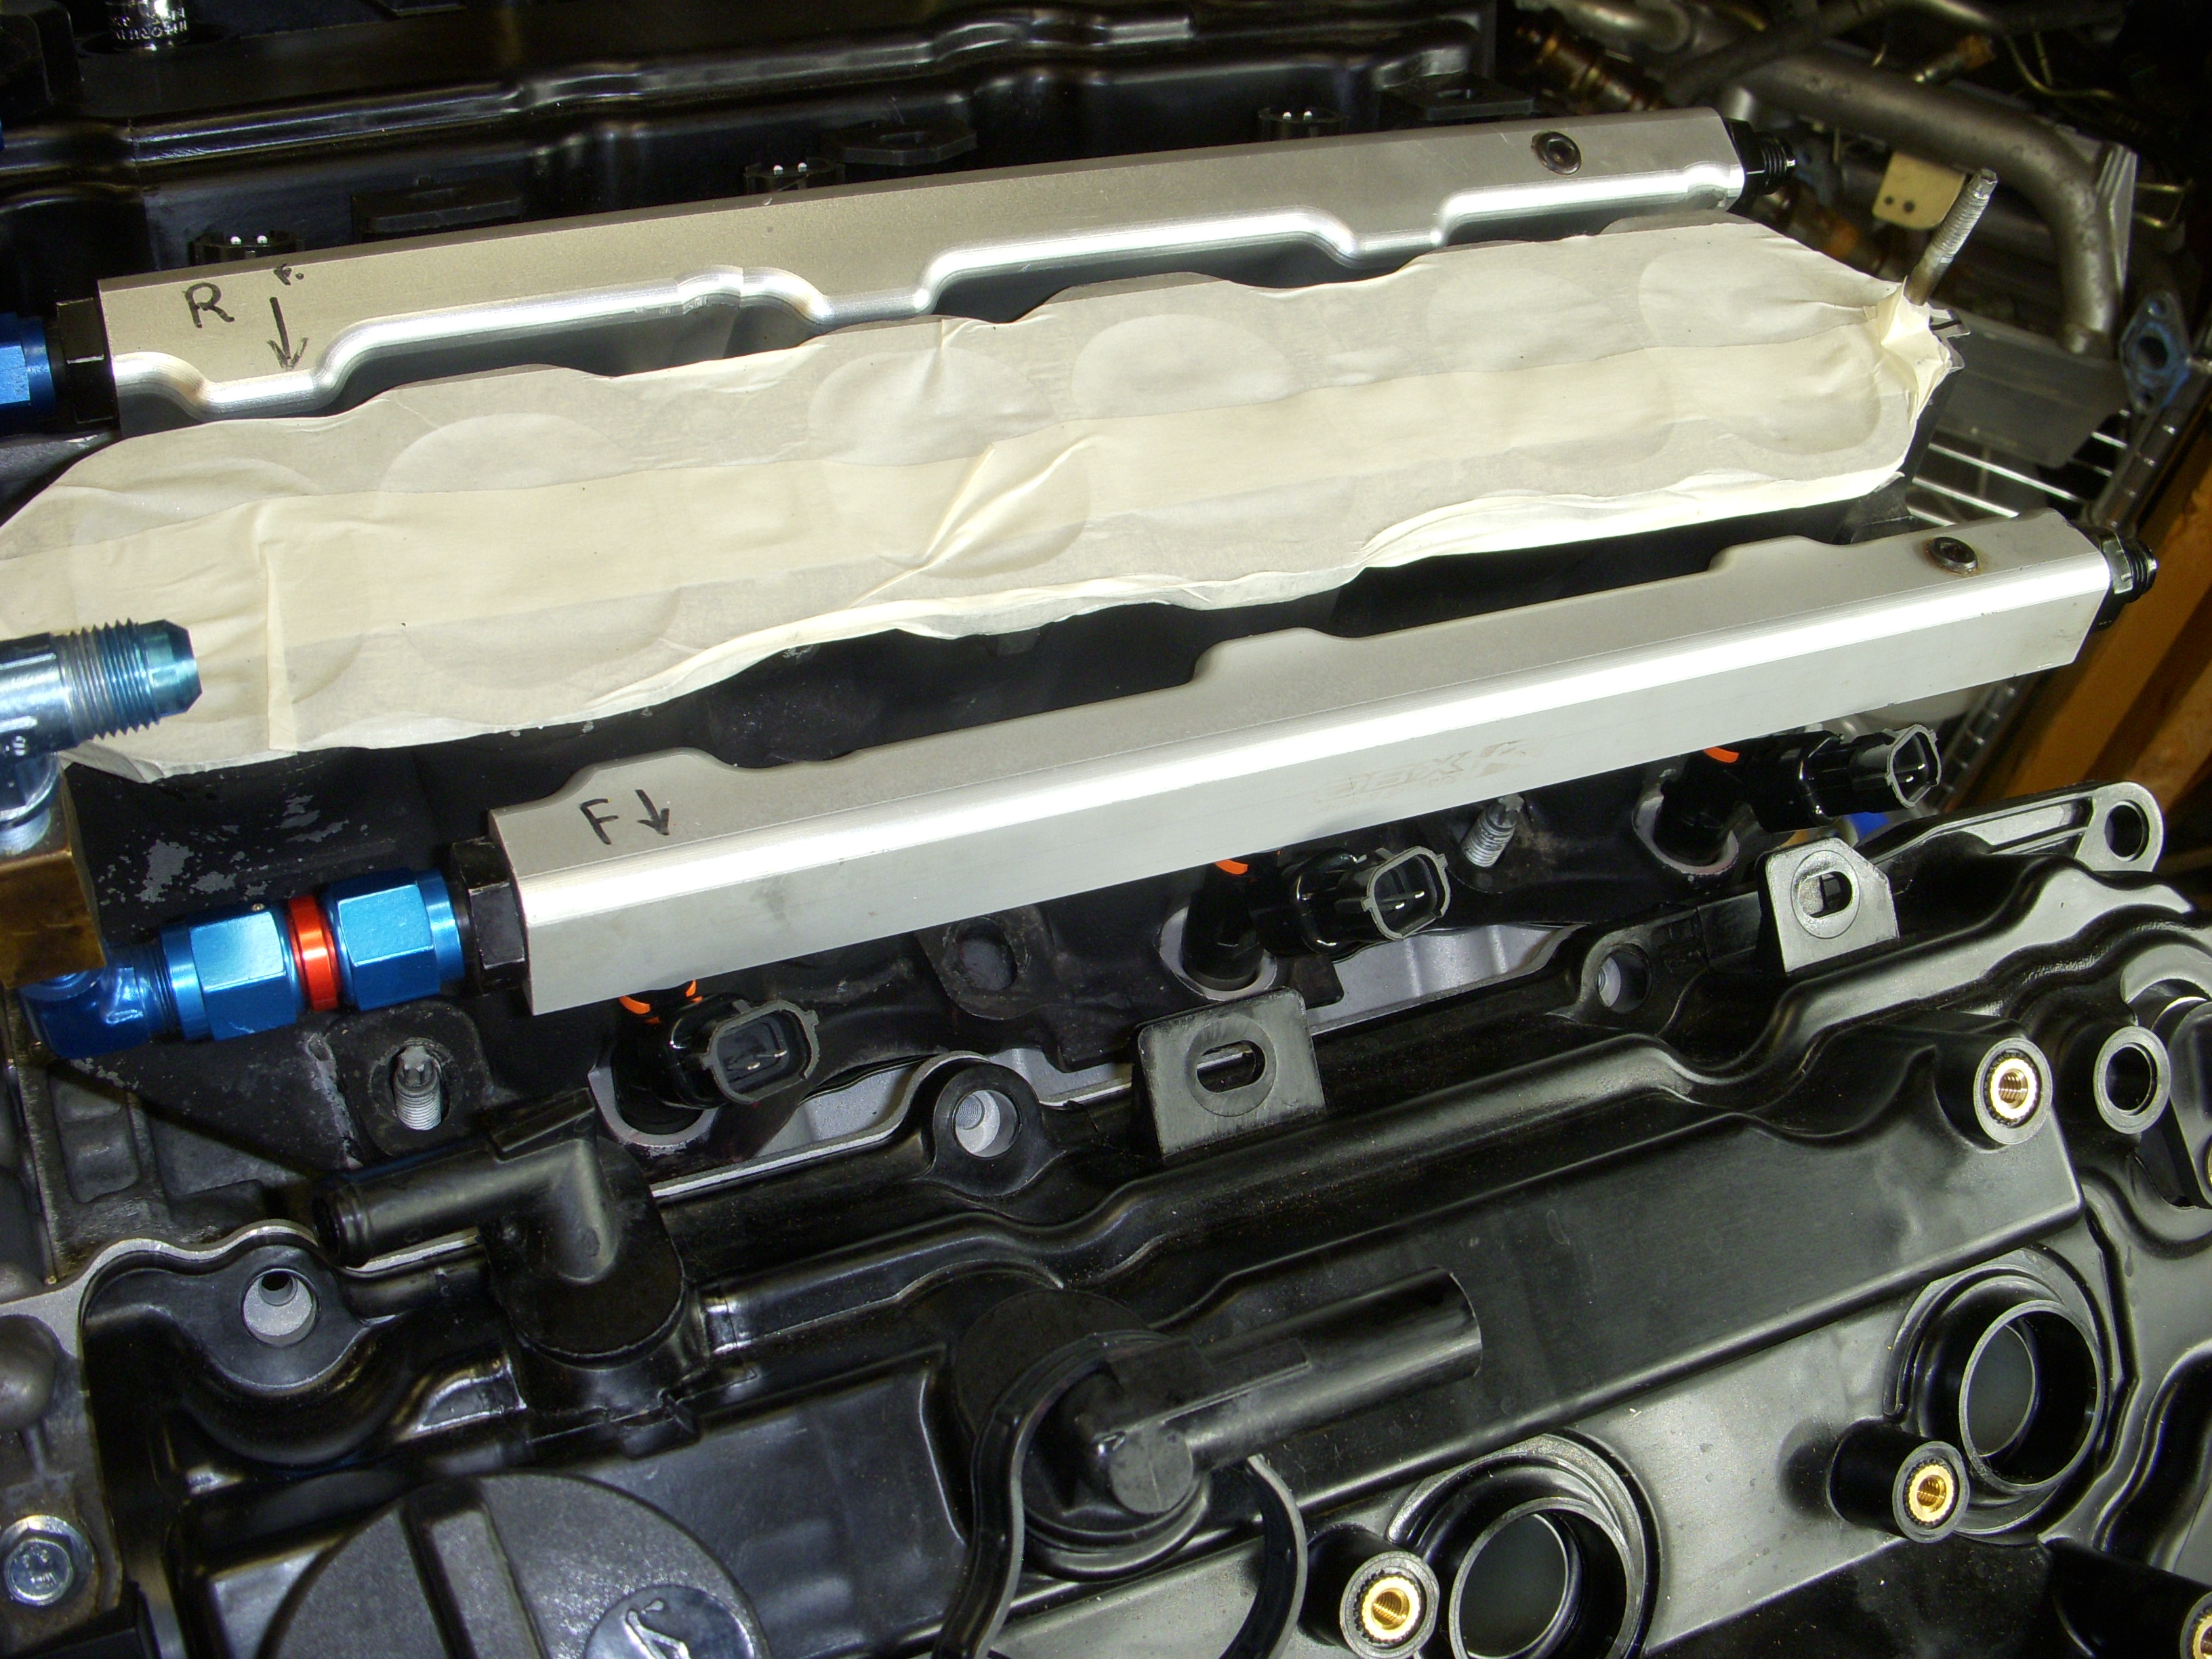
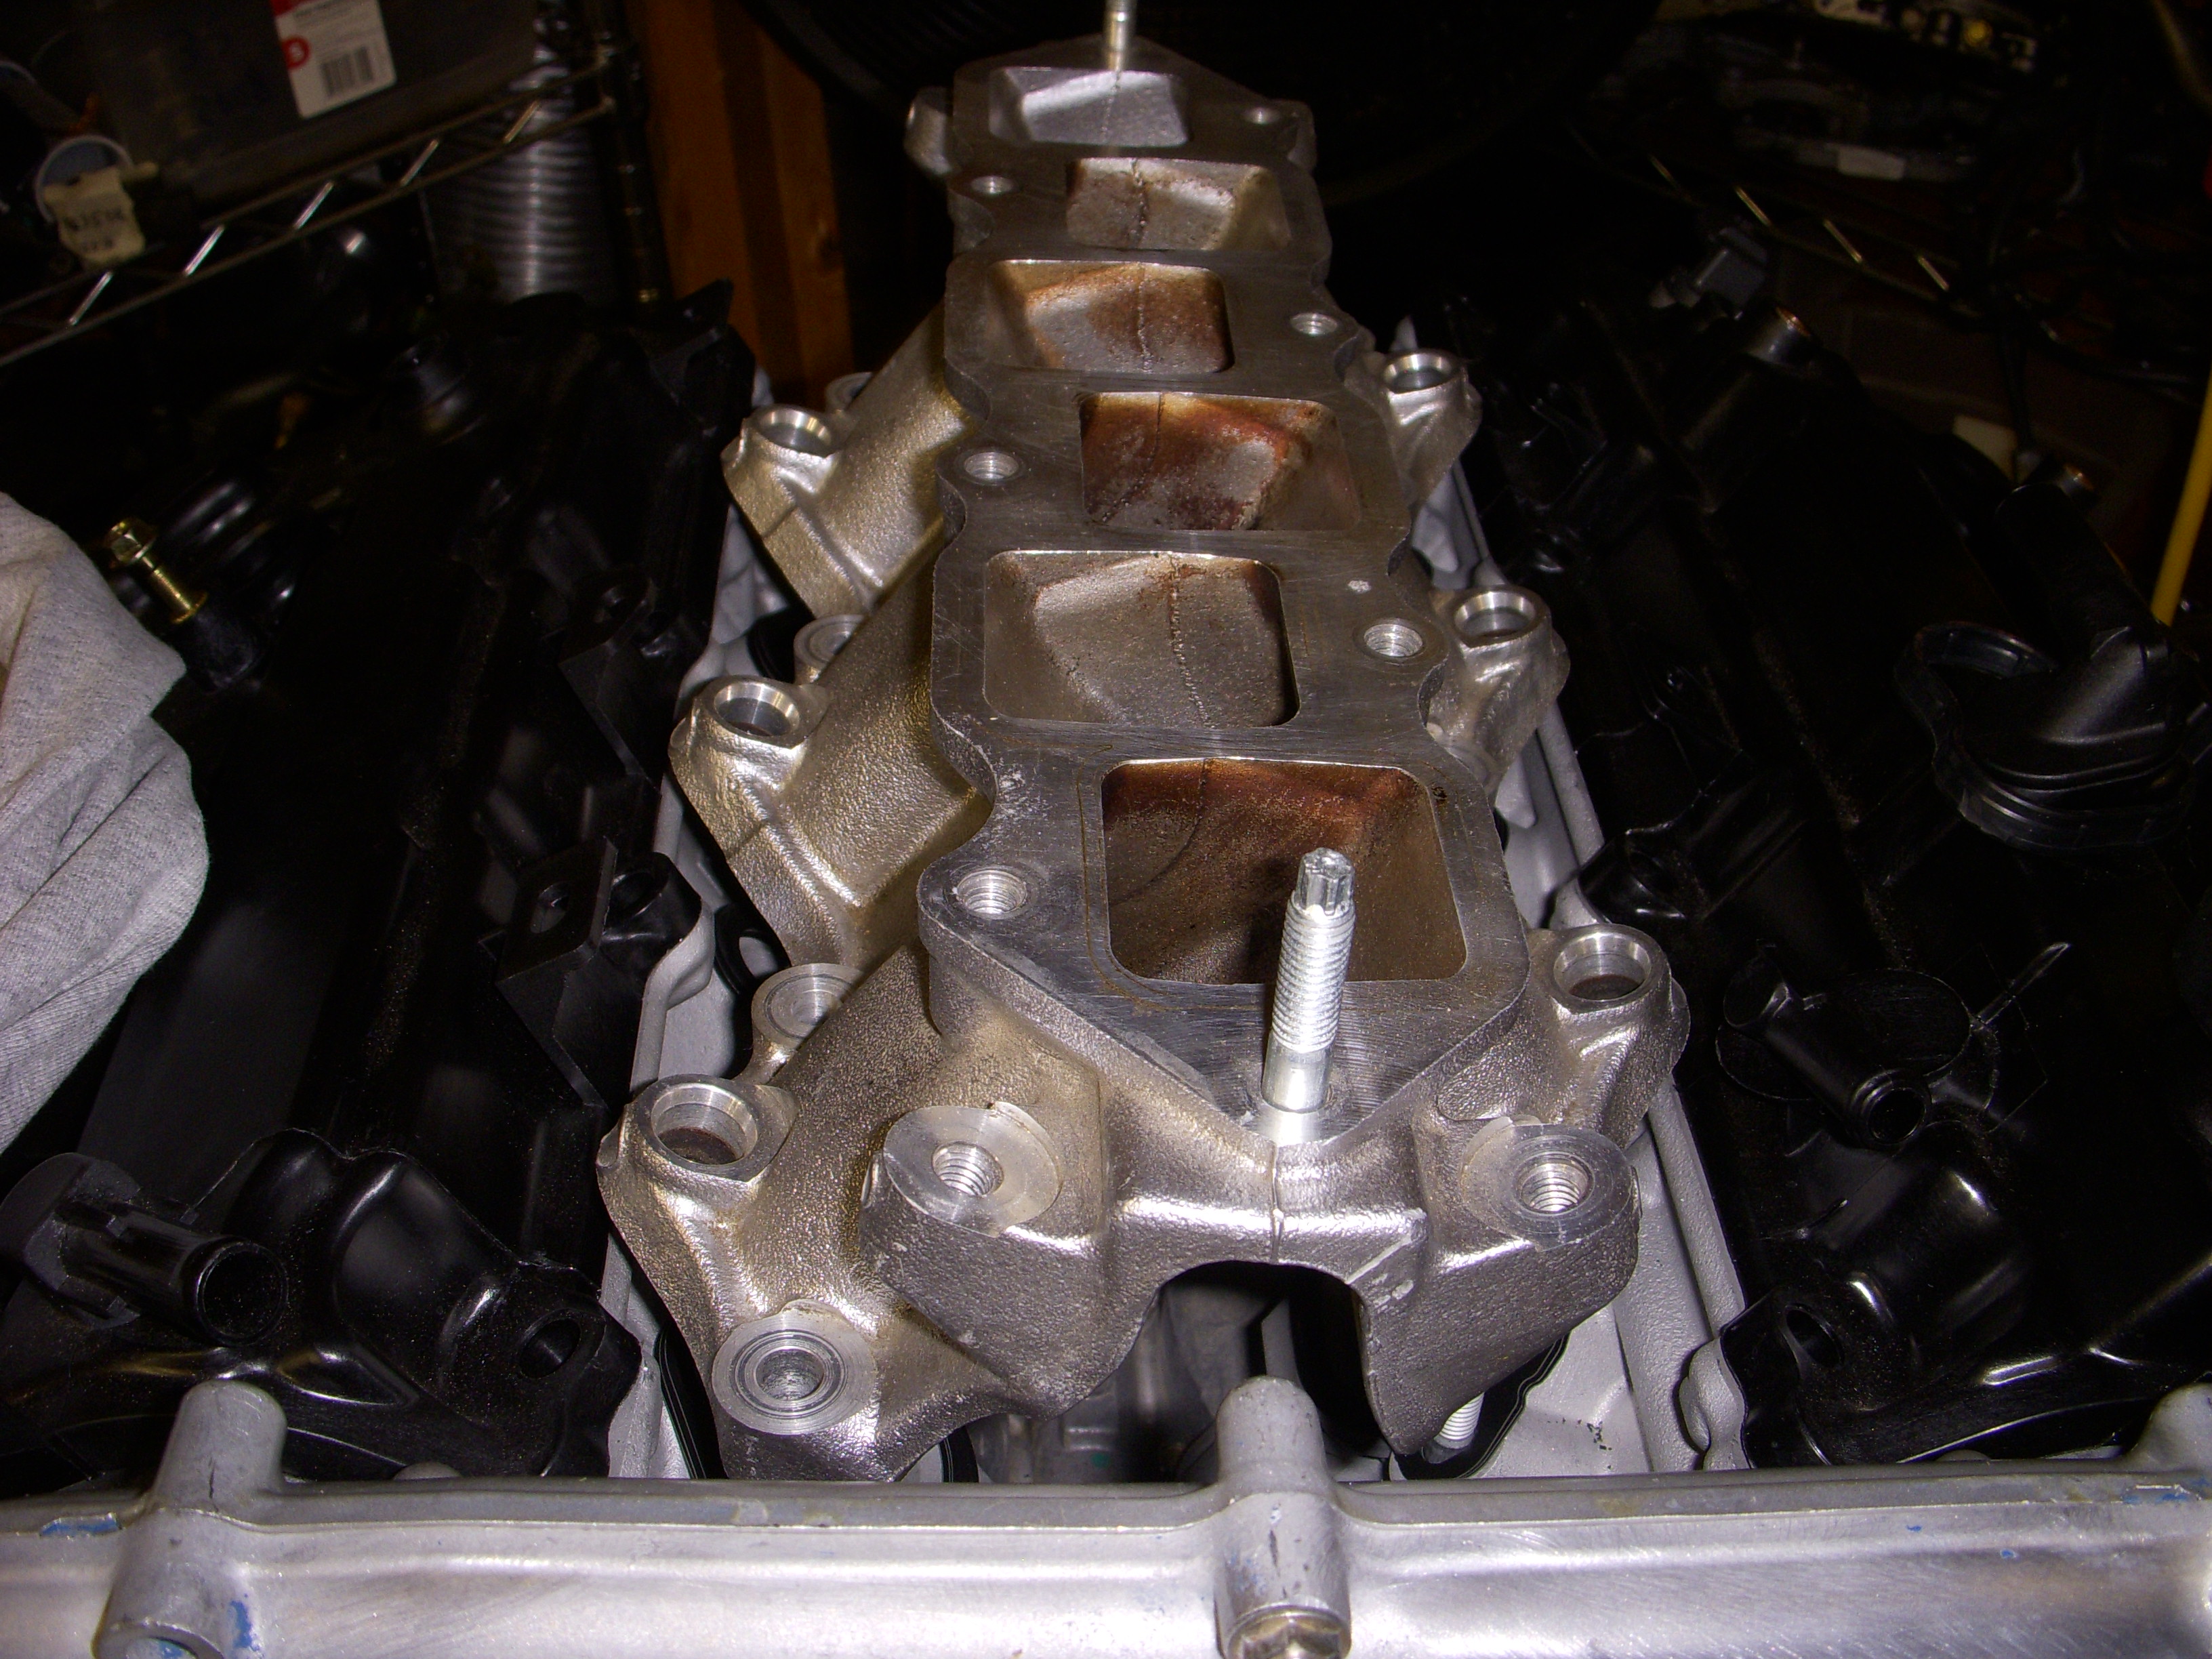
An eyeball comparison between my much-modded late VQ35DE LIM and a true VQ37HR LIM. The HR LIM is much shorter and wider than the DE manifold - I always like hands-on samples when mixing and modding parts.

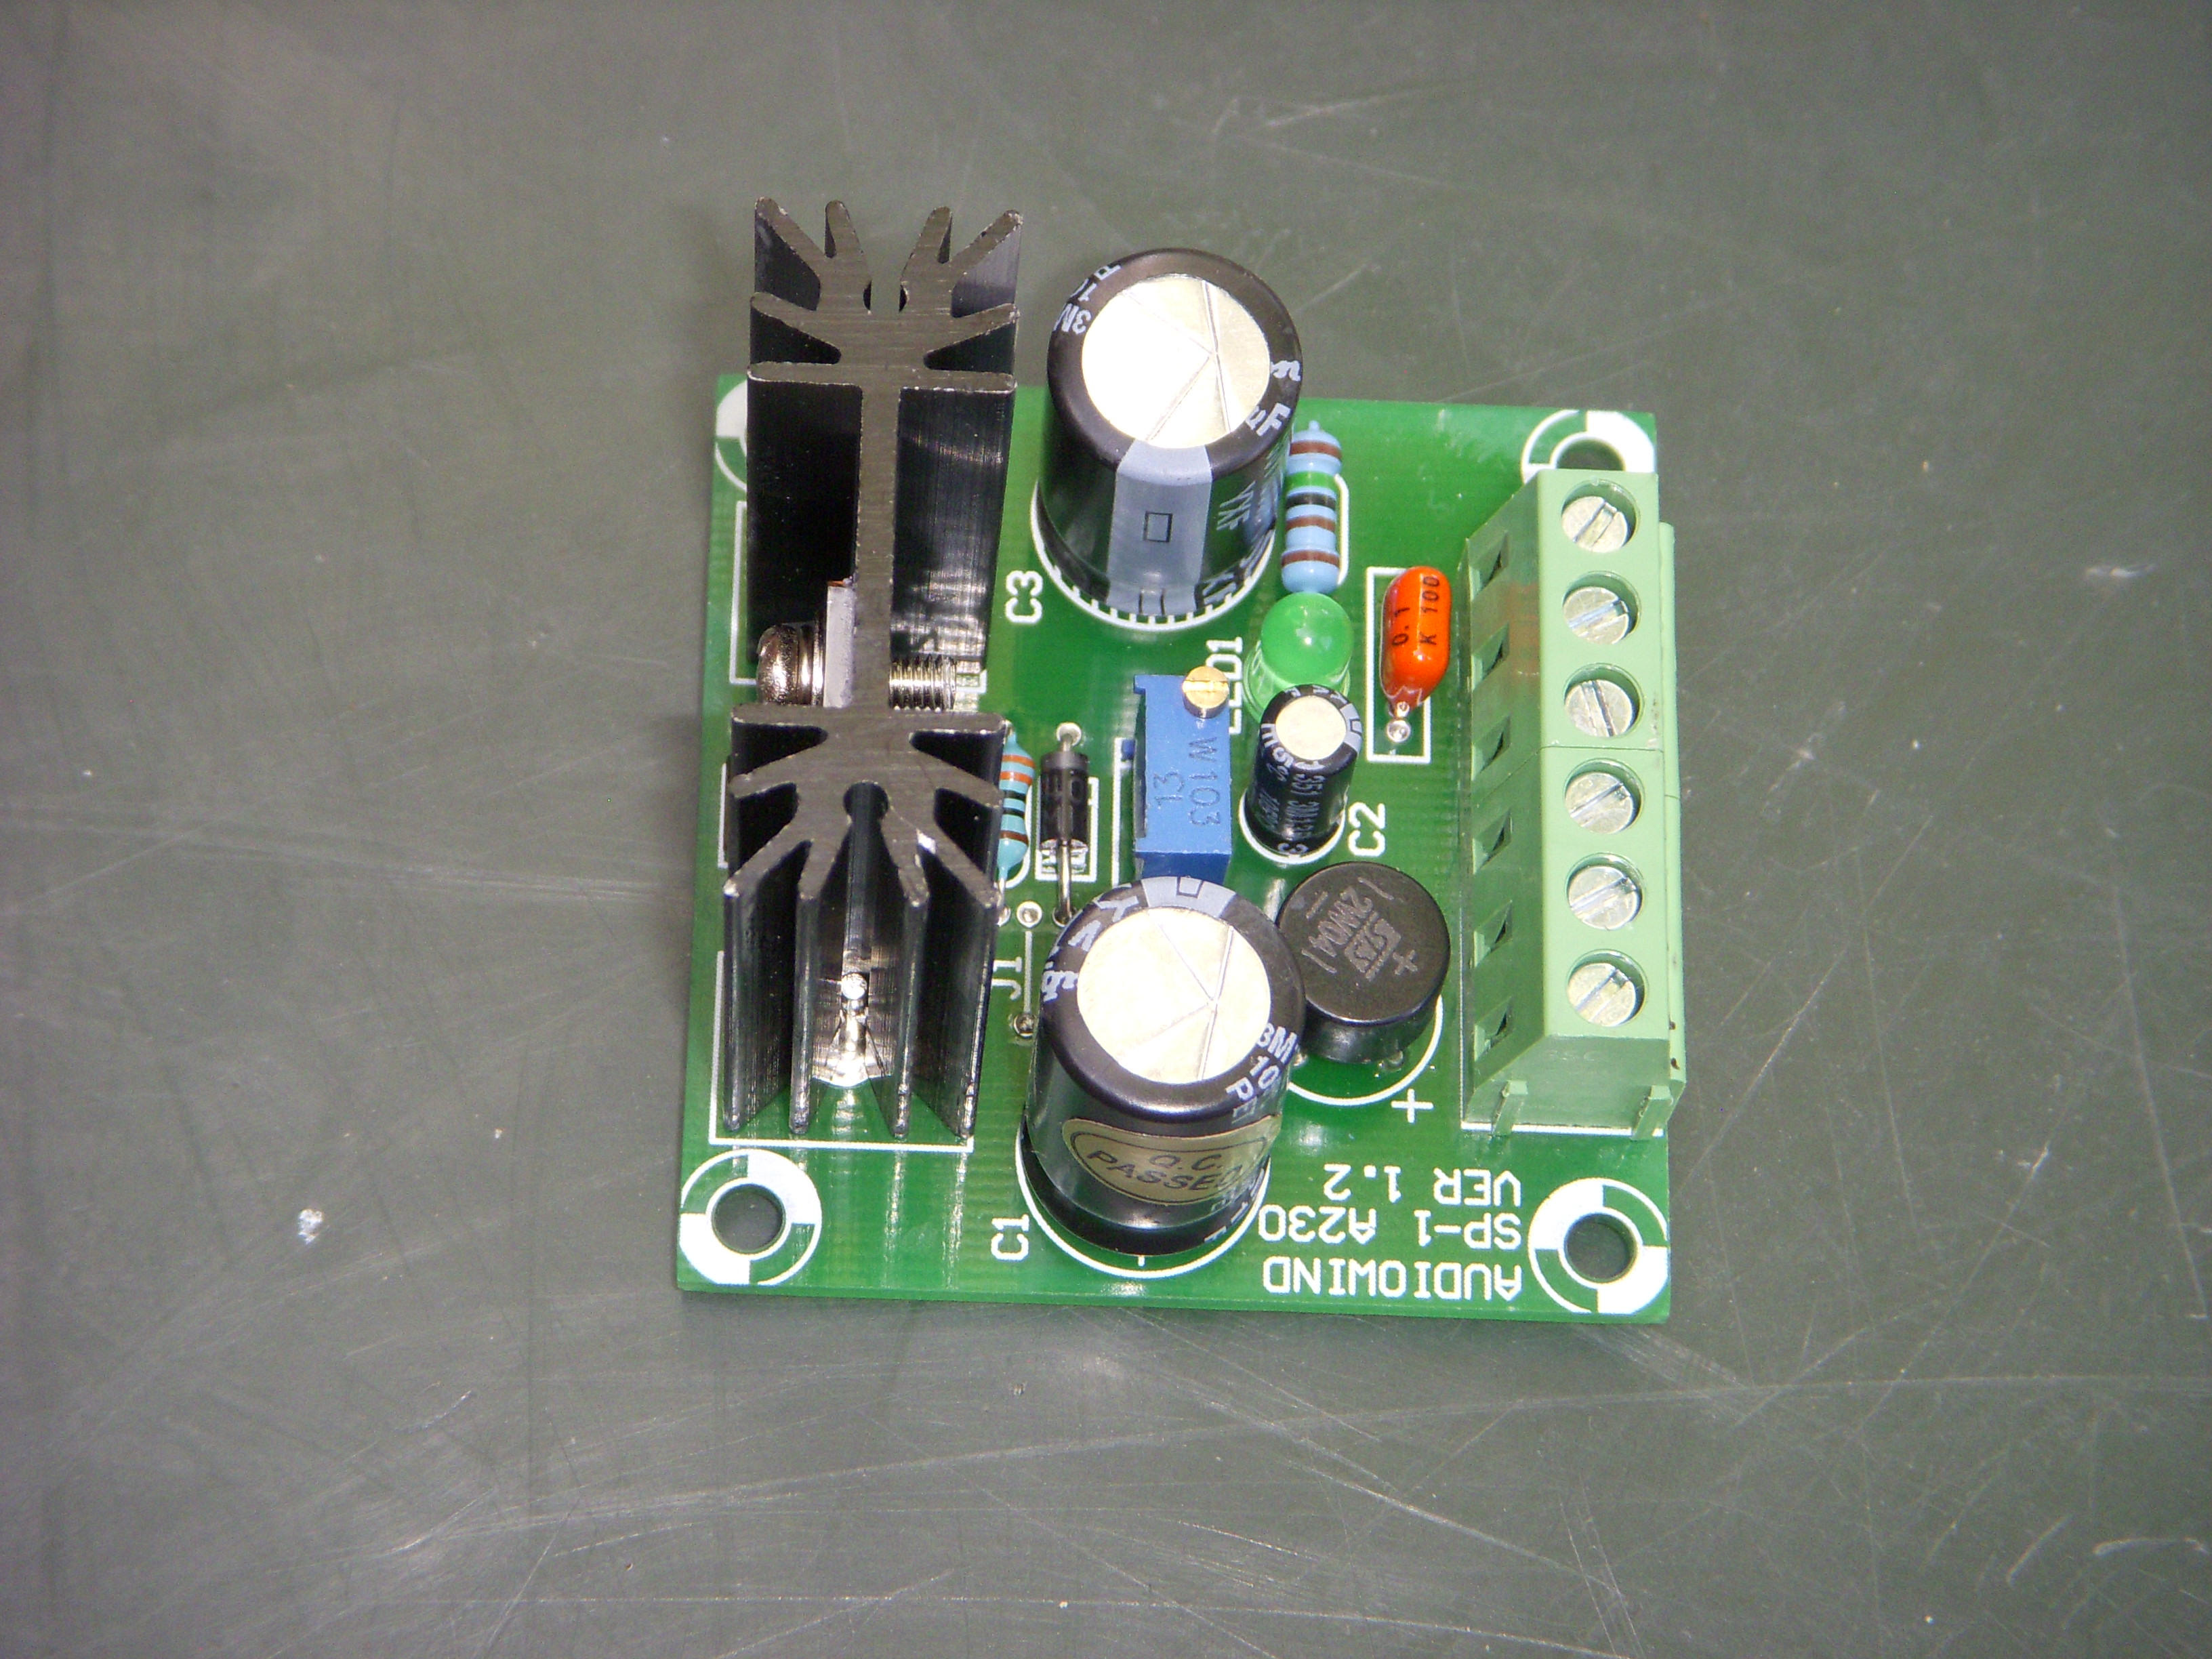
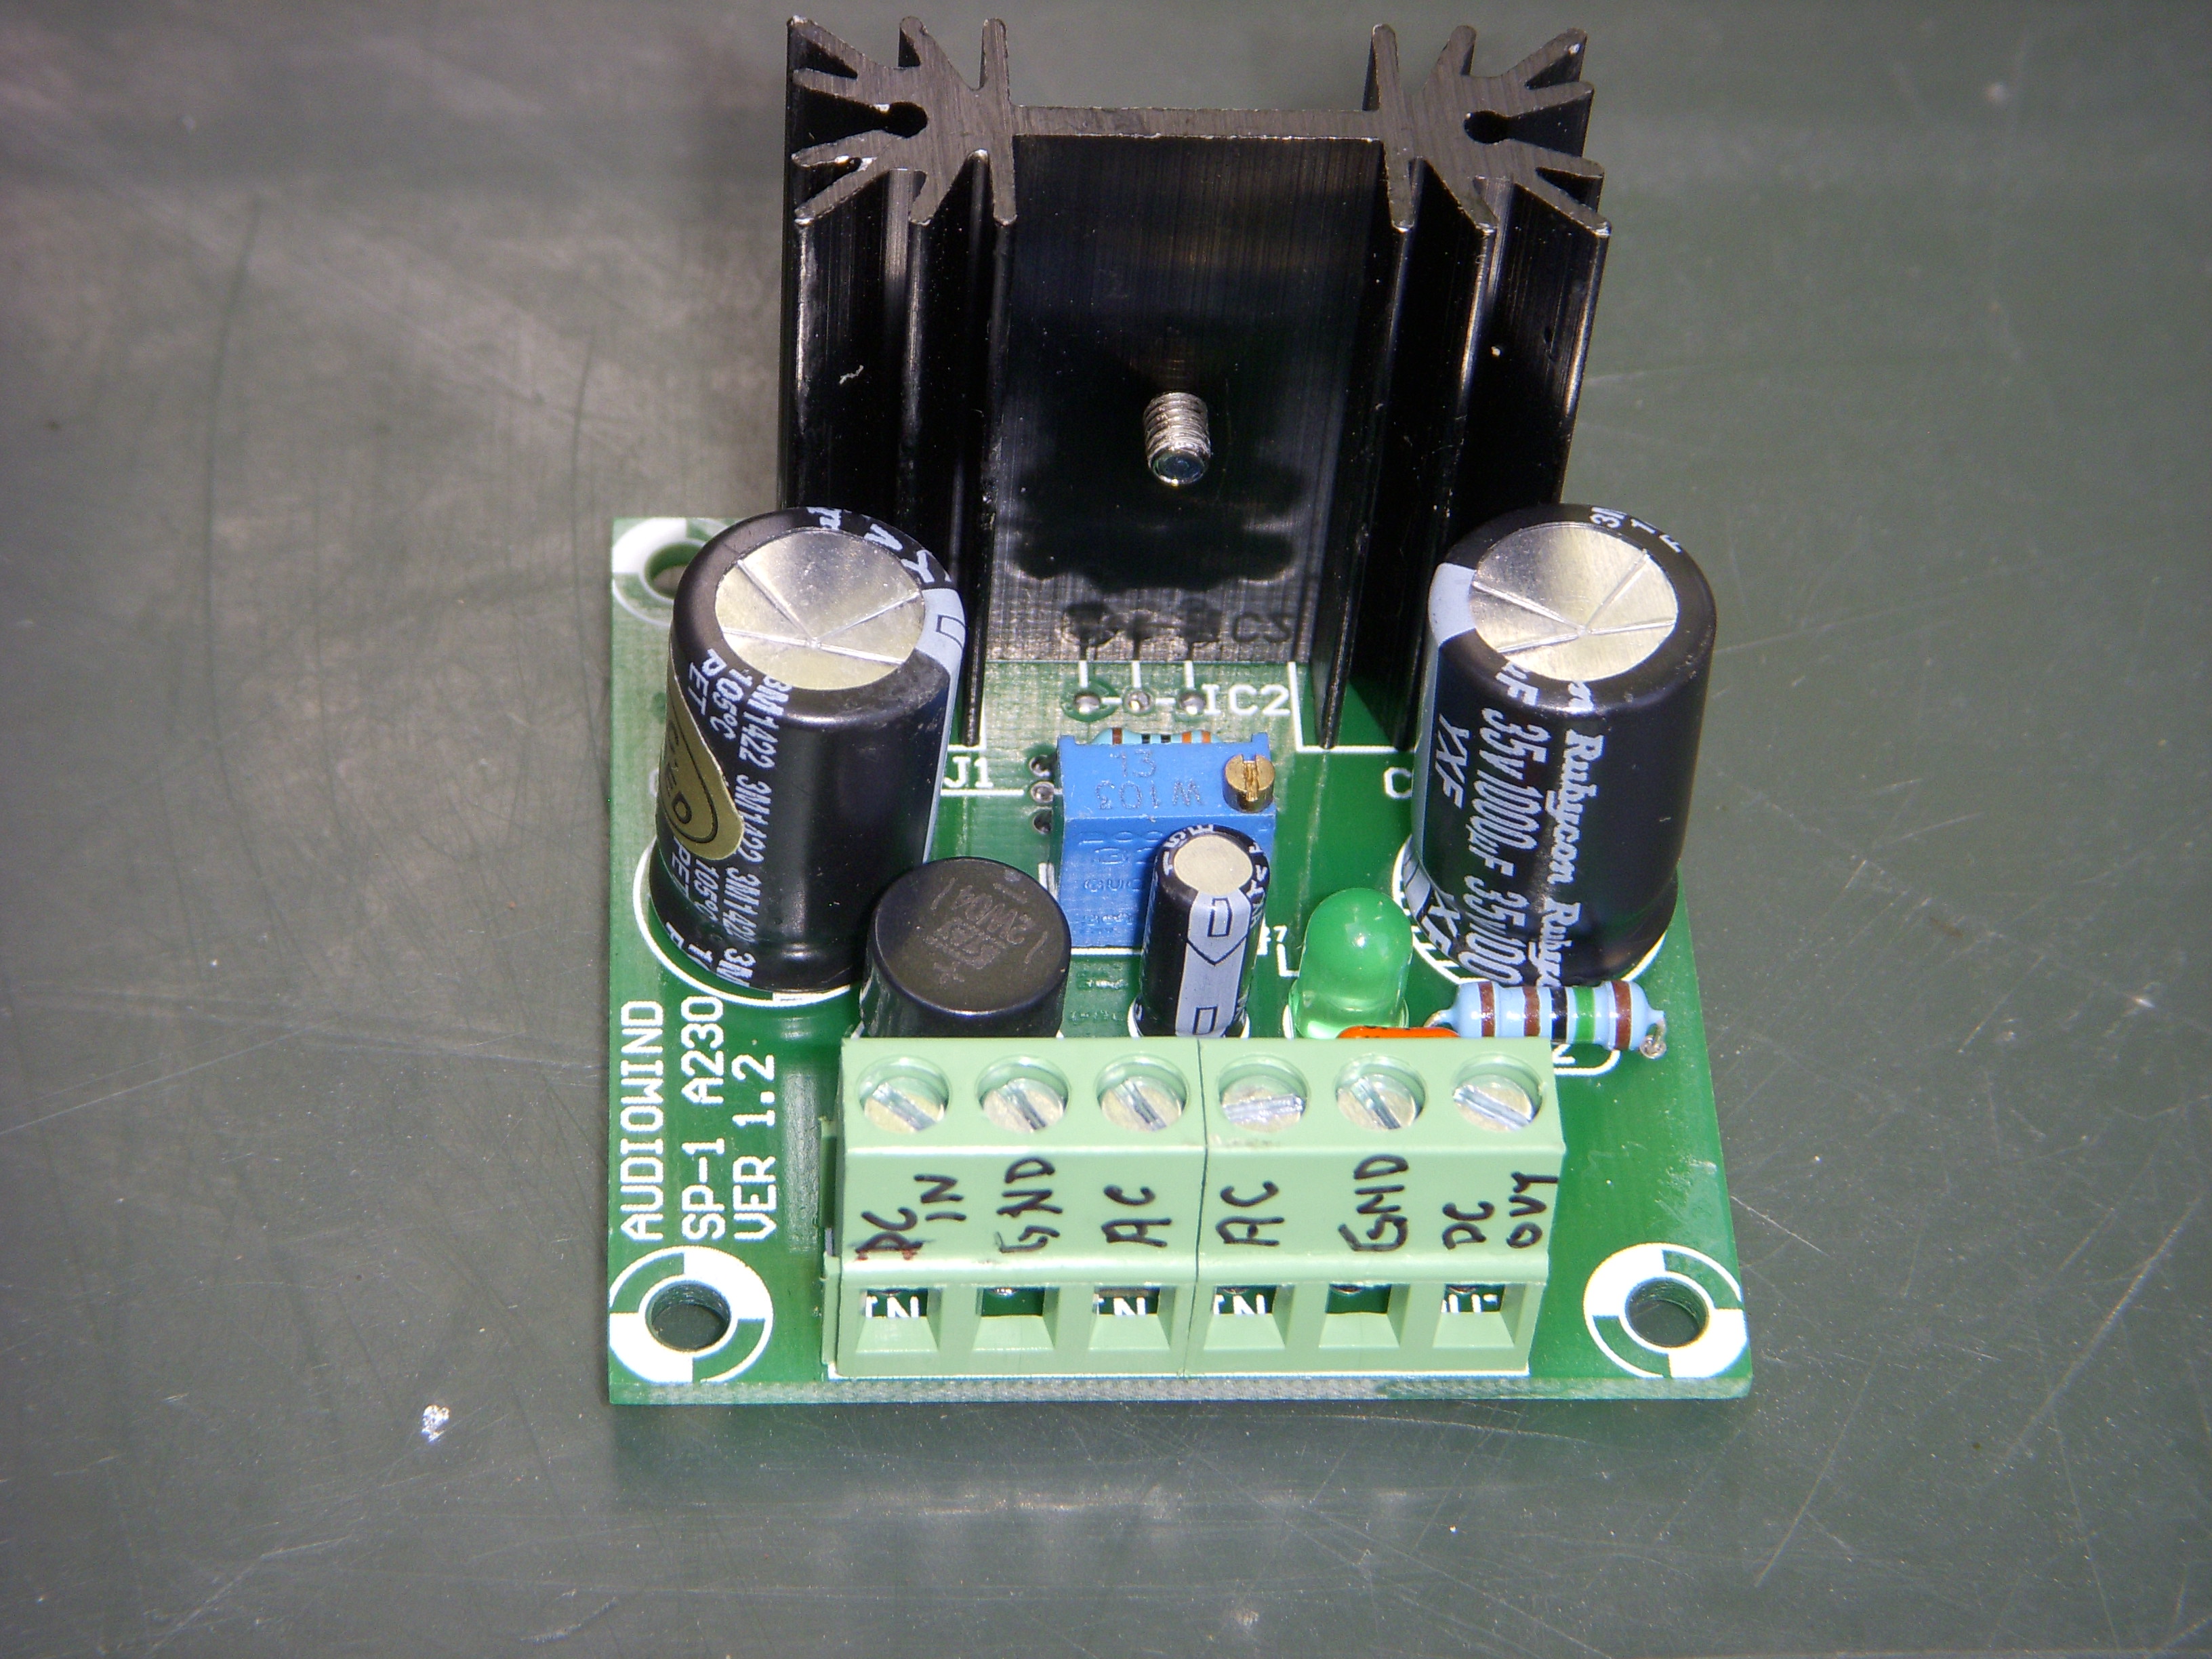
Something else for us tweakers - a healthy regulated power supply for over 24 volts in and adjustable down to 1.5 volts out, at up to 1.5 amps out. Connect up a Ground and battery IN and adjust Output to what you need - like 5 volts for Hall sensors. These are great - I've used them before, and now they are $9.99 from eBay delivered to your door. Pretty cool.
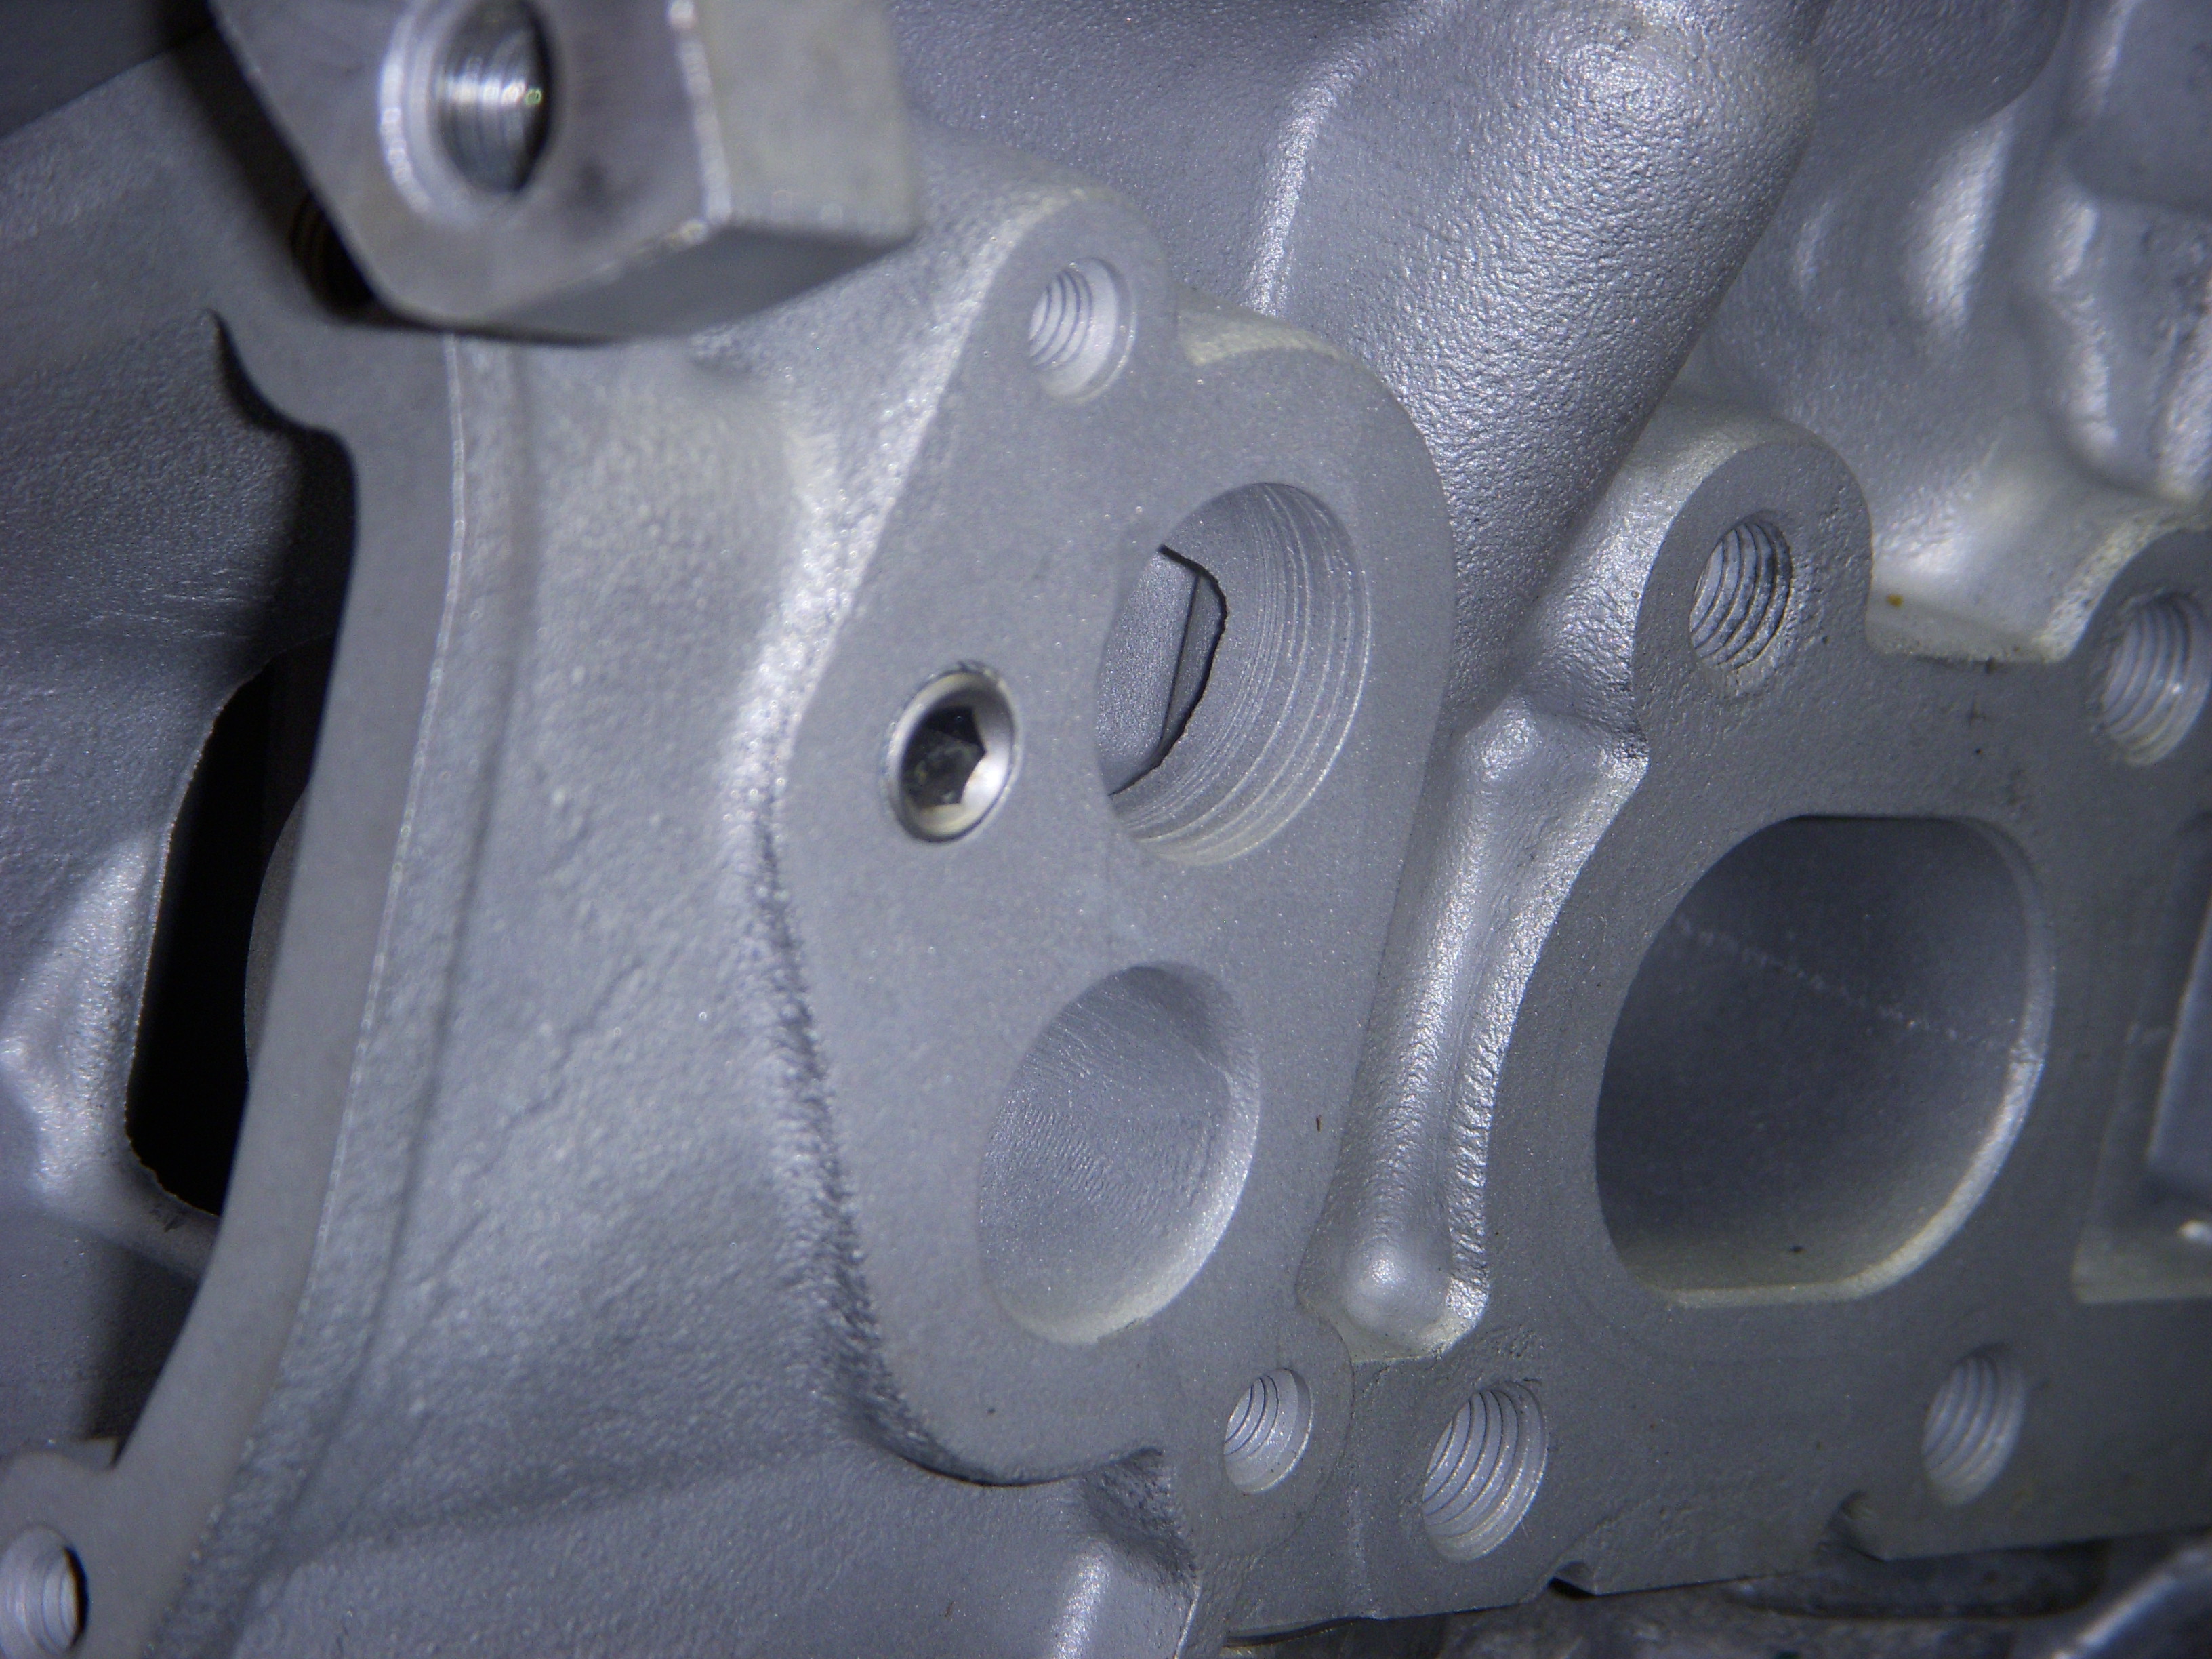
One more HR-head thing - the left-hand water attachment on the head ( 3.0 style) won't work until you plug up the extra hole. I tapped out the hole and used thread sealer to hold an allen screw.

With adapters:


An eyeball comparison between my much-modded late VQ35DE LIM and a true VQ37HR LIM. The HR LIM is much shorter and wider than the DE manifold - I always like hands-on samples when mixing and modding parts.


Something else for us tweakers - a healthy regulated power supply for over 24 volts in and adjustable down to 1.5 volts out, at up to 1.5 amps out. Connect up a Ground and battery IN and adjust Output to what you need - like 5 volts for Hall sensors. These are great - I've used them before, and now they are $9.99 from eBay delivered to your door. Pretty cool.


One more HR-head thing - the left-hand water attachment on the head ( 3.0 style) won't work until you plug up the extra hole. I tapped out the hole and used thread sealer to hold an allen screw.


Last edited by grey99max; 01-16-2017 at 05:34 PM.
08-22-2016, 06:26 PM
#1811
LandShark has Cosworth
Thread Starter
iTrader: (12)
Join Date: Jan 2004
Location: Topeka, KS
Posts: 4,327
One last thing..
I think I have figured out where to mount the Hall sensor for the trigger wheel. Since this requires a lot of custom building, and a VERY solid mount, but still adjustable, I have an idea. I'm going to scrap the AC system completely (since I never used it for 5 years or more) and this will leave a fair amount of space on the lower front of the engine, on the left side. The two bolt holes are circled in blue. Maybe some 1/2" steel runners...
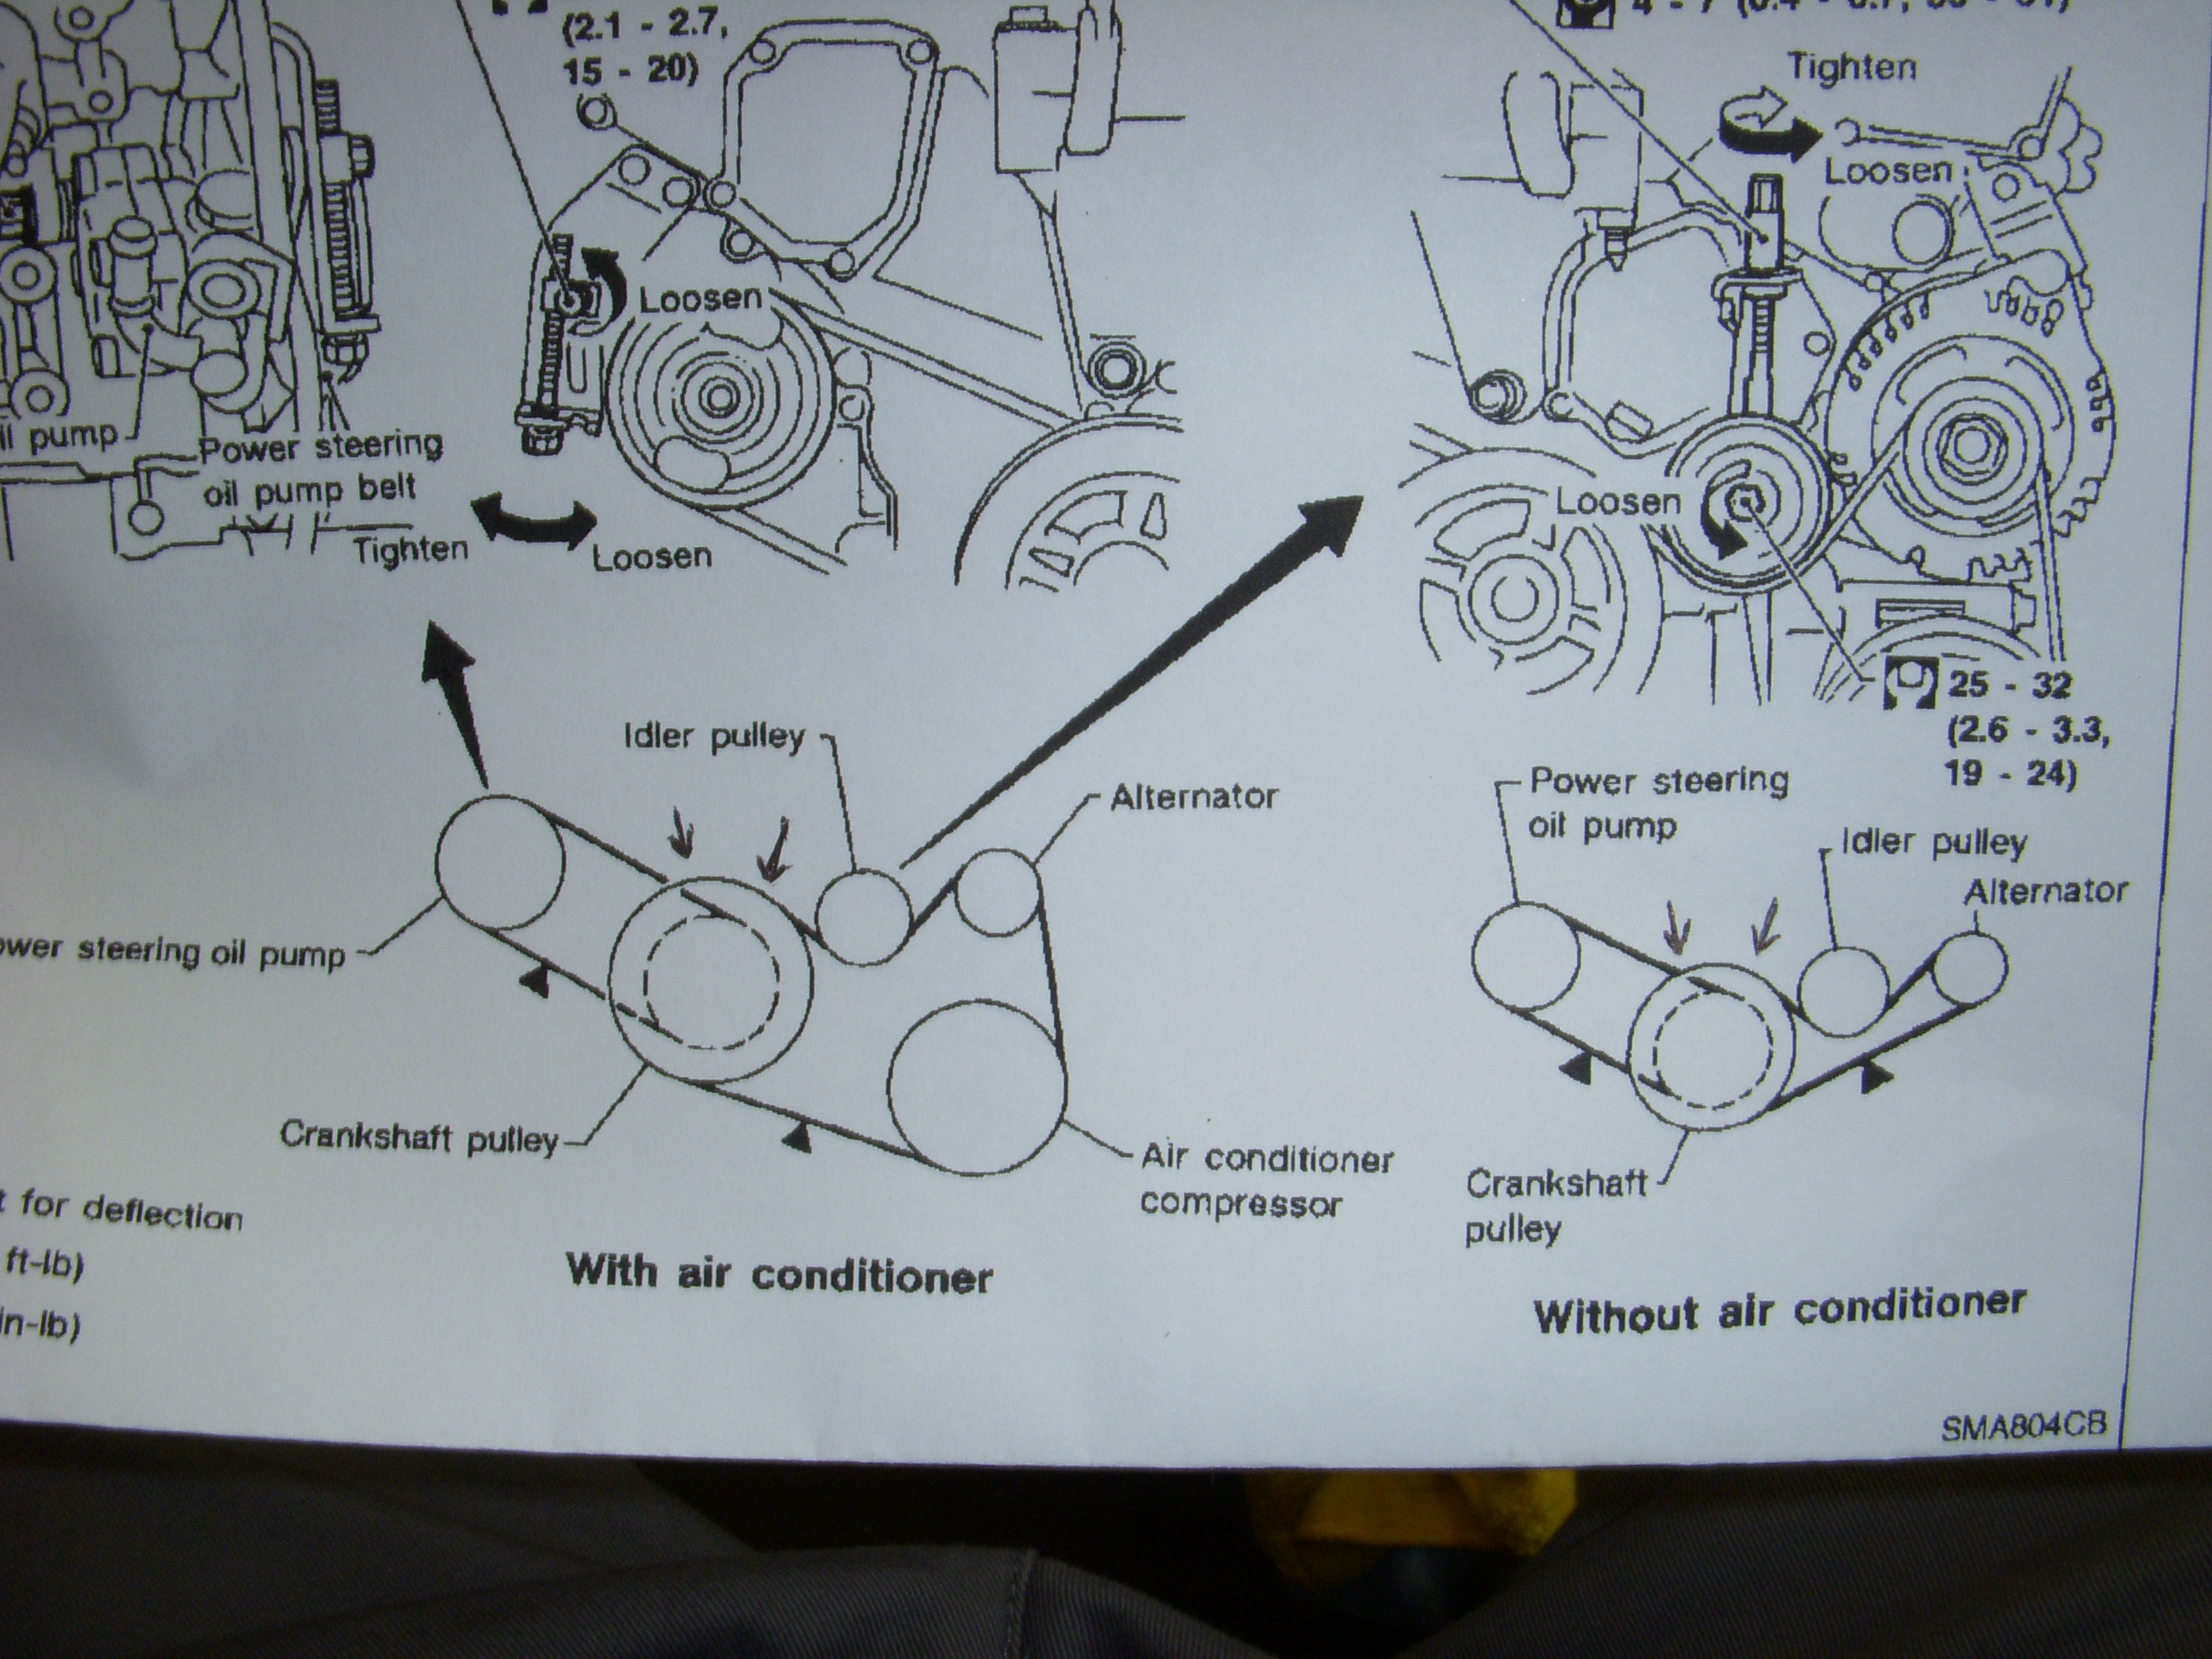
While the engine is on the rack, I'm going to mount the power steering pump and the alternator along with their tensioners to get for-sure belts for both. Beats doing that on a lift while shoving the engine up inside the car.
While the engine is on the rack, I'm going to mount the power steering pump and the alternator along with their tensioners to get for-sure belts for both. Beats doing that on a lift while shoving the engine up inside the car.

Last edited by grey99max; 01-16-2017 at 05:36 PM.
08-24-2016, 07:05 PM
#1812
LandShark has Cosworth
Thread Starter
iTrader: (12)
Join Date: Jan 2004
Location: Topeka, KS
Posts: 4,327
another factiod about HR heads...
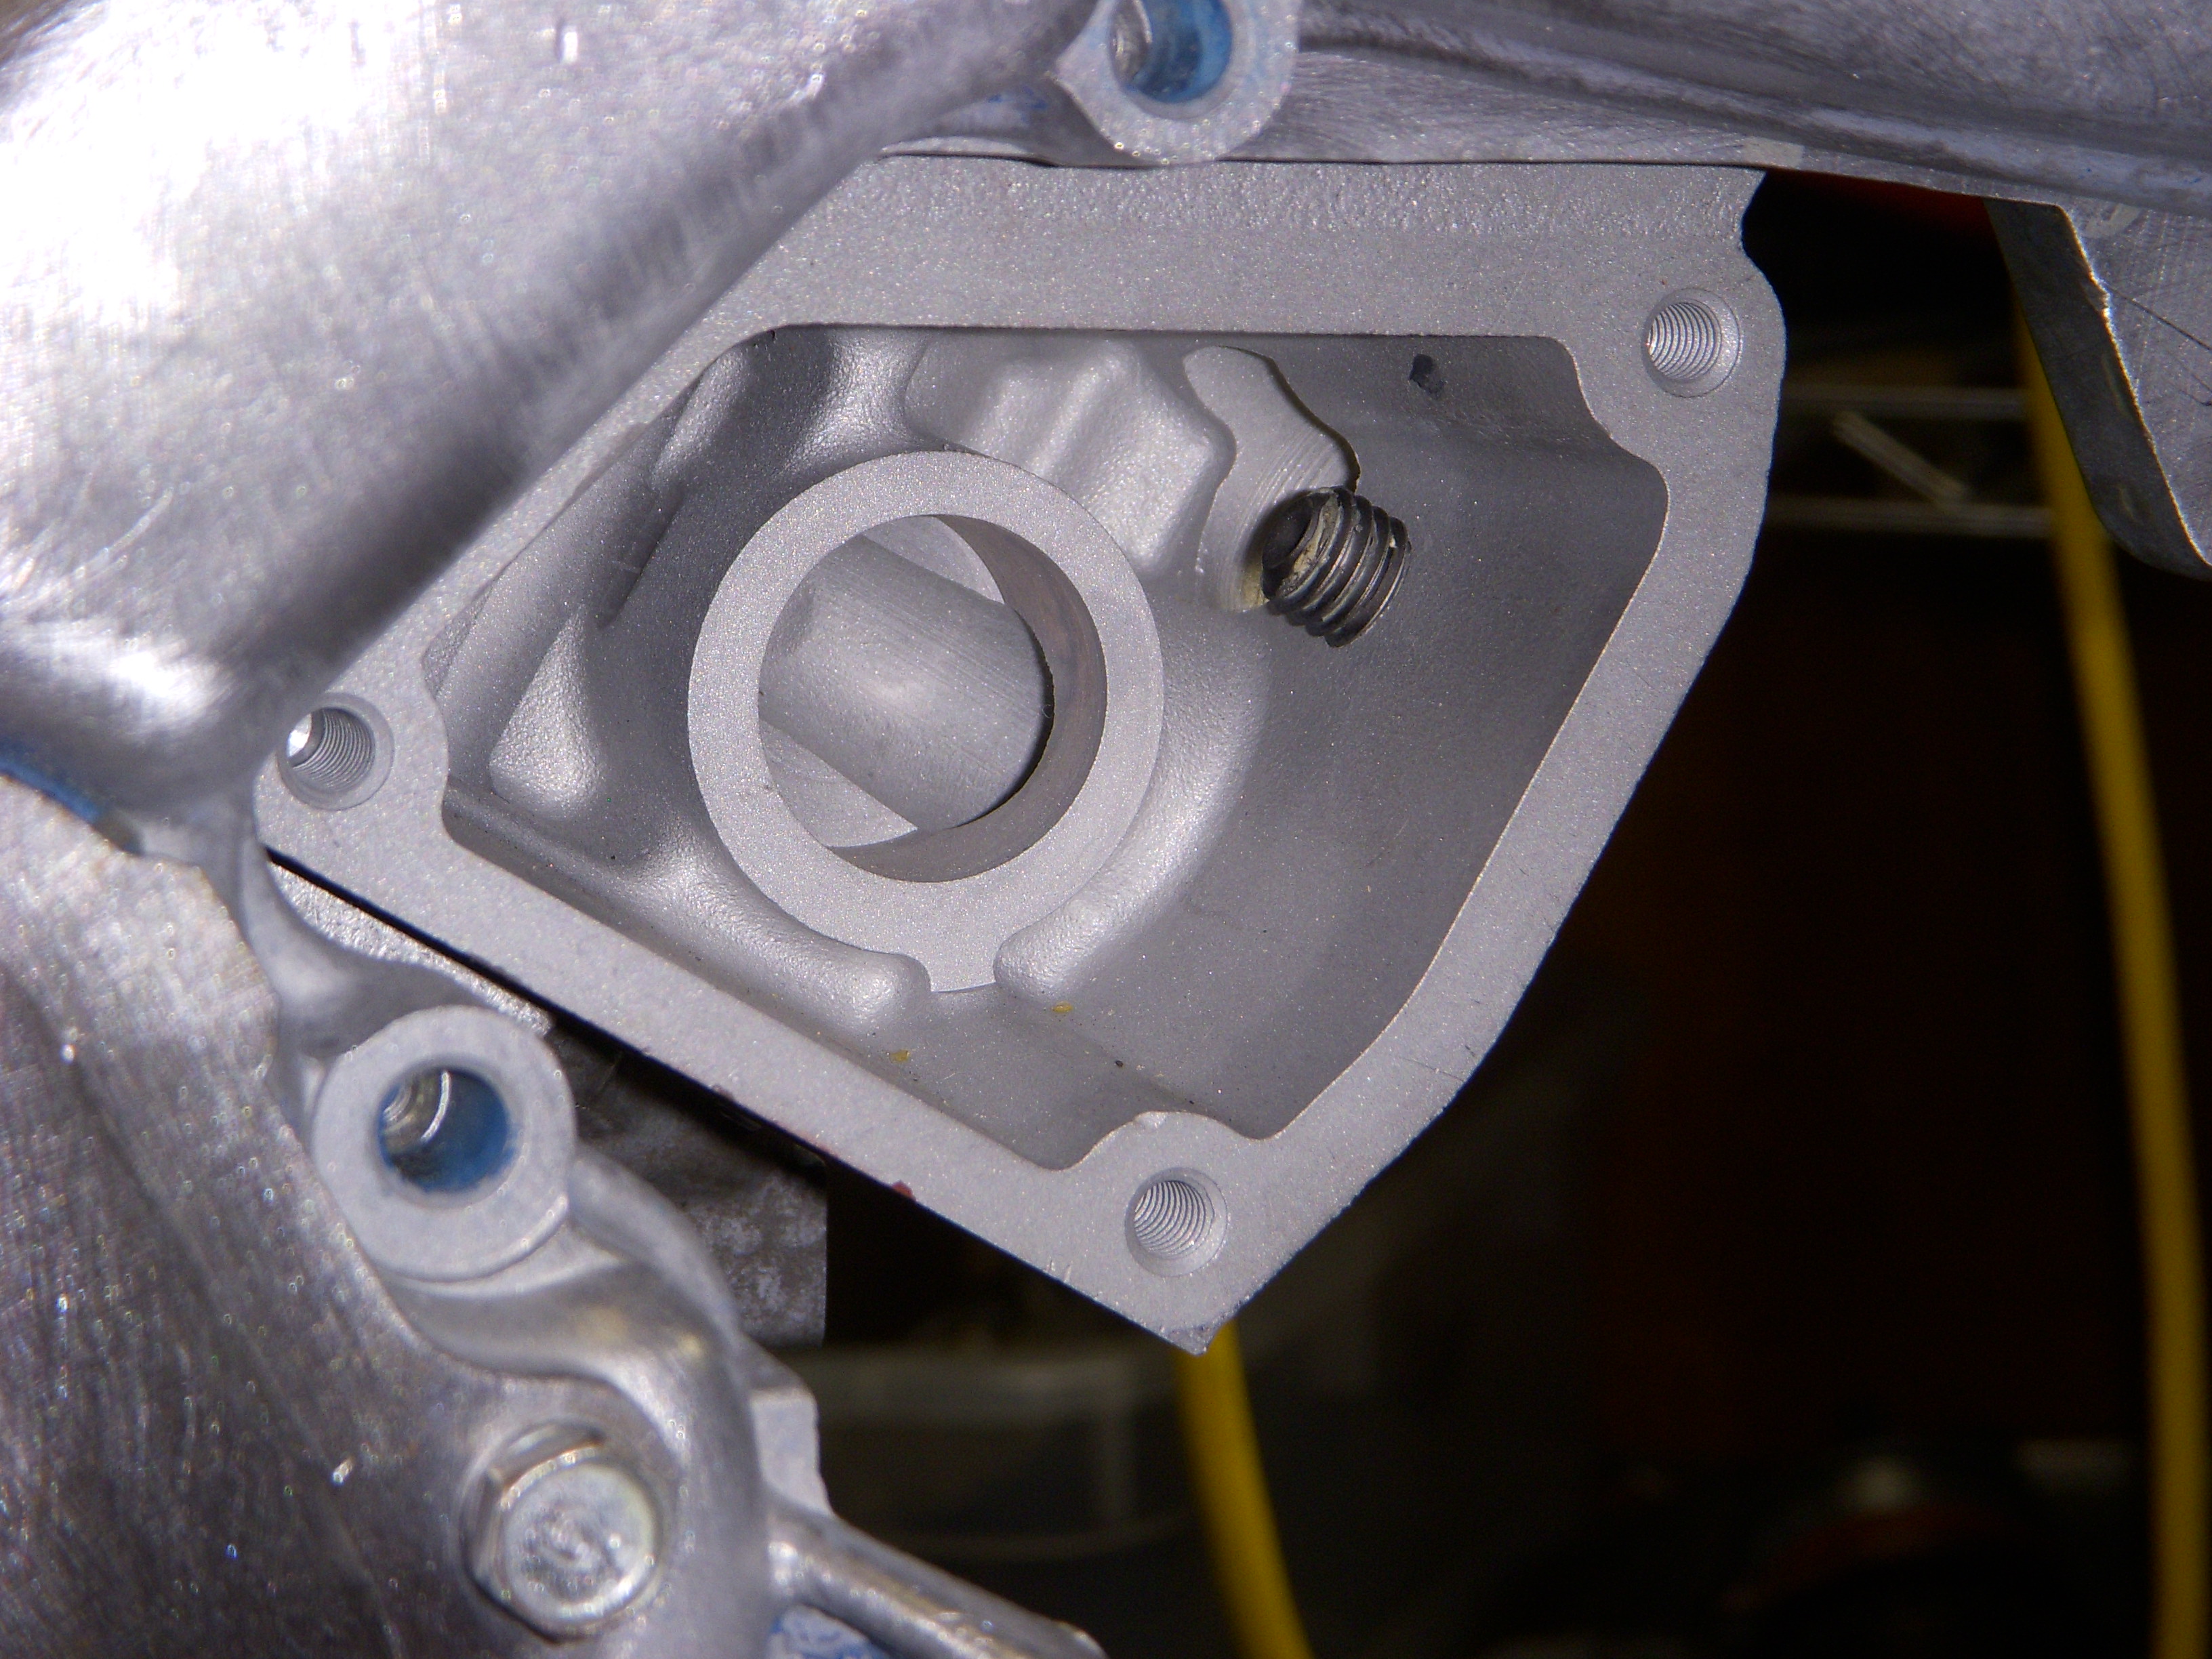
Want to know if they came from a FWD or RWD engine? Look for the plug...

The RWD engine has a dipstick mounted on the front of the engine. The dipstick hole on the left HR head has an opening for a dipstick, but is plugged from the factory. My FWD dipsticks fit into that hole jest fine.
Last edited by grey99max; 01-16-2017 at 05:37 PM.
08-24-2016, 07:29 PM
#1813
LandShark has Cosworth
Thread Starter
iTrader: (12)
Join Date: Jan 2004
Location: Topeka, KS
Posts: 4,327
Time for the trigger-wheel sensor mount...
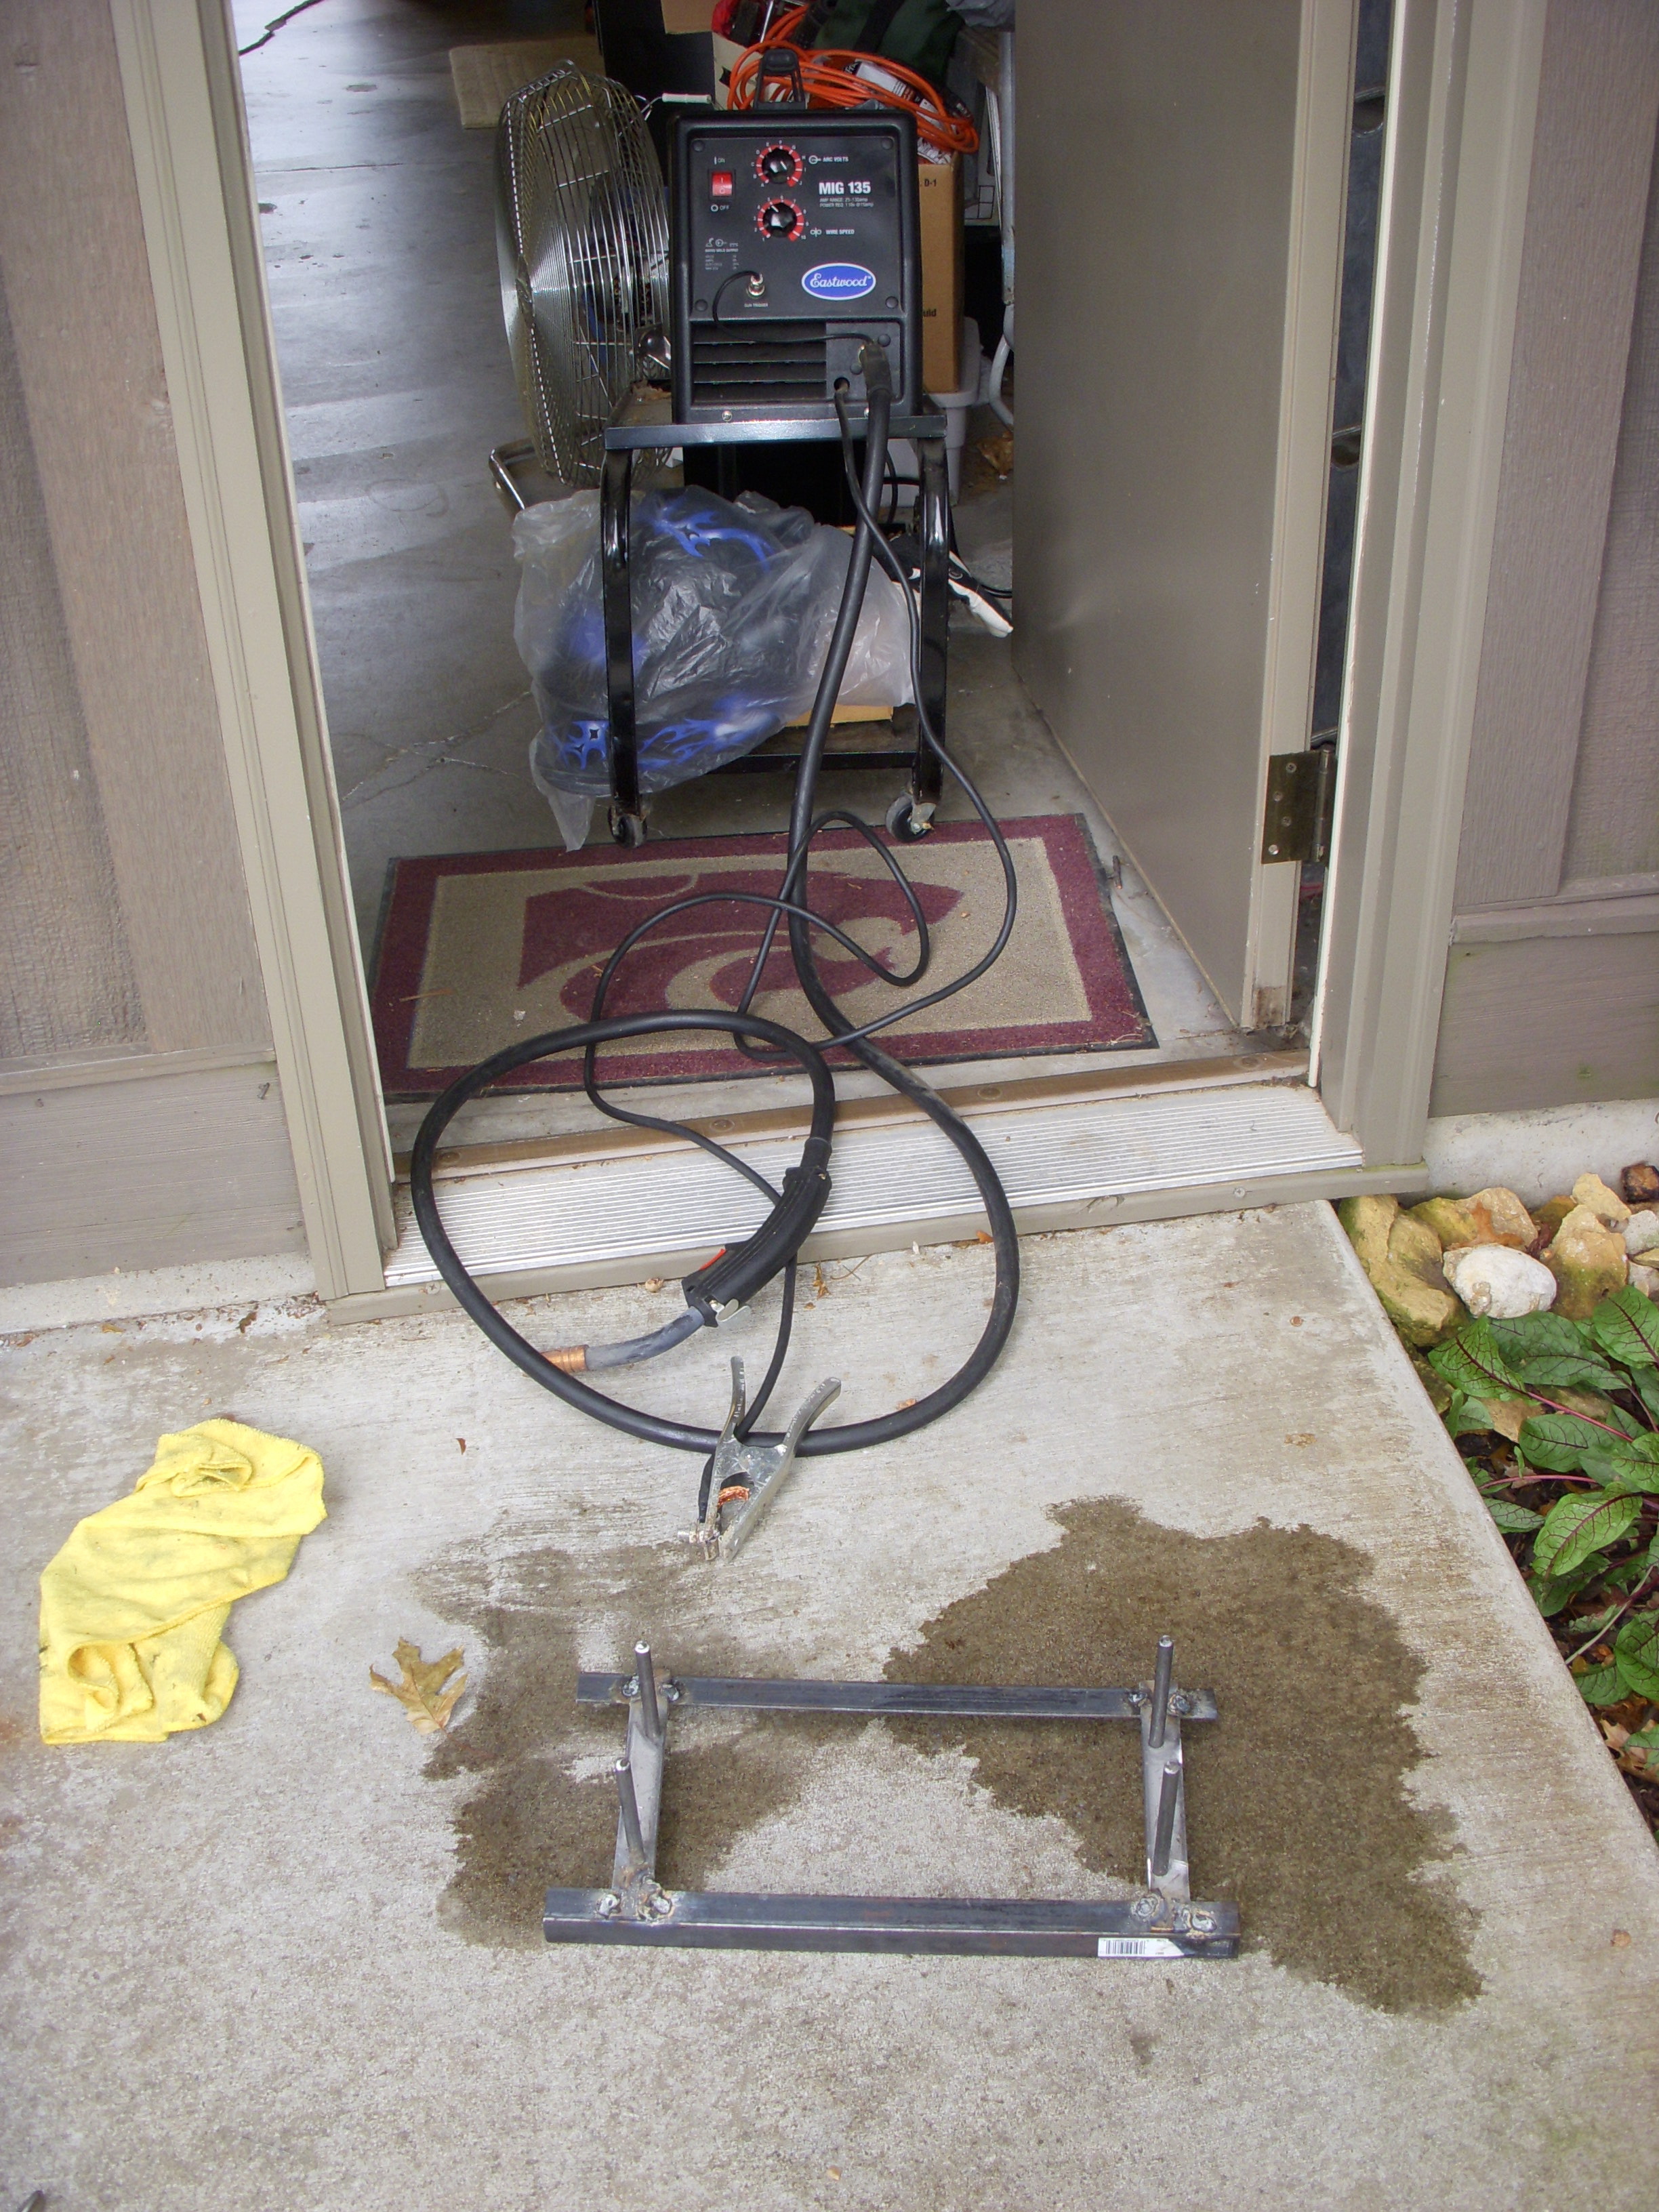
One flat piece of 1 1/2" flat steel and one "L" steel piece to start with. Going to be mounted to the lower left of the crank pulley. Without A/C. Using my Eastwood 135 MIG welder...

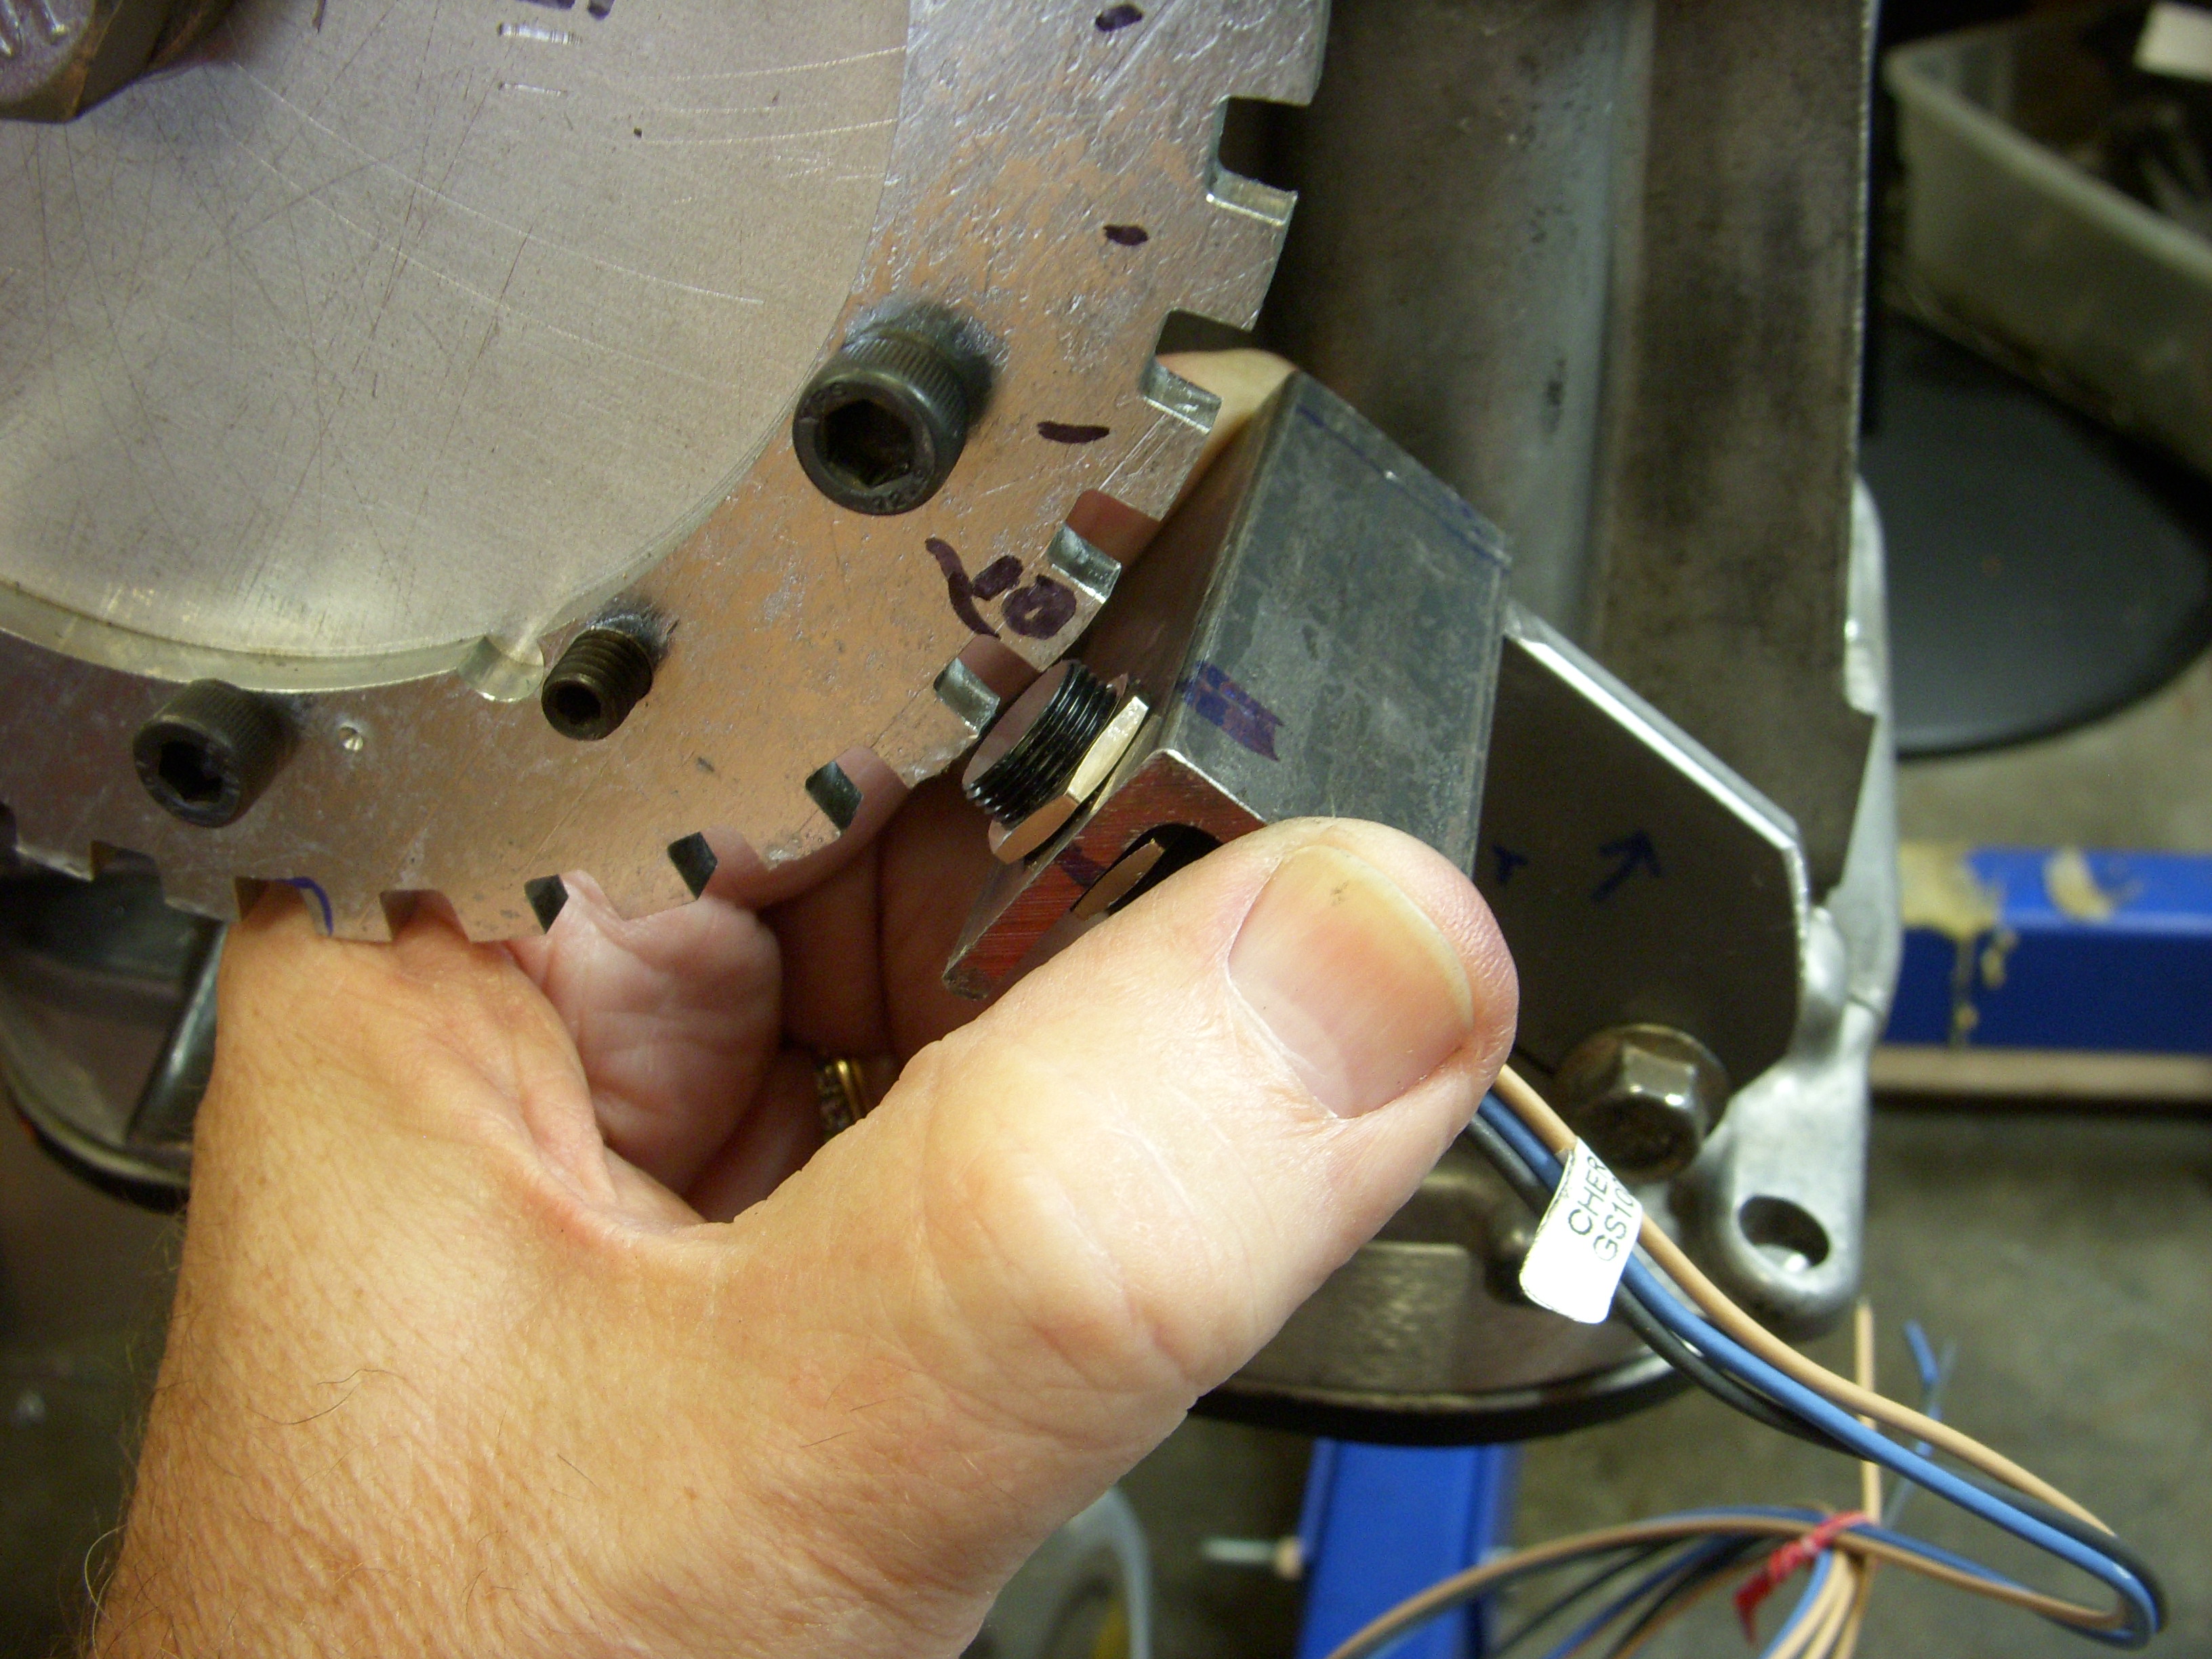
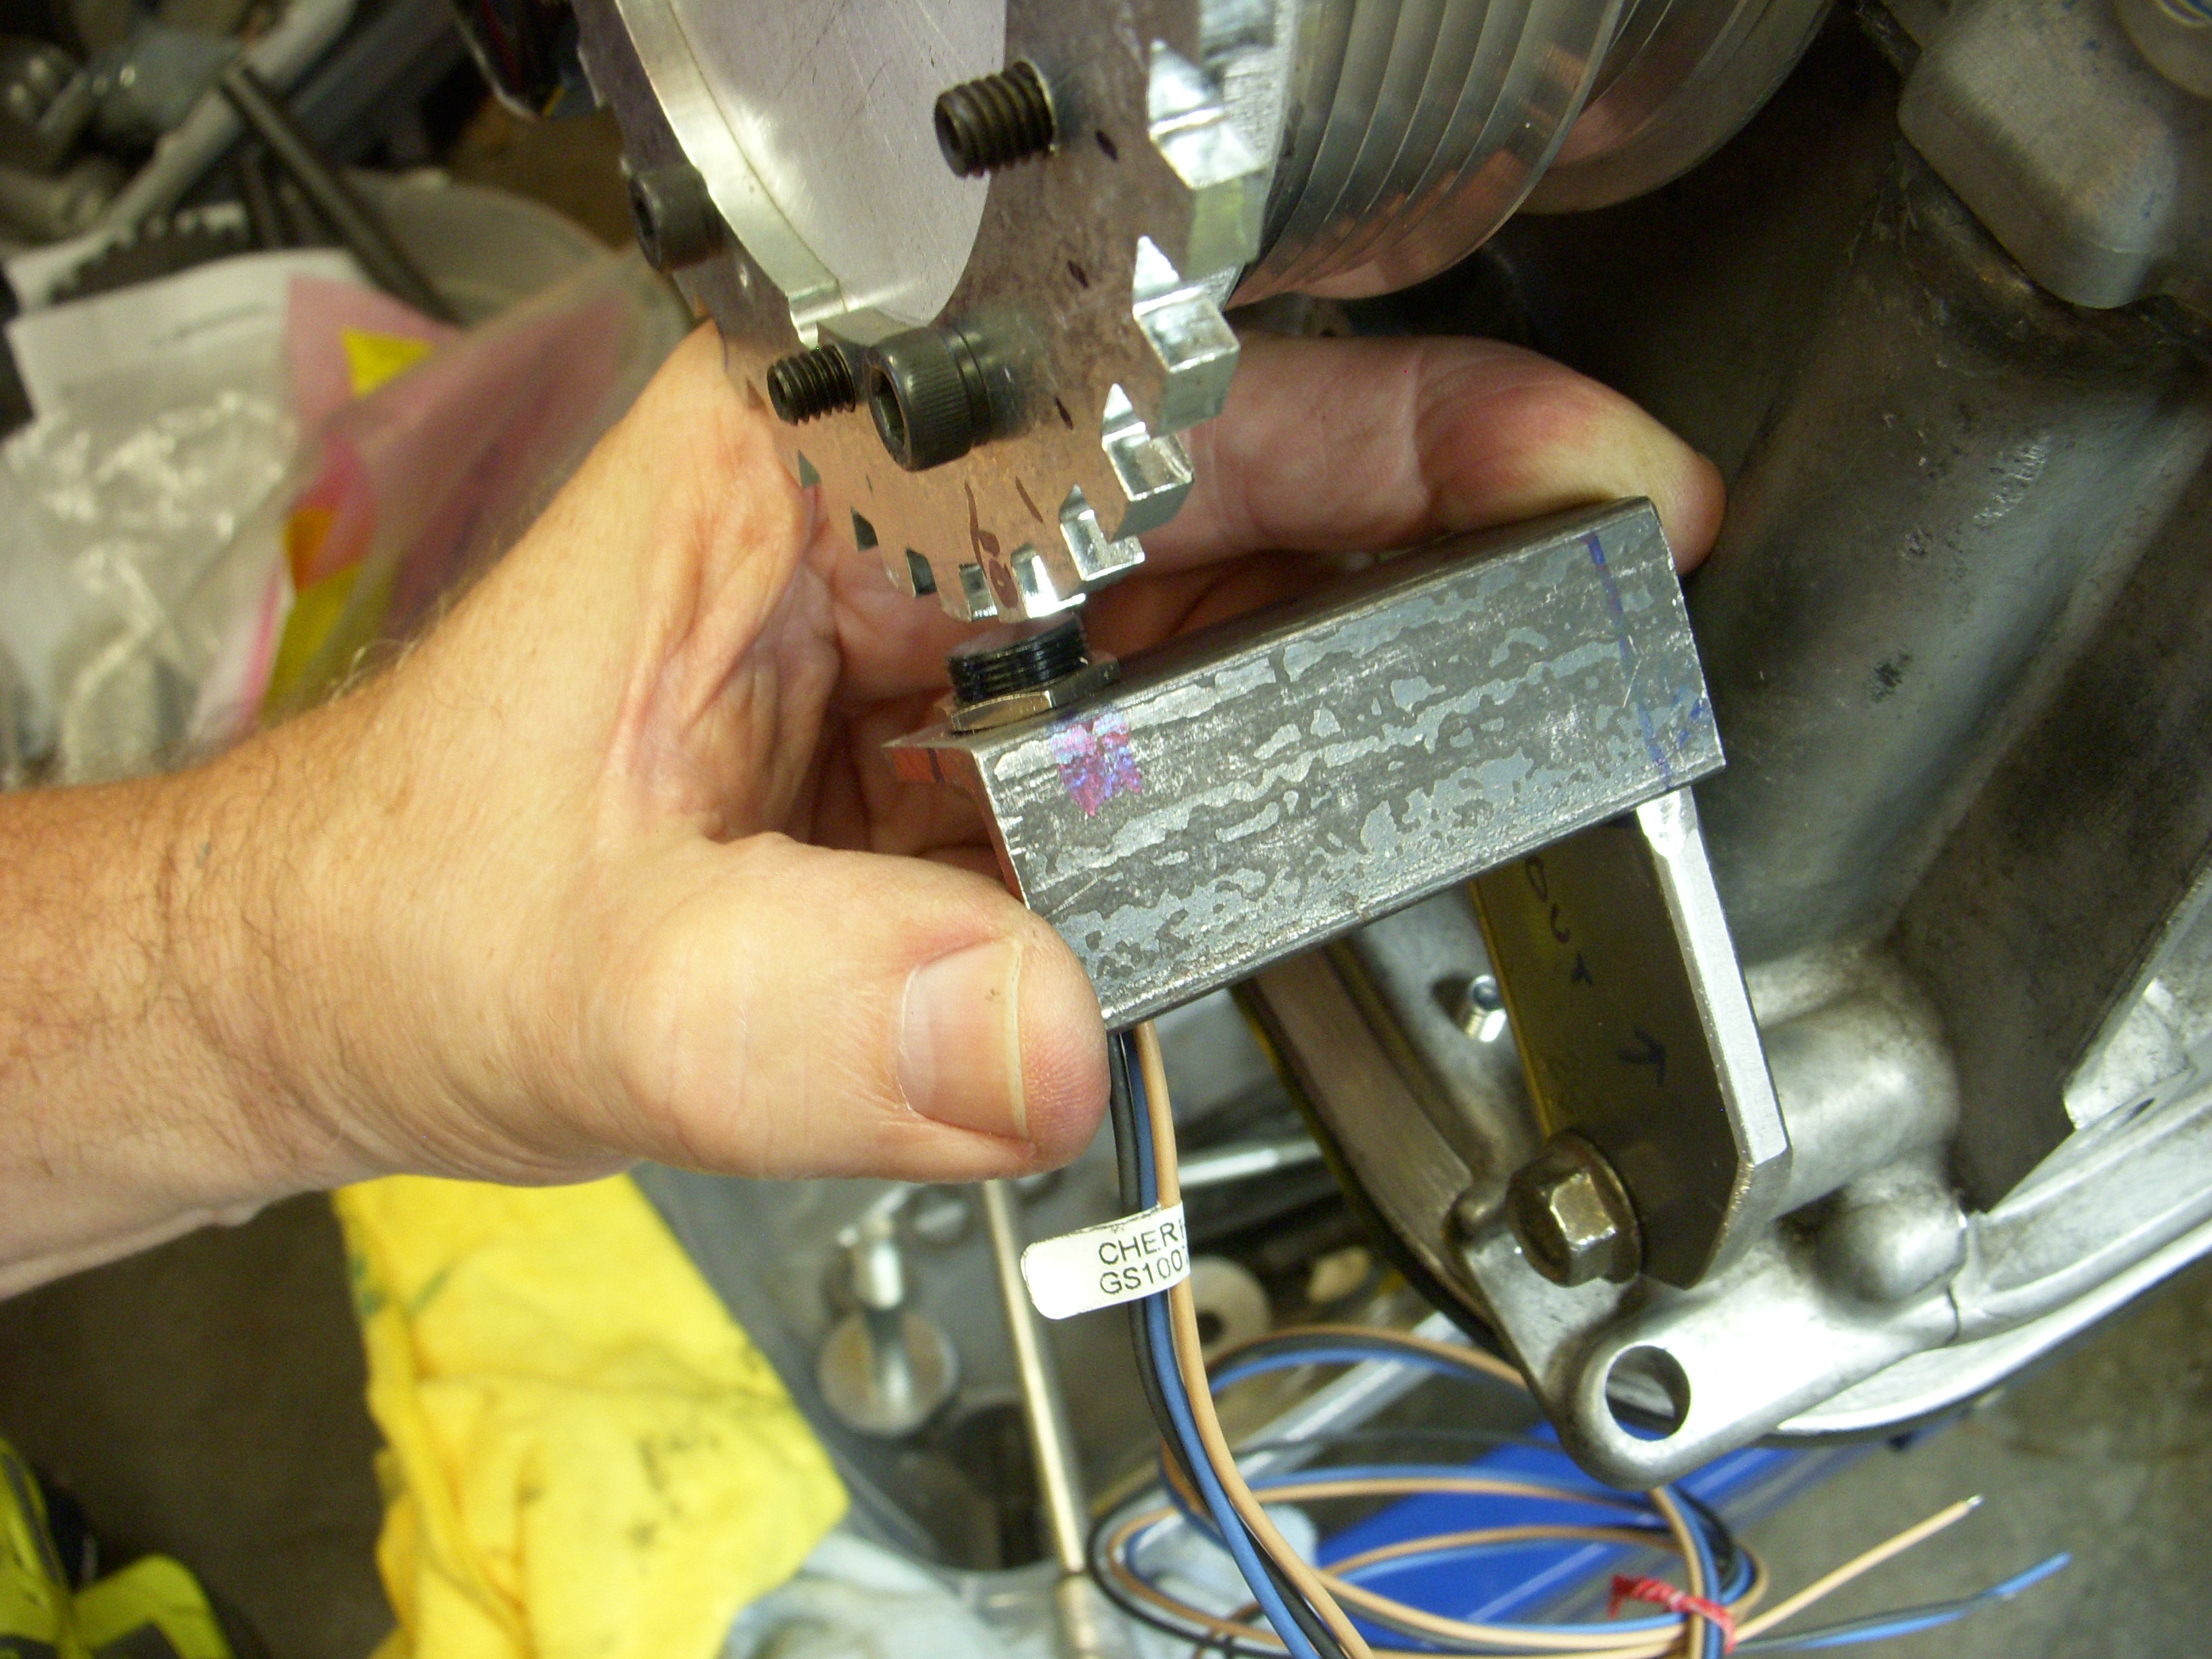
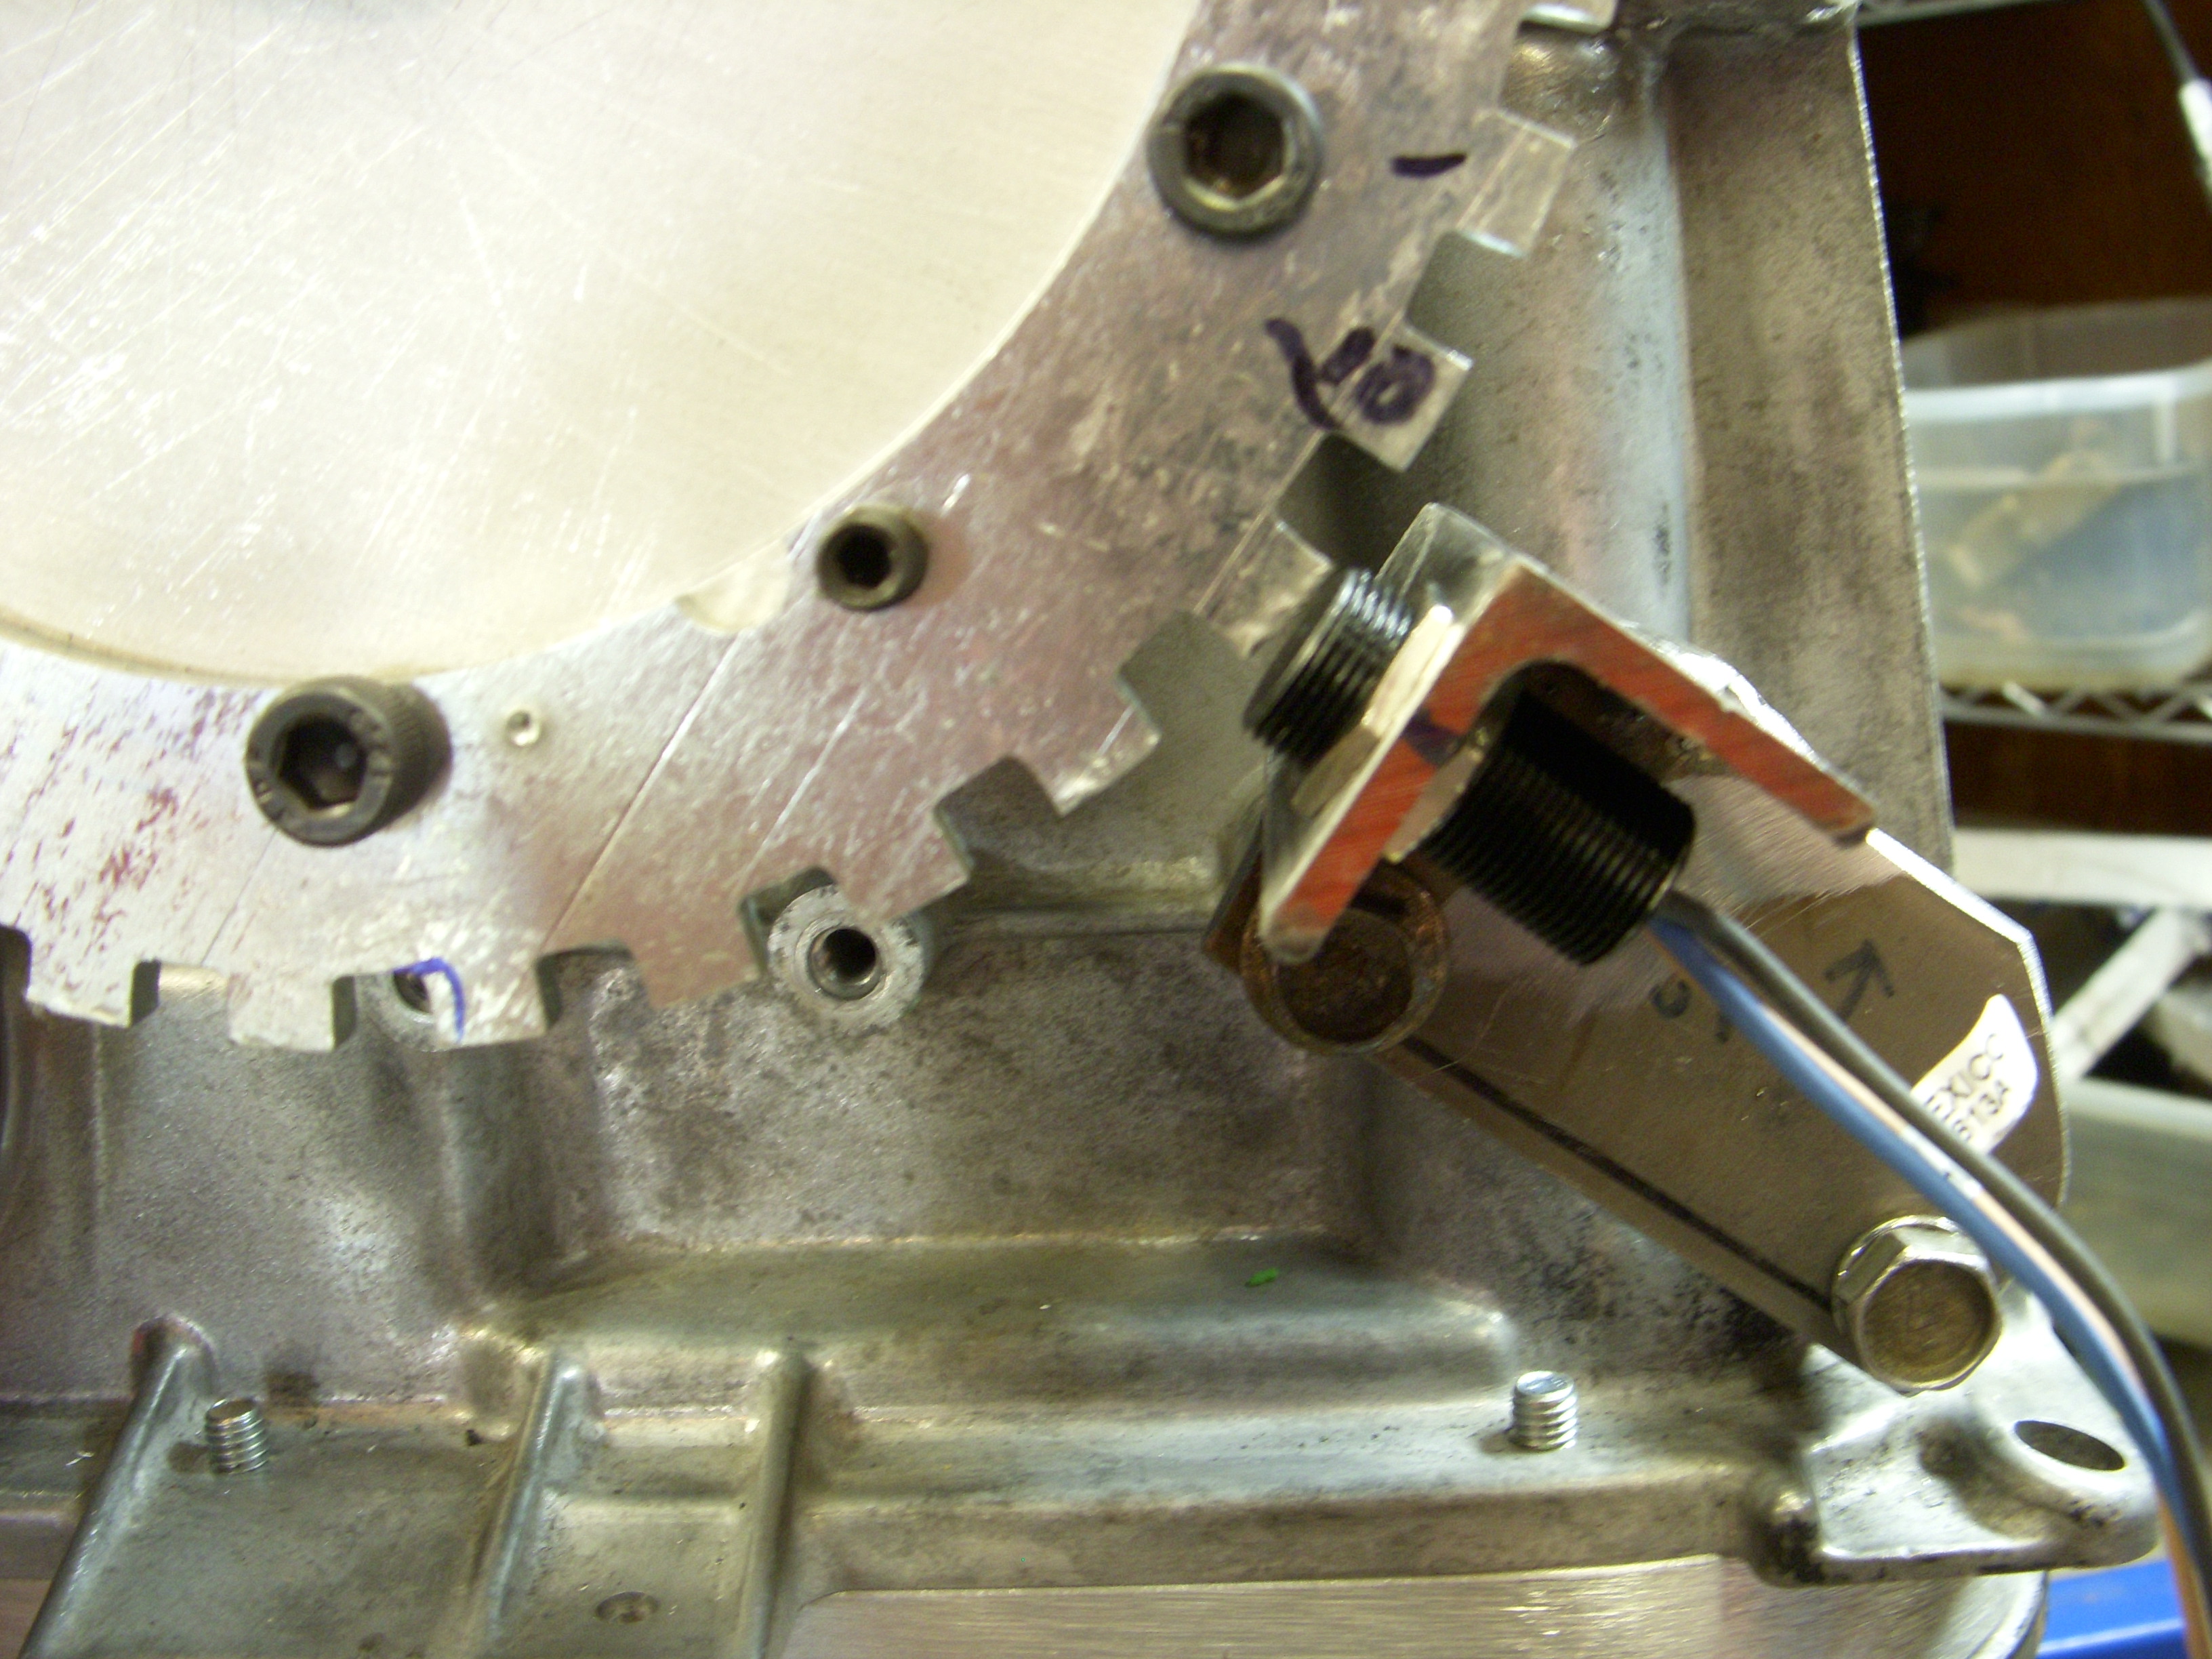
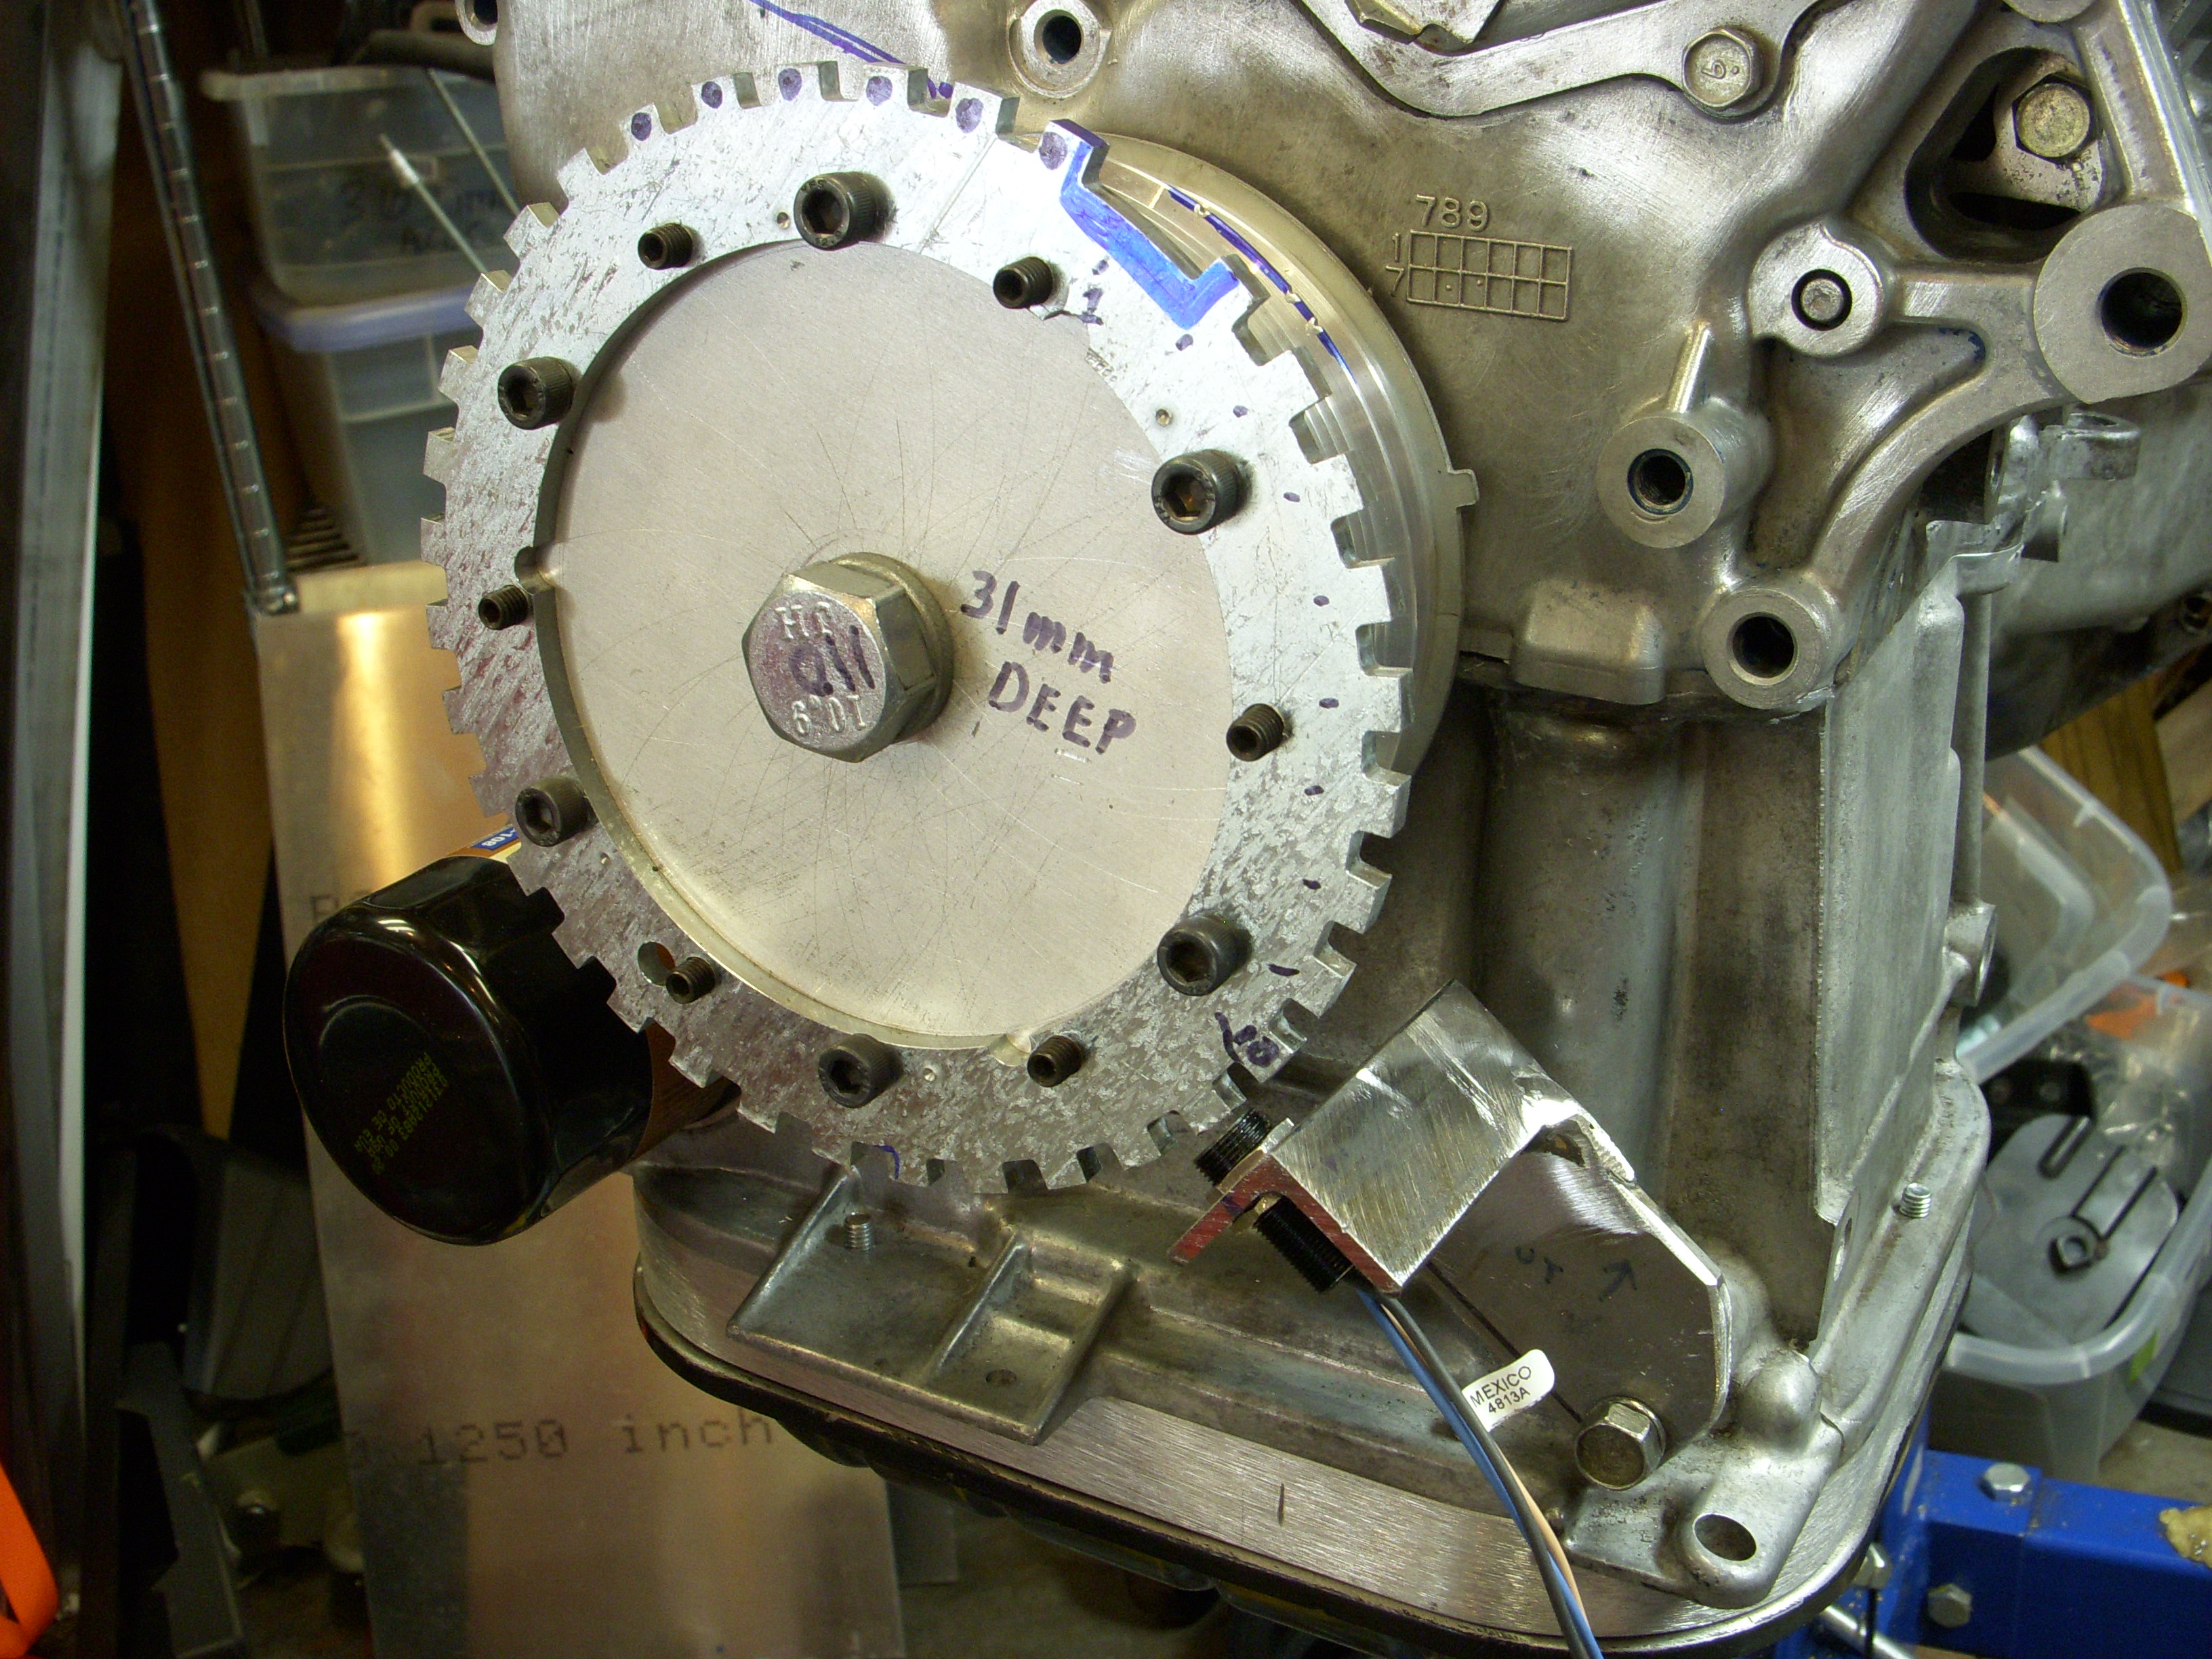
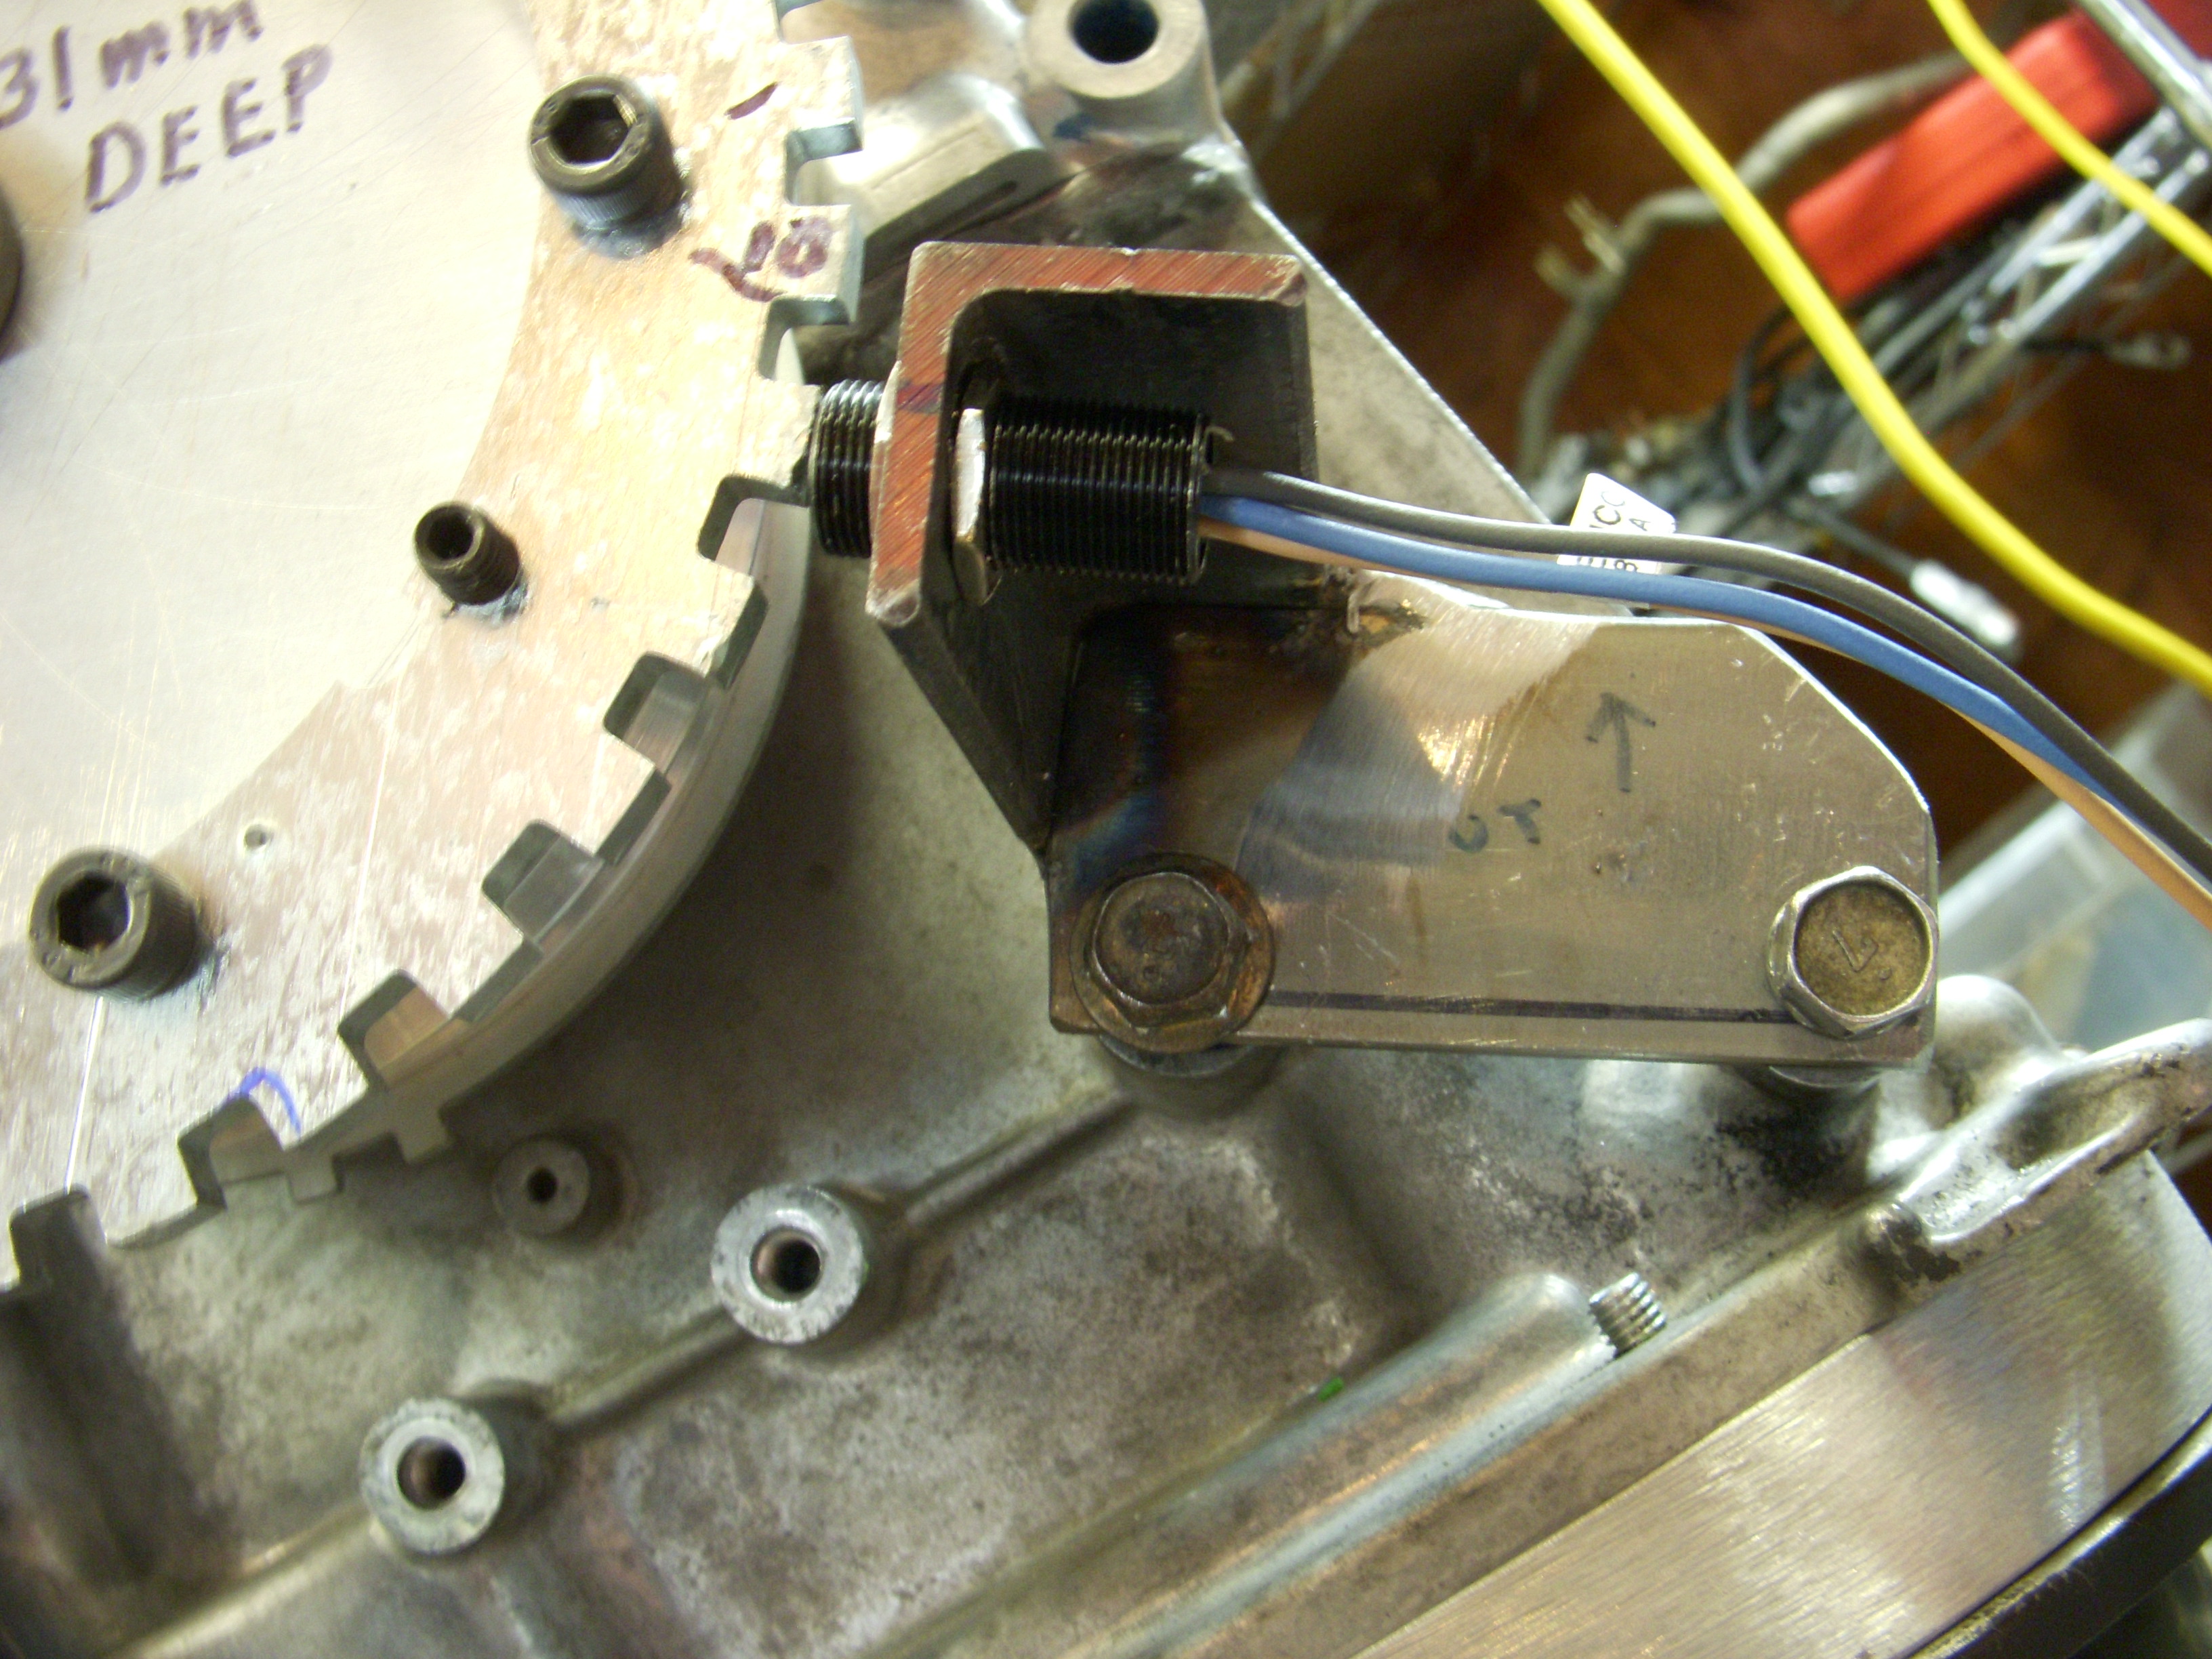
Since the pulley is made of a timing wheel bolted to a 3/8" 5 1/4" disc with a 9mm hole for the 110mm stud, and that assembly can be moved around then secured into position with the six long pointed-tip allen screws, adjustments to the location of the timing gap in relation the the Hall sensor will be pretty simple. Loosen the 24mm nut in the middle, loosen the six allen screws, rotate the trigger wheel where you want it, tighten the allen screws so the points dig into the pulley, then tighten the big bolt.


Since the pulley is made of a timing wheel bolted to a 3/8" 5 1/4" disc with a 9mm hole for the 110mm stud, and that assembly can be moved around then secured into position with the six long pointed-tip allen screws, adjustments to the location of the timing gap in relation the the Hall sensor will be pretty simple. Loosen the 24mm nut in the middle, loosen the six allen screws, rotate the trigger wheel where you want it, tighten the allen screws so the points dig into the pulley, then tighten the big bolt.

Last edited by grey99max; 01-16-2017 at 05:48 PM.
08-31-2016, 01:28 PM
#1814
LandShark has Cosworth
Thread Starter
iTrader: (12)
Join Date: Jan 2004
Location: Topeka, KS
Posts: 4,327
dumping the AC compressor
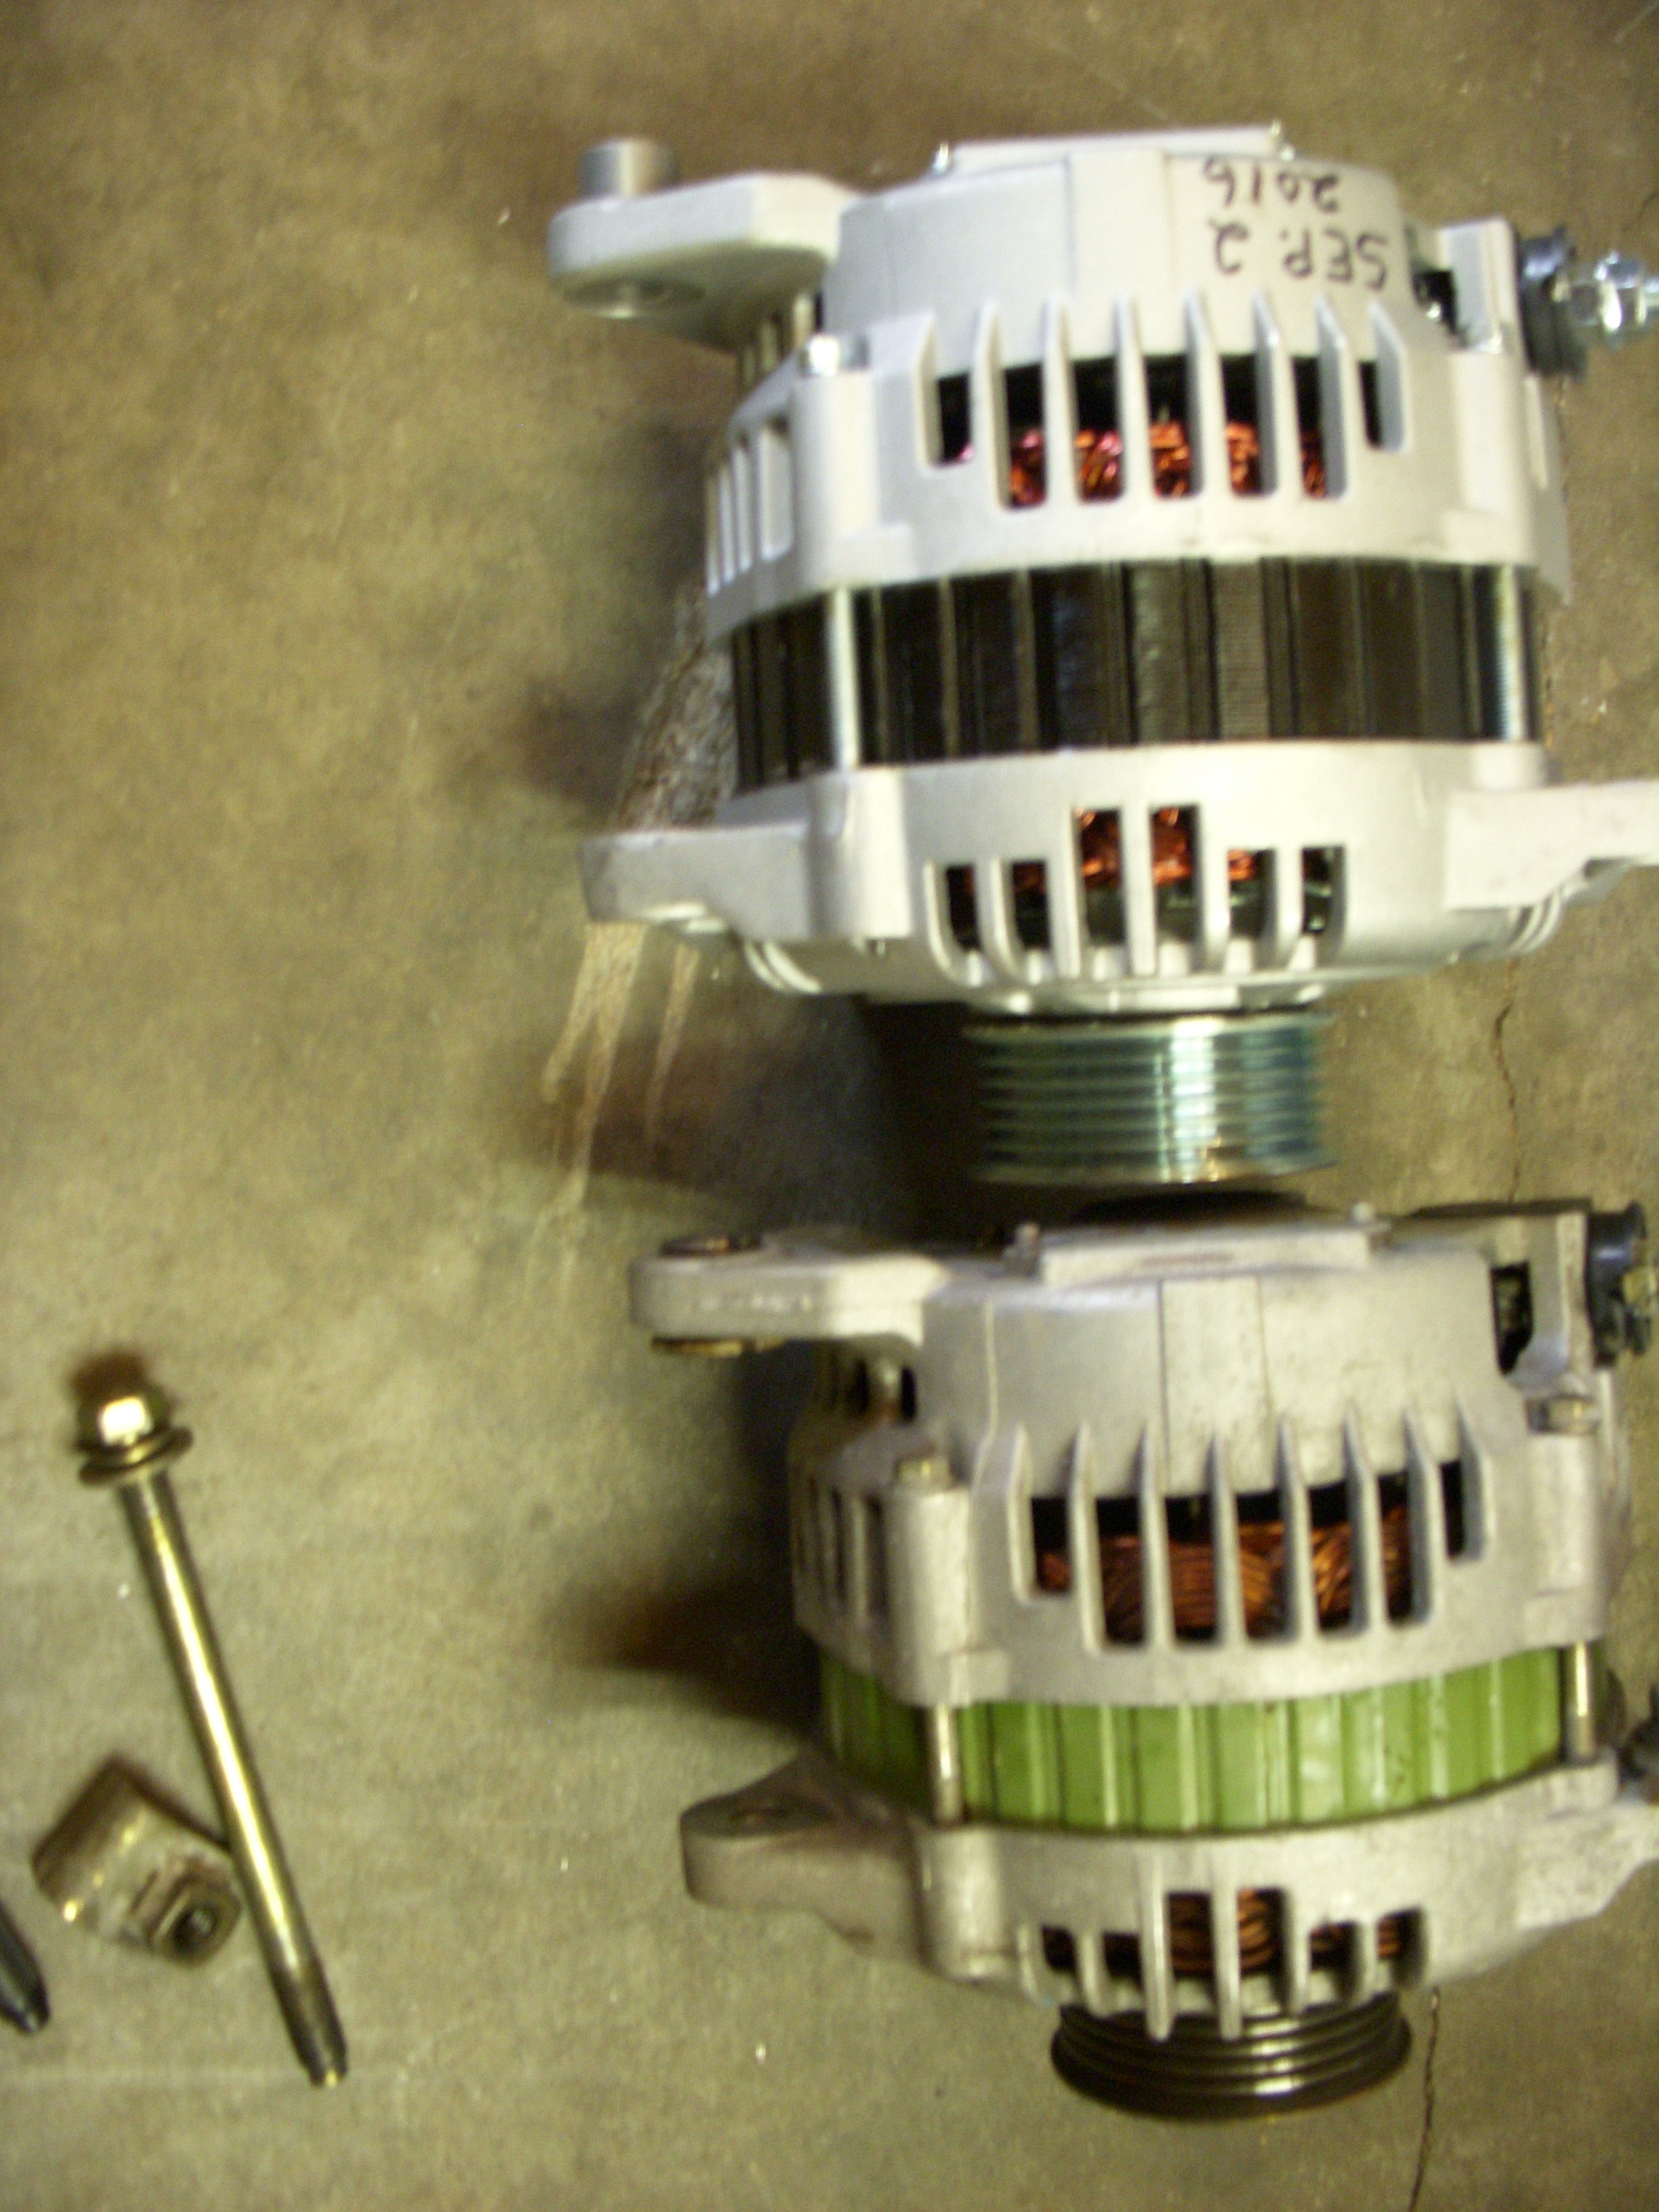
I decided to mock up the alternator to locate the right belt. I used the information Jime posted about using a 4-rib belt (to reduce belt friction). I first cleaned up the tensioner and pulley to things work correctly, then hung the original alternator and measured the approximate belt length. I verified that Jime's belt number K040335 (33.5 " belt) and this all seemed to work well.
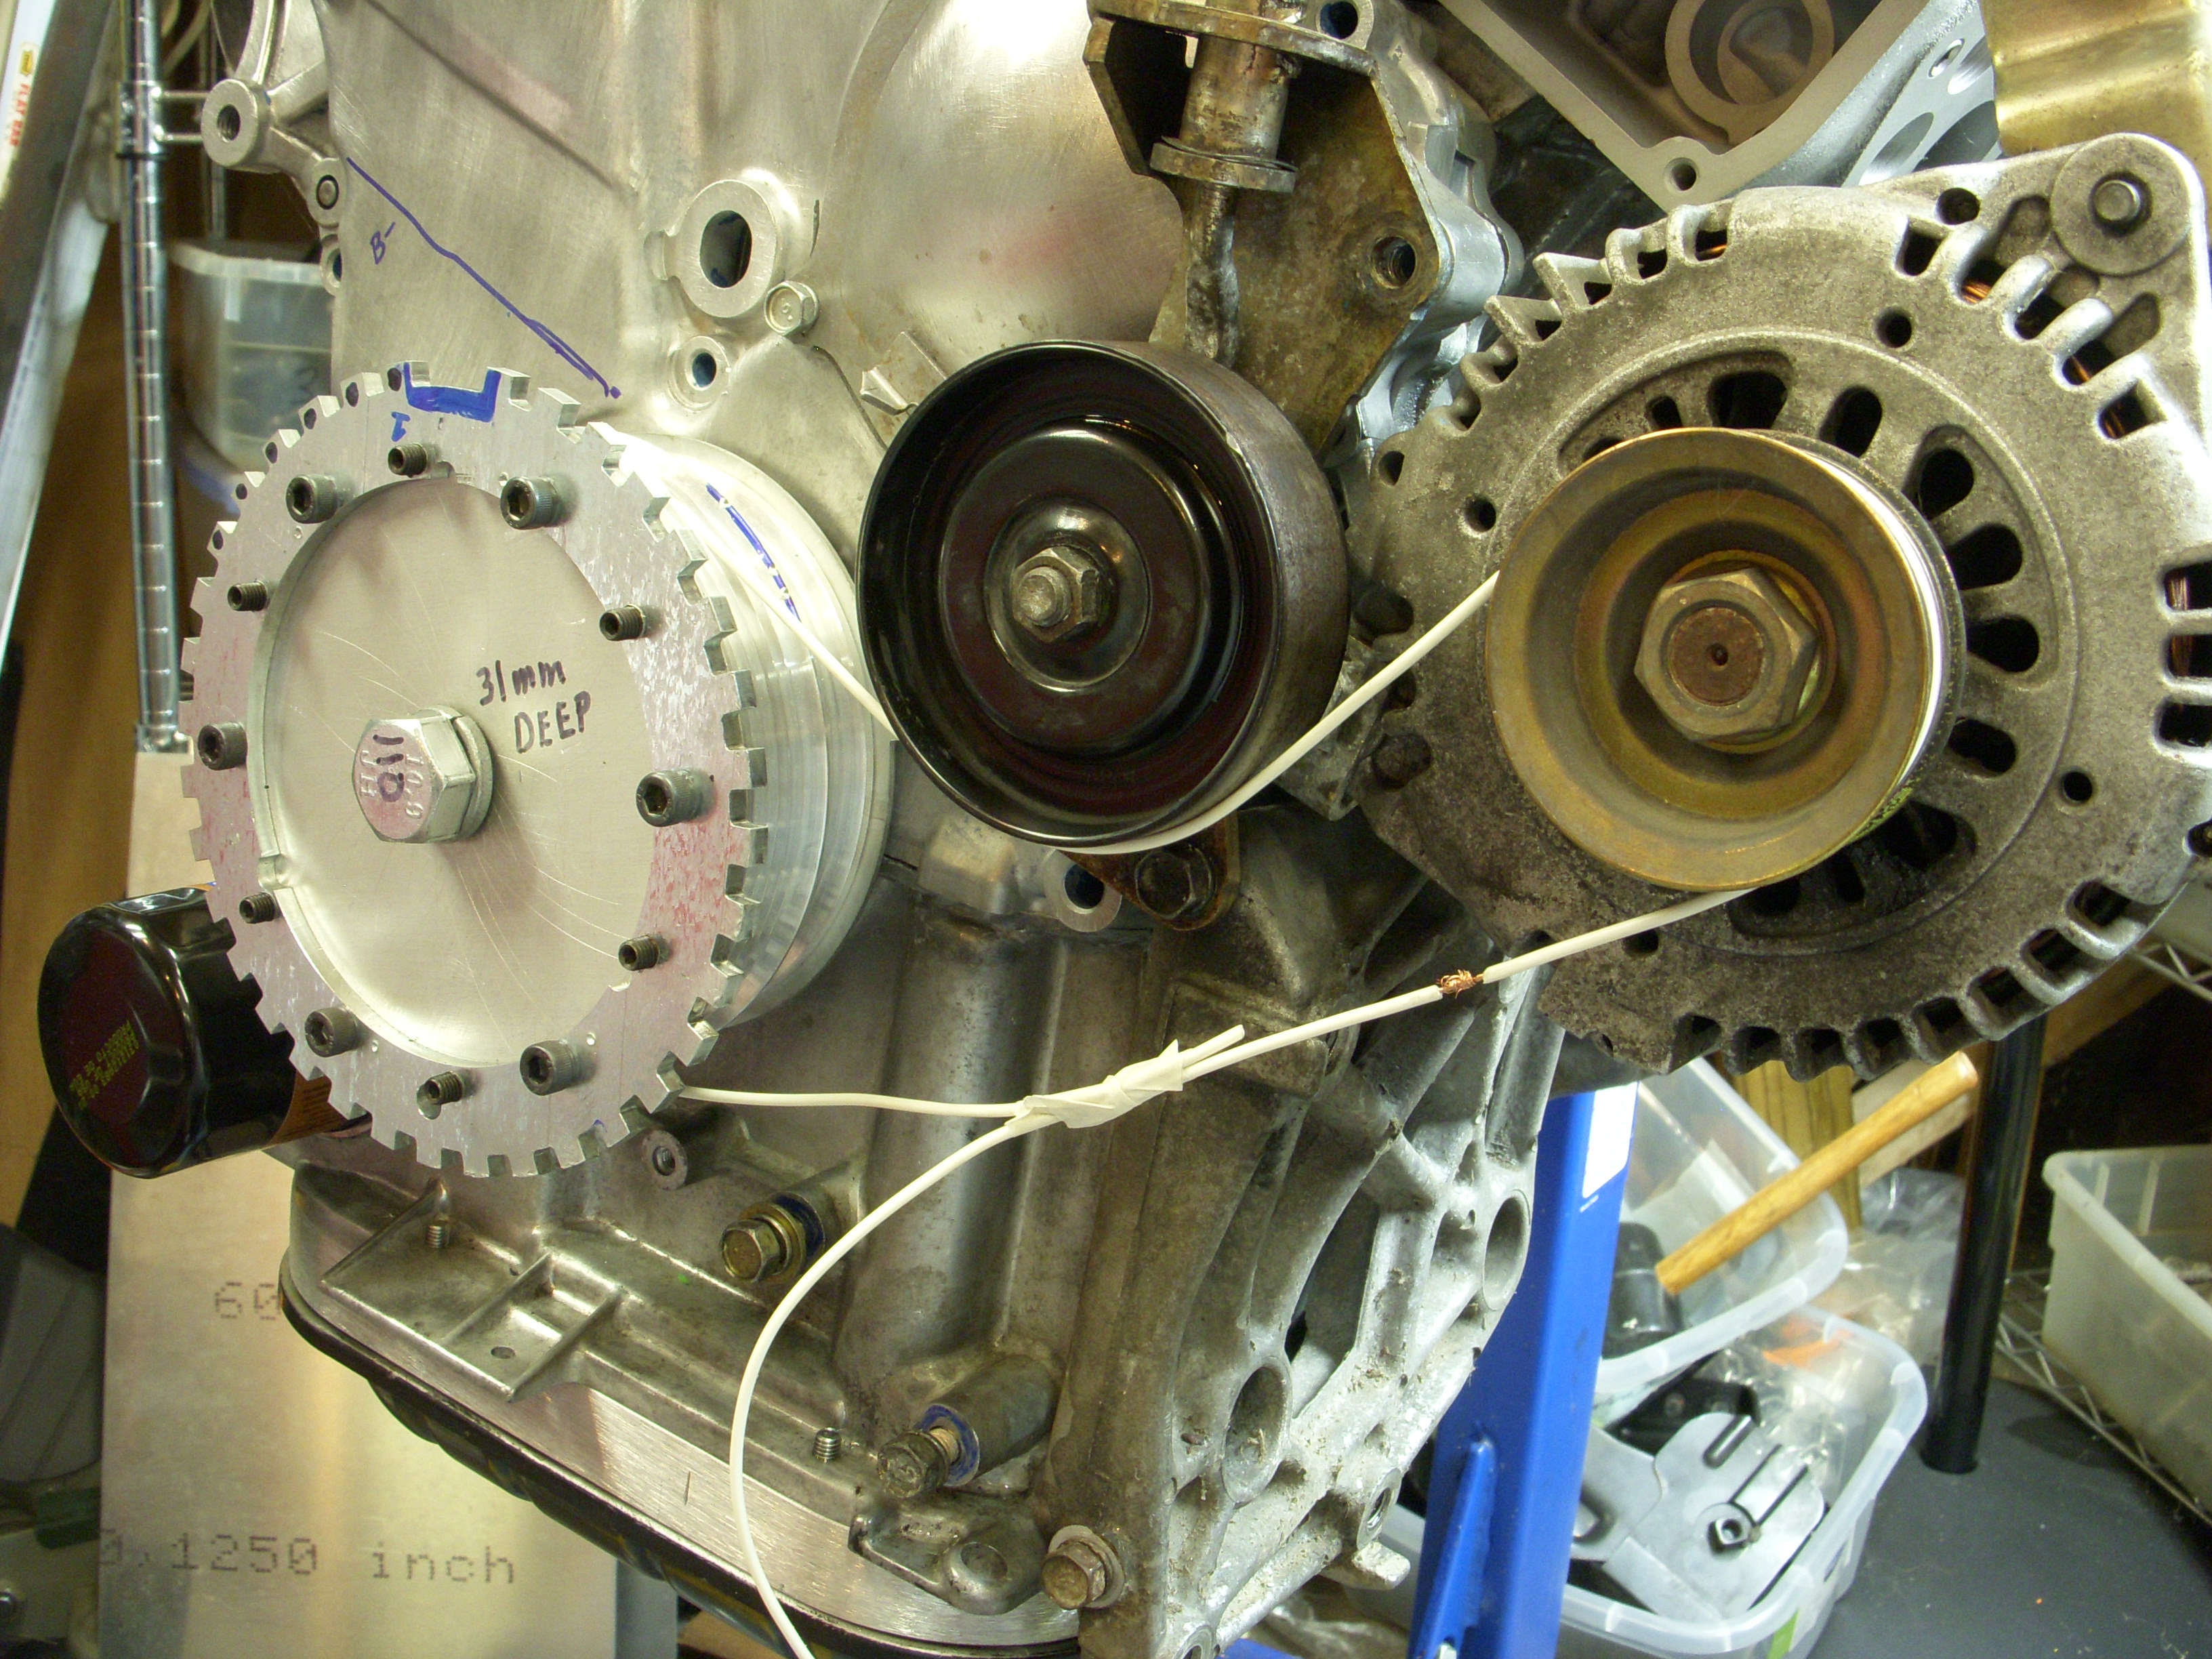
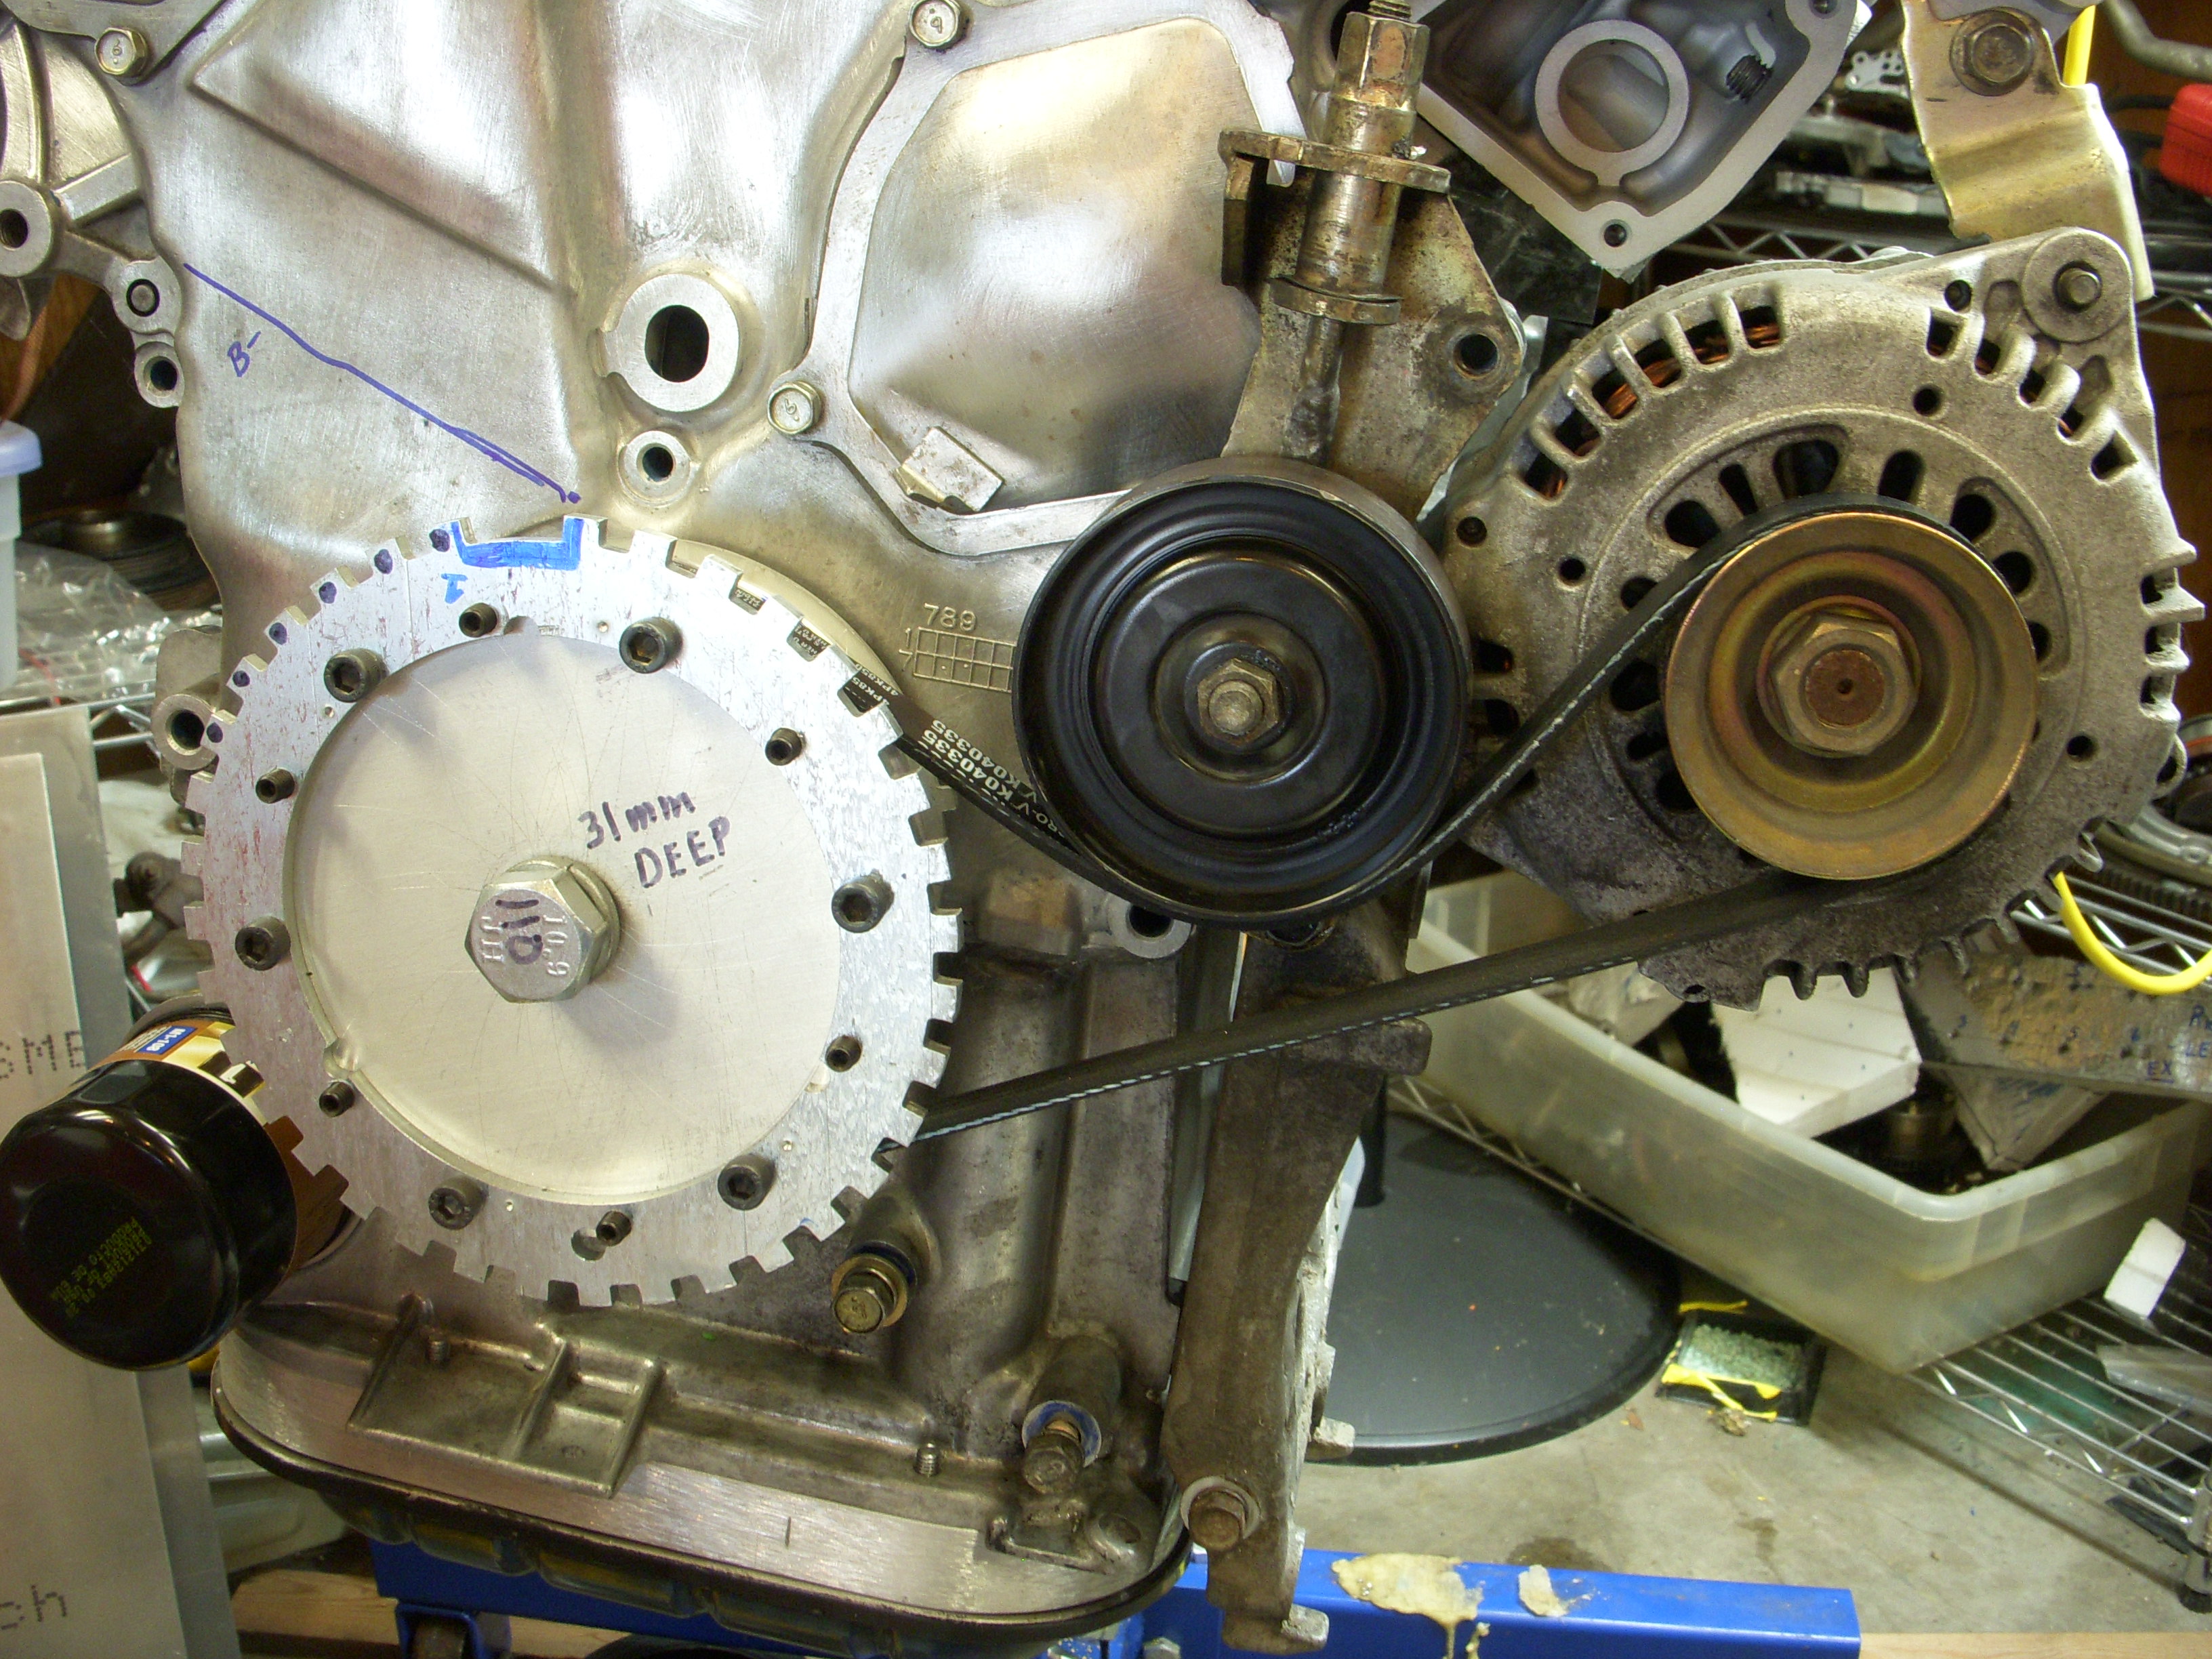
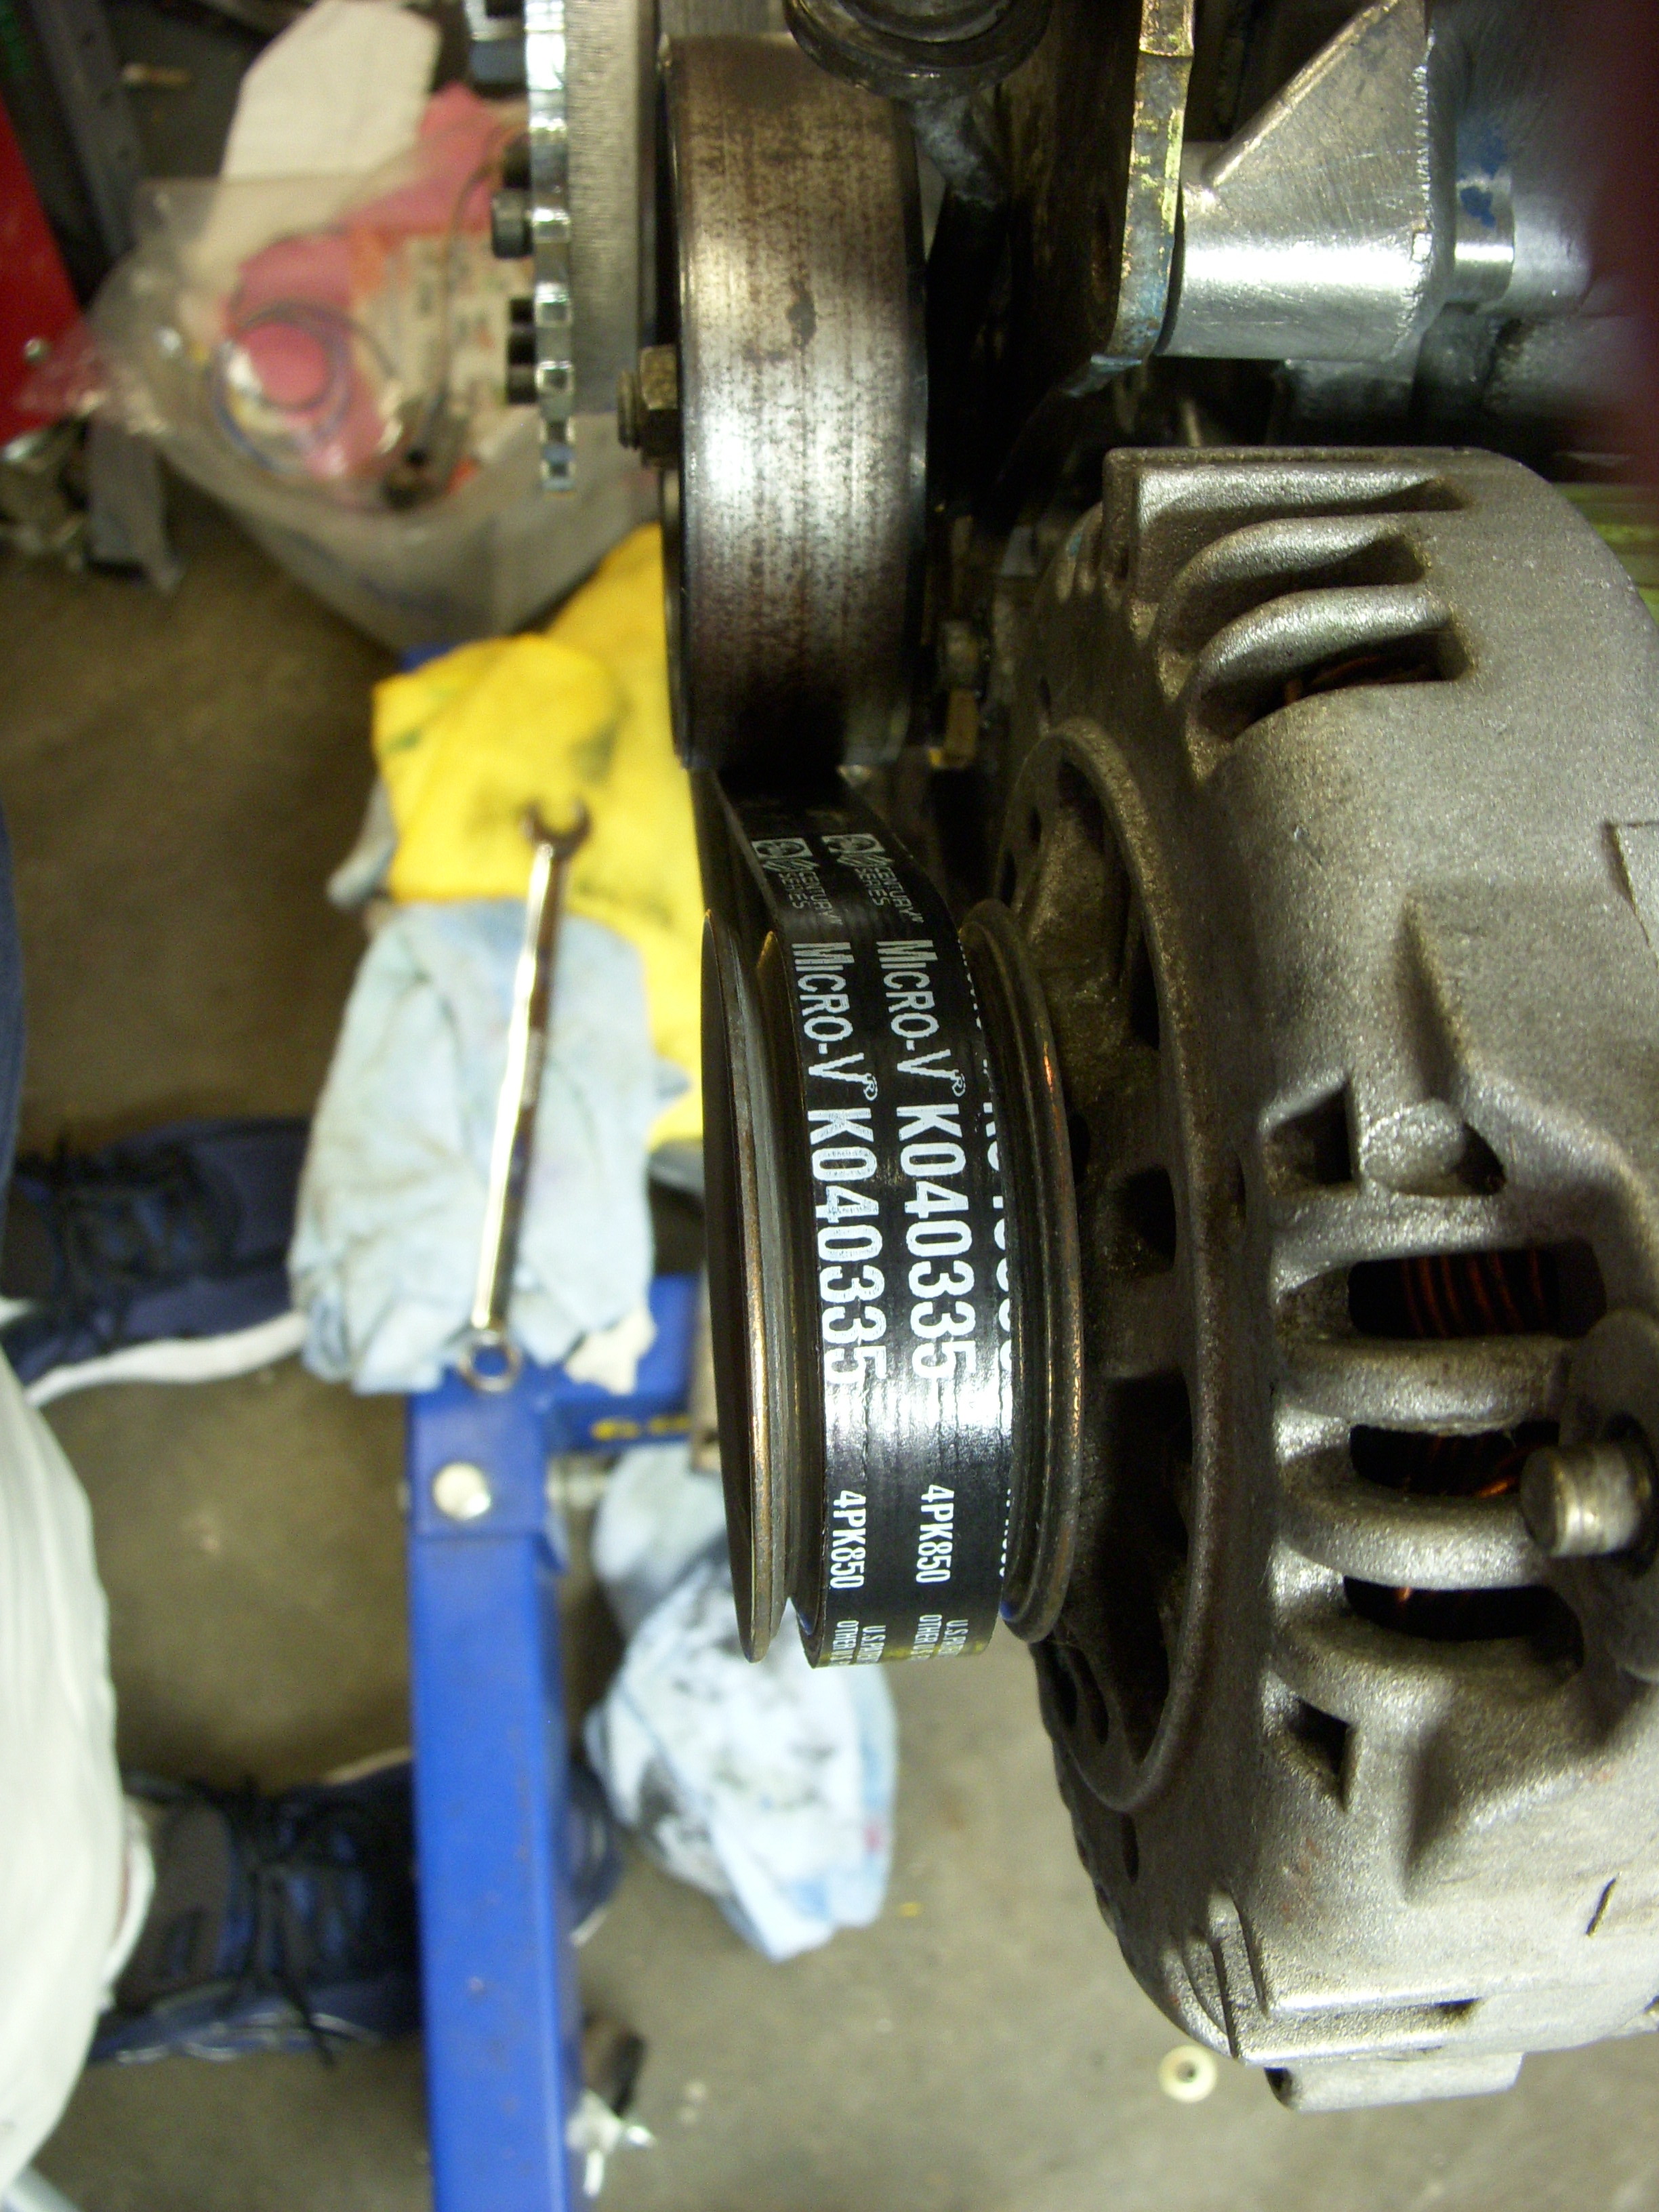
I bought a new and larger alternator - because why not?- and it's due this week. This one has a 125 amp output, up a bit from the OEM rating.
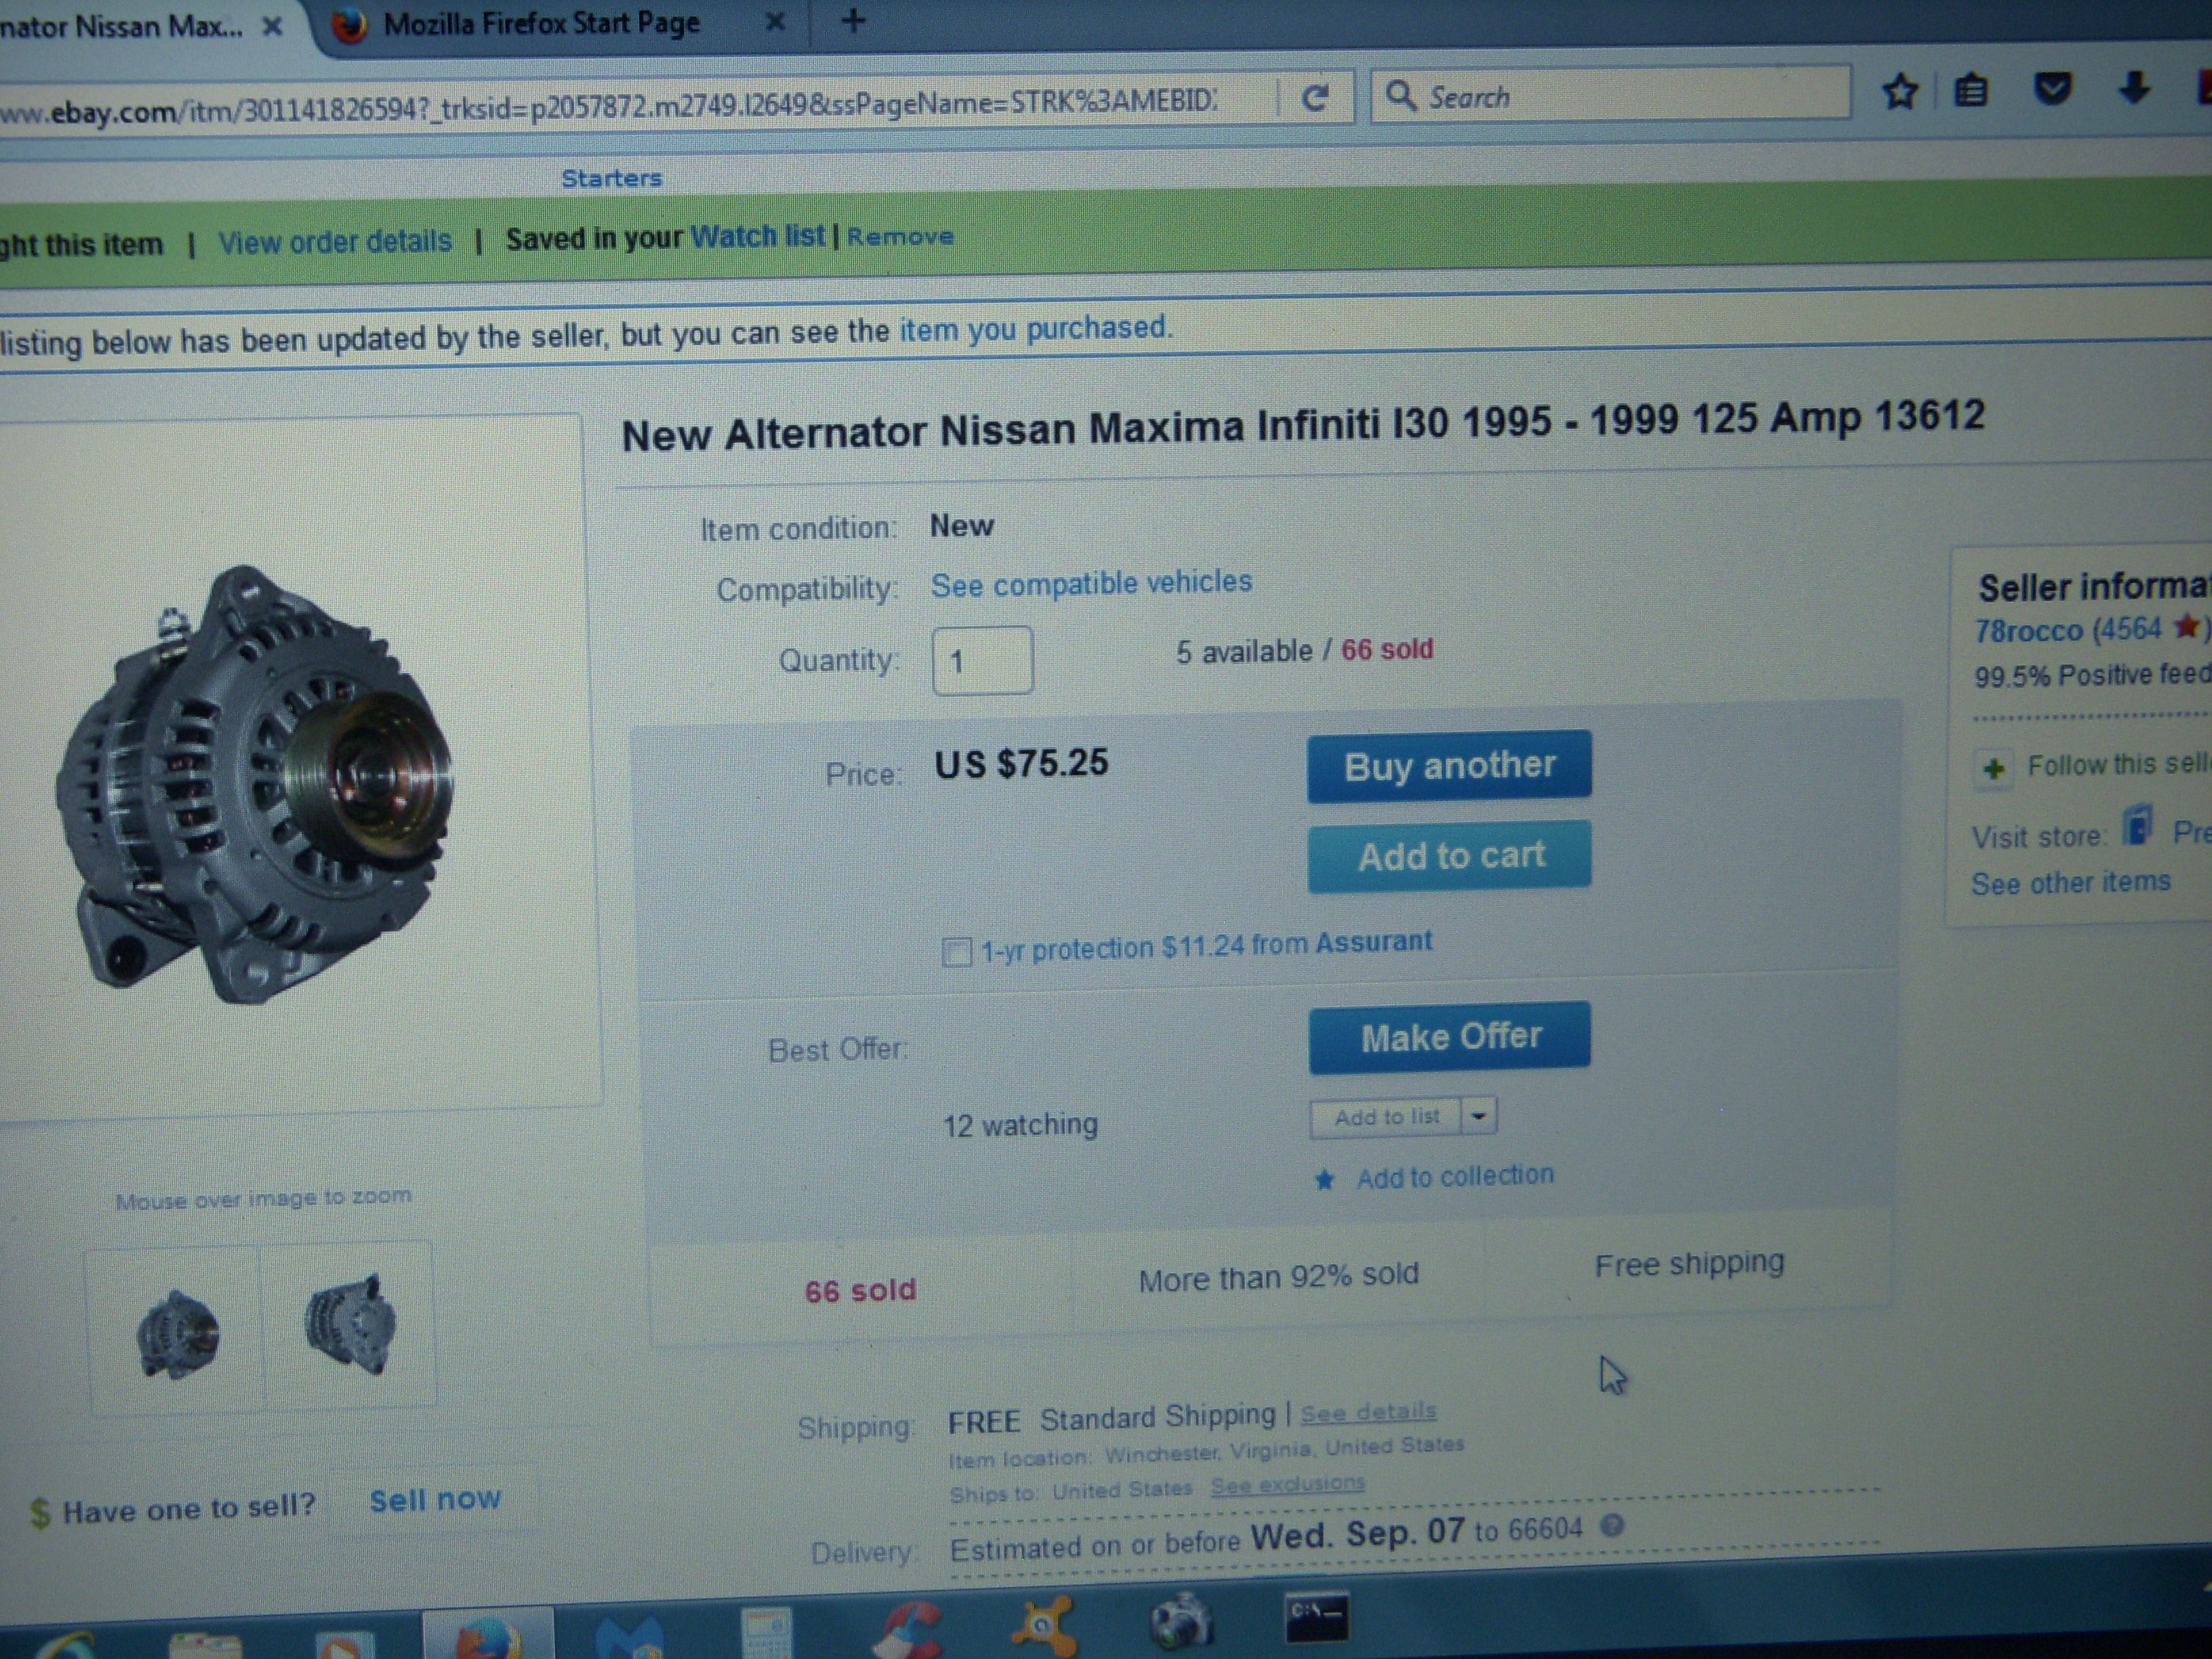
Here's the pulley I'm using - and a good price, too. I have one for a spare.
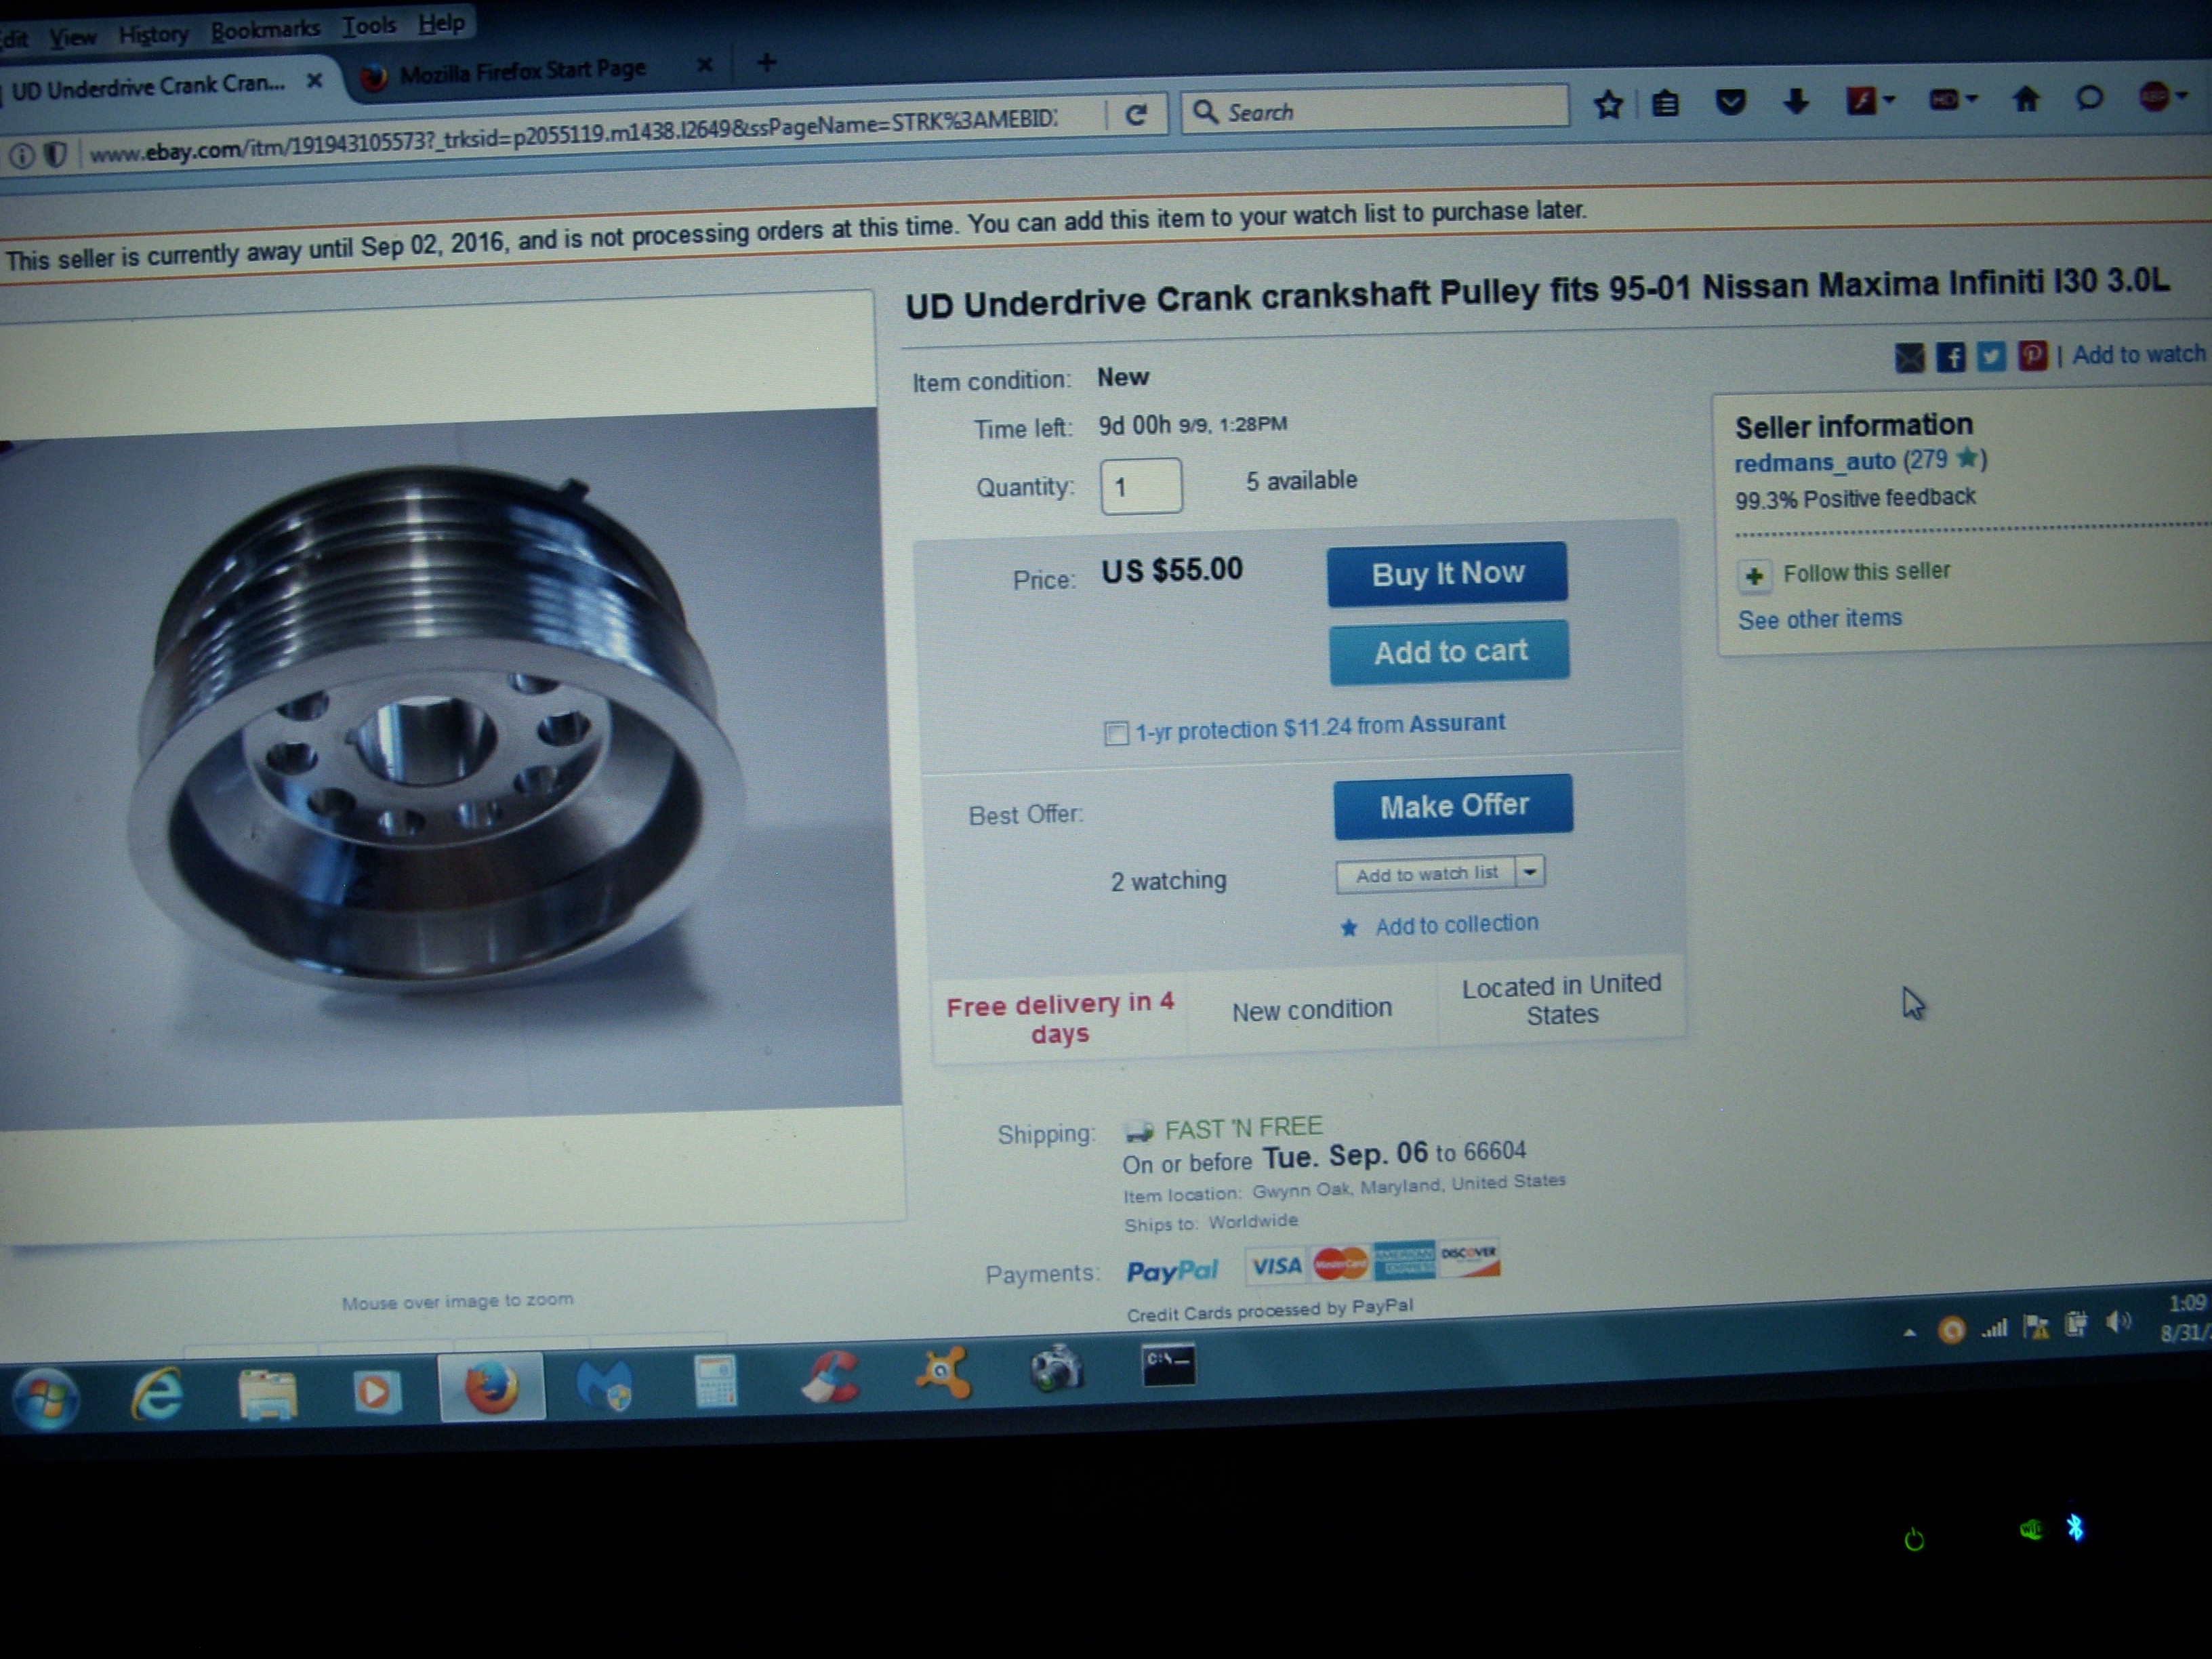


I bought a new and larger alternator - because why not?- and it's due this week. This one has a 125 amp output, up a bit from the OEM rating.

Here's the pulley I'm using - and a good price, too. I have one for a spare.

Last edited by grey99max; 01-16-2017 at 05:54 PM.
09-12-2016, 06:24 PM
#1815
LandShark has Cosworth
Thread Starter
iTrader: (12)
Join Date: Jan 2004
Location: Topeka, KS
Posts: 4,327
Back to ENGINE !
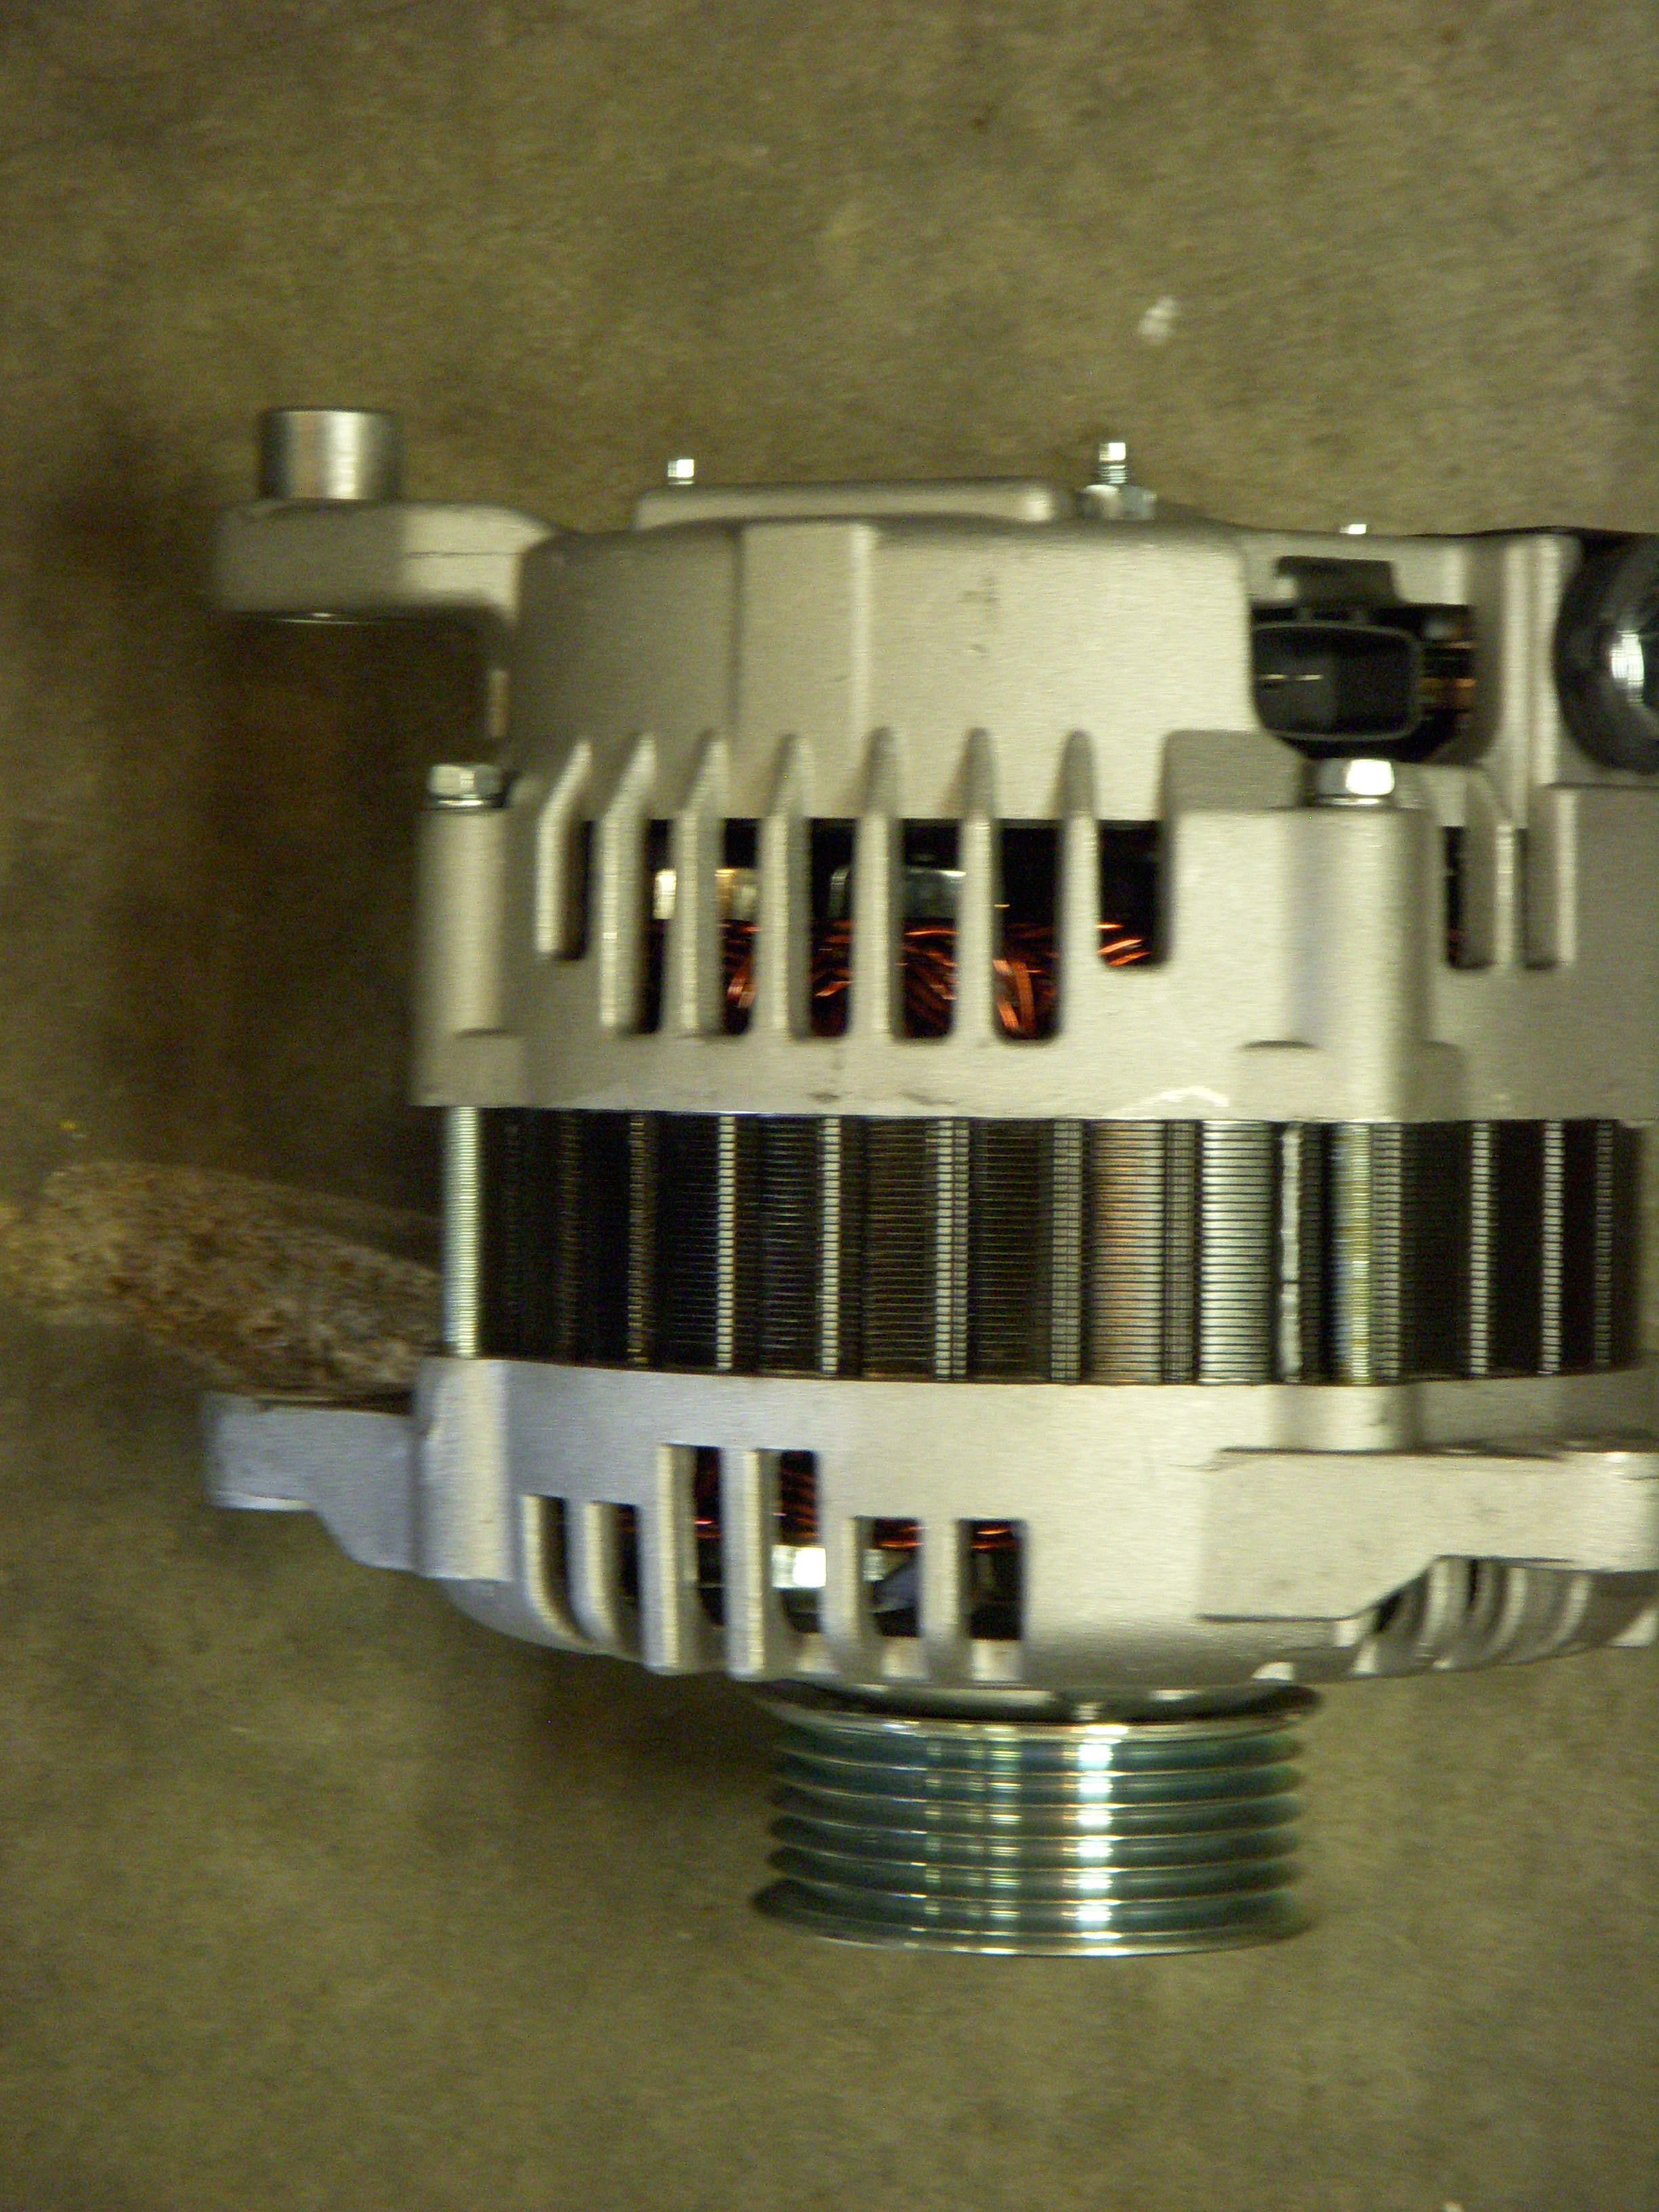
The 125 Amp alternator showed up a few days ago, and it's new and nice and all, but.... there's a problem. See the extended stud where the OEM alty has a push-in brass bushing? It's 10mm deeper than the OEM space, so I notified the seller about this AND ordered a 140mm bolt from Bel-Metric - I've got it and that makes the new alty mount up OK, but Jeezs... I've got another alty "in the mail" so in maybe another week I'll get one that fits like OEM - but I still have "Plan B" (for Bolt) ready.
New one comes with a calibration sheet...
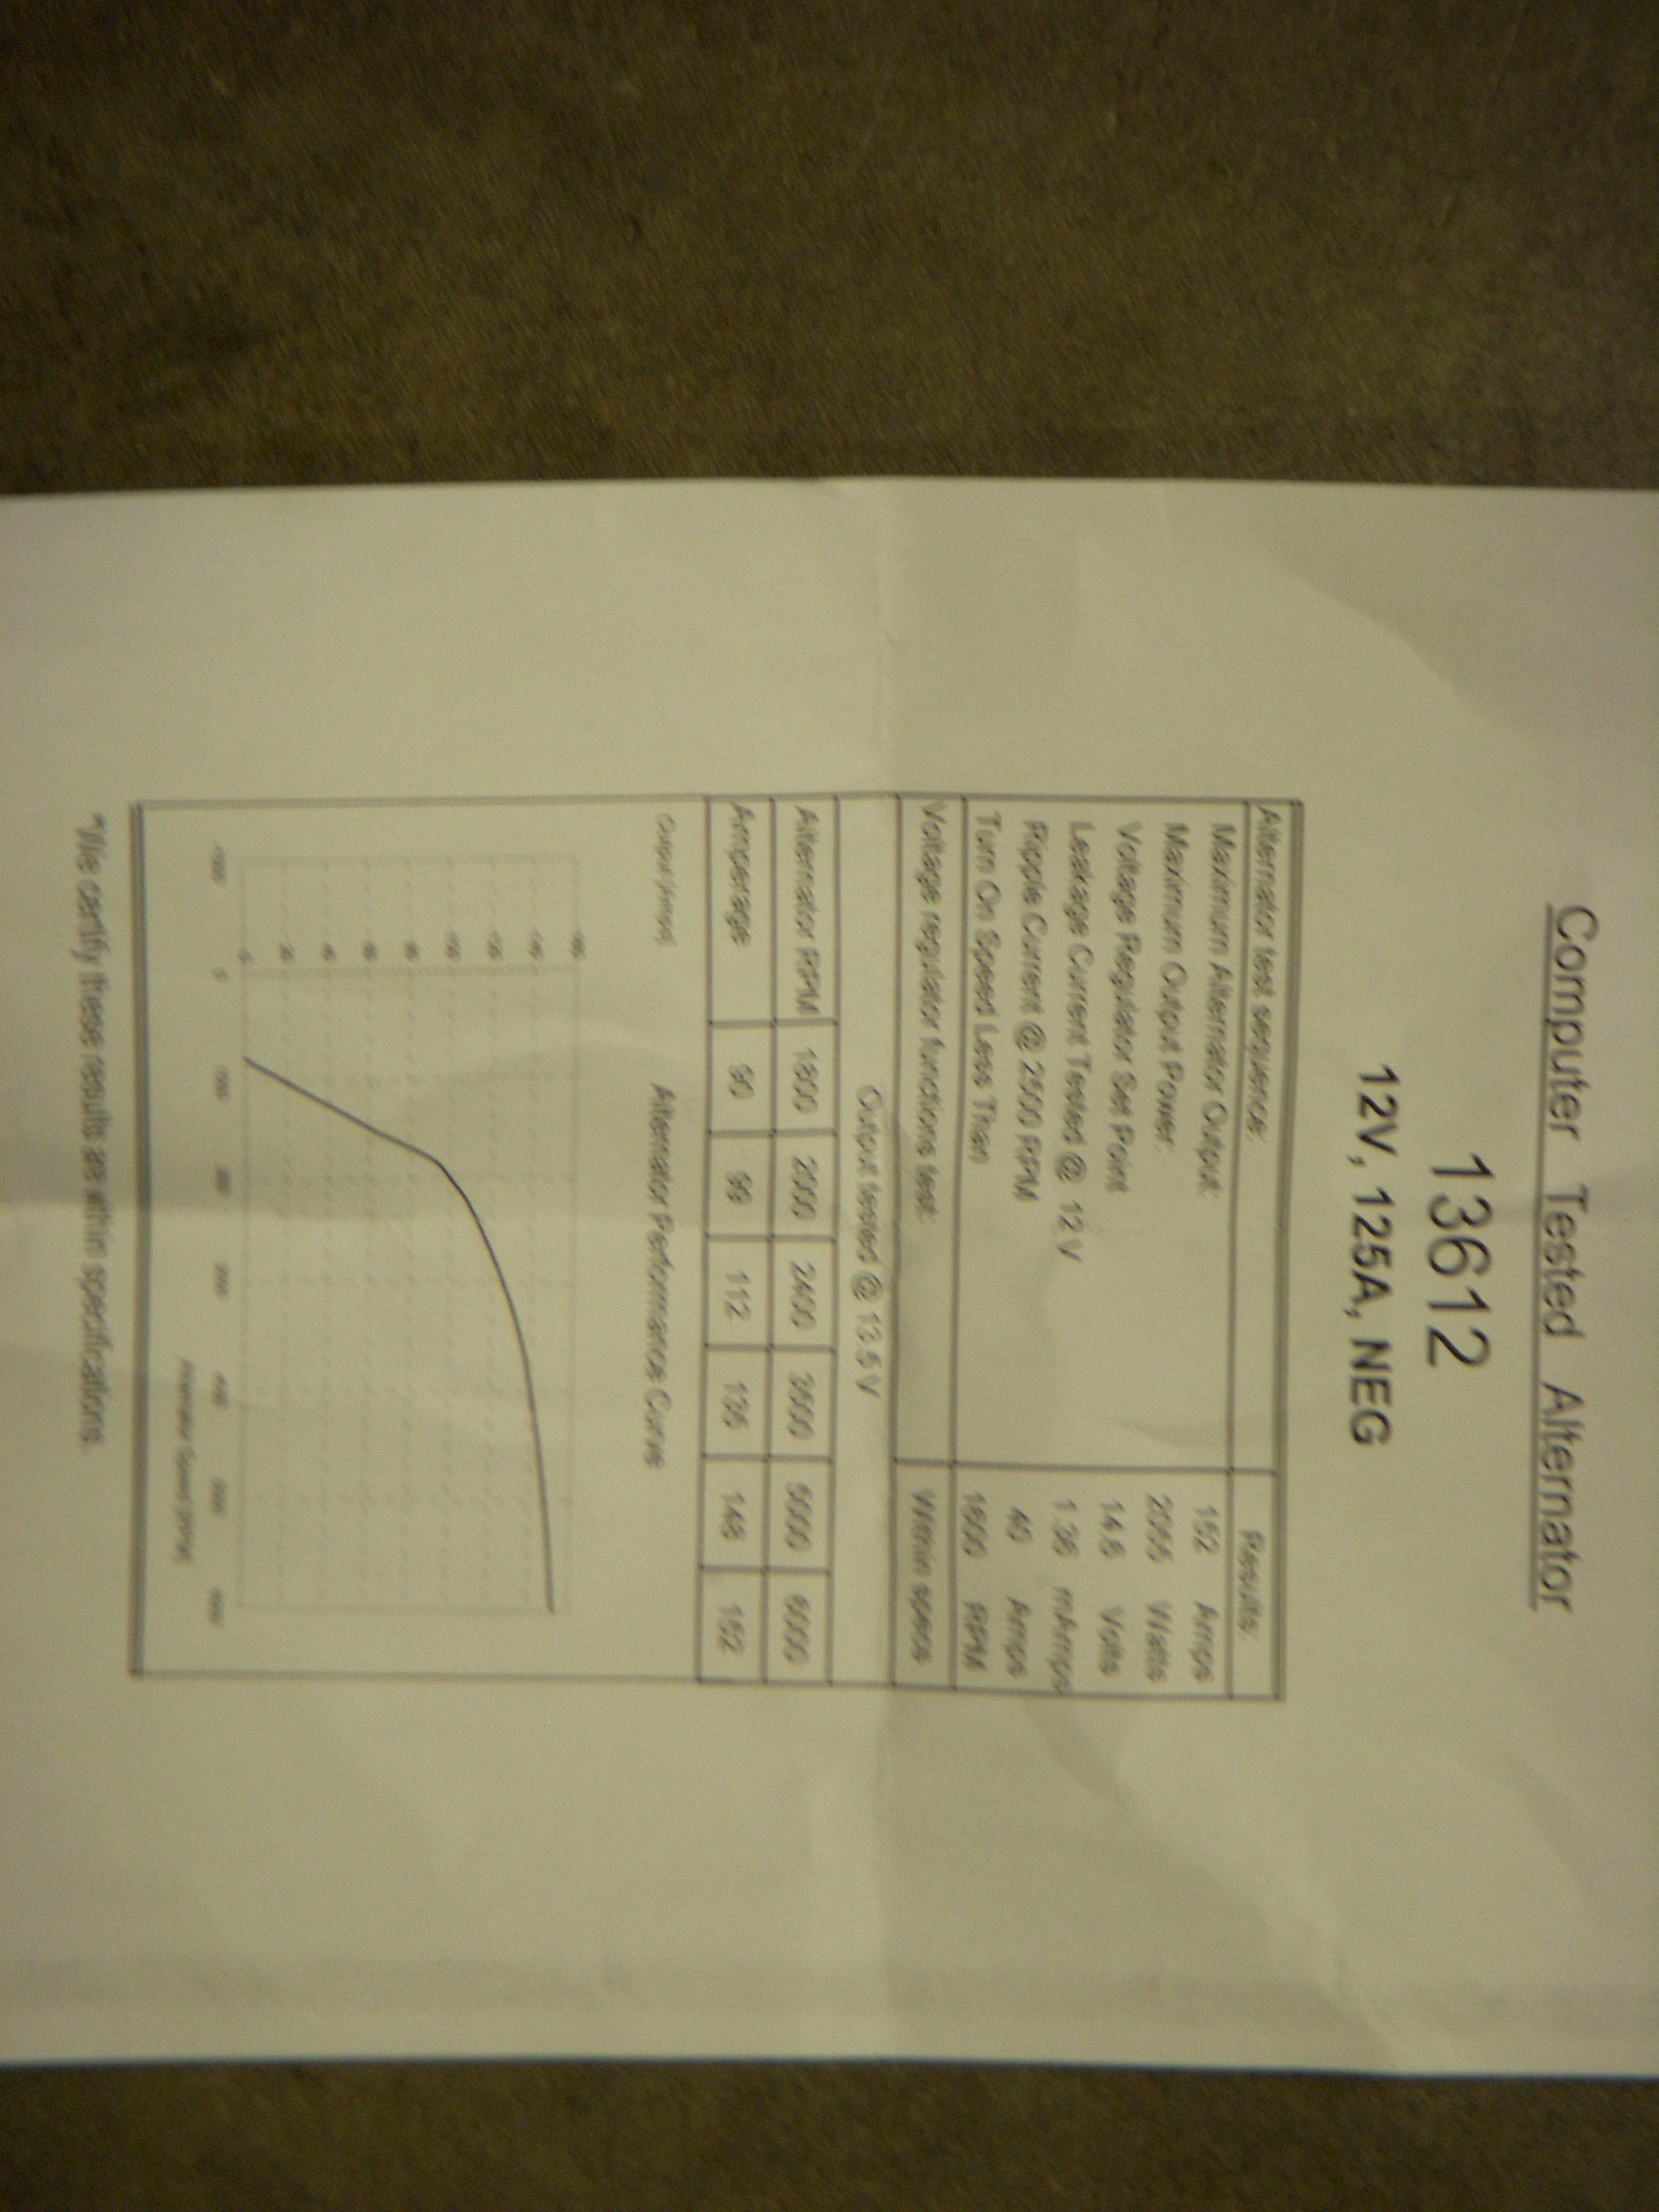
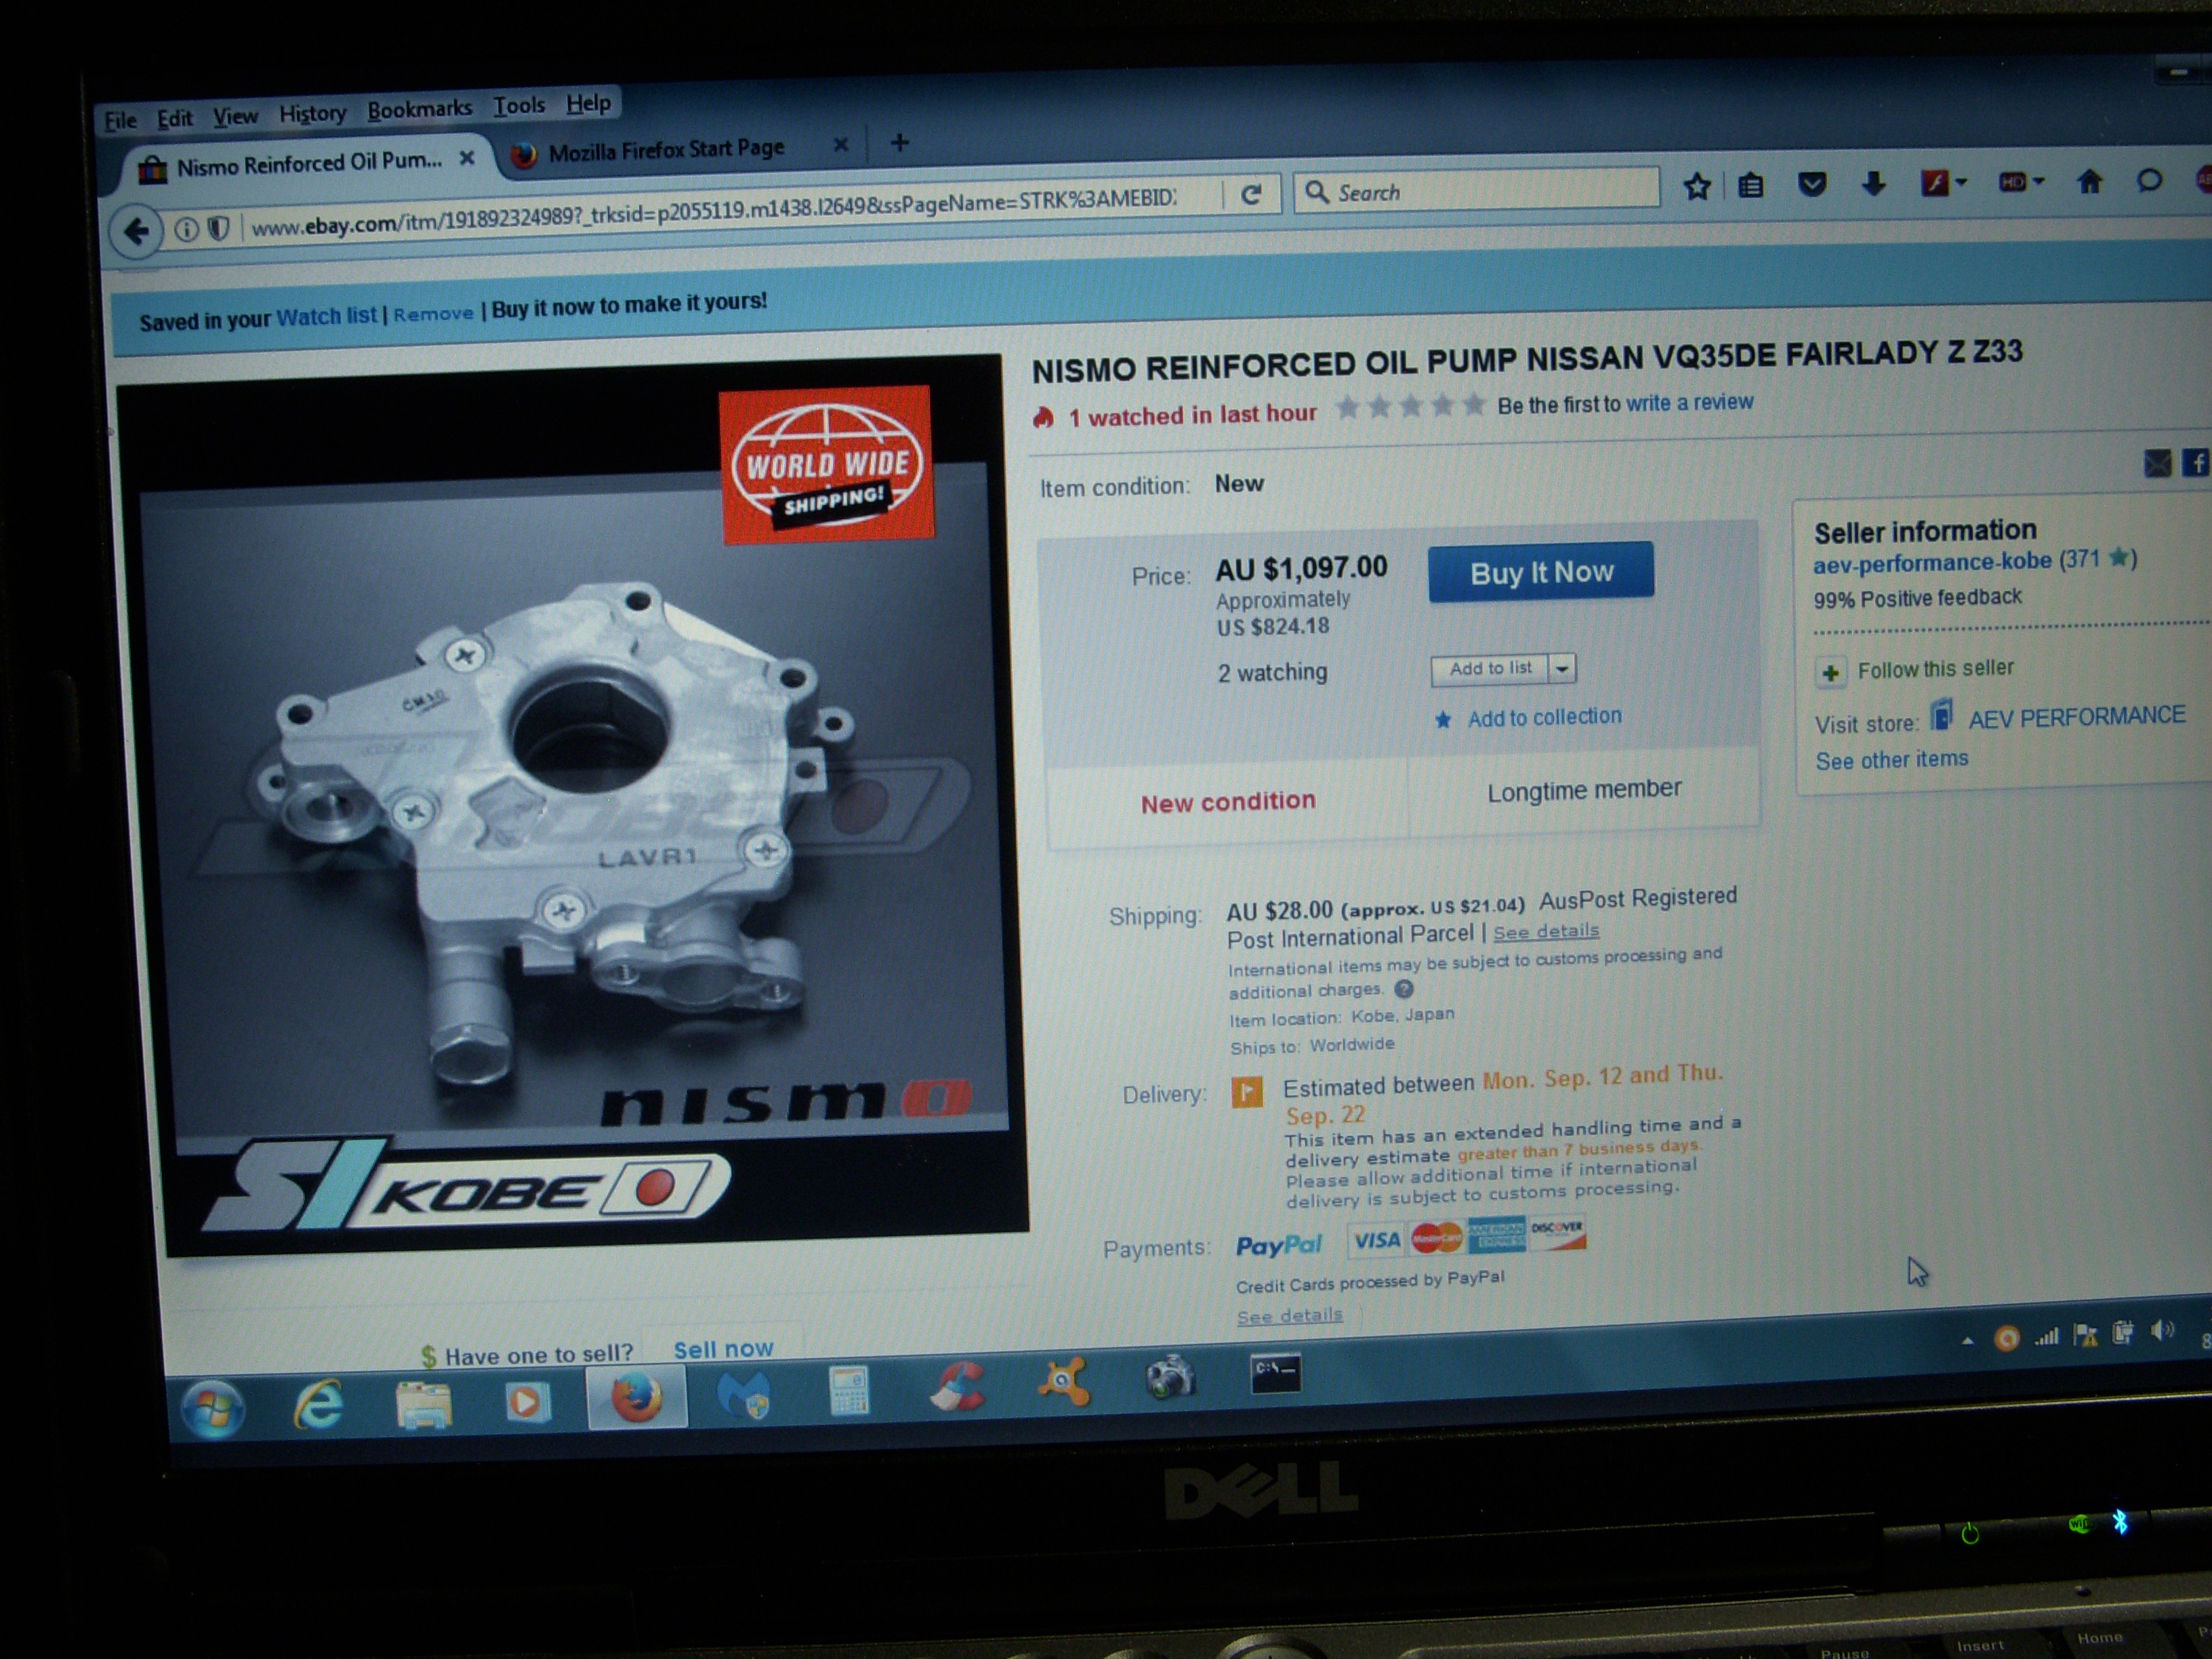
Been looking for a Nismo oil pump to update the Rev Up pump I have now, but these things are RARE now. Here's the only one on eBay I could find, but it's pricy.
New one comes with a calibration sheet...


Been looking for a Nismo oil pump to update the Rev Up pump I have now, but these things are RARE now. Here's the only one on eBay I could find, but it's pricy.

Last edited by grey99max; 01-16-2017 at 06:03 PM.
09-12-2016, 06:39 PM
#1816
LandShark has Cosworth
Thread Starter
iTrader: (12)
Join Date: Jan 2004
Location: Topeka, KS
Posts: 4,327
Off with it's HEAD !!
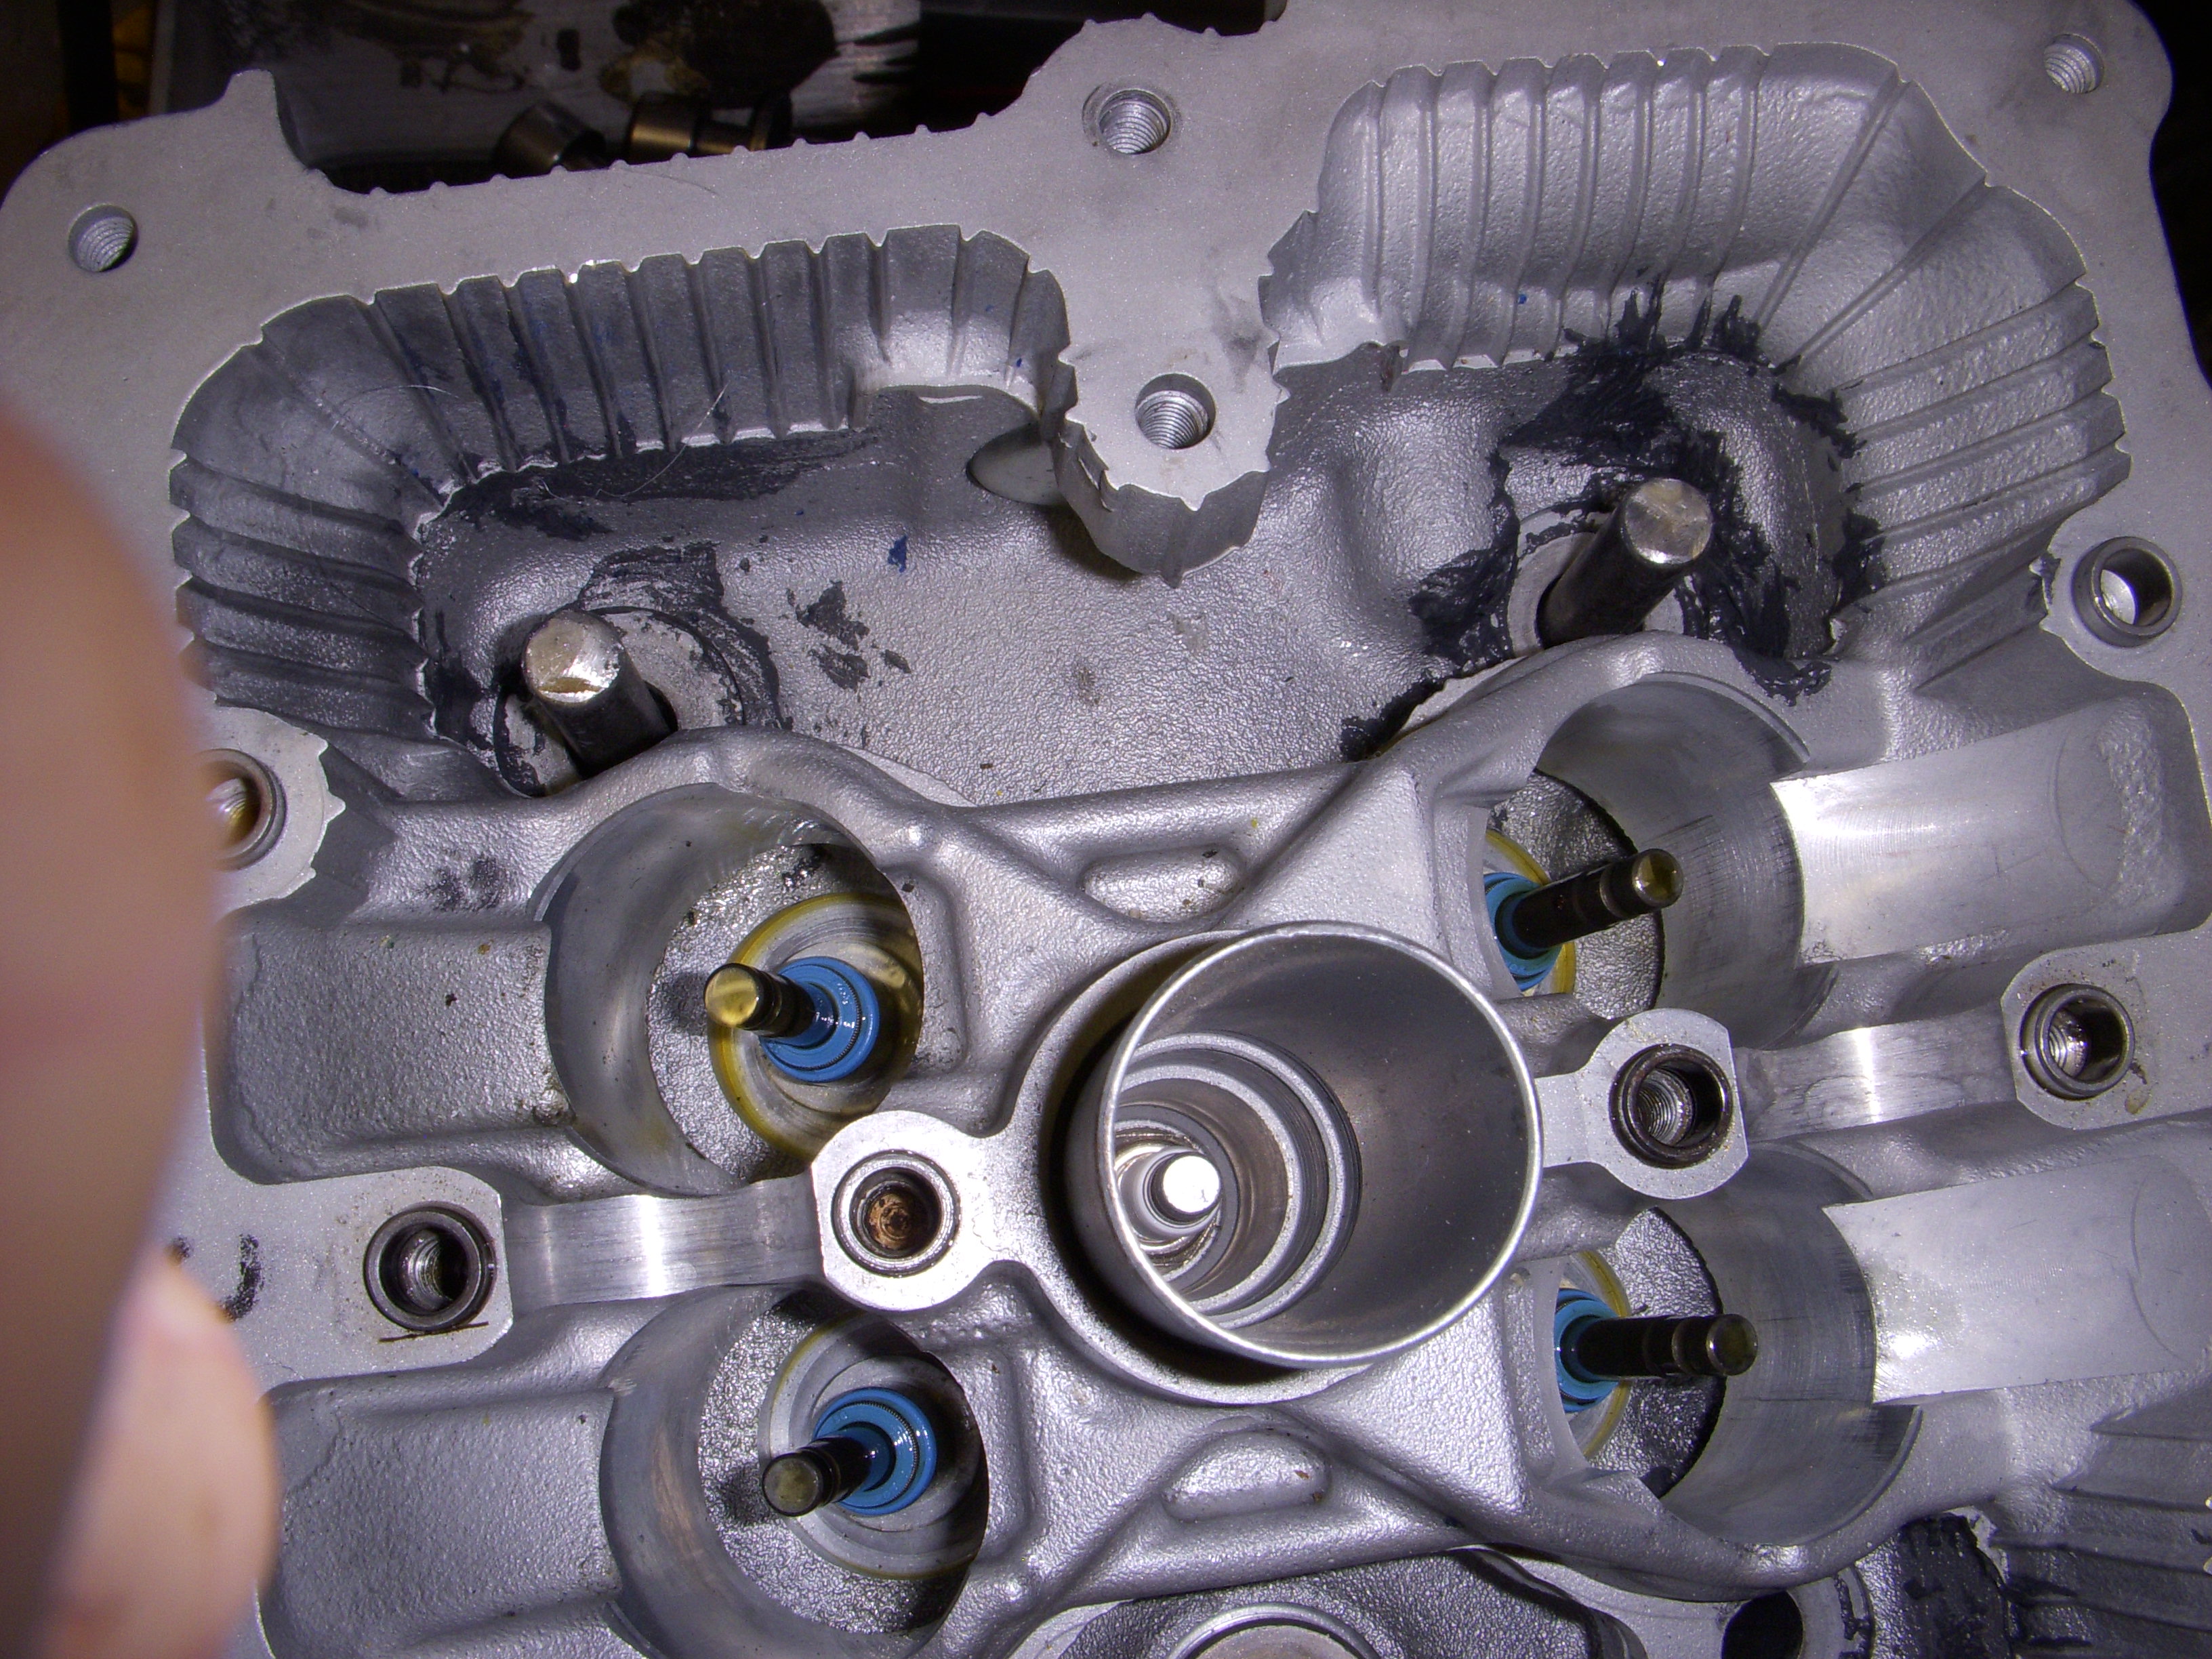
It's time to pull the heads - one at a time - and install the real HR valve springs then check piston-to-valve clearance with all 24 valves - one at a time. And NO, these aren't HR head gaskets - these are 3.5DE new but throw-away head gaskets. ARP head studs are really great.
Out come the test valve springs, and the previous new valve seals. In their place is a another set of Ferrea intake and exhaust valve seals.
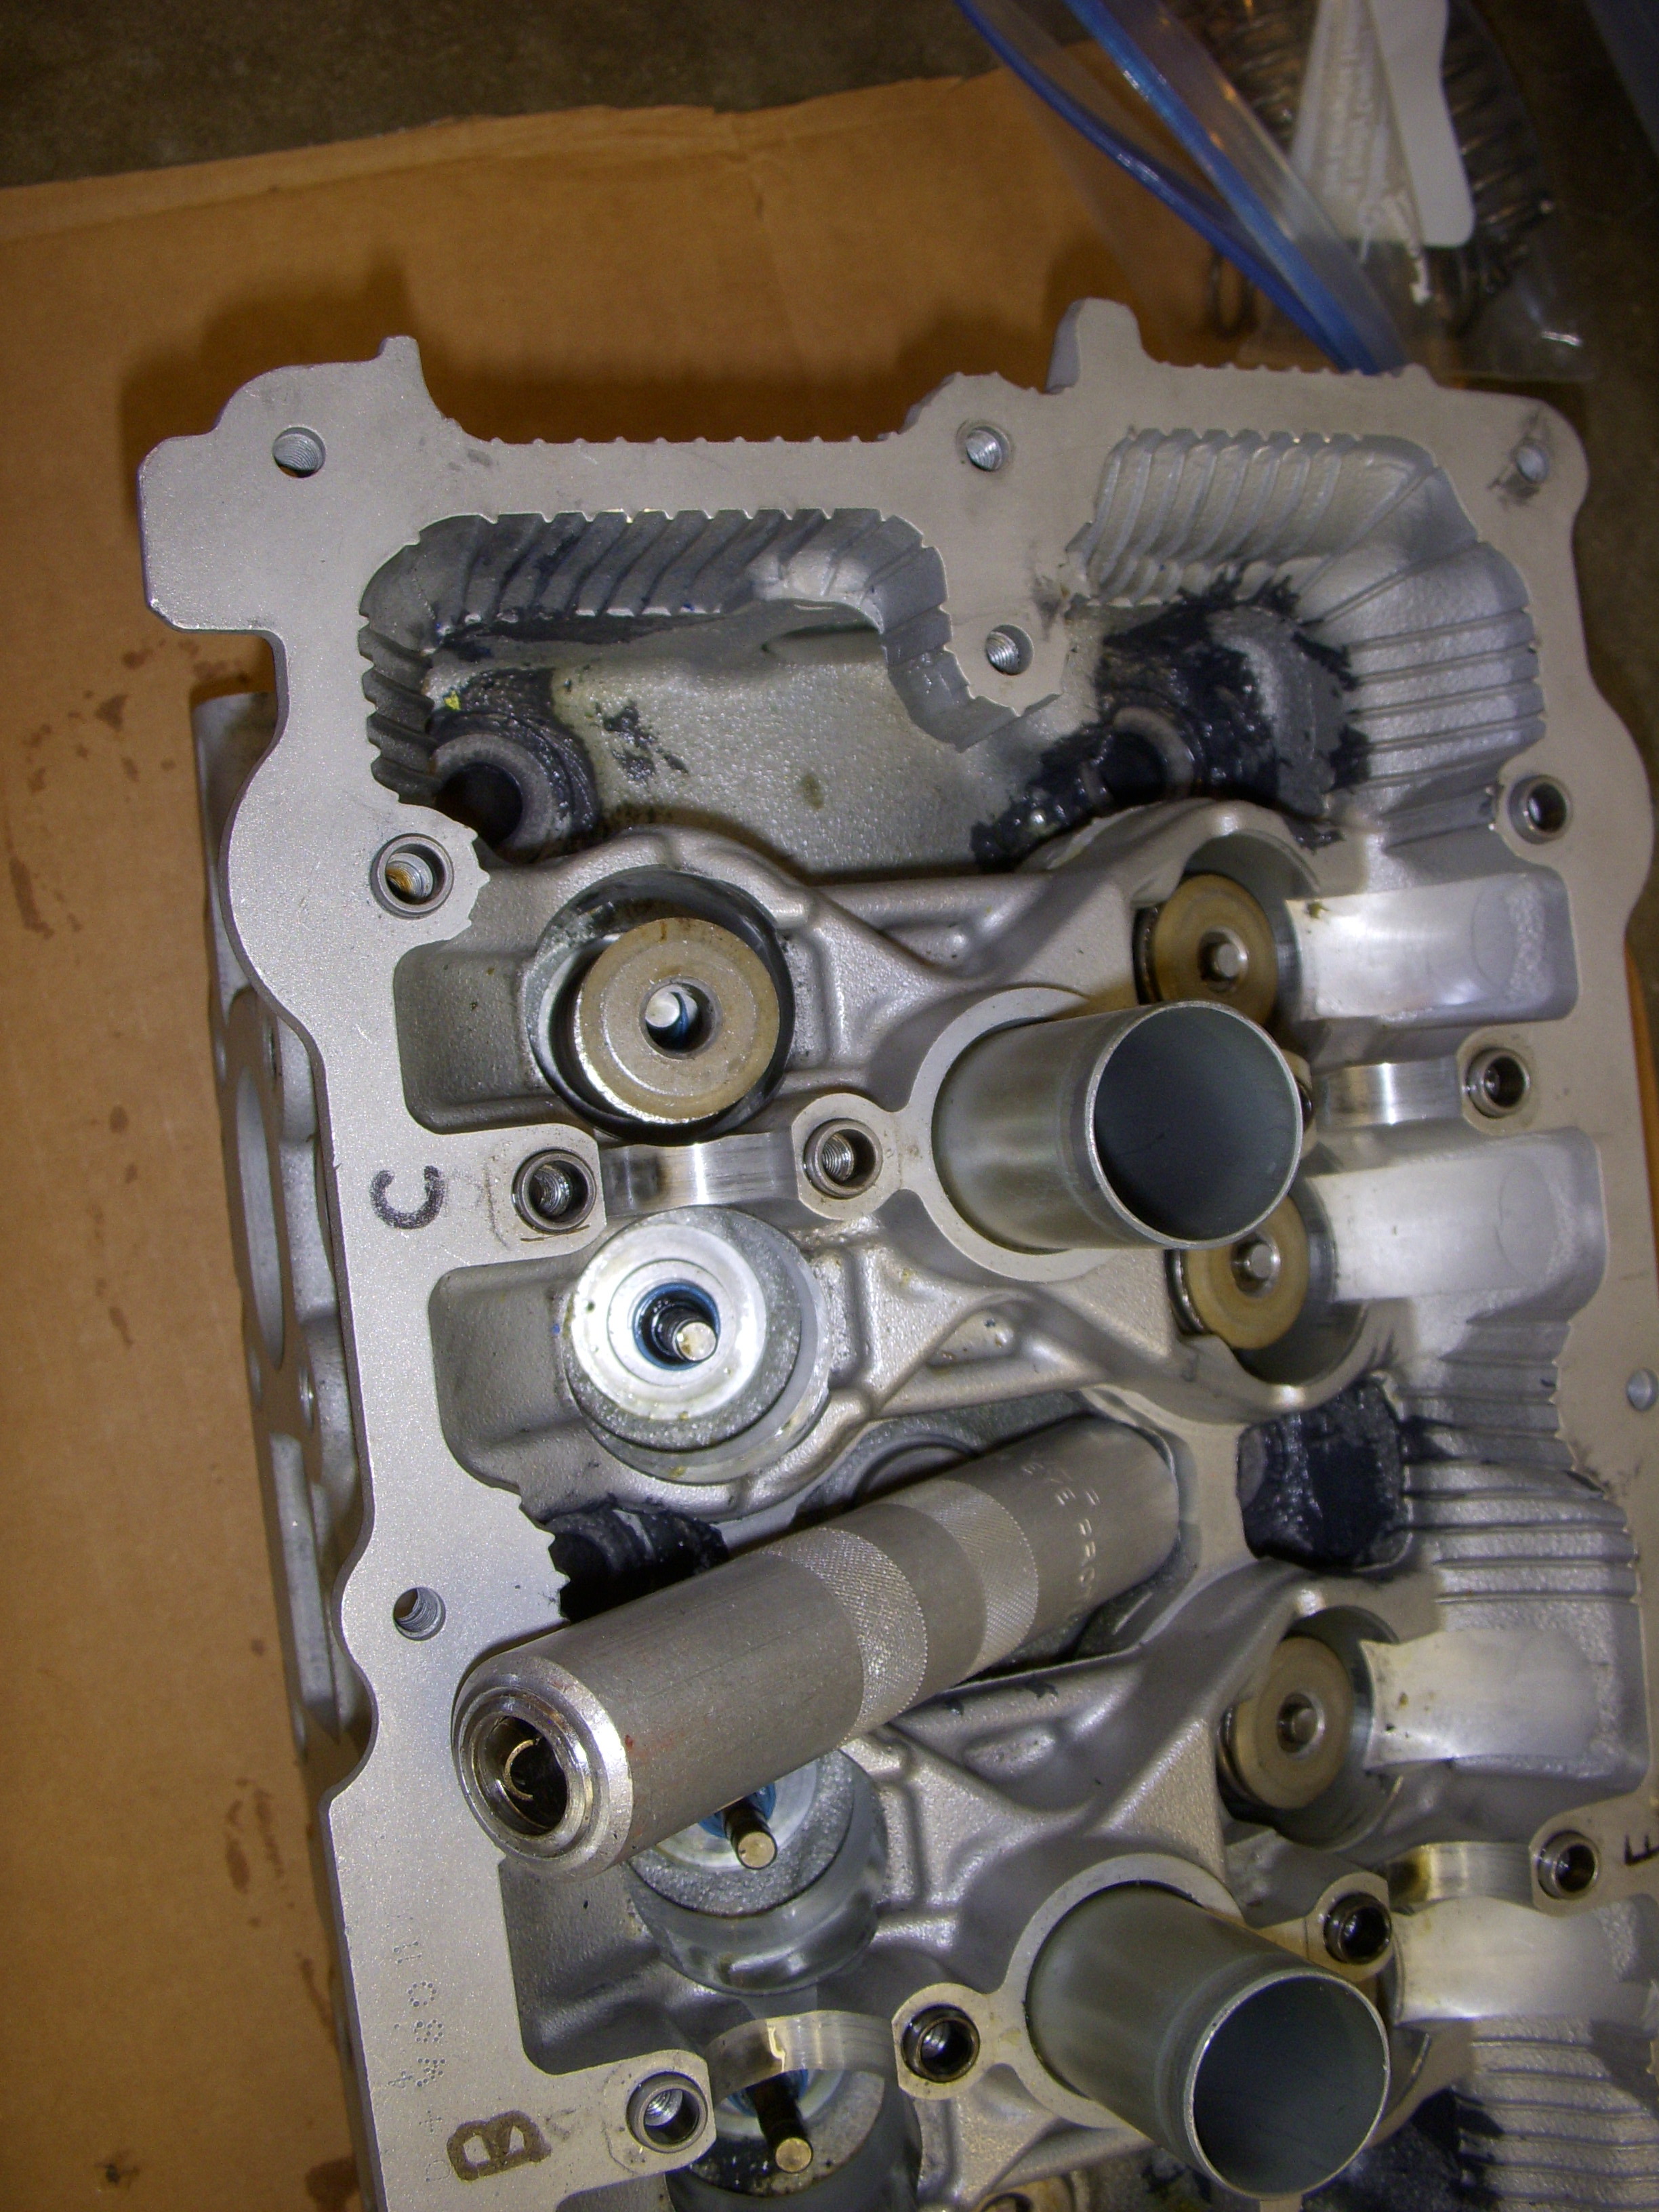
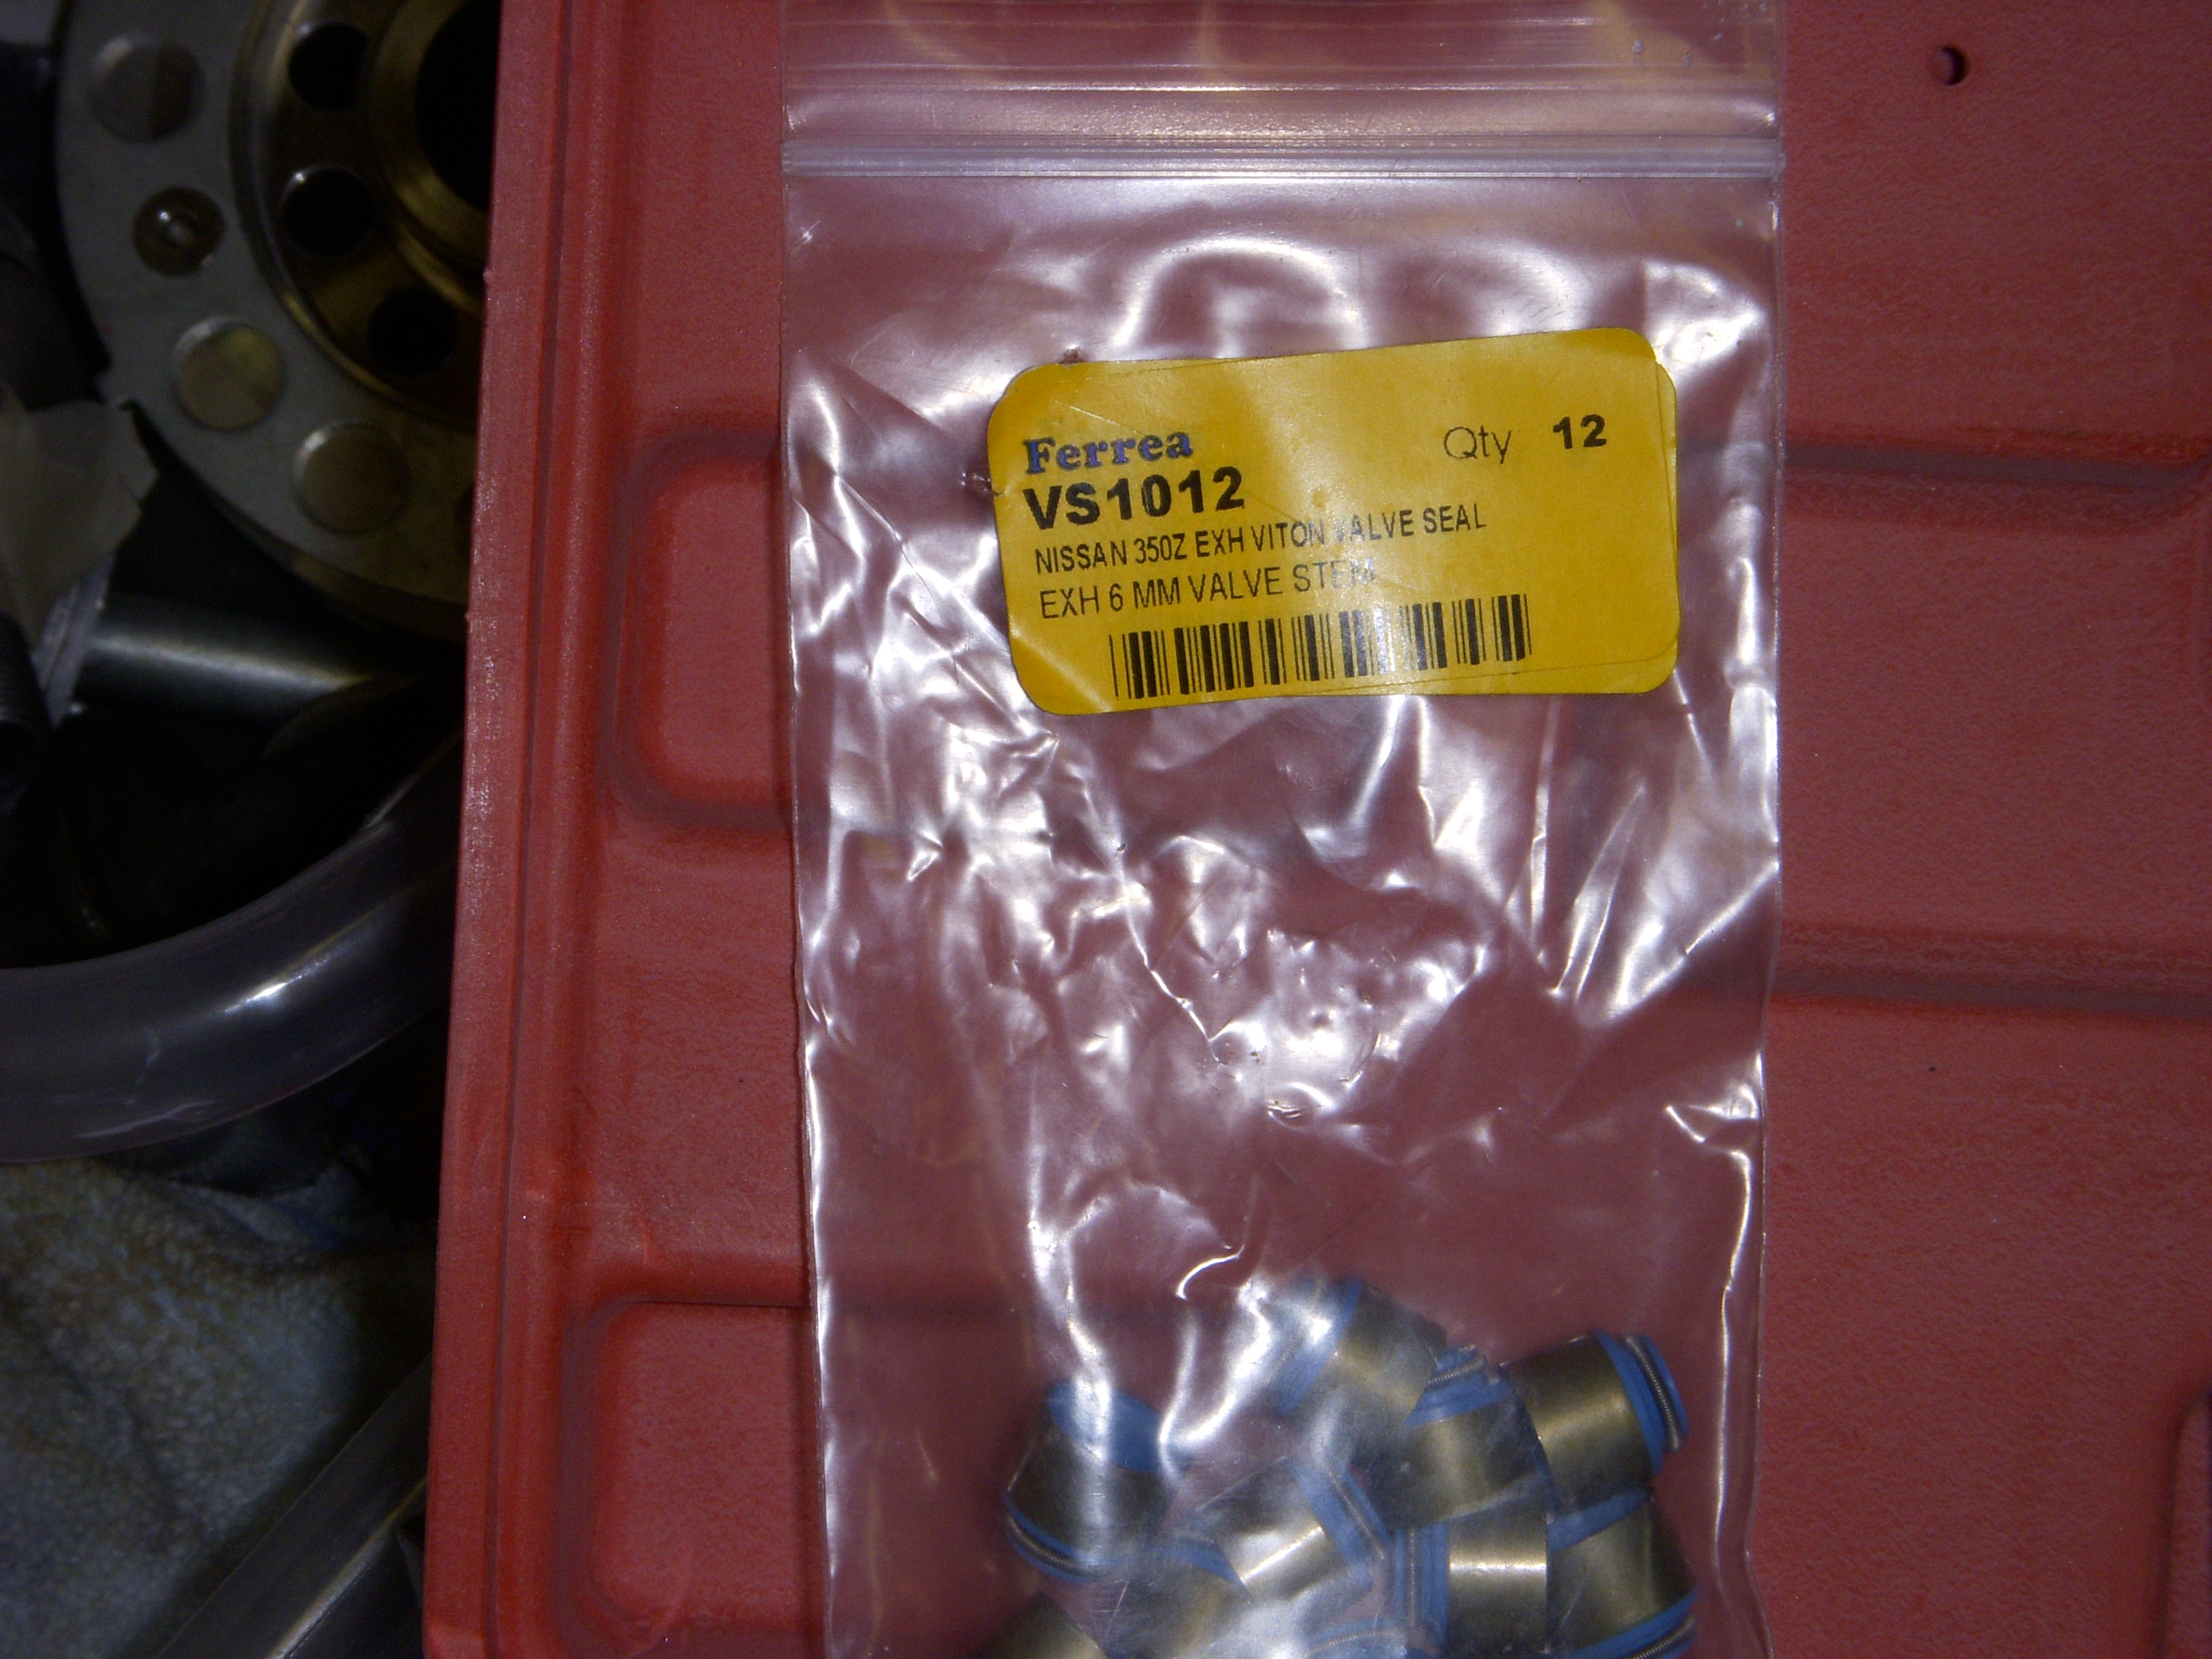
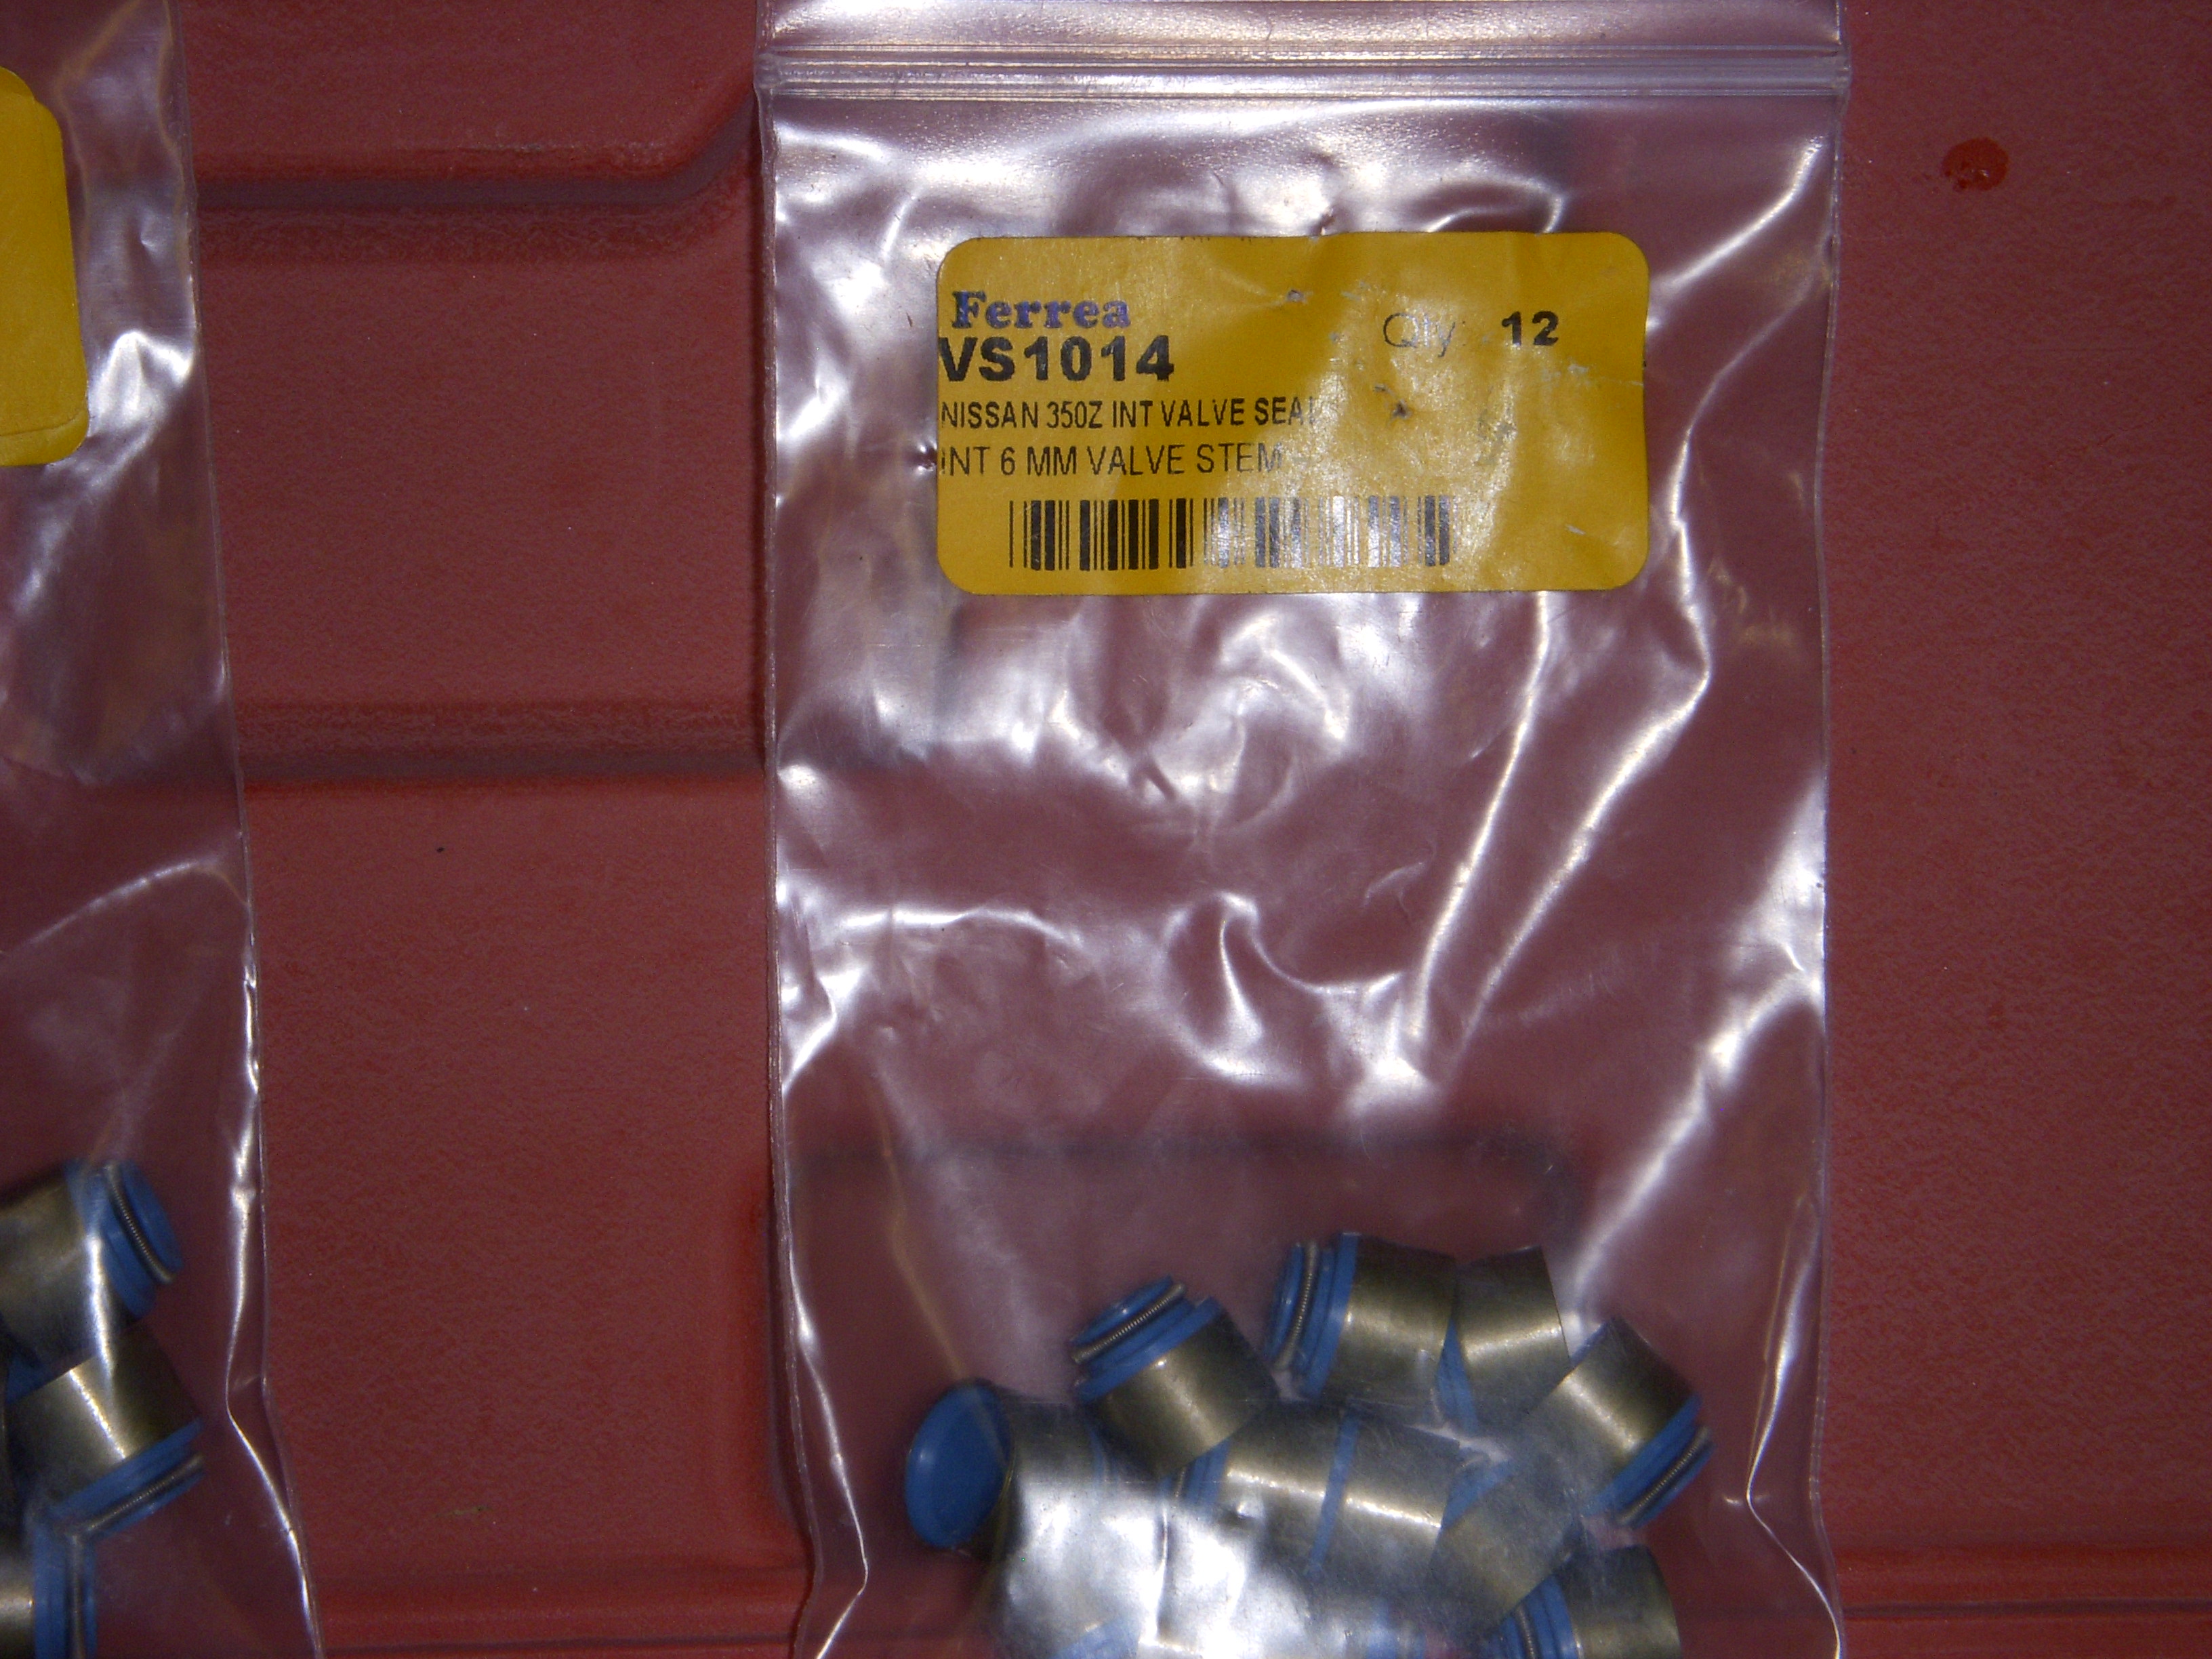
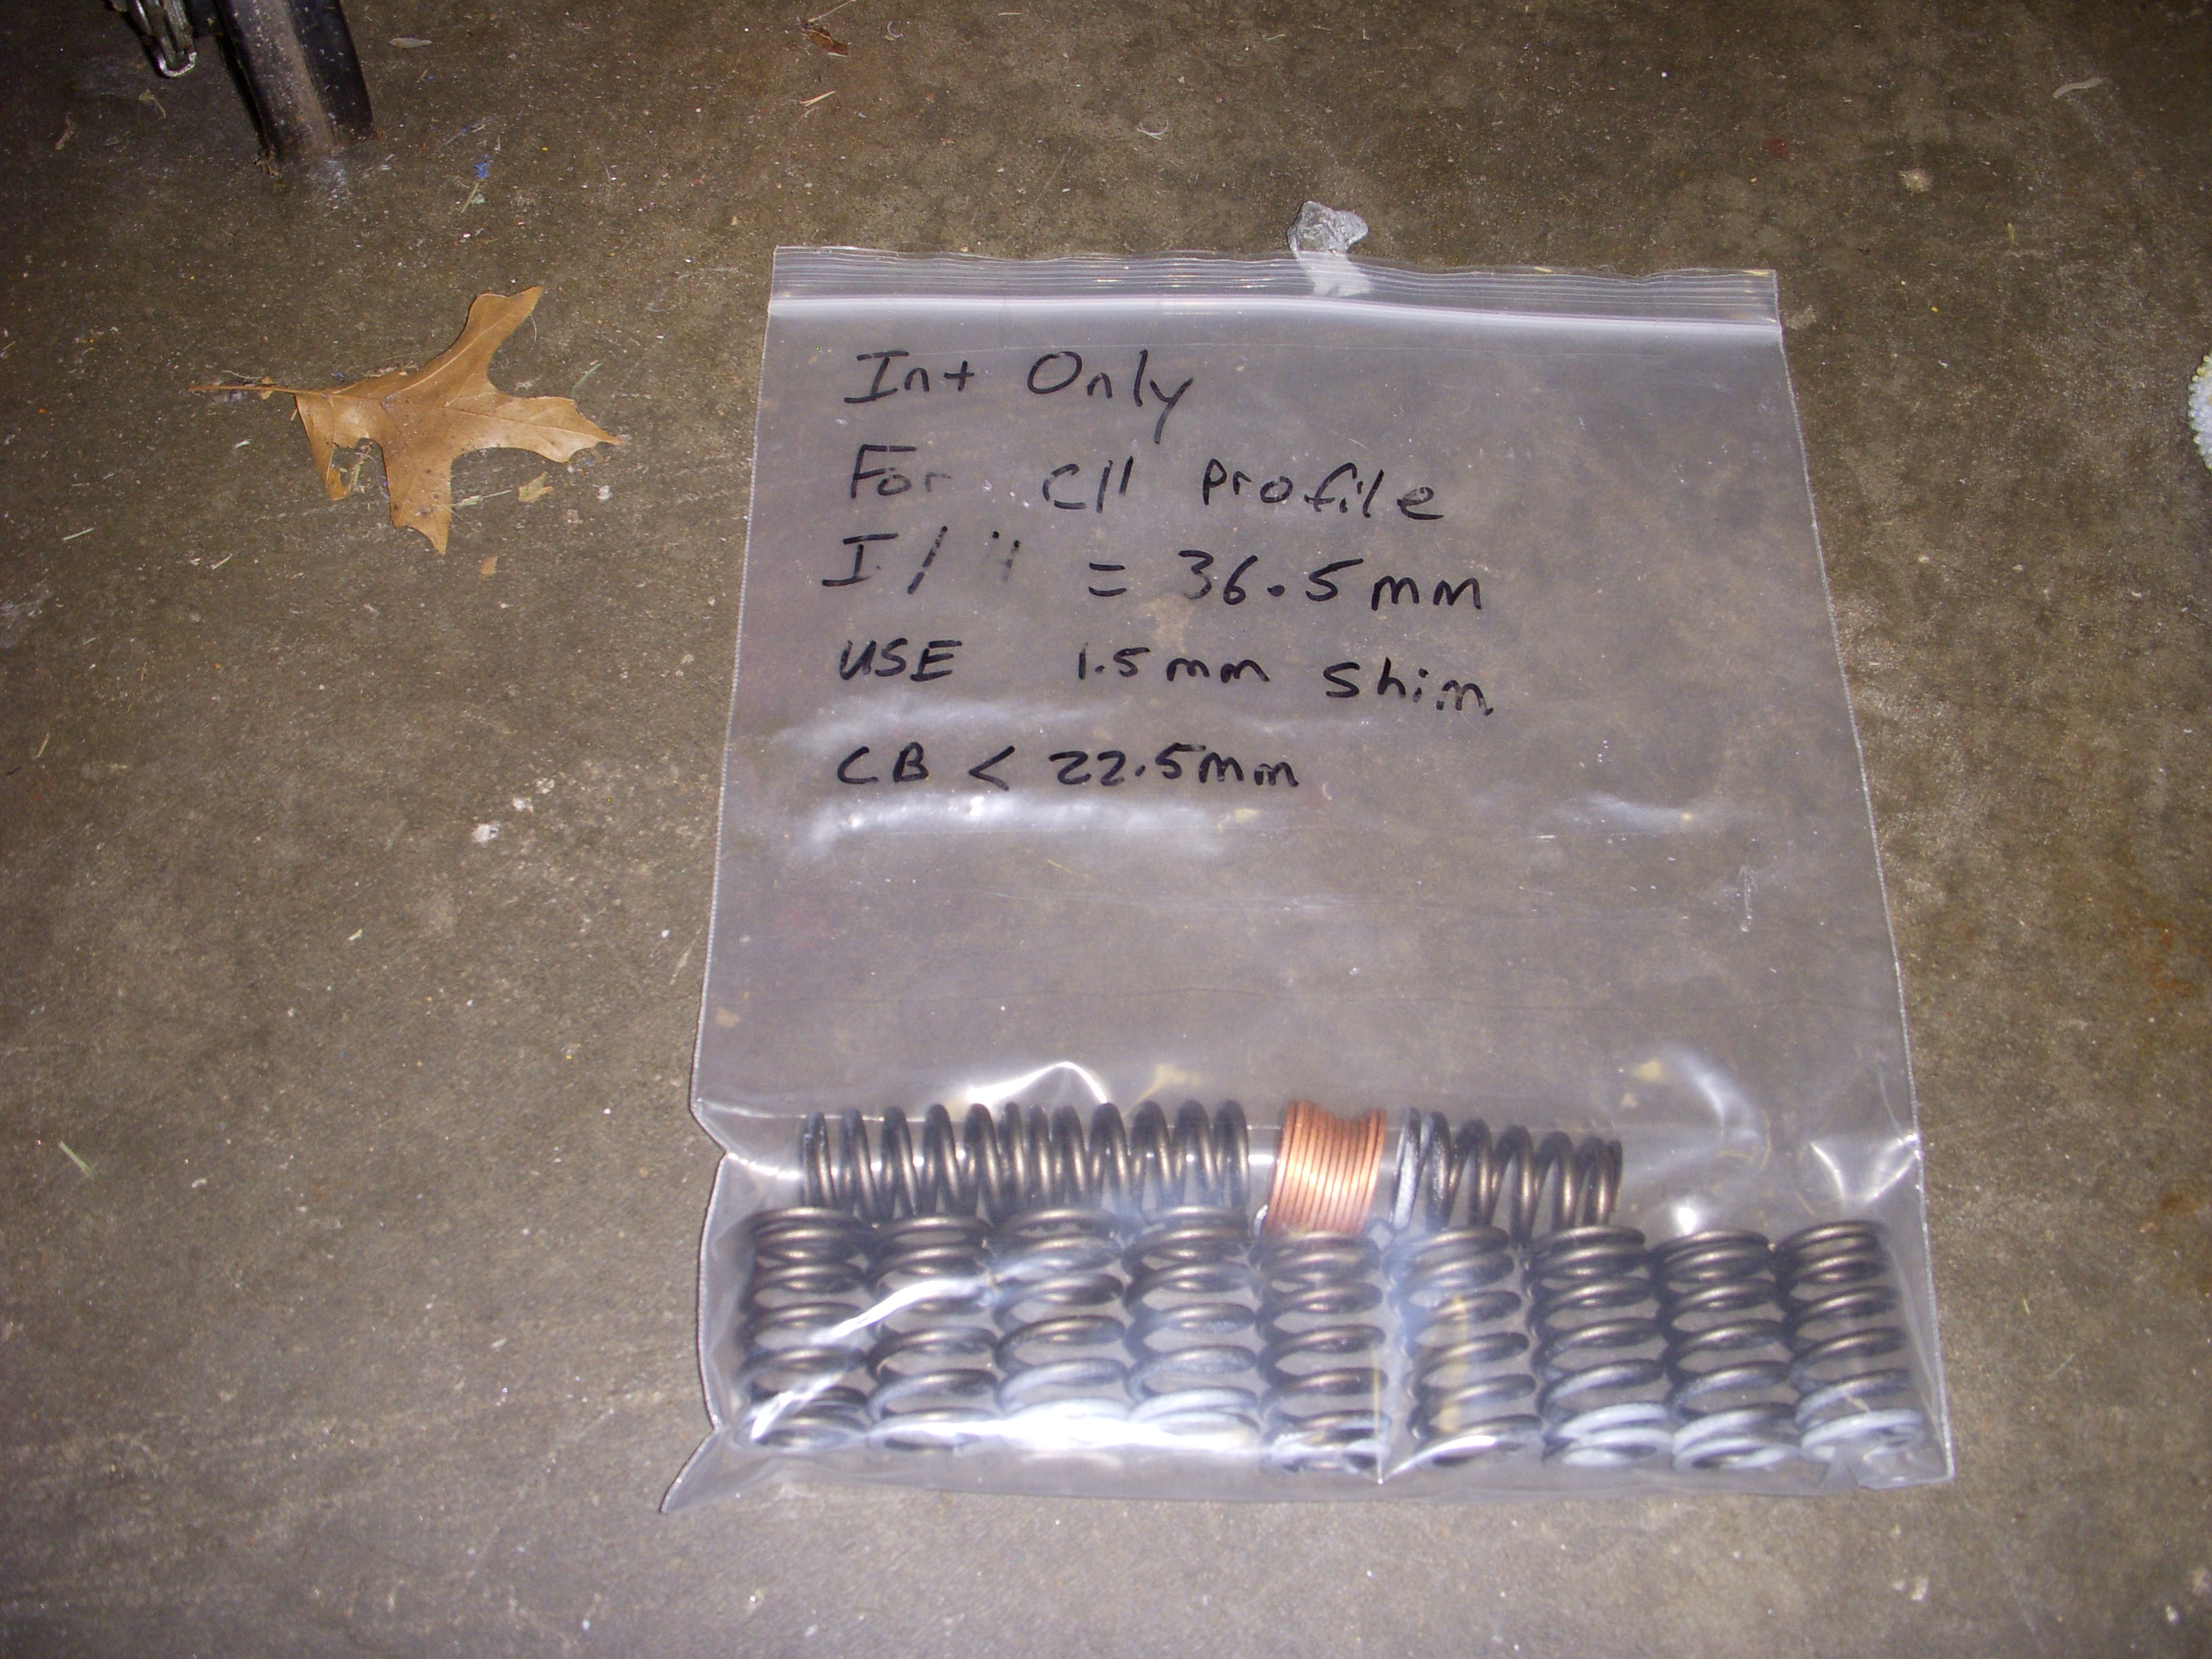
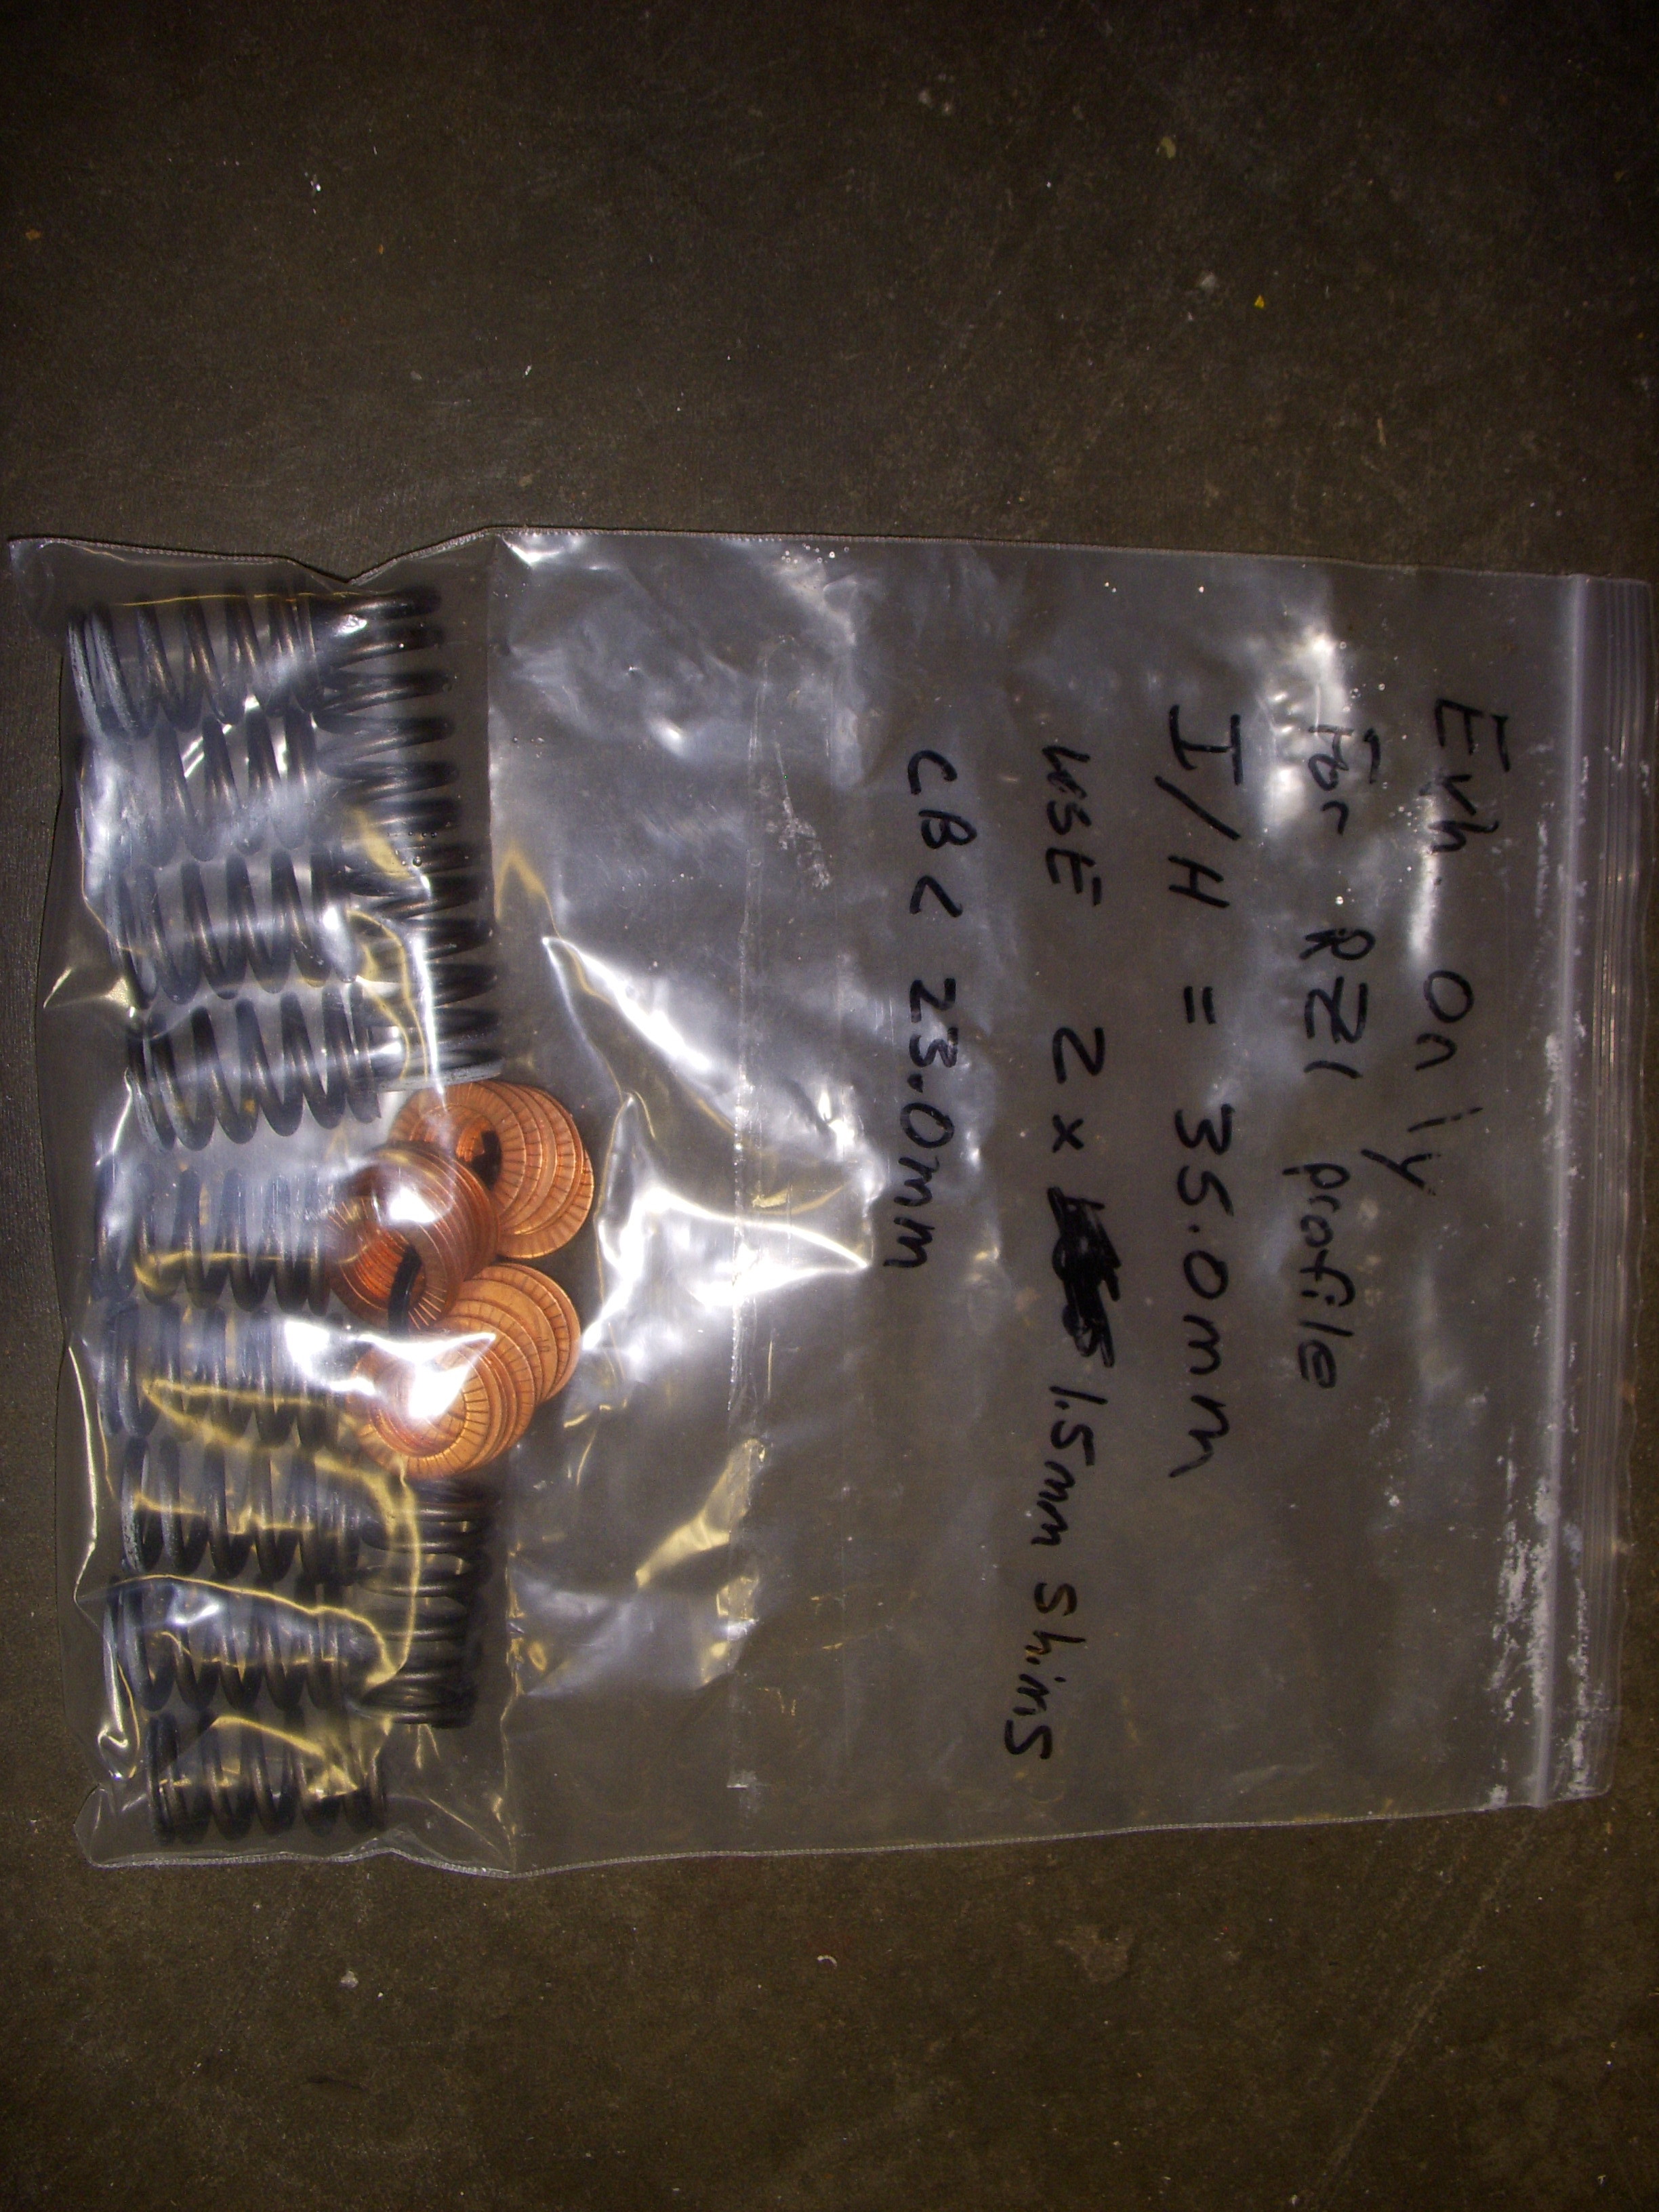
JWT intake and exhaust valve kits - shims and matched valve springs for the C11 cams.

Out come the test valve springs, and the previous new valve seals. In their place is a another set of Ferrea intake and exhaust valve seals.


JWT intake and exhaust valve kits - shims and matched valve springs for the C11 cams.


Last edited by grey99max; 01-16-2017 at 06:28 PM.
09-12-2016, 06:55 PM
#1817
LandShark has Cosworth
Thread Starter
iTrader: (12)
Join Date: Jan 2004
Location: Topeka, KS
Posts: 4,327
Another change of plans - transmission -
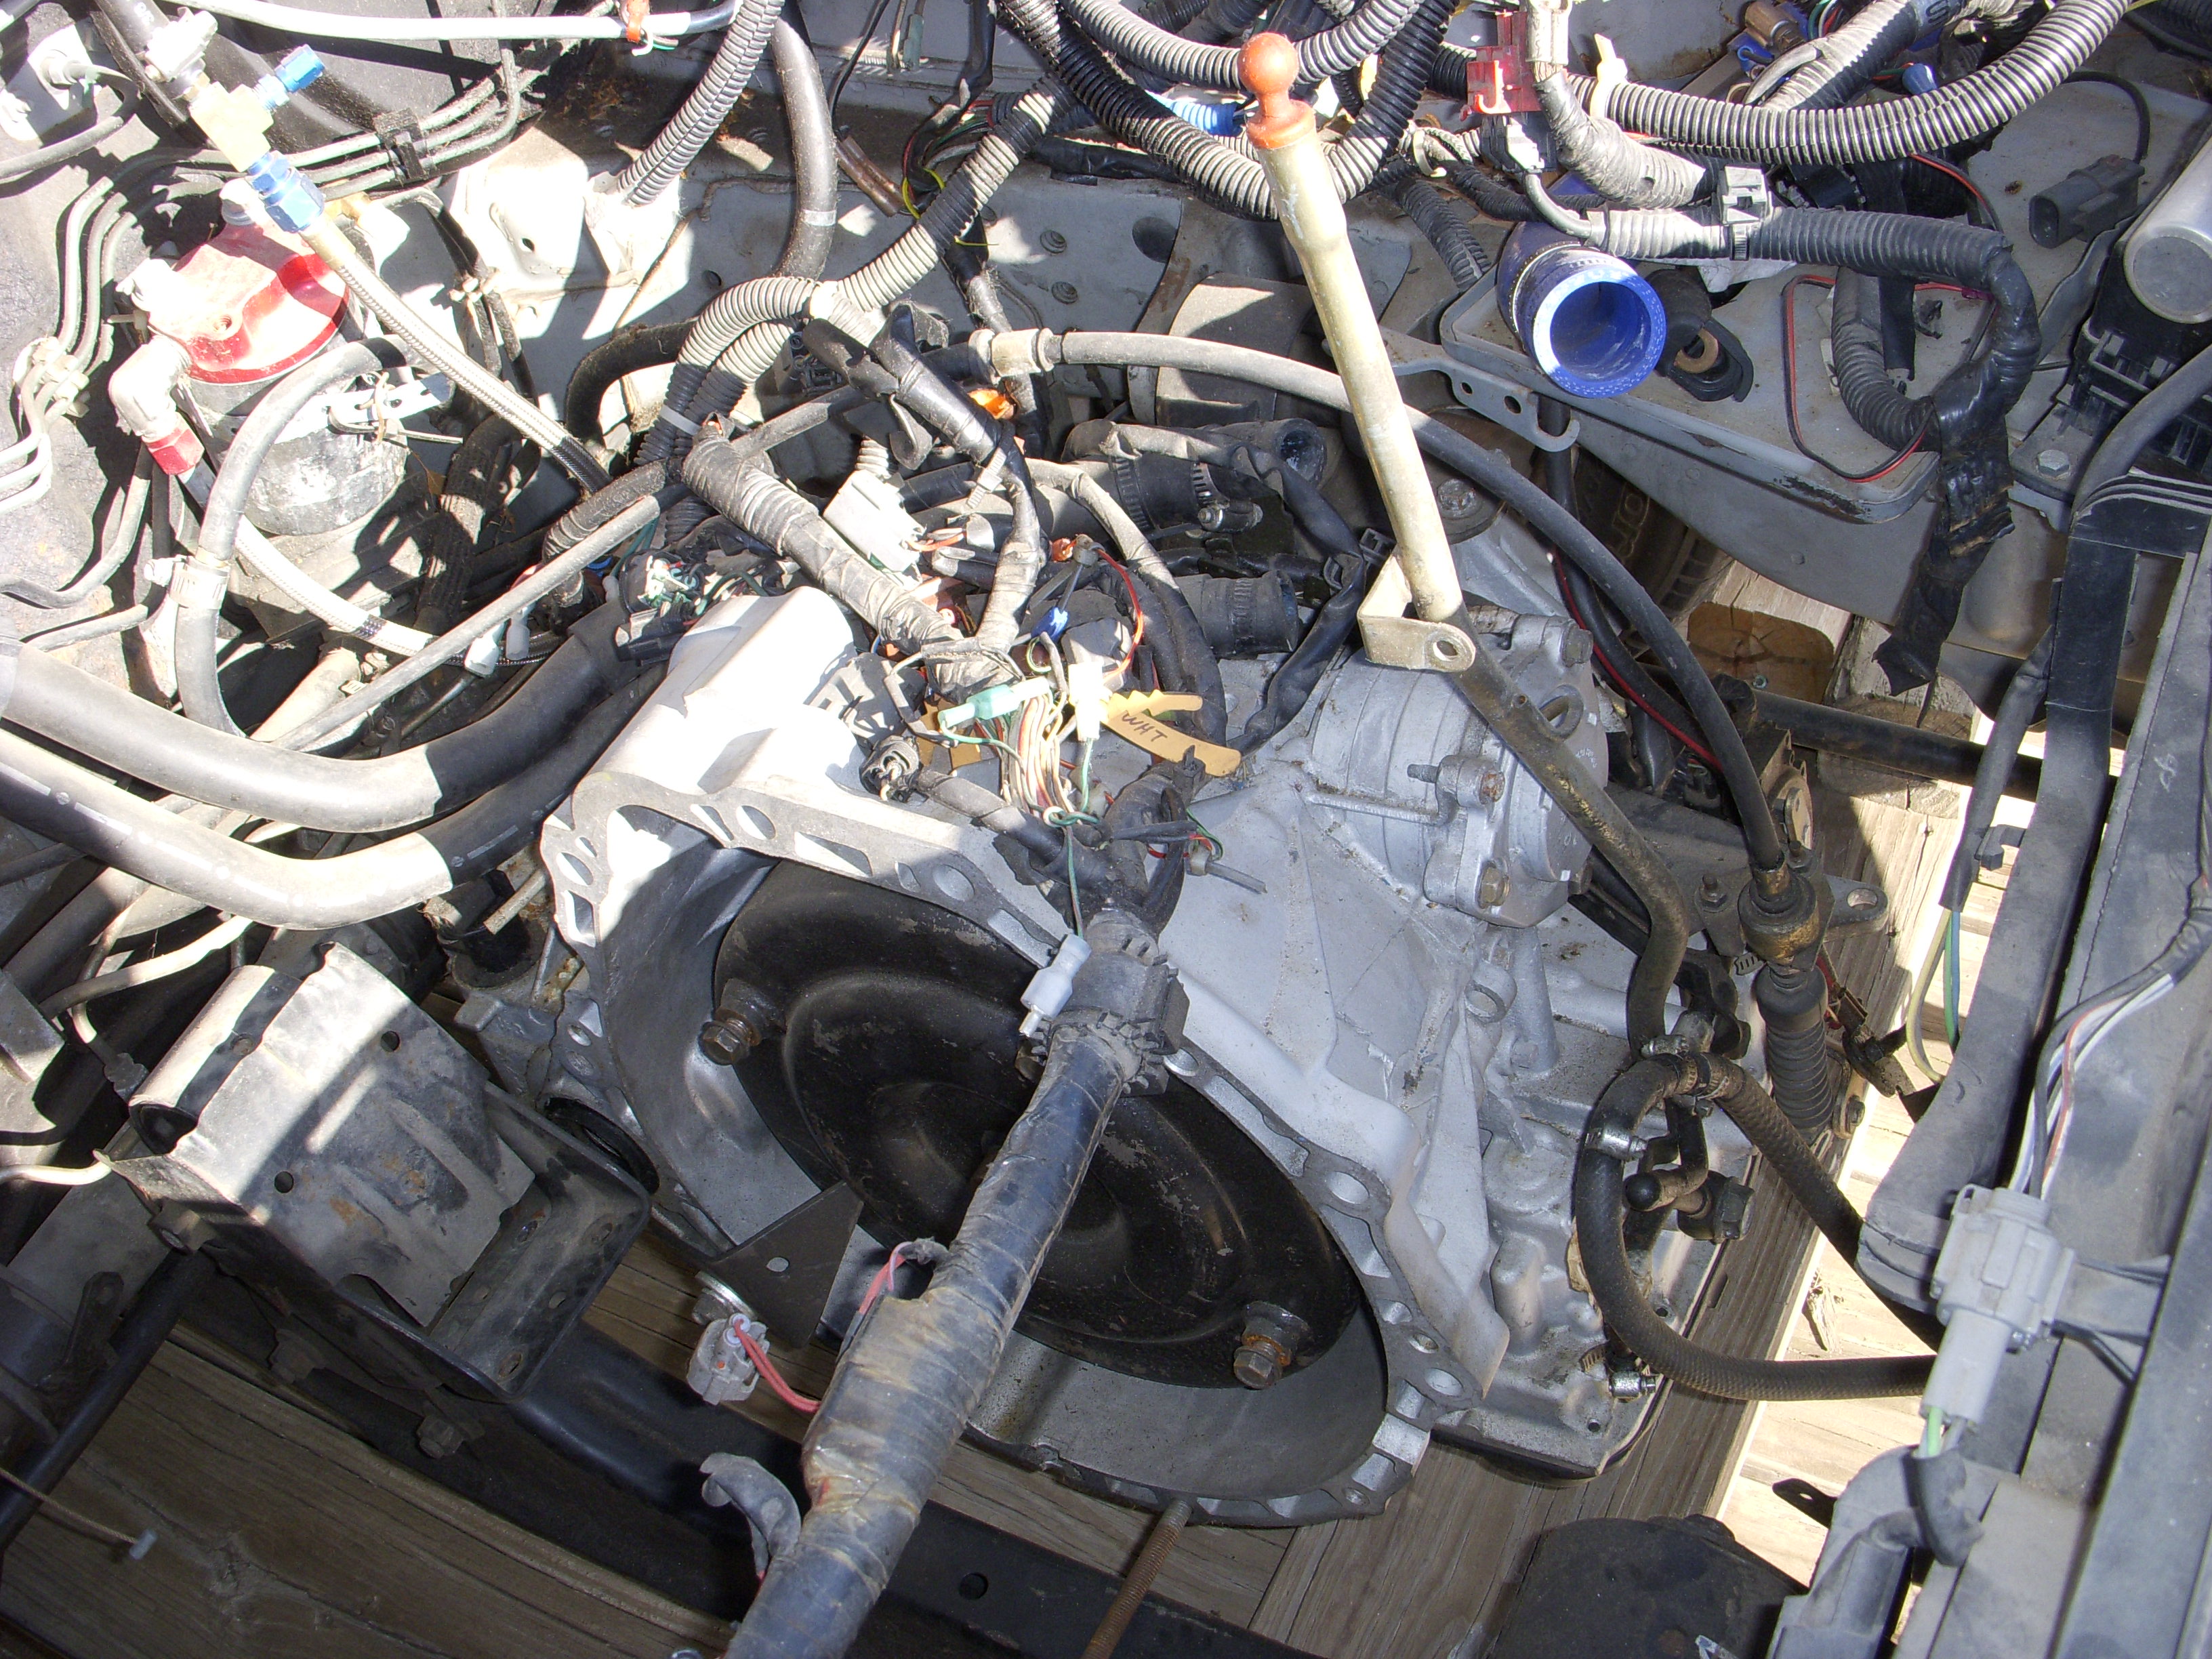
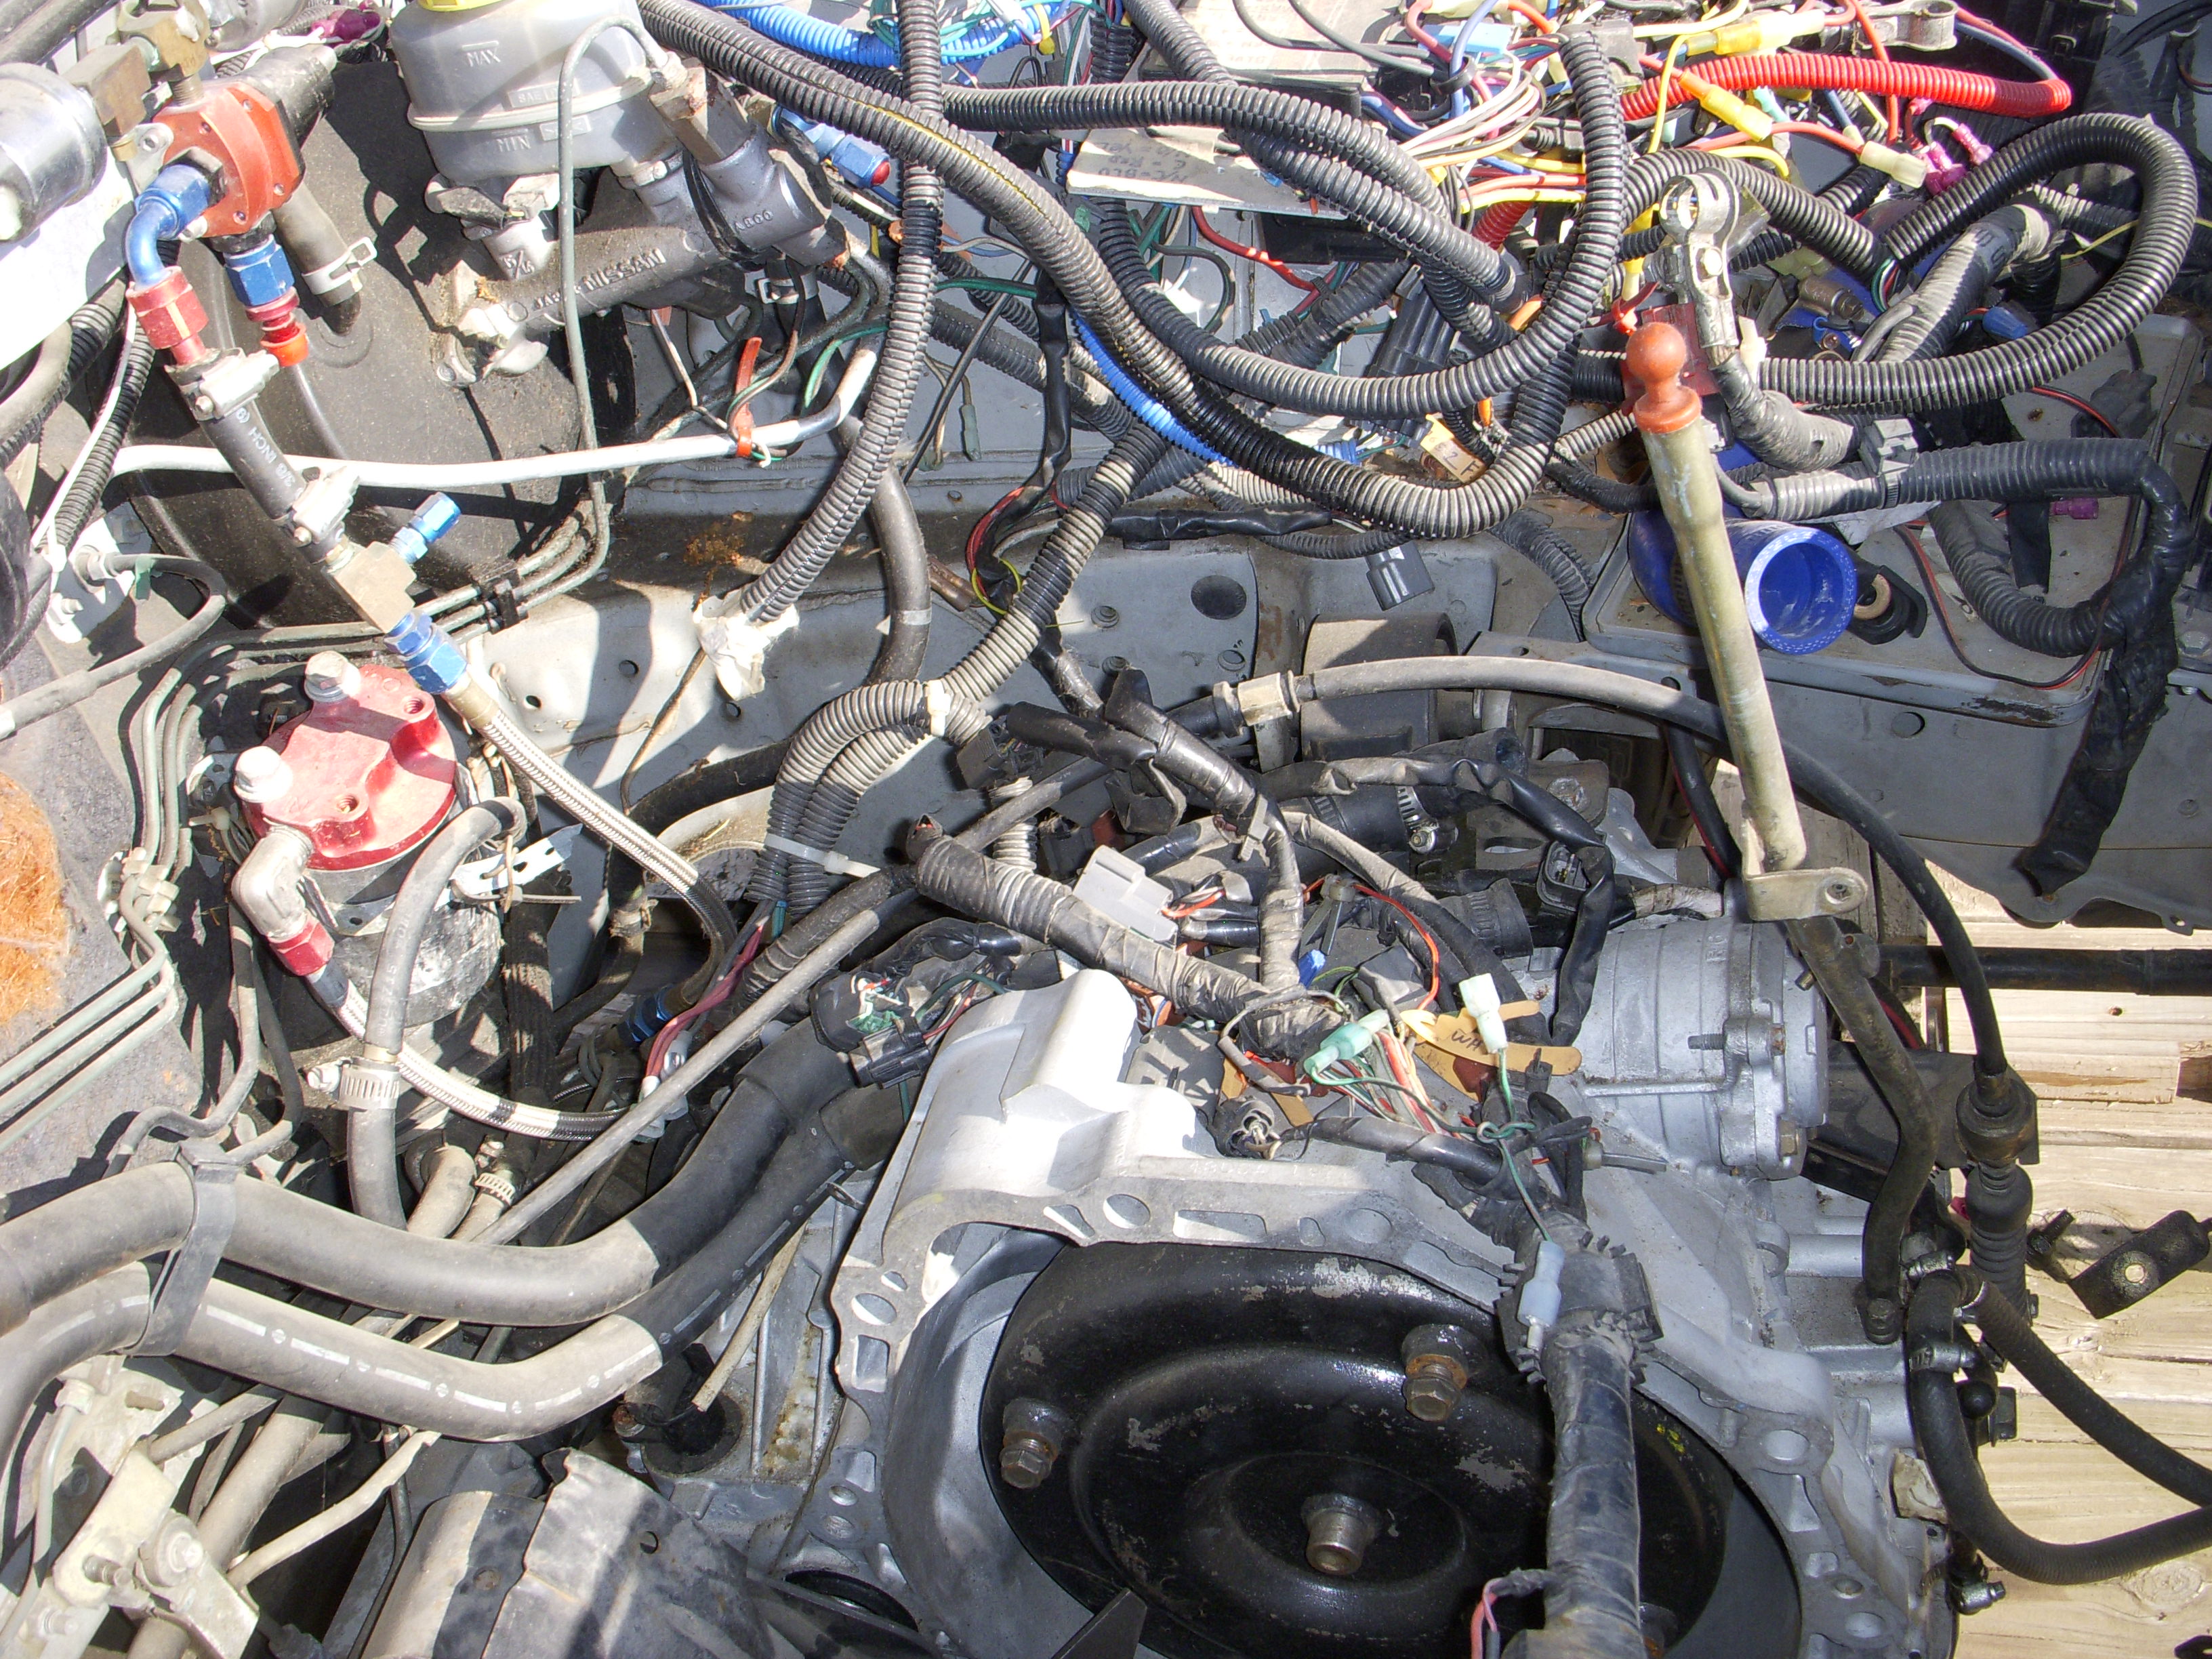
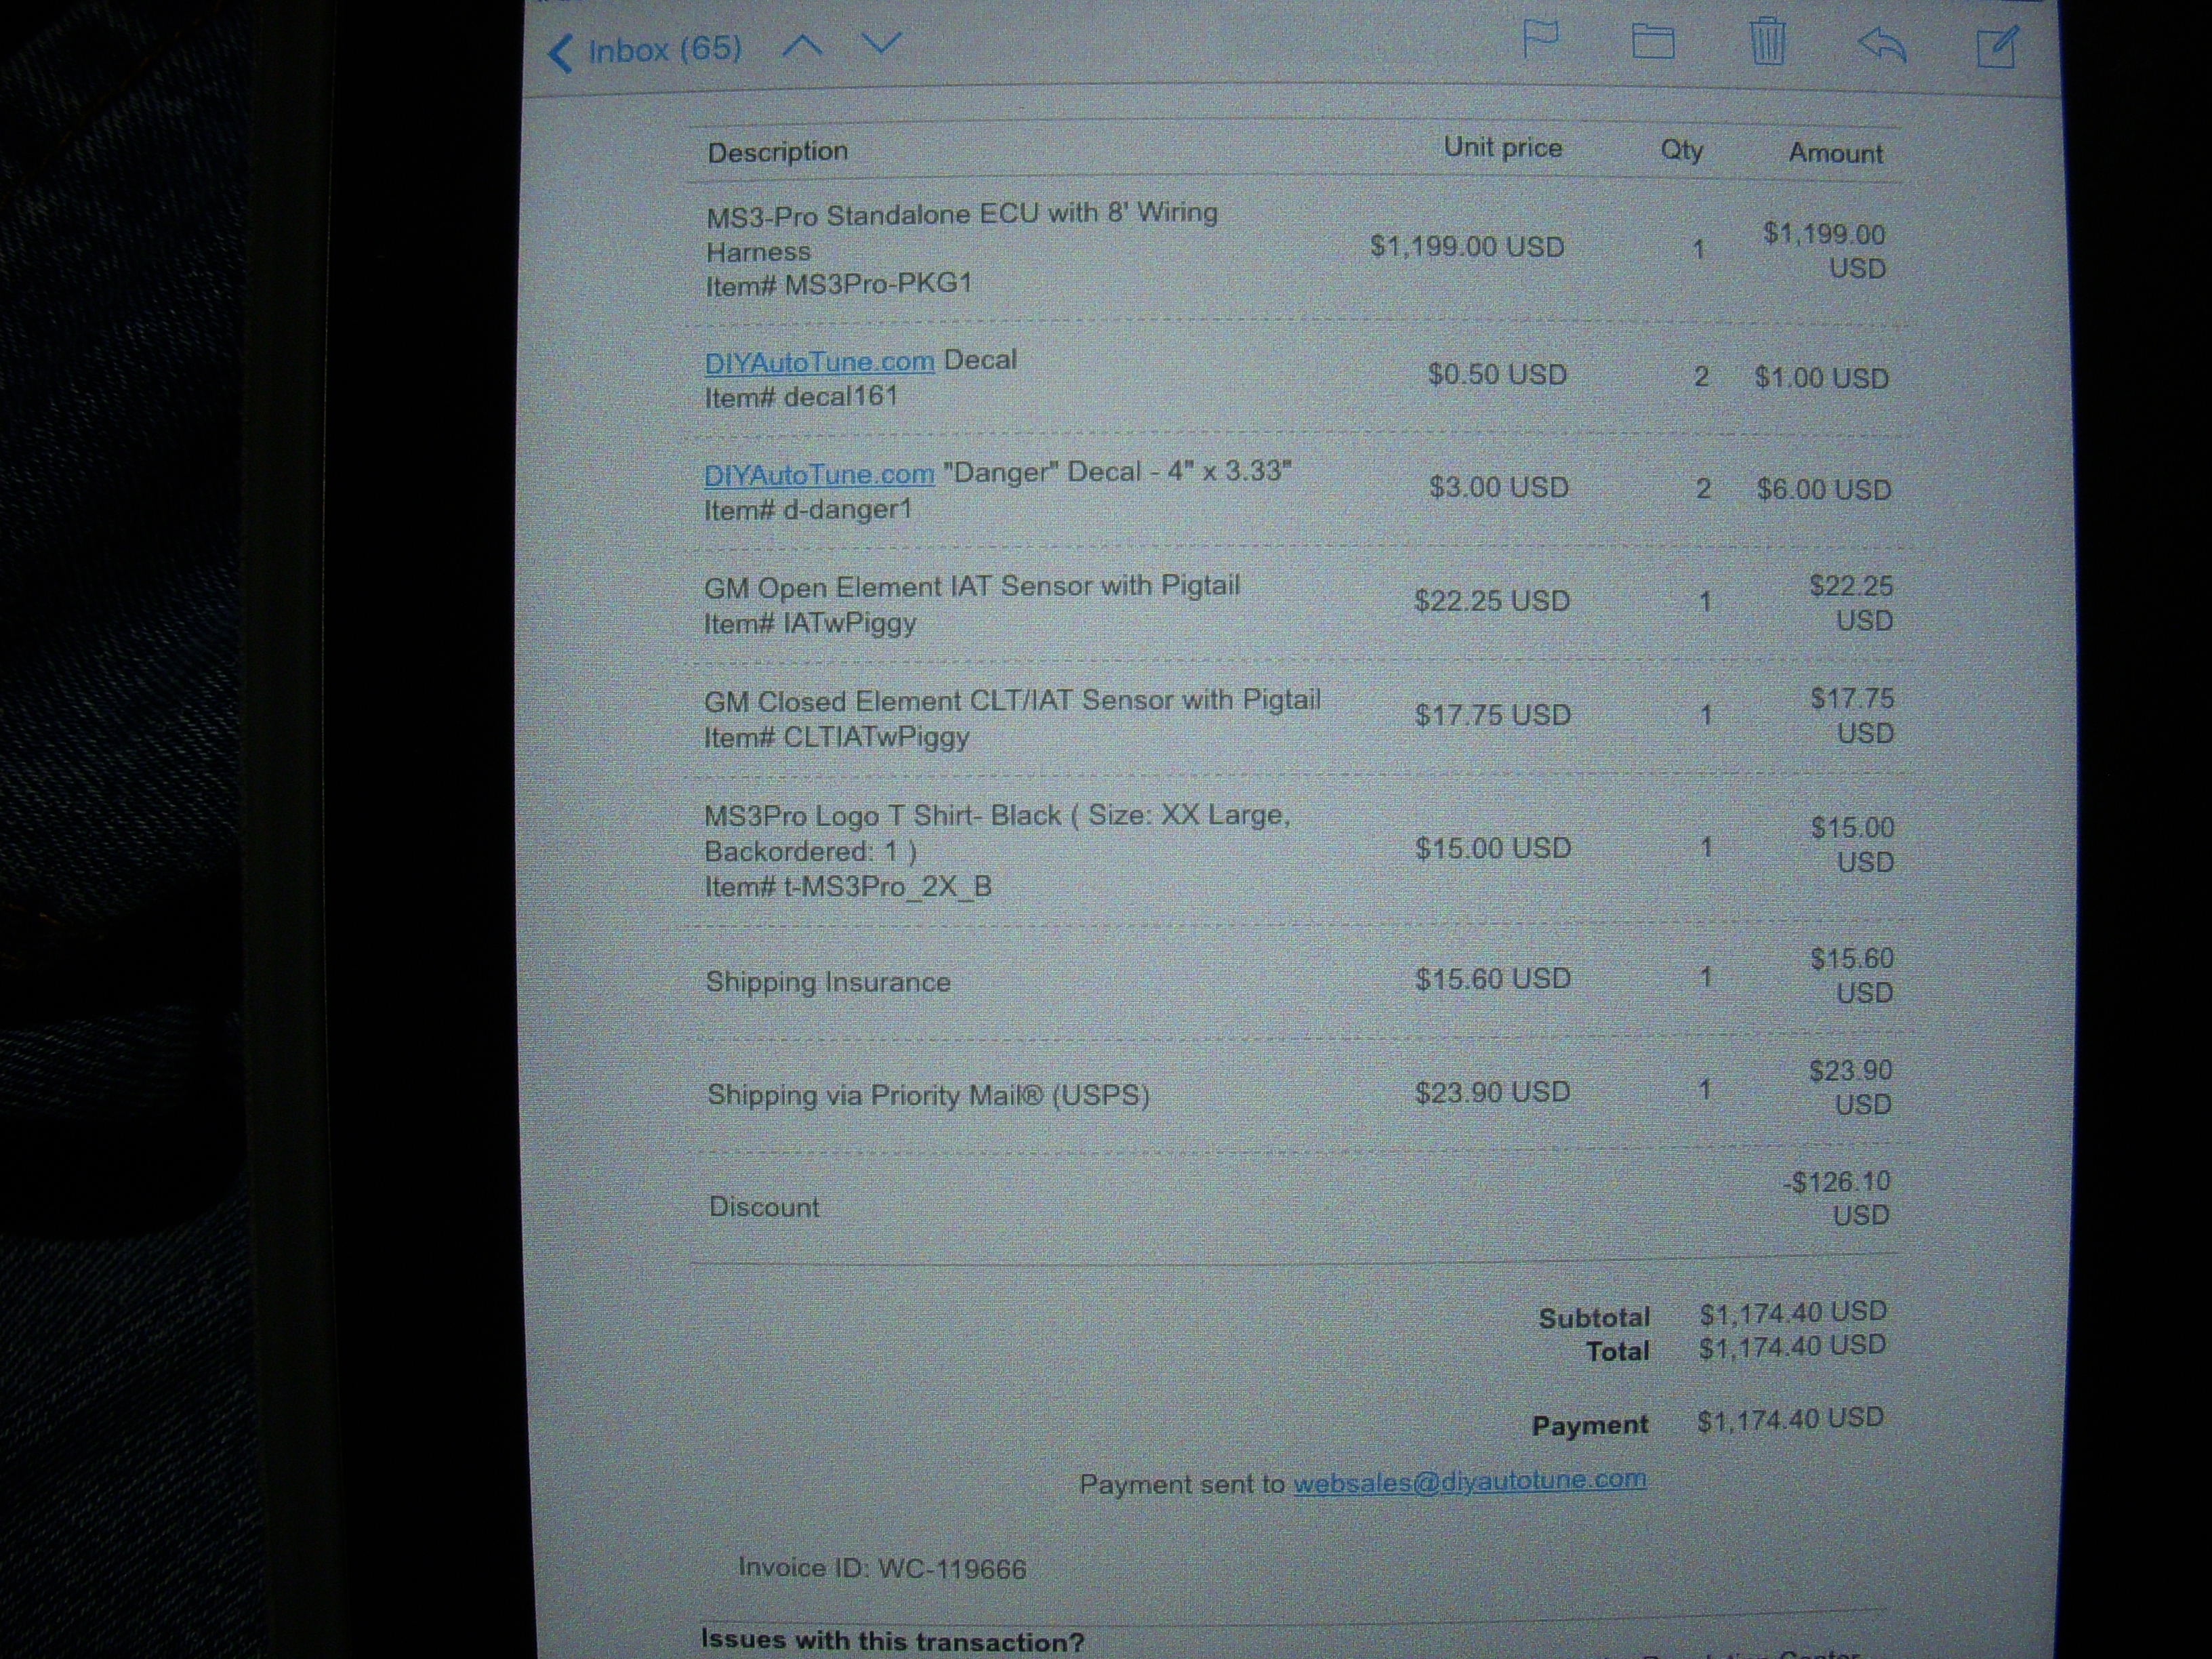
I have a seriously modified '06 2.5 Altima 4AT tranny w/spool sitting in the engine compartment and a 3100-stall TC, but... I think I would rather have a "normal" transmission in place while I'm breaking in the engine and then installing the MS3-PRO ecu system. Lots of driving required for all that.. Today I bought a 2006 Alty 4AT with 67K miles and will pick it up tomorrow, and stash in storage.
A bunch of under-the-hood photos of the Shark: (there won't be any A/C parts in there) How many mods can you find?
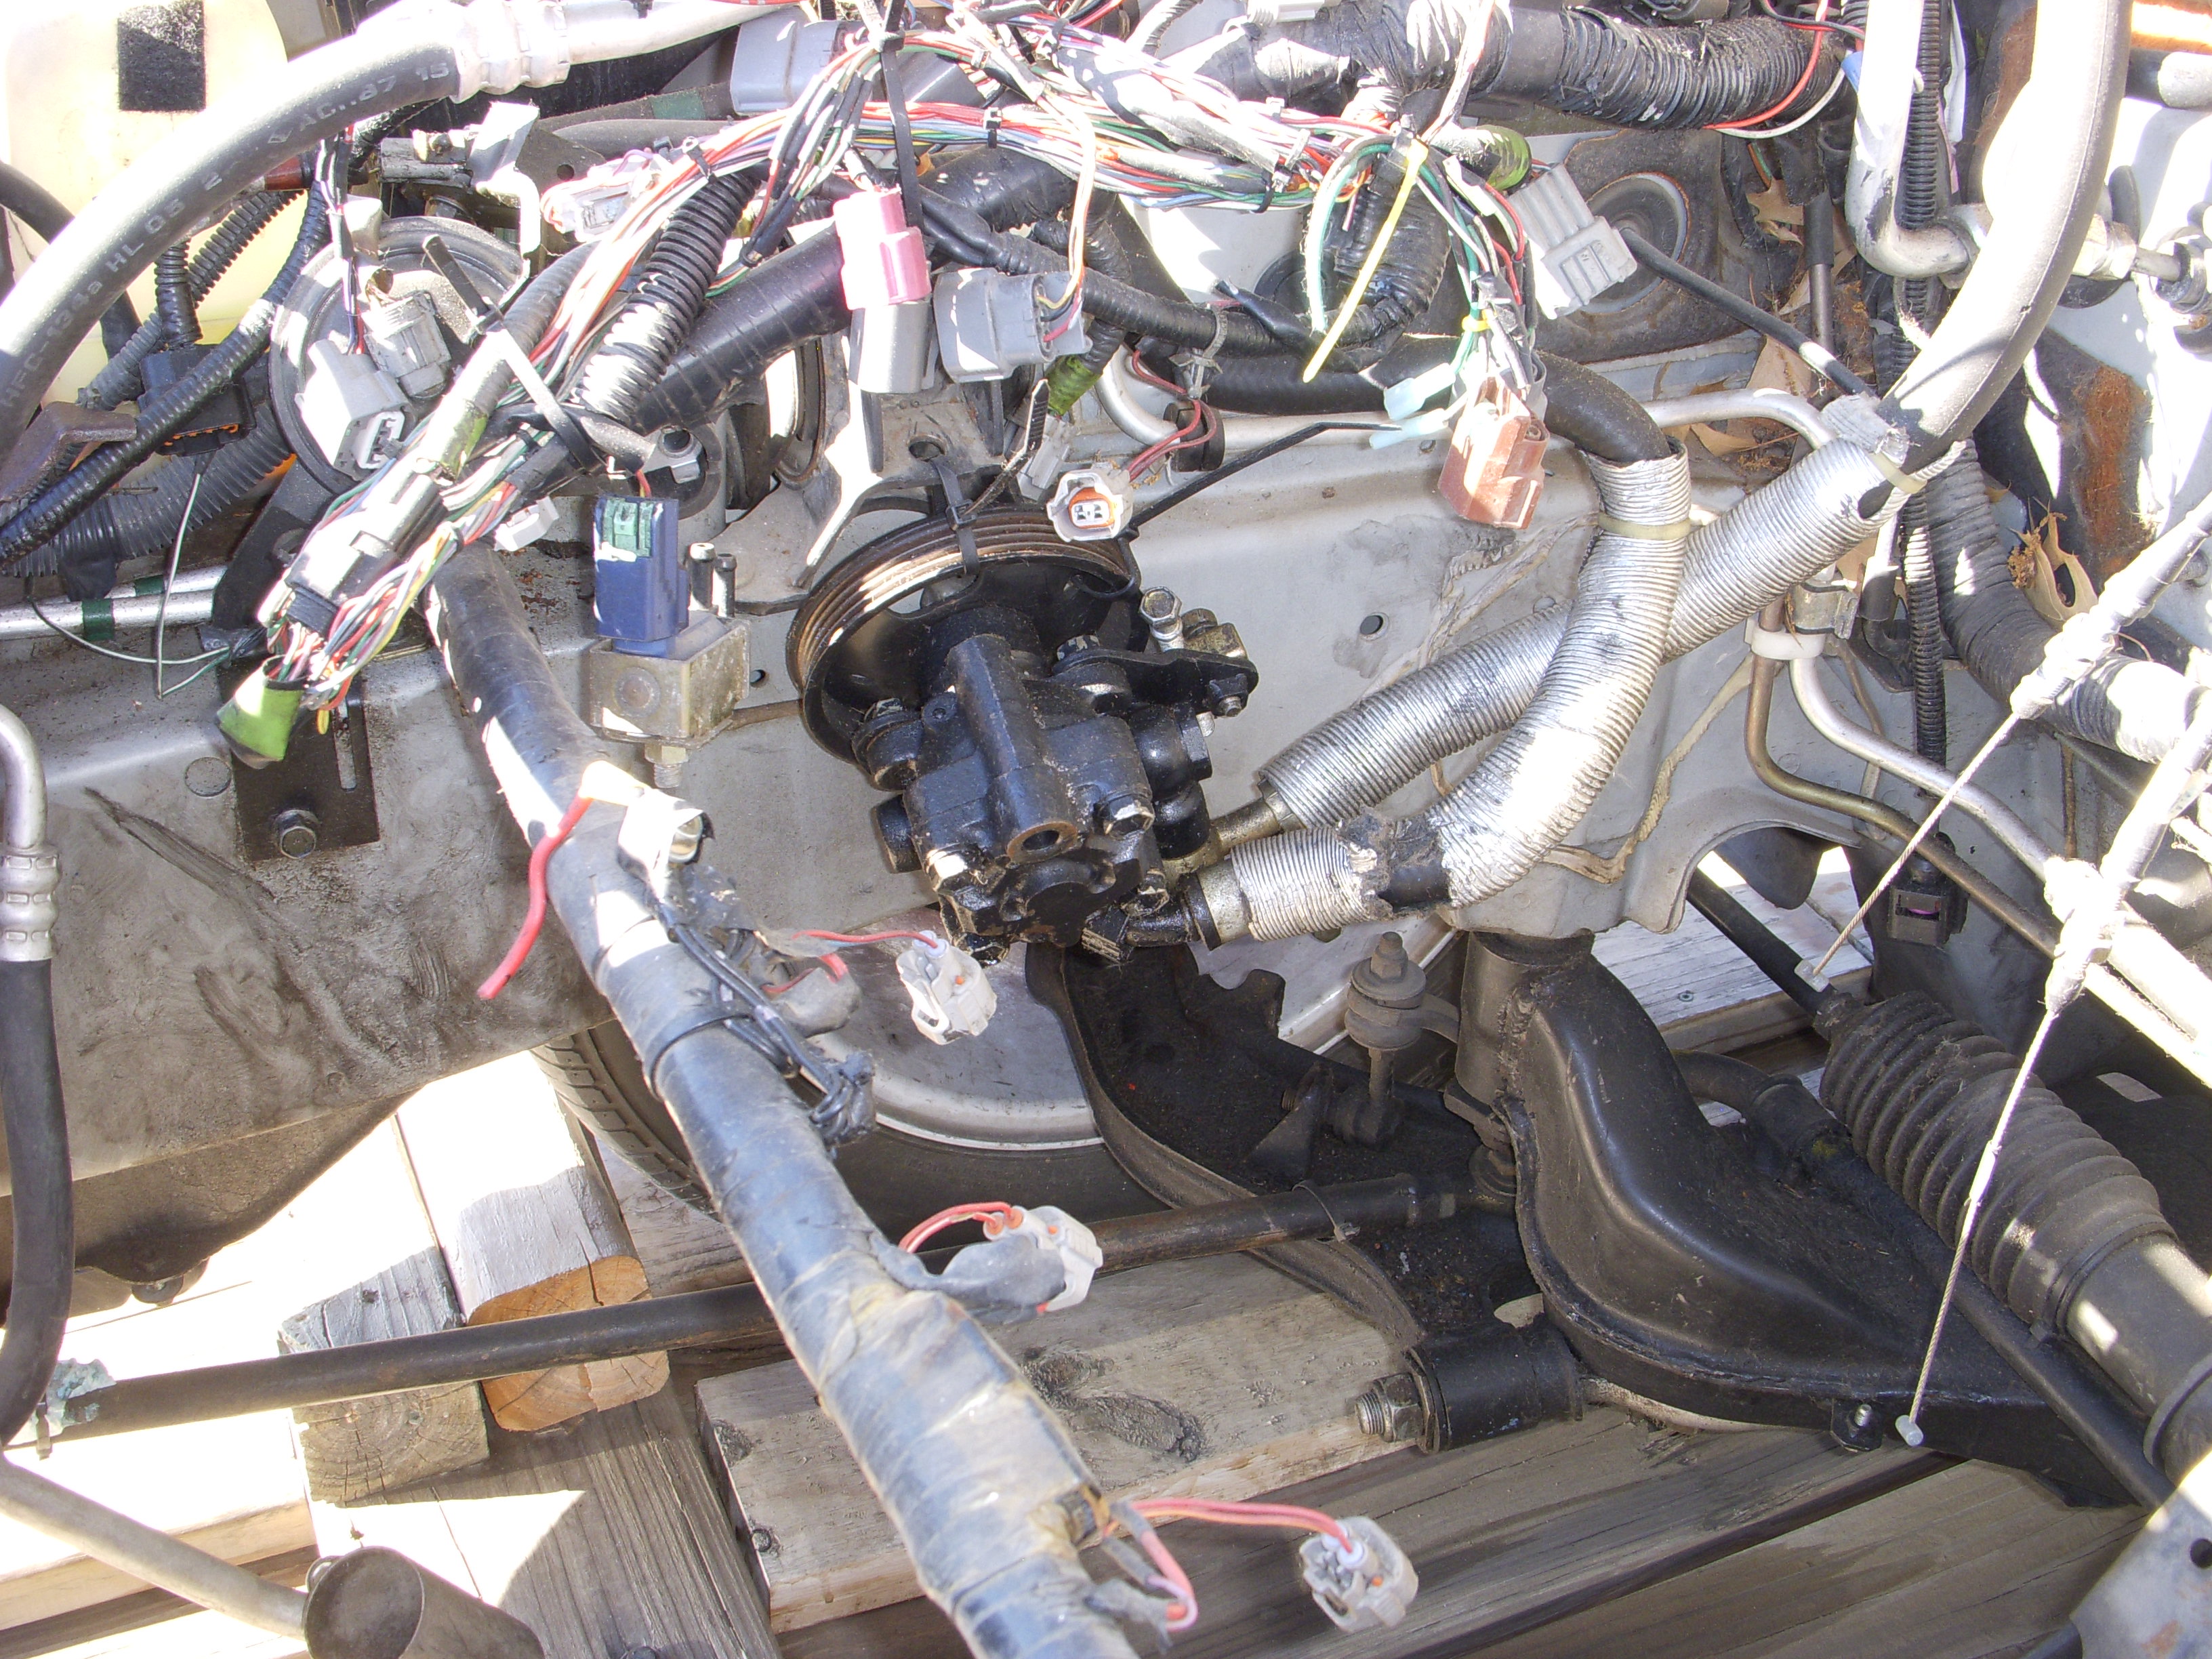
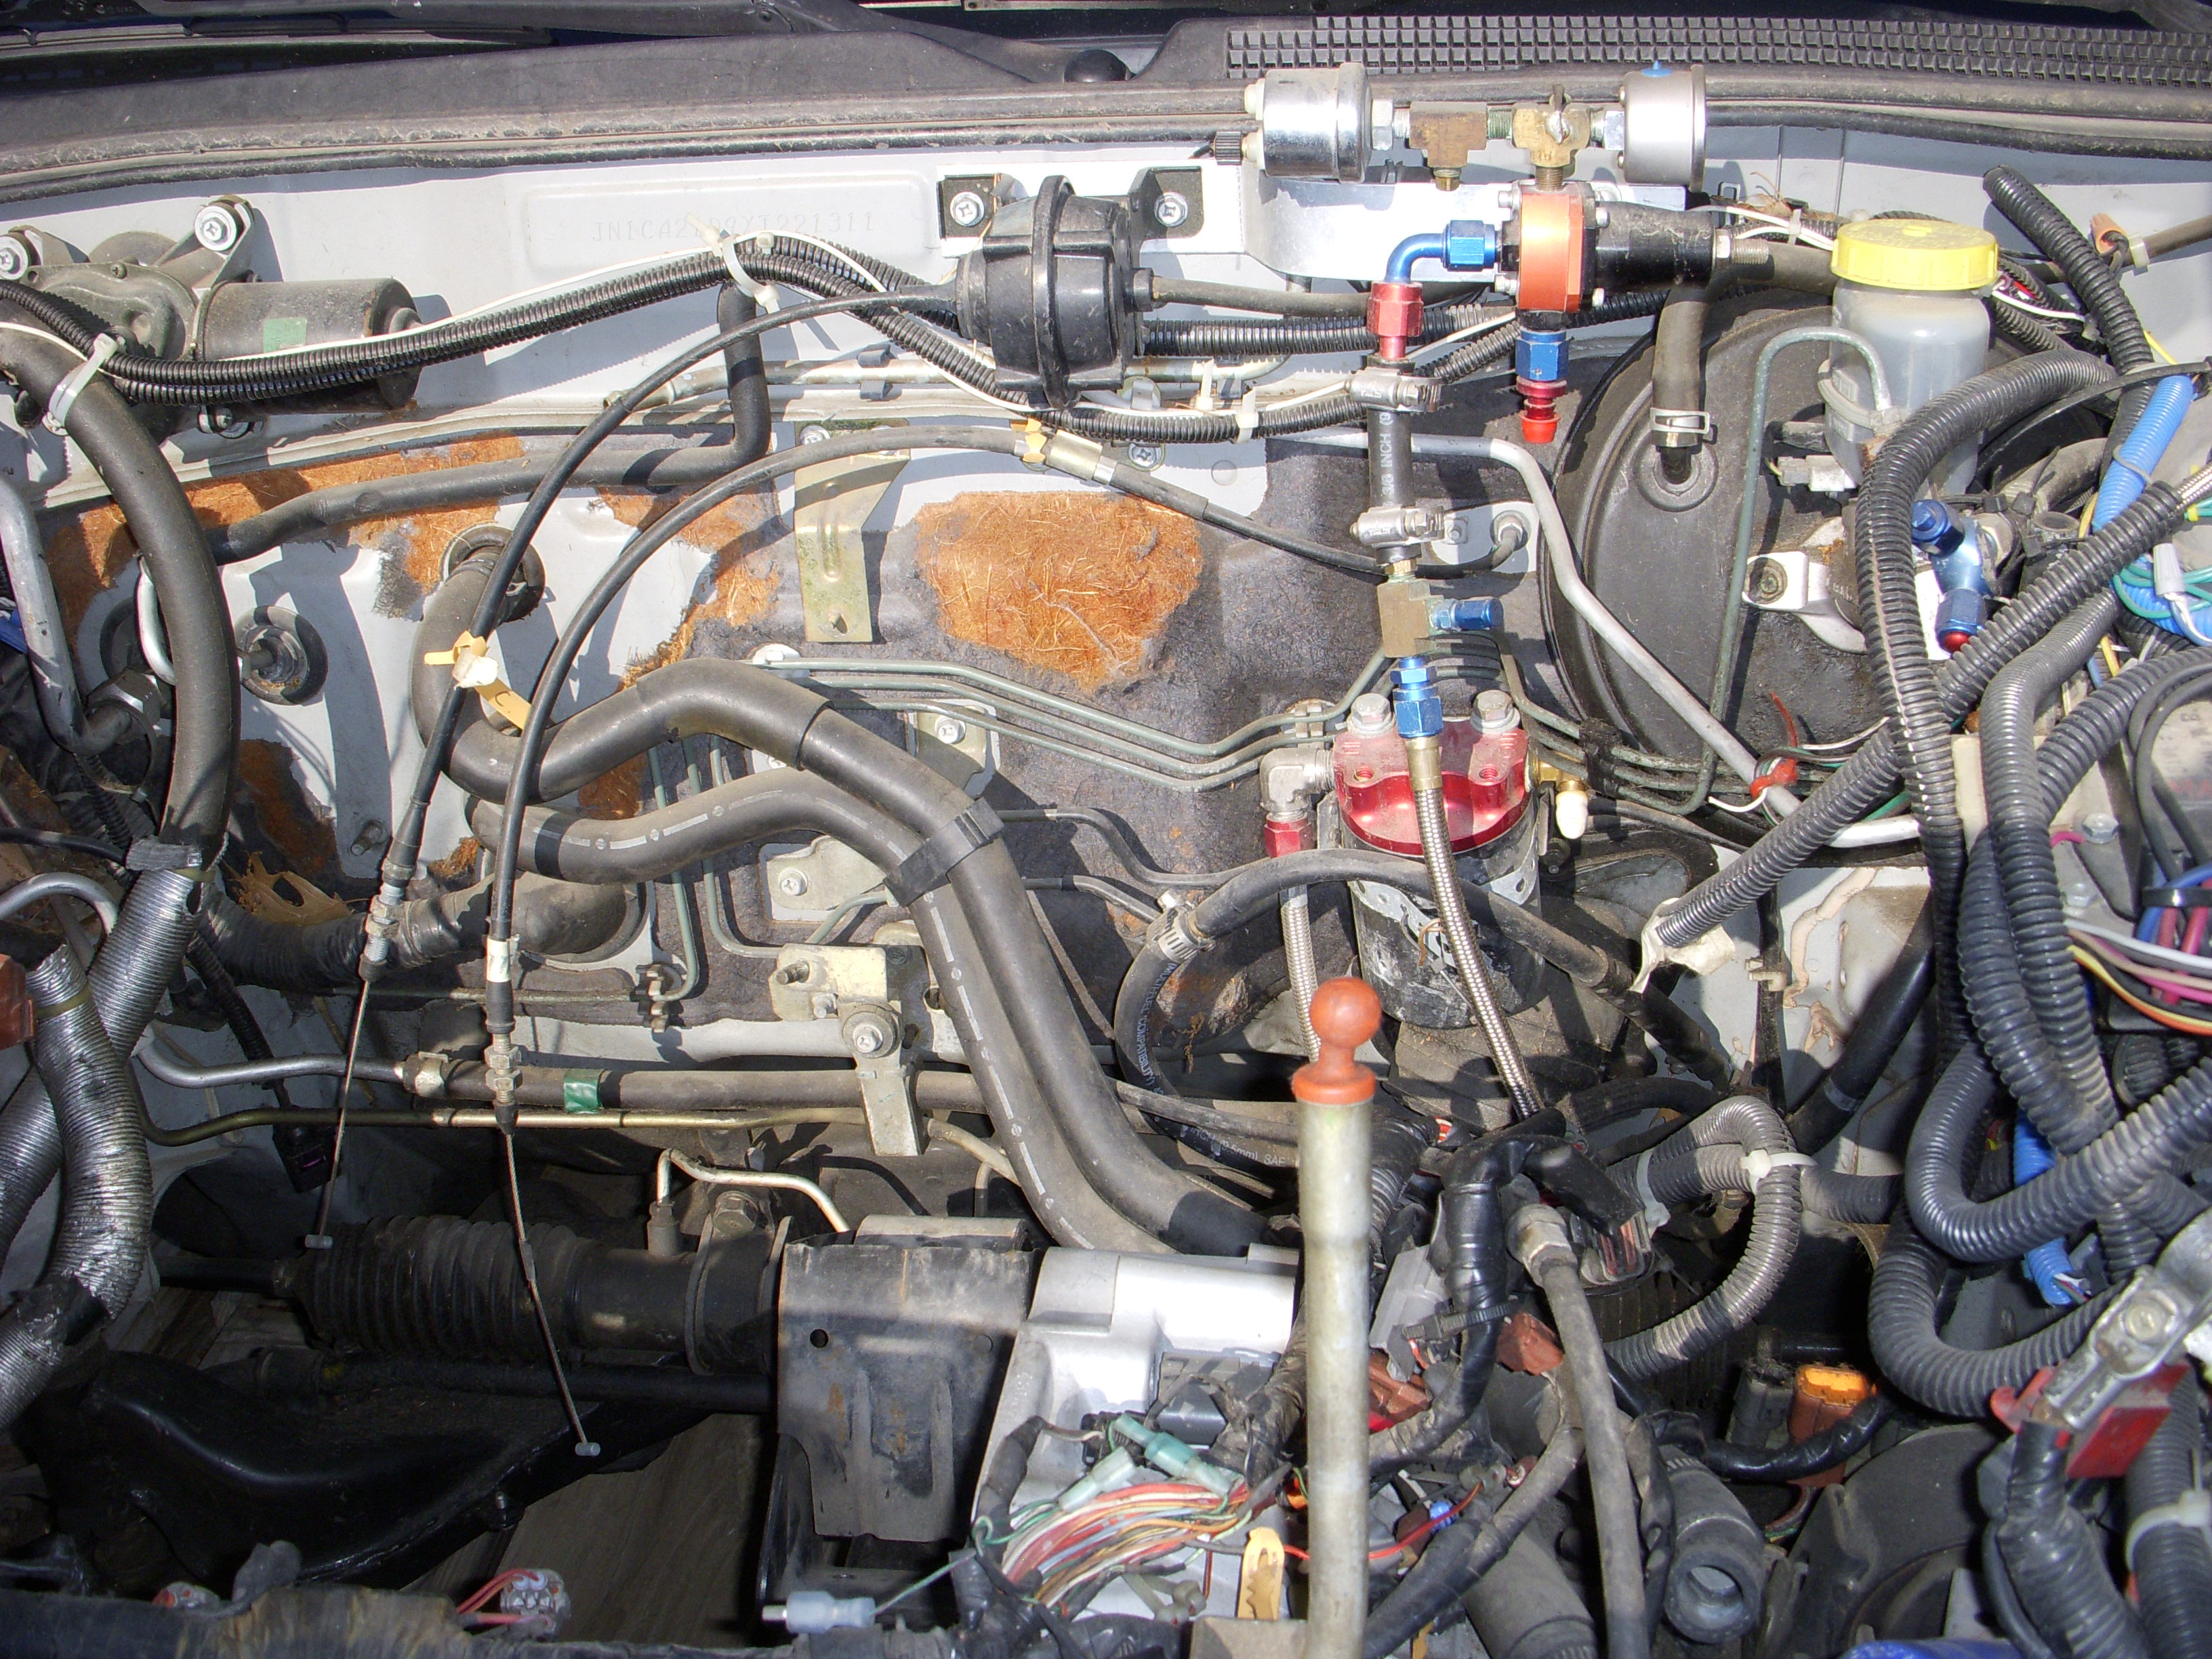

A bunch of under-the-hood photos of the Shark: (there won't be any A/C parts in there) How many mods can you find?


Last edited by grey99max; 01-16-2017 at 06:33 PM.
09-15-2016, 07:00 PM
#1818
LandShark has Cosworth
Thread Starter
iTrader: (12)
Join Date: Jan 2004
Location: Topeka, KS
Posts: 4,327
Some More Ketsup - er, Catchup....
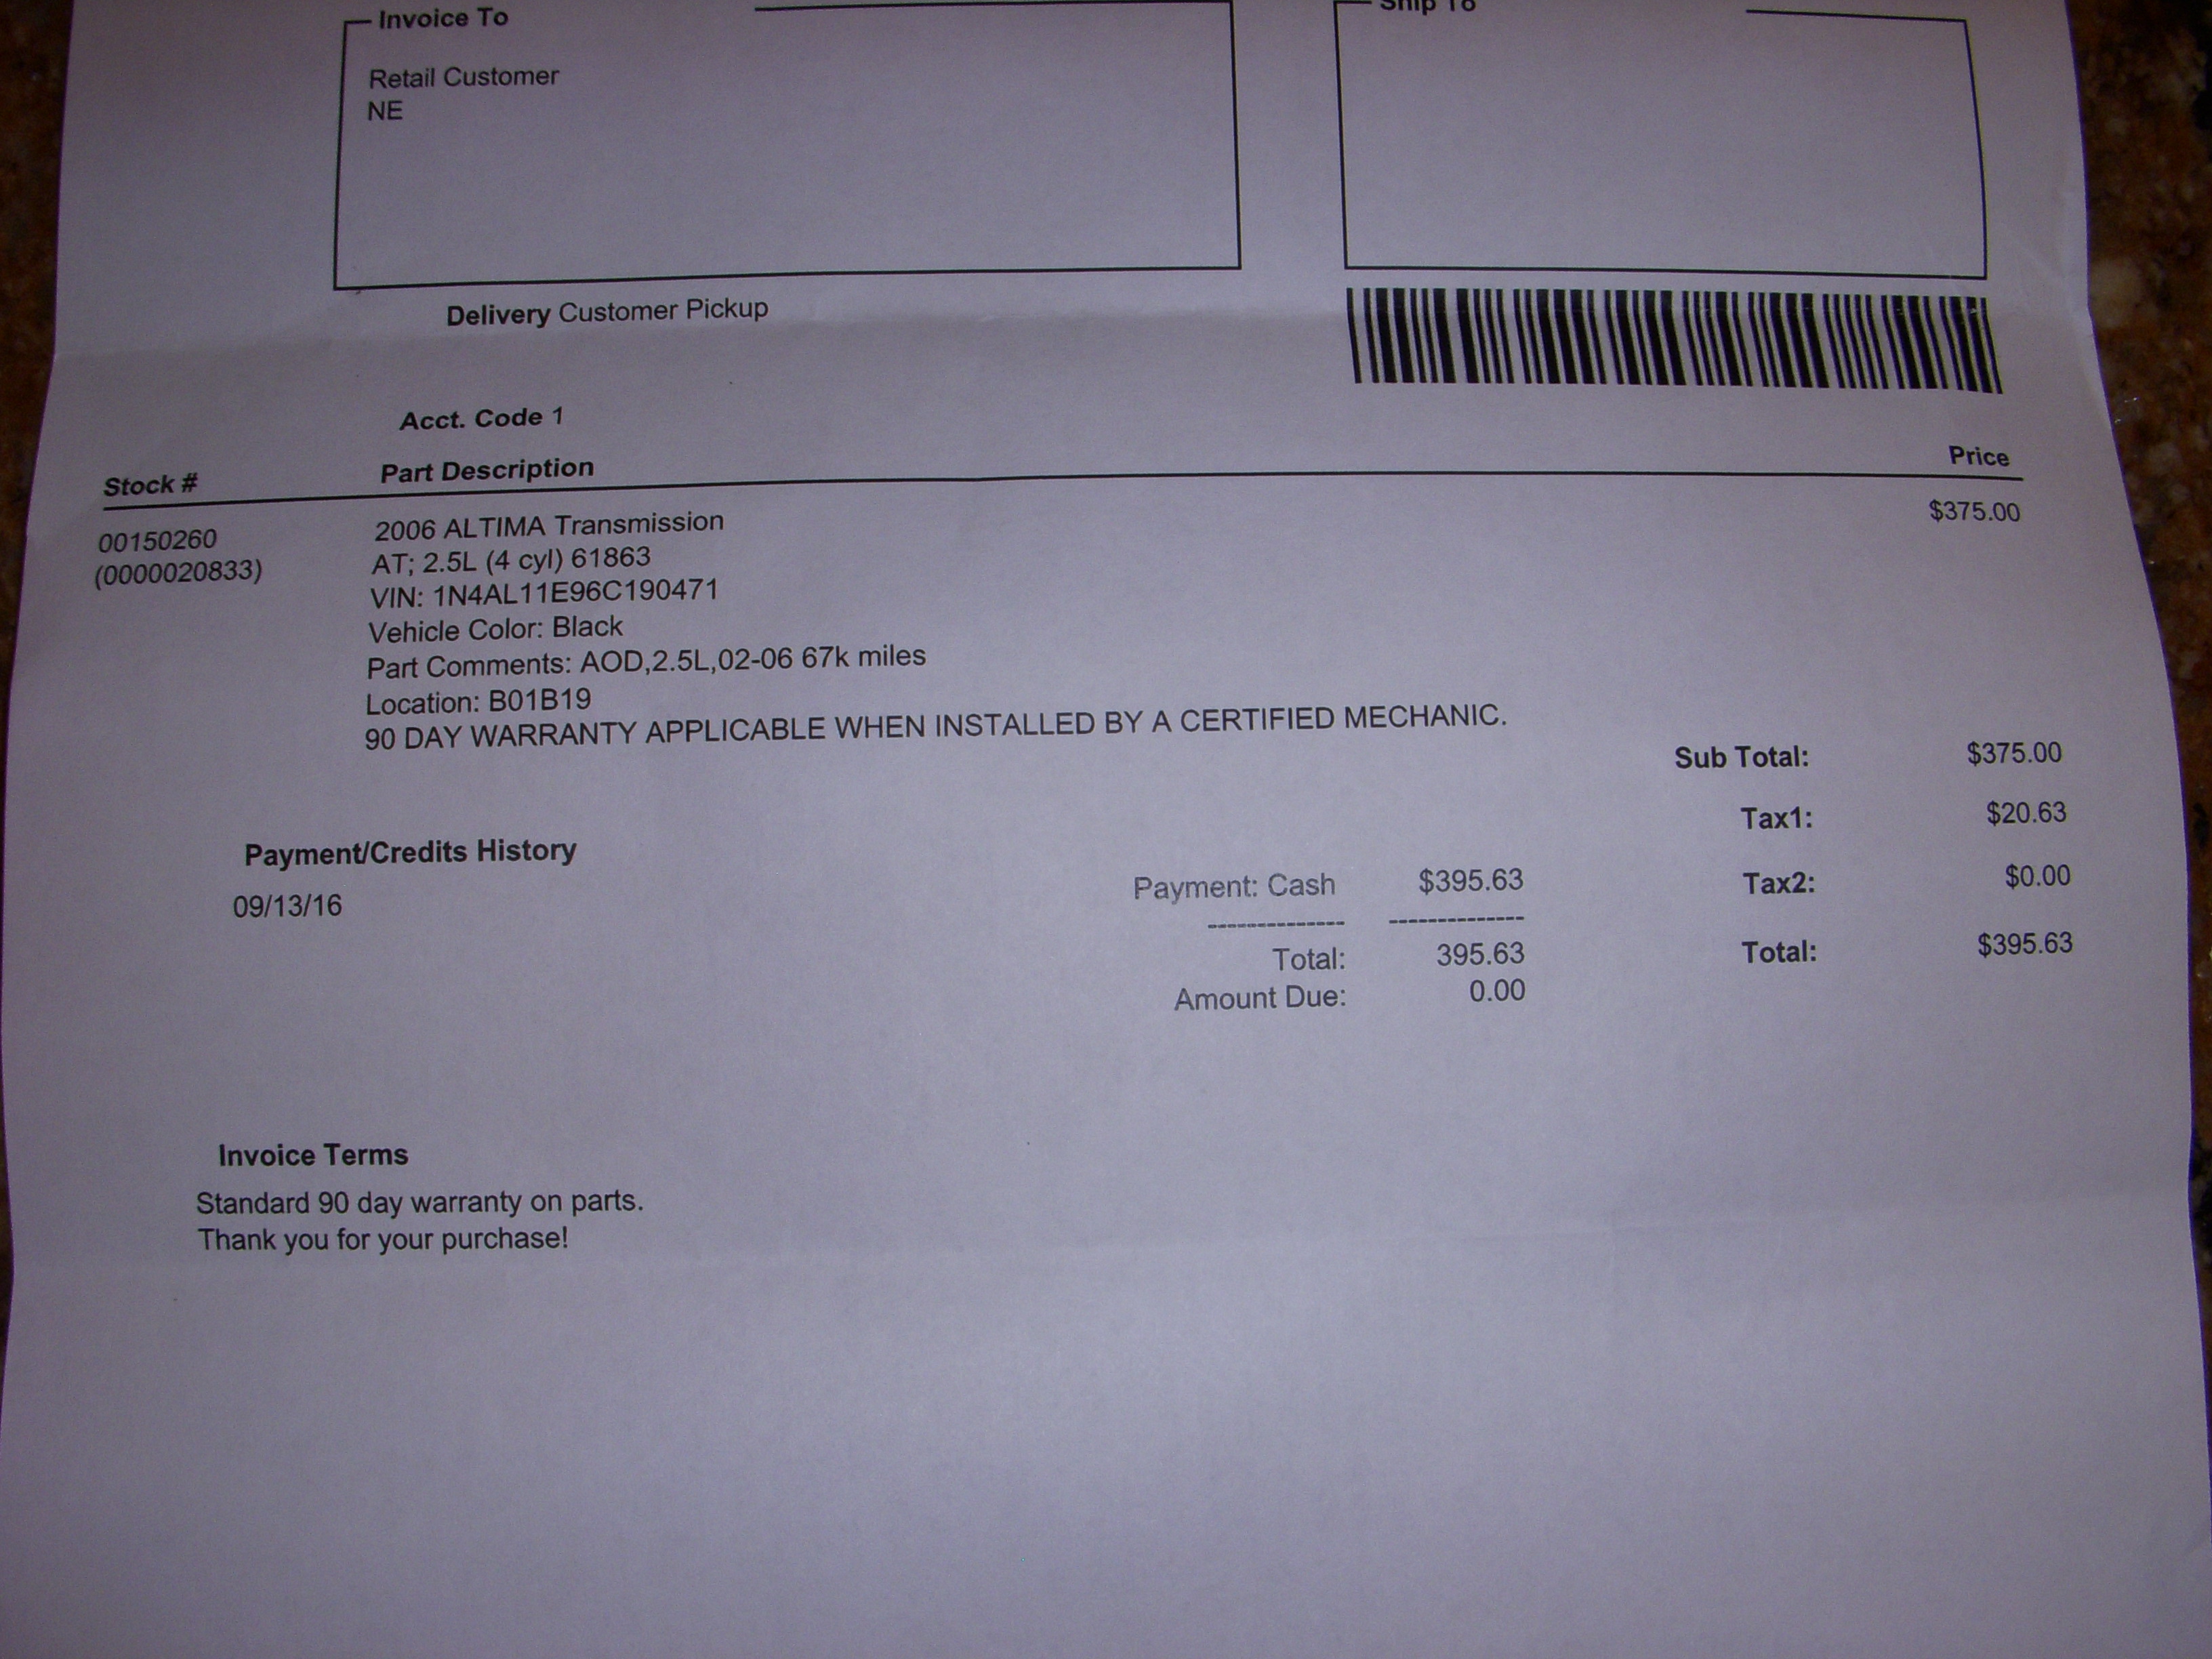
I picked up the 2006 Altima 4AT transmission last Tuesday - a 205-mile round trip. Pix of receipt attached - less than $400 for this 4AT w/67K miles. This was the last year these transmissions were sold, that I can tell. This transmission, with the bellhousing swapped for a Maxima and the newer wiring cable installed, will work in all 4AT FWD Nissans from 1993 thru 2006. Neat, huh? And the 2005-2006 Altima trannys have that magic 4.4 ratio final drive gear.
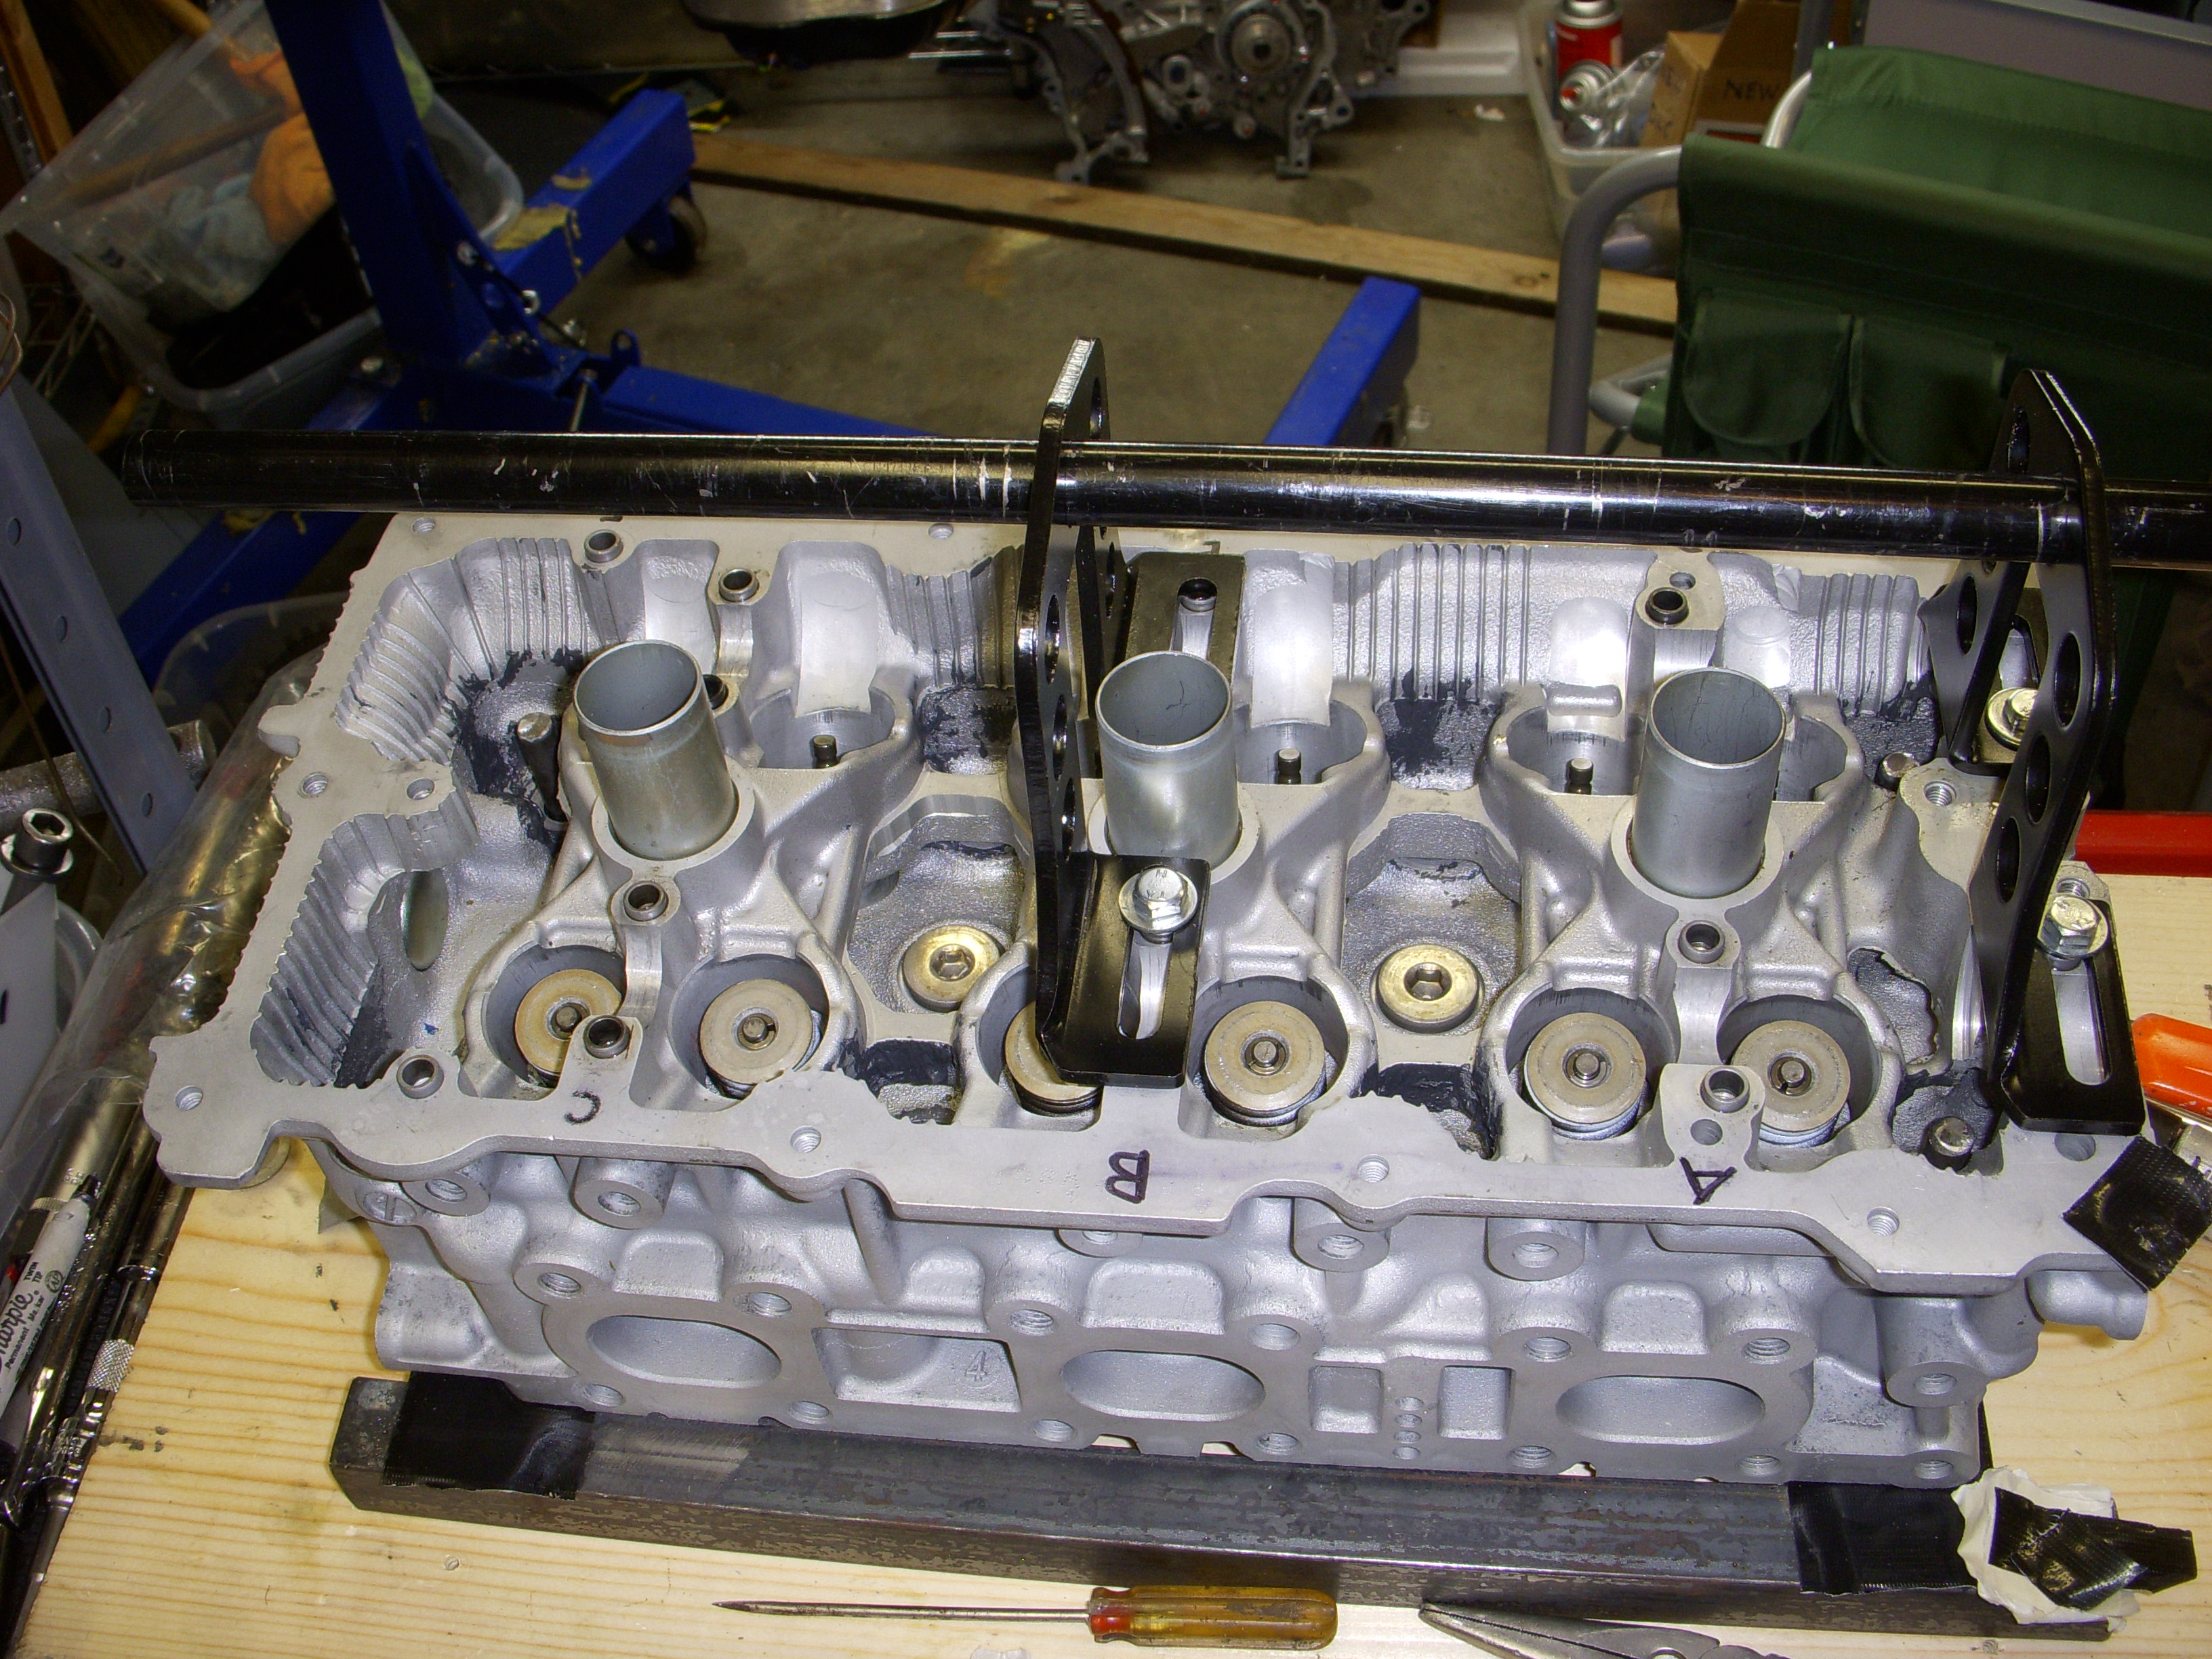
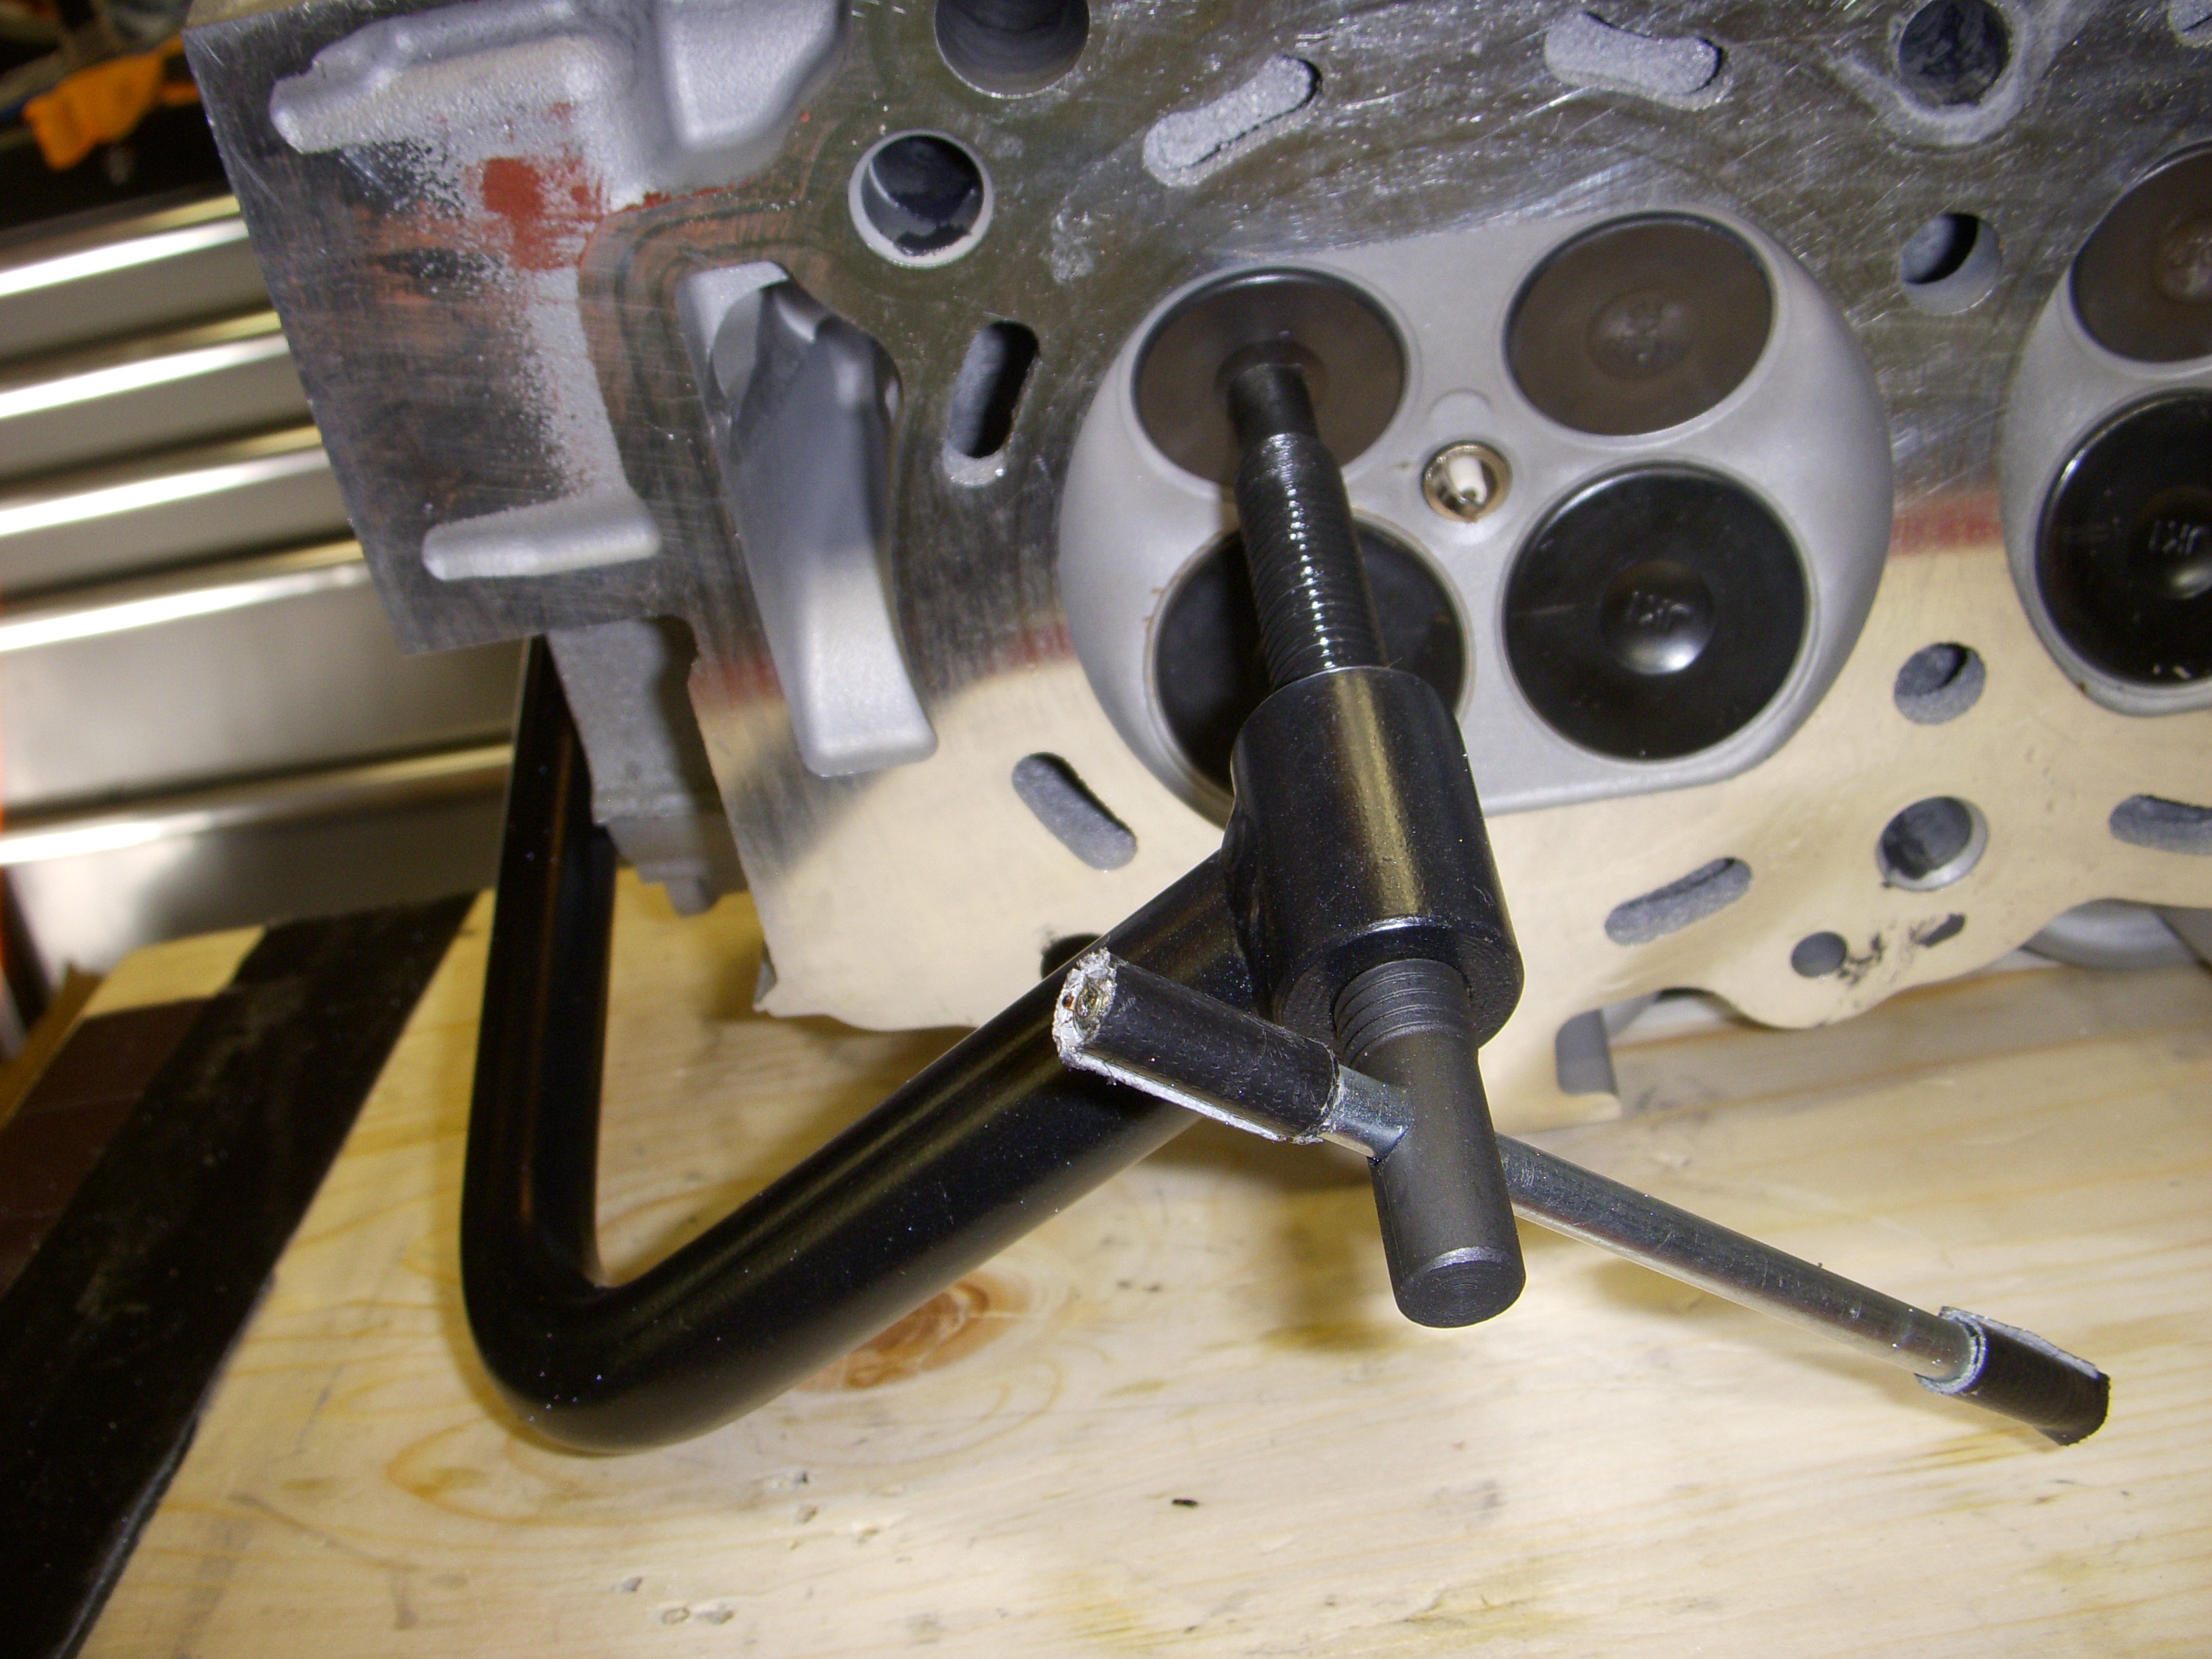
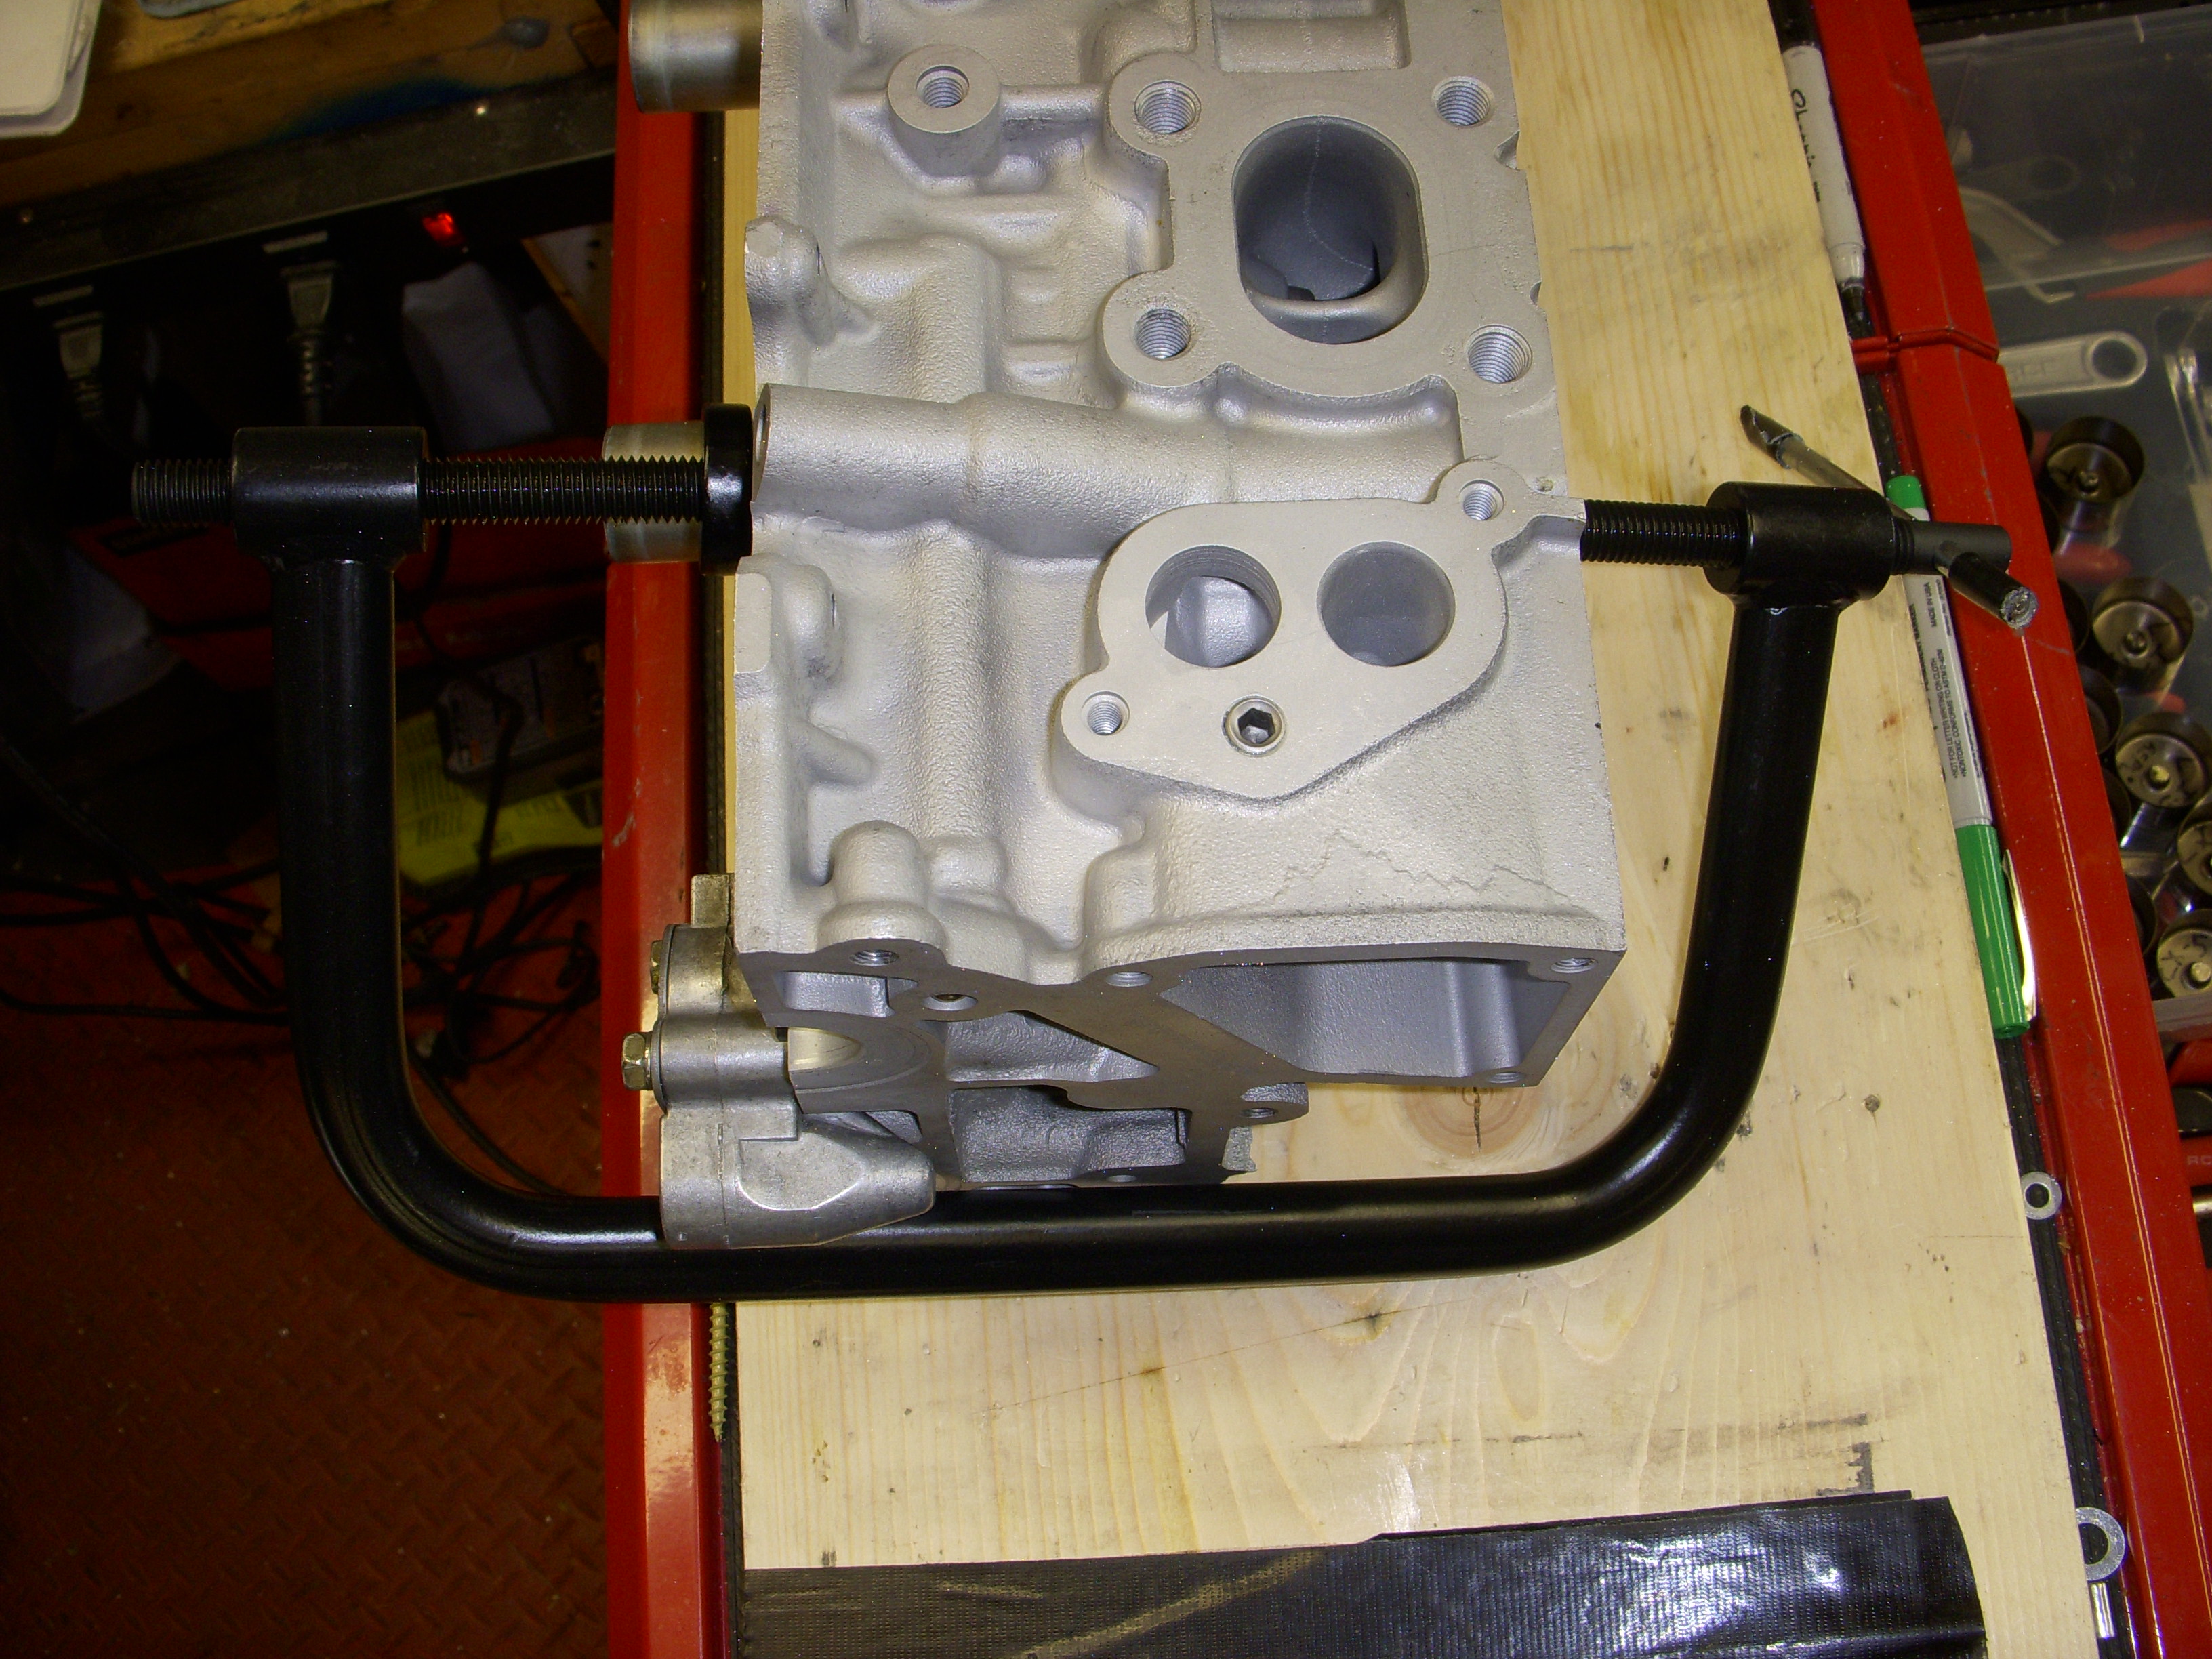
Today I built a support frame to hold a HR head firmly while installing the special HR valve springs, cause them suckars are STOUT !! I used some 3/8" steel rod to fit into the head bolt holes (head bolts are 11mm), some flat 1/8" x 1" steel, and 1" angle steel. I got to play with my Eastwood MIG welder and cutoff tool and a grinder. A whole afternoon of playing in the garage....
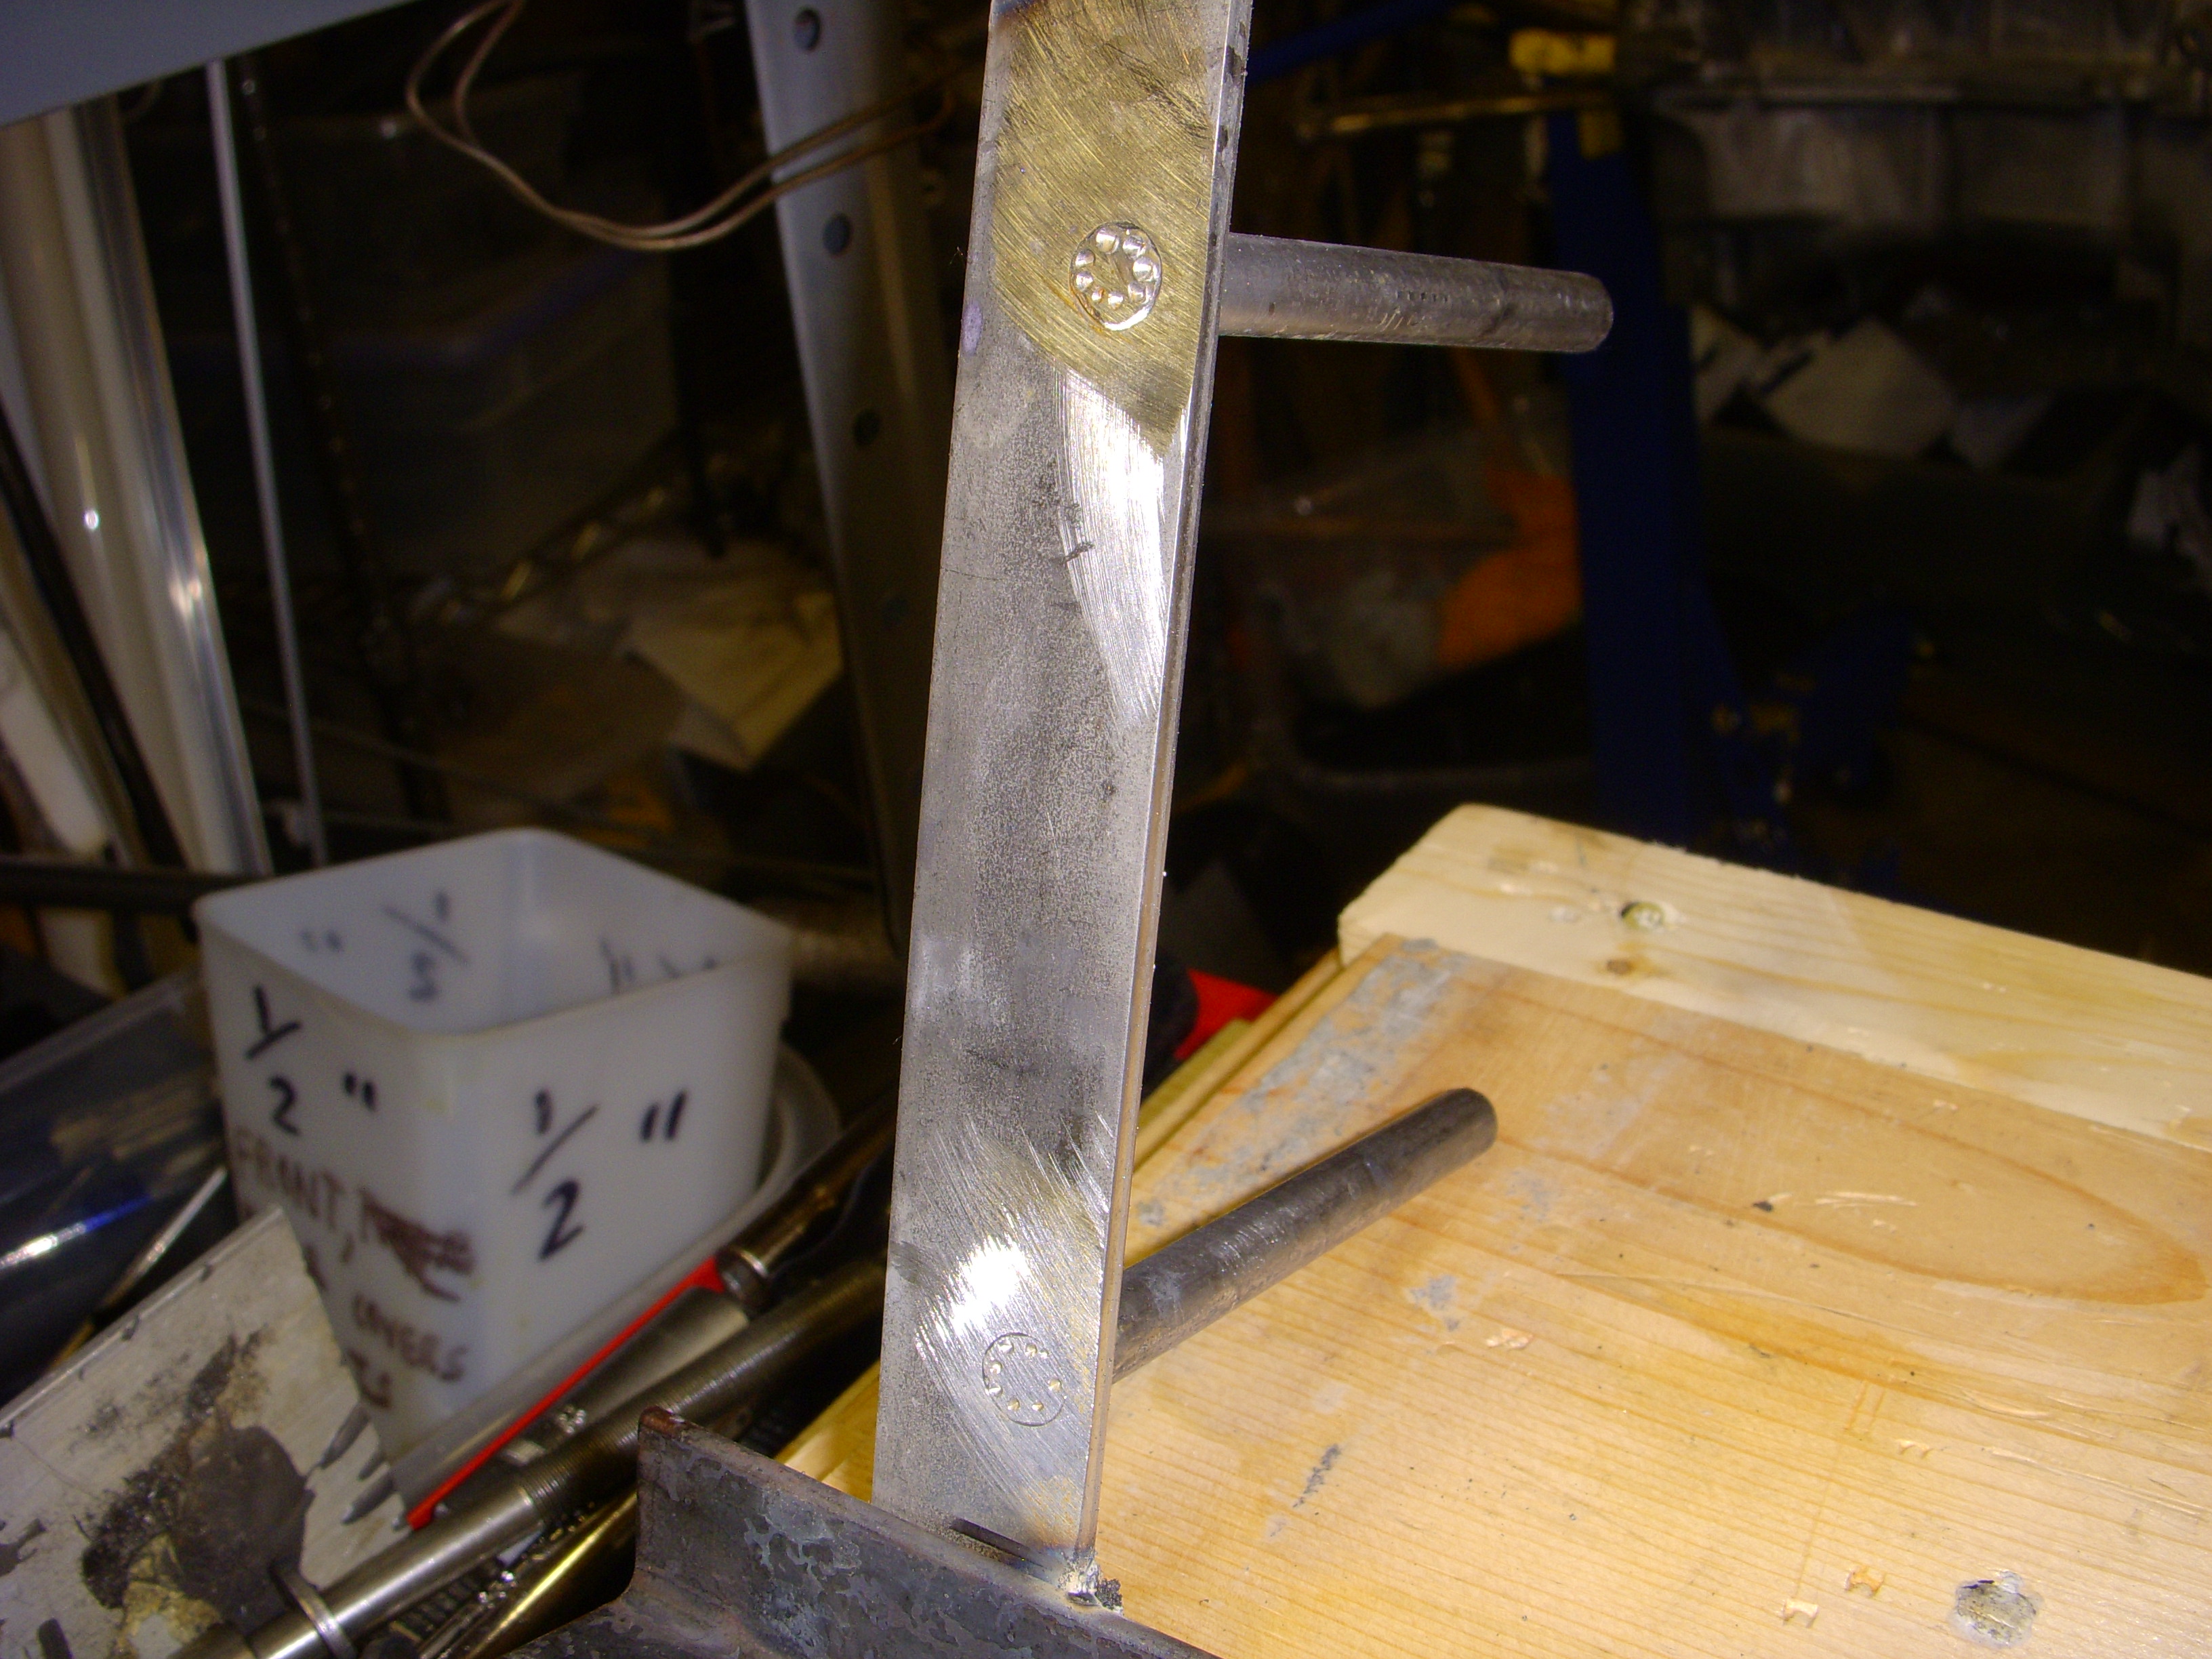
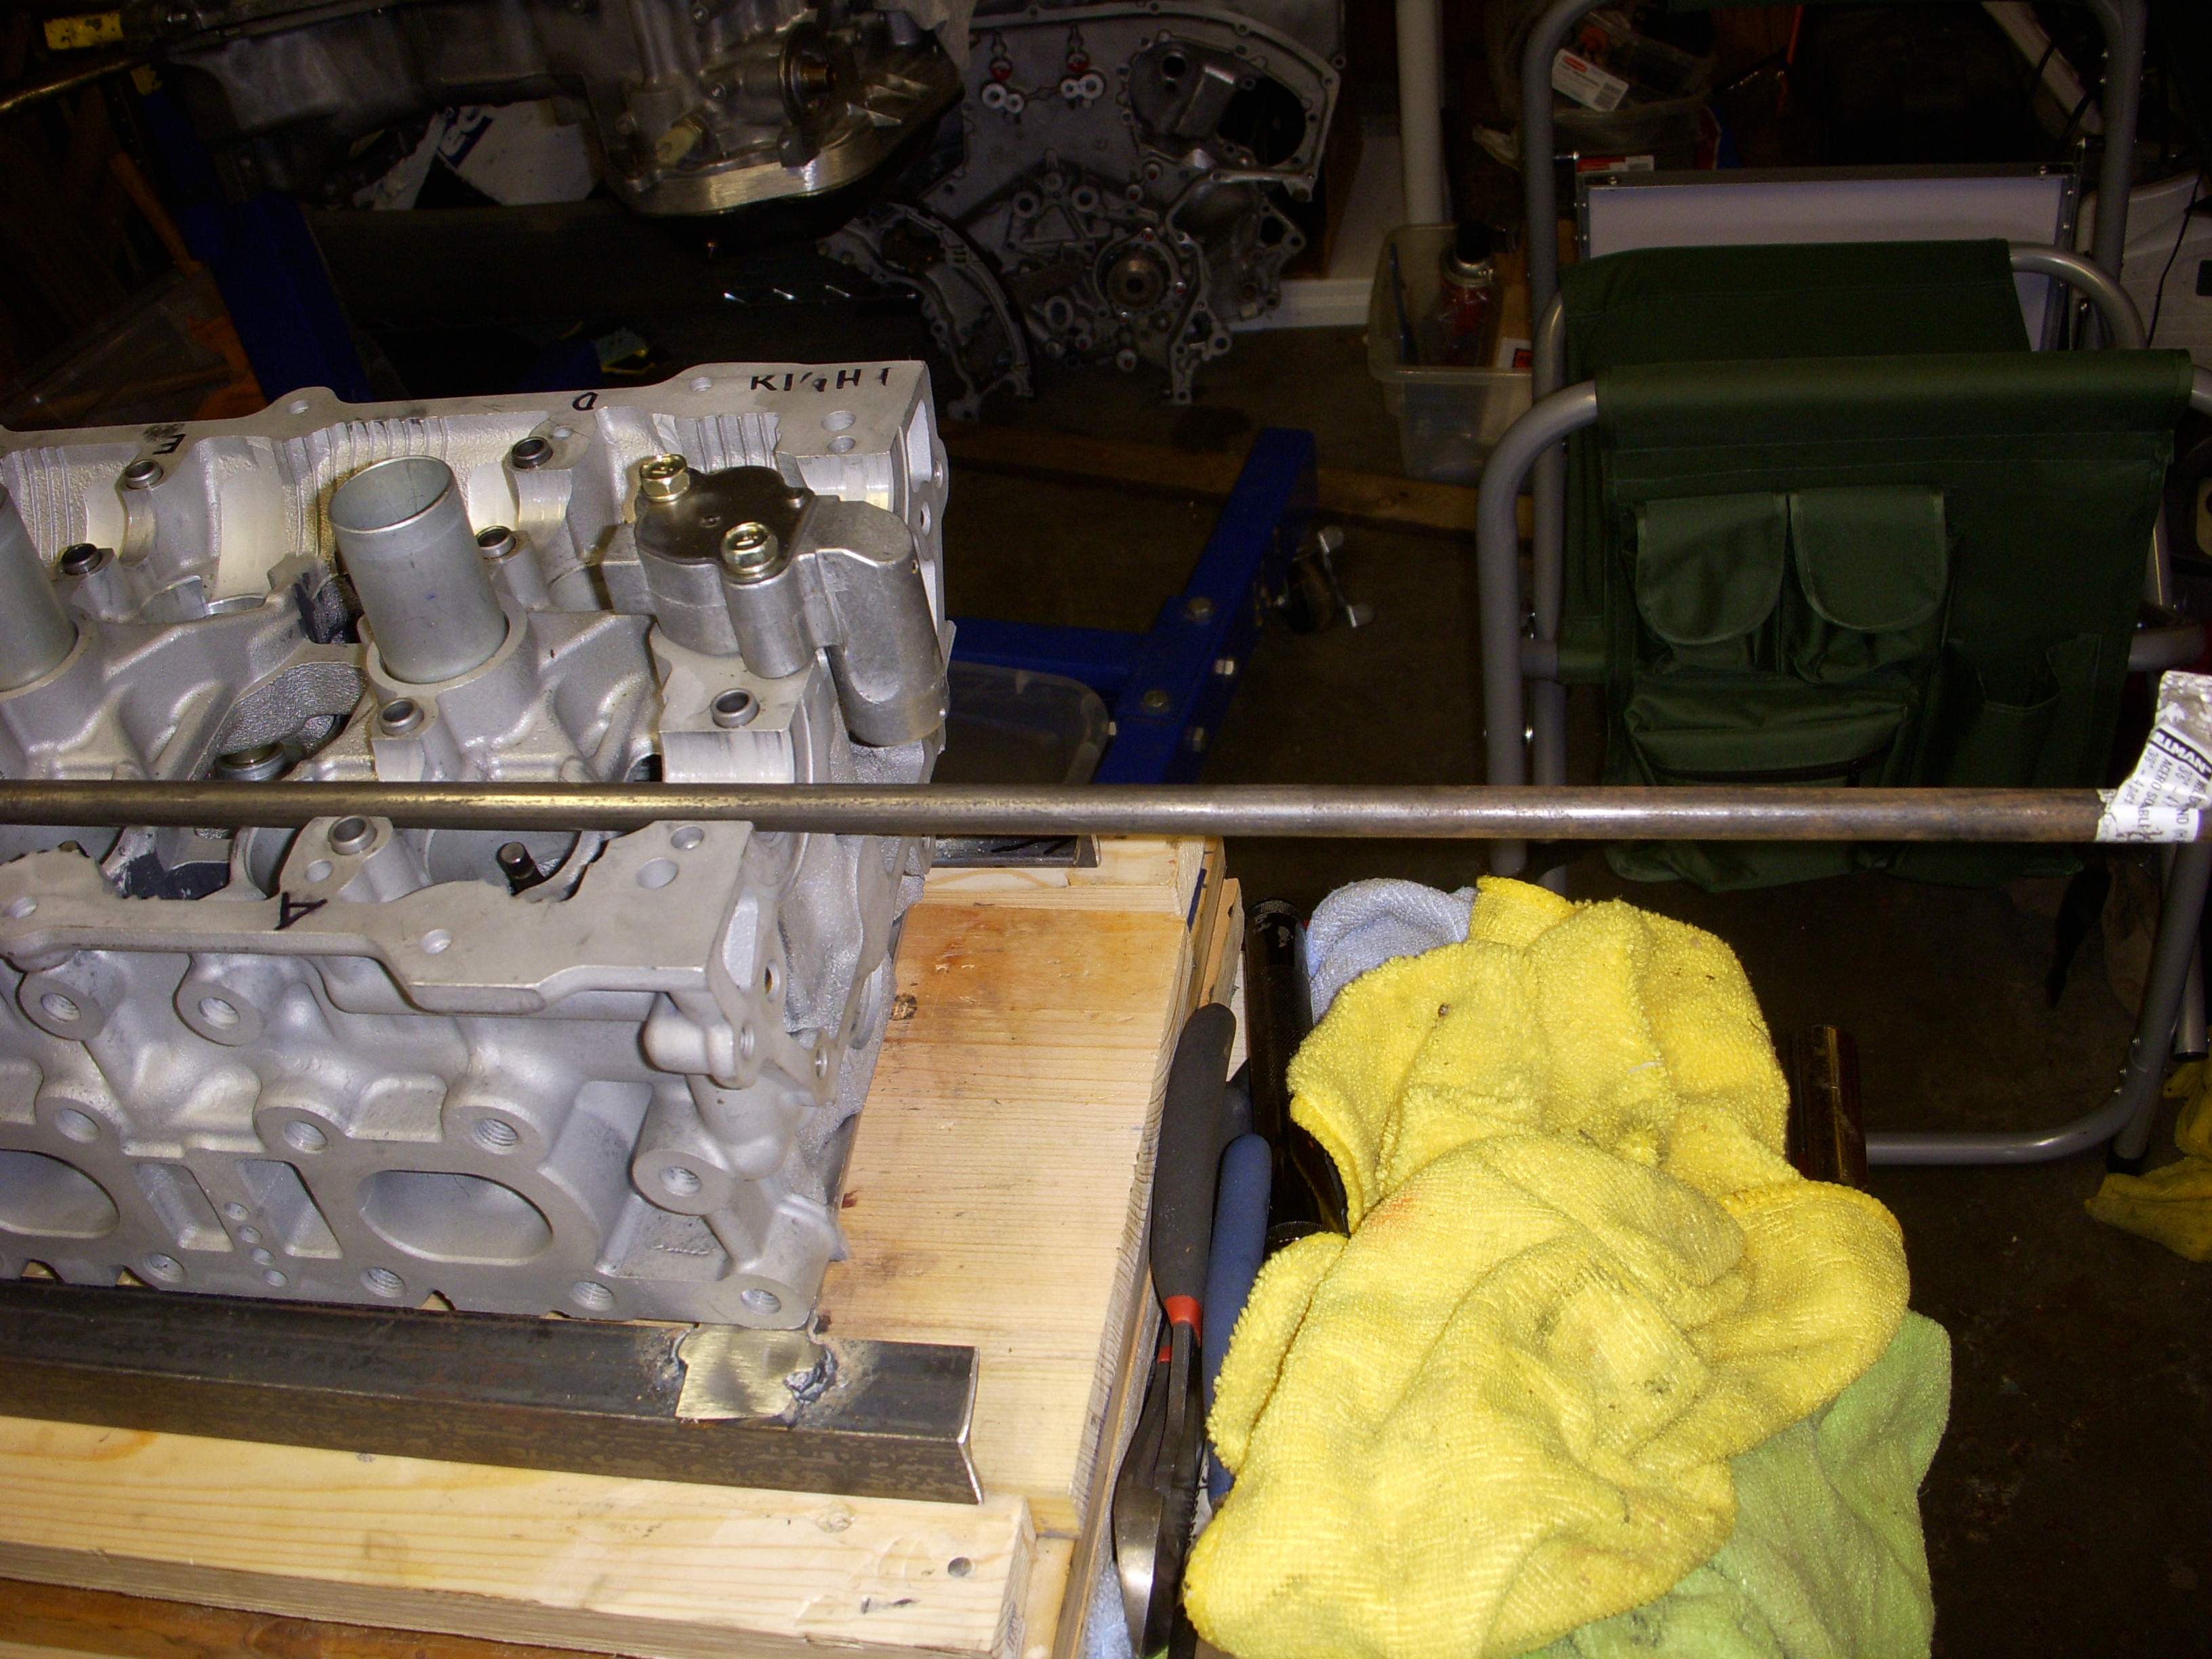
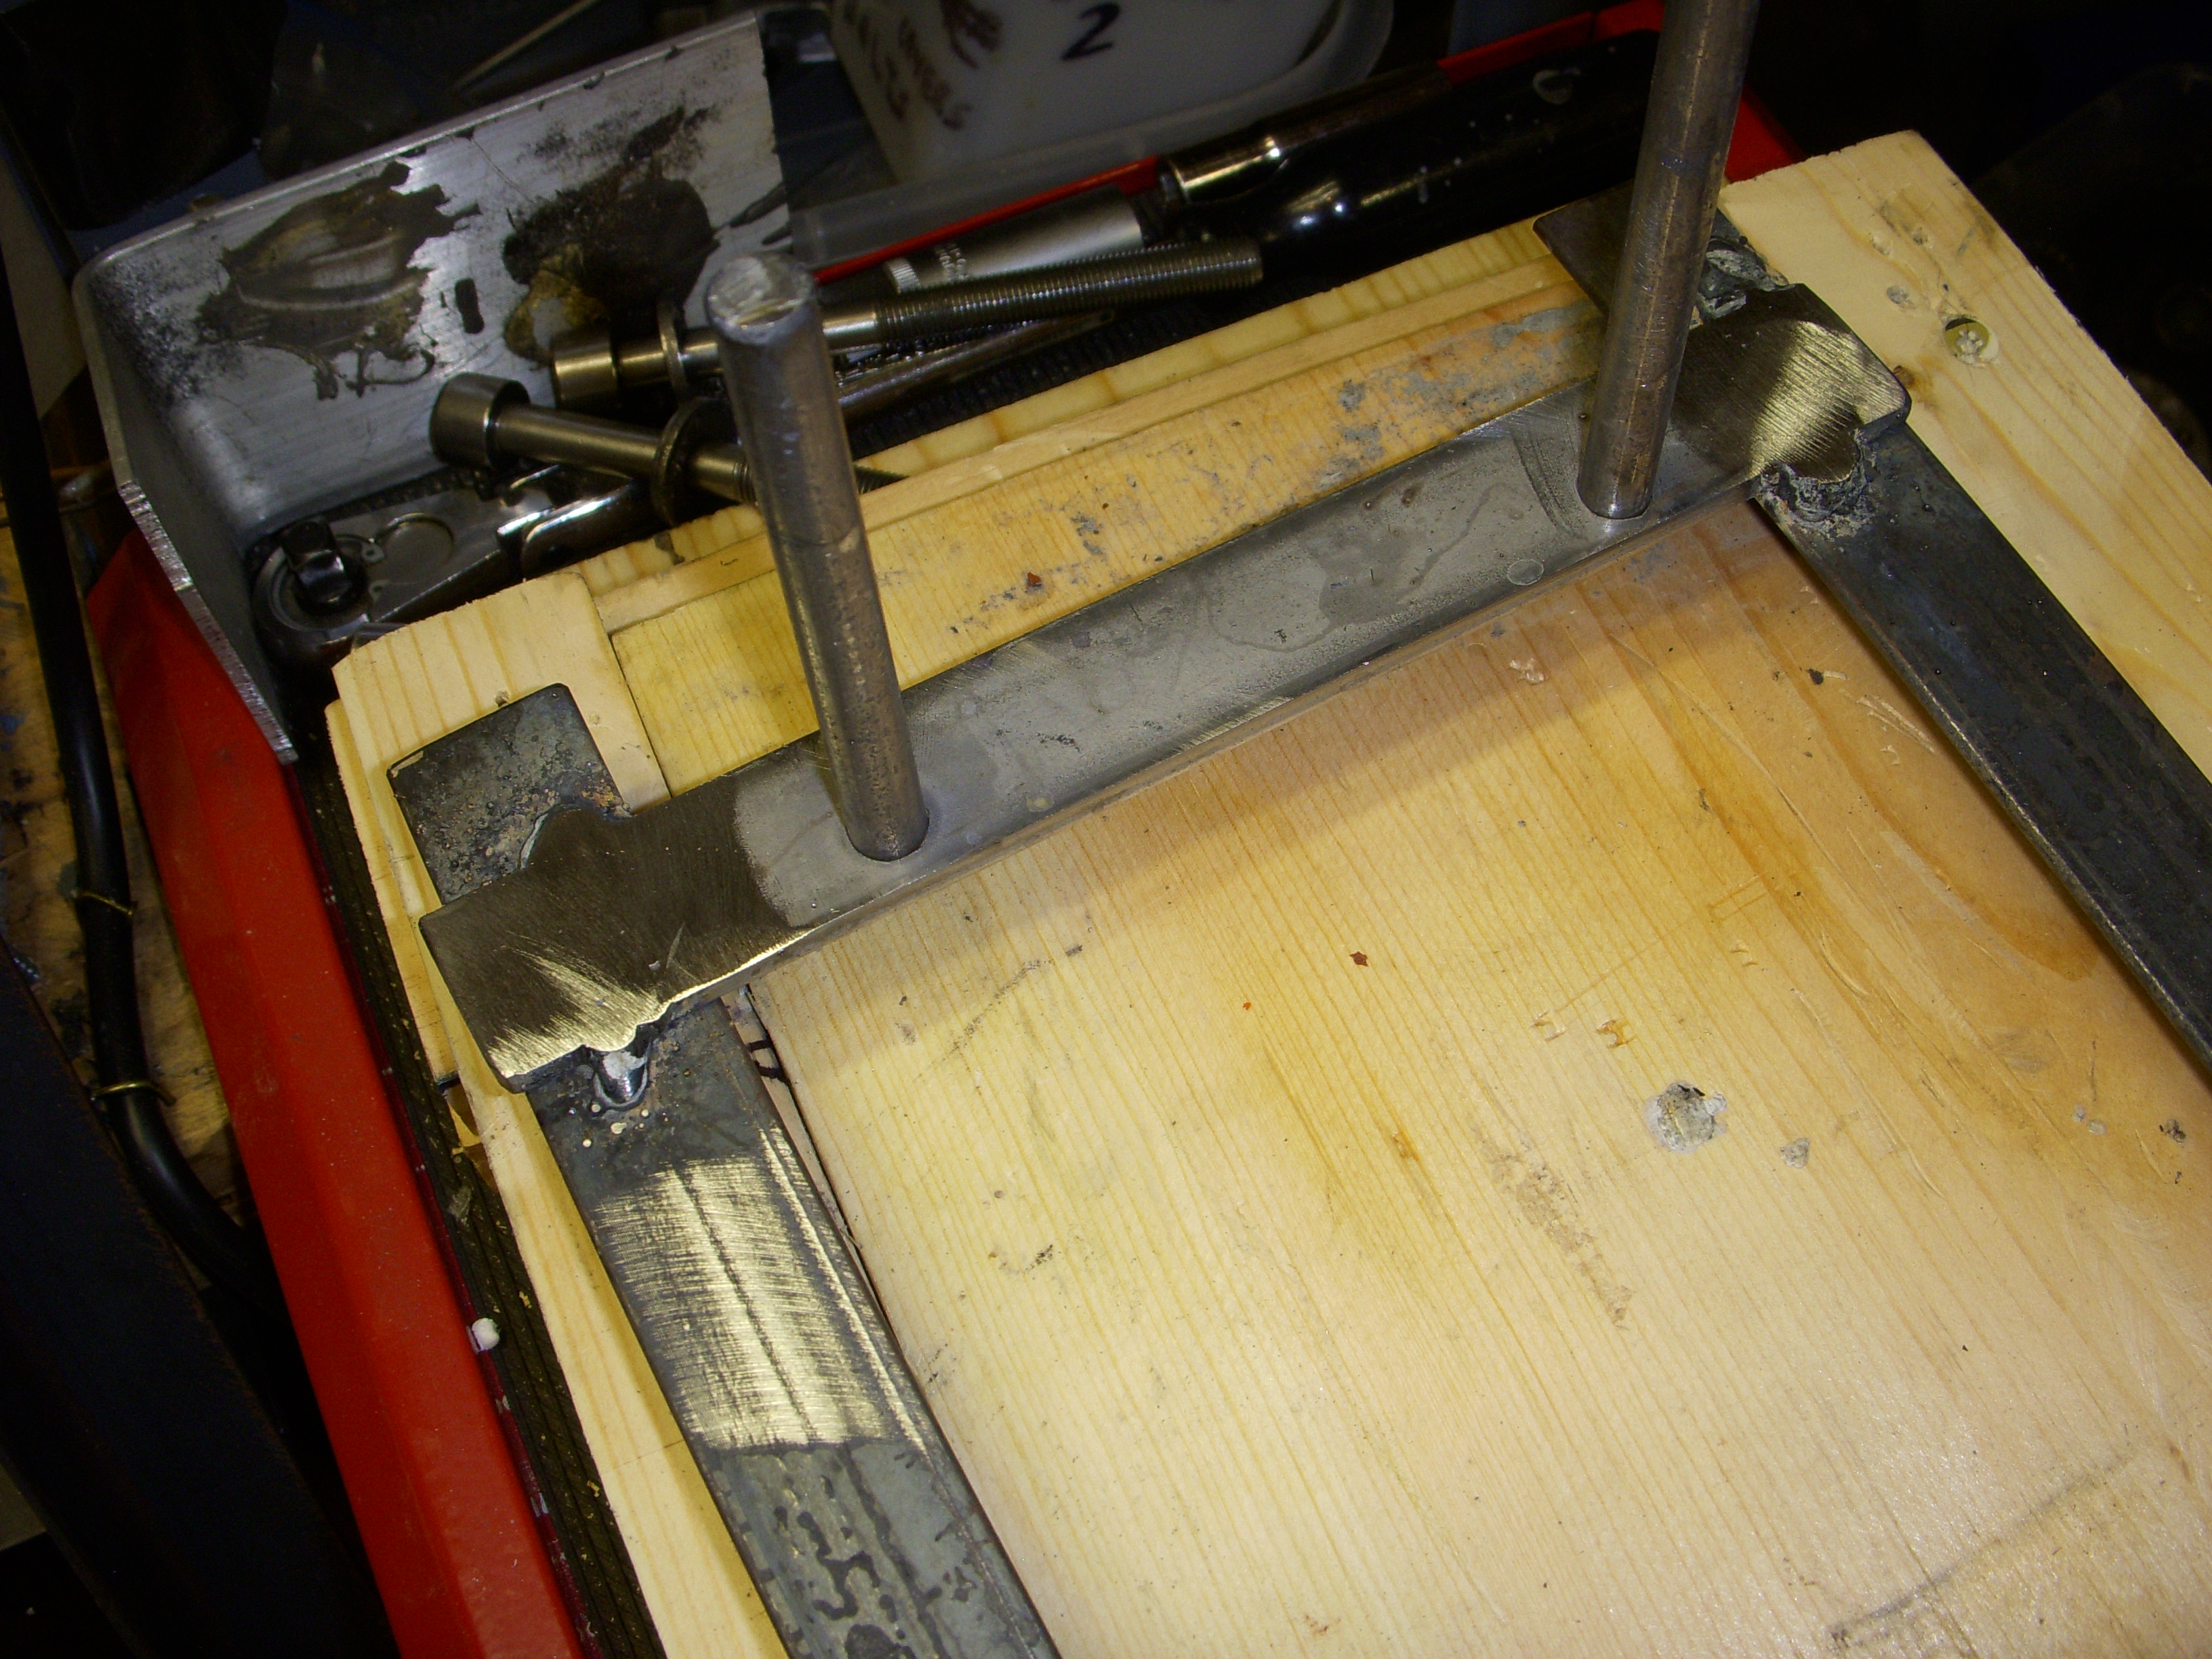
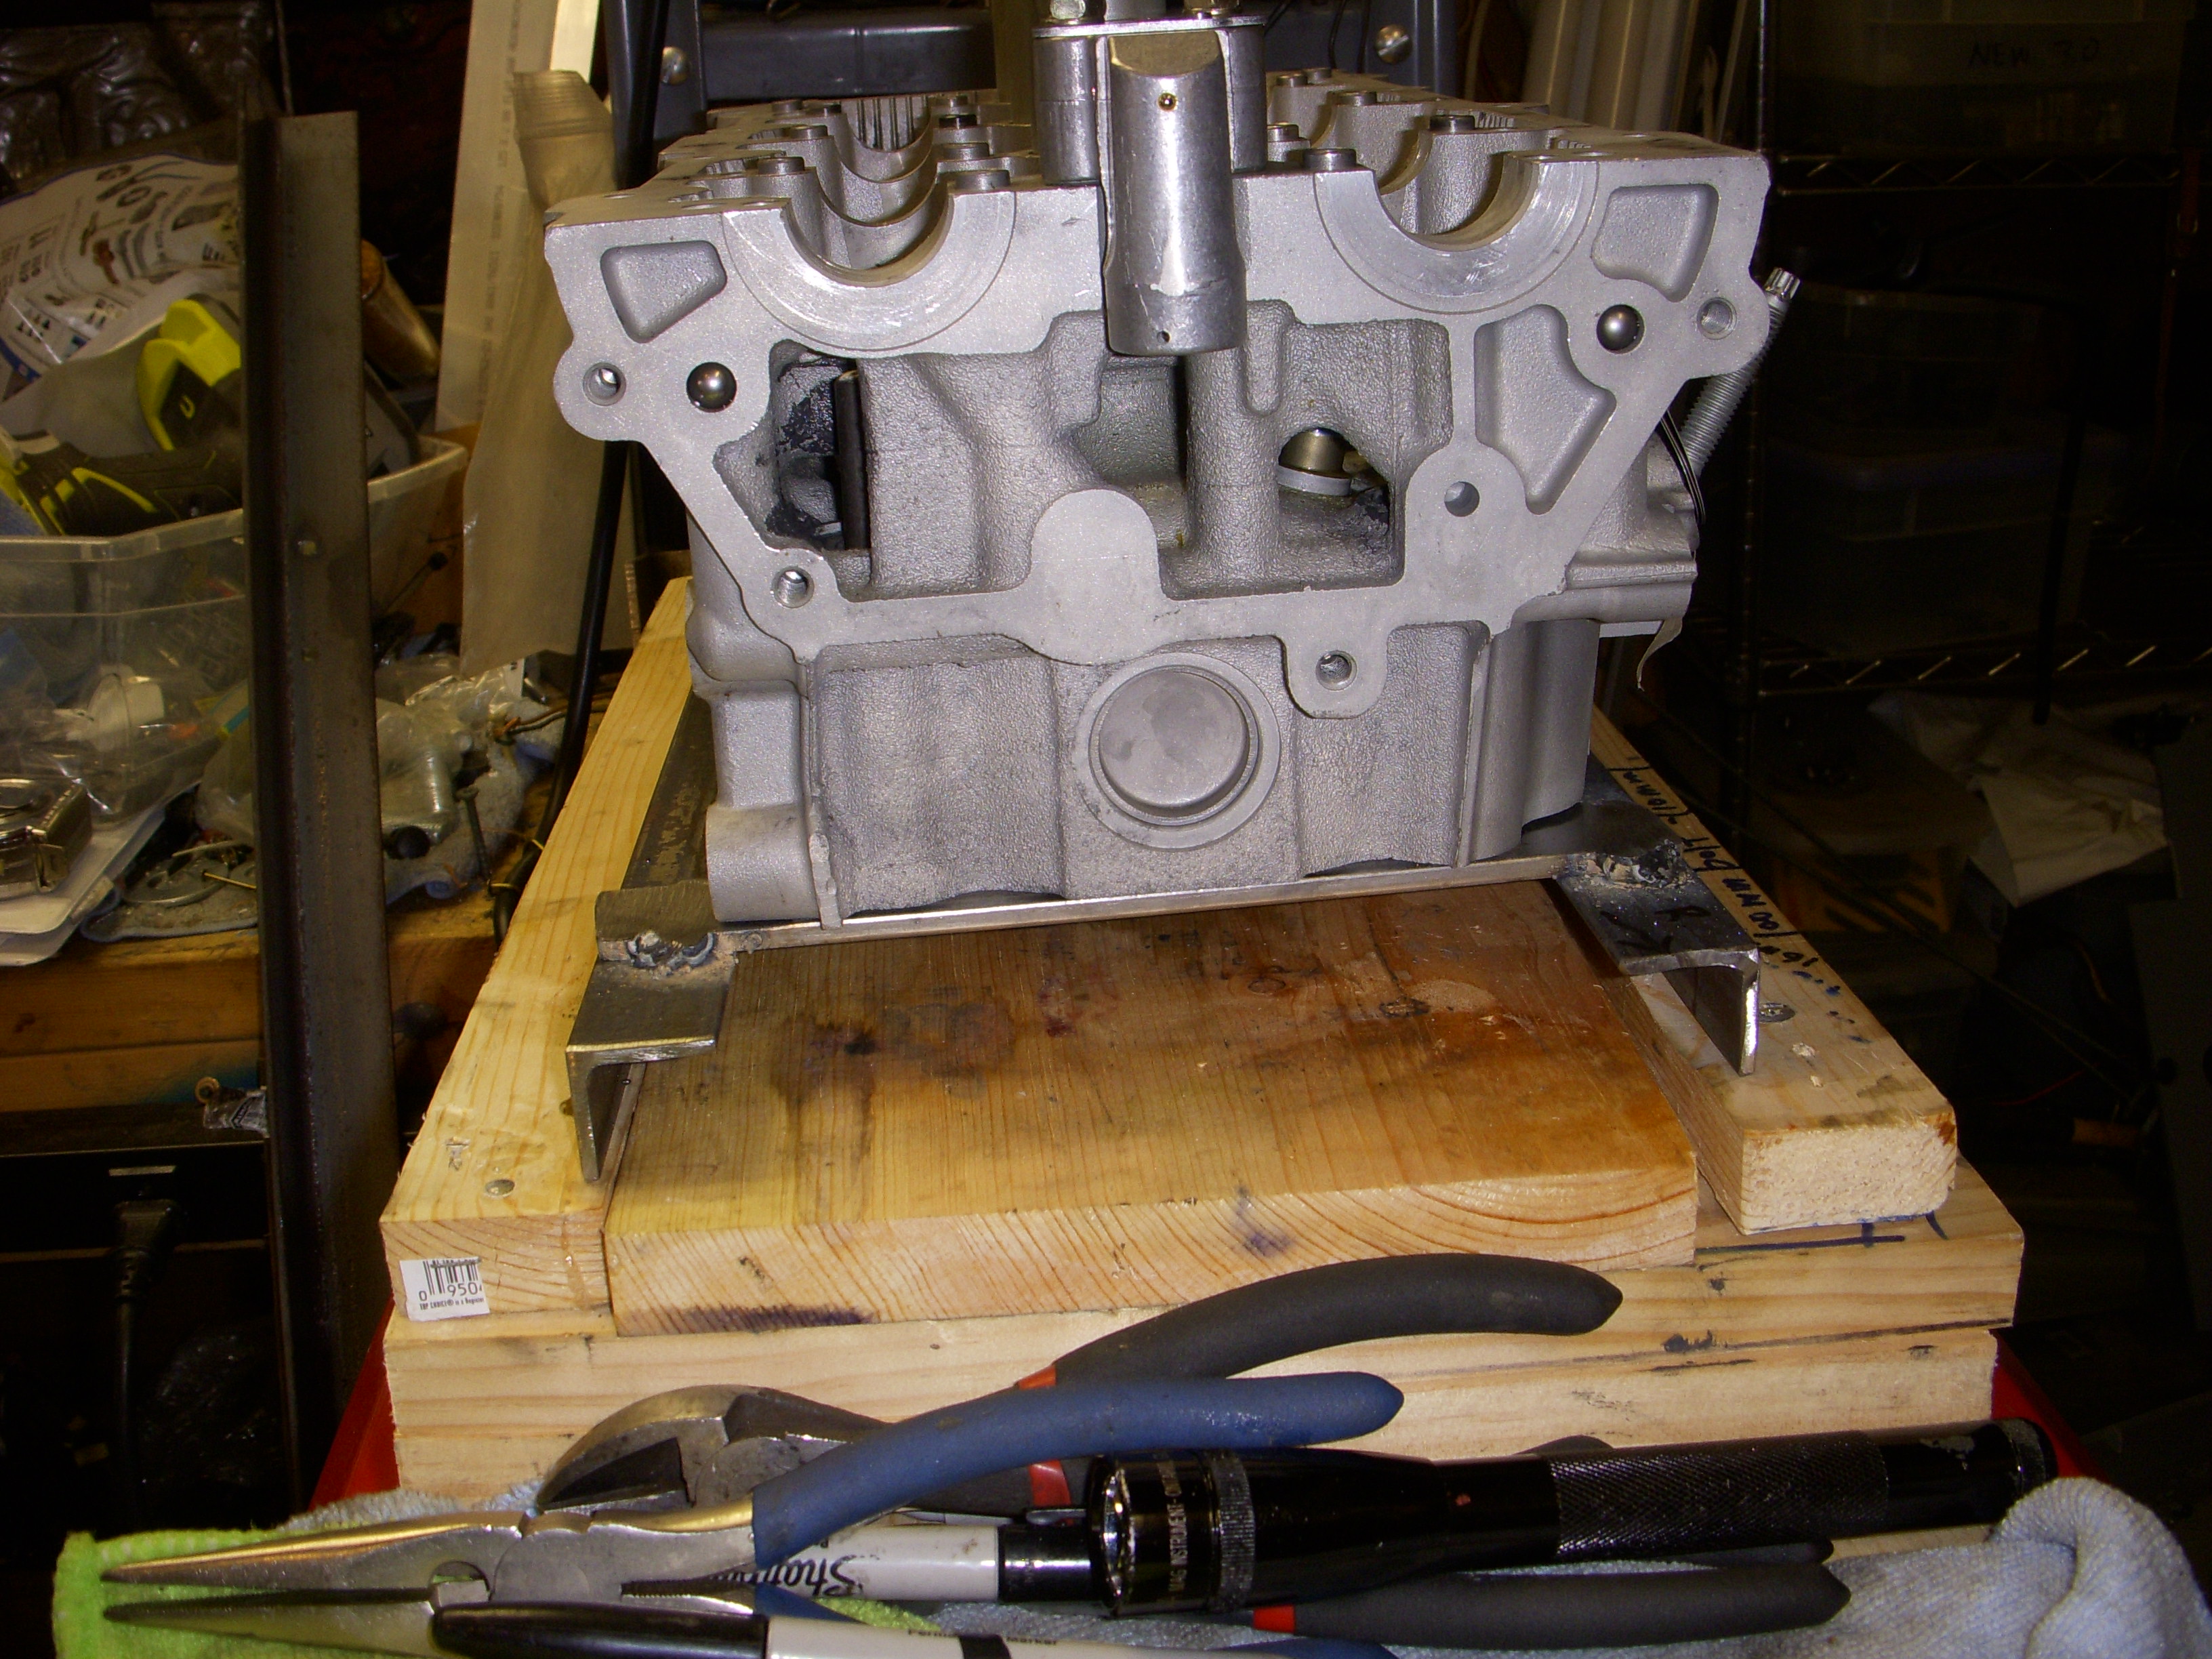
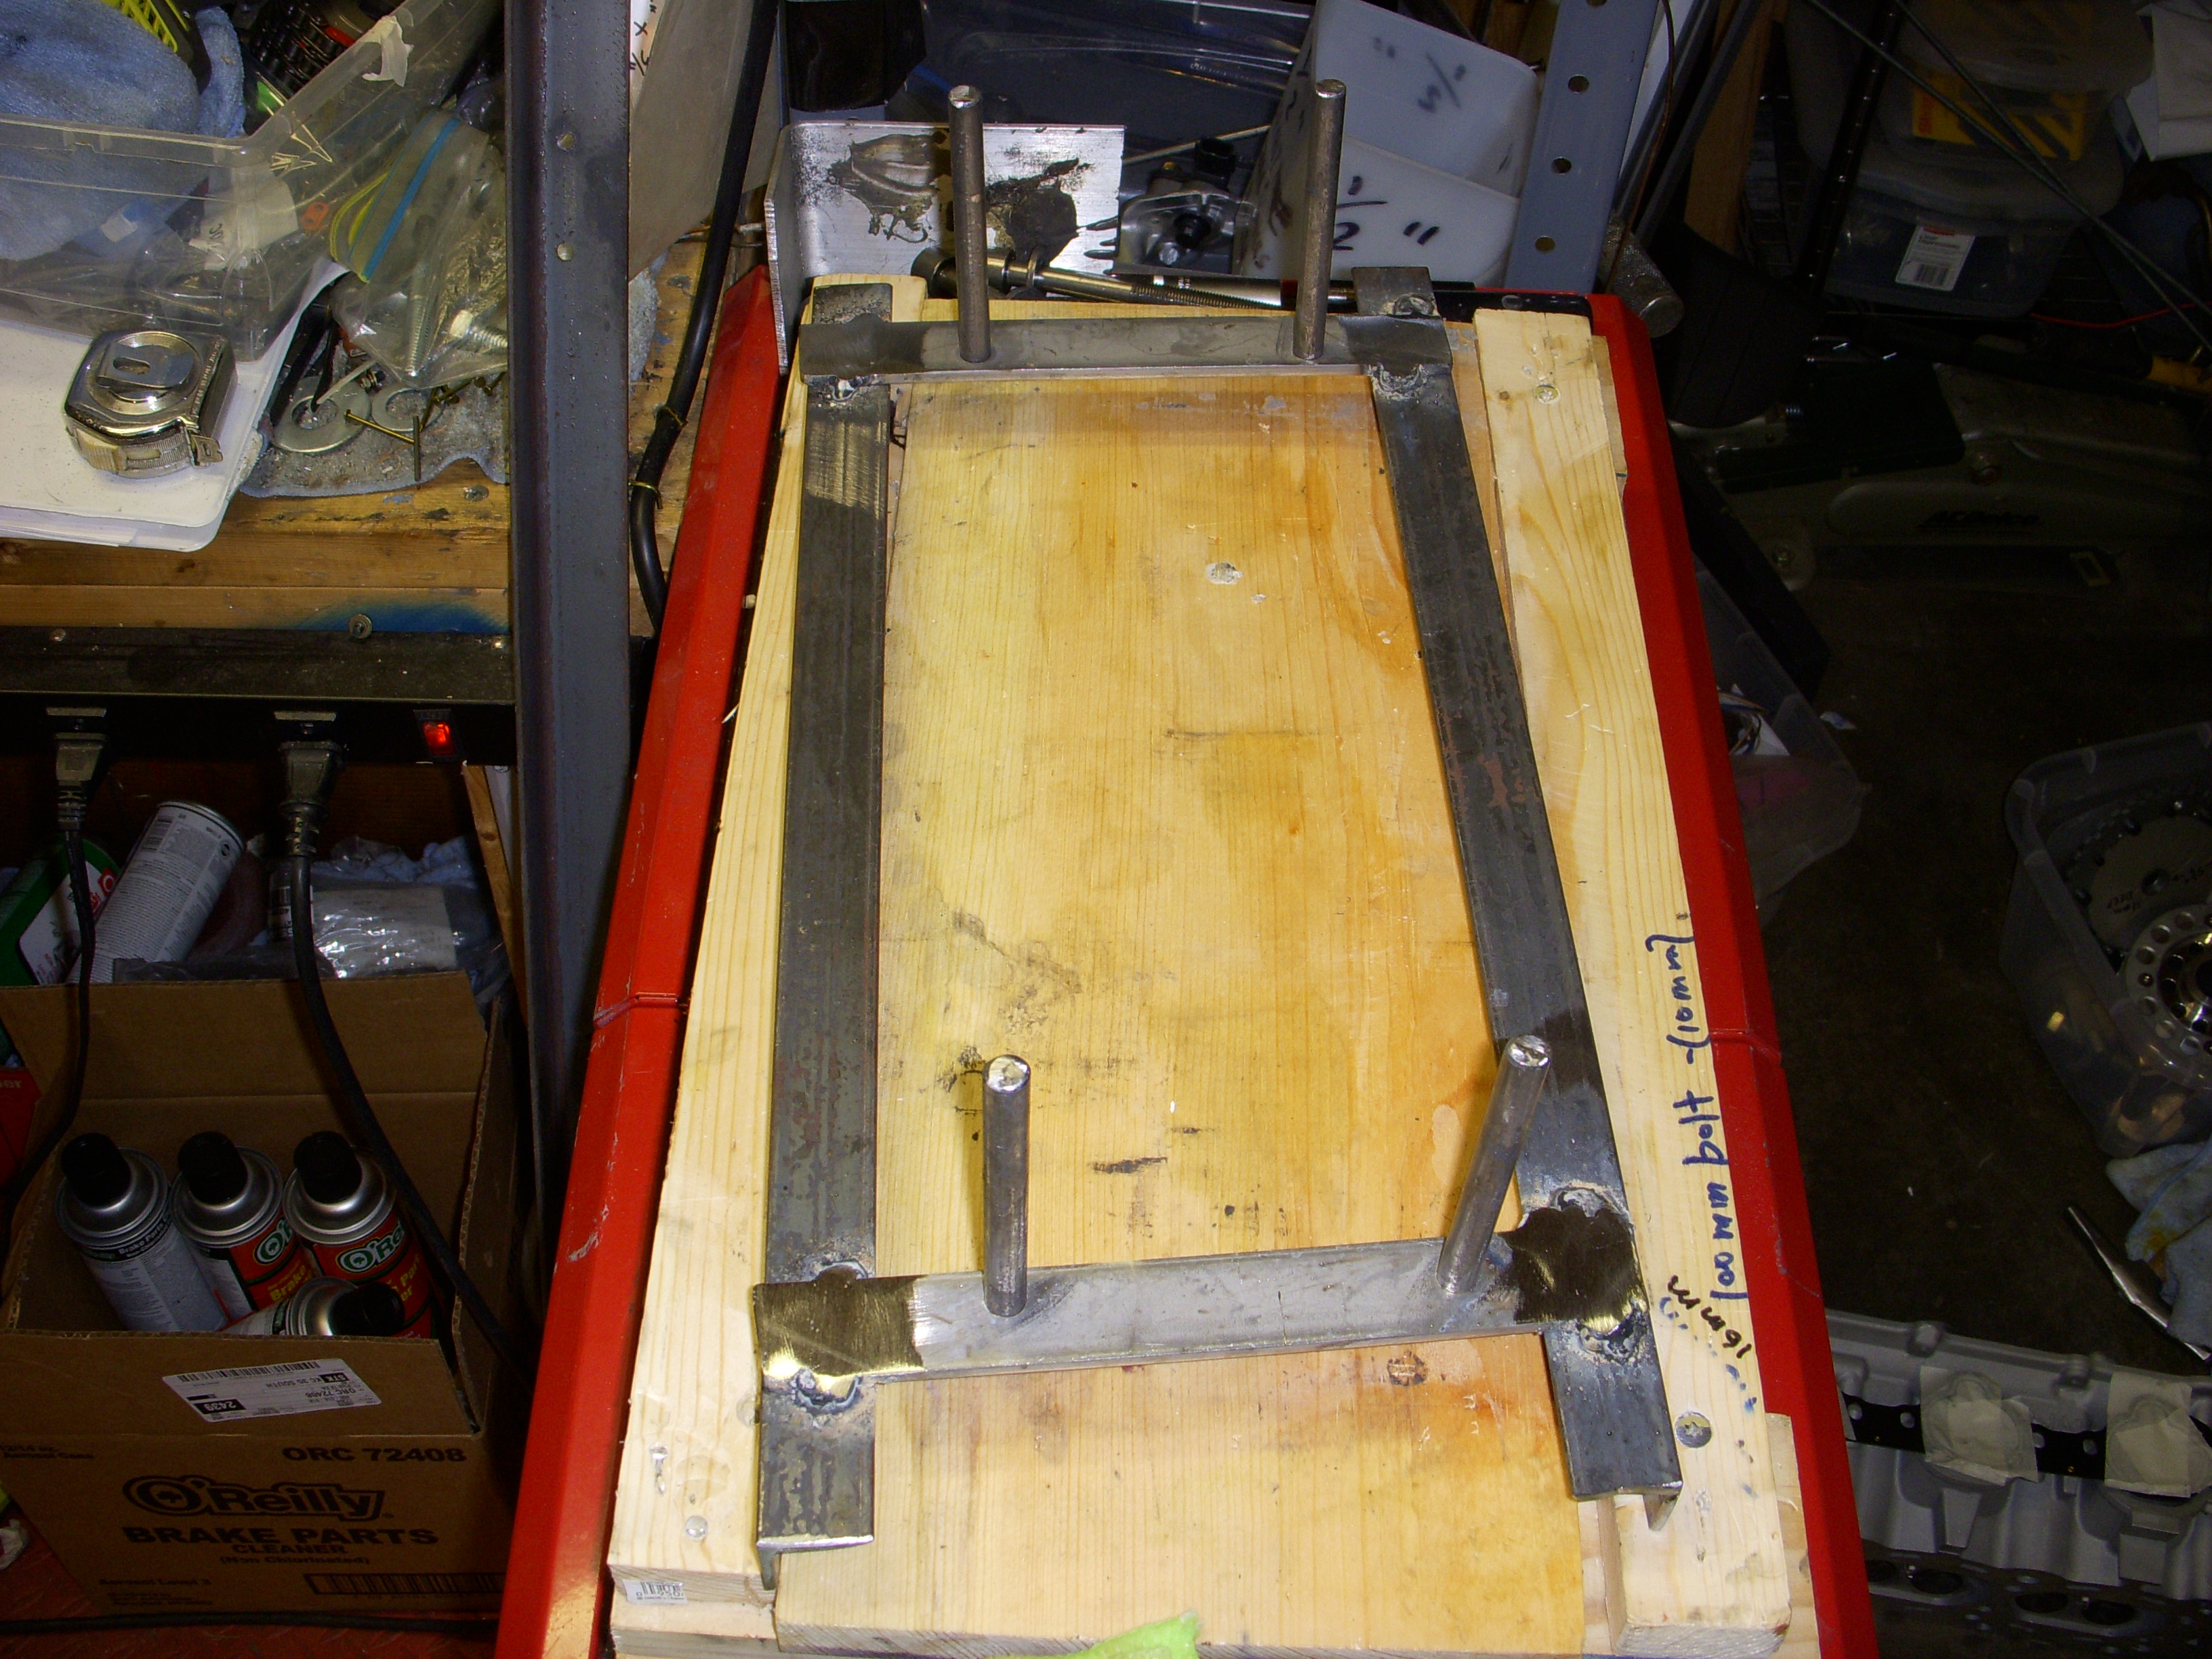
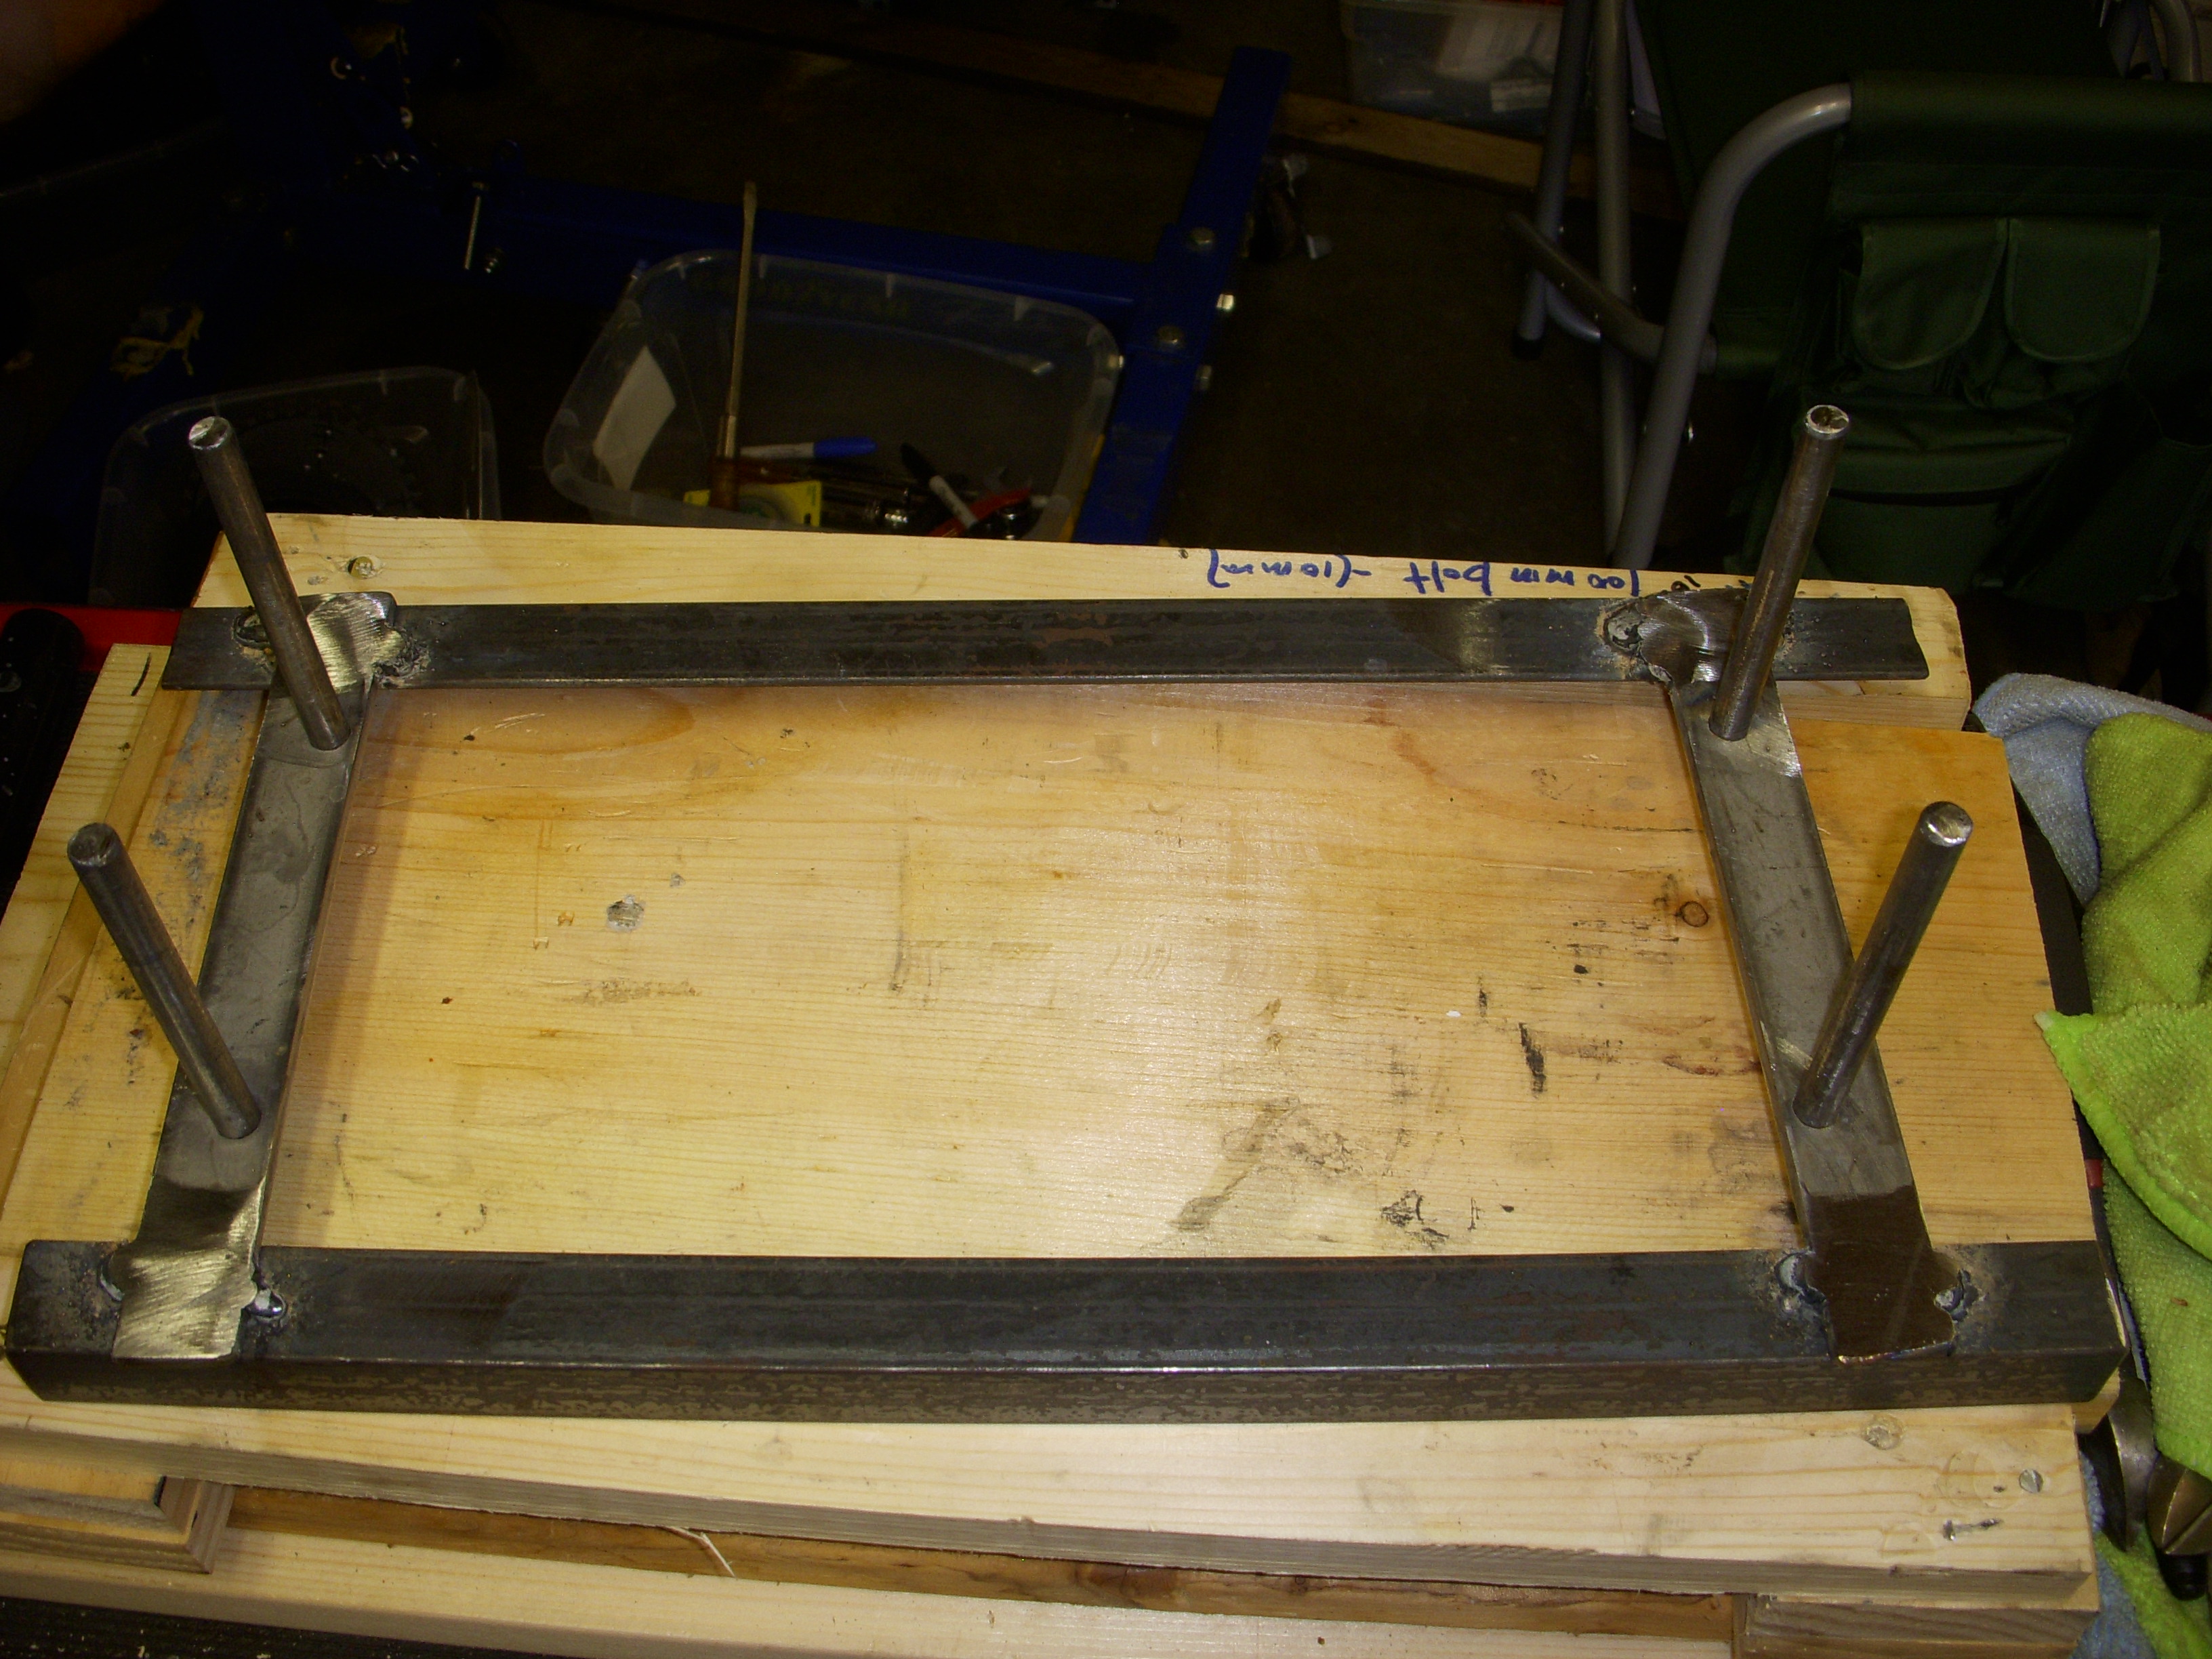

Now I can get back into the final stages of assembling these HR heads, then verifying the actual clearances of each valve during full crank rotations. Gotta have at least .050" clearance at full open position and everywhere else. This will be ... tedious, but the last major step of assembling the engine.

Today I built a support frame to hold a HR head firmly while installing the special HR valve springs, cause them suckars are STOUT !! I used some 3/8" steel rod to fit into the head bolt holes (head bolts are 11mm), some flat 1/8" x 1" steel, and 1" angle steel. I got to play with my Eastwood MIG welder and cutoff tool and a grinder. A whole afternoon of playing in the garage....


Now I can get back into the final stages of assembling these HR heads, then verifying the actual clearances of each valve during full crank rotations. Gotta have at least .050" clearance at full open position and everywhere else. This will be ... tedious, but the last major step of assembling the engine.
Last edited by grey99max; 01-16-2017 at 06:42 PM.
09-23-2016, 12:33 PM
#1819
LandShark has Cosworth
Thread Starter
iTrader: (12)
Join Date: Jan 2004
Location: Topeka, KS
Posts: 4,327
Right-hand head is assembled - finally
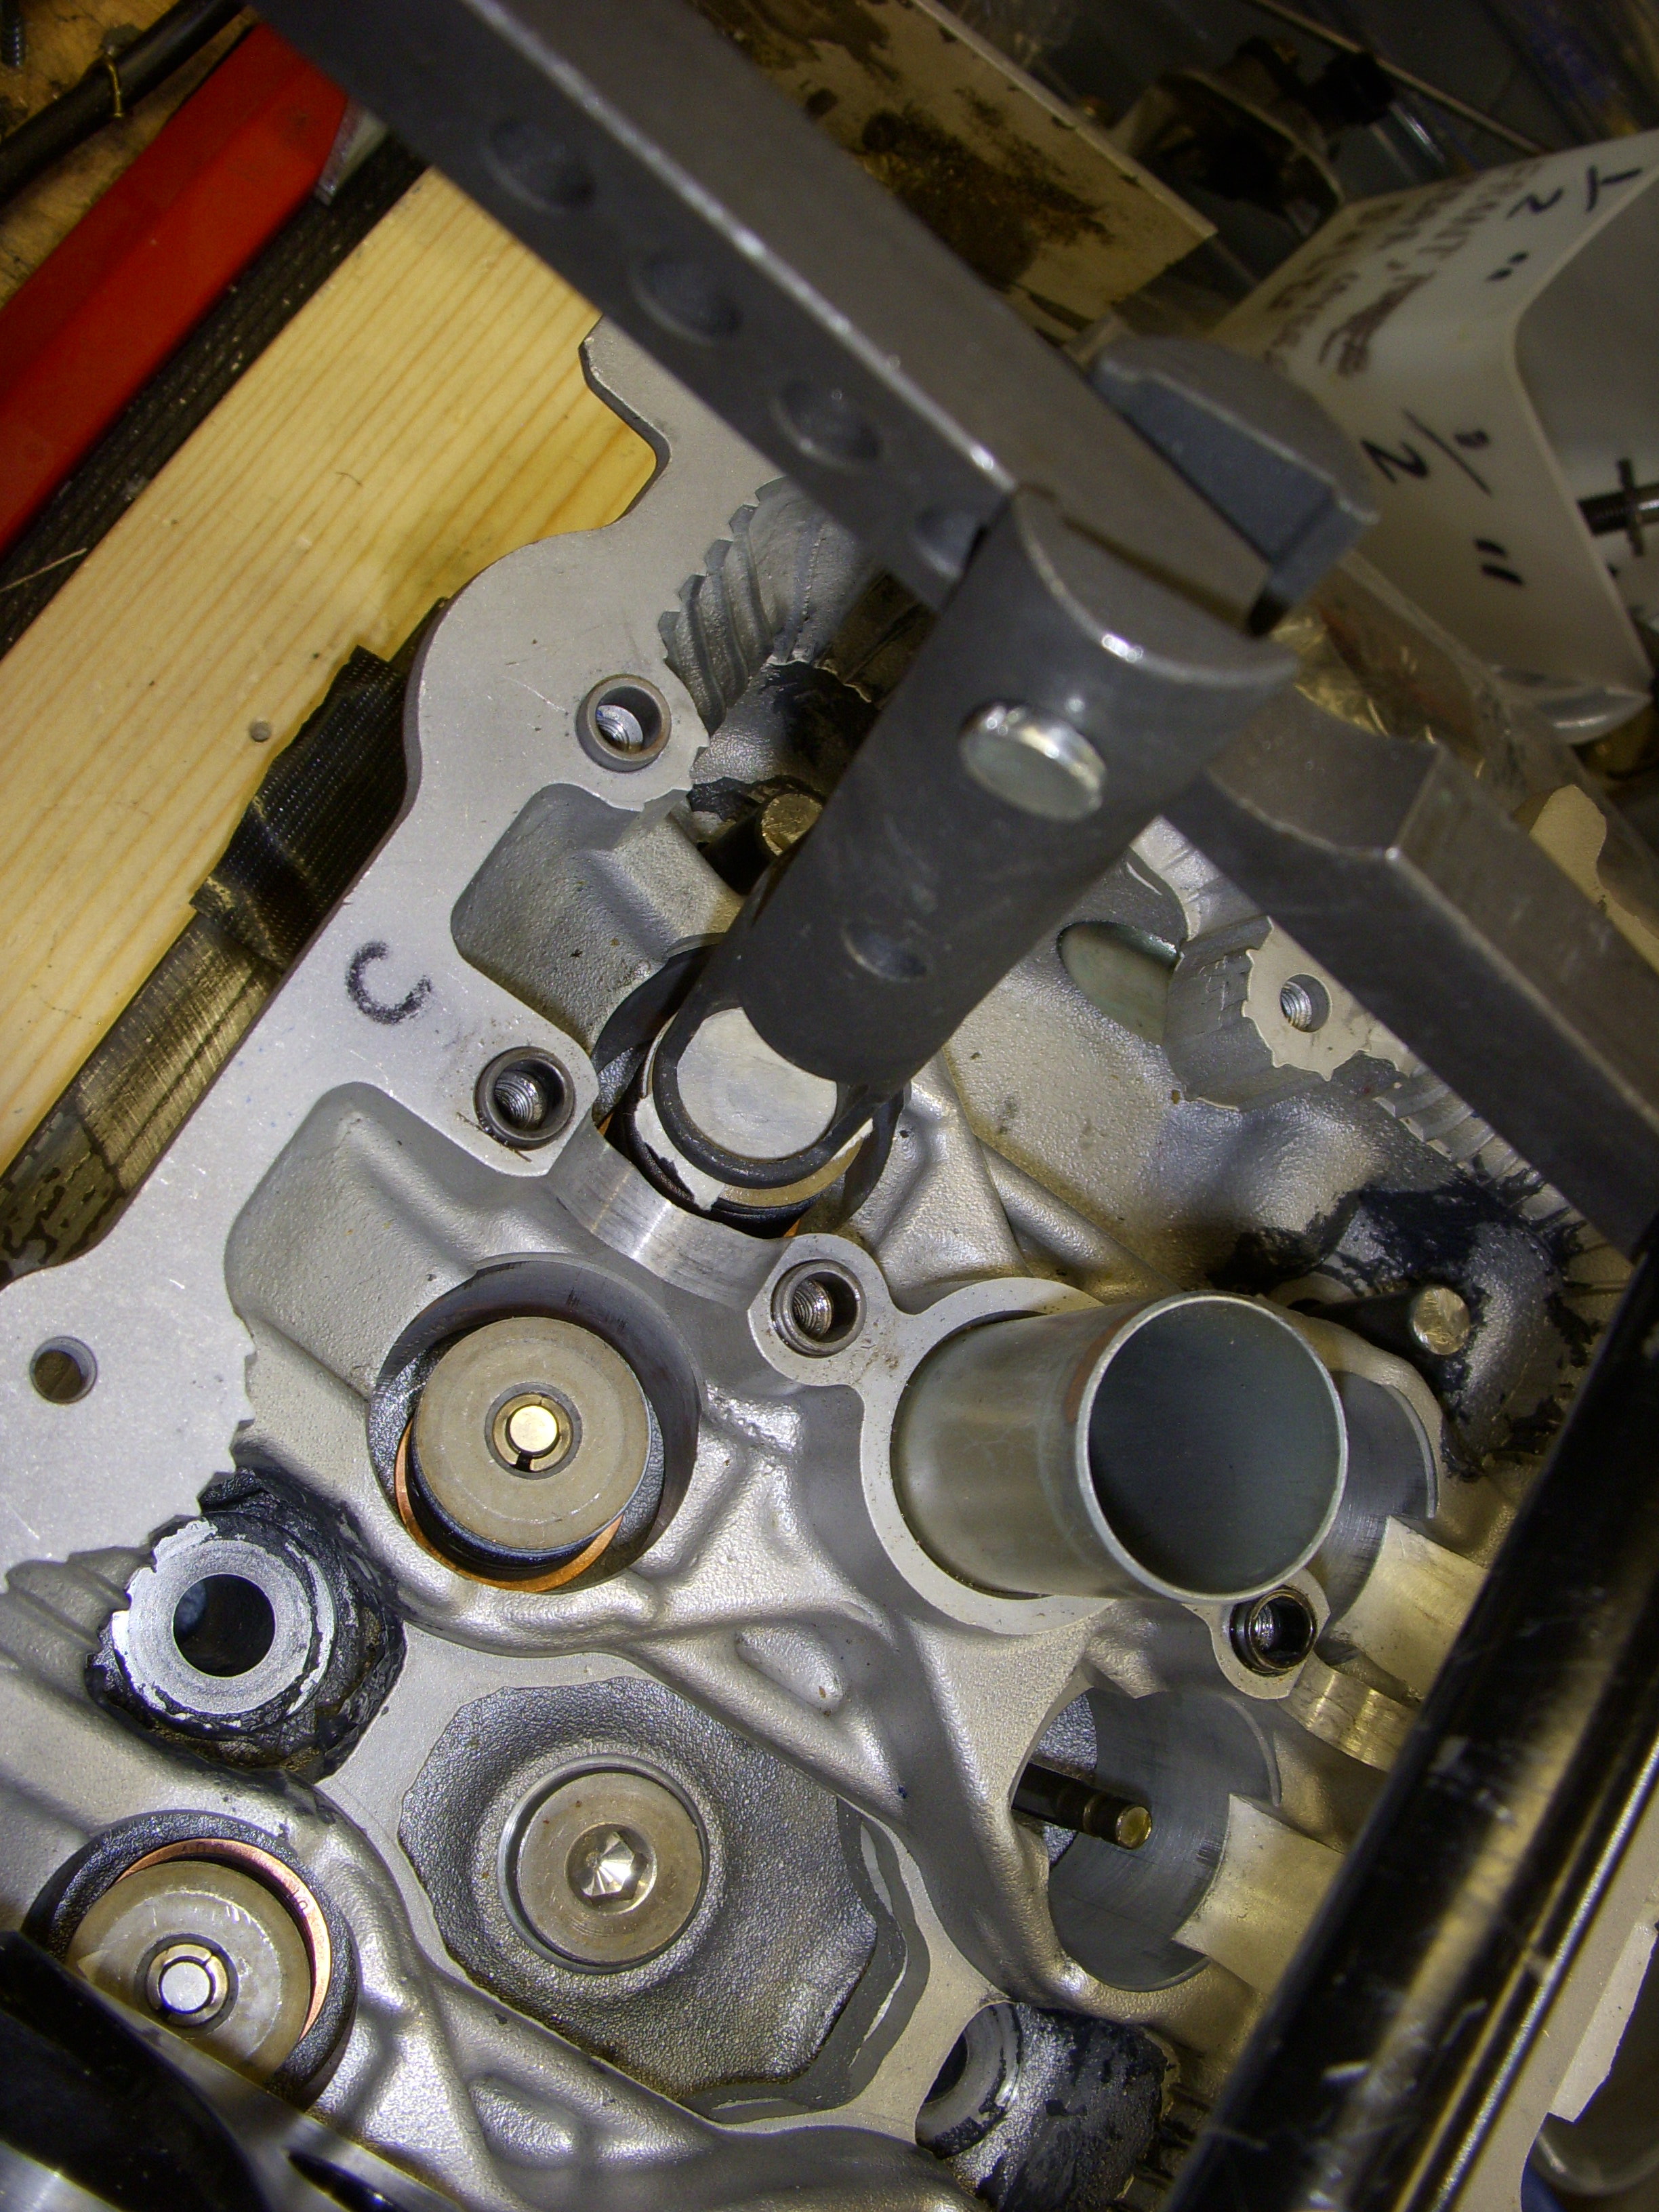
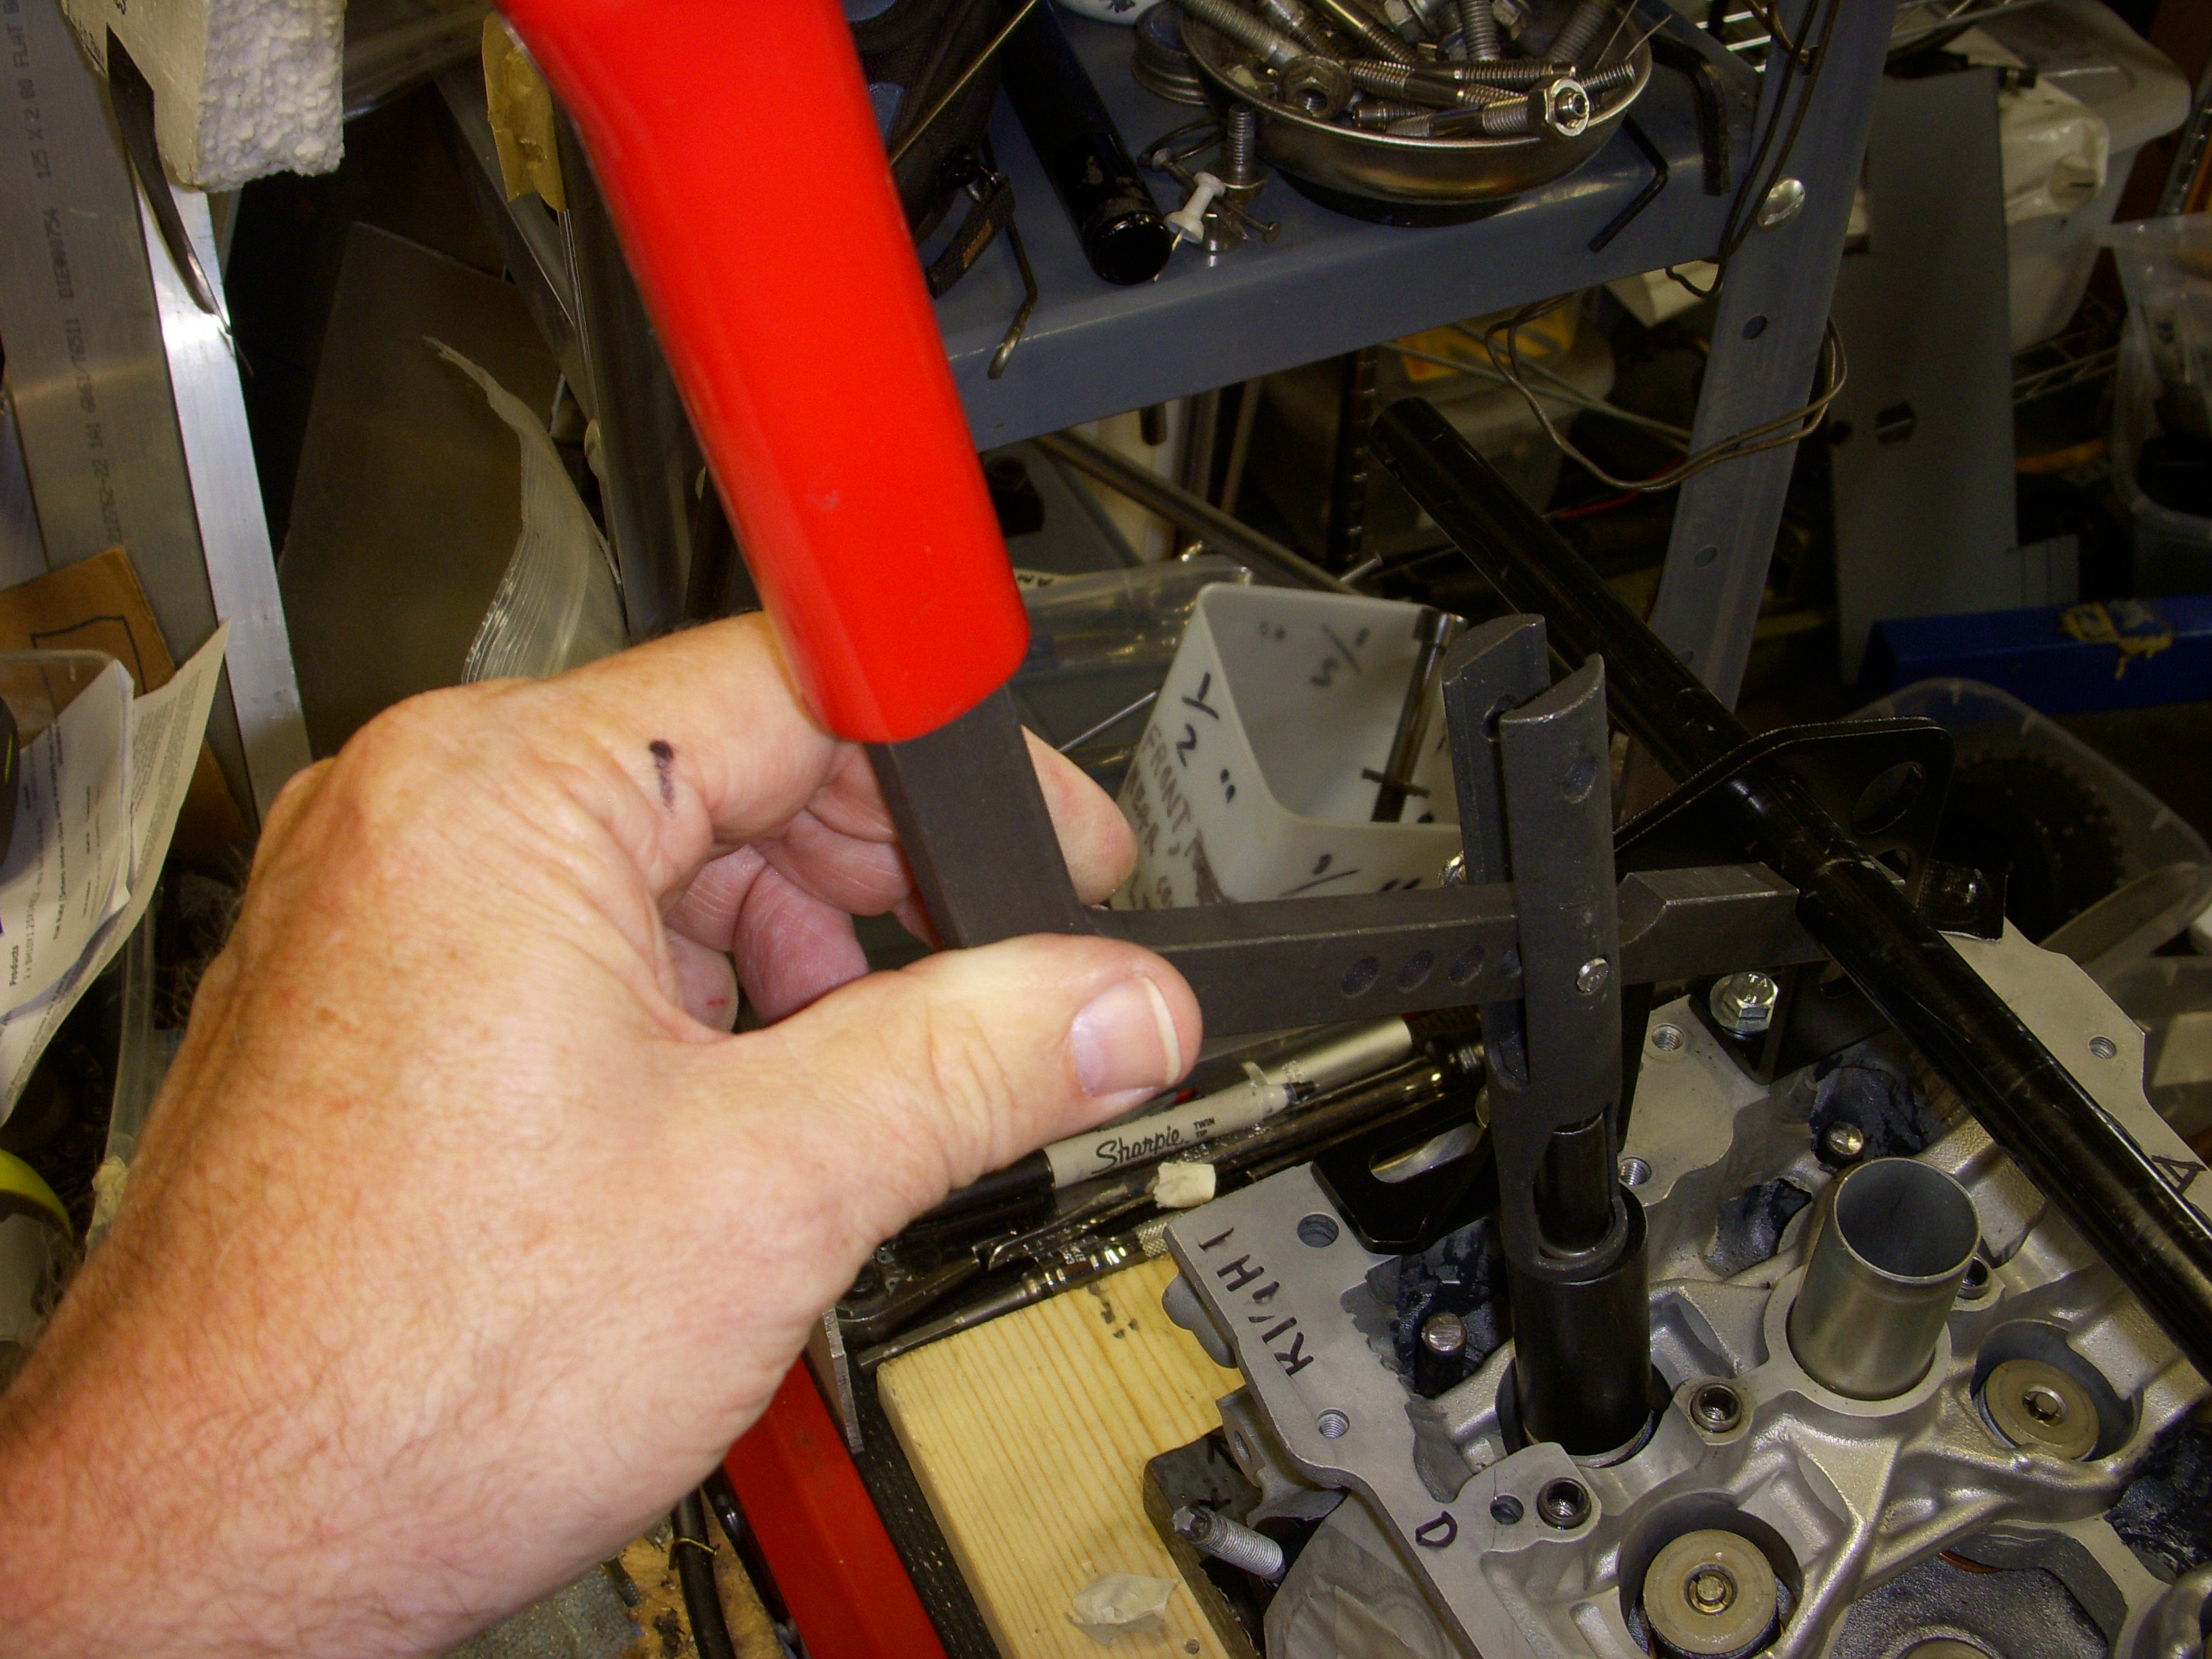
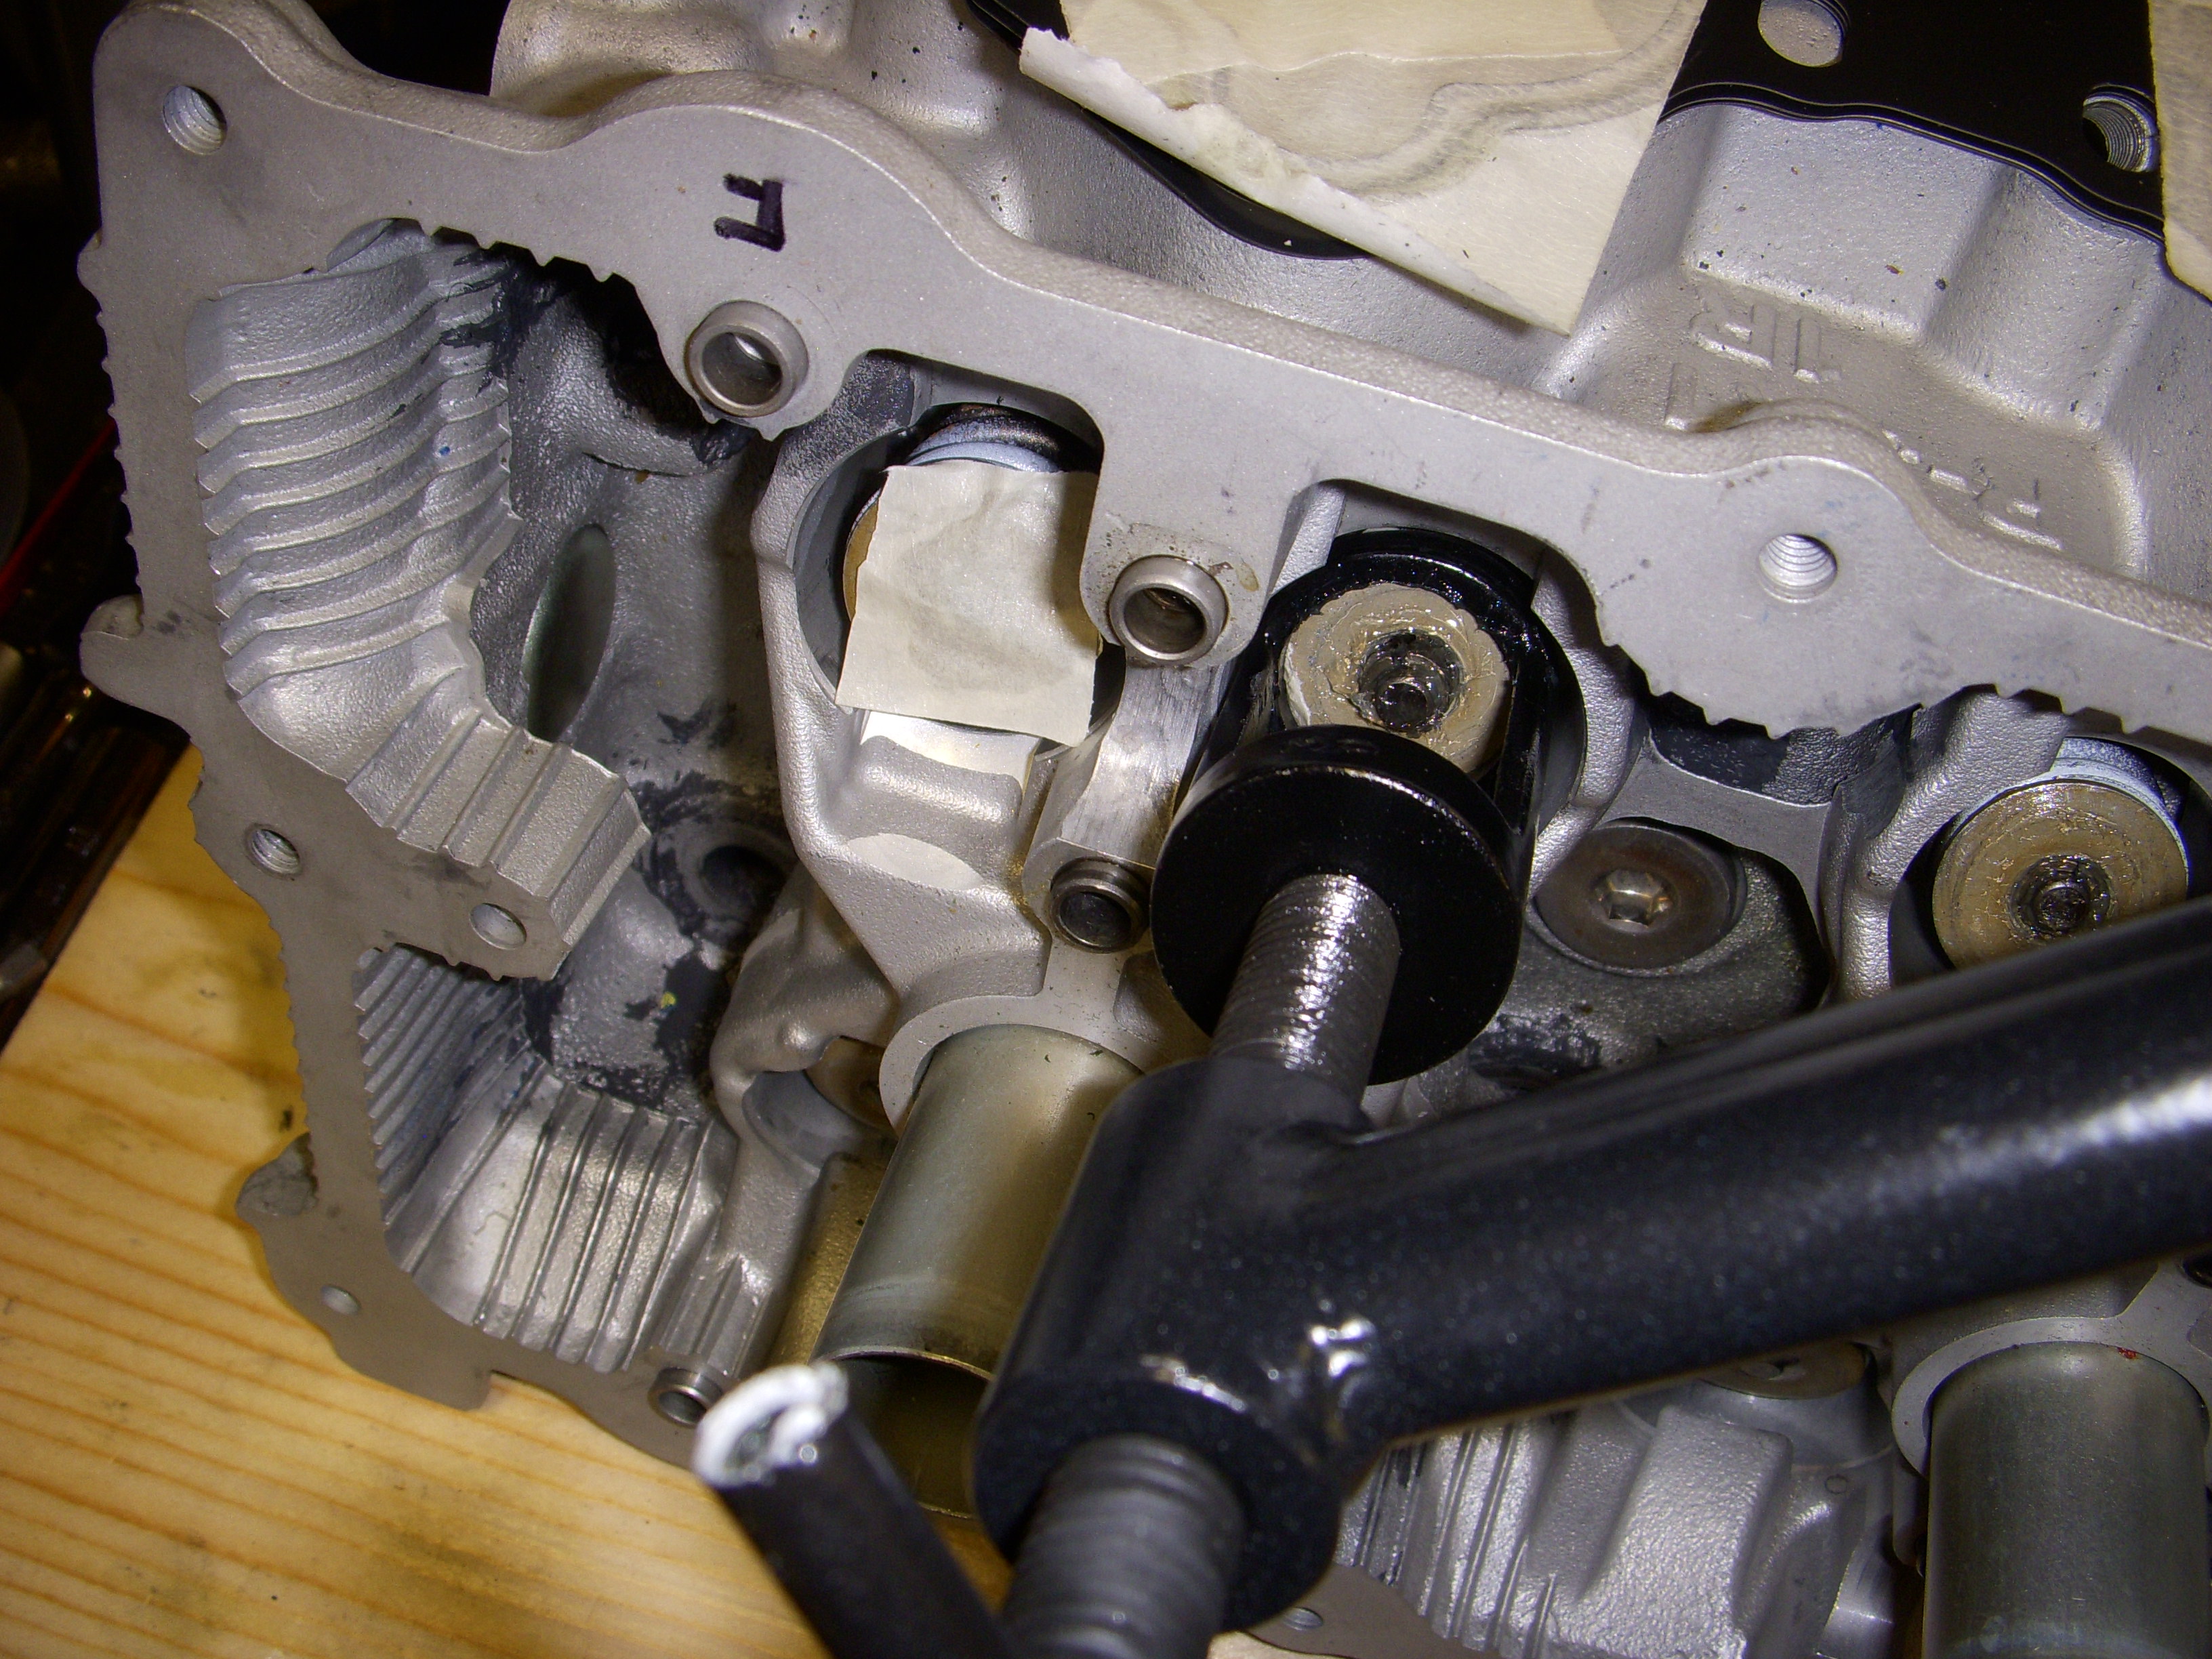
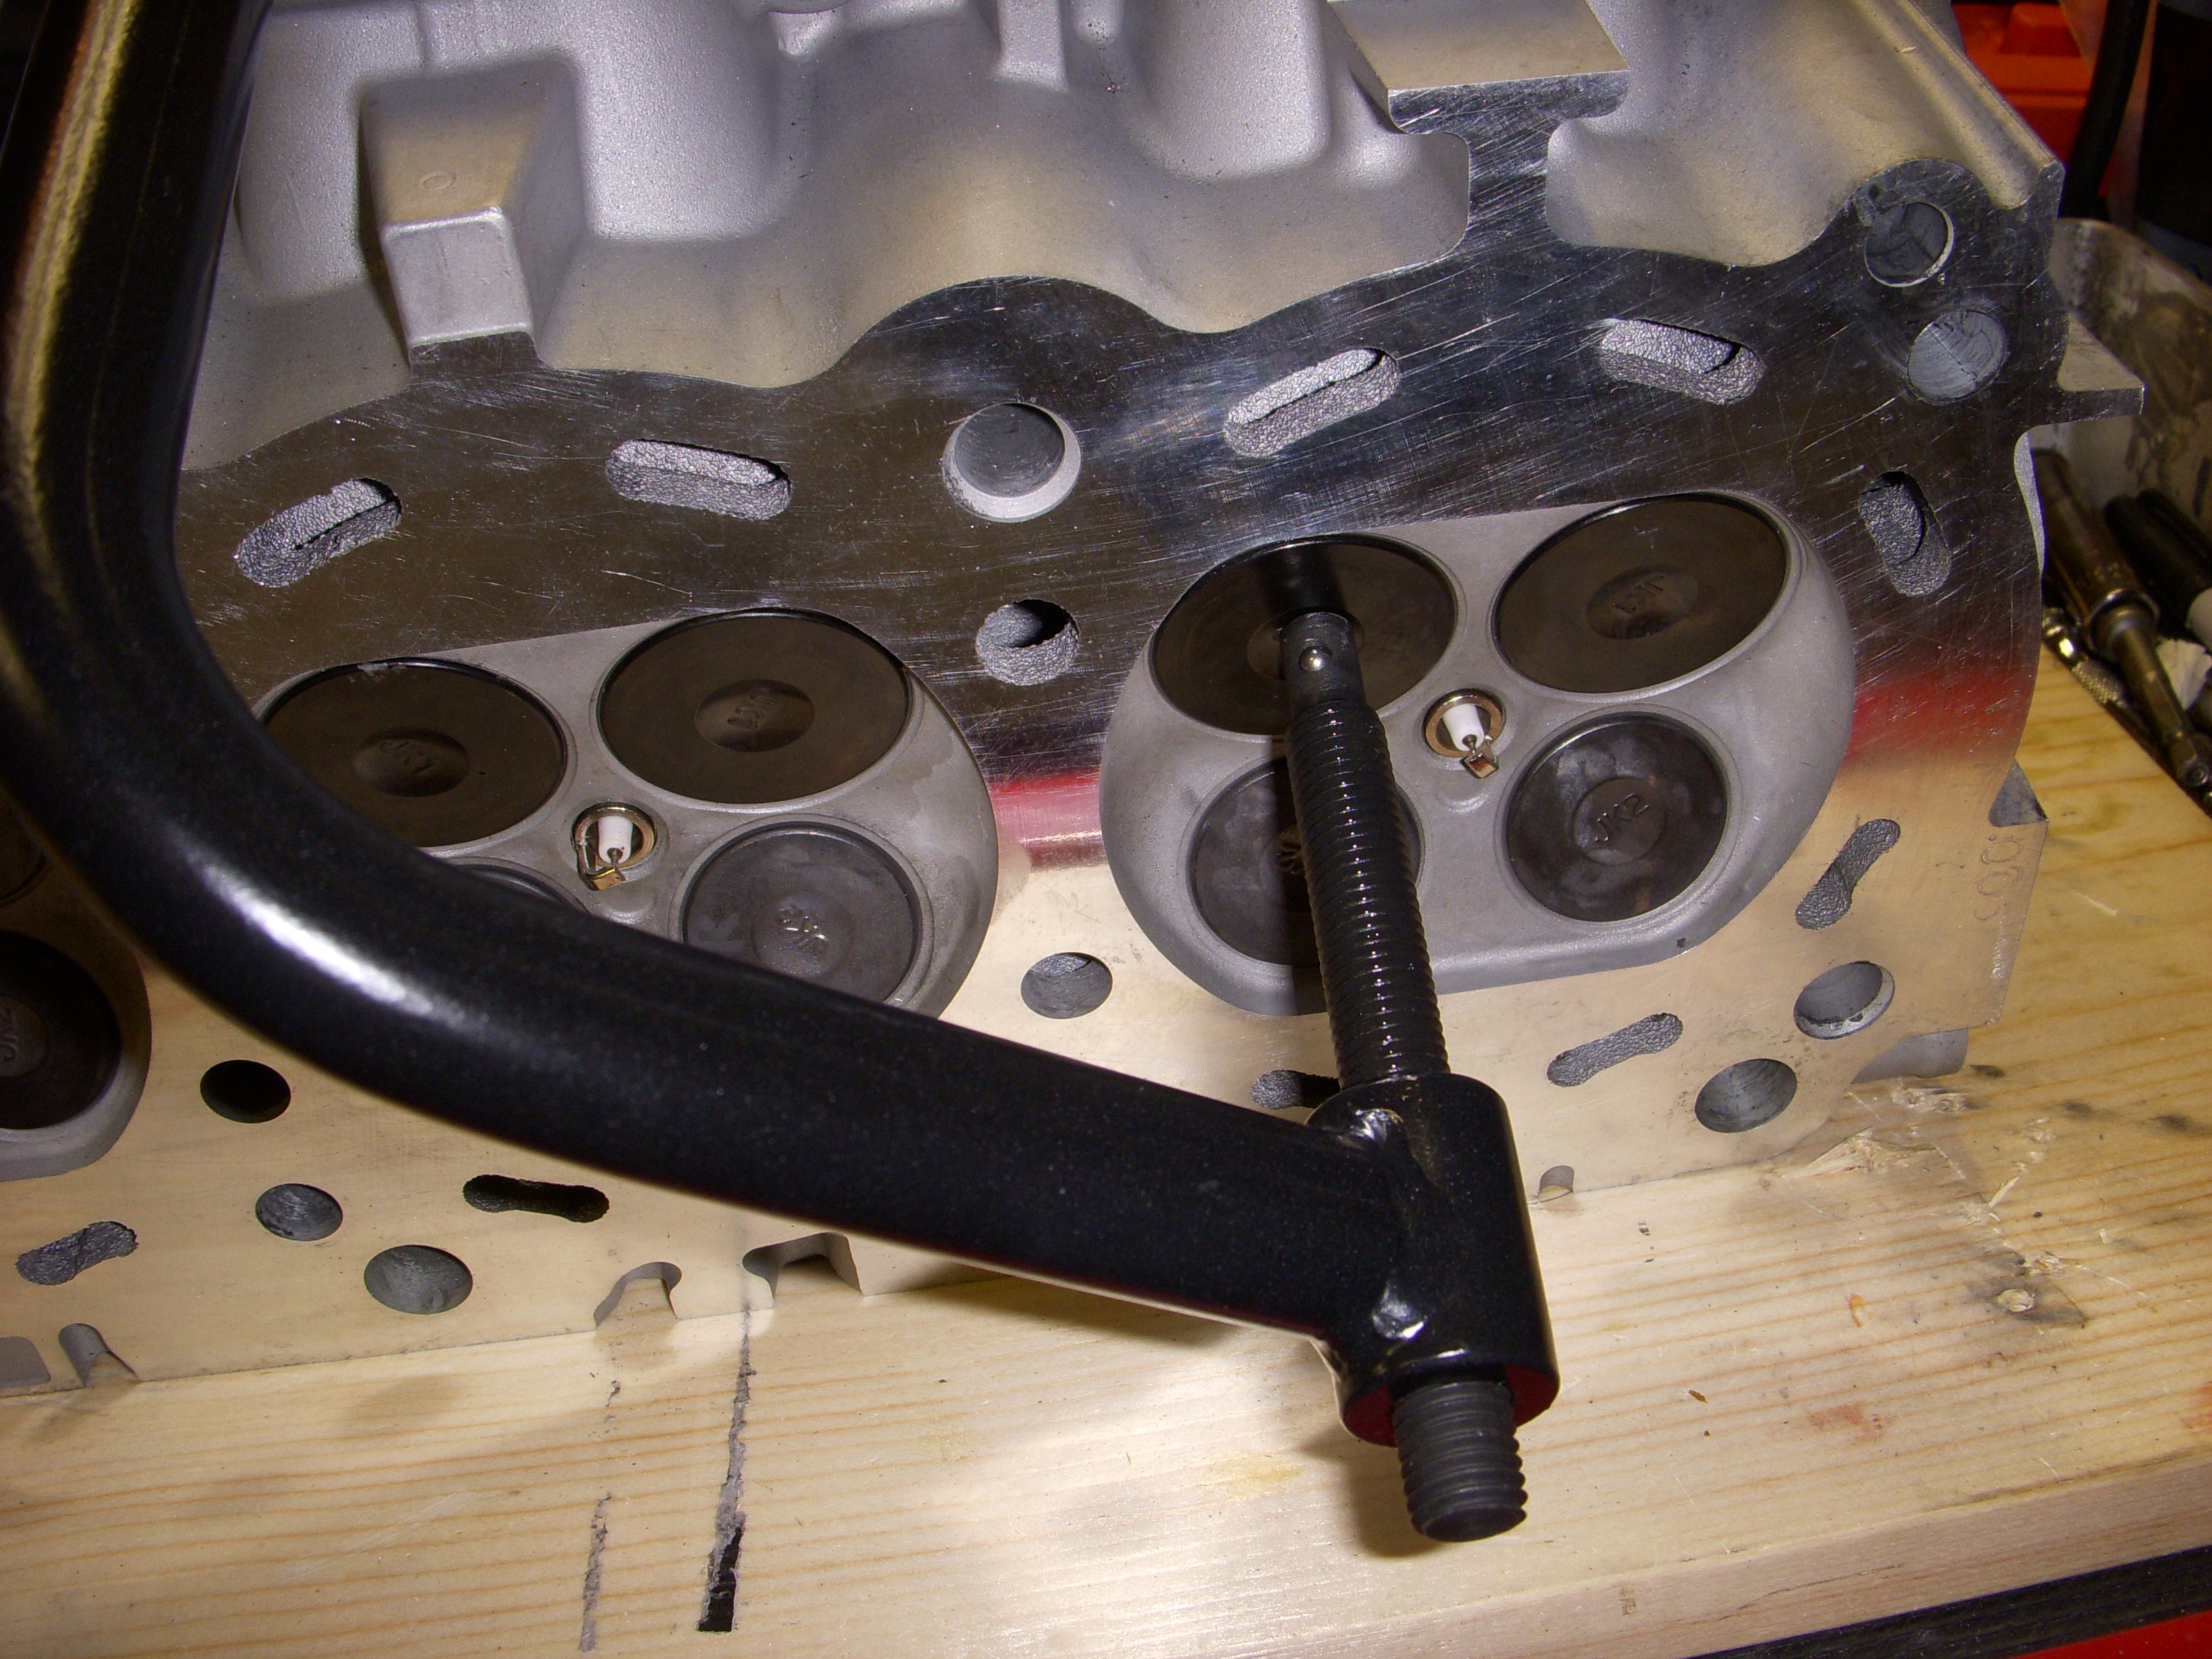
This job went in unexpected directions - of course. First, the exhaust valves had two spring shims as per JWT, so first I tried the Lisle tool, but couldn't depress the springs far enough to engage the valve keepers. I hauled out the valve tool I had used for disassembly before, and after mounting it on the head, I was able to compress the exhaust valves enough to finish all six valves. I thumped them a bit with the wooden handle of a small hammer, just to be sure.
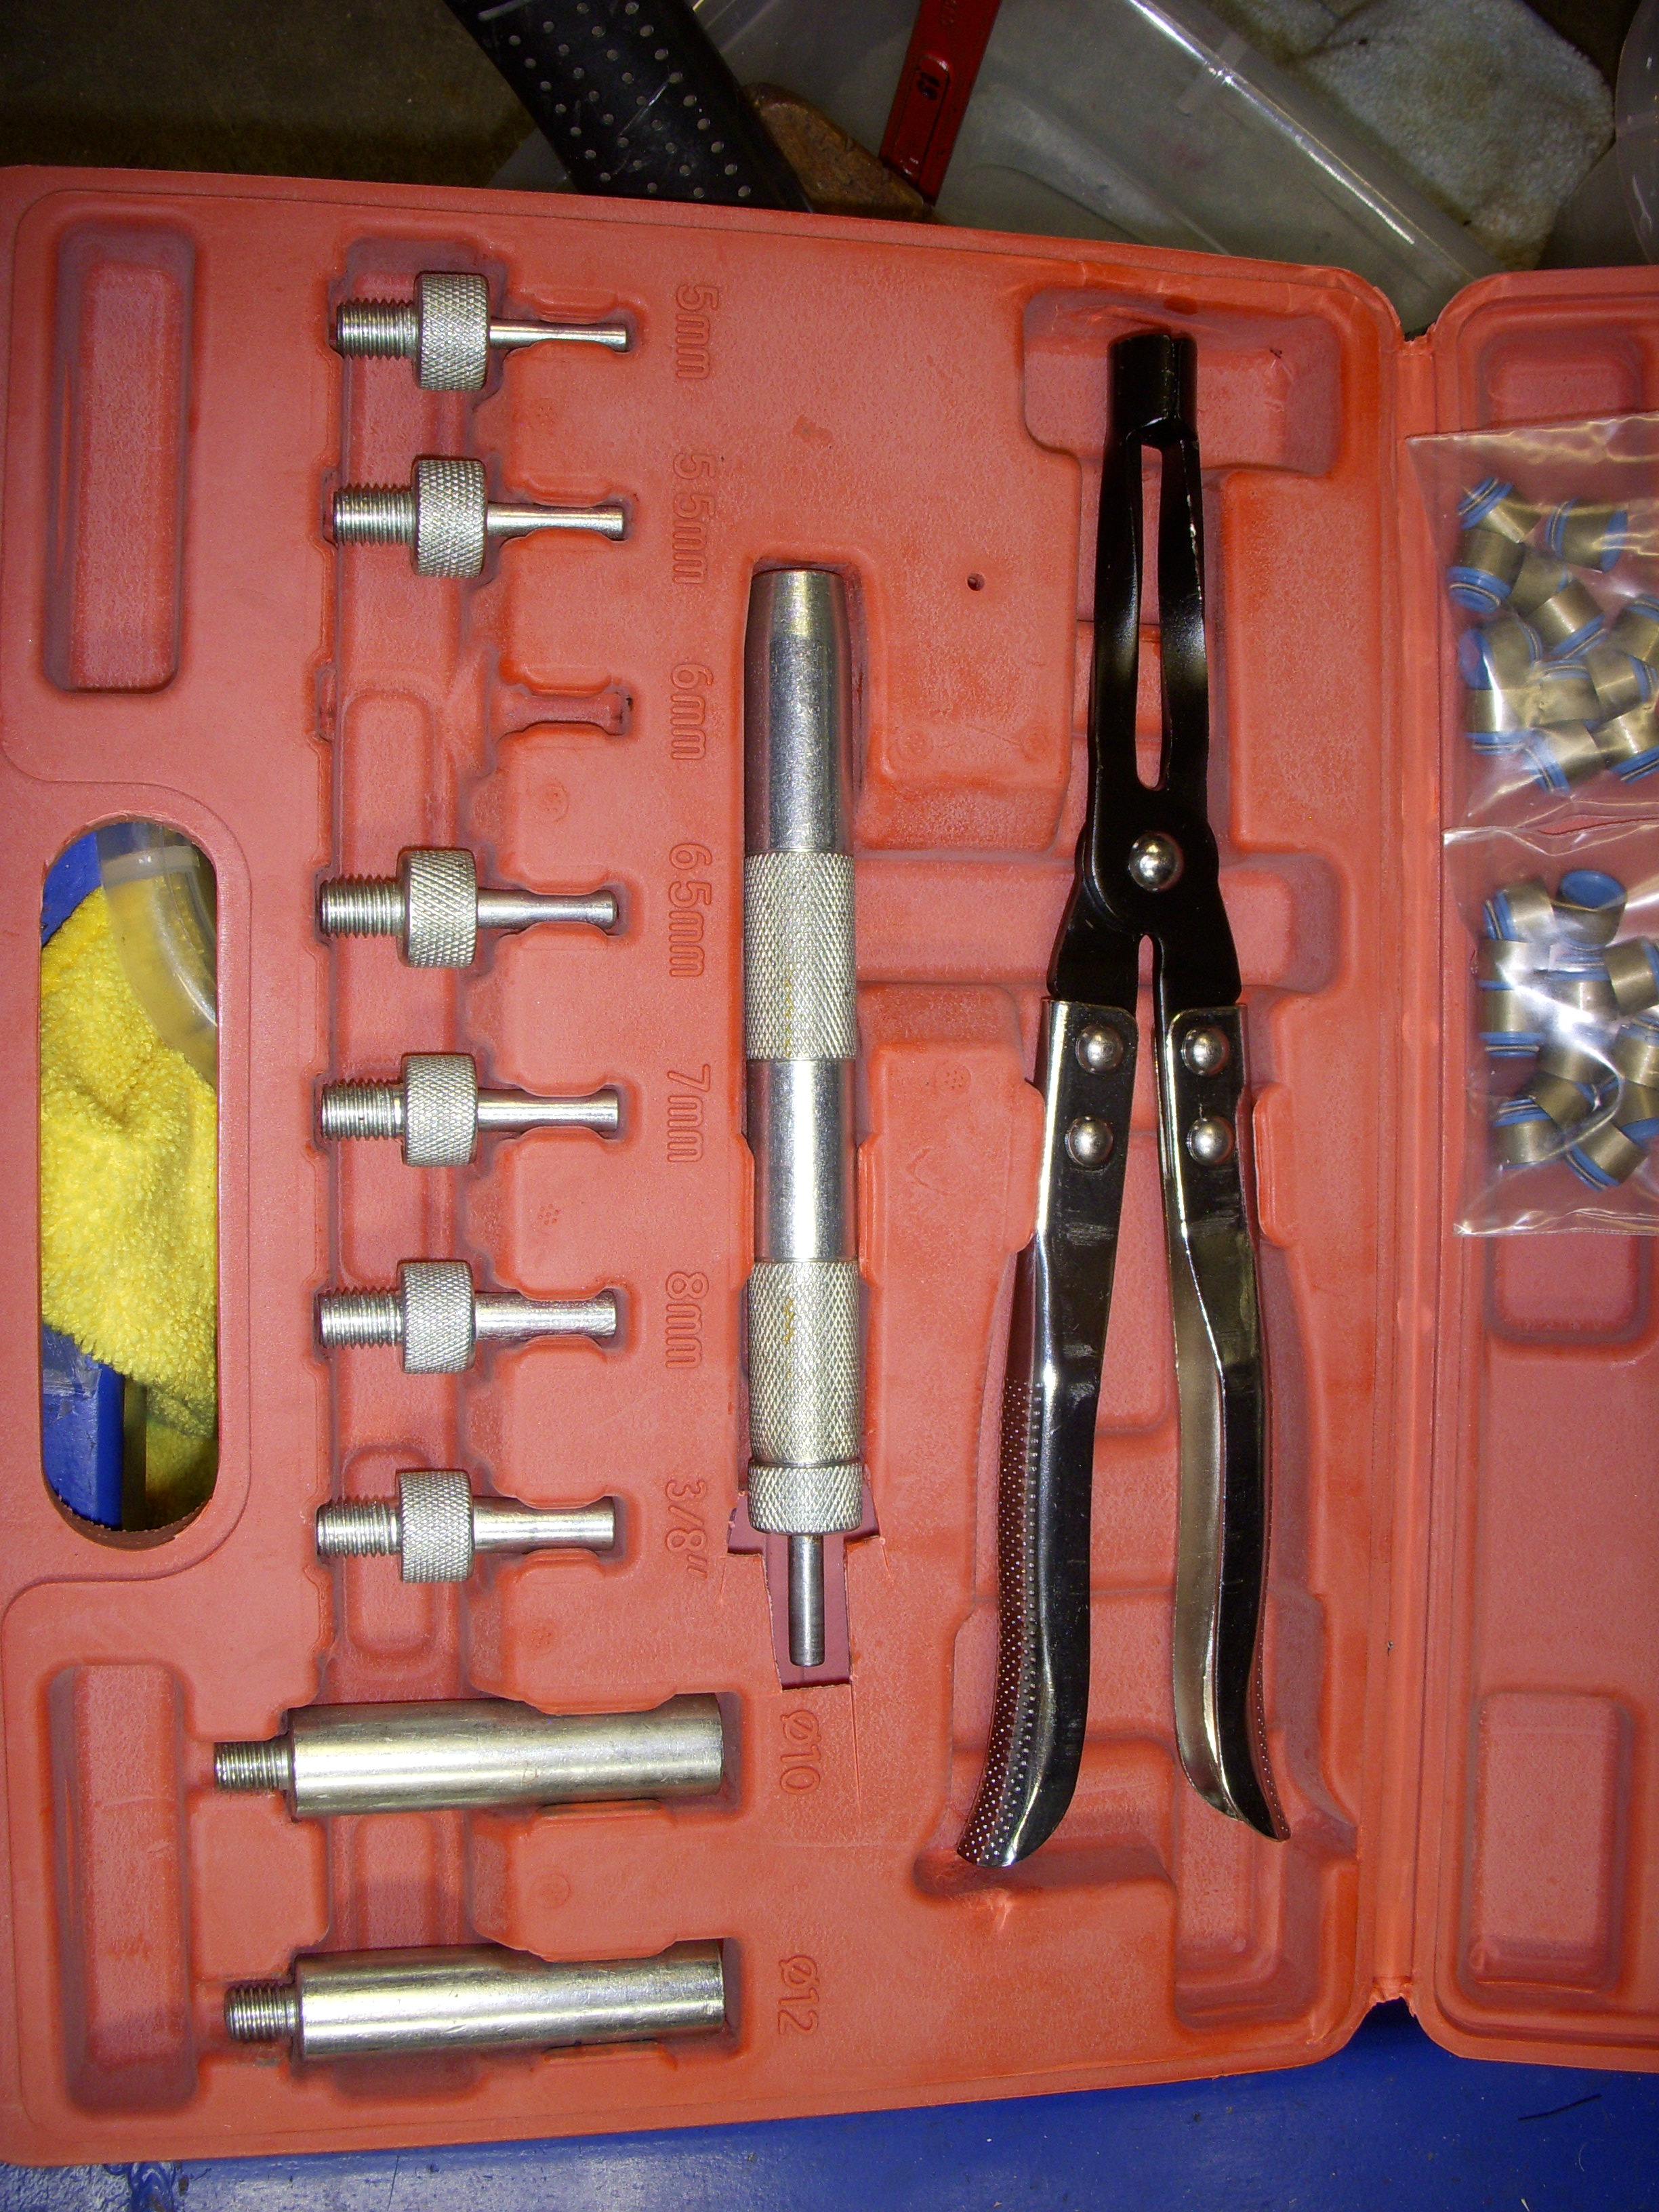
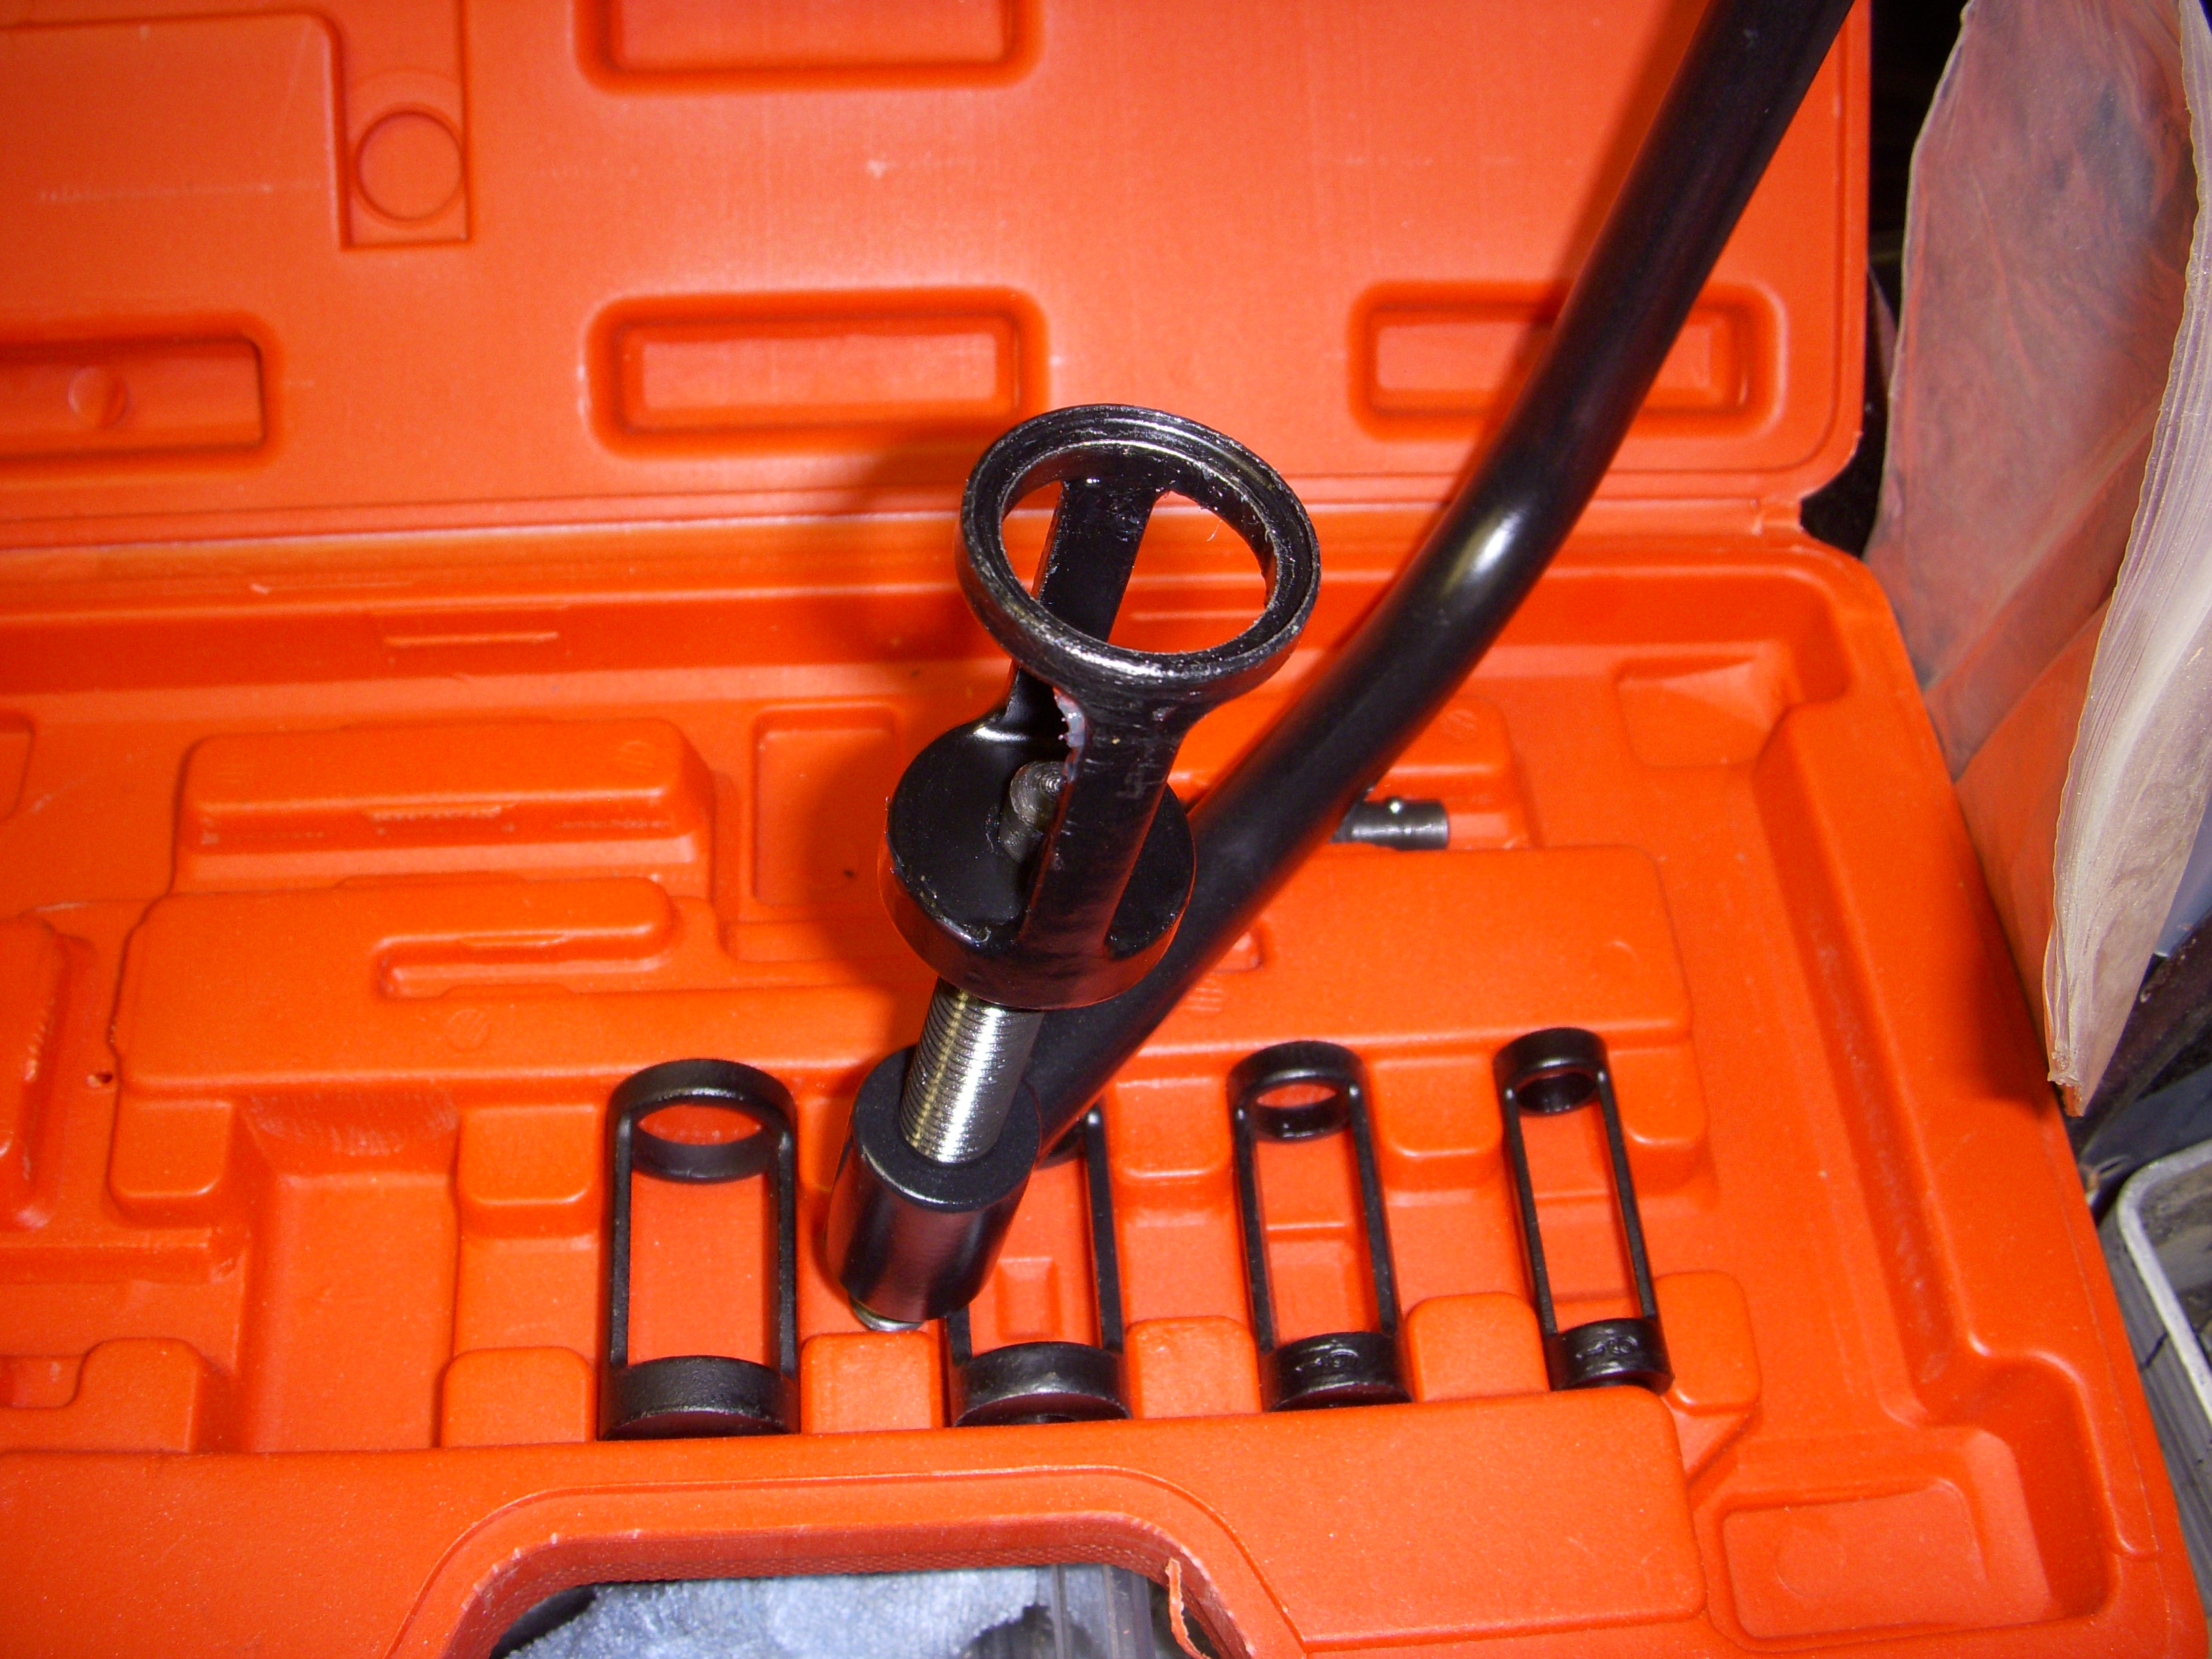
Then I moved onto the intake valves (different springs) with one shim each and tried again with the mounted compression tool - and those specially-selected springs are STOUT - and I couldn't get any to compress enough to engage the keepers. I even put the Lisle head on the compression tool, but still no luck. WTF... I searched for other compression tools and found something promising on eBay, and it arrived yesterday. It uses threaded rods, kinda like a C-clamp, and turning one will compress the spring, no problem. It has five different size heads but the largest - 30mm - fits perfectly over the HR valve retainer, so with a little trailer axle grease I was able to easily install the six intakes. Less than $24.00 shipped on eBay. Thumped them, too - OK.
Once the fall heat wave cools down, maybe tomorrow, I can get back to business. A heat-index of 103* just ain't fun, and mosquitos are thick enough to walk on in this weather.
Freaking PhotoBucket quit working, so I'll try another server.


Last edited by grey99max; 01-16-2017 at 06:52 PM.
 10-04-2016, 03:43 PM
#1821
LandShark has Cosworth
Thread Starter
iTrader: (12)
Join Date: Jan 2004
Location: Topeka, KS
Posts: 4,327
Thank you, sir!
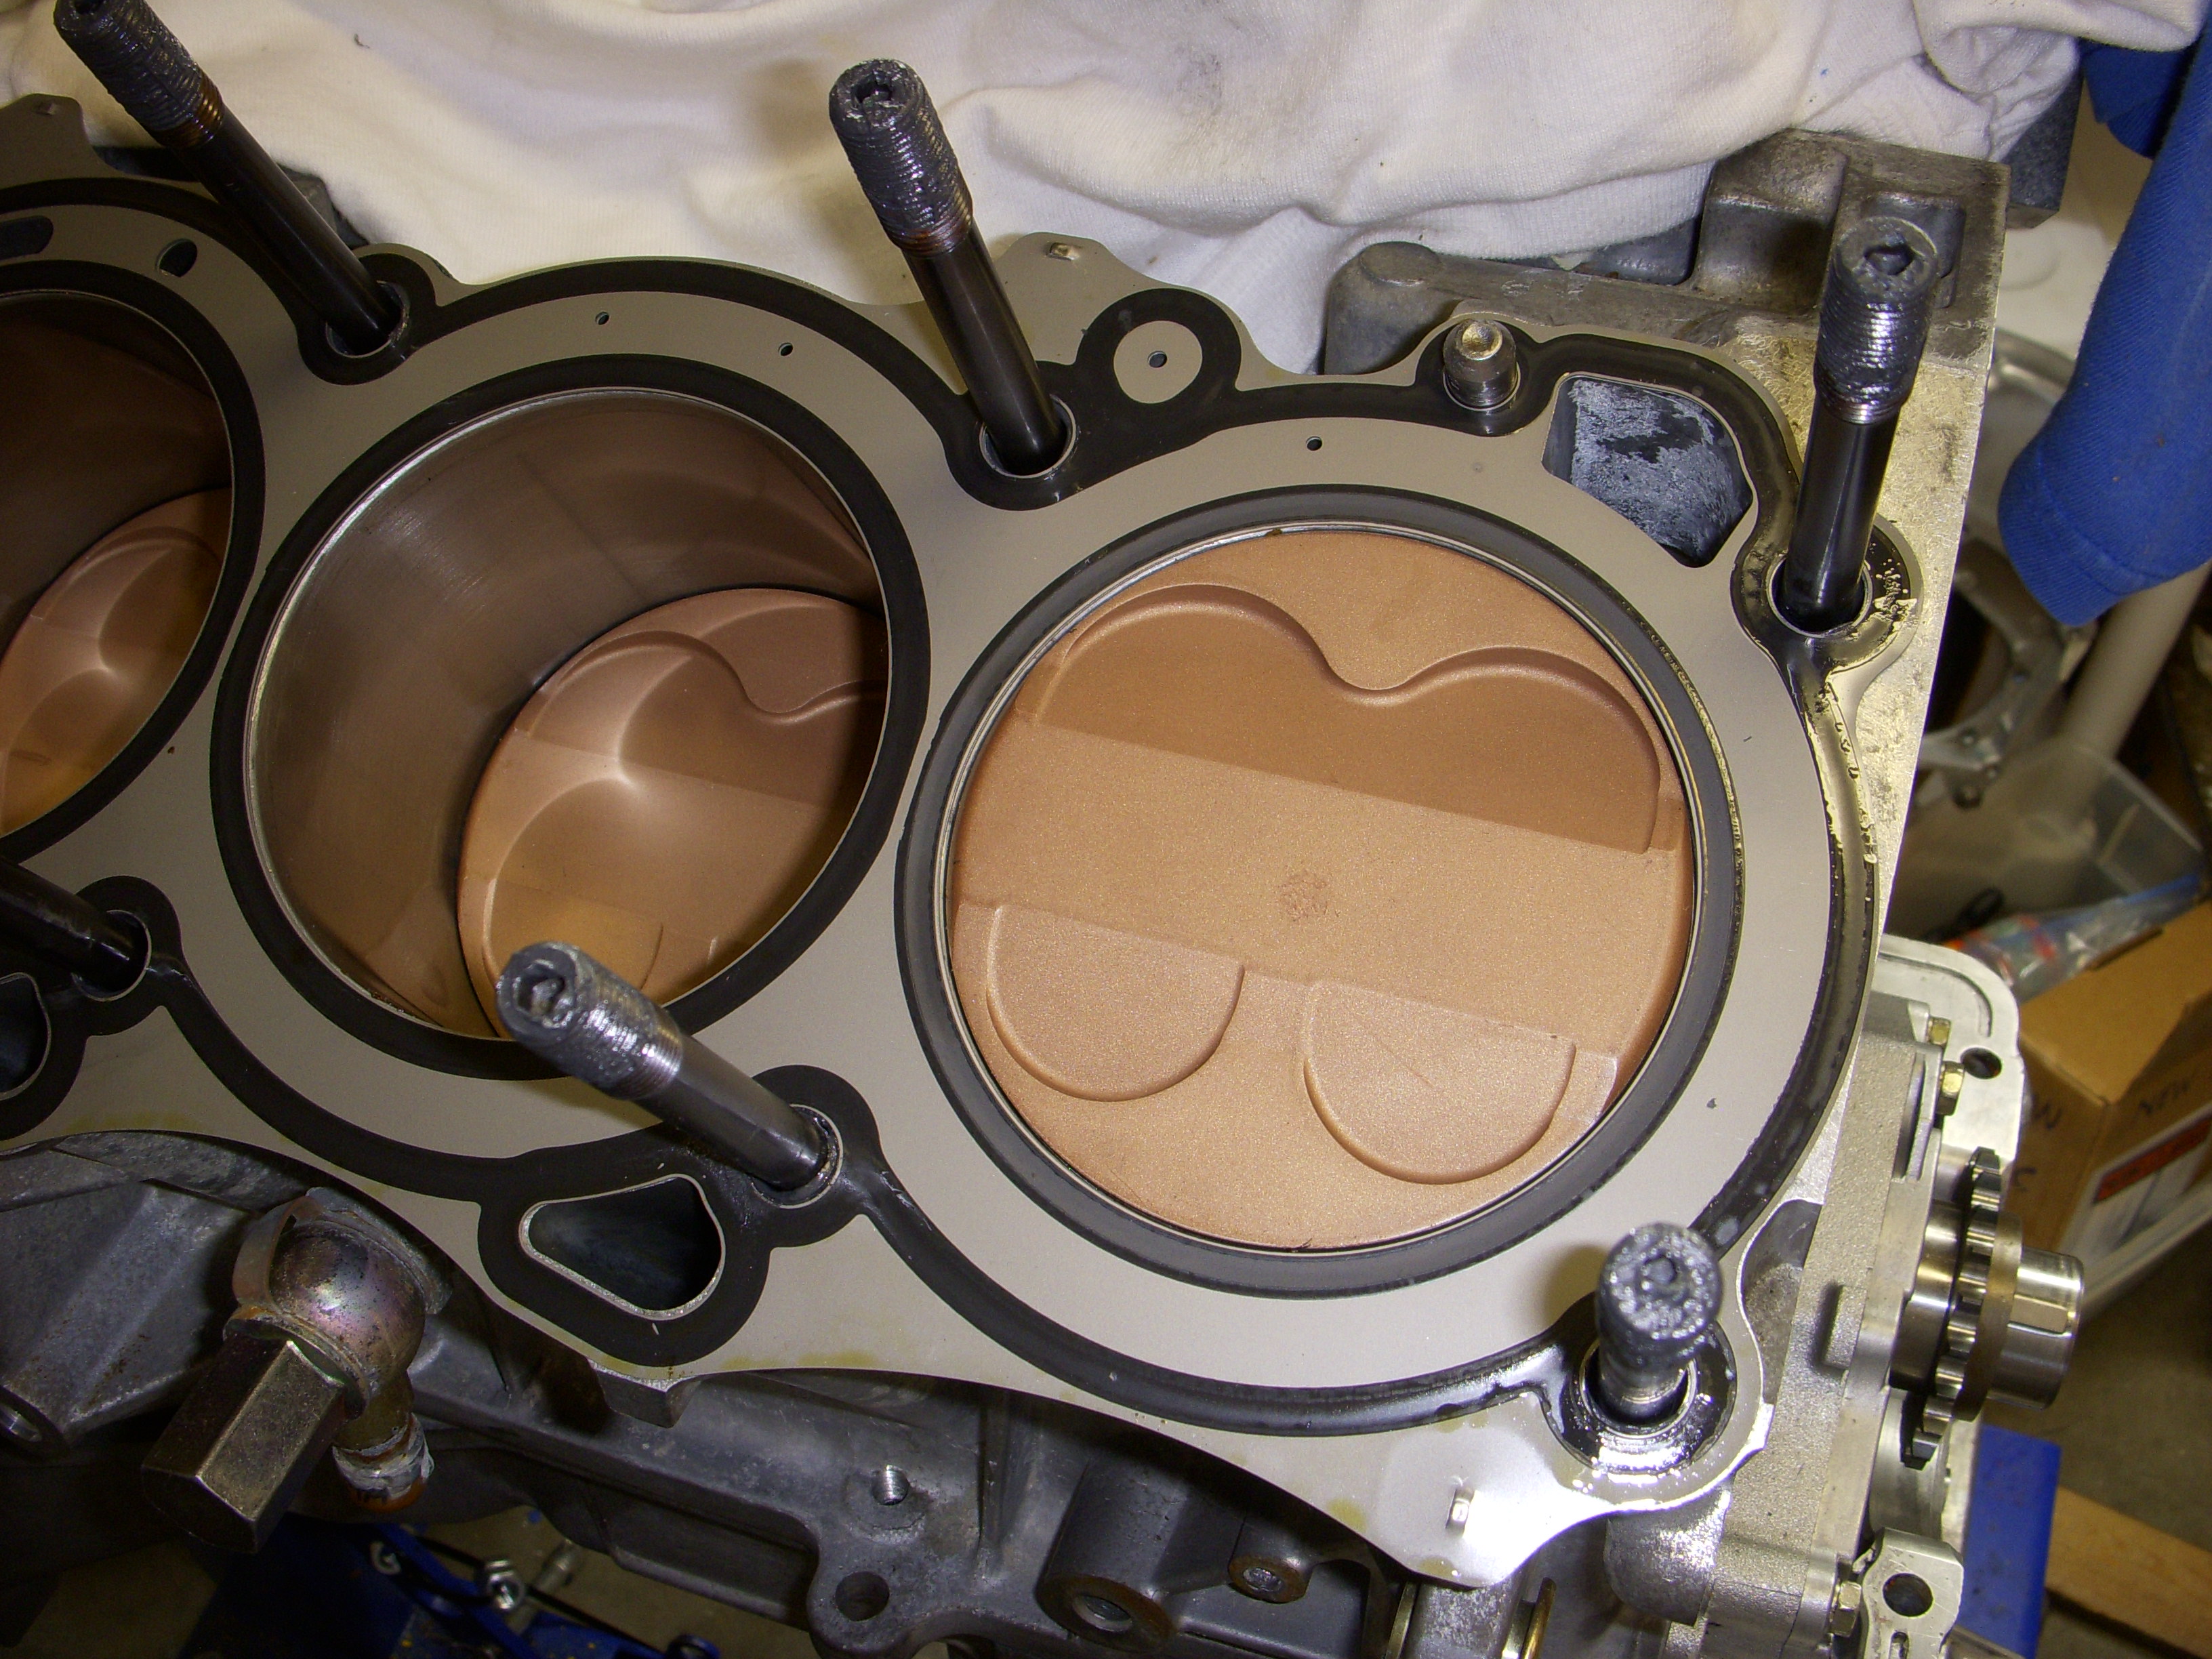
This project has been a fun challenge, and I am often amazed by how many VQ3xxx engine parts will interchange. The clearance for the BC stroker crank in the 3.0 oil pan had me worried, but with the help of Mr. Dremel, no problems. -3.76L engine-
I've had some distractions lately, (family and floods) but I did decide not to install +1mm valves in the HR heads. The monster C11/RZ1 cams from JWT has enough duration and lift (I=311*, E=300*) that it seemed pointless with what I'm using for intake and exhaust manifolds. There wasn't much I could find that documented gains from the larger valves or from porting the heads.
Besides, there's always more nitrous... and the Megasquirt MS3-Pro ecu to tweak with.
Hmmm. this is a 3-generations engine, isn't it? - 3.0 cases and timing stuff, 2005 VQ35DE block, and real FX35 HR heads. I just hope it starts.
What do you know about 350Z 6-spd transmissions? I keep getting the itch to shift something that's RWD, and since I seem to have a collection of leftover expensive cranks, rods, and pistons, and heads, and cams, and intakes, and nitrous bottles and wheels, etc, it occurs to me that stripping down an old Nissan D21 pickup and building a RWD VQ engine w/6spd for it could be fun.... I had a 93 new one and had it around for the kids until a few years ago - they kinda beat it to death so I junked it, but that sucka was light (2600 lb) and could be lighter. Maybe a Ford Ranger 8.8" rear axle... Watcha think ??
This project has been a fun challenge, and I am often amazed by how many VQ3xxx engine parts will interchange. The clearance for the BC stroker crank in the 3.0 oil pan had me worried, but with the help of Mr. Dremel, no problems.
-3.76L engine-I've had some distractions lately, (family and floods) but I did decide not to install +1mm valves in the HR heads. The monster C11/RZ1 cams from JWT has enough duration and lift (I=311*, E=300*) that it seemed pointless with what I'm using for intake and exhaust manifolds. There wasn't much I could find that documented gains from the larger valves or from porting the heads.
Besides, there's always more nitrous... and the Megasquirt MS3-Pro ecu to tweak with.
Hmmm. this is a 3-generations engine, isn't it? - 3.0 cases and timing stuff, 2005 VQ35DE block, and real FX35 HR heads. I just hope it starts.
What do you know about 350Z 6-spd transmissions? I keep getting the itch to shift something that's RWD, and since I seem to have a collection of leftover expensive cranks, rods, and pistons, and heads, and cams, and intakes, and nitrous bottles and wheels, etc, it occurs to me that stripping down an old Nissan D21 pickup and building a RWD VQ engine w/6spd for it could be fun.... I had a 93 new one and had it around for the kids until a few years ago - they kinda beat it to death so I junked it, but that sucka was light (2600 lb) and could be lighter. Maybe a Ford Ranger 8.8" rear axle... Watcha think ??
 10-07-2016, 06:47 PM
#1823
LandShark has Cosworth
Thread Starter
iTrader: (12)
Join Date: Jan 2004
Location: Topeka, KS
Posts: 4,327
Well, DUH, it's you driving your Maxima in reverse !!
I have occasional hot flashes over crate engines, like the latest complete JEGS BluePrint 632" BB-Chevy dyno tested with documentation and 815 HP and 800 TQ, and a 30-month, 50,000 mile warranty, fresh off the dyno. Delivered to your door for $11,599.00 ....
Find some old Chebby roller, add Powerglide plus TC and 9" Ford rear, add a pair of M/T ET Street Radials and go out hunting at night. Heh.. Not that I would ever do that ...
10-16-2016, 08:04 AM
#1824
Thank you, sir!
This project has been a fun challenge, and I am often amazed by how many VQ3xxx engine parts will interchange. The clearance for the BC stroker crank in the 3.0 oil pan had me worried, but with the help of Mr. Dremel, no problems. -3.76L engine-
I've had some distractions lately, (family and floods) but I did decide not to install +1mm valves in the HR heads. The monster C11/RZ1 cams from JWT has enough duration and lift (I=311*, E=300*) that it seemed pointless with what I'm using for intake and exhaust manifolds. There wasn't much I could find that documented gains from the larger valves or from porting the heads.
Besides, there's always more nitrous... and the Megasquirt MS3-Pro ecu to tweak with.
Hmmm. this is a 3-generations engine, isn't it? - 3.0 cases and timing stuff, 2005 VQ35DE block, and real FX35 HR heads. I just hope it starts.
What do you know about 350Z 6-spd transmissions? I keep getting the itch to shift something that's RWD, and since I seem to have a collection of leftover expensive cranks, rods, and pistons, and heads, and cams, and intakes, and nitrous bottles and wheels, etc, it occurs to me that stripping down an old Nissan D21 pickup and building a RWD VQ engine w/6spd for it could be fun.... I had a 93 new one and had it around for the kids until a few years ago - they kinda beat it to death so I junked it, but that sucka was light (2600 lb) and could be lighter. Maybe a Ford Ranger 8.8" rear axle... Watcha think ??
This project has been a fun challenge, and I am often amazed by how many VQ3xxx engine parts will interchange. The clearance for the BC stroker crank in the 3.0 oil pan had me worried, but with the help of Mr. Dremel, no problems.
-3.76L engine-I've had some distractions lately, (family and floods) but I did decide not to install +1mm valves in the HR heads. The monster C11/RZ1 cams from JWT has enough duration and lift (I=311*, E=300*) that it seemed pointless with what I'm using for intake and exhaust manifolds. There wasn't much I could find that documented gains from the larger valves or from porting the heads.
Besides, there's always more nitrous... and the Megasquirt MS3-Pro ecu to tweak with.
Hmmm. this is a 3-generations engine, isn't it? - 3.0 cases and timing stuff, 2005 VQ35DE block, and real FX35 HR heads. I just hope it starts.
What do you know about 350Z 6-spd transmissions? I keep getting the itch to shift something that's RWD, and since I seem to have a collection of leftover expensive cranks, rods, and pistons, and heads, and cams, and intakes, and nitrous bottles and wheels, etc, it occurs to me that stripping down an old Nissan D21 pickup and building a RWD VQ engine w/6spd for it could be fun.... I had a 93 new one and had it around for the kids until a few years ago - they kinda beat it to death so I junked it, but that sucka was light (2600 lb) and could be lighter. Maybe a Ford Ranger 8.8" rear axle... Watcha think ??
you have a collection of rods and pistons? If you ever catch the itch to sell some, hit me up, pistons and rods are next on my "to do"
10-16-2016, 08:54 AM
#1826
LandShark has Cosworth
Thread Starter
iTrader: (12)
Join Date: Jan 2004
Location: Topeka, KS
Posts: 4,327
Log in to eBay, open your Watch List and enter " 10 pcs Car Valve Spring Compressor Tool Bit Set " in the Search field and there's several listed under $20 - w/free shipping. Playing with the search can give you over 100 of the same tool set.
Good luck, and I'll think about the rods and pistons.
10-19-2016, 07:03 AM
#1827
Good morning - I love that tool and it took me a while to find it on eBay.
Log in to eBay, open your Watch List and enter " 10 pcs Car Valve Spring Compressor Tool Bit Set " in the Search field and there's several listed under $20 - w/free shipping. Playing with the search can give you over 100 of the same tool set.
Good luck, and I'll think about the rods and pistons.
Log in to eBay, open your Watch List and enter " 10 pcs Car Valve Spring Compressor Tool Bit Set " in the Search field and there's several listed under $20 - w/free shipping. Playing with the search can give you over 100 of the same tool set.
Good luck, and I'll think about the rods and pistons.
10-29-2016, 07:14 PM
#1828
LandShark has Cosworth
Thread Starter
iTrader: (12)
Join Date: Jan 2004
Location: Topeka, KS
Posts: 4,327
Ketsup time - er, catchup time...
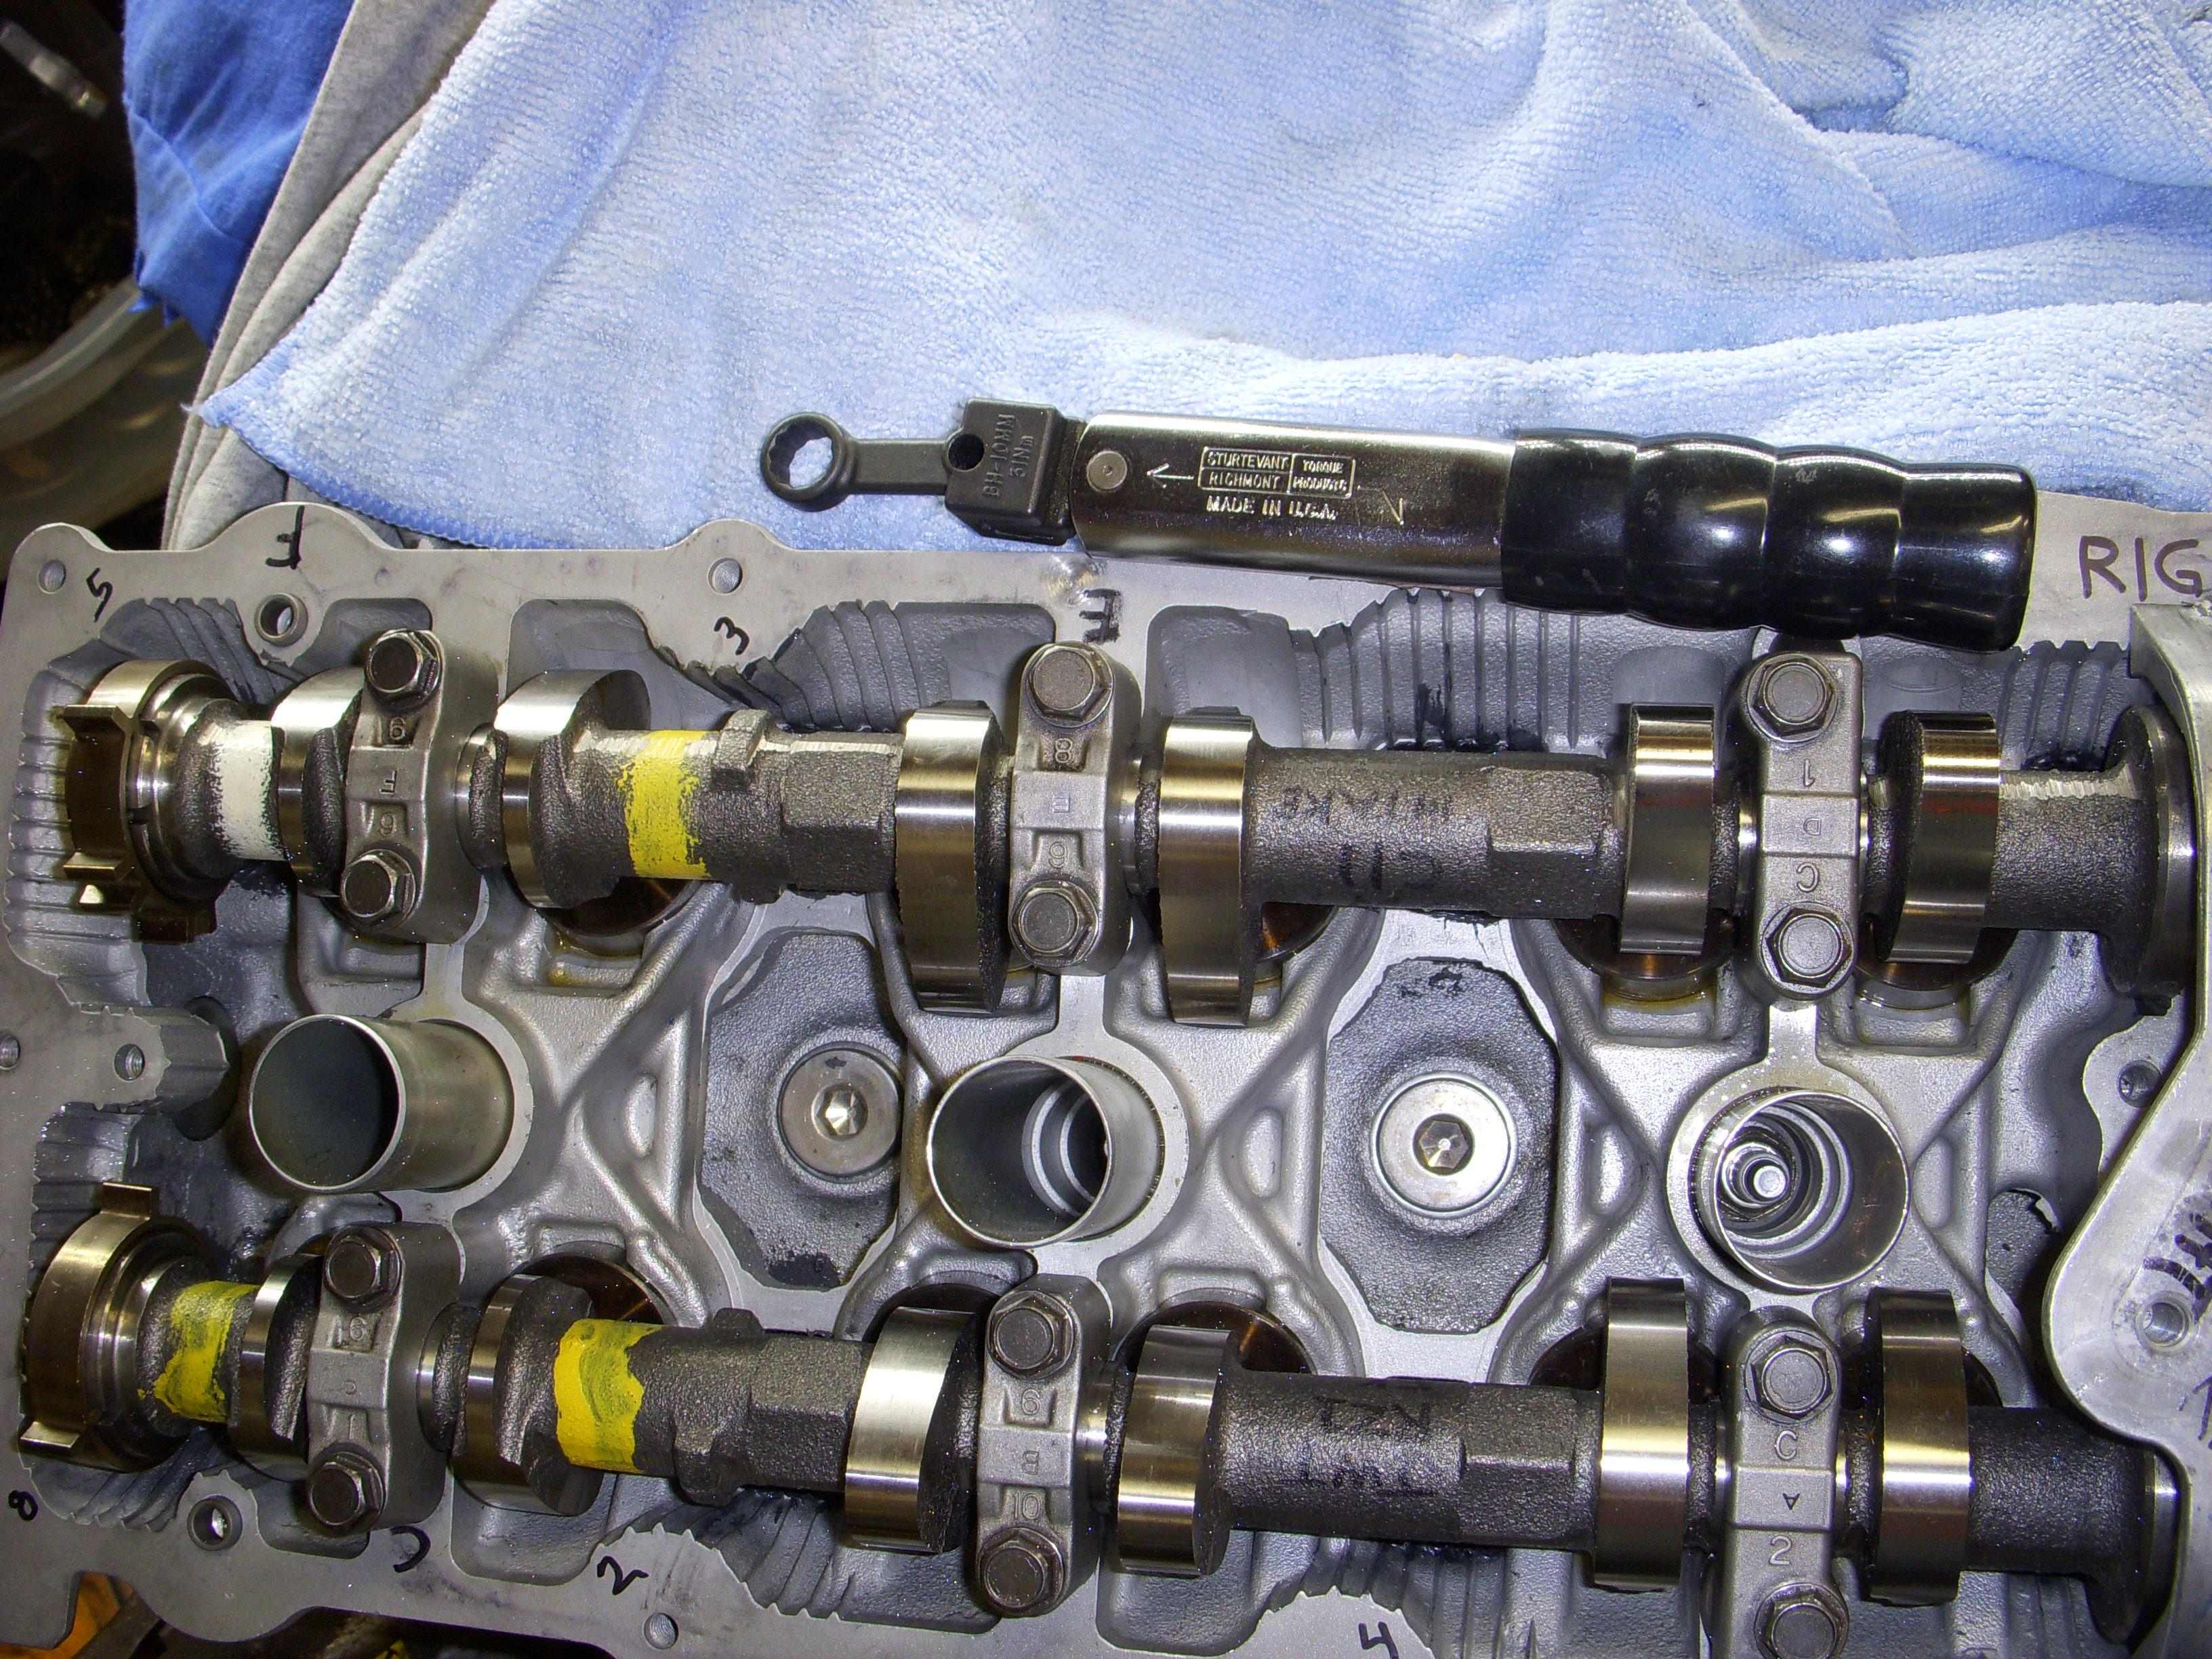
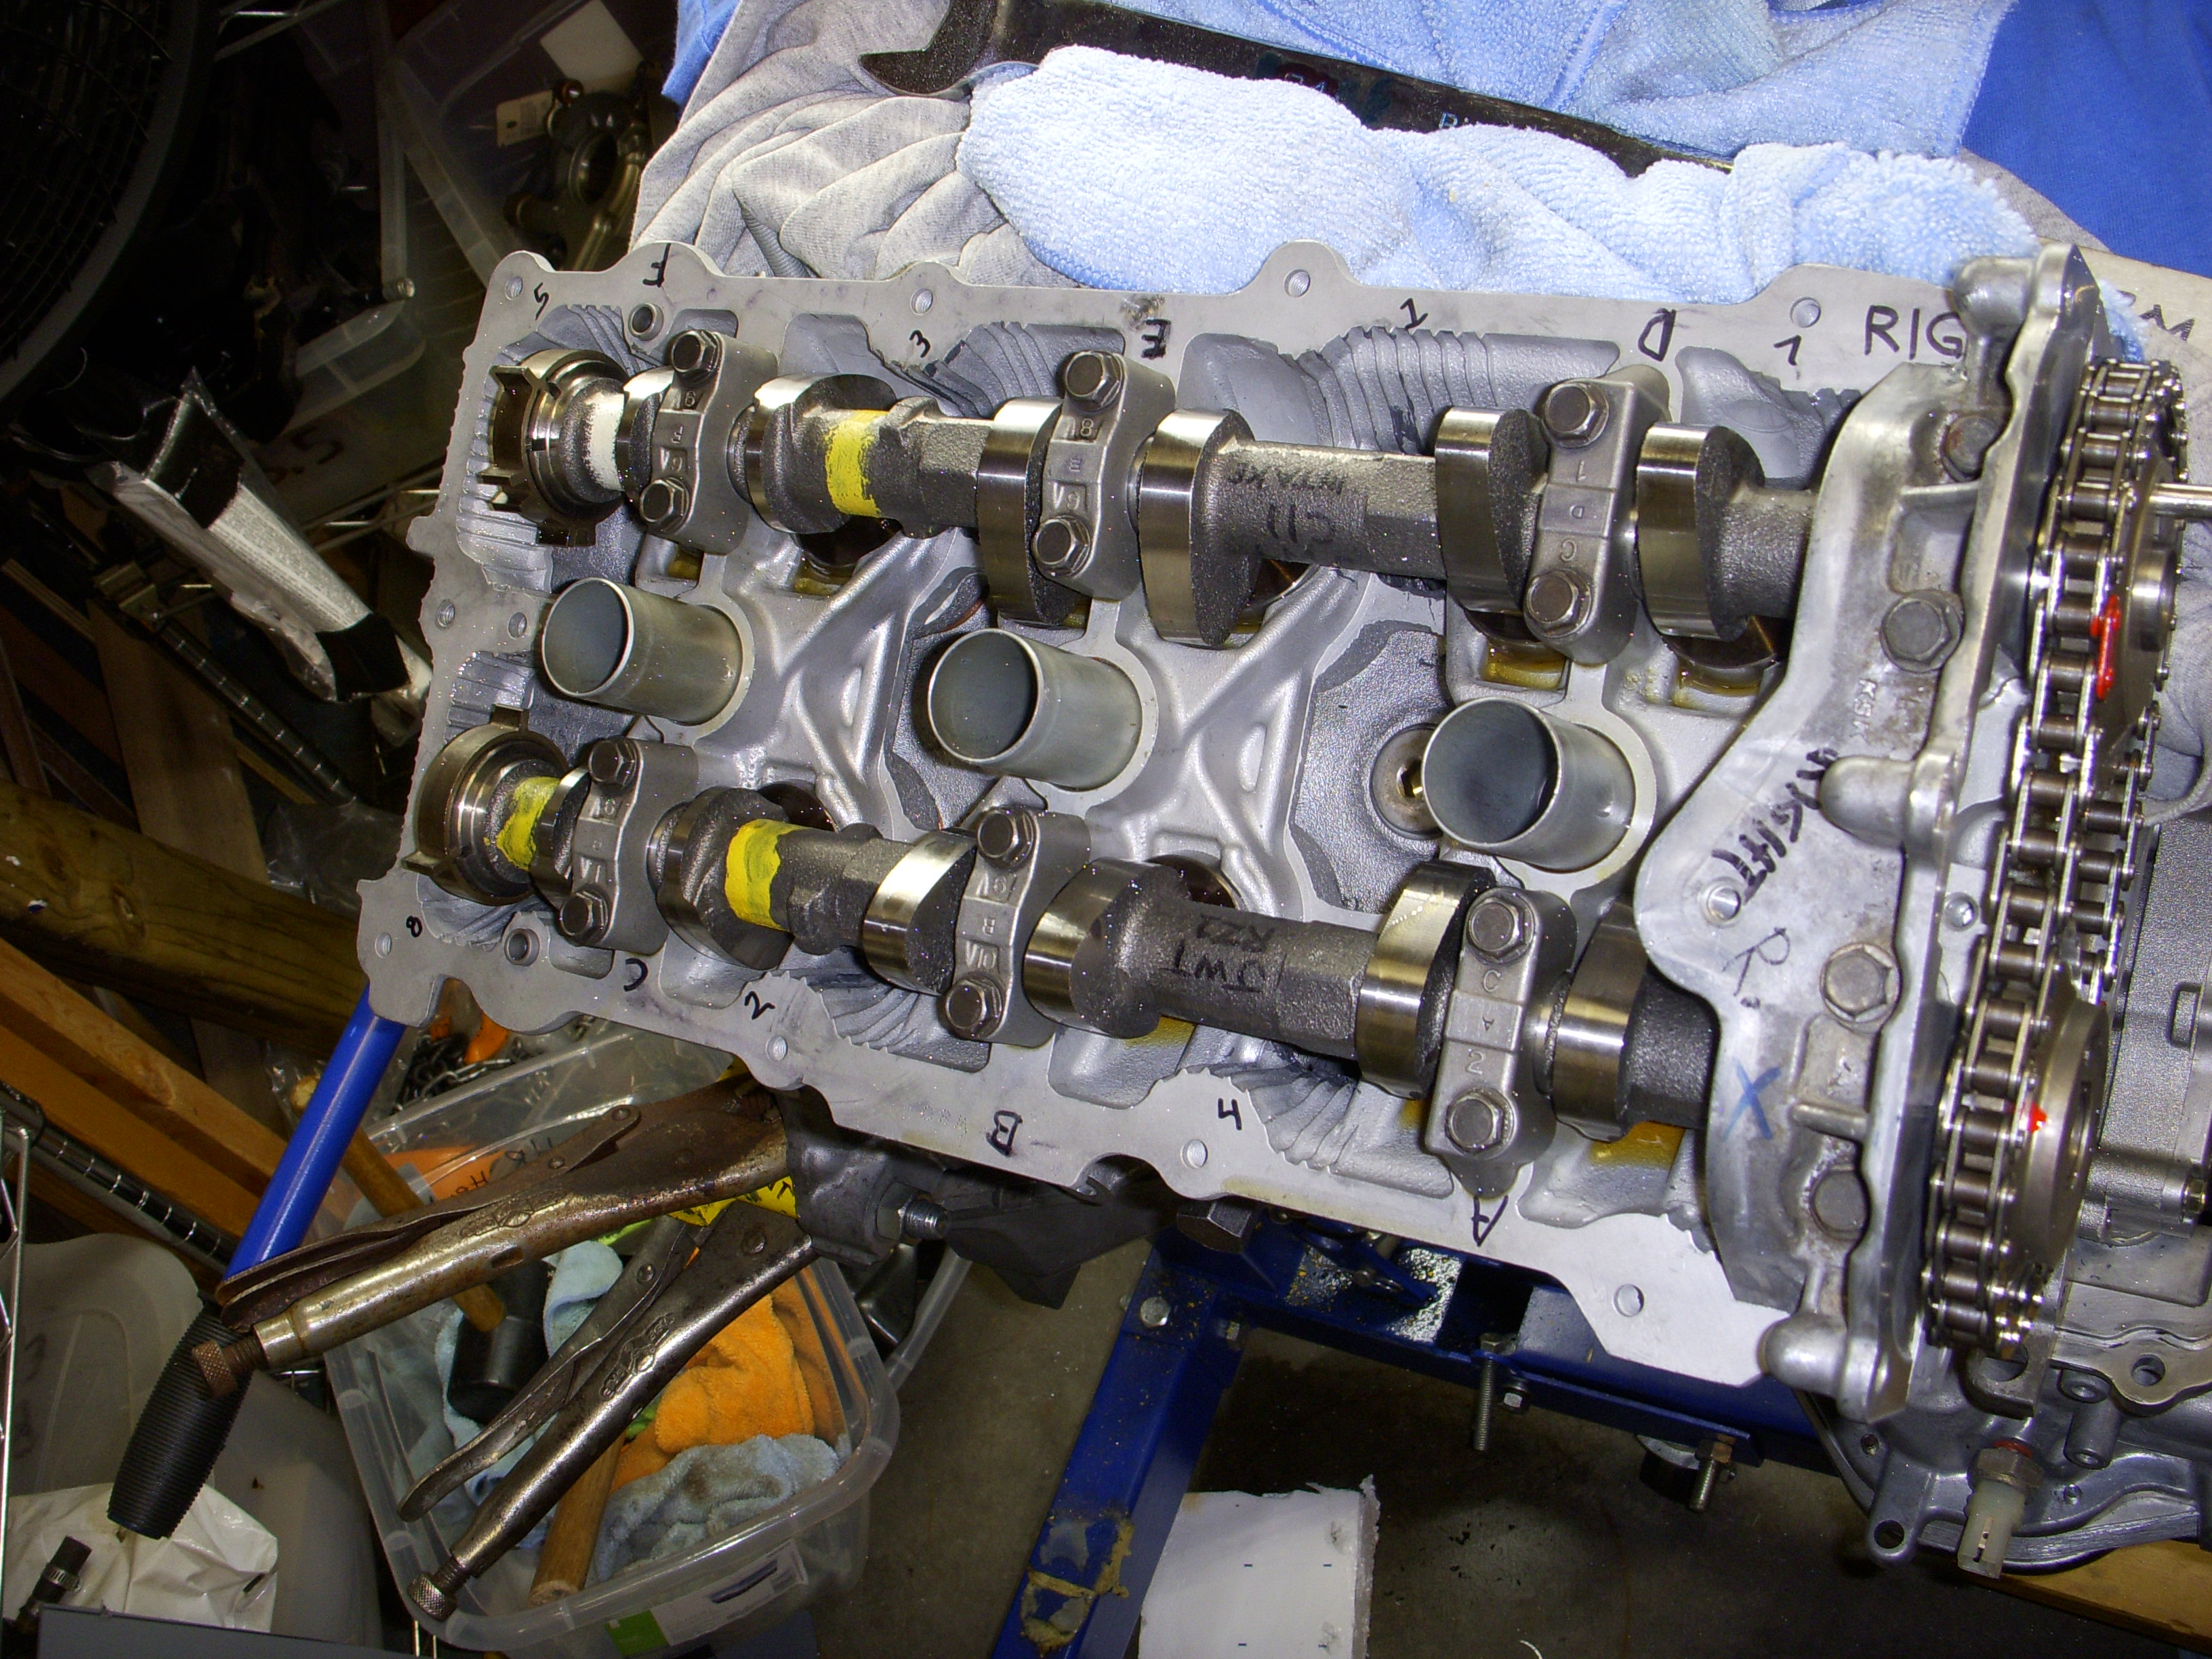
I finished installing the new springs and shims in both heads this week, and today I torqued both heads back on to 56 ft-lbs (85 is ARP final torque), installed all the chain timing stuff and now I need to unlock the crank, put a crank nut in the crank and start spinning things around. I still need to verify valve-to-piston clearance on all cylinders and if there is enough available travel on each valve to prevent coil binding on each one. That's a lot of springs to check.
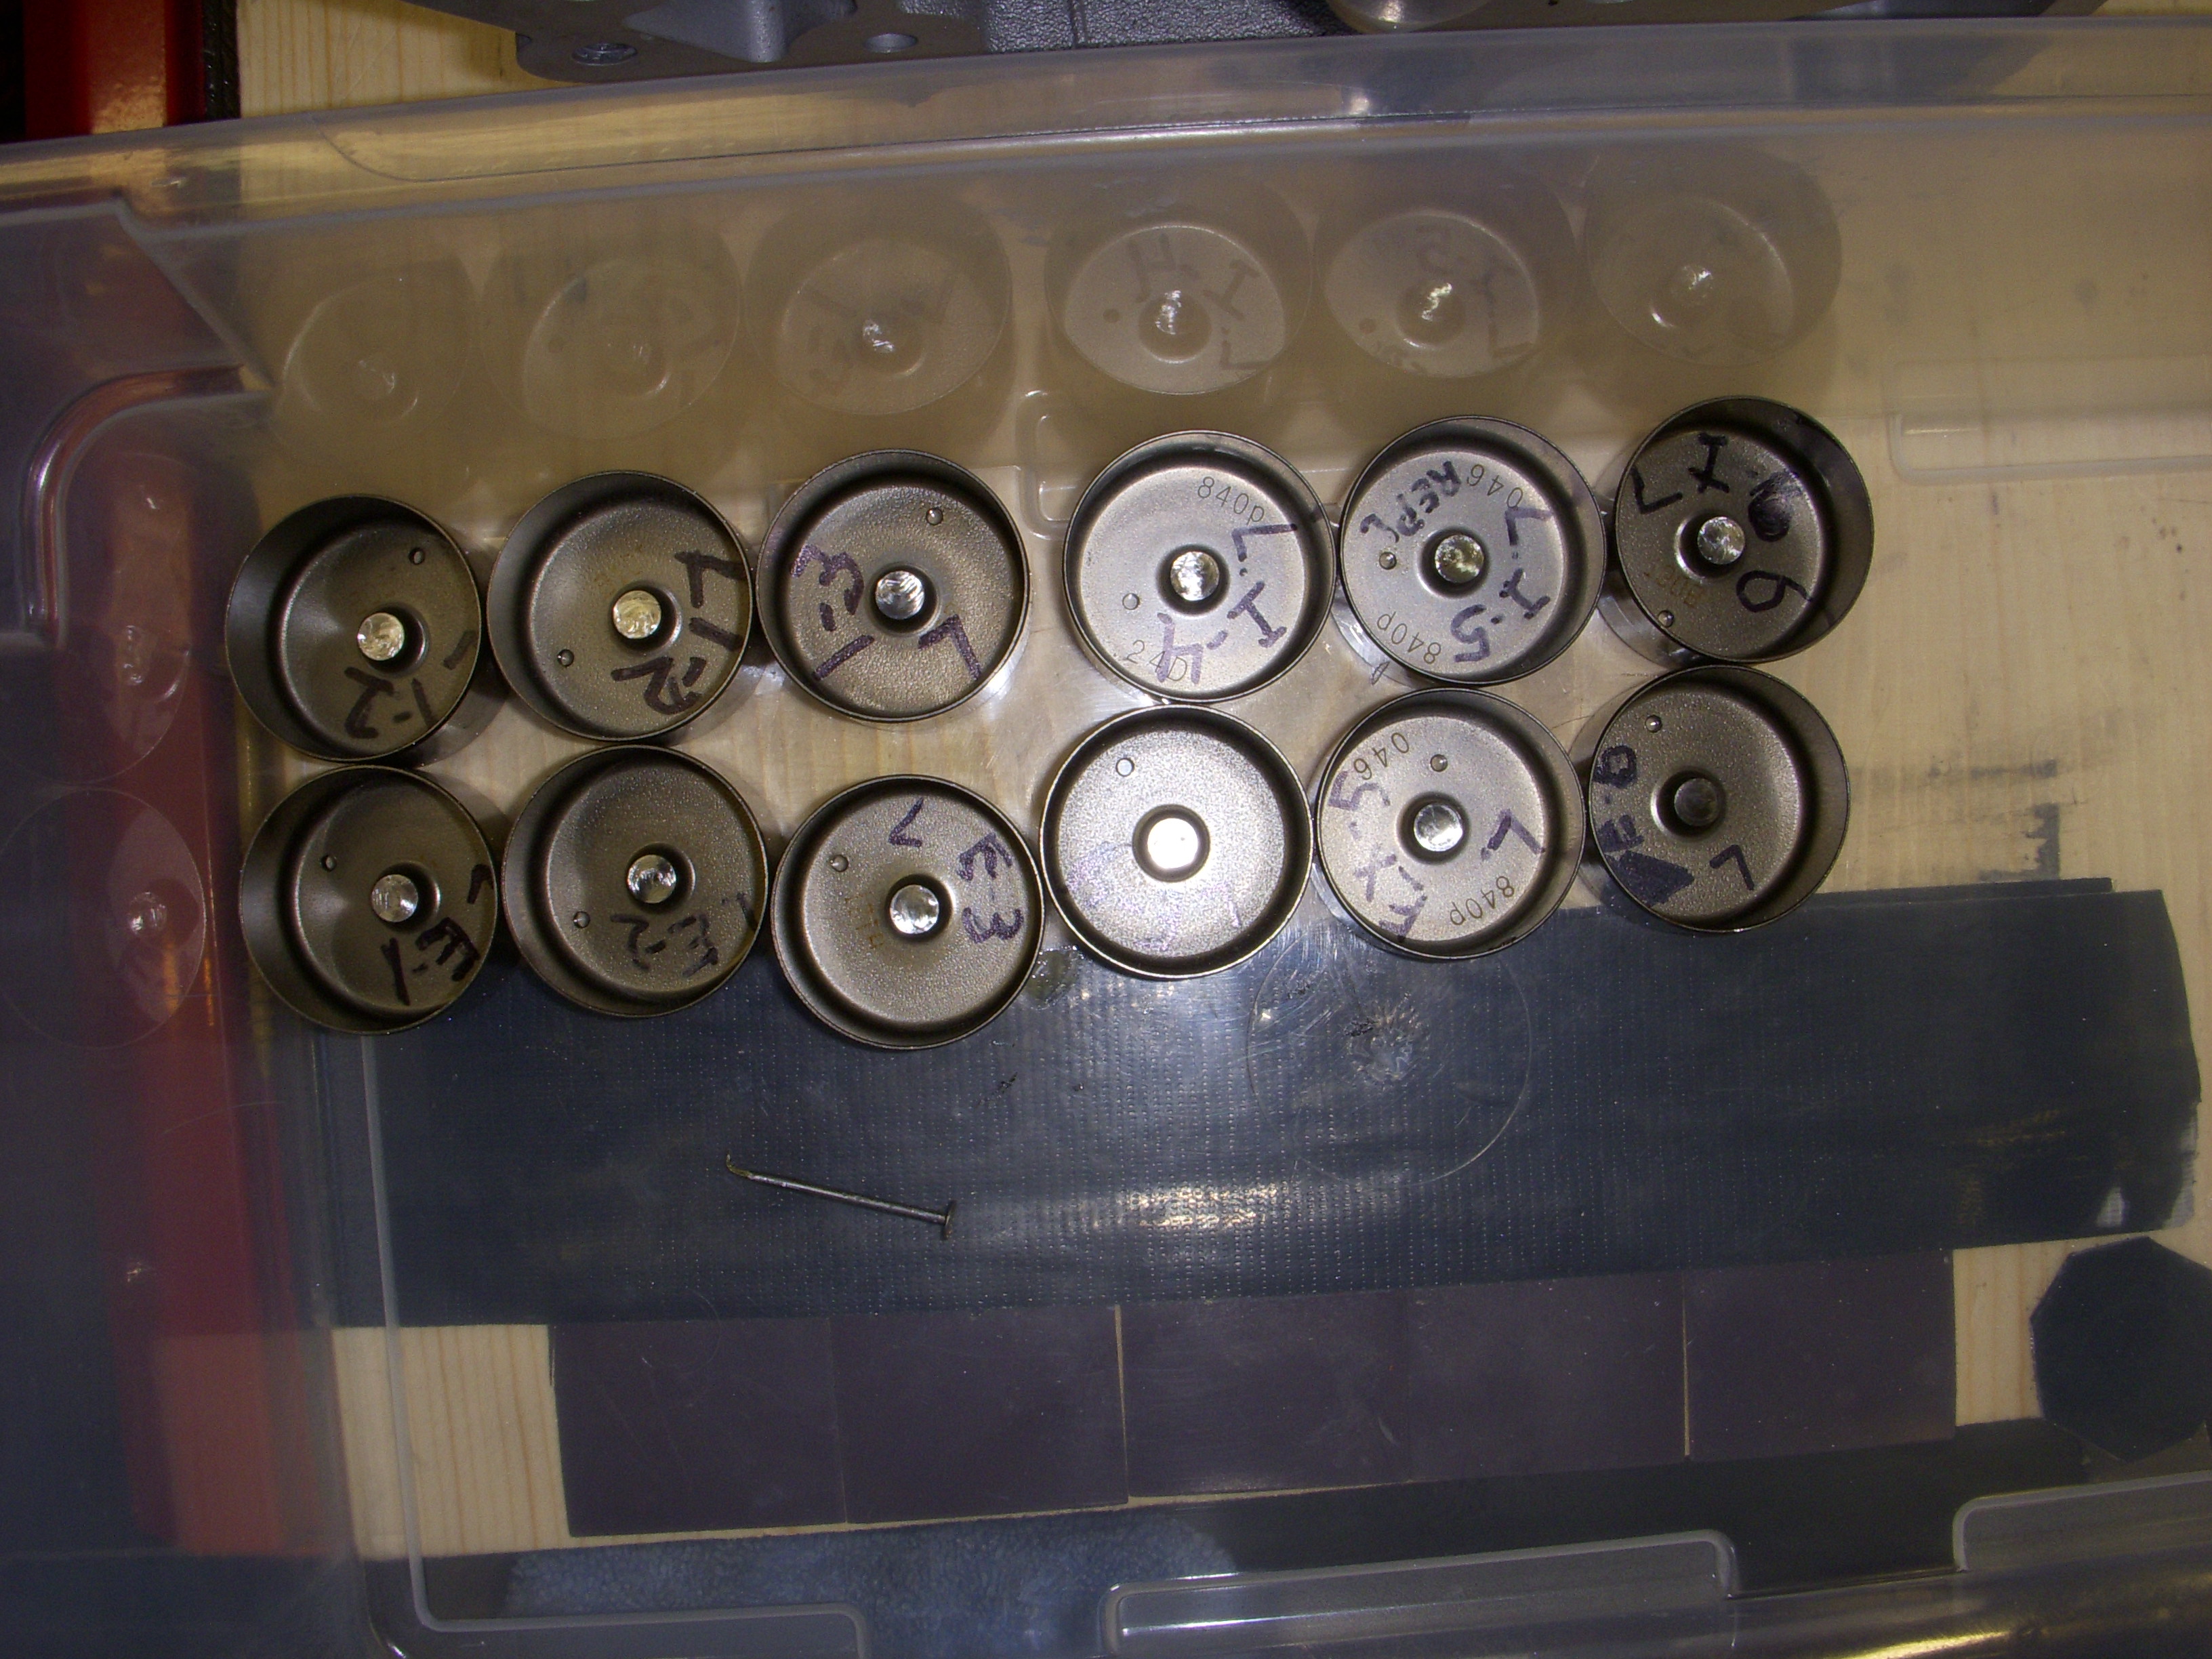
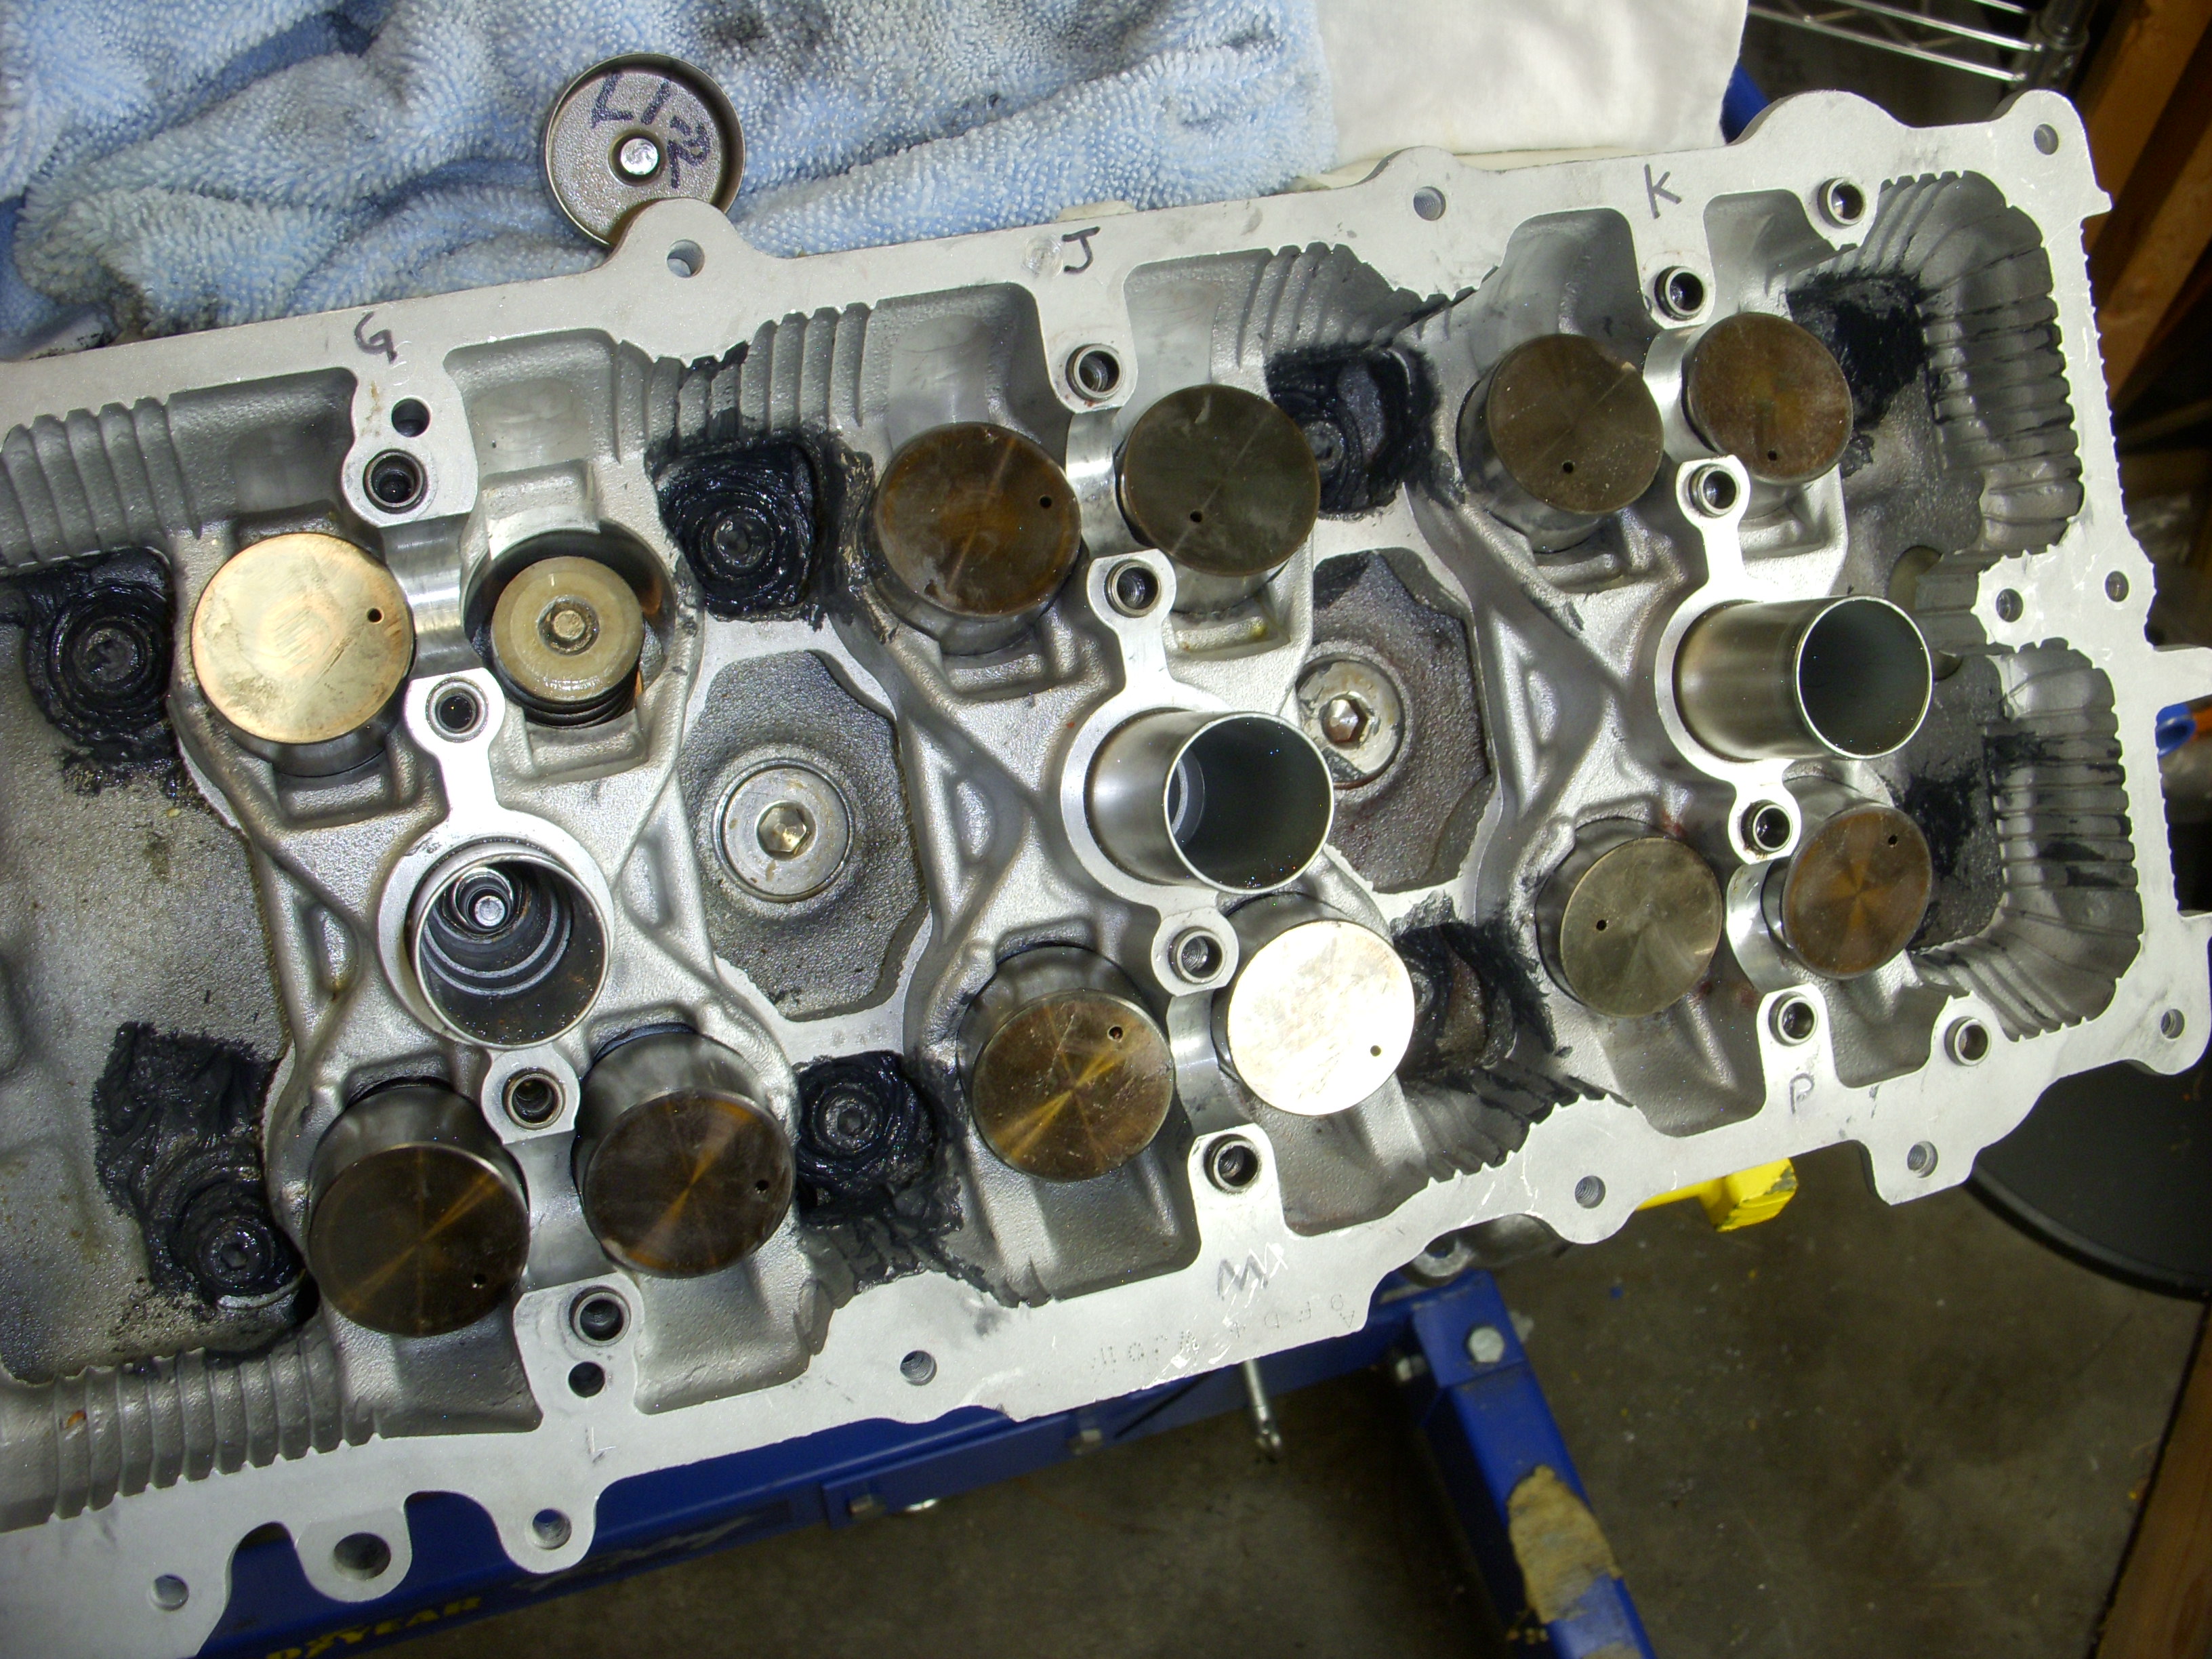
Observations - the new springs are stout - without the latest screw-type valve compressor I would still be in the garage swearing at those springs. I used a dab of bearing grease on each retainer to hold the valve locks in place until I released spring tension. Only lost one - and I still have spares. I also checked that all the valve buckets are free to rotate when a cam lobe comes by - otherwise that magic DLC coating will be history quickly.
-
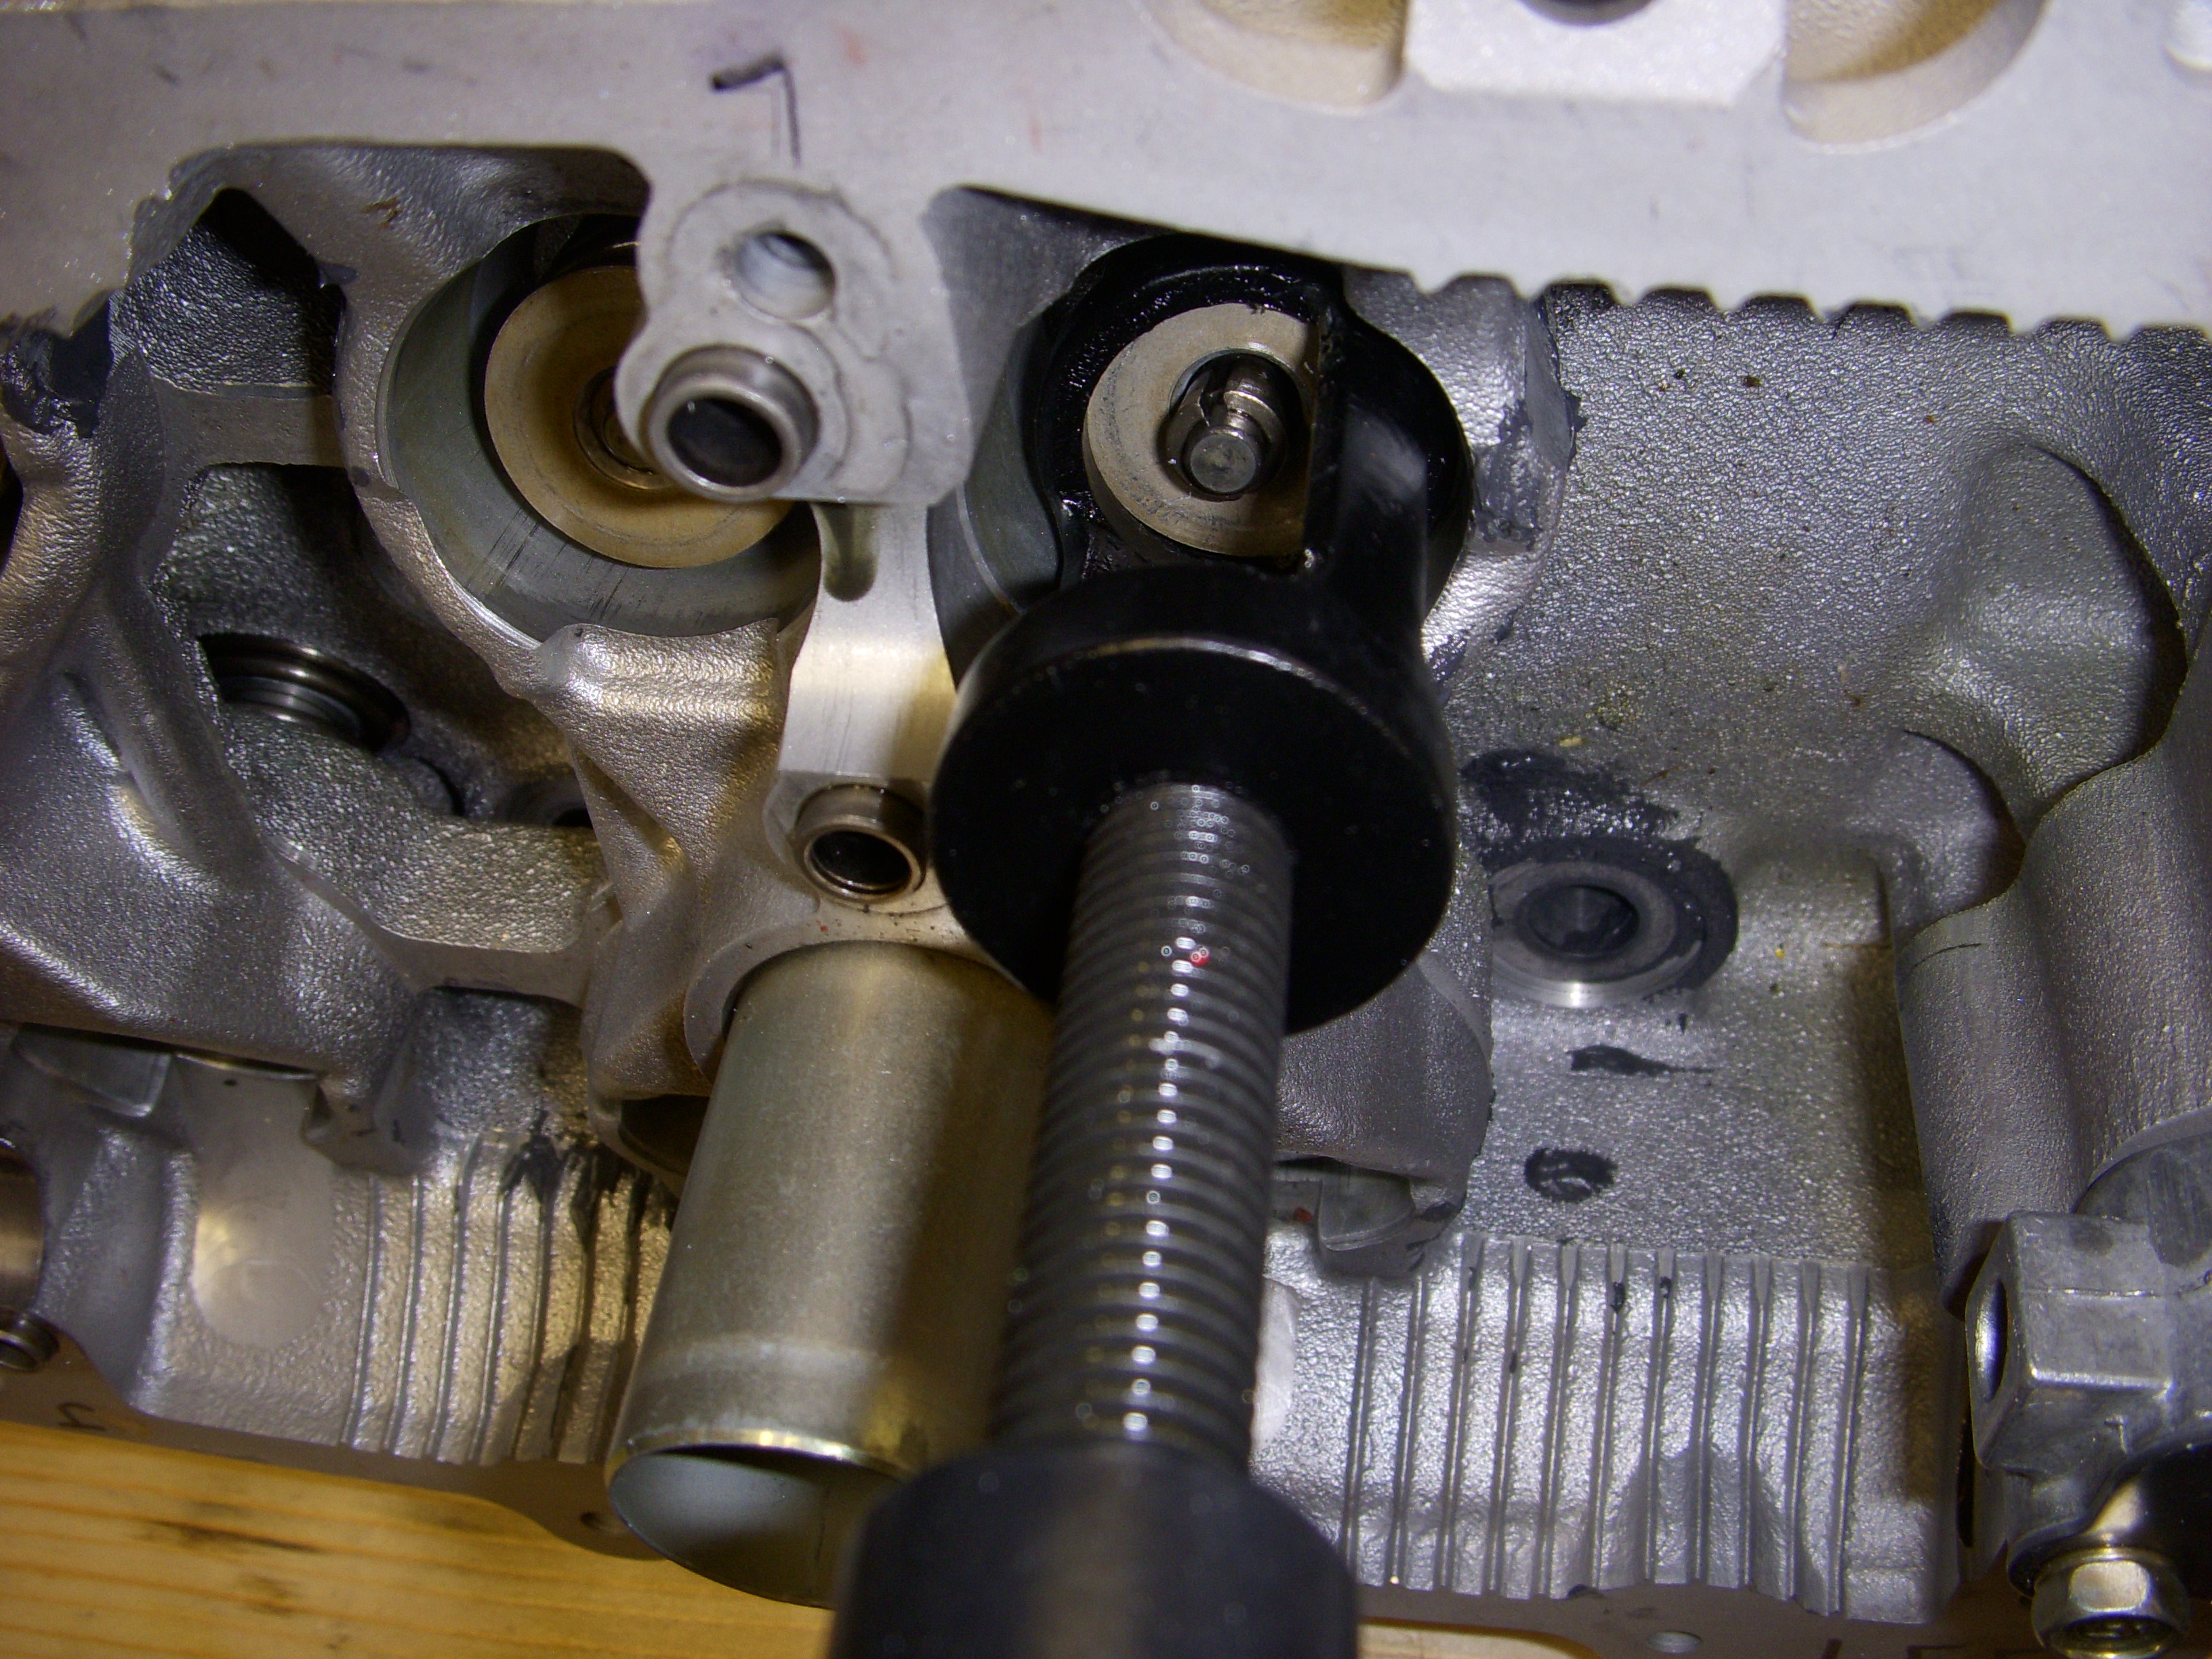
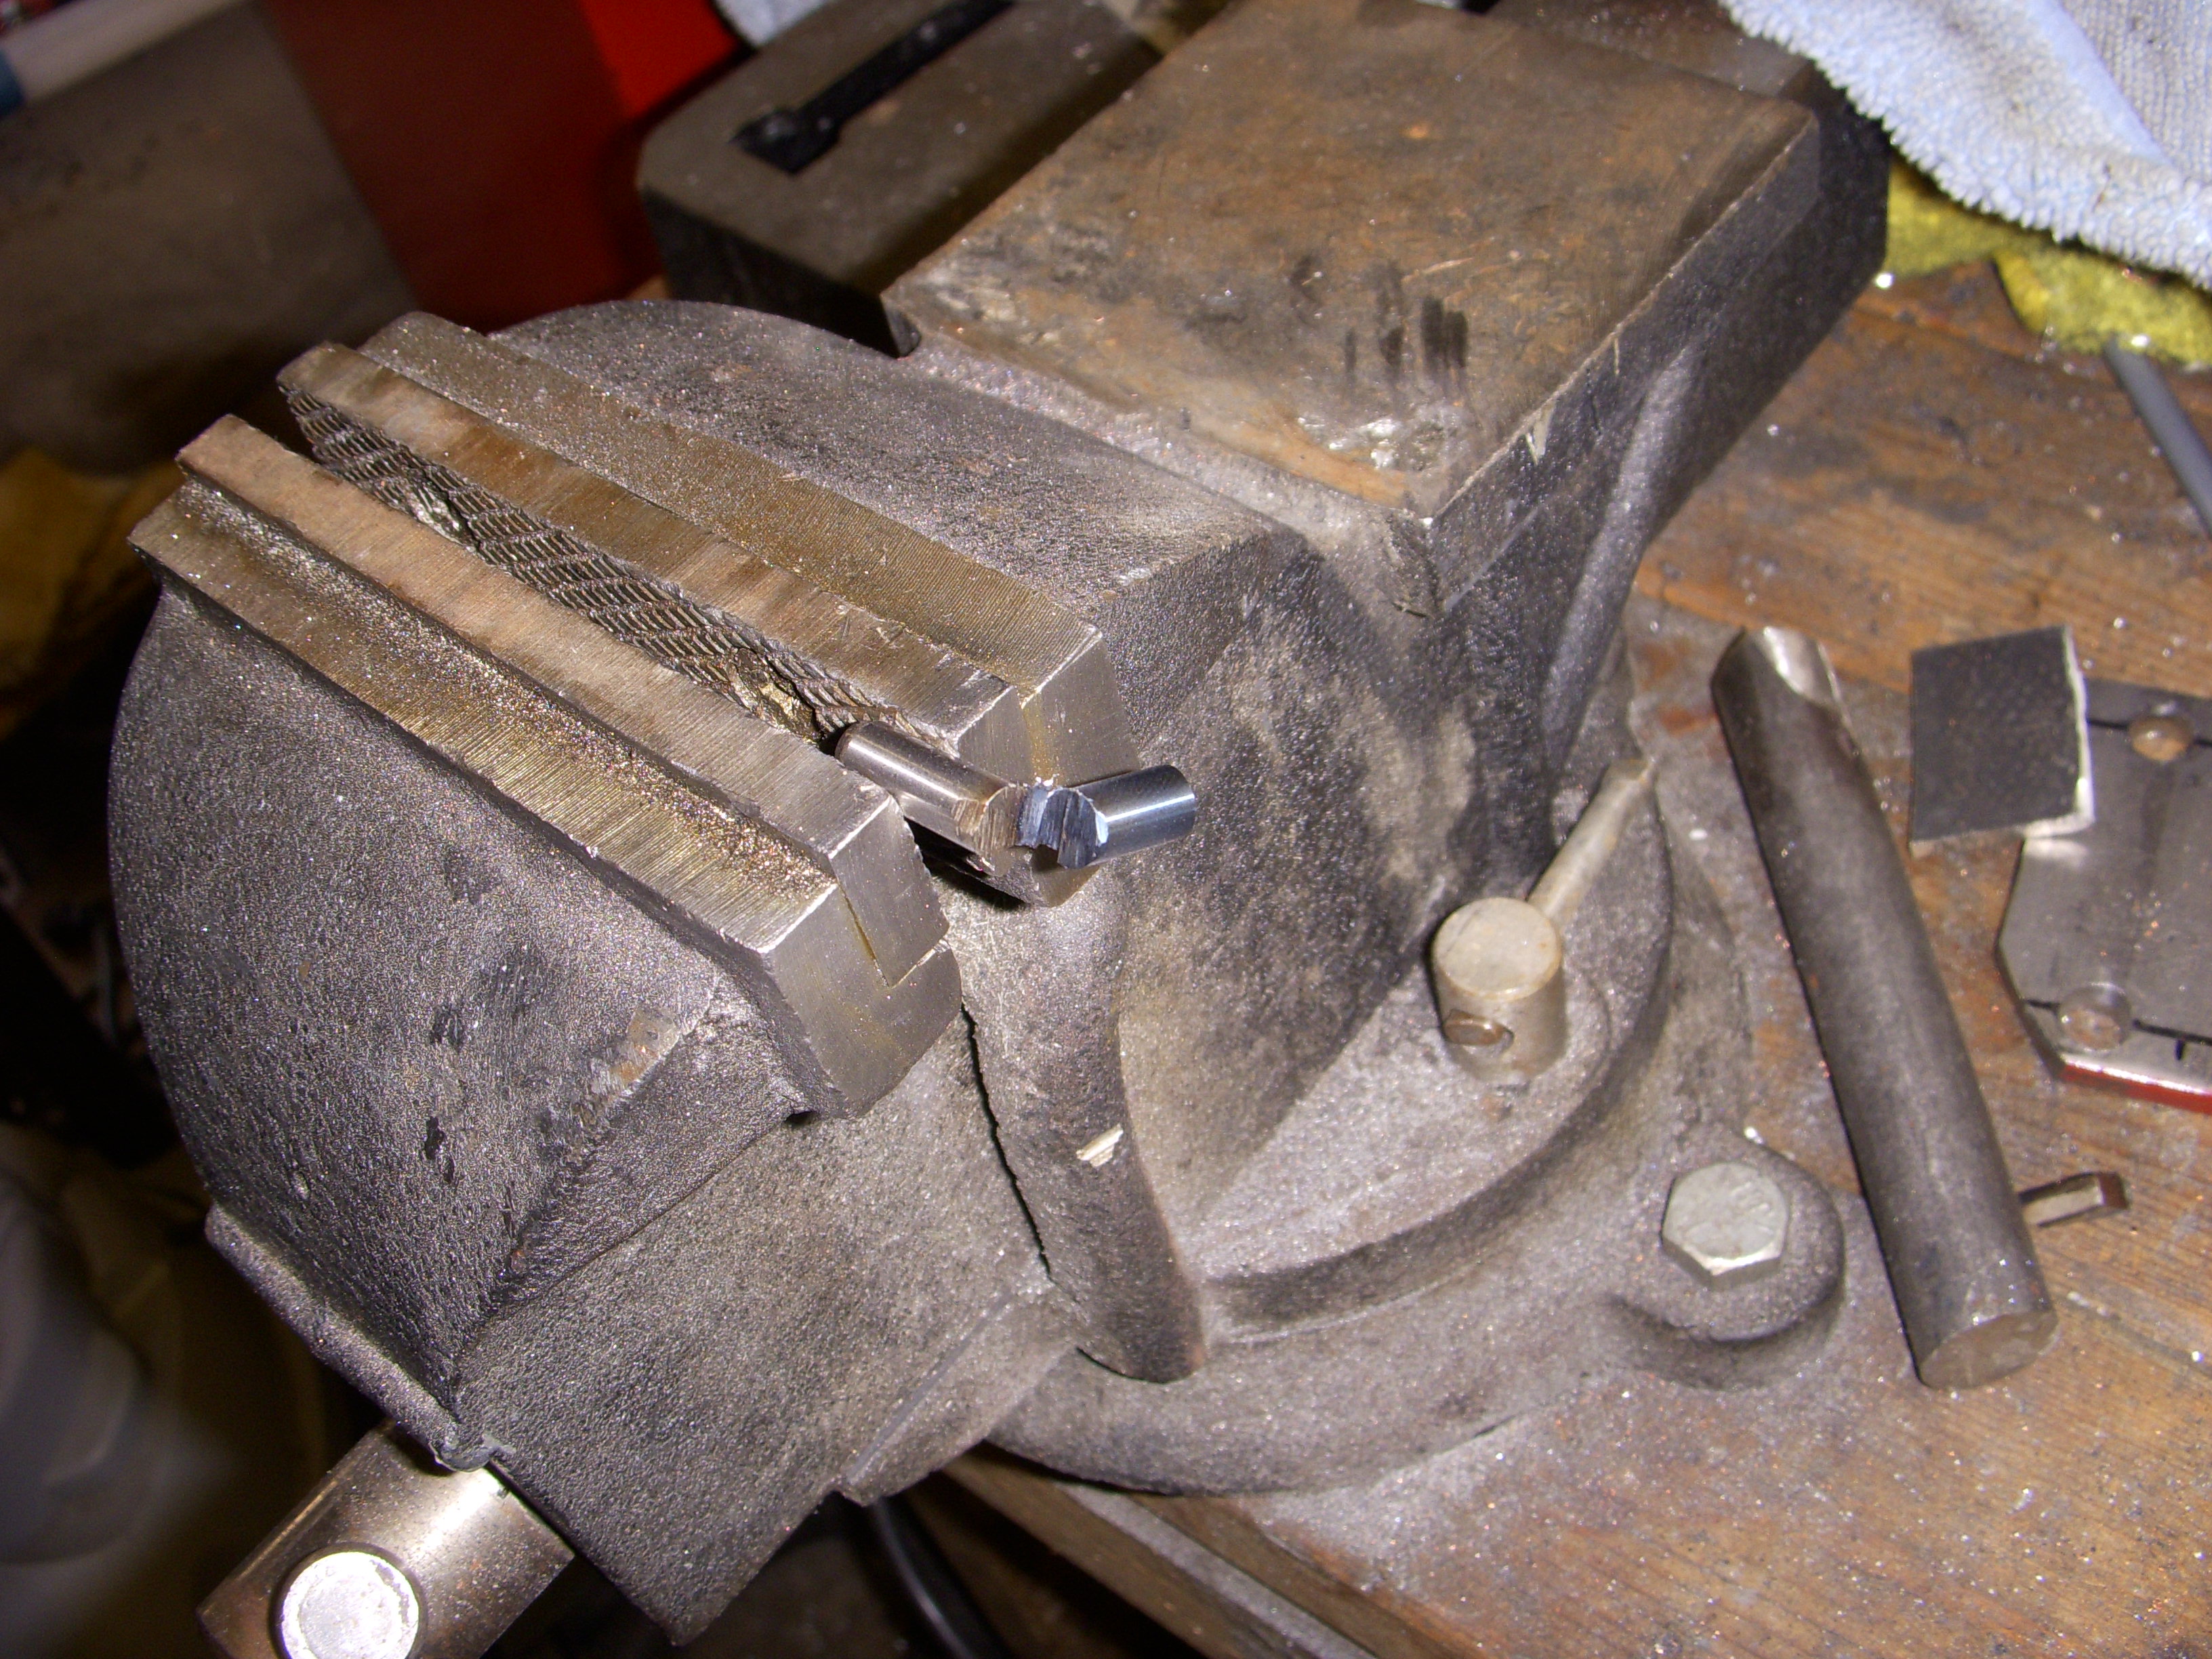
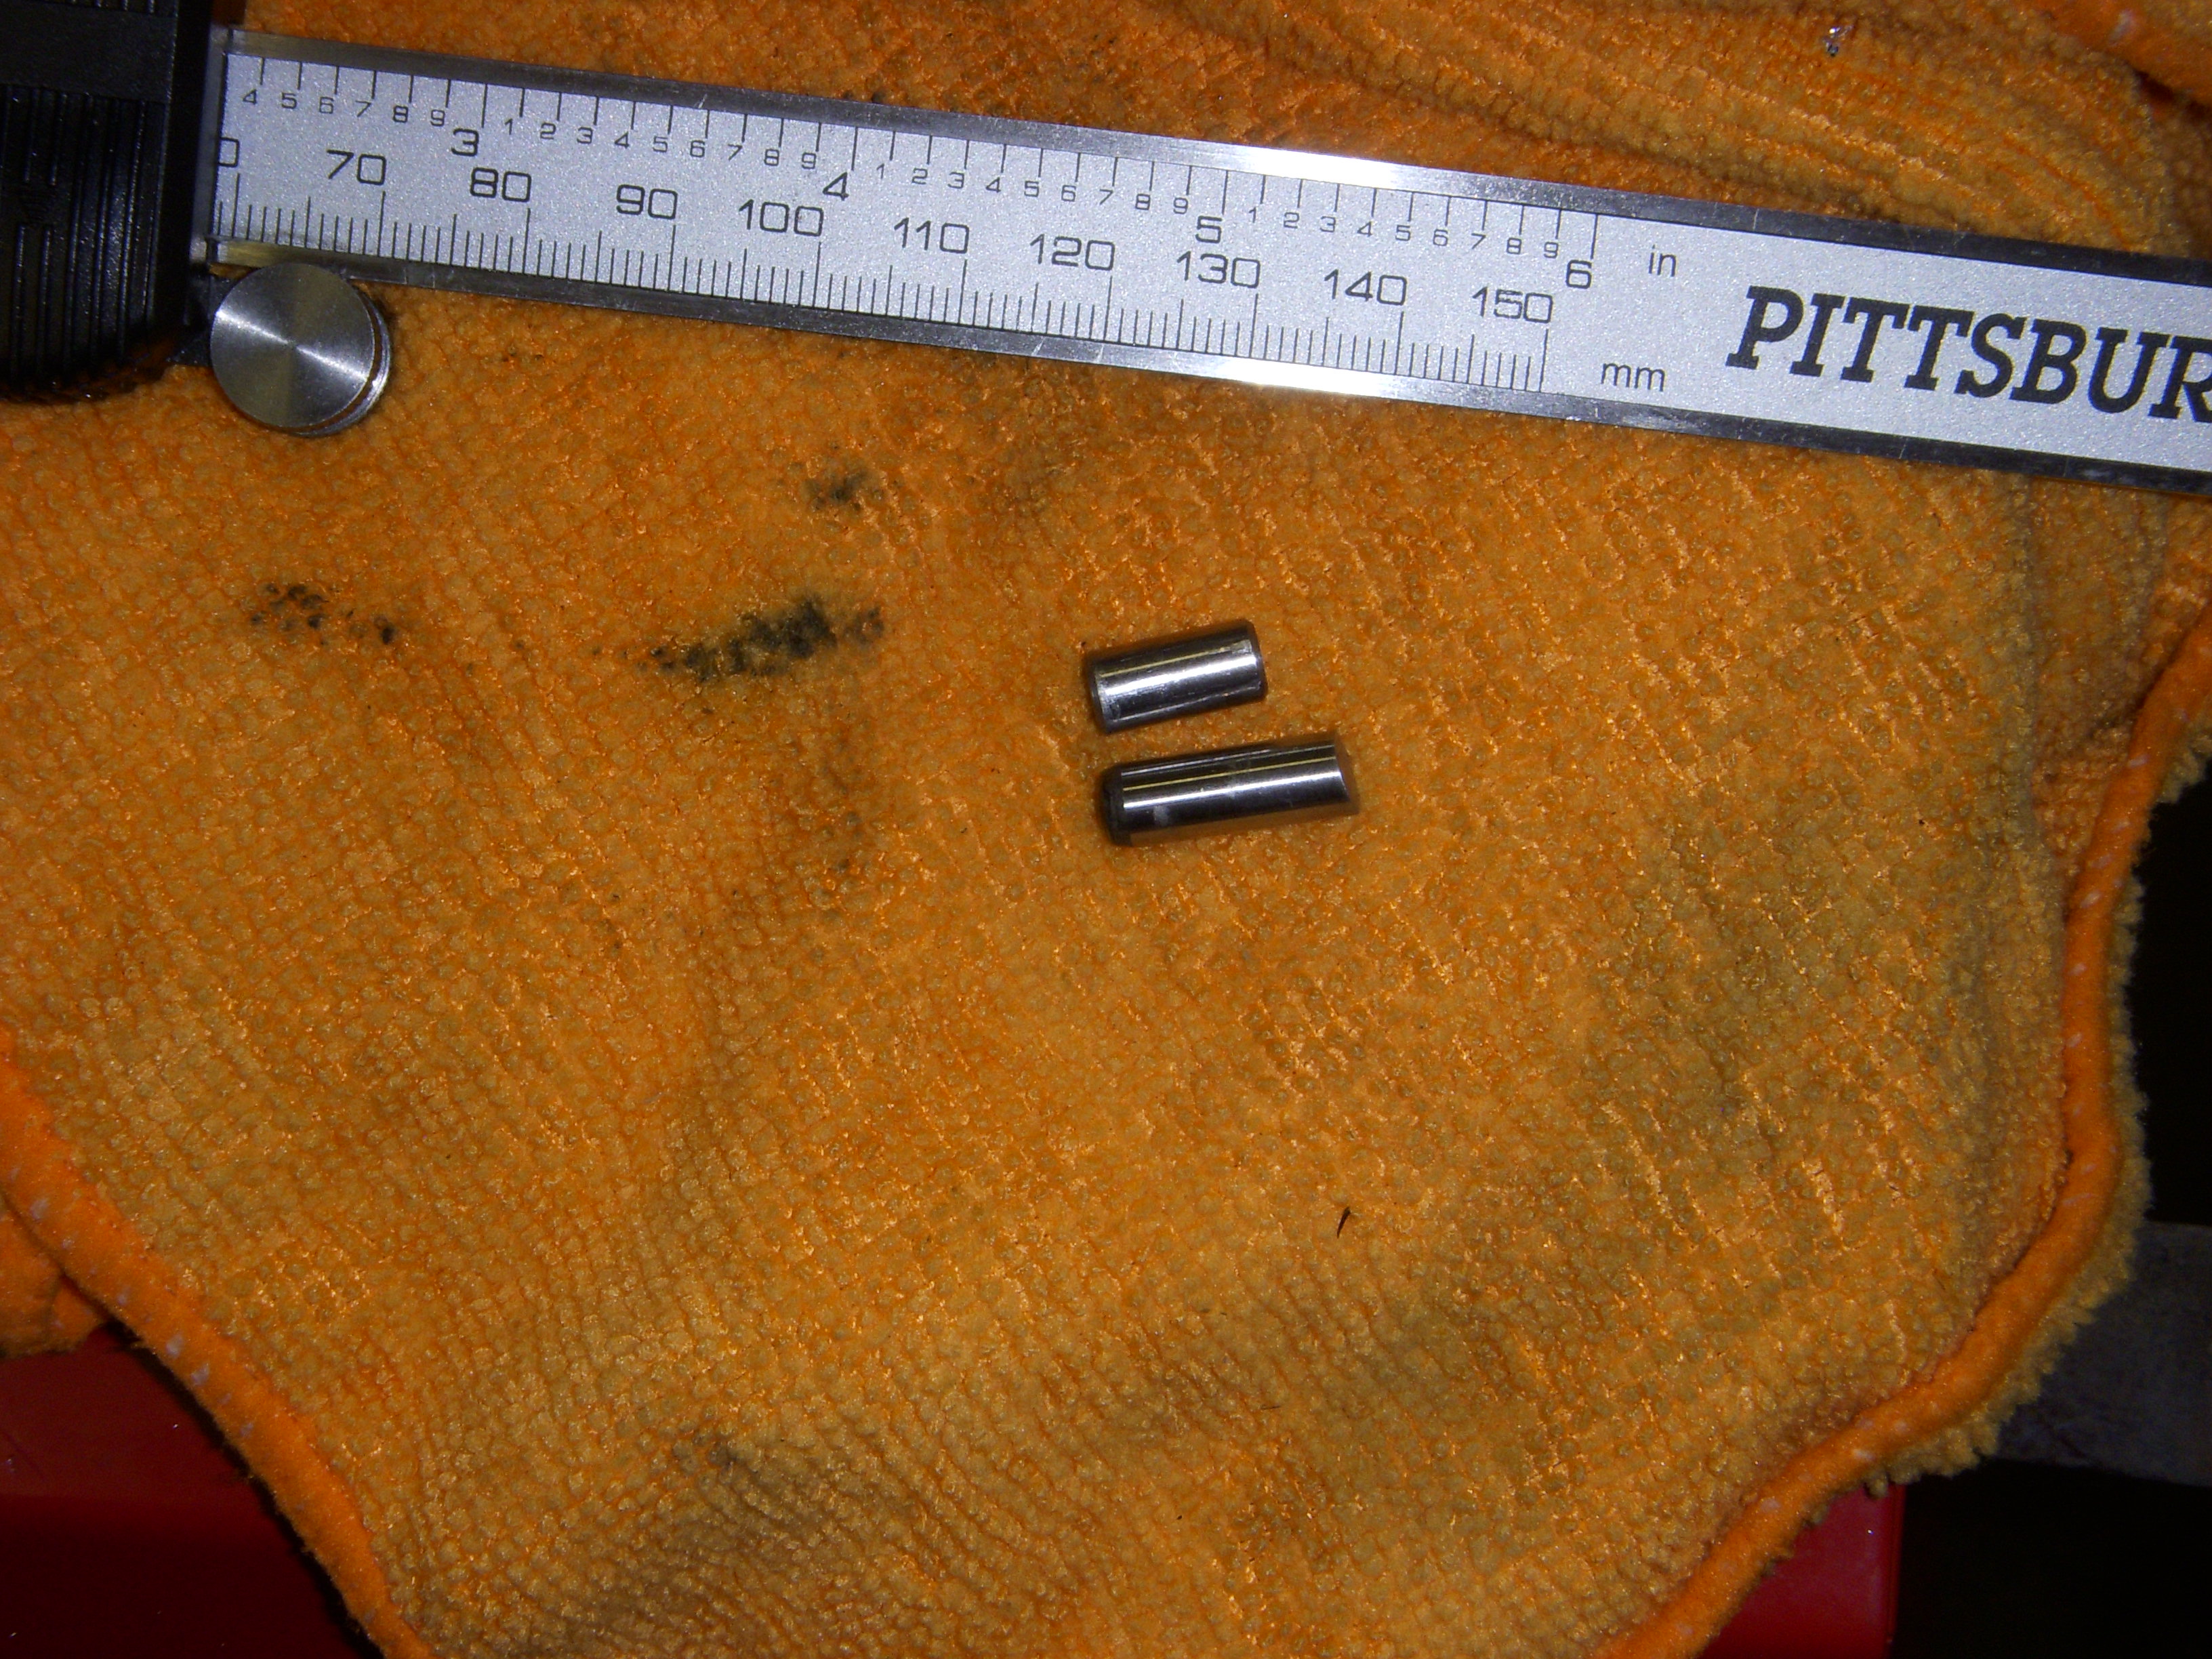
I have pulled out the short 6mm pins from both exhaust cams and replaced them with 8mm longer roller pins I shortened from 20mm with a cutoff wheel, then sanded down the cut end with a sanding block and tapped the new pin in place. The OEM pins were only sticking out of the cams by 2-3mm, and with the new springs, something could have slipped and lost the exhaust cam timing completely. I don't need that disaster right now.
I set the cams back into place using the preset 7 in-lb torque wrench. I took my sweet time in tightening all the cam brackets down - I did not want to hear a cam going SNAP when it breaks cause I got in a hurry. I have the adjustable in-lb torque wrenches for final assembly, later.
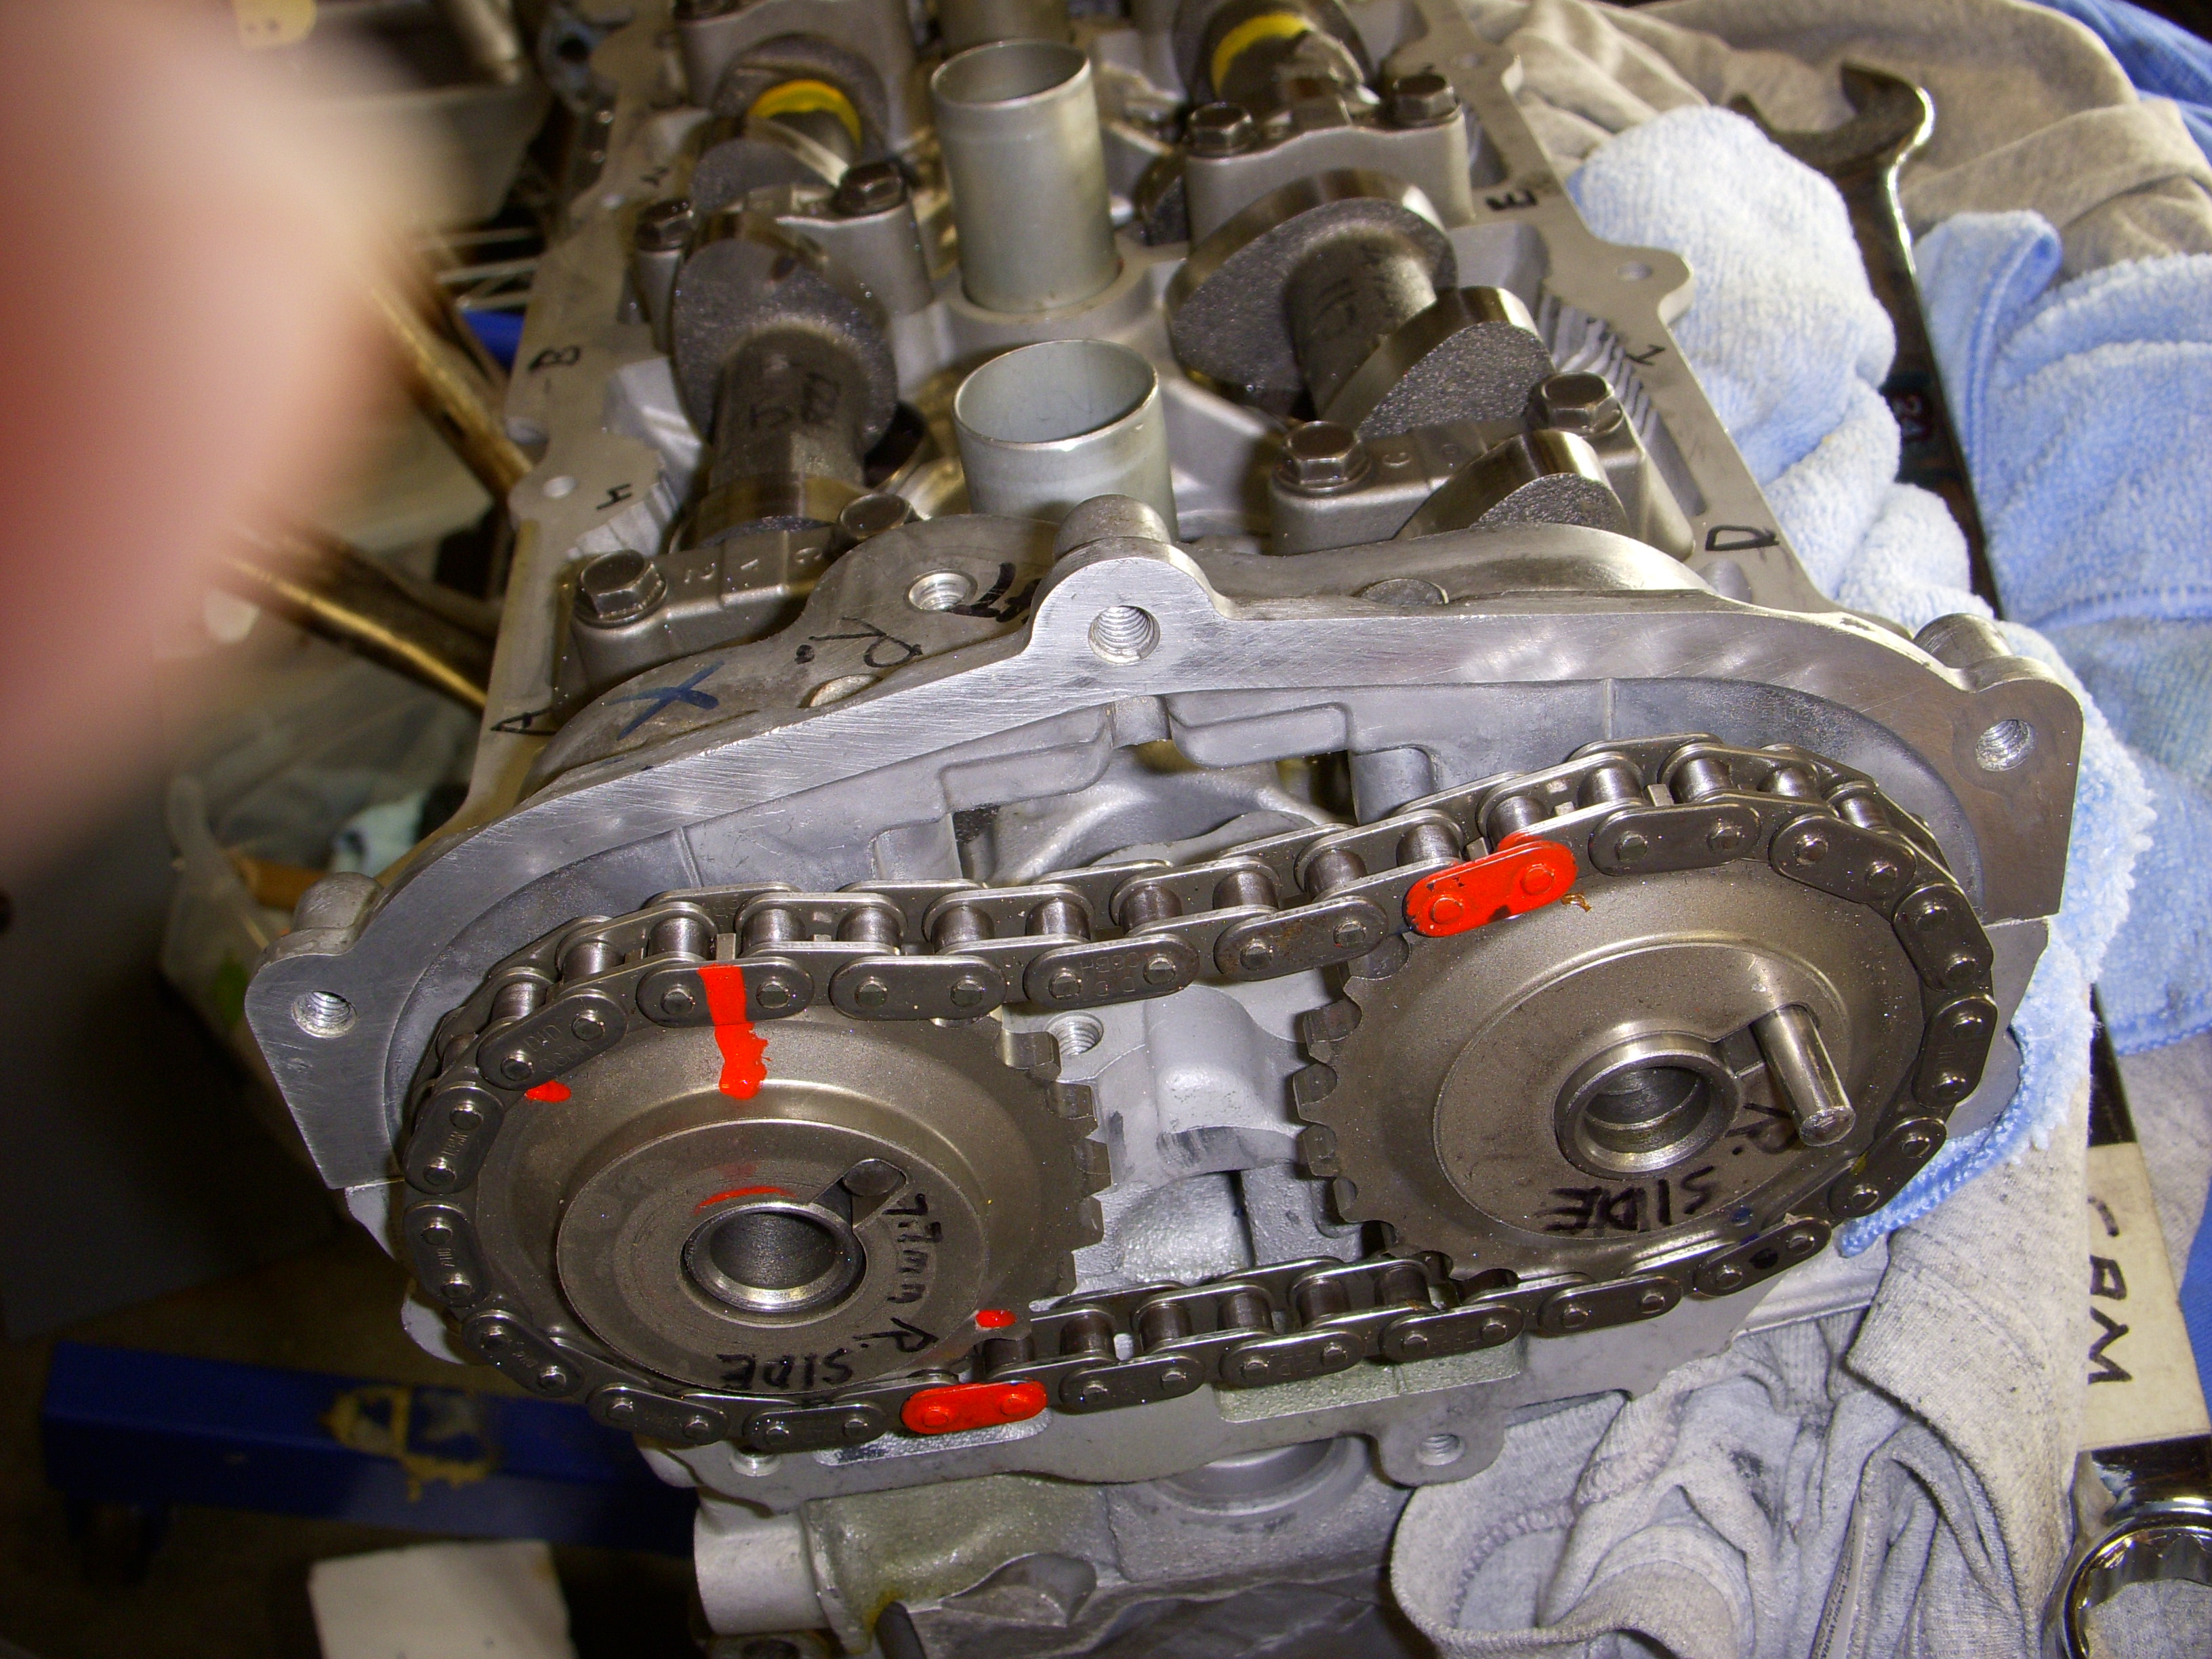
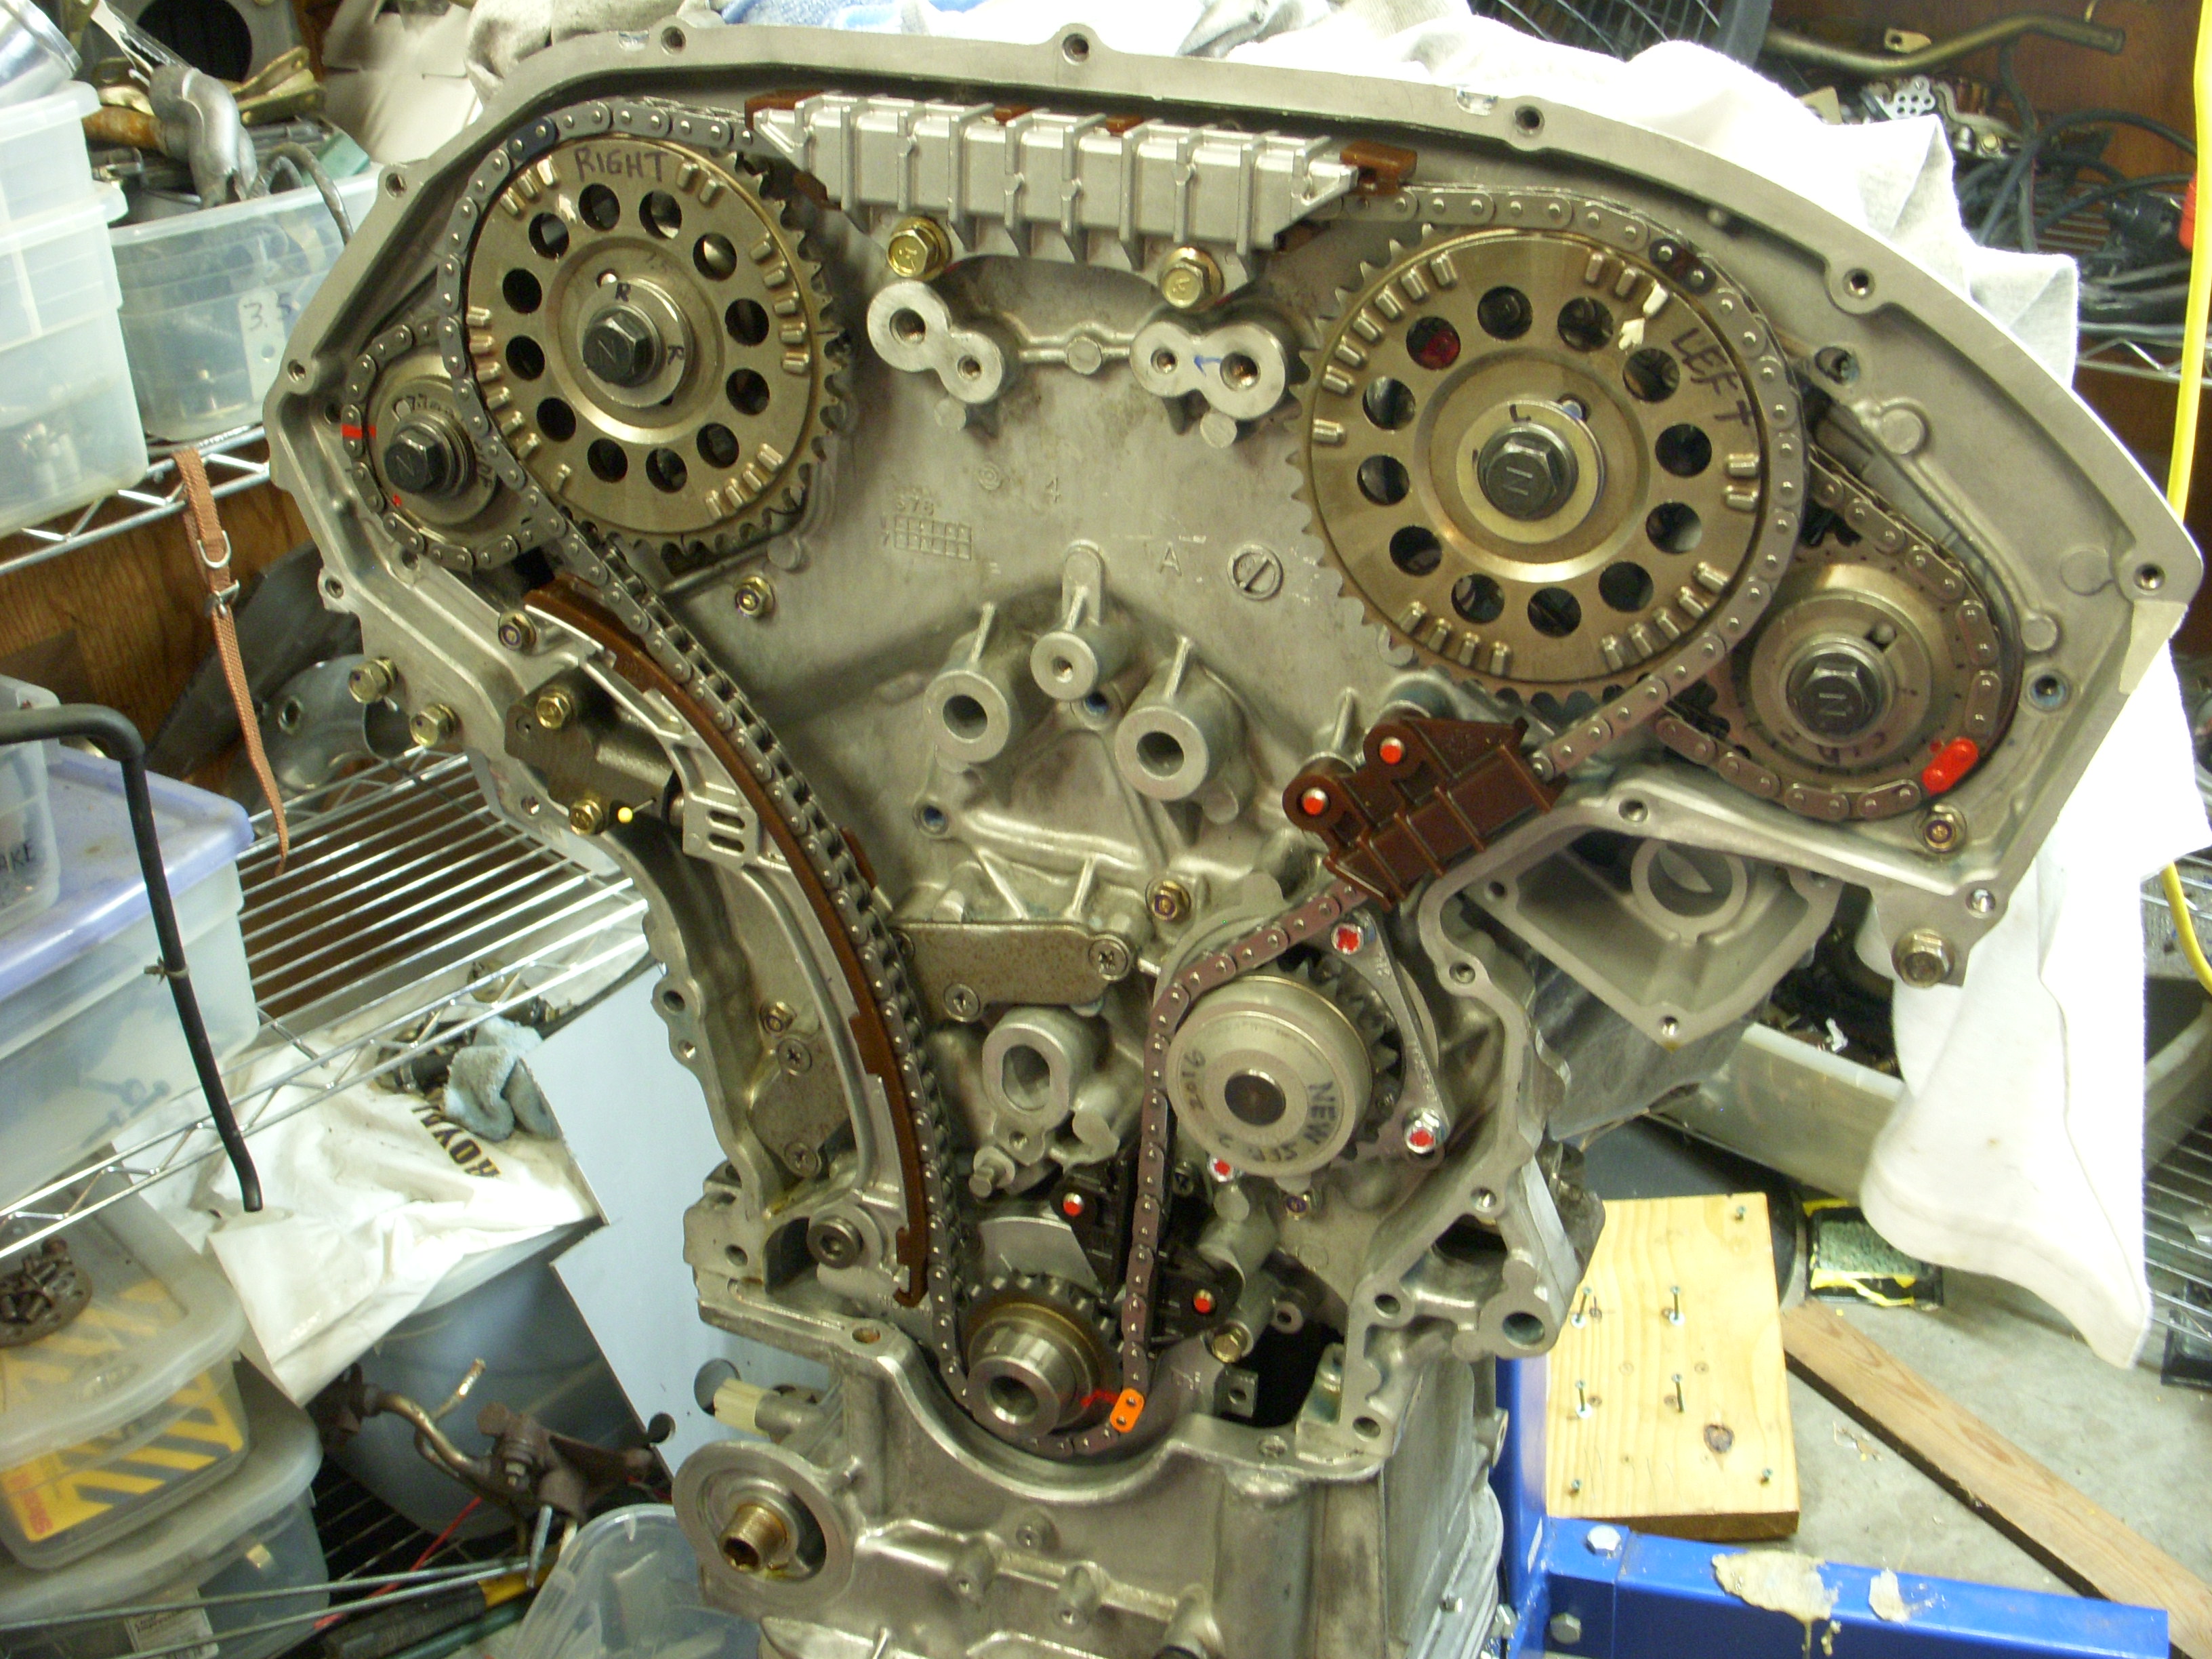
I restored the cam chains and gears to their original positions - with a couple of looong H.F. wrenches. That's a lot harder than it used to be, thanks to the new springs. I just hung the rear timing cover on the block and heads with a few bolts.

IF all the valve clearances check out and the engine rotates correctly, it's time to strip down everything done so far and do a final assembly of the entire engine.
URL=http://s48.photobucket.com/user/hwb123/media/10_Oct_2016/DSCN4822_zpsrtbzjgk5.jpg.html] [/URL]
Looks like BLT sammiches tonight! Wife picked over 300 tomatoes today before cleaning out the vines, so... BACON !!


Observations - the new springs are stout - without the latest screw-type valve compressor I would still be in the garage swearing at those springs. I used a dab of bearing grease on each retainer to hold the valve locks in place until I released spring tension. Only lost one - and I still have spares. I also checked that all the valve buckets are free to rotate when a cam lobe comes by - otherwise that magic DLC coating will be history quickly.
-
I have pulled out the short 6mm pins from both exhaust cams and replaced them with 8mm longer roller pins I shortened from 20mm with a cutoff wheel, then sanded down the cut end with a sanding block and tapped the new pin in place. The OEM pins were only sticking out of the cams by 2-3mm, and with the new springs, something could have slipped and lost the exhaust cam timing completely. I don't need that disaster right now.


I set the cams back into place using the preset 7 in-lb torque wrench. I took my sweet time in tightening all the cam brackets down - I did not want to hear a cam going SNAP when it breaks cause I got in a hurry. I have the adjustable in-lb torque wrenches for final assembly, later.

I restored the cam chains and gears to their original positions - with a couple of looong H.F. wrenches. That's a lot harder than it used to be, thanks to the new springs. I just hung the rear timing cover on the block and heads with a few bolts.


IF all the valve clearances check out and the engine rotates correctly, it's time to strip down everything done so far and do a final assembly of the entire engine.

URL=http://s48.photobucket.com/user/hwb123/media/10_Oct_2016/DSCN4822_zpsrtbzjgk5.jpg.html]
[/URL]Looks like BLT sammiches tonight! Wife picked over 300 tomatoes today before cleaning out the vines, so... BACON !!
Last edited by grey99max; 01-16-2017 at 07:10 PM.
12-01-2016, 06:46 PM
#1829
LandShark has Cosworth
Thread Starter
iTrader: (12)
Join Date: Jan 2004
Location: Topeka, KS
Posts: 4,327
OK - I'm back
Time to catch up on work done up to now - and some plans for the future. For instance, I think I can get better performance from a Honda B18, so I'm going to scrap all the VQ35 build and go the way of the Honda!
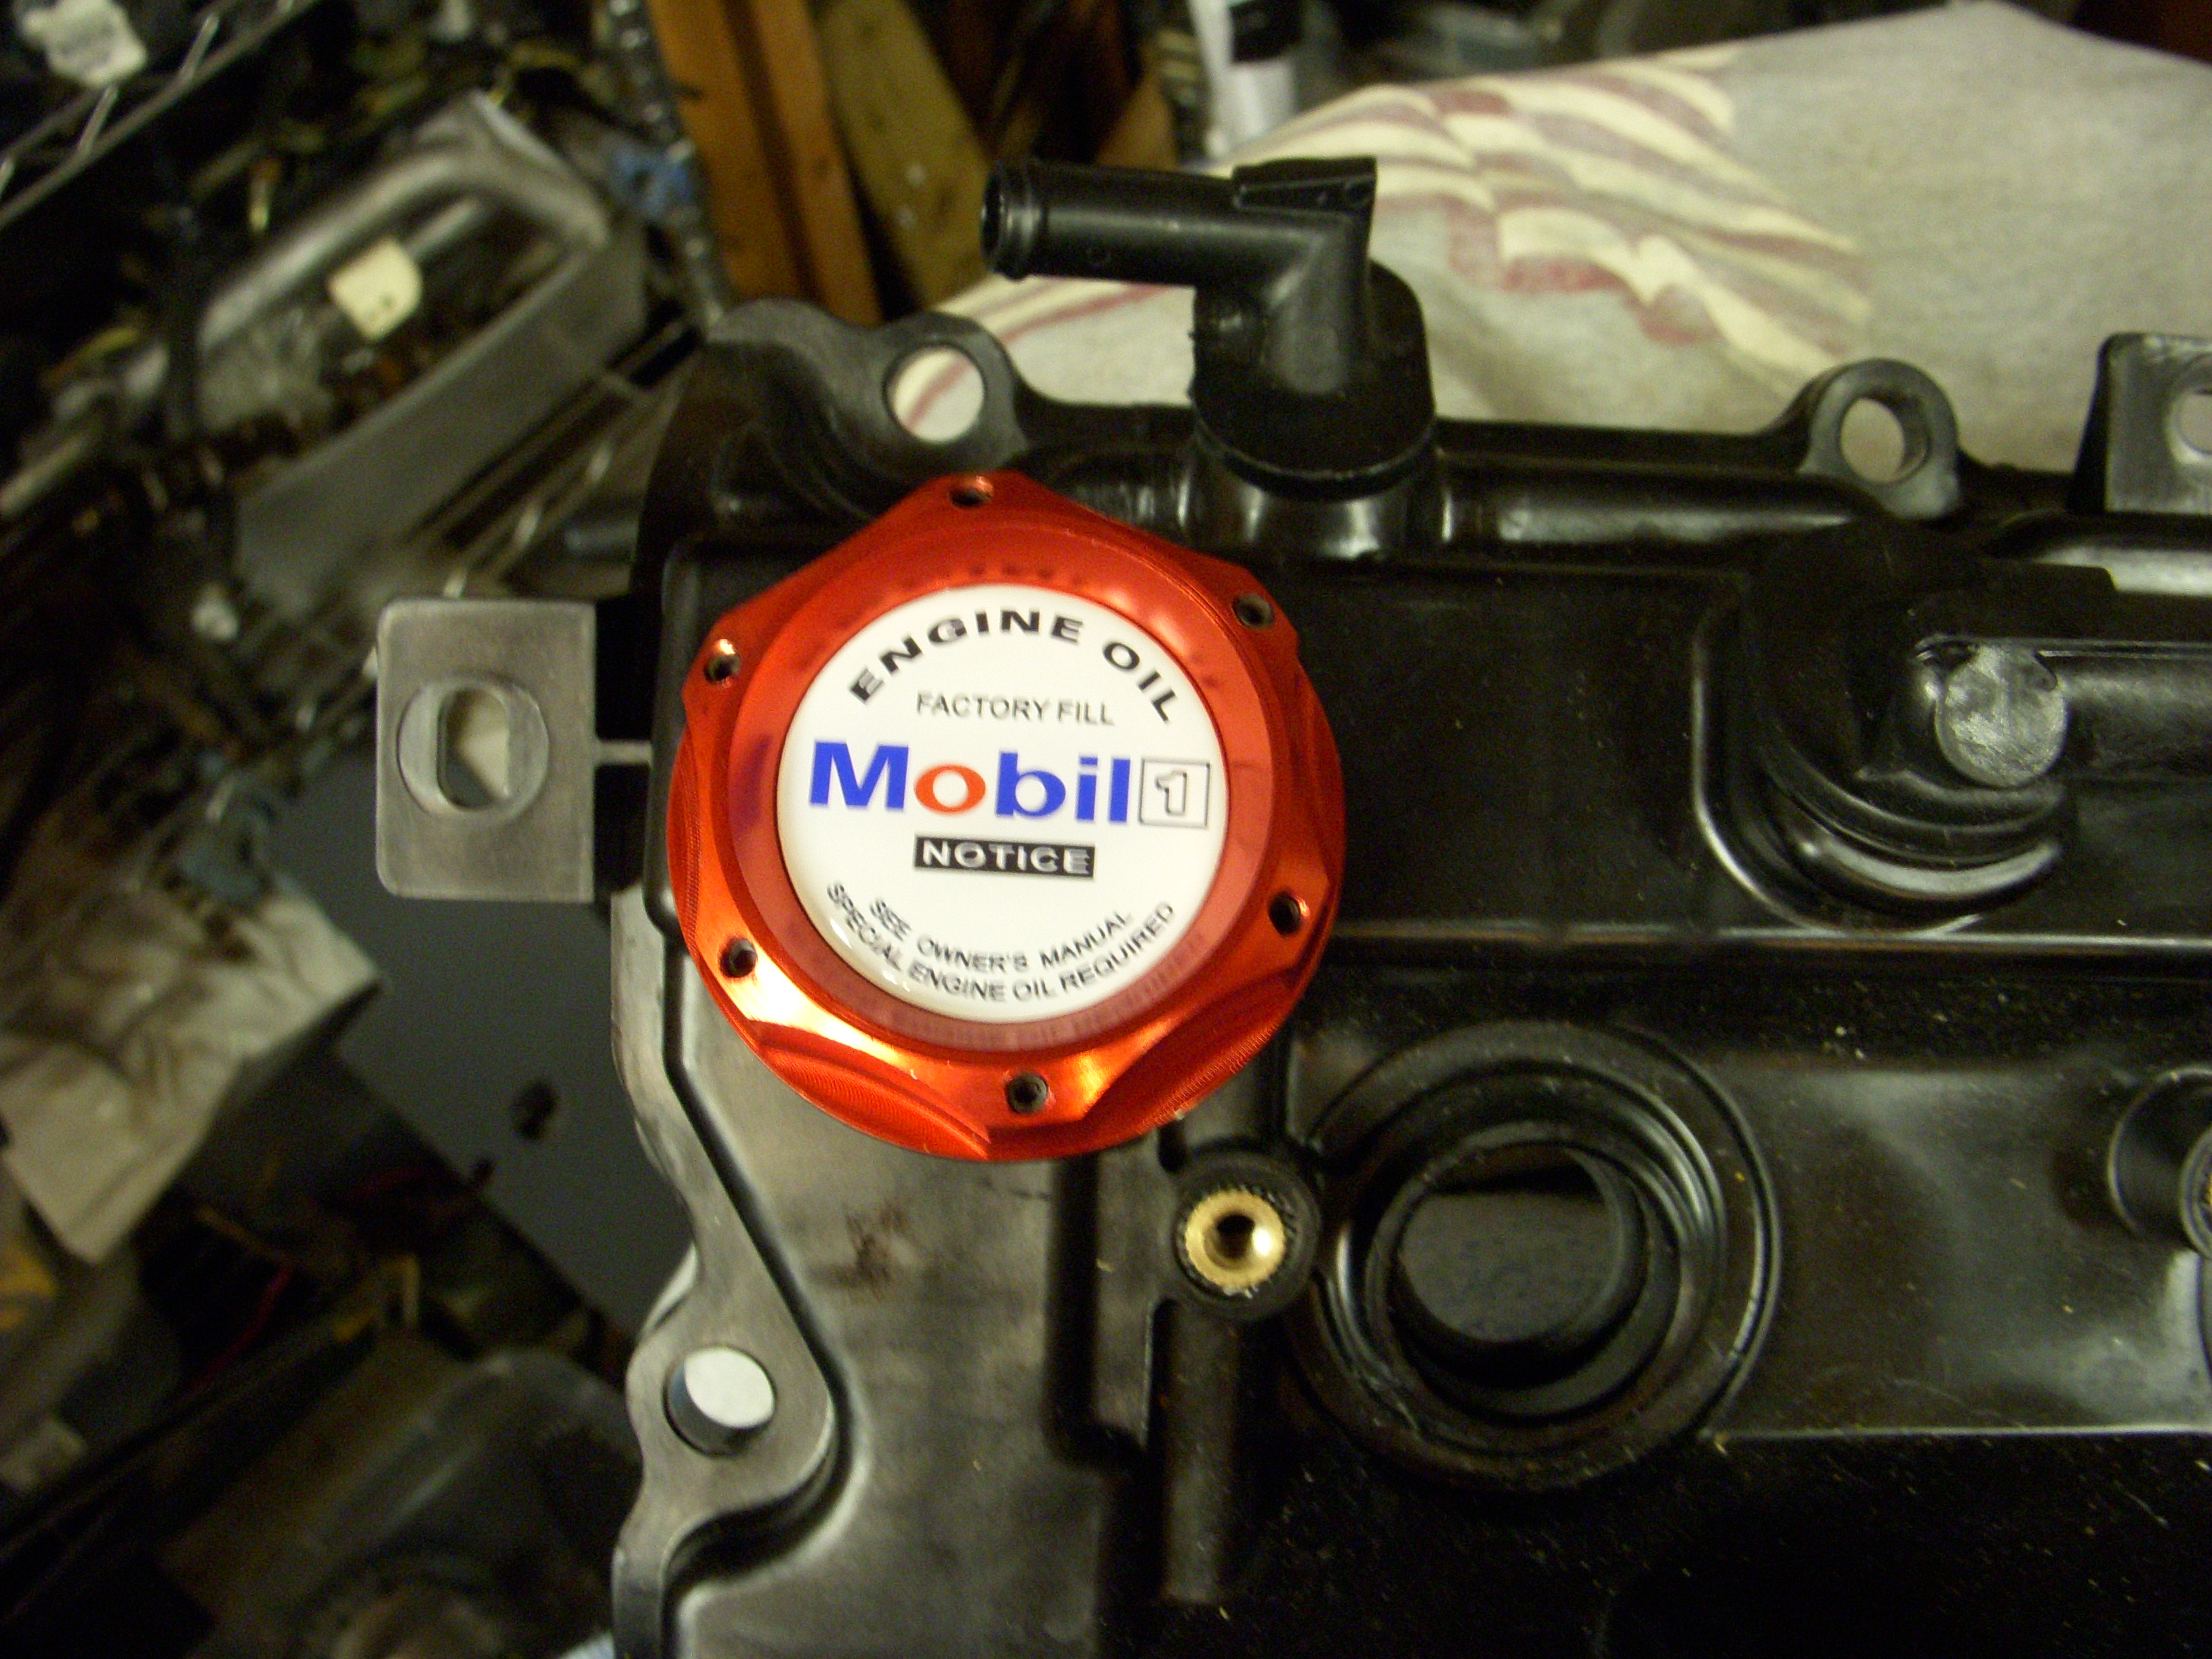
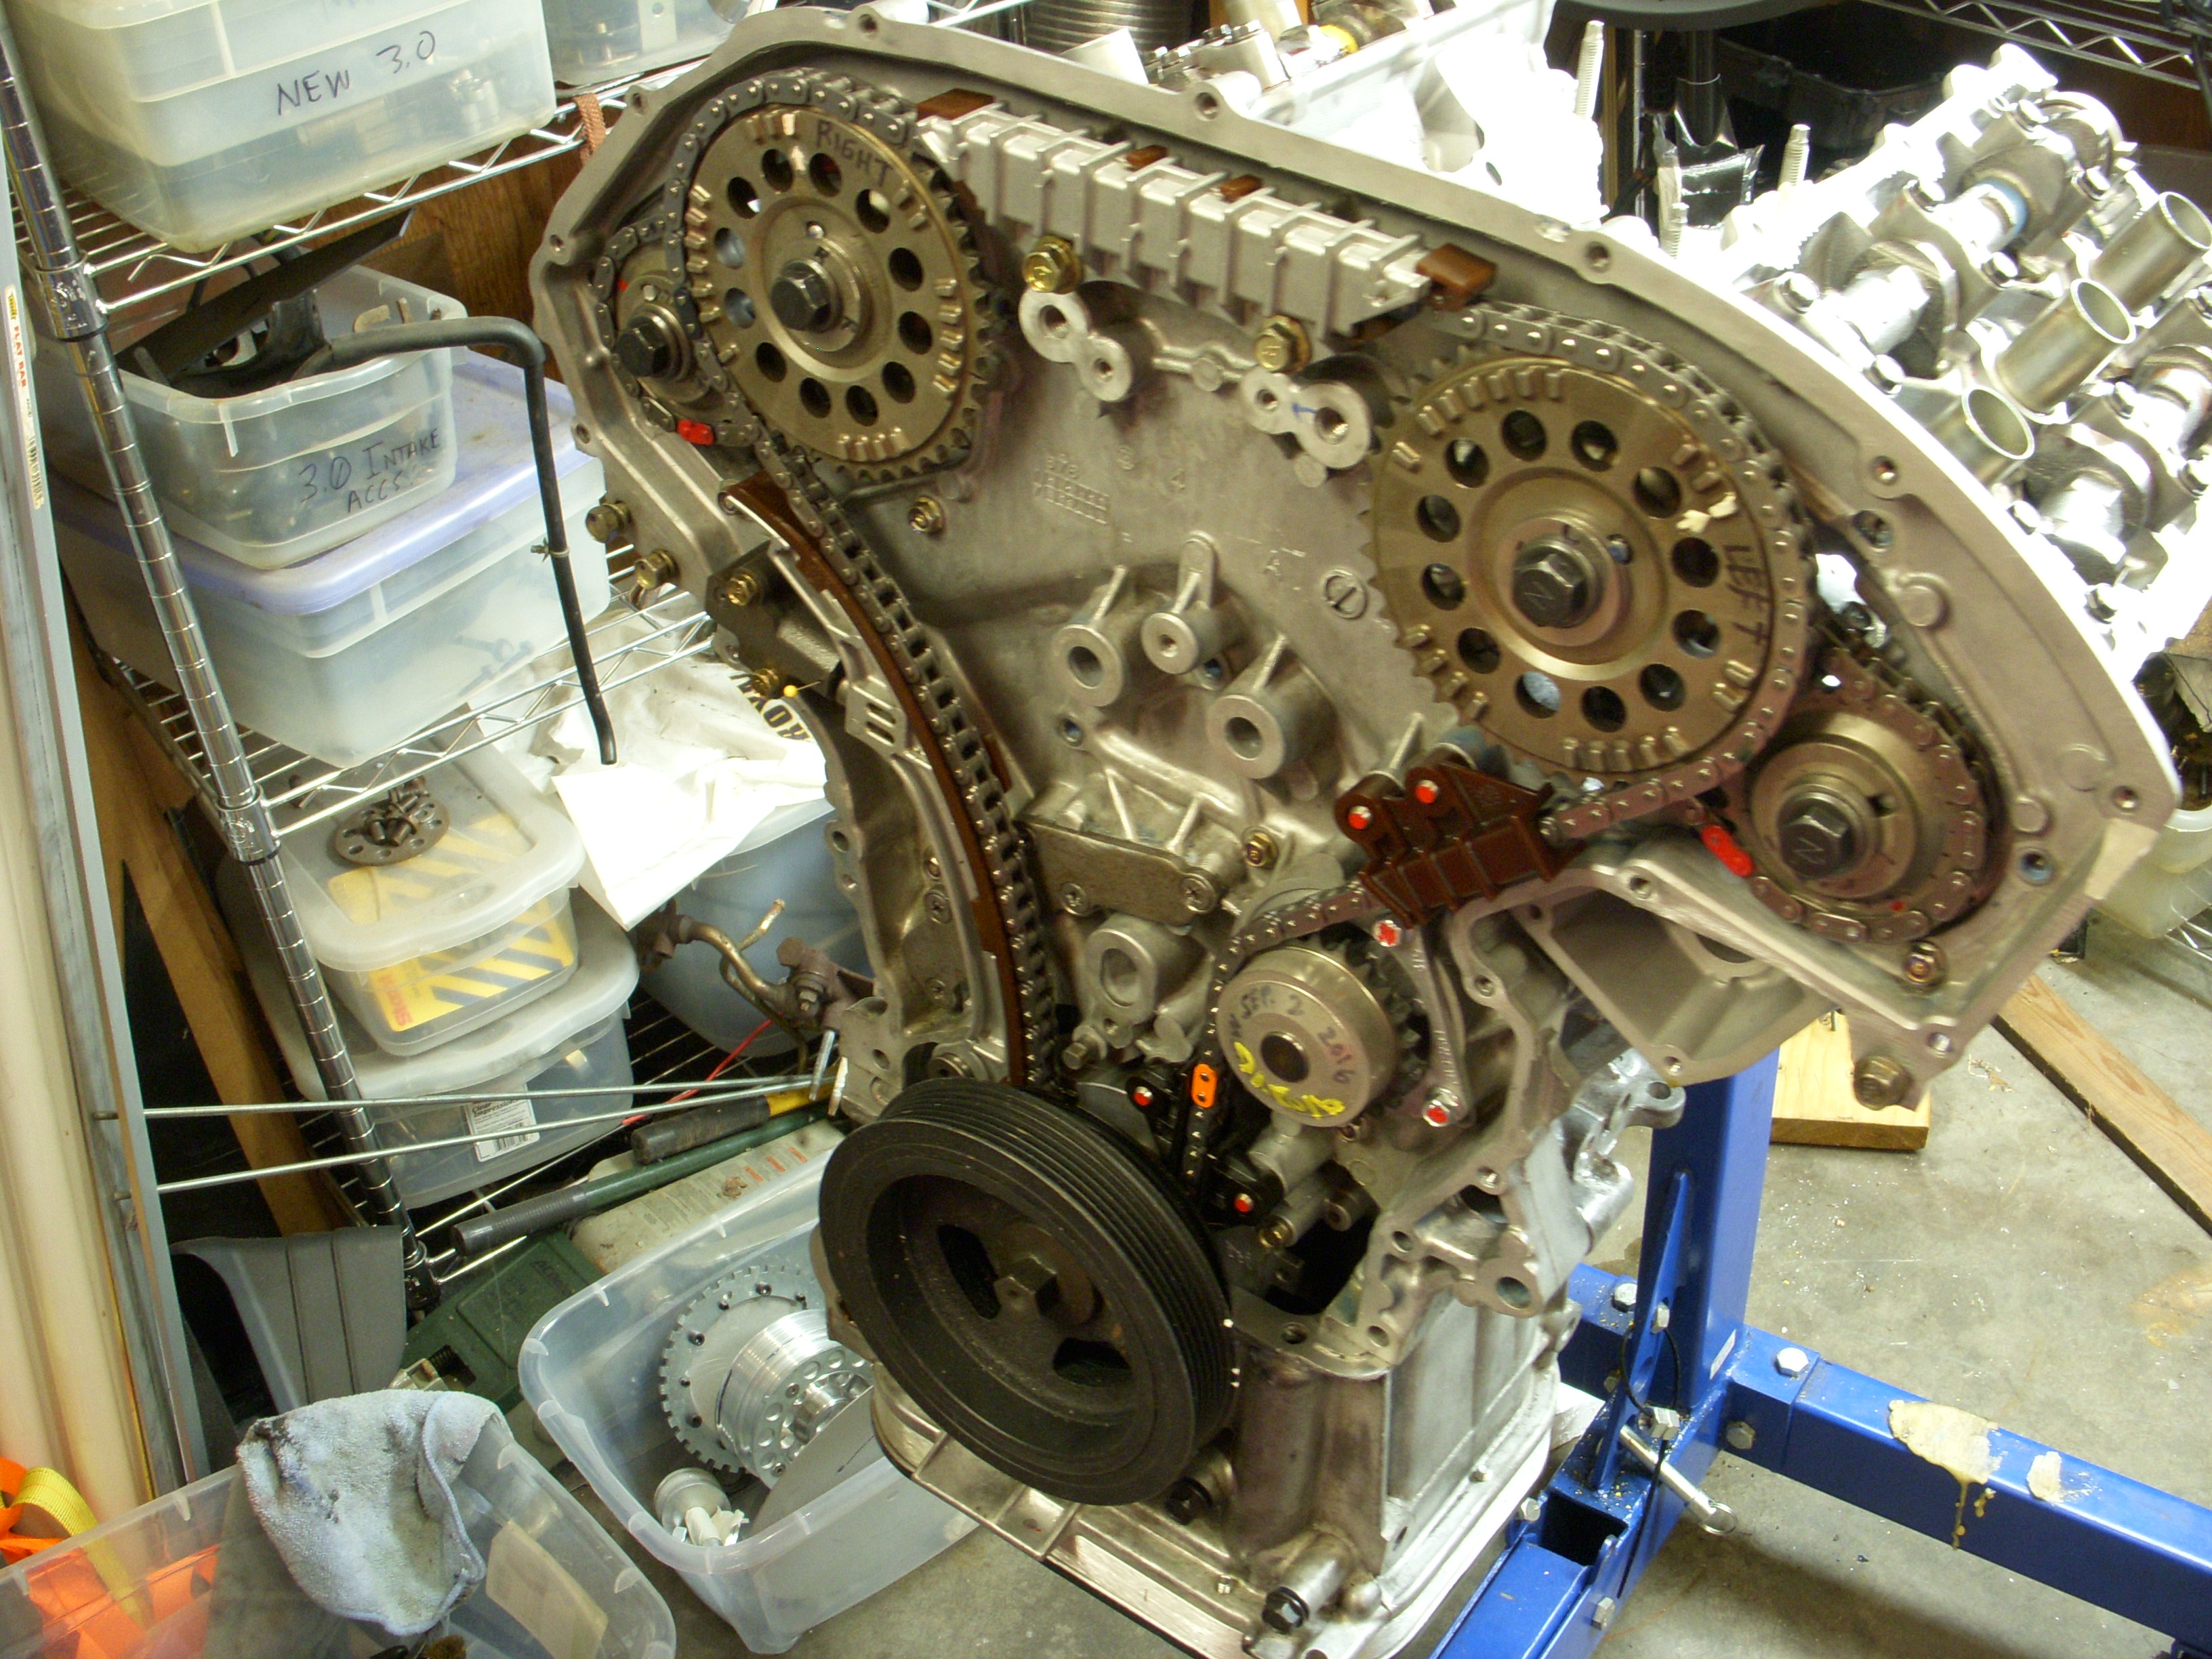
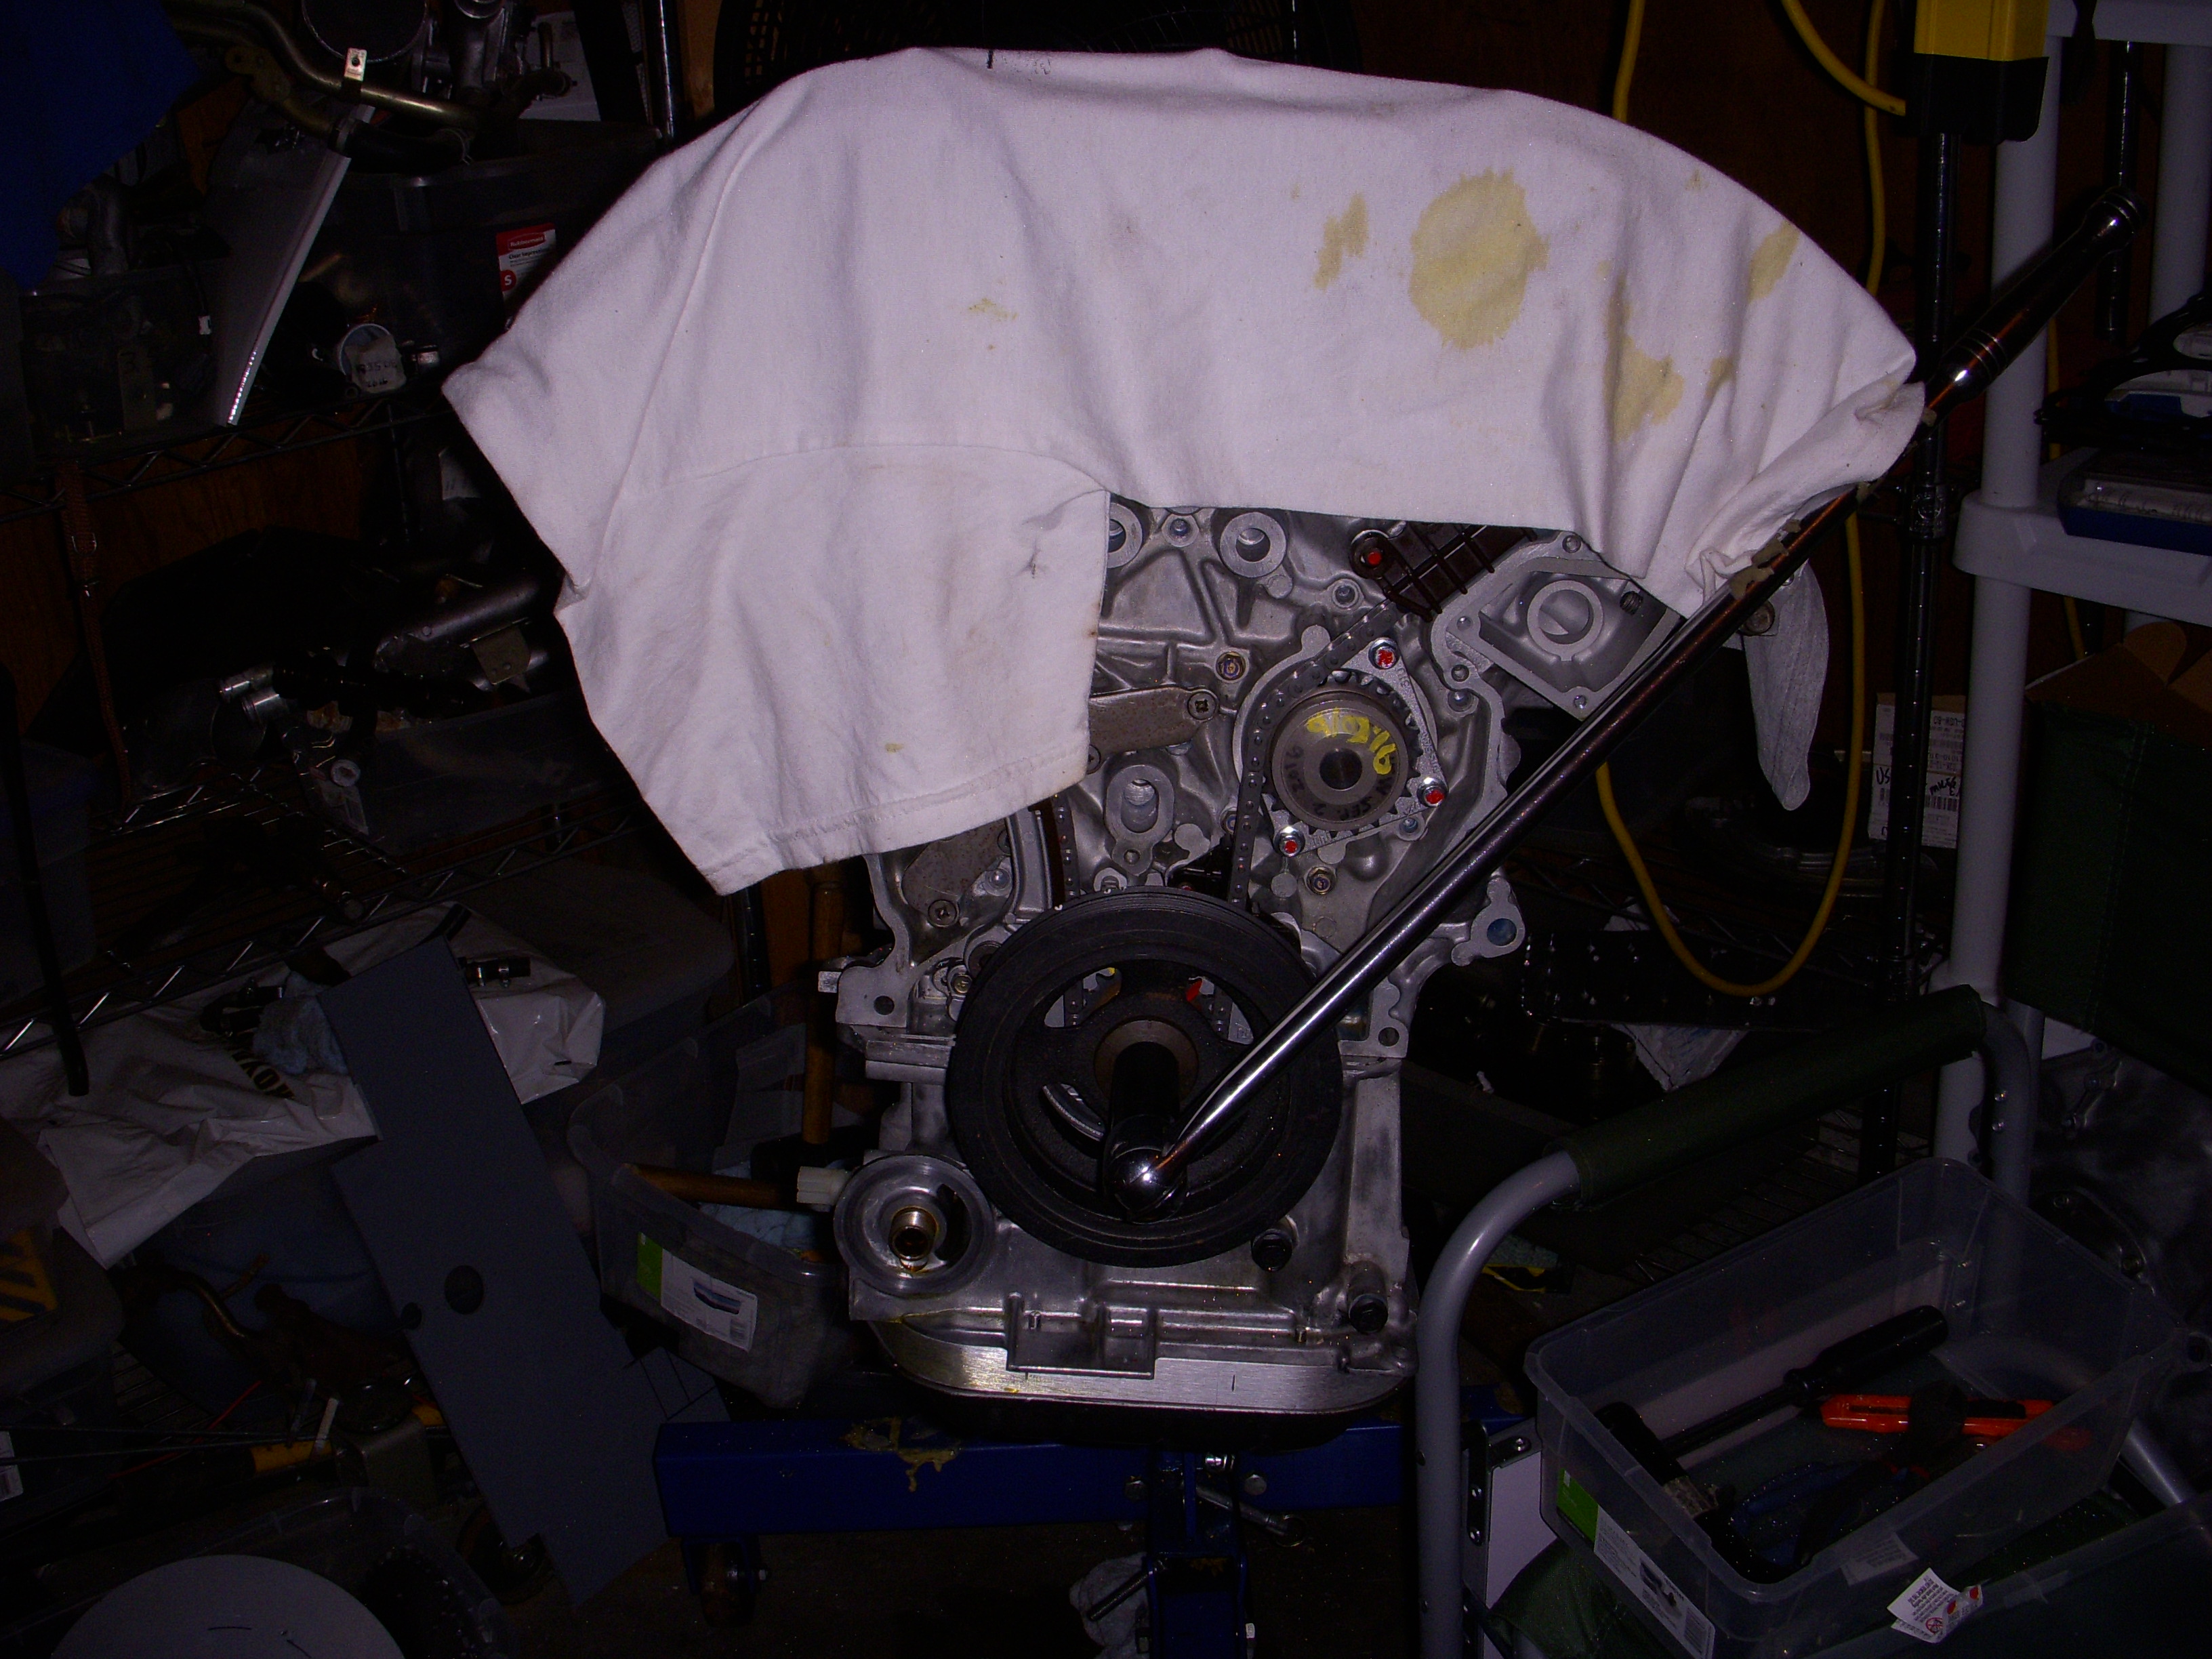
OK - just kidding.... I have both heads back on and "chained" down. Rotated the assembly with a 18"- er, 25" breaker bar because valve springs are stout. No clearance problems with rotation - valves clear pistons OK. During the intermission, I spent some time thinking about options. Just because I'm buying European EP 0W-40 Mobil1 pure synthetic with zinc and phosphorous, I bought a nice red Mobil1 oil cap. Shiny...
<a href="http://s48.photobucket.com/user/hwb123/media/11_Nov_2016/DSCN4835_zpsiz7qccqq.jpg.html" target="_blank"><img src="http://i48.photobucket.com/albums/f216/hwb123/11_Nov_2016/DSCN4835_zpsiz7qccqq.jpg" border="0" alt=" photo DSCN4835_zpsiz7qccqq.jpg"/></a>
<a href="http://s48.photobucket.com/user/hwb123/media/11_Nov_2016/DSCN4834_zpstvcdf4r2.jpg.html" target="_blank"><img src="http://i48.photobucket.com/albums/f216/hwb123/11_Nov_2016/DSCN4834_zpstvcdf4r2.jpg" border="0" alt=" photo DSCN4834_zpstvcdf4r2.jpg"/></a>
<a href="http://s48.photobucket.com/user/hwb123/media/12_Dec_2016/DSCN4839_zpsgqe8vjks.jpg.html" target="_blank"><img src="http://i48.photobucket.com/albums/f216/hwb123/12_Dec_2016/DSCN4839_zpsgqe8vjks.jpg" border="0" alt=" photo DSCN4839_zpsgqe8vjks.jpg"/></a>
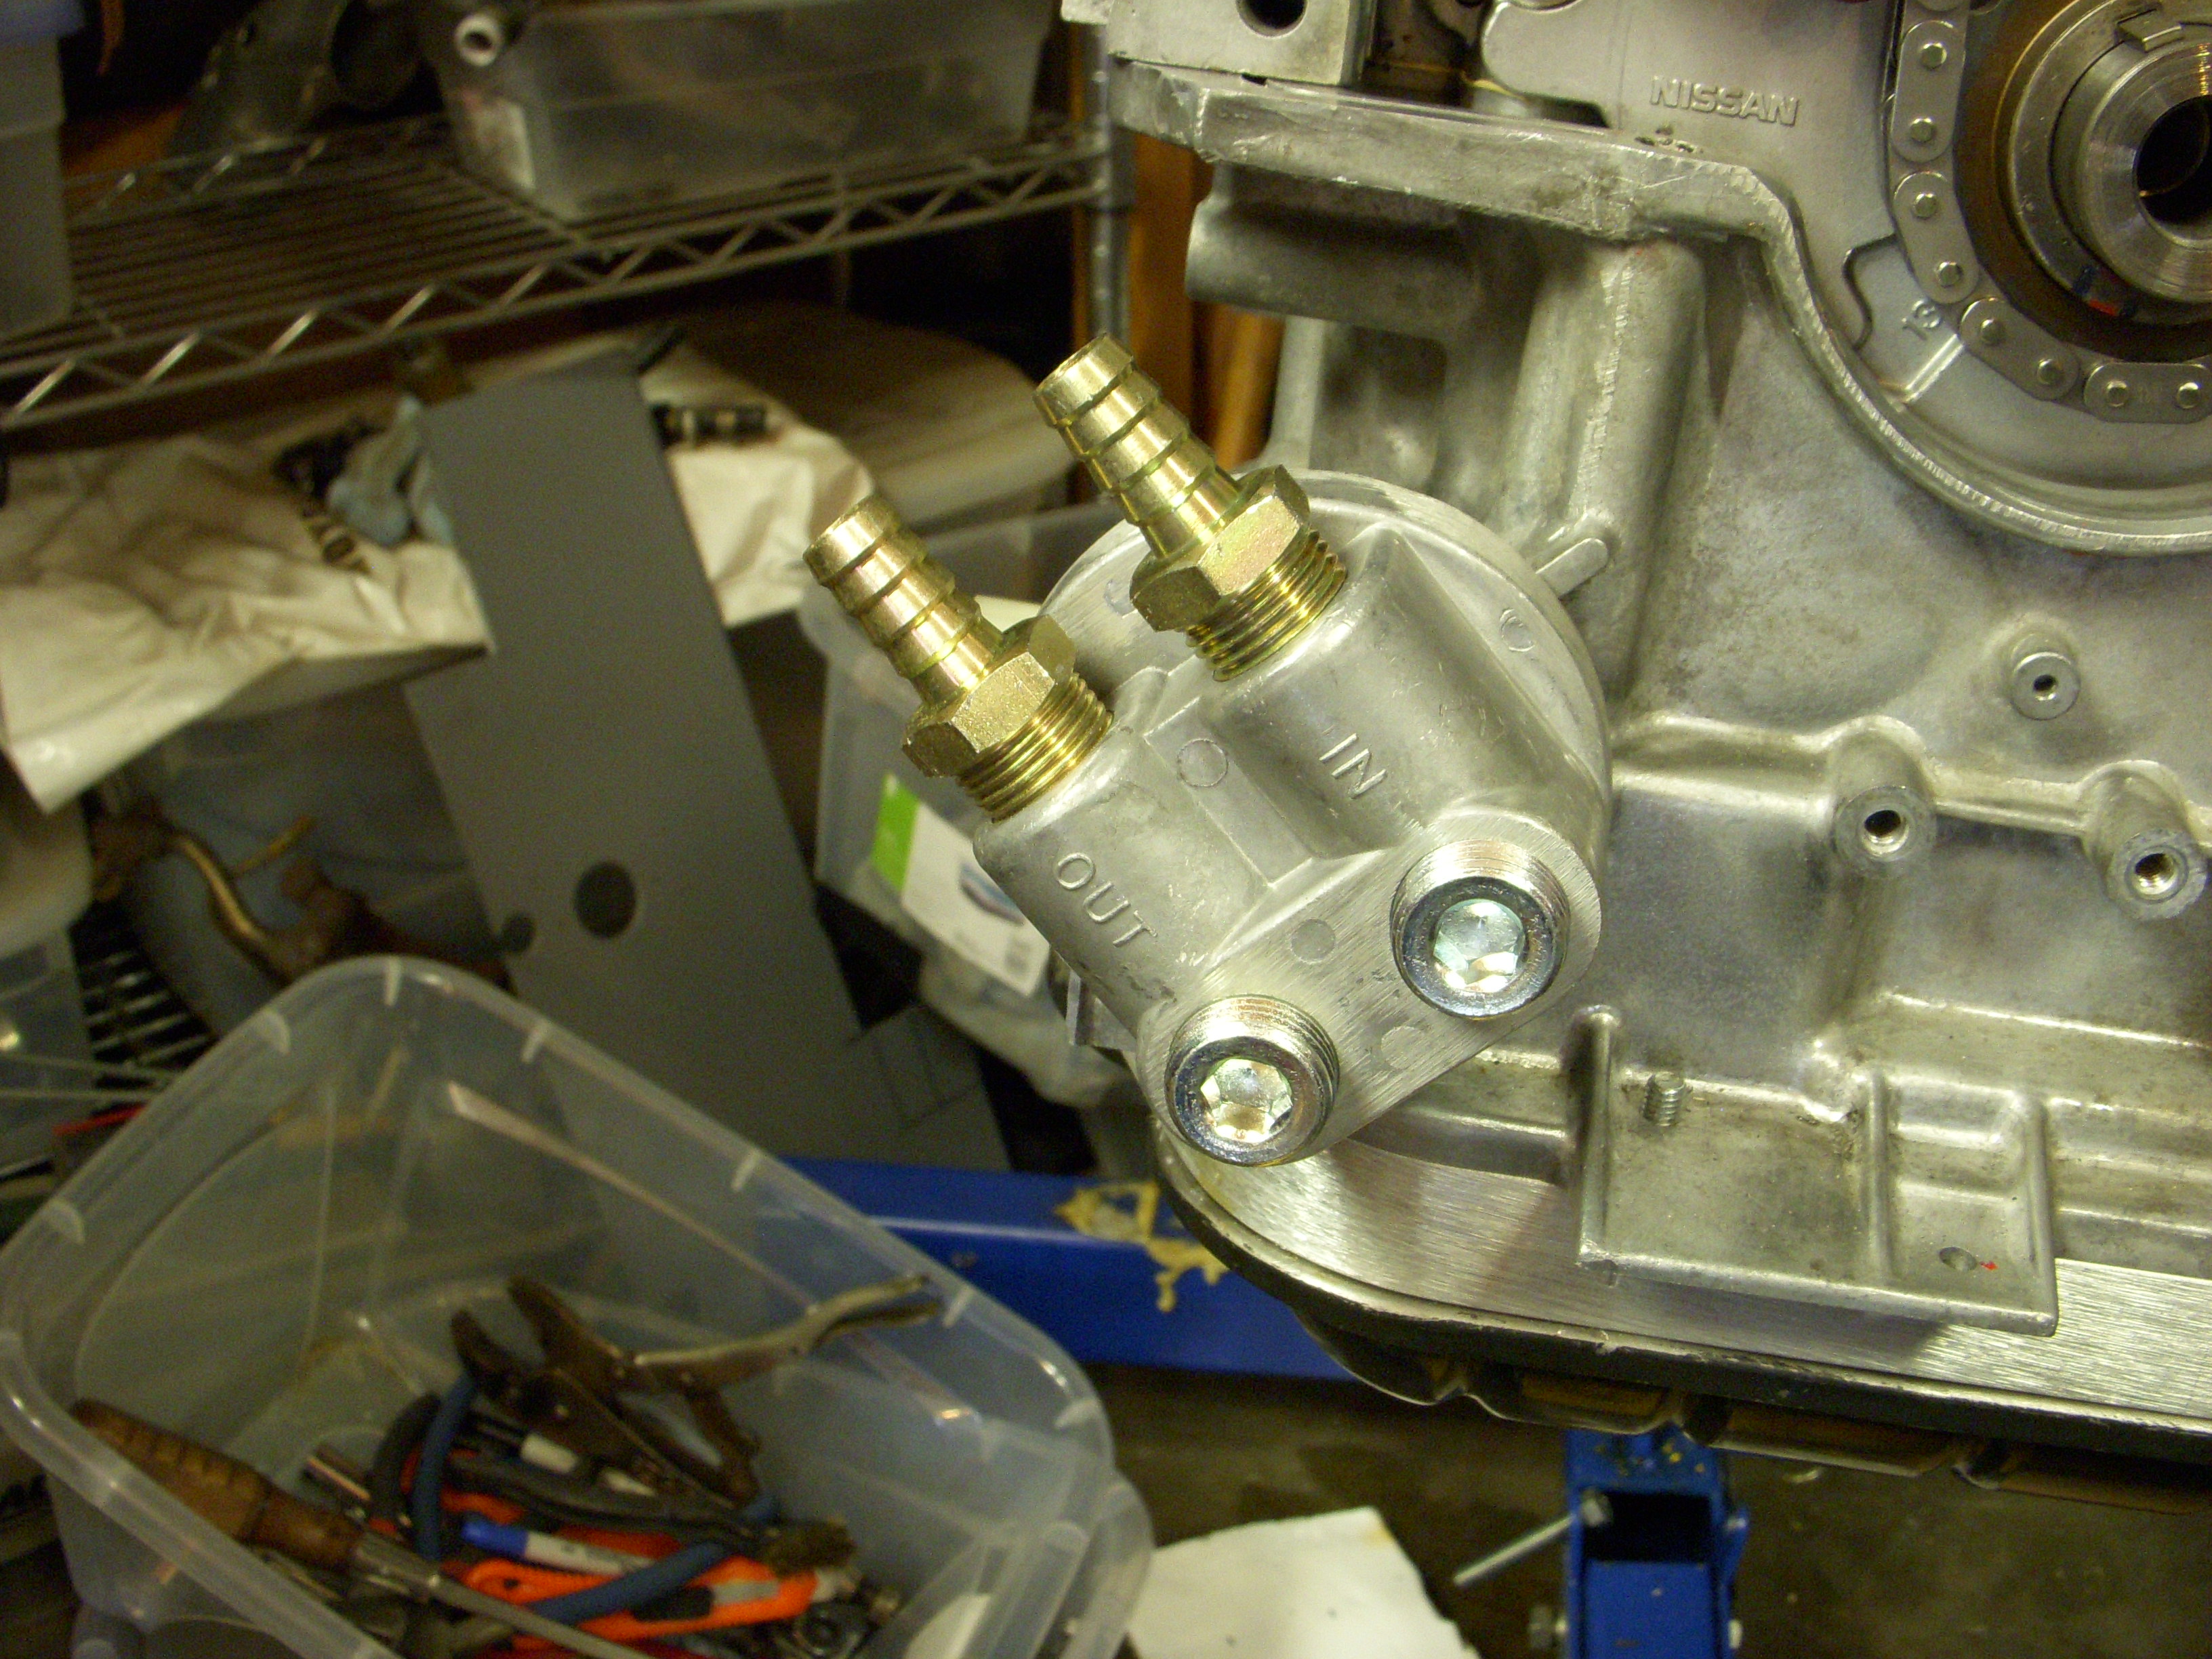
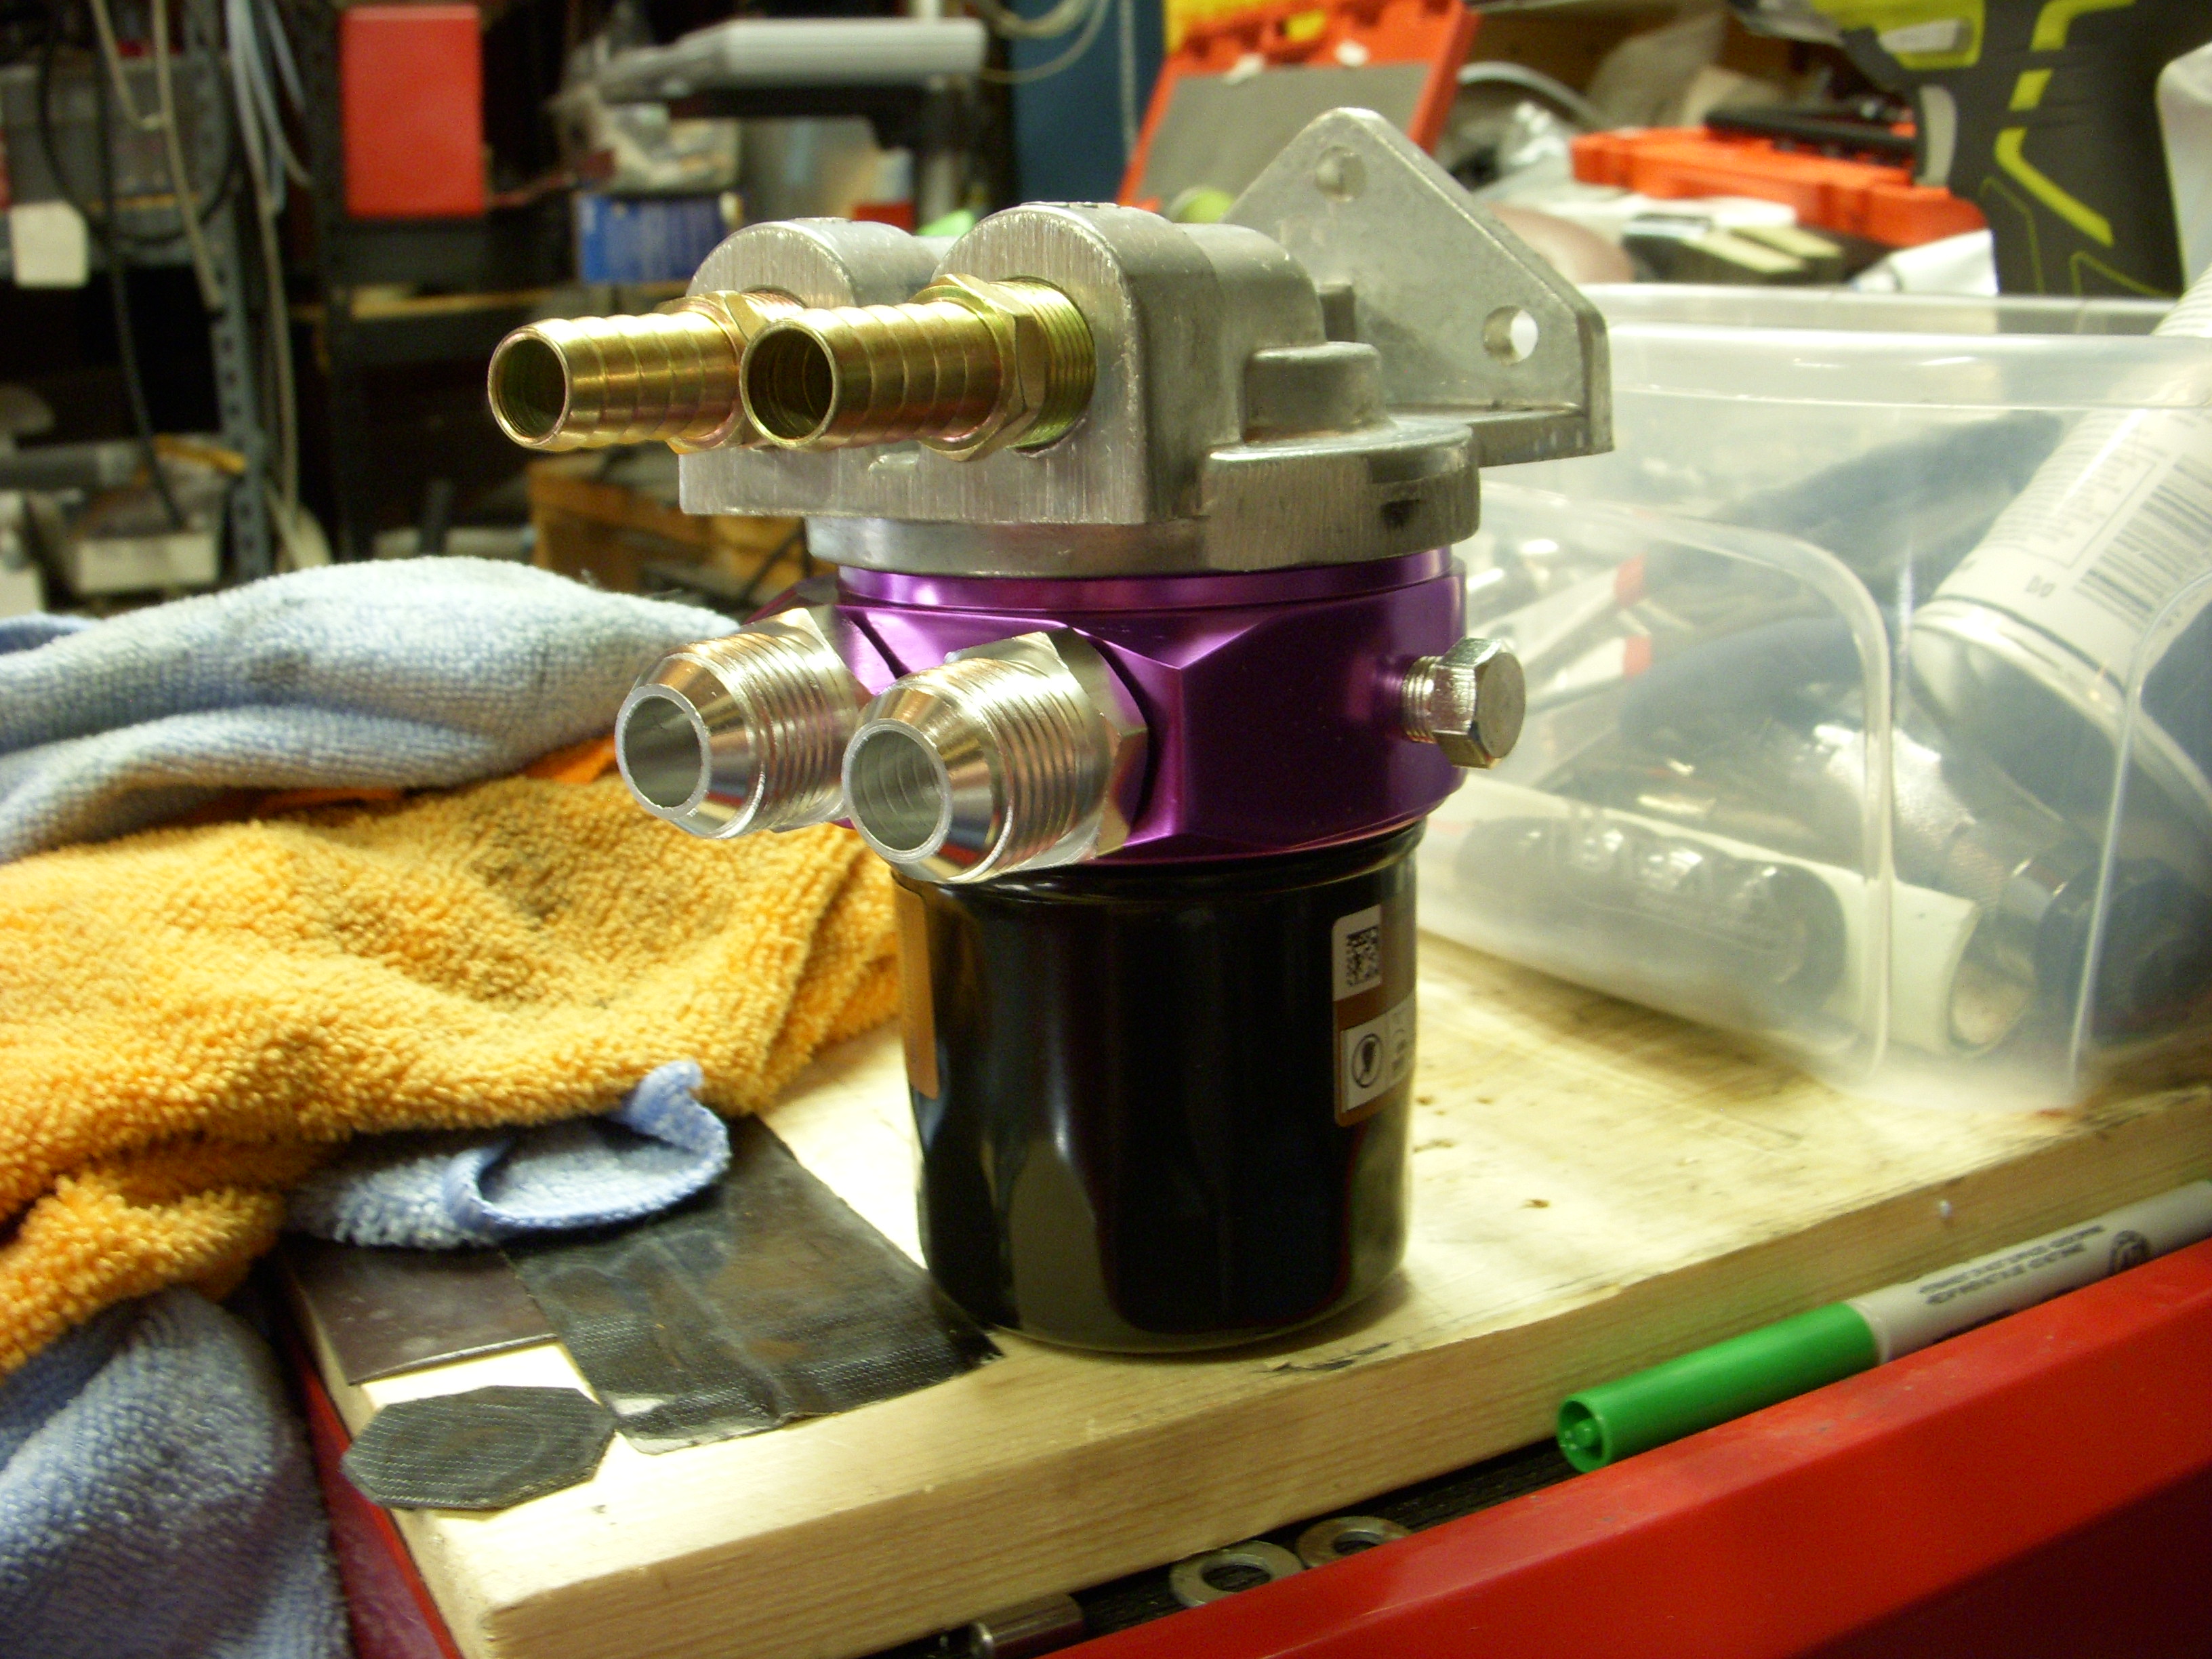
Engine oil - want to install an engine oil cooler, so located a Hayden 291 remote oil filter kit and also a sandwich plate that attaches for the radiator. I think I'll use -10AN hoses and connectors everywhere instead of rubber hoses and clamps because the engine oil will going in two different directions. May wait on the radiator until later, because running E85 kept the oil temp aroungd 200* F on the last engine. However, this Hayden kit gives an easy way to tap into the oil system to prime the engine with oil before starting.
<a href="http://s48.photobucket.com/user/hwb123/media/11_Nov_2016/DSCN4825_zpsb5ervybz.jpg.html" target="_blank"><img src="http://i48.photobucket.com/albums/f216/hwb123/11_Nov_2016/DSCN4825_zpsb5ervybz.jpg" border="0" alt=" photo DSCN4825_zpsb5ervybz.jpg"/></a>
<a href="http://s48.photobucket.com/user/hwb123/media/11_Nov_2016/DSCN4830_zpsjetp9i8d.jpg.html" target="_blank"><img src="http://i48.photobucket.com/albums/f216/hwb123/11_Nov_2016/DSCN4830_zpsjetp9i8d.jpg" border="0" alt=" photo DSCN4830_zpsjetp9i8d.jpg"/></a>
OK - just kidding.... I have both heads back on and "chained" down. Rotated the assembly with a 18"- er, 25" breaker bar because valve springs are stout. No clearance problems with rotation - valves clear pistons OK. During the intermission, I spent some time thinking about options. Just because I'm buying European EP 0W-40 Mobil1 pure synthetic with zinc and phosphorous, I bought a nice red Mobil1 oil cap. Shiny...
<a href="http://s48.photobucket.com/user/hwb123/media/11_Nov_2016/DSCN4835_zpsiz7qccqq.jpg.html" target="_blank"><img src="http://i48.photobucket.com/albums/f216/hwb123/11_Nov_2016/DSCN4835_zpsiz7qccqq.jpg" border="0" alt=" photo DSCN4835_zpsiz7qccqq.jpg"/></a>

<a href="http://s48.photobucket.com/user/hwb123/media/11_Nov_2016/DSCN4834_zpstvcdf4r2.jpg.html" target="_blank"><img src="http://i48.photobucket.com/albums/f216/hwb123/11_Nov_2016/DSCN4834_zpstvcdf4r2.jpg" border="0" alt=" photo DSCN4834_zpstvcdf4r2.jpg"/></a>

<a href="http://s48.photobucket.com/user/hwb123/media/12_Dec_2016/DSCN4839_zpsgqe8vjks.jpg.html" target="_blank"><img src="http://i48.photobucket.com/albums/f216/hwb123/12_Dec_2016/DSCN4839_zpsgqe8vjks.jpg" border="0" alt=" photo DSCN4839_zpsgqe8vjks.jpg"/></a>

Engine oil - want to install an engine oil cooler, so located a Hayden 291 remote oil filter kit and also a sandwich plate that attaches for the radiator. I think I'll use -10AN hoses and connectors everywhere instead of rubber hoses and clamps because the engine oil will going in two different directions. May wait on the radiator until later, because running E85 kept the oil temp aroungd 200* F on the last engine. However, this Hayden kit gives an easy way to tap into the oil system to prime the engine with oil before starting.
<a href="http://s48.photobucket.com/user/hwb123/media/11_Nov_2016/DSCN4825_zpsb5ervybz.jpg.html" target="_blank"><img src="http://i48.photobucket.com/albums/f216/hwb123/11_Nov_2016/DSCN4825_zpsb5ervybz.jpg" border="0" alt=" photo DSCN4825_zpsb5ervybz.jpg"/></a>

<a href="http://s48.photobucket.com/user/hwb123/media/11_Nov_2016/DSCN4830_zpsjetp9i8d.jpg.html" target="_blank"><img src="http://i48.photobucket.com/albums/f216/hwb123/11_Nov_2016/DSCN4830_zpsjetp9i8d.jpg" border="0" alt=" photo DSCN4830_zpsjetp9i8d.jpg"/></a>

Last edited by grey99max; 01-16-2017 at 07:20 PM.
12-01-2016, 06:50 PM
#1830

As always its good to hear you are still at it with your build. Looks like you got the e85 bug, i am still a fan of meth over it for some reason.
Time to catch up on work done up to now - and some plans for the future. For instance, I think I can get better performance from a Honda B18, so I'm going to scrap all the VQ35 build and go the way of the Honda!
OK - just kidding.... I have both heads back on and "chained" down. Rotated the assembly with a 18" breaker bar because springs are stout. No clearance problems with rotation - valves clear pistons OK. During the intermission, I spent some time thinking about options. Just because I'm buying European EP 0W-40 Mobil1 pure synthetic with zinc and phosphorous, I bought a nice red Mobil1 oil cap. Shiny...
<a href="http://s48.photobucket.com/user/hwb123/media/11_Nov_2016/DSCN4835_zpsiz7qccqq.jpg.html" target="_blank"><img src="http://i48.photobucket.com/albums/f216/hwb123/11_Nov_2016/DSCN4835_zpsiz7qccqq.jpg" border="0" alt=" photo DSCN4835_zpsiz7qccqq.jpg"/></a>
<a href="http://s48.photobucket.com/user/hwb123/media/11_Nov_2016/DSCN4834_zpstvcdf4r2.jpg.html" target="_blank"><img src="http://i48.photobucket.com/albums/f216/hwb123/11_Nov_2016/DSCN4834_zpstvcdf4r2.jpg" border="0" alt=" photo DSCN4834_zpstvcdf4r2.jpg"/></a>
Engine oil - want to install an engine oil cooler, so located a Hayden 291 remote oil filter kit and also a sandwich plate that attaches for the radiator. I think I'll use -10AN hoses and connectors everywhere instead of rubber hoses and clamps because the engine oil will going in two different directions. May wait on the radiator until later, because running E85 kept the oil temp aroungd 200* F on the last engine. However, this Hayden kit gives an easy way to tap into the oil system to prime the engine with oil before starting.
<a href="http://s48.photobucket.com/user/hwb123/media/11_Nov_2016/DSCN4825_zpsb5ervybz.jpg.html" target="_blank"><img src="http://i48.photobucket.com/albums/f216/hwb123/11_Nov_2016/DSCN4825_zpsb5ervybz.jpg" border="0" alt=" photo DSCN4825_zpsb5ervybz.jpg"/></a>
<a href="http://s48.photobucket.com/user/hwb123/media/11_Nov_2016/DSCN4830_zpsjetp9i8d.jpg.html" target="_blank"><img src="http://i48.photobucket.com/albums/f216/hwb123/11_Nov_2016/DSCN4830_zpsjetp9i8d.jpg" border="0" alt=" photo DSCN4830_zpsjetp9i8d.jpg"/></a>
12-01-2016, 07:20 PM
#1831
LandShark has Cosworth
Thread Starter
iTrader: (12)
Join Date: Jan 2004
Location: Topeka, KS
Posts: 4,327
More plans ...
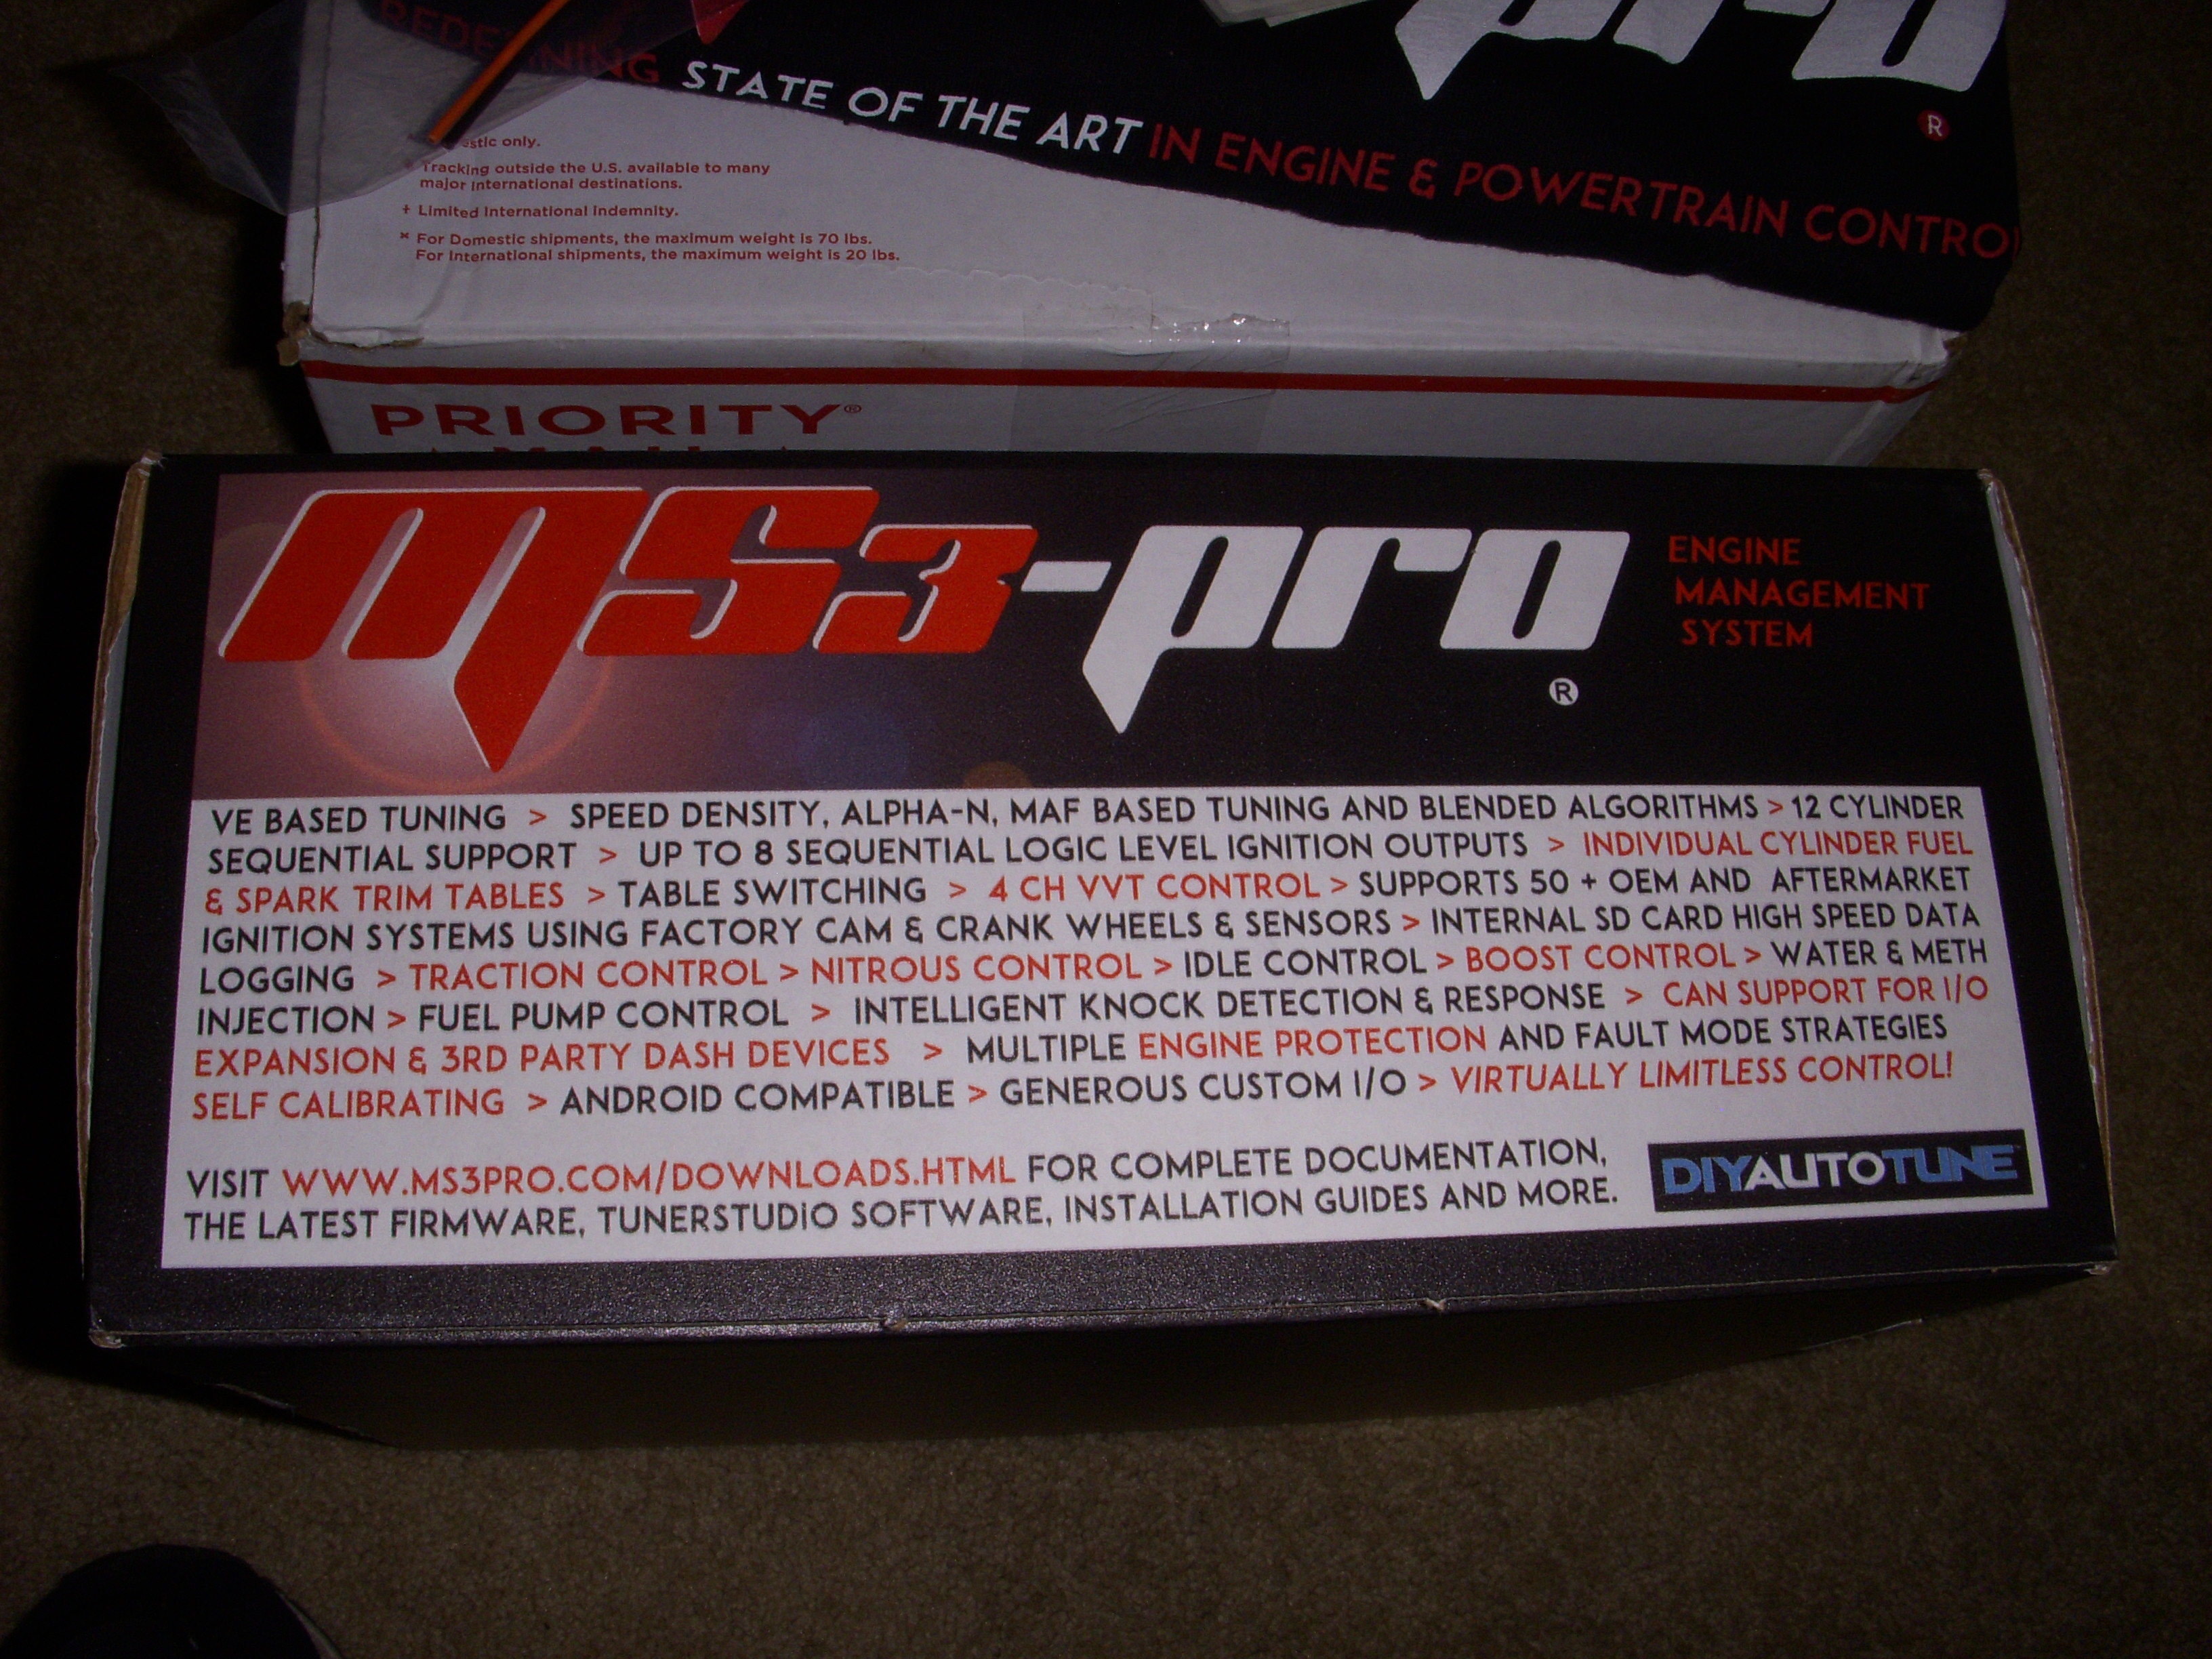
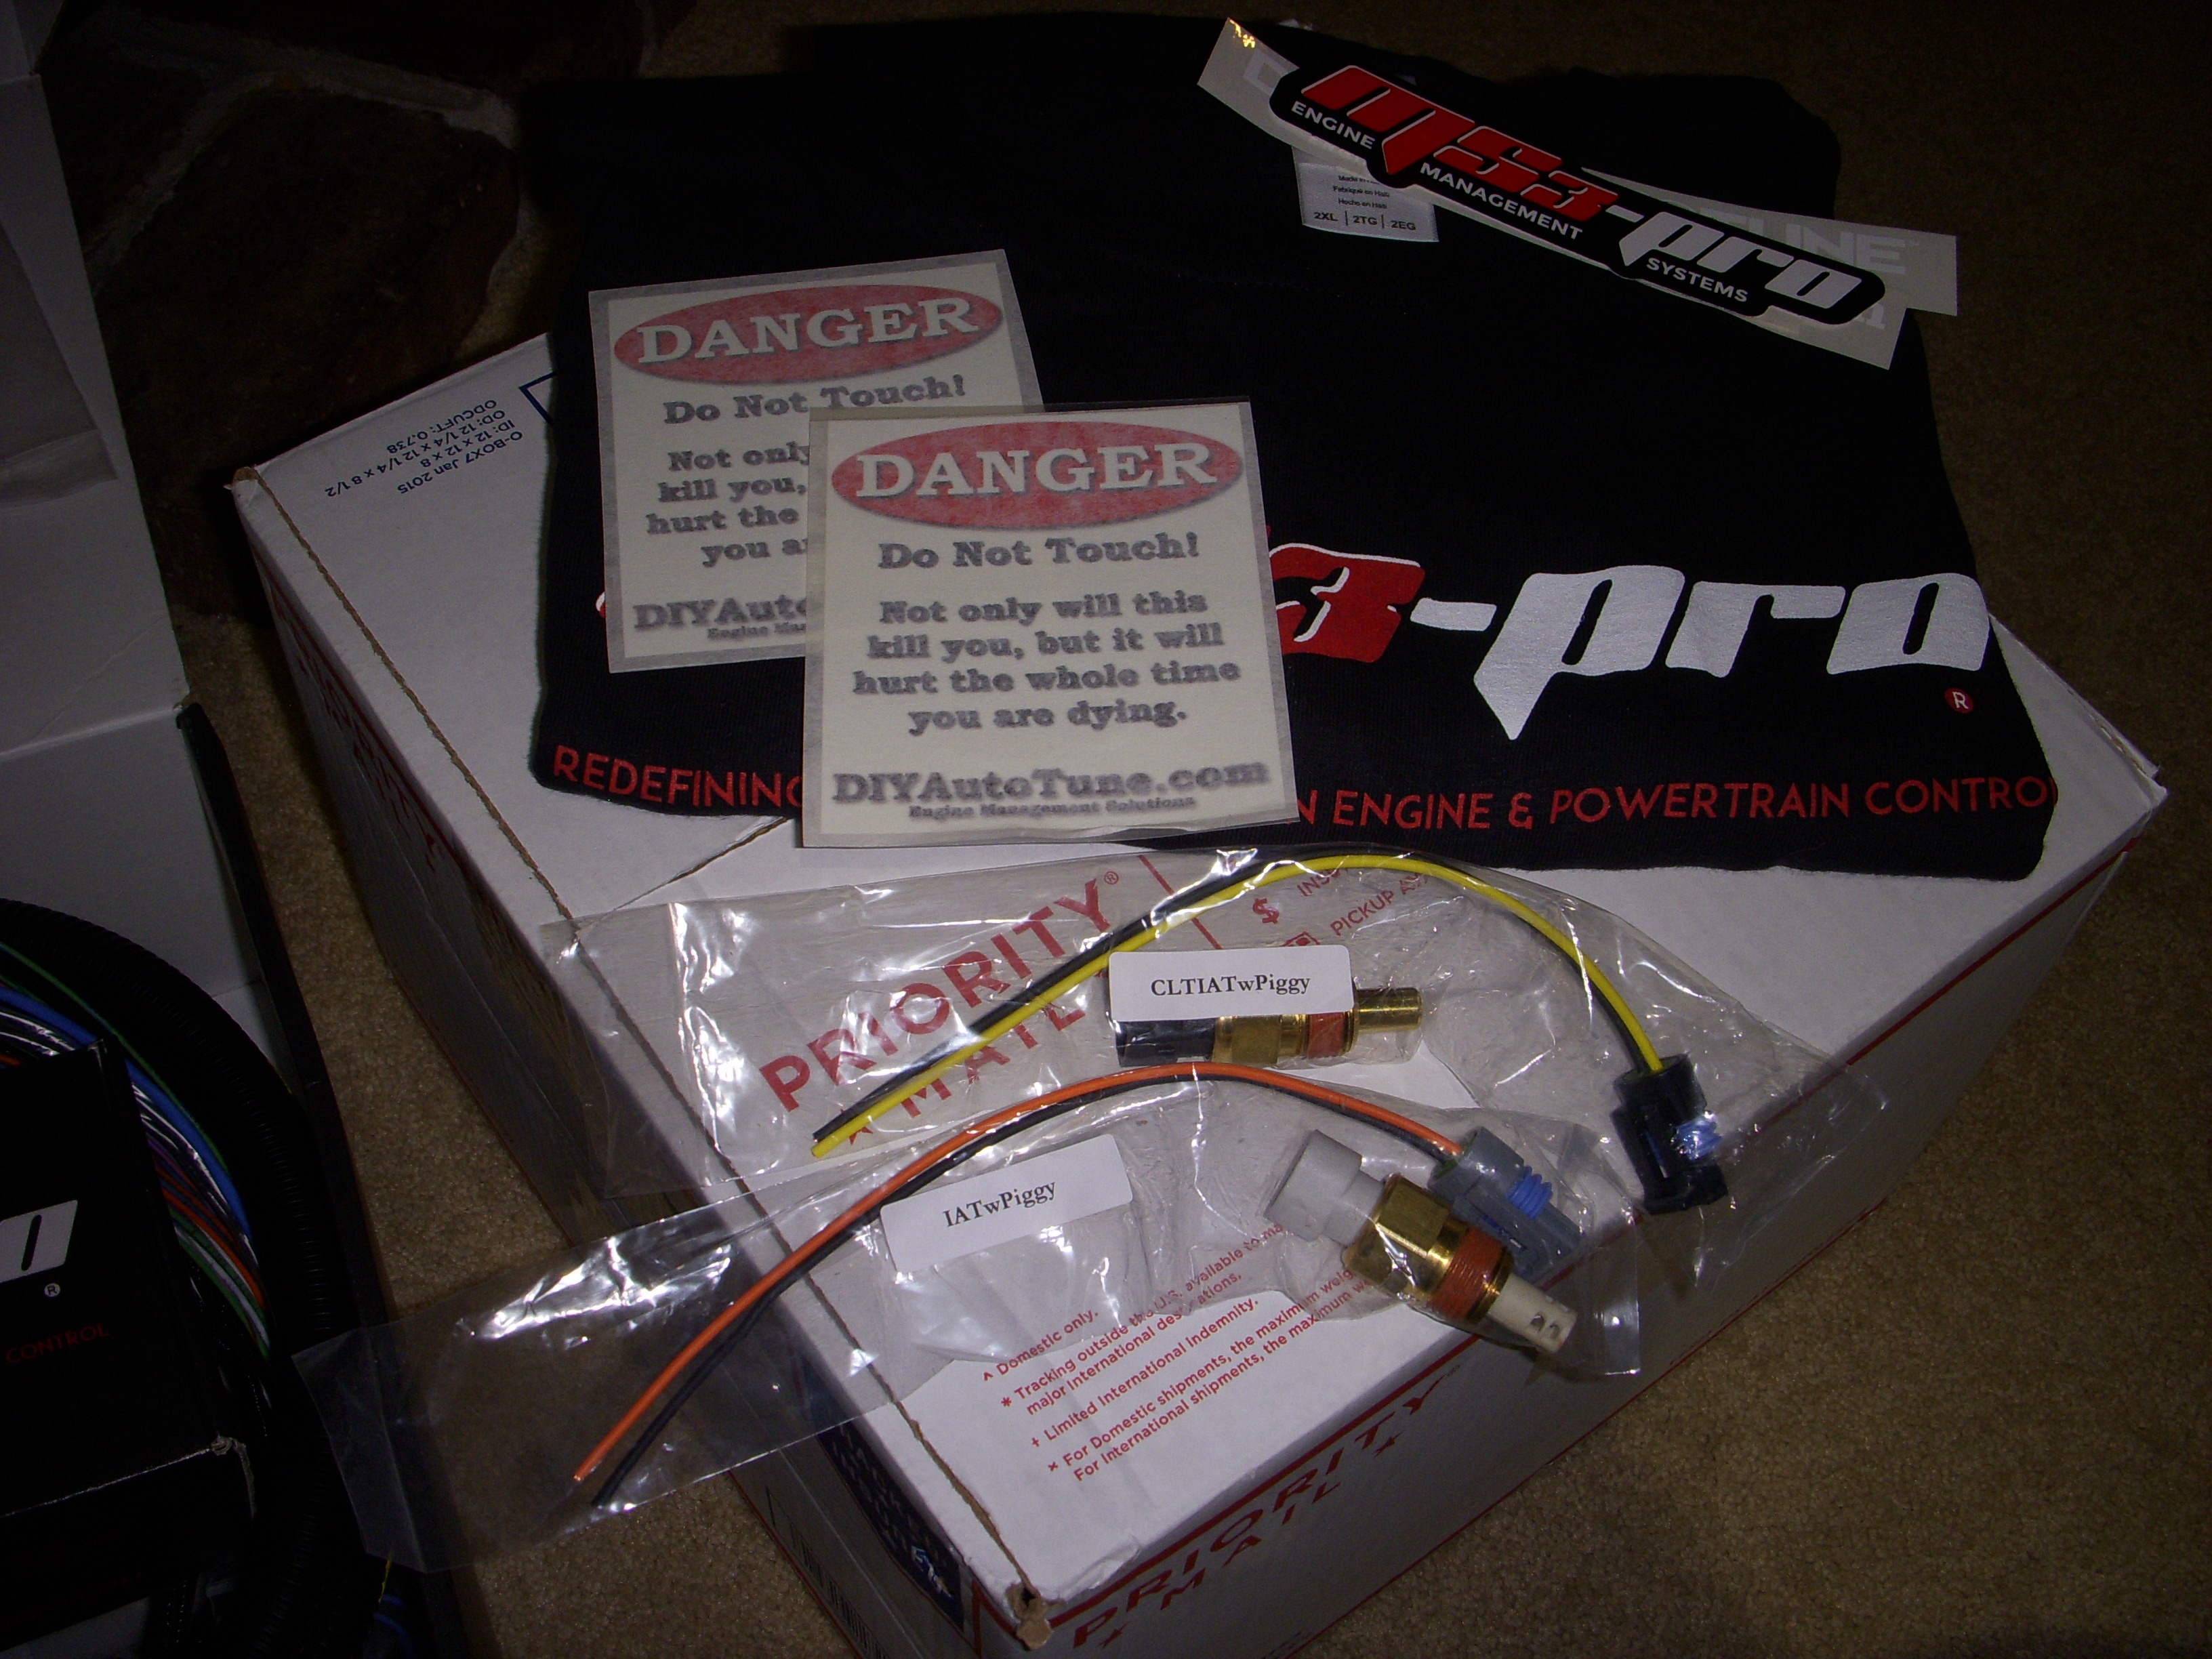
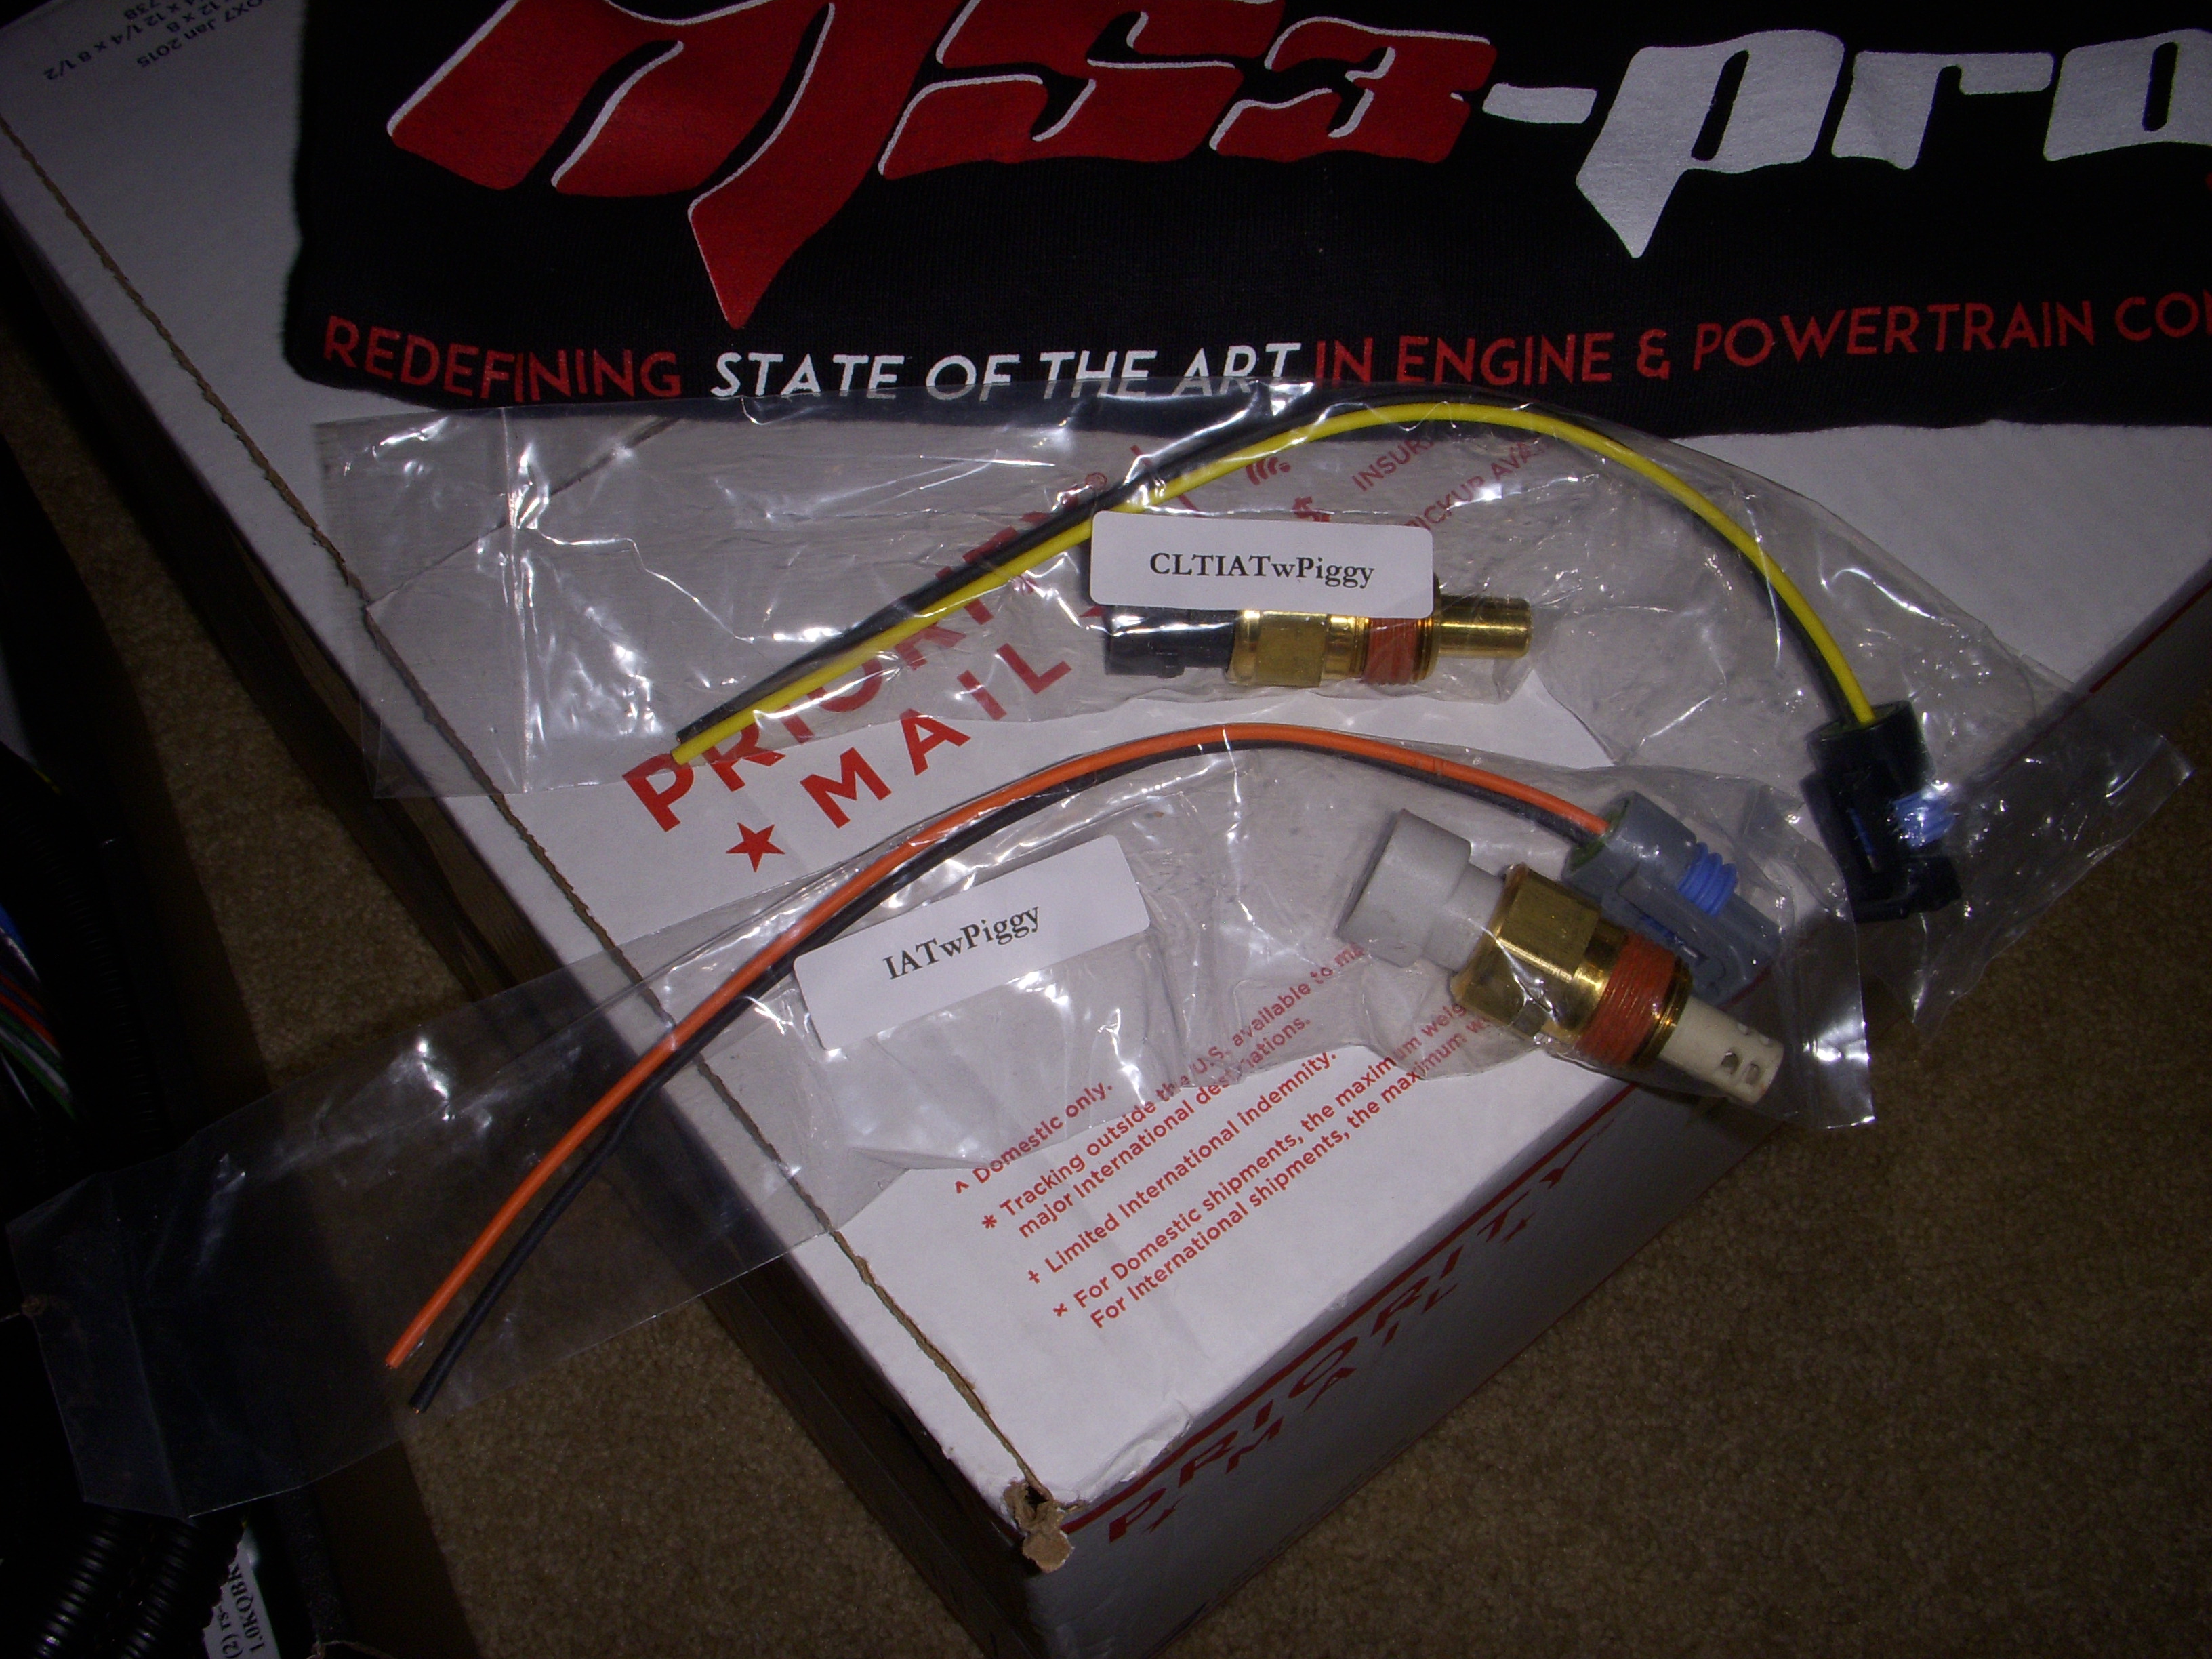
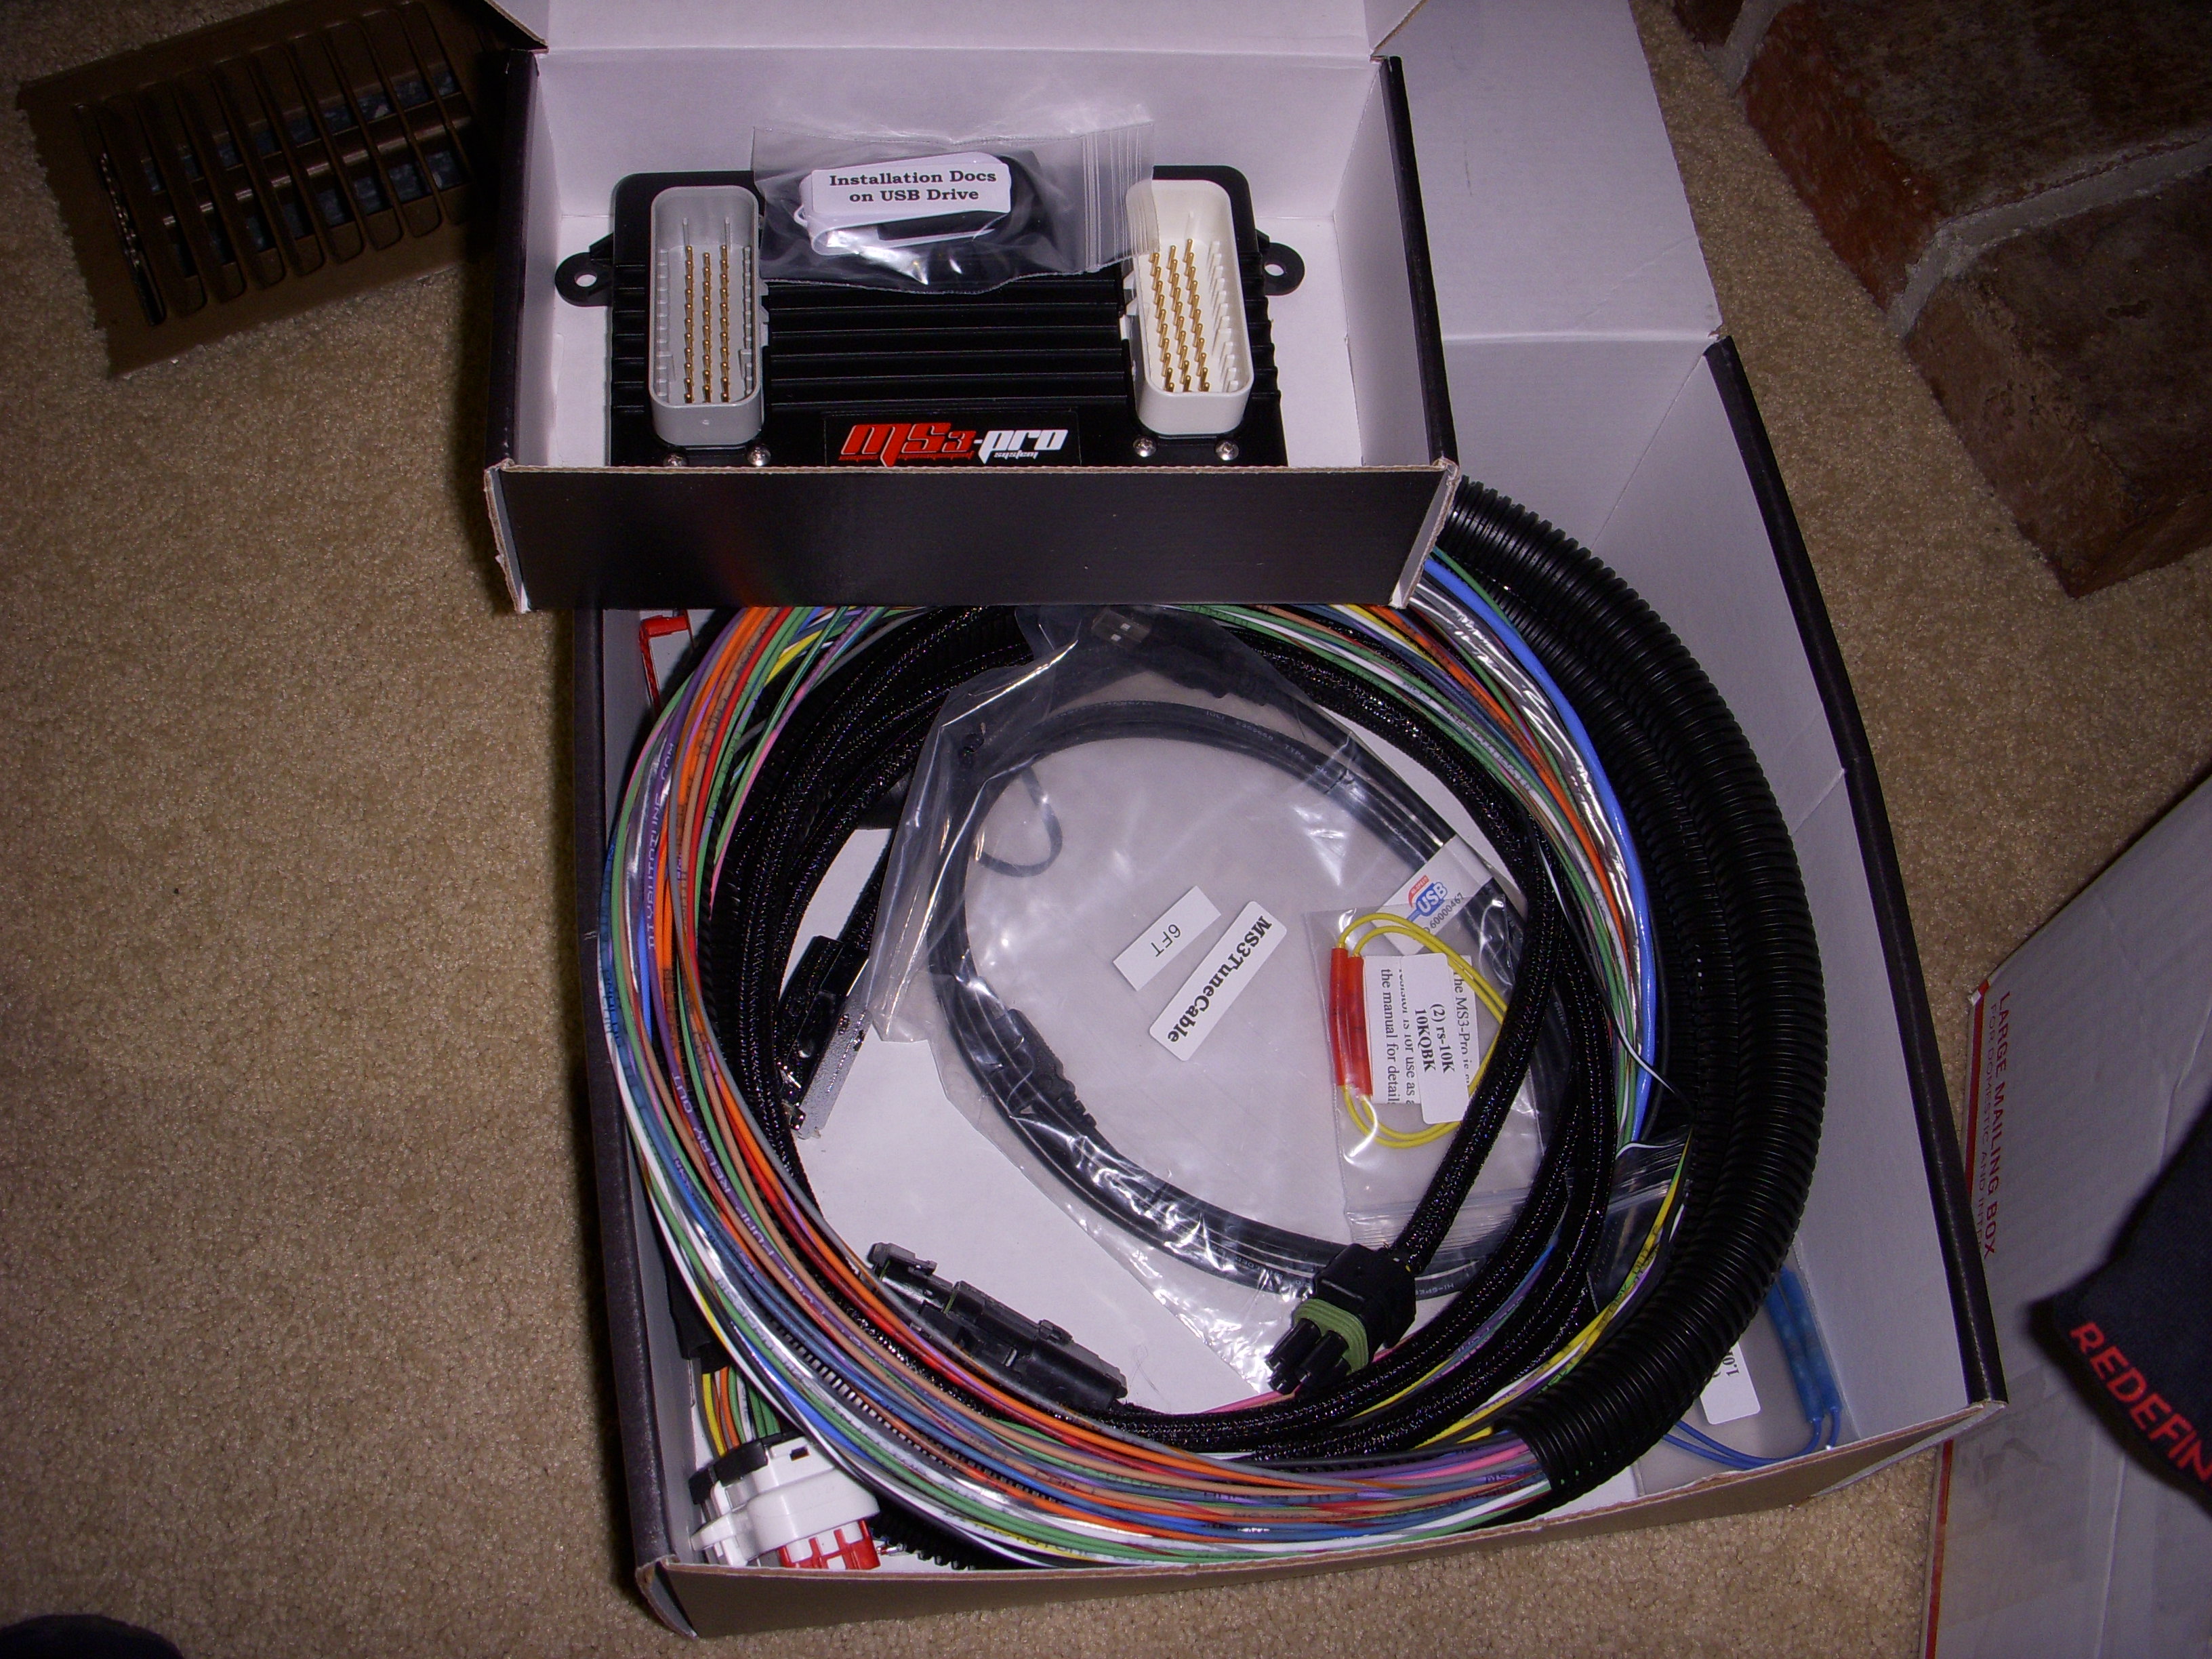
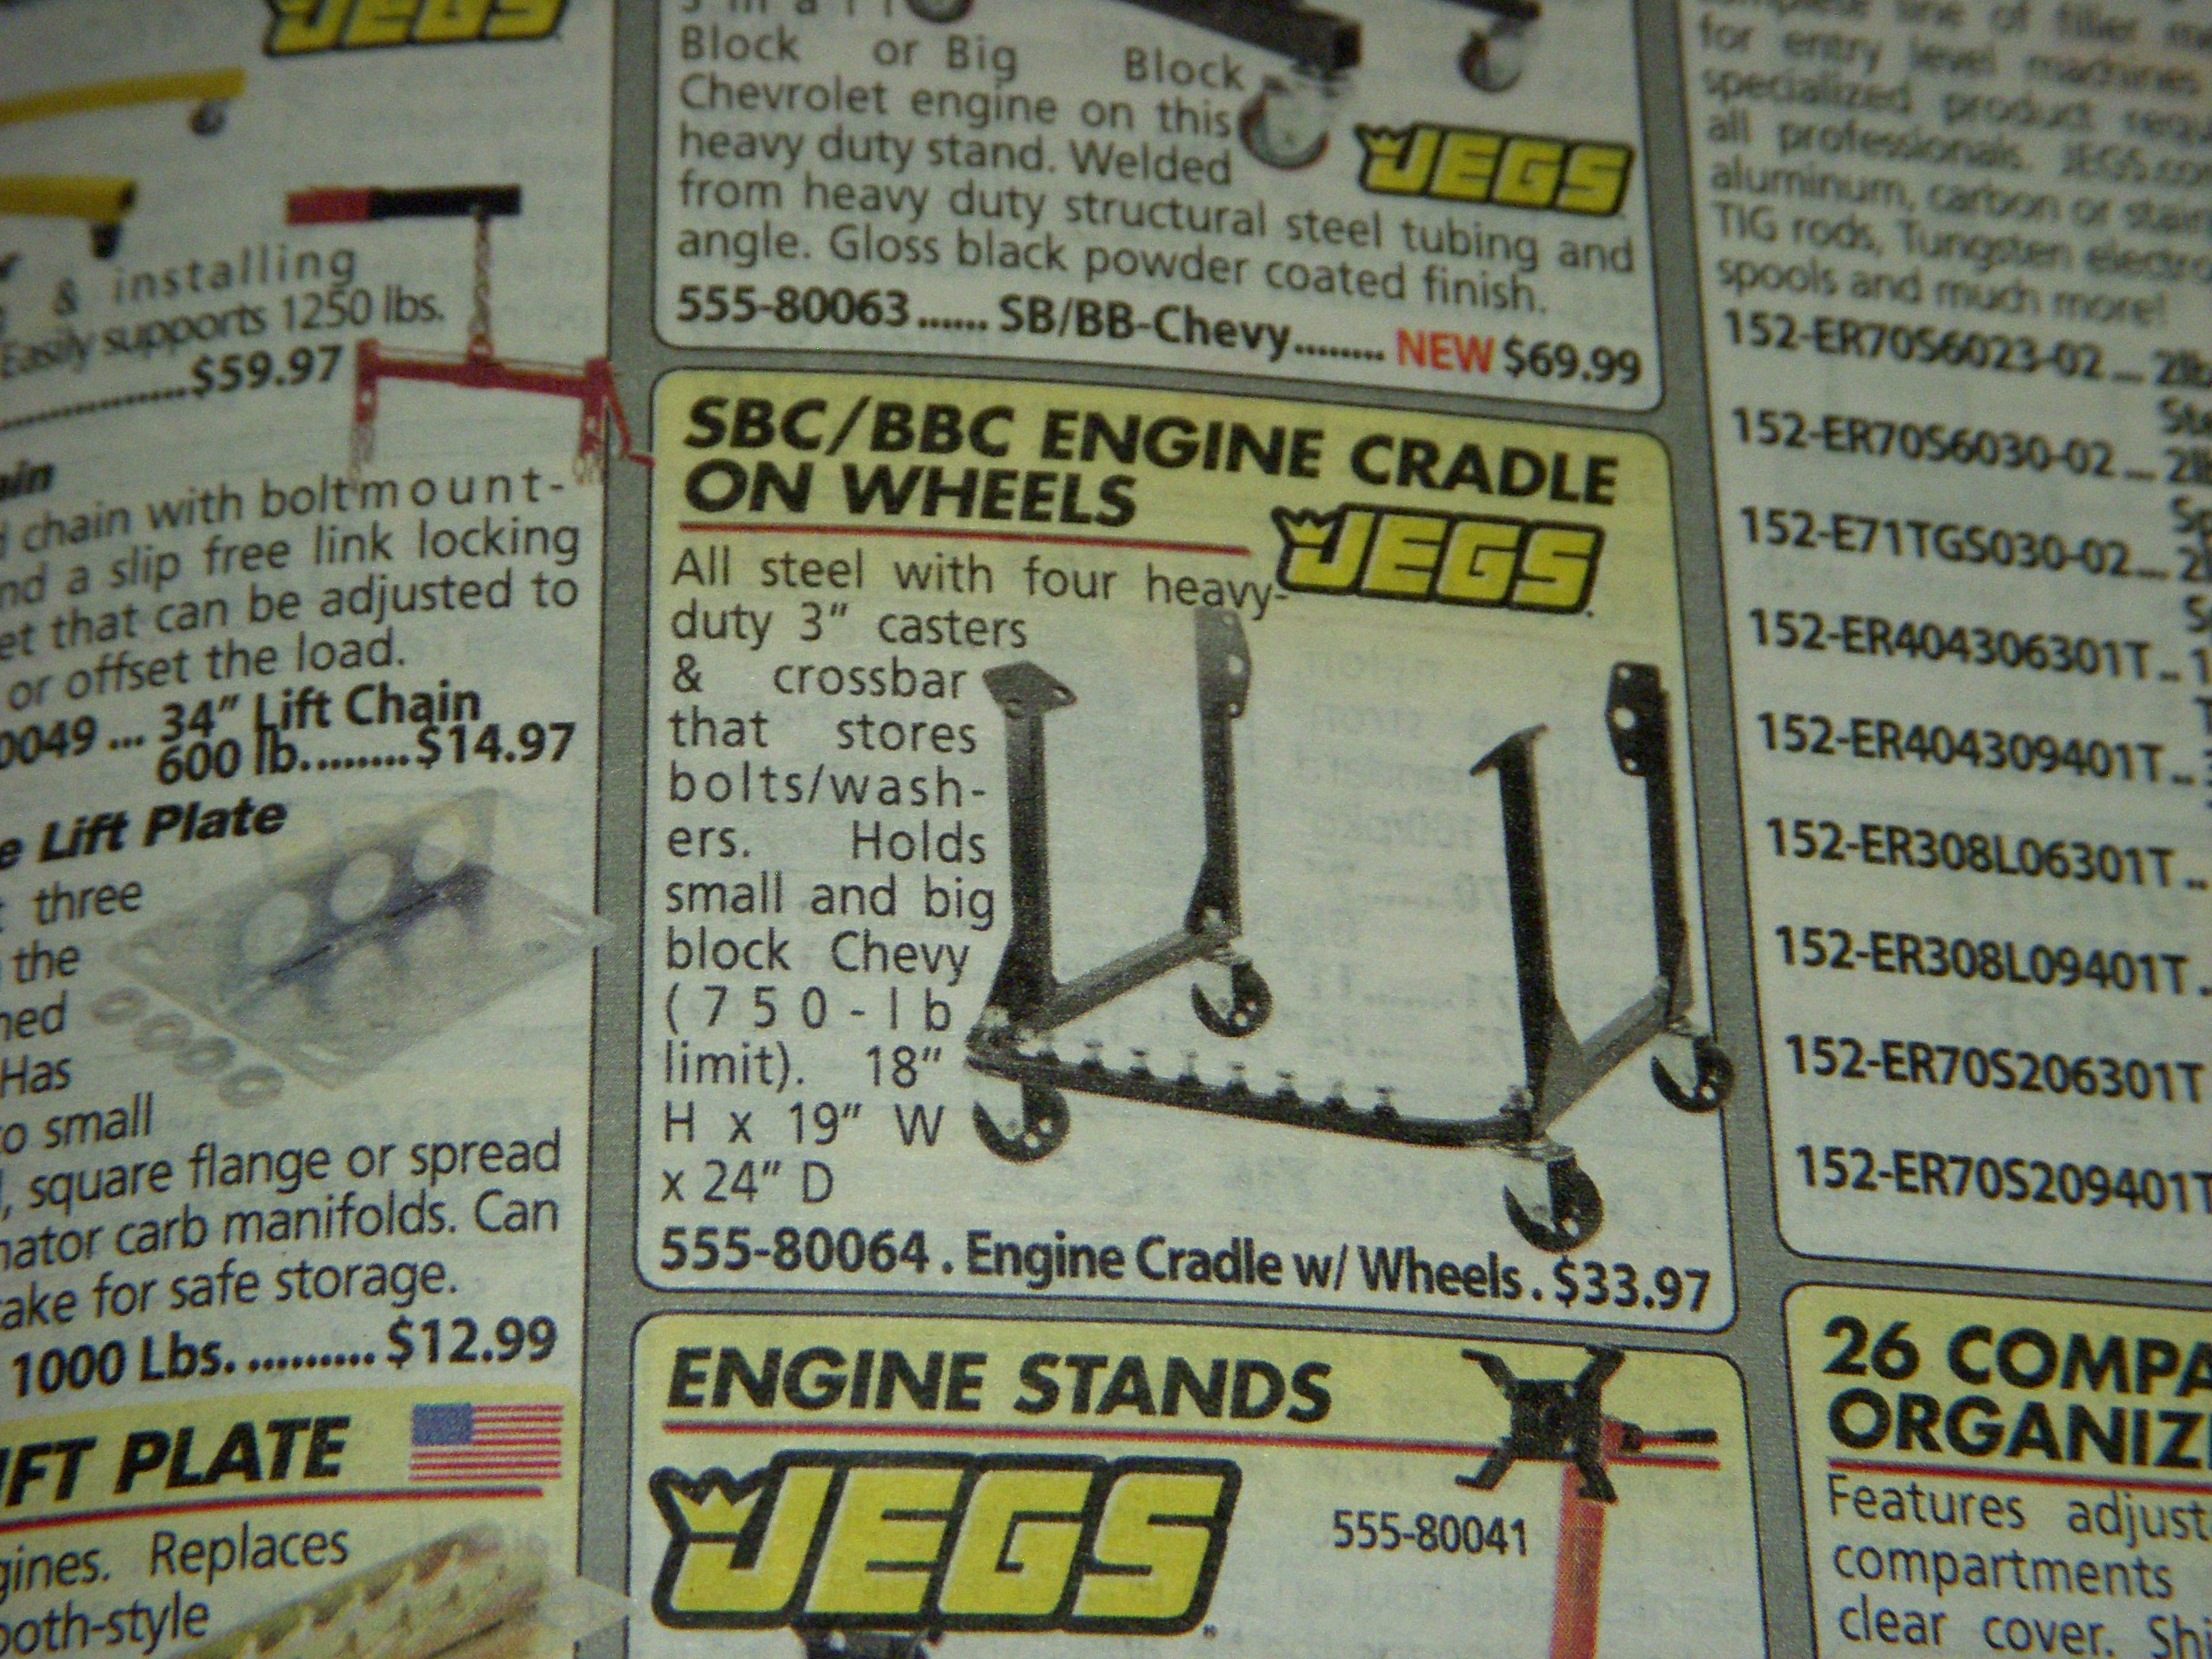
Once I get the engine buttoned up on the rotary stand, I want to completely test the new sensors with the MS3-Pro ECU, so I ordered one with 8 ft wiring harness, water and temp sensors, T-shirt, and so decals - all 10% off for Black Friday !! I also ordered a BBC-SBC roll-around engine stand from Jegs for aroung $30 shipped. I'm going to weld up mounts for the VQ35 to hold in a fixed position with access all around and mount a spare bell housing and starter on the tail so I can crank over the engine. Once the ECU is wired to the 36-1 crank and left cam Hall sensors, and the factory water and air temp sensors are connected, the ECU should be able to drive the ignition coils and fuel injectors.
JEGs engine stand: Some surgery required.
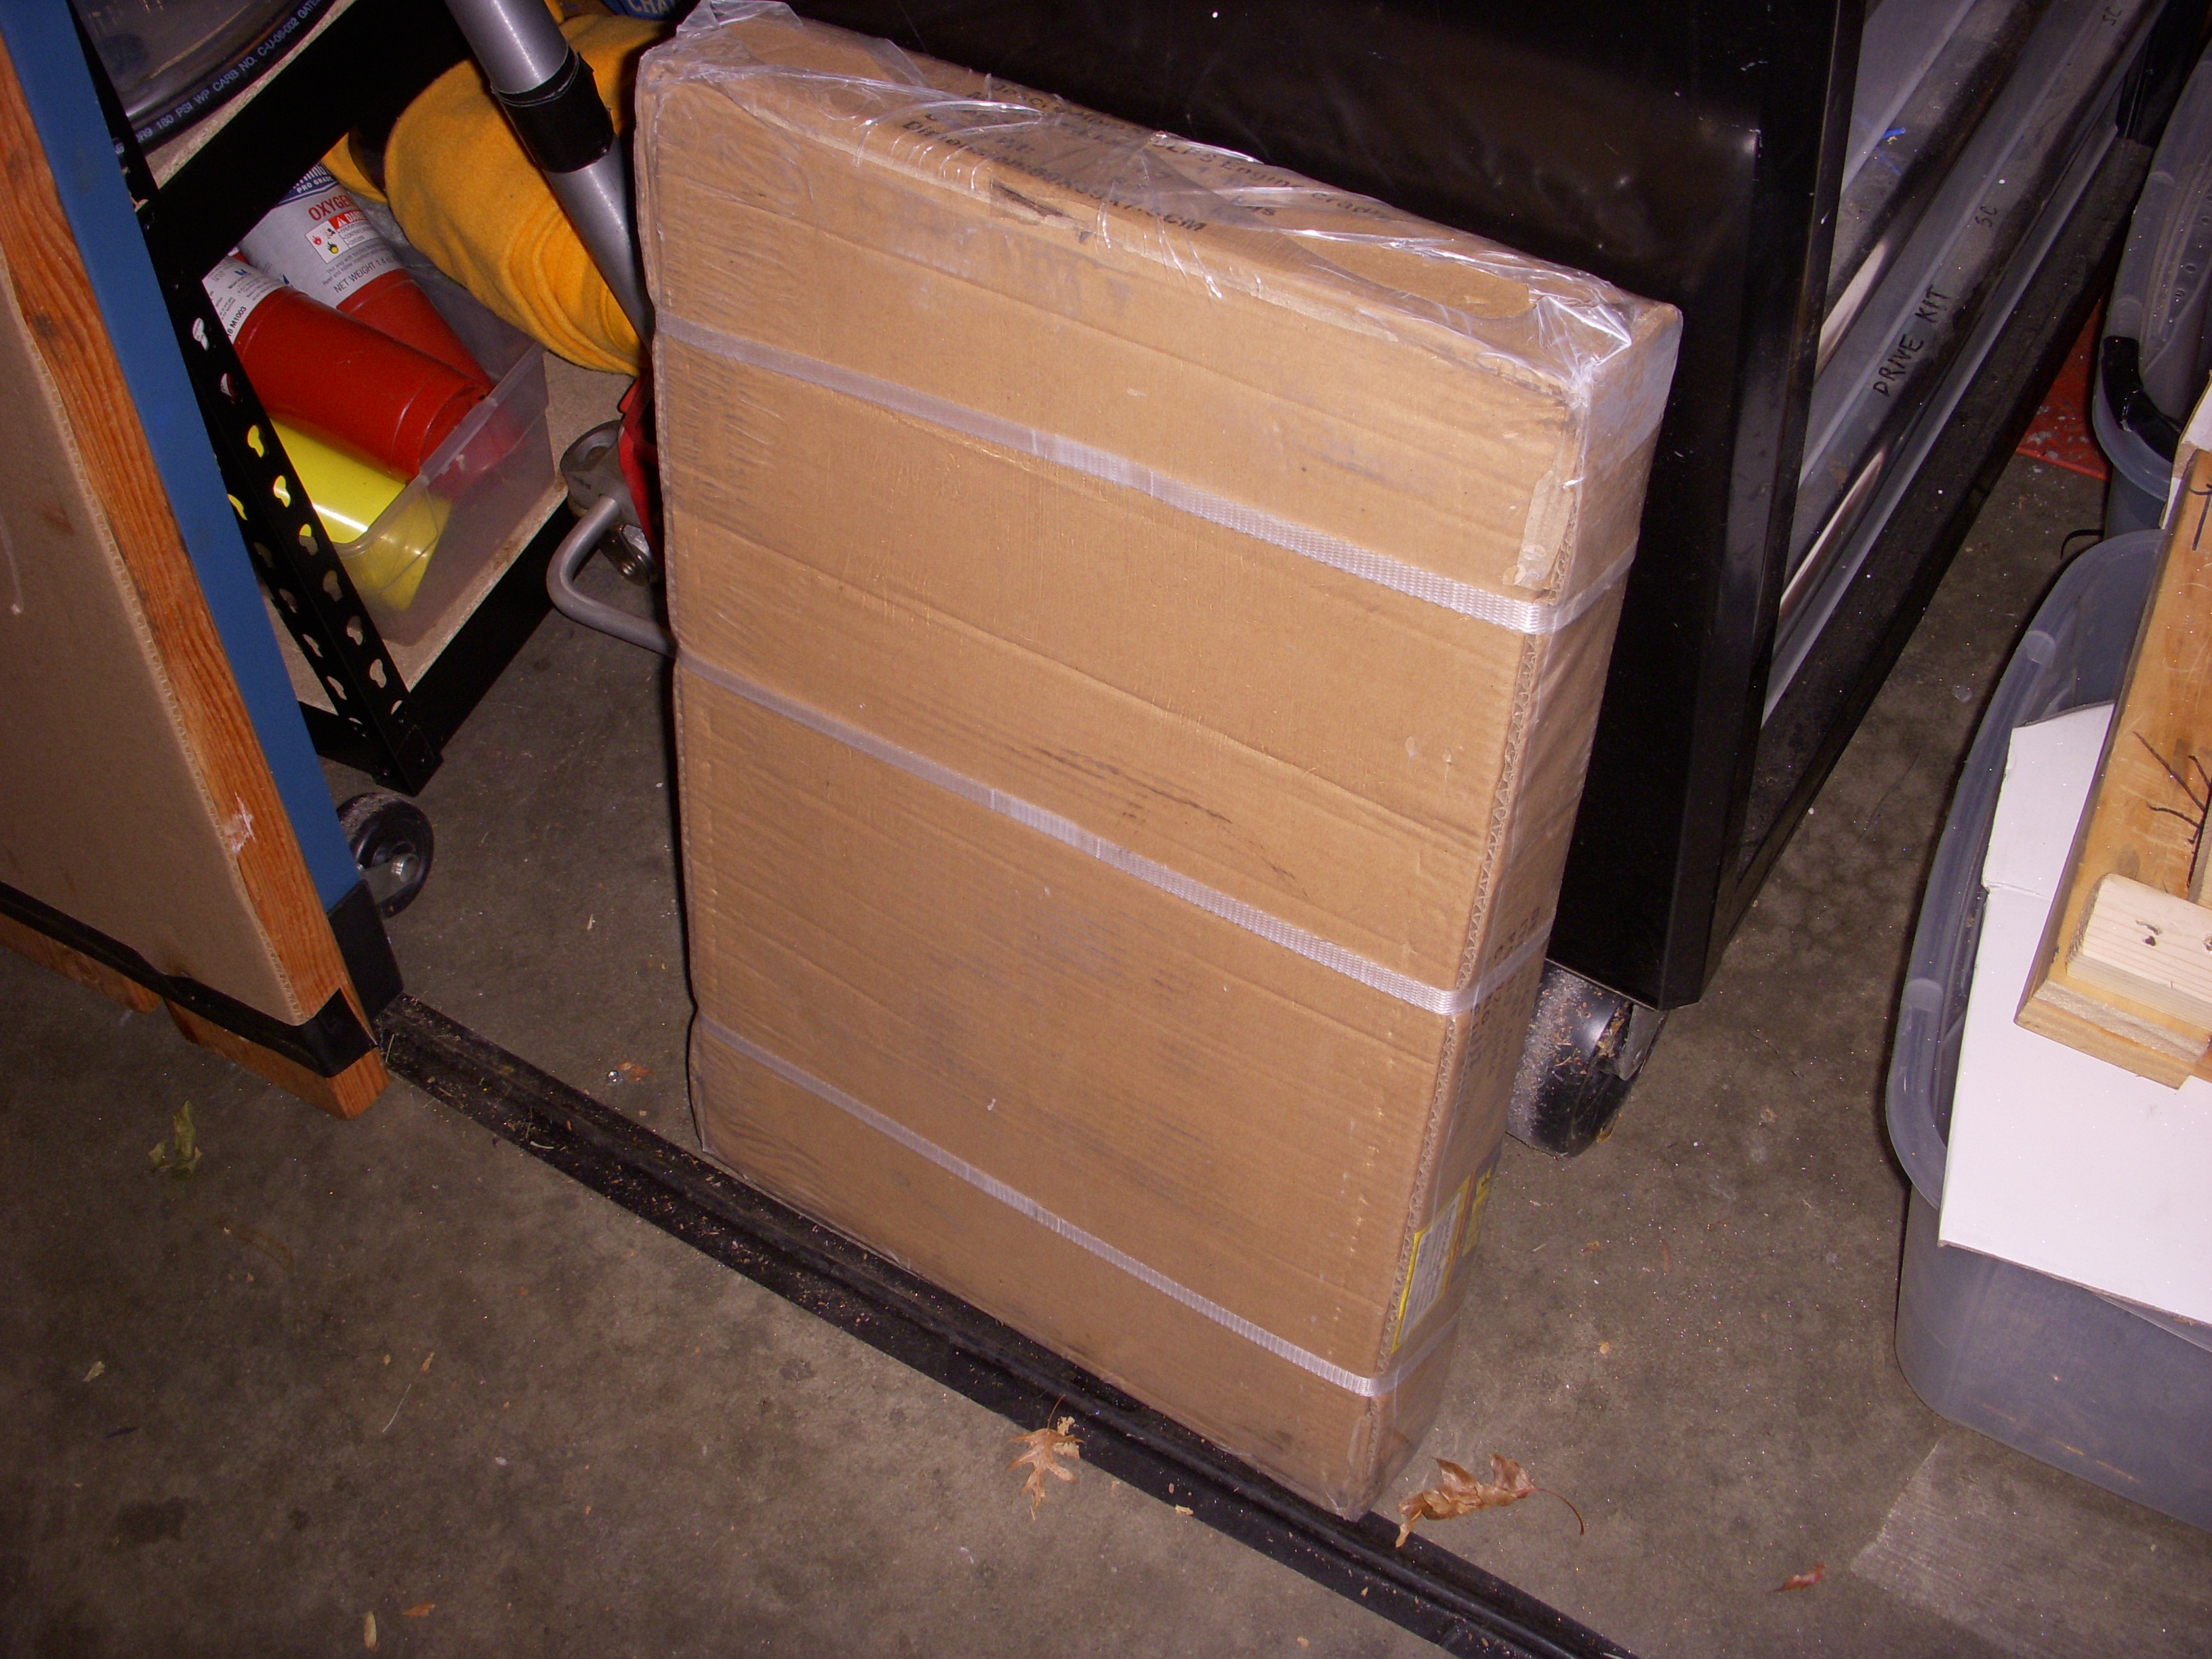
Pix:
Our temps have just dropped down into the 20-30*F range, so work will be delayed during cold days.


JEGs engine stand: Some surgery required.

Pix:

Our temps have just dropped down into the 20-30*F range, so work will be delayed during cold days.
Last edited by grey99max; 01-16-2017 at 07:29 PM.
12-15-2016, 07:19 PM
#1832
LandShark has Cosworth
Thread Starter
iTrader: (12)
Join Date: Jan 2004
Location: Topeka, KS
Posts: 4,327
too cold - I'm on hold until warmer weather
A cold front suddenly came to visit about three weeks ago - and it's still here, with temps dropping below 0*F over this weekend. Since my garage isn't heated, I'm on hold until warmer weather comes back.

Maybe April ??
01-03-2017, 05:13 PM
#1834
LandShark has Cosworth
Thread Starter
iTrader: (12)
Join Date: Jan 2004
Location: Topeka, KS
Posts: 4,327
Photos linked to Photobucket - Busted ??
Photos starting around page 42 don't work now, weirdness.
Old "but working" IMG format of a Carrillo H-beam rod:

New (and BUSTED) HTML format of the same image:
<a href="http://s48.photobucket.com/user/hwb123/media/10_OCT_2015/DSCN3792_zpssl2hrluc.jpg.html" target="_blank"><img src="http://i48.photobucket.com/albums/f216/hwb123/10_OCT_2015/DSCN3792_zpssl2hrluc.jpg" border="0" alt=" photo DSCN3792_zpssl2hrluc.jpg"/></a>
---------------------------------------------
So what changed? Photobucket? This web server?
1/11/2017 - just finished editing all photos in Page 42 AND pg 43 and pg 44 and pg 45 of this thread. Thanks to Photobucket on changing how they read IMG files.
All bad PIXs have been edited and persuaded to work again. !!! YEAH !!
-------
Last edited by grey99max; 01-16-2017 at 07:31 PM.
01-16-2017, 07:37 PM
#1835
LandShark has Cosworth
Thread Starter
iTrader: (12)
Join Date: Jan 2004
Location: Topeka, KS
Posts: 4,327
everything fixed 1-16-2016
I just finished edited all those blowed-up html PIX files that originally came from Photobucket, to the present IMG format that they are using. Don't know what happened, don't care. 
Last edited by grey99max; 01-18-2017 at 11:22 AM.


 01-18-2017, 11:18 AM
#1837
LandShark has Cosworth
Thread Starter
iTrader: (12)
Join Date: Jan 2004
Location: Topeka, KS
Posts: 4,327
HA ! Looks like the busted nitrous factory is back up and shipping bottles !! "Gotta get me some of that! "
This actually looks kinda familiar because I have ten full 15lb nitrous bottles in storage - and 50 gals of primo E85 in jugs and cans as well. Guess I'm a power-adder hoarder, right? Well, if I can get my newest engine finished up and installed this spring, maybe I can burn up some of it.
So how is your secret stroker engine doing? I see you have a WHP number posted - and I bet you have surprised a few people with it, right? Hmmm.. I wonder how many stroked 3.5s are represented in the forum - surely more than us two? (and mine's not running yet). I guess I'll just have wait until warmer weather is here...
01-26-2017, 12:50 PM
#1838
LandShark has Cosworth
Thread Starter
iTrader: (12)
Join Date: Jan 2004
Location: Topeka, KS
Posts: 4,327
Gonna buy me some billet gears..
Oil Pump Billet Gears
I was doing another search for billet gears for the Rev UP 350Z oil pump and found a new lead in eBay. Search for:
"Billet-Chromoly-Oil-Pump-Gears-Nissian-Infinity-VQ37VHR-VQ35HR-370Z-350Z "
and you will find these gears listed for $399 (and $7 shipping from Houston Tx).
"Boundary oil pump gears are machined in matched sets, and shipped with blueprinting paperwork. These gears have been proven in applications of up to 450 hp/L or 1500 HP in this application.
Our gears are cut from the highest quality chromoly billets, on our American made in house CNC machines. We guarantee your gears forever. We have found these gears to be indestructible in all applications, high RPM, turbocharged, supercharged, nitrous, or any combination. Unlike others selling oil pump gears on the side, this is our one and only specialty and we take pride in the fact no one has ever broken a set of our gears.
Stage 0: Oil Pump Gears Include
Inner and Outer Chromoly Gear Set
Blue printing paper work"
This is much less than the gears sold by RJ Manufacturing for $720.
http://www.fngperformance.com/store/...%2FVHR%29.html
.
Last edited by grey99max; 01-26-2017 at 05:55 PM.
02-02-2017, 03:29 PM
#1839
LandShark has Cosworth
Thread Starter
iTrader: (12)
Join Date: Jan 2004
Location: Topeka, KS
Posts: 4,327
How To Fix VQ35 Oil Pump Problems - homework required
Been using all this winter downtime to understand what the problems are with this oil pump - and what can be done to keep your engine from blowing up !!
Of course I rummaged thru the Interweb for information and came up with some good info - so I saved the links that had real information. I'm sure there are many more, but the reasons are few and well documented, I think. Links will be included here.
Fatal problems seem to be in two categories:
A. Loss of oil pressure, resulting in bearing failure.
There are many documented instances of the pressure relief valve "sticking"; causing internal pressure to drop - which was usually fatal to the engine.
B. Breakage of internal gears in oil pump.
The center gear would break "at the flats, referring to the crankshaft flats", causing immediate failure of the pump. There are photos of several of these failures shown in the links.
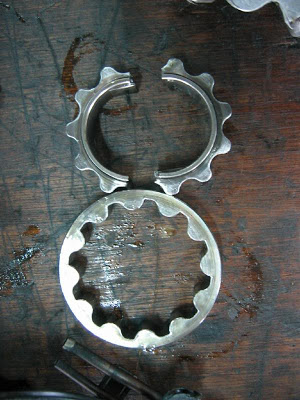
Solutions offered by several companies include polishing the insides of the pump, porting and polishing the inside of the pump, including the pressure valve, and replacing the OEM internal gears with new steel billet gears, which are virtually bulletproof. Cosworth and Nismo pumps have port and polish but seem to retain the OEM gears. Companies also create and sell billet gears, but most don't offer a complete re-worked pump with billet gears. This is really the only safe solution to Rev Up pump failures (or stock pump failures).
I found one company that does do that: SuckerPunch. (there may be others)
http://www.suckerpunchmotorsports.co...-vq35de-03-06/
Interweb links to various Rev Up pump issues.
https://www.rallysportdirect.com/bra...FRS2wAodcQUHew
https://www.z1motorsports.com/lubric...de-p-3192.html
https://www.google.com/search?q=cosw...kjQG3s_pR6RcM:
http://my350z.com/forum/2003-2009-ni...0z-sold-2.html
http://www.nissanraceshop.com/produc...higher-output/
https://thmotorsports.com/cosworth/c.../i-290345.aspx
http://my350z.com/forum/engine-and-d...ter-pumps.html
http://www.motoiq.com/MagazineArticl...Up-Part-1.aspx
https://www.z1motorsports.com/engine...de-p-5702.html
http://www.thenismoshop.com/VQ35DE-R...DE_p_1783.html
This One? My choice....
http://www.suckerpunchmotorsports.co...-vq35de-03-06/
https://conceptzperformance.com/suck...10_p_26882.php
------------------------------------------------
https://conceptzperformance.com/nism...35_p_24062.php
https://www.google.com/search?q=cosw...DbUlHAdjHLRzM:
http://www.daileyengineering.com/vq_35.htm
http://www.gtrusablog.com/2016/04/su...-pump-for.html
https://www.google.com/search?q=cosw...r_lSlRH1fXHRM:
http://www.motoiq.com/MagazineArticl...ne-Part-2.aspx
http://www.motoiq.com/Forums.aspx
----------------------------------------------------------------
Last edited by grey99max; 02-03-2017 at 02:08 PM.
02-09-2017, 03:50 PM
#1840
LandShark has Cosworth
Thread Starter
iTrader: (12)
Join Date: Jan 2004
Location: Topeka, KS
Posts: 4,327
Turbo oil scavenging pumps
Looking ahead a bit - in case I NEED to go turbo (ball bearing turbo) - then doing oil scavenging correctly is one concern. I found this companies' web site that shows several different sizes of pumps and with some really good technical information on pumps. Probably IF I go this way, there will be a separate oil tank with delivery pump and filter, and a separate scavenge pump to return to the tank. Cleaner oil, controlled pressure, correct scavenging, and a pretty tank... What's not to like ??
Reading this site was pretty interesting...
http://www.rbracing-rsr.com/oilsystems.htm
http://www.rbracing-rsr.com/turbo/oilpumps_34354054.jpg
and maybe this turbo - it's cheaper than a ball bearing model:
http://www.ebay.com/itm/Borg-Warner-...3D181754658858
.
.
.
What's not to like ??Reading this site was pretty interesting...
http://www.rbracing-rsr.com/oilsystems.htm
http://www.rbracing-rsr.com/turbo/oilpumps_34354054.jpg
and maybe this turbo - it's cheaper than a ball bearing model:
http://www.ebay.com/itm/Borg-Warner-...3D181754658858
.
.
.
Last edited by grey99max; 02-09-2017 at 05:32 PM.

