When you click on links to various merchants on this site and make a purchase, this can result in this site earning a commission. Affiliate programs and affiliations include, but are not limited to, the eBay Partner Network.
Are the plastic washers placed between the fuel rail and 4 top mounting bolts or between the fuel rail and LIM? I presumed they would sit between the fuel rail and LIM but the injectors cannot reach the LIM with that setup.
In the process of installing 6 new JECs fuel injectors. Cannot recall their location when I disassembled the fuel rail?
Mine have all had 4 hard plastic washers that are used between the rail tabs and the LIM. They are a pain to work around when installing the rail because mine like to shift out of place when I install the rail. I think on the last car I put a drop of super glue on the washer and used a Phillips screwdriver to line it up with the bolt hole that is in the LIM. Since the washers appear to be made out of a durable material like Delrin plastic, and mine were in good shape, I've not had a reason to replace them.
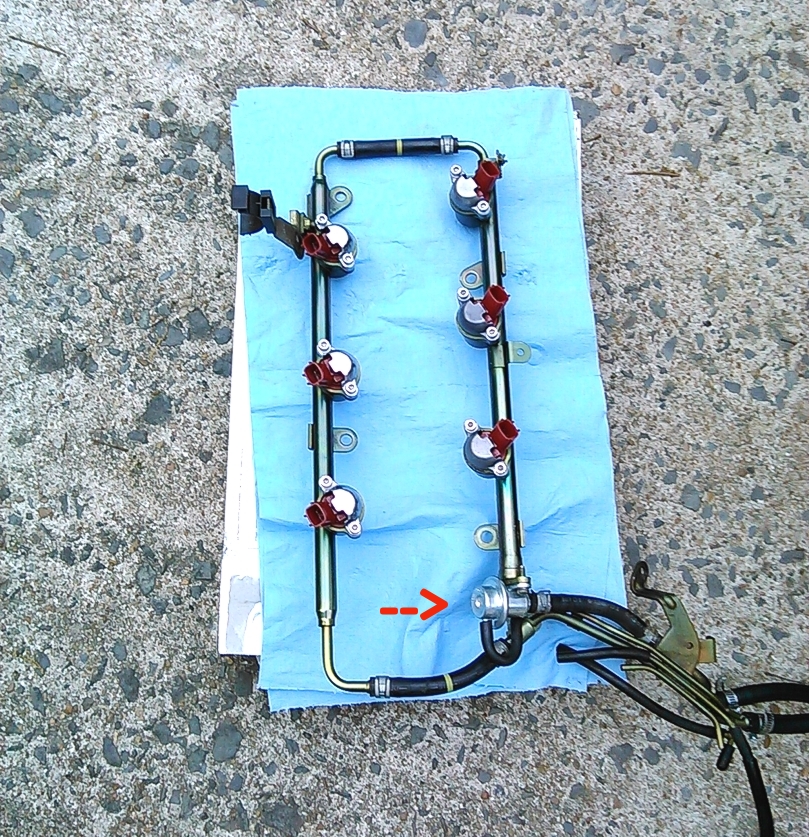
Here's a picture of a rail with the 4 tabs below.
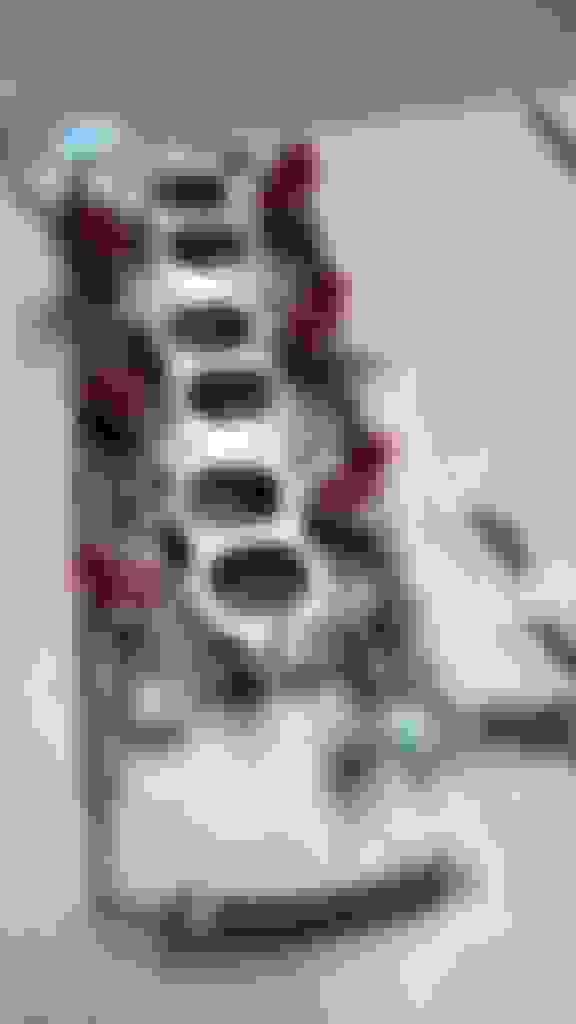
You can see 3 of the four rail mounts in the LIM picture below. When the rail is mounted it is hard to see the washers under the rail tabs.
Thanks guys. I predicted they would be seated between the rail and LIM. But with that setup the injectors cannot fully reach their cushion rings within the LIM. These new JECs injectors are the same exact size and length as the OEMs injectors I've replaced.
Thanks guys. I predicted they would be seated between the rail and LIM. But with that setup the injectors cannot fully reach their cushion rings within the LIM. These new JECs injectors are the same exact size and length as the OEMs injectors I've replaced.
Should I try bending the mounting tabs upwards?
JH - Are you using the same plastic washers as before? I haven't replaced the plastic washers yet. Its about the bottom of the rail injector cup lining up over the cushion ring. I replaced the rail hoses on the last job. IIRC, I didn't put completely mount the clamps on the rail hoses until after I had the rails seated and bolted down on the LIM and the cushions.
JH - Are you using the same plastic washers as before? I haven't replaced the plastic washers yet. Its about the bottom of the rail injector cup lining up over the cushion ring. I replaced the rail hoses on the last job. IIRC, I didn't put completely mount the clamps on the rail hoses until after I had the rails seated and bolted down on the LIM and the cushions.
Thanks for the photos CS! Using your photo I'll get it realigned and slowly tighten it tomorrow.
Should the rail be fully tightened onto the LIM before inserting the injectors with oiled O-rings or vice versa?
I'm reusing the 4 original plastic washers. I also replaced all the rubber fuel hoses in the engine bay. I used 5/16" double braided fuel injection hoses and fuel hose clamps. The 5/16" hoses are a little larger than the originals but with the clamps no leaking should occur.
Should the rail be fully tightened onto the LIM before inserting the injectors with oiled O-rings or vice versa?
I've done it both ways. I think on the last one (the 98 model) it was a mix. I installed the left bank injectors in the rail and tried them before I removed the UIM to install the right bank. I removed the rails though to replace the hoses. It seems like I found it easier to remove and reinstall the injectors with the rails mounted. However, before the 98 model came along, and on the VH45DE, I installed the injectors in the rails before I mounted them on the LIM or intake runners.
If the injectors are installed after the rails are mounted, then you don't need to worry about bumping the pintle caps on something while preparing to mount the rails.
The front injectors were left installed on the rail. I'll slide the front injectors off the rail then remount the fuel rail. All new 6 injectors have been tested on the front rail for 200 miles so I'll spray them with seafoam then oil the o-rings once again before mounting them back into the rail.
I also replaced the old OEM FPR with a new BWD FPR. The vacuum port points sideways on the BWD FPR so longer vacuum hose was installed. Your fuel rail photo in post 3 appears to also have that BWD FPR.
Thanks for your assistance CS. I'll give it a shot tomorrow then post back with some photos.
I always put the lower back together off the car ,much easier
Now that's an idea. So you mount rails and all to the LIM while it is off the car and drop it in as an assembly? If yes, I'll give it a try on my next 4th gen. :-)
I actually do that with the UIM on the VH45DE. Mount everything to it then drop it in as one big assembly. I wish I could show you a picture but PhotoBucket is down at the moment.
Originally Posted by jholley
I also replaced the old OEM FPR with a new BWD FPR. The vacuum port points sideways on the BWD FPR so longer vacuum hose was installed. Your fuel rail photo in post 3 appears to also have that BWD FPR.
.
Yep. That's an old picture from over 3 years ago. That Intermotor FPR is only type that I've ever used on 4th gen. No experience with anything else.
Yesterday one of the plastic spacers, 1752210V00, cracked so I might as well replace all 4 of them. I ordered them at local dealership costing $2.50 each and will pick them up tomorrow. For low priced items as such it's cheaper to buy them at a local dealership to avoid the S/H charge.
Originally Posted by krismax
yes i put it all together then bolt it down. super easy
This may be bad advice but i have been doing this for years. If the gaskets in my opinion have all the black still on them i keep using them.
Being paper I wouldn't risk reusing the LIM gaskets.
I did reuse the 7 year old UIM rubber gasket but since they come in a set I'll pick up the Felpro intake manifold gaskets, MS91241, for only $12.17 and both Felpro valve cover gasket sets, VS 50494 R-1, for only $38.50 at advanceAuto using a discount code TRT30T.
The rear valve cover has a very slow dry leak in the right corners. I replaced them 7 years ago with Felpro gaskets using Permatex Ultra Grey RTV sealant. This time I'm trying the Permatex Ultra Black RTV sealant. It's labelled as oil resistant and a local mechaic advised that black is better for corner sealing while grey is more flexible and used mostly for longer seals.
Reaching the UIM brackets and EGR bolts is not hard for me using a thin 12mm socket with a 1/4" ratchet but I've had enough with the U-shaped coolant hose!
I'm going to follow the routine of numerous other members and bypass that hose. Is it safe to use trans cooler hoses for that coolant line? I couldn't find 3/8" heater hose anywhere locally.
I use a high pressure temp Tran cooler hose named Thermoid brand from Advance. It's way overkill but hasn't leaked in over 3 years. I've learned the hard way to use black on rubber gasket corners that are soaked in oil. 😀
yes i put it all together then bolt it down. super easy
Not to hijack JH's thread, but I realized when I work on a VH45, that I approach things completely differently and more like Kris' note. Yeah, I've gotten spoiled by working on VQ30s.
On a VH45, I install as much as I can on the UIM so I can drop it into place as a complete assembly.
Here are some pictures where I pre-installed the throttle body, IACV, EGR, hoses, and parts of the throttle linkage on the UIM that I dropped into place on the intake runners. It looks like I just forgot all about using that approach. Eventually, I learned there are very small number of Infiniti techs that use that technique. I only know of one tech in Atlanta and another in Florida that use this approach.
The knock sensors live at the bottom of "death valley" as we call it. The VH45 has two coolant systems caps, there is one that you see in the picture and another on the radiator. It does make burping the coolant system easier to have that extra cap at the top.
Here's a picture of the intake runners after the injector rails have been installed. Basically you drop the UIM assembly on the intake runners, connect the hoses, pressurize the coolant and fuel system, and hope you don't find any leaks.
Jh - Looking back, it appears that I started using transmission fluid coolant hose for throttle body coolant hose 7 years ago when I did the job in the picture.
I'm using a similar approach to the UIM. With small hands I can remove the EGR tube bolts while leaving the IACV mounted. Since I'm bypassing the u-shaped coolant hose it's now heading straight to the TB so I left that on also.
I use a high pressure temp Tran cooler hose named Thermoid brand from Advance. It's way overkill but hasn't leaked in over 3 years. I've learned the hard way to use black on rubber gasket corners that are soaked in oil. 😀
Thanks CS. They did have 3/8" trans cooler hoses in stock so I'll purchase some tomorrow at AdvacneAuto and pick up those spacers at the Dealership. I have 2' of trans cooler hoses leftover from installing my new RAD last year but it's diameter is only 5/16".
Not to hijack JH's thread, but I realized when I work on a VH45, that I approach things completely differently and more like Kris' note. Yeah, I've gotten spoiled by working on VQ30s.
On a VH45, I install as much as I can on the UIM so I can drop it into place as a complete assembly.
Here are some pictures where I pre-installed the throttle body, IACV, EGR, hoses, and parts of the throttle linkage on the UIM that I dropped into place on the intake runners. It looks like I just forgot all about using that approach. Eventually, I learned there are very small number of Infiniti techs that use that technique. I only know of one tech in Atlanta and another in Florida that use this approach.
The knock sensors live at the bottom of "death valley" as we call it. The VH45 has two coolant systems caps, there is one that you see in the picture and another on the radiator. It does make burping the coolant system easier to have that extra cap at the top.
Here's a picture of the intake runners after the injector rails have been installed. Basically you drop the UIM assembly on the intake runners, connect the hoses, pressurize the coolant and fuel system, and hope you don't find any leaks.
Jh - Looking back, it appears that I started using transmission fluid coolant hose for throttle body coolant hose 7 years ago when I did the job in the picture.
wow that vehicle is super pretty and clean
here's some pics of a lower 01 dek IM rebuild i am selling just did it yesterday.sandblasted and newer dekrails and injectors 3.5 altima added.
yes i put it all together then bolt it down. super easy
This may be bad advice but i have been doing this for years. If the gaskets in my opinion have all the black still on them i keep using them.
Originally Posted by jholley
.......
Being paper I wouldn't risk reusing the LIM gaskets.
......
Been several years since I removed the LIM so I forgot the gasket material. Similar to the IACV gasket they're metal with a black insulator.
As you can see some of the insulation melted off. Most likely from the lean condition I got 14 months ago. I installed new LIM and UIM gaskets and gave them correct torque so they're holding well for now.
Took the guidance and installed the fuel rail on the LIM while removed.
As told I installed the new plastic spacers between the fuel rail and LIM. I replaced the 6 OEM injectors with JECs injectors from China. Also installed new FPR and fuel injection hoses.
I gave the fuel rail and LIM a scrubbing but nowhere near as clean as CS engine.
Replaced the 7 year old valve gaskets as well.
Thanks for you help!
EDIT: Also bypassed the U-shaped coolant hose on the UIM. Used CS suggestion and connected 3/8" trans cooler hose from the EGR to the TB. Forgot to take pictures of that.
Felt like I was drag racing on my 40 mile commute to work this morning! She was idling high at 750rpm. Before replacing these old injectors it wouldn't idle above 500rpm unless the IACV was giving it more air with the AC on.
Here is just a few of the numerous attempts I made to get a higher idle:
The OEM injectors had to be clogged not allowing enough fuel. I tried cleaning them 5 years ago but that made no difference. With a higher RPM she no longer vibrates while idling!
As some of you already know there is no way to manually reset the idle on these A32s. The ECM sets the idle speed by reading numerous sensors. While idling at a light for nearly a minute the RPM was slowing rising higher. The ECM is currently in the process of resetting the idle so it should drop within another 50 miles.
She hasn't accelerated this fast for over a decade. I'll post in a few days to keep you updated on how it turns out.
C O N G R A T U L A T I O N S - JH
It sounds like you have a happy 4th gen on your hands there.
Mine has been like that ever since I installed that set of JECS Chinese injectors.
As suspected the ECM dropped the idle RPM to 600rpm after adding another 50+ miles to these new injectors. Still a higher RPM and smoother ride than the weak OEM injectors were pulling off.
The JECS injectors I inserted aren't the same as the $11 ones CS got. I purchased a set of 6 new OEM injecotrs from an ebay seller in CA for $42
They claim to be original Nissan injectors labelled as NEW OTHER in an opened box. Note that 2 of the 6 injectors I first received were faulty giving off a misfire. Most likely weak coils. The ebay seller, gadgetstopstore, sent 2 replacement injectors at no cost. They worked fine and I didn't need to return the faulty injectors.
Thank you gentlemen! This is a great thread and looks like this task is positioning itself on my "Bucket List". Best part is you've covered everything that should be done to do it right and once. This way I can have everything here before "going in". LOL
I'd bet all your "other" attempts to raise the idle cumulatively complimented the great results. None if it was a waste.
jh, your test drive results sentiment is about as alluring as it gets! Fast and smooth again? My kinda womenz! LOL
Thanks again Fellas!
Before the ECM could adjust the A/F I had to heavily slam the brakes while idling.
The ECM adjusted the A/F for smoother operating but she's still driving much better. She accelerates faster and has less vibration while idling with a higher RPM. Well worth the effort and small expense!
Several weeks after installing these new injectors I was getting the CAT deficiency P0420 code. I cleared the code but it returned every ~50 miles. With theses injectors recently installed I suspected a rich fuel mixture was the culprit. I installed a brand new Walker CAT with new gaskets last fall so I didn't predict it failed so quickly.
After letting it sit overnight I pulled the plugs and found a small amount of fuel on cylinder #3 spark plug. Two days later I pulled the plugs and #3 was wet again.
I removed injector #3 and as suspected the lower O-ring had a very tiny splint. With O-rings and pintle caps in stock I decided to pull and refurbish all 6 injectors. Recently installing these new injectors popping them was very easy compared to the OEMs last May!
After inserting new upper & lower O-rings and pintle caps I sprayed them with seafoam. I well lubricated the O-rings with oil and gently inserted them into the fuel rail.
Note that if the injector doesn't slide in easily then check the O-rings. If they have any visible damage then insert new O-rings. If no damage then apply more oil to both O-rings.
I used all spare new 0-rings so I ordered a new set of Mahle GS334033 O-rings from Autozone.