When you click on links to various merchants on this site and make a purchase, this can result in this site earning a commission. Affiliate programs and affiliations include, but are not limited to, the eBay Partner Network.
NOTE: This thread covers remedying the timing chain rattle on 1998 and 1995 model VQ30DE engines. There are differences between those engine years that require a different approach.
If you have a 96-99 model VQ30DE, a new tensioner and gasket can be installed without removing the timing cover and replacing the guide. The tensioner can be accessed via the access panel door on the lower left side of the timing cover using a 10mm socket wrench.
Only the 95 model engine required timing cover removal to replace the guide with the updated version.
--- Original Story Starts Here -----------------------------
Today I performed a Timing Chain Tensioner transplant from a 99 model I30 to the 98 Maxima. The 98 Maxima had the typical morning timing chain clatter noise that comes from a worn tensioner piston inner seal and leaking valves.
The 99 I30 received a new Tensioner and Gasket sometime in 2012. This used tensioner has approximately 40,000 miles. However, this old tensioner has a gasket. I will find the gasket part number and report back more information on how to perform a quick tensioner transplant.
Meanwhile, the 98 Maxima appears to be getting along very well with the replacement tensioner. The engine runs smooth and quite now. Hopefully when I start it at 5 AM tomorrow morning, the usual clatter will be gone.
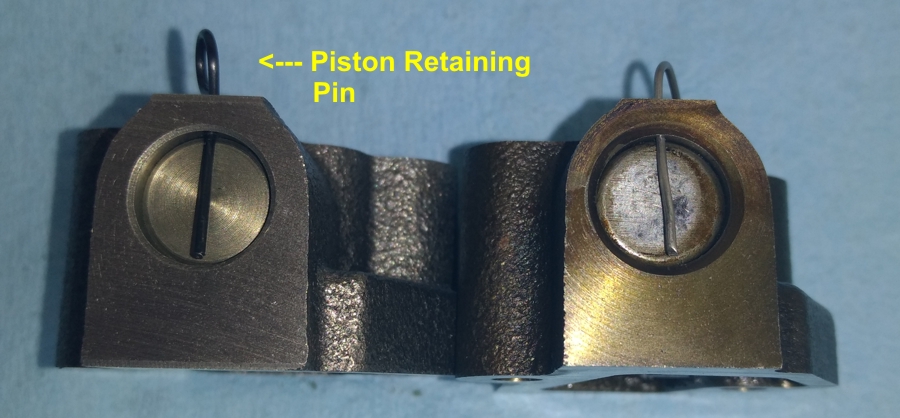
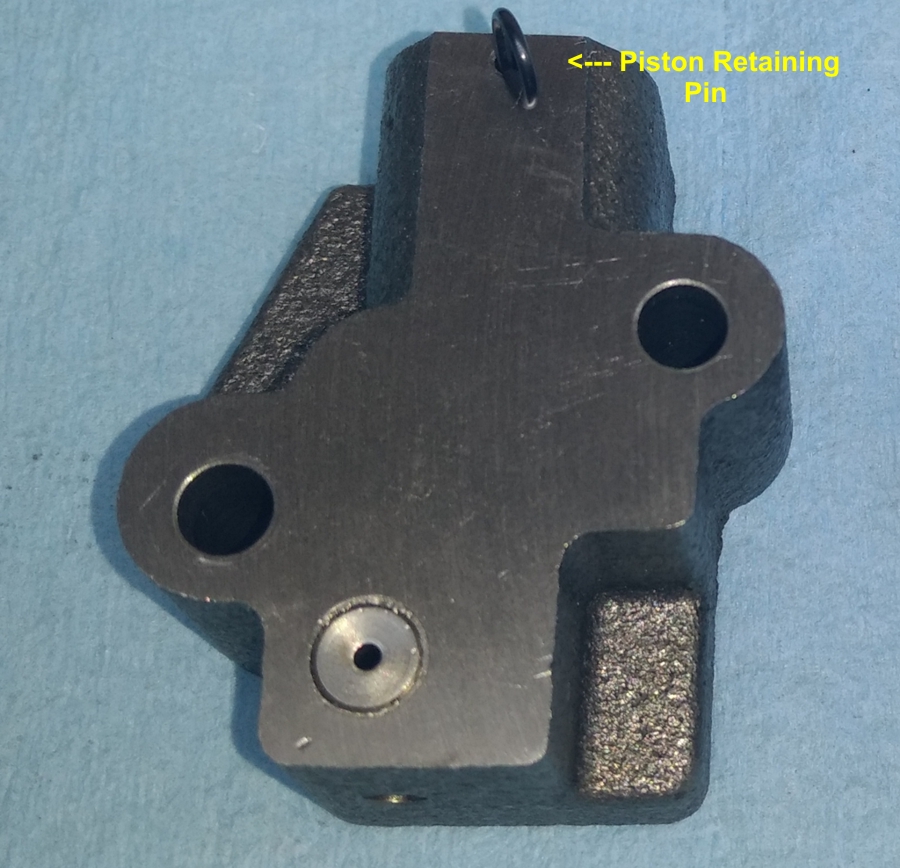
Here's a picture of the replacement tensioner with gasket on the left with a regular OEM tensioner from a 97 model SE "junkyard vehicle" on the right.
Once PhotoBucket starts working again, I will post picture on how to make tensioner replacement an easy operation.
Service Bulletin Number: NTB00054 Bulletin Sequence Number: 139 Date of Bulletin: 06/00
NHTSA Item Number: SB613977
Component: ENGINE:TIMING GEAR AND CHAIN
Summary:
VEHICLES BUILT BEFORE JN1CA31D1YT746029 MAY EXHIBIT A ENGINE TIMING CHAIN NOISE. *TT
Originally Posted by UncleMax98
Mine is 1998. Tension Gasket 13079-31U00 ($5.87 from local dealer). The new tensioner has the same shape as the old one.
Trying not to sound stupid, but I have a 98 I30. What is the copper colored cylindrical thing on the top? Is it a pressure/tension button of some kind?
Trying not to sound stupid, but I have a 98 I30. What is the copper colored cylindrical thing on the top? Is it a pressure/tension button of some kind?
It's the plunger piston. It's retracted and pinned down on the right example.
Note that I just ordered a tensioner for a 95 model with two gaskets and four bolts from CourtesyParts for the 99 model that is running a 95 model engine. The 95 models use a different tensioner.
The Tensioner I ordered for the 95 model engine is 13091-31U26 for $83.84 at CourtesyParts. The only picture I see of this part contains a guide and the tensioner. If that tensioner requires a new guide, them I'm stuck with removing the timing cover. I need to see how this 95 part is going to work before I can recommend it.
Here's a picture below for engines built from 1/96 +.
For an I30, I see OIP has the part listed for $61.62.
This tensioner looks like the ones I've pulled from a 97, 98, and 99 model engine.
Somehow I think the gasket seals the drain vent to hold oil inside the chamber for long periods of time to reduce the amount of morning clatter.
The tensioner sits behind this timing cover access panel. The access panel is held in place with four 10mm bolts.
Note: ALL bolts associated with timing chain tensioner replacement are 10mm.
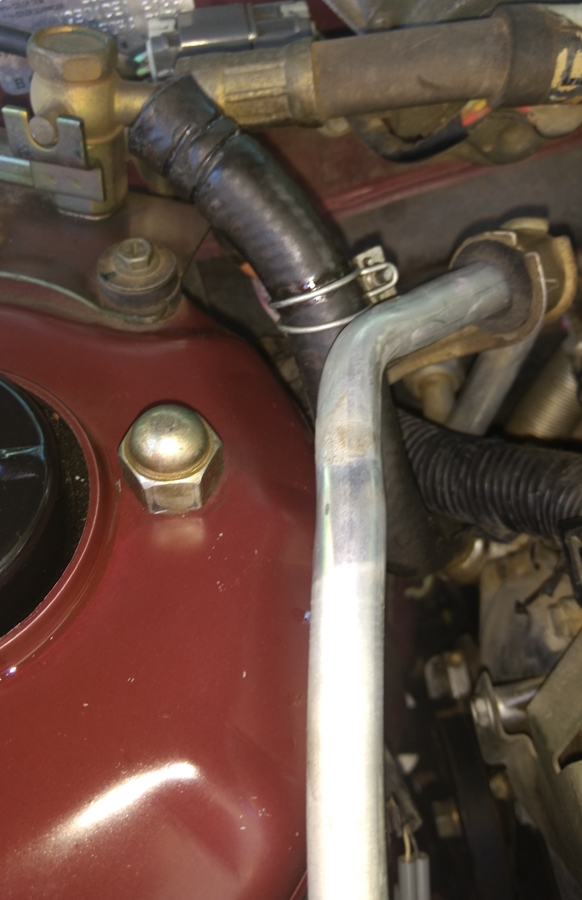
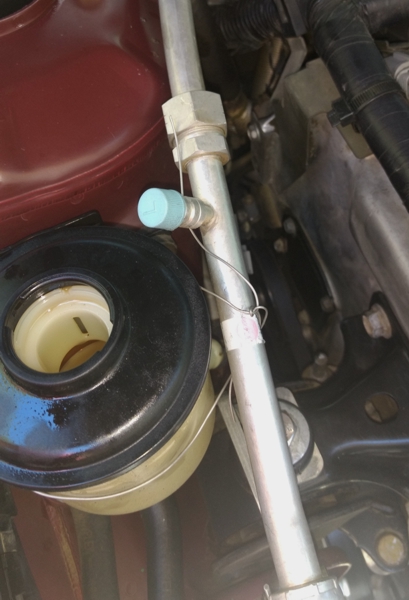
Remove the Power Steering return hose from the reservoir and loosen the A/C line bracket. The idea is to get the PS hose and A/C line out of the way to provide more room for working with the tensioner.
Mechanics wire came in handy to secure the A/C line to the PS fluid reservoir. You can see the tensioner cover in the lower right center of this picture.
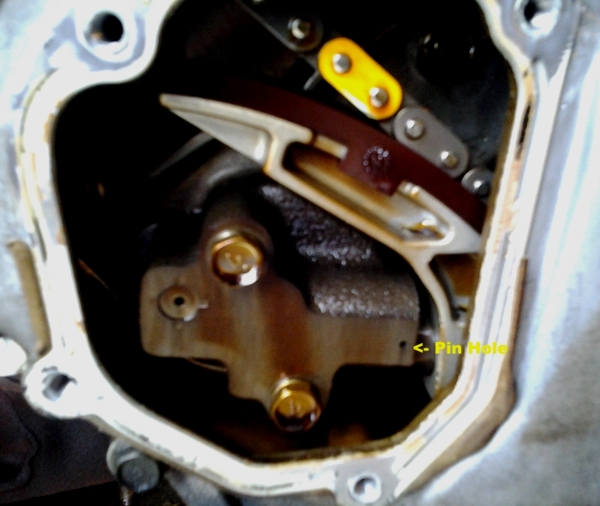
When the tensioner access panel has been removed, you can see the tensioner and the two 10mm bolts that hold it to the engine.
A close up of the tensioner show the piston being held in position for installation by the retaining pin. I used some mechanics wire to make a pin for an old tensioner that kept for example purposes.
Here’s another picture of the retaining pic. The pin must be left in the tensioner until after it has been bolted down. The final step in installation before closing the access door is to pull the retaining pin.
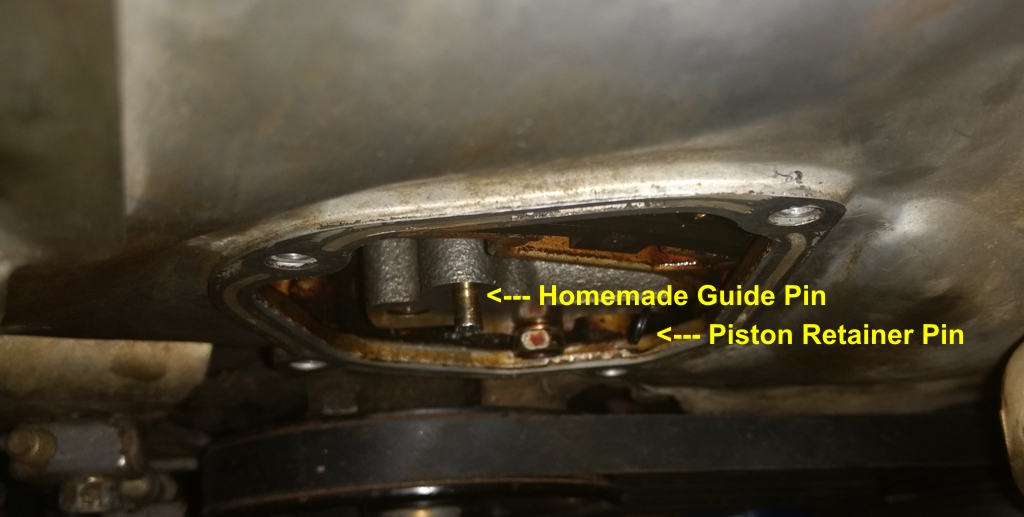
To get the tensioner to align properly over the bolt holes, I cut off the head of an extra bold to make an installation guide pin. I turned the guide pin into the block just enough for me to hang the tensioner on it to get the lower bolt started. Once I had the lower bolt started, I removed the guide pin and installed the upper bolt.
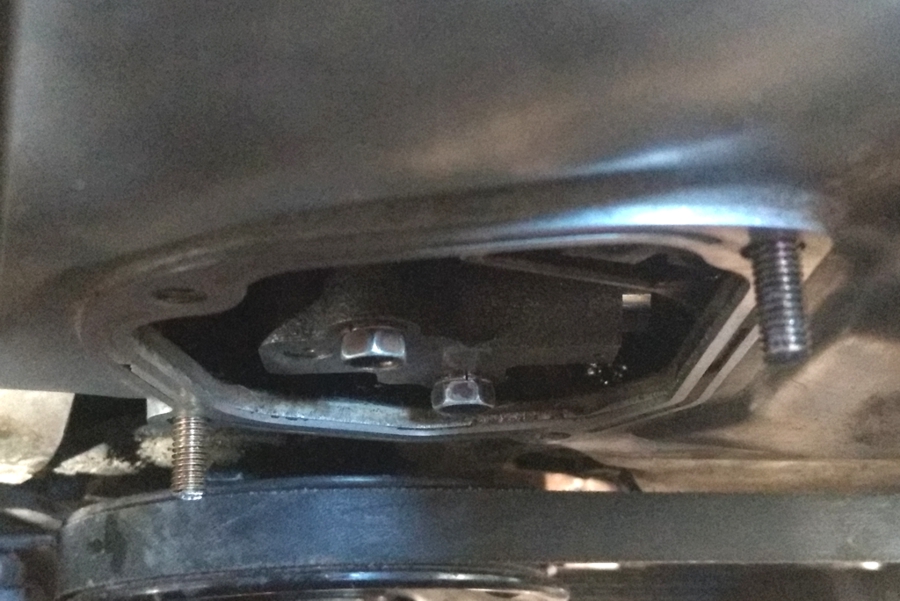
To get the access door properly aligned over the timing cover when the edge was covered in RTV, I used some extra 10mm bolts and made two addition guide pins. Once the access door was in position, I installed two cover bolts, then removed the guide pins and finished installing the remaining two bolts.
Here’s a picture of the access door at the end of the operation. You can see that I used Permatex Ultra Grey RTV.
Nice. A before and after video would have been great too, but it's too late for that, unless you have another rattler in the family.
The 99 model with the 95 model engine is rattling. Let me make a video of it. I sure hope I don't need to change both the tensioner and guide on that engine. If the tensioner and guide design changed for the 95 model, it may be a while before I can do the full TC and UOP job for that car.
It's genius using the head cut off of bolts as guide pins. Once again you have outdone yourself. Thank you for the write up. I have 160K on my I30 and still have no chain rattle.... but if I get some, this will be my go to thread.
It's genius using the head cut off of bolts as guide pins. Once again you have outdone yourself. Thank you for the write up. I have 160K on my I30 and still have no chain rattle.... but if I get some, this will be my go to thread.
+1000
And for confirming that the elusive TSB gasket is, in fact, the right thing to do!
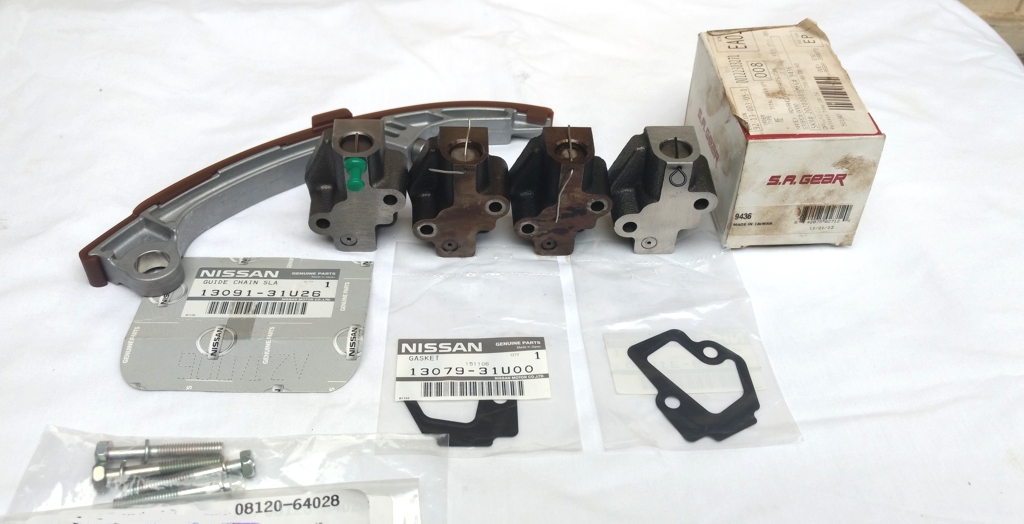
The parts arrived from Courtesy Nissan today. Now that was a Nissan Fast order. It looks like I have everything I need to work on the 99 model (with the 95 engine) this weekend.
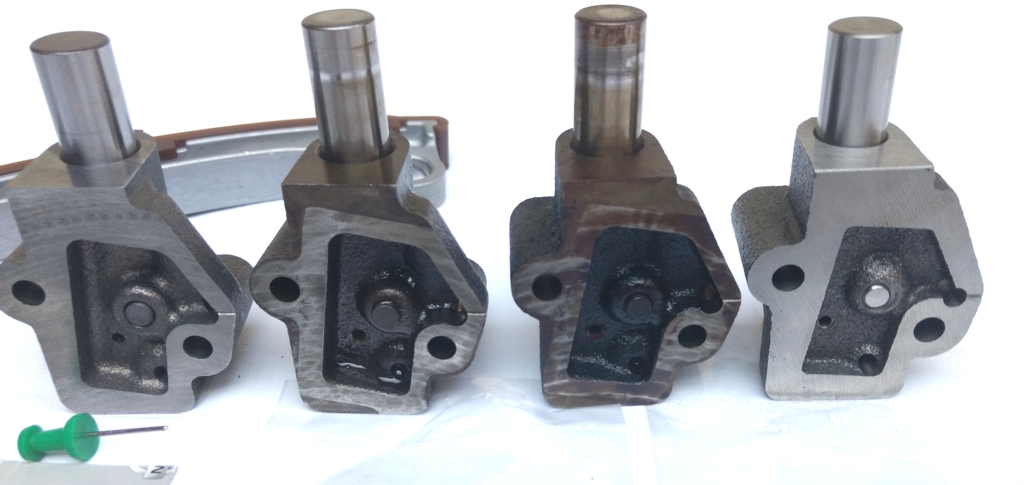
So I purchased the tensioner for a 95 model that comes with a guide. I really do not want to use the guide. It was just over 3 years ago that I had the timing cover off of of that engine and examined the guides. That engine only had 82,000 miles at the time. I will get a mileage reading this weekend when the car returns. That engine easily has under 150,000 miles.
The new OEM tensioner is on the left. The two tensioners in the middle are from a 97 (salvage yard car) and the 98 model. The tensioner on the right is an SA Gear that I purchased over 3 years ago to go in the 99 model. The guy that did the engine installation and changed the water pump did not install it. While it looks like the OEM, it doesn't have the same tight/precise feel as the OEM. I can tell the OEM has been built to some very exacting standards. So I don't know if I will ever use the SA Gear guide.
The gaskets are the right parts exactly. The bolts are correct. I ordered an extra set of bolts and gasket. I suspect the secret to success here is to always include the OEM gasket with a new tensioner.
Here's a close up of the tensioner back sides below. Again the new OEM is on the left with the SA Gear on the right.
The piston on the new OEM has a very tight and precise fit. There is no piston wobble or shake with the new OEM part. I sure hope I can use it on the 95 model engine .
More to come this weekend after I remove the tensioner and compare it to the new OEM and others below.
The SA Gear part (far right) is listed for 95-04 models with both 3.0 and 3.5 engines. I call the SA Gear part a "generic aftermarket" tensioner.
Starting the 99 model (with the 95 engine) project this morning. I picked up some M6-1.00 stud bolts from Ace Hardware to use as guide pins. I wanted to try this for readers that might find it easier to just pickup these bolts from a hardware store instead of making your own from existing bolts.
It took about 30 minutes to get the old tensioner out.
The 95 model tensioner IS DIFFERENT compared to the replacement. This tensioner had a completely different feel on removal as compared to the 97, 98, and 99 models I worked with. I could not turn this tensioner to the angle like I did with with the others to remove it without the piston popping out.
So I'm now into removing the timing cover, the upper oil pan and all that to install the new guide and the tensioner.
I will post pictures later of the differences. I really didn't want to get into the TC and UOP this weekend. Oh well.
Great idea to use those studs as guide pins for both the tensioner and it's cover plate! Similar to other members my VQ30DE is approaching 180k miles but no rattling yet. When the time comes I know what thread to search for!
Originally Posted by CS_AR
Starting the 99 model (with the 95 engine) project this morning. I picked up some M6-1.00 stud bolts from Ace Hardware to use as guide pins. I wanted to try this for readers that might find it easier to just pickup these bolts from a hardware store instead of making your own from existing bolts.
Does both the tensioner and the plate both use M6 x 1.00 studs? Also what's the approximate stud length?
The 95 model tensioner IS DIFFERENT compared to the replacement. This tensioner had a completely different feel on removal as compared to the 97, 98, and 99 models I worked with. I could not turn this tensioner to the angle like I did with with the others to remove it without the piston popping out.
So I'm now into removing the timing cover, the upper oil pan and all that to install the new guide and the tensioner.
Say it isn't so, Craig. One of my Maximas is a 95 and it has the start up rattle of death. I was hoping for an easy swap.
How comfortable are you with running the same chain. Now's your opportunity to remove doubt for another 200K or more.
You said the water pump was done when the engine was transplanted, so that's not a pressing issue. But the chain and maybe the gears and all the guides are something to consider while this deep in!
Here's a video of the 98 model after the new tensioner and gasket installation. The 99 model will sound like then when I finish the upgrade. This engine has approximately 237,000 miles.
Great idea to use those studs as guide pins for both the tensioner and it's cover plate! Similar to other members my VQ30DE is approaching 180k miles but no rattling yet. When the time comes I know what thread to search for!
Does both the tensioner and the plate both use M6 x 1.00 studs? Also what's the approximate stud length?
Yes. Both tensioner bolts and access door bolts are M6 x 1.00. I found metric automotive (M6 - 1.00 x 31mm) studs at Ace Hardware.
I also found approximate M6 - 1.00 x 4" long stud that I purchased and cut into a 2" length to use for the tensioner guide pin.
How comfortable are you with running the same chain. Now's your opportunity to remove doubt for another 200K or more.
You said the water pump was done when the engine was transplanted, so that's not a pressing issue. But the chain and maybe the gears and all the guides are something to consider while this deep in!
Quiet and smooth rule!
Based on the chain health from the picture below, I think the chain and engine will outlast the rest of the car.
The car (body) now has over 210,000 miles. It looks like a low wear engine.
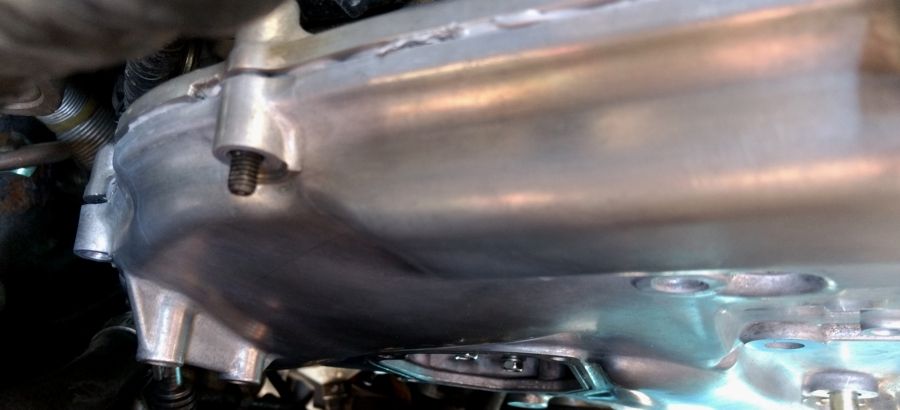
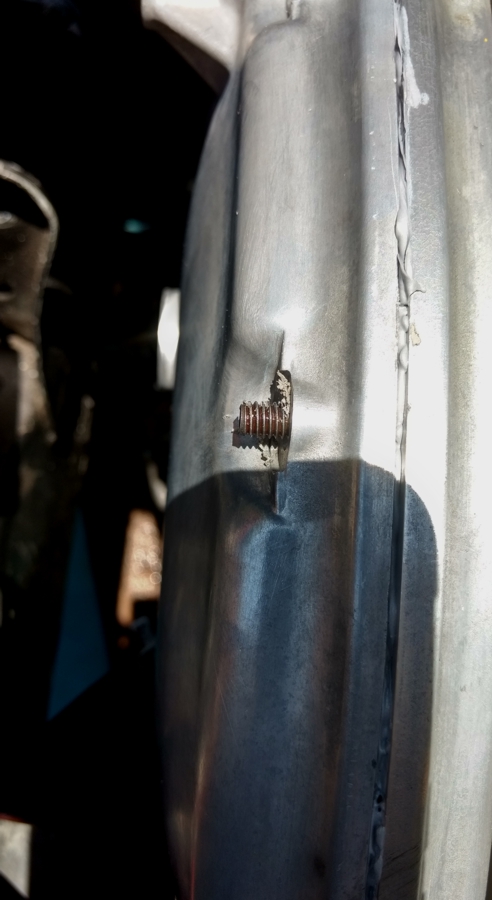
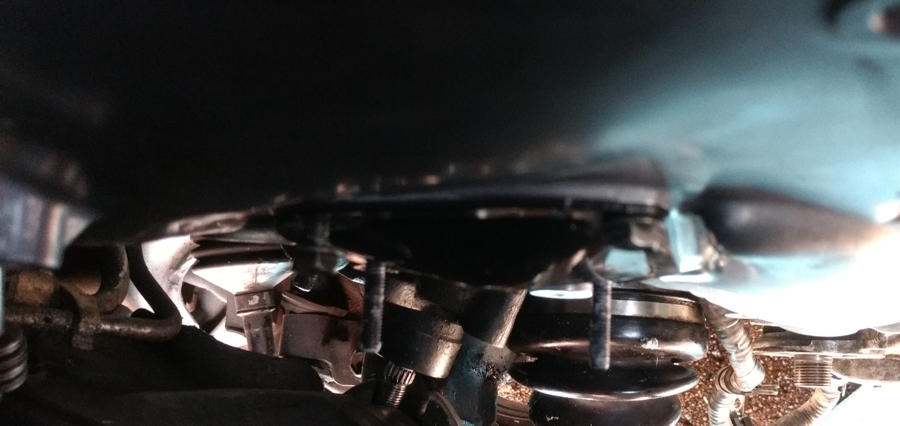
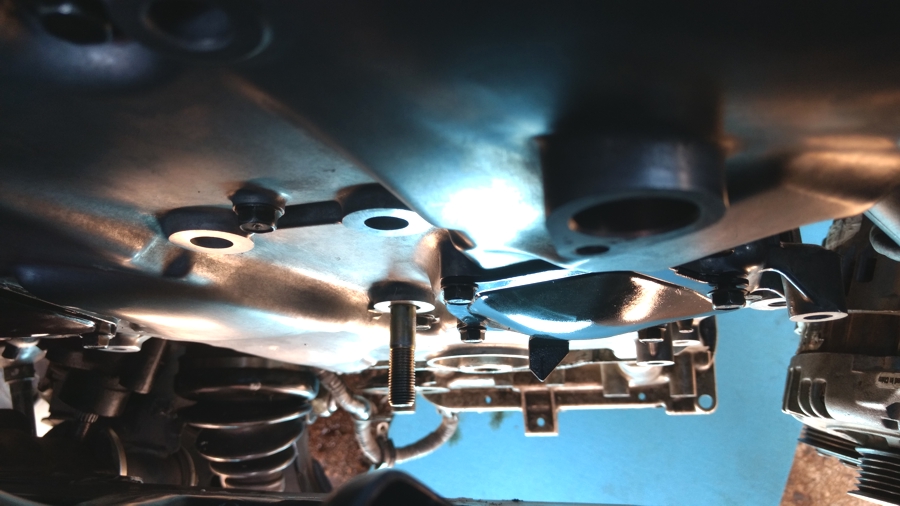
I used the M6 -1.00 x 31 mm automotive stud bolts from Ace Hardware as guide pins to hang the Timing Cover and access doors today. Here's some pictures from today's work below.
Another picture of using a stud bolt as a guide pin to hang the timing cover.
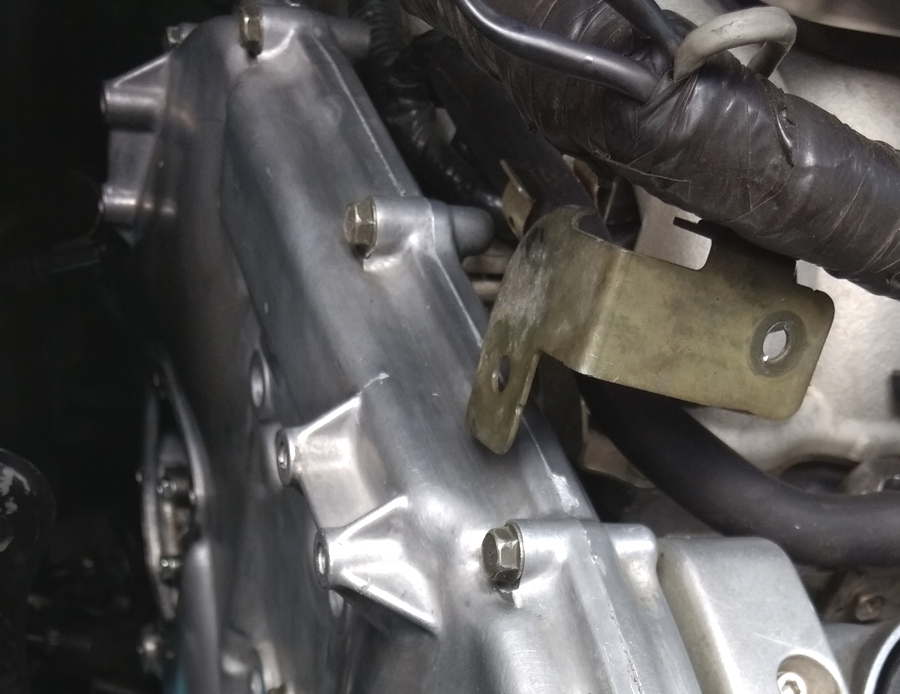
Removed the stud bolts and then used the regular 10 mm TC bolts.
Using stud bolts as guide pins for installing the access doors.
Here's a picture of the water pump access door after installation. Note that I did not completely remove the alternator or A/C compressor for this operation. I used some wire to suspend the compressor so it would not dangle by the hoses. The alternator is resting on the compressor.
The upper oil pan has been released but not completely removed in this picture. I reinstalled the passenger side engine mount so the engine would be held up by at least two engine mounts before I removed the center cross-member to remove the upper oil pan.
Started the engine this evening. After the expected new tensioner noises that sound like a train clattering down the tracks, all chain and valve system noises stopped. You've got to hold the RPM at 2,500 for about 10 minutes after the initial warm up to let the oil circulate through the tensioner system for the system to get quiet. This is a very different running and sounding engine now.
I will make a "cold start" video tomorrow morning and upload it to youtube.
I can't recall having a 4th gen without some amount of clatter. It almost seems weird.
Nice. A before and after video would have been great too, but it's too late for that, unless you have another rattler in the family.
Here's the before and after videos from the 99 (95 model engine) so show the difference made by replacing the tensioner, guide, and using the gasket as recommended in the TSB.