88 SE turbo vg30 build thread
 12-09-2015, 12:28 PM
#41

Did your original MAF wiring harness have a bunch of wire shielding in there? When I lengthened my MAF wiring for my MAF relocation, I made sure to add back in shielding for the entire length like the OEM section was.
I used this stuff, the 1/4" flat width (part number BSMT-025-1):
http://www.electriduct.com/Metal-Braided-Sleeving.html
It's always occurred to me that a lot of people with MAF issues that they blame on "tuning" problems are really probably just issues with their subpar MAF wiring/soldering/lengthening. Not saying you would do it subpar, just a suggestion on the shielding if your stock setup had it.
Also, good to see you still at it. When I was a teenager looking at cars in 1999-2000ish, what I really wanted was either a Galant VR4, or a 2nd gen Maxima SE. I think in hindsight, the Galant would have been the better choice for long-term desirability (those things still sell for $4k+ stock, up to $10k modded!), but back then I would have taken either. I just couldn't find any nice ones in my price range.
So then shortly after that I inherited my mom's 92 SE auto and the rest is history
 12-09-2015, 12:32 PM
#42

Did your original MAF wiring harness have a bunch of wire shielding in there? When I lengthened my MAF wiring for my MAF relocation, I made sure to add back in shielding for the entire length like the OEM section was.
I used this stuff, the 1/4" flat width (part number BSMT-025-1):
http://www.electriduct.com/Metal-Braided-Sleeving.html
It's always occurred to me that a lot of people with MAF issues that they blame on "tuning" problems are really probably just issues with their subpar MAF wiring/soldering/lengthening. Not saying you would do it subpar, just a suggestion on the shielding if your stock setup had it.
Also, good to see you still at it. When I was a teenager looking at cars in 1999-2000ish, what I really wanted was either a Galant VR4, or a 2nd gen Maxima SE. I think in hindsight, the Galant would have been the better choice for long-term desirability (those things still sell for $4k+ stock, up to $10k modded!), but back then I would have taken either. I just couldn't find any nice ones in my price range.
So then shortly after that I inherited my mom's 92 SE auto and the rest is history
I used this stuff, the 1/4" flat width (part number BSMT-025-1):
http://www.electriduct.com/Metal-Braided-Sleeving.html
It's always occurred to me that a lot of people with MAF issues that they blame on "tuning" problems are really probably just issues with their subpar MAF wiring/soldering/lengthening. Not saying you would do it subpar, just a suggestion on the shielding if your stock setup had it.
Also, good to see you still at it. When I was a teenager looking at cars in 1999-2000ish, what I really wanted was either a Galant VR4, or a 2nd gen Maxima SE. I think in hindsight, the Galant would have been the better choice for long-term desirability (those things still sell for $4k+ stock, up to $10k modded!), but back then I would have taken either. I just couldn't find any nice ones in my price range.
So then shortly after that I inherited my mom's 92 SE auto and the rest is history

Although it was the setting on the emanage but, guilty as charged.
12-10-2015, 08:25 AM
#43
Junior Member

Join Date: Nov 2015
Location: Queens NY
Posts: 77
...shielding that wire is necessary! i built a remote turbo set on my 1988 200sx, which i originally had moded to be a draw thru set up, so i had to extend the harness for the AFM, all the way to the back of the car!! yikes!! it worked fine but i have since reworked the set up to be a blow-thru[allowing to remove that long harness] and keeping the AFM back in the engine compartment....it feels/works much better blow-thru.
12-10-2015, 09:51 AM
#44
...shielding that wire is necessary! i built a remote turbo set on my 1988 200sx, which i originally had moded to be a draw thru set up, so i had to extend the harness for the AFM, all the way to the back of the car!! yikes!! it worked fine but i have since reworked the set up to be a blow-thru[allowing to remove that long harness] and keeping the AFM back in the engine compartment....it feels/works much better blow-thru.
 12-10-2015, 10:24 AM
#45
Junior Member
Join Date: Nov 2015
Location: Queens NY
Posts: 77
http://club-s12.org/retro4/index.php?topic=8278.240
...its a pretty long build thread...started it in 05
...its a pretty long build thread...started it in 05
12-13-2015, 06:33 PM
#46
Member
Thread Starter

Join Date: Mar 2015
Posts: 278
Good point on the shielding. I think you're right, a lot of people overlook that. I had some trouble there when hooking up my apexi neo but sorted it. My car was not shielded on the whole bundle, only shielded on the individual signal wire for the afmback to the computer. I'm making sure not to mess that up. I'll have some more updates soon. About to order a bunch of small parts to button some of this up.
12-14-2015, 04:13 AM
#47
Member
Thread Starter
Join Date: Mar 2015
Posts: 278
I've run into a problem guys. The 330cc injectors I got arr gonna need a custom set of rails which is not in the budget right now and my 260 cc injectors don't fit my 180 rail like I thought they would. Does anybody have their stock side feed rail laying around? Off a VG or a VE. Either rail will fit my motor and 260 injectors. Any spare injectors too? I know a lot of the turbo guys have gone top feed and don't need these anymore.
12-14-2015, 09:07 AM
#48
Member
Thread Starter
Join Date: Mar 2015
Posts: 278
12-19-2015, 07:21 PM
#49
Member
Thread Starter
Join Date: Mar 2015
Posts: 278
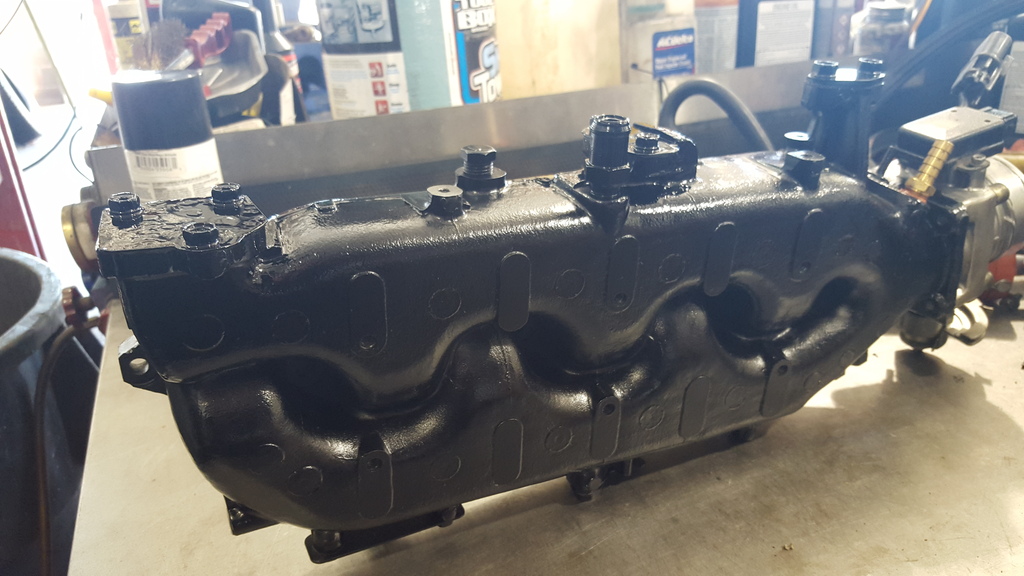
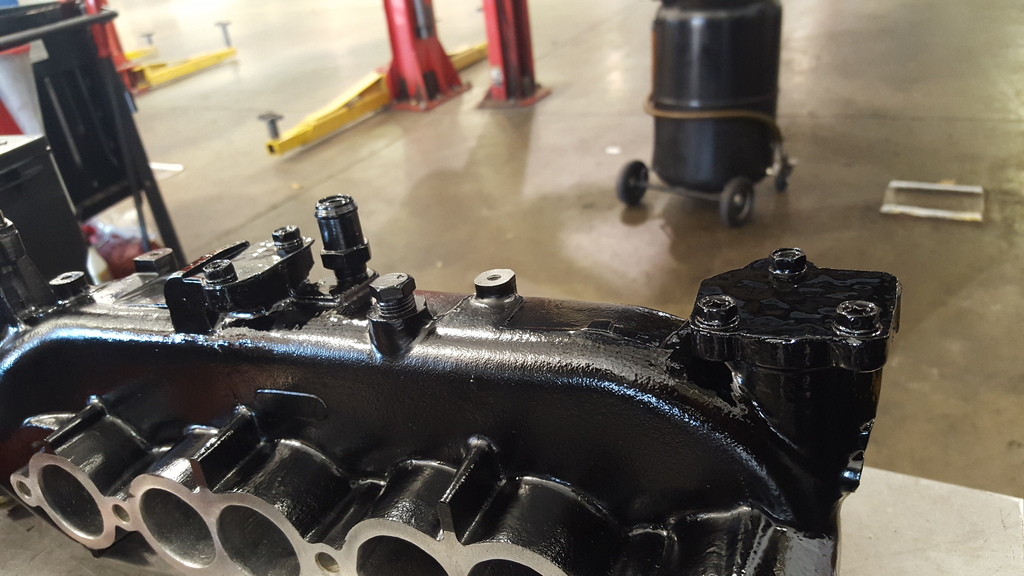
alright, heres to some more updates...did a lot of work on my upper intake manifold in my spare time till i could get to the junkyard and find a fuel rail i could work with. i port matched the runners(finally), port matched and smoothed the throttle inlet(i put the stanza 60mm throttle on long ago instead of the stock 52mm and never got around to opening the plenum to take advantage of this), finished making block of plates for the idle valves i wont be using and painted it to match my lower intake.

 12-19-2015, 07:31 PM
#51
Member
Thread Starter
Join Date: Mar 2015
Posts: 278
i cut off the coolant line nipples since i deleted the hoses going there a while back, figured there was no need to keep the unsightly connection. after cutting them flush i smoothed the area out with JB weld so it would blend in. went thru and cut of all but 2 front and rear ground posts and smoothed them as well since ill only be needing 2. there was several vacuum nipples in it as well that i wont be using, those were cut flush and plugged with JB weld to prevent boost leaks. i trust properly set JB weld a lot more than rubber nipple cover ands tiny hose clamps. I also pulled the giant fitting for the brake booster/cruise control and replaced it with a simpler barbed type. new on left. wont be using cruise control anymore.
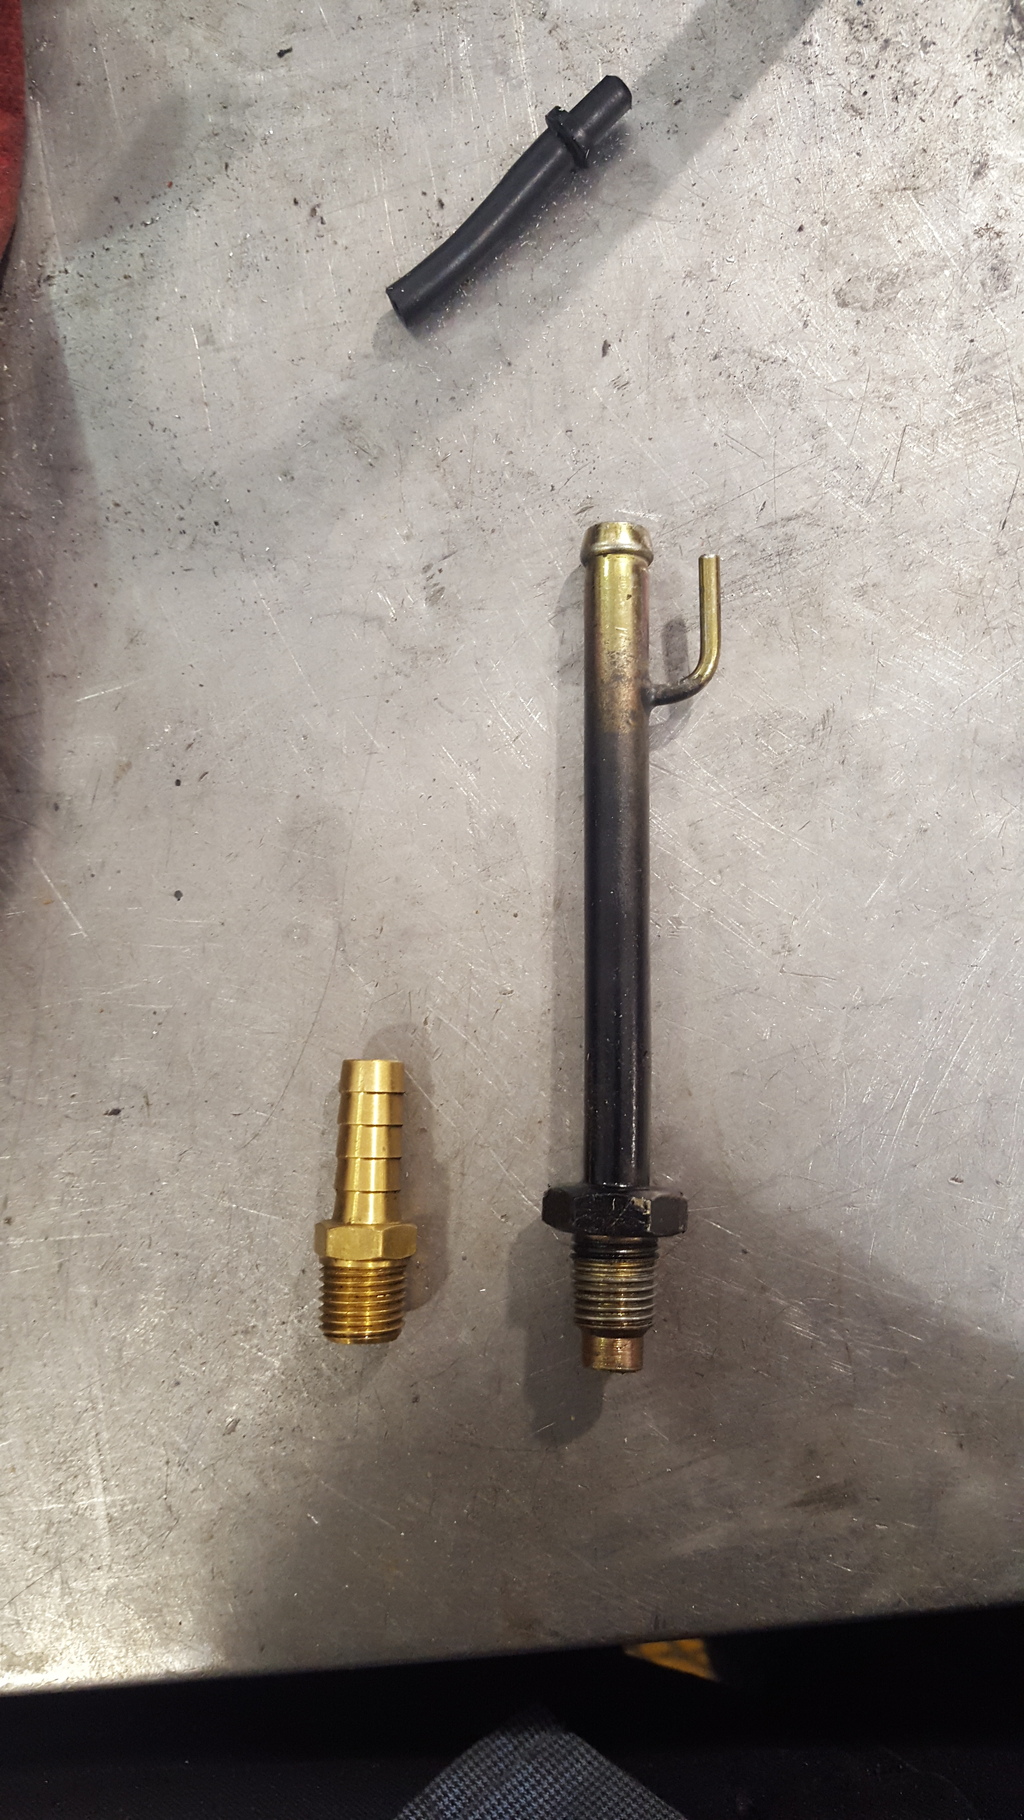
i made sure and put sealer on it prior to install as well. i use high temp/high pressure copper sealer.

i made sure and put sealer on it prior to install as well. i use high temp/high pressure copper sealer.
12-19-2015, 07:35 PM
#52
Member
Thread Starter
Join Date: Mar 2015
Posts: 278
next it went through 4 cans of motorcraft de-carb spray(we use it to break up carbon deposits so the 5.4 liter spark plugs dont break off when you try to remove them, strong stuff). i got all of the gunk from 20 years out of there, and the metal from the port matching.
heres what the throttle inlet looks like now.
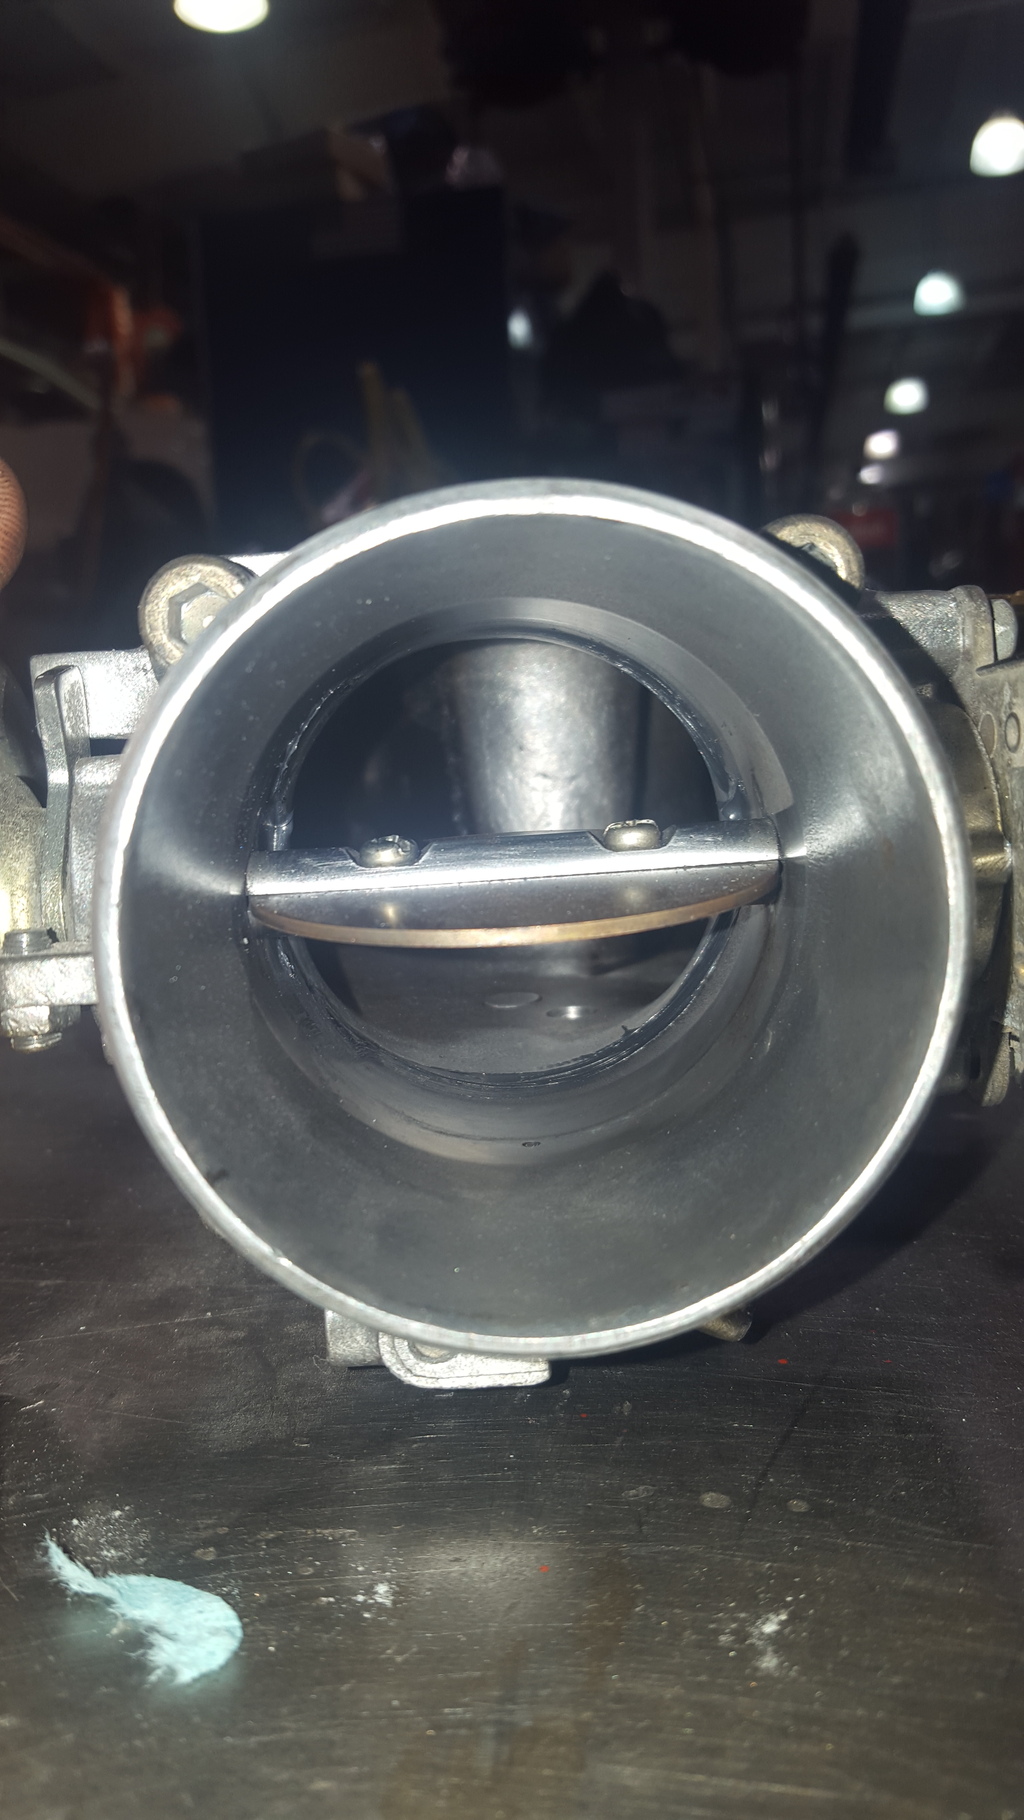
see how clean the inside is?! that de-carb stuff works great!
heres what the throttle inlet looks like now.

see how clean the inside is?! that de-carb stuff works great!
Last edited by aw11power; 12-19-2015 at 07:37 PM.

 12-19-2015, 07:44 PM
#54
Member
Thread Starter
Join Date: Mar 2015
Posts: 278
heres a couple of shots of the block off plates i made. its some pretty think stainless steel, it was hell to cut to shape. i sealed with high temp/pressure gray RTV and bolted them up prior to painting. the paint looks lumpy on there in these pictures because its wet and doesnt like to stick to scuffed stainless appearantly. it dried much smoother, but im not too concerned anyway since that side of the manifold faces the firewall so its not real visible.

 12-19-2015, 07:45 PM
#55
Member
Thread Starter
Join Date: Mar 2015
Posts: 278
when i got it home i just set it in place, wanted to see how it would look all together. set the plenum cover on there too, again just to see what i would look like. this was all done on thursday.
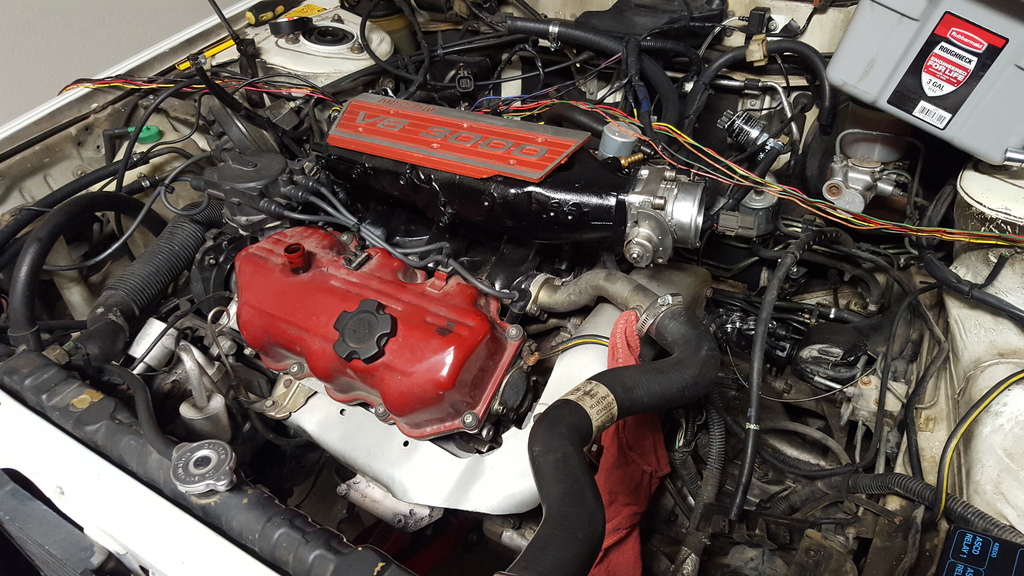
i do believe i like it a lot.

i do believe i like it a lot.
12-19-2015, 07:59 PM
#56
Member
Thread Starter
Join Date: Mar 2015
Posts: 278
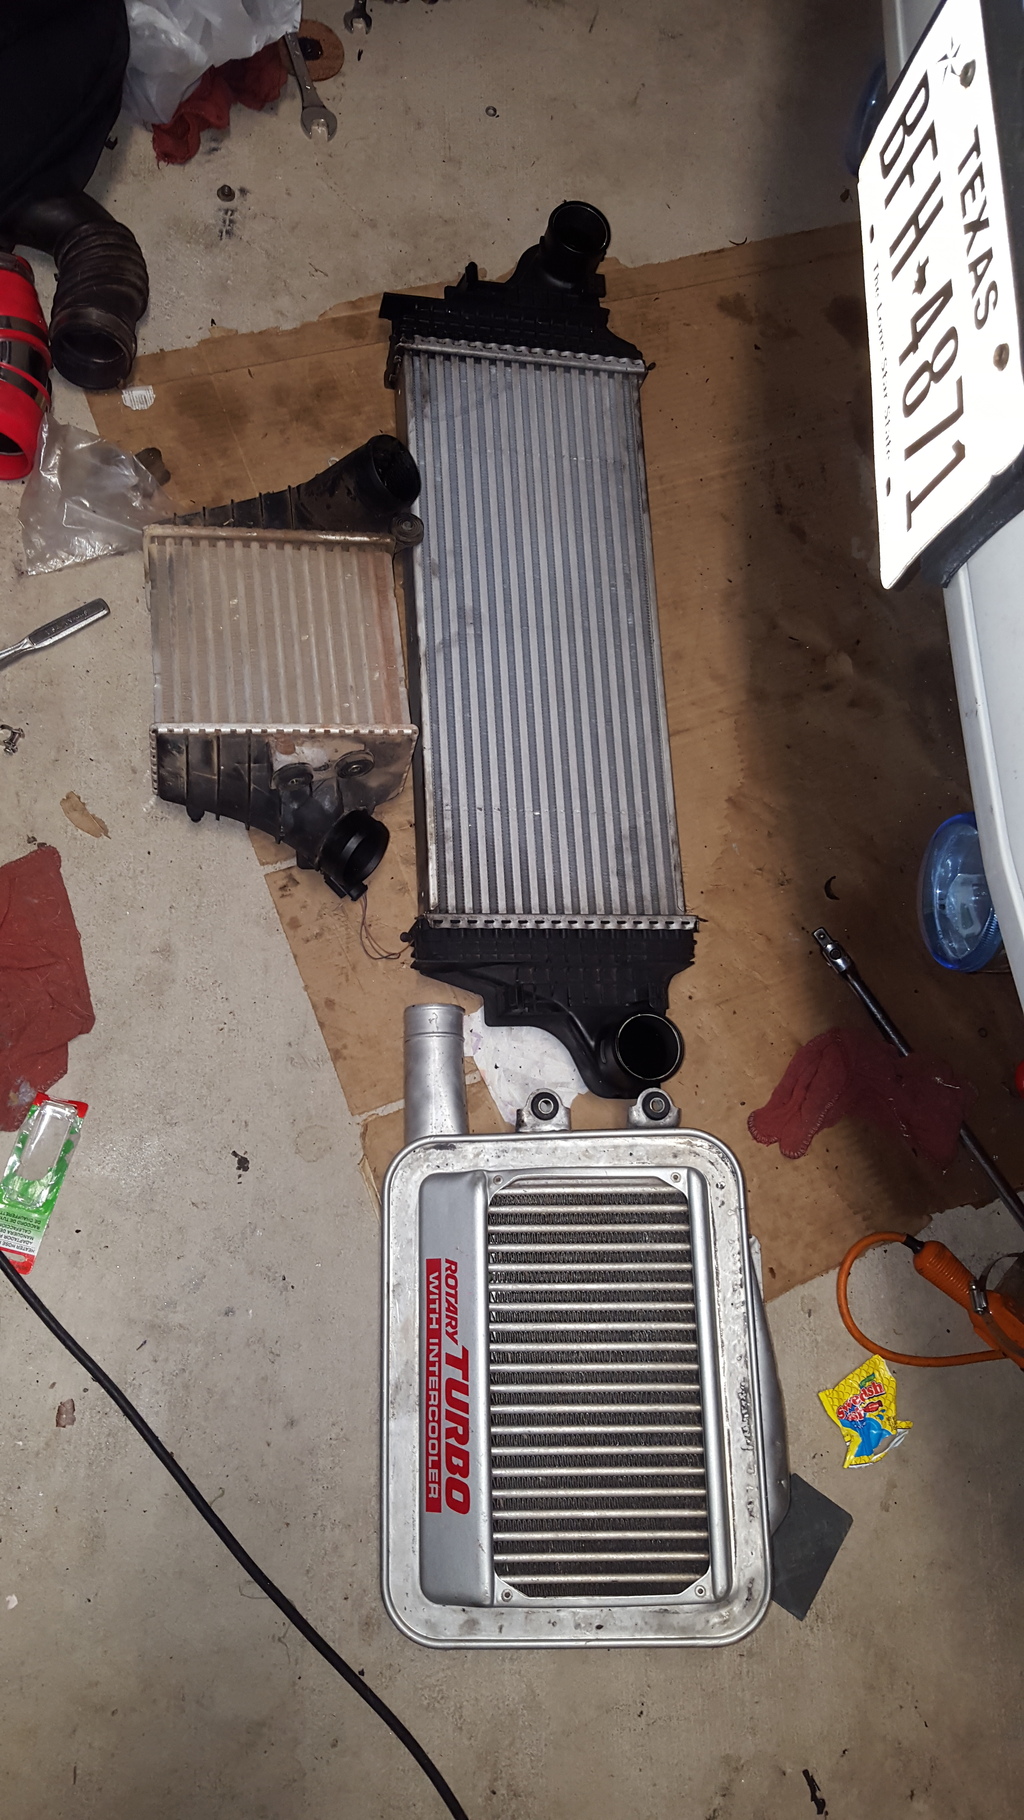
today was junk yard day. quite the adventure, it was 38 degrees when i got there this morning and by the time i was leaving round noon it was damn near 70. gotta love the texas weather, anyway, i found an inlet tube off a VW that looks like itll work perfect for this application. it fits the turbo and appears to have the bend i need.
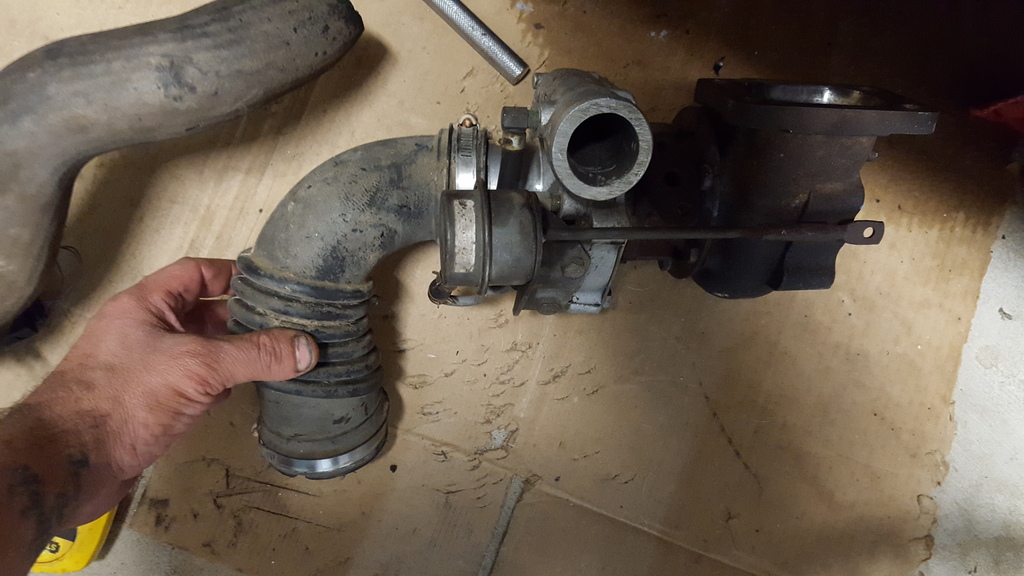
i also picked up another small intercooler as i wasnt really liking my fitment options with the one i had. its also a VW part. its much smaller length/width wise than my other one but has a much thicker core. it has some more friendly angles to its inlets/outlets. i think itll work just as well even tho its smaller since i can fit it in a better place for more airflow.

i also picked up another small intercooler as i wasnt really liking my fitment options with the one i had. its also a VW part. its much smaller length/width wise than my other one but has a much thicker core. it has some more friendly angles to its inlets/outlets. i think itll work just as well even tho its smaller since i can fit it in a better place for more airflow.
 12-19-2015, 08:05 PM
#57
Member
Thread Starter
Join Date: Mar 2015
Posts: 278
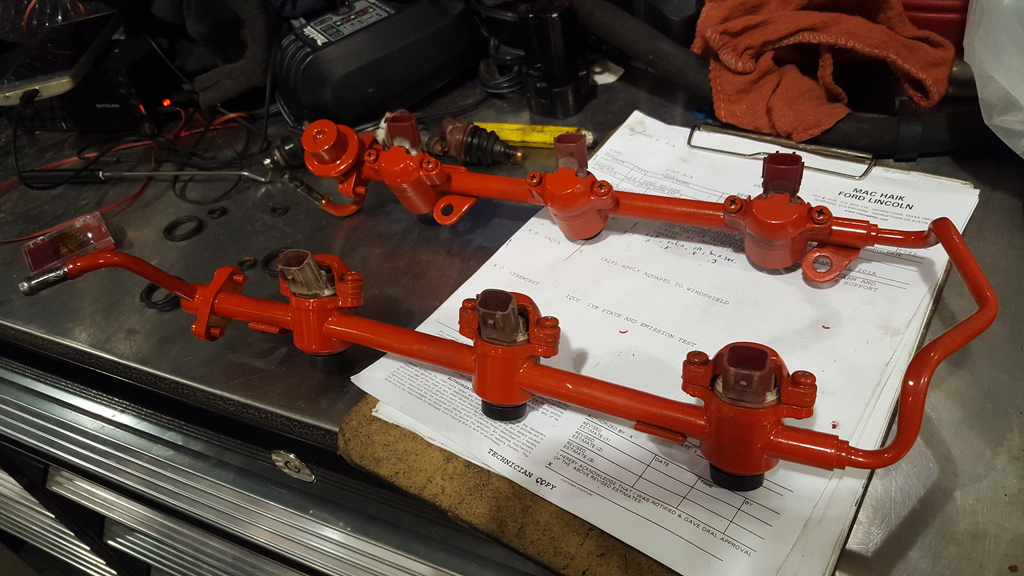
lastly i picked up a fuel rail of a 95 maxima/VQ30. it uses the injector style i wanted and the ports match my intake.
old 180s on left and 260s on right.
theres gonna be some small changes needed, but no biggie. the hold down tabs dont line up so ill have to make some small brackets and cut off the original tabs. heres the issue.
the pressure regulator also hits the heater lines because its clocked defferent. ill just have to sway the regulator off my other rail.
old 180s on left and 260s on right.

theres gonna be some small changes needed, but no biggie. the hold down tabs dont line up so ill have to make some small brackets and cut off the original tabs. heres the issue.


the pressure regulator also hits the heater lines because its clocked defferent. ill just have to sway the regulator off my other rail.
 12-19-2015, 08:14 PM
#58
Member
Thread Starter
Join Date: Mar 2015
Posts: 278
so thats pretty much everything new this week. except for one thing. it looks like no matter what i do, im gonna have to remove my air conditioning to make this work. im really, really pretty sad about that  it works great, but i dont really have a choice. i thought i could work around it, but the deeper i get into this the more apparent it becomes that the AC is just gonna have to go. bummer.
it works great, but i dont really have a choice. i thought i could work around it, but the deeper i get into this the more apparent it becomes that the AC is just gonna have to go. bummer.
 12-21-2015, 03:53 PM
#60
Junior Member
Join Date: Nov 2015
Location: Queens NY
Posts: 77
so thats pretty much everything new this week. except for one thing. it looks like no matter what i do, im gonna have to remove my air conditioning to make this work. im really, really pretty sad about that it works great, but i dont really have a choice. i thought i could work around it, but the deeper i get into this the more apparent it becomes that the AC is just gonna have to go. bummer.
it works great, but i dont really have a choice. i thought i could work around it, but the deeper i get into this the more apparent it becomes that the AC is just gonna have to go. bummer.
12-22-2015, 02:33 PM
#61
Yeah, why do you say the A/C has to go?
I went through great effort on my turbo build to keep AC. I've never really understood why people - when building stuff from scratch and/or fully custom anyway - don't just do so go into the project with the intent to keep AC, especially here in Texas
I went through great effort on my turbo build to keep AC. I've never really understood why people - when building stuff from scratch and/or fully custom anyway - don't just do so go into the project with the intent to keep AC, especially here in Texas
 12-26-2015, 06:42 AM
#63
Member
Thread Starter
Join Date: Mar 2015
Posts: 278
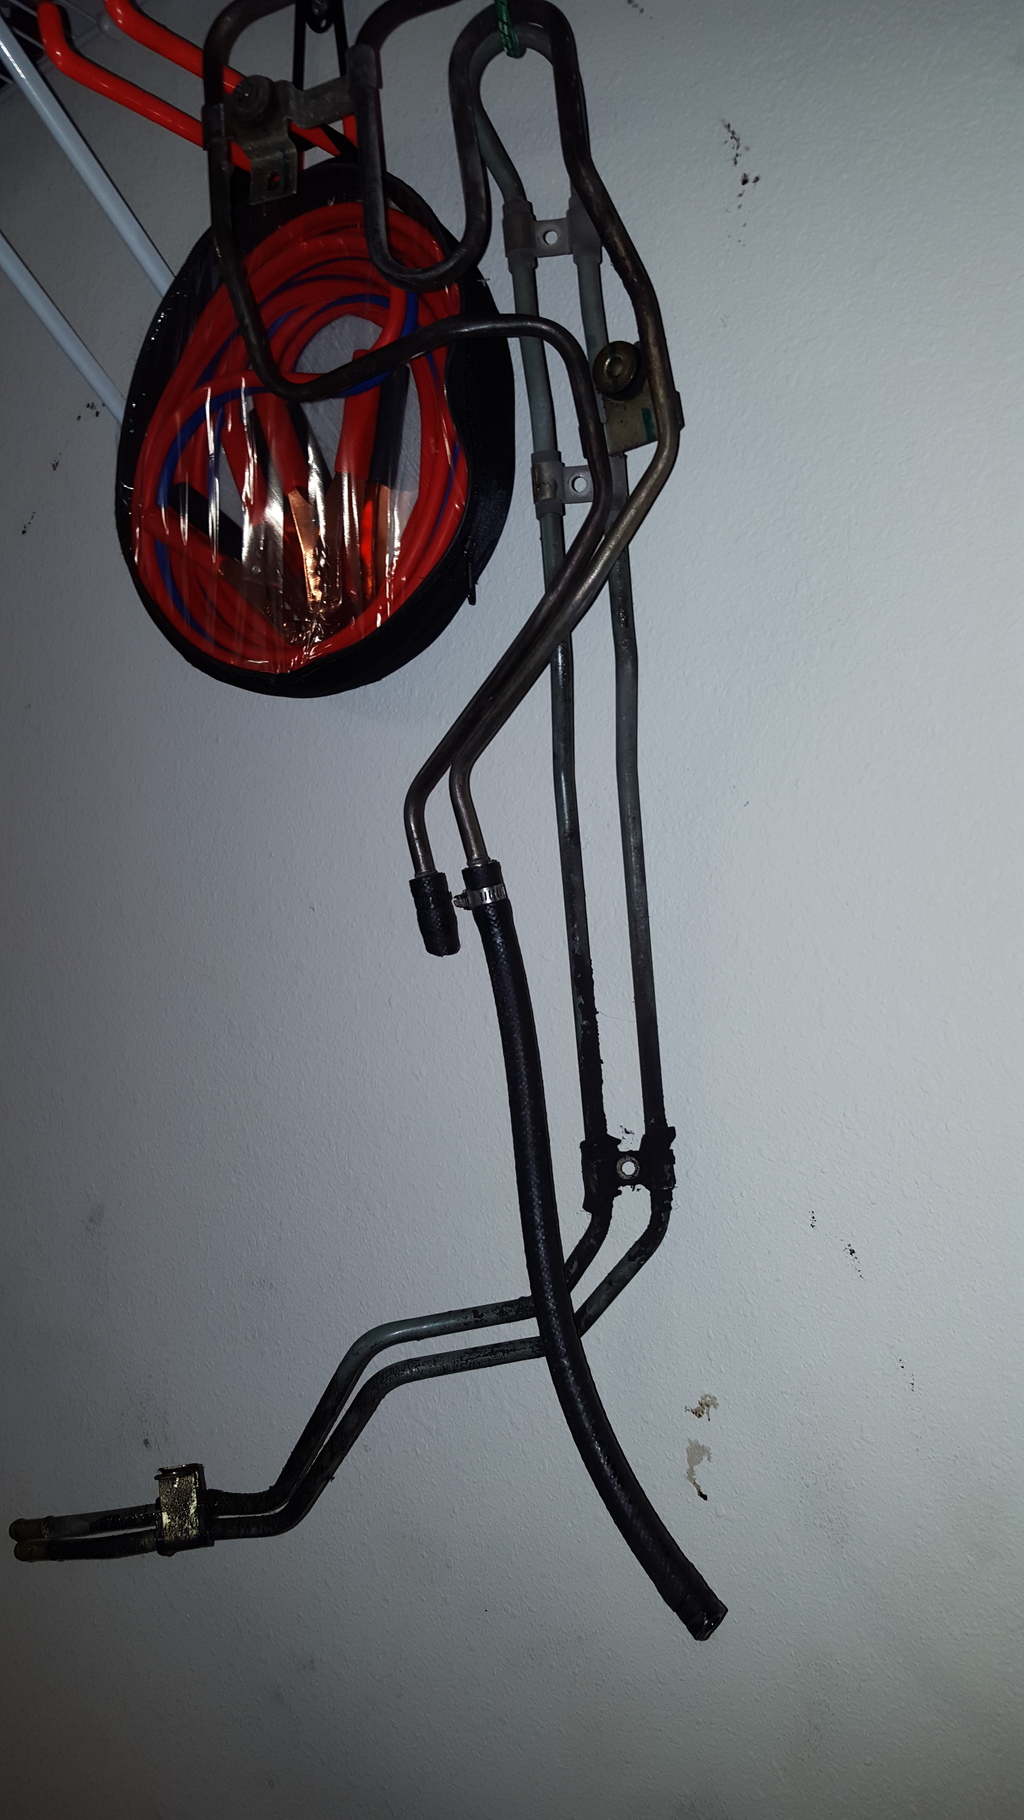
Believe me, I really don't wanna not have AC. But right now I don't see a way around it. Given what's available to me as far as fabrication resources my original plan won't work the way I hoped it would. I'll be very careful as I proceed to keep the system in mind and see if can do it in such a way that maybe the AC could go back in one day. For now all the AC parts are all neatly sealed and stored on the shelf in my garage.
Pm about the injectors?
Pm about the injectors?
01-03-2016, 01:39 PM
#64
Member
Thread Starter
Join Date: Mar 2015
Posts: 278
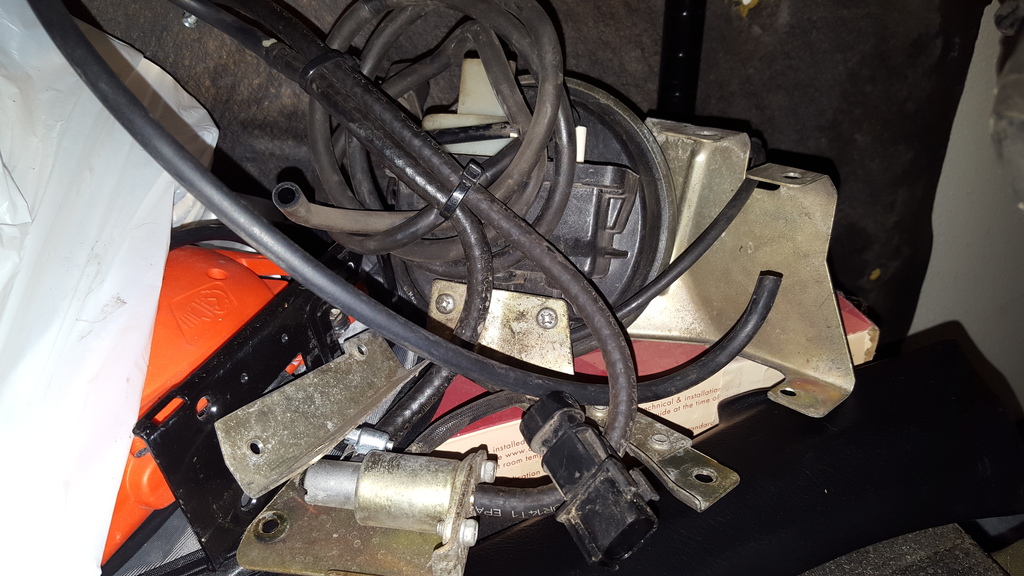
alright more news, i try to do something at least weekly. id hate to lose steam haha! first the quick and simple updates. i pulled the cruise control hardware out. i didnt use it much and it really never worked as well as a modern system anyway so i wont miss it. it made a lot more space under the hood and tidied things up a bit too. also, im a fan of anything that removes weight from over the front wheels. on the shelf and out of the way now.
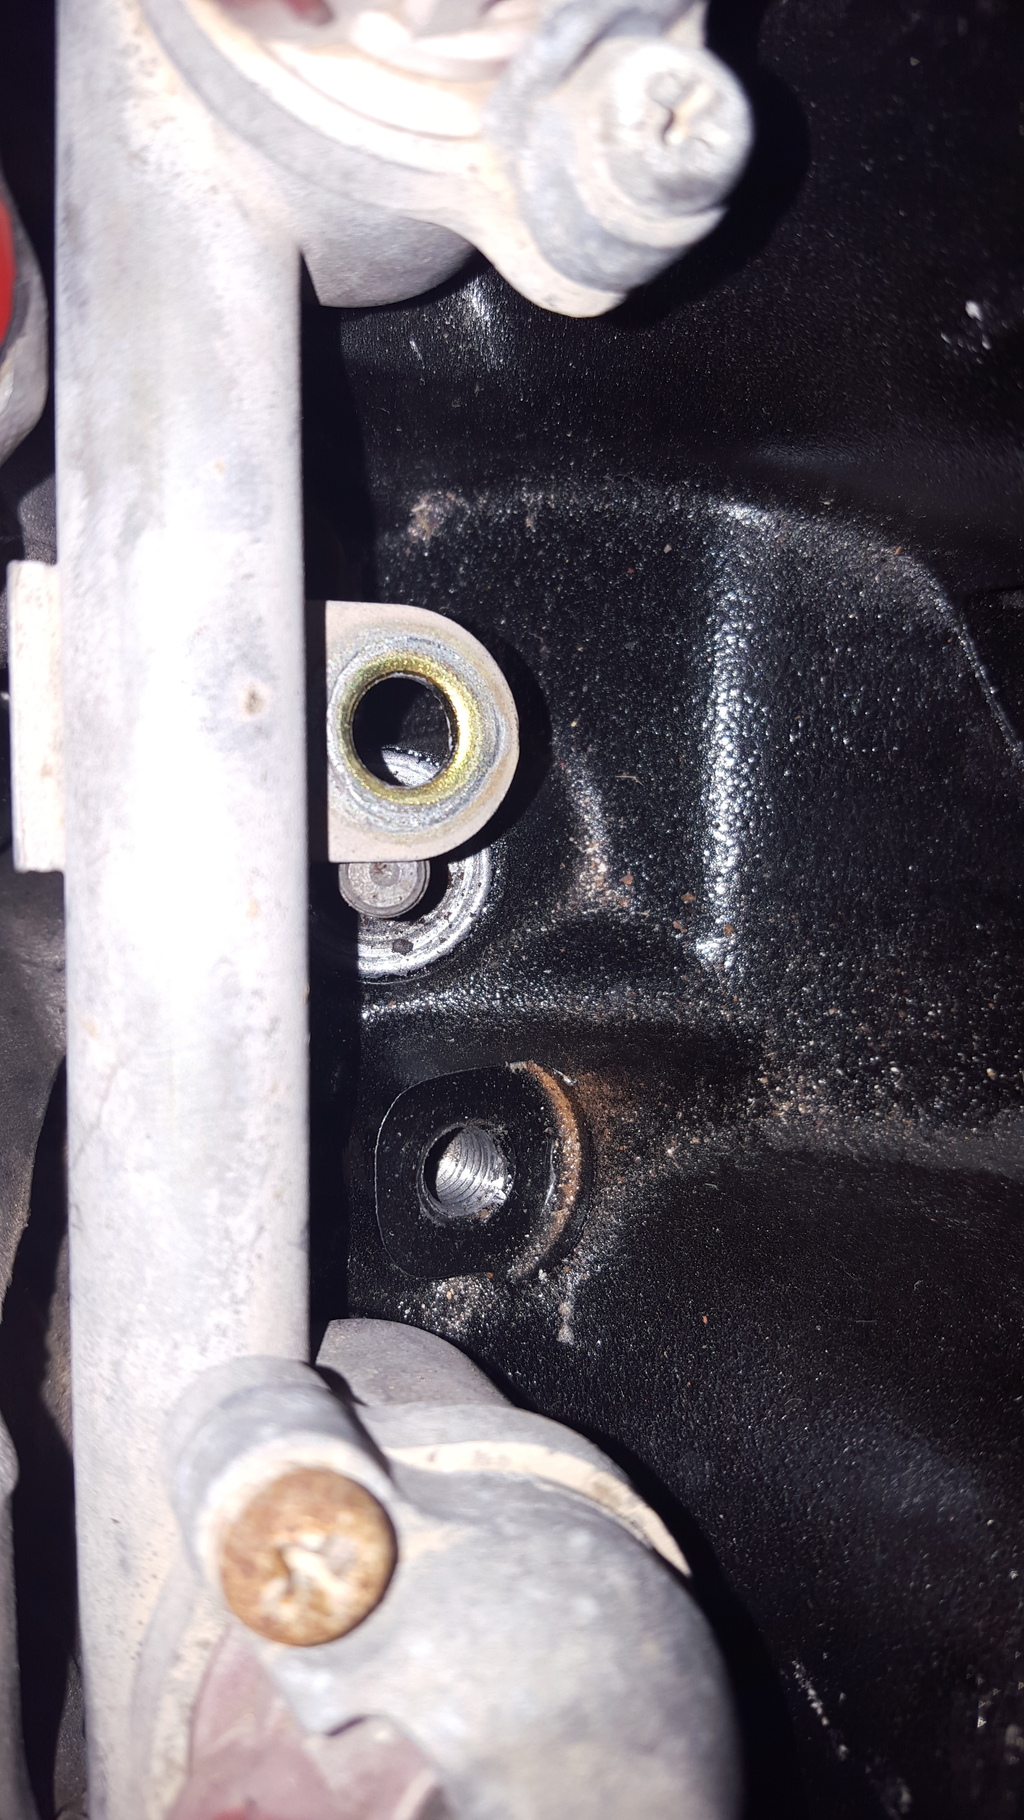
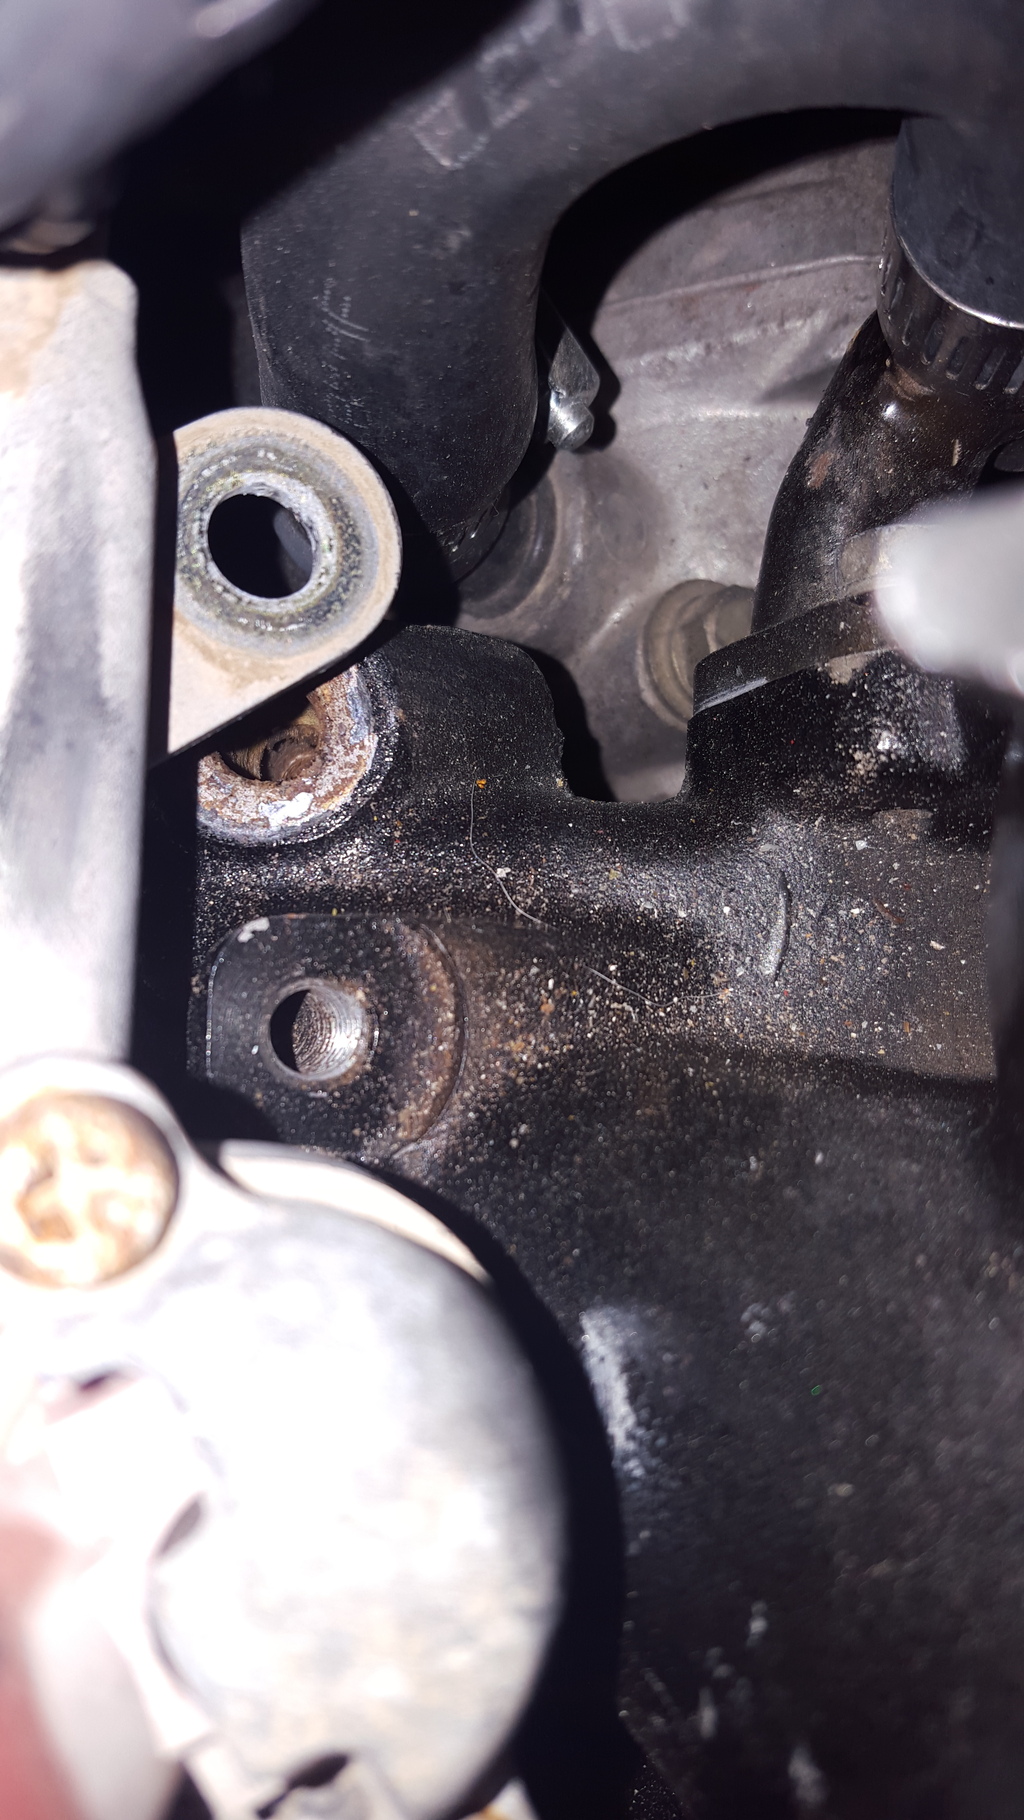
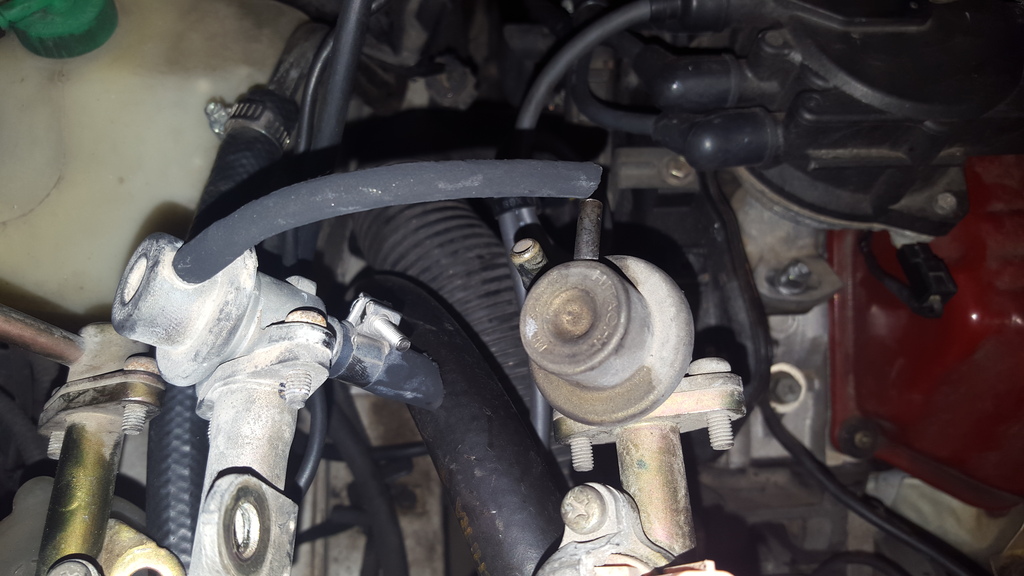
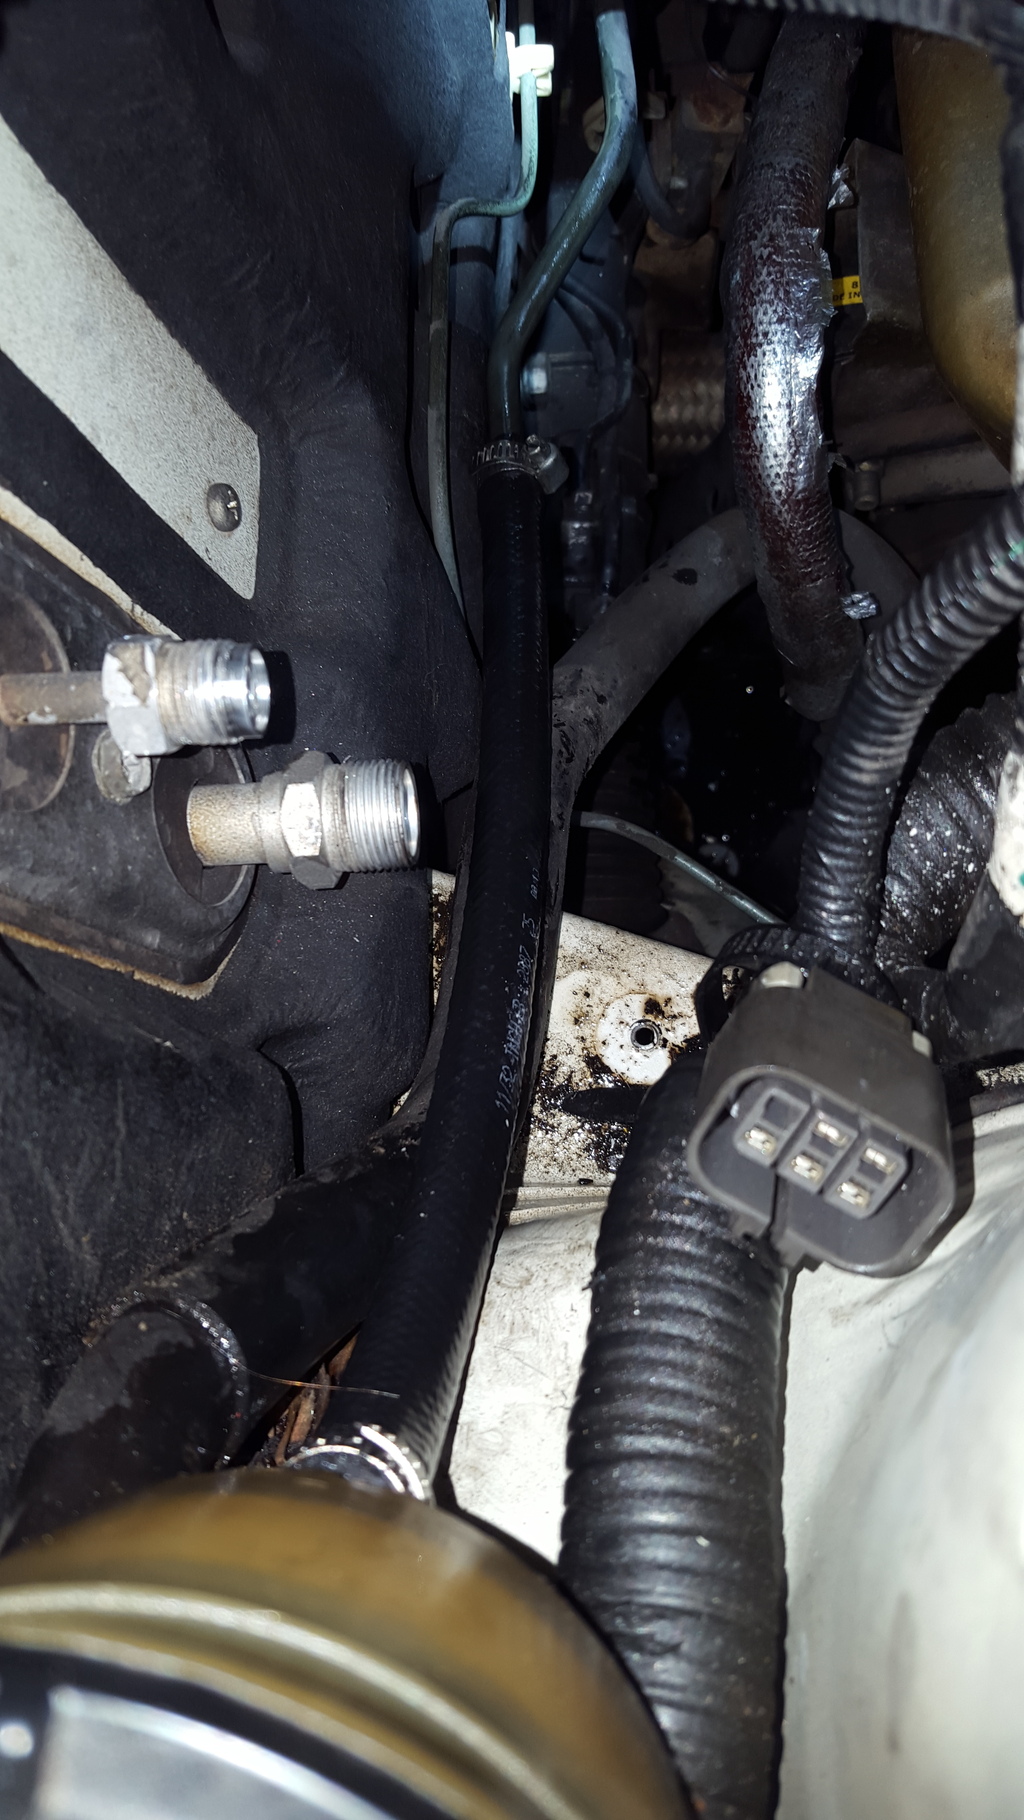
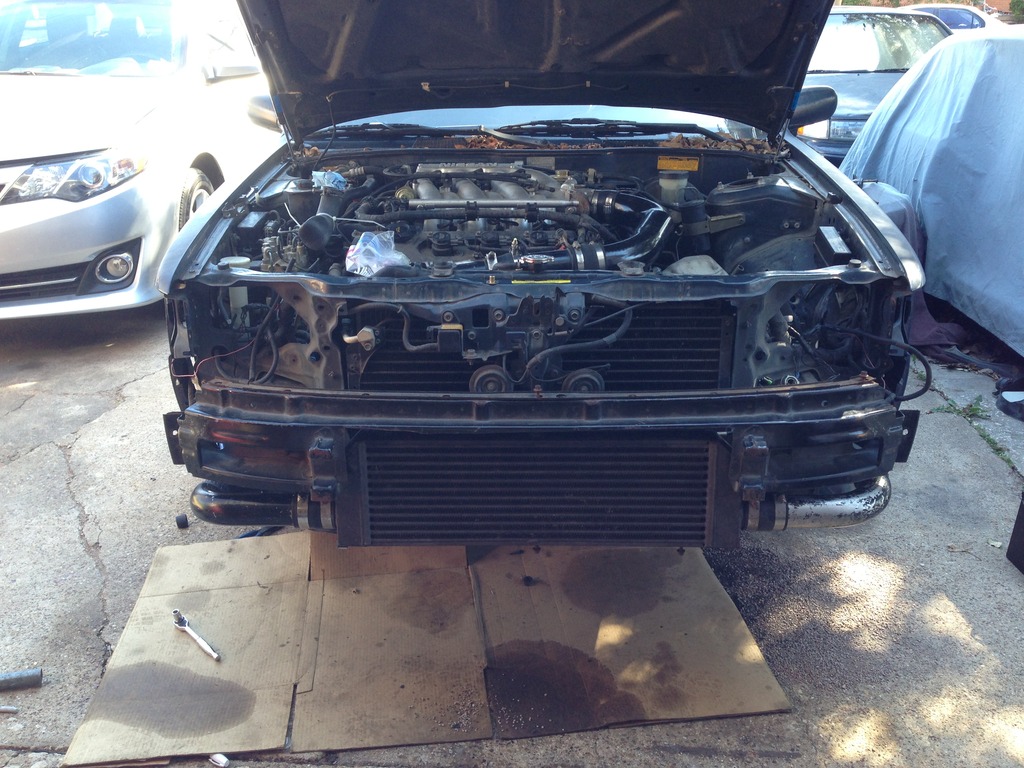
after that i finally decided to pull the power steering cooler lines out and bypassed them. ive been wanting to do this for quite some time. they were in the way of a ton of stuff and they hug a bunch of hot items under the hood, kind of counter-intuitive in my eyes. i mean seriously, look at all that crap.
id been putting it off because i had to pull a lot of other annoying components out and put em right back in to get the lines out. should have done it sooner really. heres my bypass, straight from the rack return line to the resevoir.

after that i finally decided to pull the power steering cooler lines out and bypassed them. ive been wanting to do this for quite some time. they were in the way of a ton of stuff and they hug a bunch of hot items under the hood, kind of counter-intuitive in my eyes. i mean seriously, look at all that crap.

id been putting it off because i had to pull a lot of other annoying components out and put em right back in to get the lines out. should have done it sooner really. heres my bypass, straight from the rack return line to the resevoir.
 01-03-2016, 01:57 PM
#65
Member
Thread Starter
Join Date: Mar 2015
Posts: 278
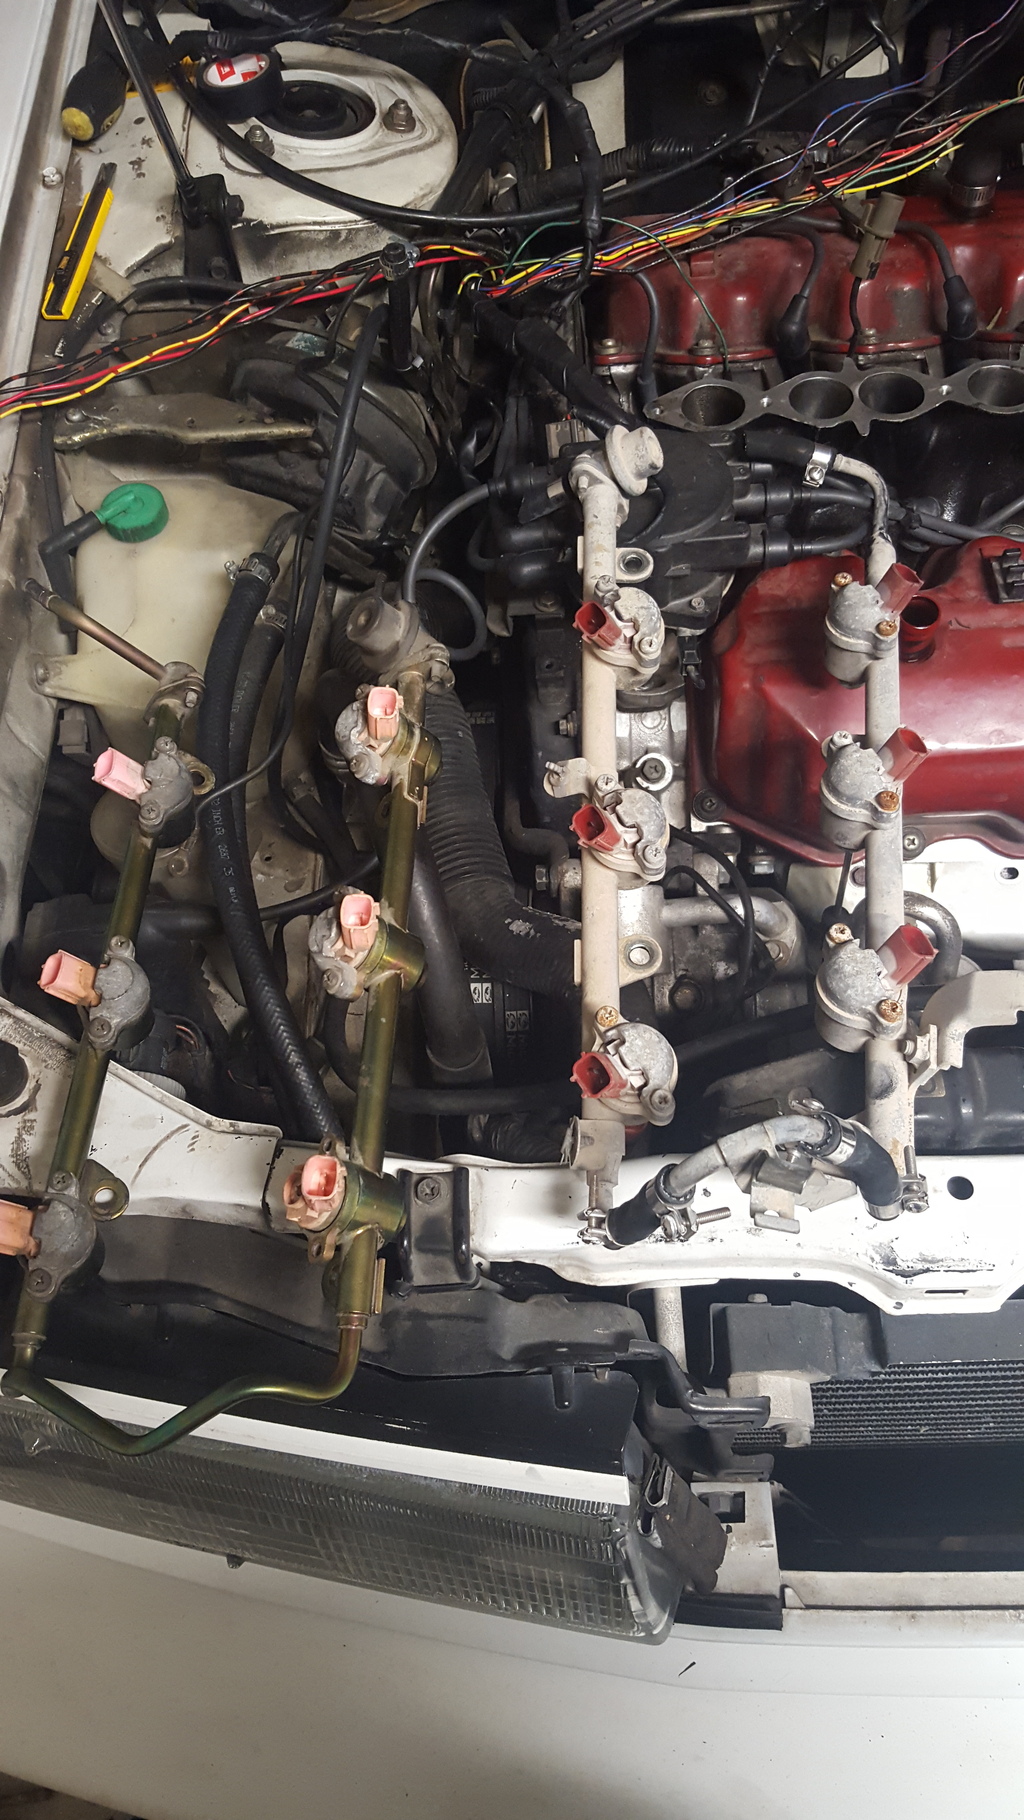
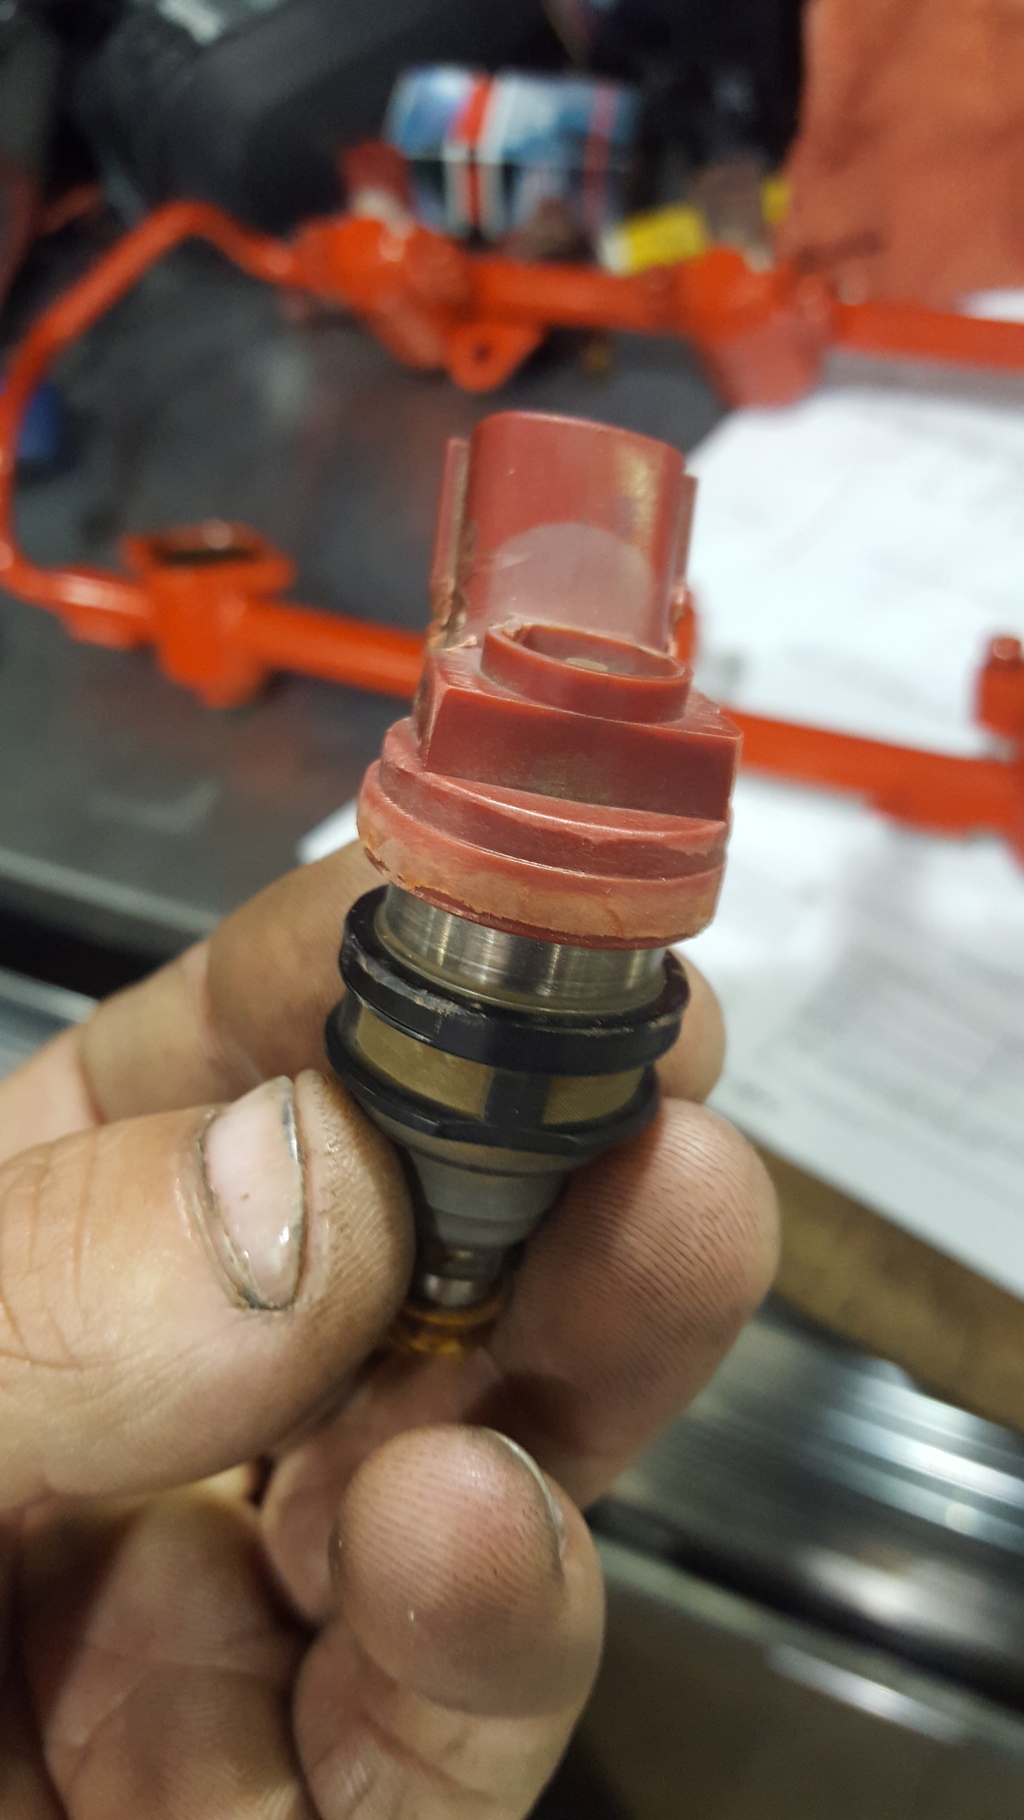
got my injector problem figured out also. without customizing a fuel rail too! i needed some odd ball o-rings for the bottom of the injector. took me forever to find em. its a BWD seal kit and youd better believe i save the part number because it took forever to find. also, found i needed to shave the top of the injectors to fit under the caps.
BEFORE
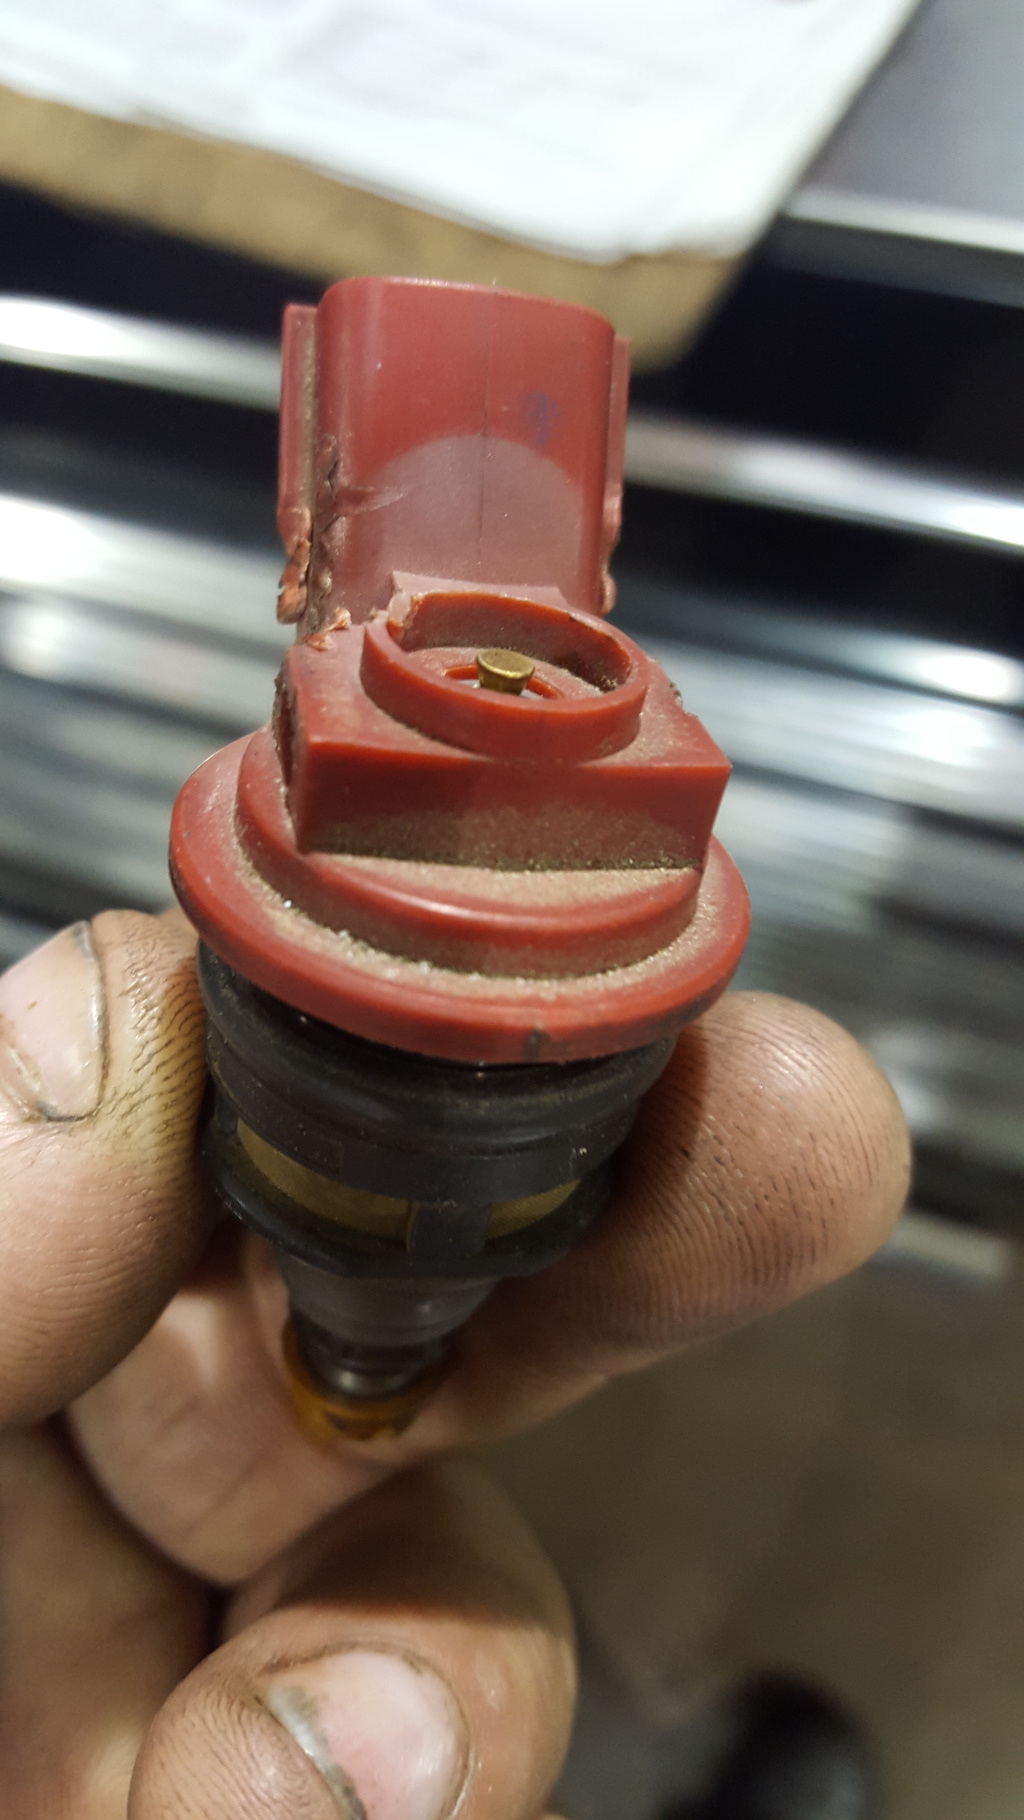
AFTER
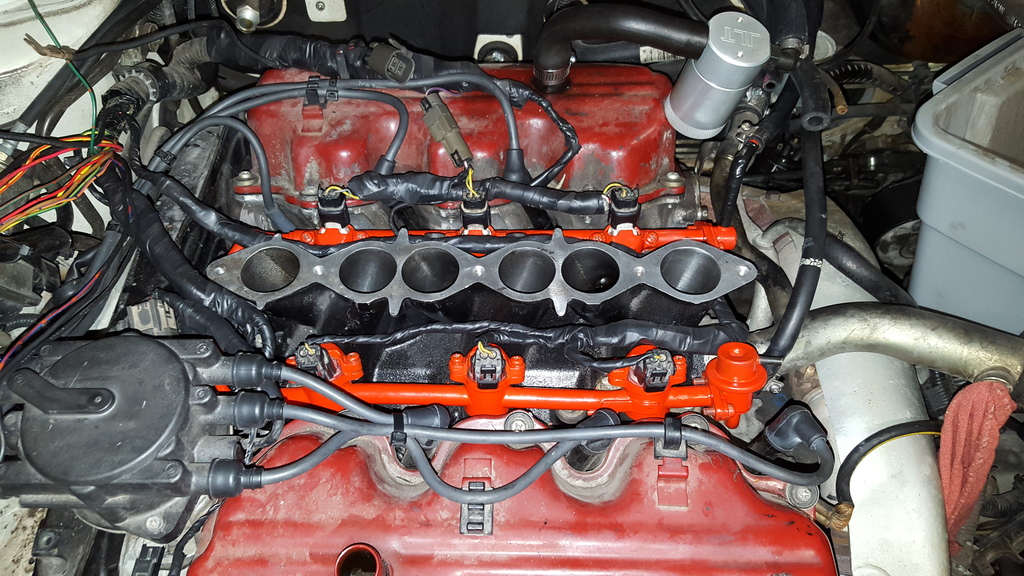
got em all in the rail and painted the rail because, well why the hell not?
pumped the rail up to 35psi, highest my pump will go and idle operating pressure for the these injectors. left the rail on my toolbox at work for 10 hours and observed no leakdown so i feel comfortable running these. and when im ready for 370s or higher, i know all i gotta do is shave that lip on the top of the injectors and drop em in. easy-peasy.
mounted fuel rail and finished re-routing the injector harness behine the manifold as opposed to draped across the front valve cover like the OE setup.
BEFORE

AFTER

got em all in the rail and painted the rail because, well why the hell not?

pumped the rail up to 35psi, highest my pump will go and idle operating pressure for the these injectors. left the rail on my toolbox at work for 10 hours and observed no leakdown so i feel comfortable running these. and when im ready for 370s or higher, i know all i gotta do is shave that lip on the top of the injectors and drop em in. easy-peasy.
mounted fuel rail and finished re-routing the injector harness behine the manifold as opposed to draped across the front valve cover like the OE setup.
 01-03-2016, 02:04 PM
#66
Member
Thread Starter
Join Date: Mar 2015
Posts: 278
i installed new upper injector seals, under-cap cushions and fuel rail to intake seals while i was at it of course. got the intake back on properly torqued and all the grounds hooked back up. also removed about 3 feet from the harness shortening the wiring for the idle switch and TPS. that was also re-routed behind the intake. used to be in the big front braid. all connections carefully soldered and heat wrapped and then everything re-wrapped in tape like OE.
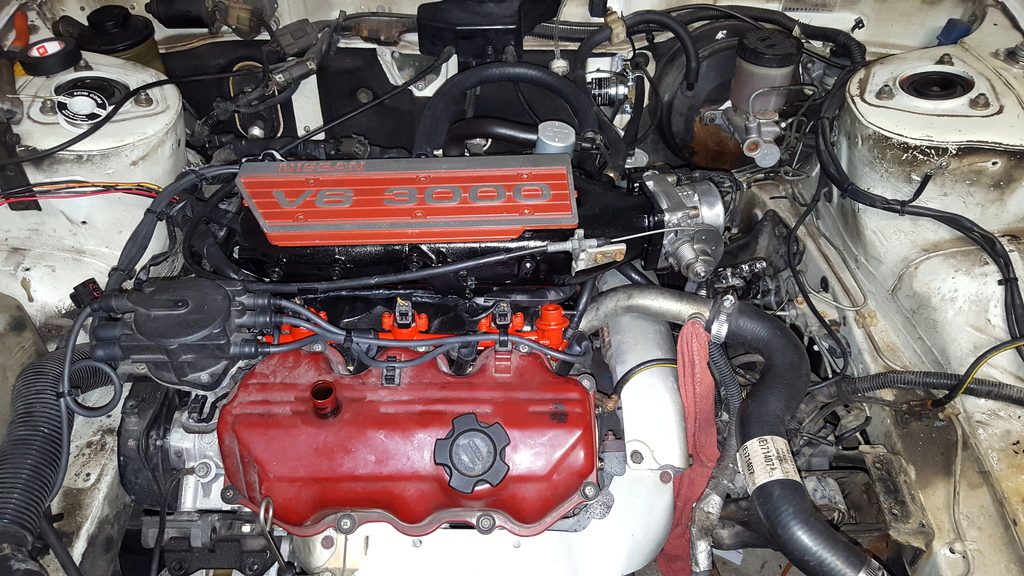
ill prolly get around to making a simple bracket to hold up that catch can on the back side of the intake tomorrow. it feels like im getting close, but i know theres still so much to do. just keeping my head foreward and trying to make steady progress and not half *** anything. im trying to keep it looking nice while im at it. i plan to show it at nismo fiesta again this year and want to have a tidy engine compartment. thats why im doing little bits of wire tuck here and there.the only wiring i havent finished yet is the MAF.
thoughts? comments? let the flaming begin lol! JK, we dont have that here because this is an adult forum
Last edited by aw11power; 01-03-2016 at 02:08 PM.
 01-07-2016, 08:12 AM
#70
Member
Thread Starter
Join Date: Mar 2015
Posts: 278
In regards to the injectors, I taped off the pick-up screens and then used a cookie disc on and angle grinder with extreme caution. Still it only took about 15 minutes to trim all of them.
The brake fluid is full, old reservoir just looks funny. The master cylinder started leaking and got replaced almost a year and a half ago. Last winter I had a new leak and had to rebuild both rear calipers and I replaced all 4 hoses when I was at it. Front calipers I installed new for the previous owner 2 years ago? My damn brakes better be good lol!
Keep posted guys, I got some more work planned this weekend.
01-10-2016, 03:00 PM
#71
Member
Thread Starter
Join Date: Mar 2015
Posts: 278
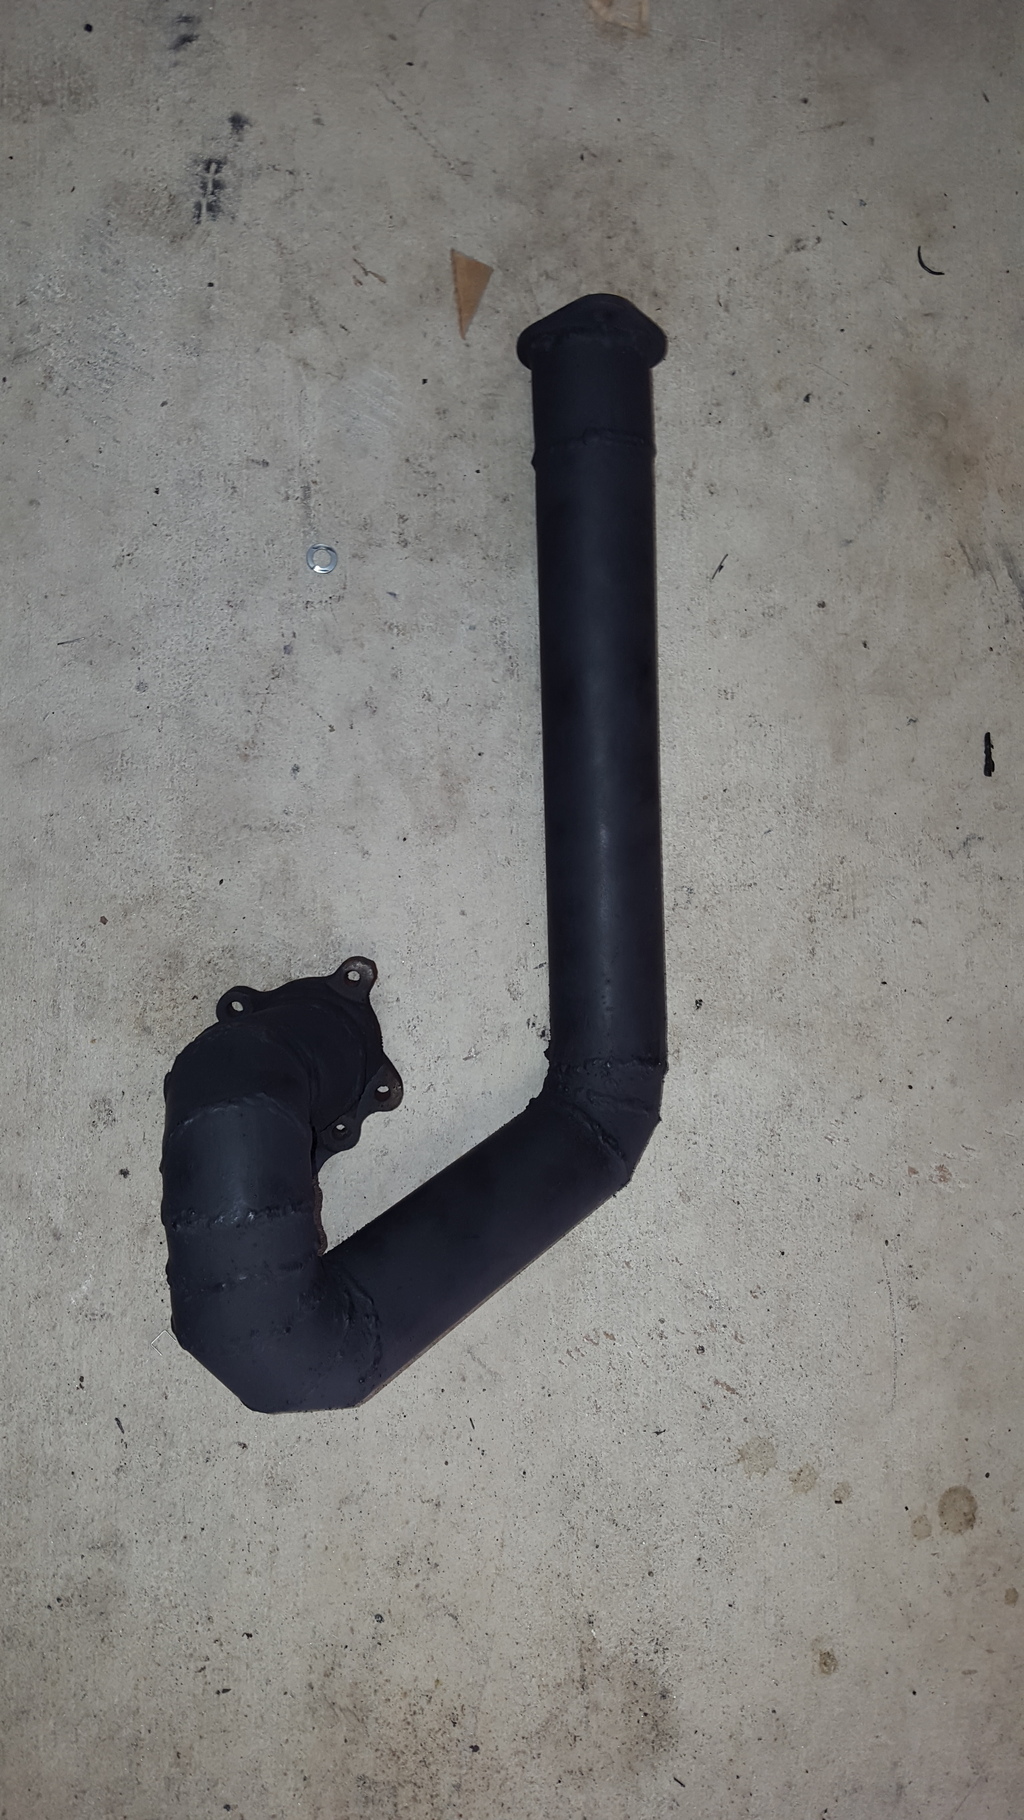
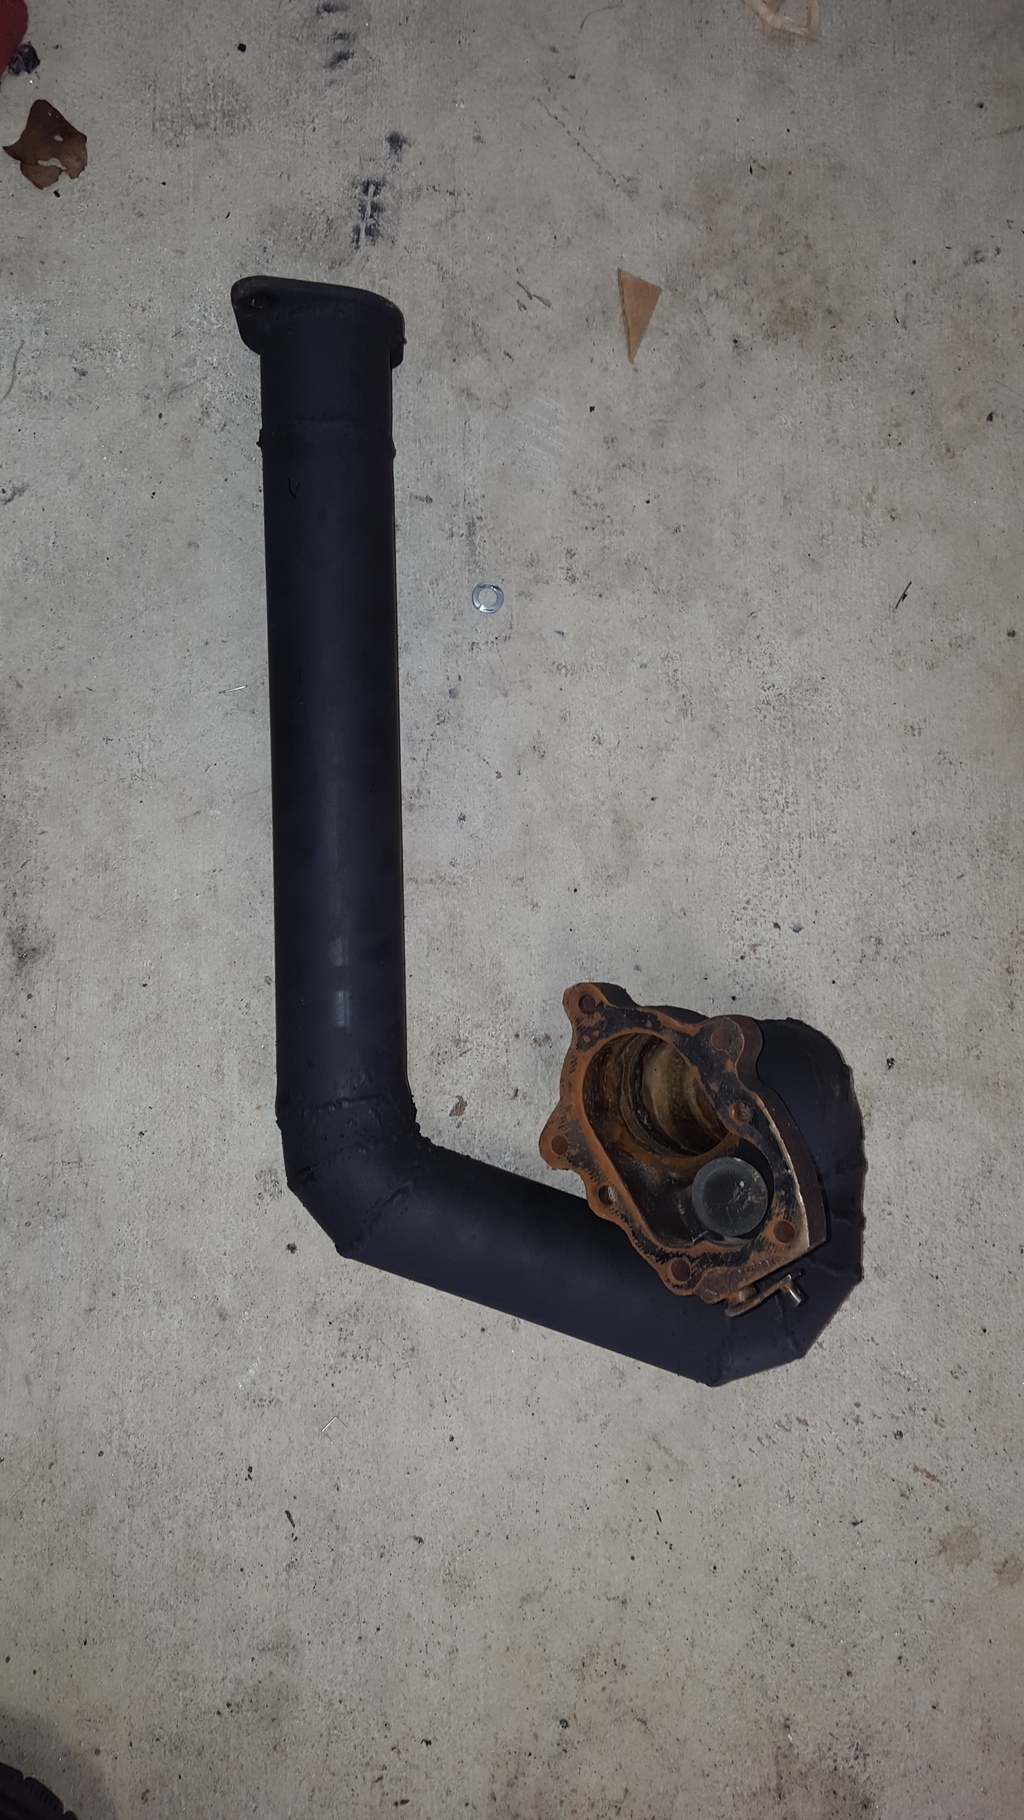
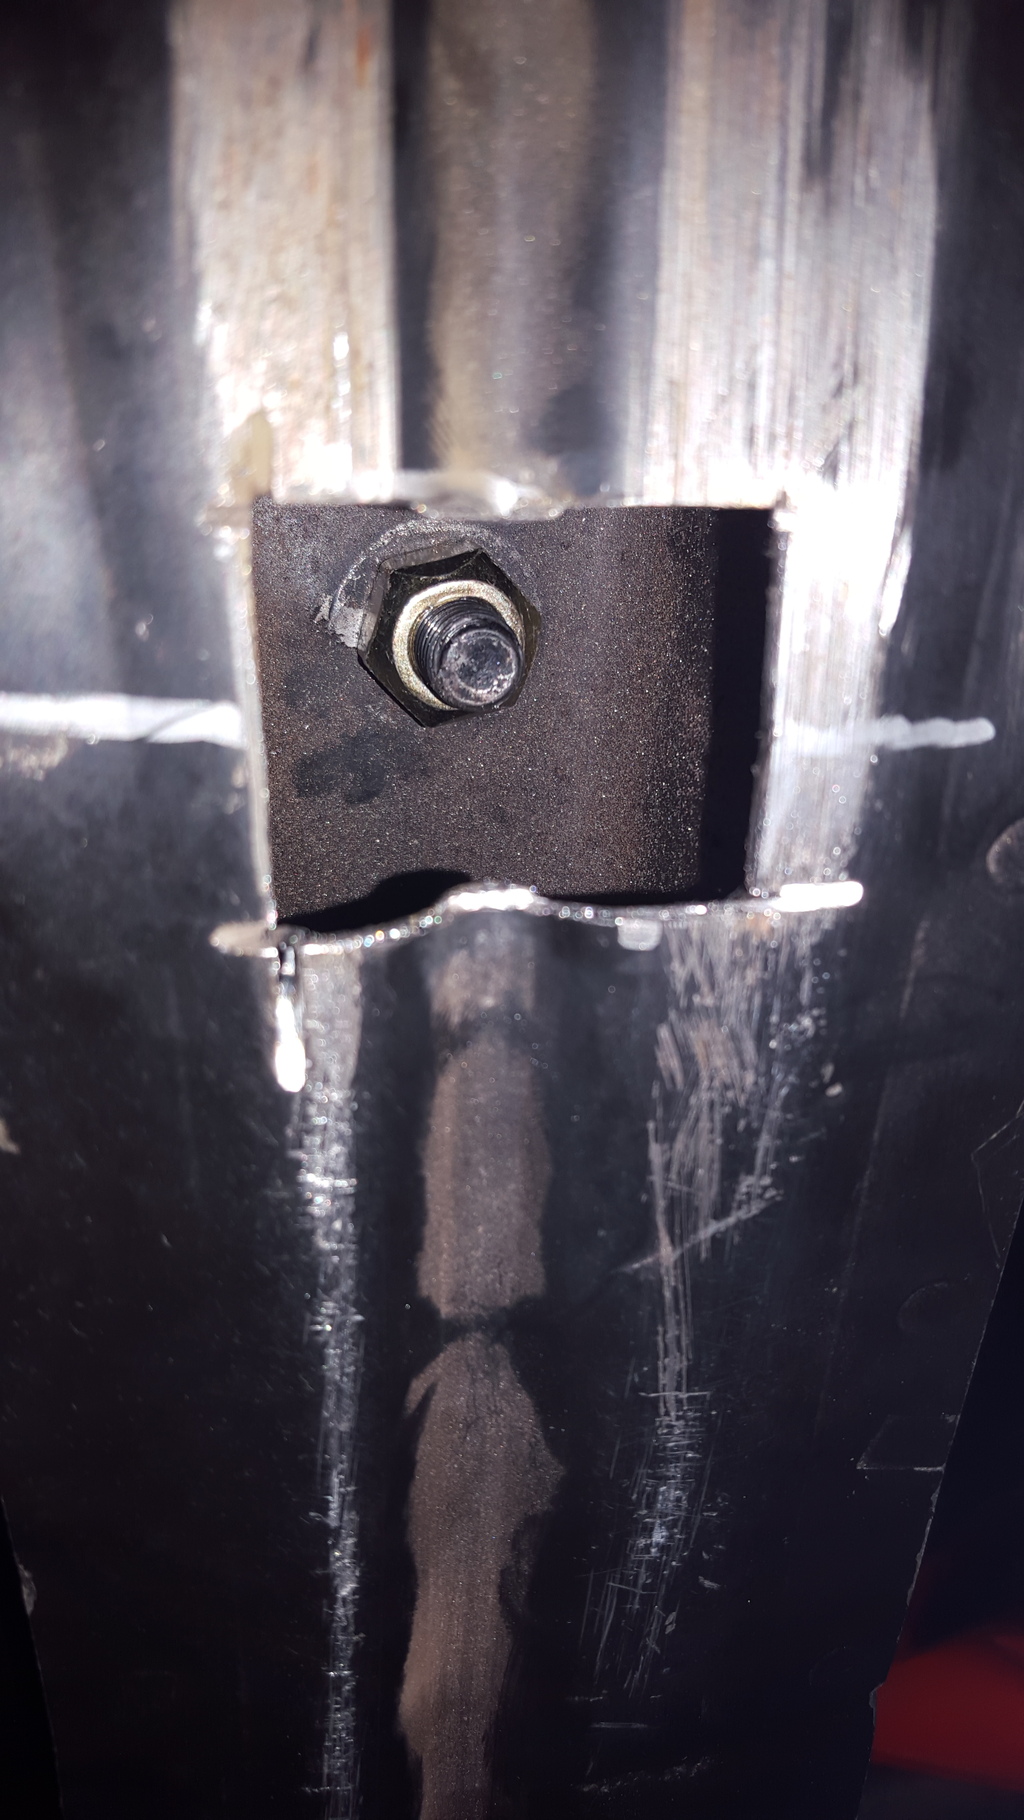
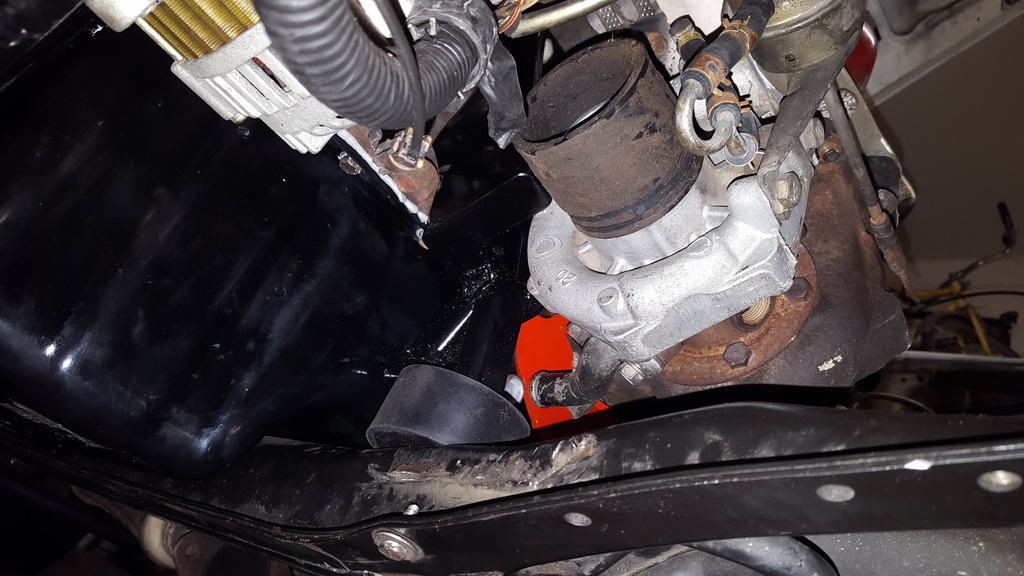
Got my down pipe back. All welded up. Not the prettiest but I'm proud of the work done here. Got a couple coats of high heat black on it now. It'll get header wrap later before it's installed.
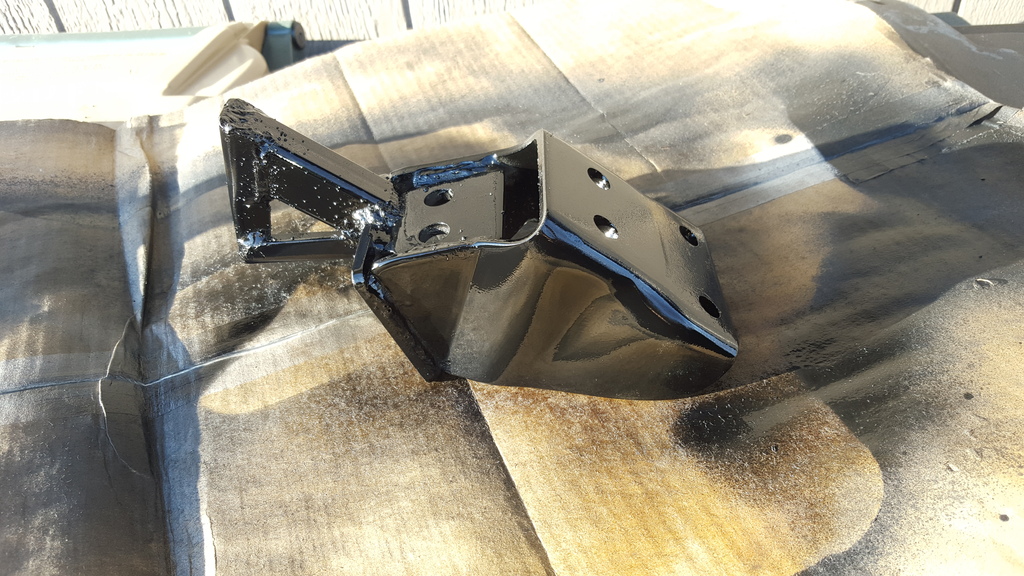
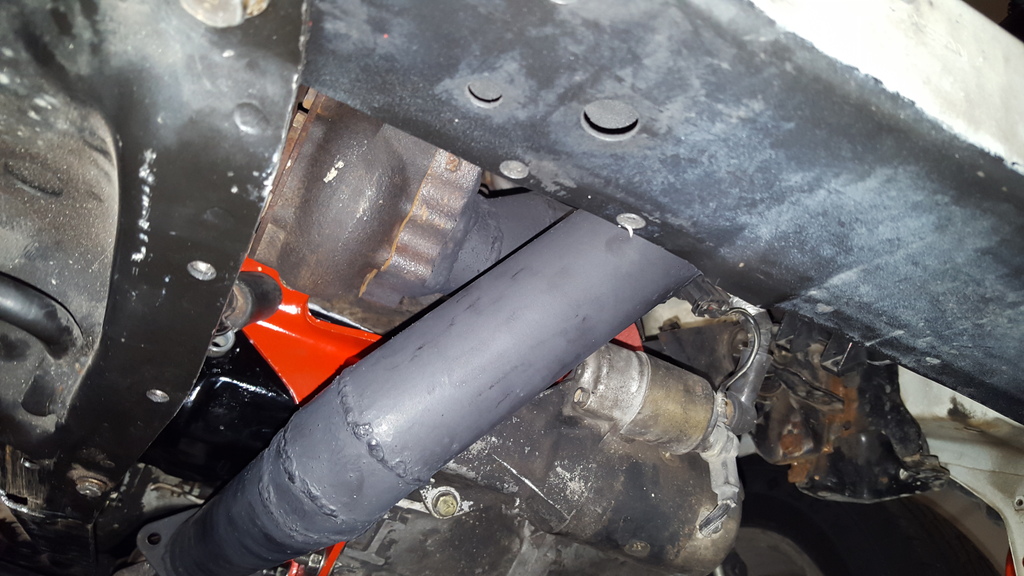
Also after a good bit of work the motor mount modification is done. Waiting for it to dry and I'll share some pics of it installed. It's built around a smaller volvo motor mount. Ithe looks wierd here but you'll see it fits well once in place.
More pics later today


Also after a good bit of work the motor mount modification is done. Waiting for it to dry and I'll share some pics of it installed. It's built around a smaller volvo motor mount. Ithe looks wierd here but you'll see it fits well once in place.

More pics later today
01-10-2016, 03:57 PM
#72
With you being a second gen you could very easily go to a top feed injector as well. Can use the stock z31 top feed rails or go aftermarket rails. Would probably need the z31 lower plenum as seal size might be different. This would open up a lot of different injector options as the sidefeeds are pita. Heres my rails I built running 1000cc. Your plenum straight bolt on as to z31 lower plenum. I run a z31 gutted plenum. I ran the stock z31 rails and dsm 450cc before going with the custom setup.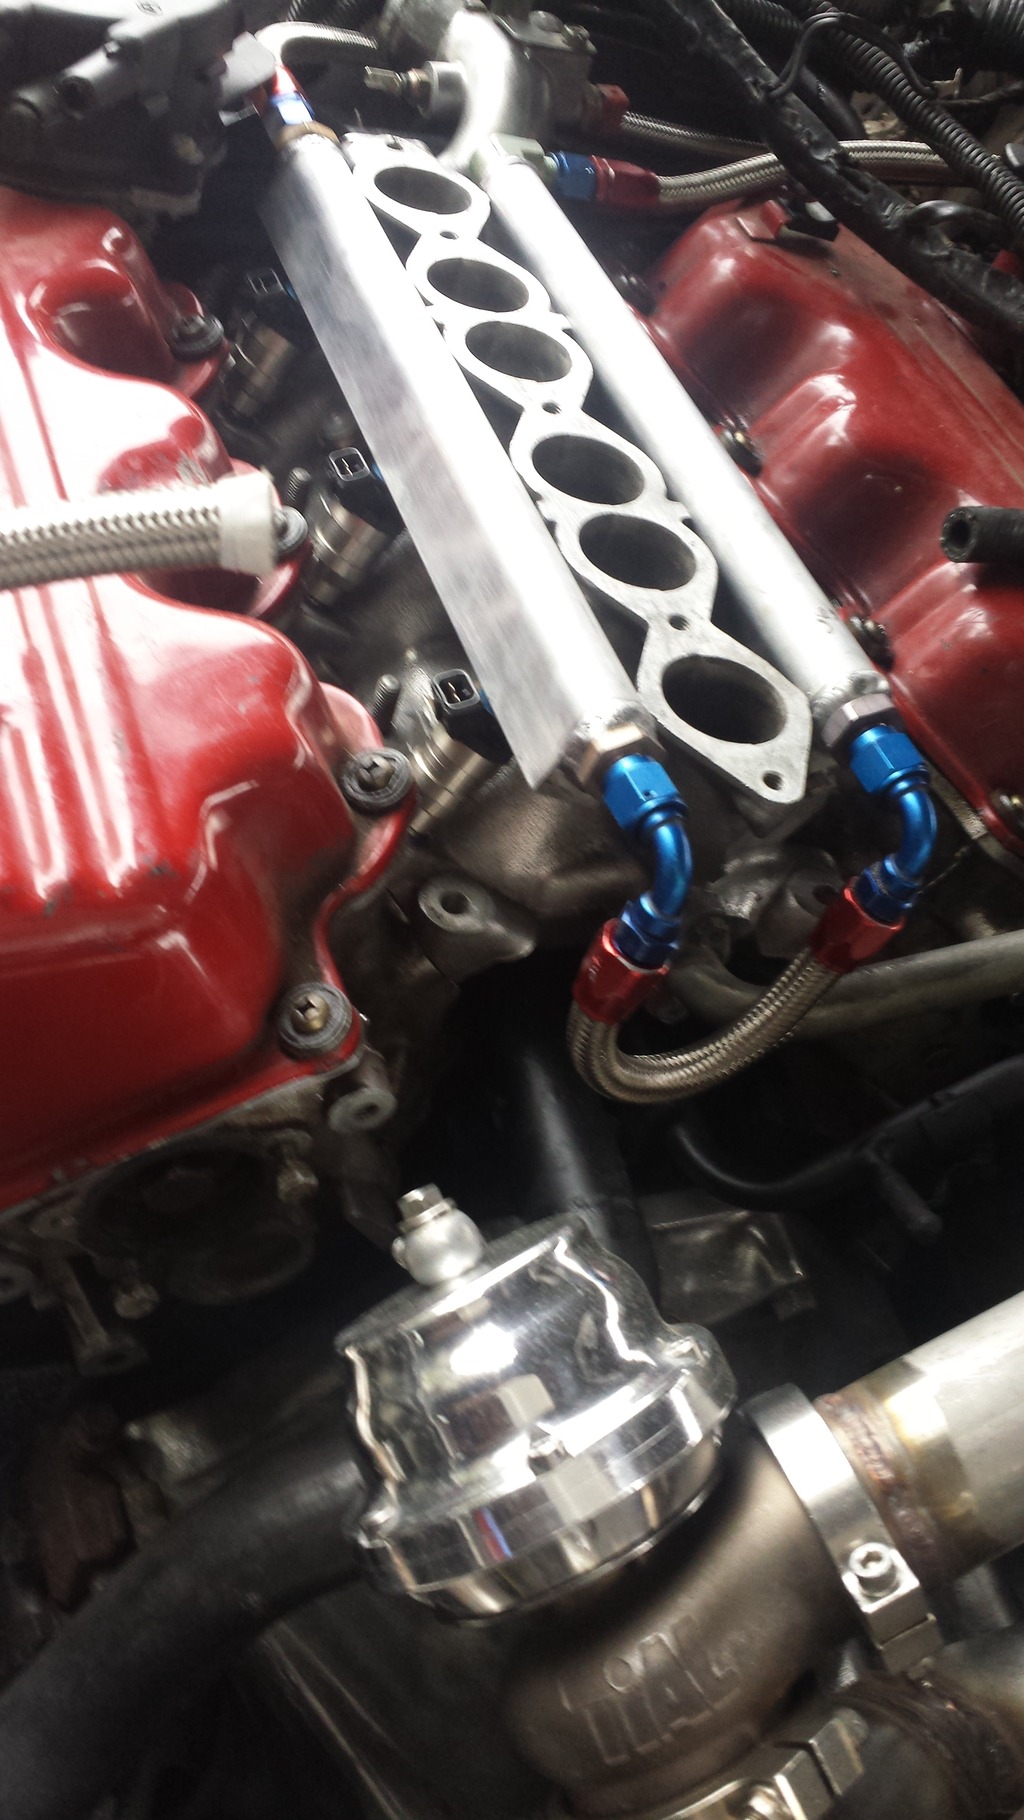
 01-10-2016, 04:46 PM
#73
Member
Thread Starter
Join Date: Mar 2015
Posts: 278
Thanks man. I'll keep that in mind. I'm going to run these 260s in the beginning and upgrade from there. I'd like the car to run first haha!
So I think I'm finsisted up for the night. Here's the last of the progress for the weekend.
Modified bracket end new mount in place. It looks wierd without the turbo on there.
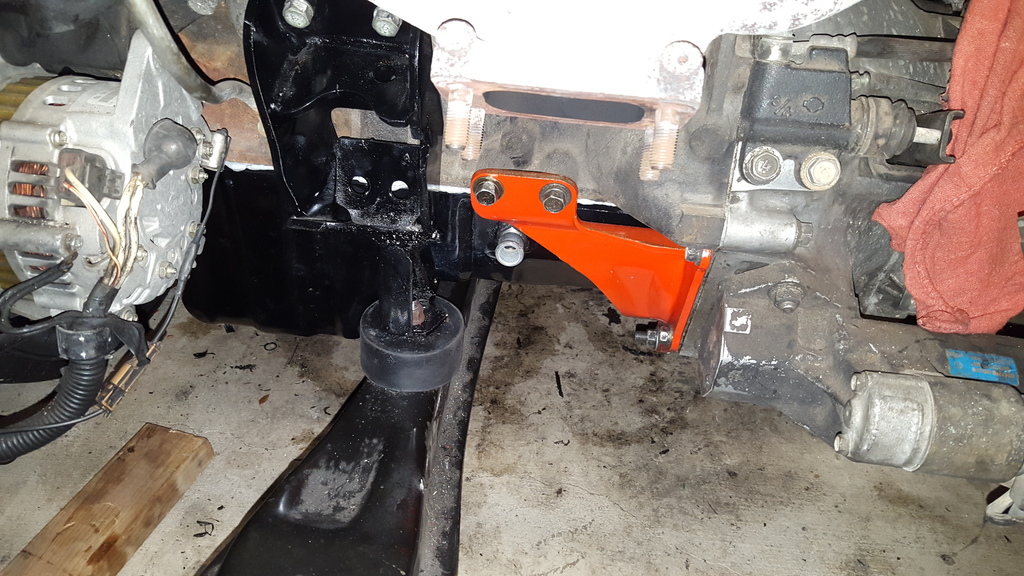
We notched a hole through the bottom of the crossmember to bolt down the other side of that mount.
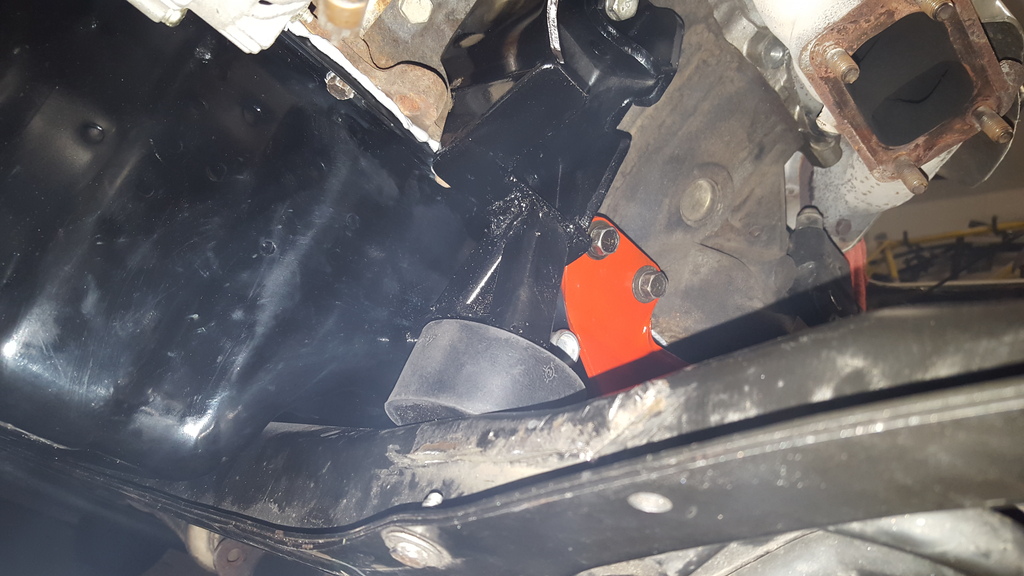
I know it looks odd, but space is a huge problem haha. We used some 3/16s square tubing so the material is plenty strong for the application.
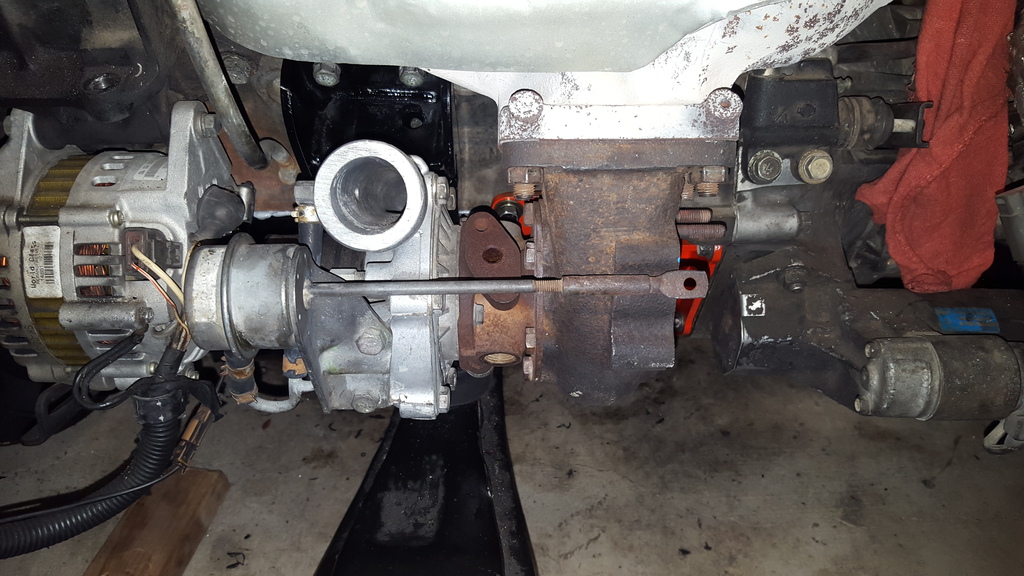
Dry fitting the turbo again to make sure all fits like it should.
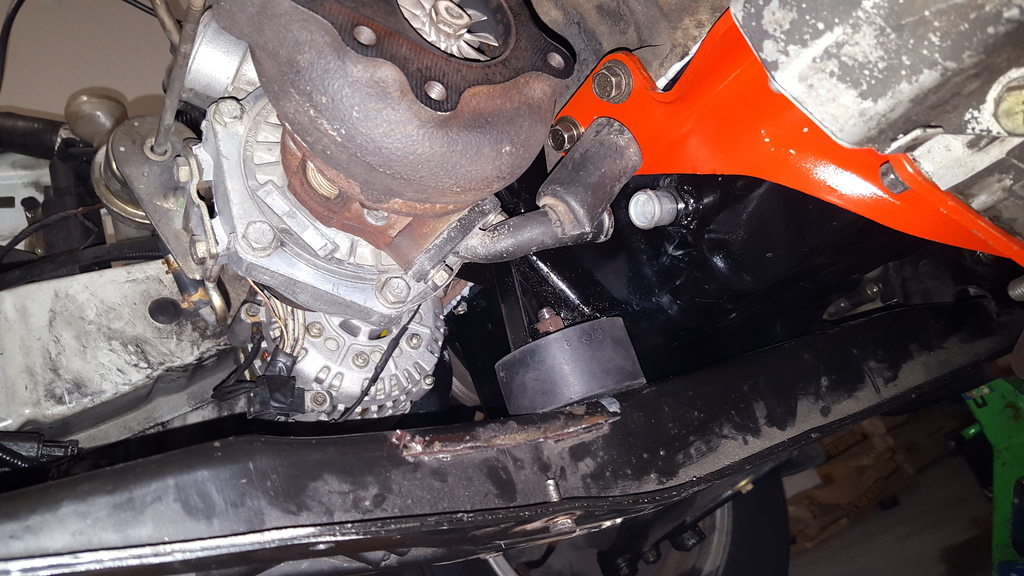
Nice and out of the way. No interference with the turbo or oil drain.
Passenger side view.
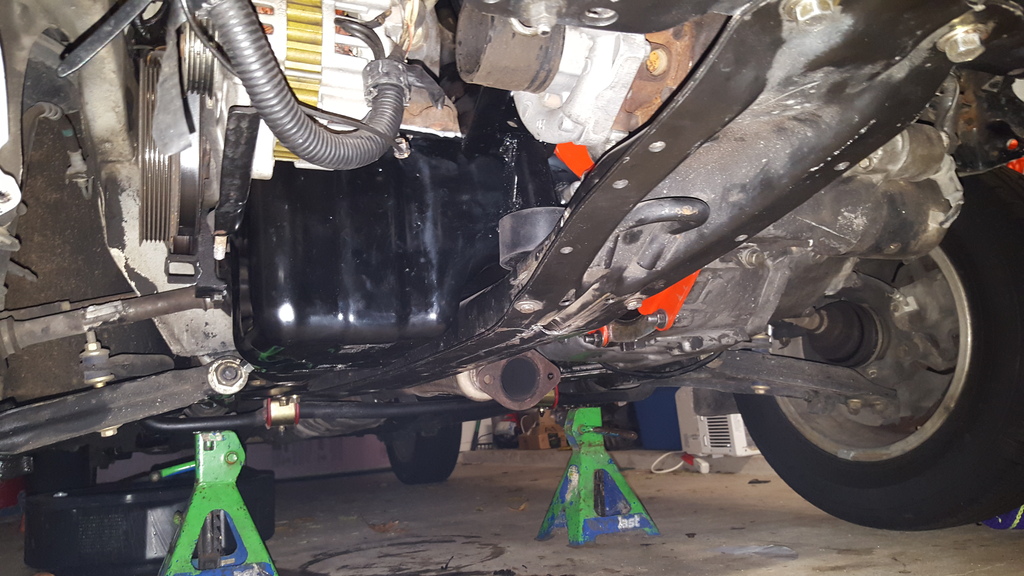
It's really nice to see the motor supported by the crossmember again. I've had a jack stand holding up the motor since November as best I can remember.
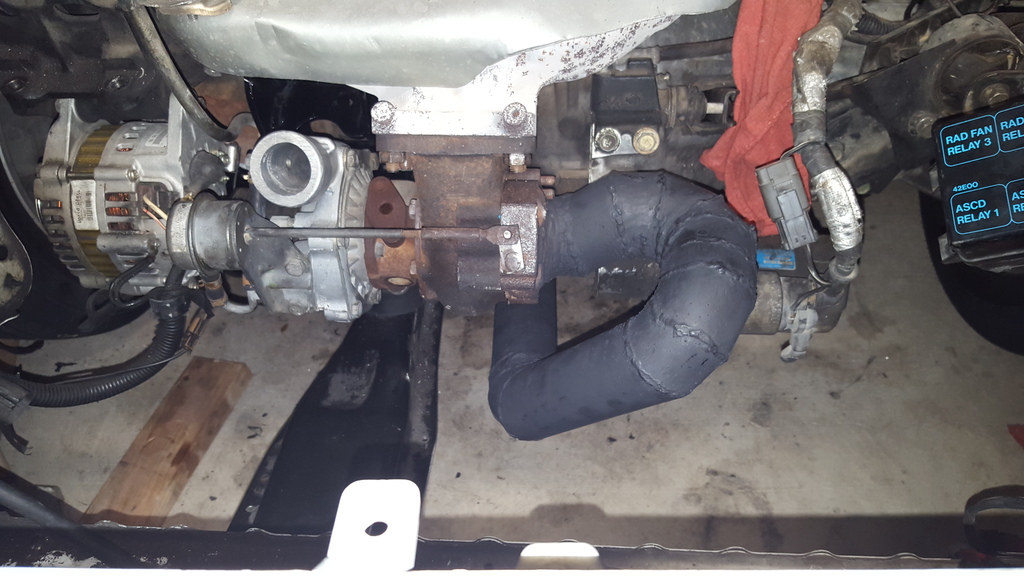
Just checking downpipe fitment again. So far so good. I can't wait for boost!!!!!!
So I think I'm finsisted up for the night. Here's the last of the progress for the weekend.

Modified bracket end new mount in place. It looks wierd without the turbo on there.

We notched a hole through the bottom of the crossmember to bolt down the other side of that mount.

I know it looks odd, but space is a huge problem haha. We used some 3/16s square tubing so the material is plenty strong for the application.

Dry fitting the turbo again to make sure all fits like it should.

Nice and out of the way. No interference with the turbo or oil drain.

Passenger side view.

It's really nice to see the motor supported by the crossmember again. I've had a jack stand holding up the motor since November as best I can remember.


Just checking downpipe fitment again. So far so good. I can't wait for boost!!!!!!
01-11-2016, 04:26 AM
#74
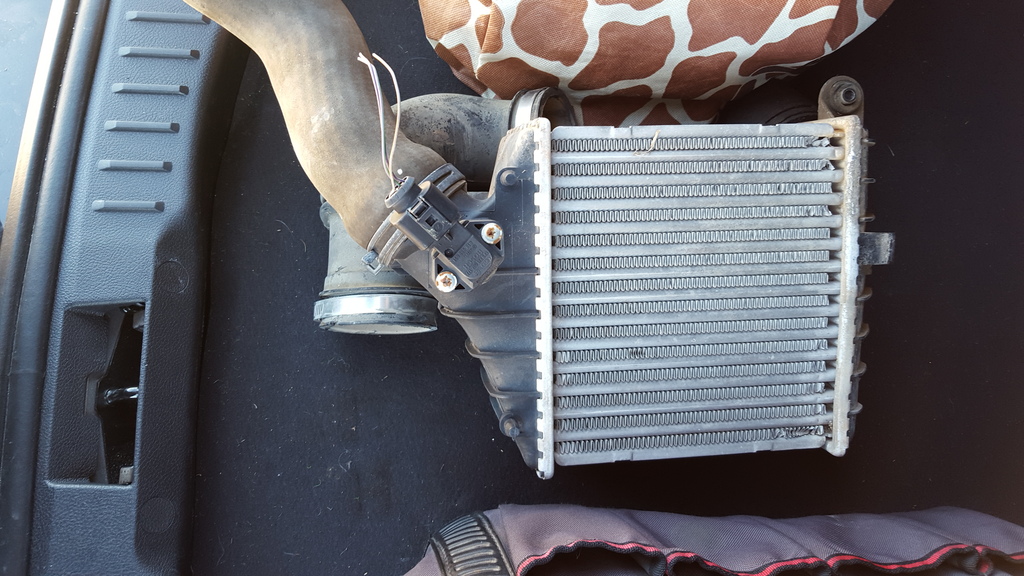
Member
Thread Starter
Join Date: Mar 2015
Posts: 278
I've begun a bit of an intercooler collection while hunting for something I can make work on the car. Right now I'm leabing towards that big Mercedes front mount in the picture. I'll have to trim the radiator support which is fine. I'm a little more worried about interference withe the head lamp assemblies. I could mount it further back to clear the headlamps, but that would pretty much guarantee I could never put a condenser back in, meaning I really would be ACless. Thoughts here guys?
 01-11-2016, 07:17 AM
#75
About your intercooler, is the concern simply that you absolutely do not want to cut your bumper cover etc?
You've already done a fair amount of fabrication anyway at this point. Why can't you notch out your bumper support (and bumper cover) some and put the intercooler in front of the radiator and condenser?
Here is mine with the bumper cover removed (I welded in some more steel plate to reinforce the support I notched out). It seems to me like almost any car could have an intercooler in this orientation
 01-11-2016, 05:24 PM
#76
Member
Thread Starter
Join Date: Mar 2015
Posts: 278
Take another look at the bumper on this car, the bumper cover is the exact same size as the bumper, there's nothing for the intercooler to be behind.
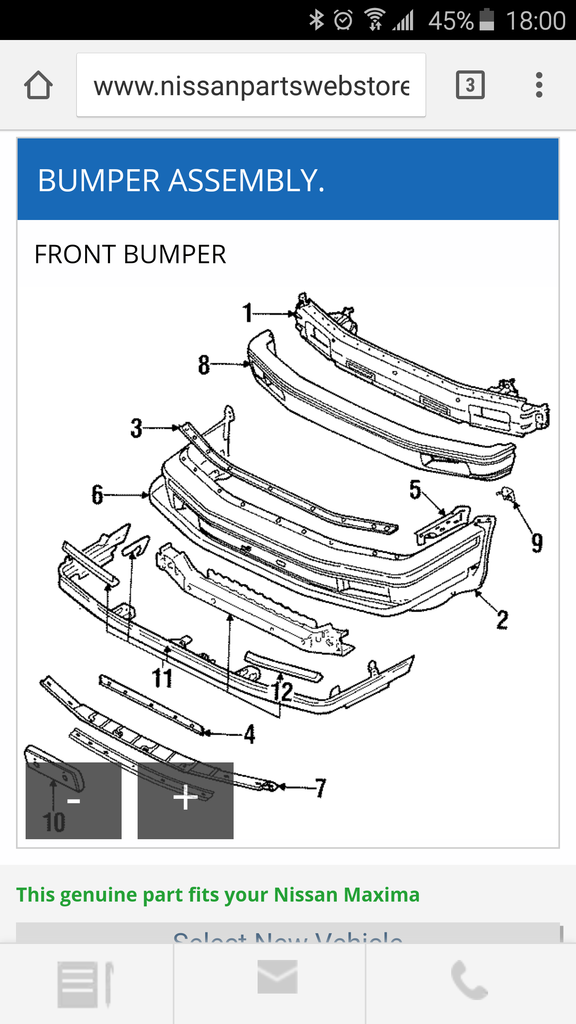
That's the exploded diagram.
And some pics I snapped in the garage, this is obviously with the radiator and condenser out of the car.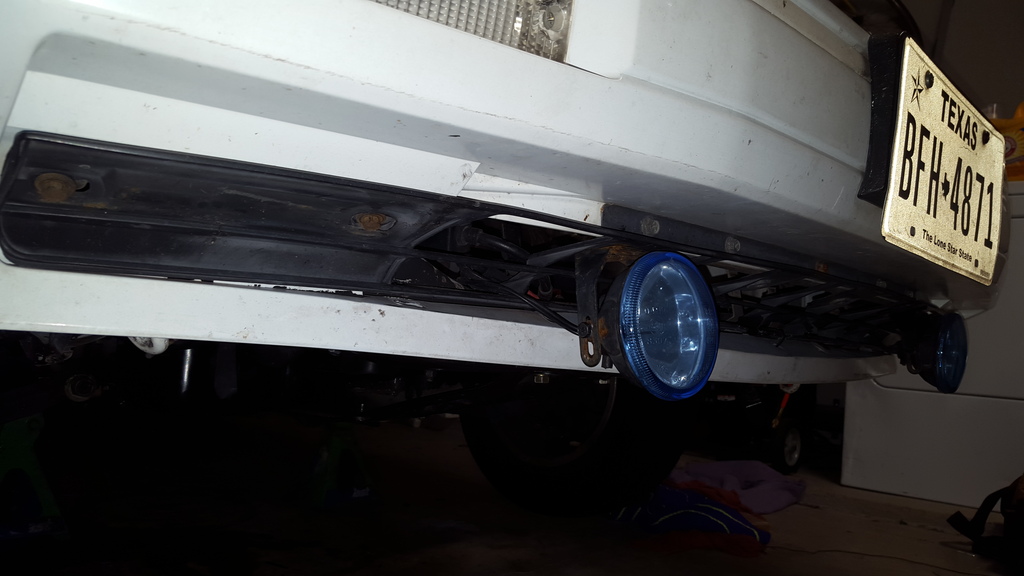
You'll see here the bottom of the cover pulls right back up to the body of the car. There is no cavity there.
See how the little black grill curves back in? That's only about 4 inches tall also (the opening)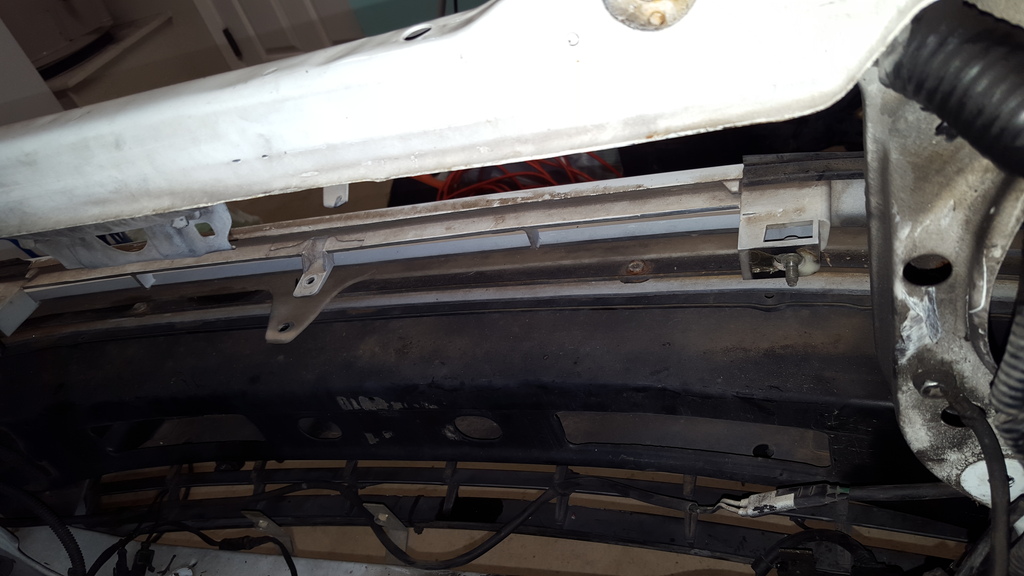
Same view from a littler bit higher.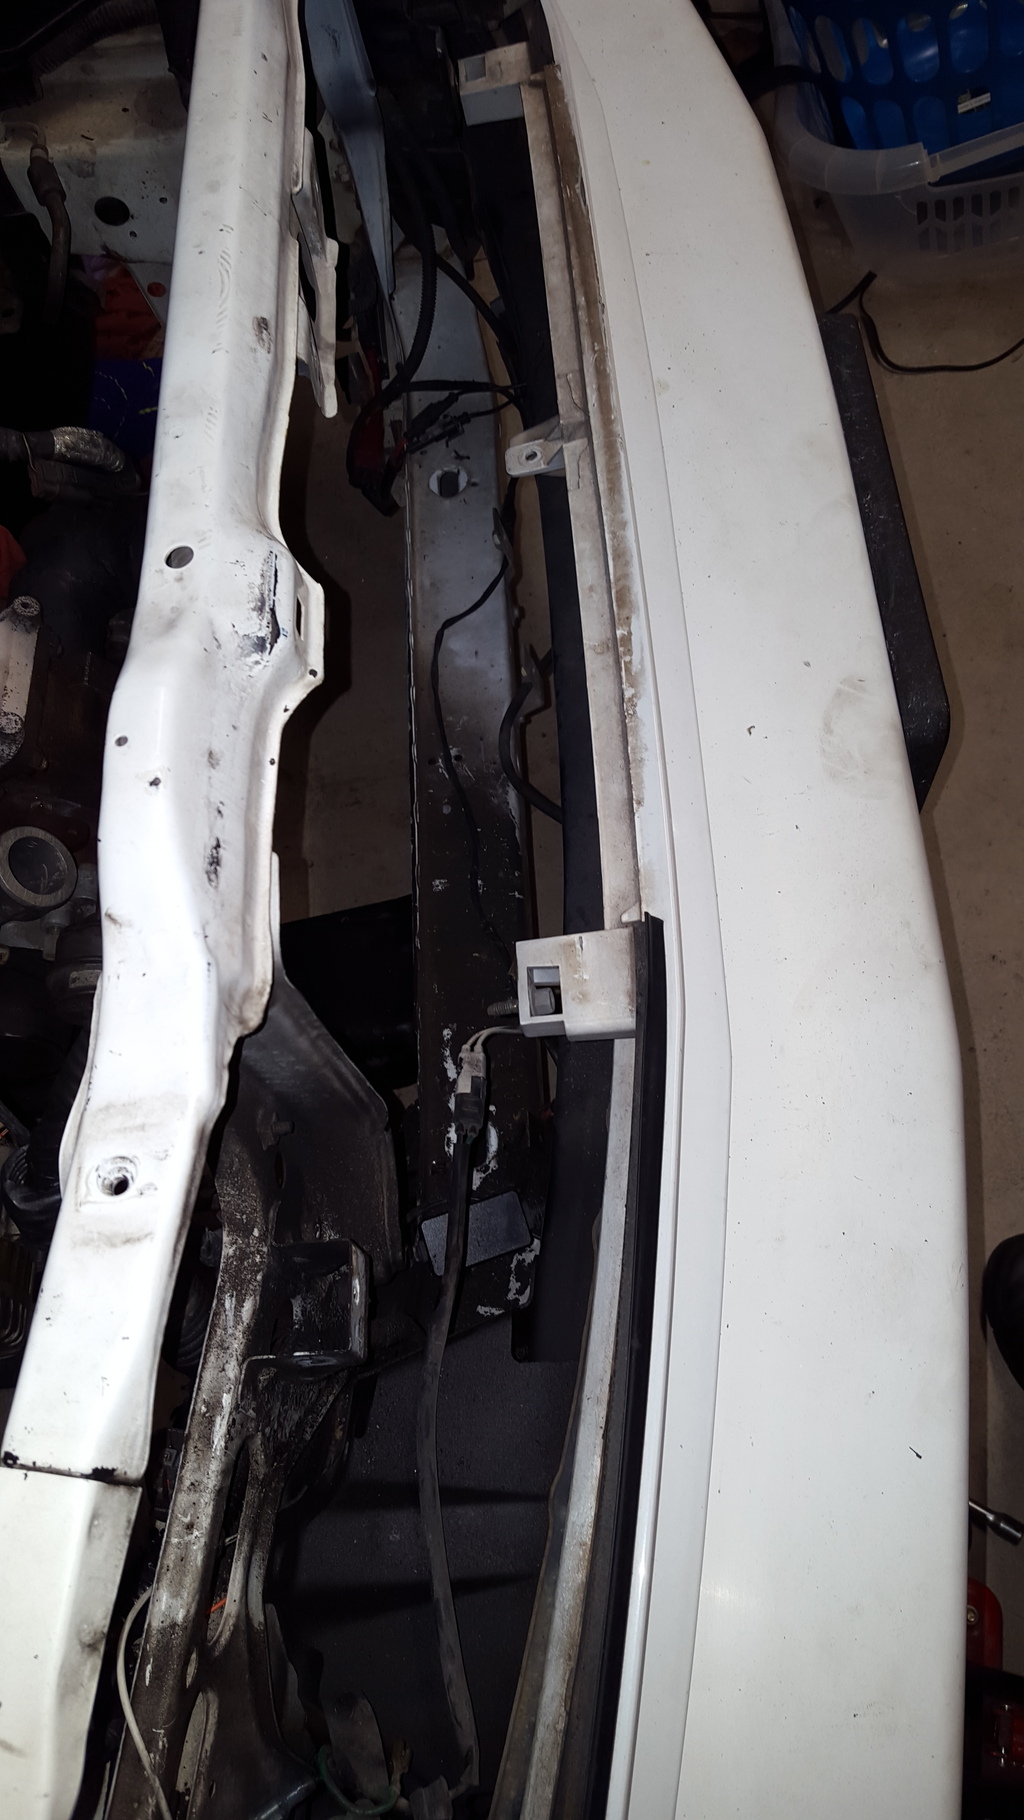
And one more view with the passenger side headlight out.
Does that illustrate the problem?

That's the exploded diagram.
And some pics I snapped in the garage, this is obviously with the radiator and condenser out of the car.

You'll see here the bottom of the cover pulls right back up to the body of the car. There is no cavity there.
See how the little black grill curves back in? That's only about 4 inches tall also (the opening)

Same view from a littler bit higher.

And one more view with the passenger side headlight out.
Does that illustrate the problem?
01-12-2016, 10:14 AM
#77
Actually it just further clarifies what I was tying to explain. Your diagram shows just as I suspected that the 2nd gen bumper/support/foam insert setup is identical to the 3rd gen (I don't mean aesthetics - I mean with the bumper beam, foam inner support bit, outer cover "system").
I'm not saying to try to put the intercooler BETWEEN the cover and the support.
I'm saying to notch out the support (#1) and then tuck the intercooler up into it. That is exactly what my picture above of my own car is showing.
I'm not saying to try to put the intercooler BETWEEN the cover and the support.
I'm saying to notch out the support (#1) and then tuck the intercooler up into it. That is exactly what my picture above of my own car is showing.
Last edited by James92SE; 01-12-2016 at 10:17 AM.
01-12-2016, 01:59 PM
#78
Junior Member
Join Date: Nov 2015
Location: Queens NY
Posts: 77
...even though my car is a vg30 200sx, its engine bay is similarly sized to your 88 Maxima...i went with the top/side mount IC from a SVO, it looks similar to the ones you pictured...it worked great as i mounted some pancake fans right on her to keep air movement constantly across its core ...i added a small 300zx hood scoop right over it ....i eventually added a diy meth injection. Mike
01-12-2016, 04:59 PM
#79
Actually it just further clarifies what I was tying to explain. Your diagram shows just as I suspected that the 2nd gen bumper/support/foam insert setup is identical to the 3rd gen (I don't mean aesthetics - I mean with the bumper beam, foam inner support bit, outer cover "system").
I'm not saying to try to put the intercooler BETWEEN the cover and the support.
I'm saying to notch out the support (#1) and then tuck the intercooler up into it. That is exactly what my picture above of my own car is showing.
I'm not saying to try to put the intercooler BETWEEN the cover and the support.
I'm saying to notch out the support (#1) and then tuck the intercooler up into it. That is exactly what my picture above of my own car is showing.