
I've been toying around with these puppies for like 2-3 months, but I'm actually going to get them done over the next 2 weeks.
Using R34 headlights this time. Here is my progress so far.
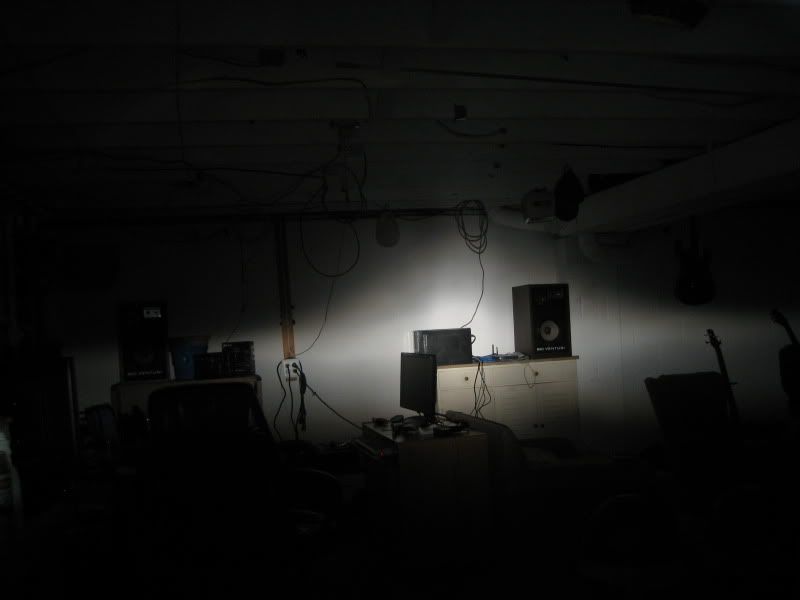
First, some output shots at 10 feet. They don't really show the width that the projectors add as well as a beam shot at 25 feet would, but I have a cramped basement. These are all with the camera in manual mode, at low exposure, so the beam isn't just a white blob.
Stock R34 Output
Low Beams

High Beams

My Headlights
Low Beams

High Beams (the lows will stay on when the highs do)
Now, the important thing to notice is the width. That's what the HIDs and projectors do. They light up much wider than the camera can capture, while the stock headlights are concentrated in the middle, so they're not good on curvy roads.
Using R34 headlights this time. Here is my progress so far.
First, some output shots at 10 feet. They don't really show the width that the projectors add as well as a beam shot at 25 feet would, but I have a cramped basement. These are all with the camera in manual mode, at low exposure, so the beam isn't just a white blob.
Stock R34 Output
Low Beams
High Beams
My Headlights
Low Beams
High Beams (the lows will stay on when the highs do)
Now, the important thing to notice is the width. That's what the HIDs and projectors do. They light up much wider than the camera can capture, while the stock headlights are concentrated in the middle, so they're not good on curvy roads.

The projectors are M35/M45 single-xenon low beams, and MDX halogen high beams.
Bulbs are Philips 35w 4300k D2S 85122+ and Osram 65w H9
Ballasts are Matsu****a Gen 3
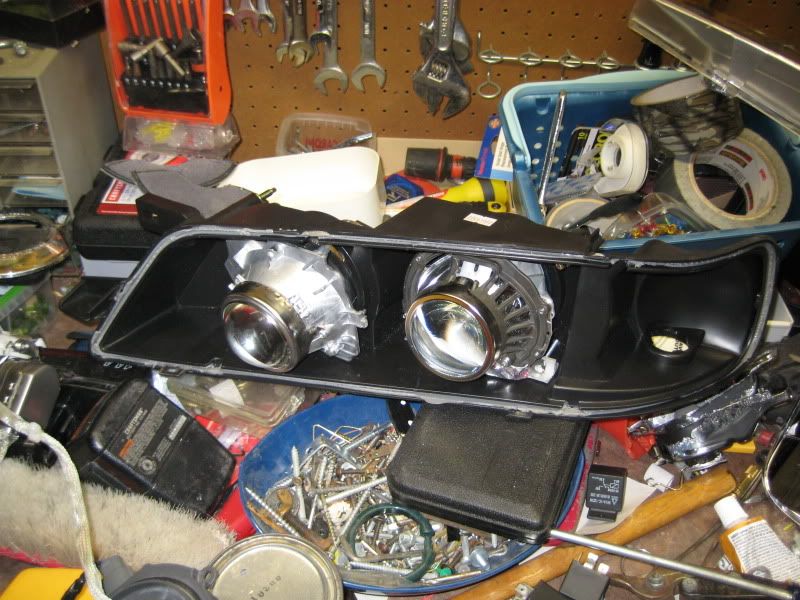
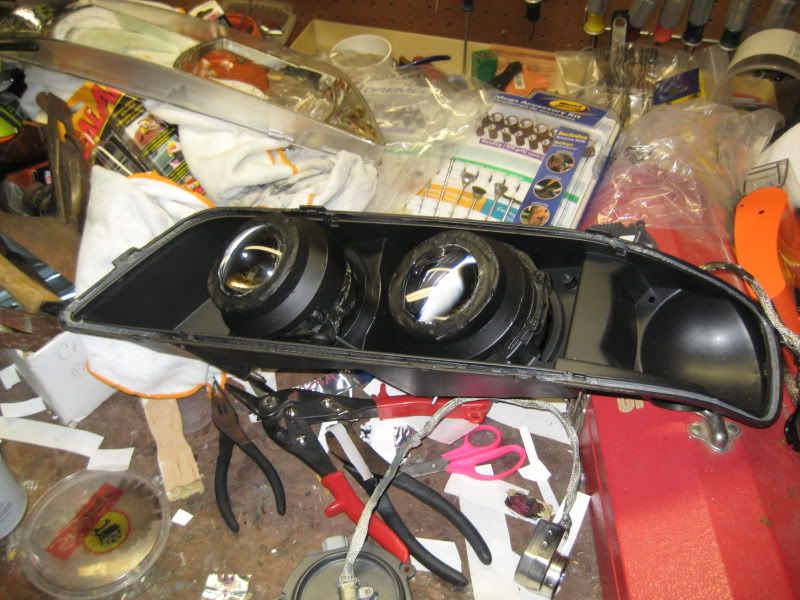
Some more pics, including a mock-up.
I'm working on getting some clear lenses. I've got a pair of 2.5" ones that are a hair too wide to fit, so tomorrow I'm bringing the Dremel grinding wheel and getting them to fit. I'm hopeful - They give a very colorful cutoff when held in front, but it's a little distorted. Hopefully, the trimming will let me get them to the perfect spot.
Not sure where I'm going with shrouds (as I hear a collective groan from anyone who remembers my first, shroudless retrofit) - I have a pair of scratched up E60 shrouds. That's half as many as I need. I'm going to go look for the famous Ace chrome rings, because I'd like to keep it consistent. If that doesn't work out, I might bite the bullet and drop $80 on 4 E46 reps.


Bulbs are Philips 35w 4300k D2S 85122+ and Osram 65w H9
Ballasts are Matsu****a Gen 3
Some more pics, including a mock-up.
I'm working on getting some clear lenses. I've got a pair of 2.5" ones that are a hair too wide to fit, so tomorrow I'm bringing the Dremel grinding wheel and getting them to fit. I'm hopeful - They give a very colorful cutoff when held in front, but it's a little distorted. Hopefully, the trimming will let me get them to the perfect spot.
Not sure where I'm going with shrouds (as I hear a collective groan from anyone who remembers my first, shroudless retrofit) - I have a pair of scratched up E60 shrouds. That's half as many as I need. I'm going to go look for the famous Ace chrome rings, because I'd like to keep it consistent. If that doesn't work out, I might bite the bullet and drop $80 on 4 E46 reps.

Ehhh it won't be the last you see of them.
I'm trying to ghettotastically refurbish the chrome on a foglight I bought - so far, using my HVAC tape has not been a huge success.
I wouldn't mind them not being that bright, since my headlights are about 4x as much output as stock, but I don't want uneven lighting, and I don't want to destroy a perfectly good foglight for no reason.
Then I see some pics of Andrew's blazer retrofit, and I'm like Awwww man that would be hot. But I really want yellow fogs.

Hmmm... just realized that I could JBweld the capsules into my MDX projectors, and they'll fit....
looks real good. Can't wait to see the finished pictures.
I am diggin those e60 shrouds. too bad they are all scratched up.
I am diggin those e60 shrouds. too bad they are all scratched up.
Yeah... they're not that bad (most of the scratches in the pic are exaggerated by the camera flash)
From what I've read, though, it's hard to get a decent finish by using fake chrome spray paint on the BMW shrouds, and re-chroming is expensive, so I don't know what to do
From what I've read, though, it's hard to get a decent finish by using fake chrome spray paint on the BMW shrouds, and re-chroming is expensive, so I don't know what to do

Yeaaa Boyyy
I grinded the 2.5" clear lens from ebay projectors down slightly to fit the M35s.

It looks like it could be a bit better if I could get it even closer to the bowl, but right now I'm running no spacers, and there isn't an easy way to make it closer. I'll try spacing the shield with 1 washer next.
I grinded the 2.5" clear lens from ebay projectors down slightly to fit the M35s.
It looks like it could be a bit better if I could get it even closer to the bowl, but right now I'm running no spacers, and there isn't an easy way to make it closer. I'll try spacing the shield with 1 washer next.

why not paint the bezels a greyish colour like used on the rx8?
just an idea. That way you will save on having to purchase 4 new bezels.
sorta like this
it's all I could find in a hurry.
just an idea. That way you will save on having to purchase 4 new bezels.
sorta like this
it's all I could find in a hurry.


Expensive... so far it's been
$120 for M35 projectors and bulbs
$10 for E60 shrouds
$30 in misc hardware
$120 for R34s
$100 for pair Matsu****a ballasts w/ pigtails
$65 for pair of MDX projectors
$15 for clear lenses
$20 for H9 bulbs + pigtails
$20 Lexus yellow capsules
$20 in relays and harness stuff
$30 foglights
So that's $550 in PARTS (I never added it up before, **** me this is expensive). Not counting the hours of time I've invested.
I did find a nice PVC pipe reducer that I can paint silver and use as the shrouds. At $3 each, it's pretty cheap.
8 months ago, I found a pair of MDX projectors for like $15, without cutoff shields. I was going to mount them next to my foglights as late-night driving lights, with H9 bulbs. Now it's spiraled out of control...
I am going to sell my old MDX single-xenon retrofit. I'll probably throw the E60 shrouds on them and try to sell them at Maxus if no one is interested online. They'll be around $250 I think.
$120 for M35 projectors and bulbs
$10 for E60 shrouds
$30 in misc hardware
$120 for R34s
$100 for pair Matsu****a ballasts w/ pigtails
$65 for pair of MDX projectors
$15 for clear lenses
$20 for H9 bulbs + pigtails
$20 Lexus yellow capsules
$20 in relays and harness stuff
$30 foglights
So that's $550 in PARTS
(I never added it up before, **** me this is expensive). Not counting the hours of time I've invested. I did find a nice PVC pipe reducer that I can paint silver and use as the shrouds. At $3 each, it's pretty cheap.
8 months ago, I found a pair of MDX projectors for like $15, without cutoff shields. I was going to mount them next to my foglights as late-night driving lights, with H9 bulbs. Now it's spiraled out of control...
I am going to sell my old MDX single-xenon retrofit. I'll probably throw the E60 shrouds on them and try to sell them at Maxus if no one is interested online. They'll be around $250 I think.
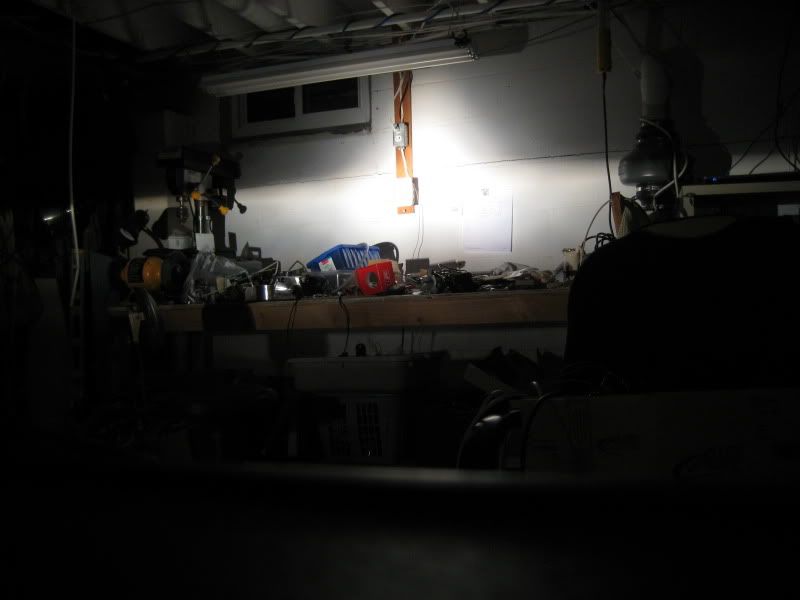
Here's some pictures of the RETROFIT LAB
I have a lot of tools, and I like to use them. Notice the bench grinder in the corner, with the vacuum below it to catch all the glass dust - that's how I got the clear lenses to fit.
I also use a PC power supply to do a lot of retro stuff.
Tonight I might solder up a Molex to Matsu****a ballast cable, to save myself from having to use alligator clips on my pigtails every time I want to light things up.
I finished up the harness today.
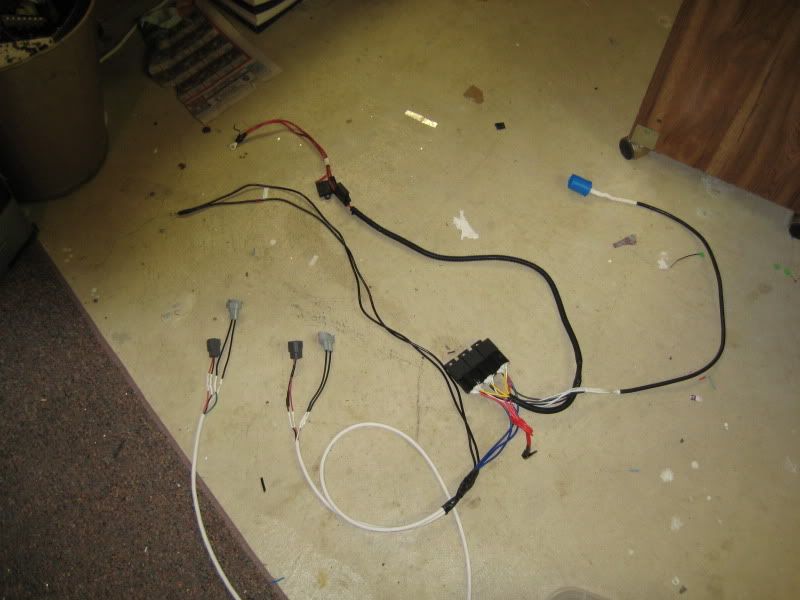
There was a lot of wiring involved, but it works. The bulb/ballast connectors are waterproof, and I sealed the 9004 and relay connectors with acrylic latex.
The low beams stay on with the high beams - I tested it with some turn signal bulbs, because I don't have a power supply big enough to run the setup (I can do 1 halogen or 2 HID at a time, any more and the power supply can't handle it)
There's separate low beam and high beam fuses.
The dark grey connectors are for the ballasts, the light grey connectors are for the high beams.
The dark grey connectors are for the ballasts, the light grey connectors are for the high beams.
Right now it's all relays, no diodes or anything else. I have a capacitor sitting here. All depends on how fast the 4th gen switches, whether or not the low beams will flicker. If they flicker, I'll add the capacitor.
I really don't intend to just 'flash' my high beams. Good H9 bulbs aren't cheap, and I'm going to try to re-wire my fogs so that I can turn them on with the ignition. H3 bulbs are a dime a dozen - I have like eight of them just chillen here.
I really don't intend to just 'flash' my high beams. Good H9 bulbs aren't cheap, and I'm going to try to re-wire my fogs so that I can turn them on with the ignition. H3 bulbs are a dime a dozen - I have like eight of them just chillen here.

You'll need a diode in there to keep the low beams on while the hi's go on.  The diode directs the power one way and our cars are a postive switched set up (stock). That just means that when the hi-beams are kicked on, the power just goes to that fillament (9004 - dual fillament burnning bulb), so to correct it, the diode allows the low beams to stay on, while also supplying power to the hi-beams.
Nice work on that set up, I bet it was a chore getting all that into the housings! lol
The diode directs the power one way and our cars are a postive switched set up (stock). That just means that when the hi-beams are kicked on, the power just goes to that fillament (9004 - dual fillament burnning bulb), so to correct it, the diode allows the low beams to stay on, while also supplying power to the hi-beams.Nice work on that set up, I bet it was a chore getting all that into the housings! lol
Nope, mine work without a diode, because I used three relays. 
When the low beams are selected, the ballasts receive power. When the high beams are selected, both the ballasts and the H9 highs receive power.
I had 3 relays, but I didn't have any nice diodes, so I said "screw it, I'll do it without them"
When the low beams are selected, the ballasts receive power. When the high beams are selected, both the ballasts and the H9 highs receive power.
I had 3 relays, but I didn't have any nice diodes, so I said "screw it, I'll do it without them"
I'm probably going to end up tearing up the harness again.
I've been thinking a lot about the independent fog light rewire.
Does anyone have wiring diagrams for how the front lighting is wired? I wonder if there's a line you can tap somewhere or a relay you can bypass that will allow operation of lows with highs.
Moar pic lovin'
These are shot at the lowest exposure setting, so in reality they are bright *****. I have a pair of big flourescent lights, and these puppies are an order of magnitude brighter. 3200 lm from the philips 35w 85122+ and 2100 lm from the Osram 65w H9
Now, keep in mind, this is in a dark basement, at night, and the only other source of lighting is the red ropelight.
I really need to adjust the aiming - the high beam is way too low, or the low beam is way too high. Won't know for sure until they're on the car, lol. The goal of the high beams is to have them pretty much horizontal, with the low beams having a slight drop over distance. My highs will be more like wide driving lights - very little foreground.
front view
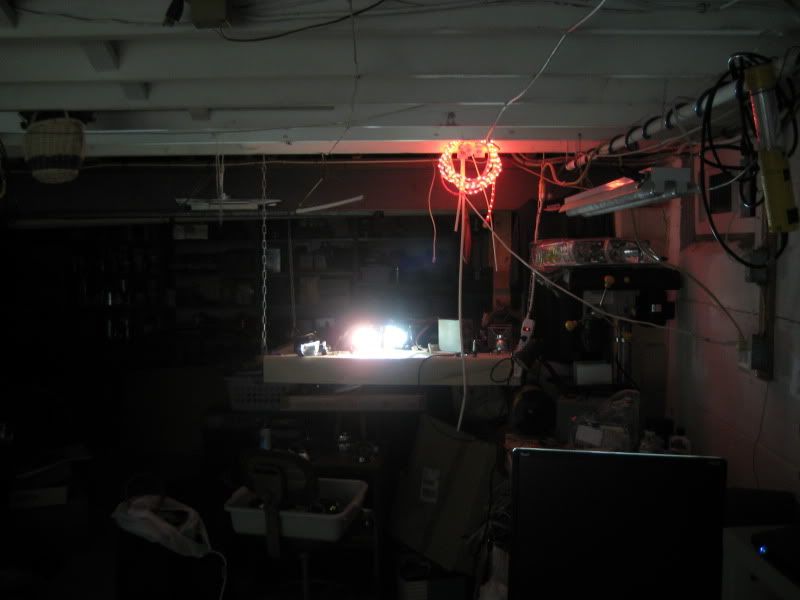
lows only
highs only

both

I've been thinking a lot about the independent fog light rewire.
Does anyone have wiring diagrams for how the front lighting is wired? I wonder if there's a line you can tap somewhere or a relay you can bypass that will allow operation of lows with highs.
Moar pic lovin'
These are shot at the lowest exposure setting, so in reality they are bright *****. I have a pair of big flourescent lights, and these puppies are an order of magnitude brighter. 3200 lm from the philips 35w 85122+ and 2100 lm from the Osram 65w H9
Now, keep in mind, this is in a dark basement, at night, and the only other source of lighting is the red ropelight.
I really need to adjust the aiming - the high beam is way too low, or the low beam is way too high. Won't know for sure until they're on the car, lol. The goal of the high beams is to have them pretty much horizontal, with the low beams having a slight drop over distance. My highs will be more like wide driving lights - very little foreground.
front view
lows only
highs only
both
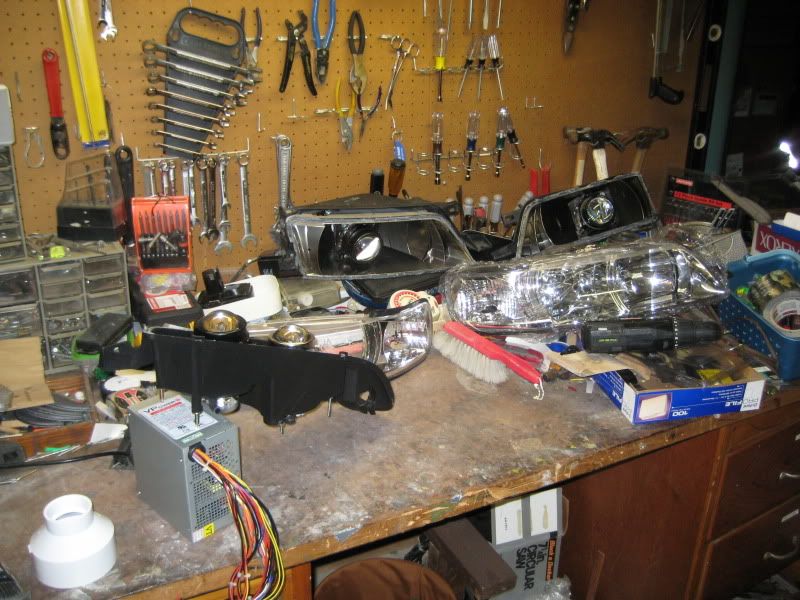
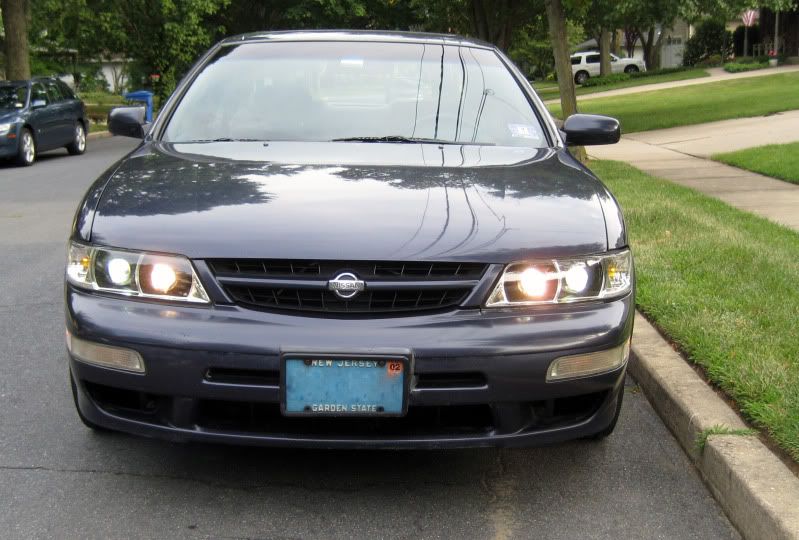
It's been awhile since I updated
I finished the retro in time for Maxus, but I didn't fully seal it up, or do a great job finishing it - it was very rushed. I did win 2nd place for a lightly modded 4th gen, so it wasn't that ugly.
here is it as it currently stands. Tonight, it's going on the car, and getting aimed. Tomorrow, it's getting sealed.


Senior Member
Quote:
Does anyone have wiring diagrams for how the front lighting is wired? I wonder if there's a line you can tap somewhere or a relay you can bypass that will allow operation of lows with highs.
Originally Posted by nalc
I've been thinking a lot about the independent fog light rewire. Does anyone have wiring diagrams for how the front lighting is wired? I wonder if there's a line you can tap somewhere or a relay you can bypass that will allow operation of lows with highs.
here ya go, one for a completely independent rewire and one for the fogs to come on with the parking lights
http://www.vqpower.com/v2/articles.php?article_id=81
http://www.vqpower.com/v2/articles.php?article_id=31
Yeah, I guess I'll just do that. I was hoping to find the wiring diagram at the actual headlight switch level, but from the FSM it looks like it's all in the piece around the steering column, and I don't want to pull my wheel off.
I was just thinking how cool it would be to modify my car so I don't need relays or harnesses or anything, by making the lows stay on with the highs, then replacing the factory headlight harnesses with heavy-duty wiring. But it seems like a mega PITA.
I was just thinking how cool it would be to modify my car so I don't need relays or harnesses or anything, by making the lows stay on with the highs, then replacing the factory headlight harnesses with heavy-duty wiring. But it seems like a mega PITA.
Quote:
I was just thinking how cool it would be to modify my car so I don't need relays or harnesses or anything, by making the lows stay on with the highs, then replacing the factory headlight harnesses with heavy-duty wiring. But it seems like a mega PITA.
What do you mean pull the wheel off? To remove what?Originally Posted by nalc
Yeah, I guess I'll just do that. I was hoping to find the wiring diagram at the actual headlight switch level, but from the FSM it looks like it's all in the piece around the steering column, and I don't want to pull my wheel off. I was just thinking how cool it would be to modify my car so I don't need relays or harnesses or anything, by making the lows stay on with the highs, then replacing the factory headlight harnesses with heavy-duty wiring. But it seems like a mega PITA.
The piece with the turn signal stalk and the wiper stalk. I was going to try to see if I could do the independent fog rewire and the "low beams stay on with high beams" rewire in there.
EL section, page 1245 in the '97 FSM
EL section, page 1245 in the '97 FSM
Quote:
The stalks come out independently, and the wiring harness just runs along the steering column. You could probably just take the headlight stalk apart and do it internally, or just throw a few diodes into the wiring harness.Originally Posted by nalc
The piece with the turn signal stalk and the wiper stalk. I was going to try to see if I could do the independent fog rewire and the "low beams stay on with high beams" rewire in there.
Ok, don't know why I didn't realize it. I'll try to give it a shot this afternoon.

Pictures of the lenses on. Still need to button up the back. Bought a 2 ounce tube of Seal-All. Will probably use the whole thing.
Not sure whether to add silver rings to the projectors, or paint some/all of the chrome trim, or what.
I was thinking of painting the chrome part around the projectors black, and adding silver or grey rings around the projectors, similar to my old retro

Not sure whether to add silver rings to the projectors, or paint some/all of the chrome trim, or what.
I was thinking of painting the chrome part around the projectors black, and adding silver or grey rings around the projectors, similar to my old retro