
Either I am completely insane, or completely genius...


Senior Member
Joined: Nov 2000
Posts: 3,879
Handling will never be like a miata or mini cooper... No argument there. Not looking to auto x the car.
And of course the car doesn't NEED A TURBO but if all people did was what the car needed... There would be endless threads on oil changes, ac work, wheel berring stuff and when someone wants to kill the game they would do a timing chain job... Lol
And of course the car doesn't NEED A TURBO but if all people did was what the car needed... There would be endless threads on oil changes, ac work, wheel berring stuff and when someone wants to kill the game they would do a timing chain job... Lol
But imagine if you spent like $14k on a 2007 BMW 335i, can you imagine what you could do, seeing as you're able to do a lot of the work and have access to the shop etc.?

That's why I'm either completely insane... Or genius. I feel you, I do. If i wanted an uber street car a 96 max isn't a great choice. I'd go with an Is300 and 2jz swap it and play the whole 4 door supra game. But... It is a fun experiment to see what kinda result i can get for honestly not much money.... That's whats crazy about this build/platform. Everything is very reasonable in price
Alright time for an update.
At the moment I have the following in the works:
(Going front to back of car)
Wielded steel intercooler piping. (have pipes gonna get them bent to be better than the kit I currently have)
clear corners (have need to install)
Turbo y pipe done more efficiently. (meaning new mandrel bent 2.5 inch tubing wielded)
Engine bay being painted black
wideband/turbo timer install (have need to install... need to put engine back in to install... engine bay painting today and tomorrow I hope)
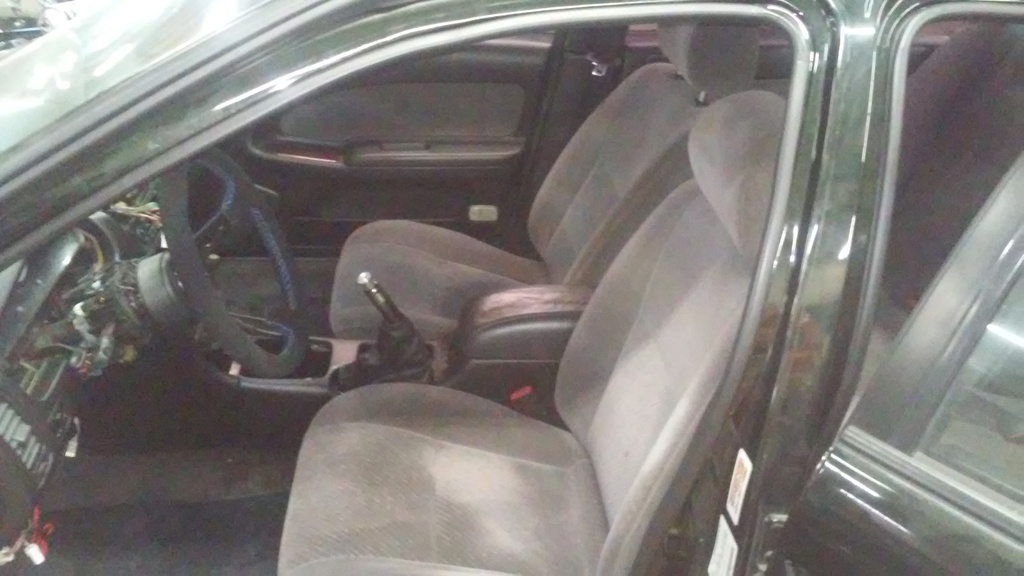
What I have been doing is completely gutting my green car, and swapping the interior from my tan car... like this
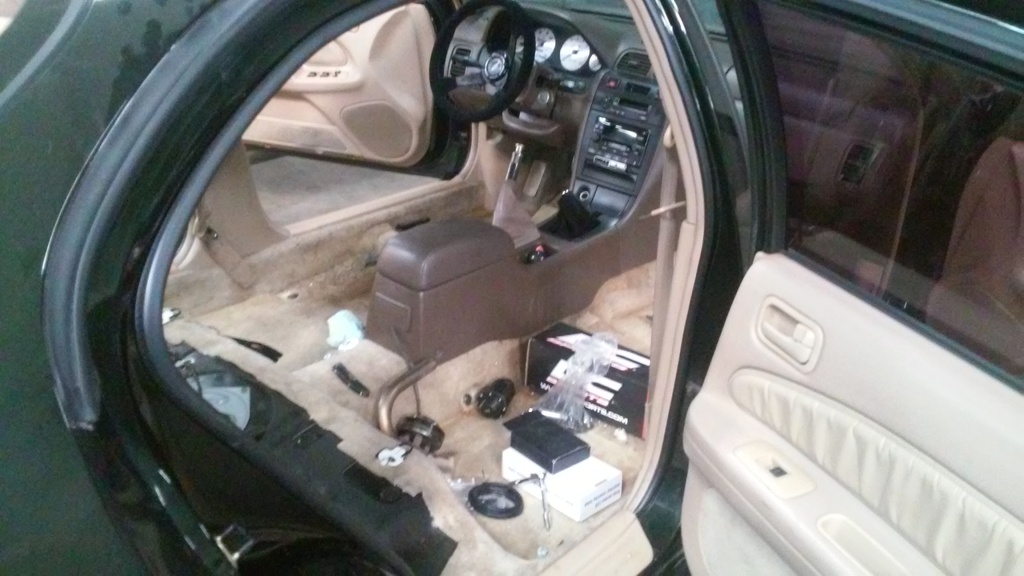
So i started with the seats, which are so painless that it actually gave me hope that the interior swap would be easy... nissan you bastards... gave me just enough hope and then...
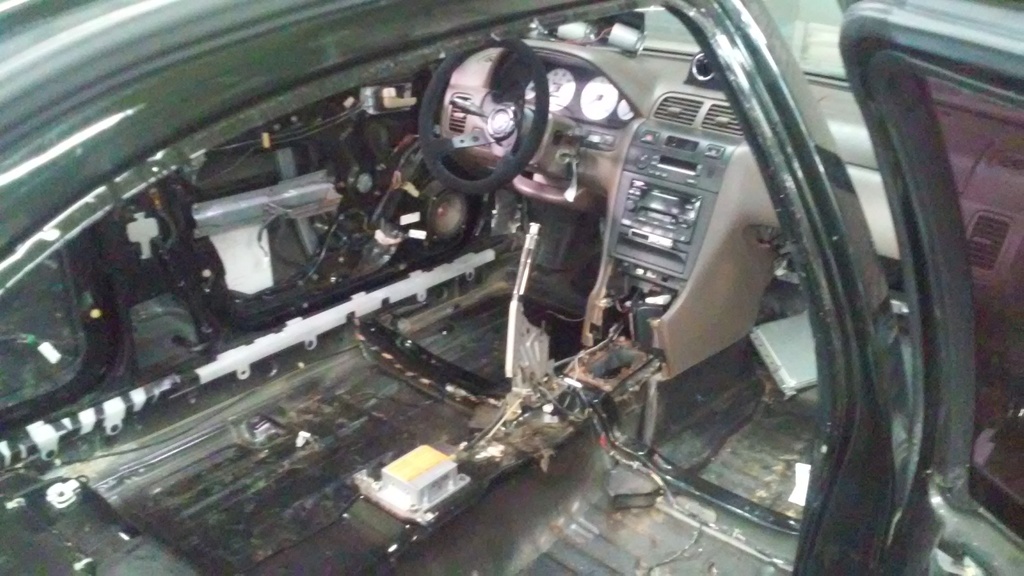
it takes me 3 hours to get here. Oh and by the way... thanks for matching EVERY thing on the interior... interior door handles... sunroof controls... weatherstripping... couldn't have just made it all black could you... NooooOOOooOOOOo had to go make it fancy. This site's language filter is really cramping my style...
SO this really isn't all that hard in hindsight. There is a stupid little bracket holding the carpet in up under the dash, and getting to it involves sniffing carpet that is 20 years old and has only ever EEEVVVVER entertained feet... think two hobo's ******* in a box full of urine. (deadpool reference) Then there are the door panels. YOU MUST HAVE DOOR PANEL REMOVAL TOOL SET. If not you will break the **** out of every single door panel... ask me how I know... please...
The headliner comes out with the removal of the seatbelts, not too difficult there, my car has the bose tweeters in the front window pillars, so be careful when pulling the trim becAuse it is 20 years old and less stable in the area where the tweeter cover is... again... ask me how I know
Then... oh yes... then there is the dash...
SAY. MY. NAME.
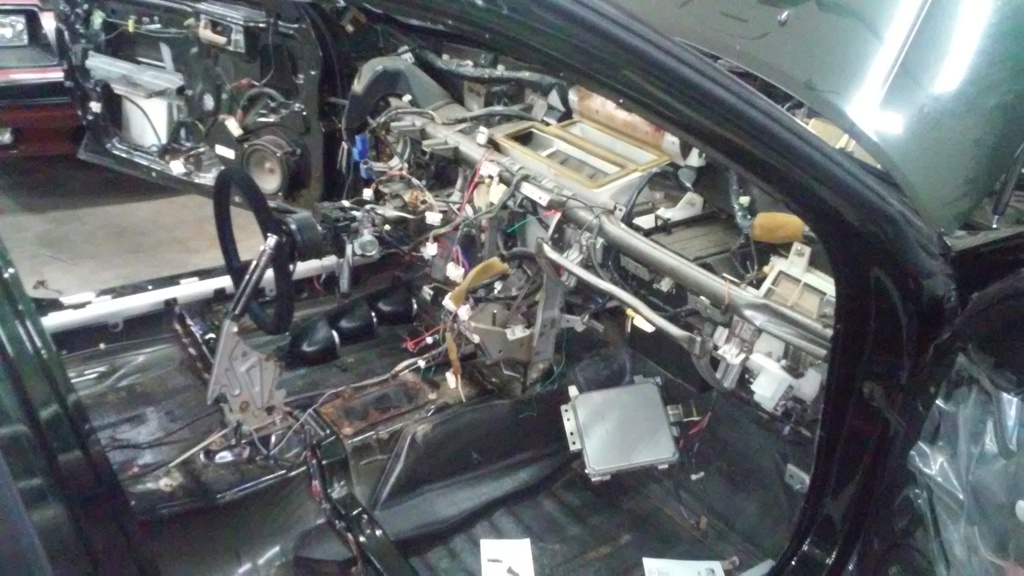

So I'm convinced nissan made this dash as punishment for some stuff that went down in the 1940's...
There is no easy way. There are screws in the vents... there are screws hiding behind the dash.. there are screws hiding and you will have to move the steering column to find them... there are screws behind the radio... so... Not gonna lie, I attacked the radio and used wire cutters to cut it out... I guess that's ok because I have a new single din that will be muuuuuuch easier to install...
So now that she is very naked, it is the opportune time to soundproof dis bish. Got me a gallon of lizard skin and some paint rollers, as well as some boom mat spray foam for the bits of the frame that are hollow...
Now you may be asking yourself "but why litch? thats just excessive... throw the interior back in it and be done."
 no.
no.
1. I want to make my interior ride epic. No road noise. No nuffin.
2. I have some bumps for the trunk. I hate that "brrrrrrmmmmmppp" sound when someone just throws some huge speakers in the trunk and doesn't use the appropriate supporting mods.
So now I wait on soundproofing stuff, and then I being the slow and careful process of pulling this interior

After that... my interior is pretty much done... mount up that triple gauge pod with my wideband, boost gauge, and oil pressure... add turbo timer in the spot under the single din
Will post pics of engine bay all painted, engine in, turbo y pipe, intercooler piping, turbo mounted, shocks, springs, axles, brakes, and wheels mounted in the near future... then its trunk work... then... we move on to PHASE 2.

At the moment I have the following in the works:
(Going front to back of car)
Wielded steel intercooler piping. (have pipes gonna get them bent to be better than the kit I currently have)
clear corners (have need to install)
Turbo y pipe done more efficiently. (meaning new mandrel bent 2.5 inch tubing wielded)
Engine bay being painted black
wideband/turbo timer install (have need to install... need to put engine back in to install... engine bay painting today and tomorrow I hope)
What I have been doing is completely gutting my green car, and swapping the interior from my tan car... like this

So i started with the seats, which are so painless that it actually gave me hope that the interior swap would be easy... nissan you bastards... gave me just enough hope and then...

it takes me 3 hours to get here. Oh and by the way... thanks for matching EVERY thing on the interior... interior door handles... sunroof controls... weatherstripping... couldn't have just made it all black could you... NooooOOOooOOOOo had to go make it fancy. This site's language filter is really cramping my style...
SO this really isn't all that hard in hindsight. There is a stupid little bracket holding the carpet in up under the dash, and getting to it involves sniffing carpet that is 20 years old and has only ever EEEVVVVER entertained feet... think two hobo's ******* in a box full of urine. (deadpool reference) Then there are the door panels. YOU MUST HAVE DOOR PANEL REMOVAL TOOL SET. If not you will break the **** out of every single door panel... ask me how I know... please...
The headliner comes out with the removal of the seatbelts, not too difficult there, my car has the bose tweeters in the front window pillars, so be careful when pulling the trim becAuse it is 20 years old and less stable in the area where the tweeter cover is... again... ask me how I know
Then... oh yes... then there is the dash...
SAY. MY. NAME.

So I'm convinced nissan made this dash as punishment for some stuff that went down in the 1940's...
There is no easy way. There are screws in the vents... there are screws hiding behind the dash.. there are screws hiding and you will have to move the steering column to find them... there are screws behind the radio... so... Not gonna lie, I attacked the radio and used wire cutters to cut it out... I guess that's ok because I have a new single din that will be muuuuuuch easier to install...
So now that she is very naked, it is the opportune time to soundproof dis bish. Got me a gallon of lizard skin and some paint rollers, as well as some boom mat spray foam for the bits of the frame that are hollow...
Now you may be asking yourself "but why litch? thats just excessive... throw the interior back in it and be done."
no.1. I want to make my interior ride epic. No road noise. No nuffin.
2. I have some bumps for the trunk. I hate that "brrrrrrmmmmmppp" sound when someone just throws some huge speakers in the trunk and doesn't use the appropriate supporting mods.
So now I wait on soundproofing stuff, and then I being the slow and careful process of pulling this interior

After that... my interior is pretty much done... mount up that triple gauge pod with my wideband, boost gauge, and oil pressure... add turbo timer in the spot under the single din
Will post pics of engine bay all painted, engine in, turbo y pipe, intercooler piping, turbo mounted, shocks, springs, axles, brakes, and wheels mounted in the near future... then its trunk work... then... we move on to PHASE 2.


UpDATE time!
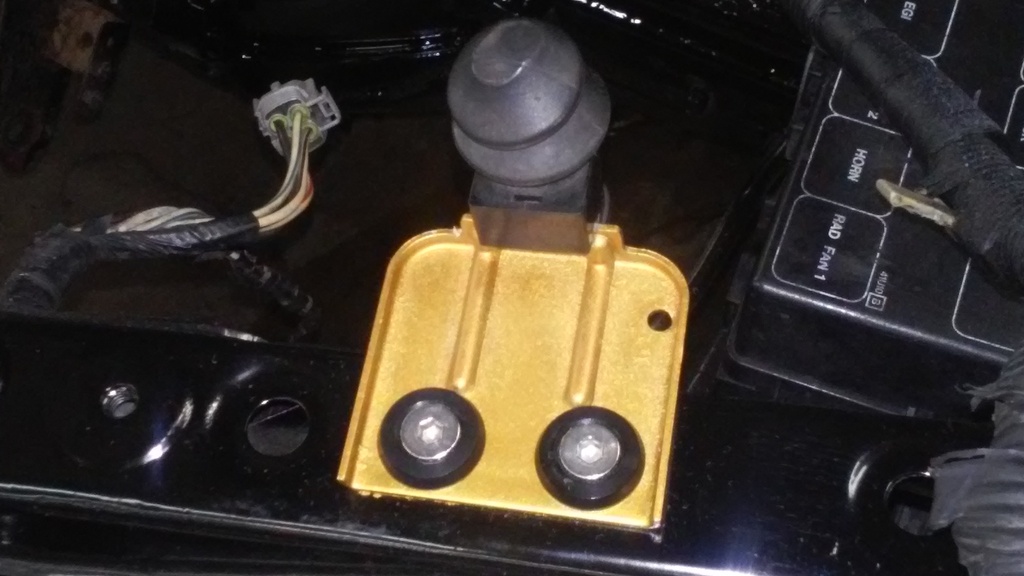
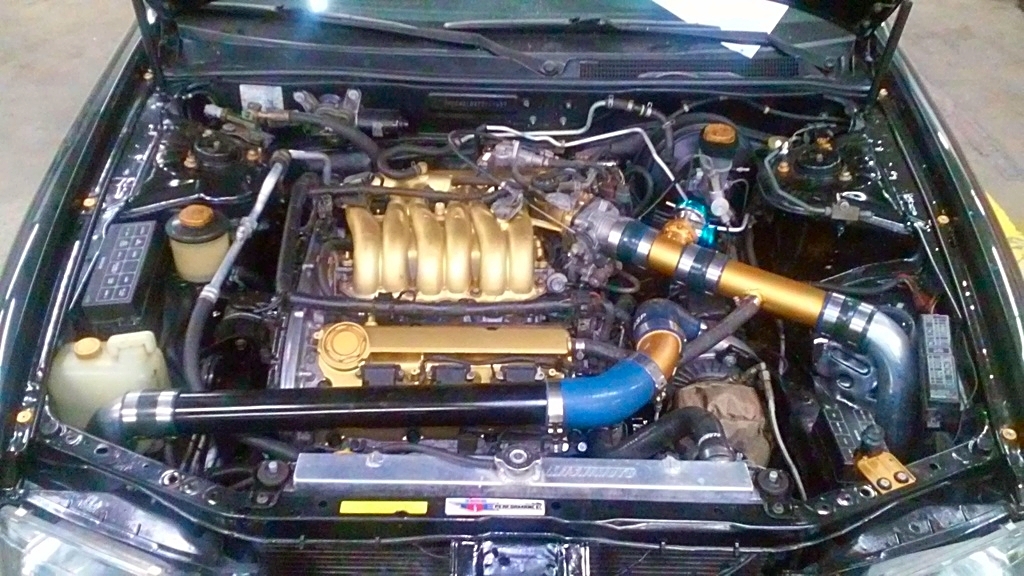
Engine bay: Painted.
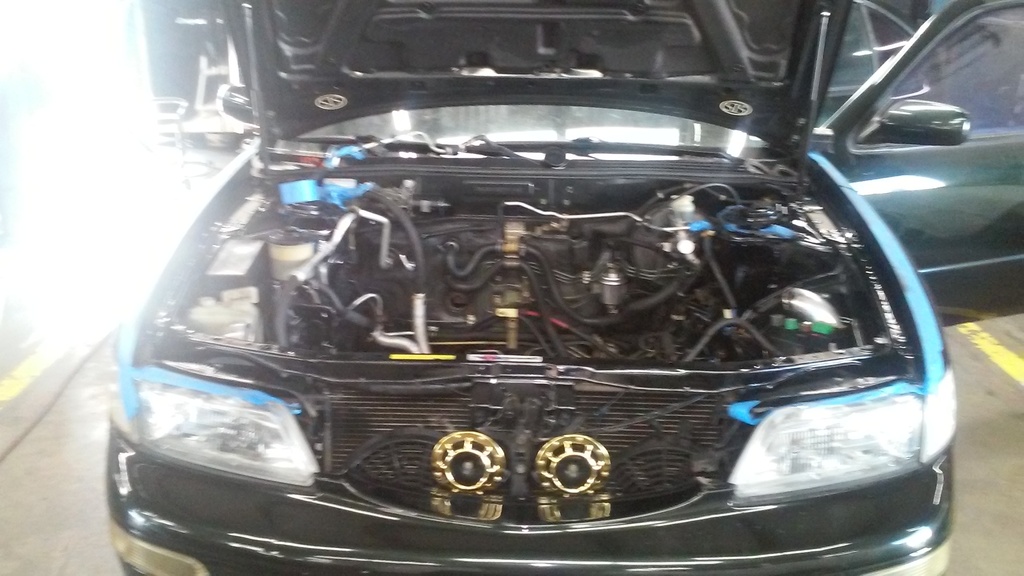
Also as you can plainly see, I have installed double horns up front, gold.. of course.. are you sensing a theme yet??? you should be...
So, Here is some engine **** for you freaky maxima peeps.
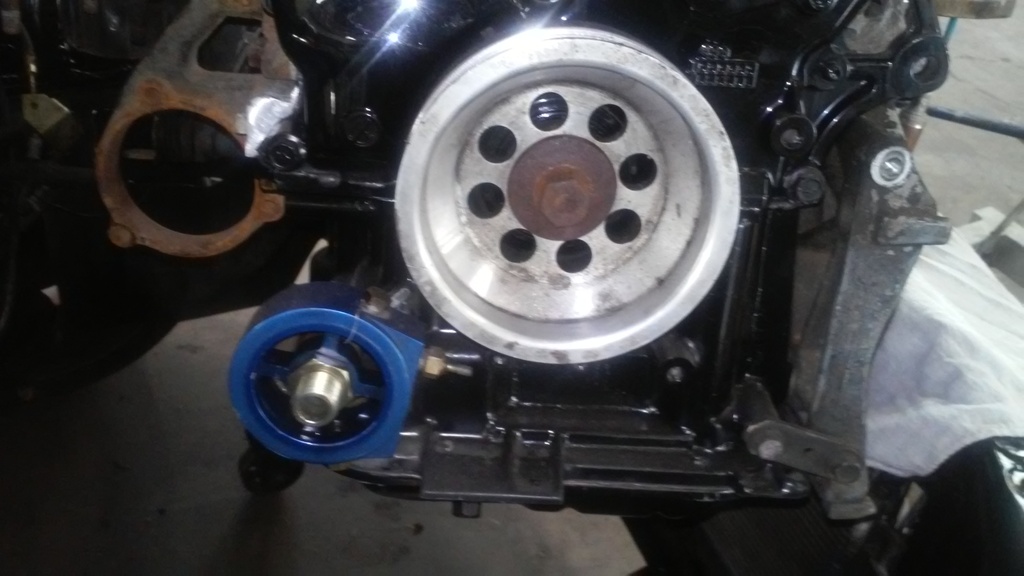
that is my underdrive pulley and my oil set up for the turbo. Its fun to see the stuff that you don't really see very often...
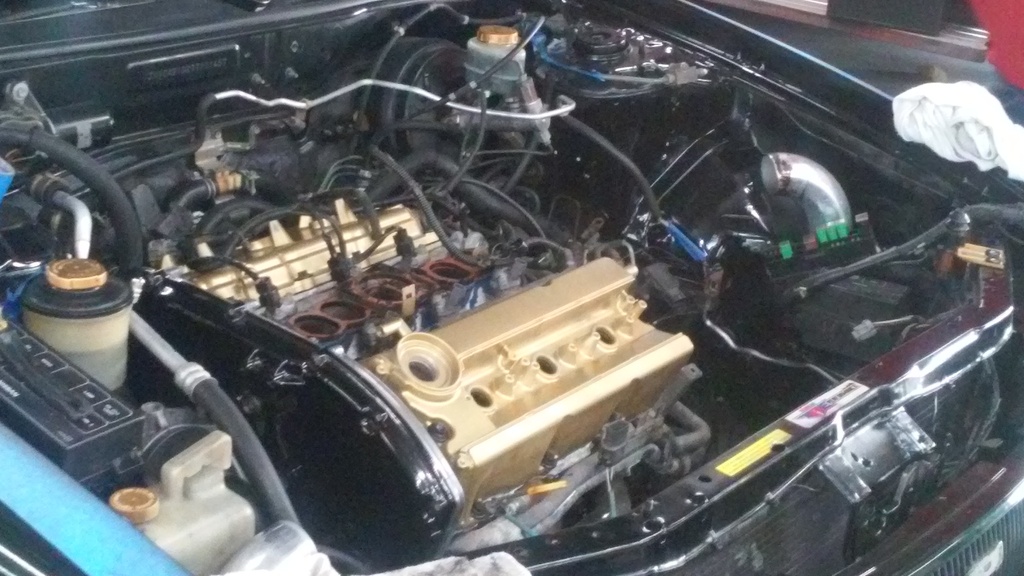
There is the engine back in the bay, with all the gold accents...(I've done more since this pic...) Also my nwp spacer kit sitting on the top there...
I did this... because details... I like it lol
Also painted the engine bay prior to dropping the engine in... then once it was in... my transmission stuck out like a SORE THUMB... so I painted it black too
My soundproofing gets here tomorrow...and I can install the interior over it saturday. Yay.
Hopefully by saturday night, my car's interior will be all back together, and I can get it on a lift monday for more shenanigans.
Engine bay: Painted.

Also as you can plainly see, I have installed double horns up front, gold.. of course.. are you sensing a theme yet??? you should be...
So, Here is some engine **** for you freaky maxima peeps.

that is my underdrive pulley and my oil set up for the turbo. Its fun to see the stuff that you don't really see very often...

There is the engine back in the bay, with all the gold accents...(I've done more since this pic...) Also my nwp spacer kit sitting on the top there...
I did this... because details... I like it lol


Also painted the engine bay prior to dropping the engine in... then once it was in... my transmission stuck out like a SORE THUMB... so I painted it black too
My soundproofing gets here tomorrow...and I can install the interior over it saturday. Yay.
Hopefully by saturday night, my car's interior will be all back together, and I can get it on a lift monday for more shenanigans.
Holy crap.
That was more labor intensive than I thought it would be.
My car is soundproofed (fingers crossed) Lets go to the pictures.
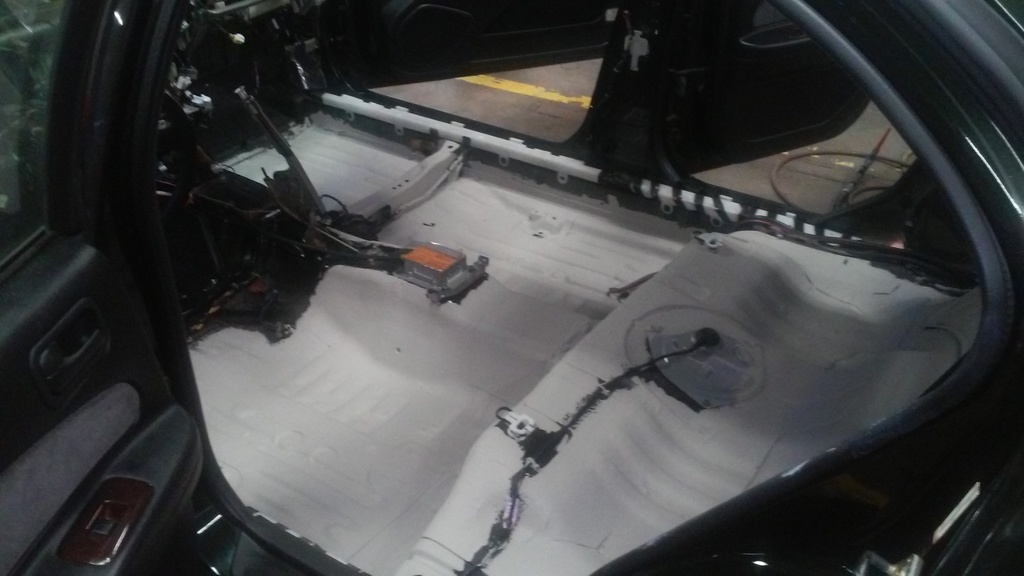
So, not super difficult. I used a simple paint brush to glop large amounts of lizard skin liquid sound deadener and heat proofer-stuff.
Before you do though *WARNING* YOU MUST CLEAN THE CRAP OUT OF YOUR CAR. I know you may think... its clean... trust me its not. Until you've taken compressed air and blown all the tiny bits of crap out of the inside and then detailed it with detailing solution... its not clean. CLEAN IT.
Then apply a thin coat first so that you give the heavier coats something to stick too, also you aren't waiting for 2 hours in between coats... I did 3 coats. Also, please use in a ventilated area, this stuff smells and will prolly get you high (hopefully _george isn't reading this)
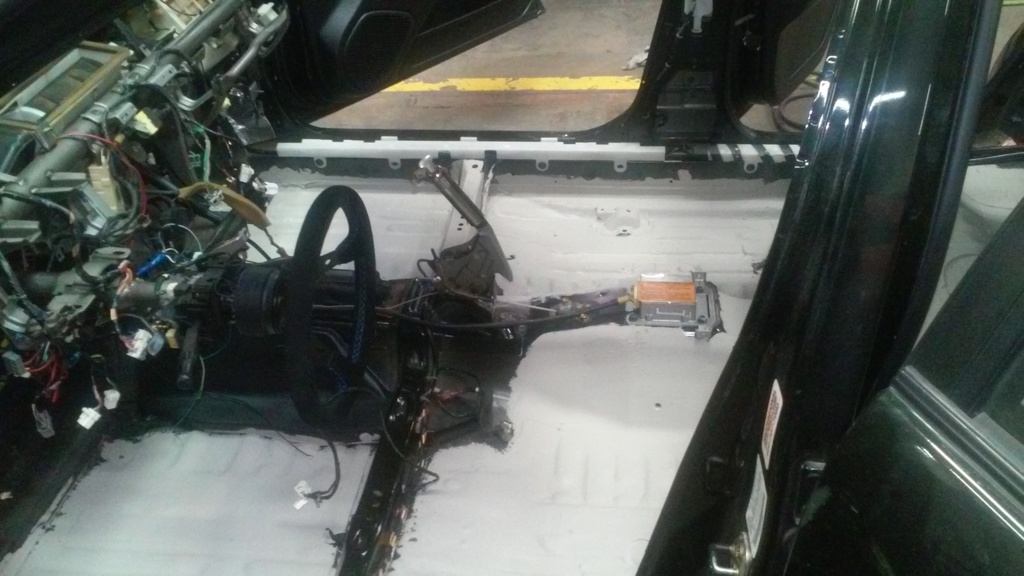
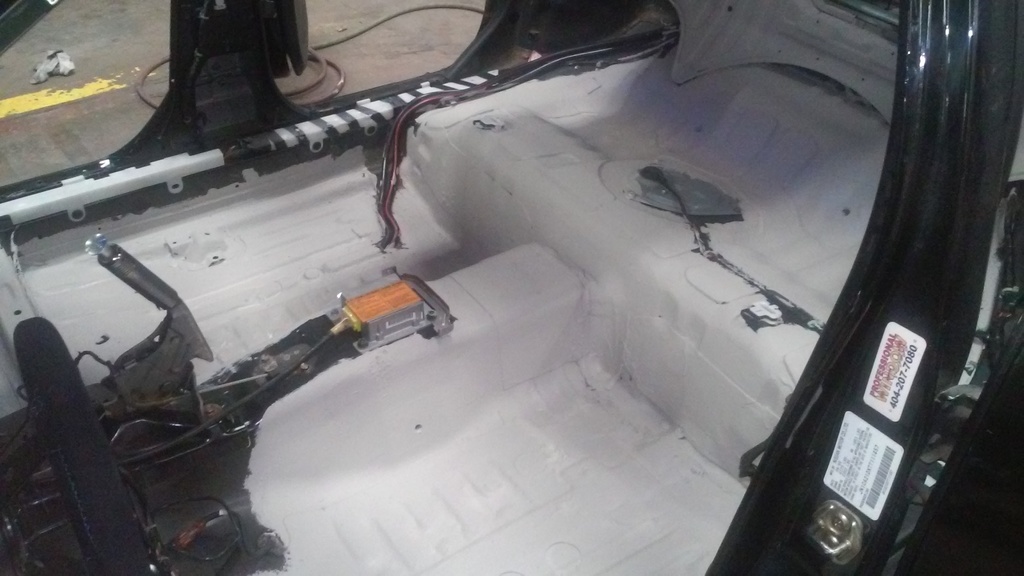
I focused on the transmission hump and the floorboards. Once I see how it works I will do my trunk.
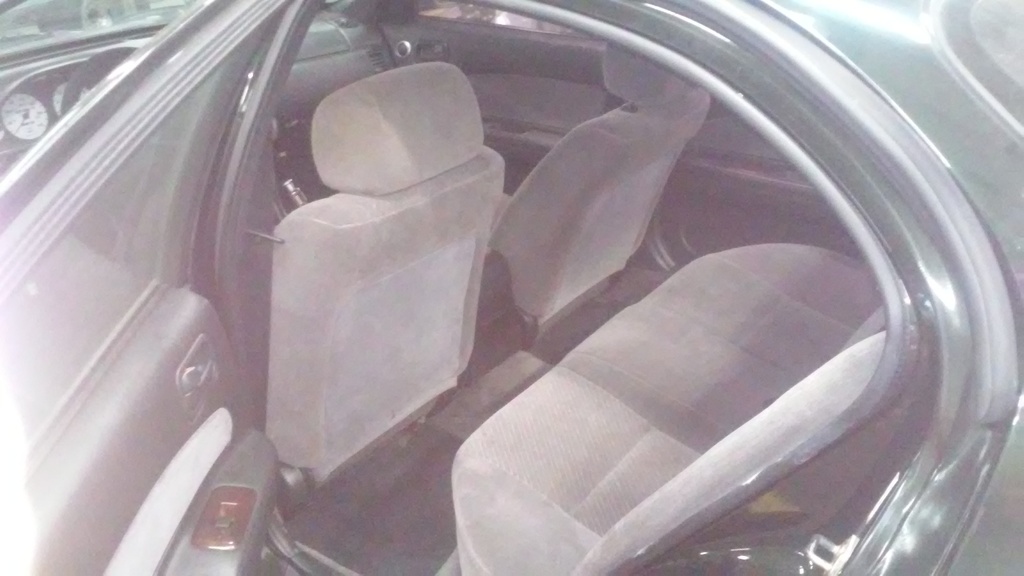
After I applied 3 coats I installed my new interior. It didn't seem to mind me clunking around with my boots and tools at all... very sturdy stuff.
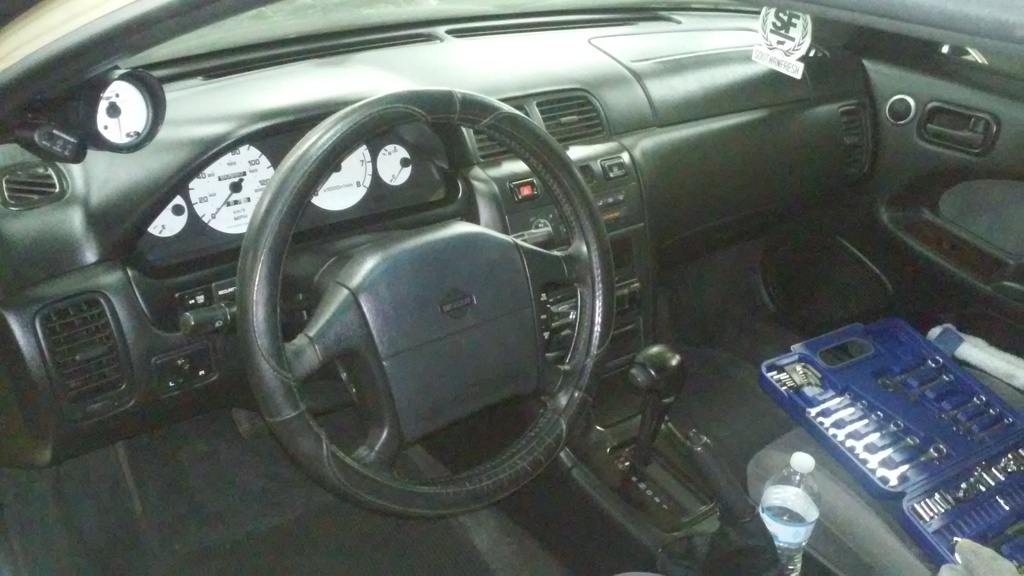
Now my interior is back together (kinda)
and here is the finished product.
Now... I can focus back on the engine...
That was more labor intensive than I thought it would be.
My car is soundproofed (fingers crossed) Lets go to the pictures.


So, not super difficult. I used a simple paint brush to glop large amounts of lizard skin liquid sound deadener and heat proofer-stuff.
Before you do though *WARNING* YOU MUST CLEAN THE CRAP OUT OF YOUR CAR. I know you may think... its clean... trust me its not. Until you've taken compressed air and blown all the tiny bits of crap out of the inside and then detailed it with detailing solution... its not clean. CLEAN IT.
Then apply a thin coat first so that you give the heavier coats something to stick too, also you aren't waiting for 2 hours in between coats... I did 3 coats. Also, please use in a ventilated area, this stuff smells and will prolly get you high (hopefully _george isn't reading this)
I focused on the transmission hump and the floorboards. Once I see how it works I will do my trunk.
After I applied 3 coats I installed my new interior. It didn't seem to mind me clunking around with my boots and tools at all... very sturdy stuff.
Now my interior is back together (kinda)
and here is the finished product.


Now... I can focus back on the engine...


 and those grey seats, yuck. otherwise looks good.
And i really like the simple cloth interior. Will decorate some with carbon fiber and some led work... But I go for simple interior... Its the engine bay i get all wild on...


Senior Member
Joined: May 2013
Posts: 1,543
I would much rather have a driver custom seat that doesn't rip overtime.. Cause mine is ripping on the right side from just sitting on it overtime. Cloth/custom interiors don't have this issue. Planning to fix it up or just get a custom seat.
Atleast u don't have to worry about leather ripping by just sitting on it. Keep on rollin with that engine work.
Atleast u don't have to worry about leather ripping by just sitting on it. Keep on rollin with that engine work.

It's ripping from the friction over time. Mine was ripping from left side getting in and out of the car. You have to lift your butt up before setting it down. Lessens the friction = longer longevity.

update time:
Strap yourselves in, sit down, shut up and behold the glory.
I am going to go from really technical and cool to over all stuff.
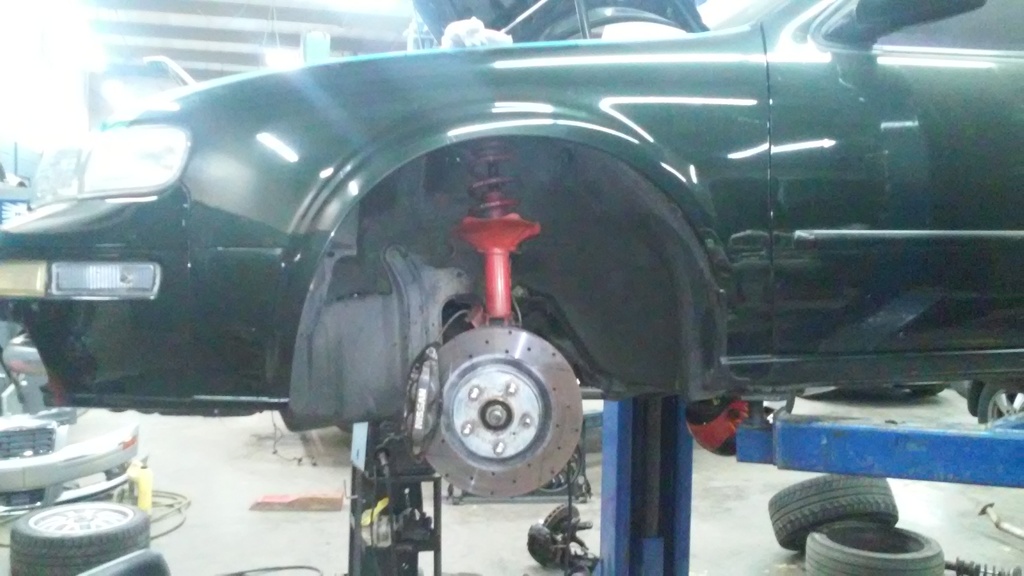
First. My suspension is DONE. KYB struts and Eibach dropzone springs. All da corners. New energy suspension bushings on the control arms and some oem sway bar bushings because... they needed it. Added to the delicious suspension combo is a very sexy, z32 caliper with a 350z track brake disk... 11.7 inches of goodness there (that's what she said)
I also swapped some clear corners on while doing this, they look much mo betters.
Now, this is gonna get a bit technical. I have had a reverse y pipe made. But because my car is significantly low, we wanted to tuck it into the body as much as possible...
here is the pipe,

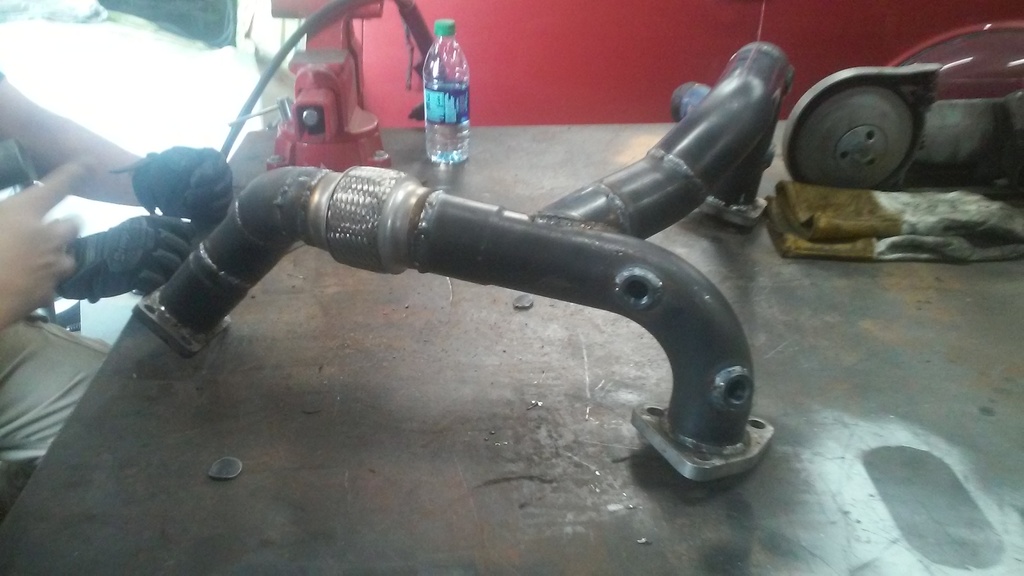
that's the wastegate getting fitted...
now that's all well and good, but here is the part that will get you a little
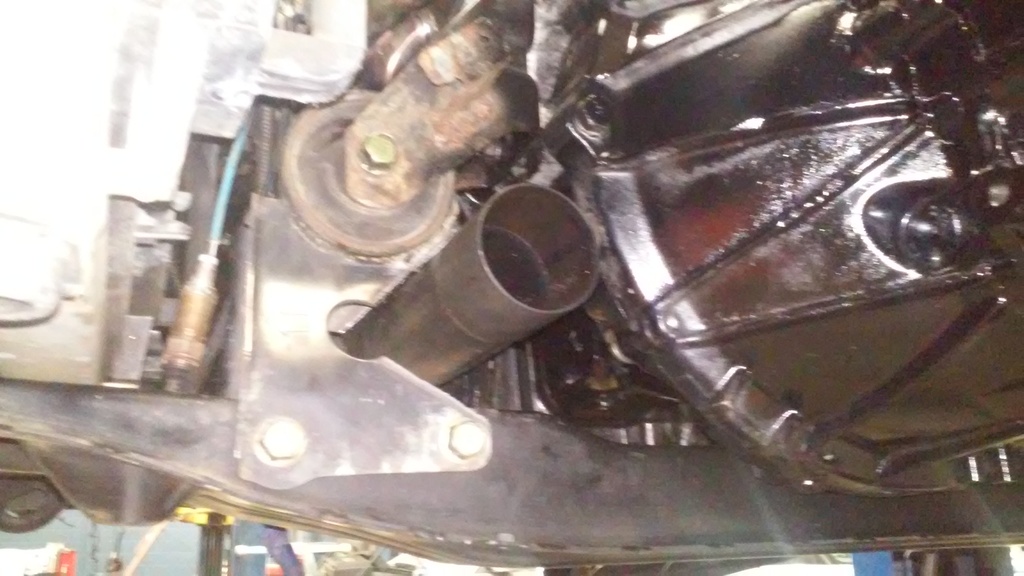
we have already reinforced that motor mount (and replaced the bushings with oem... again because we were down there and it just seemed like a good idea...)
But that crossmember isn't that hard to move, assuming you have a lift and a screw jack handy to hold up the engine, but getting the pipe in that gap has moved it super close to the body and there is no worry about dragging or smacking that pipe anywhere.
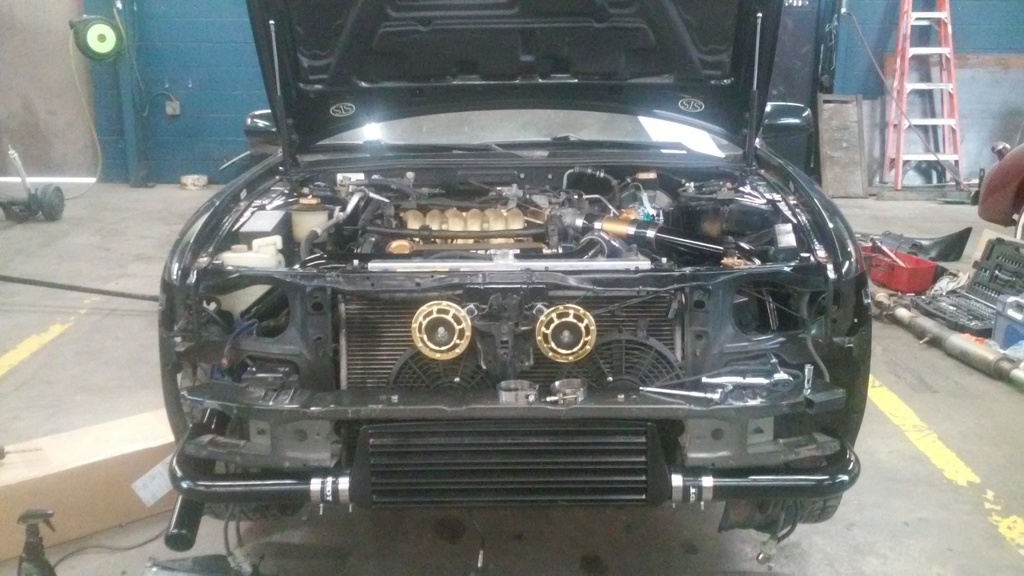
Now, on to some nifty stuff. My battery is in the trunk, in the spare wheel well specifically. Well I think that a raw trunk with a battery in it looks a bit crap. So i had the local custom stereo people make me a trunk floor that looks a wee bit better.
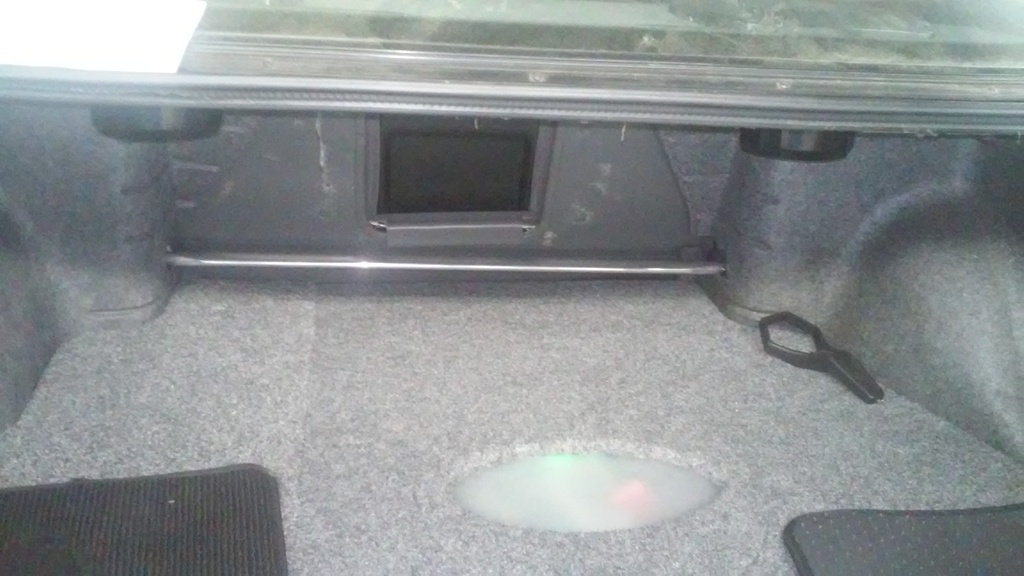
That looks much better. The little plexi glass hole is over the battery and you can look in and see it surrounded by green leds... its the small things...
Now this is how she looks at the moment. New wheels on, waiting on the magnaflow muffler (because megan fartcan is... well... megan fartcan)
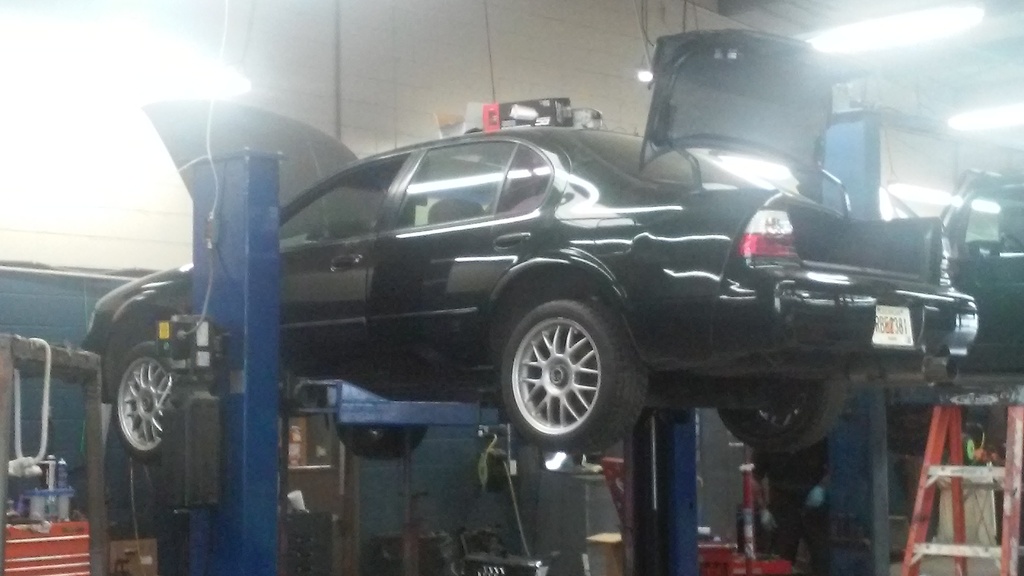
Not bad eh?
And finally the engine is all buttoned up and back together. I have ordered black intercooler piping and a black intercooler... because those couplings don't really (imho) look all that good. I also have the flanges for my ssq bov that are coming in so I can get rid of the blue one... which is a no name ebay one... and that scares me a bit...

This does not mean I am done... Nay...
I still have to do:
Heat wrap headers
Heat wrap new y pipe
Turbo blanket turbo
Wideband
Turbo timer
Headlights
FSTB
After I do all these things (this week or so)
I will then focus my attention on the outside of the car.
I picked up this little beauty from a maxima horder...
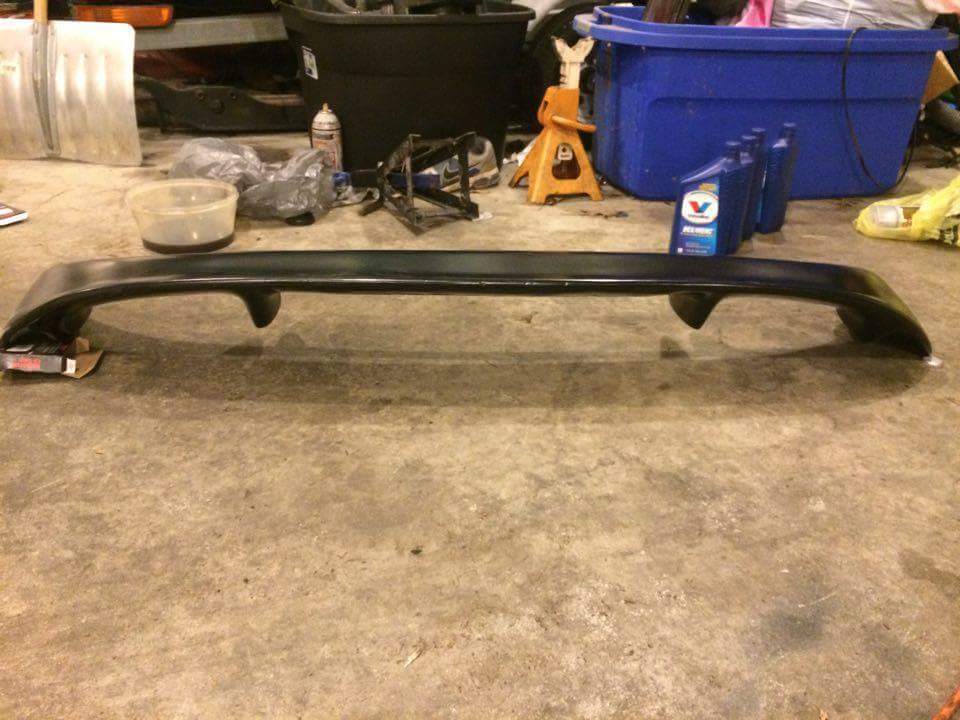

ya'll OG's know what this is... for you newer peeps... this is a stillen type 2 wing. Stopped being made around 2001 if memory serves... Going on the car.
Then I imagine an Iconic lip kit, will fit the bill nicely...
So, there we are... long update. But so damn worth it.
Strap yourselves in, sit down, shut up and behold the glory.
I am going to go from really technical and cool to over all stuff.
First. My suspension is DONE. KYB struts and Eibach dropzone springs. All da corners. New energy suspension bushings on the control arms and some oem sway bar bushings because... they needed it. Added to the delicious suspension combo is a very sexy, z32 caliper with a 350z track brake disk... 11.7 inches of goodness there
(that's what she said) 
I also swapped some clear corners on while doing this, they look much mo betters.
Now, this is gonna get a bit technical. I have had a reverse y pipe made. But because my car is significantly low, we wanted to tuck it into the body as much as possible...
here is the pipe,


that's the wastegate getting fitted...
now that's all well and good, but here is the part that will get you a little

we have already reinforced that motor mount (and replaced the bushings with oem... again because we were down there and it just seemed like a good idea...)
But that crossmember isn't that hard to move, assuming you have a lift and a screw jack handy to hold up the engine, but getting the pipe in that gap has moved it super close to the body and there is no worry about dragging or smacking that pipe anywhere.
Now, on to some nifty stuff. My battery is in the trunk, in the spare wheel well specifically. Well I think that a raw trunk with a battery in it looks a bit crap. So i had the local custom stereo people make me a trunk floor that looks a wee bit better.

That looks much better. The little plexi glass hole is over the battery and you can look in and see it surrounded by green leds...
its the small things...Now this is how she looks at the moment. New wheels on, waiting on the magnaflow muffler (because megan fartcan is... well... megan fartcan)

Not bad eh?
And finally the engine is all buttoned up and back together. I have ordered black intercooler piping and a black intercooler... because those couplings don't really (imho) look all that good. I also have the flanges for my ssq bov that are coming in so I can get rid of the blue one... which is a no name ebay one... and that scares me a bit...

This does not mean I am done... Nay...
I still have to do:
Heat wrap headers
Heat wrap new y pipe
Turbo blanket turbo
Wideband
Turbo timer
Headlights
FSTB
After I do all these things (this week or so)
I will then focus my attention on the outside of the car.
I picked up this little beauty from a maxima horder...


ya'll OG's know what this is... for you newer peeps... this is a stillen type 2 wing. Stopped being made around 2001 if memory serves... Going on the car.
Then I imagine an Iconic lip kit, will fit the bill nicely...
So, there we are... long update. But so damn worth it.

Newbie - Just Registered
Joined: Mar 2016
Posts: 9
From: Washington
I have really enjoyed reading this thread. You're putting a ridiculous amount of work into this vehicle and it's really fun to follow along. Wayyyy better than watching an ep of "This Old House."
One question about the relocated battery: I understand the goal here is to balance the weight of the vehicle more evenly, but on an FWD car doesn't having more weight in the front help maintain traction when accelerating?
One question about the relocated battery: I understand the goal here is to balance the weight of the vehicle more evenly, but on an FWD car doesn't having more weight in the front help maintain traction when accelerating?
Young grasshopper. Look where my turbo sits. The goal with battery relocation is primarily freeing up space in the engine bay so you can run the needed piping and actually have a place for the turbo.
Newbie - Just Registered
Joined: Mar 2016
Posts: 9
From: Washington

 we all give offerings at the nissan altar
She is off the lift and all buttoned up. Now I am waiting (anxiously) on some copper so we can make some silly gaskets. I also have a new intercooler and piping kit coming so I can get rid of the hodgepodge that is my engine bay at the moment...
Still though... she looks GOOD.
Also here is a shot of her with the new shoes and suspension.
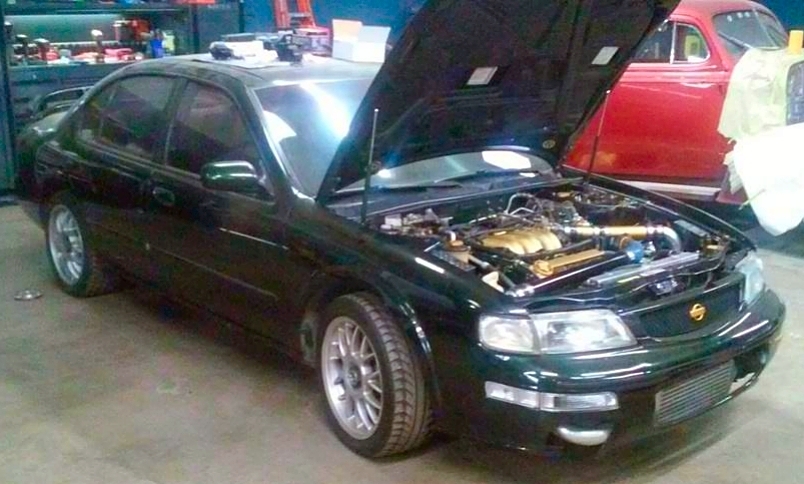
She is real dirty, but I am gonna detail her this weekend real good like. At this point she is done, just gonna do some detail stuff... then it's off to the dyno to see what shenanagans happen.
Still though... she looks GOOD.

Also here is a shot of her with the new shoes and suspension.

She is real dirty, but I am gonna detail her this weekend real good like. At this point she is done, just gonna do some detail stuff... then it's off to the dyno to see what shenanagans happen.


 aren't you just cute...
New intercooler is installed.
It was a really fun job, but really annoying because everything had to line up just right, and it was really really slow.
Things I learned from this:
1: Intercooler mounts first. Find exactly where you want it to be, then build out from there.
2: It will be asymmetrical, the piping I mean, each pipe needs to be addressed.
That's really it... I guess. For a 4th gen you will need a hole saw for the sides where the intercooler piping goes into the wheel well, and you will also need a body saw to cut a cavity where the intercooler can sit. You'll also need a good drill and some cutting liquid for drilling mounting holes.
Here is my engine bay now with the new piping run
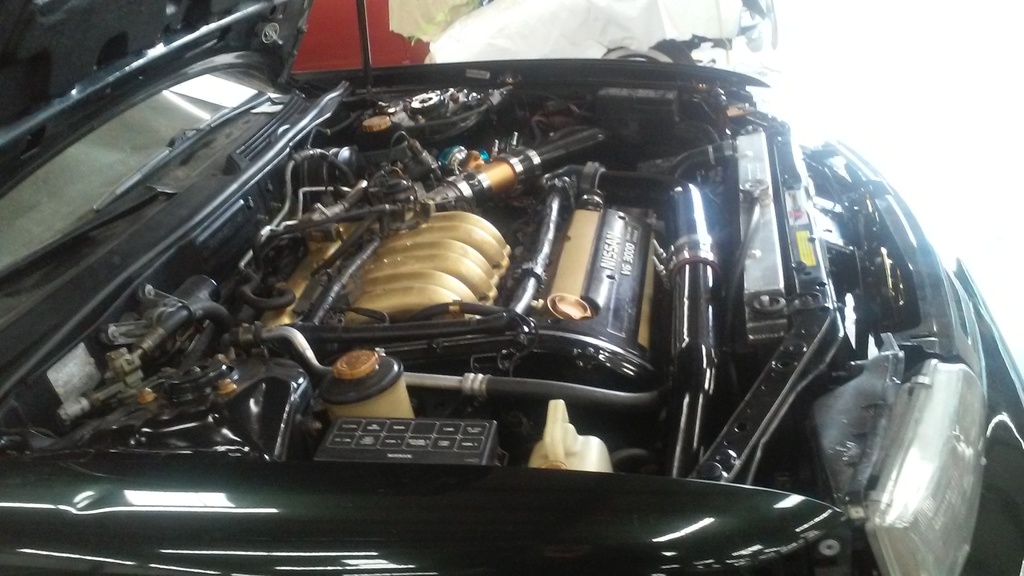
I tucked the pipes closer to the radiator, and eliminated the 3 different sections of pipe close to my throttle body, now its just 2.
Also, the gaskets for my exhaust are done. Made em out of copper, which is a really easy metal to work with. If you ever want gaskets that will never break and you don't want to mess around with the guessing game of ordering them online, take your dead gasket and trace it onto some copper sheet.

Also, the gaskets for my exhaust are done. Made em out of copper, which is a really easy metal to work with. If you ever want gaskets that will never break and you don't want to mess around with the guessing game of ordering them online, take your dead gasket and trace it onto some copper sheet.

I iz watching.
Car is looking good though. Watch out for heat with that turbo sitting where it is. the cold side of the turbo was enough to melt the wire loom on contact. I thought about adding sound deadening when i redid my interior but was like with my car running an open wastegate wtf is the point lol. I ditch my stock seats though, **** them. somebody locally installed some S14 seats in this 4th gen and the actually looked really good if you want a budget seat upgrade.
Big Black was just resurrected this past weekend. Cranky as usual but it should be hitting the dyno in the next week or 2 if my tuner doesnt cause issue, results will be incoming


Senior Member
Joined: May 2012
Posts: 1,620
From: Long Island
Finally opened this!
I really look forward to POV videos when stomping on itt when she's ready and bulletproof!
Your stick to it commitment is quite impressive!
Now I'm hooked and will be watching!
I really look forward to POV videos when stomping on itt when she's ready and bulletproof!
Your stick to it commitment is quite impressive!
Now I'm hooked and will be watching!

I'll make a final (final) final build thread since I have a bunch of partial threads all over the site.
So keep your eyes open for the final chapter of buttercup.
Its coming. Soon.