
Broken Driver Side Seat Pan


Thread Starter
Senior Member
Joined: Jan 2011
Posts: 3,037
From: Central AR
Broken Driver Side Seat Pan
I've noticed a condition that happens on driver side seats where the seat pan bolt breaks loose from the seat pan.
Both the 99 I30 and 98 GLE have this problem. I may need to look in a salvage yard for one that is without the break. It looks like the passenger side pan is made from the same metal stamping, but the bolts are different between driver and passenger side. If I had a way to put in some new bolts with washers on the the good pan that I have from the passenger side, I can make a new pan for the driver side.
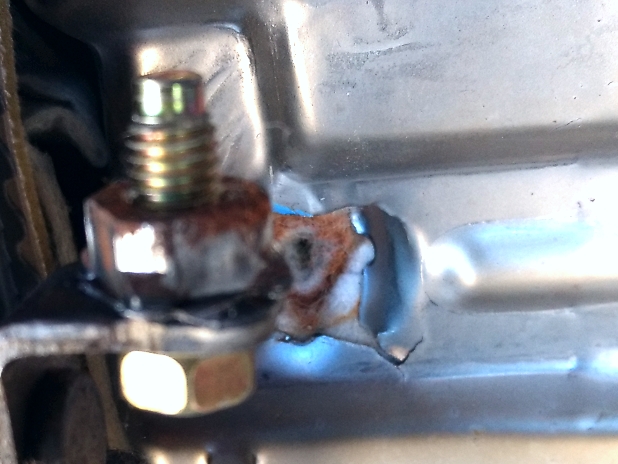
I wonder if I can take a wide head carriage bolt like the one in the picture and run it down from the top on a good passenger side pan and change it to use a nut? The carriage bolt with a large washer did the trick.

Here's a thread about the broken seat problem below.
https://maxima.org/forums/4th-genera...vers-seat.html
Both the 99 I30 and 98 GLE have this problem. I may need to look in a salvage yard for one that is without the break. It looks like the passenger side pan is made from the same metal stamping, but the bolts are different between driver and passenger side. If I had a way to put in some new bolts with washers on the the good pan that I have from the passenger side, I can make a new pan for the driver side.

I wonder if I can take a wide head carriage bolt like the one in the picture and run it down from the top on a good passenger side pan and change it to use a nut? The carriage bolt with a large washer did the trick.
Here's a thread about the broken seat problem below.
https://maxima.org/forums/4th-genera...vers-seat.html
Last edited by CS_AR; Dec 10, 2016 at 04:59 PM.
Thread Starter
Senior Member
Joined: Jan 2011
Posts: 3,037
From: Central AR
Ok I fixed it this morning.
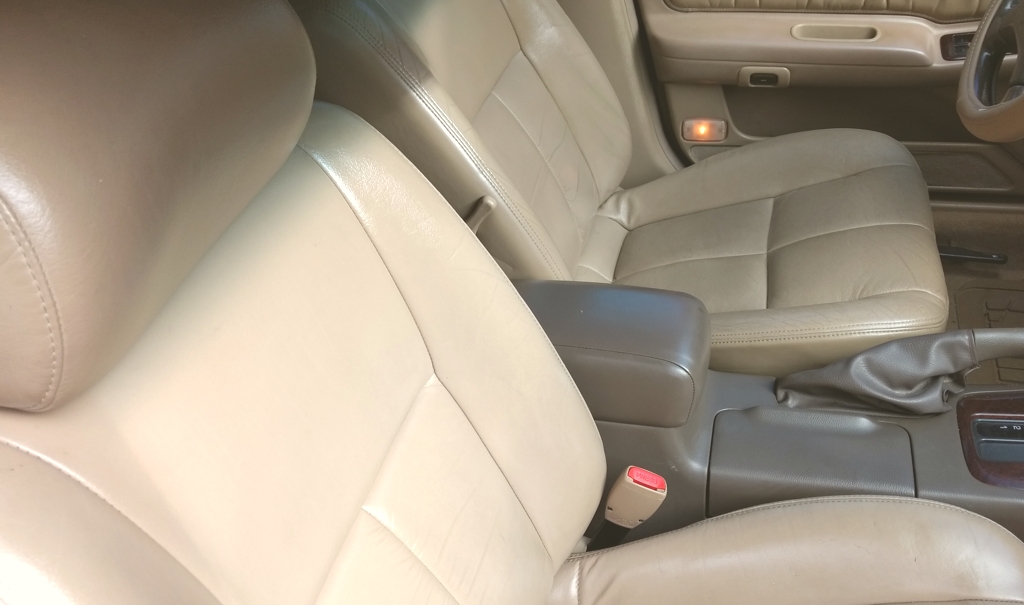
Here's the finished product. I was able to swap in the seat bottom pan, foam, and leather from the passenger side of an extra set of seats that I've been keeping in the garage. The seat swap can be done.
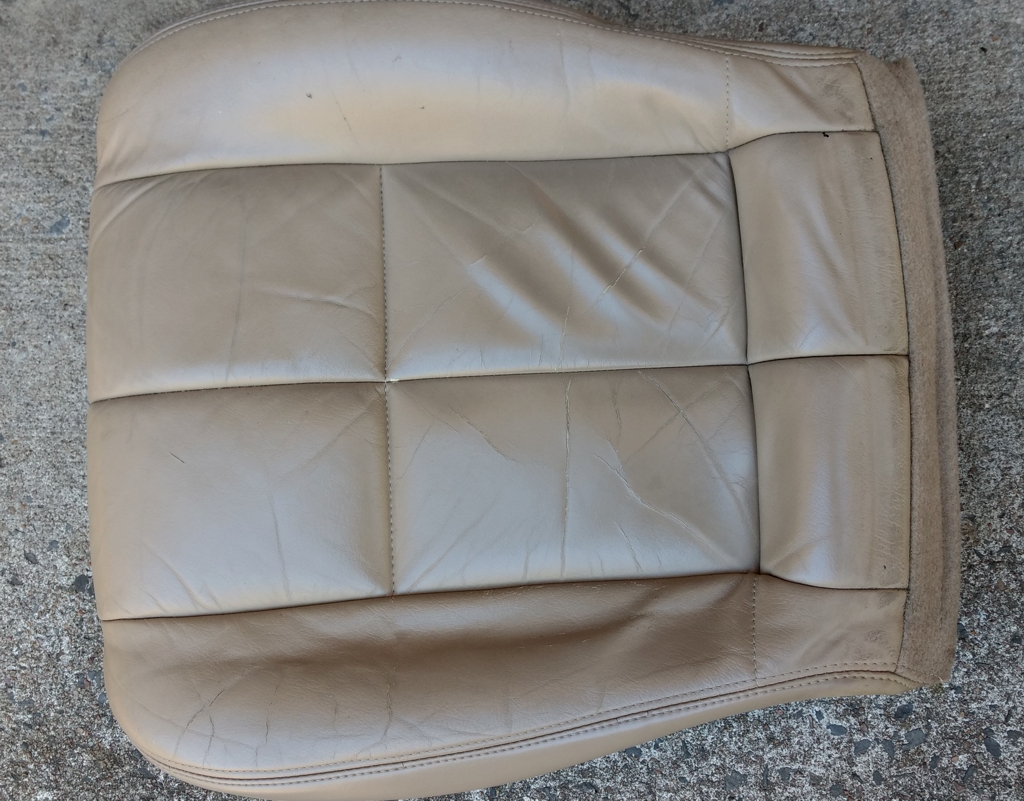
The seat bottom you see on the driver side was originally on a passenger side seat.
The old seat foam was flat and worn.
The old seat adjuster had been broken. It looks like somebody in this car's past opened the sun roof and stood up on the seat causing the adjuster to be bent and seat pan to break.
Note: You only need to move in a passenger side pan if you can't find a driver side pan in good condition. In my case, I already had a good passenger side pan and I didn't want to make a trip to the salvage yard to look for a good driver side pan.
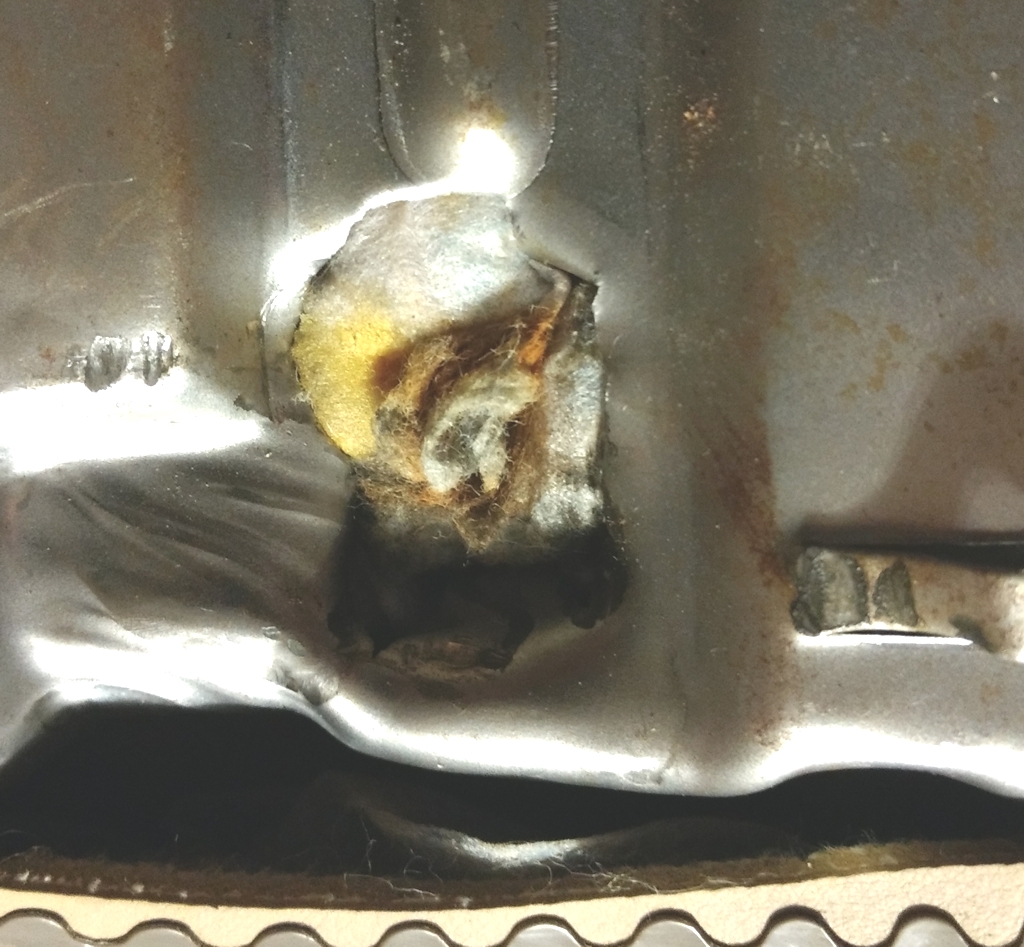
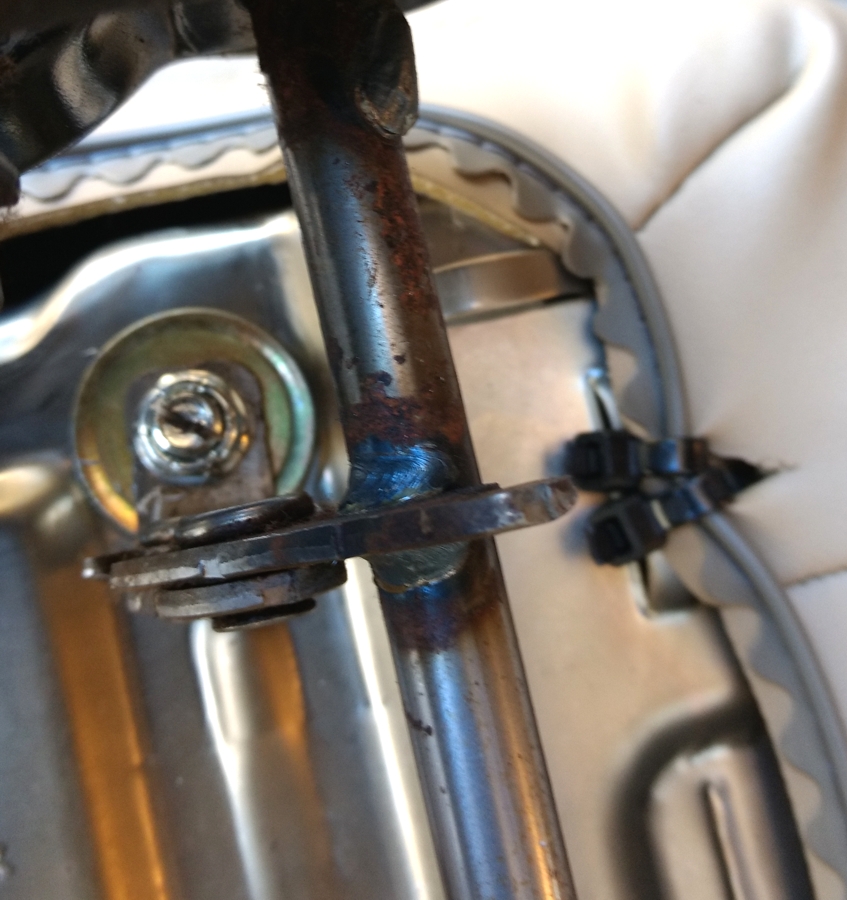
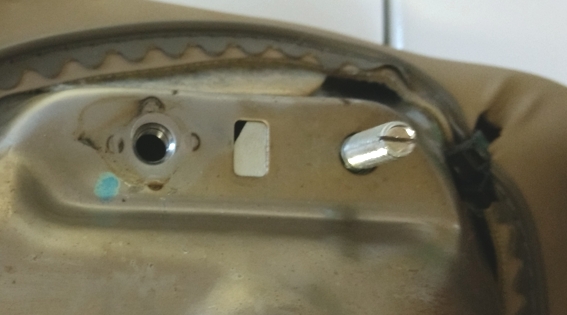
The retaining nut had busted through the seat pan leaving a big hole and no support at the front part of the driver seat.
Here's the busted retaining nut on that I found attached to a bent adjuster arm.

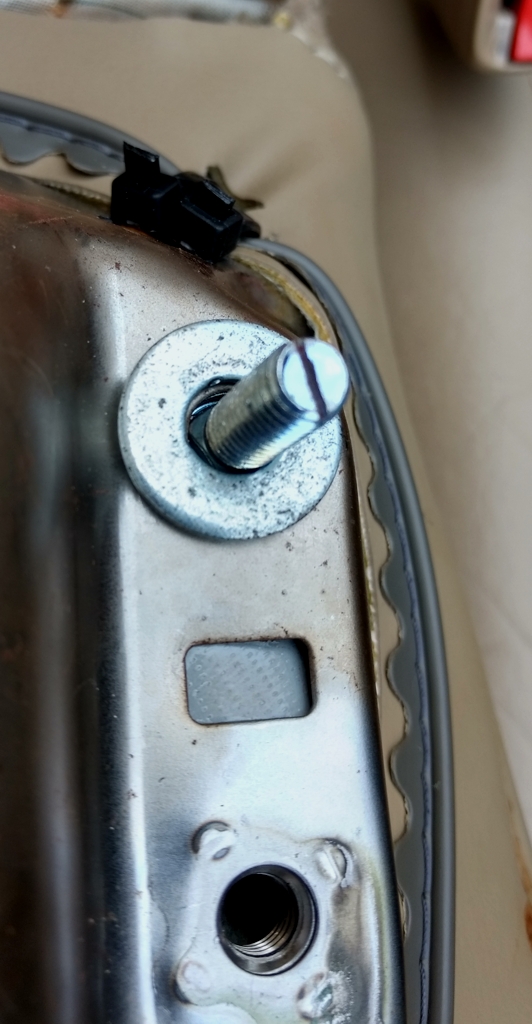
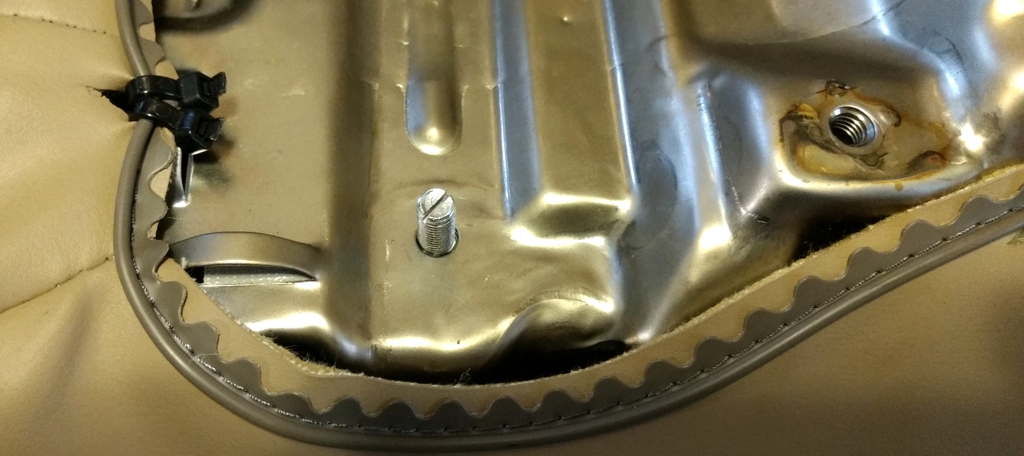
Here's the enhanced pan from the passenger side with more support from washers on both sides of the pan. I don't expect to have any further problems with this seat pan.
You can see how I used two zip ties instead of "hog ring" clips to reattach the seat material to the pan.
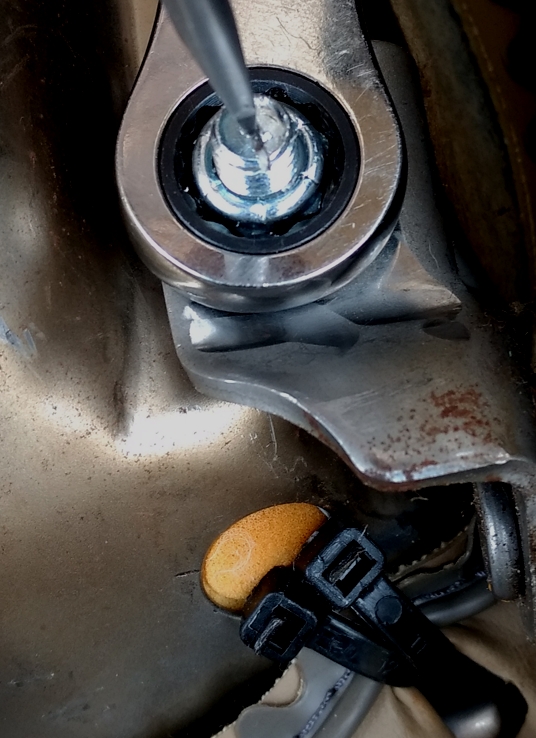
I cut a slot in the carriage bolt ends so I could use a screwdriver to start the tightening process without having a way to reach behind the bolt in the pan with the seat foam and leather installed.
Heavy metal washers were used on the inner and outer side of the pan to support the bolt and seat mounting brackets. The same washer you see in the picture below was used on the inside between the carriage bolt head and the seat pan.
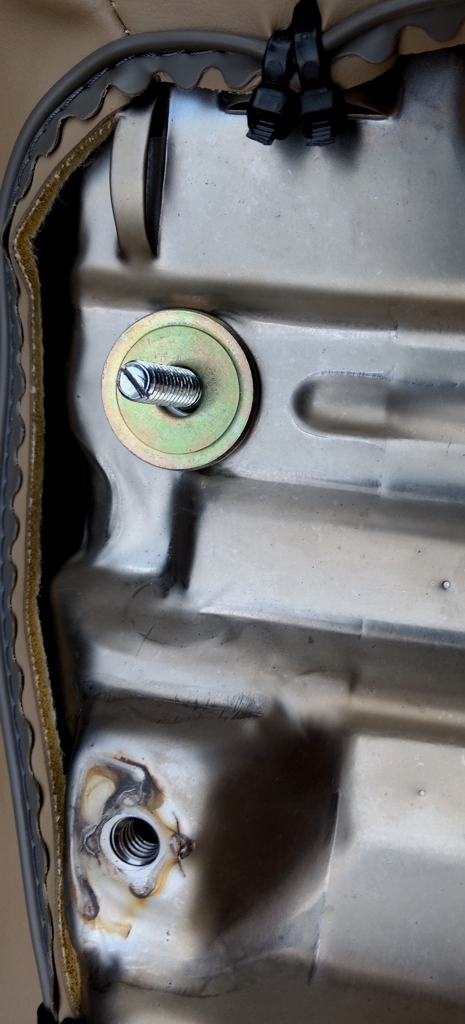
For the front part of the seat pan, I used extra washers that I had on hand from an Energy Suspension stabilizer bar link kit. Look familiar?
Gorilla tape was used inside the pan to hold the carriage bolt and new washer into place while I reattached the seat foam and stretched the seat material over the pan. You can see the adhesive side of the Gorilla tape through the square hole in the seat pan in this picture. Once you start tightening the new carriage bolts, the Gorilla tape serves no further purpose.
The screwdriver is only needed in the beginning to get past the lock nut plastic and to start the torque down. Once the square part of the carriage bolt gets a bite into the inner washer and seat pan metal, the final torque down can occur without help from the screwdriver.
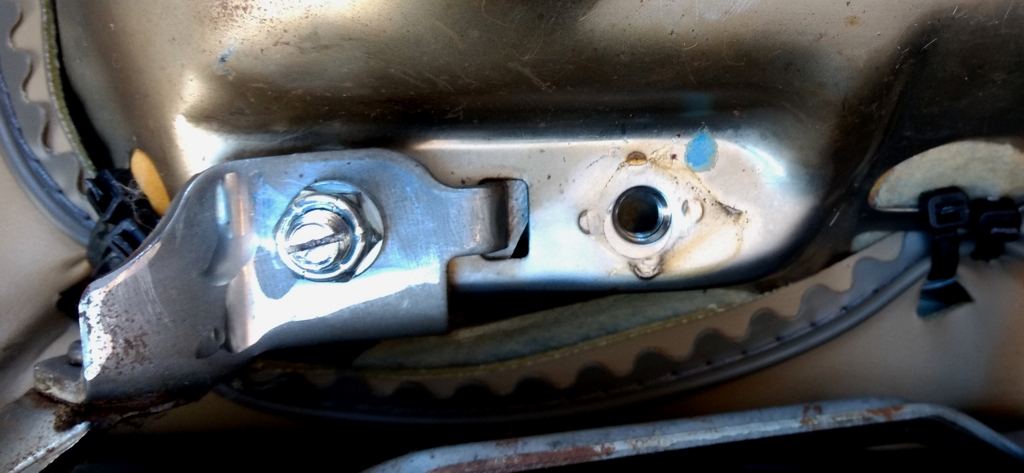
The bent seat adjuster had to be straightened.
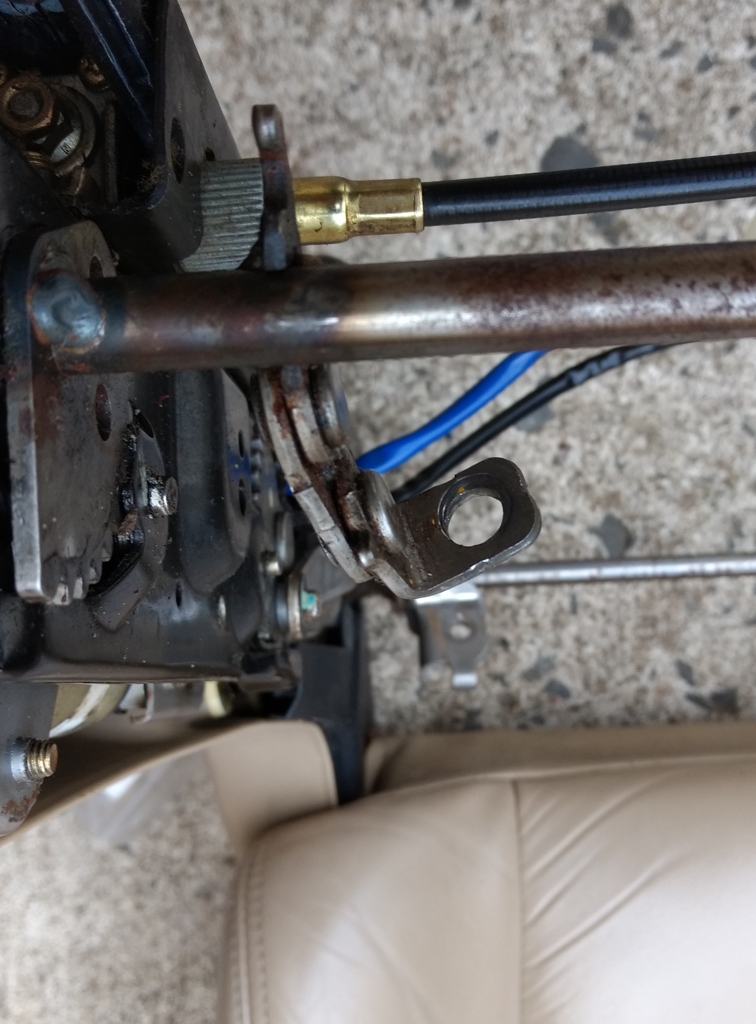
This is how the adjuster bracket should look after it has been straightened and bolted to the seat pan.

Here's the finished product. I was able to swap in the seat bottom pan, foam, and leather from the passenger side of an extra set of seats that I've been keeping in the garage. The seat swap can be done.
The seat bottom you see on the driver side was originally on a passenger side seat.

The old seat foam was flat and worn.

The old seat adjuster had been broken. It looks like somebody in this car's past opened the sun roof and stood up on the seat causing the adjuster to be bent and seat pan to break.
Note: You only need to move in a passenger side pan if you can't find a driver side pan in good condition. In my case, I already had a good passenger side pan and I didn't want to make a trip to the salvage yard to look for a good driver side pan.
The retaining nut had busted through the seat pan leaving a big hole and no support at the front part of the driver seat.

Here's the busted retaining nut on that I found attached to a bent adjuster arm.
Here's the enhanced pan from the passenger side with more support from washers on both sides of the pan. I don't expect to have any further problems with this seat pan.
You can see how I used two zip ties instead of "hog ring" clips to reattach the seat material to the pan.

I cut a slot in the carriage bolt ends so I could use a screwdriver to start the tightening process without having a way to reach behind the bolt in the pan with the seat foam and leather installed.

Heavy metal washers were used on the inner and outer side of the pan to support the bolt and seat mounting brackets. The same washer you see in the picture below was used on the inside between the carriage bolt head and the seat pan.

For the front part of the seat pan, I used extra washers that I had on hand from an Energy Suspension stabilizer bar link kit. Look familiar?

Gorilla tape was used inside the pan to hold the carriage bolt and new washer into place while I reattached the seat foam and stretched the seat material over the pan. You can see the adhesive side of the Gorilla tape through the square hole in the seat pan in this picture. Once you start tightening the new carriage bolts, the Gorilla tape serves no further purpose.


The screwdriver is only needed in the beginning to get past the lock nut plastic and to start the torque down. Once the square part of the carriage bolt gets a bite into the inner washer and seat pan metal, the final torque down can occur without help from the screwdriver.

The bent seat adjuster had to be straightened.

This is how the adjuster bracket should look after it has been straightened and bolted to the seat pan.

Last edited by CS_AR; Dec 11, 2016 at 07:39 AM.

Joined: Sep 2008
Posts: 17
From: Left coast
I found the same thing when I bought used seat after my fore/aft motor broke. Both mine and used seat pans broken same spots. I tapped hem back into place and applied lots of JB Weld to hold them. So far after 18 months still good.
Thread Starter
Senior Member
Joined: Jan 2011
Posts: 3,037
From: Central AR
If I don't have a big gaping hole pan like I did on the other two 4th gens, I may be able to fix it with JB Weld in your post. Otherwise, I will need to make a trip to the salvage yard to find another passenger side pan. If I go to the trouble of replacing a pan, then I will change up the bolts like I did on the 98 model GLE to give the adjuster brackets more support at the pan contact points.
On my next trip to the salvage yard, it would be interesting to see how many driver side seats have the problem. I suspect it will be a high percentage.