
Pulling the intake manifold isn't *that* hard

Thread Starter

Joined: Nov 2007
Posts: 4,016
From: Arlington, TX
Pulling the intake manifold isn't *that* hard
Last night, I went from 6th to 4th to get around a slow moving left lane moron on the freeway and as I am accelerating, I feel a distinct loss of power and a hard misfire. SES light started flashing so I got off at the next exit, pulled over and checked the codes. P0303. Of course, the rear bank under the intake. I babied my car home, if I gave it too much gas it would flash the SES light, which is bad. Anyway, pull up at home, very rough idle and a bad miss with any throttle.
Pulled up my Maxima FSM and checked for the P0303 code, plus typed it into search here and seems the predominate cause is either bad plugs or a bad coil. The search here led me to this link: http://www.greghome.com/Greg's%20Gar...eplacement.htm which was very helpful and made me realize it wasn't too complicated.
Started on my car at 9 AM this morning, got it all apart by around 10 AM (the driver's side upper elbow bolt is a PITA!) and pulled the coil and plug on #3. My guess is the plugs had never been changed, the gap was HUGE. Nominal plug gap for us is .043 I believe, looked to be more than double. The plug in #3 had what looked like melted metal at the base of the side electrode. Since I had purchased a set of coils from a fellow .org member a while back, I knew I had 6 good ones so I could replace coils as needed. My son drove me down to Pep Boys to get some NGK platinum plugs, then down to the Nissan dealer (a good 15 minutes each way) to get the manifold gasket-better safe than sorry, right? Got back home just before 11 AM and by 12:20 I was done. I had changed all 6 plugs (all had huge gaps), two coils, #3 (just to be sure!) and #5 since that tube was filled with oil,plus. Took a few minutes with towels to get as much oil out of #5 as possible before removing the plug. All other tubes were pristine. Wish I had picked up a 6th gen rear valve cover too, but I'll do that in a few weeks when I have more time.
Car started right up, a little blue smoke from the oil in #5 that got into the combustion chamber. No idle issues, car feels very smooth now. So far, the hesitation I was having when I went from light to heavier throttle appears to be gone.
Pro tip: If you separate the elbow from the manifold, you don't have to remove any coolant lines. Nissan didn't have that gasket but the old one seems to be working fine. However, in the future, probably best to make sure you have both the manifold and elbow gasket should you decide to do it the way I did.
I'll post up some pictures I took later, I'm hungry!
The gasket always seems like a waste of money when there's RTV laying around.
But, yeah, removing the IM is very easy. I don't even remove most of the stuff, just flip it over towards the firewall. Why people over complicate it, idk.
Speaking of bad plugs...I saw a ford minivan running on 3 cylinders LOL. 3 of the plugs had disintegrated. There was no plug below the screw base. I guess it didn't hurt the engine too much LOL.
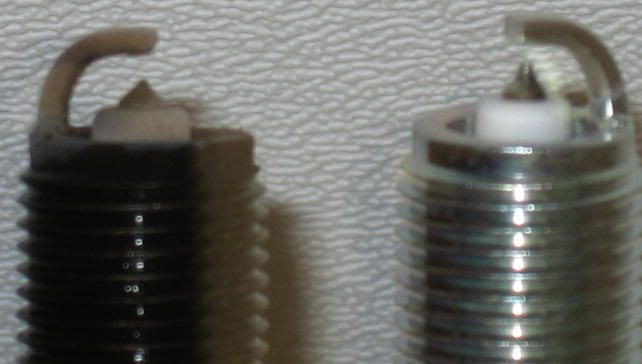

That huge gaping that you speak of Scott, sound like mine when I had mine changed. I really think mine were the originals and at 196,000 km it was definitely time for them to come out. Like yours mine had this insane gaping, which made me wonder just how I was getting any performance from them in the first place.

Thread Starter
Joined: Nov 2007
Posts: 4,016
From: Arlington, TX
Starting out, note my GAB airbox. I think I picked up a good 90 hp at the wheels with this mod! 

Airbox removed:

Manifold off, now I can get to the back plugs:

Got gap?

Airbox removed:
Manifold off, now I can get to the back plugs:
Got gap?


Yeah it is pretty easy never took off the one on my 00 when I had it but simple on the 03 fairly simple...should be doing it soon and checking the coils and plugs cause got a little misfire somewhere and changing the rear vavle cover.....
Last edited by Rods03Max619; Mar 26, 2011 at 12:59 PM.
Thread Starter
Joined: Nov 2007
Posts: 4,016
From: Arlington, TX
When I change that back valve cover, I'm going to wait until I pull the manifold up after unbolting it from the engine to give me better access to the bottom elbow bolt on the driver's side.

Thread Starter
Joined: Nov 2007
Posts: 4,016
From: Arlington, TX
Drilled it out, then used a sharp pair of scissors (pushing into the holes and twisted) to make the holes large enough to get a 3/4" wide at the tip file in there to finish enlarging them and smoothing the holes.


Thread Starter
Joined: Nov 2007
Posts: 4,016
From: Arlington, TX
I believe there is a dyno sheet showing a 9 hp gain with the GAB and a K&N drop in filter (which I also have).
sascuderi-car has a little over 150k miles on it, pretty sure those plugs were installed on the assembly line. I can't imagine they were changed like they were supposed to be at the 105k mile recommendation.

Senior Member
Joined: Nov 2004
Posts: 605
From: St. Charles, MO
I use a heat gun and lighter to make the drilled holes smoother. Just heat it up ever so lightly and press on the soft plastic
You went to change your plugs, and removed the entire UIM, or just the intake plenum?
I can't figure out what you're saying, Scott. I thought you were planning on just removing the intake plenum.
I can't figure out what you're saying, Scott. I thought you were planning on just removing the intake plenum.

DO NOT DO BUSINESS WITH THIS MEMBER - OWES PEOPLE MONEY
iTrader: (7)
Joined: Jan 2008
Posts: 3,468
From: Greensboro, NC
My advice: Don't bolt the elbow back up to the mounting point that's such a PITA. This one change hasn't caused me a single problem over 2 years and makes taking the UIM off as simple as pulling vacuum lines and the intake, then 4 bolts on the UIM. Easily a 5-10 minute job. 
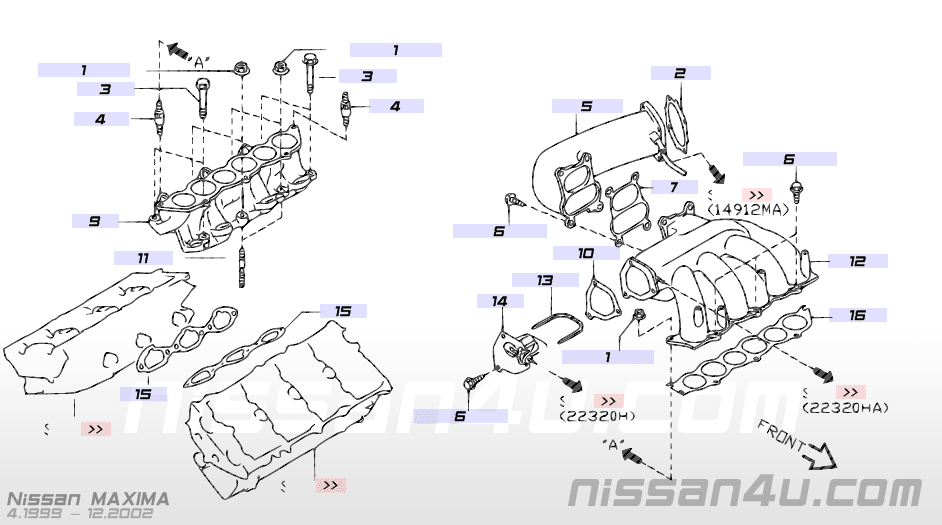
I believe he removed #12, Rochester. Sometimes referred to as UIM and sometimes referred to as intake plenum. Referred to by Nissan as the intake manifold collector.
DO NOT DO BUSINESS WITH THIS MEMBER - OWES PEOPLE MONEY
iTrader: (7)
Joined: Jan 2008
Posts: 3,468
From: Greensboro, NC

My advice: Don't bolt the elbow back up to the mounting point that's such a PITA. This one change hasn't caused me a single problem over 2 years and makes taking the UIM off as simple as pulling vacuum lines and the intake, then 4 bolts on the UIM. Easily a 5-10 minute job.
Been wrong all these years? Yikes!

DO NOT DO BUSINESS WITH THIS MEMBER - OWES PEOPLE MONEY
iTrader: (7)
Joined: Jan 2008
Posts: 3,468
From: Greensboro, NC
Edit: sparks beat me.

I just did the plugs on my g/f's 03 Altima SE. Compared to removing the UIM on a 3.0, the 3.5 is cake. I took the whole maifold off with ease in a few minutes. Plugs looked great at 87k BTW. I replaced the IM gasket along with all the bolts. With ratcheting wrenches its easy.
Refresh my memory, what makes the 6th gen vc better?
Refresh my memory, what makes the 6th gen vc better?
Thread Starter
Joined: Nov 2007
Posts: 4,016
From: Arlington, TX
The back two bolts under the elbow everyone complains about didn't give me any problems removing or putting them back in.
Removed the upper intake (#12), separated the elbow (#5) from it so I didn't have to disconnect any of the coolant lines. I meant to take more pictures but my hands were pretty filthy and I didn't want to get all that gunk on my camera. When I pull it again to change the rear valve cover I will take more pictures.
The back two bolts under the elbow everyone complains about didn't give me any problems removing or putting them back in.
The back two bolts under the elbow everyone complains about didn't give me any problems removing or putting them back in.
Those Armour-All cleaning wipes do wonders

Removed the upper intake (#12), separated the elbow (#5) from it so I didn't have to disconnect any of the coolant lines. I meant to take more pictures but my hands were pretty filthy and I didn't want to get all that gunk on my camera. When I pull it again to change the rear valve cover I will take more pictures.
The back two bolts under the elbow everyone complains about didn't give me any problems removing or putting them back in.
The back two bolts under the elbow everyone complains about didn't give me any problems removing or putting them back in.
There's some irony here on the reasoning for coolant going around the TB. The intention is to gently heat up the TB, so the valve doesn't stick in sub-zero climates, and the "coolant" fluid is actually quite hot when at temperature. However, if you're not concerned about that, then the by-pass should actually lower the temp of the air as it passes through the throttle body.
At least, that's my understanding of the whole thing. Someone feel free to correct me on this too, if needed.
Thread Starter
Joined: Nov 2007
Posts: 4,016
From: Arlington, TX
We've actually had a couple colder than normal winters here but I think the coldest we got was the low teens. Might do the by-pass mod then, I could use another 50 hp.
50 hp is pretty ambitious. (jk jk) The bypass is part of NWP's instructions when installing phenolic spacers. In fact, he gives you a hose connector with the kit.
So back to my noobish question: can you or can't you get at the back plugs by just removing the Intake elbow, instead of the entire UIM?
So back to my noobish question: can you or can't you get at the back plugs by just removing the Intake elbow, instead of the entire UIM?
Thread Starter
Joined: Nov 2007
Posts: 4,016
From: Arlington, TX
I looked at just taking off the elbow but it seemed like enough of the upper intake would have been over the valve covers to make the access difficult. Figured the extra 5-10 minutes of work would save me triple that in trying to finagle the plugs and coils out with very little clearance.
Honestly, even if you've never done it, the whole process of pulling the intake, changing plugs and putting everything back together shouldn't take more than 2-3 hours. Now that I've done it once, I'd be able to do it in 60-90 minutes tops.
Honestly, even if you've never done it, the whole process of pulling the intake, changing plugs and putting everything back together shouldn't take more than 2-3 hours. Now that I've done it once, I'd be able to do it in 60-90 minutes tops.
A bit more difficult with spacers. Although there's plenty of advice, experience and encouragement here to get through that, too.
It's just curiosity that has me thinking is all, because there's only 20K miles on a set of Iridium plugs I've been using. No need to change them, they should be fine.
It's just curiosity that has me thinking is all, because there's only 20K miles on a set of Iridium plugs I've been using. No need to change them, they should be fine.

Thread Starter
Joined: Nov 2007
Posts: 4,016
From: Arlington, TX

I just did 4 holes in my airbox; there is a thread somewhere that seemed to indicate that if you have no exhaust mods 4 holes is optimal.
To the person who inquired about 6th gen valve cover; not only is it cheaper, it does not have the oil seal issues that the 5th gen rear cover has, and it is a perfect fit.
To the person who inquired about 6th gen valve cover; not only is it cheaper, it does not have the oil seal issues that the 5th gen rear cover has, and it is a perfect fit.
DO NOT DO BUSINESS WITH THIS MEMBER - OWES PEOPLE MONEY
iTrader: (7)
Joined: Jan 2008
Posts: 3,468
From: Greensboro, NC
A bit more difficult with spacers. Although there's plenty of advice, experience and encouragement here to get through that, too.
It's just curiosity that has me thinking is all, because there's only 20K miles on a set of Iridium plugs I've been using. No need to change them, they should be fine.
It's just curiosity that has me thinking is all, because there's only 20K miles on a set of Iridium plugs I've been using. No need to change them, they should be fine.