
The making of a rear valence

Thread Starter

Joined: Nov 2004
Posts: 7,353
From: Upland CA
The making of a rear valence
This may be my biggest project yet - the making of a rear valence. The rear valence is the lower part of the rear bumper. I always thought the Stillen one was a bit plain. I wanted something spicey but NOT ricey. In the discussions regarding getting a newfront bumper someone photoshopped a bumper for the rear using Chern's car. I liked it. But, I wanted something a bit different.
I have always liked center exiting exhaust. Its used on concept cars a lot, and of course many production cars, Porsche Cayman, Mini Cooper S, Lambo Mercielago, Jeep SRT8, etc. I know it isnt everyone cup of tea. But I feel it and I feel it on the Maxima.
So, I have been tinkering with a design until I developed what I think is a great rear valence. Since I dont know how to use photoshop, I used Microsoft Paint which allowed me the basic idea to design the look I wanted. Here is my final rendition:
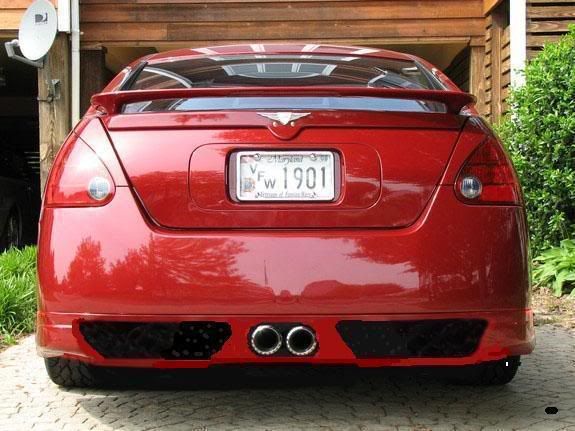
I like this design because it uses mesh on either side of the exhaust which makes the rear appear less bulbous. Another advantage is that you can still use the stock type set up of dual twin pipes by having the exhaust poke through the mesh and use mesh for center area or even have it blocked off entirely.
The first thing after designing a rear I liked was to figure out what material to make it out of. I thought about ABS like I used on my splitter, but I dont have a molding machine. Likewise with urethane, I dont have an injection molder. CF is great but expensive. Fiberglass seems the best route for material. I knew nothing about it so I read about it. Basically, you make a mold, apply grease so the glass doesnt stick (release agent) and then lay the glass mat down and cover it with a mixture of resin and hardener. It will need about 5-6 layers i think to be strong enough.
After it dries and I trim it up, I will sand the crap out of it and then mount it. Ill then decide where i want my holes to be covered with mesh later. Then, Ill cut the holes, prime it and have it painted.
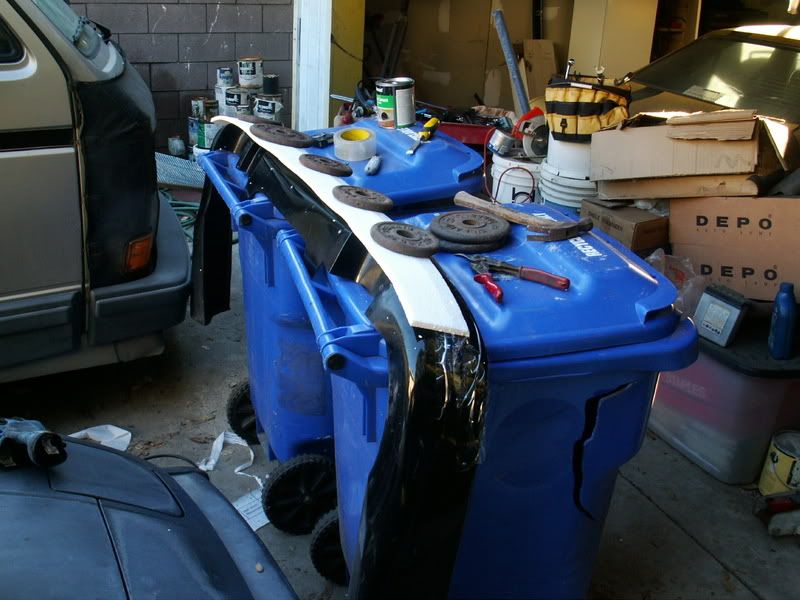
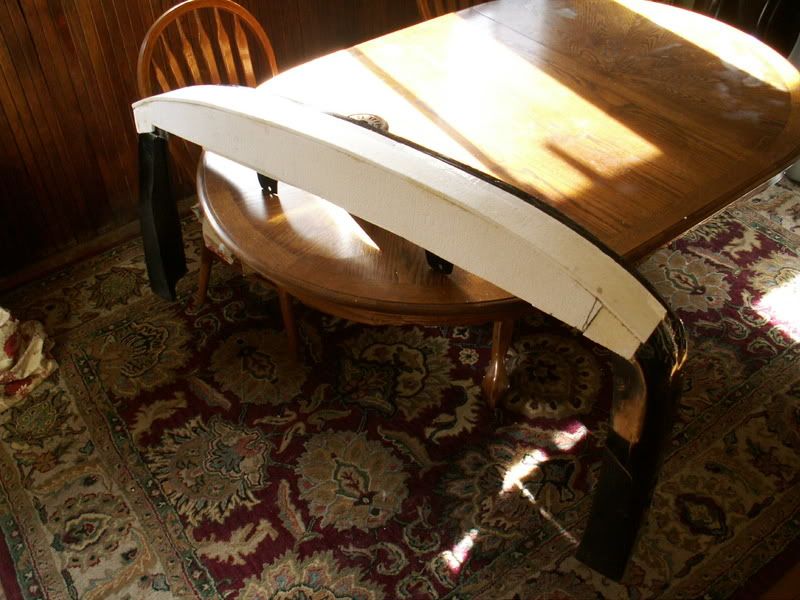
I am trying to figure out how to make a mold. I tried chicken wire but its too flimsy. I found some styrofoam at Home Depot. I placed it on my Stillen valence and since I want to extend it down some, I taped the valence and used contact cement to apply the styrofoam. Here is a pic so far:
I have always liked center exiting exhaust. Its used on concept cars a lot, and of course many production cars, Porsche Cayman, Mini Cooper S, Lambo Mercielago, Jeep SRT8, etc. I know it isnt everyone cup of tea. But I feel it and I feel it on the Maxima.
So, I have been tinkering with a design until I developed what I think is a great rear valence. Since I dont know how to use photoshop, I used Microsoft Paint which allowed me the basic idea to design the look I wanted. Here is my final rendition:
I like this design because it uses mesh on either side of the exhaust which makes the rear appear less bulbous. Another advantage is that you can still use the stock type set up of dual twin pipes by having the exhaust poke through the mesh and use mesh for center area or even have it blocked off entirely.
The first thing after designing a rear I liked was to figure out what material to make it out of. I thought about ABS like I used on my splitter, but I dont have a molding machine. Likewise with urethane, I dont have an injection molder. CF is great but expensive. Fiberglass seems the best route for material. I knew nothing about it so I read about it. Basically, you make a mold, apply grease so the glass doesnt stick (release agent) and then lay the glass mat down and cover it with a mixture of resin and hardener. It will need about 5-6 layers i think to be strong enough.
After it dries and I trim it up, I will sand the crap out of it and then mount it. Ill then decide where i want my holes to be covered with mesh later. Then, Ill cut the holes, prime it and have it painted.
I am trying to figure out how to make a mold. I tried chicken wire but its too flimsy. I found some styrofoam at Home Depot. I placed it on my Stillen valence and since I want to extend it down some, I taped the valence and used contact cement to apply the styrofoam. Here is a pic so far:


Senior Member
Joined: Jan 2004
Posts: 369
From: toronto
Guest
Posts: n/a
Thats what we said about the Splitter....
But when it was done everybody changed their minds quickly so I'm going to hold off until it is complete because with Deus I usually change my opinion totally when the project is finished.
PS-Thanks deus for sig help.
But when it was done everybody changed their minds quickly so I'm going to hold off until it is complete because with Deus I usually change my opinion totally when the project is finished.
PS-Thanks deus for sig help.

I am trying to figure out how to make a mold. I tried chicken wire but its too flimsy. I found some styrofoam at Home Depot. I placed it on my Stillen valence and since I want to extend it down some, I taped the valence and used contact cement to apply the styrofoam. Here is a pic so far:
This link should give you the concept behind plug and mold making. I used this for researching dry carbon part construction.
http://www.rollordrown.com/kayak/gstick.html
Last edited by sloonz; Jan 1, 2008 at 12:47 AM.
Thread Starter
Joined: Nov 2004
Posts: 7,353
From: Upland CA
I want it to look exactly like the top pic in this thread although I may change things as I progress. The contact glue has dried and the styrofoam seems to be holding well, with the help from some clear tape. I only need to put styrofoam on the back side and then underneath which will make the production easier. The skill will be blending it in to the Stillen piece. I may need to resort to bondo for that. The side parts will be glassed directly on to the Stillen piece which will have tape on it to protect it.
Last edited by DeusExMaxima; Jan 1, 2008 at 01:30 AM.


Thread Starter
Joined: Nov 2004
Posts: 7,353
From: Upland CA
Ramberg: True, but if you had OEM mufflers, and you were going to change anyway, it would be cheaper because you only need one muffler.
04BlackMaxx: I like that idea too. The center exhaust and rear diffusers is really cool. Its actually my 2nd option
Miamiblack: Cost is reduced from change over from OEM since only 1 muffler is needed. I am making it so that there is the option of leaving the middle area fiberglass
04BlackMaxx: I like that idea too. The center exhaust and rear diffusers is really cool. Its actually my 2nd option
Miamiblack: Cost is reduced from change over from OEM since only 1 muffler is needed. I am making it so that there is the option of leaving the middle area fiberglass

Thread Starter
Joined: Nov 2004
Posts: 7,353
From: Upland CA

Member
Joined: Aug 2007
Posts: 289
well.... from my past experience, the fiberglass resin burns through styrofoam or however you spell it. I use to mix the resin in styrofoam bowls and it would start melting through and start smoking. I hope that doesn't happen to your rear valence. Let me know how it turns out though. By the way, I think you can fiberglass cardboard.

yeap, it will get messy though, so you will need some patience, also I know there are some high density foams out there that can take the resins directly, I think its the same kind they use to hold fake flowers in (dont quote me on that)
Thread Starter
Joined: Nov 2004
Posts: 7,353
From: Upland CA
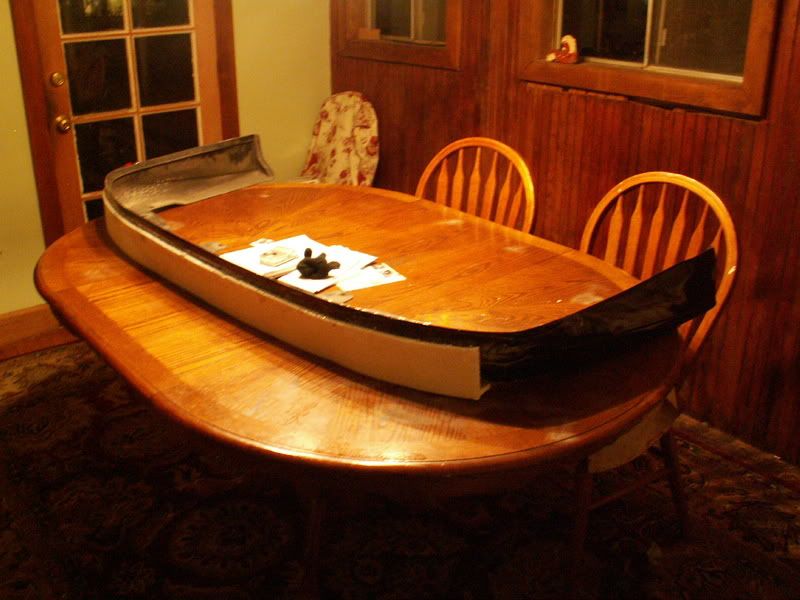
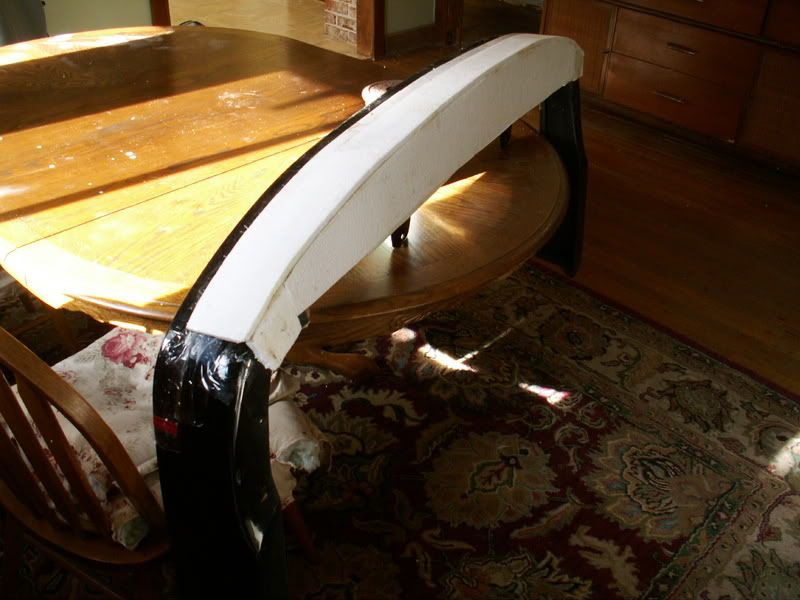
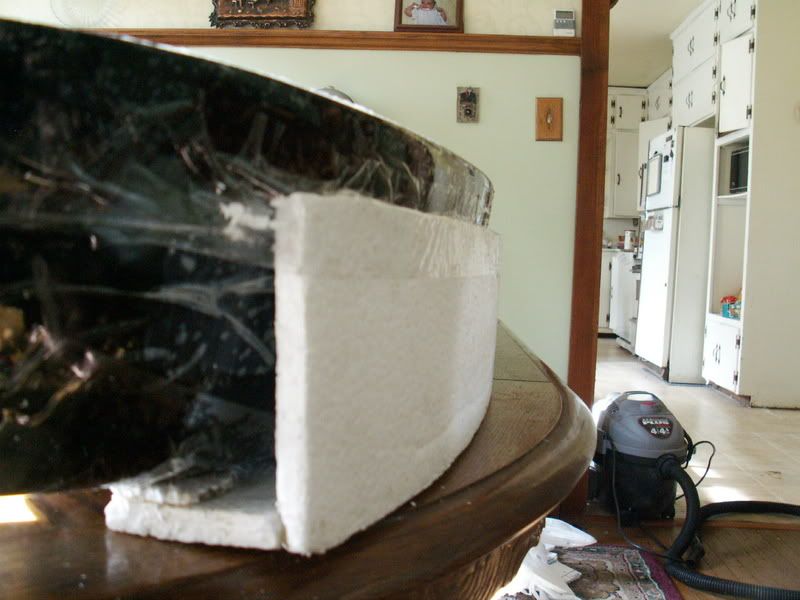
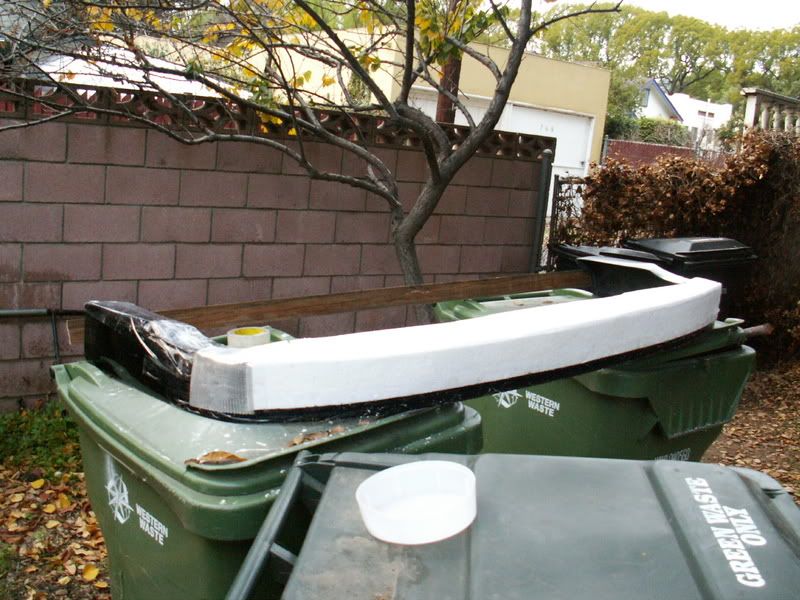
I saw that high density foam at Michaels. The problem is that they sell it in blocks. I already have my sheet foam glued to the Stillen piece and its starting to take shape. Here are the most recent pics:
I figure if I can get the basic shape with what Im using, and then bondo the top of it for get a more precise shape, Ill be stylin. The other consideration is that the styrofoam/bondo layer is fairly thick,which will make my valence too wide. There are several options to compensate for this: 1. I can put two layers of glass, remove it, and then glass the inside with 4-5 layers to compensate some, 2. I can make glass the outside, just like Im planning, but use that piece as a plug. THEN, I can put a release agent INSIDE the plug, and that can be my valence. The advantage here is that I can make many valences, if I break mine or I want to sell them.
What are your thoughts??? Anyone??
Thread Starter
Joined: Nov 2004
Posts: 7,353
From: Upland CA
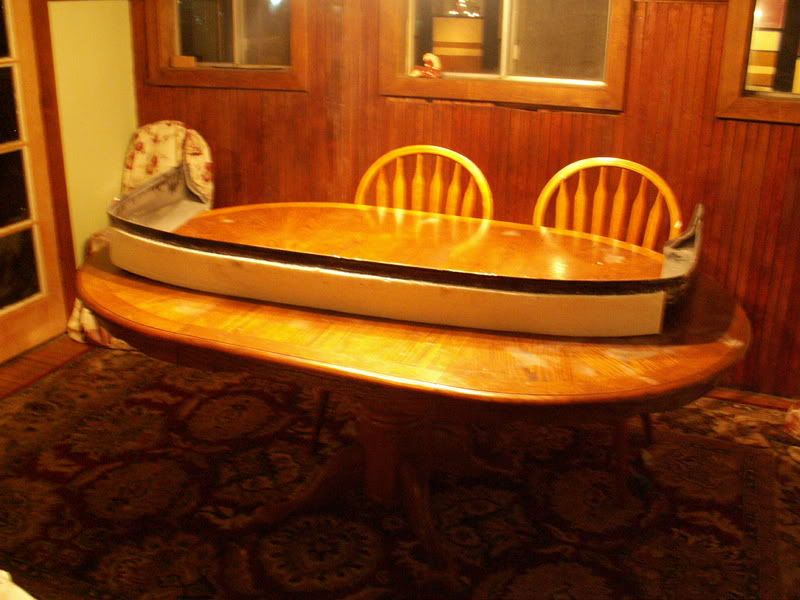
Actually, the problem may resolve itself since the valence is curved around going from the top down around underneath. The way I have it set up, the stryofoam goes straight up and down. What Ill prolly do is just build up the top inside edge to match the Stillen piece so it fits the OEM bumper. Check out these pics taken looking downward:

and then from the side:
and then from the side:


i dont know but this sounds like a pain in the *** if you ask me. it looks kinda cool but we would have to cut and weld a straight pipe from where the mufflers split. and will it affect our cars at all? CEL?
Thread Starter
Joined: Nov 2004
Posts: 7,353
From: Upland CA
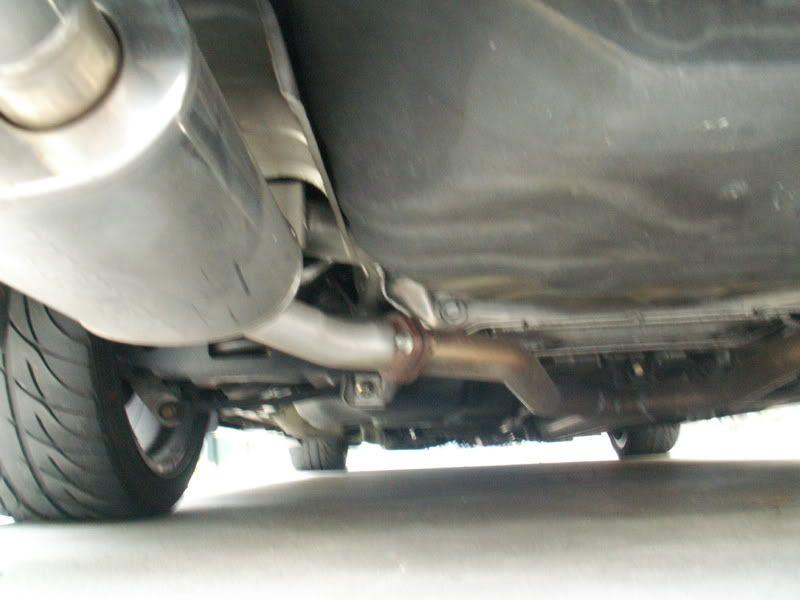
You simply weld a mating flange to a SINGLE pipe, follow the SAME path of the muffler feed pipe, set a smaller muffler back away from the rear (you have several inches to do this), and then run a single pipe to the center exhaust exit, and weld on dual tips. Another alternative is to unbolt both mufflers, run two smaller mufflers on each side as described above, and run both pipes around spare tire holder and feed out through the center exhaust.
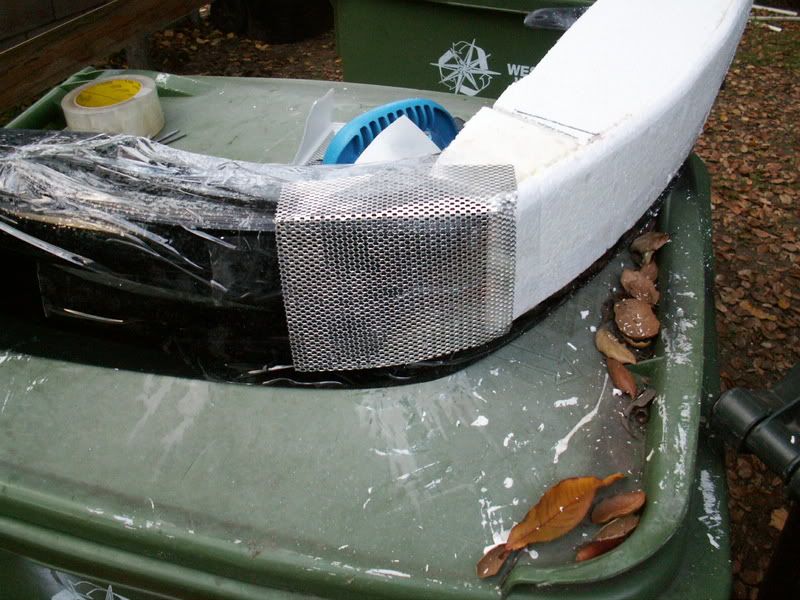
Here are some updated pics showing the aluminum patch to blend the styrofoam to the Stillen piece which will then be bondoed:
Last edited by DeusExMaxima; Jan 1, 2008 at 04:43 PM.
Thread Starter
Joined: Nov 2004
Posts: 7,353
From: Upland CA
Thanks Red. Here is bondo on the patch. The styrofoam didnt seem to have much of a problem taking bondo although I put tape on most of the area where bondo was in contact with styrofoam.
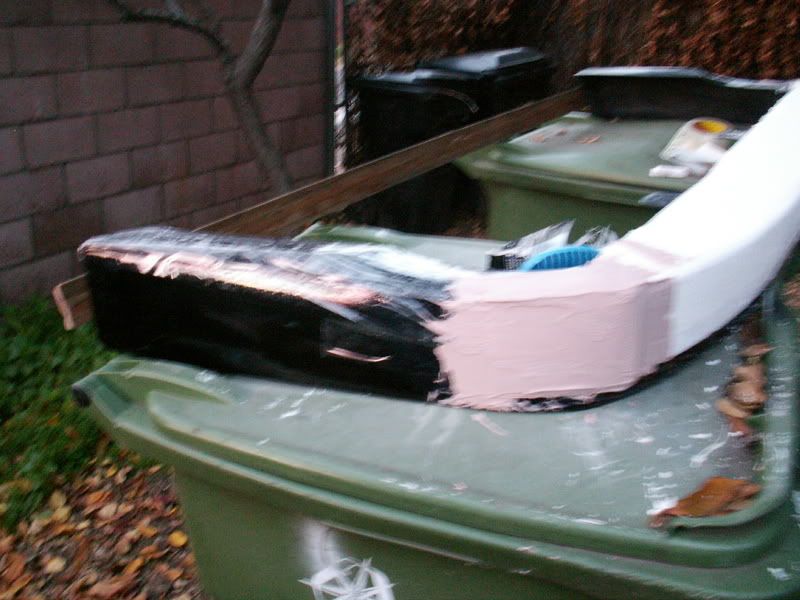
I also bolted a brace between the two ends to stabilize it while I move it around
I also bolted a brace between the two ends to stabilize it while I move it around
Last edited by DeusExMaxima; Jan 1, 2008 at 05:24 PM.


Senior Member
Joined: Jan 2007
Posts: 323
I'll have to say that I'm not a fan of how you've modded your Maxima. I do, however, have a great deal of respect for how far you are willing to go to make the vehicle your own. A lot of people talk about what they are going to do to their cars, you actually get to work and go above and beyond.
I hope it works out for you and I anxiously wait to see how this turns out.
I hope it works out for you and I anxiously wait to see how this turns out.


Thread Starter
Joined: Nov 2004
Posts: 7,353
From: Upland CA
The status is, I need to put bondo on the mesh on the other side, sand both sides, and basically keep bondo-ing and sanding until the rear of the valence blends in with the sides.
Last edited by DeusExMaxima; Jan 2, 2008 at 12:42 PM.