
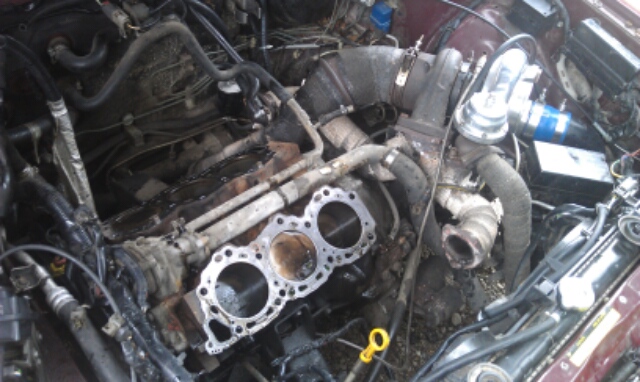
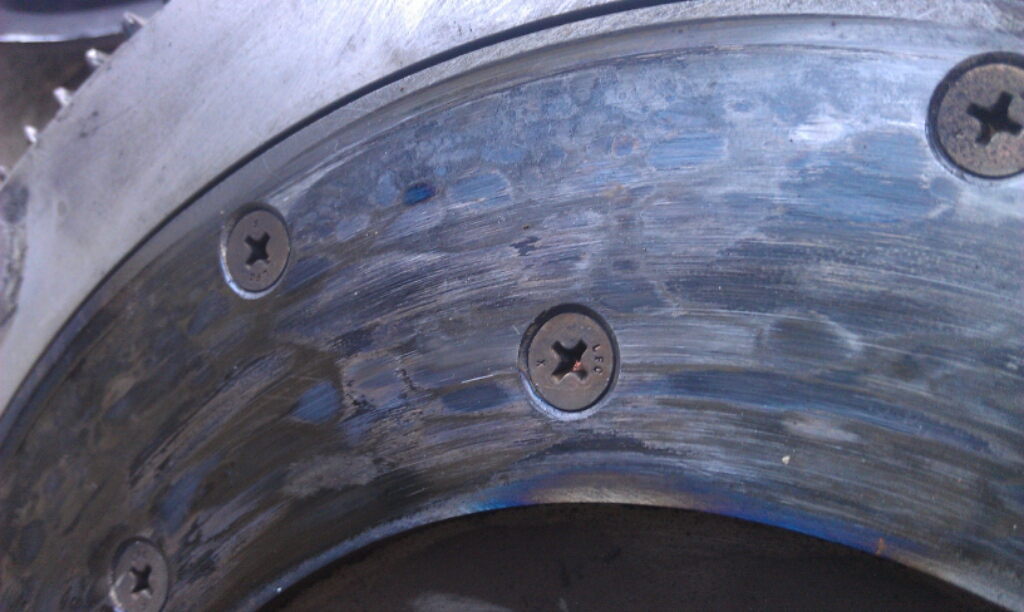
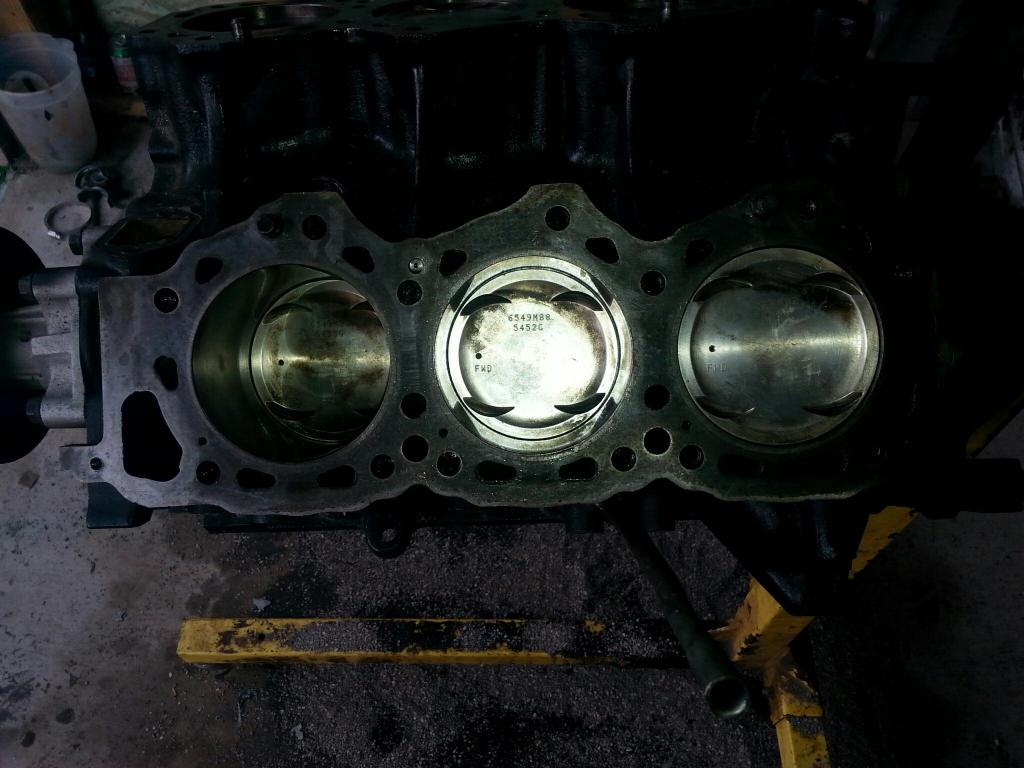
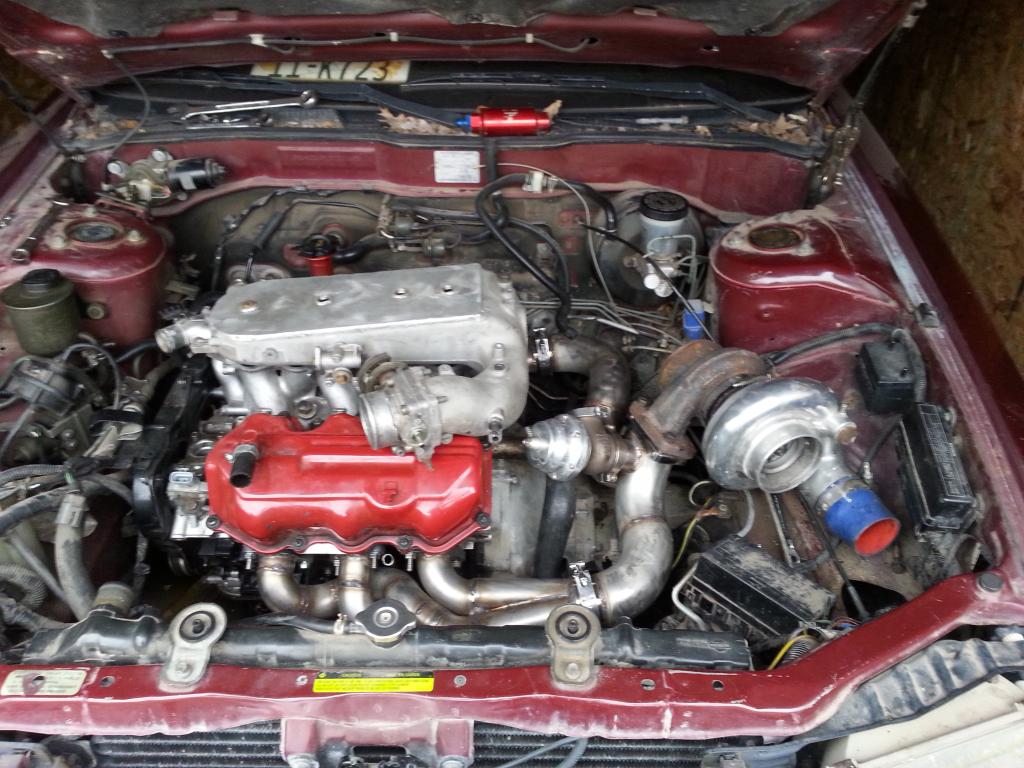
For those who are not familiar with my car heres a little back round. This was my first car 10 years ago has been boosted last 7 but driven rarely last few years. 2 years ago I was really getting it dialed and and it took a serious beating for a solid year. Unfortunately I pushed it to hard. I never did dyno Im guessing car was putting down mid 400s. So heres the results of the melted piston. Took me 45 min to tear down to this point.

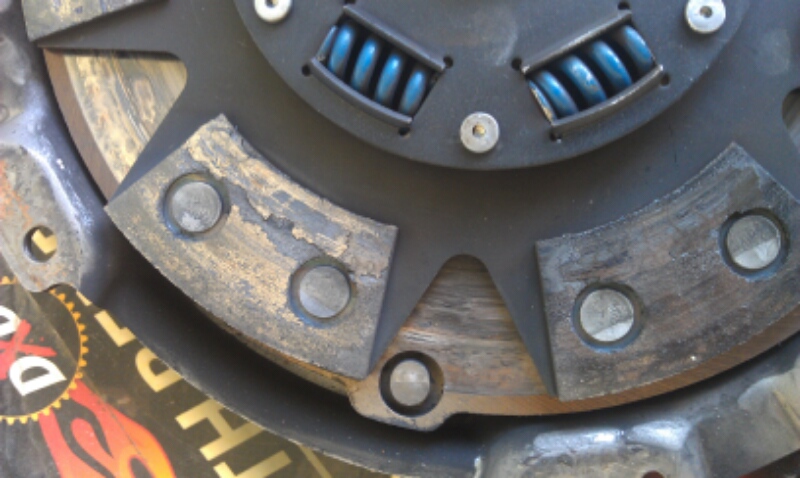
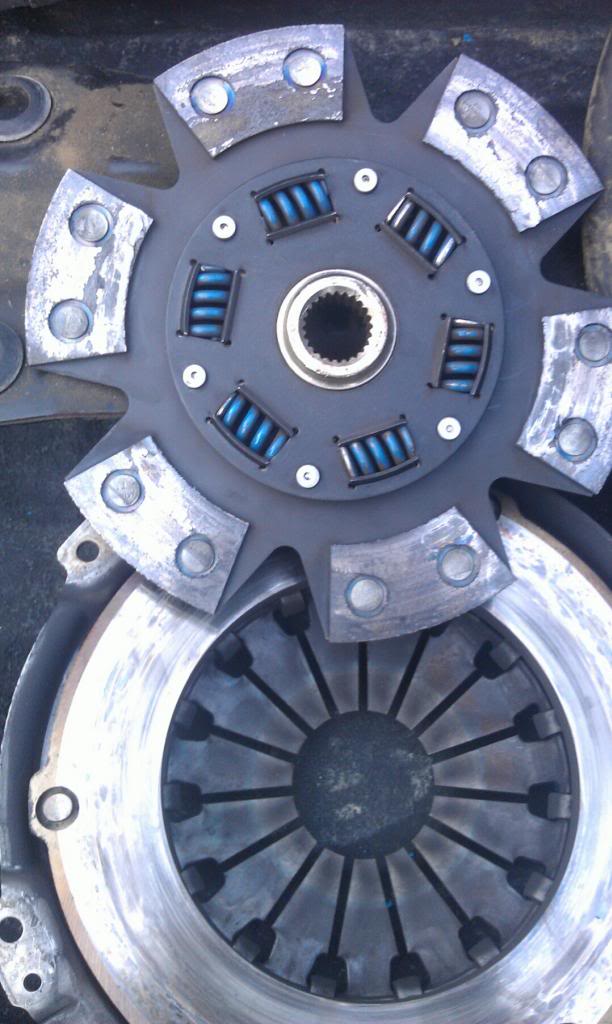
This is where I cried seeing my Southbend stage 5 smoked. Clutch was rated 700+ ft/lbs. After talking with southbend Looks like I made to much power to soon. My fault for not fully breaking clutch in.


This is where I cried seeing my Southbend stage 5 smoked. Clutch was rated 700+ ft/lbs. After talking with southbend Looks like I made to much power to soon. My fault for not fully breaking clutch in.


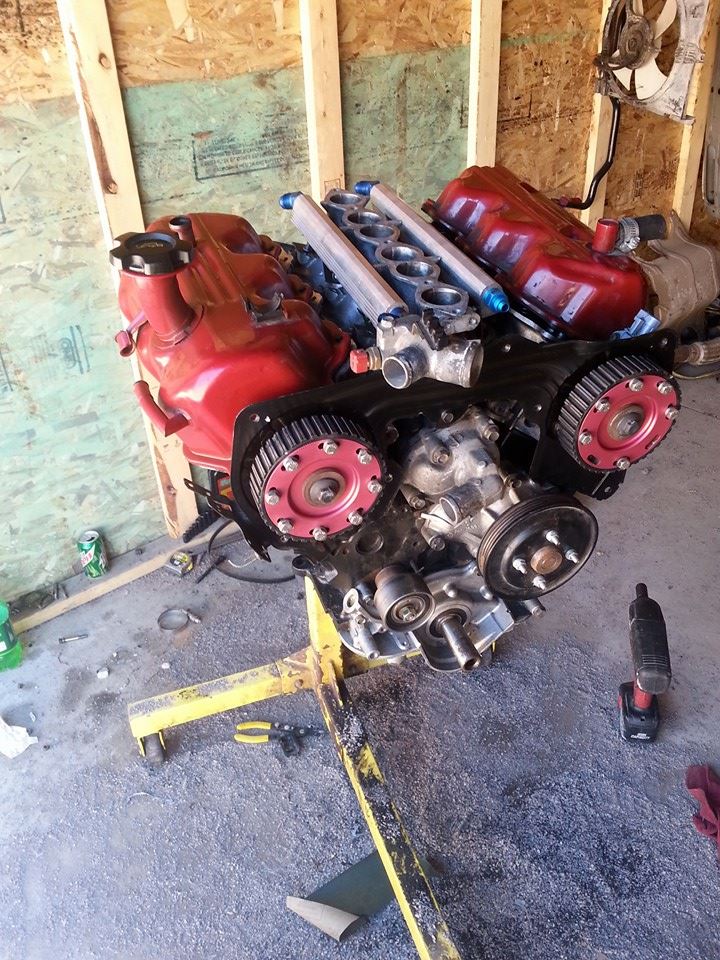
I then let the car sit for a year gathering parts slowly deciding where I wanted to go. I planed on another stock bottom end vg30e with my built heads. I stumbled onto local guy parting out a z31 which happened to be a shiro. Two truck loads home I tore down the motor I picked up for $600. Motor had z32 88mm weisco pistons, z32 TT rods with Arp Rod bolts. I tore it down to inspect his work on the rebuild. I saw quite a few issues so I went ahead and rebuilt the bottom end. Fresh bottom end and cleaned up my ported 85e heads with my schneider 280h cams, Schneider 110lb dual springs and Russ adjustable cam gears.
Got some help setting the timing.
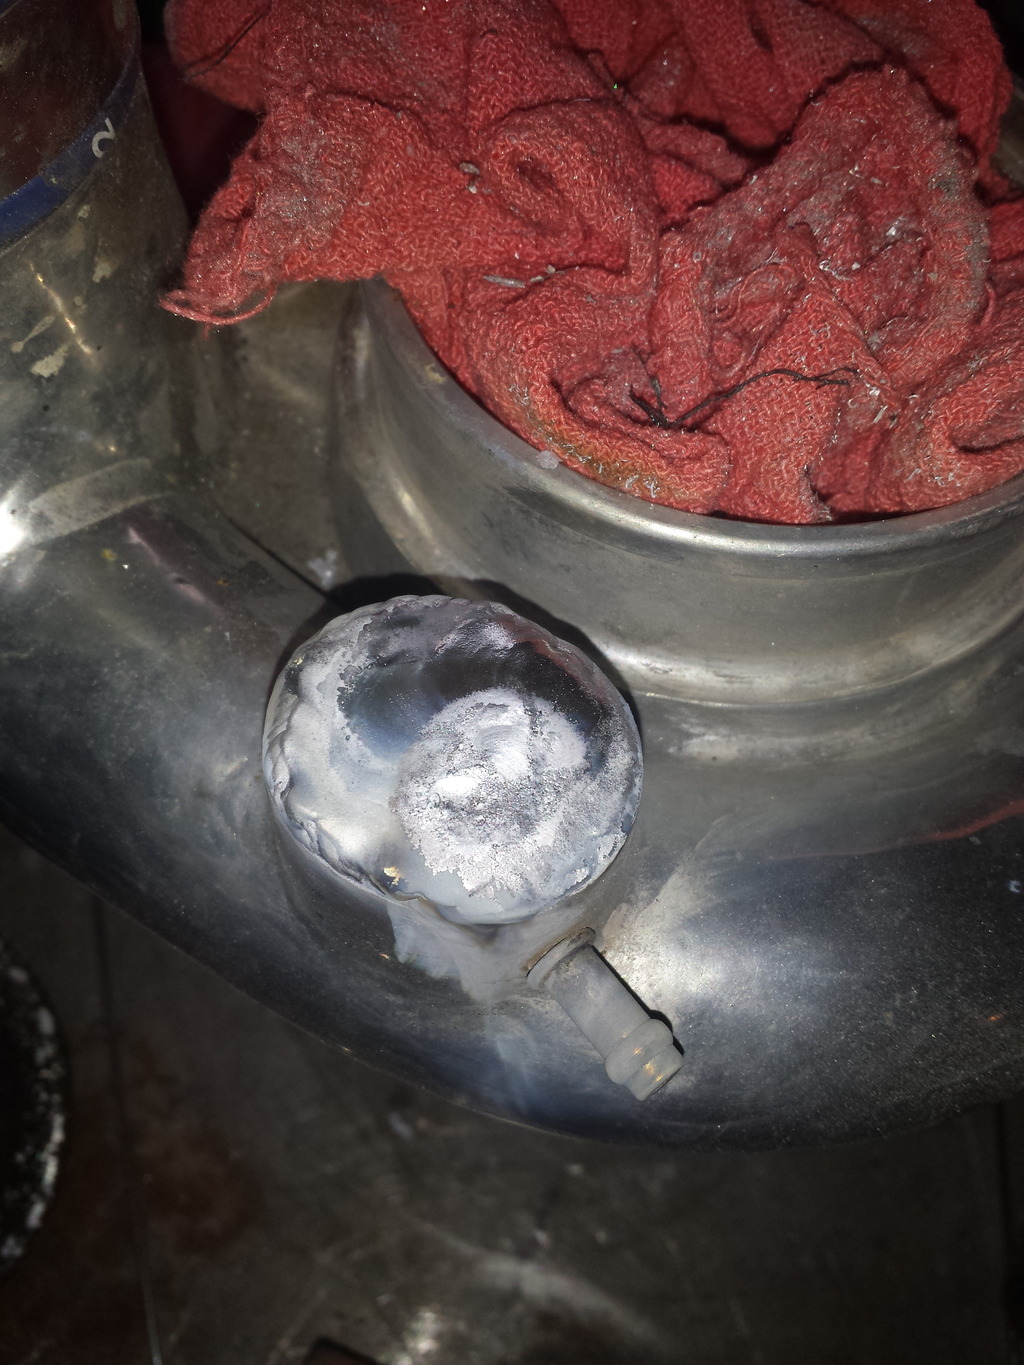
Taking care of my fuel issues with. Aluminum rails and -6 an feed lines. Also 900cc seimens injectors
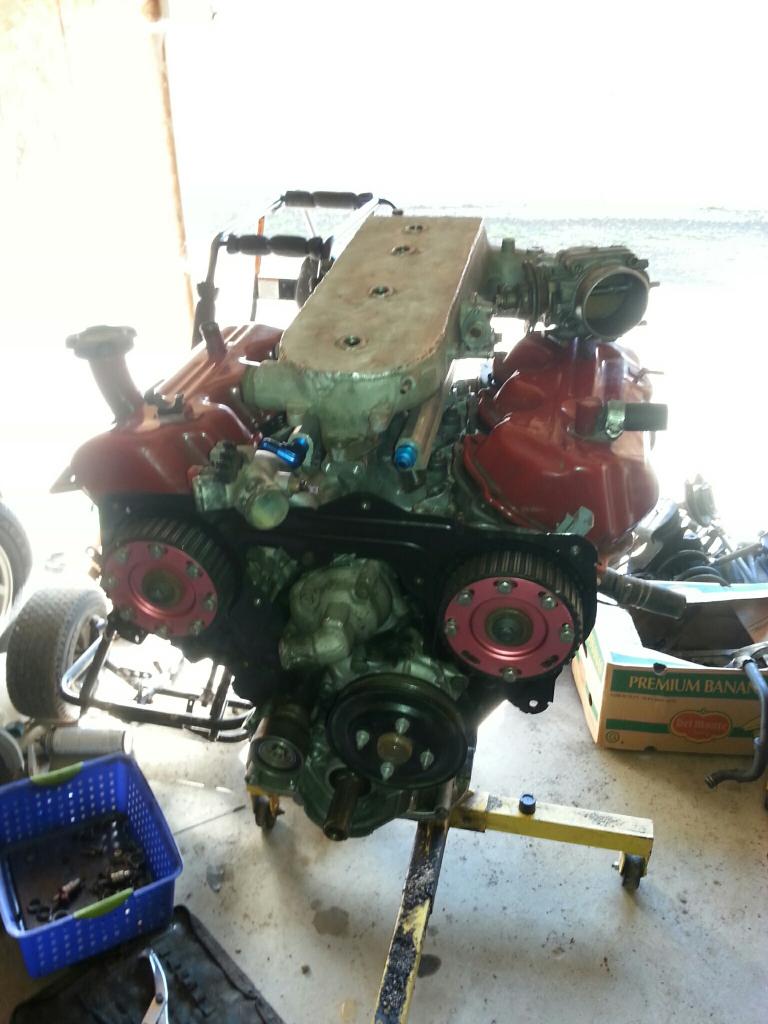
Im staying with the z31 plenum it worked very well with the top feeds and also made my pluming much easier to route. Except its now a gutted plenum.


Got some help setting the timing.

Taking care of my fuel issues with. Aluminum rails and -6 an feed lines. Also 900cc seimens injectors

Im staying with the z31 plenum it worked very well with the top feeds and also made my pluming much easier to route. Except its now a gutted plenum.

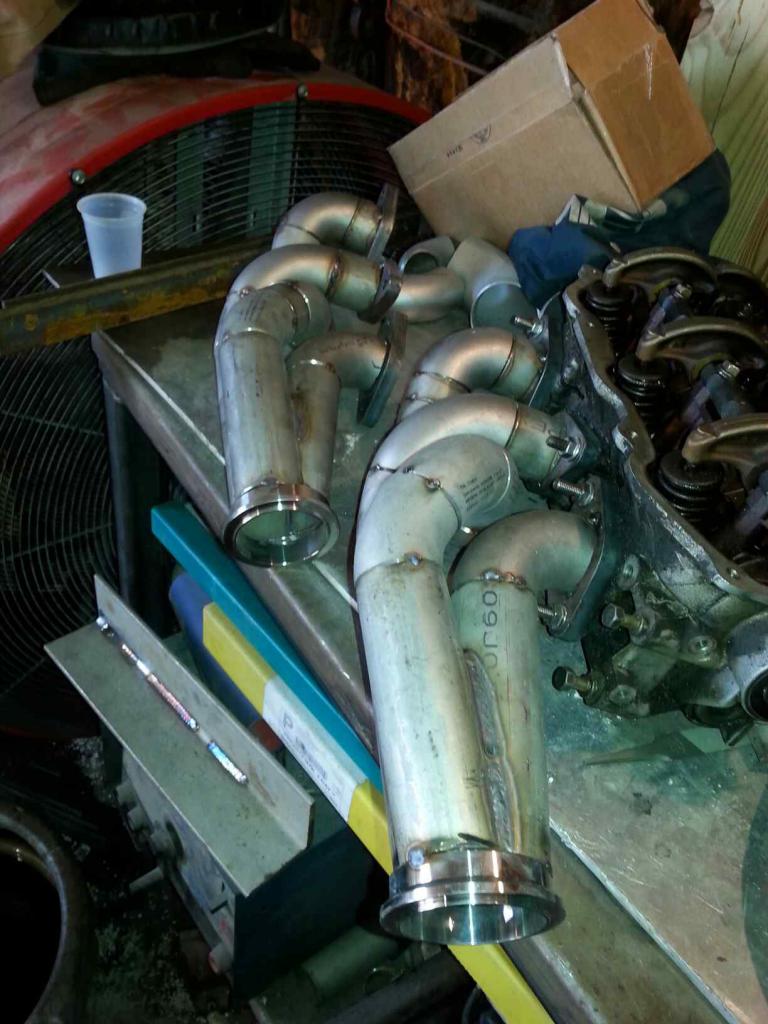
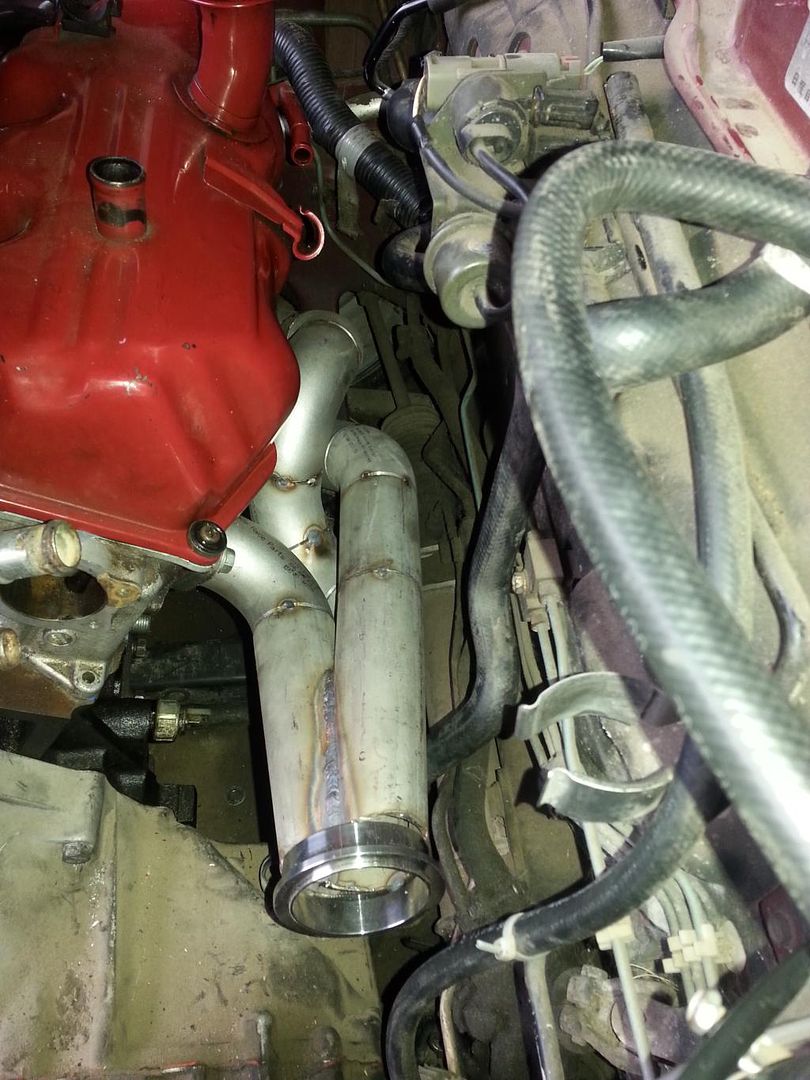
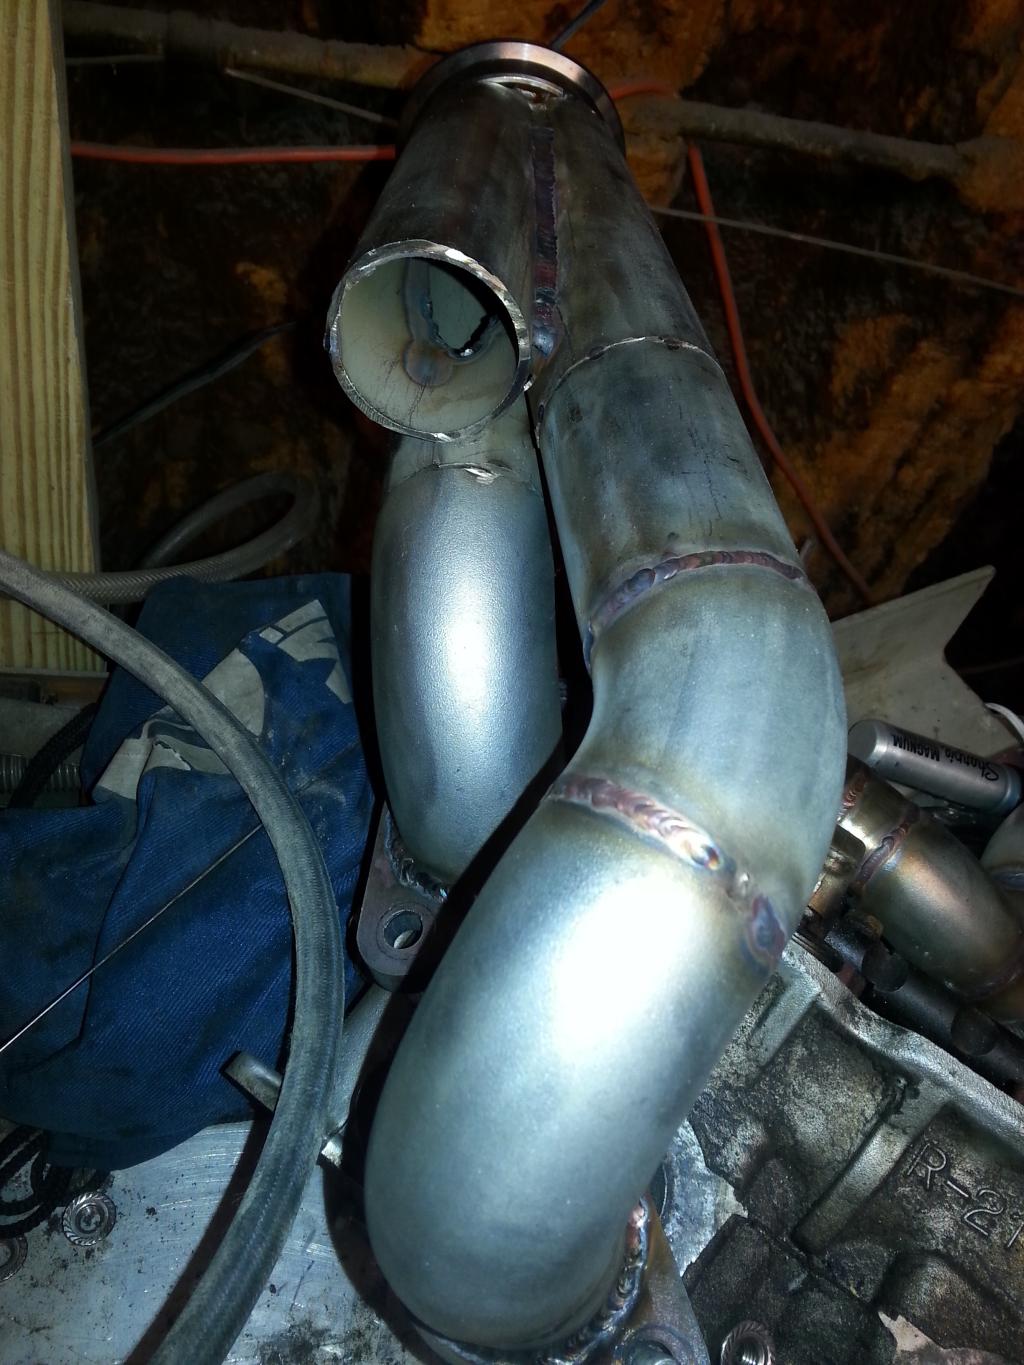
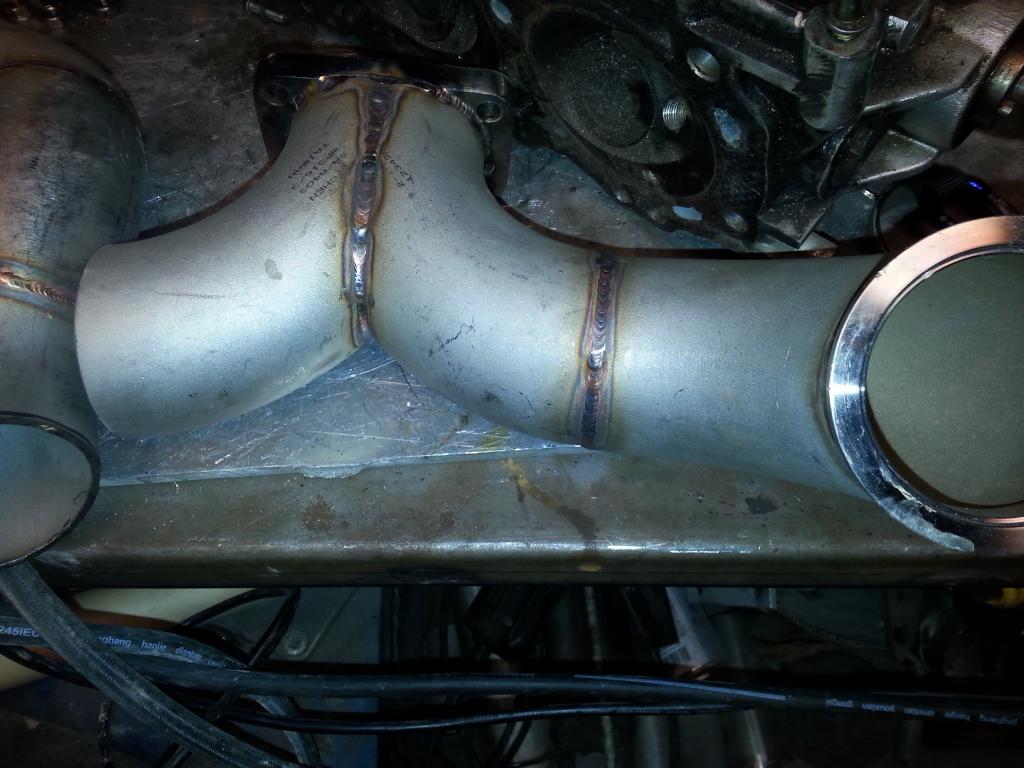
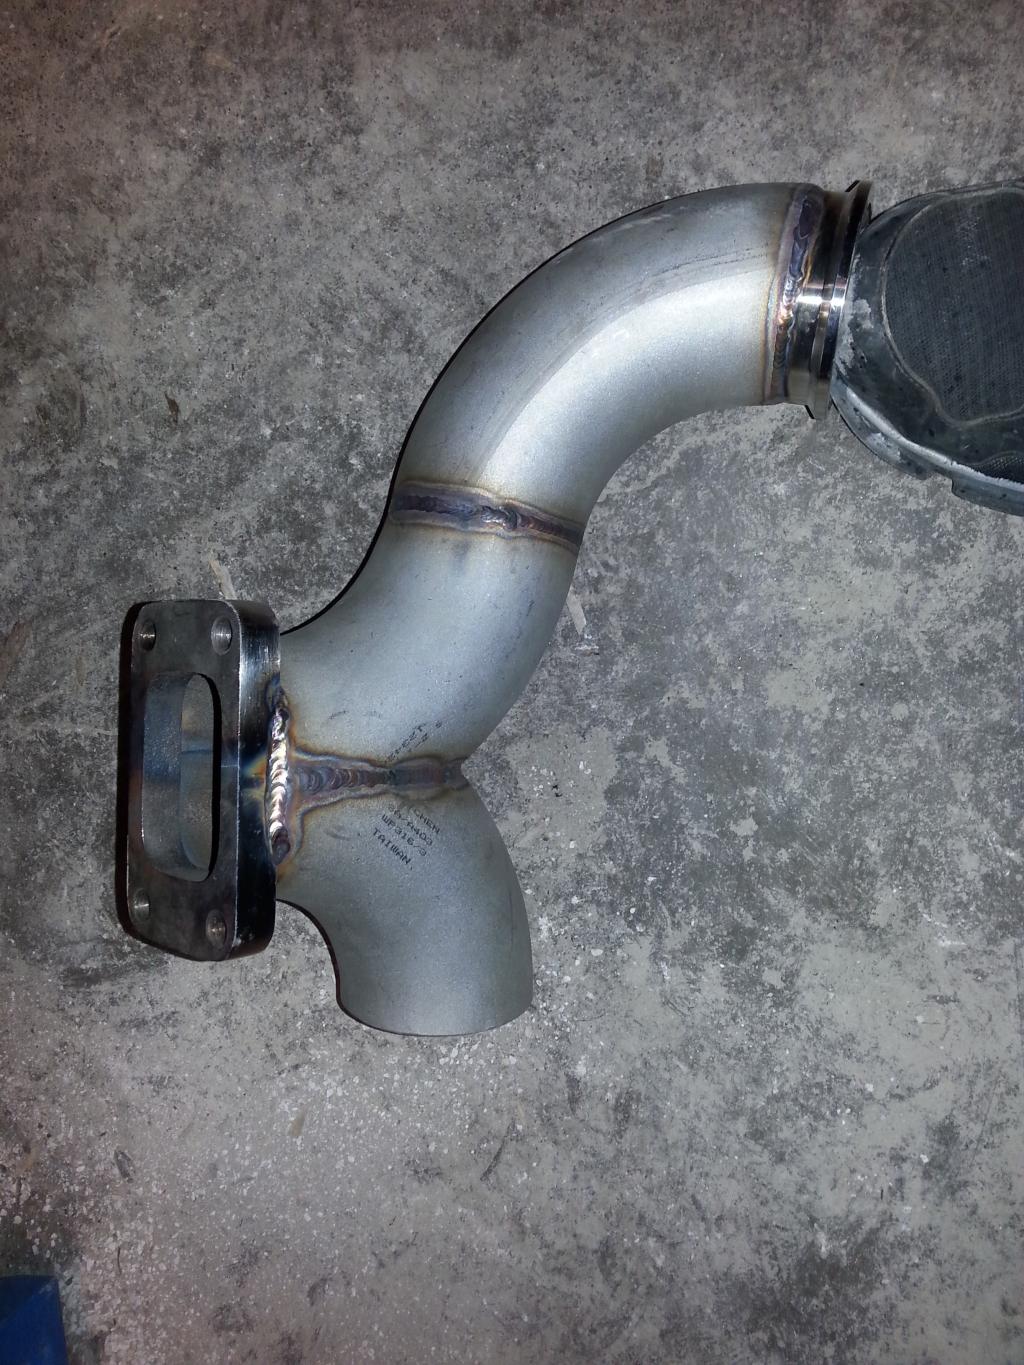
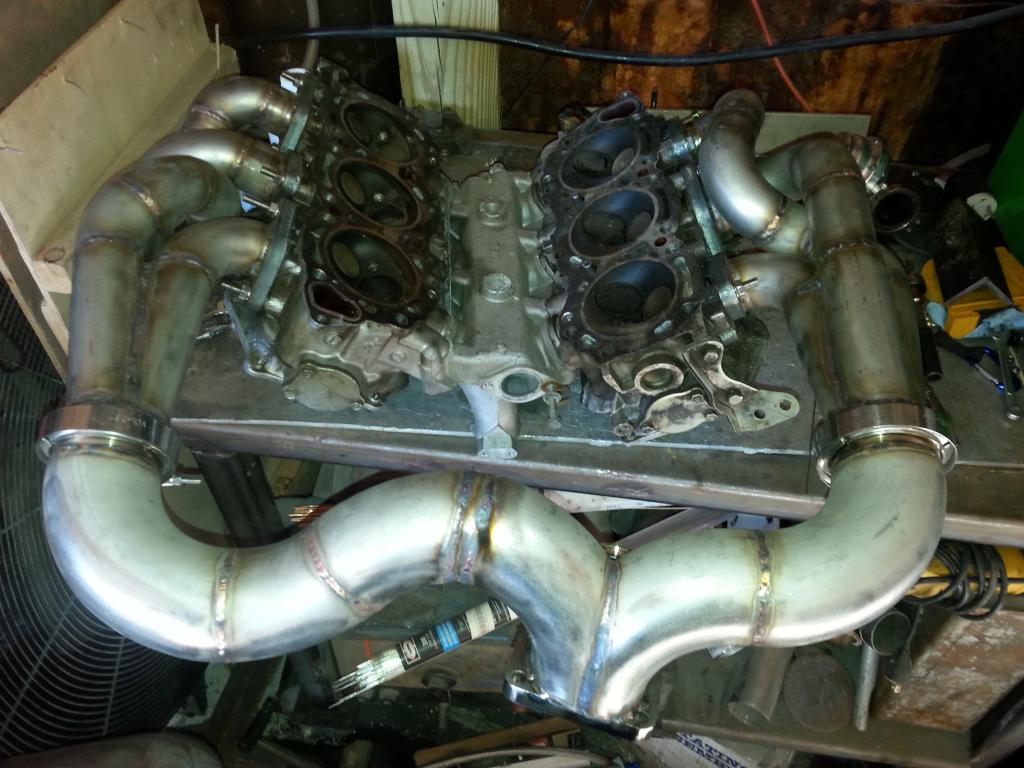
Fast forward few months to now. My new headers are taking shape. Decided to just go full stainless with vband for the crossover pipe. I will be keeping the same turbo. Holset He351cw. I did get rid of the tial 38mm for tial 44mm. With everything vband should look clean and make it very easy to work on. 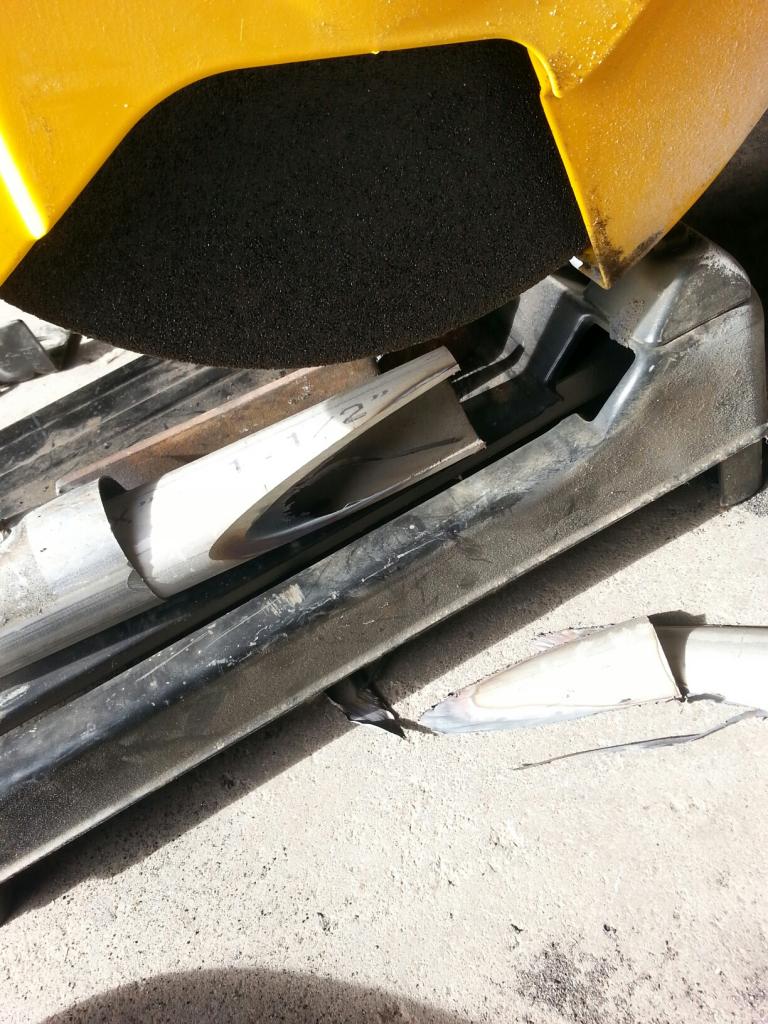

Mocked up on old junk head. Also back and forth to the car to ensure no clearance issues.


Mocked up on old junk head. Also back and forth to the car to ensure no clearance issues.


Awesome build. Can't wait to see this as it continues to unfold.
It's great to see 3rd gens still around, especially one with some power to boot.
It's great to see 3rd gens still around, especially one with some power to boot.


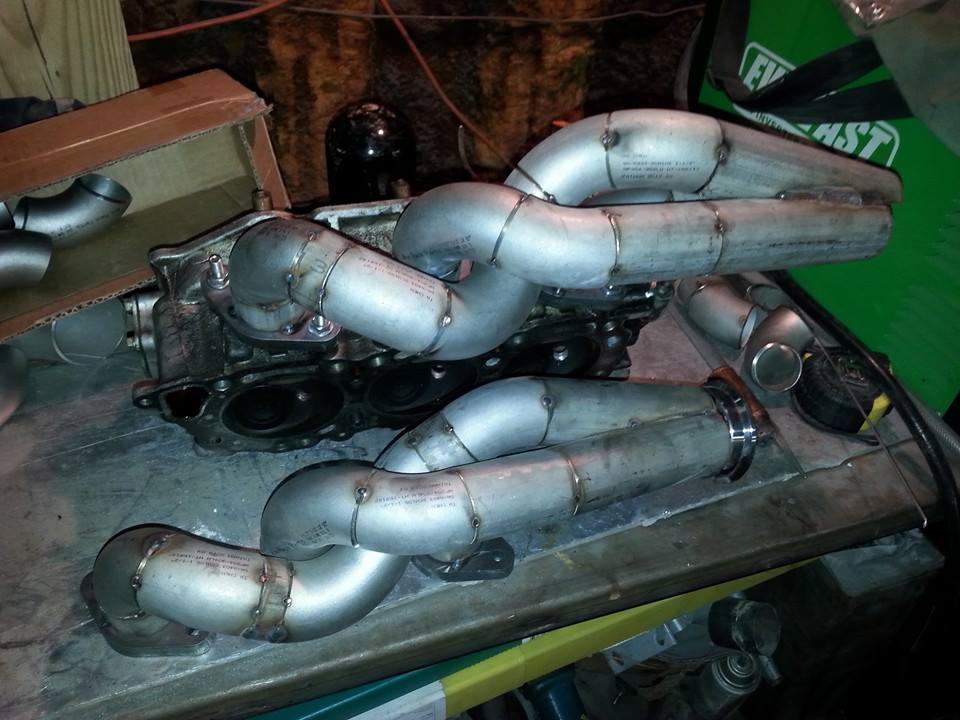
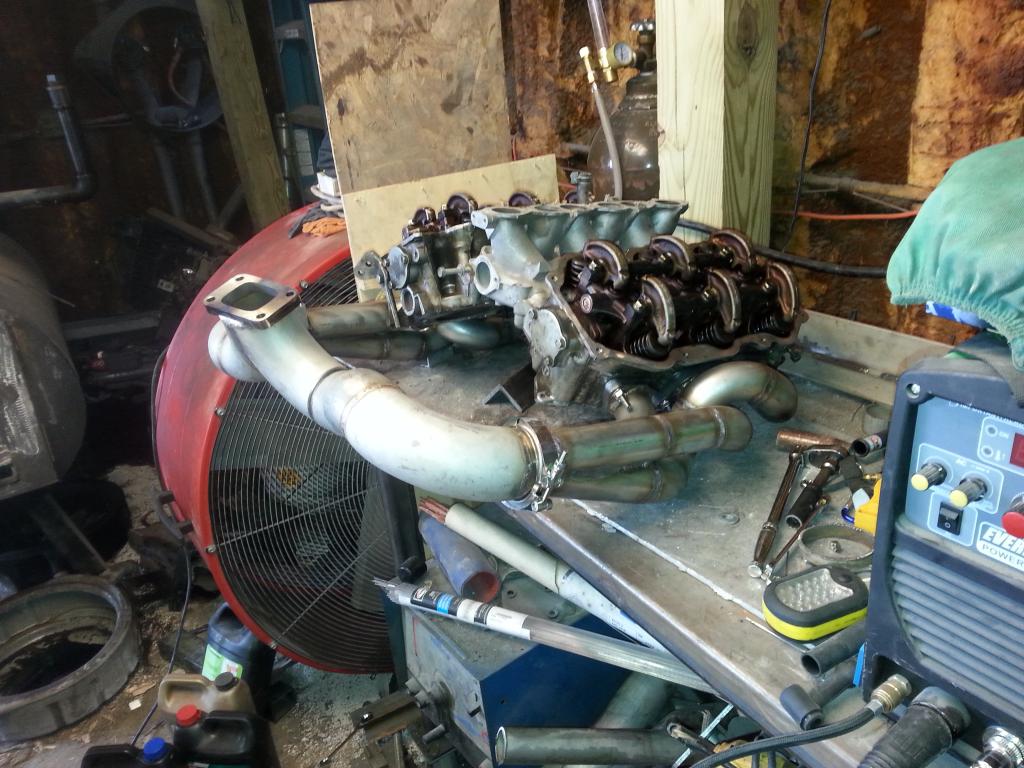
Ran out of material couple weeks ago. So while I waited I was slowly playing with fuel setup. That will be a seperate update later on. But material showed and finished mocking up the second header. Ran into small issue on the rear engine mount touching the header. But should be able to sort that out in hours work.
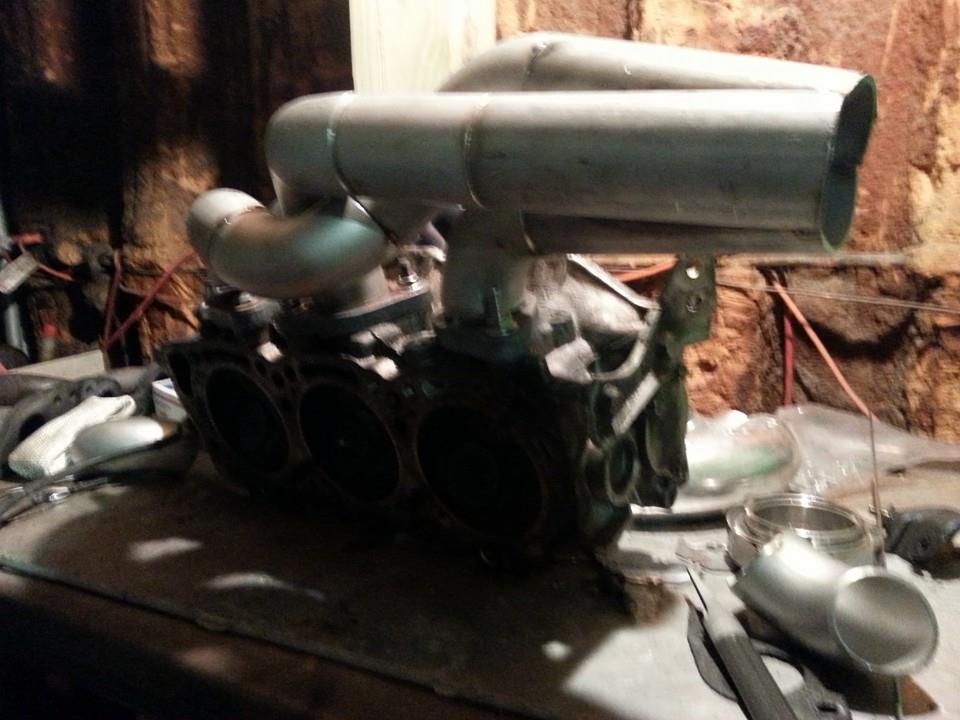
A inside shot of the collectors.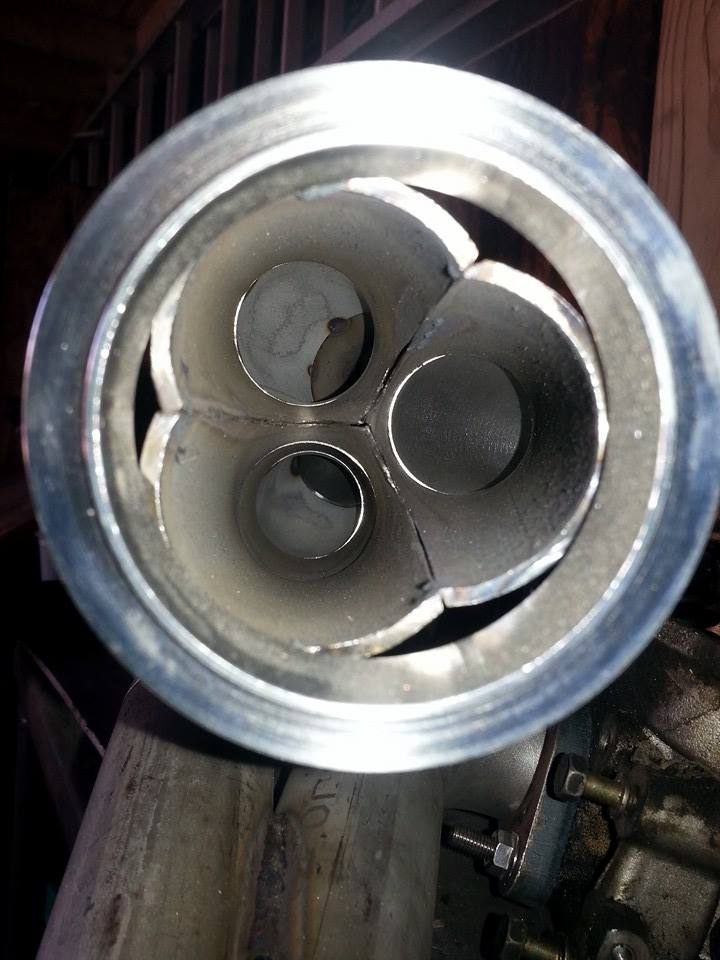
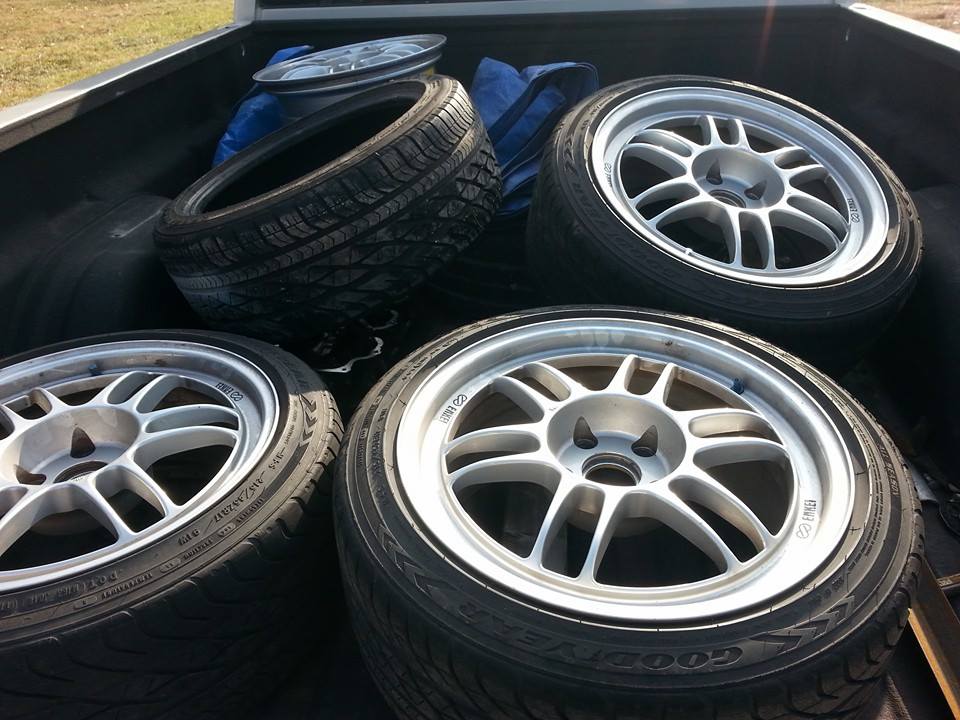
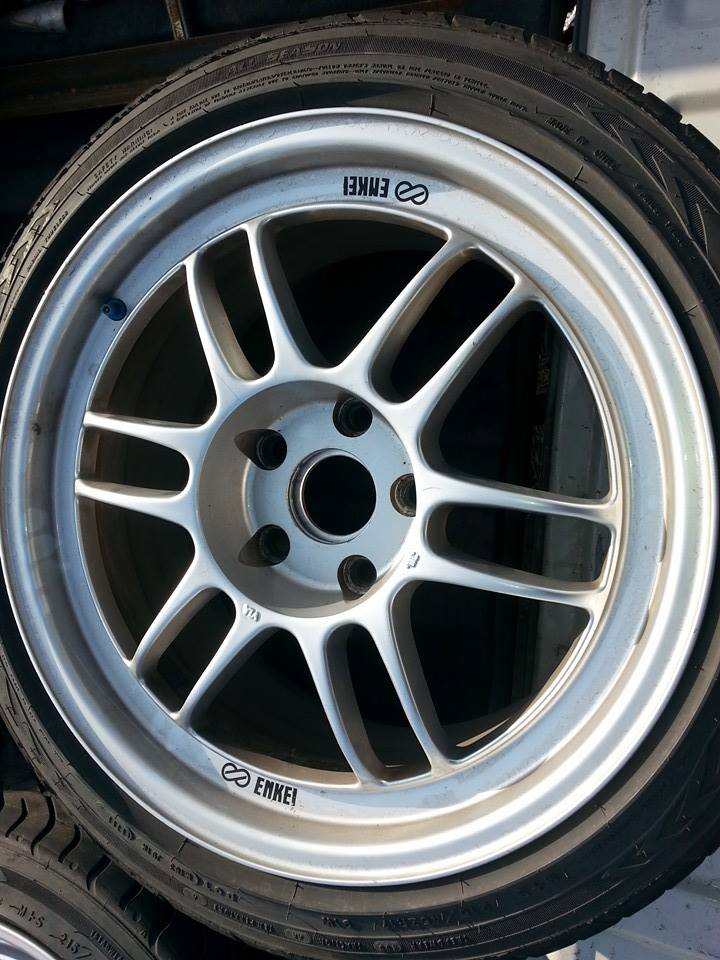
I also got new wheels. Time to retire the tiny MSR 7" wheels after 9 years. Found these enkeis on craigslist for $200. 17x8.5 with streteched tires which I will not run. Looking at running 245-255/45 Nitto n555r Radials or Proxes R88 up front. Then just a standard street tire on the rear. This should definetly help me hook up finally.


A inside shot of the collectors.

I also got new wheels. Time to retire the tiny MSR 7" wheels after 9 years. Found these enkeis on craigslist for $200. 17x8.5 with streteched tires which I will not run. Looking at running 245-255/45 Nitto n555r Radials or Proxes R88 up front. Then just a standard street tire on the rear. This should definetly help me hook up finally.


Yes one wheel had a crack in bead on back side. I fixed with my tig. Time I sell the tires off then ill have $50 in enkei rpf1 
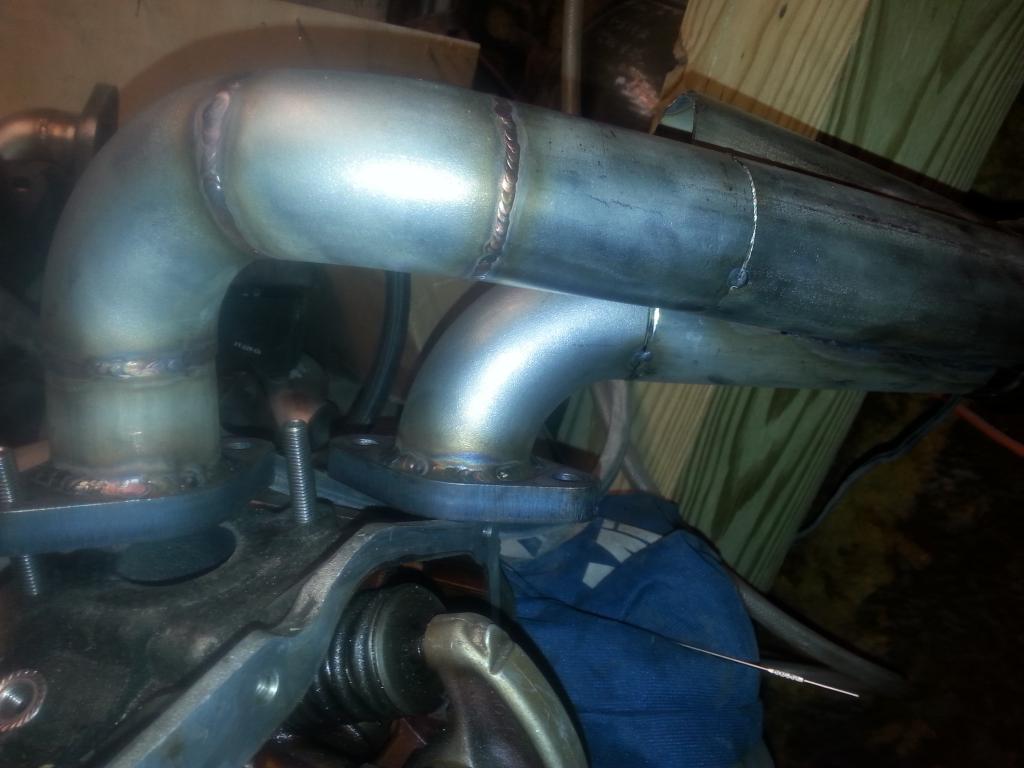
Small update. I pulled the rear motor mount and just removed the heat shield off it. That gave me plenty clearance without having to modify my header to fit. I have 10 days off for the holiday so hopefully I can get these finished up wastegate ran etc. Also get good start on my fuel lines before back to work.
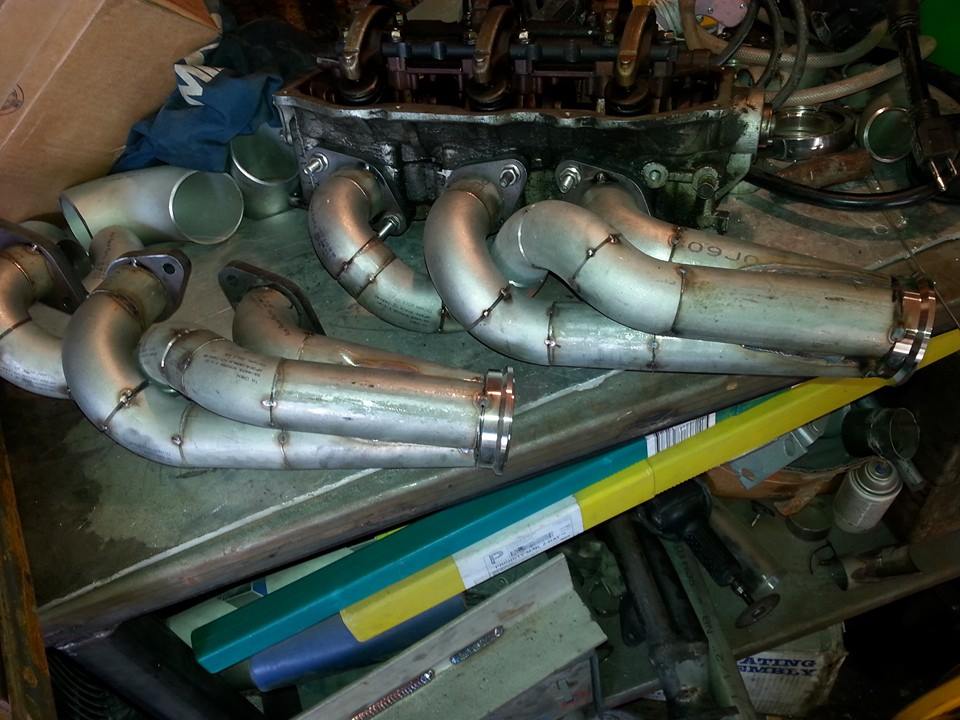
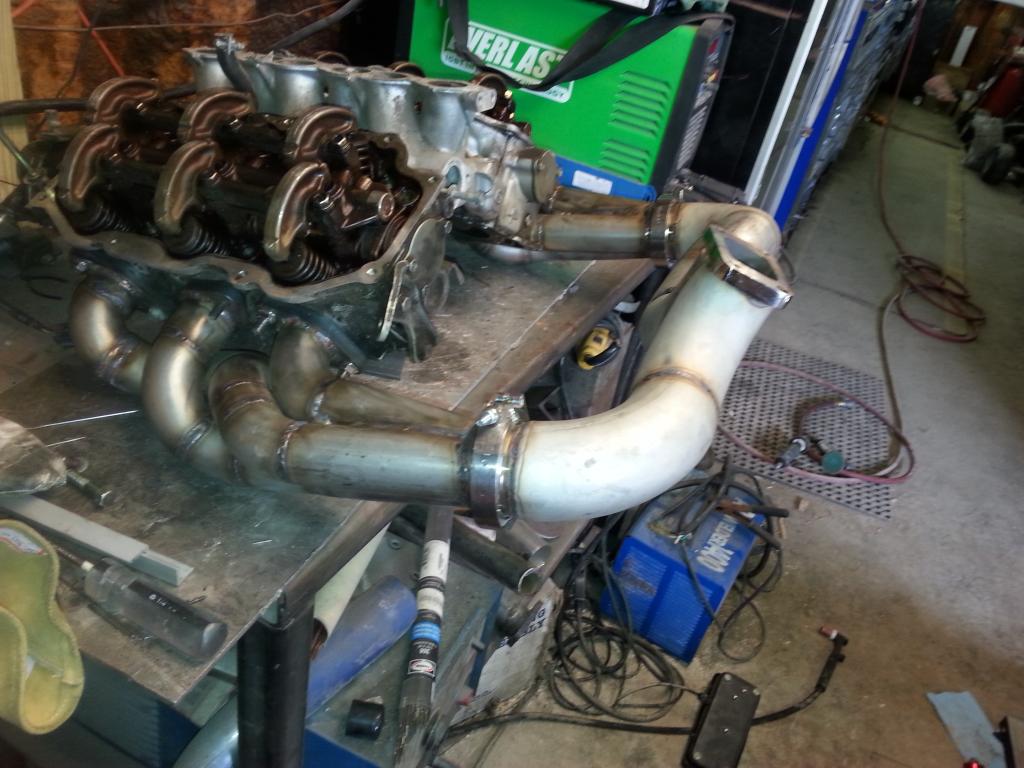
I started to tack up my crossover up. Plan to try and keep same turbo location to minimize any changes to charge piping.
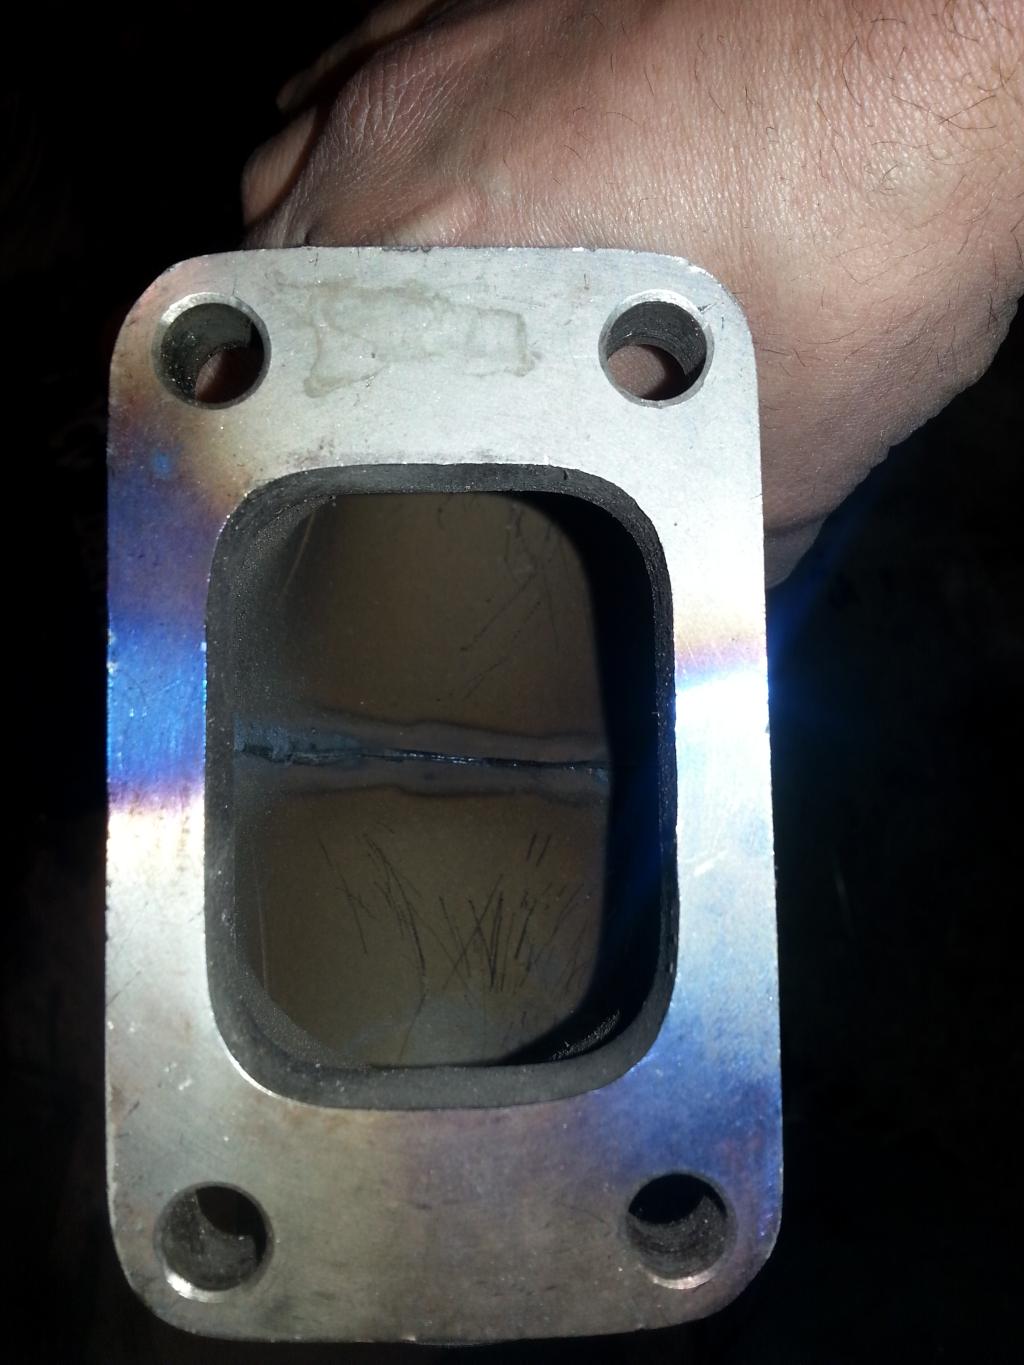
The collector will be simple 2 into 1 for the flange.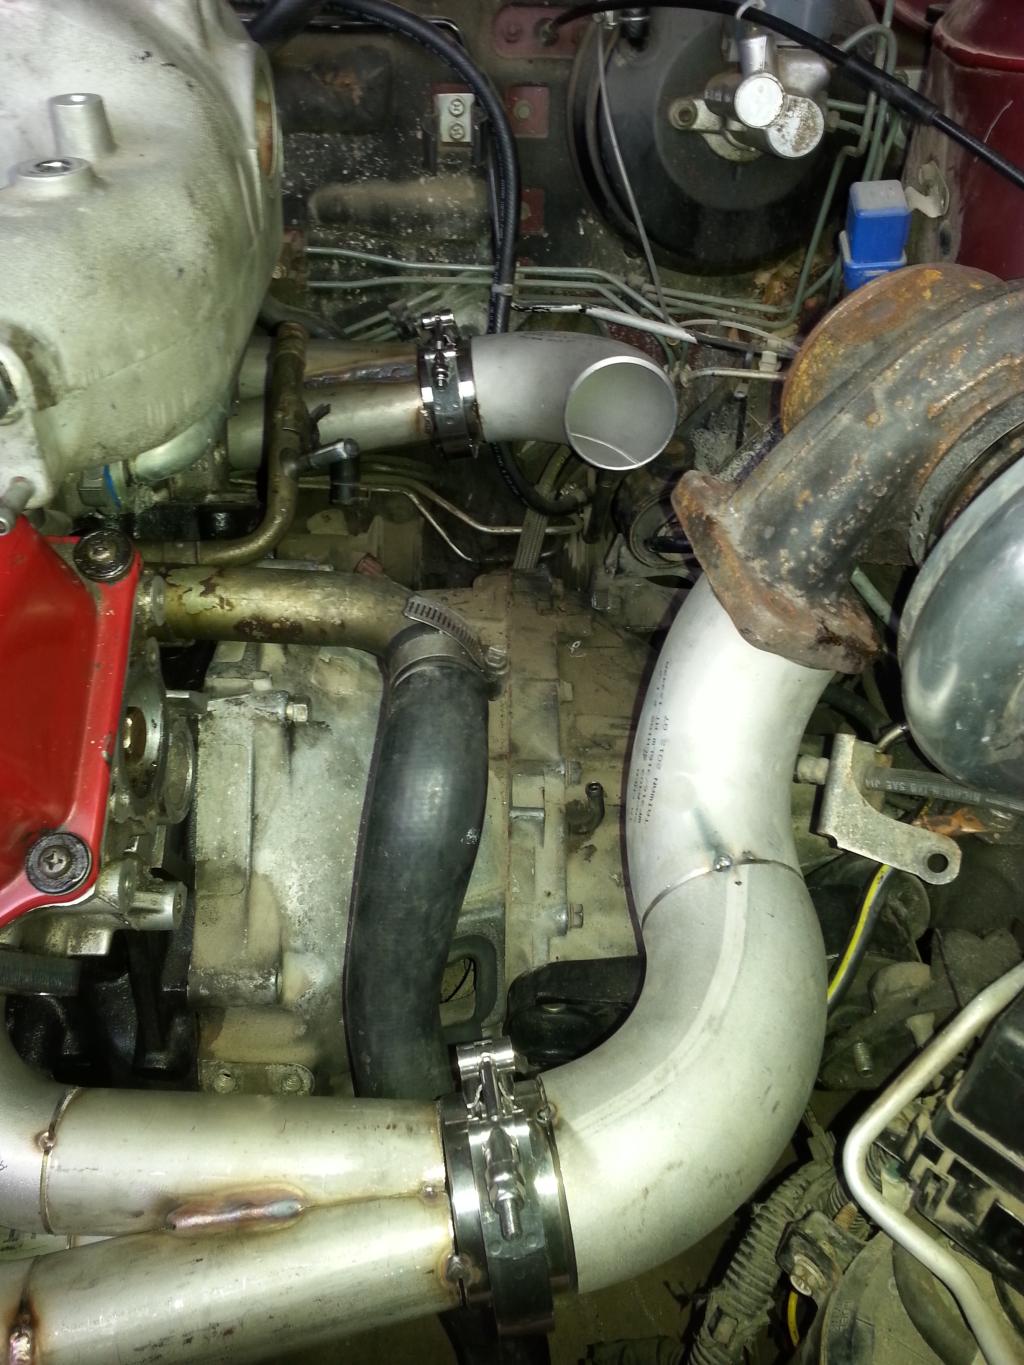


I started to tack up my crossover up. Plan to try and keep same turbo location to minimize any changes to charge piping.

The collector will be simple 2 into 1 for the flange.


This is an awesome build!!! Wish I was this talented! Looking forward to seeing future progress! I miss my 3rd gen VE now!

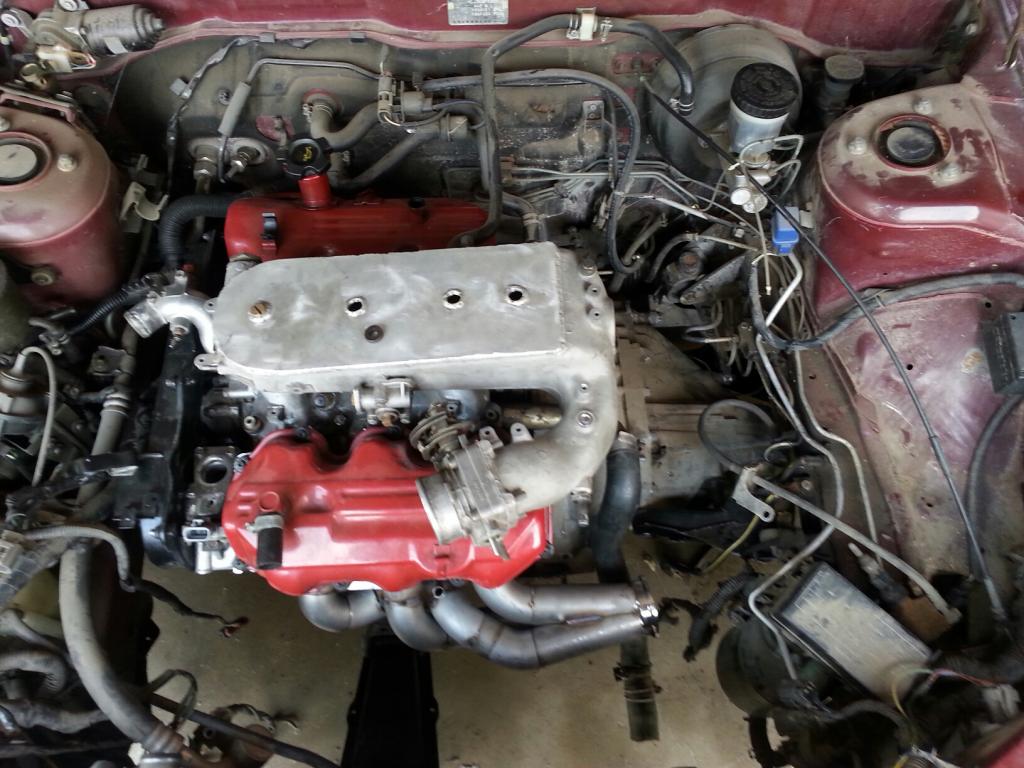
I do have tons of room. 3rd gens are so easy once everything. Eliminated. Emissions. Etc. I have eliminated everything down to basics. I still have ac and power steering.
Quote:
Not sure what your asking.Originally Posted by t6378tp
How is the z31 uim and the low/midrange with those short runners
Kinda hard to tell as I changed multiple things when I first did the swap. If I changed only that at the time I don't thing i would of felt Any lose or gain.
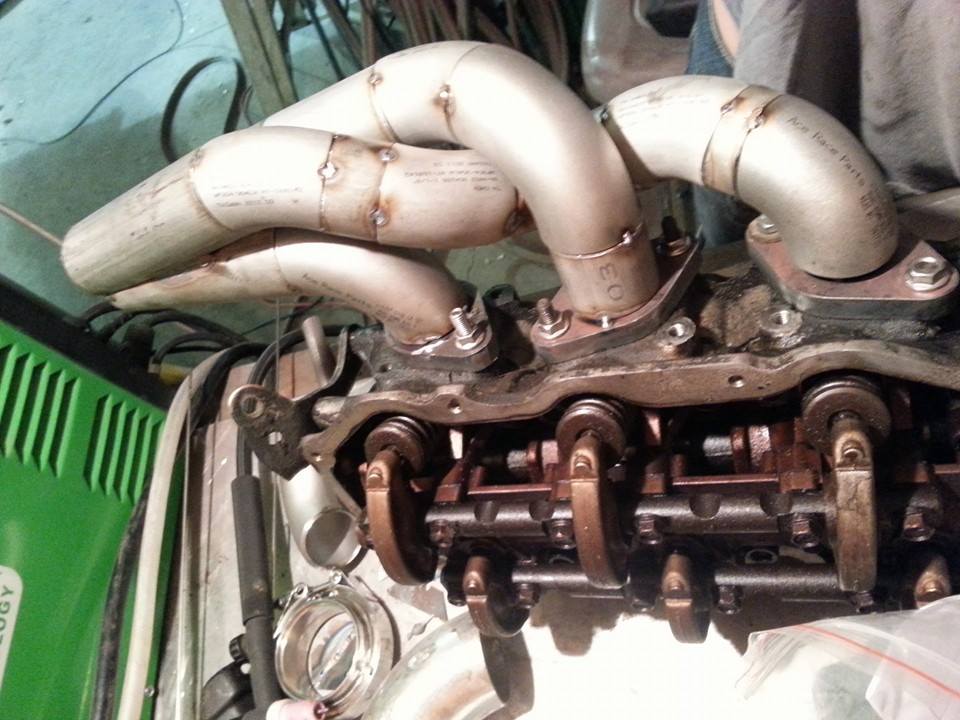
Headers are finally done. I was doing a detail how to weld these collectors up but I lost all my pictures somehow. Ill try and get them recovered. I did get a few of them back just none on the collector side of it. Got 80% off the header welded up on the mock up head bolted down. Every little bit I can reach. After I can't get any more I cut the tacks off the runners to collector and remove one by one. 
On this set I only had to remove the one runner to reach everything.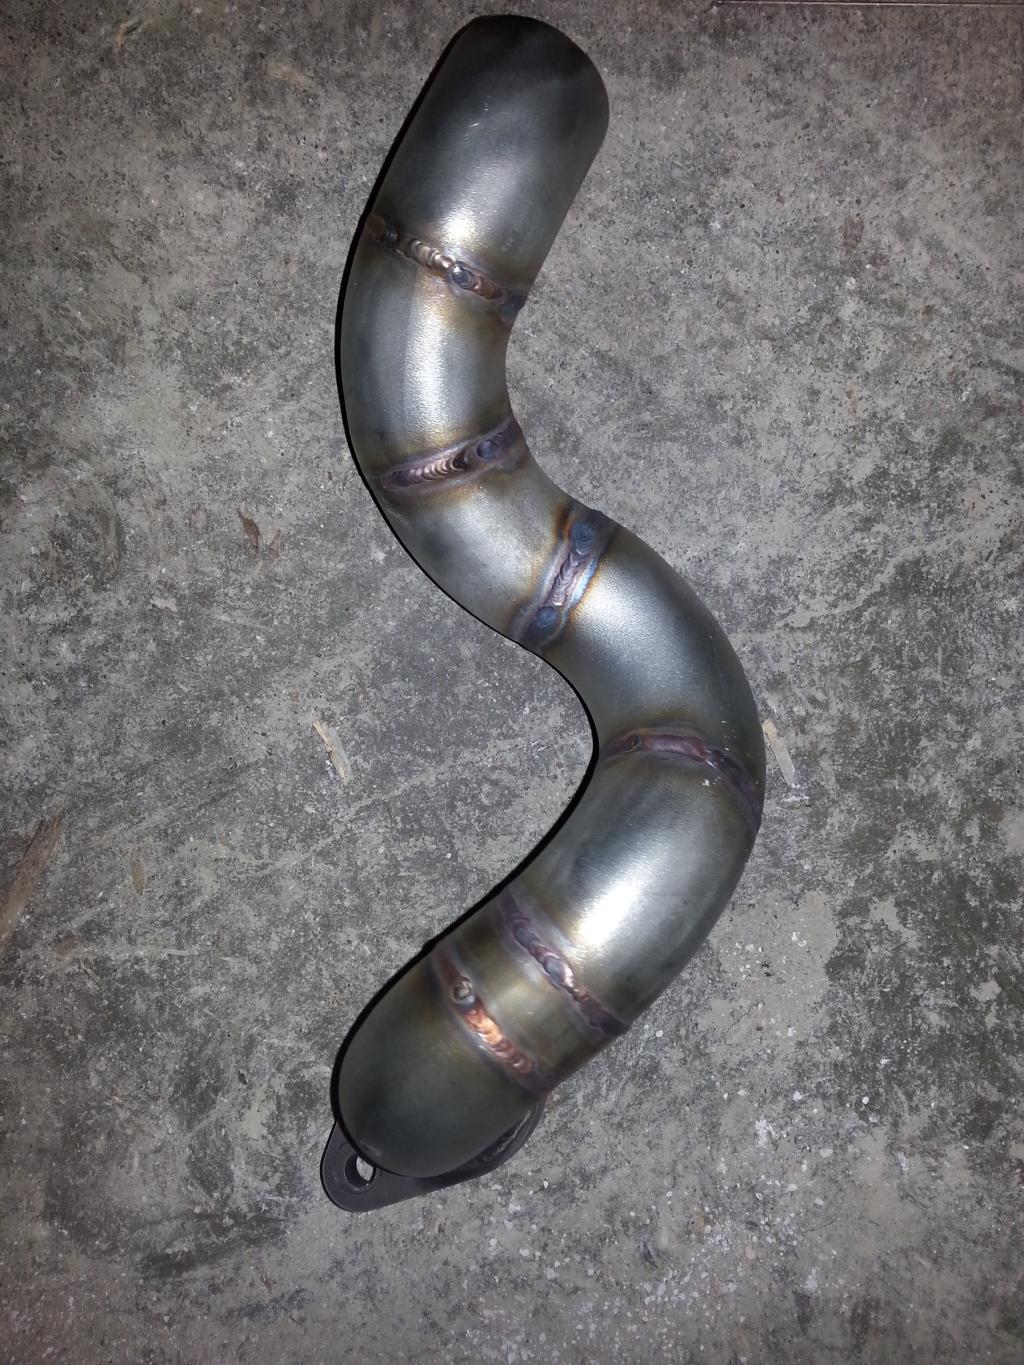
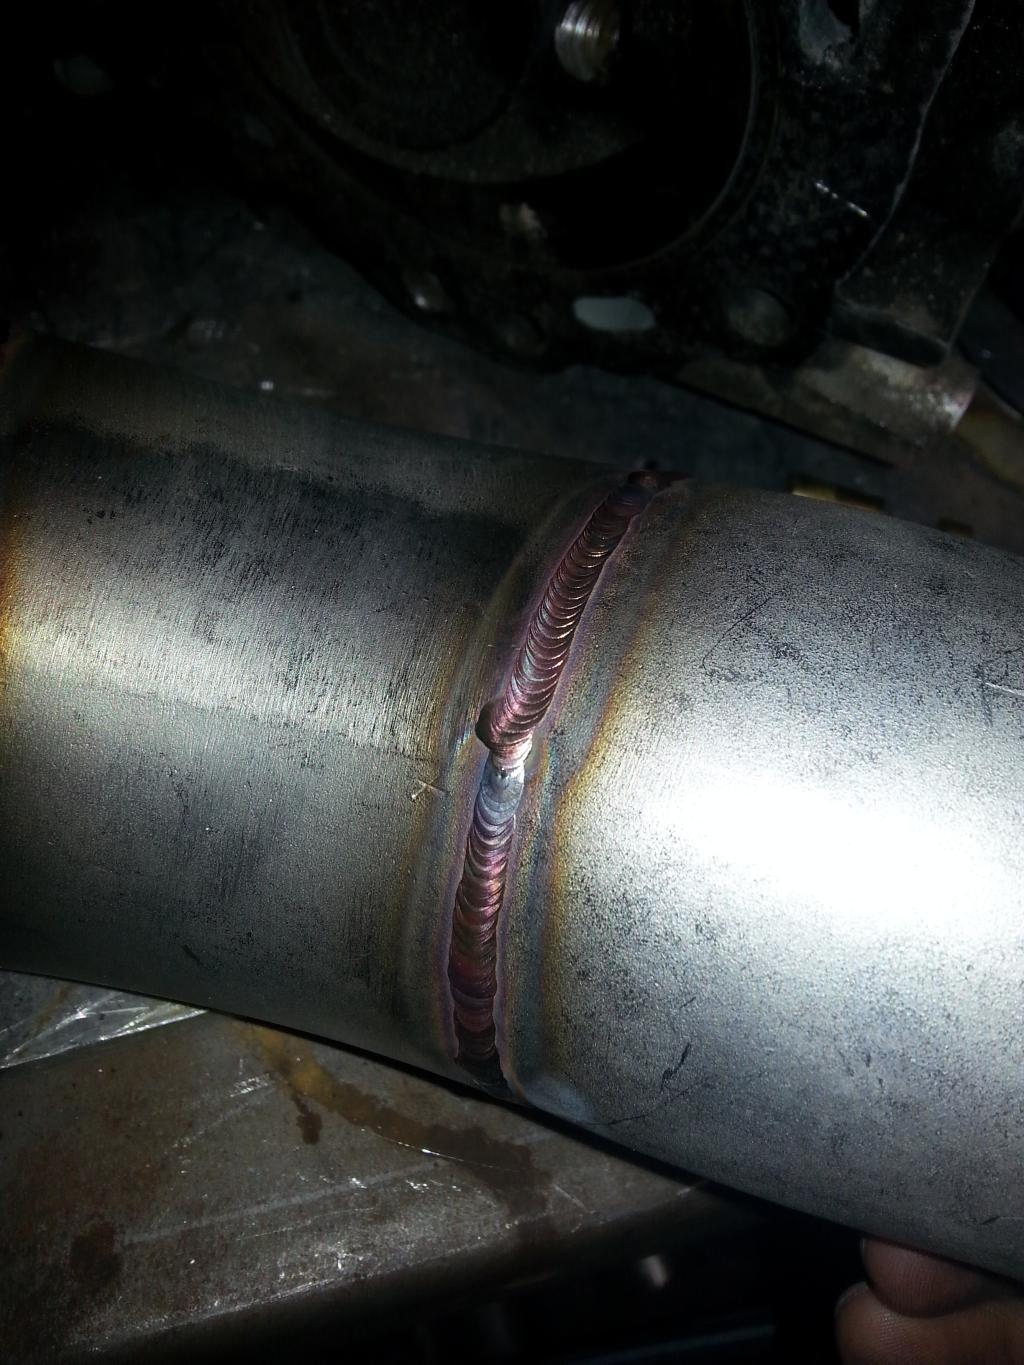
Same process for the crossover pipe somewhat. If you notice my crossover pipe is in two pieces. This is due to after welding everything they will pull. If I welded it all up they would have not fit. So at this point will install in car and weld the last weld together to ensure nice fit and no leaks on the vband.


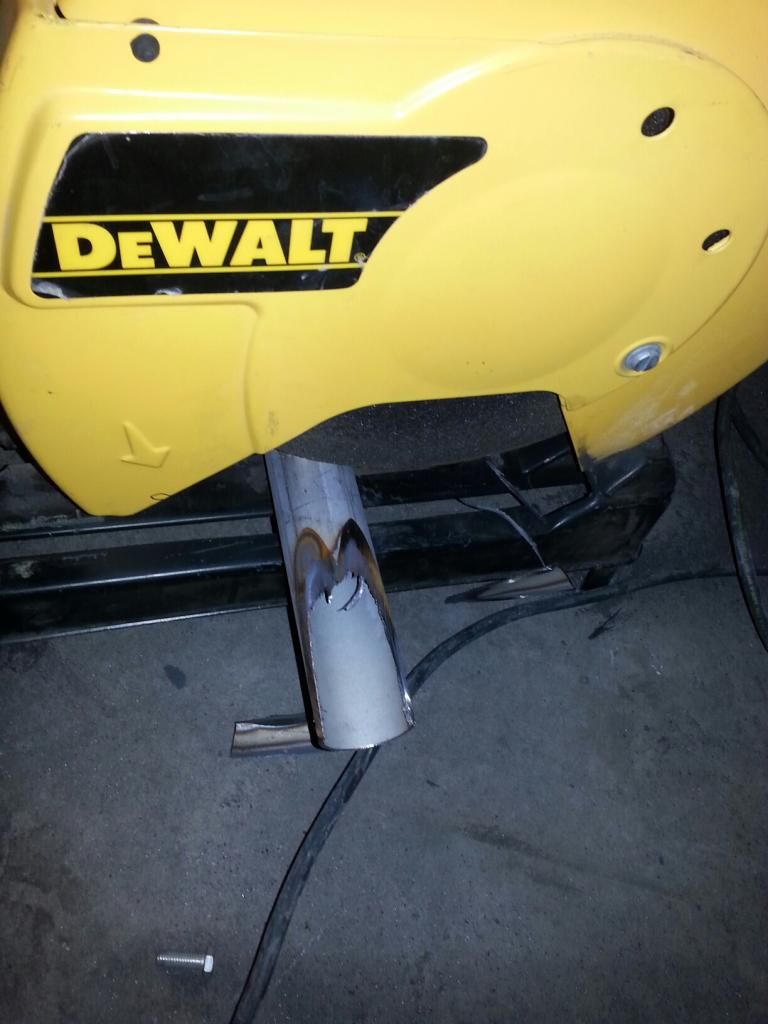
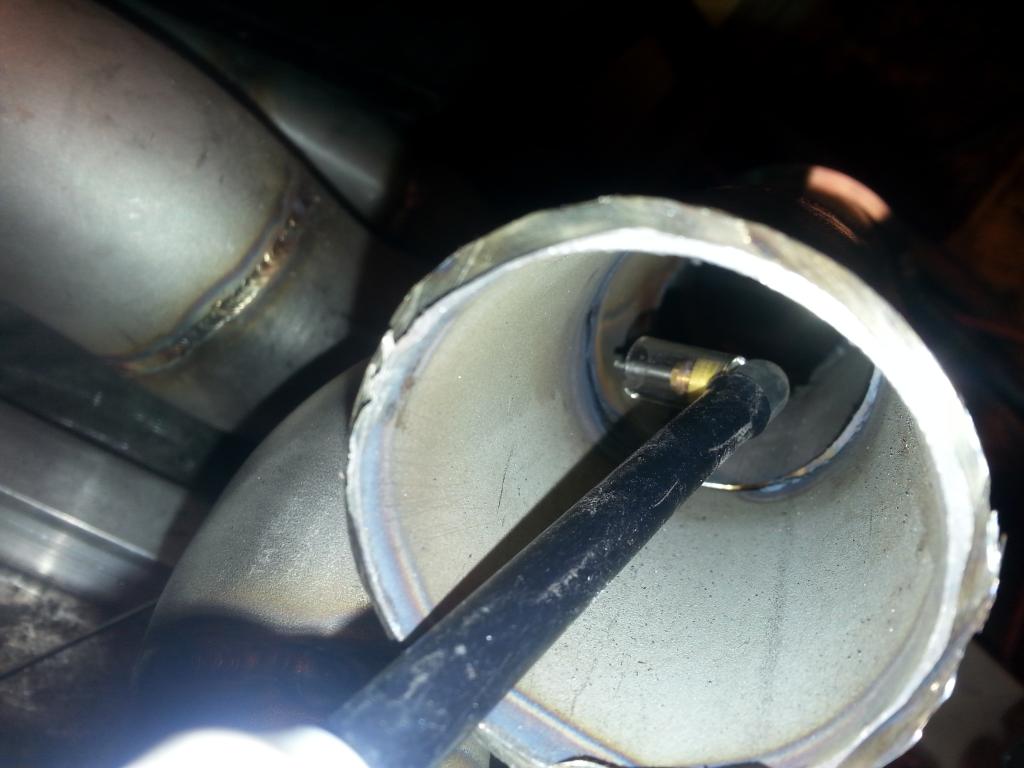
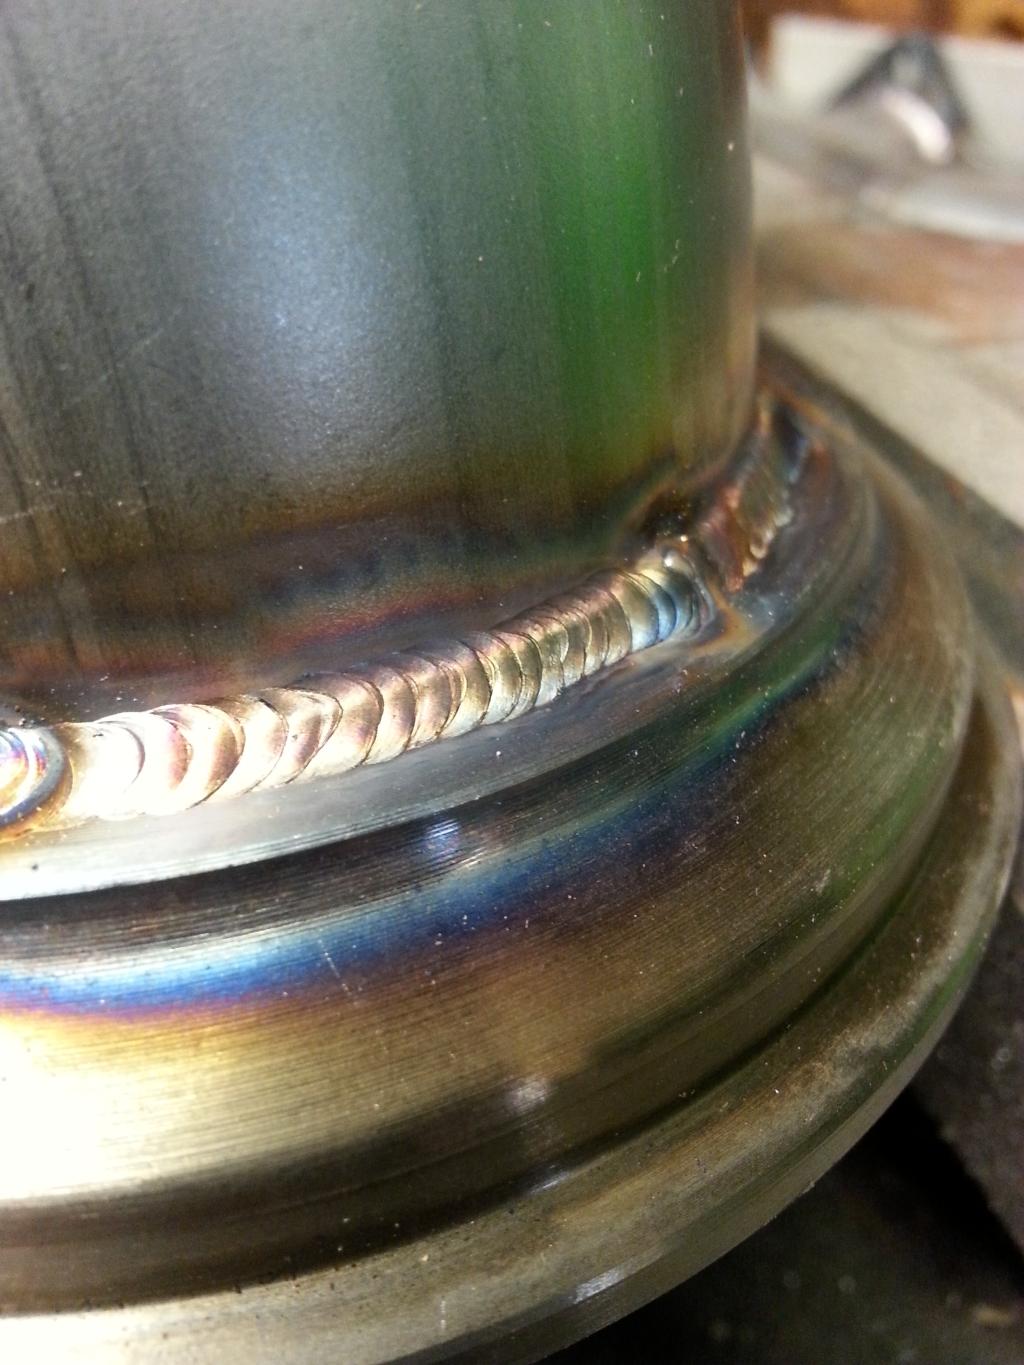
Its been awhile since I updated as the car got put on hold. My funds went to the new house and will be moving first of April. Heres the little bit of progress ive made since the previous update. Heres a shot if back welding inside the 1.5" collector with my micro tig.
Finished crossover pipe.
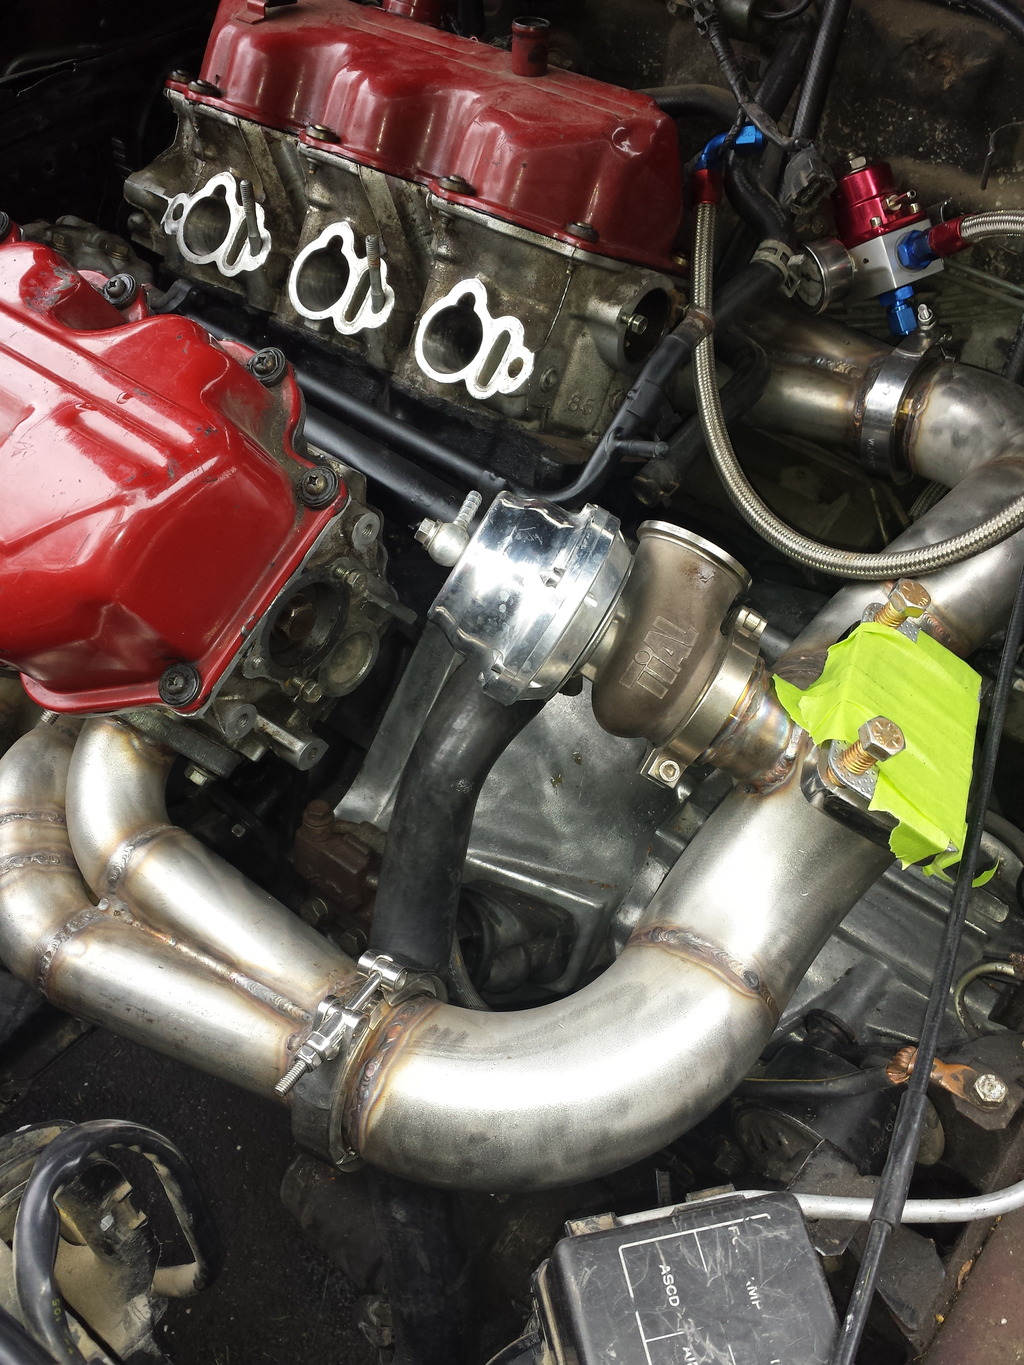
Shot of 44mm tial wastegate installed. Low boost spring to for break in 14psi.
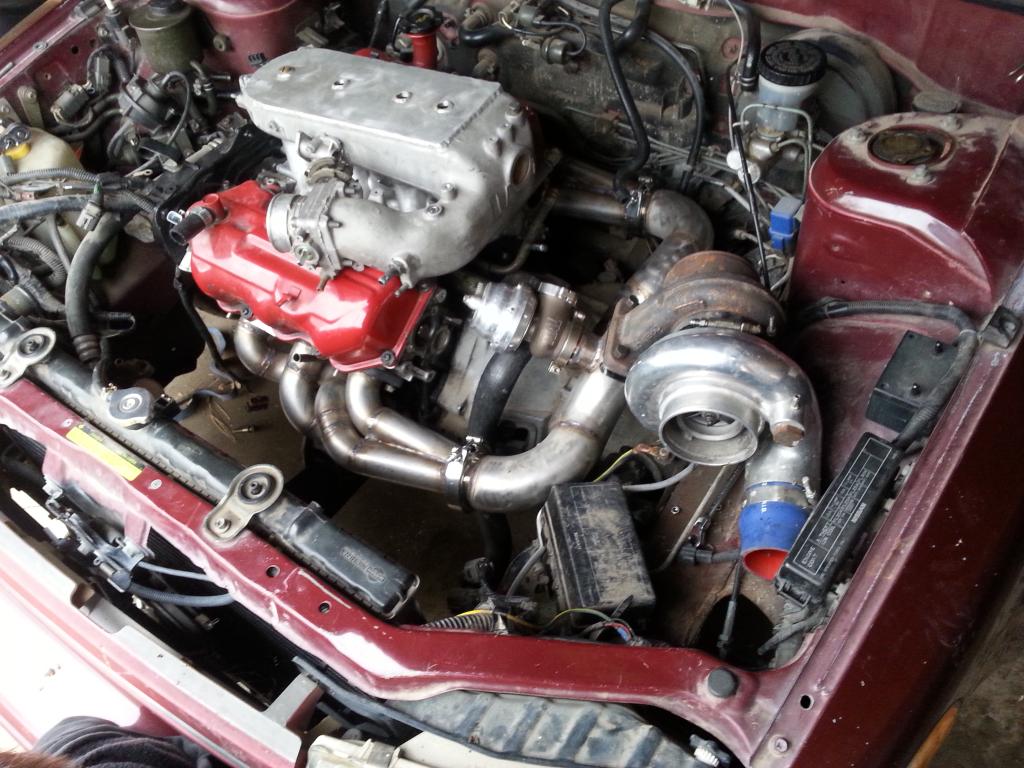
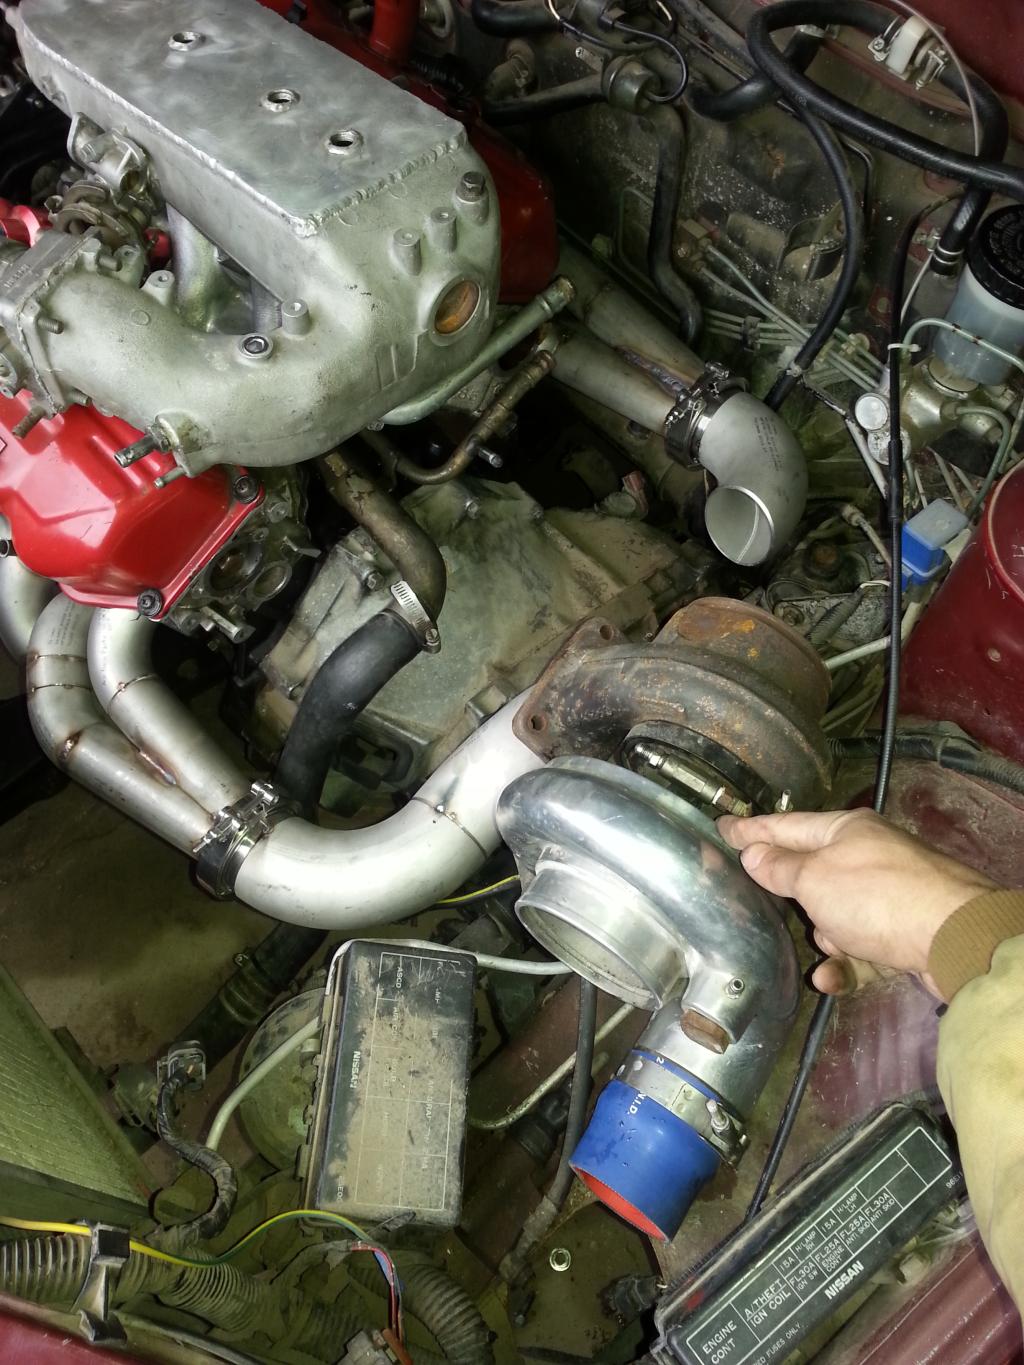
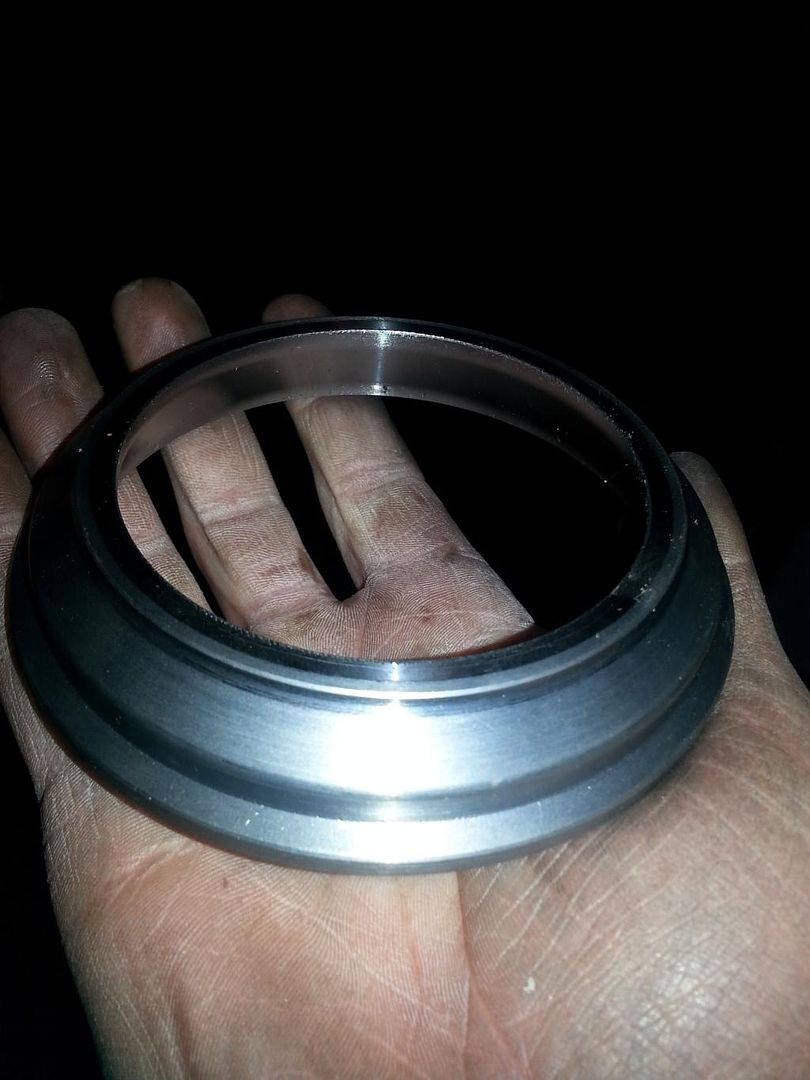
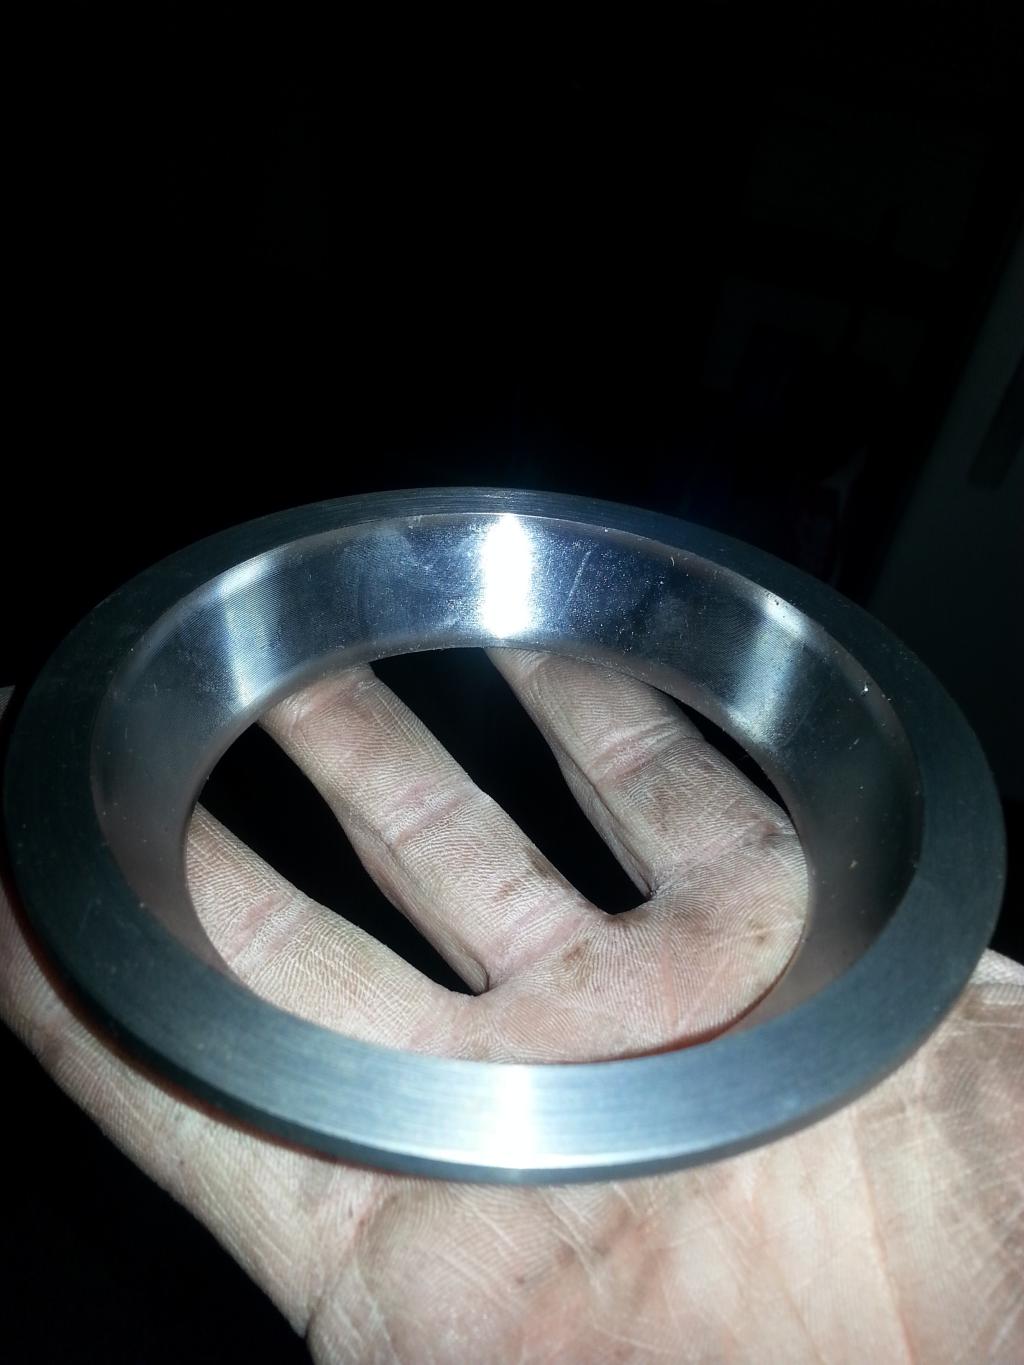
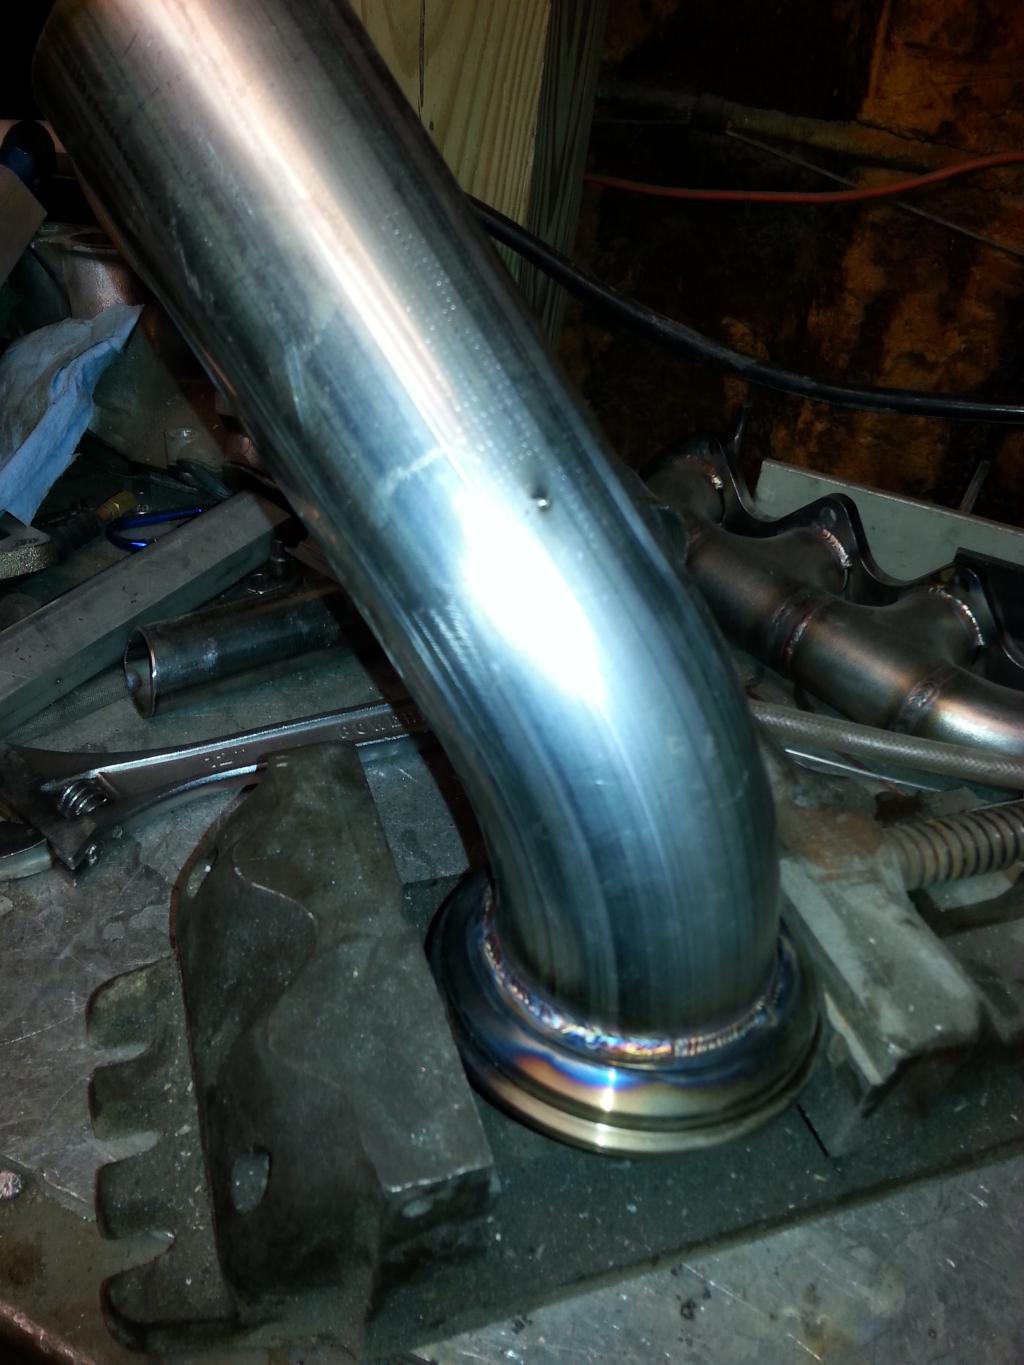
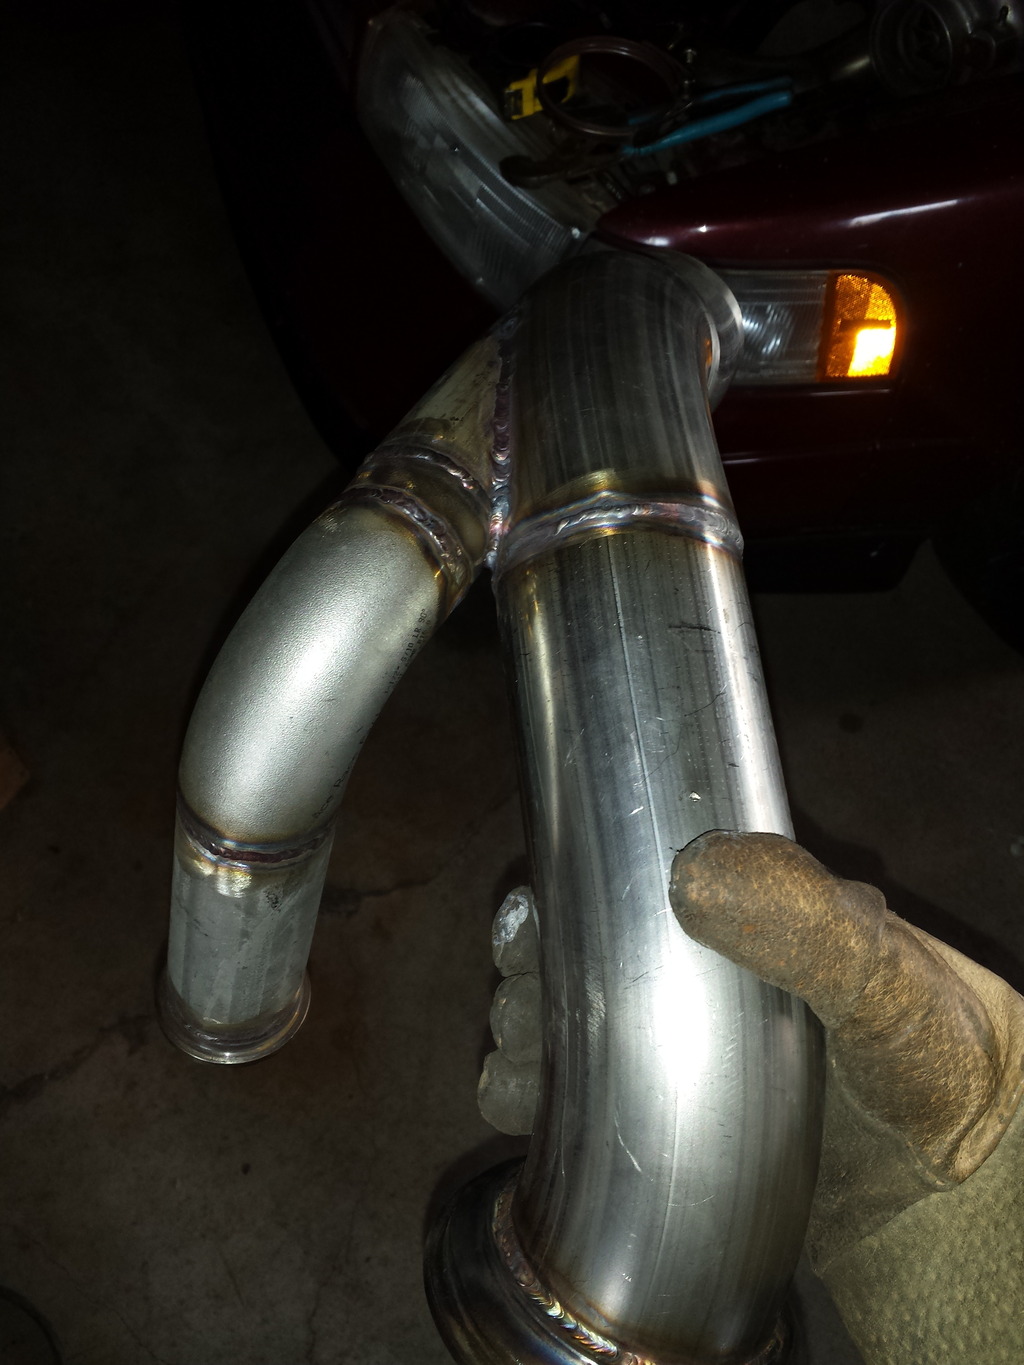
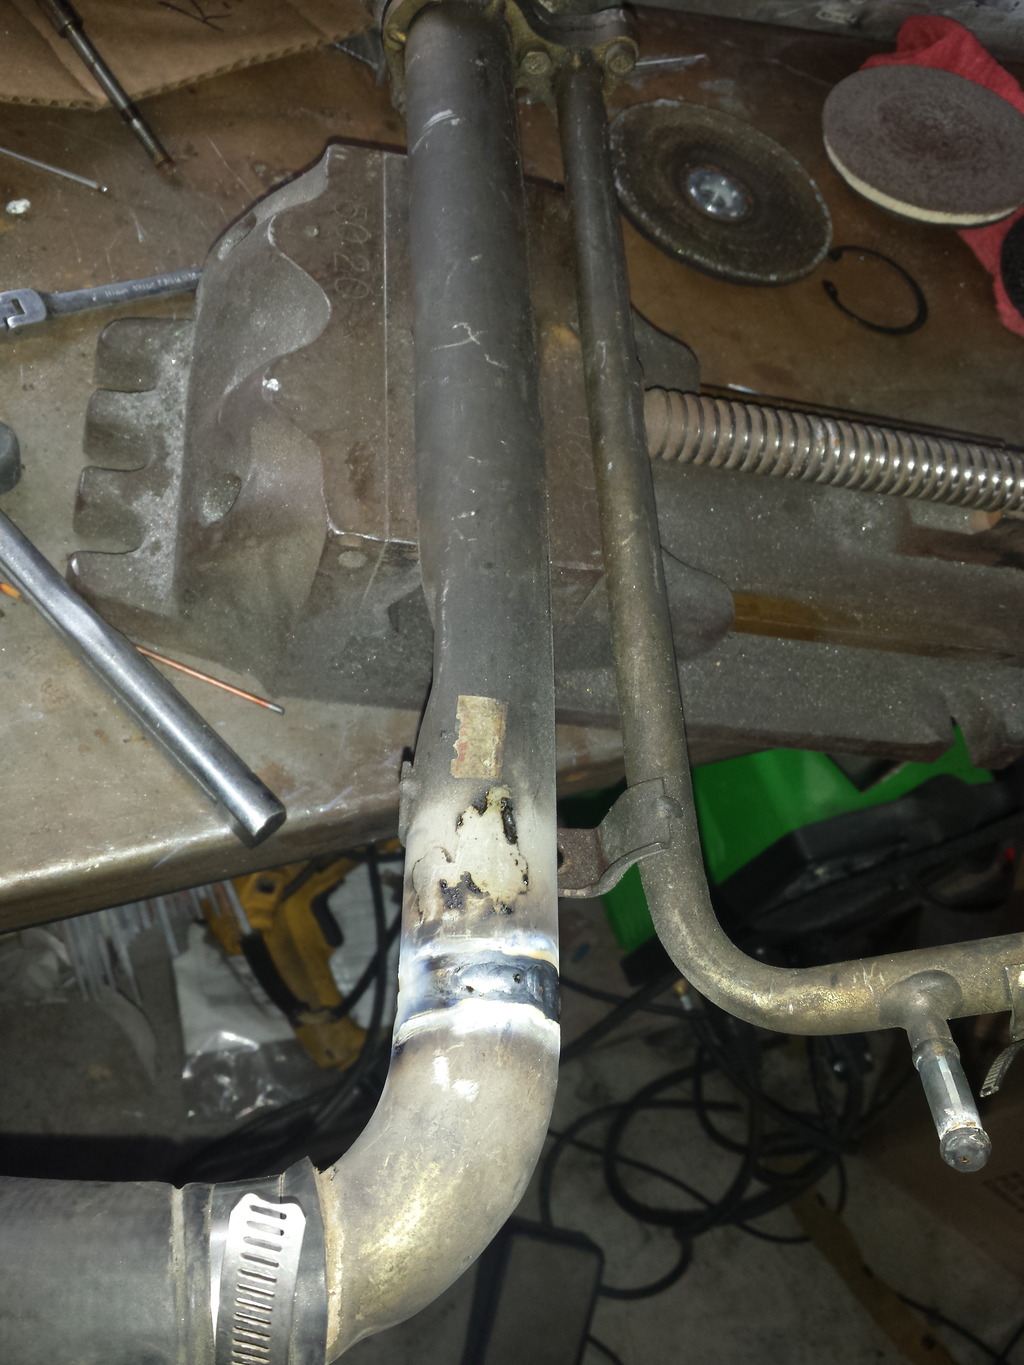
The start of my 3" downpipe. I finally found a vband reducer to fit my he351 no more big bulky cast iron elbow. 4" to 3" reducer.
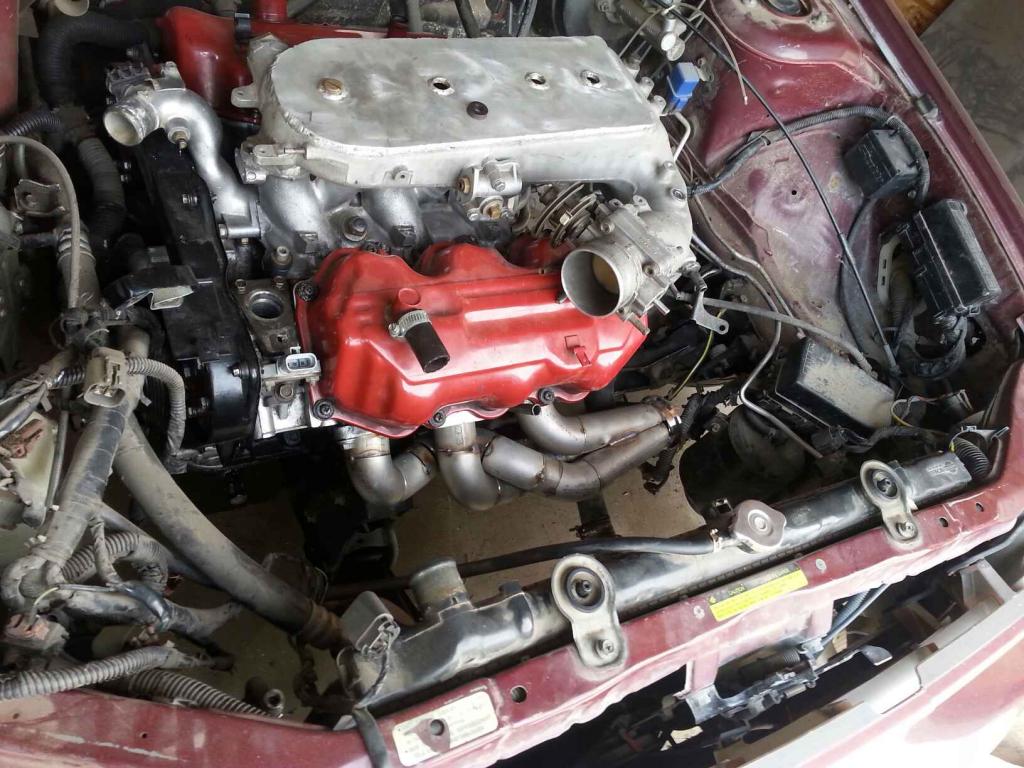
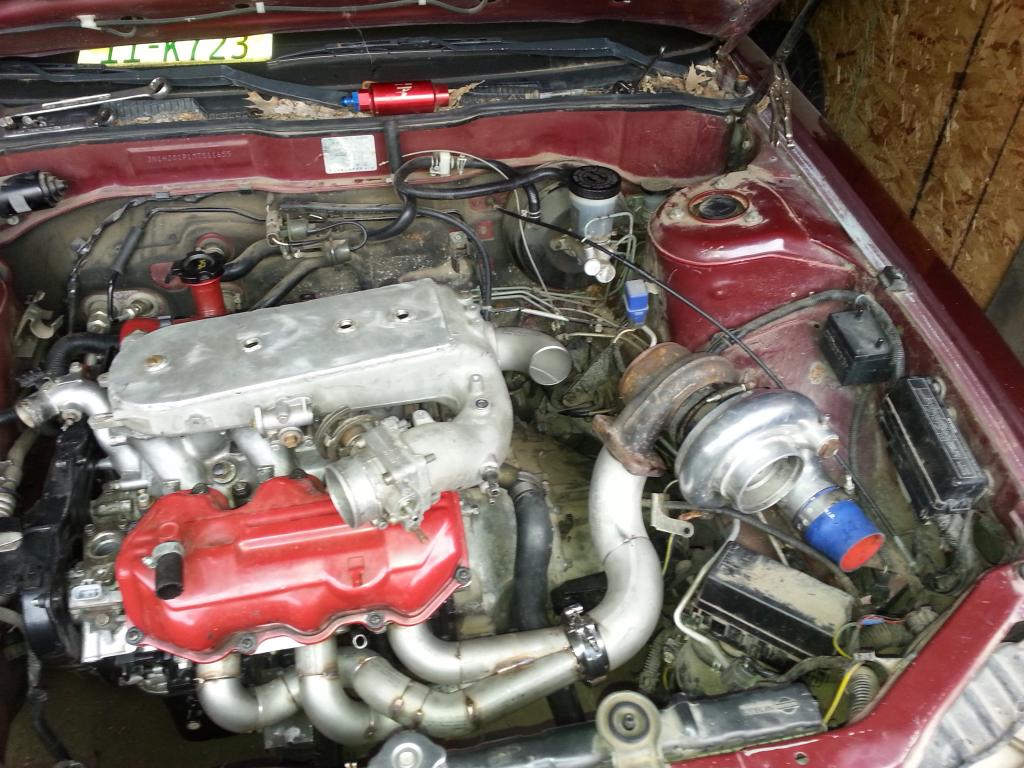
This is pretty much where the car stands stitting in my storage unit for one more month then get to bring to the new house and week or two should be ready to fire up. I have my to do list and only thing left to order are the 950cc injectors and my fuel pump. New clutch and flywheel and the rest of the good stuff ready to install at the new house.

Finished crossover pipe.


Shot of 44mm tial wastegate installed. Low boost spring to for break in 14psi.


The start of my 3" downpipe. I finally found a vband reducer to fit my he351 no more big bulky cast iron elbow. 4" to 3" reducer.


This is pretty much where the car stands stitting in my storage unit for one more month then get to bring to the new house and week or two should be ready to fire up. I have my to do list and only thing left to order are the 950cc injectors and my fuel pump. New clutch and flywheel and the rest of the good stuff ready to install at the new house.

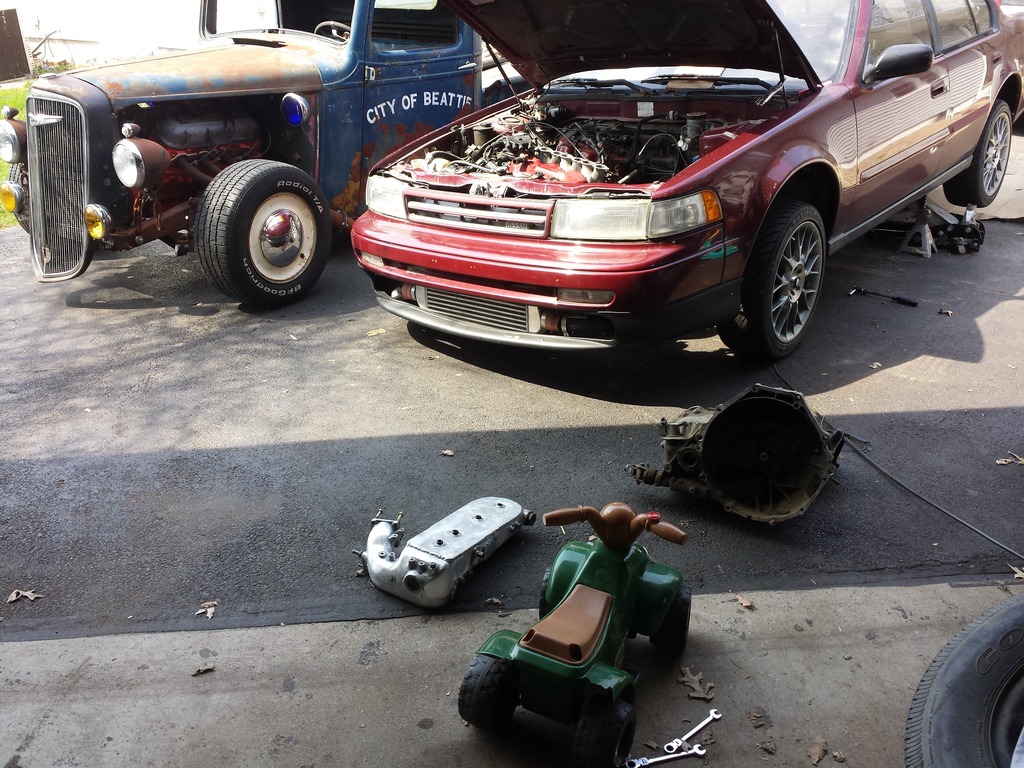
Alright im settled into the new house and back on track. Im really shooting for first start up end of april early may. Its So nice waking up and walking to the garage and not in a storage unit. Its decent sized and will suite my needs. I plan do some upgrades to the garage in time lighting insulation ac and heat etc. Heres the garage 24x26. Have to do some sorting for all my parts and build some shelving but fits my Shiro and maxima just fine with plenty room to work around. Have my welder all set up in the back wall. 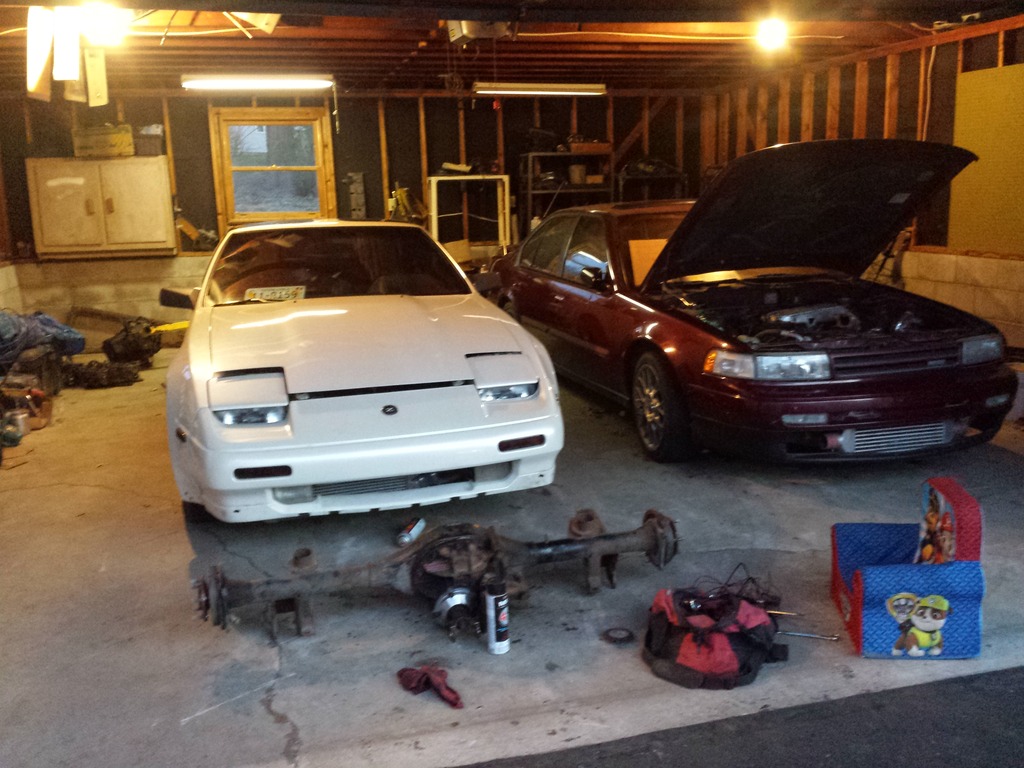
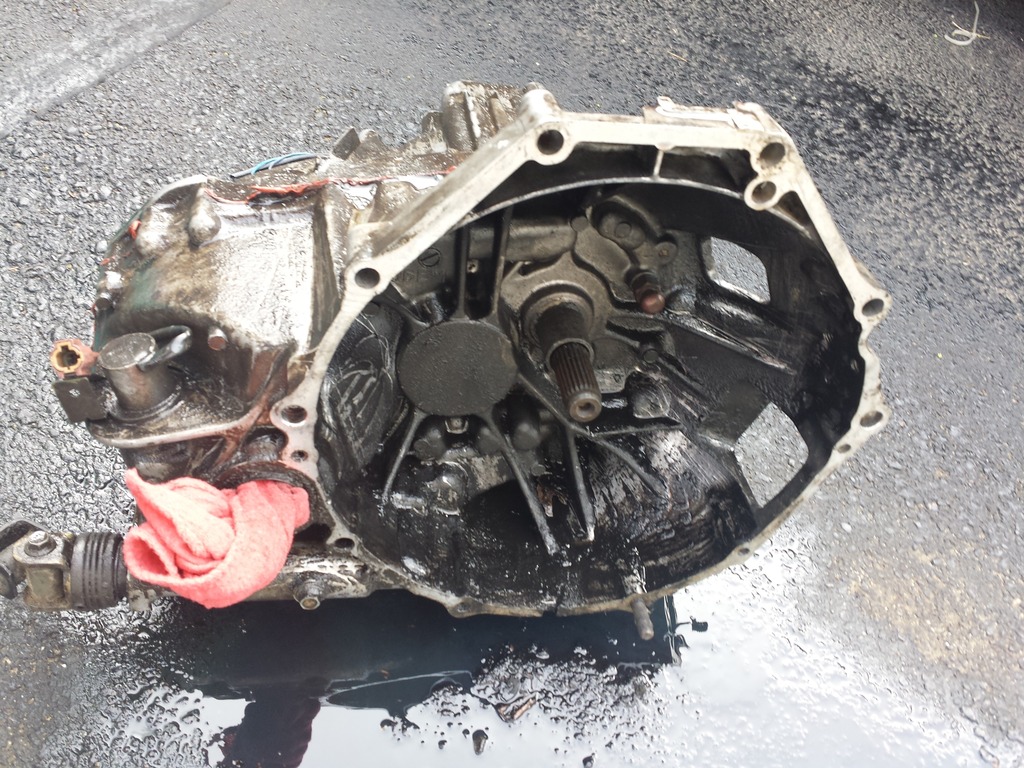
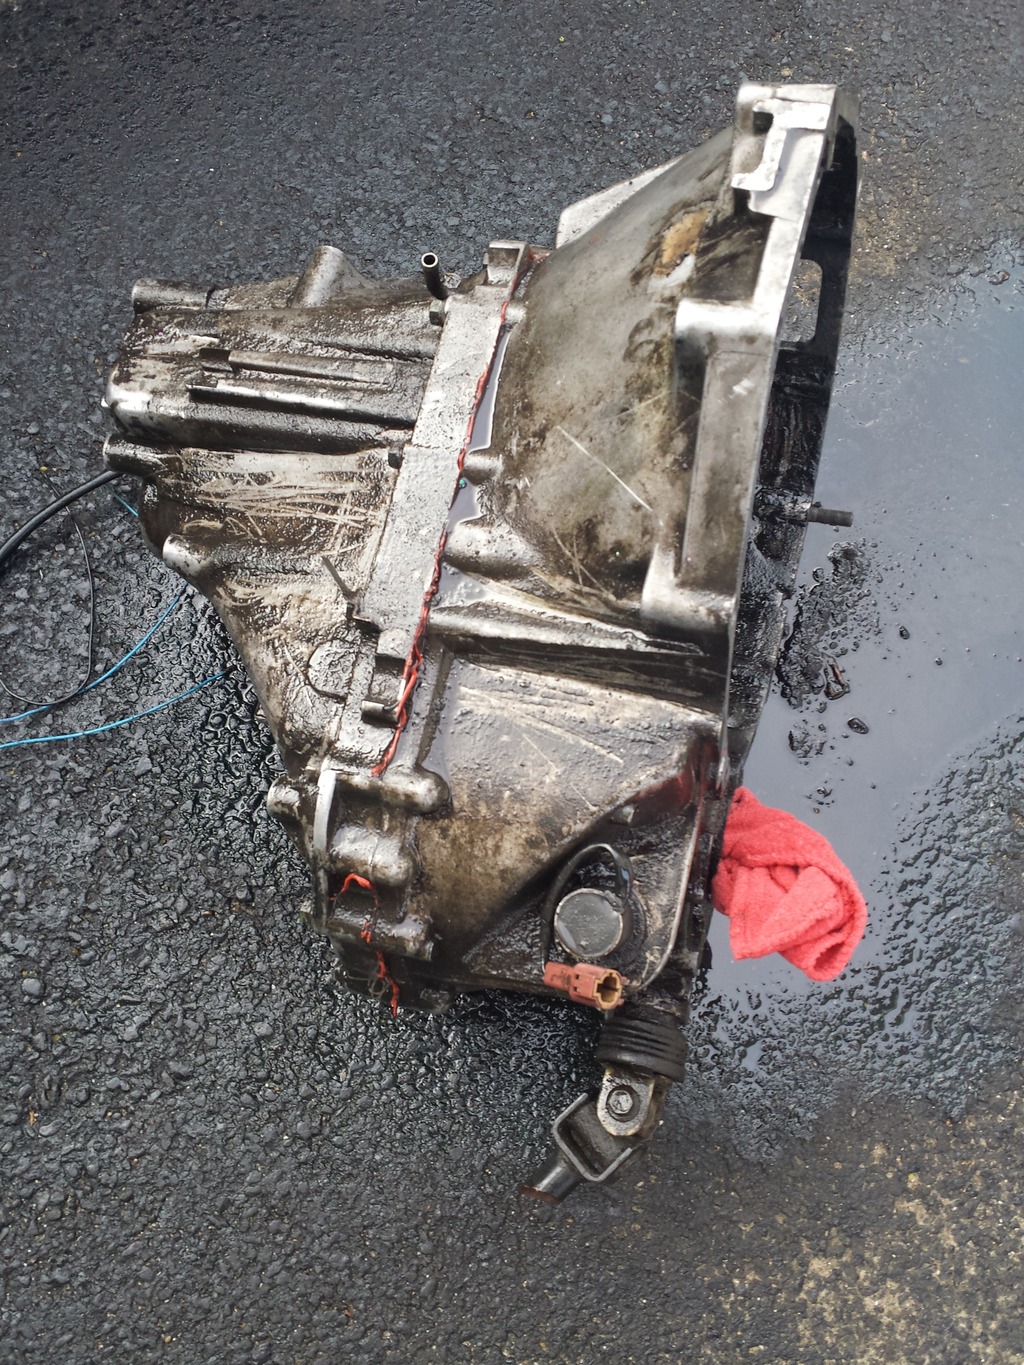
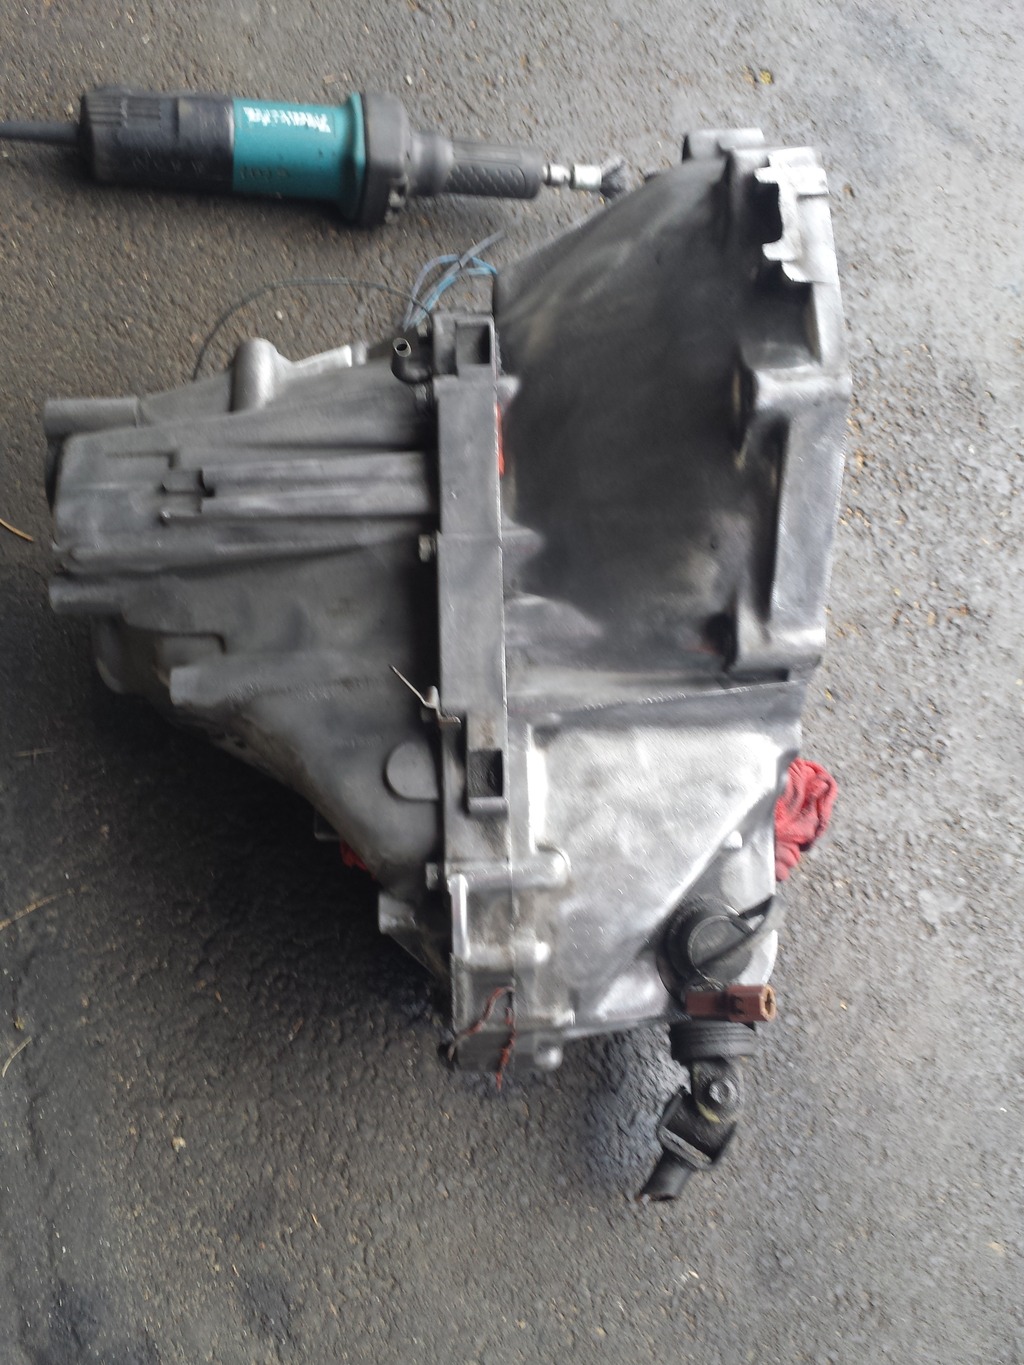
Got my to do list made and went to work day after got moved in. Got my ve hubs apart and starting cleaning up and installing new wheel bearings. Also since Ive never ran the ve trans it was quite greasy from my old parts car some some gunk and good scrubbing it cleaned up. I scrapped majority off with a scrapper.
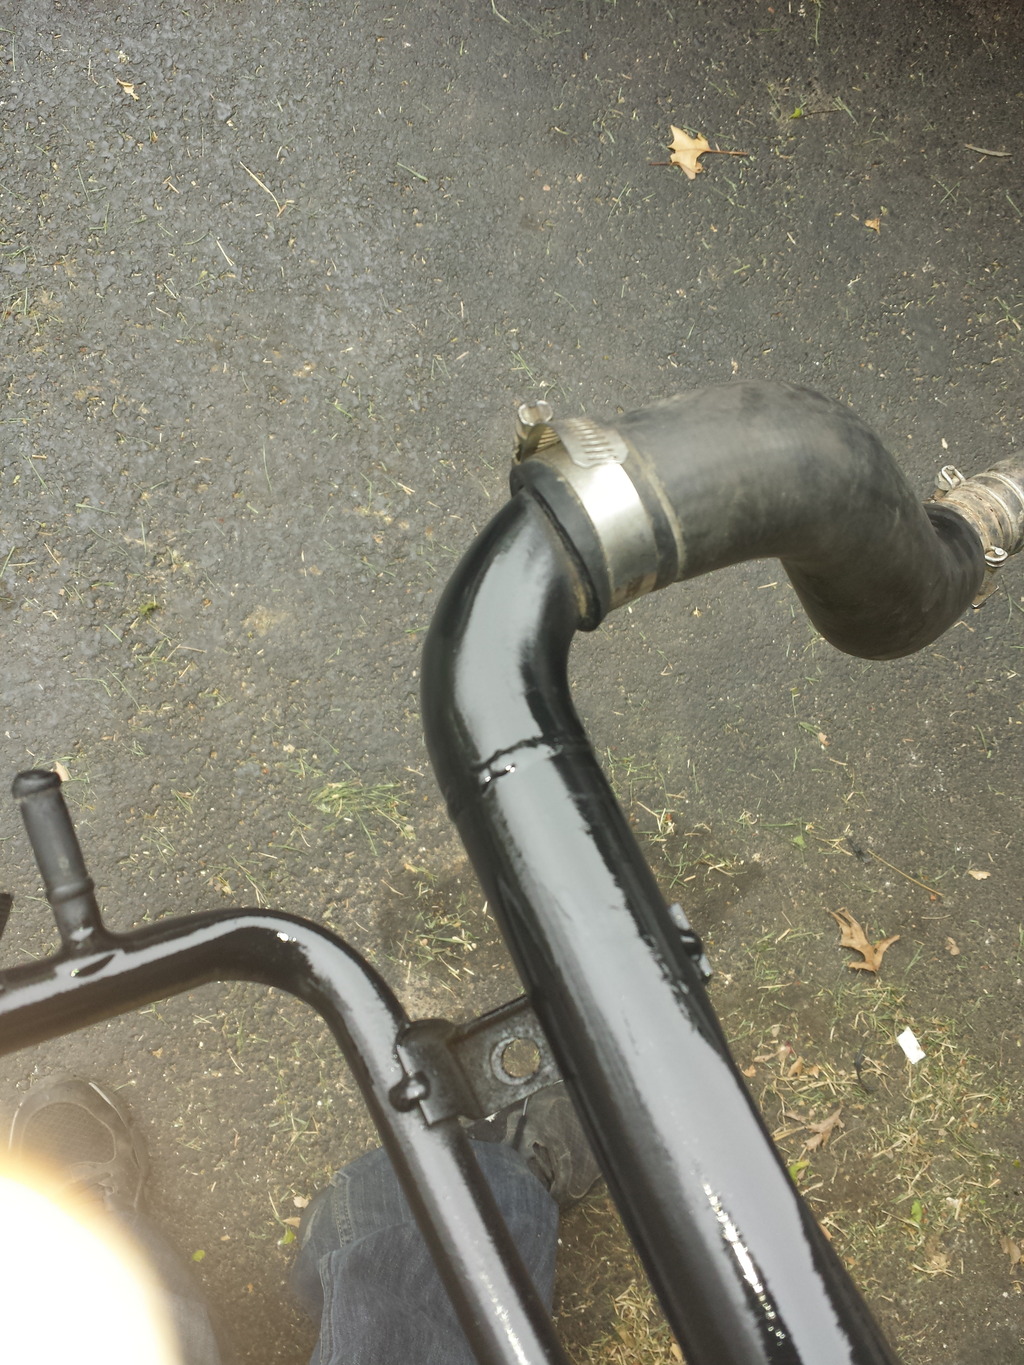
Now that I have the car next to my welder I can actually finish up my downpipe and dump tube. I decided to tie it in this time. Previous setup was open dump. I have it down behind the motor just need to get some more stainless and a vband for it to tie into the exhaust which I also have to make.
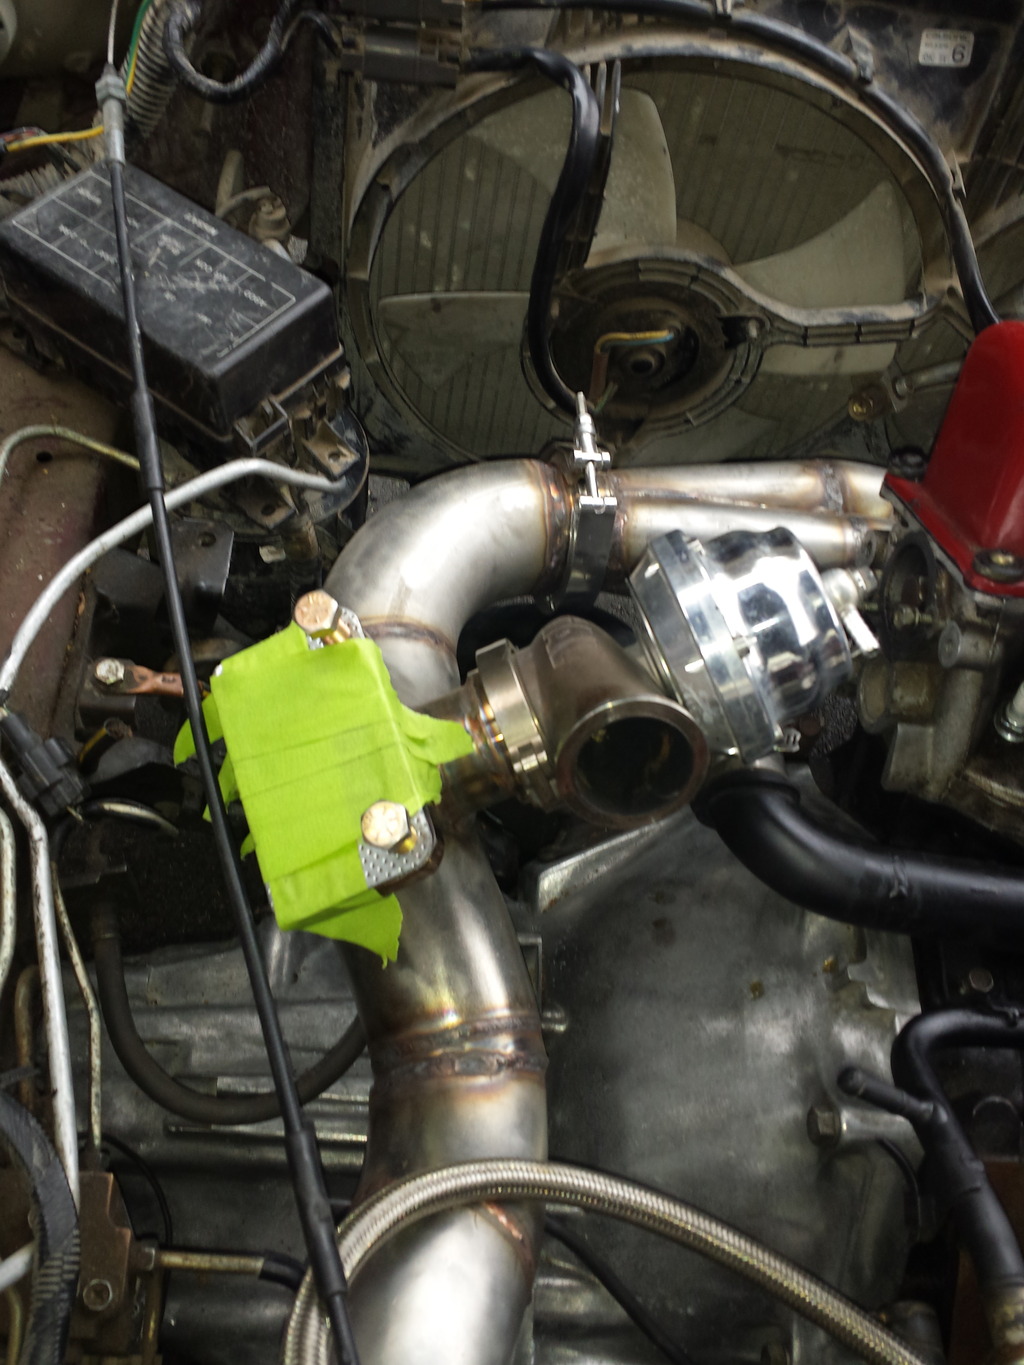
(fuse box is loose and not actually mounted there)
All fitting good and happy so then car exploaded for clutch install and finaly assembly. Here got the mock up trans out. Dropped the tank for the walbro 460 e85 pump and running -6 an fuel lines all way up.
Had this spec stage 5 clutch laying around decided to give it a shot instead the southbend. Needs some cleaning due to sitting but it new in the box. Got second hand for $240 shipped!
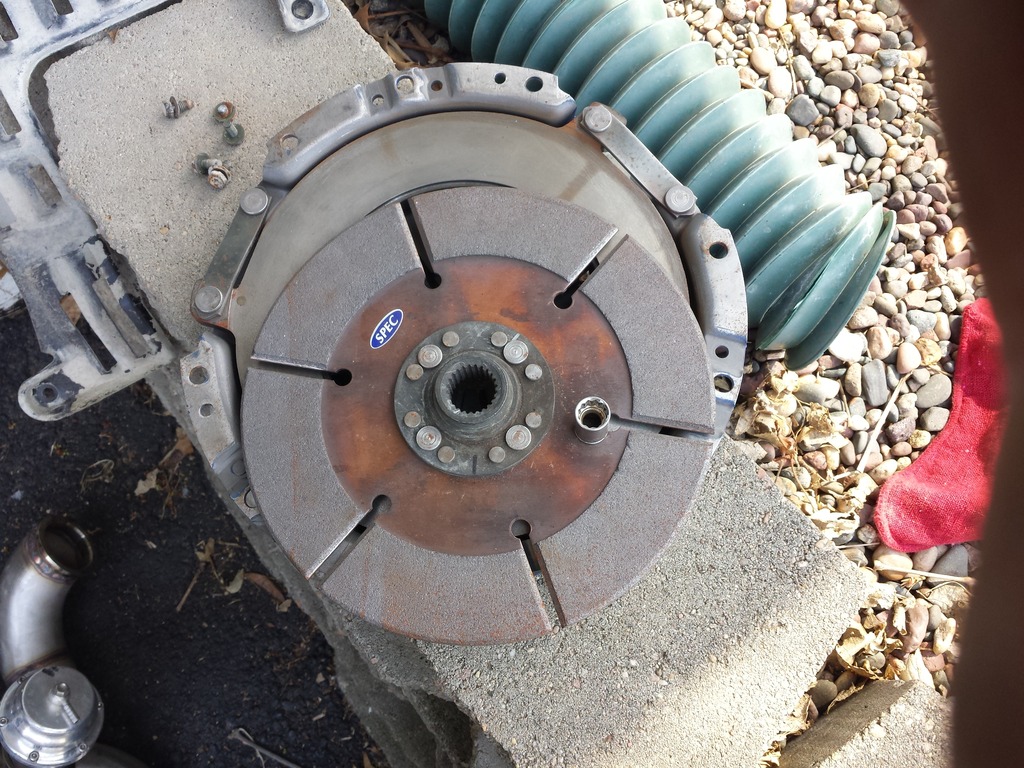 New friction plate to go with the clutch. Needs some slight cleaning also from sitting.
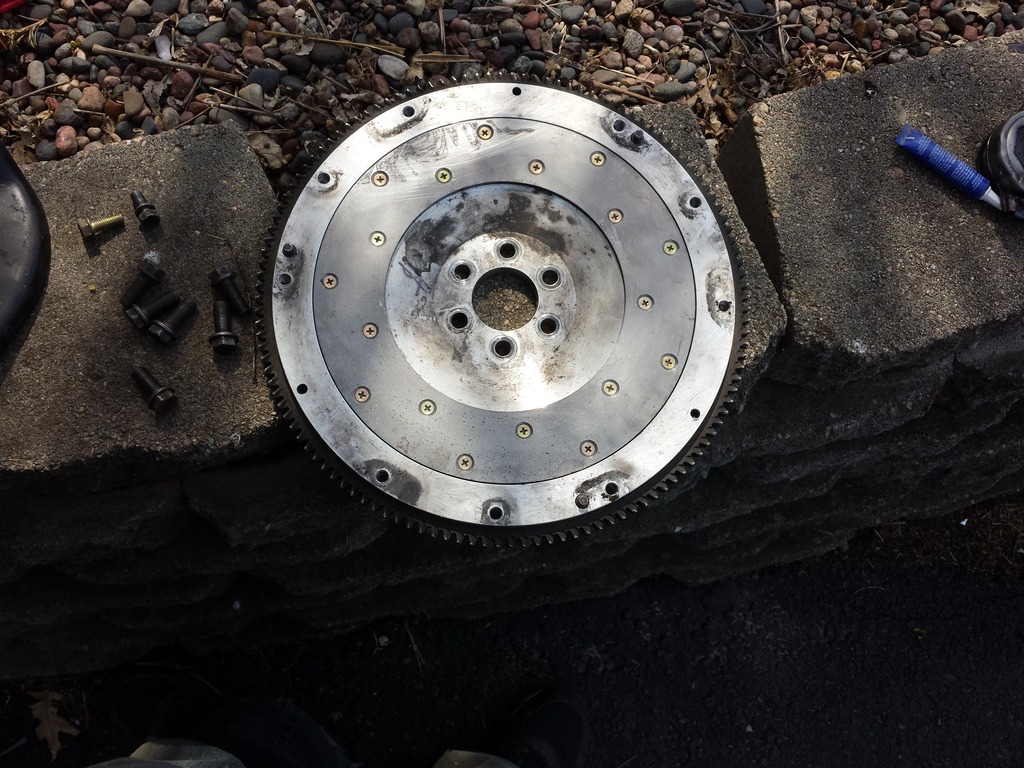
Thats it or this weekend. Ill be updating weekly now so stay tuned.


Got my to do list made and went to work day after got moved in. Got my ve hubs apart and starting cleaning up and installing new wheel bearings. Also since Ive never ran the ve trans it was quite greasy from my old parts car some some gunk and good scrubbing it cleaned up. I scrapped majority off with a scrapper.


Now that I have the car next to my welder I can actually finish up my downpipe and dump tube. I decided to tie it in this time. Previous setup was open dump. I have it down behind the motor just need to get some more stainless and a vband for it to tie into the exhaust which I also have to make.
(fuse box is loose and not actually mounted there)


All fitting good and happy so then car exploaded for clutch install and finaly assembly. Here got the mock up trans out. Dropped the tank for the walbro 460 e85 pump and running -6 an fuel lines all way up.

Had this spec stage 5 clutch laying around decided to give it a shot instead the southbend. Needs some cleaning due to sitting but it new in the box. Got second hand for $240 shipped!
 New friction plate to go with the clutch. Needs some slight cleaning also from sitting.
Thats it or this weekend. Ill be updating weekly now so stay tuned.

Got the clutch,flywheel,trans in for hopefully the last time. I knew I had an issue with my coolant line for my lower radiator hose. Ended up just shorting the pipe little over an inch and problem solved. Will end up changing the hose itself up a bit to get a little more clearance from the header. Little paint to finish it up.
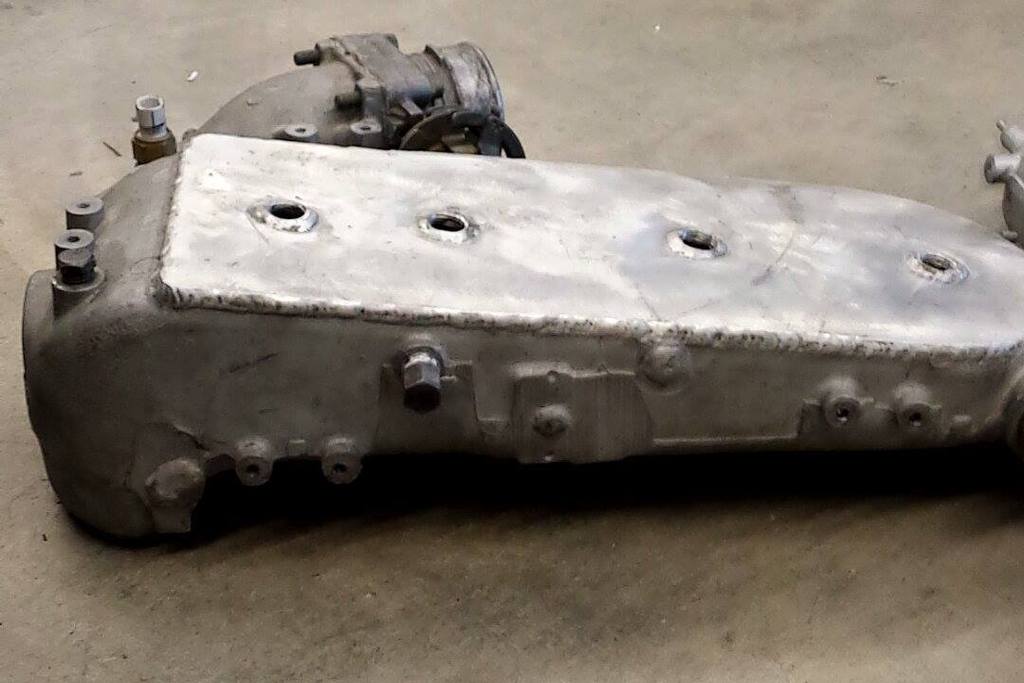
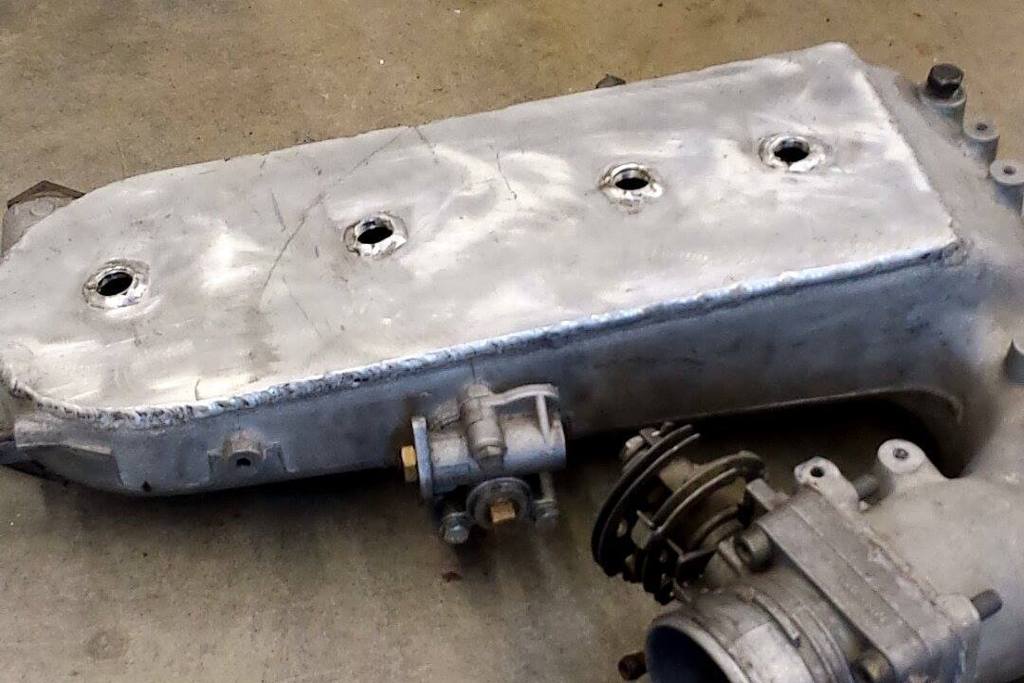
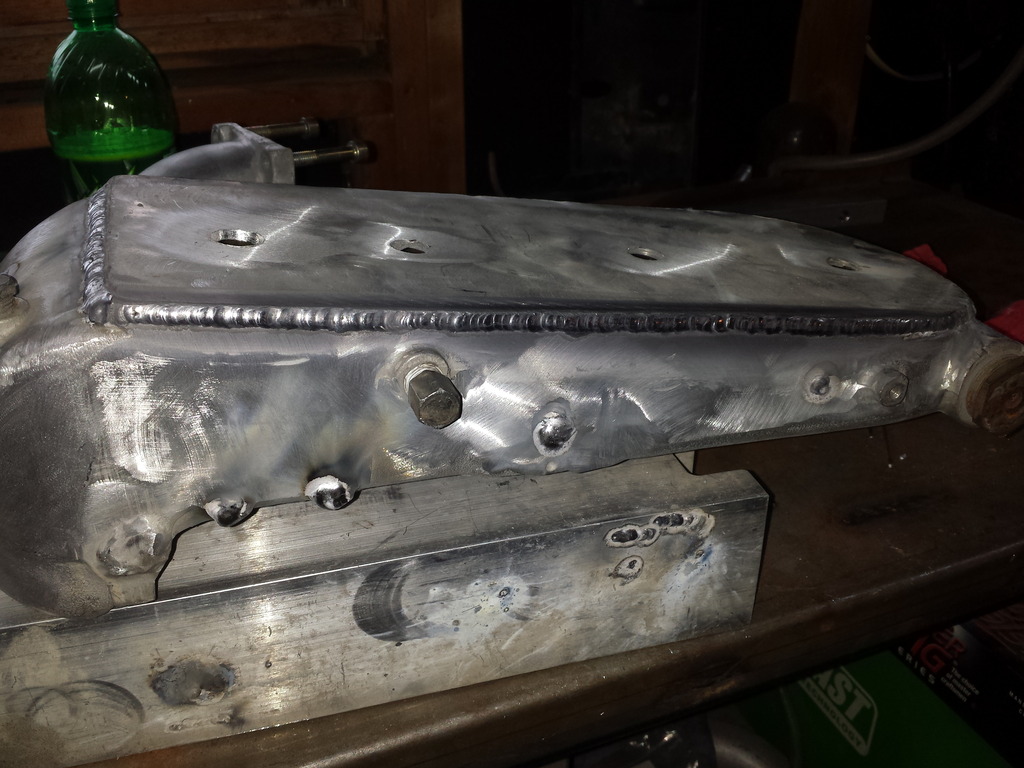
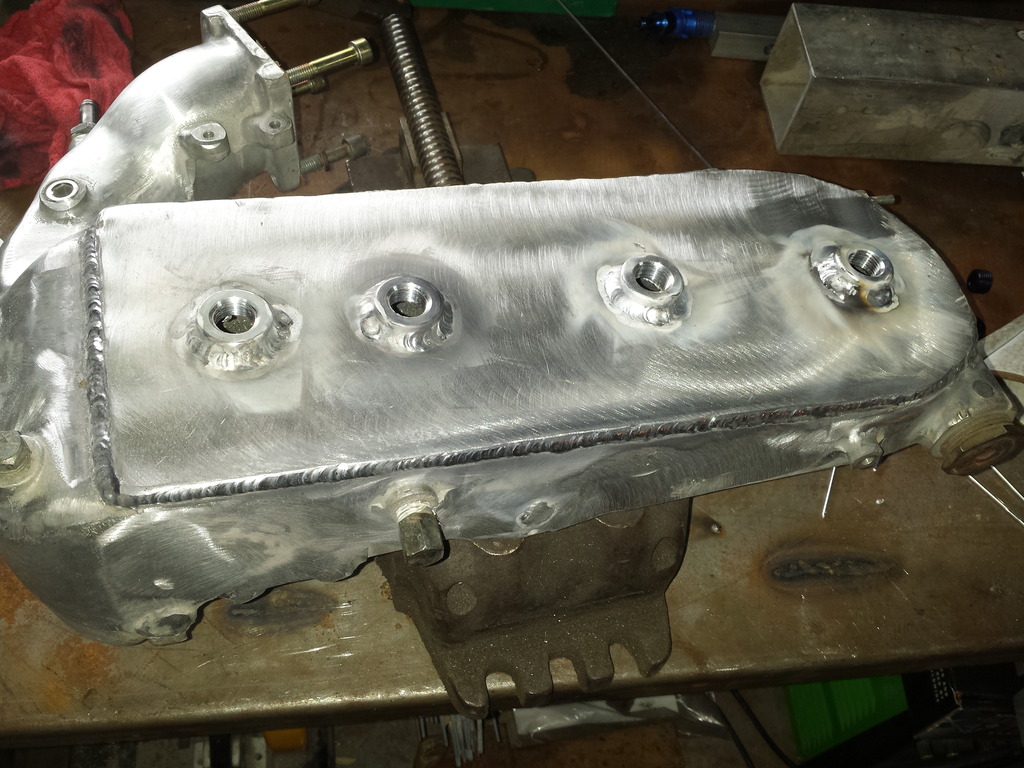
Ordered my 1000cc injectors finally so while I wait on parts and cant do my much I decided to fix my intake and my turbo. On the intake the bungs for the plug they had very poor threads and the welds I wasn't happy with. Also Shaved everything else I didn't need.
Before
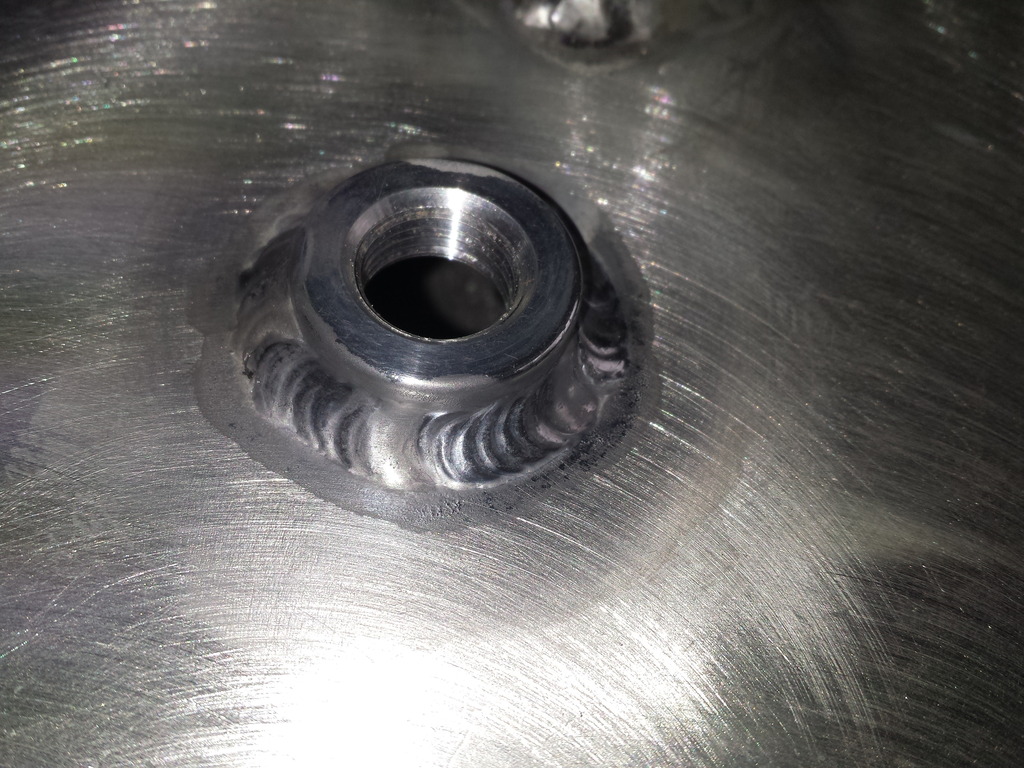
Can really see how bad the old bungs were plugs wouldn't even tighten down.
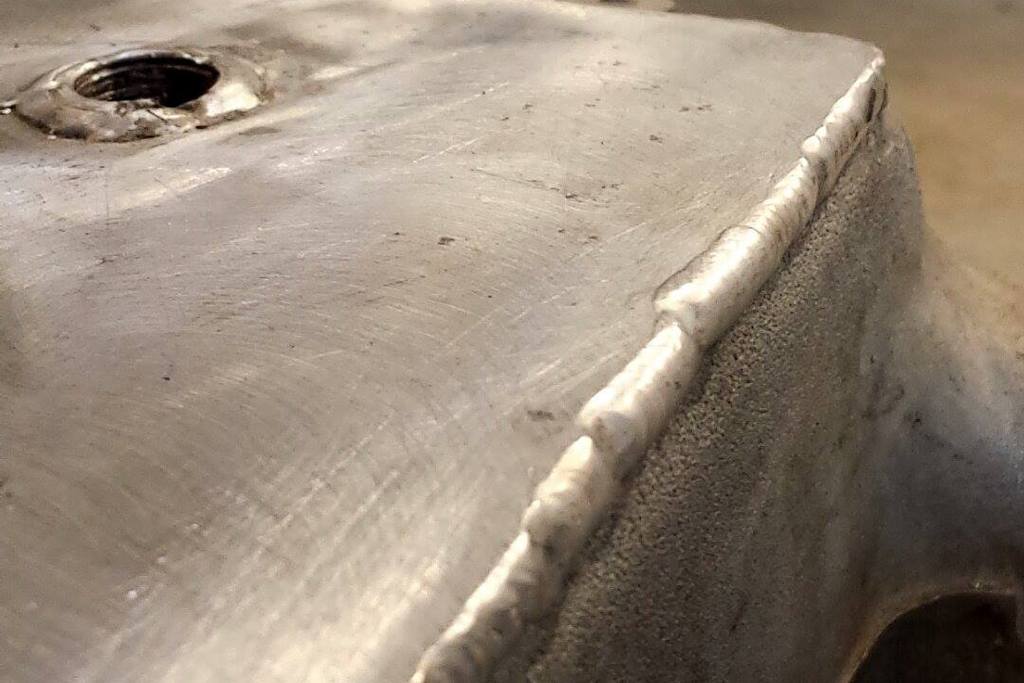
After
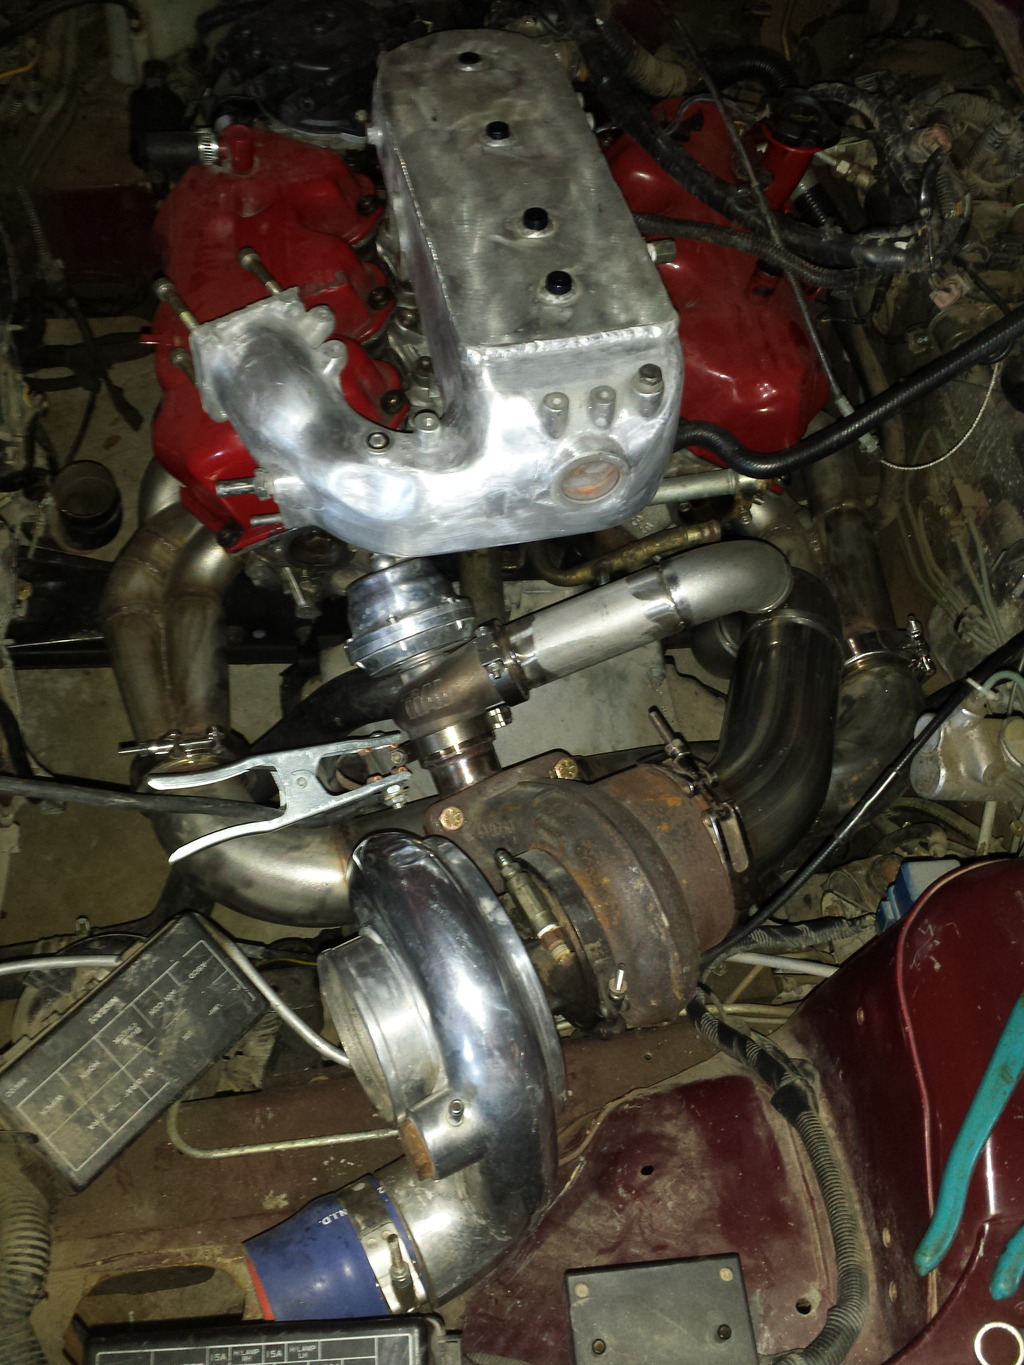
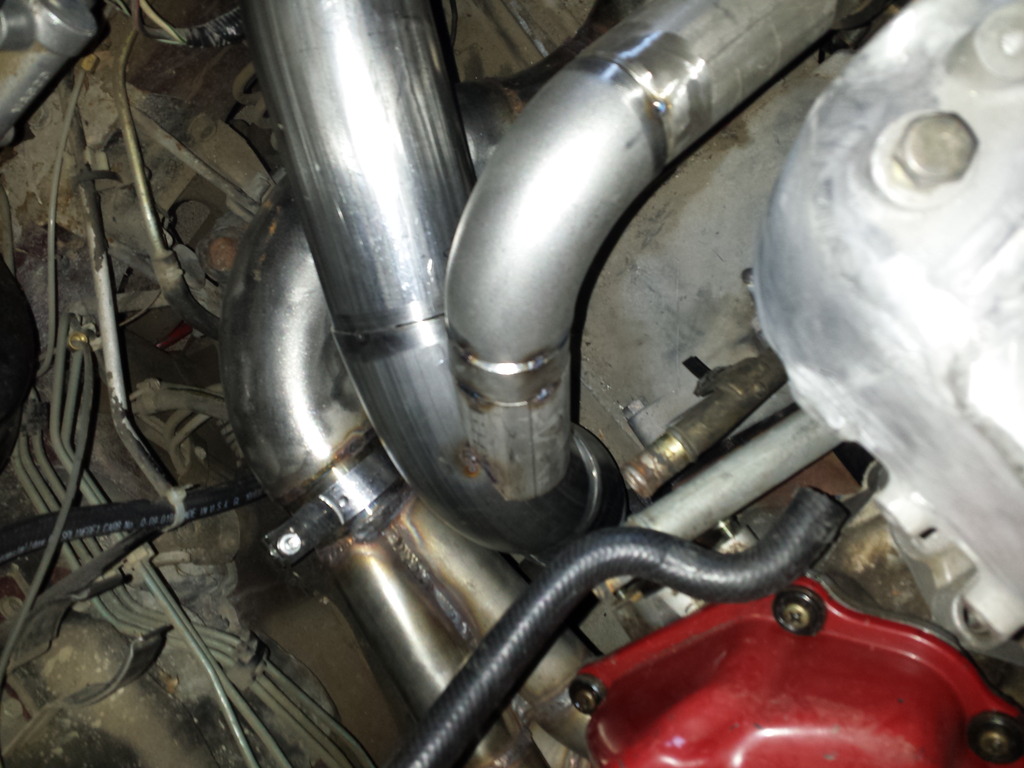
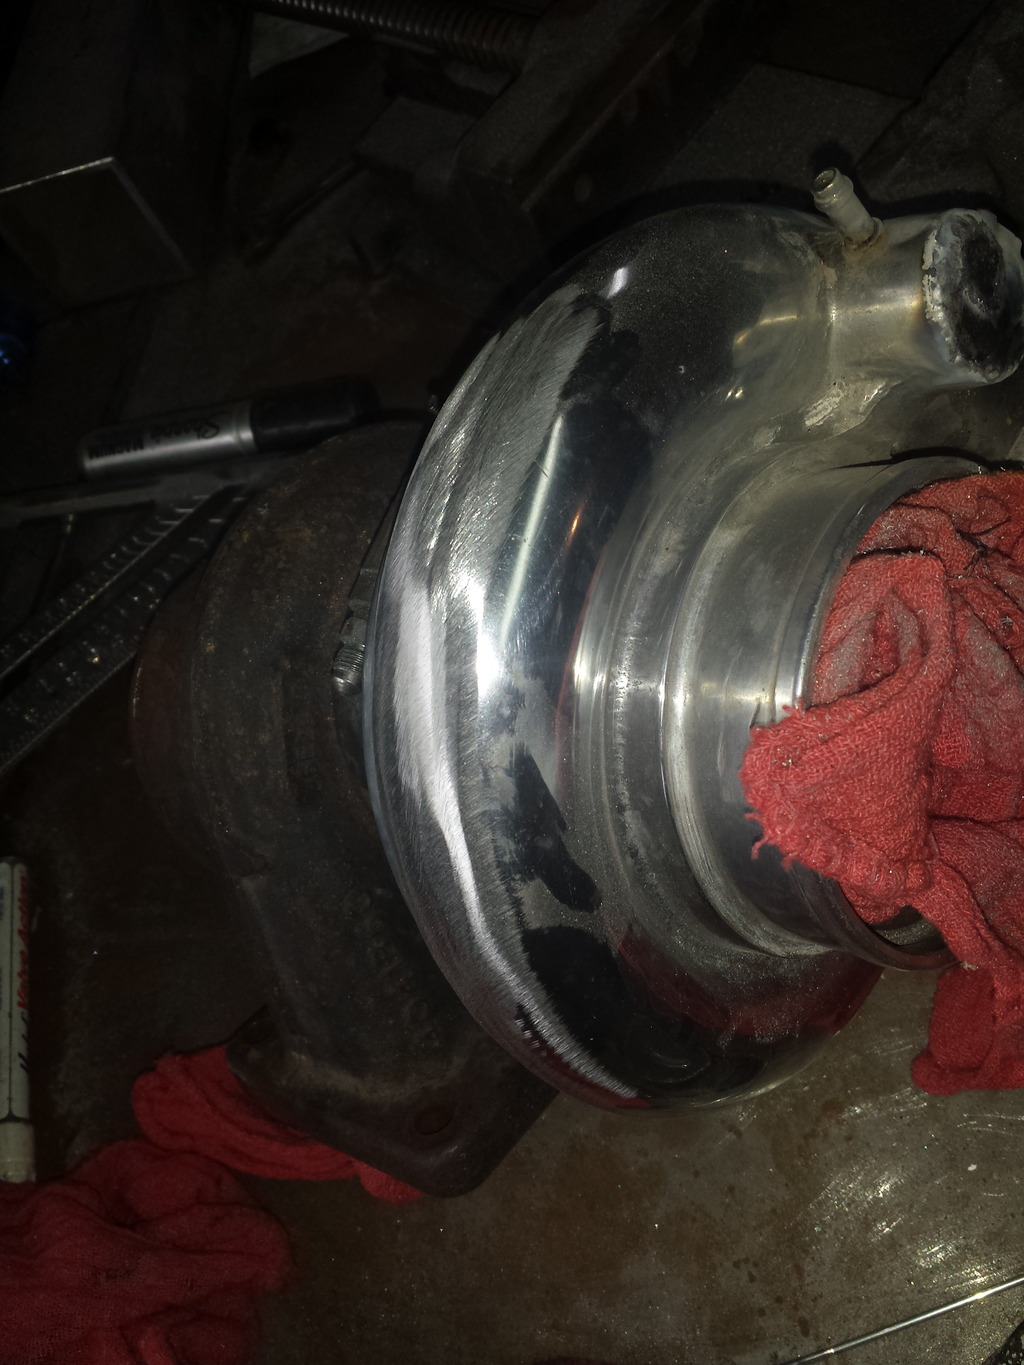
As for the turbo It had low spots where the internal wastegate mount was from the factory. So little welding to build up and grinding. Was all I needed to do. Now that everything is nice and smooth. Intake and compressor will be fully polished.
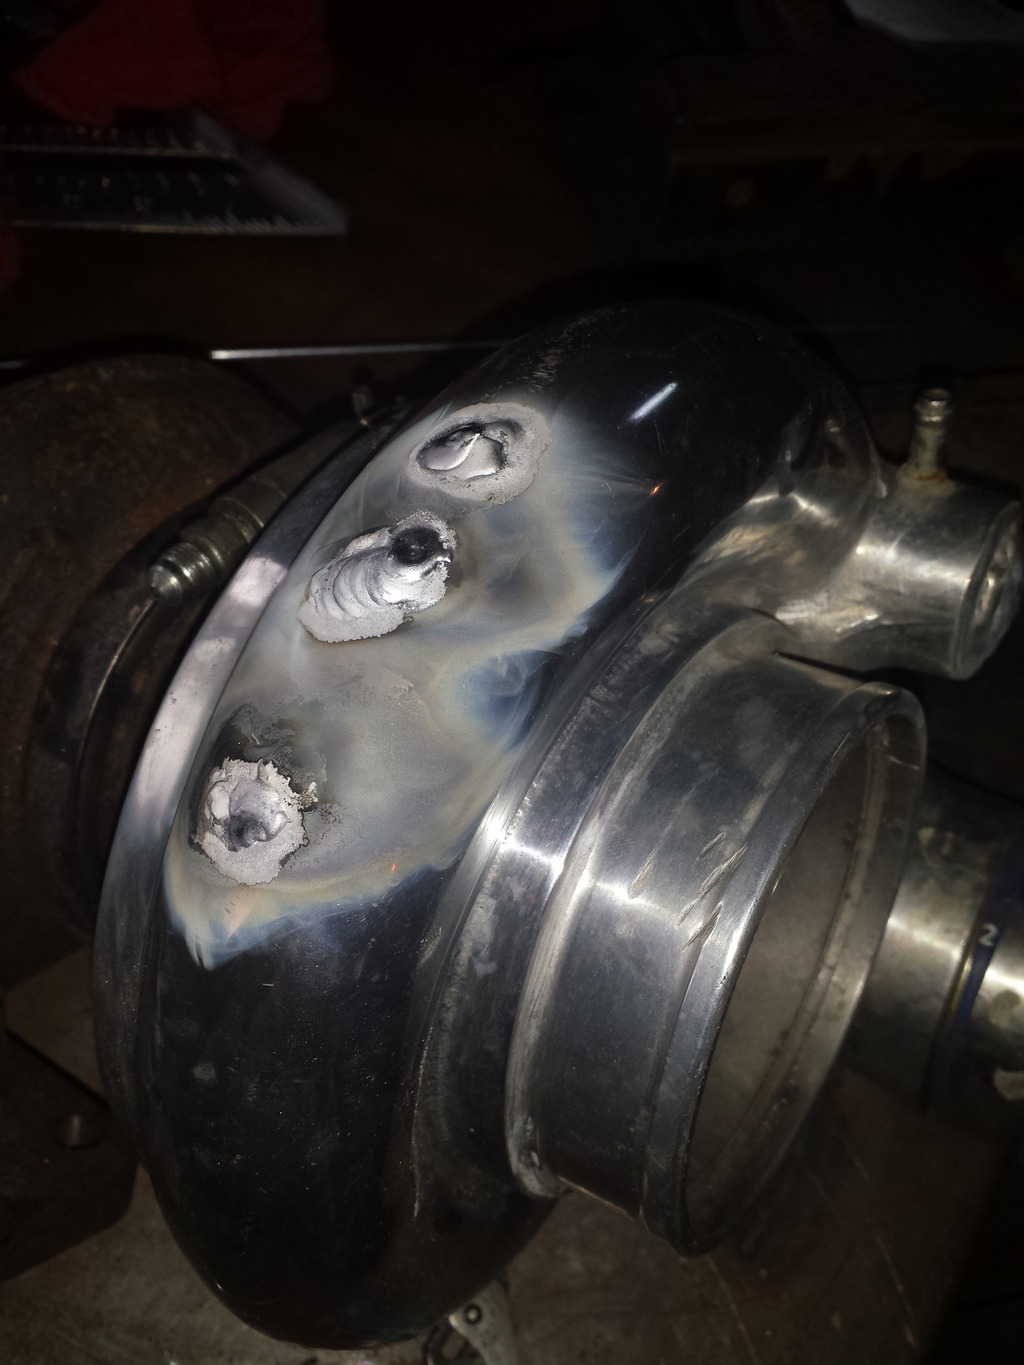
Also filled a old sensor port that I had a ugly plug in before.
This is where I stand. waiting on parts. I got some other misc stuff done starter,power steering on etc. Also will be converting over to z31 dizzy. Should have the turbo polished and the down pipe on tomorrow. Also hoping get alt and ac back in before the weekend over.


Ordered my 1000cc injectors finally so while I wait on parts and cant do my much I decided to fix my intake and my turbo. On the intake the bungs for the plug they had very poor threads and the welds I wasn't happy with. Also Shaved everything else I didn't need.
Before


Can really see how bad the old bungs were plugs wouldn't even tighten down.

After


As for the turbo It had low spots where the internal wastegate mount was from the factory. So little welding to build up and grinding. Was all I needed to do. Now that everything is nice and smooth. Intake and compressor will be fully polished.


Also filled a old sensor port that I had a ugly plug in before.

This is where I stand. waiting on parts. I got some other misc stuff done starter,power steering on etc. Also will be converting over to z31 dizzy. Should have the turbo polished and the down pipe on tomorrow. Also hoping get alt and ac back in before the weekend over.
Quote:
Its finished and running. Not driving yet need to pull the trans out and look into throw out bearing. Also redoing brake setup.Originally Posted by nism0max
Any updates?

Quick update. Ecu lost power havnt sources problem yet. Finally tracked down engine harness. Friend pulled one down in Kansas hope receive it middle November when he makes it my way.