Vq30de build
 12-04-2014, 03:29 PM
#1
Junior Member
Thread Starter

Join Date: Dec 2014
Posts: 35
Vq30de build
I posted this build in the vq30de section of nicoclub but I figured i would get more of a reaction here and I used to troll this site alot back in 2008 when i owned a maxima so basically I recieved a free nissan block and a box of parts... decided I was going to rebuild it, boost it to 10-15psi and slap it in the biggest POS maxima 5spd I can find for that sleeper look where you think you know your car is gonna stomp on that wreck but your left looking at the nissan logo.
Im gonna need help because none of the bolts are in labeled bags which would make my life easier and I am sure I will have more than a few questions as this build continues
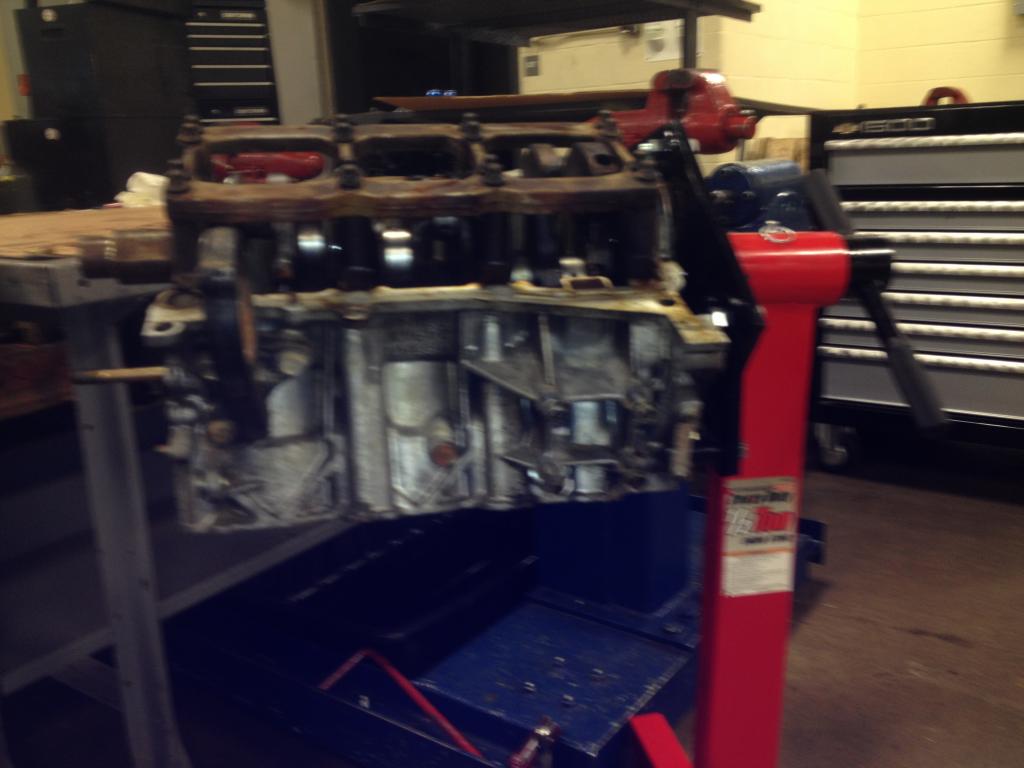
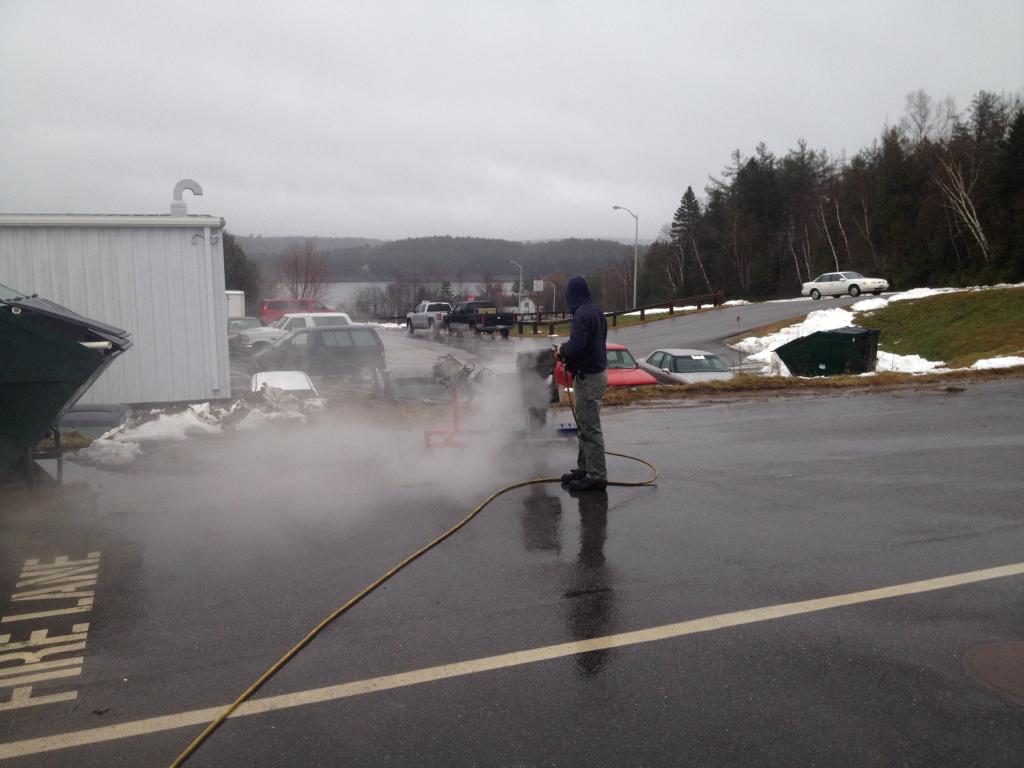
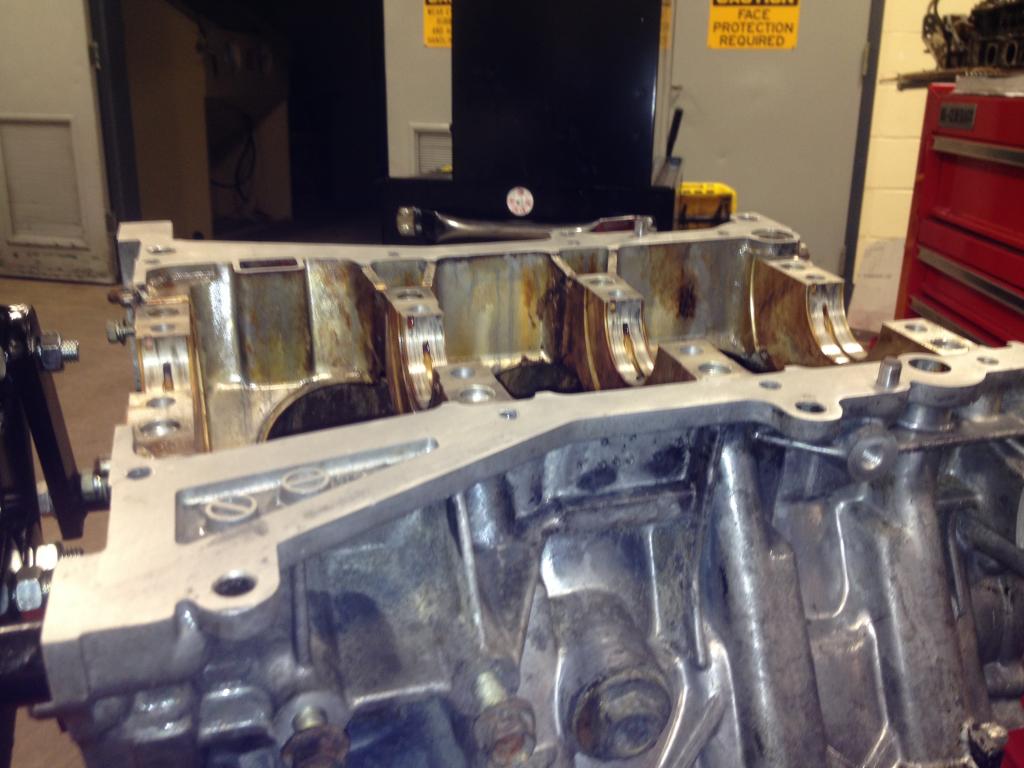
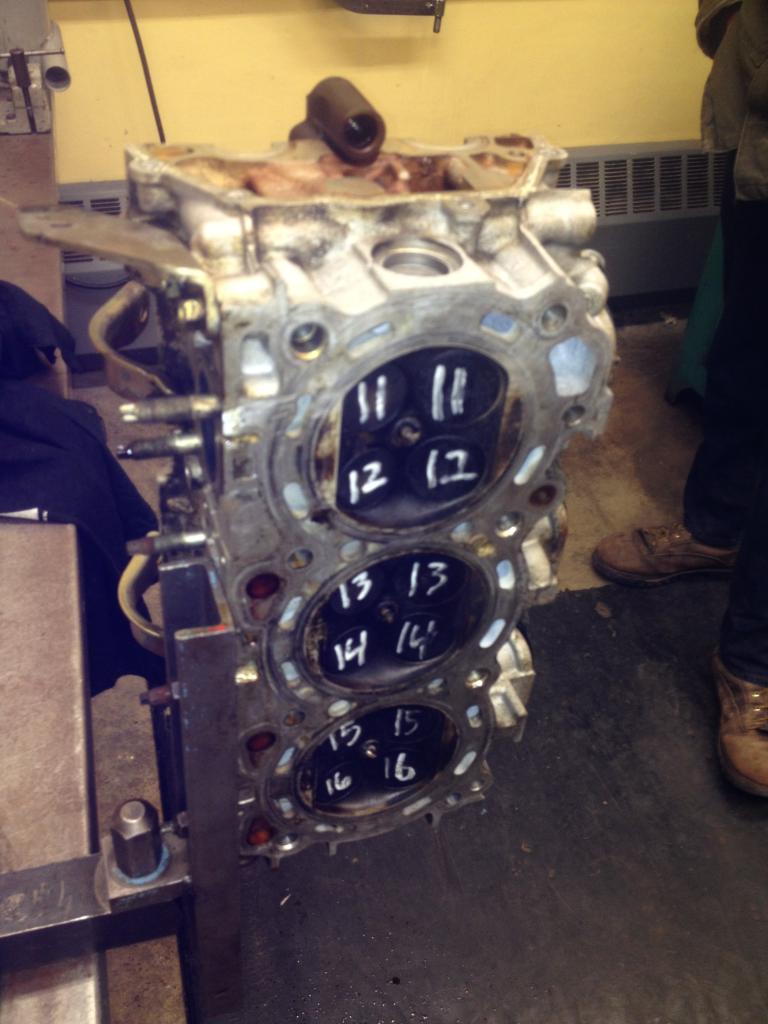
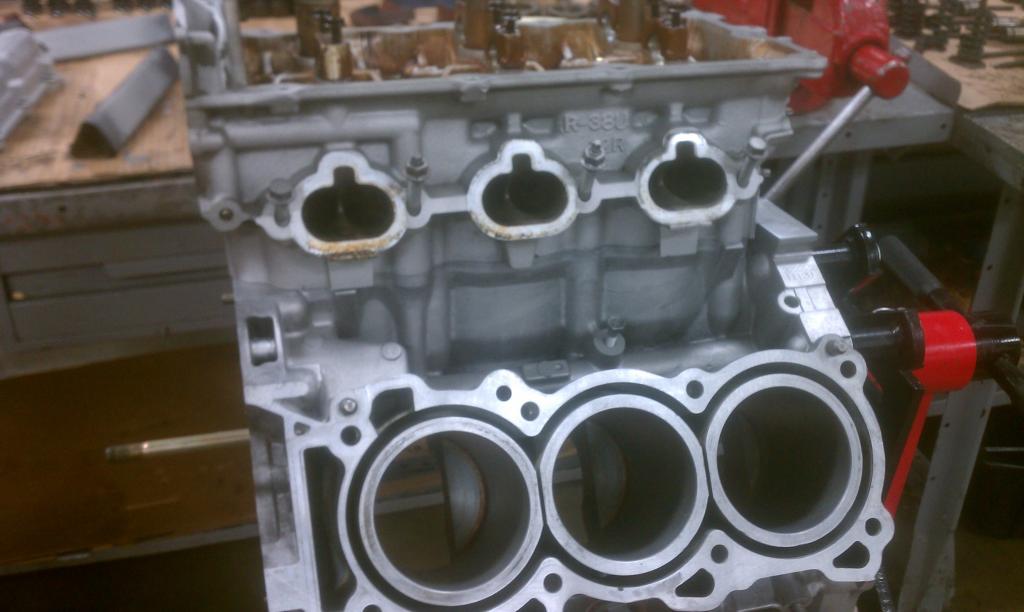
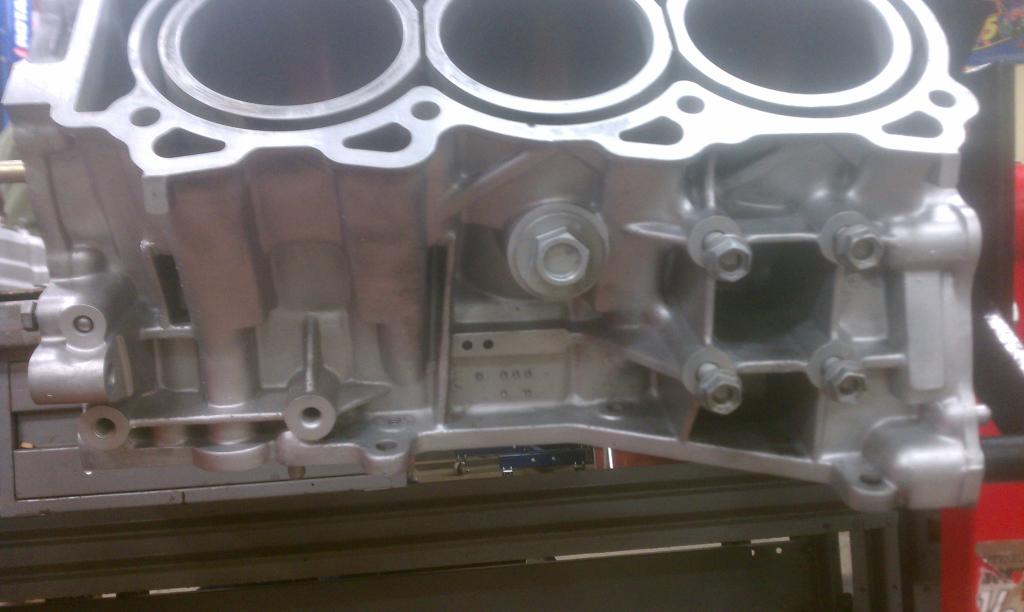
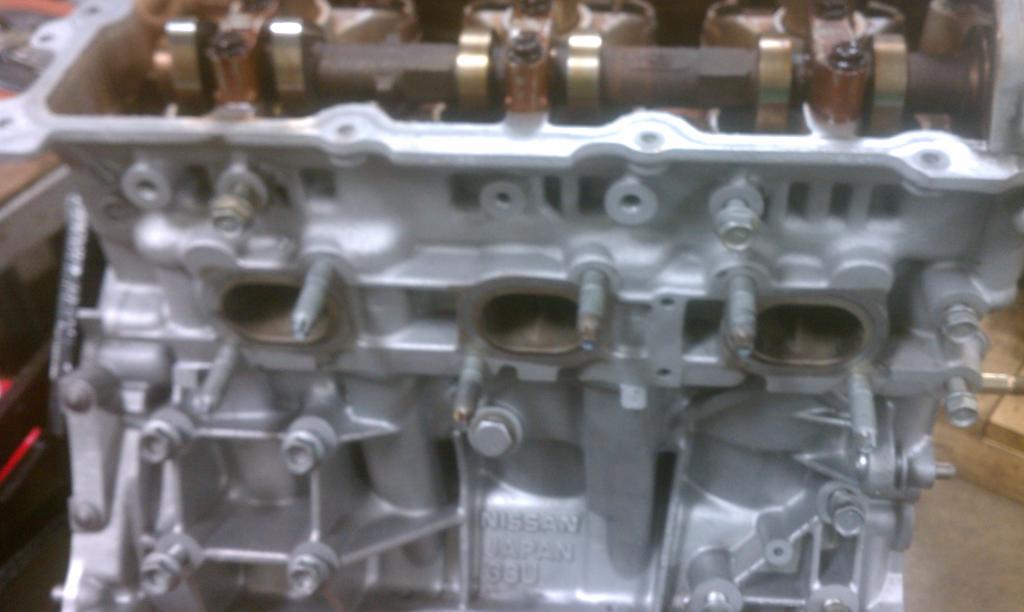
I got the engine into the shop today, Removed the heads and the crank then pressure washed the block to remove some gunk before I start to make sure nothing is warped or distorted.
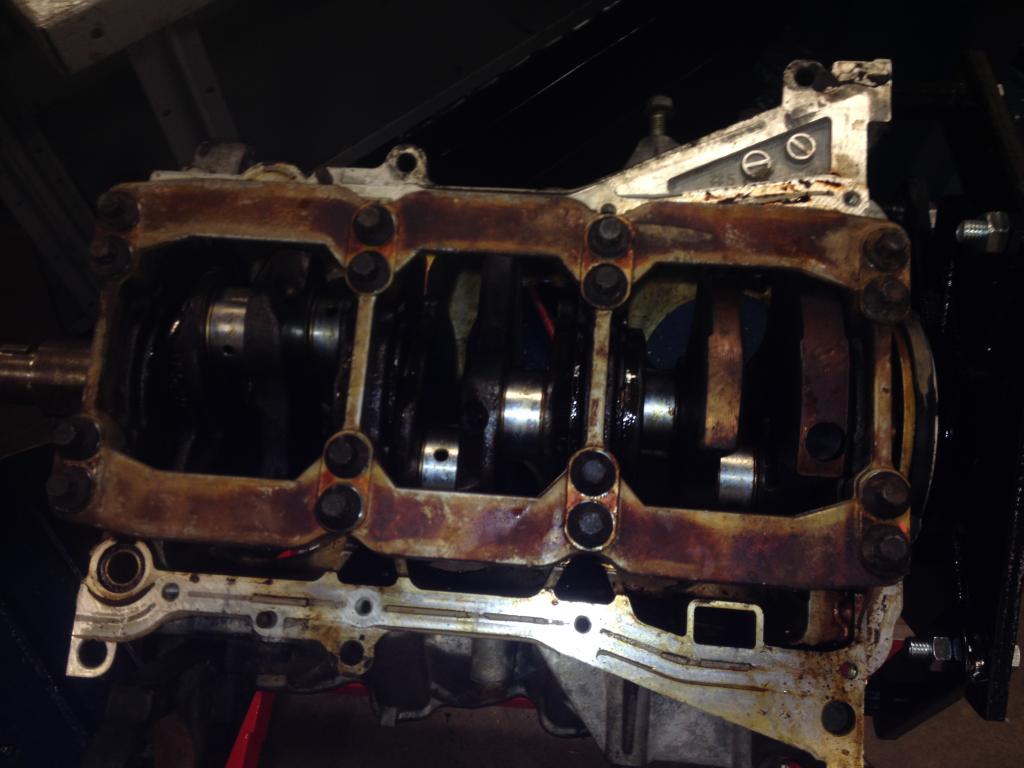
Used a giant file wrapped in fine sandpaper coated with WD-40 to clean up mating surfaces and checked the surfaces for distortion with a machinist flat edge and a 1 thousandth feeler gauge, not one spot warped even tho this engine clearly overheated.

Im gonna need help because none of the bolts are in labeled bags which would make my life easier and I am sure I will have more than a few questions as this build continues
I got the engine into the shop today, Removed the heads and the crank then pressure washed the block to remove some gunk before I start to make sure nothing is warped or distorted.


Used a giant file wrapped in fine sandpaper coated with WD-40 to clean up mating surfaces and checked the surfaces for distortion with a machinist flat edge and a 1 thousandth feeler gauge, not one spot warped even tho this engine clearly overheated.


 12-04-2014, 03:31 PM
#2
Junior Member
Thread Starter
Join Date: Dec 2014
Posts: 35
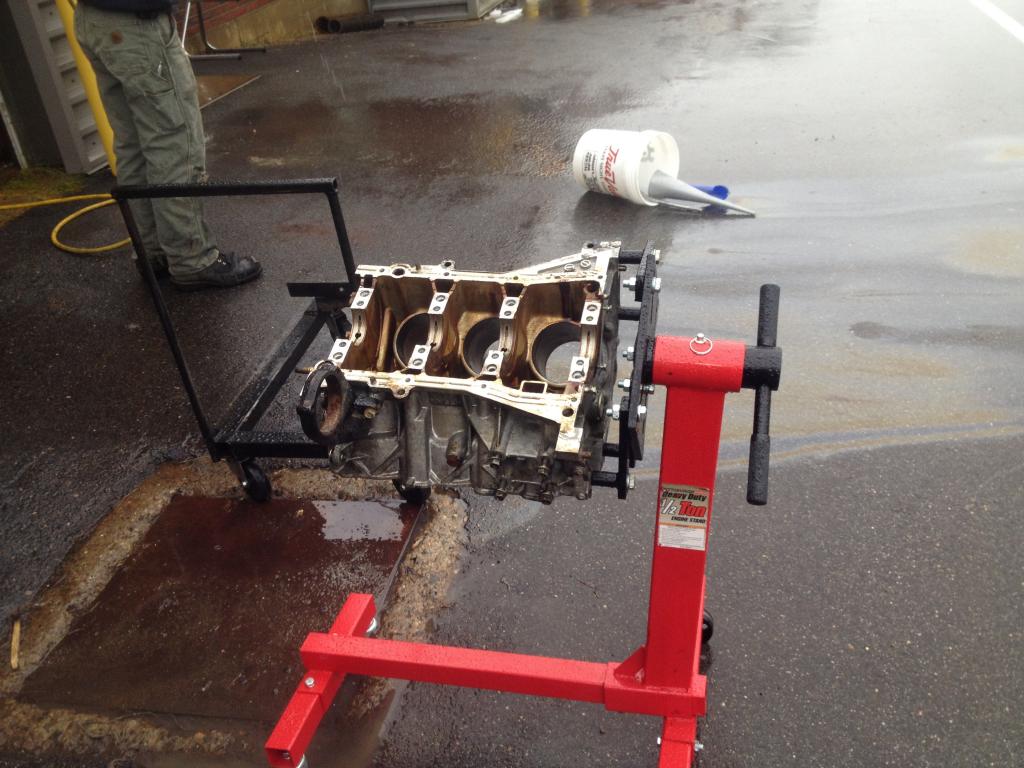
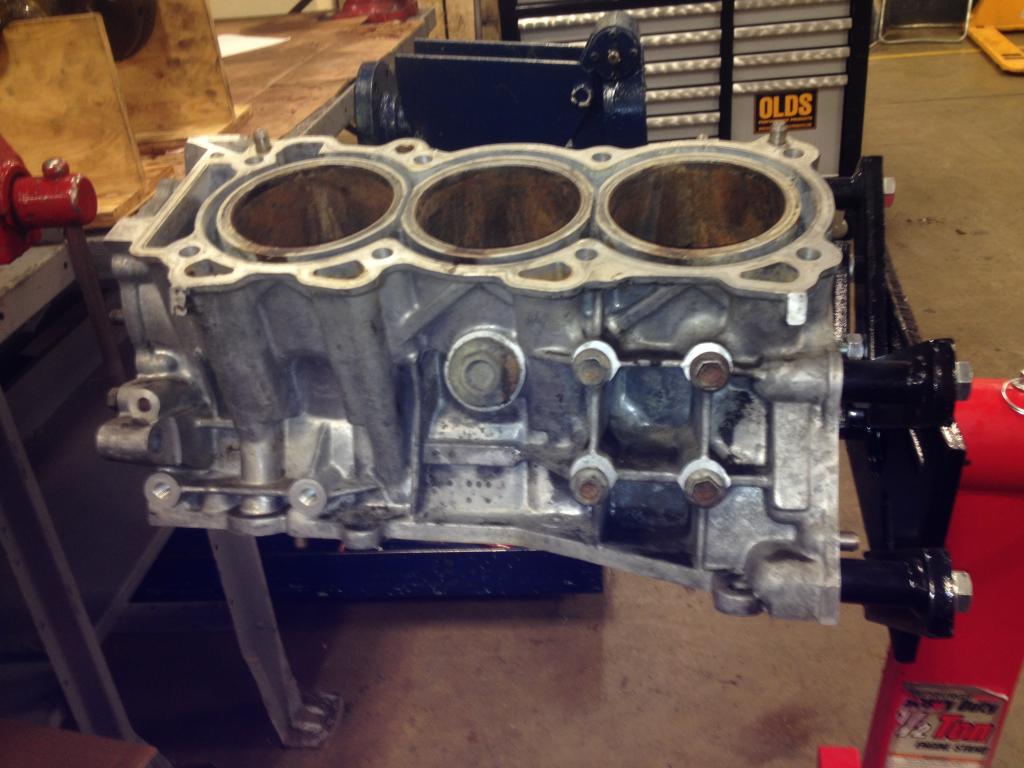
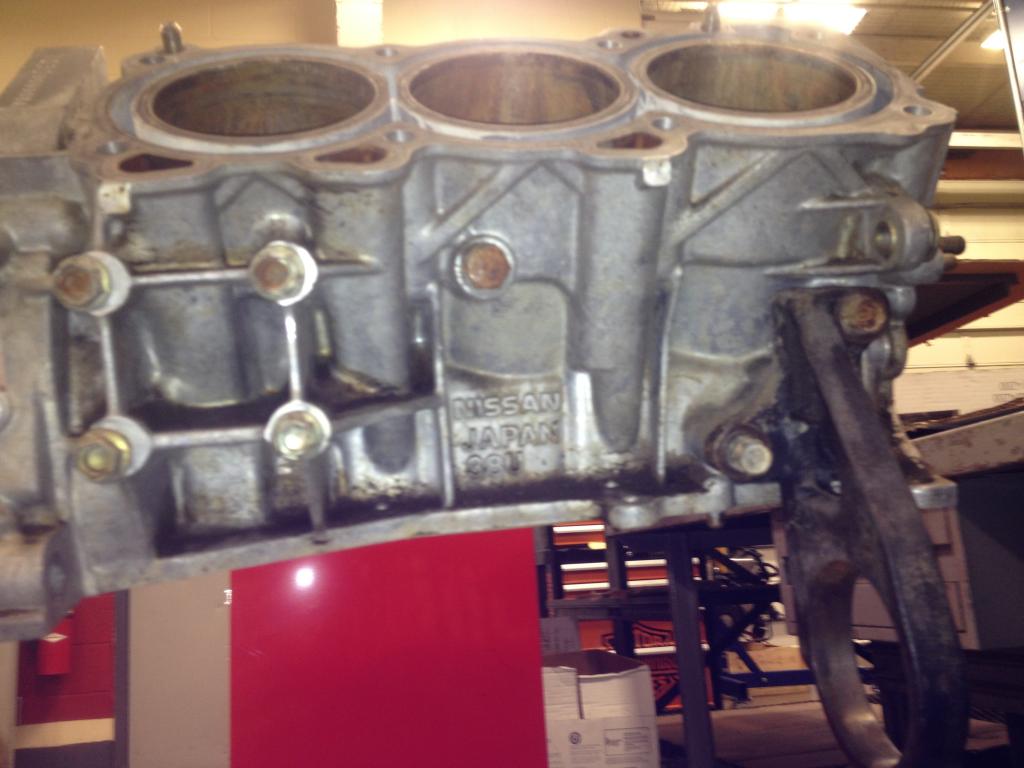
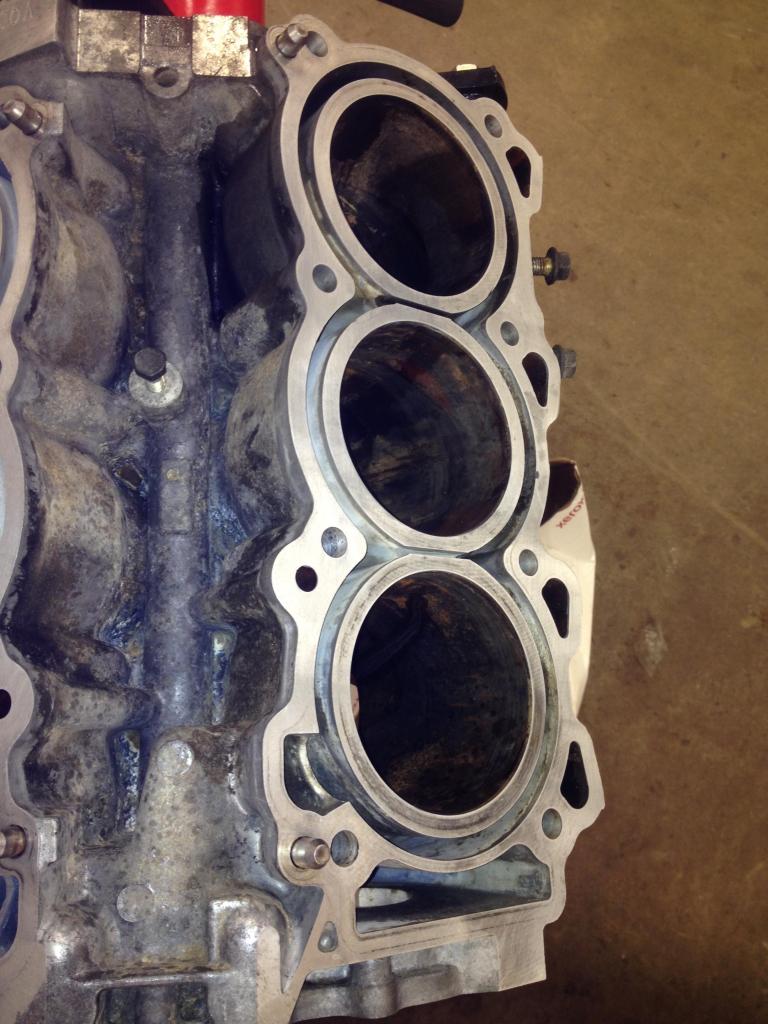
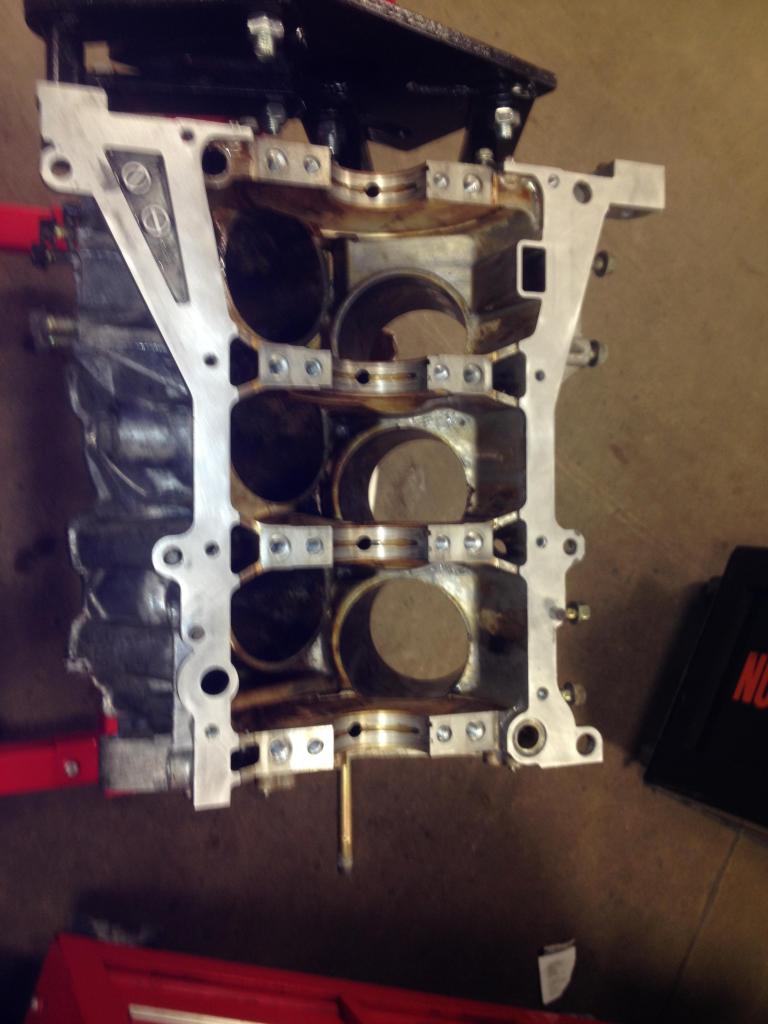
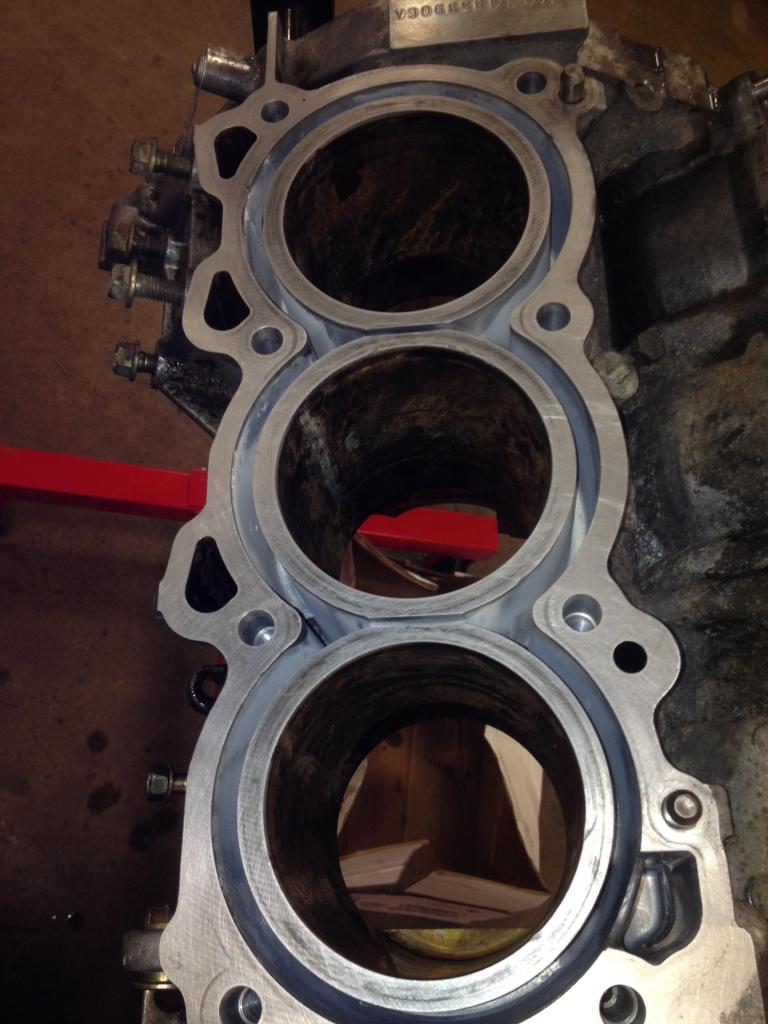
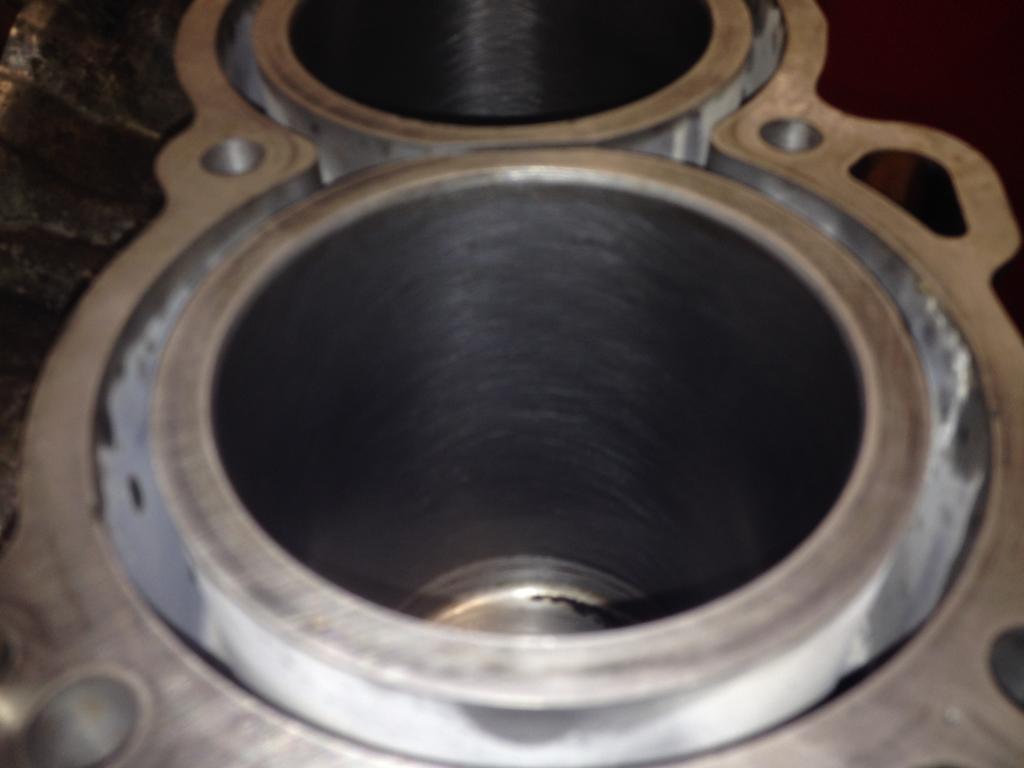
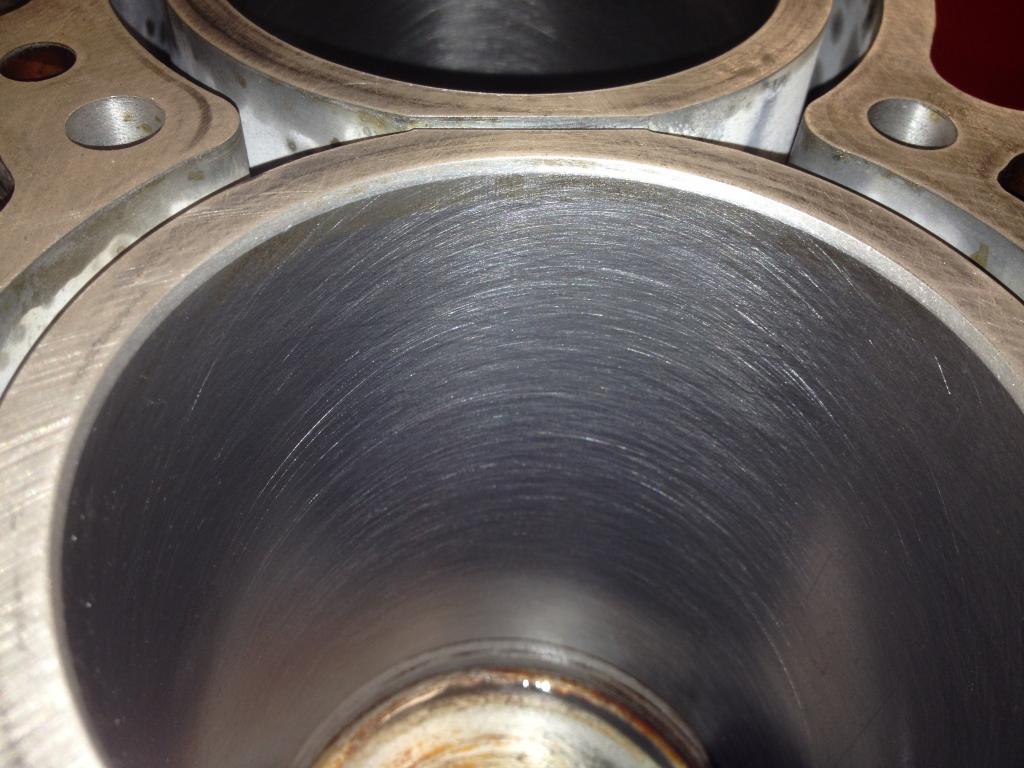
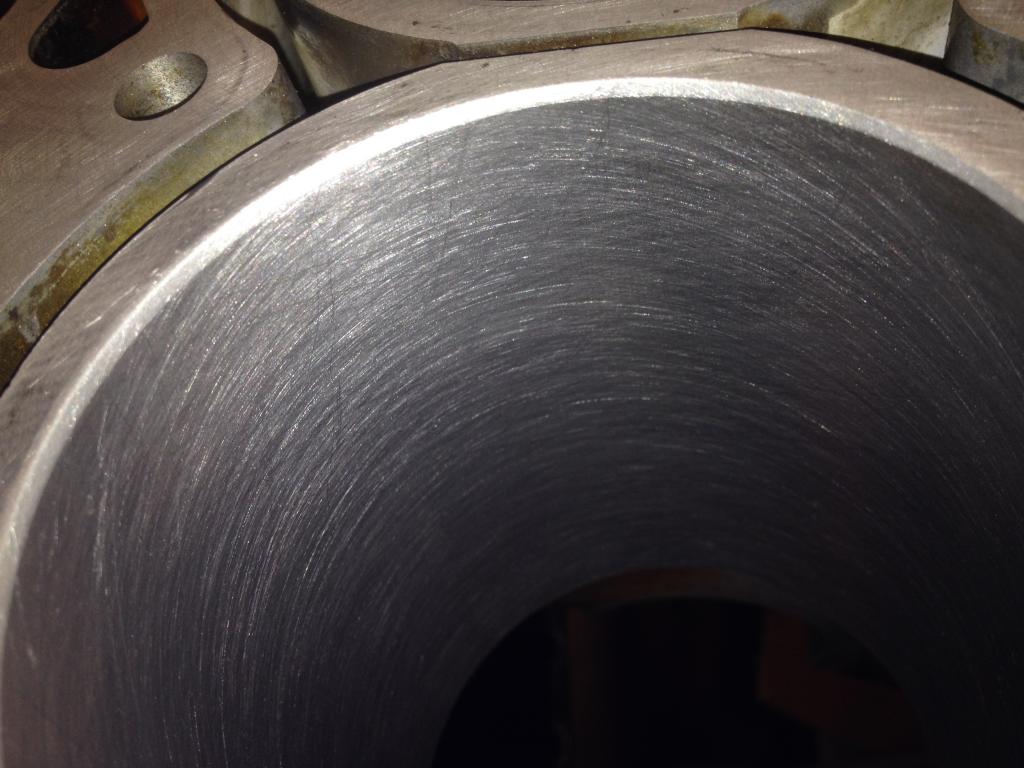
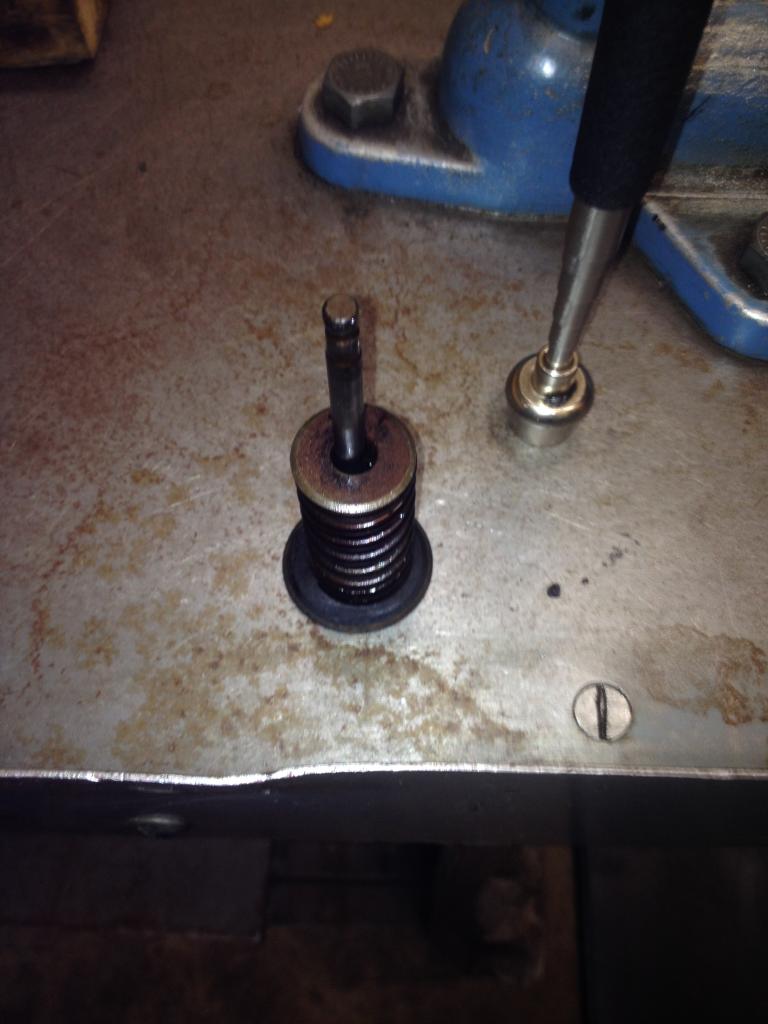
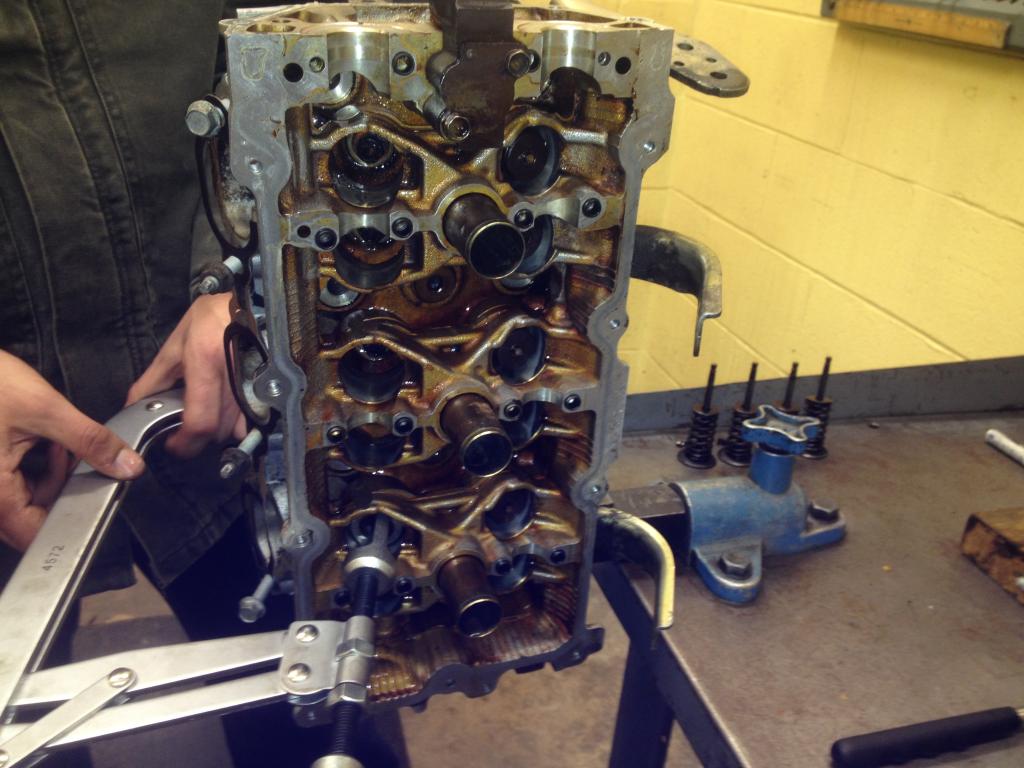
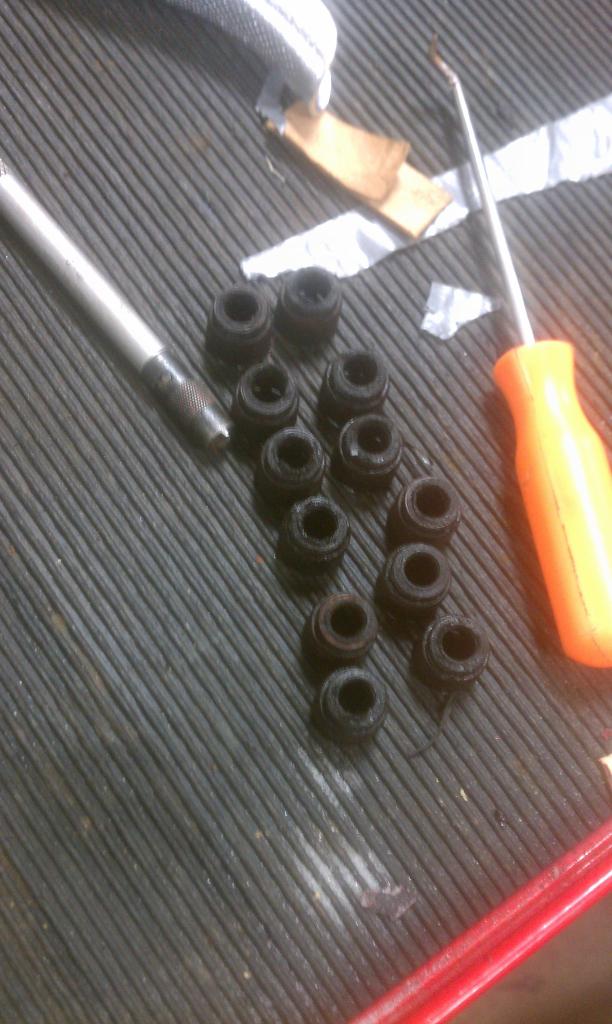
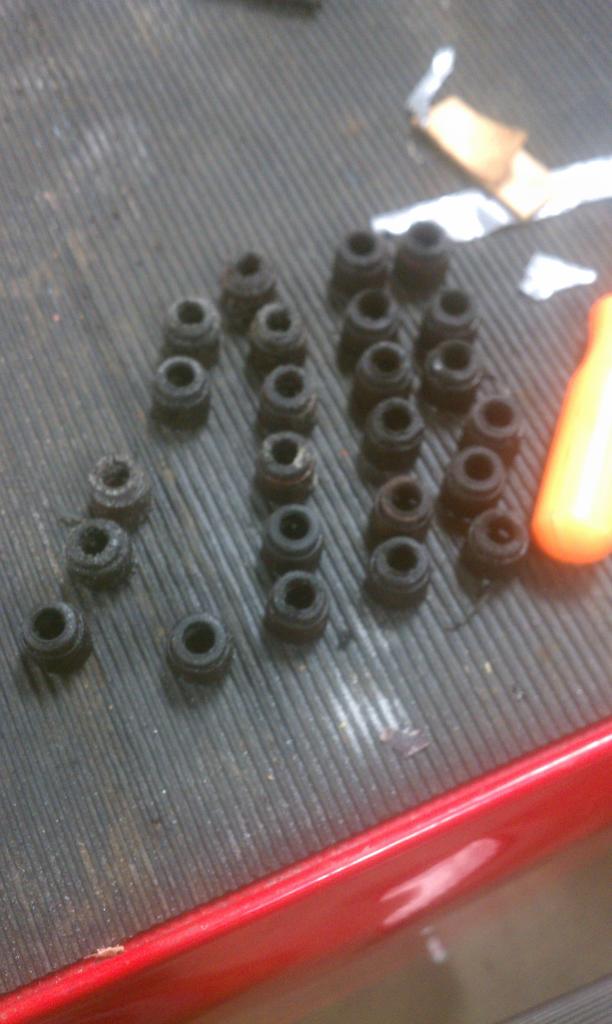
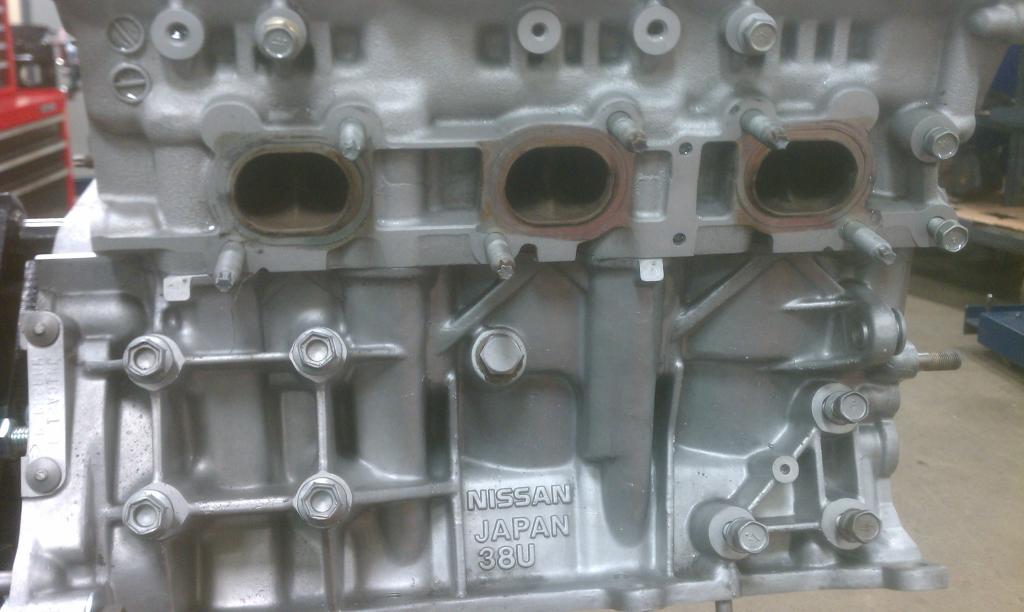
Ball Honed the cylinders to remove surface rust and check for pitting in all of the cylinders, 1 cylinder had 1 pit in it.... so close to getting away without boring if I wanted to but of course I want that 1mm extra displacement
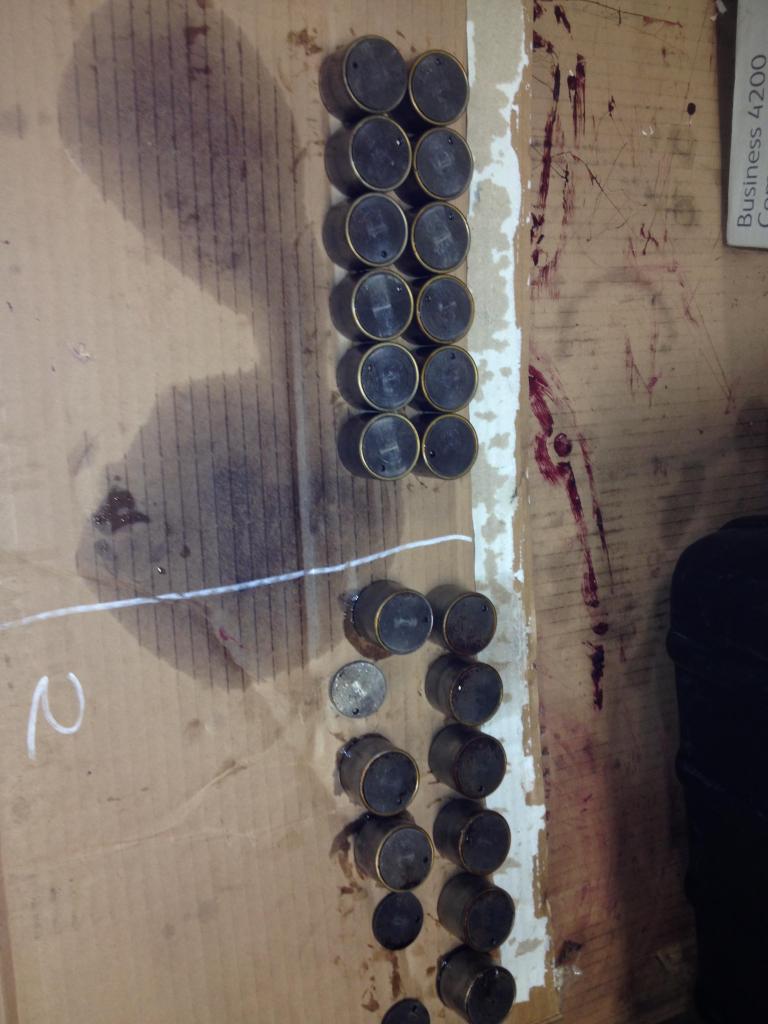
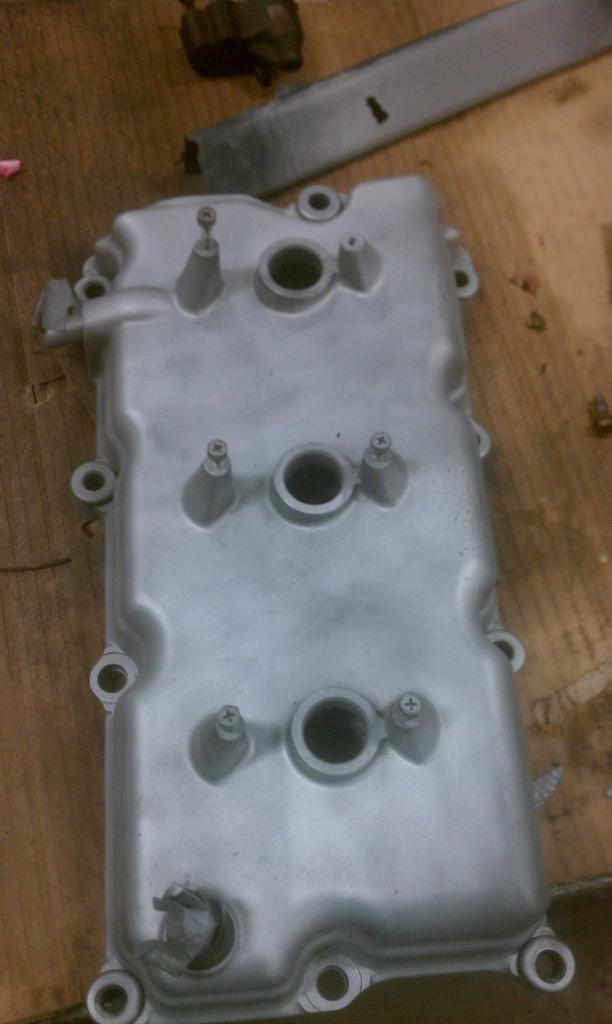
Pressurewashed the heads and started to remove the shims and buckets, 3 buckets will not come out I have pushed them in with rubber mallets and oiled them with 10w30, wd40, pb blast I even forced them to spin by using a pick pushed into the oil feed hole in them but I still cannot get those 3 out the rest either pulled out with a magnet or the previous method.
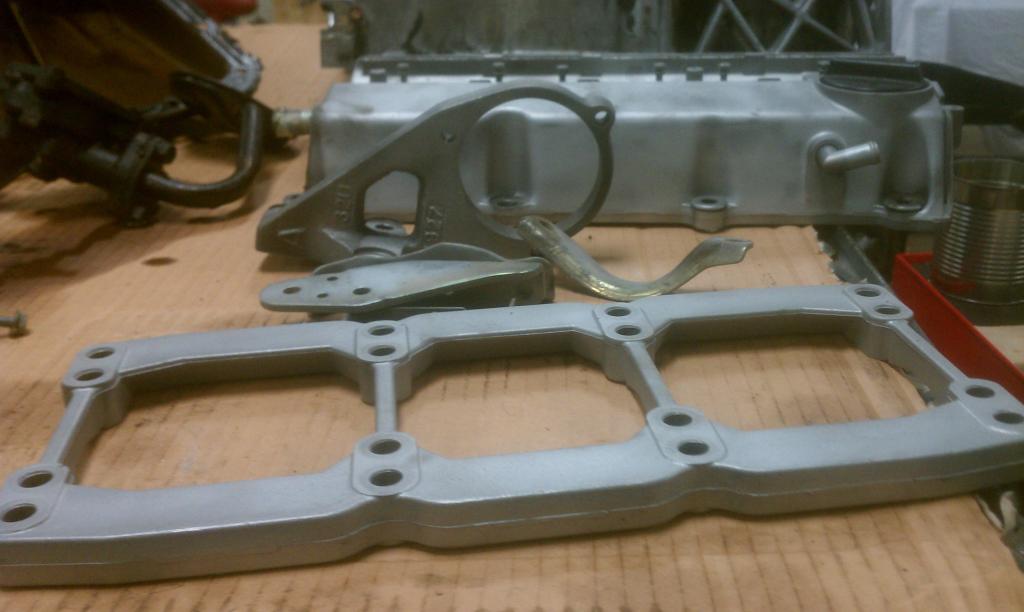
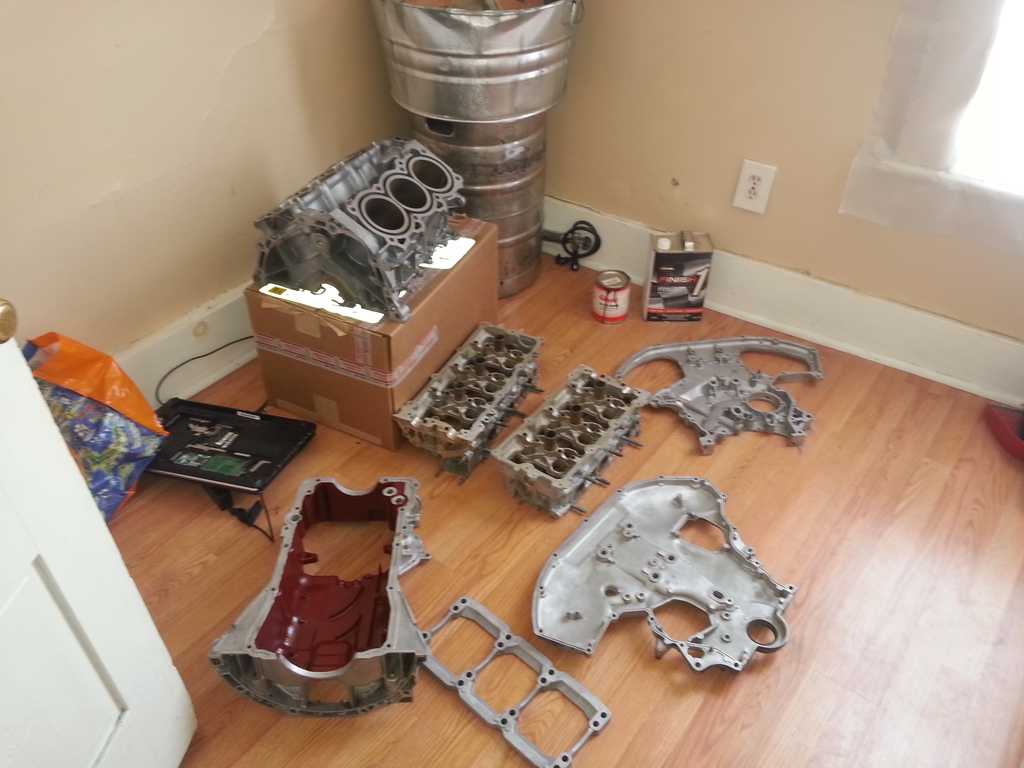
Started sorting out parts aswell that were just thrown into a box this is where I am really gonna need some forum help from people with experience, none of the bolts are labeled this is a nightmare of an issue but im keeping optimistic with it.
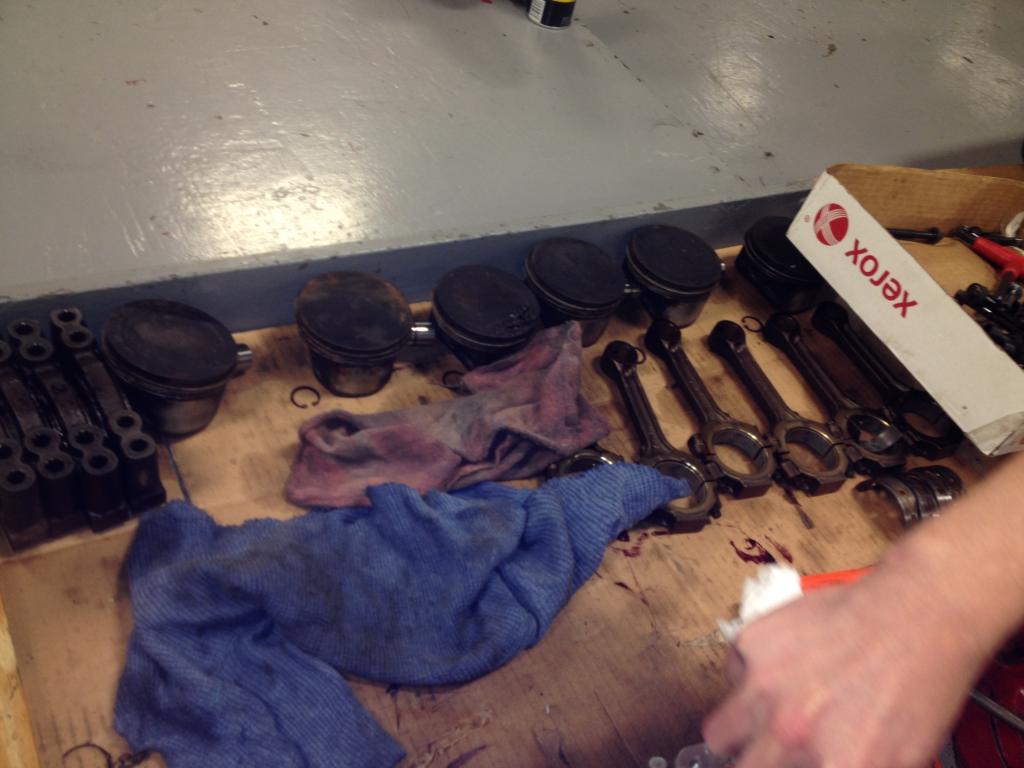


 12-04-2014, 05:19 PM
#5
Junior Member
Thread Starter
Join Date: Dec 2014
Posts: 35
I plan on putting around 8k into this entire project car, trubo, build, ecu, etc, I have so many plans yet none of them set in stone yet ive been reading on the 3.3l by using a 3.5 crank which would be badass to use the pauter rods for the 3.5 but isnt the 3.5 crank weaker than the 3.0? and has this ever even been accomplished.
aftermarket high performance parts for the vq30 are almost non existent I would like an upgraded exhaust valve but I might have to settle for a coating of some kind that I have no knowledge of.
who makes the best headgasket to run on this motor I plan on forcing alot of air down her throat and cant afford to be set back by an inferior seal.
any information on products for anypart of this motor good or bad would be much appreciated because I just dont have the knowledge on the vq.
12-04-2014, 05:25 PM
#6
Senior Member

Join Date: Jan 2011
Location: Central AR
Posts: 3,041
If you haven't already, take some time to check the "All Motor" section on this site at the following link.
We have several members who have posted some very cool build threads in that section.
https://maxima.org/forums/all-motor-61/
There is also a Supercharged and Turbocharged section.
https://maxima.org/forums/supercharged-turbocharged-38/
::
We have several members who have posted some very cool build threads in that section.
https://maxima.org/forums/all-motor-61/
There is also a Supercharged and Turbocharged section.
https://maxima.org/forums/supercharged-turbocharged-38/
::
Last edited by CS_AR; 12-04-2014 at 05:39 PM.
 12-09-2014, 08:34 PM
#9
Junior Member
Thread Starter
Join Date: Dec 2014
Posts: 35
Pajama Bottoms
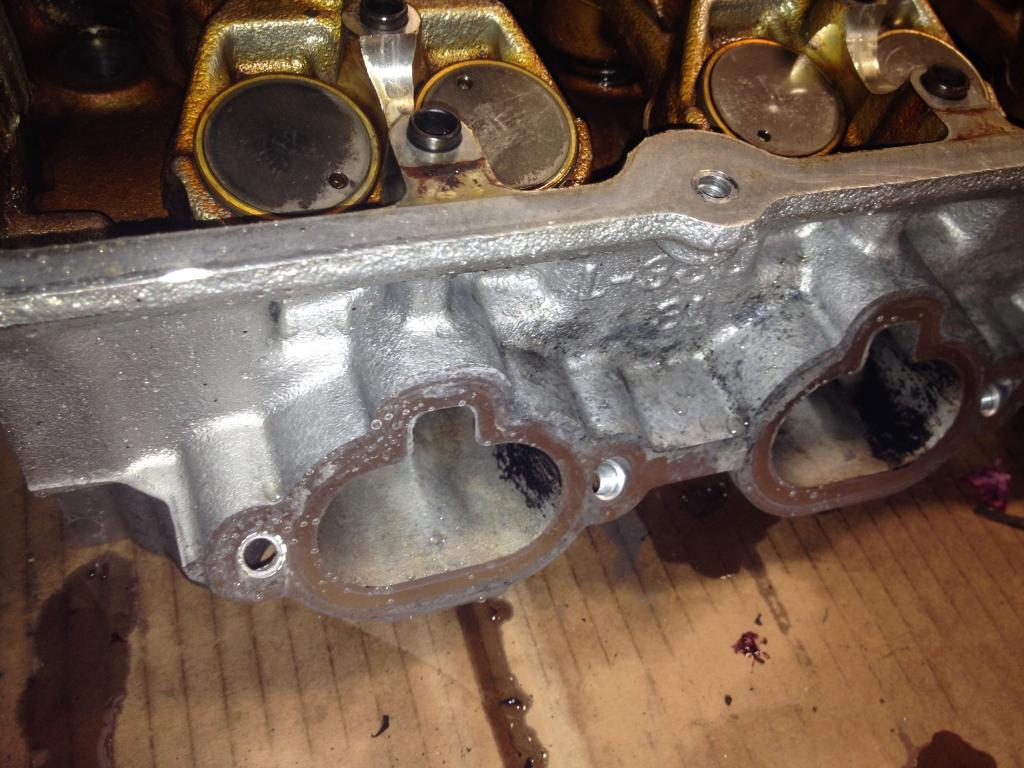
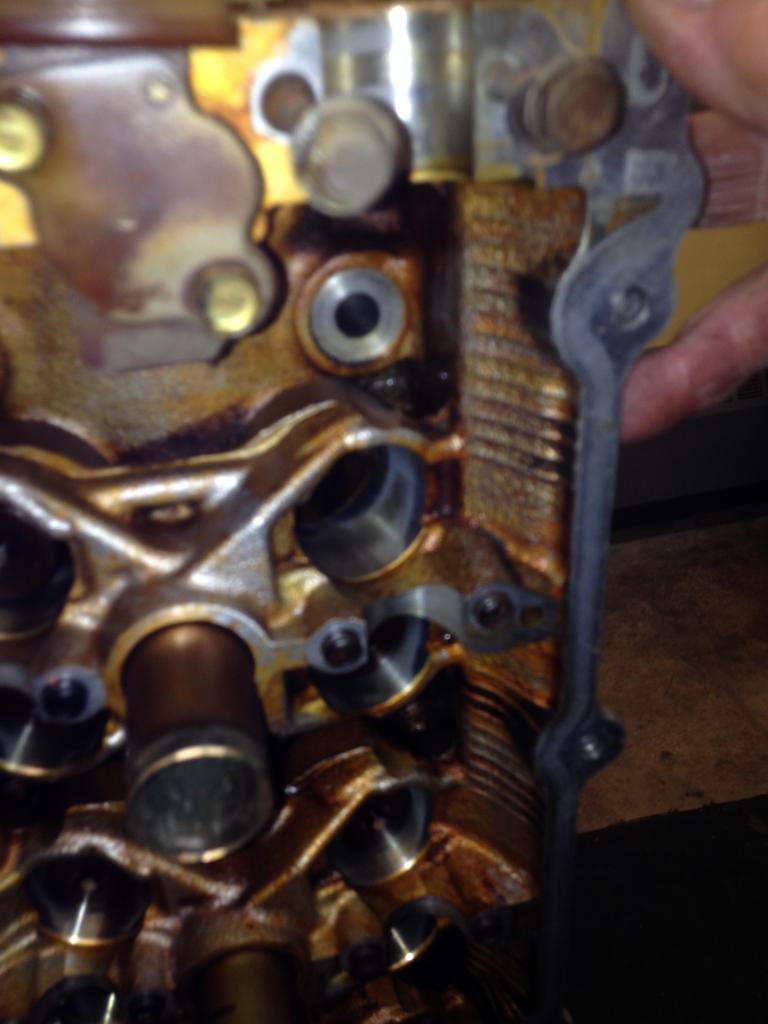
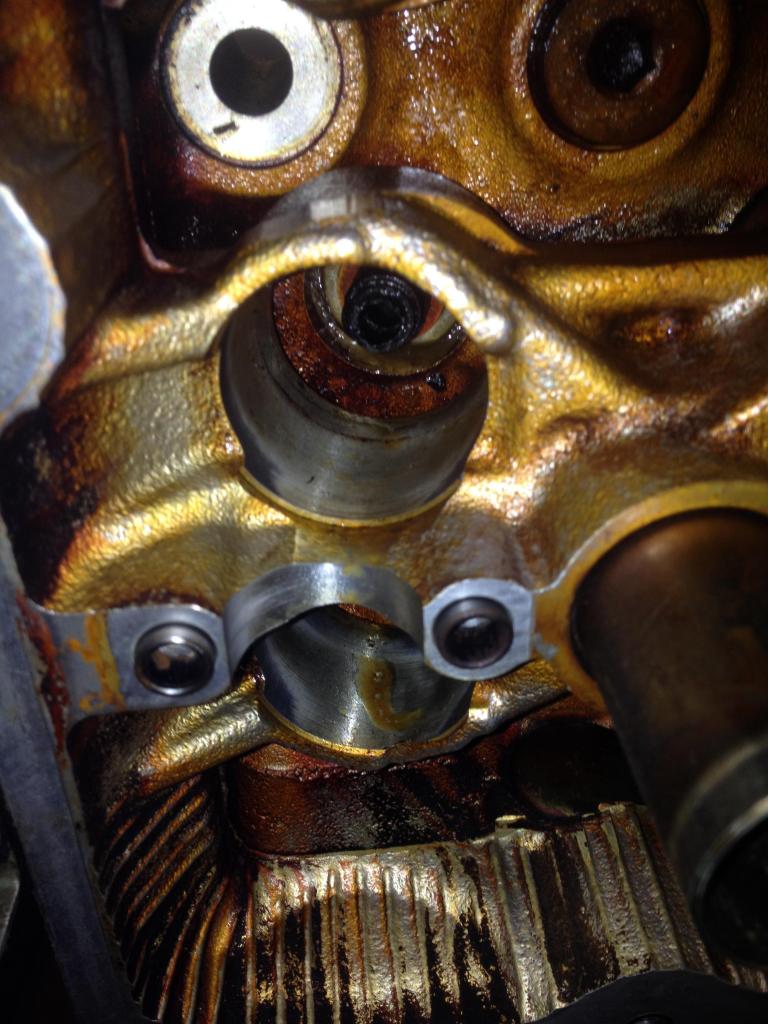
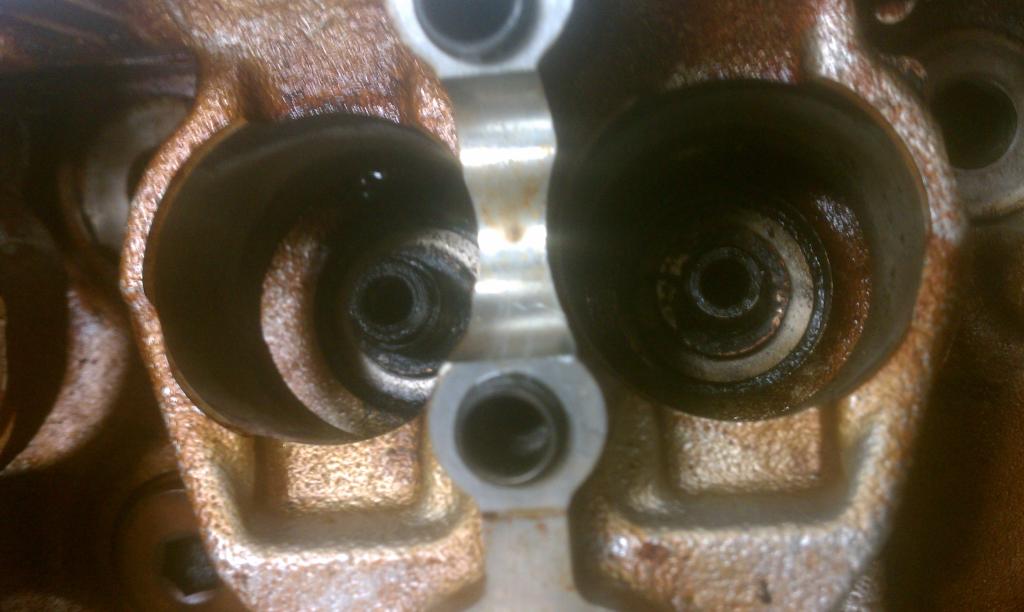
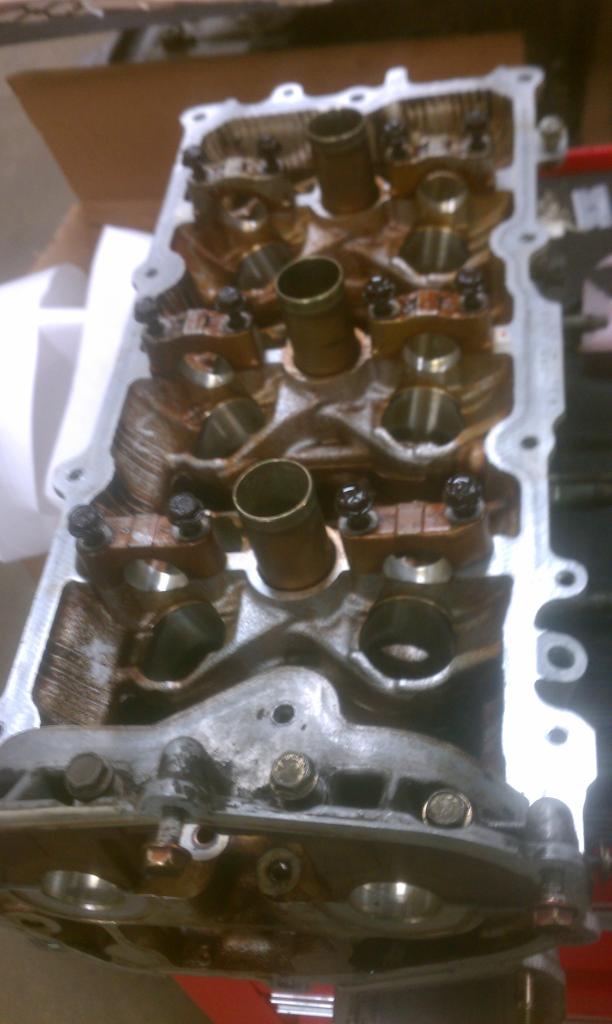
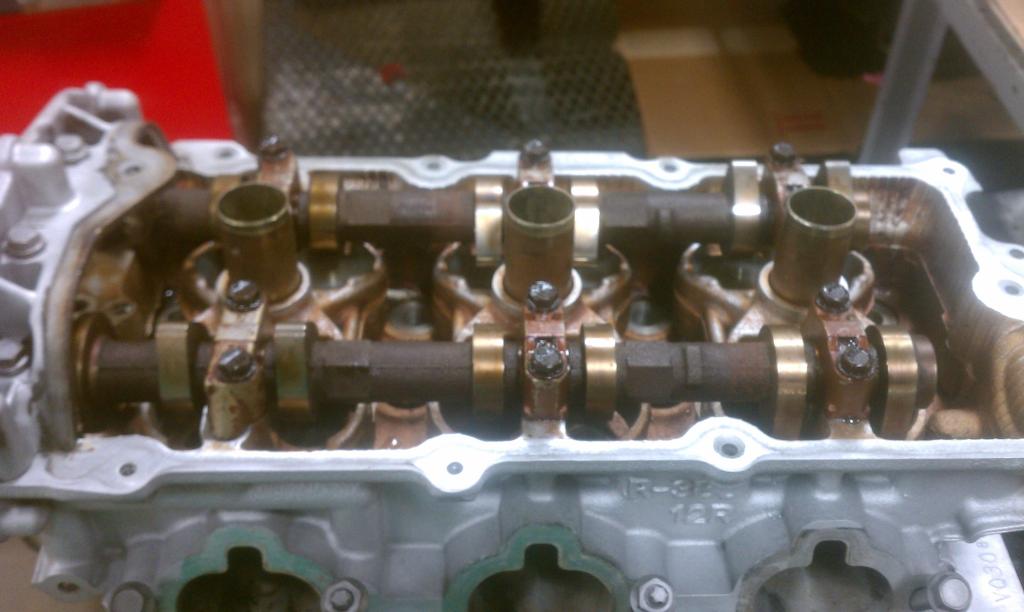
So I removed the stuck lifters with alot of effort it was not easy, I assumed the head was warped but after analysis it is not.
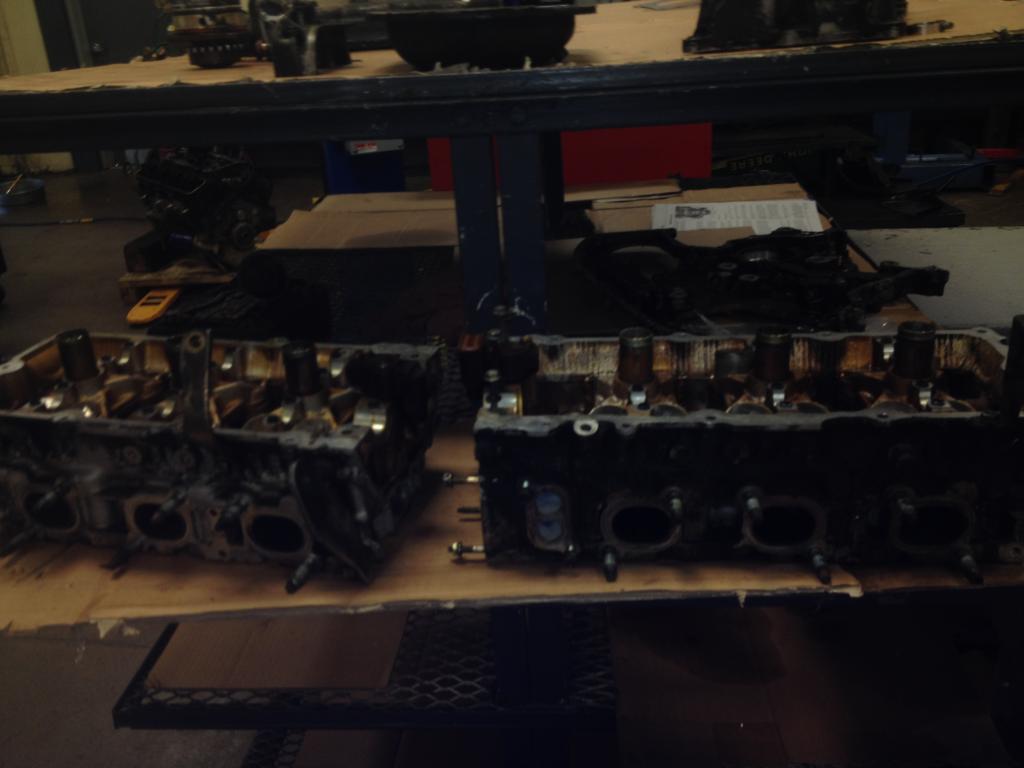
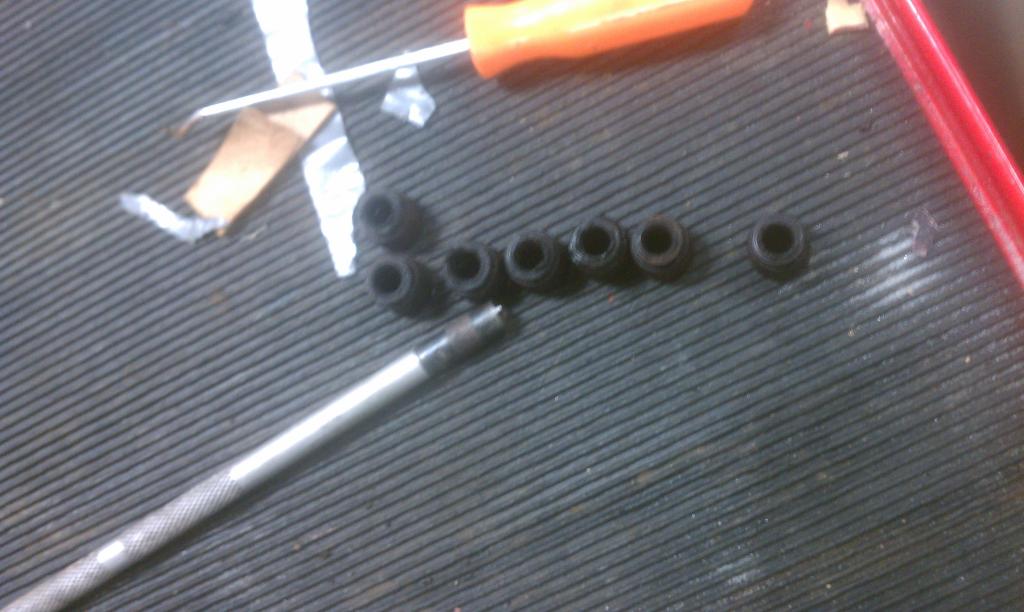
removed the all of the valves from both heads and pressurewashed the heads again to remove more crap off of them.
Valve seals were all ****, had oil creating silly putty on the back of some of my intake valves.
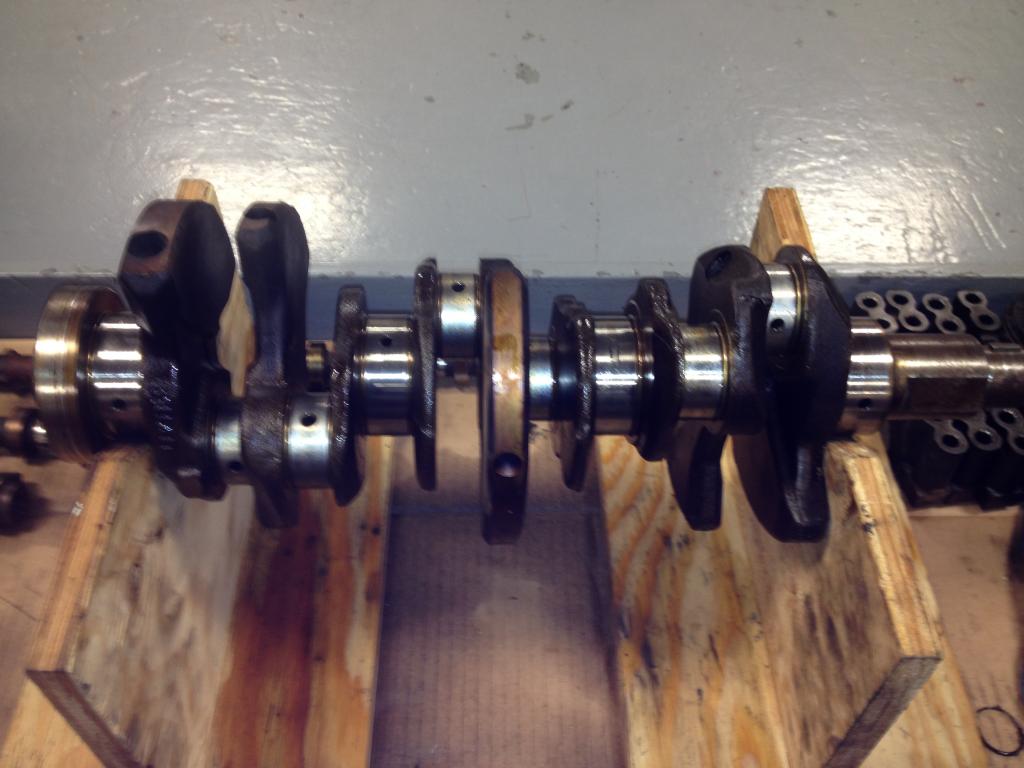
Decided to go with the 350z crank after a little bit of research, all objections to this decision will be welcomed hopefully someone can match my math because im now sure if all of the spec's i have received are trustworthy.

removed the all of the valves from both heads and pressurewashed the heads again to remove more crap off of them.
Valve seals were all ****, had oil creating silly putty on the back of some of my intake valves.
Decided to go with the 350z crank after a little bit of research, all objections to this decision will be welcomed hopefully someone can match my math because im now sure if all of the spec's i have received are trustworthy.


 12-09-2014, 09:43 PM
#12
Junior Member
Thread Starter
Join Date: Dec 2014
Posts: 35
Cmax are you asking if i resleeved the block? if you are i did not its the stock sleeves which thru me for a loop at first thinking they werve nikasil and not iron sleeves with an aluminum casting around them to create the block, pretty sophisticated engine the vq30de. nissan is deffinately not full of idiots.
Last edited by BoostinBy; 01-26-2015 at 07:21 PM.
01-21-2015, 10:23 AM
#13
Junior Member
Thread Starter
Join Date: Dec 2014
Posts: 35
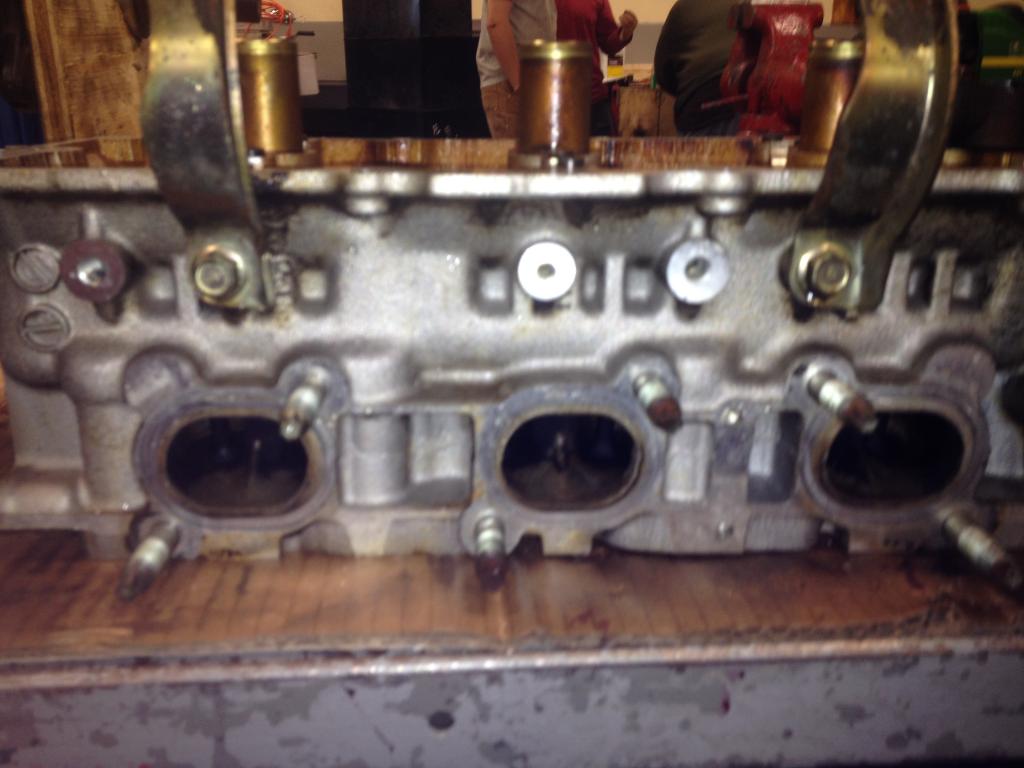
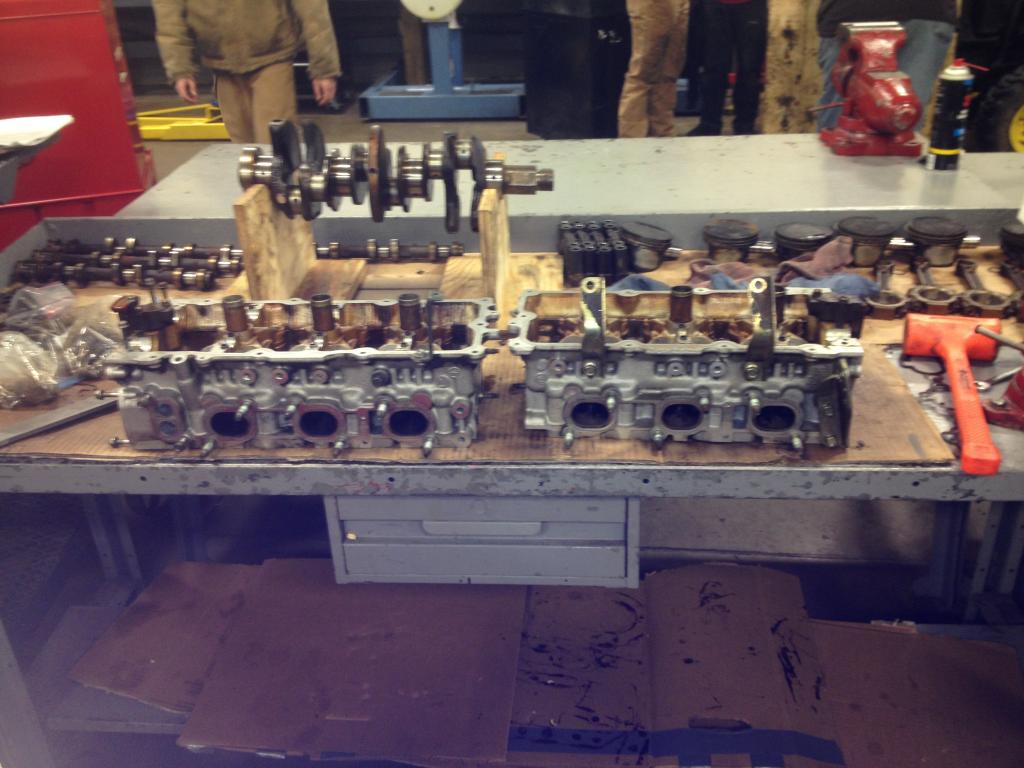
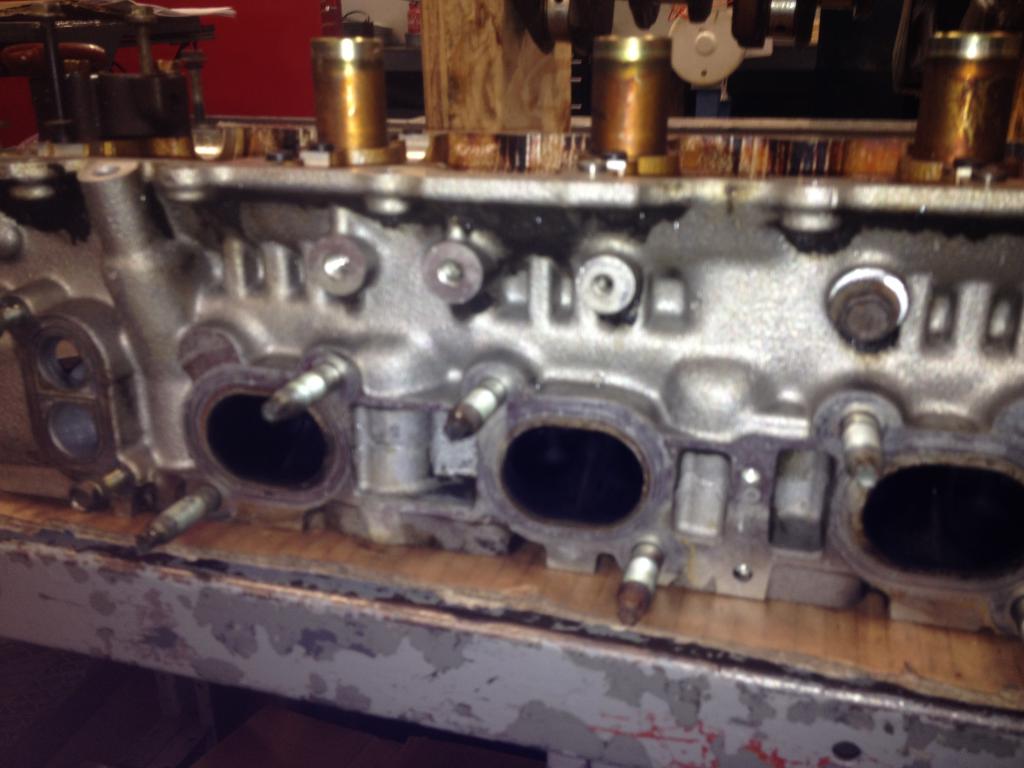
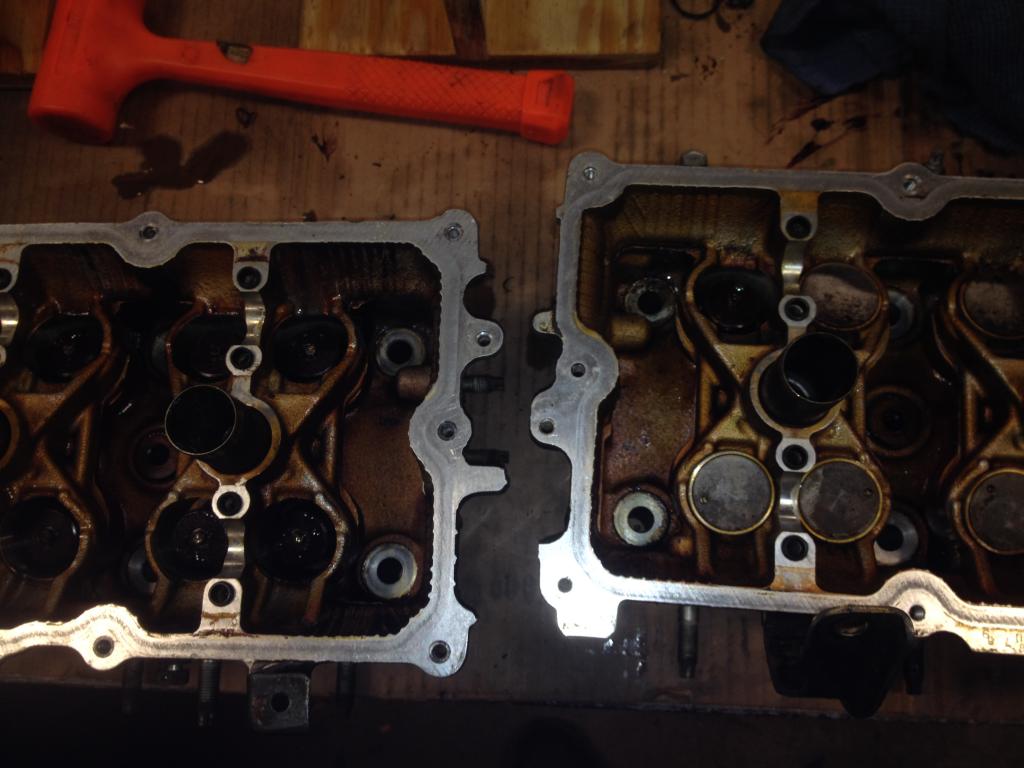
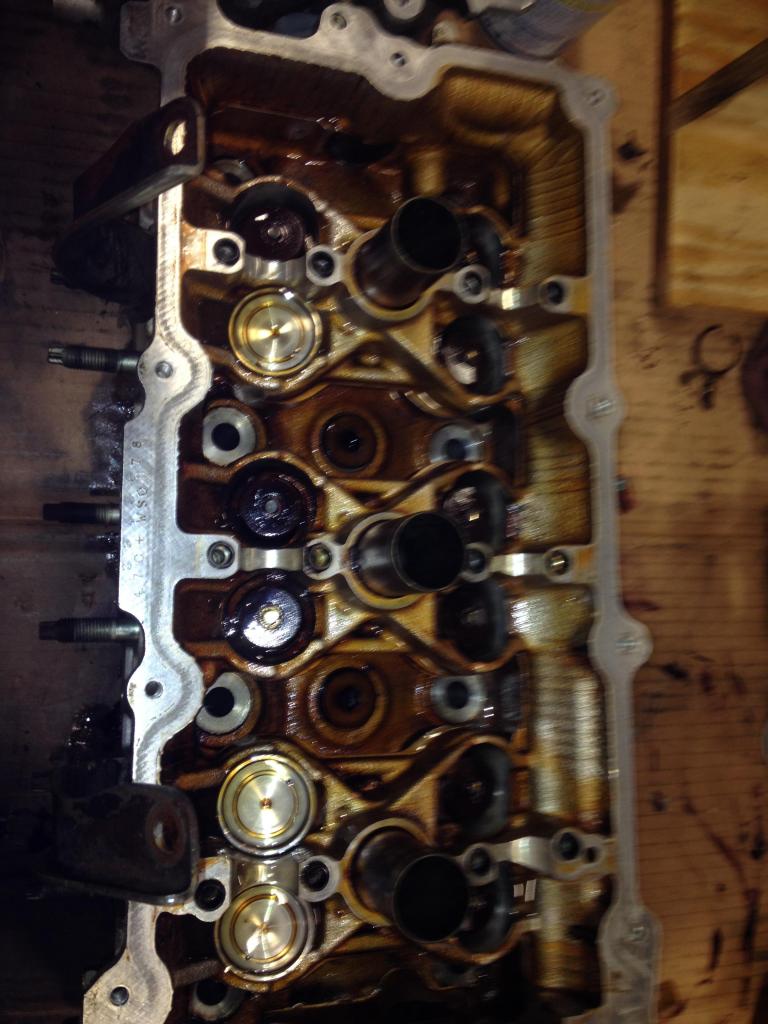
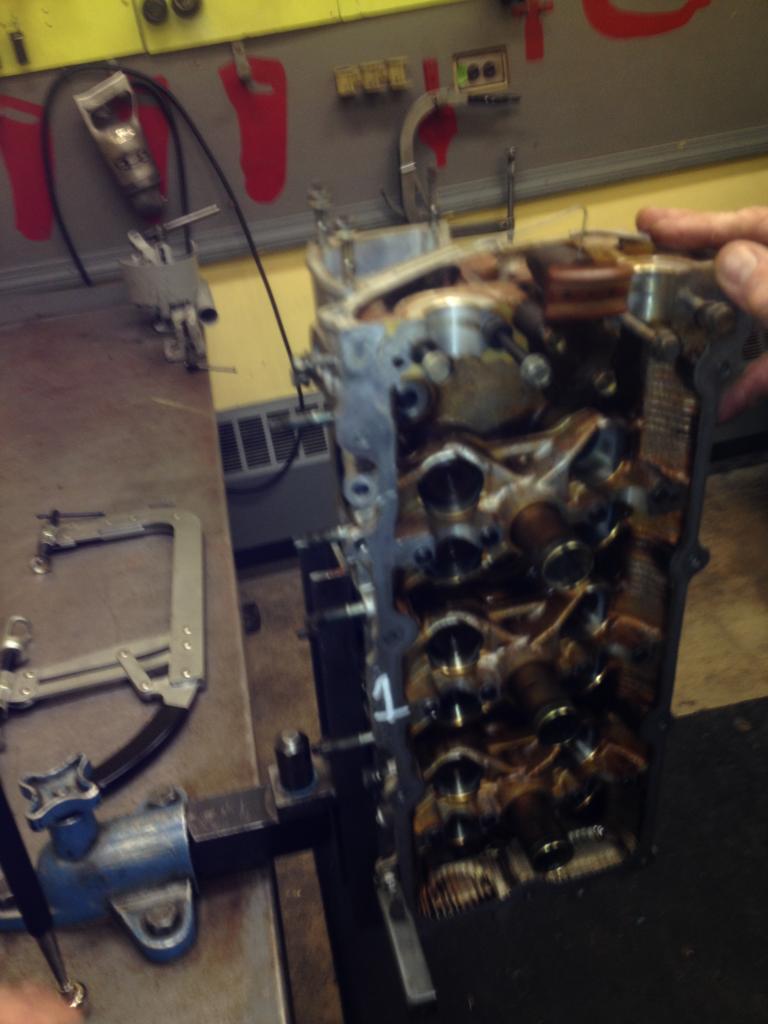
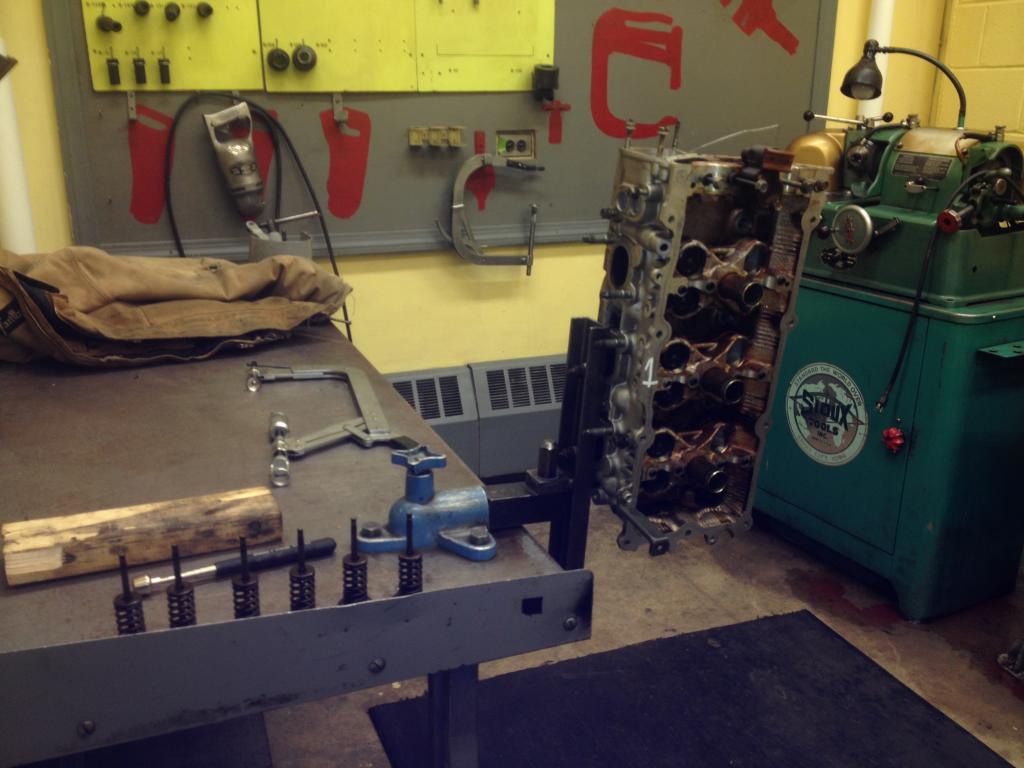
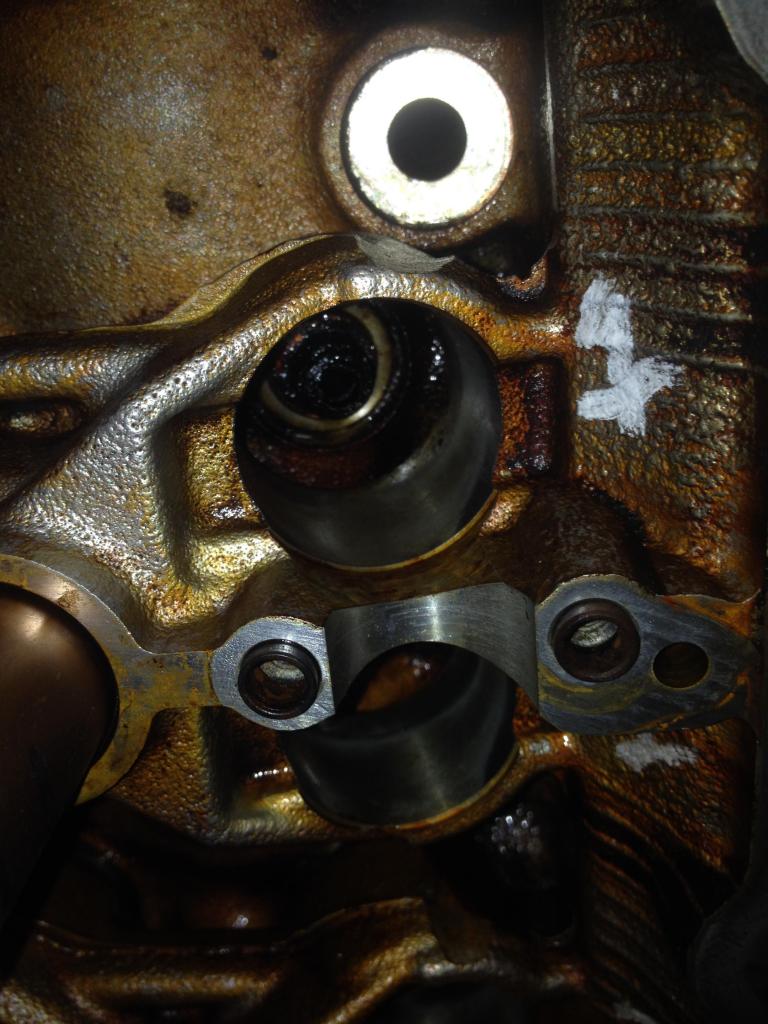
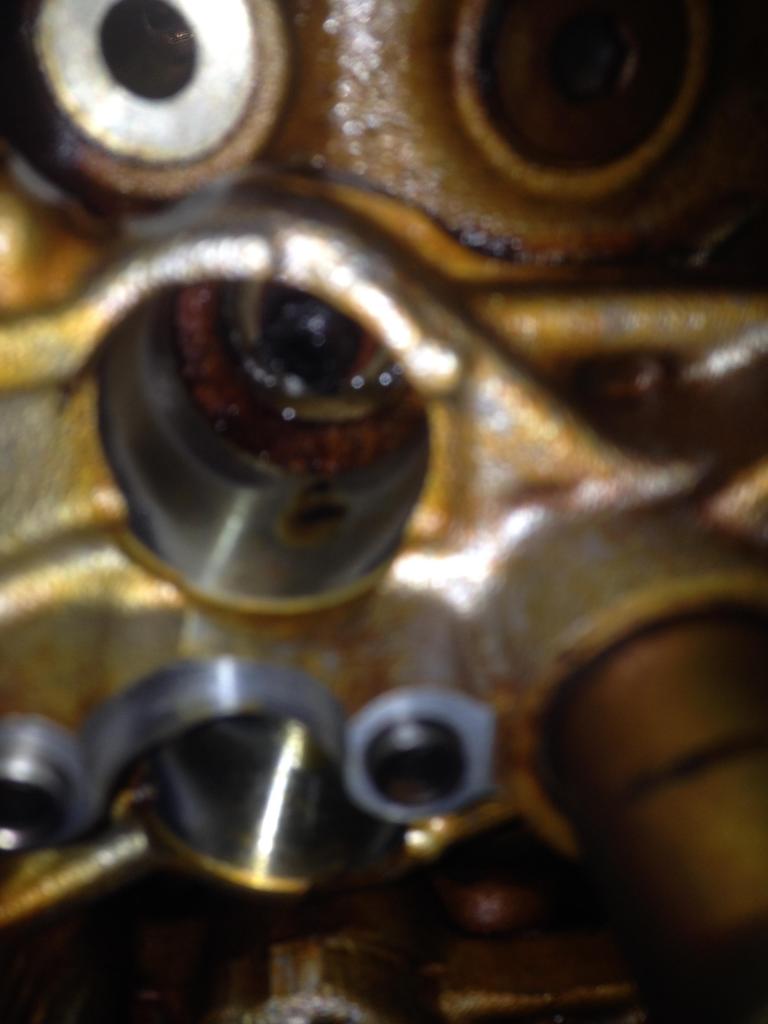
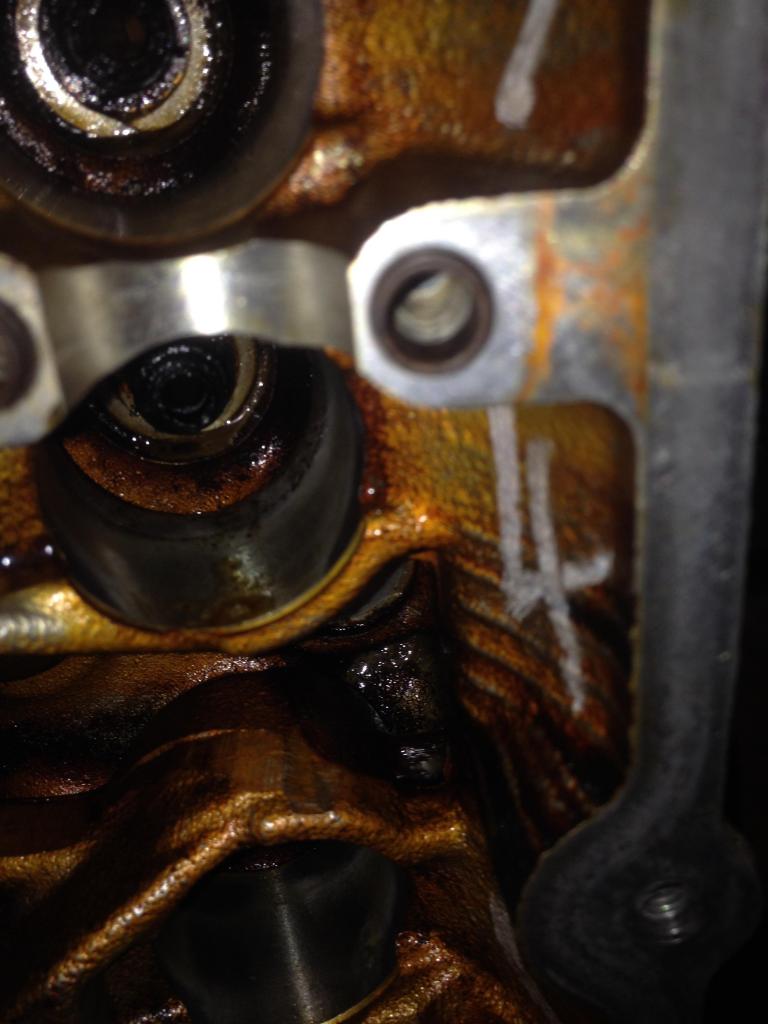
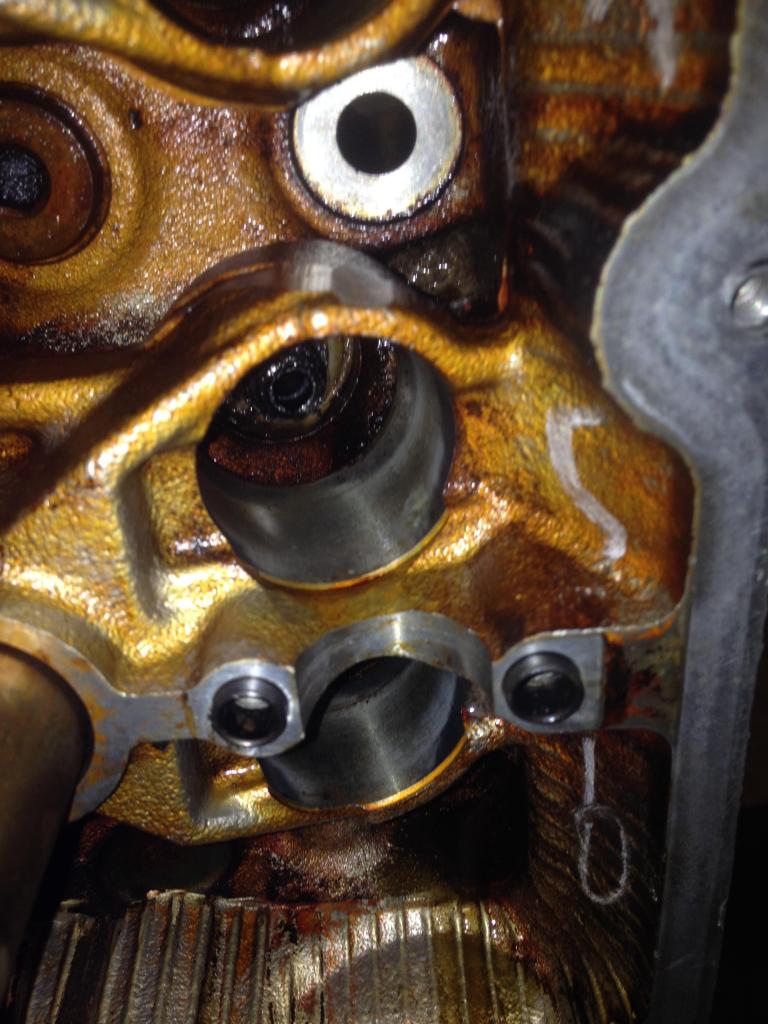
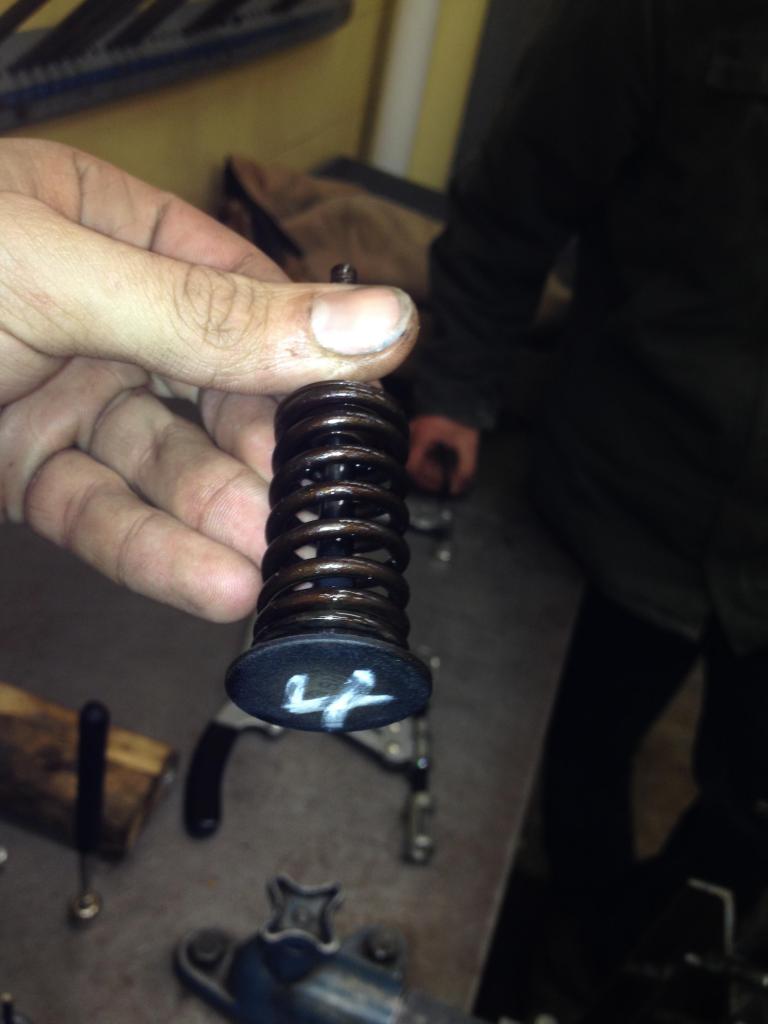
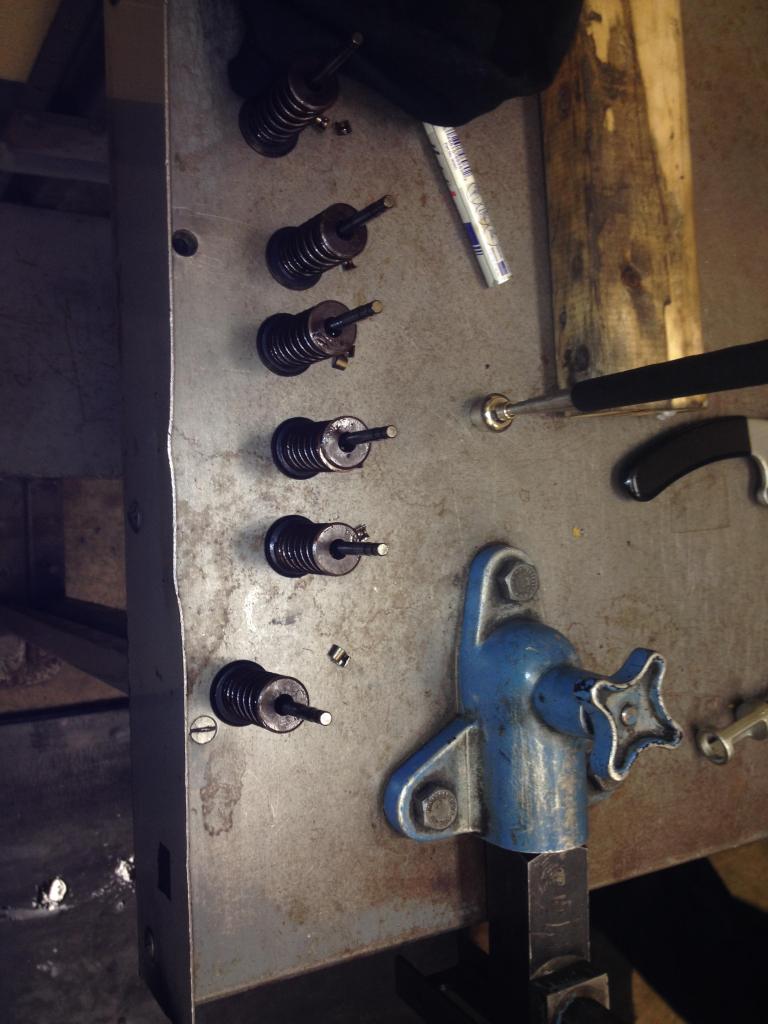
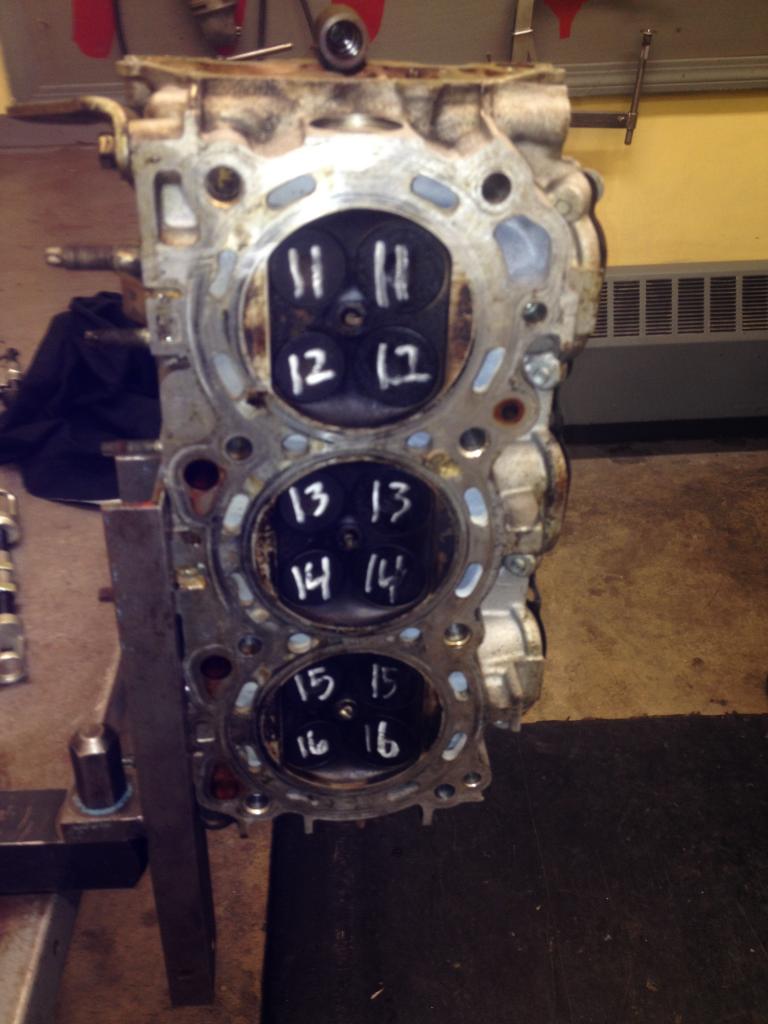
Been so busy I haven't had time to do much to the motor but I cleaned it with glass beads, removed valve seals, checked out a lot of the specs and started to piece together my rebuild heres a few pictures.
valve seals were pretty stuck on there not used to that.
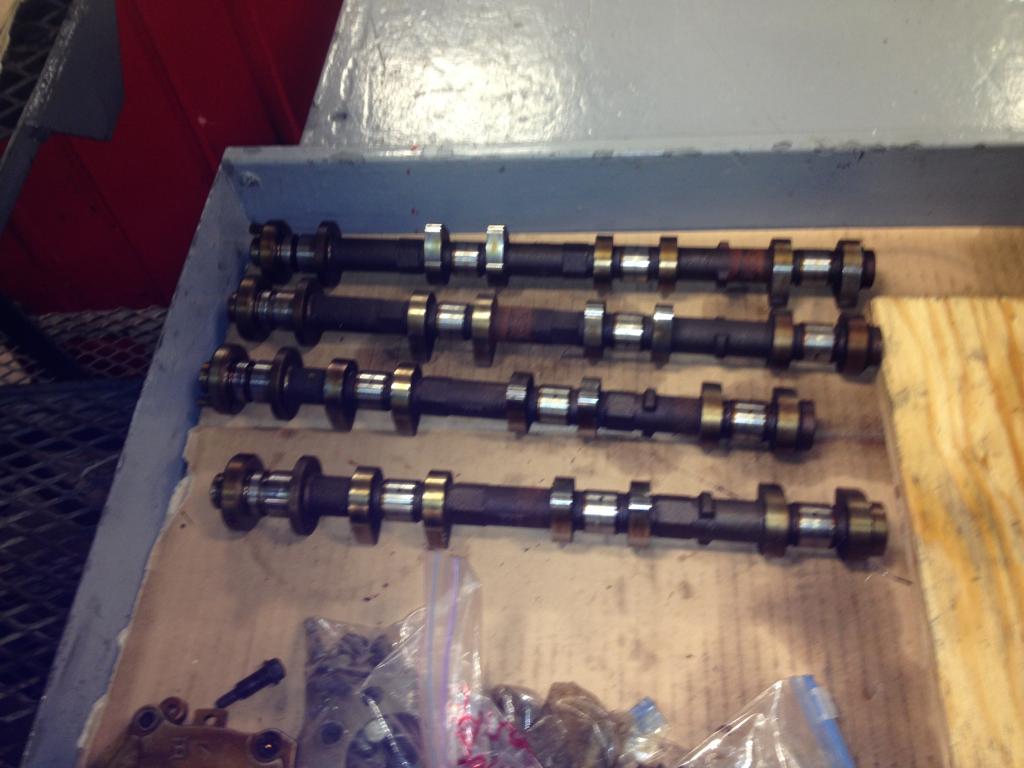
The cam caps were all out of place idk why but I matched them up correctly, oiled it up and installed the cam to make sure it does not bind at all.
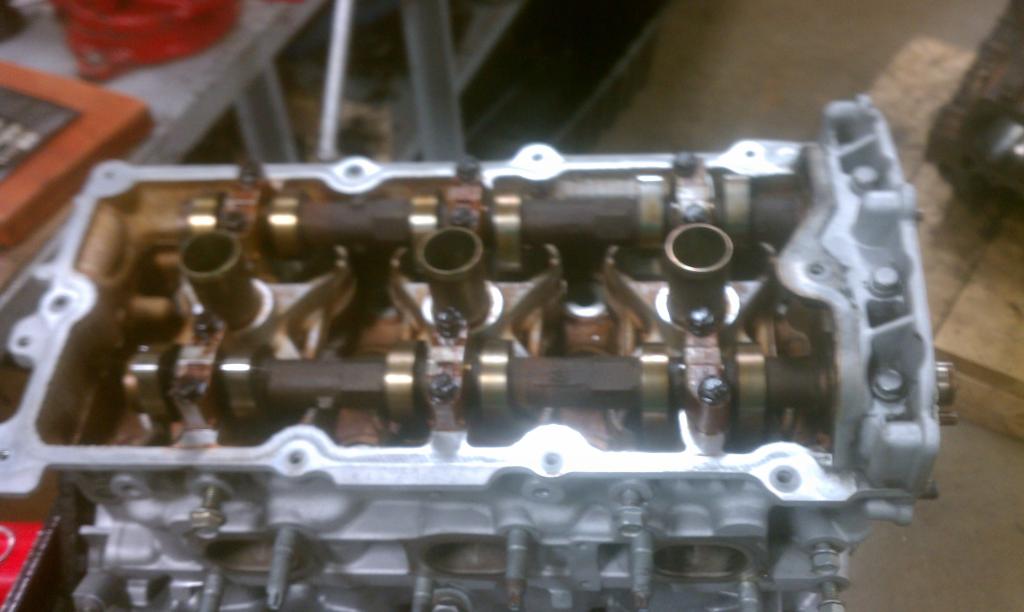

valve seals were pretty stuck on there not used to that.


The cam caps were all out of place idk why but I matched them up correctly, oiled it up and installed the cam to make sure it does not bind at all.


 01-21-2015, 12:34 PM
#16
Junior Member
Thread Starter
Join Date: Dec 2014
Posts: 35
Nah the motor was rebuilt previously and Idk why I want it so clean I plan on painting it but I will know about the dirt underneath and that's gonna bother me now who knows anything about the rebuild kits none of them state manufacturers of gaskets etc or bearings
01-26-2015, 03:45 PM
#17
Junior Member
Thread Starter
Join Date: Dec 2014
Posts: 35
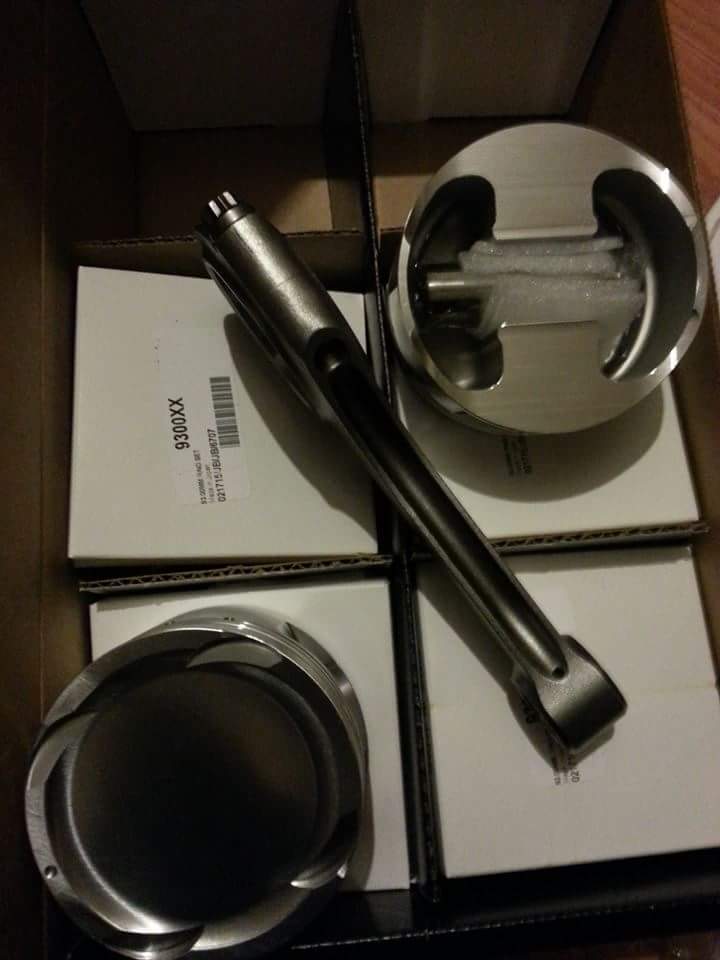
Ordered eagle h beam vq35de rods, custom wiesco pistons changed the the piston pin height to match vq35de and 20cc dish and a rebuild kit.
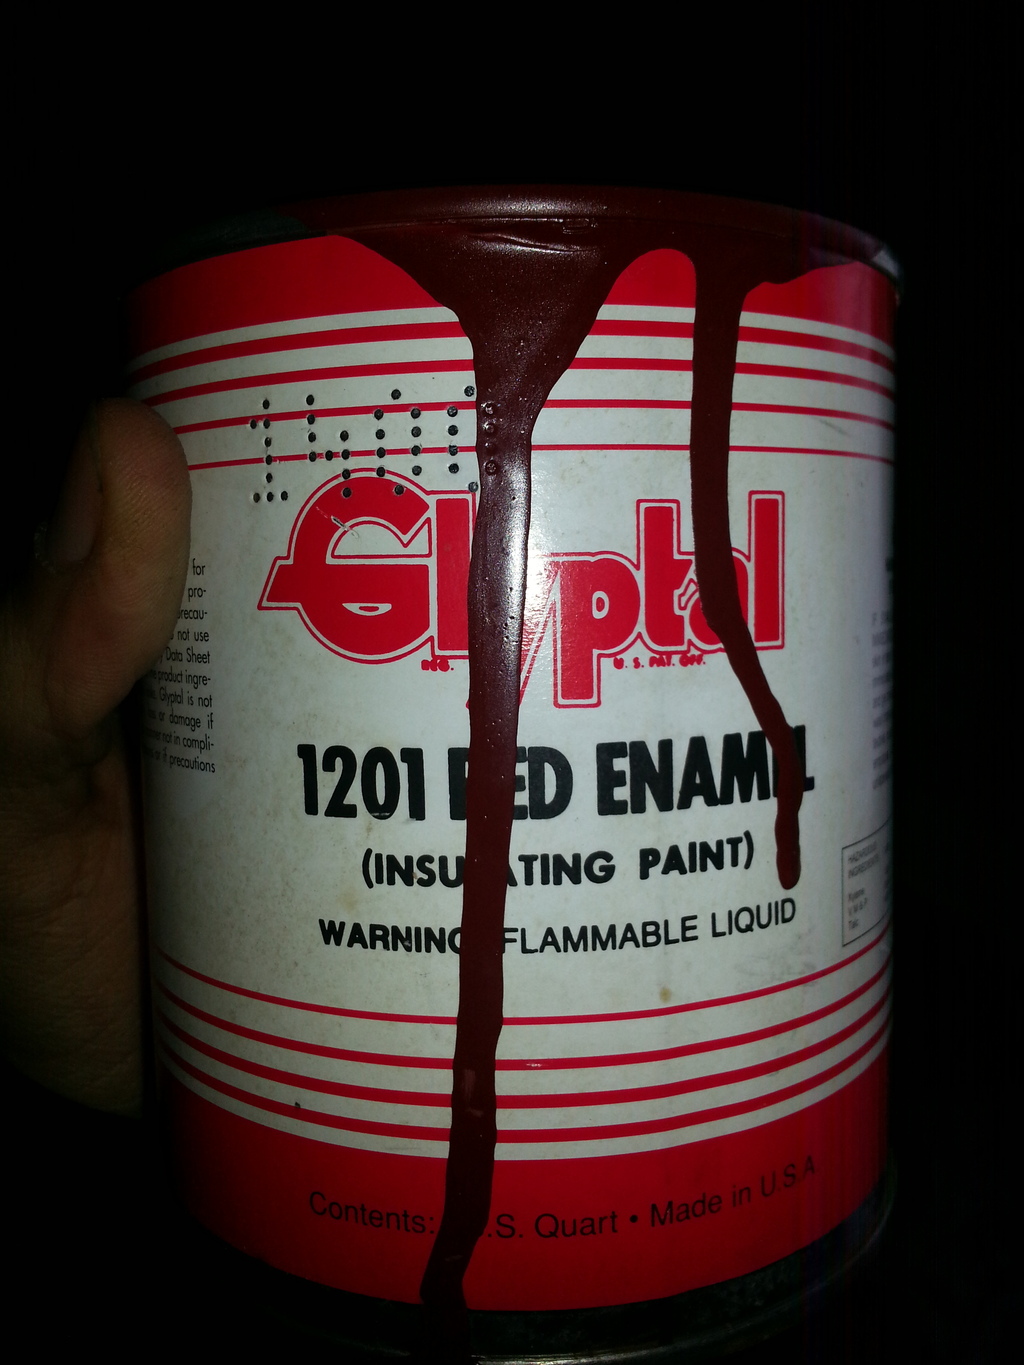
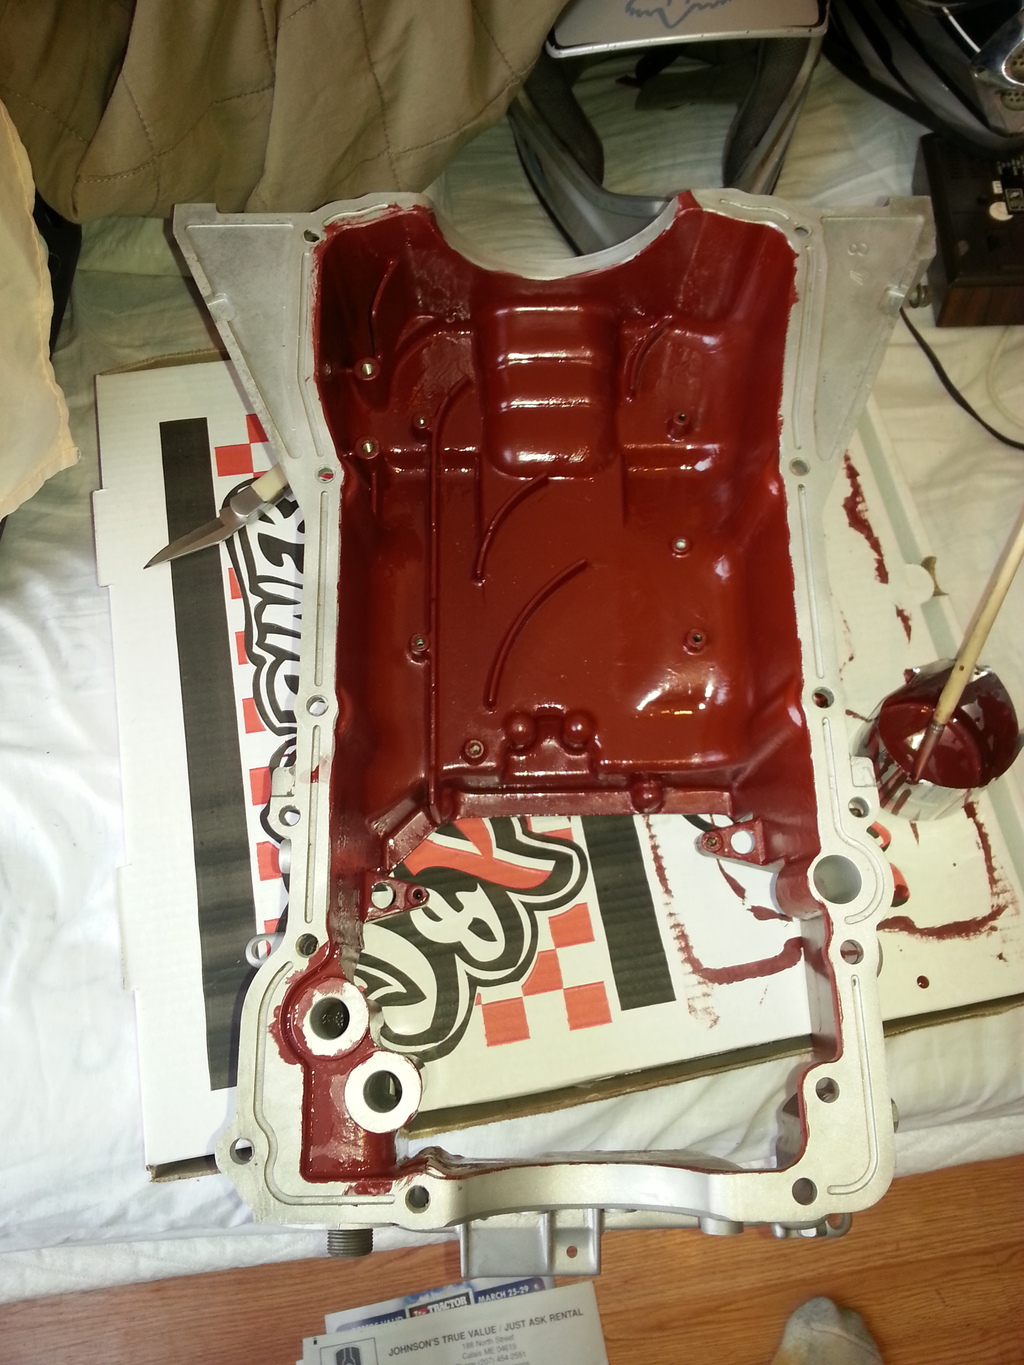
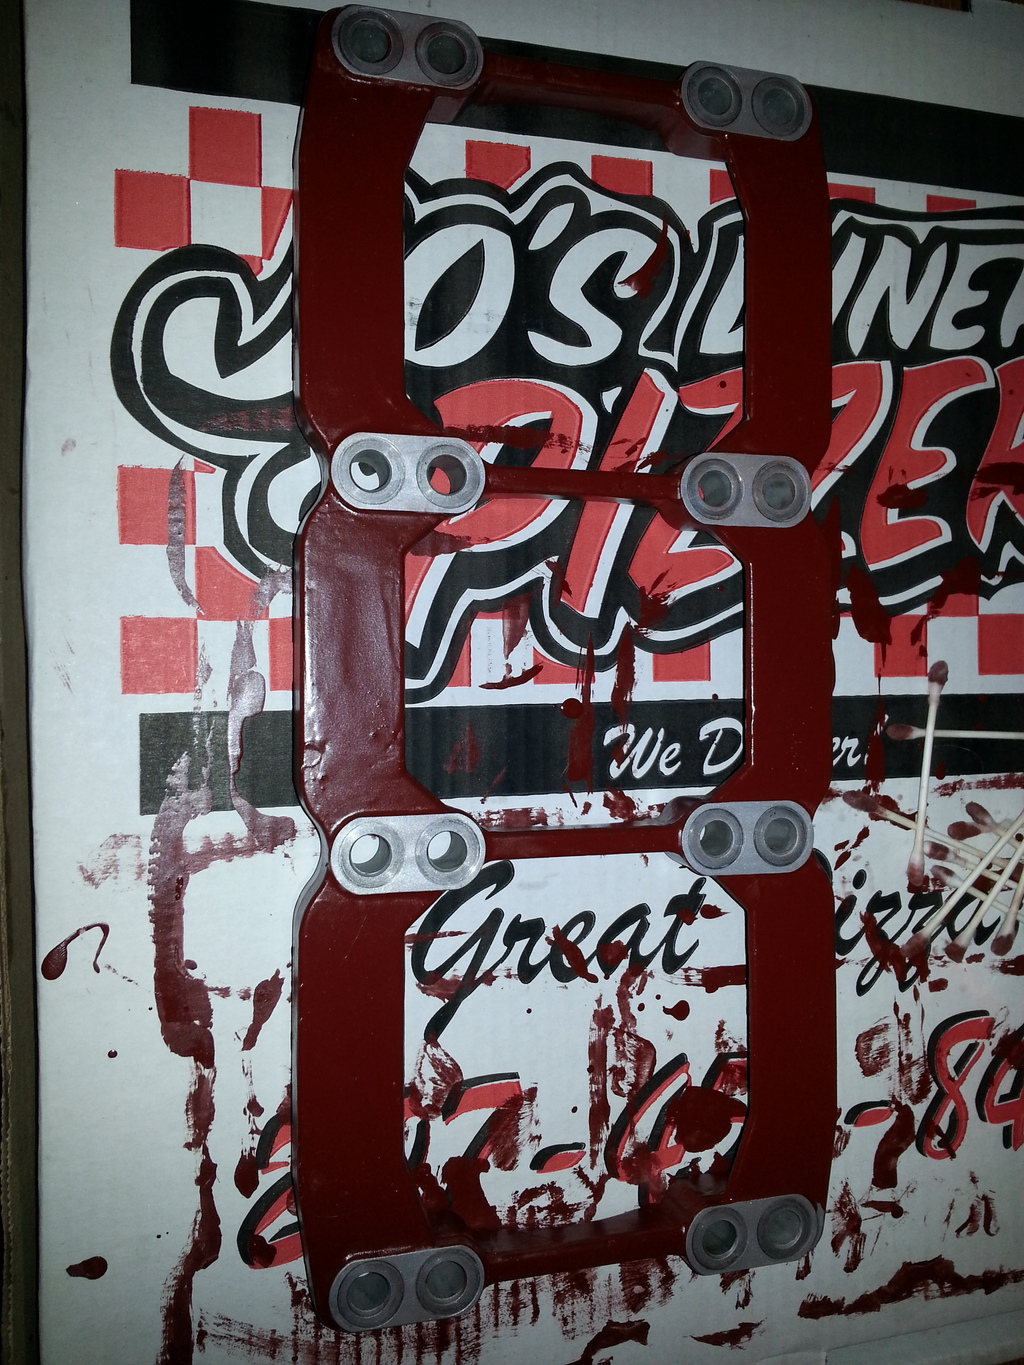
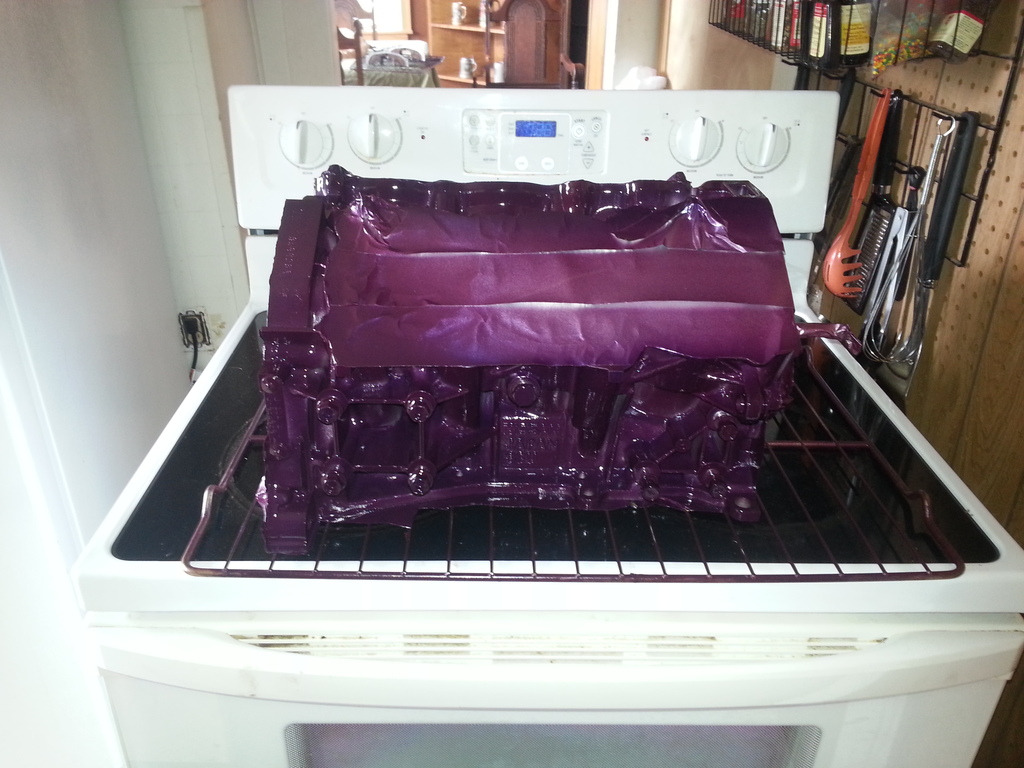
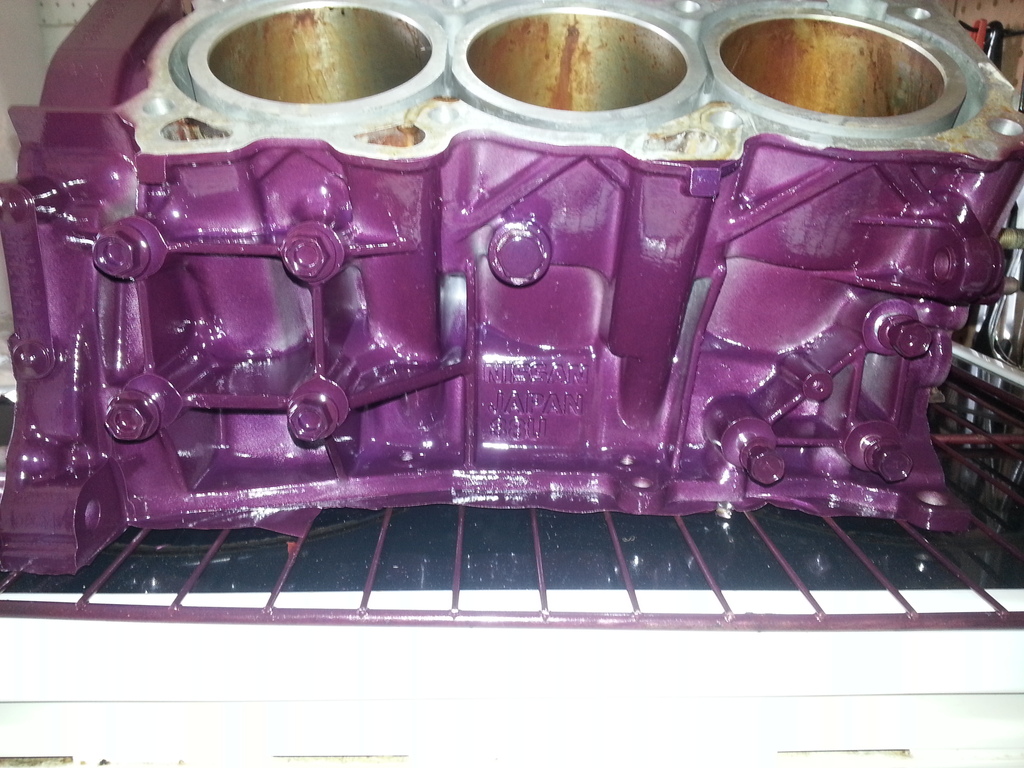
Gonna paint my galleys, head and oil pan with glyptal 1201 and paint the motor purple why I wait for parts still haven't bought a crank yet...
Gonna paint my galleys, head and oil pan with glyptal 1201 and paint the motor purple why I wait for parts still haven't bought a crank yet...
Last edited by BoostinBy; 01-26-2015 at 03:48 PM.
 01-26-2015, 07:12 PM
#23
Junior Member
Thread Starter
Join Date: Dec 2014
Posts: 35
I even said in that post I used a ball hone just to remove rust but what grit should should I use for the plasma Molly this is my first time with the material I was told 680 by my grandfather who was an toolmaker for T.I and other companys. Is this correct or should I go higher
Last edited by BoostinBy; 04-05-2015 at 09:41 PM.
01-26-2015, 07:16 PM
#24
Junior Member
Thread Starter
Join Date: Dec 2014
Posts: 35
I have never done a performance rebuild just stock rebuilds.
Also does anyone regrind these valves at all or just buy new? I was going to do a 3 angle on the head but haven't decided on the valves if it is fine I have the machinery to do it I just didn't know if it was worth my time over money.
Also does anyone regrind these valves at all or just buy new? I was going to do a 3 angle on the head but haven't decided on the valves if it is fine I have the machinery to do it I just didn't know if it was worth my time over money.
Last edited by BoostinBy; 01-26-2015 at 07:54 PM.
01-26-2015, 10:09 PM
#25
I've kept my builds as close to stock as possible because these are everyday production cars and not race cars. I've seen people do unnecessary things to these vq's just keep it simple and you'll have less problems


 04-04-2015, 03:50 AM
#30
Junior Member
Thread Starter
Join Date: Dec 2014
Posts: 35
Okay so I brought all of the parts I wanted to paint with glyptal to my apartment.
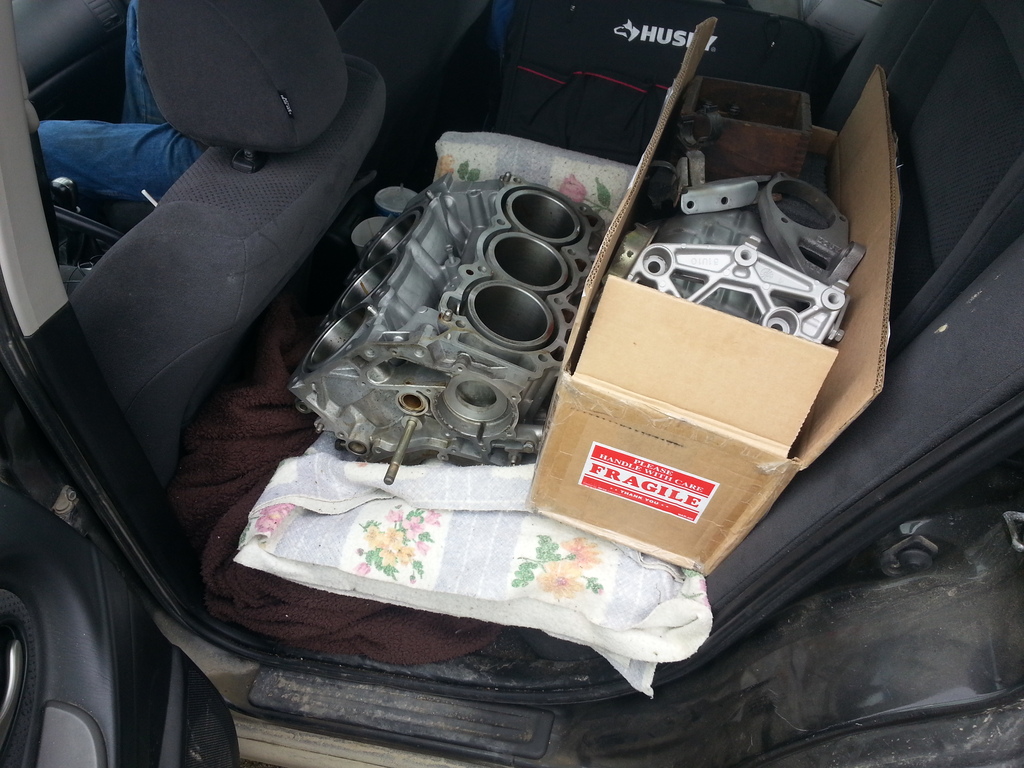
After I did this tho I decided to powdercoat everything so I packed it all up into this 02 maxima I got for cheap and drove to my actual house to powdercoat the block and everything over this weekend
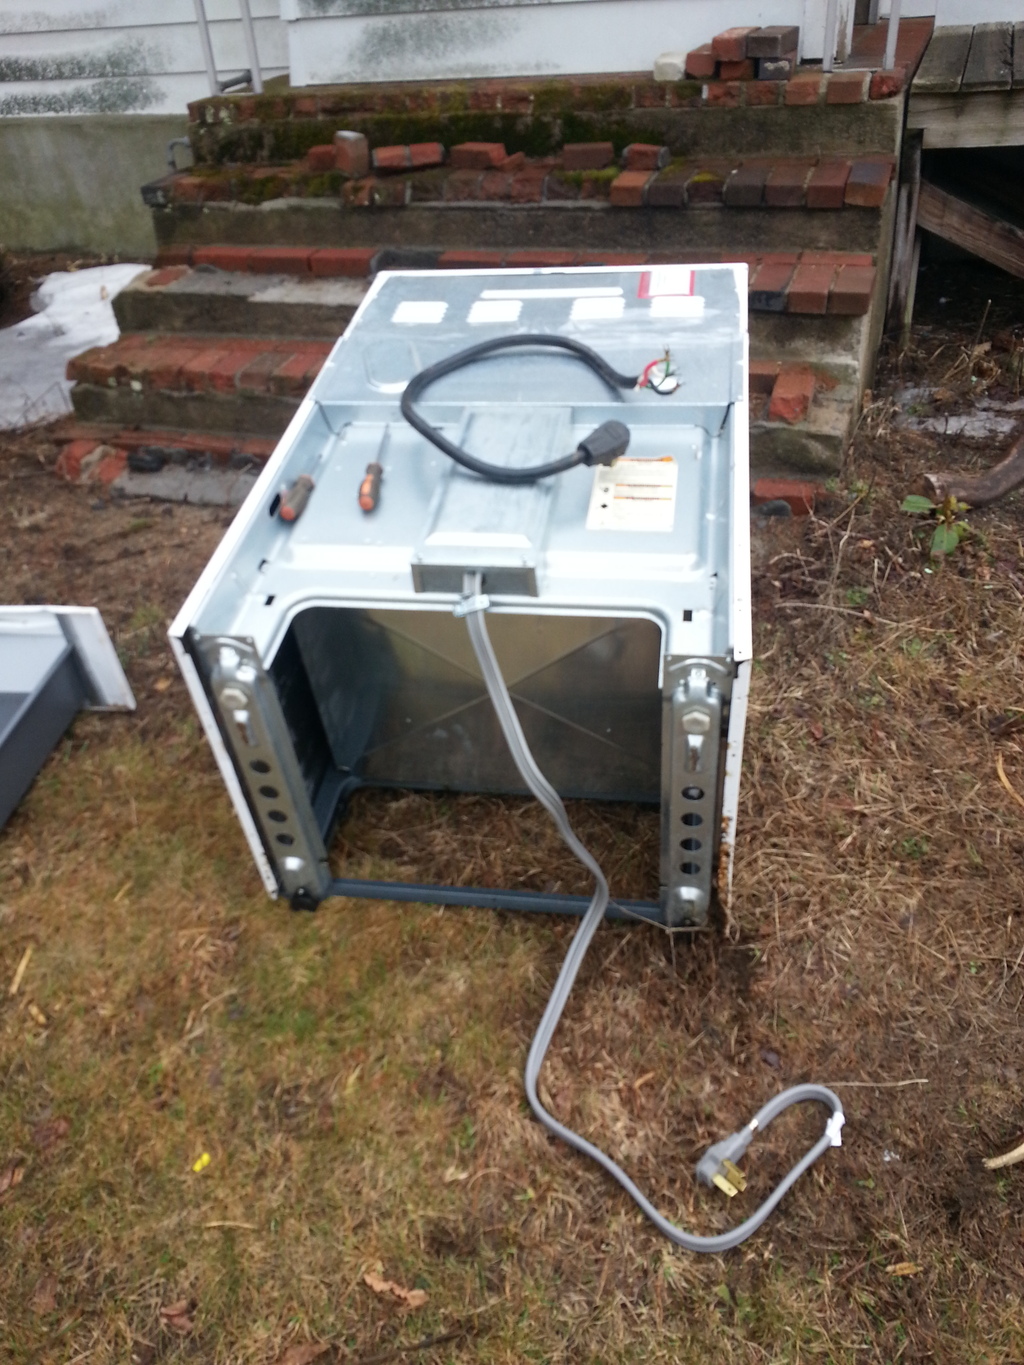
Went on craigslist to buy an oven that I could bake the powder and glyptal on with. Converted it to 3 prong 240 because my house is ancient.
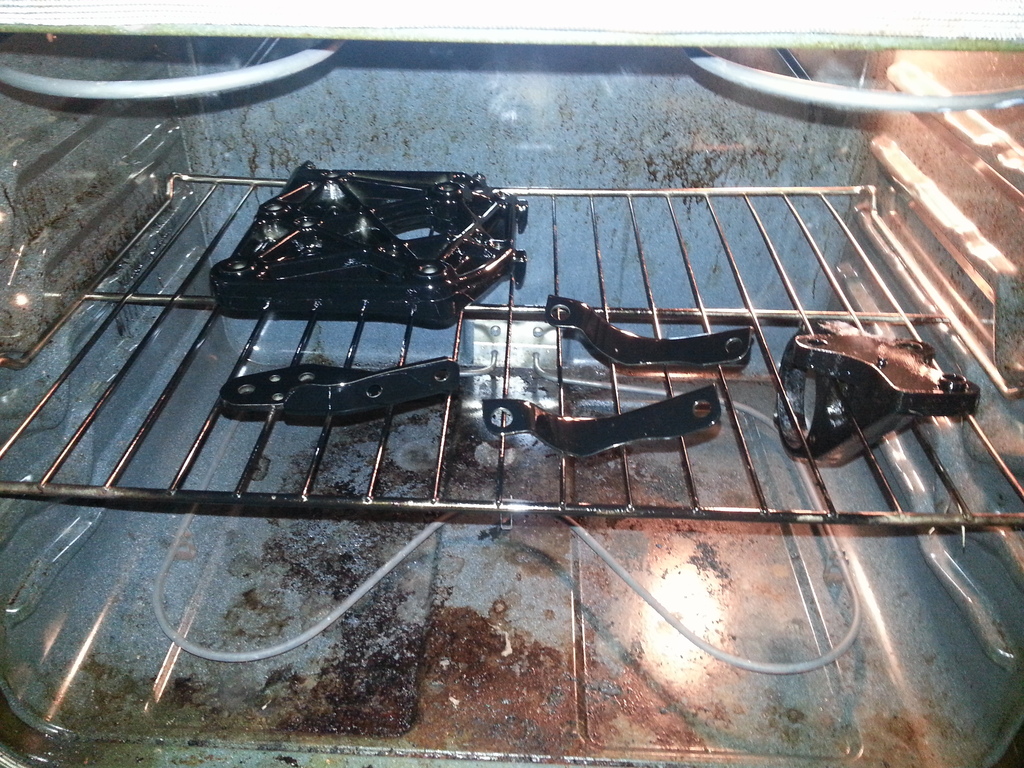
And proceeded to powder coat parts, only got a few done but its the prep work thats killer gonna try and tackle the block today.
Recieved pistons but the pin was 20mm not 22 sent them back recieved new ones and somehow ended up with k1 rods not eagle but im just gonna deal with it for now.


After I did this tho I decided to powdercoat everything so I packed it all up into this 02 maxima I got for cheap and drove to my actual house to powdercoat the block and everything over this weekend


Went on craigslist to buy an oven that I could bake the powder and glyptal on with. Converted it to 3 prong 240 because my house is ancient.

And proceeded to powder coat parts, only got a few done but its the prep work thats killer gonna try and tackle the block today.


Recieved pistons but the pin was 20mm not 22 sent them back recieved new ones and somehow ended up with k1 rods not eagle but im just gonna deal with it for now.
 04-04-2015, 09:37 AM
#31

Glyptol? Did I fall asleep and wake up to one of those garage shows on speed channel?

I think this is the first time in the FI nissan world I've seen glyptol.
Props.
Matter fact, I've only seen a handful of datsun builds with them.
I think this is the first time in the FI nissan world I've seen glyptol.
Props.
Matter fact, I've only seen a handful of datsun builds with them.


 04-05-2015, 01:25 PM
#36
Junior Member
Thread Starter
Join Date: Dec 2014
Posts: 35
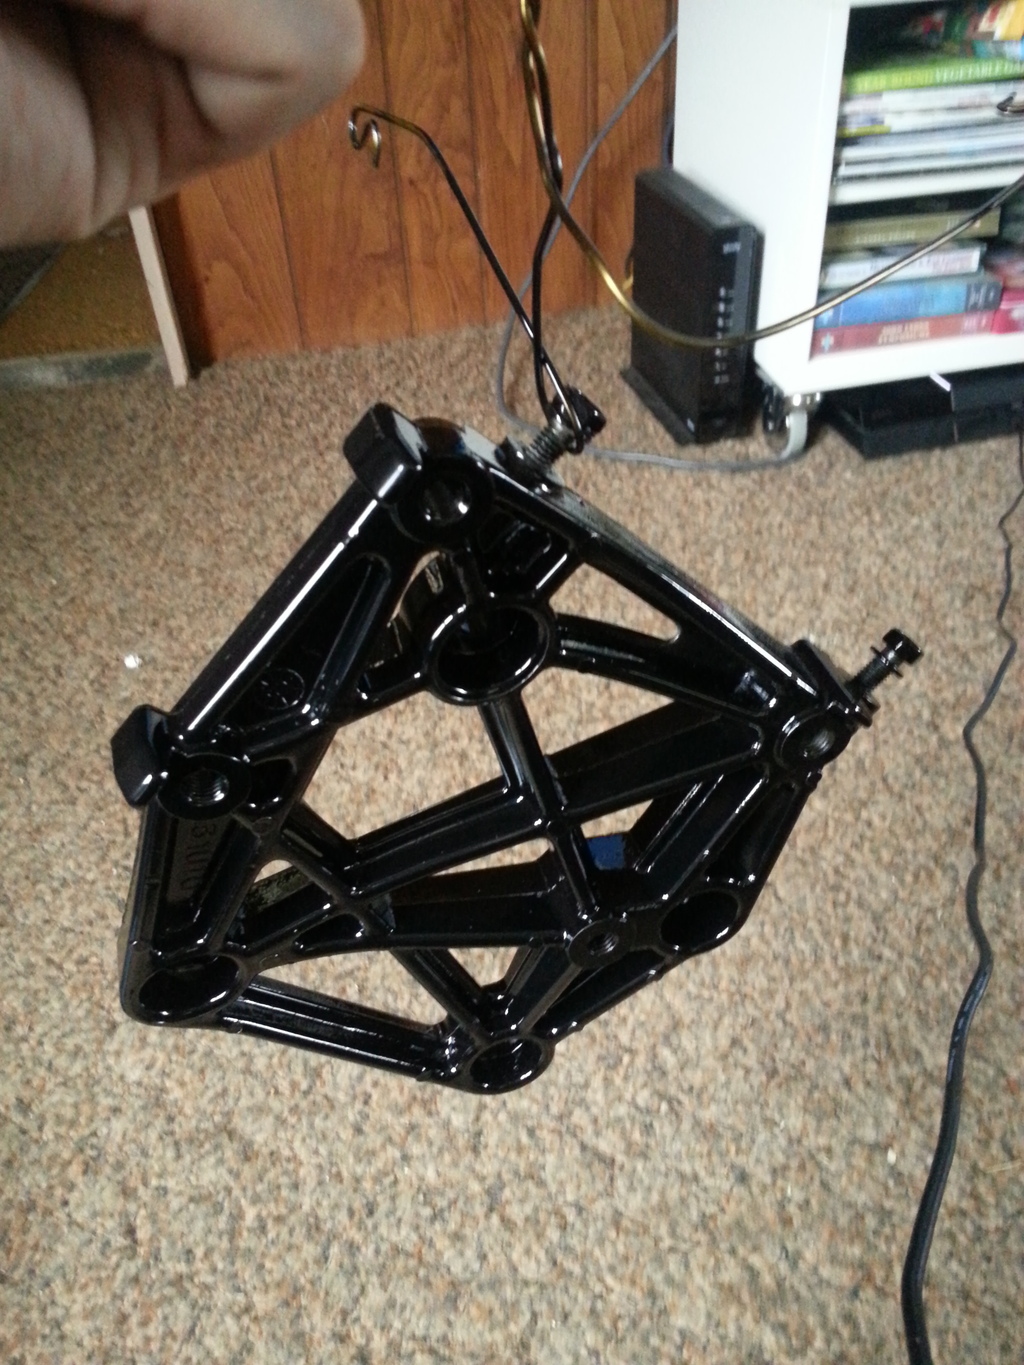
So the block was the biggest hastle and I couldnt get it perfect a little paint run happened and some masking issues nothing major im just a perfectionist who doesnt have the time to fix it
Inner covers done I have more parts to paint but its starting to rain and I hope it stops soon I have to be at work tmmr 400 miles away and id like to be finished painting today.
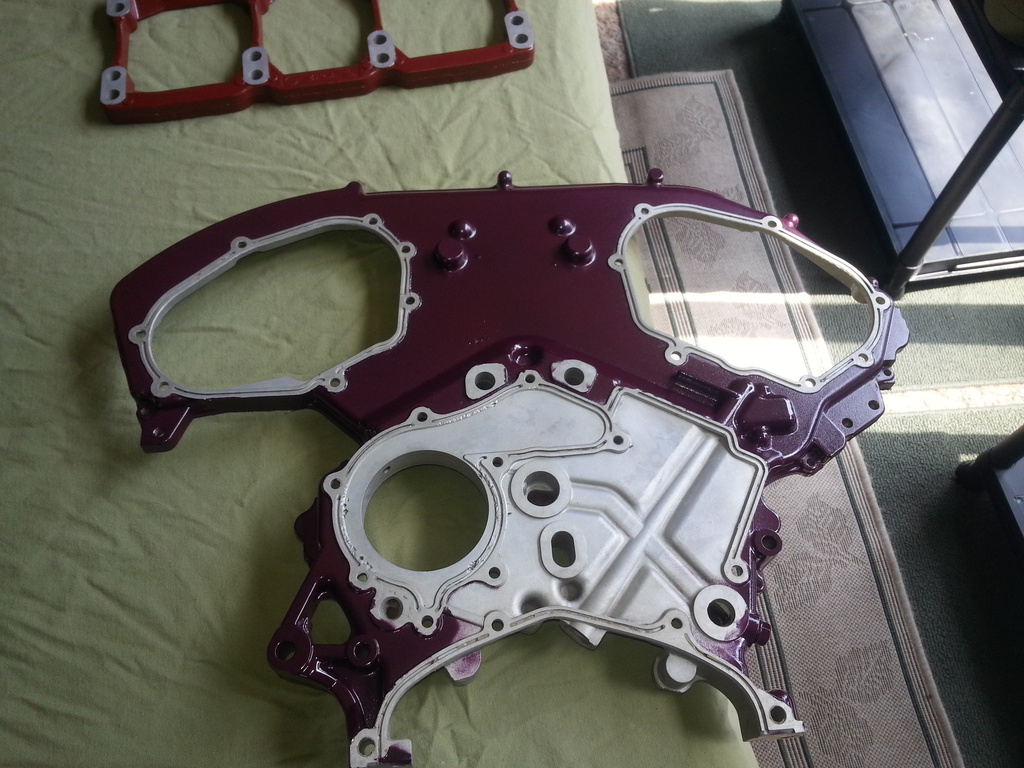


Inner covers done I have more parts to paint but its starting to rain and I hope it stops soon I have to be at work tmmr 400 miles away and id like to be finished painting today.


