When you click on links to various merchants on this site and make a purchase, this can result in this site earning a commission. Affiliate programs and affiliations include, but are not limited to, the eBay Partner Network.
Hey org!
I've searched and read a lot to get through my timing chain job. I'm thankful for such an engaged community for these 4th gens.
I bought the car non-running. After replacing the alternator/ac idler pulley it started right up with a wicked timing chain noise. I replaced the chain and now I need to pass emissions.
These are the codes it had when I bought it:
Current Faults
P0325 Knock Sensor 1 Circuit
P0400 Exhaust Gas Recirculation Flow
Pending Faults
P0325 Knock Sensor 1 [Duplicate?]
P0443 Evaporative Emission Control System Purge Control Valve Circuit
I replaced the timing chain, spark plugs, waterpump and knock sensor and reset CEL. Now I have these codes
Current Faults
P0325 Knock Sensor 1 Circuit
Pending Faults
P0325 Knock Sensor 1 [Duplicate?]
P0443 Evaporative Emission Control System Purge Control Valve Circuit
It runs great, but every minute or so the idle will go up past 1,100 for 3-4 seconds and in an instant drop back down to normal. I reset the CEL, start up with no code. After restarting, the P0325 code comes back.
I don't understand which solenoid could be causing P0443. I'm assuming P0325[knock] is a ghost code from one of the others. P0400 hasn't popped up again, but I also haven't driven the car. It's only been idling so far [need to pass emissions]. Will it pass emissions with the knock code? a CEL is not an instant disqualifier here.
Since P0400 popped up I will clean the EGR tube and also do the procedure EVAPORATIVE (EVAP) EMISSION CONTROL SYSTEM CLEANING PROCEDURE FOR EVAP CANISTER CHARCOAL LEAKAGE INCIDENTS
Some of the components mentioned with P0443 go by different names. I've been having a hard time identifying where to start.
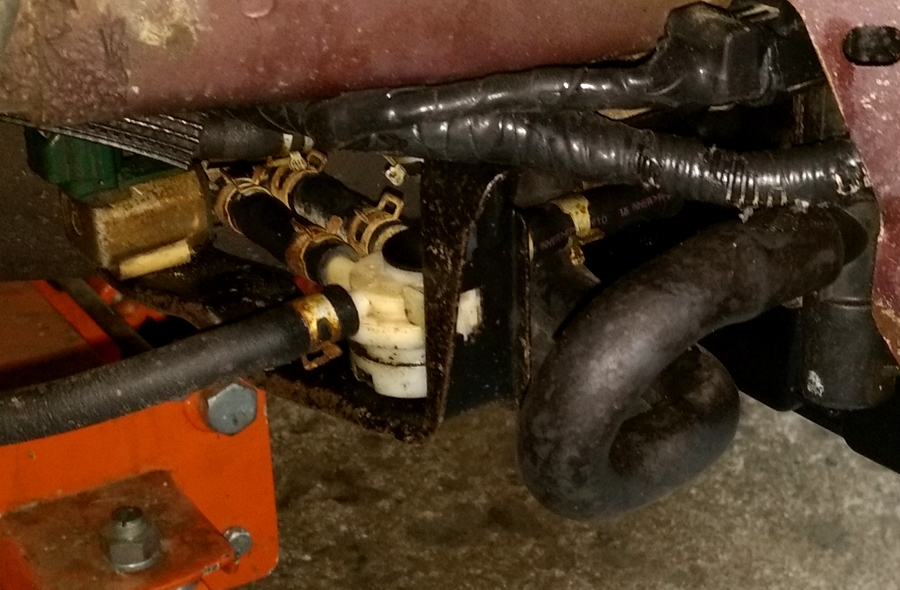
Before you do all that, start at the middle hose (vacuum) which is attached on the lower side of the throttle body. make sure that it is not kinked or leaking.
this is a vacuum source for several sensors. mine was kinked after I removed the throttle body for cleaning and service.
Also - car has a lot of smoke while it's running - even fully warmed up. Compression test revealed all cylinders were between 180 - 185. Engine has 194K. Oil pressure check indicated healthy pressure. Maybe fuel injector o-rings? PCV? Caused by the codes I have? Smells really rich, smoke is not black.
Going to try to resolve the CEL this weekend. I'm going to clean EGR tube, test resistance on new and old knock sensors and replace the purge valve. Hopefully that's enough to remedy all codes.
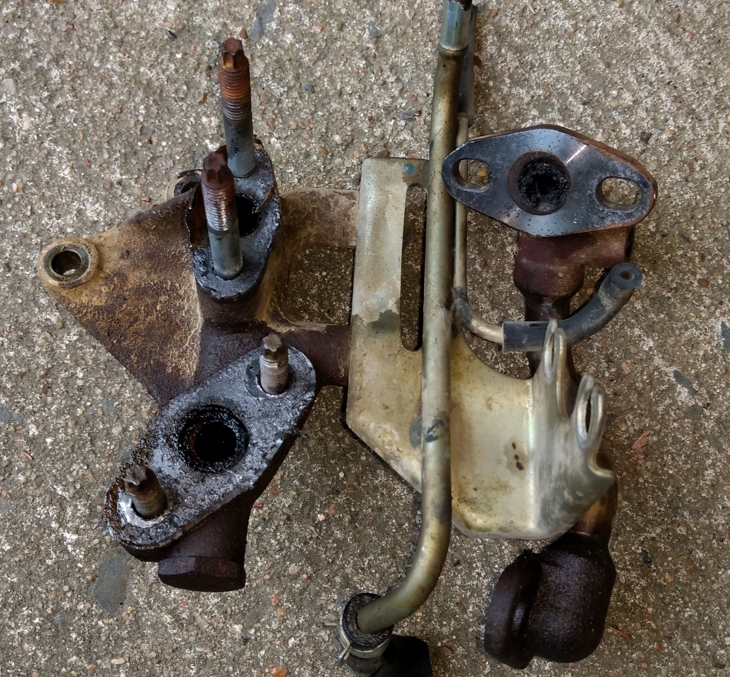
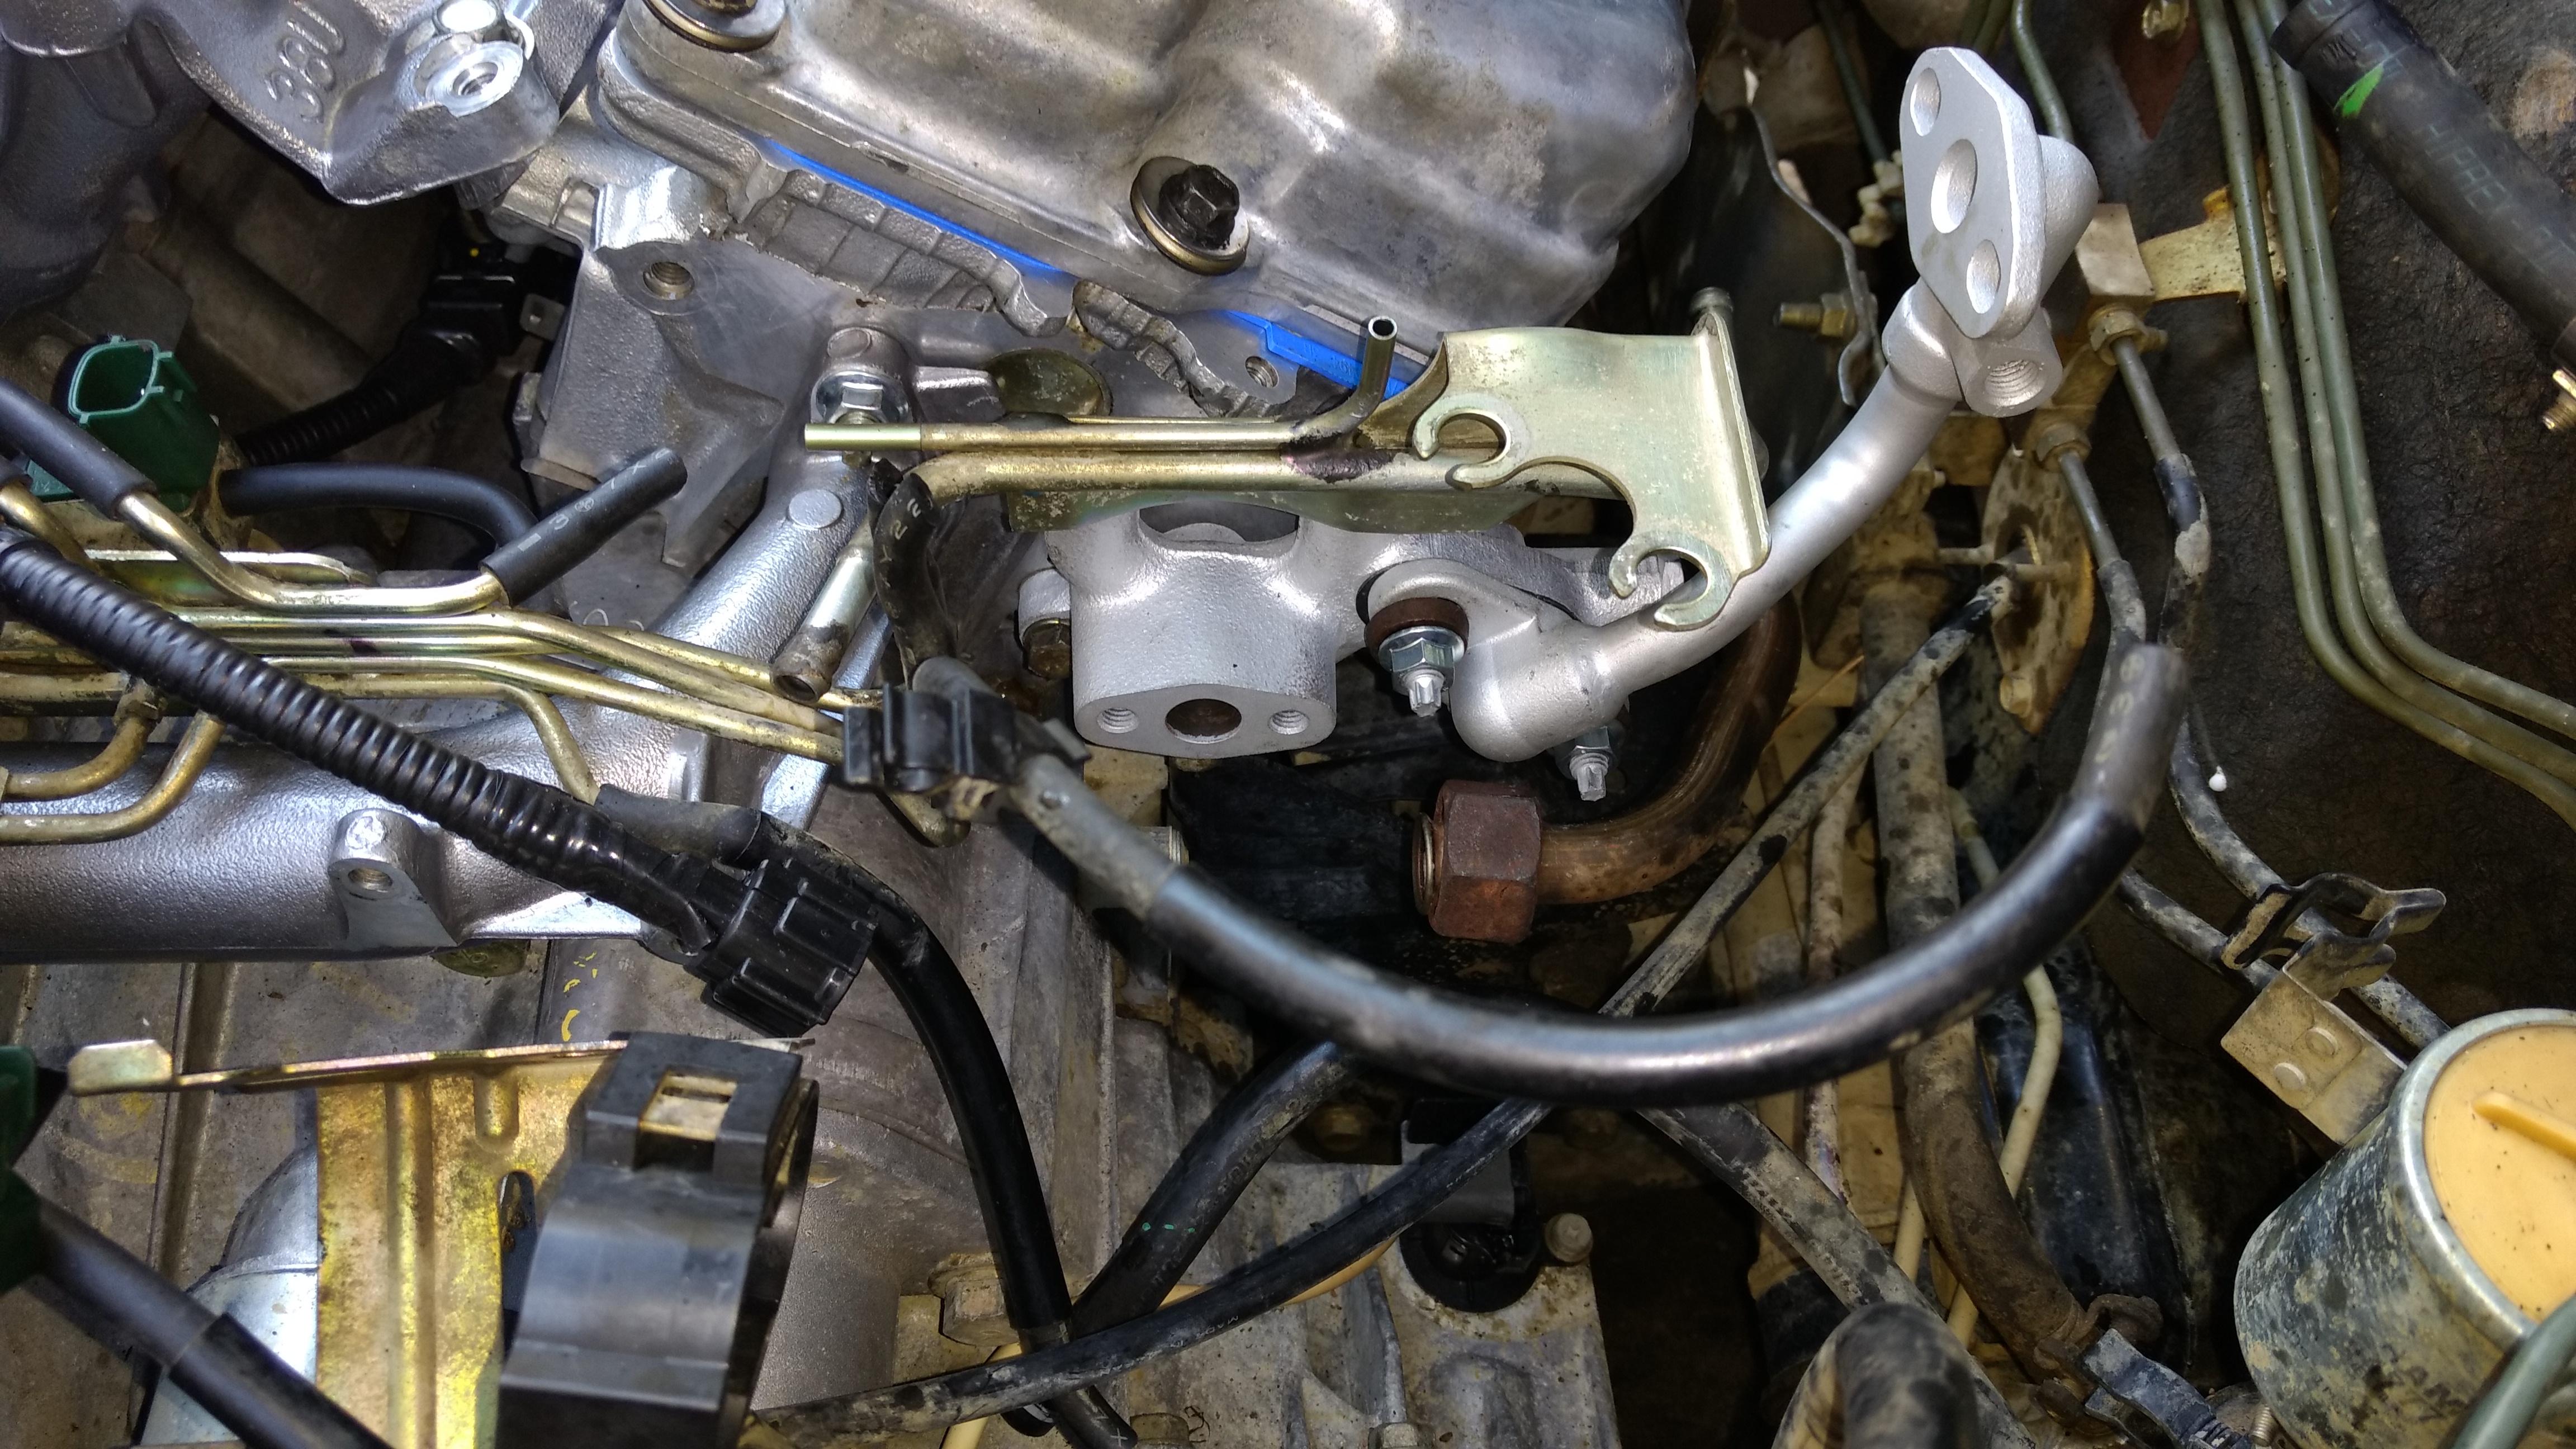
When you get into EGR cleaning, let share a couple of tricks for removing the tube and assembly that kept me from having to cut any bolts.
There are two 14mm bolts under the assembly that I remove early in the process.
The bolt holes on the assembly are in the upper left of the pictures below.
Note the pictures are from the 99 and the 98 models. So you'll see some slight differences. I've done four of these EGR cleaning jobs over the years for a 95, 98, and two 99 models.
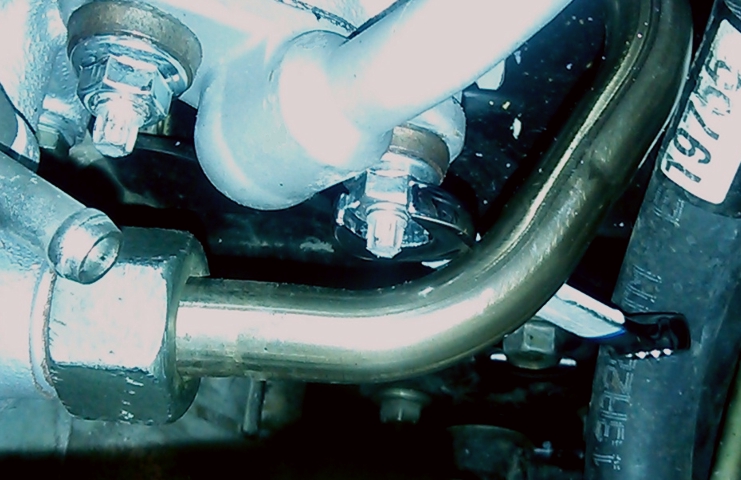
I use an open end wrench to go under the EGR exhaust pipe to loosen and tighten the "right nut" that holds the tube in place. I use a regular barrel type socket for the left nut.
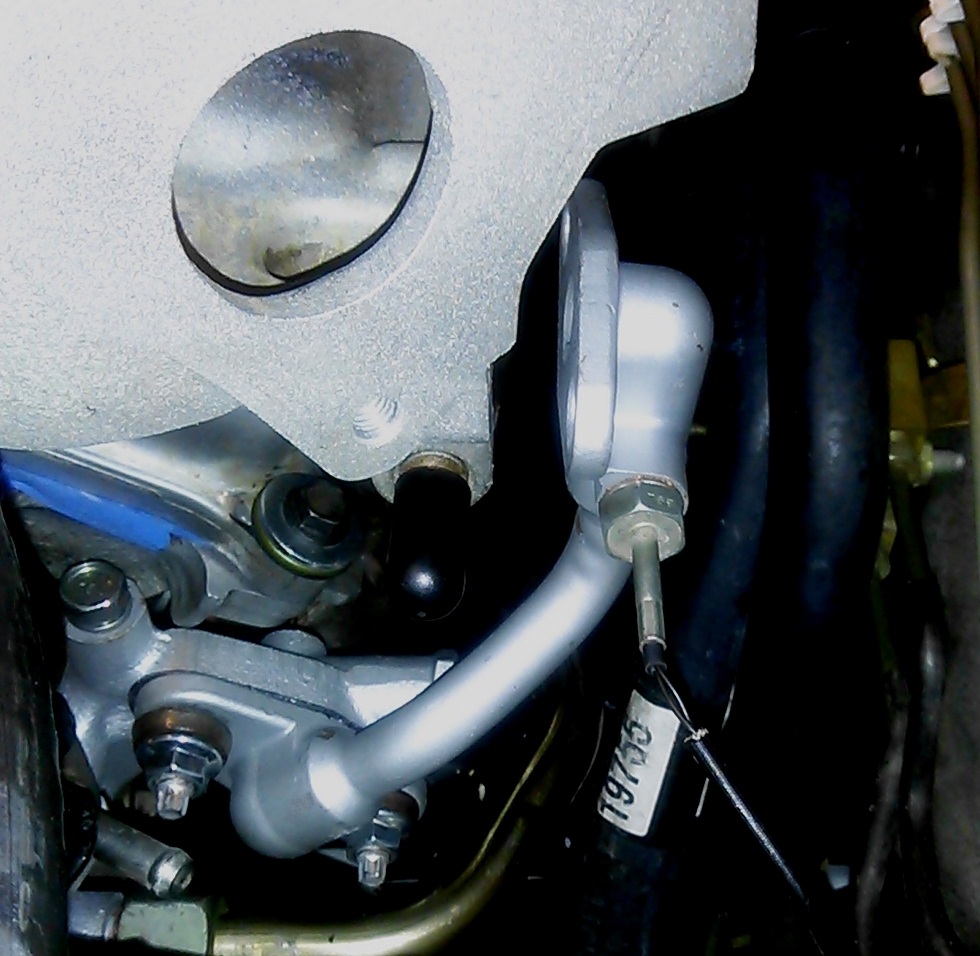
I leave the tube loose then swing it into the intake plenum to mount it.
Also, I bypass the EGR cooling tubes and run the line straight in and out of the throttle body. You can see where I capped off the EGR coolant line that runs through the intake plenum.
I drop the assembly and tube into place with the tube bolts intact. You can see one of the assembly bolts that is under the assembly in the picture below.
I stick the EGR tube gasket on the tube before I swing it into the intake plenum to bolt it down.
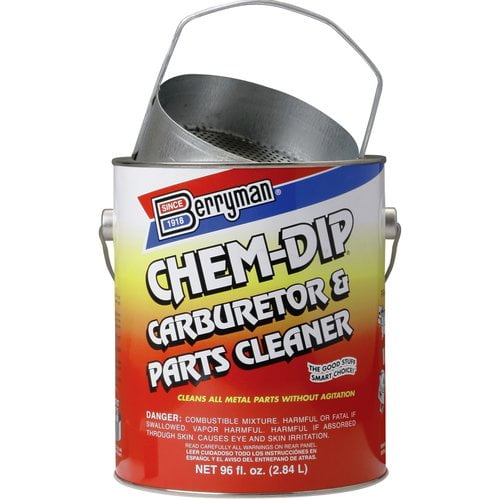
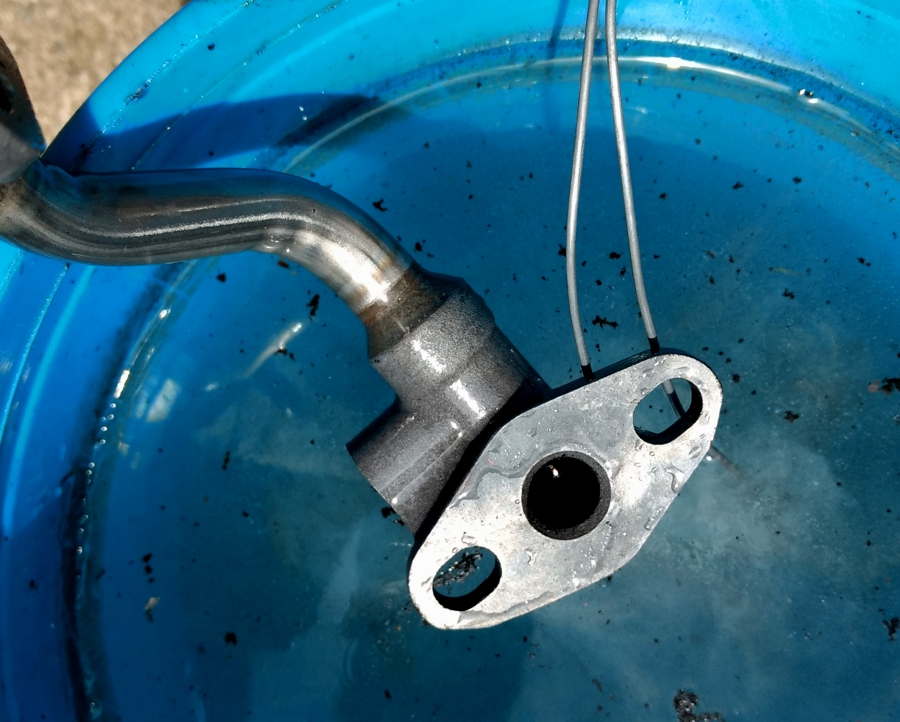
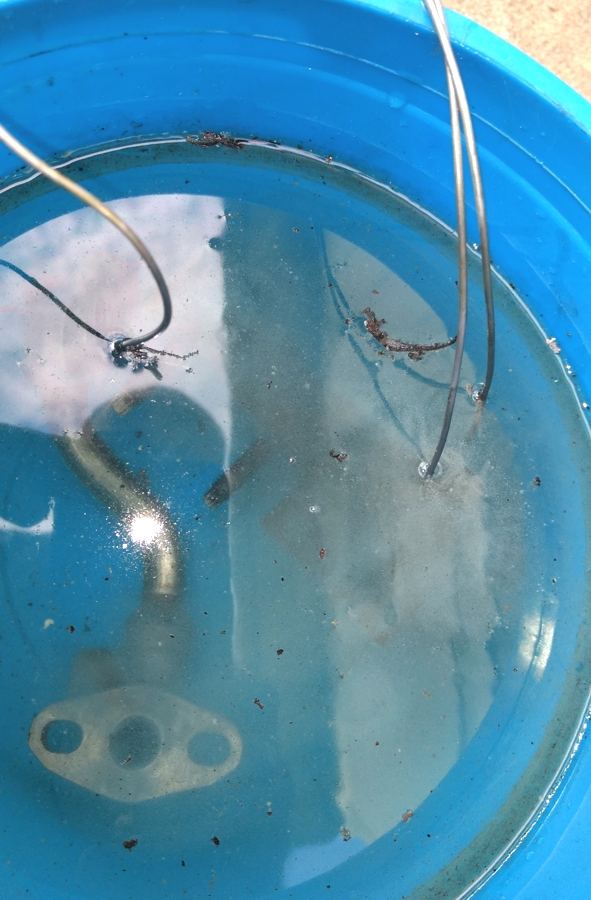
I soak the EGR parts in Berryman Chem-Dip to melt away the carbon deposits.
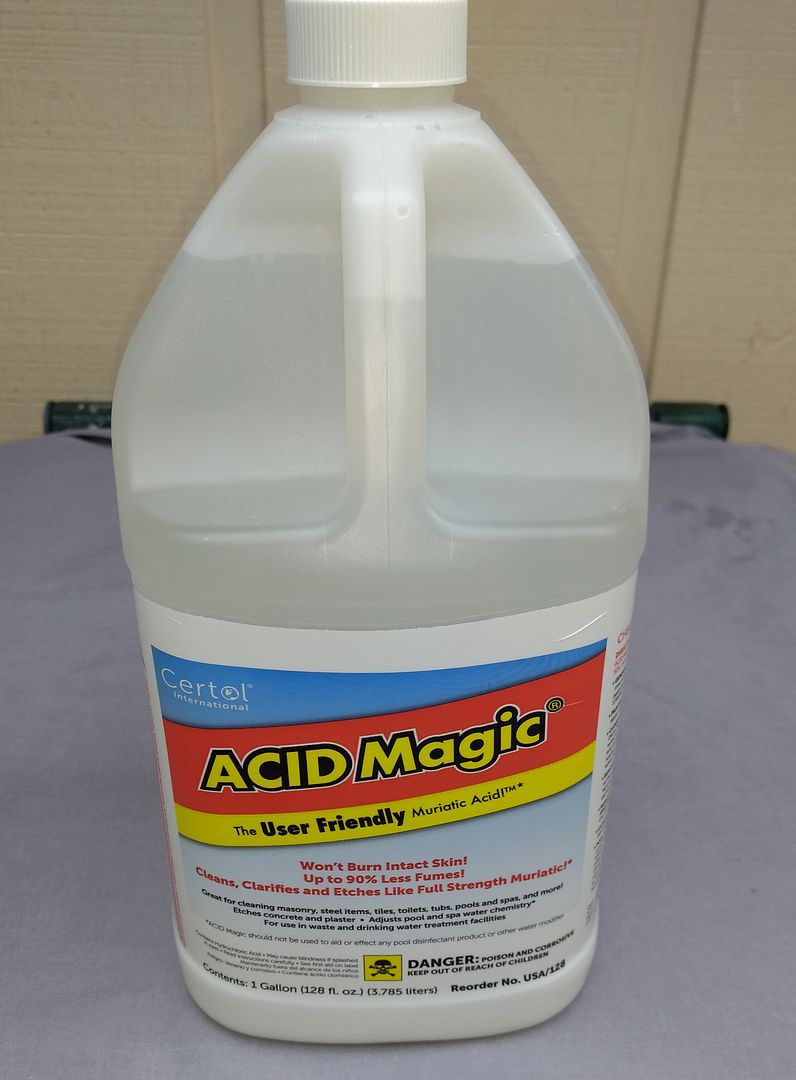
Then I soak the parts again in a Muriatic acid/water mix to dissolve any rust. I started this acid bath process with the last EGR cleaning job. It adds another day to the process from letting the parts soak overnight.
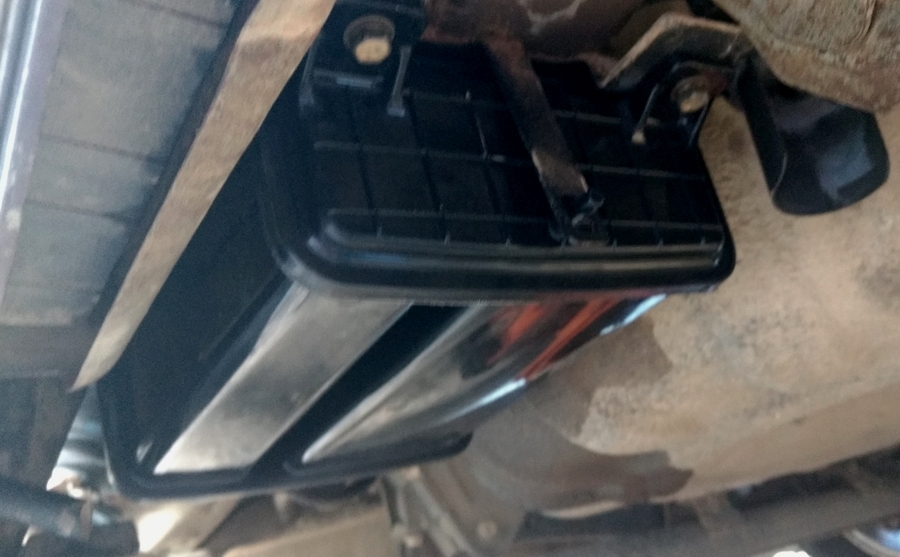
I finally cleared up my assortment of evap codes by replacing a mud filled canister and the white plastic valve.
Here's the valve that I replaced with a Dorman 911-508 Vapor Canister Purge Valve.
Awesome! Thanks for the tip. I was just going to get a hacksaw blade You remove EGR exhaust pipe and move it out of the way so nut can come off of the EGR tube studs?
I found a guy willing to let me take evap volume control solenoid, evap purge control solenoid and whichever one is by the knock sensor [with a couple of other odds and ends I need] for $60! Not bad. Hopefully they are in tact.
Will report back this weekend with results. Thinking about it, not driving the car and having our cold rainy weather is probably causing all of the smoke/condensation. Didn't smoke when I first towed it home.
Awesome! Thanks for the tip. I was just going to get a hacksaw blade You remove EGR exhaust pipe and move it out of the way so nut can come off of the EGR tube studs?
Nope. Couldn't budge the EGR pipe. I just disconnect it from the EGR valve. I bought a new one and couldn't get the old one off to replace it. :-(
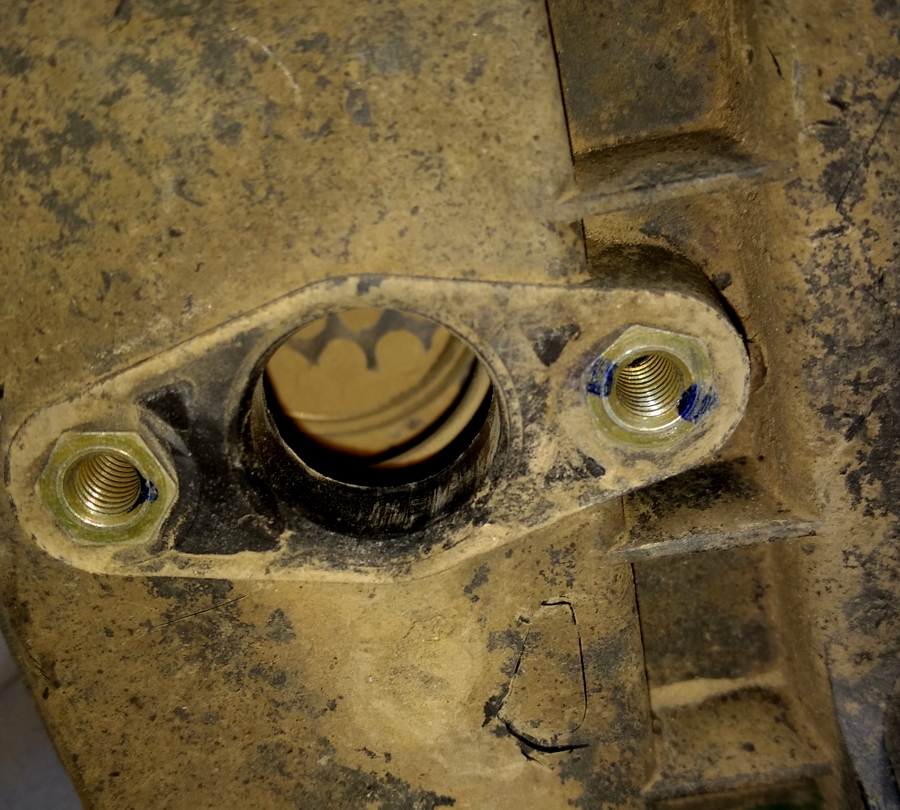
In the picture below, you can see how the EGR pipe is stationary and that I drop the assembly into place and bolt it down using the two bolts that are under the assembly body. You can see one of the 14mm bolts under the mount assembly in the picture. The two bolts that are under the assembly are hard to see from the top side. Especially with the EGR valve mounted. I think people try to start removing parts with the EGR tube with that connects to the intake plenum. That's actually the last part that I remove after I remove the entire assembly that you see in the picture. I leave the two nuts that hold the EGR tube loose, until after I've mated the tube to to the intake plenum. After the tube bolts are started in the intake plenum, then I do a final torgue down of the tube nuts and bolts.
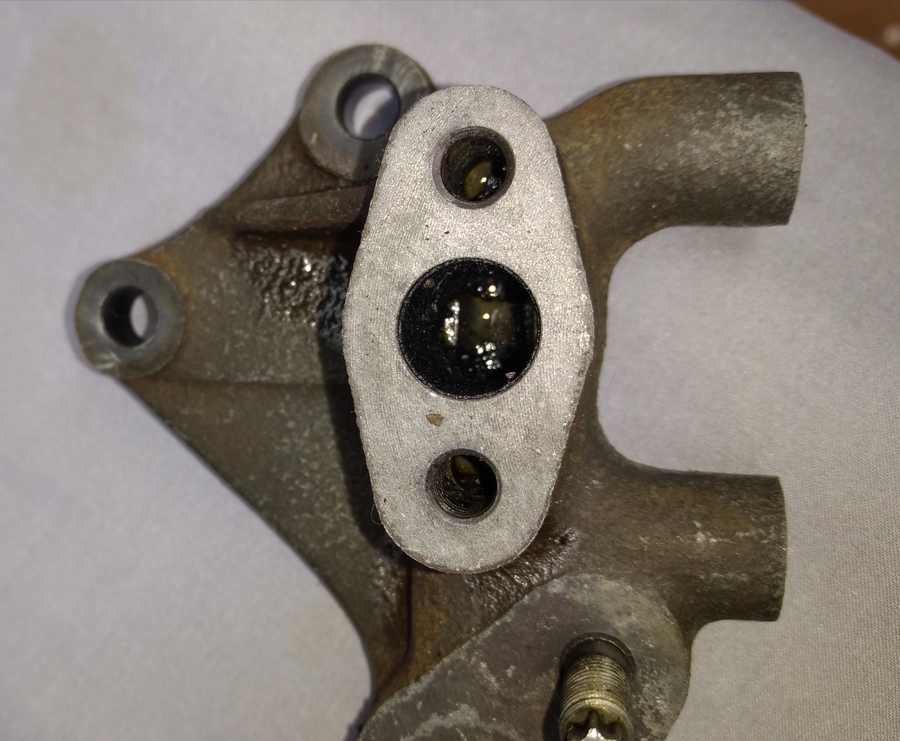
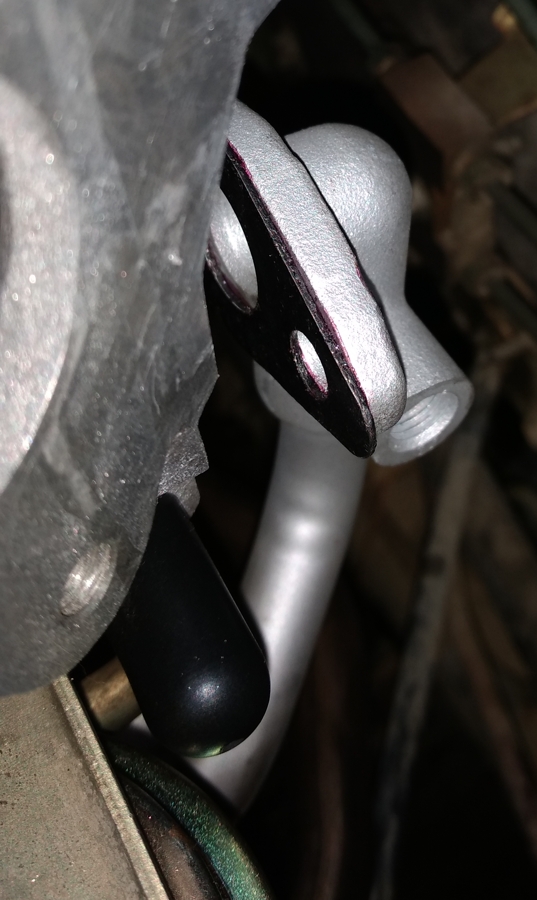
I remove the two bolts that are under the mount assembly as the first step. Here's a picture of the bolt holes looking from behind the assembly. The wire I use for dipping the assembly is running through one of the holes. Often people don't realize those bolts exist under the assembly until after they start removing parts from the top and find a need to cut the right tube bolt. Its counter intuitive I know. But so much like the way our engines are designed.
I've learned that taking a "bottom up" approach for removing the EGR assembly and tube was easier.
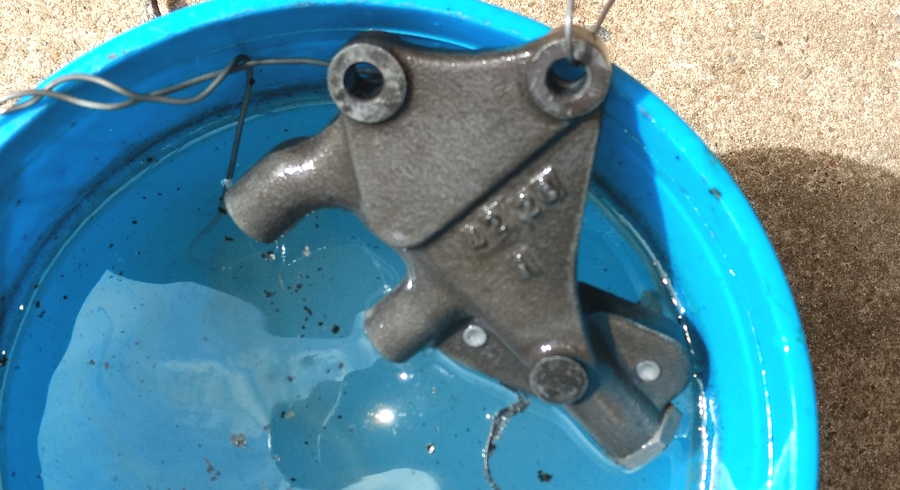
To recap, I clean, add gasket, and reassemble the three parts in the picture BELOW as a single assembly before I drop it into place behind the EGR pipe. I finger tighten the two nuts that hold the EGR tube into place during the initial assembly so that I can swing the EGR tube into the intake plenum. After everything is squarely positioned and bolted to the intake plenum, then I do a final torque down.
If you find you need to remove one of the stud bolts in the picture, I have used a 5mm (or 5.5mm) star pattern socket to unscrew the bolts.
Happy thanksgiving! I'm going to meet with the family soon, but I had a hankering to work on the Maxima. This has become obsession level.
I blew out the main evap line that runs back to the canister with my compressor and other associated lines. Then I found out my purge control valve [black 'saucer'] was plugged. I blew threw it and unplugged it [using my mouth, no pressure]. Unfortunately, it isn't supposed to flow without vacuum - verified its bad. Applying an air compressor to its vacuum pot on top, hit the trigger too hard, I blew the top off the valve ! [d'oh]. Scared me 'booom!' Despite that, My P0443 code is gone! No SES light anymore. I reassembled the non-working valve, but it is stuck open so evap flows.
The vacuum source that goes to the top of purge control valve has no vacuum, so I traced it back. Not plugged. The solenoid that controls vacuum is operating. I'm now wondering if the solenoid itself has a good vacuum source for it to switch the flow on and off.
The knock code stayed... at least there's no glaring SES light. I got a momentary code for oxygen sensor earlier. I'll replace the purge control valve and get its vacuum source back. If that doesn't work, I'll do oxygen sensors sooner rather than later.
I'm not getting any vacuum here when the engine revs. No vacuum at all. I blew out the line. The solenoid that controls it is functioning (By the knock sensor), and it also has a power source.
Also, for anyone else with P0443... I found these videos INSANELY helpful. Now I know how the evap system works. I used a blake bleeder vacuum pump, but it worked the same.
One more thing... CS_AR - I still can't believe how clean you can get those parts. You do fantastic work. I'm going to try your cleaning method when I do the EGR tube... always wondered how to get these parts back into OEM shape without sanding or painting
One more thing... CS_AR - I still can't believe how clean you can get those parts. You do fantastic work. I'm going to try your cleaning method when I do the EGR tube... always wondered how to get these parts back into OEM shape without sanding or painting
Thanks Pixelporsche. Actually the EGR tube and mount were painted with VHT ceramic header paint. It's a lot of work for parts that you can't see when it comes to EGR hardware. Getting the EGR hardware clean on the inside is more important than the exterior. The EGR hardware I throw in with water pipes that you can see on the engine front. I figured out how to refurbish the water pipes using VHT three years ago because I had no way to get corroded up pipes looking decent without sending them out for powder coating or nickle plating.
The bucket of carb cleaner and acid wash provide the most bang for the buck. Just be sure not to dip any aluminium parts in an acid wash. It makes them look terrible.
Here's a thread on the VHT prep, priming, painting, and curing process.
As for O2 sensors, I buy NTKs from www.rockauto.com. I've found new O2 sensors bring low end pep and help and bring a slight increase in MPG. I try to replace O2 sensors when they get over 120,000 miles as a maintenance item. They are really easy to replace on a 4th gen Maxima compared to one of my Hondas with a V6. Also, I've got an 04 Civic that eats O2 sensors between 30,000 to 40,000 miles. I can't complain about the Nissans.
Hey, if you are going to replace the KS without removing the intake manifold. I use a 1/4 inch drive with extension and U-joint to reach into the valley to remove the KS bolt. I've never been able to get a 3/8 drive U-joint to make a sharp turn that is needed to break loose a KS bolt.
One tip that will save you a lot of time if you decide to replace the vacuum hoses around Vacuum Galley A and B is to study Page EC-16 of the FSM "EC section". I learned to number the hoses and vacuum ports according to the diagram references on Page 16.
When I started reconnecting the new vacuum hoses, I could follow the numbers that I taped on the hoses to reconnect everything. It removed the guesswork from the re-connection process.
Here's a link to the FSM EC section for a 98 model.
Also note, if you decide to replace the KS (assumed Fed spec) without removing the intake manifold, be sure that you can reach your hand into the valley to replace the bolt before you start. I wear an XL size glove and I cannot reach into the valley without a lot of pain. One of my sons wears a medium/large size glove. So he can easily reach into the valley to reinstall the bolt by hand when I need to replace one. If you wear an XL glove, you might want line up somebody with a smaller hand to start the KS bolt when you replace it.
I did replace the KS. I removed a solenoid to access underneath the intake. Code still present. Going to replace purge solenoid valve and figure out why it's not getting vacuum although the solenoid is activating. That should clear up P0443.
Meanwhile, I did my first test drive. Radiator cap is leaking - it began to come apart. Sure did freak me out to come home to bellowing steam. Glad it was simple. The front end sounds like it is going to rattle apart going over bumps. I'm now adding front struts to the ever-growing list
Just programmed a key FOB so it has keyless entry now. Replaced struts for the hood so I don't need a 2x4.
Battery won't hold a charge overnight, got a $45 reman from a local wrecker.
Reattached balljoint to wiper motor arm so the windshield wipers work again - but the balljoint is very worn. Needs replacement.
Going to have my windshield guy come out and put a new windshield in. Has a crack clear across the glass.
All in all, I'm only about $400 into this $250 Maxima... She's going to live, Jim!
Unrelated... CS_AR, are these engines fairly noisy by design? It has a pronounced valve train clatter. Sounds very similar to about every VQ30DE video I've watched, but there are some quieter than others.
Not used to valve train noises in my 'good running' engines
Unrelated... CS_AR, are these engines fairly noisy by design? It has a pronounced valve train clatter. Sounds very similar to about every VQ30DE video I've watched, but there are some quieter than others.
Not used to valve train noises in my 'good running' engines
Hey Jim. Yes and no. I don't notice any valve train noise when standing in front of my three VQ30DE when they run. However, when I record the engines running on my cell phone's video recorder, I can hear all kinds of clicking noises over everything else. When I watch any VQ30DE video, I can hear the noise. It seems that cell phone microphones like to pick up high frequencies over the lows that accompany normal engine sounds.
The VQ30DE does not use hydraulic lash adjusters (HLAs) like some other Nissan engines. So there will always be some noise from the VQ's solid lifters.
I've checked the valve clearance on two of my VQ30DE engines and all were within recommended tolerances. So I don't worry about a little noise from the solid lifters. More than one Nissan mechanic has told me that "noisy valves are happy valves" and to stop worrying. I got over it.
It's only when I can hear the main timing chain slapping the upper guide on a cold startup that causes me to worry. I had the tensioner replaced on one of the 99 model engines a few years ago due to the noise it made on a cold startup. The new tensioner solved the problem.
Even though the VQ30DE with its solid lifters is not as quiet as my VH45DE with HLAs or like my Hondas with timing belts, I would still rather drive the VQ30DE over the others for the long haul. HLAs sometimes fail. They are a big pain to replace. I have to get the Honda valves adjusted periodically because the valve adjustments sometimes tighten up and then you run the risk burning a valve because it is not properly closing. Then there is the issue with timing belts that require change every 100,000 miles. So I would rather have a little noise from a VQ than some of the issues that I see with other engines.
Some of the movement noise that you may be hearing from the front suspension is from worn out sub-frame bushings.
After replacing struts, end links, anti-sway bar bushings, and lower control arms on my 99 model, I could still hear the sub-frame moving around so I bought some sub-collars from one of our members in the group deals section. I also have some Energy Suspension sub-frame bushings that I will attempt to install on the 98 model. It's one of those things where you work through replacing the obvious items first. Then work into tightening up the other suspension components as work past the easy/obvious problems. I think suspension work it is like peeling an onion. You take it one layer at a time till you are done.
I have a set of sub-frame collars that I bought in the classifieds that is missing one of the open collars. I may have to get someone I know with a machine shop to make the missing collar our of HDPE. I want to install those collars on the 98 model.
Another thing that I may try is to take a sub-frame collar set for a S13/S14, Z32, Q45, and 3rd gen Maxima and modify it so it will work on a 4th gen sub-frame. I ordered one of the sets yesterday. I will compare it to the partial kit that I have try to see what I can adapt so it will work on a 4th gen. It may not work. I won't know until I try.
Drifters are big on removing sub-frame slop by installing sub-frame collars.
You can get the idea for sub-frame collars in the 240sx picture below.
Great ideas! I will most likely start with front struts, sway bar links and tie rod ends.
I MIGHT have gotten rid of P0443
• Replaced 70% of vacuum tubing under throttle body and inspected the rest
• Used a vacuum pump to test individual lines
• I replaced the Black Saucer [Purge Control Valve] with a working unit.
• I ran a vacuum tube right from solenoid to Black Saucer.
• I bench tested the solenoid to make sure it will let vacuum through when actuated. This involved a multimeter, alligator clips, power source, and vacuum pump
• I verified solenoid had a good vacuum source
and NOW I have vacuum when revving up while warm! The evap is flowing, flowing, flowing!
Last edited by pixelporsche; 11-26-2016 at 03:48 PM.
EGR Cooling line question: Does the EGR only modulate the exhaust gasses? Why? The Fast Idle Control wax solenoid on my 99 throttle body was not moving. High idle condition after warm up (1500-2000 RPM). I removed the throttle body and tested the FIC and it works fine(see the video link)
. But feeling the coolant lines in and out of the EGR valve makes me think I may have a blocked coolant passage. Does the EGR also modulate the coolant? Coolant line routing looks as though it goes through the throttle body, then through the EGR, then into the upper air intake manifold.
If the TB bench tested fine, I would make sure coolant is really getting there through the line that runs by the intake. Check the heater core lines as well to see if they're flowing.
Temp sensor usually just results in really hard cold starts.
Next up, check voltage on TPS and search for vacuum leaks.
This is for a 1998. Can't find a diagram for the coolant hoses yet.
 11-20-2016, 10:33 PM


 I appreciate it.