
Baked VQ30DE Parts - The VHT Curing Process


Thread Starter
Senior Member
Joined: Jan 2011
Posts: 3,037
From: Central AR
Baked VQ30DE Parts - The VHT Curing Process
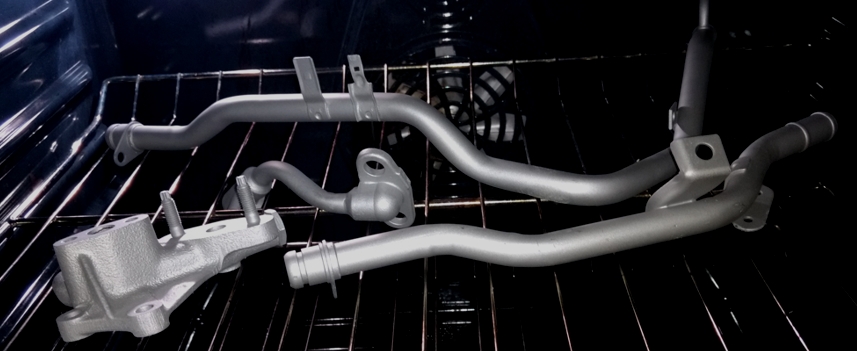
Tonight I'm baking some parts to get ready for this weekend's under plenum and hose refresh project.
About three years ago I discovered properly prepared, primed, and painted engine parts with VHT header paint. It really seemed to work well after all this time.
The secret is not get into a hurry when curing the parts painted with VHT. I start by letting the parts dry for 24 hours then baking them at 150 f for 30 minutes, then 200 f for 30 minutes, 250 f for 30 minutes, 350 f for 30 minutes, 450 f for 30 minutes, and then at 550 for an hour with a cool down between increments. Yeah I know this is more curing than VHT recommends. However, the finish is more like what I've seen produced during a powder coating process. The finish really holds up to engine heat. I have an extra set of parts that I will change out as part of the under plenum project. The idea is to get everything prepped and ready to go before I start turning wrenches. So I just fly into doing the job like I'm replacing everything with new parts. It makes the job quick and easy.
Here we go again. Can anybody recognize the parts in the picture?

Last edited by CS_AR; Nov 3, 2016 at 08:31 PM.

I bet wifey really appreciates you putting car parts in the oven and baking them. LOL I have no experience with this..only what I've read on numerous occasions, that you shouldn't do this procedure in the same oven that you prepare food in.
Did you research this and did you find otherwise?
I know what those parts are. Nice job.
Did you research this and did you find otherwise?
I know what those parts are. Nice job.
Thread Starter
Senior Member
Joined: Jan 2011
Posts: 3,037
From: Central AR
Well sometimes what you don't know won't hurt ya.. A good vent-a-hood works wonders. After I'm done tonight, I'll run it through a self cleaning cycle for 2-3 hours. I am so thoughtful.
Everything will be just beautiful tomorrow morning. Ha!
Everything will be just beautiful tomorrow morning. Ha!

They look fantastic! So you cure them after painting, is that right? VHT is a header paint? Haven't used it but I've used quite a bit of generic high heat stuff that is horrible for anything that actually gets hot.
Thread Starter
Senior Member
Joined: Jan 2011
Posts: 3,037
From: Central AR
Like with any painting project, it's all about preparation, priming, paint in fine layers, and post process (curing).
The Product Instructions
http://www.vhtpaint.com/high-heat/vh...eproof-coating
Preparation
I removed any rust and grime using a Muriatic acid bath.

Here's a a video about the heat resistance process.
.
The Product Instructions
http://www.vhtpaint.com/high-heat/vh...eproof-coating
Preparation
I removed any rust and grime using a Muriatic acid bath.


Here's a a video about the heat resistance process.
Thread Starter
Senior Member
Joined: Jan 2011
Posts: 3,037
From: Central AR
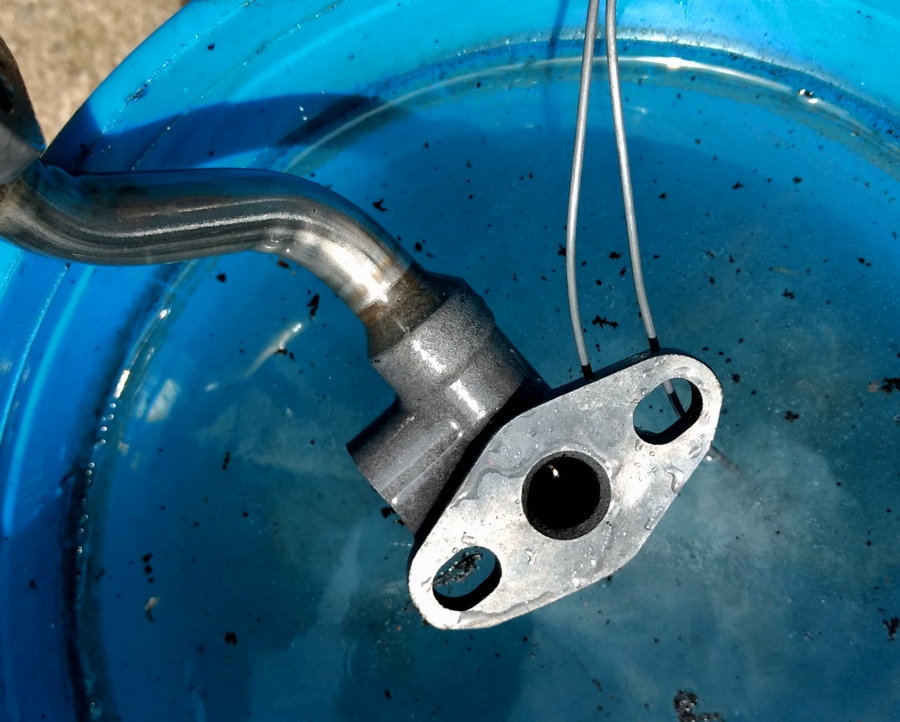
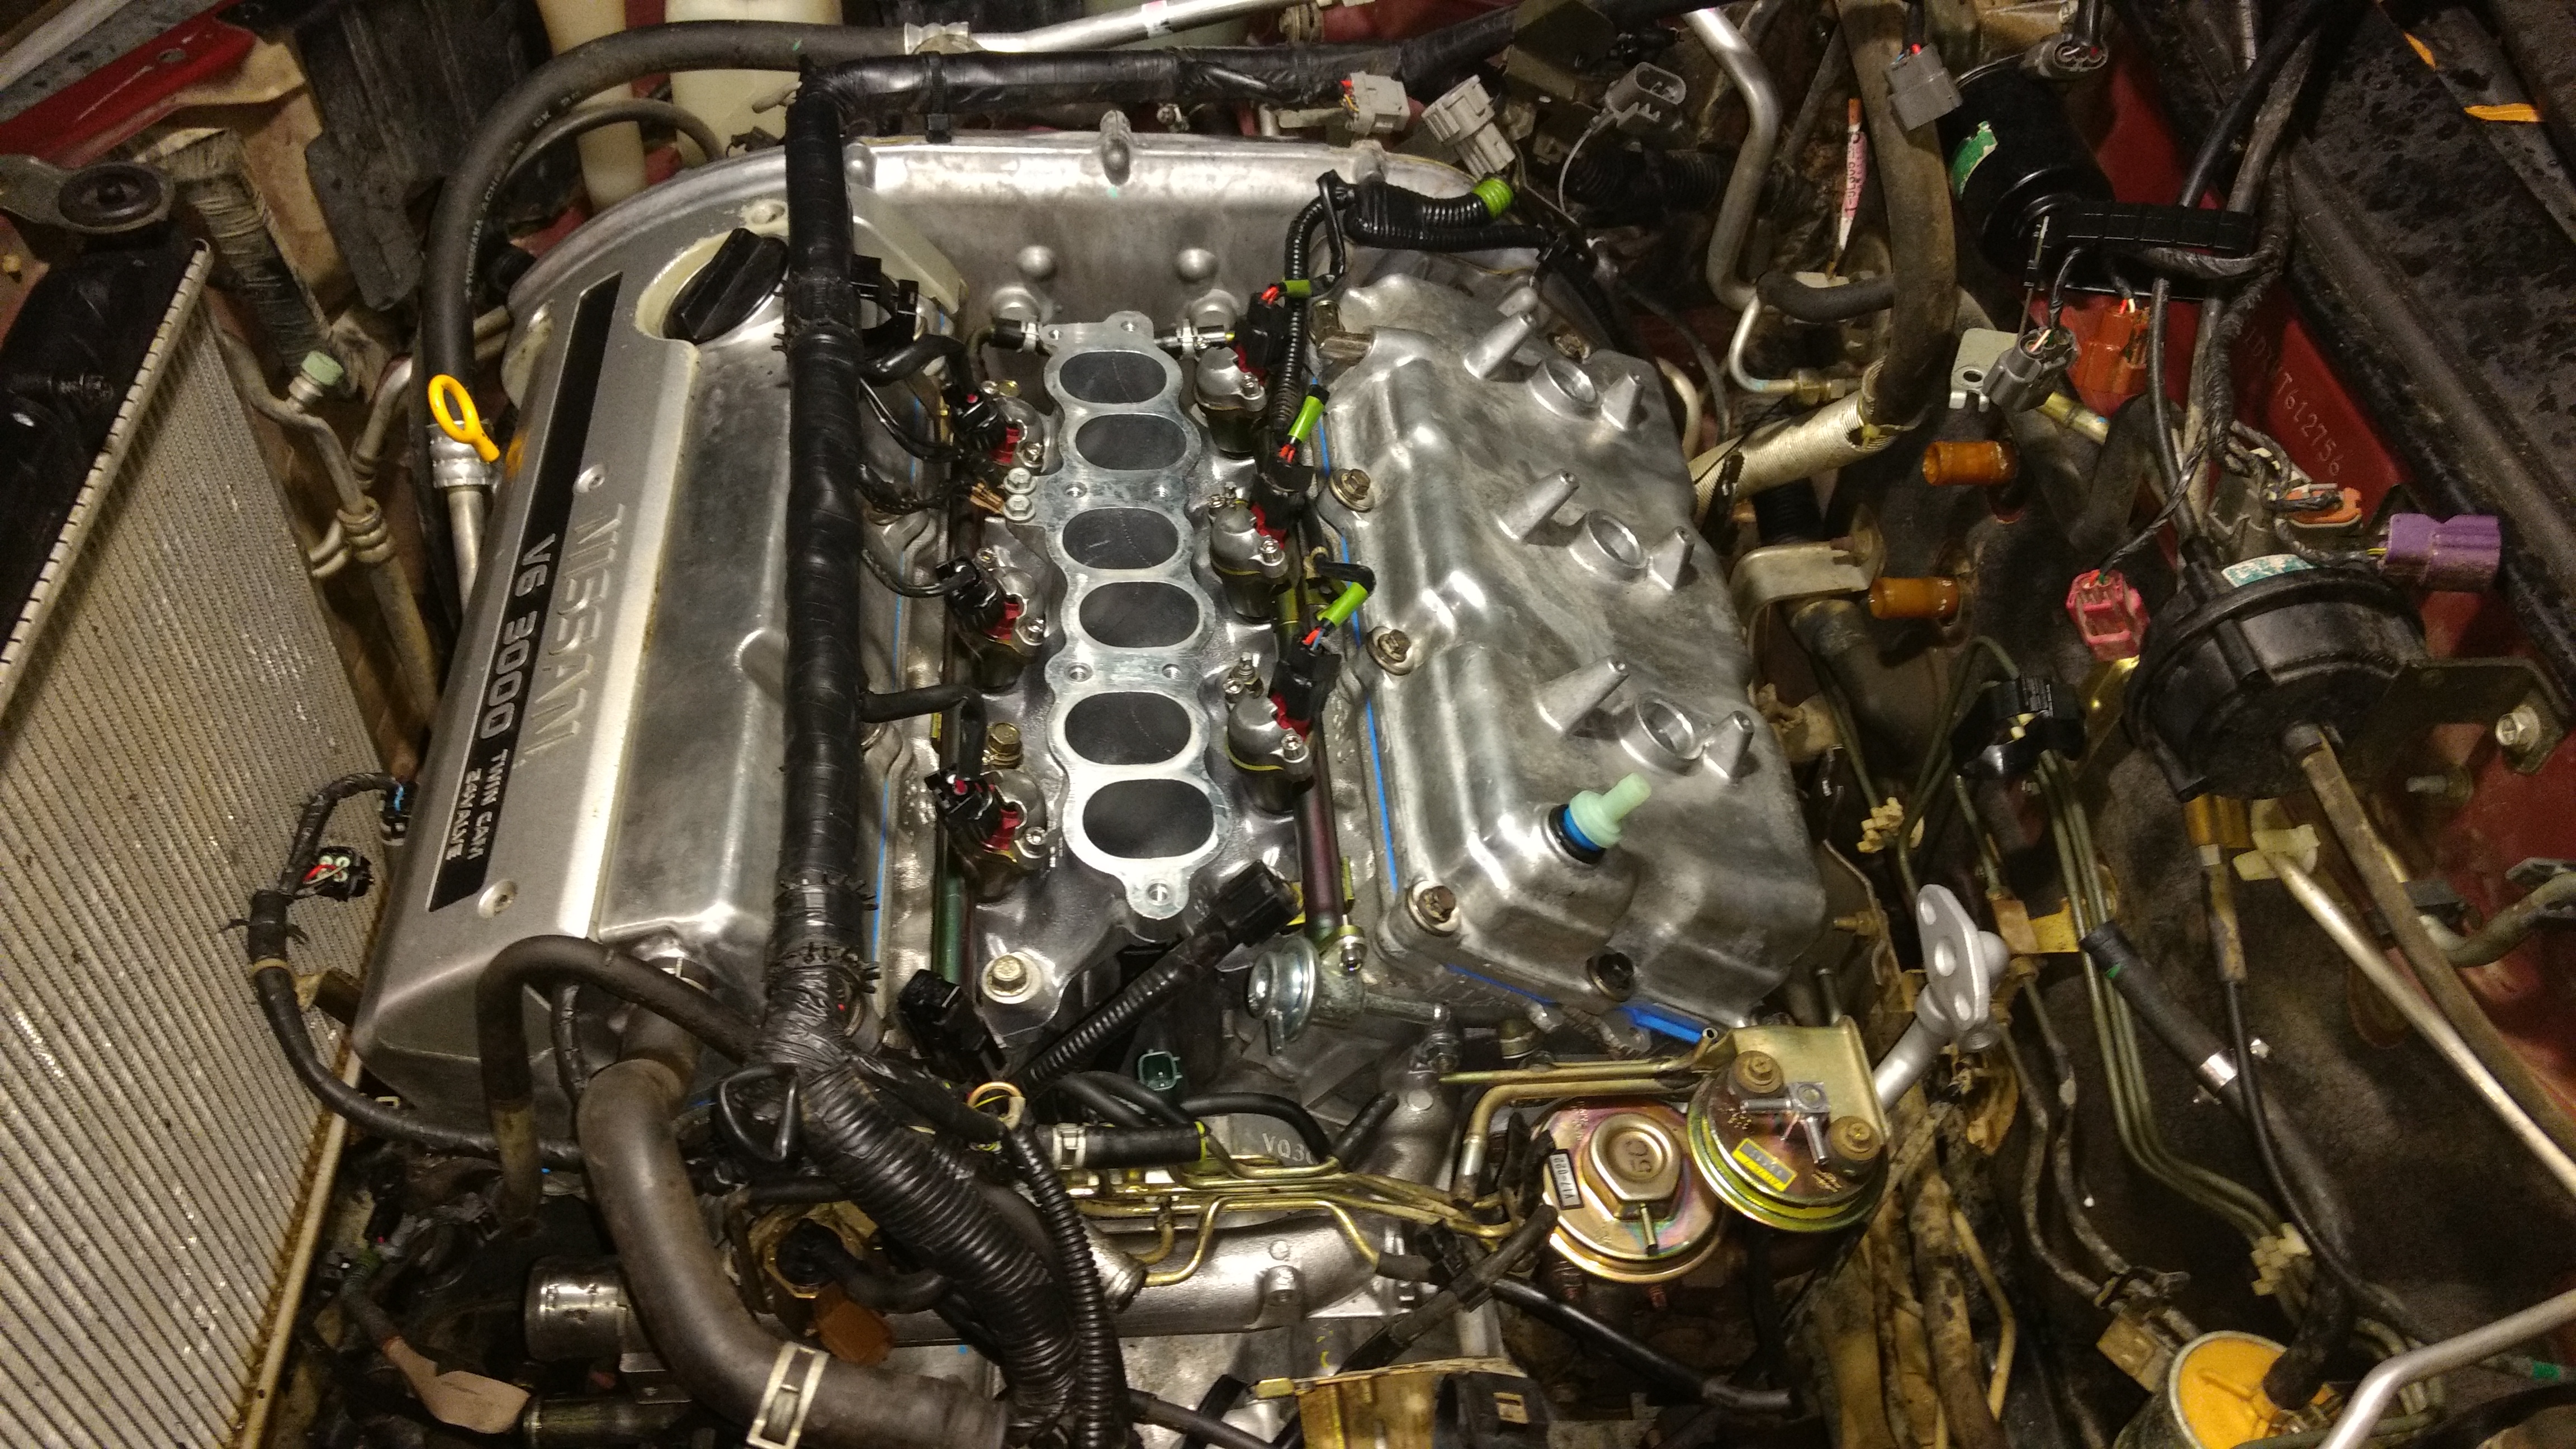
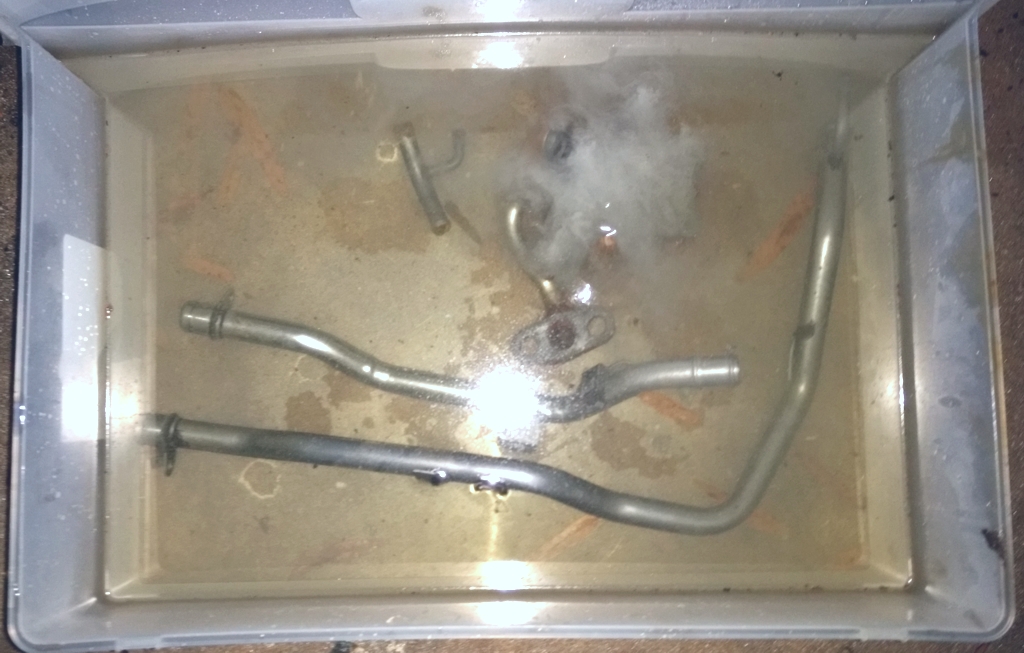
After pulling the UIM (a.k.a intake plenum) I found the EGR opening to be completely clogged. The UIM was carbon filled mess. Now you can see why I wanted to have a clean EGR tube and assembly ready to go for this job.
Other parts that I have ready to go for installation tomorrow.
Rear Valve Cover
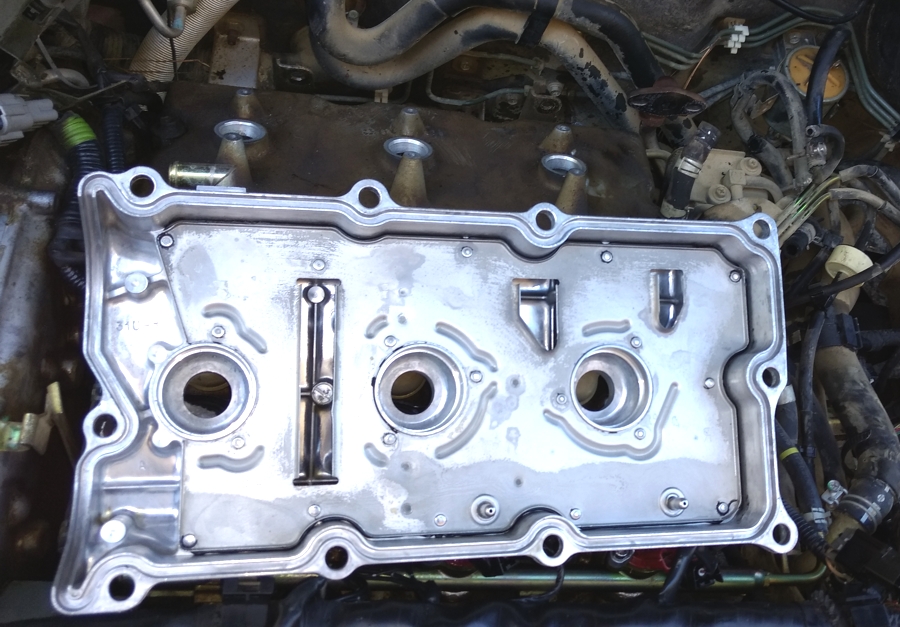
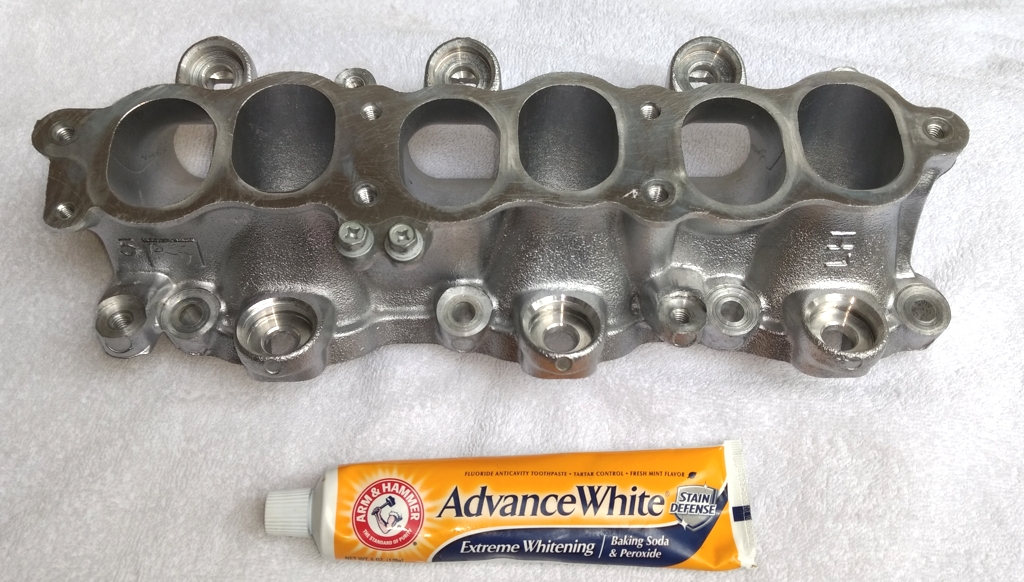
LIM
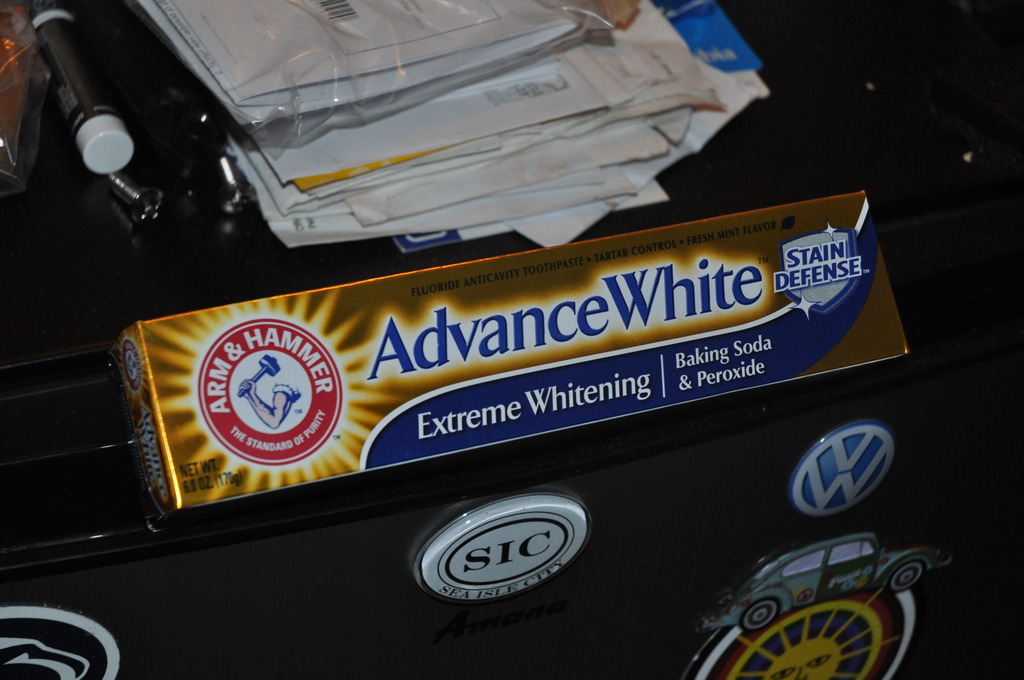
From a motorcycle maintenance video, I discovered the Arm and Hammer Baking Soda Toothpaste with Peroxide does a good job for cleaning aluminum. It really makes it aluminum parts sparkle. After the usual carb cleaner soak, I gave the parts a good work over with an old toothbrush. Here's how it turned out.
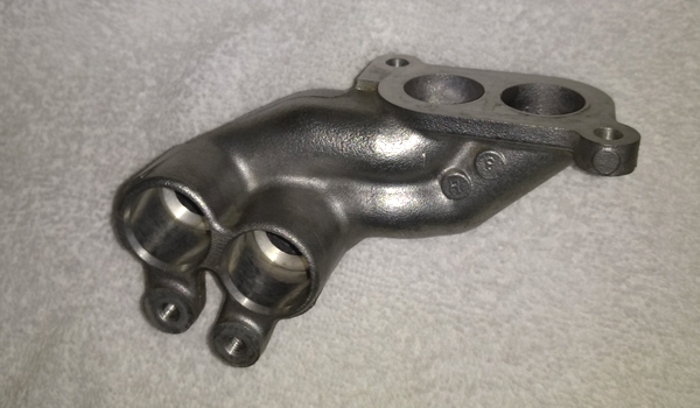
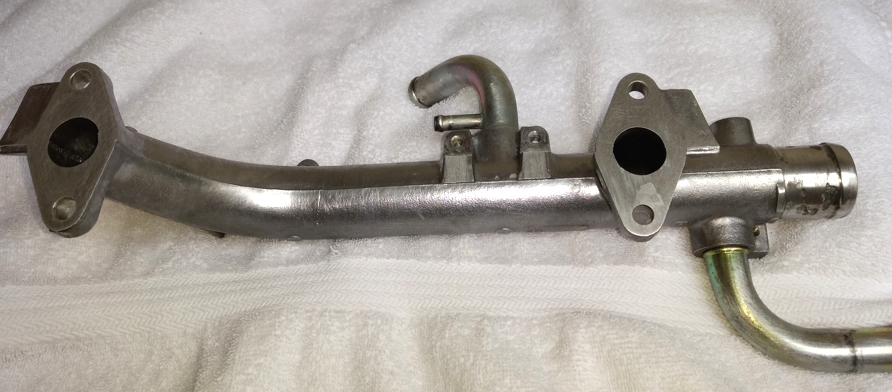
Check this out.

This part connects to the two heater hose pipes in the first post.

Other parts that I have ready to go for installation tomorrow.
Rear Valve Cover

LIM
From a motorcycle maintenance video, I discovered the Arm and Hammer Baking Soda Toothpaste with Peroxide does a good job for cleaning aluminum. It really makes it aluminum parts sparkle. After the usual carb cleaner soak, I gave the parts a good work over with an old toothbrush. Here's how it turned out.
Check this out.


This part connects to the two heater hose pipes in the first post.


Last edited by CS_AR; Nov 5, 2016 at 09:07 PM.

Senior Member
Joined: May 2013
Posts: 1,543
"Hey hun, guess whats for dinner?" "can you smell it from the oven?"
"Kind of...Is it baked potatoes?"
"No, not even close.."
"Then what are we having for dinner?"
"VQ30de parts"

"well then...this is one dinner night I sure will never forget"..
Very nice progress though, feels nice to refresh some parts, make them clean and nice again. Keep up the good work.
"Kind of...Is it baked potatoes?"
"No, not even close.."
"Then what are we having for dinner?"
"VQ30de parts"
"well then...this is one dinner night I sure will never forget"..
Very nice progress though, feels nice to refresh some parts, make them clean and nice again. Keep up the good work.


Thread Starter
Senior Member
Joined: Jan 2011
Posts: 3,037
From: Central AR
Installed the EGR assembly hardware today. There are two 12 mm bolts that hold the EGR mounting hardware to the block. If you remove those bolts, you can lift the entire assembly out much easier than pulling it out piece-by- piece.
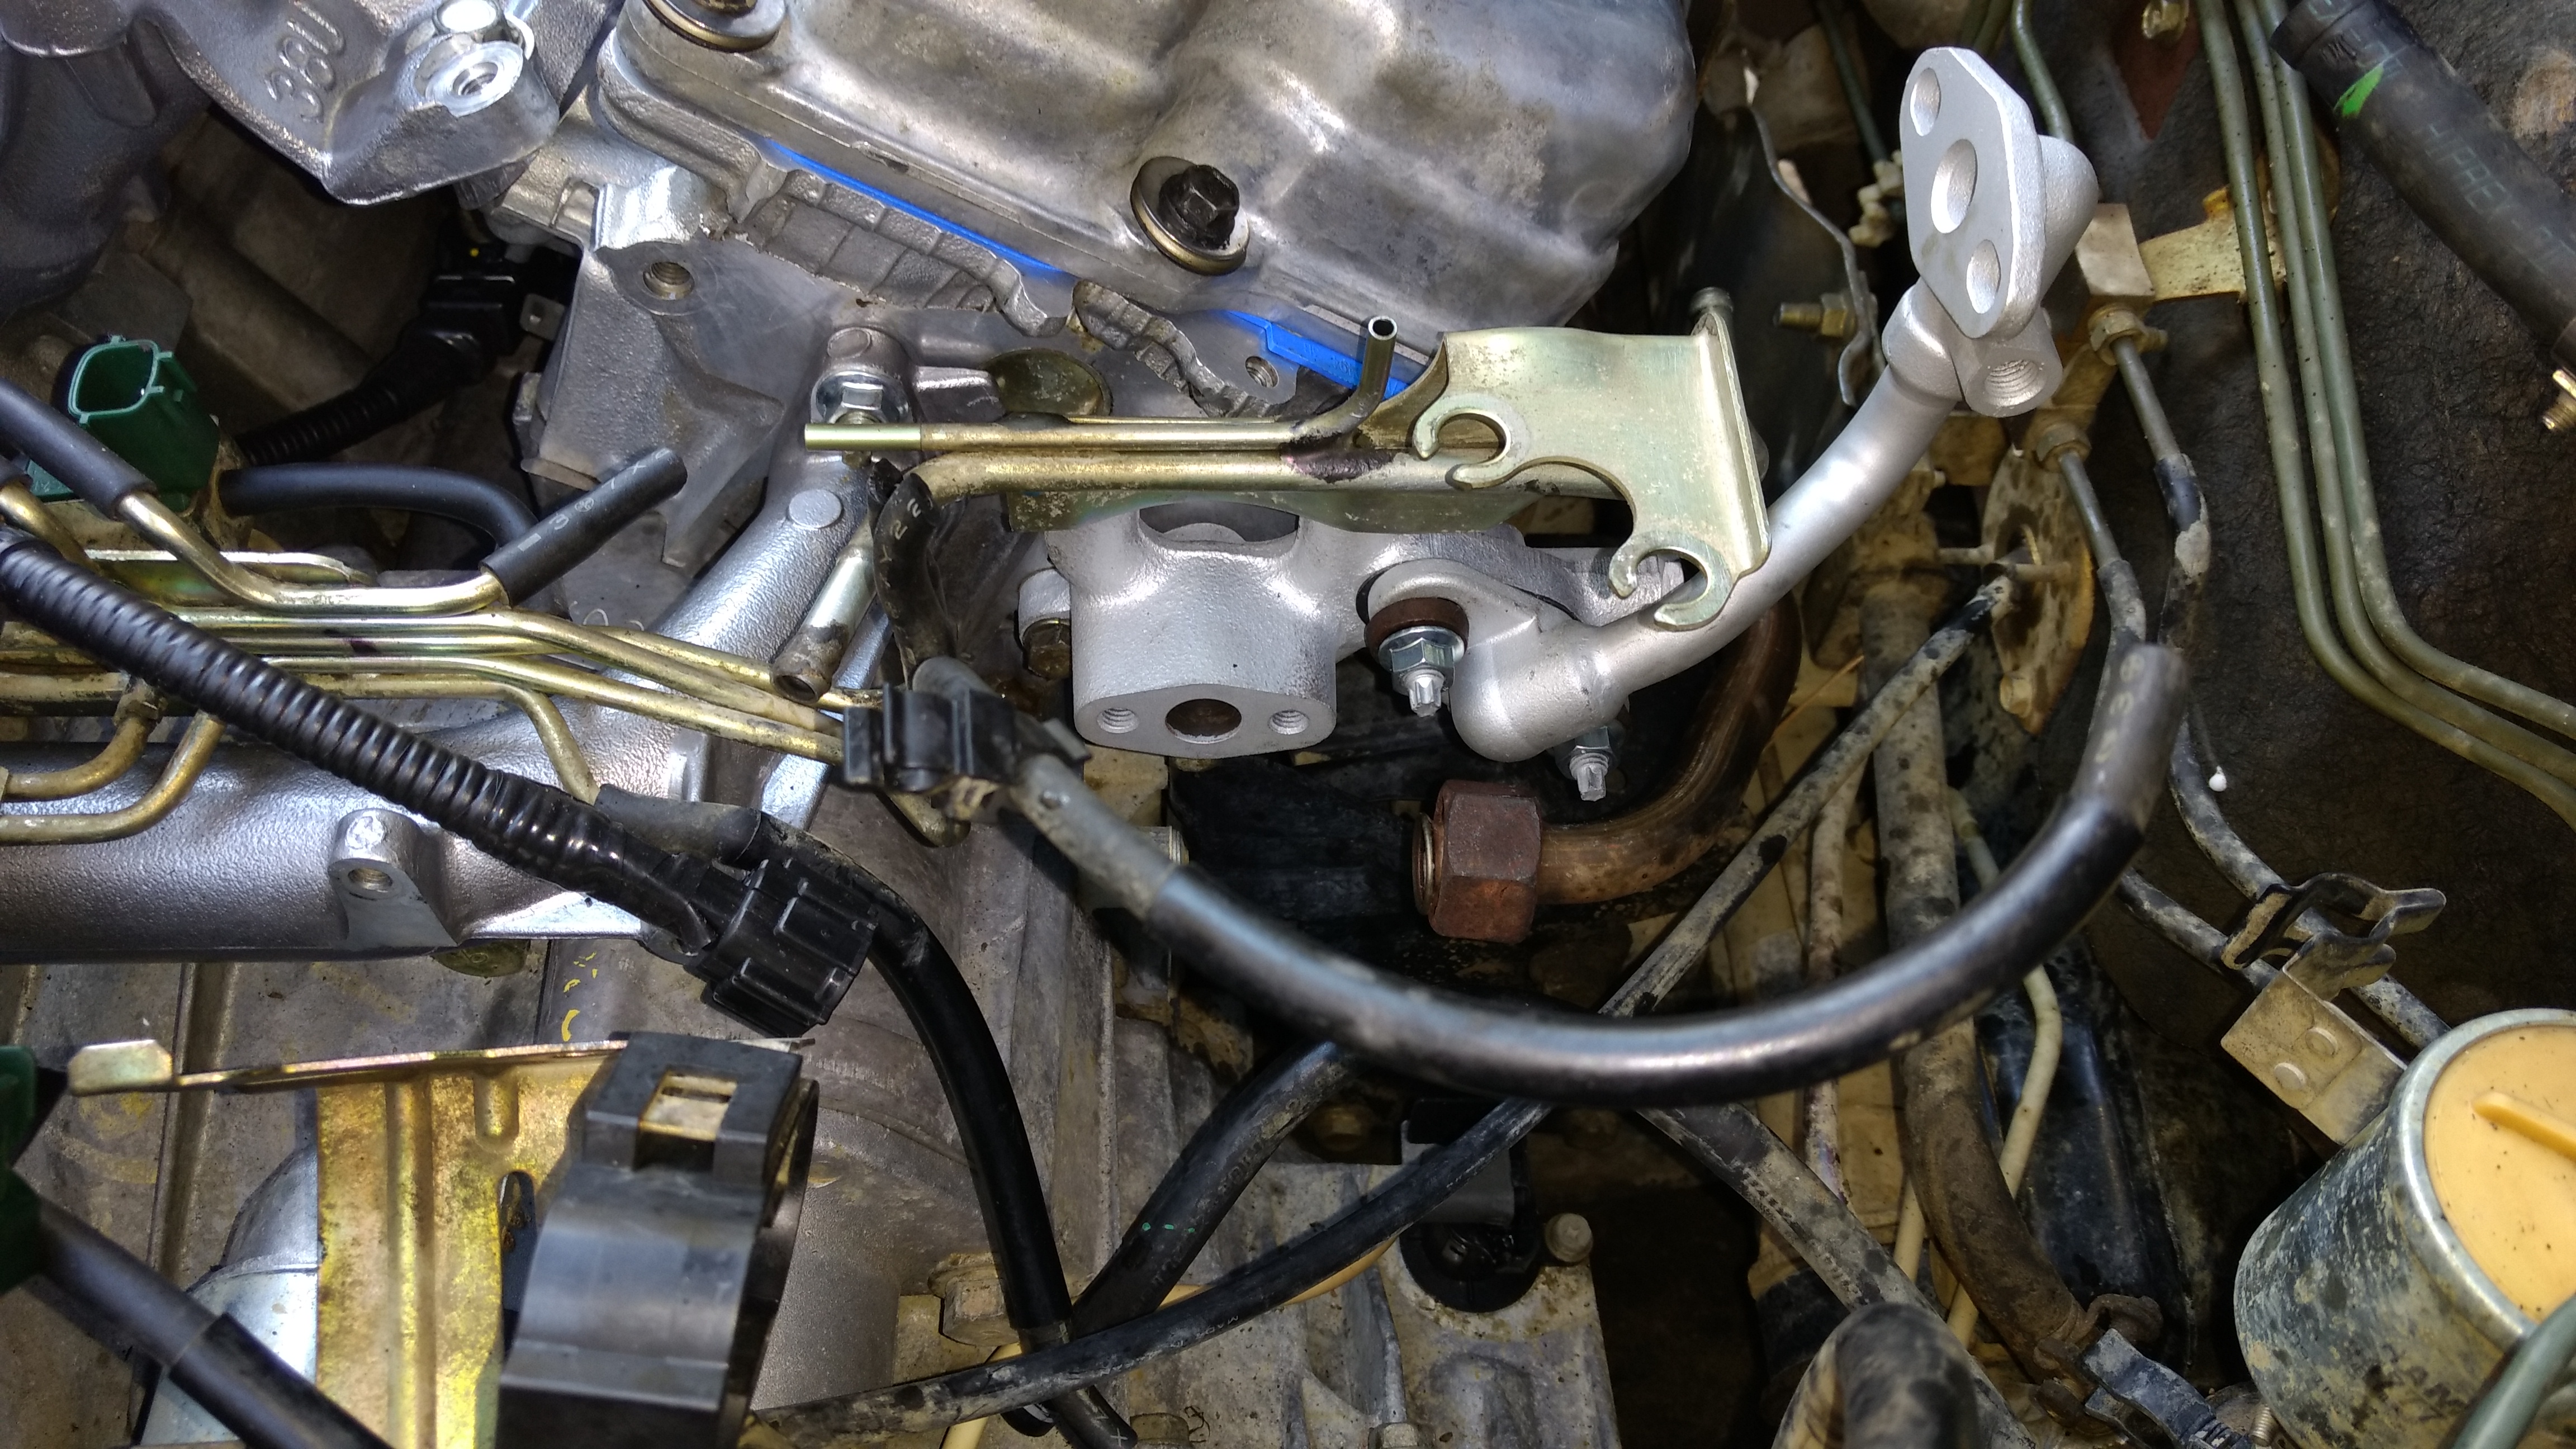
Next I installed a new EGR and EGR vacuum solenoid, a new OEM thermostat and gasket, then installed the LIM and injector rails.
What am I going to do with all of these vacuum lines?

Next I installed a new EGR and EGR vacuum solenoid, a new OEM thermostat and gasket, then installed the LIM and injector rails.
What am I going to do with all of these vacuum lines?

Last edited by CS_AR; Nov 6, 2016 at 05:41 PM.
Thread Starter
Senior Member
Joined: Jan 2011
Posts: 3,037
From: Central AR
Now that I'm approaching three years since first used VHT header paint on the coolant pipes for Max III, I want to show a picture of how they look today.
The pipes (and the rest of the engine) are getting dusty and dirty, but the finish is holding up well.

Here's another picture below after 3 years below.

The pipes (and the rest of the engine) are getting dusty and dirty, but the finish is holding up well.

Here's another picture below after 3 years below.

Last edited by CS_AR; Nov 27, 2016 at 04:10 PM.
I love the color of the VHT header paint. It really meshes well with an OEM scheme.
I'm going to try the Arm & Hammer toothpaste trick
Is that the 'Flat Aluminum' color?
https://www.amazon.com/VHT-SP102-Fla...000CPJLH6?th=1
I'm going to try the Arm & Hammer toothpaste trick
Is that the 'Flat Aluminum' color?
https://www.amazon.com/VHT-SP102-Fla...000CPJLH6?th=1
Thread Starter
Senior Member
Joined: Jan 2011
Posts: 3,037
From: Central AR
I love the color of the VHT header paint. It really meshes well with an OEM scheme.
I'm going to try the Arm & Hammer toothpaste trick
Is that the 'Flat Aluminum' color?
https://www.amazon.com/VHT-SP102-Fla...000CPJLH6?th=1
I'm going to try the Arm & Hammer toothpaste trick
Is that the 'Flat Aluminum' color?
https://www.amazon.com/VHT-SP102-Fla...000CPJLH6?th=1


Thread Starter
Senior Member
Joined: Jan 2011
Posts: 3,037
From: Central AR
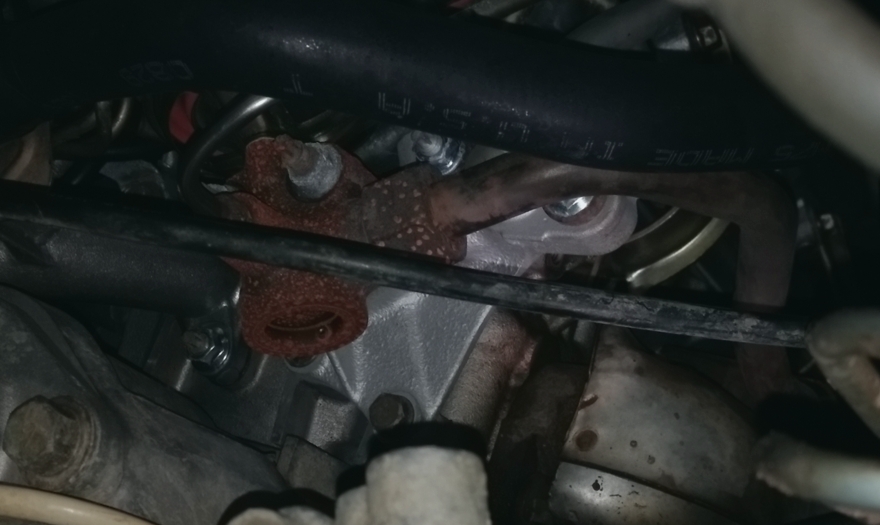
Here's another picture looking up from under the car.
Notice how the gold pipe on the left looks like the paint is starting to bubble and separate from the metal pipe. For that gold pipe I used Dupli-Color high temp engine enamel on two pipes that connect into the aluminum cross-head cooling tube. That one didn't work out so good. So I learned to ONLY use VHT ceramic header paint for restoring metal pipes.
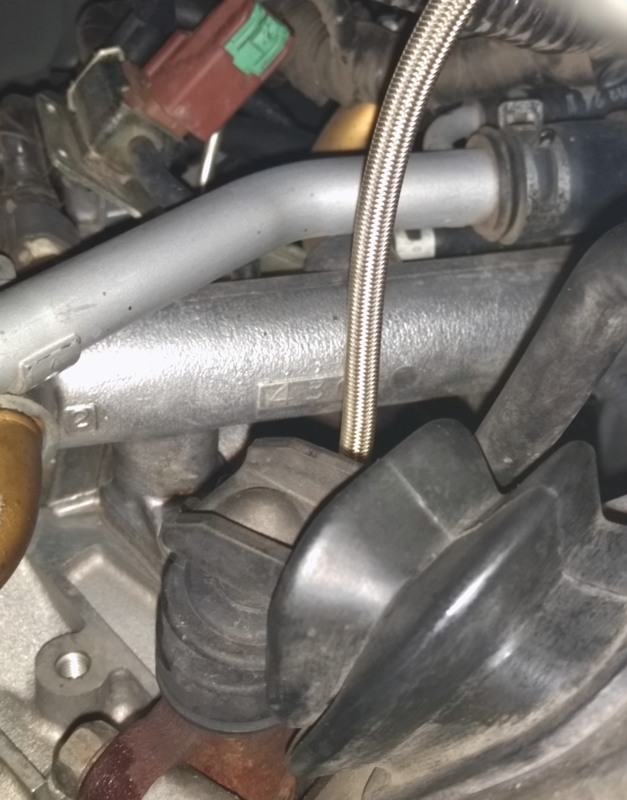
Notice how the gold pipe on the left looks like the paint is starting to bubble and separate from the metal pipe. For that gold pipe I used Dupli-Color high temp engine enamel on two pipes that connect into the aluminum cross-head cooling tube. That one didn't work out so good. So I learned to ONLY use VHT ceramic header paint for restoring metal pipes.

where you get the time to totally restore these old 4th gens and the patience is anybody's guess. i love my max, i've spent a ton of cash and time trying to get the old girl running right, but stuff just keeps breaking/wearing out. i just ordered 2 more oem mitsubishi front coils from japan as i like to stay oem like you. does the whitening toothpaste really work on the engine cleanup? love to try it, feel free to send any used ") parts you may have to me, i'm sure they're better than anything new i could buy.
parts you may have to me, i'm sure they're better than anything new i could buy. 
parts you may have to me, i'm sure they're better than anything new i could buy.
Thread Starter
Senior Member
Joined: Jan 2011
Posts: 3,037
From: Central AR
I got the idea for Arm & Hammer backing soda toothpaste with peroxide from this guy on youtube. Though I use a wet brush for the finishing touch on rough cast aluminum after I soak it in carb cleaner.
as a detailer i can tell you that i've tried steel polish and terry towels and a ton of elbow grease and it only got a little brighter. i was kind of like, wtf? to that guy's 1920 homemade polisher, i can do a better job by hand than that, but i get what he's trying to do. i wonder if you can polish the uim that way or do you have another method? i've used brushes and wheel cleaner before and got great results.
Thread Starter
Senior Member
Joined: Jan 2011
Posts: 3,037
From: Central AR
as a detailer i can tell you that i've tried steel polish and terry towels and a ton of elbow grease and it only got a little brighter. i was kind of like, wtf? to that guy's 1920 homemade polisher, i can do a better job by hand than that, but i get what he's trying to do. i wonder if you can polish the uim that way or do you have another method? i've used brushes and wheel cleaner before and got great results.

Last edited by CS_AR; Nov 28, 2016 at 12:00 PM.
and so, it begins.....
did you use brushes to get in the corners and what not? i was just going to use micro fiber towels and those round wax pads and see what my results would be. write-up on how you used the paste, thanks

did you use brushes to get in the corners and what not? i was just going to use micro fiber towels and those round wax pads and see what my results would be. write-up on how you used the paste, thanks
Thread Starter
Senior Member
Joined: Jan 2011
Posts: 3,037
From: Central AR


Thread Starter
Senior Member
Joined: Jan 2011
Posts: 3,037
From: Central AR
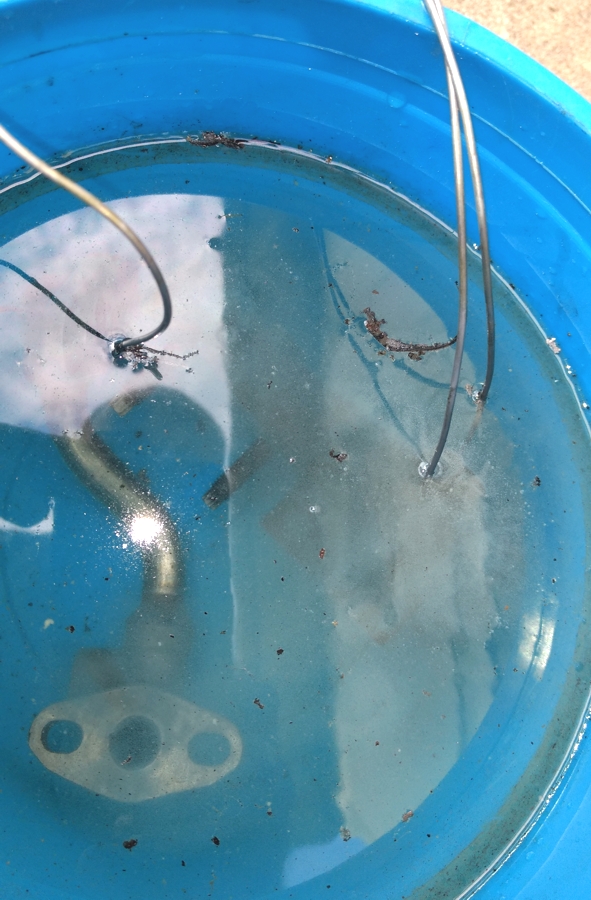
I've got another batch of EGR parts brewing in the muriatic acid wash here tonight. This is the first time I've tried it on the coolant pipes. It removes any corrosion and rust from the pipes. This will make preparing those parts a breeze.

Thread Starter
Senior Member
Joined: Jan 2011
Posts: 3,037
From: Central AR
This intake manifold was a crazy amount of work. Here's a picture when I was starting the final finish work.

VH45DE people get really into polishing that funky looking intake plenum. I don't know this engine.

Now this was some kind of a project...
I really like the A32 platform since I can relax and enjoy doing fun stuff like suspension enhancements that you can enjoy as you drive. I open the hood on the car in this picture about once a month to check the fluids. Otherwise I never see the engine.

As far as the parts that I'm cleaning right now, I will get them ready and put on a light coat of VHT primer to keep any surface rust from returning then keep them in the workshop till spring or summer. The weather way is too cold and damp now for any painting projects.
Last edited by CS_AR; Nov 28, 2016 at 09:54 PM.
Thread Starter
Senior Member
Joined: Jan 2011
Posts: 3,037
From: Central AR

Your engines look amazing and brand new! Wish I had the patience for it. 
For those smaller EGR parts you could use a ventilated toaster oven.
When I powder coated my calipers and their brackets I used my old dirty toaster oven to cure them. Curing only takes 15min at 450f with powder coating.
https://maxima.org/forums/4th-genera...-calipers.html
For those smaller EGR parts you could use a ventilated toaster oven.
When I powder coated my calipers and their brackets I used my old dirty toaster oven to cure them. Curing only takes 15min at 450f with powder coating.
https://maxima.org/forums/4th-genera...-calipers.html
Last edited by jholley; Dec 5, 2016 at 06:25 AM.
Thread Starter
Senior Member
Joined: Jan 2011
Posts: 3,037
From: Central AR
Your engines look amazing and brand new! Wish I had the patience for it.
For those smaller EGR parts you could use a ventilated toaster oven.
When I powder coated my calipers and their brackets I used my old dirty toaster oven to cure them. Curing only takes 15min at 450f with powder coating.
https://maxima.org/forums/4th-genera...-calipers.html
For those smaller EGR parts you could use a ventilated toaster oven.
When I powder coated my calipers and their brackets I used my old dirty toaster oven to cure them. Curing only takes 15min at 450f with powder coating.
https://maxima.org/forums/4th-genera...-calipers.html
I found this thread about the VHT ceramic paint curing process to be funny and helpful.
http://www.thirdgen.org/forums/exhau...aint-tips.html
The thing I've learned is to take the time to gradually bring the heat up, with 30 minute cool down steps in between, so the paint doesn't lift during the process. The more heat up and cool down steps, the better it seems to work. Also, if you don't get into a hurry with the curing process, it keeps the "melted crayon" smell to a minimum as the paint gets a chance to harden between heat treatments. My oven will only heat up to 550 degrees, so I leave the parts in for over an hour as the last step.
Before I learned to have the parts completely clean and oil free (oil from finger prints included), and to properly prime and cure, I've had some disasters where the paint lifted during the high heat steps or after being exposed to engine exhaust heat.
Also, I wanted to run the restored pipes for a number of years before posting about it. I like to keep a few new things working through a multi-year test phase to see if it lasts before mentioning it.
Back in 2010, when I did the midlife refresh on the Q45, I found a local plating shop that also does power coating. So I sent the vacuum lines and engine brackets out for powder coating. The powder coated parts in the picture have held up perfectly over the years. However, they are not exposed to exhaust temps.

When I tried to restore the power steering reservoir in the picture below, I had a world of trouble trying to get any high temp paint to stick to the metal. So I took it to the plating guy and he told me that, depending on the type of metal, it can actually hold an oil residue that keeps any type of paint from sticking after it has been exposed to heat. He said the only way to fully remove the residue before powder coating or plating is to heat the part in a kiln to 1,200 degrees to basically burn it off. Then clean the part and prepare it for powder coating. That worked. Six years later, the reservoir still looks the picture.

Last edited by CS_AR; Dec 5, 2016 at 09:43 PM.
welp, the only thing i noticed after trying to polish the vq with the arm and hammer is that maxy smelled minty fresh after i started the engine. other than that there really wasn't any huge difference. i got some super fine steel wool and went to town for a few minutes more and lost patience. i'm not taking the vq apart to clean up the engine, i was hoping to just get a quick polish. am i lazy? maybe a little, but i thought about just using engine cleaner but i don't want something else to spring a leak or short out. put enough into maxy lately that i could've bought another vq.

Junior Member
Joined: Apr 2016
Posts: 59
From: Modesto, California
I use my B&D 1/2" drill and a Ryobi buffing wheel w/ a cutting and polishing compound stick. It takes me hours to get that kind of finish!
Do you think he just really spins that crank faster than it appears in the video??
By the way... Your painting and finish looks absolutely fantastic!
I have a lot of work ahead of me before I feel comfortable enough to do the final paint job on the body. I was hoping to have it done by early 2017. Maybe Jan. or Feb. But after looking at this thread and several others... mostly yours... I am seeing that deadline getting further and further away!
Thread Starter
Senior Member
Joined: Jan 2011
Posts: 3,037
From: Central AR
By the way... Your painting and finish looks absolutely fantastic!
I have a lot of work ahead of me before I feel comfortable enough to do the final paint job on the body. I was hoping to have it done by early 2017. Maybe Jan. or Feb. But after looking at this thread and several others... mostly yours... I am seeing that deadline getting further and further away!
I have a lot of work ahead of me before I feel comfortable enough to do the final paint job on the body. I was hoping to have it done by early 2017. Maybe Jan. or Feb. But after looking at this thread and several others... mostly yours... I am seeing that deadline getting further and further away!
That VH45DE engine was my first real car project since I was a kid working at an imported car dealership after school and weekends. So my entry into DIY restoration started off with a Japanese beast engine project. I had to move very slowly. I was learning as I went along. I saw a lot of pictures of the finished product. At the time, only a few "how to" videos existed on the process.
That VH45DE engine finishing project came with a lot of failures and reworks on the sand cast aluminum intake plenum. Once I got it to near finished polished state, I couldn't get the final luster that I wanted. I had been working it with various grades of steel wool and wheel polishes with an electric buffer.
For the final cleanup I tried everything from kerosene, vinegar, Windex, glass plus, white polishing compound. You name it. So I happened on a package of "Cape Cod" polishing cloths at my local Ace Hardware. That worked well enough that I could live with it. Then came the problem of how to keep the finish from tarnishing again. Had I created a maintenance nightmare? I didn't know about baking soda toothpaste in those days. It would have saved me a lot of time on the finishing steps.
About the same time I tried a new product on some allow wheels that made them repel brake dust and dirt. That worked to provide a protective coating that would hold up without yellowing. This stuff works to protect bare aluminum. I use it to protect the aluminum after the final cleaning.
To me toothpaste scrub works best on sand cast aluminum where you don't have a smooth finish and you are cleaning the bumps without smoothing them out. Its good for cleaning off the residue left behind by a carb cleaner dip.
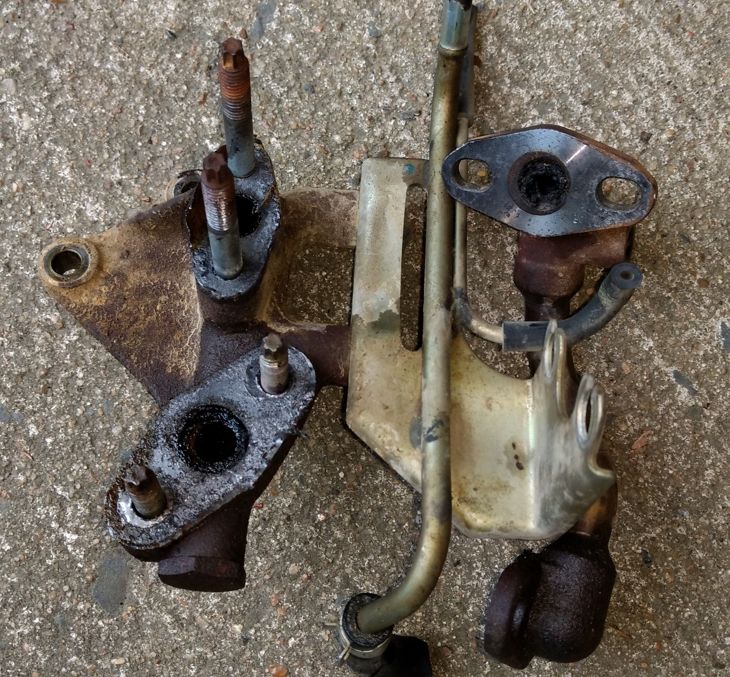
I have a set of EGR parts in the works. The tube cleaned up fine on the first acid soak. The mounting base I had to put back in the carb cleaner to dissolve the rest of the carbon inside the port. This one was the worst that I've seen to date. That mounting base one will take a couple of rounds before I can get it clean enough for VHT.

Meanwhile I found this video about a sandblasting attachment for a pressure washer. I have a 3,500 lb Honda M-t-M pressure washer that could drive it.
I can think of a dozen uses for this power washer attachment. Hmmmm.
Last edited by CS_AR; Dec 8, 2016 at 05:24 AM.
Thread Starter
Senior Member
Joined: Jan 2011
Posts: 3,037
From: Central AR
Tonight I snapped a picture of the VHT painted EGR parts. The parts have been on the car since early November.
You can see the new EGR has already started rusting. However, the parts painted with VHT header paint are holding up much better.
Hopefully, five years from now when I clean the EGR tube and mounting assembly again, it will be a much easier process.
You can see the new EGR has already started rusting. However, the parts painted with VHT header paint are holding up much better.
Hopefully, five years from now when I clean the EGR tube and mounting assembly again, it will be a much easier process.

Last edited by CS_AR; Dec 28, 2016 at 08:41 PM.

Thread Starter
Senior Member
Joined: Jan 2011
Posts: 3,037
From: Central AR
I'll give Easy-Off it a try. Getting rid of the carbon buildup takes the most time for me. Especially around the UIM port.
On the last one I did, the carbon buildup had completely closed the UIM port.
It was hard as a rock from many years of neglect. I had to take a small coal chisel to punch out a hole to work some carb cleaner inside to start melting it.
I have a Valve Cover with a few remaining spots of carbon buildup inside that I have been soaking in carb cleaner for weeks. It seems like the longer the carbon buildup is baked on, the harder it is to remove.
I have another set of EGR pipes that I've been prepping for the next time I need some clean EGR pipes. I will try on that set.
Thanks again for the idea.
Junior Member
Joined: Apr 2016
Posts: 59
From: Modesto, California
And.... my hopes and dreams to paint my car next month once again runs into a brick wall.
Our 2006 Dodge Durango Limited Edition 5.7L Hemi is now knocking.
My wife, I love her, but, gods she is hard on cars!, had decided to bypass and ignore my instructions that the oil needs changing.
I usually do this myself, but, between moving into a new house, working, working on my car and the hated Christmas bull****, I told her to take it to a lube & tune shop.
She did not.
Anyone who knows about these trucks will tell you that, compounded with the fact that it is designed to run on 5W20 oil, it is a VERY sensitive engine and it is unwise to take any chances with it!
Now I am going to have to pay the price for this mistake.
The push rods and/or lifters are rattling pretty hard at 1500 RPM on the passenger side.
Of course, taking it to a Dodge dealership will yield the expected results. New engine is required, $3500 - $4000 minimum plus time and labor.
So I am going to have to buy new rods and lifters, hopefully not be forced to yank the entire engine and be able to do this from the top.
Either way... It is at least $400-$500 in replacement parts plus all the crap I will have to buy on top of this... Gaskets, seals, etc....
But on the good note!
I can continue to tweak my Maximiss (not Maximus) until she is one of a kind!
I am going to start a new thread and show some of the things I have done to date.
I would really love to hear some input from everyone here.
In particular, you, CS_AR.
I am real big on LED's lighting the inside of my Max, red actually, so that is what I have been doing for the last week or so...
I am watching the evolution of your car, CS and it is quite inspiring.
Keep it coming!
Thread Starter
Senior Member
Joined: Jan 2011
Posts: 3,037
From: Central AR
Over the holidays, I found a Harbor Freight had this blasting cabinet on sale and used a 20% off coupon to bring the price down to $135.
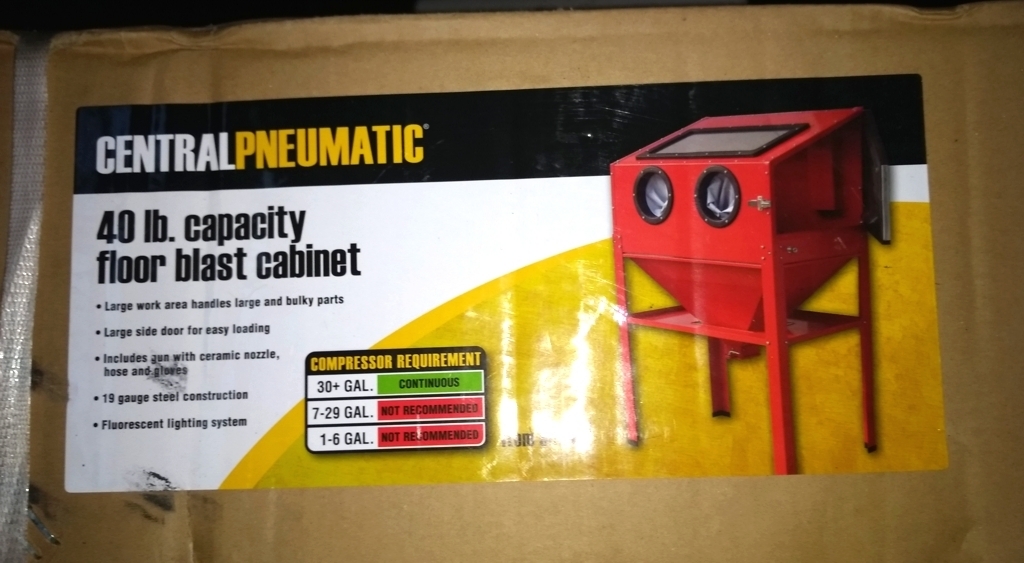
Then my son managed to get the following 20 lb media blaster from a Pawn Shop's listing on Craig's List. So for roughly $200 I've managed to get into a tank and blasting cabinet. I have several projects lined up for this year where media blasting will speed up the finishing process. I've done some sand blasting using a small HF gun a couple of times in the past. I would like to get into soda blasting because it is water soluble. It is a lot less mess and work to remove any remaining media when you can just wash it off with water.
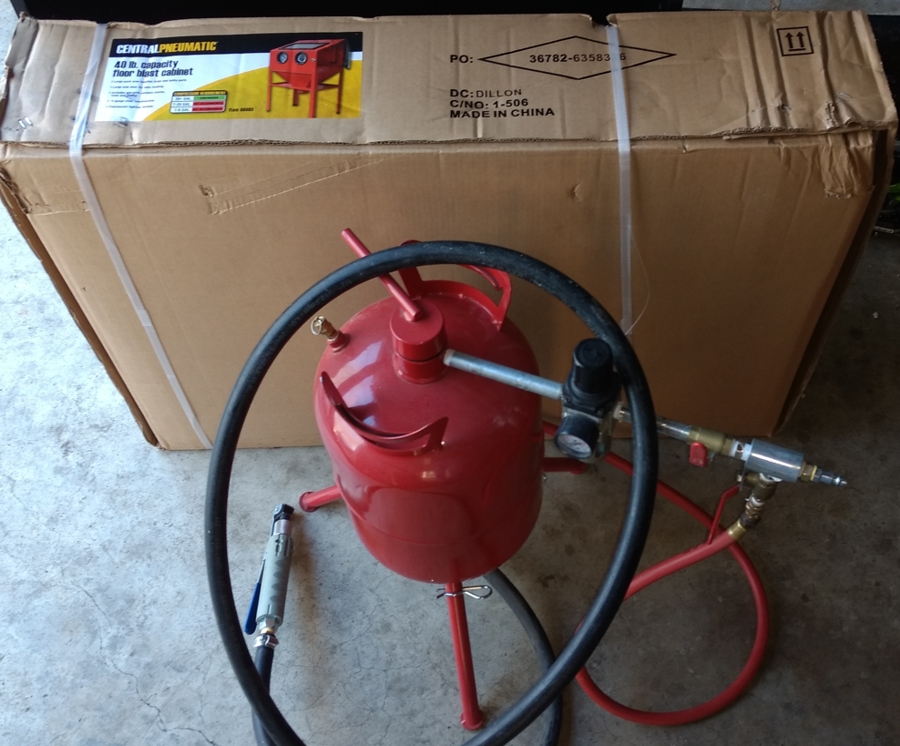
I will be powering the blaster with the HF 29 gallon 150 lb compressor. This air compressor and assorted tools made a huge difference on the latest 4th gen restoration project.

Now I need the weather to warm a bit to put together the blasting cabinet and start using it.
Last edited by CS_AR; Jan 7, 2017 at 05:38 PM.
Junior Member
Joined: Apr 2016
Posts: 59
From: Modesto, California
Nice!
I have been eyeballing that blasting cabinet from Harbor Freight for a while now. I just purchased the Mig/Tig welder setup from them and a 6" palm sander. So I have to pace myself!! Lol!
Let us know how it all works out together.
We are in flood watch out here, so, I feel you on the weather warming up! I even managed to get some damage on the front, driver-side quarter panel... but it is too wet to do anything just yet...
.....and still fighting with the Dodge.....Meh!
Link to My Maxima Thread
Last edited by SneakyBastard; Jan 9, 2017 at 10:20 AM.
Thread Starter
Senior Member
Joined: Jan 2011
Posts: 3,037
From: Central AR
I'm in the process of putting together the blasting cabinet. So many screws, so little time, and so little room to work in the garage right now.
The cabinet kit comes with a suction feed type gun and tubing to recycle the media within the cabinet. So I may not need to use the other media tank with the cabinet. When all said and done, I may use the media tank for outside projects on big parts that will not fit in the blasting cabinet.
The cabinet kit comes with a suction feed type gun and tubing to recycle the media within the cabinet. So I may not need to use the other media tank with the cabinet. When all said and done, I may use the media tank for outside projects on big parts that will not fit in the blasting cabinet.

Thread Starter
Senior Member
Joined: Jan 2011
Posts: 3,037
From: Central AR
I tried that on a Warpspeed y-pipe. Some parts of it worked and others didn't I think the heat variance between different parts of the pipe, allowed some part of it to heat too fast. If I have a large part to cure that won't fit in a oven, I think I will use the torch method like one of the videos above. I think I could get better results by evenly applying heat using a torch while measuring it with a Harbor Freight light sensor type thermometer compared to short engine warm ups. I guess it depends on the size of the part and the amount of patience someone has to do short engine warm ups and cool downs.