
2nd Gen headlight restoration!


Thread Starter
Senior Member
Joined: Jul 2011
Posts: 1,095
From: Salt Lake City, UT
2nd Gen headlight restoration!
So I thought I'd post this little how to on how to restore headlights on the 2nd Gen Max. My Dad owns a 1985 Maxima and the headlights have seen better days. Prior to the restoration even with the brights on you could barely see the road in front of you. This was because the reflective housing was eroded and chard to a black color absorbing the light rather then reflecting it.
The Restoration involved removing the headlight assembly, heating the assembly to separate the glass lens from the plastic bulb housing. Then prepping and painting the housing with a reflective metallic chrome spray; which would restore the housing's ability to reflect light effectively onto the road.
Getting both light assemblies removed from the car was not as easy as a task as it is on my 4th gen. First you need to remove the side markers. It's 4 screws on each lens with a standard Philips head screw driver. After they are loose, twist the bulb fitments and remove them.
Step two is removing the grill assembly from the front of the car. This is being held on by 9 clips. Two on each end of the headlights, 2 on each inner part of the headlights and 1 in the middle (in front of the hood latch). After removed you will see 1 bolt below each glass lens on each headlight. Use a 10mm socket to remove. There is also 1 10mm bolt on the top of the radiator support (for each headlight) and 2 10mm bolts behind the removed corners (4 10mm bolts total for each headlight assembly).
After all the bolts have been removed, the light assemblies will simply slide out (don't forget to disconnect the headlight bulb and park light bulb from back of assembly). On each assembly you will notice 6 small black metal clips holding the glass to the plastic. Carefully use a butter knife to pry these off (may take some force). After all 12 clips are off both headlights preheat your oven to 200F.
When your oven has preheat itself to 200F place both headlight assemblies on center rack. Let them sit for about 10 minutes. Remove them from the oven (be sure to use towels or hot pad, they will be hot). Then carefully use a butter knife to pry the glass away from the plastic housing.
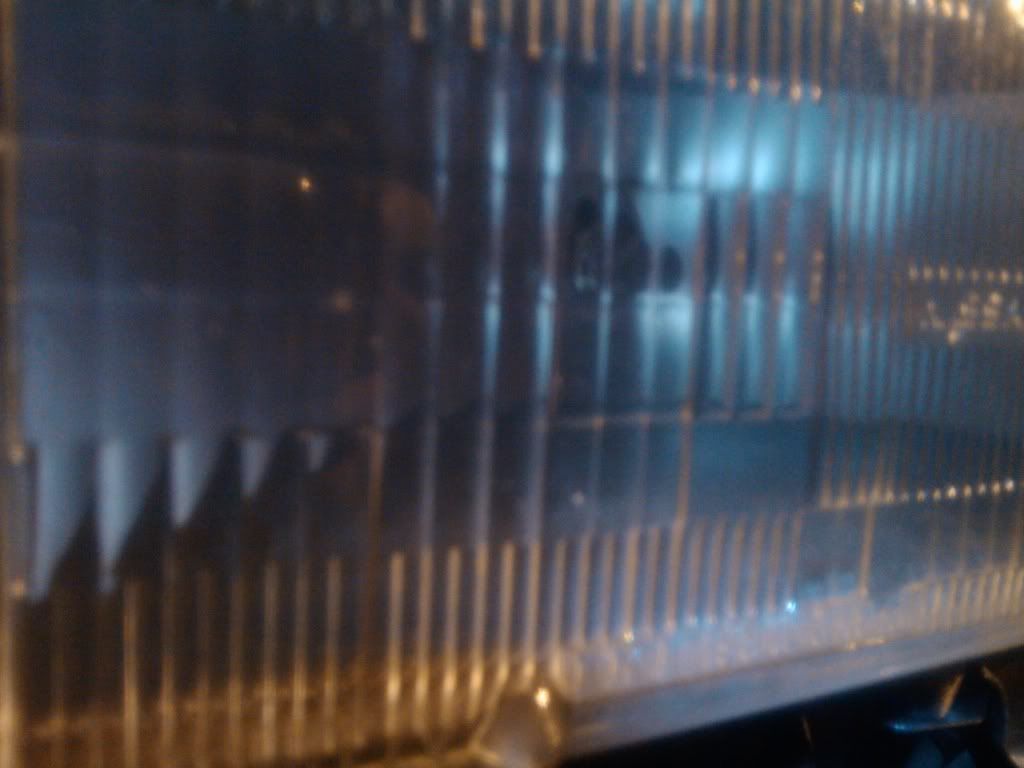
Once the glass has been removed you may notice how disgusting the headlight housing may be do to the many years of use and other elements.
Now it's time for prepping and painting. Wash the housing out using a garden hose and wipe dry. After dry you may need to sand it down. I used 250 grit sand paper and lightly sanded all the dull areas and left over reflective areas.
Then take a can of primer and spray the inside of the housing with 2-3 coats. After it's dry take your chrome metallic paint and spray 3-4 even coats on the entire inside. Once it's dry preheat your oven to 200F.
Clean the glass lenses using a glass cleaner. If they are bad and need to be restored, do so using a headlight restoration kit. After cleaning the glass lenses place them back onto the newly painted housing and reattach the 6 black clips to the lens and housing.
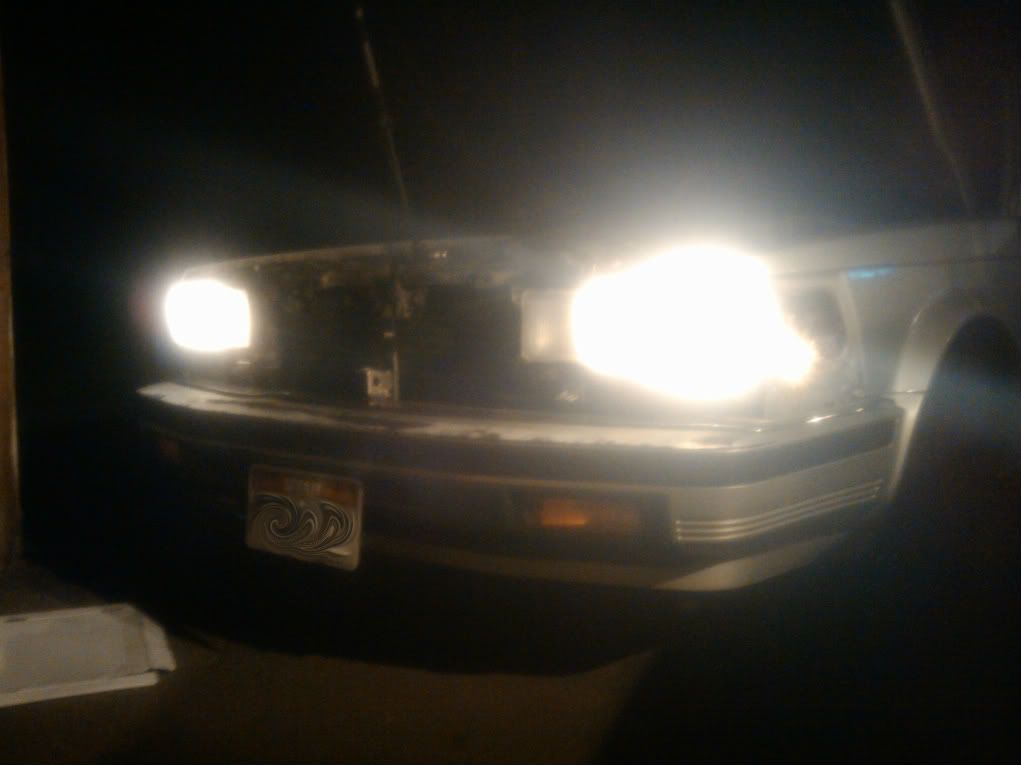
Place both housings in the oven for 10min then pull them out to cool. After they've cooled off put them back on the car, re-install the grill and corner lights, plug in the bulbs and LET THERE BE BRIGHT LIGHT!
I wish I would have got some pictures of the lights previous to the restoration but it was 12pm when I started this project. I do however have pictures of the final product and my dad was very happy with how well he was able to see the road on his return home.
The Restoration involved removing the headlight assembly, heating the assembly to separate the glass lens from the plastic bulb housing. Then prepping and painting the housing with a reflective metallic chrome spray; which would restore the housing's ability to reflect light effectively onto the road.
Getting both light assemblies removed from the car was not as easy as a task as it is on my 4th gen. First you need to remove the side markers. It's 4 screws on each lens with a standard Philips head screw driver. After they are loose, twist the bulb fitments and remove them.
Step two is removing the grill assembly from the front of the car. This is being held on by 9 clips. Two on each end of the headlights, 2 on each inner part of the headlights and 1 in the middle (in front of the hood latch). After removed you will see 1 bolt below each glass lens on each headlight. Use a 10mm socket to remove. There is also 1 10mm bolt on the top of the radiator support (for each headlight) and 2 10mm bolts behind the removed corners (4 10mm bolts total for each headlight assembly).
After all the bolts have been removed, the light assemblies will simply slide out (don't forget to disconnect the headlight bulb and park light bulb from back of assembly). On each assembly you will notice 6 small black metal clips holding the glass to the plastic. Carefully use a butter knife to pry these off (may take some force). After all 12 clips are off both headlights preheat your oven to 200F.
When your oven has preheat itself to 200F place both headlight assemblies on center rack. Let them sit for about 10 minutes. Remove them from the oven (be sure to use towels or hot pad, they will be hot). Then carefully use a butter knife to pry the glass away from the plastic housing.
Once the glass has been removed you may notice how disgusting the headlight housing may be do to the many years of use and other elements.
Now it's time for prepping and painting. Wash the housing out using a garden hose and wipe dry. After dry you may need to sand it down. I used 250 grit sand paper and lightly sanded all the dull areas and left over reflective areas.
Then take a can of primer and spray the inside of the housing with 2-3 coats. After it's dry take your chrome metallic paint and spray 3-4 even coats on the entire inside. Once it's dry preheat your oven to 200F.
Clean the glass lenses using a glass cleaner. If they are bad and need to be restored, do so using a headlight restoration kit. After cleaning the glass lenses place them back onto the newly painted housing and reattach the 6 black clips to the lens and housing.
Place both housings in the oven for 10min then pull them out to cool. After they've cooled off put them back on the car, re-install the grill and corner lights, plug in the bulbs and LET THERE BE BRIGHT LIGHT!
I wish I would have got some pictures of the lights previous to the restoration but it was 12pm when I started this project. I do however have pictures of the final product and my dad was very happy with how well he was able to see the road on his return home.
Last edited by infinimax96; Aug 12, 2011 at 01:59 AM.

Member
Joined: Jul 2011
Posts: 158
From: Brooklyn, NY
Nice write up! I have a spare set of Headlights I will be restoring. Although I was gonna go with the black housing/yellow highbeam look as the JDM Bluebird. Any after pics of the housings in the day time with the lights off?

Newbie - Just Registered
Joined: Apr 2013
Posts: 2
So I thought I'd post this little how to on how to restore headlights on the 2nd Gen Max. My Dad owns a 1985 Maxima and the headlights have seen better days. Prior to the restoration even with the brights on you could barely see the road in front of you. This was because the reflective housing was eroded and chard to a black color absorbing the light rather then reflecting it.
The Restoration involved removing the headlight assembly, heating the assembly to separate the glass lens from the plastic bulb housing. Then prepping and painting the housing with a reflective metallic chrome spray; which would restore the housing's ability to reflect light effectively onto the road.
Getting both light assemblies removed from the car was not as easy as a task as it is on my 4th gen. First you need to remove the side markers. It's 4 screws on each lens with a standard Philips head screw driver. After they are loose, twist the bulb fitments and remove them.
Step two is removing the grill assembly from the front of the car. This is being held on by 9 clips. Two on each end of the headlights, 2 on each inner part of the headlights and 1 in the middle (in front of the hood latch). After removed you will see 1 bolt below each glass lens on each headlight. Use a 10mm socket to remove. There is also 1 10mm bolt on the top of the radiator support (for each headlight) and 2 10mm bolts behind the removed corners (4 10mm bolts total for each headlight assembly).
After all the bolts have been removed, the light assemblies will simply slide out (don't forget to disconnect the headlight bulb and park light bulb from back of assembly). On each assembly you will notice 6 small black metal clips holding the glass to the plastic. Carefully use a butter knife to pry these off (may take some force). After all 12 clips are off both headlights preheat your oven to 200F.
When your oven has preheat itself to 200F place both headlight assemblies on center rack. Let them sit for about 10 minutes. Remove them from the oven (be sure to use towels or hot pad, they will be hot). Then carefully use a butter knife to pry the glass away from the plastic housing.
Once the glass has been removed you may notice how disgusting the headlight housing may be do to the many years of use and other elements.
Now it's time for prepping and painting. Wash the housing out using a garden hose and wipe dry. After dry you may need to sand it down. I used 250 grit sand paper and lightly sanded all the dull areas and left over reflective areas.
Then take a can of primer and spray the inside of the housing with 2-3 coats. After it's dry take your chrome metallic paint and spray 3-4 even coats on the entire inside. Once it's dry preheat your oven to 200F.
Clean the glass lenses using a glass cleaner. If they are bad and need to be restored, do so using a headlight restoration kit. After cleaning the glass lenses place them back onto the newly painted housing and reattach the 6 black clips to the lens and housing.
Place both housings in the oven for 10min then pull them out to cool. After they've cooled off put them back on the car, re-install the grill and corner lights, plug in the bulbs and LET THERE BE BRIGHT LIGHT!
I wish I would have got some pictures of the lights previous to the restoration but it was 12pm when I started this project. I do however have pictures of the final product and my dad was very happy with how well he was able to see the road on his return home.

Thread
Thread Starter
Forum
Replies
Last Post
MAXSE5SPD
General Maxima Discussion
33
Sep 17, 2022 04:00 AM
Dennis Twohy
1st & 2nd Generation Maxima (1981-1984 and 1985-1988)
0
Oct 1, 2015 06:01 PM
sdotcarter
6th Generation Maxima (2004-2008)
2
Sep 2, 2015 09:53 PM