
AW11Power build thread for my 88 SE


Thread Starter
Member
Joined: Mar 2015
Posts: 278
AW11Power build thread for my 88 SE
So, here we go. Beginning with initial repairs to get it running and then working towards sleeper mods. I hope you all enjoy.
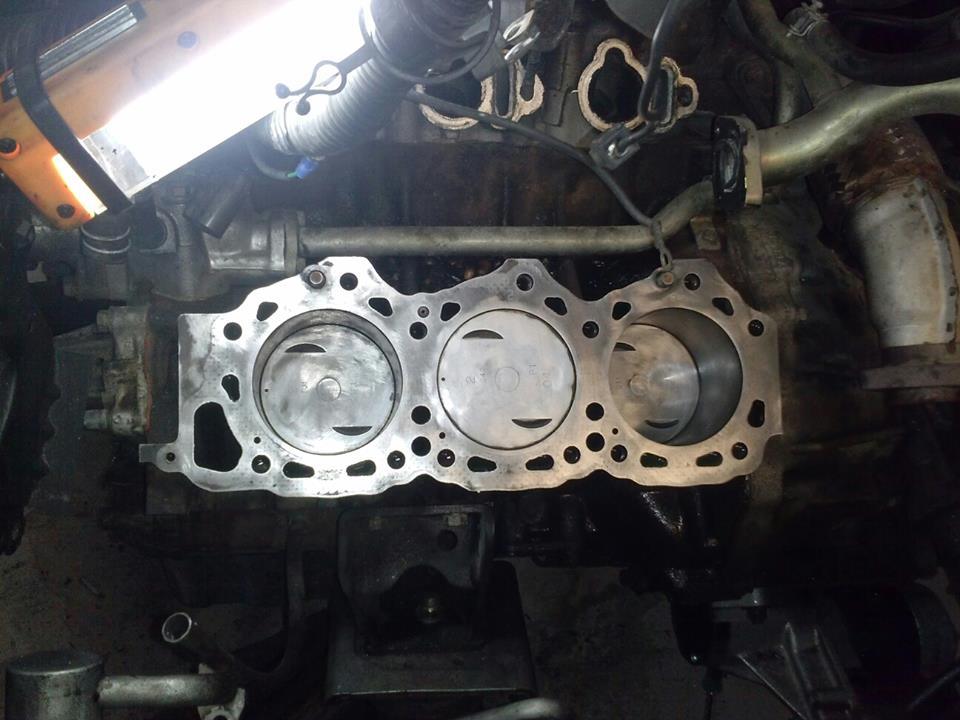
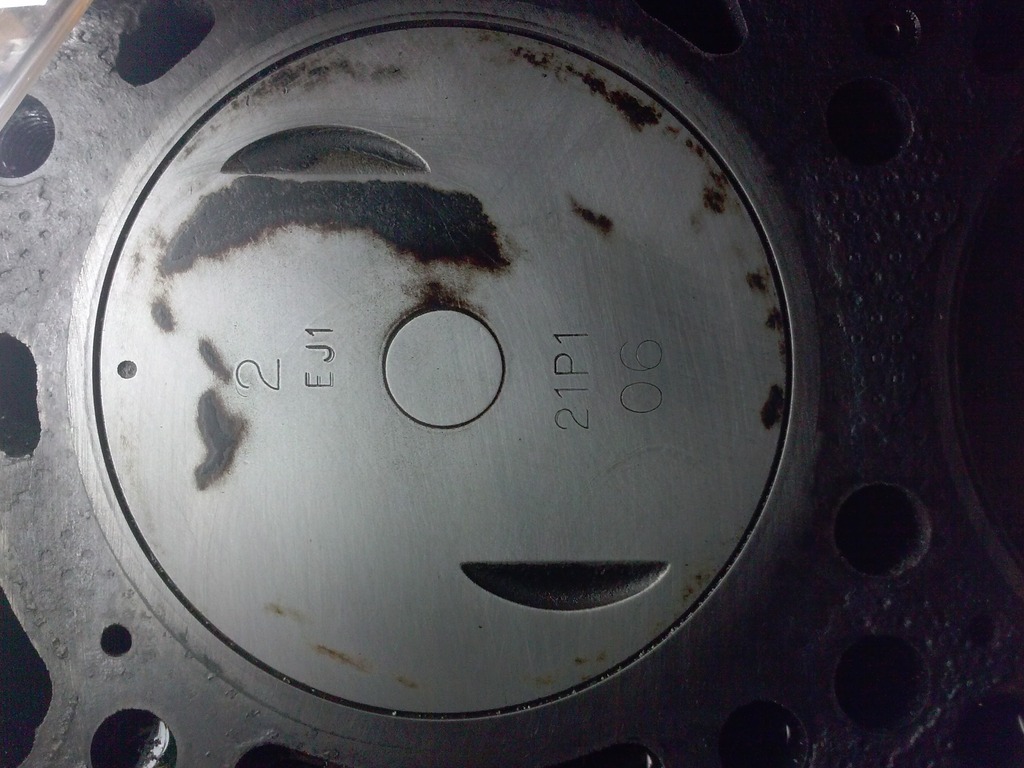
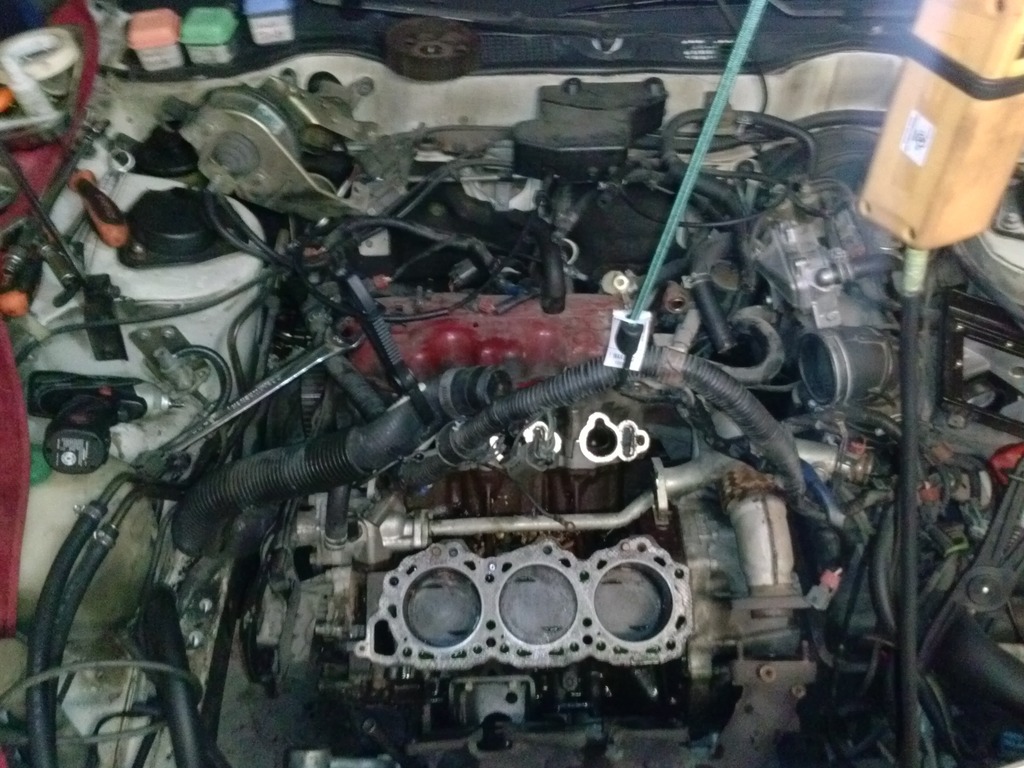
Unfortunately I didnt get a lot of pics of this part, but this is from when I pulled the front head off tho replace the bent valves.
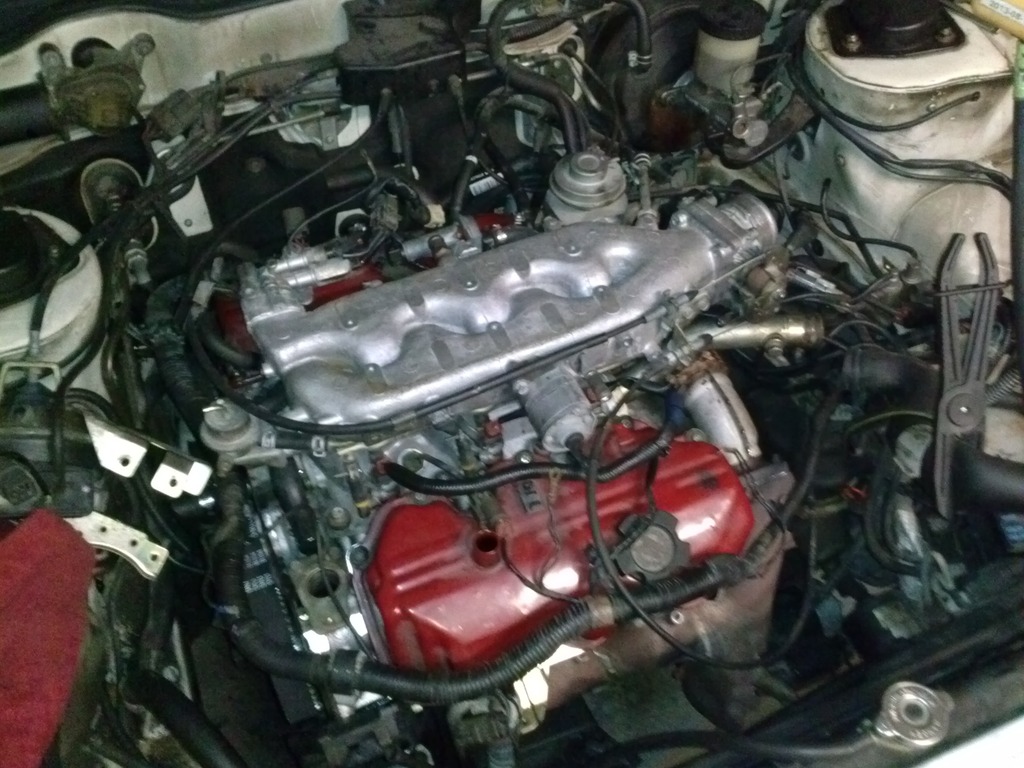

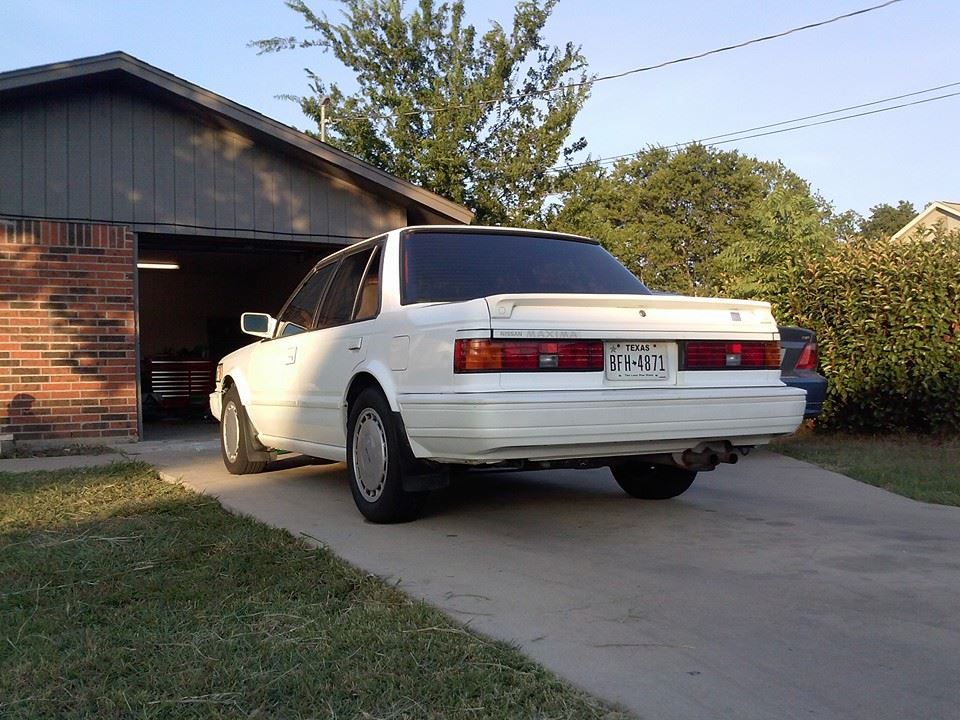
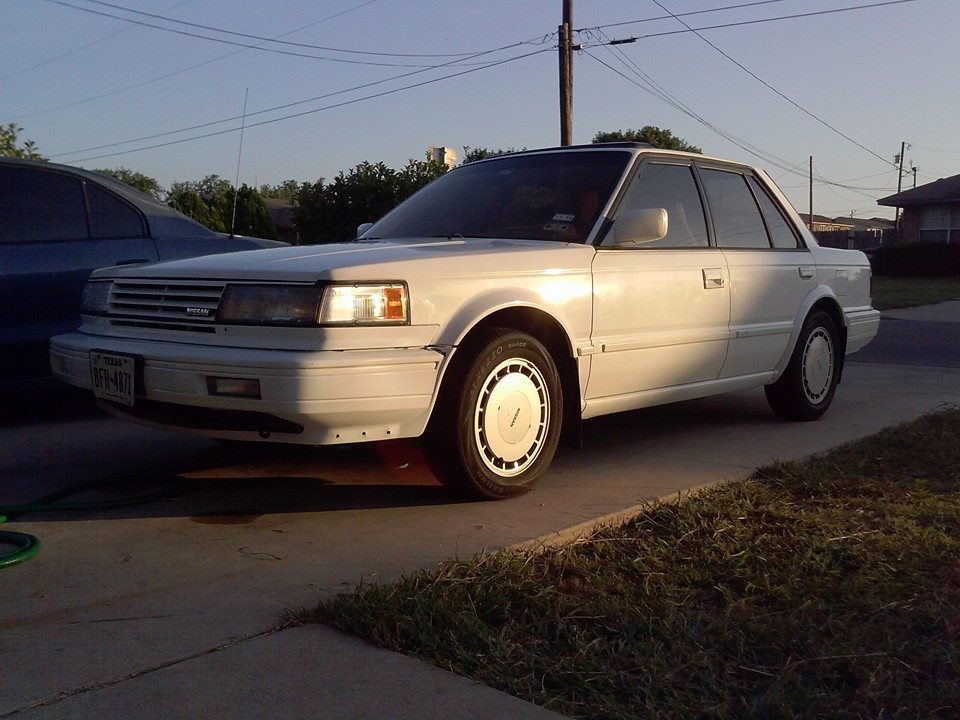
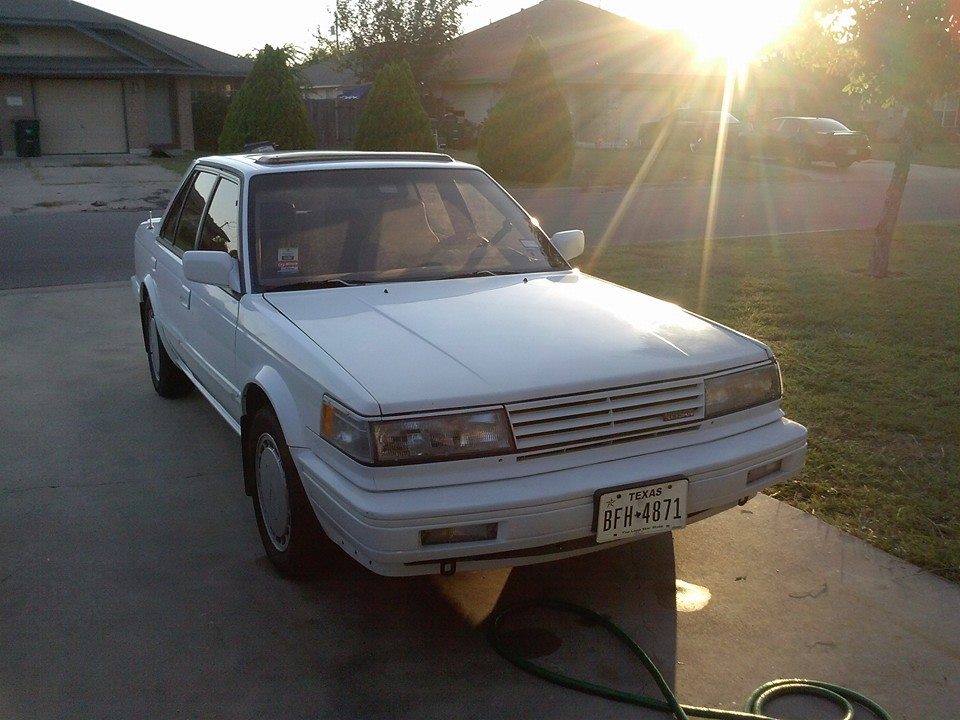
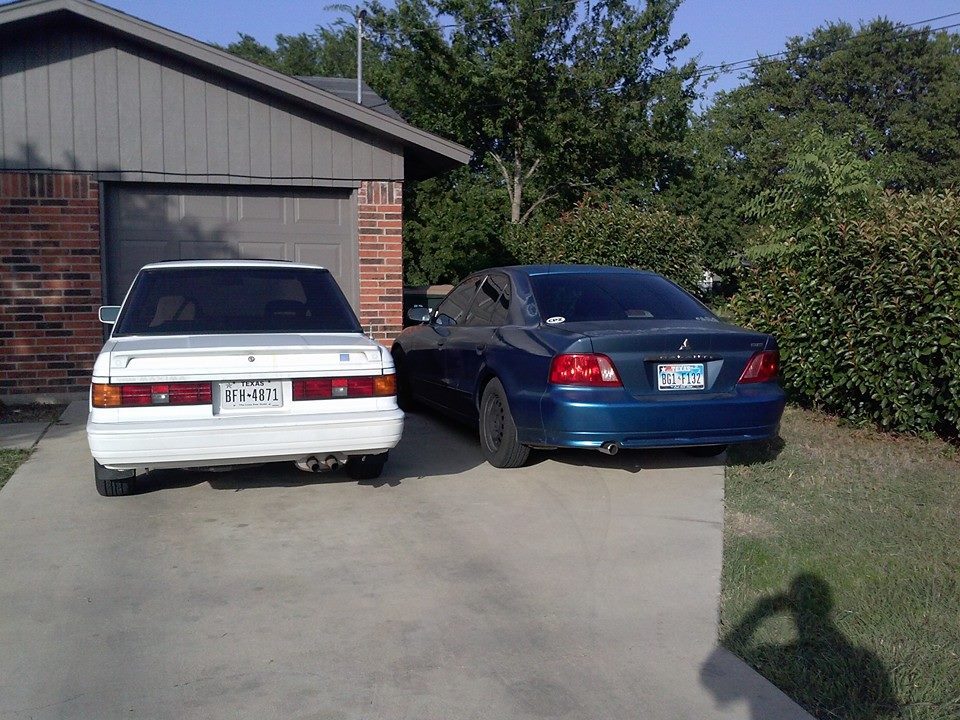
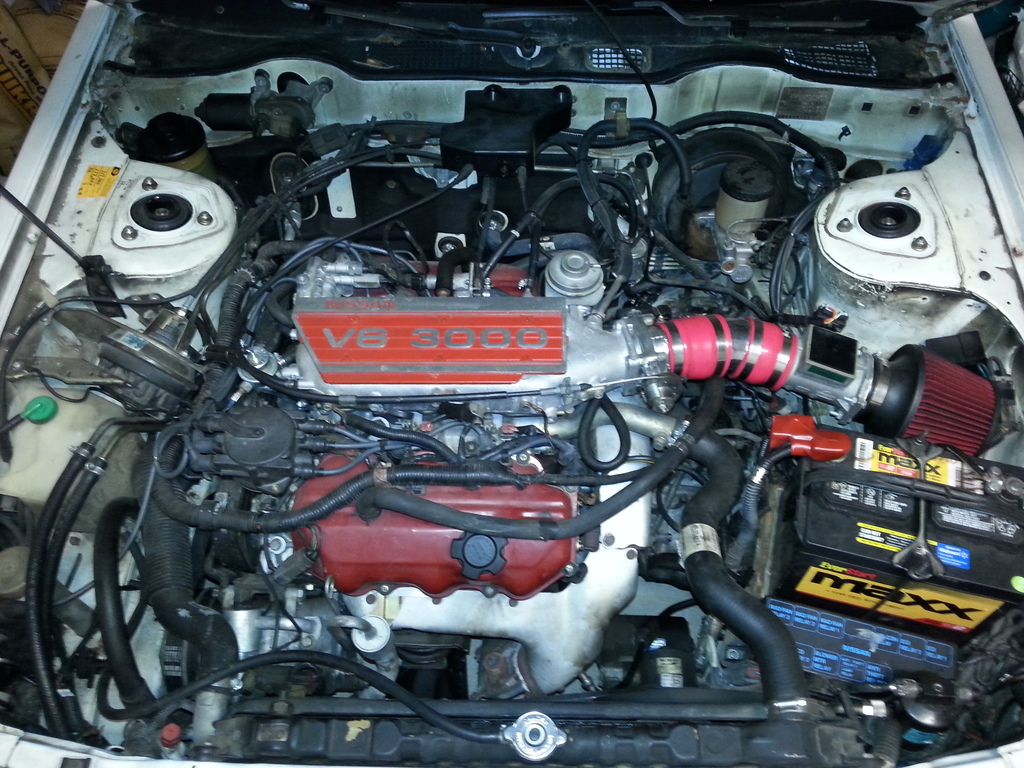
After I got it to run again I washed it real good and took some pics...
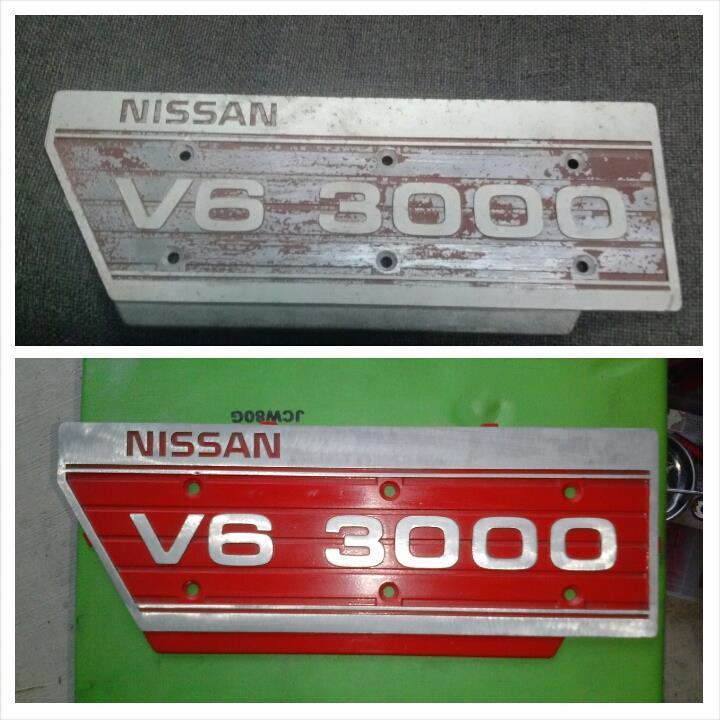
Next I "refubished" the plenum cover, because I cant stand the look of worn out stuff haha! I cleaned off all the old paint with wire brush. Then I painted it all with high heat red. Lastly I brushed all the high spots with an angle grinder and cookie disk and clear coated it. Here's a before and after. I really like how it came out.
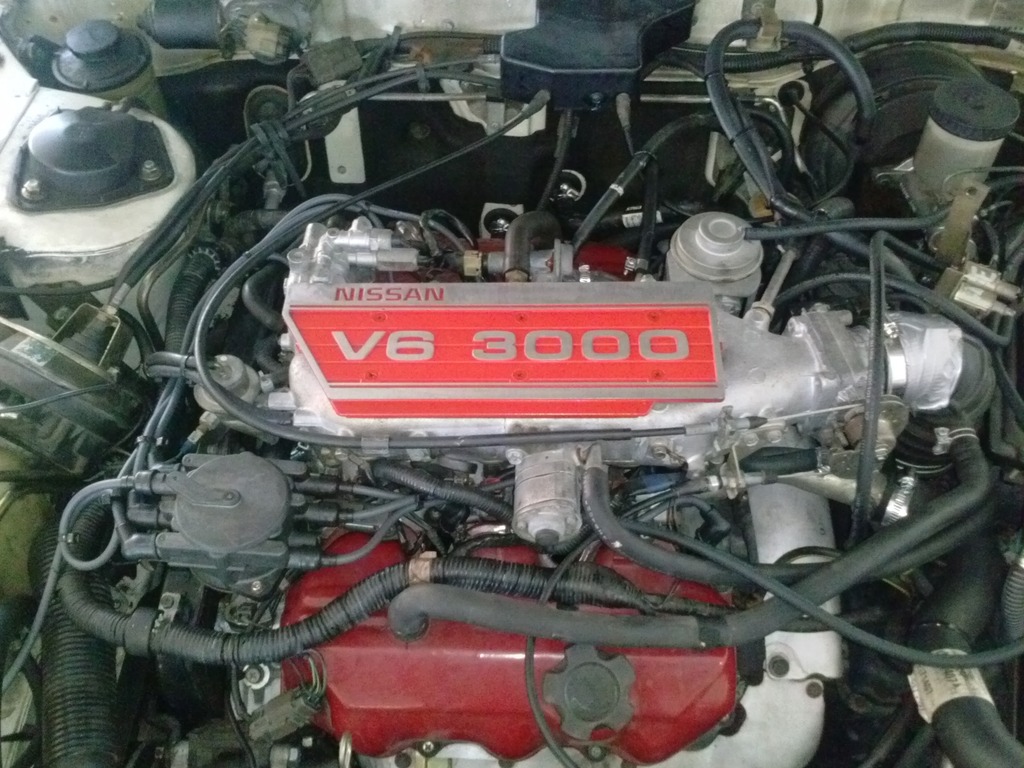
This is it installed, pics NEVER do justice
Unfortunately I didnt get a lot of pics of this part, but this is from when I pulled the front head off tho replace the bent valves.


After I got it to run again I washed it real good and took some pics...


Next I "refubished" the plenum cover, because I cant stand the look of worn out stuff haha! I cleaned off all the old paint with wire brush. Then I painted it all with high heat red. Lastly I brushed all the high spots with an angle grinder and cookie disk and clear coated it. Here's a before and after. I really like how it came out.

This is it installed, pics NEVER do justice

Last edited by aw11power; Apr 10, 2015 at 11:14 PM.
Thread Starter
Member
Joined: Mar 2015
Posts: 278
Further repairs after that were...
New front brake pads and rotors,
New front and rear struts w/alignment (monroe struts, god I'll never use those again)
New fuel pump and filter
New starter
New alternator
New valve cover, oil pan and head gaskets
New timing belt/tensioner/cam and crank seals with water pump and belts
New front control arm bushings, end links and sway bar bushings
New tires (cheap ones but better than the old dry rotten ones)
New power steering pump
New rear sway bar link bushings
Replaced all 4 brake hoses and master cylinder
New rear brake pads and rotors
Retro fitted AC system to R134a
I may be forgetting some things...
New front brake pads and rotors,
New front and rear struts w/alignment (monroe struts, god I'll never use those again)
New fuel pump and filter
New starter
New alternator
New valve cover, oil pan and head gaskets
New timing belt/tensioner/cam and crank seals with water pump and belts
New front control arm bushings, end links and sway bar bushings
New tires (cheap ones but better than the old dry rotten ones)
New power steering pump
New rear sway bar link bushings
Replaced all 4 brake hoses and master cylinder

New rear brake pads and rotors
Retro fitted AC system to R134a
I may be forgetting some things...
Last edited by aw11power; Apr 10, 2015 at 11:20 PM.
Thread Starter
Member
Joined: Mar 2015
Posts: 278
Oh yeah...
New LF and RF CV axles
Rebuilt rack and pinion with new mount bushings and outer tie rods
Replaced all PS return hoses
Replaced all Coolant hoses and vacuum lines
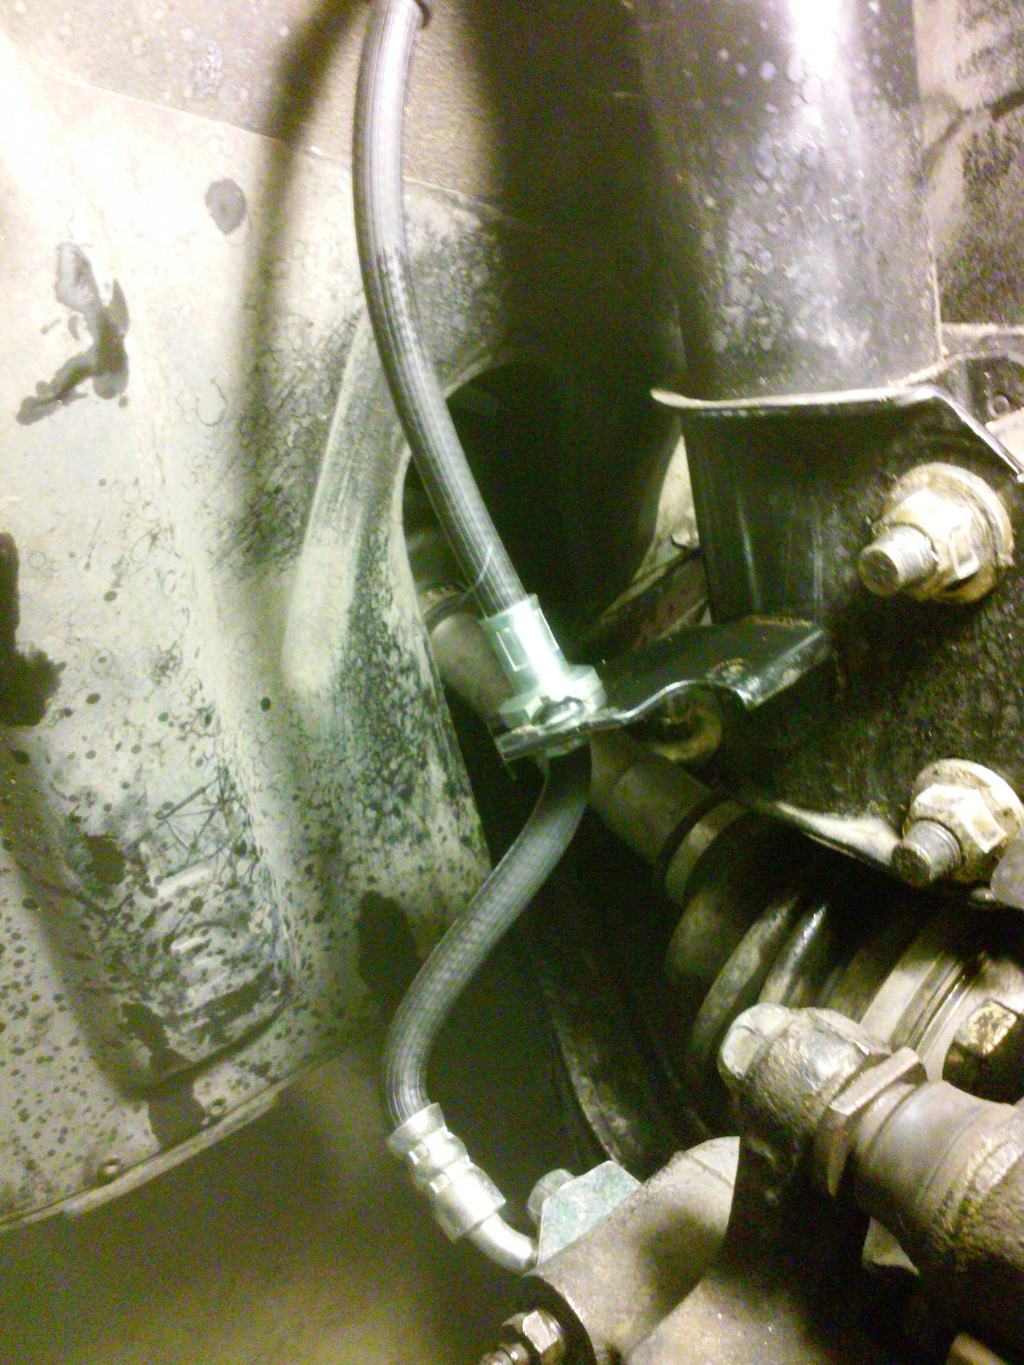
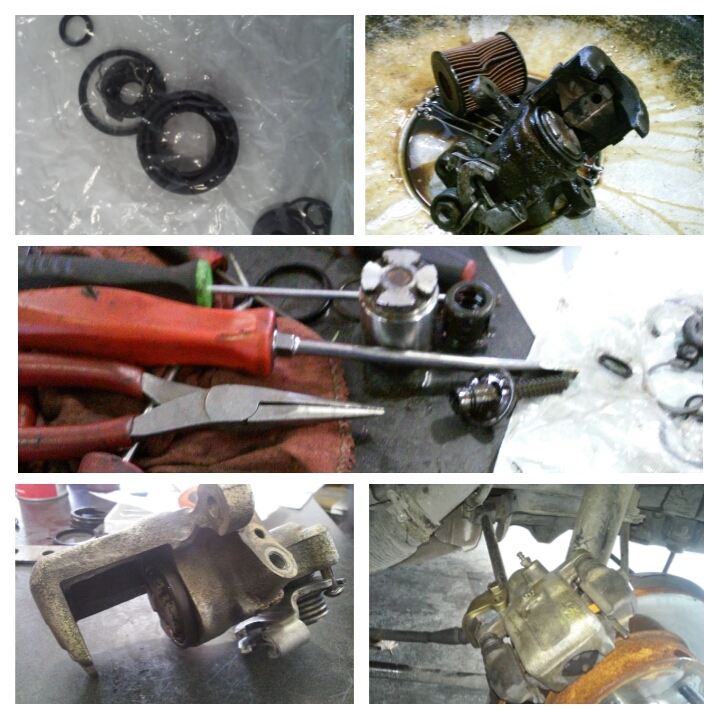
Also rebuilt the LR brake caliper that started to leak, major pain...
New LF and RF CV axles
Rebuilt rack and pinion with new mount bushings and outer tie rods
Replaced all PS return hoses
Replaced all Coolant hoses and vacuum lines
Also rebuilt the LR brake caliper that started to leak, major pain...

Last edited by aw11power; Apr 10, 2015 at 11:17 PM.
Thread Starter
Member
Joined: Mar 2015
Posts: 278
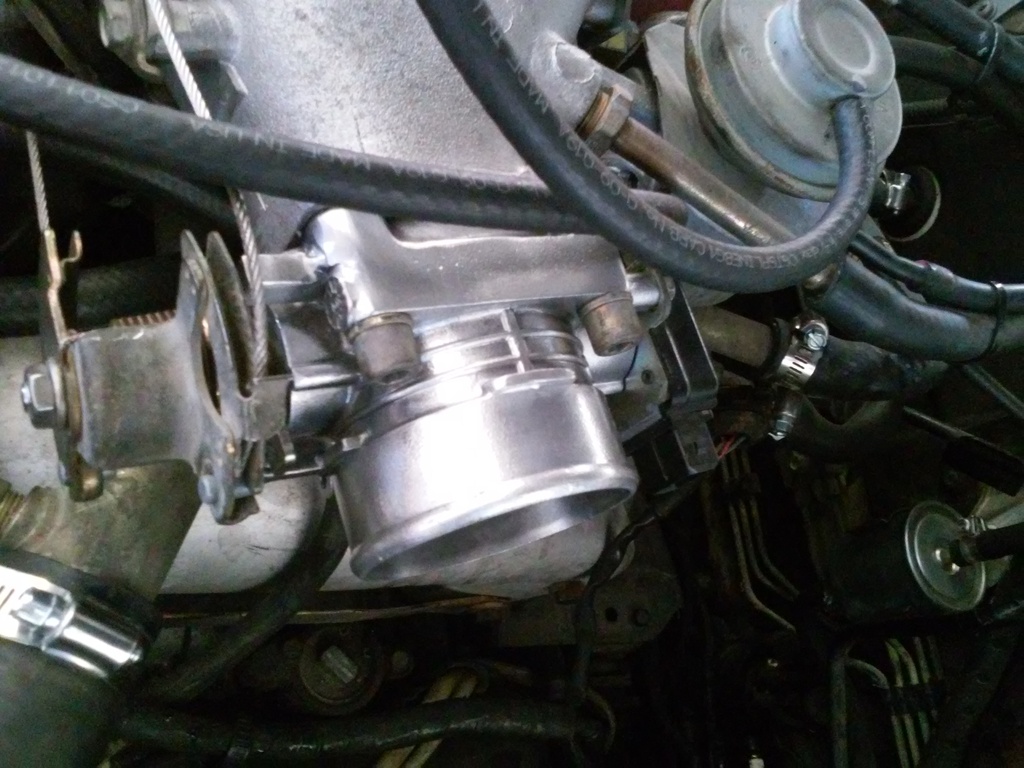
Next up was throttle body mod(very common with the 300zx guys)
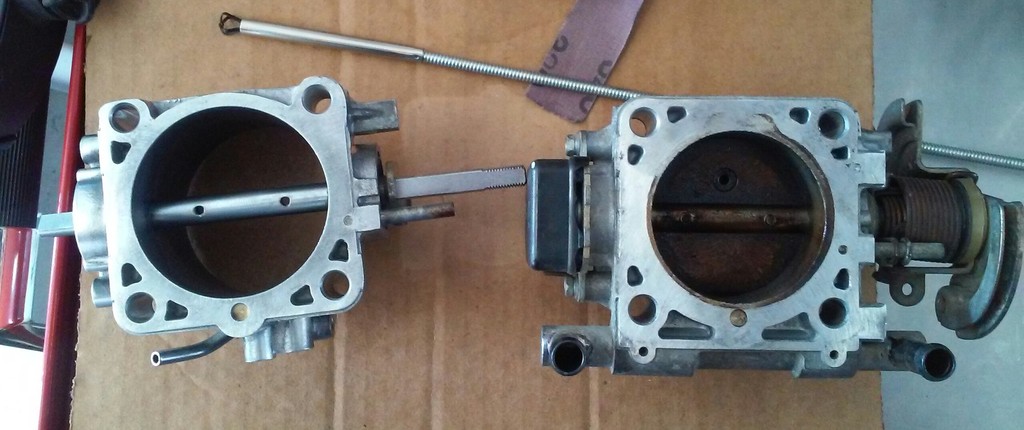
I ditched the 52mm stock throttle body in favor of a 60mm unit from a 240sx.
I have'nt yet ported the plenum, but I'll get to it. First thing was to disassemble my donor throttle and thoroughly clean it, then i cut out the internal coolant lines and ground them smooth. Used a high speed aluminum brush to make it shine and clear coated it. Cant say its faster 'per se' but it certainly has crisper response.
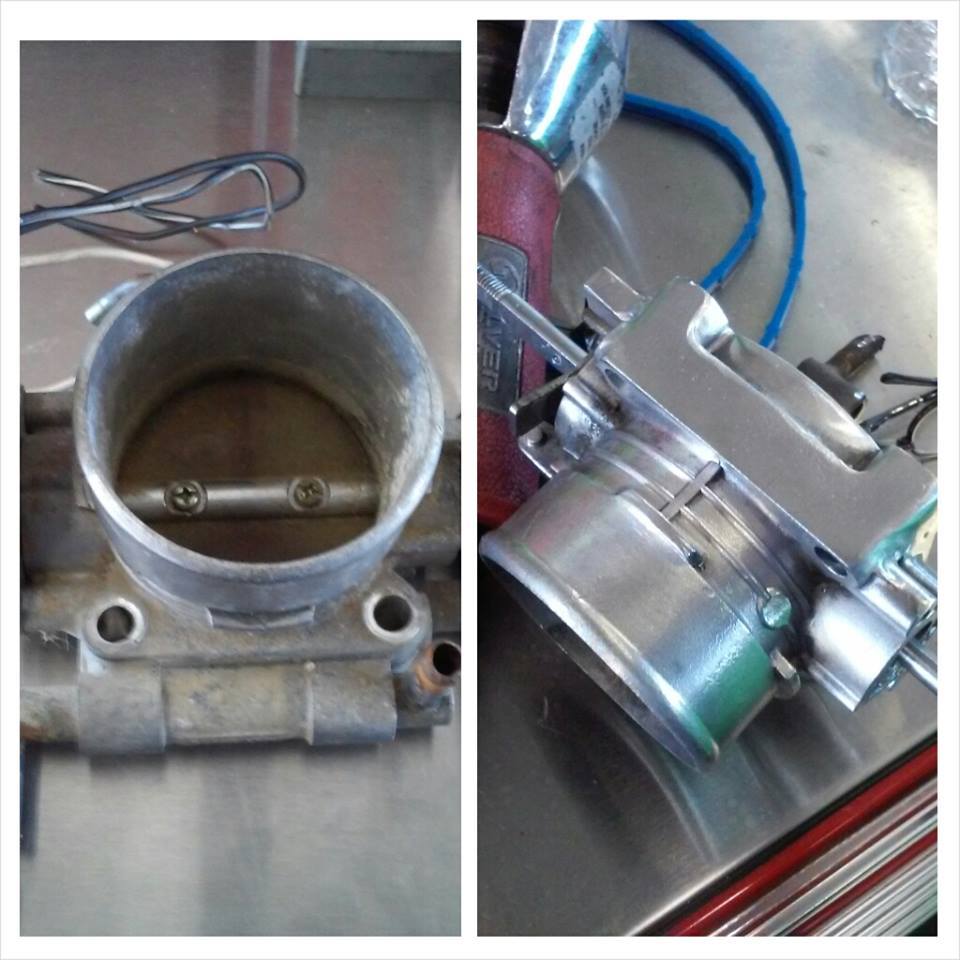
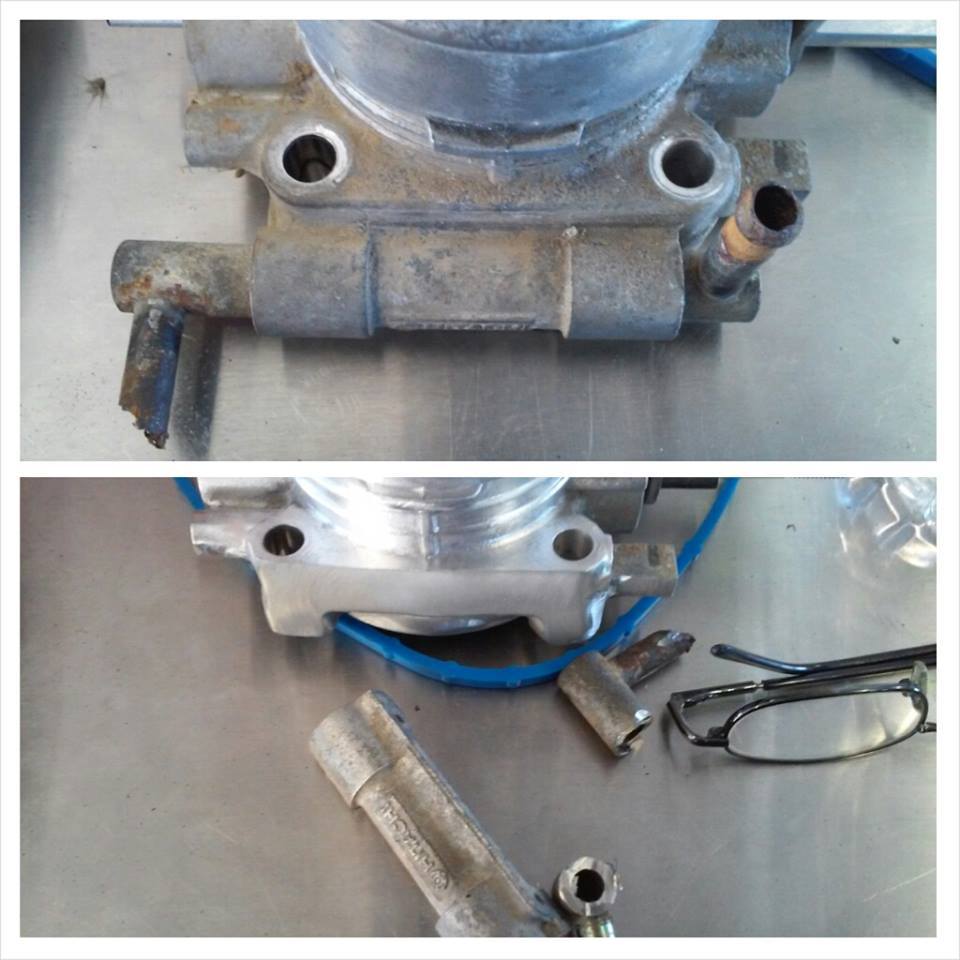
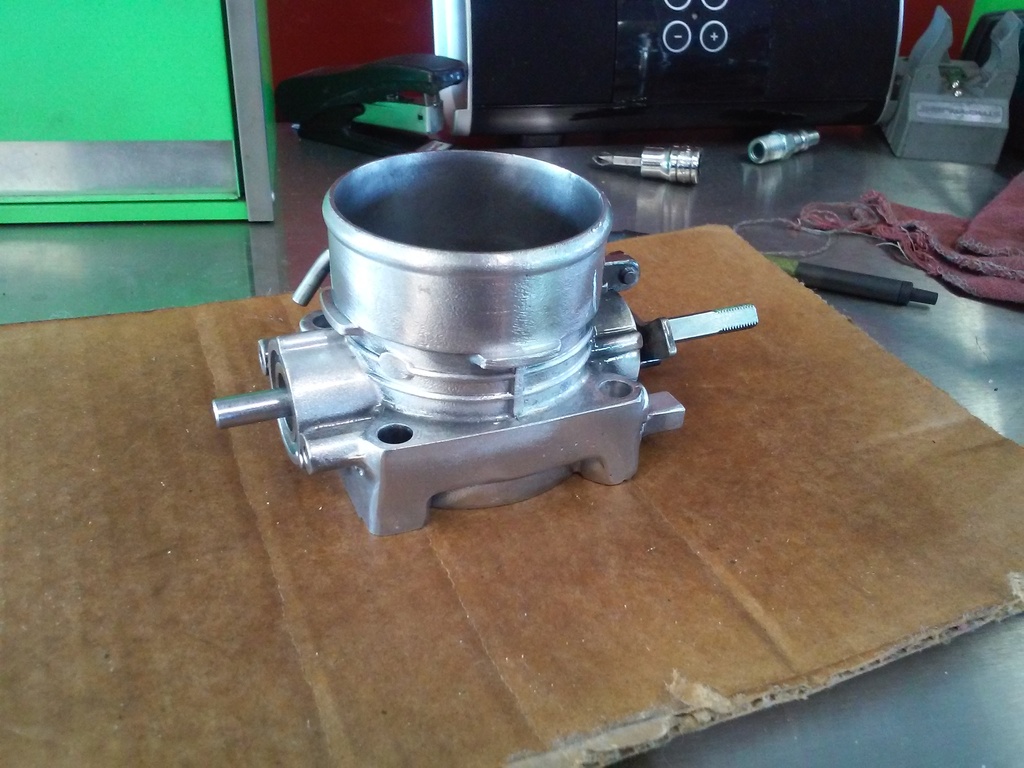
Im really proud of the fact that it looks like the coolant lines were never there.
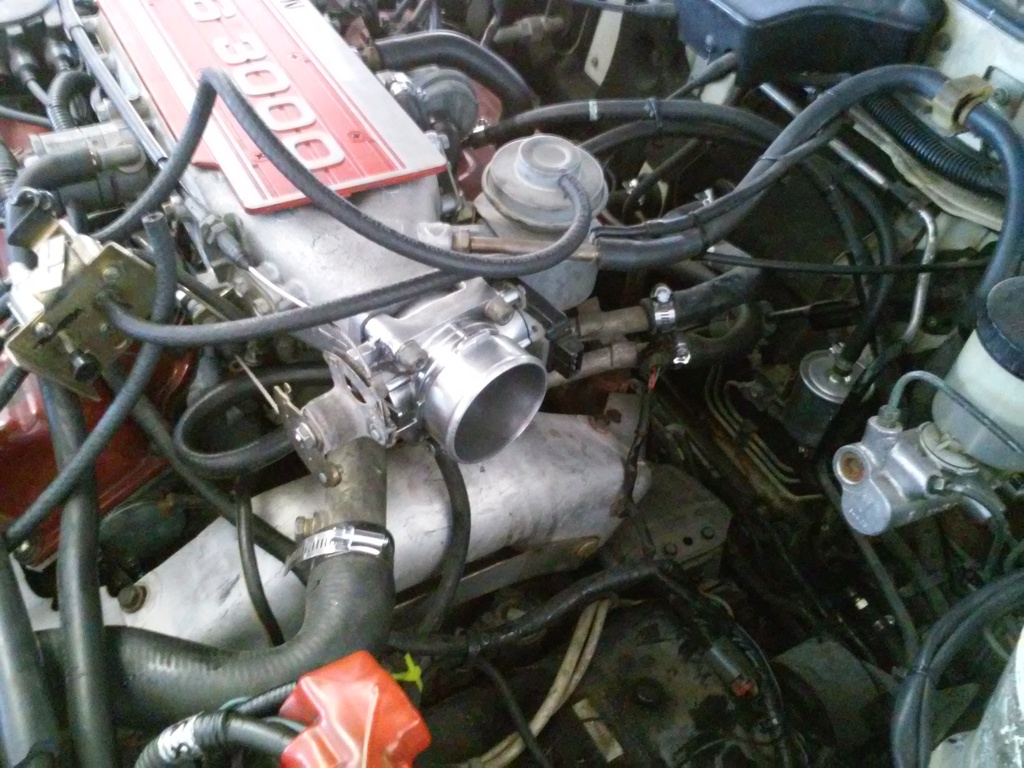
I bypassed the hoses in the car but left the connections intact as I'll need them for my turbo later.
Notice the size difference, 240sx on left and maxima on right
Purdy...
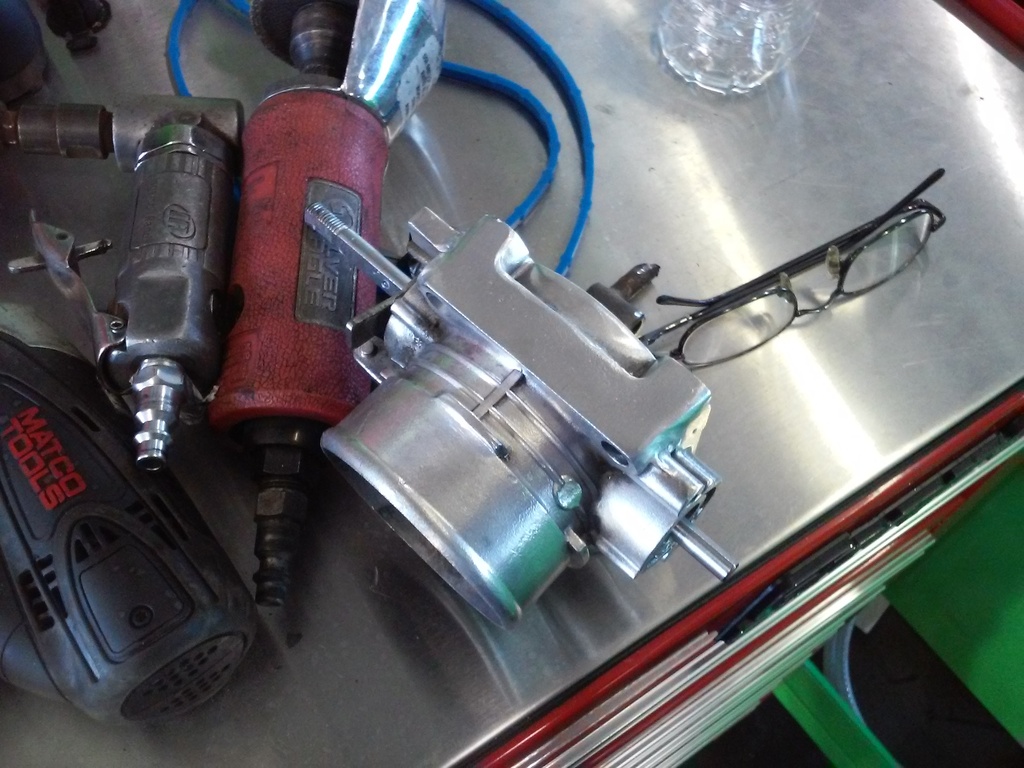
Once upon a time I used to re-furb motorcycle carbs this way...
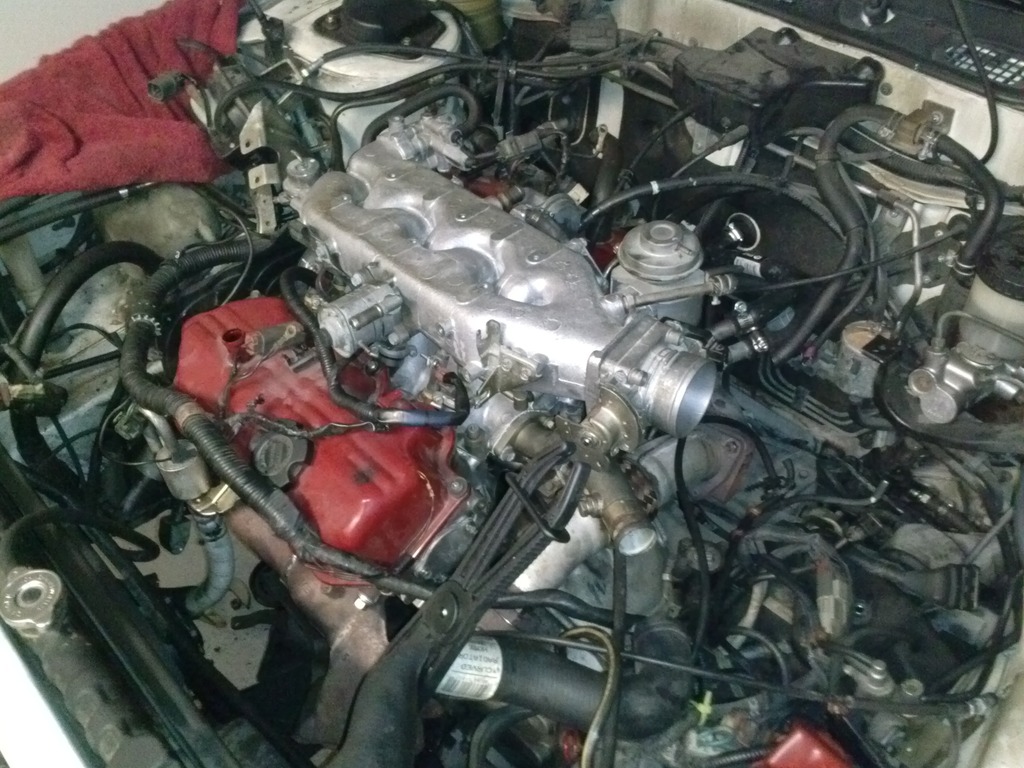
On car...
I ditched the 52mm stock throttle body in favor of a 60mm unit from a 240sx.
I have'nt yet ported the plenum, but I'll get to it. First thing was to disassemble my donor throttle and thoroughly clean it, then i cut out the internal coolant lines and ground them smooth. Used a high speed aluminum brush to make it shine and clear coated it. Cant say its faster 'per se' but it certainly has crisper response.


Im really proud of the fact that it looks like the coolant lines were never there.
I bypassed the hoses in the car but left the connections intact as I'll need them for my turbo later.
Notice the size difference, 240sx on left and maxima on right

Purdy...

Once upon a time I used to re-furb motorcycle carbs this way...

On car...


Last edited by aw11power; Apr 10, 2015 at 11:27 PM.


Member
Joined: Aug 2007
Posts: 180
From: Weeki Wachee, FL
SWEET!! So the 60mm TB is a direct swap, huh? Are you gonna open up the exhaust? BTW, I'm gonna do the intake plenum cover re-paint as well, it's what you see staring you in the face when you pop the hood!
Thread Starter
Member
Joined: Mar 2015
Posts: 278
Thanks guys. Ive got several more posts to make. These are all things I've worked on over the last few months. So Ill be posting much, much more shortly.
As for the throttle, its bolt on yes, but requires some minor changes. The TPS swaps straight over, the bolt holes all line up perfect, but the coolant lines are upside down. Some people reroute their hoses, I chose instead to delete them all together for a variety of different reasons. Also, You have to swap over the cable connectors, esp. if you have an automatic as the 240 doesnt have a hook up for the trans control cable. Also, I you want maximum benefit from this mod, you have to remove your upper plenum and port it to match the new inlet. Even without that, I noticed much better throttle response and slightly more pep. I will be opening up the exhaust a little later.
As for the throttle, its bolt on yes, but requires some minor changes. The TPS swaps straight over, the bolt holes all line up perfect, but the coolant lines are upside down. Some people reroute their hoses, I chose instead to delete them all together for a variety of different reasons. Also, You have to swap over the cable connectors, esp. if you have an automatic as the 240 doesnt have a hook up for the trans control cable. Also, I you want maximum benefit from this mod, you have to remove your upper plenum and port it to match the new inlet. Even without that, I noticed much better throttle response and slightly more pep. I will be opening up the exhaust a little later.
Thread Starter
Member
Joined: Mar 2015
Posts: 278
Next order of business was the audio system. Started by pulling the blown 35watt clarions from the front doors ans replacing them with Pioneer 200watt 2 ways.
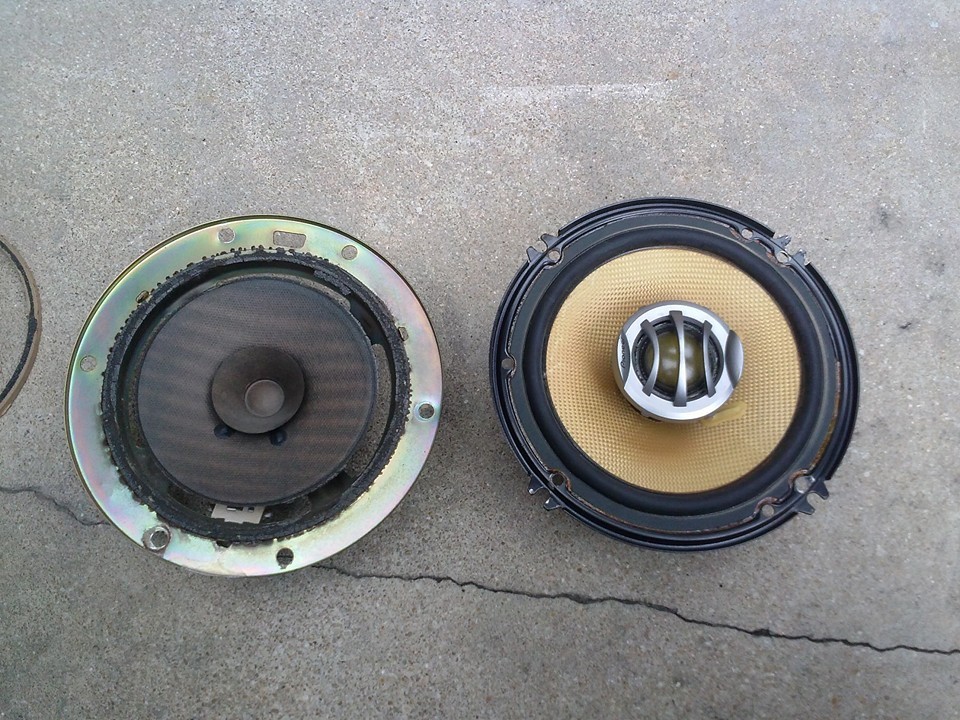
Then I bought these for the rear...

and pulled apart what was left of the rear speaker housings
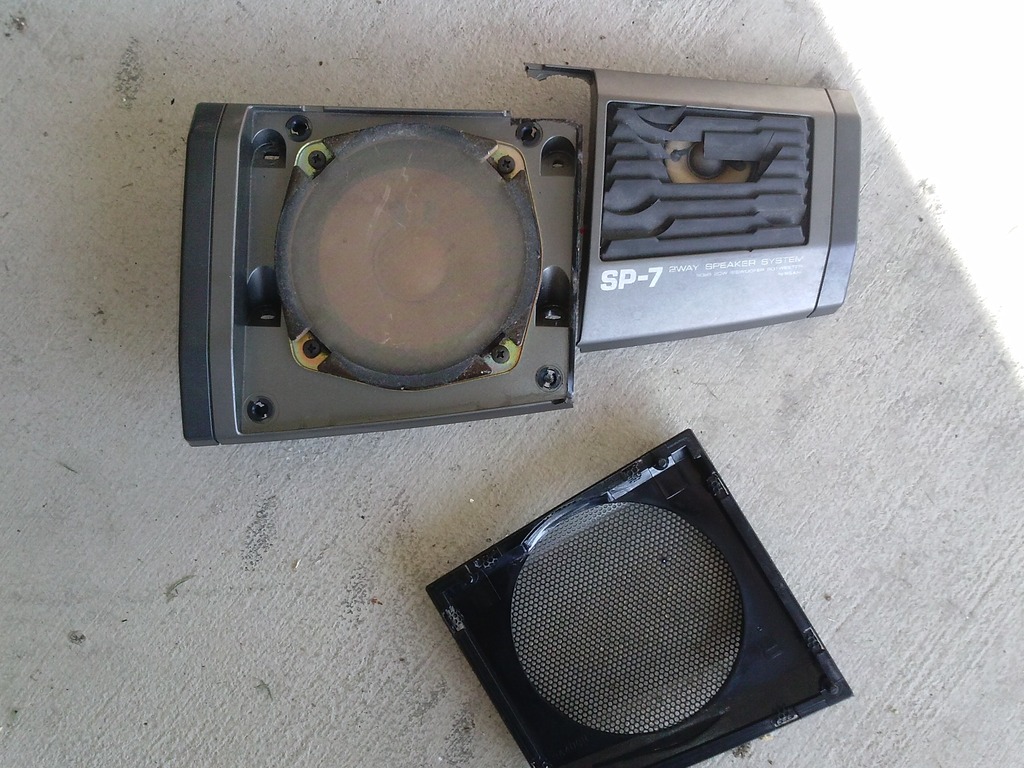
I had to trim away alot of material to get these 5.25s to fit. I think the originals were 4 inch lol. Also made a new tweeter cover with some mesh material and painted the housings. Then soldered the old clarion tweeters back into the circuit since they still worked great.
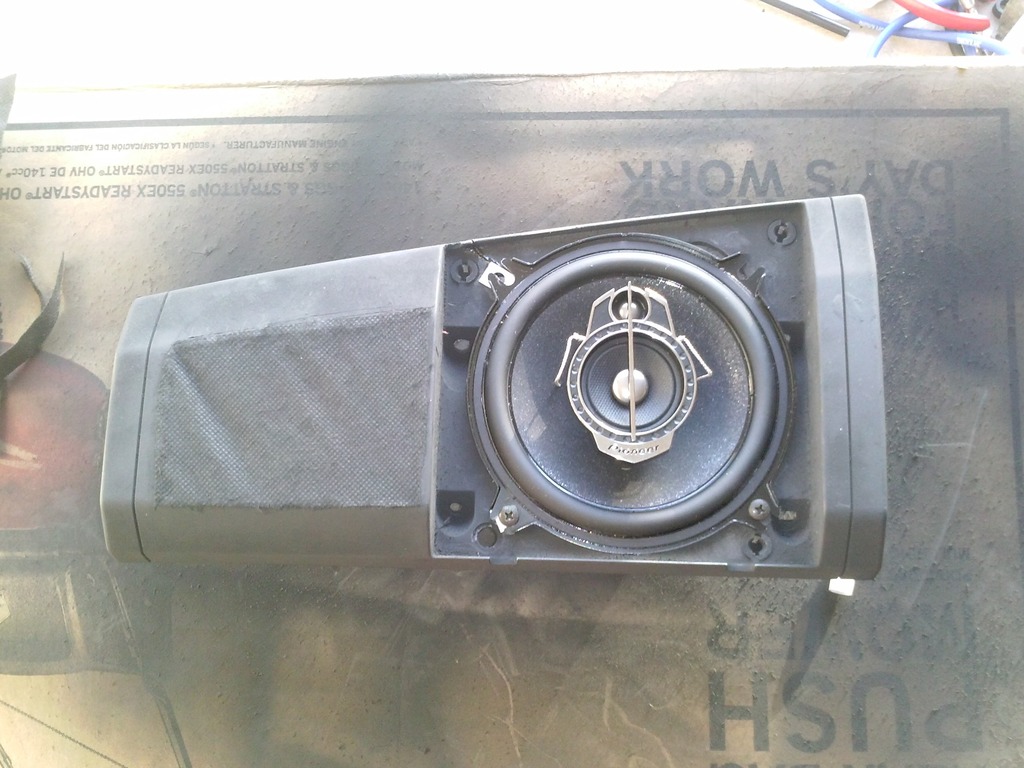
Here they are installed and covered back up
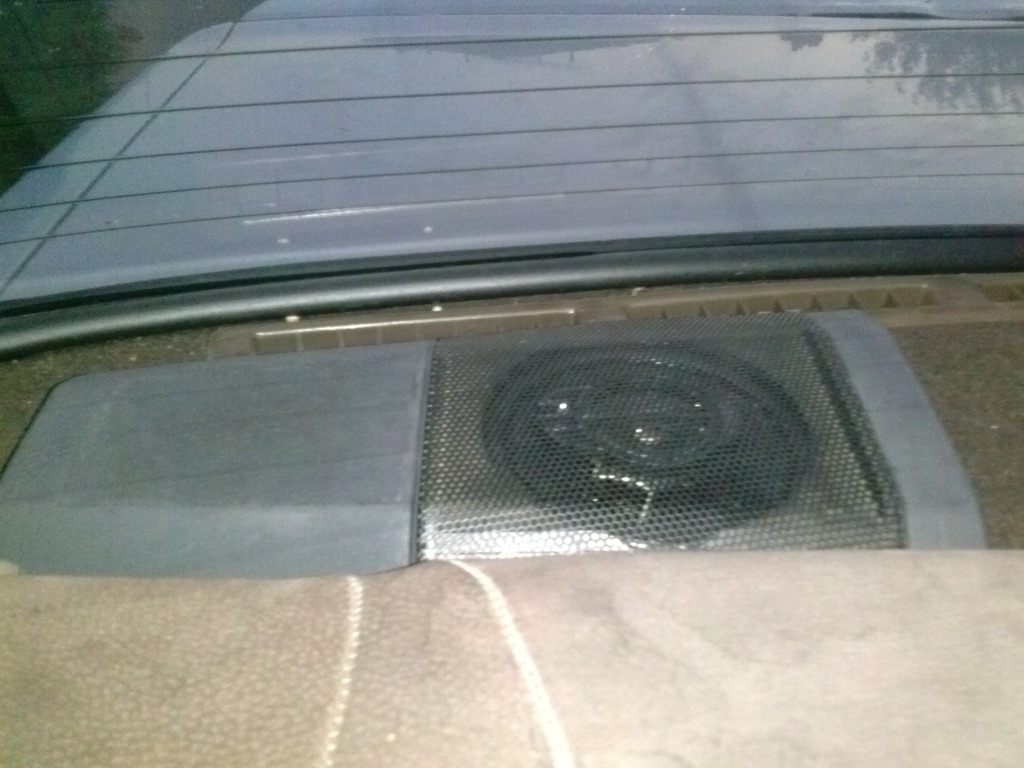
Also installed a pyle slim 10 inch woofer under the driver seat. self powered 200 watt. I like to have a full spectrum of sound for my music.
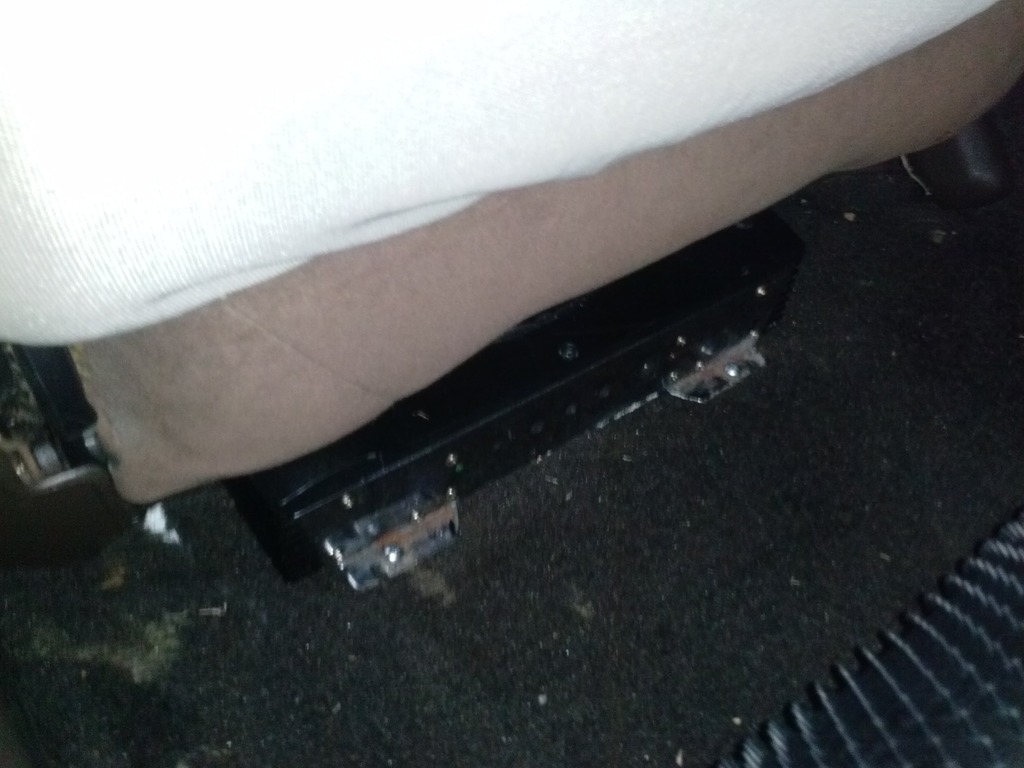
It actually hides under the floor mat decently

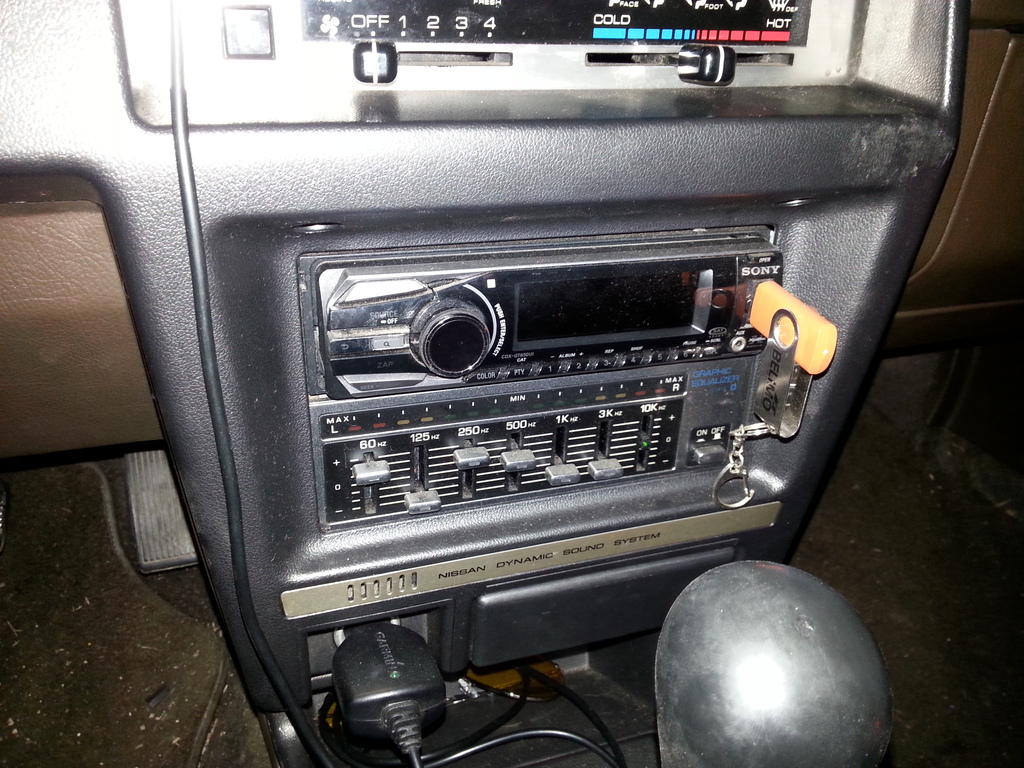
The last thing was to install my favorite Sony head unit. Its a CD/FM/AM/AUX/USB 35,000 color unit with 4 x 52w channels for a total of 208 with low power woofer output. The system sounds beautiful and my alternator is pissed lol!
Oh yeah, heres the head unit

Then I bought these for the rear...

and pulled apart what was left of the rear speaker housings

I had to trim away alot of material to get these 5.25s to fit. I think the originals were 4 inch lol. Also made a new tweeter cover with some mesh material and painted the housings. Then soldered the old clarion tweeters back into the circuit since they still worked great.

Here they are installed and covered back up

Also installed a pyle slim 10 inch woofer under the driver seat. self powered 200 watt. I like to have a full spectrum of sound for my music.

It actually hides under the floor mat decently

The last thing was to install my favorite Sony head unit. Its a CD/FM/AM/AUX/USB 35,000 color unit with 4 x 52w channels for a total of 208 with low power woofer output. The system sounds beautiful and my alternator is pissed lol!
Oh yeah, heres the head unit

Last edited by aw11power; Apr 12, 2015 at 11:14 AM.

Thread Starter
Member
Joined: Mar 2015
Posts: 278
after a while I found it was running rich. A quick voltage check showed me that my oxygen sensor wasnt sendind a signal anymore. I could have bought a new one for like $35. But whats the fun in that? Im too cheap and adventurous for that sort of thing. So I dug a new ford three wire out of my toolbox that was laying around. Checked all the leads and repinned the OE nissan connector to make it plug and play for my car. Gas mileage went back to an acceptable level and it no longer smells rich. Total cost=FREE! 
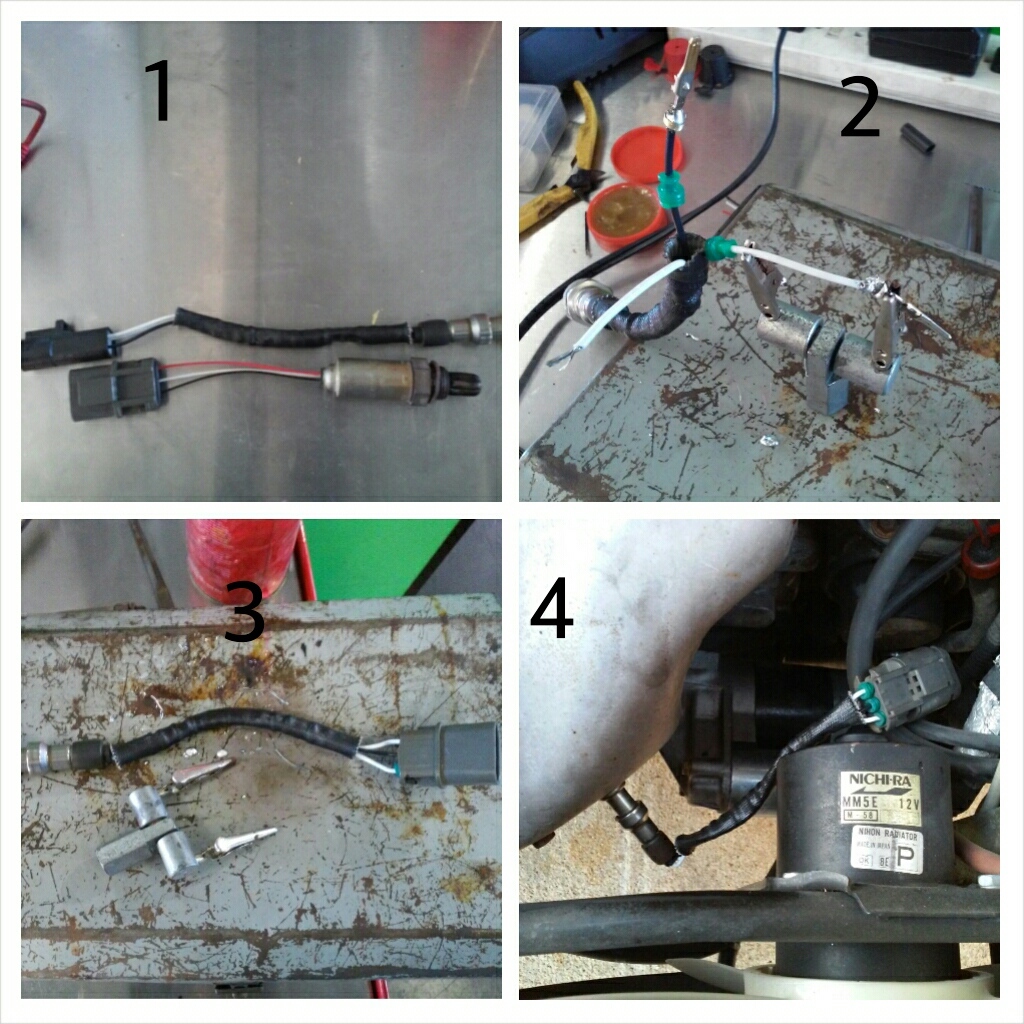
Solved that problem

Solved that problem
Thread Starter
Member
Joined: Mar 2015
Posts: 278
I was missing a the switch cover for my lock button. That sort of thing drives me crazy. So junkyarding I went. Couldnt find a maxima anywhere, shocking right? I did however find a 91 infiniti m30 that used the same time of switches.
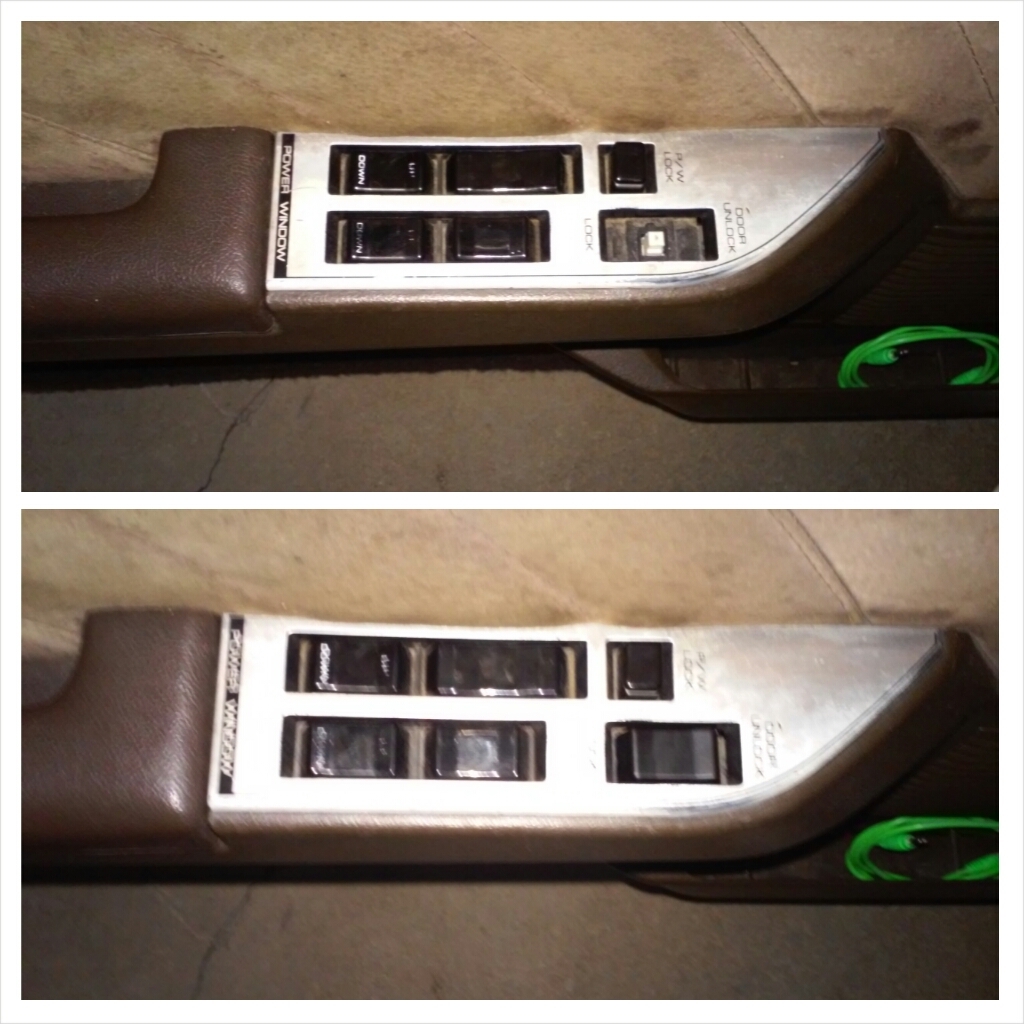
much better

much better
Thread Starter
Member
Joined: Mar 2015
Posts: 278
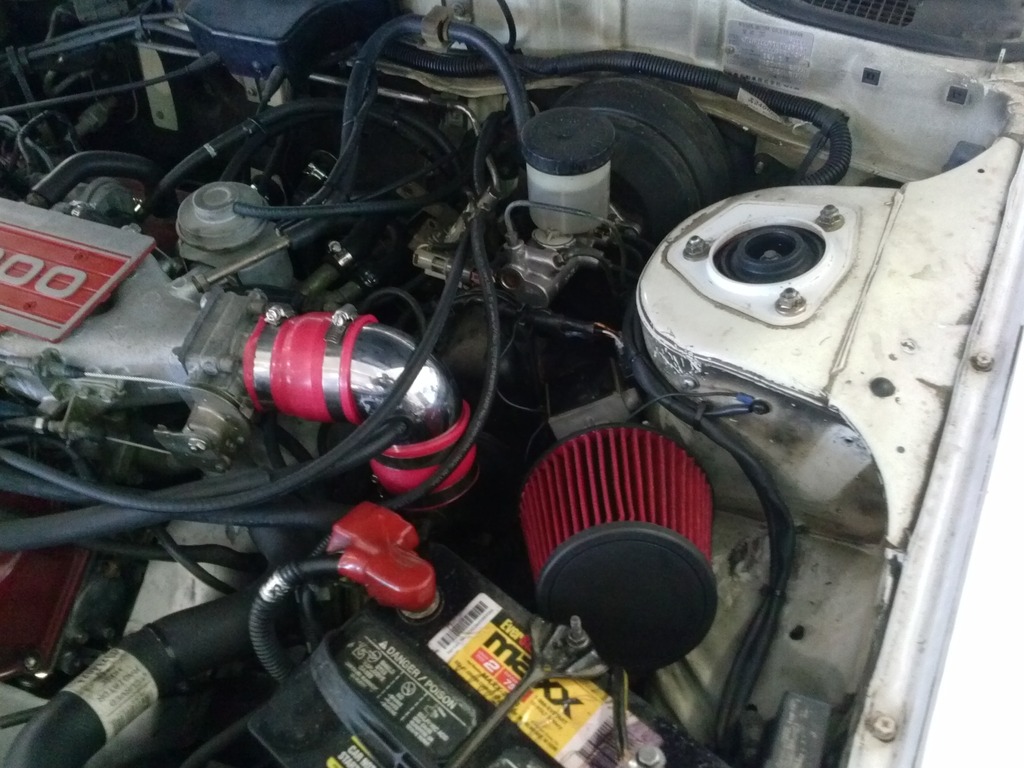
Then ditched the factory air box so I could put an open filter on it. Kept the plumbing and resonator box at that time though.
Making a MAF adaptor plate
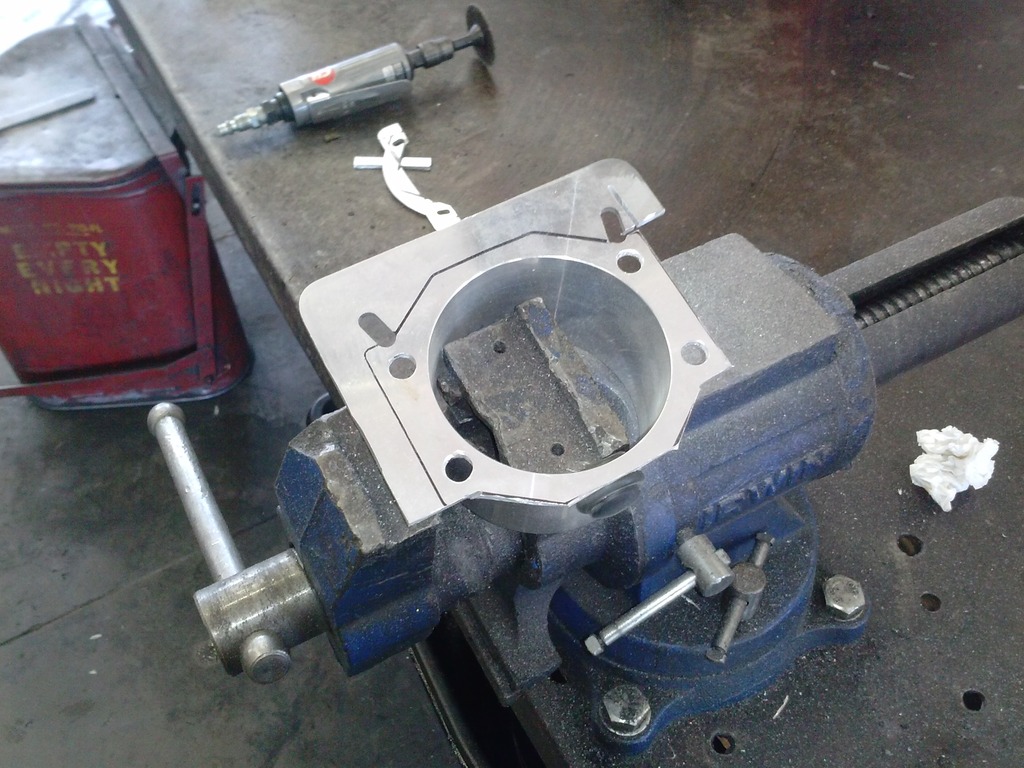
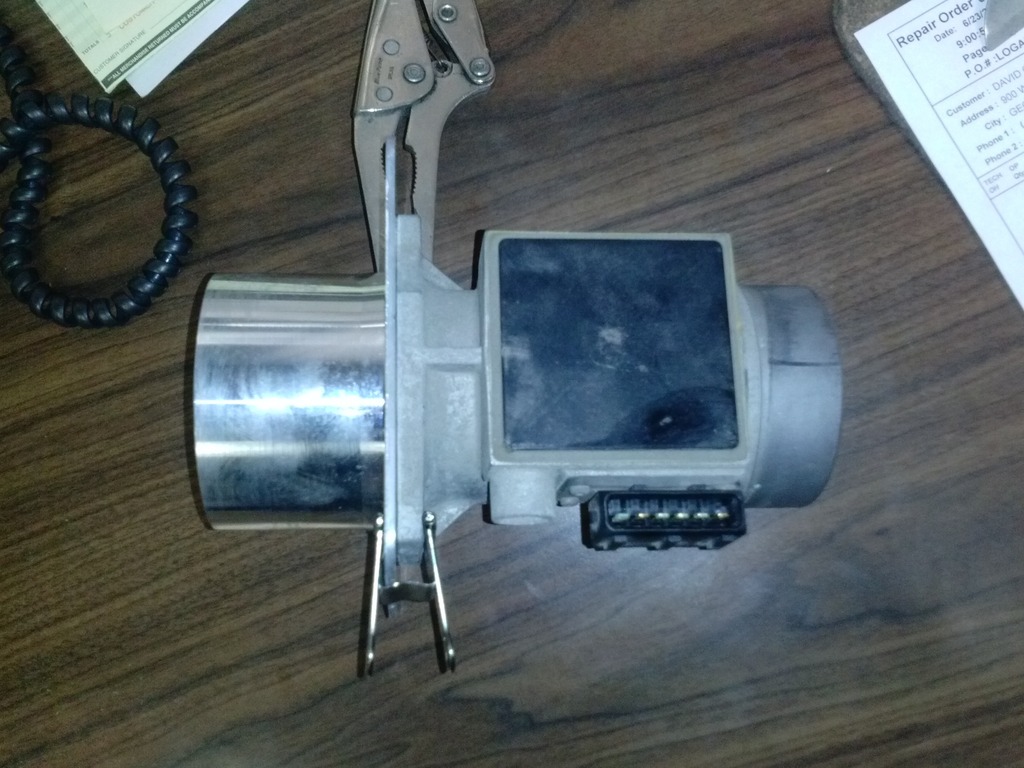
It was a universal one, but I thought it looked dumb with all the extra material hanging on there so I trimmed it down.
Installed
(this was before the throttle upgrade)
Making a MAF adaptor plate


It was a universal one, but I thought it looked dumb with all the extra material hanging on there so I trimmed it down.
Installed

(this was before the throttle upgrade)
Last edited by aw11power; Apr 11, 2015 at 07:24 PM.
Thread Starter
Member
Joined: Mar 2015
Posts: 278
Anyone else notice the stock lighting is abysmal at night? Me too. Heres my changes.
First I opened the headlight housings to spray fresh chrome paint inside and restore some of its original reflectiveness.
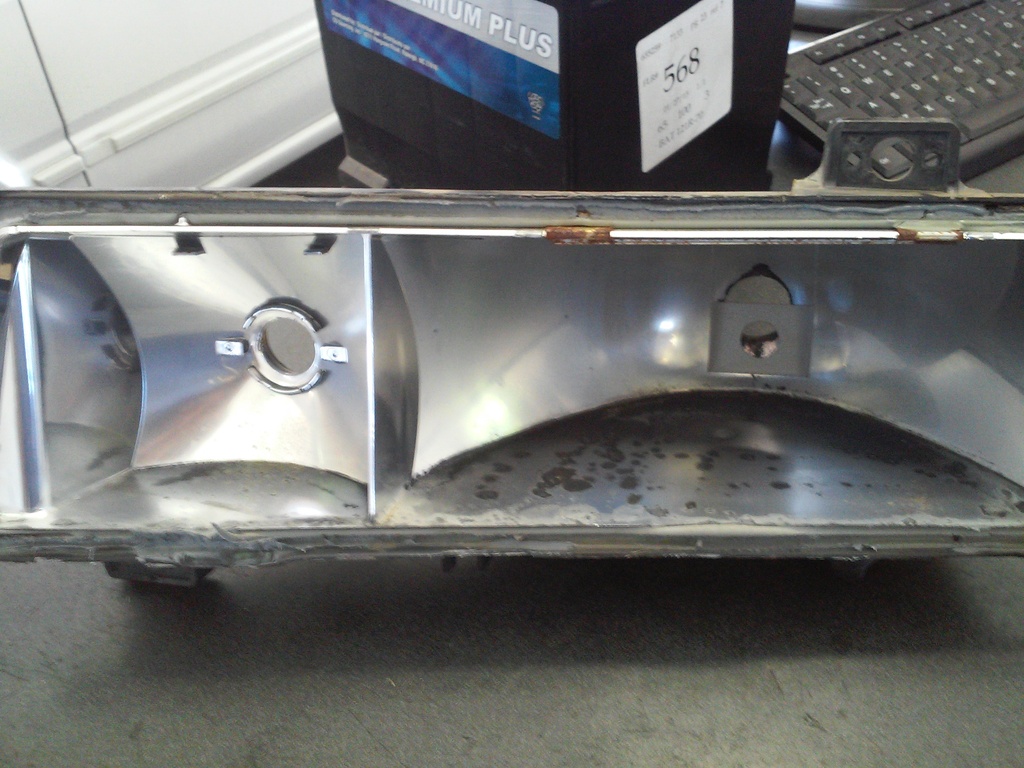
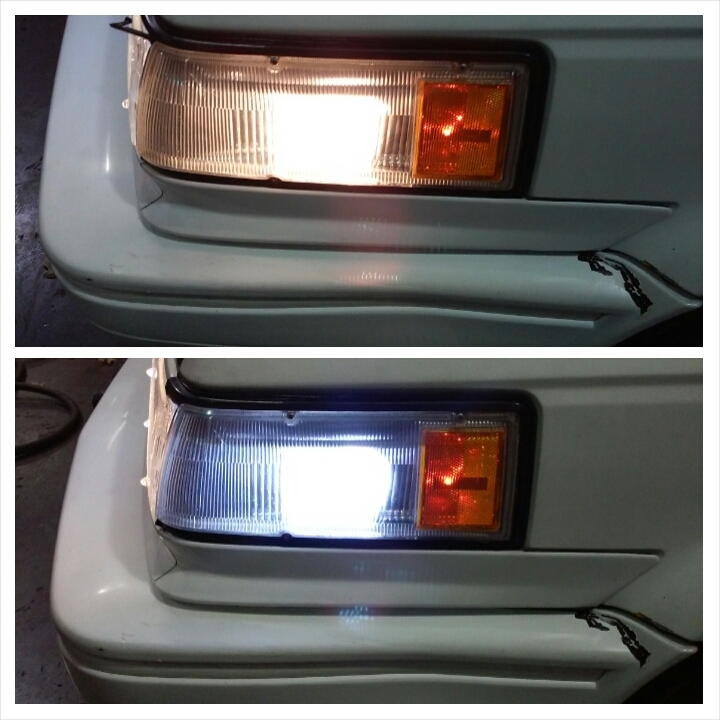
That helped some but wasnt everything I was hoping. I also wanted lower power consumption on my electrical system. So here is before and after replacing my dim element running lights with LEDs. Made reflective signs visible from much greater distances, definitely a good improvement.
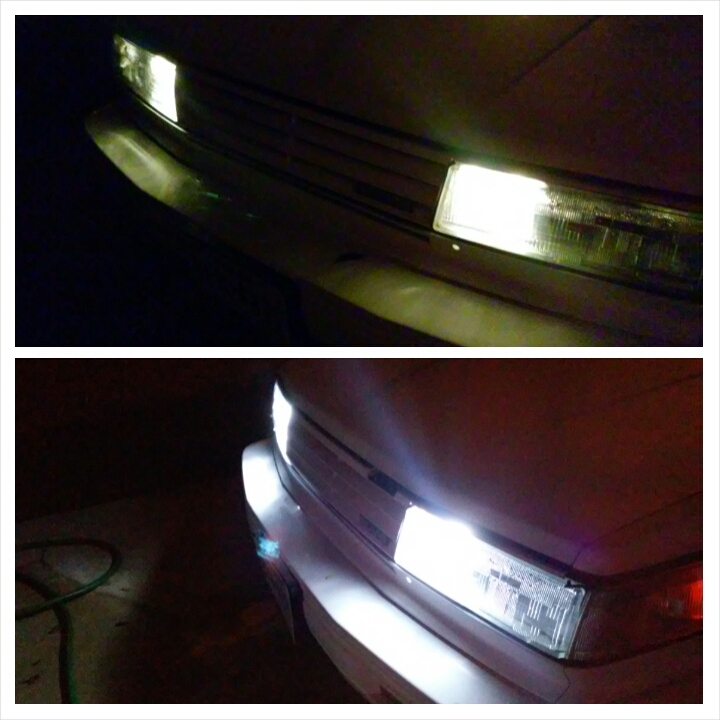
These two were in front of my house with no headlights on, just a comparison of the output from the running light bulbs. first is normal, second is with LEDs.
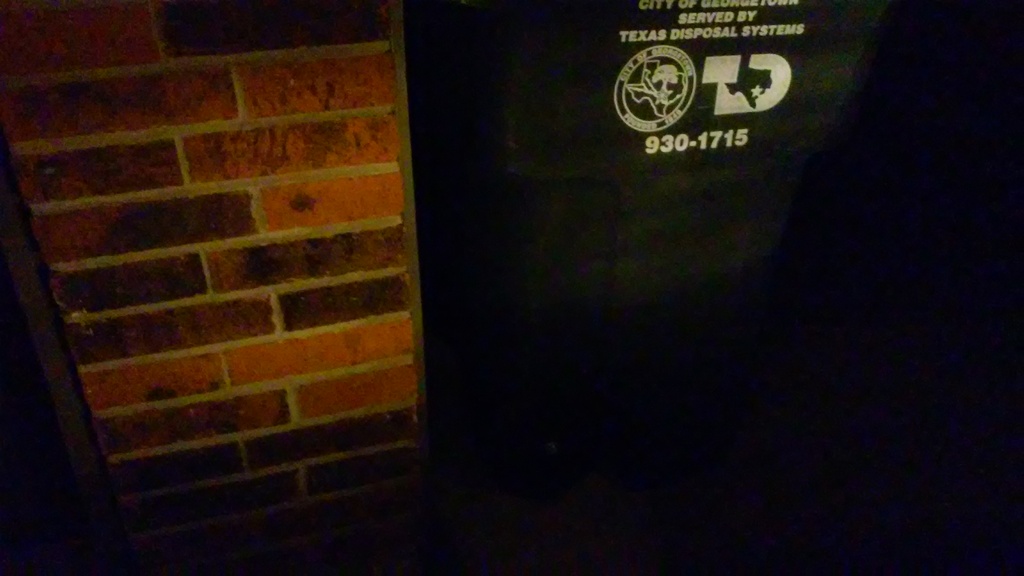
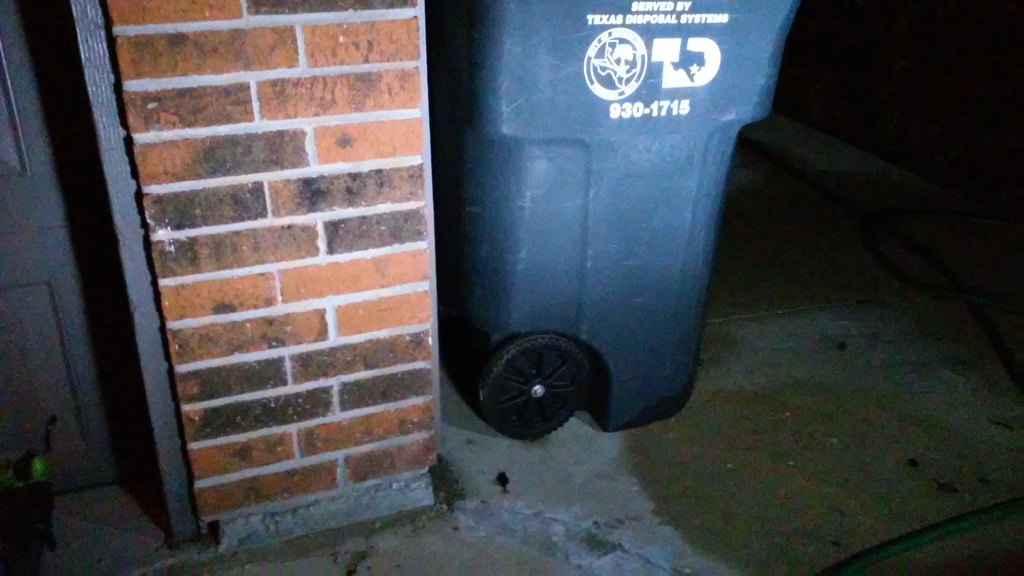
Next I replaced my corner lamps with the same type bulbs, again, big improvent in visibility.
First I opened the headlight housings to spray fresh chrome paint inside and restore some of its original reflectiveness.

That helped some but wasnt everything I was hoping. I also wanted lower power consumption on my electrical system. So here is before and after replacing my dim element running lights with LEDs. Made reflective signs visible from much greater distances, definitely a good improvement.

These two were in front of my house with no headlights on, just a comparison of the output from the running light bulbs. first is normal, second is with LEDs.


Next I replaced my corner lamps with the same type bulbs, again, big improvent in visibility.

Last edited by aw11power; Apr 11, 2015 at 07:28 PM.


Thread Starter
Member
Joined: Mar 2015
Posts: 278
I appreciate that guys! Ill keep posting up all the work ive completed and then keep posting the ongoing upgrades.
In reguards to the HID question; Yes and no. HIDs work well in *some reflector housings. Ive honestly not been completely happy with pattern of the HIDs. Ive actually been running some 35watt LED headlights for a few weeks that have a perfect beam pattern, but a terrible high beam. So I'm still working on a permanent solution. All I know for sure is that pretty much everything is better than the stock halogens, maybe I'm just really picky about my headlights LOL
In reguards to the HID question; Yes and no. HIDs work well in *some reflector housings. Ive honestly not been completely happy with pattern of the HIDs. Ive actually been running some 35watt LED headlights for a few weeks that have a perfect beam pattern, but a terrible high beam. So I'm still working on a permanent solution. All I know for sure is that pretty much everything is better than the stock halogens, maybe I'm just really picky about my headlights LOL

I see you're a Texan! Yeehaw!!!! Anyway why didin't you make your intake a SRI in see your intake is still looping around and making it shorter with less bents yields better response and Higher output....I must say that your junkyard finds are very interesting...what's the 240sx TB's bore ID? I"ll love to see if my 4th gen could use that same upgrade...I'm still curious if a 3rd gen ypipe will bolt to a 2nd gen Chassis...If you're interested I can ship you a test setup 3rd Gen exhaust manifolds w/ypipe and you test out the fitment. The 3rd gen setup is better than 2nd Gen wrap around ypipe setup....
Thread Starter
Member
Joined: Mar 2015
Posts: 278
+1 on the 60mm throttle.
Funny you should mention the short ram intake...
This is my current setup, I had kept the original resonator box at first because I needed all the vacuum hook ups. I have since deleted a variety of emission components that allowed me to set up a simpler intake. I have completely deleted, seconday air injection components, EVAP recirc(atmoshmere vented for now), decelleration lean out valve and disabled EGR. In regaurds to the newer Y-pipe design. Yes, it is certainly a superior design. Ive done a lot of research on compatability between those years. In order to use the y-pipe on a second gen, you need to relocate both the oil filter and the oil pressure sender. This could probably be accomplished using the filter bracket off the 3rd gen. 2nd gen the filter screws directly to the back of the block, right in the way of the down pipe lol. Im pretty sure thats the only real changes needed to make it work. I hadnt yet messed with it since I plan to go turbo in the future and intend on using mostly stock VG30et parts from a Z31 300zx. I already have manifolds and turbo...
Funny you should mention the short ram intake...

This is my current setup, I had kept the original resonator box at first because I needed all the vacuum hook ups. I have since deleted a variety of emission components that allowed me to set up a simpler intake. I have completely deleted, seconday air injection components, EVAP recirc(atmoshmere vented for now), decelleration lean out valve and disabled EGR. In regaurds to the newer Y-pipe design. Yes, it is certainly a superior design. Ive done a lot of research on compatability between those years. In order to use the y-pipe on a second gen, you need to relocate both the oil filter and the oil pressure sender. This could probably be accomplished using the filter bracket off the 3rd gen. 2nd gen the filter screws directly to the back of the block, right in the way of the down pipe lol. Im pretty sure thats the only real changes needed to make it work. I hadnt yet messed with it since I plan to go turbo in the future and intend on using mostly stock VG30et parts from a Z31 300zx. I already have manifolds and turbo...
Last edited by aw11power; Apr 12, 2015 at 11:15 AM.
Nice! That's what's up! I have a friend with an 88 Max with bent valves....I'm too busy now to try this 3rd Gen Exhaust Manifold and ypipe upgrade on a 2nd Gen Chassis...But if you wanna try it let me know I'm live in Houston but In Dallas doing some training...
Thread Starter
Member
Joined: Mar 2015
Posts: 278
First video
In case anyone wanted to know what it sounds like or how it accelerates with that intake/throttle setup and all that emission stuff gone (LOL)...
Here ya go
88 maxima intake mods: https://youtu.be/yeX5dpYuJwQ
Here ya go
88 maxima intake mods: https://youtu.be/yeX5dpYuJwQ
Thread Starter
Member
Joined: Mar 2015
Posts: 278
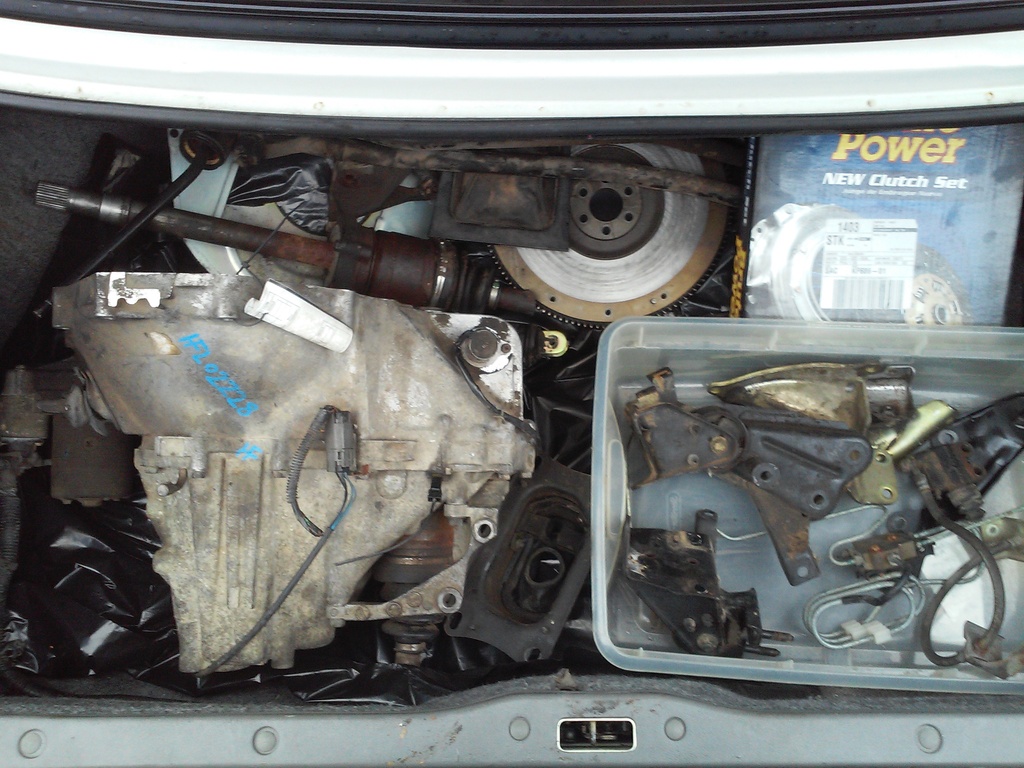
So, on to the next thing. My automatic started going out(slipping in first and very, very hard shift to second) and I could'nt find what I needed to repair it. Also, I hate automatic...So I decided to do a 5 speed conversion. Only problem....no 2nd gen donors anywhere! So I did what anyone would do and decided to get all the stuff from a different year and make it work! Got all my parts from a 91 VG30. Surprisingly, you can fit all of it in the maxima's trunk

Thread Starter
Member
Joined: Mar 2015
Posts: 278
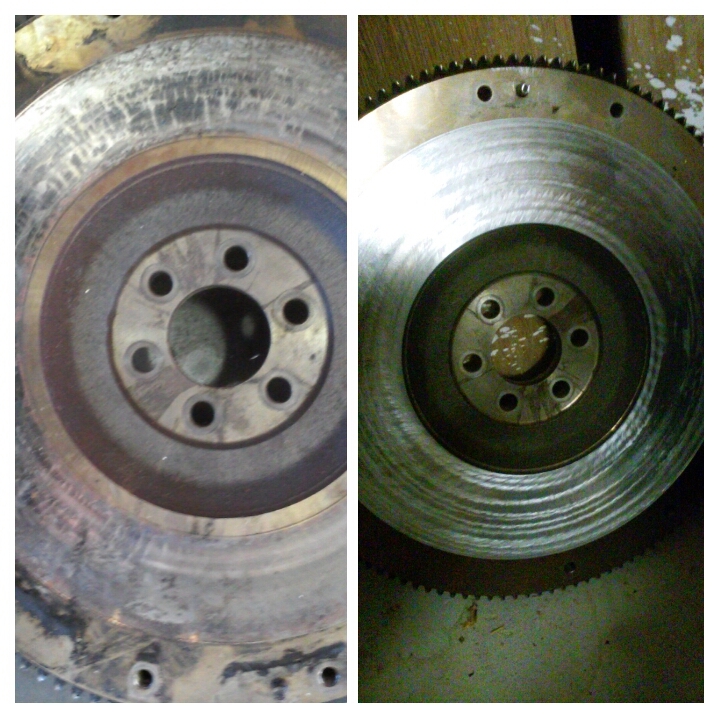
Resurfaced the flywheel
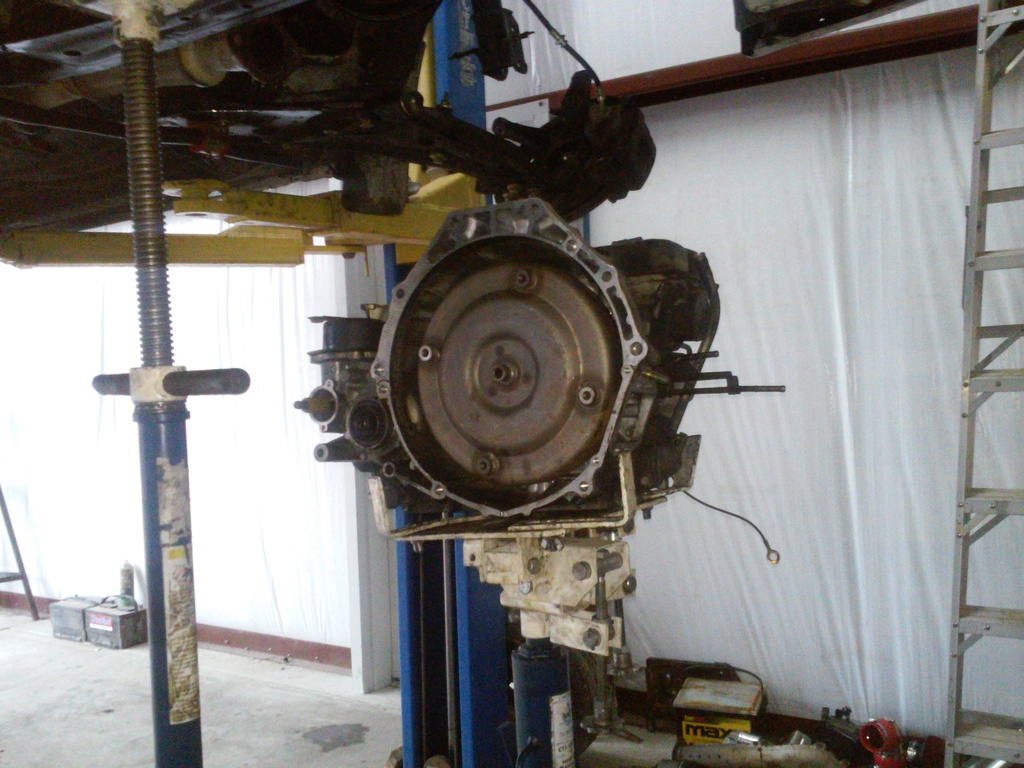
Pulled the automatic out
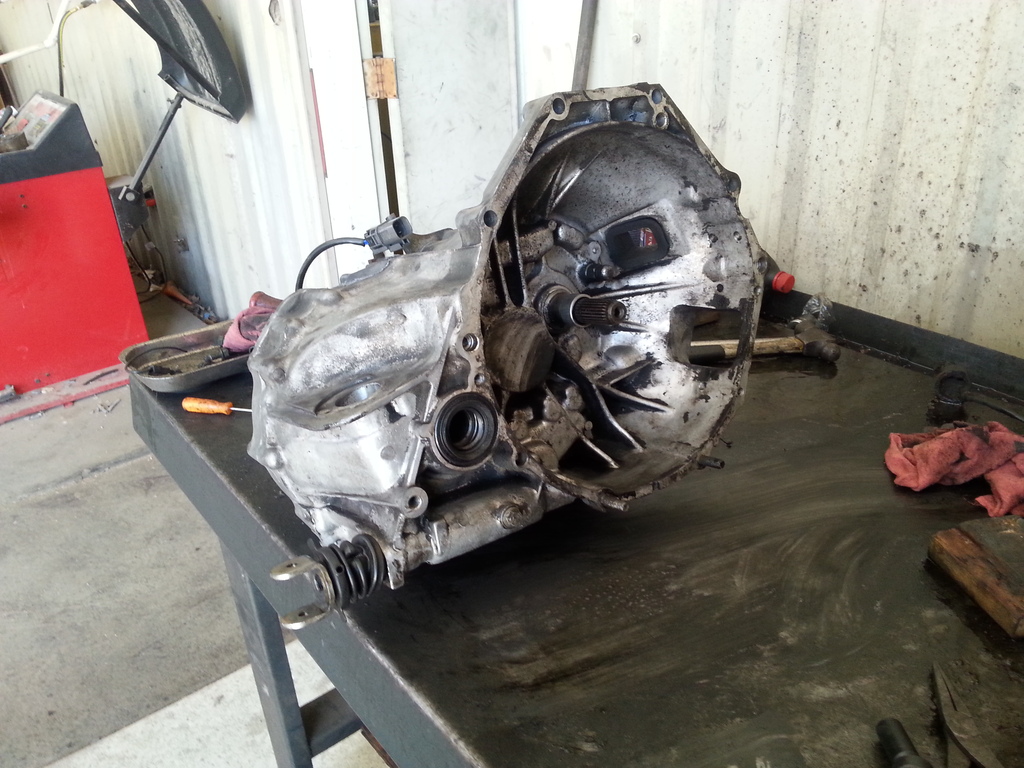
And cleaned up the manual to put it in
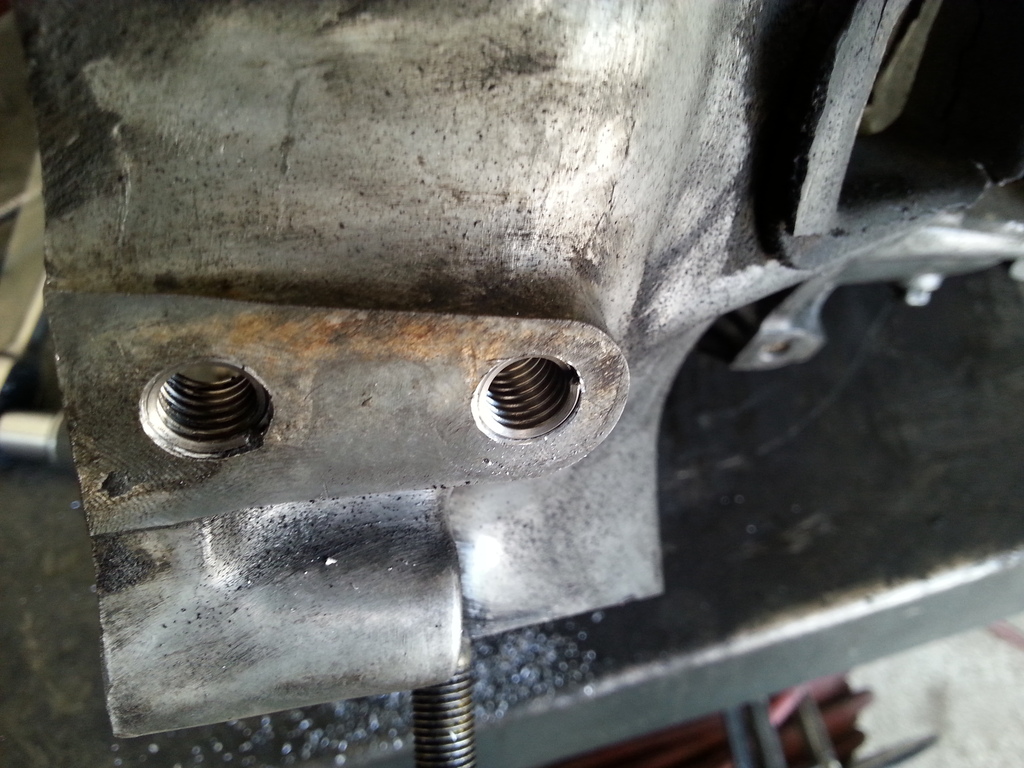
Noticed that the slave cylinder bolt holes were missing threads lol! Tapped and helicoiled them


Pulled the automatic out

And cleaned up the manual to put it in

Noticed that the slave cylinder bolt holes were missing threads lol! Tapped and helicoiled them


Last edited by aw11power; Apr 13, 2015 at 02:50 PM.
Thread Starter
Member
Joined: Mar 2015
Posts: 278
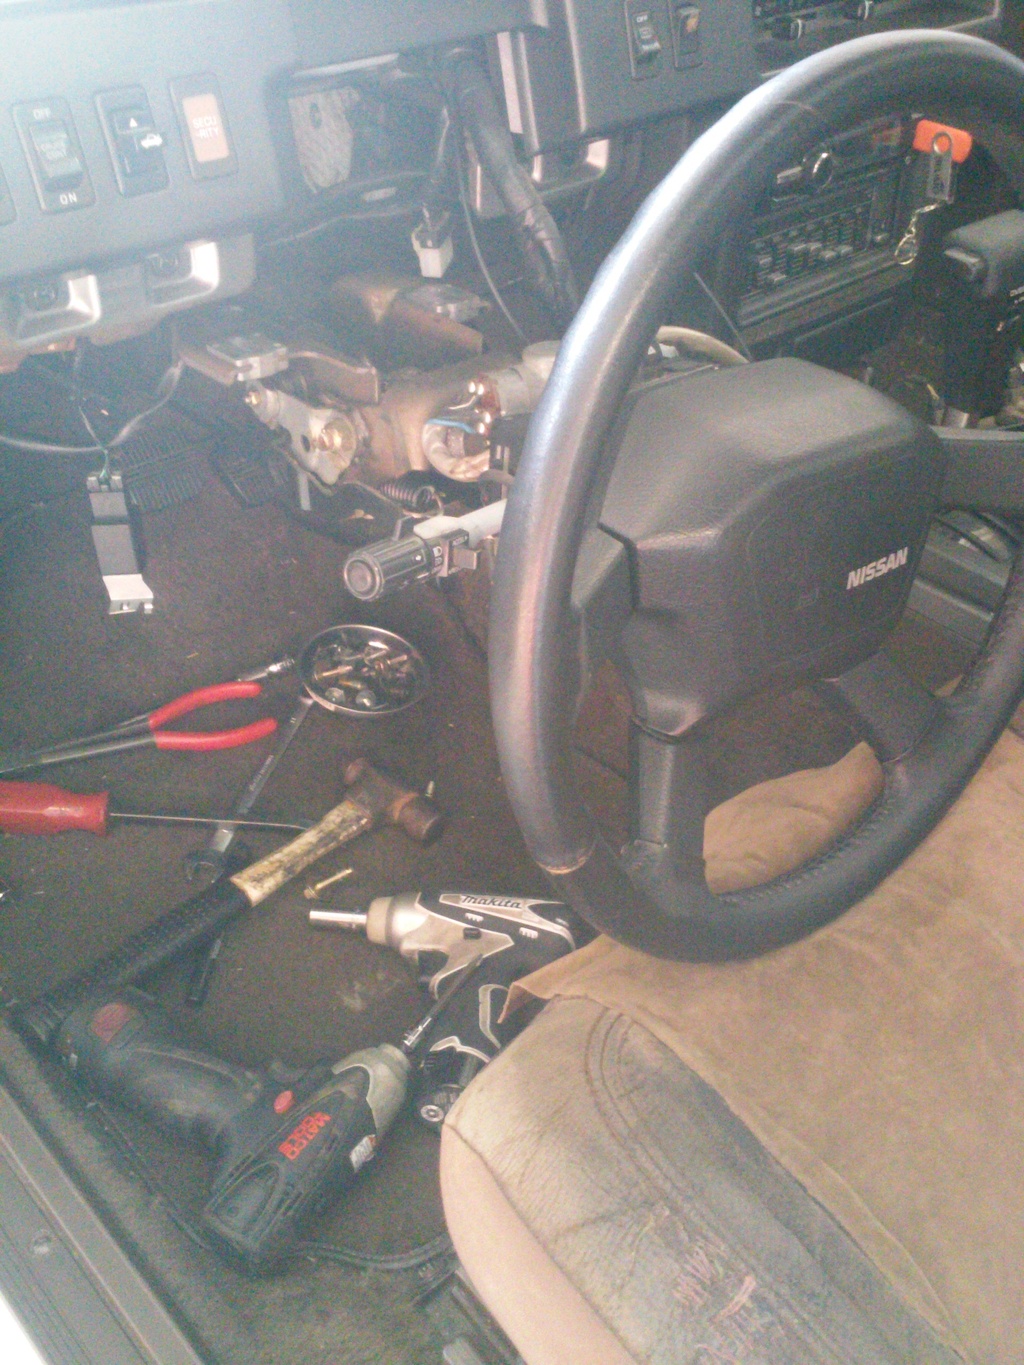
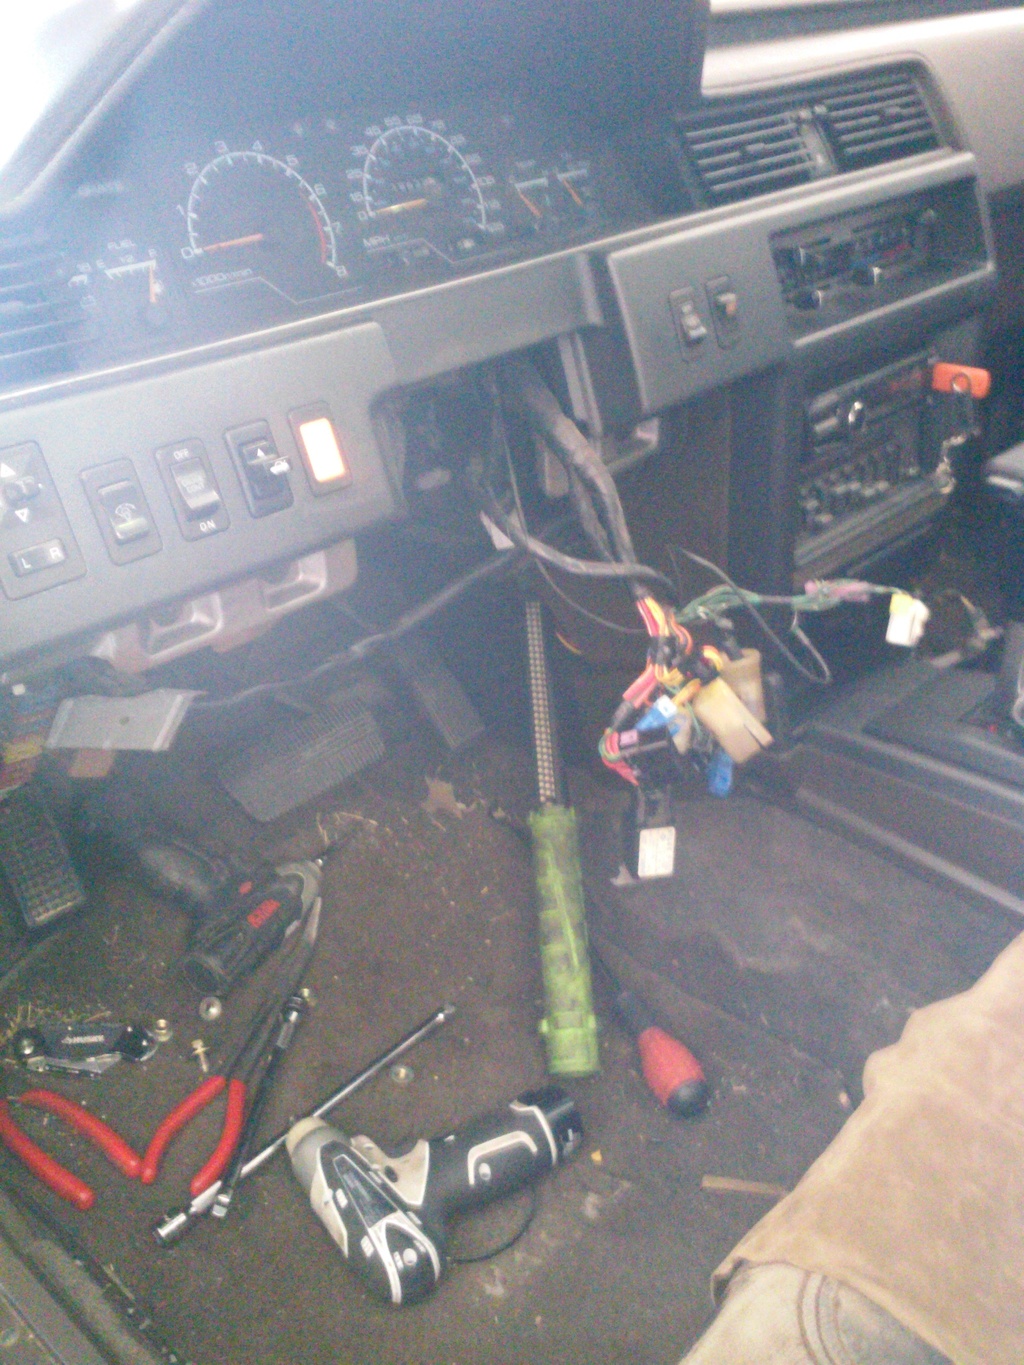
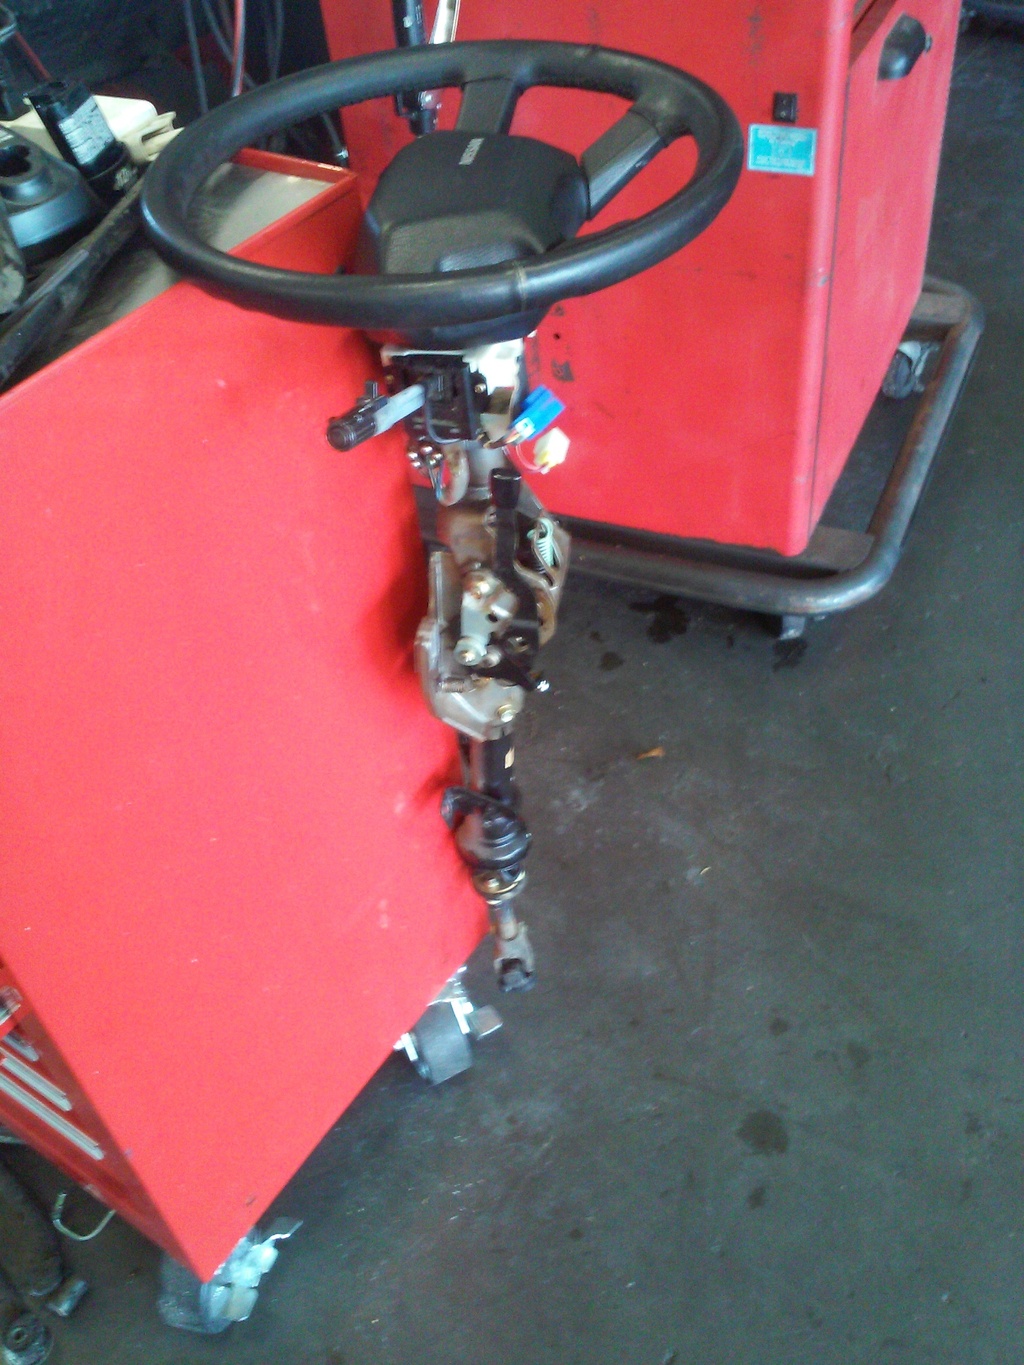
Started pulling out the pedals, which required pulling the steering column.
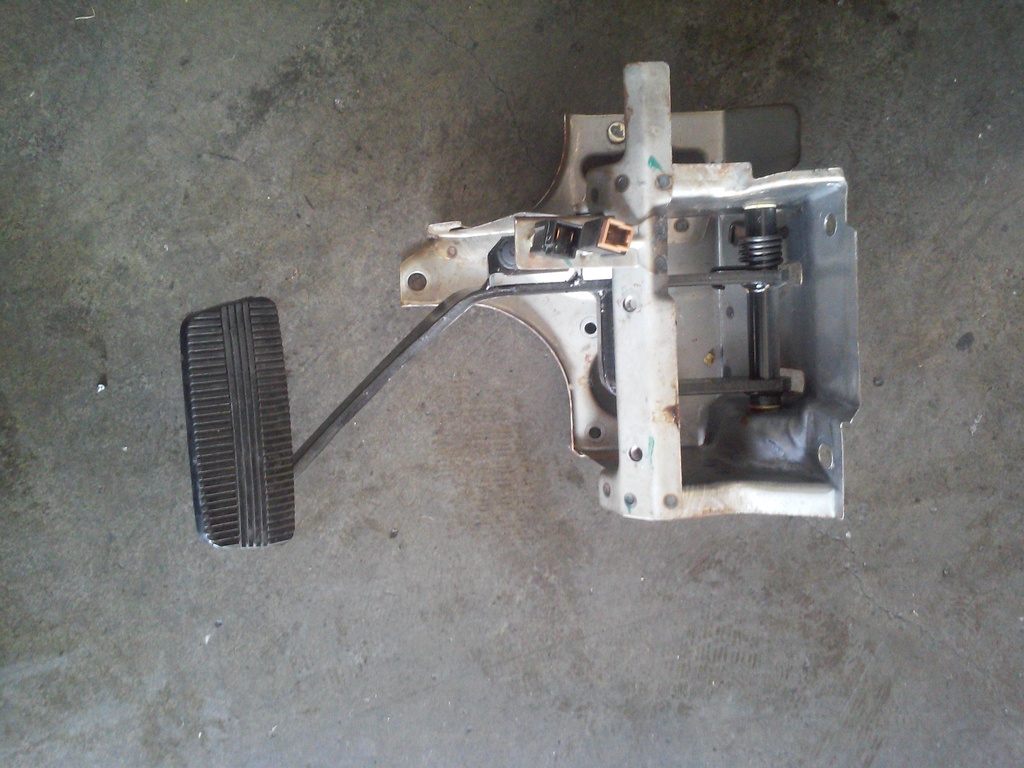
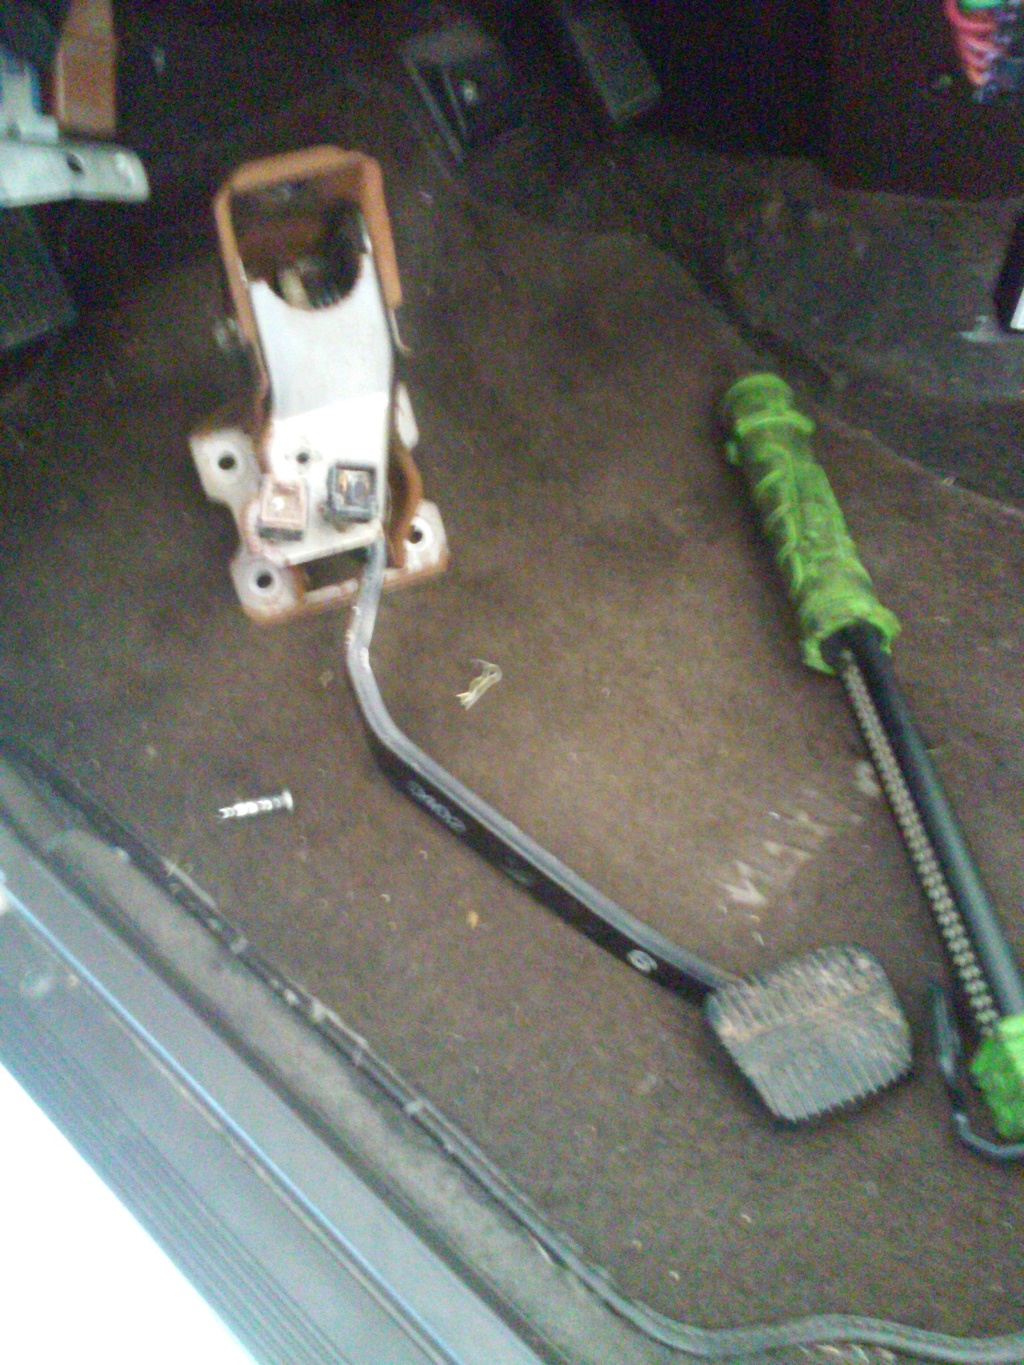
As it turns out, the pedals from the 1991 model are more different than I had thought...
So the wouldnt fit. I ended up having to chop my automatic brake pedal in half and move the rubber pad from the other car onto it, and them remove a startling amount of material from the new clutch pedal assembly to make it work. In the end this resulted in my clutch pedal being closer to my brake pedal than I wanted. This will be solved with a cut and weld at a later date. It's weird, but at least functional in the meantime.
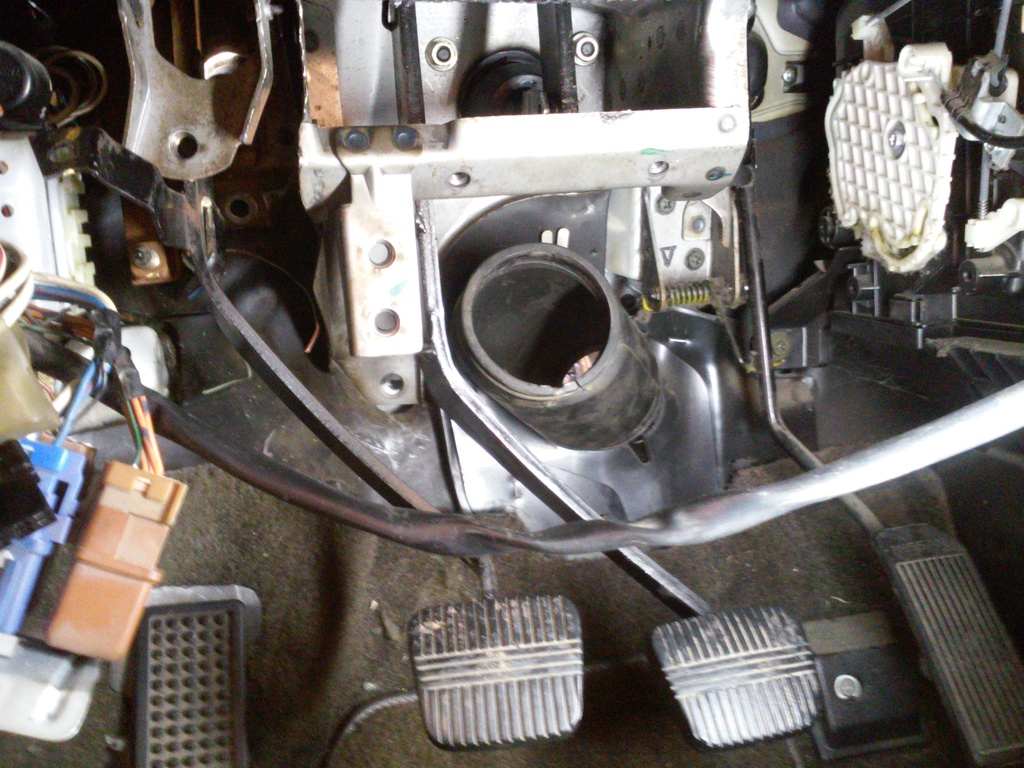
The master cylinder bolted directly up with zero issues. The clutch lines fit save for one bolt hole which I drilled and tapped.
Thread Starter
Member
Joined: Mar 2015
Posts: 278
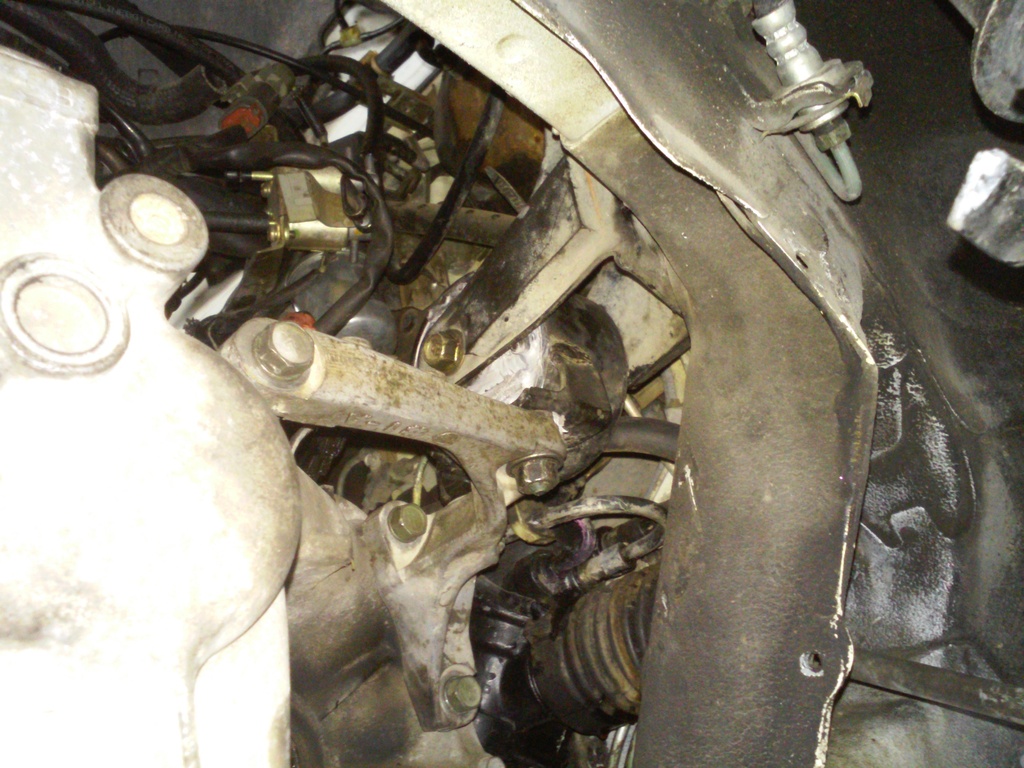
As far as fitment of the other items, alxes, shifter/linkage and rear transmission mounts were all bolt up affairs. Front mount on the other hand required a far bit of modification and welding on a bracket I fabbed up to make it line up. I made sure to get the manual trans starter of the donor car, had to repin the connector but that fit as it was supposed to.
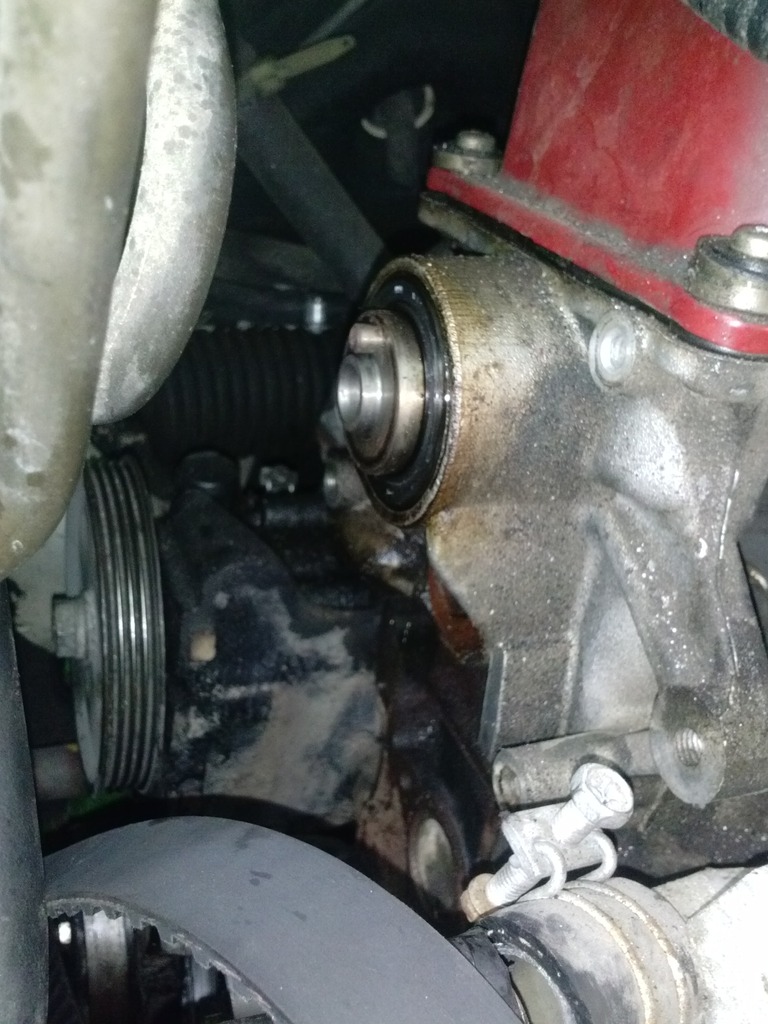
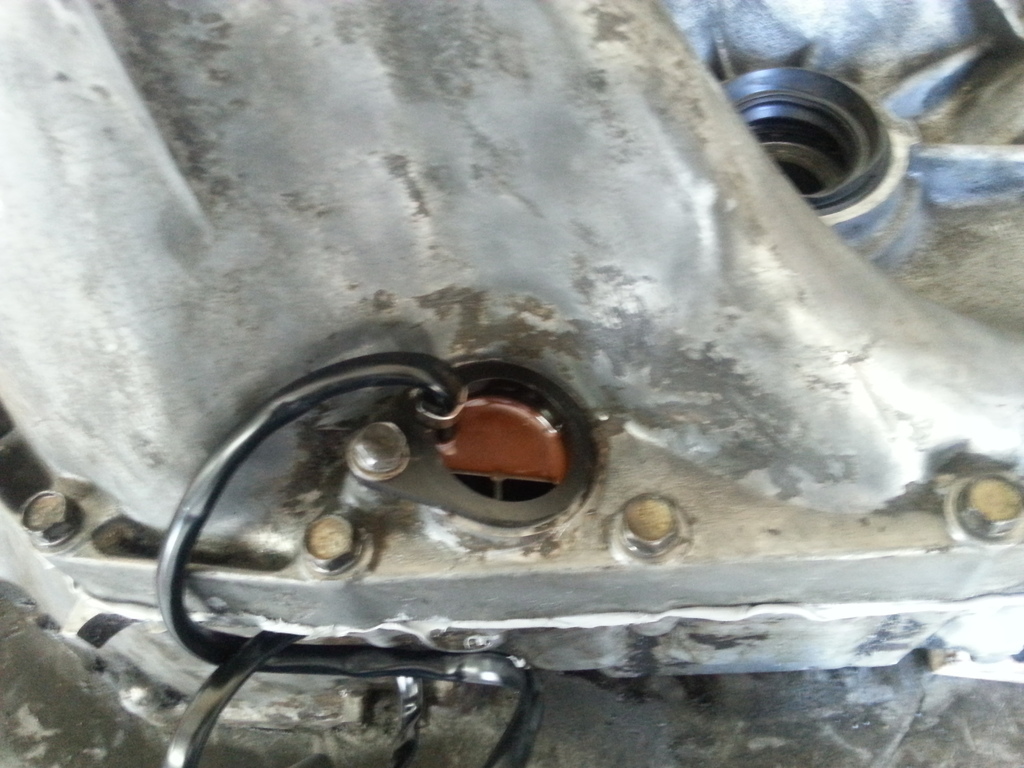
Put a new rear main seal and clutch kit.

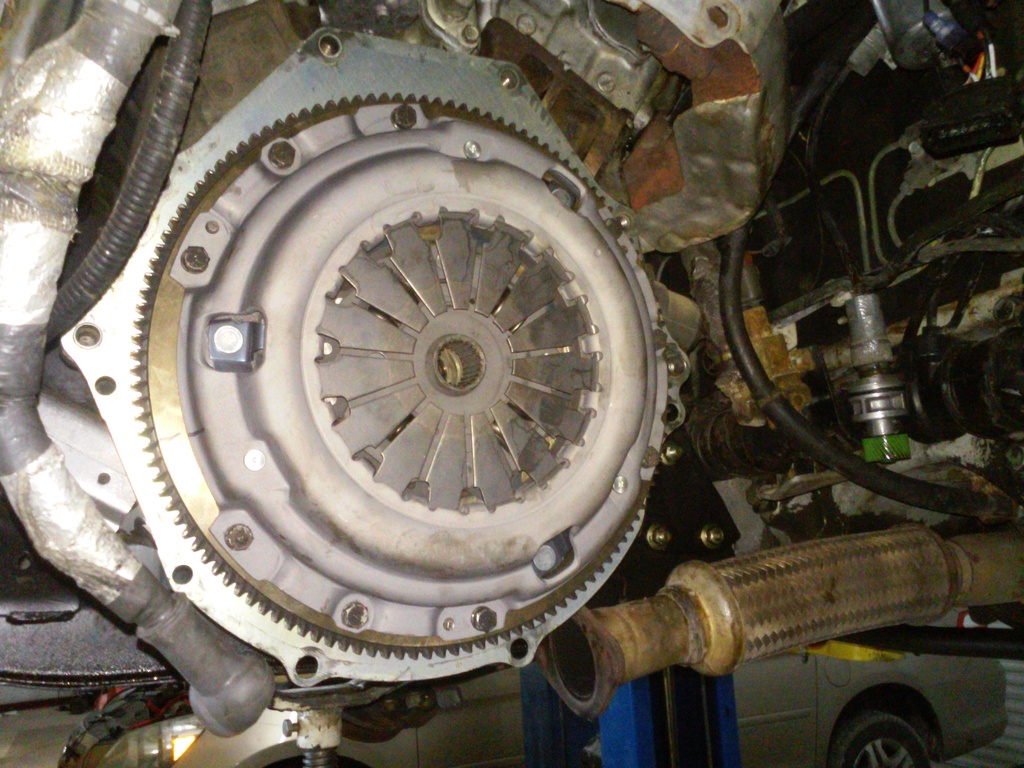
Rear mount lined up
Put a new rear main seal and clutch kit.


Rear mount lined up

Thread Starter
Member
Joined: Mar 2015
Posts: 278
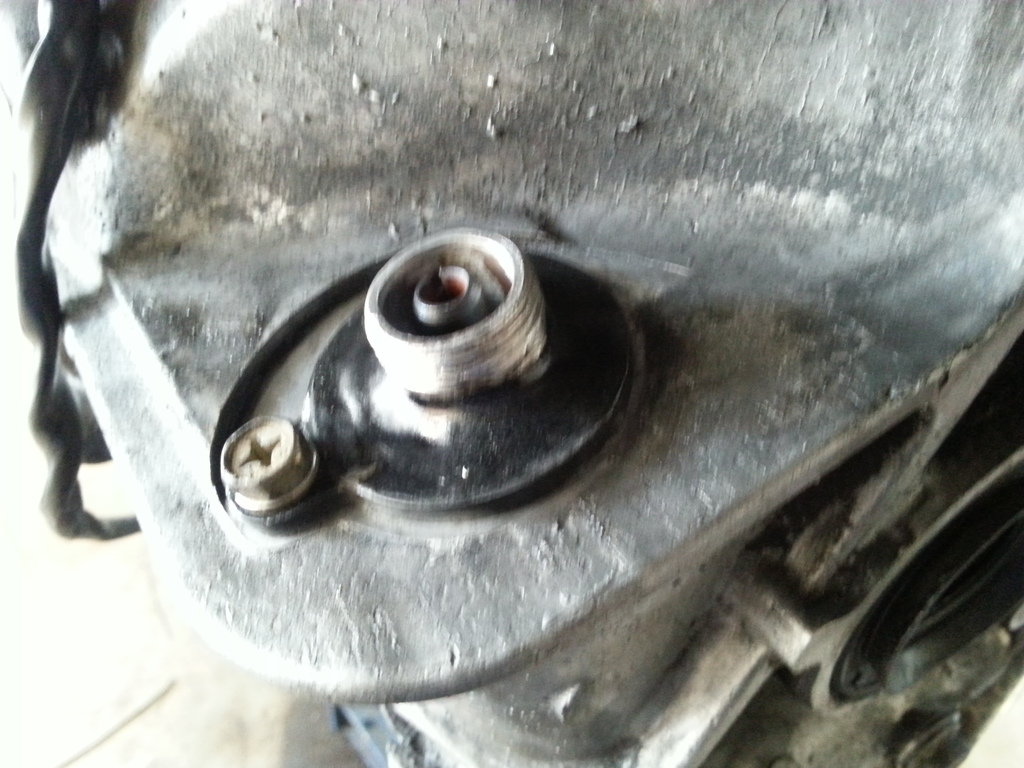
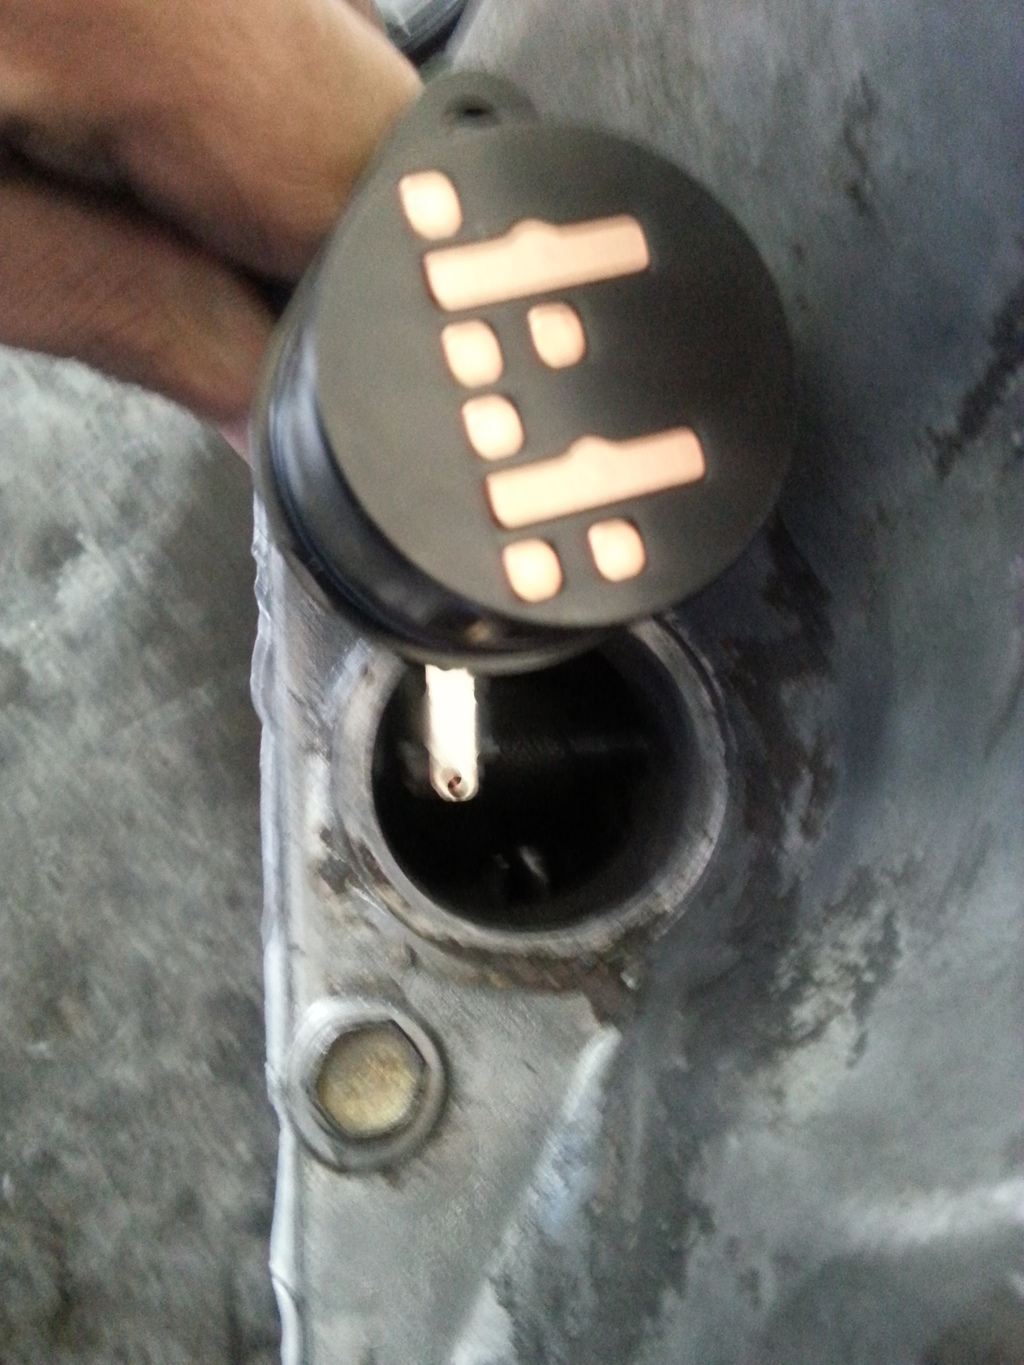
The speedometer drive gear was also different...This project was full of problems I wasnt totally ready for. The new trans used an electric sender and the old cable drive not only had to short of a shaft to reach the gear in the trans but it was also a bigger diameter. So I used a total of 3 senders to make some thing work. The original mechanincal broke when i took it out, but it yeilded a good internal seal. So first step I cut all of the electronics off of the back of the new trans electrical sender and grinded the back flat. Next I cut the threads off of a toyota c52 transmission speedo sender I had laying around(by dumb luck it had the same threads for the cable to screw onto) and TIG welded those threads to the back of my now blank housing. Ground that down to clean up the welds and painted the housing black to sort of hide the work haha. After that I had to cut the shaft with the right gear on it and "splice" (TIG weld) the shaft end from the toyota sender so it would have a keyway to turn the cable.
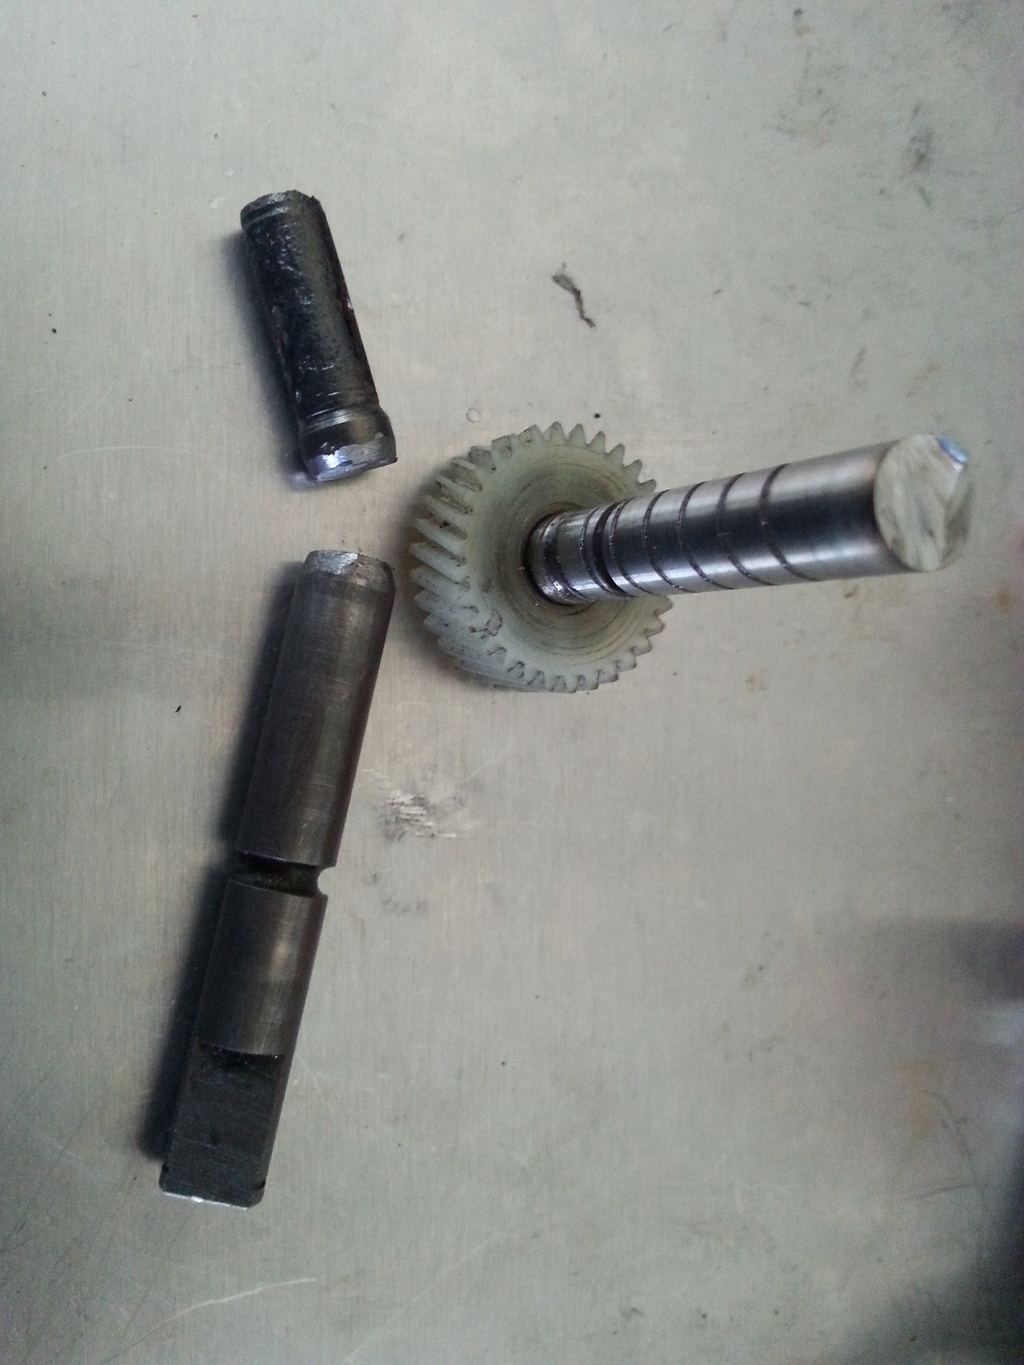
The end result was this frankensteined speedo sender...but hey, it works.
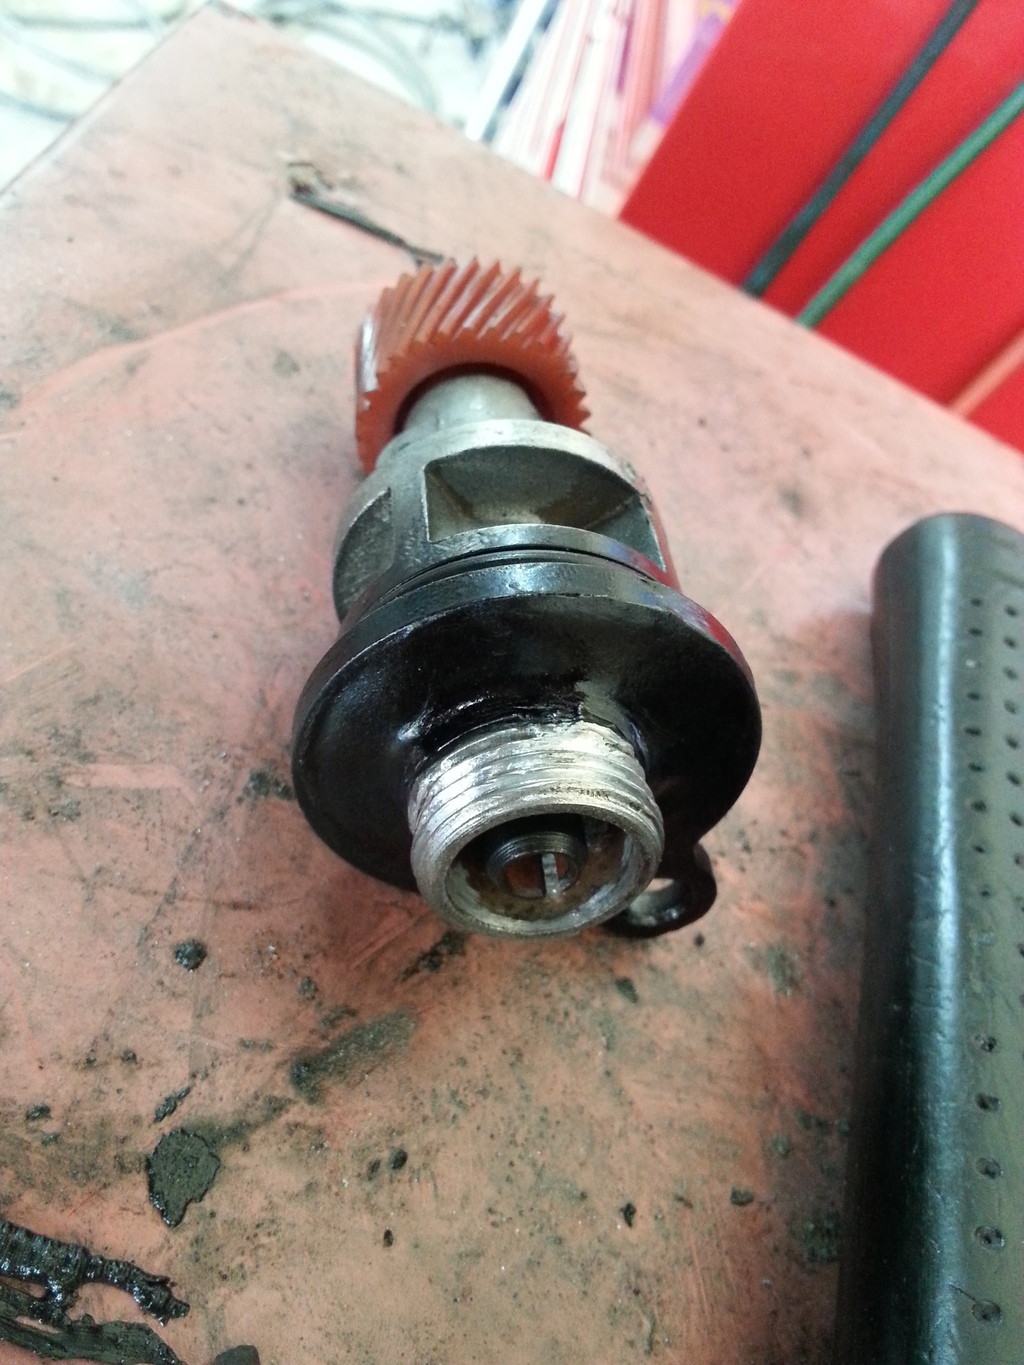
It almost looks like its supposed to be there.

The end result was this frankensteined speedo sender...but hey, it works.

It almost looks like its supposed to be there.

Thread Starter
Member
Joined: Mar 2015
Posts: 278
The trans then got oil and the car lowered down, It was time for the moment of truth. Took it for a test drive and it shifted very smoothly, but made a terrible, terrible growling on decel and a pretty nasty clicking sound when accelerating in low gear. I prayed it was something wrong with one of my axles. When I brought the car back into the shop, further diagnosis told me that the noise was coming from inside the transmission....BOOOO! I really, really was'nt prepared for that.....more to come.
Last edited by aw11power; Apr 13, 2015 at 06:51 PM.
Thread Starter
Member
Joined: Mar 2015
Posts: 278
SO....the 5 speed had to come right back out and onto the bench.
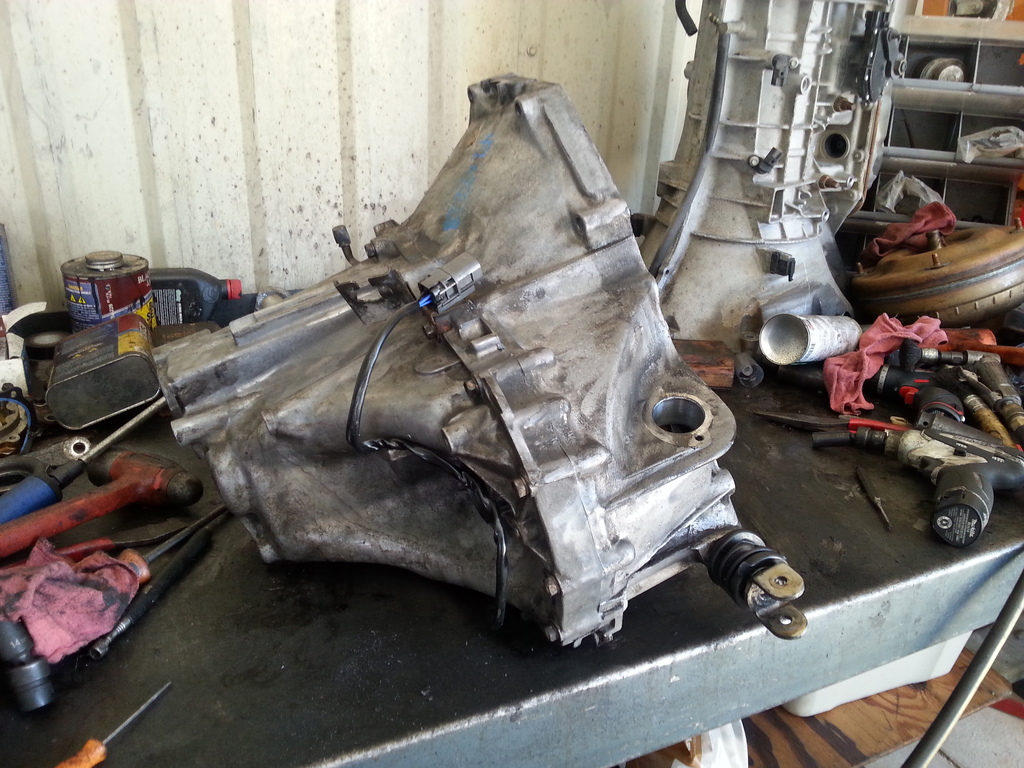
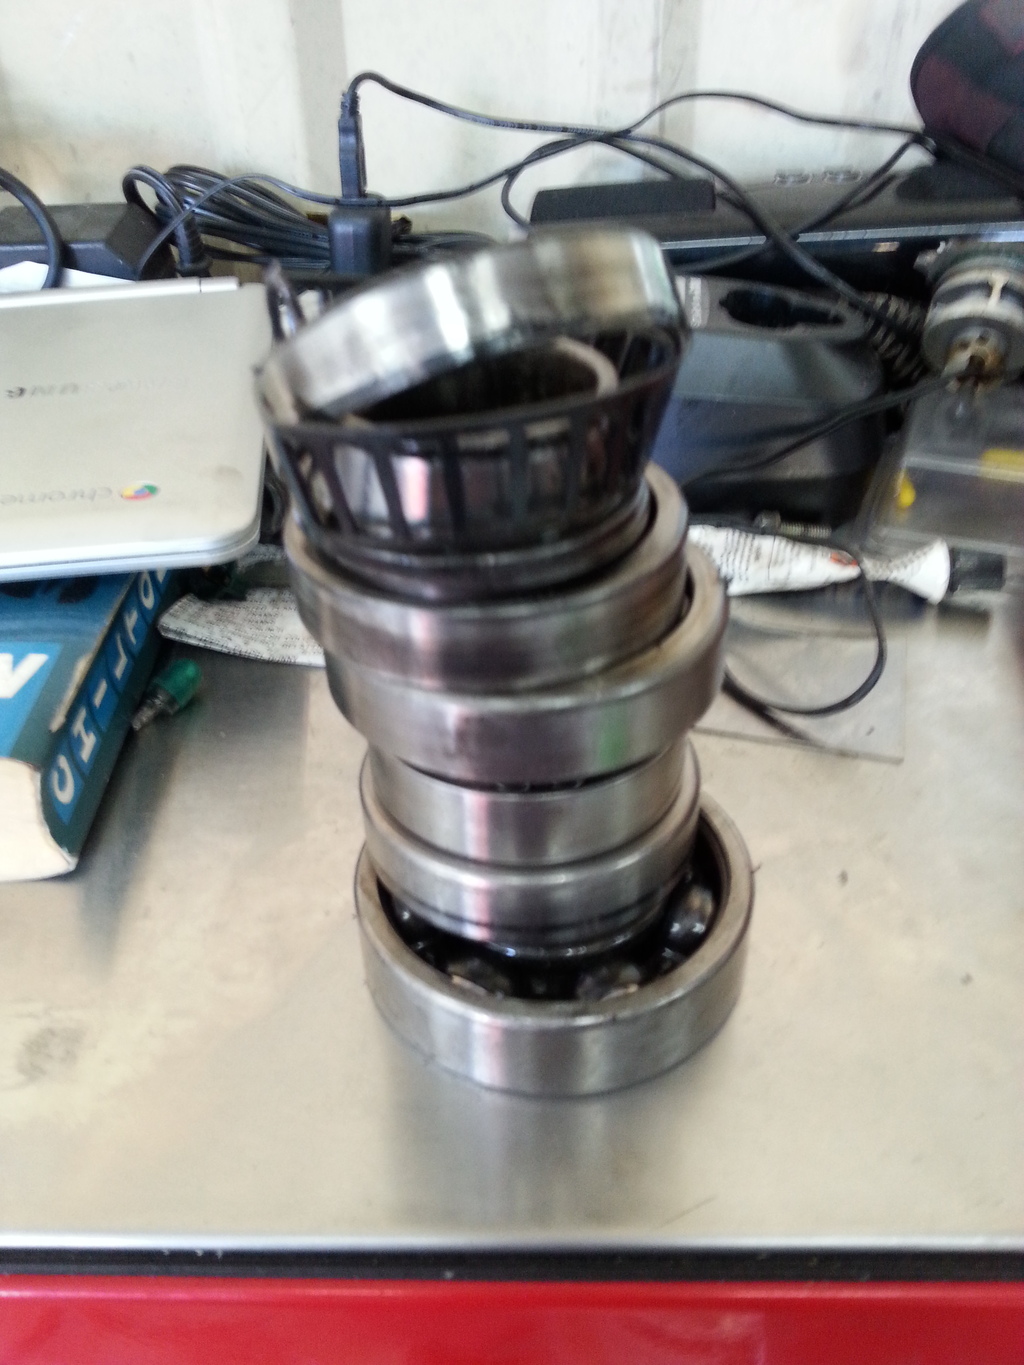
Cracked the case open to investigate and found a bad input shaft bearing. I should've torn it down before I out it in, but live and learn. I ordered a bearing kit and replaced all the bearings and seals in the transmission. Heres all the trashed bearings I replaced.
Also replaced the gear position switch.
Finally re-installed my now rebuilt 5 speed (LOL) and drove it once again. This time with no noise and buttery smooth shifts. Its a completely different animal with the 5 speed. Especially since the 91 trans is not the same final drive ratio as the 88 auto OR manual. By converting to this transmission I shaved about 30lbs of junk, got rid of liquid connection torque converter and gained a true mechanical connection thru a clutch, also dropped my gearing. went from 3.428 final drive to a 3.650 final drive. To say the car is substantially faster would be an understatement. This thing really moves now

Cracked the case open to investigate and found a bad input shaft bearing. I should've torn it down before I out it in, but live and learn. I ordered a bearing kit and replaced all the bearings and seals in the transmission. Heres all the trashed bearings I replaced.

Also replaced the gear position switch.


Finally re-installed my now rebuilt 5 speed (LOL) and drove it once again. This time with no noise and buttery smooth shifts. Its a completely different animal with the 5 speed. Especially since the 91 trans is not the same final drive ratio as the 88 auto OR manual. By converting to this transmission I shaved about 30lbs of junk, got rid of liquid connection torque converter and gained a true mechanical connection thru a clutch, also dropped my gearing. went from 3.428 final drive to a 3.650 final drive. To say the car is substantially faster would be an understatement. This thing really moves now
Thread Starter
Member
Joined: Mar 2015
Posts: 278
Road testing with Adyno software shows results so far. I did 10 baseline runs prior to any of these mods averaging a peak wheel HP of 147. After mods I repeated 10 more test runs with Adyno and peak wheel HP now averages 158. Ill take it to a real phyisical dyno one day, but for now ill keep using these software aided street runs just to have a metric for what kind of difference certain mods actually make.

