
Master Window Switch Repair


Master Window Switch Repair
My window switch failed on me and would only allow me to put the windows down with the exception of the driver window which could still travel in both up and down directions. In order to put all other windows back up I had to reach across the car and use the switch located on the other doors. As I'm sure many of you know the switches run about 125 new so I decided to attempt a repair of my broken master switch. The circuit writer is a bit expensive but its still a lot cheaper than a new switch and can be used for many applications even fixing the defroster when you accidentally take a razor to it.

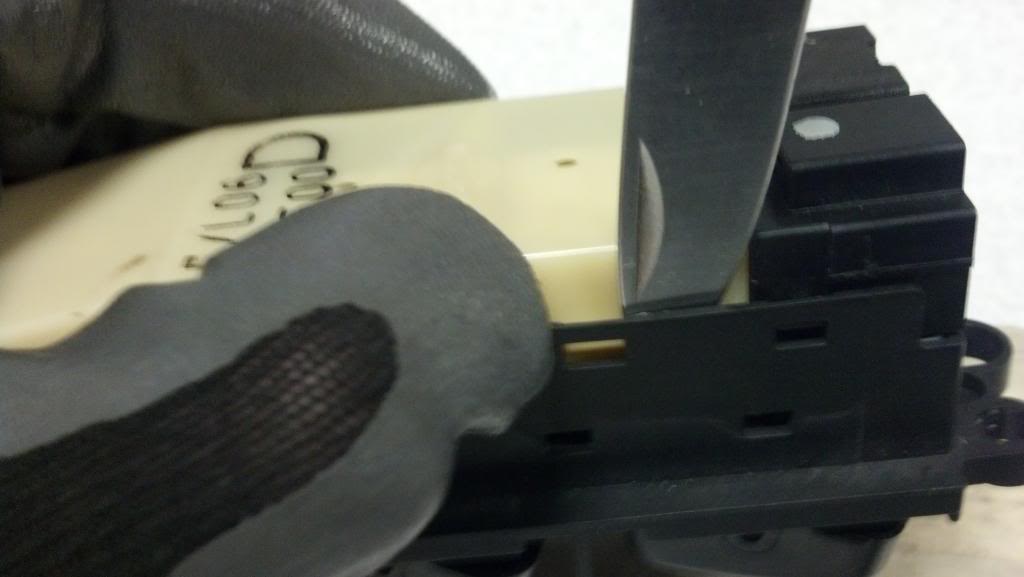
First I removed the master switch from the driver side door and carefully removed the cover. The plastic tabs are fairly sturdy but take care not to crack them. During this step I learned that it is best to do this with the switch upsidown or else youll spend your time looking for the little plastic bits instead of fixing the switch. They are located under the rubber part so slowly separate the two halves.
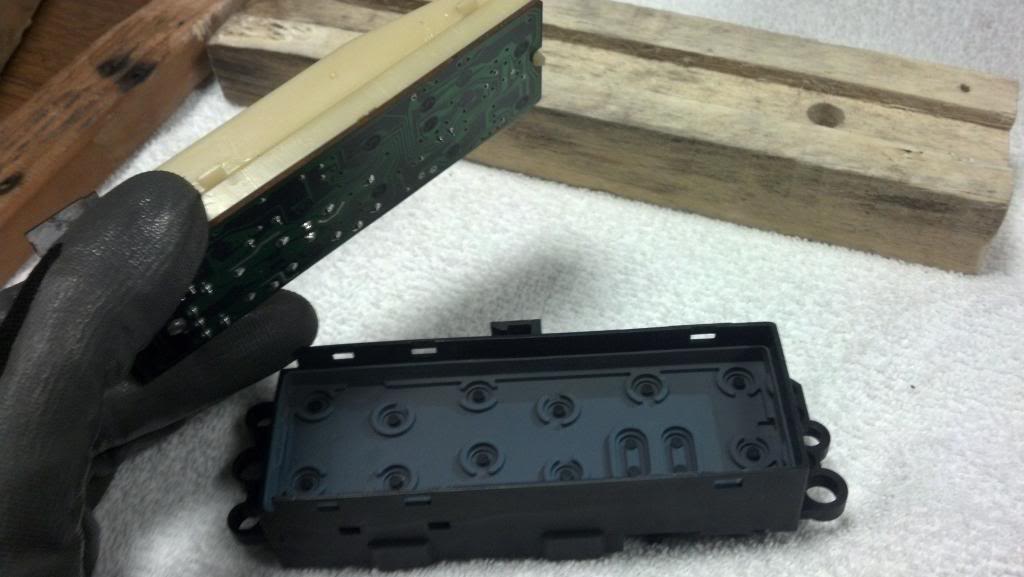
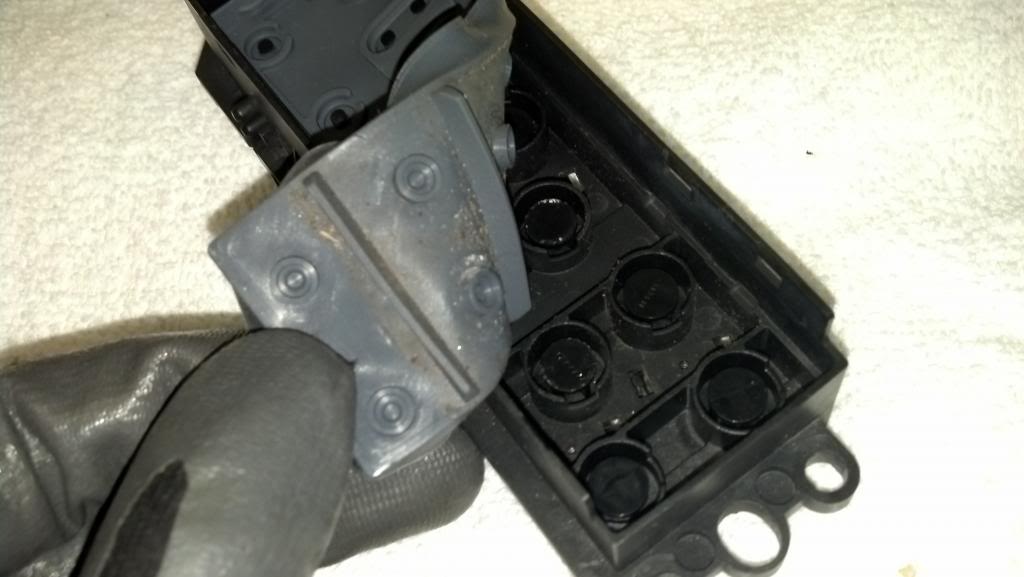
Second remove the white plastic cover from the back of the board by prying the hook away from the switch and then down. Once released the end near to plug should slide off easily.
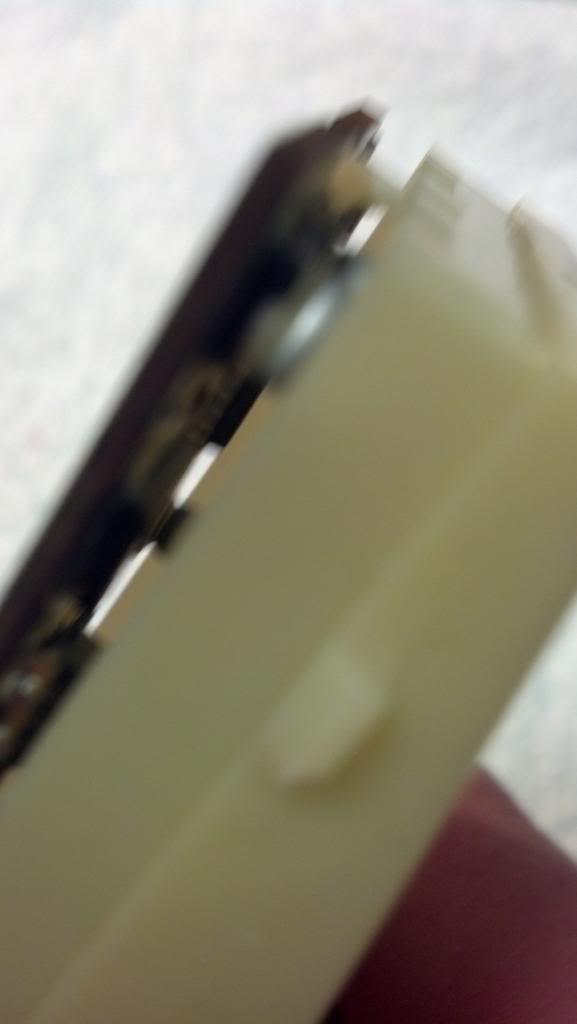
Third inspect the board for corrosion and damage. Unfortunately I don't have any pictures from before but if there are areas of the board that have been blackened and burned out of are white with oxidation they must be cleaned with the fiberglass brush and razor or y other appropriate means. Pay close attention to areas that go through the board connecting both sides as these may be damaged as well and could be overlooked.
Four once cleaned down to board or metal apply the circuit writer carefully. You don't want to make a big mess and short out the switch, However if some excess is applied it can be removed fairly easily with a razor once dry. For holes connecting the two sides of the board make sure to apply to prepared metal surface on both sides. I found it helpful to use a thin wire to ensure that the connection was made through the board.
Five after drying 4 hours with 40 watt light any excess circuit writer was removed with razor and fiberglass brush. Then reassembled switch and allowed and cleaned the pins in the plug with a small file.
Reinsalled master switch to find that it was functioning properly.
First I removed the master switch from the driver side door and carefully removed the cover. The plastic tabs are fairly sturdy but take care not to crack them. During this step I learned that it is best to do this with the switch upsidown or else youll spend your time looking for the little plastic bits instead of fixing the switch. They are located under the rubber part so slowly separate the two halves.
Second remove the white plastic cover from the back of the board by prying the hook away from the switch and then down. Once released the end near to plug should slide off easily.
Third inspect the board for corrosion and damage. Unfortunately I don't have any pictures from before but if there are areas of the board that have been blackened and burned out of are white with oxidation they must be cleaned with the fiberglass brush and razor or y other appropriate means. Pay close attention to areas that go through the board connecting both sides as these may be damaged as well and could be overlooked.
Four once cleaned down to board or metal apply the circuit writer carefully. You don't want to make a big mess and short out the switch, However if some excess is applied it can be removed fairly easily with a razor once dry. For holes connecting the two sides of the board make sure to apply to prepared metal surface on both sides. I found it helpful to use a thin wire to ensure that the connection was made through the board.
Five after drying 4 hours with 40 watt light any excess circuit writer was removed with razor and fiberglass brush. Then reassembled switch and allowed and cleaned the pins in the plug with a small file.
Reinsalled master switch to find that it was functioning properly.
Last edited by MaxKGB; May 6, 2013 at 12:48 PM.
Hi yea sorry about that. I'll put up additional info for that. Should have taken before pics to go with this but was skeptical that it would actually work. I think I have another switch somewhere so if I can find it I'll do that one too and put it up

Yeah I don't quite understand exactly what you did. I've never even heard of a circuit writer before. This is some sort of pen you can just "draw" over an existing circuit board to repair it?
And why don't you embed your photos too? That makes it more cohesive from a following along standpoint. Otherwise you have to tab between windows back and forth
And why don't you embed your photos too? That makes it more cohesive from a following along standpoint. Otherwise you have to tab between windows back and forth

Hey guys, sorry to get into this thread but since this is related to a switch repair I would like to ask something about this master switch.
My master switch controls driver window perfectly, but the front passenger can be put up but not down, if I reach the passenger controller it works up and down correctly, so I assume the problem is my master switch for the front passenger.
here is the tricky part, for both rear windows I can bring them down but not up, if I reach the switch on each door is the same problem, they can go down but neither of them will go up, if I keep trying and trying they go up eventually but that can take 2 to 15 minutes of repeatedly pressing up on the switch, and this could be either the door one or the master.
Is there any chance that both of my rear window regulators are busted? or this is definitely my master switch and both of the switches on each door are bad? to me seem a weird coincidence that both do the same thing (go down but no up)

I've repaired a few master window switches, but I have built a collection of used ones and haven't had one go out for a long time, so I haven't bothered repairing any for several years. What happens is traces become burned at random points. You find them with a magnifying glass and a good eye. I enjoy drinking alcohol while doing these things. Find the points, scrape the board, bridge the gap. I didn't read the guy's post, but I assume a conductive version of the circuit writer was used which I didn't know existed. I just use solder and solid wire for this type of work. I don't see how a paint pen will hold up to currents that burn through copper traces in the first place.
The best thing to do is simply to not burn out your switch, which I assume is caused by holding buttons down continuously when the motor is struggling or the window is already all the way up. If a window is going up slowly, hold the button in increments of 5 seconds with pauses in between. Then either replace the motor or lube up the trim to avoid the problem in the future.
Hey guys, sorry to get into this thread but since this is related to a switch repair I would like to ask something about this master switch.
My master switch controls driver window perfectly, but the front passenger can be put up but not down, if I reach the passenger controller it works up and down correctly, so I assume the problem is my master switch for the front passenger.
here is the tricky part, for both rear windows I can bring them down but not up, if I reach the switch on each door is the same problem, they can go down but neither of them will go up, if I keep trying and trying they go up eventually but that can take 2 to 15 minutes of repeatedly pressing up on the switch, and this could be either the door one or the master.
Is there any chance that both of my rear window regulators are busted? or this is definitely my master switch and both of the switches on each door are bad? to me seem a weird coincidence that both do the same thing (go down but no up)
My master switch controls driver window perfectly, but the front passenger can be put up but not down, if I reach the passenger controller it works up and down correctly, so I assume the problem is my master switch for the front passenger.
here is the tricky part, for both rear windows I can bring them down but not up, if I reach the switch on each door is the same problem, they can go down but neither of them will go up, if I keep trying and trying they go up eventually but that can take 2 to 15 minutes of repeatedly pressing up on the switch, and this could be either the door one or the master.
Is there any chance that both of my rear window regulators are busted? or this is definitely my master switch and both of the switches on each door are bad? to me seem a weird coincidence that both do the same thing (go down but no up)


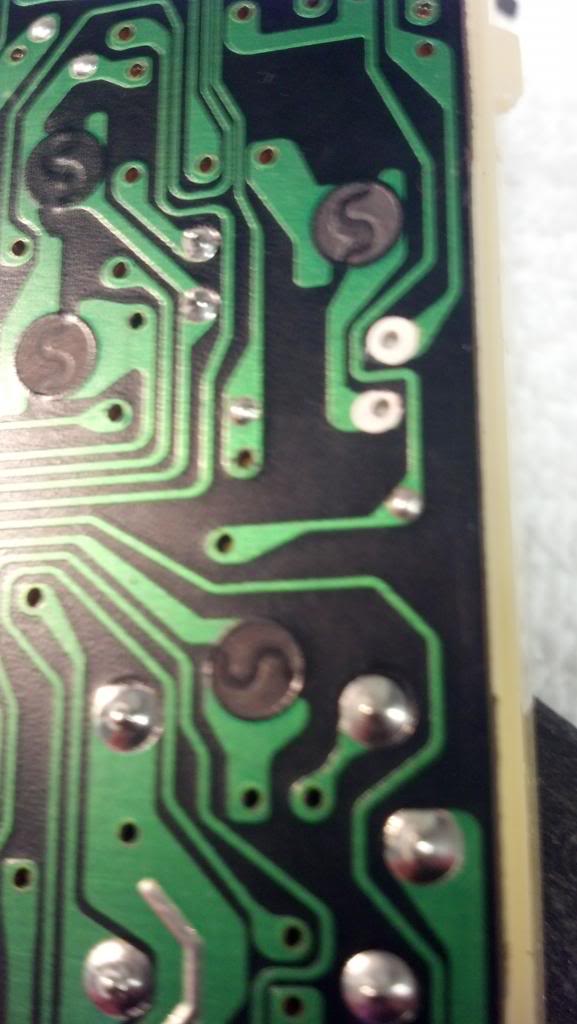
I haven't figured out the embed images thing yet. I looked at the sticky but but still didn't understand. maybe my girlfriend can show me how it works but for now I have attached links with highlighted areas to show where i applied the circuit writer. Its like Hectic described about repairing the burnt up copper except I used this pen because I'm not that good at soldering. Also the pen contains silver which is more conductive than copper so i hope it will handle the power demands of the switch without issues. So far the pen seems to be holding up and I've been enjoying power windows for about a week.
I wasn't able to find my other switch to show a step by step repair but hopefully I'll be able to soon or i'll just get another one. Also I apologize for being a bit all over the place but I'm still in school and it's final exam time. Hope the pictures are of some help.
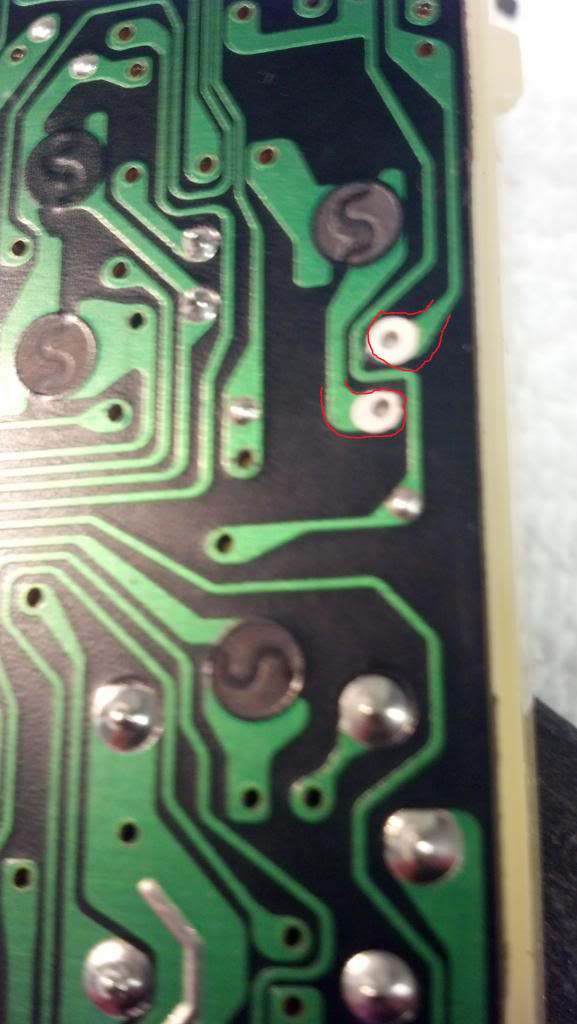
^^ 2nd pic is better...shows indeed that the trace is burned. Nice job on repairing it!
 All I would have done differently is put clear nail polish on it after it was dry...just to be safe.


Fist you need to remove the handle. It is secured by two bolts with one at the top and one at the bottom. The top bolt is covered by a plug which you can pry out gently with a dull screwdriver. Once the handle is off you can use the back of a knife or stiff plastic card to pry up the panel containing the window switch. There are clips at both ens of the panel that can be pushed in while prying up to remove. This may take a bit of force to remove but should be fine with a bit of care. The switch and then be unscrewed and the connections removed.

Member
Joined: Sep 2002
Posts: 140
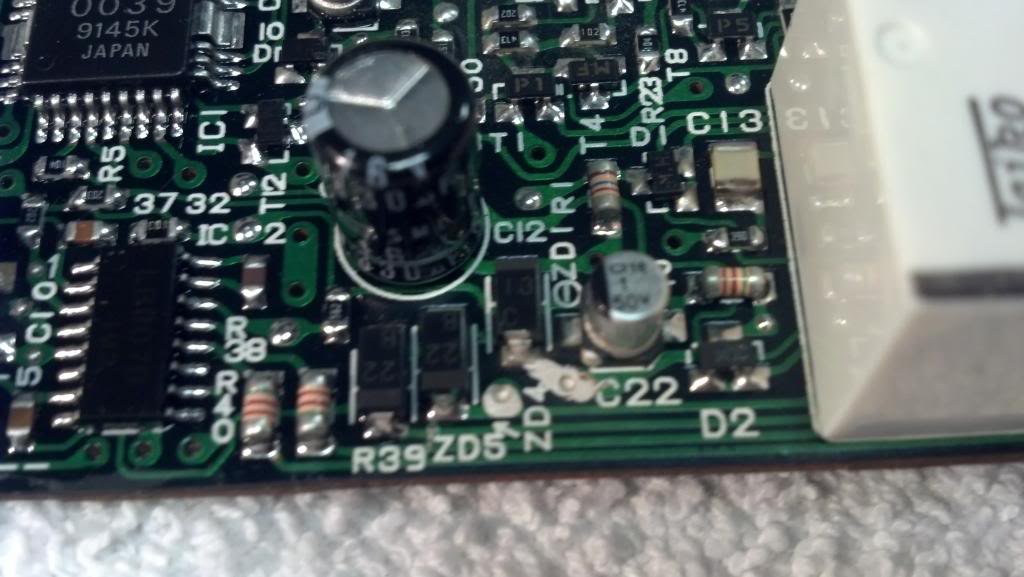
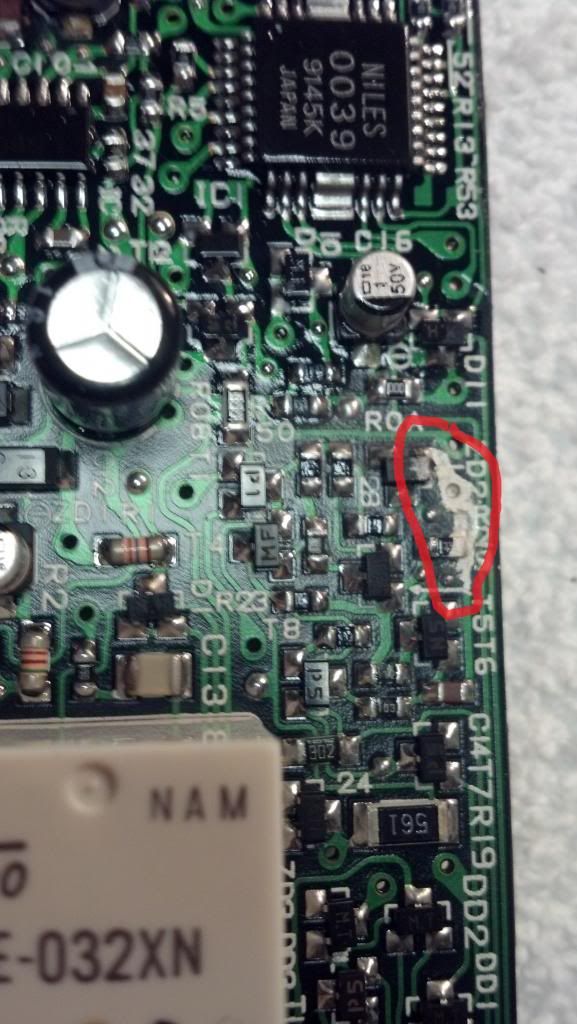
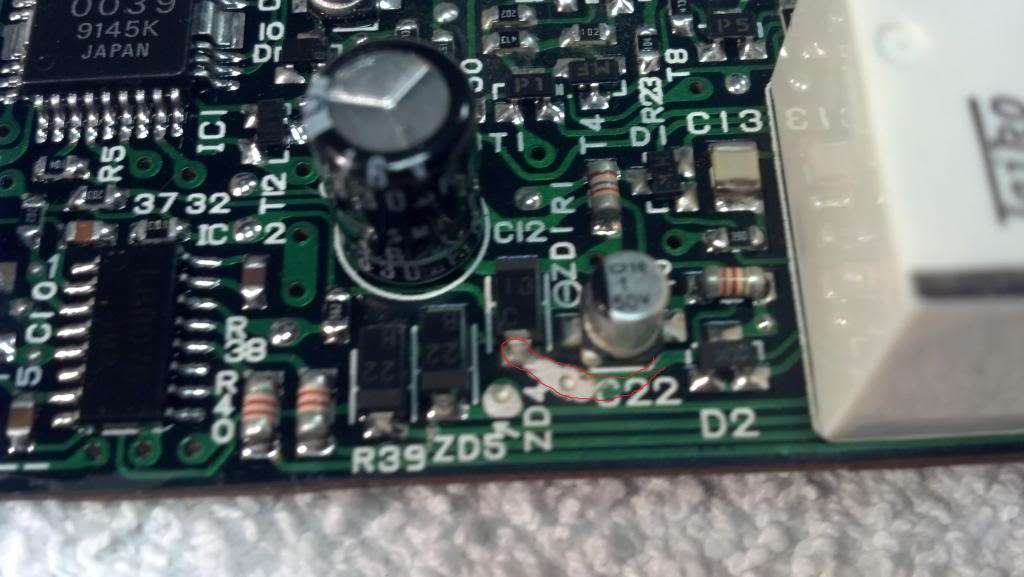
After a trip to the junk yard today, I found that most of the circuit boards were burnt around the area circled in post #9. This appears to be a surface mount zener diode (labeled ZD2) and a few resistors (one labeled R29).
I found one board that was not burnt, so I bought it and it worked perfectly. So, before you buy a JY master switch, I suggest you take it apart and inspect ZD2. Be sure to bring a magnifying glass if your vision isn't perfect.
I found one board that was not burnt, so I bought it and it worked perfectly. So, before you buy a JY master switch, I suggest you take it apart and inspect ZD2. Be sure to bring a magnifying glass if your vision isn't perfect.

Thread
Thread Starter
Forum
Replies
Last Post
AaronL
5th Generation Maxima (2000-2003)
15
Aug 8, 2020 10:31 AM
mkaresh
8th Generation Maxima (2016-)
21
Mar 12, 2018 06:48 PM
HerpDerp1919
3rd Generation Maxima (1989-1994)
2
Sep 29, 2015 02:02 PM