
Plasti dip on a 3rd gen, whole car - pictures


Plasti dip on a 3rd gen, whole car - pictures
Yes the plasti dip bug bit me
I sprayed it at the end of the summer. I was on the fence for awhile on whether to do it or not, but I was tired of the car looking like crap from the cosmetic attention it needed. I dont have the proper painting facilities, so I did not want to get involved in a thorough base coat/clearcoat job right now, so this became the choice
I'm going to try not to get to deep into the technicalities of plasti dip (Dipyourcar forums are better suited for that) but I sanded smooth the bumpers and front lip so the peeling clearcoat lines wouldnt show through to the finished product. Sanding is not required for plastidip adhesion, just clean and dry and free of oil/grease/wax.
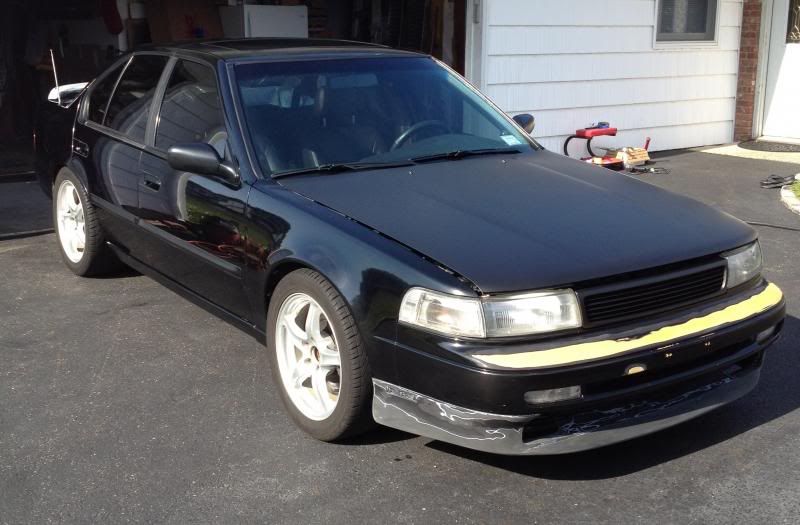
The "before" shot. The sides of the car are still mint, but the bumpers, stillen lip, hood, roof, and trunk needed some fixing. The hood and roof would benefit from some good compounding, the bumpers began fading a long time ago, and the trunk fell victim to the stock spoiler decay and needed to have holes patched and welded. I had already sprayed just the hood some time ago to test out the dip first
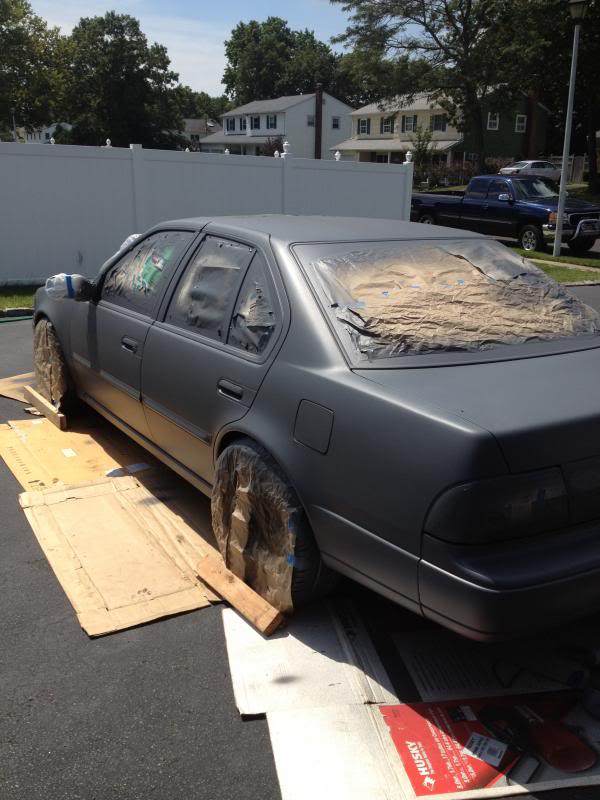
I started with a few coats of the "gunmetal gray" dip color to act as a primer. This let me achieve better hiding of the multi-colored bumpers- yellow/gray/etc
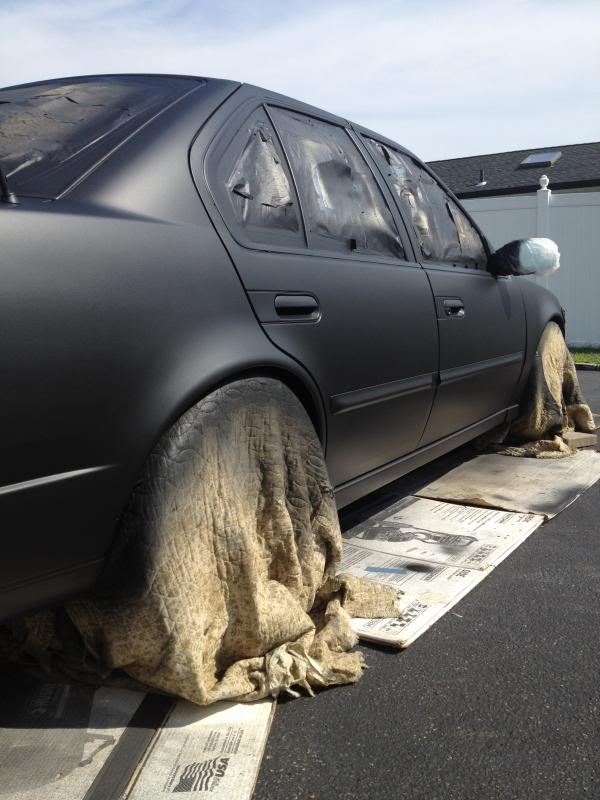
Then the coats of matte black
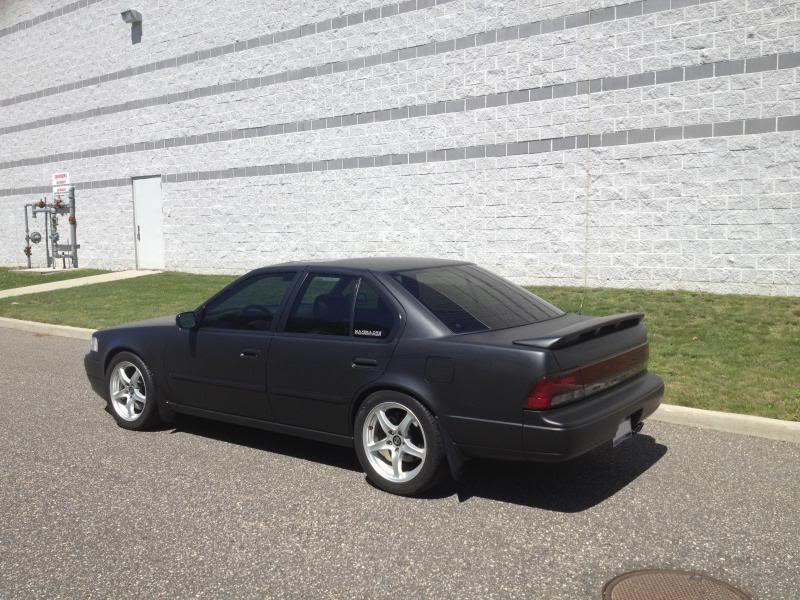
Peeling process - the window trim/molding on the 3rd gens are difficult when it comes to this. There is no gap where the trim meets the glass or where the trim meets the body of the car. Compare to the 7th gen maxima or most newer cars where there isnt even a molding, the glass just stops at the body of the car leaving a clean gap right at the edge. So i gently traced around all of the trim with a razor blade to cut the dip, and then peeled it. I also sprayed the side window trim with the plasti dip glossifier to give it some contrast to the rest of the matte black on the body panels.. trying to avoid that "rattle can spray bomb the entire car" look

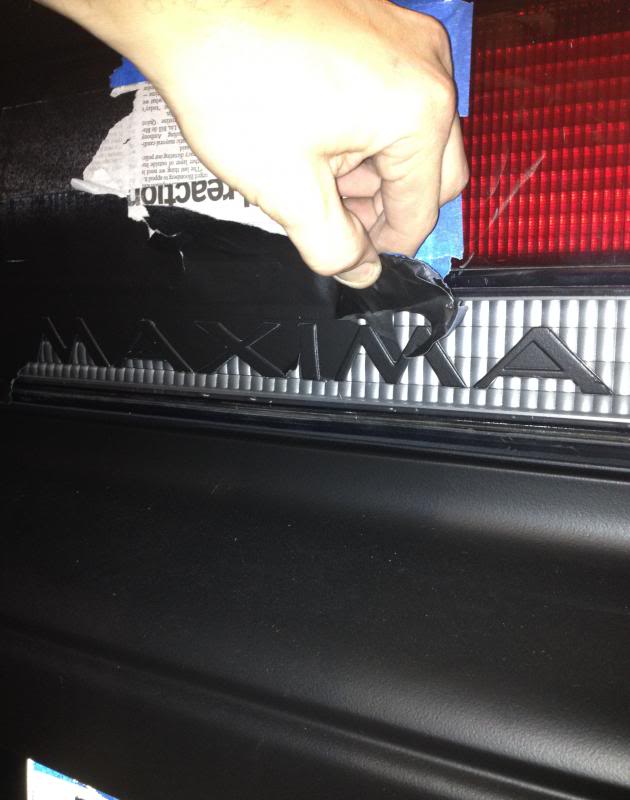
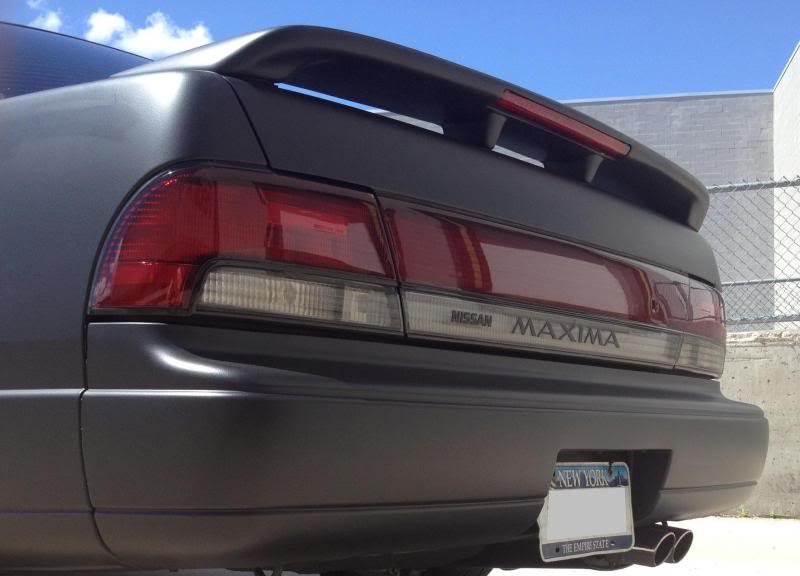
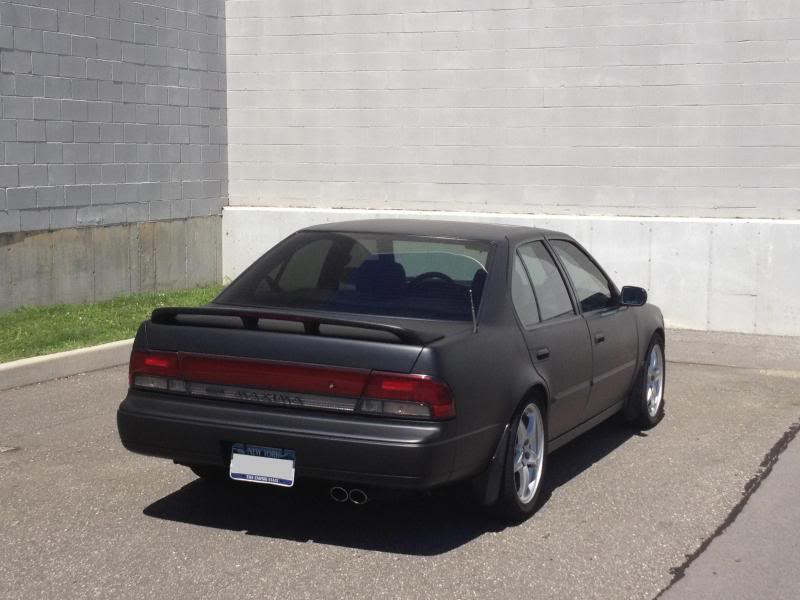
Rear lettering - this was tedious! Again here, there is no definitive separation crevices on the lettering. We dont have separate stick-on emblems, its more like embossed out from the plastic centerpiece. So i traced this all out gently with a razor blade, then peeled the rest off
I sprayed it at the end of the summer. I was on the fence for awhile on whether to do it or not, but I was tired of the car looking like crap from the cosmetic attention it needed. I dont have the proper painting facilities, so I did not want to get involved in a thorough base coat/clearcoat job right now, so this became the choice
I'm going to try not to get to deep into the technicalities of plasti dip (Dipyourcar forums are better suited for that) but I sanded smooth the bumpers and front lip so the peeling clearcoat lines wouldnt show through to the finished product. Sanding is not required for plastidip adhesion, just clean and dry and free of oil/grease/wax.
The "before" shot. The sides of the car are still mint, but the bumpers, stillen lip, hood, roof, and trunk needed some fixing. The hood and roof would benefit from some good compounding, the bumpers began fading a long time ago, and the trunk fell victim to the stock spoiler decay and needed to have holes patched and welded. I had already sprayed just the hood some time ago to test out the dip first
I started with a few coats of the "gunmetal gray" dip color to act as a primer. This let me achieve better hiding of the multi-colored bumpers- yellow/gray/etc
Then the coats of matte black
Peeling process - the window trim/molding on the 3rd gens are difficult when it comes to this. There is no gap where the trim meets the glass or where the trim meets the body of the car. Compare to the 7th gen maxima or most newer cars where there isnt even a molding, the glass just stops at the body of the car leaving a clean gap right at the edge. So i gently traced around all of the trim with a razor blade to cut the dip, and then peeled it. I also sprayed the side window trim with the plasti dip glossifier to give it some contrast to the rest of the matte black on the body panels.. trying to avoid that "rattle can spray bomb the entire car" look
Rear lettering - this was tedious! Again here, there is no definitive separation crevices on the lettering. We dont have separate stick-on emblems, its more like embossed out from the plastic centerpiece. So i traced this all out gently with a razor blade, then peeled the rest off
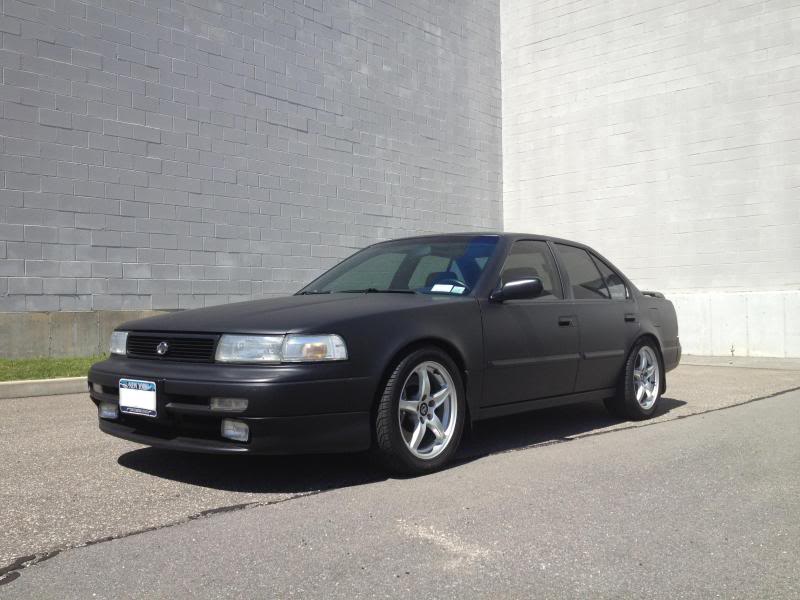
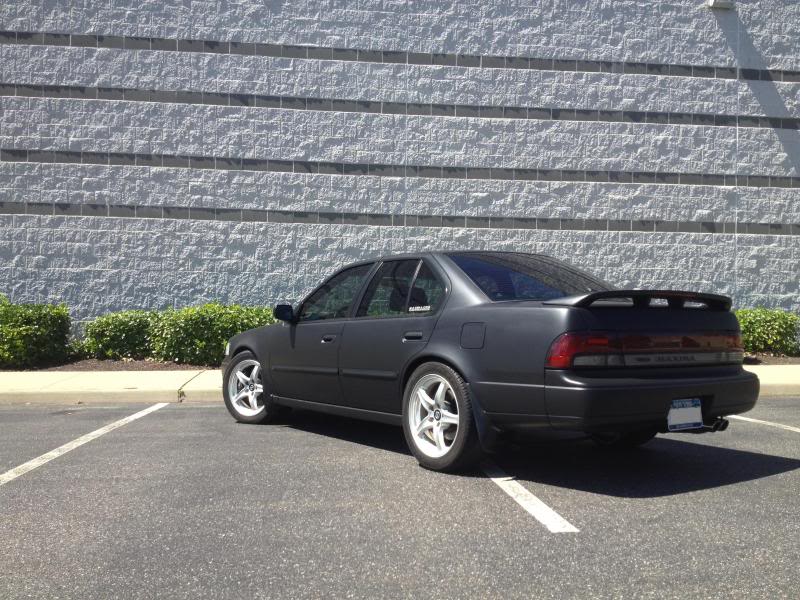
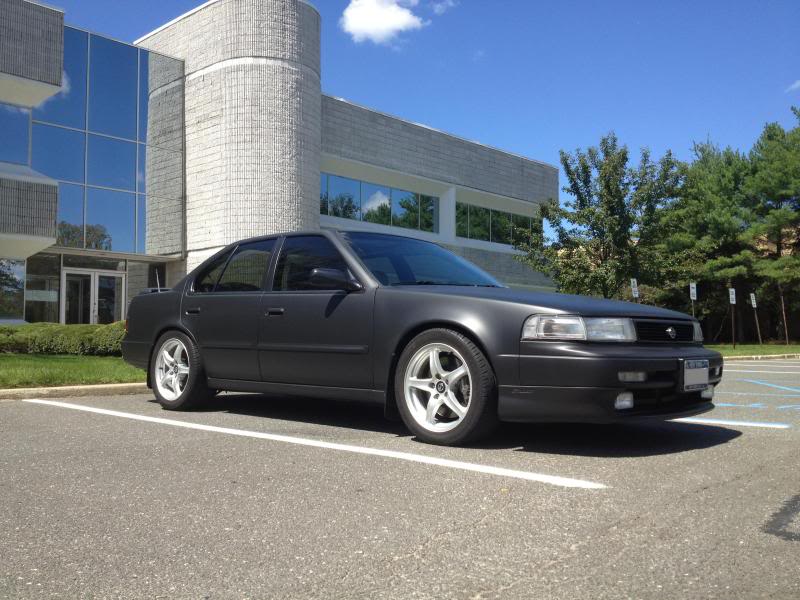
Finished product!
I'll continue to leave it like this for now (Done in late summer, Its now january, so 4-5 months and its still holding up fine) Maybe I'll change the color in the spring.. a charcoal gray/blue mix, some type of red, maybe a pearl white, who knows. The matte finish did kind of grow on me. Though one day when i have the time and facilities for base & clearcoat work, I would probably want to go back to the original gloss black and use the plasti dip for window trim and accents and whatnot

I'll continue to leave it like this for now (Done in late summer, Its now january, so 4-5 months and its still holding up fine) Maybe I'll change the color in the spring.. a charcoal gray/blue mix, some type of red, maybe a pearl white, who knows. The matte finish did kind of grow on me. Though one day when i have the time and facilities for base & clearcoat work, I would probably want to go back to the original gloss black and use the plasti dip for window trim and accents and whatnot


I'm actually really liking this. I assume you rattle canned it - or did you use a gun? I'm not usually a fan of plastidip, but damn, I think I might go this route - unsure of color though.
Getting rust spots and car looking pretty ugly with the patches of primer I've sprayed on the spots I ground off. Was going to putty up some dings and pop a couple studs on to work a dent out of the quarter panel then paint it, but hell, plastidip would be a nicer alternative since I don't think I want to spend too much more money on this car at this point.
Getting rust spots and car looking pretty ugly with the patches of primer I've sprayed on the spots I ground off. Was going to putty up some dings and pop a couple studs on to work a dent out of the quarter panel then paint it, but hell, plastidip would be a nicer alternative since I don't think I want to spend too much more money on this car at this point.


almost looks like the stock charcoal color in a couple of the pictures. seems when most people plastidip their cars they ignore the 'prep work' however looks like you did an awesome job taping it off so your finished product looks a million times better than most

Looks great
I've wanted to plastidip one of my 3rd gens for a couple years now. Problem is both cars need a bunch of body work. So once I do all that I'll probably want to go ahead and paint them for real.
I've wanted to plastidip one of my 3rd gens for a couple years now. Problem is both cars need a bunch of body work. So once I do all that I'll probably want to go ahead and paint them for real.


Member
Joined: Dec 2013
Posts: 165
From: Ny longisland
Finished product! I'll continue to leave it like this for now (Done in late summer, Its now january, so 4-5 months and its still holding up fine) Maybe I'll change the color in the spring.. a charcoal gray/blue mix, some type of red, maybe a pearl white, who knows. The matte finish did kind of grow on me. Though one day when i have the time and facilities for base & clearcoat work, I would probably want to go back to the original gloss black and use the plasti dip for window trim and accents and whatnot

Junior Member
Joined: Dec 2013
Posts: 22
Finished product!
I'll continue to leave it like this for now (Done in late summer, Its now january, so 4-5 months and its still holding up fine) Maybe I'll change the color in the spring.. a charcoal gray/blue mix, some type of red, maybe a pearl white, who knows. The matte finish did kind of grow on me. Though one day when i have the time and facilities for base & clearcoat work, I would probably want to go back to the original gloss black and use the plasti dip for window trim and accents and whatnot
I'll continue to leave it like this for now (Done in late summer, Its now january, so 4-5 months and its still holding up fine) Maybe I'll change the color in the spring.. a charcoal gray/blue mix, some type of red, maybe a pearl white, who knows. The matte finish did kind of grow on me. Though one day when i have the time and facilities for base & clearcoat work, I would probably want to go back to the original gloss black and use the plasti dip for window trim and accents and whatnot

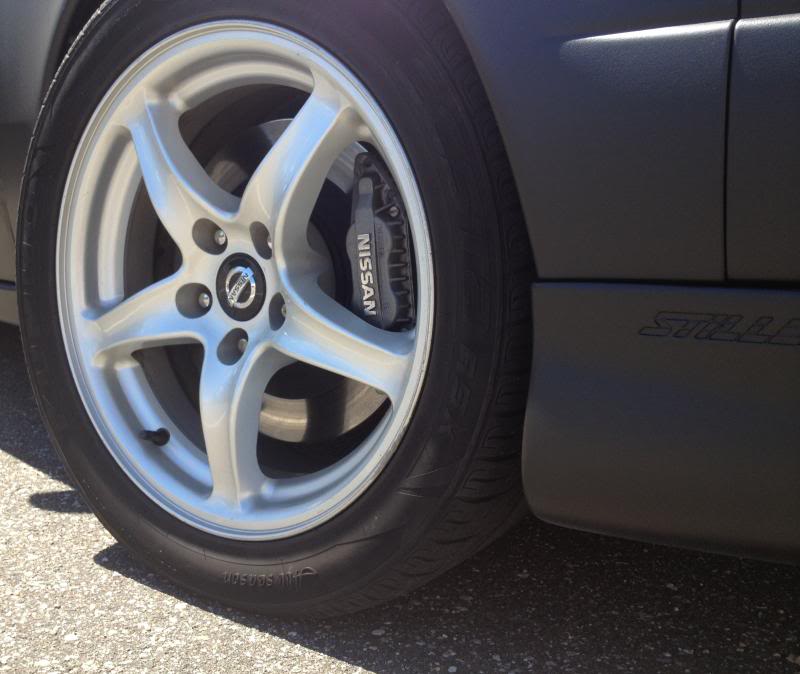
I'm sure I'd notice the imperfections in person but from your pics it looks great!! I like that color with your after market wheels...by the way, what year/model are the rims from?
Last edited by shiloh51933; Jan 24, 2014 at 08:00 AM.


im pretty sure its just using Z32 brake parts. calipers, brackets, rotors, etc. its a upgrade from stock 3rd gen brakes, cant remember what you have to modify to fit them if anything at all.


Thread
Thread Starter
Forum
Replies
Last Post
Lakersallday24
6th Generation Maxima (2004-2008)
10
Jun 16, 2019 01:35 AM
YourLocalAsian
6th Generation Maxima (2004-2008)
3
Aug 17, 2015 02:33 PM
MikesChevelle
5th Generation Maxima (2000-2003)
4
Aug 6, 2015 11:36 AM
laparka66
7th Generation Maxima (2009-2015)
16
Aug 6, 2015 09:36 AM
ViciousVQ30
4th Generation Classifieds (1995-1999)
0
Aug 5, 2015 05:40 PM