
My next project - roof reskin


My next project - roof reskin
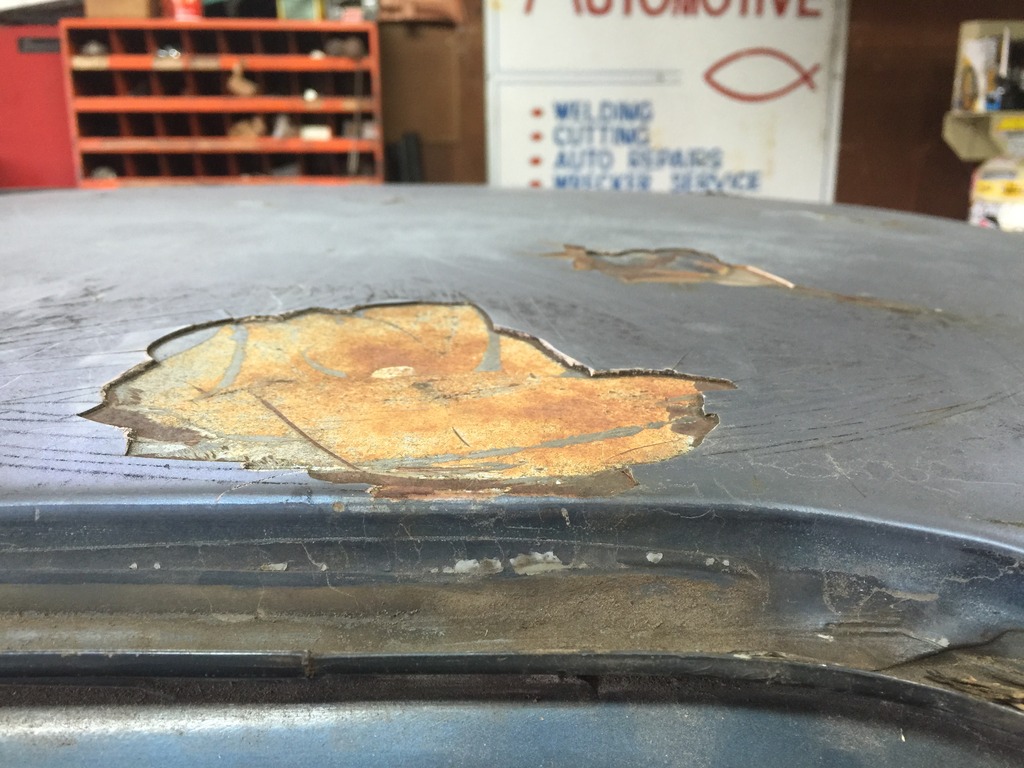
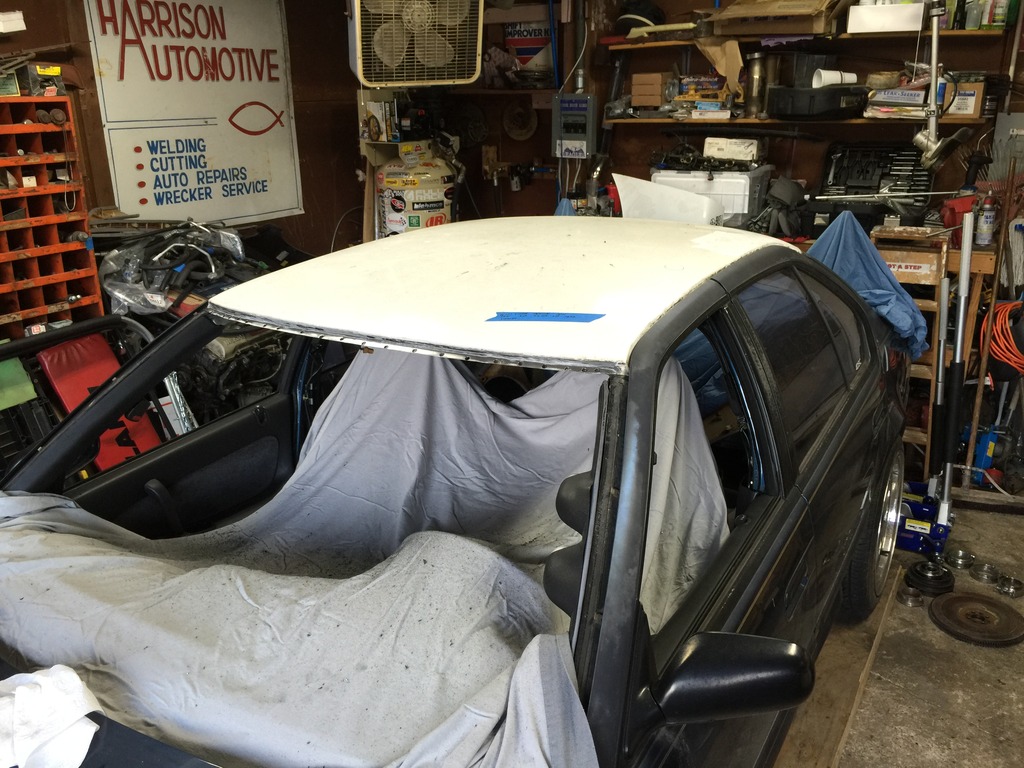
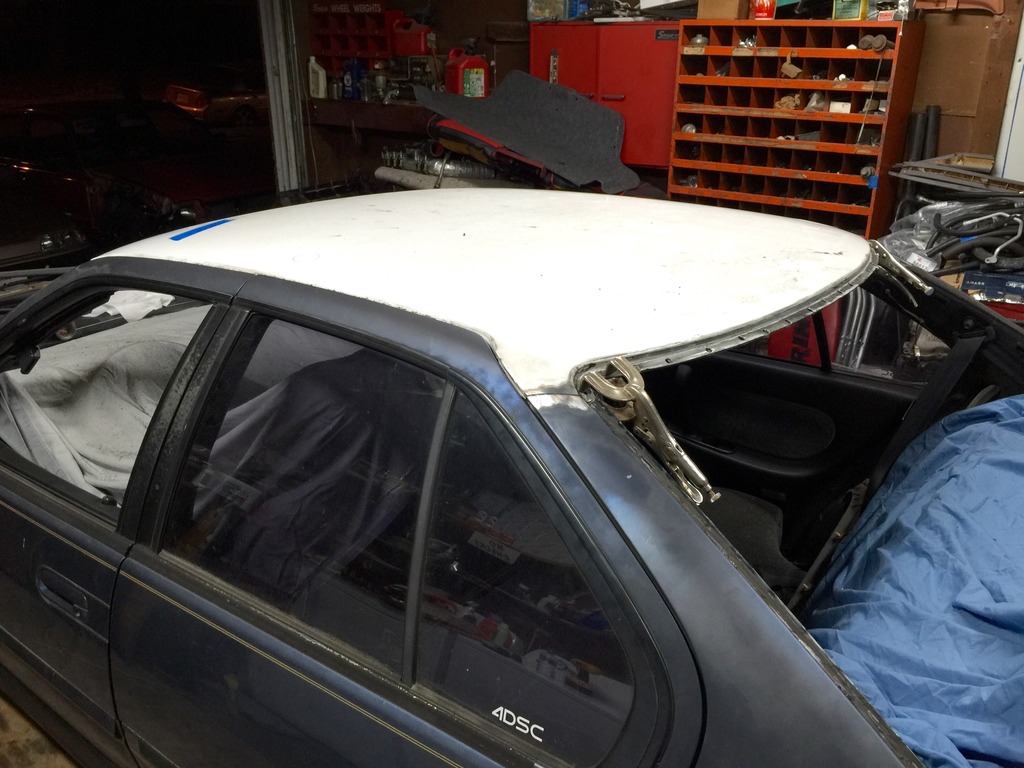
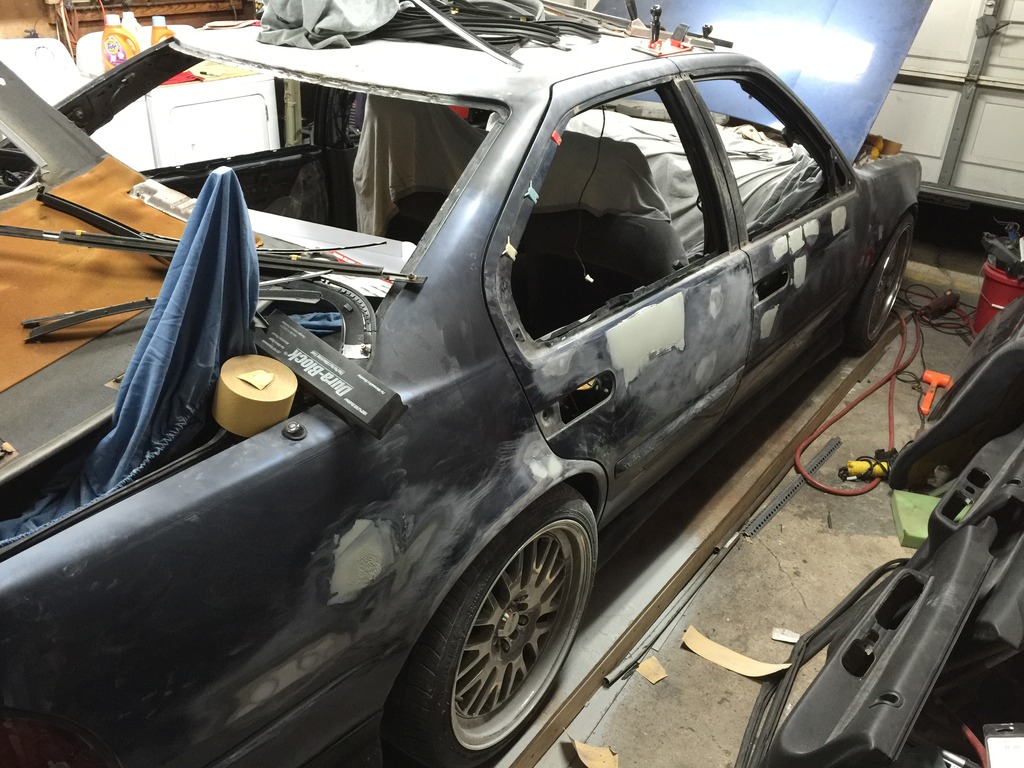
I have been meaning to do this for a few years now but the time has finally come. My blue VE - which I bought non-running and with a blown automatic transmission for $200 - had some pretty bad hail damage at some point in its life. The "repair" was a textbook way to NOT repair hail damage on a roof.
The repair consisted of simply bathing the entire roof in a too-thick layer of Bondo. They did this on the hood too. I long ago replaced the hood but the roof has always bothered me. In the past 4-5 years, it's started to flake off in huge chunks. The faded paint never bothered/embarrassed me but the huge chunks flaking off the roof did!
Here's an example:
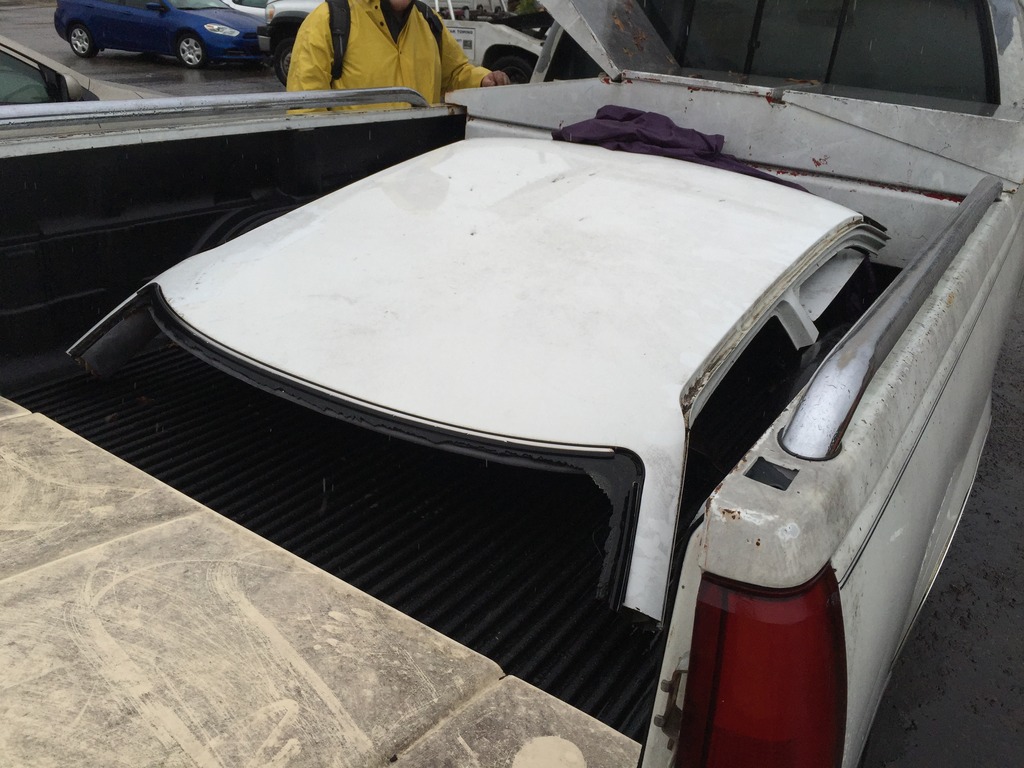
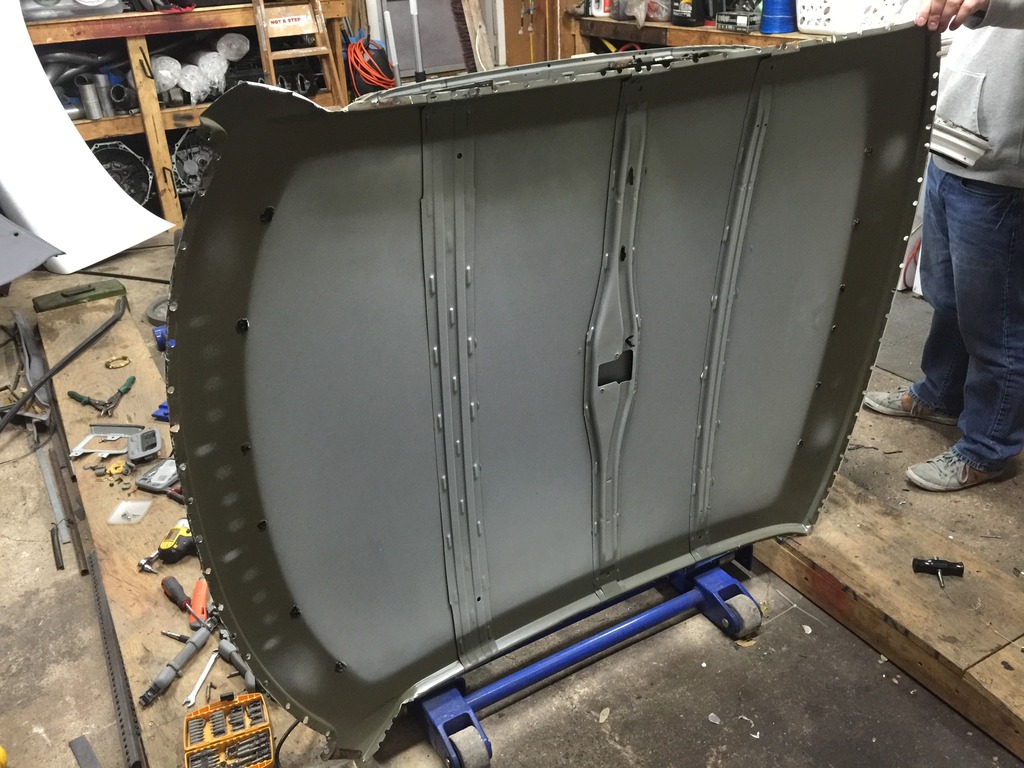
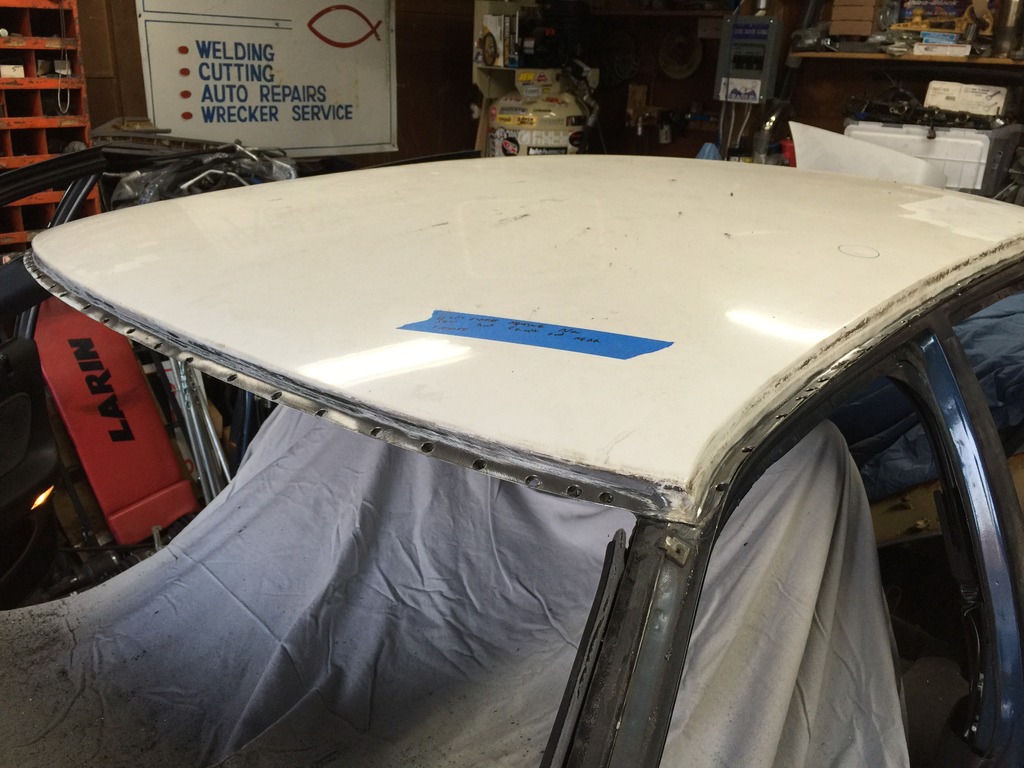
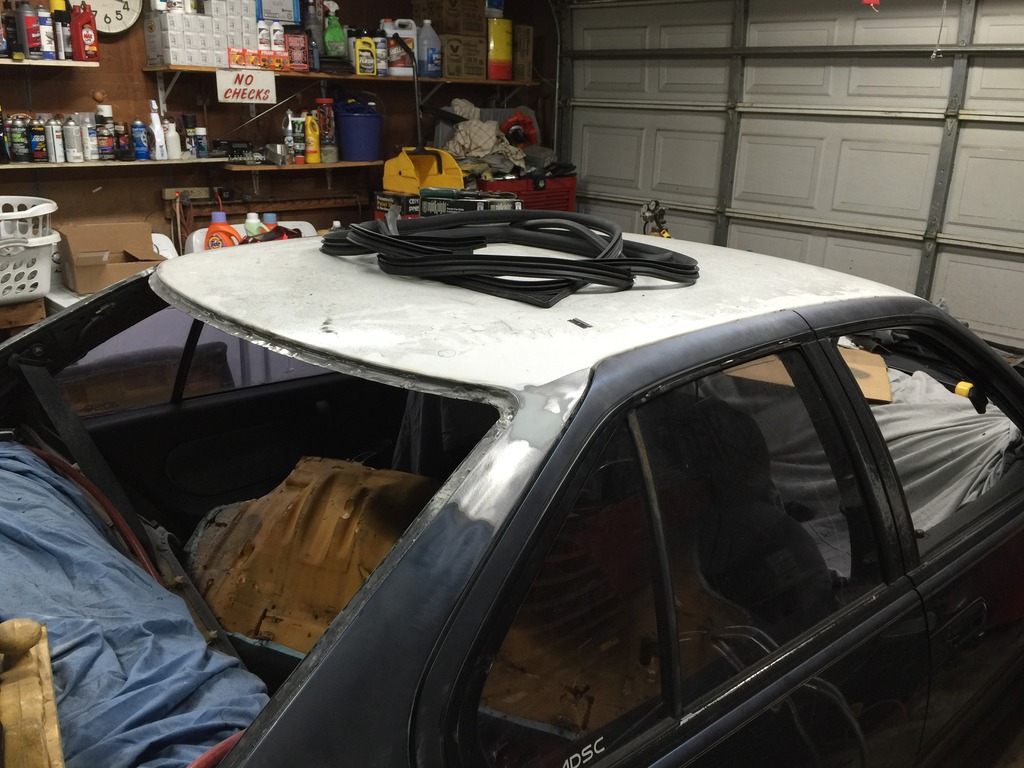
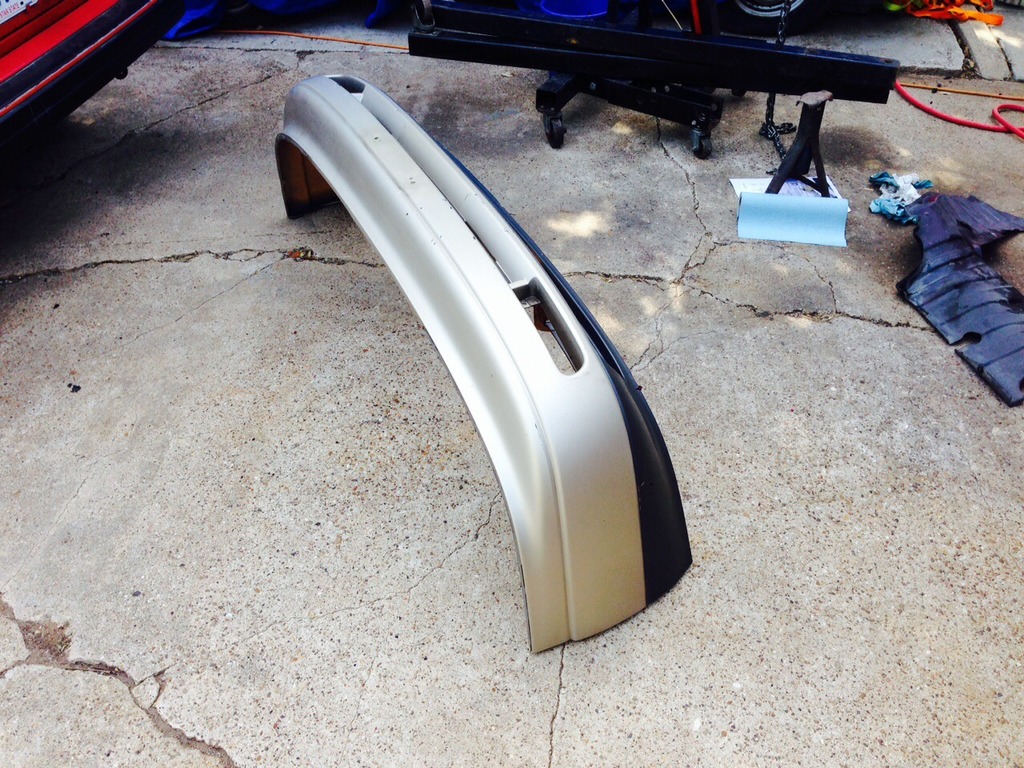
Anyway, so last weekend I went to the junkyard and cut a roof off a donor 3rd gen. Unfortunately I couldn't source any good local sunroof donor cars, so I went no sunroof:
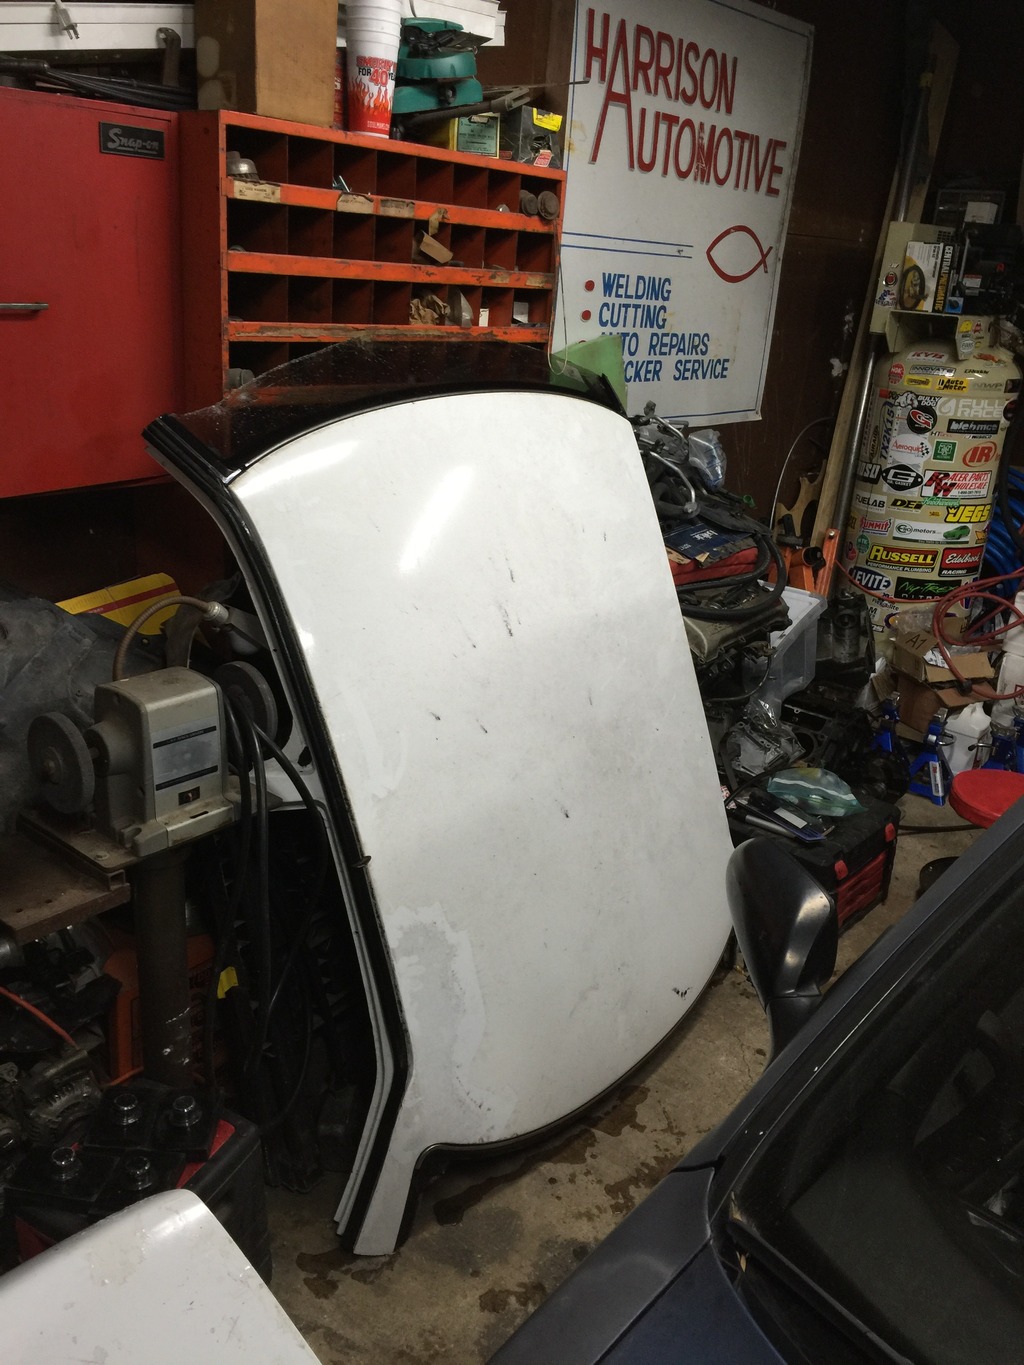
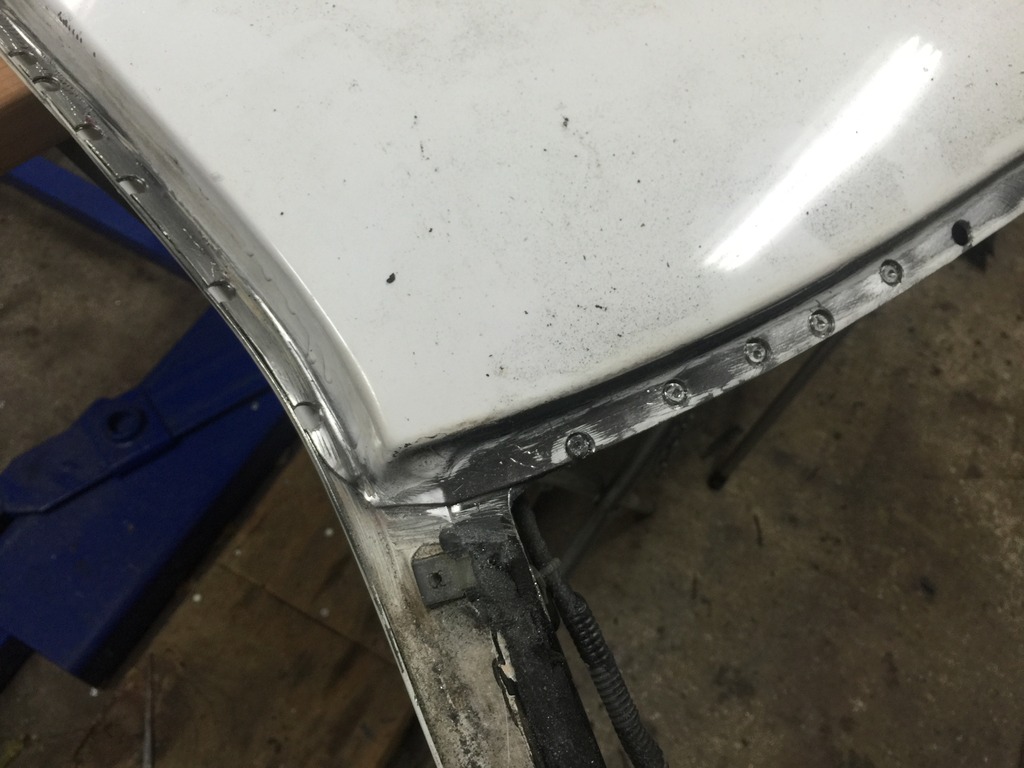
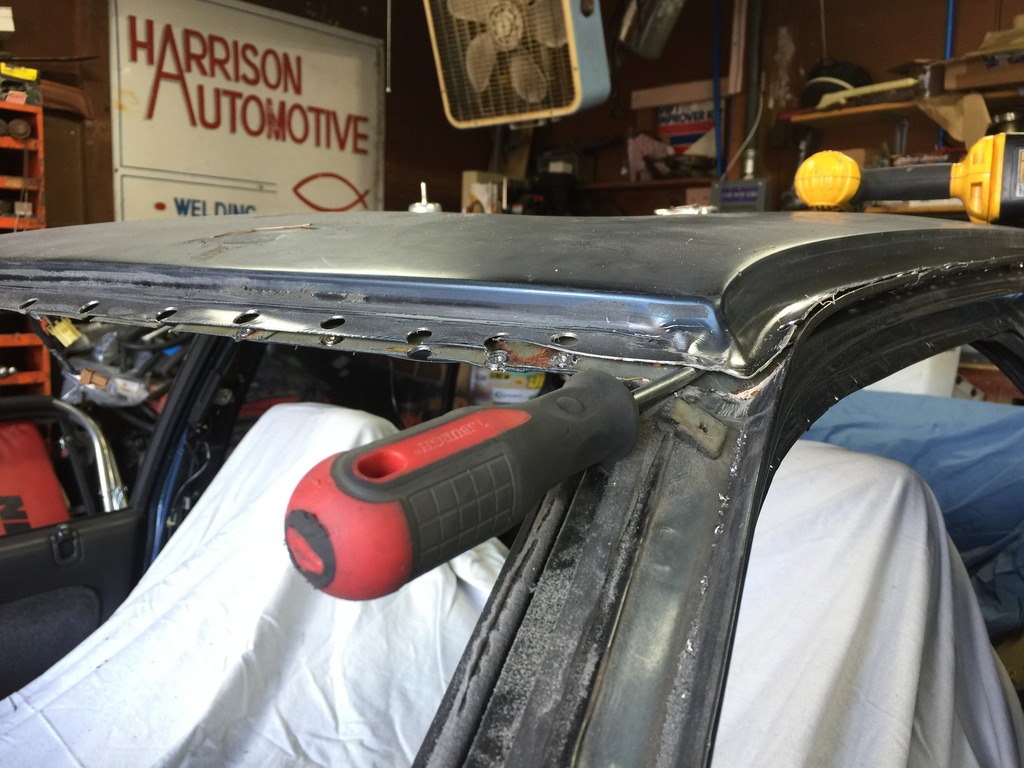
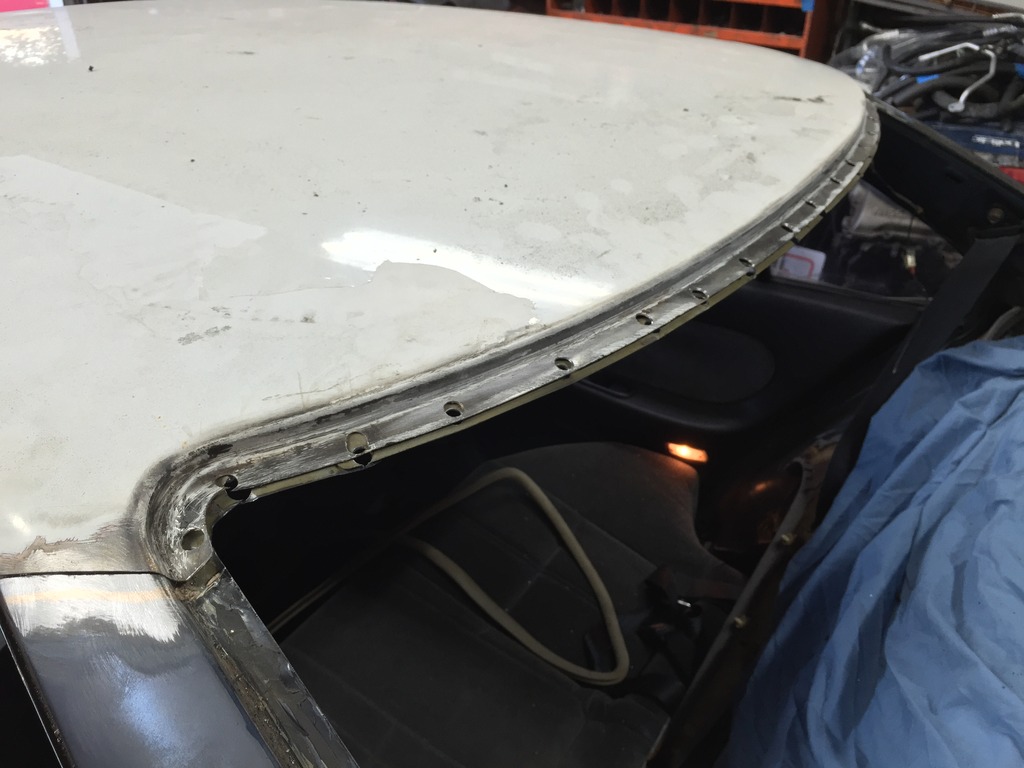
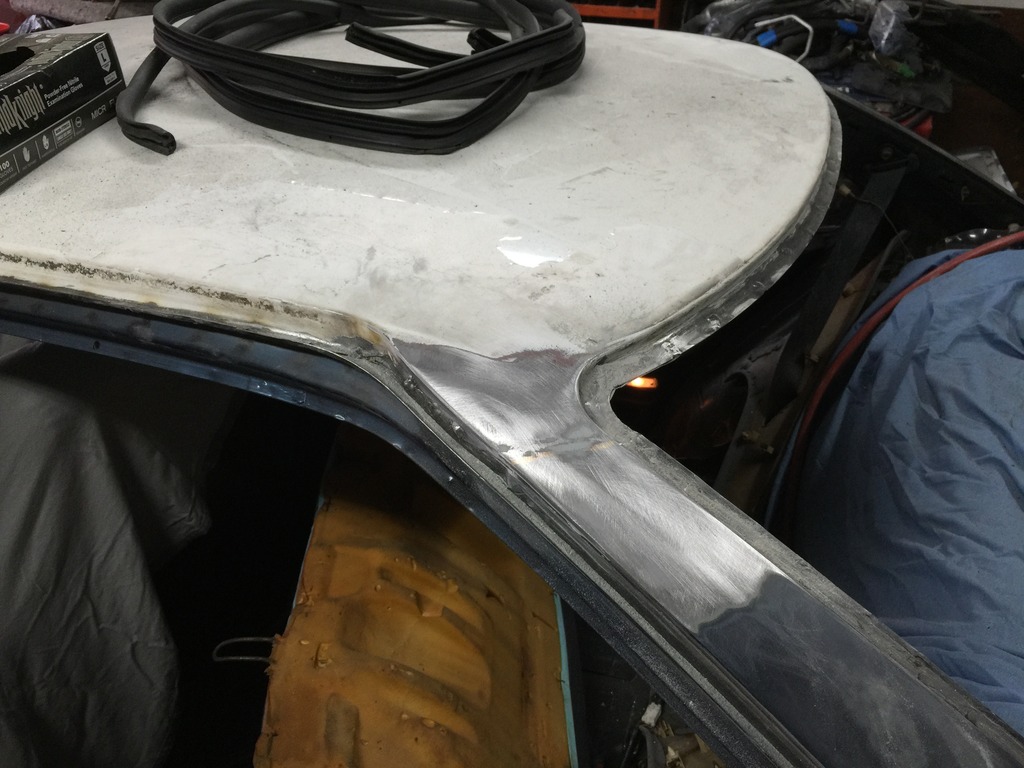
This weekend I started working on separating the donor roof skin. From the factory, the seam is brazed to the body at the C pillar:
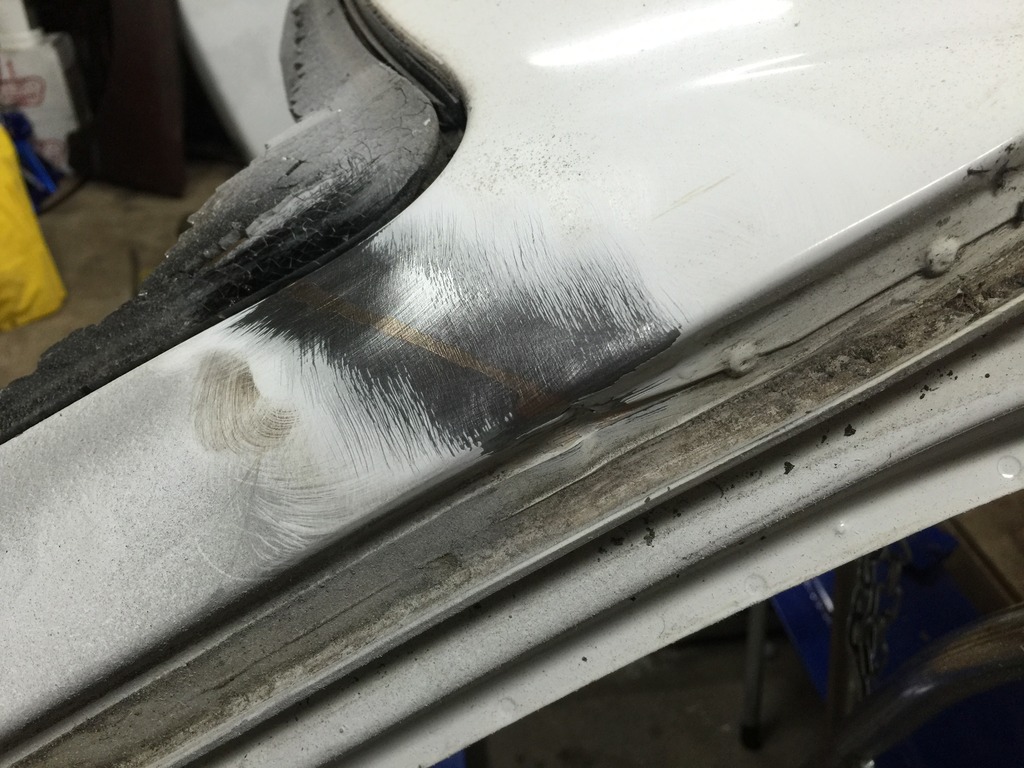
This part is really tedious - getting all the seam sealer gone (wire wheel) and drilling out the spot welds:

Once you do that, with a little bit of work you can "pop" the roof skin off:
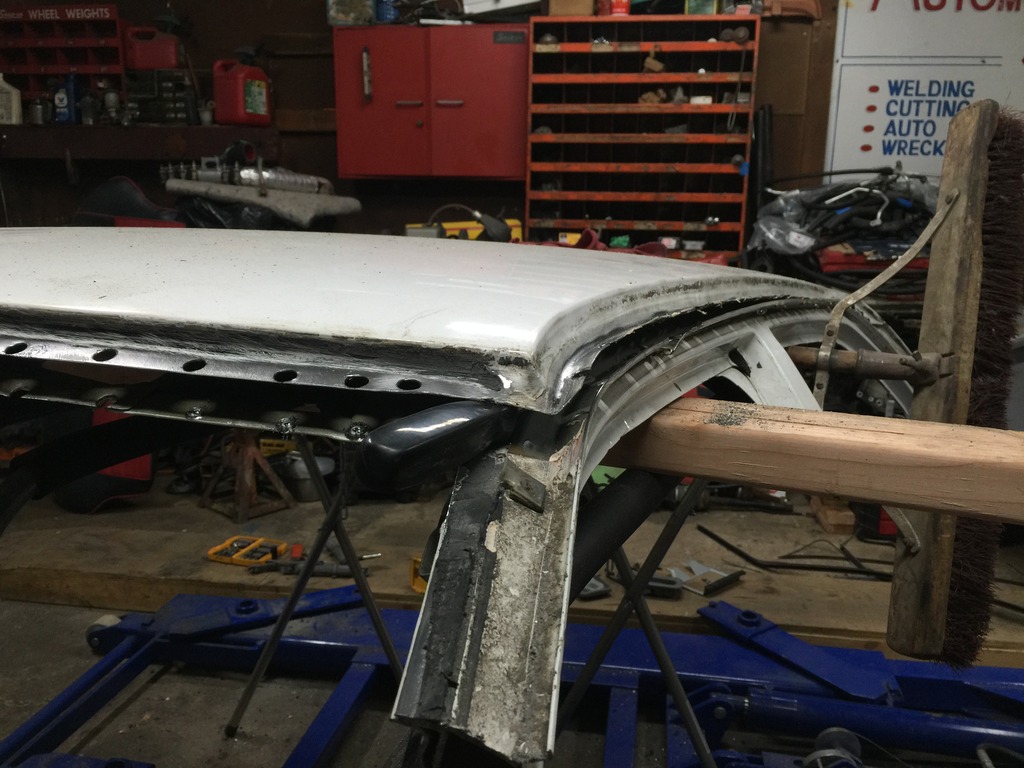
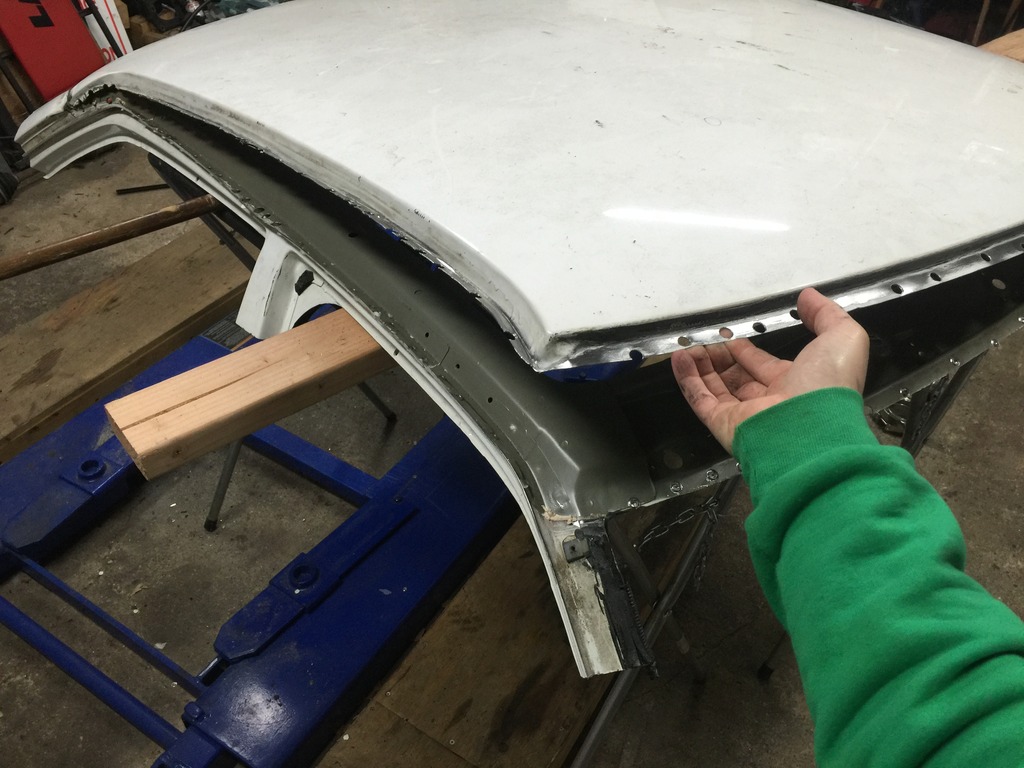
Skin removed:
Removing headliner, sunroof, and front and rear glass (without cracking them, not to brag or anything ):
):
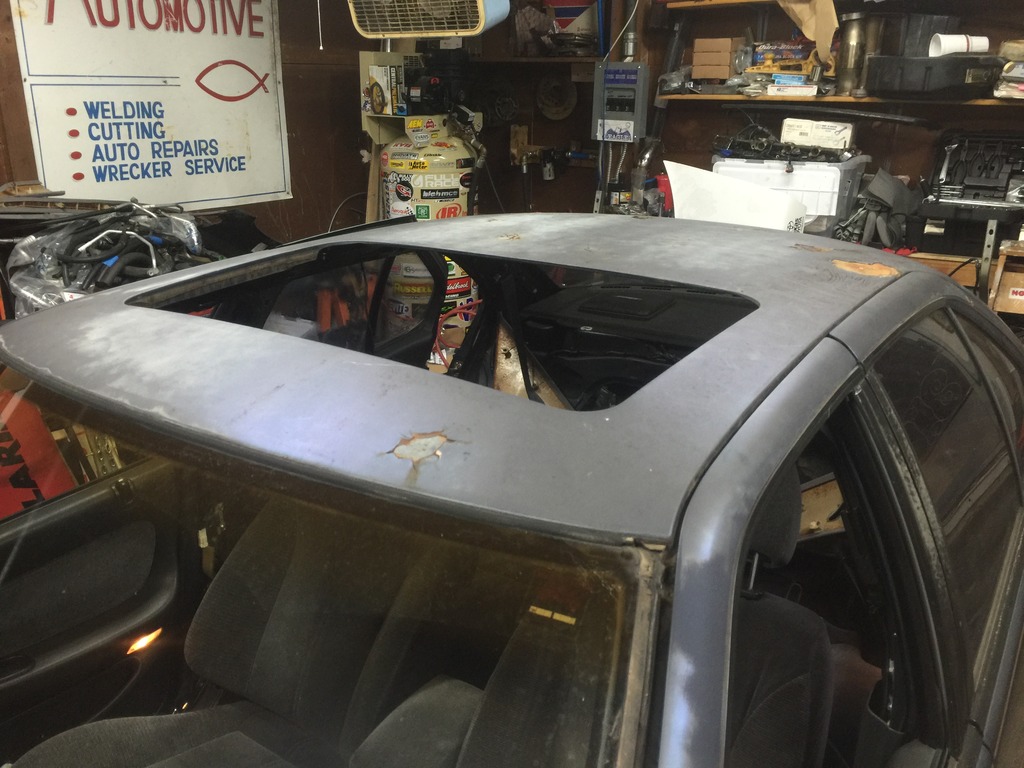
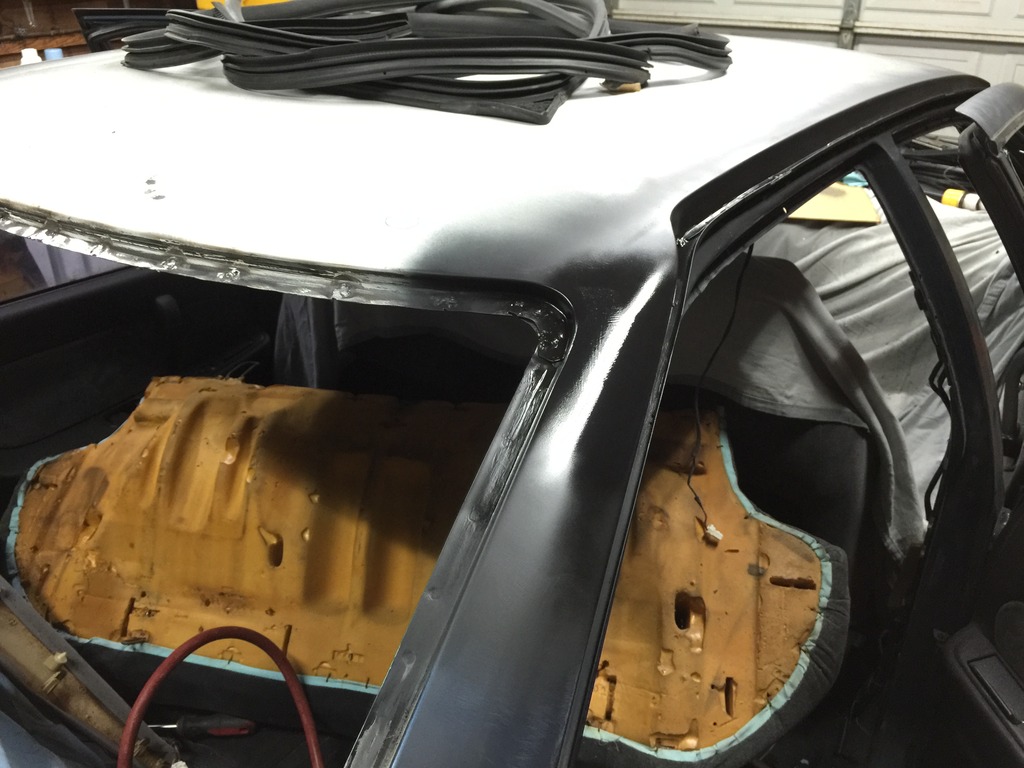
Protecting the interior:

Spot welds drilled out:
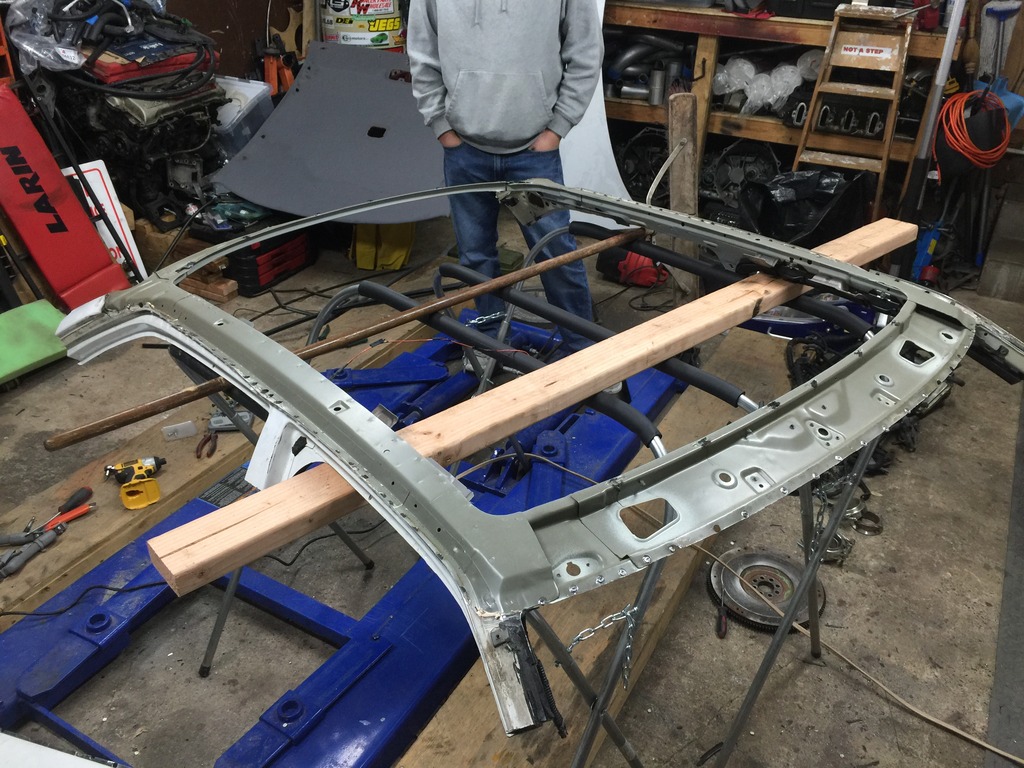
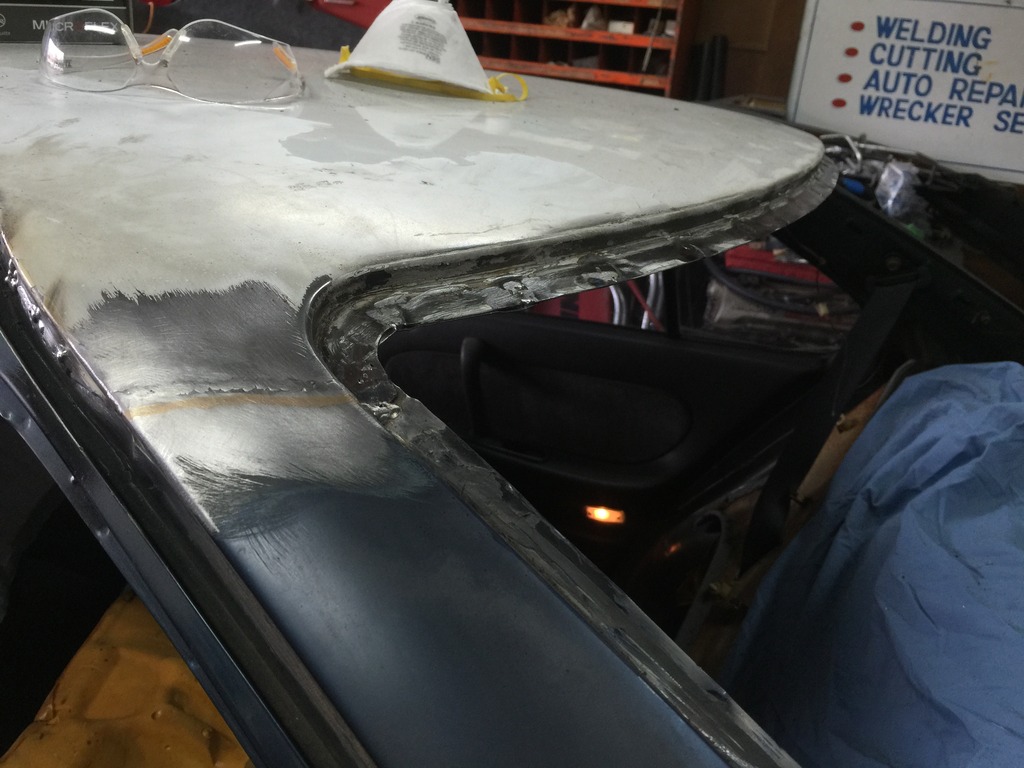
Removed (notice I cut ABOVE the brazed joint - easier to remove material later on if need be versus trying to add material if I took away too much):

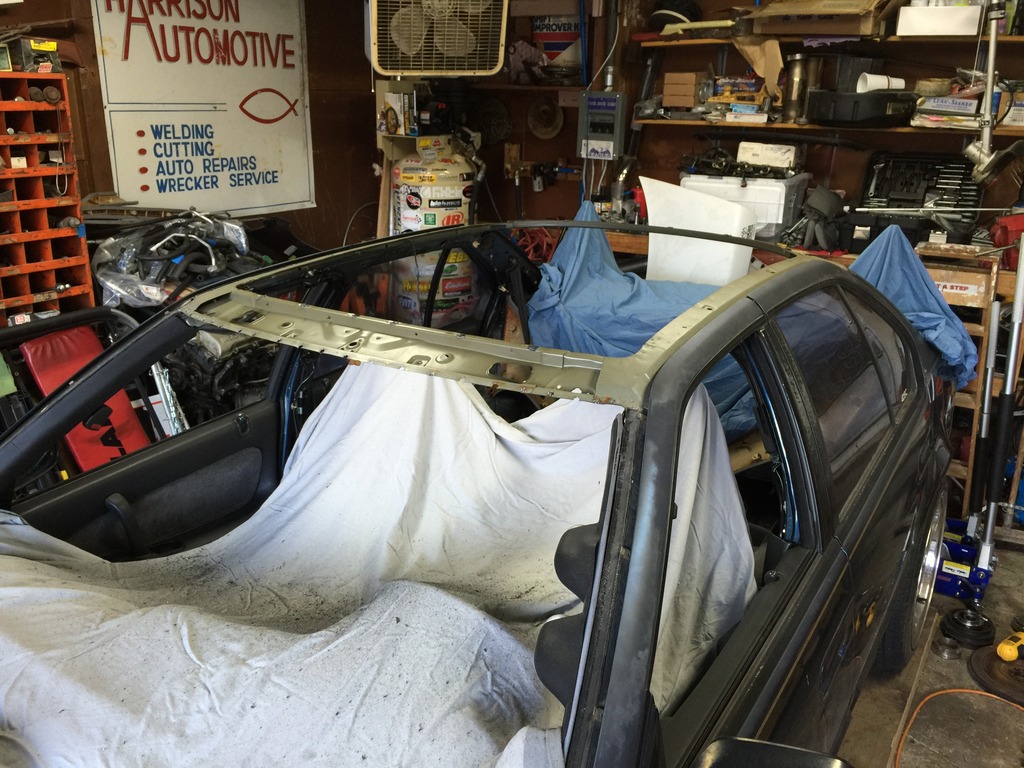
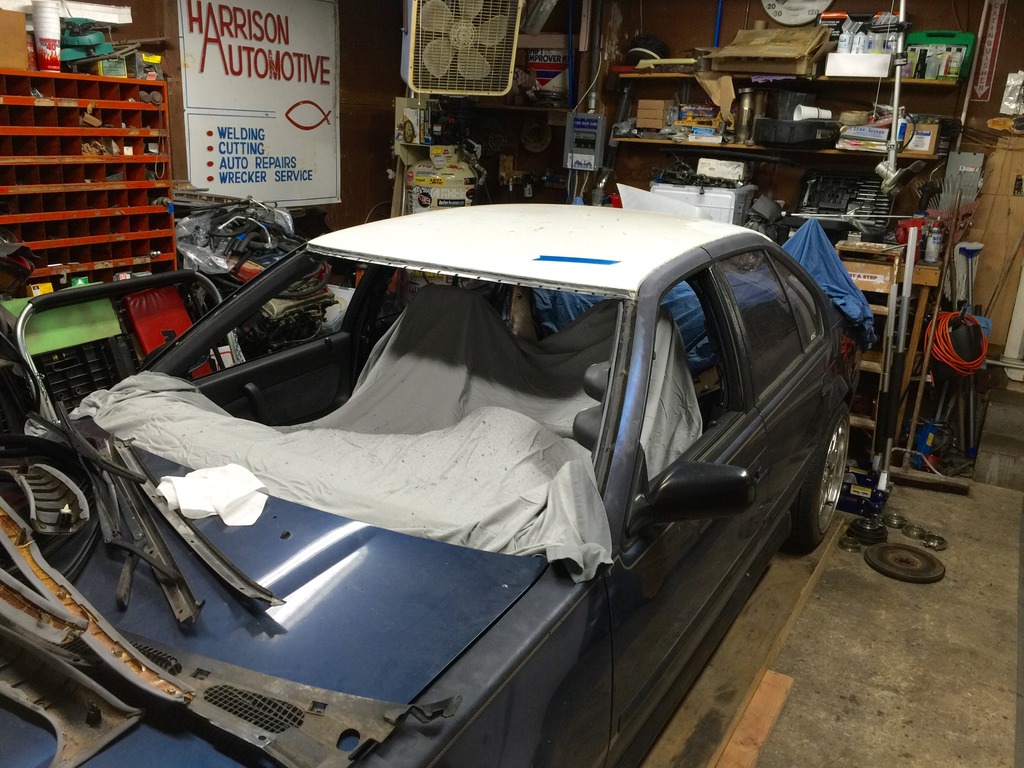
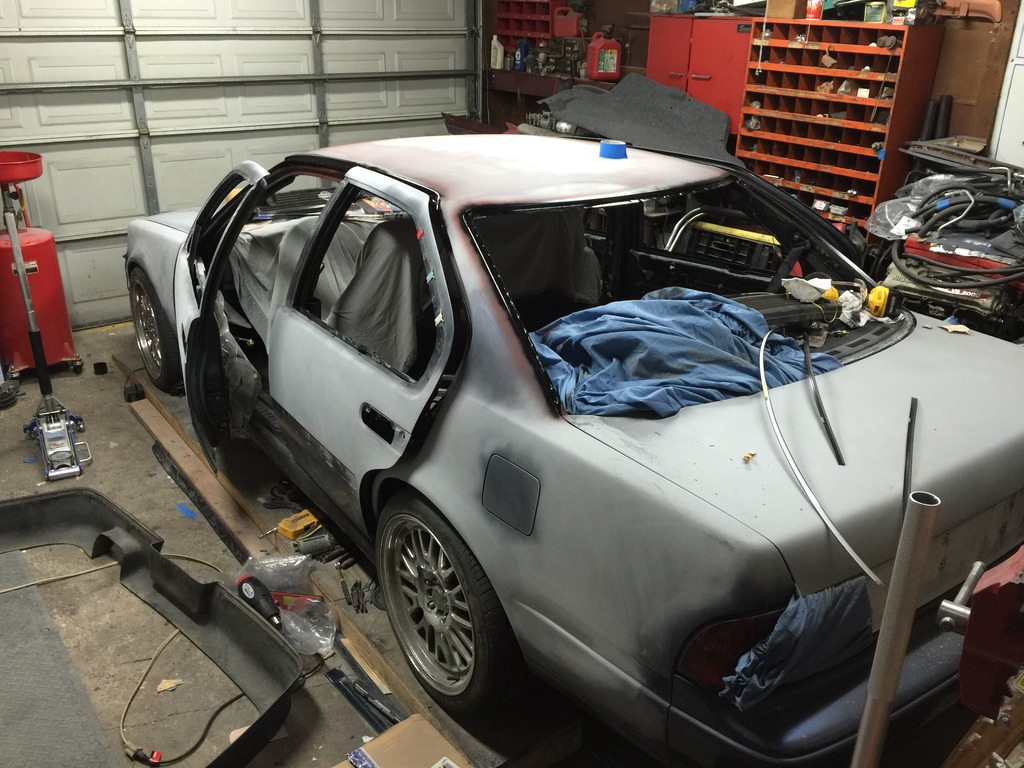
The offender officially removed. Look at all that Bondo cracking out.

The repair consisted of simply bathing the entire roof in a too-thick layer of Bondo. They did this on the hood too. I long ago replaced the hood but the roof has always bothered me. In the past 4-5 years, it's started to flake off in huge chunks. The faded paint never bothered/embarrassed me but the huge chunks flaking off the roof did!
Here's an example:

Anyway, so last weekend I went to the junkyard and cut a roof off a donor 3rd gen. Unfortunately I couldn't source any good local sunroof donor cars, so I went no sunroof:


This weekend I started working on separating the donor roof skin. From the factory, the seam is brazed to the body at the C pillar:

This part is really tedious - getting all the seam sealer gone (wire wheel) and drilling out the spot welds:


Once you do that, with a little bit of work you can "pop" the roof skin off:


Skin removed:

Removing headliner, sunroof, and front and rear glass (without cracking them, not to brag or anything
):


Protecting the interior:

Spot welds drilled out:

Removed (notice I cut ABOVE the brazed joint - easier to remove material later on if need be versus trying to add material if I took away too much):


The offender officially removed. Look at all that Bondo cracking out.

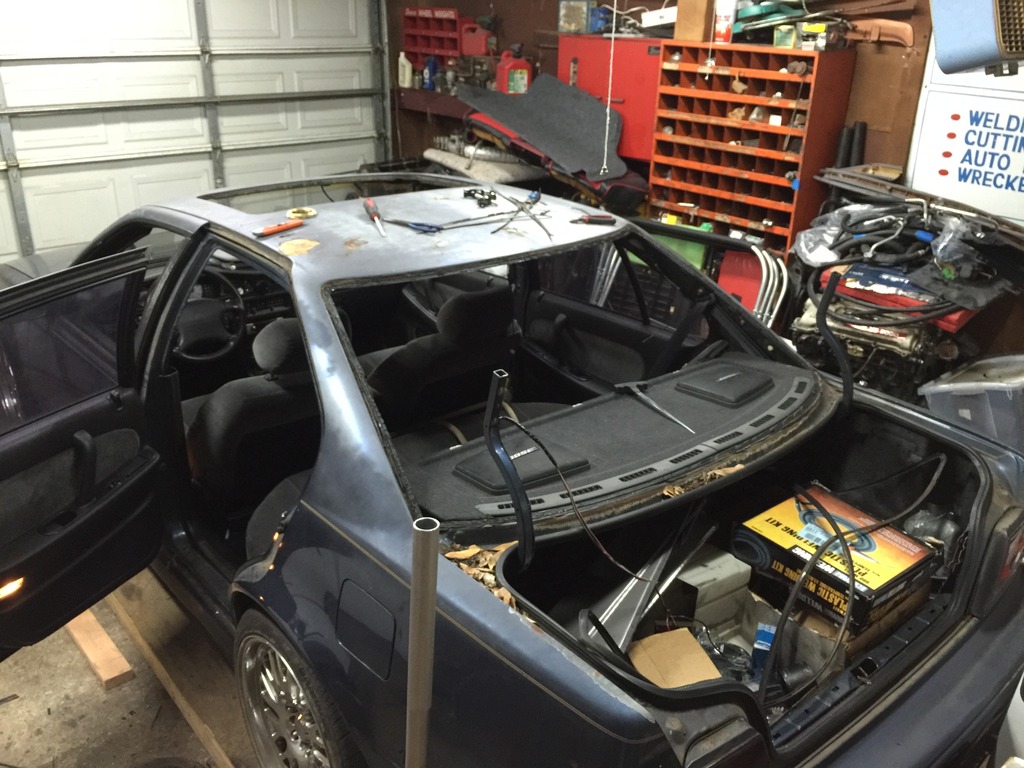
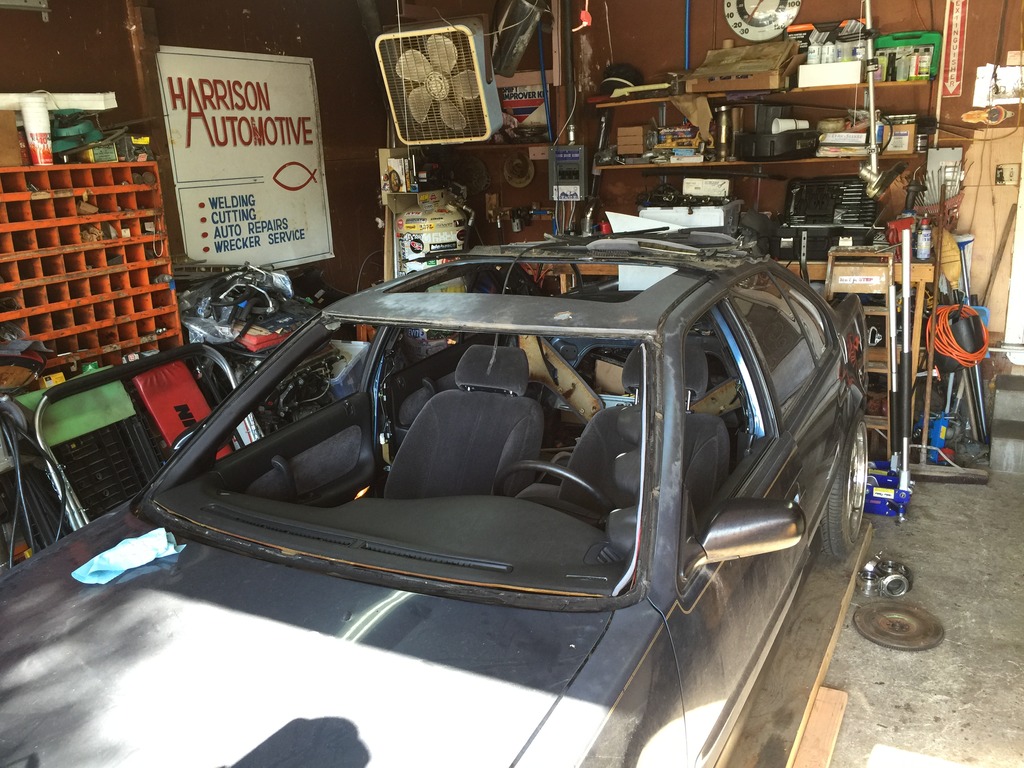
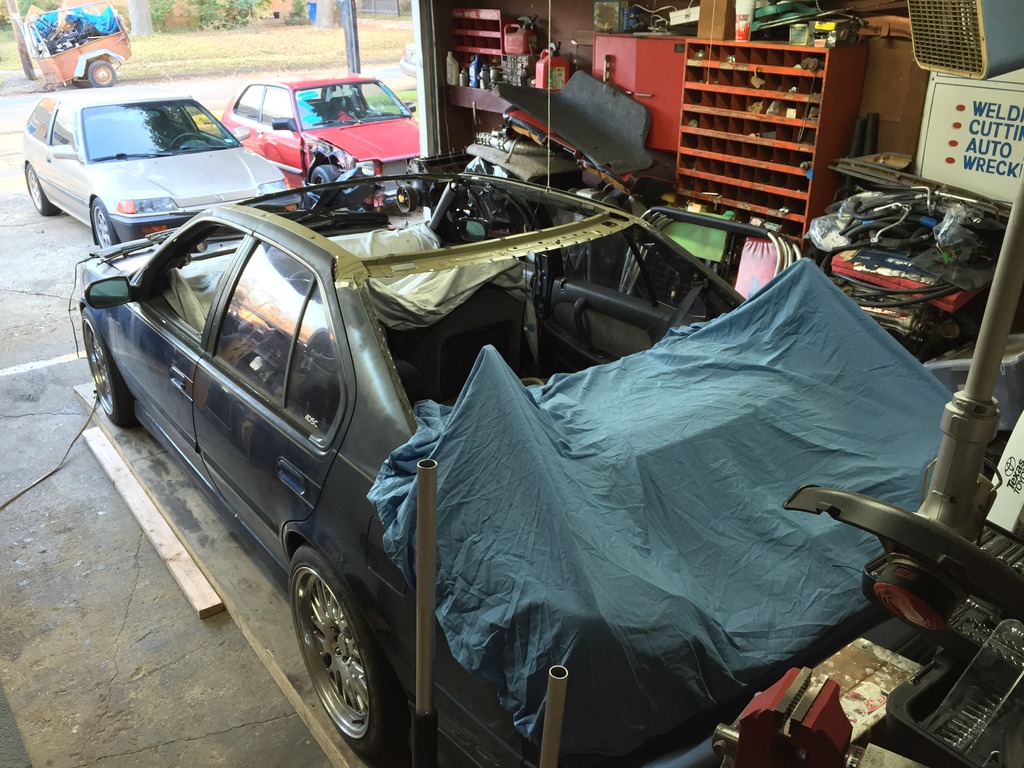
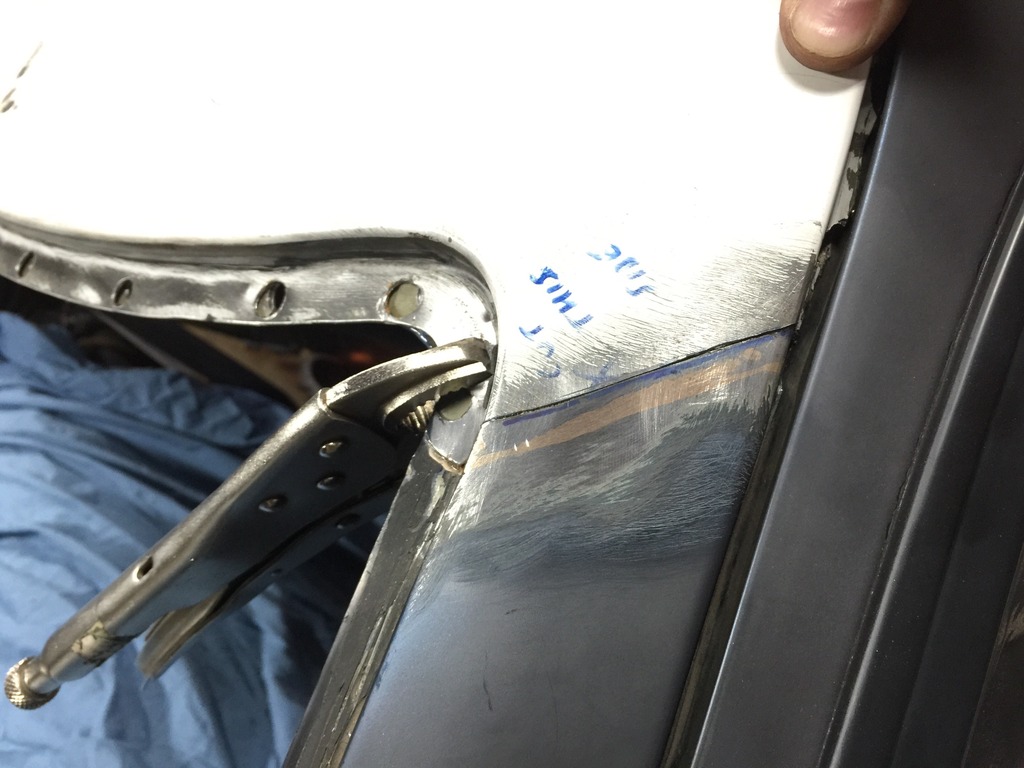
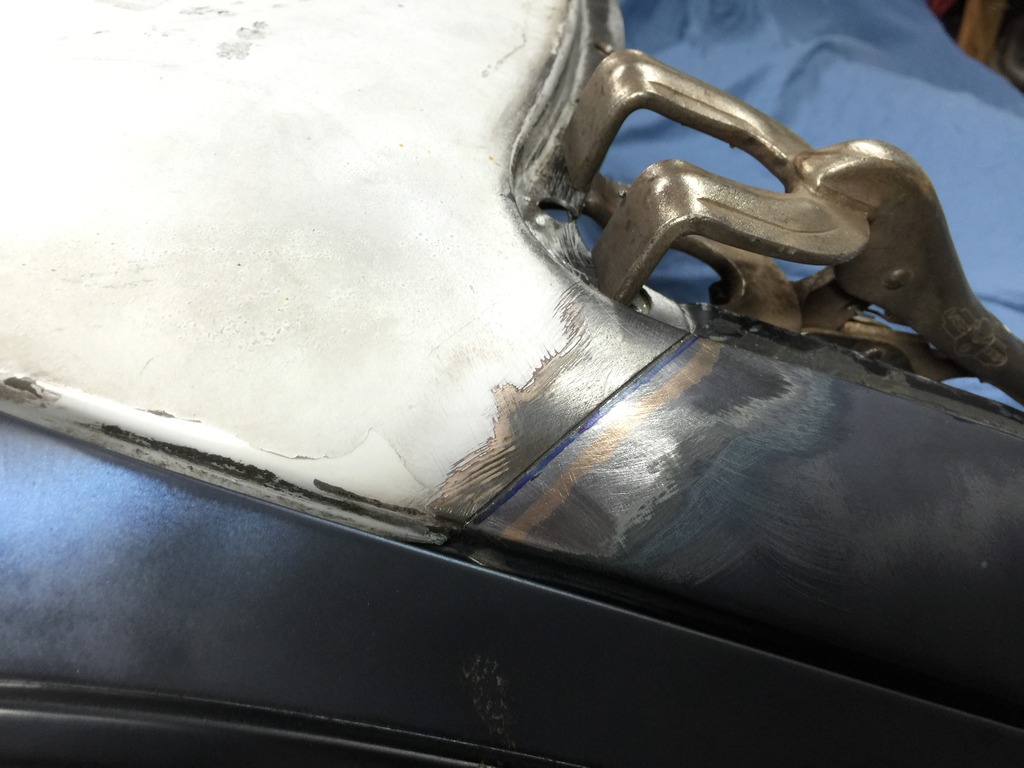
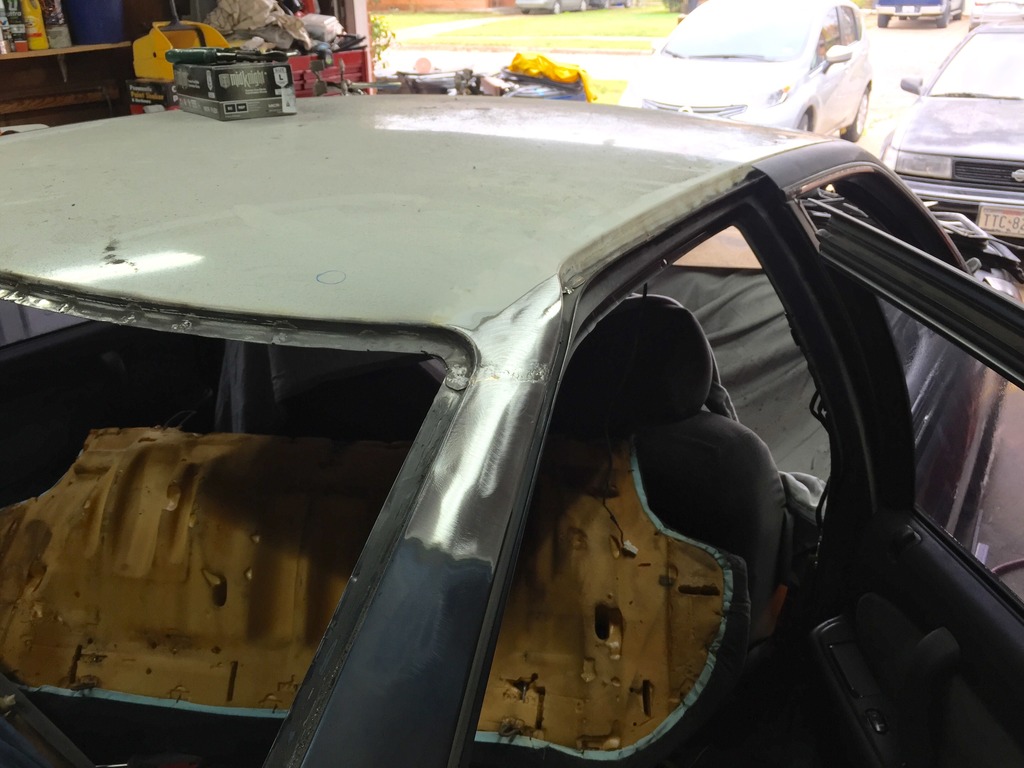
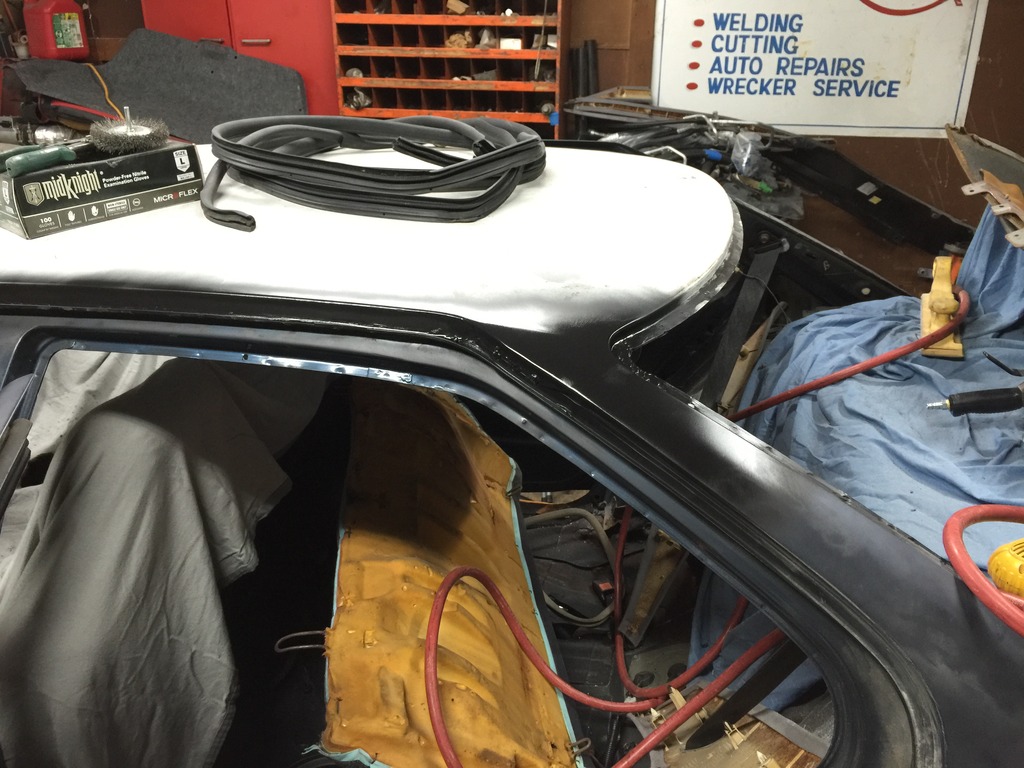
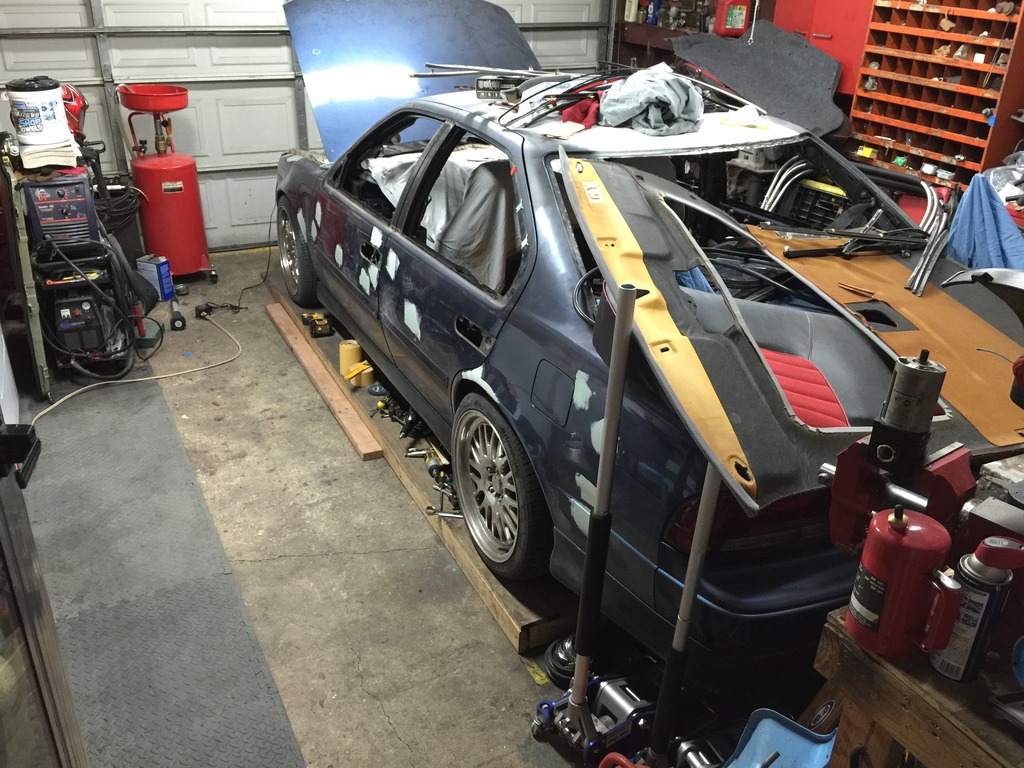
Starting to fit the new roof:
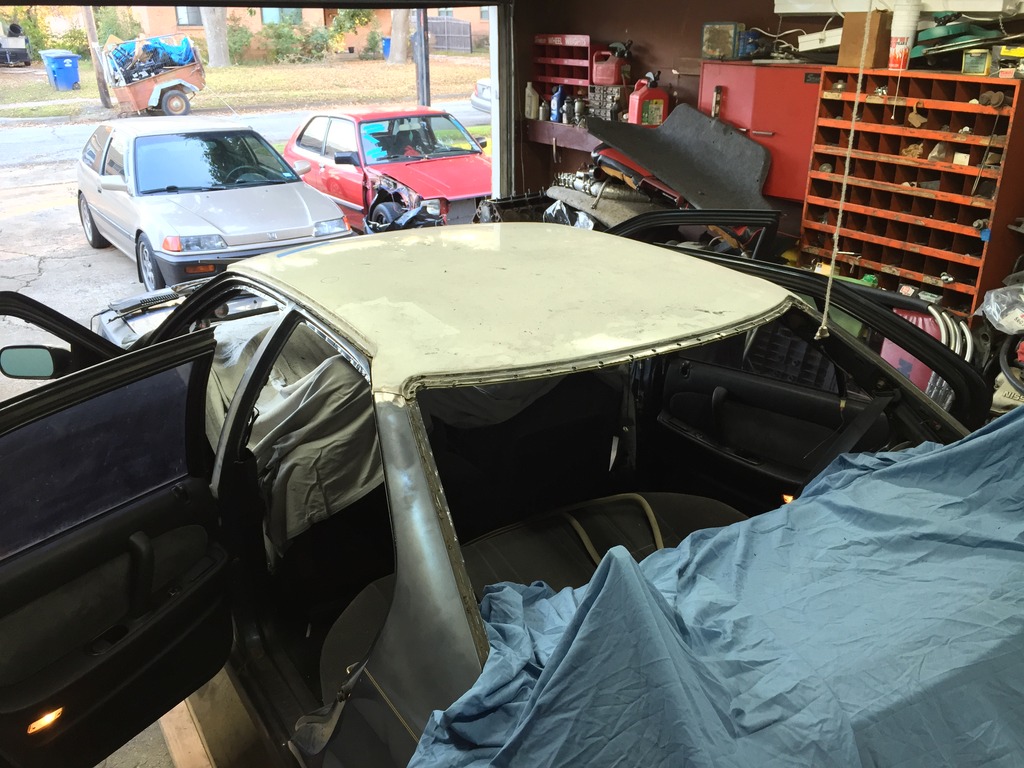


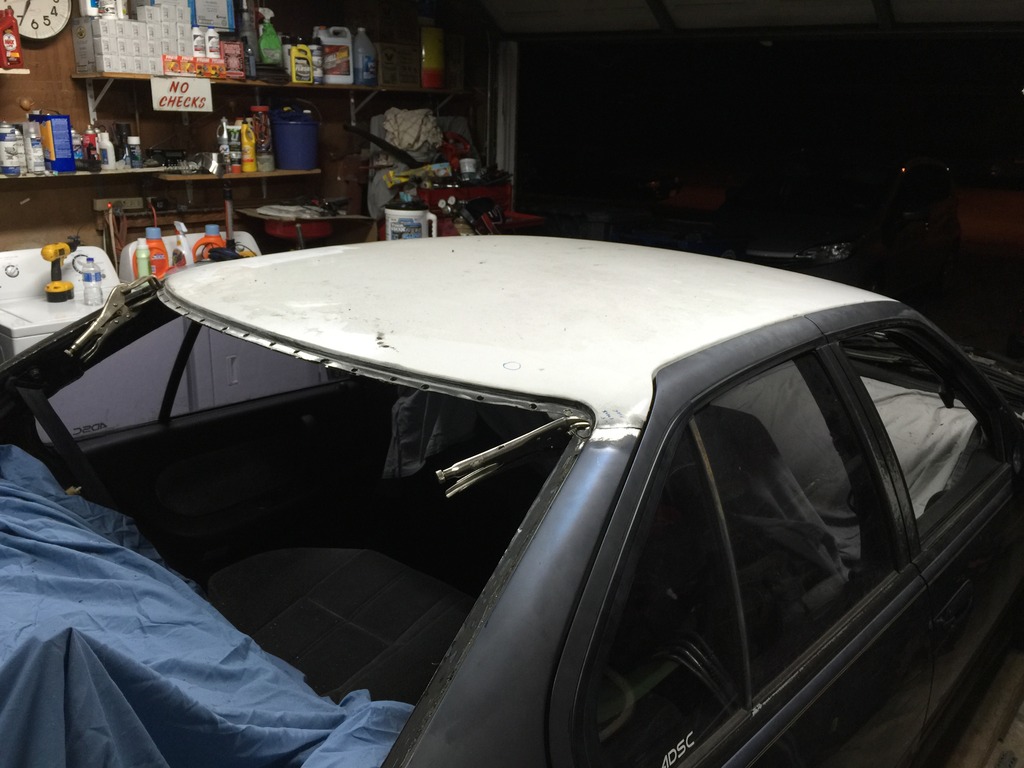
Alignment after some trimming/massaging
And that's as far as I got yesterday. This coming week/weekend I'll weld everything up and hopefully fairly soon after that put the glass back in and check this project off my list. Hopefully by spring I'll be fully boosted, properly tuned and putting down some serious power, rocking fresh paint and pretty much finally done with my long overdue project.
Also, for the record, the sunroof assembly weighs 40 pounds. Interestingly, even though the sunroof skin has some beefier support stuff to hold up the sunroof assembly, it actually weighs 1 pound less than the non-sunroof skin. I guess the big cutout really makes up that difference.


Alignment after some trimming/massaging


And that's as far as I got yesterday. This coming week/weekend I'll weld everything up and hopefully fairly soon after that put the glass back in and check this project off my list. Hopefully by spring I'll be fully boosted, properly tuned and putting down some serious power, rocking fresh paint and pretty much finally done with my long overdue project.
Also, for the record, the sunroof assembly weighs 40 pounds. Interestingly, even though the sunroof skin has some beefier support stuff to hold up the sunroof assembly, it actually weighs 1 pound less than the non-sunroof skin. I guess the big cutout really makes up that difference.
Awesome work James! Keep it up!
I didn't realize they brazed on these cars, that's pretty cool. I started getting into TIG then subsequently MIG silicon bronze on older cars, mostly out of curiosity but then found it's really nice for finishing work.
I'm a bit curious though, why not just straight drill the out the spot welds on the white roof (vs spot weld cutter, I've found everything but the captured version of the rotabroach likes to walk without a pilot and it's easier just to use a sharp drill bit) and why not save the base metal on the blue car? I just recently started diving into body work myself (vastly prefer mechanical) and started out the hole saw cutter method and quickly switched to just grinding the welds out with a cut off wheel when I want to save the base metal.
I didn't know they brazed on these cars either. I DID strongly suspect a factory joint on the C pillar (based on noticing the OEM replacement roof skins are to be joined in that same spot on the C pillar, meaning I suspected there's a factory joint there too), so I wasn't surprised to find a factory joint there - but I was pretty surprised to see the brazing there on the C pillar joint. Pretty cool really.
I'll just be using normal MIG with small wire to weld them back together. Don't have the time or desire to mess with trying to learn TIG or brazing just for this project lol.
Regarding cutting out the spot welds, I've used both methods in the past. On my most recent project, replacing the whole driver side front headlight bucket area on my Civic - I found it very time consuming, tedious and imprecise to try to cut them out with a normal drill bit. Unless you go really oversized with the bit, if you aren't perfectly centered you typically wind up with one corner still "stuck" welded together. And then every single one you have to screw with a chisel between the two pieces unless you want to drill it out even bigger. Plus, you have to try to self-regulate the depth if you don't want to go through both layers.
So I found that just blasting through them with an actual spot weld cutter (I just used the $5 Harbor Freight one, which works great) is FAR faster and easier. The spot weld cutter cuts through like butter and punches a "plug" right out through the bottom (unless it's the doubled-up thick material).
Also, the most important factor is that I have underside/backside access to EVERY spot weld hole on this project. That's the primary reason I wasn't concerned about going through both layers. I'll just hold a welding spoon on the underside and weld in from the top to fill in each hole. If I didn't have underside or backside access to every location, I definitely would have saved the inside/bottom layer.
Of course I'm sure saving the underlying spotweld base material is the textbook "proper" way to do it, combined with proper rosette weld technique. But I definitely have no concerns about the strength/rigidity of this when I'm done. Not like this is a track car anyway

So I've been a little bit worried about locating new front seals/moldings for the front glass. I did buy OEM new rear glass stuff a couple of years ago so I'm set on the rear. I spent quite a lot of time today trying to hunt down a complete set of OEM stuff, but unsurprisingly, almost all of it is officially unavailable from Nissan.
On the SE's, the two side pieces, as well as the upper corner pieces are just painted metal and can be re-used. I would prefer new, but I will just have to plan to re-paint mine. The downside to that is that the rubber pieces on mine that sit between the molding and glass are pretty worn out/dried up/shrunken up. Hopefully I can find nicer pieces on a donor car or something but it won't be the end of the world if not.
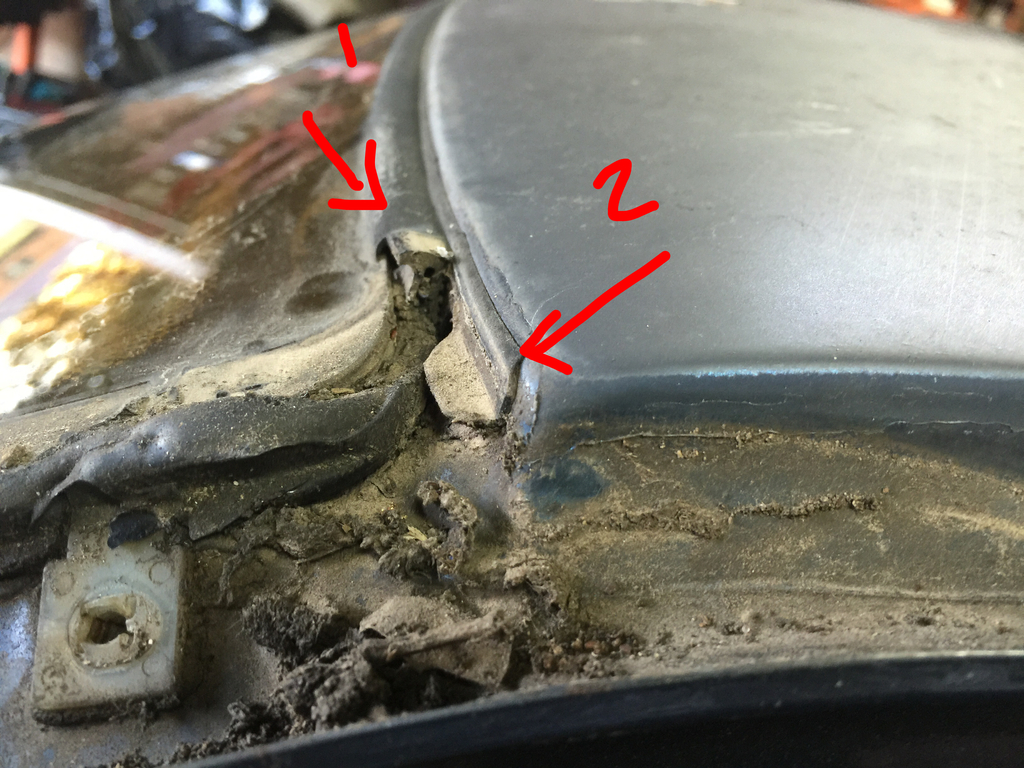
But about the actual upper non-reusable molding. It's a two piece setup. Here's a reference pic I took of my car before removing the glass. One thin strip actually gets stuck to the roof side (#2), and then the actual main piece sits in between that and the glass (#1):
Anyway, I had totally forgotten that some years ago I bought a random aftermarket set for my window. The listing on it was pretty vague, it just called it "front glass seal" or something to that effect, but it was cheap and I bought it just in case. Well I totally forgot about that until tonight, so I dug it out and lo and behold it's actually identical to the OEM stuff!
It's Gold Glass Group (GGG) 597 B Kit (597 "C" Kit is for the GXE):
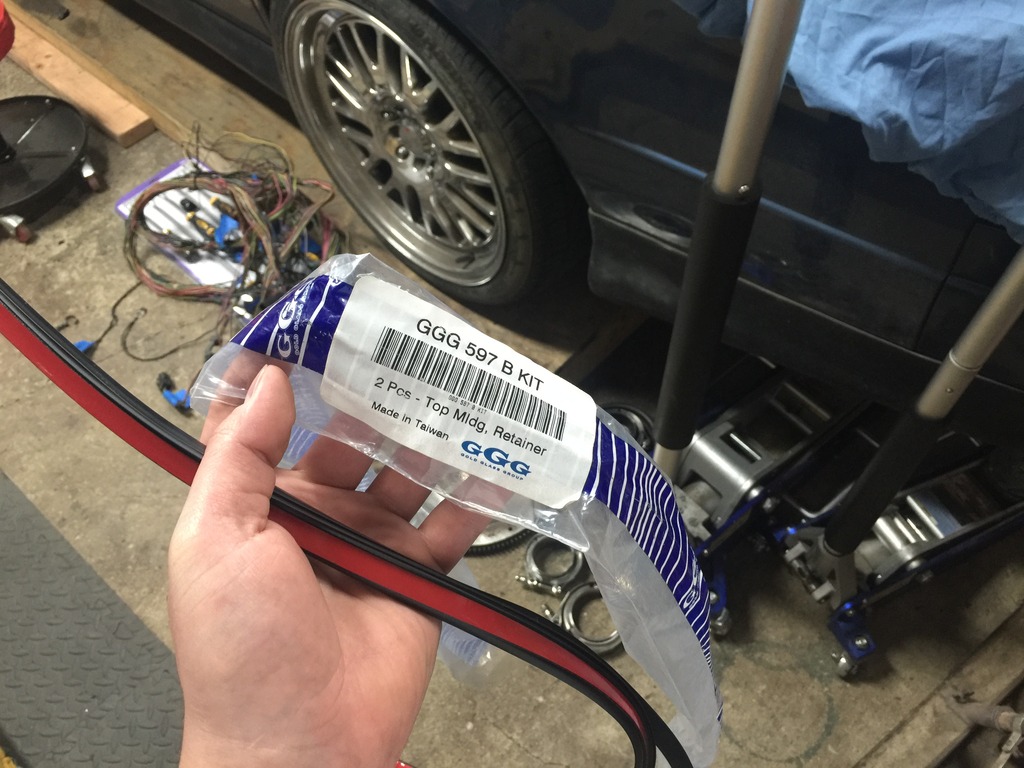
I'm going to order another set or two of this kit for future use just in case I ever need to replace the glass again.
On the SE's, the two side pieces, as well as the upper corner pieces are just painted metal and can be re-used. I would prefer new, but I will just have to plan to re-paint mine. The downside to that is that the rubber pieces on mine that sit between the molding and glass are pretty worn out/dried up/shrunken up. Hopefully I can find nicer pieces on a donor car or something but it won't be the end of the world if not.
But about the actual upper non-reusable molding. It's a two piece setup. Here's a reference pic I took of my car before removing the glass. One thin strip actually gets stuck to the roof side (#2), and then the actual main piece sits in between that and the glass (#1):

Anyway, I had totally forgotten that some years ago I bought a random aftermarket set for my window. The listing on it was pretty vague, it just called it "front glass seal" or something to that effect, but it was cheap and I bought it just in case. Well I totally forgot about that until tonight, so I dug it out and lo and behold it's actually identical to the OEM stuff!
It's Gold Glass Group (GGG) 597 B Kit (597 "C" Kit is for the GXE):


I'm going to order another set or two of this kit for future use just in case I ever need to replace the glass again.

I just spent some time trying to find where to buy GGG stuff. You can't buy from GGG directly, they use a distributor setup.
The problem is their distributors are almost all actual glass install/service places. I couldn't find any local authorized distributors who would sell me just the seal kit without paying them to do the install and everything too.
Thankfully, Peter at GGG was nice enough to point me to an authorized distributor that he said is "e-commerce friendly".
http://www.automotivedesigngroup.com/
They don't list this kit on their website, but I sent them an e-mail and after some back and forth (about whether or not I own an auto glass shop - which of course I don't), they agreed to sell me a couple, thankfully.
I had to call and order over the phone but all went smooth and it's even already been shipped. Jose there at Automotive Design Group was very helpful and friendly to me about this. So now I'll have two extra sets for future needs/use.

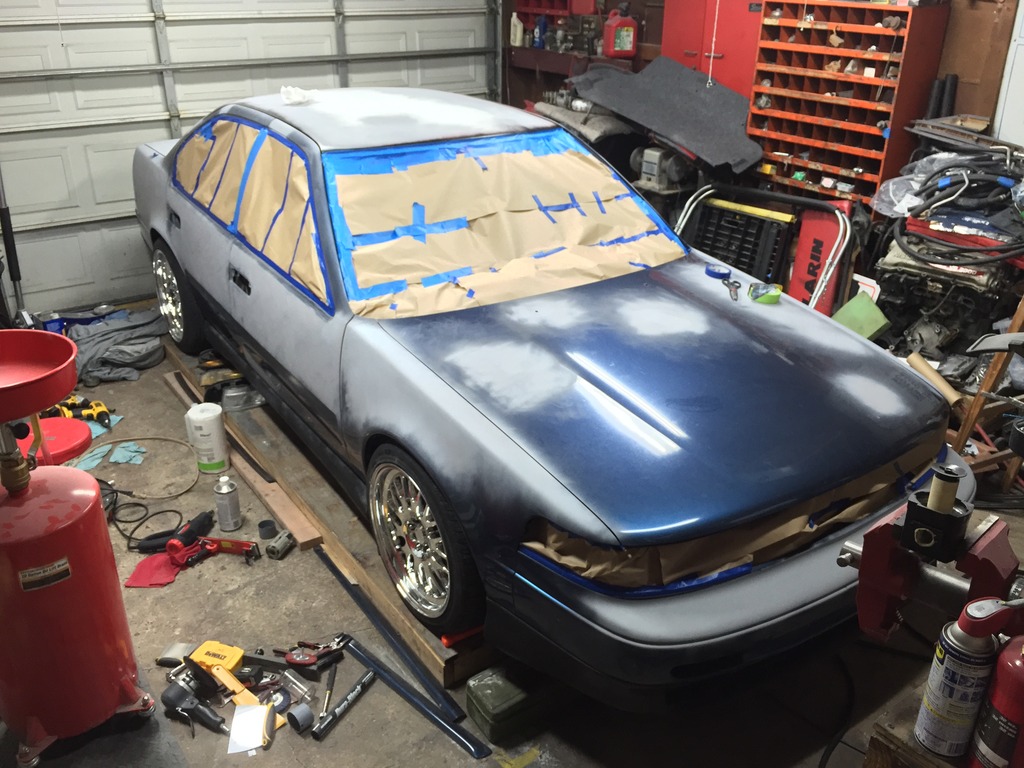
I got the roof totally welded in this past weekend:
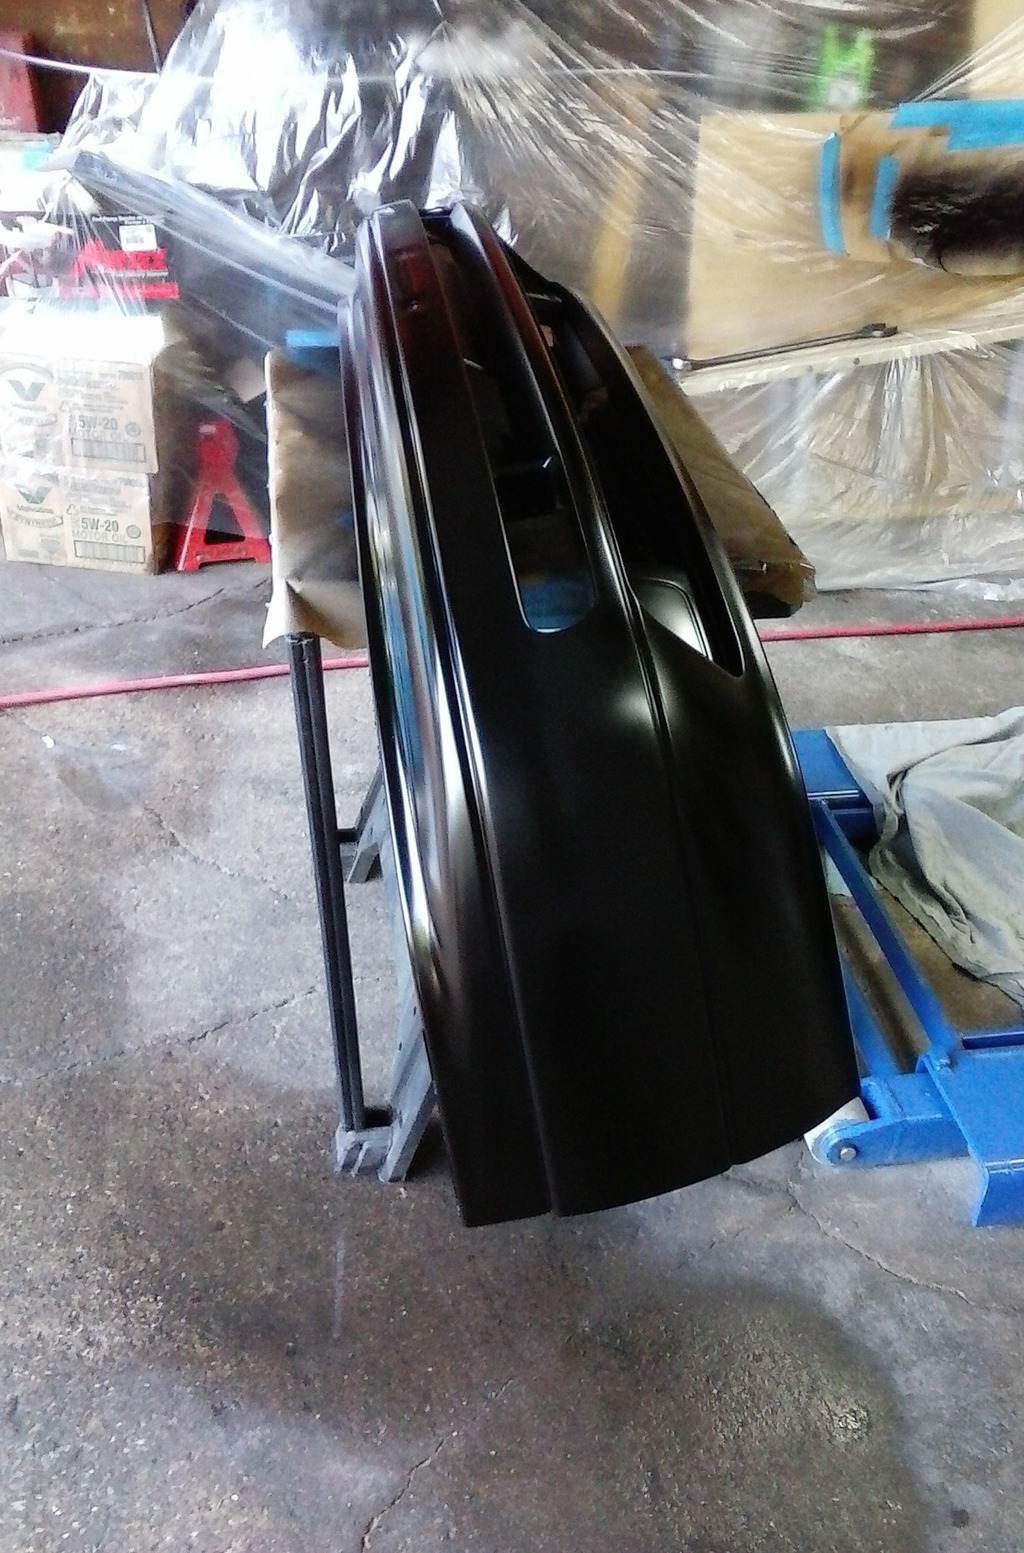
Little bit of Evercoat:
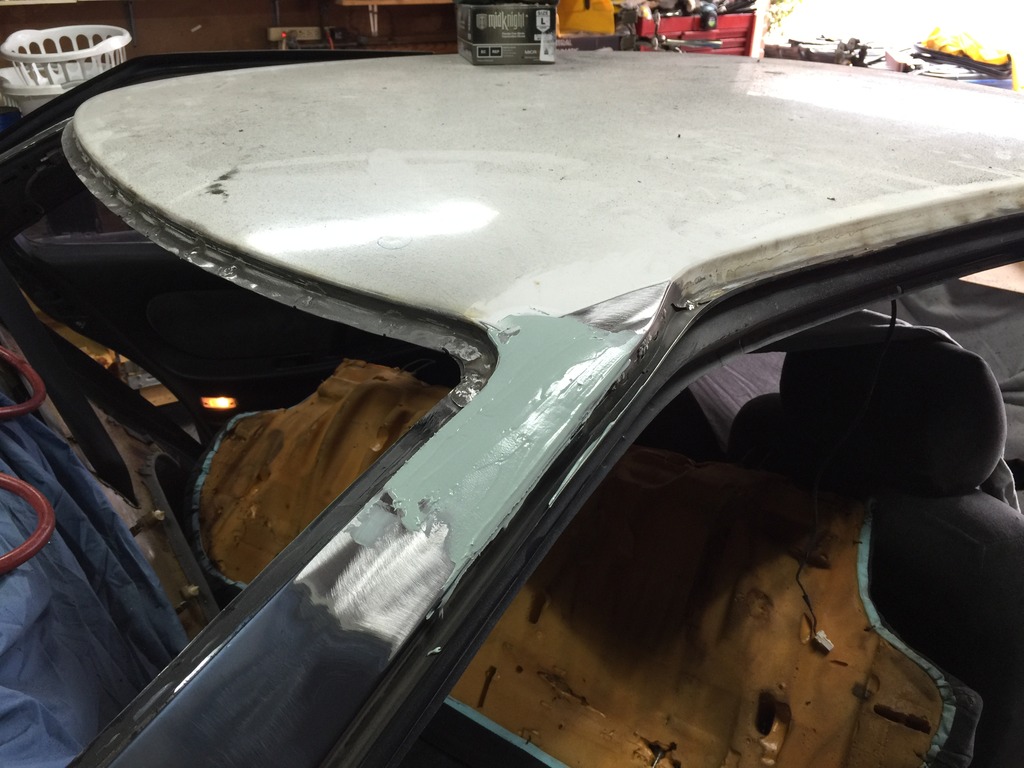
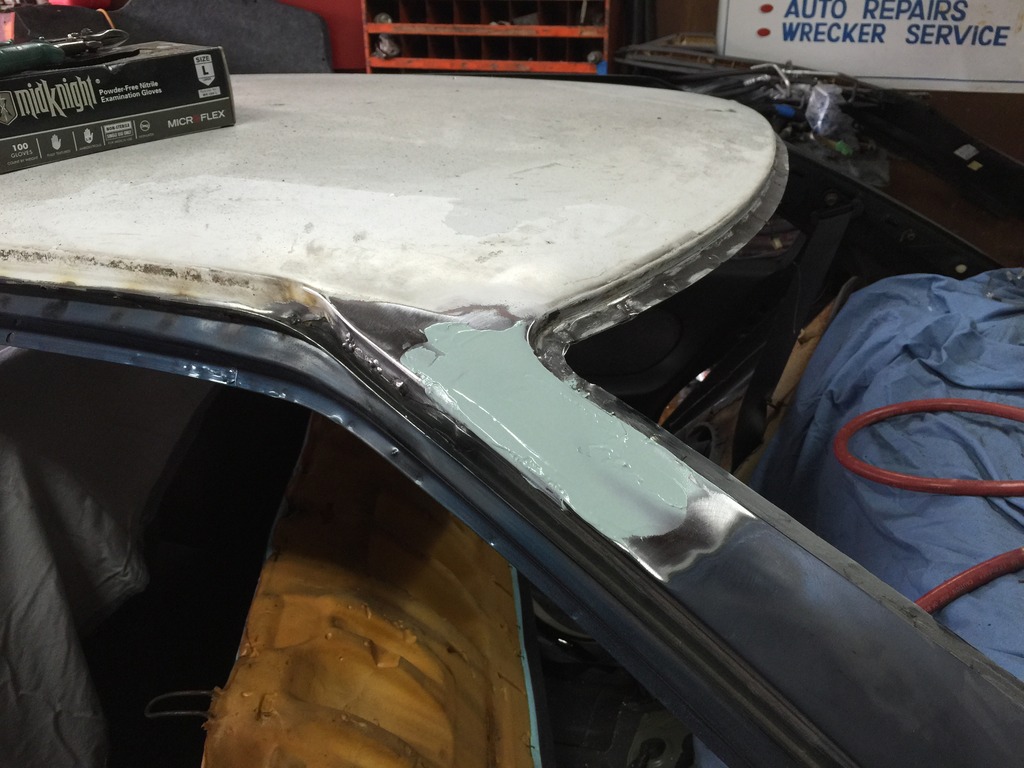
Sanded out to very, very little filler on the driver side. A bit more on the passenger side but still not much:
Little bit of primer on top (haven't done any fine grit sanding yet):
And this sure snowballed quickly


Little bit of Evercoat:


Sanded out to very, very little filler on the driver side. A bit more on the passenger side but still not much:


Little bit of primer on top (haven't done any fine grit sanding yet):


And this sure snowballed quickly


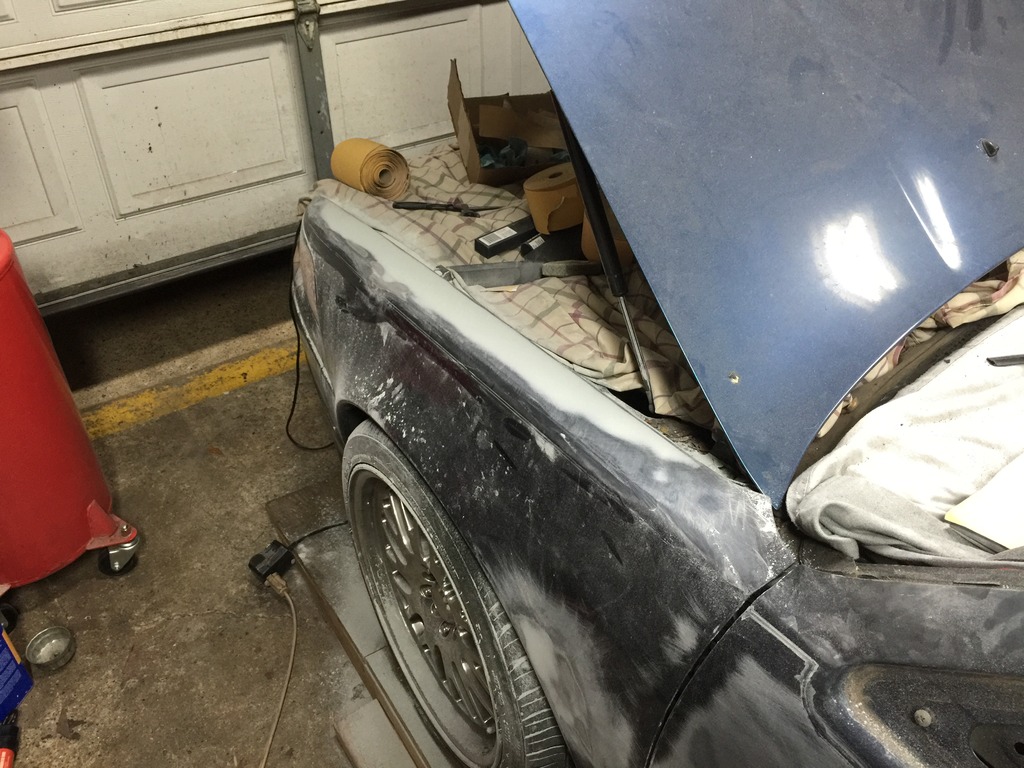
People, this is why you don't lean on the tops of your fenders when working on your car.
I make a point not to lean on the fenders when working on cars but I see it allllllllllll the time from other people. I inherited this mess on this car. But then again I can't complain much for a $200 car.
I'm also perhaps the only person in the world who cares enough at this point to try to buy a lot of this stuff for these cars, but I was pretty disappointed to find out this week that almost all of the rubber trim/weatherstripping/etc for these cars are obsolete. I really thought the belt moldings were available but nope. Seems I checked a few years ago and they were still available, so I should have bought them back then.
Thank goodness I had the thought to buy the window channel rubber for all four doors some years ago. Whew.
About the only thing still available today is the back side hood (cowl attached) seal, and the front bumper "shield sights" (the rubber between headlights and bumper cover that always cracks/breaks apart). Basically everything else is obsolete.
The weatherstrip for the front passenger door is available, but none of the other doors. Drip rail weatherstrip is not available - that's the stuff I really need. Here in Texas, they shrink up and deteriorate. Maybe some northern guy can source some good ones for me.
I need 73580M and 73581M in this picture for anybody in non-sun ravaged parts with access or spares of these:

I'm also looking for a good driver door welt trim/weatherstrip (76923 in the picture). All the driver door ones here are cracked and crumbling on the lower B pillar area.

I was really surprised to see that they were brazed. But the most surprising part is that, on the passenger side, the brazing wasn't a clean shot straight across, it had a couple of "legs" on it. And my welding got a little close to one of those "legs" - and ended up actually getting on/in the brazing. I was expecting it to just NOT weld (acting like a copper welding spoon or something), but to my surprise it actually welded exactly like the surrounding metal. 
I make a point not to lean on the fenders when working on cars but I see it allllllllllll the time from other people. I inherited this mess on this car. But then again I can't complain much for a $200 car.

I'm also perhaps the only person in the world who cares enough at this point to try to buy a lot of this stuff for these cars, but I was pretty disappointed to find out this week that almost all of the rubber trim/weatherstripping/etc for these cars are obsolete. I really thought the belt moldings were available but nope. Seems I checked a few years ago and they were still available, so I should have bought them back then.
Thank goodness I had the thought to buy the window channel rubber for all four doors some years ago. Whew.
About the only thing still available today is the back side hood (cowl attached) seal, and the front bumper "shield sights" (the rubber between headlights and bumper cover that always cracks/breaks apart). Basically everything else is obsolete.
The weatherstrip for the front passenger door is available, but none of the other doors. Drip rail weatherstrip is not available - that's the stuff I really need. Here in Texas, they shrink up and deteriorate. Maybe some northern guy can source some good ones for me.
I need 73580M and 73581M in this picture for anybody in non-sun ravaged parts with access or spares of these:
I'm also looking for a good driver door welt trim/weatherstrip (76923 in the picture). All the driver door ones here are cracked and crumbling on the lower B pillar area.
i mean this in the nicest way bro...you're effin nuts...but it's awesome.
my orig windshield is soooo pitted (but not cracked or anything) i thought about replacing the glass but my fear about the aged molding bugs me.
my orig windshield is soooo pitted (but not cracked or anything) i thought about replacing the glass but my fear about the aged molding bugs me.


These just screw on and they're metal so they're easily paintable. The edges that touch the glass do have rubber on them but they aren't actually "seals" in the sense of needing to be water tight or anything.
You can tell because you can see the drip rail itself sticking several inches lower than the weatherstrip. The weatherstrip is supposed to sit all the way down over the lowest point of the drip rail.
Thanks man
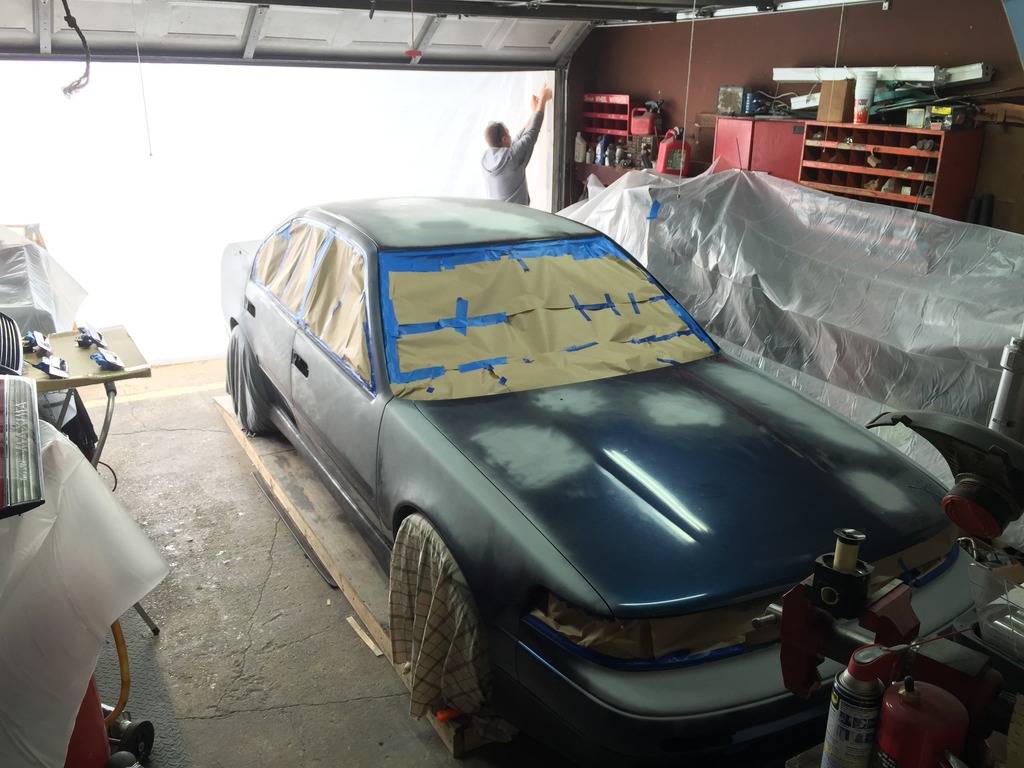
My immediate plan is to Plasti Dip it here shortly. I'm doing all the body work and getting it totally straight so that in a couple of years when I do my 'real' paint job on it, I can just peel the dip off, shoot some sealer on it, and be ready for my real base/clear job.
I've been working on this basically non-stop since I started this thread - all weekend and every night after work till about midnight or so. I've even come home on my lunch several times to do some sanding/more filler and going back to work all dusty like a moron
. Here are some more pics. This passenger rear quarter had a ripple that I almost didn't notice. Hopefully I got it all flat. Some of this stuff is hard to tell in a relatively dark garage and on a time constraint.

Trunk lid took more work than I thought it would. Looking at it by eye at the junkyard, it appeared totally flat:

Also had about 4 dings on the roof that I took care of:

I don't have any 'before' pictures to show, but my whole trunk area opening was very rusty (surface only) and had seemingly no paint on it in a lot of areas (hence the rust). I'm not sure why they would have had to be painting in there previously but somebody did, and did a poor job on the prep because it was all just flaking off and exposing metal. I sanded it all off and hit it with some primer:

Here's how it sits now:


Hopefully I can get it all finished up this week. I hope to dip it Christmas weekend (if it stays warmer like it has been) but it needs a lot of little time consuming stuff. Supposedly I can paint right over primer with Plasti Dip but I would like to at least get some rattle can paint over the primer spots just in case - that's my main concern time-wise. Needs a lot of finish sanding with finer grit paper and then time to get some rattle can paint over the spots I've worked on.
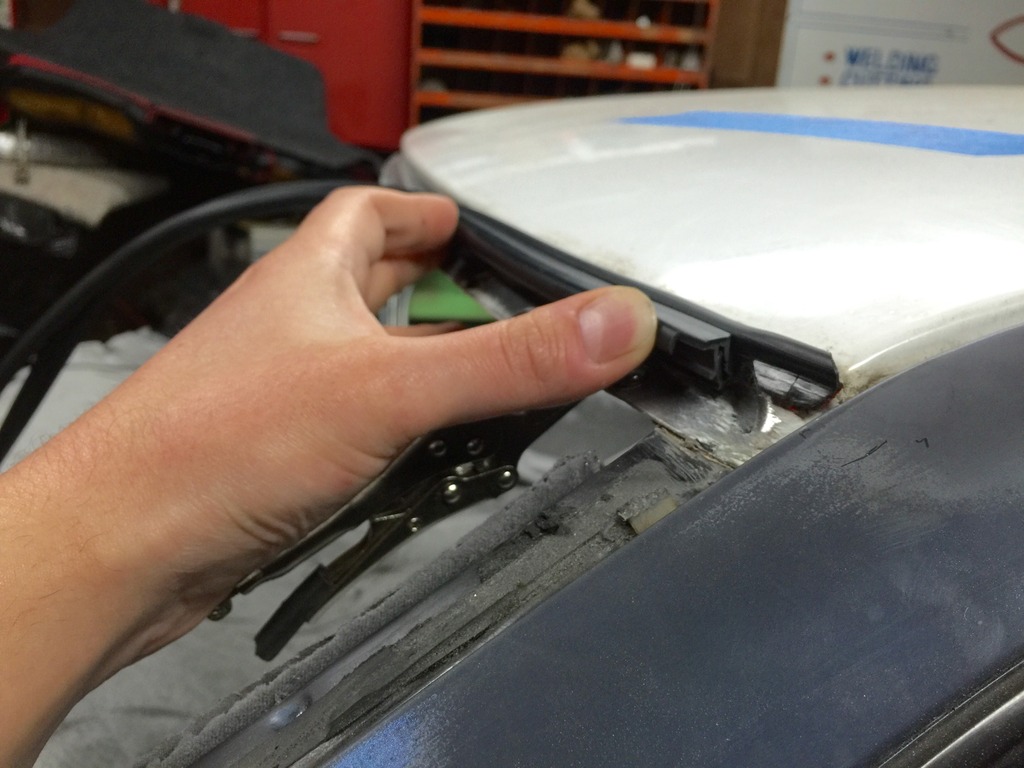
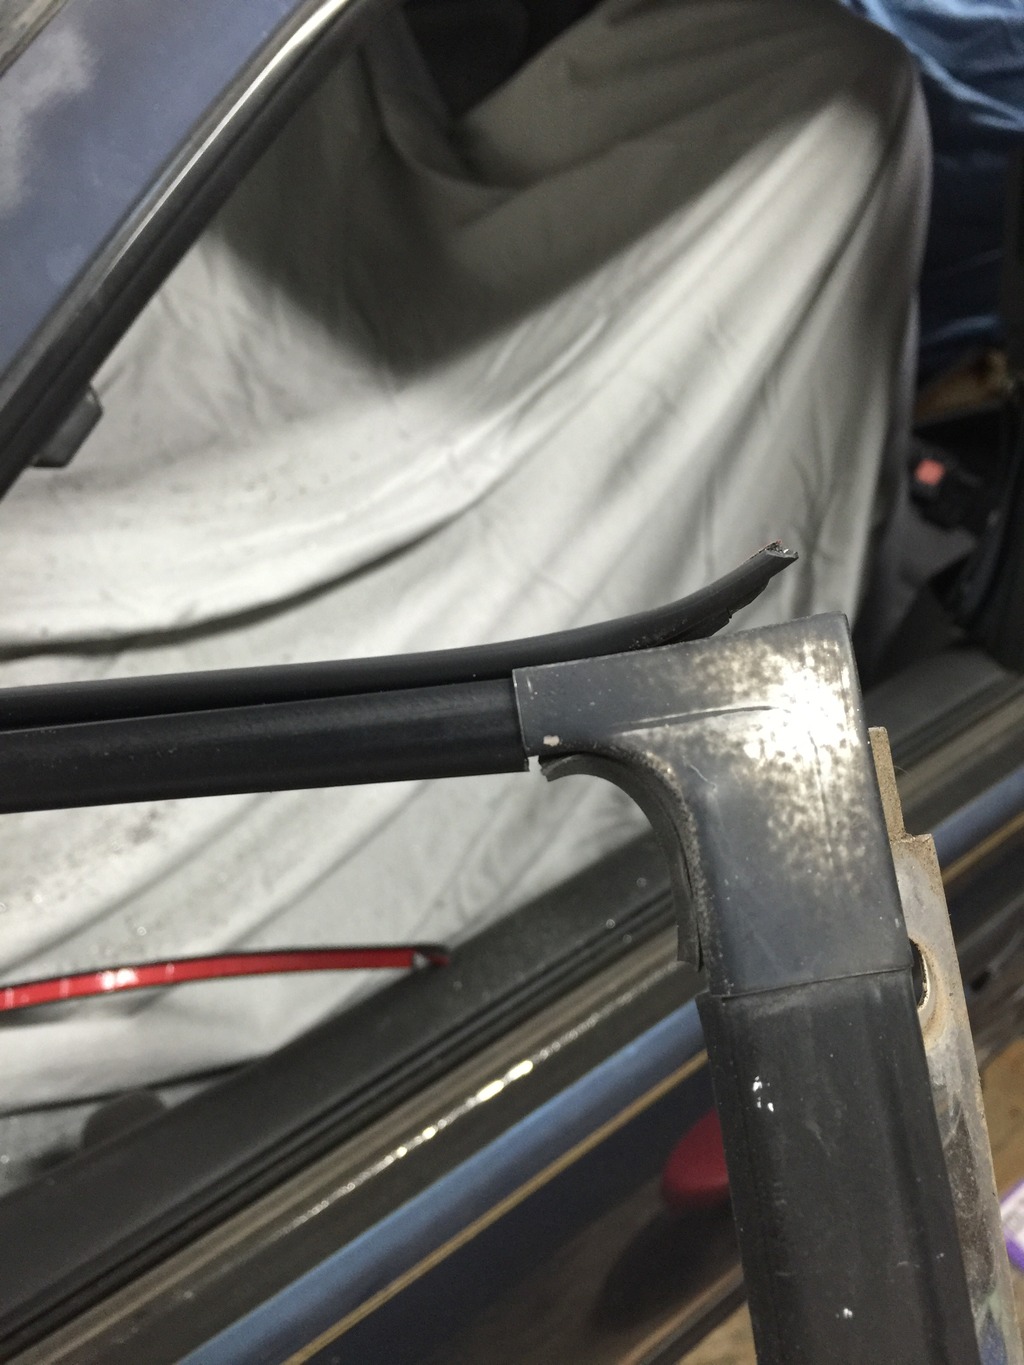
James the top molding. that piece gets wrecked when the glass is pulled off.
if you want to see how the body work looks you can spray some solvent on it (prep clean or something) and that will give the body some shine and give you an idea how it looks in the light. the other alternative is to get on some guide coat and flat board it. best to touch it with a gloved hand. that gives you an idea if the body work is ok or not.
if you want to see how the body work looks you can spray some solvent on it (prep clean or something) and that will give the body some shine and give you an idea how it looks in the light. the other alternative is to get on some guide coat and flat board it. best to touch it with a gloved hand. that gives you an idea if the body work is ok or not.
Anyway, about the body - yeah, I've got some 3M dry guide coat, I just don't feel like wasting it on this somewhat quicky Plasti Dip job. I don't do the gloved hand but I have always done the hand on clean blue shop towel thing. It's mainly just a matter of not being totally willing right now to go allllll the way on this, yet wanting it to look pretty much totally straight for the dip job. I don't want to have a whole bunch of rattle can on it right now so that there's less chance of reaction goofiness come time for the real job.
I am certain I've gotten all the actual dings and dents, but what I'm not certain of is getting out every last bit of waviness - I know the doors are good but the passenger front fender still doesn't quiiiiiiiite feel right in one spot. It had a dent that not only got top of the fender, but also the side on that non-flat area where it starts to curve into the fender flare. It's perhaps the worst area on the car for a dent/filler work since you really can't get any part of it with a typical block. I have a round Dura Block I've been using on it but it still doesn't quiiiiiite feel right. I'll fool with it some more tonight and beyond that it's going to have to wait until my "real" paint job.
I want to be done with it by the next couple of days because I want to let all the filler and rattle can sit and "gas off" for a couple of days before the dip. I'm pretty sure the dip will cover a lot of crap but I want to be better safe than sorry in terms of potential bleed-through.
And by the way, I've been using Evercoat Rage on this. Man it really blows Bondo out of the water. I should've been using Evercoat years ago. It's amazing how much more pleasant it is for your sandpaper not to become clogged CONSTANTLY like Bondo.
Yep, the Evercoat Rage quart was like ~$22-23, Bondo is like $12 for a quart. Apparently there's even an Evercoat Rage Gold. I need to get some of that for next time. If I understand correctly, Evercoat Rage is typically used as the "bottom" layer and/or for larger dents, and then for the finishing touches/pinholes/etc. you can use the Gold over it. The Gold looks to lay on verrrrrry smooth.
well you can use any glaze as the top skin coat.
this fills in any rough sanding scratches and pin holes.
the gold can be used as a glaze as the processing is so smooth.
again...cost is $$$.
personally i HATE doing body work so i get the best products so it'll make my life easier. painting on the other hand..that i enjoy doing.
this fills in any rough sanding scratches and pin holes.
the gold can be used as a glaze as the processing is so smooth.
again...cost is $$$.
personally i HATE doing body work so i get the best products so it'll make my life easier. painting on the other hand..that i enjoy doing.
Looks like you were using the right stuff James. Looks to be the green short strand fiberglass filler? Atleast you didnt use the red. The fiberglass is water proof where as the red will eventually crack over time like your previous roof. Bondo makes a gold too but i believe thats just a step above the red. The green short strand is good stuff for holding up better over time IMO. Glaze is o.k for pin holes and probably better on plastic bumpers etc. Rather than the metal. The glaze tends to crack about as bad as the red bondo. Once you get it all good and smooth a good sandable filler primer coat should give you a better idea on how well it was sanded and how well the edges of the patch work were feathered in. Just keep working going to finer and finer grit but from what i see looks like your doing a pretty damm good job James. Keep up the good work ☺ also you may want to look into using an adhesion promoter on the plastics like the bumper. Base/Clear is good if you have a good hvlp gun but from what ive been told by some good old school body guys is that now theres getting to be really good single stage on the market so why worry about clear coat runs and all the mixing of the reducers with the paint and hardners with the clear when you can just shoot it with a ready to go single stage.
Last edited by ac max 92; Dec 21, 2015 at 06:47 PM.
Looks like you were using the right stuff James. Looks to be the green short strand fiberglass filler? Atleast you didnt use the red. The fiberglass is water proof where as the red will eventually crack over time like your previous roof. Bondo makes a gold too but i believe thats just a step above the red. The green short strand is good stuff for holding up better over time IMO. Glaze is o.k for pin holes and probably better on plastic bumpers etc. Rather than the metal. The glaze tends to crack about as bad as the red bondo. Once you get it all good and smooth a good sandable filler primer coat should give you a better idea on how well it was sanded and how well the edges of the patch work were feathered in. Just keep working going to finer and finer grit but from what i see looks like your doing a pretty damm good job James. Keep up the good work ☺ also you may want to look into using an adhesion promoter on the plastics like the bumper. Base/Clear is good if you have a good hvlp gun but from what ive been told by some good old school body guys is that now theres getting to be really good single stage on the market so why worry about clear coat runs and all the mixing of the reducers with the paint and hardners with the clear when you can just shoot it with a ready to go single stage.
No plastic filler is waterproof. You're talking about epoxy on fiberglass...I assume. If your filler is cracking then you're using way too much...go back to reshape the metal. It should no thicker than 1/8 inch at the most. The glaze...same thing it should be virtually translucent. You're not supposed to make new panels from it. The glaze is just a creamier or a smoother bondo. It's literally there to just fill in the very slight imperfections..pin holes and sand scratches that were missed. There's a glaze that's made for abs plastic. Again that's all put on very very thin. Any big repairs I grab the automix gun and use the 2 part epoxy to repair it. That stuff will flex with the piece. Sand able primer coat won't tell you jack...it's so dull and rough. Unless you're talking about sealer that goes on almost like paint you can't spot any defect from the primer filler. That stuff actually fills in minor defects and you shoot with a big tipped gun. Guide coats are your friend with long board sanding
Spray on for wet sanding and dust on for dry sanding.
Single stage is ok...but you have to do a lot of work to maintain the shine. The bc/cc business is much better at keeping the color nice...until the clear breaks down. Also single stage paints you won't get pearls or metalliacs.
Sanding. Sand the filler to like 320. Sand the primer to about 400 to 600. If you're blending then sand the adjacent panels to 800.
If your spraying bc/cc and is getting a lot of runs then try adjusting your spray gun set up or the technique.
Sorry ac...not sure where you're getting your info from but there's a lot of misinformation there.
I haven't looked at much plastidip stuff in a while but with all that work I'm like please please please paint it that blue was my favorite OEM color
you might check out summit, I don't know what plastidip costs but you can get stuff to paint the whole car for a couple hundred. With how much work you've put in to it I think it would do it a lot of justice. They're the same paint as eastwoods lineup fwiw, not top tier but a nice enough way to get a good coat on a car.
that blue was my favorite OEM color you might check out summit, I don't know what plastidip costs but you can get stuff to paint the whole car for a couple hundred. With how much work you've put in to it I think it would do it a lot of justice. They're the same paint as eastwoods lineup fwiw, not top tier but a nice enough way to get a good coat on a car.
I've actually had all my "real" paint supplies for a year or so now. I considered Eastwood but ended up going with UreKem - amethyst blue metallic. They are "budget" but have great reviews and are a family owned/run business. In fact I already have their paint for my Civic too (going red on it).
Already own a Devilbiss HVLP gun set. I even already have a Breathe-Cool supplied air respirator system too. I ain't messing around with no isocyanates
The primary reason I am doing the dip at this point is because I can do it this time of year and in much more subpar conditions. I really need it to be ~ 70 degrees or so for my real paint job, whereas dip I've read people shoot it no problem down into the 50's. The biggest thing though is that for my real paint job I am going to build an actual "booth" in my garage and I simply don't have the time for that (plus I can't paint this time of year anyway like I said).
I already have my dip, and the beauty is that all this work isn't going to waste because I can just peel it off in a year or two when I'm ready/able to do the real base/clear job.
The plasti dip industry has grown incredibly over the last few years. It's gone from simply rattle-canning the whole car to more professional grade high gloss coatings now that can pretty much stand next to traditional clear coat. With the right mix of tints and/or pearl additives, you could probably get very close to the original blue on your car. Its definitely a perfect choice in your situation though, to temporarily give the car a clean look until you get around to actually painting it. Then you're not driving around like a primered/body filler'ed redneck
I made the same choice with mine. At the time, it was meant to be temporary and here we are today 2 years later, still dipped. I did it outside in the driveway, just plain matte black, no additives or gloss, and with one of the first electric spray guns that was out at the time. Its a user friendly product but the quality of the finish and end result will be a reflection (pardon the pun) of the equipment, environment, and your spraying skills. If i ever re-dip it (or actual BC/CC), i want to be in a paint booth, have more practice, and use a better spray gun
What's tricky on our cars with dip is getting clean lines and smooth peels around the window trims. Unlike most newer cars that have gaps between the glass and body panels, our window trim rests right on the body. So you'd have to spend extra time masking those off. What I did is let the dip "bridge" over the body/trim, and then later (when dry) reverse masked off the surrounding body and sprayed the window trim with the glossifier to give it a bit of a contrast to avoid that reckless mono-tone spray-bomb look over the whole car. The problem with letting the dip "bridge" like that is over time with use of the car and air/water/movement/hot-cold weather, it will eventually lift away. Though, depending on how long your idea of temporary is, maybe you will not care as much since you'd be soon peeling it anyway. If I ever re-dip mine, and did so with long-term use in mind, I would improve on the masking I did to avoid that bridging
I had totally forgotten you dipped, but it looks great. And you are spot-on about the quality of colors they have produced just in the past few years. I remember even 5 years ago, dipped cars looked mostly horrible outside of plain black. The only colors were like a chalky baby blue, a camouflage looking green, a chalky pink-ish red, etc.
In the past few years they have added pearlizers, glossifiers, clears, many new colors, etc. It's downright impressive actually. Stuff like this:

About the side window trim/moldings, I am actually going to dip it all with the moldings off and then add them later (I'm going to tape it off right at the edge of the molding line as I don't want to dip all the way UNDER the moldings and then have trouble peeling it later).
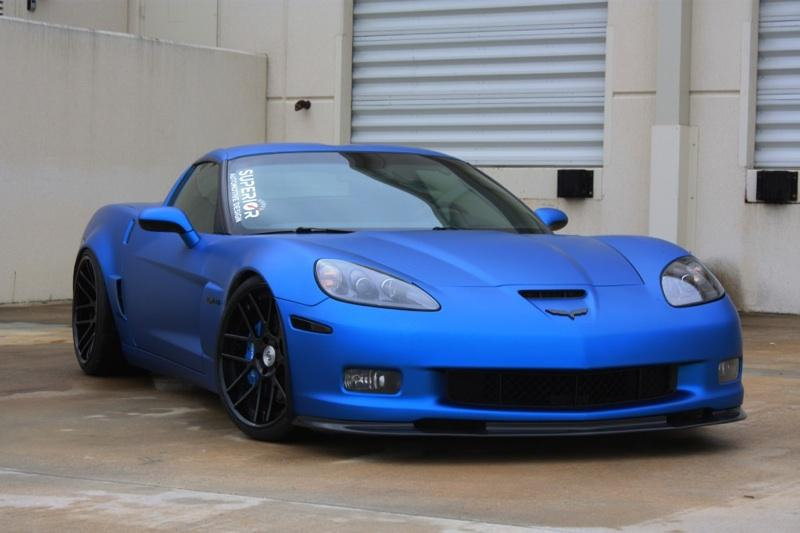
For now, due to cost, I'm just going with their new Flex Blue color. I didn't want to spend the extra right now for Perhaps in the spring or such I'll add a pearl or glossifier on top but if it comes out looking like Fonzie's Audi did below, I'll be more than happy for a year or two. This is Flex Blue over a gunmetal base (which is exactly as I will be doing).
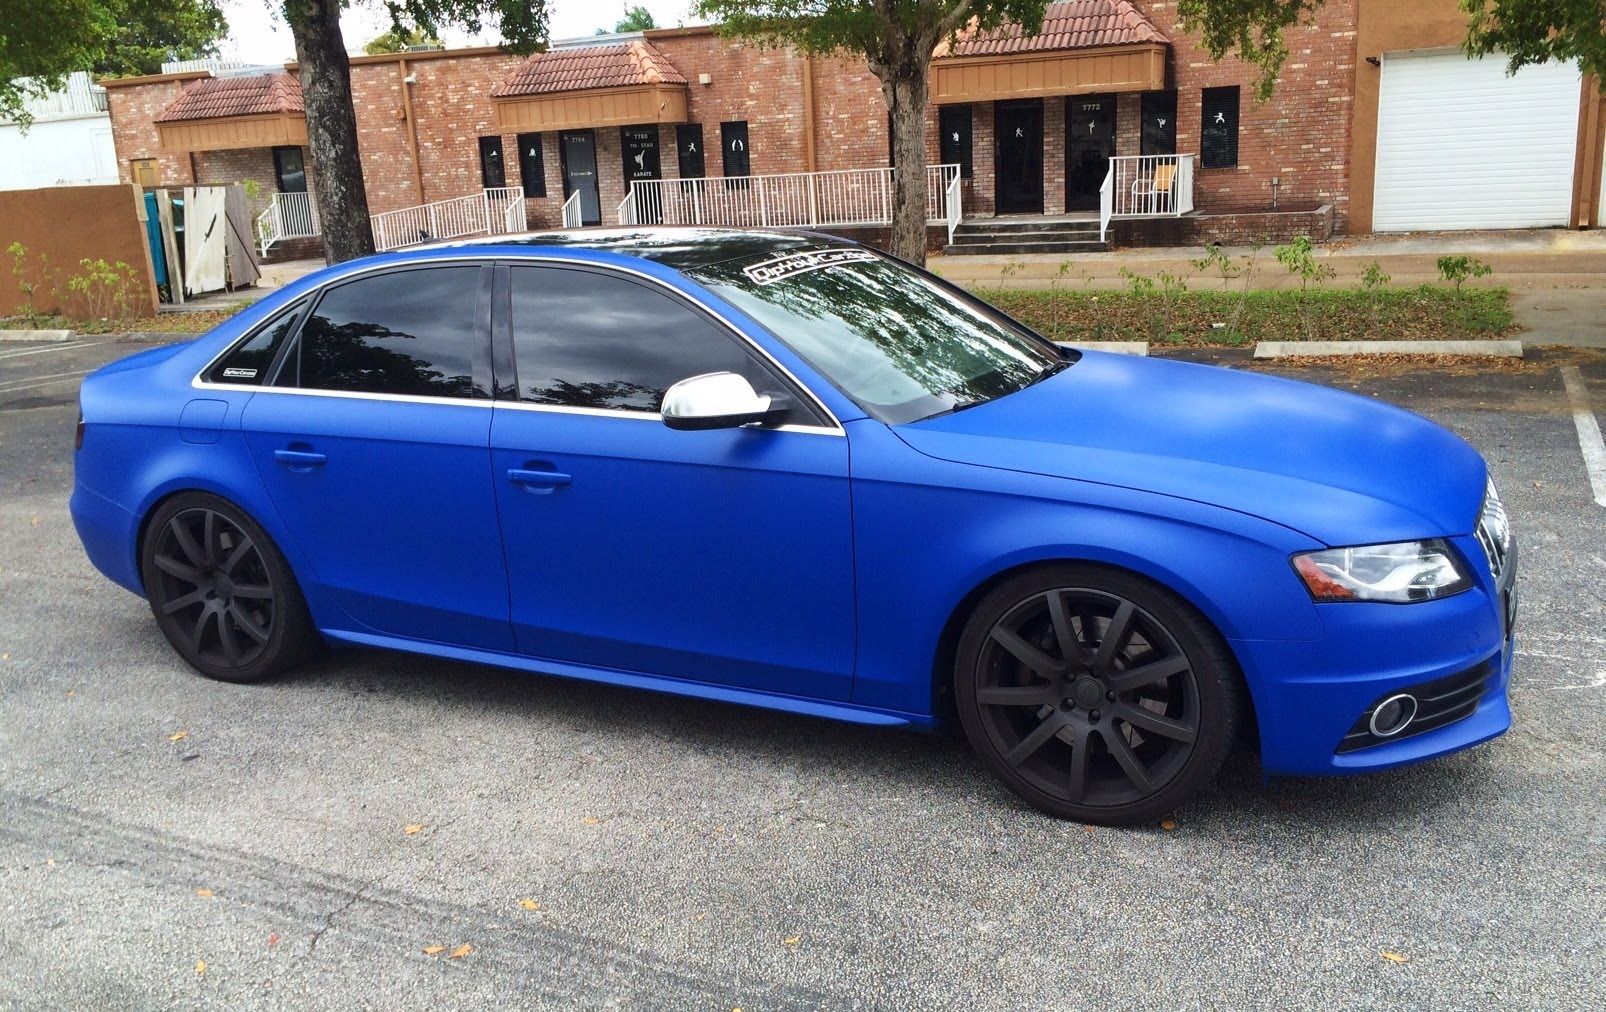
If I could figure out the combo that produced this color though I would do it in a heartbeat. But can't find any details on it
In the past few years they have added pearlizers, glossifiers, clears, many new colors, etc. It's downright impressive actually. Stuff like this:
About the side window trim/moldings, I am actually going to dip it all with the moldings off and then add them later (I'm going to tape it off right at the edge of the molding line as I don't want to dip all the way UNDER the moldings and then have trouble peeling it later).
For now, due to cost, I'm just going with their new Flex Blue color. I didn't want to spend the extra right now for Perhaps in the spring or such I'll add a pearl or glossifier on top but if it comes out looking like Fonzie's Audi did below, I'll be more than happy for a year or two. This is Flex Blue over a gunmetal base (which is exactly as I will be doing).

If I could figure out the combo that produced this color though I would do it in a heartbeat. But can't find any details on it

Very nice work Dan! What brand clear do you use and what tip size?
Yeah, unfortunately the reducer I bought with all my UreKem stuff is actually the slow reducer (90 degrees +) as originally I anticipated painting way back in late summer of 2014 (according to my receipts, I actually bought the stuff in April of 2014). I would have to now re-buy fast reducer specifically if I were going to try to rush and paint it by the end of the year.
I had read that primer, specifically, does not like colder temps (I'm talking even into the 60's). Have you had any experience spraying primer in cold temps?
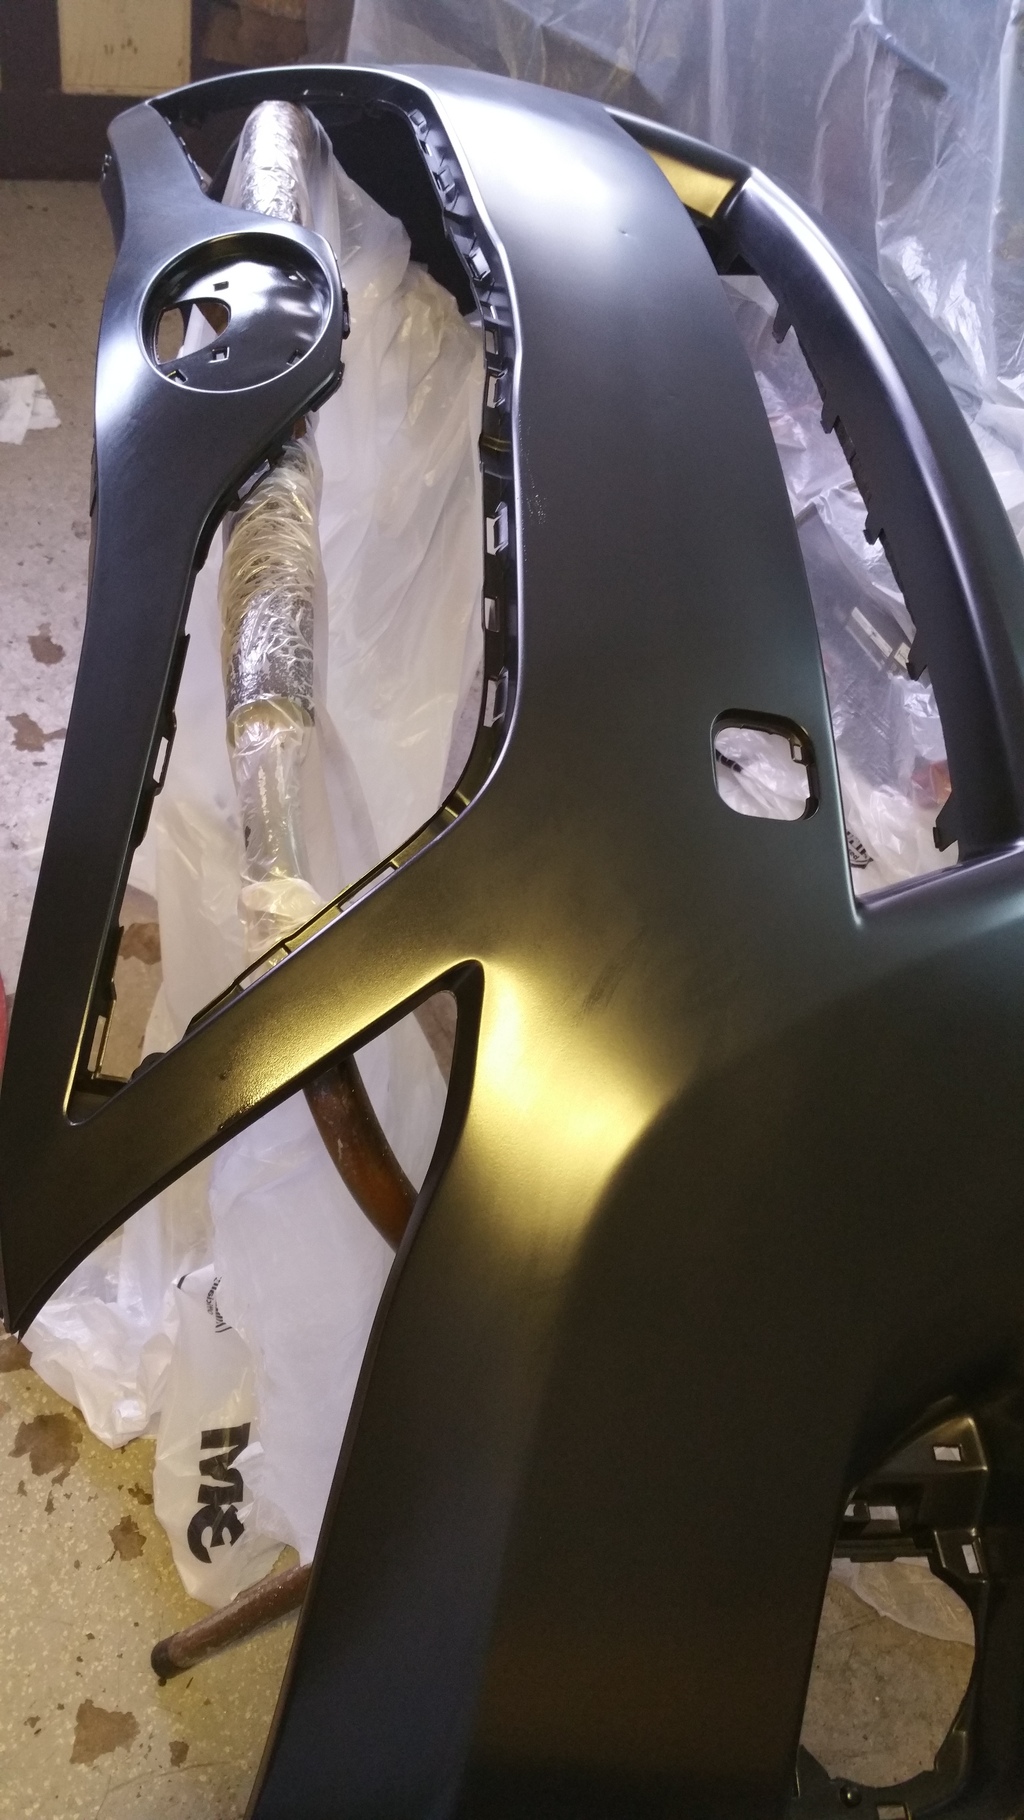
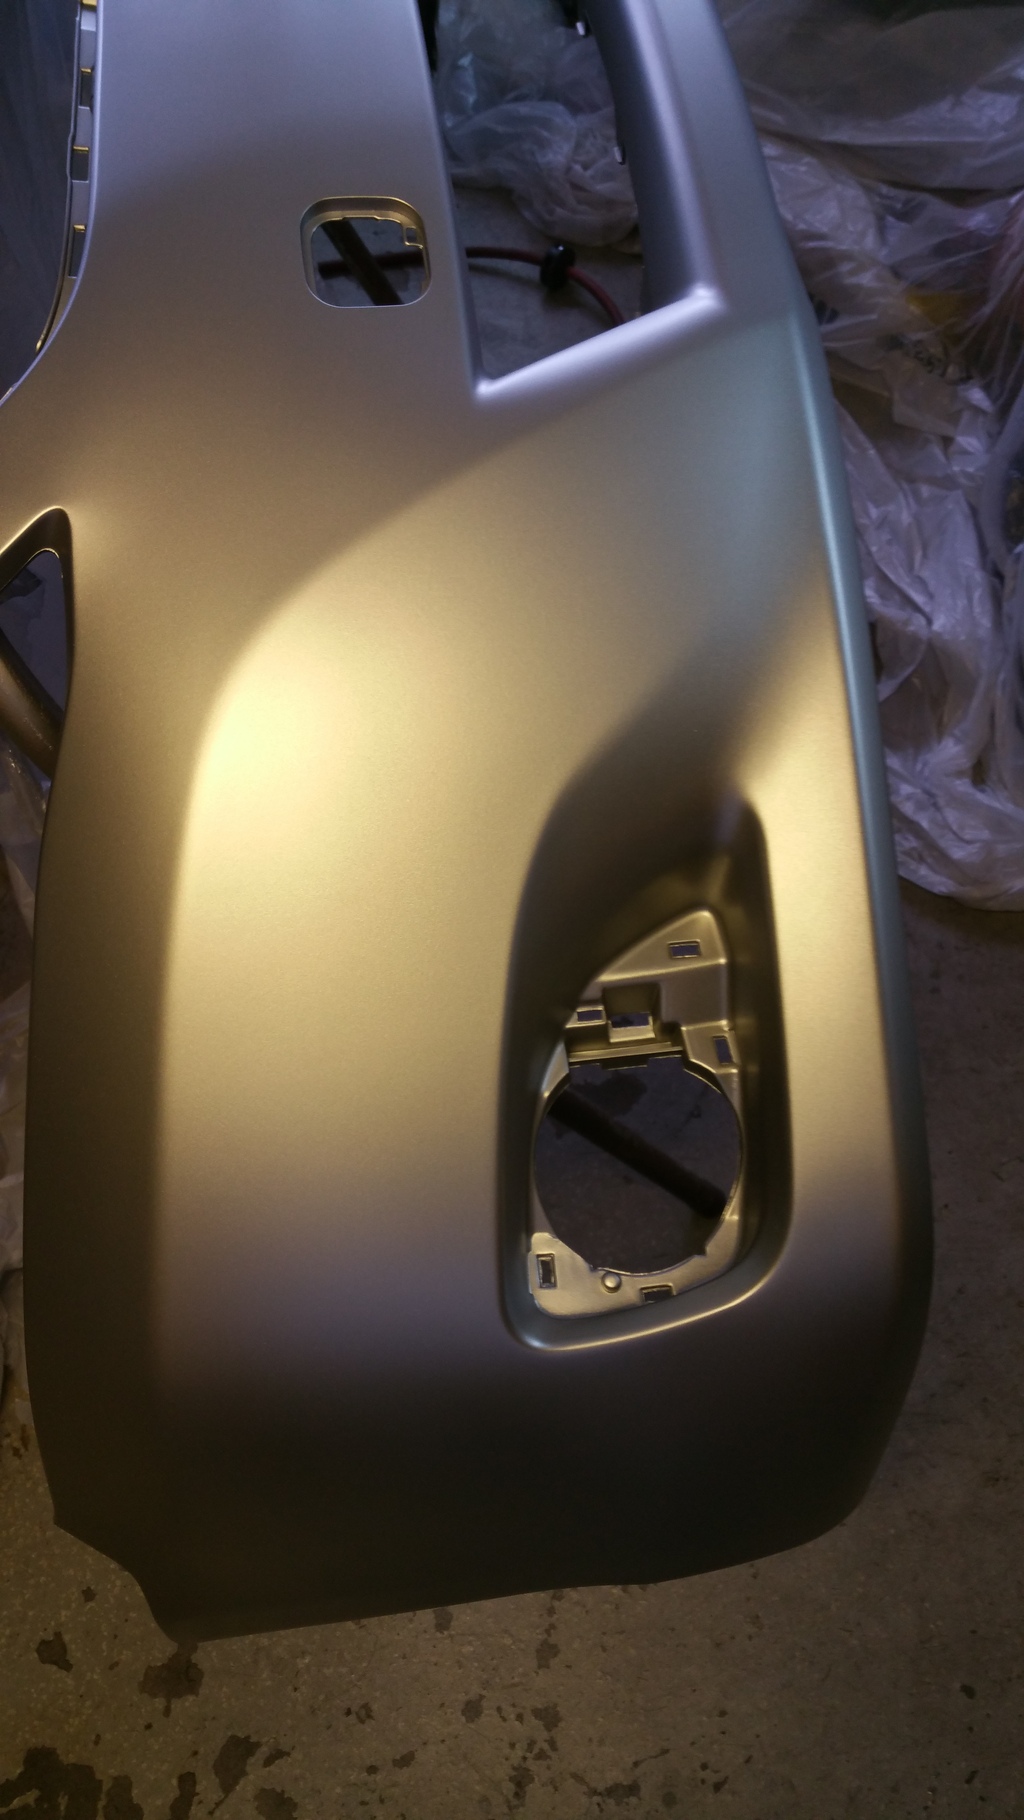
Also - about that bumper, did you use any adhesion promoter or flex agent or anything of the sort? I have continued to read conflicting reports about what to use on bumpers.
As a test, summer 2014, I went to the JY and got a good bumper cover for my black VE (which had suffered a cracked cover due to a cooler in the middle of the highway). Literally all I did to it was scuff it with a Scotch-brite pad, clean it, and spray it. No primer or anything. I wanted to see if it would adhere and how it would hold up.
It actually came out much better than I figured for such a quicky little-prep job (pics aren't the best as I was on a temp phone between iPhones). Of course it then looked much better than the rest of the car lol.
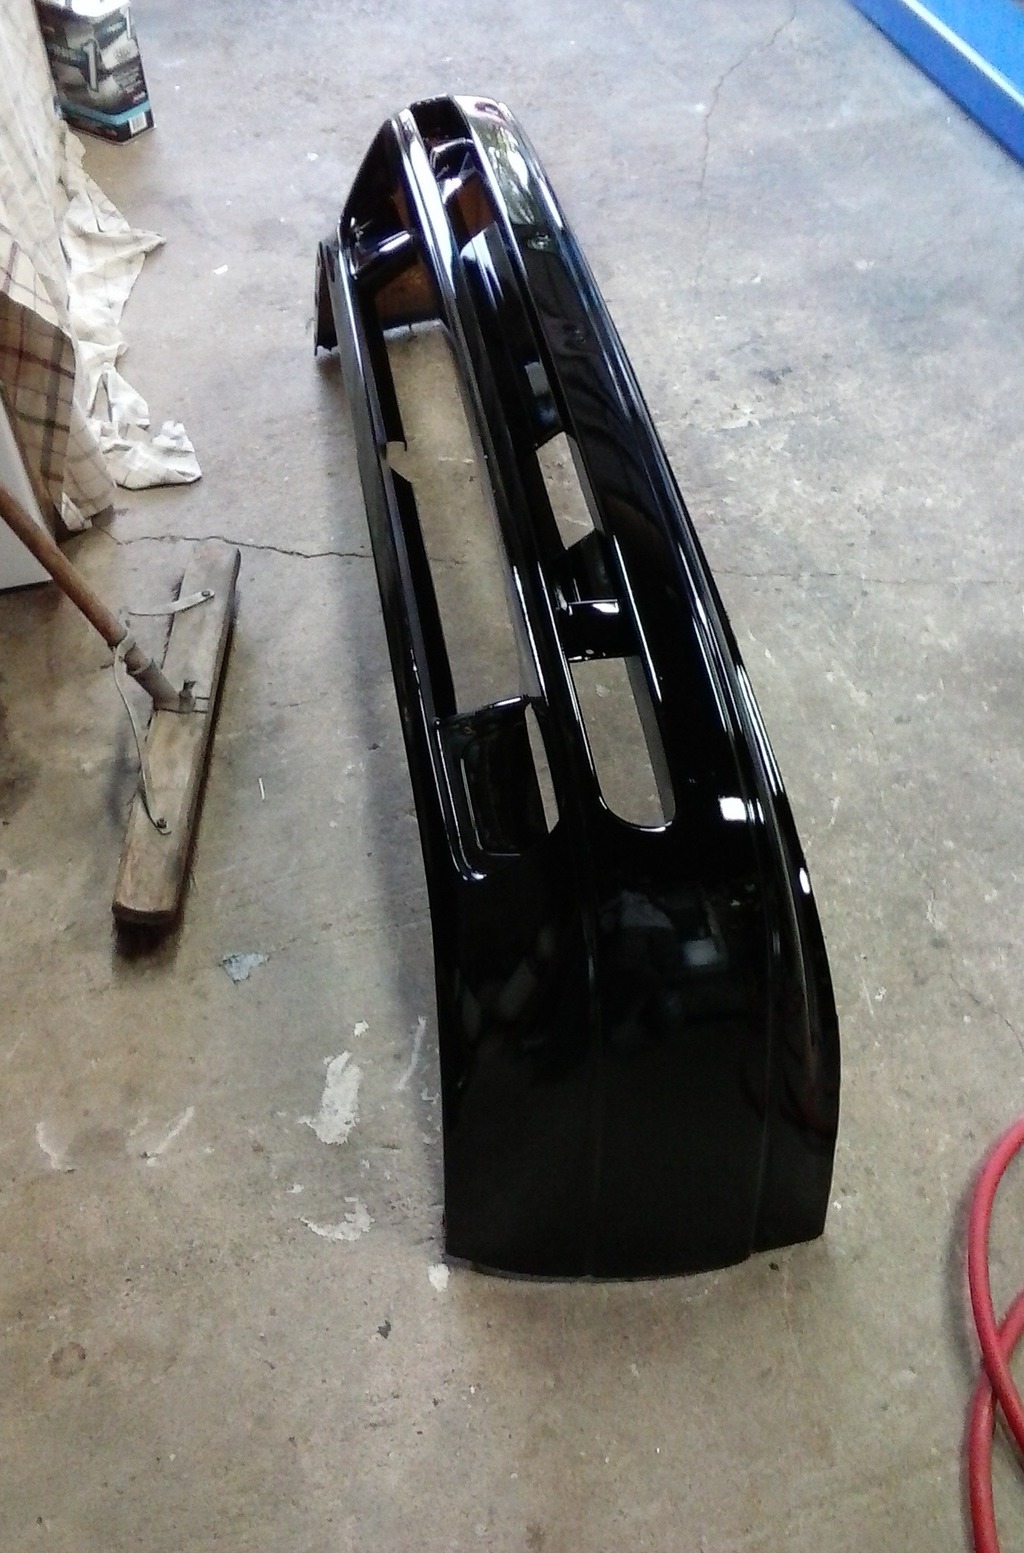
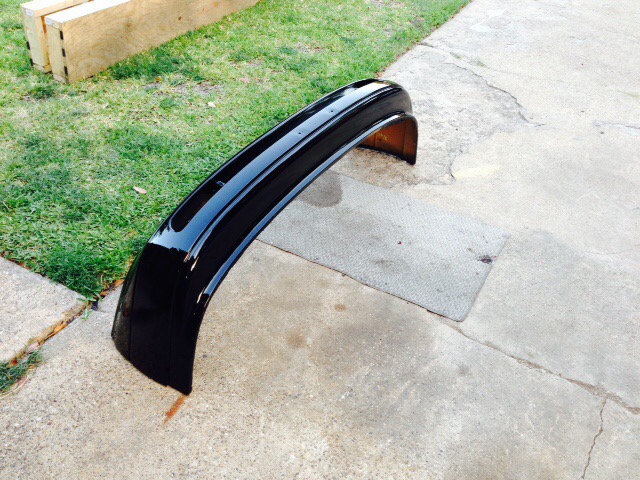
Now a year and a half later, the paint still looks great but I can juuuuuust start to see a little bit of spider web "cracking" in a couple of spots. I can't remember if the original cover had that too and I tried to sand it out, but didn't completely and thus painted right over it and it's coming through, or if it's due to no flex agent or whatever. I definitely haven't hit anything with it.
Yeah, unfortunately the reducer I bought with all my UreKem stuff is actually the slow reducer (90 degrees +) as originally I anticipated painting way back in late summer of 2014 (according to my receipts, I actually bought the stuff in April of 2014). I would have to now re-buy fast reducer specifically if I were going to try to rush and paint it by the end of the year.
I had read that primer, specifically, does not like colder temps (I'm talking even into the 60's). Have you had any experience spraying primer in cold temps?
Also - about that bumper, did you use any adhesion promoter or flex agent or anything of the sort? I have continued to read conflicting reports about what to use on bumpers.
As a test, summer 2014, I went to the JY and got a good bumper cover for my black VE (which had suffered a cracked cover due to a cooler in the middle of the highway). Literally all I did to it was scuff it with a Scotch-brite pad, clean it, and spray it. No primer or anything. I wanted to see if it would adhere and how it would hold up.
It actually came out much better than I figured for such a quicky little-prep job (pics aren't the best as I was on a temp phone between iPhones). Of course it then looked much better than the rest of the car lol.


Now a year and a half later, the paint still looks great but I can juuuuuust start to see a little bit of spider web "cracking" in a couple of spots. I can't remember if the original cover had that too and I tried to sand it out, but didn't completely and thus painted right over it and it's coming through, or if it's due to no flex agent or whatever. I definitely haven't hit anything with it.
so the paints (primer/bc/cc) are all dependent on the chemical reaction. chemical reaction will slow down in the 60s and below that nothing will happen. you can paint the primer/sealer in the upper 60s but dont go under 60s. always used a catalyzed paint. for the DBC the catalyst is optional but i always use it just in case you need to make any repairs. you don't want the BC to wrinkle/peel up when you spray a touch up. of course i've done it without it before but it's hairy if the part needs to be re-touched up if you messed something up. if you have an IR heater you can shoot the paint and stick it under the heat lamp....but keep any eye on the temp or else bad things will happen.
for anything plastic you always use an adhesion promoter. there's 2 kinds...one that sits on the plastic and one that kinda melts into the plastic. i use PPG DPX801...you spray the BC right over this. the DPX801 melts into the plastic. I use PPG DBC for BC and PPG concept 2021 for clear. it's really thick (the clear) but the shine is fantastic.
i stock all 3 temps of DT reducer since in the NE it goes from downright hot in the summers to the freezing temps in the winters.
flex...unless you're going to have the part sit around for a while you technically don't really need flex. yeah you can add it..but the part will age over time and the paint will still spider upon impact. fresh paint (within a month) will have some flex in it where you bend the part and the paint won't crack. you don't add the flex in the BC...only in the CC. keep in mind over time the part will still crack upon impact...the flex will give you more time.
with jy parts..if the OEM paint is in good condition then you can sand it down to the bc and shoot your bc over it.
always look over the tech sheets...the manufacturers spent a lot of R&D on the products so it will be successful out in the field. don't play chemist and mess around with it. i follow PPG's p-sheets to the T and never had any issues. for the clear i put a touch more reducer to thin it out a little so it's easier to apply.
the gun tip....i think it's like 1.8 for BC/CC...but i'm not 100% sure.
Nice job on that metallic Dan! I've always read that metallics are very difficult to shoot.
I'll have to re-check out my black bumper and see if maybe something did impact it. It's entirely possible though that it was already spidered and since it was mainly just a test/trial run, I didn't care and still just scuffed it lightly. Who knows. I have a terrible memory.
So basically if I had bought, say, a brand new aftermarket bare plastic bumper - I would want to use PPG DPX801 (or something similar/on par) first. If re-painting a good bumper with no major paint defects and cracking/spidering/etc., can just go ahead and sand off the old clear coat, and spray right over the old base. Correct?
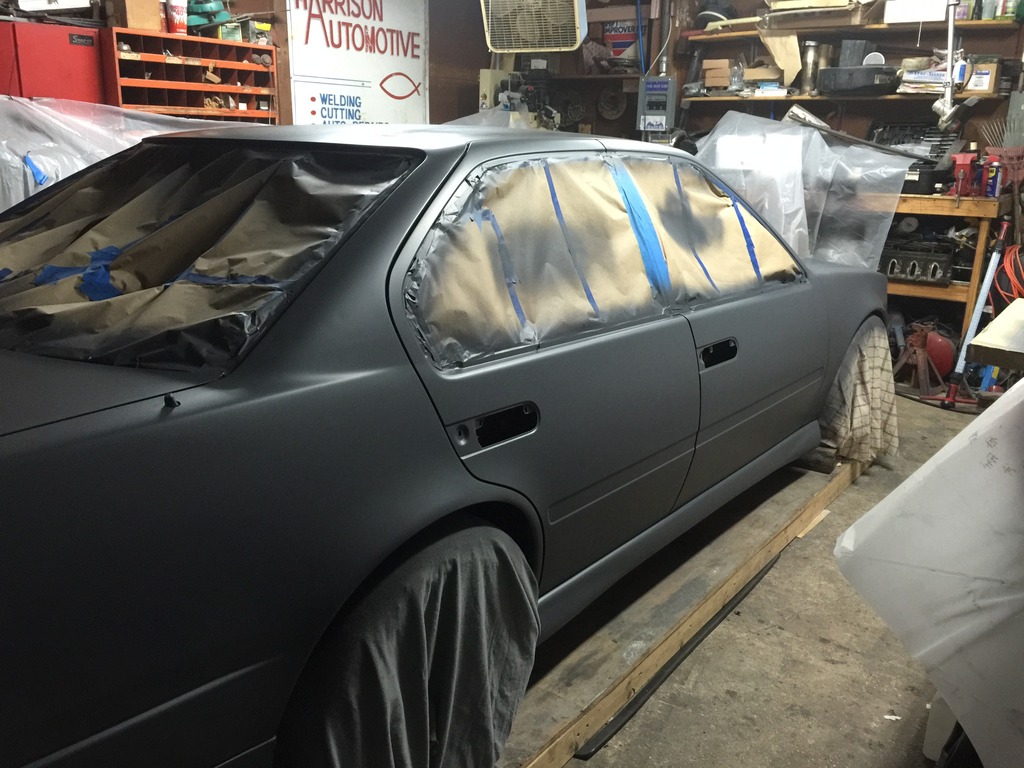
Still been working on the car. I figured I needed to get the front and rear glass frames painted and drip rail stuff done, as it would be very difficult to do all that AFTER the dip. Well, I could do it, but it would be pretty tedious/annoying to try to not screw up the dip doing all that work around it. Better safe than sorry just doing it before hand.
I had also forgotten how fast this seam sealer sets up. It's the Eastwood brand seam sealer, paintable in one hour. But by the time I gooped it all into the rail and ran my finger (gloved) across it all to smooth it, it was already starting to set. Literally by the time I ran from one side to the other with my finger. Then pulling the tape off, it wanted to stick to the tape in a couple areas. Still came out fine, though. This stuff isn't visible anyway with the drip rail weatherstrip installed.
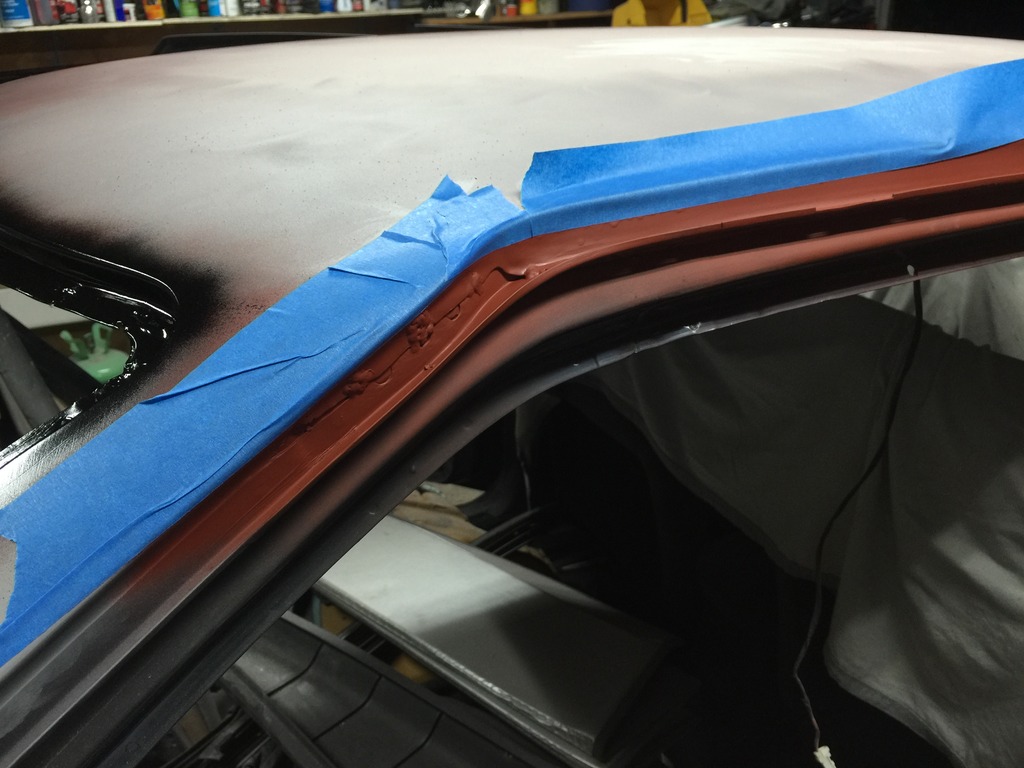
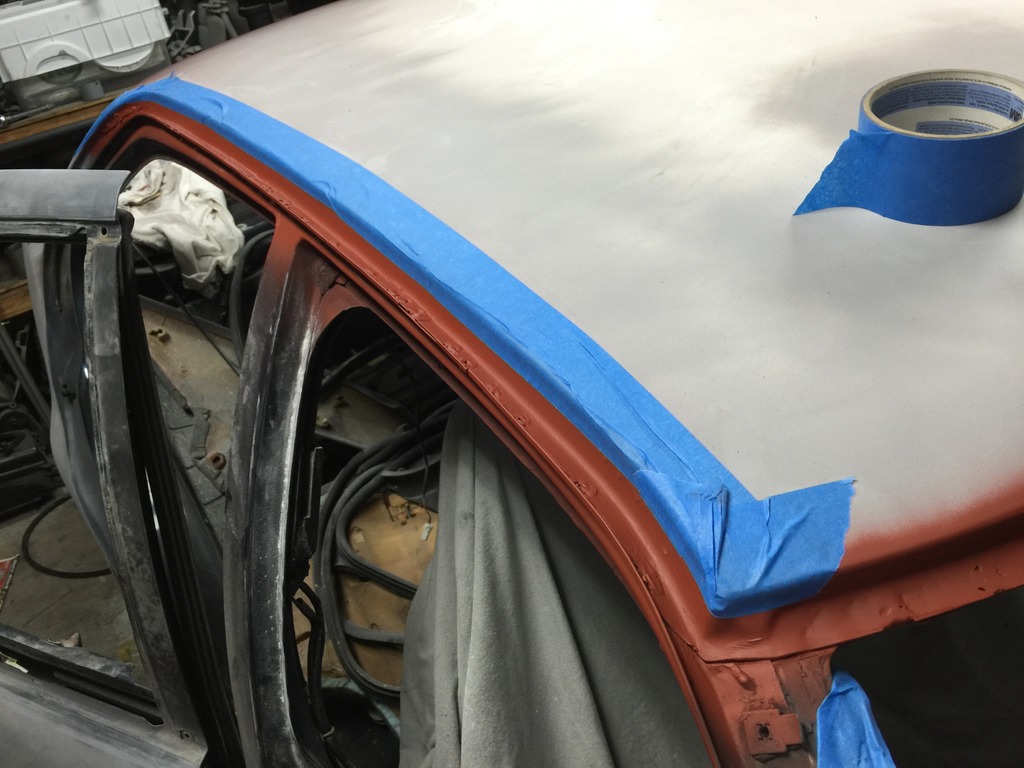
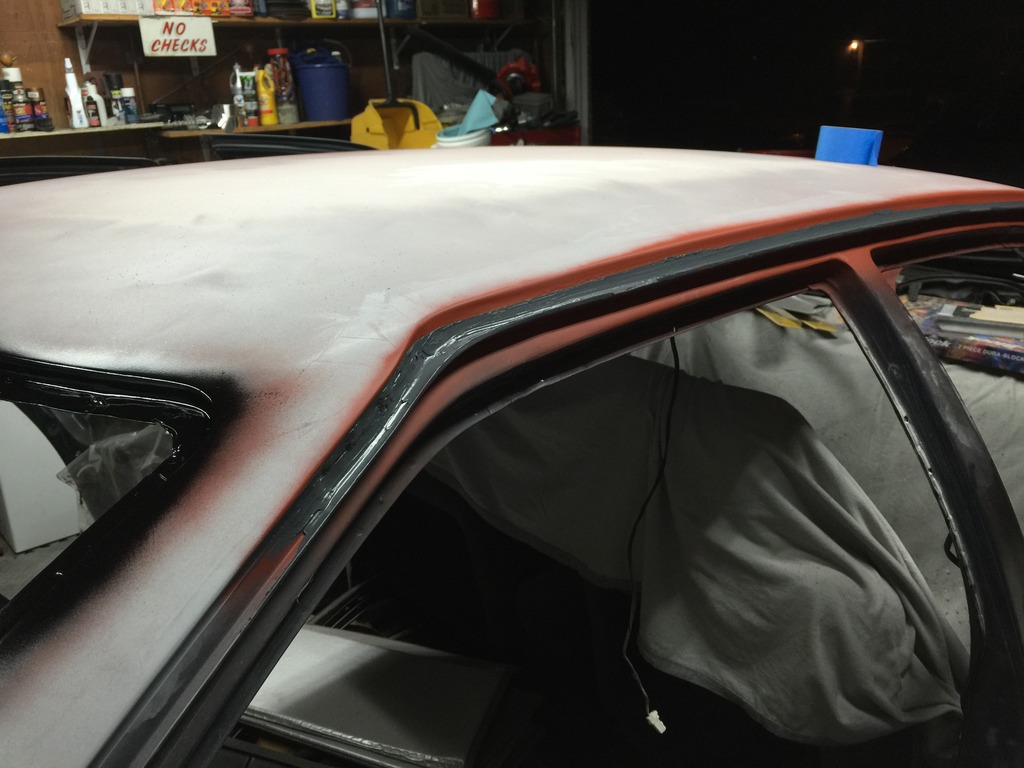
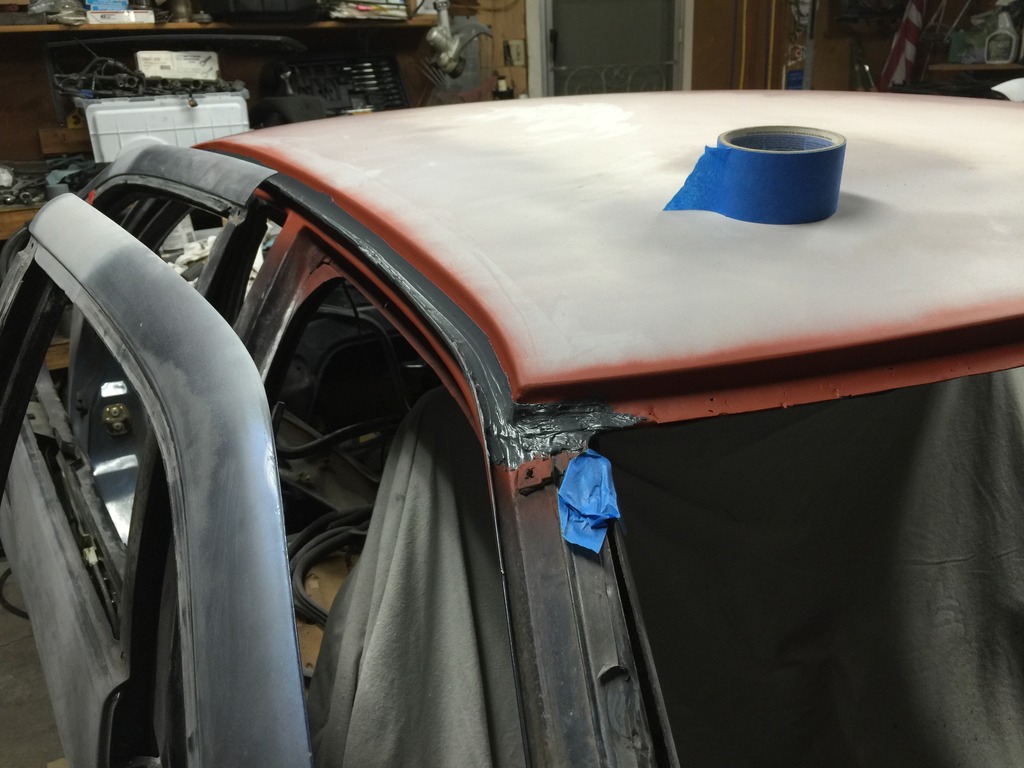
And here's how it sits now. Basically as good as it's gonna get since I want to try to paint it tomorrow (assuming no extremely lengthy family obligations). Thankfully we're being let go at 1 from work today, so I'll be able to get home and pull the car out into the driveway this afternoon to blow it all off, clean it, and clean the garage out in preparation for tomorrow.
I do still have to re-mount my rear valence though. I forgot how time consuming and tedious it is to try to get all that old mounting tape off. That's going to kill a lot of time today unfortunately.
I think that passenger front fender area I was worried about came out fine. I did another skim layer of filler the other day and sanded it out. With that whole area painted with primer, while it was wet, it looked perfectly good to me. I'm sure if I was painting it jet gloss black, I could probably spot some of the work. But with a matte dip color, I think it it'll be perfectly fine.
I'll have to re-check out my black bumper and see if maybe something did impact it. It's entirely possible though that it was already spidered and since it was mainly just a test/trial run, I didn't care and still just scuffed it lightly. Who knows. I have a terrible memory.
So basically if I had bought, say, a brand new aftermarket bare plastic bumper - I would want to use PPG DPX801 (or something similar/on par) first. If re-painting a good bumper with no major paint defects and cracking/spidering/etc., can just go ahead and sand off the old clear coat, and spray right over the old base. Correct?
Still been working on the car. I figured I needed to get the front and rear glass frames painted and drip rail stuff done, as it would be very difficult to do all that AFTER the dip. Well, I could do it, but it would be pretty tedious/annoying to try to not screw up the dip doing all that work around it. Better safe than sorry just doing it before hand.
I had also forgotten how fast this seam sealer sets up. It's the Eastwood brand seam sealer, paintable in one hour. But by the time I gooped it all into the rail and ran my finger (gloved) across it all to smooth it, it was already starting to set. Literally by the time I ran from one side to the other with my finger. Then pulling the tape off, it wanted to stick to the tape in a couple areas. Still came out fine, though. This stuff isn't visible anyway with the drip rail weatherstrip installed.


And here's how it sits now. Basically as good as it's gonna get since I want to try to paint it tomorrow (assuming no extremely lengthy family obligations). Thankfully we're being let go at 1 from work today, so I'll be able to get home and pull the car out into the driveway this afternoon to blow it all off, clean it, and clean the garage out in preparation for tomorrow.
I do still have to re-mount my rear valence though. I forgot how time consuming and tedious it is to try to get all that old mounting tape off. That's going to kill a lot of time today unfortunately.

I think that passenger front fender area I was worried about came out fine. I did another skim layer of filler the other day and sanded it out. With that whole area painted with primer, while it was wet, it looked perfectly good to me. I'm sure if I was painting it jet gloss black, I could probably spot some of the work. But with a matte dip color, I think it it'll be perfectly fine.
Nice job on that metallic Dan! I've always read that metallics are very difficult to shoot.
I'll have to re-check out my black bumper and see if maybe something did impact it. It's entirely possible though that it was already spidered and since it was mainly just a test/trial run, I didn't care and still just scuffed it lightly. Who knows. I have a terrible memory.
So basically if I had bought, say, a brand new aftermarket bare plastic bumper - I would want to use PPG DPX801 (or something similar/on par) first. If re-painting a good bumper with no major paint defects and cracking/spidering/etc., can just go ahead and sand off the old clear coat, and spray right over the old base. Correct?
yup if you bought an black urethane bumper (like the stillen kit) all you have to do is scuff it and spray DPX801 on it. then once that's set up you will spray your BC directly over that and then the CC.
if it's an OEM bumper with OEM finish you want to sand it down to about the basecoat and then spray over the factory base assuming the base is in good shape and not breaking apart or flaking. most likely you want to shoot some primer on that...i mean unless the bumper has not see any road time you will have some rock chips and scrapes on it. that's why it's usually not ideal to refinish used bumpers unless you're ready to bring it down to the bare plastic.
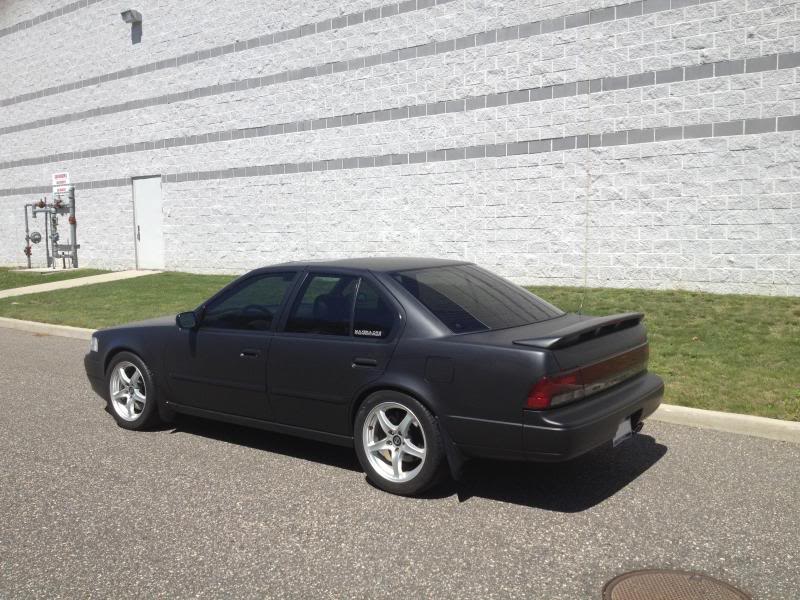
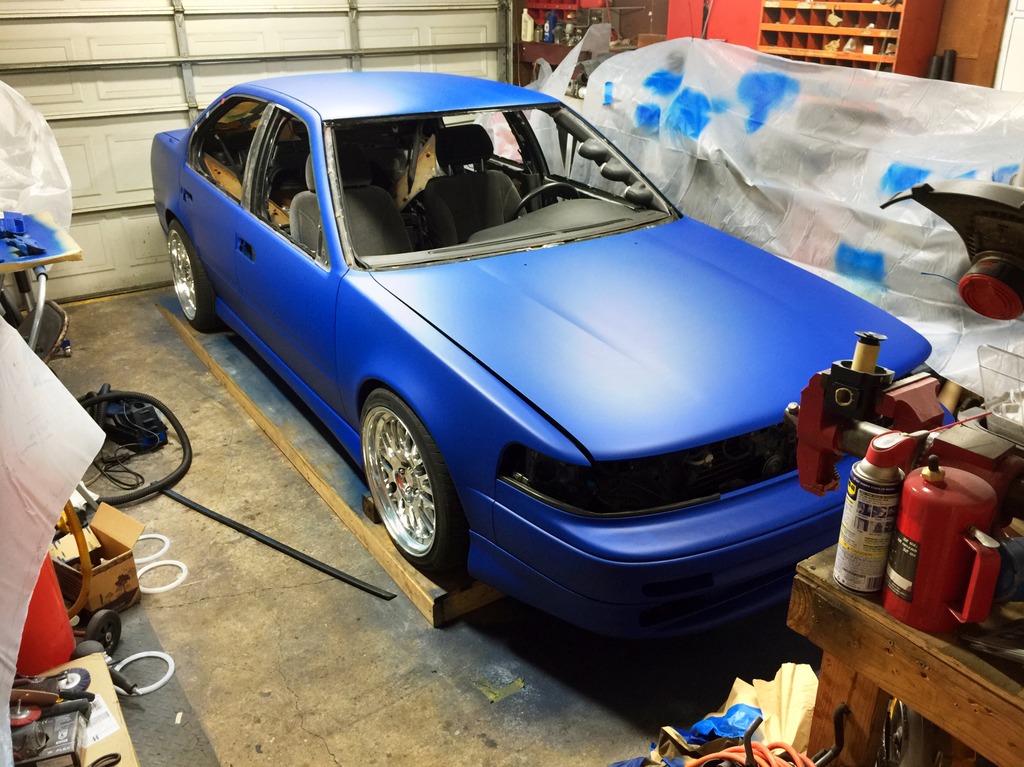
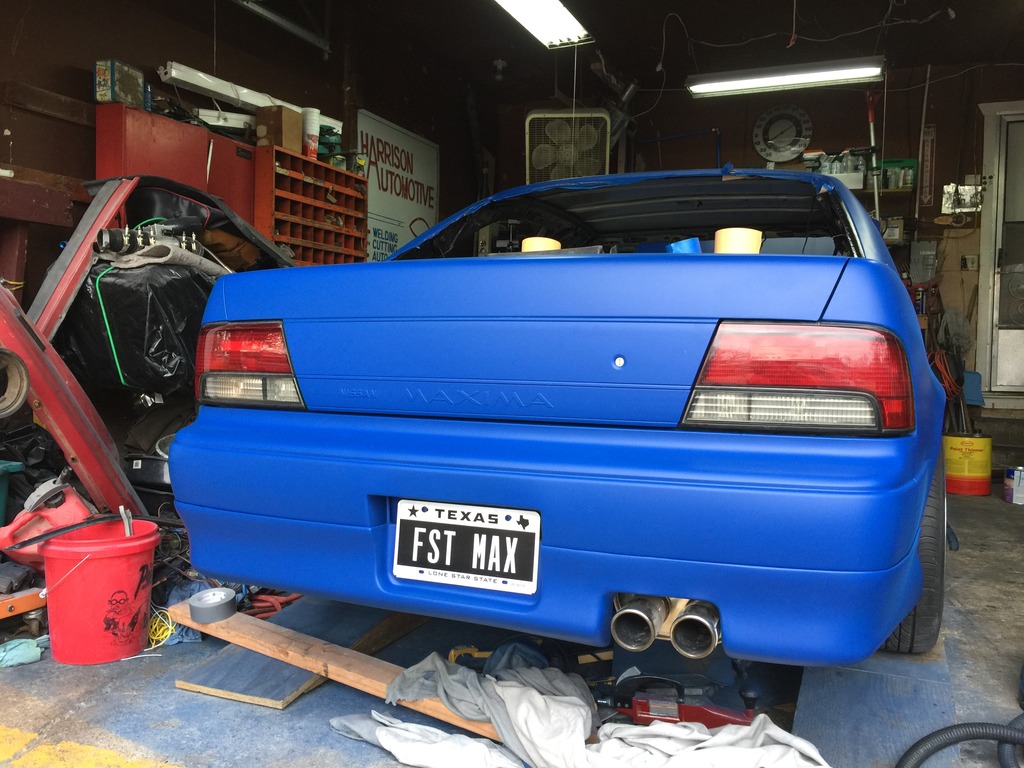
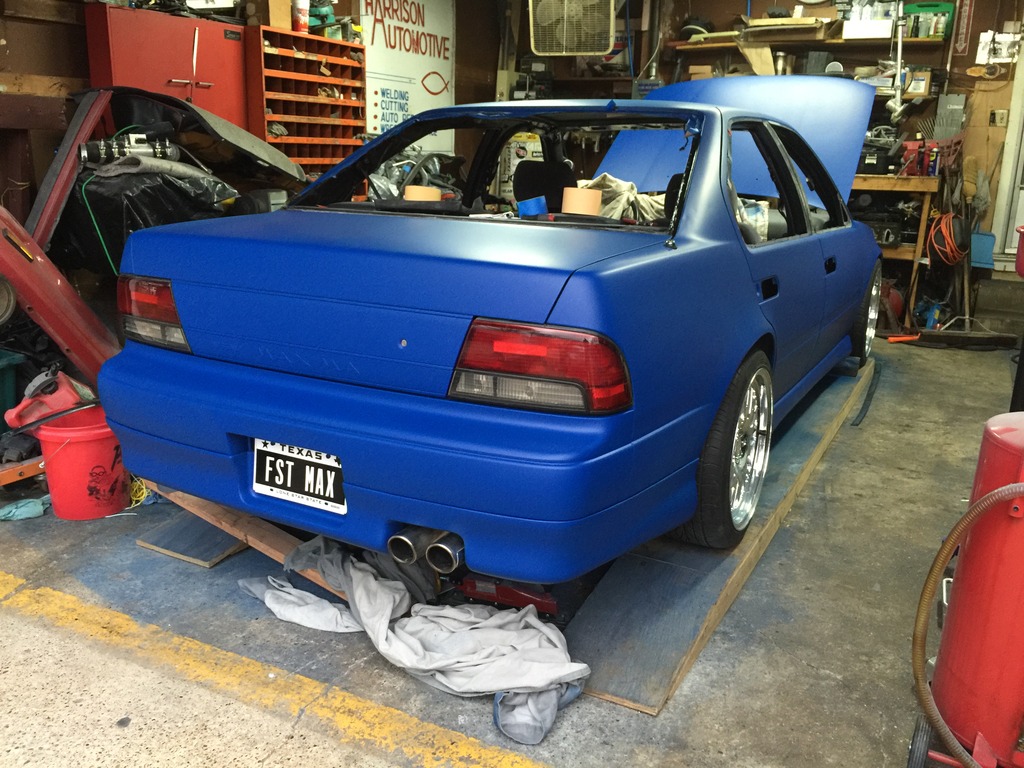
Got it finished yesterday in between family obligations
Gunmetal base:
Noticed I missed a could of hail dents on the passenger C pillar. Never even saw them until I started spraying the blue
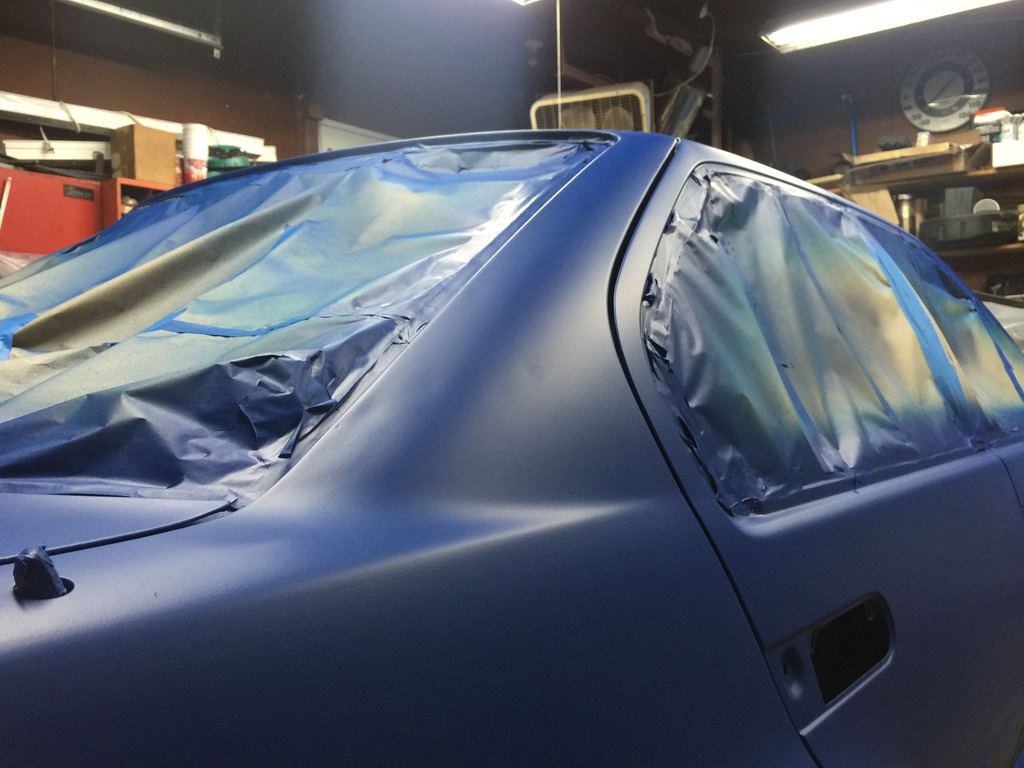


Gunmetal base:

Noticed I missed a could of hail dents on the passenger C pillar. Never even saw them until I started spraying the blue


lol man you are insane you know that? The color is not my taste, i would prefer a gloss paint because its an older car but the craftsmanship and effort, first of all i have never seen a "roof reskin" . Even though i know its not you make it seem simple.
Top notch stuff man. With this your car is now easily in the top 3 maximas i have ever seen.
. Even though i know its not you make it seem simple.Top notch stuff man. With this your car is now easily in the top 3 maximas i have ever seen.
I actually really like it though, especially with the satin look. It's funny because some of the reactions I've gotten from neighbors/family members - I can tell they think it's hideous and are too nice to say so. Kind of like how I used to react to the chalky bright baby blue or pale diarrhea green I used to see people paint their cars with back in the early PlastiDip days or even the older and somewhat popular at the time "roll on" Home Depot paintjob using household paint. I might add a pearl or a gloss onto it later on, but probably not because I'm tired of messing with it.I will be adding "Dip Coat" to it though - it's kind of a spray on wax type of thing. It slightly darkens the color, adds some shine, and makes the dip feel more "slick" like normal paint rather than rubbery/textured.
If I didn't also have a stock Maxima though, I definitely wouldn't go this "wild" on the turbo car. But this is the exact reason I have two.
Oh dang that looks good. Love the blue I didn't realize they'd come so far with the dips, I thought they were still just home depot rattle can jobs.
Sorry if I missed it but where'd you get it? I forget if you had a special gun to spray it or not? I'm thinking it might be a good solution for my '91 F350, it's not the right time of year to respray it and it's about as low as you can get on the priorities list/project backlog but I'd like to get something on it between now and when I get more time and really like your results
I didn't realize they'd come so far with the dips, I thought they were still just home depot rattle can jobs.Sorry if I missed it but where'd you get it? I forget if you had a special gun to spray it or not? I'm thinking it might be a good solution for my '91 F350, it's not the right time of year to respray it and it's about as low as you can get on the priorities list/project backlog but I'd like to get something on it between now and when I get more time and really like your results
I got it from www.dipyourcar.com - they're pretty much the industry standard place. The guy that owns DYC, he calls himself Fonzie but that is evidently not his birth name, is almost single handedly responsible for the explosive growth of dipping.
I just bought their "professional car kit" or whatever it's called, it comes with the ready to spray dip AND a spray gun/turbine deal. Literally everything you need to spray it nicely - doesn't even use a compressor since it comes with the turbine deal.
I must say I'm pleasantly surprised with the gun itself. It's DYC branded, although I assume it is just some other sprayer relabeled. But it seems well made/sturdy and sprays well. Comes apart very easily with only like 5-6 parts for easy cleaning. My only complaint with it though is that if you're painting the roof, hood, or trunk lid (and thus are painting facing the gun straight down) is that the gun gets very sputtery UNLESS it's about exactly 3/4 full. More than that, or once it gets down to about 1/2 pot or less, it doesn't like it. I figured that out on the gunmetal base thankfully and knew better on the blue coats. Although the roof was still very difficult to not stripe, simply due to the height with the car on my ramps and even using a ladder/chair it was just difficult to reach and keep proper form. So I have a slight bit of striping in the roof still.
It was $330 some odd total for the "kit", and the kit also comes with tape, strainers, mixers, extra gaskets/stuff for the sprayer, a lot of stuff really. It's surprising they can sell all that crap for the price they do. You could also just spray it through a normal HVLP gun I'm sure, or even like a Wagner gun, but I didn't want that stuff in my "real" gun.
If you buy the straight up gallons like at Home Depot or something (you'd then have to thin them yourself to make them sprayable) and use your own gun you already have you could do it really cheaply actually.