
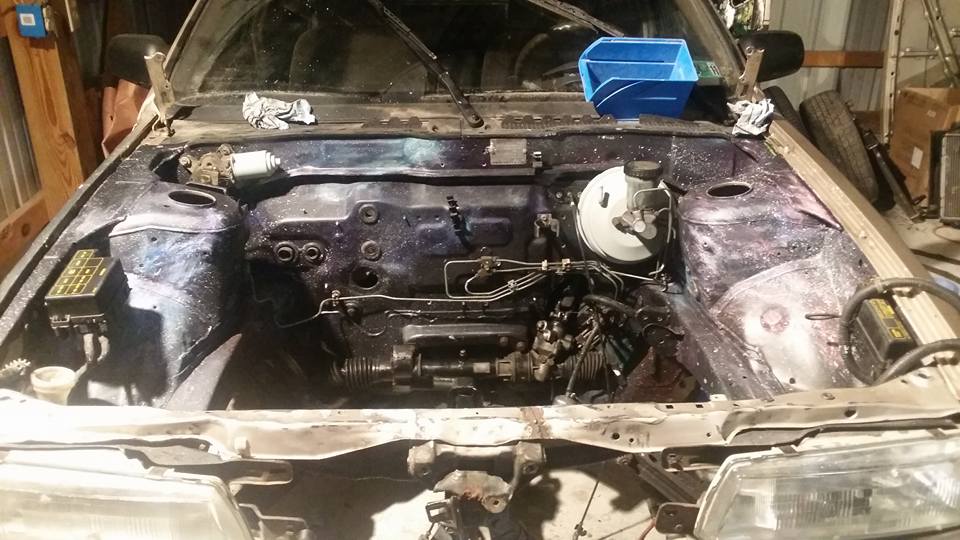
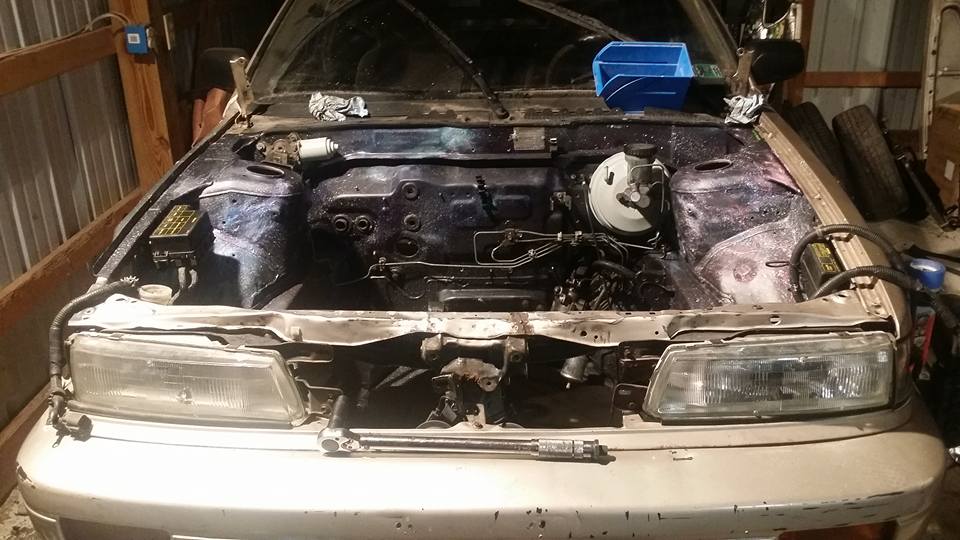
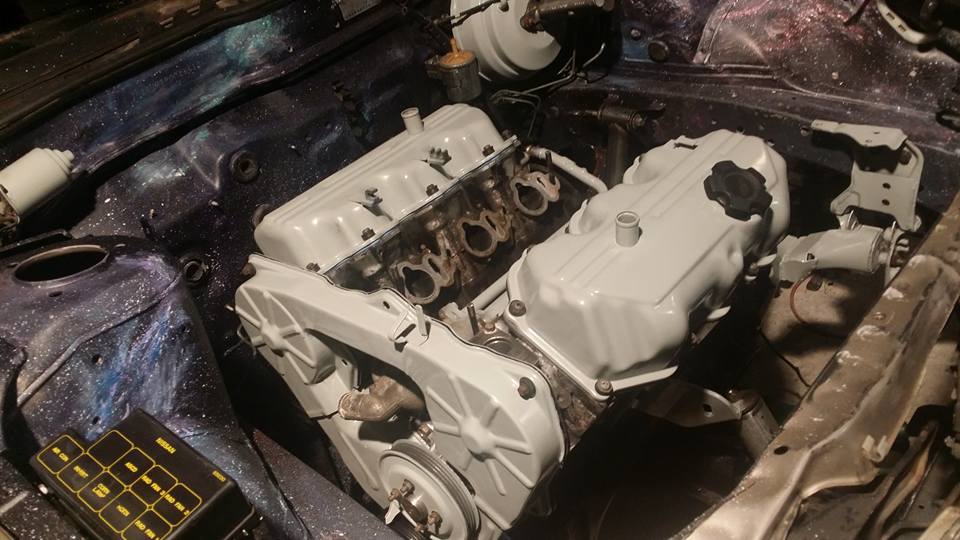
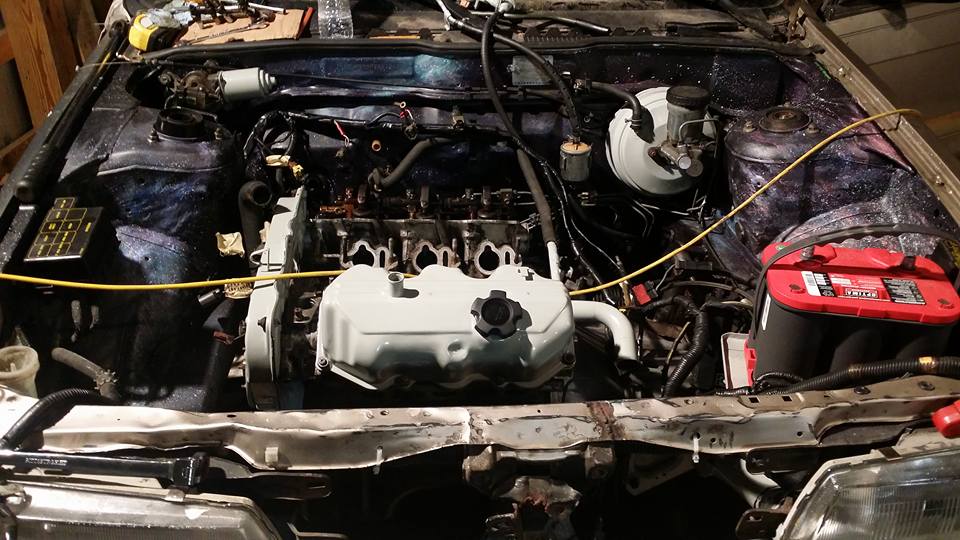
Turbo VG swapped stanza


Paint by numbers was just a thing around in the younger years where you paint different areas of a pic a certain colour depending on the number. Was just a silly wisecrack. That's a pretty unique paint job on that engine bay..

Thread Starter
Member
Joined: Oct 2016
Posts: 286
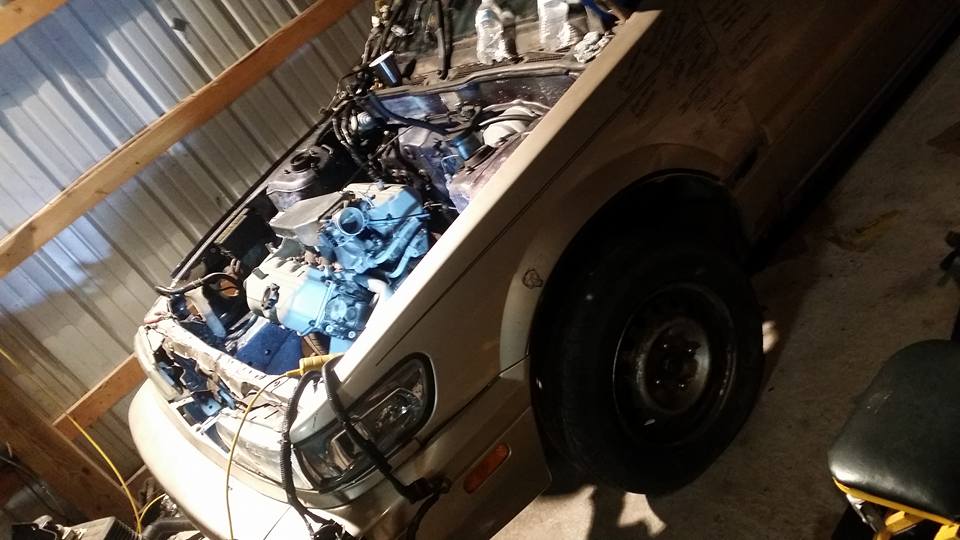
oh lol thank you, i am really pleased with how it came out. i wasnt sure what to expect since my friend had never painted an engine bay before but i think she did an excellent job.


Thread Starter
Member
Joined: Oct 2016
Posts: 286
going up tomorrow to get started on installing everything back into the car. i should have everything back together in a few hours but i still have to drain and refill the tank and i might need to make new adapters for the injectors orings because i think the ones i made are too short to get a good seal so probably not gonna have time to start it but definitely soon.
Thread Starter
Member
Joined: Oct 2016
Posts: 286
yesterday did not go as planned at all, had a family member get a very serious injury, compound fracture in their ankle, almost lost their foot so i was at the hospital for about 8 hours trying to calm down my family. by the time i got to the garage it was 9pm so i hung out for a few hours and installed the brake booster and master, windshield wiper motor, the steering rack and the two fuse boxes. im gonna get everything back in later in the week and back on the ground so i can finish the exhaust and see if i can get it to start up next weekend.
Last edited by Nate Boslet; May 18, 2018 at 10:34 AM.
Thread Starter
Member
Joined: Oct 2016
Posts: 286
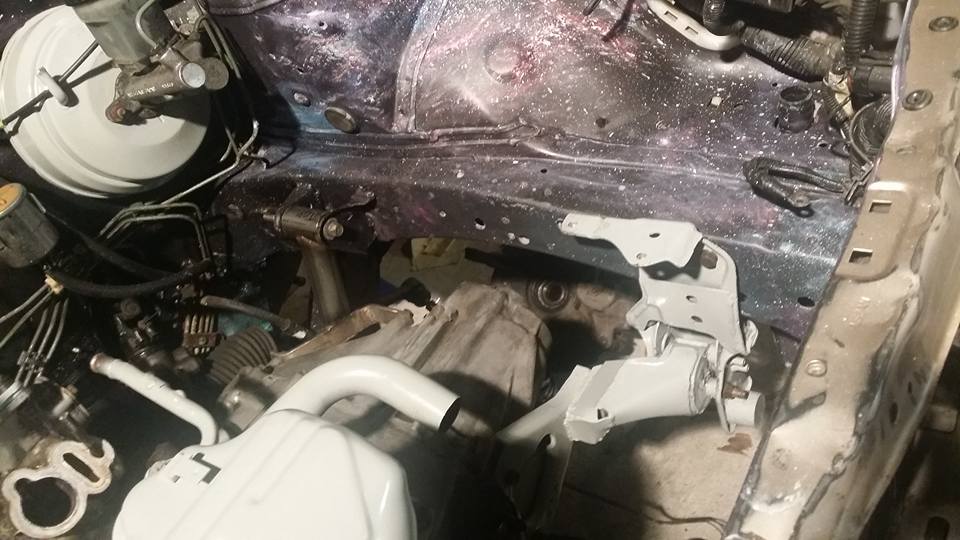
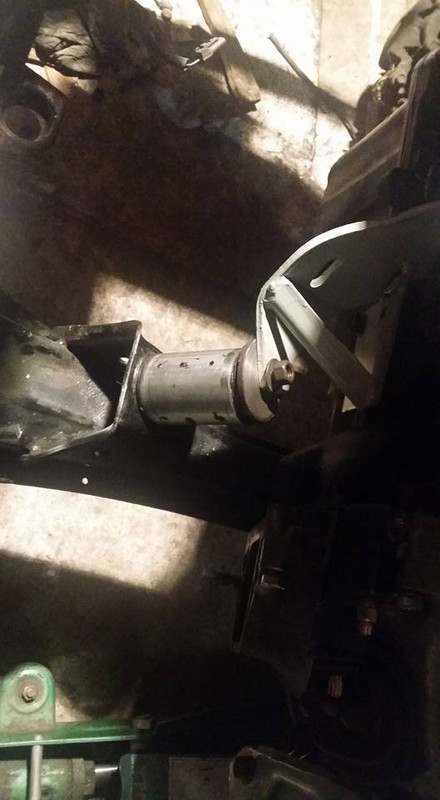
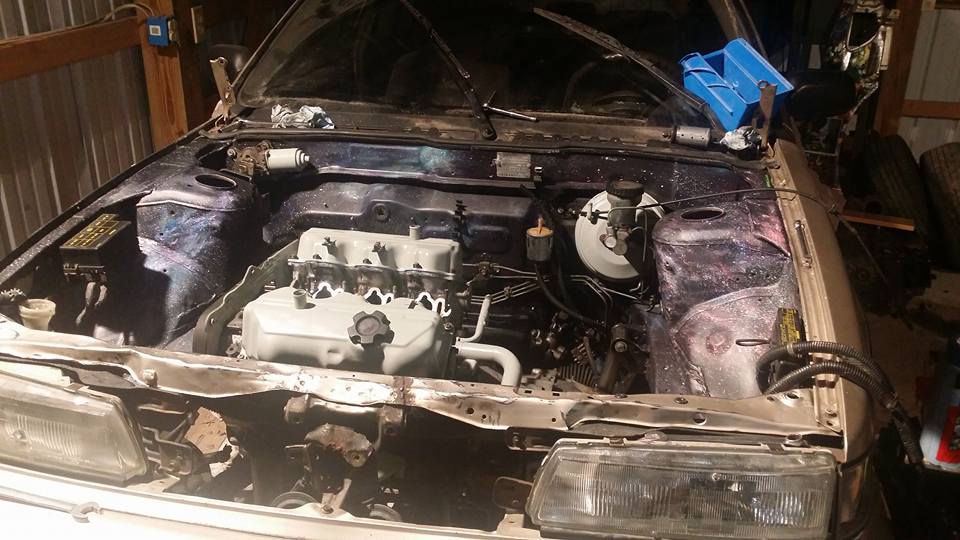
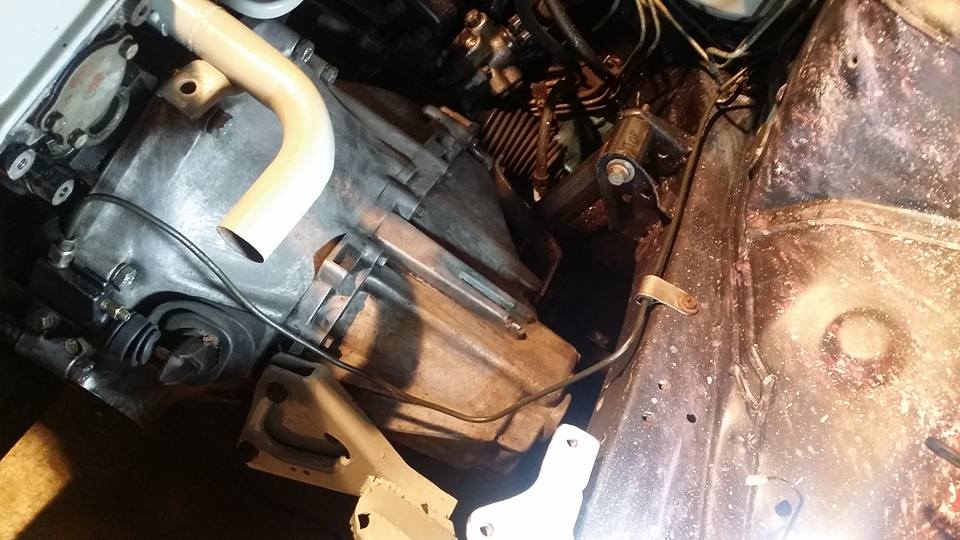
got the motor reinstalled. the new front mount is slightly taller than the solid one but it seems to fit fine, the mounting bracket isnt quite straight over the hole in the crossmember but otherwise everything fits exactly the same way it did before i pulled it out, which means it fits well.


Last edited by Nate Boslet; May 18, 2018 at 10:33 AM.


Member
Joined: Jul 2007
Posts: 275
From: MO
The VG looks so clean and unencumbered. I love it. I wish it could stay that way 
What kind of paint do you use for things like the valve covers, timing covers, and the water pump pulley?
It's neat seeing a complete build like this.
Also, cool design on the engine bay paint! Gave me a "galaxy" feel.
What kind of paint do you use for things like the valve covers, timing covers, and the water pump pulley?
It's neat seeing a complete build like this.
Also, cool design on the engine bay paint! Gave me a "galaxy" feel.
Thread Starter
Member
Joined: Oct 2016
Posts: 286
The VG looks so clean and unencumbered. I love it. I wish it could stay that way
What kind of paint do you use for things like the valve covers, timing covers, and the water pump pulley?
It's neat seeing a complete build like this.
Also, cool design on the engine bay paint! Gave me a "galaxy" feel.
What kind of paint do you use for things like the valve covers, timing covers, and the water pump pulley?
It's neat seeing a complete build like this.
Also, cool design on the engine bay paint! Gave me a "galaxy" feel.
Thread Starter
Member
Joined: Oct 2016
Posts: 286
didnt get much done yesterday, i was missing some nuts and bolts to put the intake and passenger axle in and without those things done i had to wait to do like 20 other things so i basically just started going over the rest of the car to find things that i could do while i was there. i put the intake on just to see what it looks like.

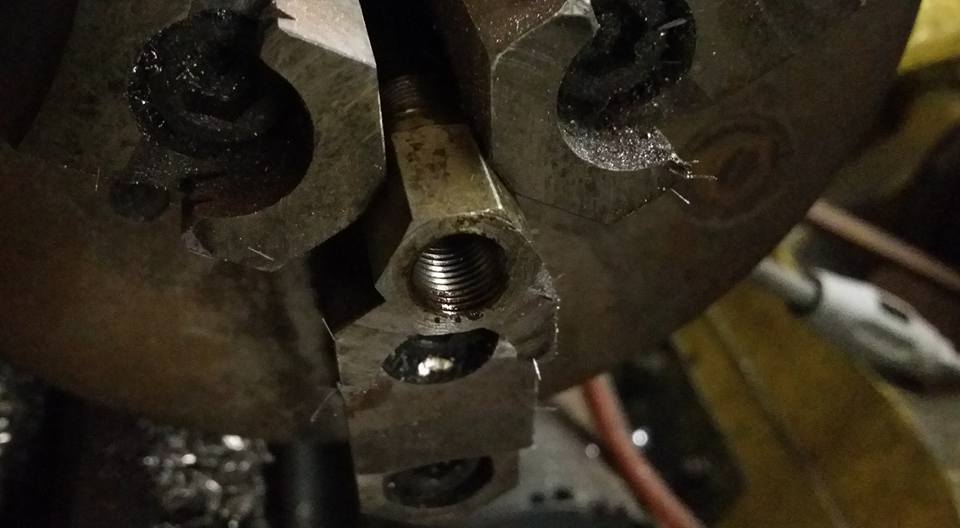
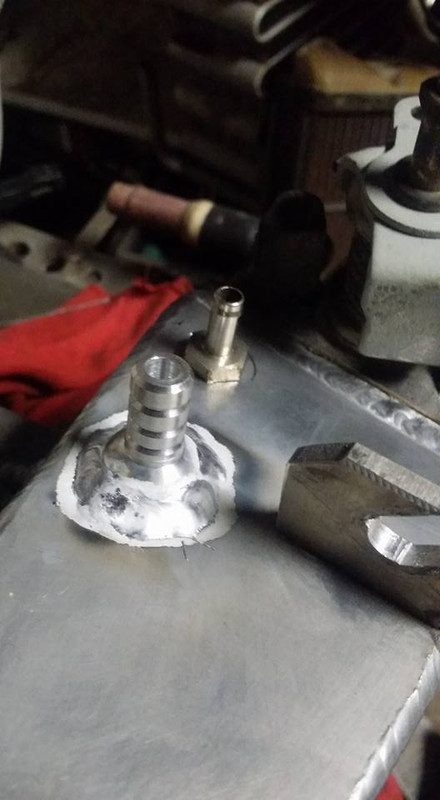
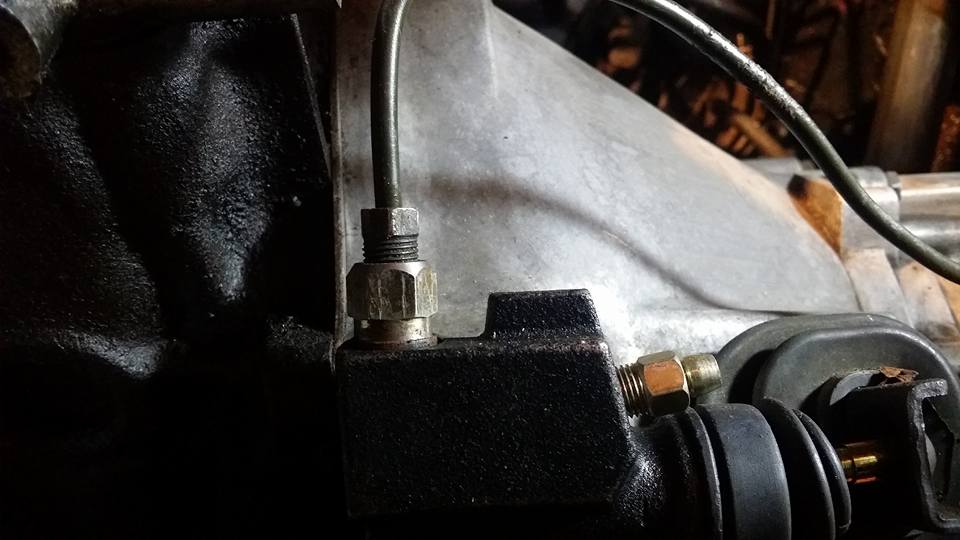
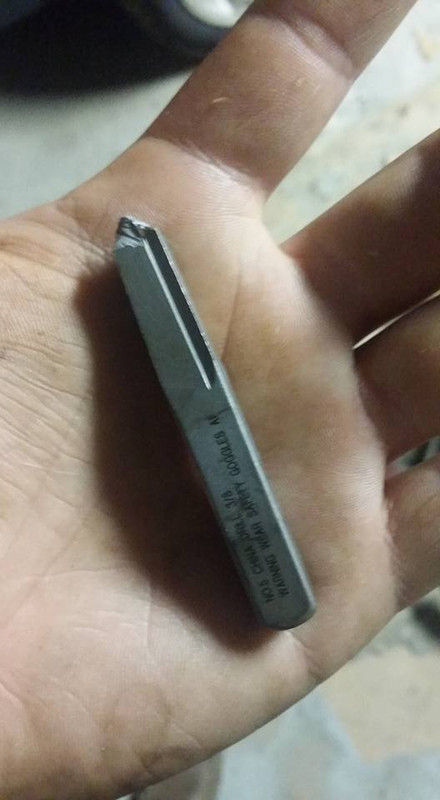
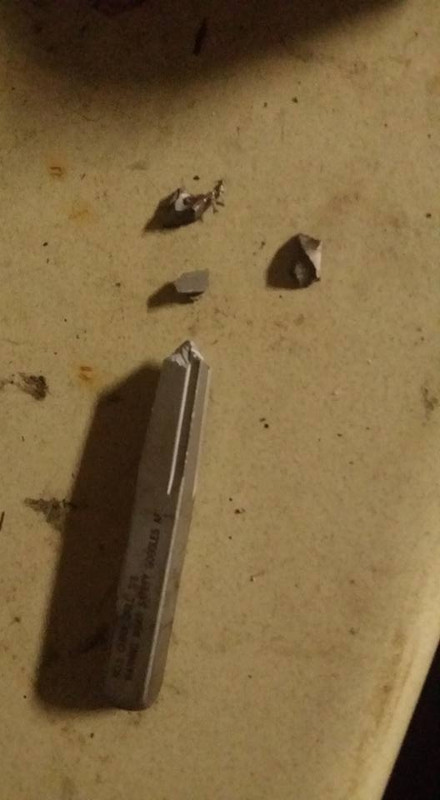
i was looking at how im going to run my clutch line and ran a hard line to the slave but i i forgot that the slave uses a banjo fitting instead of a brake compression fitting. originally the banjo goes into a rubber line which attaches to the trans or frame somewhere and then goes into a hard line anyway, so i decided to make an adapter that will allow me to just run a single hard line to the trans. i plan to use rubber clamps that will absorb whatever vibrations from the drivetrain to try to keep anything from rubbing but im not worried about flex or anything since the poly mounts have everything pretty solid. so i already had an adaptor that converted a 10mm bleeder to an 8mm bleeder and it was like 2 inches long for some reason so i brought that home, parted about half of it off and drilled it out. next i needed to make the bottom of the hole slightly convex in order for the fitting to seal so i had to sacrifice a drill bit and grind a special drill.
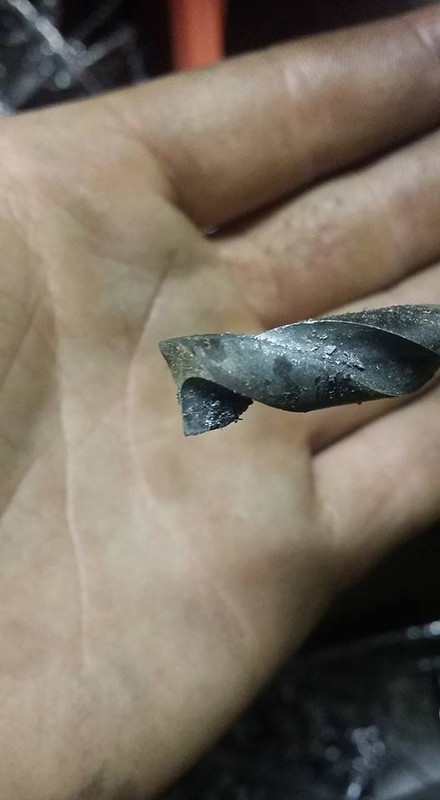
here is the hole drilled out with the bit i reground.
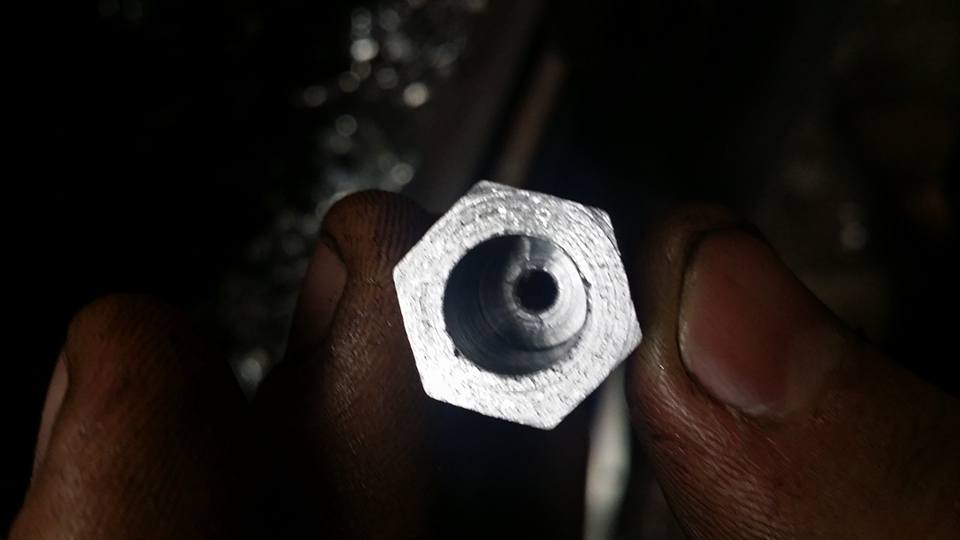
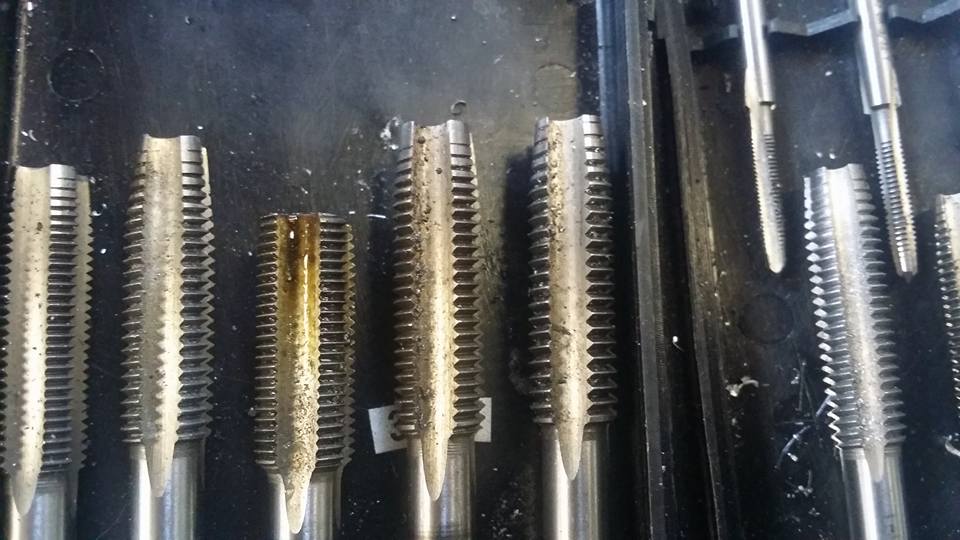
tapped the hole for the compression fitting threads.
then i chamfered the outside and countersunk the opening to the threads.
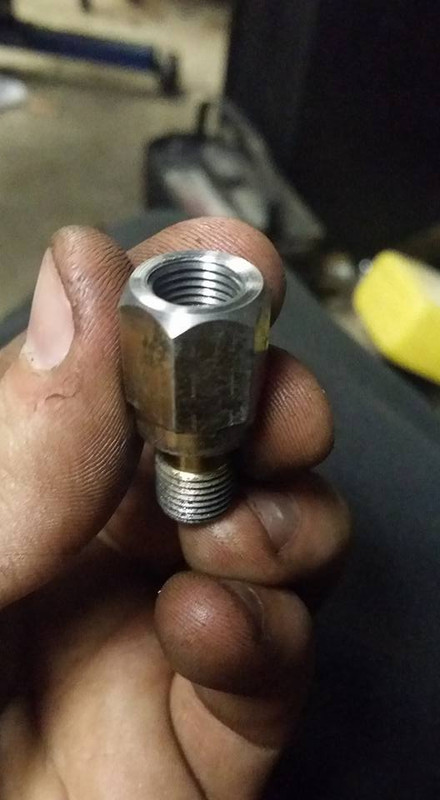
so im hoping now i will have a solid, cheap clutch setup that wont leak within a month like the hose i have would lol going back probably tonight, definitely gonna be getting a lot of stuff done this week.
i was looking at how im going to run my clutch line and ran a hard line to the slave but i i forgot that the slave uses a banjo fitting instead of a brake compression fitting. originally the banjo goes into a rubber line which attaches to the trans or frame somewhere and then goes into a hard line anyway, so i decided to make an adapter that will allow me to just run a single hard line to the trans. i plan to use rubber clamps that will absorb whatever vibrations from the drivetrain to try to keep anything from rubbing but im not worried about flex or anything since the poly mounts have everything pretty solid. so i already had an adaptor that converted a 10mm bleeder to an 8mm bleeder and it was like 2 inches long for some reason so i brought that home, parted about half of it off and drilled it out. next i needed to make the bottom of the hole slightly convex in order for the fitting to seal so i had to sacrifice a drill bit and grind a special drill.
here is the hole drilled out with the bit i reground.
tapped the hole for the compression fitting threads.
then i chamfered the outside and countersunk the opening to the threads.
so im hoping now i will have a solid, cheap clutch setup that wont leak within a month like the hose i have would lol going back probably tonight, definitely gonna be getting a lot of stuff done this week.
Last edited by Nate Boslet; May 18, 2018 at 10:35 AM.
Thread Starter
Member
Joined: Oct 2016
Posts: 286
Thread Starter
Member
Joined: Oct 2016
Posts: 286
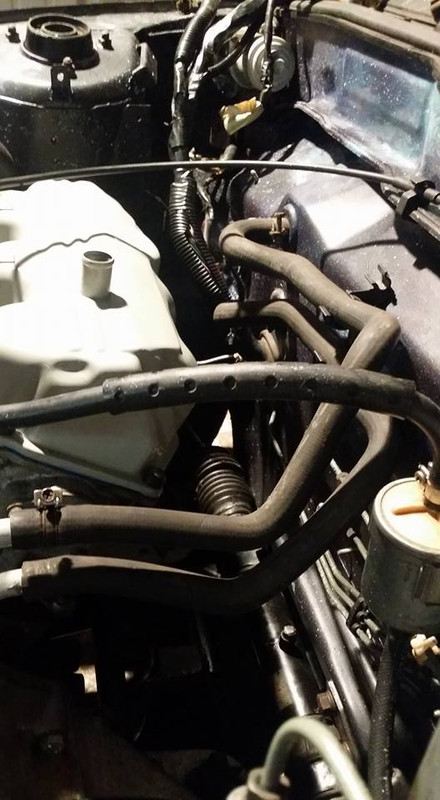
so after installing the intake for the first time i realized i forgot to put vacuum fittings on it lol so i brought it home to put those in.. heres the brake master fitting i turned on my lathe.
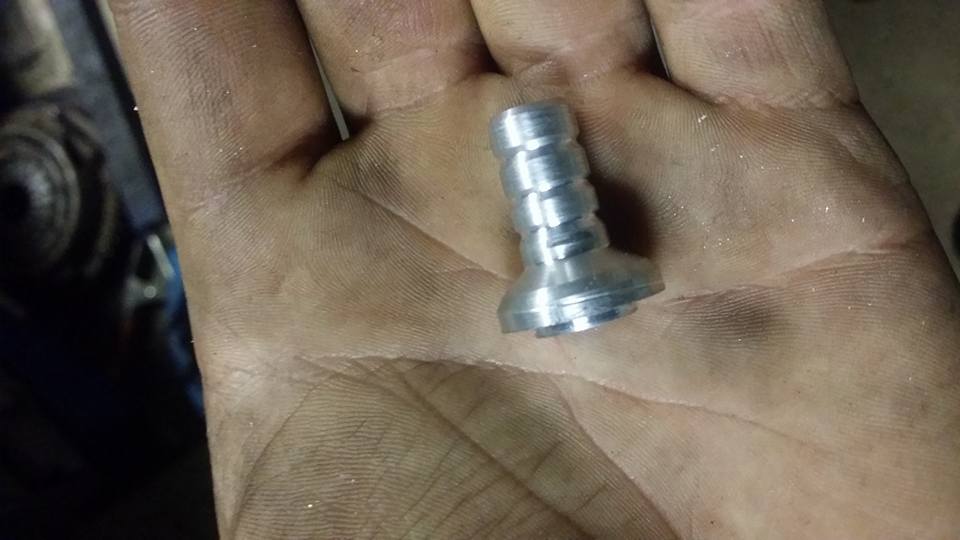
i apparently will only need one vacuum fitting for the fuel pressure regulator since i deleted all the other vacuum related stuff. when i go turbo ill have to install a few more but instead of needing to make plugs or whatever and worrying about leaks i just left them out and stuck with the necessities.
heres both of them installed.
back at the garage after reinstalling the intake and finishing up the little things that the front end needed i put the wheels back on and put the car back on the ground for hopefully the last time.
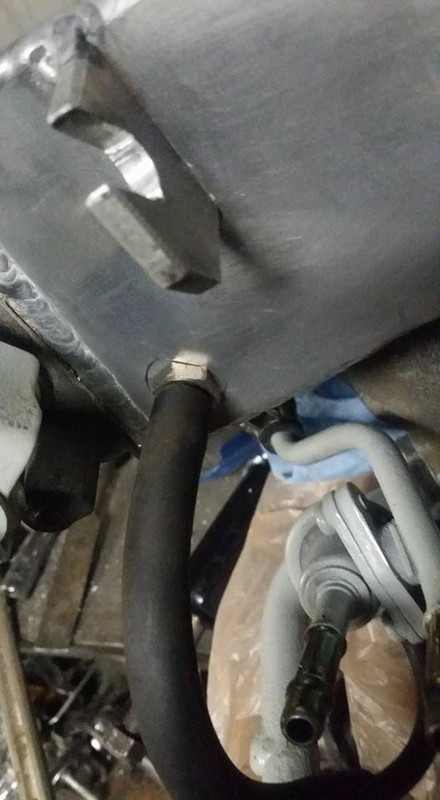
for the brake adaptor fitting i made i realized the threads werent deep enough because the tap i used was a like an easy start tap so i took it over to the belt sander and ground it down to a flat bottomed tap so the threads would reach the bottom.
heres the adaptor fitting installed.
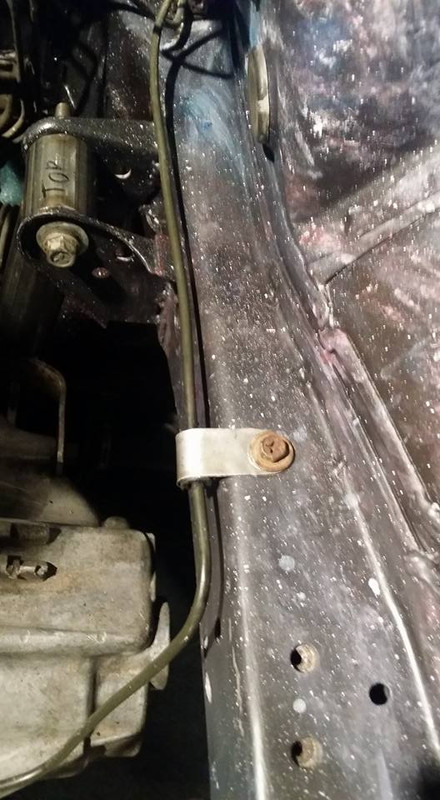
i cut up an exhaust shield and a vacuum line to make a little insulated bracket to hold the clutch line in place.
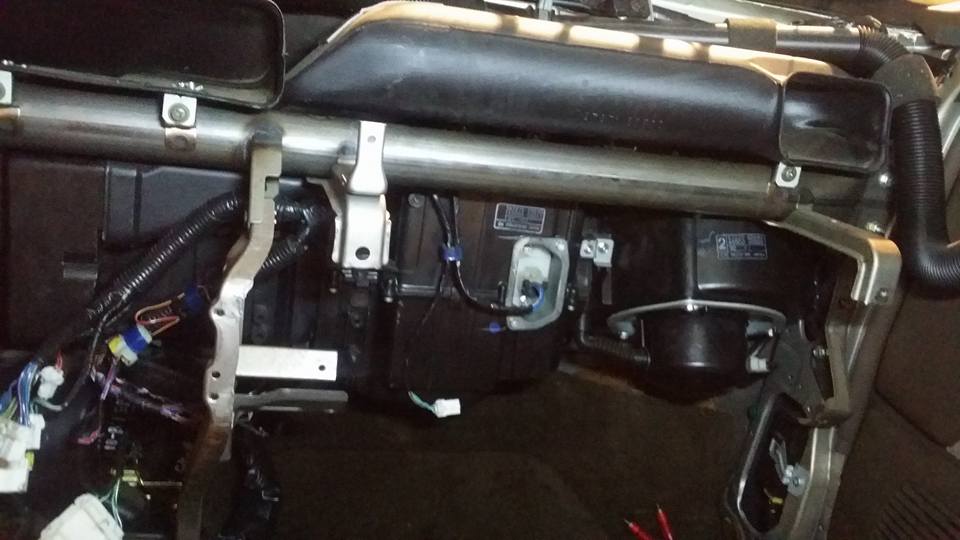
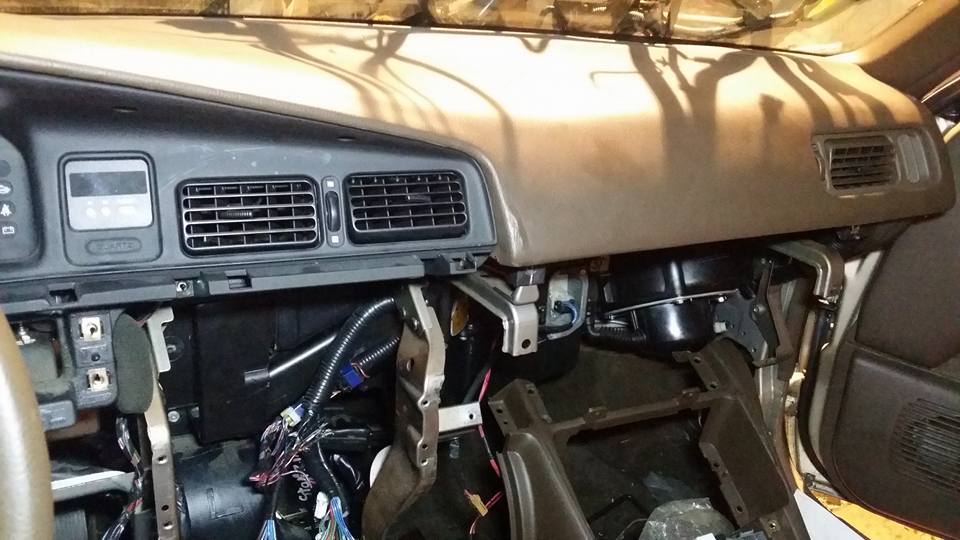
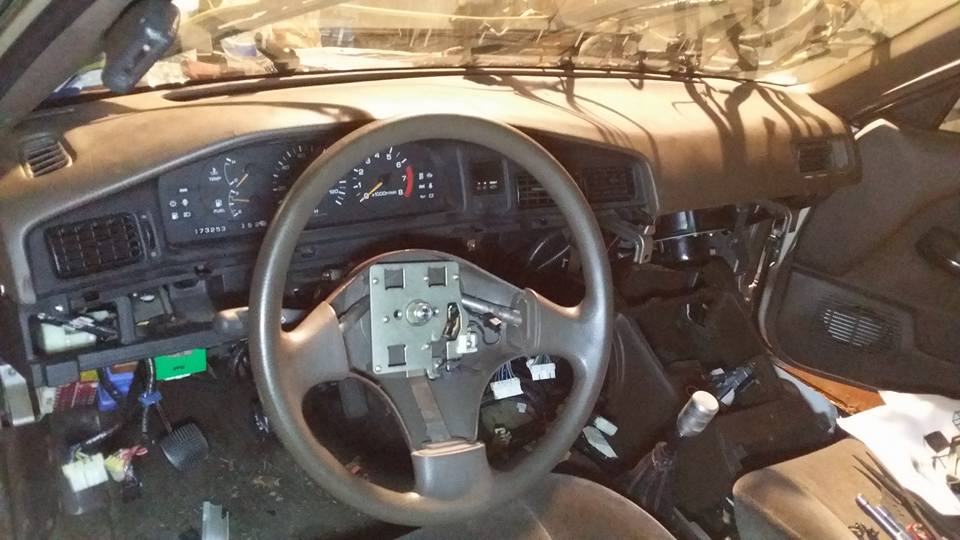
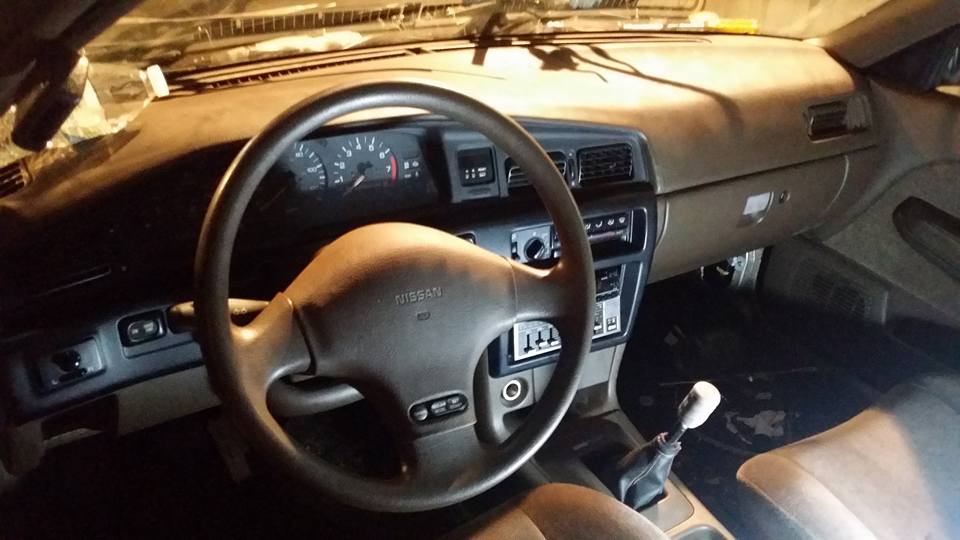
with the ecu and harness installed i moved on to the interior, i pulled the ac exchanger out of the plastic housing thing because i dont need it and i dont want any useless weight in the car and installed all the other climate control and vents and stuff.
i found this hole busted out of this piece when i first pulled everything apart. i know the air vents leak everywhere and its really not that big of a deal but i wanted to patch it anyway.
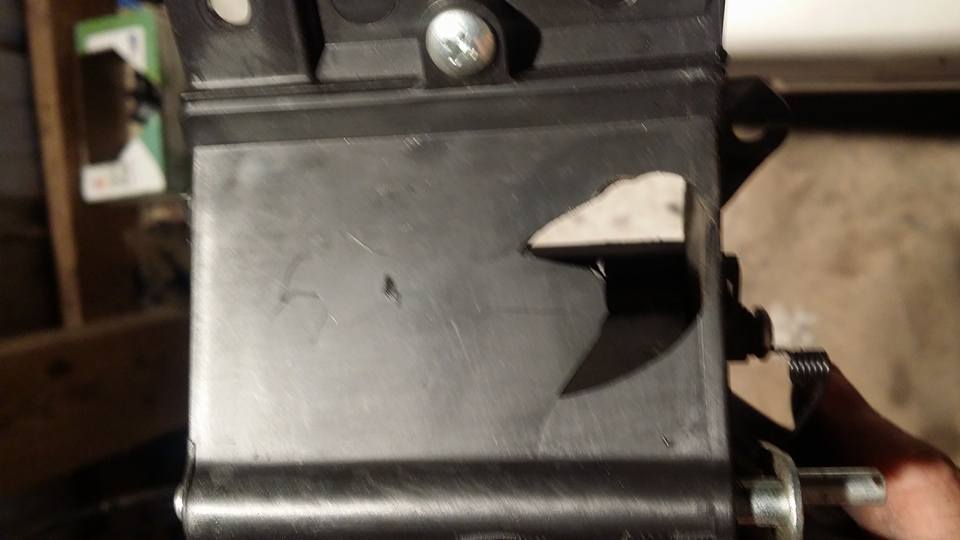
while i was looking for some random little piece of plastic to patch it with and.... to my immense dismay... i came across a korn cd i made like 10 years ago that was cracked in half. so in the hopes that korn will bring my car good traction and clean oil i used a piece of it to patch my vent.
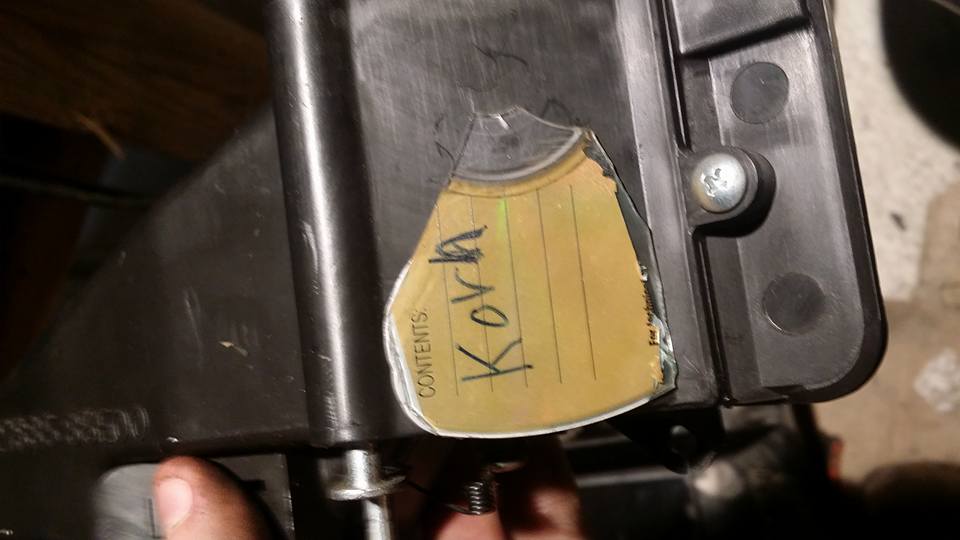
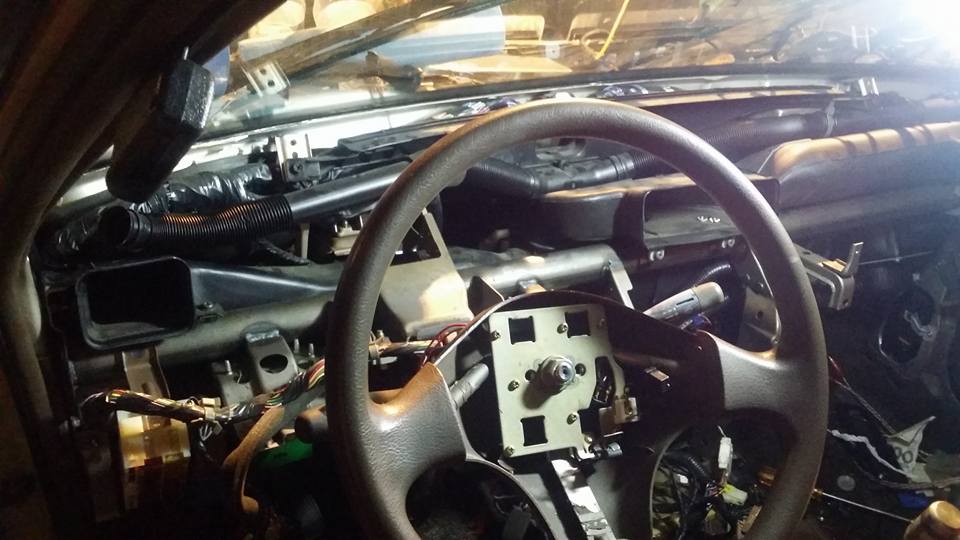
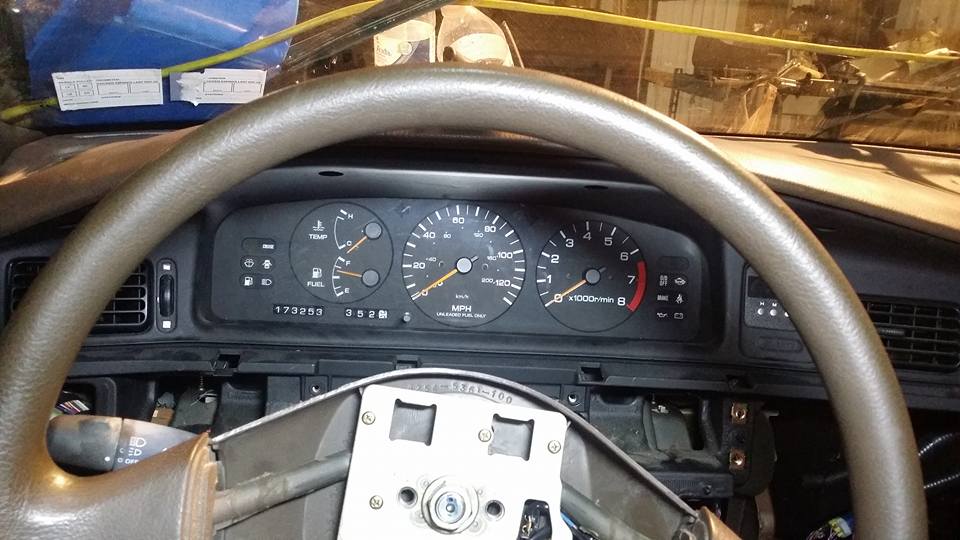
next i slapped in the dash which went in a lot easier than it originally came out. without taking the steering wheel off you have to put it in through the passenger door lol
then right before i called it a night i threw the heater lines in.
i apparently will only need one vacuum fitting for the fuel pressure regulator since i deleted all the other vacuum related stuff. when i go turbo ill have to install a few more but instead of needing to make plugs or whatever and worrying about leaks i just left them out and stuck with the necessities.
heres both of them installed.
back at the garage after reinstalling the intake and finishing up the little things that the front end needed i put the wheels back on and put the car back on the ground for hopefully the last time.
for the brake adaptor fitting i made i realized the threads werent deep enough because the tap i used was a like an easy start tap so i took it over to the belt sander and ground it down to a flat bottomed tap so the threads would reach the bottom.
heres the adaptor fitting installed.
i cut up an exhaust shield and a vacuum line to make a little insulated bracket to hold the clutch line in place.
with the ecu and harness installed i moved on to the interior, i pulled the ac exchanger out of the plastic housing thing because i dont need it and i dont want any useless weight in the car and installed all the other climate control and vents and stuff.
i found this hole busted out of this piece when i first pulled everything apart. i know the air vents leak everywhere and its really not that big of a deal but i wanted to patch it anyway.
while i was looking for some random little piece of plastic to patch it with and.... to my immense dismay... i came across a korn cd i made like 10 years ago that was cracked in half. so in the hopes that korn will bring my car good traction and clean oil i used a piece of it to patch my vent.
next i slapped in the dash which went in a lot easier than it originally came out. without taking the steering wheel off you have to put it in through the passenger door lol
then right before i called it a night i threw the heater lines in.
Last edited by Nate Boslet; May 18, 2018 at 10:36 AM.

Thread Starter
Member
Joined: Oct 2016
Posts: 286
thank you, they probably wont if they never see this thread lol tbh most of it is just out of necessity, if i dont have to make something i try to avoid it but if theres no cheap/easy/simple way of getting something done the way i want i just gotta make it myself lol once the hood goes back on im gonna focus on them hood struts hahaha
Thread Starter
Member
Joined: Oct 2016
Posts: 286
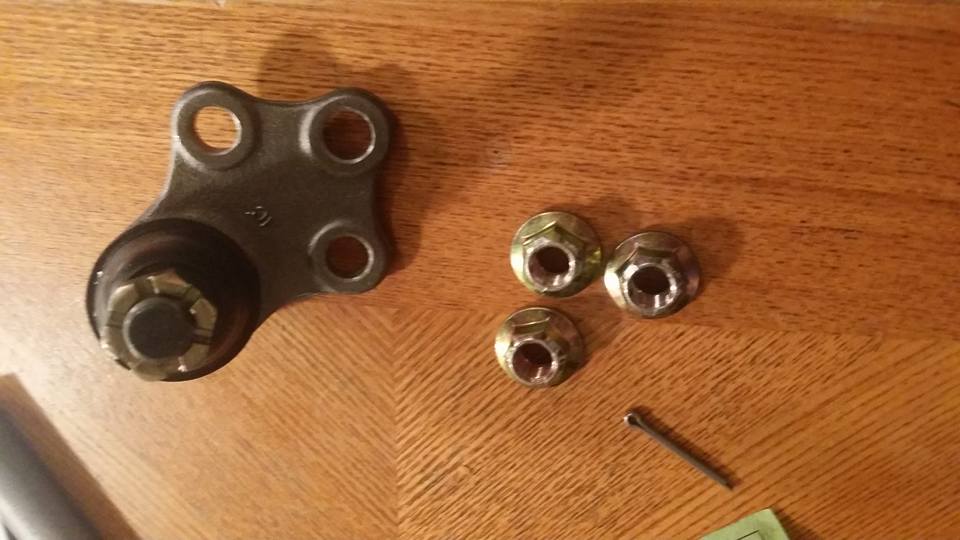
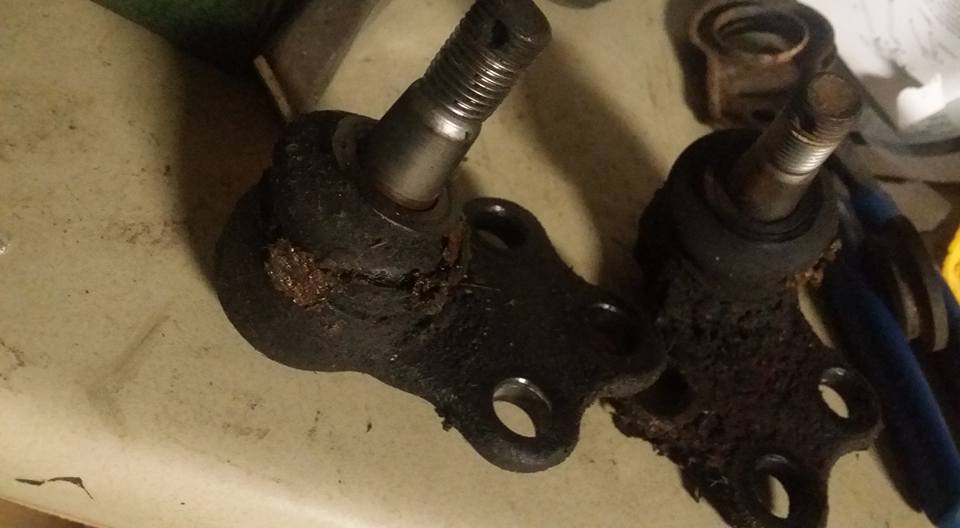
the car had a bit of a shimmy and a shake to it before, i called it character at the time but while everything is apart anyway i figured i would actually fix it lol i noticed the ball joints were pretty beat. i expected to have to pull the lower control arms off but it turns out they just bolt on. so instead of taking a day or so finding a press and bringing the control arms there one at a time or whatever it took me about 20 minutes per side lol

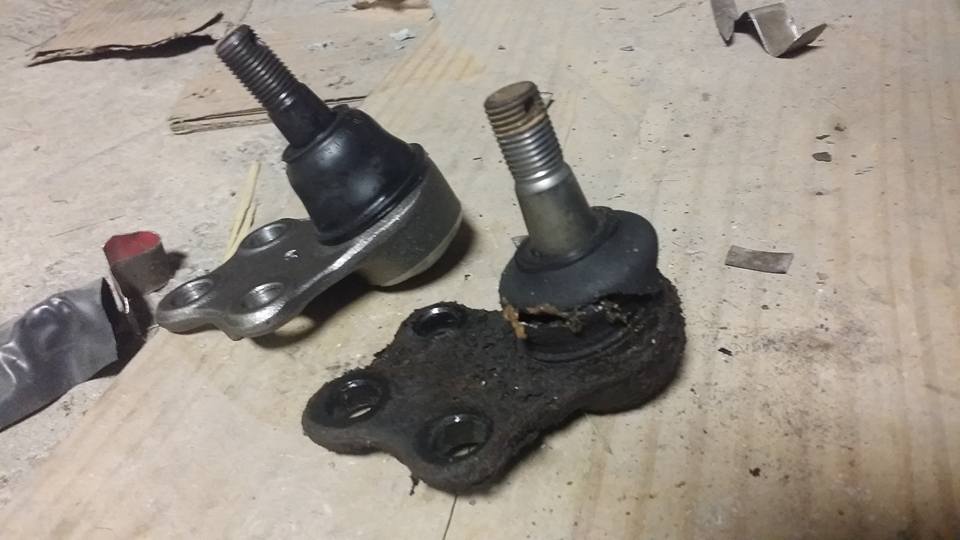
only the one ball joint was actually loose, the other one was ok but with the boot torn like that its only a matter of time before it fails too. i know this will help with the shake but its gonna need new shocks as well, more on that later.... i have some plans...
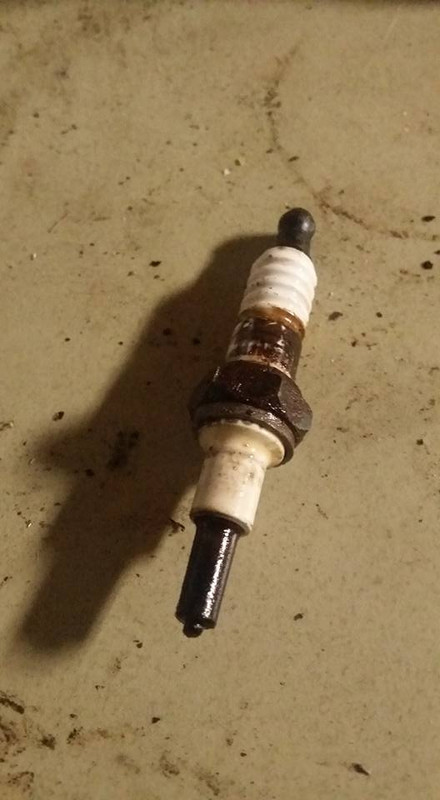
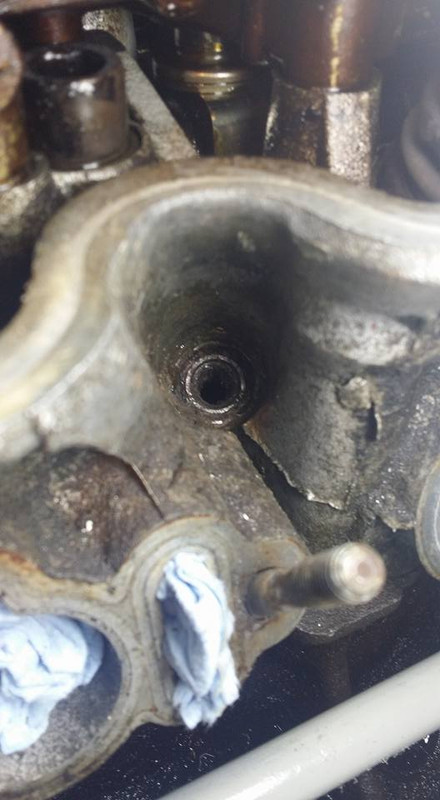
then this happened..... i never pulled the plugs out of these heads until now and had no idea they were extremely dry and corroded in there. i needed a breaker bar to get out the last 3 and the very last one snapped off like this on me. im gonna work on getting it out today with some heat and kroil and a good extractor. use anti seize on your plugs, i know a lot of people will tell you not to but it will prevent this from happening and this is the last thing in the universe you want to have to deal with lol
only the one ball joint was actually loose, the other one was ok but with the boot torn like that its only a matter of time before it fails too. i know this will help with the shake but its gonna need new shocks as well, more on that later.... i have some plans...
then this happened..... i never pulled the plugs out of these heads until now and had no idea they were extremely dry and corroded in there. i needed a breaker bar to get out the last 3 and the very last one snapped off like this on me. im gonna work on getting it out today with some heat and kroil and a good extractor. use anti seize on your plugs, i know a lot of people will tell you not to but it will prevent this from happening and this is the last thing in the universe you want to have to deal with lol
Last edited by Nate Boslet; May 18, 2018 at 10:38 AM.
I'm really impressed with you and this project. You encounter a problem and you come up with a fix. The things you do look like they are factory made. Well, maybe not the CD patch on the air duct, but everything else.
Thread Starter
Member
Joined: Oct 2016
Posts: 286
i didnt get a chance to mess with the spark plug yesterday but im gonna try to see what i can do about it tonight, then it will be fluids time and possibly even first start.
Member
Joined: Jul 2007
Posts: 275
From: MO
I am impressed with how calm you are about things like your snapped spark plug. That would have crushed me, motivationally speaking. Do you treat it like a stud and just drill a hole in the middle and use an extractor or an easy out? I always worried this would happen to me but I've been lucky so far.
Thread Starter
Member
Joined: Oct 2016
Posts: 286
I am impressed with how calm you are about things like your snapped spark plug. That would have crushed me, motivationally speaking. Do you treat it like a stud and just drill a hole in the middle and use an extractor or an easy out? I always worried this would happen to me but I've been lucky so far.
Last edited by Nate Boslet; May 18, 2018 at 10:40 AM.
Member
Joined: Jul 2007
Posts: 275
From: MO
Right on. That makes sense. I will be hoping that it comes out smoothly when you go after it. If anyone can do it I know it's you from looking at your work so far!
I was sitting over here thinking about how I changed all of the spark plugs on both of my vehicles (Maxima and 300ZX) recently and how I didn't put anti-seize on any of them
I was sitting over here thinking about how I changed all of the spark plugs on both of my vehicles (Maxima and 300ZX) recently and how I didn't put anti-seize on any of them
Thread Starter
Member
Joined: Oct 2016
Posts: 286
since i bought this car the trunk was a pain in the *** to get open, the interior release didnt work and the lock in the back would move all over and the only way to open it was to develop the special technique (wiggle the **** out of the key until something works) and after investigating the possible cause, i found that the lock cyinder had a little tab that was broken off and there was a little spring for the interior latch that came loose or something, the spring took like 10 seconds to fix but the cylinder needed a lot more attention.

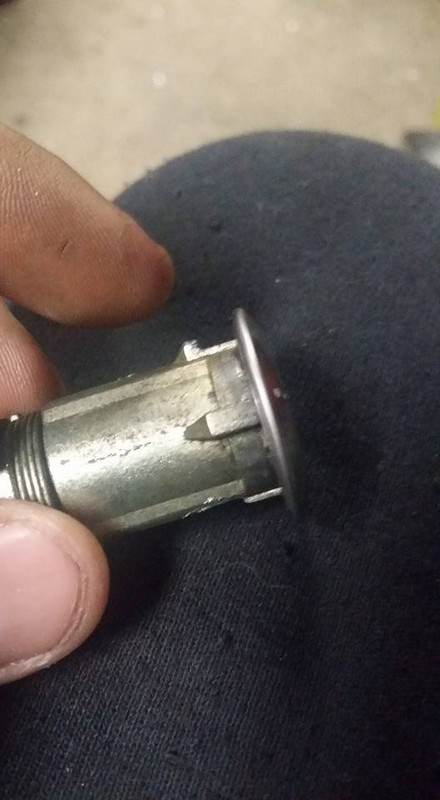
idk what happened to the other pictures i took of the repair but basically all i did was take a piece of aluminum filler rod and bend it around the cylinder where the tab used to be and then use jb weld to hold it in place. obviously the repair made the cylinder slightly bigger since the casting was super thin where the tab connected to the cylinder body so i had to trim away some of the material on the trunk to get it to fit in but it did and my trunk is 100% functional again.
i got the extractor but i need to apply heat to the area but i dont want to damage any of the surrounding components, warp the head or start a fire inside of my engine or whatever other bad thing might happen from shooting a blow torch directly into my cylinder so i came up with an ingenious plan... ill bring a bar of steel and my torch and heat up the steel as hot as i can get it and then ill press the steel bar directly onto the spark plug threads so just the spark plug absorbs all the heat and then hopefully it will come loose before all of the heat gets pulled out into the head. instead of using penetrating oil that will just burn up from the heat i will use wax which will wick into the threads on its own to better lubricate everything. i will also make a spark plug tap out of an old plug and run it down all the threads once the broken plug is out.... if it does come out lol we will see.
Last edited by Nate Boslet; May 18, 2018 at 10:41 AM.
Thread Starter
Member
Joined: Oct 2016
Posts: 286
started out trying to use my heat transfer method with the metal rod to try and heat the spark plug piece up and as it turns out, air is much more thermally conductive than the like 1 square millimeter of contact area of steel to steel.... meaning no matter how glowing red hot the bar got, the spark plug stayed room temperature. so i decided to start pulling apart everything to get as much of the flammable/meltable **** away from where i would be blasting flames. little did i know (pre flame blasting fortunately) that my fuel lines still had an asston of gas in them from when i was testing my fuel pump and rails for leaks. idk why i didnt expect that but after taking them off my entire engine was covered in gas lol so no flames tonight (last night)
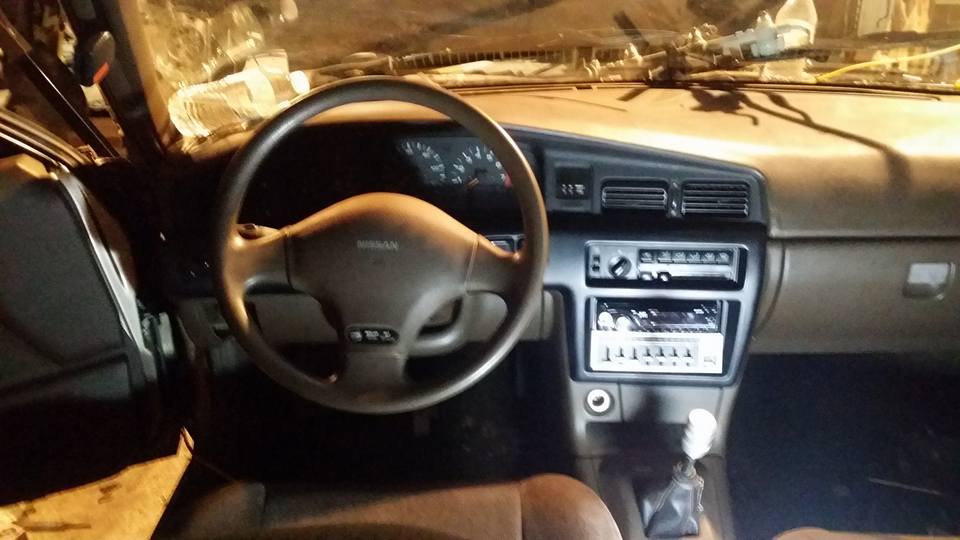
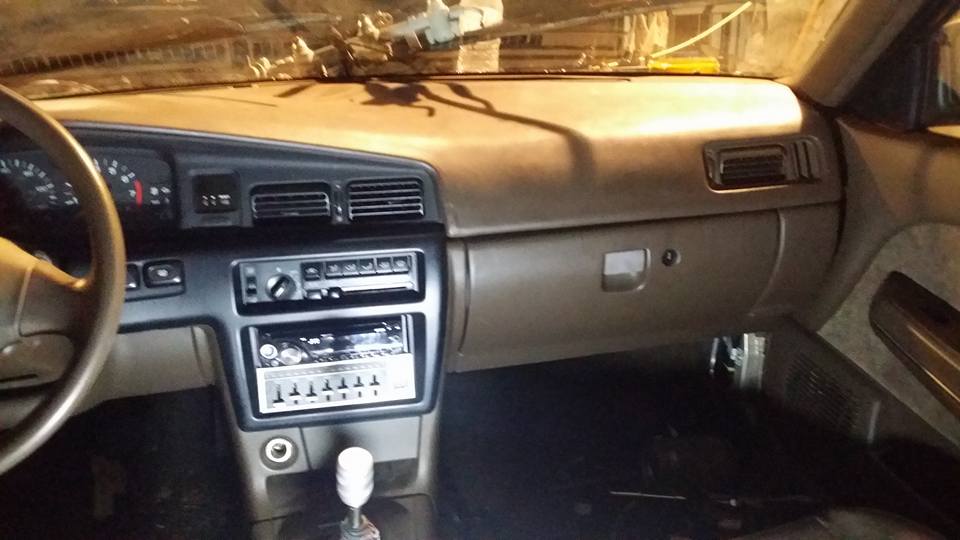
so i went back inside the car to finish putting the interior together. which took all of 10 minutes. the radio and EQ arent wired or mounted at all i just slapped them in there to see what they look like together, i really hate this radio and will probably get something with a usb input but for now music isnt really a concern of mine so its fine. im sure many will recognize the EQ as it is actually from a maxima, i actually pulled it out of a wagon, idk if those are rare or not but i didnt pull the plugs/pigtails for the outputs when i got it from the junkyard so if anyone doesnt want to see me defile it by epoxying terminals into the plug sections then make me an offer lol
the exhaust has had to come out for a while now and i was kind of avoiding it but i didnt have anything better to do at the time so here it is. everything was rusty as **** and difficult to get out and instead of dropping my sway bar (which is like 1/4 inch thick im about to make a thicker one on principle) i just chopped the muffler off. this rusty hole is actually where a hanger used to be which fell completely off when i pulled the muffler down lol
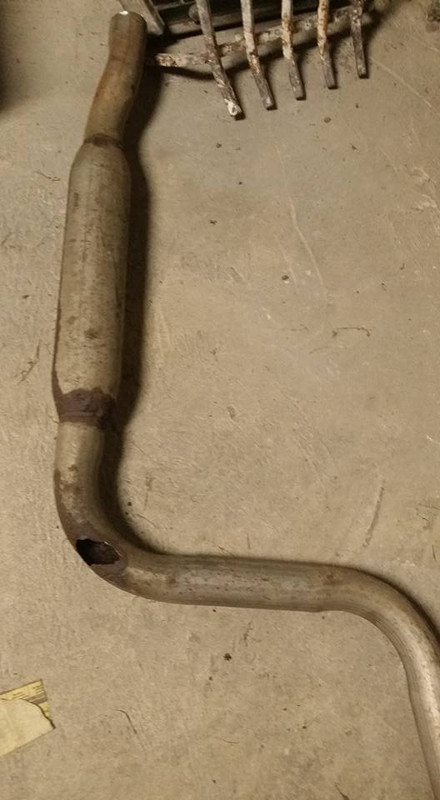
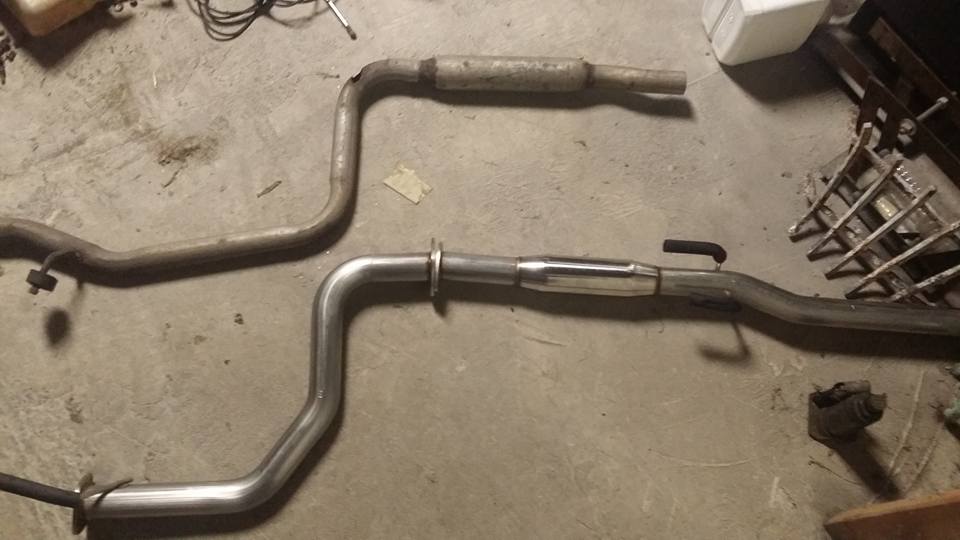
the rest of the exhaust doesnt look all that bad, its really rusty in some spots but it looks like it was replaced relatively recently before i bought the car in 2012. i liked the design of the muffler, i had originally thought that was why the car was so quiet but it turns out the muffler was completely empty, the packing must have all burned out, what was ACTUALLY making the exhaust so quiet was this....>
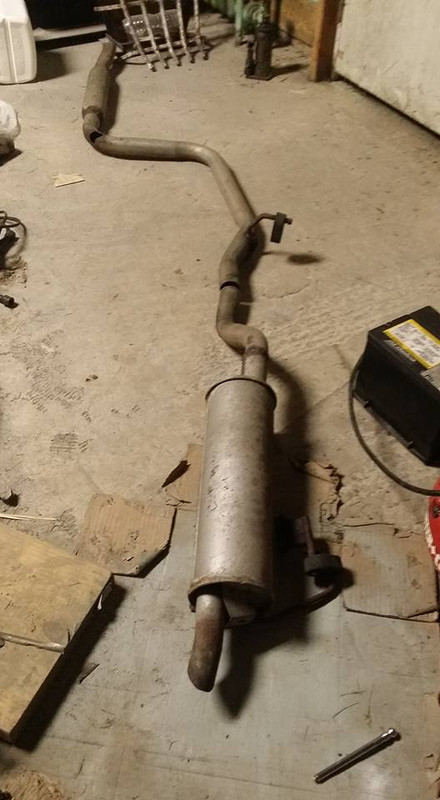
this pile of junk was entirely inside of the catback before the muffler. i kept banging it on the floor and this **** just kept falling out lol this pile is about a foot in diameter too dont let that washer fool you, the washer is huge.

so my first thought was, im gonna have to make a new exhaust, then it was whats the cheapest possible exhaust i can make? obviously aluminum intercooler piping would be cheap, light, and from what i have seen will be perfectly safe and strong enough to be used as a catback. while i was doing my research and looking up materials it was looking better and better to me.
until i found a ****ing stainless integra exaust for 100 bucks that looks like it will basically bolt in...... so maybe one day ill do an aluminum exhaust but that day will not be soon lol next time i go up to the garage i will be working on removing the plug and then ill put everything back together and maybe get the exhaust all modified and installed. we will see.
so i went back inside the car to finish putting the interior together. which took all of 10 minutes. the radio and EQ arent wired or mounted at all i just slapped them in there to see what they look like together, i really hate this radio and will probably get something with a usb input but for now music isnt really a concern of mine so its fine. im sure many will recognize the EQ as it is actually from a maxima, i actually pulled it out of a wagon, idk if those are rare or not but i didnt pull the plugs/pigtails for the outputs when i got it from the junkyard so if anyone doesnt want to see me defile it by epoxying terminals into the plug sections then make me an offer lol
the exhaust has had to come out for a while now and i was kind of avoiding it but i didnt have anything better to do at the time so here it is. everything was rusty as **** and difficult to get out and instead of dropping my sway bar (which is like 1/4 inch thick im about to make a thicker one on principle) i just chopped the muffler off. this rusty hole is actually where a hanger used to be which fell completely off when i pulled the muffler down lol
the rest of the exhaust doesnt look all that bad, its really rusty in some spots but it looks like it was replaced relatively recently before i bought the car in 2012. i liked the design of the muffler, i had originally thought that was why the car was so quiet but it turns out the muffler was completely empty, the packing must have all burned out, what was ACTUALLY making the exhaust so quiet was this....>
this pile of junk was entirely inside of the catback before the muffler. i kept banging it on the floor and this **** just kept falling out lol this pile is about a foot in diameter too dont let that washer fool you, the washer is huge.
so my first thought was, im gonna have to make a new exhaust, then it was whats the cheapest possible exhaust i can make? obviously aluminum intercooler piping would be cheap, light, and from what i have seen will be perfectly safe and strong enough to be used as a catback. while i was doing my research and looking up materials it was looking better and better to me.
until i found a ****ing stainless integra exaust for 100 bucks that looks like it will basically bolt in...... so maybe one day ill do an aluminum exhaust but that day will not be soon lol next time i go up to the garage i will be working on removing the plug and then ill put everything back together and maybe get the exhaust all modified and installed. we will see.
Last edited by Nate Boslet; May 18, 2018 at 10:41 AM.
Thread Starter
Member
Joined: Oct 2016
Posts: 286
im getting very excited to drive it but at the same time im apprehensive to finish it lol i will have to bring my Z to the garage so i have something else to be creative with lol
Thread Starter
Member
Joined: Oct 2016
Posts: 286
i mean if you guys really want i can start a thread about it haha im actually trying to sell the headers on it so i can make a new setup once the stanza is done and it switches places with it. i have a lot of stuff that needs to be fixed on it and redone. let me know i guess
Member
Joined: Jul 2007
Posts: 275
From: MO
i mean if you guys really want i can start a thread about it haha im actually trying to sell the headers on it so i can make a new setup once the stanza is done and it switches places with it. i have a lot of stuff that needs to be fixed on it and redone. let me know i guess

I just finished my NA2T swap on my 85 Z. I don't have your skills on tap, so it took me ages. What I have seen of your Z looks....intense, to say the least.
Thread Starter
Member
Joined: Oct 2016
Posts: 286
ill definitely be posting it somewhere. maybe hybridZ. hmu on facebook if you have any questions or anything, i know a lot more about z31s than i do maximas lol
Member
Joined: Jul 2007
Posts: 275
From: MO

Thread Starter
Member
Joined: Oct 2016
Posts: 286
Thread Starter
Member
Joined: Oct 2016
Posts: 286
so i got my 100 dollar, ebay special catback in the mail today and waited to open it until i got to the garage, before i even touched it i wanted to focus 100% of my attention on this spark plug so i could get it out. i carefully heated the plug with my torch, melted some wax into the hole, hammered the extractor into the hole, grabbed my cheater pipe and very gingerly applied force to it in the appropriate direction AAANNNNDDDDDDDDD...
broke the ****ing extractor right off.

so after a few minutes of contemplating turning on my fuel pump and spraying down the garage and myself and taking another shot at the torch, i decided i would at least attempt to extract the extractor from the plug so i can possibly move forward with a different, less annihilative plan.
after about an hour i had gotten most of the big pieces out and pushed one giant piece into the inside of the engine (its small enough to get out with my magnet once the plug is out)
now that im exactly where i was before i showed up i decided to go do something else before my morale deteriorated entirely lol
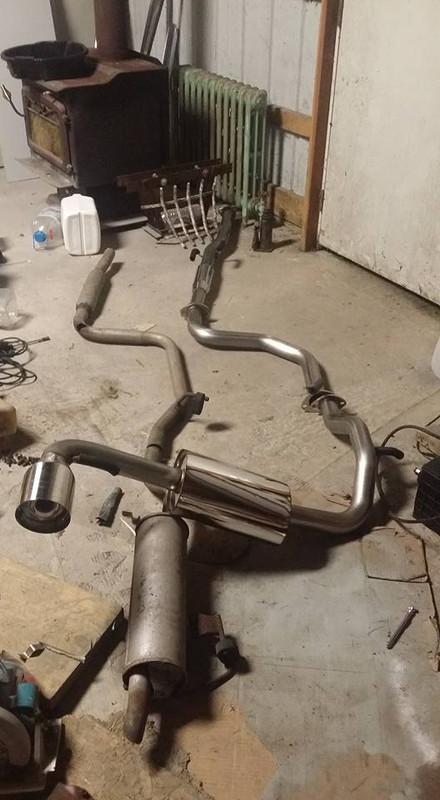
after unboxing the exhaust i noticed 2 things:
1. the majority of the exhaust actually appears to be made of things that most other functioning exhausts are made of. (metal)
2. the muffler isnt the same as the one pictured in the ebay listing AT ALL. the one on the listing looked more like a bigger version of the resonator and appeared to be of decent quality. this muffler however is made of stainless foil and has no baffles, no packing, no nothing, its just a big chamber with a perforated tube through the middle leading me to expect that it will sound like total dogpoop. only one way to find out.... if it sounds too awful tho im gonna probably just make my own muffler to replace it with. something super quiet.
obviously its going to have to be modified, i knew that before i bought it, but for 100 bucks i really cant complain. if i was to build an exhaust from scratch it would have been at least 3 times as expensive and would have required much more time to complete whereas the majority of this exhaust already fits up the way i need it to.
so tomorrow i plan on returning the extractor for a larger one, drilling out the center of the plug and using the larger/stronger extractor to make some progress here. if THAT doesnt work i will probably try to drill the threads out completely and use a pick to pull the threads out of the hole and then do my best to clean the cylinder out. if all else fails ill have to pull the head and replace the headgasket which i clearly dont want to do but if it has to be done then so be it i guess.
broke the ****ing extractor right off.
so after a few minutes of contemplating turning on my fuel pump and spraying down the garage and myself and taking another shot at the torch, i decided i would at least attempt to extract the extractor from the plug so i can possibly move forward with a different, less annihilative plan.
after about an hour i had gotten most of the big pieces out and pushed one giant piece into the inside of the engine (its small enough to get out with my magnet once the plug is out)
now that im exactly where i was before i showed up i decided to go do something else before my morale deteriorated entirely lol
after unboxing the exhaust i noticed 2 things:
1. the majority of the exhaust actually appears to be made of things that most other functioning exhausts are made of. (metal)
2. the muffler isnt the same as the one pictured in the ebay listing AT ALL. the one on the listing looked more like a bigger version of the resonator and appeared to be of decent quality. this muffler however is made of stainless foil and has no baffles, no packing, no nothing, its just a big chamber with a perforated tube through the middle leading me to expect that it will sound like total dogpoop. only one way to find out.... if it sounds too awful tho im gonna probably just make my own muffler to replace it with. something super quiet.
obviously its going to have to be modified, i knew that before i bought it, but for 100 bucks i really cant complain. if i was to build an exhaust from scratch it would have been at least 3 times as expensive and would have required much more time to complete whereas the majority of this exhaust already fits up the way i need it to.
so tomorrow i plan on returning the extractor for a larger one, drilling out the center of the plug and using the larger/stronger extractor to make some progress here. if THAT doesnt work i will probably try to drill the threads out completely and use a pick to pull the threads out of the hole and then do my best to clean the cylinder out. if all else fails ill have to pull the head and replace the headgasket which i clearly dont want to do but if it has to be done then so be it i guess.
Last edited by Nate Boslet; May 18, 2018 at 10:43 AM.
That sparkplug is a nightmare. I think you should bite the bullet and take the head off before you start all the drilling and whatever. Then you can drill, pound, use explosives and not care if something falls through the hole.
It's the way fate works - if you leave the head on, something bad will happen. Take the head off and the job will get done flawlessly.
It's the way fate works - if you leave the head on, something bad will happen. Take the head off and the job will get done flawlessly.
Thread Starter
Member
Joined: Oct 2016
Posts: 286
not at all i appreciate the input i am just willing to do just about anything to not have to pull the head, if i had a mill or something i would probably have already taken it off (cause if i had a mill i would probably have enough side work to not be worried about money and time right now lol) but right now i dont really have a really sturdy way to hold the head unless its on the car anyway, it wont fit in my vice and my engine stand will not hold it in place at all so even if i am inevitably forced to pull the head for some other reason i would still rather do it after i got the plug out which i am very confident i am capable of i just dont know how many extractors ill go through lol