
The Wizard performs magic with CF fabric on custom steering column. Tons of PICS!!


The Wizard performs magic with CF fabric on custom steering column. Tons of PICS!!
I thought I would share with you my build of my custom Carbon Fiber vinyl steering column with gauge pod project. This has been a long time in the making. This project accomplishes three things, it finally will cover the lame wrinkled Paper Mache steering column (spray painted black) I�ve been driving around with for the past 6 months, and will cover the awkward cutout in the bottom of the steering column trim piece now that I have an aftermarket steering wheel. And lastly, I have an addiction with carbon Fiber and this kicks off my carbon fiber interior overhaul Phase! I still have many plans for CF in the interior, and have something really special and unique never done before in the works. I have about 40 hours into it already and will share with you once I get close to being done.
Keep in mind that I have no experience with Paper Mache and haven�t done any upholstery work (no crafts classes in high school except for Ceramics FTW). Your feedback/comments/suggestions are more than welcome.
Ok, enough babbling� here we go!
Phase I-Paper Mache
Here�s where it all started 6 months ago. The top of the steering column and my fake CF gauge pod I picked up for $10 shipped. LOL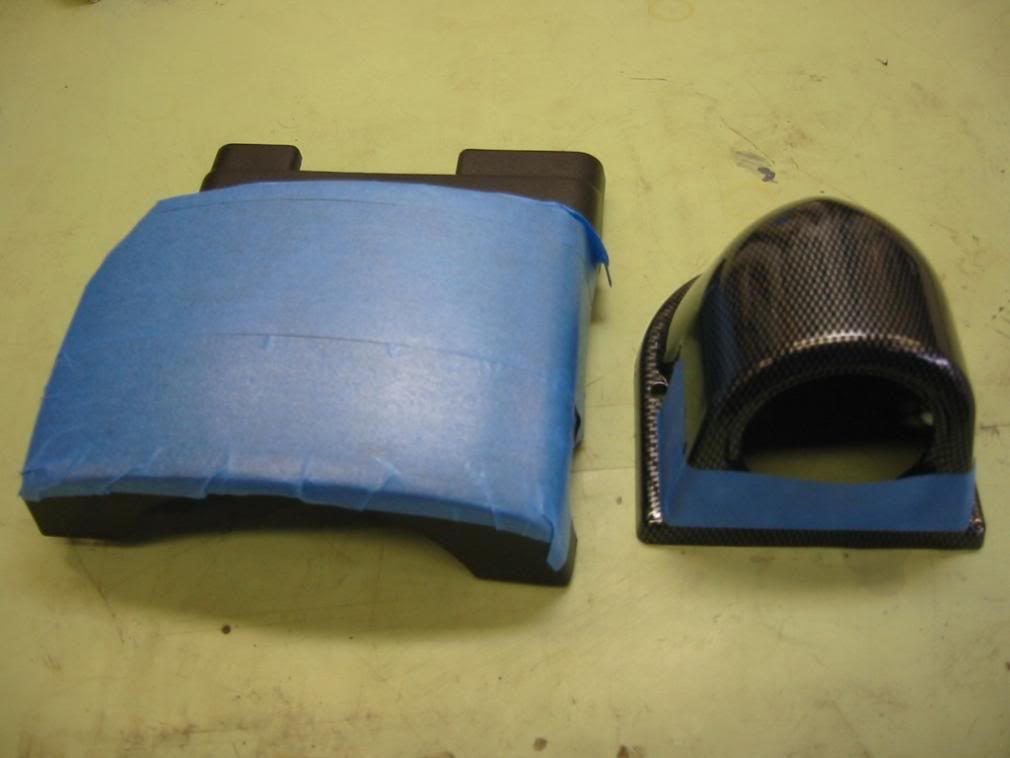
Test fitting of how I�m going to mount it. I ultimately cut off the footing of the pod and made it fit the best I could on top of the steering column. I also hacked off a portion of the back of the pod since it protruded too far.
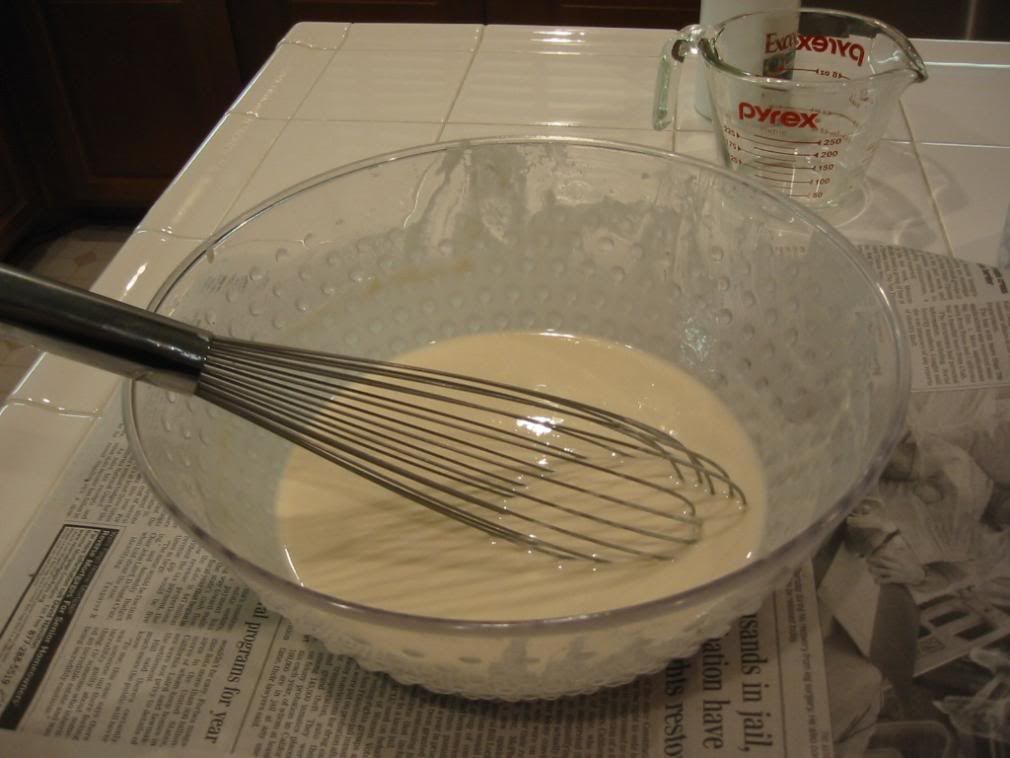
Some good ol� flour to be my glue

The Mix!
Keep in mind that I have no experience with Paper Mache and haven�t done any upholstery work (no crafts classes in high school except for Ceramics FTW). Your feedback/comments/suggestions are more than welcome.
Ok, enough babbling� here we go!
Phase I-Paper Mache
Here�s where it all started 6 months ago. The top of the steering column and my fake CF gauge pod I picked up for $10 shipped. LOL
Test fitting of how I�m going to mount it. I ultimately cut off the footing of the pod and made it fit the best I could on top of the steering column. I also hacked off a portion of the back of the pod since it protruded too far.
Some good ol� flour to be my glue
The Mix!
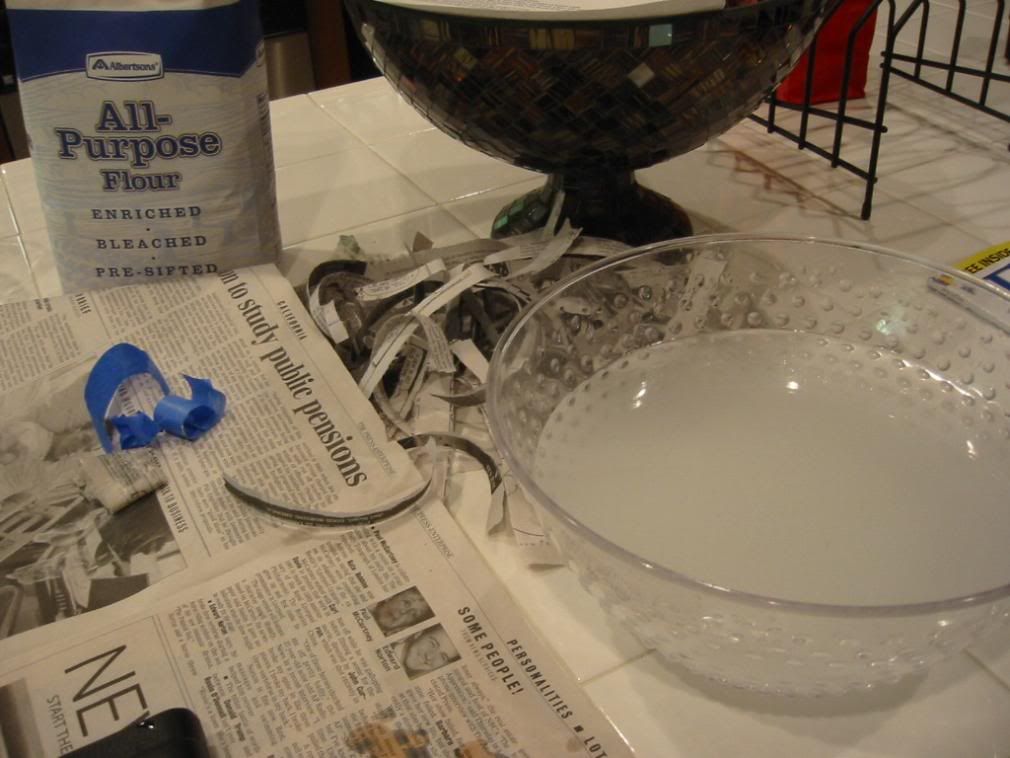
I used this bowl of water to get the crap off my hands after each strip was layed. I then dried my hands on a towel on my lap. Newspaper strips can be seen in this pic as well.
And so it starts!
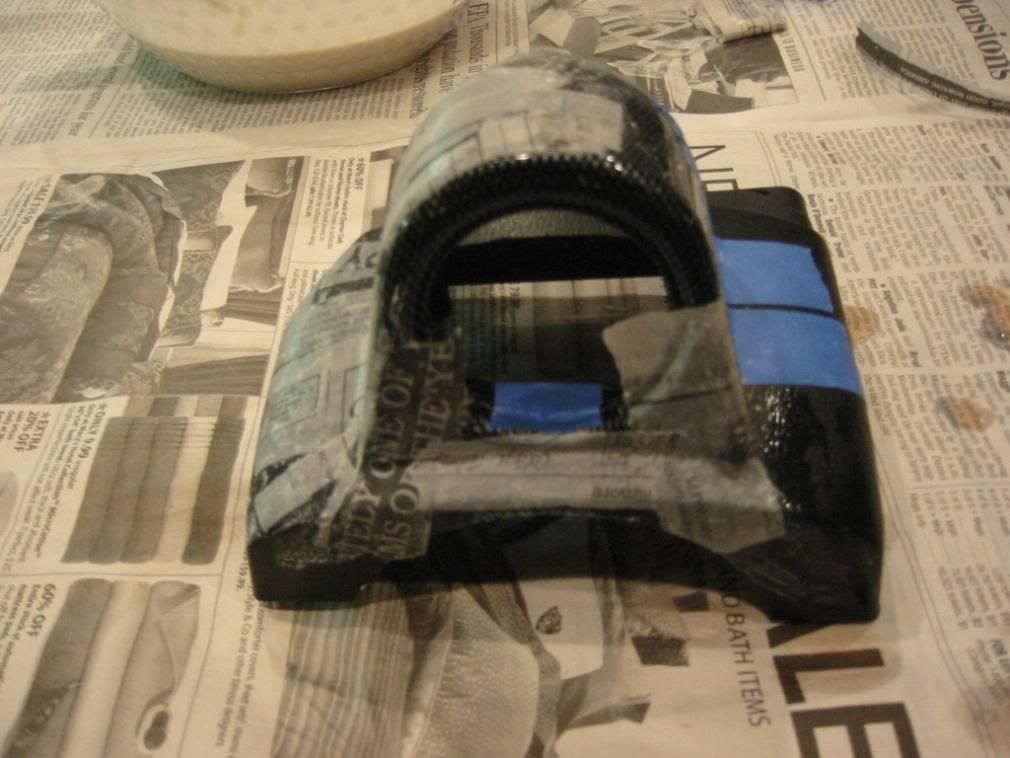
Workin� on the sides�

Rear shot�
It�s coming together now!
And so it starts!
Workin� on the sides�
Rear shot�
It�s coming together now!
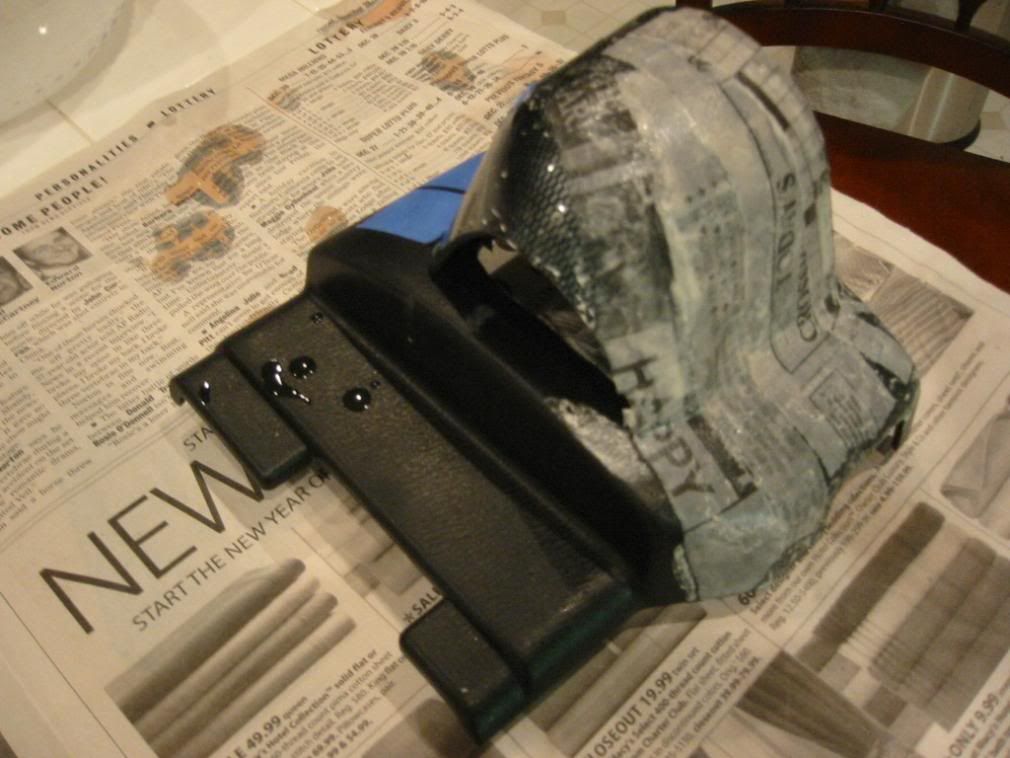
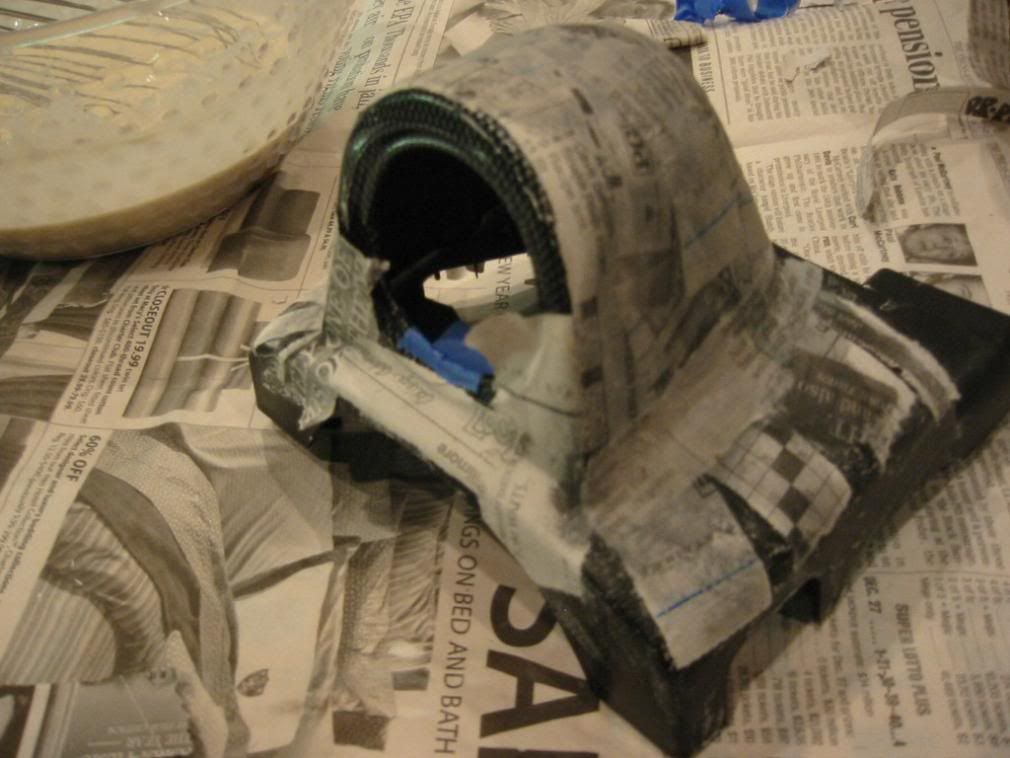
First layer is almost done�
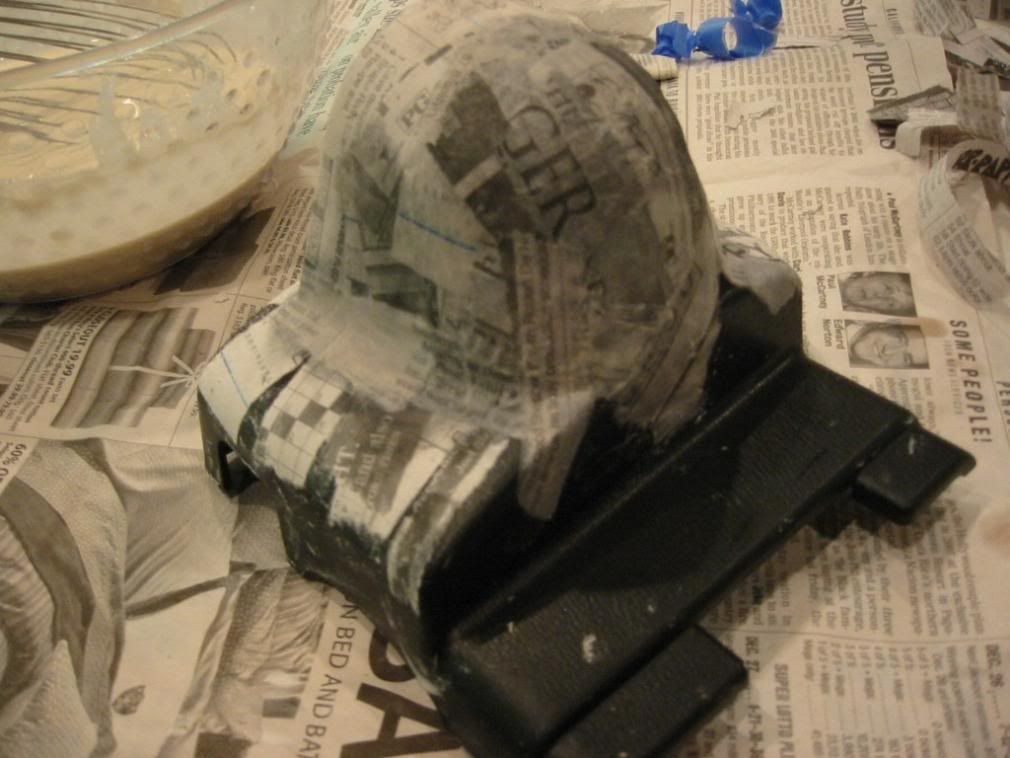
I then let it sit and dry for 24 hours and applied another layer and shaped it even more. No pics, don�t want to bore you too much.
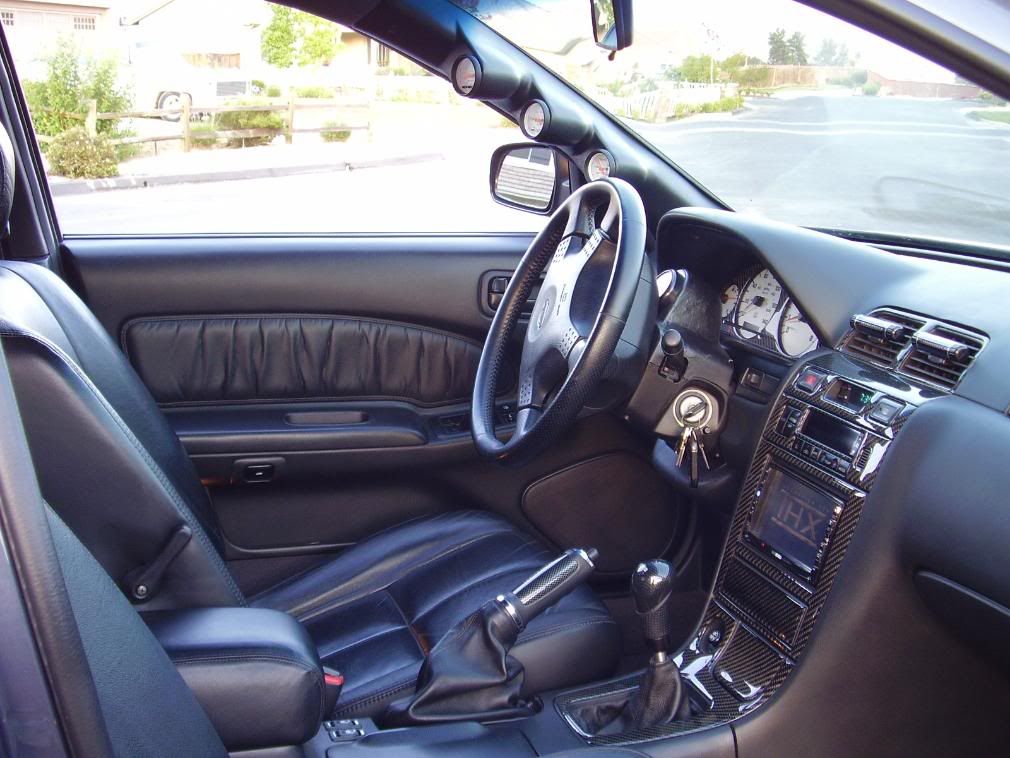
Here�s a pic of my steering column as it was for the past 6 months. (old shift boot and e-brake boot)
Now we�re caught up to present day.
The next phase is when the real fun began!
I then let it sit and dry for 24 hours and applied another layer and shaped it even more. No pics, don�t want to bore you too much.
Here�s a pic of my steering column as it was for the past 6 months. (old shift boot and e-brake boot)
Now we�re caught up to present day.
The next phase is when the real fun began!


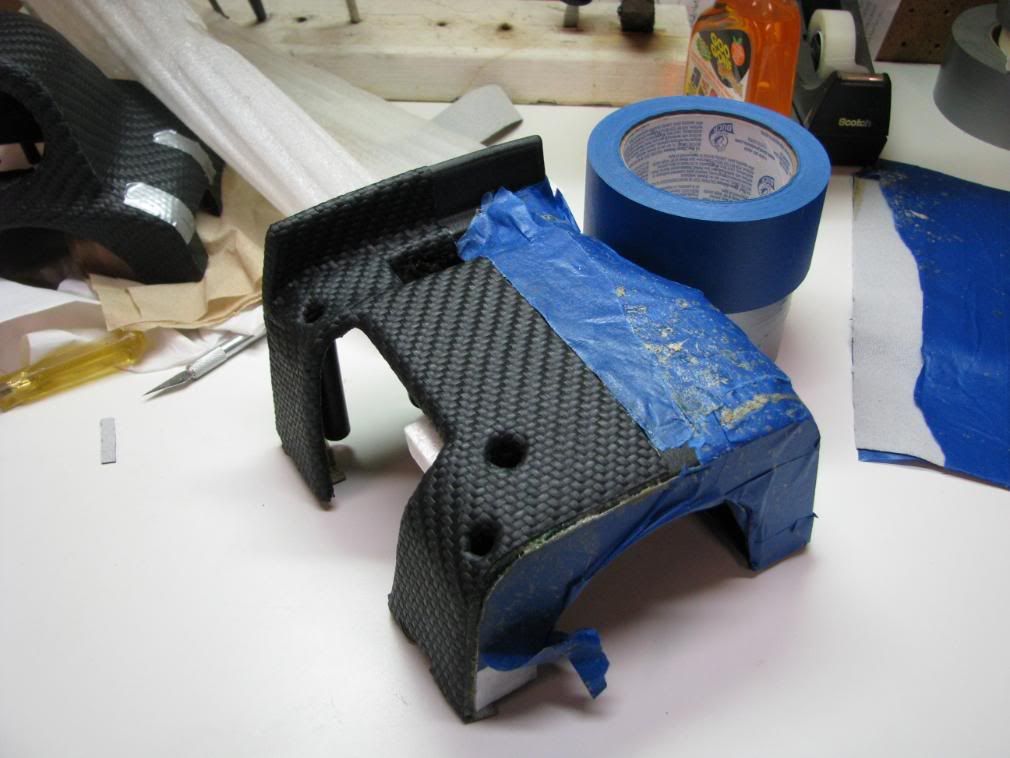
Phase II-Adding the CF to the top of the steering column
Unfortunately, I can�t find all the pictures I took (must have saved some in a weird location one day) so for now these pics will have to do showing the build.
The CF material is extremely difficult to work with and does not like hugging contours/going around corners too much. I had to use a blow dryer to soften the material and pull like a **** to get the vinyl to follow the contours. Due to the complexity of the top piece, I chose to do the front face in a separate phase and to have a seem in the rear of the piece so I can do the pulling I described above. Luckily the glue needs only 5-10 minutes to setup, and has a working time of about 20 minutes.

All done!
You can see the front CF piece has not been done, and some metal is on, which means it�s time to show you Phase III!
Unfortunately, I can�t find all the pictures I took (must have saved some in a weird location one day) so for now these pics will have to do showing the build.
The CF material is extremely difficult to work with and does not like hugging contours/going around corners too much. I had to use a blow dryer to soften the material and pull like a **** to get the vinyl to follow the contours. Due to the complexity of the top piece, I chose to do the front face in a separate phase and to have a seem in the rear of the piece so I can do the pulling I described above. Luckily the glue needs only 5-10 minutes to setup, and has a working time of about 20 minutes.
All done!
You can see the front CF piece has not been done, and some metal is on, which means it�s time to show you Phase III!


looks good, then i saw the part where you said it wouldnt countour and had to read it again(you used fabrick). did you not wanna deal with thr real cloth and nit the mess. i mean you d have to cruise around for a day or 2 till it dries but itl matgh the other trim better.
btw where did you find the cloth at, ive been searchin on ebay for ever.
btw where did you find the cloth at, ive been searchin on ebay for ever.


pancakes??? dont you mean cookies??? btw, how the friggin hell do you figure out how to do this $hit?? i mean, cripes, all other mods are basically reading instructions, this is straight outta mcguivers $hit. wtf did you do, go back to your old elementary school and ask them " hoow do i paper mac my dash pod??? 


Member
Joined: Feb 2008
Posts: 56
From: Central New Jersey

 me likes. mehz wants one too plz.

to go fast!
if i'm not mistaken:
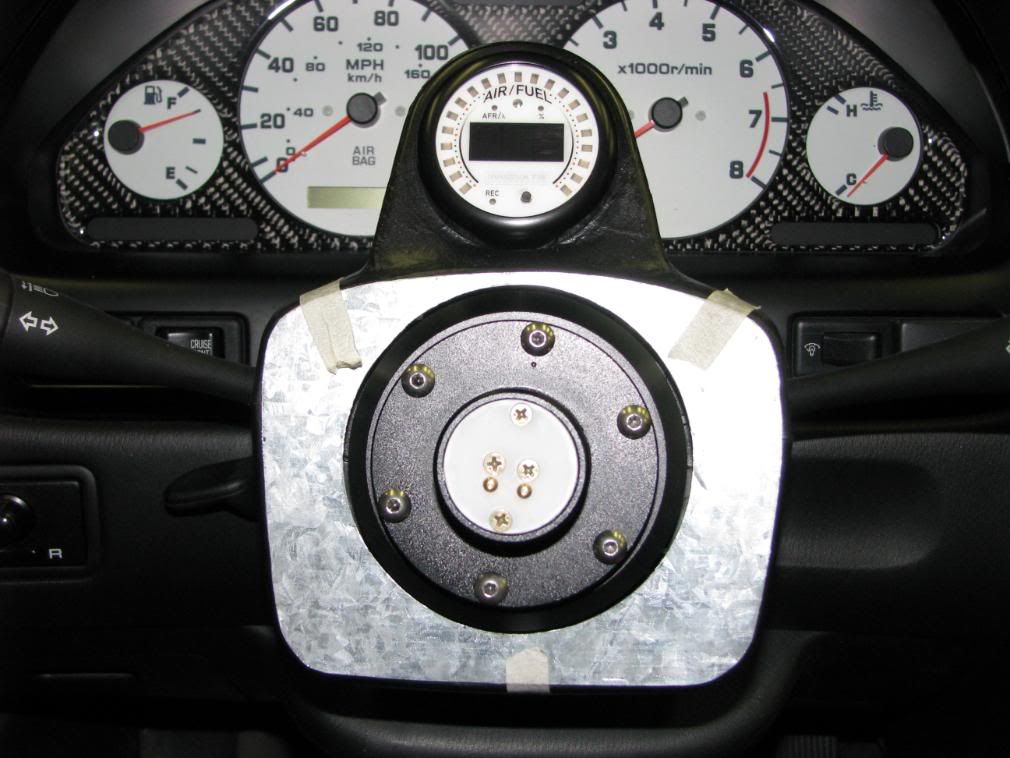
Autometer Electronic Boost gauge
Autometer Electronic Fuel Pressure gauge
Autometer Dual Intake Temperature gauge
Innovate Motorsports Wideband XD-16 A/F gauge
generally not my style either but the wiz pulls it off so well...
if i'm not mistaken:
Autometer Electronic Boost gauge
Autometer Electronic Fuel Pressure gauge
Autometer Dual Intake Temperature gauge
Innovate Motorsports Wideband XD-16 A/F gauge
generally not my style either but the wiz pulls it off so well...


Thanks to everyone for your positive feedback. For those with questions.....
Yeah, I originally wanted to do the real deal, but I didn't for three reasons. First, everyone I contact won't reveal how to do it or any tips/tricks. Ideally, I would like a direct replacement, not a CF overlay. I also figured it would get awfully expensive to buy the CF and equipment, and it would take me a loooooong time to master it. But, now I'm starting to have second thoughts now that I've gained experience fiberglassing on Ptatohed's car. I bet I could figure it out after all.
I bought the cloth from yourautotrim.com. I received samples from 4 different places, and this one stood out from the crowd. Unfortunately though, the stuff I bought has since been discontinued and is not what you see on the website. When I ordered it and the lady told me about it being discontinued, I bought enough to complete all my future CF projects. What you see on the website currently today I don't like too much.
That's actually next. This will be done at the same time I do the headliner so that the CF pattern flows from headliner to pillars. I'm **** like that.
This isn't what I was referring to in my MOTM thread.  I'm in the midst of a different project that is 5 times more complex and 5 times more unique. As stated in my first post, I have about 40 hours into it and will share once I see the light at the end of the tunnel.
See above for source of CF. As for the glue, I almost bought glue that supposedly is made for this type of work from yourautotrim.com, but I decided I would take my chances first using 3M's SuperTrim glue (heavy duty) found at your local Autozone or Napa. It's $15 at Autozone and $18 at Napa. I'll show a pic of the can later for reference.
Bwhahahhaha. LOL at McGyver comment.
Going into this I feared this might turn into a catastrophe, but it's surprisingly turning out quit well IMO.
Nope. This isn't the "Top Secret" project I hinted about. Soon grasshopper, soon. 
For those with questions.....looks good, then i saw the part where you said it wouldnt countour and had to read it again(you used fabrick). did you not wanna deal with thr real cloth and nit the mess. i mean you d have to cruise around for a day or 2 till it dries but itl matgh the other trim better.
btw where did you find the cloth at, ive been searchin on ebay for ever.
btw where did you find the cloth at, ive been searchin on ebay for ever.
I bought the cloth from yourautotrim.com. I received samples from 4 different places, and this one stood out from the crowd. Unfortunately though, the stuff I bought has since been discontinued and is not what you see on the website. When I ordered it and the lady told me about it being discontinued, I bought enough to complete all my future CF projects. What you see on the website currently today I don't like too much.
That's actually next.
This will be done at the same time I do the headliner so that the CF pattern flows from headliner to pillars. I'm **** like that. I'm in the midst of a different project that is 5 times more complex and 5 times more unique. As stated in my first post, I have about 40 hours into it and will share once I see the light at the end of the tunnel. pancakes??? dont you mean cookies??? btw, how the friggin hell do you figure out how to do this $hit?? i mean, cripes, all other mods are basically reading instructions, this is straight outta mcguivers $hit. wtf did you do, go back to your old elementary school and ask them " hoow do i paper mac my dash pod???
Going into this I feared this might turn into a catastrophe, but it's surprisingly turning out quit well IMO.
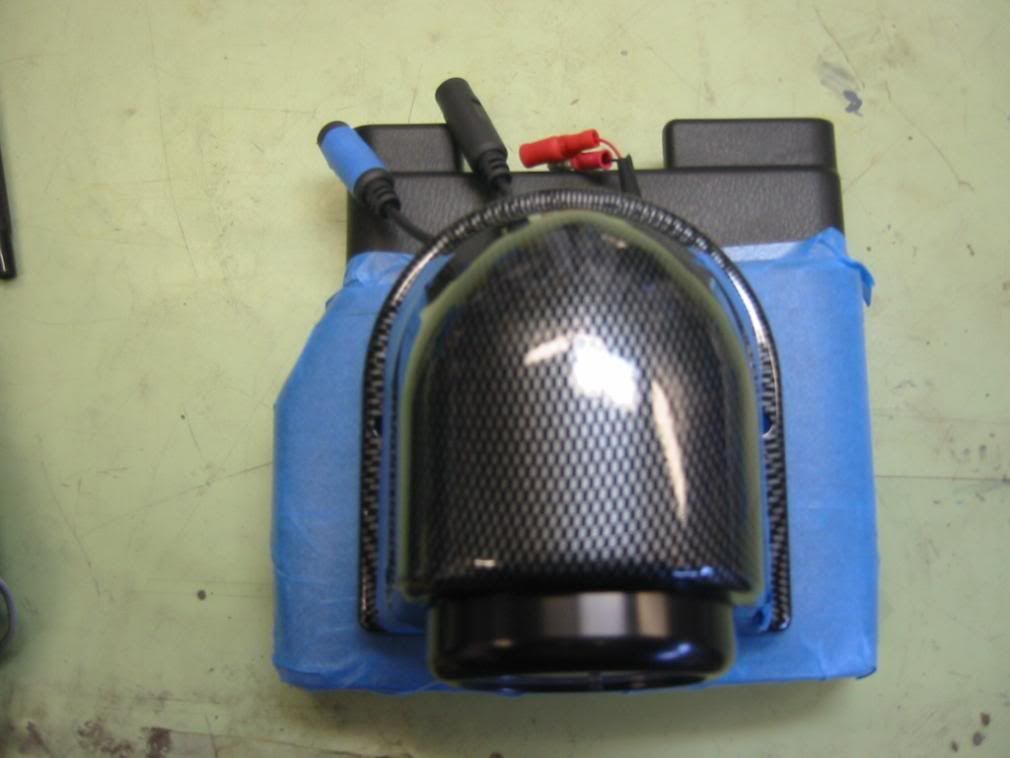
Phase III-Metal to cover the awkward notch in the bottom of the steering column and form a perfect circle around new aftermarket steering hub
Here�s the awkward notch I mentioned in the bottom piece of the steering column

Here�s the awkward notch I mentioned in the bottom piece of the steering column

Phase III-Continued
Ok. On with the sheet metal. I used a very thin piece of sheet metal and cut it to fit the front face of the steering column and used a compass to get a perfect circle around the NRG short hub adapter.

Straight on pic
Ok. On with the sheet metal. I used a very thin piece of sheet metal and cut it to fit the front face of the steering column and used a compass to get a perfect circle around the NRG short hub adapter.
Straight on pic
Last edited by The Wizard; Mar 31, 2008 at 08:36 AM.
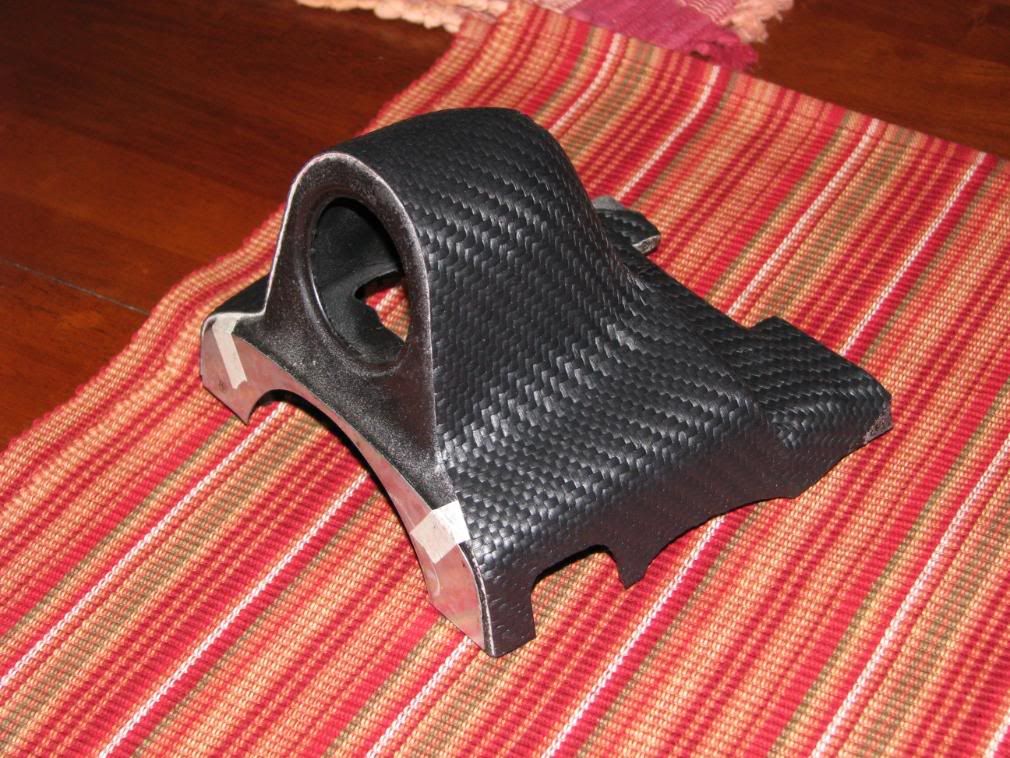
Once I got the metal just how I wanted, I cut it at the seam and starting gluing it to the top and bottom of the steering column pieces.

Here�s a pic of the backside showing how I�m hiding the ugly awkward notch..

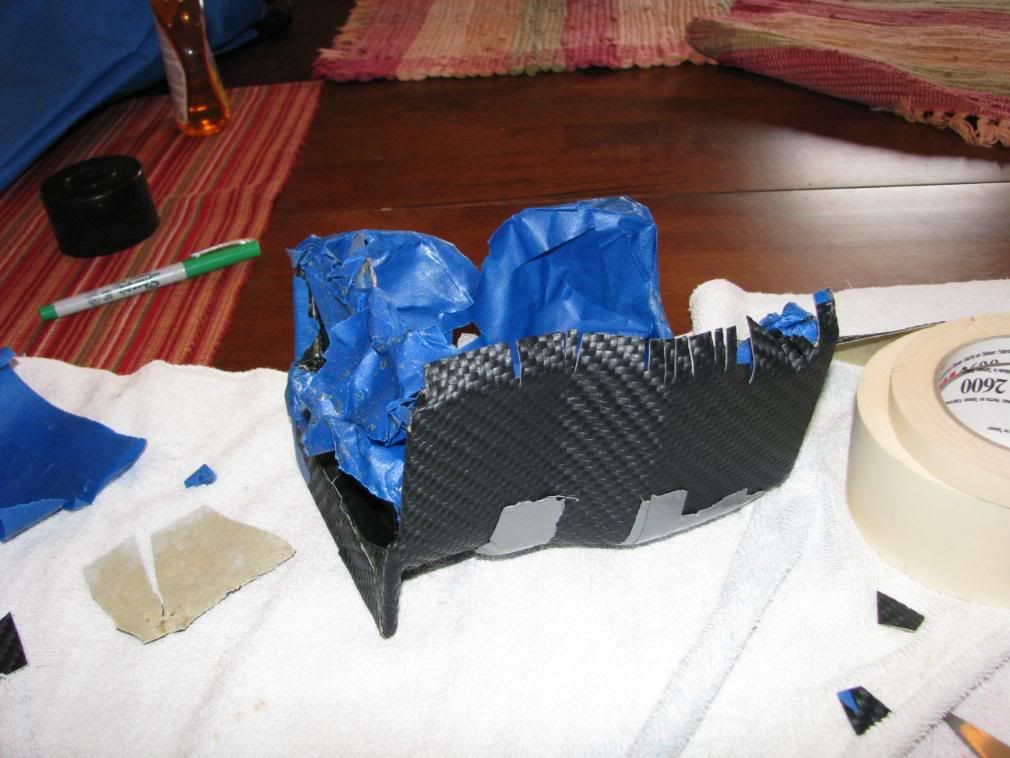
24 hours later, the bandages came off and this is how it looks�all scuffed up with 60 grit sandpaper and ready for CF.
Here�s a pic of the backside showing how I�m hiding the ugly awkward notch..
24 hours later, the bandages came off and this is how it looks�all scuffed up with 60 grit sandpaper and ready for CF.
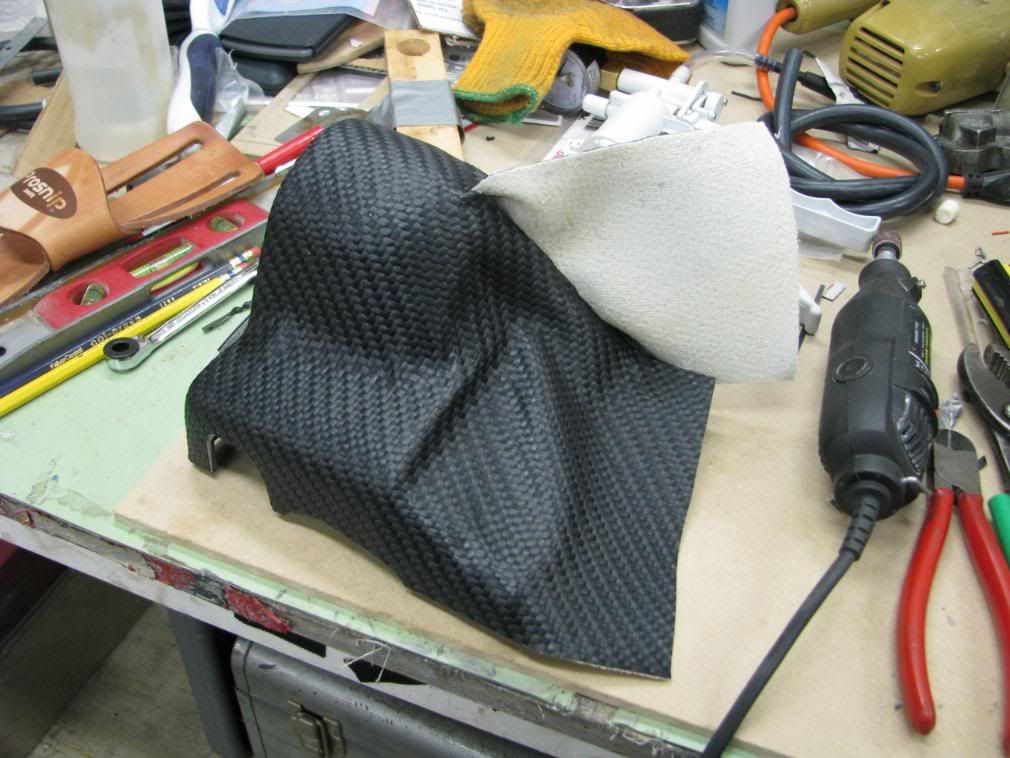
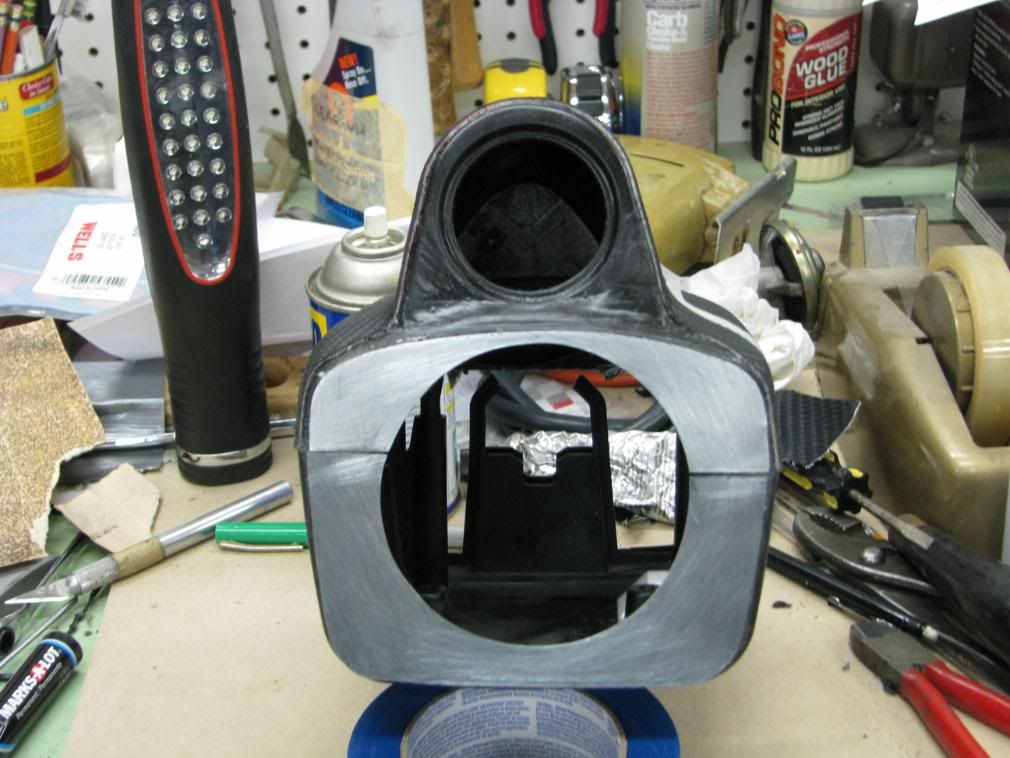
Phase IV-Adding CF to the bottom piece-What a nightmare!!
I thought the top was going to be the most difficult and the rest was going to be a piece of cake. I was so wrong! Trying to shape the vinyl, pull it etc was a royal PITA!!! Rolling the edges on the sides was extremely time consuming, but it was worth it in the end. Oh, and knew I had to have the CF pattern flow/match with the top piece. Overall, the pattern of the CF vinyl matches the same angle as the CF on the dash kit. Anyway, on with the pics�
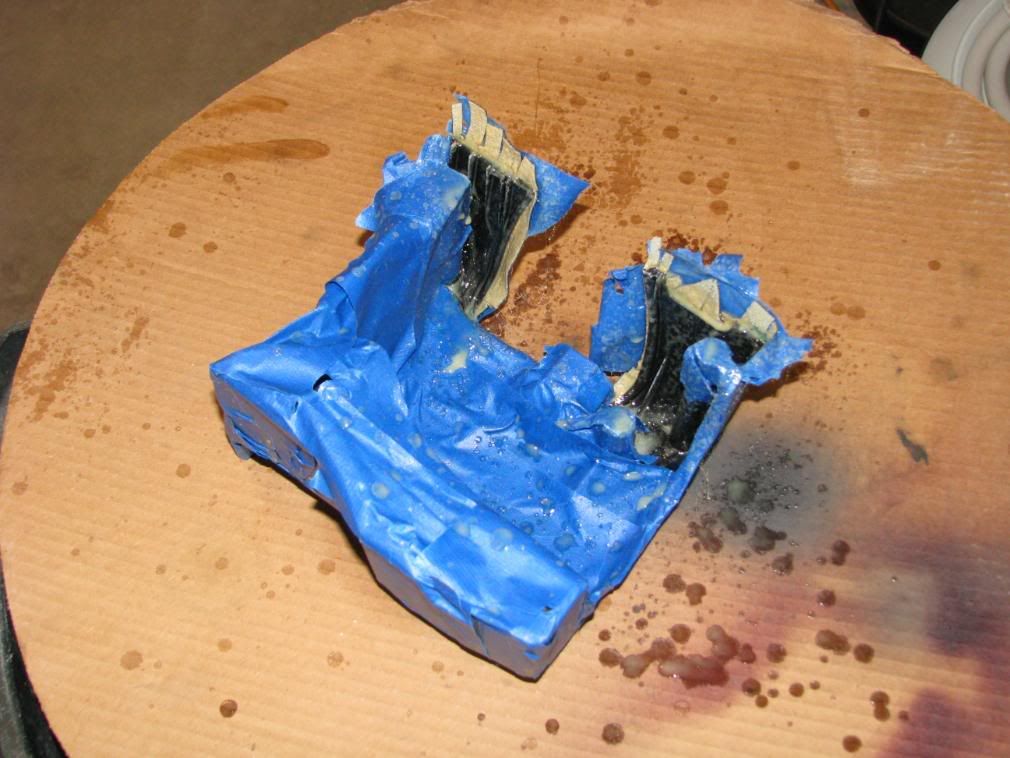
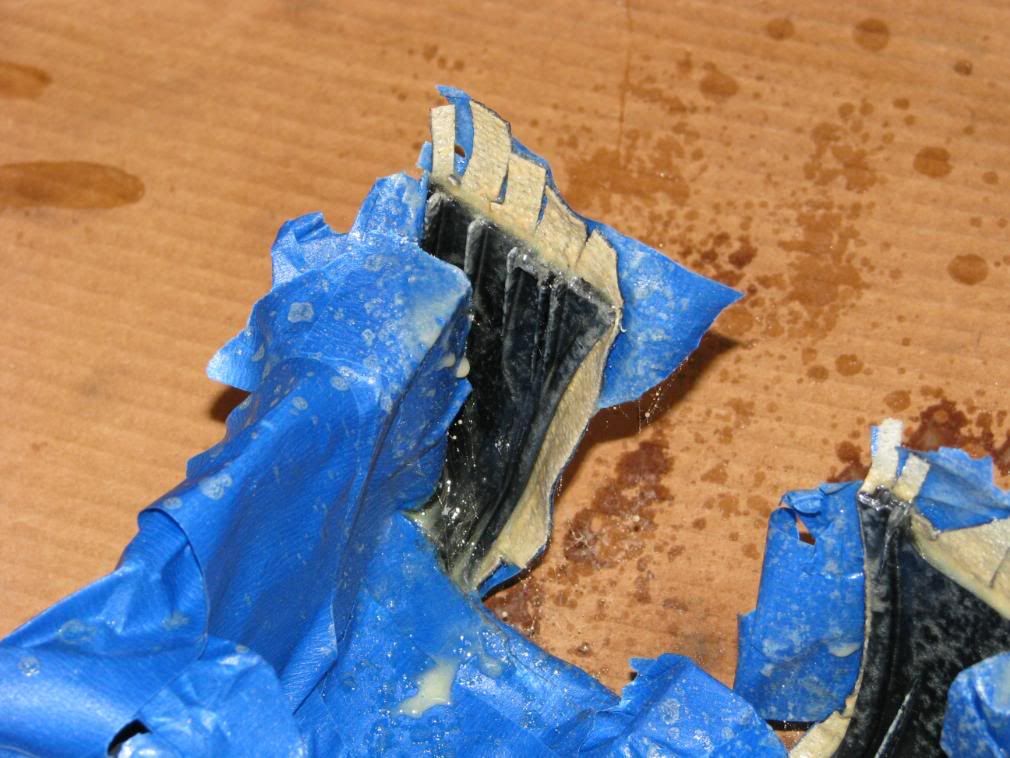
Here it is after the initial layer was added. I�m now cutting the ends so I can roll the edges for a super clean look and fit in-between all the existing slats/grooves.
Close-up
Another angle
Lots of tape to make sure everything stays in place as it dries for 24 hours
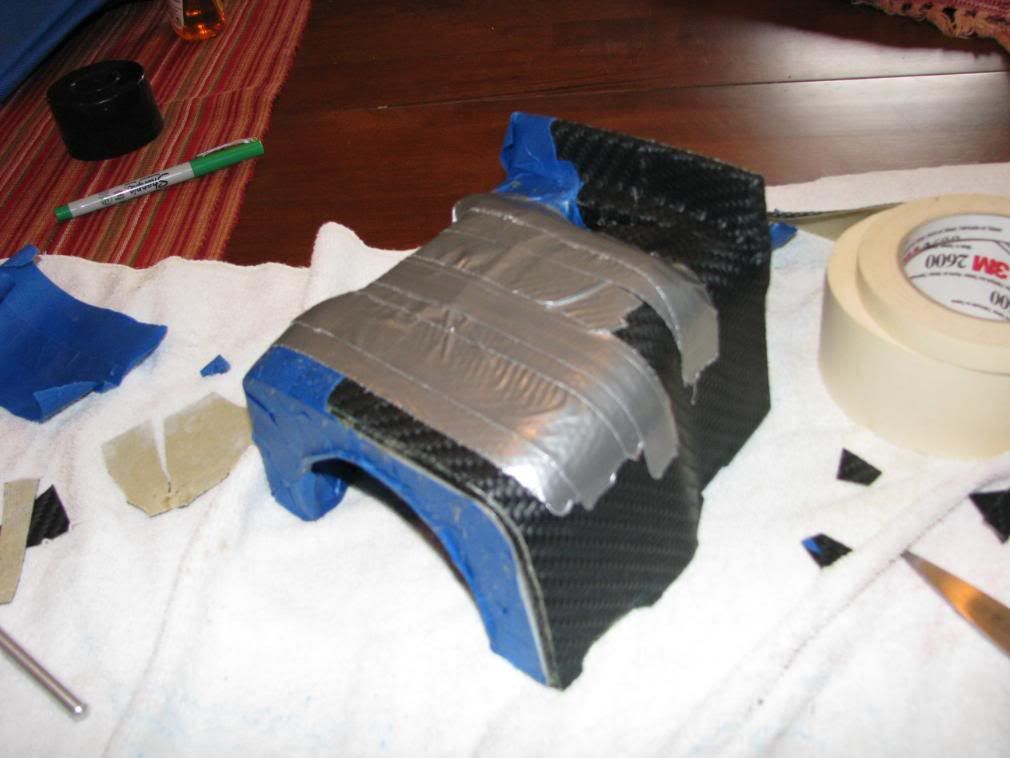
I thought the top was going to be the most difficult and the rest was going to be a piece of cake. I was so wrong! Trying to shape the vinyl, pull it etc was a royal PITA!!! Rolling the edges on the sides was extremely time consuming, but it was worth it in the end. Oh, and knew I had to have the CF pattern flow/match with the top piece. Overall, the pattern of the CF vinyl matches the same angle as the CF on the dash kit. Anyway, on with the pics�
Here it is after the initial layer was added. I�m now cutting the ends so I can roll the edges for a super clean look and fit in-between all the existing slats/grooves.
Close-up
Another angle
Lots of tape to make sure everything stays in place as it dries for 24 hours

