
How To Re-Wrap Steering Wheel
 04-20-2013, 04:24 AM
#1

How To Re-Wrap Steering Wheel
Hey everyone. I couldn't find anything about re-wrapping a steering wheel on here, or the whole entire internet for that matter, so I decided I would post a thread with at least what is needed and general instructions.
WARNING! I nor Maxima.org is responsible for any damages to your vehicle or yourself. Take precaution and follow safety guidelines.
What's needed:
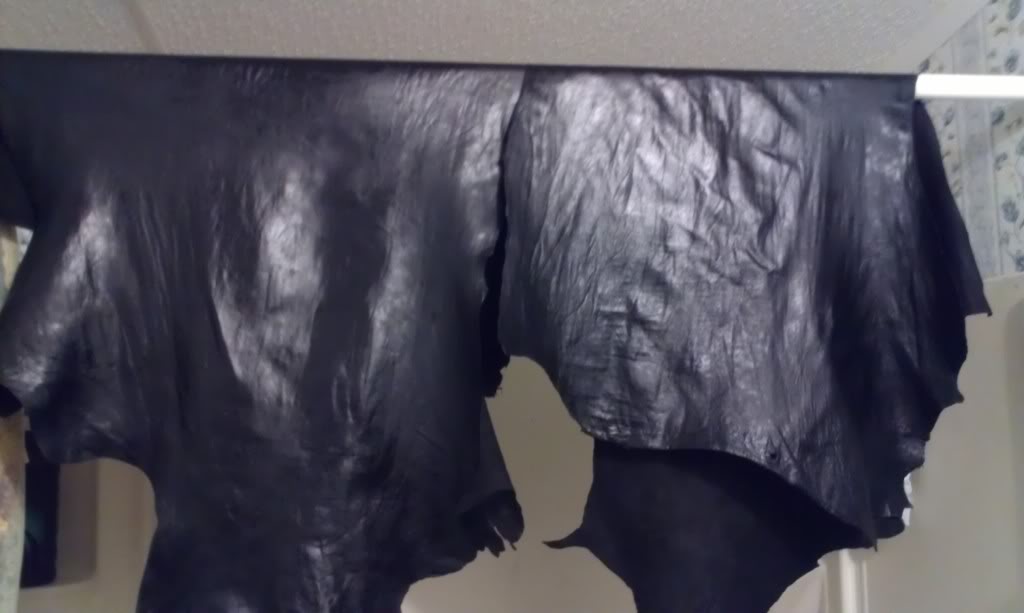
Leather (cowhide is used from the factory, but I used sheepskin) - At least 5 square feet of standard grade or up.
Waxed Nylon Thread (to wrap leather to the steering wheel)

Regular Thread (to sew the individual pieces of leather together)
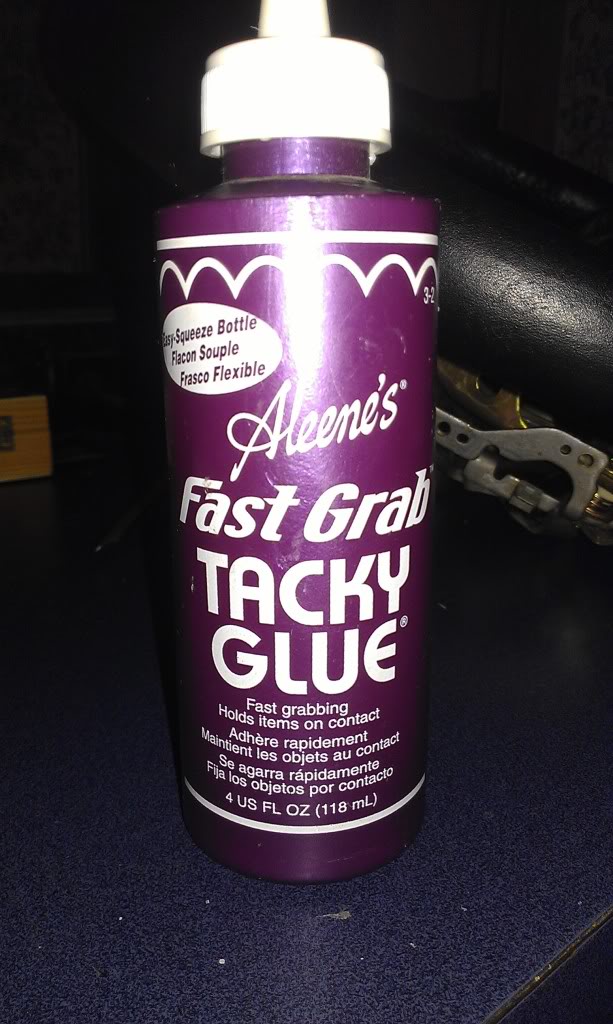
Rubber cement or glue (this is what I used)
Two Sewing Needles
A Sharp Blade (to cut the thread on the old wrap, and to cut out the new leather. Scissors can also be used after the blade has gone through and cut enough to give you a template to cut out)
Phillips Head Screwdriver
Flat Blade Screwdriver
T-50 Security/Tamper Proof Torx Bit (to take out the airbag)
3/4 Socket wrench (for the bolt holding down the steering wheel)
Socket Wrench Extension
Steering Wheel Puller (OPTIONAL)
Patience (THIS IS NOT AS SIMPLE AS IT MAY SEEM. IT TAKES AT LEAST TWO DAYS TO DO IT RIGHT.)
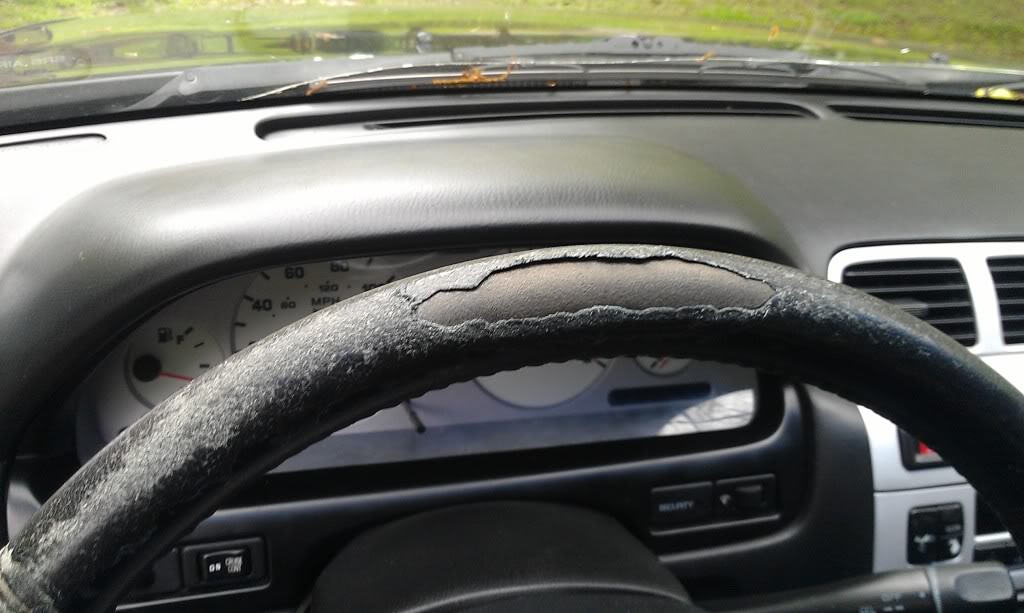
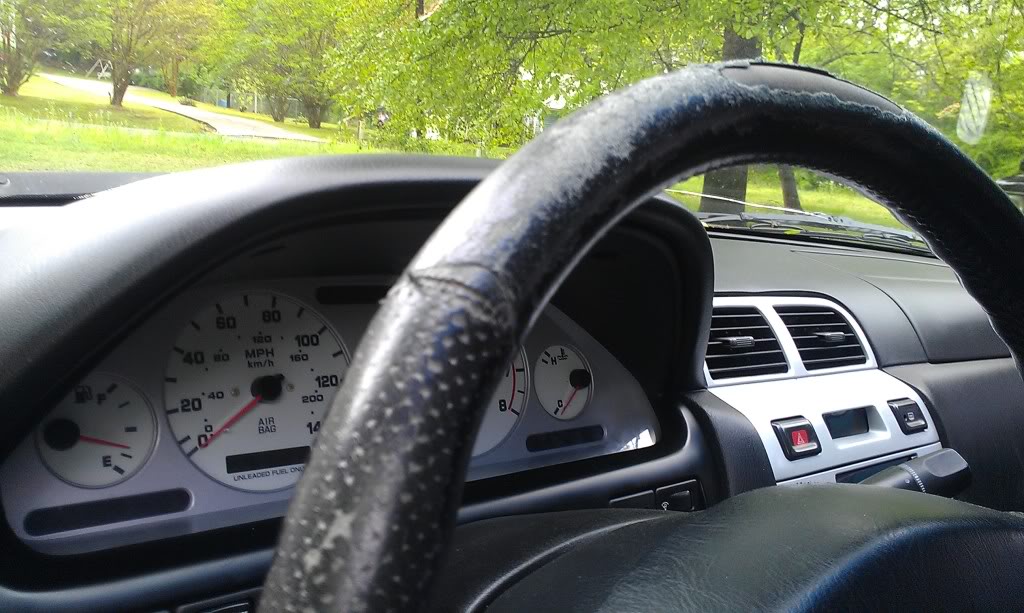
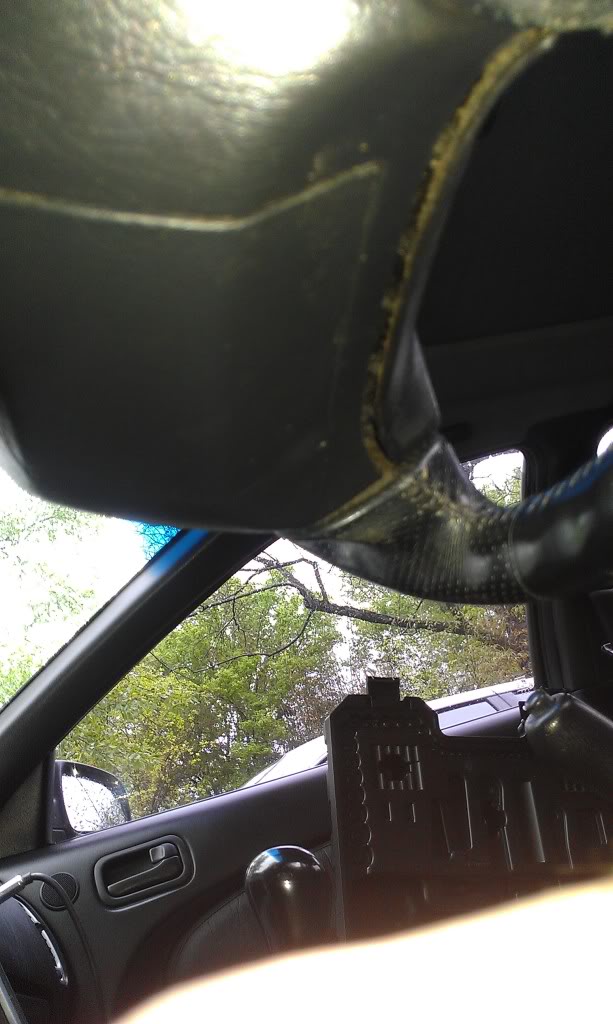
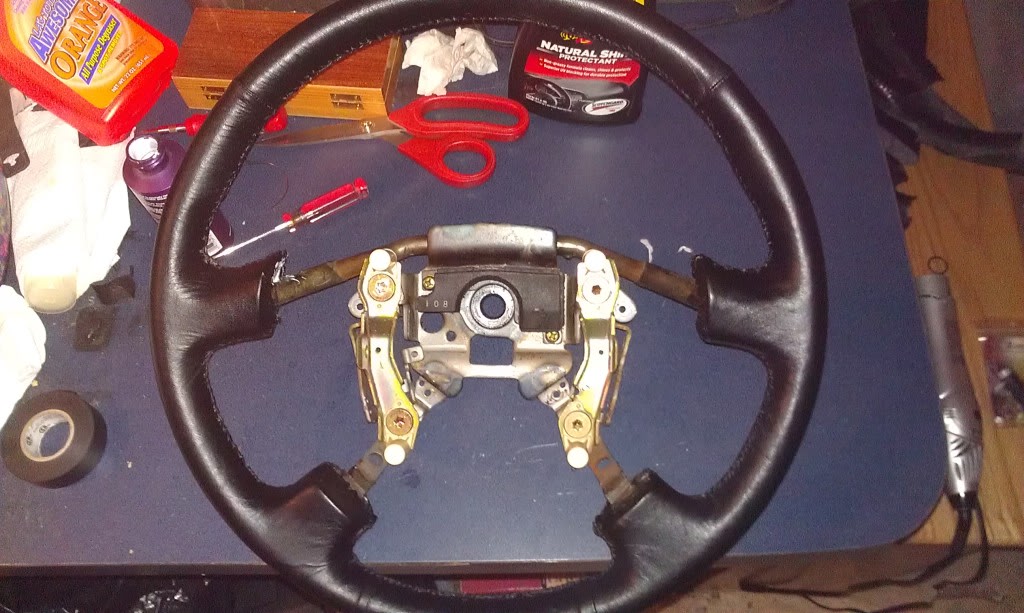
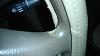
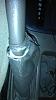
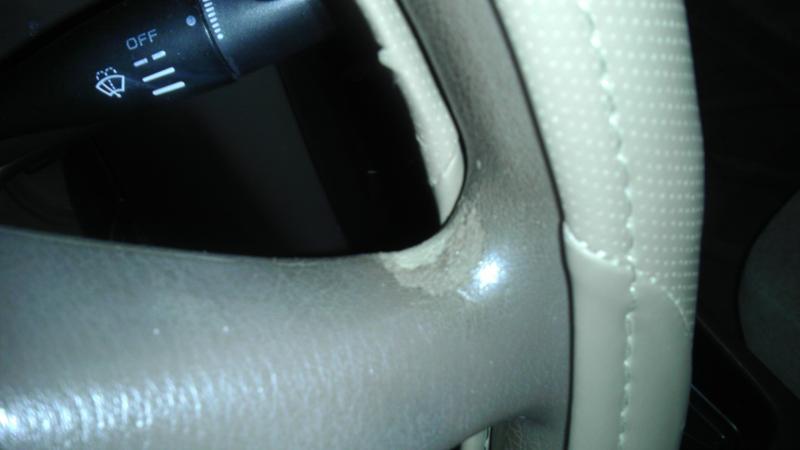
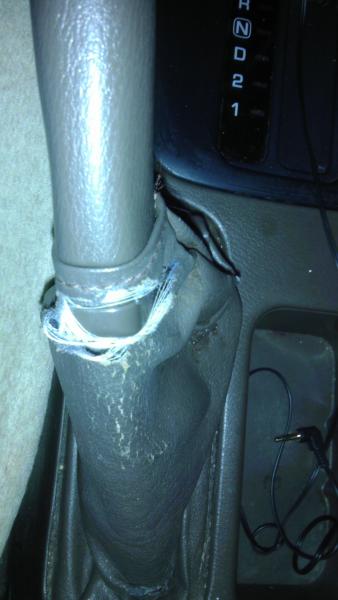
Before Pictures:
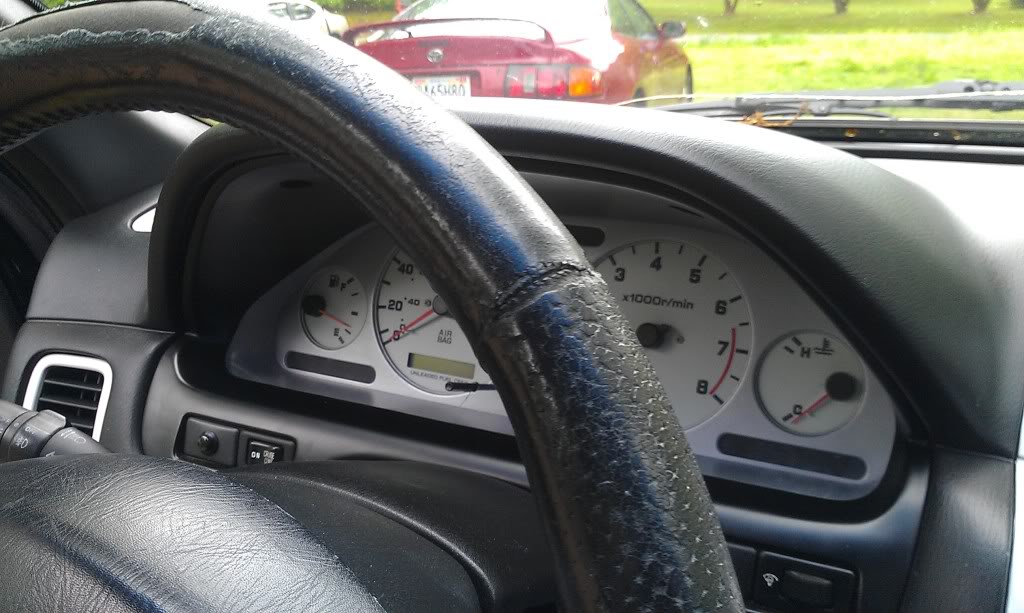
BEFORE YOU DO ANYTHING, MAKE SURE YOU DISCONNECT YOUR BATTERY AND LEAVE IT DISCONNECTED FOR AT LEAST 10 MINUTES BEFORE STARTING.
START:
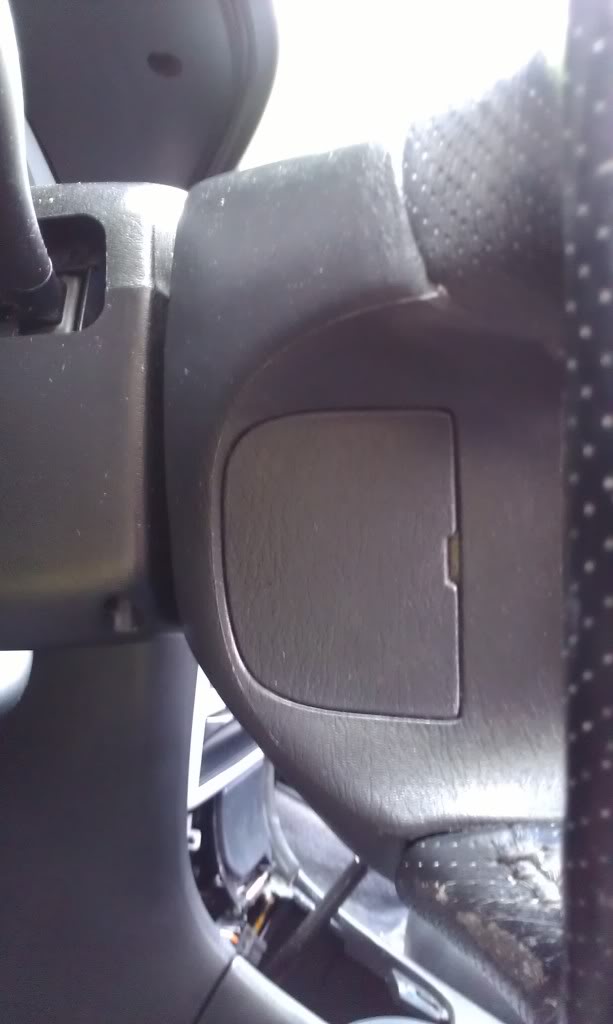
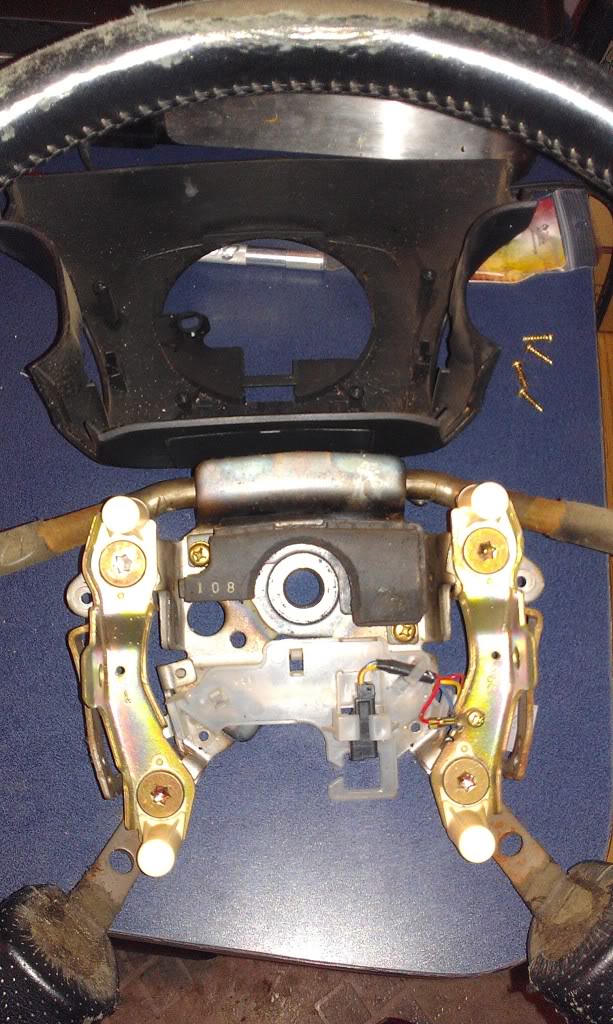
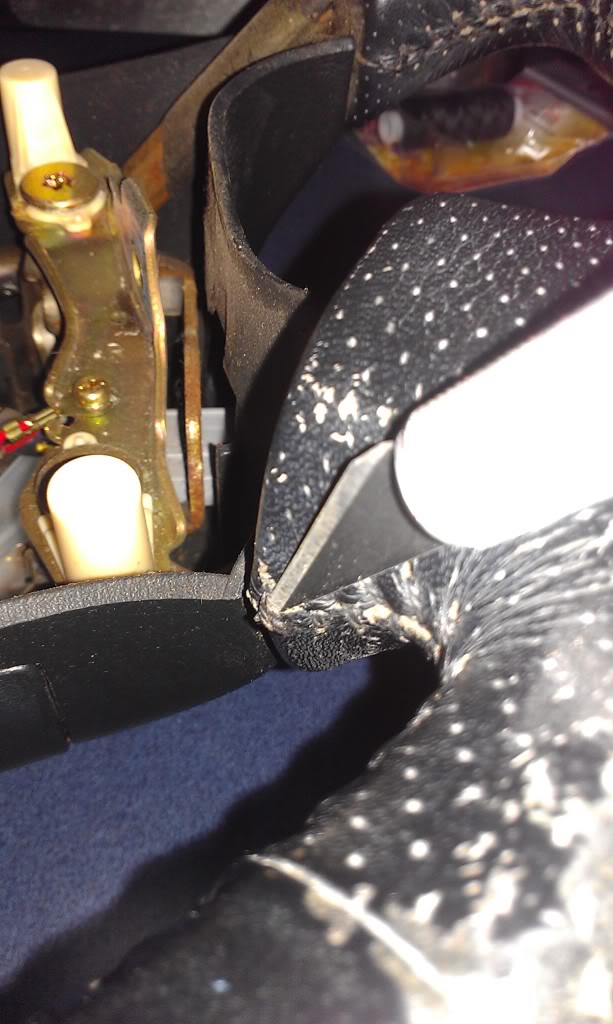
Step 1: Remove access plates on both sides and bottom of the steering wheel.
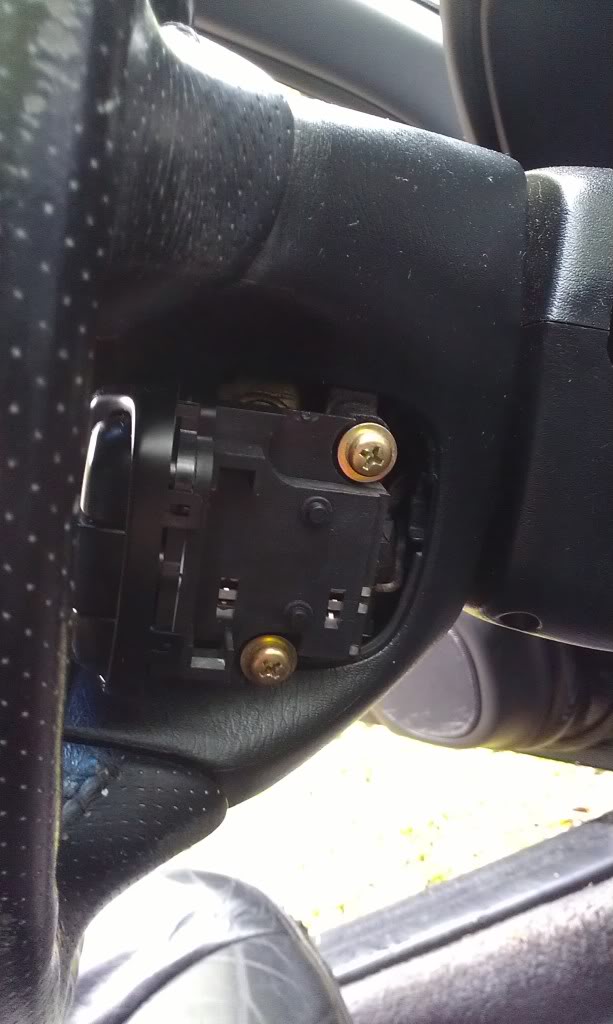
Step 2: Disconnect air bag harness through the bottom opening, then unscrew the cruise control switch and pull it out.
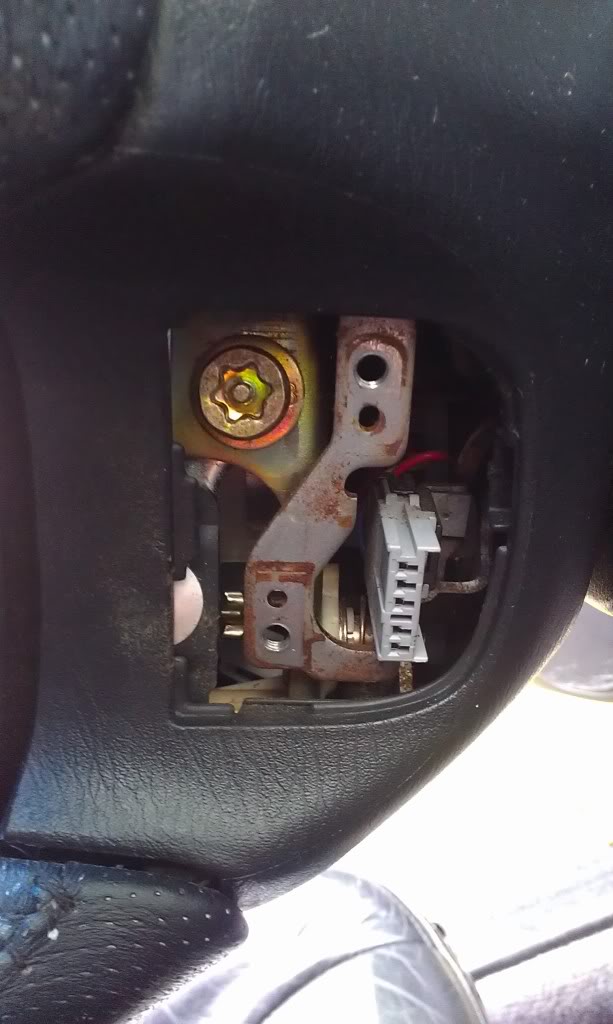
Step 3: Use the Torx bit to unscrew the airbag bolts on both sides of the steering wheel, then pull the airbag assembly out and place it airbag side down somewhere safe.

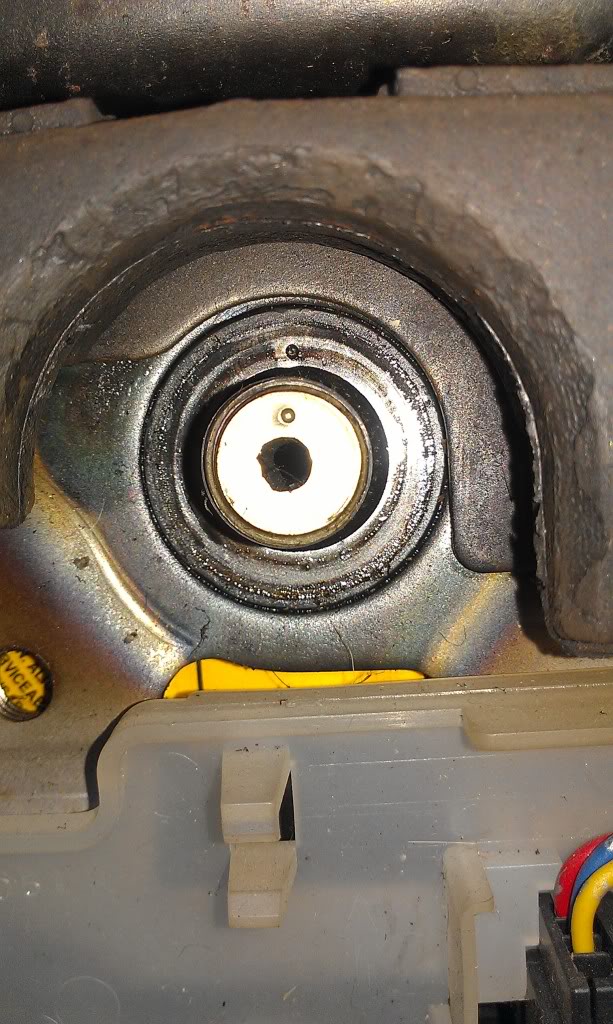
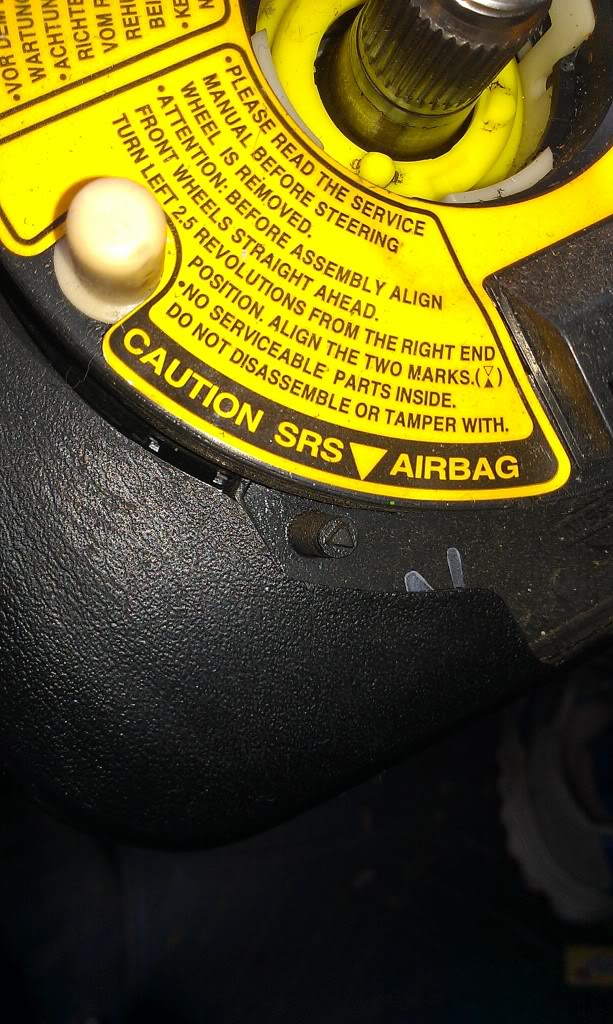
Step 4: Unbolt the steering wheel bolt and take it almost all the way off, leaving the bolt on a few threads to prevent self injury while pulling off steering wheel. Then pull on the steering wheel and wiggle it around until it breaks free. (or use the optional steering wheel puller) Notice the indention's on the bolt and the steering wheel. This is how you align your steering wheel back to the right spot. Then notice the warning on the clock spring just in case it gets off as well. Disconnect the remaining plug for the cruise control and pull the steering wheel off. Now you're ready to start taking it apart. *enter sarcastic smile here*
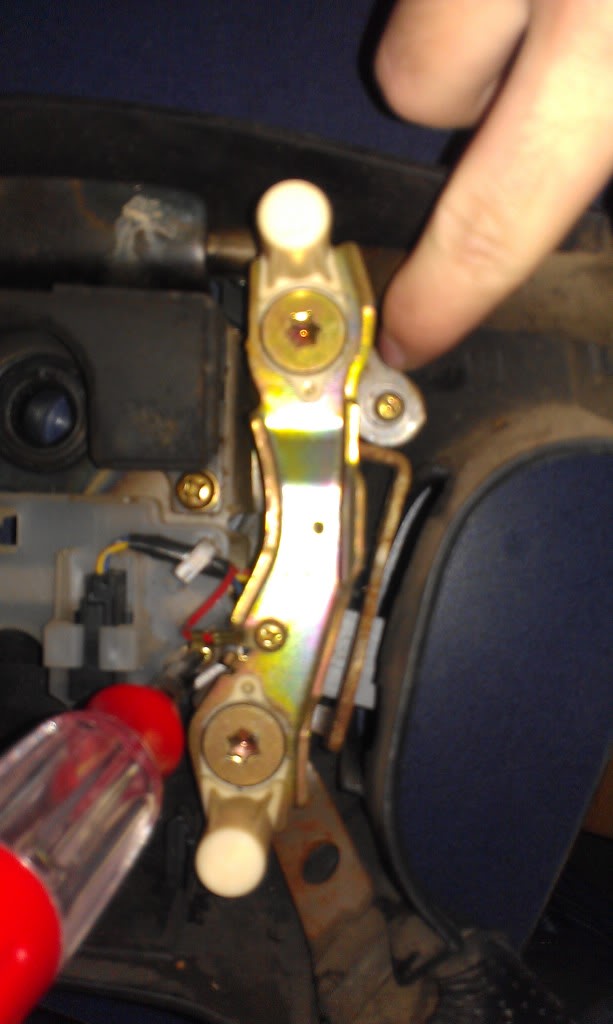
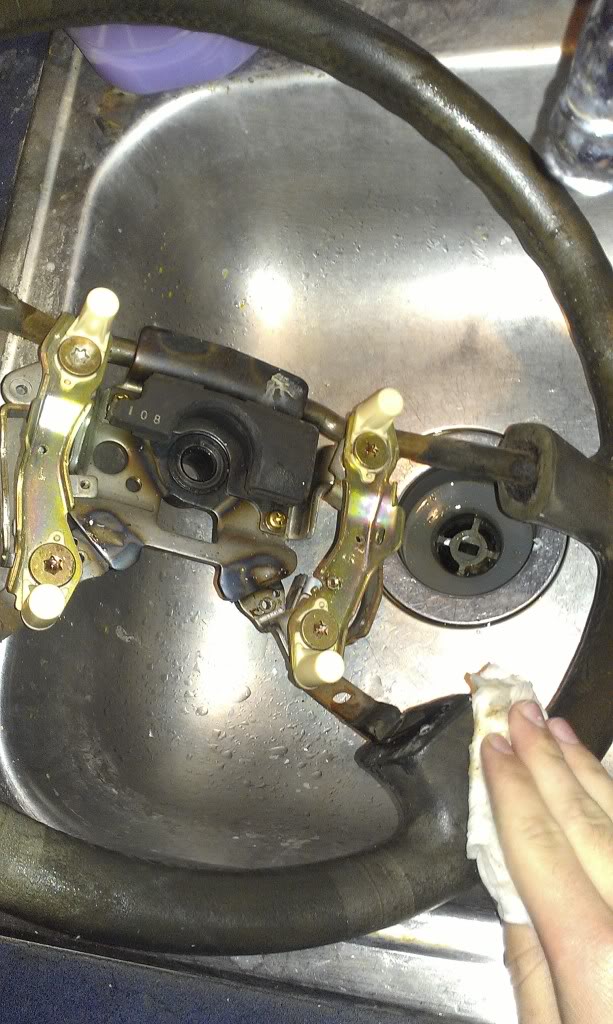
Step 5: Unscrew the rest of the cruise control unit and remove it from the steering wheel. Then unscrew the back plastic plate and remove it as well.
WARNING! I nor Maxima.org is responsible for any damages to your vehicle or yourself. Take precaution and follow safety guidelines.
What's needed:
Leather (cowhide is used from the factory, but I used sheepskin) - At least 5 square feet of standard grade or up.
Waxed Nylon Thread (to wrap leather to the steering wheel)
Regular Thread (to sew the individual pieces of leather together)
Rubber cement or glue (this is what I used)
Two Sewing Needles
A Sharp Blade (to cut the thread on the old wrap, and to cut out the new leather. Scissors can also be used after the blade has gone through and cut enough to give you a template to cut out)
Phillips Head Screwdriver
Flat Blade Screwdriver
T-50 Security/Tamper Proof Torx Bit (to take out the airbag)
3/4 Socket wrench (for the bolt holding down the steering wheel)
Socket Wrench Extension
Steering Wheel Puller (OPTIONAL)
Patience (THIS IS NOT AS SIMPLE AS IT MAY SEEM. IT TAKES AT LEAST TWO DAYS TO DO IT RIGHT.)
Before Pictures:
BEFORE YOU DO ANYTHING, MAKE SURE YOU DISCONNECT YOUR BATTERY AND LEAVE IT DISCONNECTED FOR AT LEAST 10 MINUTES BEFORE STARTING.
START:
Step 1: Remove access plates on both sides and bottom of the steering wheel.
Step 2: Disconnect air bag harness through the bottom opening, then unscrew the cruise control switch and pull it out.
Step 3: Use the Torx bit to unscrew the airbag bolts on both sides of the steering wheel, then pull the airbag assembly out and place it airbag side down somewhere safe.
Step 4: Unbolt the steering wheel bolt and take it almost all the way off, leaving the bolt on a few threads to prevent self injury while pulling off steering wheel. Then pull on the steering wheel and wiggle it around until it breaks free. (or use the optional steering wheel puller) Notice the indention's on the bolt and the steering wheel. This is how you align your steering wheel back to the right spot. Then notice the warning on the clock spring just in case it gets off as well. Disconnect the remaining plug for the cruise control and pull the steering wheel off. Now you're ready to start taking it apart. *enter sarcastic smile here*
Step 5: Unscrew the rest of the cruise control unit and remove it from the steering wheel. Then unscrew the back plastic plate and remove it as well.
Last edited by Aflion; 04-22-2013 at 12:42 PM.
 04-20-2013, 04:38 AM
#2
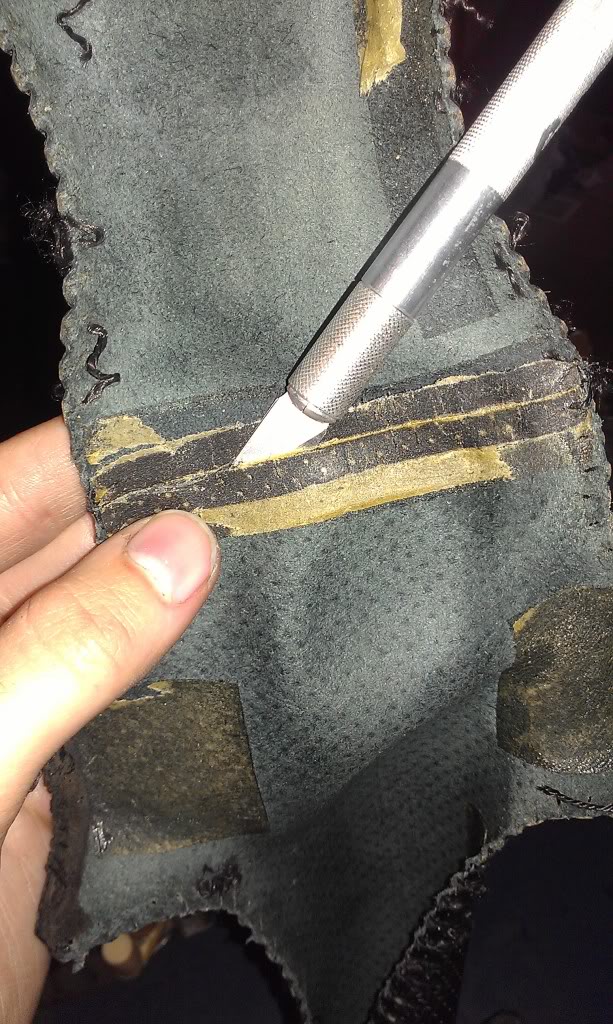
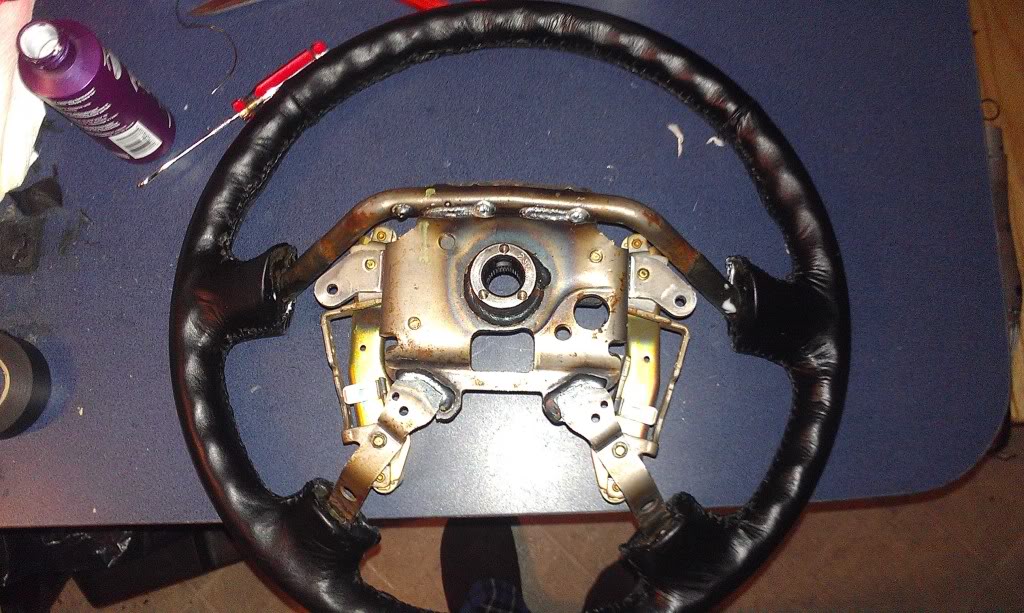
Step 6: Now you can get your blade and start cutting the threads on the wrap. (Be careful while doing this as you do not want to destroy the leather. You will use it as a template for your new leather wrap) It is glued by rubber cement on some places, so be careful not to rip the leather as you pull it away from the foam wheel.
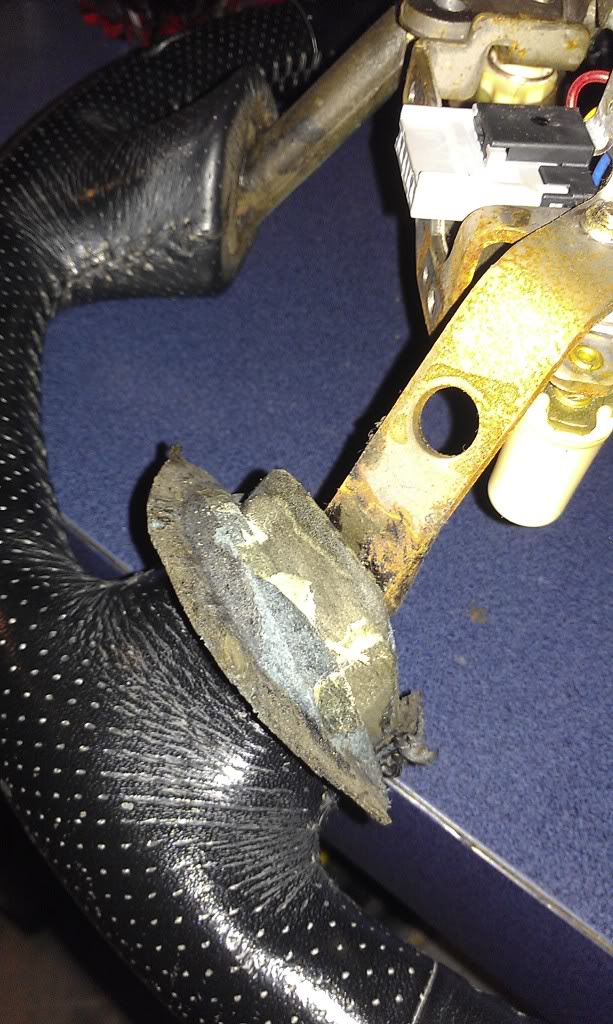
Step 7: After all of the thread has been cut and the leather is lifted away, you will need to split one of the seams carefully, and try to keep the thin leather that is used to connect each piece in tact. If you can't, it's OK. Just remember to add 1/4" to the end when you're cutting out the new pieces of leather. Now pull the wrap off and split the sections carefully. You will probably notice like I did if you have the perforated steering wheel, that it isn't really perforated. It's just made to look like it. Bummer!
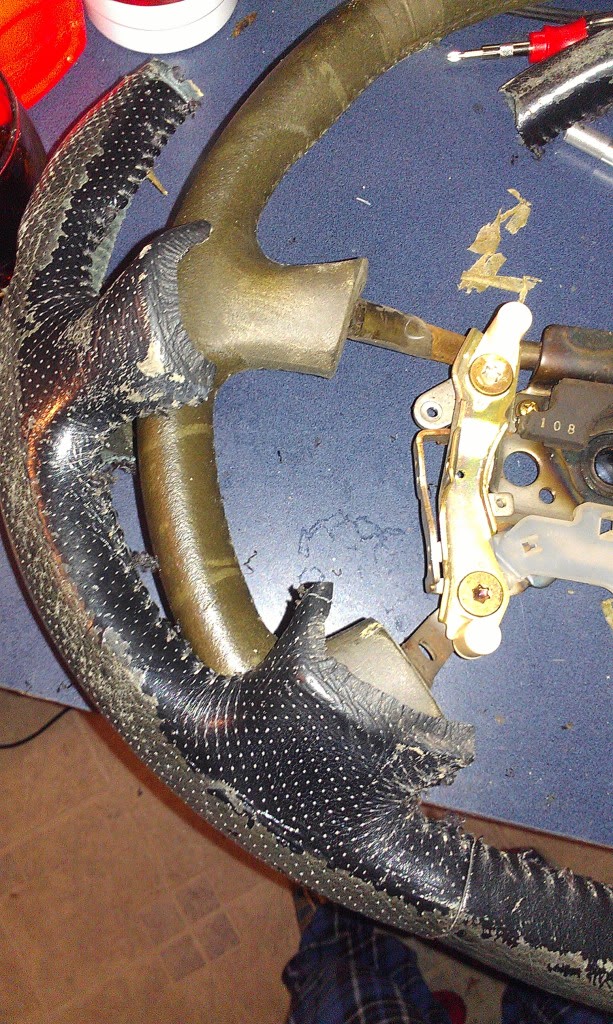
Step 8: Wash the steering wheel off with Dawn to get the rest of the rubber cement/glue off.
Step 9: Cut out the new leather by using the old leather as a template. (MAKE SURE YOU INCLUDE THE FLAP THAT CONNECTS THE LEATHER PIECES TO EACH OTHER OR IT WILL BE MESSED UP AND YOU WONT BE ABLE TO CONNECT THEM) I do not have any pictures of this step because it is hard enough to try to hold down the leather to get an even cut. Also, another person to help hold the leather down while you cut or vice/versa is very much recommended.
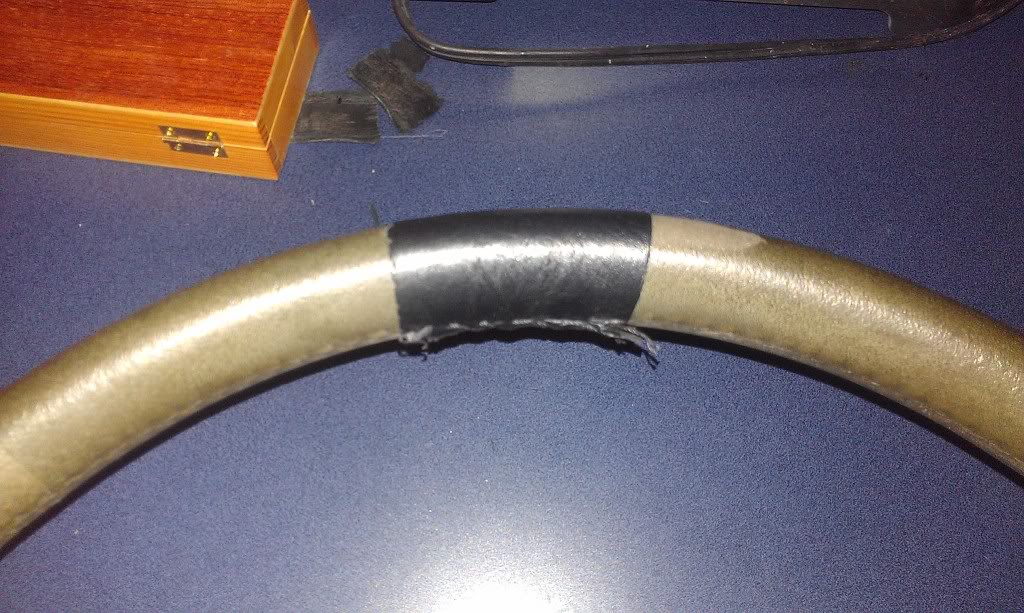
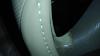
Step 10: Wrap the steering wheel in the new leather! WOOHOO! I recommend using the baseball pattern stitching, as that is the style used from the factory. This is why the two needles are needed. It isn't a very complicated pattern, as it is only one thread overlapping the other when they constantly switch sides. I do not have the steering wheel complete as of right now because I was doing multiple things yesterday and I am as well today. I re-wrapped a 350Z shift **** in the same leather and I also made a shift boot with the same leather. 5 square feet can get you pretty far, and I have 10 square feet in the picture of the leather. Lol. I did do a test spot on the steering wheel just to show as an example right now, and I will upload the picture of the steering wheel completed when I am able to get around to finishing it later today.
Step 7: After all of the thread has been cut and the leather is lifted away, you will need to split one of the seams carefully, and try to keep the thin leather that is used to connect each piece in tact. If you can't, it's OK. Just remember to add 1/4" to the end when you're cutting out the new pieces of leather. Now pull the wrap off and split the sections carefully. You will probably notice like I did if you have the perforated steering wheel, that it isn't really perforated. It's just made to look like it. Bummer!
Step 8: Wash the steering wheel off with Dawn to get the rest of the rubber cement/glue off.
Step 9: Cut out the new leather by using the old leather as a template. (MAKE SURE YOU INCLUDE THE FLAP THAT CONNECTS THE LEATHER PIECES TO EACH OTHER OR IT WILL BE MESSED UP AND YOU WONT BE ABLE TO CONNECT THEM) I do not have any pictures of this step because it is hard enough to try to hold down the leather to get an even cut. Also, another person to help hold the leather down while you cut or vice/versa is very much recommended.
Step 10: Wrap the steering wheel in the new leather! WOOHOO!
I recommend using the baseball pattern stitching, as that is the style used from the factory. This is why the two needles are needed. It isn't a very complicated pattern, as it is only one thread overlapping the other when they constantly switch sides. I do not have the steering wheel complete as of right now because I was doing multiple things yesterday and I am as well today. I re-wrapped a 350Z shift **** in the same leather and I also made a shift boot with the same leather. 5 square feet can get you pretty far, and I have 10 square feet in the picture of the leather. Lol. I did do a test spot on the steering wheel just to show as an example right now, and I will upload the picture of the steering wheel completed when I am able to get around to finishing it later today.


 04-20-2013, 01:58 PM
#7
Yeah. I had saw that and I was just wanting a steering wheel thats not tore up. And for the price of wheelskins I could wrap 2 steering wheels. That, and I've never had a good steering wheel, so I though that would be nice. Haha. I know it's not for everyone, but I was doing it anyways, so i figured might as well for the other select few that wanted to go through it.
Posted from Maxima.org App for Android
Posted from Maxima.org App for Android


 04-20-2013, 05:44 PM
#12
Yeah, I admit a steering wheen cover is easier, but actual wrapped steering wheel is a lot nicer. I'm wrapping it right now. I will probably post the picture of the complete wrapped steering wheel late tonight or tomorrow. Im having to hand stitch it all.
Posted from Maxima.org App for Android
Posted from Maxima.org App for Android
04-20-2013, 05:58 PM
#13
i've done that before, but over top of the original steering wheel cover. def worth it for the satisfaction of saying you did it yourself. i'm doing a q45 i think soon or a wheelskins.
04-20-2013, 07:31 PM
#14
An update of how it's going. About 1/4 of the way through. Looking like it's taking about 2 hours per quarter, so I will be going late into the night. I think it's looking pretty good so far, though.
 04-21-2013, 05:59 AM
#15
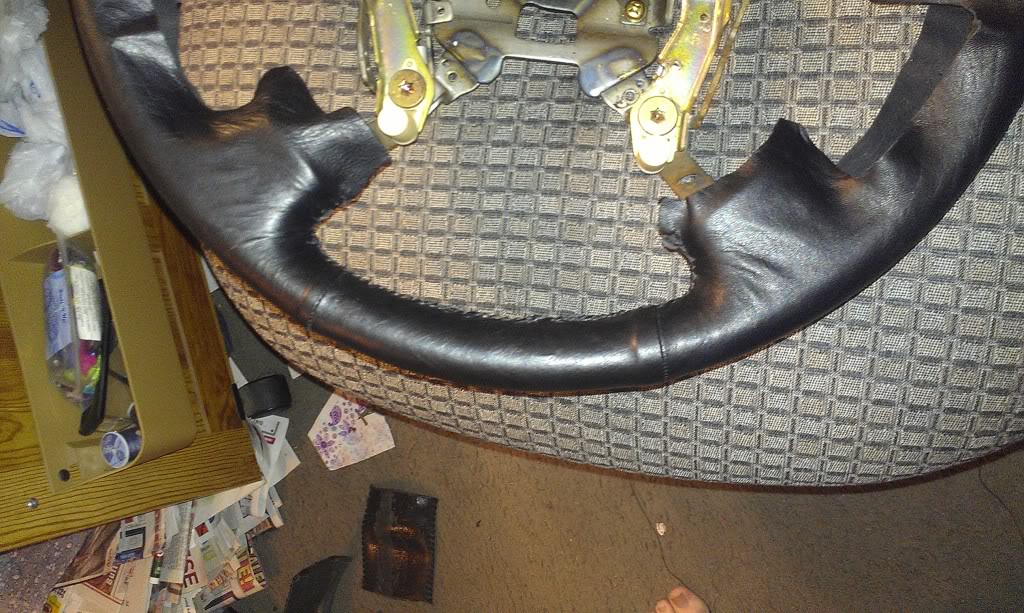
Well, I had to stay up all night working on it to finish it, but it's done! I finally finished at 6 a.m. central time. It has it's flaws, but it's to be expected as this was my first time sewing anything. Second if you include the shift boot I did right before it. But I think it looks nice, and I'm very pleased with the outcome compared to the steering wheel cover I had and especially compared to the tore up leather. It is definitely a tedious job, and now I fully understand why it costs so much to get it professionally re-wrapped. Well worth the work though.
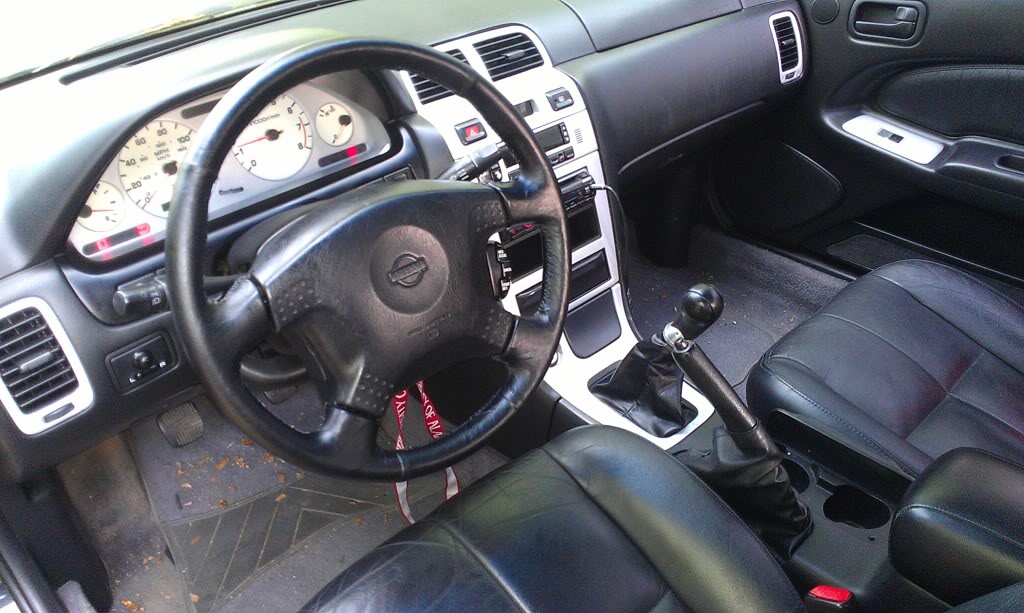
I finally finished at 6 a.m. central time. It has it's flaws, but it's to be expected as this was my first time sewing anything. Second if you include the shift boot I did right before it. But I think it looks nice, and I'm very pleased with the outcome compared to the steering wheel cover I had and especially compared to the tore up leather. It is definitely a tedious job, and now I fully understand why it costs so much to get it professionally re-wrapped. Well worth the work though.

 04-21-2013, 08:22 AM
#23
Originally Posted by JSutter
You've got quite a bit of patience! That original wheel is the worst I have seen. I can't wait to see the finished product.
Posted from Maxima.org App for Android
 04-21-2013, 08:44 AM
#26
Originally Posted by alexdoug05@aol.com
Looks Great .Why didn't you put some wood trim in there?
Still looks kicking though.
Still looks kicking though.
Posted from Maxima.org App for Android
04-21-2013, 08:46 AM
#27
agreed, the stock one's use a very thick leather with a protective uv layer on top of the leather. i'm sure it'll last, just how long i'm not sure.
04-21-2013, 08:50 AM
#28
Originally Posted by Trini Boom
That's very impressive and must applaud you. I am just thinking isn't that material thinner? It looks like the sun will take a beating on that much quicker..
Posted from Maxima.org App for Android
04-21-2013, 04:23 PM
#29
 Looks like a pro job!
04-21-2013, 11:45 PM
Looks like a pro job!
04-21-2013, 11:45 PM
#30
Originally Posted by JSutter
Quote:
Originally Posted by Aflion
Yeah. I've always been really laid back and patient. And I've already posted the finished wheel. Lol.
Posted from Maxima.org App for Android
WOW, not sure how I missed that. Looks like a pro job!
Originally Posted by Aflion
Yeah. I've always been really laid back and patient. And I've already posted the finished wheel. Lol.
Posted from Maxima.org App for Android
WOW, not sure how I missed that. Looks like a pro job!
Posted from Maxima.org App for Android


 04-22-2013, 12:39 PM
#36
Thanks for all the complements you guys. Go for it if you want to. It's definitely worth the trouble. And pmohr is right. Has to be security bit. What I got was called a tamper proof bit. I'll edit the write up. Thanks for telling me. Lol.
Posted from Maxima.org App for Android
Posted from Maxima.org App for Android
Last edited by Aflion; 04-22-2013 at 12:43 PM.
04-22-2013, 01:14 PM
#38
Originally Posted by BlackThornDemon
Quick Tip:
Use some hot water and a cloth to soften up the leather. Makes it easier to avoid (or get out) wrinkles.
Use some hot water and a cloth to soften up the leather. Makes it easier to avoid (or get out) wrinkles.
Posted from Maxima.org App for Android
04-22-2013, 07:36 PM
#39
Newbie - Just Registered

Join Date: Nov 2012
Location: Teaneck, NJ
Posts: 6
oh man. gotta love this. this is gonna solve my problem with the steering wheel problem and the e-brake cover. kudos to this forum, kudos to the internet. and best of all, kudos to the more creative people to share ideas

 04-22-2013, 08:07 PM
#40
oh man. gotta love this. this is gonna solve my problem with the steering wheel problem and the e-brake cover. kudos to this forum, kudos to the internet. and best of all, kudos to the more creative people to share ideas
Attachment 3960
Attachment 3961
Attachment 3962
Attachment 3960
Attachment 3961
Attachment 3962
Good luck if you're going to try it. And remember, eBay is your best friend.