
Timing Cover Removal Tip


Junior Member
Joined: Sep 2014
Posts: 73
What I did was after removing the upper oil pan I reinstalled the cross member to support the engine and then take off the timing cover motor mount and start taking off the timing cover, gears, rear timing cover etc. Should be able to reinstall the cross member in just a few minutes.
 . Thanks for the inputs metalgod3082 and CS_AR.

Hey guys, very informative thread.. I would like to add a few points if that's ok.
I wish i would've taken vids/pics when I did mine, but I wasn't able to. I removed/installed the timing cover on my 4th Gen with the engine in the car WITHOUT removing the upper oil pan. Took a lot of patience,finesse, and another set of helping hands. First, I used a little super glue to put new half moon gasket on the bottom of the cover & made sure it cured. Next I installed the cover, tilting it(bottom in first), then slowly & carefully bringing it on the dowels(this is when helping hands come in handy), started a few bolts, and basically "walked" the cover on.
I wish i would've taken vids/pics when I did mine, but I wasn't able to. I removed/installed the timing cover on my 4th Gen with the engine in the car WITHOUT removing the upper oil pan. Took a lot of patience,finesse, and another set of helping hands. First, I used a little super glue to put new half moon gasket on the bottom of the cover & made sure it cured. Next I installed the cover, tilting it(bottom in first), then slowly & carefully bringing it on the dowels(this is when helping hands come in handy), started a few bolts, and basically "walked" the cover on.

Thread Starter
Senior Member
Joined: Jan 2011
Posts: 3,037
From: Central AR
Hey guys, very informative thread.. I would like to add a few points if that's ok.
I wish i would've taken vids/pics when I did mine, but I wasn't able to. I removed/installed the timing cover on my 4th Gen with the engine in the car WITHOUT removing the upper oil pan. Took a lot of patience,finesse, and another set of helping hands. First, I used a little super glue to put new half moon gasket on the bottom of the cover & made sure it cured. Next I installed the cover, tilting it(bottom in first), then slowly & carefully bringing it on the dowels(this is when helping hands come in handy), started a few bolts, and basically "walked" the cover on.
I wish i would've taken vids/pics when I did mine, but I wasn't able to. I removed/installed the timing cover on my 4th Gen with the engine in the car WITHOUT removing the upper oil pan. Took a lot of patience,finesse, and another set of helping hands. First, I used a little super glue to put new half moon gasket on the bottom of the cover & made sure it cured. Next I installed the cover, tilting it(bottom in first), then slowly & carefully bringing it on the dowels(this is when helping hands come in handy), started a few bolts, and basically "walked" the cover on.
Thanks for the tip.
Sent from my Z998 using Maxima
Last edited by CS_AR; Dec 10, 2014 at 04:37 PM.
Thread Starter
Senior Member
Joined: Jan 2011
Posts: 3,037
From: Central AR
Nope. Just carefully moved it out of the way. Some plugs were disconnected since I had removed rails for refurbishing injectors at the same time.
Sent from my Z998 using Maxima
Sent from my Z998 using Maxima
Last edited by CS_AR; Dec 18, 2014 at 11:38 AM.
Junior Member
Joined: Sep 2014
Posts: 73
Good news! I finally removed the rear TC. Man it was awful not having any power/air tools. Anyways, I ran into some problems that I like to share with others.
First, you will need to remove the alternator since the two bolts holding it in place goes through the TCs. The bottom bolt goes through both the TCs and the top bolt goes through the Rear TC. The FSM didn't mention that.
Second, the PS pump mounts on the rear TC as well, so that has to be removed. The tension bracket is bolted on to the rear TC.
Third, pay attention to the sizes of the 25 bolts that holds the rear TC in place. There are 17 short bolts and 8 long bolts. The length differences are small, so if you're not paying attention you'll miss it.
This is my problem, I wasn't paying attention and now I don't know where the longer bolts go. I can't find any mention of size it in the FSM and the online parts listing diagram doesn't show any details.
Here's a picture of what I'm referring to.

and here's the rear TC diagram:

I know bolt #14 is the shorter bolt, because I forgot to take that one out, after I noticed the difference.
Does anyone know any about this?
First, you will need to remove the alternator since the two bolts holding it in place goes through the TCs. The bottom bolt goes through both the TCs and the top bolt goes through the Rear TC. The FSM didn't mention that.
Second, the PS pump mounts on the rear TC as well, so that has to be removed. The tension bracket is bolted on to the rear TC.
Third, pay attention to the sizes of the 25 bolts that holds the rear TC in place. There are 17 short bolts and 8 long bolts. The length differences are small, so if you're not paying attention you'll miss it.
This is my problem, I wasn't paying attention and now I don't know where the longer bolts go. I can't find any mention of size it in the FSM and the online parts listing diagram doesn't show any details.
Here's a picture of what I'm referring to.
and here's the rear TC diagram:
I know bolt #14 is the shorter bolt, because I forgot to take that one out, after I noticed the difference.
Does anyone know any about this?
Last edited by MaxiNoob98; Dec 20, 2014 at 12:05 PM.
Thread Starter
Senior Member
Joined: Jan 2011
Posts: 3,037
From: Central AR
I haven't found the differences noted other than I see some different looking bolts on diagrams from the FSM.
When I've faced this situation in the past, I would take an ice pick looking punch tool or a long nail and probe in the holes to find the 8 longs or look at the back cover to see if there are some openings that have a deeper space. Along this line, I make a "dry run" to install a cover without RTV just to get the swing of cover positioning alignment before I make a "final wet run" with RTV. I use Permatex Ultra Grey RTV.
When I've faced this situation in the past, I would take an ice pick looking punch tool or a long nail and probe in the holes to find the 8 longs or look at the back cover to see if there are some openings that have a deeper space. Along this line, I make a "dry run" to install a cover without RTV just to get the swing of cover positioning alignment before I make a "final wet run" with RTV. I use Permatex Ultra Grey RTV.
Junior Member
Joined: Sep 2014
Posts: 73
Hey CS_AR,
I just want to double check and get a second opinion about this. So the new o-ring that I order came in and its completely different. I just don't what to find out later that I got the wrong parts.
Here is a picture.

It seems to find better than the old one and it protrudes out a little bit too, so I'm guessing this is a better design? When you did yours, did you get the round o-rings or the same square type o-rings?
New:

Old:

I just want to double check and get a second opinion about this. So the new o-ring that I order came in and its completely different. I just don't what to find out later that I got the wrong parts.
Here is a picture.
It seems to find better than the old one and it protrudes out a little bit too, so I'm guessing this is a better design? When you did yours, did you get the round o-rings or the same square type o-rings?
New:
Old:
Thread Starter
Senior Member
Joined: Jan 2011
Posts: 3,037
From: Central AR
You've gone in deeper than I went with the rear TC o-rings. Fortunately I didn't have a leaking TC o-ring so I just re-torqued the cover bolts and hoped for the best. So far so good.
For the Upper Oil Pan (UOP) o-ring it was a rounded o-ring like the one in the picture above. I used a small amount of grease to hold/stick the o-ring in position while I installed the UOP.
Are you replacing the rear half moon also?
For the Upper Oil Pan (UOP) o-ring it was a rounded o-ring like the one in the picture above. I used a small amount of grease to hold/stick the o-ring in position while I installed the UOP.
Are you replacing the rear half moon also?
Junior Member
Joined: Sep 2014
Posts: 73
You've gone in deeper than I went with the rear TC o-rings. Fortunately I didn't have a leaking TC o-ring so I just re-torqued the cover bolts and hoped for the best. So far so good.
For the Upper Oil Pan (UOP) o-ring it was a rounded o-ring like the one in the picture above. I used a small amount of grease to hold/stick the o-ring in position while I installed the UOP.
Are you replacing the rear half moon also?
For the Upper Oil Pan (UOP) o-ring it was a rounded o-ring like the one in the picture above. I used a small amount of grease to hold/stick the o-ring in position while I installed the UOP.
Are you replacing the rear half moon also?
I'm also changing out both the half moon too. They seems to be brittle to me. Not as flexible as the Fel-Pro ones that I got from Amazon.
I wanted to ask you, how did you get your engine so shining? Did you wire brush the whole thing? The best I can get was a dull aluminum shine.
Thread Starter
Senior Member
Joined: Jan 2011
Posts: 3,037
From: Central AR
For the oil pan and timing covers, I would start with a metal pot scrubber like the kind you get at a grocery store and cleaned up everything with real carb cleaner (the kind you buy by the gallon from a parts store).
I picked up some big aluminium foil pans at Wal*Mart like people use for making a big pan of Ziti or to cook a turkey as a way to partially dip the part while scrubbing it with carb cleaner and the pot scrubber.
Once I got the parts clean, I used a Green Scotch Bright scrubbing/sanding pad to start breaking down and polishing the finish.
After the Scotch Bright Finish, I used different roughness level steel wool from 00 to 0000 to polish the finish with some wet sanding as I needed it.
At different points I used jewelers polishing brushes on a Dremel tool like the ones in the picture in small areas.
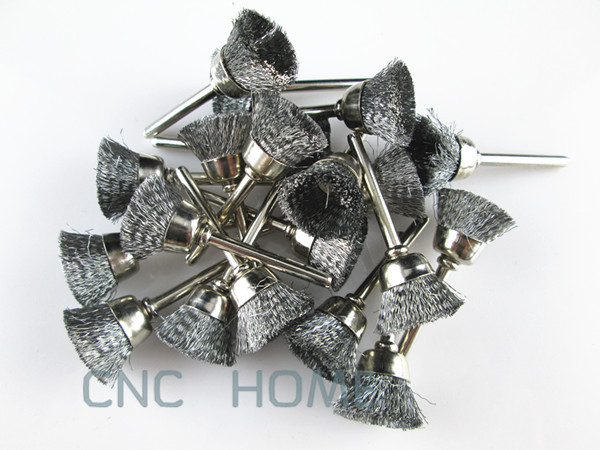
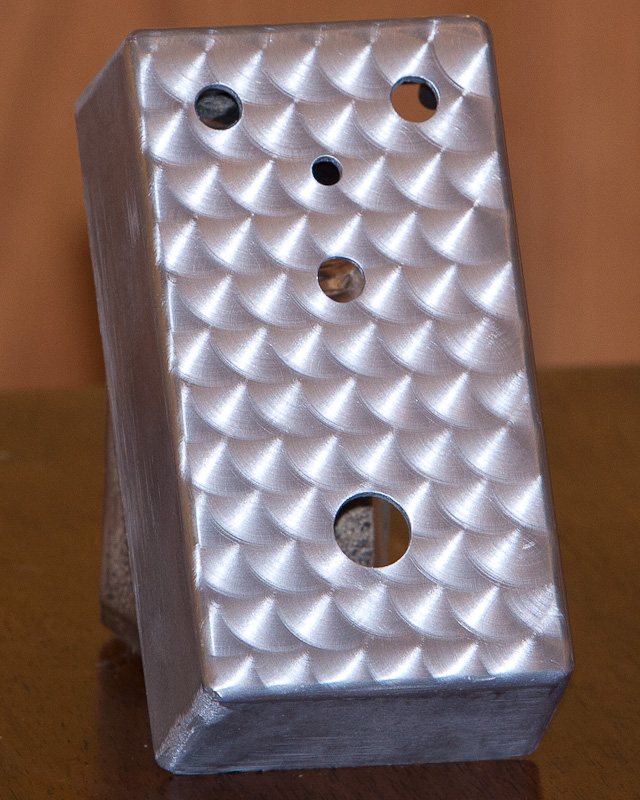
If you want to go all the way you can use the jewelers brushes to put an engine turn finish on the front valve cover.
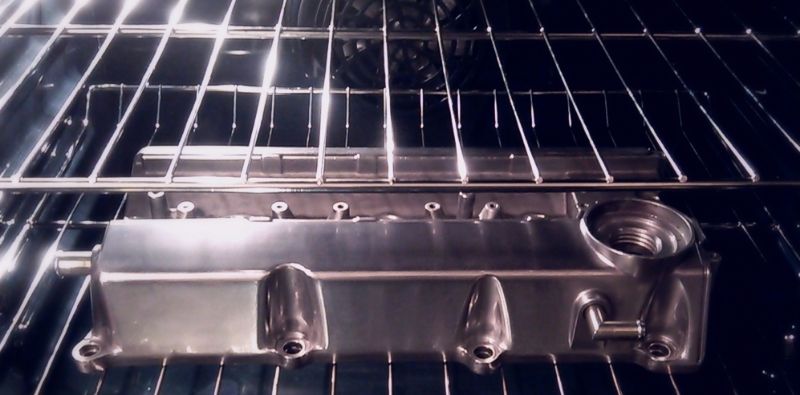
After I got the VC all buffed up with 0000 steel wool, then I sprayed it with Armour All Wheel Protectant (because it doesn't yellow and it can handle the heat from disc brakes) and baked it for an hour at 200 to let it cure before installing it.
When I need to give it a touch up cleaning, I use Cape Cod Polishing Cloths from WalMart about once a year.

I picked up some big aluminium foil pans at Wal*Mart like people use for making a big pan of Ziti or to cook a turkey as a way to partially dip the part while scrubbing it with carb cleaner and the pot scrubber.
Once I got the parts clean, I used a Green Scotch Bright scrubbing/sanding pad to start breaking down and polishing the finish.
After the Scotch Bright Finish, I used different roughness level steel wool from 00 to 0000 to polish the finish with some wet sanding as I needed it.
At different points I used jewelers polishing brushes on a Dremel tool like the ones in the picture in small areas.
If you want to go all the way you can use the jewelers brushes to put an engine turn finish on the front valve cover.
After I got the VC all buffed up with 0000 steel wool, then I sprayed it with Armour All Wheel Protectant (because it doesn't yellow and it can handle the heat from disc brakes) and baked it for an hour at 200 to let it cure before installing it.
When I need to give it a touch up cleaning, I use Cape Cod Polishing Cloths from WalMart about once a year.
Last edited by CS_AR; Dec 21, 2014 at 01:07 PM.


Damn it, dude! You're like the french chef of engine cleaning and maintenance.
"On the next episode of CS_ARs clean kitchen garage, making your VQ spotless to give it that mmm, good, wholesome feeling of home "
"
"On the next episode of CS_ARs clean kitchen garage, making your VQ spotless to give it that mmm, good, wholesome feeling of home
"


Member
Joined: Jan 2015
Posts: 167
From: Virginia
I meant for the front of the engine...I know the half moon is the more common leak in the rear especially compared to the rear main seal. But in the front...is the half moon there also more common than the front timing cover O rings / front main seal? Thanks

Thread
Thread Starter
Forum
Replies
Last Post
raffivegas
6th Generation Classifieds (2004-2008)
0
Aug 23, 2015 09:54 PM
MaximaDrvr
7th Generation Maxima (2009-2015)
16
Aug 19, 2015 08:20 PM