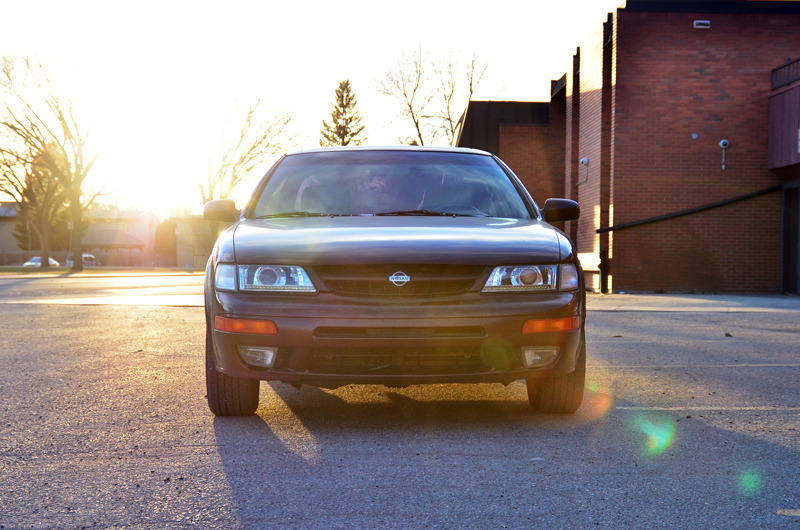
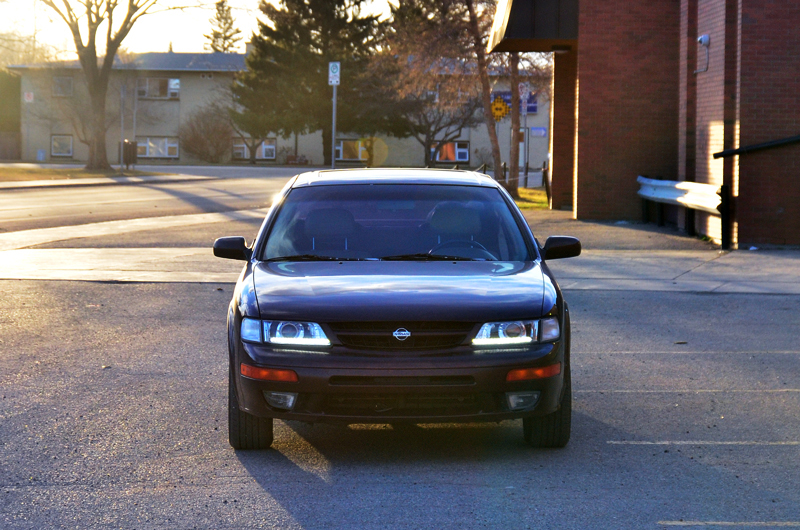
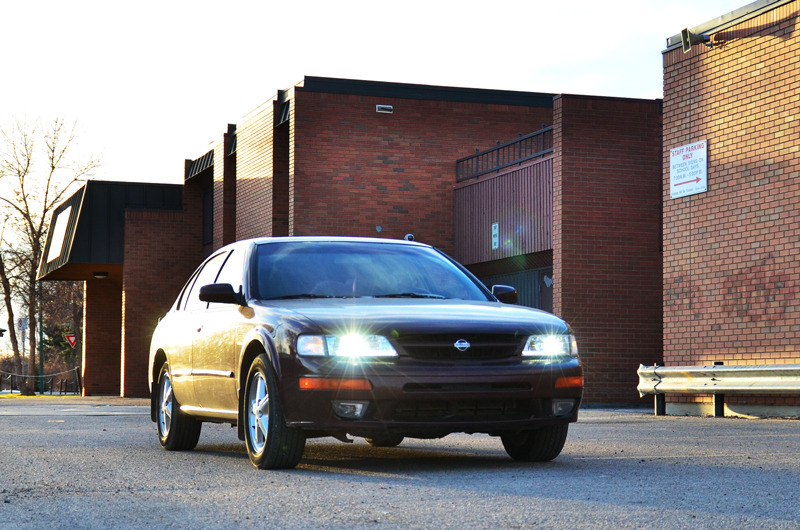
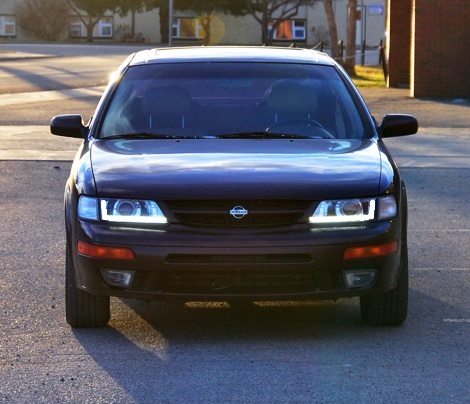
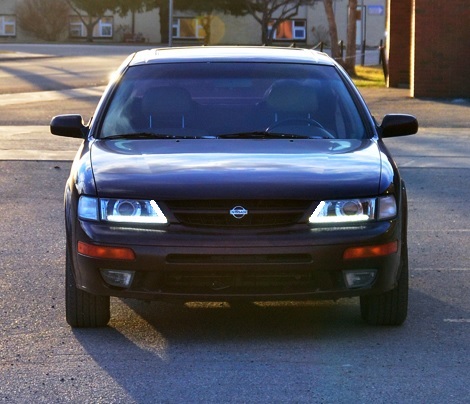
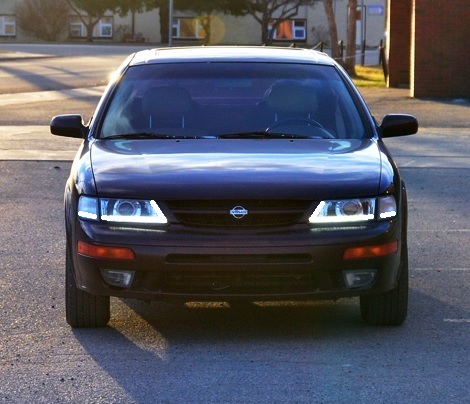
Retrofitted G37 sedan projectors + Custom DRL
#1
Retrofitted G37 sedan projectors + Custom DRL
Hi folks, just thought I'd share my retrofit project on my 99 Maxima.
Components:
- Used Depo headlights.
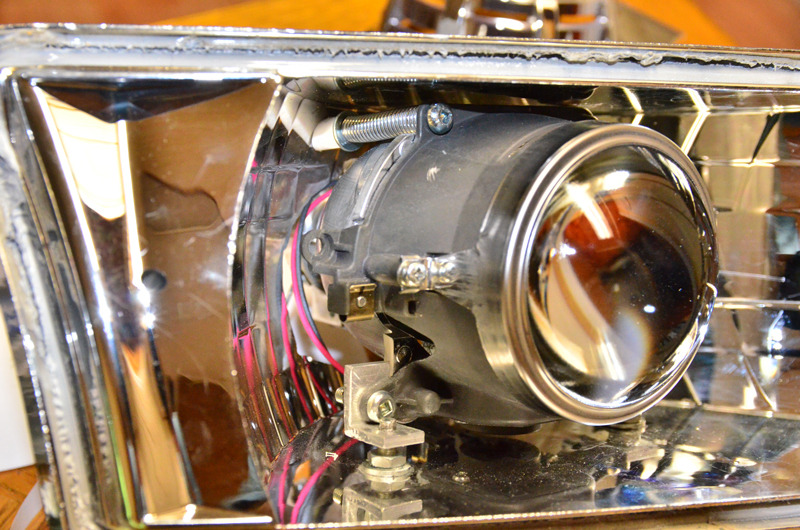
- G37 sedan projector.
- '13 Cadillac SRX semi-clear lens.
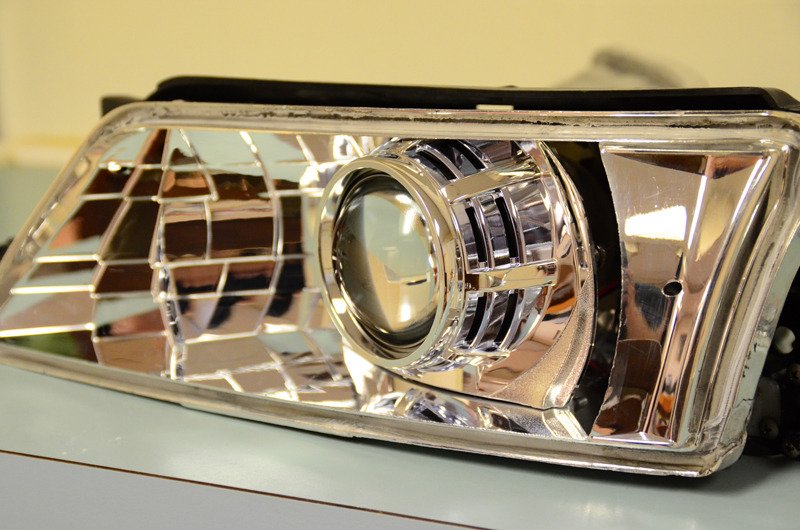
- OEM G37 shrouds.
- Denso Slim ballasts.
- Osram CBI 66240 bulbs.
- Nichia Superflux white LEDs.
- exLEDs reflectors for superflux LEDs.
- Custom wiring harness + DRL & headlight controller.
Mounted using the JNC method, giving minor rotation and height adjustment on top of the factory reflector adjusters (vert + horiz).
For more info about the JNC mounting method: http://www.hidplanet.com/forums/show...model-pictures
OEM G37 sedan shrouds fitted.
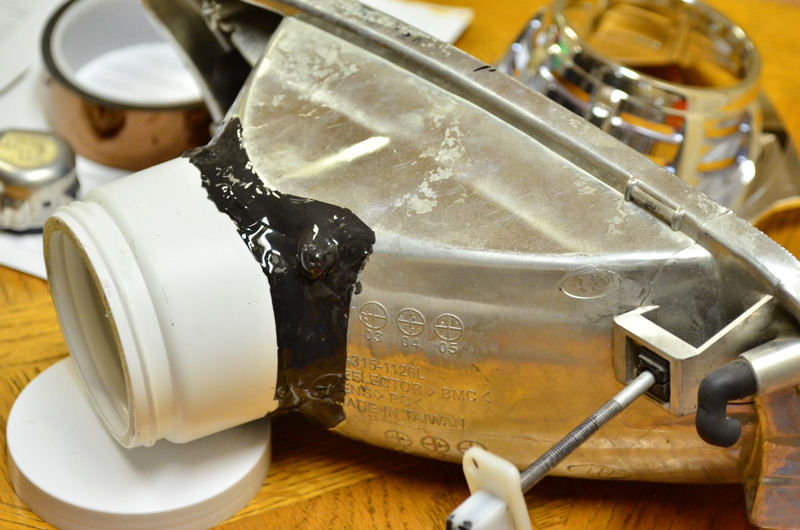
After cutting the container, I used lots of JB weld to secure it into place.
Not shown, but there is also a bunch of epoxy around the inside for added strength. For that I used a self-mixing syringe type clear epoxy.
Here it is, fitment with the reflector mounted into the housing.
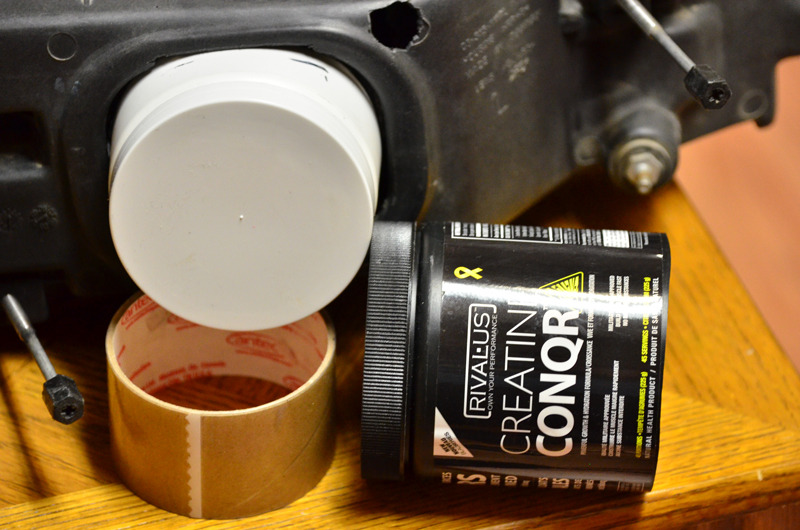
The empty containers were from workout supplements; different colours, but both were identical in size.
I used a sheet of balsa wood for the base, with some chrome vinyl for the front edge which will be visible.
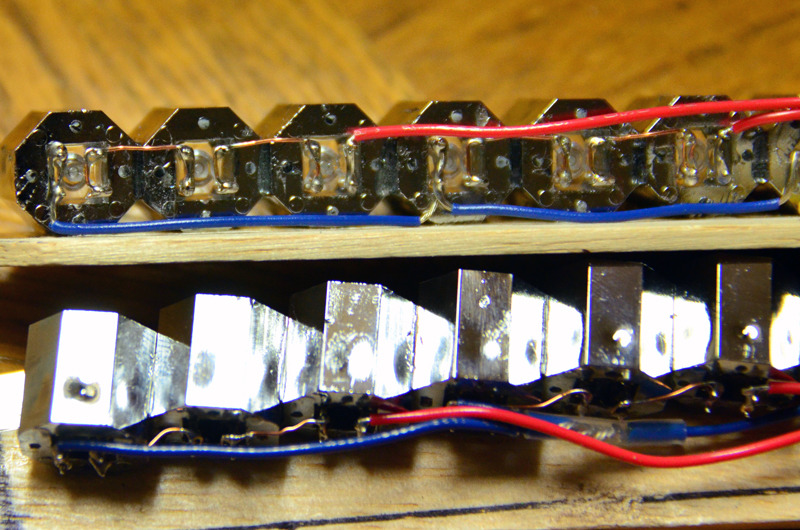
The LED were secured into the reflectors with epoxy; the reflectors secured to the base & one-another with clear epoxy.
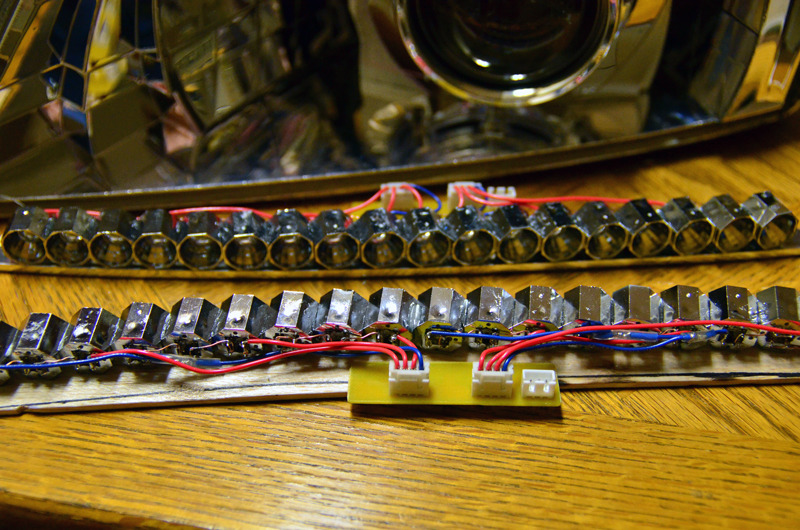
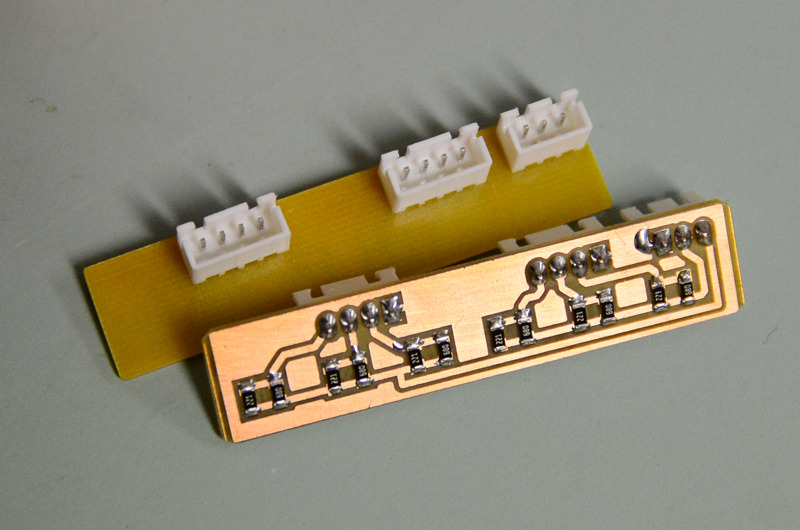
Home-made resistor array, clear-coated after everything was soldered to prevent the copper from oxidizing.
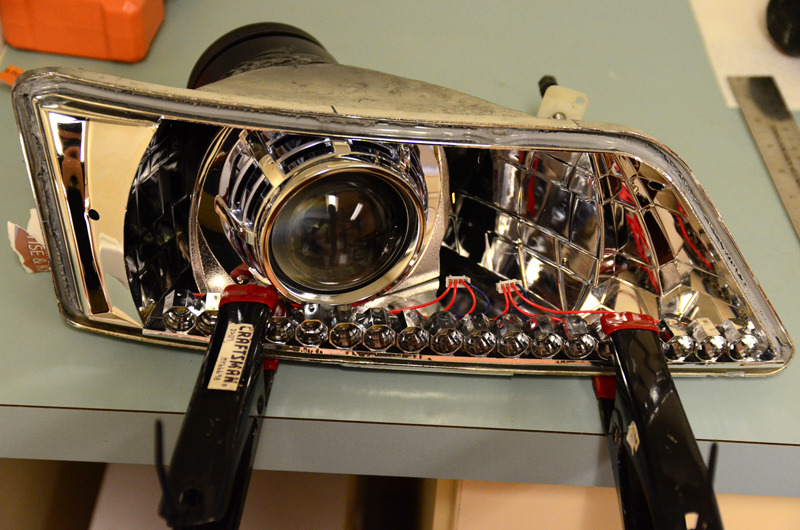
Epoxy'd the DRL base into place.
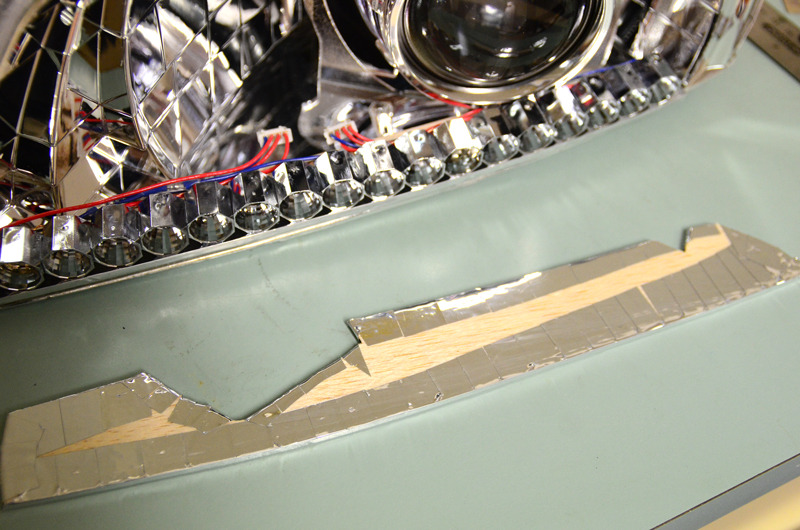
Cutout the top cover, also made from a sheet of balsa wood. Showing the bottom view where the chrome vinyl wraps around.
Prior to mounting, I spread epoxy all over to prevent the edges of the vinyl from lifting.
Epoxy'd the top cover. The reason I used chrome vinyl is so that the DRL assembly flows well with the rest of the headlight.
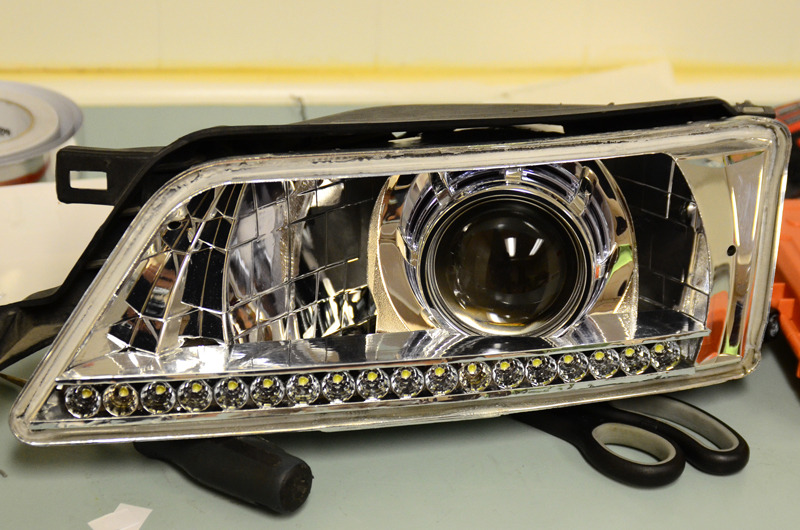
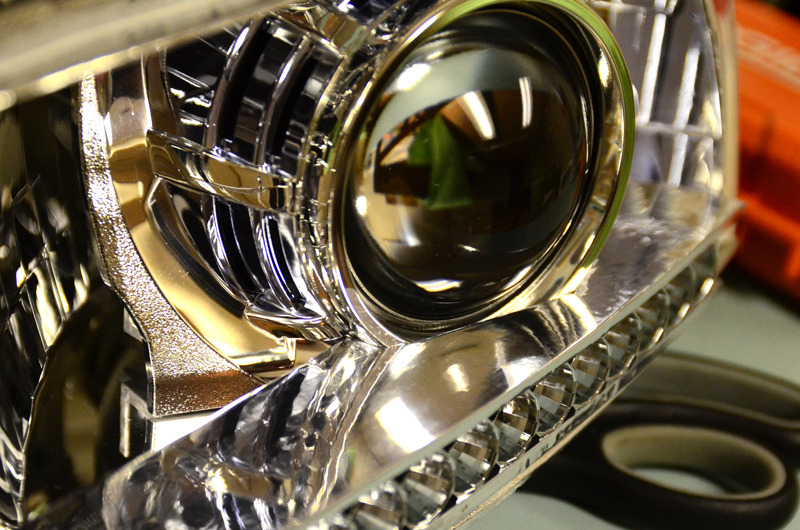
Close up of fitment.
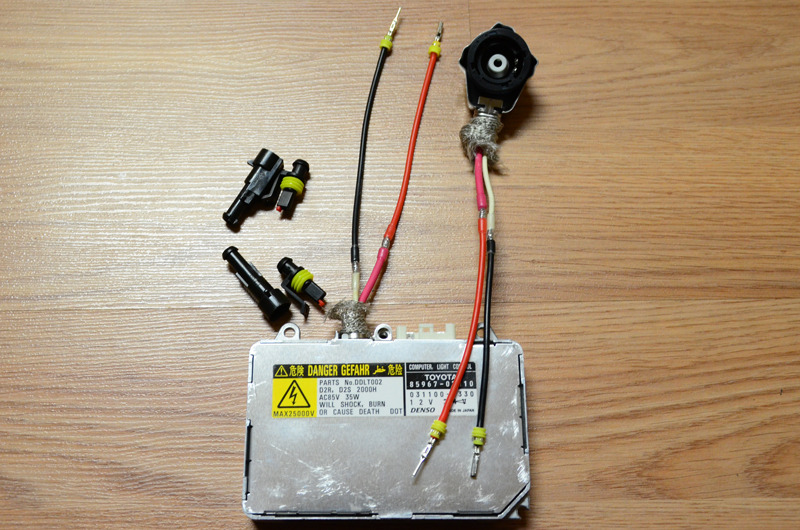
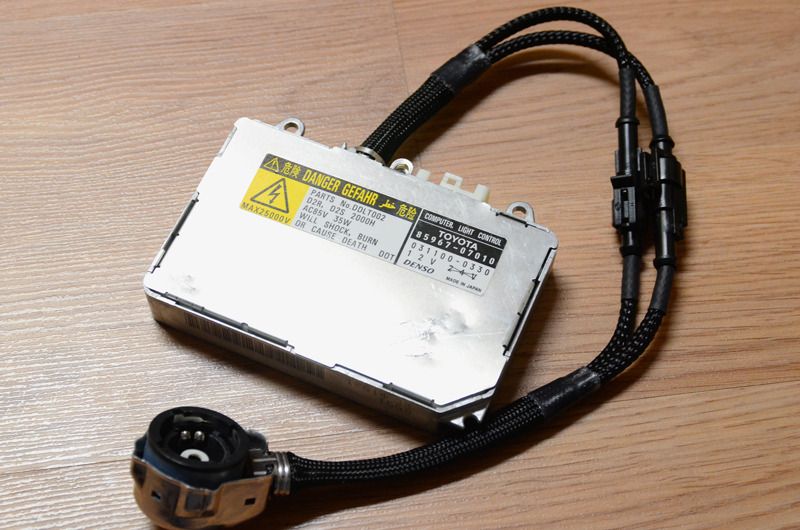
The Denso slims had the short cords, this would be problematic for most retrofits...
I extended the wires while making the ballasts D2S/AMP hybrid. This will make headlight removal easier as well.
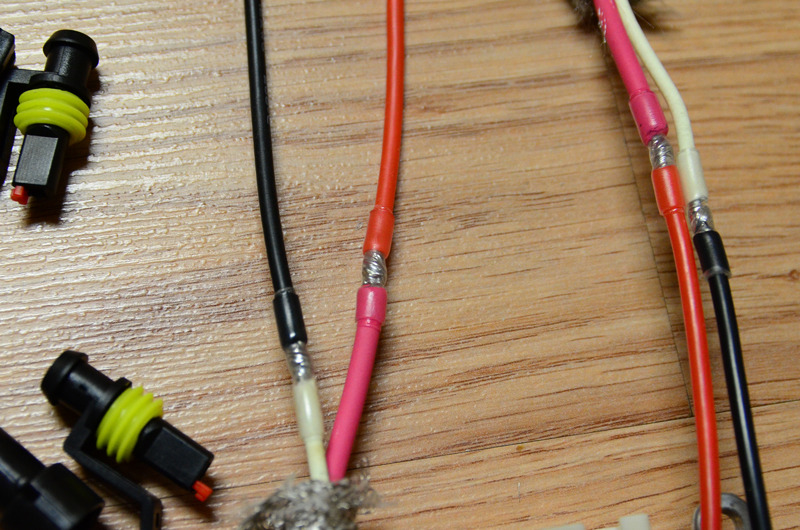
Soldered + adhesive lined shrink tubing. Notice how the solder joints offset one-another, good practice in case the joint or insulation fails (which it shouldn't, lol).
Components:
- Used Depo headlights.
- G37 sedan projector.
- '13 Cadillac SRX semi-clear lens.
- OEM G37 shrouds.
- Denso Slim ballasts.
- Osram CBI 66240 bulbs.
- Nichia Superflux white LEDs.
- exLEDs reflectors for superflux LEDs.
- Custom wiring harness + DRL & headlight controller.
Mounted using the JNC method, giving minor rotation and height adjustment on top of the factory reflector adjusters (vert + horiz).
For more info about the JNC mounting method: http://www.hidplanet.com/forums/show...model-pictures

OEM G37 sedan shrouds fitted.

After cutting the container, I used lots of JB weld to secure it into place.
Not shown, but there is also a bunch of epoxy around the inside for added strength. For that I used a self-mixing syringe type clear epoxy.

Here it is, fitment with the reflector mounted into the housing.
The empty containers were from workout supplements; different colours, but both were identical in size.

I used a sheet of balsa wood for the base, with some chrome vinyl for the front edge which will be visible.
The LED were secured into the reflectors with epoxy; the reflectors secured to the base & one-another with clear epoxy.

Home-made resistor array, clear-coated after everything was soldered to prevent the copper from oxidizing.


Epoxy'd the DRL base into place.

Cutout the top cover, also made from a sheet of balsa wood. Showing the bottom view where the chrome vinyl wraps around.
Prior to mounting, I spread epoxy all over to prevent the edges of the vinyl from lifting.

Epoxy'd the top cover. The reason I used chrome vinyl is so that the DRL assembly flows well with the rest of the headlight.

Close up of fitment.

The Denso slims had the short cords, this would be problematic for most retrofits...
I extended the wires while making the ballasts D2S/AMP hybrid. This will make headlight removal easier as well.

Soldered + adhesive lined shrink tubing. Notice how the solder joints offset one-another, good practice in case the joint or insulation fails (which it shouldn't, lol).

Last edited by yellow_cake; 04-13-2015 at 01:22 AM.
#2
Terminals crimped on.
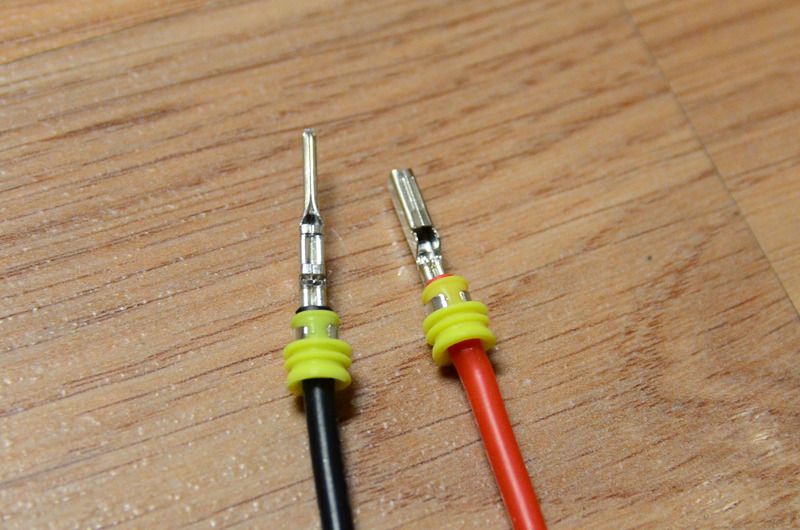
Ooooohhh, aaaahhh... I'll be potting the ballasts as well.
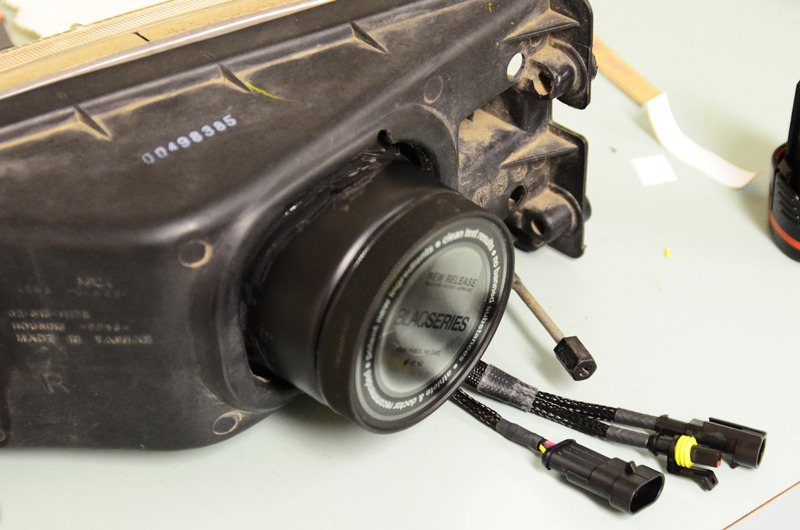
Wires fished out through a rubber grommet.
Here's the wiring setup: The one loom has the DRL + solenoid wires, the other has the ballast cord.
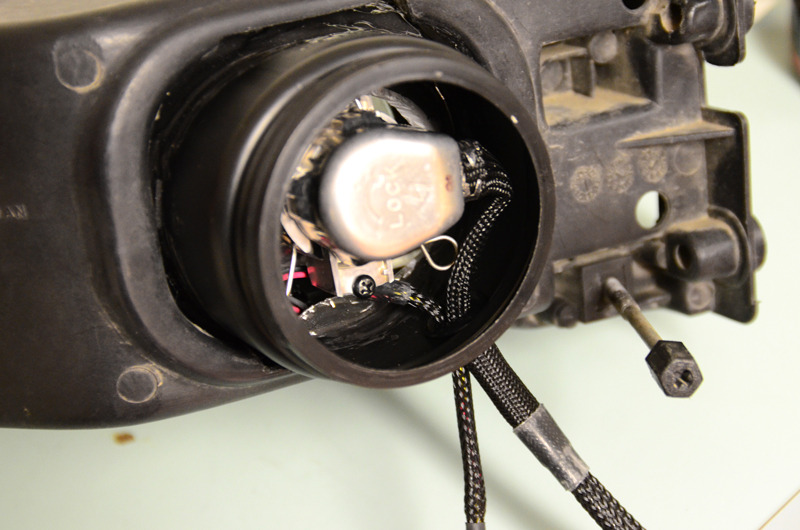
Cap screwed on, sealing the back from dust/water.
The 3-pin connector wires: solenoid positive, ground, and DRL positive.
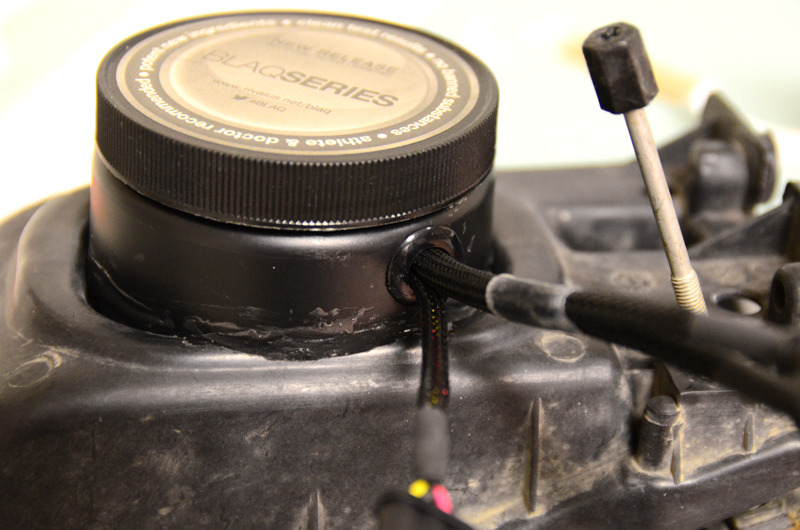
The rubber grommet at the bottom.
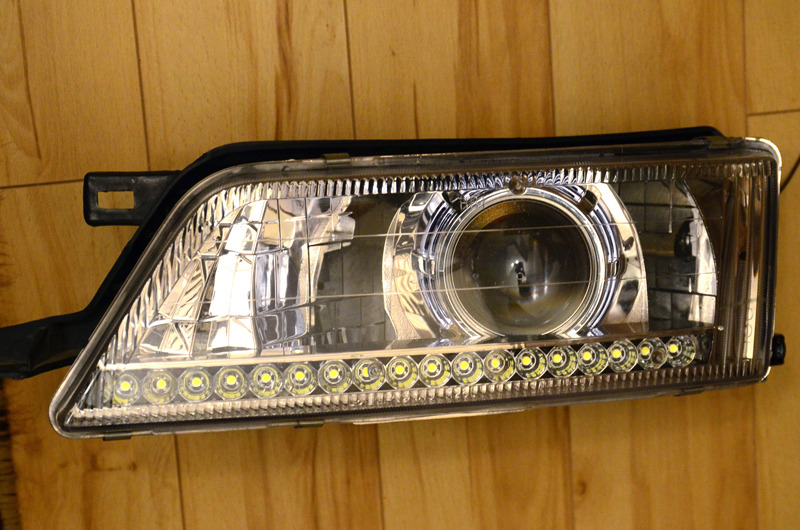
Headlight completed!
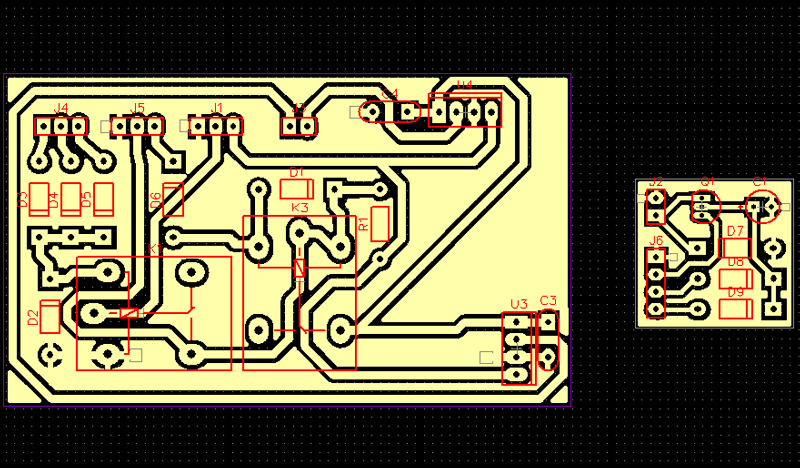
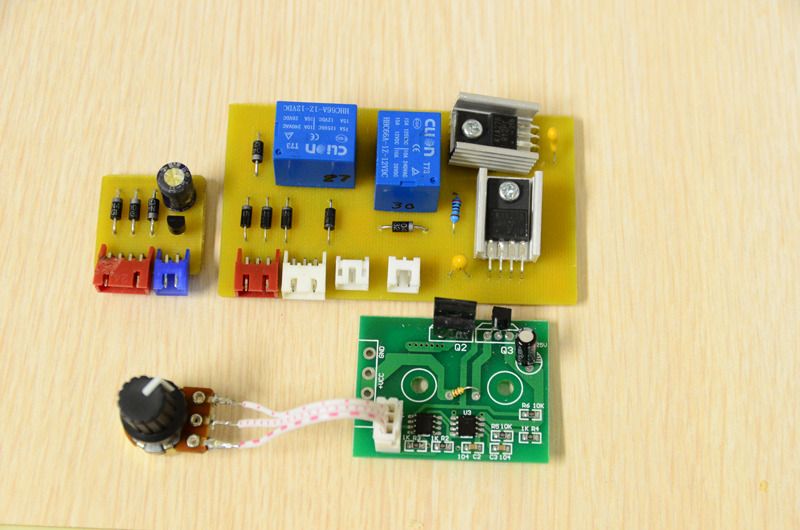
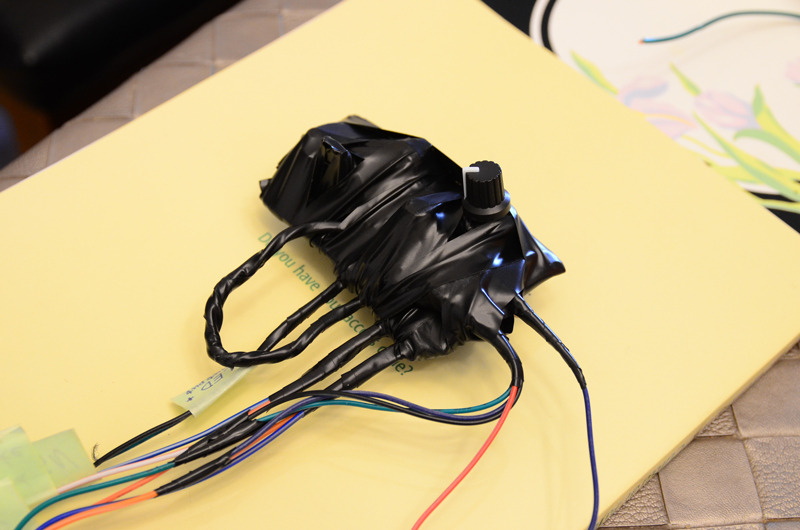
Here's the custom DRL controller + headlight controller.
The DRL controller has a dual brightness mode via an external PWM (ebay). Also, I've made it so engaging the e-brake will disable the DRL, just like the stock DRL. This will give me the ability to pull the handbrake up one click and have the DRLs off if I need to be stealthy, lol.
On the right is the low+high beam controller. basically it's a delay off circuit. Meaning, if the headlights are on and then turn them off, it will take about 2 seconds to shut off... I did this mainly for flashing while the headlights are off. This way it's not flashing the ballasts as they remain on in between flashes.
Ebay PWM at the bottom.
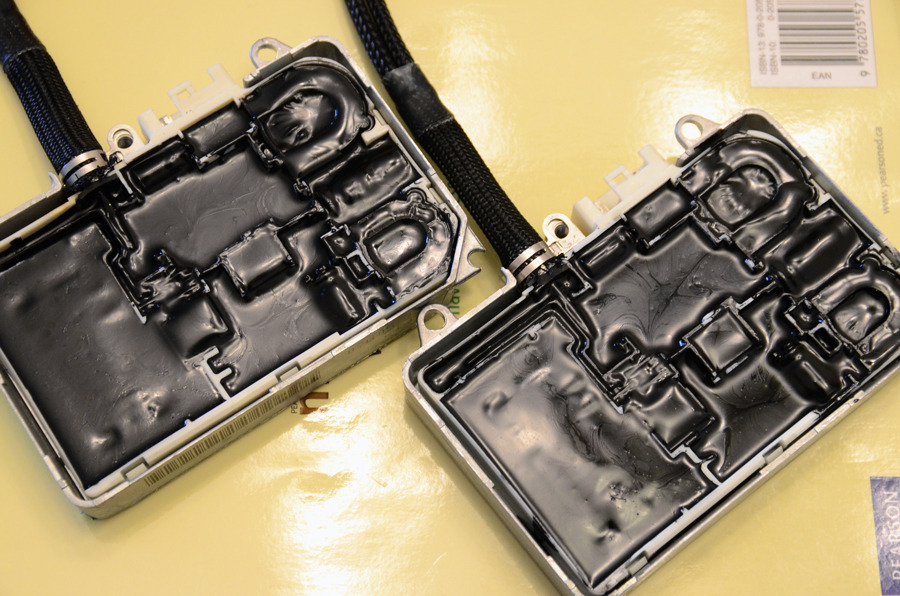
Potted the Denso ballasts.
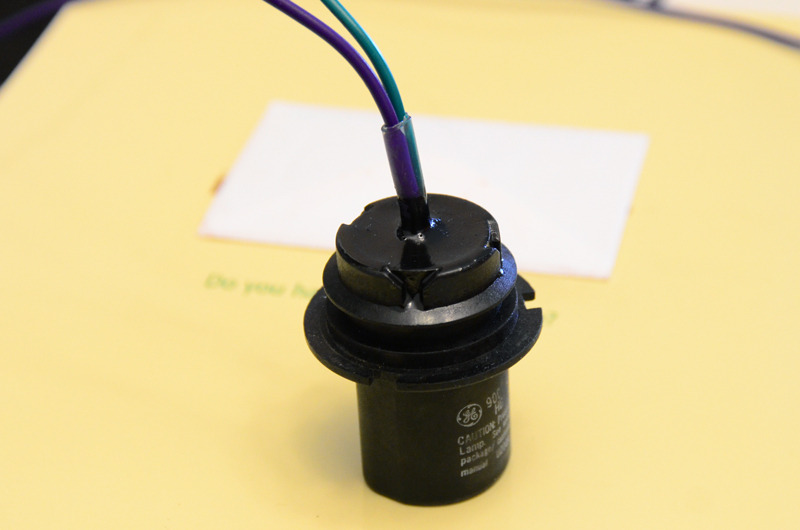
Made a 9004 "connector" out of an old bulb. Removed the bulb and soldered wires onto the pins, then filled it with potting compound.
Eventually I plan on making an Arduino controlled DRL/headlight controller, it will have a fancy aluminum housing... For now, I've got the current setup wrapped in electrical tape... yea, it looks like a grease job, LOL.

Ooooohhh, aaaahhh... I'll be potting the ballasts as well.

Wires fished out through a rubber grommet.
Here's the wiring setup: The one loom has the DRL + solenoid wires, the other has the ballast cord.

Cap screwed on, sealing the back from dust/water.
The 3-pin connector wires: solenoid positive, ground, and DRL positive.

The rubber grommet at the bottom.

Headlight completed!

Here's the custom DRL controller + headlight controller.
The DRL controller has a dual brightness mode via an external PWM (ebay). Also, I've made it so engaging the e-brake will disable the DRL, just like the stock DRL. This will give me the ability to pull the handbrake up one click and have the DRLs off if I need to be stealthy, lol.
On the right is the low+high beam controller. basically it's a delay off circuit. Meaning, if the headlights are on and then turn them off, it will take about 2 seconds to shut off... I did this mainly for flashing while the headlights are off. This way it's not flashing the ballasts as they remain on in between flashes.

Ebay PWM at the bottom.

Potted the Denso ballasts.

Made a 9004 "connector" out of an old bulb. Removed the bulb and soldered wires onto the pins, then filled it with potting compound.

Eventually I plan on making an Arduino controlled DRL/headlight controller, it will have a fancy aluminum housing... For now, I've got the current setup wrapped in electrical tape... yea, it looks like a grease job, LOL.

#8
Thanks for the critique guys. The LEDs are mounted rather permanently using epoxy,so removing them will likely butcher the headlights as well...
Meeting the legalities of a DRL was a challenge. The stock headlight runs the high beam at half power as the DRL. With an HID setup, my other option was to mount external DRL modules or run the HID all the time (not willing to do the latter).
Meeting the legalities of a DRL was a challenge. The stock headlight runs the high beam at half power as the DRL. With an HID setup, my other option was to mount external DRL modules or run the HID all the time (not willing to do the latter).
#12
What are the laws governing DRLs? I know Canadian law requires them, but is there laws governing brightness or location? I thought if I were to go with DRLs, I would use the front lens where the turn signal is. I moved my turn signals to the corner lights, so the middle bumper lights are pretty much for looks only. I can make them light up white or yellow. Or white during the day, then dim amber with parking/headlights. That would be cool
#15
I am planning to convert the cornering lights to DRLs to make them look a bit more "complete."
#18
I know exactly what you mean, I'm working on a little DRL project myself and our headlights don't exactly lend themselves to favorable DRL spots. I think mines are gonna go where the front turn signals are.......I'm gonna use the 10W COB eagle eye LEDs. Those things are stupid bright.....
#19
One of the better retros i have seen in a while. I agree on what was said about the LED strip but definitely play around with them see what you can come up with. You have the skill to make just about anything you want out of them.
#24
Thanks for the input guys, I appreciate it.
I've got lots of lighting mods planned for the car! Hopefully I can get around to them and I'll definitely share once I do.
I've got lots of lighting mods planned for the car! Hopefully I can get around to them and I'll definitely share once I do.
#26
I actually have something like that planned. Just waiting for the parts to arrive before I can get to work on it.
Thread
Thread Starter
Forum
Replies
Last Post
BPuff57
Advanced Suspension, Chassis, and Braking
33
04-16-2020 06:15 AM
trsandrew
7th Generation Maxima (2009-2015)
17
04-08-2016 07:45 PM
trsandrew
Group Deals / Sponsors Forum
2
10-25-2015 03:47 PM


