
MY AE MOD - pictures
 02-07-2006, 04:02 PM
#1
ahhh! cliMAX!

Thread Starter
Join Date: May 2005
Posts: 792
MY AE MOD - pictures
I used this write up:
http://www.cardomain.com/ride/2190617/3
The only things I need to add is
A - temperature - set it to like 225, its more than enough.
I only needed to put it in for 10 min, and they came apart very nicely
MAKE SURE TO PUT IT FACE UP. The write up says face down.. but it become hazy after that...
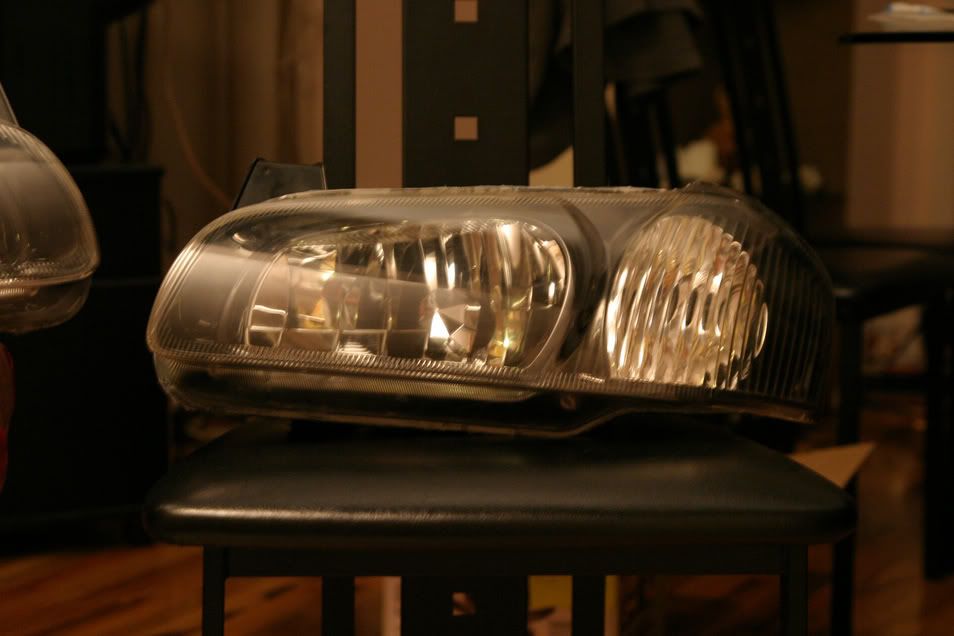
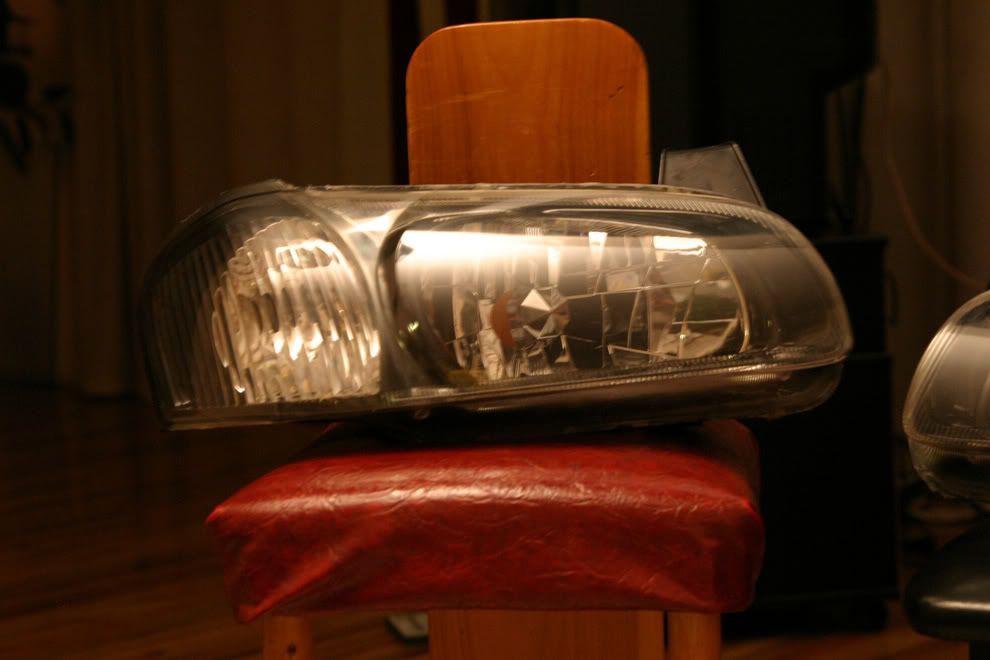
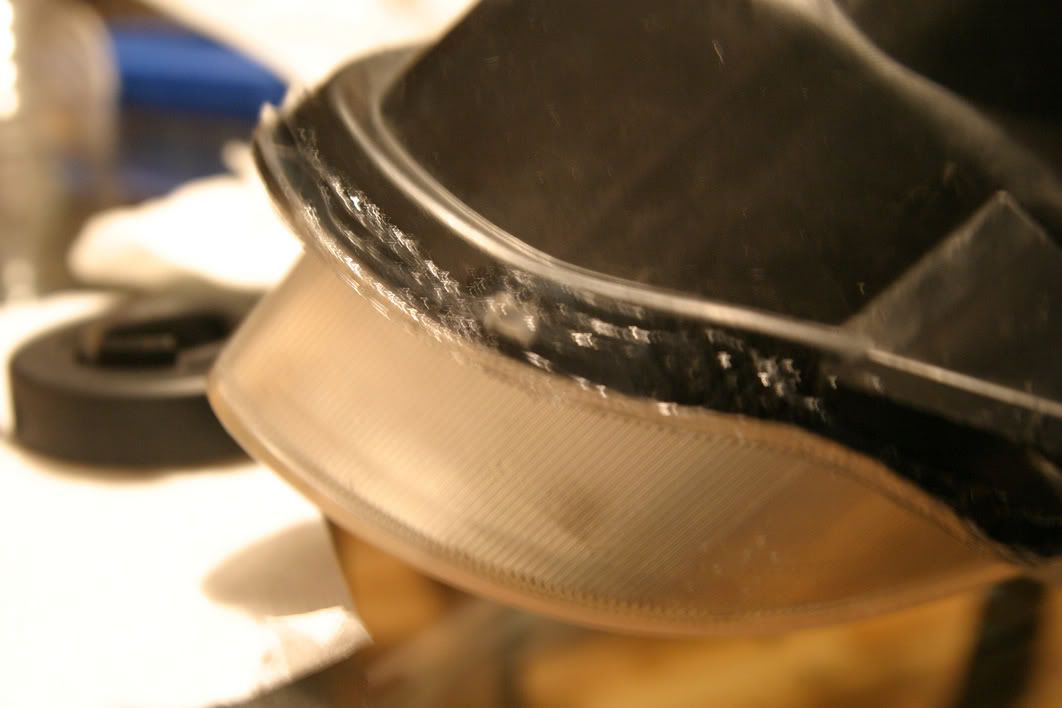
Original Front:

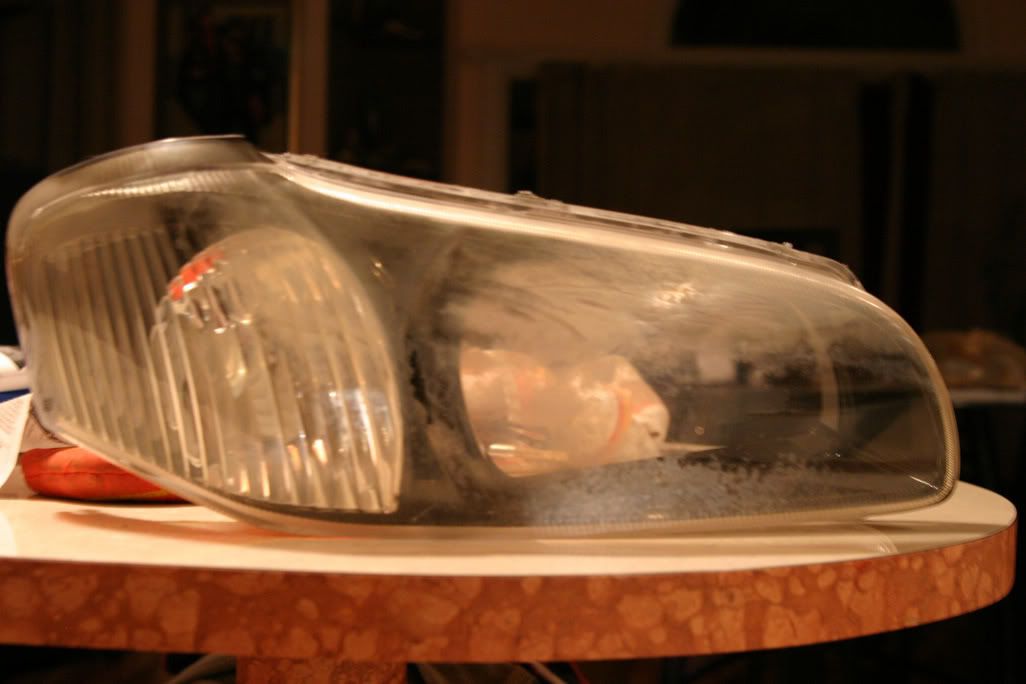
My left headlight was very hazy.. so i did the AE on it first.. because it wouldnt be as bad if the headlight got destroyed.
Originals:

Say goodbye to headlight # 1 [I was very scared doing this lol]

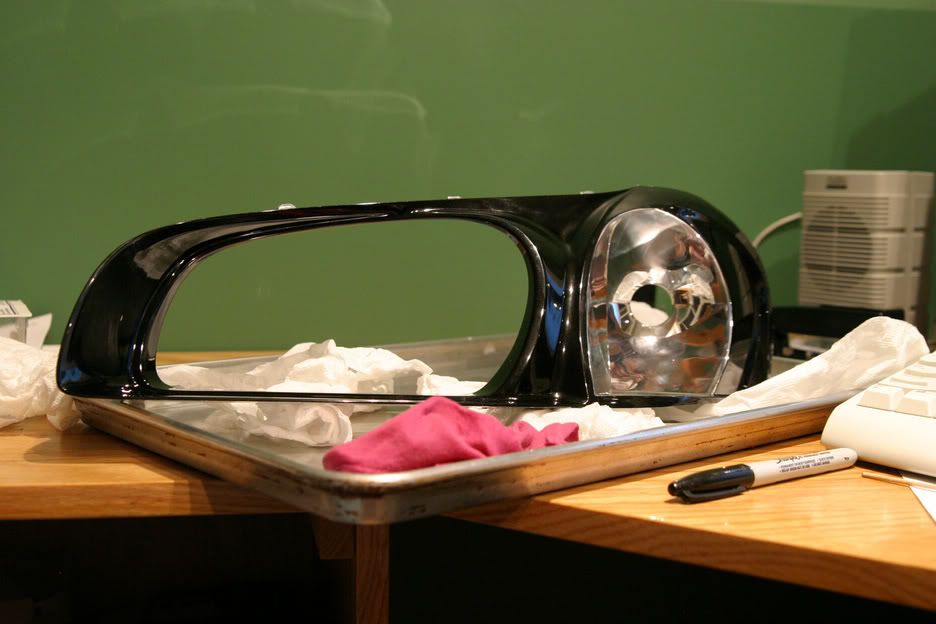
Headlight split into its parts - front, back and silver middle piece:
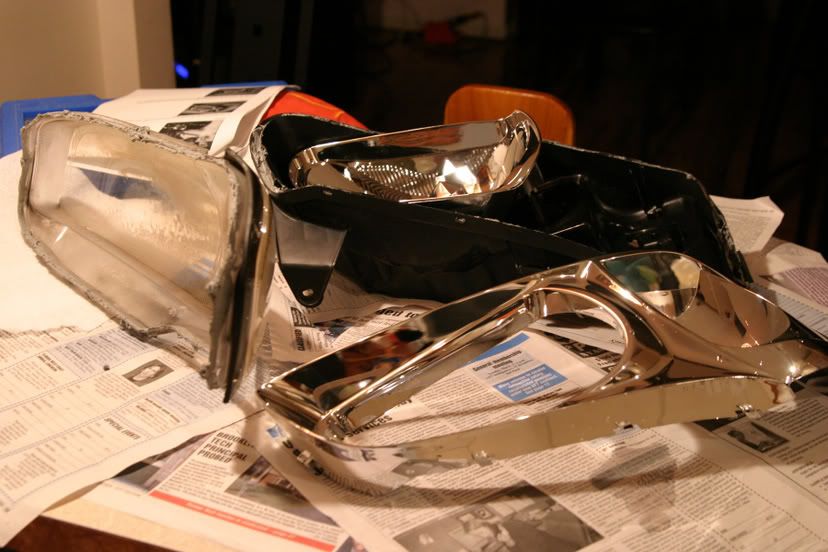
Using a cloth with water and soap.. I began the rubbing process:

http://www.cardomain.com/ride/2190617/3
The only things I need to add is
A - temperature - set it to like 225, its more than enough.
I only needed to put it in for 10 min, and they came apart very nicely
MAKE SURE TO PUT IT FACE UP. The write up says face down.. but it become hazy after that...
Original Front:
My left headlight was very hazy.. so i did the AE on it first.. because it wouldnt be as bad if the headlight got destroyed.
Originals:
Say goodbye to headlight # 1 [I was very scared doing this lol]
Headlight split into its parts - front, back and silver middle piece:
Using a cloth with water and soap.. I began the rubbing process:


 02-07-2006, 04:03 PM
#3
ahhh! cliMAX!
Thread Starter
Join Date: May 2005
Posts: 792
Installed on car:
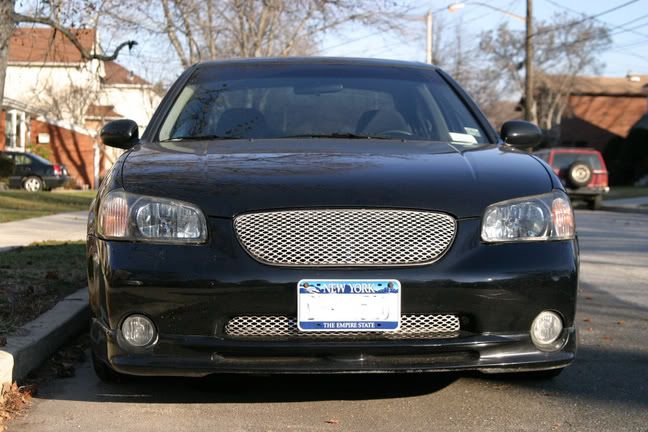
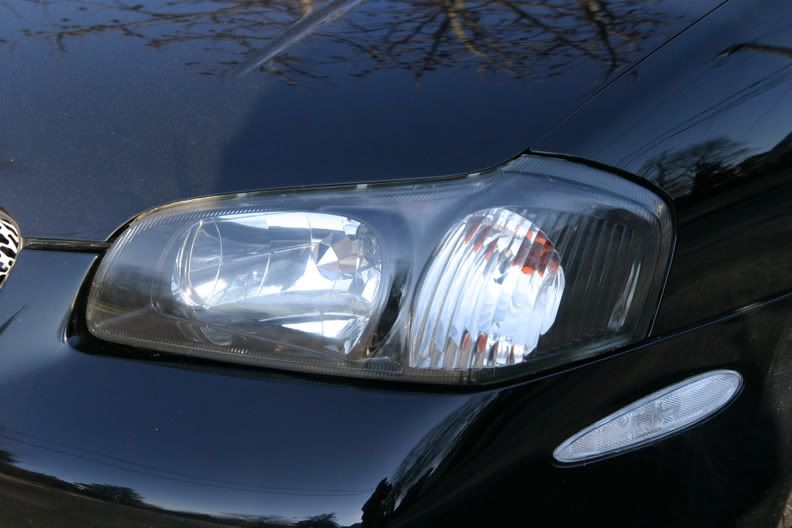
Also, to prevent the condensation I had before, I siliconed the whole border around both headlights:
Taking the headlights out of the car wasn't too bad.. maybe like 10 min for both.
Getting them in was a PITA.
Also, to prevent the condensation I had before, I siliconed the whole border around both headlights:
Taking the headlights out of the car wasn't too bad.. maybe like 10 min for both.
Getting them in was a PITA.
02-07-2006, 04:06 PM
#4
Nice job, but I wouldn't have done the silicone. You'll never get them back apart now. FYI: heating and re-assembling them would have sealed them as good as the factory did.
02-07-2006, 04:40 PM
#6
Supporting Maxima.org Member
iTrader: (11)
Join Date: May 2004
Location: Hoagieville, PA
Posts: 1,372
Your lights look awesome and so does your car.
Glad to see my write-up helped. The only reason why I had the headlights in the oven twice was because I wanted to take my time prying the headlight apart. I didn't want to pop it apart with one shot..I was afraid of cracking something.
I placed the headlight in the oven face down on a wet towel because I didn't want the front plastic heated up. I didn't get the condensation in the headlight when I had it faced down.
Great Job!
02-07-2006, 04:43 PM
#7
ahhh! cliMAX!
Thread Starter
Join Date: May 2005
Posts: 792
Thanks a lot man.
The condensation I had in the headlight prior to doing any work on them at all.
The factory seal was just crappy I guess.
The reason I advised keeping them up, is because the first light I did, I followed your directions, and put it face down. When I took it out, it was more hazy then when I put it in.
When I did the second one, I put it face up, and it did not change the haziness.


 02-07-2006, 05:36 PM
#12
ahhh! cliMAX!
Thread Starter
Join Date: May 2005
Posts: 792
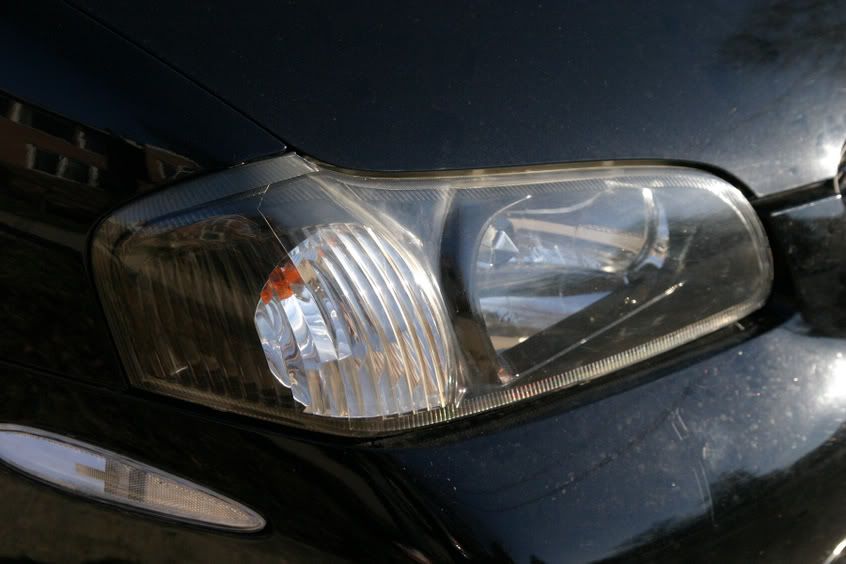
Nope, just polished the outside...
I was thinking of doing the inside.. but since it was perfectly clear. The haze only forms on the outside.. because its exposed to the weather and other elements.
Thanks for the compliments.
I was thinking of doing the inside.. but since it was perfectly clear. The haze only forms on the outside.. because its exposed to the weather and other elements.
Thanks for the compliments.
 02-07-2006, 06:48 PM
#14
ahhh! cliMAX!
Thread Starter
Join Date: May 2005
Posts: 792
I had some insane polish actually.
I found the polish that is used to make fiber optics maximally transparent.
It is not even rated in grit.. it just said "3 micron"
I belive that's about 2500grit
Used special polishing liquid which was also from the fiber optics thing.
Any plastic polisher should work. There is actually a how-to somewhere here.


 02-08-2006, 10:05 AM
#19
Supporting Maxima.org Member
iTrader: (15)
Join Date: Nov 2004
Location: Clifton Park, NY
Posts: 4,035
Looks good, I used the same write-up. I used PlastX to take the chrome off though, much much easier.
When I had mine in the oven at 250 for 20 min they still would not come apart... I had to bump it to 275 for mine to come apart and they still did not come apart to easy.
When I had mine in the oven at 250 for 20 min they still would not come apart... I had to bump it to 275 for mine to come apart and they still did not come apart to easy.


 02-09-2006, 06:19 AM
#25

godlyone ----- nice lower grill, where did u get it, how much was it? or did you make one ur self? i got upper one, but iam looking for lower, couldnt' find it on ebay....
thanks
btw nice headlights, i did the same mod, looks really good
thanks
huso
thanks
btw nice headlights, i did the same mod, looks really good
thanks
huso


Thread
Thread Starter
Forum
Replies
Last Post
bigfrank
4th Generation Maxima (1995-1999)
2
10-01-2015 12:51 PM