
Replaced Rear VC Gasket this weekend: Pics and Observations
 11-17-2008, 07:01 AM
#1

Replaced Rear VC Gasket this weekend: Pics and Observations
I finally landed up replacing the Rear Valve Cover gasket on my 01 GLE.
The car has 167K miles on her and I had noticed dual signs of oil leak:
1. Coming down on the passenger side LCA
2. Between the engine and trans, still need to confirm if it was VC or RMS.
On closer observation I had noticed the rear vc leaking pretty badly.
Parts were ordered from DaveB.
Tools:
1. Various sizes of 10mm and 12mm sockets to get the bolts and nuts opened.
2. PB Blaster or equivalent to get hard to open bolts/nuts.
3. Shop towels to clean as to keep moving. I suggest this as you will have your intake exposed and cleaning around that area as you open the different parts will avoid any dirt for getting into the manifold.
4. Throttle body cleaner if you want to clean up your TB.
5. Masking tape and sharpie to label out the hoses as you remove them.
6. Digital camera to take pics of hoses with labels before you remove them.
7. Permatex black RTV Gasket for putting 2 dabs for the VC gasket. FSM has the exact spots. I'll try and post a pic of it later today.
8. Magnetic telescopic tools to pic up bolts that may fall into the engine bay, especially the rear collector bolts and the air box bolts.
Some notes on this effort:
Make sure you do this with plenty of time. I did it over 2 days since the car is garaged and we have another car to get around.
Label hoses and electrical connectors properly.
Some of the bolts are pain in the backside and you have to be patient to get them out. The Intake Manifold collector rear bolts are a true pain and will test your patience big time.
Make sure you have plenty of tools from small sockets to big ones, I landed up using my 1/4 inch drive sockets the most due to their size and ease of use.
Well to the pics!
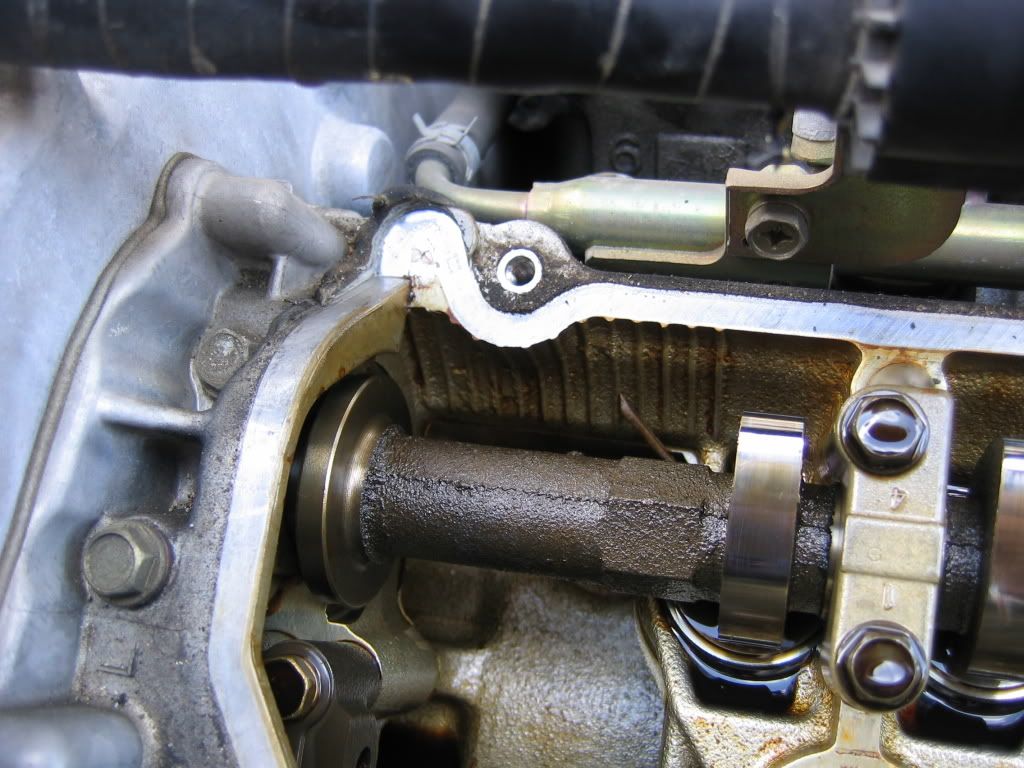
1. Here is a shot of the rear VC with the collector removed. The FSM says to remove the rear supports brackets completely but as you can see in this pic, I did not remove the lower bolts just the upper ones.

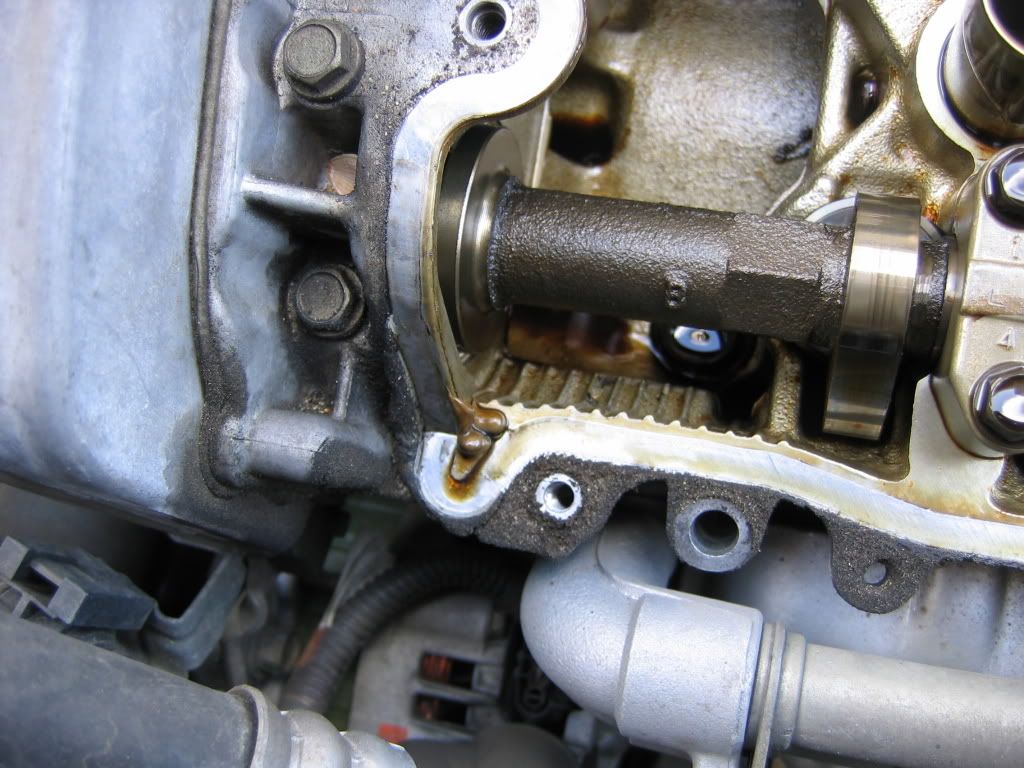
2. Another view of the VC. You can see the extent of the leak. While I had all the stuff off, I also replaced my PCV valve, compared to the new one the old one was definately stuck.

3. Underside of the Rear VC. I was amazed at how clean the VC and components were. The previous owner did take great care of this car. No signs of any sludge etc.

4. A pic of the cams, again no signs of sludge or any major wear and tear.

5. While I had the collector out, I decided to open up the VIAS as so many folks on the org have complained. I found my VIAS to be perfect! The cup was still solidly in place and working without any issues. Thats what we call an unmolested Max!

The car has 167K miles on her and I had noticed dual signs of oil leak:
1. Coming down on the passenger side LCA
2. Between the engine and trans, still need to confirm if it was VC or RMS.
On closer observation I had noticed the rear vc leaking pretty badly.
Parts were ordered from DaveB.
Tools:
1. Various sizes of 10mm and 12mm sockets to get the bolts and nuts opened.
2. PB Blaster or equivalent to get hard to open bolts/nuts.
3. Shop towels to clean as to keep moving. I suggest this as you will have your intake exposed and cleaning around that area as you open the different parts will avoid any dirt for getting into the manifold.
4. Throttle body cleaner if you want to clean up your TB.
5. Masking tape and sharpie to label out the hoses as you remove them.
6. Digital camera to take pics of hoses with labels before you remove them.
7. Permatex black RTV Gasket for putting 2 dabs for the VC gasket. FSM has the exact spots. I'll try and post a pic of it later today.
8. Magnetic telescopic tools to pic up bolts that may fall into the engine bay, especially the rear collector bolts and the air box bolts.
Some notes on this effort:
Make sure you do this with plenty of time. I did it over 2 days since the car is garaged and we have another car to get around.
Label hoses and electrical connectors properly.
Some of the bolts are pain in the backside and you have to be patient to get them out. The Intake Manifold collector rear bolts are a true pain and will test your patience big time.
Make sure you have plenty of tools from small sockets to big ones, I landed up using my 1/4 inch drive sockets the most due to their size and ease of use.
Well to the pics!
1. Here is a shot of the rear VC with the collector removed. The FSM says to remove the rear supports brackets completely but as you can see in this pic, I did not remove the lower bolts just the upper ones.
2. Another view of the VC. You can see the extent of the leak. While I had all the stuff off, I also replaced my PCV valve, compared to the new one the old one was definately stuck.
3. Underside of the Rear VC. I was amazed at how clean the VC and components were. The previous owner did take great care of this car. No signs of any sludge etc.
4. A pic of the cams, again no signs of sludge or any major wear and tear.
5. While I had the collector out, I decided to open up the VIAS as so many folks on the org have complained. I found my VIAS to be perfect! The cup was still solidly in place and working without any issues. Thats what we call an unmolested Max!
Last edited by kukx30de; 11-18-2008 at 04:44 AM.
 11-17-2008, 07:04 AM
#2
Continued!
6. Here is a shot of the Valve cover with the new gasket and spark plug seals. It was interesting to see how hard the gasket and seals had become, there was almost no flex in the rubber.

7. Here is a pic of the cams after a wipe down and ready for reassembly.

8. All done!... now we monitor for the next few days to make sure we have no leaks! As part of putting all back together I replaced the upper intake manifold gasket since the old one had actually cracked at several places.

N just a final pic of the bay all done yeah it was a big task to get to the Rear VC gasket.

7. Here is a pic of the cams after a wipe down and ready for reassembly.
8. All done!... now we monitor for the next few days to make sure we have no leaks! As part of putting all back together I replaced the upper intake manifold gasket since the old one had actually cracked at several places.
N just a final pic of the bay all done
yeah it was a big task to get to the Rear VC gasket.
Last edited by kukx30de; 11-17-2008 at 08:42 AM.

 11-17-2008, 01:23 PM
#6
I would agree with the 45min estimate to get the plenum off. It can sure be lower but those bolts on the back of the collector/plenum are horrible. You have to like get them out with 2 fingers. Otherwise it is really easy, if I were to do it again, I would surely order some of those plastic ties and simply break off the old ones. I spent way too much time to salvage them and slowly get them out!
11-17-2008, 01:34 PM
#7
Senior Member

Join Date: Oct 2003
Location: Pleasanton,CA
Posts: 1,136
 11-17-2008, 04:36 PM
#10
 11-17-2008, 06:35 PM
#14
Senior Member

Join Date: May 2005
Posts: 416
Remove the hardware on top of the manifold. This will free up some room to get your hand back there. The real pain is the hose that connects on the bottom of the upper intake manifold. You cant see it, you have to do it by feel.
11-17-2008, 06:39 PM
#15
11-18-2008, 04:34 AM
#18
11-18-2008, 04:42 AM
#19
On the passenger side the PS high pressure hose has a bracket right next to the intake collector bracket. You can remove this to free up some space.
On the drivers side there are 2 hoses that really block off access to those bolts. I'll take some pics of that area too and post them.
As for the top hardware you dont need to get a lot of them out as it doesnt help. I only removed the evap and brake master cylinder hoses as they are external units connected to the collector. Thinking now, I should take a pic and post with markings on which hoses to remove
. The intake collector actually buldges just before it curves parallel to the firewall so u have to get your hands from either side with wrenches or really small sockets i.e. 1/4" drive else you cant even get a rachet on them to pop the bolt before you use fingers to finally get them out.
Last edited by kukx30de; 11-18-2008 at 04:46 AM.
 11-20-2008, 11:34 AM
#21
Senior Member
Join Date: Oct 2003
Location: Pleasanton,CA
Posts: 1,136
kukx30de : 2 questions before I attack this leak from my end..
1) Did the idle change since you changed the gaskets and cleaned the TB/VIAS.
2) Did you have to do the idle learn procedure by any chance..
1) Did the idle change since you changed the gaskets and cleaned the TB/VIAS.
2) Did you have to do the idle learn procedure by any chance..
11-20-2008, 01:26 PM
#22
I had the battery removed from the car to get more space.
From the TB perspective, I did not remove the vacuum lines at the bottom of the IACV but I did remove the electrical connector. I used CRC throttle body cleaner, but I did notice that my TB was not all that dirty even after 167K miles. I have seen pics of cars with lower miles and more gunk. While cleaning the TB, I did not spray directly into the chamber. I took a few old socks, wore them on my wrist, sprayed the cleaner and then wiped clean. Took a little longer time, but I did not want any cleaner go into the IACV.
I reconnected everything and the last item I put back was the battery. I did not have to do the re-learn procedure.
final note: My car is an 01 so it doesnt have drive by wire, I suspect it maybe different for those cars. However, my gut feeling says the ECU would save this data even if the battery was disconnected and go back those settings unless we mess something up.
good luck and let me know how it goes.
From the TB perspective, I did not remove the vacuum lines at the bottom of the IACV but I did remove the electrical connector. I used CRC throttle body cleaner, but I did notice that my TB was not all that dirty even after 167K miles. I have seen pics of cars with lower miles and more gunk. While cleaning the TB, I did not spray directly into the chamber. I took a few old socks, wore them on my wrist, sprayed the cleaner and then wiped clean. Took a little longer time, but I did not want any cleaner go into the IACV.
I reconnected everything and the last item I put back was the battery. I did not have to do the re-learn procedure.
final note: My car is an 01 so it doesnt have drive by wire, I suspect it maybe different for those cars. However, my gut feeling says the ECU would save this data even if the battery was disconnected and go back those settings unless we mess something up.
good luck
and let me know how it goes.
11-20-2008, 03:21 PM
#23
Senior Member
Join Date: May 2005
Posts: 416
I didn't see you put any sealant on the low parts of the valvcover. To show you what i am talking about, here are some pics.
Here you want to put some sealant on the top left corner and the otherside as well
Here you want to put some sealant on the bottom left corner and the otherside as well
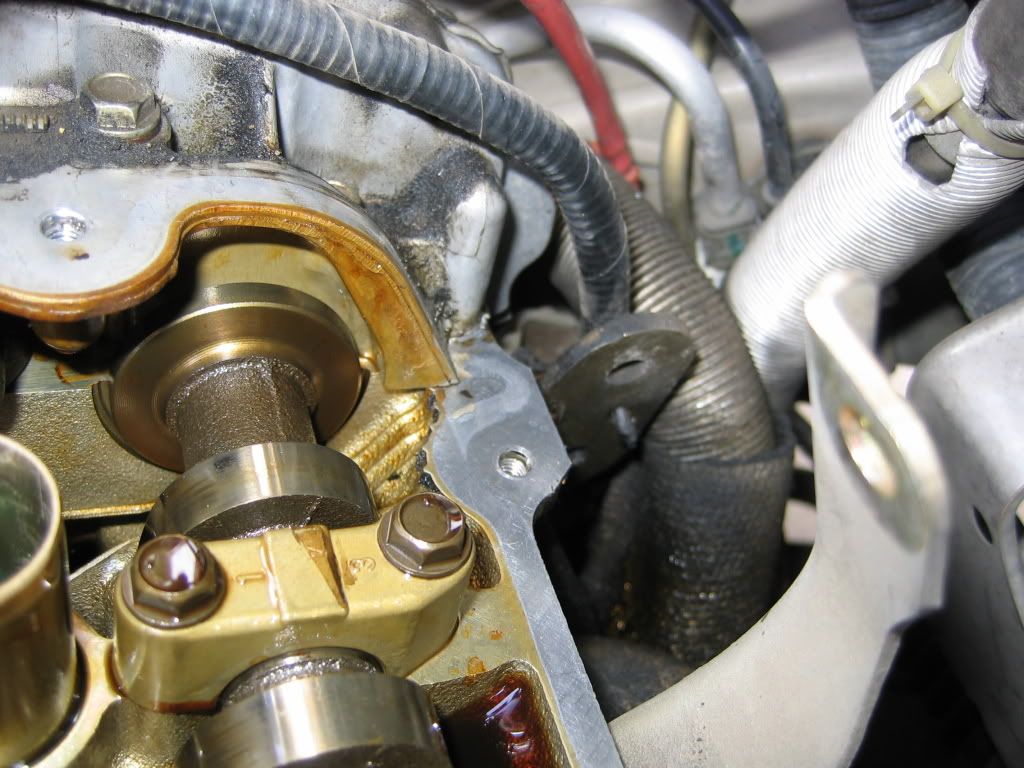
for the back side, do the same. Here's where mine was leaking real bad, on this corner.
To get your hand back there to remove the screws from the bracket you should take this off.

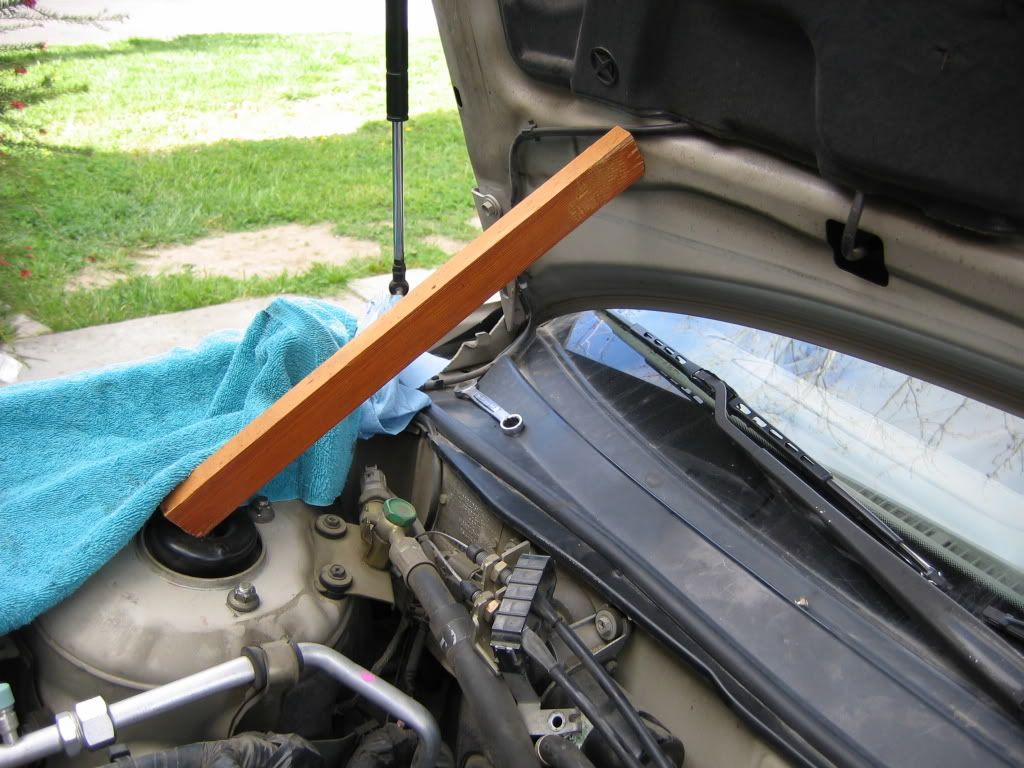
Also i removed the hood struts from fender and installed my stillen hood holder , much easier to work on the car when the hood is straight up.
Here you want to put some sealant on the top left corner and the otherside as well
Here you want to put some sealant on the bottom left corner and the otherside as well
for the back side, do the same. Here's where mine was leaking real bad, on this corner.
To get your hand back there to remove the screws from the bracket you should take this off.
Also i removed the hood struts from fender and installed my stillen hood holder , much easier to work on the car when the hood is straight up.
11-20-2008, 04:39 PM
#24
Thank you for the added pics sir!
Yes I did put the RTV sealant as in step 7. The FSM actually shows where to apply a dab of it
I did not take any pics as you need to apply the sealant and put the VC back on so as to get a perfect seal.
Appreciate your addition of pics. This weekend I am going to re-organize this post so that I can convert it into a How-to since one does not exist on the Org.
Cheers!

 11-21-2008, 08:56 AM
#29
Im down to help, and maybe our kids can play together. I don't have the experience captain gay (davevq hehe) has I am sure we can tackle it .
Really good pics and write up OP.
11-23-2008, 08:14 AM
#30
Well i have deep respect for anyone who has taken off the upper manifold/plenum .. I just attempted to this morning and said screw it. There are way too many hoses and screws/bolts to take off! I'm going to get a quote from the dealership and a small garage to see how many hours of labor they'll charge for. I just need my upper intake manifold gasket replaced 
04-30-2010, 07:55 AM
#32

Well i have deep respect for anyone who has taken off the upper manifold/plenum .. I just attempted to this morning and said screw it. There are way too many hoses and screws/bolts to take off! I'm going to get a quote from the dealership and a small garage to see how many hours of labor they'll charge for. I just need my upper intake manifold gasket replaced
Op, Clean engine bay.
04-30-2010, 09:06 AM
#33
And I'm assuming you use power tools to take it off in 10 mins lol you should post a video on youtube of you taking it off ( 10 min is the max a video can be on youtube i believe)
 03-09-2011, 07:19 AM
#37
Man about 2 yrs and 32K miles ago!
I just checked the rear cover again over the weekend and it has held up well. No leaks to report of.
On the other hand, I have a leak on the front VC now. Not bad knowing shes at right about 199300 now.
Will probably do it with my ypipe next weekend.
Just an FYI... the gaskets while available in non dealer stores... are more expensive... just get the gasket and tube seals from your dealer parts dept. My local parts guy matches with courtesy parts. The front gasket was about $17 and each tube seal was about $3. Permatex black where needed.
03-09-2011, 07:24 AM
#38
if i do the back ima do the front..just the kind of maintenance guy that i am. i hate to do half the job know what i mean. but thats good to hear man. should i permatex just the corners or run the bead around where the VC will sit?
03-09-2011, 07:36 AM
#39
Just the corners.
If you see the FSM... it shows the locations where the permatex is needed. Its just the corners where the gasket meets the timing cover side and then makes a 90 degree bend on the valve train base.
Doesnt even need too much.
I would have done the front... but 2.5 yrs ago... I had no sign of leak on the front... so opening it and spending another 30 bucks I bought other stuff instead.
If you see the FSM... it shows the locations where the permatex is needed. Its just the corners where the gasket meets the timing cover side and then makes a 90 degree bend on the valve train base.
Doesnt even need too much.
I would have done the front... but 2.5 yrs ago... I had no sign of leak on the front... so opening it and spending another 30 bucks
I bought other stuff instead.